flipperphil
-
Posts
32 -
Joined
-
Last visited
Content Type
Profiles
Forums
Gallery
Events
Everything posted by flipperphil
-
 Peter thanks for the good words. I purchased Rigging Period Ship Models by Lennarth Petersson, this has excellent drawings of different parts of the rigging for period ships. The drawings are very detailed and a great help for someone like me that has limited experience of rigging a ship. The other book I have is The Armed Transport Bounty by John McKay, this is from the Anatomy of the Ship series. These books I can highly recommend for anyone building the Bounty. Phil
 -
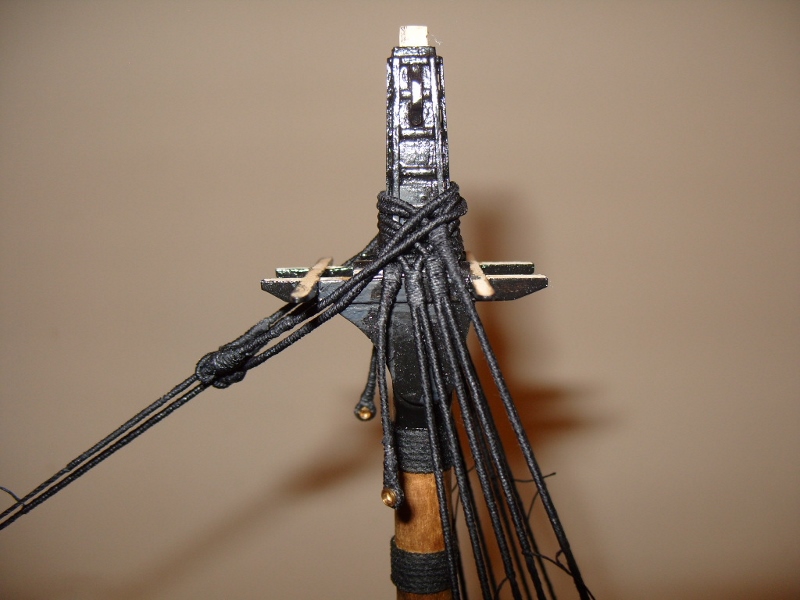
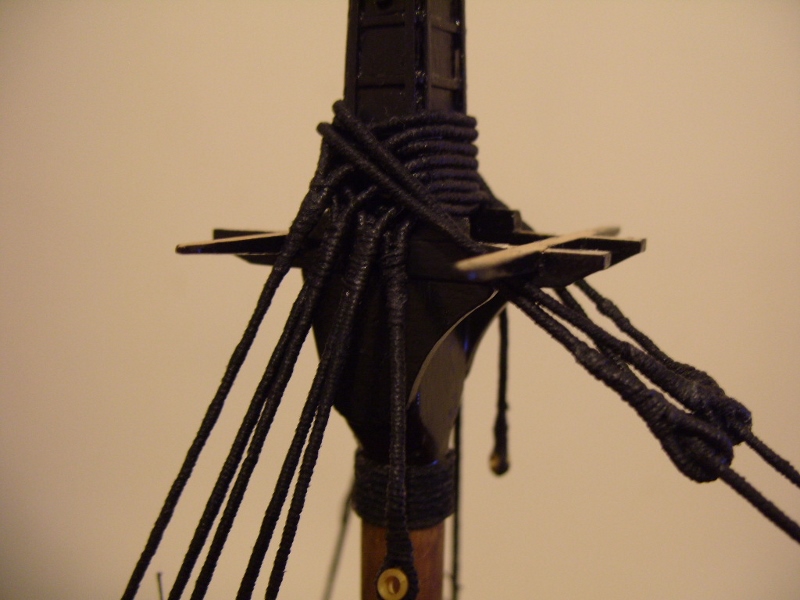
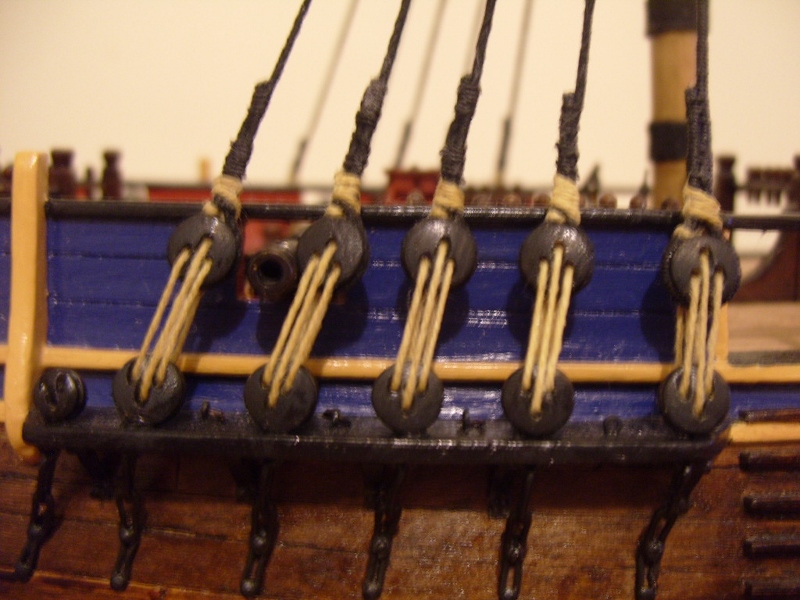
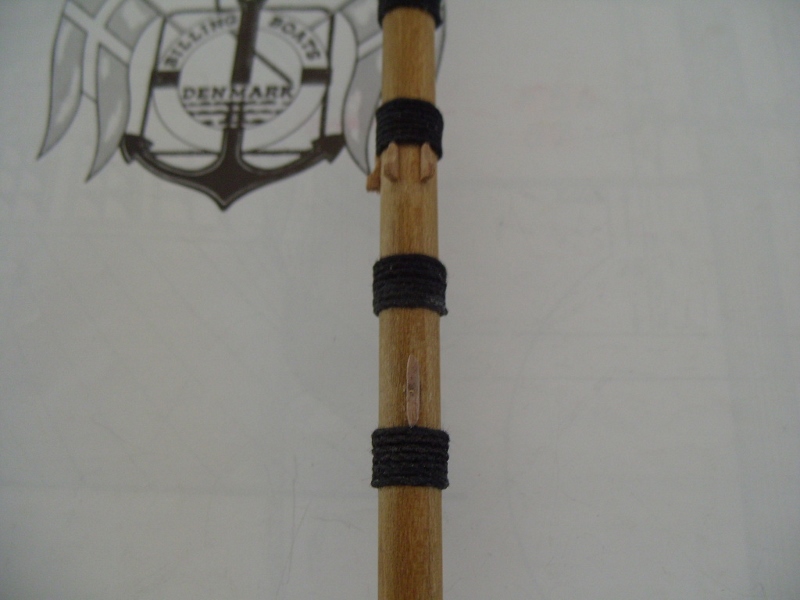
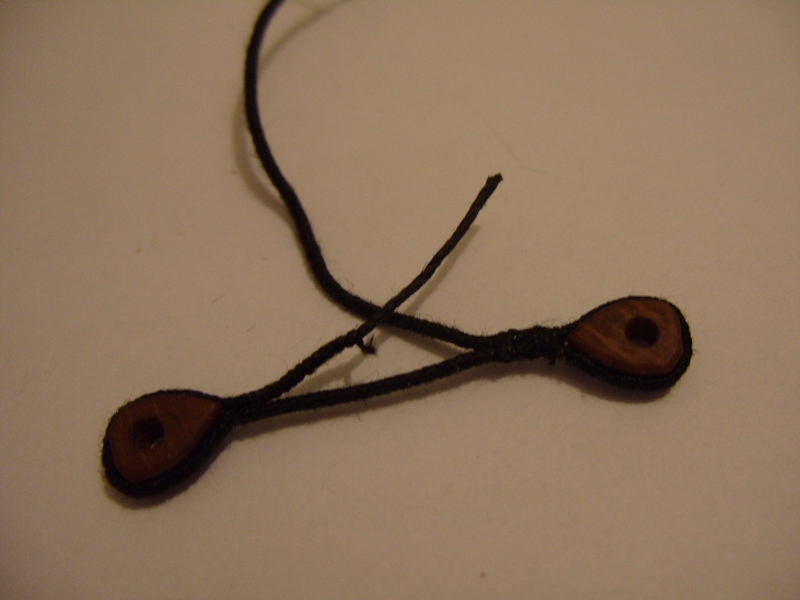
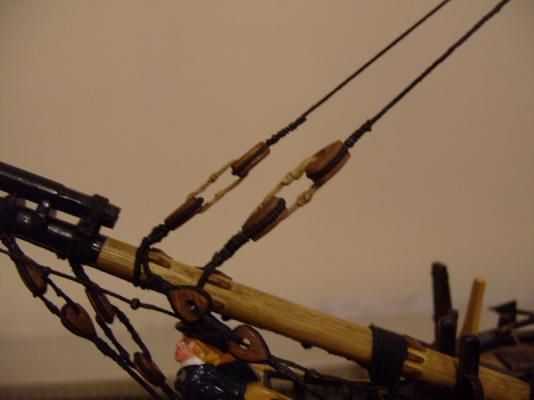
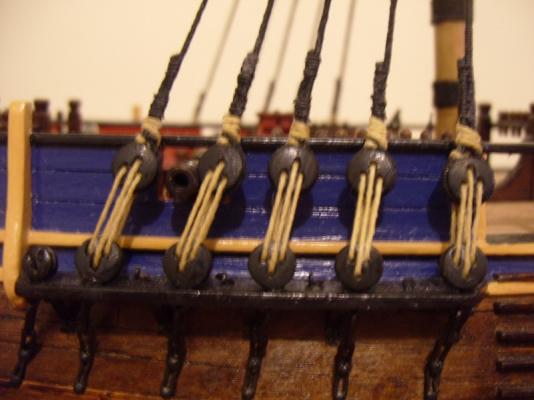
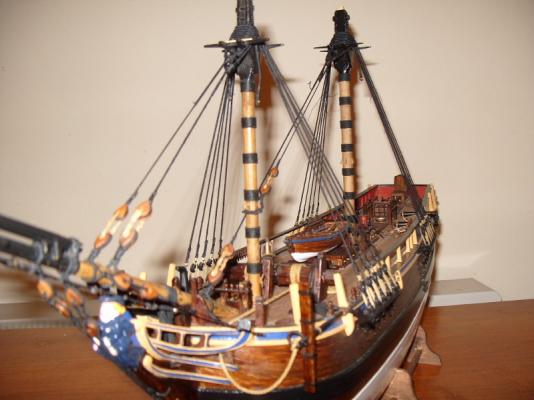
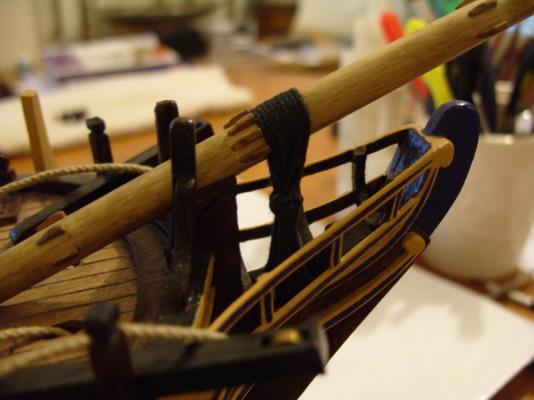
At long last I'm into the rigging. Foremast and mainmast have been set in place and burton pendents added, these have been served complete with thimbles. One pair for each mast. Next was the shrouds, the foremast first, two pairs and one single each side, ( I believe the single ones are called swifters.) The leading shroud on each side have been served for their entire length, all the rest are served down to the catharpins, the serving took an age to do it was all wound on by hand. The lanyards went on with no trouble and once all were in place tighten'd down trying to keep the upper deadeyes the same height, the same was done for the mainmast. The stays came next and are served at the top only, a mouse was added to each stay, (not that easy to make but came out OK I think) Harts were added to the bottoms complete with lanyards. I think the main stays could have been a bit thicker, still they look OK so I will leave them as they are. Phil


-
Hi Duke Good to see your build log is up and running. As for your keel problem what Chris recommends is good advise. Filler blocks at the bow and stern are definitely the way to go on this one, these will be a great help when you do the planking. I found this job extremely difficult on my build, I'm sure things would have been a lot less problematic had I used blocks. As this is a single plank kit you will need to be very precise with your planking unless you decide to double plank then you can afford to make a few mistakes as the second planking will cover them up, any way good luck with your build I look forward to seeing your progress. Phil
-
Just found you'r log, she looks very good Ian I especially like the colours, you seem to have got so much work done in such a short time. Congratulations on a great build can't wait to see here finished . Phil
-
Hi all First I must say thanks to Allan, Ian and Duke for looking in and there kind words, I must get around to dropping in on your builds to see what I've been missing out on. I haven't been around for nearly a year now so have much to catch up on, some late nights coming up for me I think. As for my build I hope to restart it very soon, It's been far too long since I've worked on it just over a year in fact. I'll dig the tools out and give them a polish this weekend in readiness. Phil
-
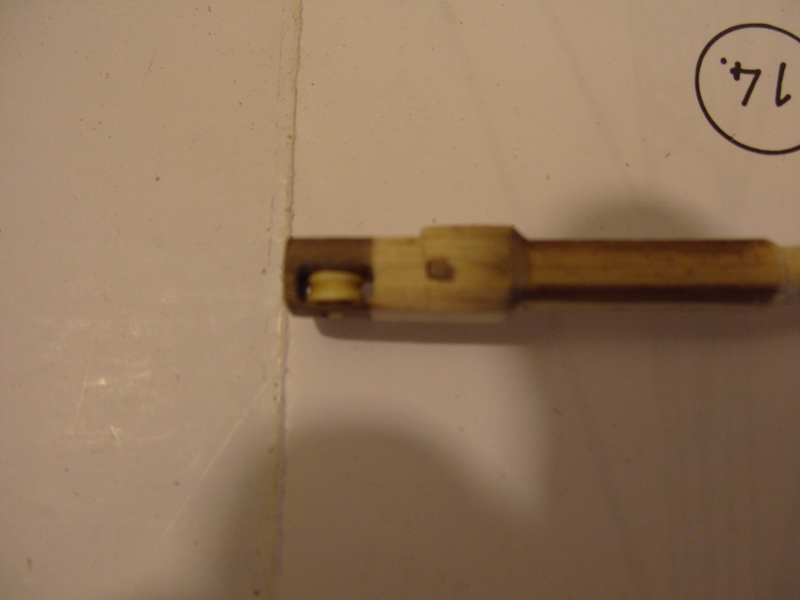
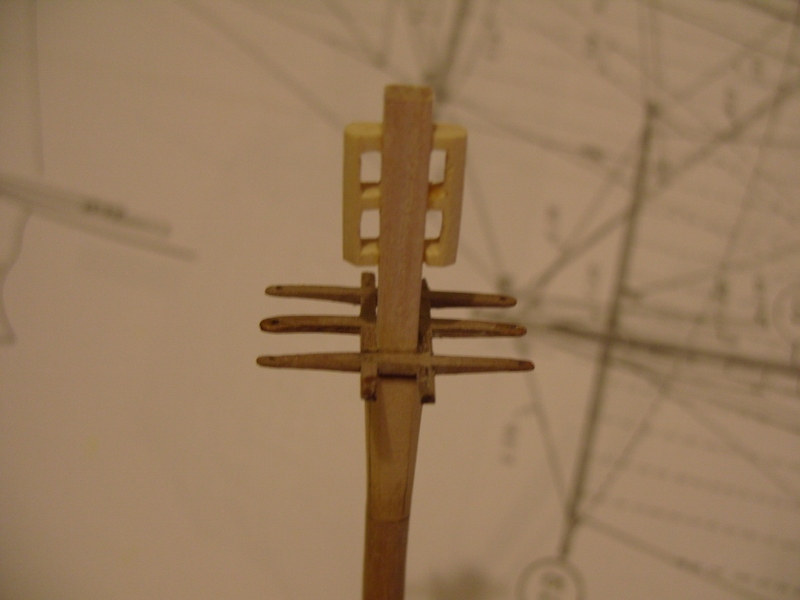
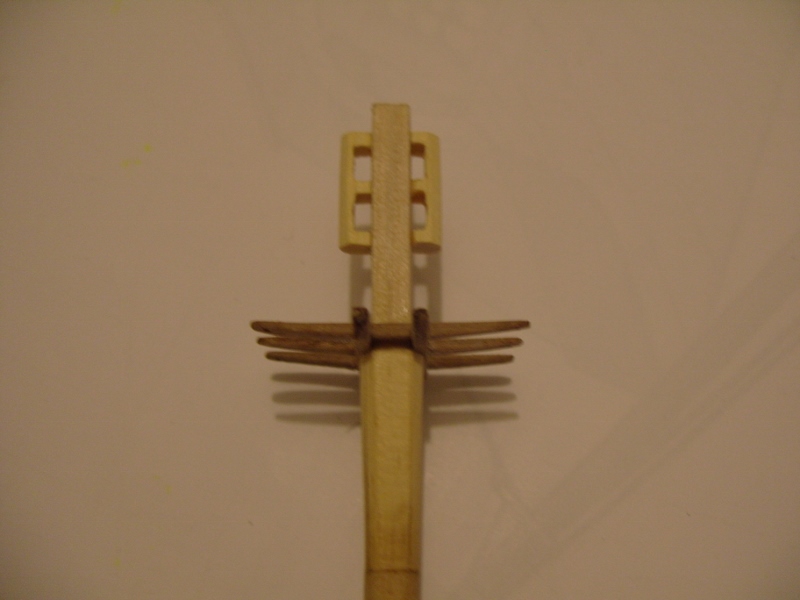
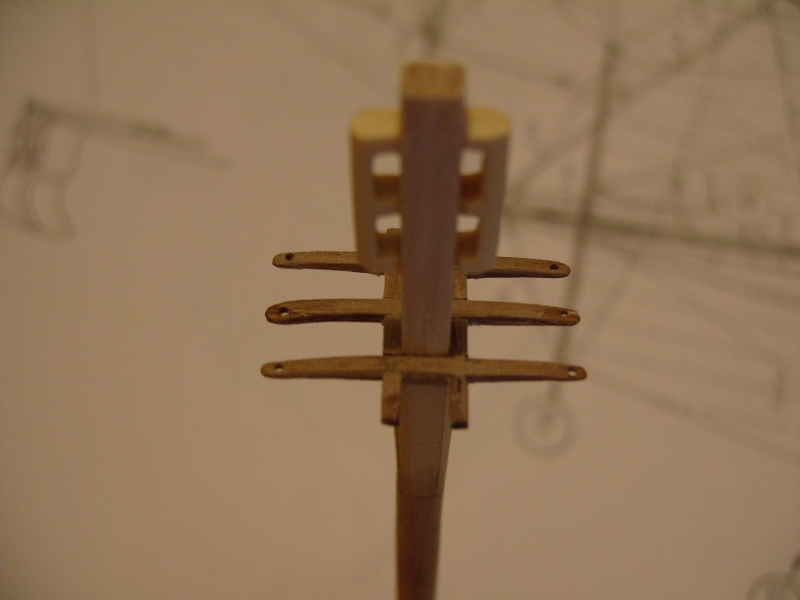
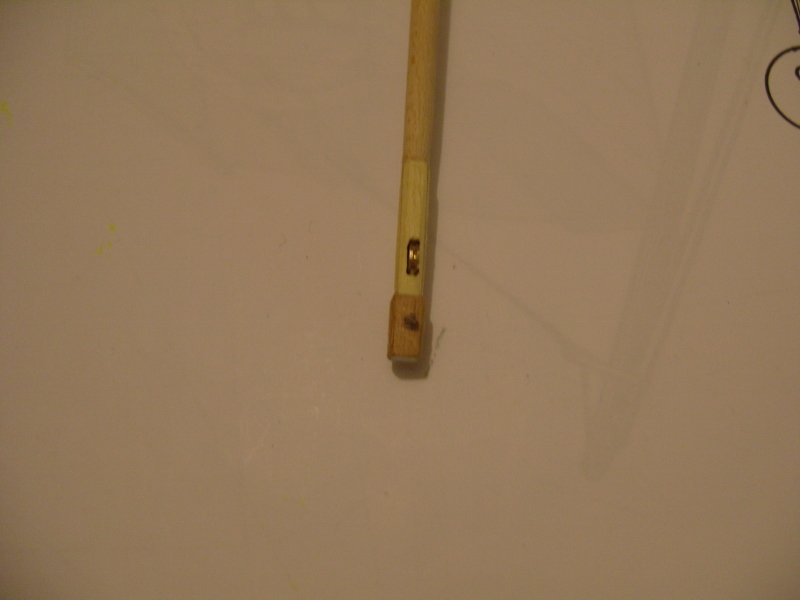
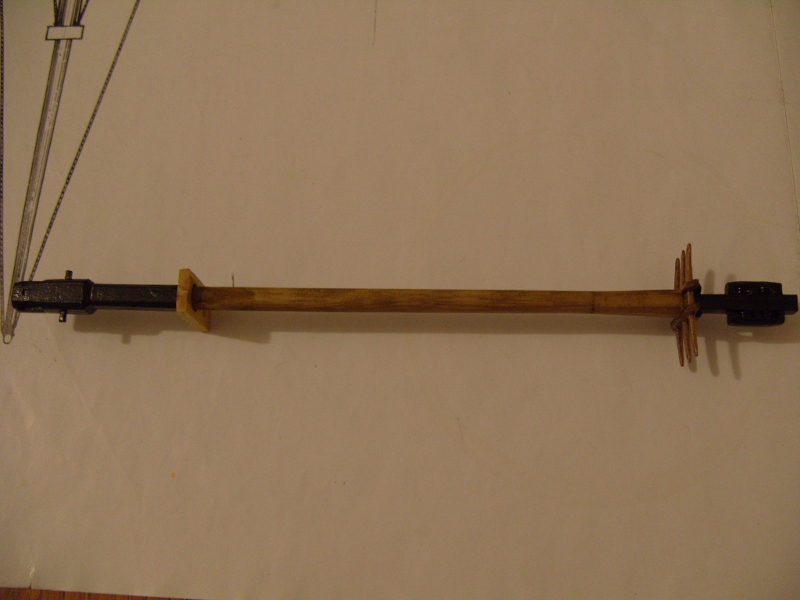
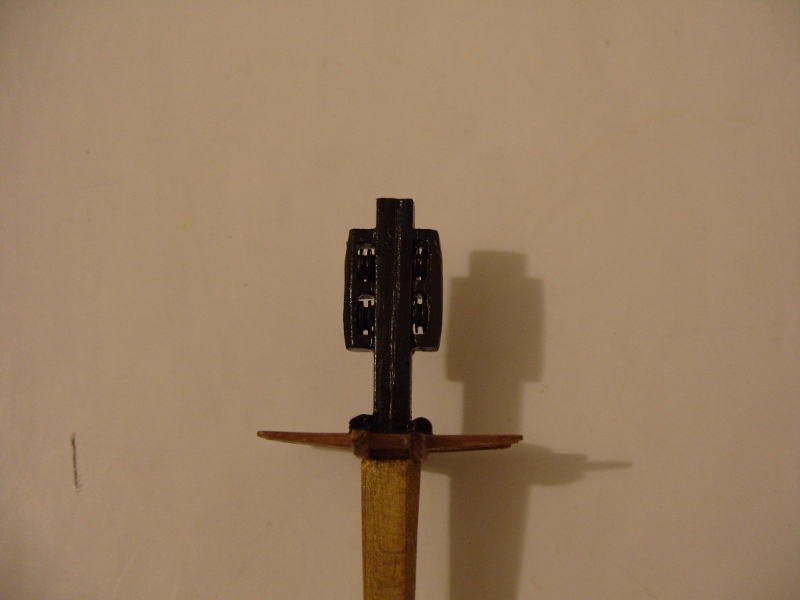
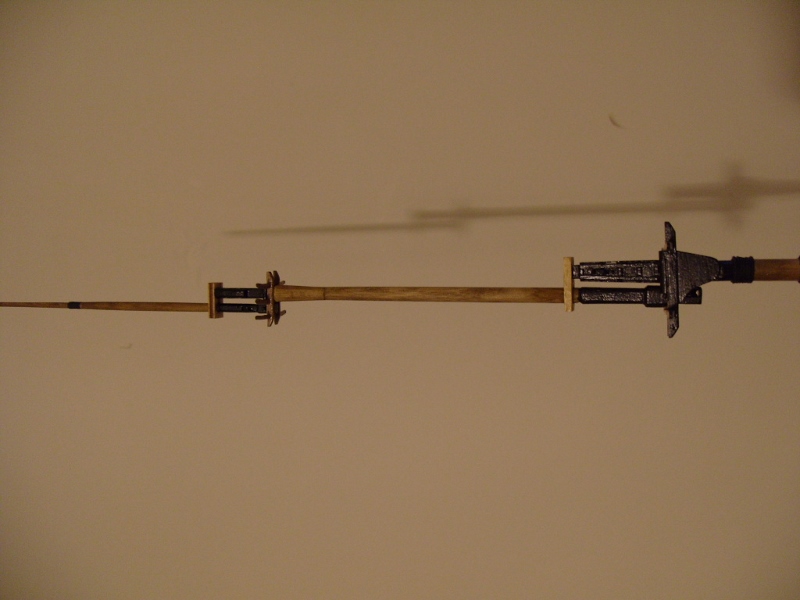
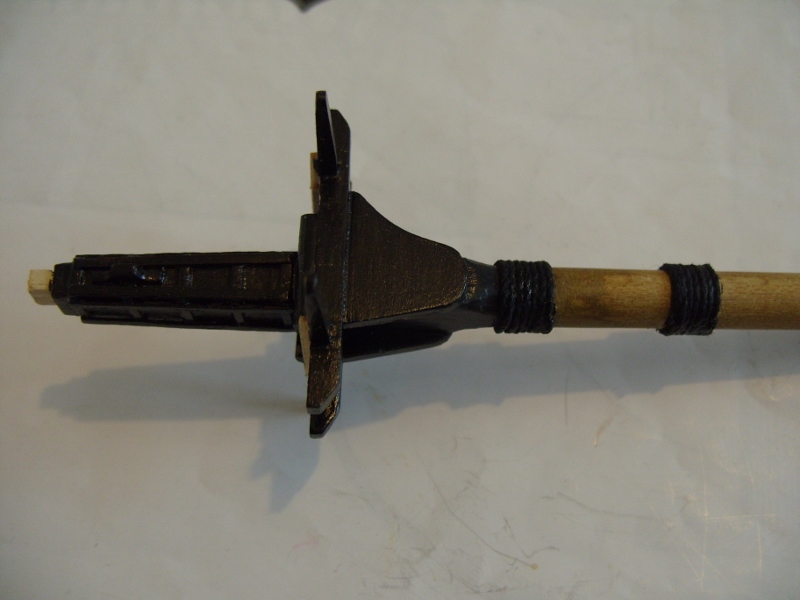
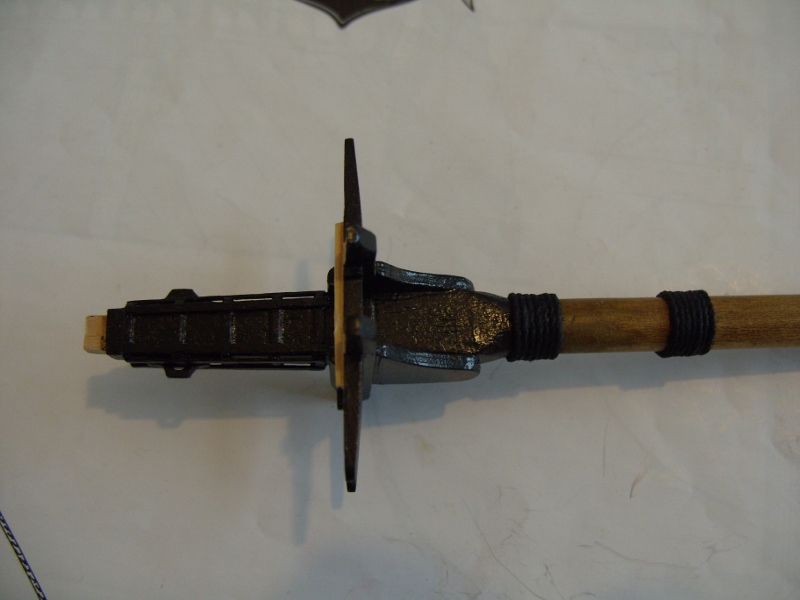
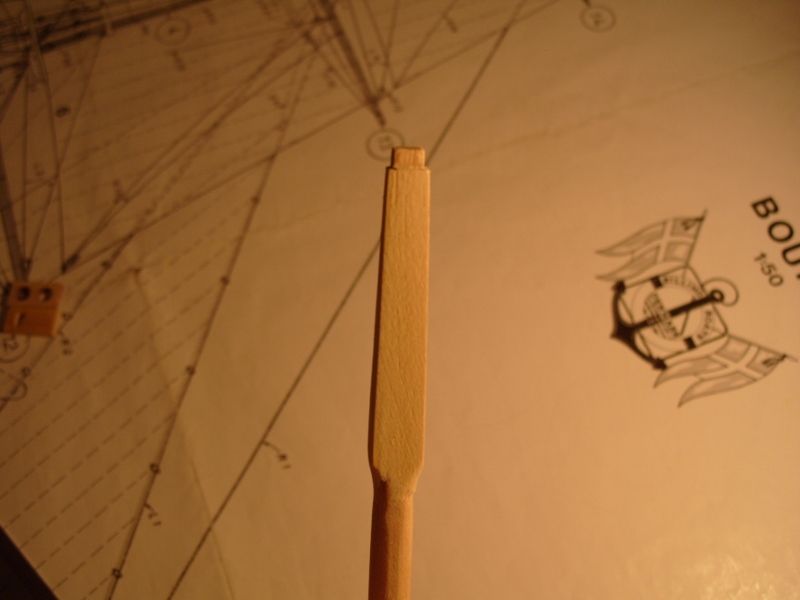
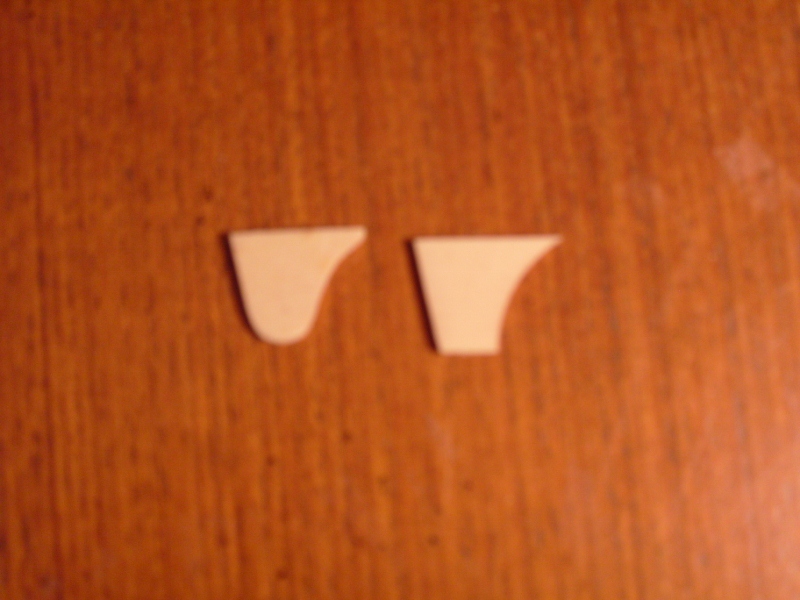
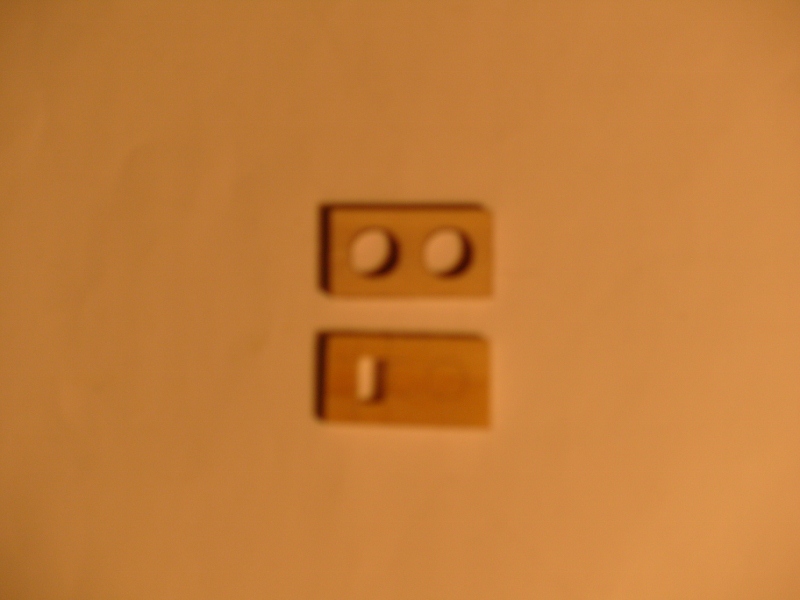
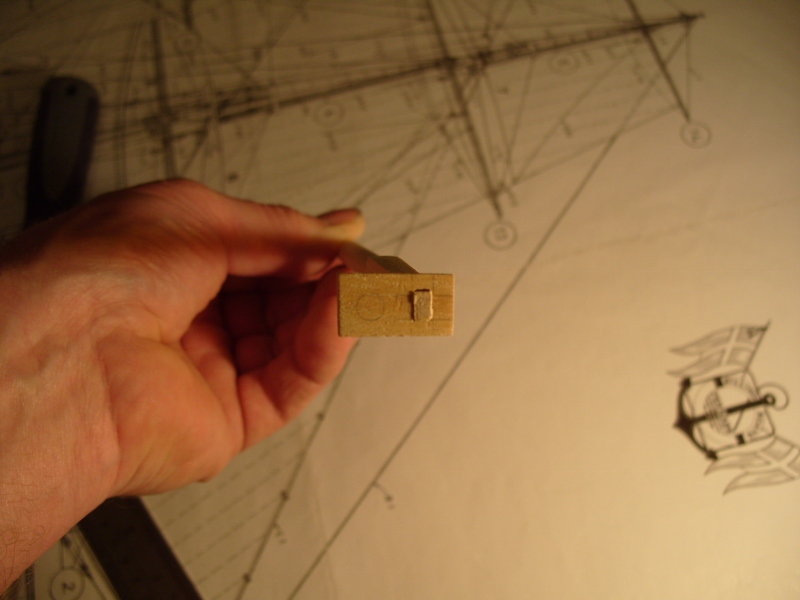
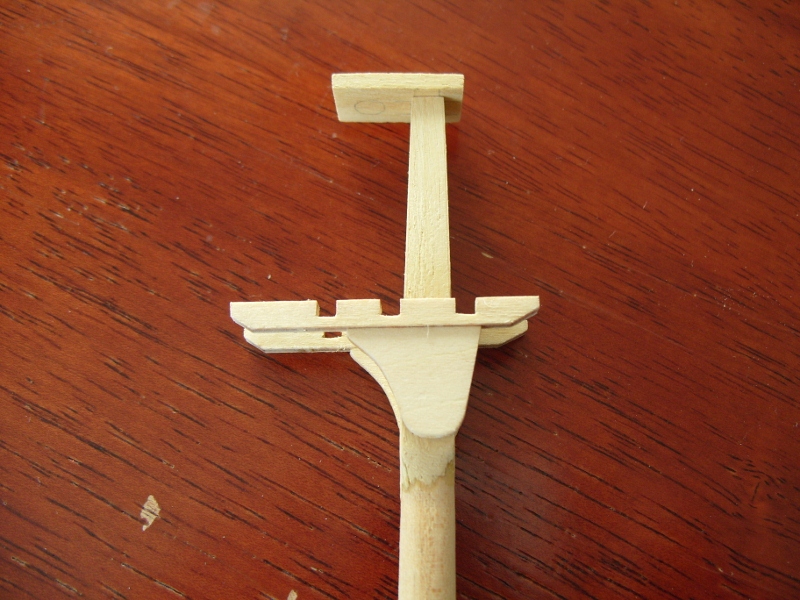
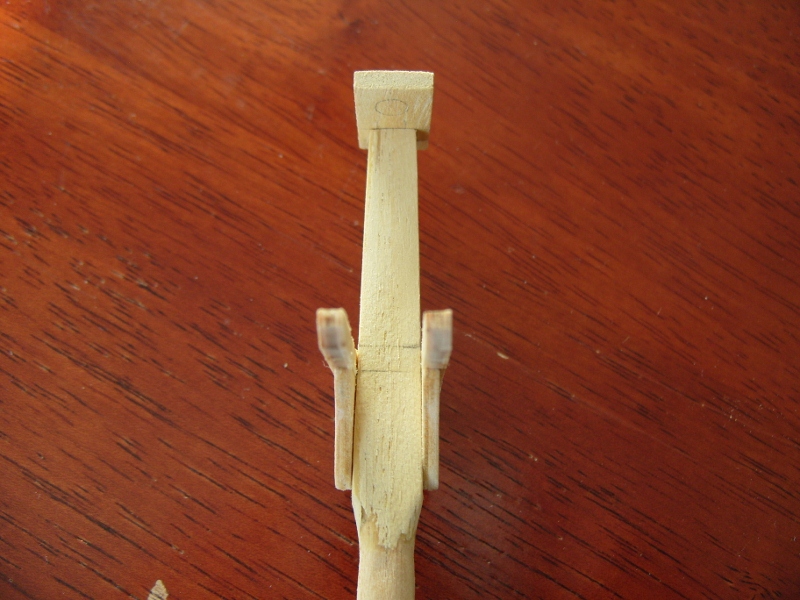
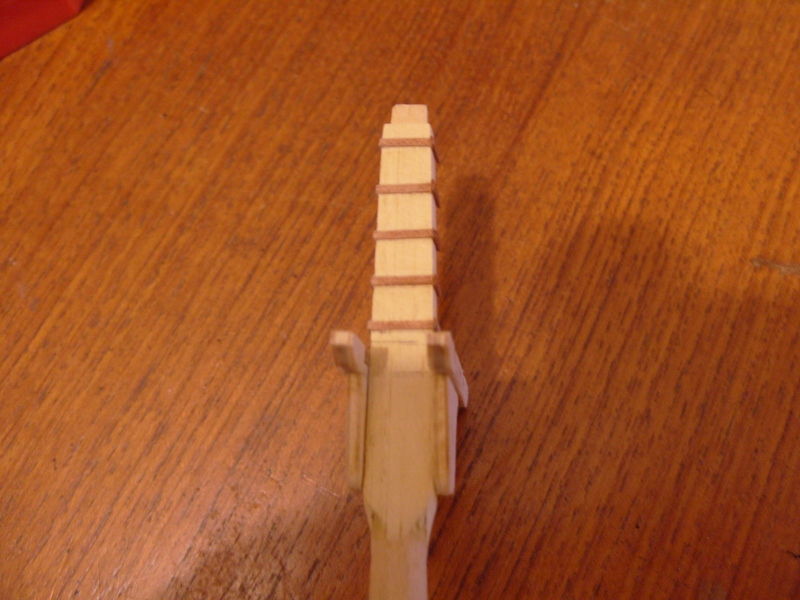
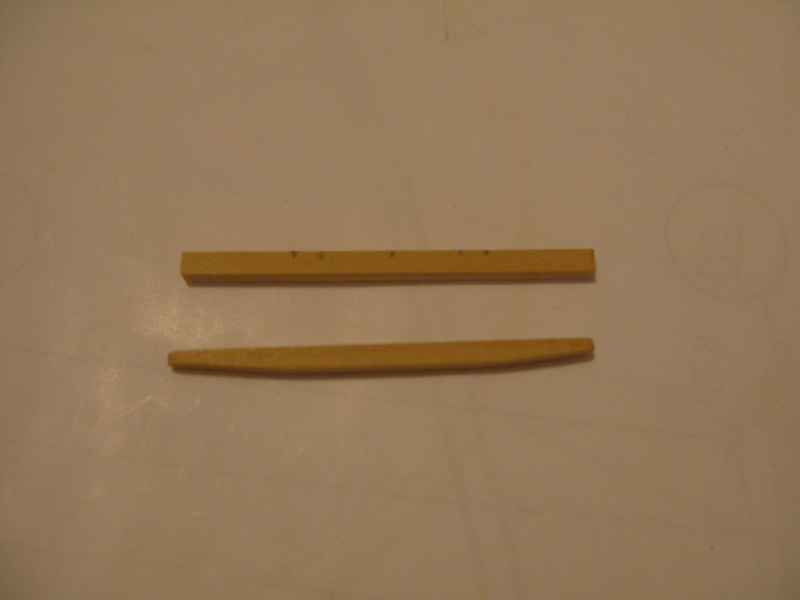
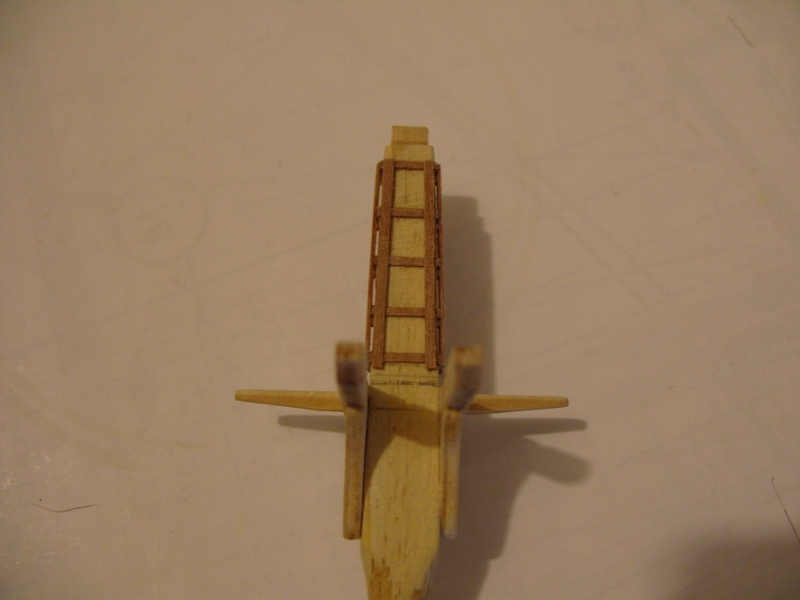
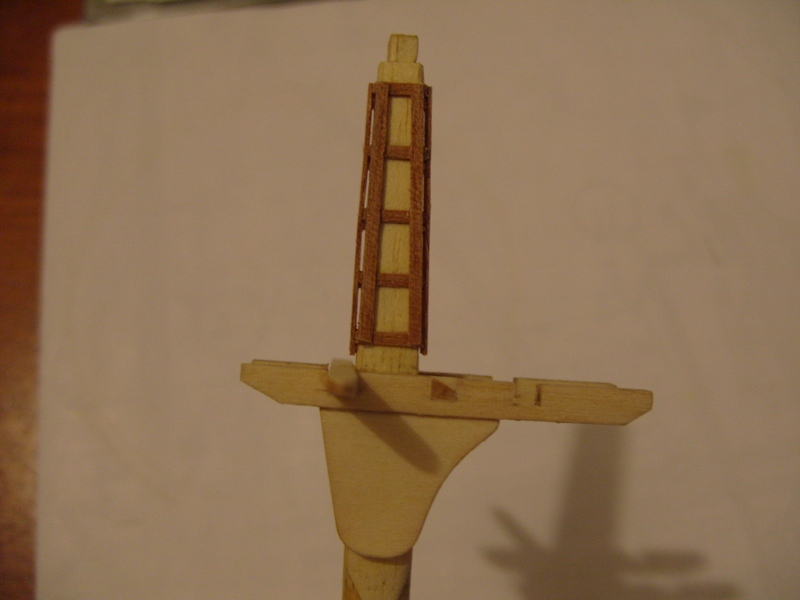
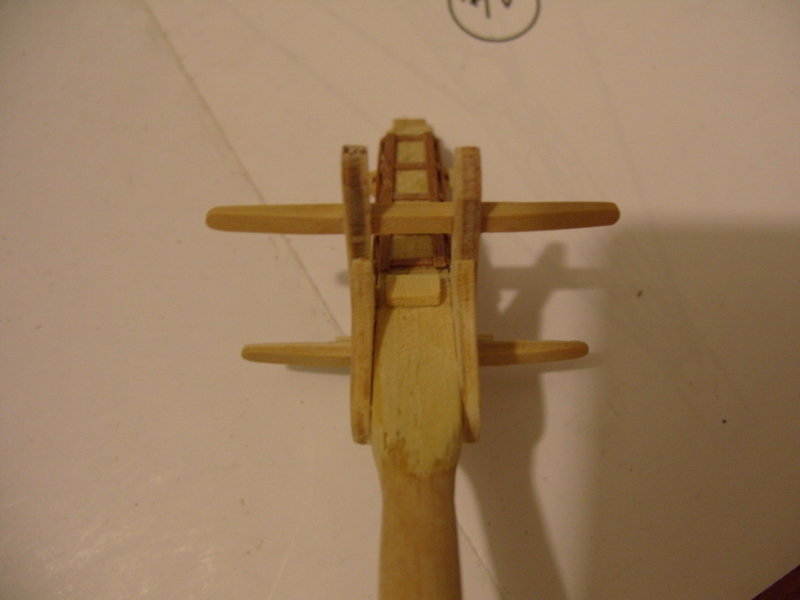
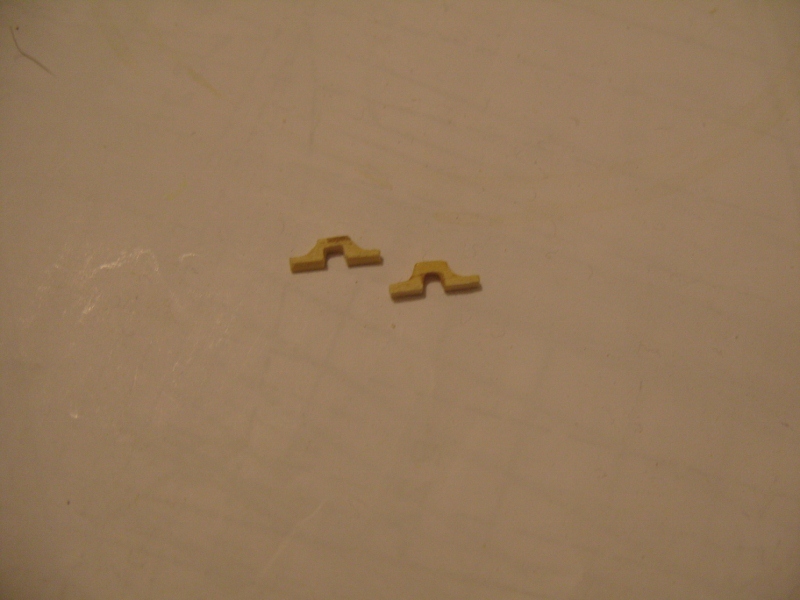
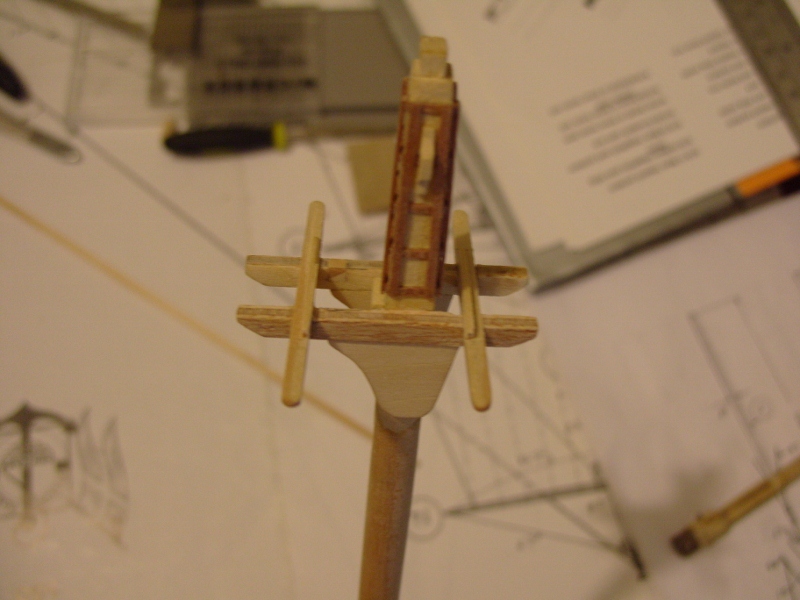
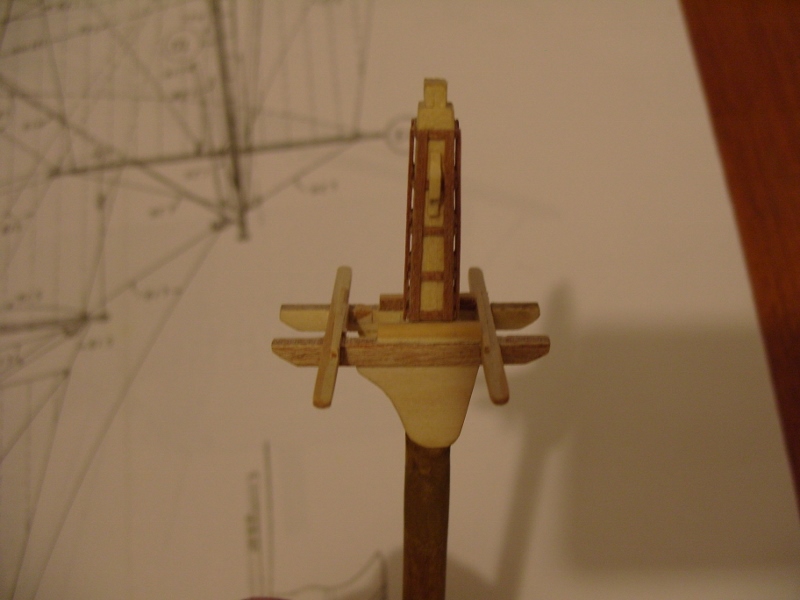
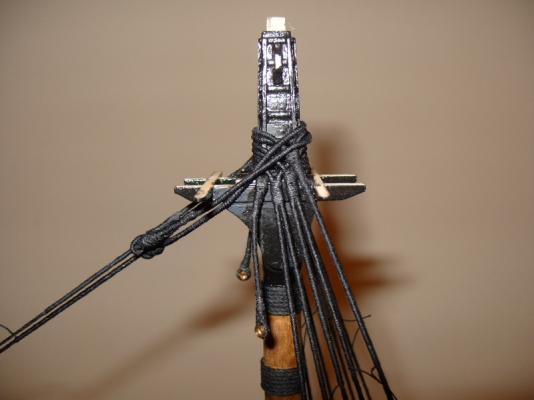
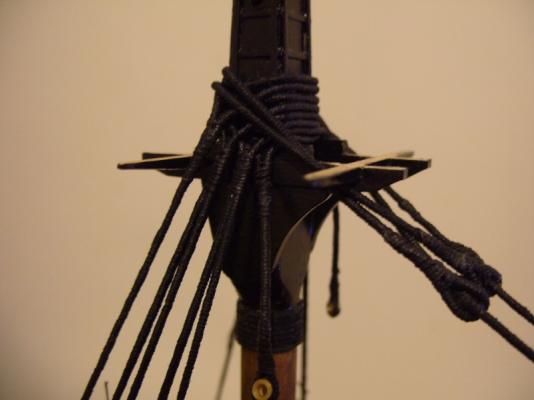
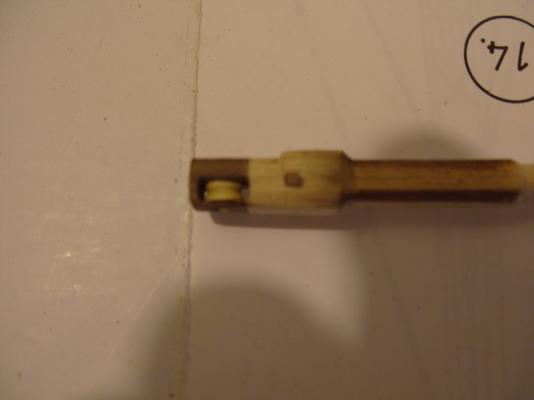
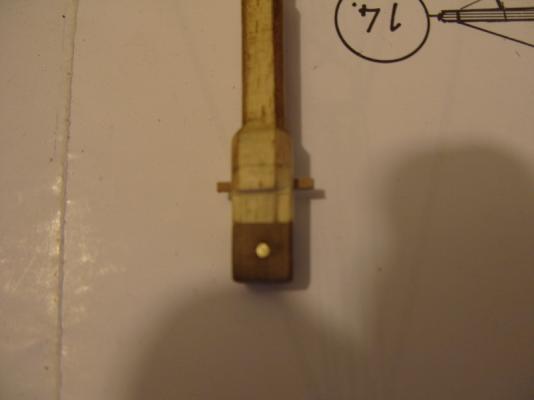
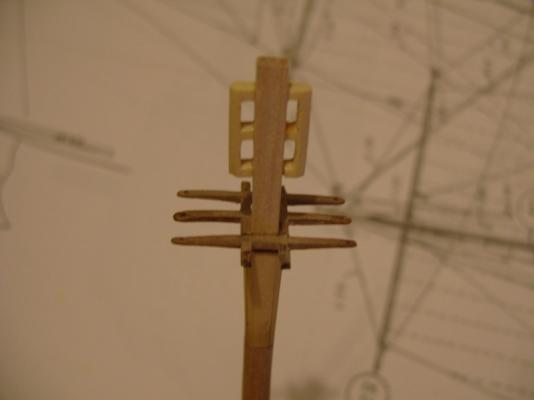
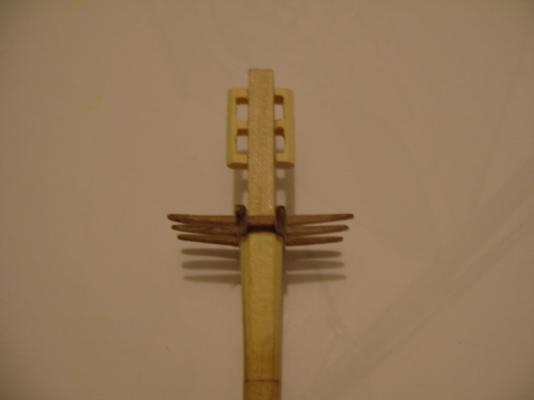
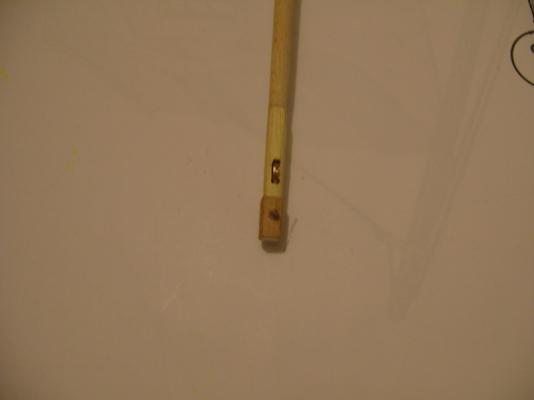
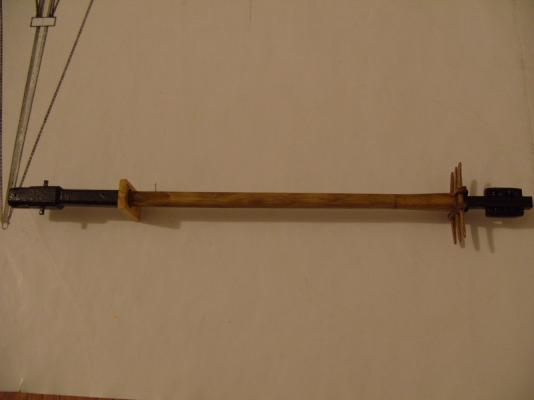
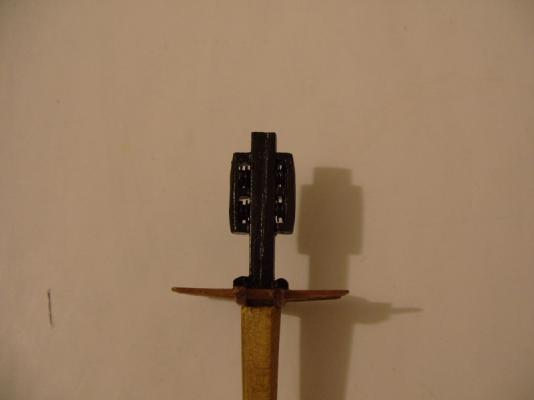
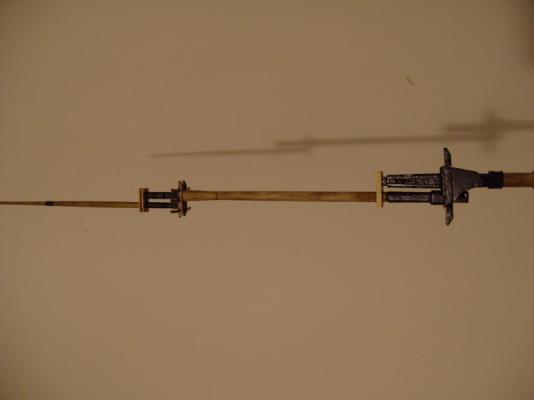
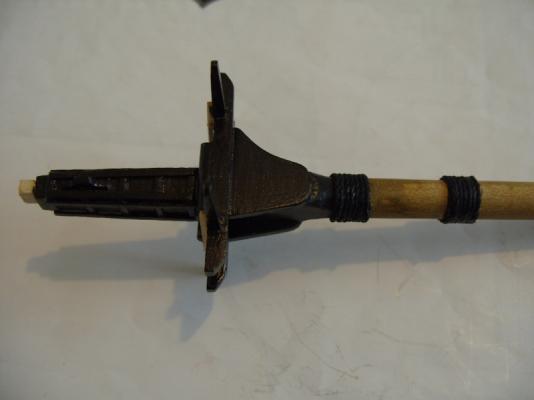
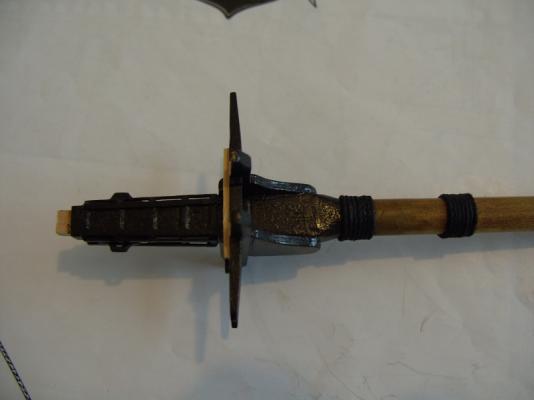
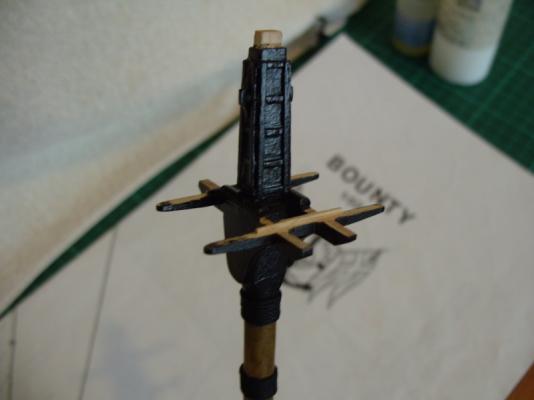
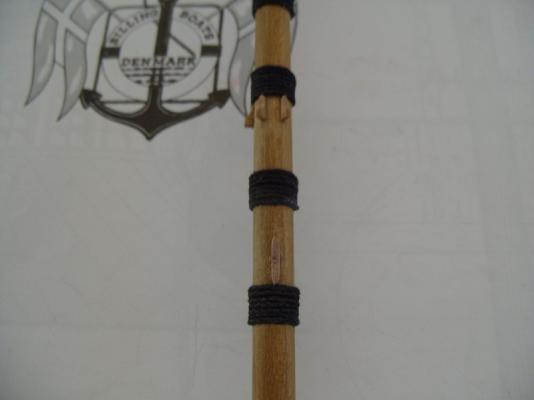
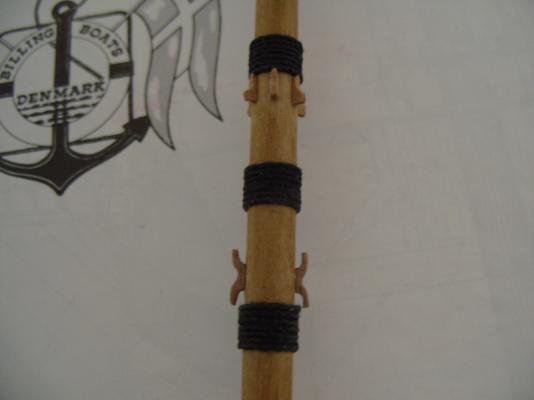
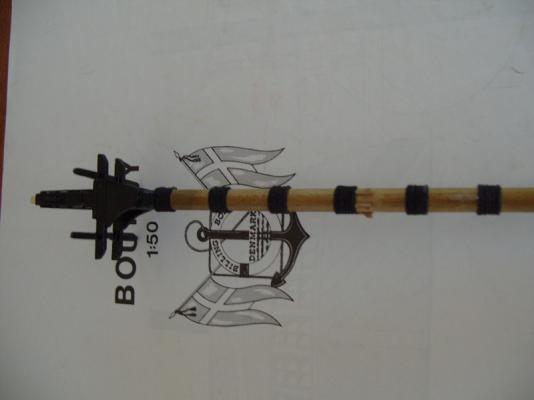
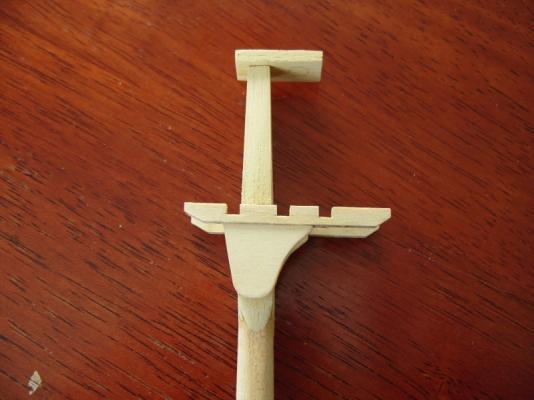
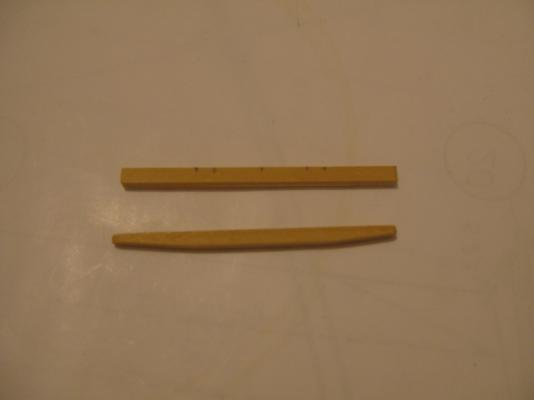
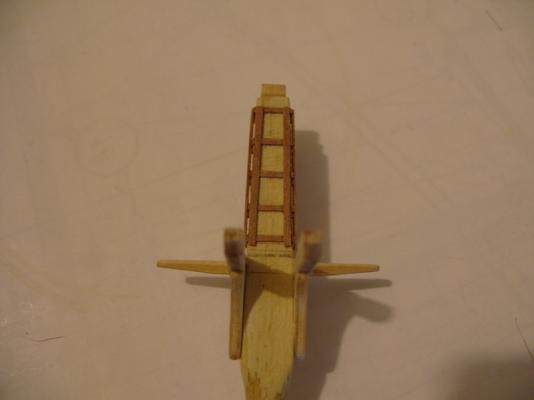
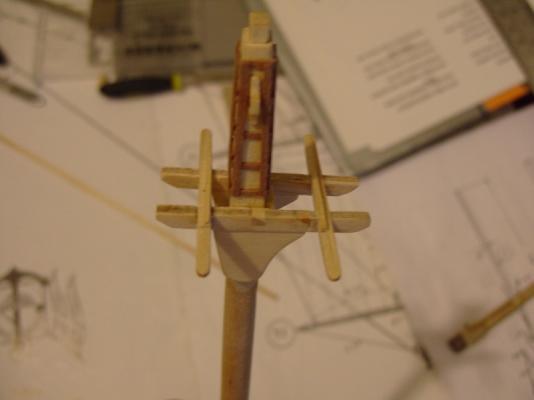
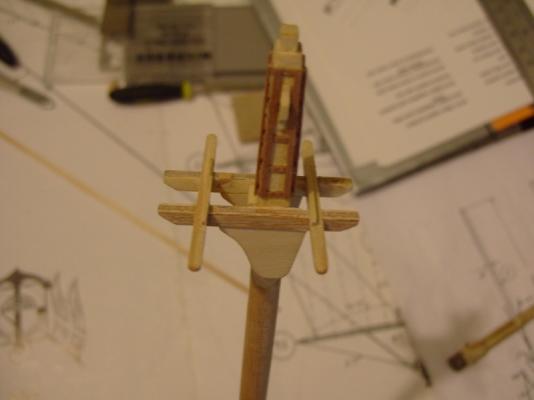
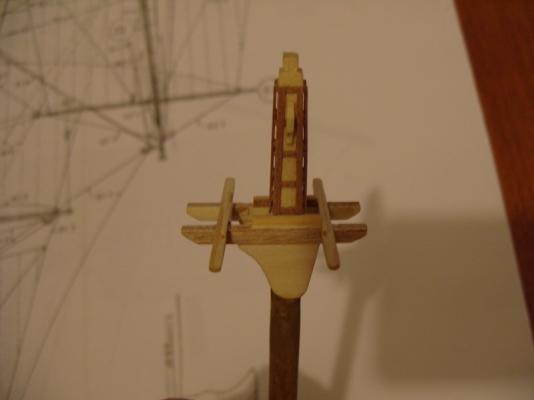
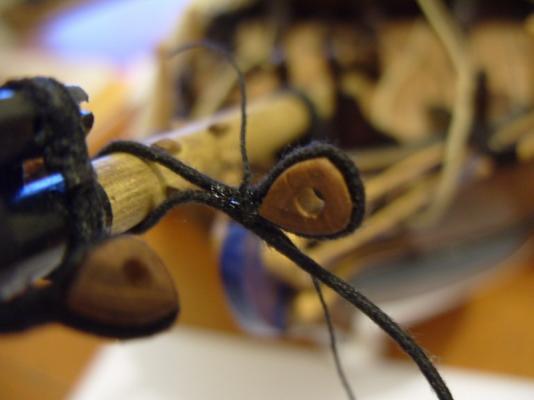
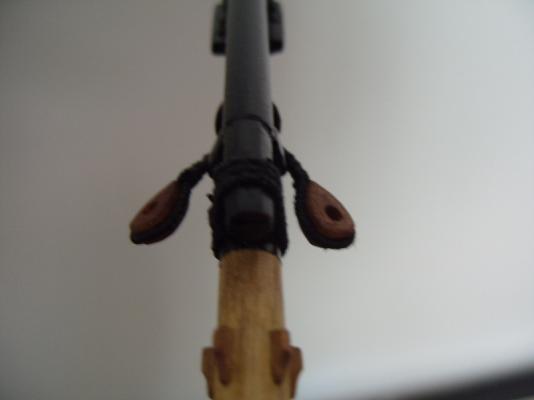
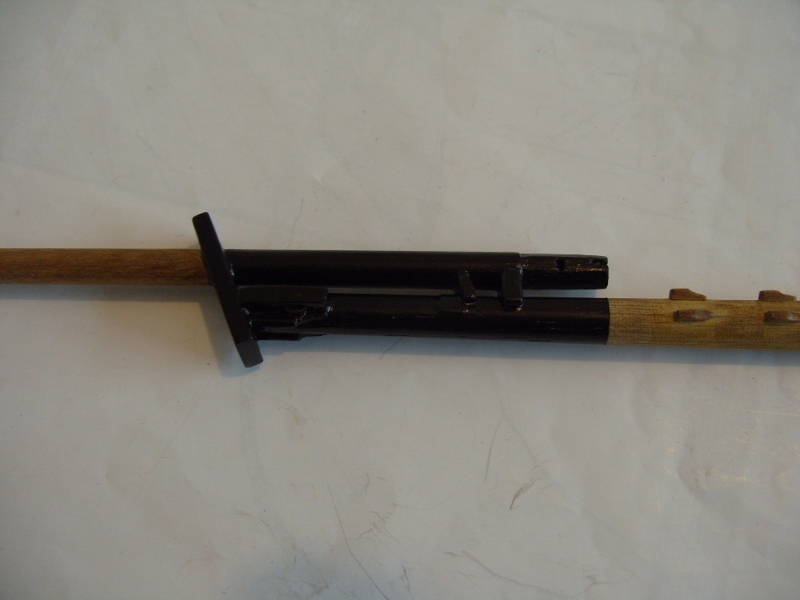
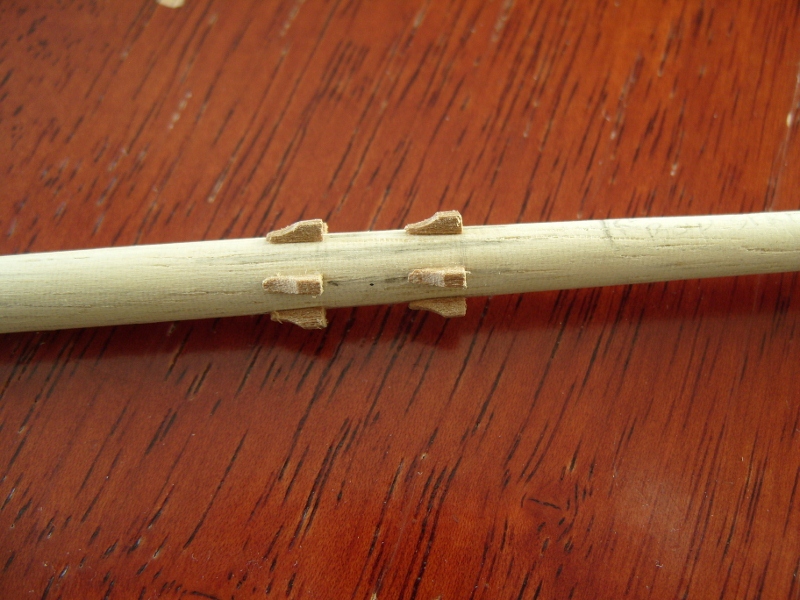
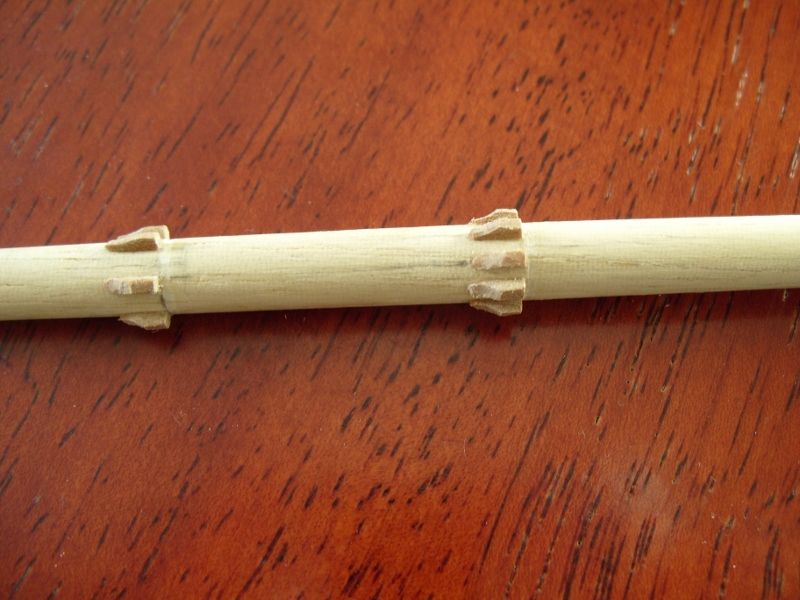
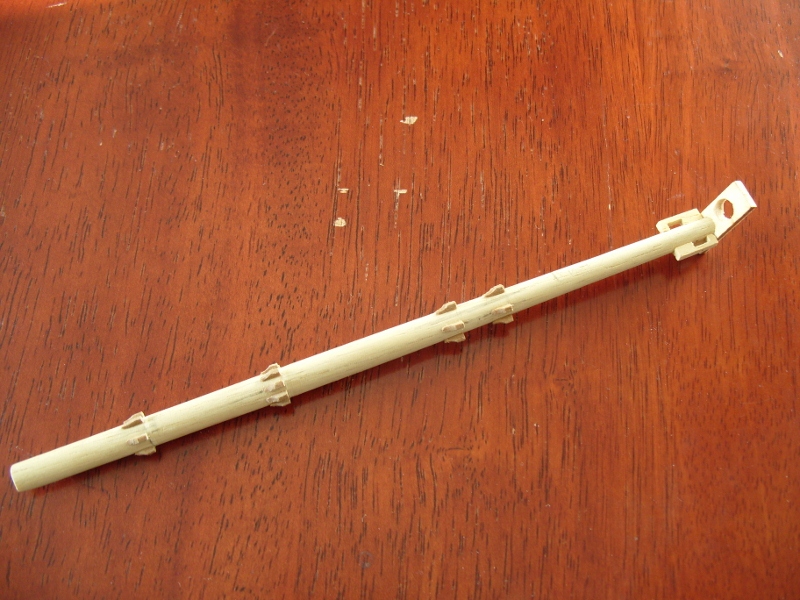
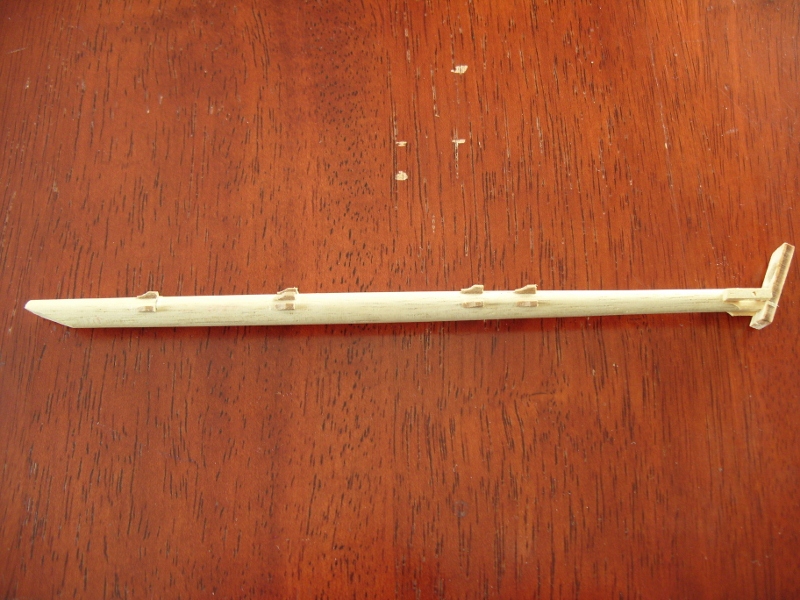
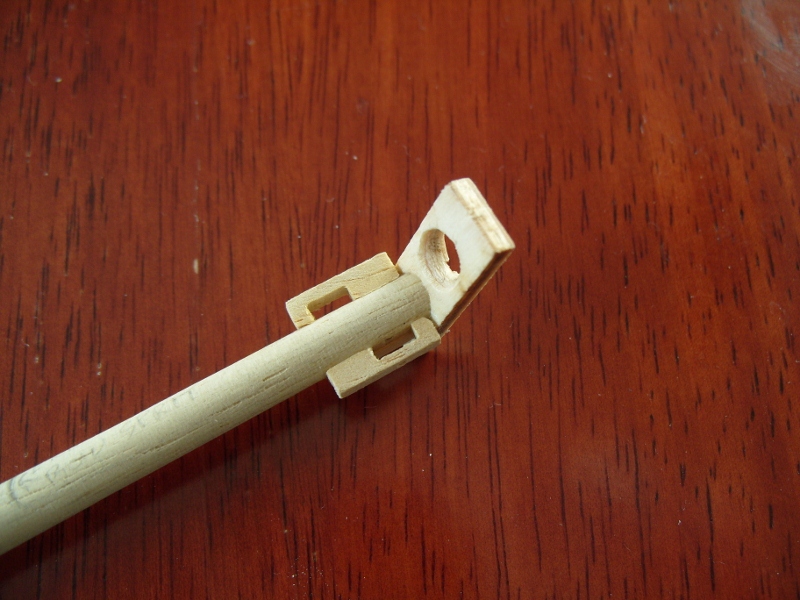
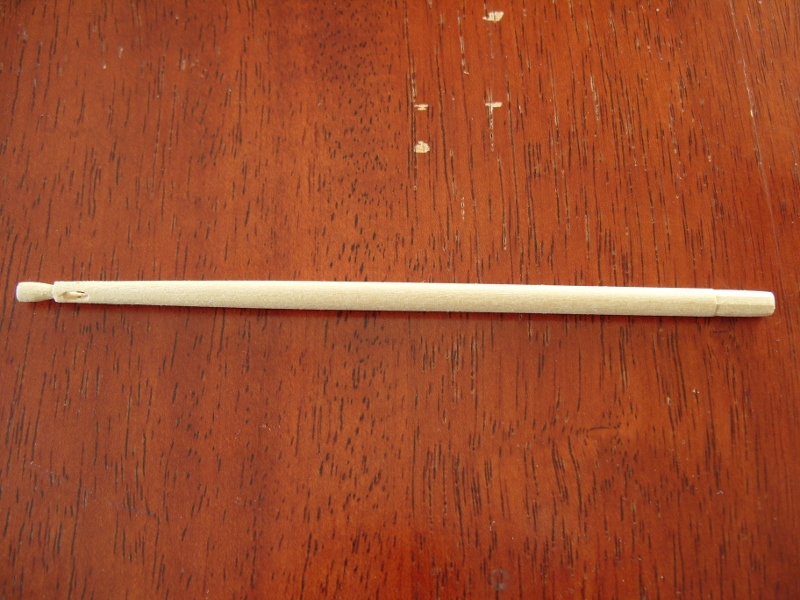
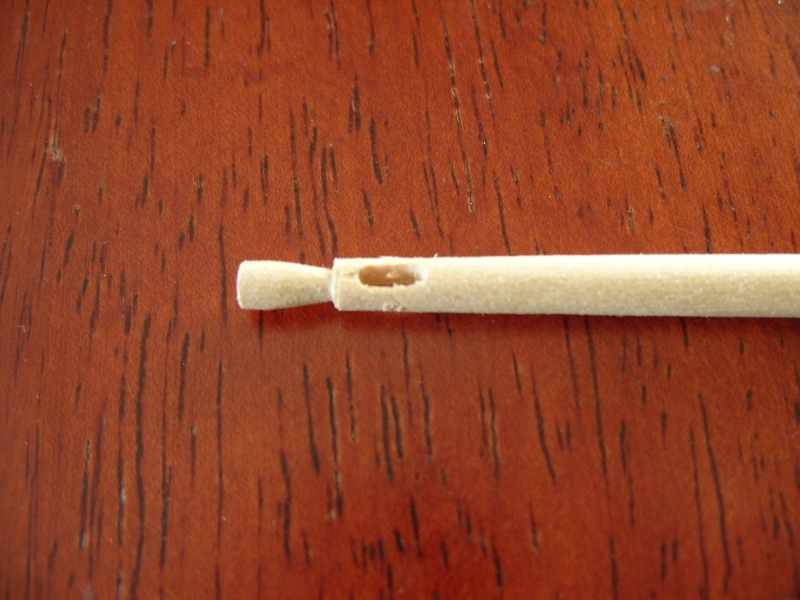
Popeye I am going to step the lower masts and do the shrouds and stays first, then work my way up each mast, completing the standing rigging as I go, that's the plan anyway. I know exactly what you mean about the thread supplied by Billings, being really fuzzy and the more you play with it the worse it gets. I'm actually using black thread by Caldercraft for all the standing rigging on this build. It's better but can still becomes quite fuzzy if not handled with care. Moving on, the fore topmast needed some attention next, again the bottom portion was squared off and pieces of wood added to each side to pack it out ready for shaping, picture 1. A sheave was added to the bottom along with a fid, pictures 2&3. Once this was complete the top of the mast was given the same treatment, first squaring of the top portion, followed by adding pieces of wood to each side to pack it out ready for shaping the hounds. (I did have some pictures of this but unfortunately I managed to lose them and haven't been able to recover them, so no pictures of this part of the assembly). Moving on, the tressel trees were added next and 3 cross trees were made from walnut strip, these were then glued into position. Two cheek blocks were made and glued into position on the mast. A new mast cap was also made, pictures 4,5&6. The fore topgallant got the same treatment with sheaves added to the bottom and near the top, picture 7. Pictures 8&9 show the fore topmast finished. Picture 10 shows the masts temporarily assembled, the caps will be painted black after final assembly. Next up is the tops, but more on that later. Regards Phil
-
Managed to get around to resizing the pictures from yesterday, also got some together of the lower portion showing the cleats in position. There's also a couple of overall shots of the finished lower foremast. It's now ready to be stepped. Regards Phil
-
Hi Popeye Thanks again for the good words and yea, your sure right about the model makers leaving a lot of the details down to the modeller. But with this one sometimes I think I've bitten off more than I can chew. Still perseverance must prevail, I'll get there in the end. Regards Phil
-
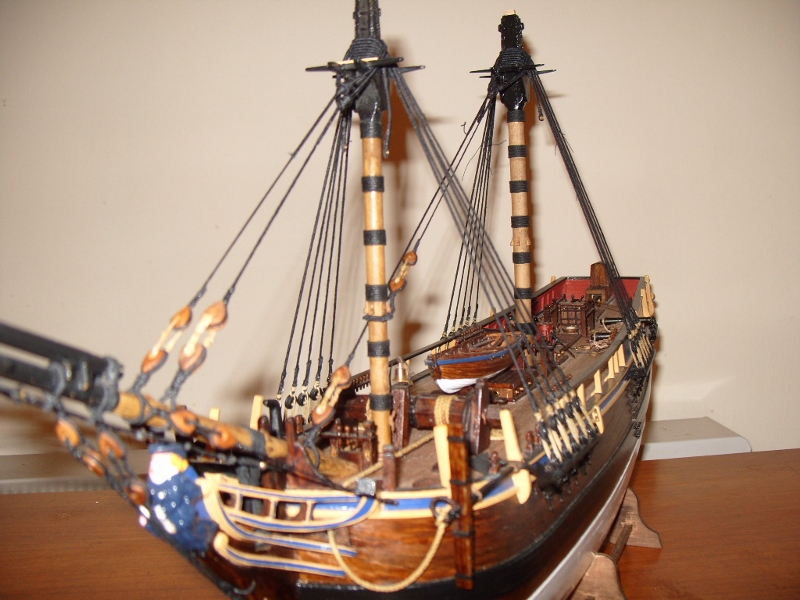
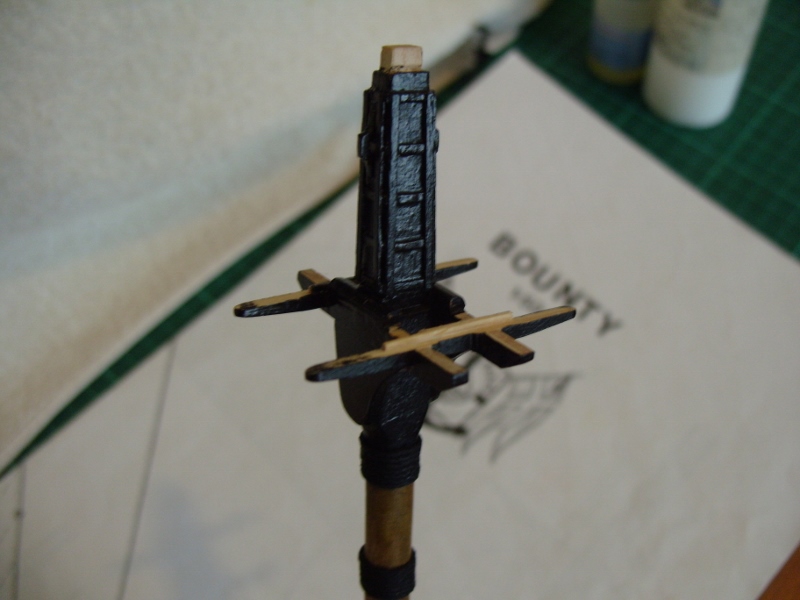
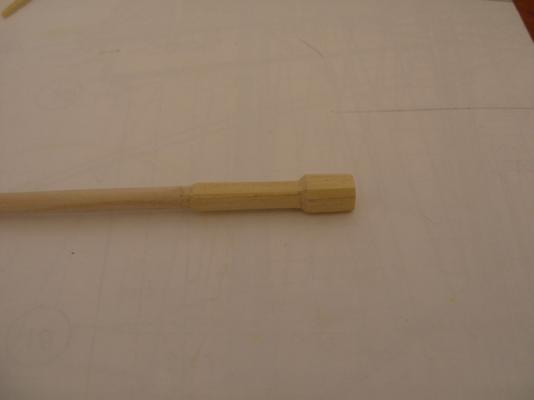
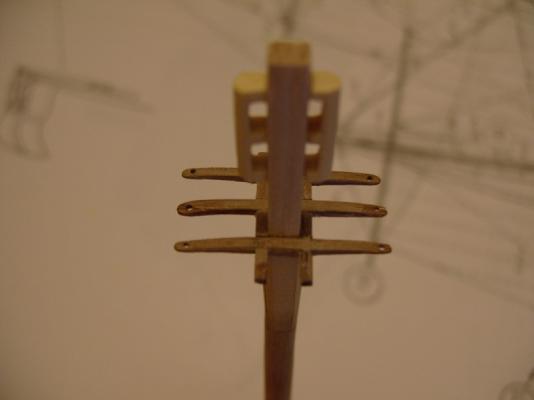
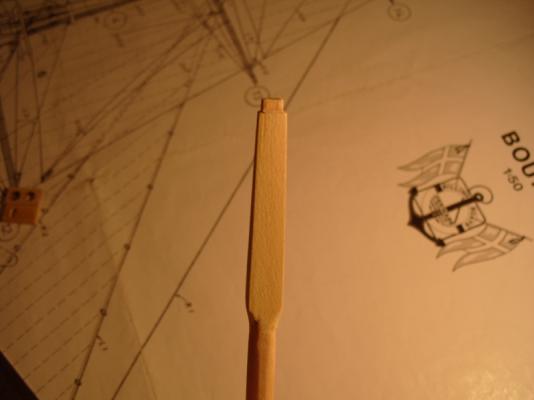
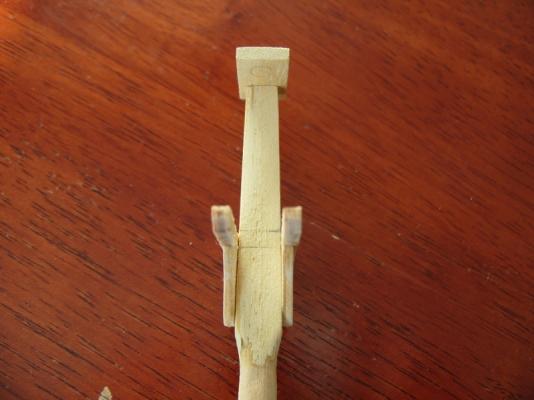
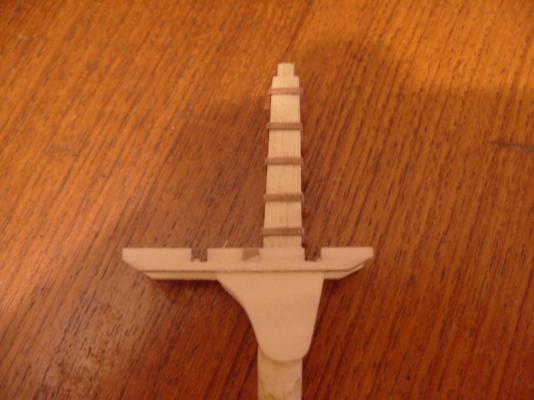
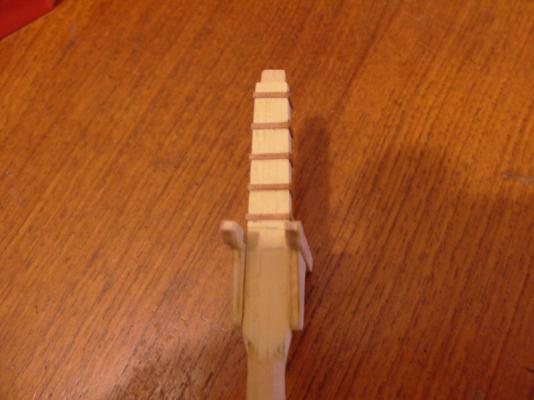
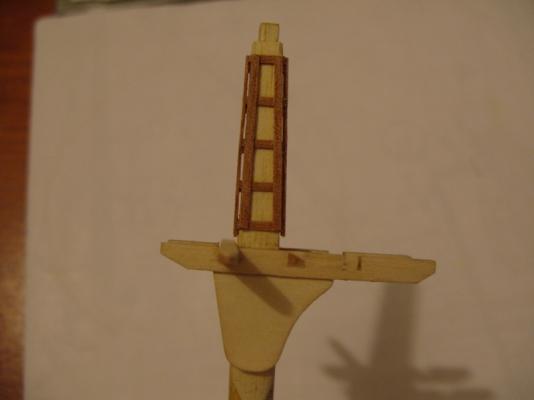
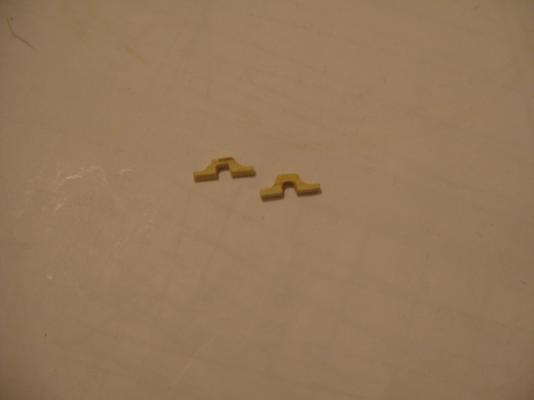
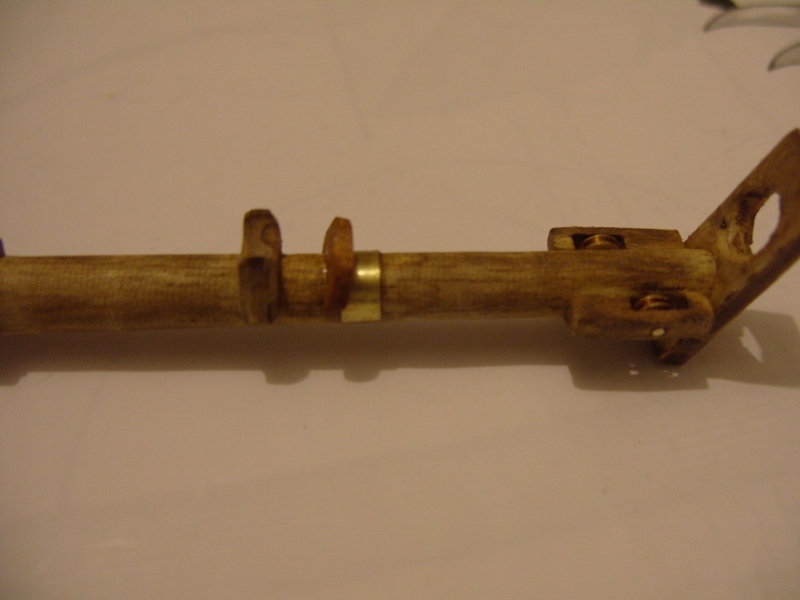
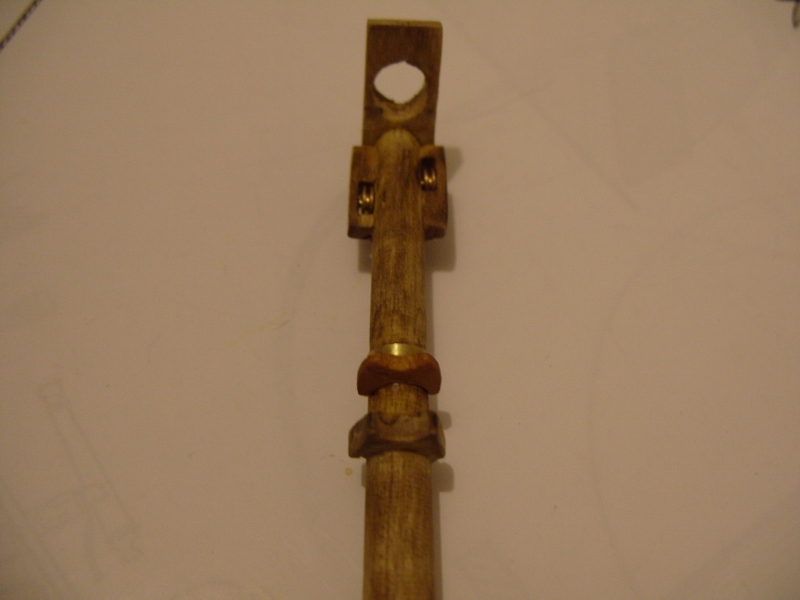
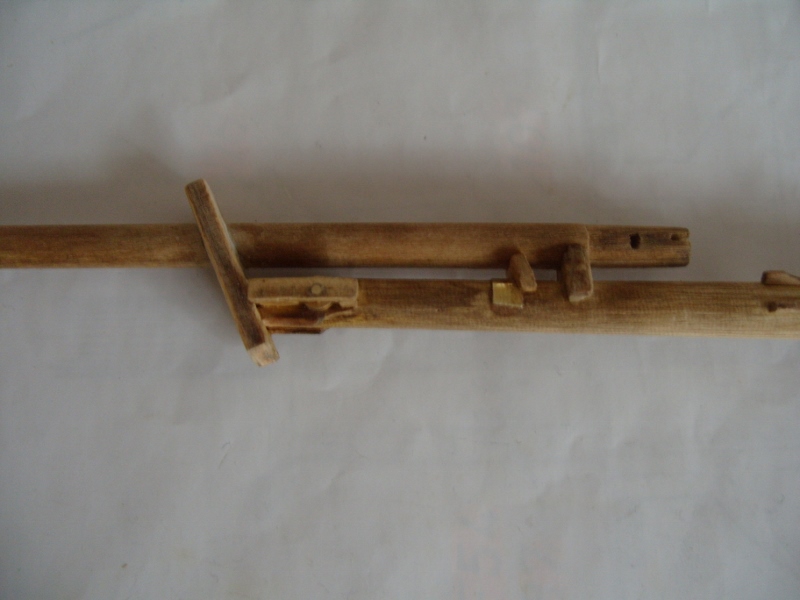
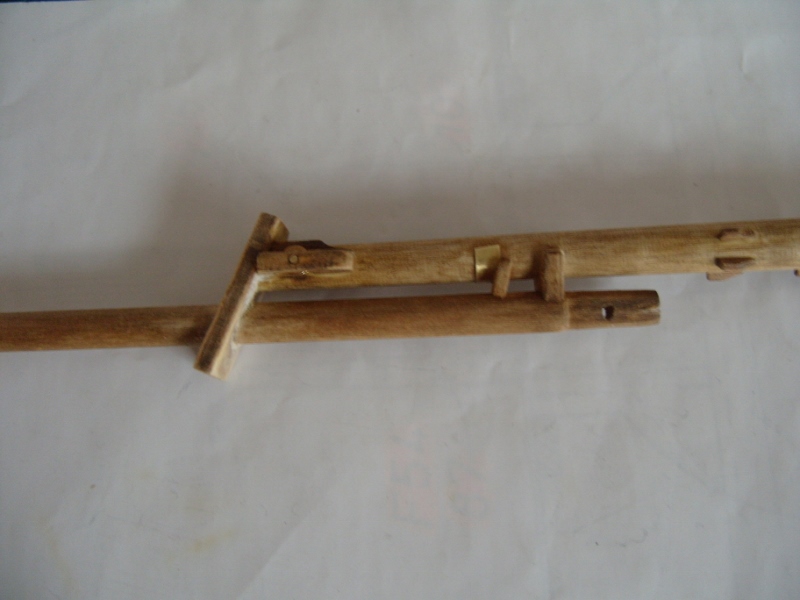
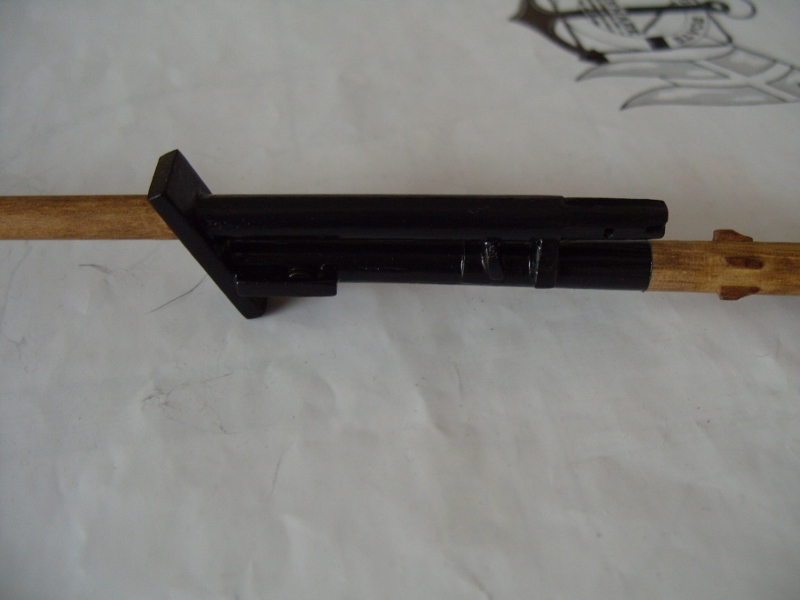
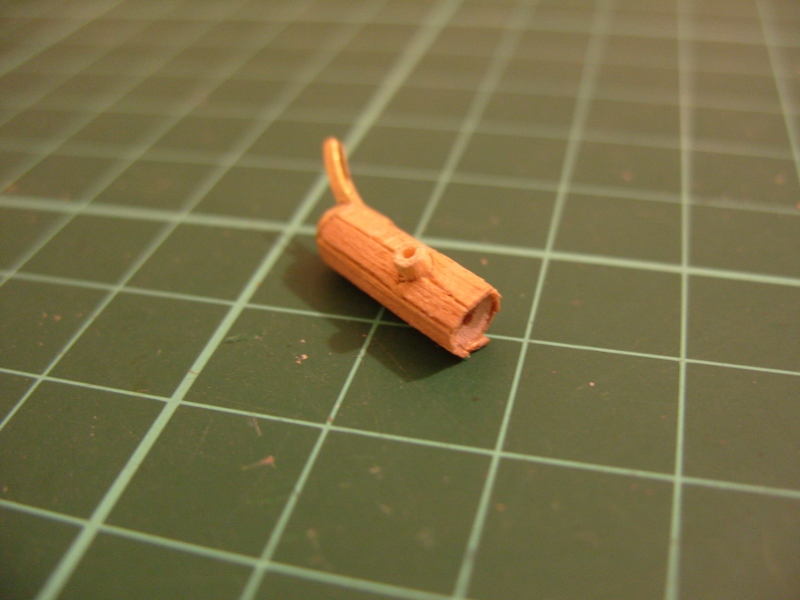
Before starting the masts I had a good look at the AoTS book. It soon became apparent that I was going to have a lot of work to do to get them to resemble the drawings in the book. So starting with the foremast the first job was to square off the top portion of the dowel supplied. Once this was done, pieces of wood were glued to each side of the square section to bulk it out ready for shaping into the required tapered profile, picture 1. Next the kit parts for the bibbs were reshaped, picture 2. Then a new cap was made, kit part at top, new cap below, picture 3. This was then test fitted to the top of the mast, picture 4. Next the bibbs and tressel trees from the kit were glued into place, pictures 5, 6 & 7. The tressel trees are from the kit and have 3 cut outs for the cross trees, only 2 cross trees are needed so the middle cut outs were filled in, picture 8. This picture also shows the banding which was added, also shown in picture 9. Picture 10 shows the making of the cross trees. Picture 11 shows the rear cross tree fitted and the battens in place. Picture 12 also shows the battens. Picture 13 shows the front cross tree added and a small block glued in place. At this point I noticed that the rear cross tree was fitted too close to the mast. It then became apparent that the tressel trees in fact were fitted too far forward, so these were moved back into their correct position, picture 14. Two jeer block strop cleats were made, picture 15, these were then fitted into position, picture 16. This picture also shows small battens added to the top of the cross trees which will help to centralise the top when fitted. Picture 17 shows the bolsters fitted into position. All of this work was then painted black and woddings were added to the mast, pictures 18, 19 & 20. Just a little more to do on the lower part of the mast, more on that later. Pictures 18, 19 & 20 need to be resized, will show them at a later date. Regards Phils


-
Hi Zyxuz Sorry for the delay in this reply, but thanks for looking in and the kind words. Regards Phil Hi Popeye Likewise, sorry for the late reply and thanks for your continued interest. Regards Phil
-
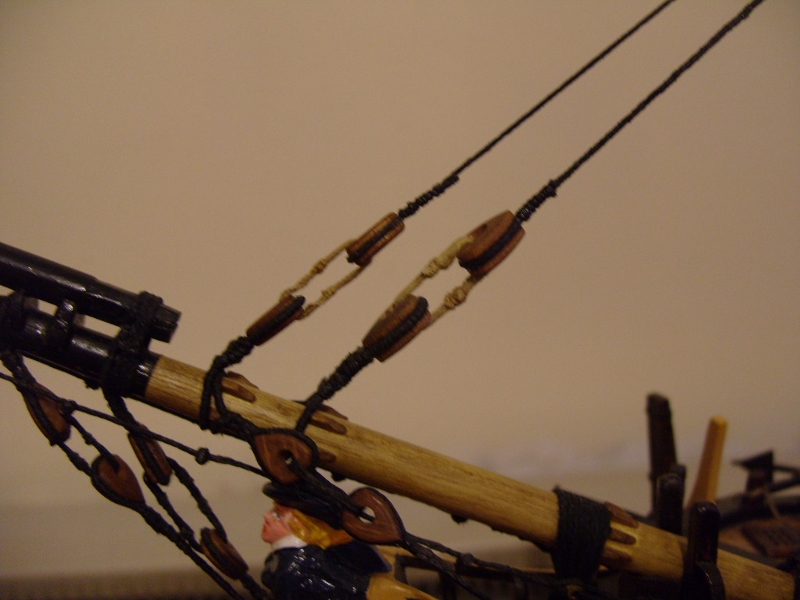
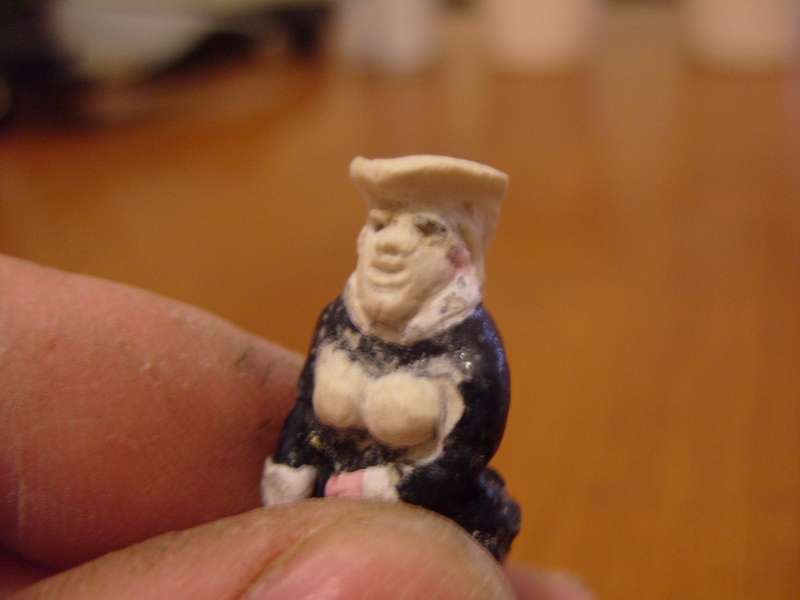
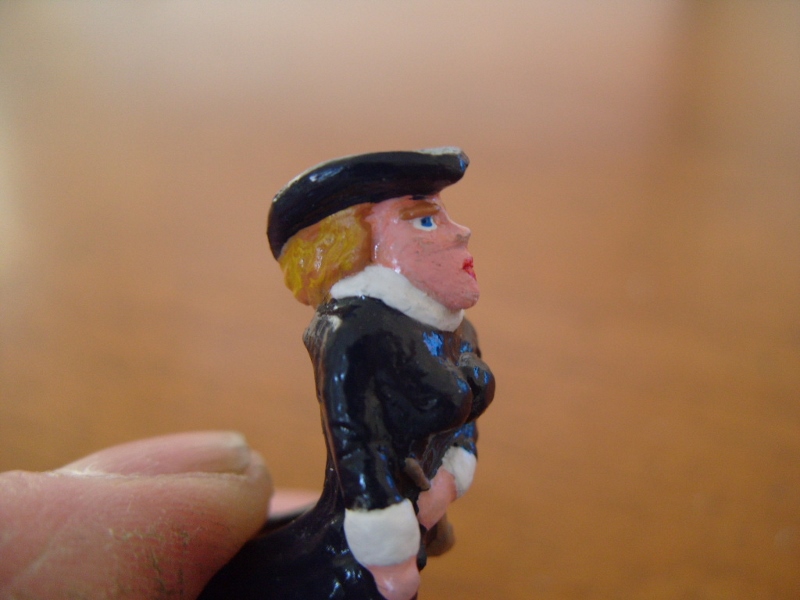
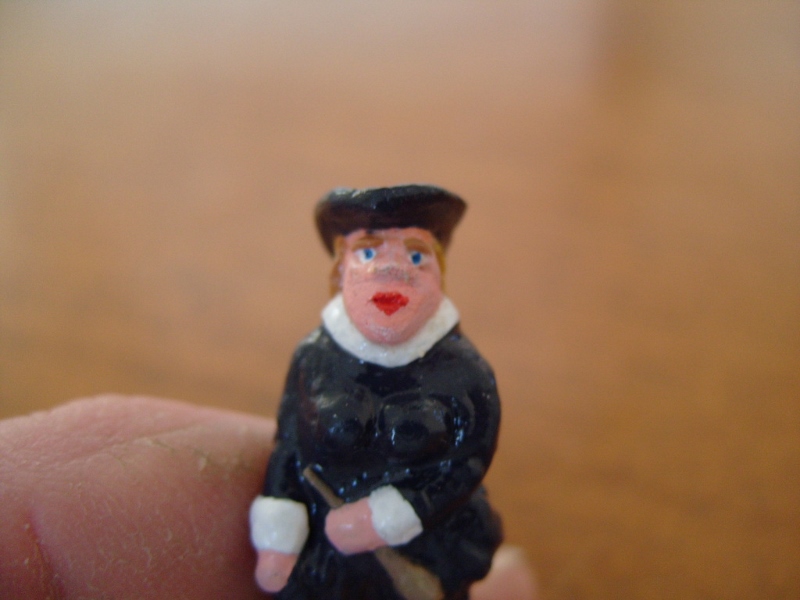
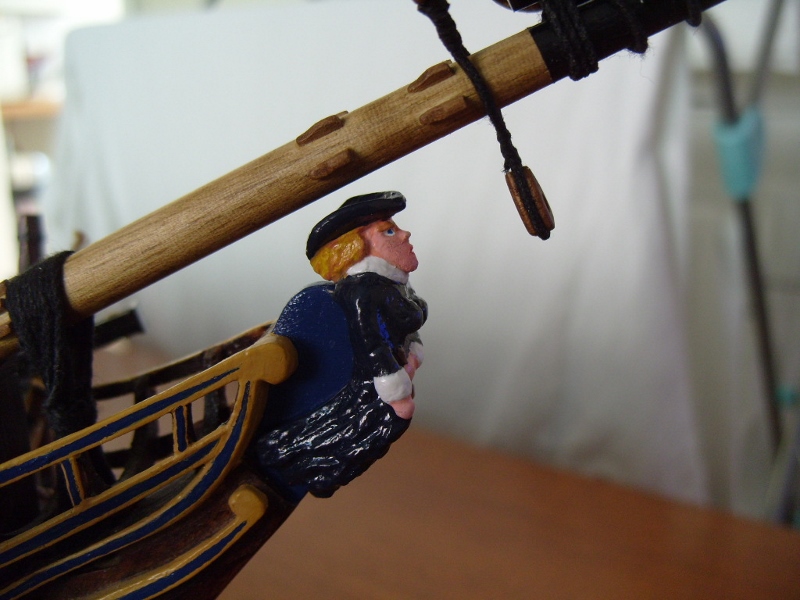
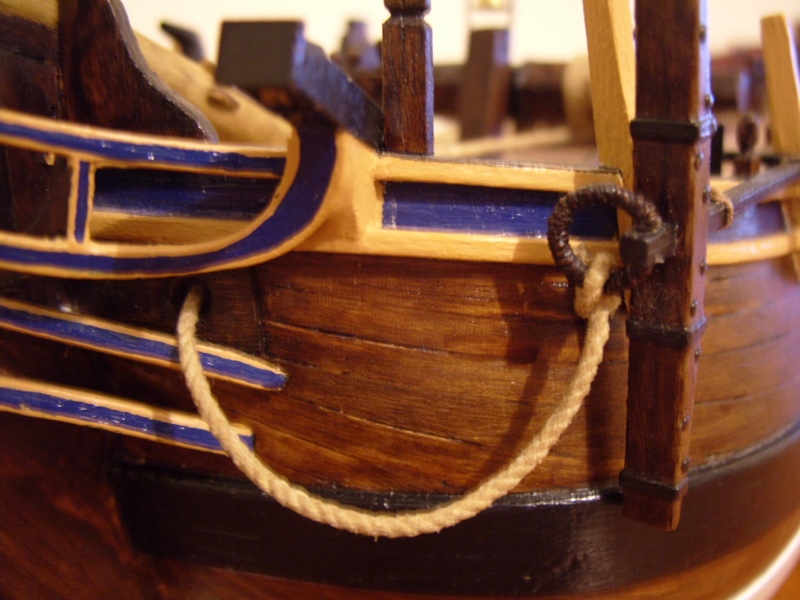
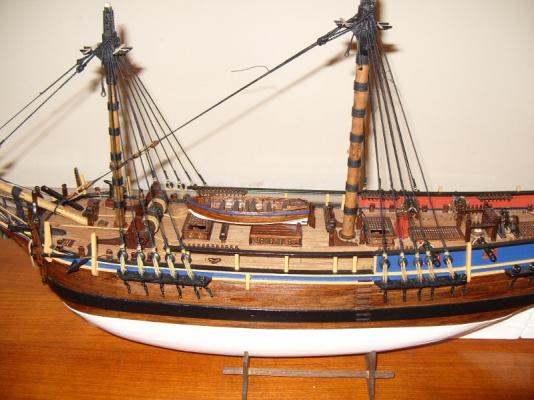
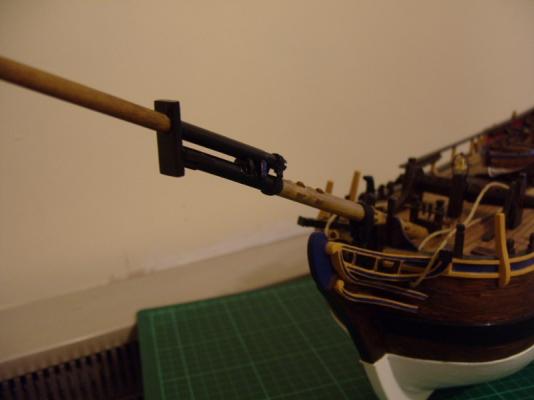
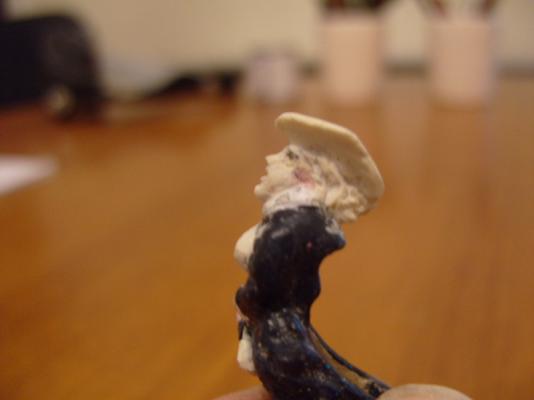
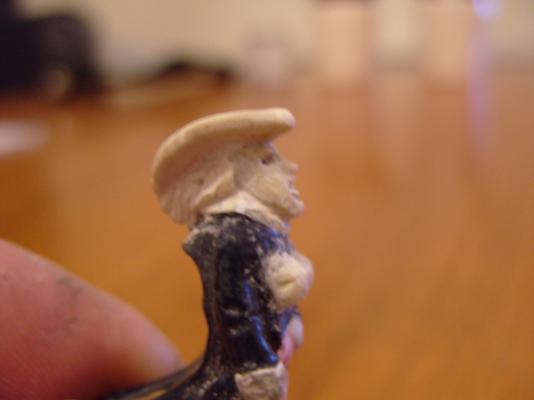
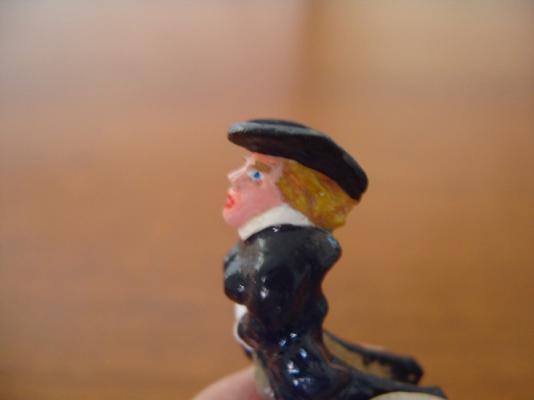
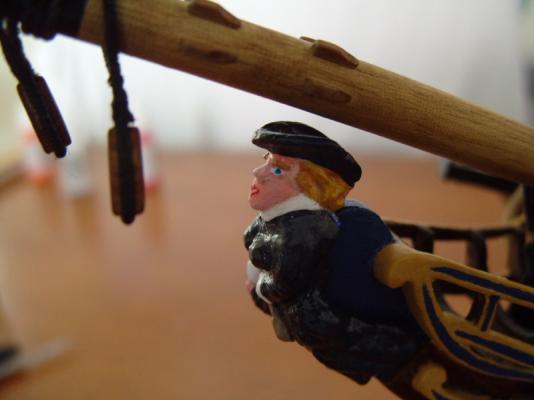
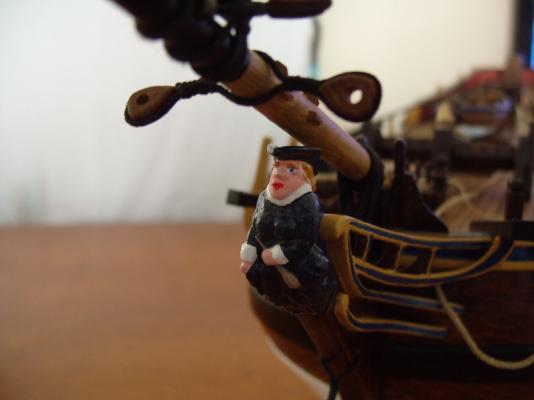
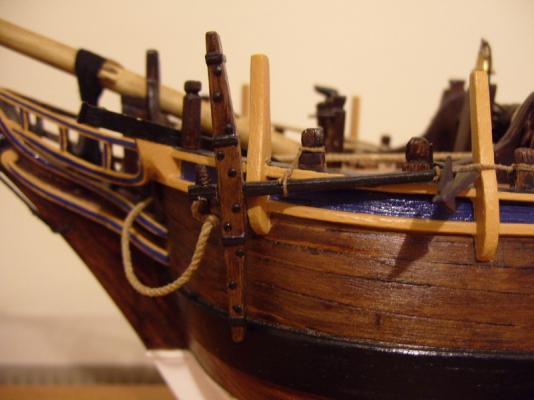
Now that the figurehead is in place, her cloak has been extended onto the stem and blended in, also she has had some shoes added complete with silver buckles, she is now finished at last. Moving on, the two stays are in place, these have been served which was done by hand, this was very time consuming but worth the effort. The two shrouds and horses are also in place, I just need to induce a little sag in the ones on the bowsprit, the ones on the jib boom have had this done already. There's a little tidying up to be done in this area, the close up shots sure do show up all the little imperfections, perhaps I should stop taking close ups. To finish off the jib boom I made a jib traveller from brass rod. Small brass thimbles were used for the rollers which were added along with the hook to the ring which was then closed up soldered together, the whole thing was then blackened. This completes this area for now at least. Now on to the masts which have been started, but more on that later.


-
Matt Sorry for the late reply, but as I have already explained work had to come first. In answer to your question, the tops in my kit were also made of plywood, these have been discarded apart from the frames, which I kept and used to make up the grates by adding strips of wood from one side to the other and then filling in length ways with small pieces of wood to give the grating affect. Once these were sanded smooth the centre part was removed to accept the mast. Hope you can understand this, if not then please let me know and I'll try to explain in more detail. Regards Phil
-
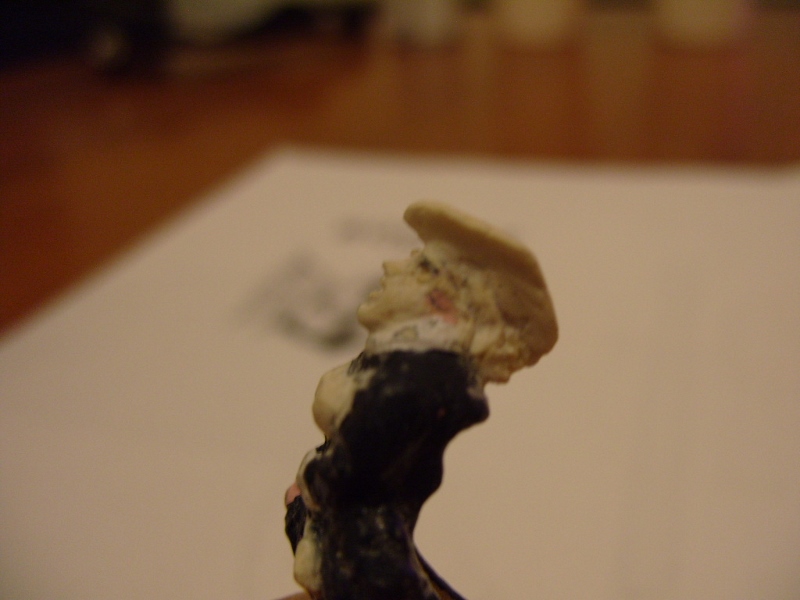
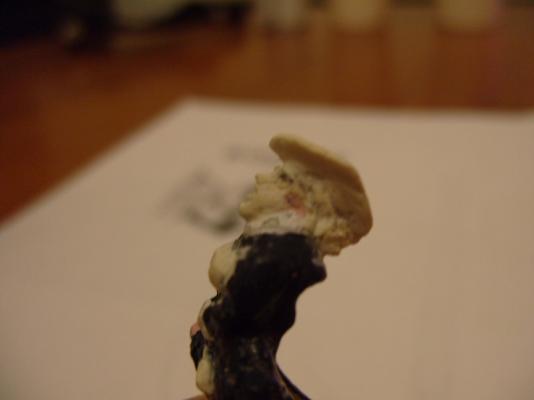
Well it's been nearly 3 months since I last posted, work had to take precedence unfortunately. Still I have managed to make some progress, the bowsprit is now fixed into position along with the figurehead. As some of you may remember I did not like the facial features on this and so modifications were made. This was done by adding wood filler and re-shaping the features. I had to make several attempts at this before getting what I think is acceptable, much better than before anyway. The gammoning has been done and second anchor has been made, these are now fixed in their positions, wasn't sure what to do with the anchor ropes, so I just coiled them up on the deck. I also started on the bowsprit rigging, the saddles for the stays were made up and are in position. The foremast and top have been made, but more on that later. Regards Phil


-
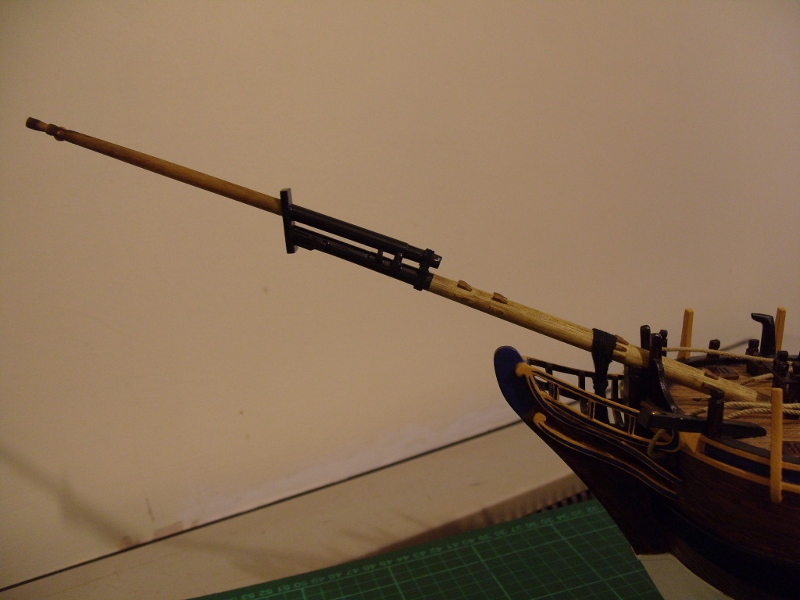
A bit more work done on the bowsprit and jib boom, a piece of brass has been added to the bowsprit to represent the lead lining. Also the sprit sail yard sling saddle has been added. The jib boom has been glued to the bowsprit and the centre part of the two has been painted black, the rest will be varnished. In the A.O.T.S book there is a diagram of a fish davit, can anyone tell me what this is and where it goes? It is shown on the same page as the bowsprit and jib boom, so I presume it goes in this area somewhere. Your help in this matter would be much appreciated as I have no idea where this goes. Thanks. Regards Phil

-
It's good to see that your dead eyes have arrived, can't wait to see what you do with them. Not too long to wait I hope. Regards Phil
-
Hi Popeye Your lobster twins are looking really good. I like what you have done to the Denny-Zen. The lobster traps and sought table came out really well, also the weathering, it makes it look like a real working boat instead of one that has just come from the showroom so to speak. Like all of your builds I have found these two very entertaining to watch. Who needs a TV in their lounge when they've got a Popeye. Seriously though very well done and I can't wait to see the end result. Regards Phil
-
Hi Popeye Thanks again for the good words. I hope to be mounting the bowsprit this weekend with any luck. Phil
-
Hi St george Nice of you to drop by and thanks for the good words. Hi Nirvana Thanks for dropping by and the good words. The McKay book is definitely a great help when building the Bounty. It's surprising just how much the kit manufacturers leave out. Hi john 46 Thanks for looking in and the good words. Regards Phil
-
Hi Shipyard Sid Thanks for the good words. As for the sails, Billings do supply the material to make these, so 'yes' I will be adding sails. Not sure at the moment whether to do full sails or furled sails. Either way it's going to be a lot of work making them, so I may enlist the help of the admiral, it's probably good to keep her on side anyway. Regards Phil
-
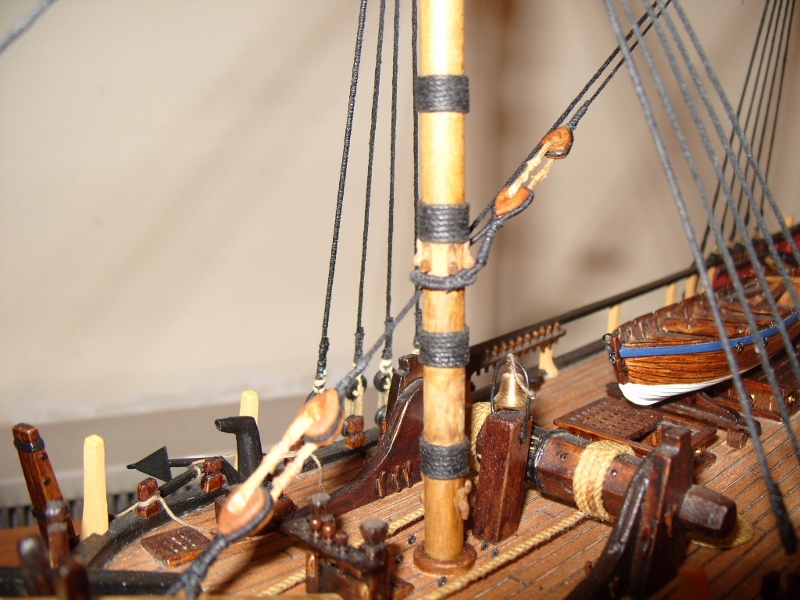
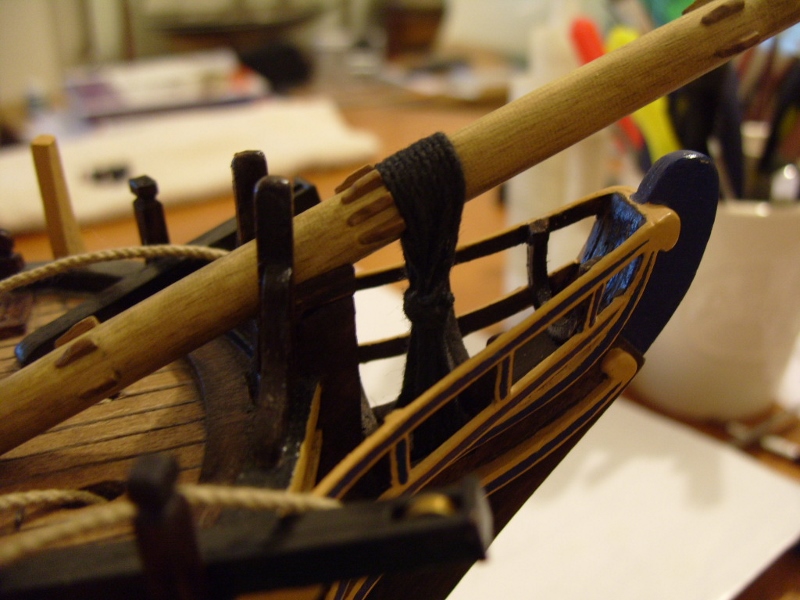
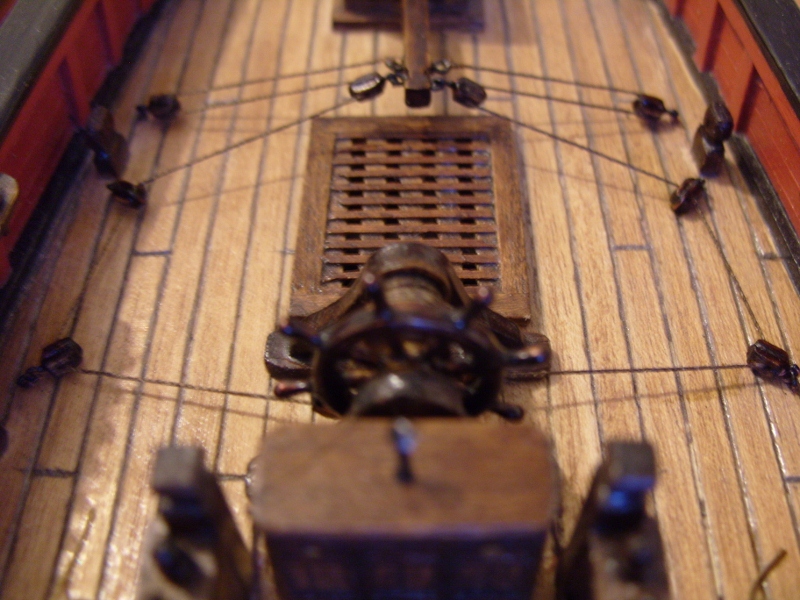
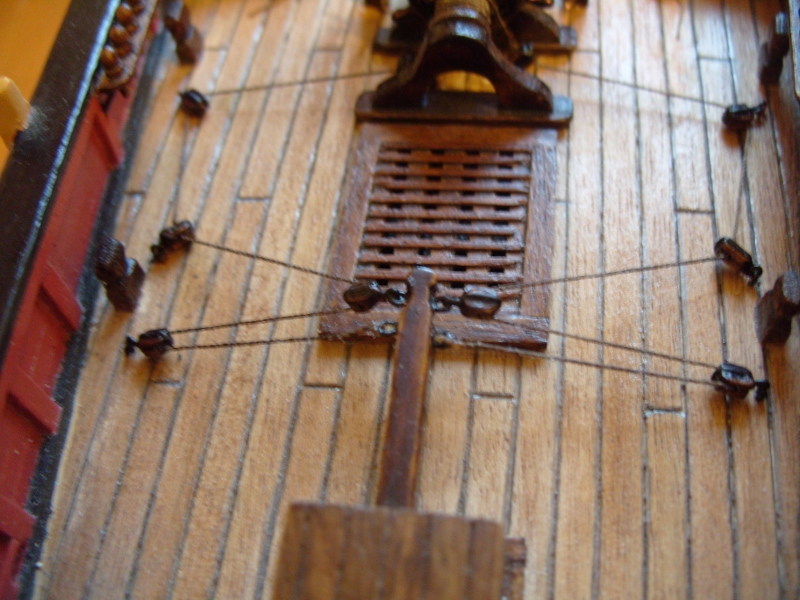
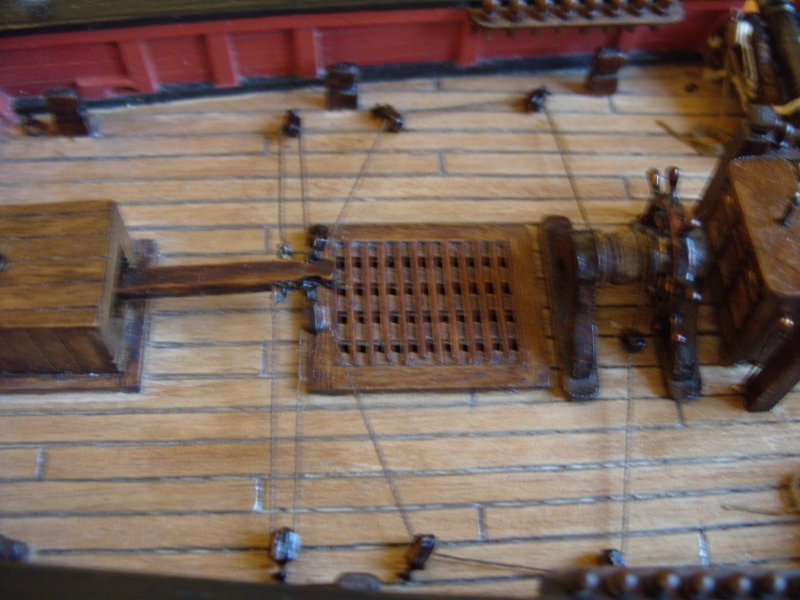
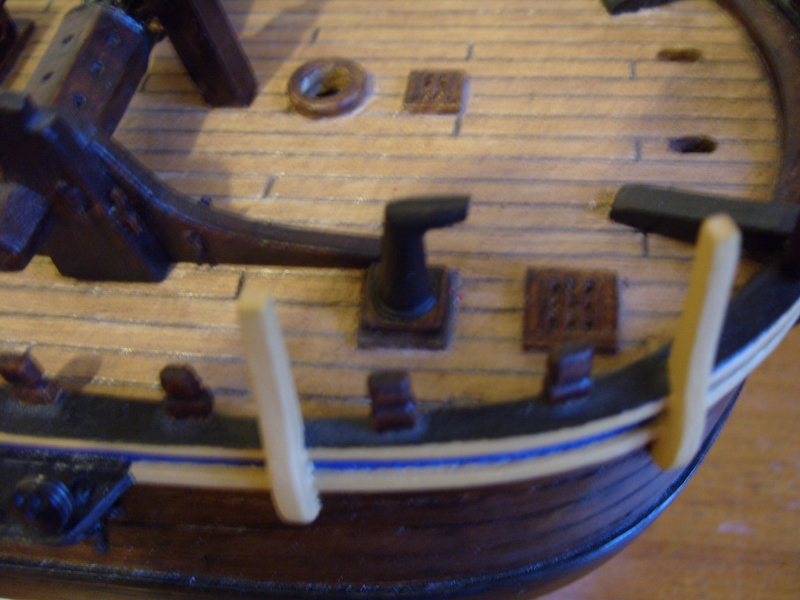
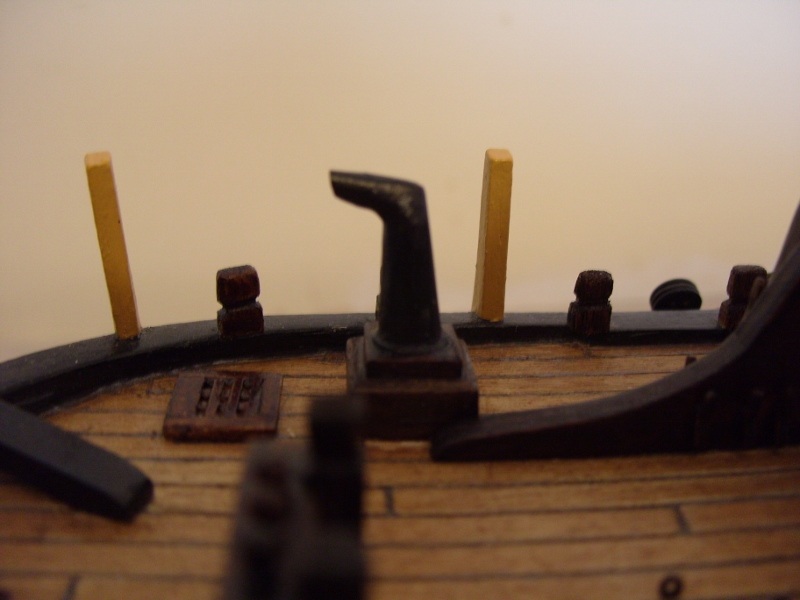
With all the deck fittings now in place except the swivel guns, which I've decided to leave until later, probably when most of the rigging is done, I'm now moving on to the bowsprit and masts. Starting with the bowsprit, using the dowel rods from the kit, the bowsprit was measured for length and then cut and sanded to shape. Once I'd got the circumference right, I added the collar and gammoning cleats, these were made from 2mm x 1mm walnut strip. Each one was filed into shape and then cut from the strip ready to be glued into place on the bowsprit. Once these were all done the cap was fixed into place after the correct angle was achieved. Two blocks were then added, one either side just behind the cap, complete with the sheaves. This just left the saddle which was also glued into place. The jib boom came next, again this was cut to length and shaped, a sheave was added to the tip. All these details were taken from the A.O.T.S book. Regards Phil

-
Klimi, David, Popeye and John Thanks for looking in and the kind words, they really help in keeping me motivated with this build. I am now two years in and probably at my pace still got a year or more to go. I'm also finding it hard not to start another build. I've got one waiting in the wings already. Still a lot to do on this build, so I must keep my hands out of the box until much later in the year or next. Oh well, I'll get there eventually. Phil
-
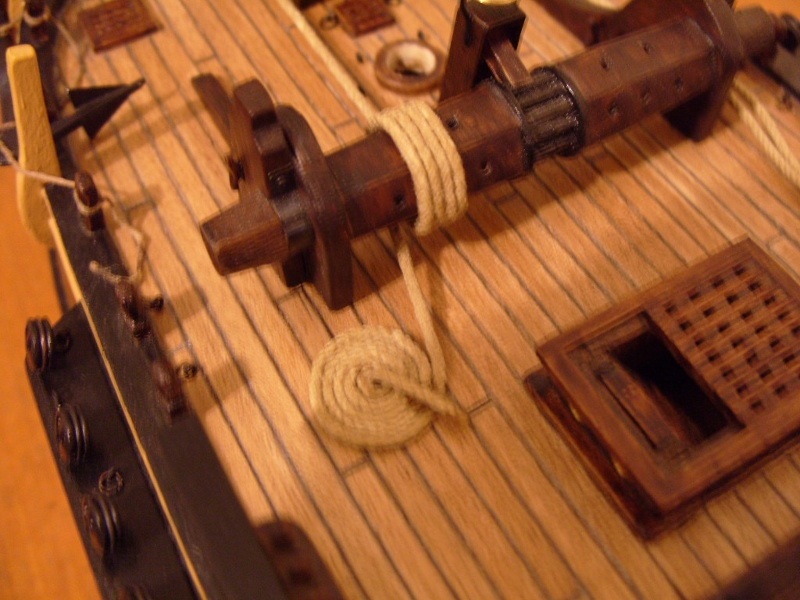
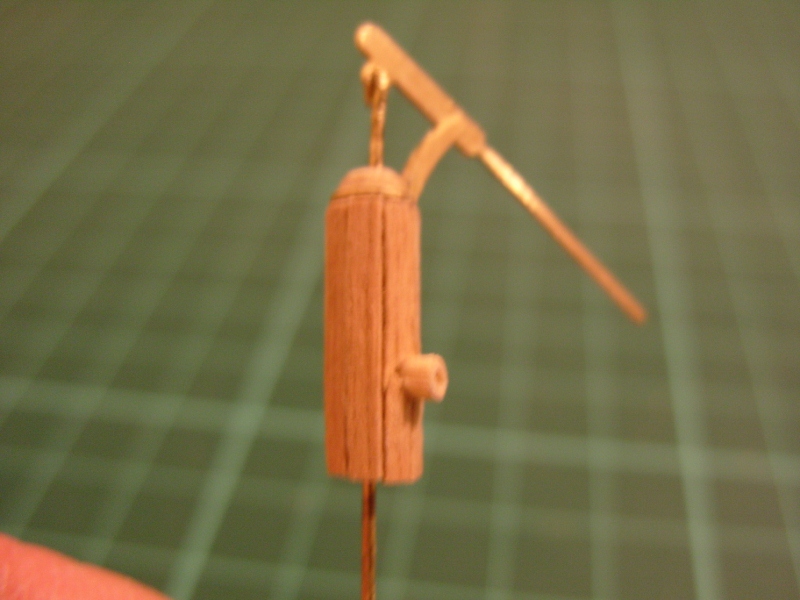
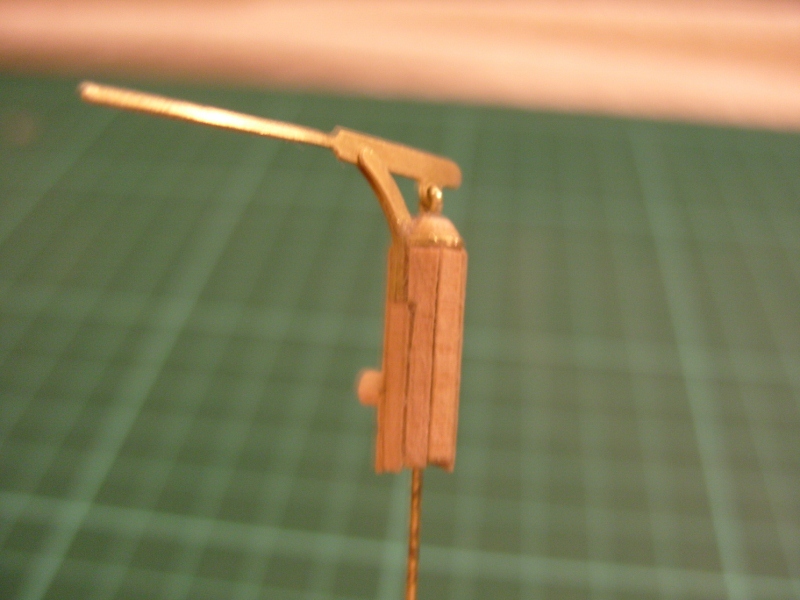
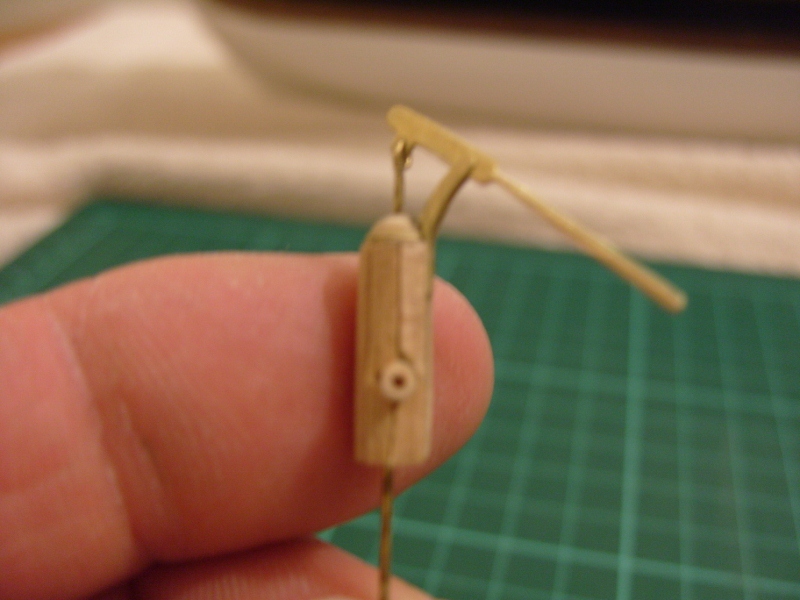
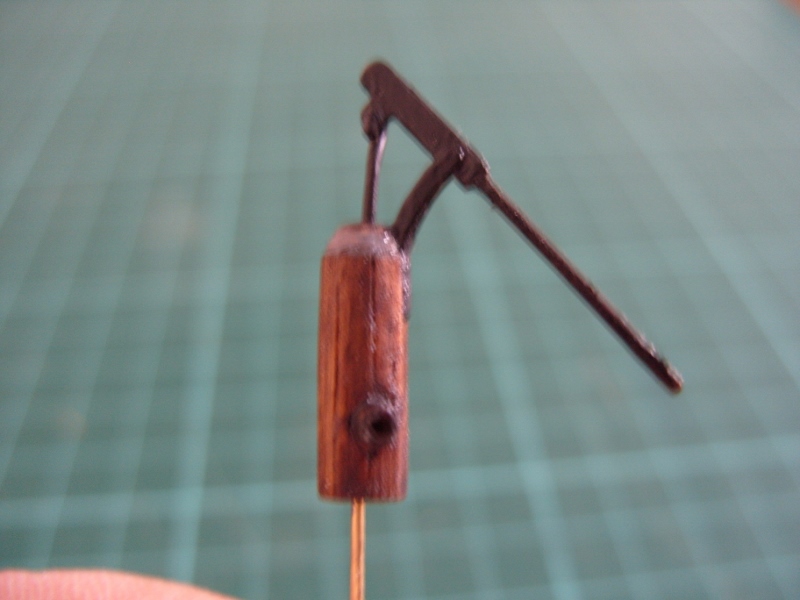
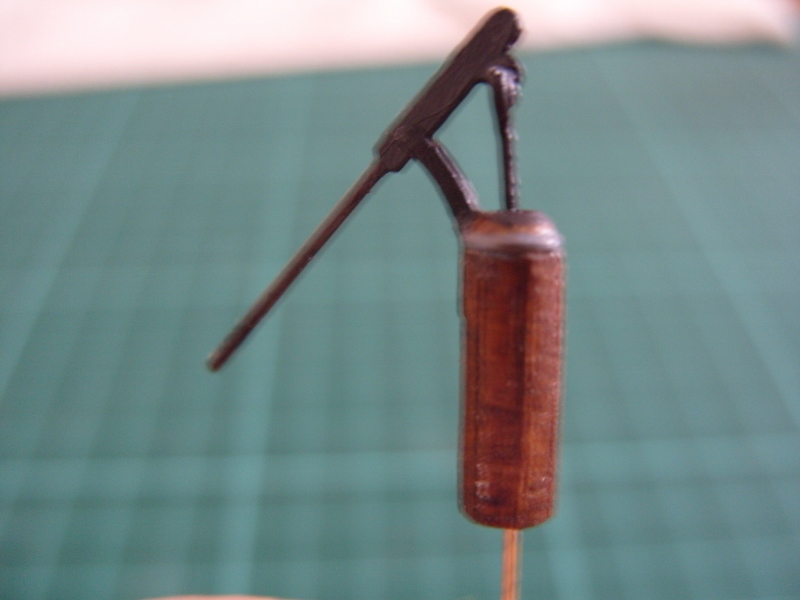
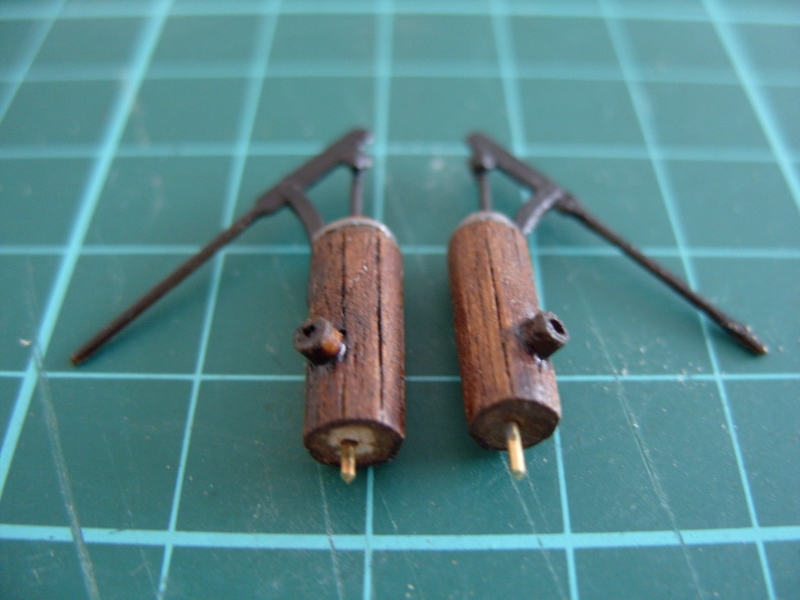
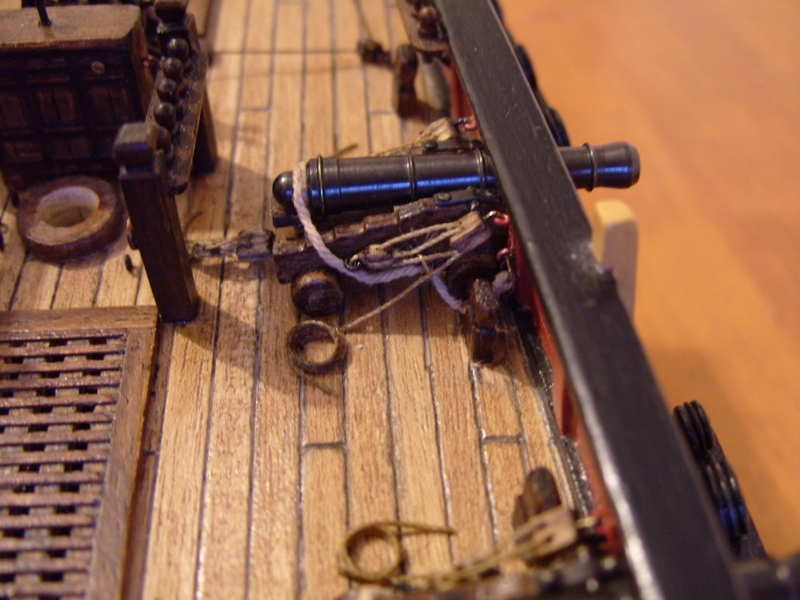
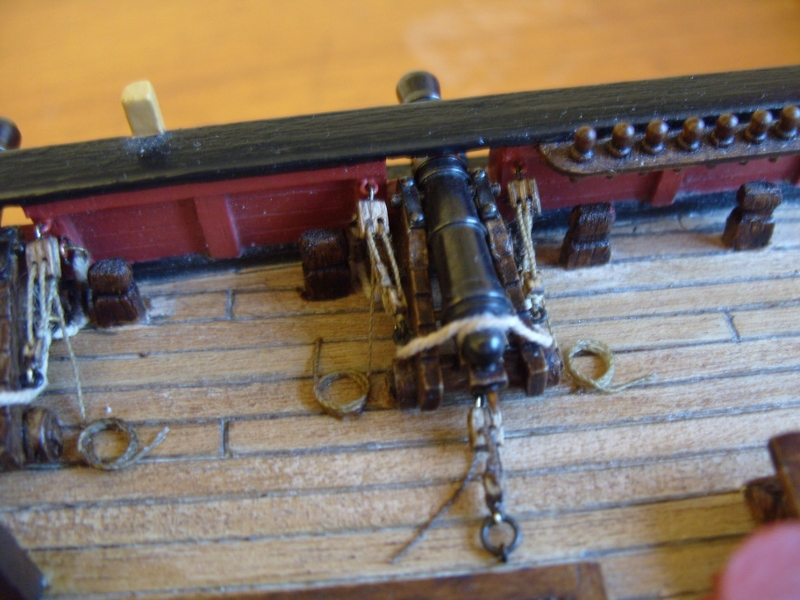
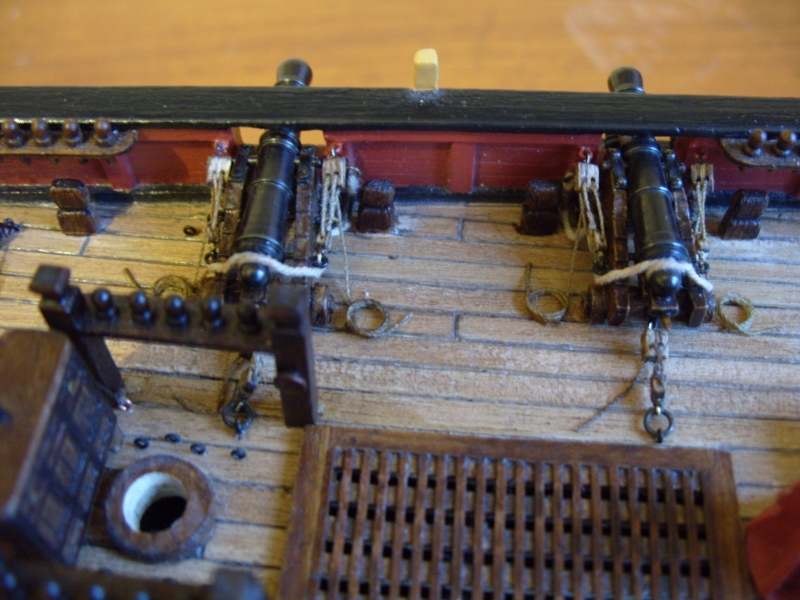
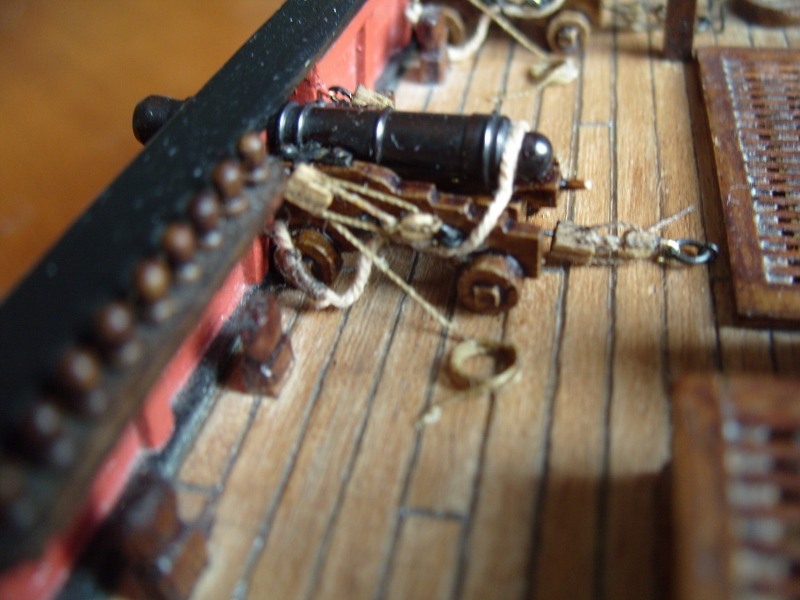
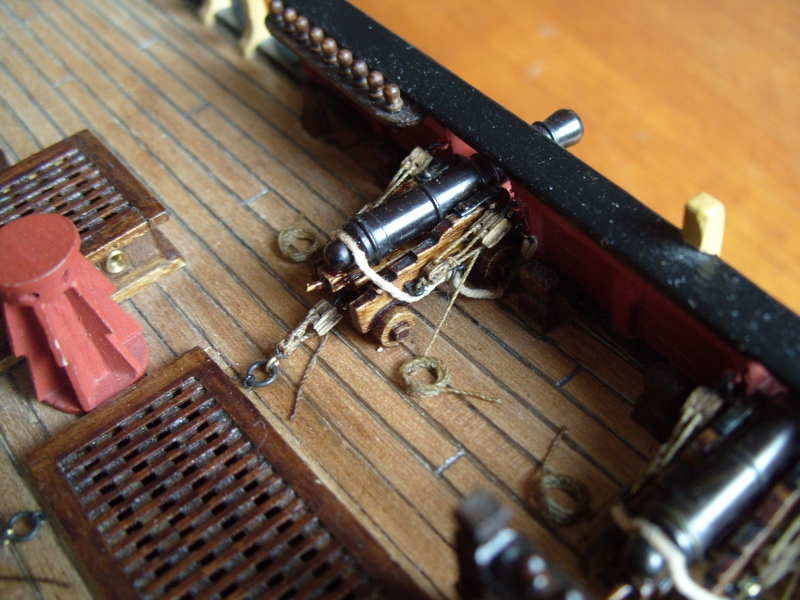
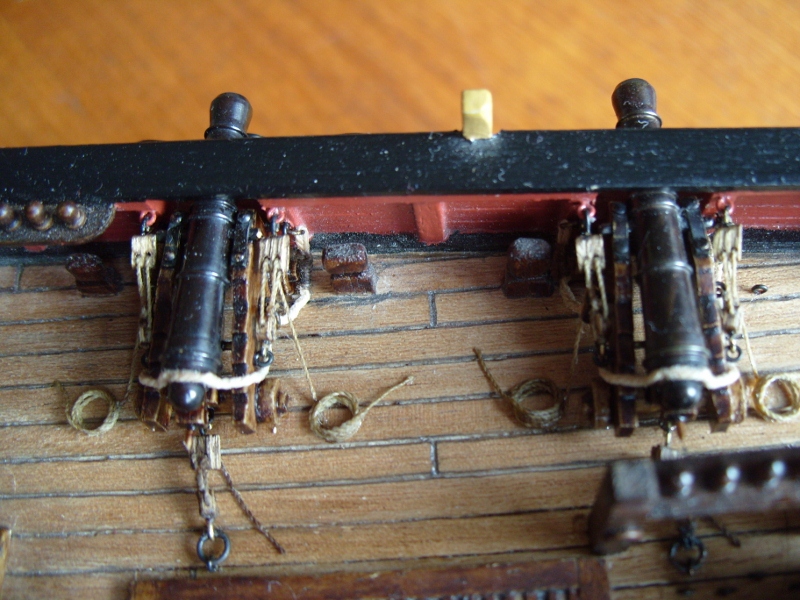
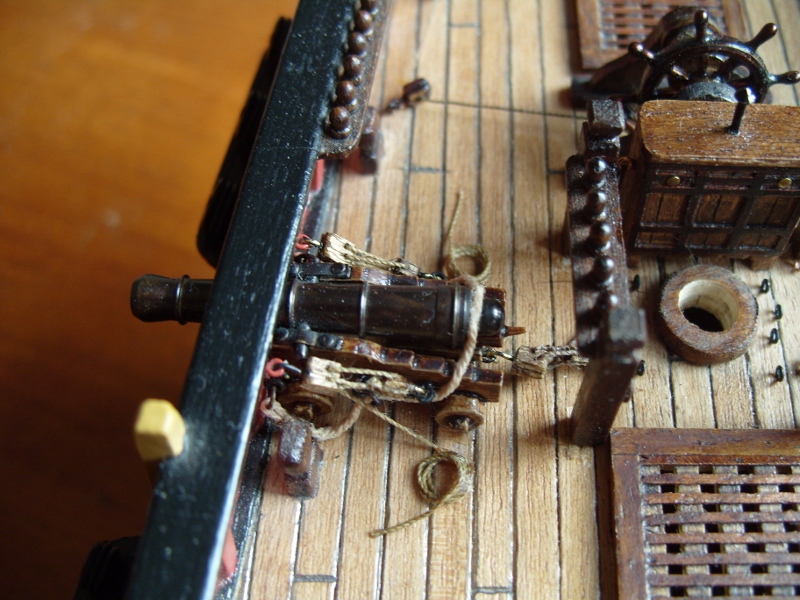
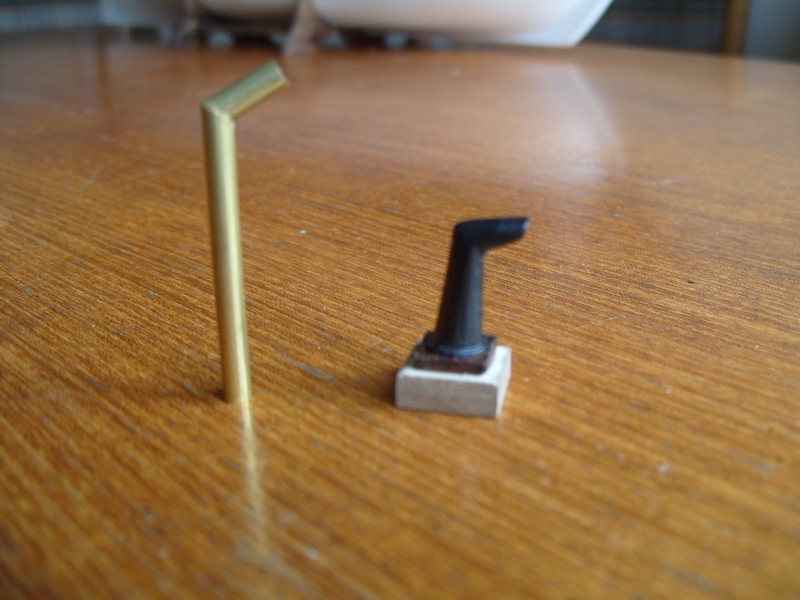
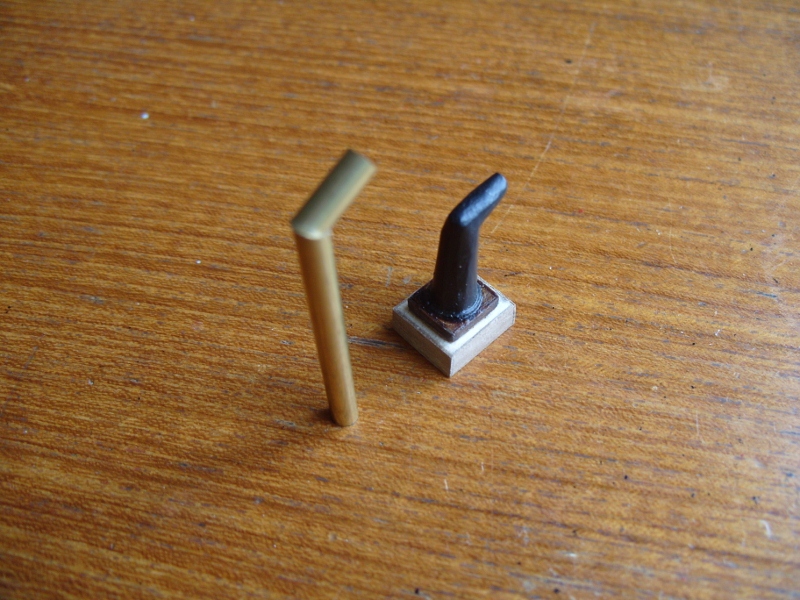
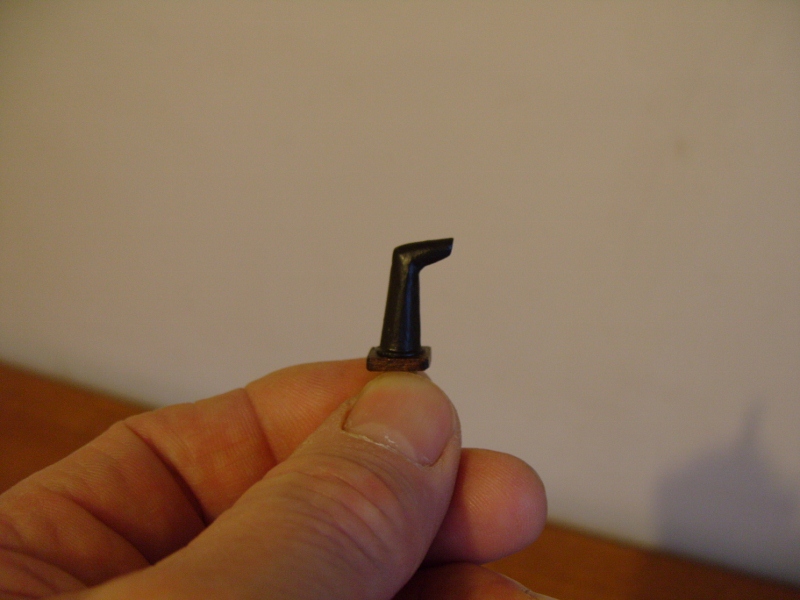
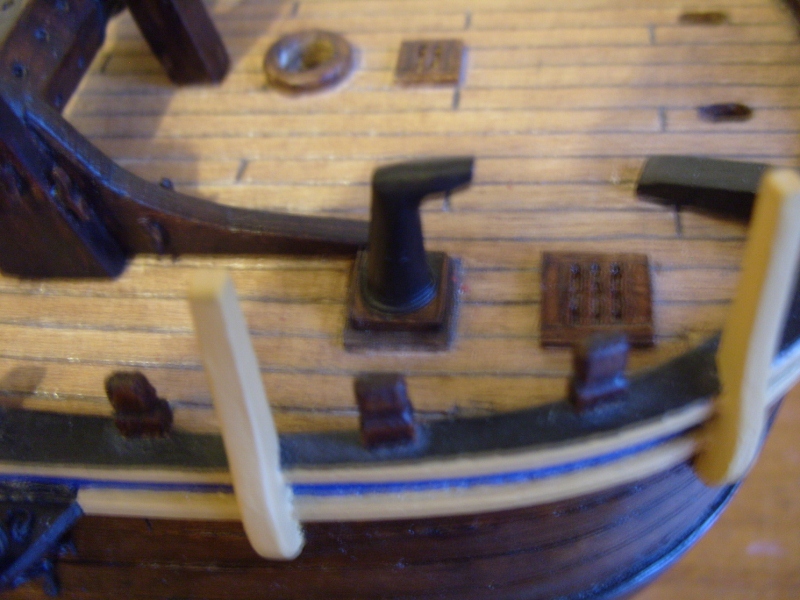
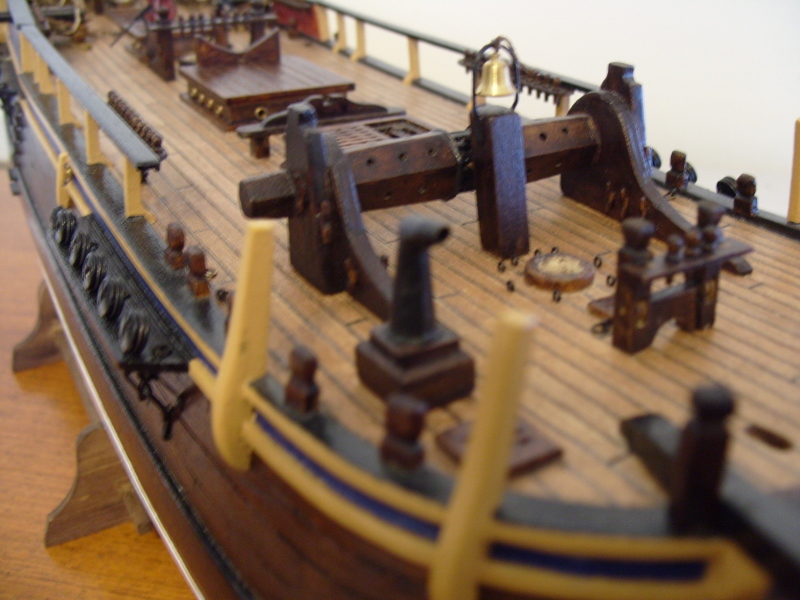
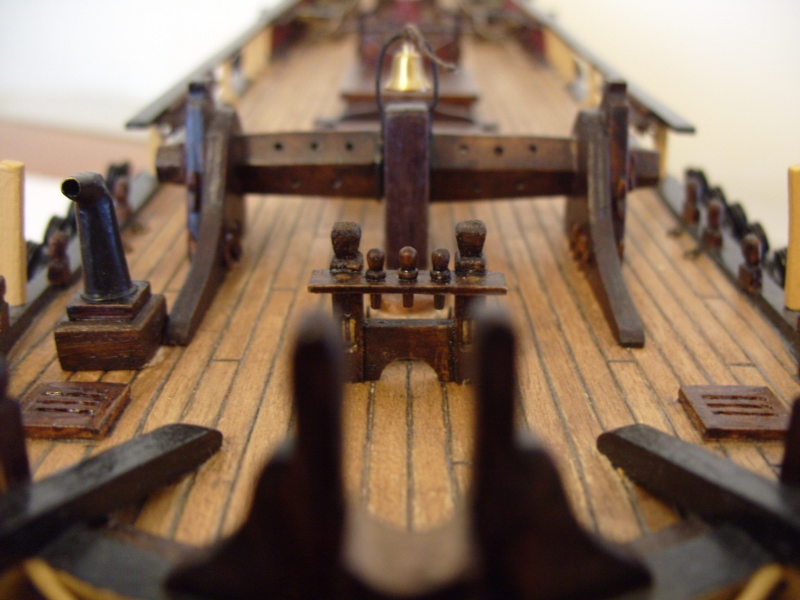
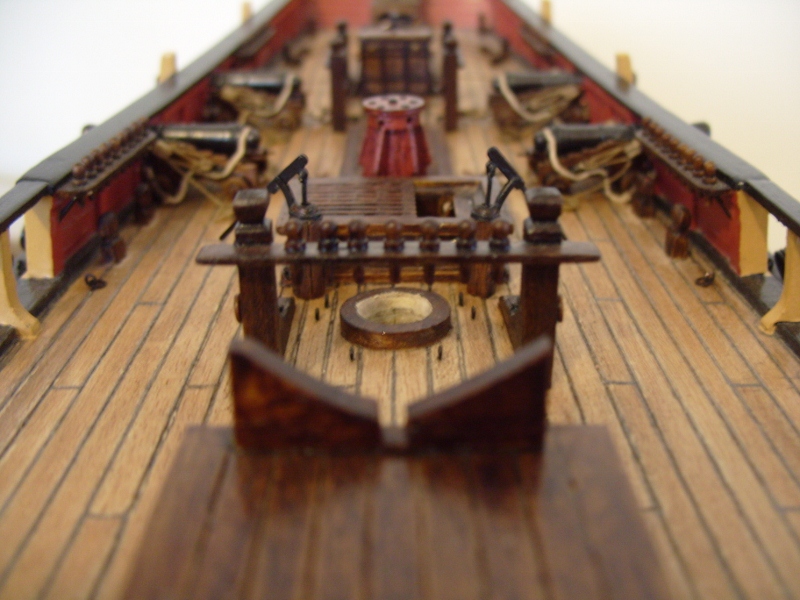
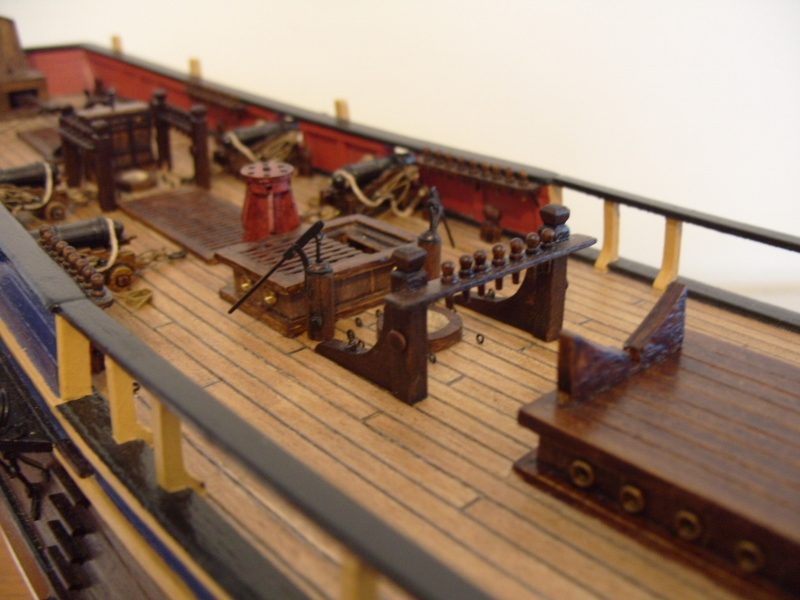
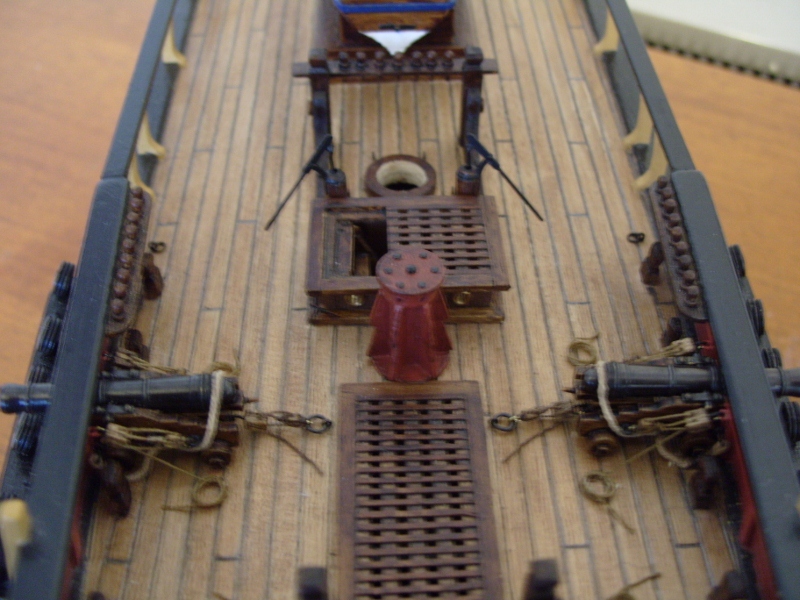
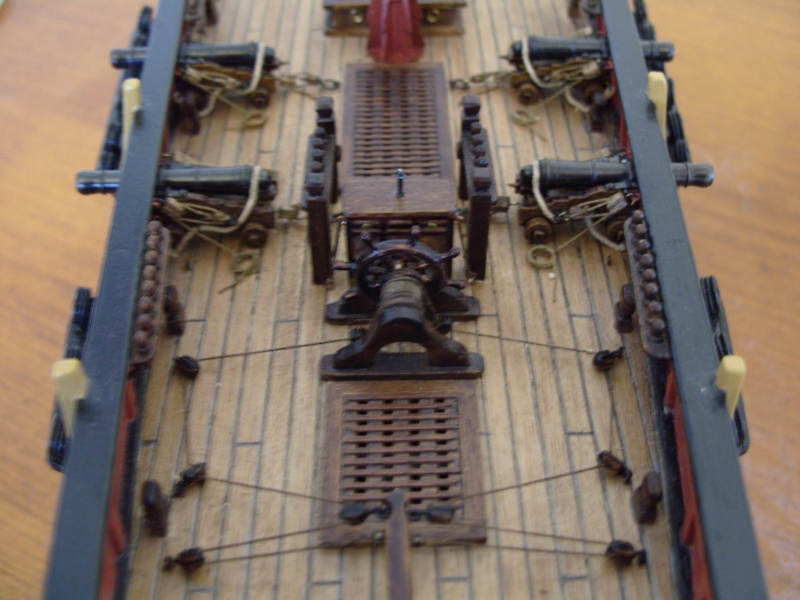
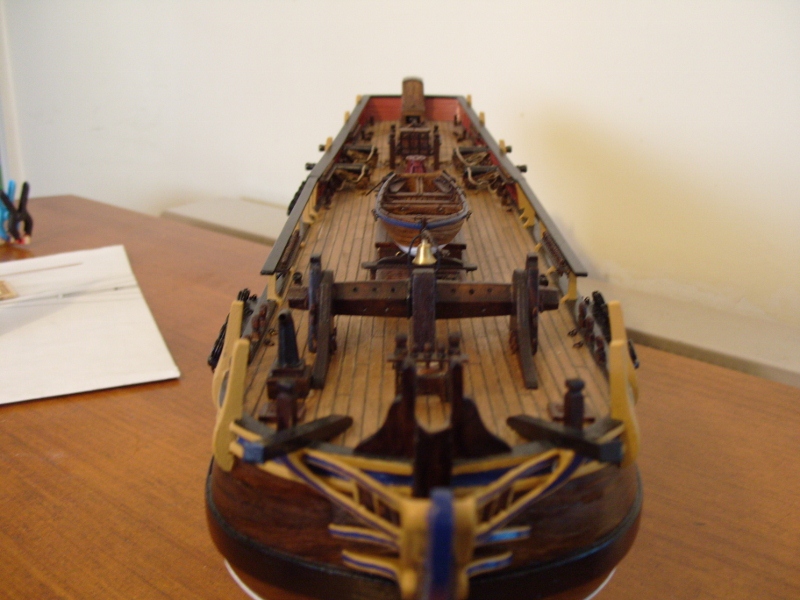
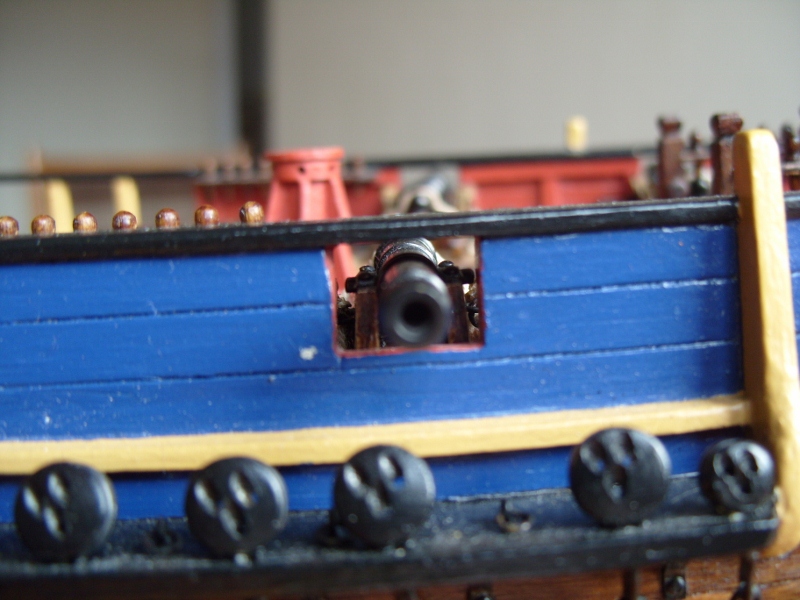
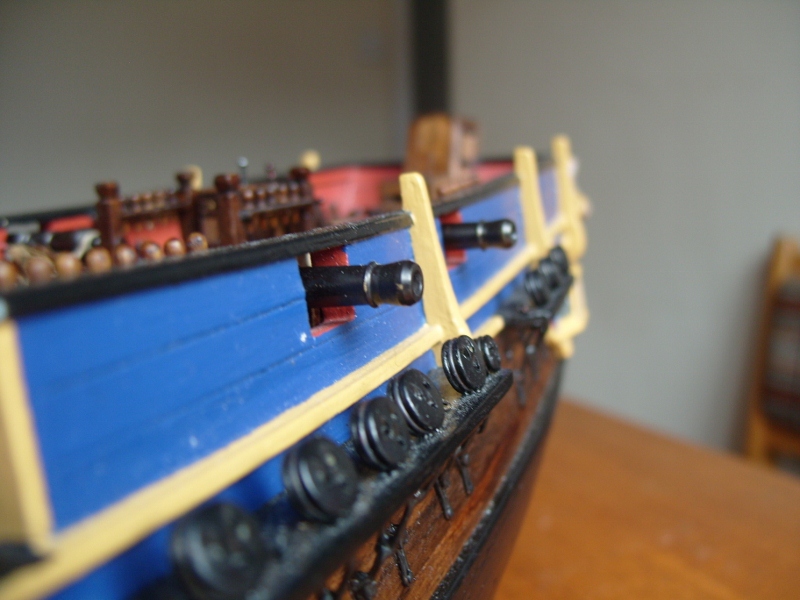
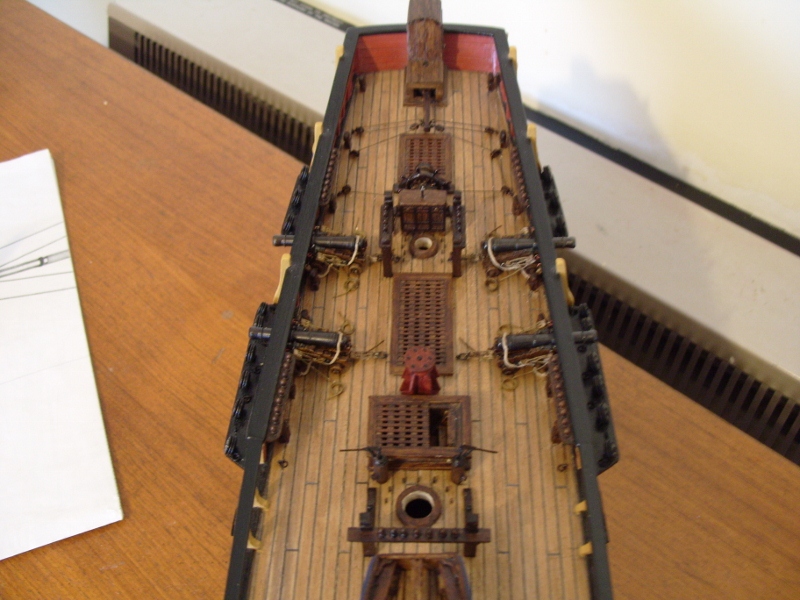
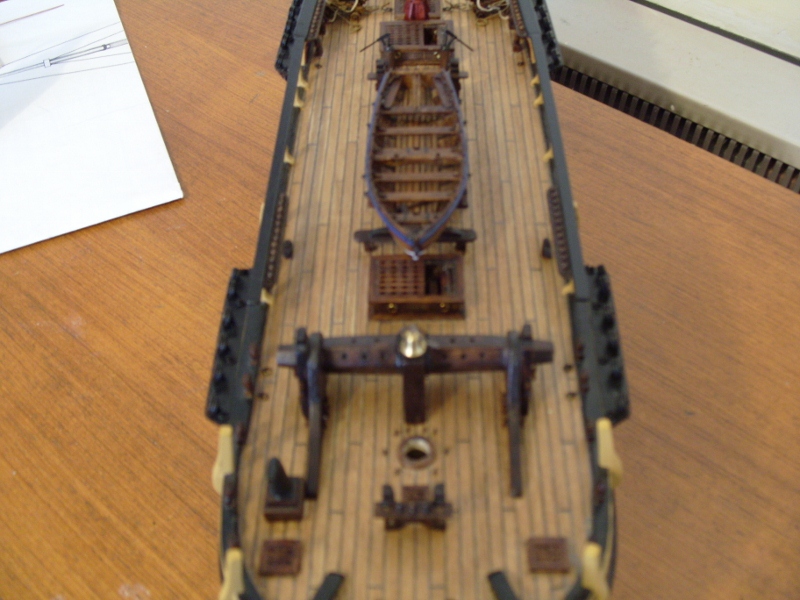
The Elm tree pumps were next, there wasn't any supplied in the kit, so I purchased a pair from Caldercraft, once made up they looked pretty good but I decided to clad around the dowel rod that they were made from with 0.5mm x 2mm planks and added a metal band around the top from brass. The small piece of dowel for the outlet was drilled out to make it look hollow, the pumps were then stained and all the brass parts painted black. The rigging for the steering from the ship's wheel to the tiler arm came next, this was done following the drawings in the A.O.T.S book. Moving on to the cannons, these were fully rigged and coils were made on the ends of the ropes to lay on the deck. A new chimney was made, the one in the kit was totally the wrong shape. This was made from brass sheet which was cut to shape and rolled into a cone then soldered along the seam. Two cones were made, one large, one small, the ends were mitred and then these were soldered together, forming the chimney, this was then painted black. This just left all the parts to be fixed in position on the deck in their relative places. This ship's boat needs to be tied down, but I haven't worked out how to do this yet, any suggestions would be much appreciated. This brings us right up to date with this build, any posts from now on will not have been viewed before. Regards Phil


-
Cheers Popeye
-
Hi Popeye It's good to hear from you again. It want be long now and I'll be up to date with this log and able to move on with the new progress pics that are waiting in the wings. Hi Theo Thanks for looking in and the kind words. Feel free to copy what ever you like. Hi David Thanks for looking in. I hope I don't have the same problem with my dog. I don't think they'd be much left of anything if he got hold of it. Regards Phil
-
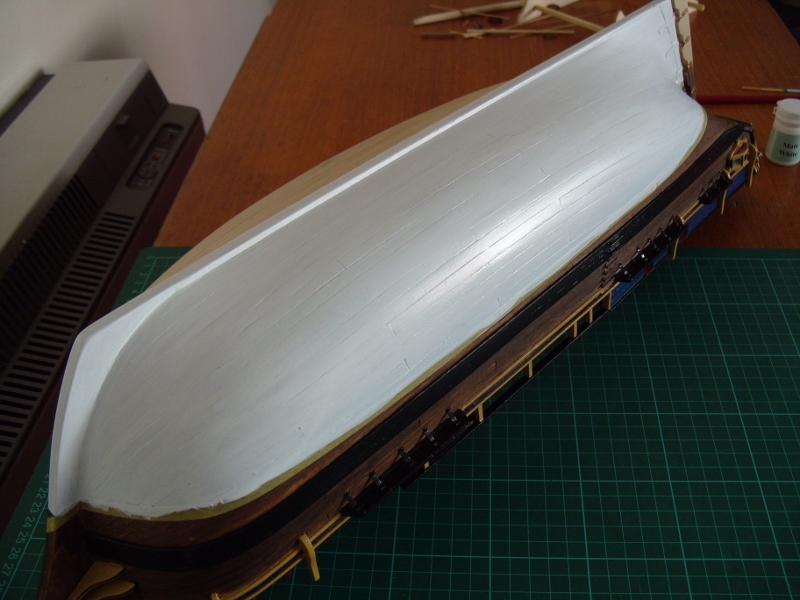
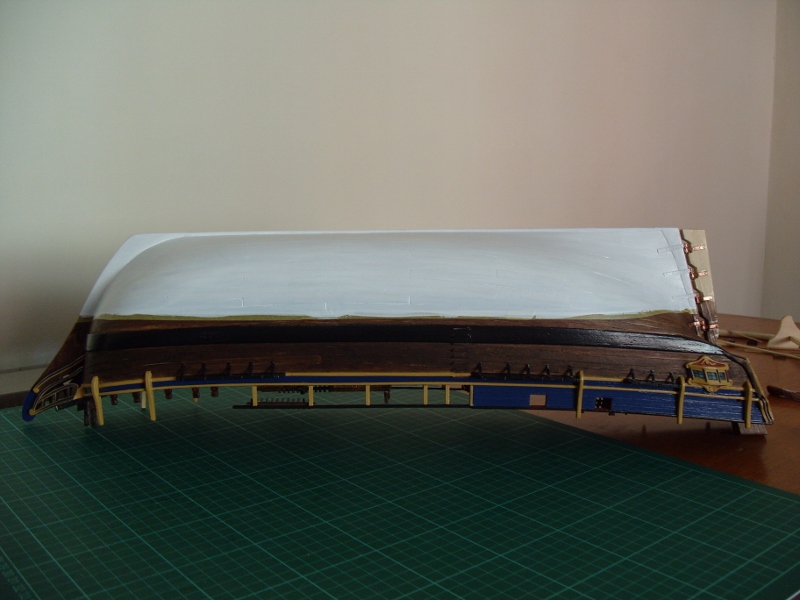
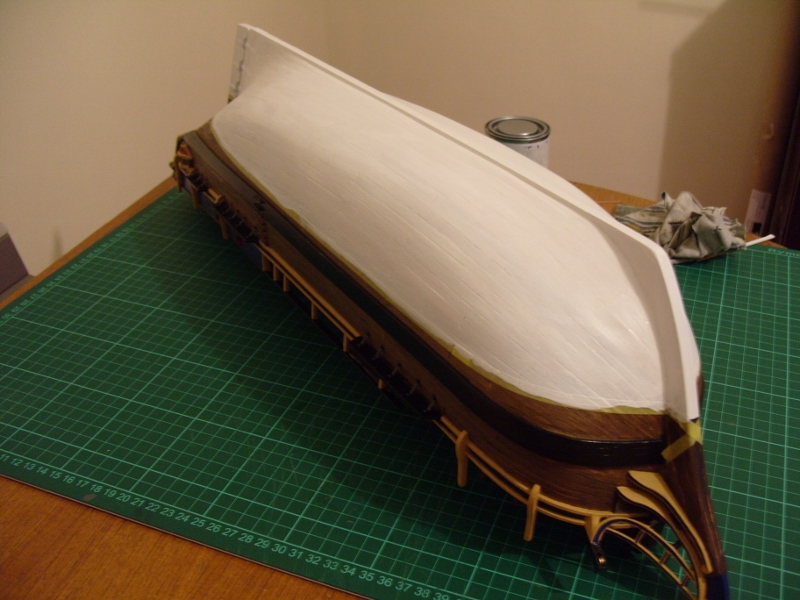
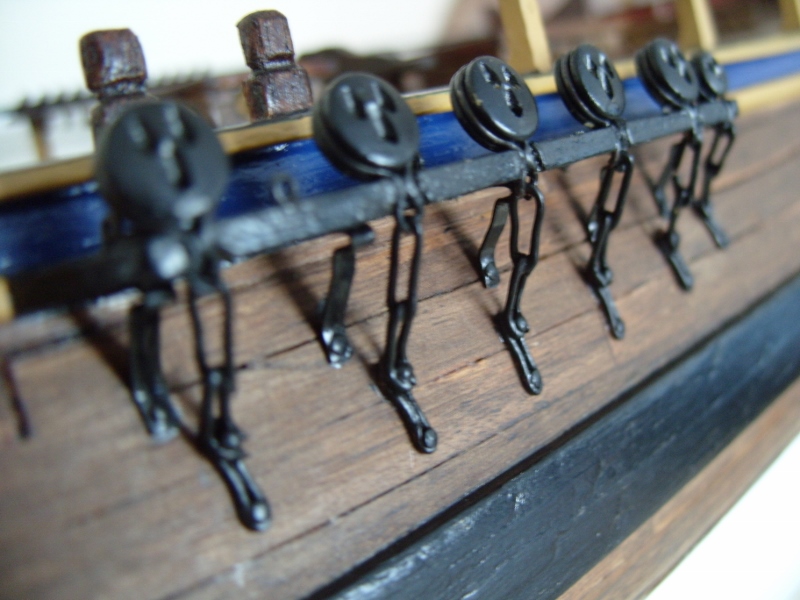
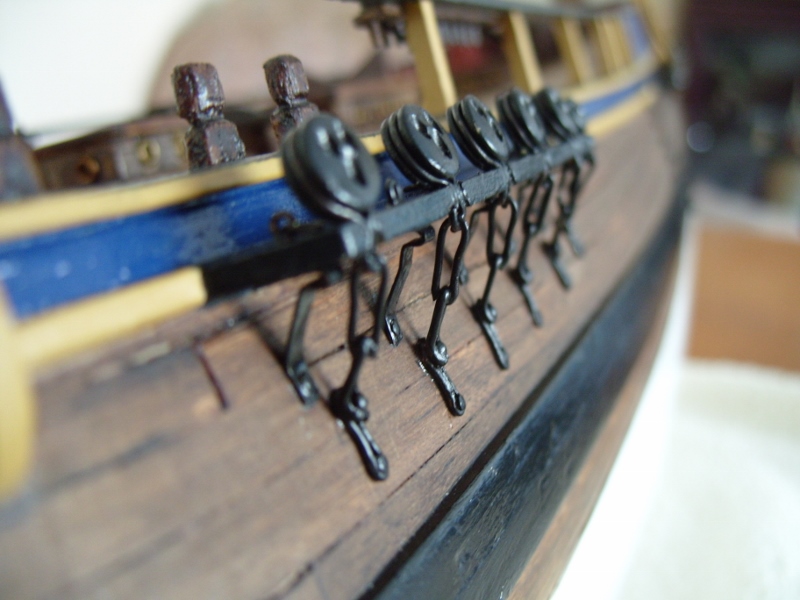
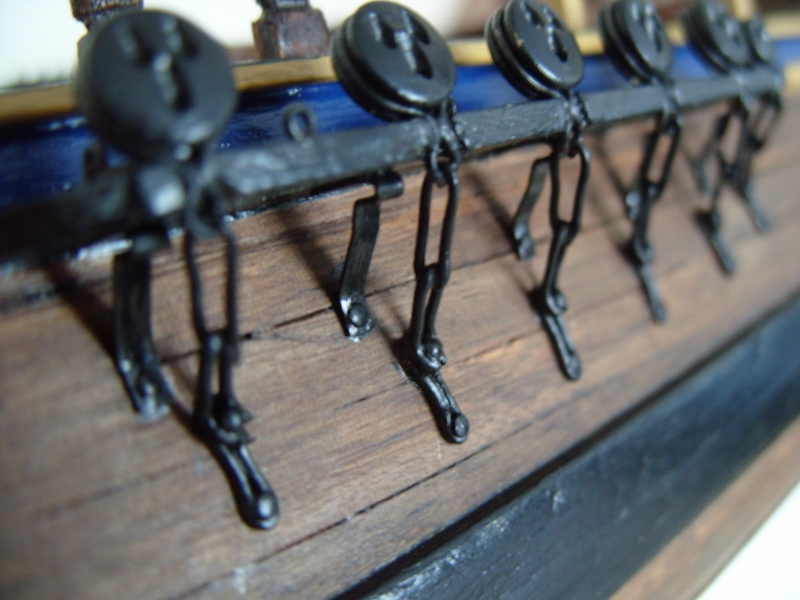
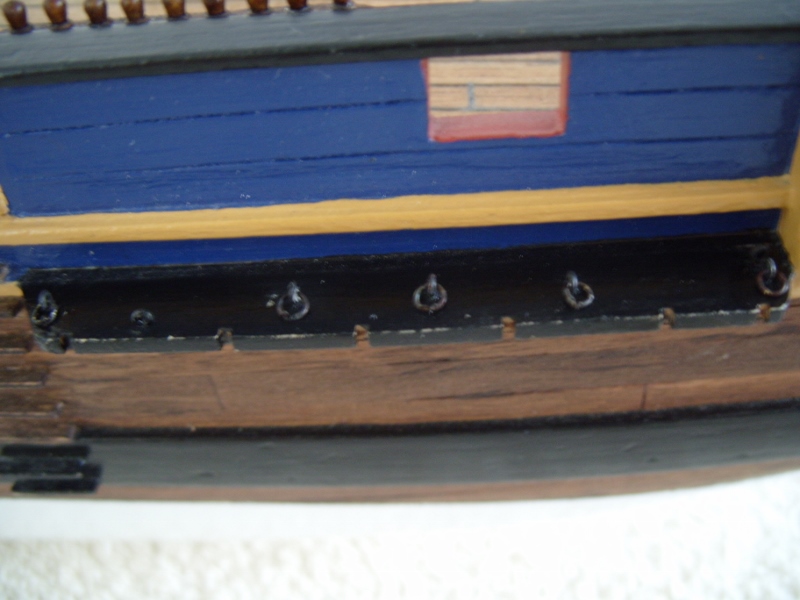
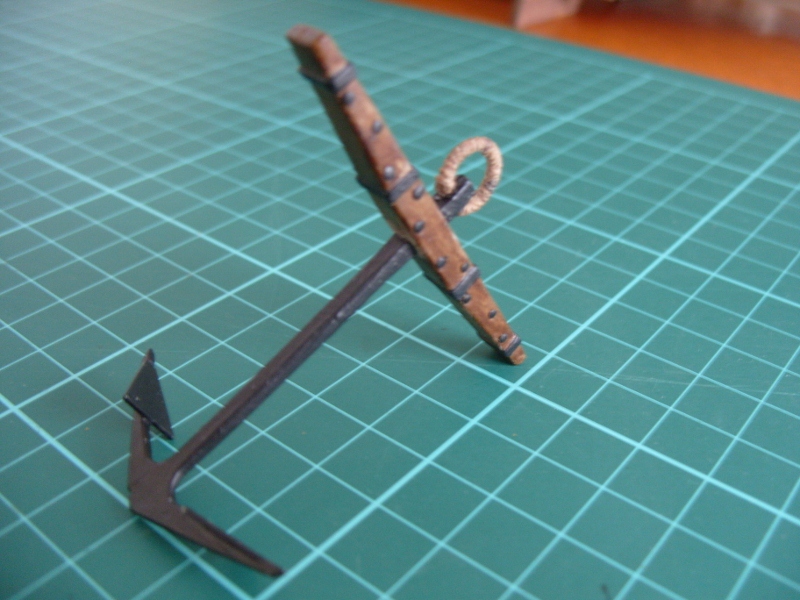
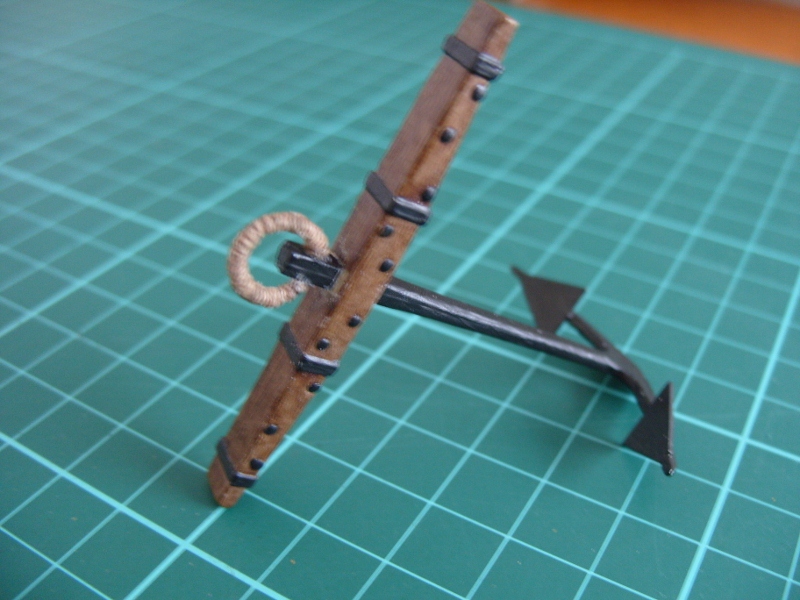
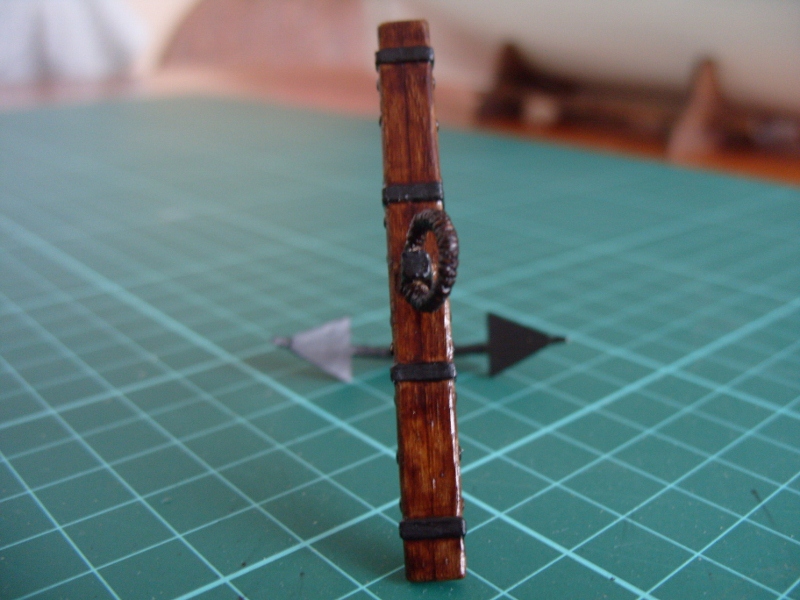
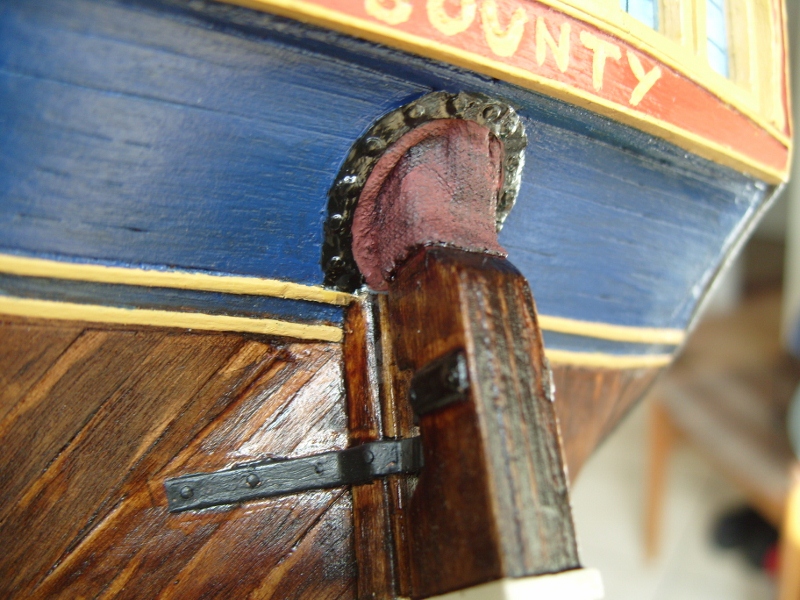
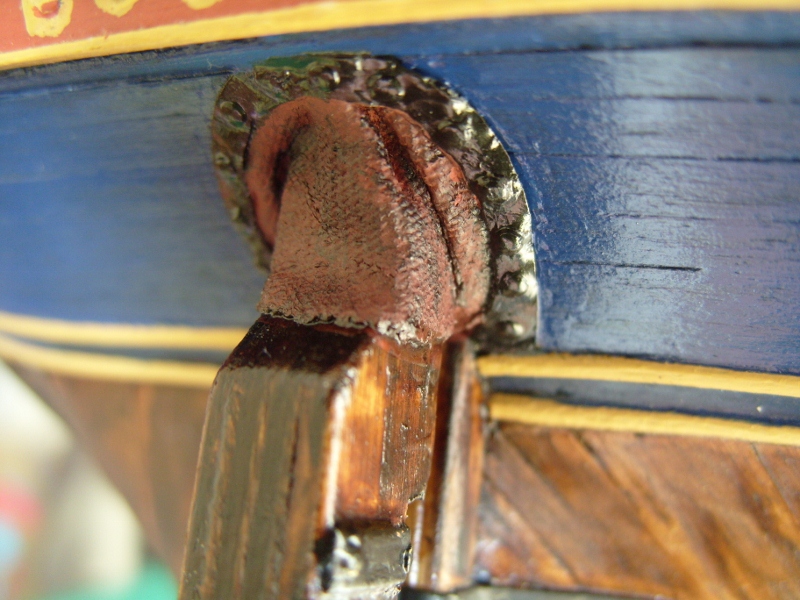
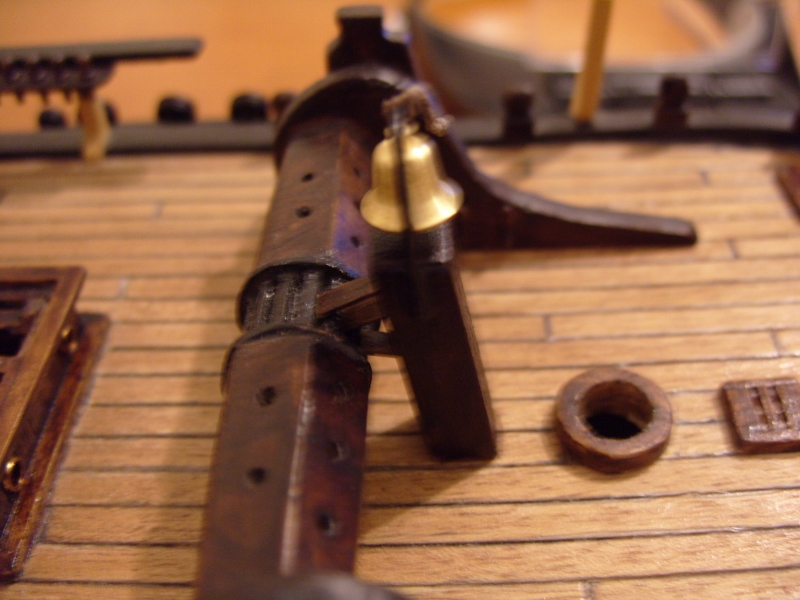
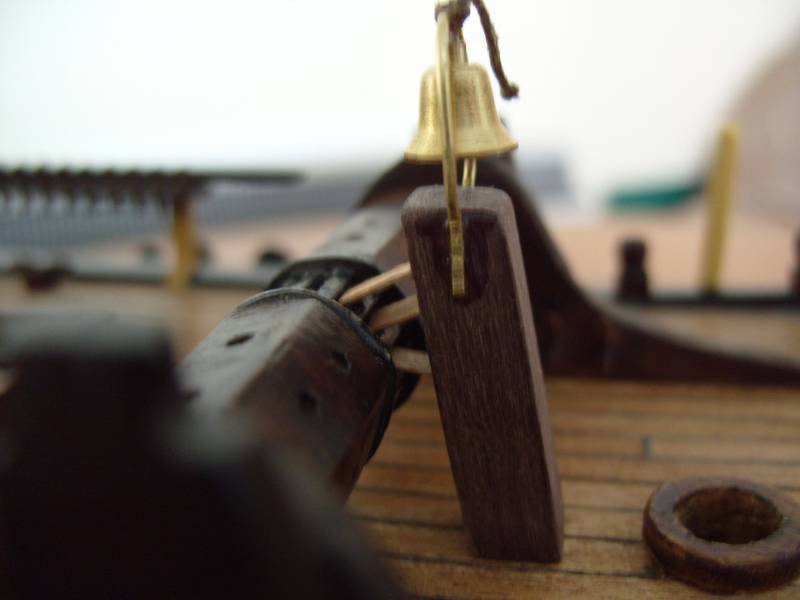
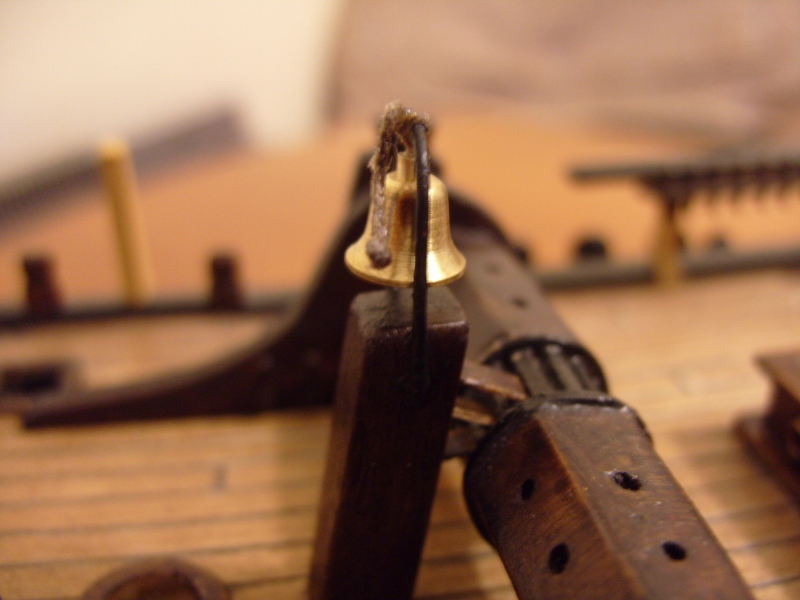
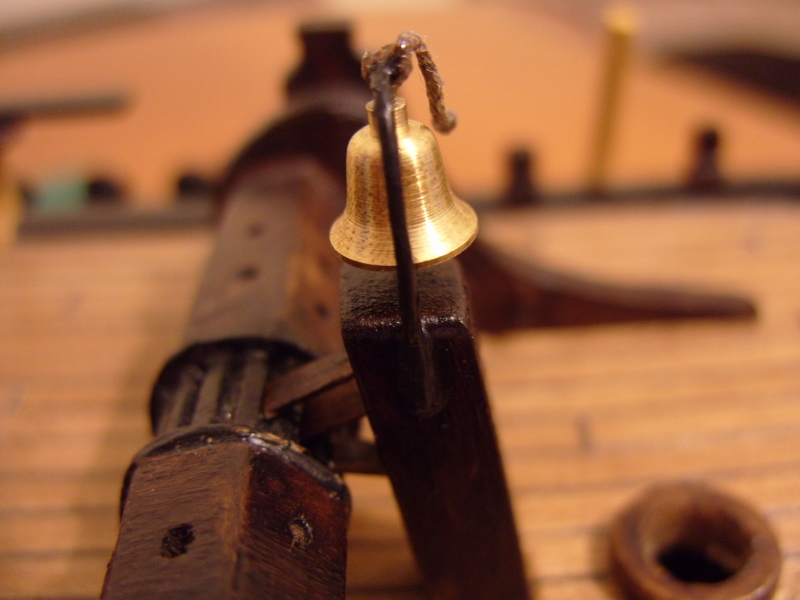
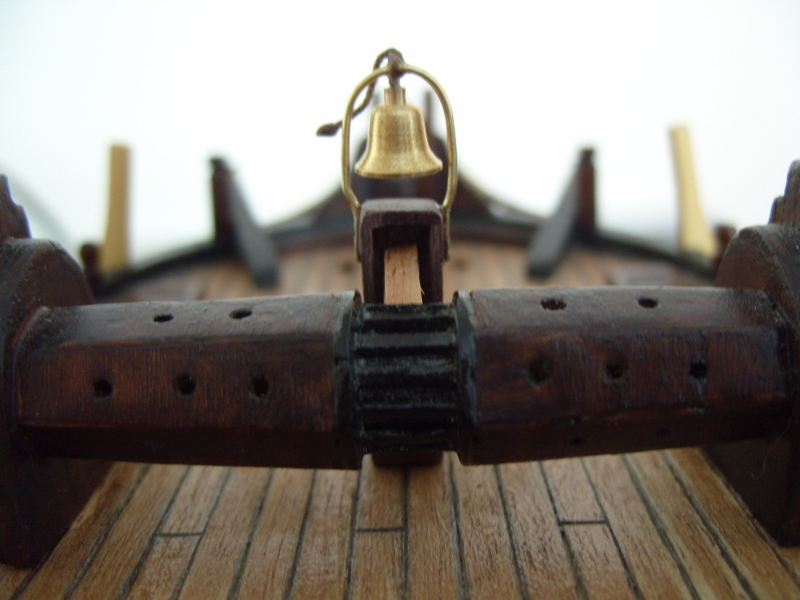
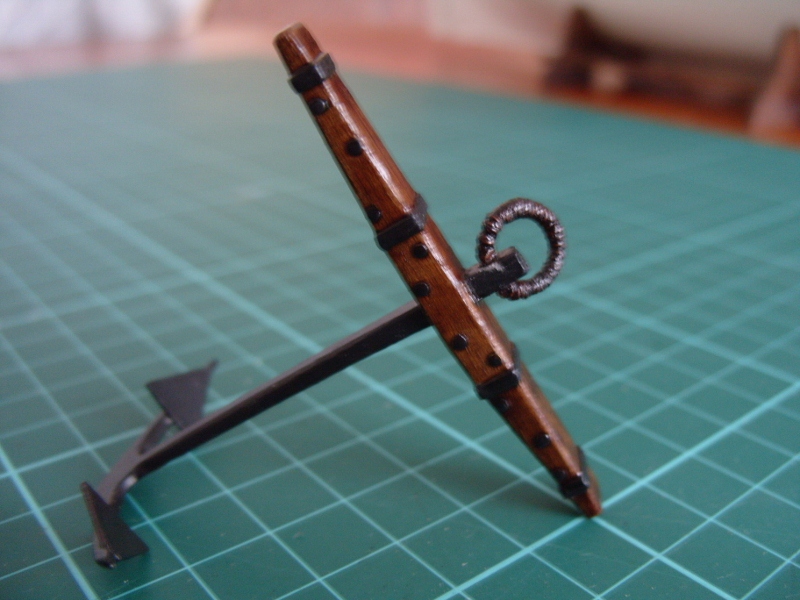
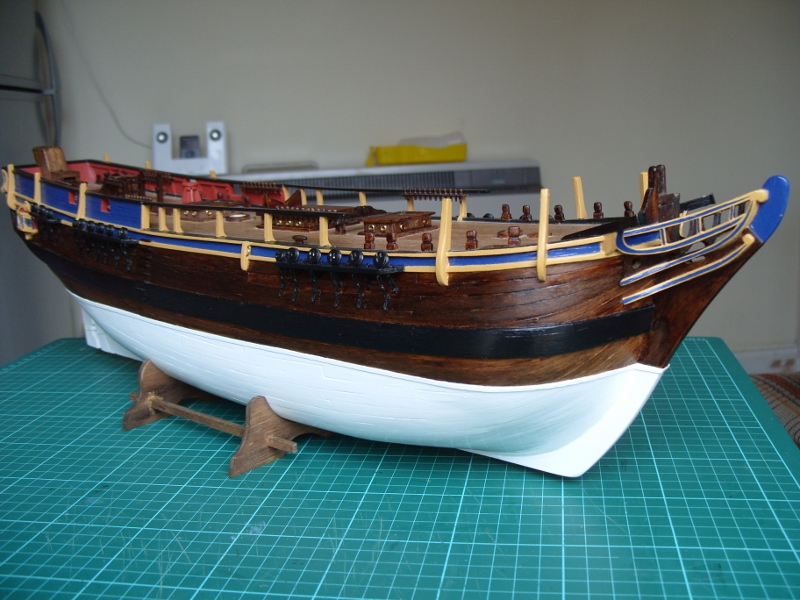
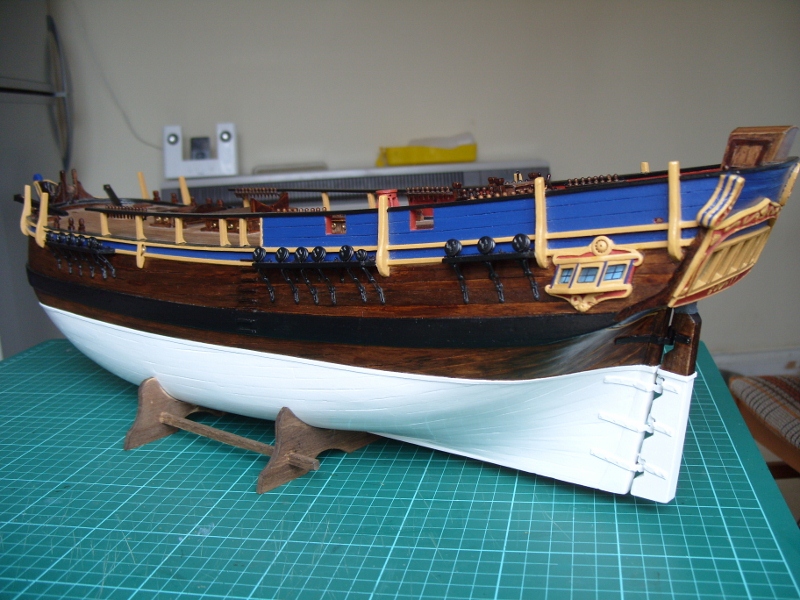
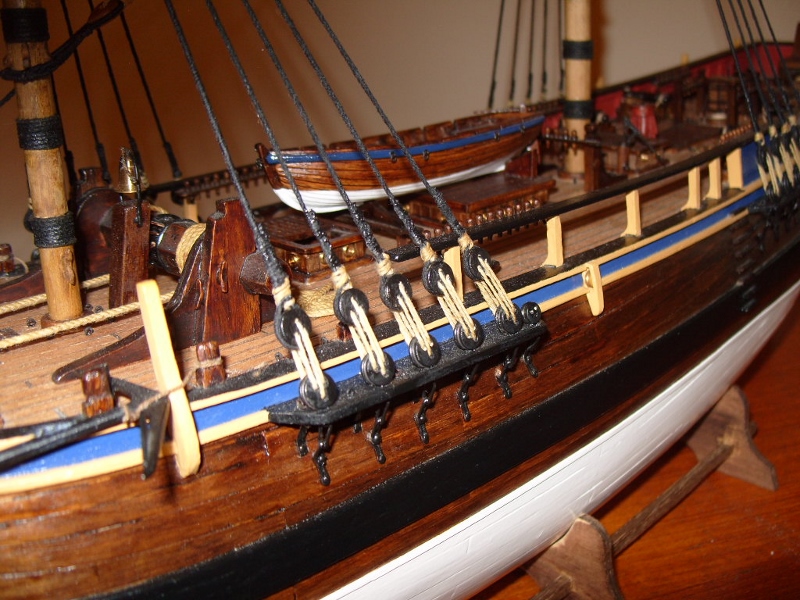
Moving on, the hull was painted white. I did think about weathering this, but after some trial attempts on scrap wood I decided against this as I could not make the weathering look realistic. I did add a piece of very thin strip wood where the white met the stained wood at the water line in an attempt to get a better finish here. Once this was done and I was satisfied I moved on to the channel chains and chain dead eyes. I did not use the kit supplied chain plates as these would have been wrong, so I made up the chains from brass rod which was blackened. Unfortunately these got scuffed when they were being assembled, so had to be touched up with black paint once fitted to the hull. Rings were also added to the channels where appropriate. One of the anchors was made up, again I did not use the plastic ones supplied in the kit but purchased metal ones from Caldercraft instead, these looked much better. All that was needed was the bands around the stock to be made from brass strip and the pins added and I had a nice looking anchor. I still have the other one to make. I also made a rudder shroud from a piece of t-shirt and a collar for this made from brass. Once fitted the rudder still moved at this point, but once it was painted it did stiffen up some what, but this is a static model so it want be moving anyway. The pawl bitt post was next, complete with its bell, again the one in the kit wasn't used because it was the one that was fitted to the Bethia and part of this was removed when it became the Bounty and so one was made from scratch. This was then stained and fitted into place. Regard Phil