Jon219
-
Posts
52 -
Joined
-
Last visited
Content Type
Profiles
Forums
Gallery
Events
Everything posted by Jon219
-
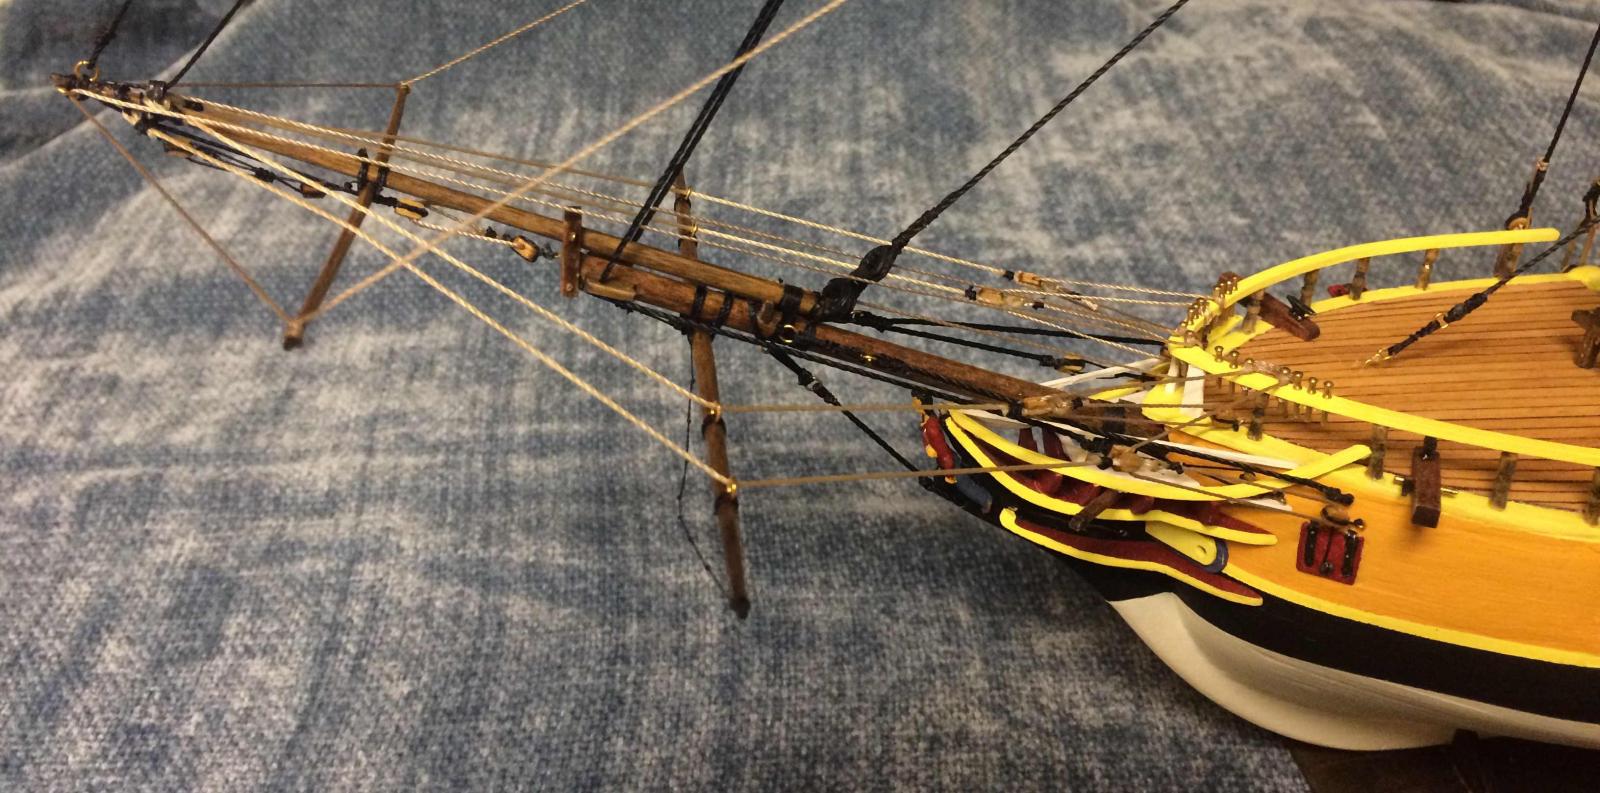
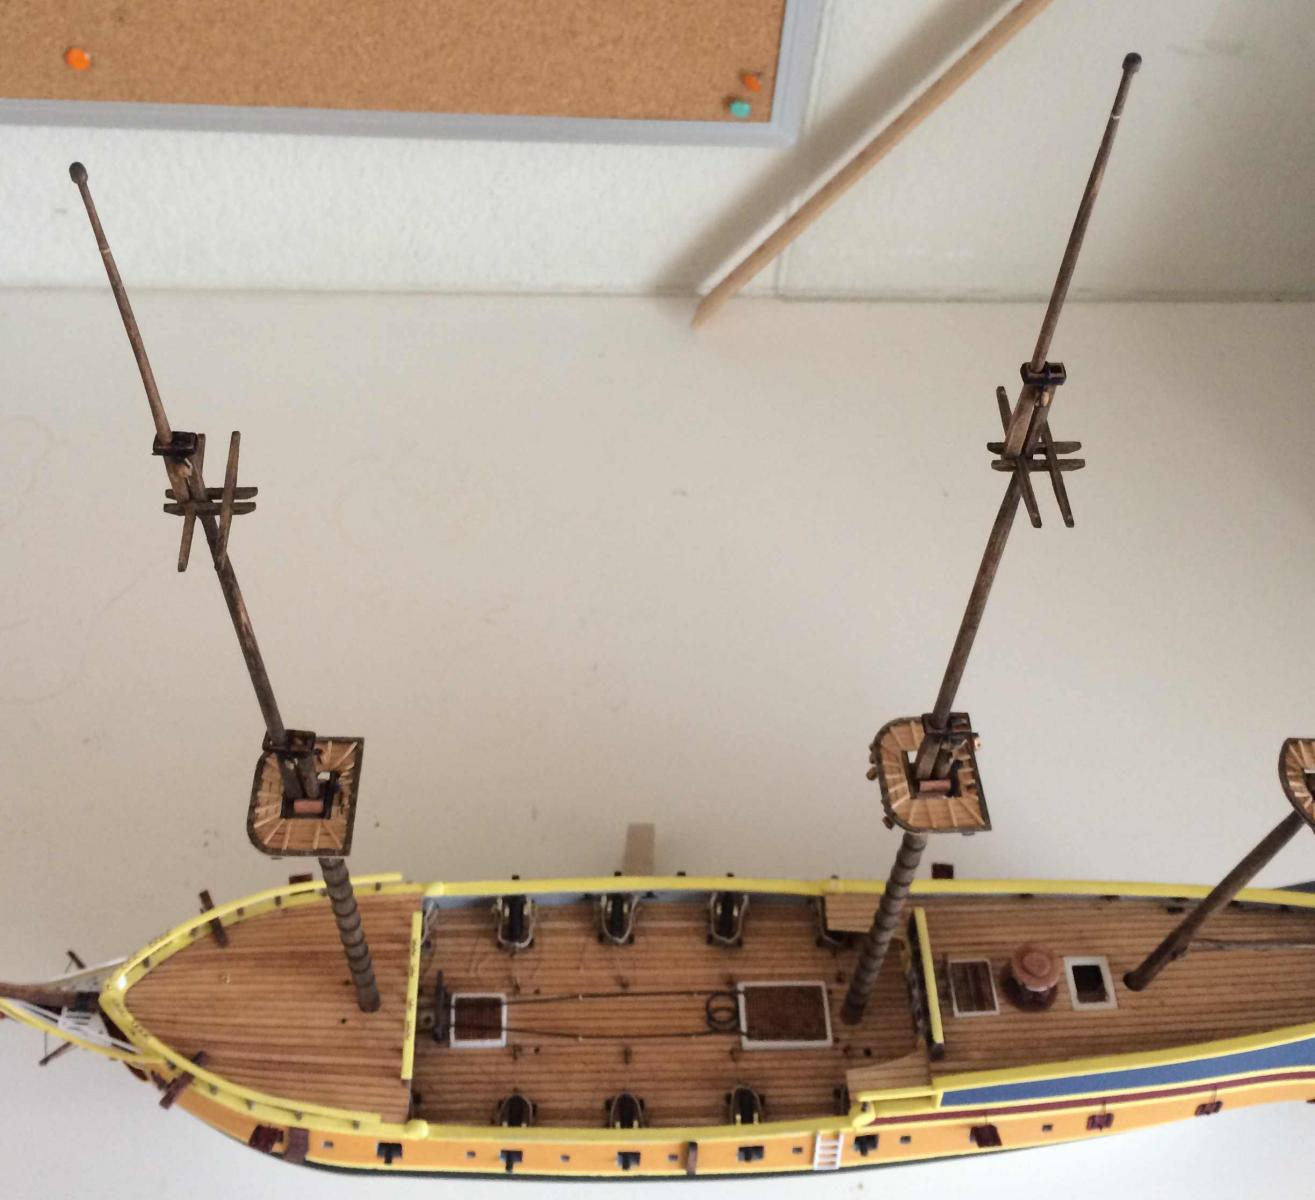
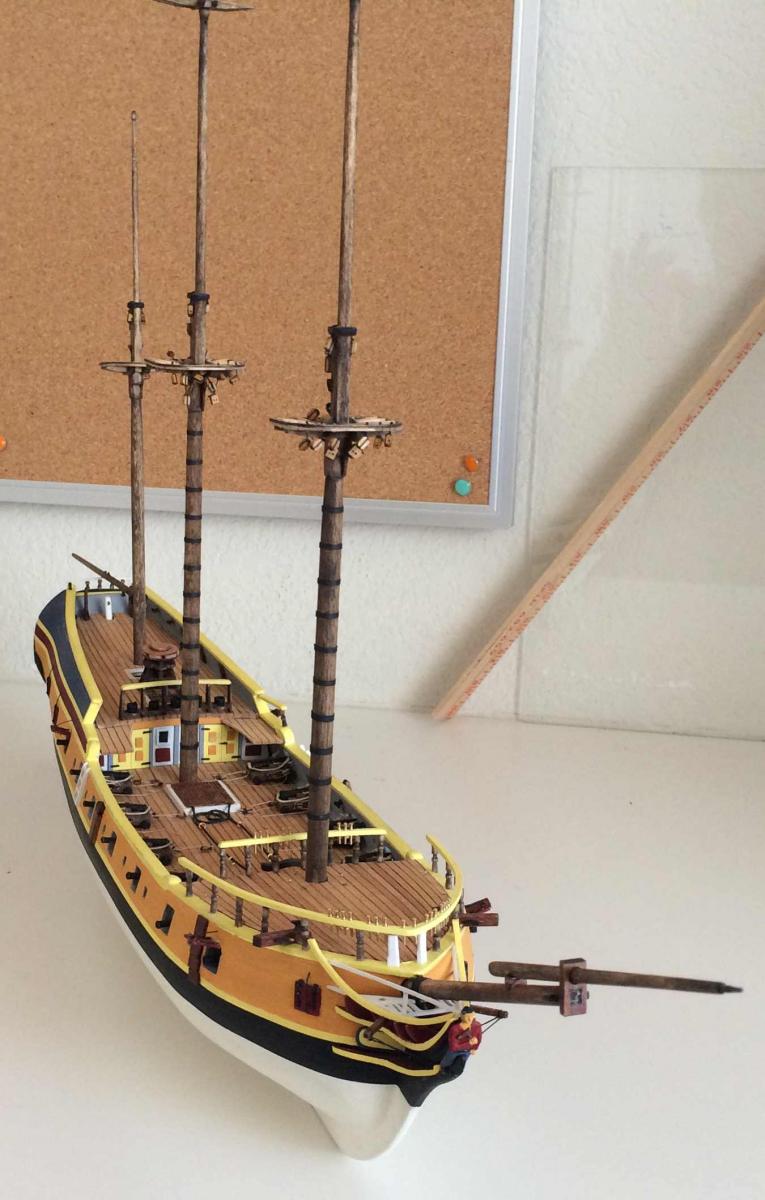
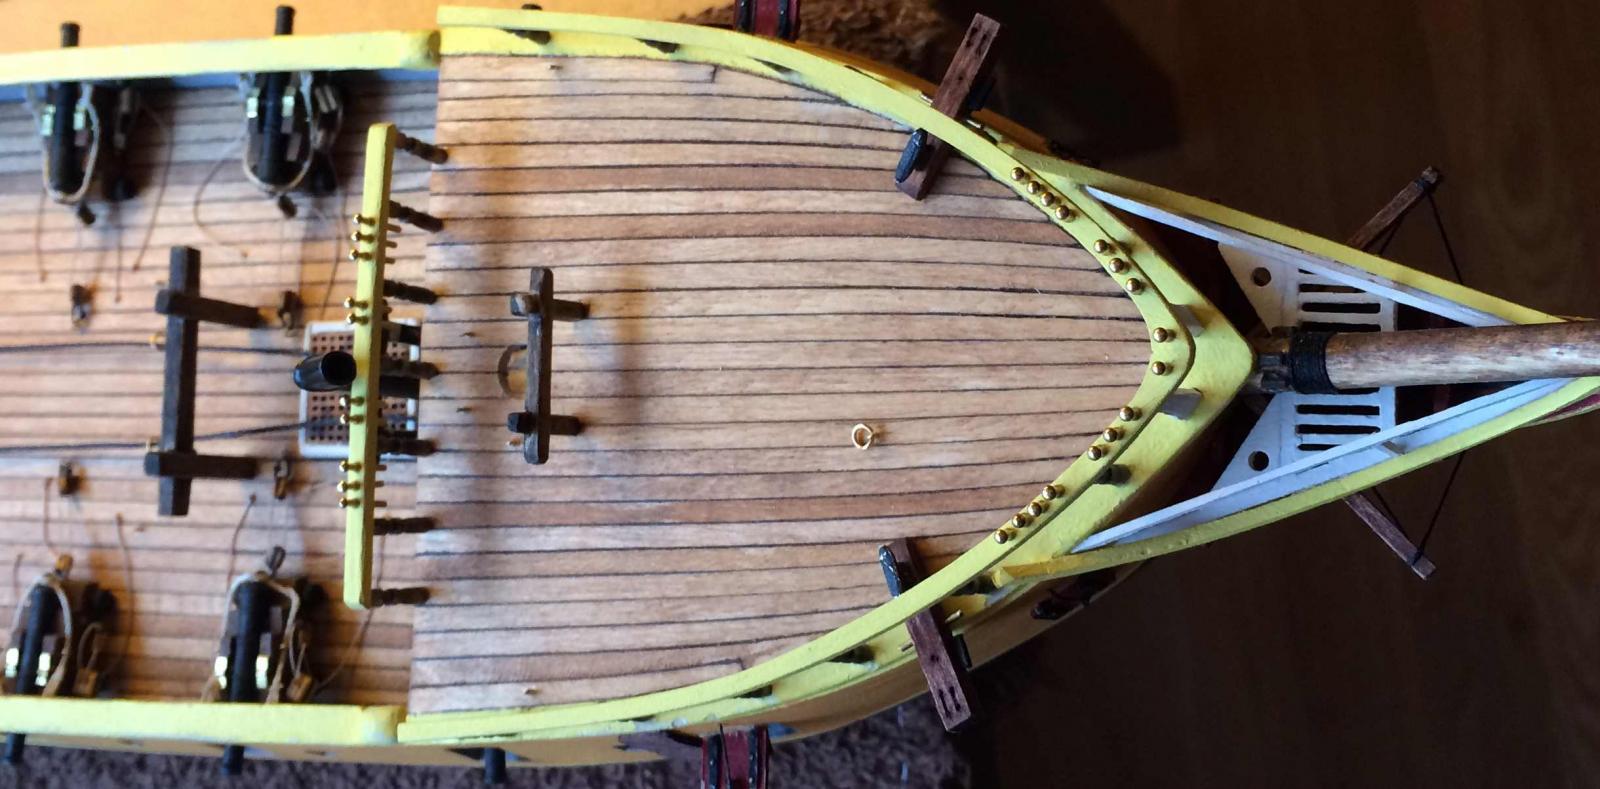
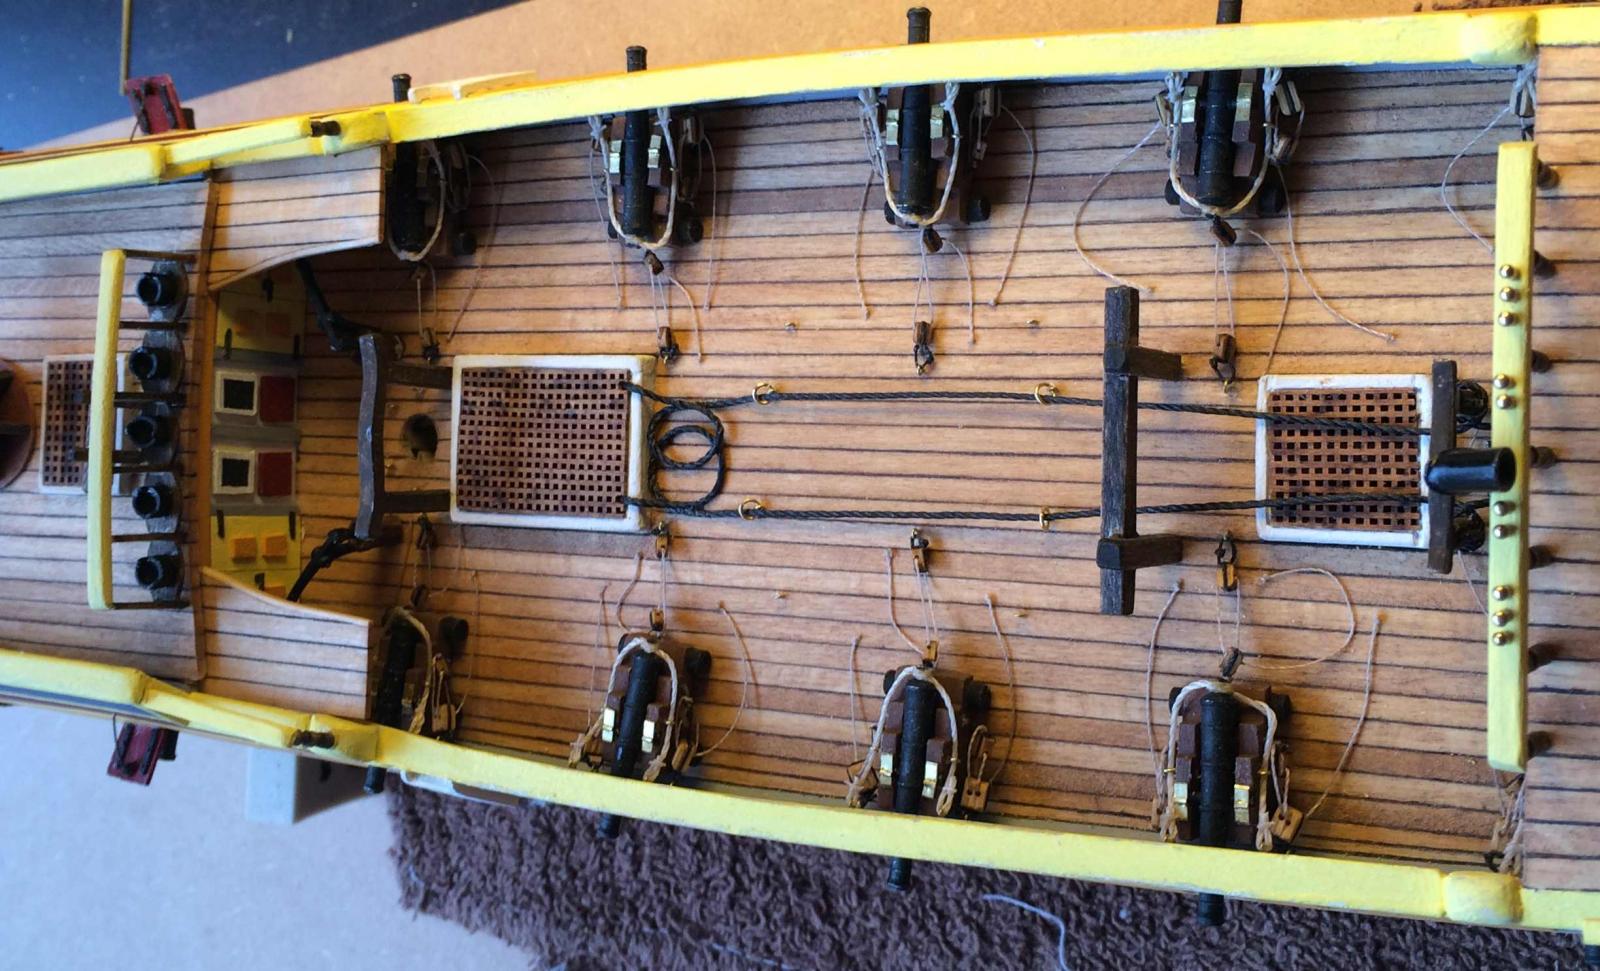
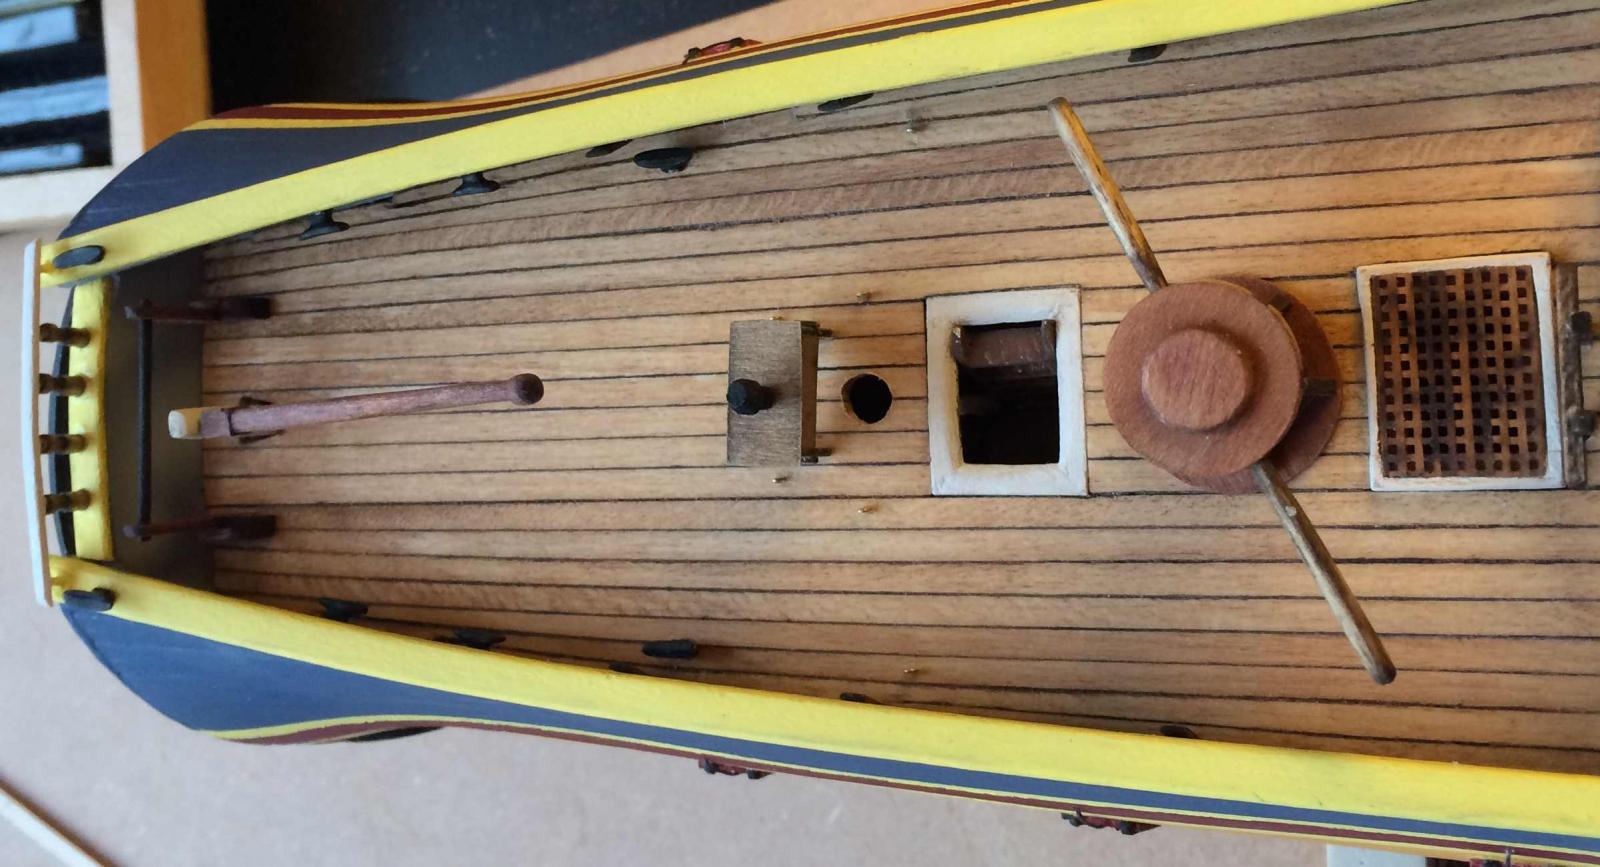
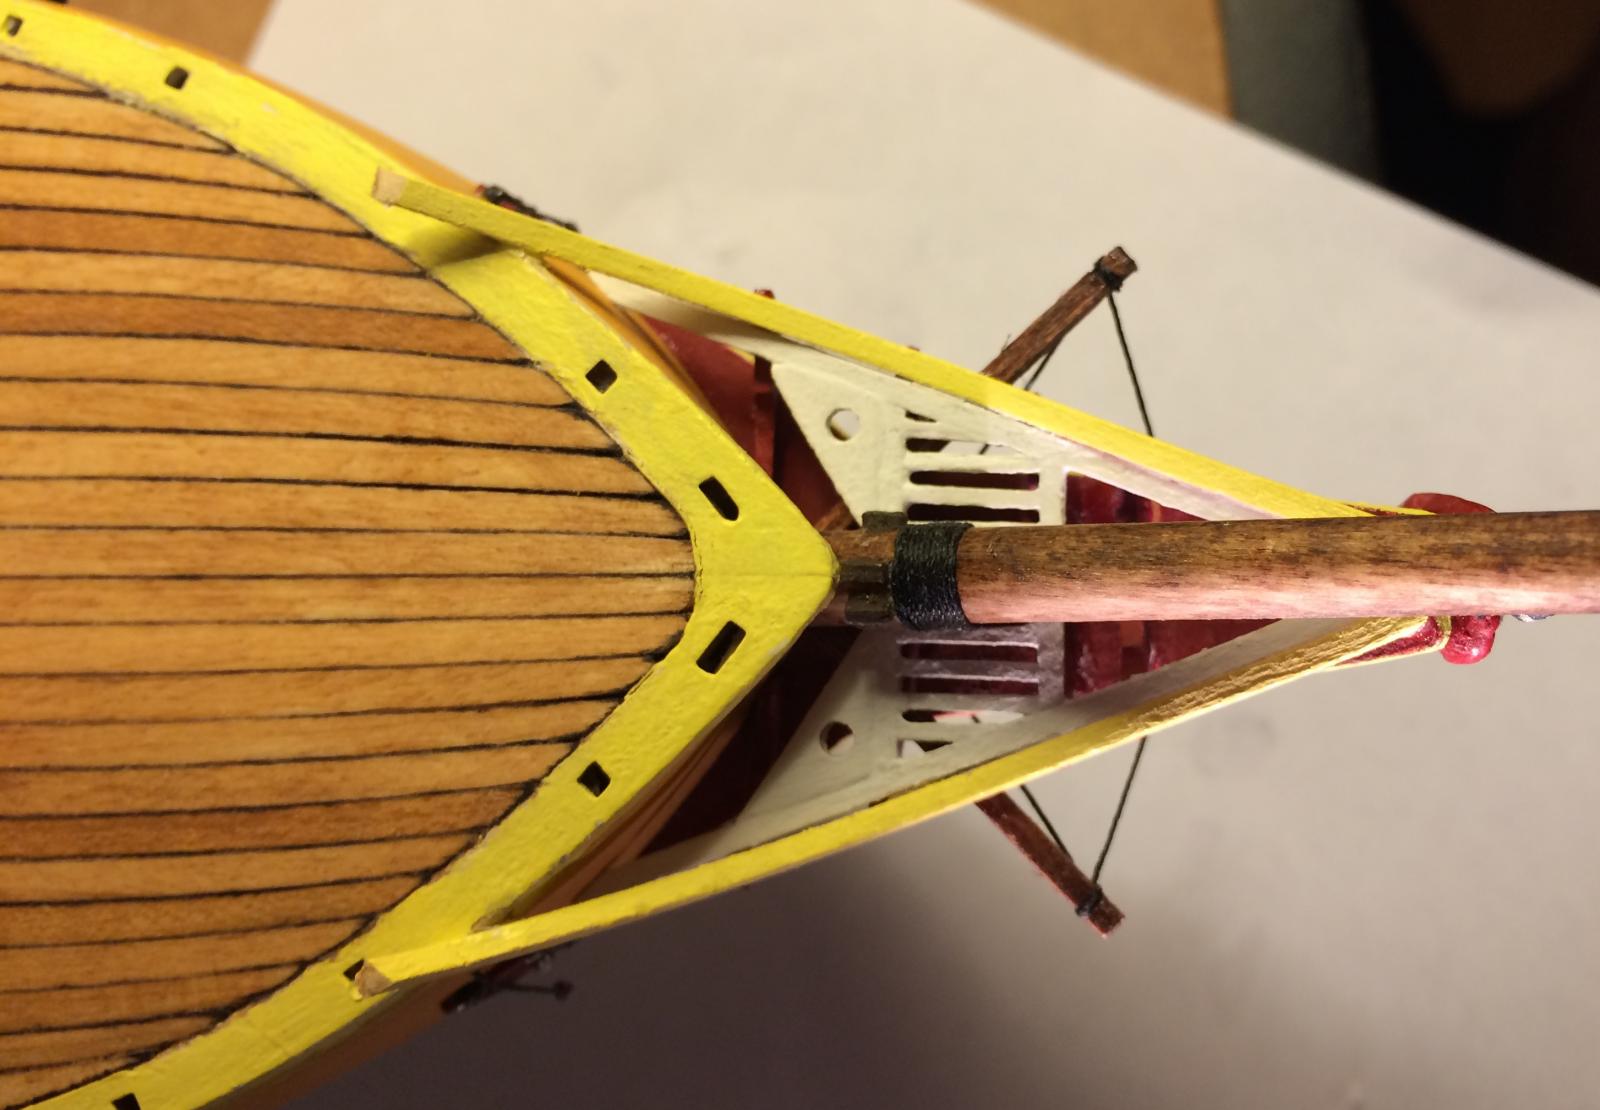
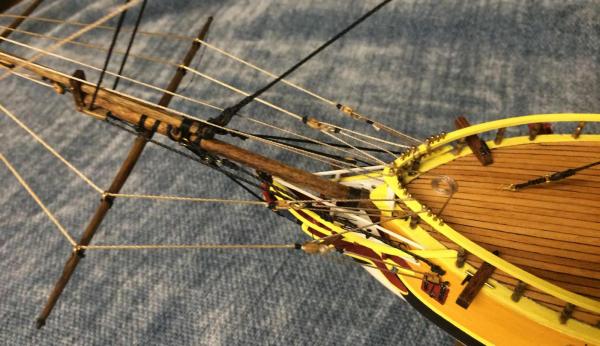
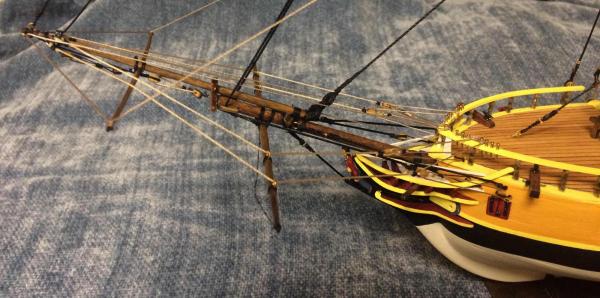
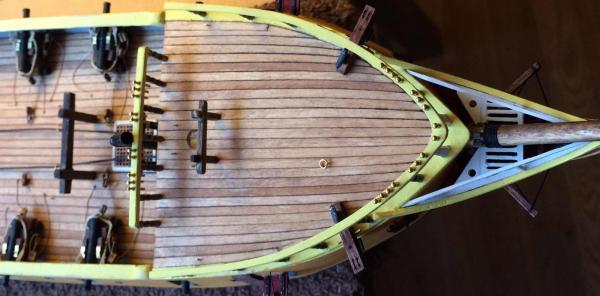
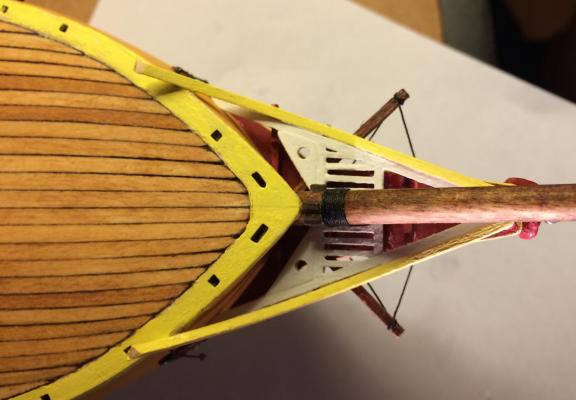
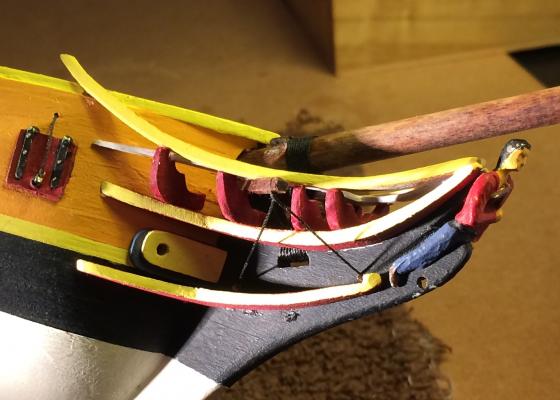
 It's been forever since I posted but I've just been plugging along. Started the rigging and I've been focusing on the Standing Rigging and the Bowsprit/Jibboom area, I wanted to hit that Bowsprit/Jibboom area because it just confused the heck out of me looking at the plans. By just focusing on one rope at a time and slowly working through it, at least most of it became clear to me. One thing that I'm trying to understand better is what order the rigging needs to be done in, I think the instructions are a bit simplistic in that they say finish all the standing rigging first and then proceed to the running rigging. I understand starting at the running rigging to get everything in it's place and solid but there are times when I feel like I'll be leaving something underneath that will be a lot harder to get at once things "outside" it are done. So I've bounced a bit between running and standing rigging as I build it up. At this point it's just pick a rope and work through the starting and ending of it and see how it goes. Of course the biggest trick with the standing rigging is getting the tension on the ropes with the right balance of tight and not pulling things out of place. I've had to replace a couple of ropes as later ropes have just make them too slack. Here are my pictures of the Bowsprit/jibboom area. I still have the outer guys to put in place but I'm thinking I'll hold off on them for now. I'm trying to work out a way to make the footropes look good and I'll try to finish them up once I come up with something.
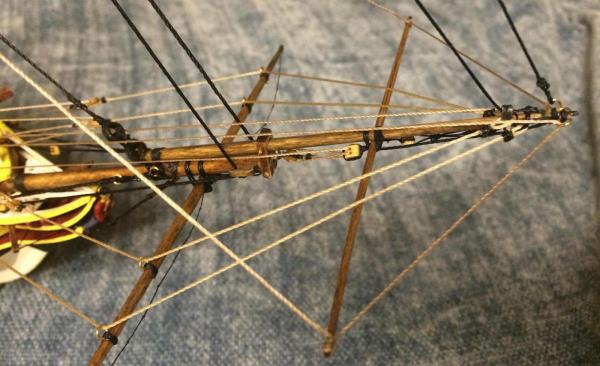
- 131 replies
-
- 3
-

-
- rattlesnake
- model shipways
- (and 1 more)
-
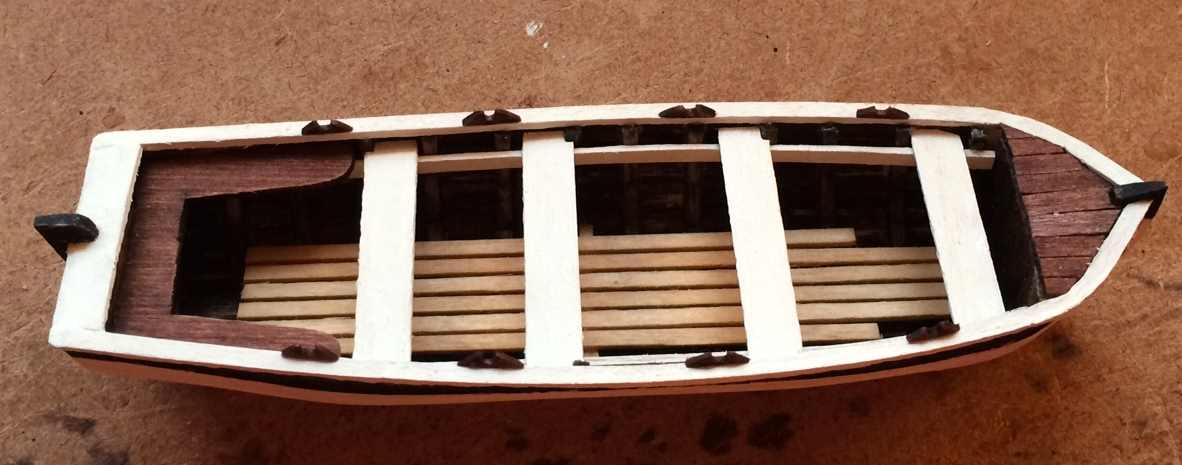
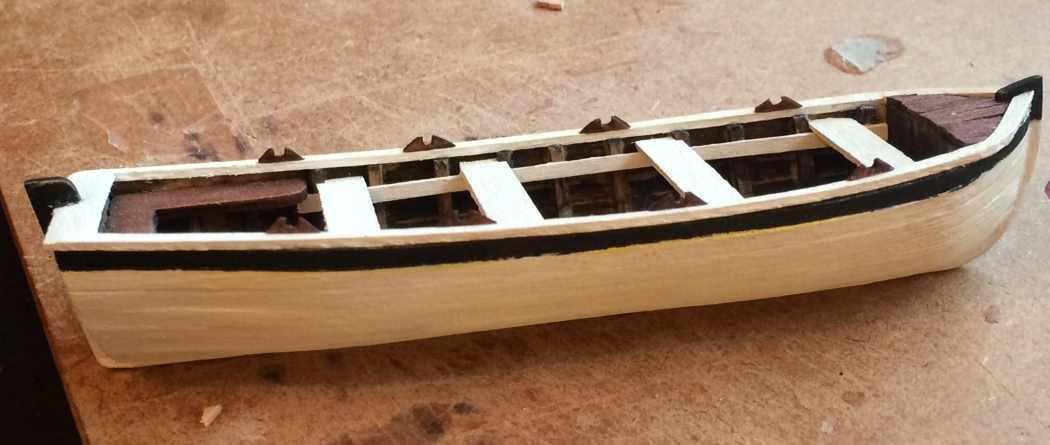
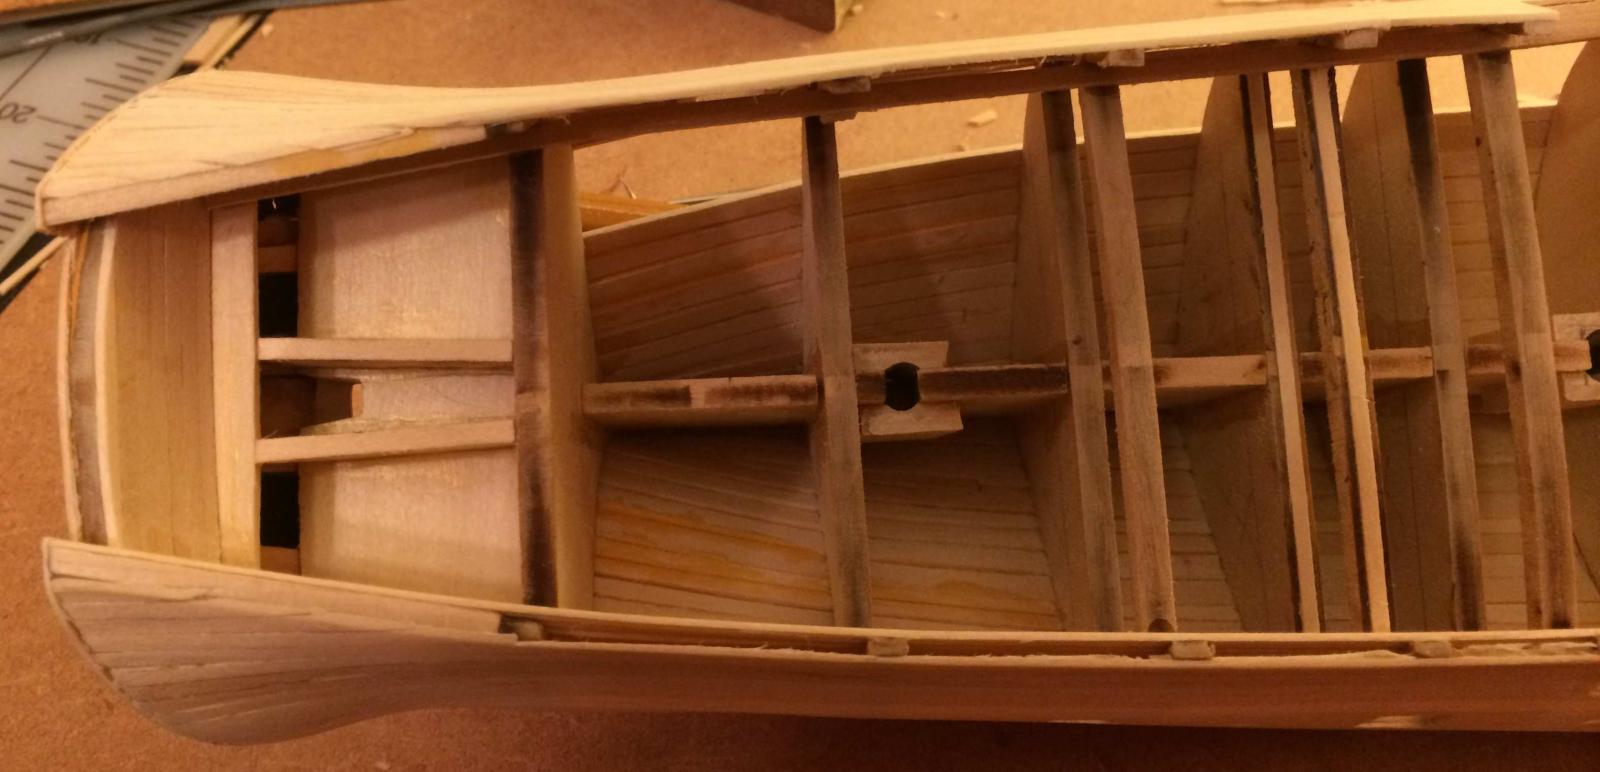
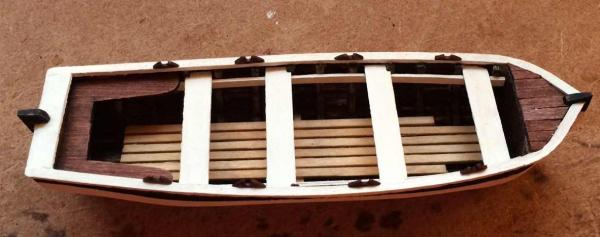
Lifeboat Got the Model Shipways lifeboat kit and for the most part followed the excellent log by JSGearson. I did change a couple things though. I didn't use a 1/16" square piece for the top strake. Any way I looked at it with that size on the strake, it just looked off to me so I substituted the regular planking (1/32" x 3/32"). I then used a 1/32" x 1/16" plank on the top of the top strake and side bent it to match the curve of the hull. It did kink a bit but I just sanded them out as best I could. In the Model Shipways plans it looks to me like the bow and stern are a little higher than the center of the boat so I tried to give the model a little more of that curve by adjusting the tiny tabs that you lay the top strake on. I left the two middle ones untouched but trimmed about half off the two outer ones to allow the plank to curve a but to the ends. I seemed like that made a natural curve and the ends ended up right where I wanted them to be. Observations Pretty much ran into the same issues as JSGearson and being able to follow his build was a tremendous help. I wanted to stain the inside of the boat dark to stand out against the lights detail pieces inside the boat, but my planking job was so poor that the stain came through and stained a lot of the outside of the boat. So much for using a light stain for the one section on the outside. On the Rattlesnake if my planks were a bit loose I could add some glue on the underside that's never seen and seal it. A small model like this where you can see both sides of the planking requires a lot more skill to get tight. I ended up just painting the outside white with the top strake black (hats off toe JSG again!). With some glue on the inside boat surface and all the ribs there, staining the inside didn't come out near as well as I had hoped. I'm not sure what I'd do if I was doing it again, I might try staining the wood before gluing it to the frame. In any case there are enough other things inside of the boat that it's not too bad, just more blotchy than I would have liked. Just another one of those live and learn experiences. Made the oarlocks from a 1/16" square piece and just cut the angles and notches and then sliced it in half making two in the process. Still haven't done the rudder, don't think that will be too hard but I'm wondering if the rudder would have been attached when it was stowed on the ship or would have been inside and then put in place if they were planning on launching it. For that matter it seems to me that the lifeboat would have been covered up by a tarp in real life but I'm guessing that for models it's such a nice piece of detail to see that most leave off the tarp. For me the hardest part of working with something this size is that there's just no where to push without breaking something. My technique is still rough enough that I sometimes need to push a piece a bit to get it in place and every time I did that it seemed like something broke. I spent a good deal of time of the floor looking for tiny pieces. I'm still debating if I'm going to try and add the little detail piece from the plans that sits on the top rail near the bow. It looks purely ornamental but I'll probably give it a couple trys and see if I can get something that looks decent. Also still need to do the oars, I've seen several different techniques to create them on the forums and trying to decide which way I'll go.

- 131 replies
-
- 3
-
-
- rattlesnake
- model shipways
- (and 1 more)
-
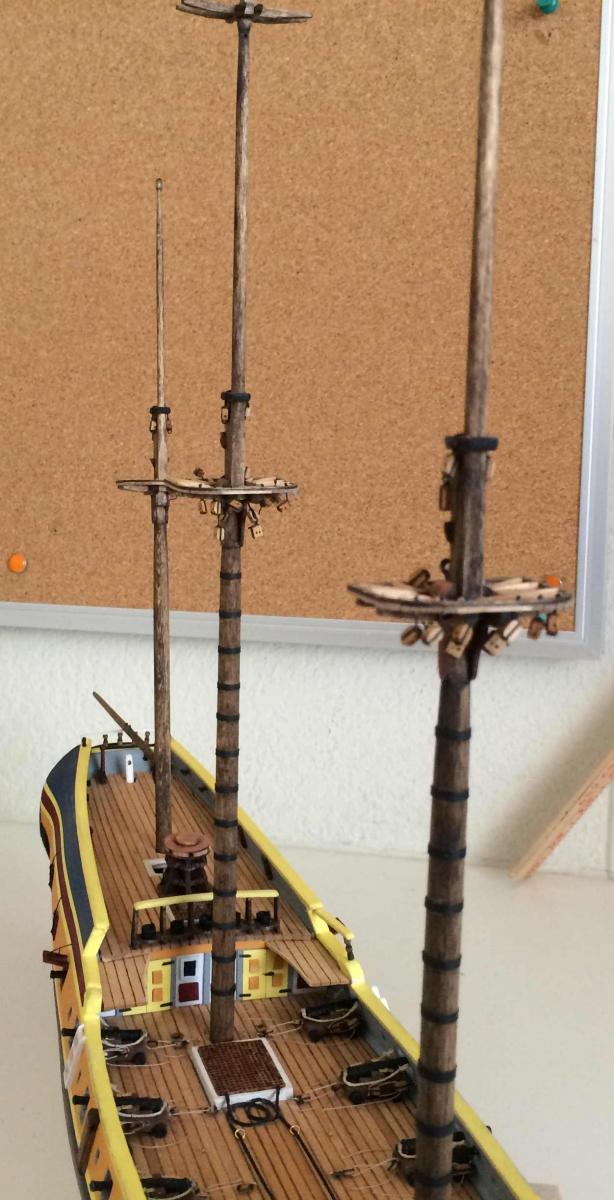
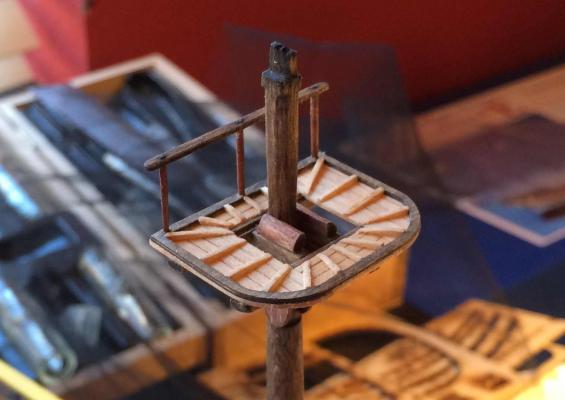
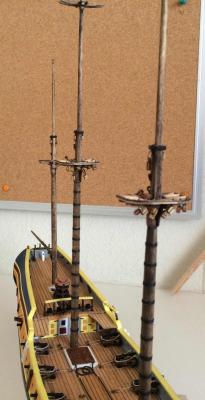
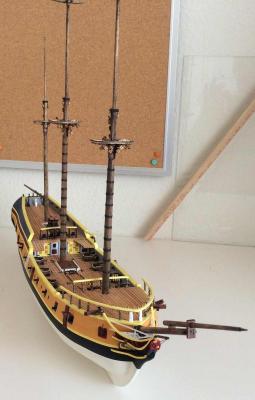
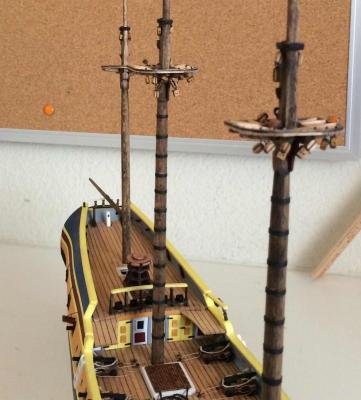
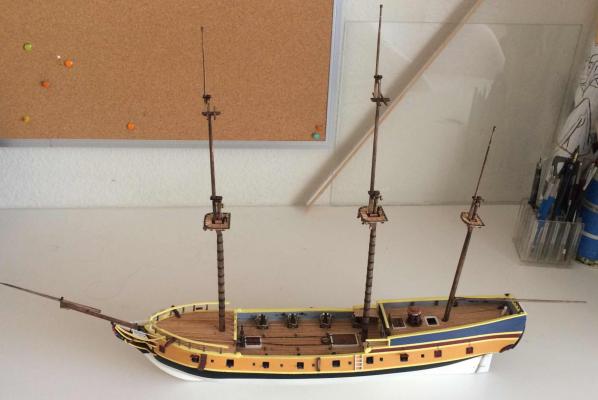
Masts I've been working on the masts. I could not work with the dowels provided with the kit, the wood was just too hard to shape, so I tried using some square basswood from the local Hobby Lobby and that worked much better for me. I could use my knife to get close to the shape and then sand smooth and round. Working from the plans I'd decide on width several places along the length and then check with the calipers and slowly work the mast till it was close to the width from the plans and looked "right" to me. I stained it with the same stain I've been using and used black construction paper for the iron bands of the Main and Fore masts. I really enjoyed making the tops, but I had to substitute planking for the solid tops from the kit. To get a little spacing between each plank I cut the planks longer than they needed to be and then laid them out on wax paper till i got the spacing I wanted and then I put glue on the laser cut rim piece where that section of planks would be and then set it down on top of the planks, trying not to disturb the spacing as I set it down. and then I trimmed and sanded the planks till they were even with the rim. When placing the masts I realized that when I left the hole in the decking for the Mizzen mast, I placed the hole directly over the top of the spot in the frame for the Mizzen, not remembering that the Mizzen comes out at an angle so the hole is a bit out of place. I managed to enlarge the hole and even had to undercut the mast a bit so it can sit at the proper angle. I will have to custom build a Mizzen mast wedge and make it a bit bigger on one side to cover the gap between the mast and the deck. I think I've gotten all the blocks and fittings on the masts that I'll need but I'm still not gluing them in place until I have to. Ive been struggling with the bread and butter lifeboat and I just don't see any way to make it look presentable. Possibly if I had an electric tool to work on the inside but even then I don't think it will ever look right. I took a good look at the JSGearson post on building the Model Shipways lifeboat and since it was only about $5, I've ordered one and will give it a try, it looks challenging but fun. I'll be referencing that post as I build it and can't give enough thanks for the effort put into documenting everything and laying it out so clearly.

- 131 replies
-
- 3
-
-
- rattlesnake
- model shipways
- (and 1 more)
-
Deck Finishings Looking at Starting Masts I'm trying to finish up as many of the deck details as I can find. It seems like every time I look at the plans I notice something new, the latest one is I realized that there's a chesstree on the outside of the hull that I hadn't seen before. I've added the rest of the railings, pins, eyes, ringbolts, kevels, buckets and the iron horse on the deck, and the billboard on the hull. I also finally addressed the problem of the ropes for the cannons, some of them were OK but others just came out at obviously wrong angles so I decided to just try to have them lay naturally beside the cannon. I just used a bit of superglue on the very end and stuck them to the deck. Many of the deck pieces aren't glued down yet, I feel that I'll just break them off so I'm waiting to see when that sweet spot of getting them glued down will be. I have to say here that every time I look at the other Rattlesnake builds I'm so inspired. I see how the others of you have done things so amazing and I tell myself that I will try to make mine that good as well. I haven't gotten there yet but I'm getting a little better as I go though this process. Thank you so much for sharing your work and ideas. I started looking at the masts and stared to plan them so I cut a dowel for the main and fore mast and gave an initial go at shaping. I'm not sure if it's me or the dowel wood or what but I can't seem to make much headway on shaping. I got my electric drill and chucked the end of the main mast down and sanded like crazy for what seemed like forever and did almost nothing. i picked up a cheap caliper at Frys and after all the work I did, including using a knife to cut, I was able to get one small section of the mast from 6.33MM to 6.05MM while I think I need to get down to near 5MM with a smooth taper. The dowel wood just seems like concrete. I felt like I've gotten pretty good at sanding and filing to create shapes (at least with the basswood) but the dowel wood just seems to hard. I've read some of the information on creating the masts from square stock so I think I'll go to the local Hobby Lobby and see if I can find some basswood that might be the right size and give it a shot. The one thing that concerns me a bit is the strength of the basswood, it seems like there will be a lot of stress and pulling on the masts and I'm not sure it'll be strong enough.


- 131 replies
-
- 3
-
-
- rattlesnake
- model shipways
- (and 1 more)
-
Thanks for pointing out where it is in the booklet, I've probably studied that diagram 20 times and never noticed it.
-
Thank you so much, I haven't seen anything in the plans or instructions that says anything about the billboard but that make perfect sense. I will add that now!
-
Is the billboard the fake window near the stern? I've been struggling with what to do with those since the kit pieces aren't very even and the hull still has some curve where they need to go so I can't figure out how to get them to lay flat against the hull. I've considered dipping them in hot (boiling) water to see if the metal will get a little more pliable where I can shape it but I haven't tried that yet. I've also considered trying to make them from wood but the carving still seems way above my skill level.
-
Deck Details I've been working on the binnacle, bitts, and outside ladders plus I finished up the pieces on he platform. I decided to make the binnacle instead of using the metal piece included with the kit and I'm glad I did, it seems that wood looks better than metal for things that are made out of wood. I also finished up the first railing with the posts made from the toothpicks I found and it worked just like I hoped it would. Still have the gangways, kevels, chesstrees, and lots of cleats and eyes to finish out the deck details. I also have started on the lifeboat and boy is there a lot of sanding with this. The outside isn't too bad but the inside is really hard to find room to work. I did try what I'd seen suggested here and left the bottom piece off to try and help to get to the inside but it didn't really work for me so I've gone ahead and glued the bottom on. I found some spray paint for the metal pieces that should be black (cleats and smokestack) and I really wish I had thought of that when I did the cannons. Spray paint looks much better than brushed paint to me, at least on these pieces. I just made a jig with holes in if for the cleats to hold them while I spray pint them and that seems to work well for tiny pieces.


- 131 replies
-
- 2
-
-
- rattlesnake
- model shipways
- (and 1 more)
-
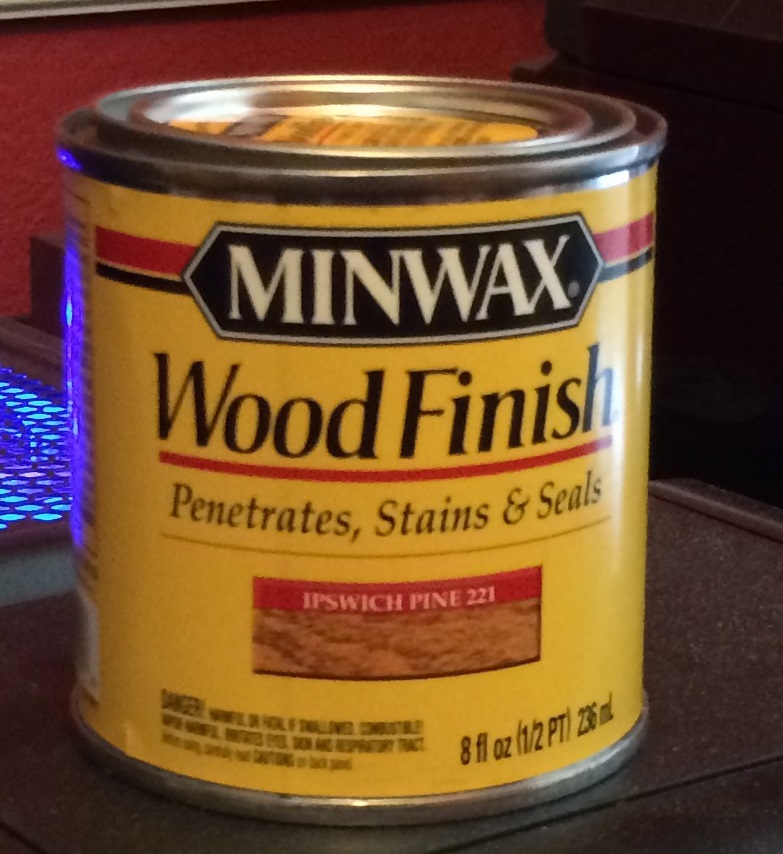
Capstan Railing Posts Idea Decided I couldn't use the metal Capstan that came with the model so I've made one. It seemed pretty straightforward, just cutting out the pieces and putting them together. One thing I've decided is that staining the wood to make it darker looks much better to me than painting the wood brown. I wish I had discovered that before making the cannons, I think they'd look a lot better with stain than they do with the brown paint but can't see pulling them out at this point, lesson learned. I also found that the best way to stain small pieces is to just pick them up with the tweezers and dunk them in the stain. I'm using the Minwax Wood Finish Stains I pictured before and I have three shades now, the light natural look, a red mahogony and a dark walnut. It seems to me that giving different functional pieces different shades helps my eyes see the detail better when everything is so small. I would think that different pieces on a ship would be made of different woods so hopefully the different shades aren't too crazy. This Capstan that I made from the plans is a little bigger than the one included but I'm trusting the plans, it's pretty big on the deck. One other problem I may have solved is the posts for the railings on the sides of the ship. I've wanted to have something that wasn't just smooth wood and didn't see a way to shape that many different pieces and get any consistency. I discovered these toothpicks at my local Albertsons and I think they may work for the railing posts. They have a nice shape at the top and I can just cut to the desired length for the posts, we'll see. It was $3 for a package of 250 so no loss if they don't work out. I already used the toothpick for the two capstan posts.


- 131 replies
-
- 2
-
-
- rattlesnake
- model shipways
- (and 1 more)
-
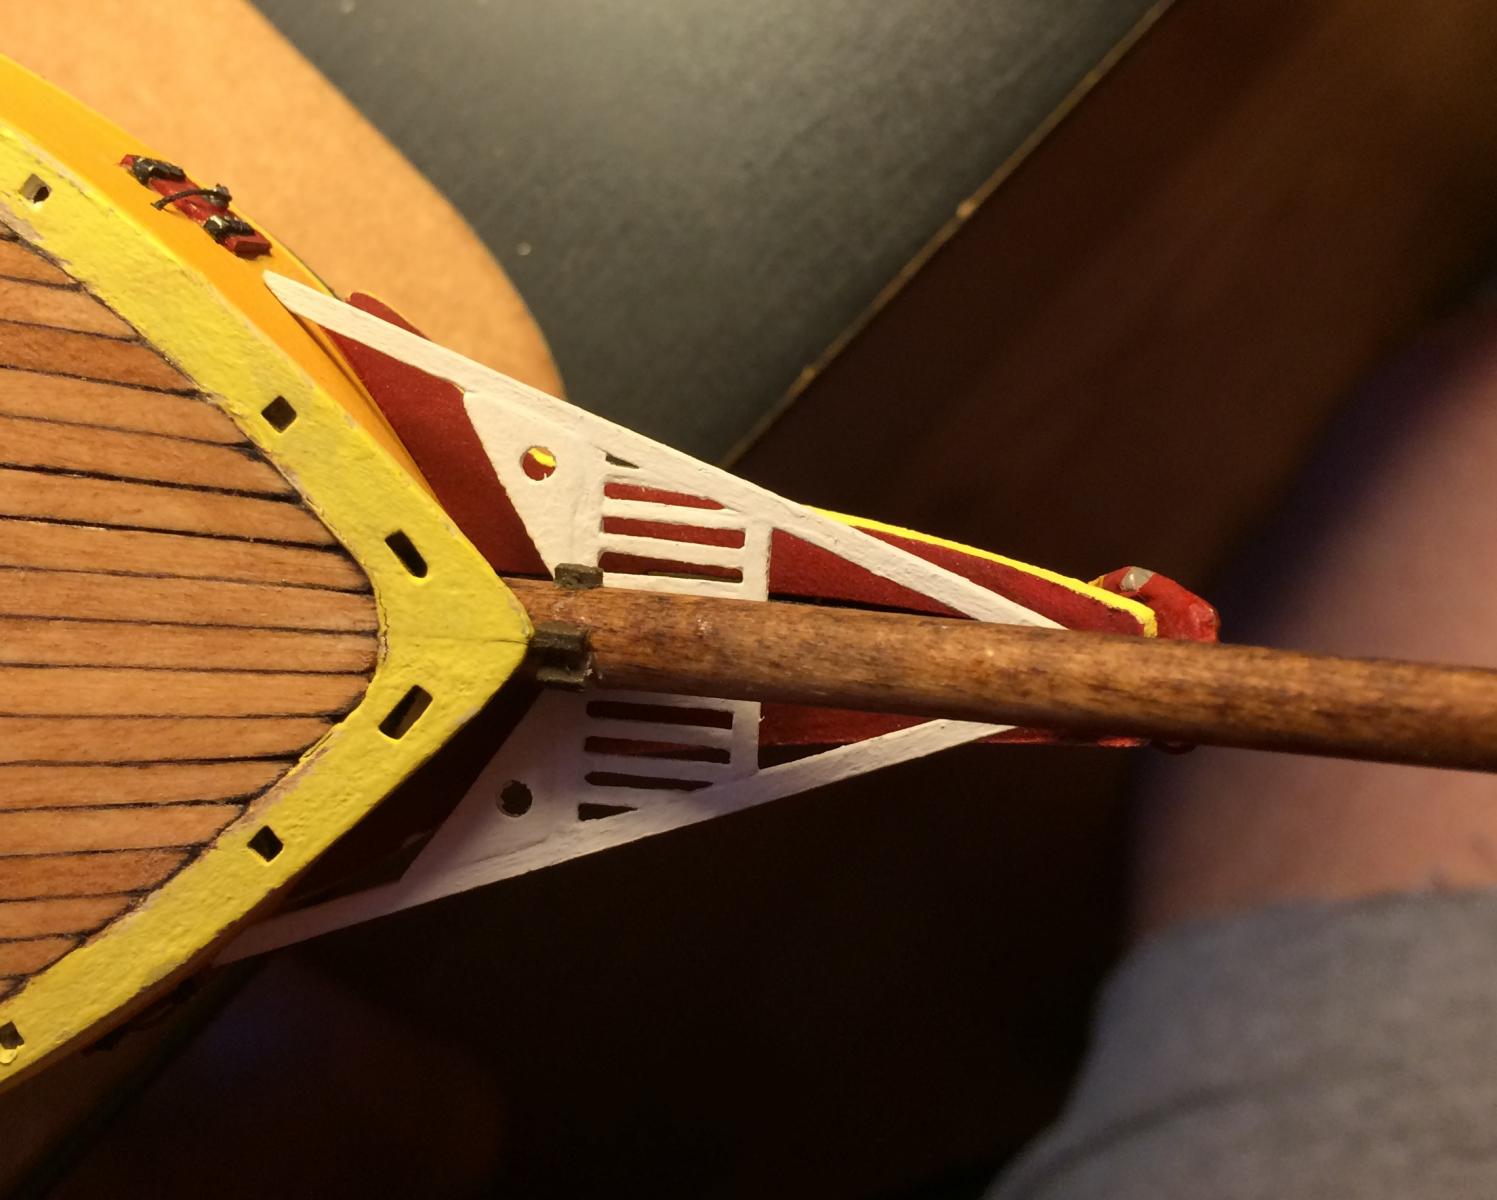
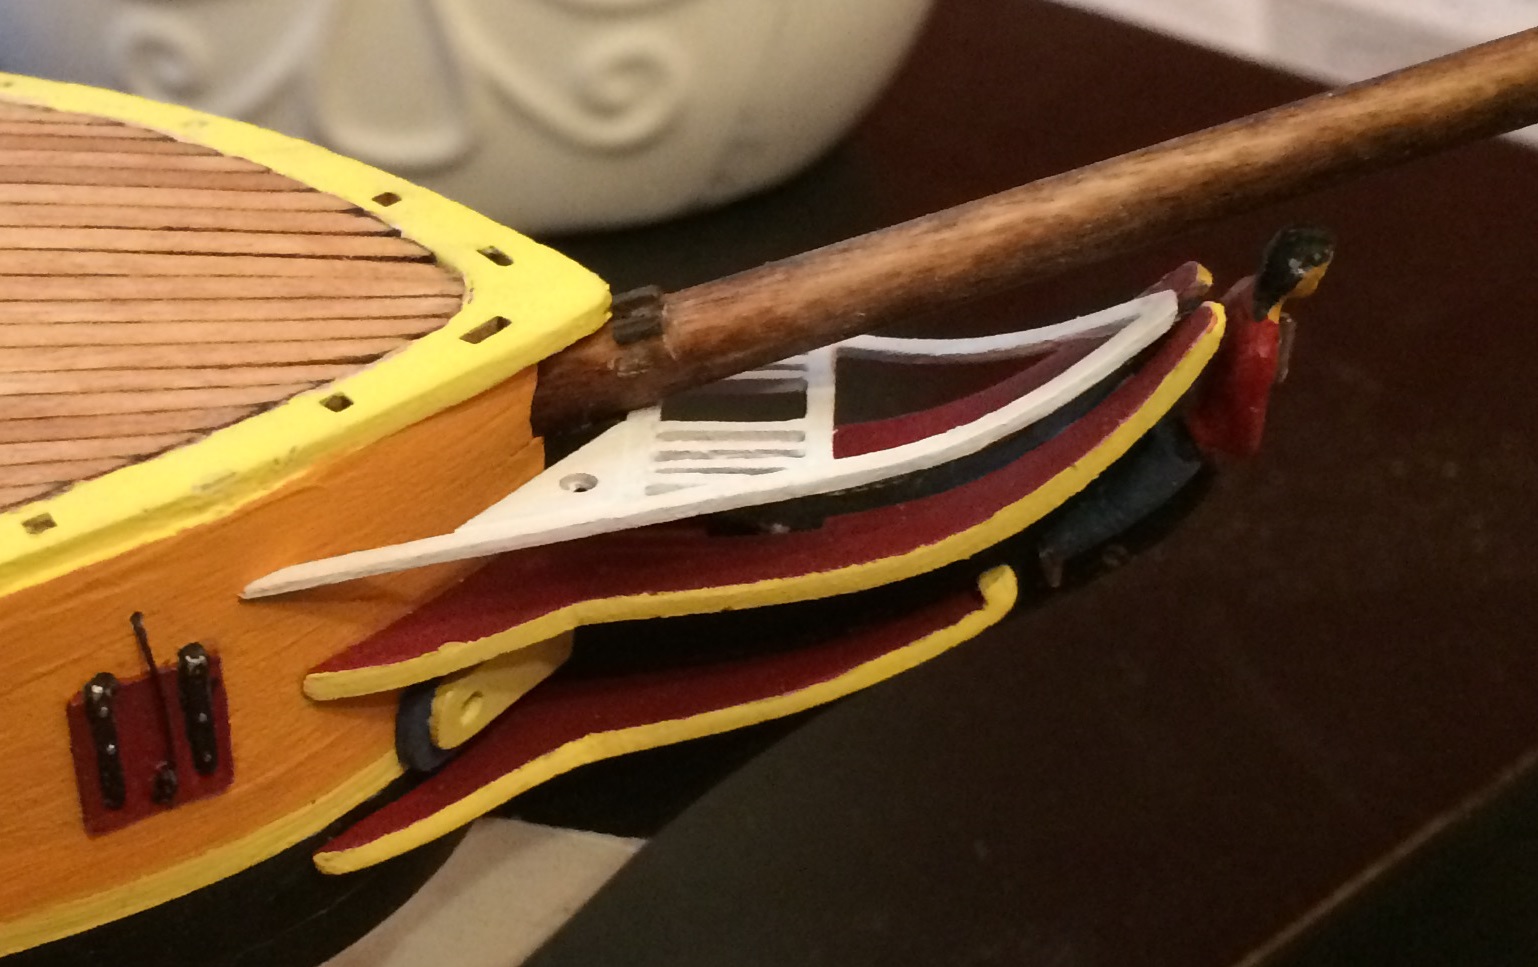
Headrails and Platform I've added the top headrail and the headtimbers. This didn't really end up matching the instructions or plans very closely as I just tried to add it layer by layer, adjusting the ideal (plans) against what I could make work. Hopefully its not too far off. the biggest change right now is that there's no second headrail. I had plans to add it after the top headrail and headtimbers but I can find a way to do it no that looks like it would fit between the top headrail and cheek. I think my headrail and cheeks are still a bit on the large clunky side and if I'd made them trimmer and sleeker then the last headrail would fit. I'll keep looking at it for now to see what I can do. Added back the gammoning and it fit nicely in the space I left in the platform for it, and I also added the boomkins and their guy ropes. As usual the pictures show where I need to go back and touch up things. I think I'm going to work on more deck details next. The capstan provided is a mess so I'm planning on building one and I have the deck buckets and holder as well to work out. The buckets provided don't look so great but maybe with some filing they can be salvaged.
- 131 replies
-
- 4
-
-
- rattlesnake
- model shipways
- (and 1 more)
-
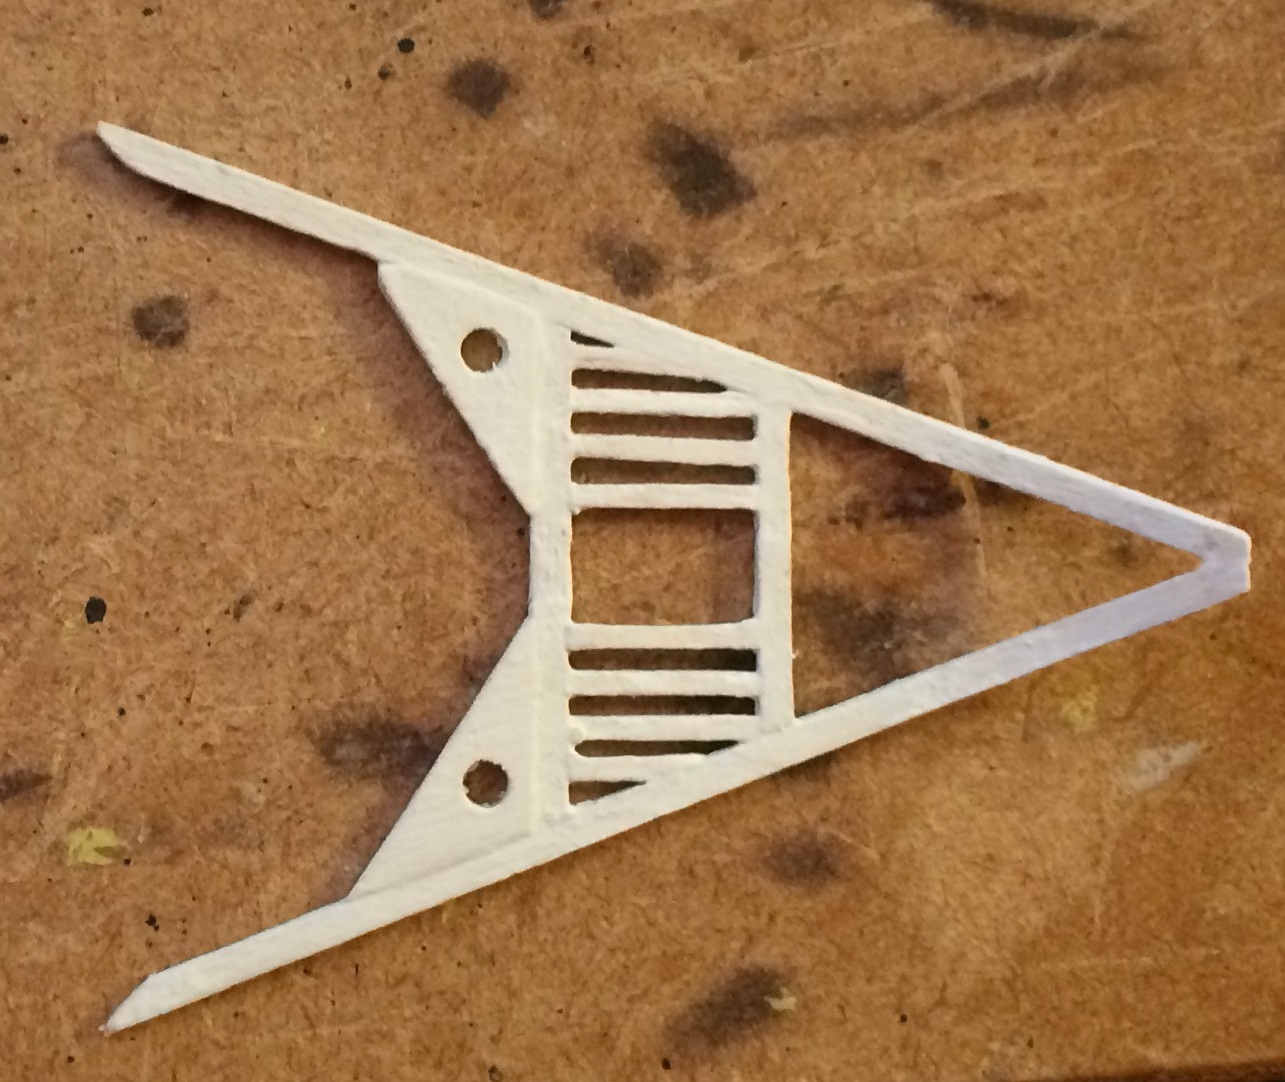
Bow, Cheeks, Headrails and Platform Got to confess that the more I looked at the plans and instructions the more uncertain I was how to approach these. It seems like every piece depends on another piece to fit in the right place and I had no idea where to start. I have checked out the excellent work by others of you that have done this and it was a great help. I decided to first put the cheeks in since they seemed to be the foundation for everything about them. I cut them out of 1/16" Basswood and then sanded them thinner leaving them thicker at the very end for the curl flourish, I think they're probably a little wider than they should be now that I have them on the ship. Then I soaked them and taped/tie wrapped them in position to get the approximate curves. Sanded again to get a nice fit and then painted the dark red I've been using and made the edges yellow to help bring out the detail. This seemed to go OK, except somewhere I got confused about there the anchor chain comes out and I put the piece that reinforces that below the top cheek instead of above. By the time I figured that out it just seemed like it was best to let that be and continue on. Trying to work out the relationship of the headrails and the platform so I went ahead and built the platform. I sliced and sanded some strips to get the grating on the platform but I left a space in the middle since the gammoning has to go somewhere, if I've figured this out correctly the gammoning should go in the space of the center of the platform. I also made a space on the cheeks where the gammoning can pass through. I'm hoping that by having the platform to put in place I can make the headrails the right shape and position to work now. At this point the platform will sit in place without any glue so I'm hoping to make all these pieces fit somehow. Next I'll work on the headrails and see if this will all come together.


- 131 replies
-
- 3
-
-
- rattlesnake
- model shipways
- (and 1 more)
-
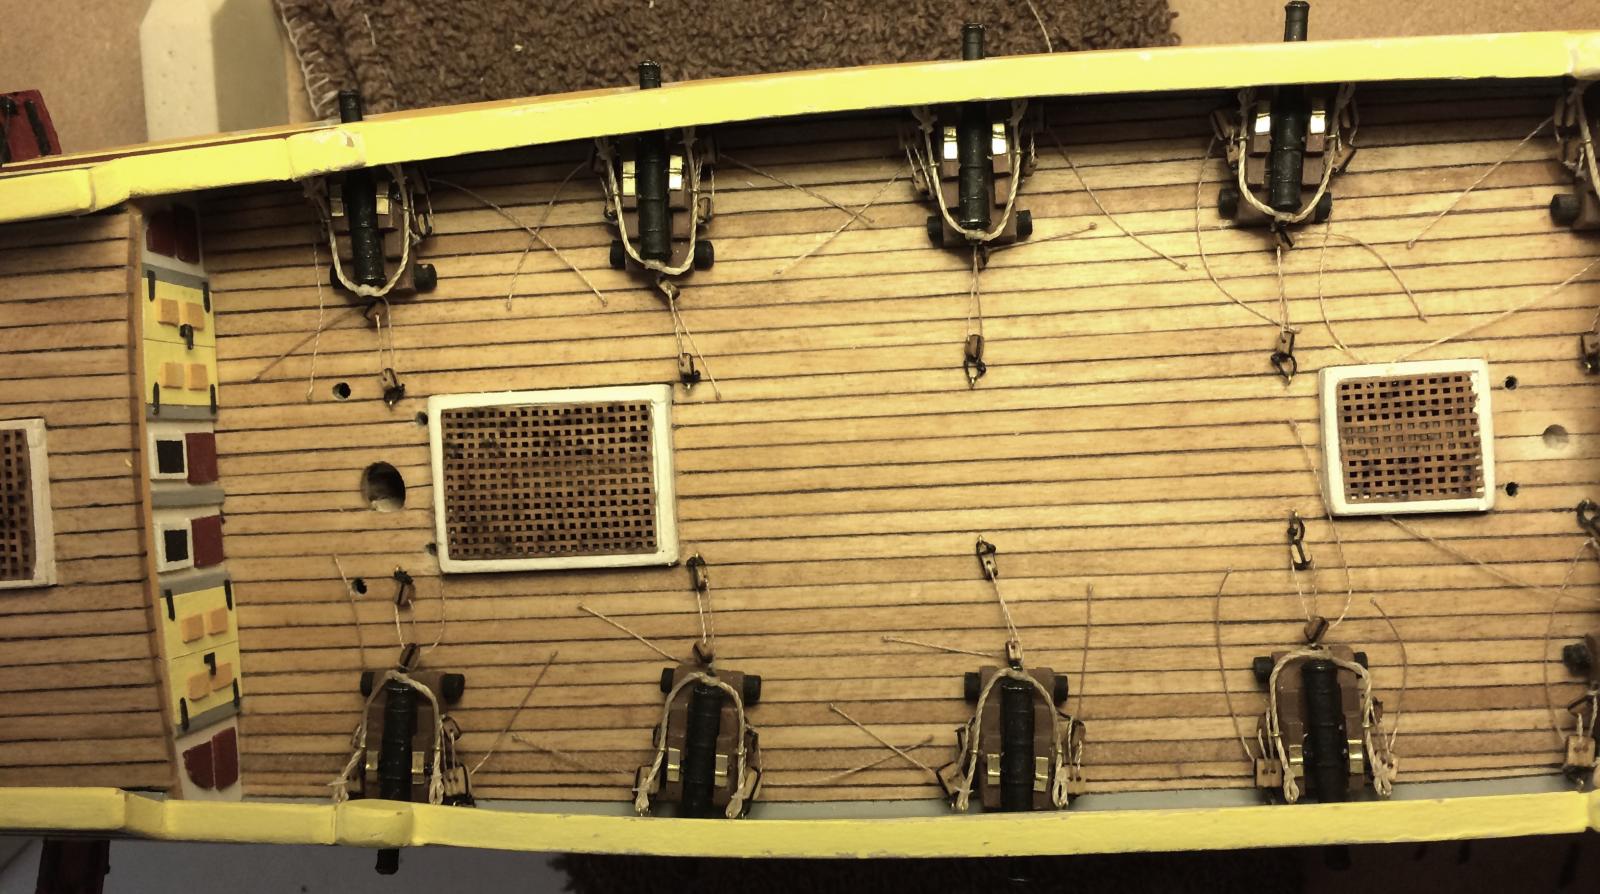
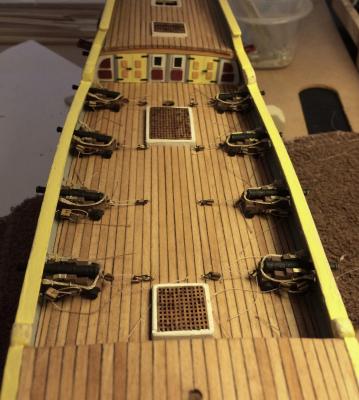
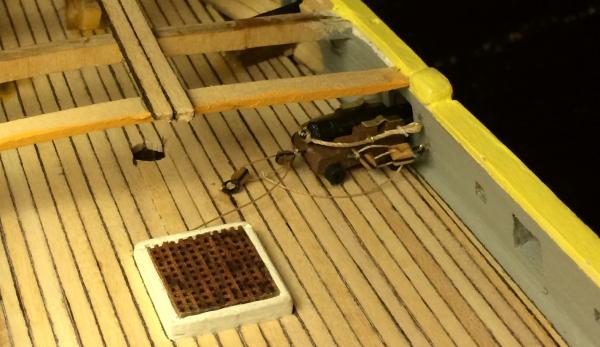
Cannons Been working on these little buggers for a while but finally have them done. I felt like I wanted to add as much detail to them as I could so I added brass plates on the top of where the cannons pivot. I put a bit of a dent in each one of the brass plates by pushing it down on top of a pin with a pair of plairs. I had to order extra eyebolts, single and double blocks to do all the rigging on them but felt it was worth it. I finished each rope with a knot where it ends and right now the ropes are loose on the deck and I'm trying to decide if I'll glue them in position, right now I'm leaning to gluing them down just to get a neater look. They aren't really long enough to roll up but some of them seem to want to go where it doesn't seem natural. I want to finish the other pieces of this deck before deciding on that and if I do glue them where they should be. Have a couple of pieces to finish on this deck, the gangways, and I'll have to start the lifeboat at some point, I've kinda been putting that off.

- 131 replies
-
- 2
-
-
- rattlesnake
- model shipways
- (and 1 more)
-
I used Minwax Wood Finish found at my local Lowes. They had several different finishes and I picked the lightest color I could find. I just brushed it on (small brush, tiny amount each time), waited about 30 seconds and if any area looked light I brushed a little more on, then dabbed any excess off with a paper towel. Did each of the three decks one at a time.

- 131 replies
-
- 1
-
-
- rattlesnake
- model shipways
- (and 1 more)
-
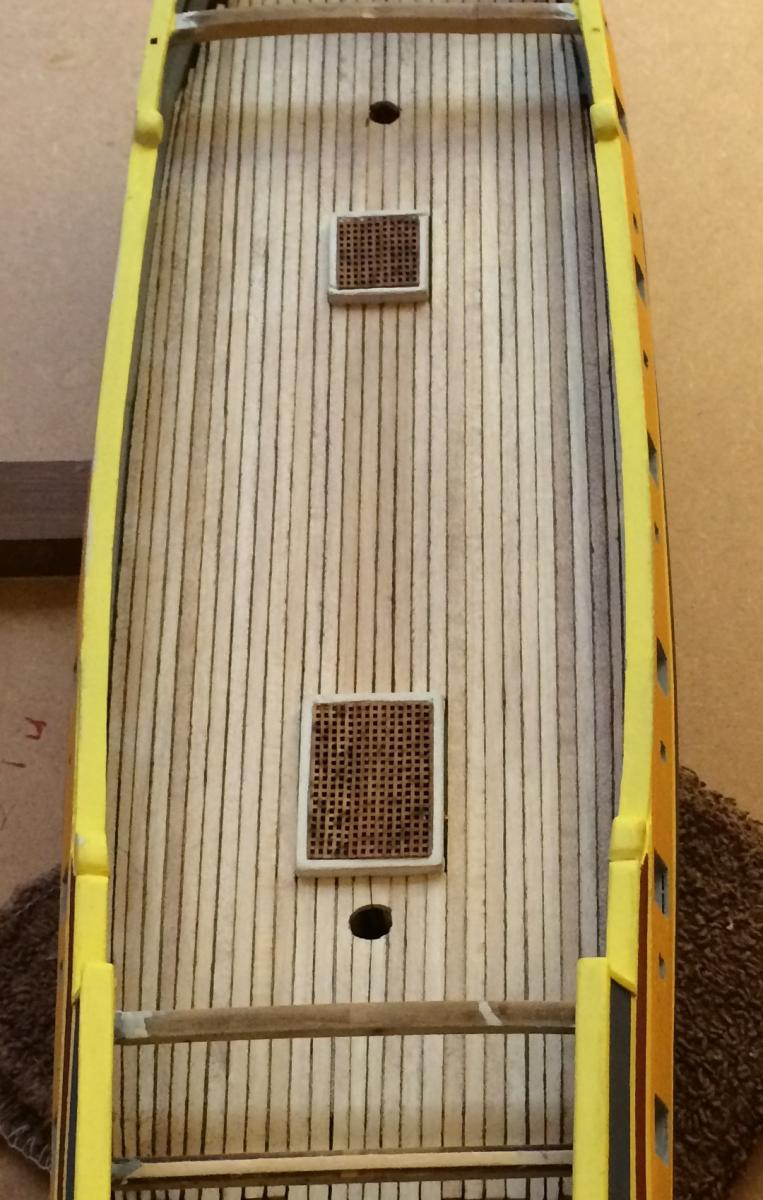
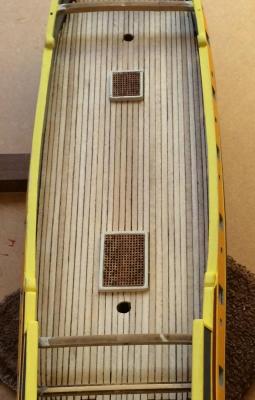
Decks Finished Finished the last deck and went with a light pine stain to finish the decking. I measured the width of the planks on the plans and tried to match that as I built the deck out from the center and was able to get much closer to the look of the planks matching the curve of the outside hull even though I started in the center. Next I'll be working on getting the details finished on the gun deck, mostly the cannons.
- 131 replies
-
- 4
-
-
- rattlesnake
- model shipways
- (and 1 more)
-
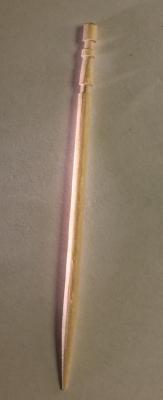
Decking / First Cannon I've finished the decking on the poop deck (I think that's right, so many new terms). I'm still struggling with getting the curves to match the hull curves as it gets away from the center and near the hull. This lead to some improvising closer to the stern and I'm going to focus on getting better at that technique as I do the fore deck. Before starting the decking I felt I needed to go ahead and add the section of the bowsprit that glues under the decking. I cut the notch in the end for the cap so I wouldn't have to do that with it glued to the ship, stained it and attached it. I also put in two dummy cannons in the second gunports and added the gunport covers. As I started decking the fore deck I realized that I had two cannons that would be under the decking and really hard to install after finishing the decking so went to work on those two cannons. Looking at the way the ropes and tackle for the cannons was pictured in the instructions and plans I realized I had to decide how much of that I wanted to include. Counting up hardware I realized there were not enough blocks and eyes in the kit to rig all the cannons so I decided to order more pieces and proceed with the full set. To attach the blocks to the cannon I tied a black thread around the block and then finished the knot with a tiny spot of super glue, I added a tiny spot of super glue on the other end of the block too for good measure. I then drilled a very tiny hole in the sides and back of the cannon and inserted the end of the thread into the hole with a spot of super glue on it. It seems pretty strong that way but time will tell. I also put eyes in the side of the cannon to guide the breech lines. Put all the blocks and thread together and then put the cannon on the deck, got it in place, glued it down and then went back and tightened the ropes and trimmed everything up. Now I've realized that I haven't put a finish on the deck and I have that cannon down on it, but I think I'll just work around this one cannon but now I need to decide how to finish the deck. I really like the look of the wood just as it is, but leaving it unfinished seems like it might cause problems down the road. I will find something that will give it a matte finish and hopefully not darken the wood up too much.

- 131 replies
-
- 2
-
-
- rattlesnake
- model shipways
- (and 1 more)
-
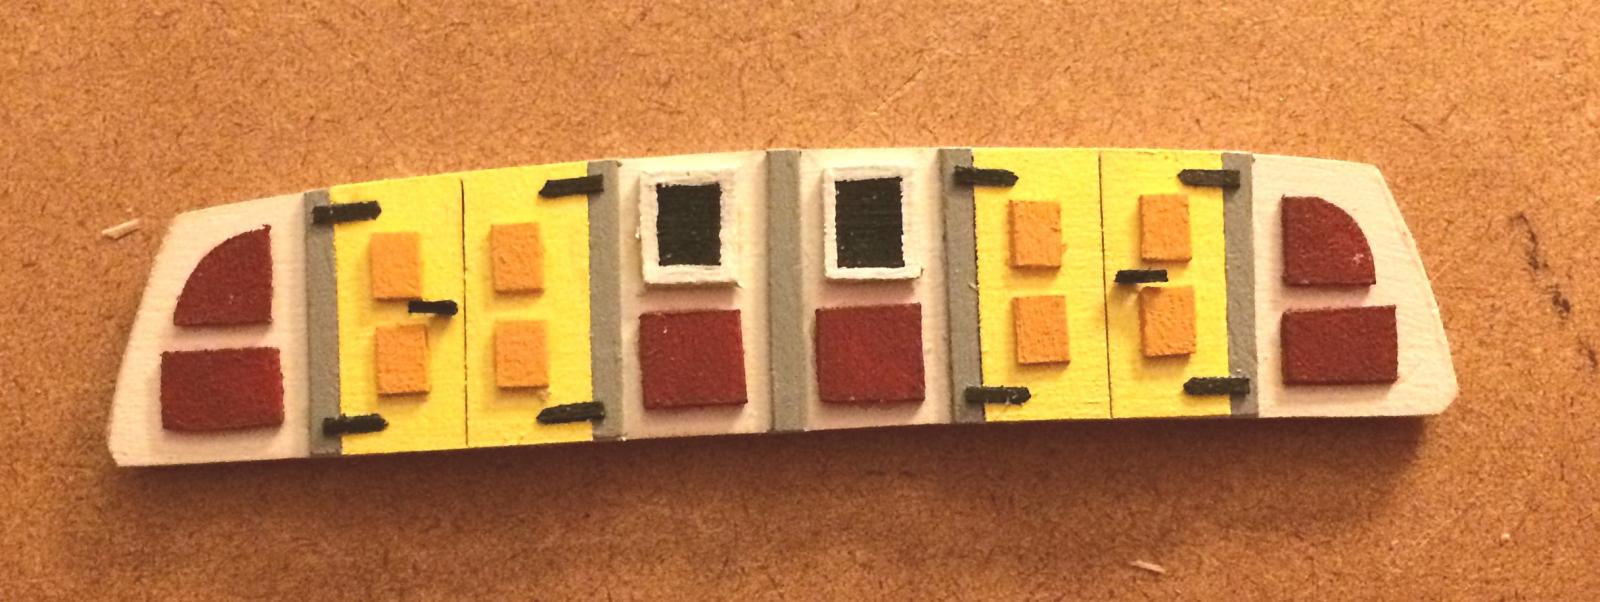
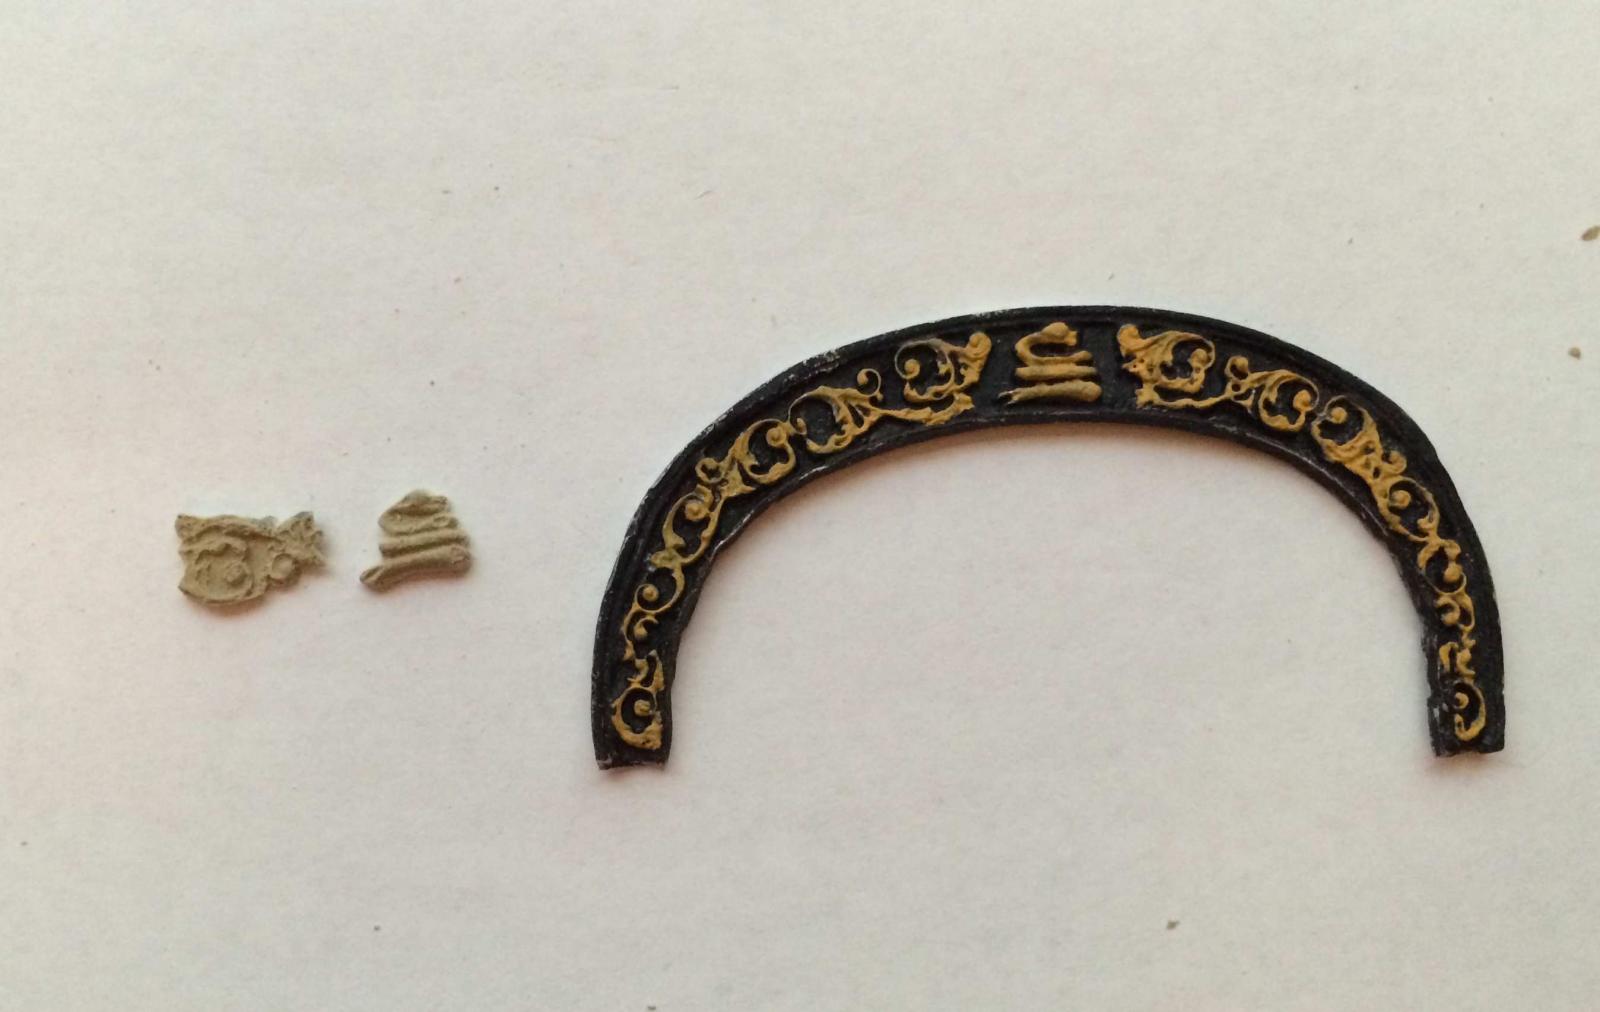
Poopdeck Bulkhead Nothing in the instructions I've found says when to add the poopdeck bulkhead. The only thing I could find on it was the picture in the plans but as I looked it seemed that it needed to be added before the poopdeck decking planks. First thing I tried was to cut an approximate shape out of paper and then transfer that to wood and then sand into shape. It fit OK, but it didn't fit as well as I'd like it to when I realized that I had the cutout leftover from the bulkhead where it would be going. It's the same size and shape with the exception of the deck and side planking, so I sanded that down and it fit really well. After trying and failing to paint the designs on the piece I decided to make all the designs out of wood and paint them before applying. Was going so well that I decided to make the hinges and door handles out of wood as well. Even the thinnest wood seemed too thick so had to sand all the pieces thinner. I found that the best way to paint and sand tiny pieces was to stick them to scotch tape and work with them on the scotch tape. Just had to be careful when taking them off the scotch tape not to break them, especially the door handles.


- 131 replies
-
- 2
-
-
- rattlesnake
- model shipways
- (and 1 more)
-
Working on Hull Detailing and First Decking I've been working on finishing the outside hull details and started some decking. After all the experimentation I did trying to find a way to make a better fashion piece I ended up using the supplied piece. I think one of my misconceptions about the kit was that the metal pieces were good to go as is. So I filed stretched and worked the fashion piece till it was at least passable. I don't think there's a way to make a better piece short of getting into carving a new one myself and I wasn't ready to tackle that yet (next time). One thing I'm completely lost on is how to shape the molding strip that goes down the side of the hull. The plans show it at curving up from the edges to a point in the center. Short of a teeny tiny router (which I don't have) I just can't think of a way to produce that curve consistently alone the length of the molding. Still not sure what I'm going to do for that. I've added the molding and the fashion piece extensions. The fashion piece extensions I made are quite a bit different than the plans but it seemed like the best way to go. I've also added some of the gunport covers and I've decided I'll close the back two and front one. Made a couple fake cannons for the open gunport that will be in the officers quarters. Then I started with the first deck. Started in the center and used a black art marker to color the edges for the tar effect. As it got where the planks needed to be curved to start matching the curve of the hull I took the two pieces on each side and sanded the curve of them together trying to keep them as symmetrical as possible. I did run out of the stock to make the grating covers so I sent Model Shipways an email asking if I could get more and offering to pay for it, and a couple days later it just showed up in the mail. Great customer service and much appreciated. At this point I'm preparing to do the fore and aft decks and start working on all the deck details. Everything here seems very interconnected and I'm trying to make sure I do things in the right order so I won't have to undo anything to get to something I missed. Most of the pre-cast deck pieces look OK except the capstain and I think I'll need to build one for it to look decent.


- 131 replies
-
- 3
-
-
- rattlesnake
- model shipways
- (and 1 more)
-
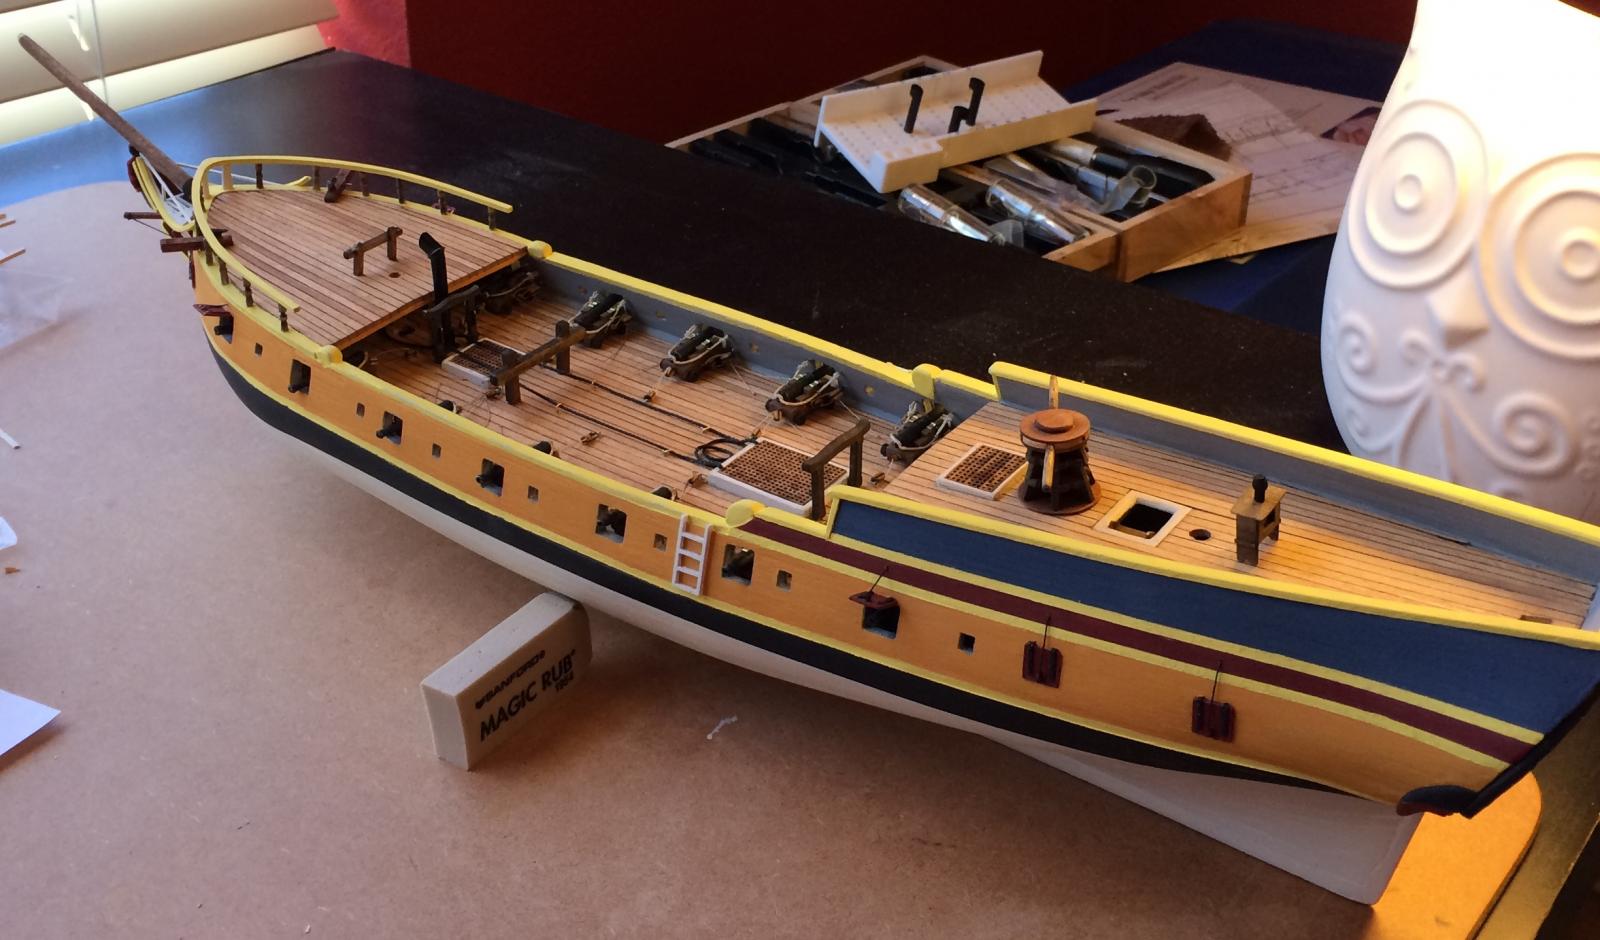
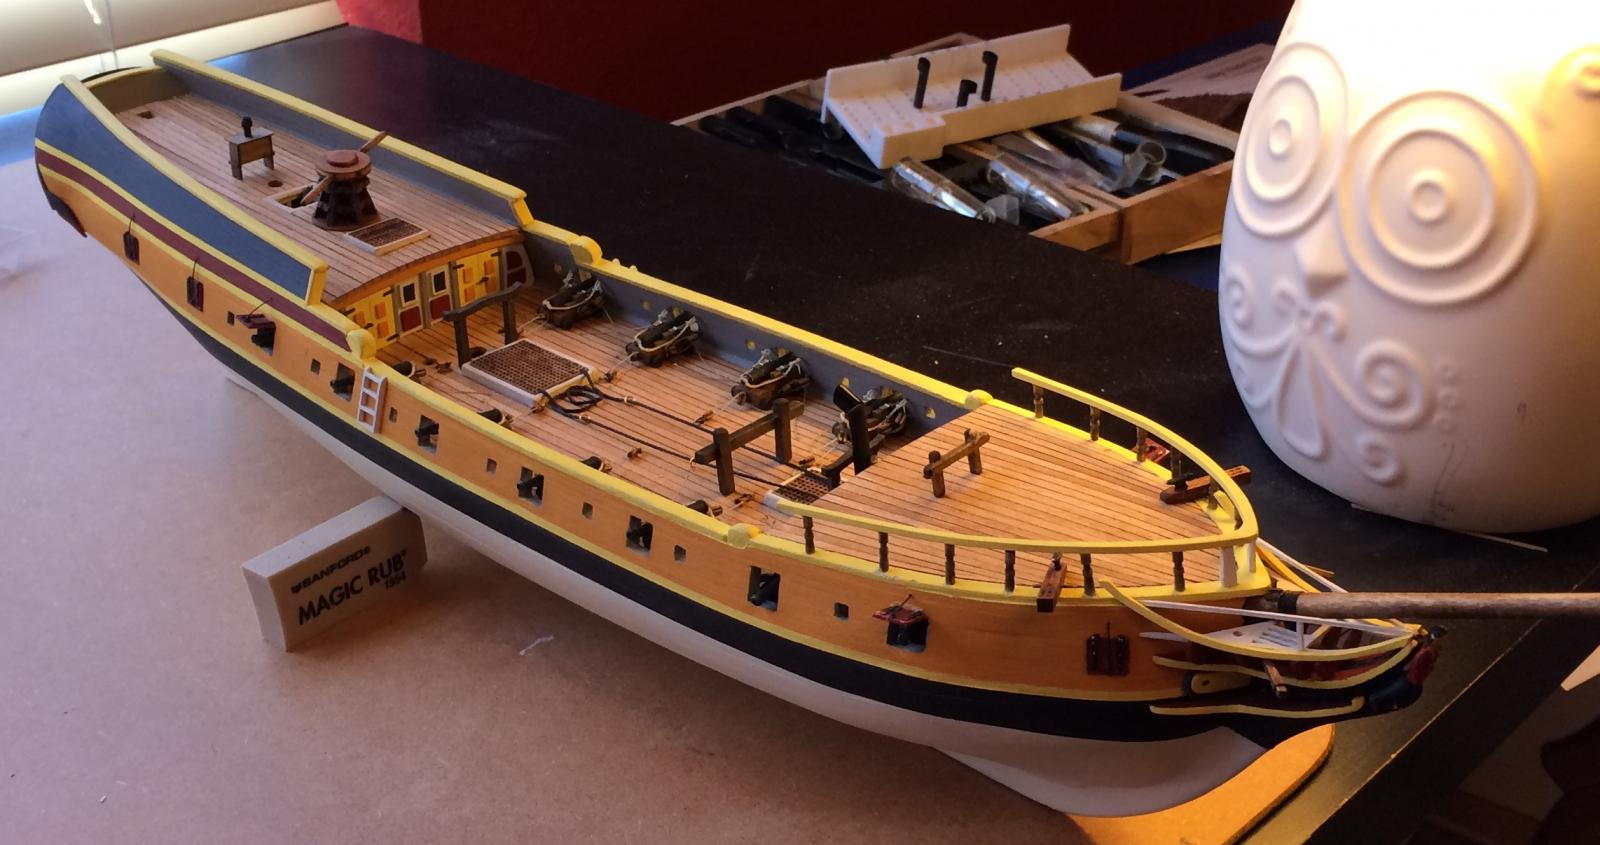
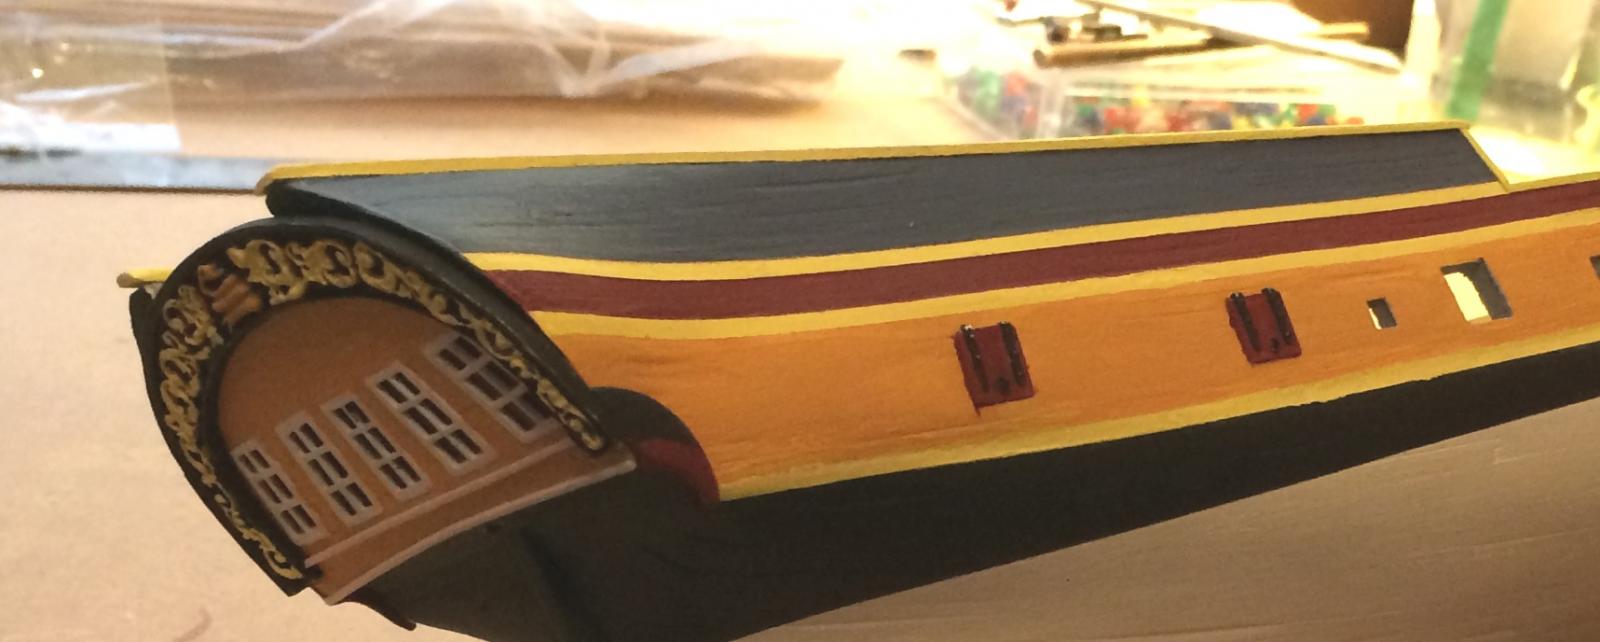
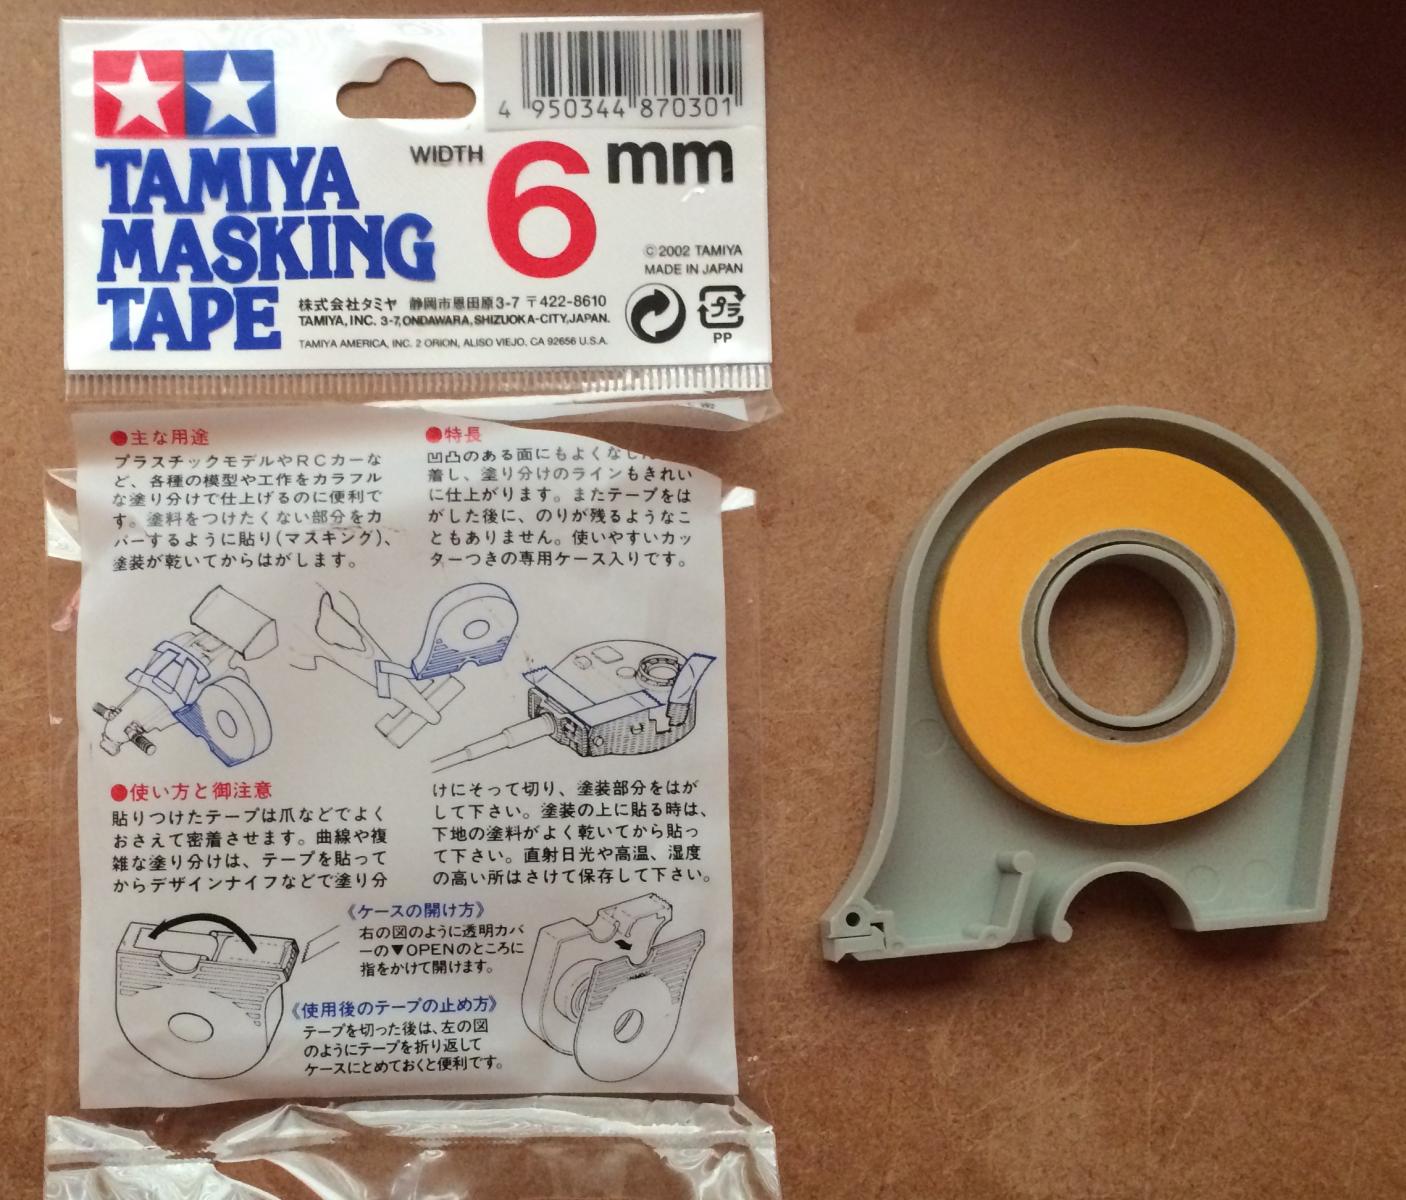
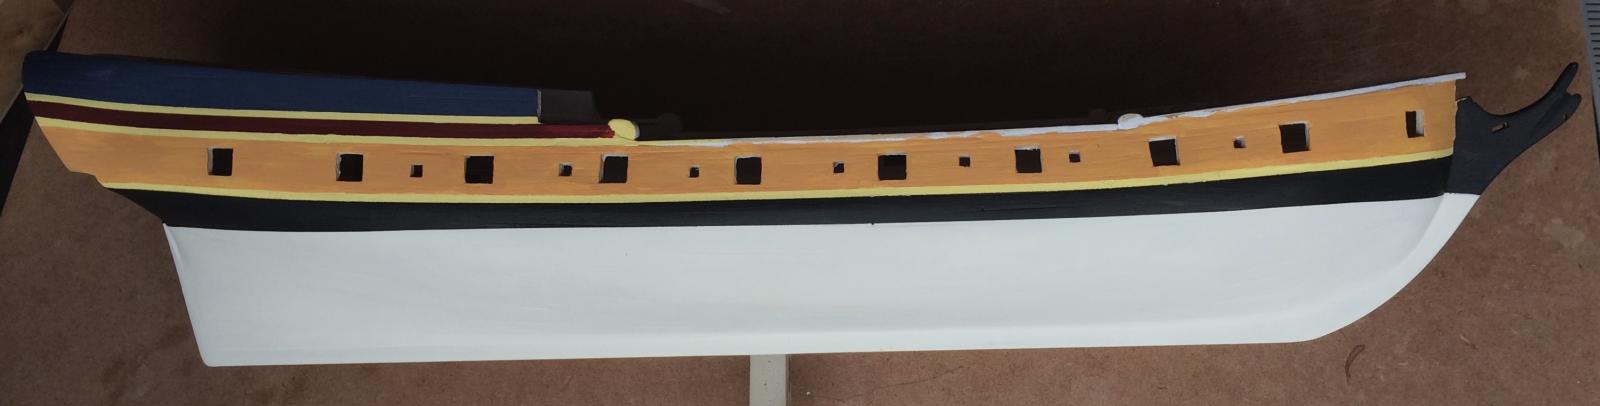
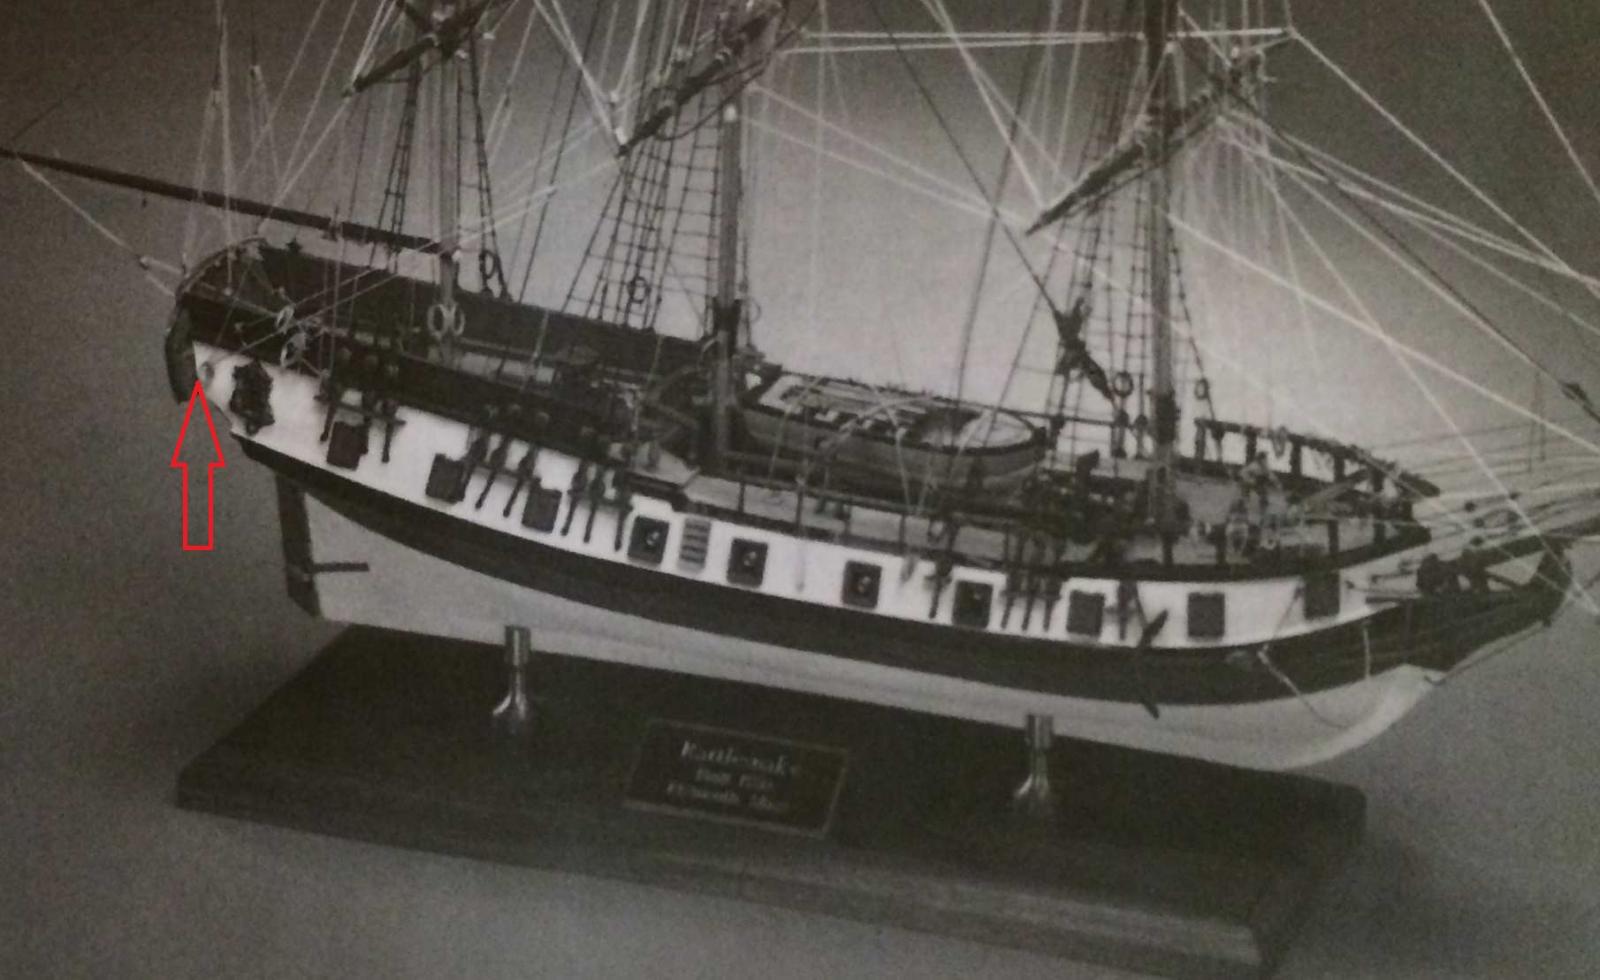
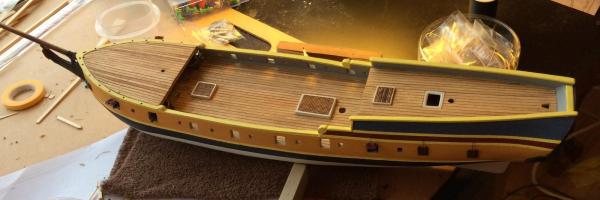
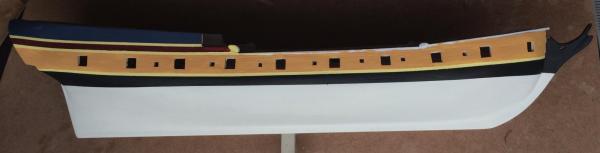
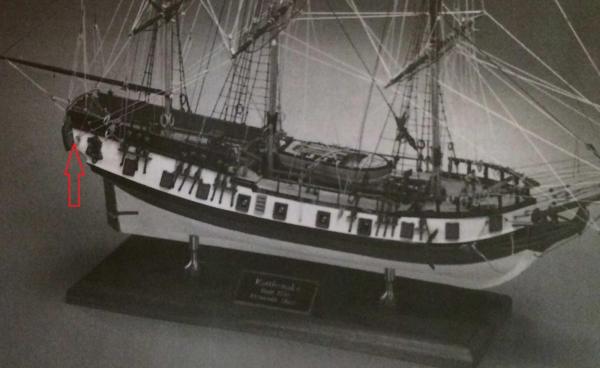
Hull Painting I will start this off with the first product I've found that I feel I need to recommend, Tamiya Masking Tape. Found this in my local Hobby Lobby and decided to give it a try on the hull paint since I wanted stripes. I found this product to be flexible enough to go around slight curves and imperfections and it gave me a perfect line. It came off easily and didn't leave any residue. This was really obvious compared to the other product I decided to use which was graphic line tape. The reason I decided to use this was that it was exactly the right width for the lines I wanted to create on the ship so I decided to paint the yellow for the lines in a broad line across and then cover it up with the graphic tape and remove it to create the lines. While this worked well in testing it didn't work as well on the ship, I believe this was due to it being on the ship longer and using more paint than I did on my test. I still worked but I had places where it pulled up the original paint as I was removing it and the lines were't always as clean as what I got using the Tamiya Tape. Here's a picture of the Tamiya Tape and the dispenser, I was not able to decipher the Japanese instructions so I just took it out of the dispenser and cut off what I needed. My inspiration for the color scheme came from this picture of the Lady Washington. The picture below doesn't really show the colors correctly, especially the blue, it's more of a uniform blue, but couldn't seem to find a color correction that matched the colors. I took an ivory paint for the hull and added a couple drops of the yellow-orange paint to get it a little more off white. I've got some touch up to do, I may try to use the Tamiya Tape to clean up the lines and the orange color is a bit splotchy but I think this is all fixable with some work. All the hand rails will need to be painted the light yellow color as well but I"m leaving them for now as I have some more work to do on them to get them right.


- 131 replies
-
- 3
-
-
- rattlesnake
- model shipways
- (and 1 more)
-
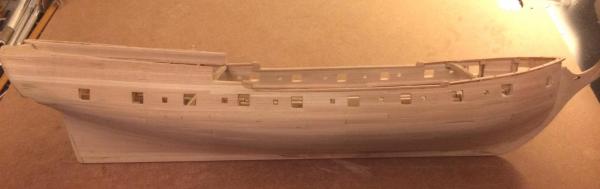
Benchmark 1 (Hull) There's not a lot more to see but I've been working on finishing up the hull planking and the inside walls (instructions call them ceilings, which confused me, so much terminology to learn). I've sanded and done some filling to get things as smooth as I can. I've been looking to this point as a kind of benchmark and I've also spent a lot of time looking at the instructions and pondering my next steps. There's still some roughness in places but I don't think I can sand some of those out without running out of wood. Certainly a case of I wish I knew then what I know now, but that seems to be the way I learn. I don't really mind a bit of rough in the finished product, I'm sure there were places on real ships where a bit of variance showed. I do think I want the lines of the planking to show even after painting but I'm not sure if they will, that seems like a function of the paint and how I apply it, but I'll see if I can get that effect. I feel like I should paint the hull now, before I put in the deck planking. I want to use a varnish or stain on the deck planks that preserves the look of the natural wood and I'm afraid that if I get paint on that, even if I remove it that it will leave enough residue to throw off the look. I'm going to start with a primer on the parts that are ready to paint now and then sand some more to see how paint will hold up as I handle the ship working on the rest. Been reading through a lot of the other Rattlesnake builds and looking at pictures of period ships to get ideas on the paint scheme and I think I know what I want to do. If it works out I'll have a picture and comments, if not, well, back to the drawing board.
-
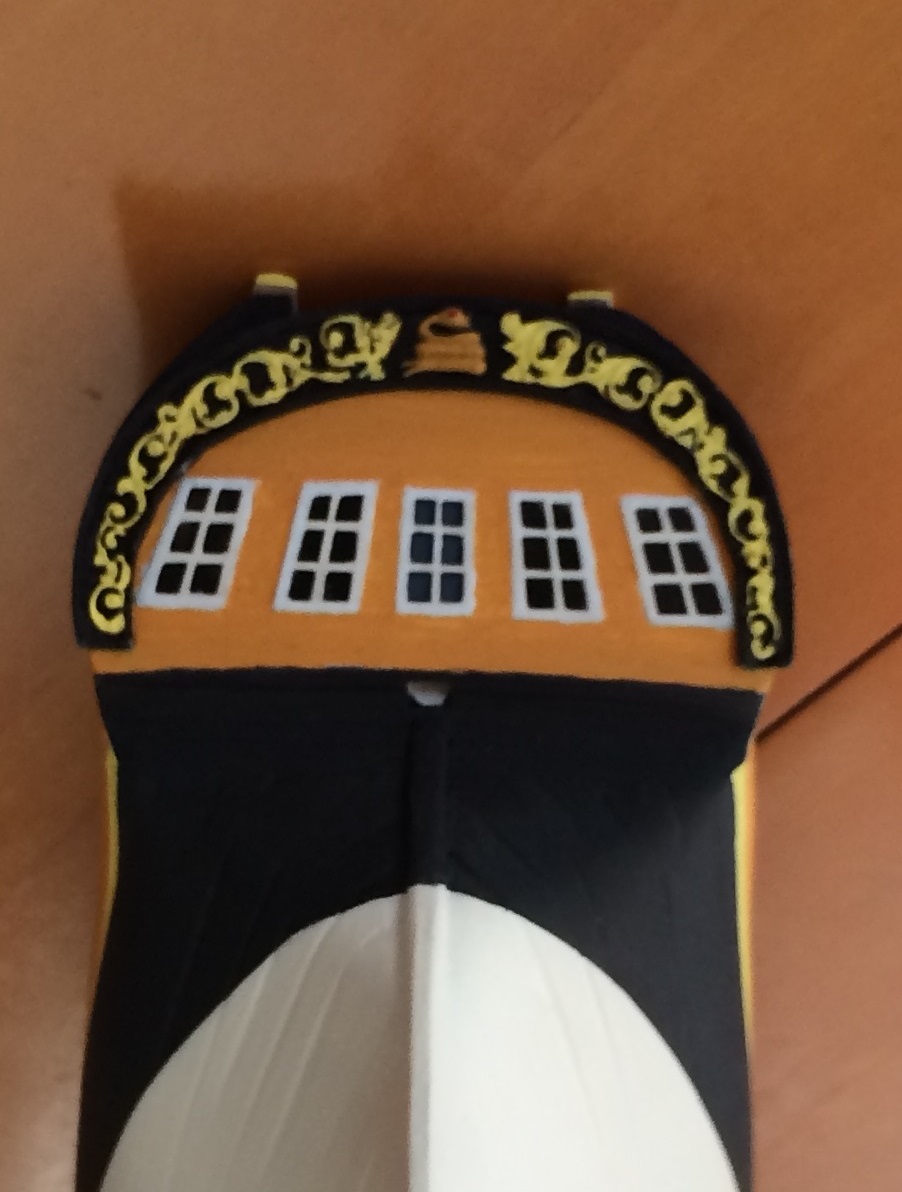
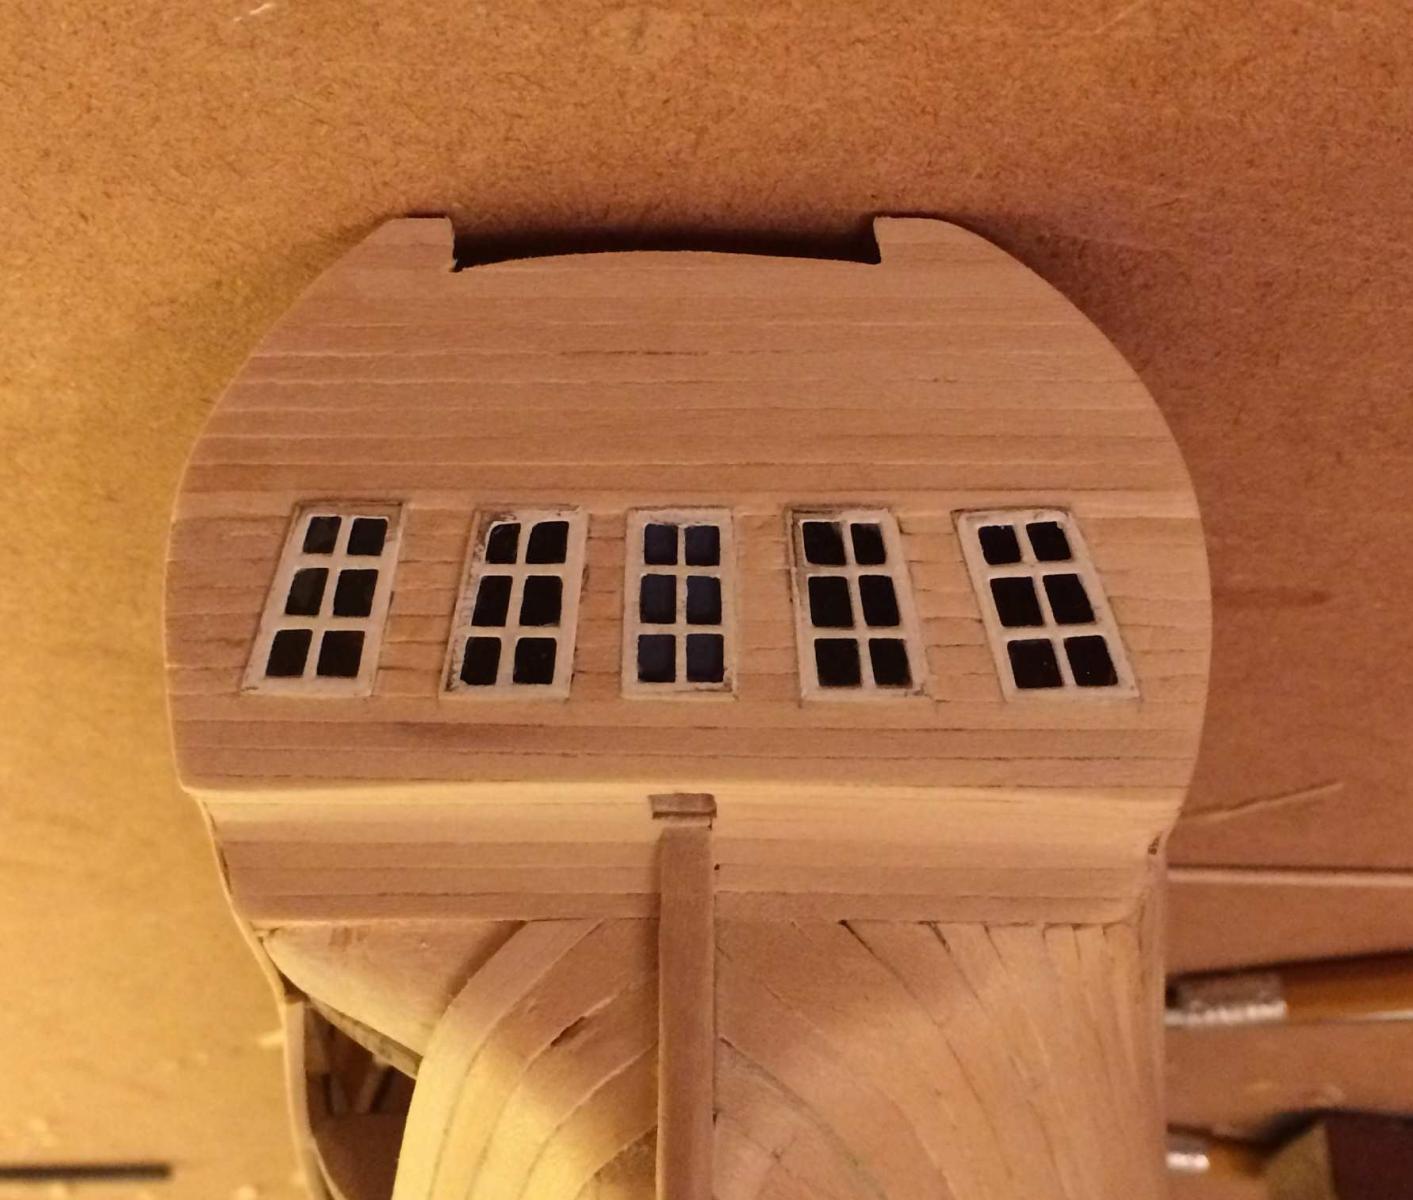
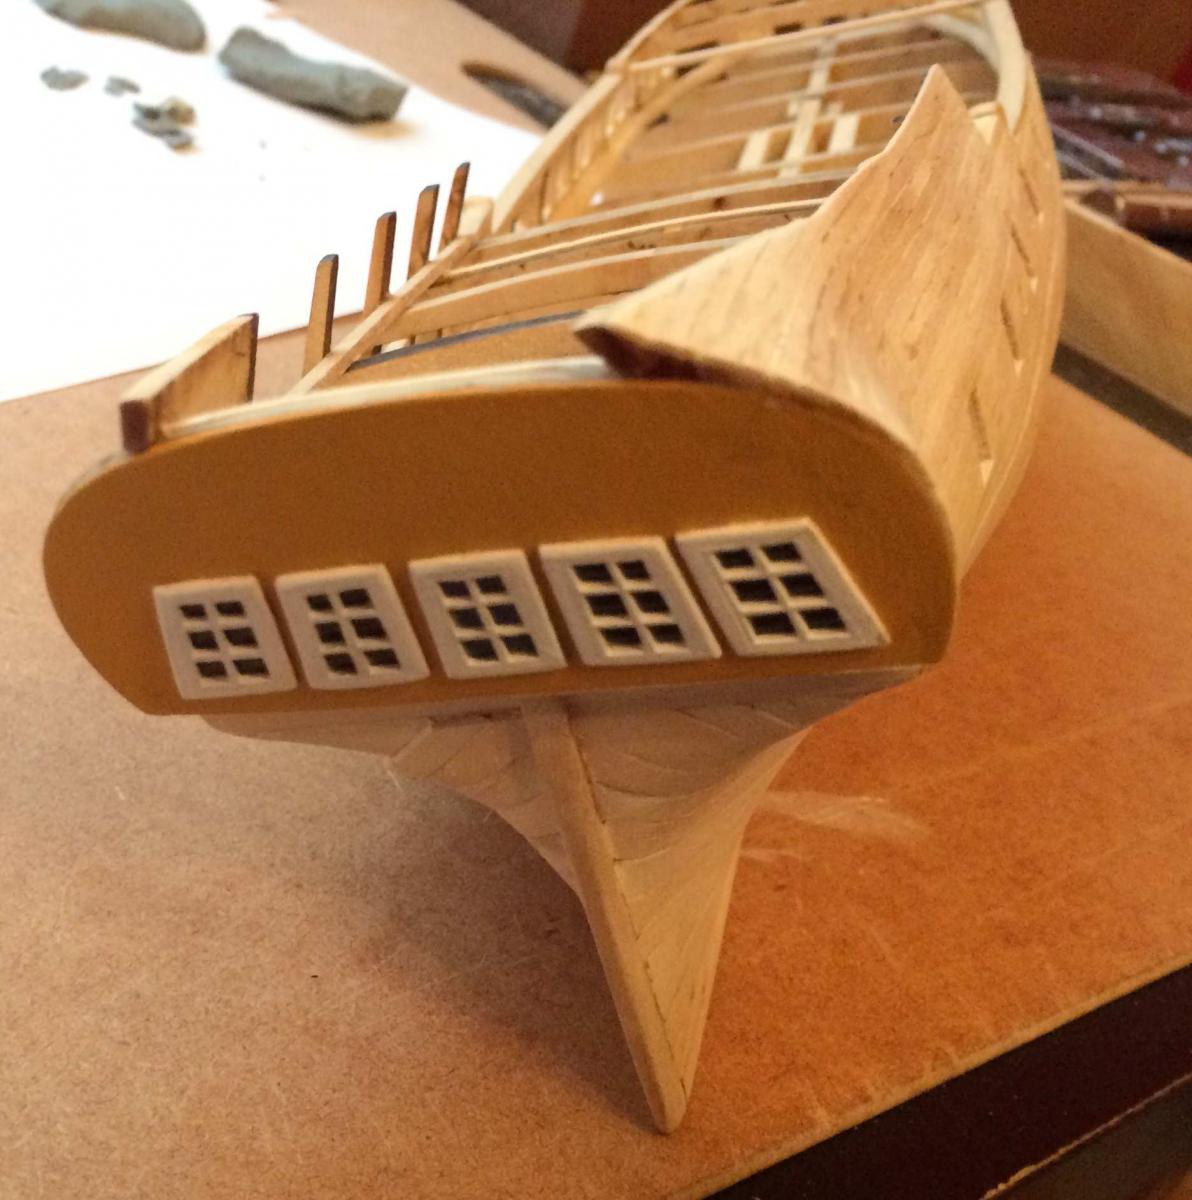
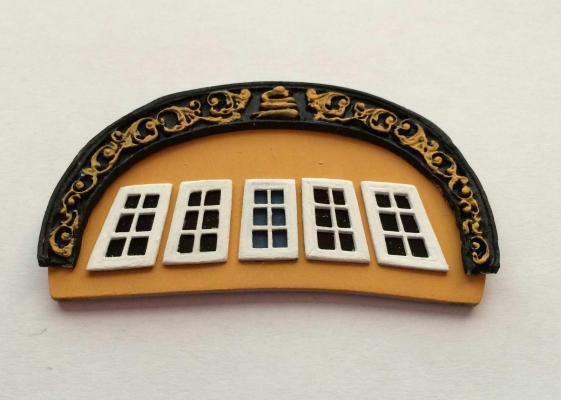
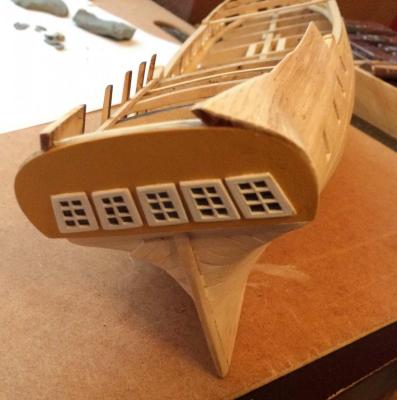
Redoing The Transom After seeing the excellent work by JSGerson on the back of his transom with the planking I decided that I couldn't leave the back of the transom as a flat piece of wood. Looking back at them now my windows looked terrible, the framing around them was way too large which made the whole thing look artficial. So I tore off the windows, trimmed the frames to a more reasonable width and then glued them back on the transom. This also allowed me to place the windows more evenly across the transom as the cutouts were not positioned very well, one of them was much close to the edge than the other. I just knew I would plank over any spots in the transom where the cutout showed. That allowed me to go from this: To This: I like the planked transom much better. The window frames need to be repainted and I'm still working on the fashion piece. Here's a couple more shots of the stern and transom. Detail of the counter with the curve in the transom and curve in the counter coming together. Top view showing planking the inside of the transom and how the exterior planking follows the transom. And a side view of the planking and transom. I have a couple places where it doesn't look like sanding will smooth everything out and I'll need to use some wood filler but all in all, it's been a very enjoyable process so far and my first milestone will be when I have a completed hull blank. I'm calling it a blank because it won't have any of the molding or other pieces that attach to the hull, but all planking except the decks will be done.


- 131 replies
-
- 3
-
-
- rattlesnake
- model shipways
- (and 1 more)
-
JS, your carving looks great to me. That's interesting about the gap, I didn't realize that. Need to ponder how that will affect what I'm planning. I also see that the back of your transom is planked, I realize that we have different kits of the same ship but I just decided to see if I can do that on my ship. It looks so much better that way.
-
Wow that's some amazing carving! It seems like that's an amazing skill all on it's own. Something I'll have to think about since I do enjoy the intricate work but might be a bit much to chew off while learning on my first model.
-
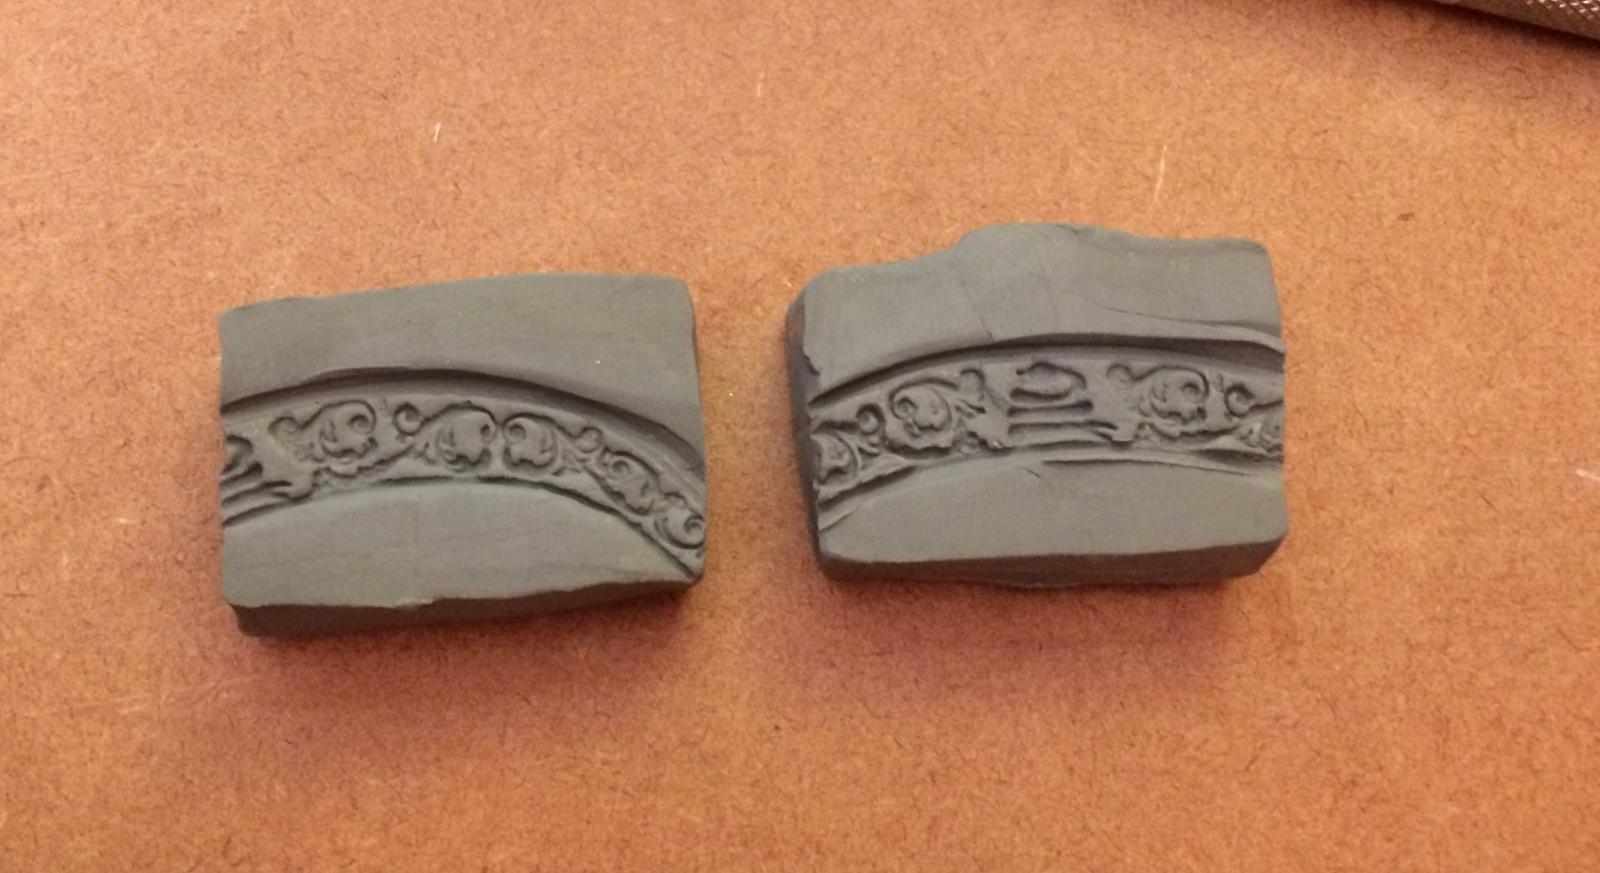
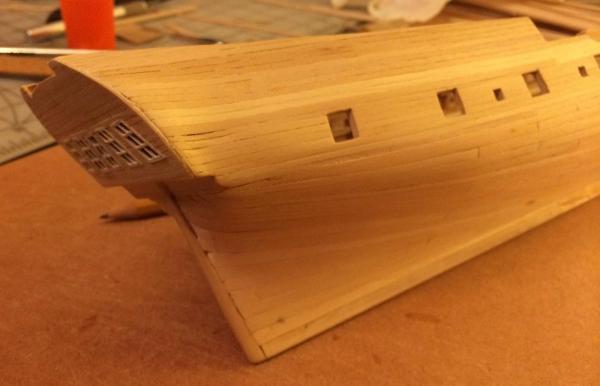
Stern planking, Transom and Fashion Piece I'm working my way up the hull planking around the oar and gun ports and as I got near the top things didn't quite make sense to me. The plans and the picture both seem to indicate that the planking stays tight against the side support piece all the way till it hits the transom, and that the transom just sticks out flat. I kept looking as that just didn't seem right to me, it made the windows in the transom a little outside of the hull and makes the window look very fake and the room behind it impossible. The drawing in the book "American Sailing Ships" is quite different from the plans and the transom seems to protrude only very slightly, if any from the hull. So I decided I'd do what looked better to me and I had the planking tight against the hull all the way to the last bulkhead (N) and then curved the wood out to the edges of the transom. That created a gap between the planking and the edge of the transom at the top by the edge supports but I want to cover that with the fashion piece but the included fashion piece isn't big enough or the right shape to do that. Since I hate the way the included metal fashion piece looks anyway, I've decided that I'm going to make my own fashion piece but I didn't really have any idea how to do that. I'd like to make something that will fit the new shape and be slightly bigger than the transom to give a little bit of that edge look. Shaping it and getting it to fit seems no problem but how to do the carvings? I don't really think I could ever carve that so I've decided to see if I can use the existing metal casting as mold and them make copies of the carvings on it to glue on the one I'm making. For a quick test I found some modeling clay and pressed it into the metal fashion piece. I then filled the two molds, one with wood filler and one with wood glue to see how it would work. The glue one didn't ever really dry so that didn't work but the made from the wood filler seems to work. Picture shows a couple of the test pieces I cut out and the transom that just looks like junk to me. I think this concept will work but the wood filler is a bit grainy and pretty brittle so I'm going to see if I can find something that's designed specifically for molding and see how that works. This will be an ongoing project and I need to finish planking the other side before I can really fit and attach the fashion piece. I think I'll also try to remove the paint off the metal fashion piece to give me a sharper cast and more detail on the castings. I also decided to plank the inside of the transom since the flat piece of wood didn't really look right and I'm wondering why the kit doesn't call for planking the back of the transom as well, I can't imagine that it wasn't planked in reality and the flat wood looks out of place among all the planking. Even sanded it seems like the texture of the planking will show through the paint. If the windows weren't so tightly attached I'd think about pulling them off and planking the transom and then re-installing them, I may even try it anyway. Trying to figure out how to make a new fashion piece and replace the one in the kit is actually pretty enjoyable, it let me get a little bit creative as I tried to figure out how to make a replacement. I'm pretty confident I can create something that will look better than the one in the kit, that thing is just awful.


- 131 replies
-
- 2
-
-
- rattlesnake
- model shipways
- (and 1 more)
-
Planking the Hull Well I've made about every mistake that could be made while planking. I decided to focus on two sets of instructions "Simple Hull Planking Techniques for Beginners" and the instructions that came with the model. The model instructions said to start at the top and Simple Hull Planking said to start at the Garboard Strake and I decided to do that since it just make more sense to me. The instructions are great, I just didn't put everything together until I had started planking and saw how things worked. My first, and probably biggest, mistake came when I put the temporary battens on and marked off the hull. Even though the lines looked good (to me) my positioning of these made the belts too narrow in places, especially at the bow, and too wide in places, especially on the lower belt at the stern. Many of my subsequent problems arose from this as it caused many too wide and too narrow planks. This meant that I ended up having to use some stealers and many of the planks vary way too much in thickness as I tried to adjust on the fly as I planked up the hull. I also seemed to run the Garboard Strake too far forward even though I'd read that was an easy mistake to make which pushed subsequent planks up too high and had to work to constantly adjust against that. I decided since I was painting that I would just plow ahead and use this as a learning experience and see if I could get everything to work. For the most part everything works, although I do have one spot that's a bit low and if it were a real ship it would look like a drunken shipbuilder made it. Sanding and wood filler are helping it look decent and I think with paint it will be passable. I understand much more now and think the next time I try this the experience will help the result by much better. I'm working up the sides now, working around the gunports and oarports and finding the thinner, smaller planks quite difficult to work with. They're so fragile and easily moved out of position, but I'm getting there.


- 131 replies
-
- 6
-
-
- rattlesnake
- model shipways
- (and 1 more)
-
Thanks Russ, the bow blocks have been bugging me ever since I put them on and I don't think I've ever done any fairing when I didn't take some off of them. I do fear they're still too large and I've been hoping that when I go to lay that first plank on them they'll show me where I need to trim more. My goal has been to have the smoothest transition I can from the bulkhead to the blocks and into the rabbet at the keel. I'm just having a hard time visualizing what that is, even when I use a fairing board.