72Nova
-
Posts
514 -
Joined
-
Last visited
Content Type
Profiles
Forums
Gallery
Events
Everything posted by 72Nova
-
 I tend to agree with druxey but your latest attempt looks solid Marc. I used thread to strop my dead eyes on the Vasa, I used thinned down PVA with paint and while still wet I rolled it out on a flat surface with a metal straight edge but a paint stick would work just as well, this seems to hold the fibers in check and the end result looks good. Michael D.
- 2,437 replies
-
- 1
-

-
- heller
- soleil royal
- (and 9 more)
-
Shifting gears a bit I decided to do a mockup of the canon/ tackles and breech rope, at this scale I simply knotted up the ends and painted to simulate the blocks, looks convincing enough to my eyes for this retina stressing exercise. These close-up shots are great for spotting where touch ups are needed. Thanks for looking. Michael D.
- 104 replies
-
- 5
-

-

-
- Sovereign of the Seas
- Airfix
- (and 1 more)
-
Your craftsmanship is on full display, just fantastic!!👍 Michael D.
-
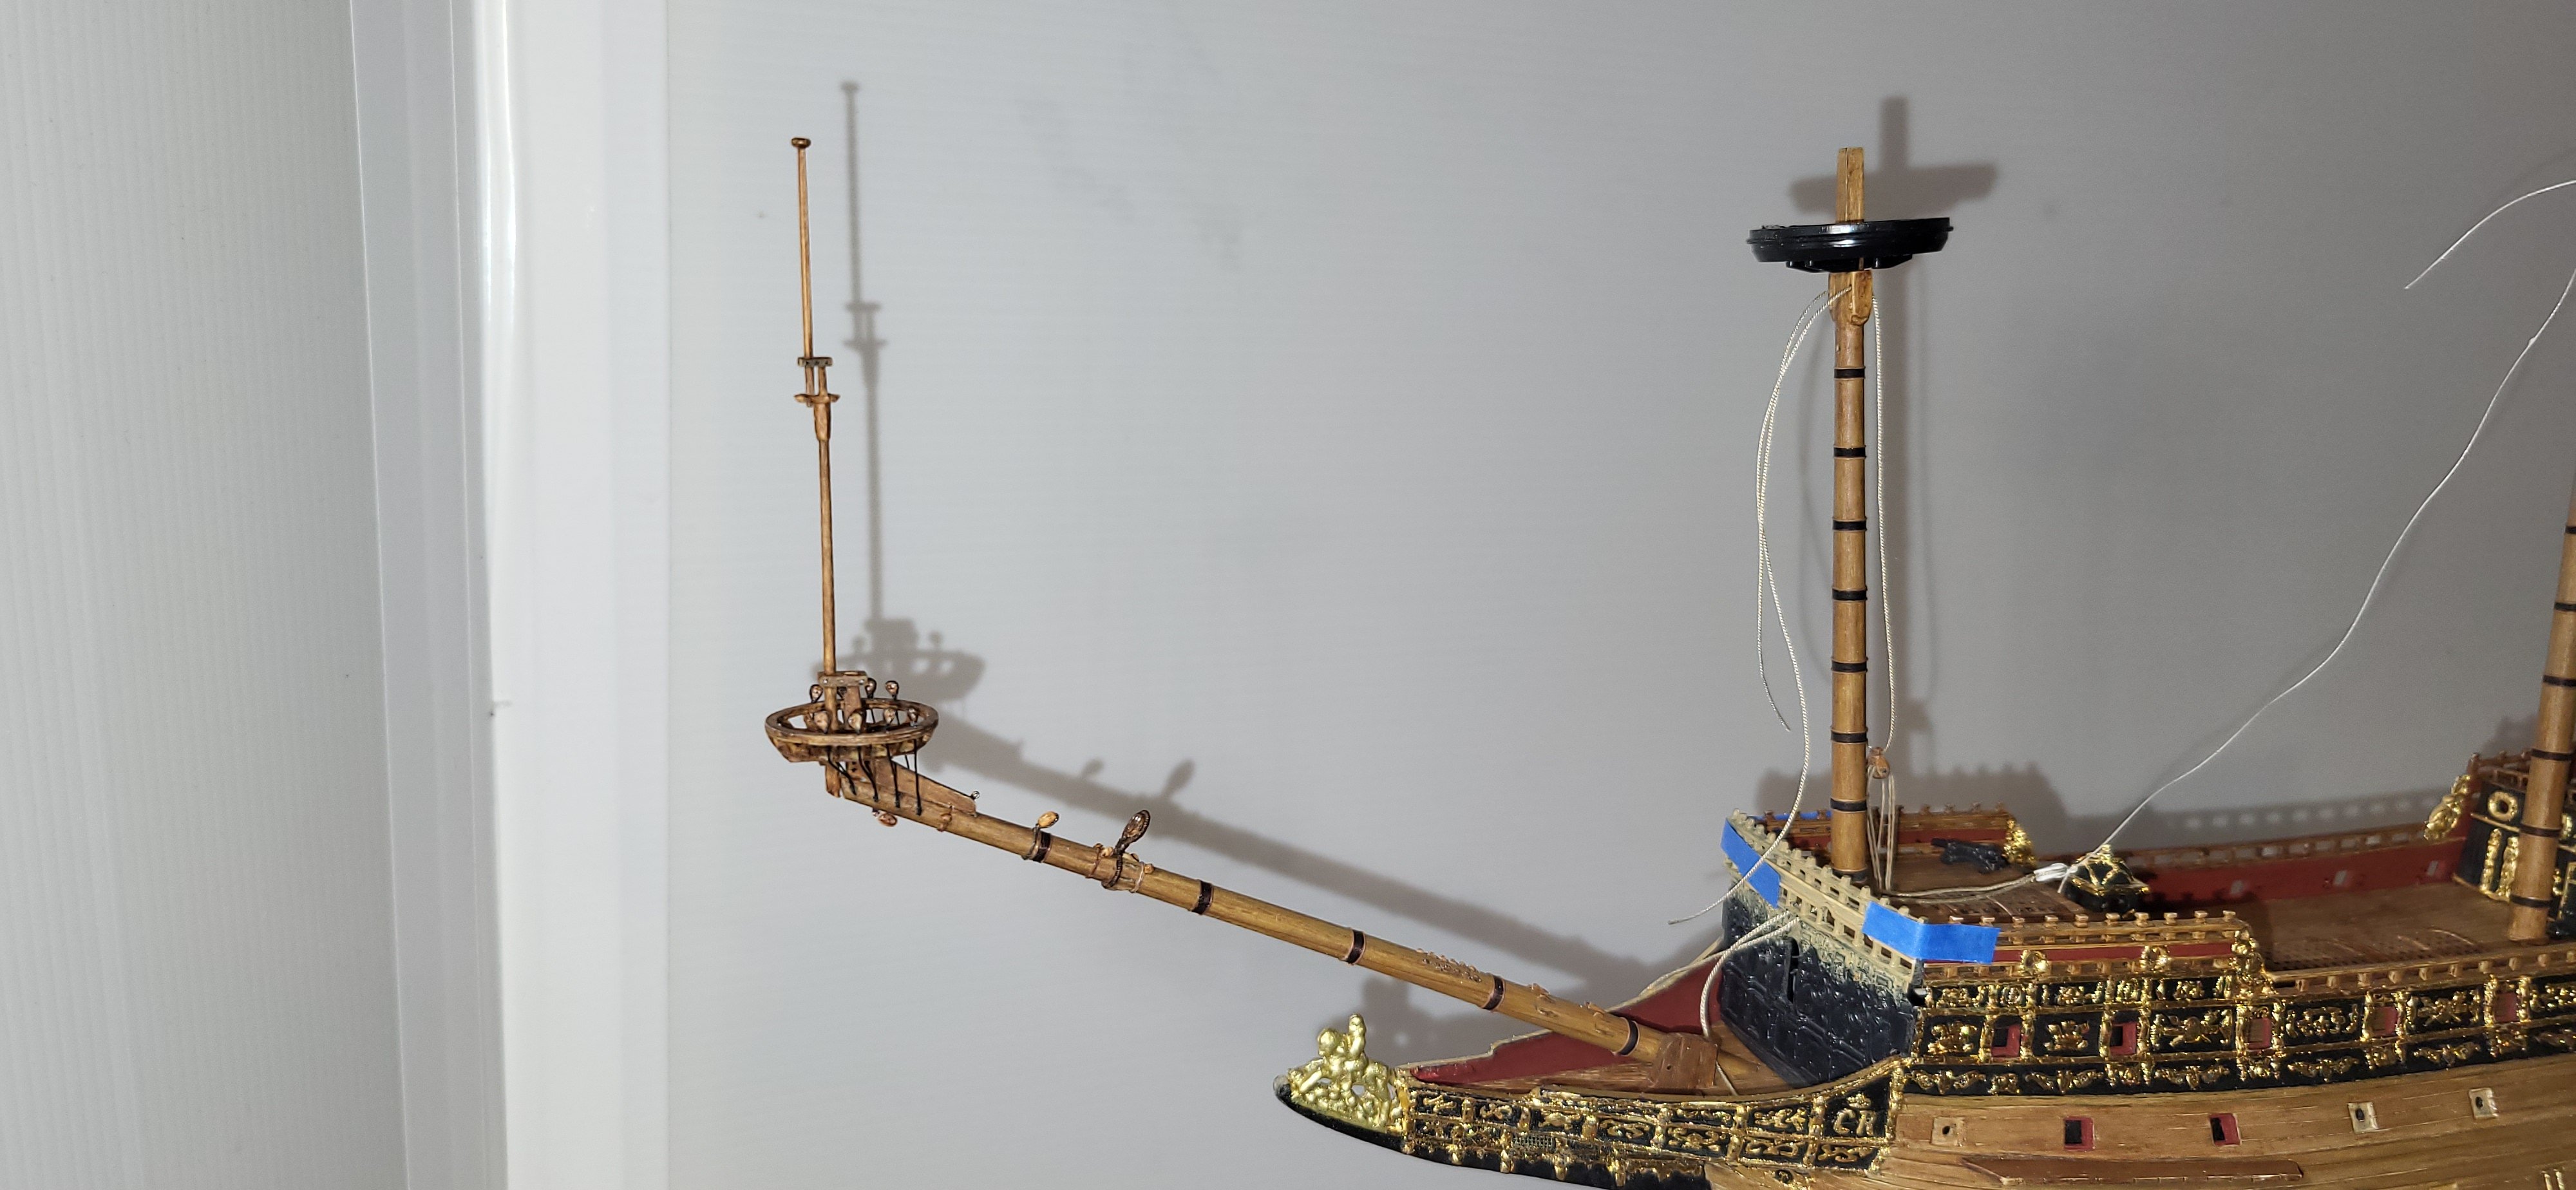
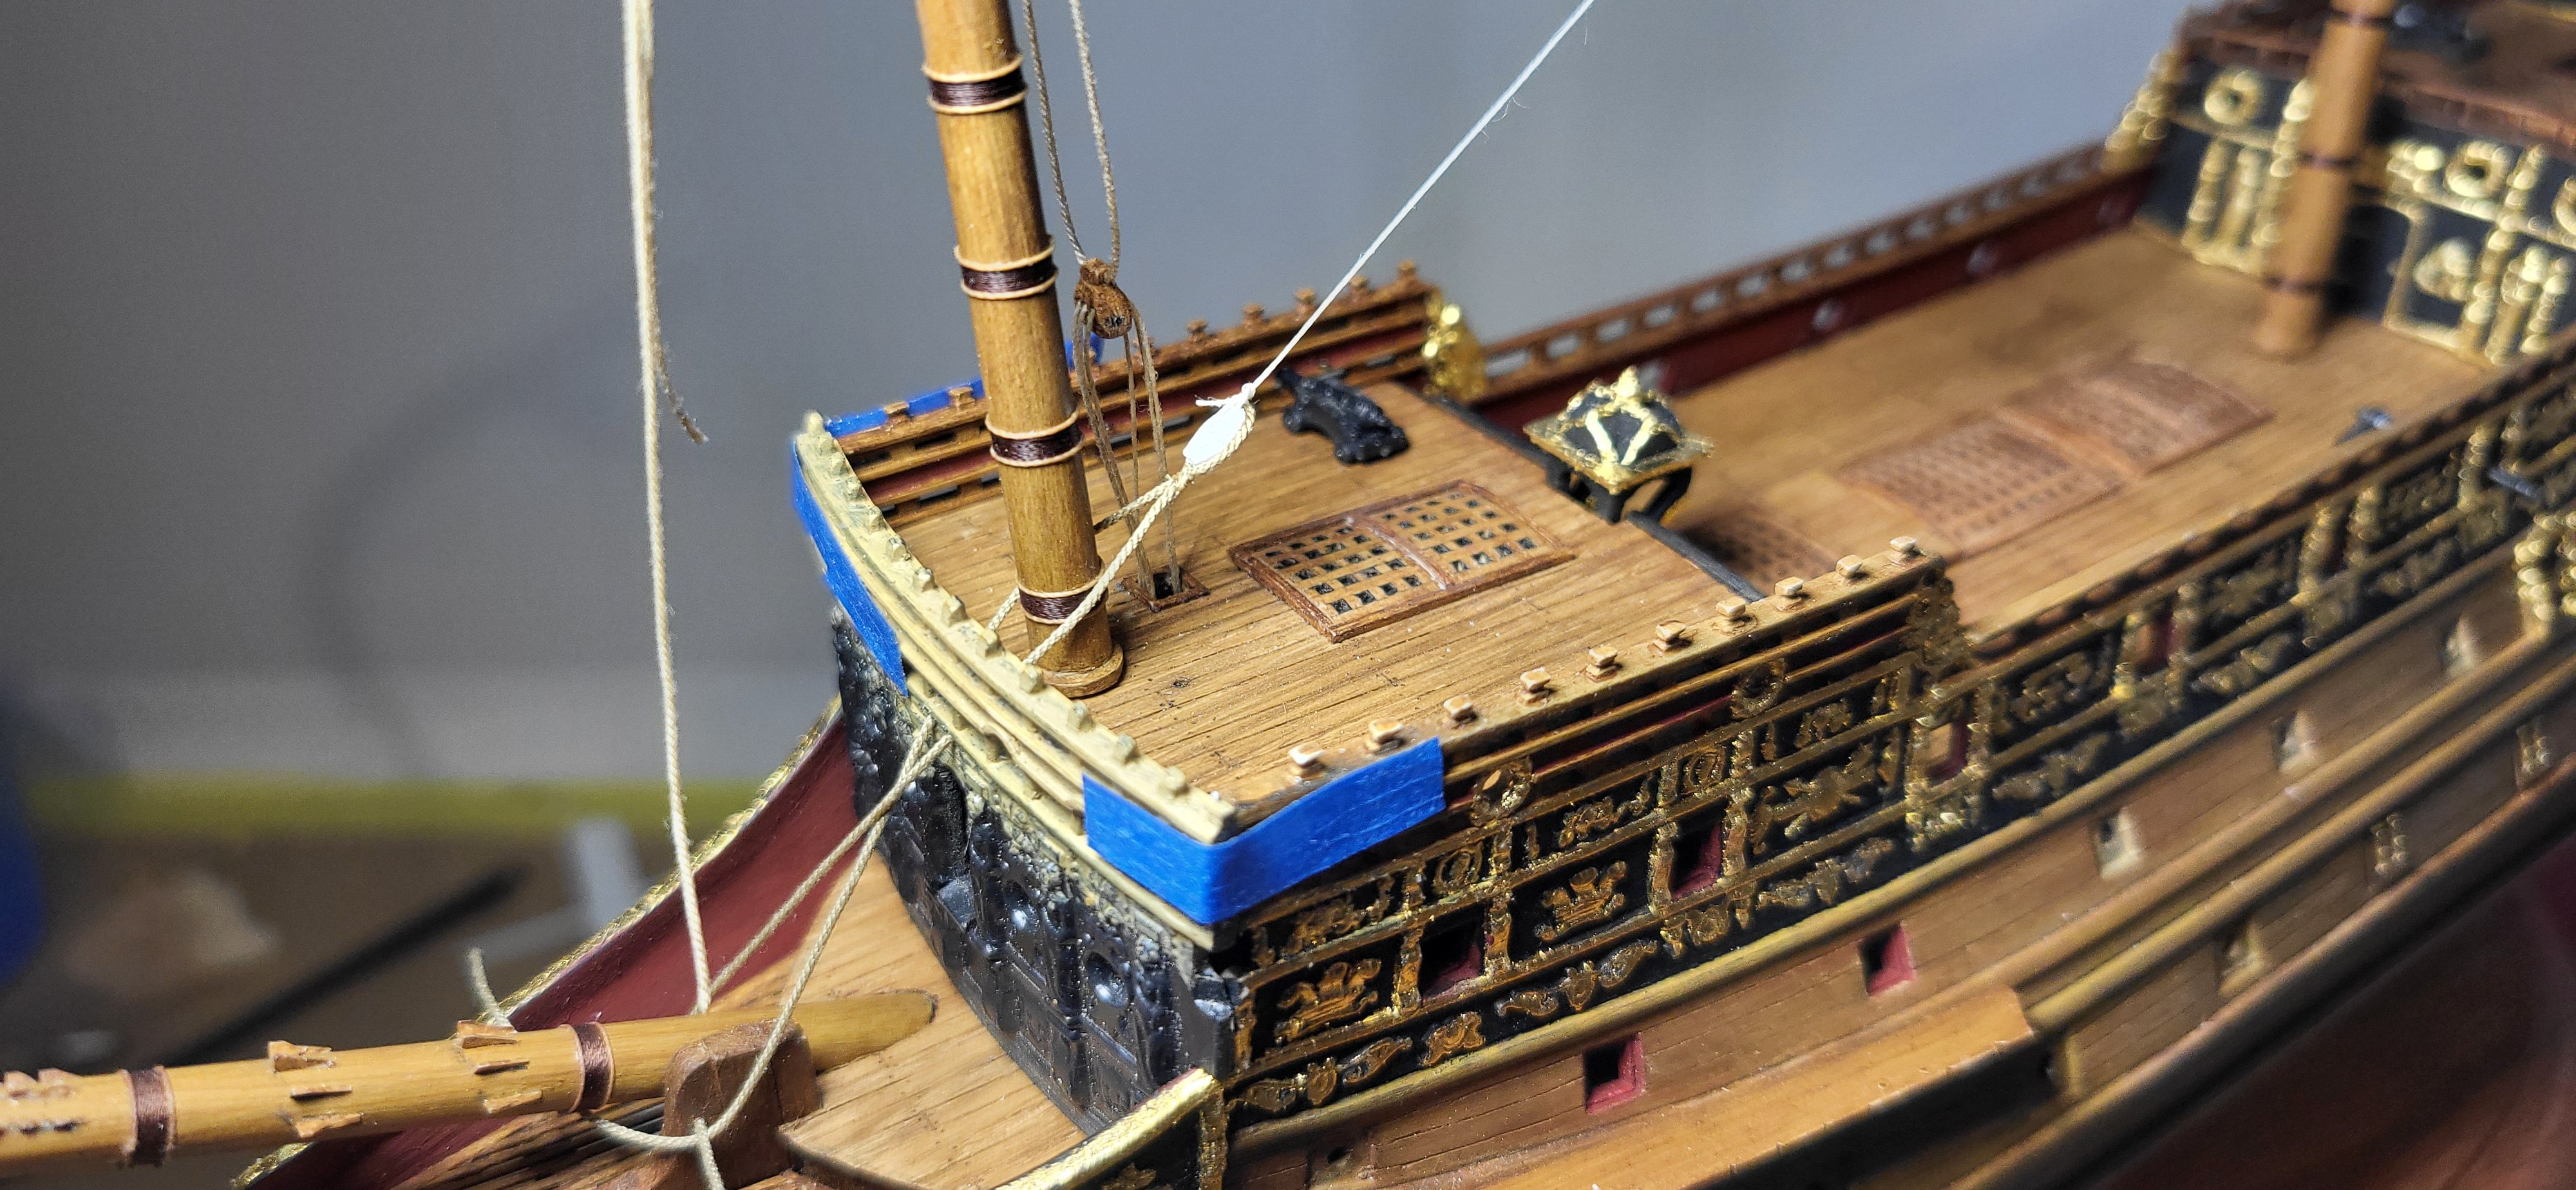
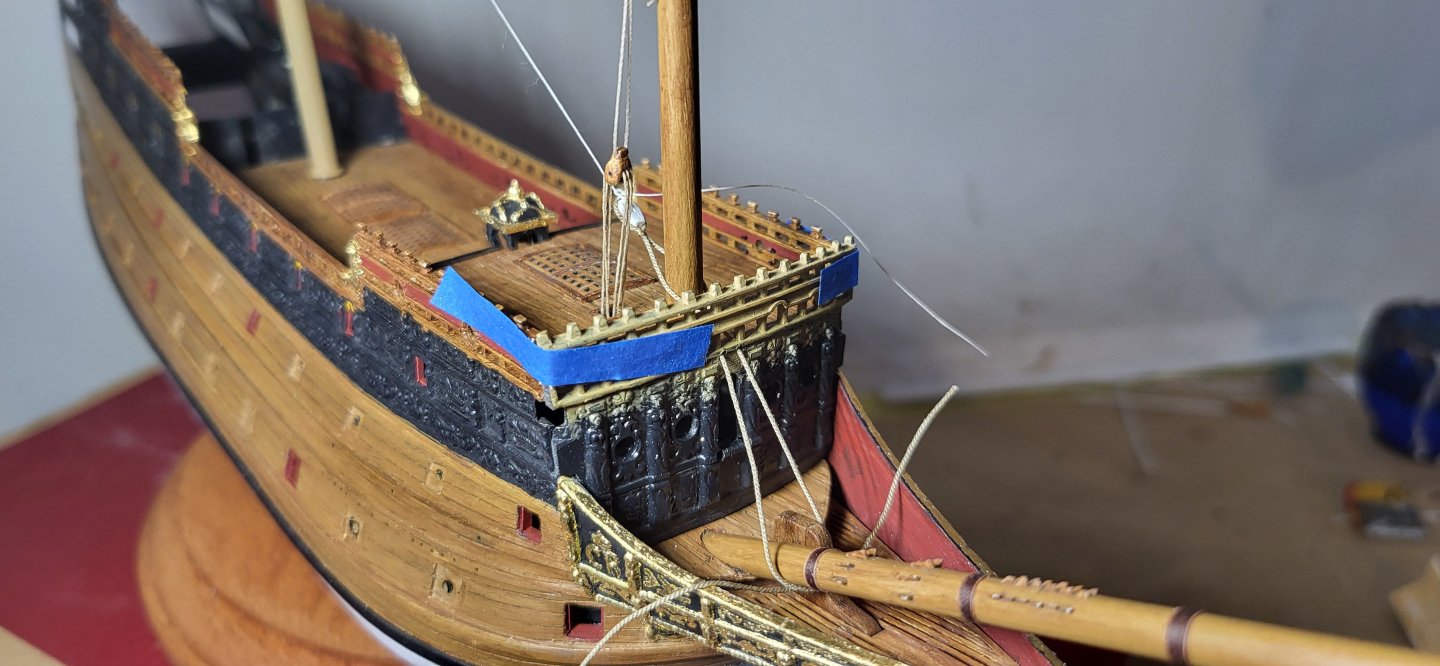
The inboard beakhead pin rails are completed along with the range pin rail, 28g brass wire is used for the belaying pins. I did spend a considerable amount of time to mock up the lines if using the gammoning sheave but did not like the run of the lines to the forecastle with the offset bowsprit. I'm still aways from setting the bowsprit assembly in for good but getting closer, while a bit premature I started prepping the Fore and Main stays....76mm and .88mm lines are used. Cheers! Michael D.
- 104 replies
-
- 6
-
-
- Sovereign of the Seas
- Airfix
- (and 1 more)
-
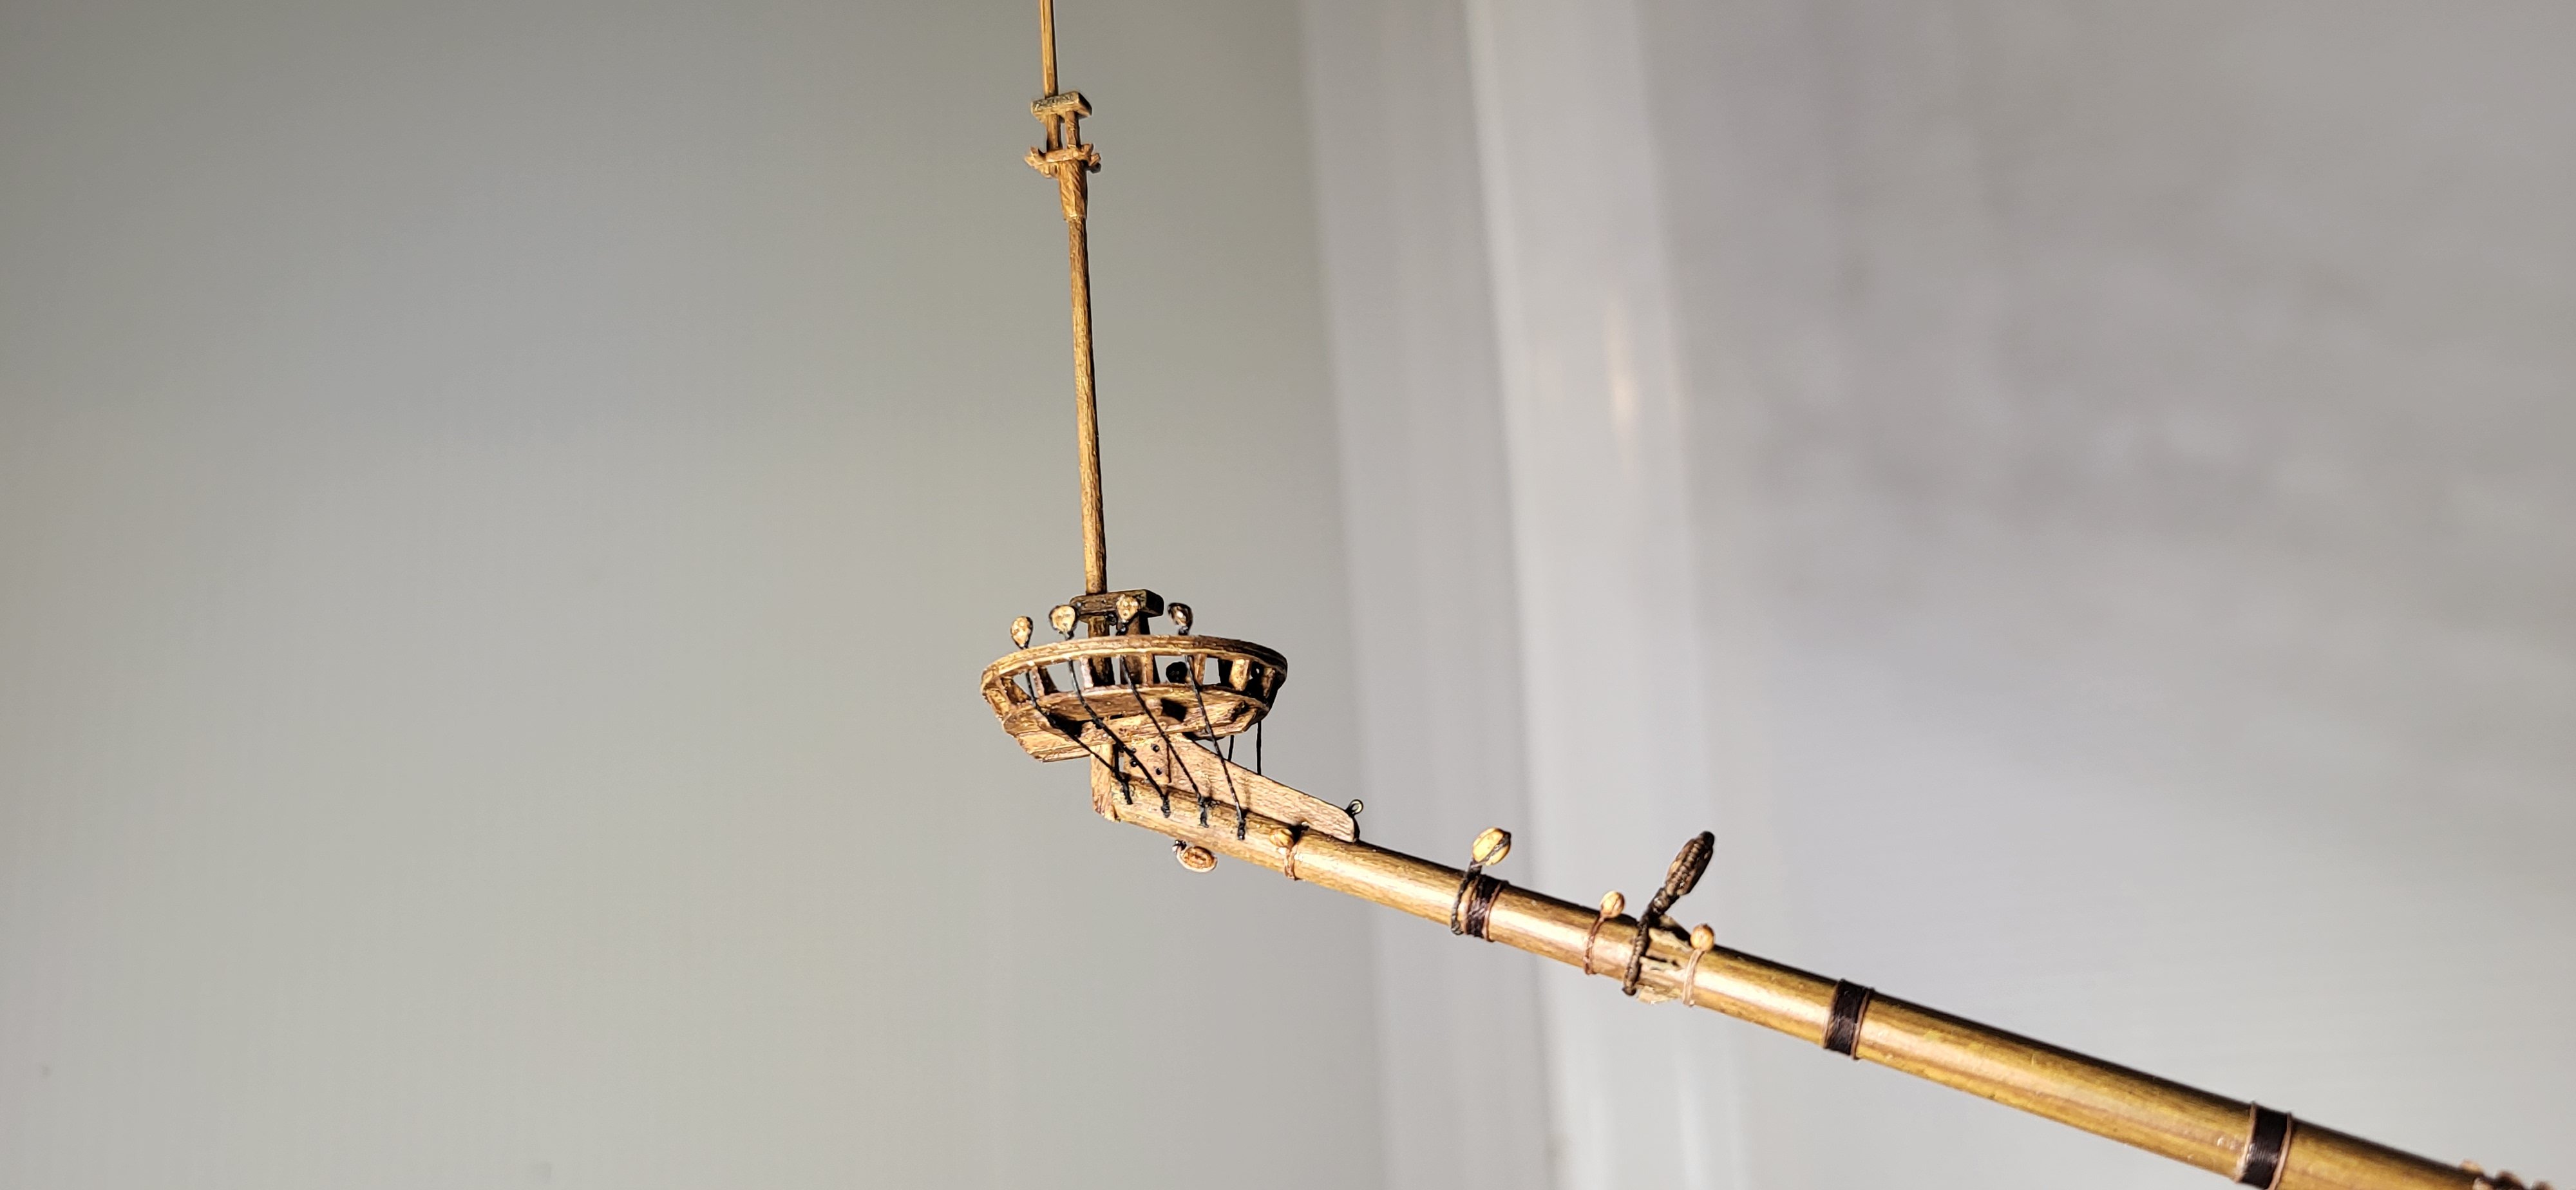
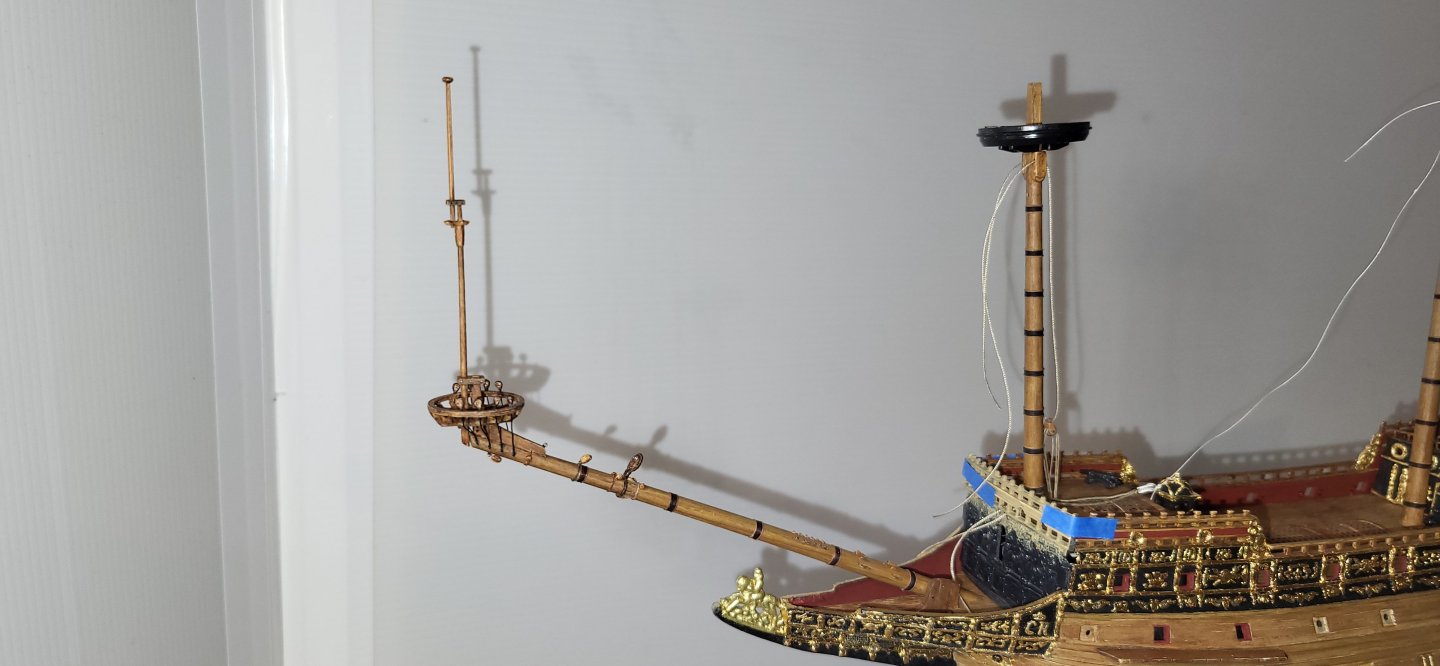
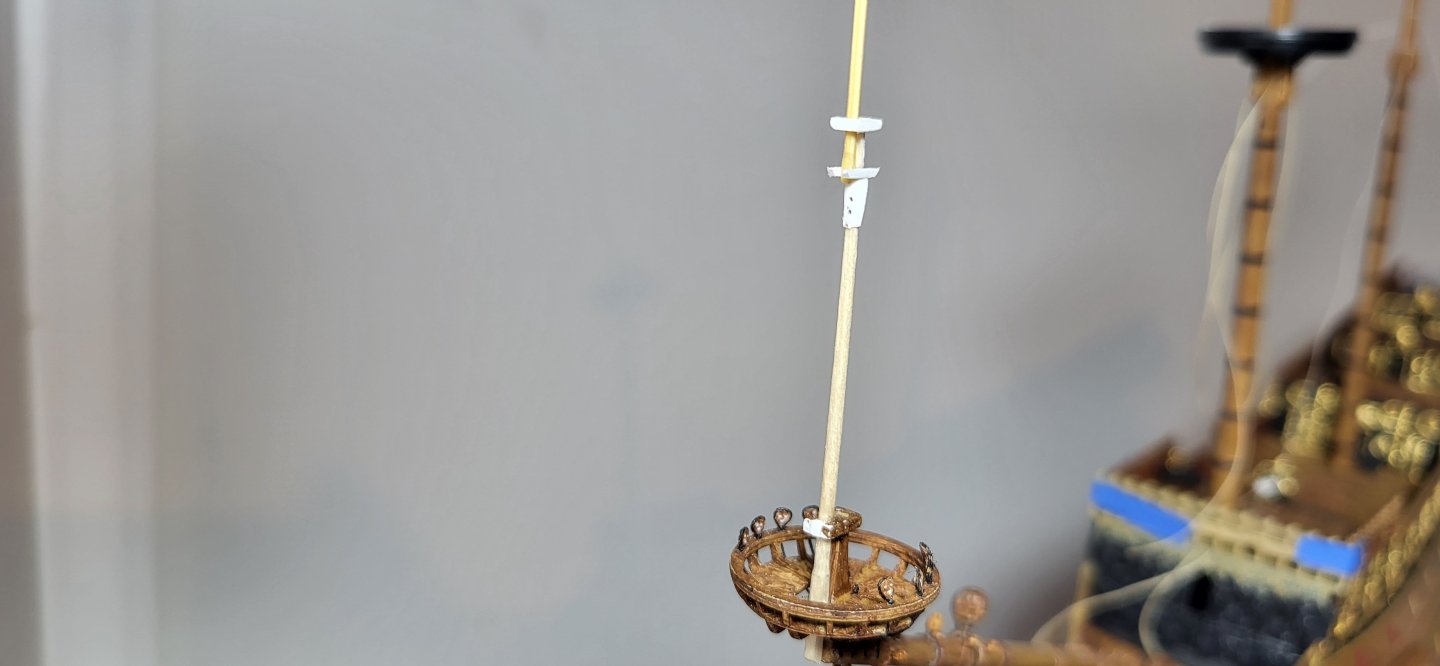
Thank you, Kirill. The sprit topmast for the most part is complete minus the necessary blocks etc, I'm quite happy with the result, up next my focus will be set the bowsprit in permanently but first I need to decide if I want to use sheaves secured to the gammoning or pin rails and a range..... looking at both Payne's and Van De Velde plates suggest pinrails as the lines run directly inboard of the beakhead so that's what I'll probably go with. Michael D.

- 104 replies
-
- 6
-
-
- Sovereign of the Seas
- Airfix
- (and 1 more)
-
Hi Kirill, I was anticipating your inquiry about the bowsprit, I used sprue from the kit to fabricate it with a slight crown, I did perform a makeshift load test on the bench and it's actually quite stout plus with the addition of the bowsprit shrouds, the wanna be engineer in me believes this will work out. Michael D.
- 104 replies
-
- 2
-
-
- Sovereign of the Seas
- Airfix
- (and 1 more)
-
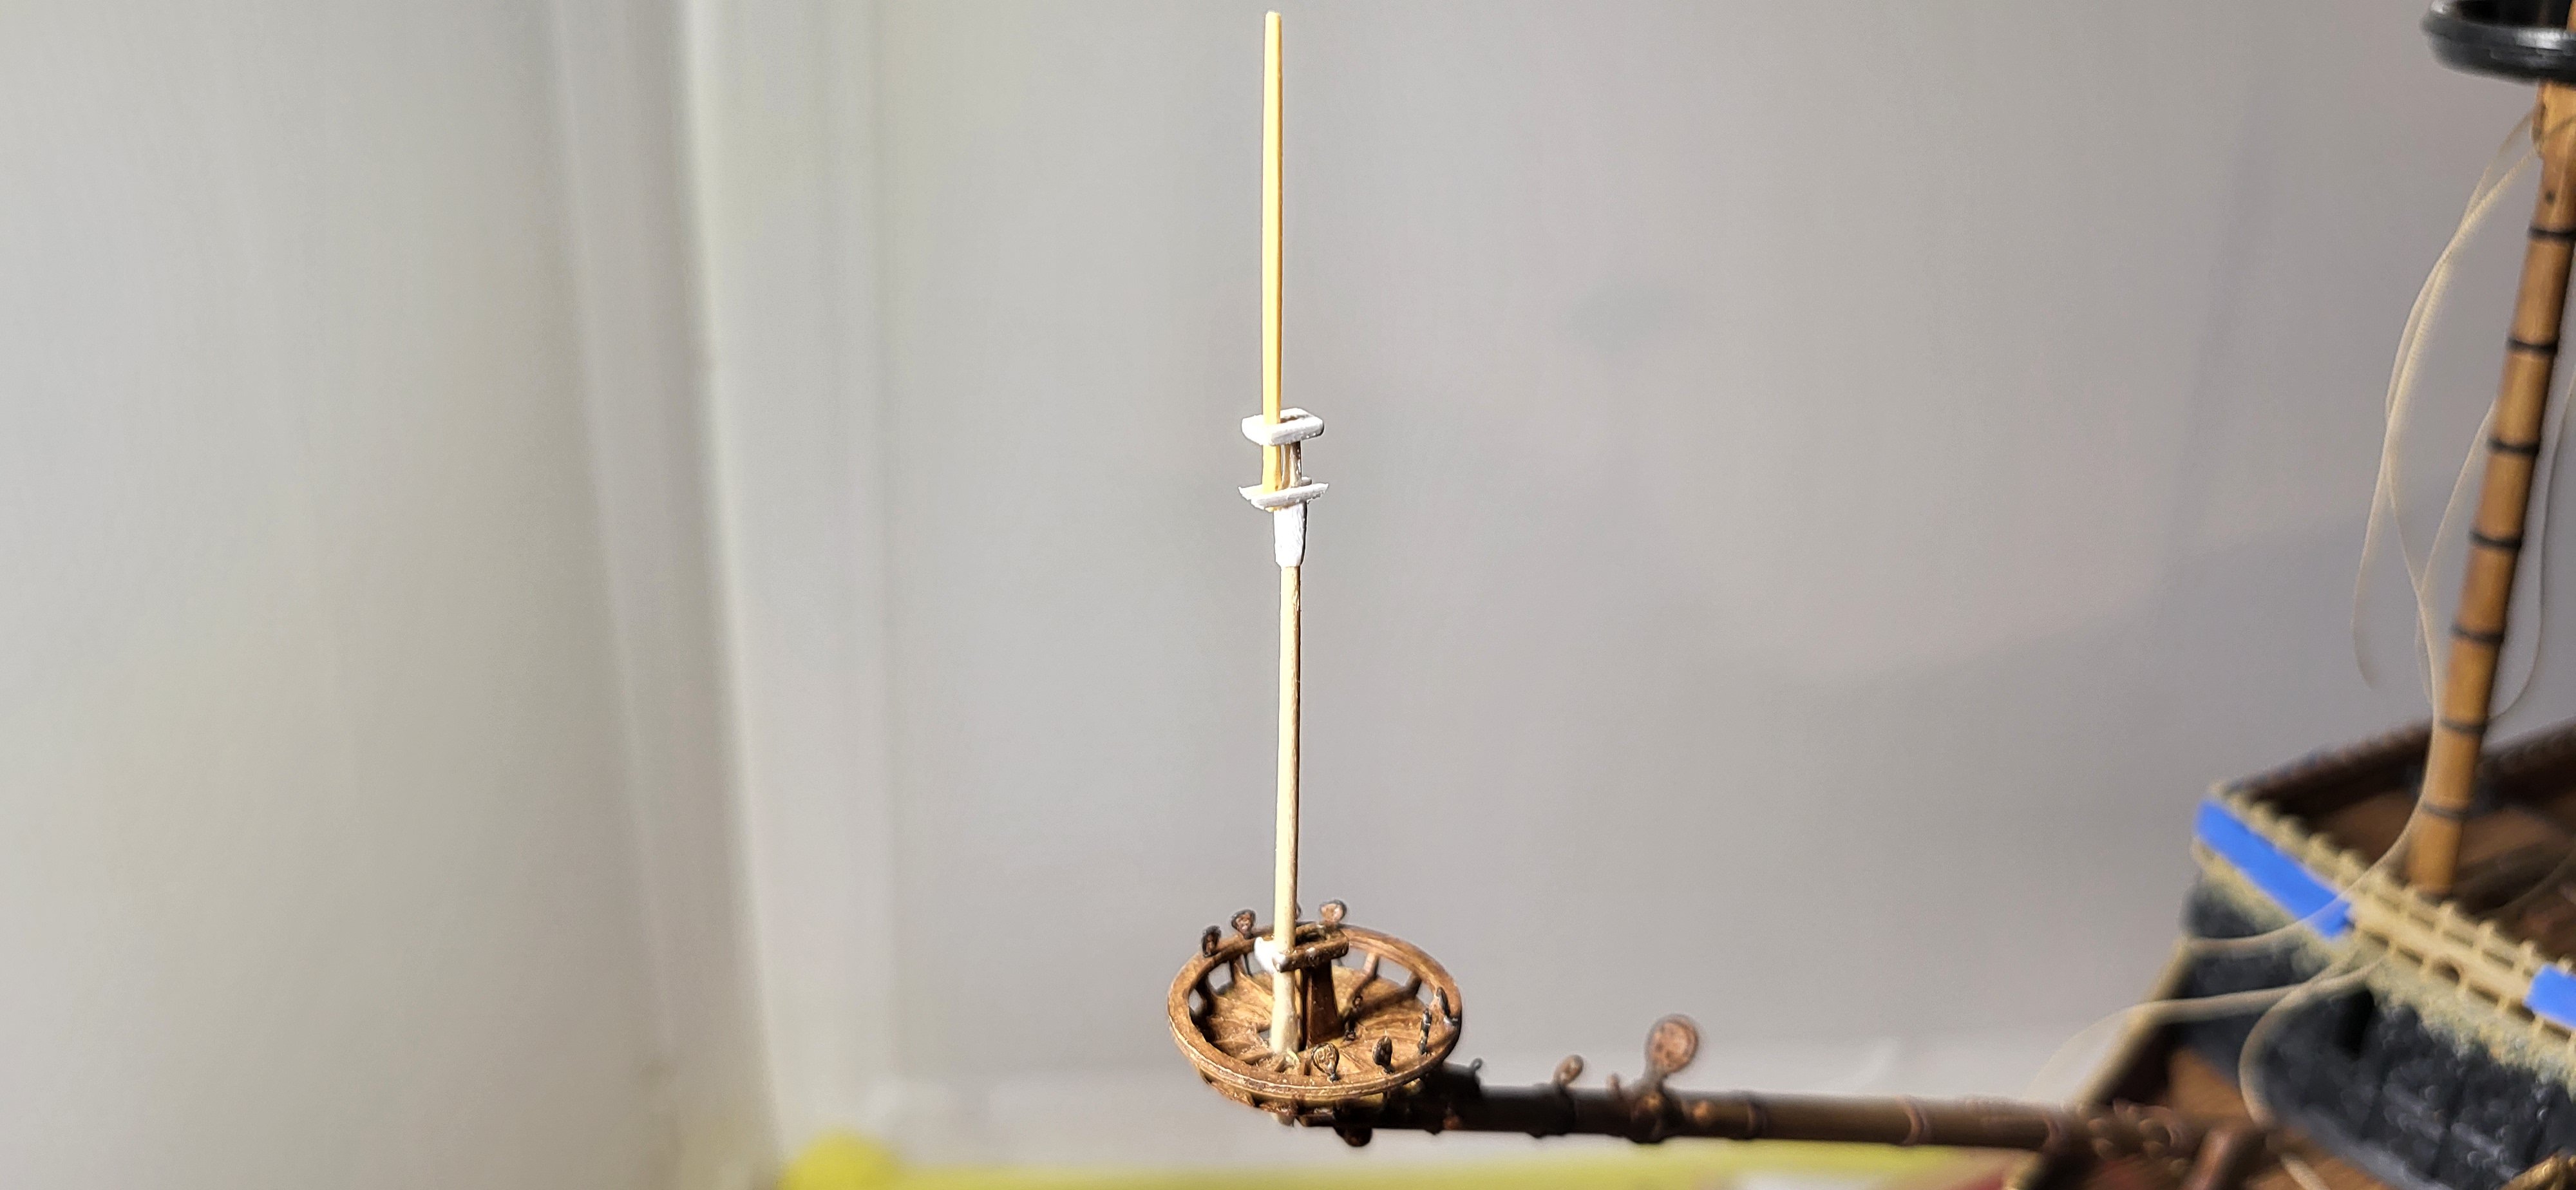
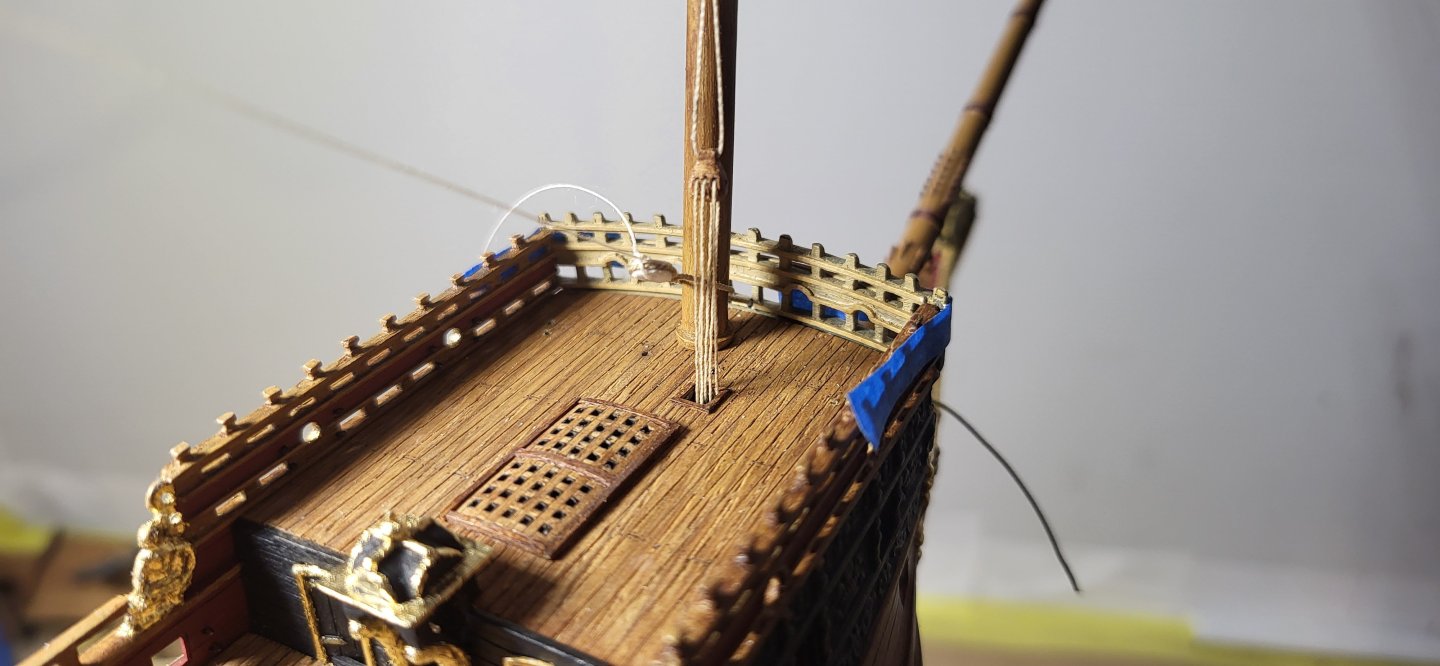
I've been working on dressing out the bowsprit, fore stay collar with 5-hole dead eye and misc blocks for the bowlines. I ended up scratch building the sprit topmast, usually I stay true to the medium I'm working with but in this case, I used toothpicks to hold up to the additional stress from the top gallant and royal stay crowsfeet attached to the shrouds , while still in the rough in stage it's looking pretty good, also the main mast wooldings are completed. Thanks for looking as always. Michael D.


- 104 replies
-
- 7
-
-
-
- Sovereign of the Seas
- Airfix
- (and 1 more)
-
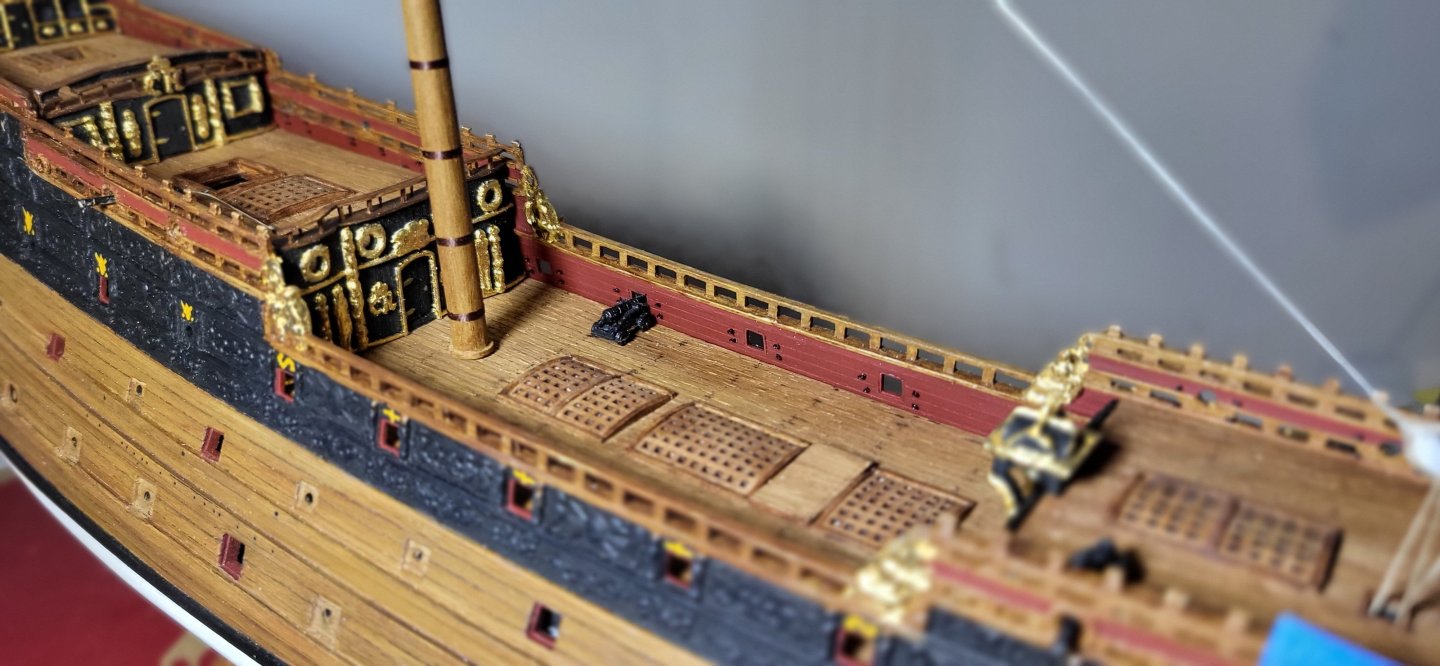
Kirill there is a hole in knee for the collar and yes the collar will be crossed outside the beakhead. I've completed the wooldings on the fore mast and still have the simulated wooden bands left to do on the main, also the remaining deck is place along with mocking up the canons, I'm not so sure the carriages for the main deck canons are entirely correct but I'll research that later. Michael D.


- 104 replies
-
- 10
-
-
-
- Sovereign of the Seas
- Airfix
- (and 1 more)
-
Thank you, Kirill, yes I still need to make a figure for the knee, neither of my go too resources...Lee's, McKay and Anderson mention the collar passing on the SB side, my thoughts are that may be the case the last part of the 17th century?. Anderson states during the first half of the 17th century that the two parts of the collar run either side of the mast. My second mock up is what I'm going with based on both resources and looks suitable to me. I was able to add the two sleeves in the beakhead for the collar to pass through, when I reach the point for the final, the splice will be on the PS and the collar will be fully served according to Lee's. Michael D.
- 104 replies
-
- 7
-
-
- Sovereign of the Seas
- Airfix
- (and 1 more)
-
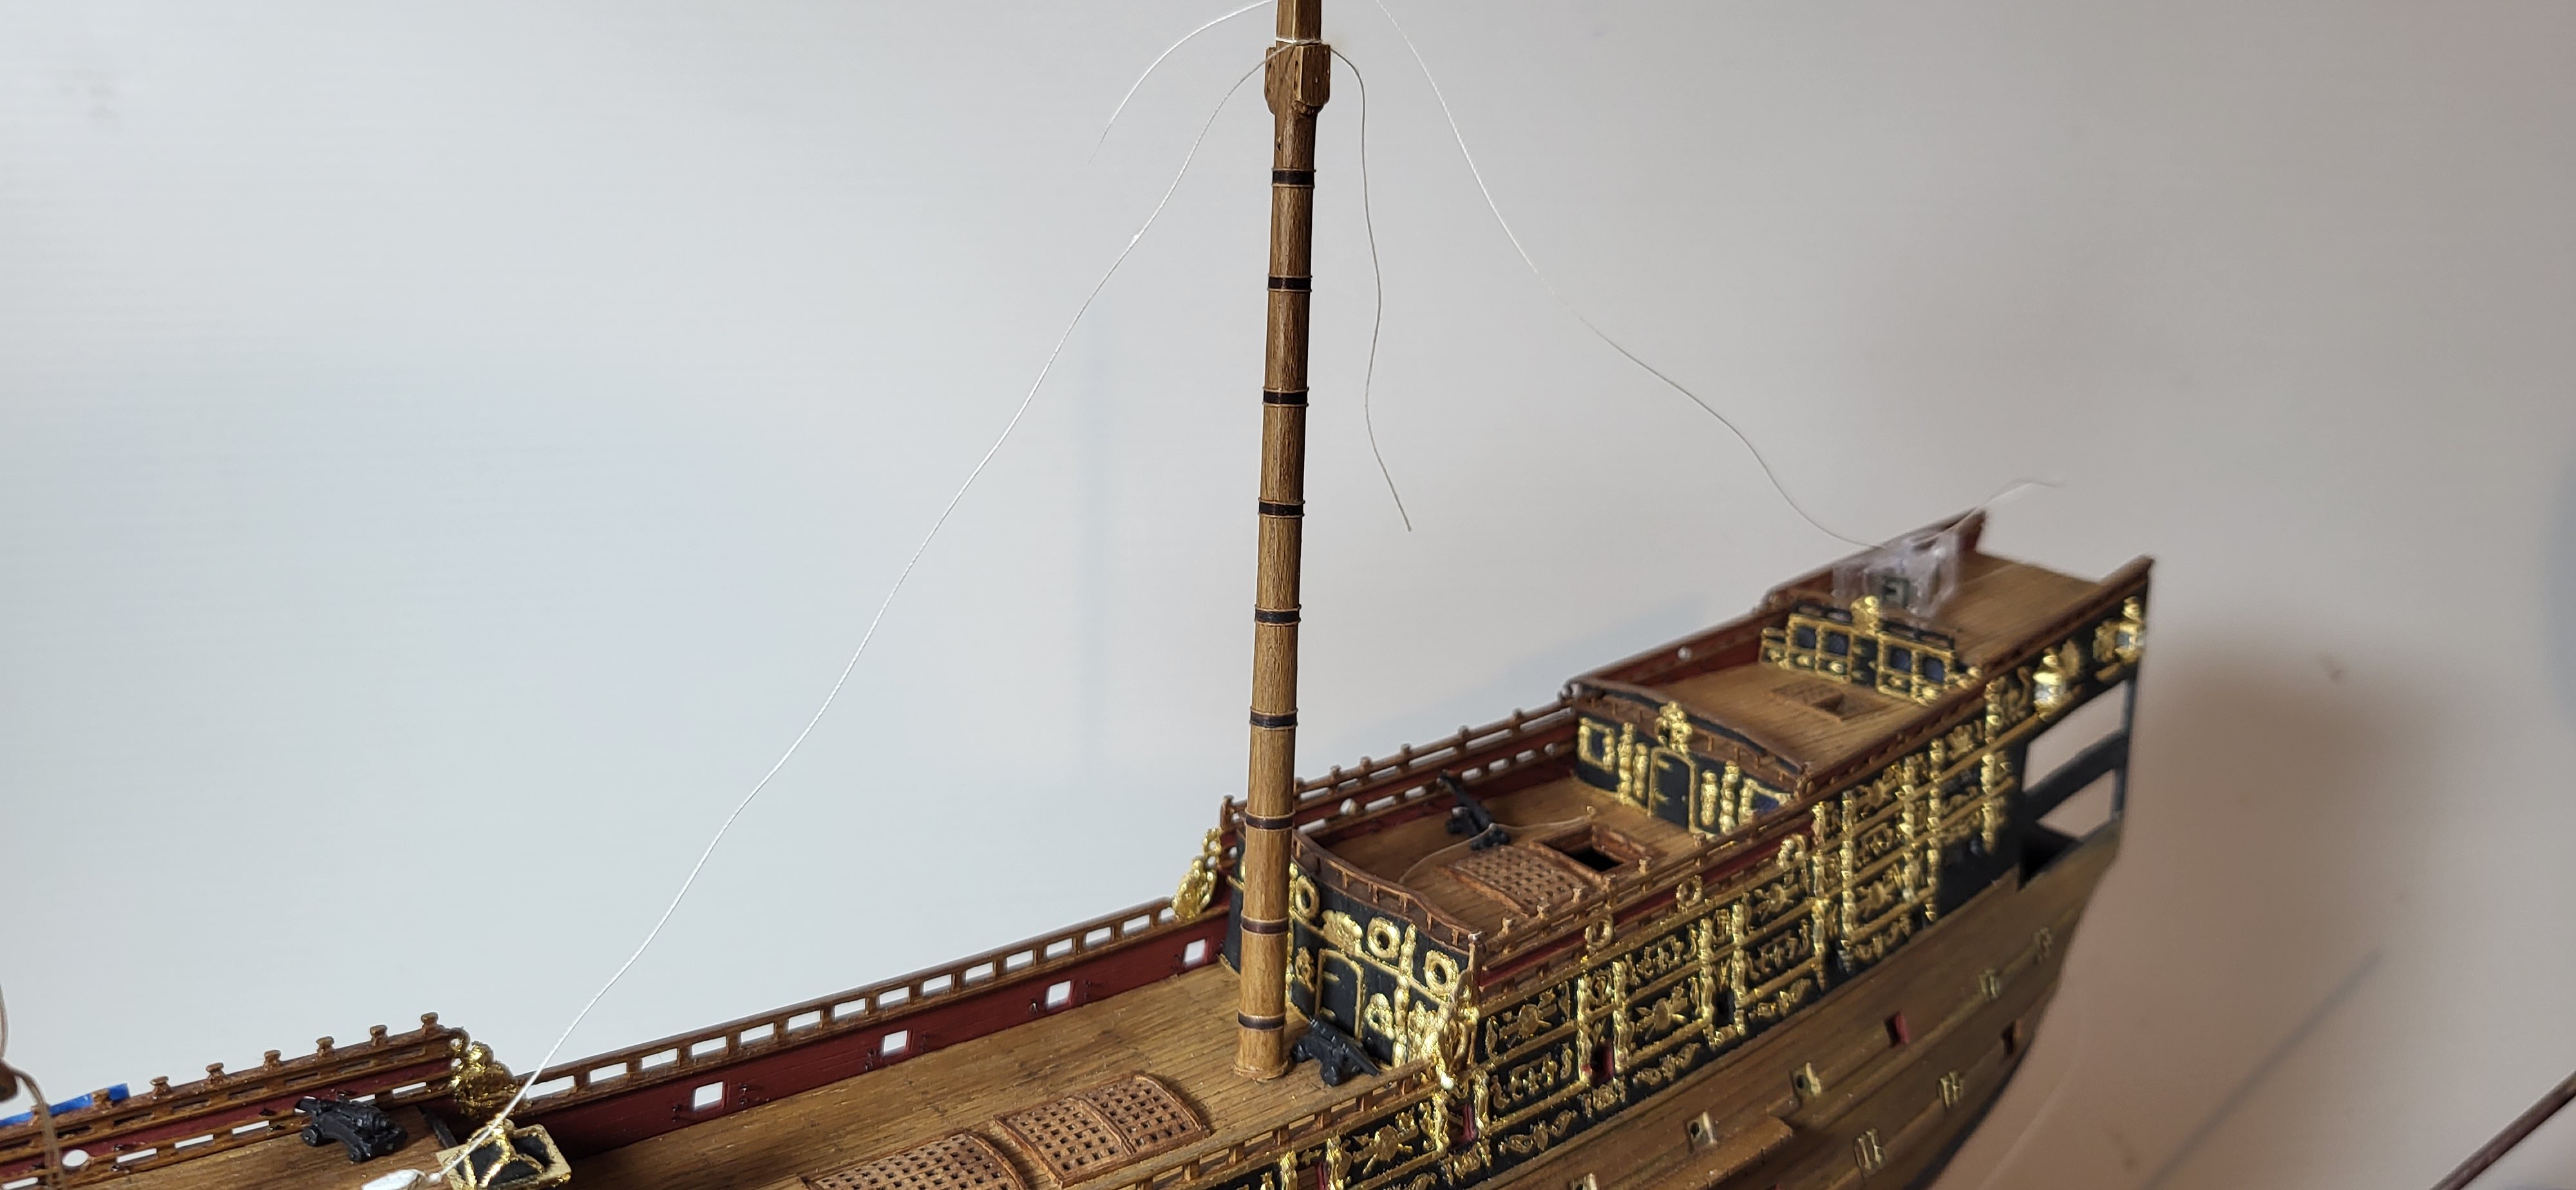
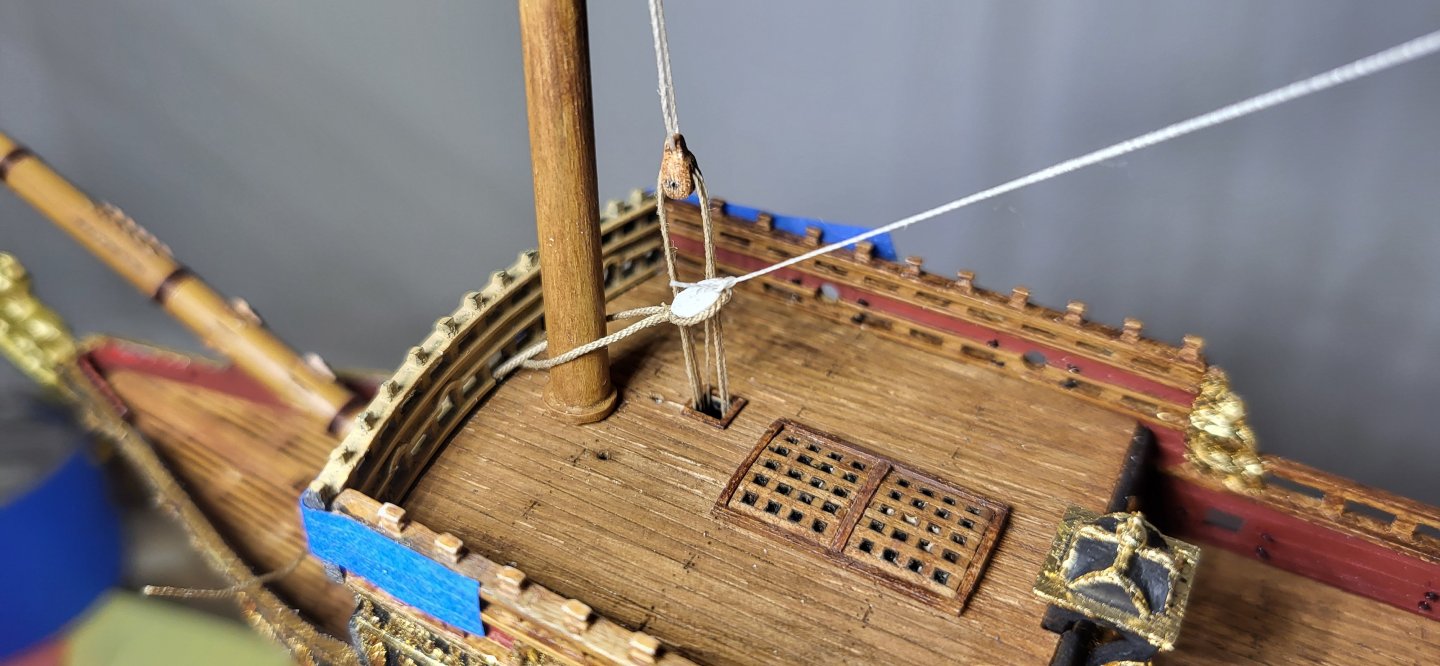
Since my last update I finally glued the hull together and made the base. Before setting the forecastle and main deck in place, I needed to finish the belfry and rig the fore course tie halliard along with adding the eye bolts for the cannon tackles, I used .32g brass for them. I needed to fashion a new main mast according to the dimensions in Mc Kay's book, here you see the difference from the kit supplied mast. Up next I need to make some modifications to the beakhead, one of those is possibly adding the sleeves above the door for the collar based on Paynes plate but that would require cutting holes in the deck to feed it up through and not so sure I want to do that, my preliminary mock up of the collar and stay looks pretty good. As always thanks for looking. Michael D.
- 104 replies
-
- 9
-
-
-
- Sovereign of the Seas
- Airfix
- (and 1 more)
-
Lovely work Jan, and the sunlight really bring the colors and wood tones to life. Michael D.
-
Thank you Jan, your compliment is much appreciated, I'm following your amazing SOS card build as well..stunning. John I really appreciate your gracious compliment, you have quite an array of completed builds, are any of them posted on the site?. Michael thank you for the kudos, that's very thoughtful of you, I do keep an eye out on your builds and see improvements with each one, keep up the good work. Michael D.
- 104 replies
-
- 2
-
-
-
- Sovereign of the Seas
- Airfix
- (and 1 more)
-
No worries, Marc we all have more important things to do in life. Thanks for the compliment, it's been a while since I had to paint details with crisp lines etc. Michael D.
- 104 replies
-
- 1
-
-
- Sovereign of the Seas
- Airfix
- (and 1 more)
-
Hi Maurice, This build is just fantastic on all levels, I've always admired all your builds and they just get better and better, Cheers🥂 Michael D.
- 614 replies
-
- 3
-
-
-
- Indefatigable
- Vanguard Models
- (and 1 more)
-
The gun ports I opened up are trimmed out and painted along with the lower hull. once I complete the starboard side and the hull is glued together I'll finish modifying the stern/rudder post, rudder, pintles and gudgeons. Thanks for looking. Michael D.
- 104 replies
-
- 11
-
-
-
- Sovereign of the Seas
- Airfix
- (and 1 more)
-
Those colors really pop Ian, nicely done. With it sitting on your table saw, it really put's into perspective of big she is, fantastic job👍 Michael D.
- 502 replies
-
- 4
-
-
-
- Quadrireme
- radio
- (and 1 more)
-
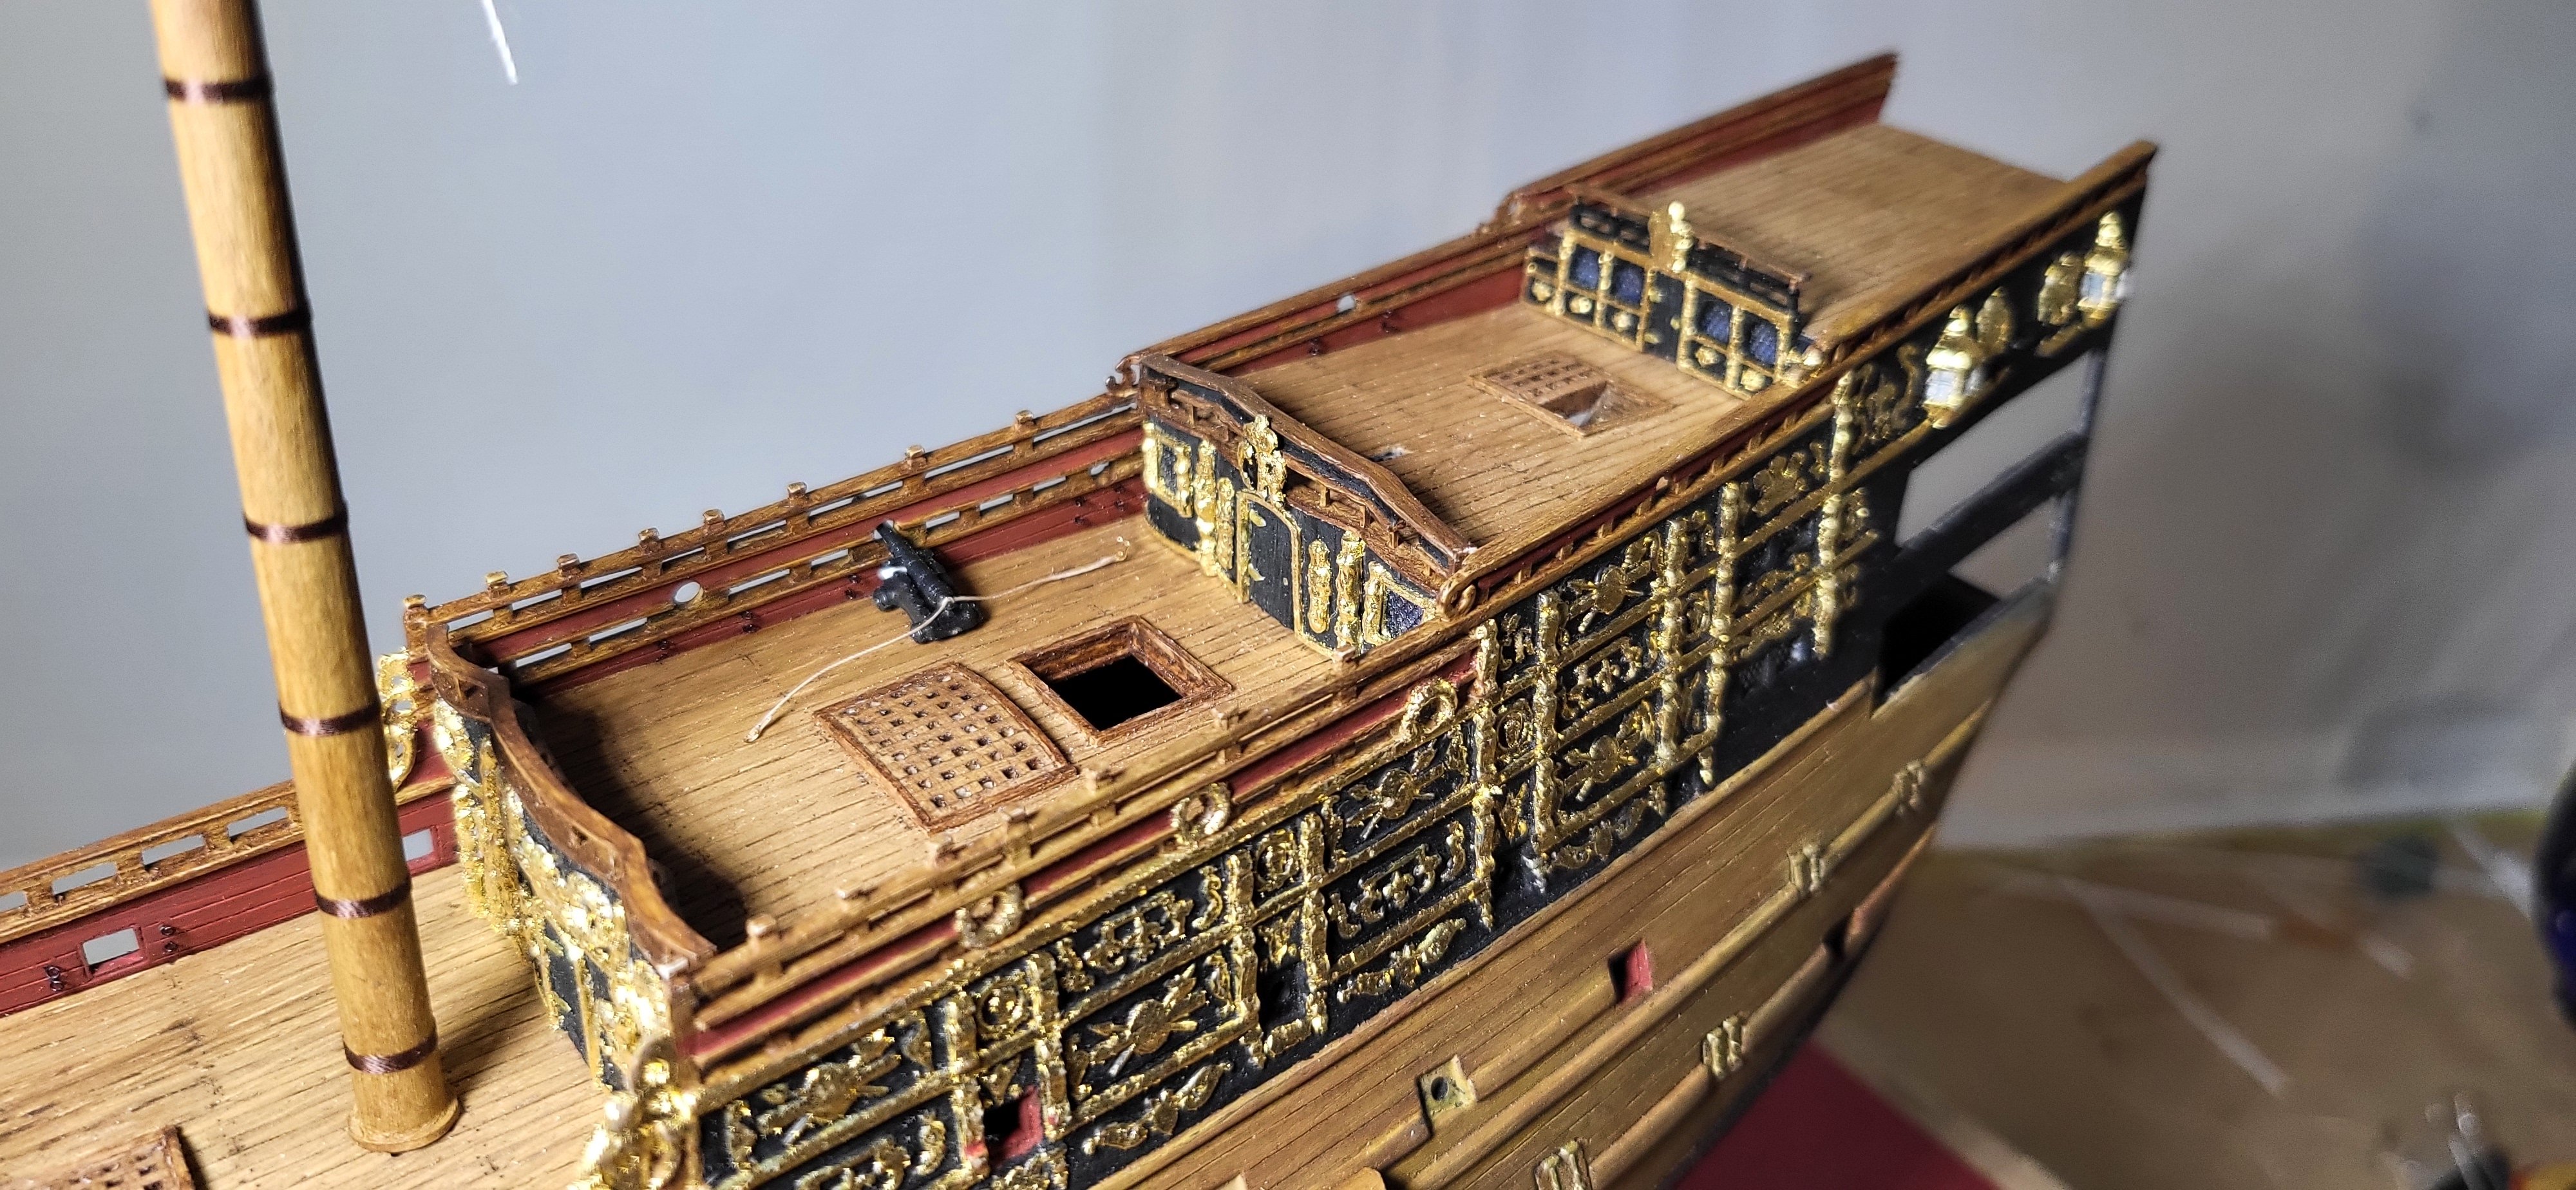
Somewhat of a crowning moment, besides some minimal fine tuning, the gilding on the port side is more or less complete along with making the as cast lanterns look as good as possible, they'll suffice. Michael D.
- 104 replies
-
- 8
-
-
-
- Sovereign of the Seas
- Airfix
- (and 1 more)
-
I competed the bow decorations, also I removed the existing center carving in the trailboard and replaced it with a grid design based on Payne. I scribed in the scarf joints on the stem/keel as well. Michael D.
- 104 replies
-
- 9
-
-
-
- Sovereign of the Seas
- Airfix
- (and 1 more)
-
Thank you Ian, yes I'll be adding decorations at the bow also along with the side lantern area and above the gun ports, the only medium I've been using is Sulpey and I find the castings are too proud for these smaller areas so I just freehand them in with paint. Michael D.
- 104 replies
-
- 2
-
-
- Sovereign of the Seas
- Airfix
- (and 1 more)
-
Thank you, Ian, means a lot coming from someone with a decerning eye. Knee deep into gilding the port side hull and adding decorations, I always apply a gold base before applying the leaf as any voids are not seen, honestly the gold leaf paint looks pretty good but doesn't quite have the luster I'm after with the leaf. The desert yellow on the hull is just base for the whitewash I'll be applying. Thanks for looking. Michael D.
- 104 replies
-
- 9
-
-
-
- Sovereign of the Seas
- Airfix
- (and 1 more)
-
Making a little more progress on the port side hull, finished up the gallery window panes and made new timberheads, these little guys measure less then 2mm, while not 100% uniform they won't be too noticeable once all the rigging is in place, also started painting the bulwarks , I used Tuscan red. Michael D.
- 104 replies
-
- 9
-
-
-
- Sovereign of the Seas
- Airfix
- (and 1 more)
-
Bill, I used a contour gauge, I think the one I had was 10" so I had to do it in a few sections, first attempt gets you real close then you fine tune the next template to where you want it then transfer to the Styrofoam. I'm not sure how far up from keel but that doesn't really matter, I used 1" foam basically to carry the weight of the model without flexing. I'd get the contour of the hull right at the bottom of lower wale at midships, mine sits up a little high so that would look about right. Hope that helps Bill. Michael D.
- 1,503 replies
-
- 1
-
-
- Le Soleil Royal
- Heller
- (and 1 more)
-
Hey Bill, I too decided to set mine in a waterline after completion, unfortunately all my in-progress pics got lost through Photobucket but I traced the hull profiles in cardboard then transferred to 1" Styrofoam and set into the new base, fairly simple task. A couple of photos (if you don't mind) to show the result, somewhat generic for my only attempt. Michael D.
-
I still had quite a bit of work left to do on the hull prior to gluing up so that's been my focus, I'm opening up some of gun ports and thickening the hull in those areas, also finished up putting in the last gunport beneath the gallery. I finished the added decorations, I used artists acrylic and hand painted them in, this left a raised surface to make it easier to gold leaf, I know they are just kind of random in their looks with no rhyme or reason but at this scale I think it looks okay, still need to work the leaf more and some touch up along with installing the window panes. Thank for looking. Michael D.
- 104 replies
-
- 8
-
-
-
- Sovereign of the Seas
- Airfix
- (and 1 more)
-
I applaud your proficiency on this build, it's barely been a month since you started, just fantastic!! Michael D.