


Justin P.
-
Posts
991 -
Joined
Content Type
Profiles
Forums
Gallery
Events
Posts posted by Justin P.
-
-
-
29 minutes ago, mtaylor said:
I tend to buy, rope, blocks, deadeyes, and cannon for my scratch ships. I have a rope walk and intend on using it... someday.
Yep... same. Ive been thinking a lot about the cannon for my Triton project and opted to buy them. I have every intention to make all the rope needed, but will admit that I bought some (just in case).
-
1 hour ago, modeller_masa said:
I'm making 3D capstan model for 3D printer
Looks like you are using Shapr3d. As I did here:
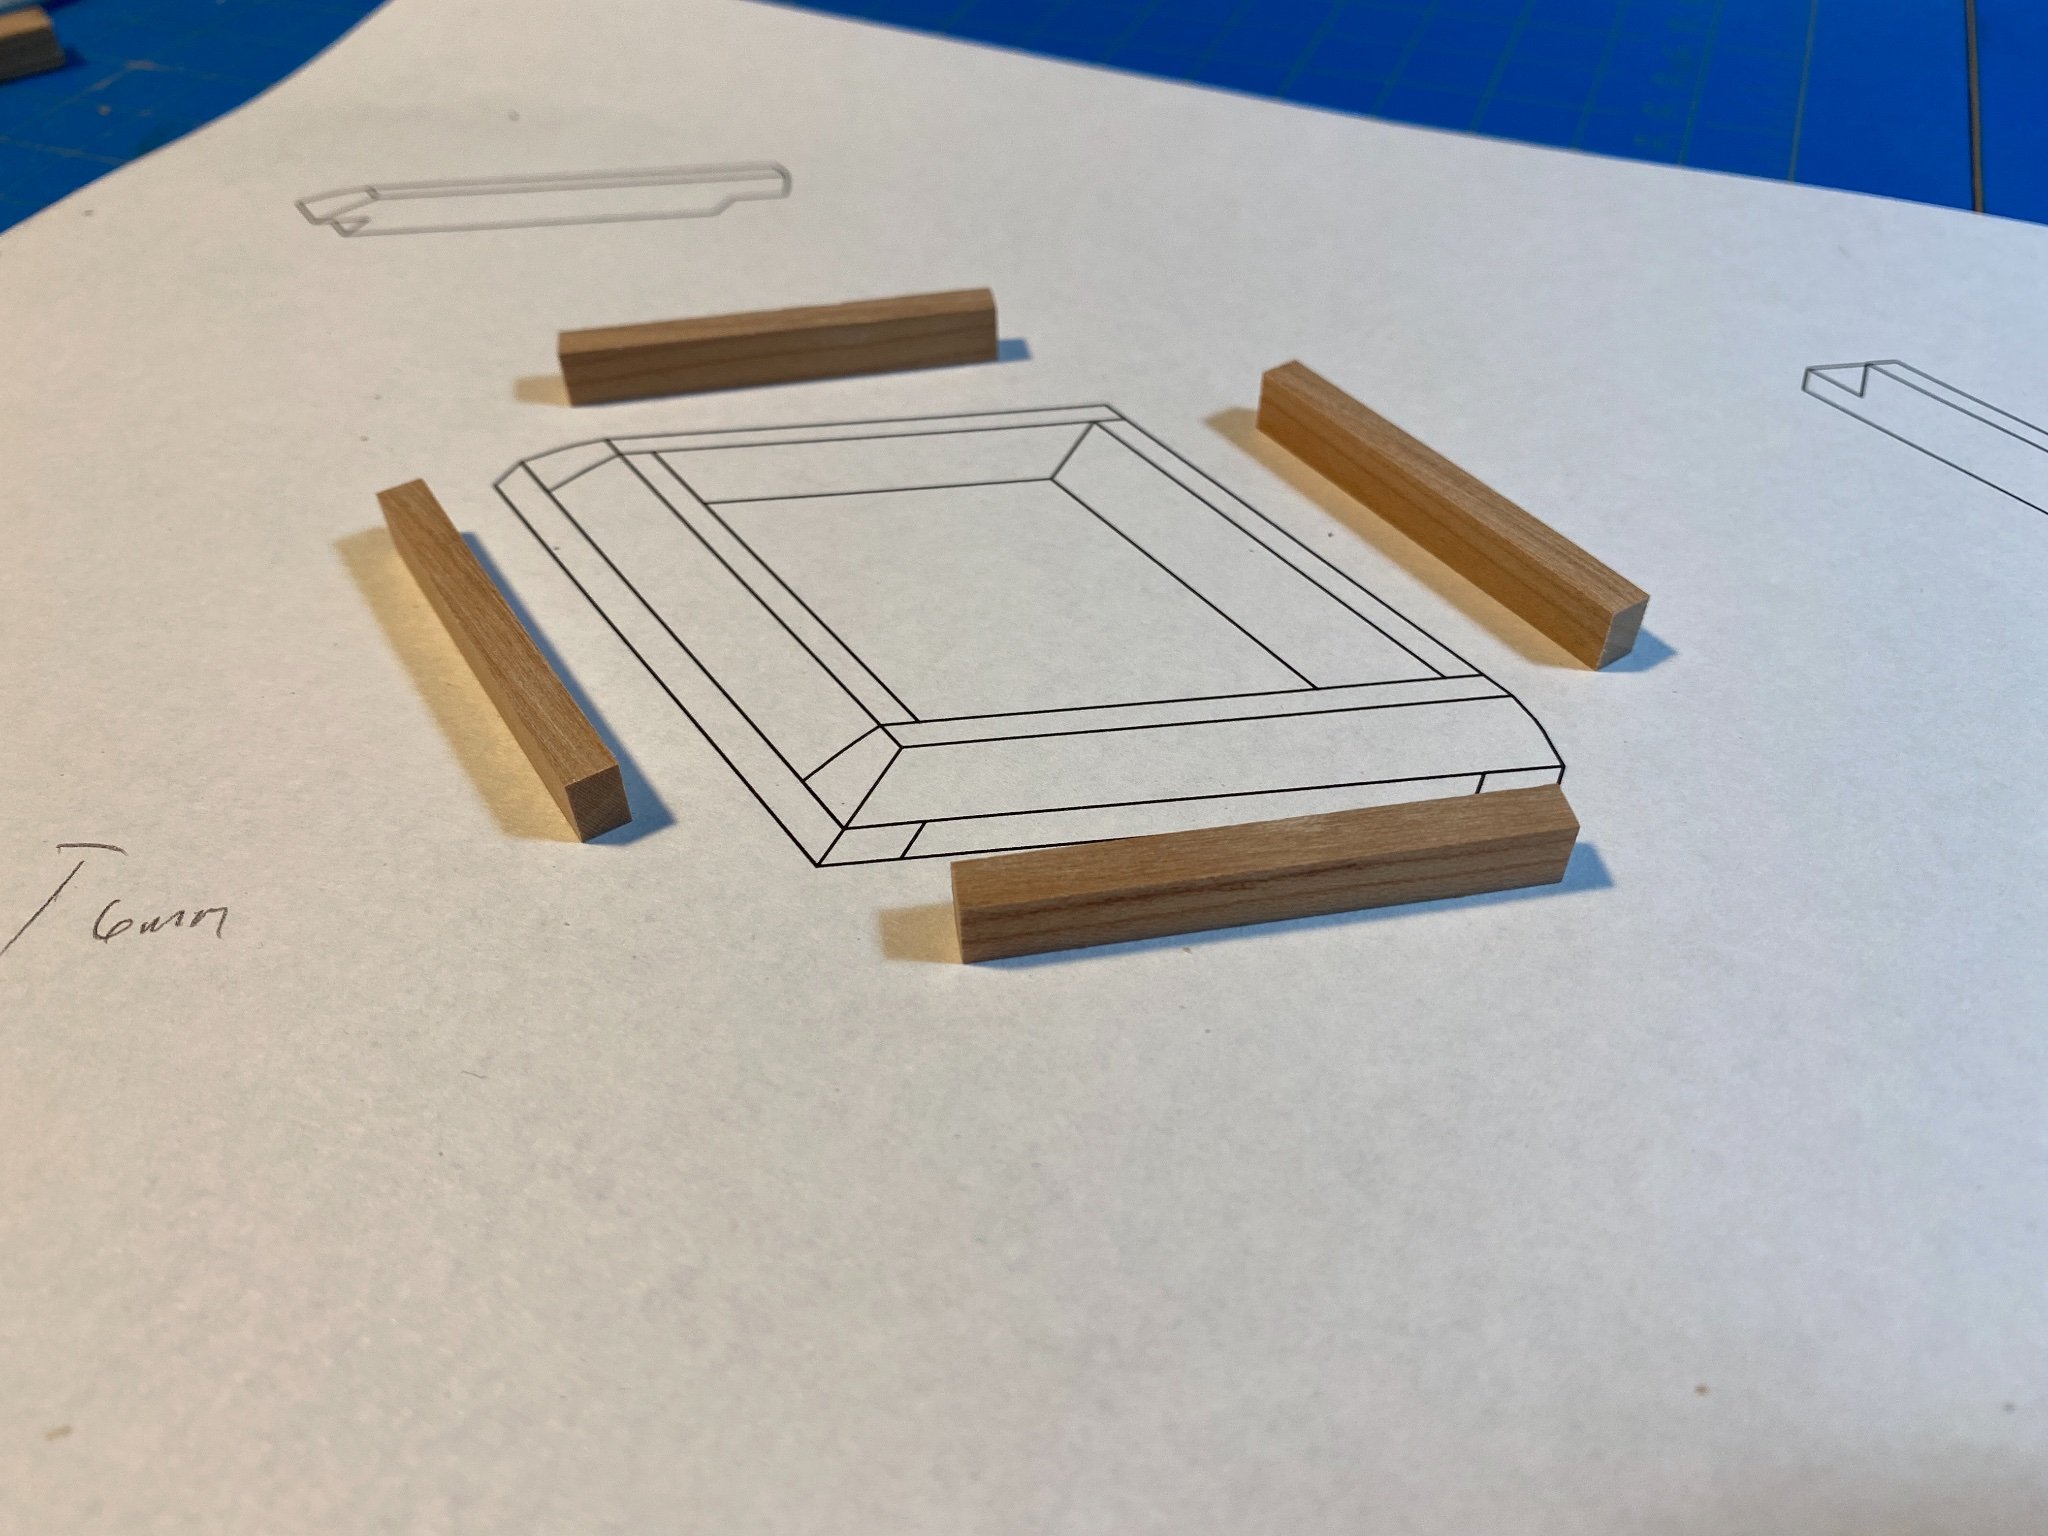
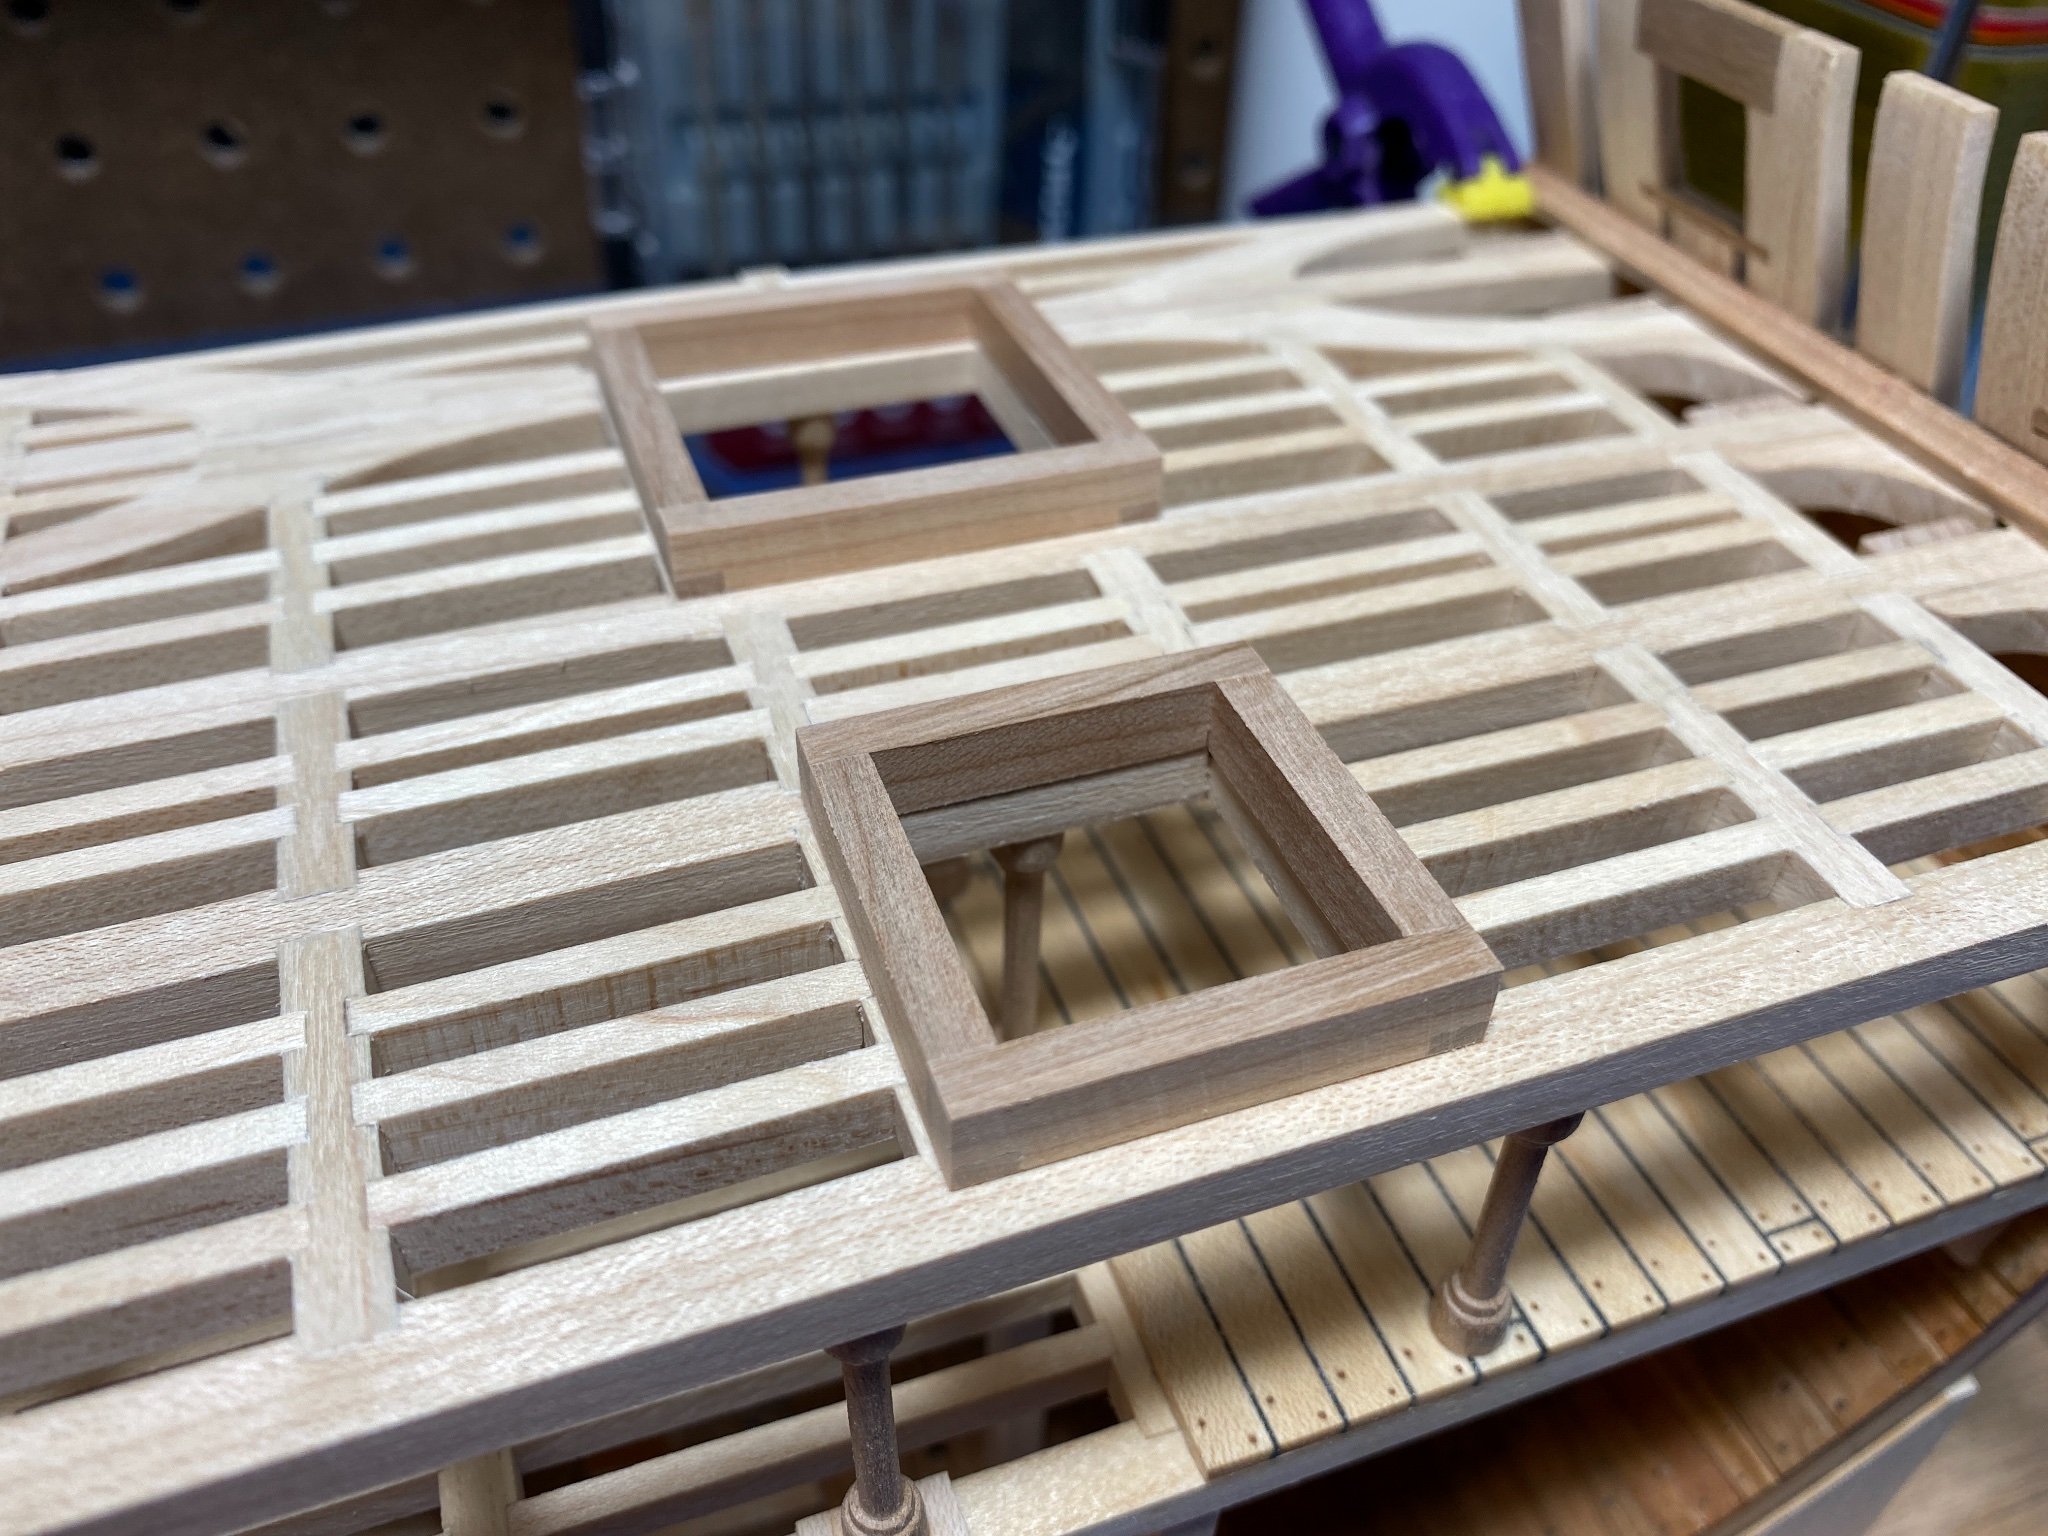
Im sure that Toni will respond in due time, but to answer a couple of your questions, yes I noticed a few inconsistencies in the plans with regard to stated measurements. However, this I think falls within tolerance, at least in so much as the intended build is in wood and therefore some amount of final fitting will be required. When you assemble according to accepted practice you should be creating your grate first, then fitting your coamings to it This ensures a good tight fit. I look at ship model plans as approximations to be finessed as you build (in wood). So I think you can apply the same principal here (as I did too with my own 3d work).
Secondly, yes the battens are supposed to run fore and aft (or at least that what Ive read in various places).
- modeller_masa and Cathead
-
 2
2
-
1 hour ago, Jaager said:
They are sitting on a pot load of re-drawn lines plans by Norman Swales and ignore inquires about purchasing full size copies or how to contact Swales about the same.
Is that the same Norman Swales who has also done a lot of illustrative and figure work for the games industry? You might try a different company, or possibly one his co-authors/contributors. There seem to be quite a few (if its the same person. Unique name...
-
-
Great Job! I cant wait to start this project, you've done a wonderful job.
- mtaylor and usedtosail
-
2
-
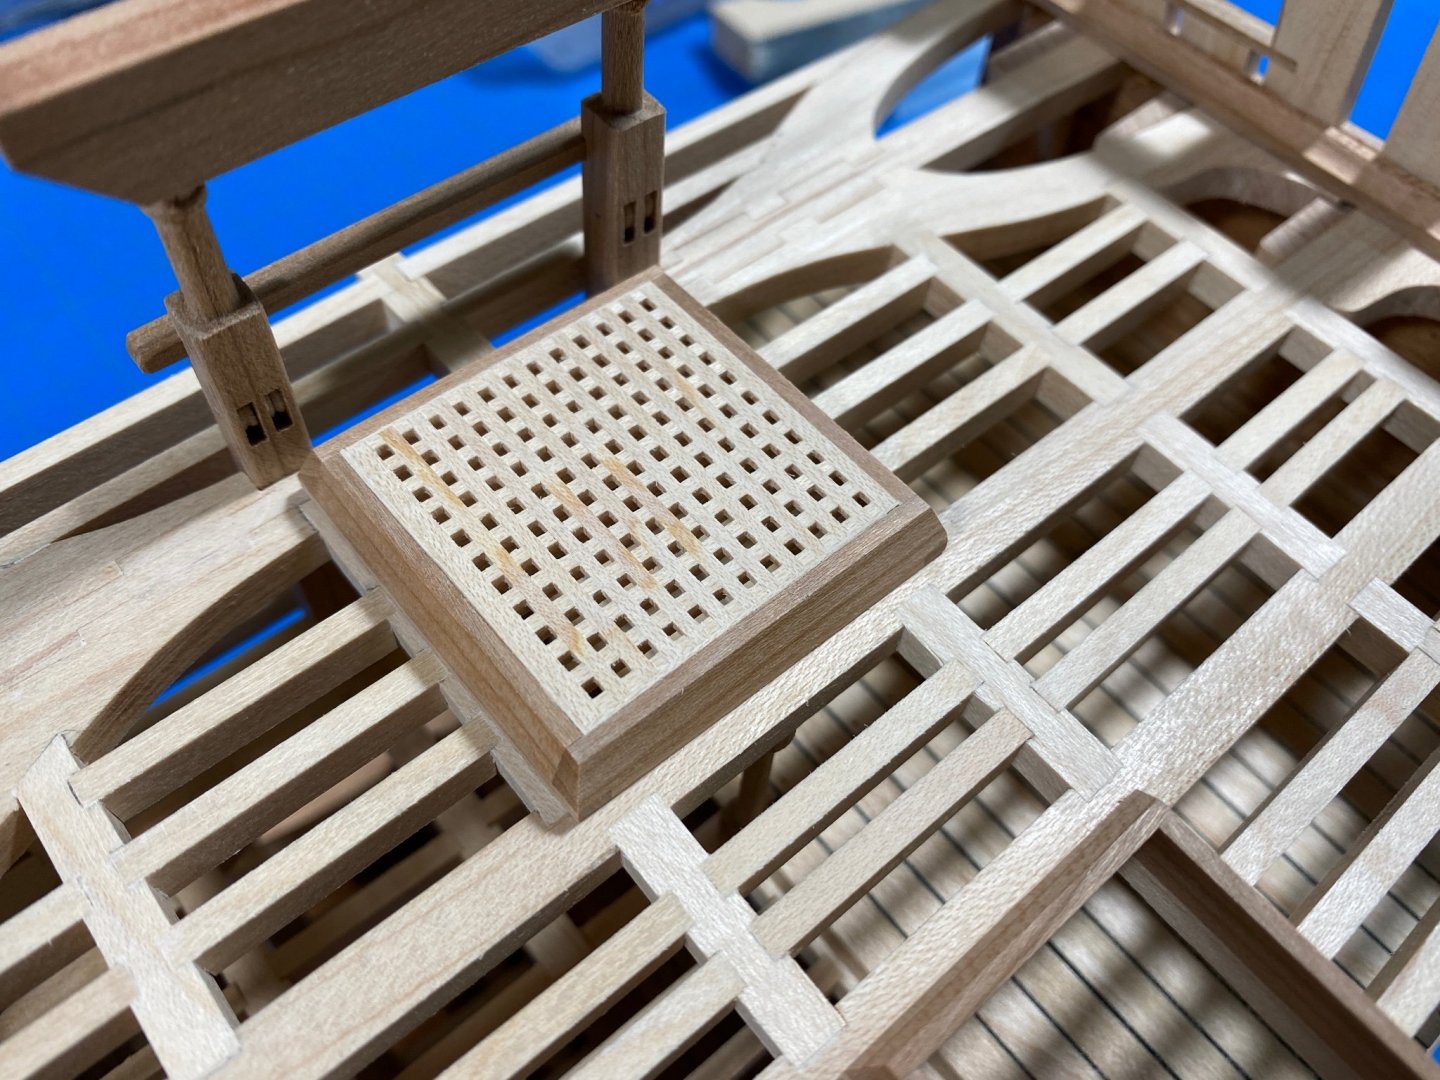
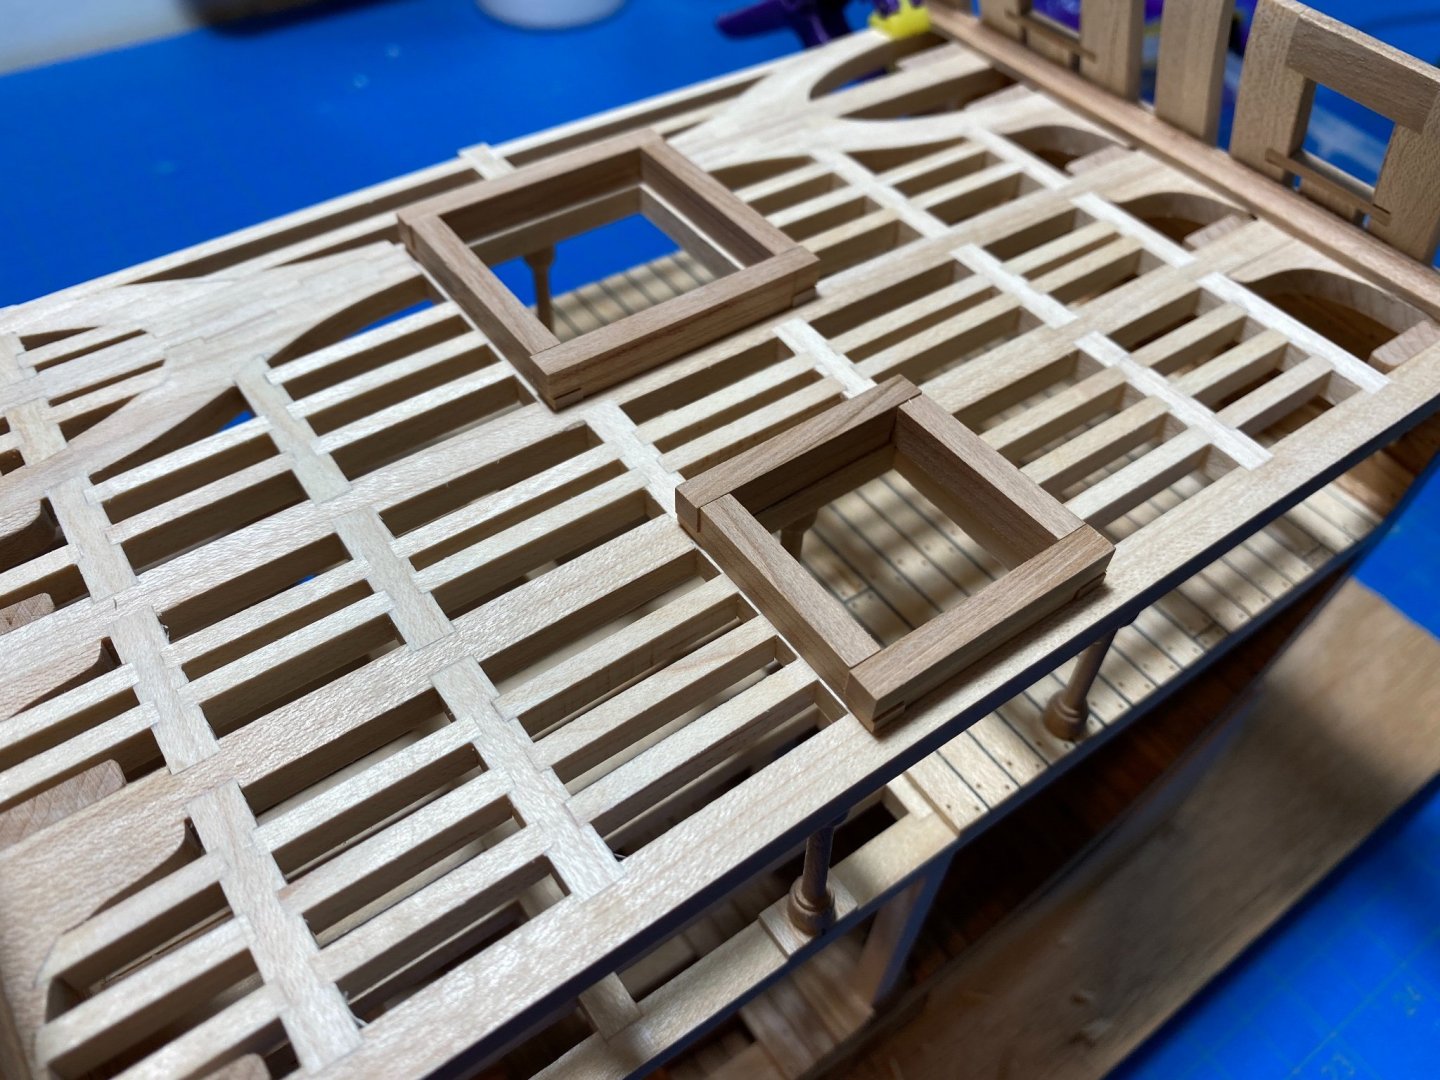
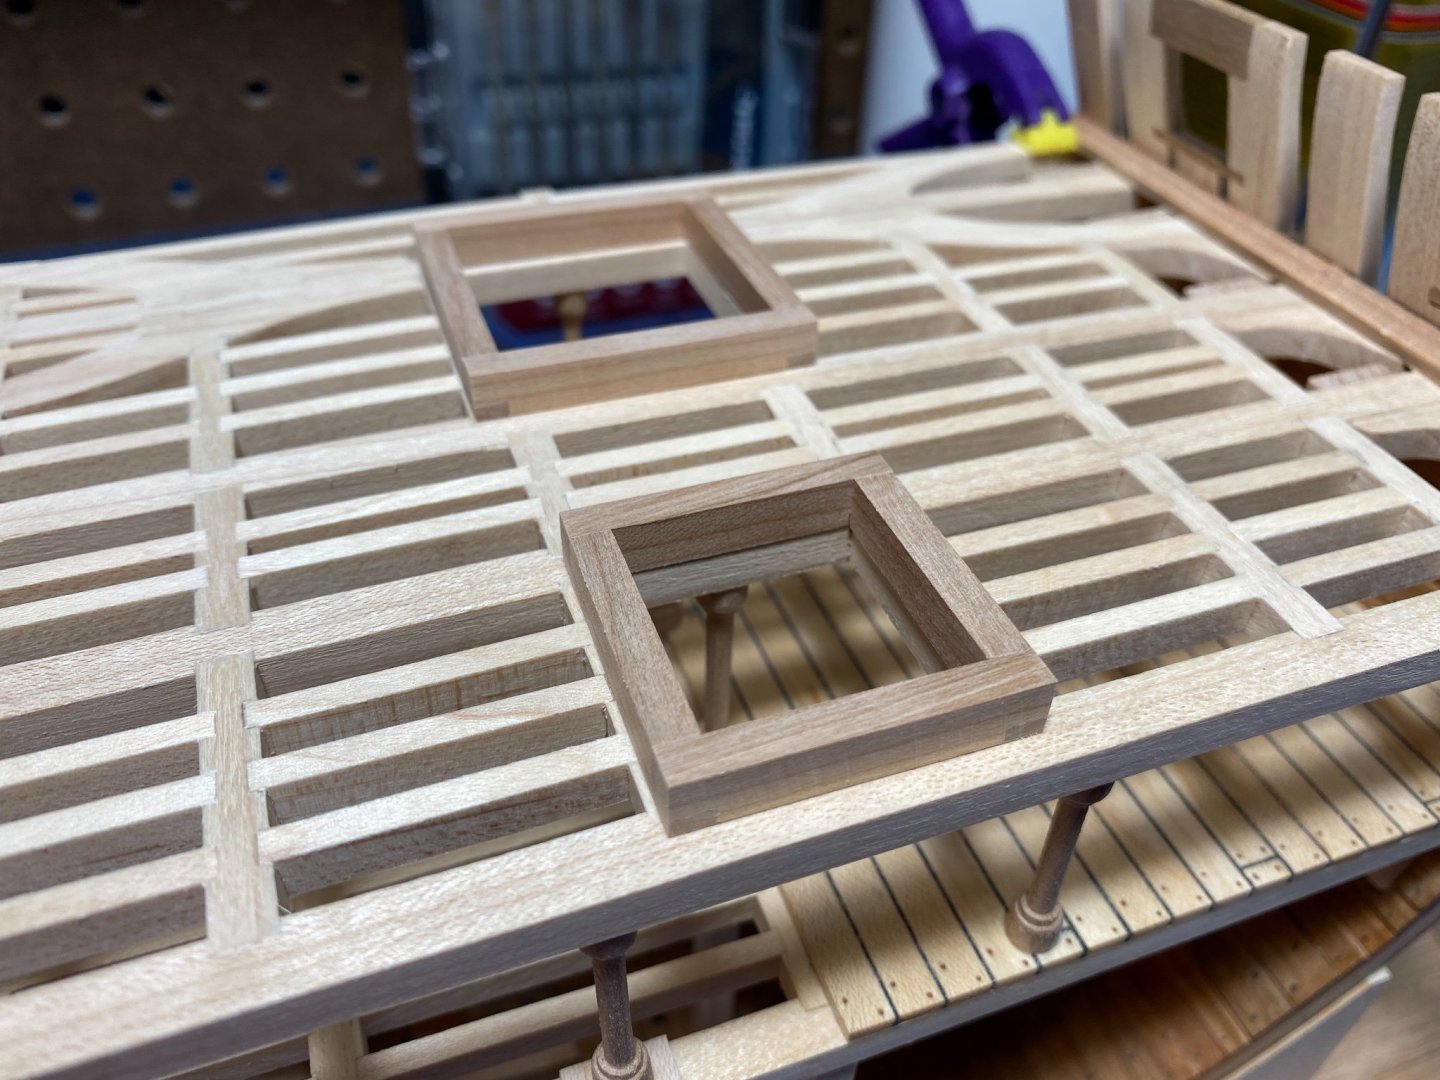
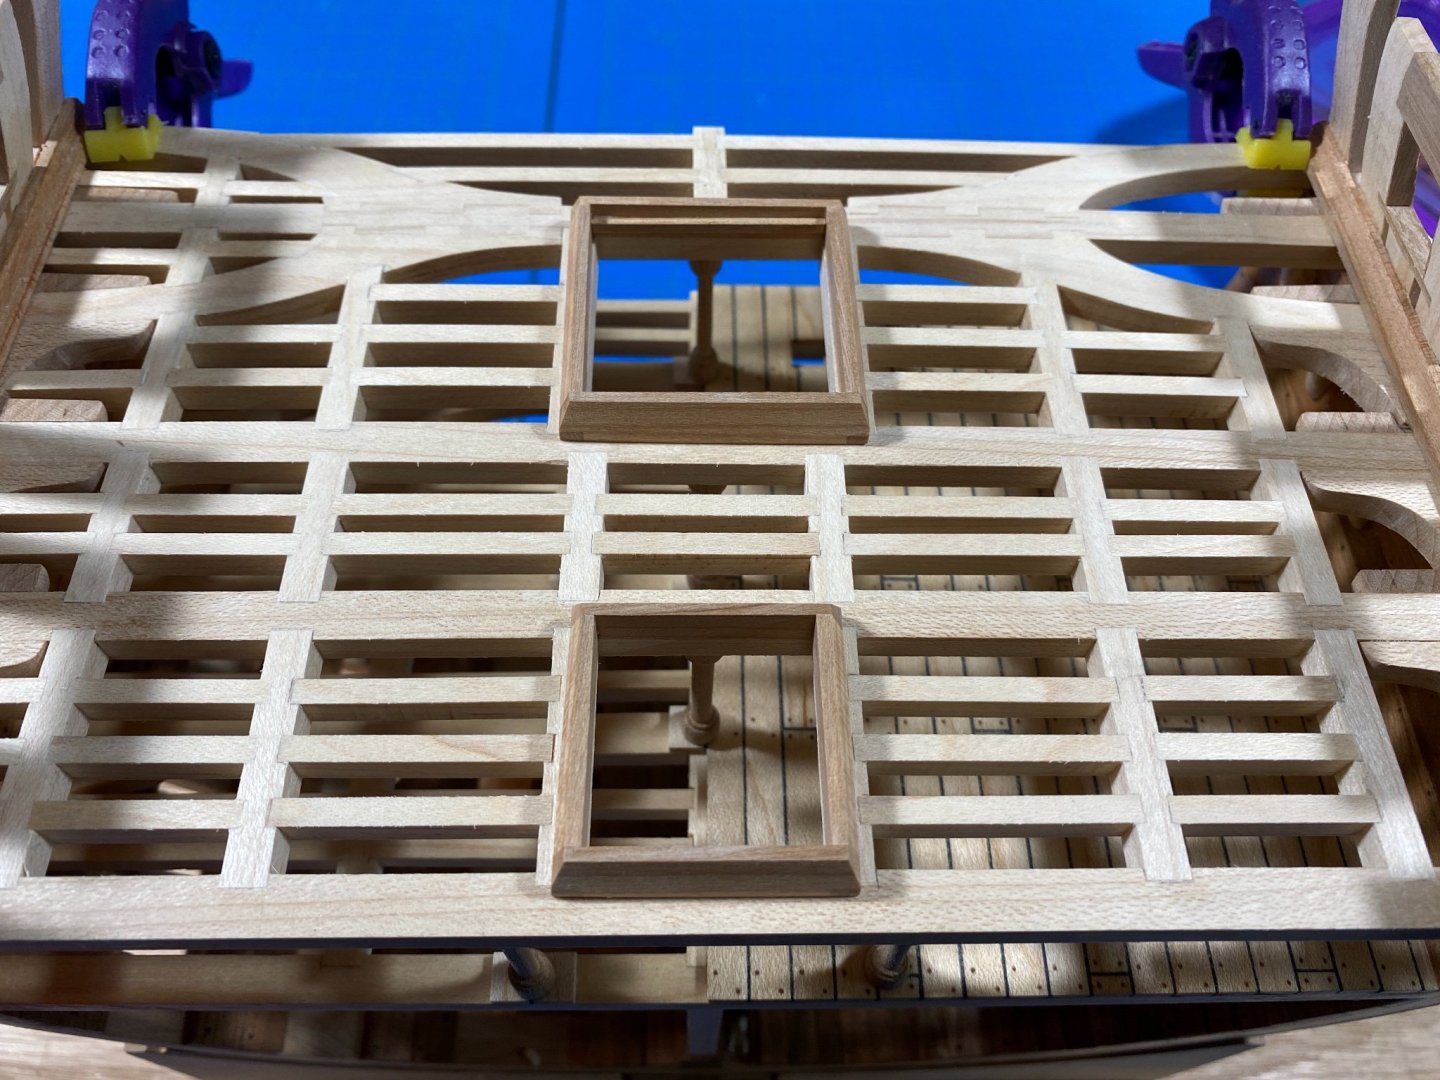
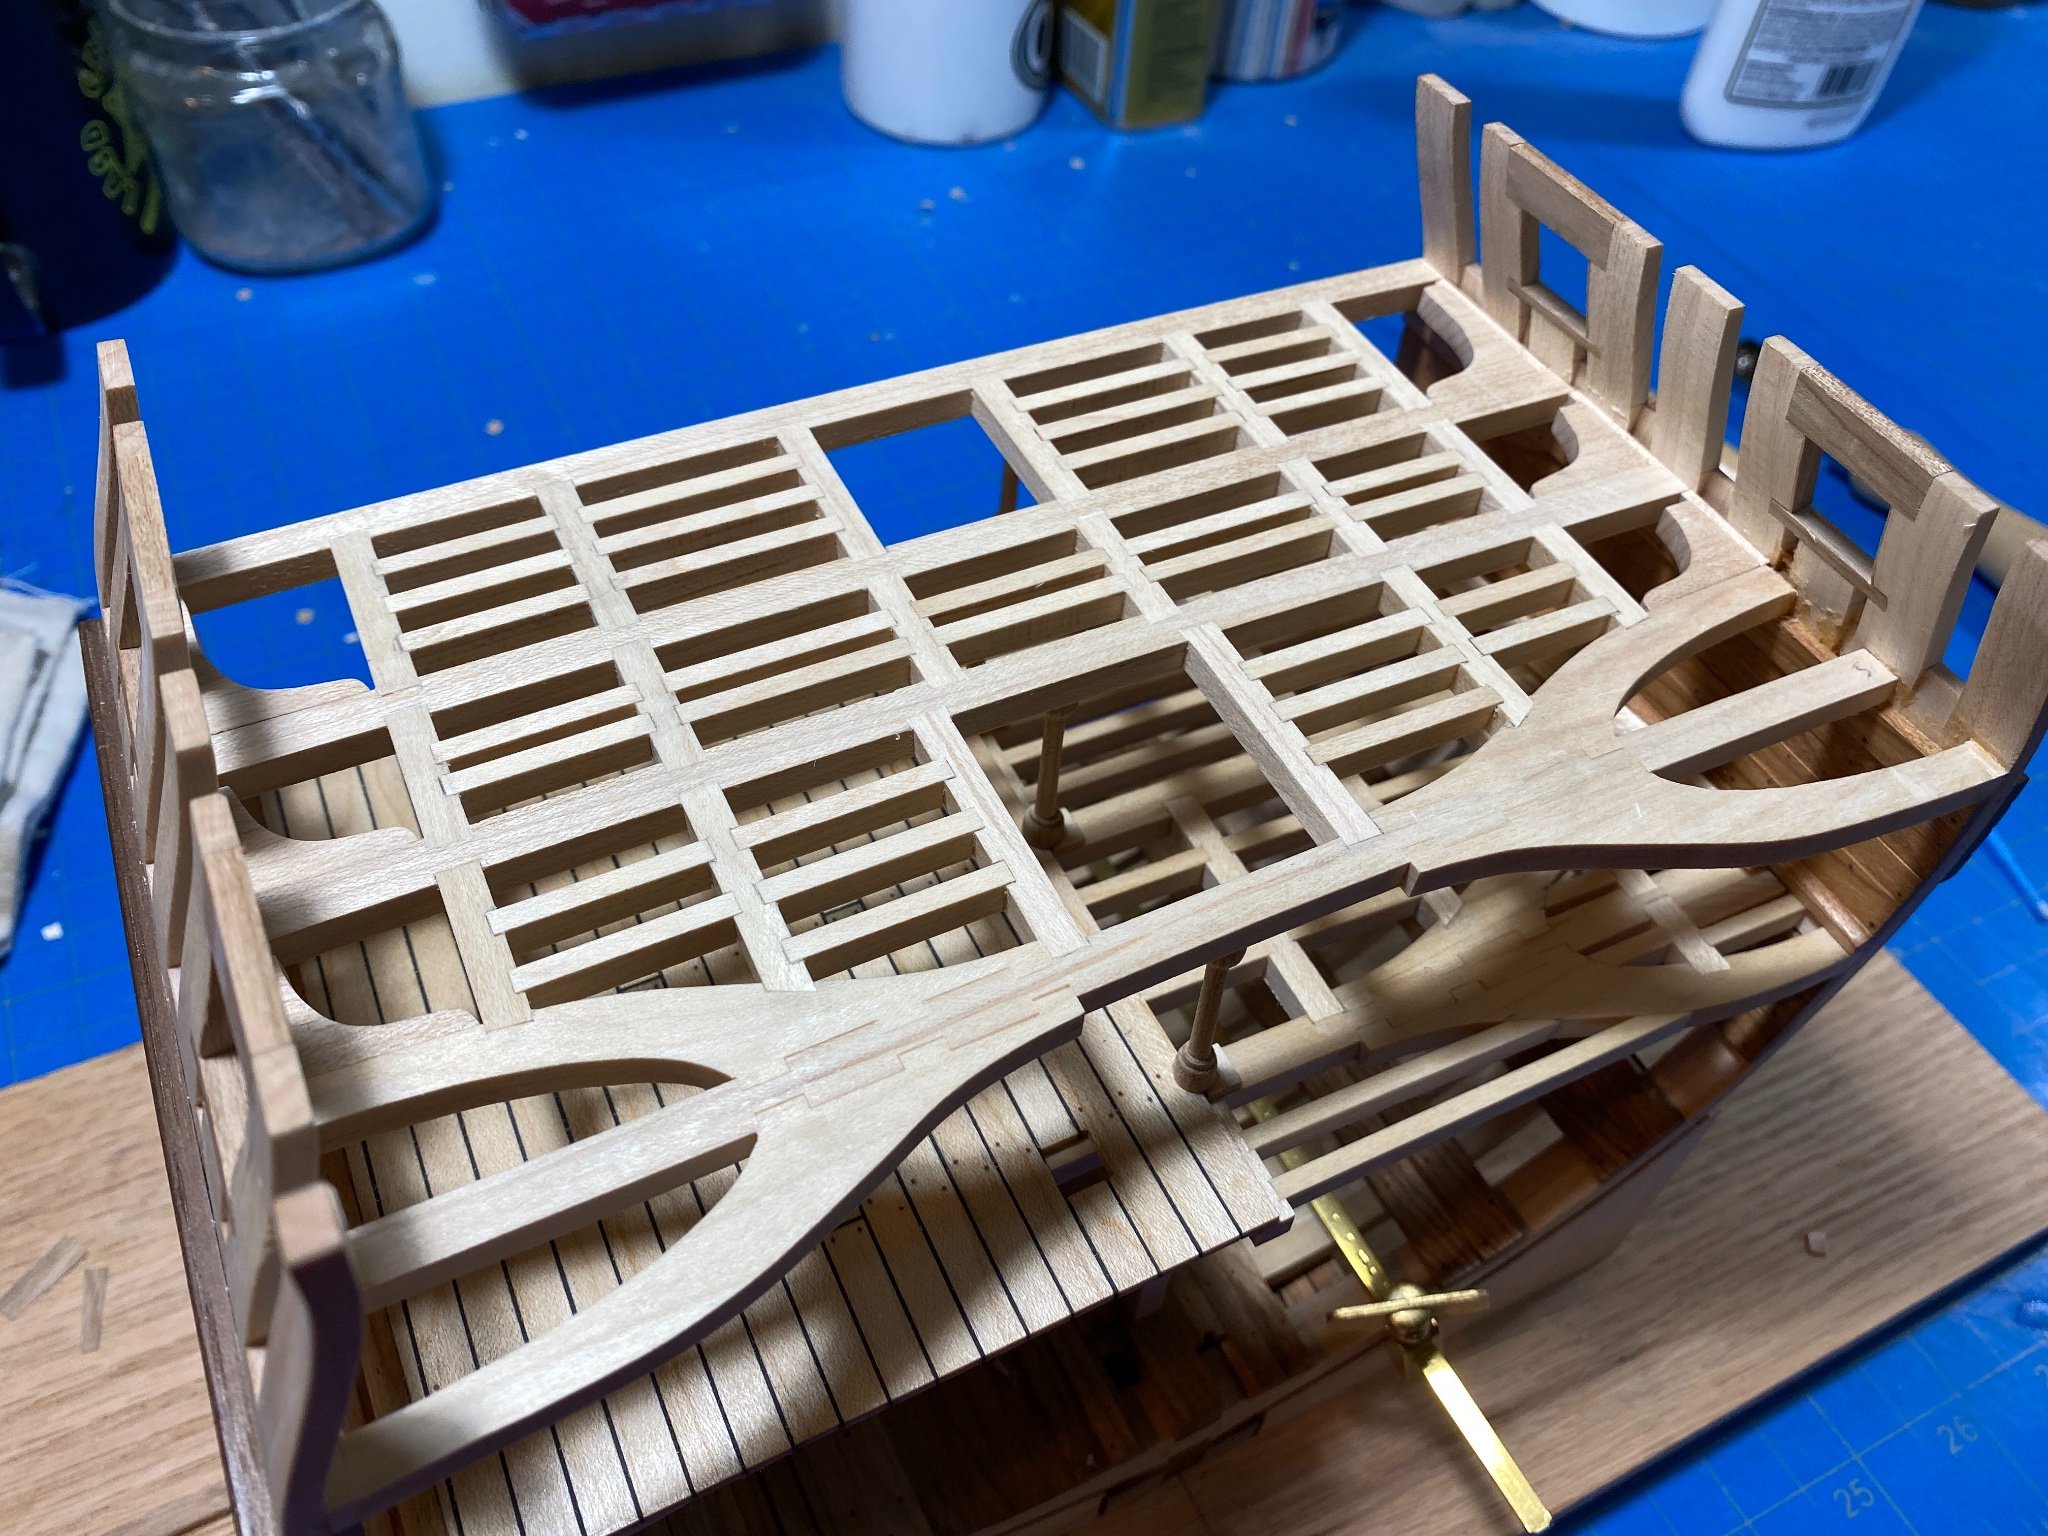
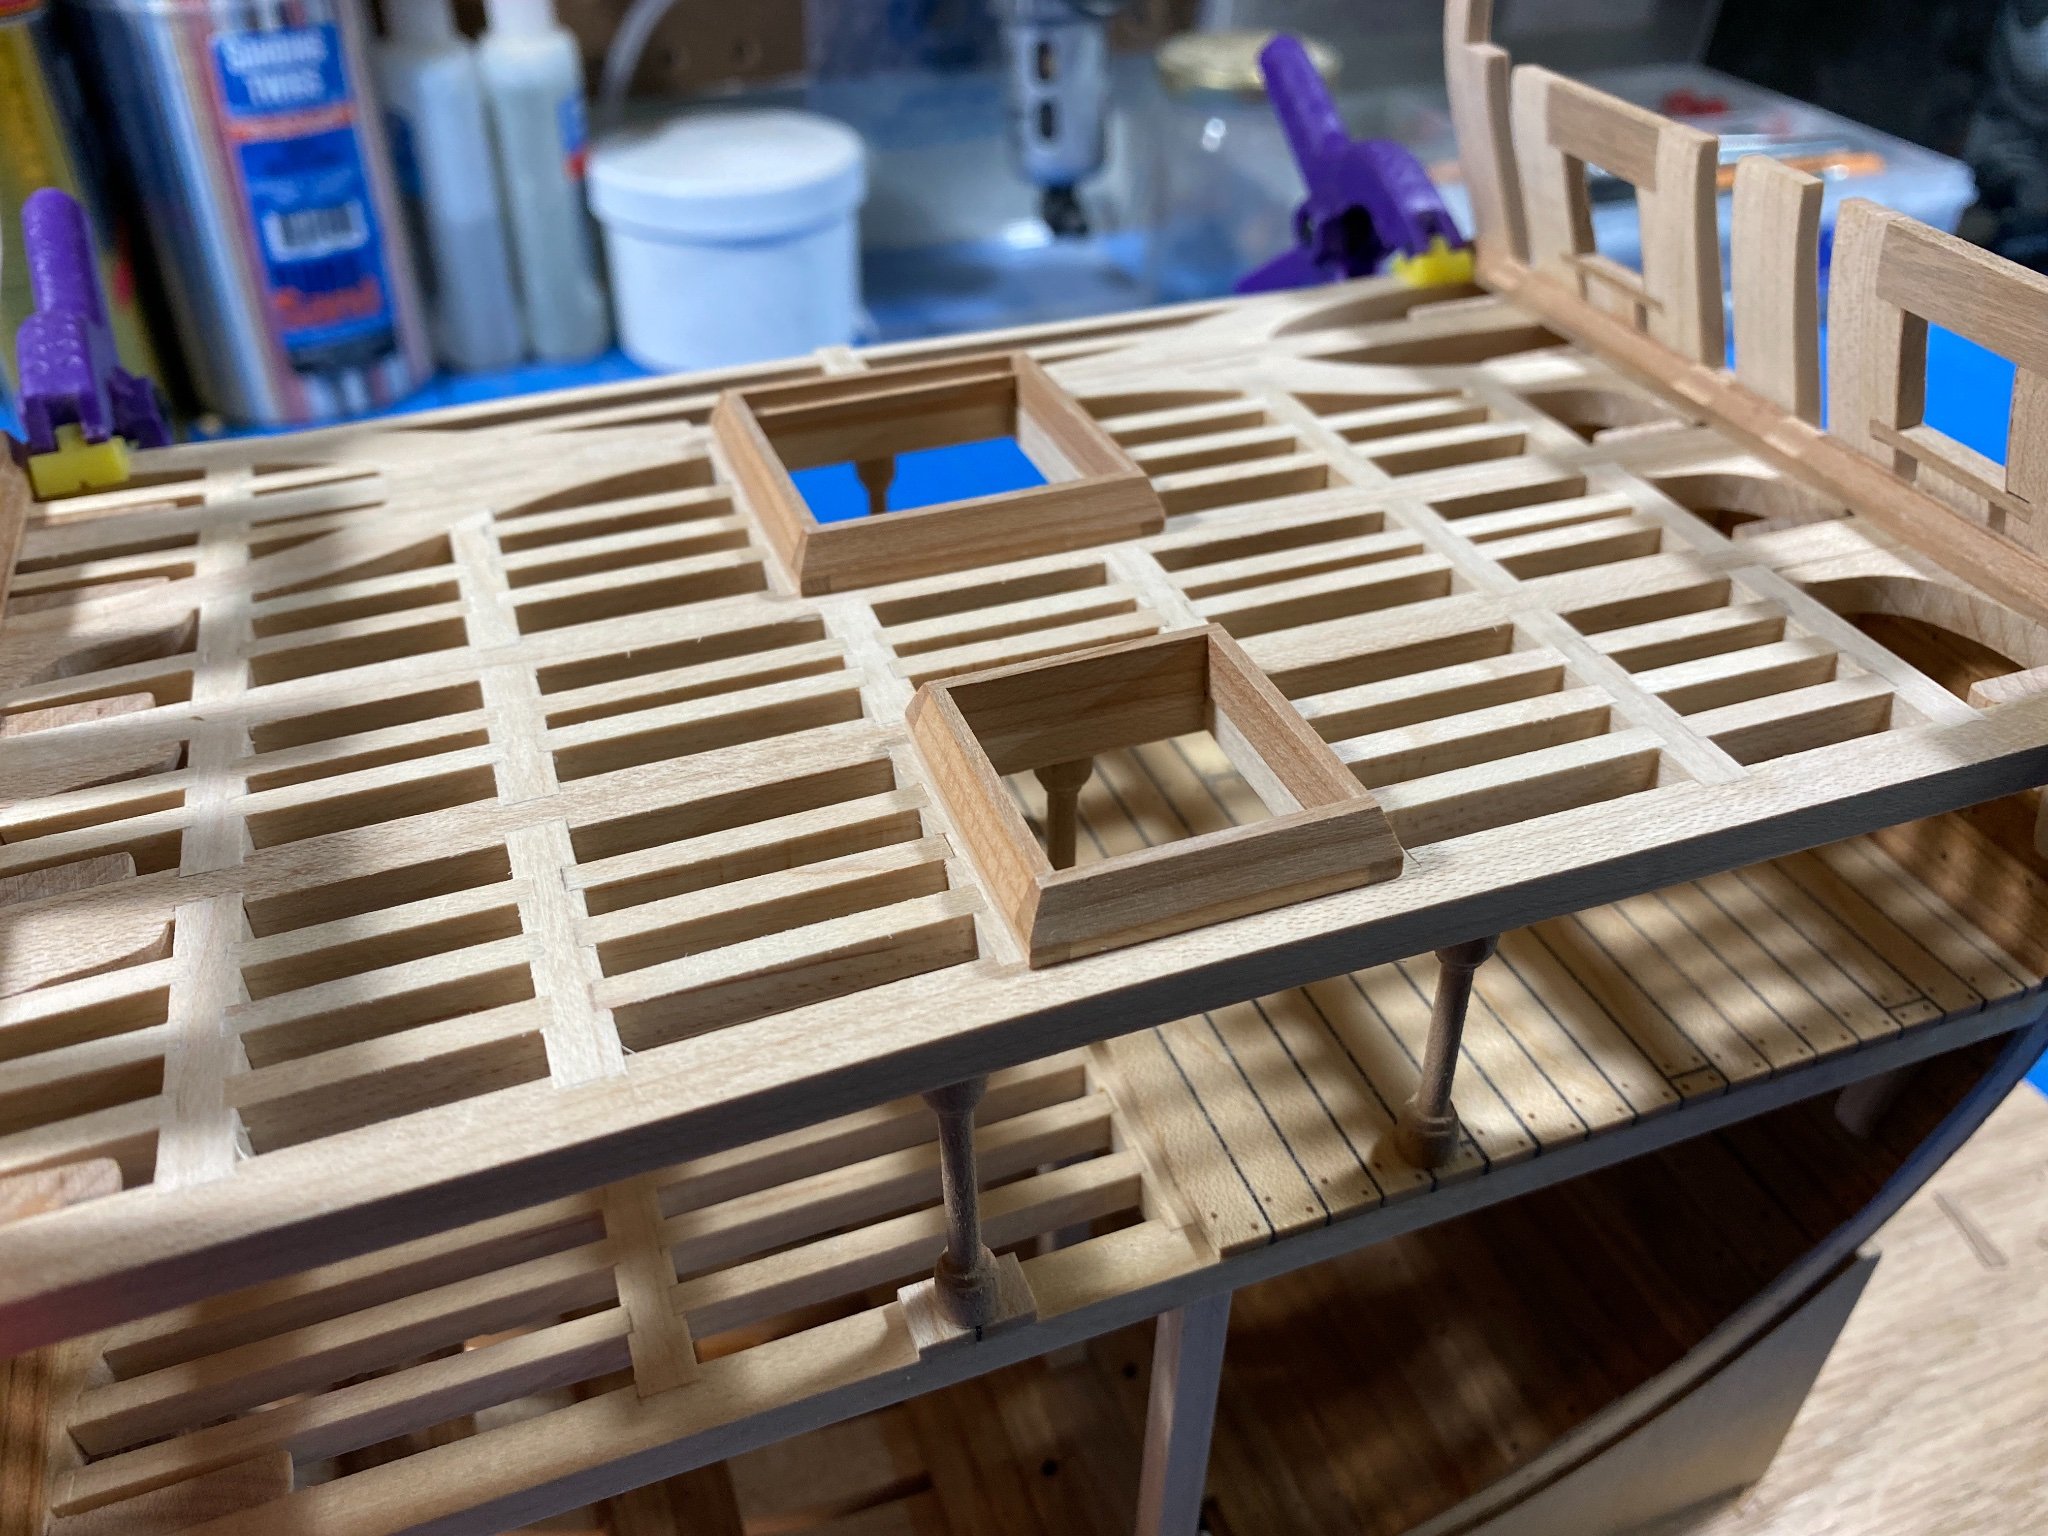
Grating.
I thought I had taken more photos of the process, but apparently I did not. I spent the better part of the weekend on this one hatchway. I managed to make one in about 2-hours, which was ok-ish... then spent the next 10-12 hours over two days trying to make another. Getting the tolerances right so everything fit well and was consistently cut made the process that much harder. Im happy with the result though. I had thought I was going to get a bit farther with the planking of the gun deck, until about 12:30 Sunday a huge broad-leaf maple came crashing down from the area just off my property line and completely pulverized my fence...
So the rest of Sunday and part of yesterday I was clearing and fence building. Fun times.
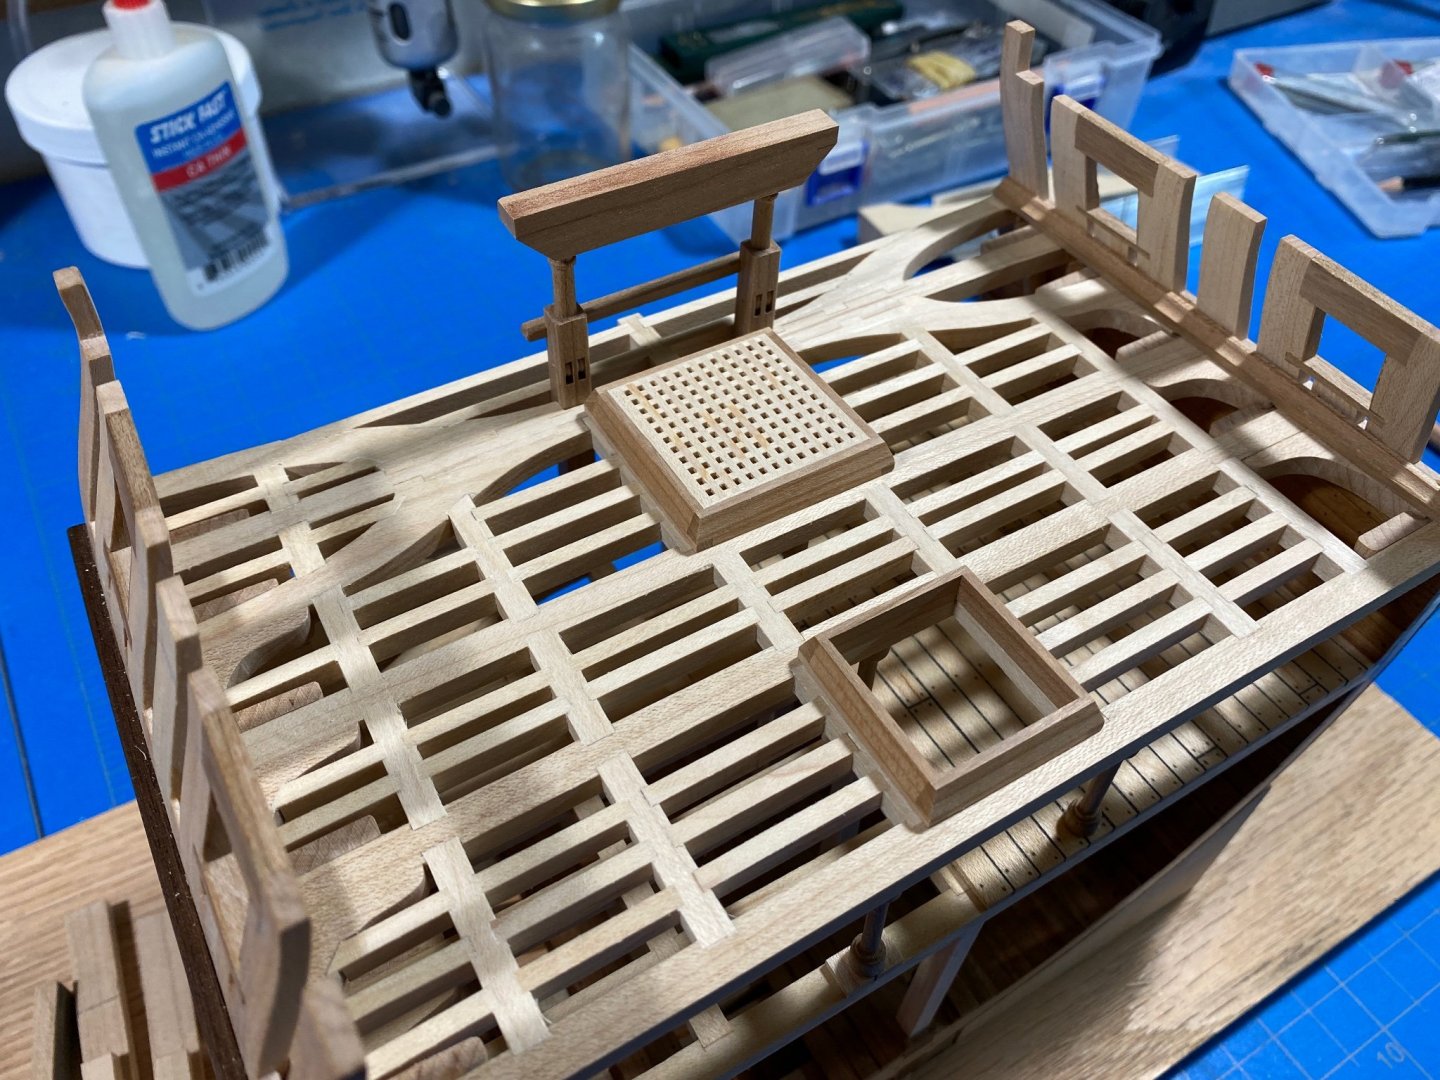
Deck planking going in...
-
-
14 minutes ago, Thanasis said:
Could someone please translate the French text in simple English....
Many thanks
"The captain mounted the schooner Terpsieore with eleven guns, five on each side and one in the bow, to which were joined eleven other hydro-vessels. The largest of these vessels carry no more than twenty guns, nor the smallest less than eight. The strongest caliber of these guns is twelve pounds, a few single full guns are usually thirty-six pounds and sometimes even go up to forty-eight."
-
Ive used/tried many of suggestions above. For whatever reason every time I use something with a soft structure like the emery sticks or pads, sponges, I end up rounding over parts. I pretty much stick to hard shapes now, but take the point about going any higher than 400. I have enjoyed using an aluminum oxide brand called Gator, but their sheets come with that proprietary backing intended for their sanding tools which cant be removed. This makes it difficult to get a purely flat surface.
-
On 10/6/2021 at 8:32 PM, Roger Pellett said:
Hey! If my post sounded critical of replies by Bob and Justin, I’m sorry. A
Roger
No at all! I actually thought you made an excellent point that I had wished I made myself. You are absolutely right, I learned the hard way (multiple times) that a rotary tool is just the wrong tool for most things Ive tried with it.
- Canute, mtaylor and Roger Pellett
-
3
-
To specifically answer your question though, cutting the rabbet can be made easier when you consider using a scraper method as opposed to actually "cutting" the rabbet. I had mixed/poor results trying to use a knife. However once I learned how to perfect a custom scraper tool from a box knife blade, my result got much better. I wish I could pull the best resource to share on this method out of thin air, but I cant recall how I put it together. Its covered in good detail in many places on the forum, and in a articles here and there. Maybe someone else can link to something that covers this well. The problem with having access to so much good info on MSW is that its hard to remember where in the site it came from when the time comes!
-
3 minutes ago, tlevine said:
Read everything you can.
Agreed. However, I think the spirit of Glenn's wisdom still has value. Read everything you can, when you cannot be building. At least this version has served me well. If I have bench time, Im building. I try to not spend too much of that valuable time with my nose in a book. The more I build, the better modeler I become. When I cant be at the bench, I READ. I read MSW, I read modeling books, I read articles, I read Age of Sail fiction and non-fiction, etc... I also try to read as much as I can regardless of context on my modeling subject. This enriches my experience.
Maybe its just me... maybe Im obsessive. I know both daughter and wife cant possibly roll their eyes enough or groan any louder when they see another book arrive or I start in about how their current life issue is analogous to that time Captain so-and-so did that thing back in 1740... ha!
My advice would be to focus on the Dory, read a few things about the Dory - get to know the design, its purpose and history and just start building it.
-
Hi All,
Apologies if this topic is covered elsewhere, I think I did a pretty good search ahead of starting this thread - but you never know.
Ive done quite a lot experimenting with different brands/types of sandpaper over the years and Im curious, what's your favorite and why? Whats your go-to grit sequence for finishing parts? Ive lately been making sticks with a 400, 600, 800, 1200 sequence using wet/dry paper. This stuff seems to clog quickly, but is far easier to use on custom sticks than the higher quality brands.
Whats your experience?
- Edwardkenway, thibaultron and mtaylor
-
3
-
47 minutes ago, Malazan said:
I’ll look else where for wood.
Try the new Modellers Sawmill. New but has good experience, and close support from seasoned modelers. http://www.modelerssawmill.com
- mtaylor, thibaultron, Malazan and 2 others
-
5
-
51 minutes ago, Bob Cleek said:
Interestingly, despite the unbelievable amount of information on the internet (along with an incredible amount of garbage,) ship modelers who have not built a sufficient research library will forever remain at the mercy of the kit manufacturers whose plans and instructions may leave something to be desired.
So true. Indeed one of my favorite parts of the hobby is the collecting/curating my library.
-
-
-
-
2 hours ago, Matt D said:
Beautiful work, Justin! This is turning out terrific.
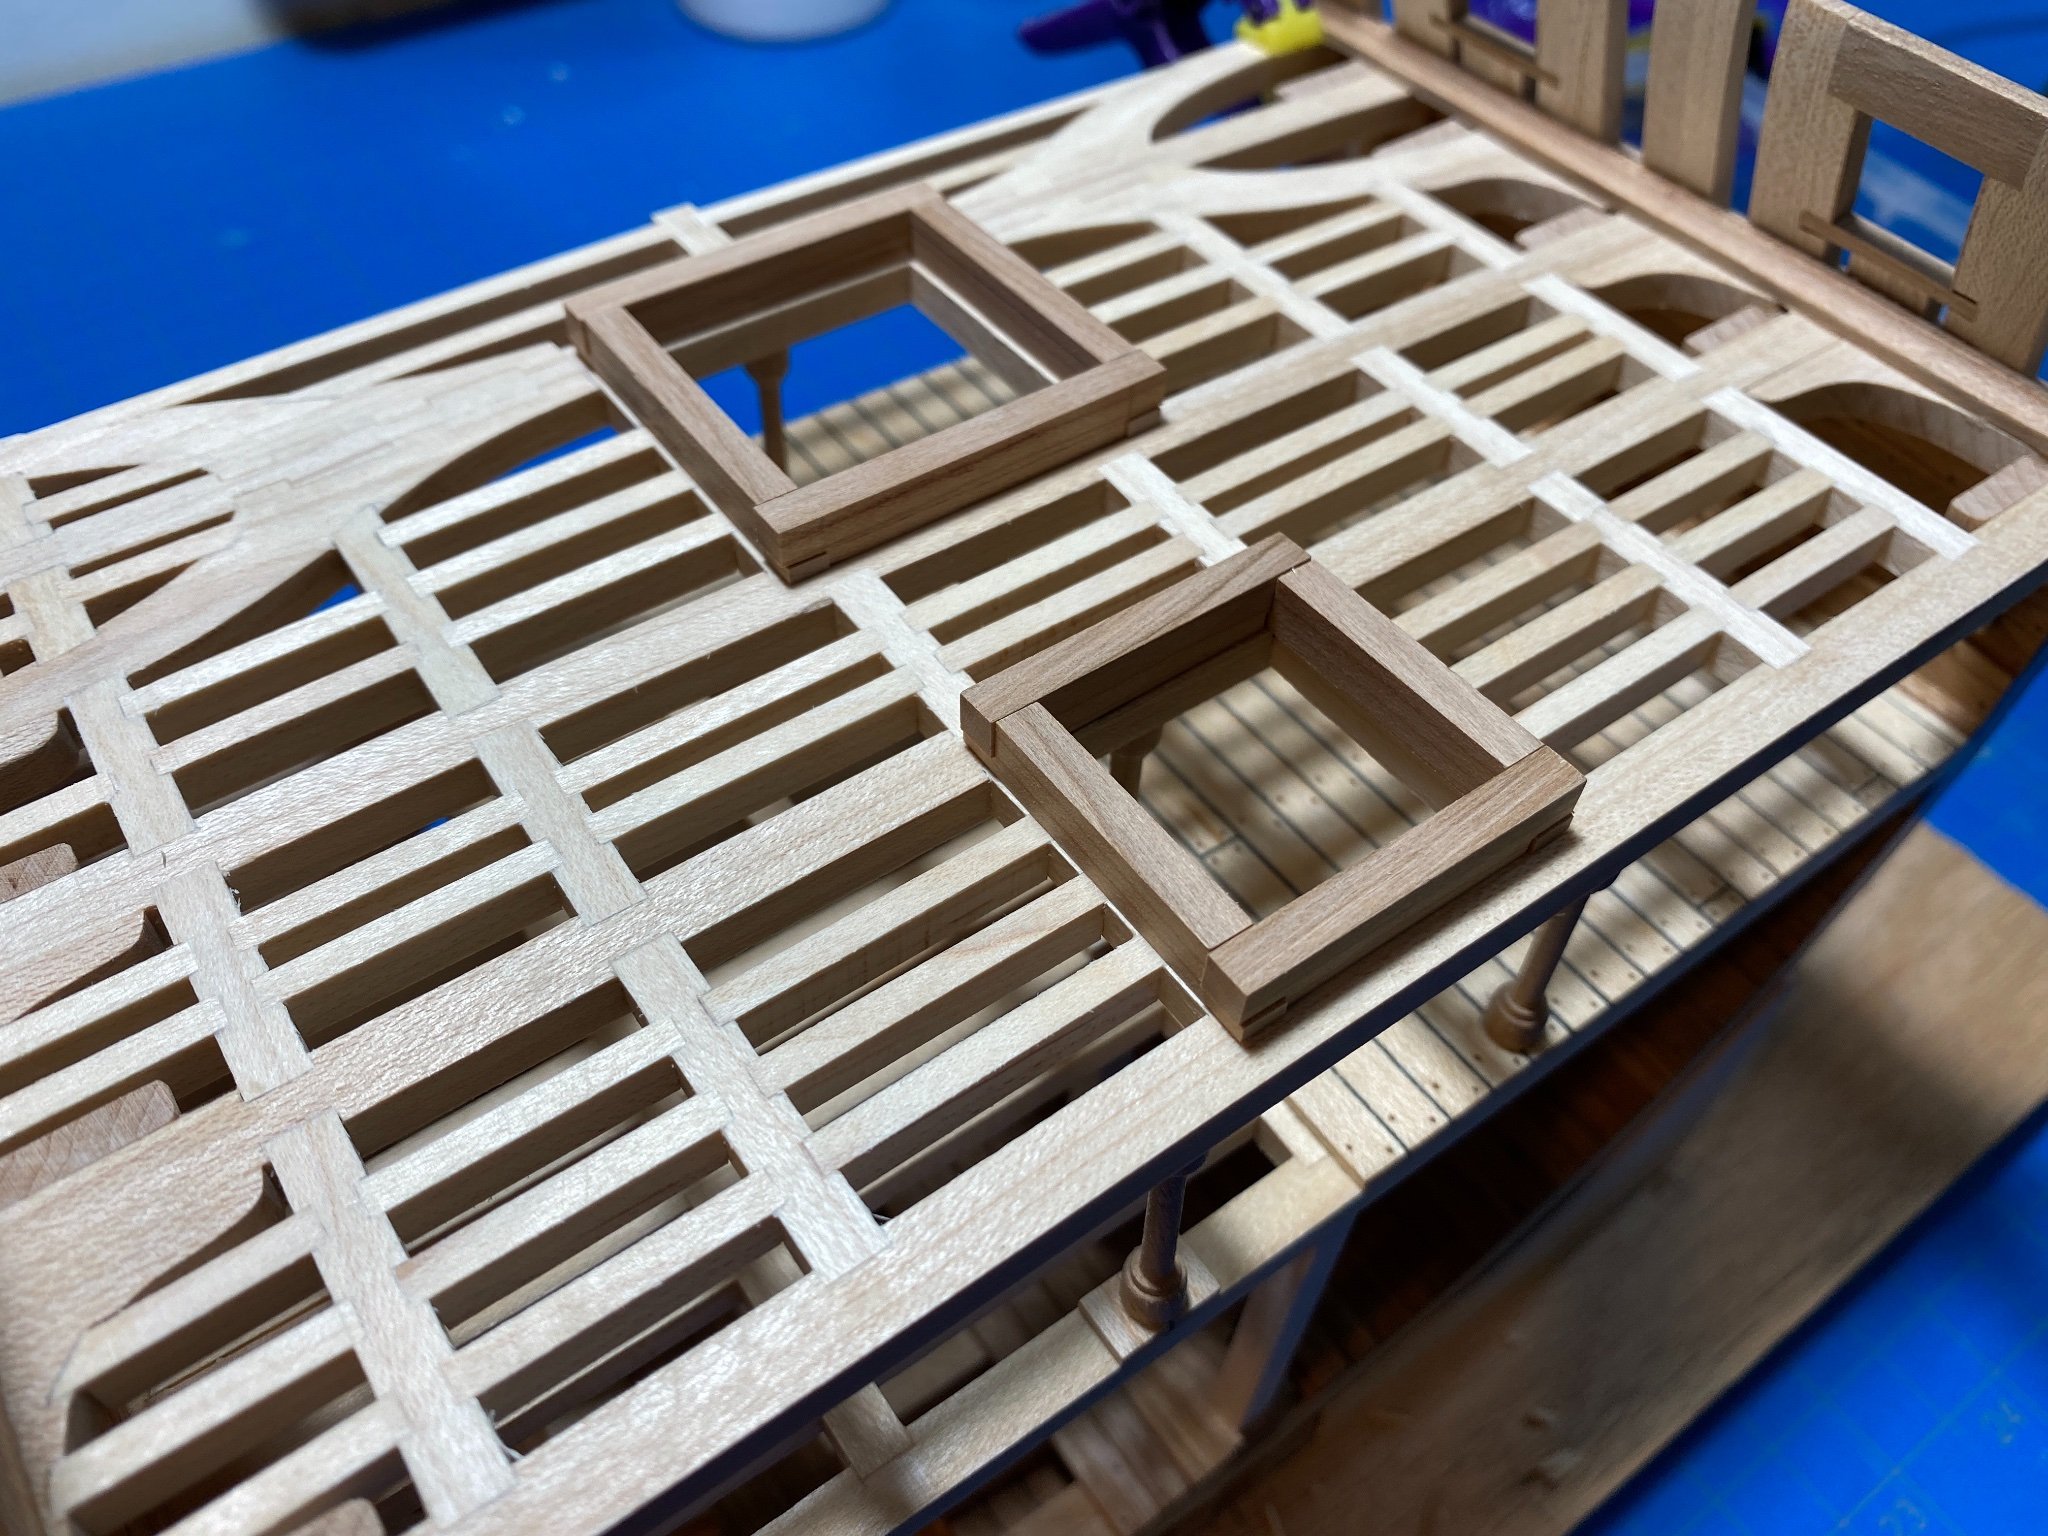
Thanks Matt, Ive been following your Winnie project and see that is going well too! Especially your coamings and gratings. I suspect I may have made an error in building out my hatch coamings BEFORE the grating, which you seem to have knocked out very nicely. I was reading up on Clare Hess' blog @catopower, and discovered that I may have trouble getting mine to fit as nicely as yours, I seem to have done them in reverse order. Ive been looking to see if the Syren gratings would suit Triton or if I should just go ahead make them myself. I might be making them over again now that I am stupidly reading up on gratings AFTER I made the coamings. So much to be said about planning out through your entire project (or at least 5-10 steps ahead) rather than step by incremental step as I seem to continually forget.
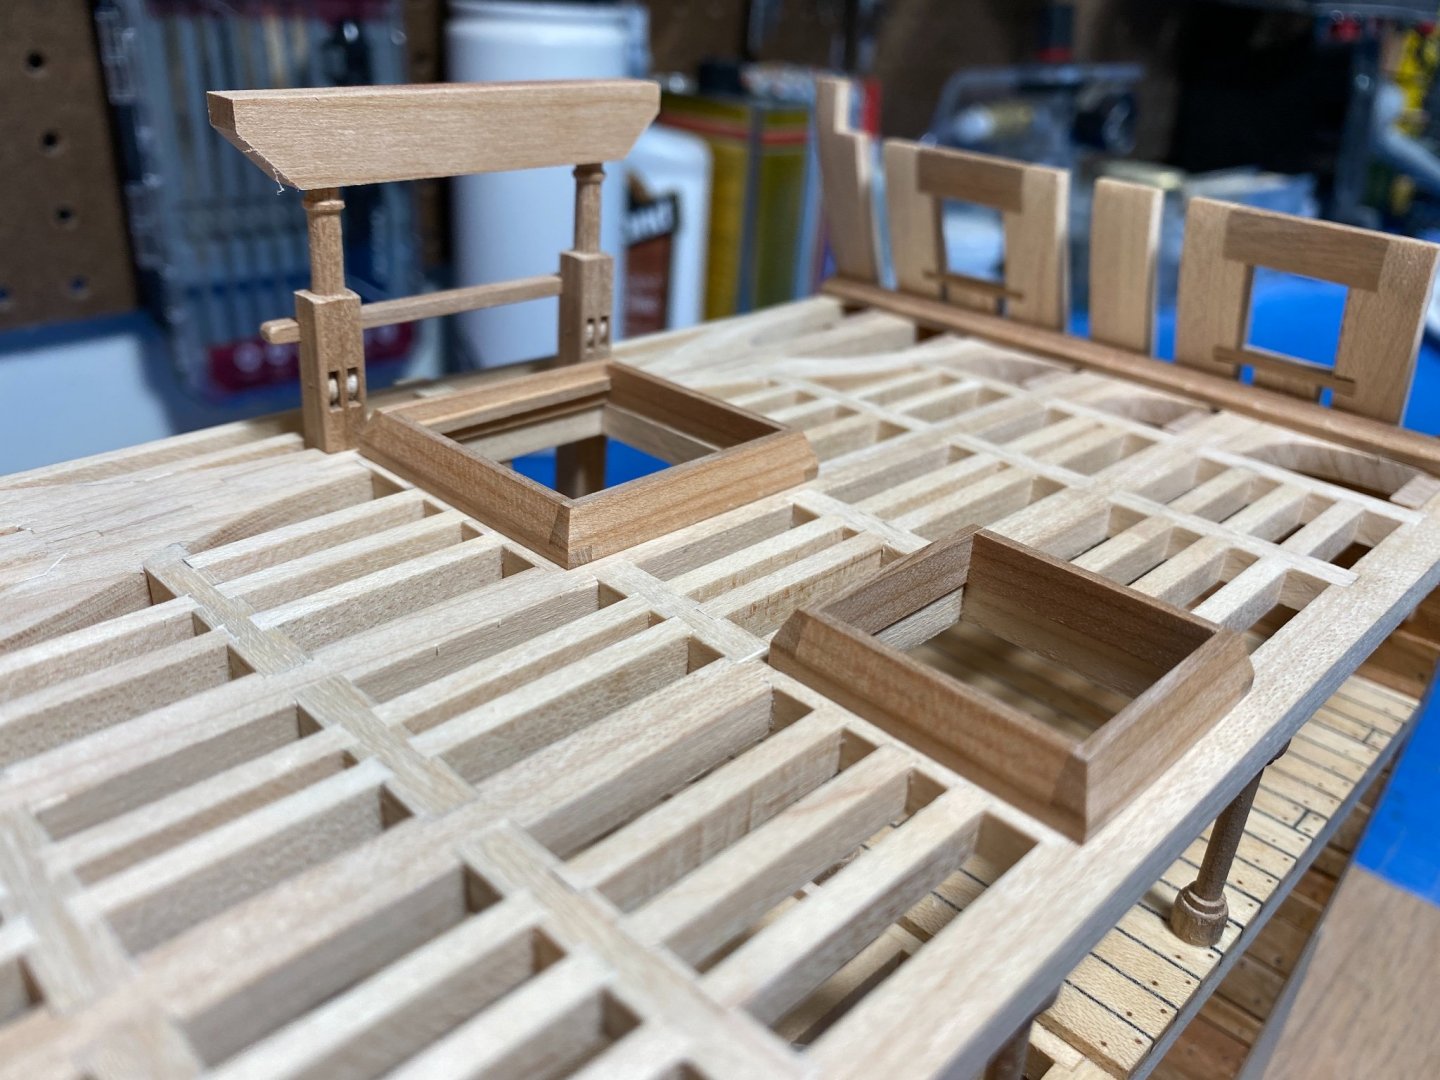
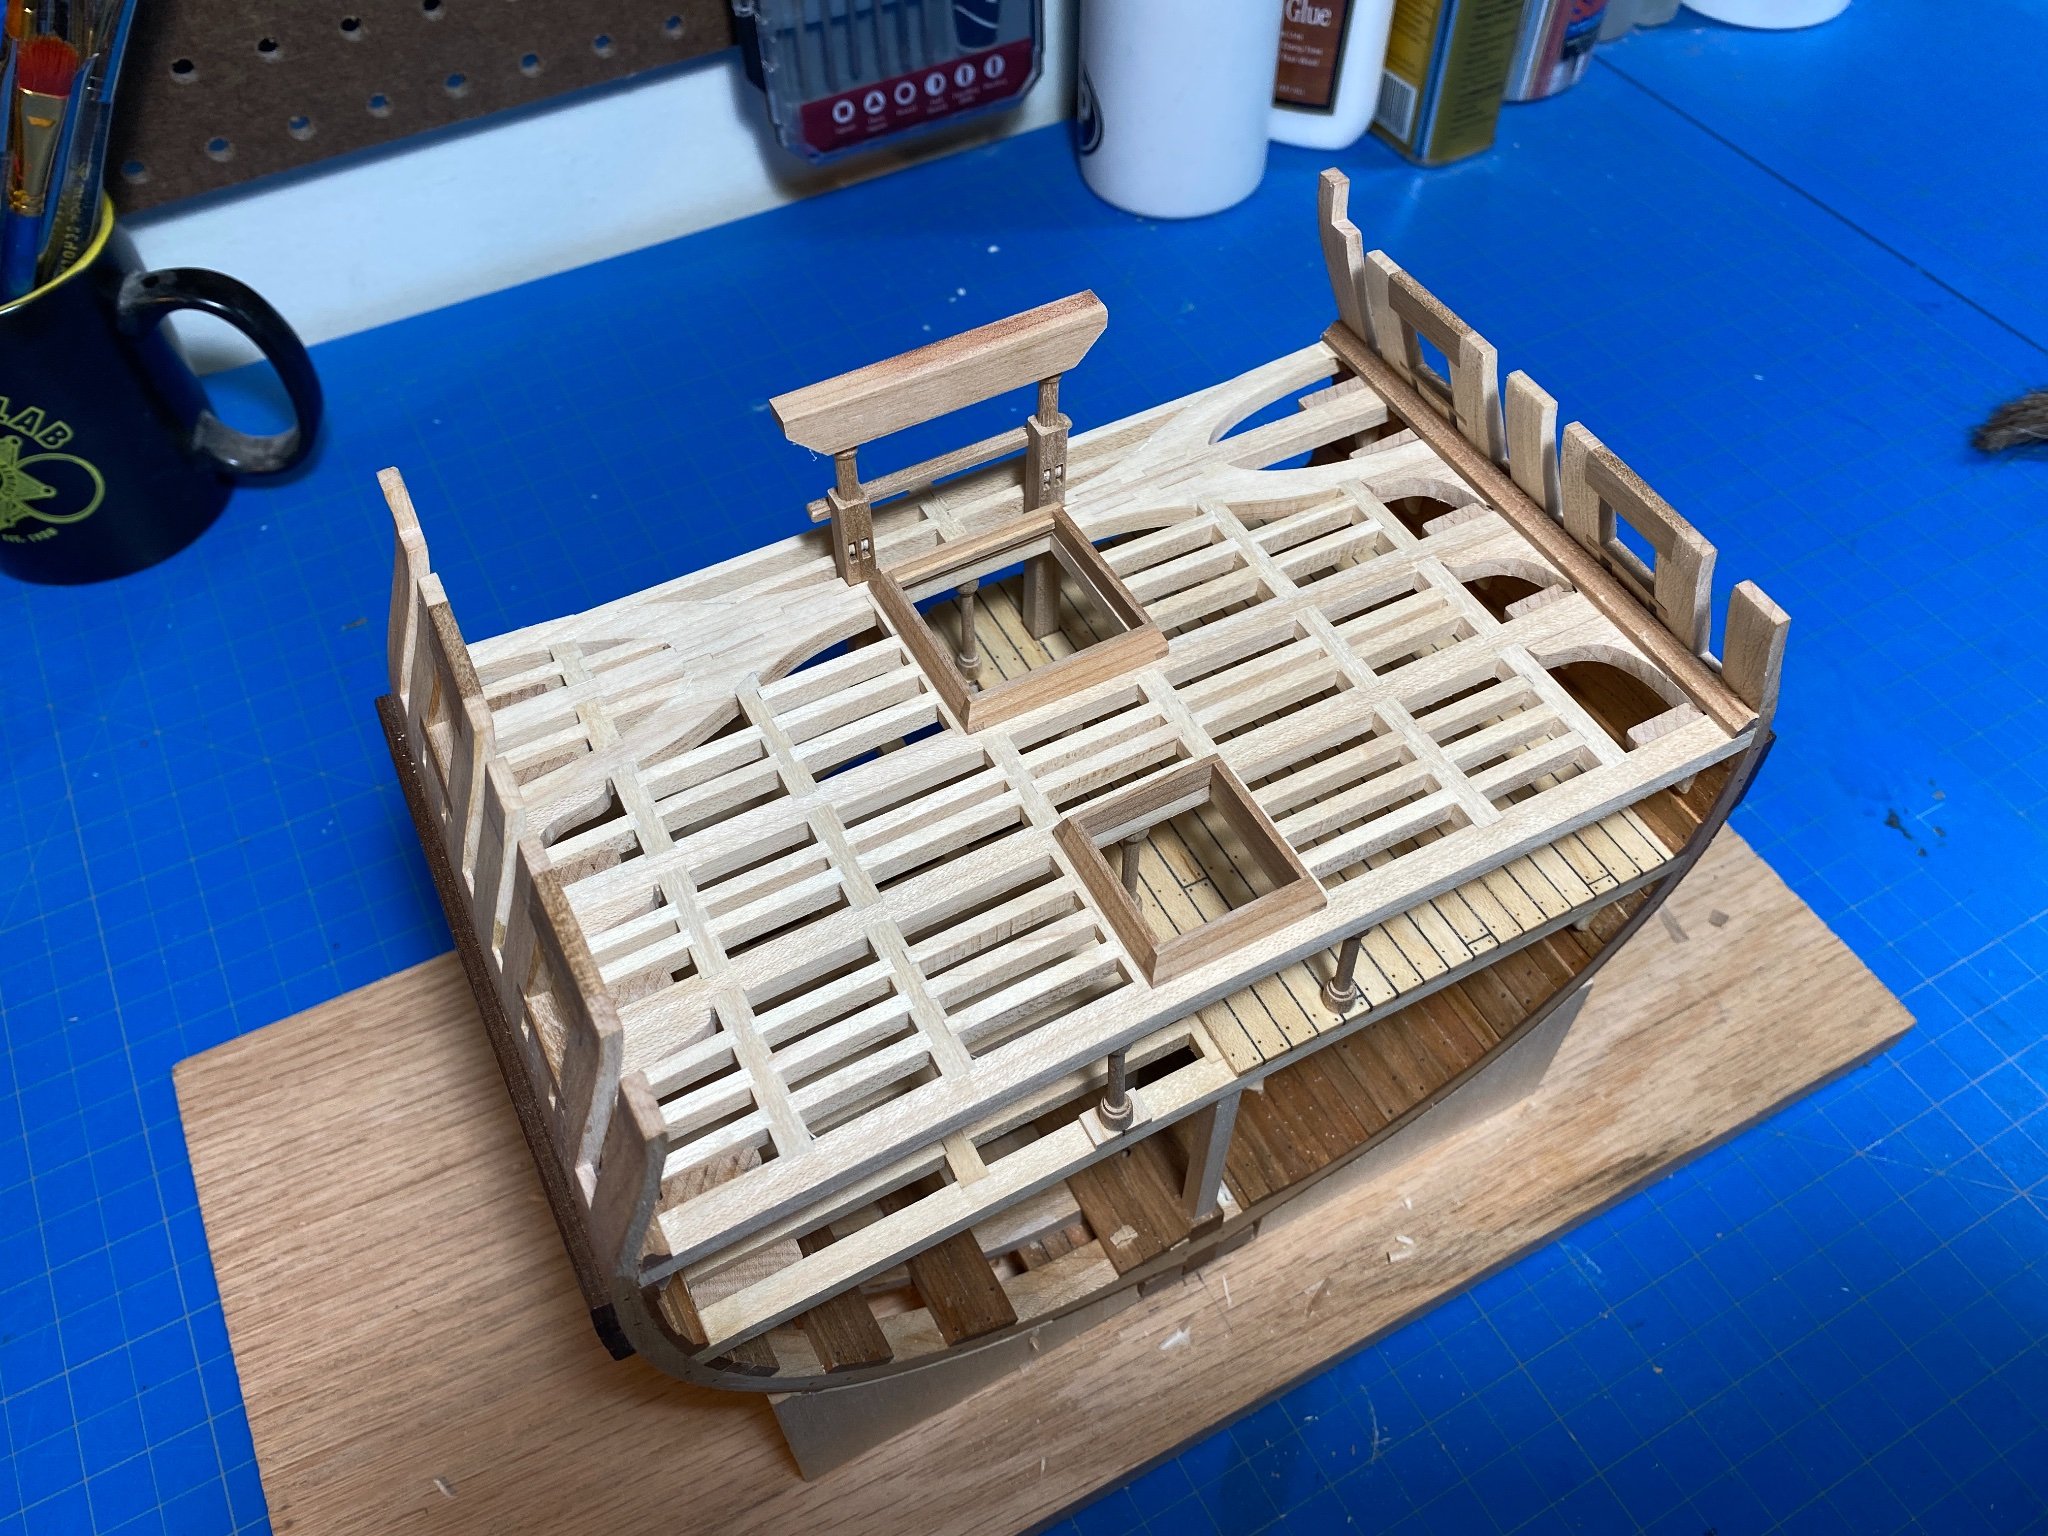
The dummy gallows is just my latest attempt. Its probably my third or fourth... I kept shaping and trying to eek out something more graceful. I hated all of them. I decided to give it some time... ha.
- mtaylor, Edwardkenway and BobG
-
3
-
8 hours ago, Roger Pellett said:
I offer a contrary opinion. Since I enjoy sidetracking threads, this advice is worth exactly what you paid for it. 😜
Don’t buy a rotary tool! Instead buy a decent set of needle files.
Agreed, perhaps I should have qualified my own comment above! I actually rarely use my own rotary tool (Foredom or Dremel) for ship modeling activities. But do love my Foredom regardless.
-
+1 for Foredom. Mine is over 25 years old, and runs like a top. Also +1 for the foot pedal which acts as a variable speed controller - lots of versatility. I also have a Dremel, with the various attachments - its good, but once you've tried the Foredom its hard to say its great.
-
Progress is slow, but is moving forward! I think Ive complained broadly about this but work onsite has geared back up to five-days-a-week so my time at the bench has dwindled significantly. Add to that Fall family activities and well, things slow down. We also bought a camper, so getting all that sorted out and clearing a space on the property to park it has taken quite a lot of my weekends over the last couple months.
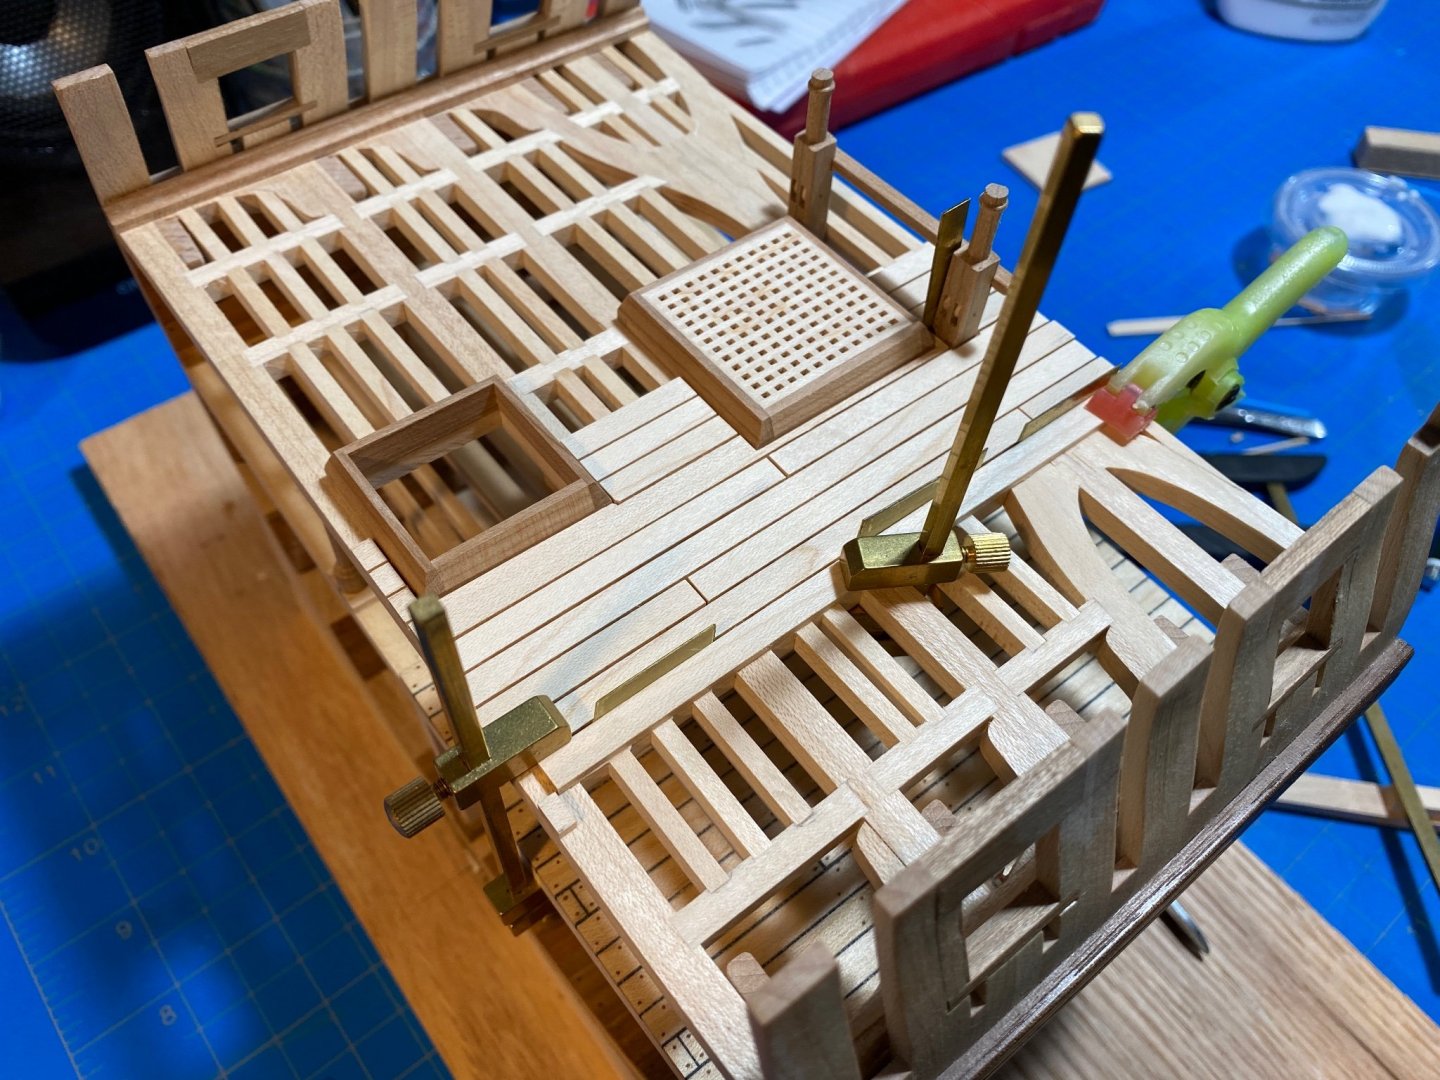
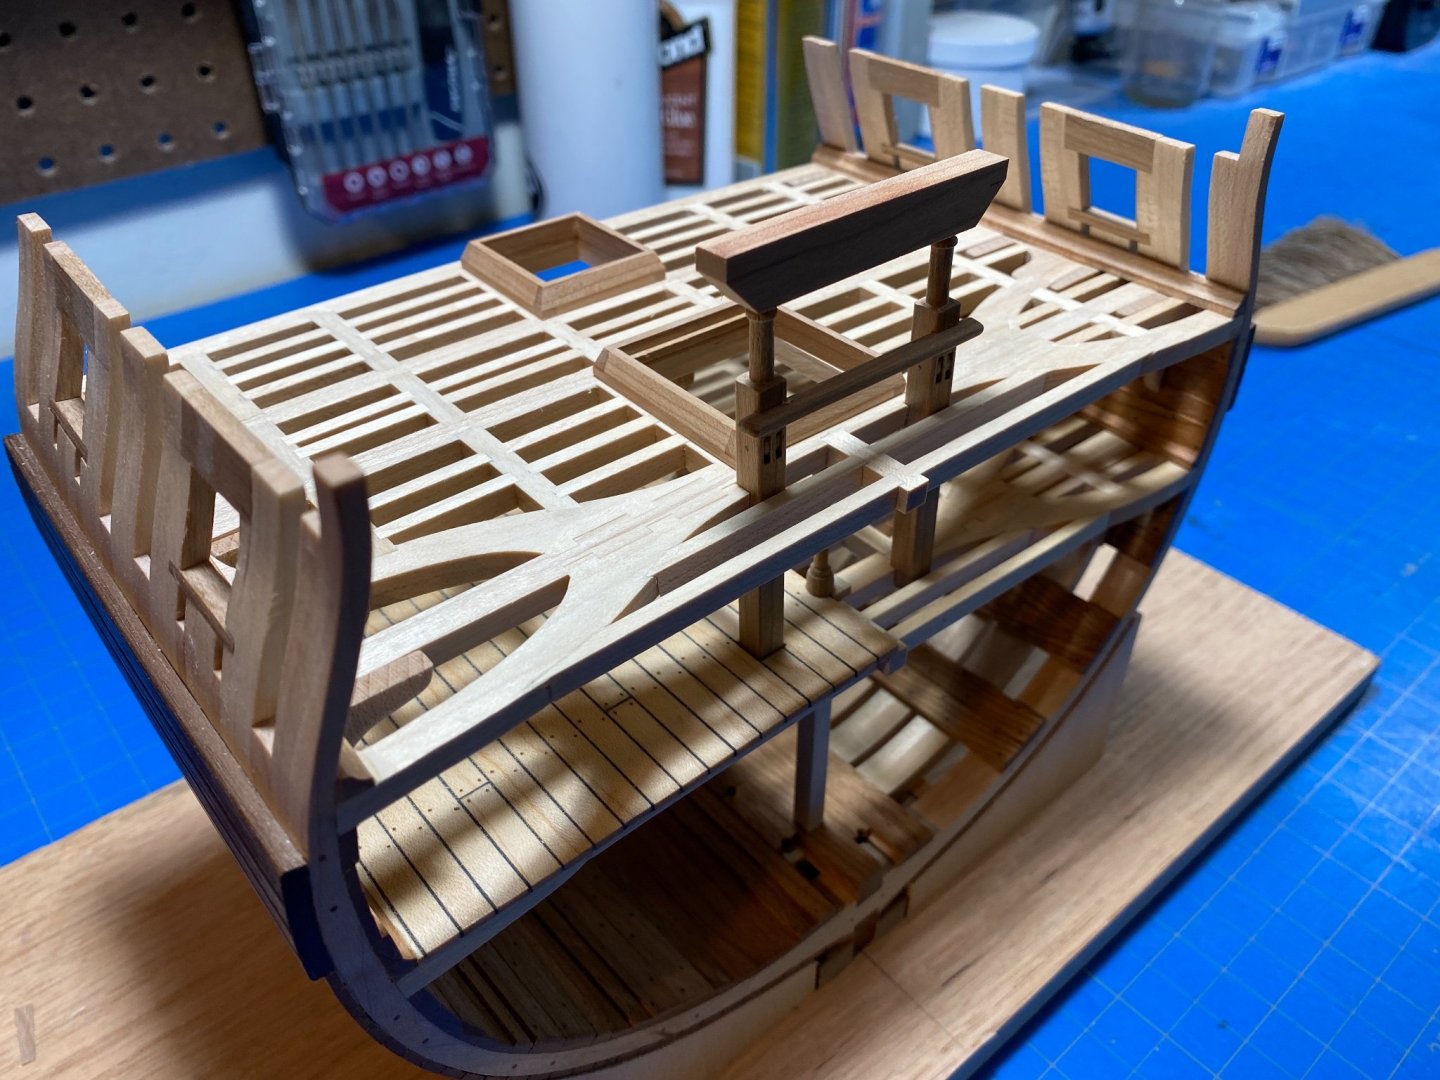
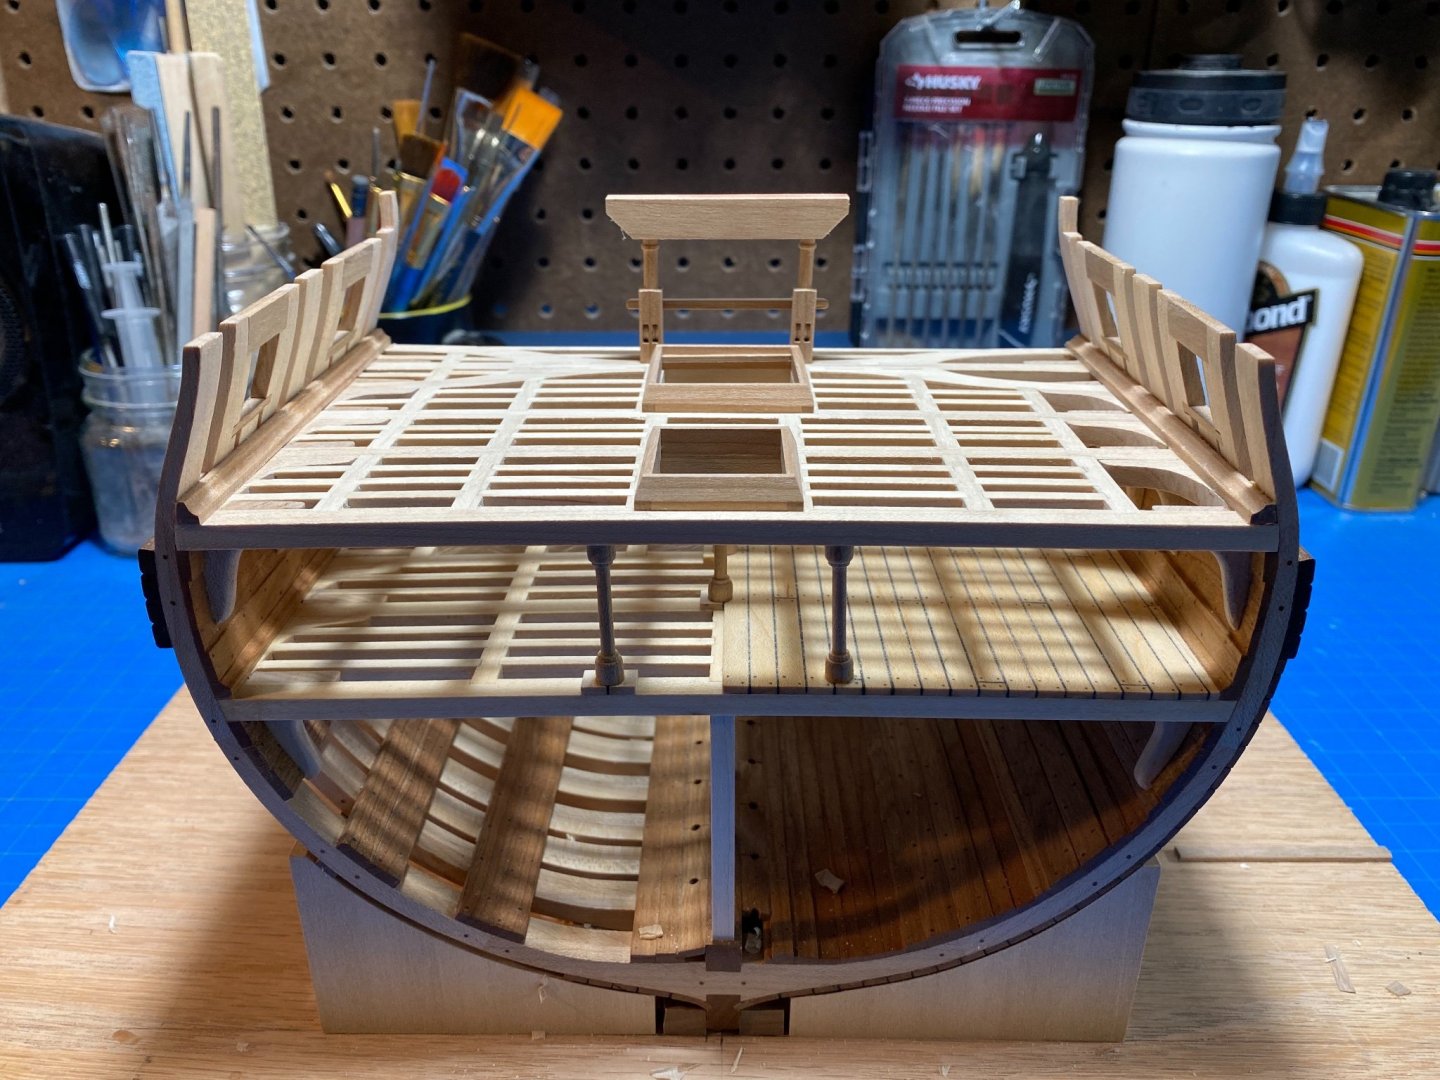
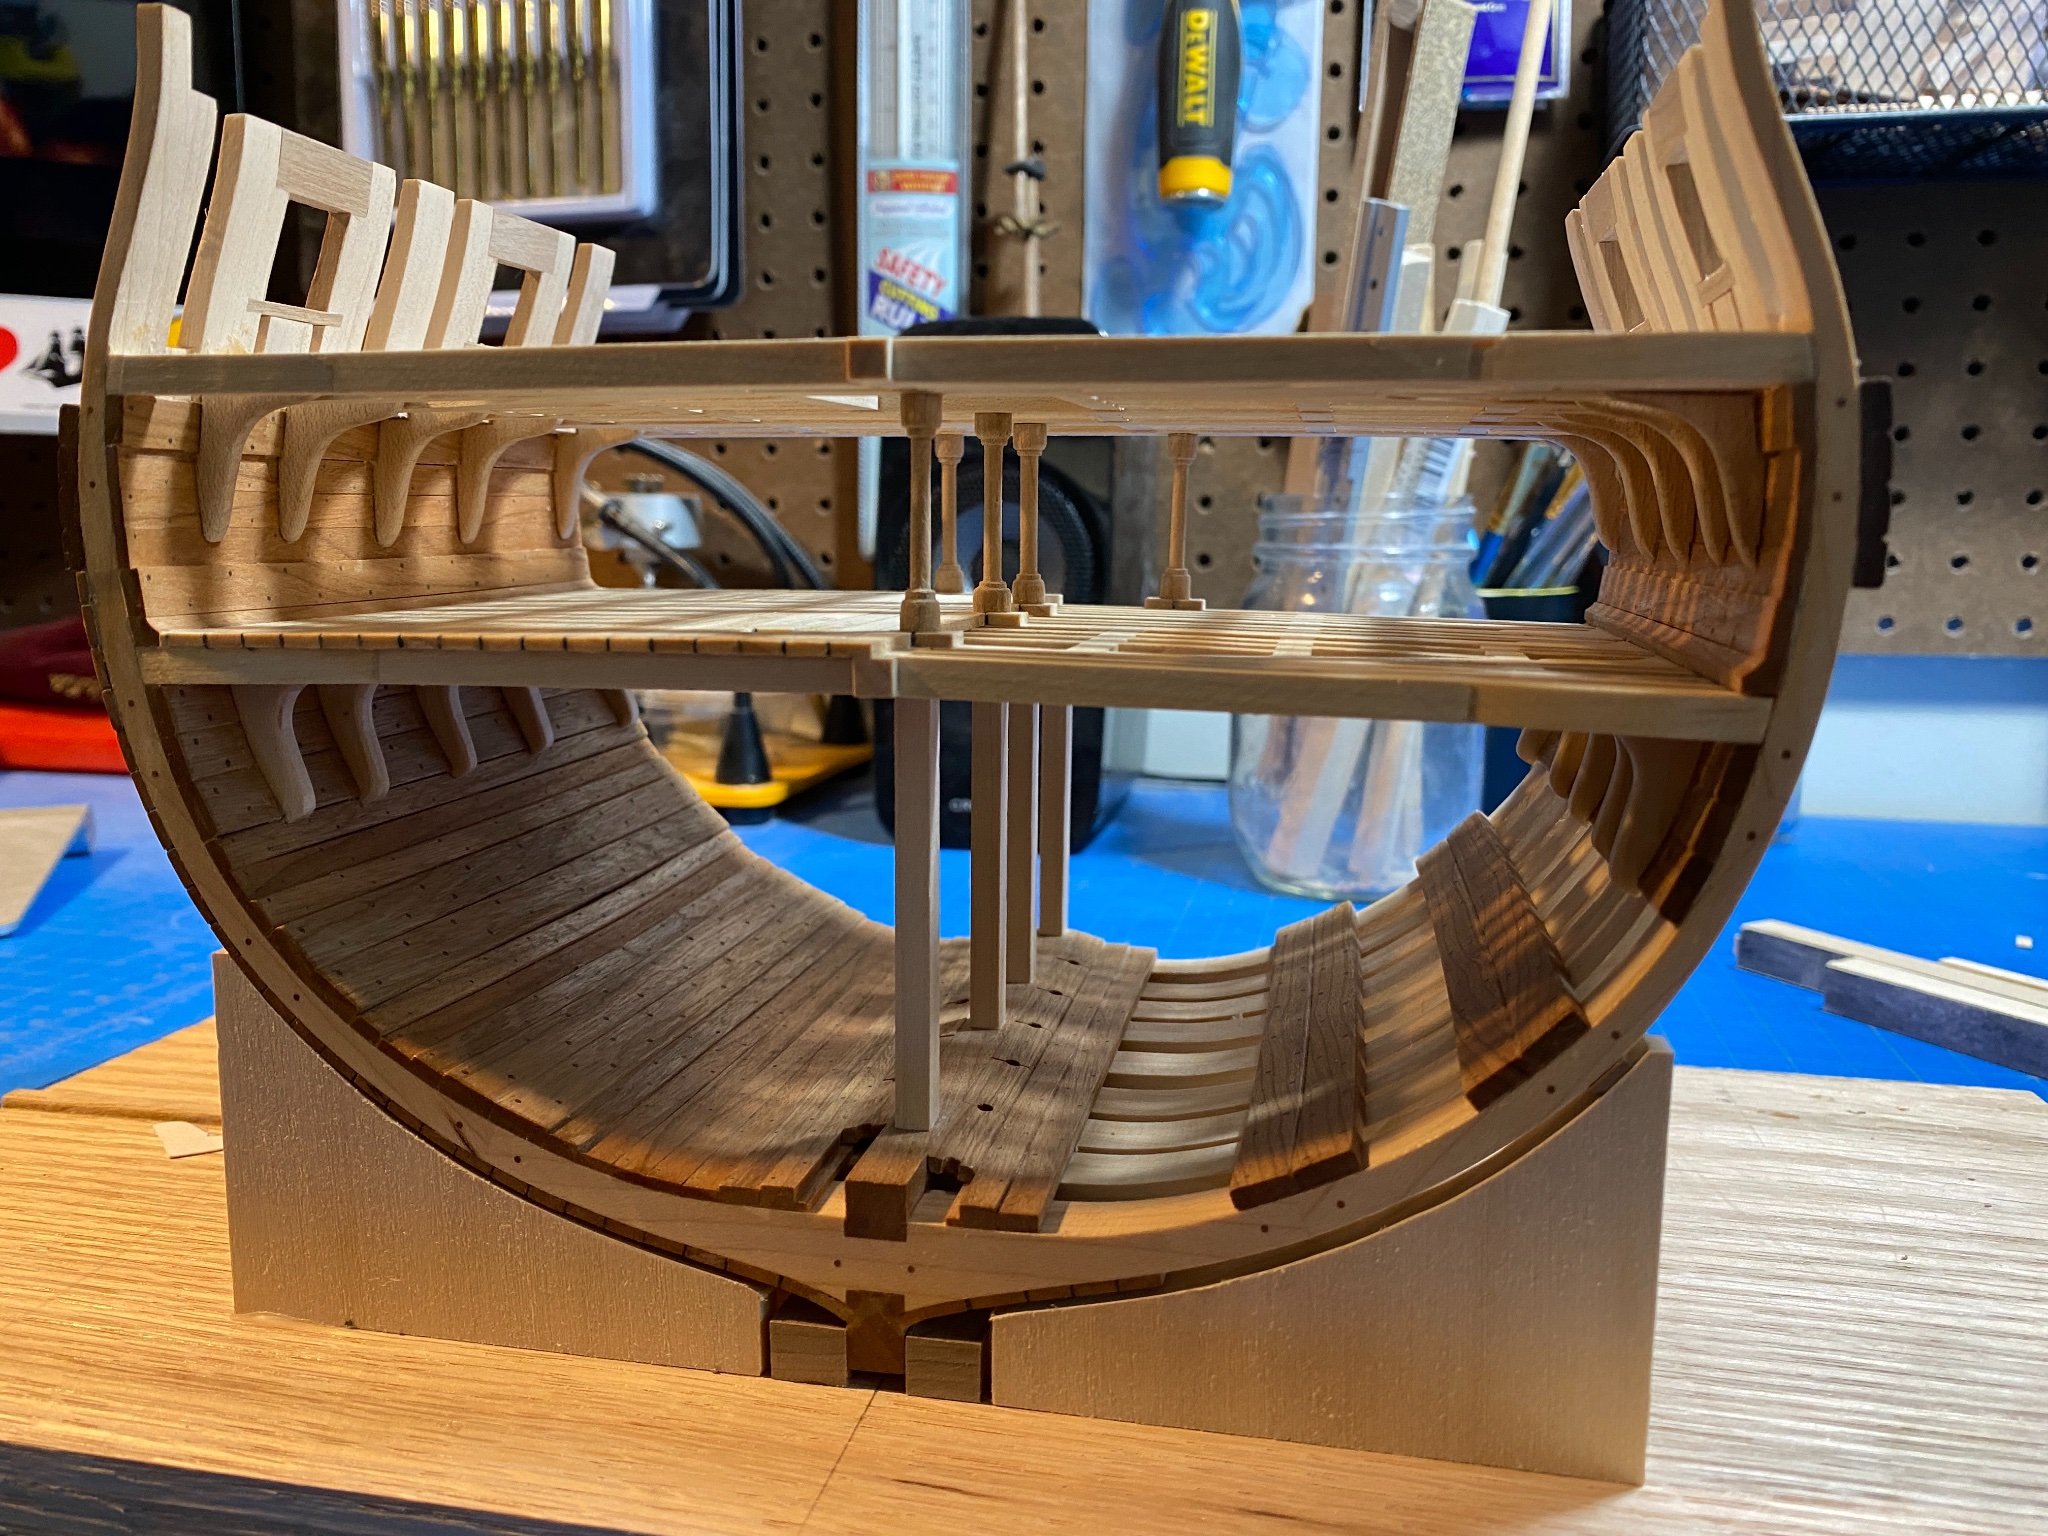
Anyhow.. since my last post Ive gotten all the gun deck framing completed and started in on the hanging knees.
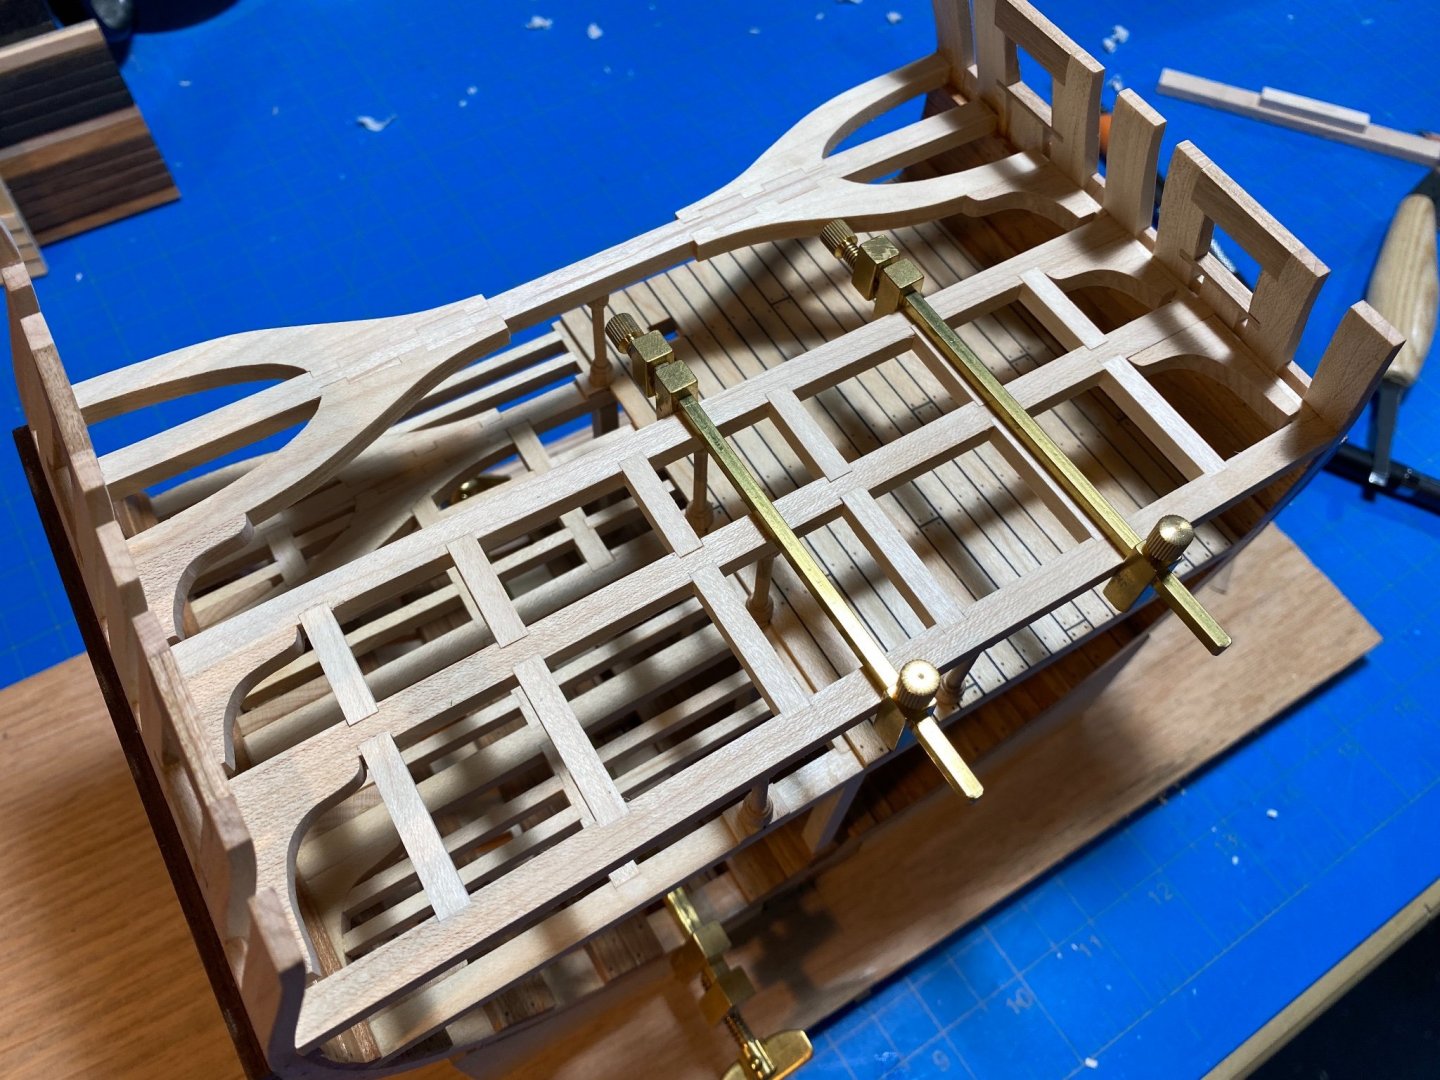


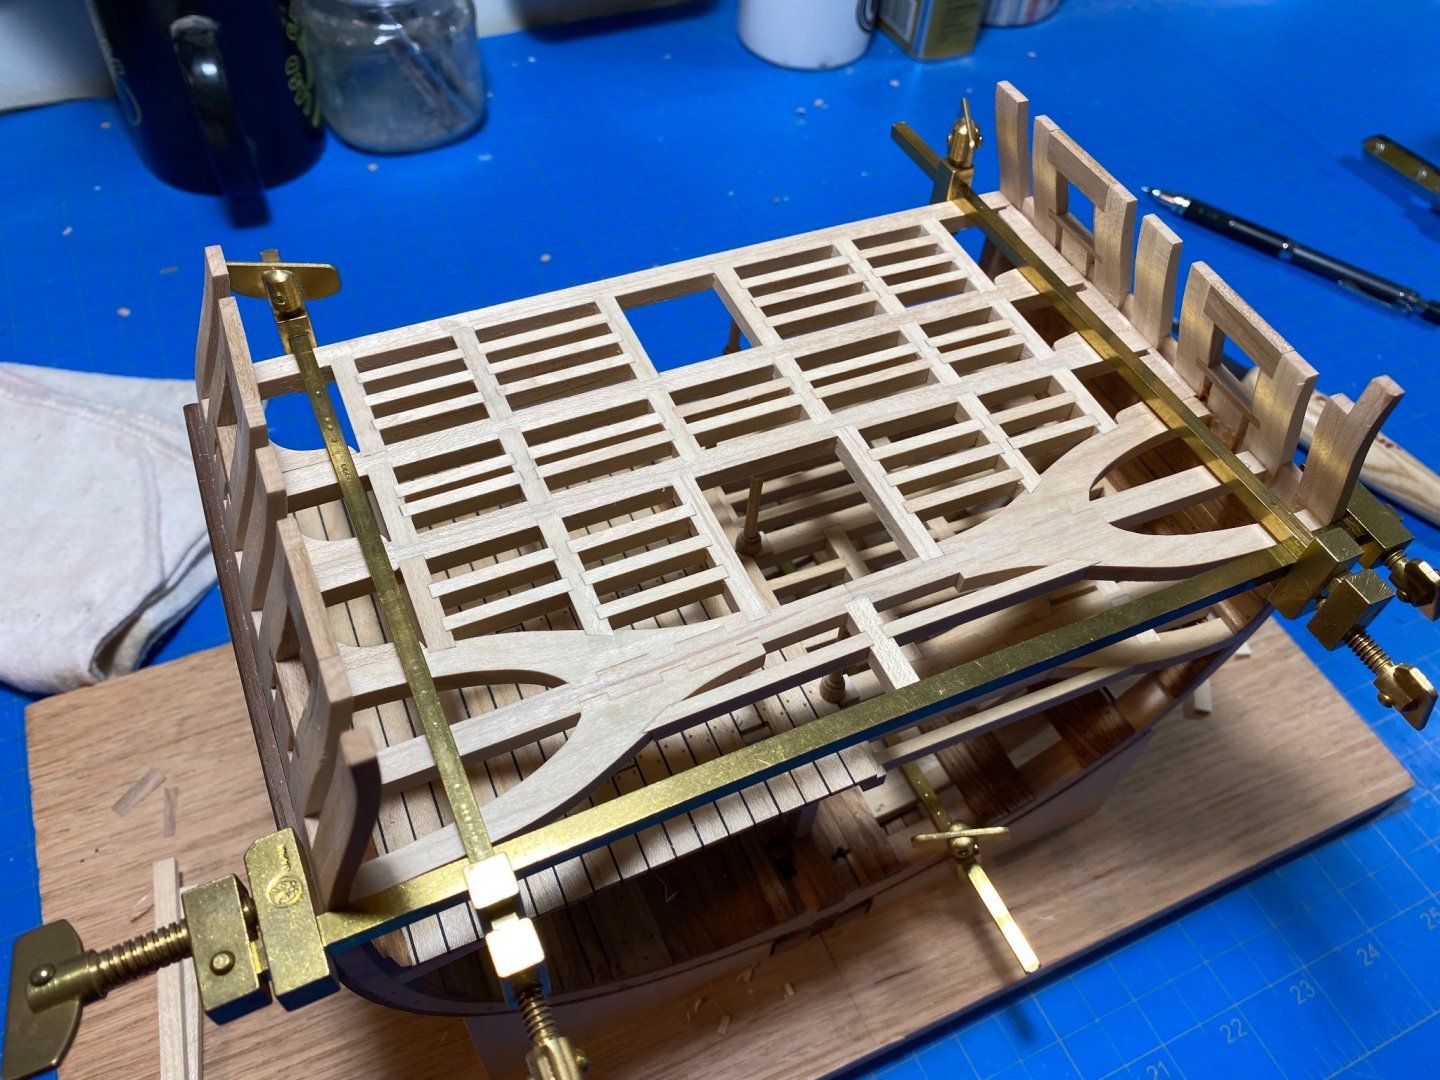
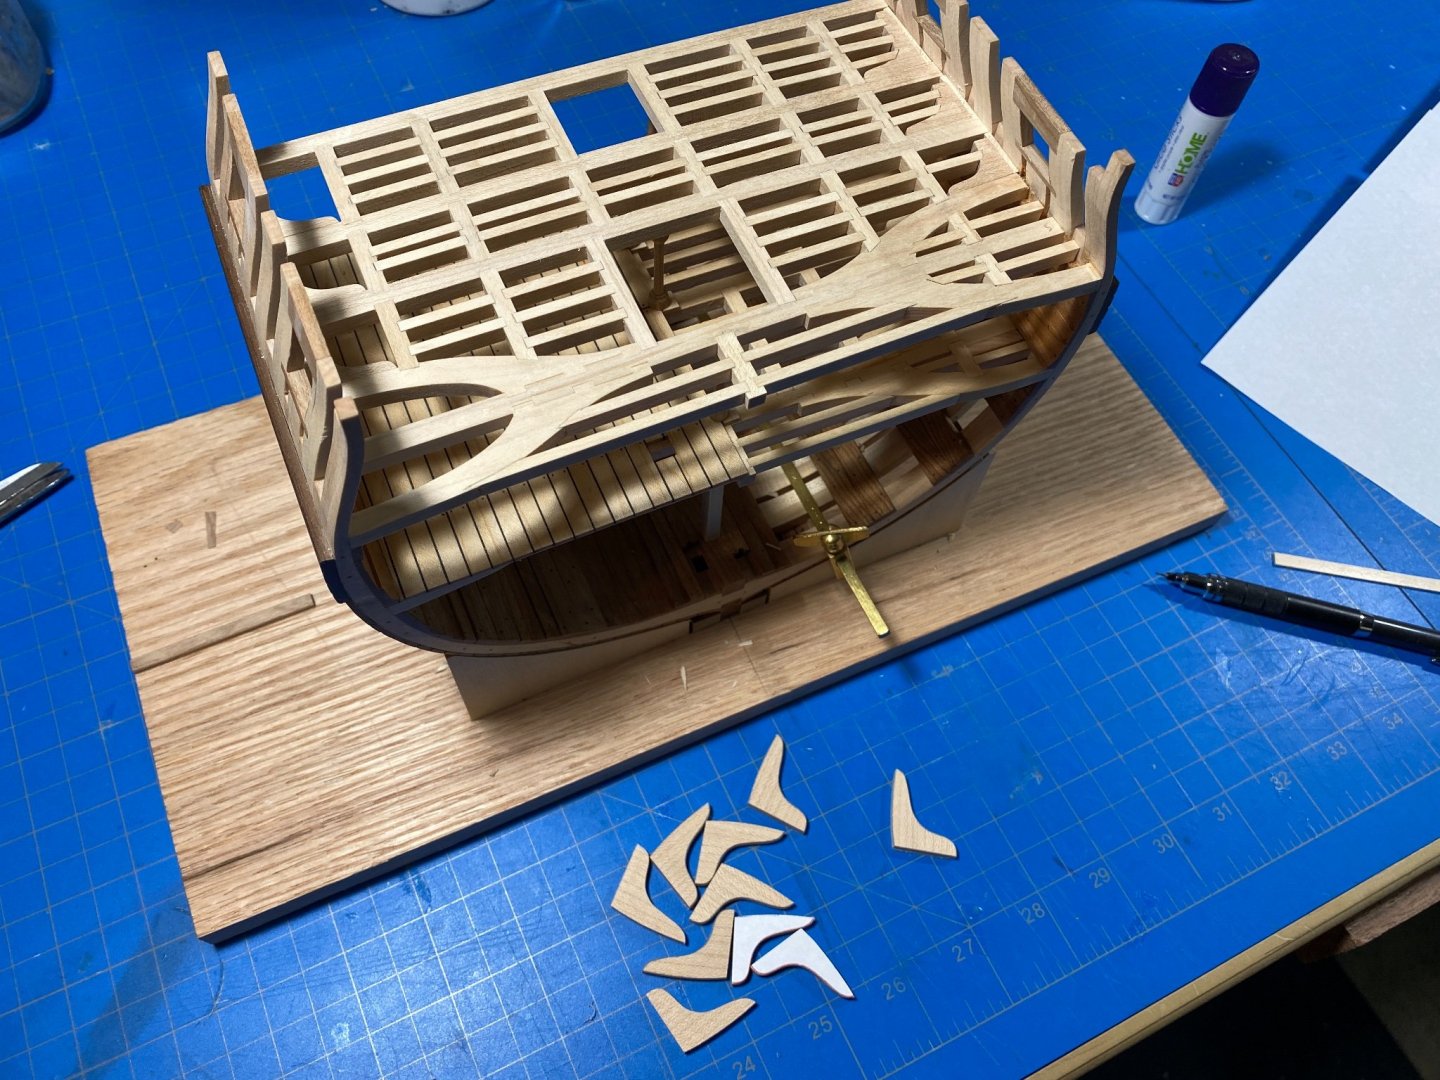
I have to say that the hanging knees are one my least favorite activities. For whatever reason, working though shaping all ten really had my hands ache. Happy with them for now, but as with my lower deck knee's they are subject to later perspective and could get rejected.

After those, and cutting and shaping the gun deck waterways (which Ive decided to redo), I jumped into the hatchway framing. This I thoroughly enjoyed. Really any extended use of my Byrnes saw is just a joy. All the notching and cutting was done on the saw.


Last thing for this update was the installation of the bitts. I left the gallows for later though do have a dummy placed in the picture. I need to look back over TFFM for some ideas on shaping the gallows.

-
43 minutes ago, Jorge Diaz O said:
Hello, thanks for answering. I already built HMS Triton from MSW plans, it took almost three years to complete but there were some mistakes, sorry for the confusion. It's my fault, I thought they were original. Good afternoon sir.
I thought so! I wasn't sure.
- mtaylor and Jorge Diaz O
-
2


Lowell Grand Banks Dory by tlee01 - FINISHED - Model Shipways
in - Kit build logs for subjects built from 1851 - 1900
Posted
Looks like real clean work. That lobster trap is great…. The fun and frustrating bits go hand in hand!