


juleslucas
-
Posts
52 -
Joined
-
Last visited
Content Type
Profiles
Forums
Gallery
Events
Posts posted by juleslucas
-
-
-
Haha, I like your jewelry box, or maybe you can store small materials used for Cutty like deadeyes

- CaptainSteve, mtaylor, GLakie and 2 others
-
 5
5
-
Thank you Nenad and donrobinson!
We have the name as well - Oliver (or Olivér in Hungarian)

-
Dear Friends!
I have just became a father yesterday!!!

My son was born around 10 am with 3720 grs and 54 cm. Admiral and baby are fine and healthy - slow down in progress expected for the next couple months...
-
Some more progress on the Cutty....
As the second part of planking is now completed both upper wooden and lower copper some more productive (at least for me is in front of me). And as I can see these are the details that are really far from the original characteristics, but since I am doing a kit build I am following the instructions provided by Del Prado and making my own version of Cutty Sark - especially with the colors used by me!
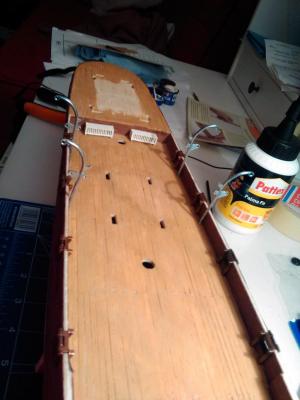
So channels are created for foremast and mainmast - drilled some holes in it to hold the rope ladder and the rigging of these masts.
Also I started to work on all three masts - foremast, mainmast and mizzenmast, together with their crow's nest and all attaching pieces. and also the yards and booms.
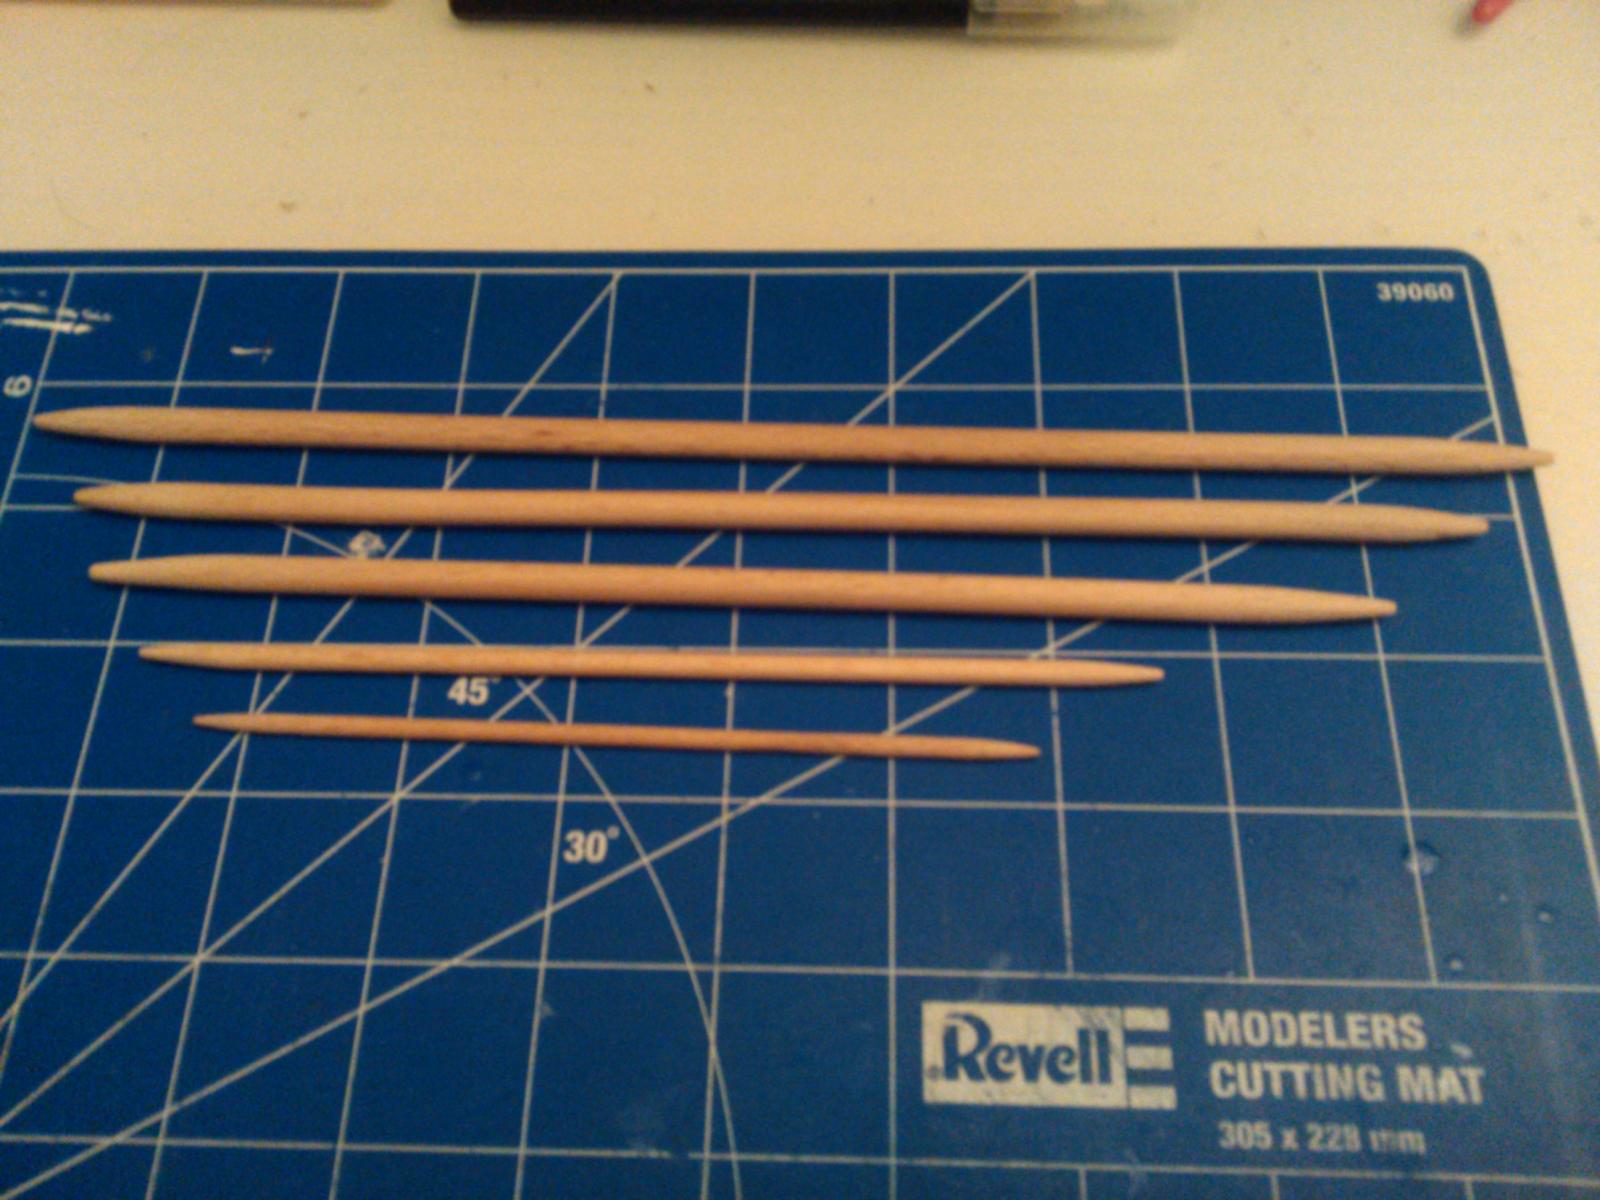
I have to cut the different sizes for every mast and yards, and also sharpen both ends for the yards and one end for the booms.
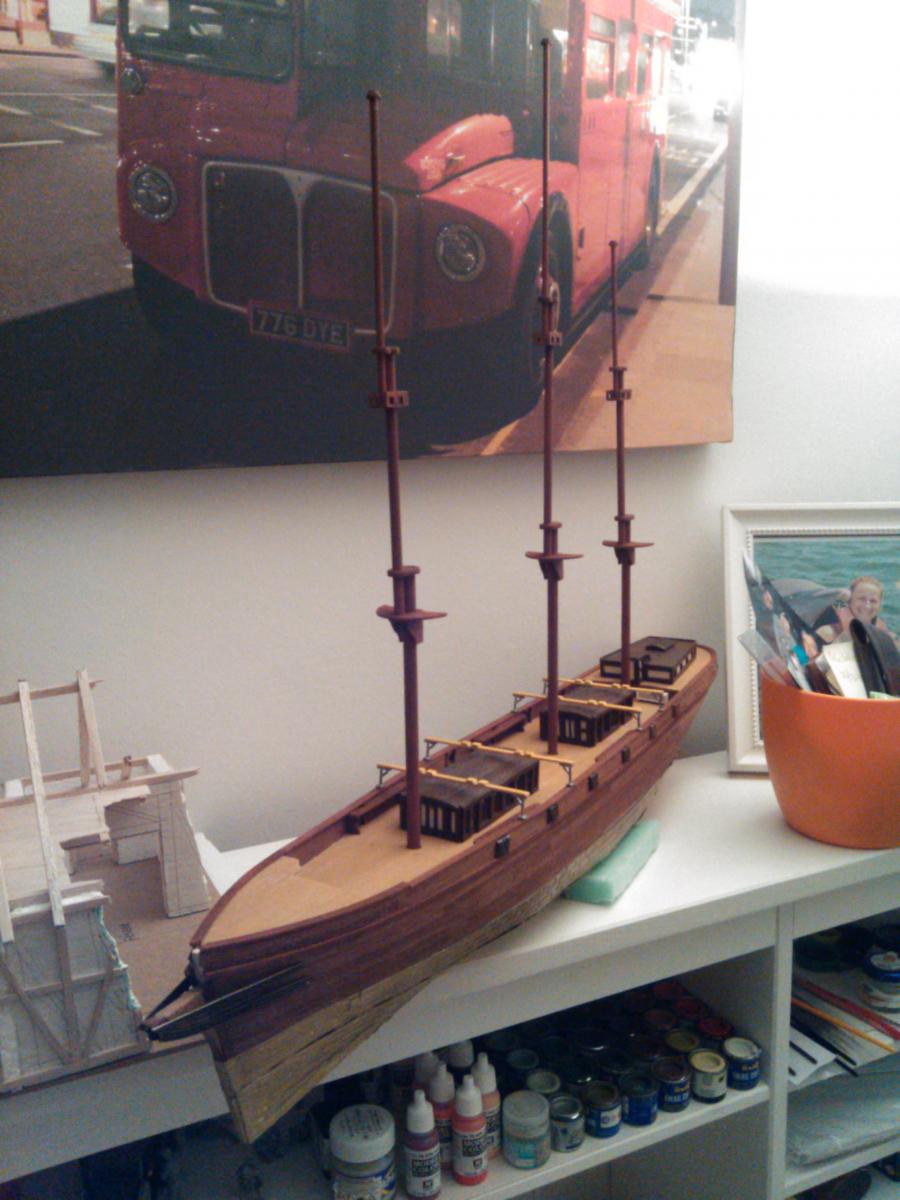
I will use brown color for all the masts and yards, as I like the way it looks like (more than the white one - sails will be white).
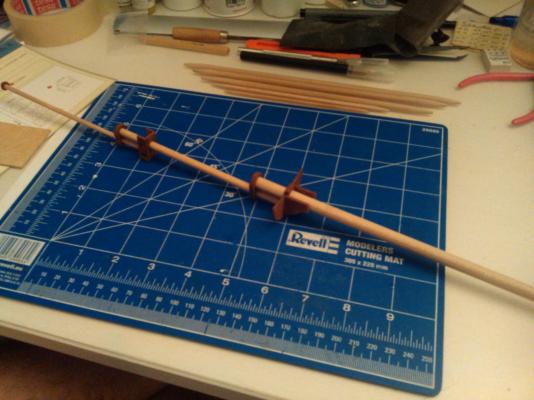
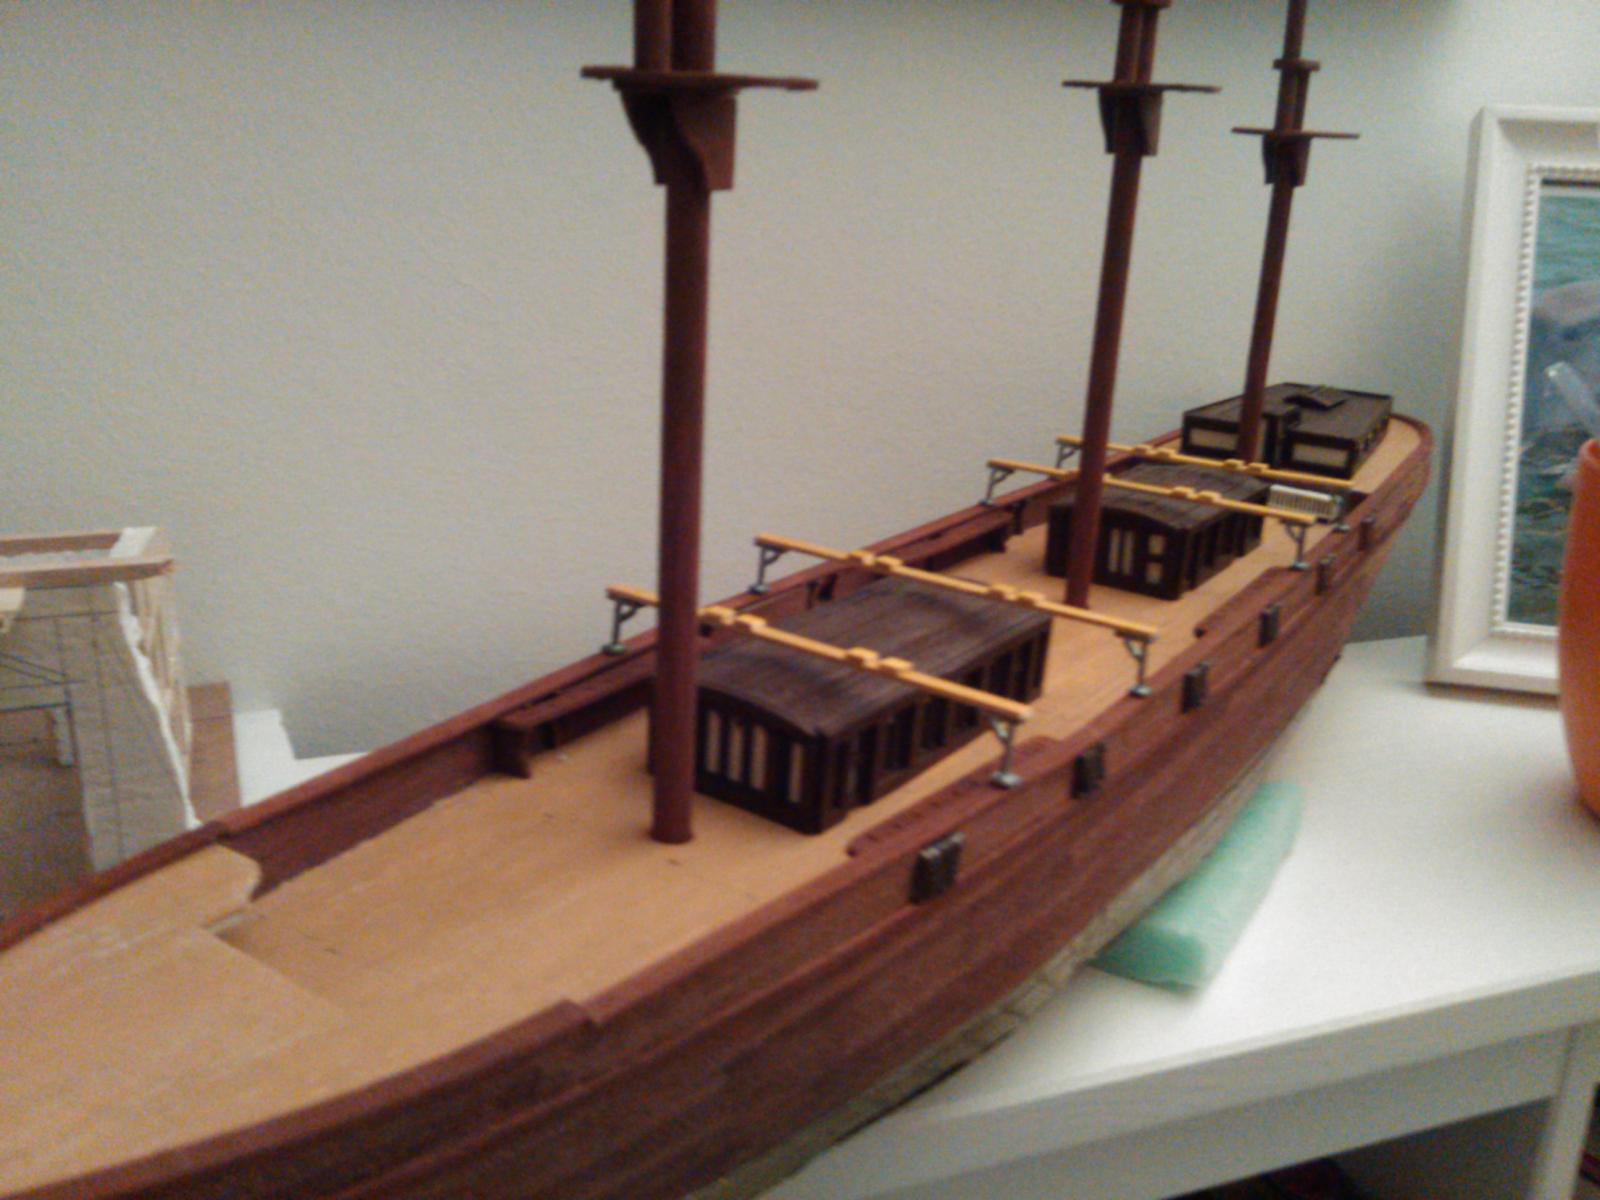
And this is how it will look like once they are fixed to the hull - not yet done...

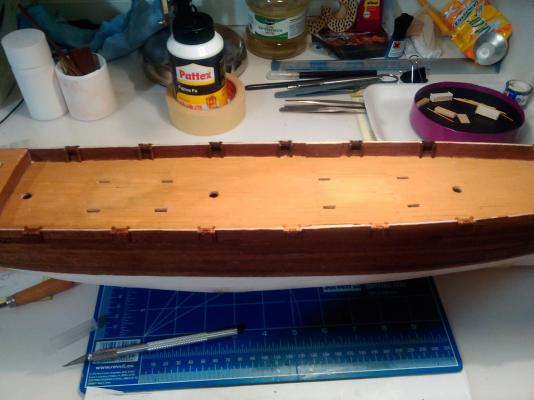
and a closer look:

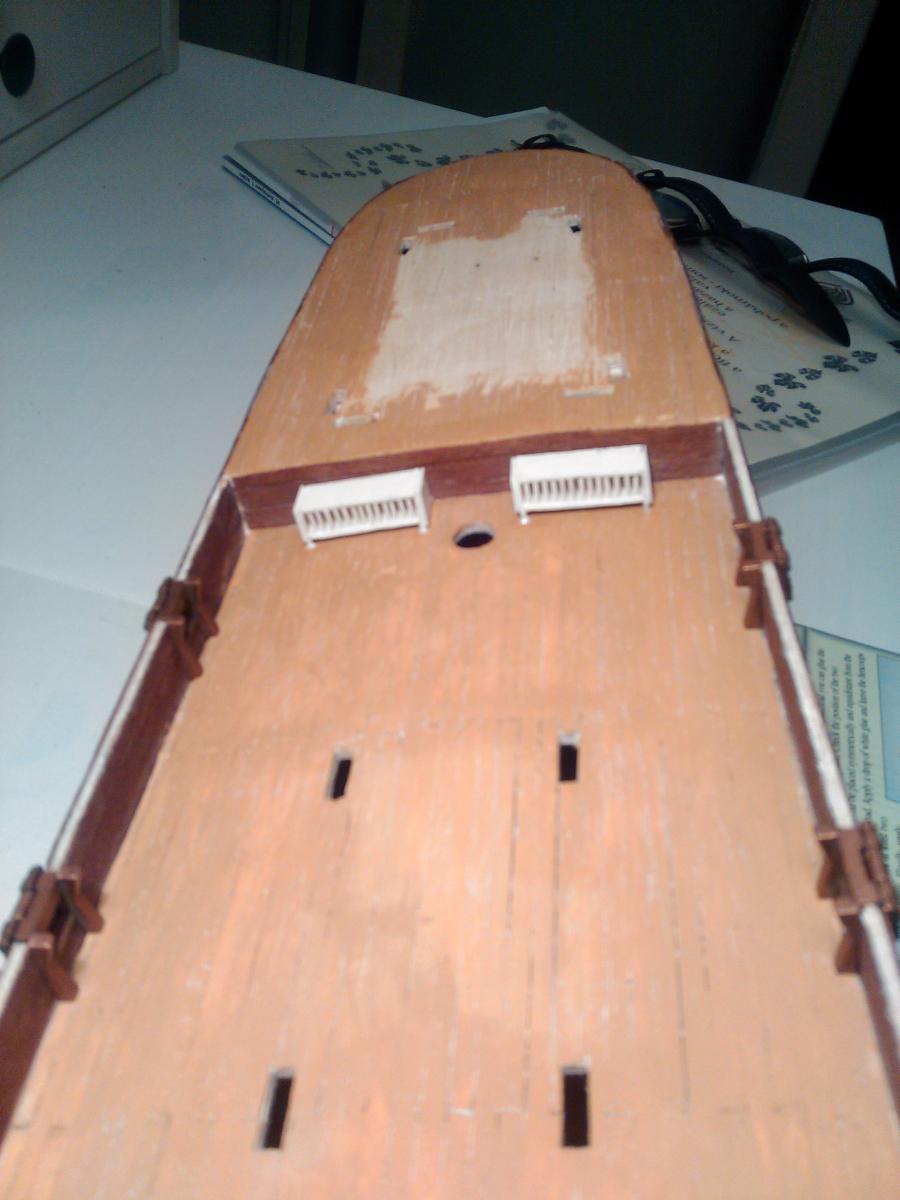
From this picture you can see, that all the deck houses are now attached, and the poop deck house has its skylight window attached as well.
Above the main deckhouses I already prepared the strakes to hold the boats and shallops (prepared all 4 of them already.
Also I have prepared the compass (there was nothing to prepare on it
 ), the anchors with their chains and the bilge pump - will be attached to the deck sooner or later.
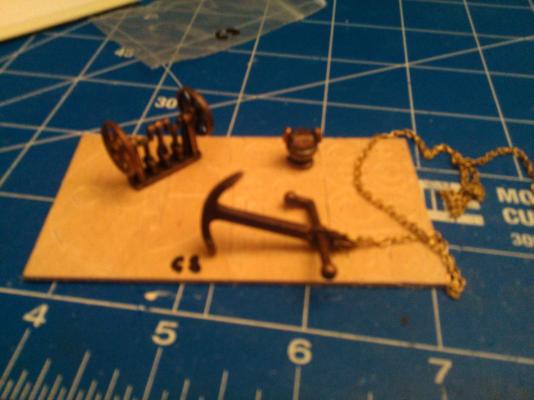
Any opinions, comments are welcome.
P.S. - Baby is waiting his time (12-Sep) as it seems...
-
Wow, wonderful work, very nice details, beautiful craftsmanship. I wish my model would like similar to yours at least half of it
I like how the bilge pump looks like and also the cover for the hatches and etc....
Keep up the good work it is so good to follow your pics.
-
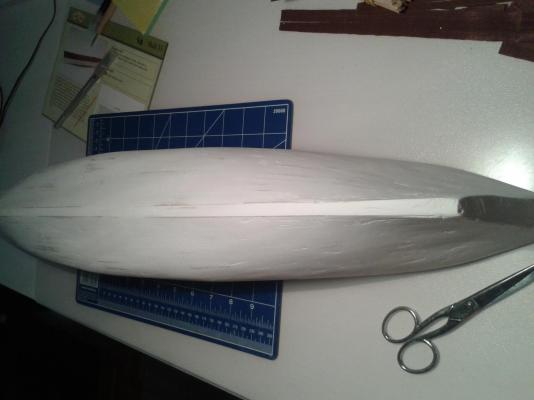
Well it was a very very very hot summer - impossible to concentrate on modelling as no air conditioning...
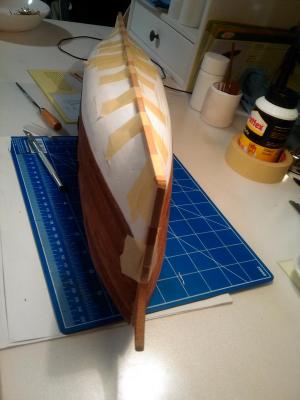
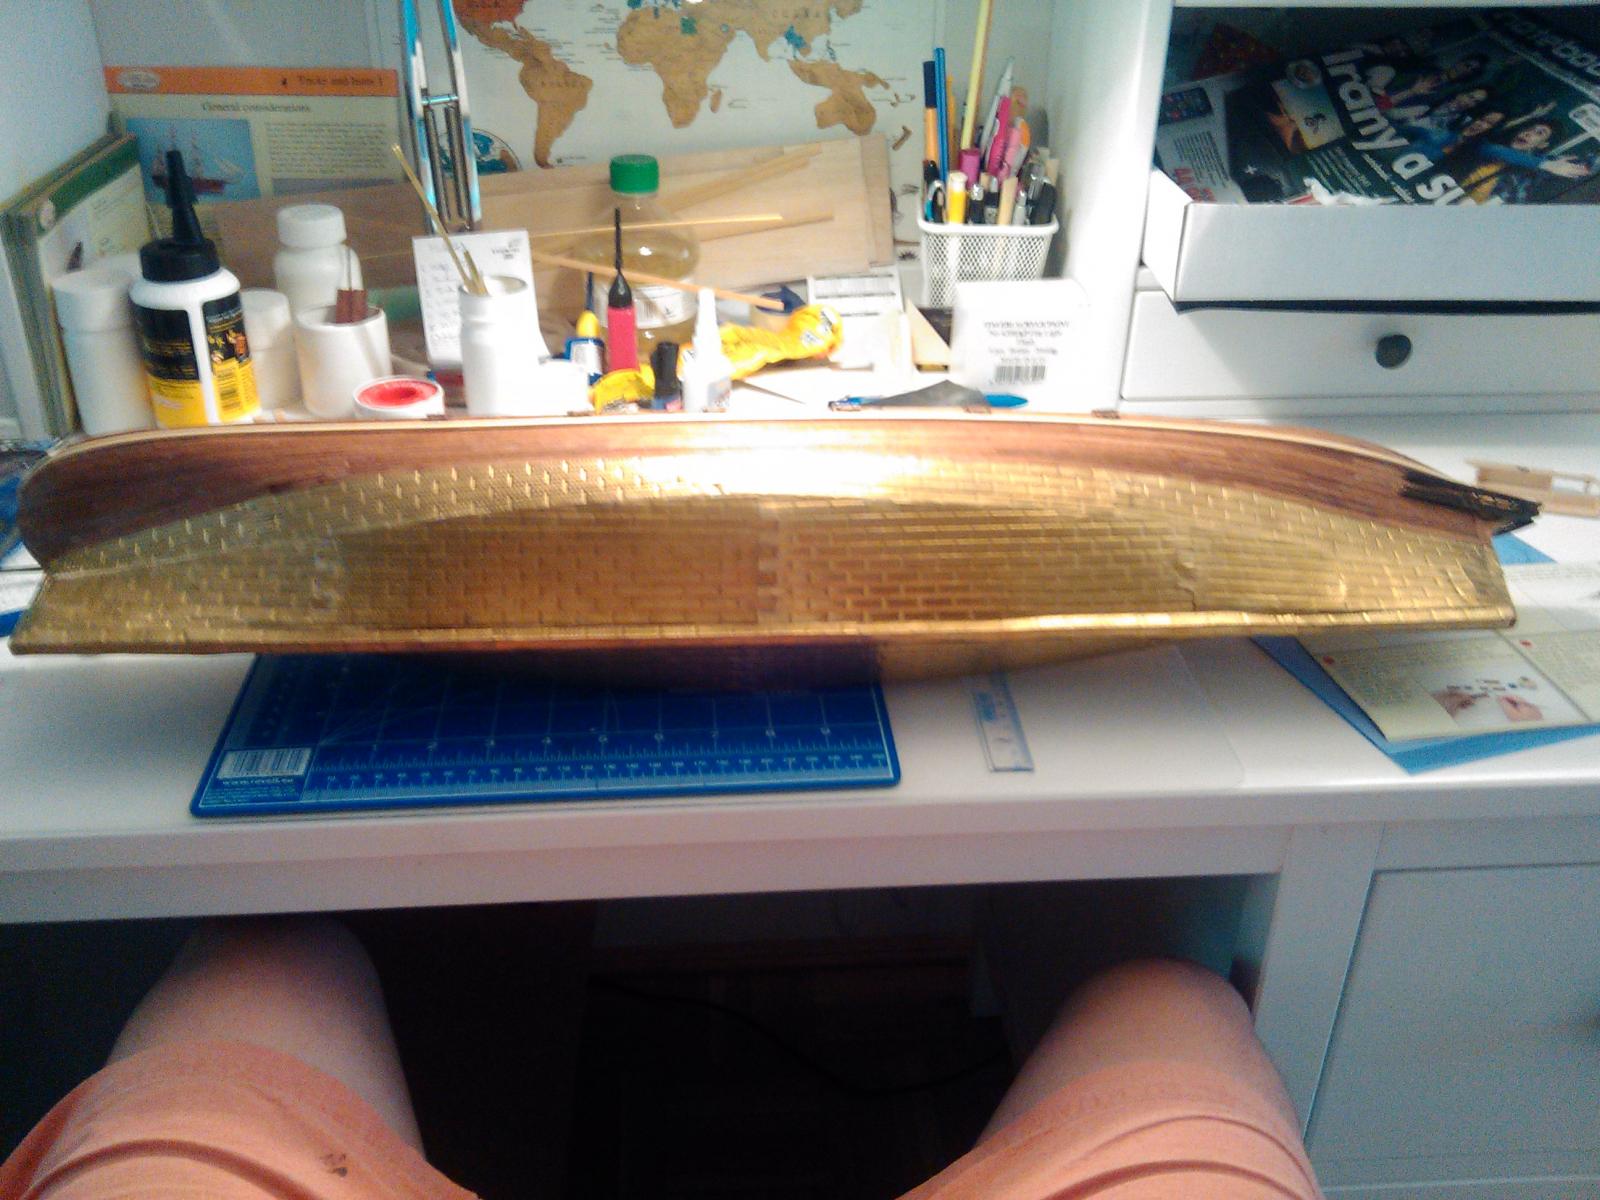
Although I found a few cool days to progress with the copper plating and now here are the results (not the final one, as still some finishing touches are needed, where ever the copper plates are not attaching correctly to the hull)
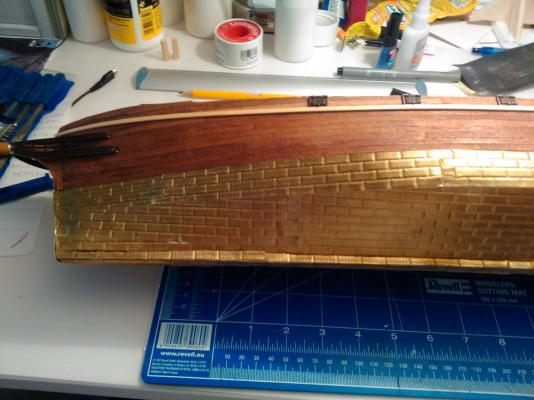
The biggest problem for me was to find the correct glue, that actually hold the plates firmly, and easy to work with. I have tried all the instant glues I had at home, but somehow was really hard to work with, some plates got kind of "ruined", but I will leave it as it, kind of like real life damage on the hull
Finally I was able to buy an instant glue from Chinese shop for 400 HUF - that would be little more than 1 EUR. Works and holds pieces perfectly, although there is no time to play around
I had to try the pieces 100 times to make sure they align correctly. Sometimes I had no patience to try them that many times - error is visible from close up ... that would be a quick fix on the way - should be corrected once in the dry dock

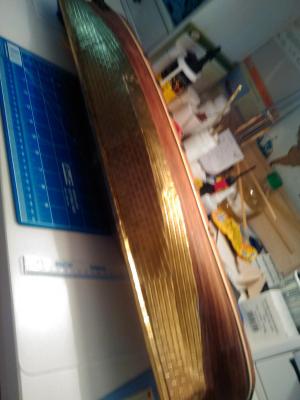
The pictures are bit blurry, but copper plating finished on both sides and keel. I have also attached the bow and stern decoration plates that came with pack.
Further updates on deck work is to come soon, although Admiral is now in week 39!!! So baby is coming in any days.... excited times for me, scarifying times for Admiral (baby is now around 4kg...)
Cheers
-
Wow Nenad!
Wonderful job with the deadeyes, and honestly one of your photos taken of the ship looks like standing on the deck of a real ship
On the other hand sorry to hear about the sickness of your mother-in-law. We in Hungary say that trouble has three times... I guess you are there, from now on only good things would happen to you!!
Gyula
- Piet, CaptainSteve, Omega1234 and 2 others
-
5
-
That is a good suggestion, thank Marc.
As I was checking the copper plates provided by this kit, I have already realized that there are some already different in color, and I will try not to use them, as I hope I have more copper plates than needed to cover her.
But definitely I will put them on open air, for the benefit of Admiral, she will love all these copper plates scattered around the house
:D -
-
Marc,
Your build looks fantastic and very detailed, keep up
- tasmanian, GLakie and keelhauled
-
3
-
Okay, it is time for some further updates, and I am not talking about all the new furniture I installed in our flat... As we bought 2 big wardrobes a new chair for my Admiral and sold a big bookshelf and a smaller wardrobe.
Still some more furniture is coming in, counting a baby bed, as now we have to prepare for the new member of our fleet
Coming in September.So besides these movements I had little time to deal with her, but I have a few details ready (still following the assembly plan step by step
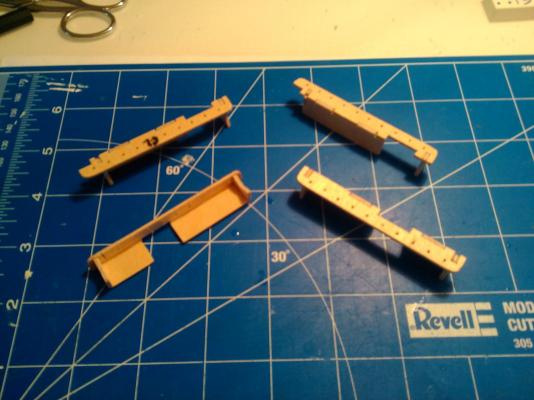
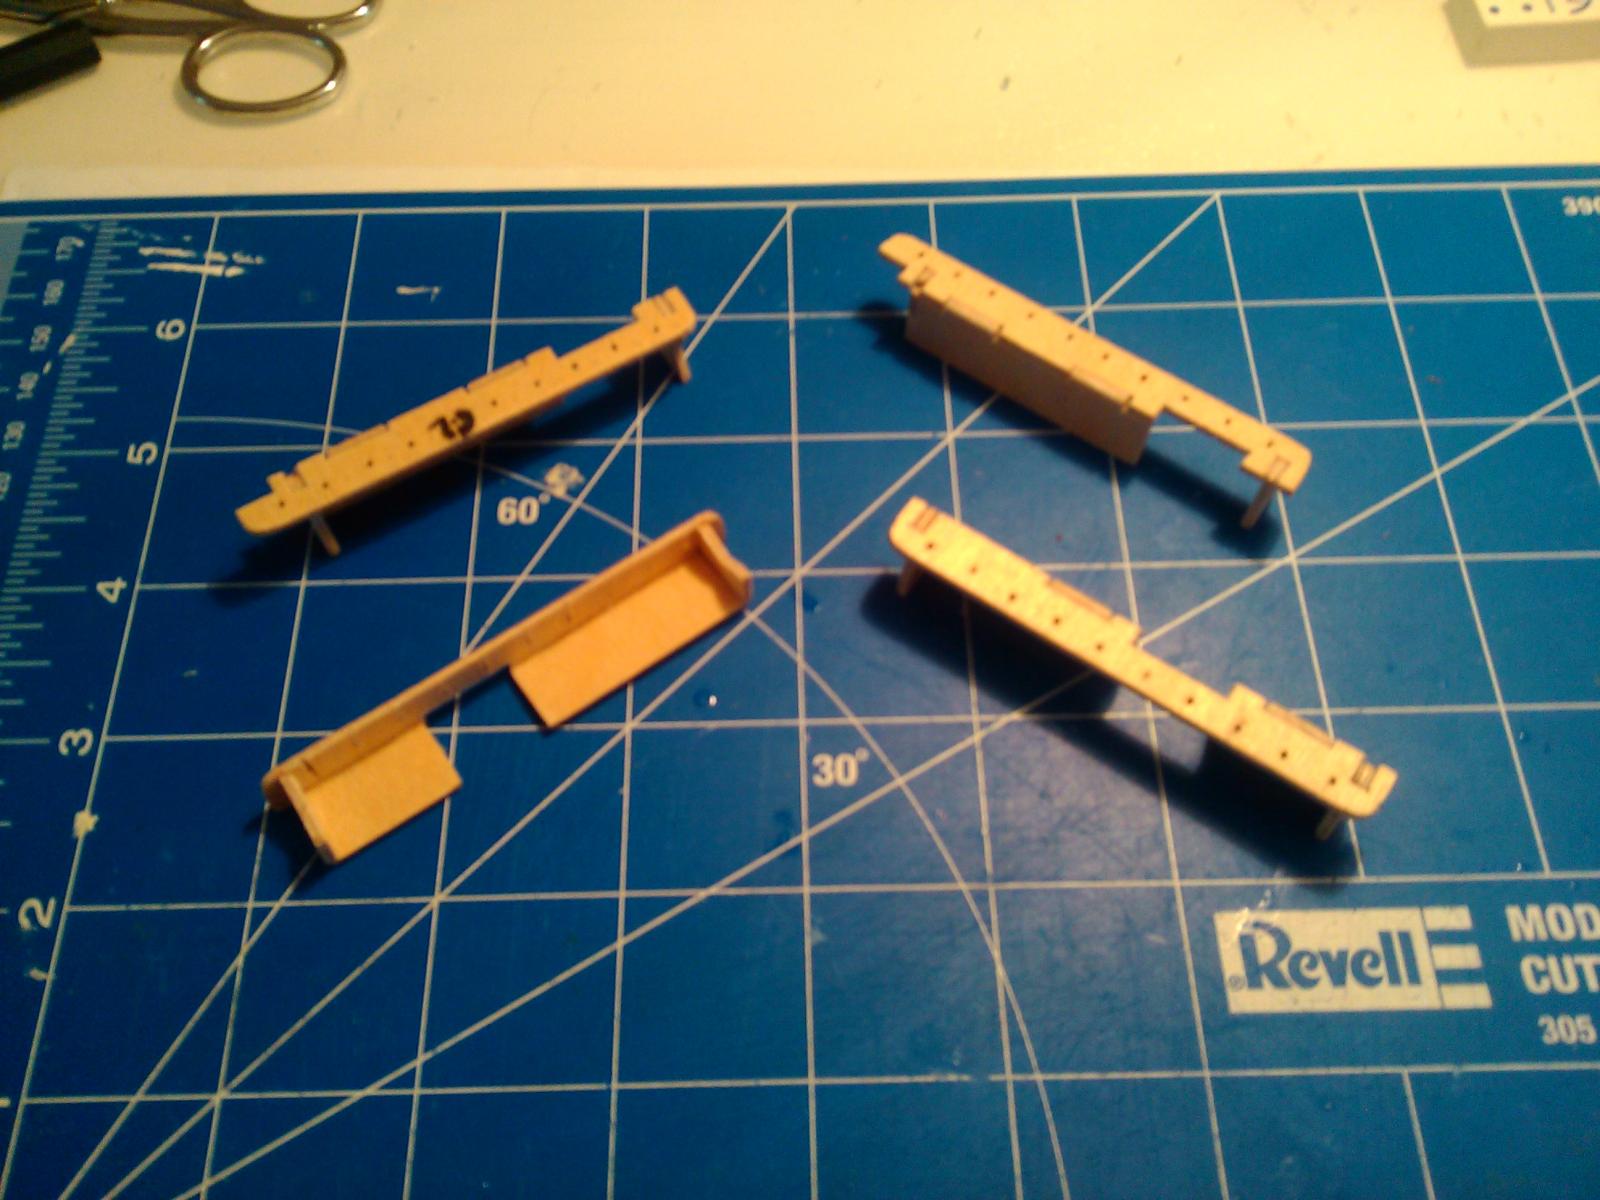
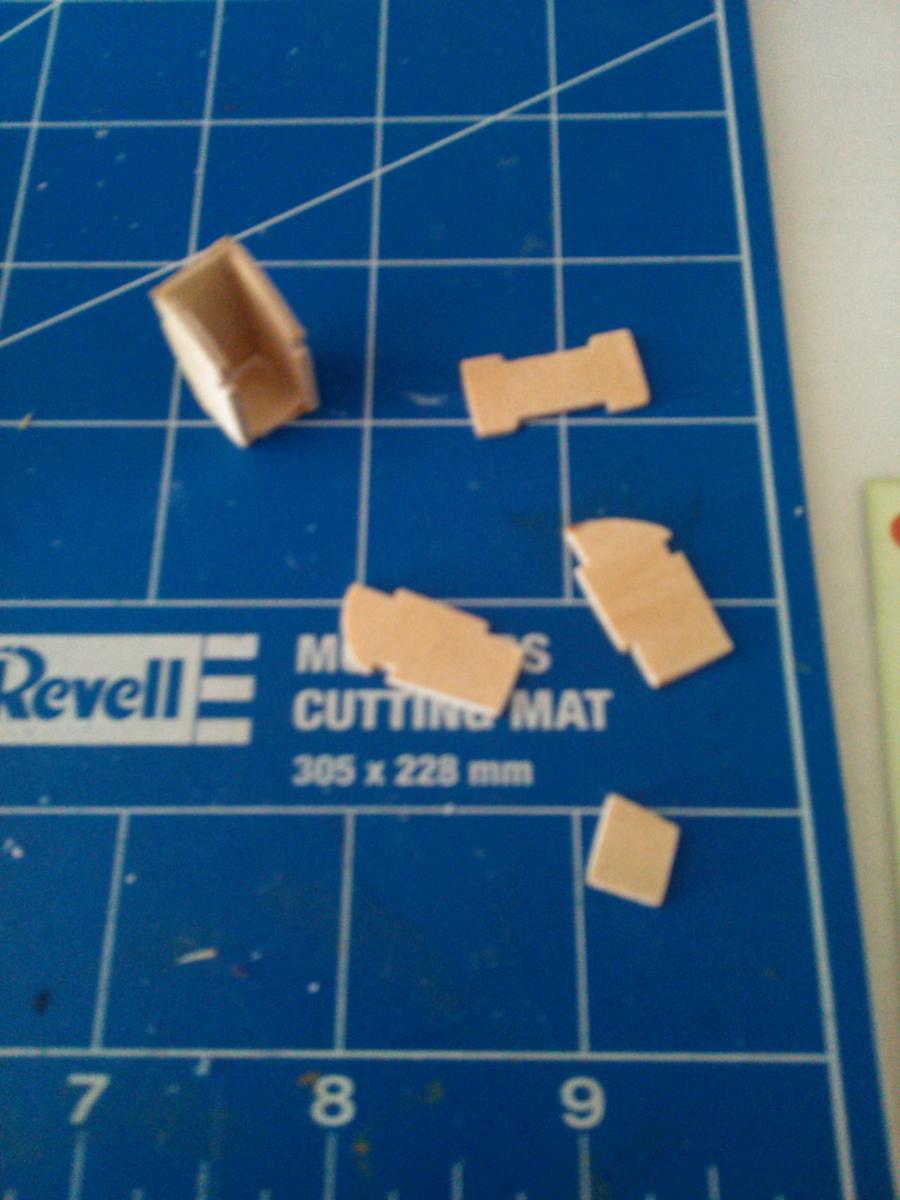
)I have created the toilets, by cutting the sides, attaching them and painted in white, while using a narrow strake cut in small pieces to create the dimension of the brown sides and the white roof for the toilets.
They are not yet attached, as there would be still more work to be done.
Raw material:

Final result:
Also I have measured and created the holes for the Davits, which will be used for the life boats as I understand.
There is no much work with the davits itself, as they are already shaped and painted, so easy job....
The next action will be (and starting soon) is the copper plating of the lower part of the hull. I am excited for sure!!
-
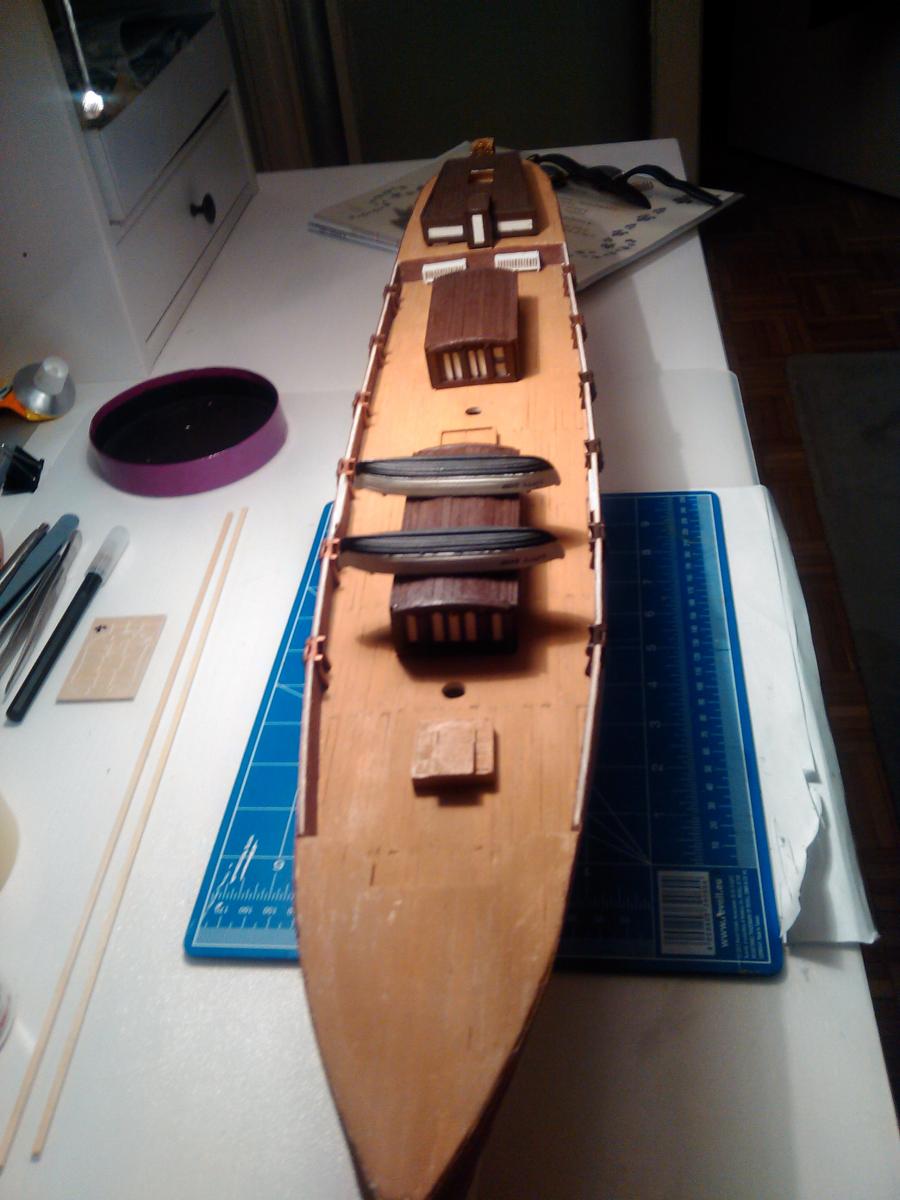
Ohh and for the fun I have placed several objects I have already created for the Cutty Sark, but they are still waiting in the cupboard for their time to be attached to their final places, such as the deck houses, the life boats, etc.
Here it is how it looks now: Isn't she beautiful?


-
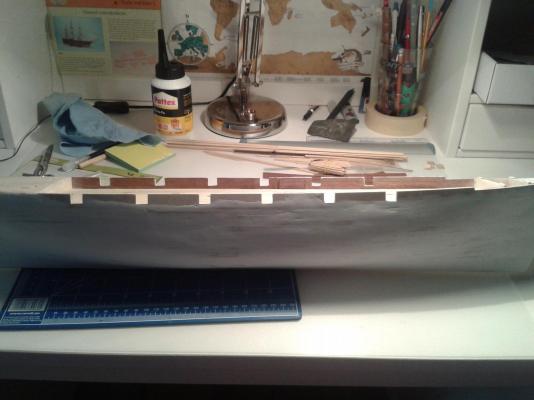
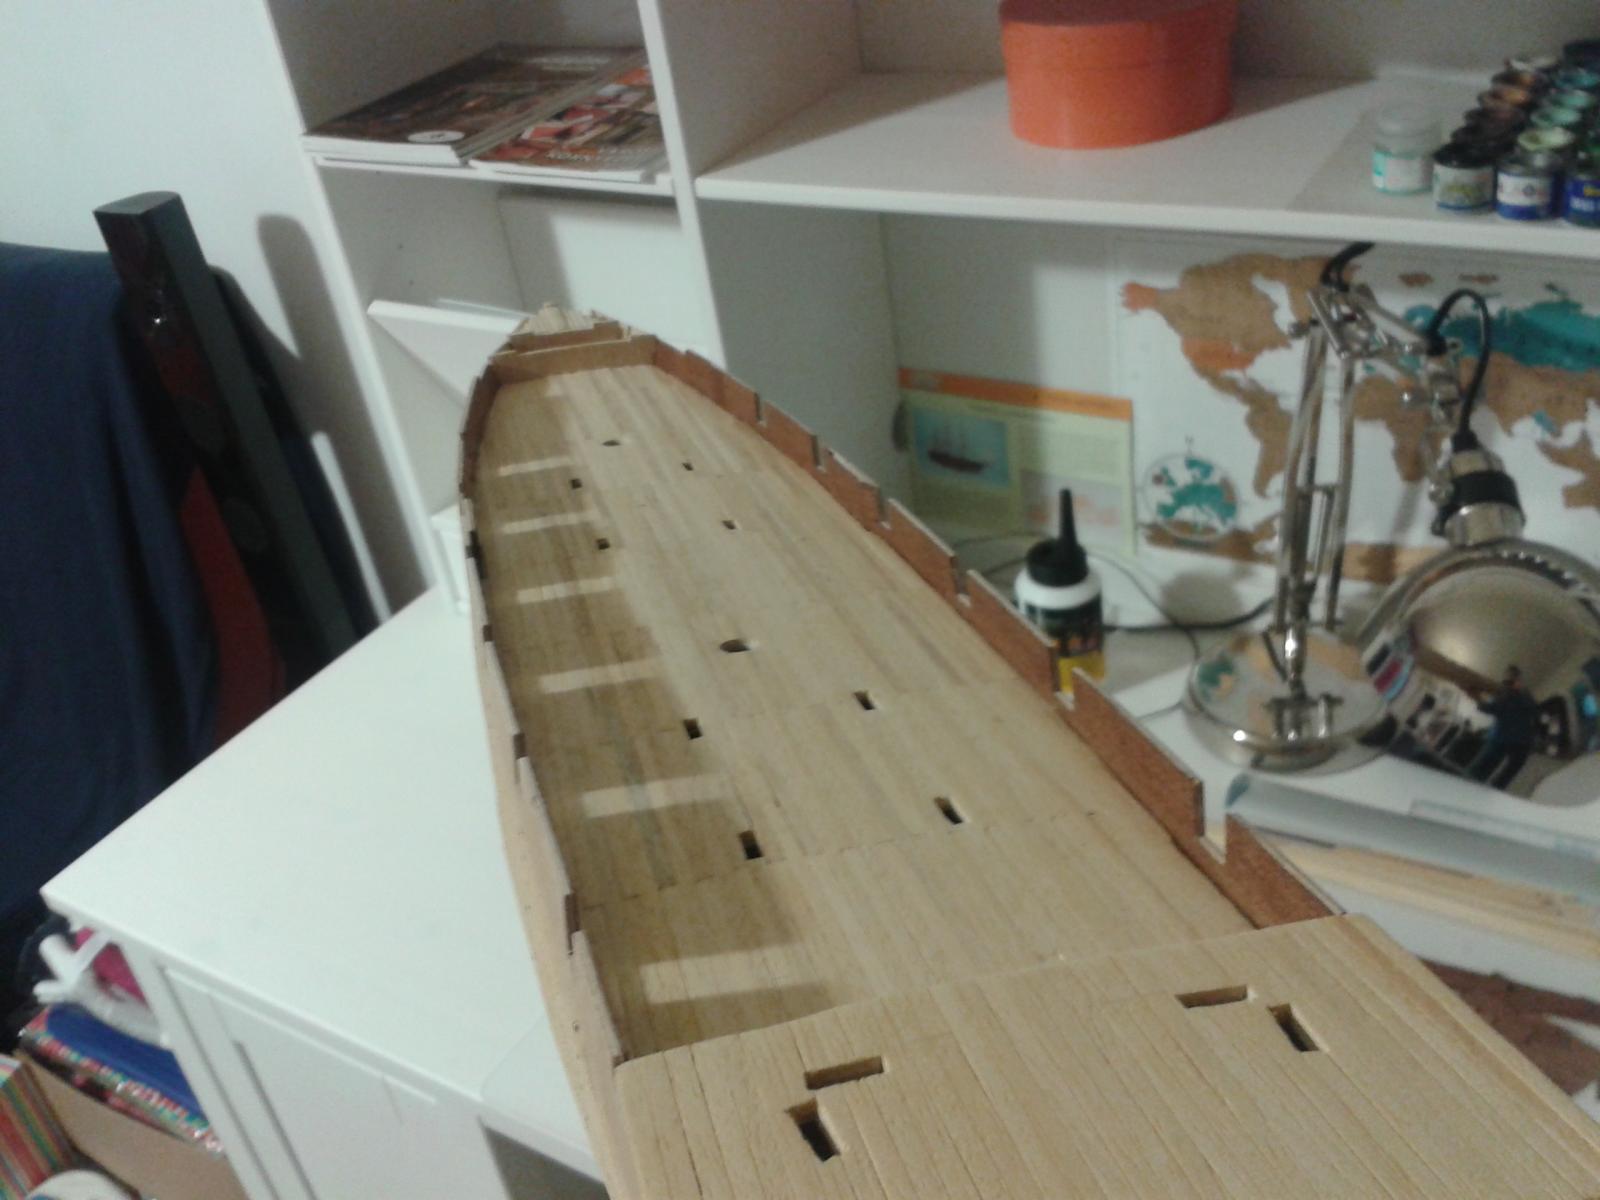
Okay, lets see how I progress with her:
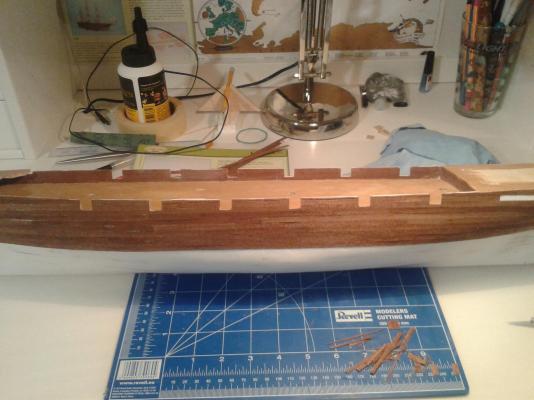
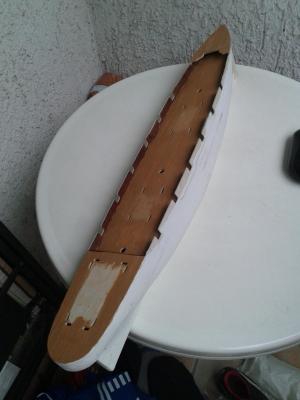
I have finished the big job of second planking of the top of Cutty, only small gaps to be filled, but it will be a continuous job, when I am bored with other stuffs ...
I have also attached all the 12 clearing ports that came with the kit to the main deck, actually I really like their color, so I assume I will not paint them for now
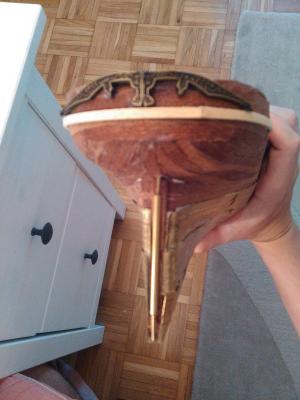
As next step, according to assembly guide I have attached the keel to Cutty, it came in 3 pieces only, there might be some further adjustments needed, taking into consideration the shape of the wood...
The keel at the bottom:
And the stem at the bow:

-
...
So you actually have an accurate depiction of the color scheme for her deck houses.
Marc
Hi Marc,
Thanks for your explanation, and I am very happy and that is what I actually thinking about, that such an old Lady should have had plenty variations during her years under different owners and captains, and there might be a few years not even documented at all...
... If you are interested, I can post some photos of hen coops ...
Hi Nenad,
As I am closely watching your work and posts I have already realized that the DelPrado kit is very different to the original C-Plans or reality, but as I see a photo of how my Cutty will look like I am confident enough to continue with the DelPrado scale and plans and do some minor alterations only here and there.
As for the photos, they are very welcomed, but I assume I will also see them in your blog, once you get to that phase of your construction, as I enjoyed the creation of your Pig Pen as well... by the way how does Piggy feel herself in the new home?
-
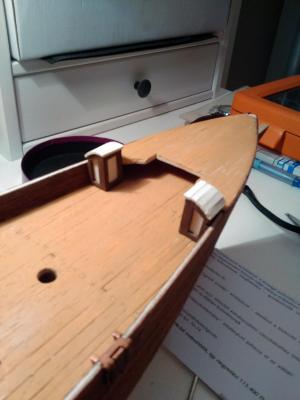
In post #1 - Posted on 24 July 2014, nearly a year ago I raised my concern about how the Hen coops look like in the Del Prado kit - basically they do not look like anything
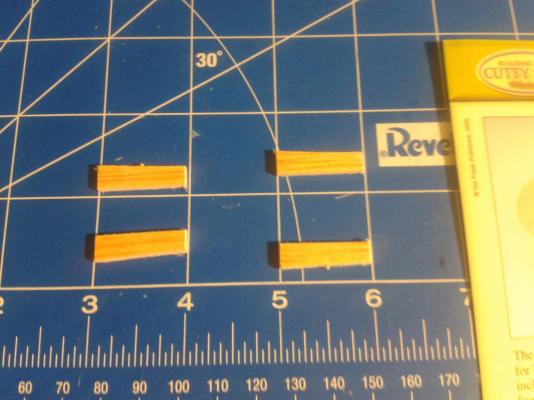
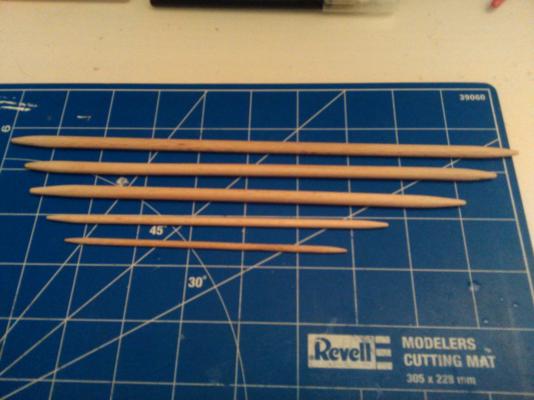
So back at time I requested help on dimensions and received, thanks to Bob. So I have started to create my own version of hen coops. For which I used 1mm thick balsa wood, 0,5mm thick cardboard paper and a special Vietnamese toothpick, made of bamboo and with a diameter of 1mm only.
And obviously some white paint...
So here is the result: (on the top my version, on the bottom DelPrado version)
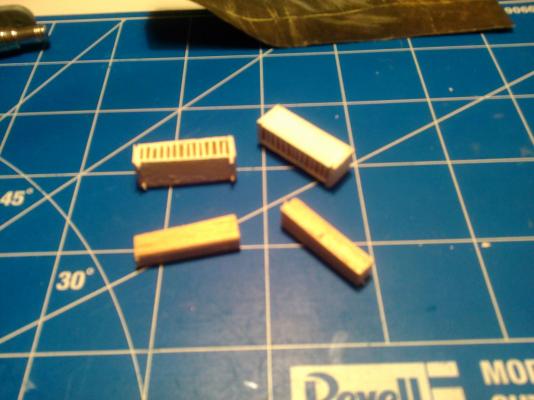
And here you can see, how it looks like once attached to their place

They are neat, at least for me
-
-
-
... Some space between strips just has to be there, to show planking structure....
Well, to be honest I like this approach, as it has some certain point in it. Although I try to cover as much as possible using different techniques you also mentioned Nenad.
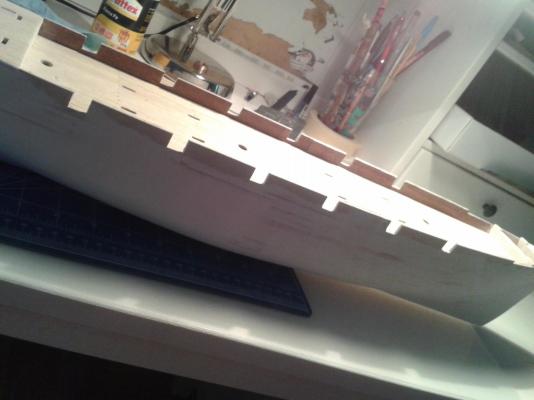
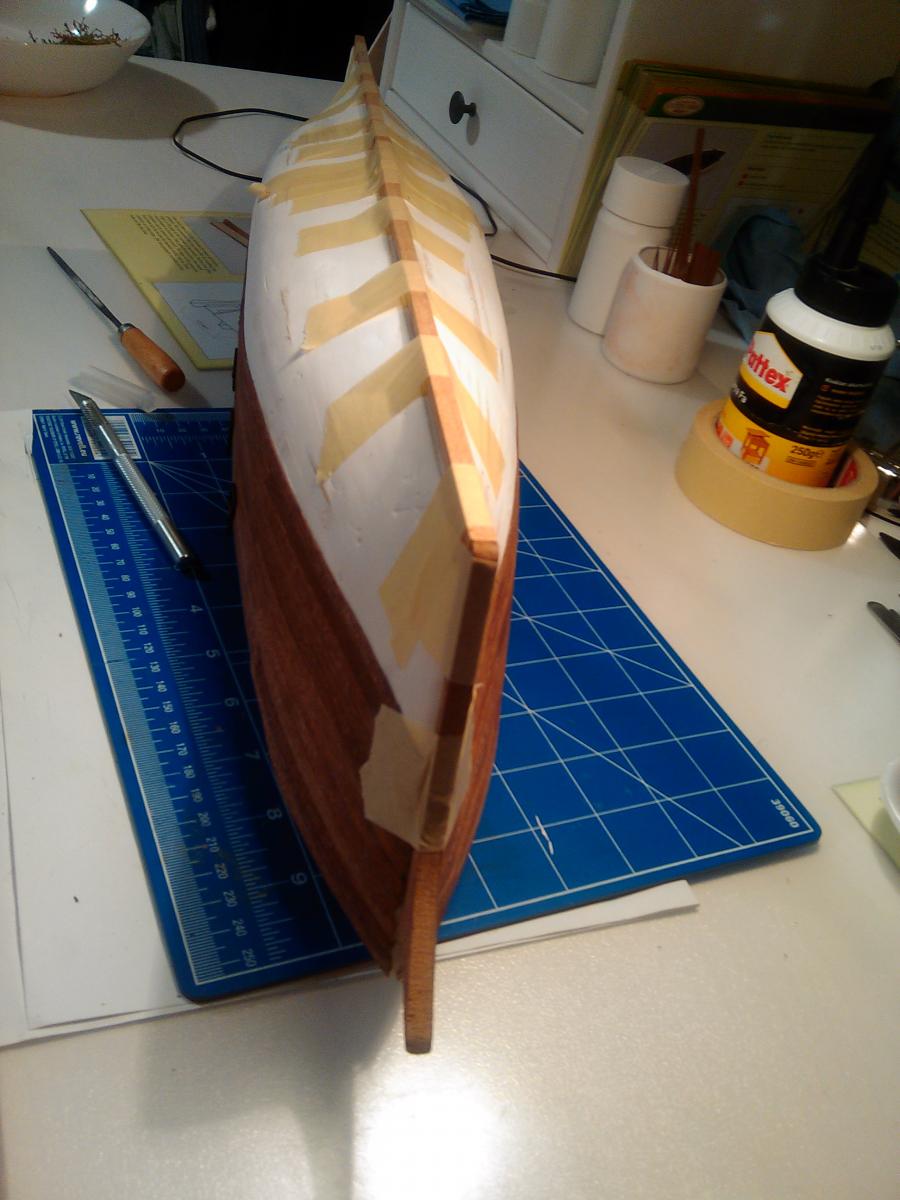
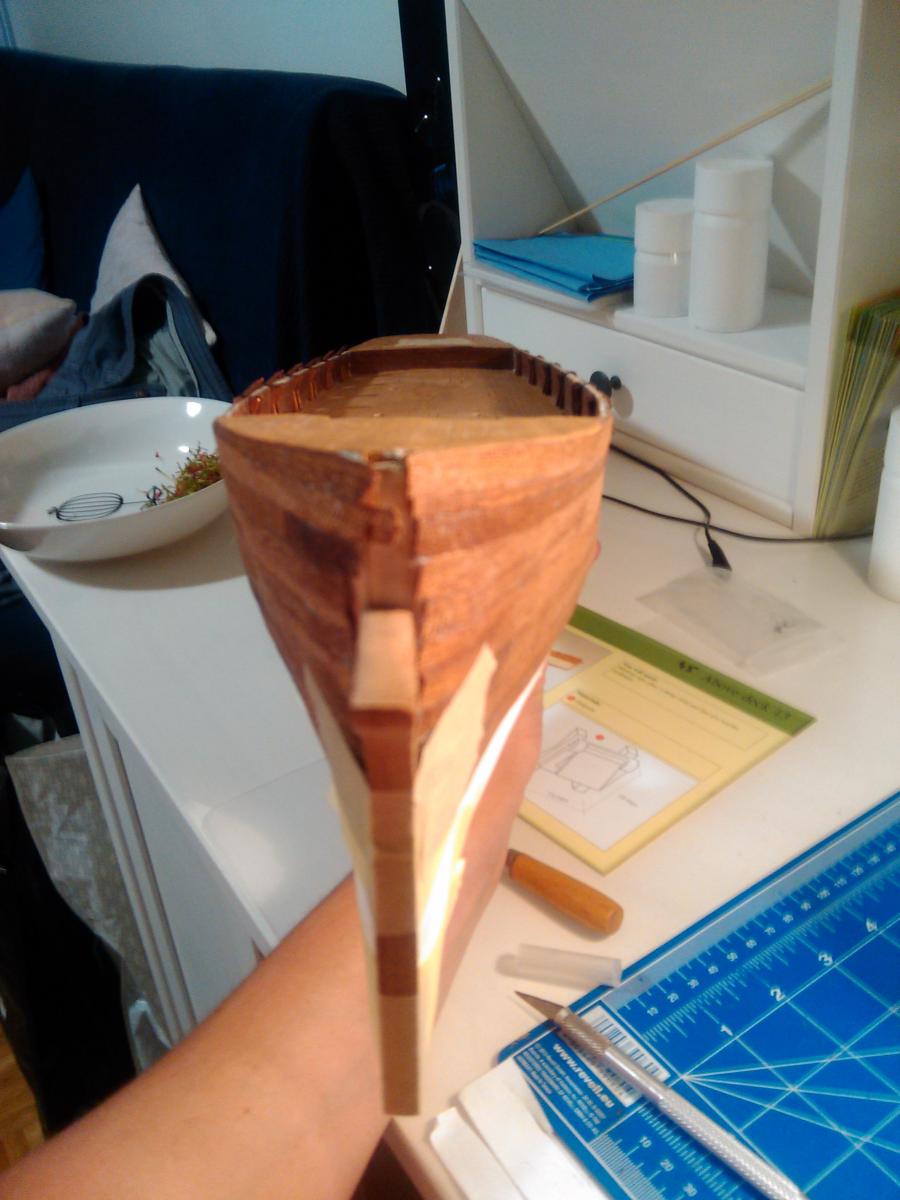
As promised I have some further photos to share as well, as now, I am approaching 98% readiness with upper secondary planking

Also I started to attach the water ports to the hull. It is not a big deal, as they come in 3 pieces - 2 pieces for the frame, out of which one comes from the inside and the other from the outside of the bulwark, and there is one piece for the shudder. Actually they can be attached in a way, that you can also open them... In case of a big storm inside the room the deck will not be flooded entirely

Meanwhile I got back to my little hencoops and started to redesign them based on some other materials and dimensions from rfolsom.
Cheers and have a good week ahead!!
-
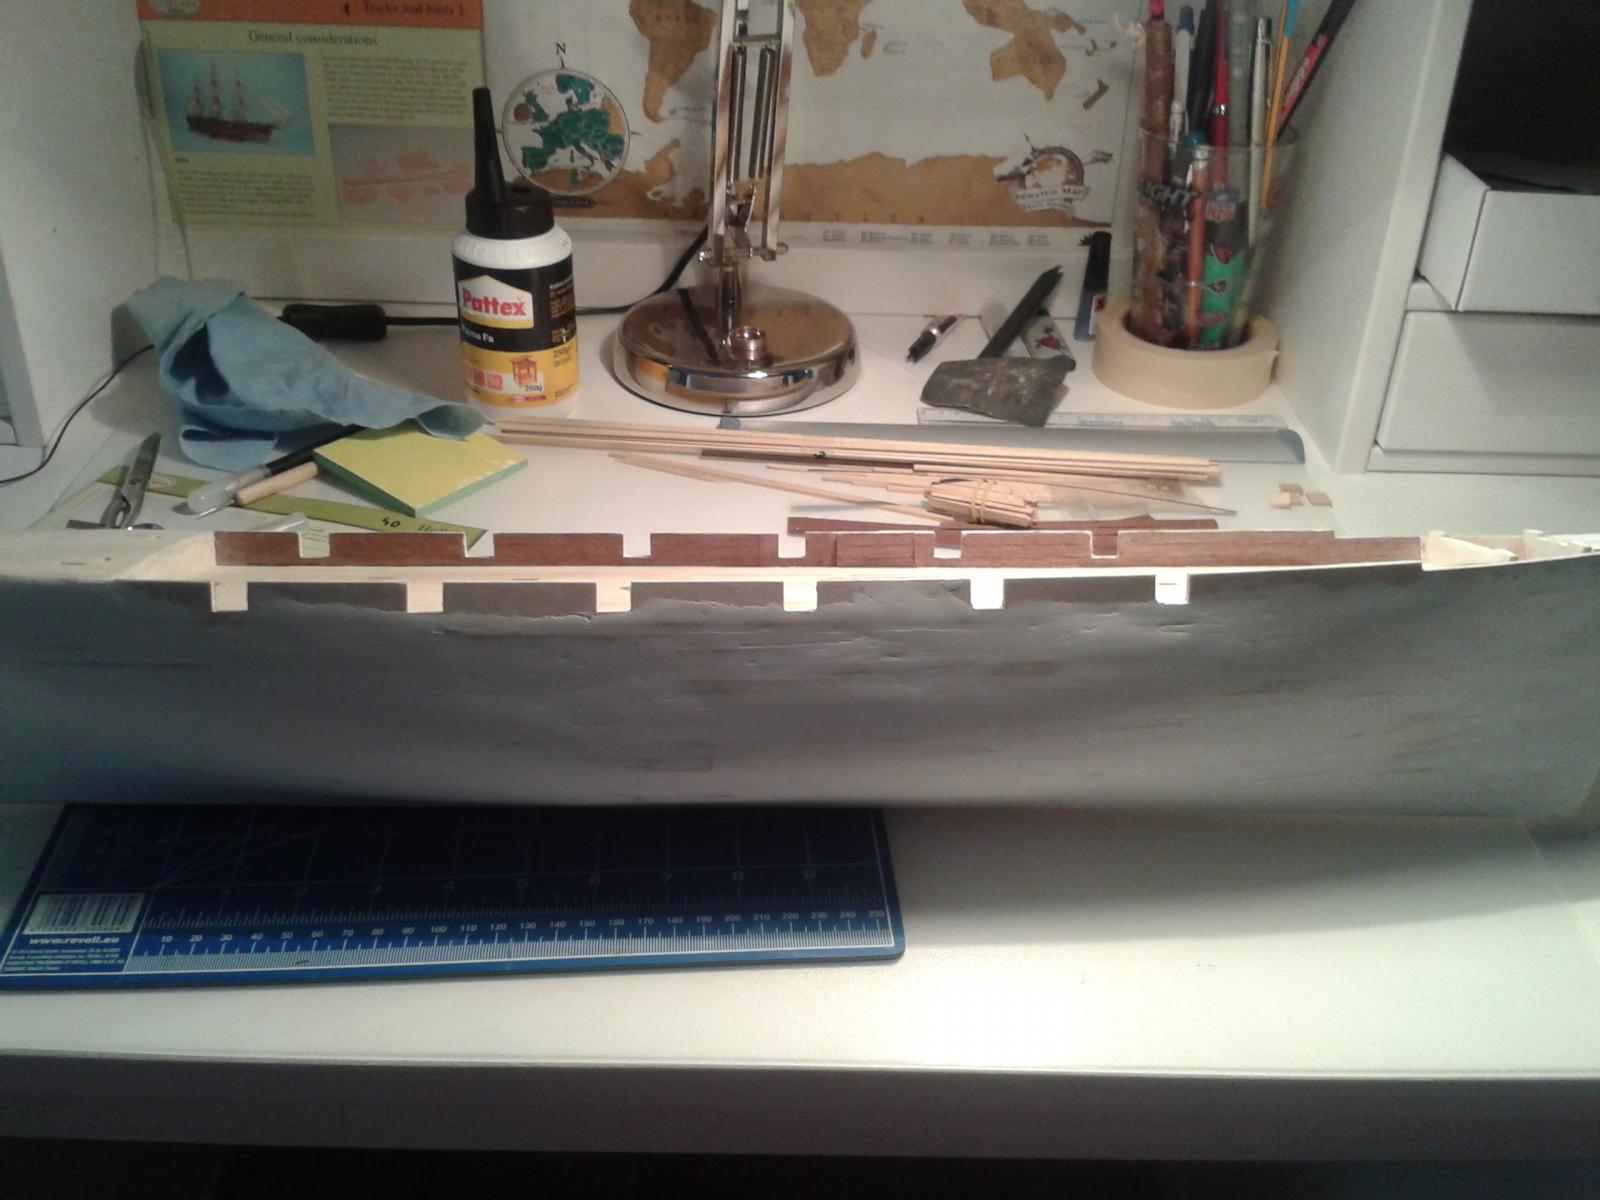
Wow, it has been a while I posted anything here, and it was for a reason...
Simply I had other stuff to do, and hence had no time to deal with Her.
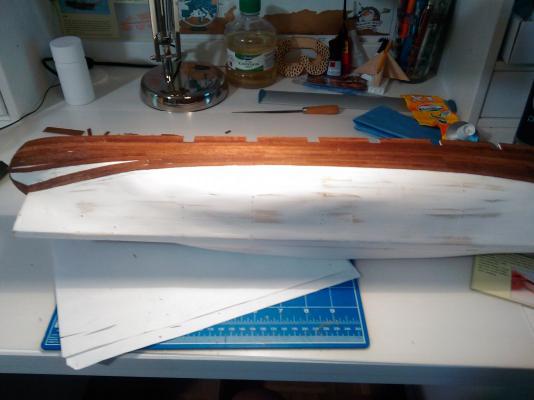
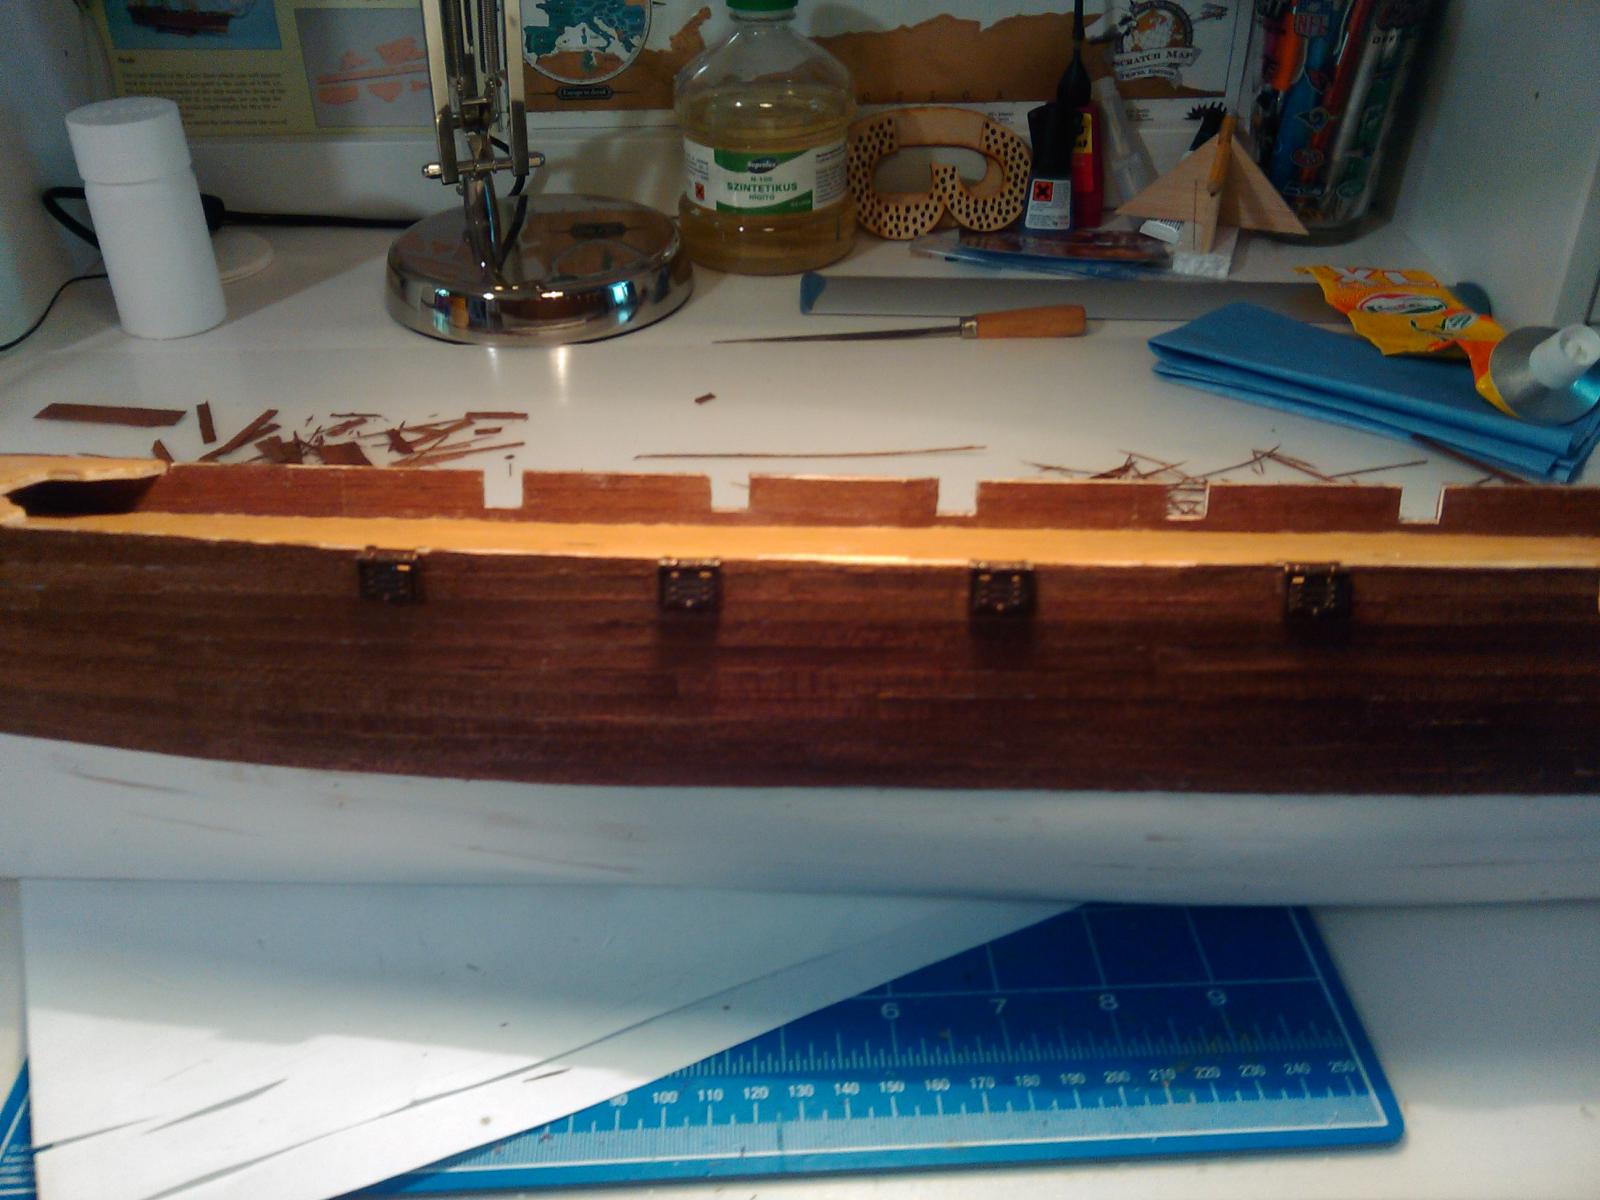
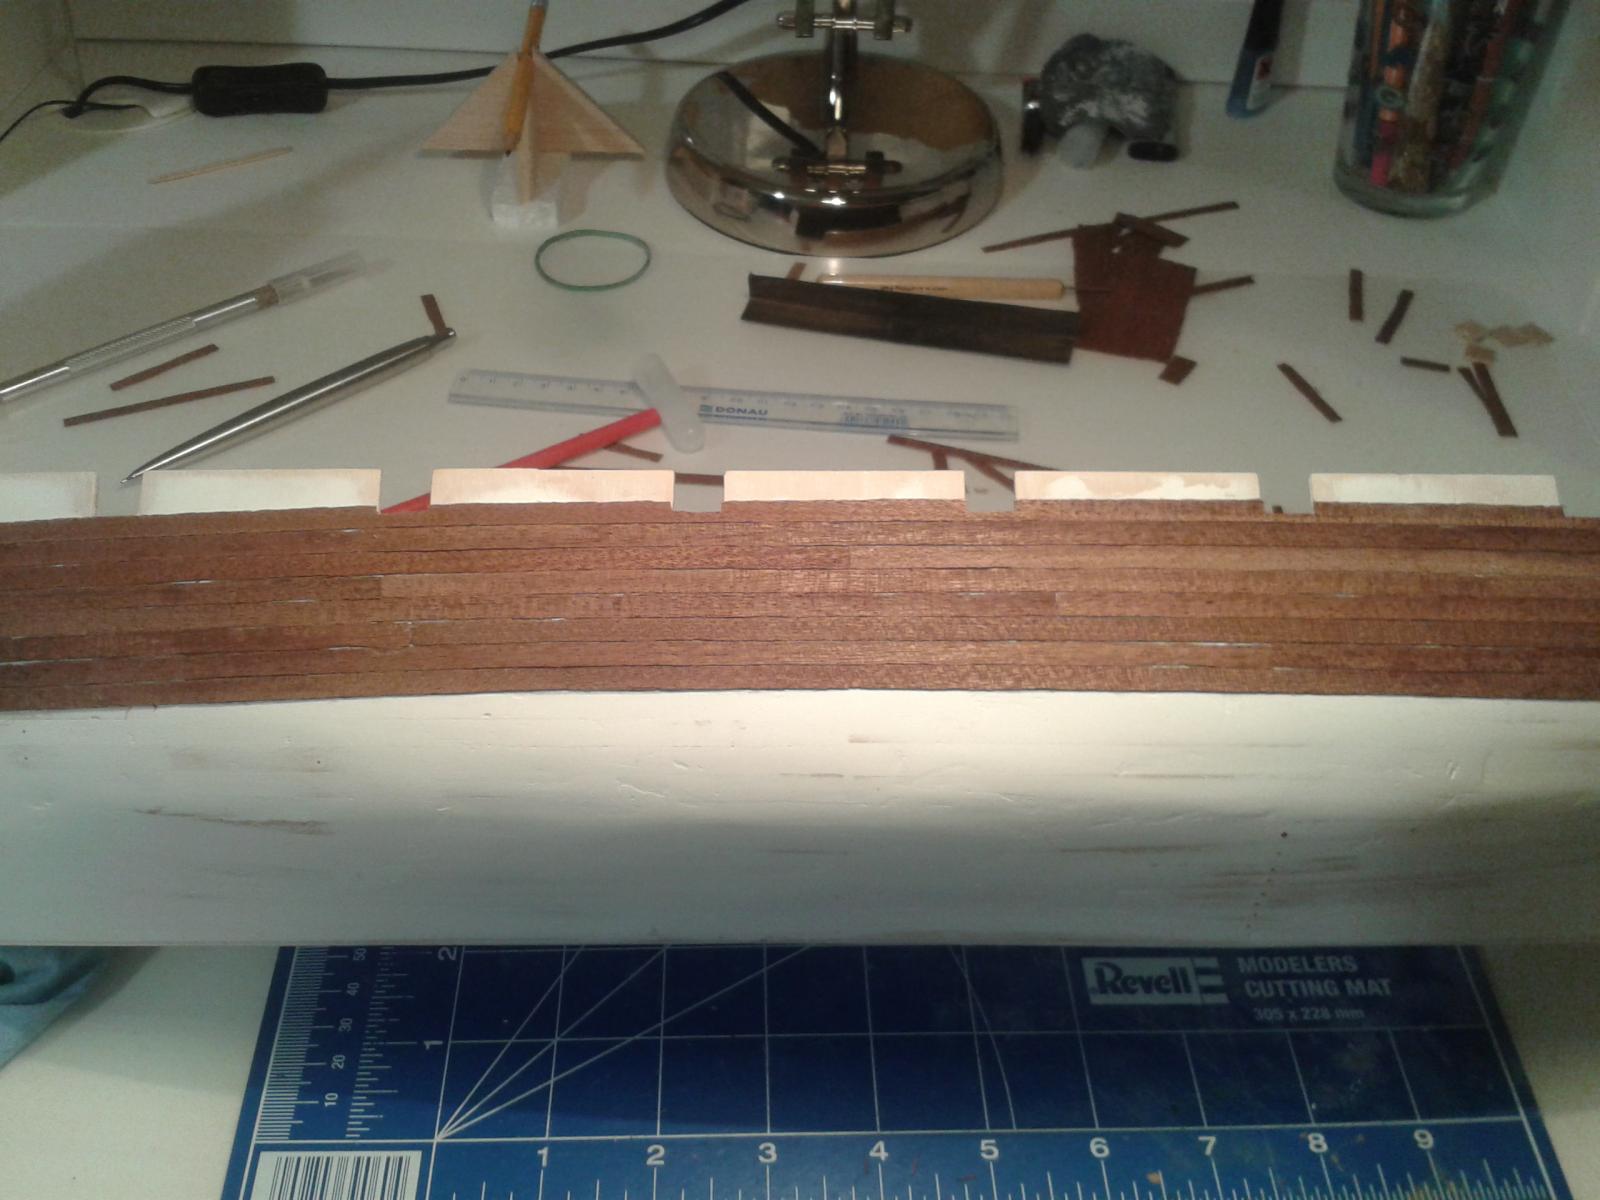
Good news I am back on track again. I have started the secondary planking of the ship. Unlike to most kits and reality the Del Prado version is not painted black above the water level but has some fine sappele strakes to be attached as secondary planking. They are very thin and comes in very different shapes, and even though I tried to align them as close and as matching as possible there are many tiny holes visible between the neighboring strakes.
This is not a great problem, just makes the whole process like 100 times longer, as I need to cut them into tiny little perfect hair wide size and attach them.
No worries, I am progressing and photos will come soon as well Actually I have 2 to share:
Opinions, comments?
-
-
Absolutely true Nenad, I have called them gunports as it is named in the instruction sheet, might be technical name for it even if it is used for water or for cannons, I do not know.
-
Okay, so here comes some progress, lot progress I would say. I have added the two gunports, which was not something hard, as I had to use the two halves pre-cut and glue them together, than I used the sappele planking to line the interior side of the gunports. These will be used to cover the outside of the ship as well above the copper line.

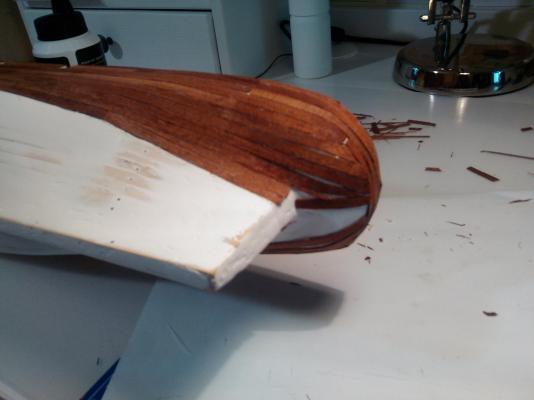
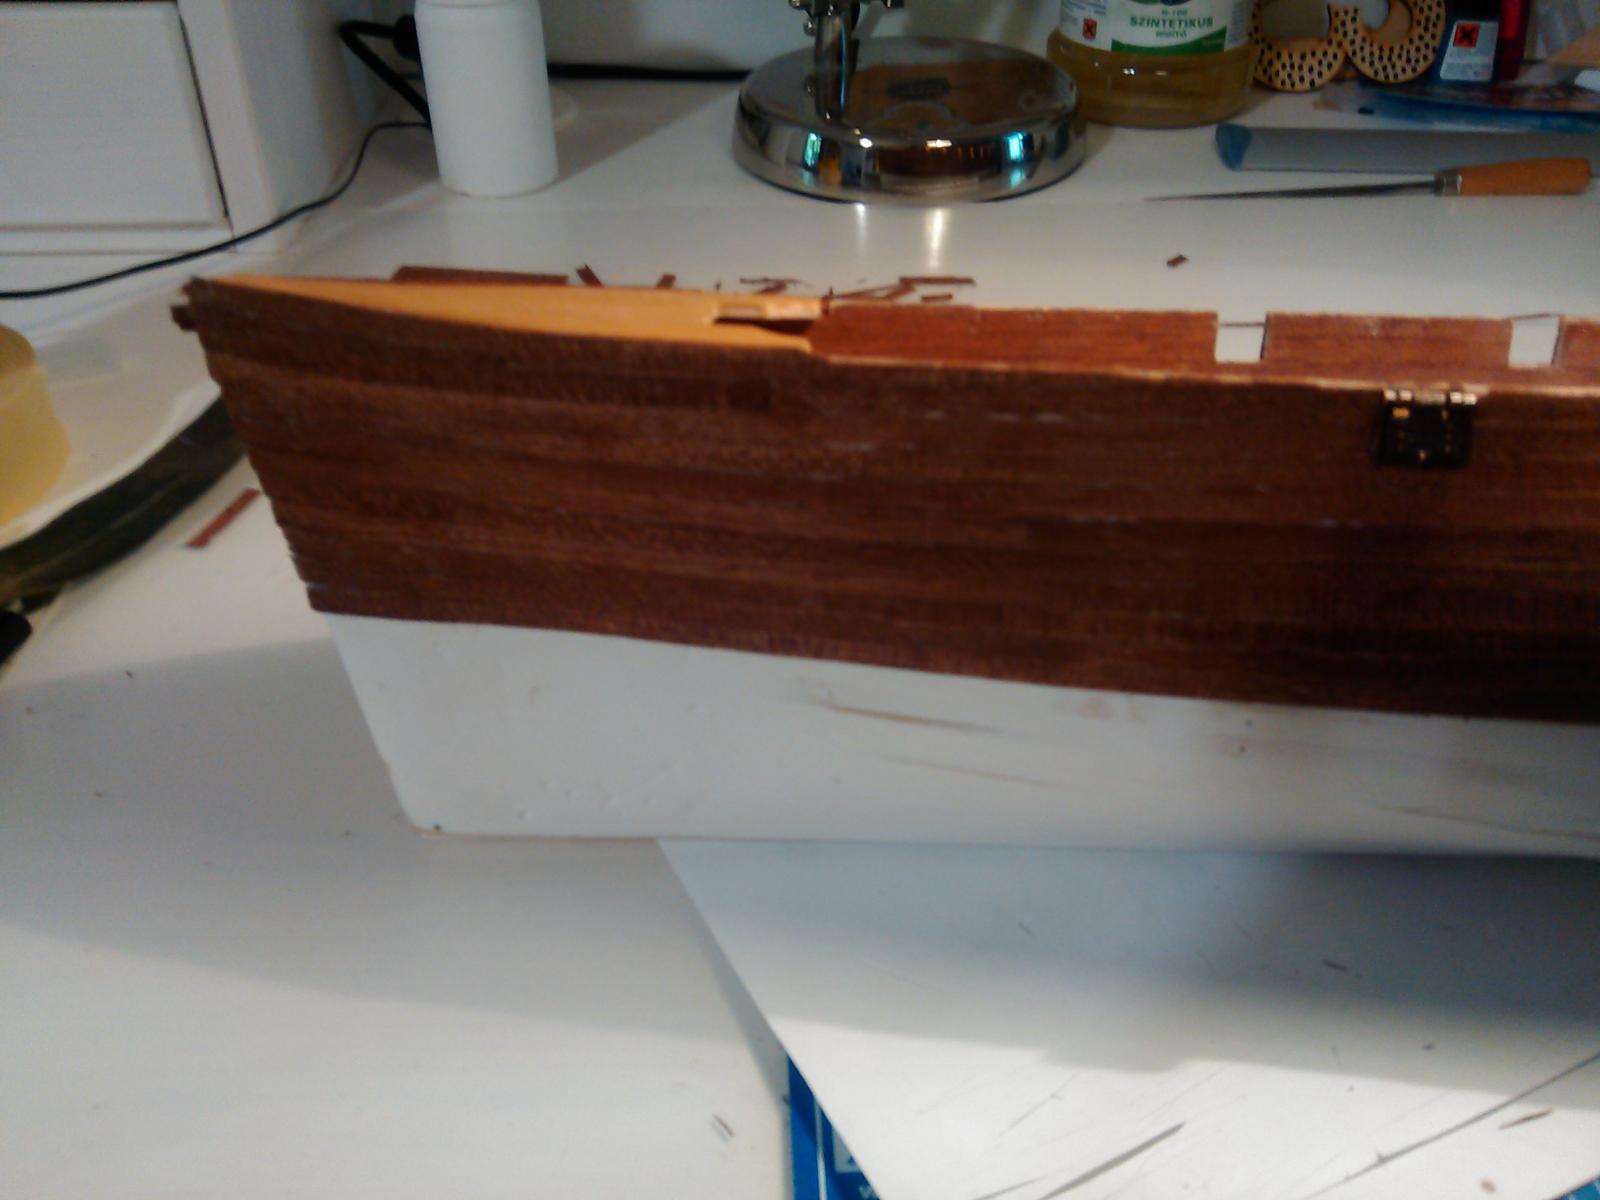
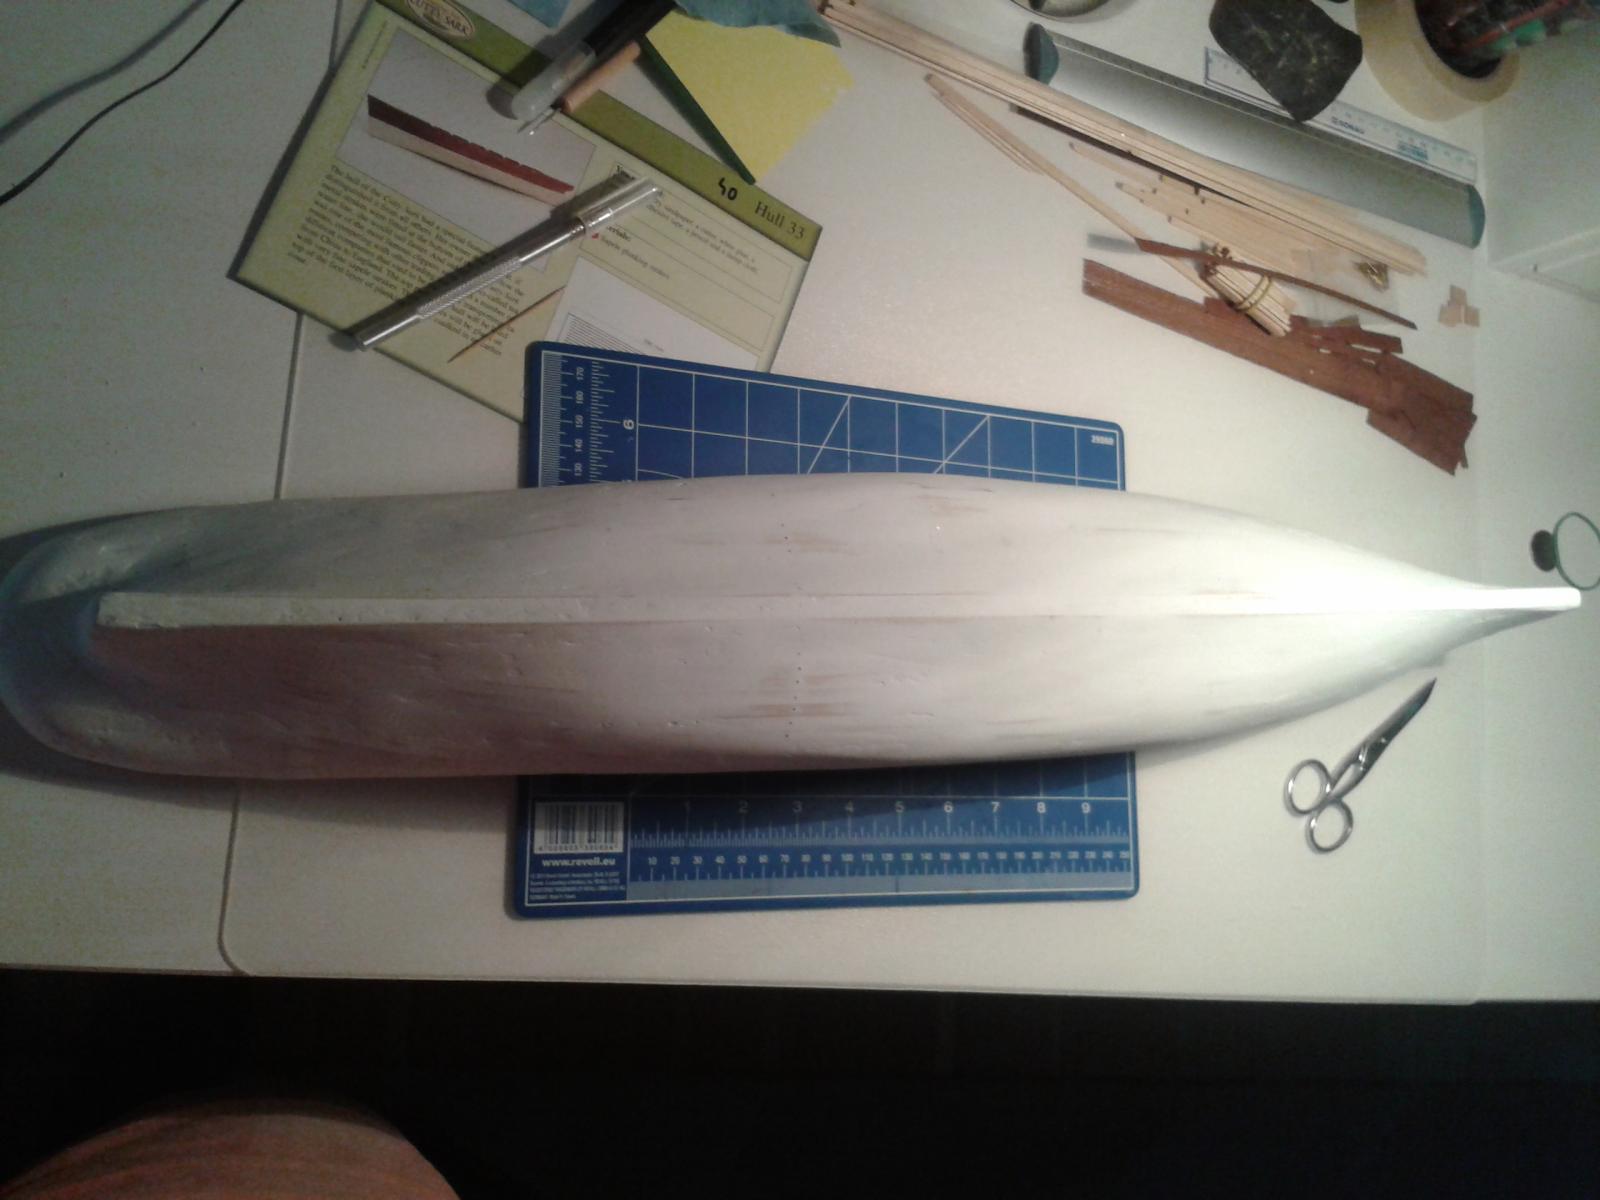
Once they were properly attached I have finished the planking of the exterior of the hull. Not much was missing so this was an easy step. Next I started to add layers of wood filler, wait for it to dry, sand it. Check the surface again and the line of the ship, add some extra wood filler, wait for dry, sand it. Repeated it for a couple of times until I received an acceptably smooth surface... This was then I realized that the bow section of the ship is too thick, so I have removed the planking from the bow, started to remove some excess wood and reinforcement and also shortened the planks wherever needed.

Now the line of the ship is decent again, next there is some work needed on the stern - this is minor to the one I had to do with the bow section.
Meanwhile I have stained the deck surface of the ship, again not exactly the color of CS, but with the color picked by Admiral, actually I also like this color for the ship.
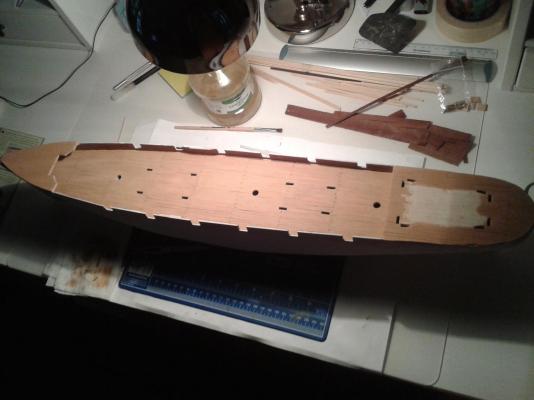
And the result after a layer of varnish added:
-
Good progress Nenad!
To imitate metal pieces you might try to use and empty tube of Mustard, cut it in half and wash it, and use that for a material... you can easily cut it, fold it and do a lot of thing with that.
Just for an idea...
- NenadM, dgbot and CaptainSteve
-
3


Cutty Sark by Nenad
in - Build logs for subjects built 1851 - 1900
Posted
My favourite is the Vietnamese Bamboo toothpicks. Their diameter is of 1 mm (some even less) and still super strong...