rexnuktia
-
Posts
34 -
Joined
-
Last visited
Content Type
Profiles
Forums
Gallery
Events
Everything posted by rexnuktia
-
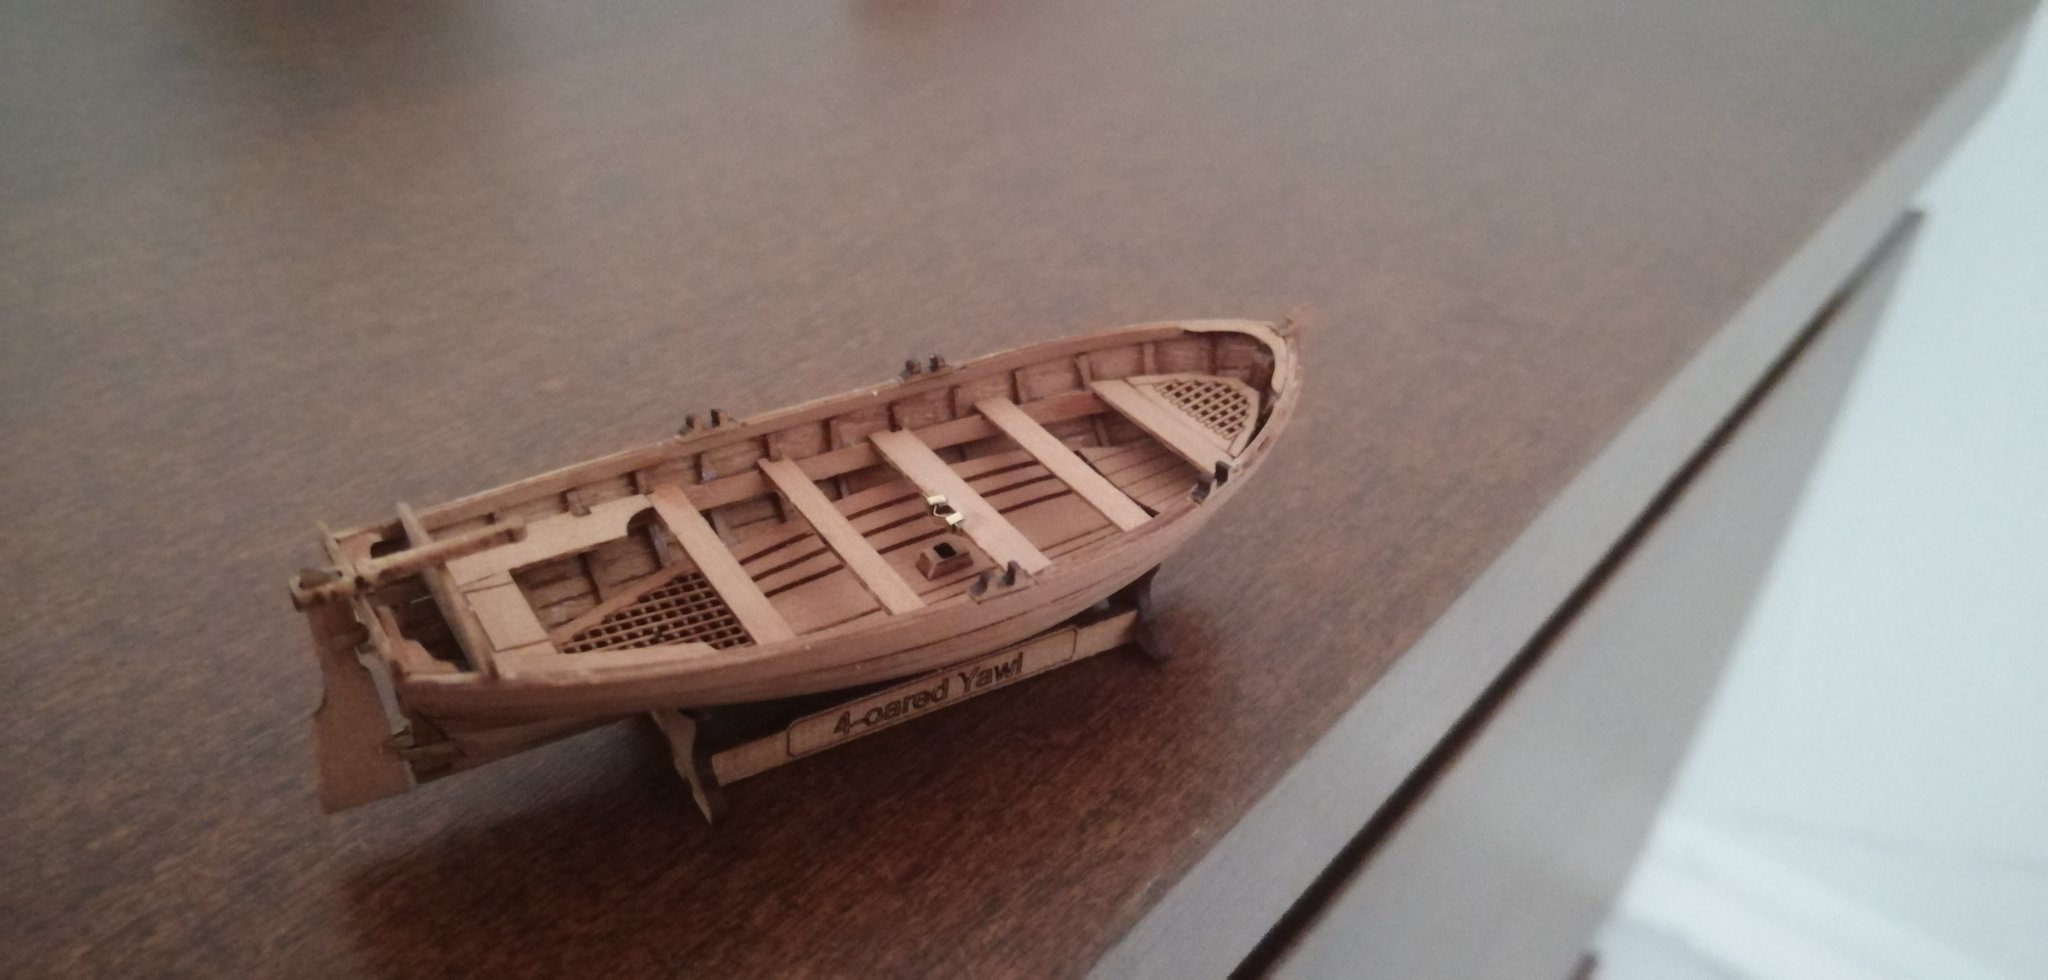
They just look like tiny masterpieces
-
Only oars and a couple of final strips near the top to go... might even dream of doing that tomorrow...
-
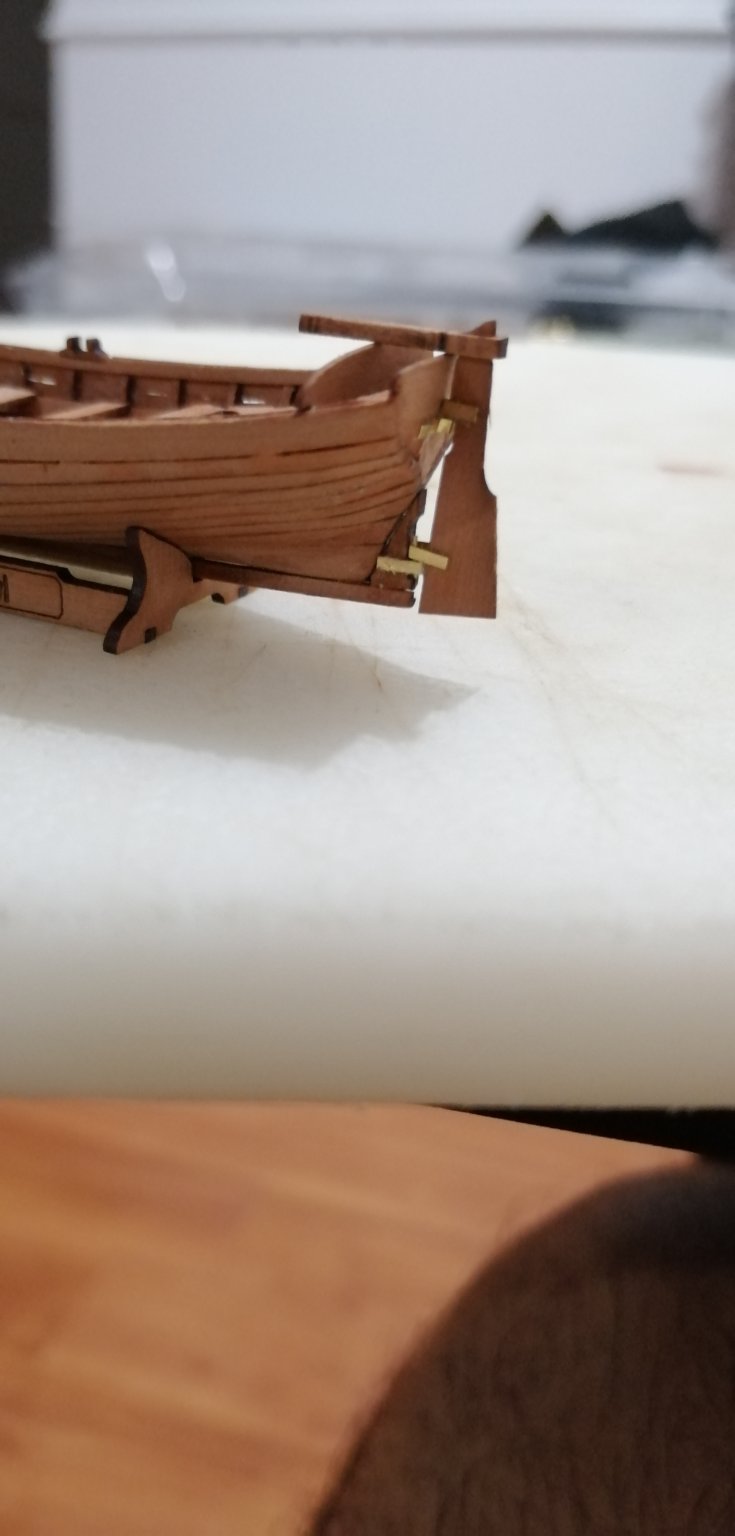
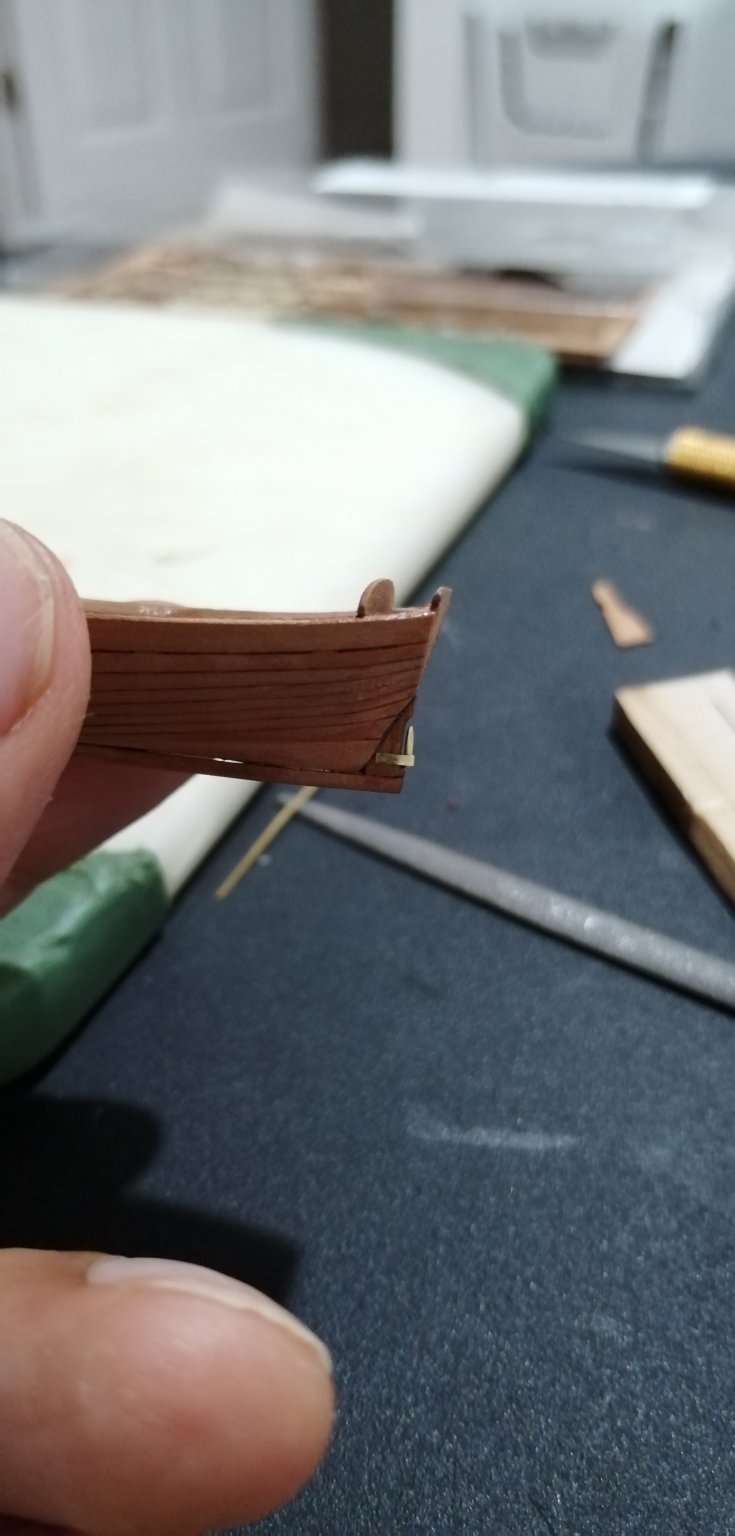
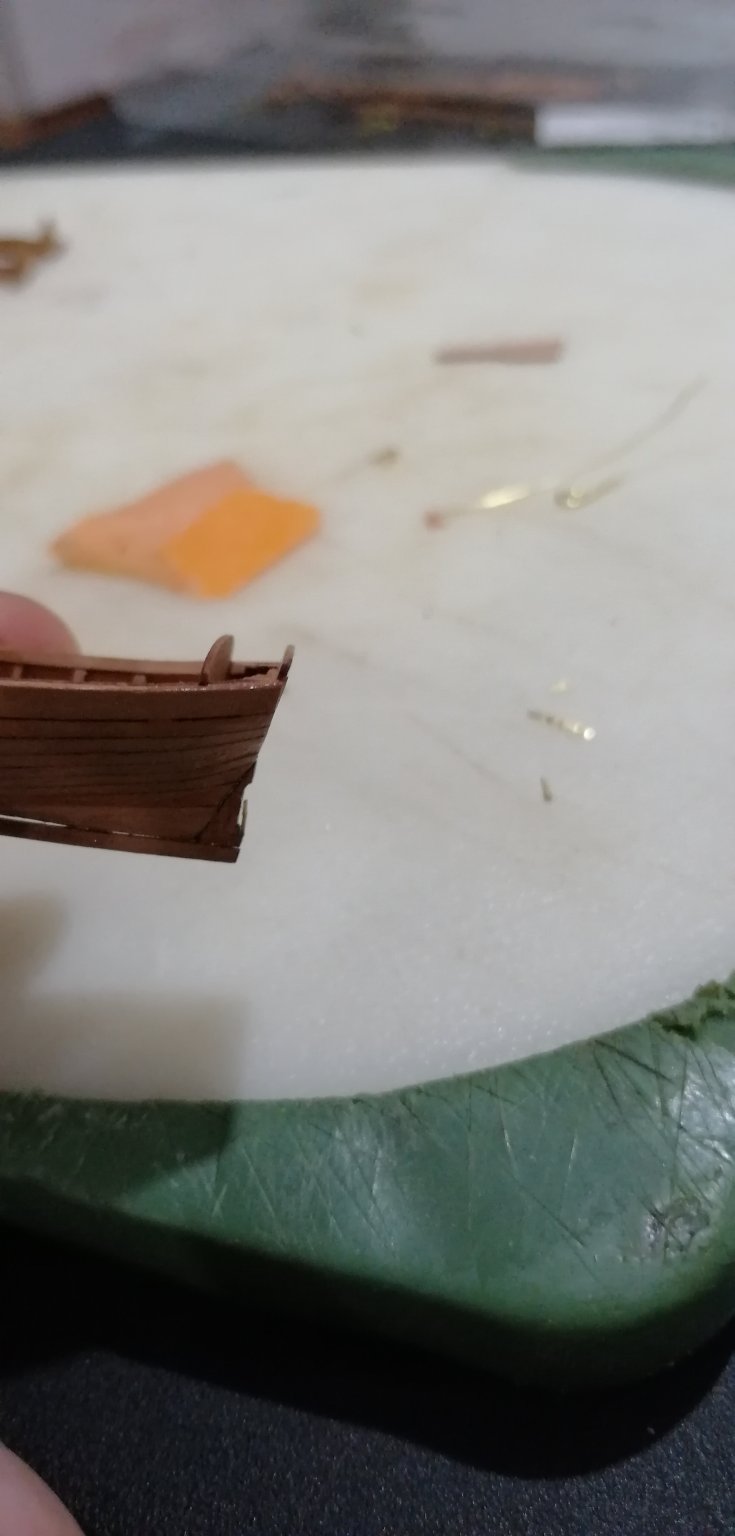
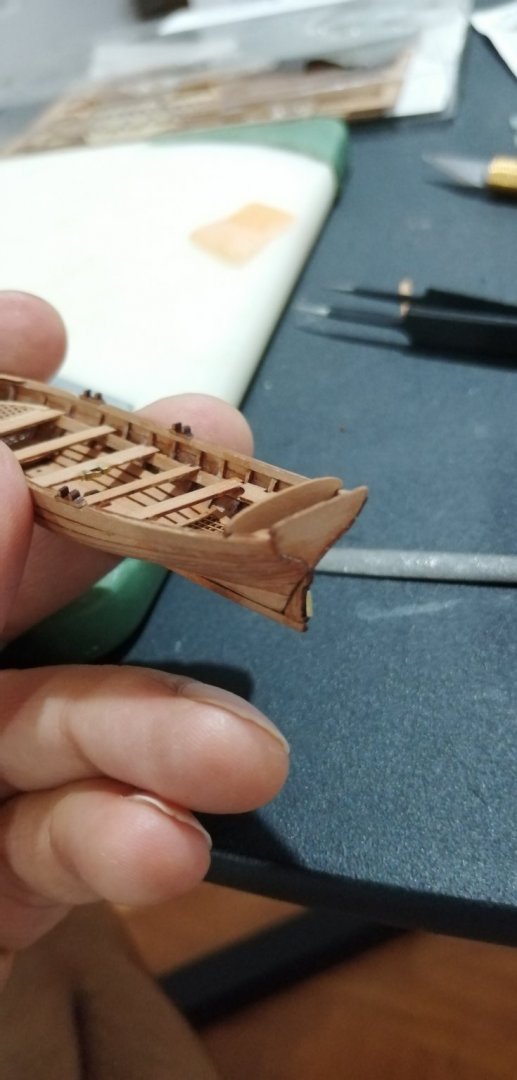
Thought about it and assembled everything like this picture. Now the last step would be to place the rudder in position and glue the attachment points one by one with superglue. Turned out well.

-
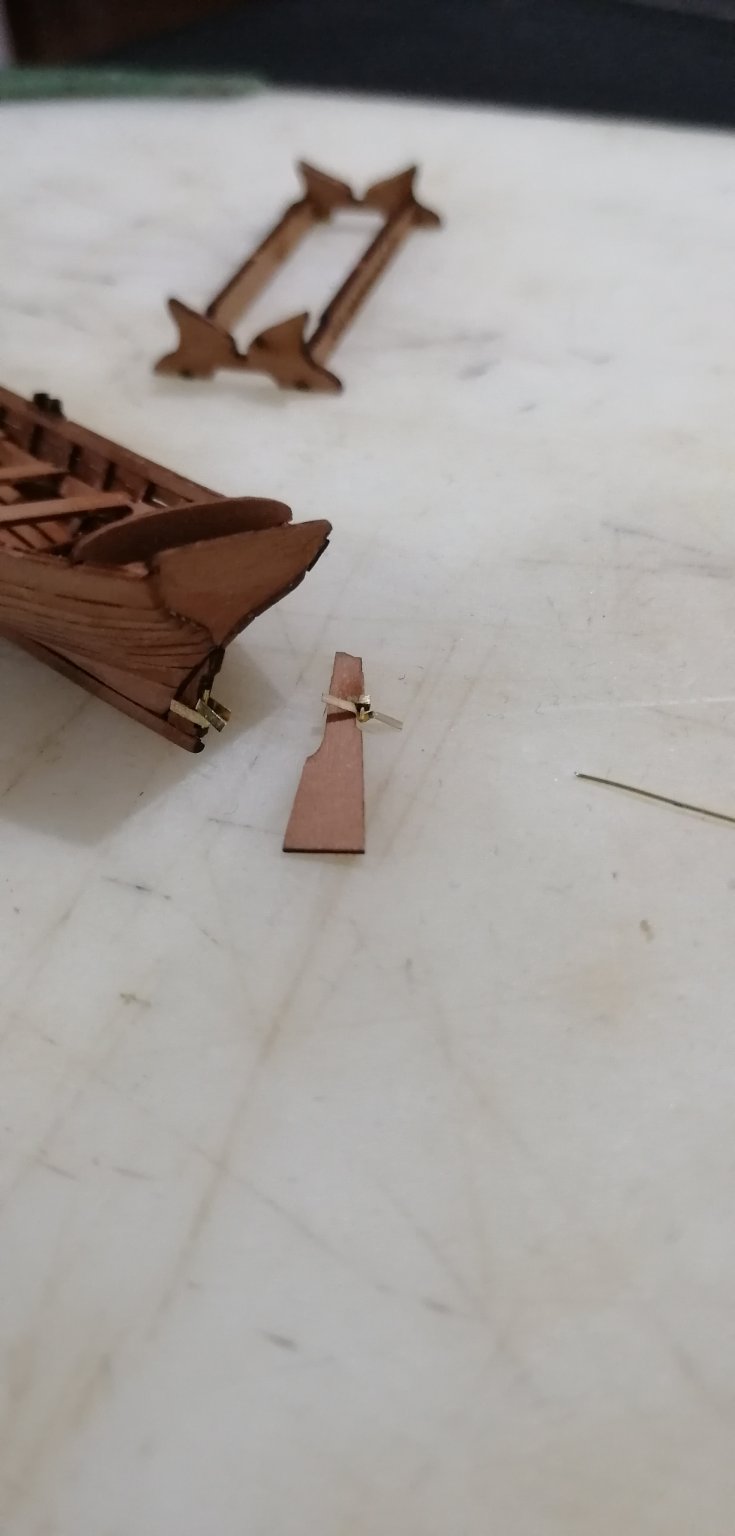
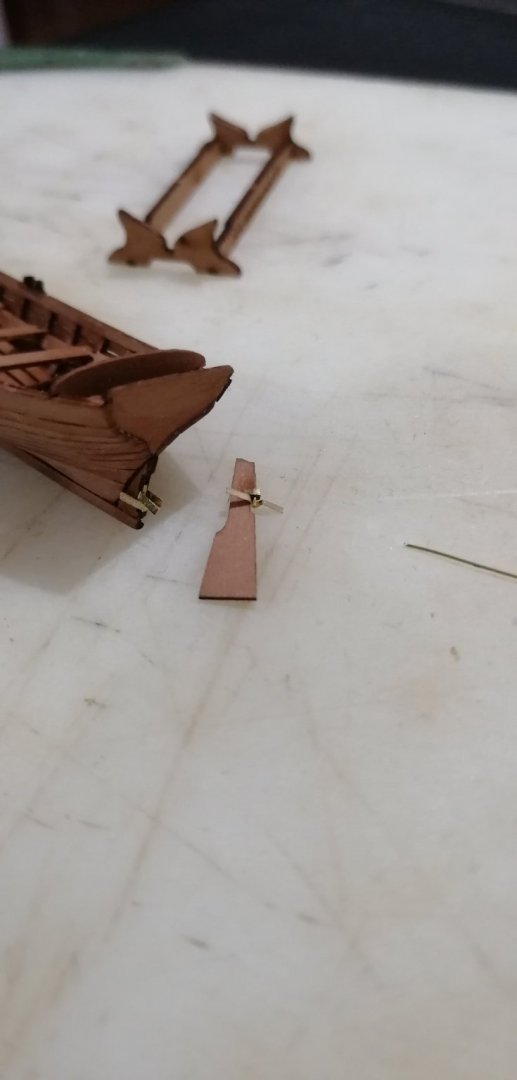
Then I started with the rudder assembly. Pin was glued in place but it looked too big. Realized after putting the hinge cover on it that there was thinner gauge wire also included in the kit. So this was all ripped apart and the thinner wire used.


-
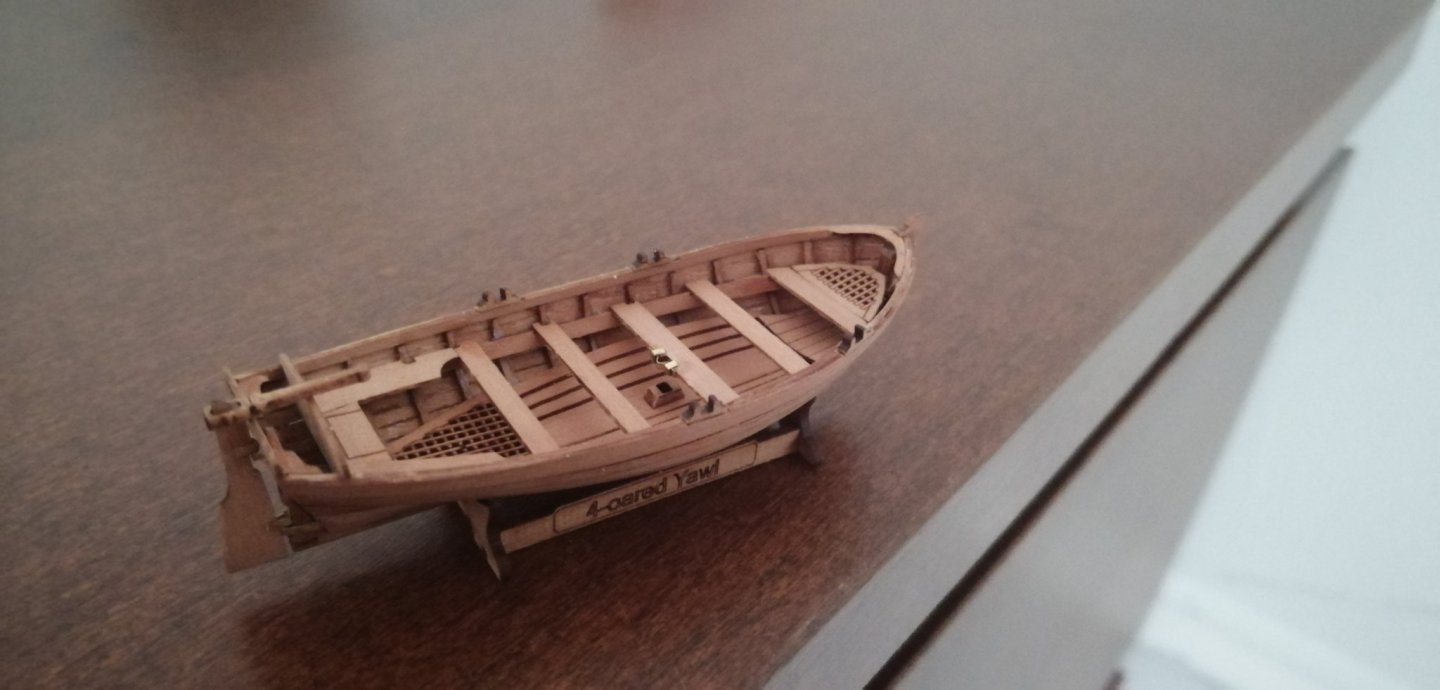
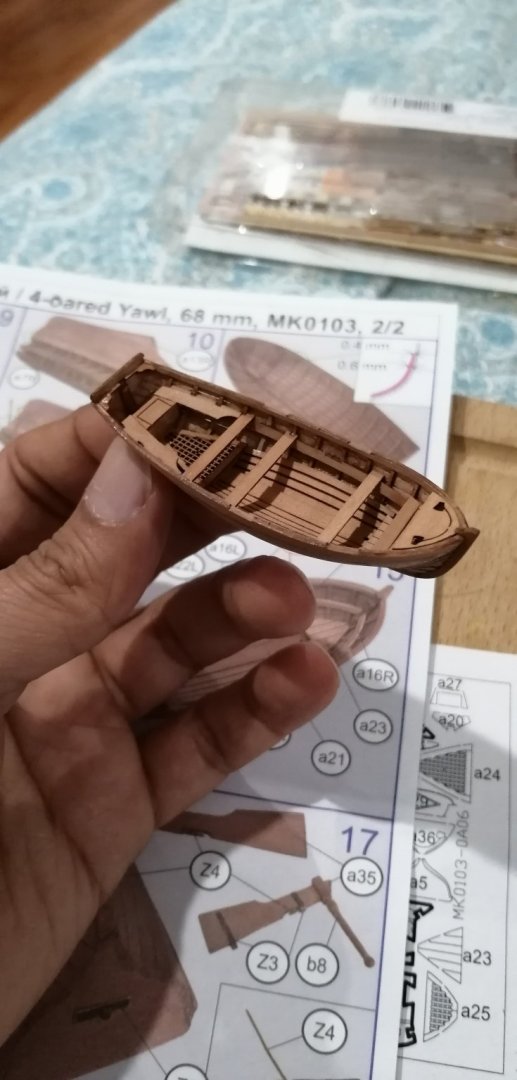
First, the easier mast holder was completed followed by the oar holders
-
And after a short (2 month???) break which included a truly frustrating session of dealing with PE, I rigged up a sophisticated PE bender today and got to work

-
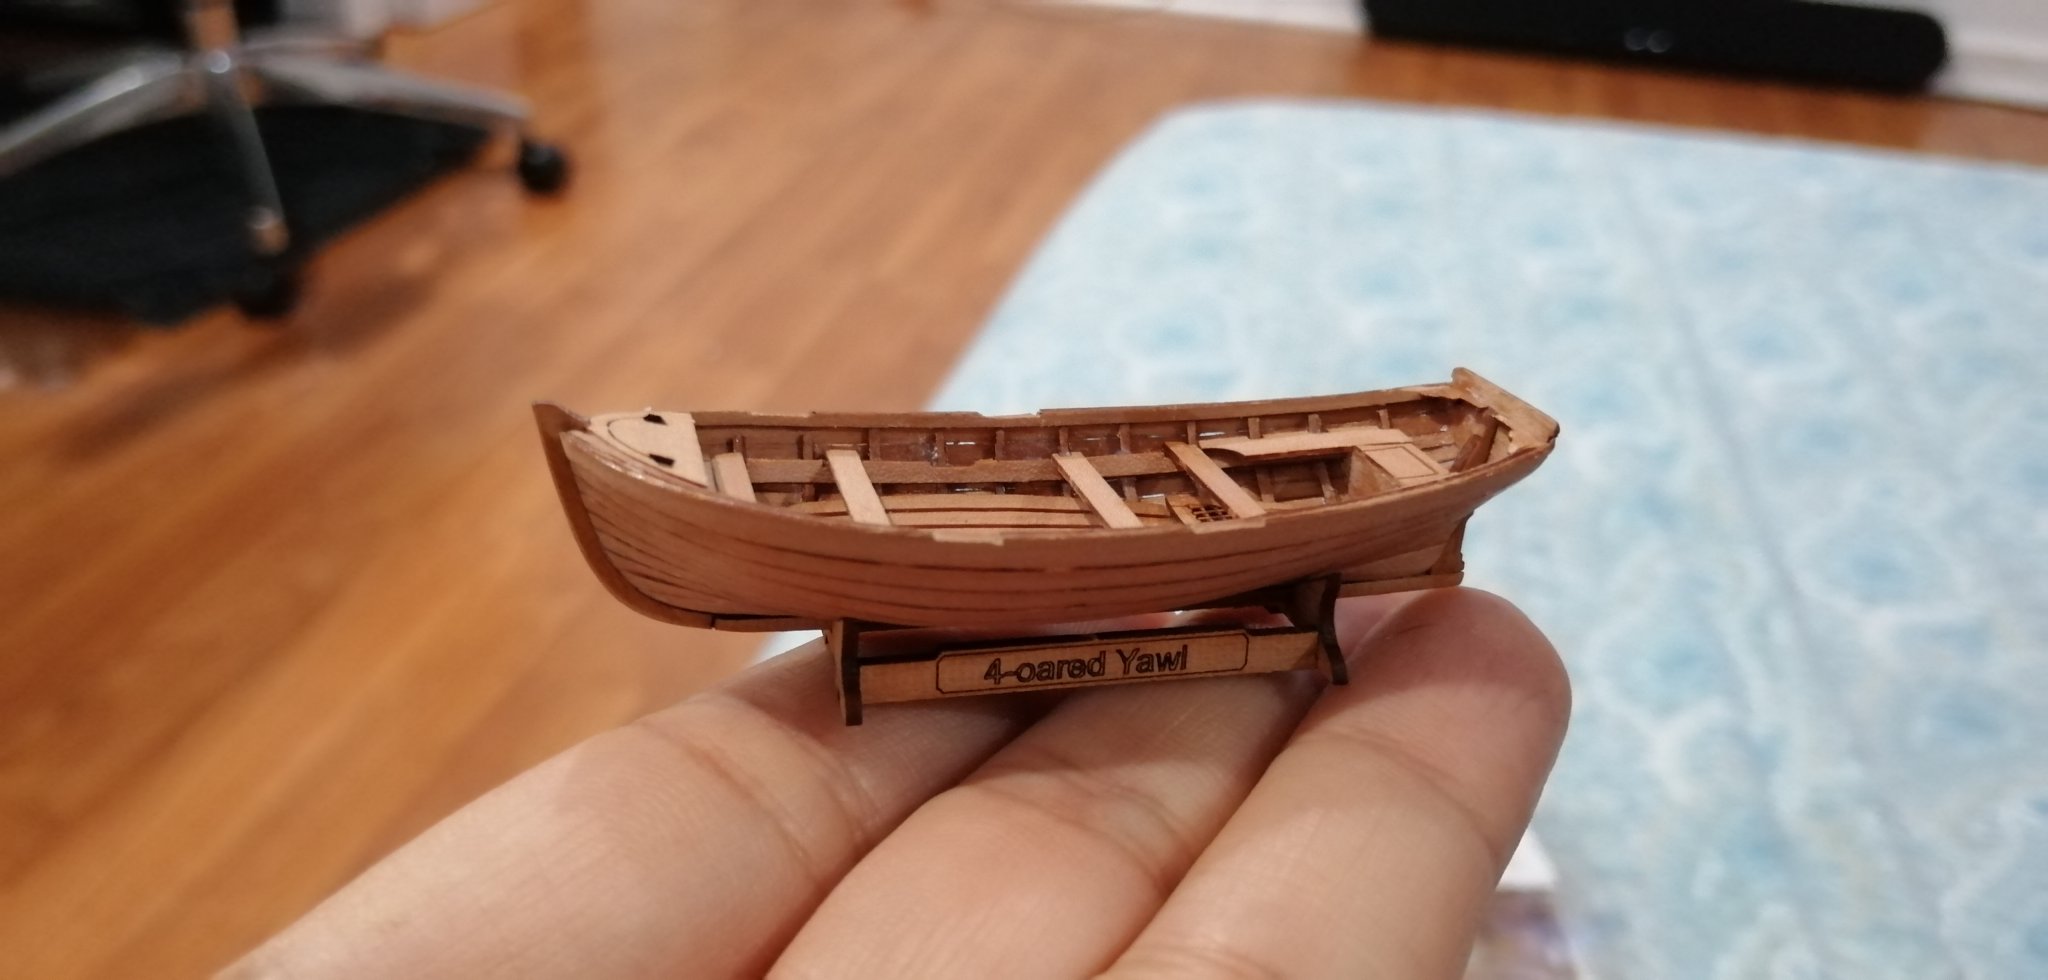
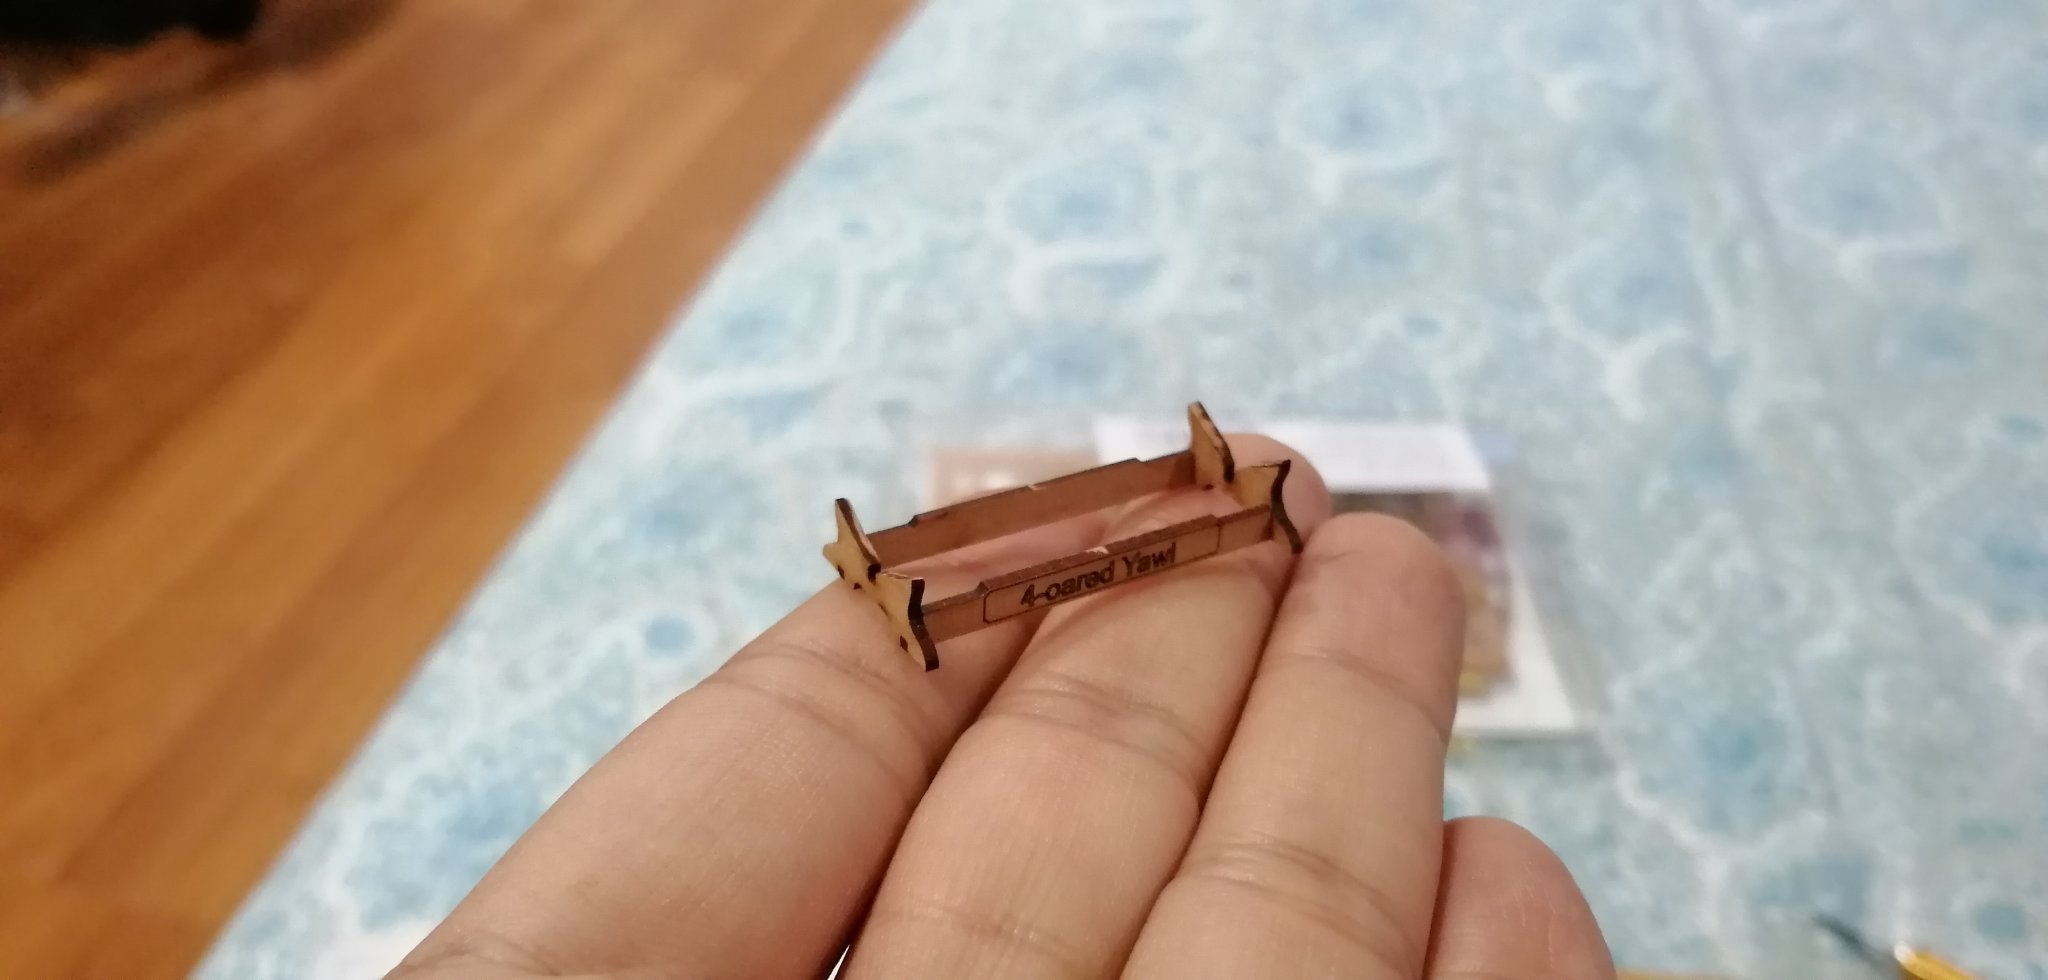
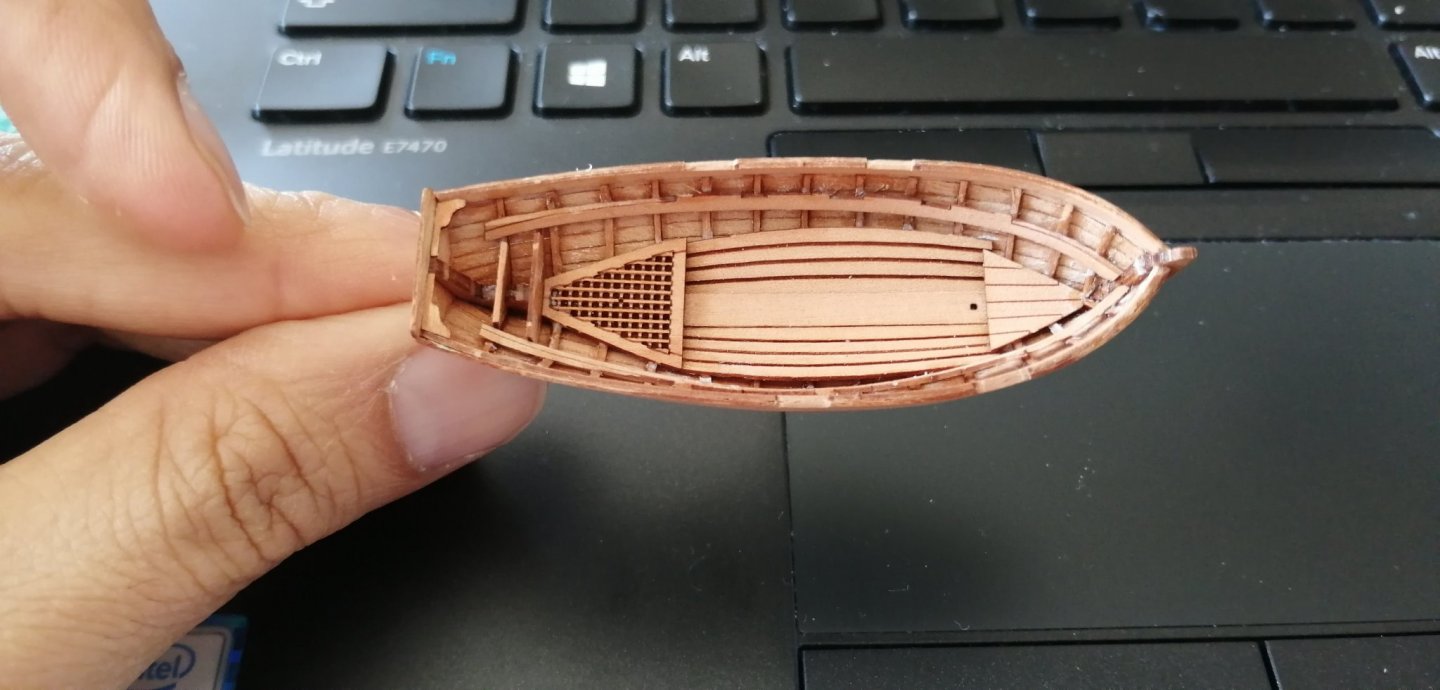
So using wood glue now, I find tiny pieces stay in place long enough to stick without clamping. I do let the glue thicken a bit (by waiting for a couple of minutes) before putting the pieces together. Front nose jig will be removed after curing timorrow morning. The back board will not sit properly. I'll need to shave off some pieces from the aft sitting boards which will be done tomorrow as well after the glue is dry. Center board left off as per instructional recommendation. It needs the metal bracket and mast to align base mast holder first. Also built the stand as glue was drying. Pieces stayed at right angles while the glue was drying.


-
That Sir, is exactly what I was looking for, although to ccoyle's point again, the slow cure CA is another very good option. Thank you very much for the guidance, I'll definitely check out your build links and give the wood glue a shot.
-
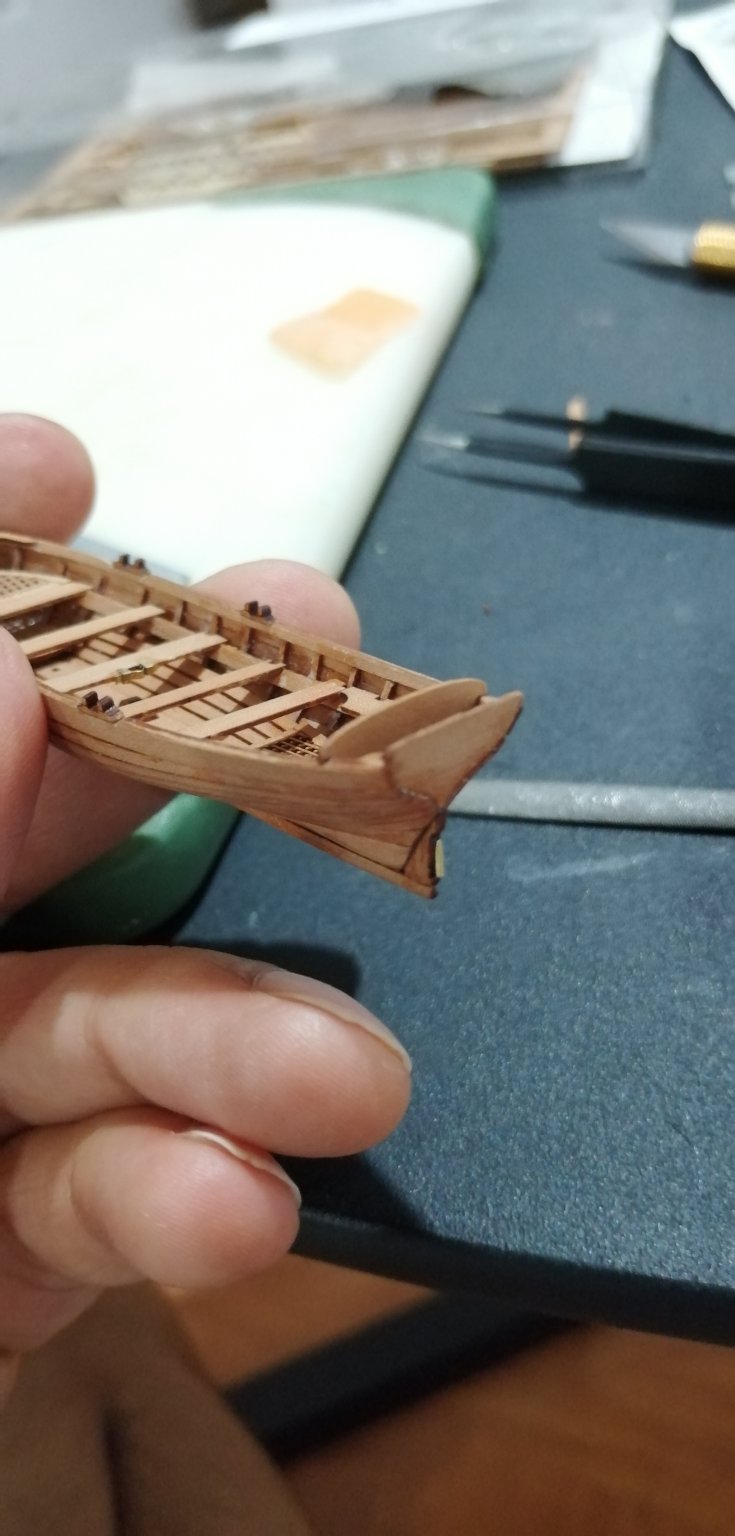
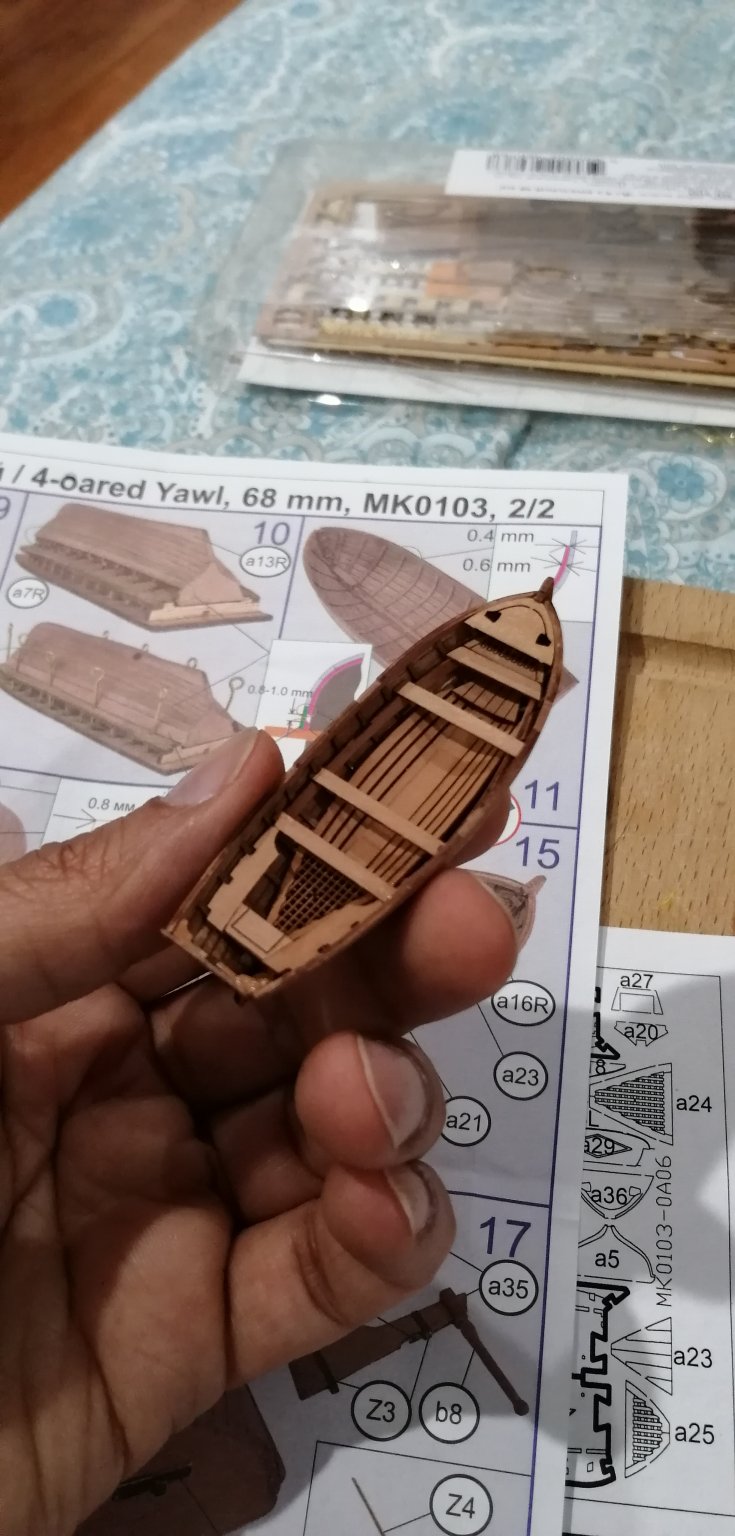
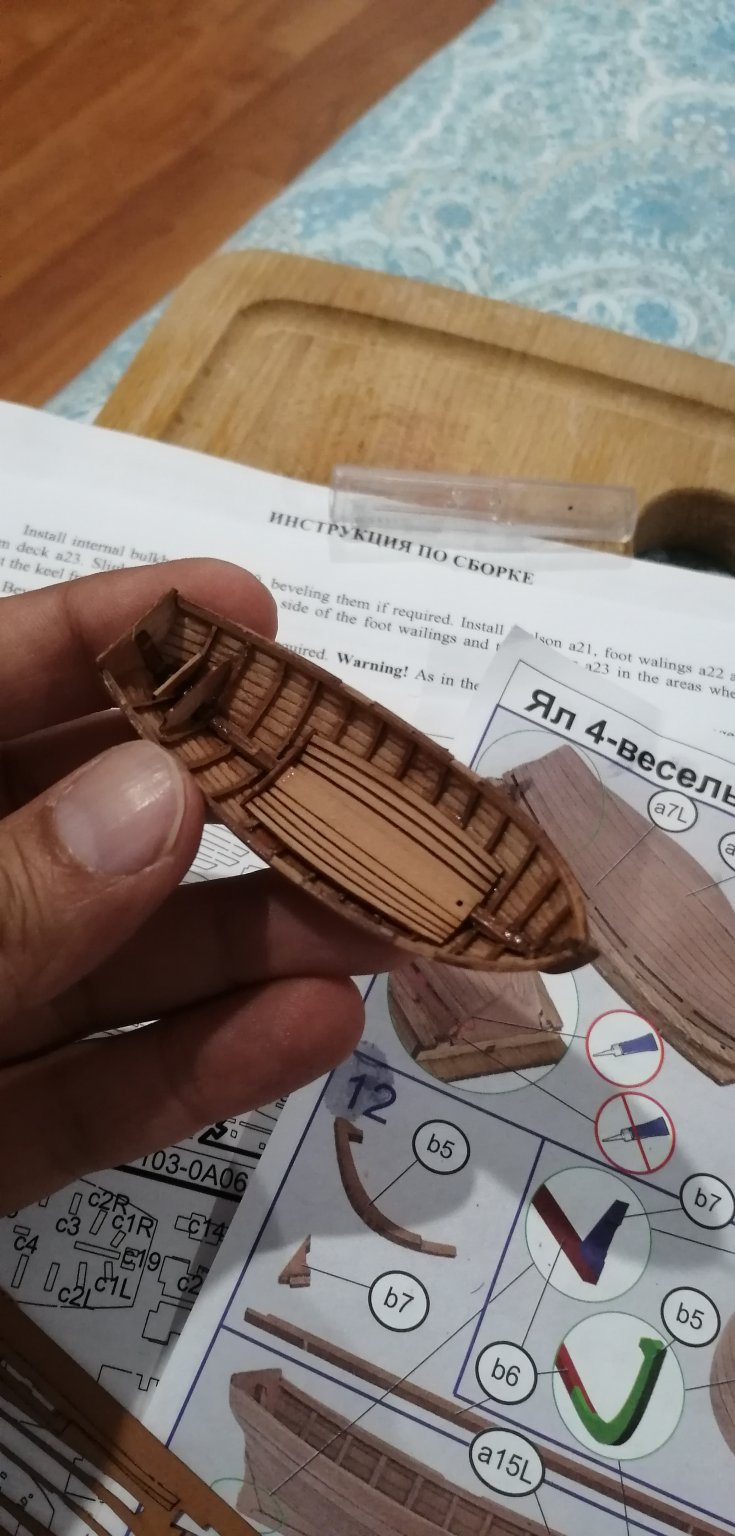
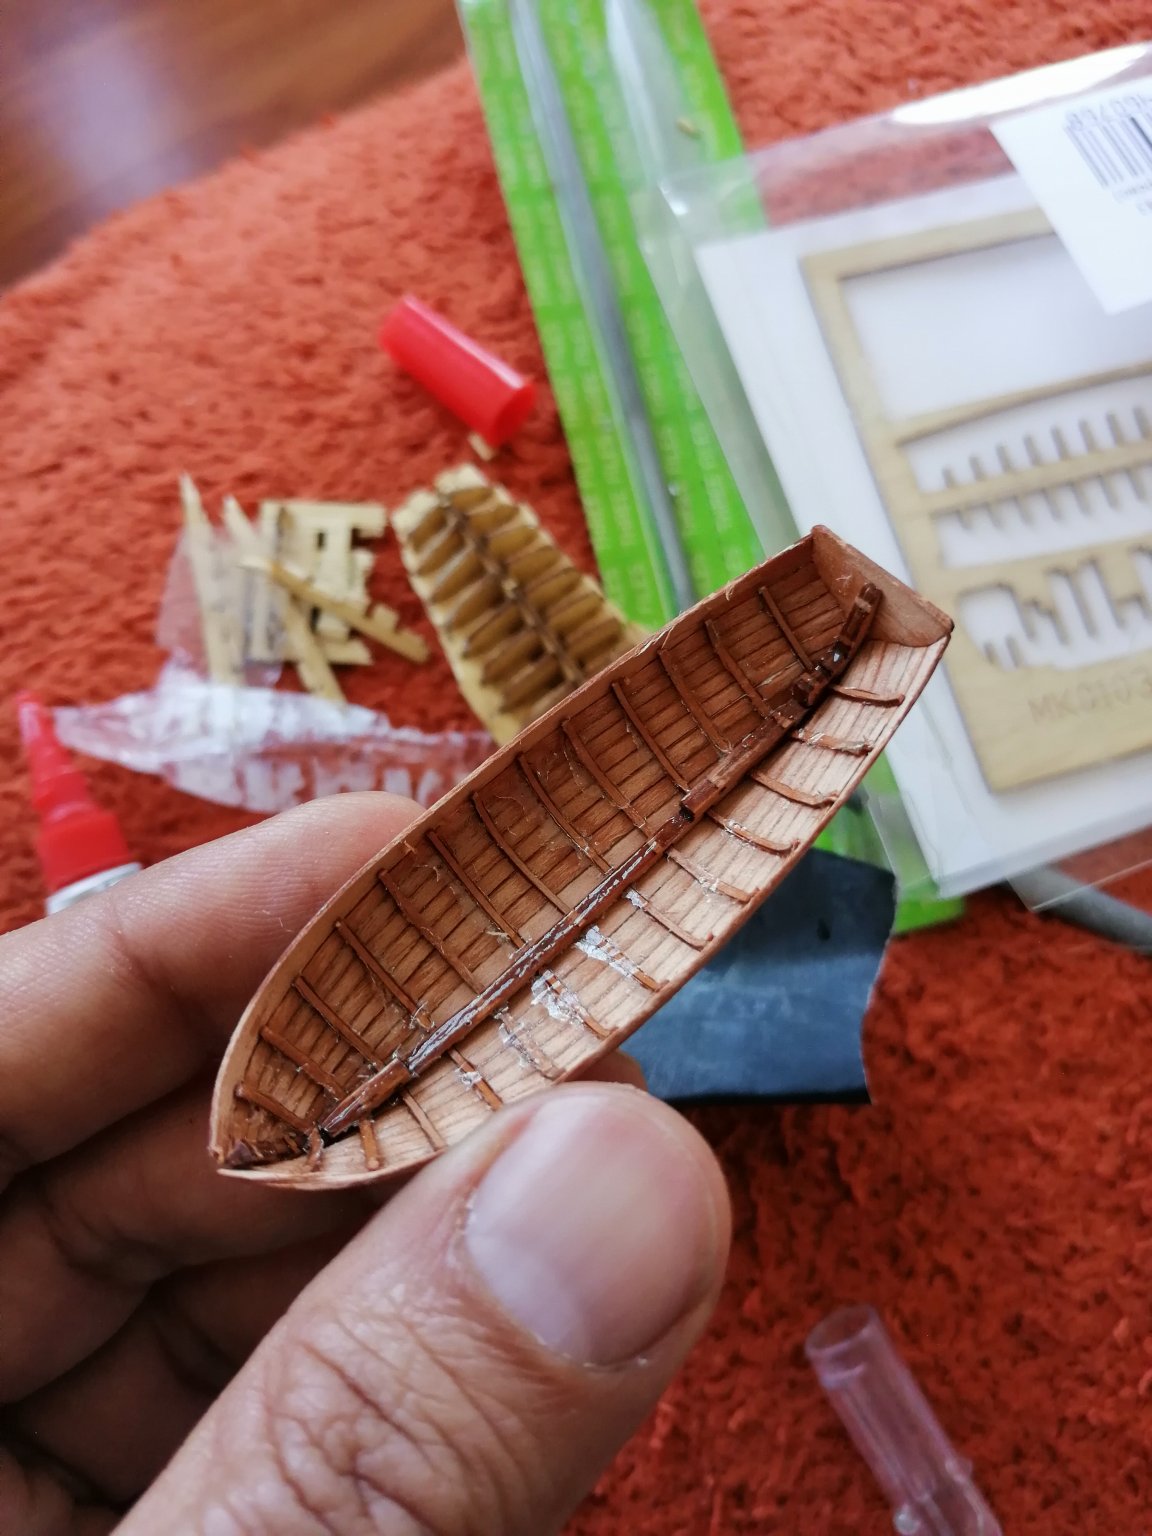
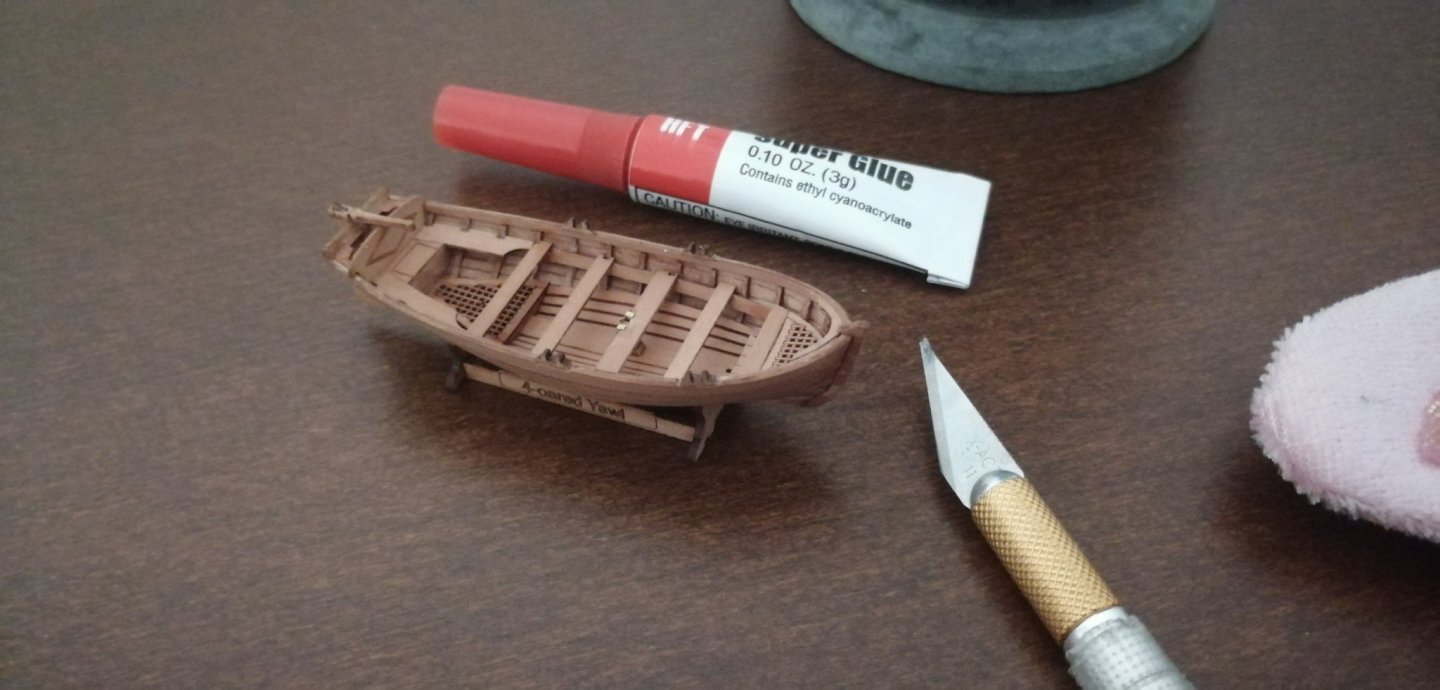
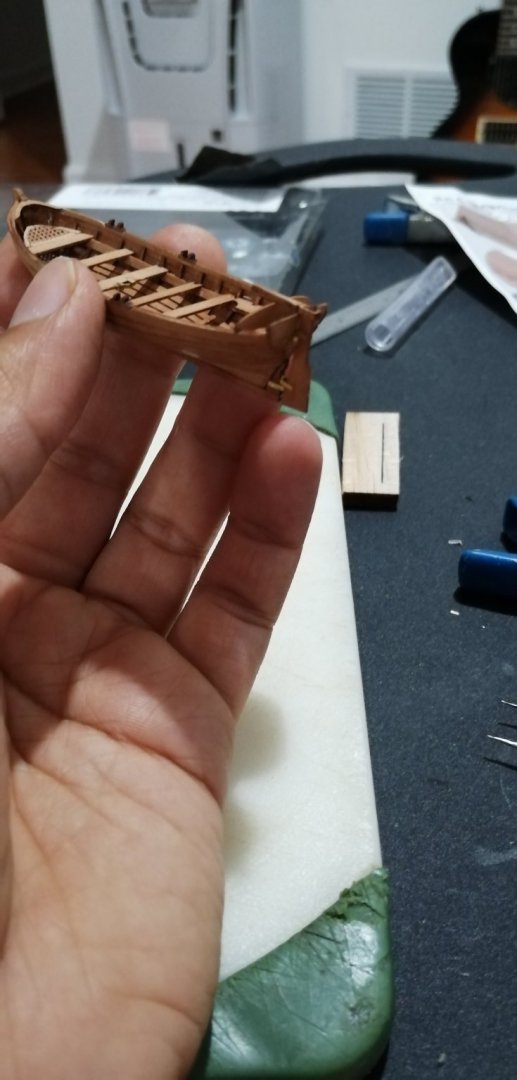
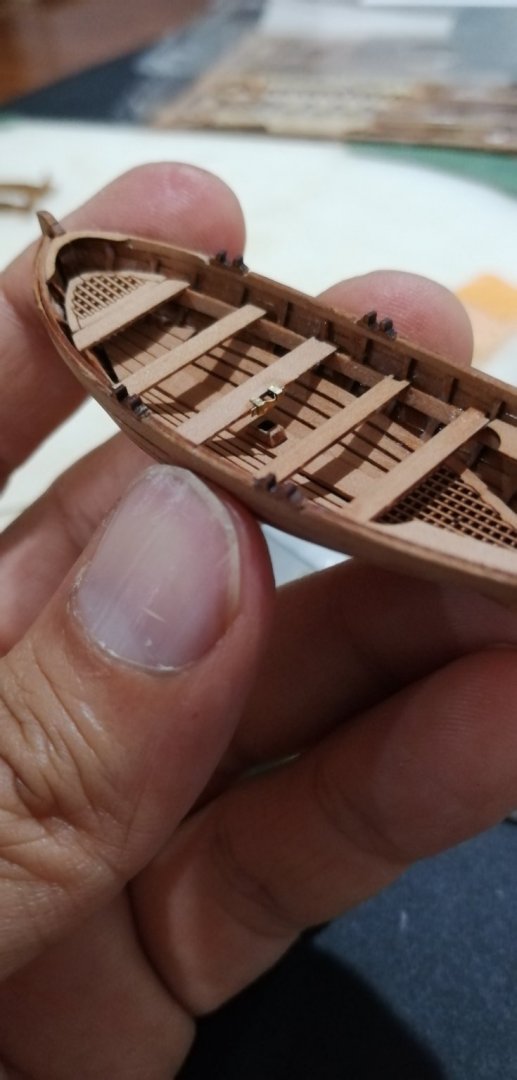
On the home stretch now. Having the foot boards in one piece is a brilliant design move. I was dreading putting these on one by one... A couple of things were glued a touch out of alignment as my patience is running out. Will continue tonight as kids are a full time job during the day. Also just wanted to add that I tried to glue the rear grating using wood glue, but after a few minutes, the part curled up. Had to go back to superglue to tack it in place.

-
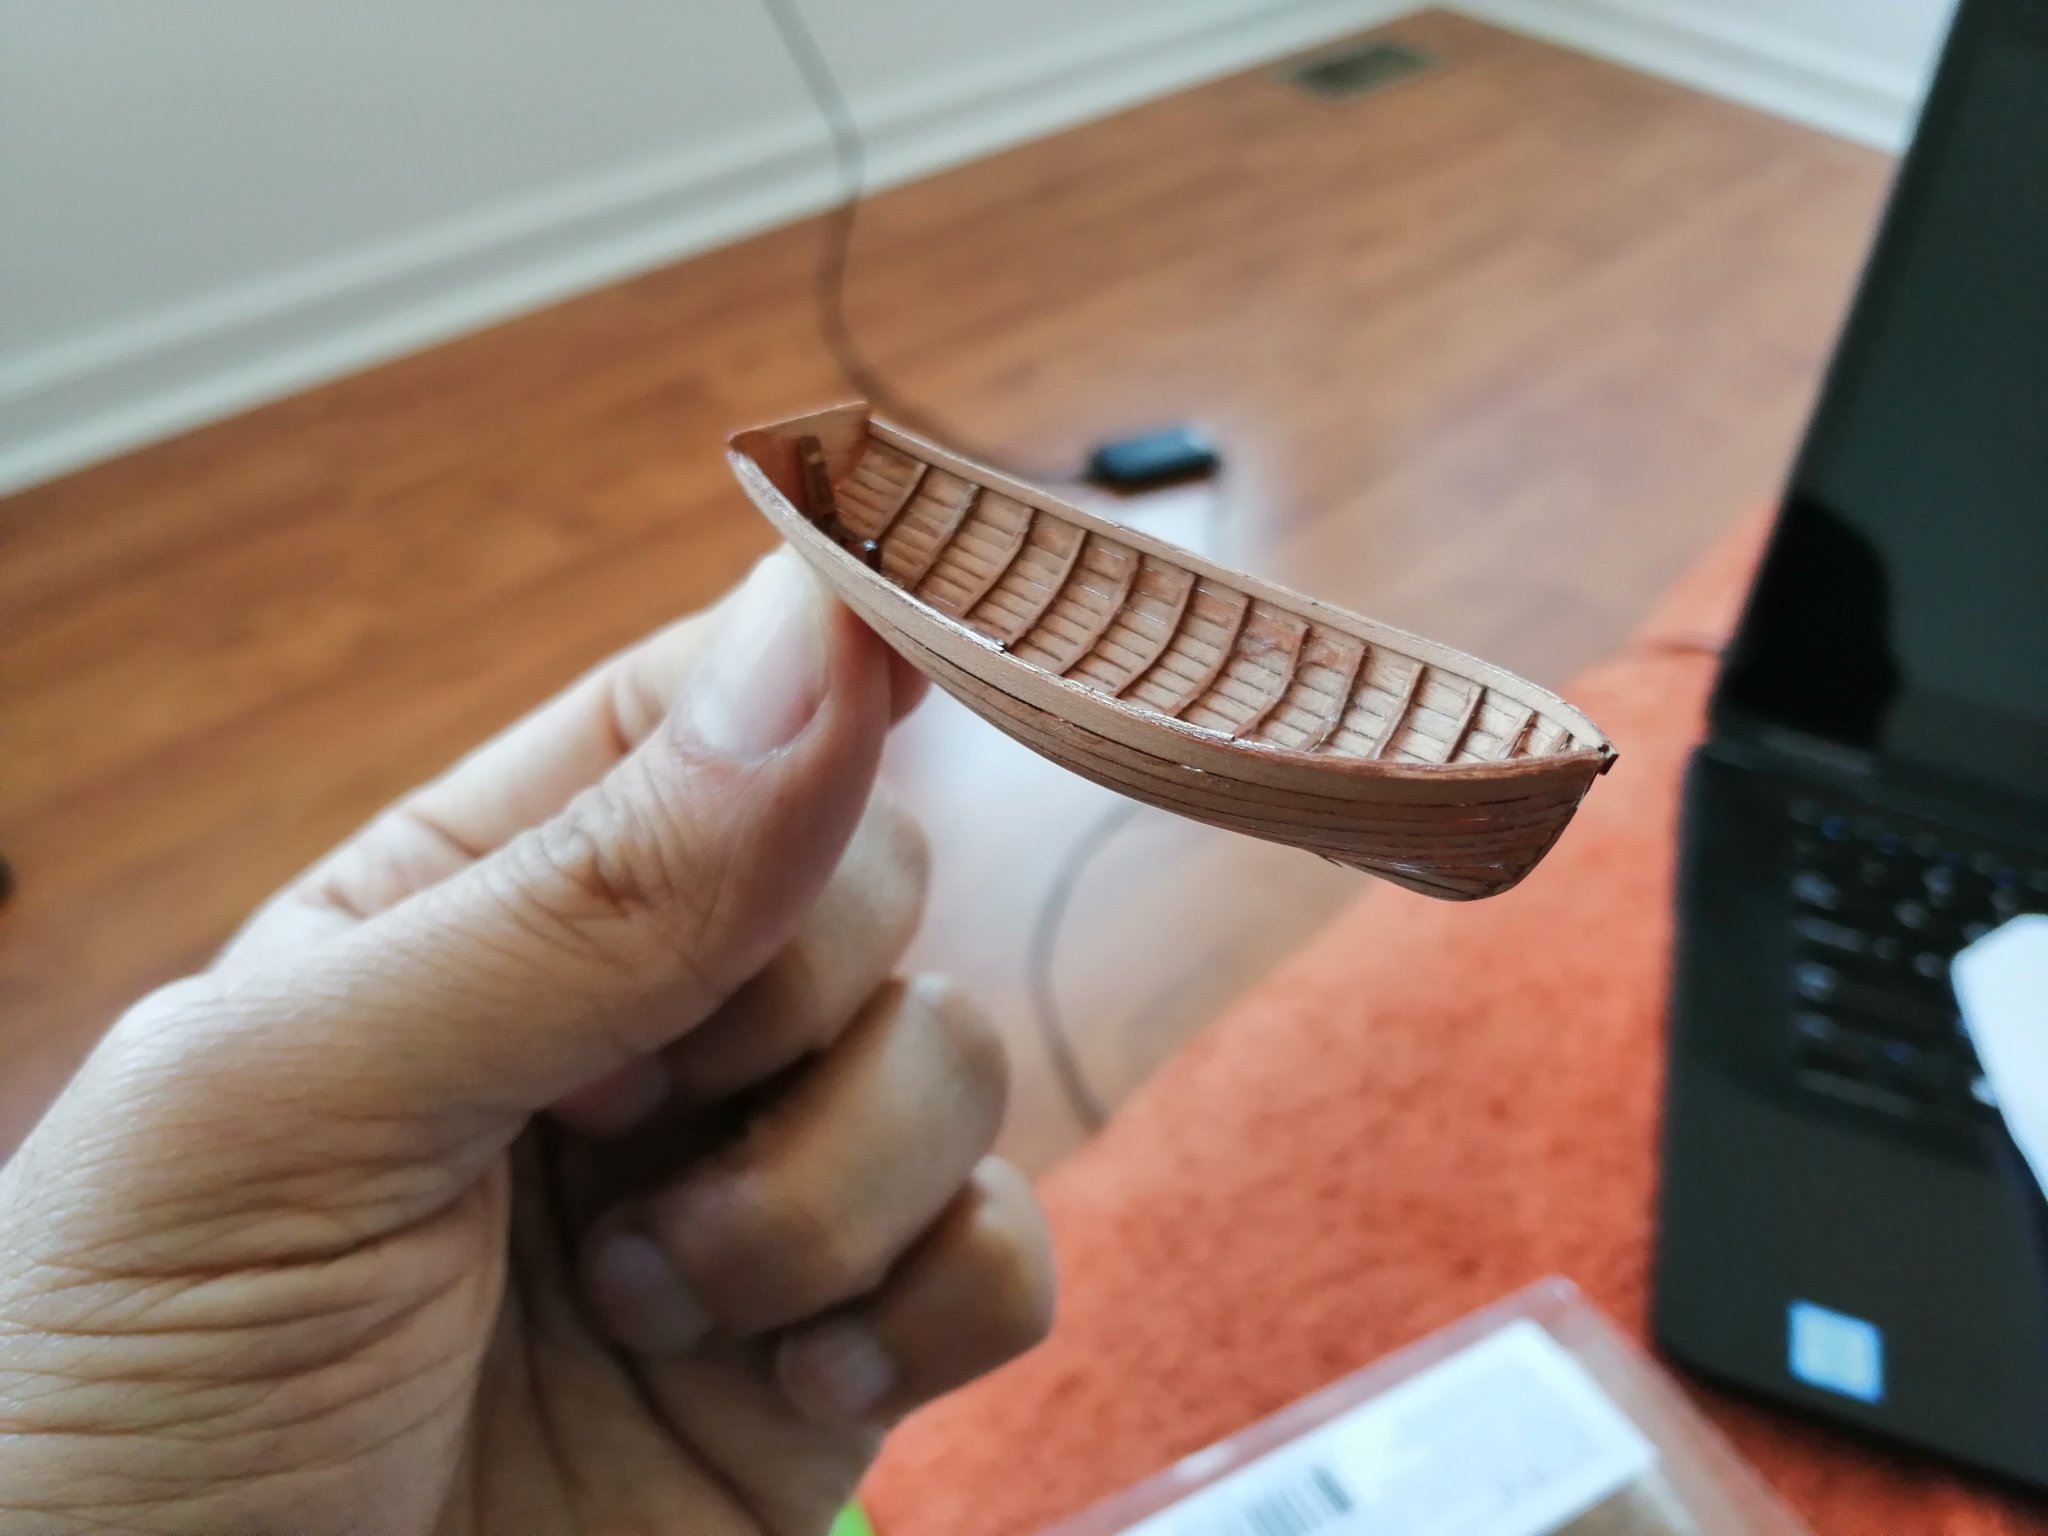
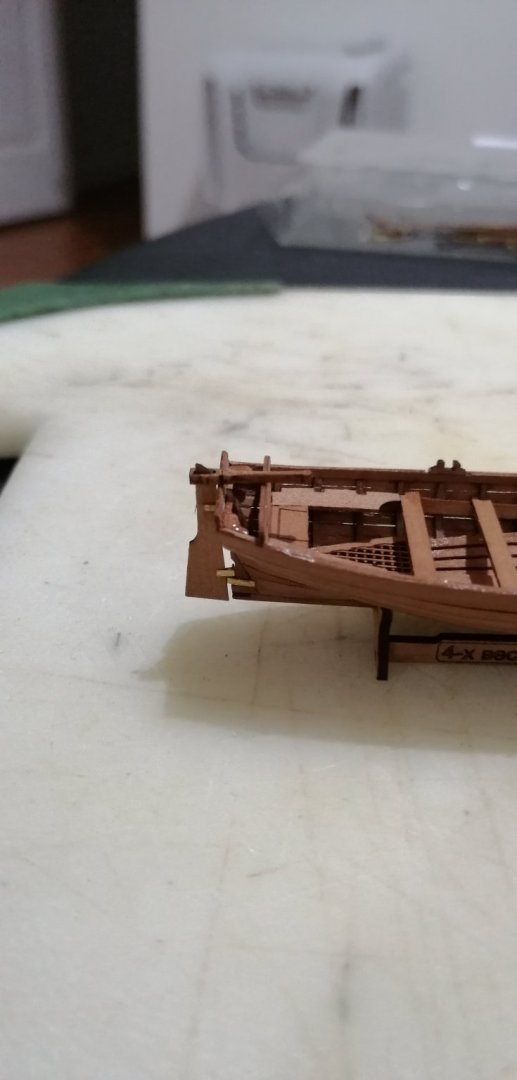
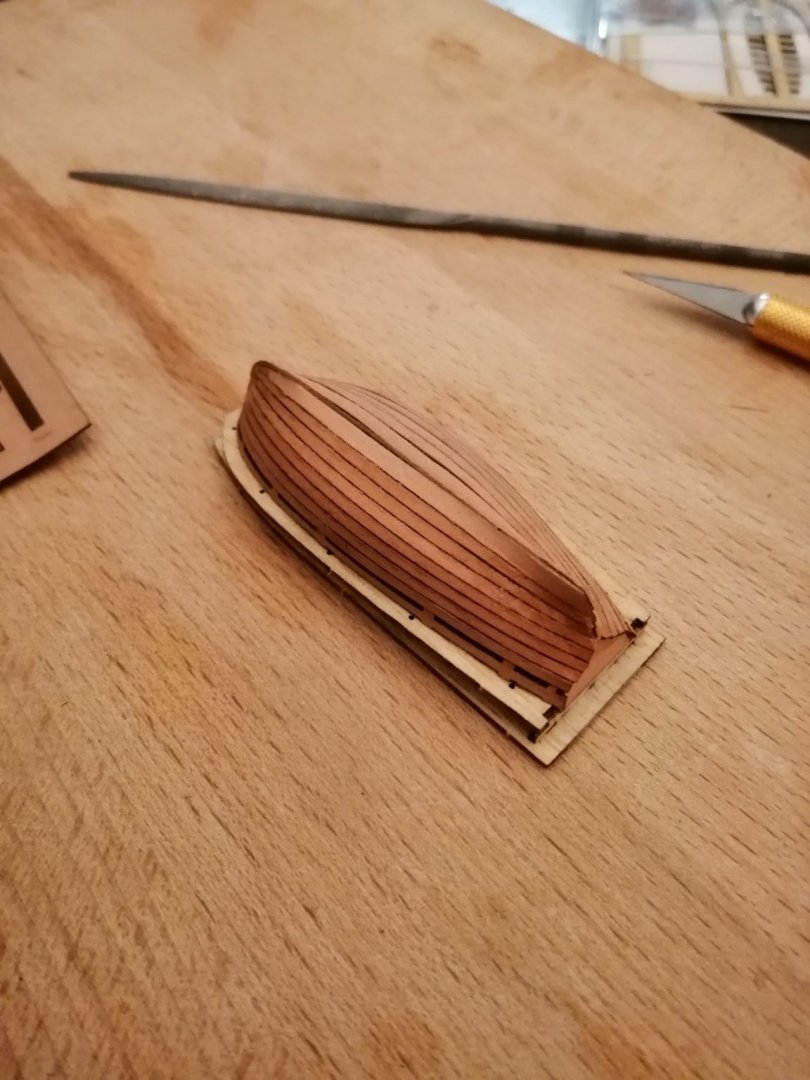
Keel in place. Required quite a bit of sanding on the fore part to make it match the boat without significant gaps. In the end had to force fit the last part with superglue.

-
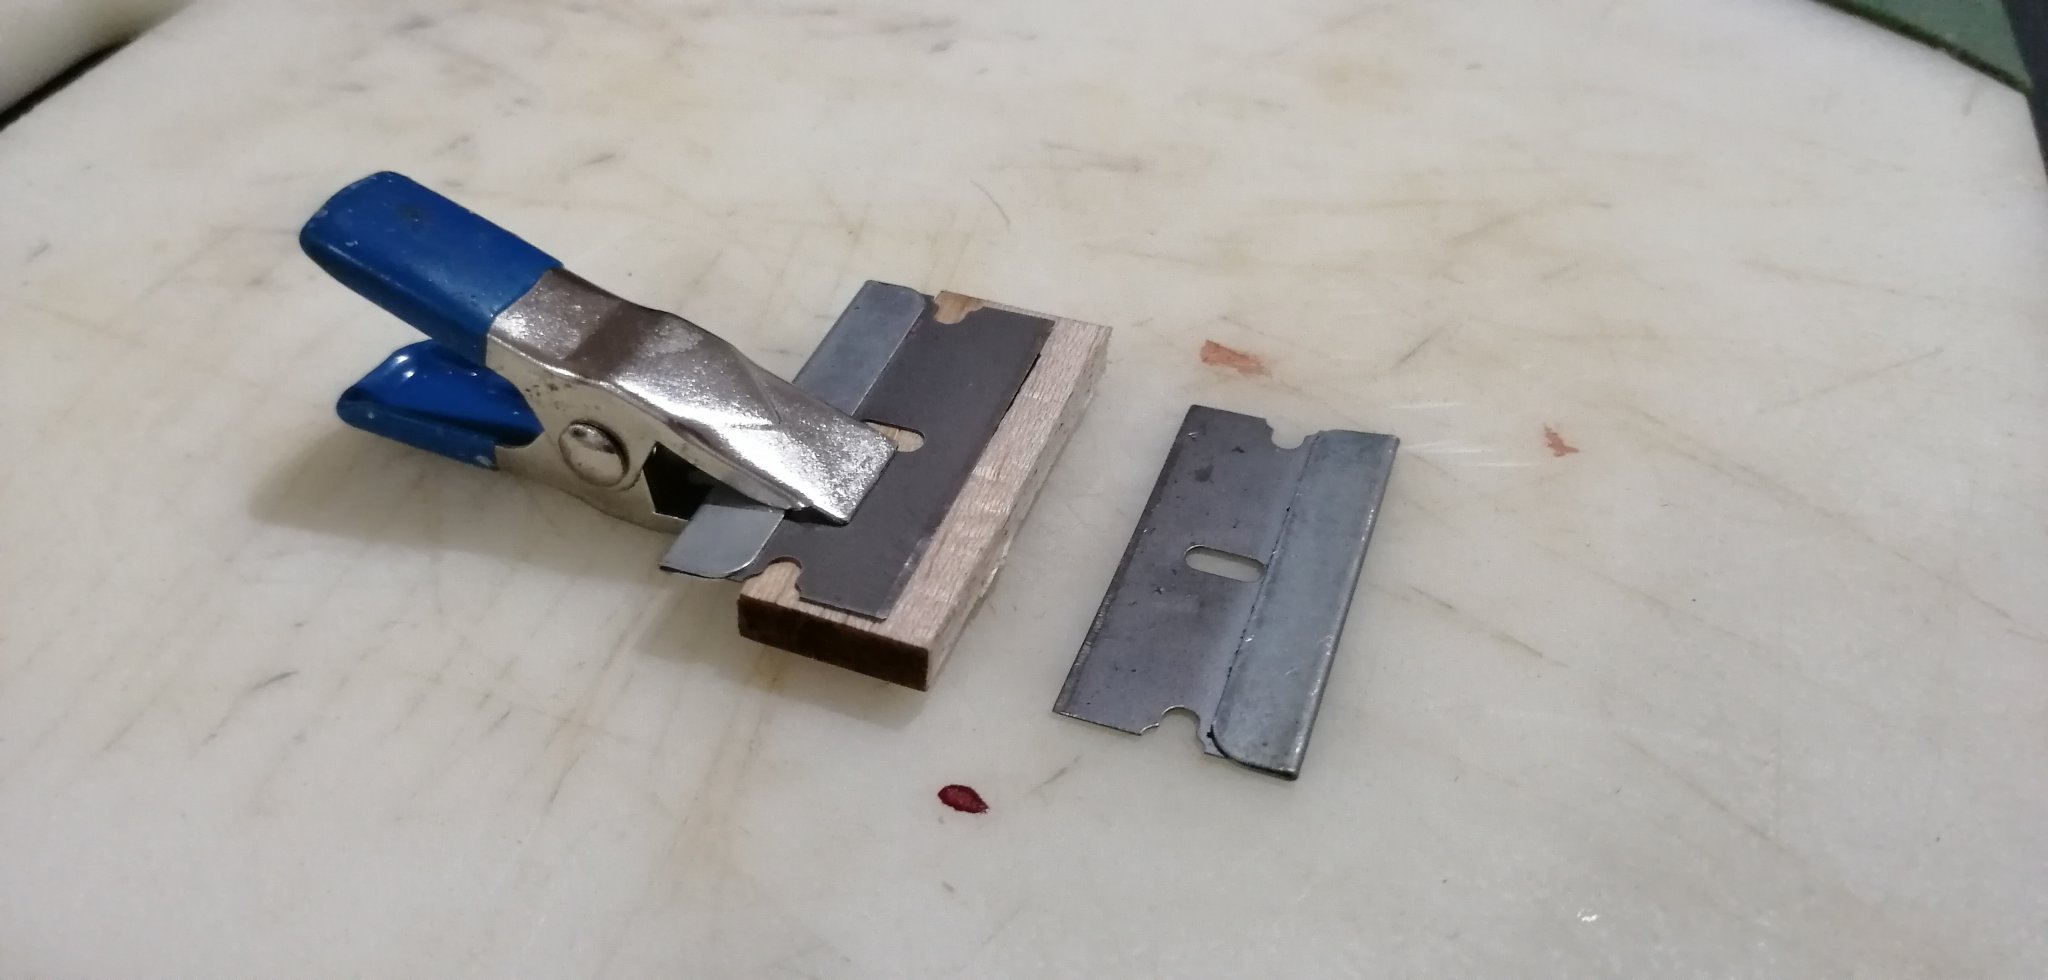
But how do you hold these tiny weird shapes pieces in place while waiting for the glue to dry? My clamps are way too big and utterly useless for such a tiny application. 😟
-
Thanks buddy, you can call me Amar. The "rexnuktia" screen name is just a made up thing from years ago when I used to play onlone video games LOL!
-
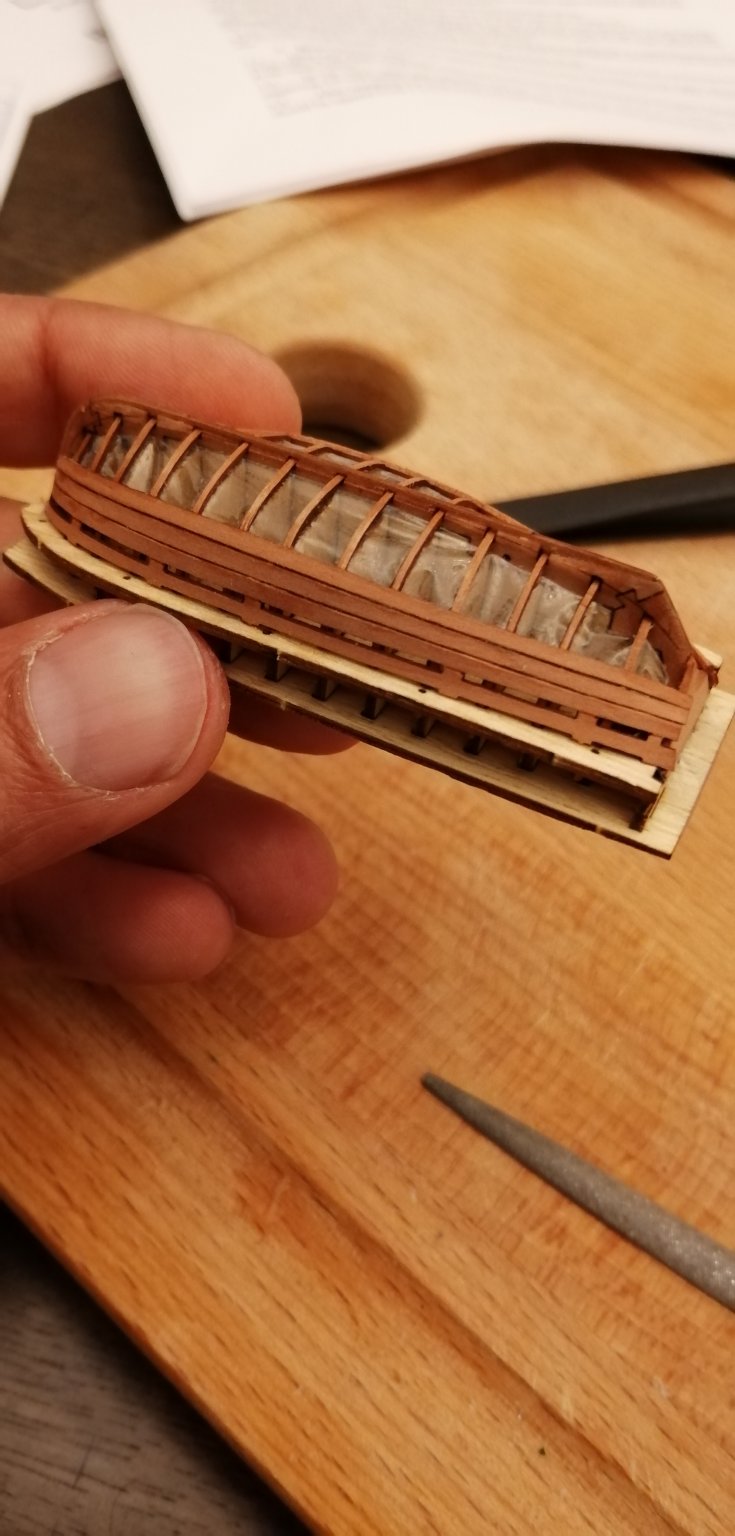
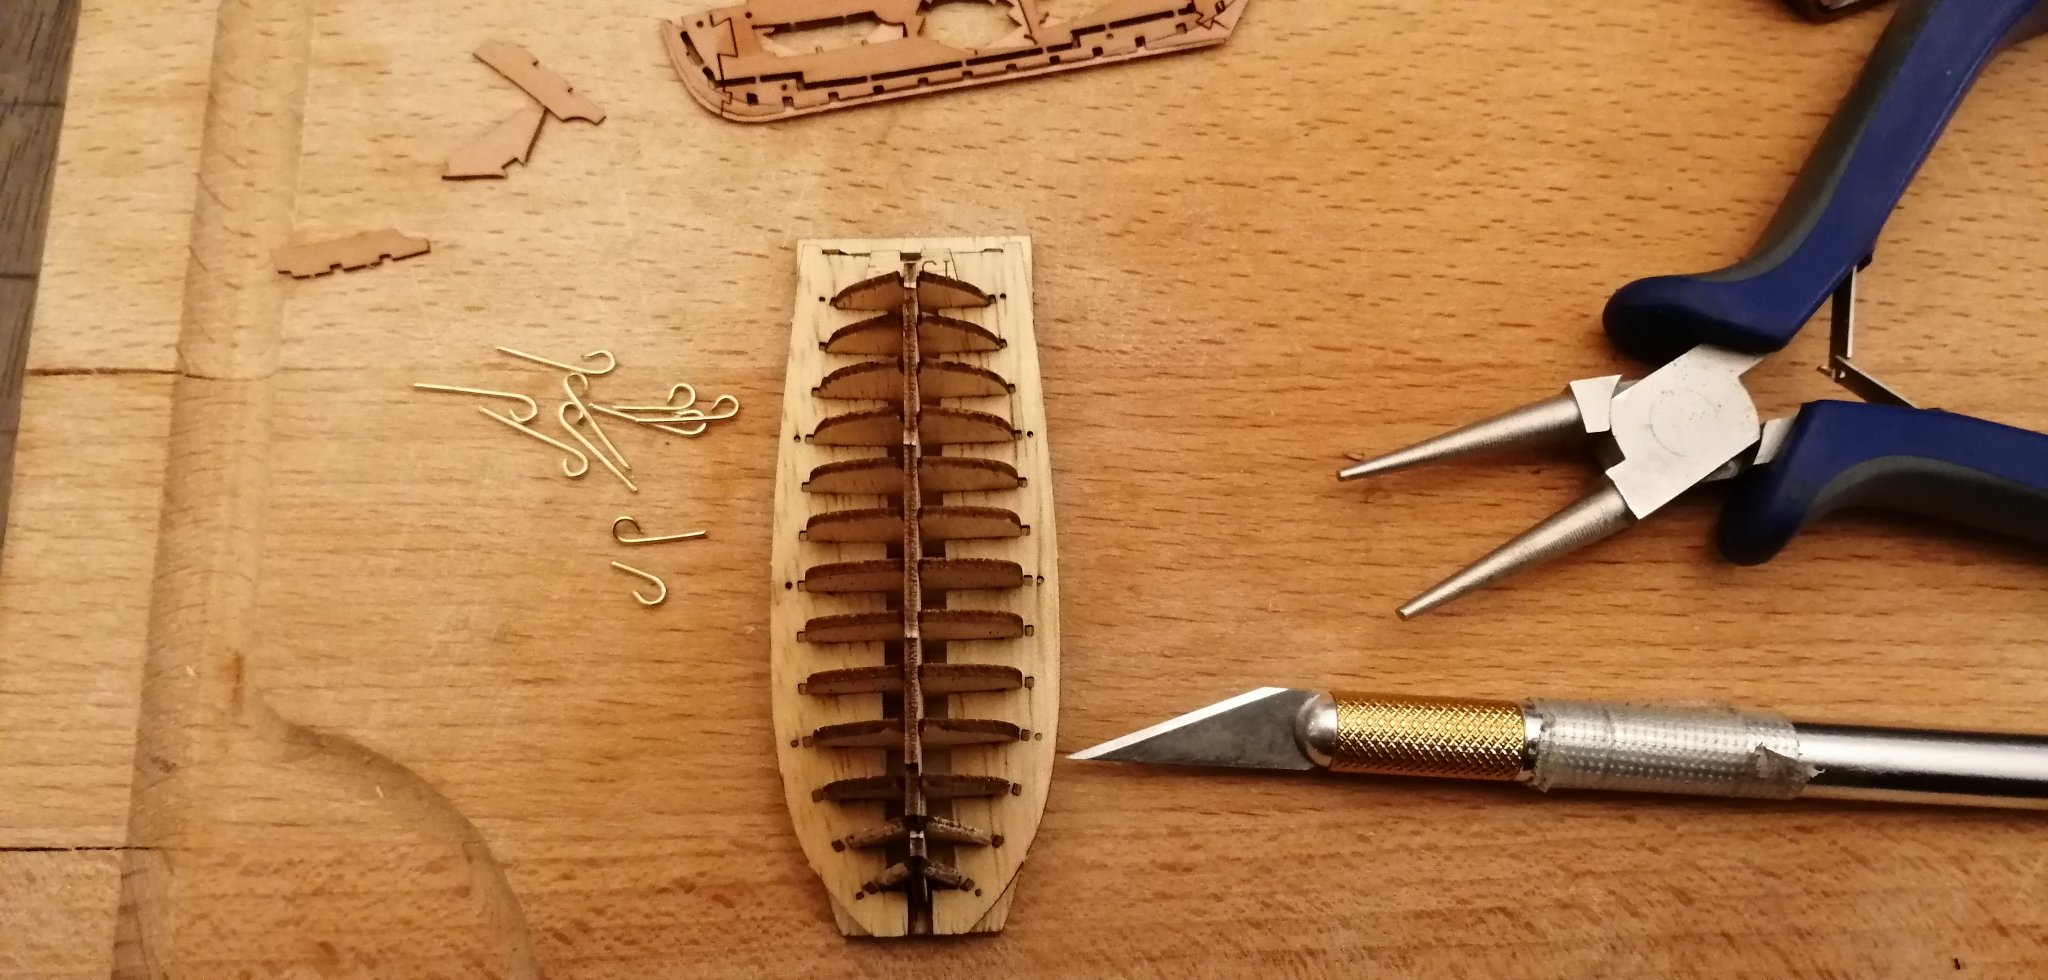
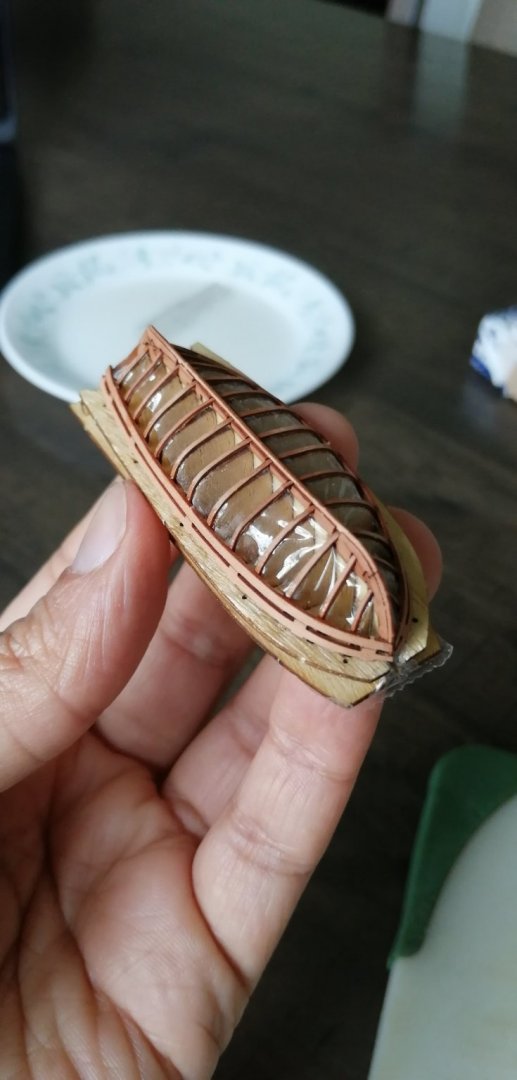
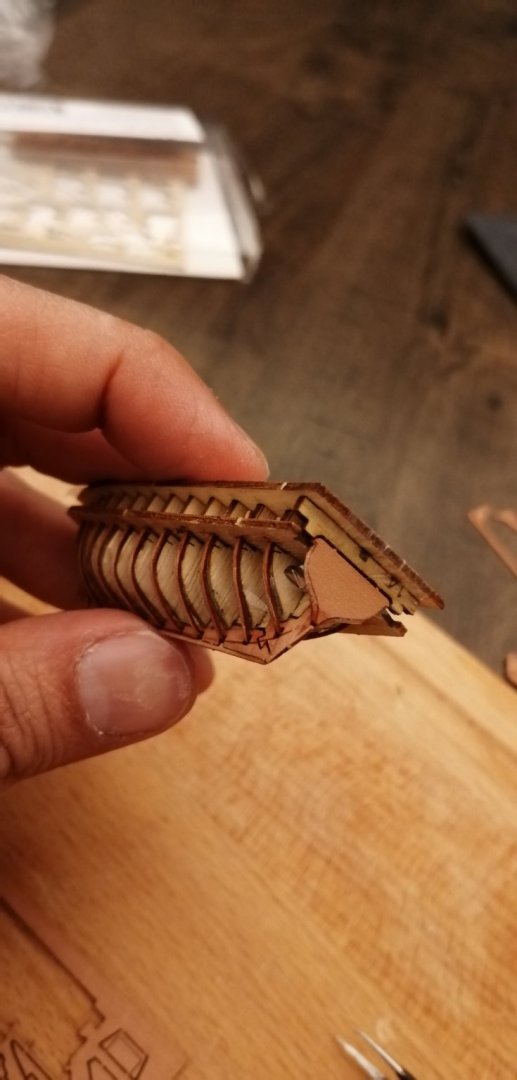
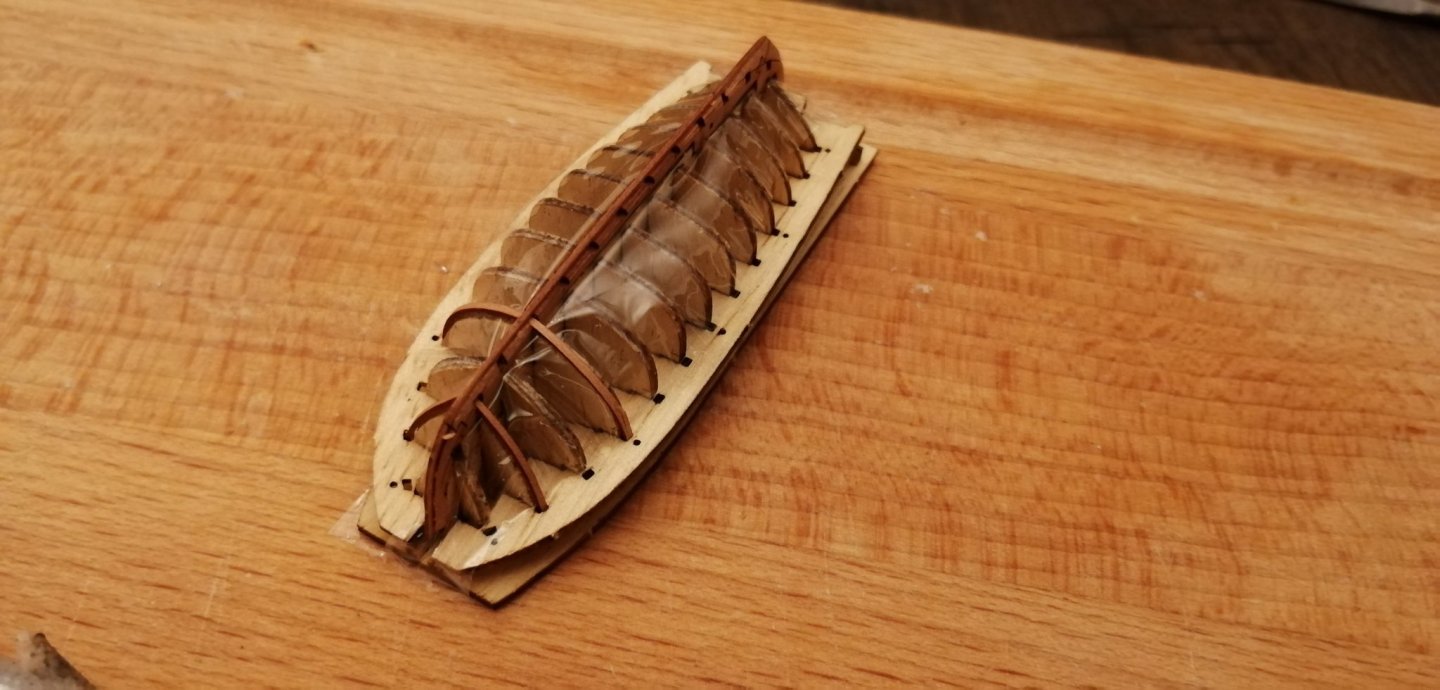
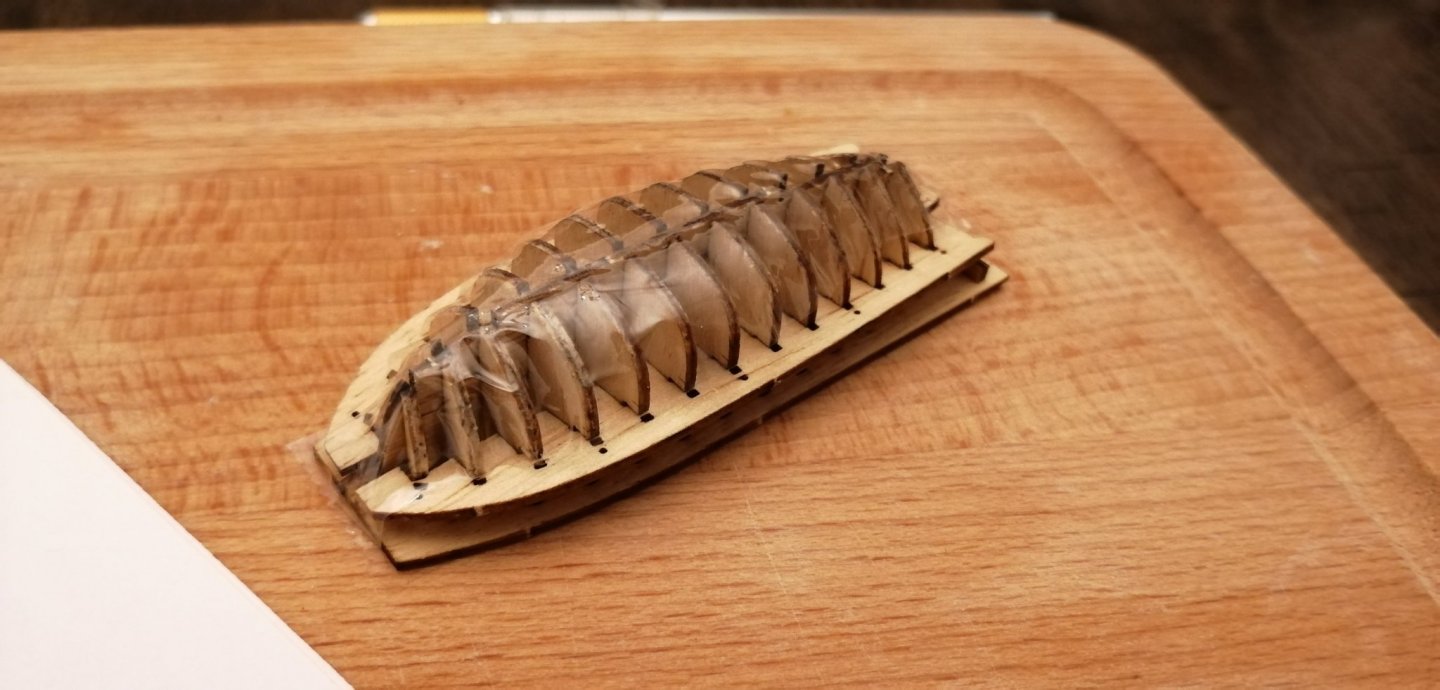
As can be seen, a lot of superglue permiated the shrink wrap and stuck it to the hull. I have no idea how it would be possible to build something like this with a slow cure glue! Lots to learn here...
-
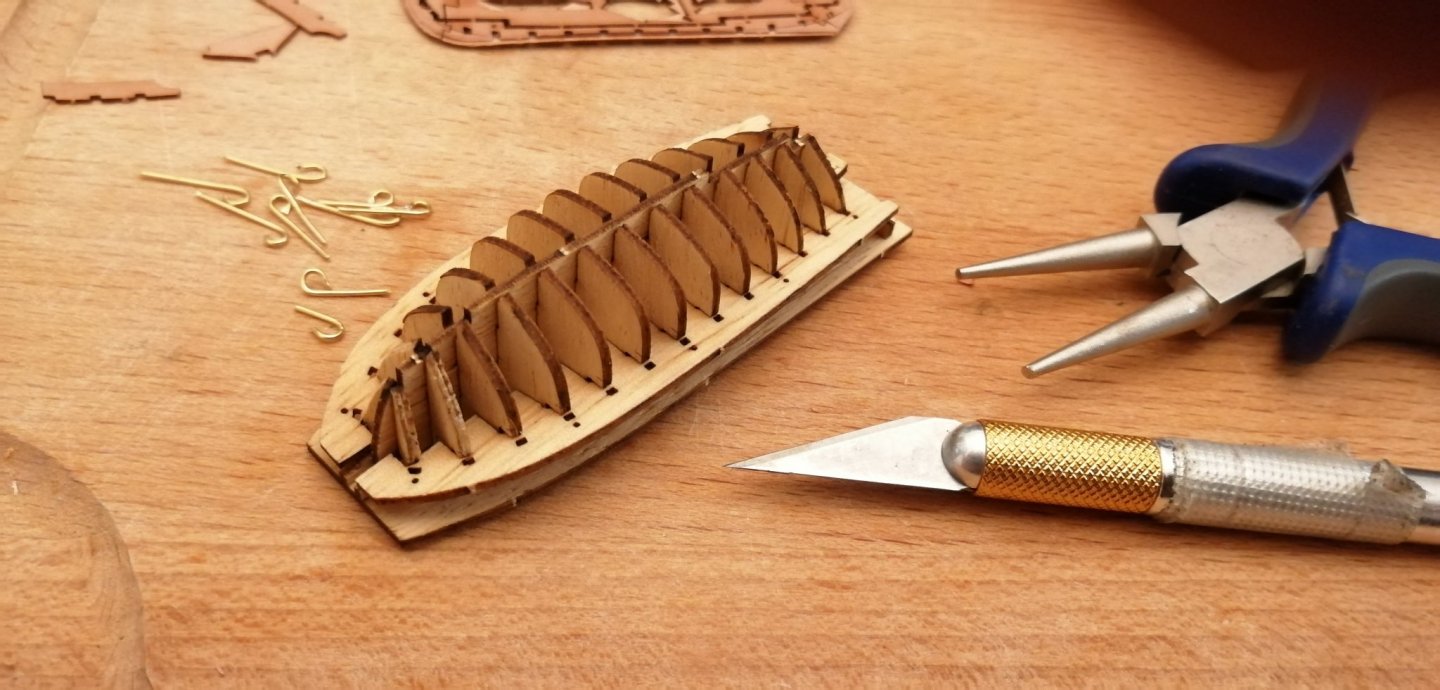
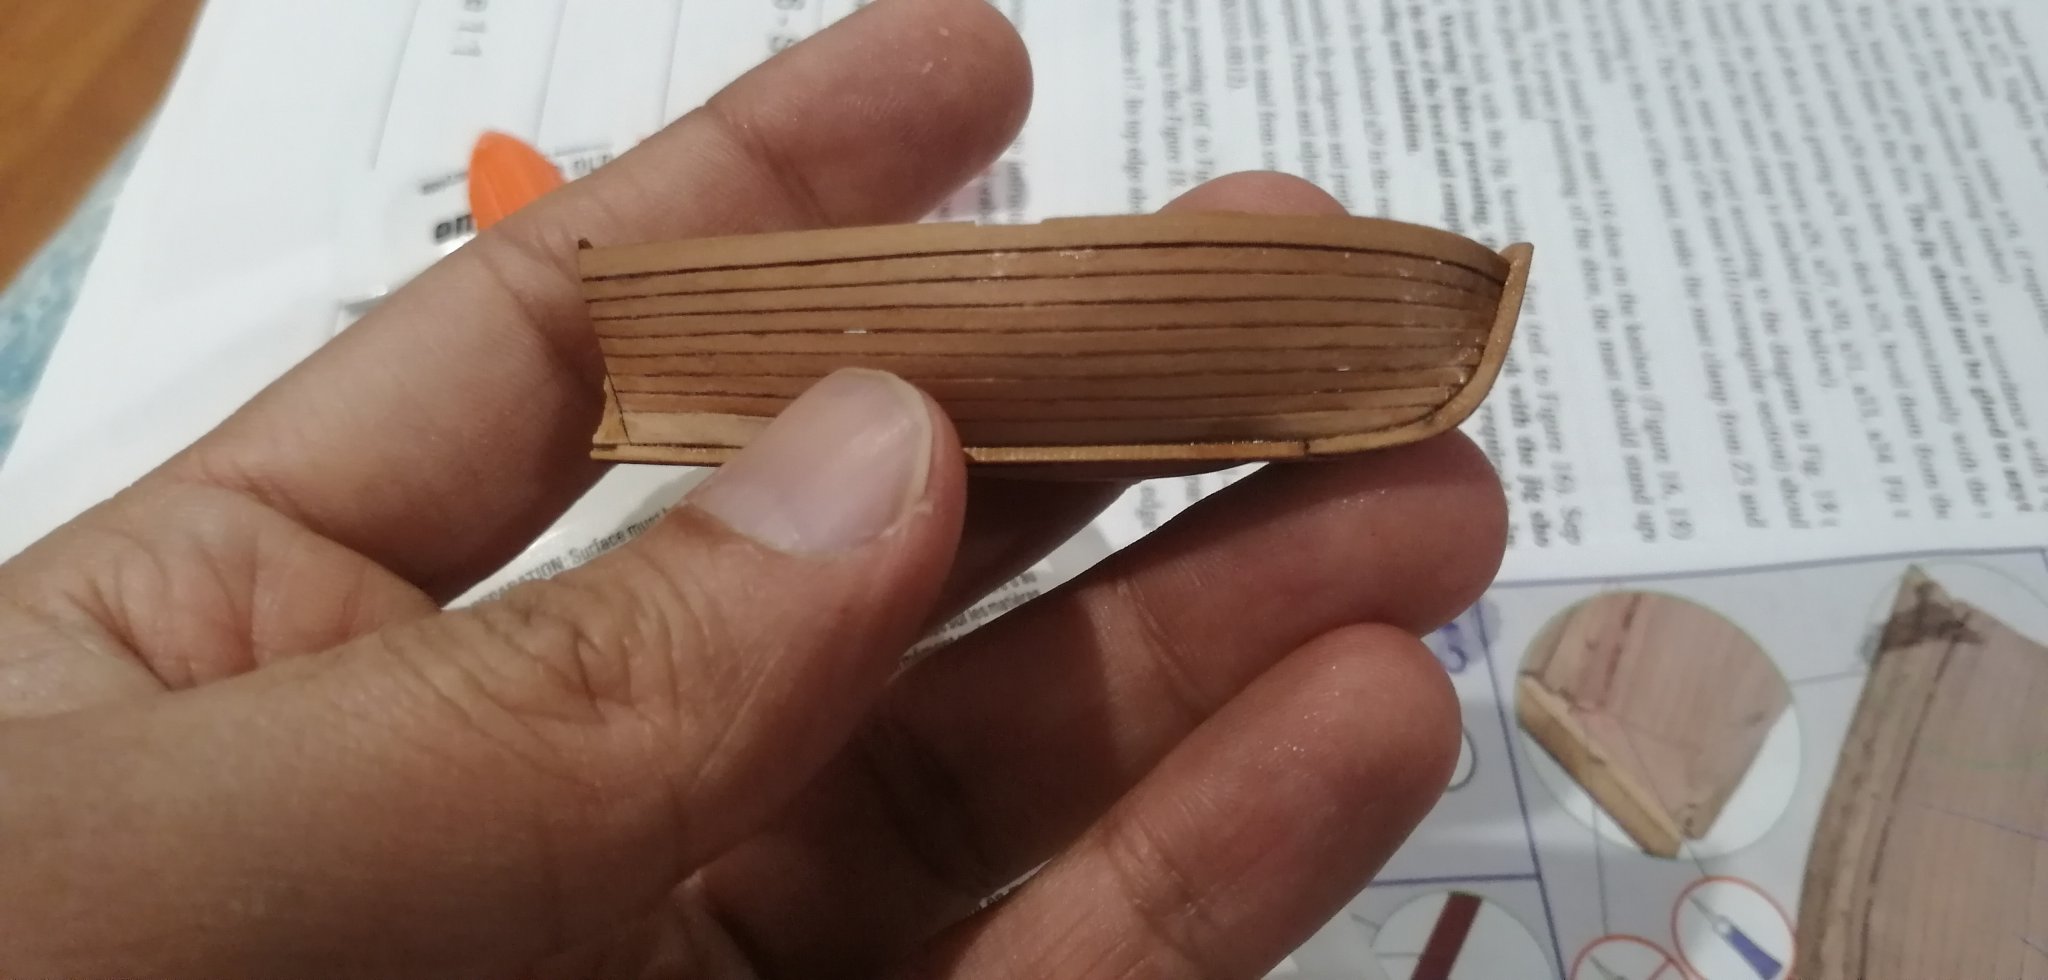
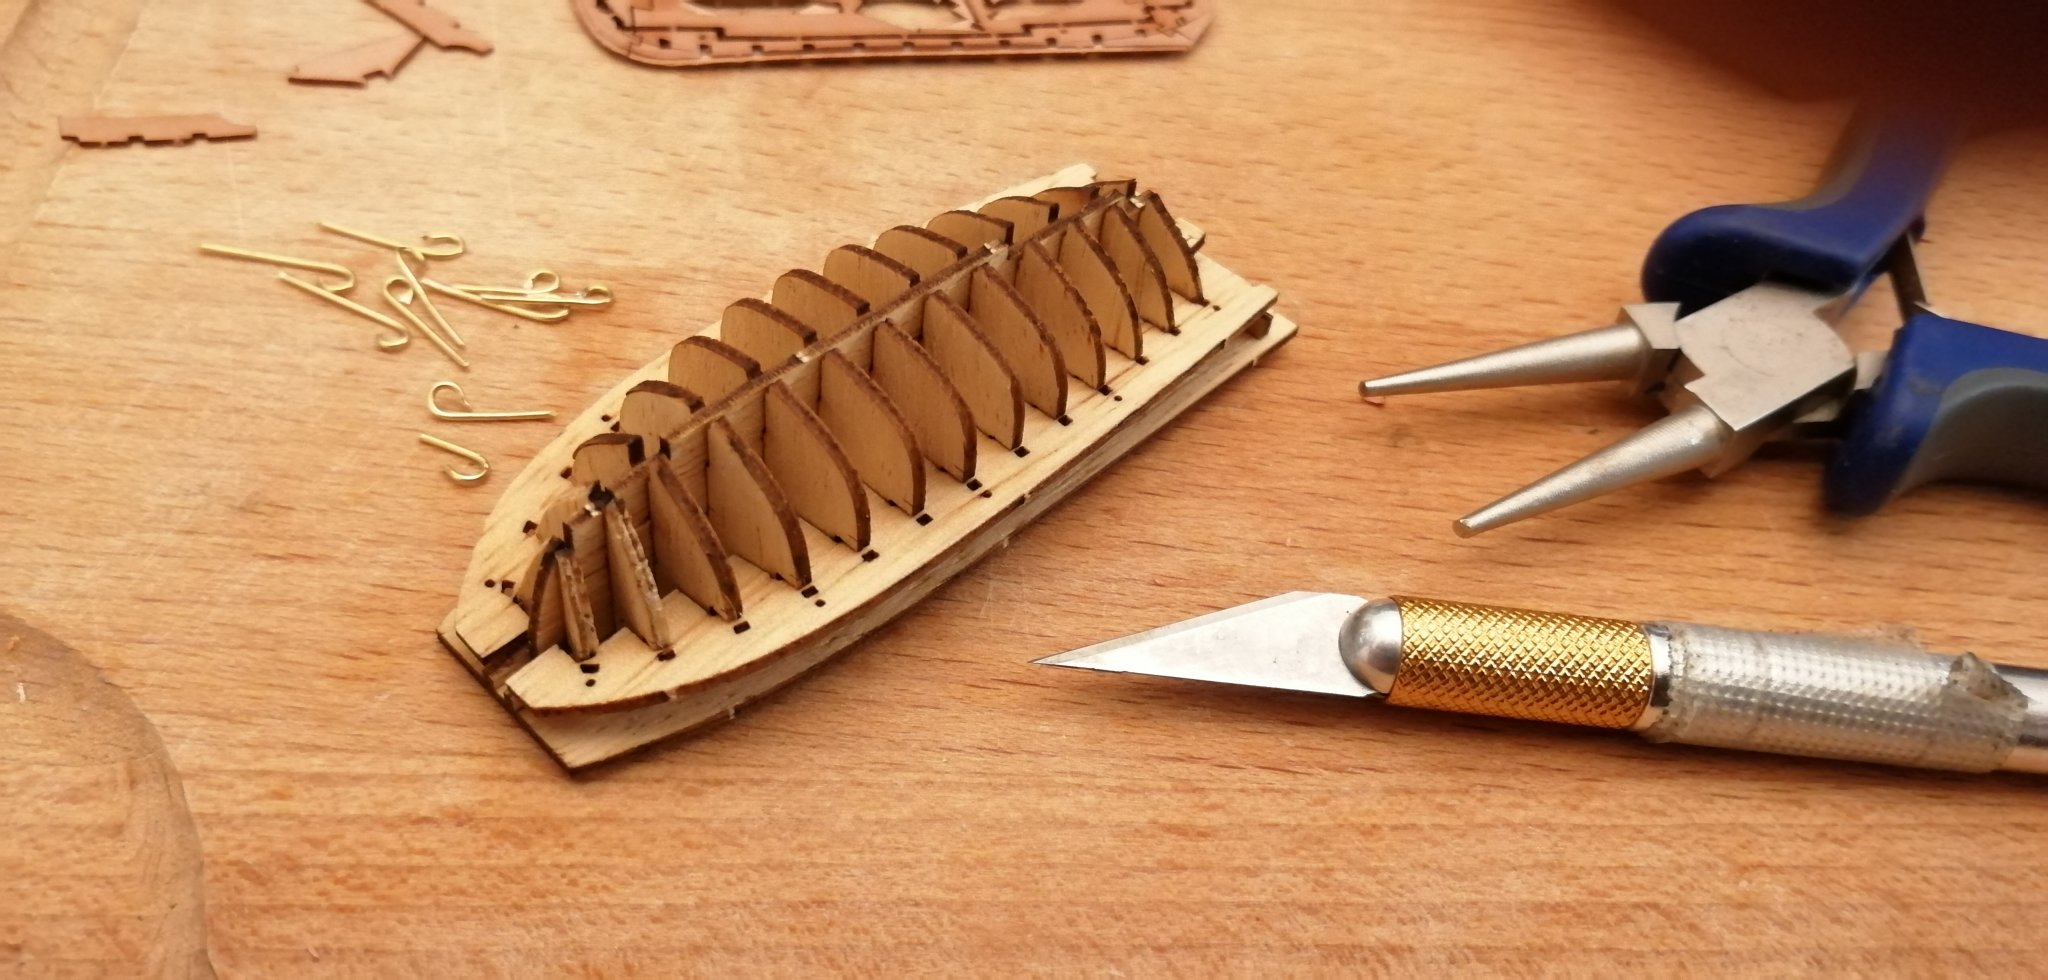
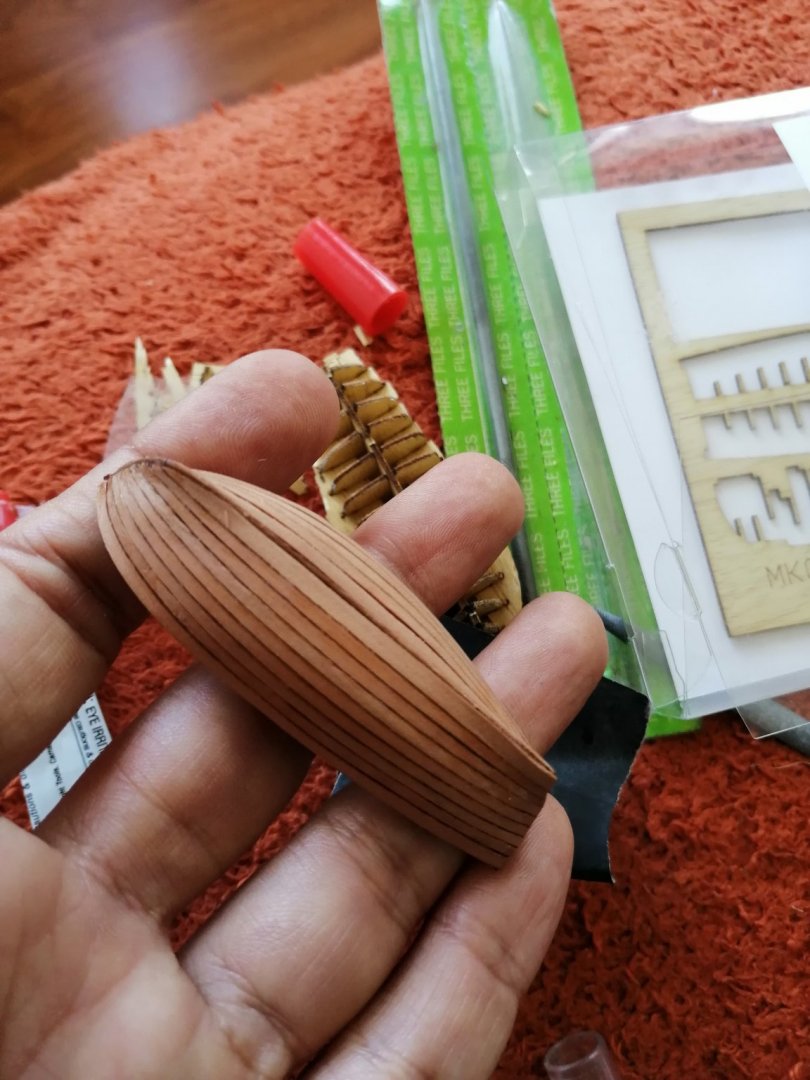
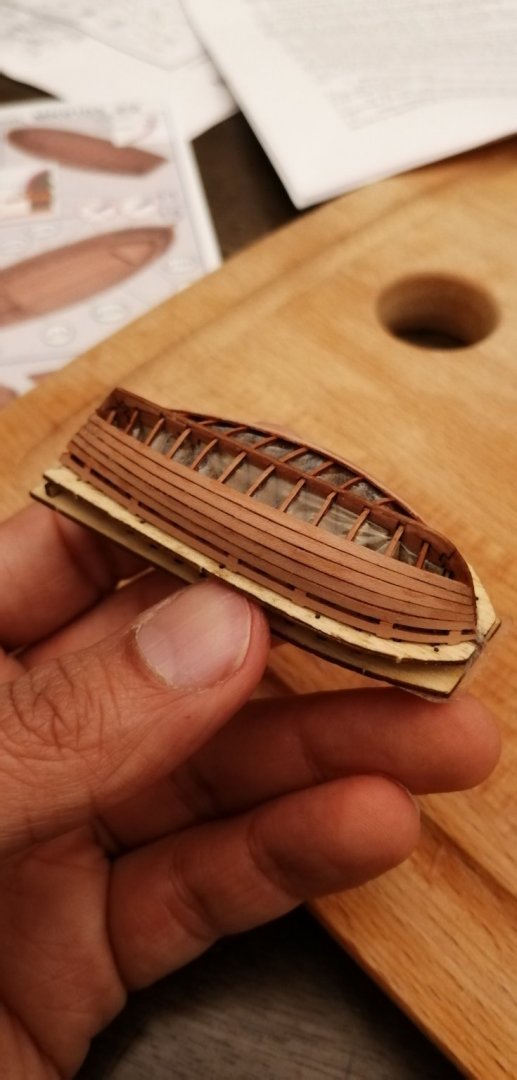
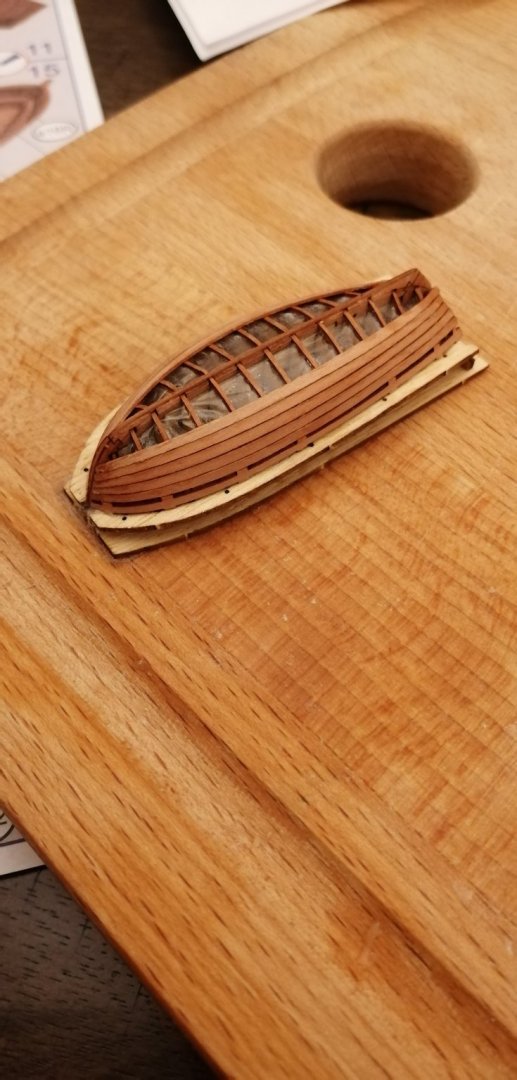
So today was really a struggle. Easily the most difficult part of the build was cutting the ribs 1 mm apart to attach the final top plank. Despite using a brand new blade, I ended up breaking a few formers. Then it got worse as the rear hull got stuck to the jig. Some man handling and jig demolition was required, but luckily I got the boat out in one piece.

-
Thank you so much guys (ccoyle & Ybes). Really appreciate the help and kind words. I'll keep these names in mind. In fact, I did get a response from the Ebay seller (Valentina) that she has contacted the manufacturer regarding english instructions. Glad I didn't wait LOL.
-
Ta-da!
-
Maybe I'll do two more tonight
-
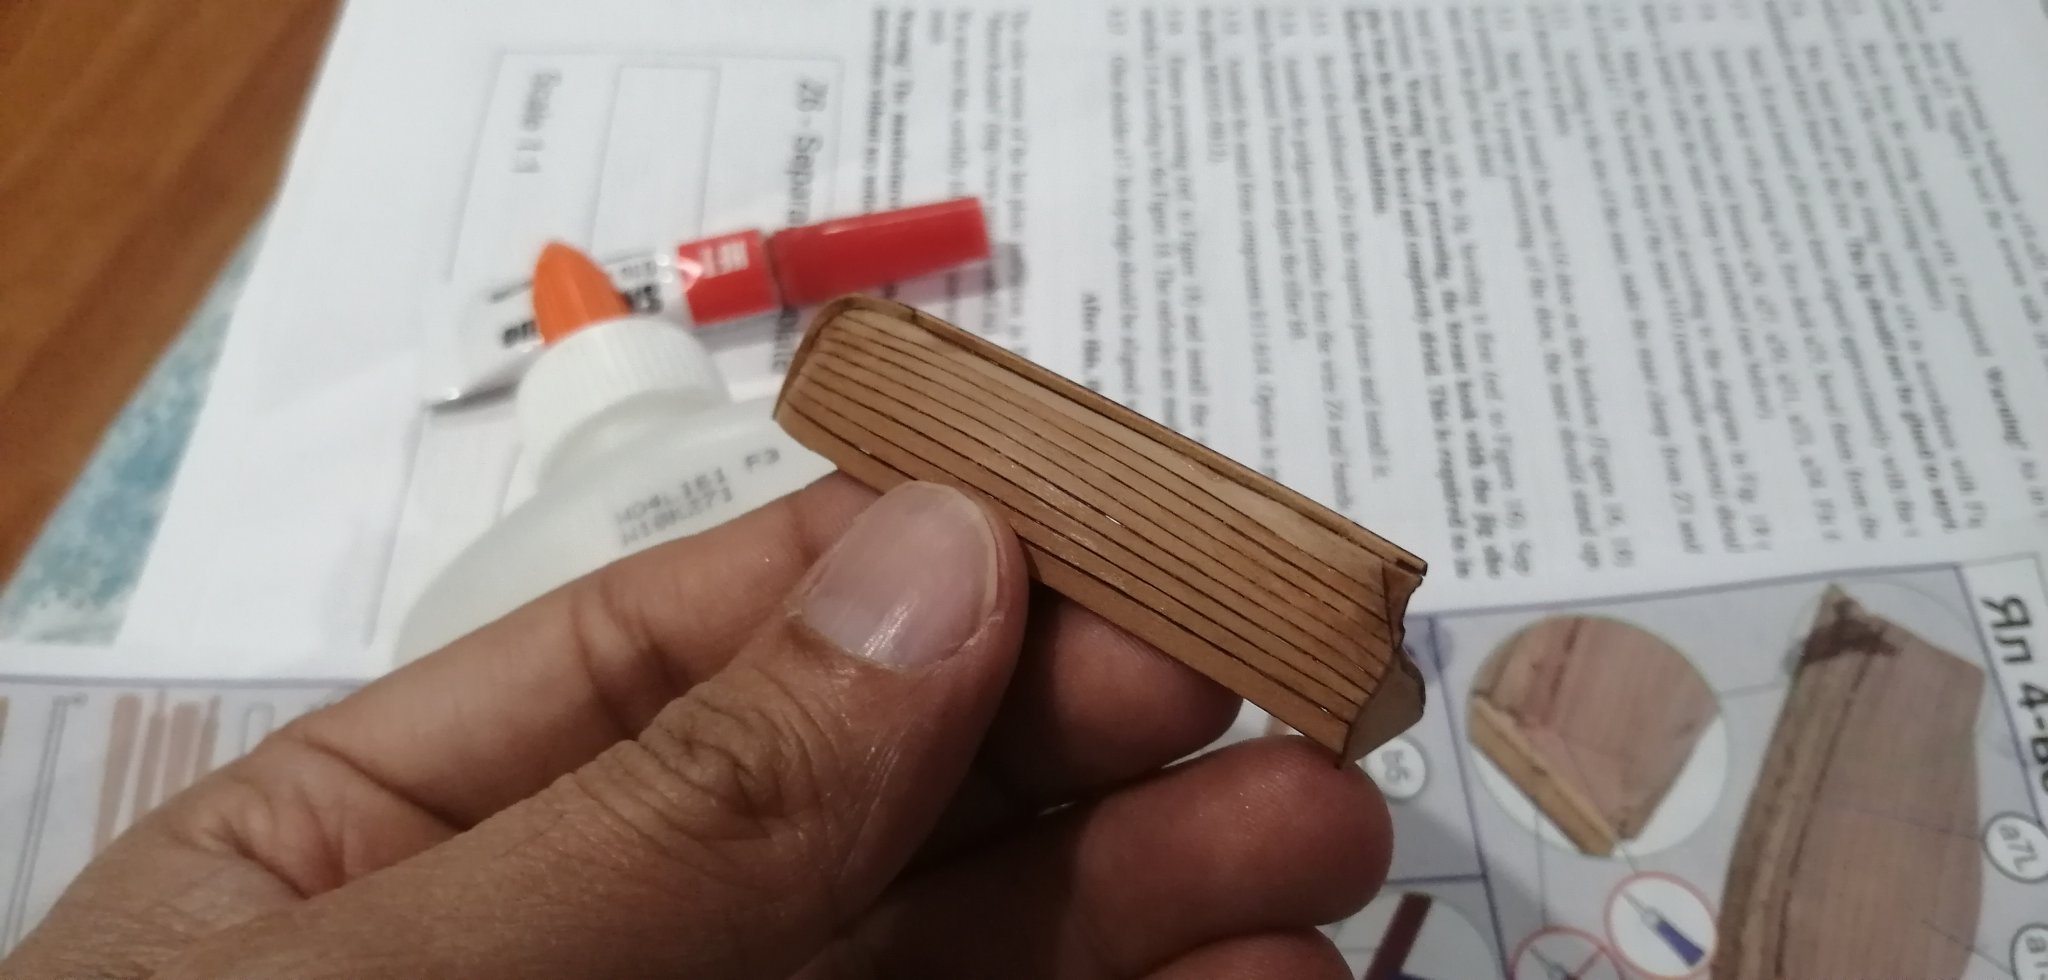
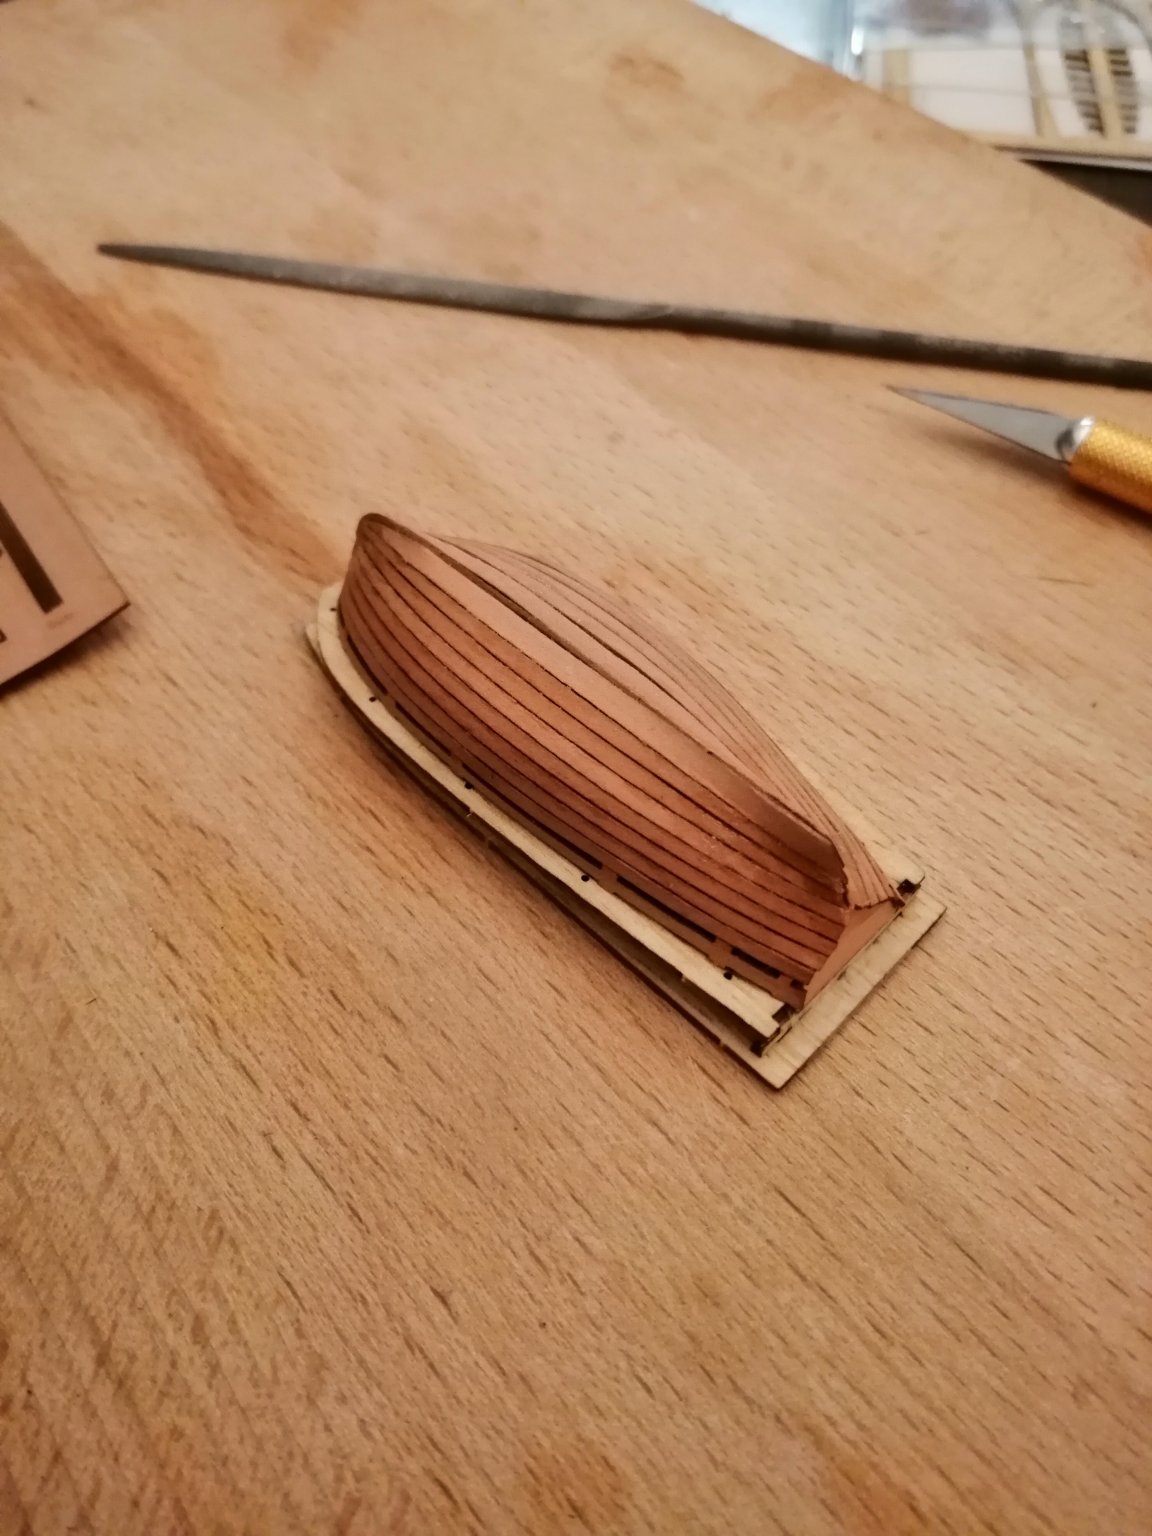
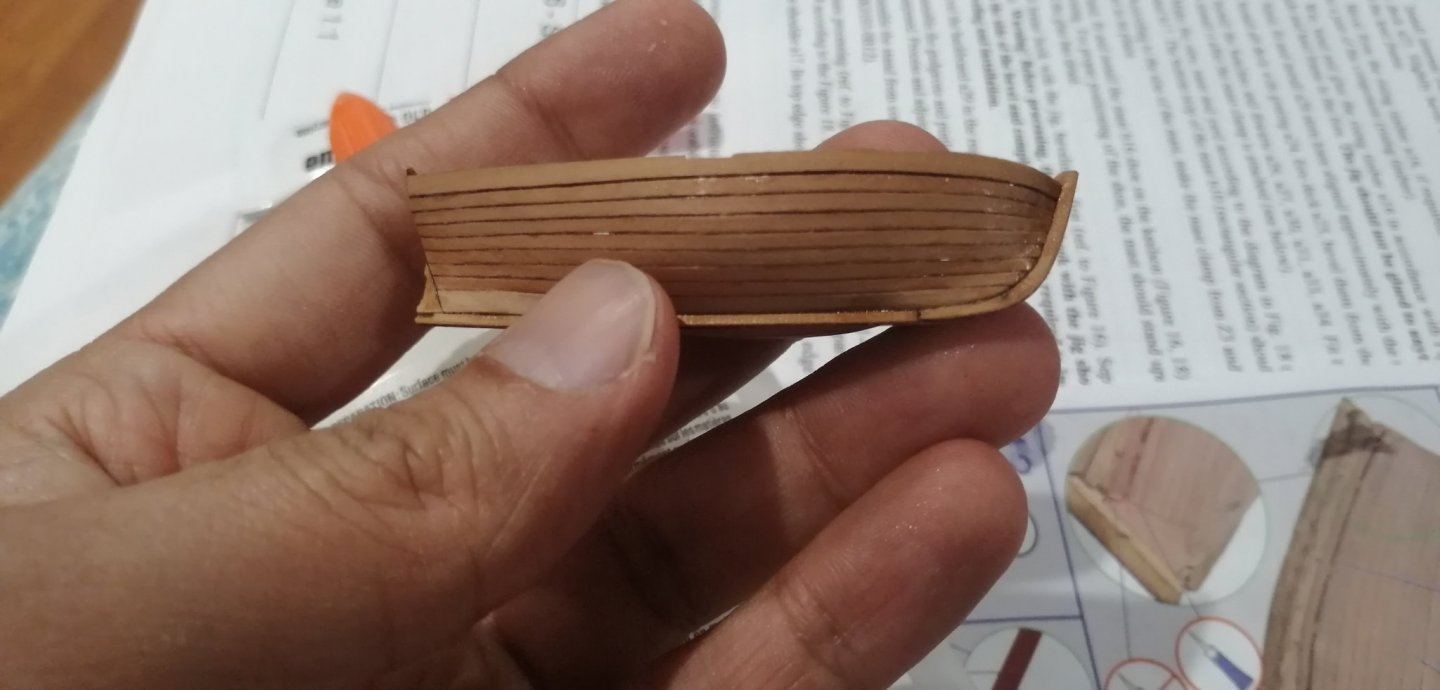
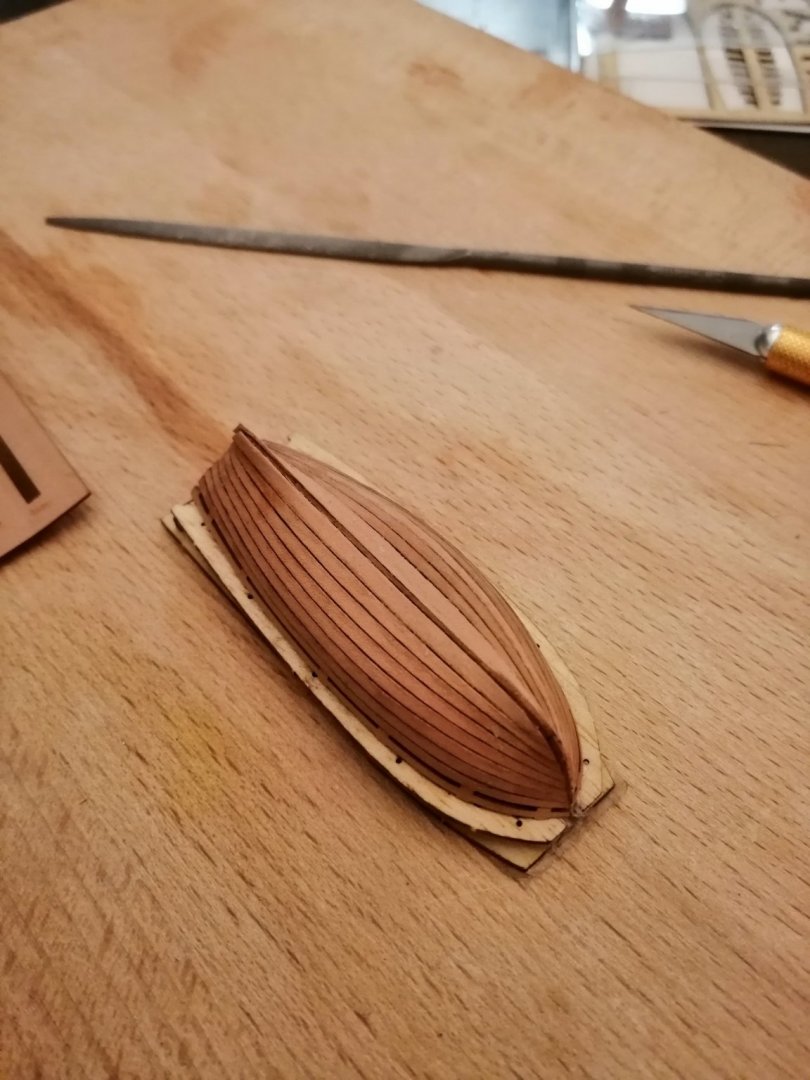
Coming along... I hope this isn't too much gap between planks?


-
Good start this afternoon

-
Transom in place. All set for planking tomorrow.
-
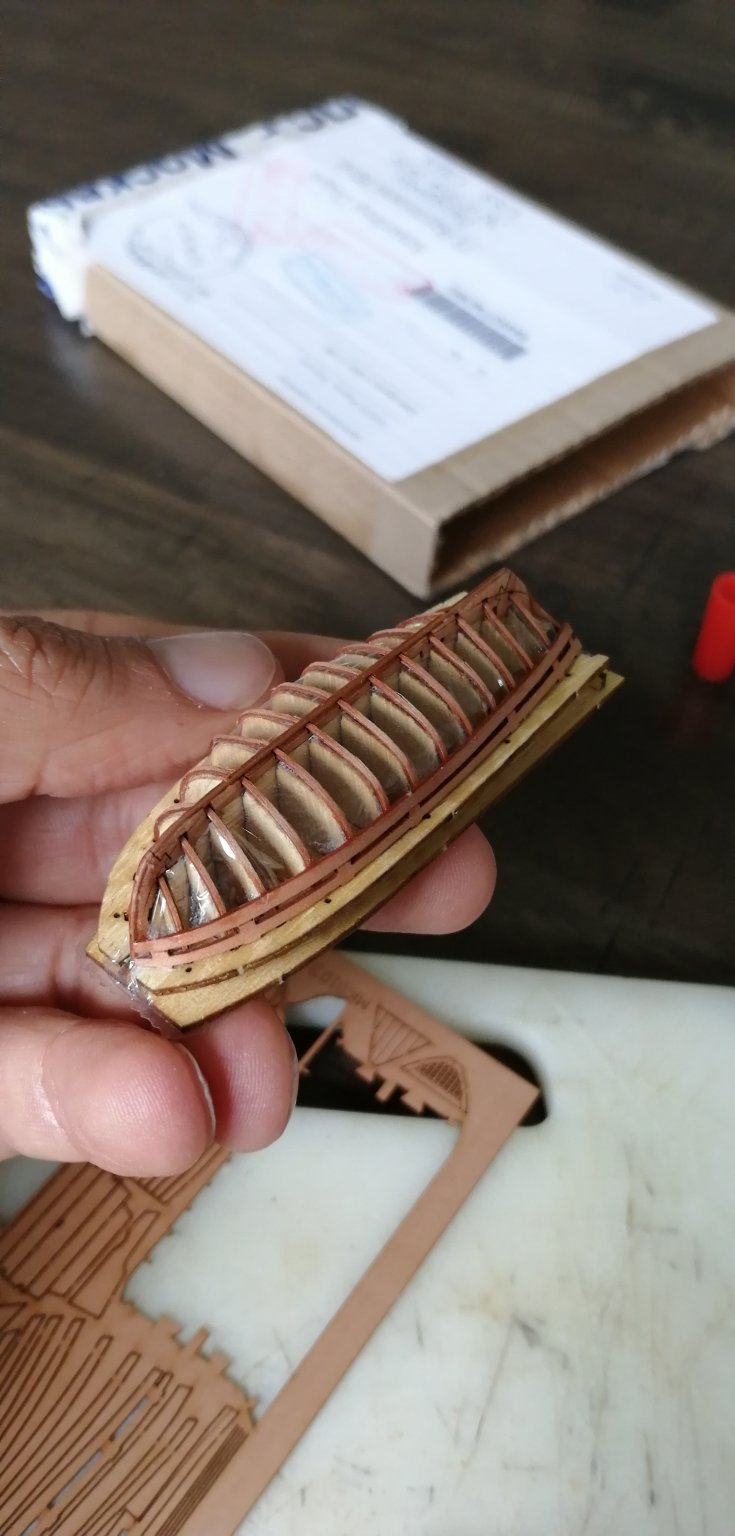
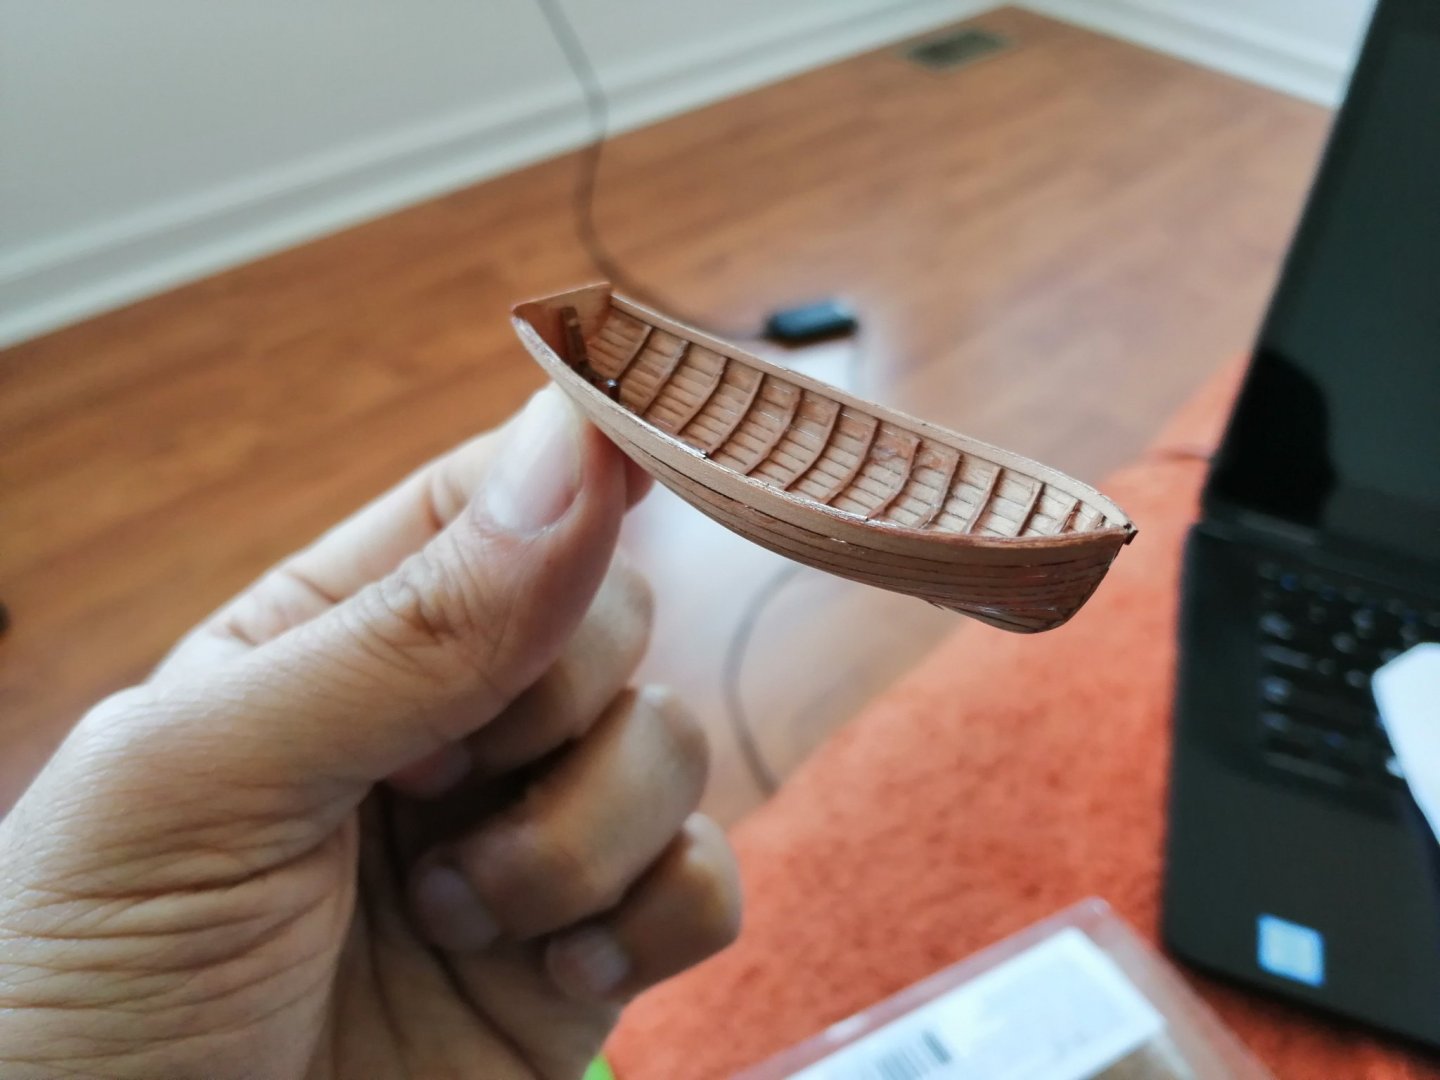
Cleaned up and added keel. Fit was adequate. Rib insertion was time consuming, but not too bad. I rolled a bend in each using my cutting knife. There is plenty of clearance for these to pass tbrough the holes in the keel and jig. Made only one mistake where one rib cracked and has a bump. I'll try to flatten it using superglue tomorrow before planking.

-
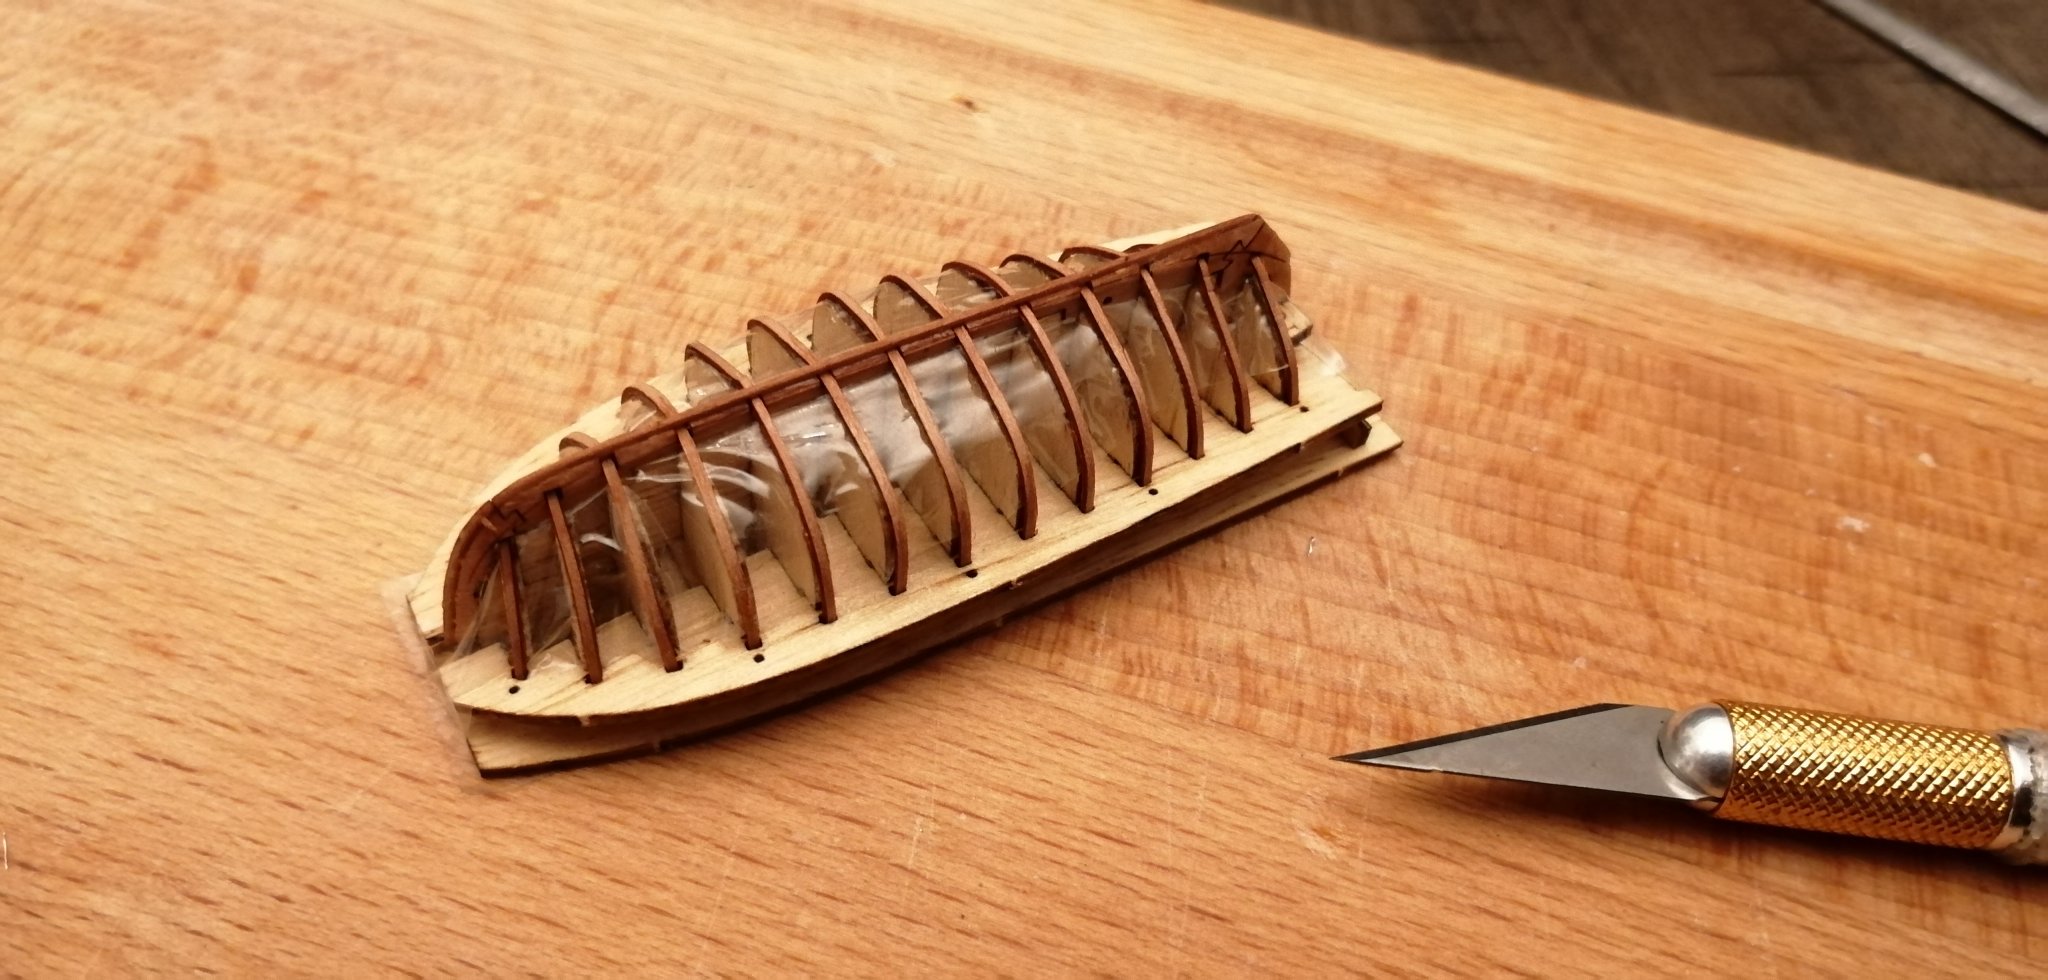
Rib formers soaked in water for 20 mins while I beveled the formers I found I had missed due to lack of instructions. Added cling film cover and tried to shrink it using a heat gun. Over heated and had to repeat.

-
Nope, and good luck trying to find their Russian site using google. I don't remember how I found it, but then I had to translate each page to make sense of it. Luckily I found an email address which responded with thesd instructions.
-
You are most welcome Yves, and yes, I completely agree; this is a beautiful very well detailed kit. And now for some good news. I got an email response from Master Korabel with the english instructions. I am sharing them here for our member's future reference. MK0103_PACKAGE_ENG_IMG.pdf
-
Forgot to mention the last pieces of the jig were soaked for about 40 minutes in cold water, and were now gently curved and attached. I was aware "etsinko" had mentioned fit issues due to the wood swelling, but it went pretty painlessly for me. And it's time to call it a night for now. I have a well founded reputation with the wife for not finishing my kits, so hopefully I can return to this tomorrow … wish me luck !