rlindenbergsr@gmail.com
-
Posts
16 -
Joined
-
Last visited
Recent Profile Visitors
597 profile views

.thumb.jpeg.fc5d633a7b34428fcf19419a73d56d55.jpeg)

-
 EricWilliamMarshall reacted to a post in a topic:
Chesapeake Bay Flattie by rlindenbergsr - Midwest Products - Scale 1:32 - SMALL
EricWilliamMarshall reacted to a post in a topic:
Chesapeake Bay Flattie by rlindenbergsr - Midwest Products - Scale 1:32 - SMALL
-
EricWilliamMarshall reacted to a post in a topic:
Chesapeake Bay Flattie by rlindenbergsr - Midwest Products - Scale 1:32 - SMALL
-
GrandpaPhil reacted to a post in a topic:
Skiff by rlindenbergsr - FINISHED – Midwest Products – SMALL - Scale 1:12 - first wooden ship build
-
GrandpaPhil reacted to a post in a topic:
Chesapeake Bay Flattie by rlindenbergsr - Midwest Products - Scale 1:32 - SMALL
-
rlindenbergsr@gmail.com reacted to a post in a topic:
Chesapeake Bay flattie by Jparsley - FINISHED - Midwest Products - SMALL
-
yvesvidal reacted to a post in a topic:
Chesapeake Bay Flattie by rlindenbergsr - Midwest Products - Scale 1:32 - SMALL
-
Mtoriordan reacted to a post in a topic:
Chesapeake Bay Flattie by rlindenbergsr - Midwest Products - Scale 1:32 - SMALL
-
Mtoriordan reacted to a post in a topic:
Chesapeake Bay Flattie by rlindenbergsr - Midwest Products - Scale 1:32 - SMALL
-
Cap'n Rat Fink reacted to a post in a topic:
Chesapeake Bay Flattie by rlindenbergsr - Midwest Products - Scale 1:32 - SMALL
-
Cap'n Rat Fink reacted to a post in a topic:
Chesapeake Bay Flattie by rlindenbergsr - Midwest Products - Scale 1:32 - SMALL
-
Cap'n Rat Fink reacted to a post in a topic:
Chesapeake Bay Flattie by rlindenbergsr - Midwest Products - Scale 1:32 - SMALL
-
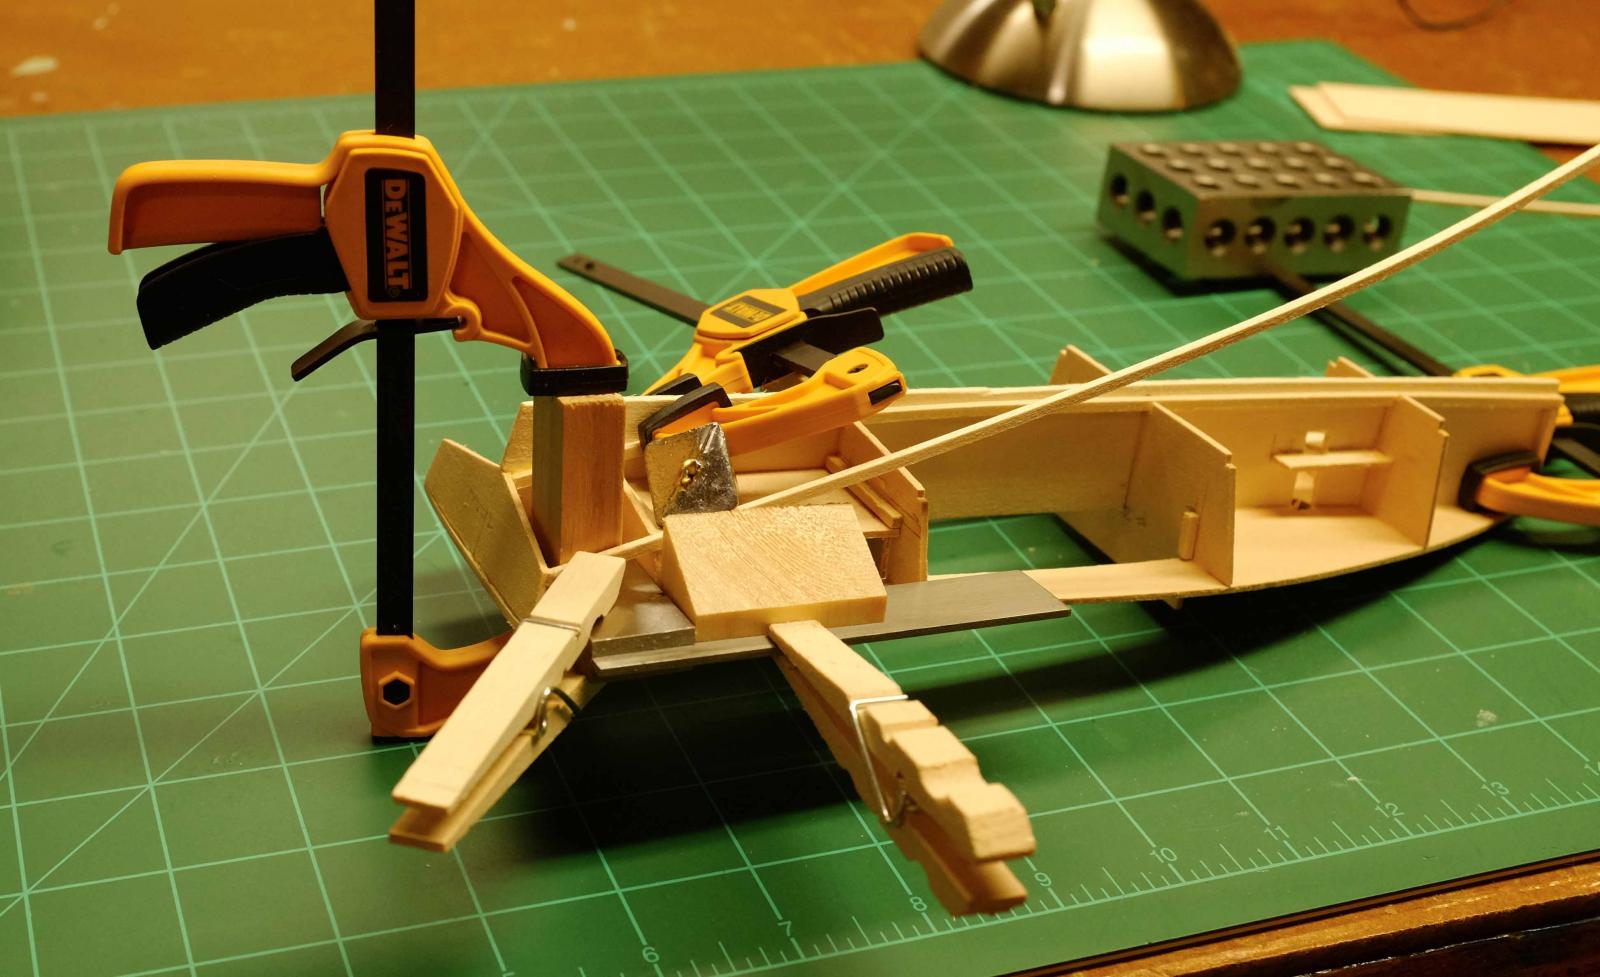
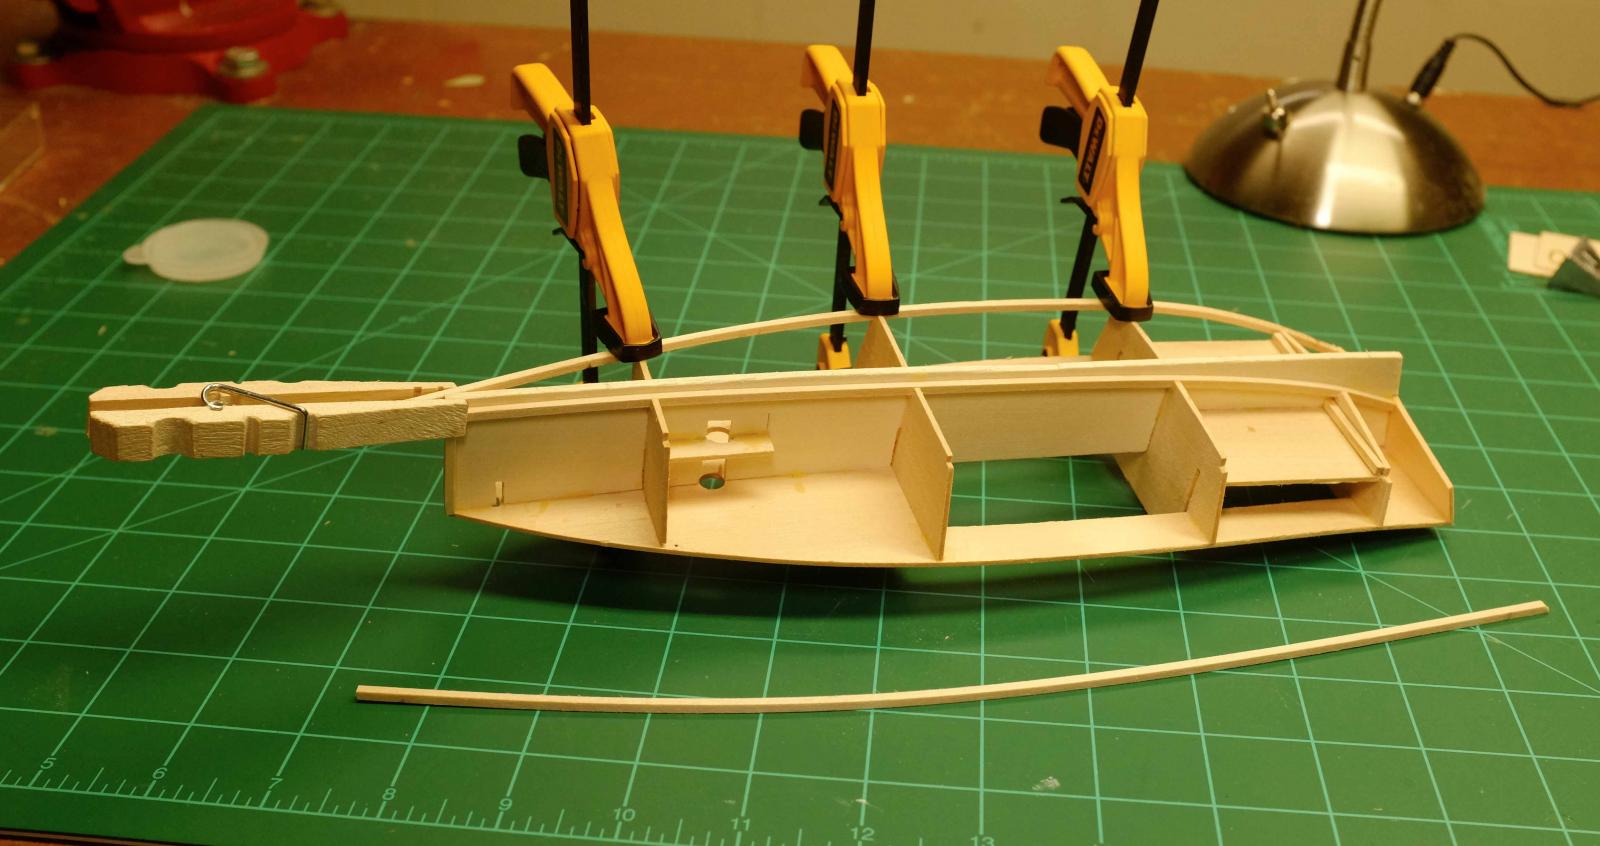
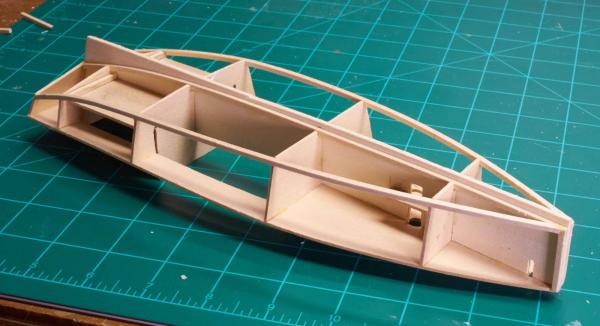
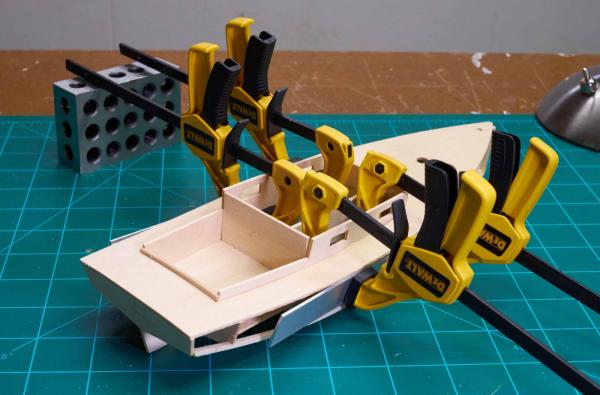
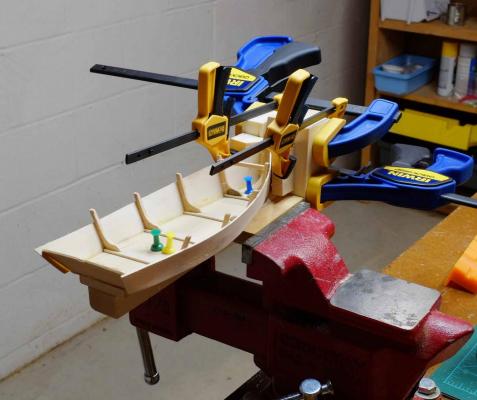
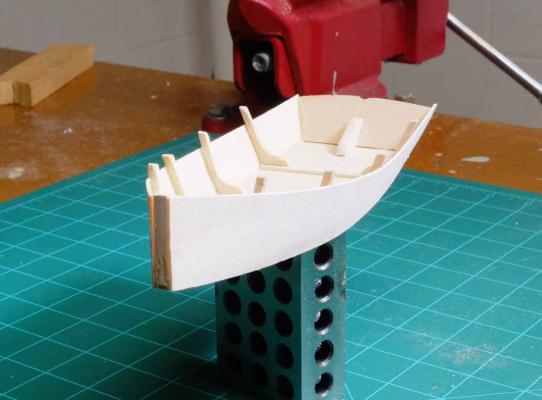
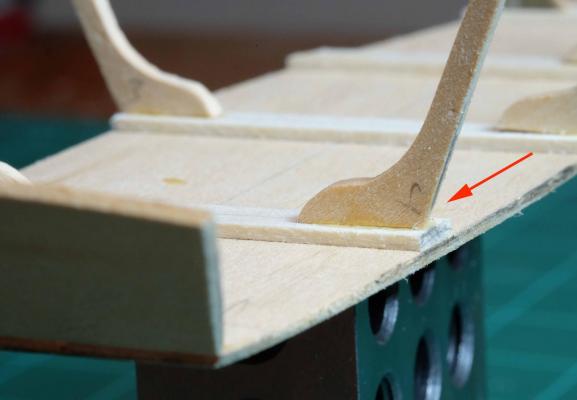
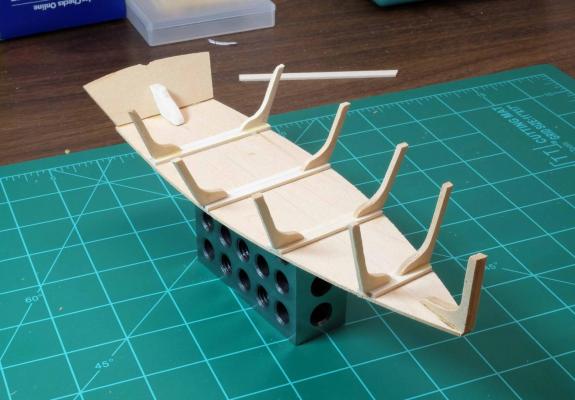
 I have made some progress on my flattie. The next step was to attach the chine. I made a jig using some nails in a board to follow the needed curve. I soaked the strip and put it in the jig with heat from a mini heat gun. The chine is first attached to the transom. The clamping was kind of involved, but here it is: After the glue had cured. I attached the chine to the remaining bulkheads. In the photo below one can also see the second chine strip which was bent on the jig. After both chines were attached, This is how it looked: In a previous post I incorrectly referred to the braces at the mast step as “bow stiffeners.” On the above photo one can see the actual bow stiffeners attached to the foreward edge of the keel. The final thing I have done is to attach the cabin sides to the deck and bulkheads.


-
rlindenbergsr@gmail.com reacted to a post in a topic:
Dinghy by Mtoriordan - FINISHED - Midwest Products - Small - 1" = 1' (1/12)
-
Thanks, Tim On my first build, Midwest’s Yacht Skiff, I started with minimal tools. I’ve been adding some better things. Sometimes the right tool makes things a lot easier. I am finding the things I am acquiring for this hobby are not too bad expense-wise. My other hobby is photography and it’s a killer!
-
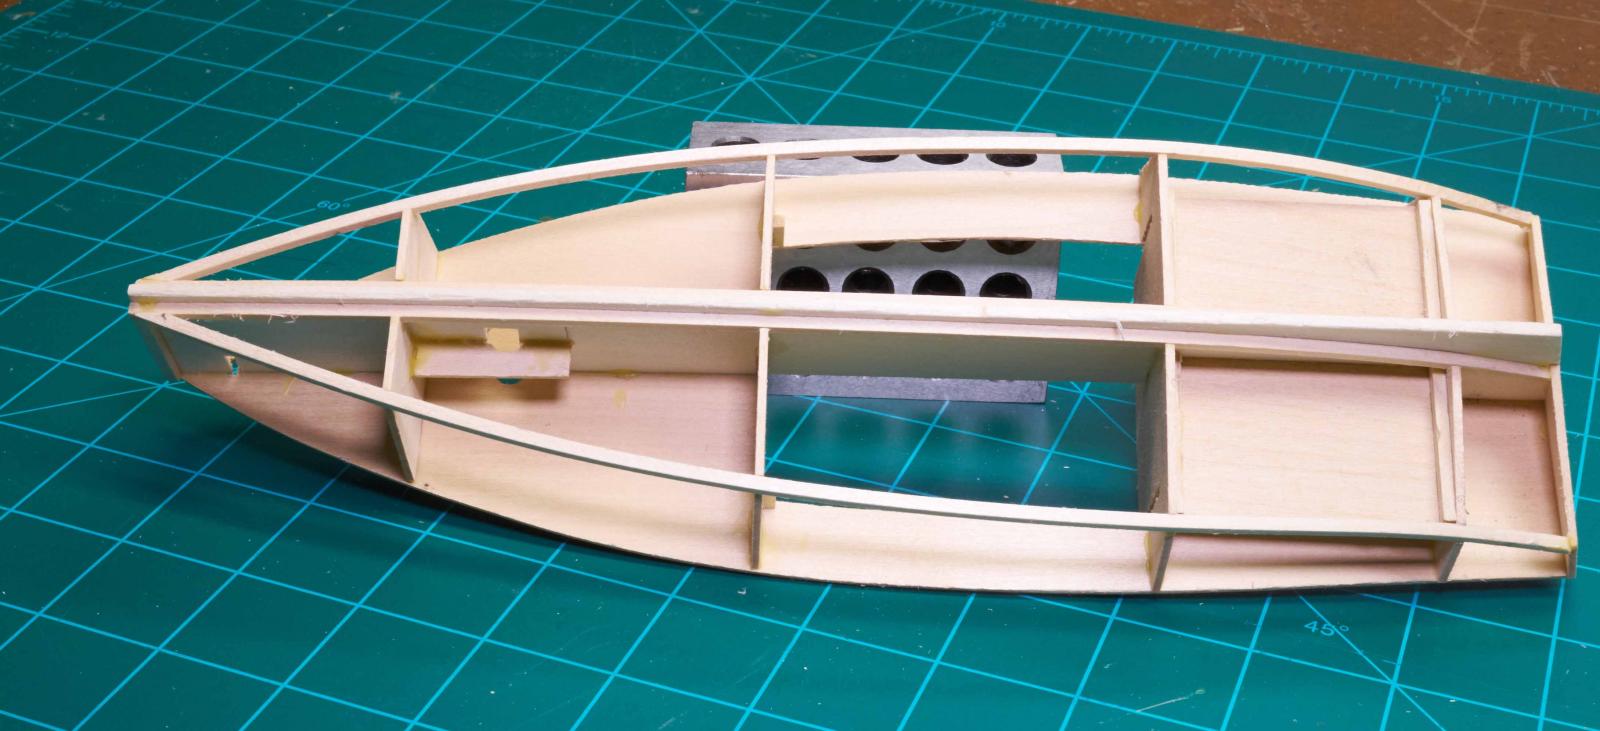
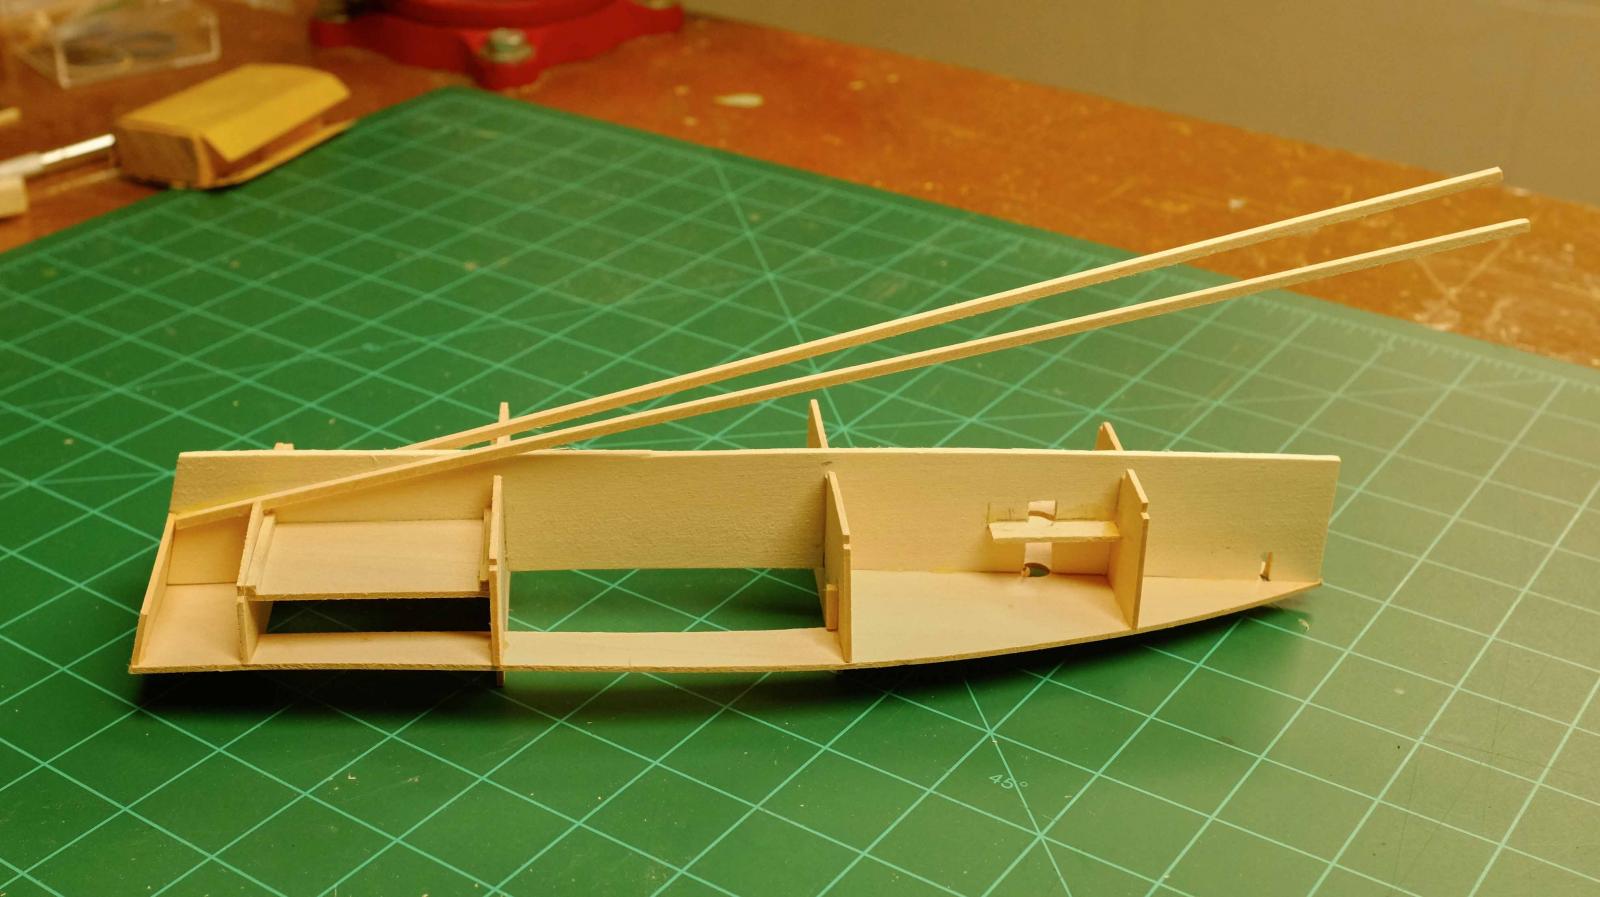
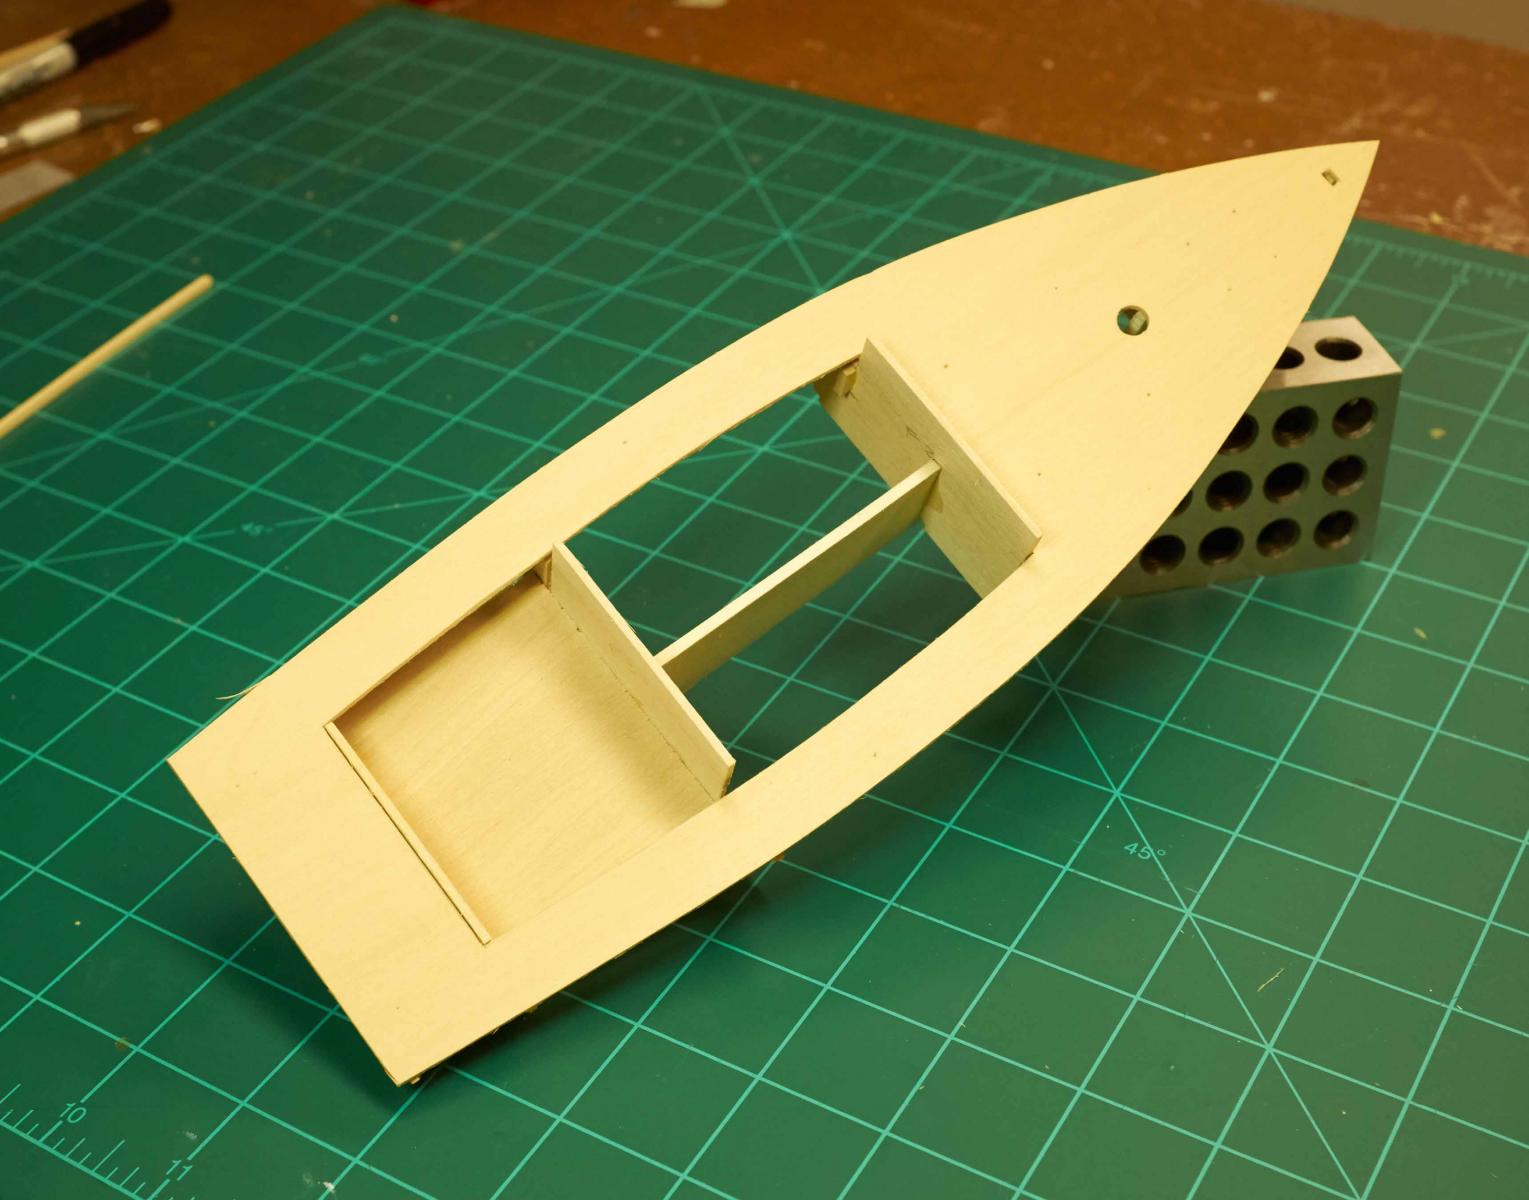
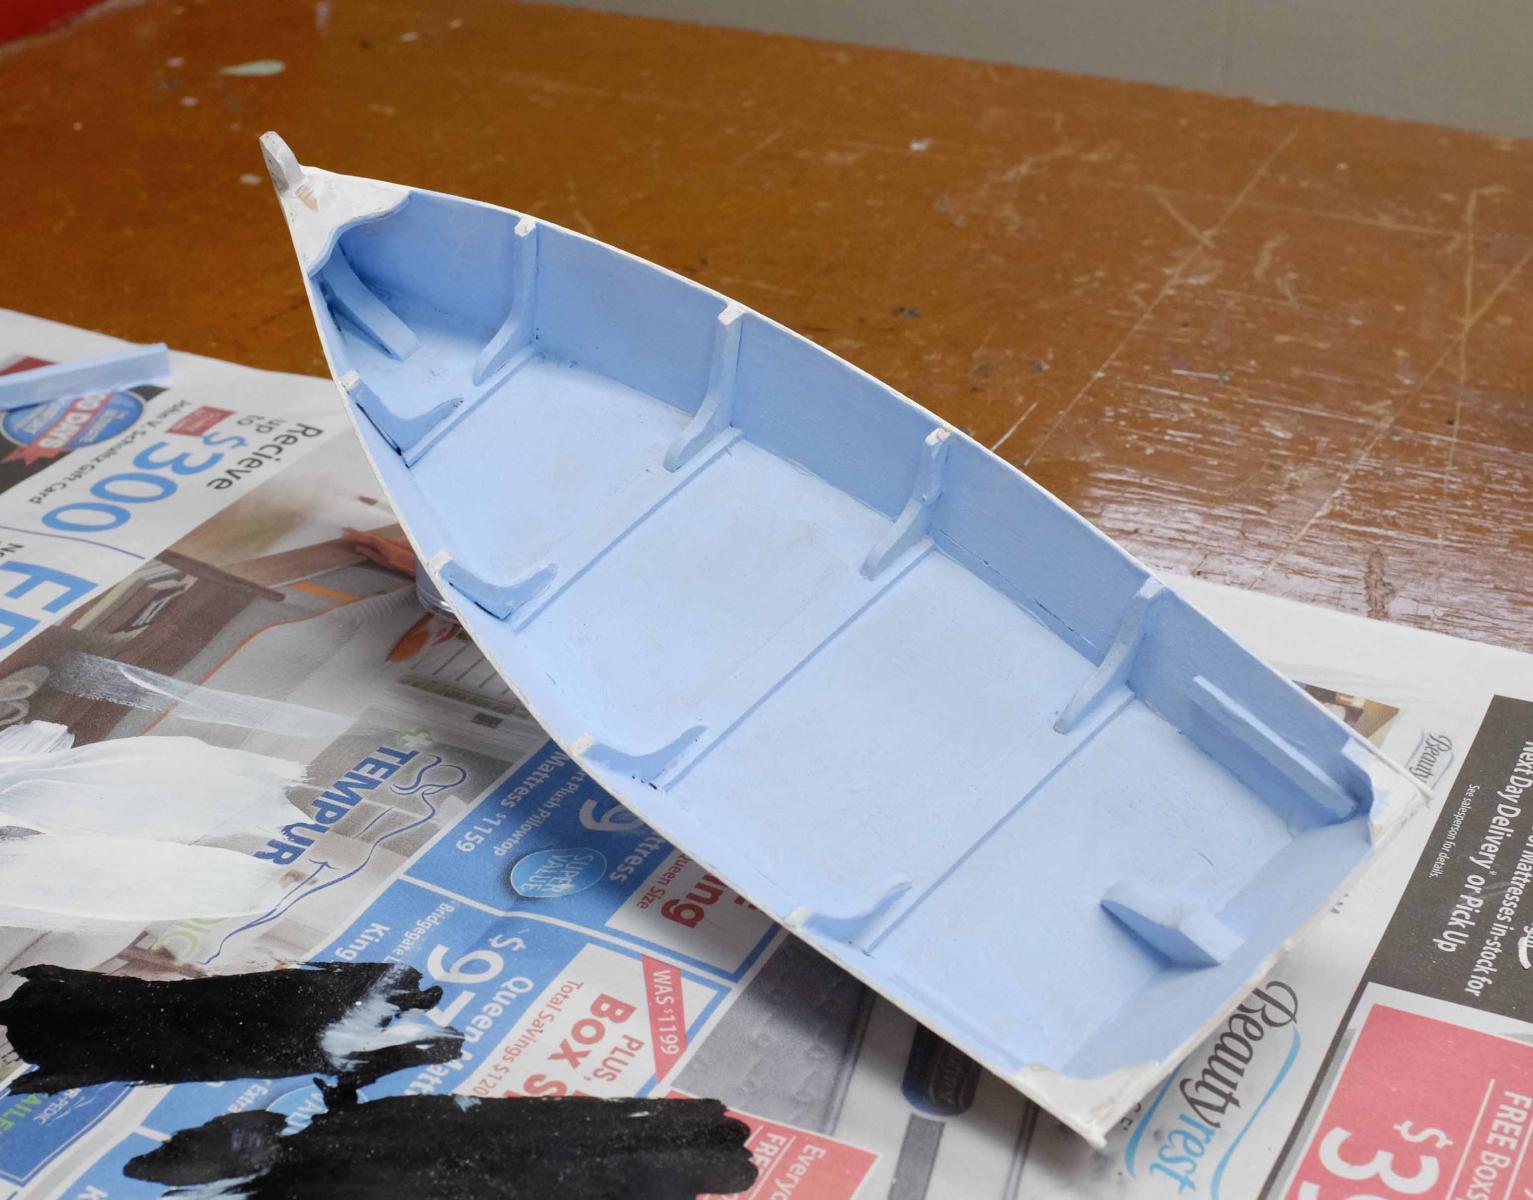
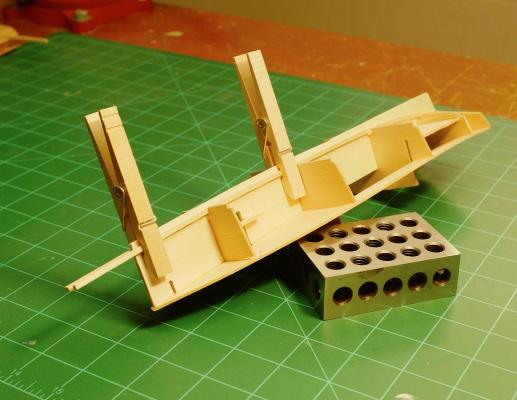
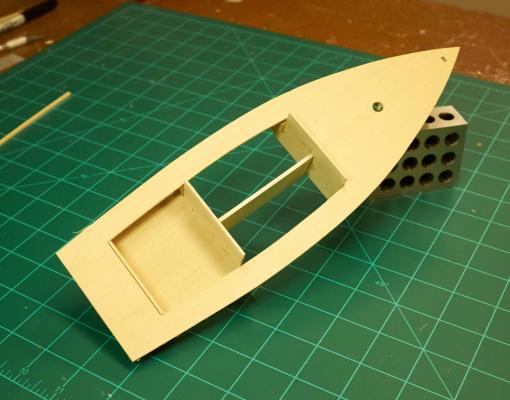
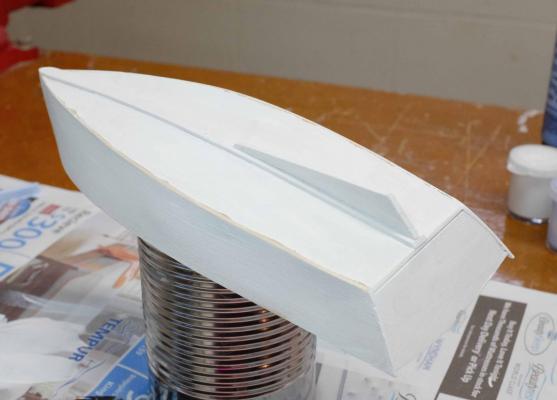
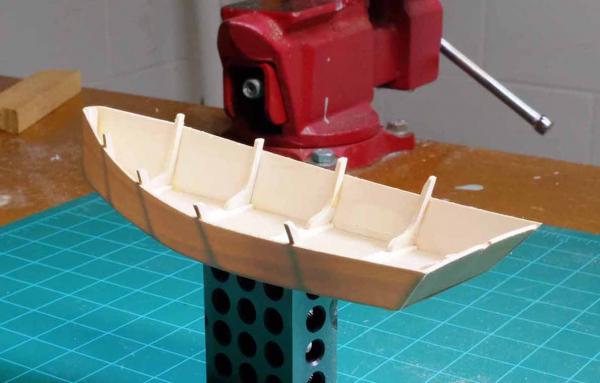
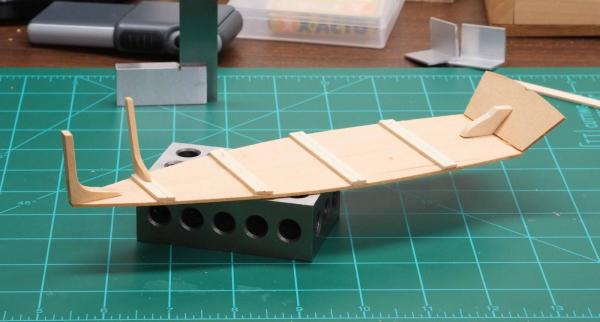
I attached the deck in two phases since it has a curve. First I glued it to the transom and rear bulkhead. then I glued the deck to the forward bulkheads and keel. Next, bow stiffeners were added around the mast step. A keel strip was glued along the keel and in notches in the bulkheads. Again I did this in two phases.


-
rlindenbergsr@gmail.com reacted to a post in a topic:
Dinghy by Mtoriordan - FINISHED - Midwest Products - Small - 1" = 1' (1/12)
-
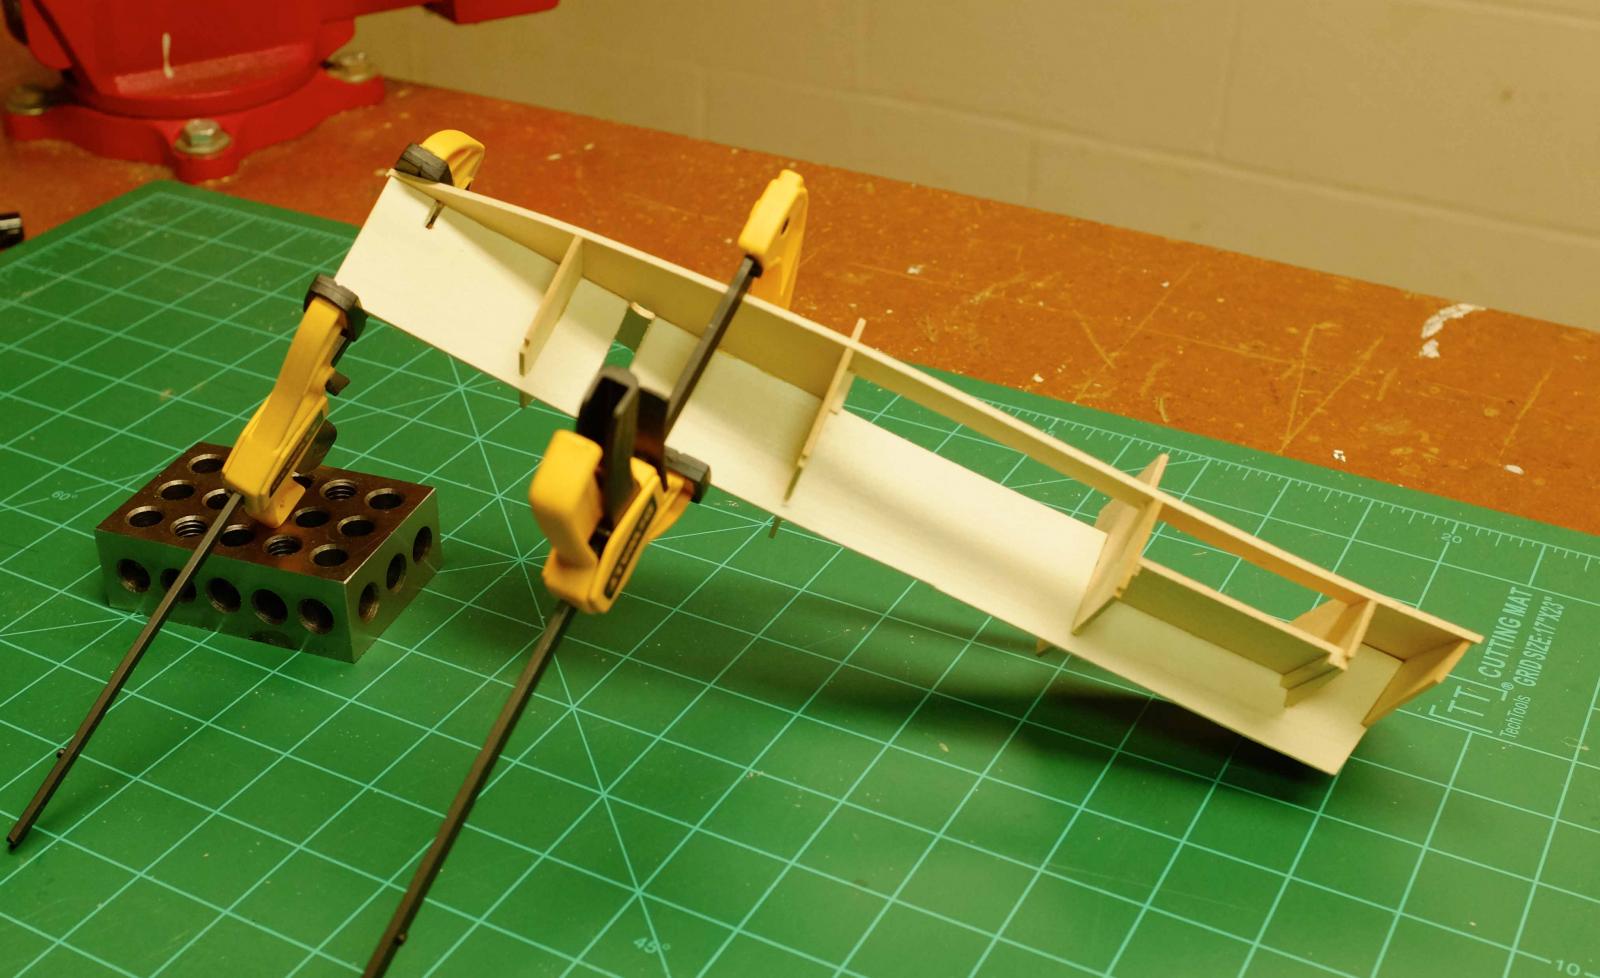
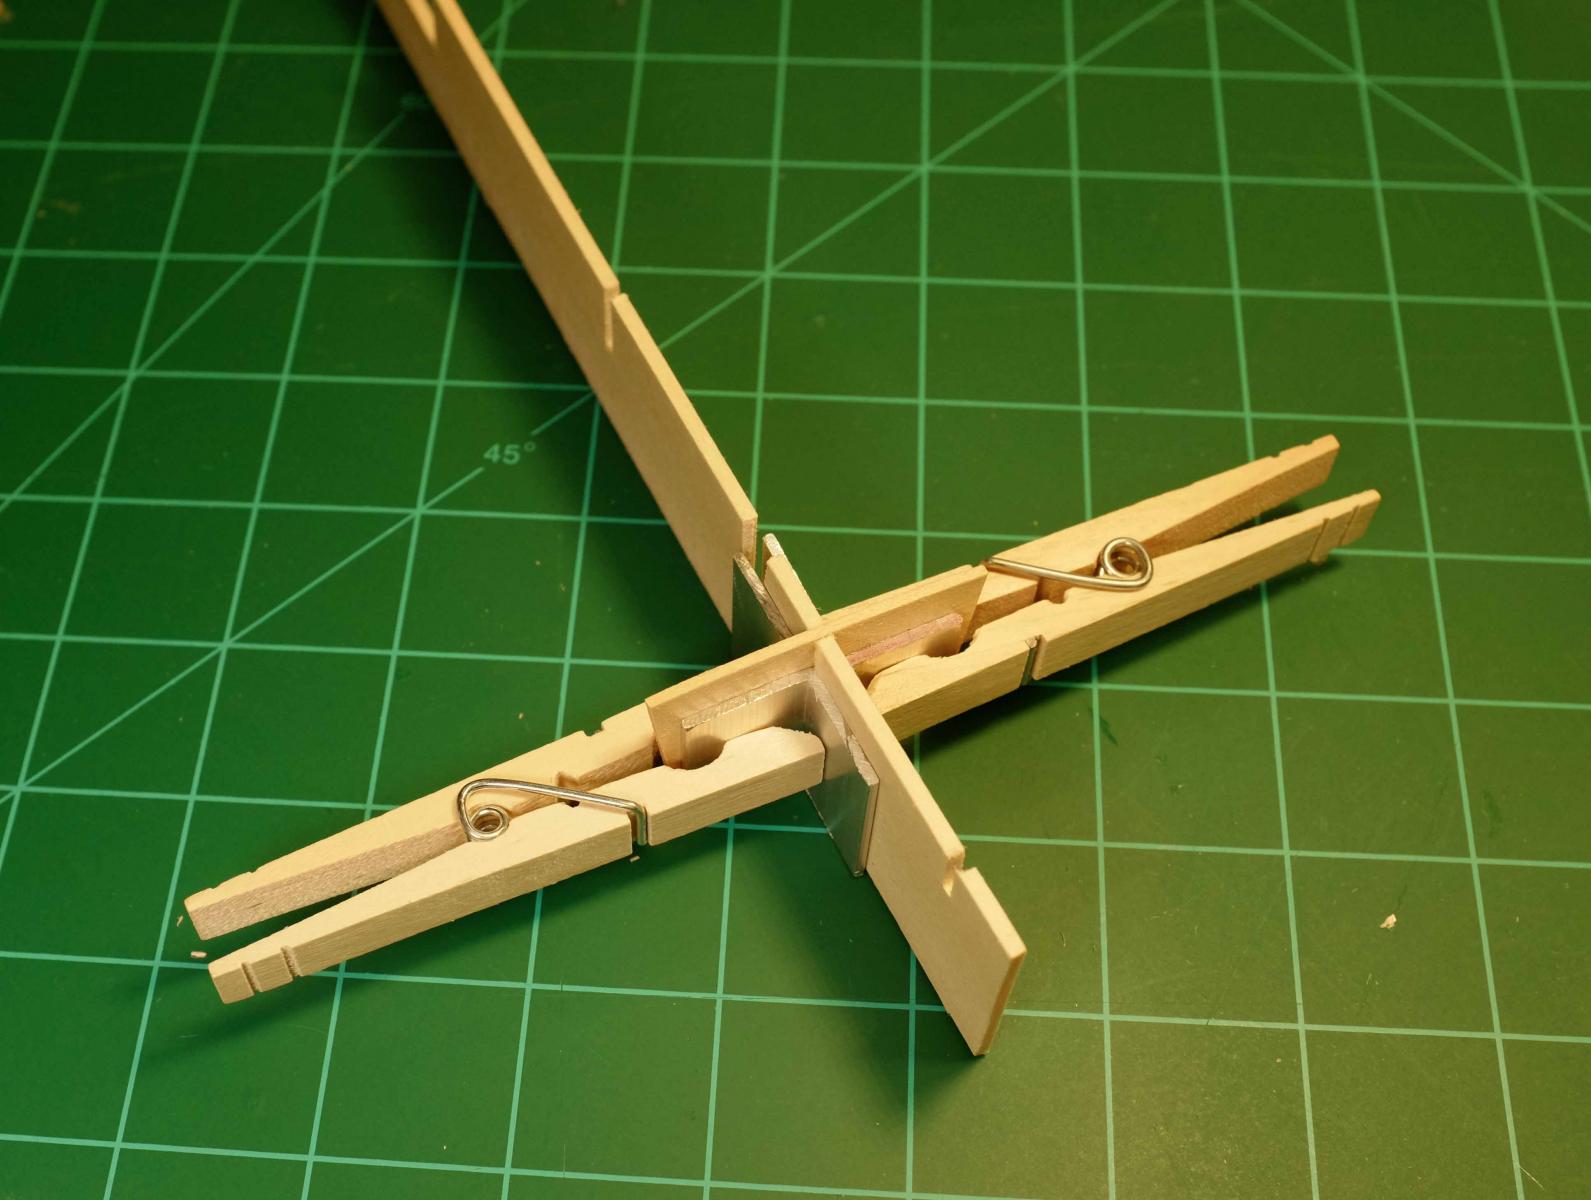
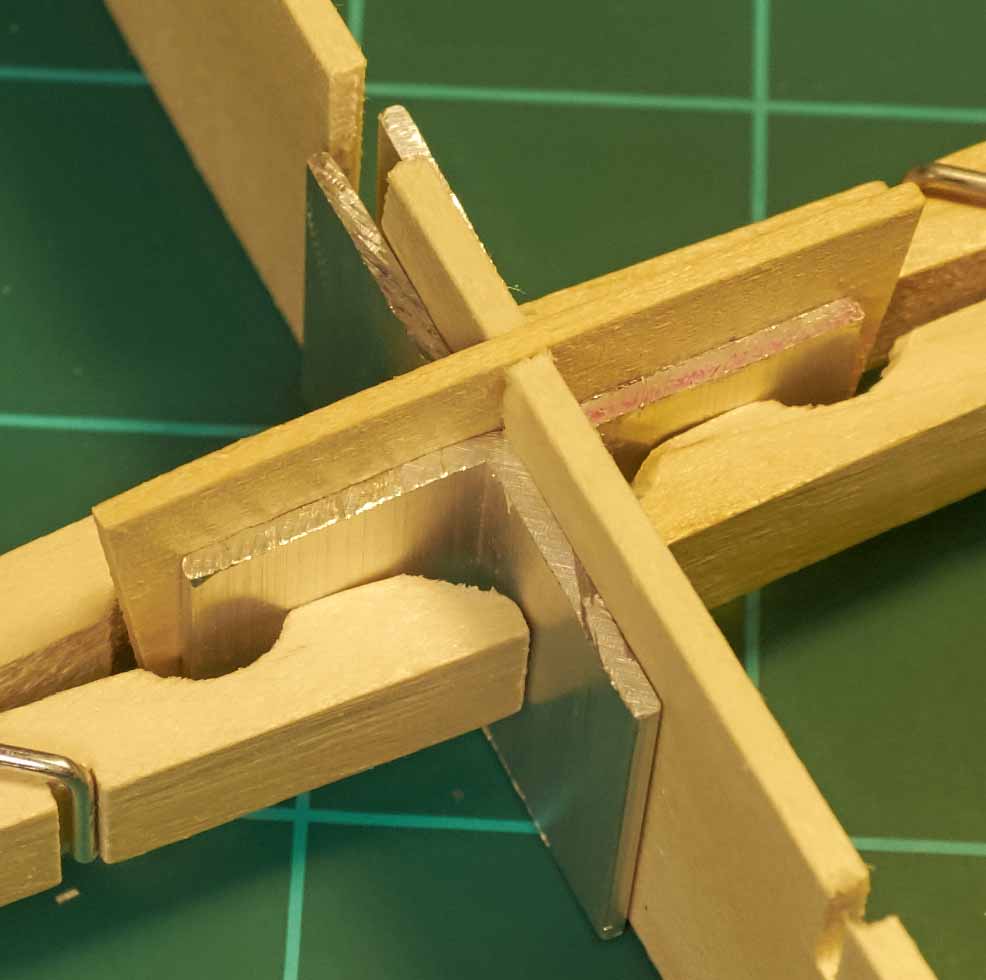
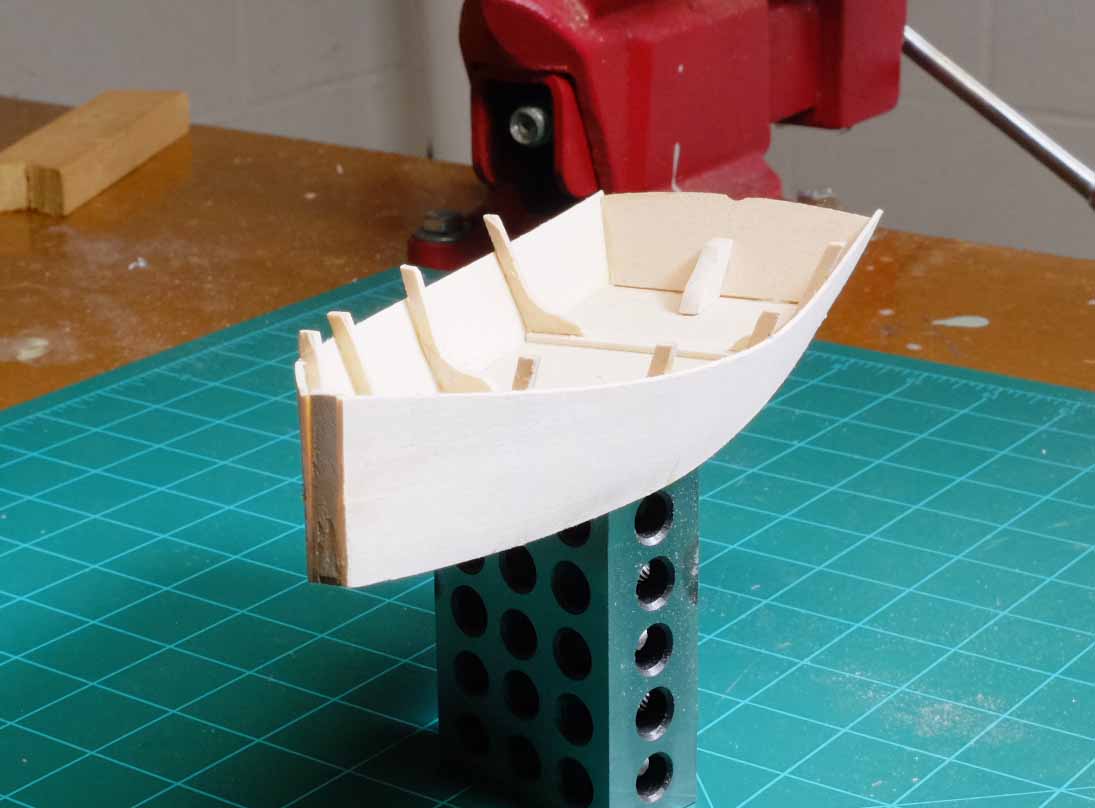
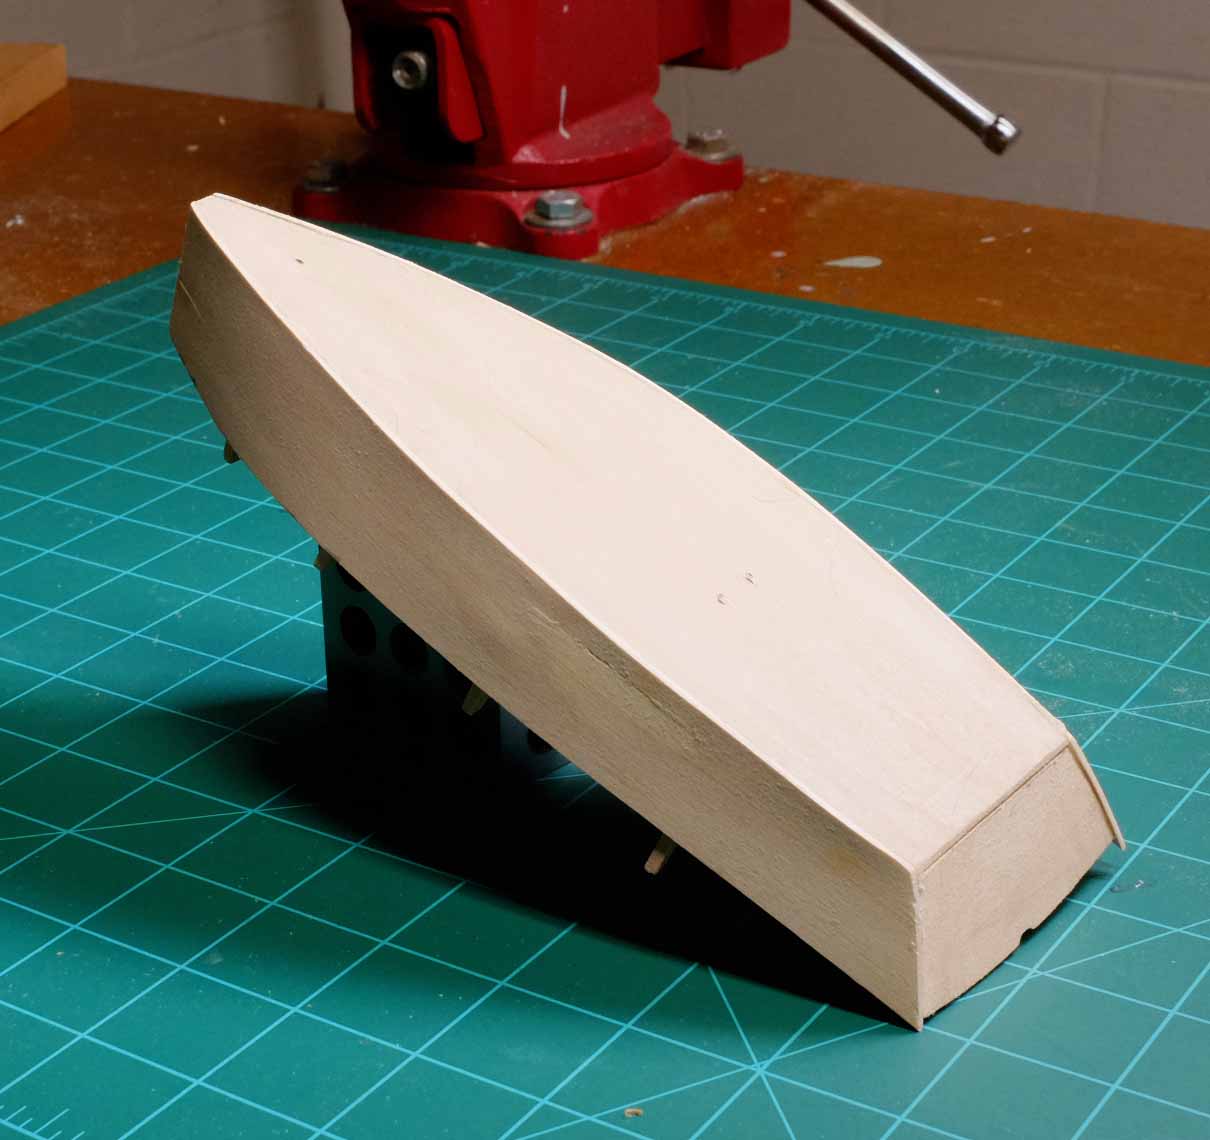
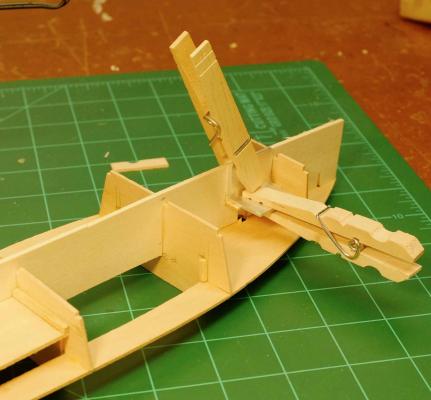
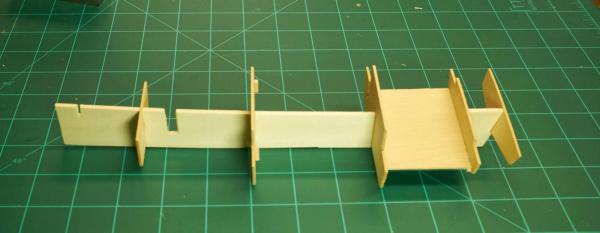
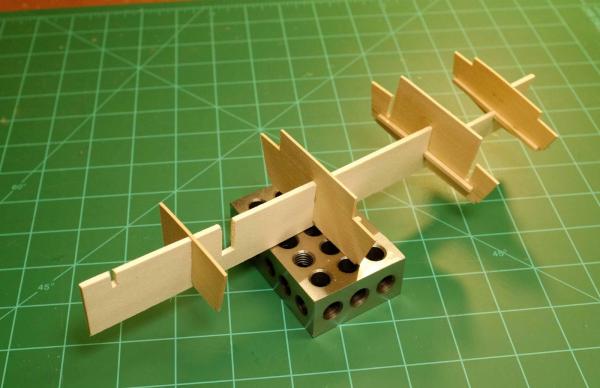
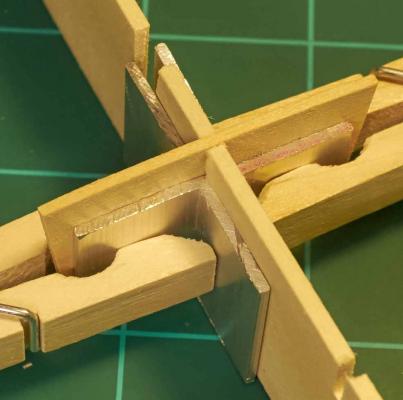
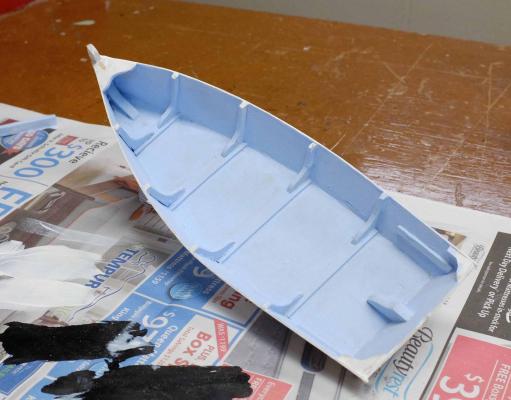
Thanks for the vistits. Comments and suggestions are welcomed. Attaching the transom to the keel in correct alignment was a little tricky. Here’s the setup I used: The complete keel/bulkhead assembly Test fitting the deck


-
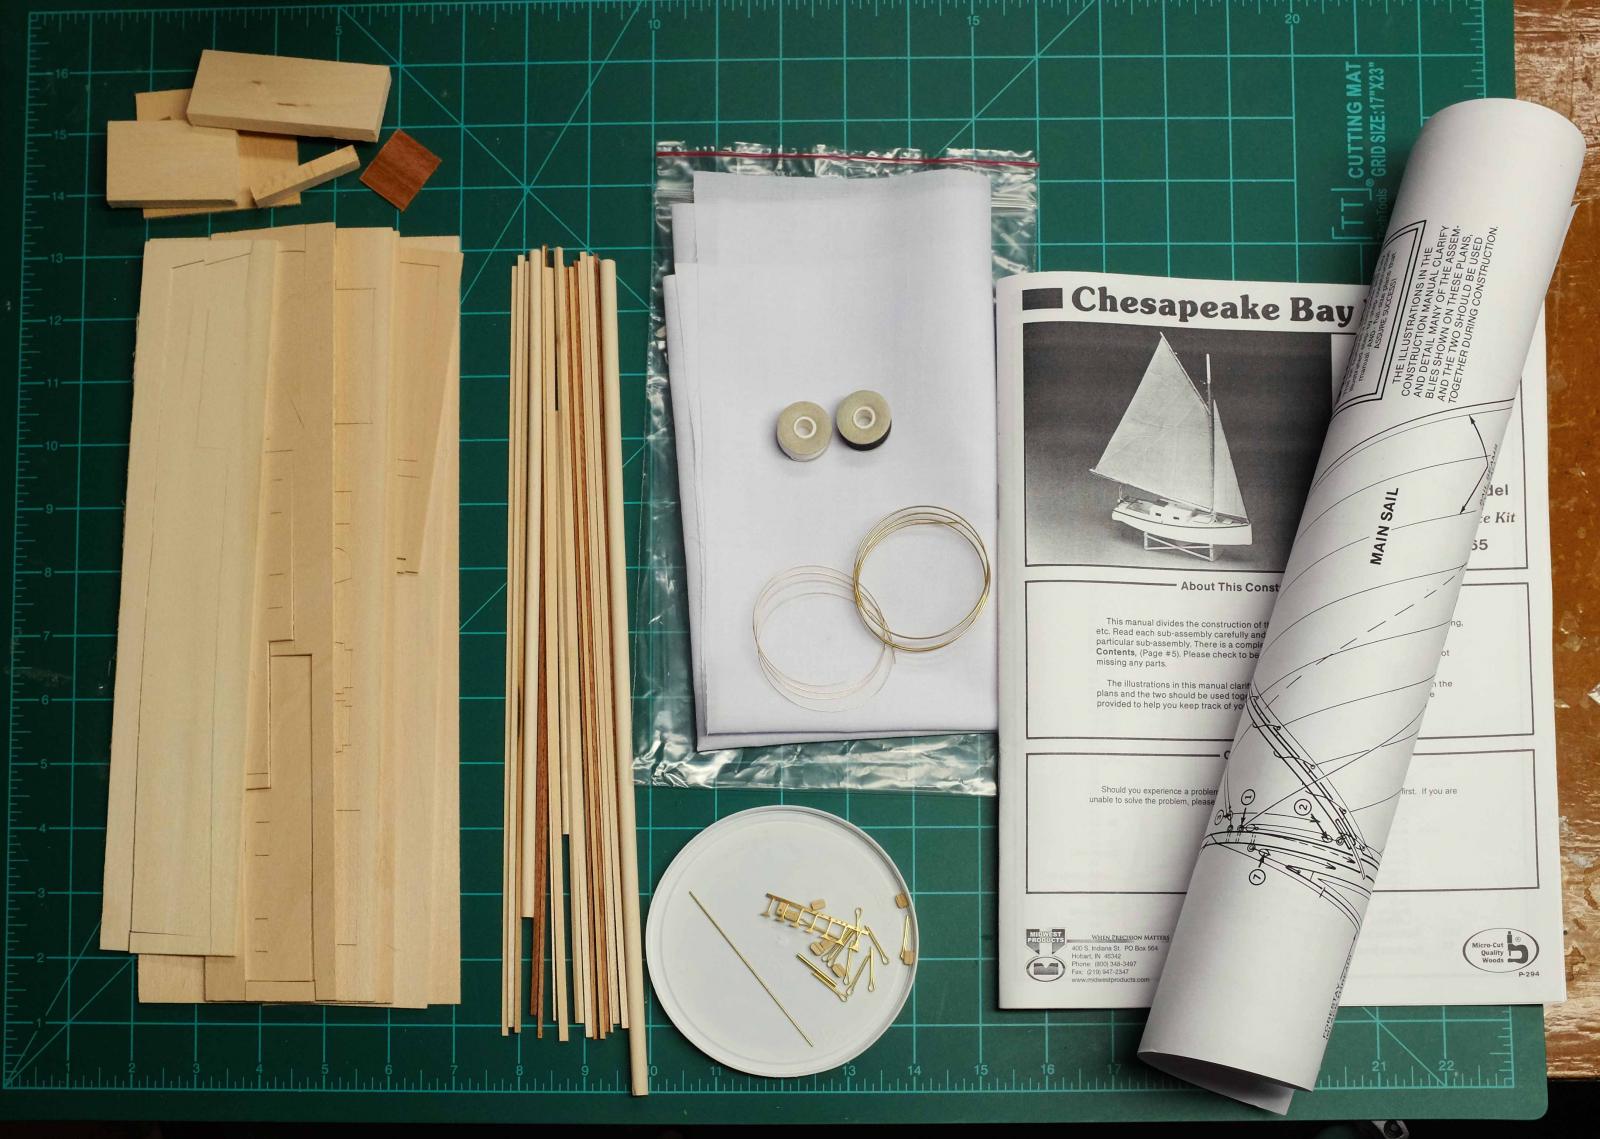
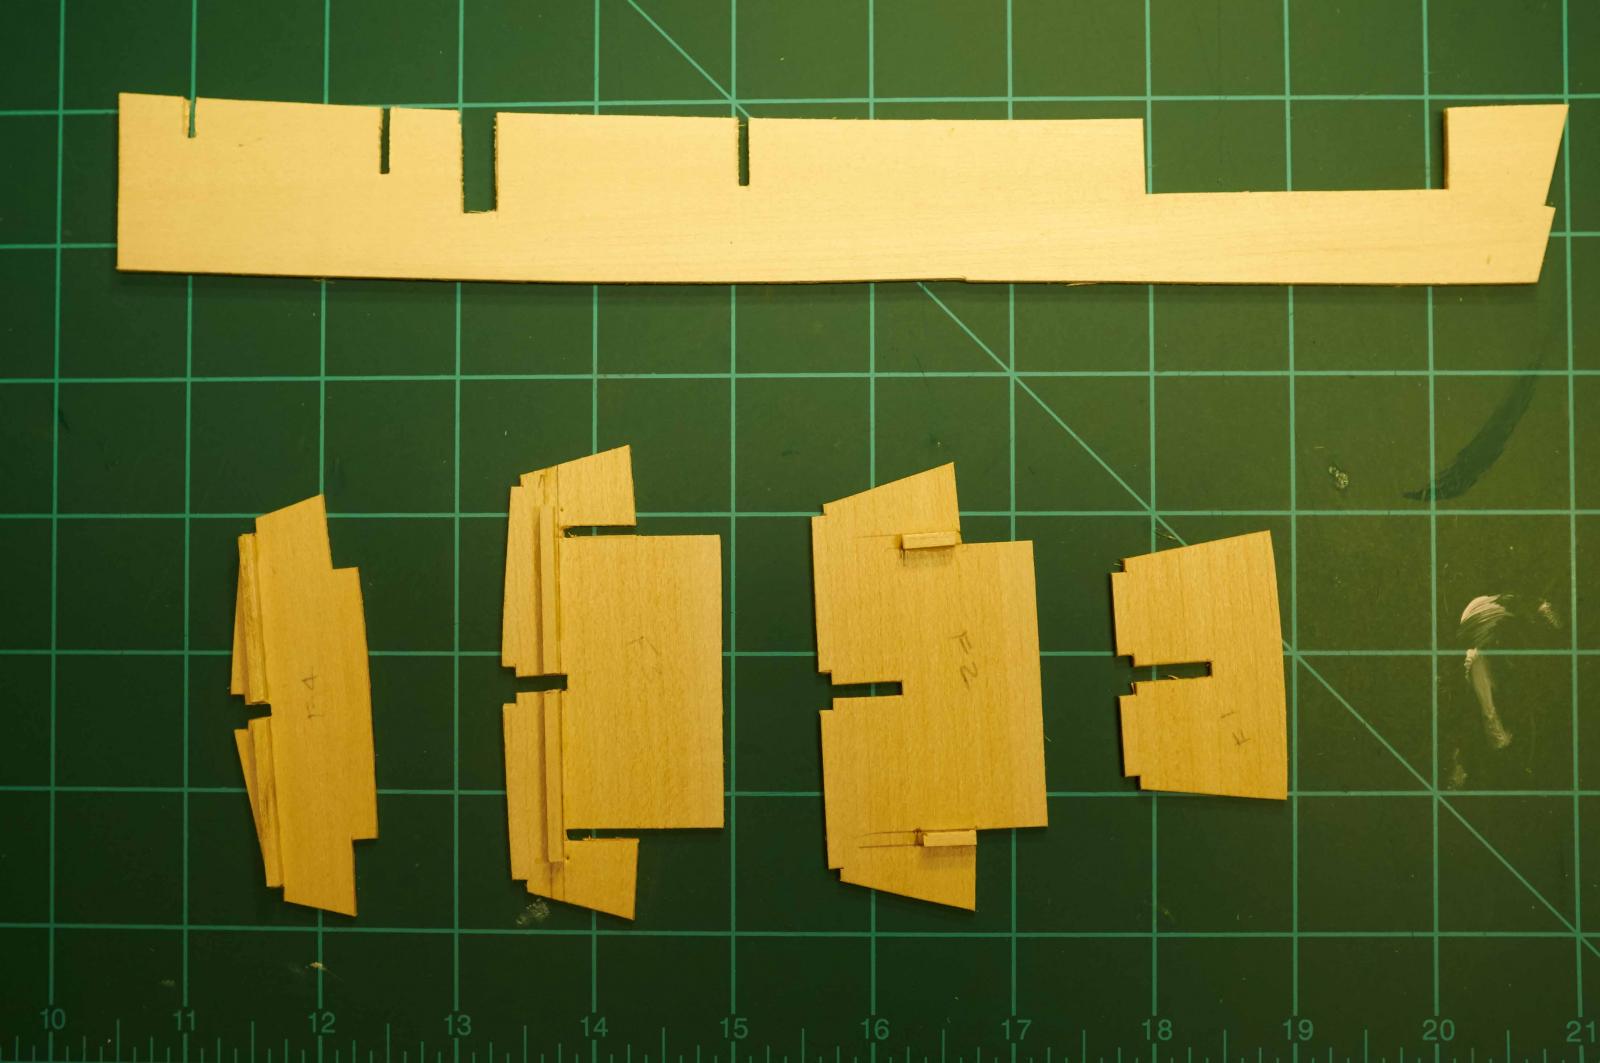
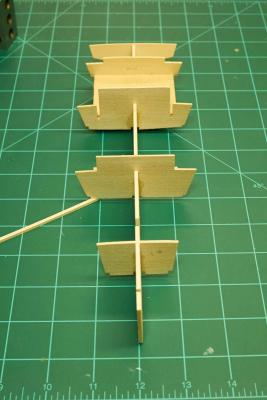
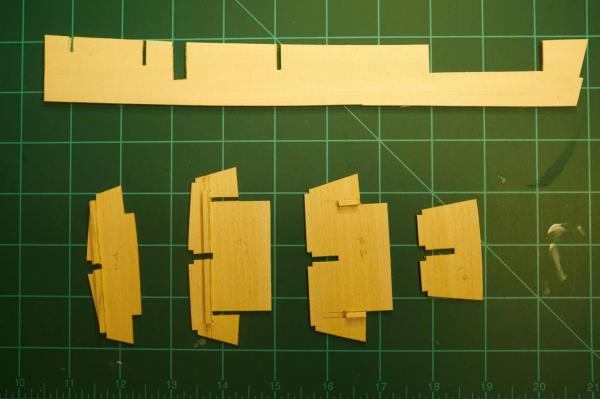
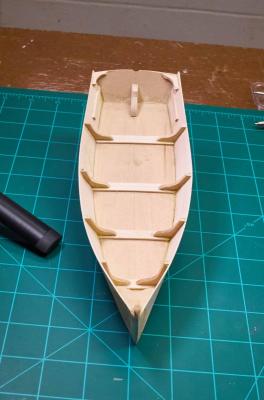
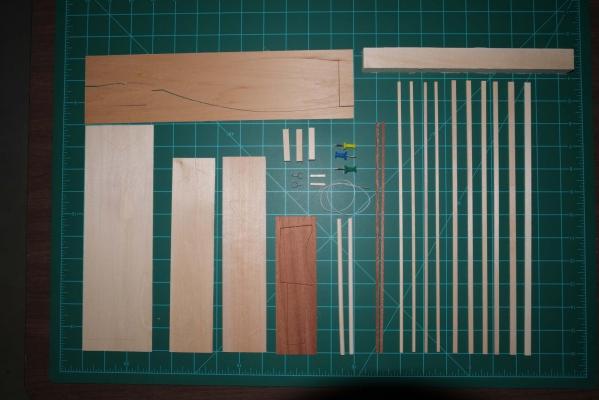
Chesapeake Bay Flattie by Richard L — Midwest—SMALL Scale 1:32 This is my second wooded ship/boat kit. My first was Midwest’s Yacht Skiff. I made many mistakes, but learned a lot from it. I hope it will permit me to achieve a better result with this kit. Here’s what’s in the kit: This photo shows the keel and the bulkheads. Three of the bulkheads have braces glued in place. Test fitting the bulkheads to the keel. Attaching the first bulkhead to the keel. I have cut pieces of aluminum angle stock to use when clamping to keep the bulkhead square with the keel.


-
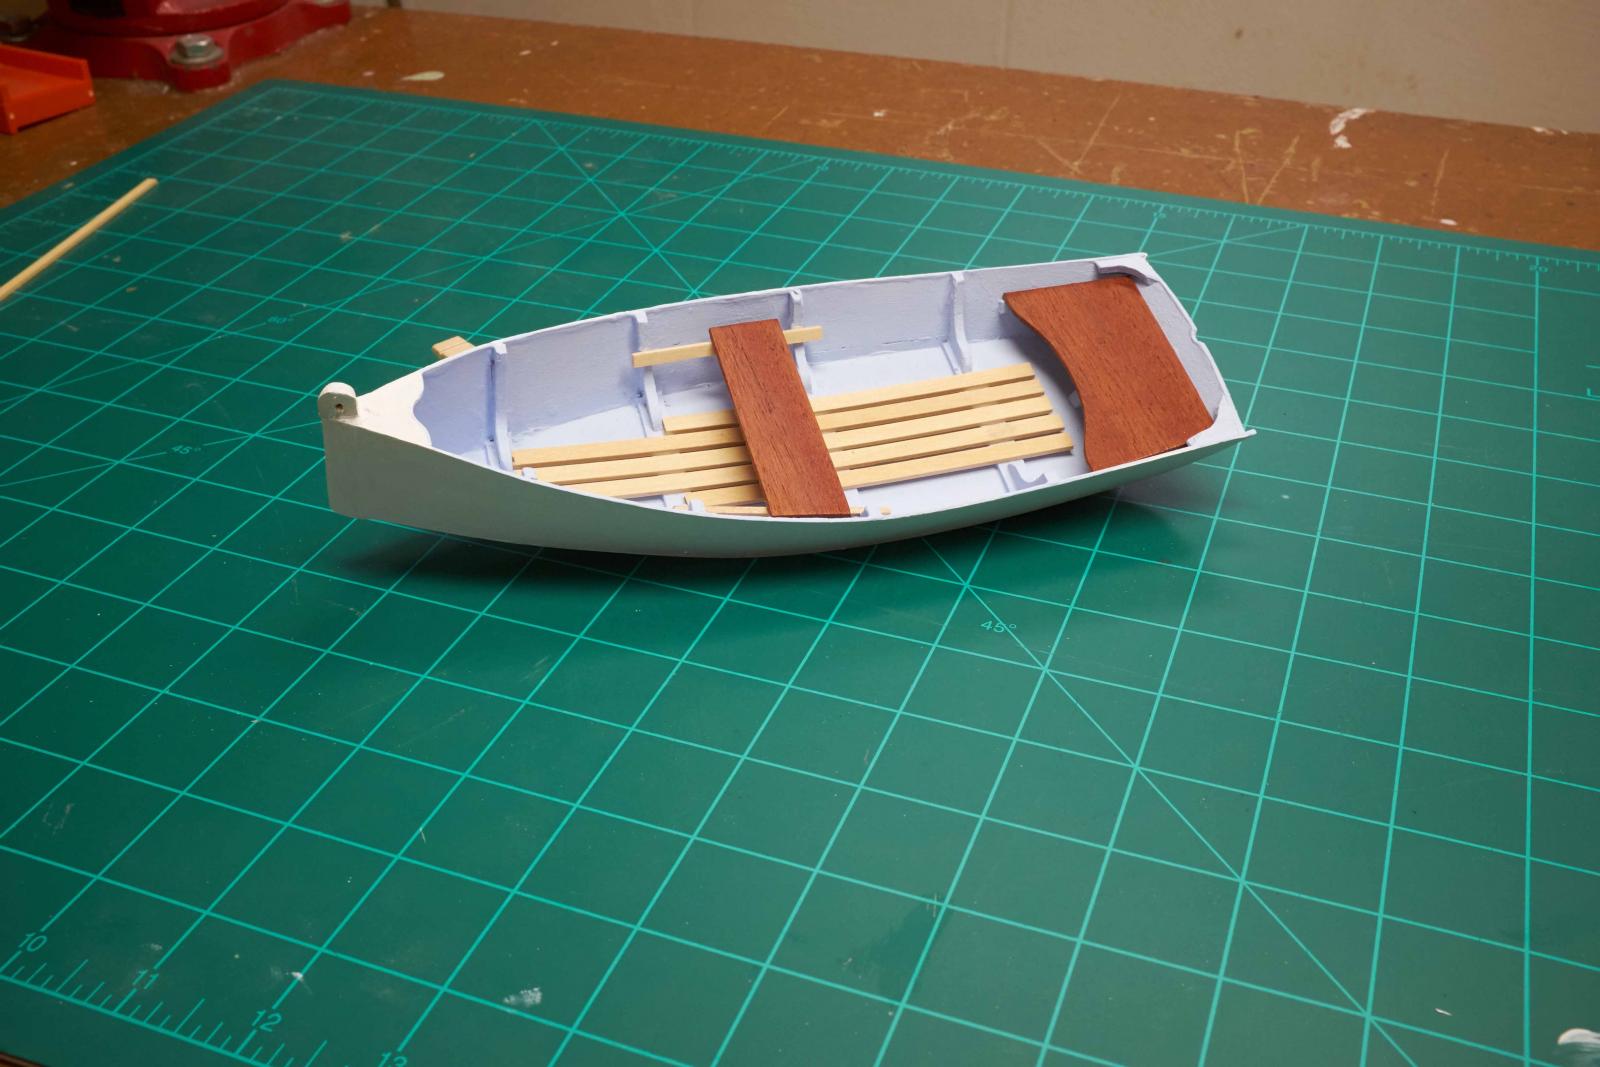
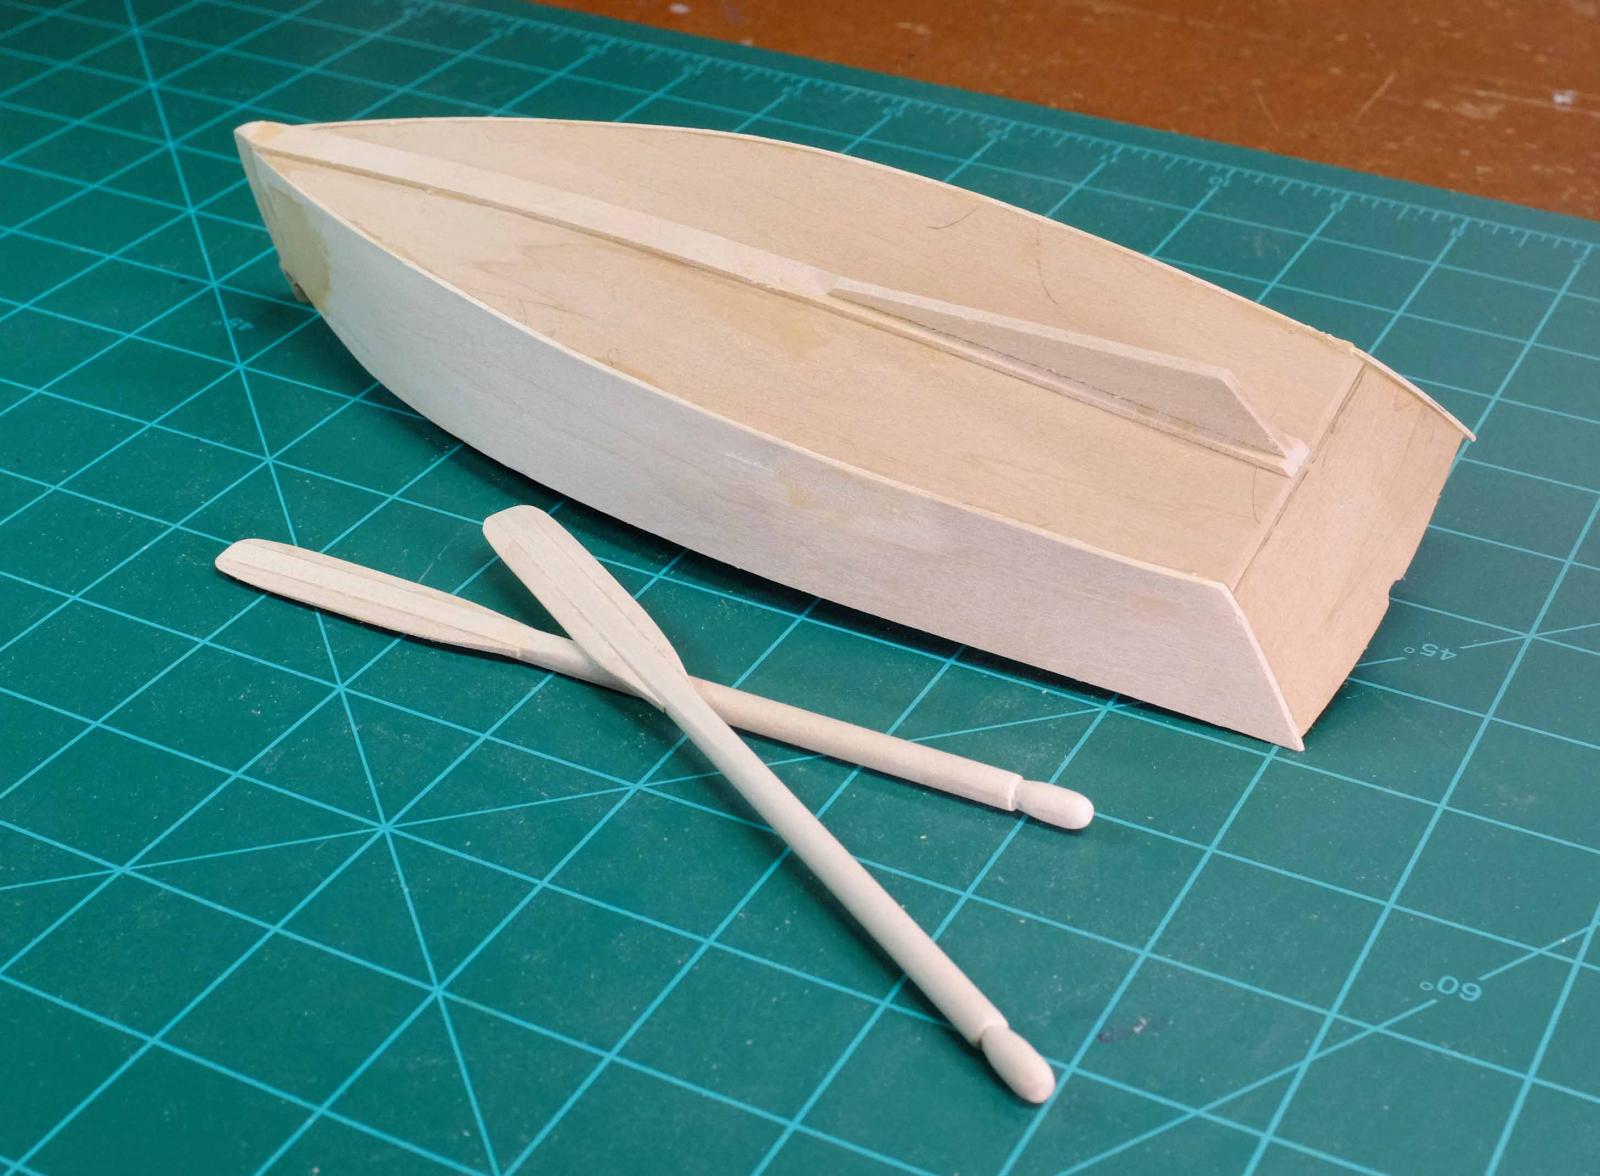
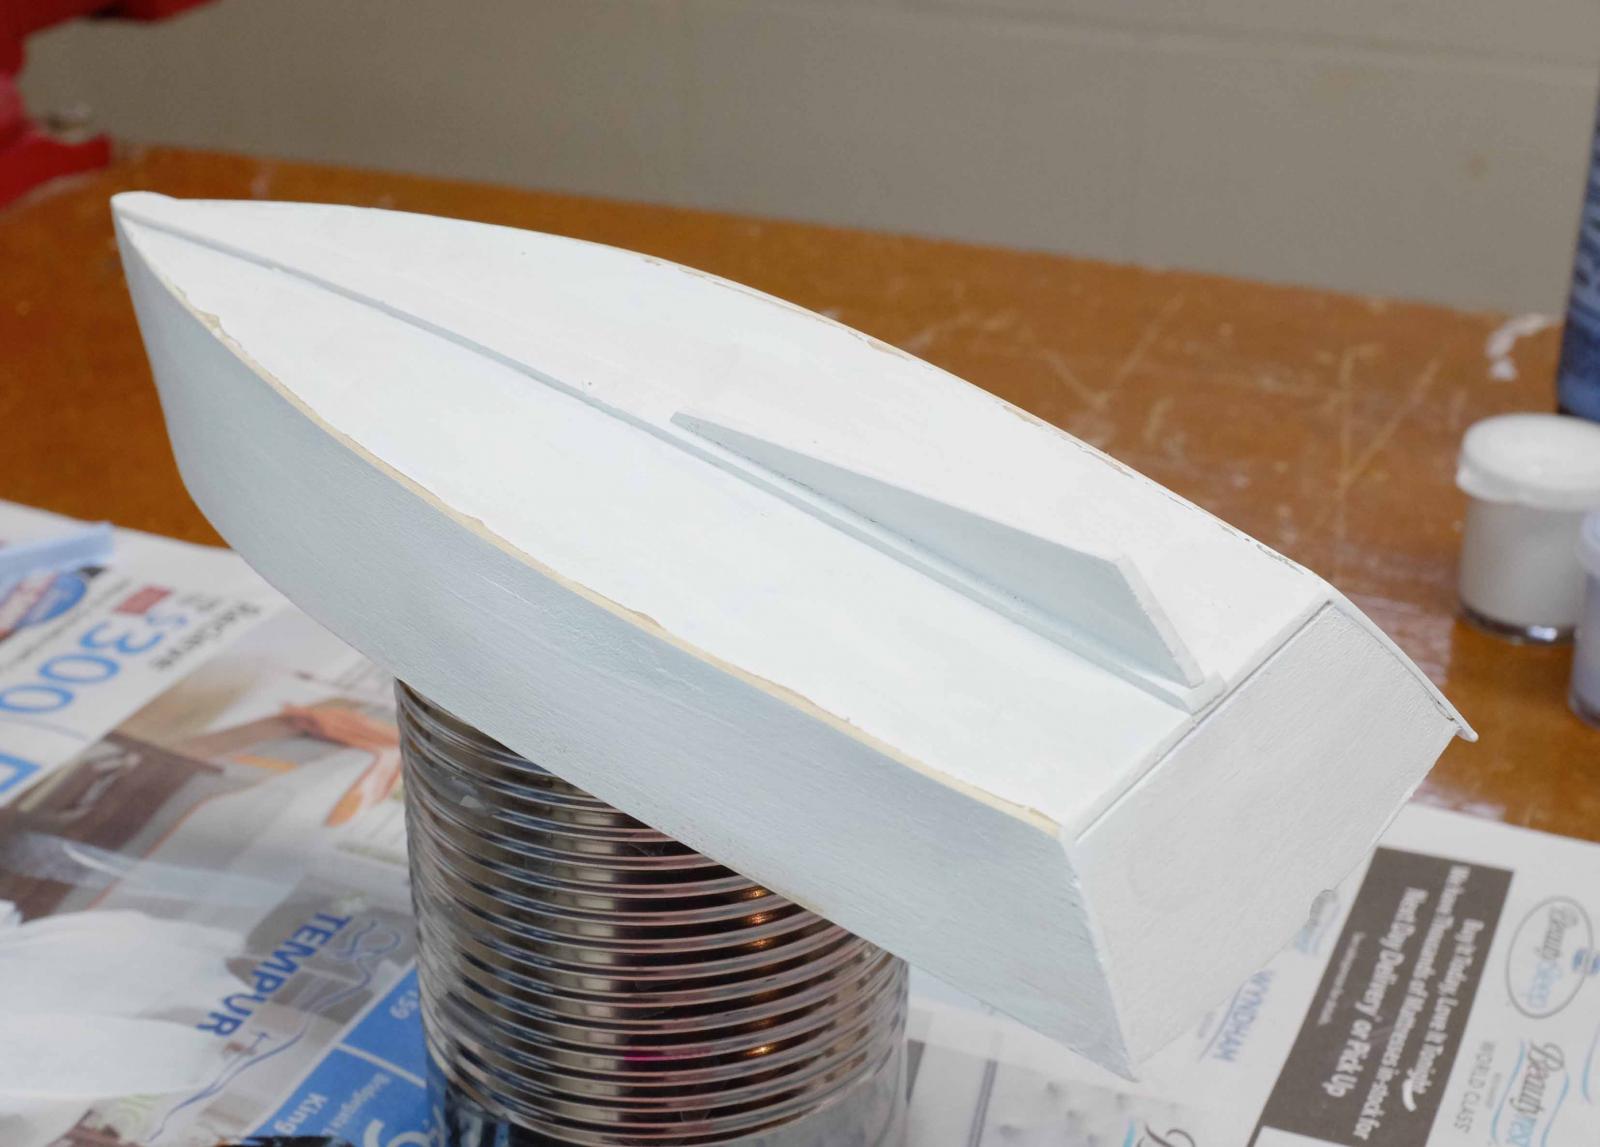
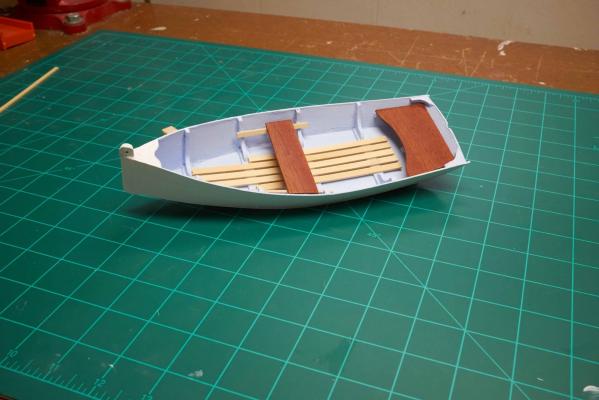
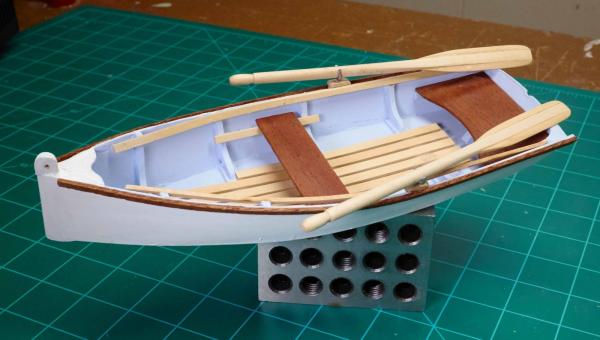
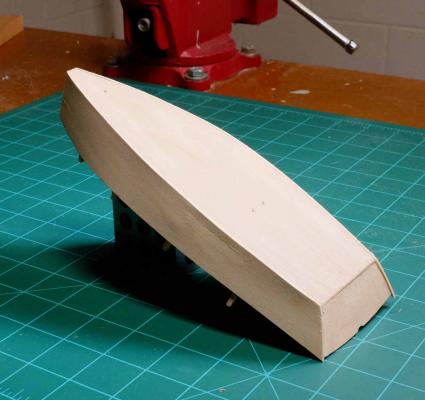
Here are a couple of shots of my completed build. I know it’s pretty rough by the standards of work one sees on this site. However, I learned a LOT! and had fun (mostly) too. I’ll soon be starting my second kit. Thanks to all who stopped by and especially those who provided helpful comments. Just before last element were added: Done:
- 19 replies
-
- 6
-
-
- skiff
- Midwest Products
- (and 2 more)
-
I finally have gotten back to my build: I have completed the build and will soon post photos of the completed skiff.

- 19 replies
-
- 4
-
-
- skiff
- Midwest Products
- (and 2 more)
-
Since my last post, I’ve spent most of my time breaking things and repairing them. I snapped a couple of the frames and split the side planks. I finally attached the side planks to the stem. Then the stem was pulled off-center. I undid the planks and reattached them to the stem with more rigorous clamping. So now I have done some sanding. Although it still has plenty of warts, it feels like I am making some progress. My next task is to try and clean up the result of some over-enthusiastic glue application. Regards, Richard
-
So, after a pause I'm back to my skiff. I have removed and repositioned a couple of frames. I also cracked a couple While I was sanding and had to repair them. Things are now mounted on a strong back with some temporary braces. I have attached the plank on one side. Note that the fore end of the plank is intentionally not attached to the stem at this stage. After the other plank is attached, the temporary bracing is removed. Then the fore ends of both planks are glued to the stem.

- 19 replies
-
- 3
-
-
- skiff
- Midwest Products
- (and 2 more)
-
Thanks for the water suggestion Joe and Brian. I'll try it and post results. I understand your comment about the transom, Joe. The bottom of the transom is sanded in a bevel where it meets the bottom. I think I didn't sand it quite enough, although the joint seems strong. I am working on keeping my sanded surfaces true. Even though I use a sanding block, I tend to end up with a slight curve. Regards, Richard
- 19 replies
-
- 1
-
-
- skiff
- Midwest Products
- (and 2 more)
-
Thanks Joe and Russ. Joe, I have to say you saw it coming. As I was sanding, one of the frames popped off. In the photo below you can see the empty spot. The aim of the photo is to show that one of the frames is too far inboard, if that is the correct term. A gap is left where it should meet the side plank when it is attached. So it needs to be removed repositioned. I have read in build logs about using isopropyl alcohol to soften glue. (I am using Elmer's Carpenters Glue). I applied isopropyl to the joint with a q-tip. I let it sit for a while, but the joint is still firm. I tried cutting into it with and xacto but no dice. So now I am thinking about building up the edge of the frame with a thin strip of wood. What do you think is the best plan? Regards, Richard
-
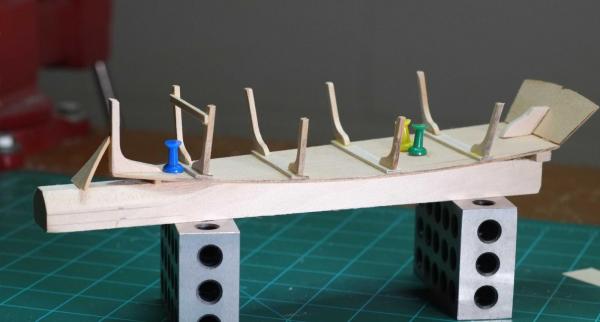
You're quite right. It may not be apparent form the photo, but most of the frames are not perpendicular to the bottom. They have a tilt in anticipation of the curve yet to be applied to the bottom. After a bit of sanding the hull is mounted on a strongback. A shim is placed fore and aft which creates the curve. Thanks for the heads up!
-
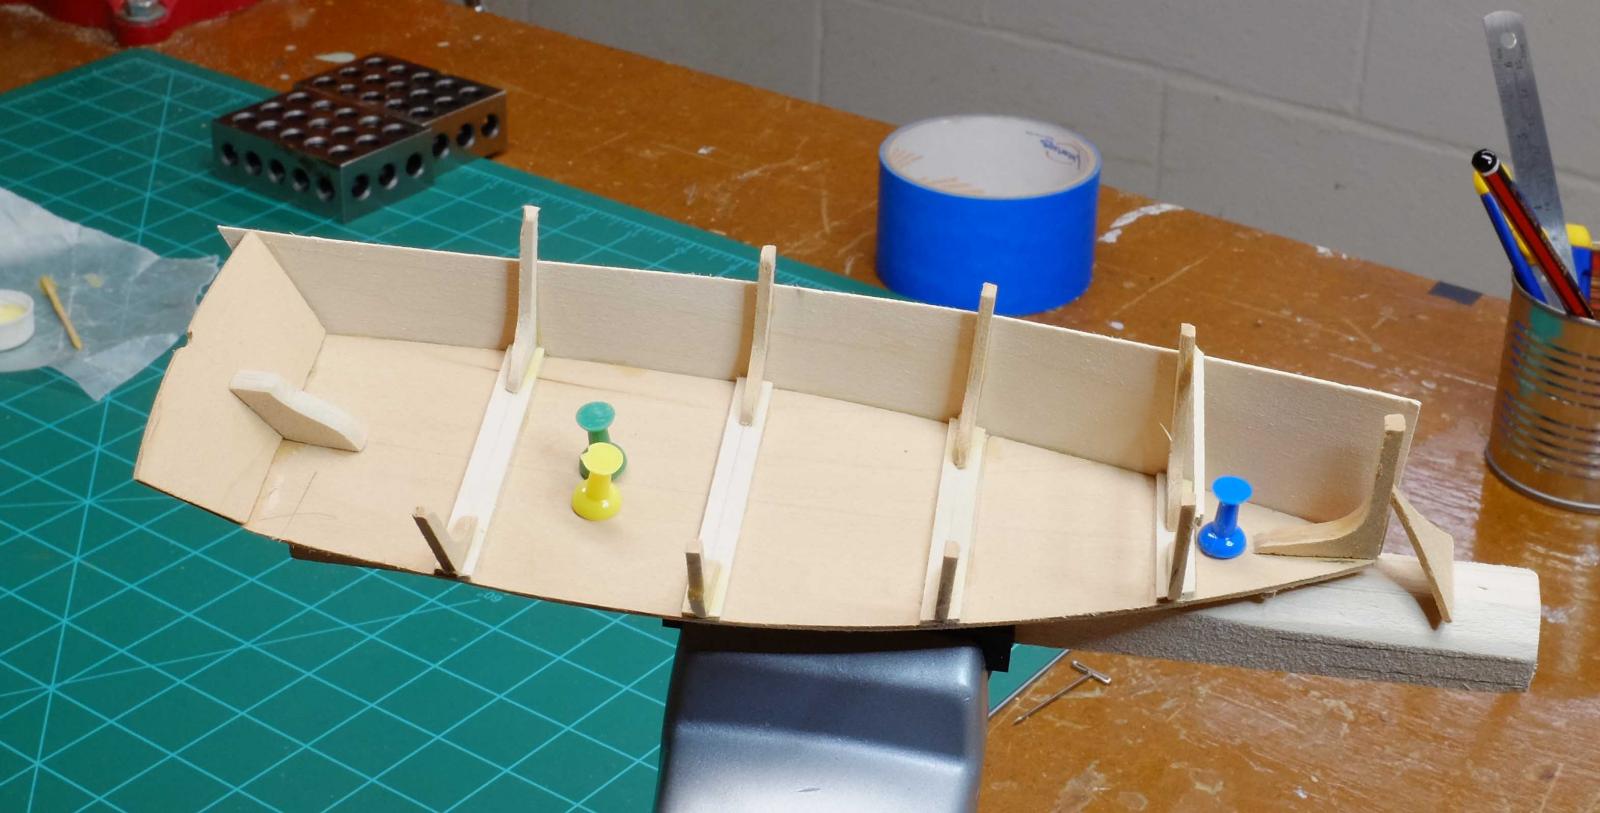
So, I do have a little progress to report. All of the frames are now fixed to the cleats. Next up is sanding to fair the hull.
- 19 replies
-
- 2
-
-
- skiff
- Midwest Products
- (and 2 more)
-
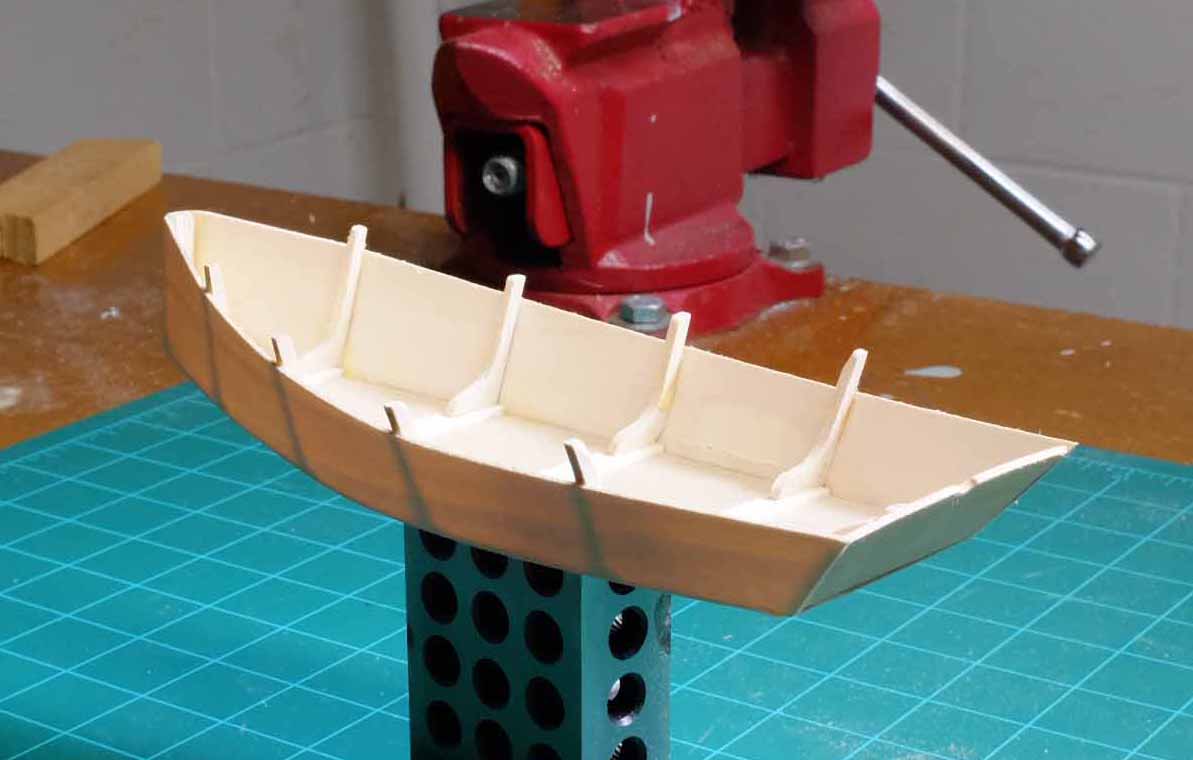
Well, thanks for your comments and encouragement! My progress has been slow, but enjoyable. Since I am using Elmer's wood glue, I have to clamp each part and wait for it to cure. This forces me to take time to think about how do what's next. I have also been improving the lighting in my work area, which is a must for me. Here it is so far: Regards, Richard
- 19 replies
-
- 2
-
-
- skiff
- Midwest Products
- (and 2 more)
-
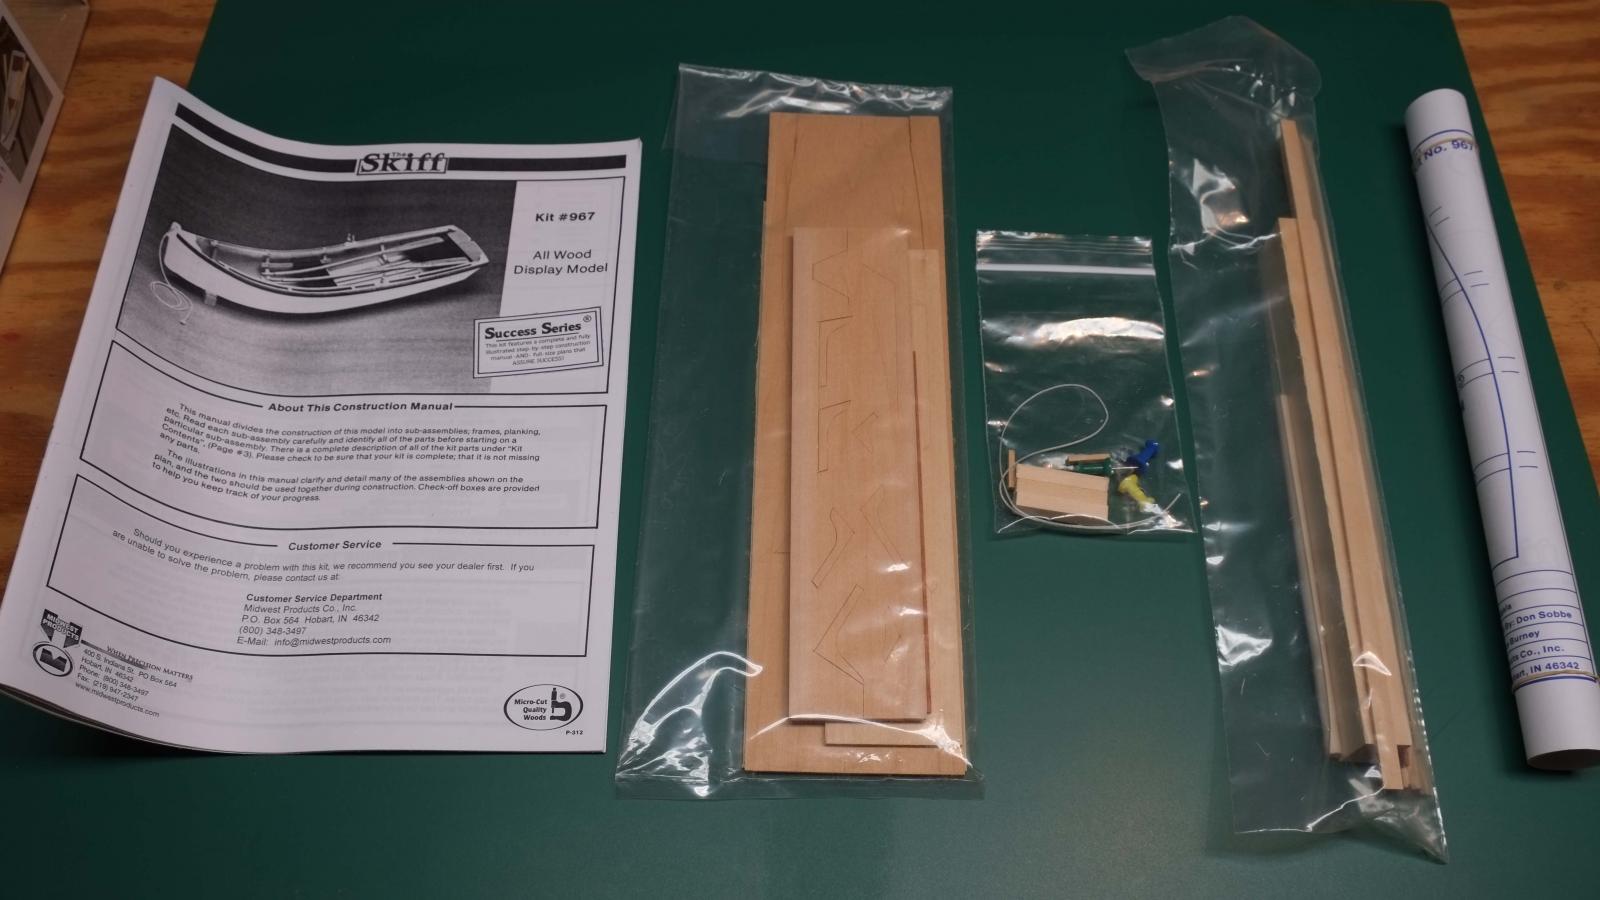
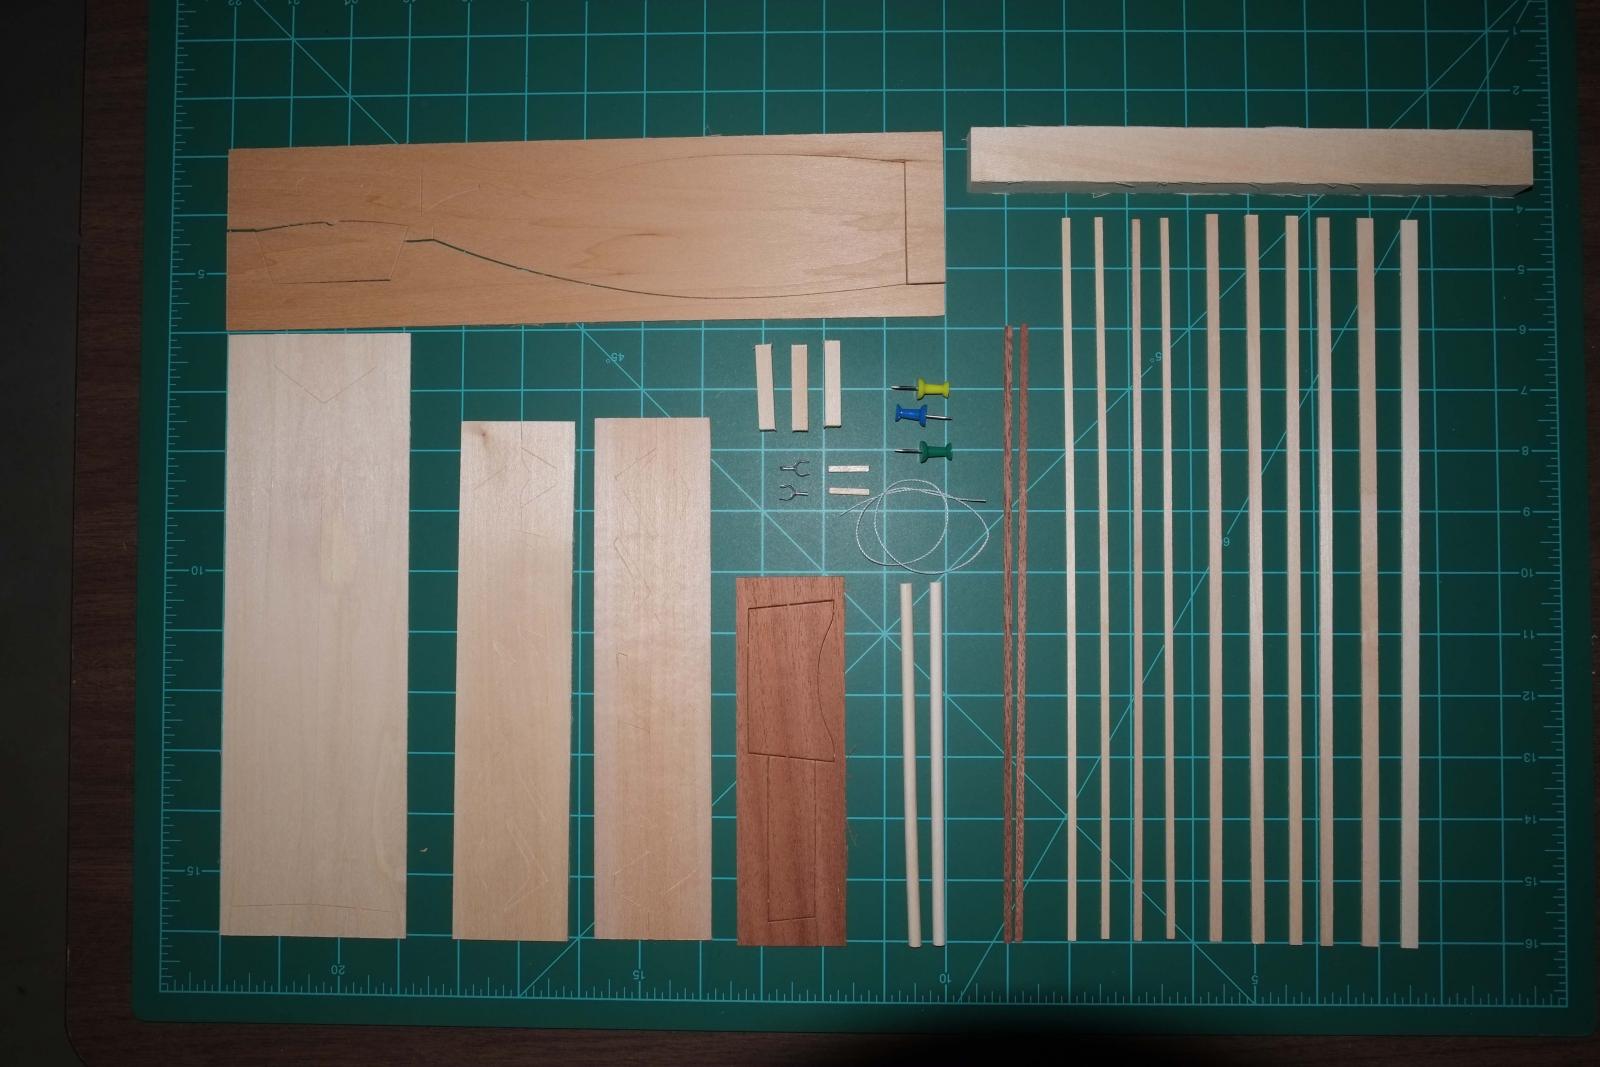
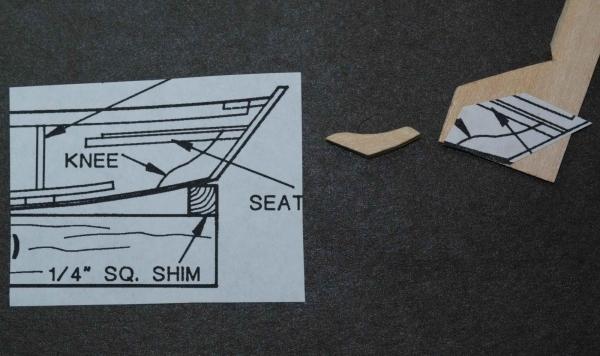
I have my first kit, Midwest Products Skiff. I inventoried the parts, and all are present. One of the first steps was to remove two pieces from the wood sheet and glue them together to create the skiff's knee. After sanding I discovered that I had removed too much material and my part was now too small. I decided to make a replacement. I scanned the portion of the plans that showed the part and printed it. I cut out the relevant portion out of the printed copy as a template. I glued it to a piece scrap with rubber cement. I then cut out replacement parts and glued the halves together. I now have a proper knee. Illustration shows (left to right) relevant part from plans, undersize part, scrap wood with template. I am now wondering if the rubber cement I used to attach the paper template will leave a residue on the wood that will be a problem when I get to the finishing phase. Do you think it will keep paint from adhering?

- 19 replies
-
- 4
-
-
- skiff
- Midwest Products
- (and 2 more)