captain_hook
-
Posts
675 -
Joined
-
Last visited
Content Type
Profiles
Forums
Gallery
Events
Everything posted by captain_hook
-
 Very impressive work!
 -
Very nice work!
-
You‘re making good progress. As you use a lot of holly for planking I hope you don’t mind me asking - are you going to partially paint the ship later or leave it natural?
-
That is a nice little boat, well done! And great photos too.
- 62 replies
-
- 2
-

-

-
- Saucy Jack
- vanguard models
- (and 3 more)
-
Thank you guys for the support. I don't want to give up but this task will definitely slow me down quite a bit and I have to move on carefully as I don't have much scrap wood for spare parts left. Precut-planking sucks! @Beckmann Yes, I use a heat-gun for pre-bending the planks. But clamping them helps a lot to fix them in the right position until the glue has dried. @Chuck Thank you. I will keep that solution in mind if I fail to use the precut-planking properly. @mtaylor Yes, you're right - per aspera ad astra.
-
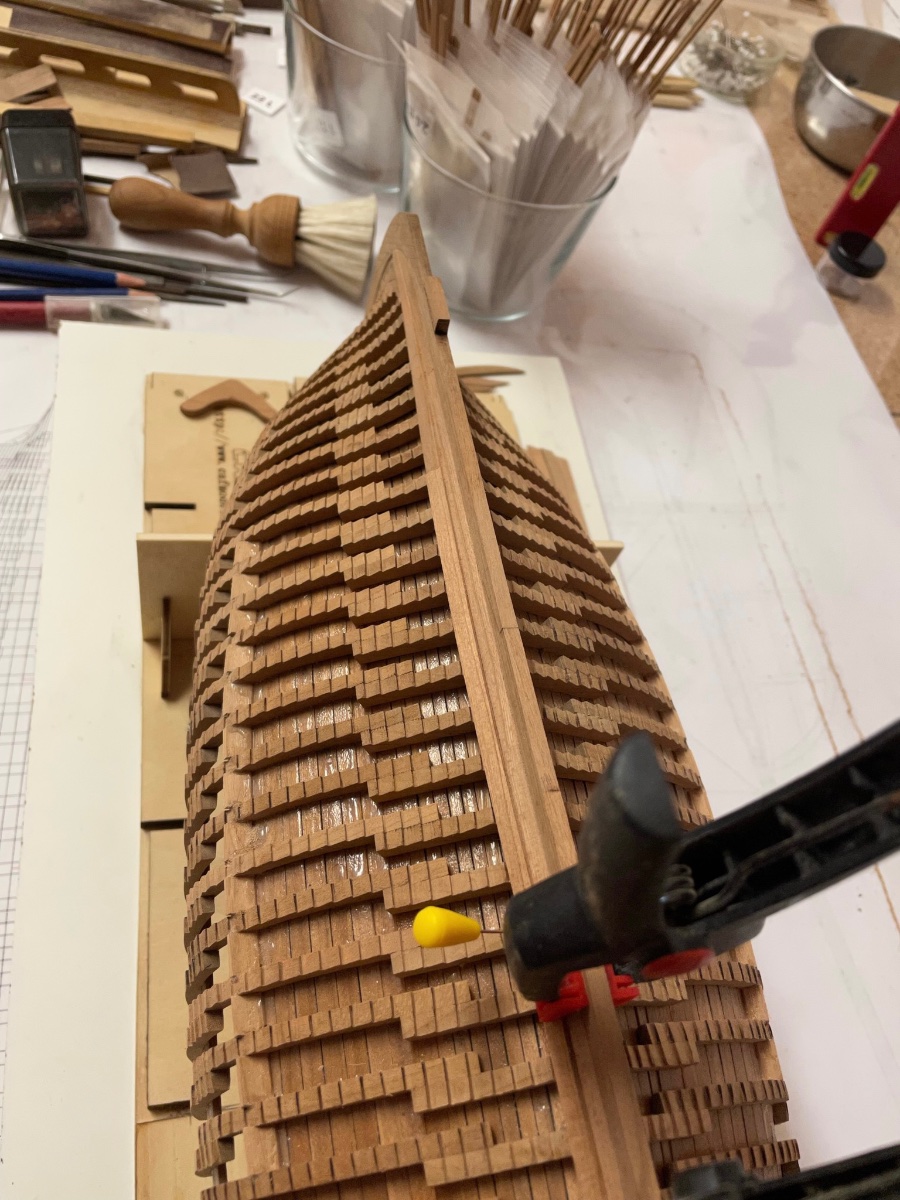
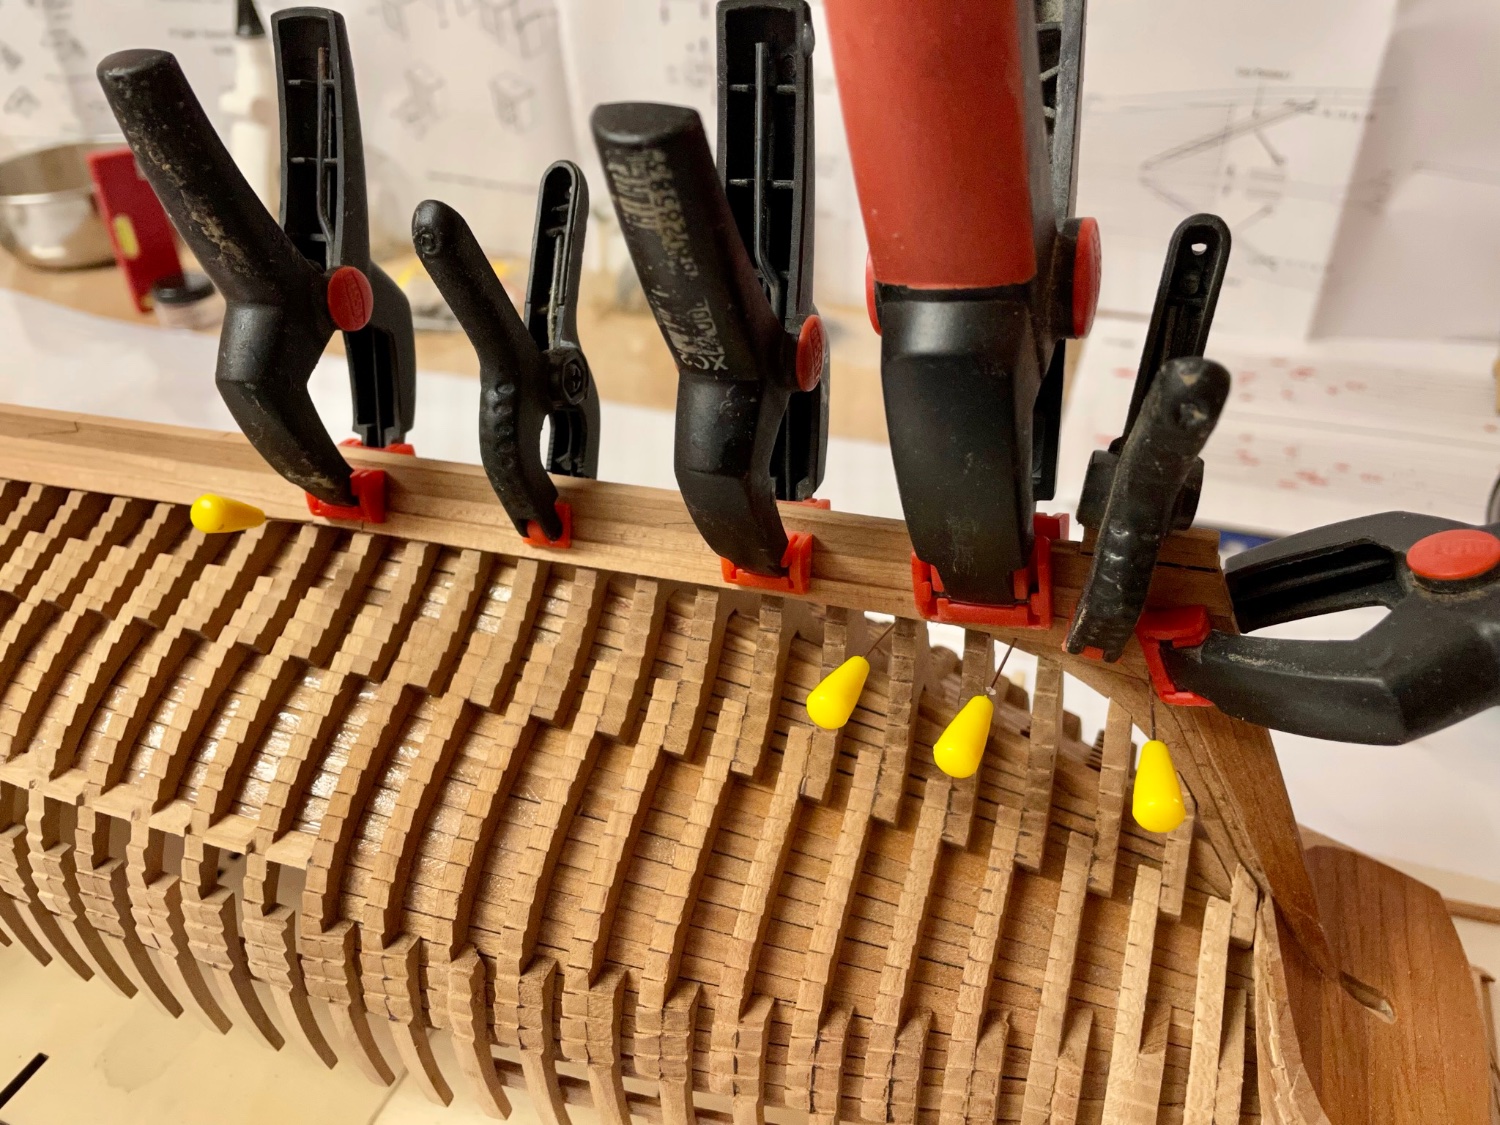
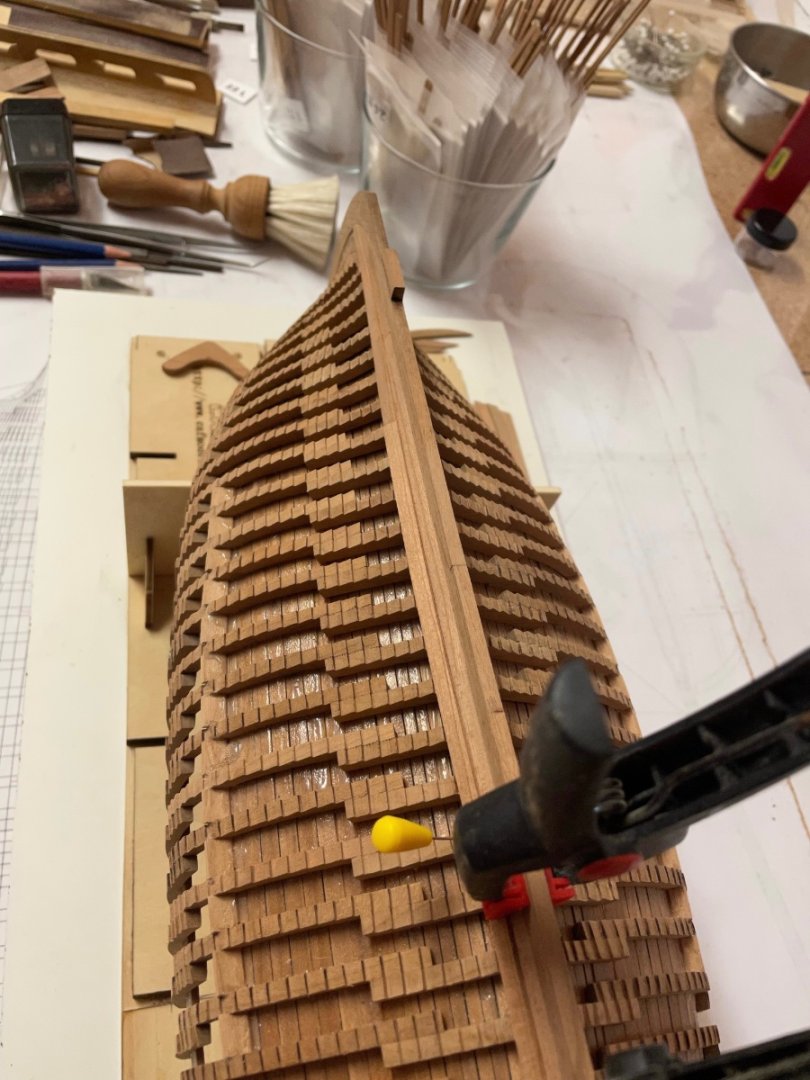
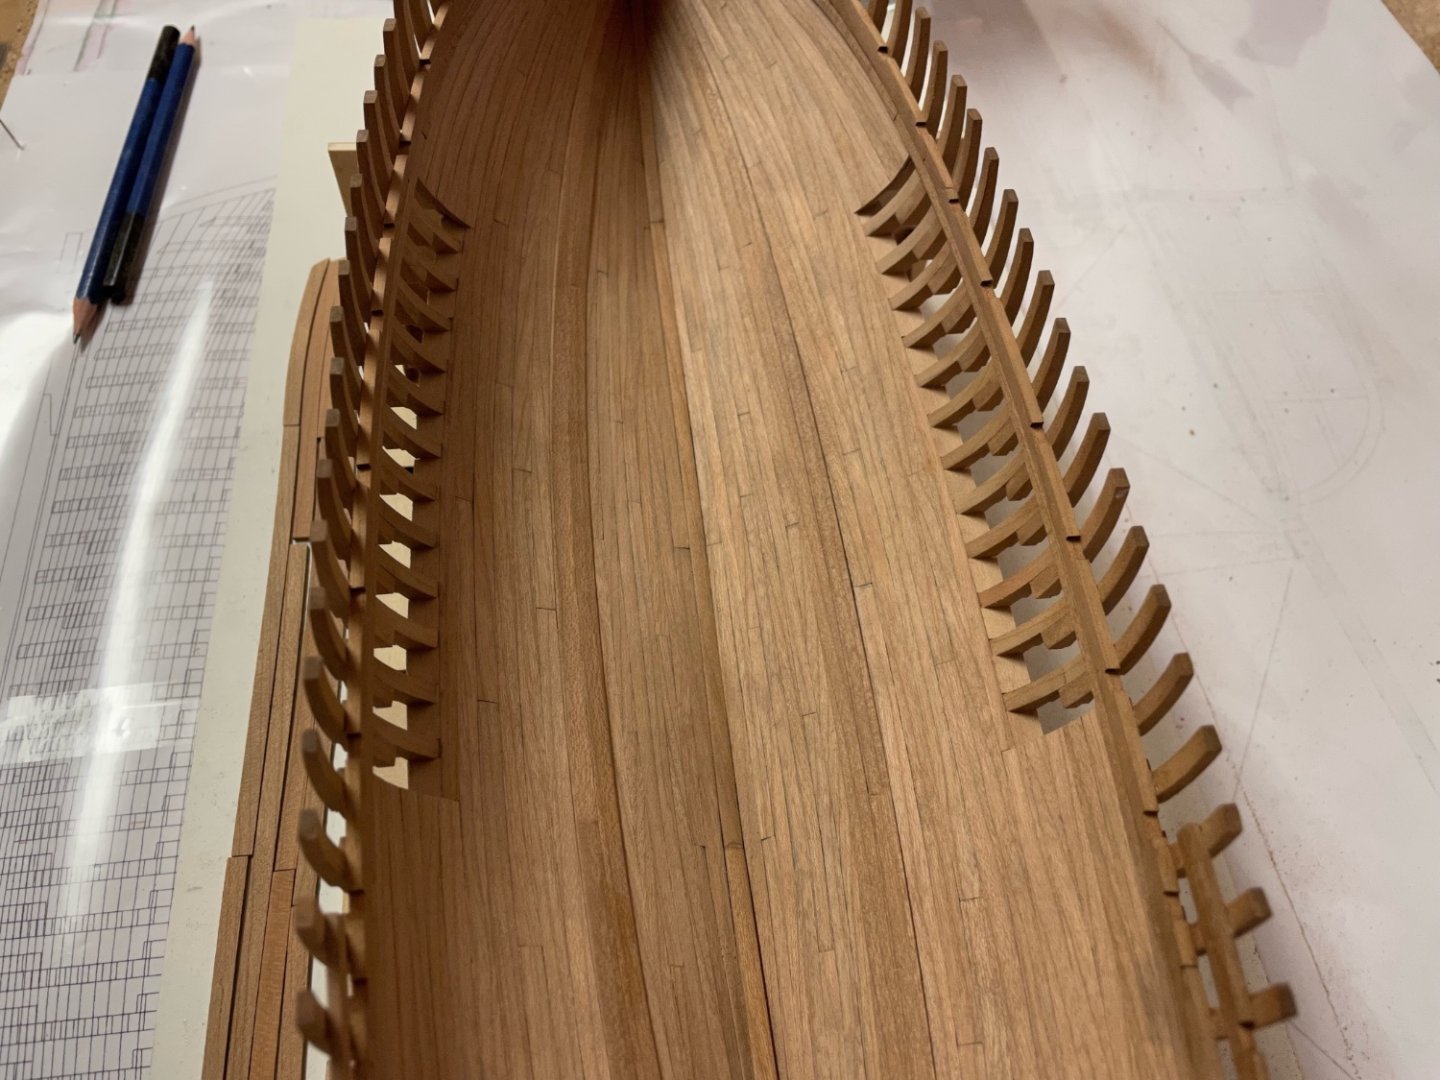
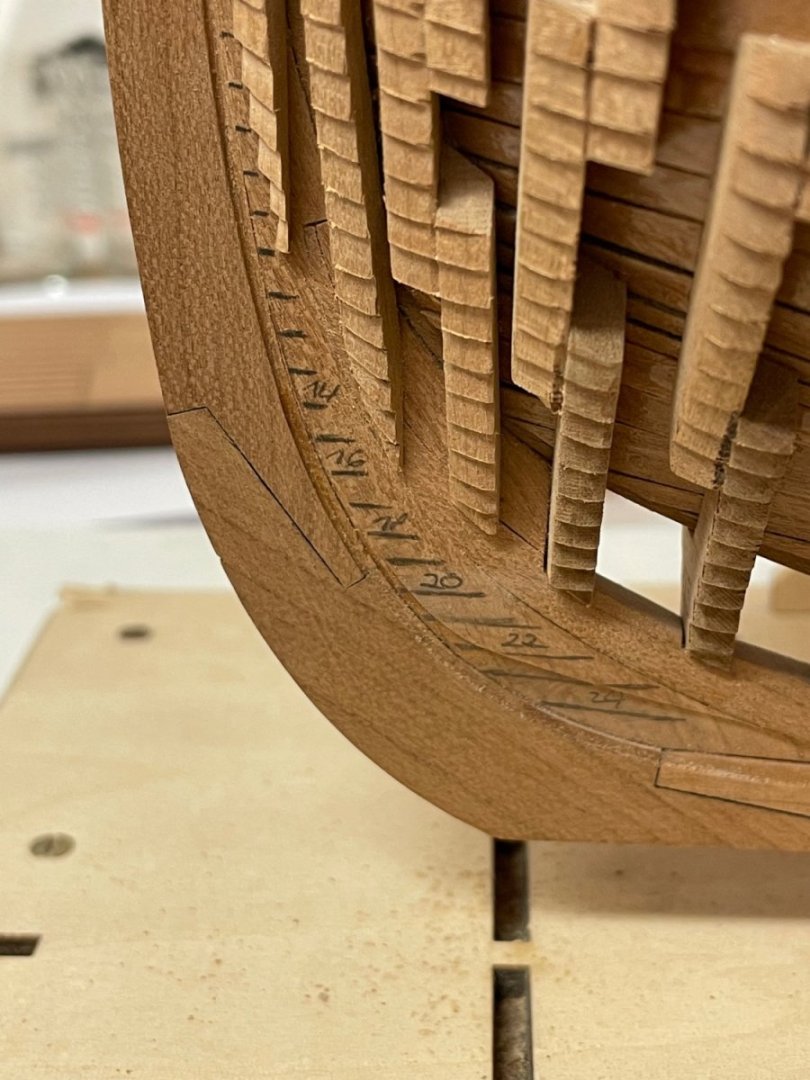
Today I have started planking the outside with the first two planking rows on the starboard side. This is pretty much testing my patience and perseverance. No. 25 consists of four parts and no. 24 of three parts. No parts is fitting exactly from the start as they are longer and wider as needed. So you’re able to make custom adjustments but this takes a very large amount of time. As the cnc-milled rabbit is only about .5 mm deep you have to taper / flatten all parts of no. 25 to fit into that rabbit too. Took about 3 hours to finish one row and there are 23 more rows to go … I caught myself thinking about starting another project several times and this might be the final task to decide if I will continue building this model next year or just switch to a more suitable project like the Cheerful which has been waiting for me in the shelf for about 3 years now. As the cherry stripes are slightly rotated around their own axis from center to bow and center to stern to fit the hull several clamps are needed to fix them in position until the glue has cured. Another problem is that the plans do not show exactly where the overlap of the clinker-planking begins for each row - so it’s about 3 cm at the bow and 5 cm at the stern for no. 24. So that’s it all for this year, have to help my wife preparing the New-Year-Party. Stay tuned .. and happy new year! Andreas

-
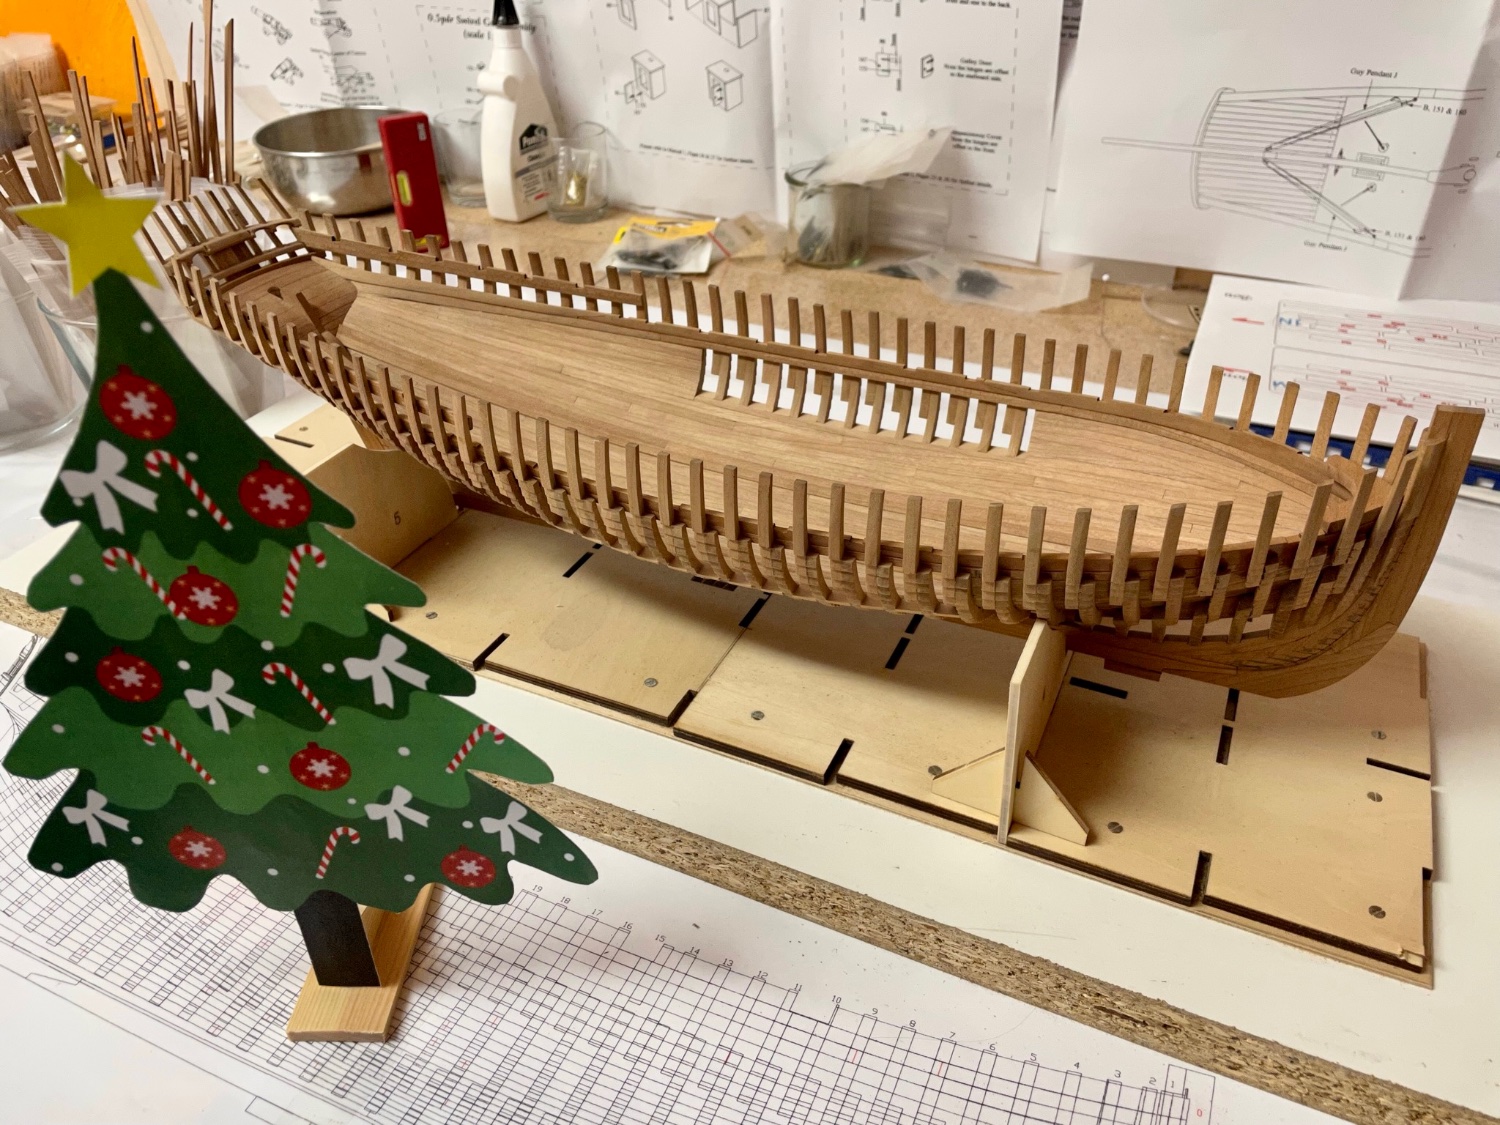
As there were plenty of other things to do before Christmas I didn‘t quite find the time for modeling - but I will return to my build in a few days and start the planking then. Here in Germany there was some snow falling down last week but now it is just raining all day. But I heard a lot in the News about a heavy blizzard running through the USA and I hope all of you living there are ok and able to stay save until it is gone. Seems like Santa Clause has also visited my workshop and left a little Christmas tree there. I wish everyone on MSW a happy Christmas and - if you have any - a nice holiday. See you all here next year again ..

-
Congratulations - she is a beauty! A POF-model doesn‘t always have to be a big ship to become impressive.
-
These VM kits are like some sort of 3D-puzzle. It is amazing how kits have evolved trough the years - compared to early Caldercraft kits like the Cruiser brig. Nowadays most of the hard work has already been done for the modeler. But James's skills may the building of the prototype look a lot easier than it actually is. BTW I liked the unpainted one a lot more - such a shame to cover all the nice wood ..
- 473 replies
-
- 6
-
-

-
- Indefatigable
- Vanguard Models
- (and 1 more)
-
Thank you very much, Dfell and Vladimir_Wairoa for the nice comments - very much appreciated.
-
Nice start! Good luck with your new build and hope you will recover soon. I also lost my modeling-motivation for about a year and still have to force myself to start the next intended step. But when the first 30 minutes have passed I‘m into it again for hours. But you‘re right - a small project is a good way to get experience of success and light the fire again ..
- 55 replies
-
- 2
-
-
- marisstella
- batelina
- (and 1 more)
-
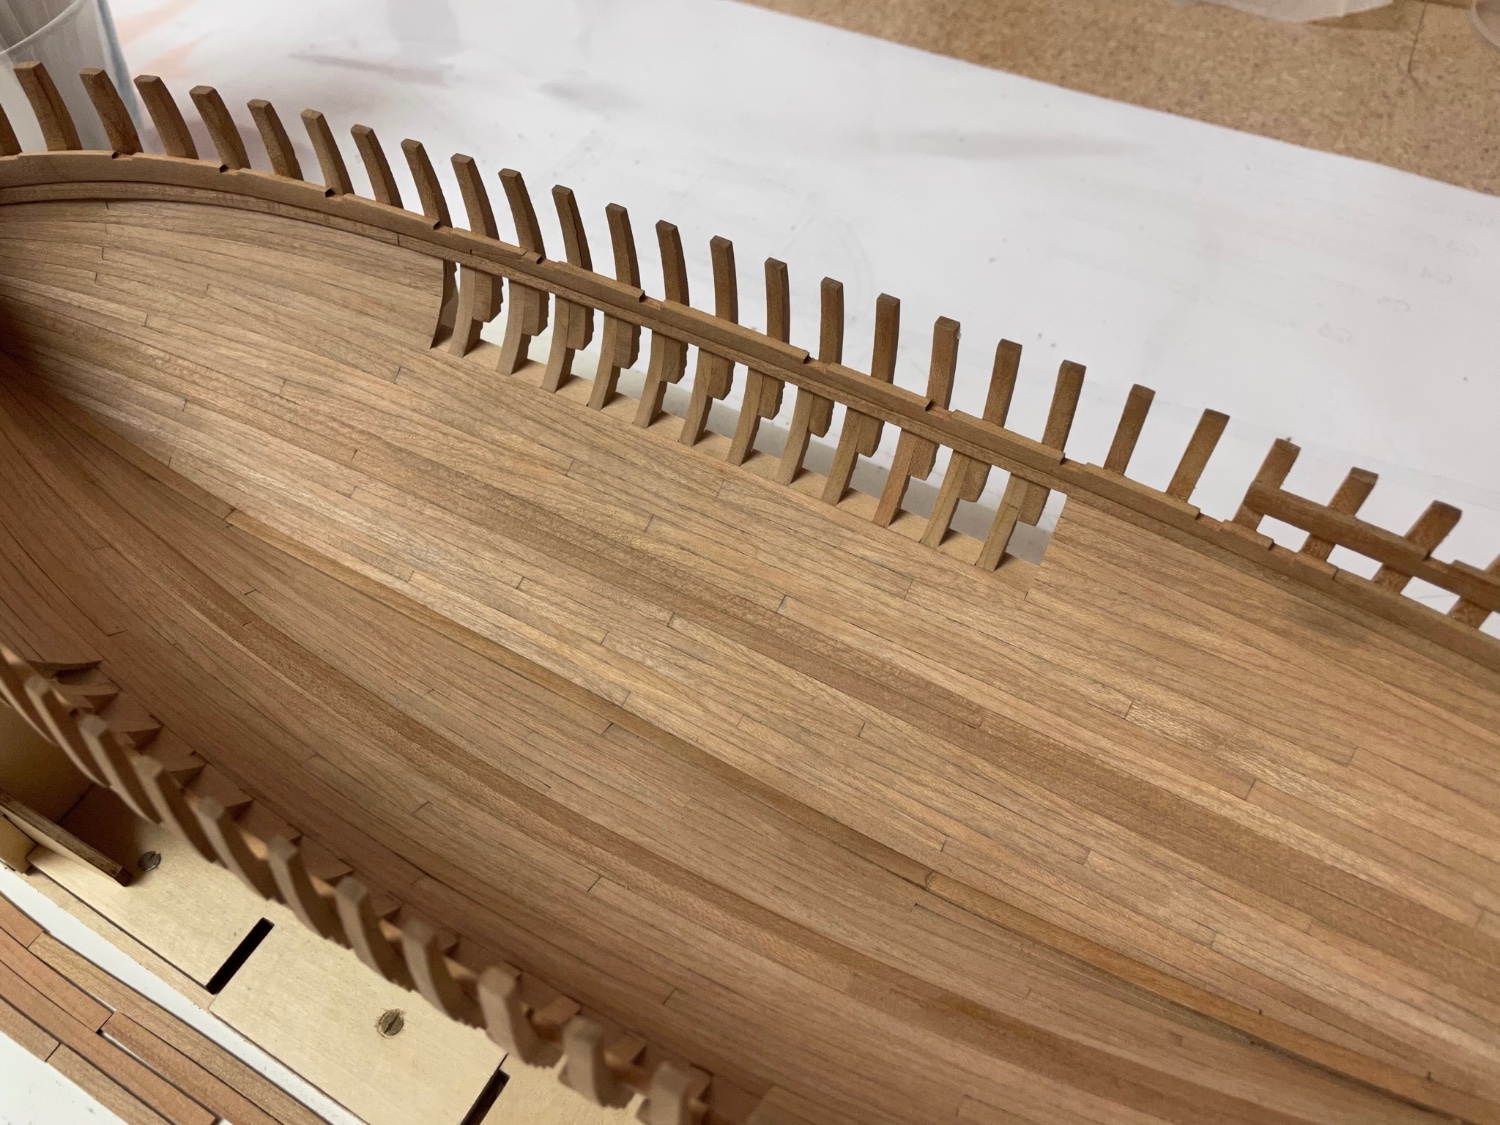
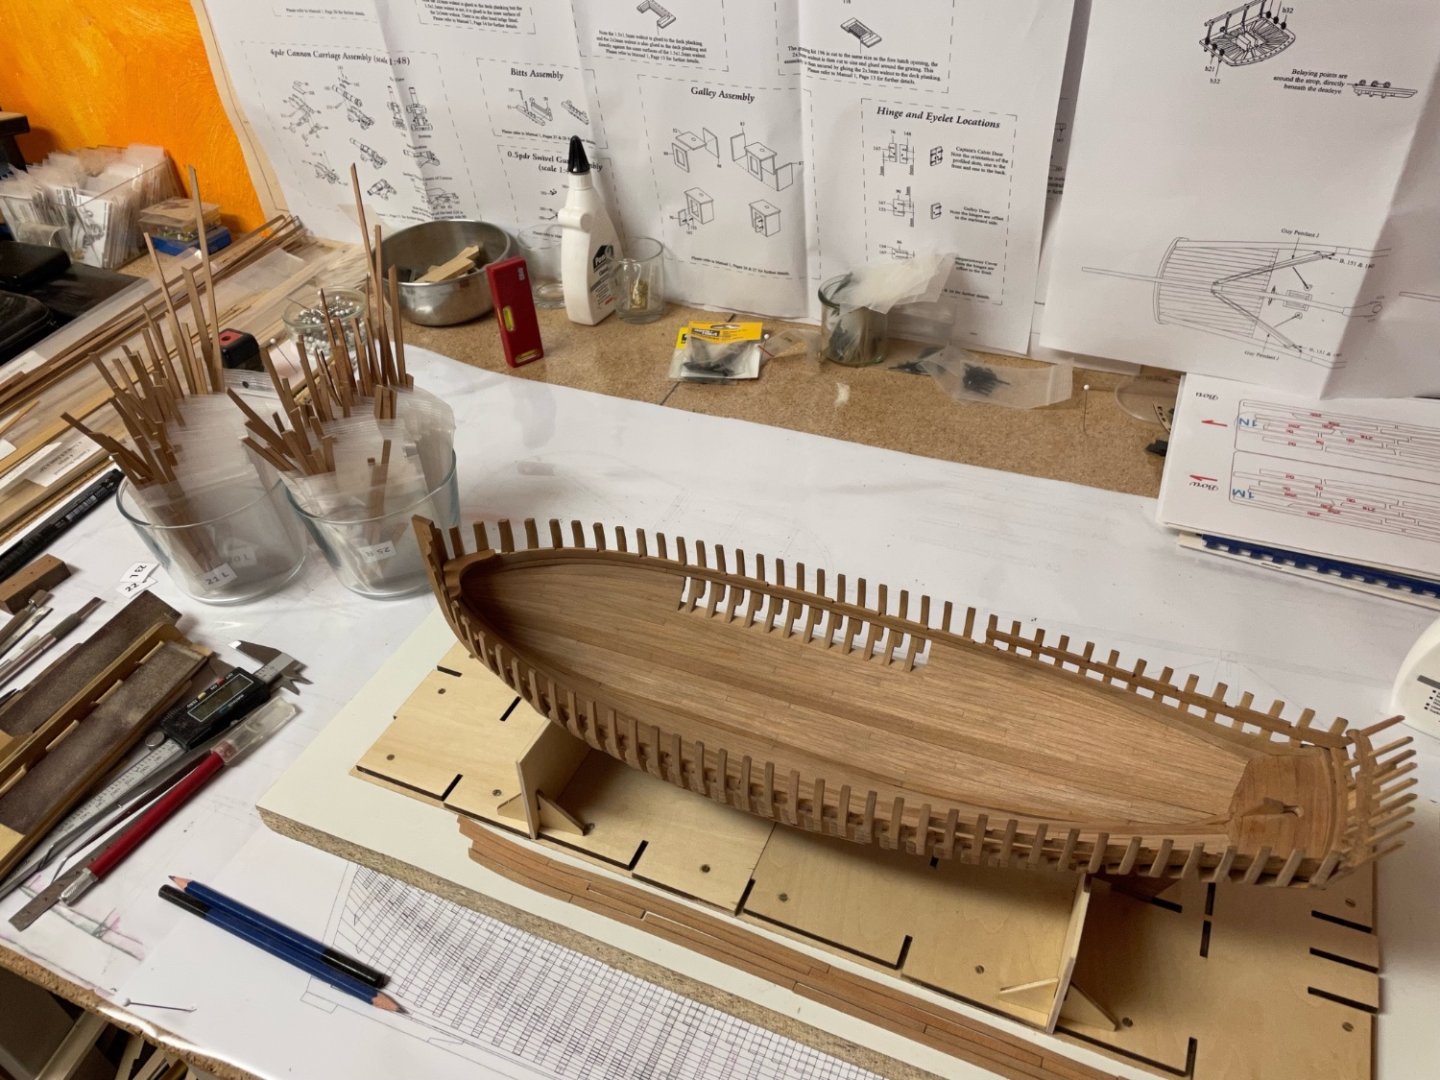
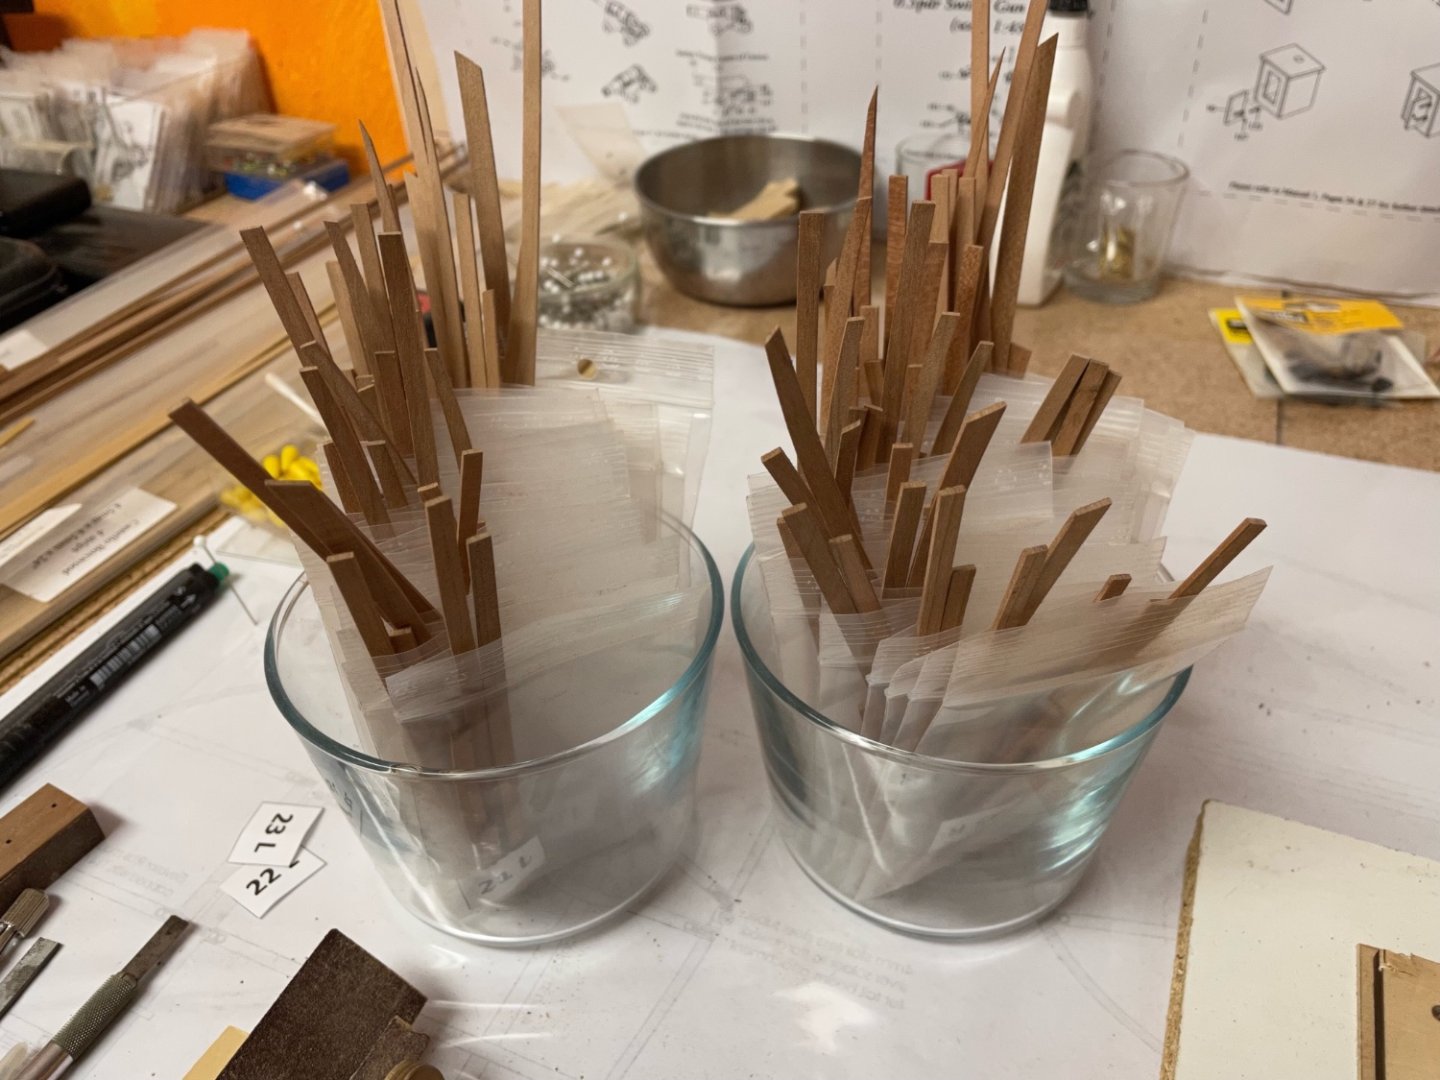
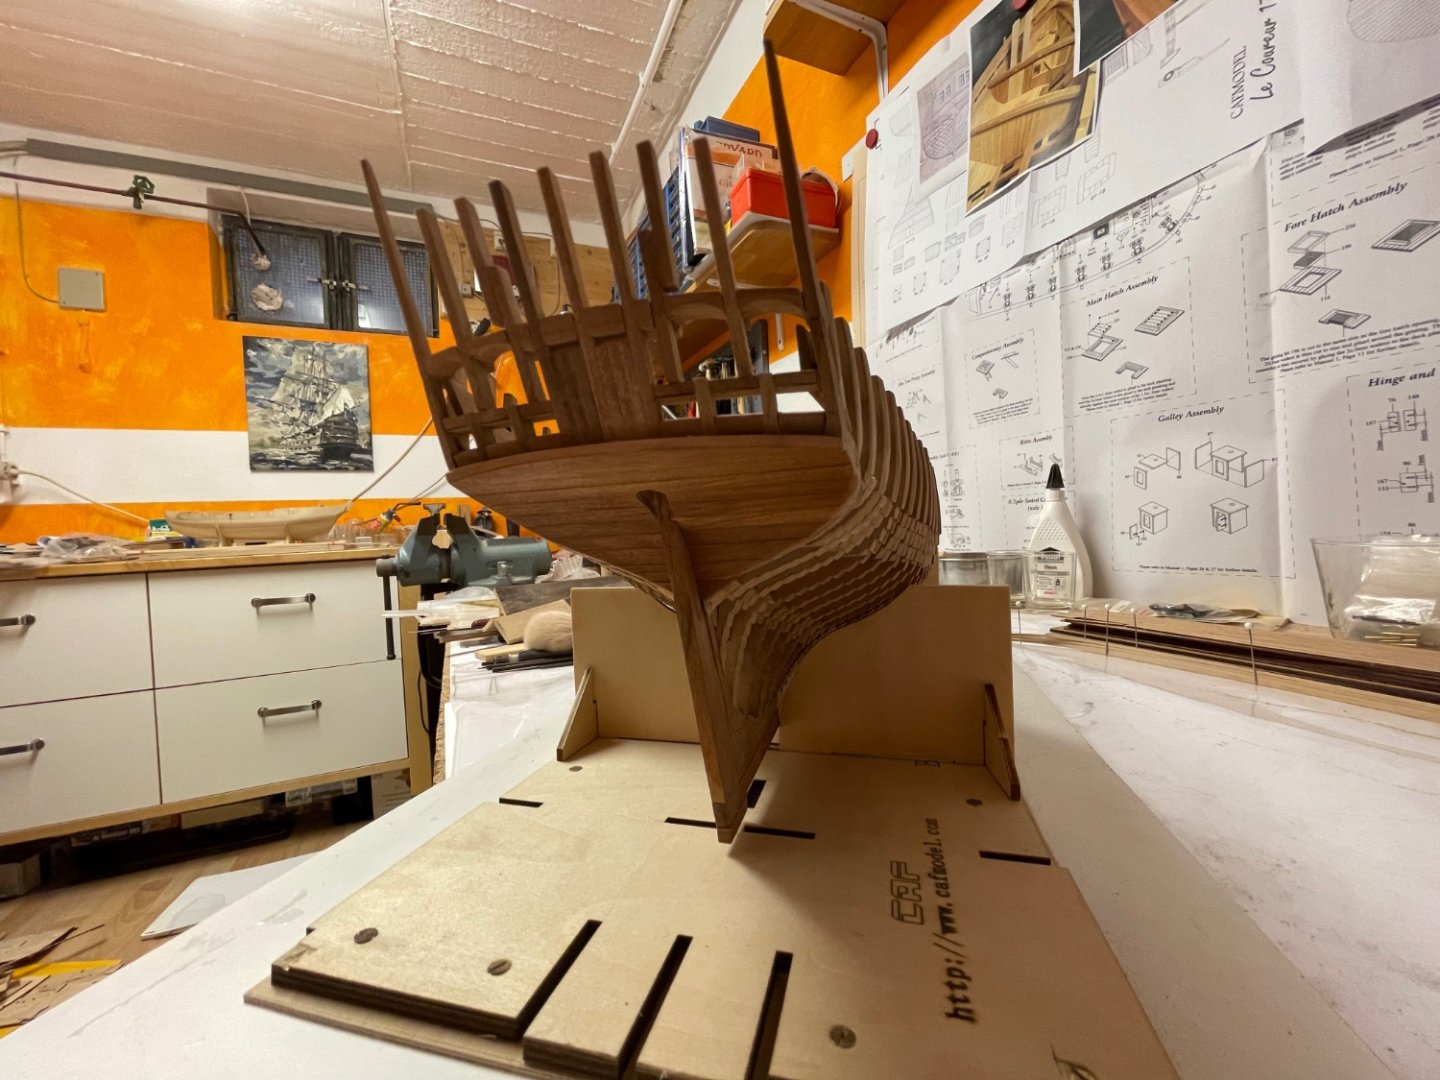
I have done some more small steps that have to be done before planking of the ship will start. I prepared all supplied planking strips and removed all the laser char with 120 grit sanding paper. I had to exchange four planking strips as well because of small defects in the cherry wood and used them as templates for new ones made of scrap wood. There are 25 planking rows on each side and the planking layout used on one side is mirrored on the other. That is a lot of work ahead and I hope to finish both sides before Christmas. And I closed the gaps between the inner and outer planking left and right of the frames that are still viewable with small pieces of scrap wood. On the real ship this may have been done to prevent things falling between the planking sheets. At last I sanded the stern planking to the final shape. I‘m still a little scared about the clinker-planking but will start with that major step the next days. Stay tuned ..

-
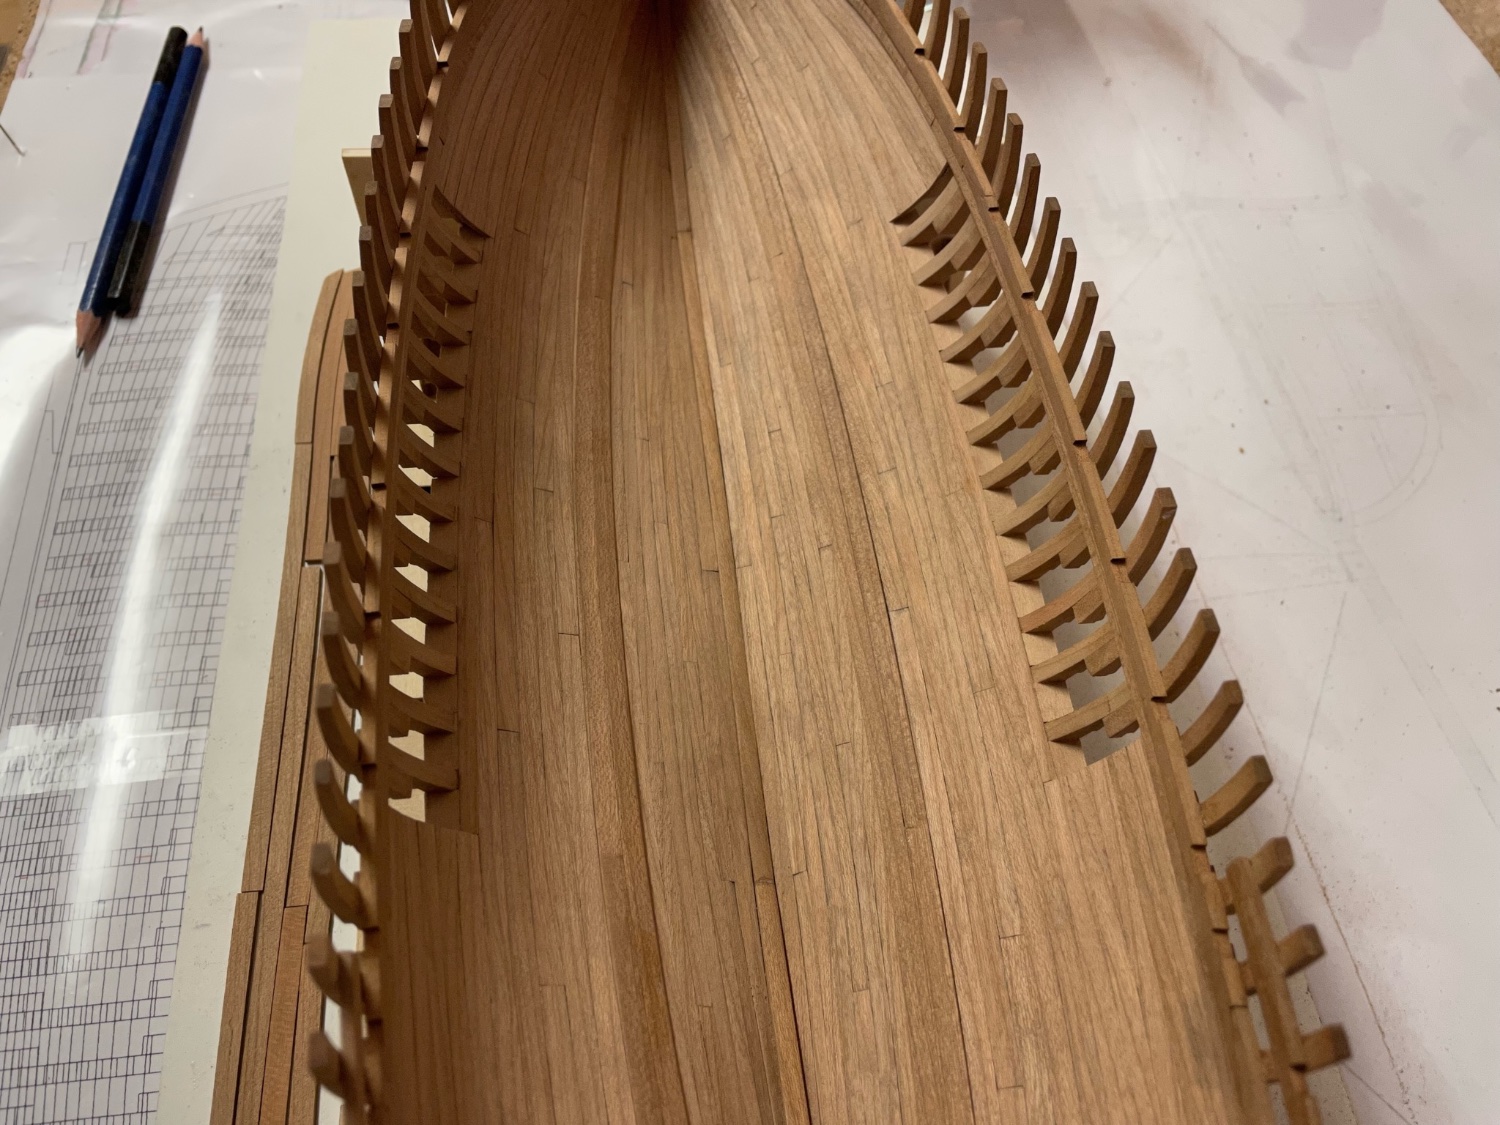
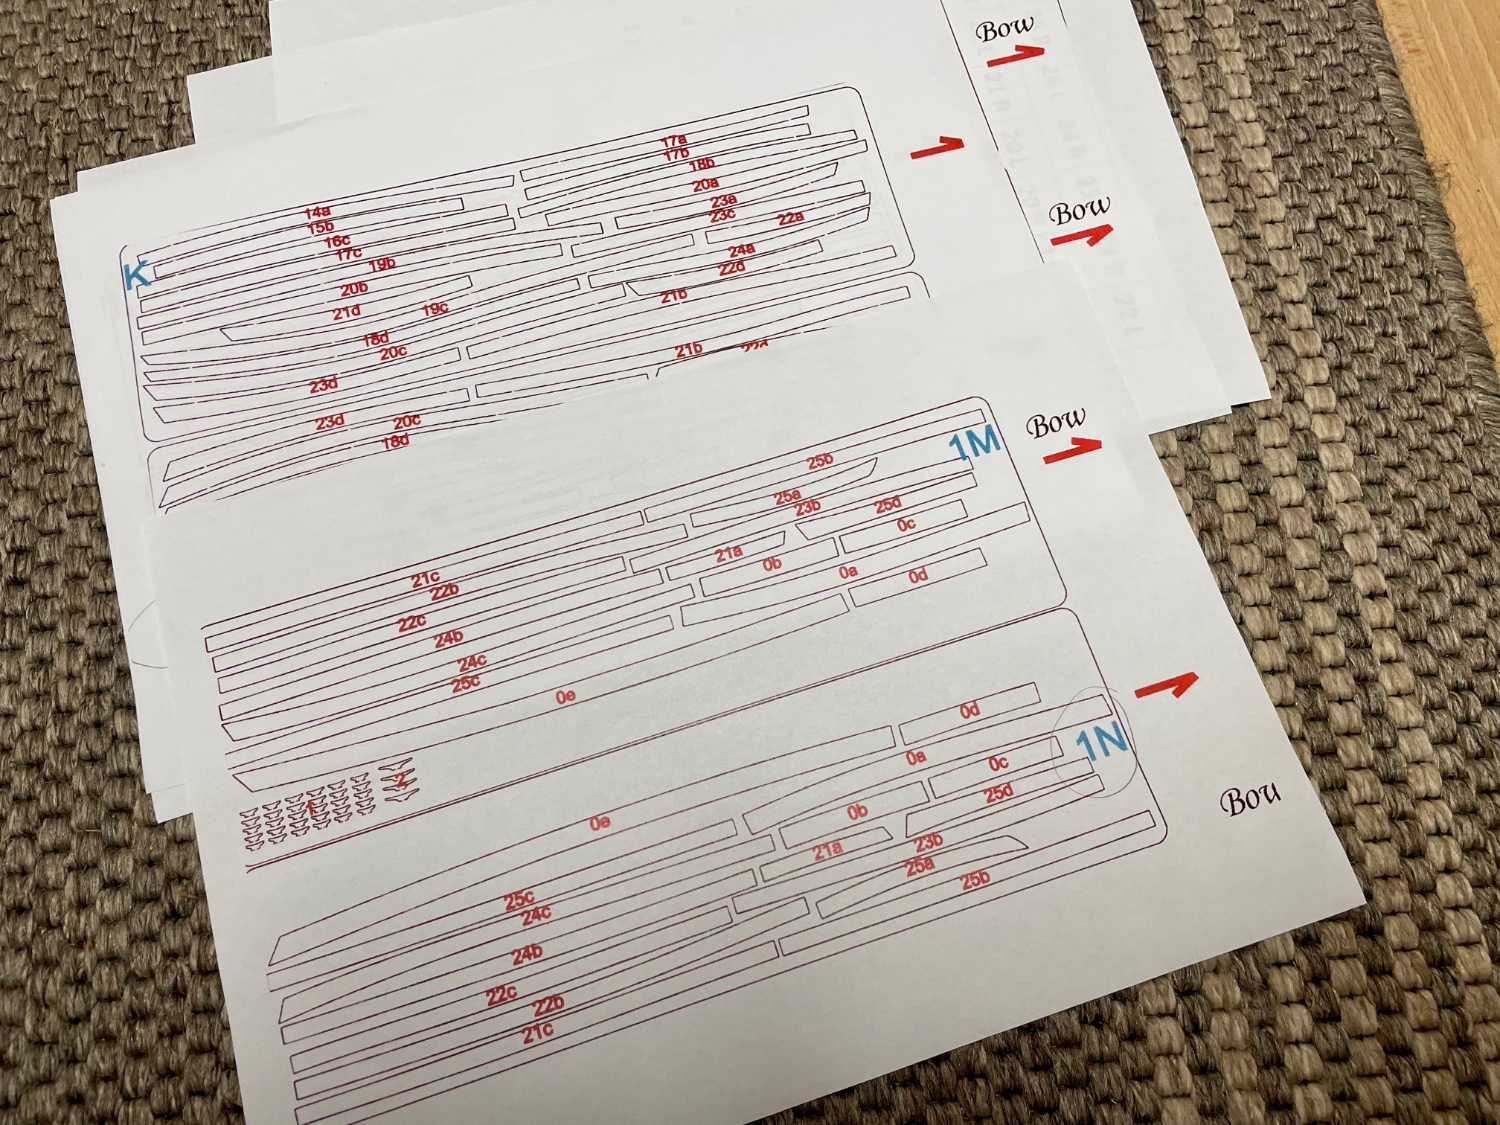
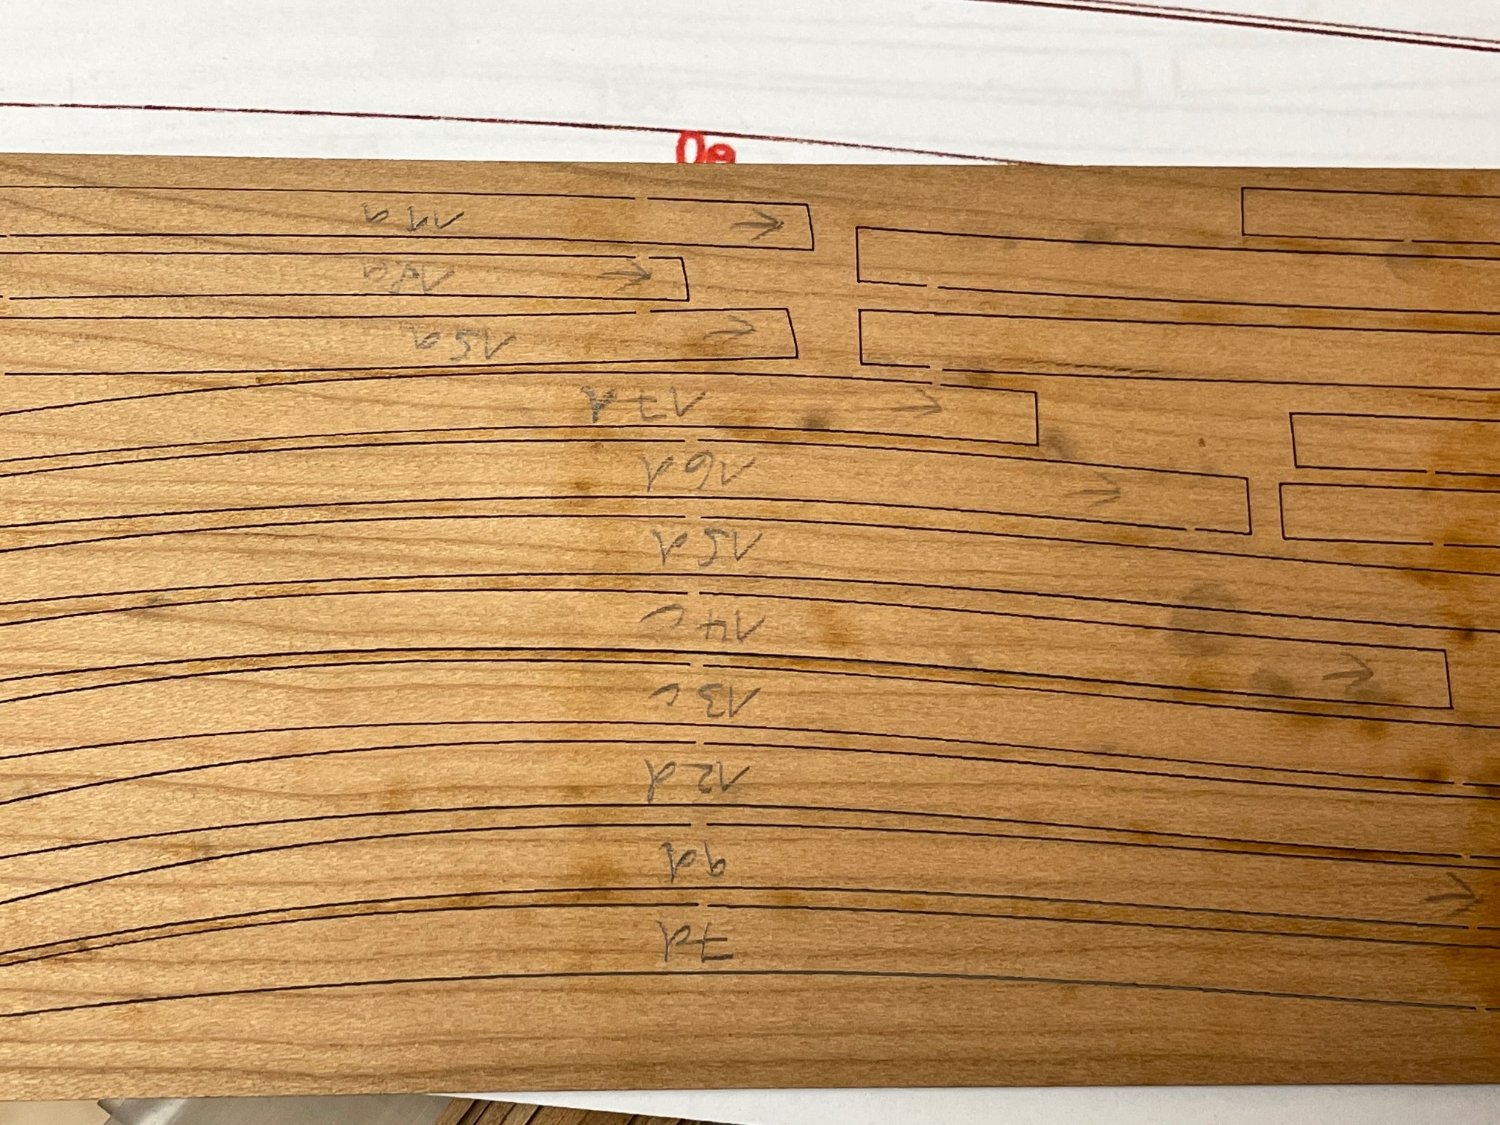
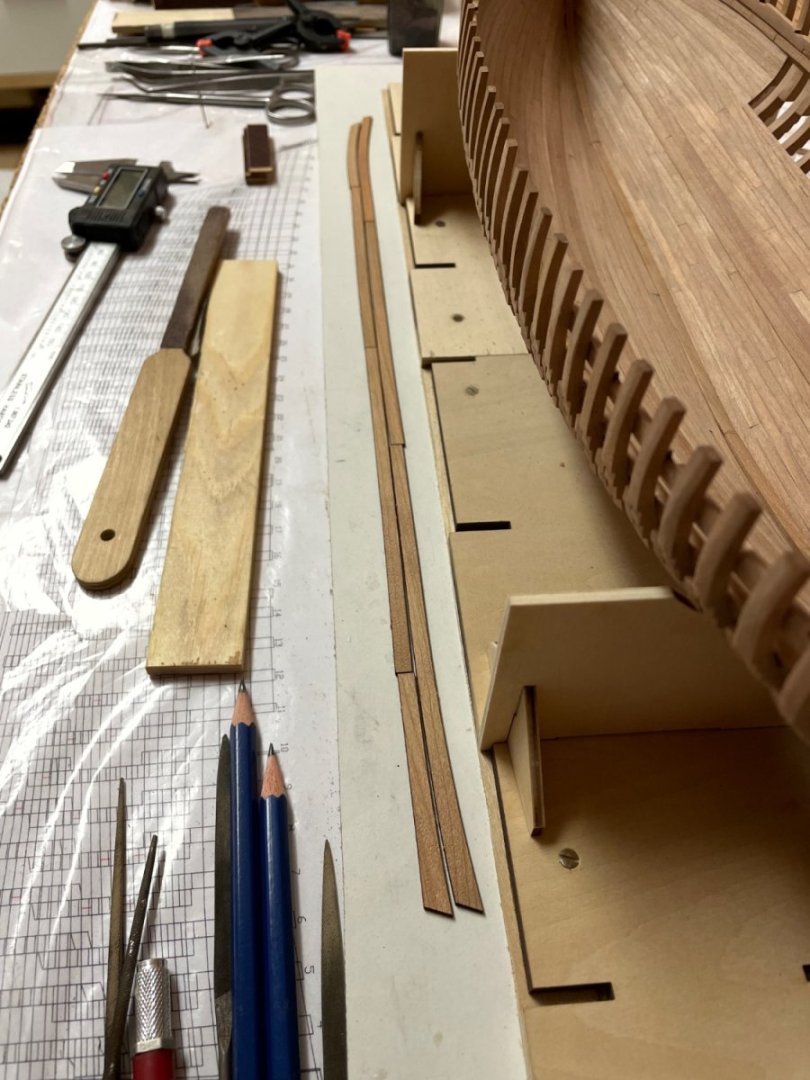
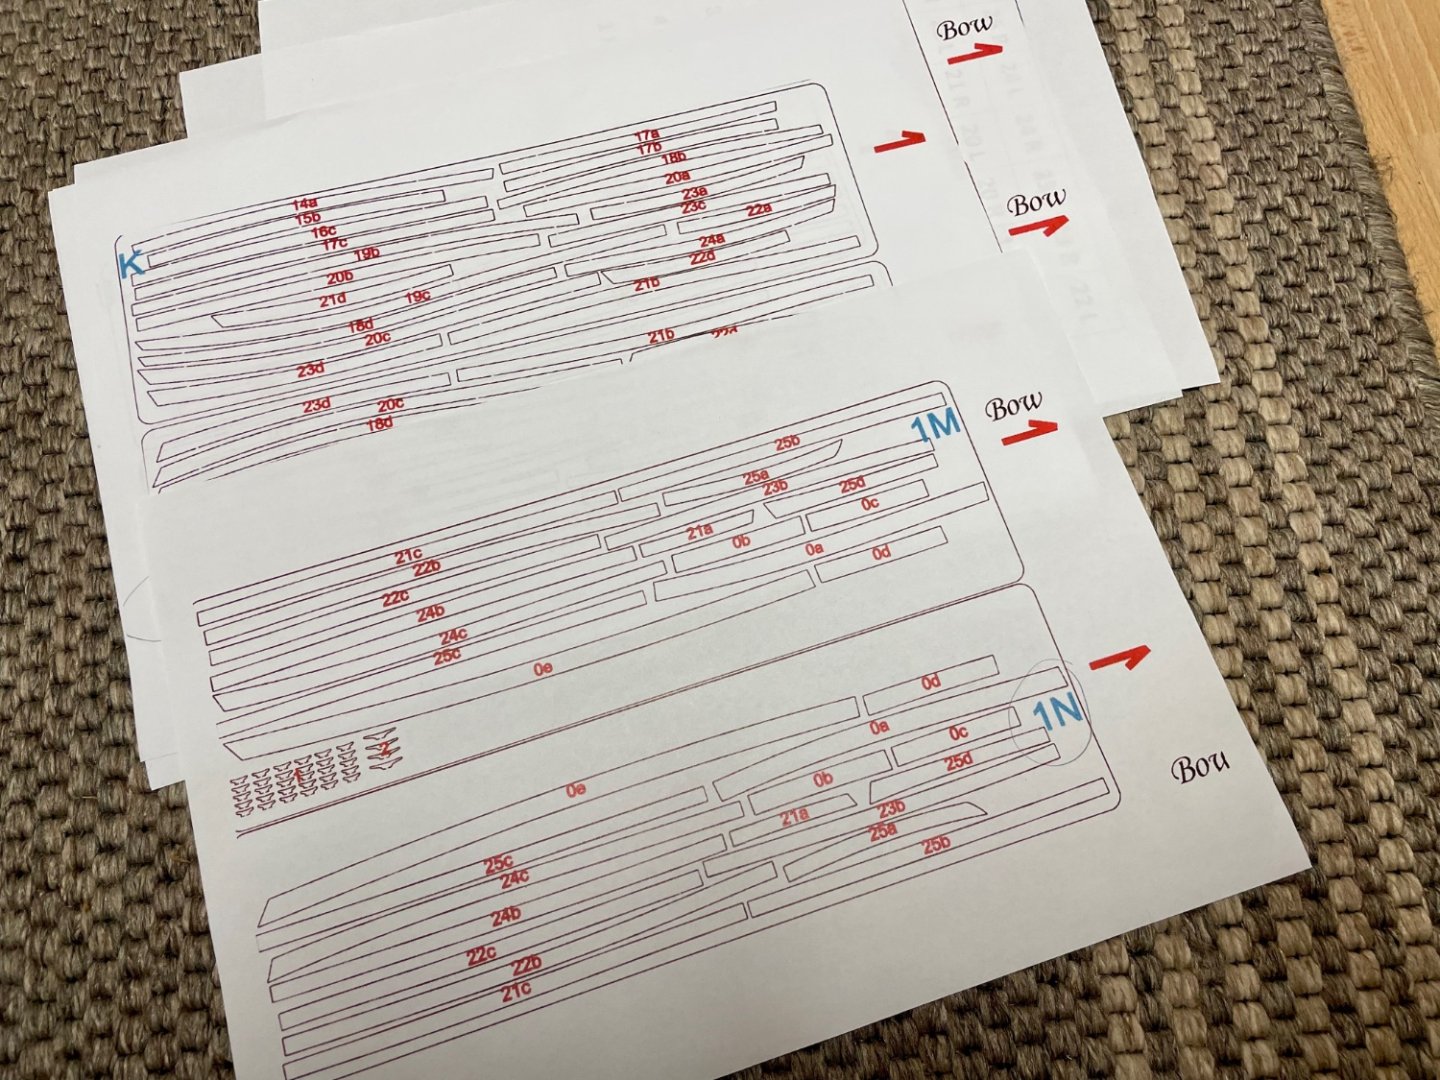
I did some preparation prior to planking the sides, this will help me ensure that the precut-parts are not mixed up later. I first enlarged all the precut-planking parts list pages from the manual for better reading the numbers and orientation, then transferred all part numbers and a small arrow to indicate the directions to the bow onto the lasered parts with a pencil. Then I carefully released all the precut-planking parts out of the sheets and selected them by the corresponding planking row, usually 3 or 4 parts per row. - starting with an A at the bow to C or D at the stern. These parts will need some cleanup, removing of the laser char as well as some adjustment to fit the hull later. And I may substitute strips with defects by parts made of scrap wood if necessary. As I have plenty of plastic bags laying around in my workshop I used them to group all parts of each row. I also scanned the plan showing the planking run on bow and stern with my computer, printed these areas on heavy paper, glued them temporarily onto the keel with some tape and transferred the planking run by pencil to indicate the width of each plank there. After this preparation I‘m now ready to start planking with the first 2 rows No. 25 and 24 bottom-up on port side. I‘m a little scared .. For me this will be the most difficult construction step as this will be my first clinker-planked ship, every part still needs to be brought to shape and there is little scrap wood for spare parts. I hope not to mess it up. Stay tuned ..


-
Ah, and I forgot to tell: It is far more easier to cut the hole for the rudder at this stage (before you plank the stern) than doing this as the manual suggests far more later. I did it using a drill and several needle files before planking the stern and reshaped the hole after I finished the planking. You can check the shape of the hole with a scrap wooden strip (4mm x 5,3mm) - if you can turn the strip inside the hole the shape is just right.
-
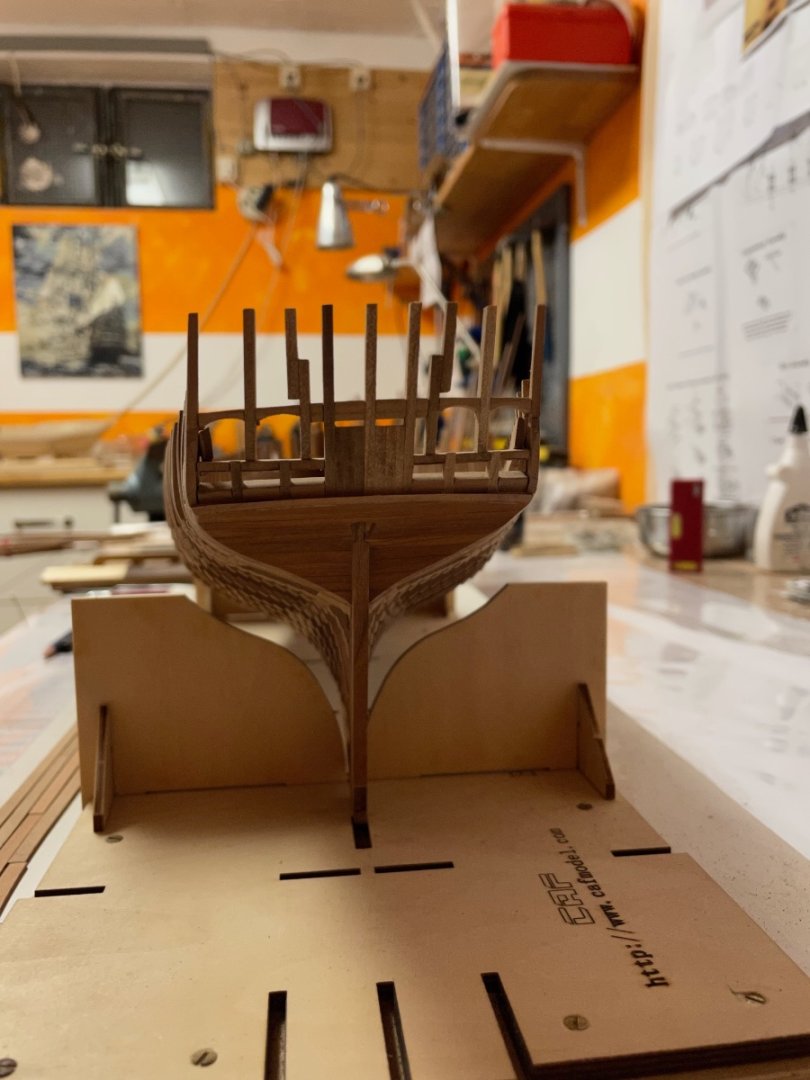
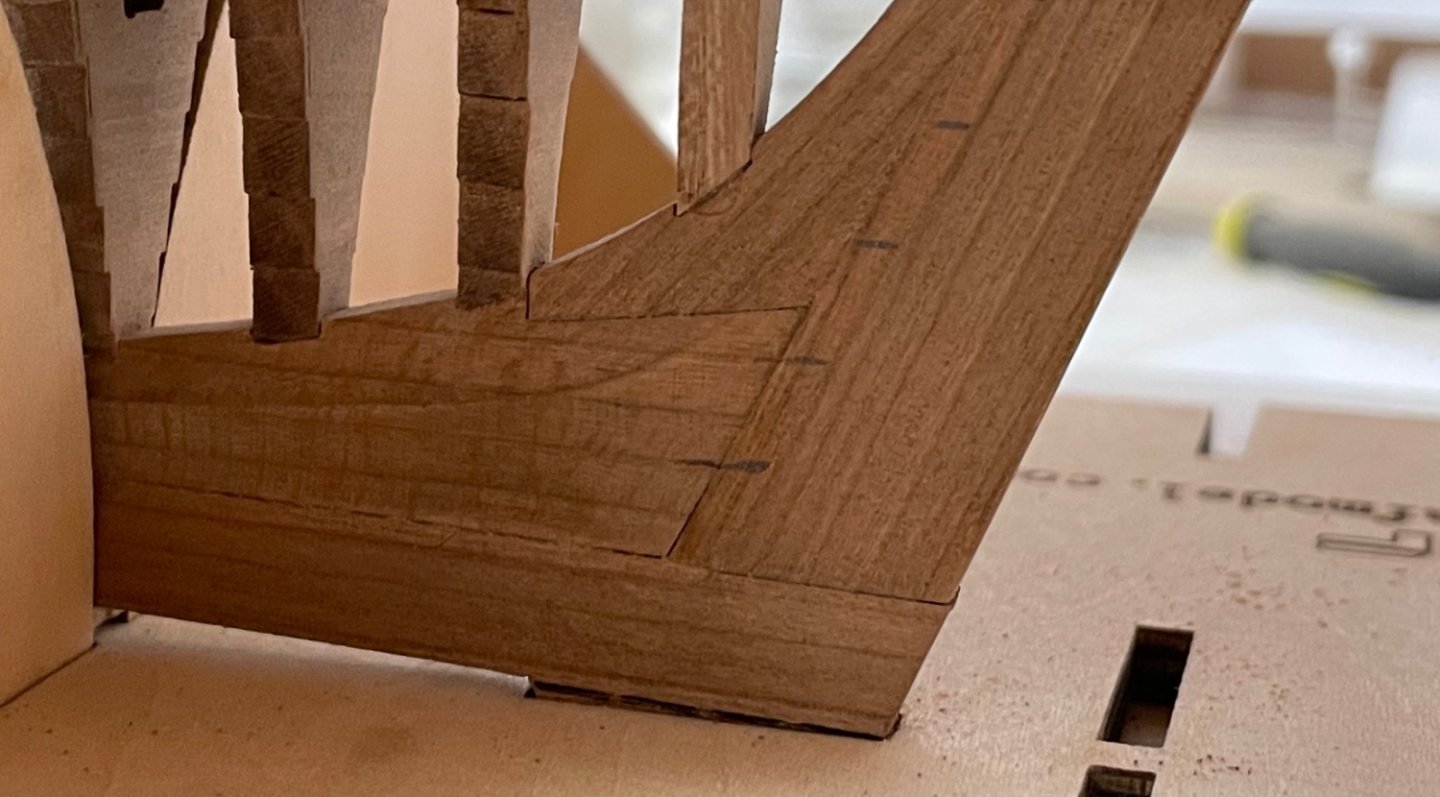
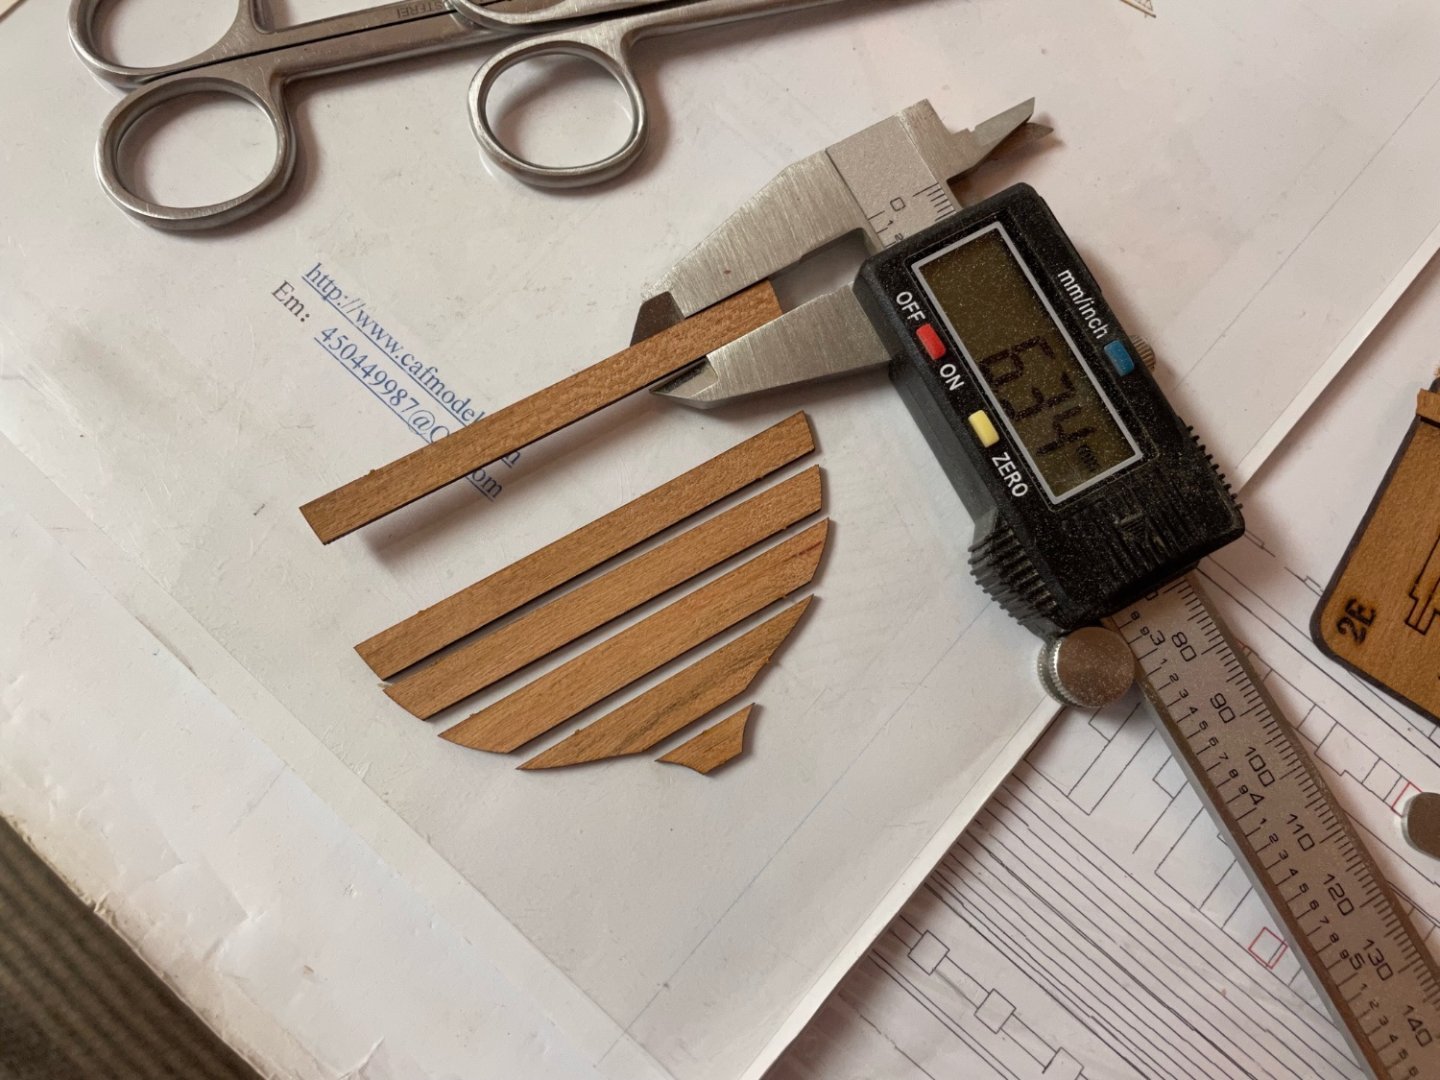
I have just finished planking the stern. The kit supplies some lasercut-parts for that but these parts are about 6.5 mm wide (at 1/4 scale that would be over 31 cm) and they are therefore difficult to apply properly. And their length is just too small to allow any adjustments. Instead of that I used the supplied 5mm cherry strips for planking as there are plenty of them available in the kit. I sanded the edges roughly to shape and will adjust the planking to final shape when I start doing the sides. Applied some WOP to protect the wood - at first I freezed for a second as the cherry wood has a very intense and shady colour. But the colour is already fading out as the WOP starts to dry - hopefully I will get used to that brown colour. I understand that cherry trees are a cheap wood source often found in asian countries - and well suited for furniture and other stuff. But if CAF is ever collecting feedback for a V2.0 of the Coureur then my second loudest request (well the first is a better manual) would be using pear instead of cherry. It is just more suitable for POF, has great colour and surface, doesn‘t burn as much as cherry when lasered and sticks well to wood-glue. Vanguard Models as well as Master Korabel have shown great kits using pear as primary wood. But anyway .. I will skip treenailing the cherry wood because bright treenails would look a little weird surrounded by dark wood (like an inverted photo). But maybe I will substitute the planking above the whale with boxwood stripes and show some treenailing there. I like the two colour-planking-setup (like seen on Alex’s HMS Sphinx). I haven‘t decided yet. I will then have to check all the steps for the planking first and make some adjustments where necessary to enable a smooth planking run for each row. Then I will start the clinker-planking botton-up. Stay tuned ..

-
Very nice work! Lots of patience and skill necessary to build the frames but when completed successfully it definitely shows. And the yellow cedar has such an nice warm yellow color.
-
Incredible work! Fits the model perfectly.
-
Very nice and clean work. If the gap keep worrying you and it isn‘t too deep you may try to fill it with paint. Apply several layers (let them dry between each layer) and then sand after each layer with 600er grit or smoother until the gap has disappered. This method is suitable for smooth painting jobs as well. For deeper gaps a wood filler might be the better choice.
-
That will surely be an awesome project and the scale is just perfect to show some great detail - and you don‘t have to deal with too many tiny parts as well.
- 793 replies
-
- 3
-
-
- speedwell
- syren speedwell
- (and 1 more)
-
Looking forward to see your progress. She looks beautiful. Are you going to build some Interieur for the cabin? My Badger is placed aside as I‘m busy with the Coureur but I hope to build up her cabin as well when I resume the build next year. But I fear that there won‘t be enough light coming trough the tiny windows to see anything of the Interieur later.
-
Hello Werner, that is some impressive custom-modeling you did for your model. Especially like the cabin-Interieur.
-
Very nice and interesting. When I had first heard of card modeling I thought of something kids build in kindergarten like a car or a small cubic house. But I was surprised about the complex paper and card models that are available today - churches, planes, ships, trains etc. Some of the even don‘t look like paper models when they are finished. BTW are card models endangered to warp by high air humidity?
-
Very beautiful and well done. It is such a lot of work to rig a big ship like the Victory but it will be surely as satisfying to see her finished.
- 521 replies
-
- 1
-
-
- caldercraft
- victory
- (and 1 more)