


wernerweiss
-
Posts
199 -
Joined
-
Last visited
Content Type
Profiles
Forums
Gallery
Events
Posts posted by wernerweiss
-
-
49 minutes ago, Chuck said:
Lovely progress....well done. A pleasure to follow your log on this kit.
Chuck
Hello Chuck,
thank you very much for your personal appreciation! I would never have thought so far when beginning with the build......
Best regards
Werner
-
@all, thank you very much for your comments and your likes!
-
Hello modelers,
with this post I continue the gallery with the latest pictures, but first some remarks:
-
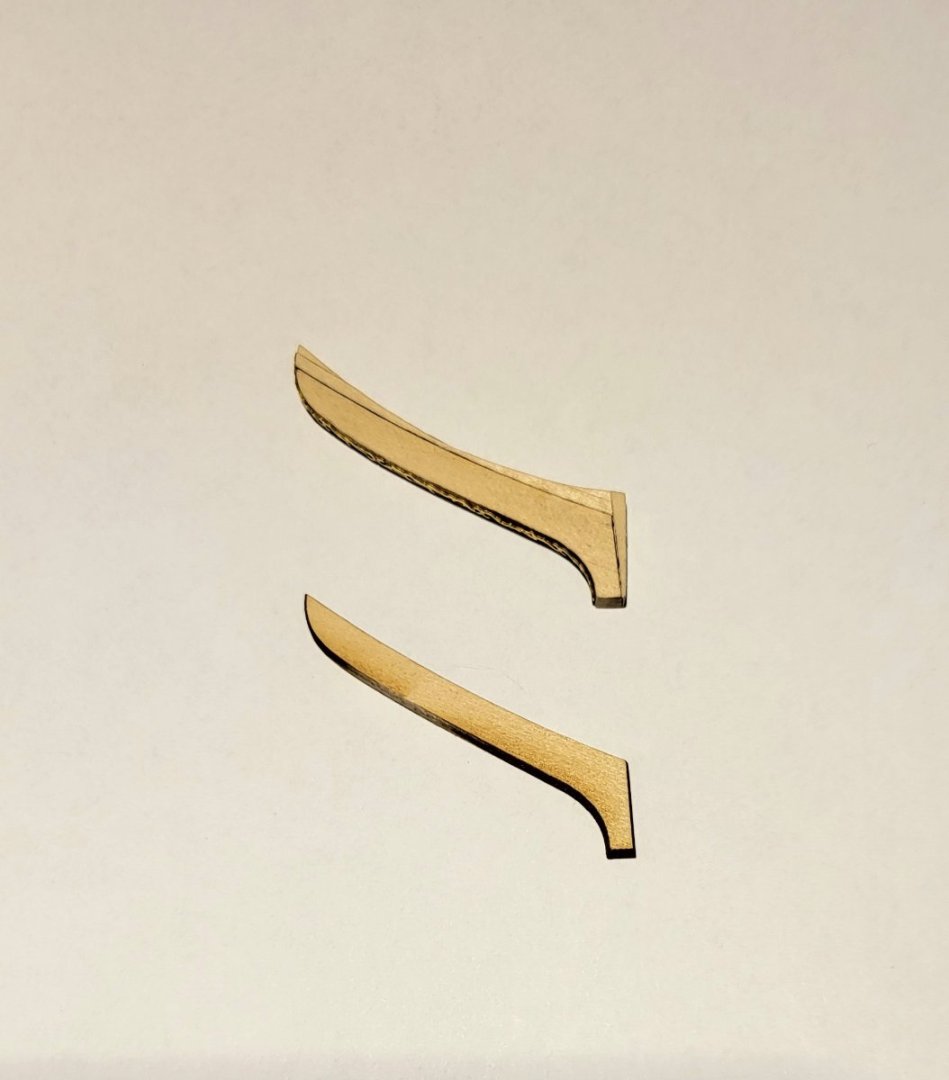
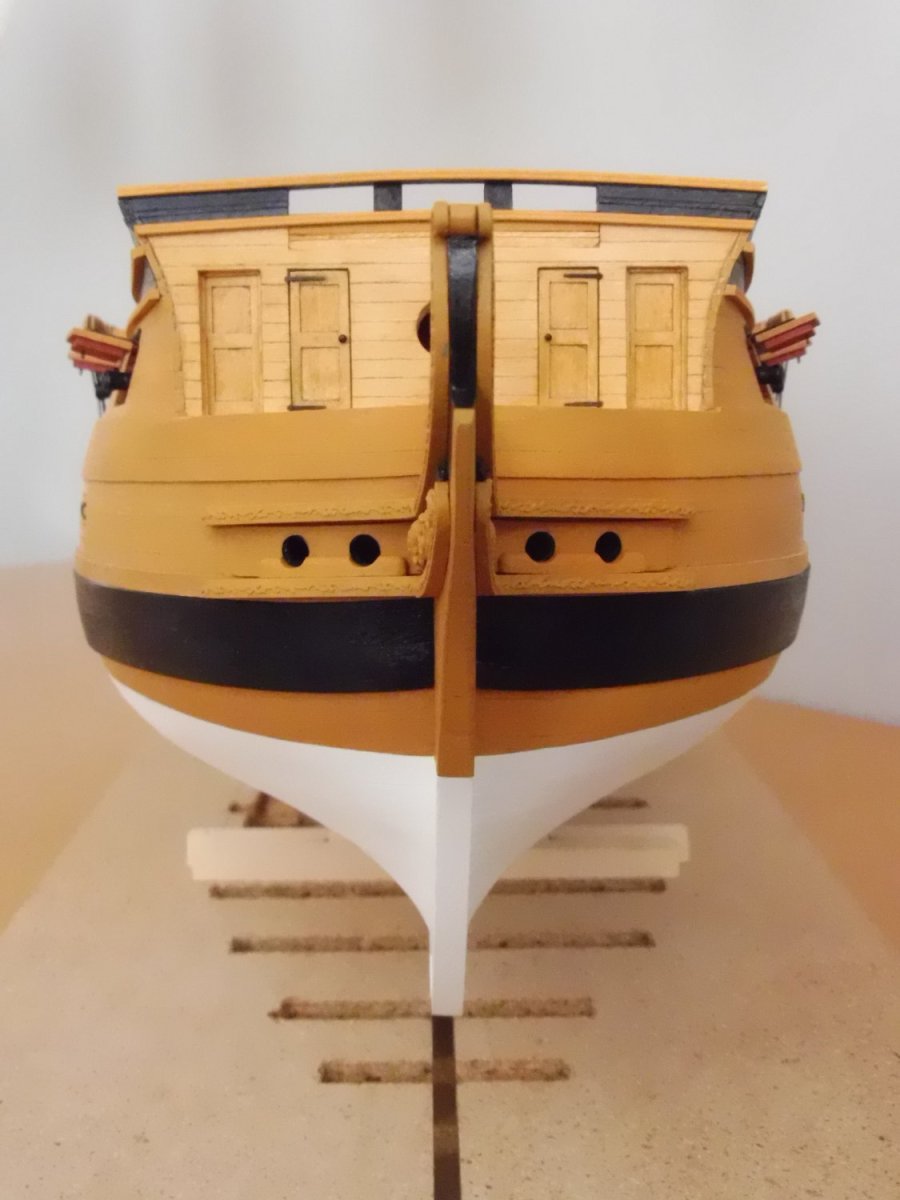
Even if you build very carefully, for example the bow curve of the finished hull may differ from that of the prototype. Due to the bow curve of my model I had to make the shown adjustments with the cheeks to fit on the bow curve. The laser cut cheeks turned out to be too straight, so I hat to reshape them with a rounder curve to fit to the hull.
-
Regrettably the cast trailboards were not inversely equal. The starboard trailboard was a bit longer, thicker and wider than the port one. This is not what I would call high quality.
-
My next step will be the installation of the main head rails. Between them runs the so-called head beam, and sheet one shows two knees connecting this beam to the main head rails. These knees are not mentioned in the instructions, so I have to decide whether to omit them or not.
-
At the end of chapter 15 on page 134 it is suggested that the catheads are glued in place. I would suggest not to do so at this time. In the next chapter the main head rails are installed and for that purpose an appropriate angle has to be sanded at the corners of the beakhead bulkhead showing towards the stem. This is much easier without the catheads as an obstacle for the sanding tool.
See yourself, questions and remarks welcome.
.thumb.jpg.2a29b19930cecd489e671ac77d4d3b01.jpg)
.thumb.jpg.bf6b6bacc2e3489409f56bfec7a9fecb.jpg)
.thumb.jpg.ad96f02d4b08658484ebebb6943a7054.jpg)
.thumb.jpg.44338953a381d158d847ee402232c92b.jpg)
.thumb.jpg.b0030db5ca5998bea4223703451b0270.jpg)
.thumb.jpg.ea3aef0aab4cda52c7f1ca00e54c7c8c.jpg)
.thumb.jpg.090cff9909b33f096bd43cbd402a2238.jpg)
.thumb.jpg.ecf0ac16a783f47f6d63e148f4613a85.jpg)
.thumb.jpg.03b795e090c7197116f2c08db0d5ec15.jpg)
.thumb.jpg.233134b1bfdffe3e27635bf9303d9ca5.jpg)
.thumb.jpg.b59eb03ae7742c6df8aa2d227273f17b.jpg)
.thumb.jpg.2e2d13a7e5b128bd01e5e4a397bc302e.jpg)

-
-
-
Hello Harshil,
Congratulations on this progress, excellent work as always!
Yes, you have to be very careful not to spoil the great cabin' s deck with its pattern.....but so it is with the much bigger area of the gun deck, the basswood is very soft and does not forgive tools falling on it, but, as modelers we ARE careful..
I am going to update my Confederacy build log soon showing the progress of the forecastle deck and the bow stem
Greetings
Werner
-
1 hour ago, hollowneck said:
I am not familiar with “beading tool;” can you (or another MSW member) post a photo of the tool? thanks!
A beading tool is in principle a nail with a grip......see Google
- hollowneck, Dave_E, Canute and 3 others
-
 6
6
-
-
-
5 hours ago, WalrusGuy said:
Thank you, Werner!
Yes, printed directly on card stock and glued to to a thin sheet of wood. And yes, I did mean the self-adhesive paper. Is the surface of the self-adhesive paper similar to normal paper?
Harshil
Yes, it is. Exactly, I had the pattern printed on a normal A4 paper sheet with a peelable back in a copyshop so I could glue the pattern on a piece of ca. 1,5 mm thick card. So I did not use a wood layer and glued the card directly on the false deck.
-
Hello Harshil,
once again, very clean work!
Yes, one has to be very careful once the cabin floor is finished, and later on there are two cannons and possibly furniture to be positioned and glued.....
Did you print the pattern directly on the card? I printed it on self-adhesive paper (is this what you mean with label paper?)
Werner
-
Hello Harshil,
wonderful work with an amazing result - highly recommended for imitation!
With this attention to detail I look forward to your finished model!
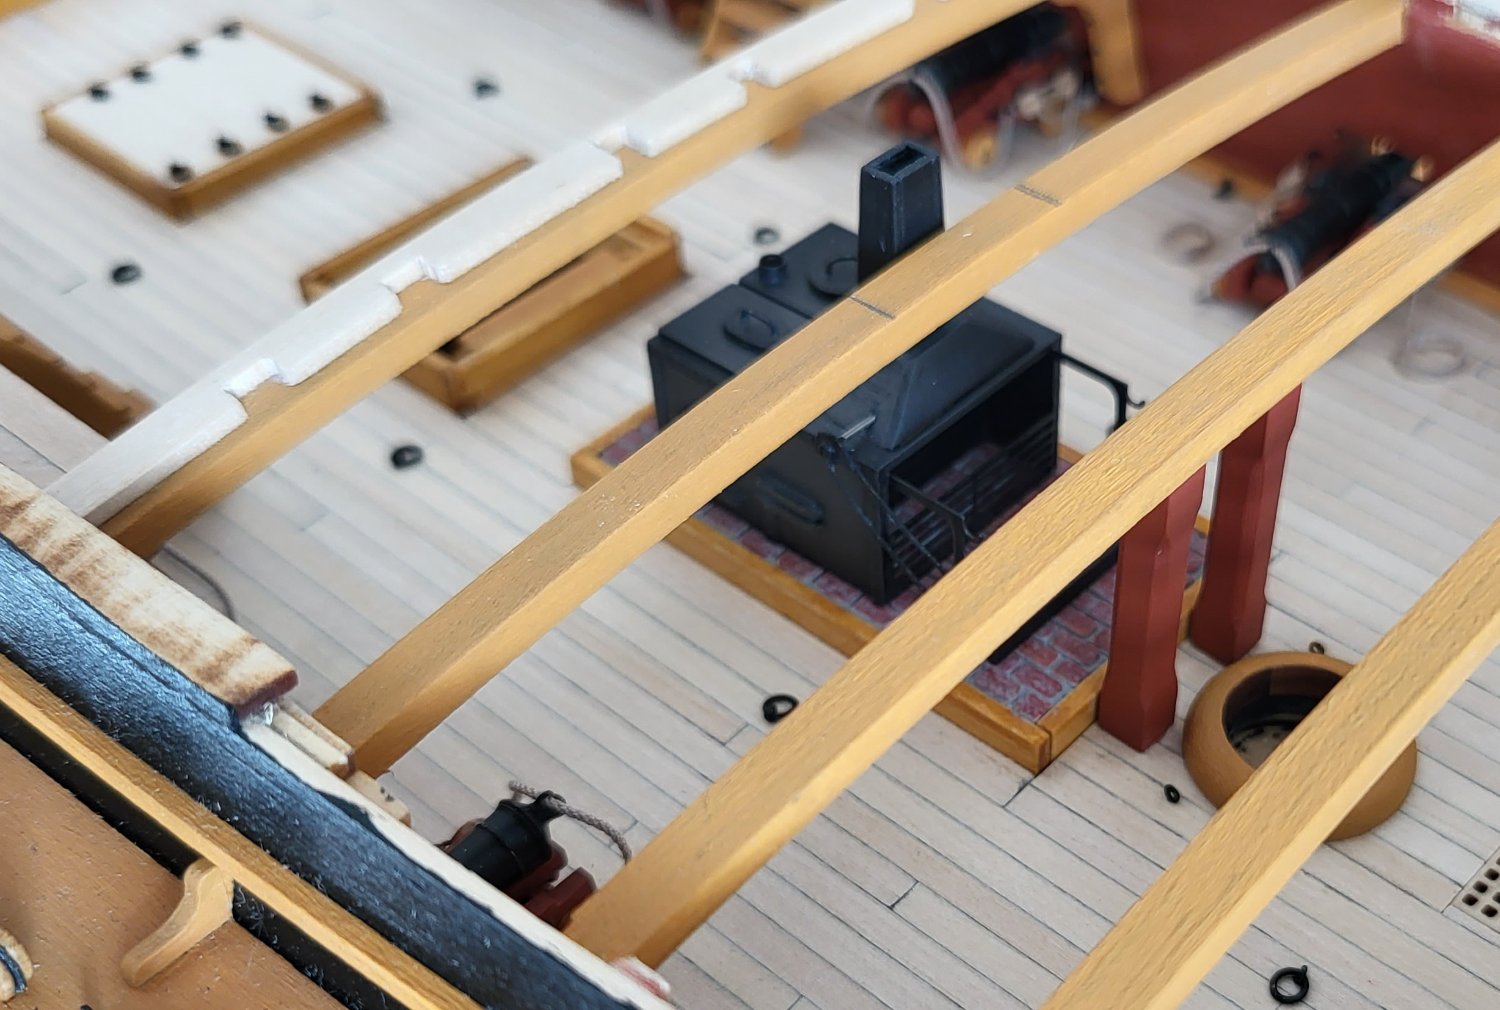
I must admit that I was too lazy to paint the bricks in different shades.....
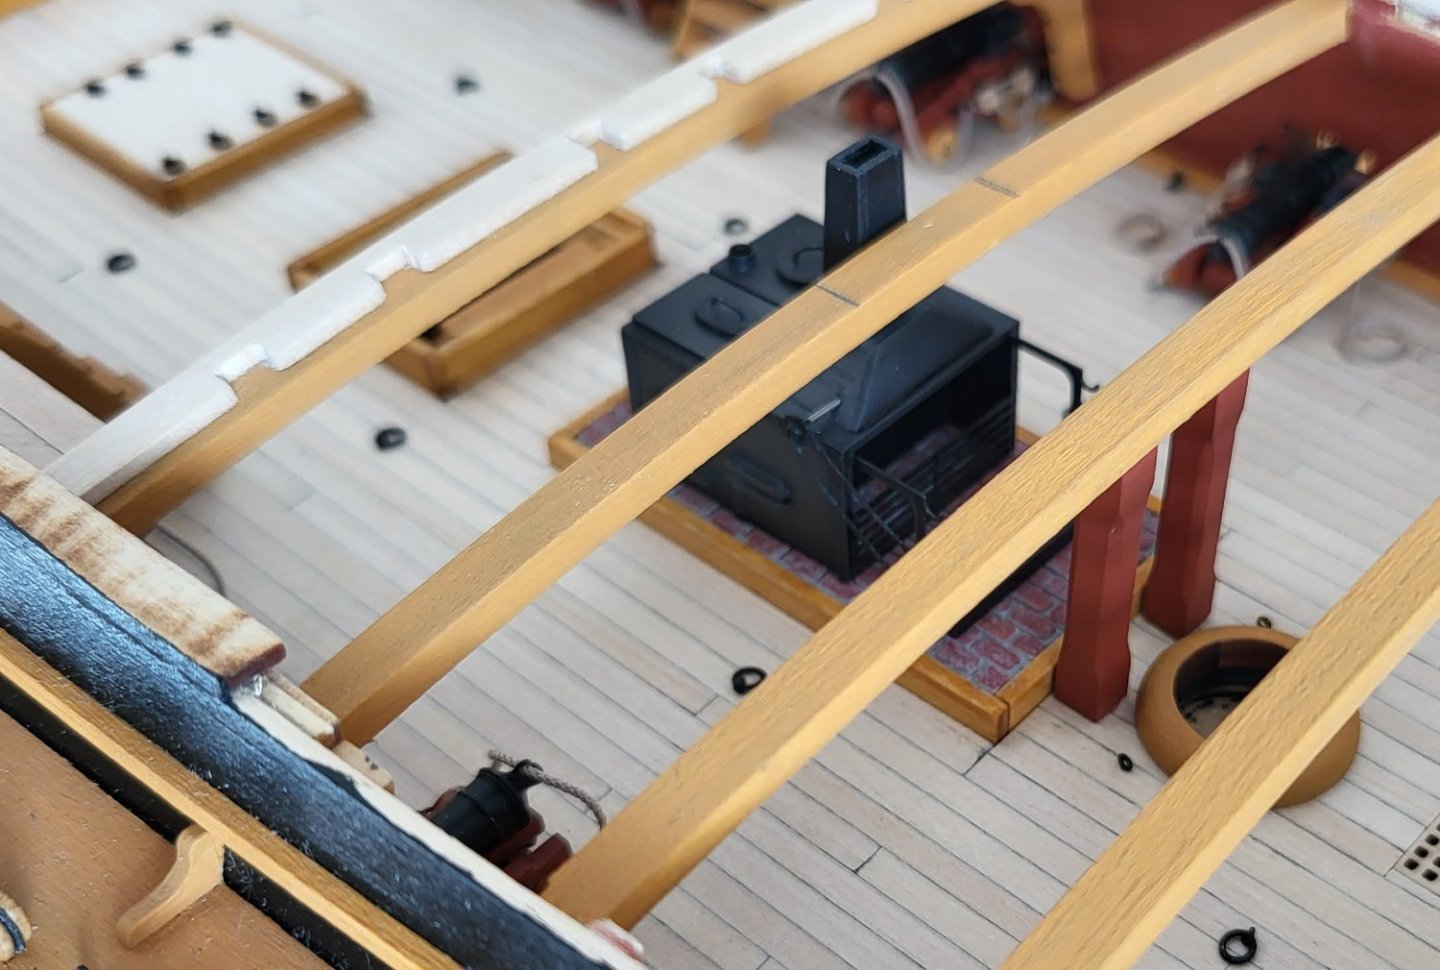
It is a pity that most of the brick surface is later on covered by the stove.
-
Hello Harshil,
regarding the gluing of the hatch coamings and the brick platform on the false deck I would highly recommend not to follow the instructions and plank the gun deck first.
This makes it much easier to sand the gun deck all over its length because then there are no obstacles for your sanding tool....but maybe you already thought about it.
-
Hello Harshil,
again, very clean woodwork...did you use the provided basswood or another kind of wood, e.g. beech?
I cast the "bricks" with moulding cement and cut/sanded it to shape to fit in the wooden frame. Then I painted it red to resemble "brick". Afterwards I painted it all over with grey (not too thick) to fill the grooves and immediately dabbed the grey paint off the "brick" surfaces leaving a rest of grey paint....I think this method should also work on your wooden "bricks"
(As the height of the cast didn´t match the height of the frame, I glued the cast on a piece of thick card)
Werner
-
Hello Harshil,
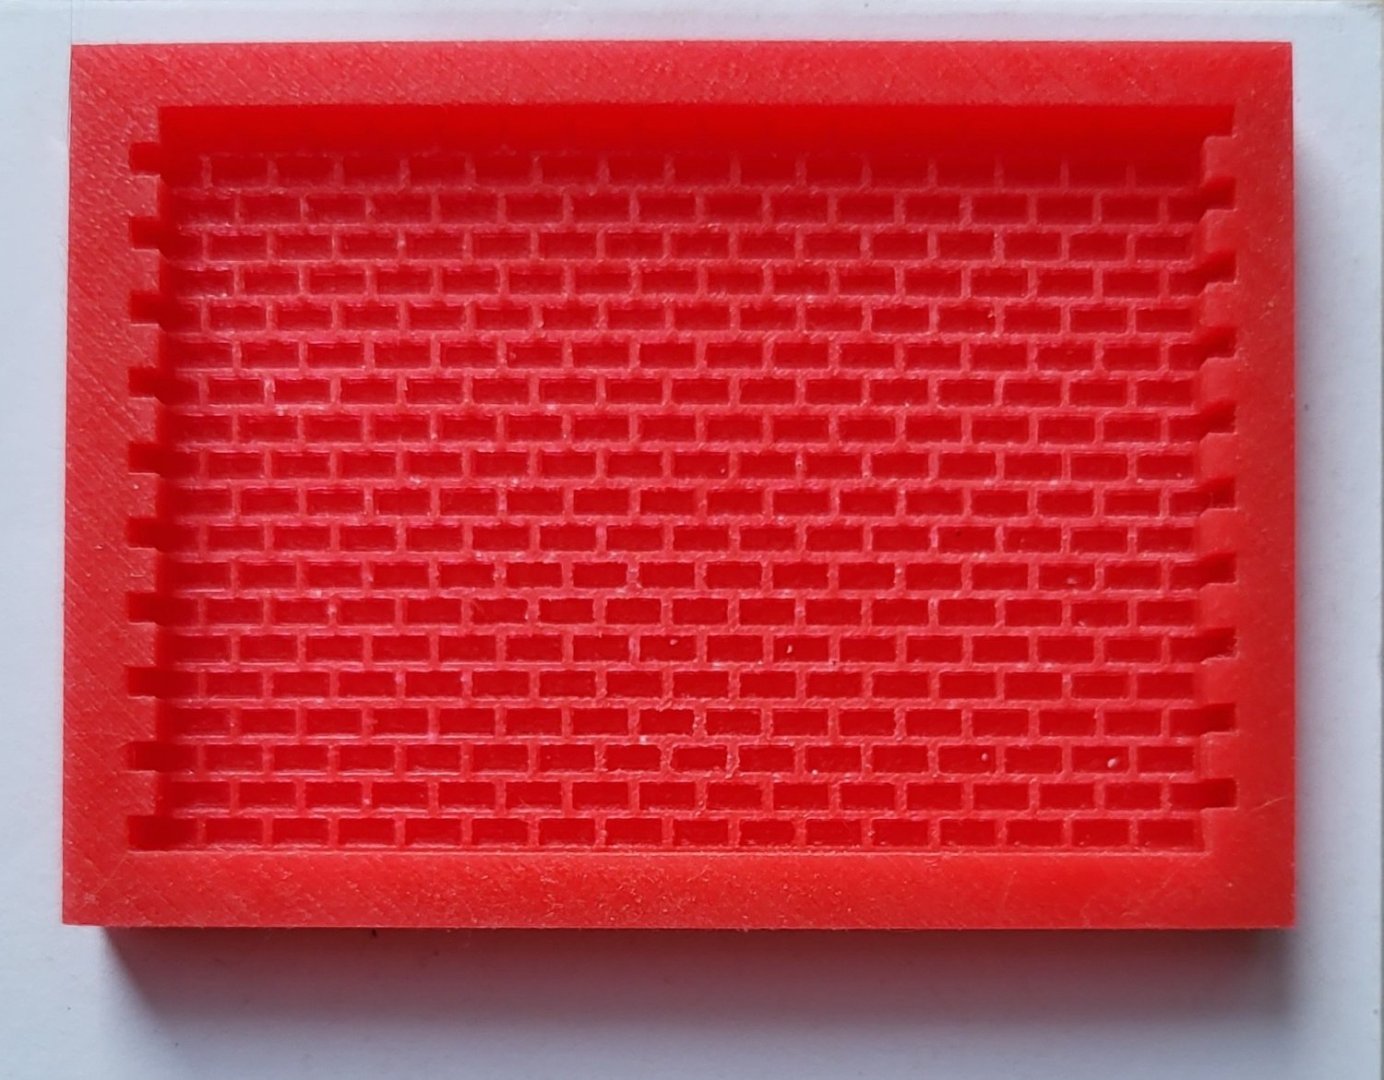
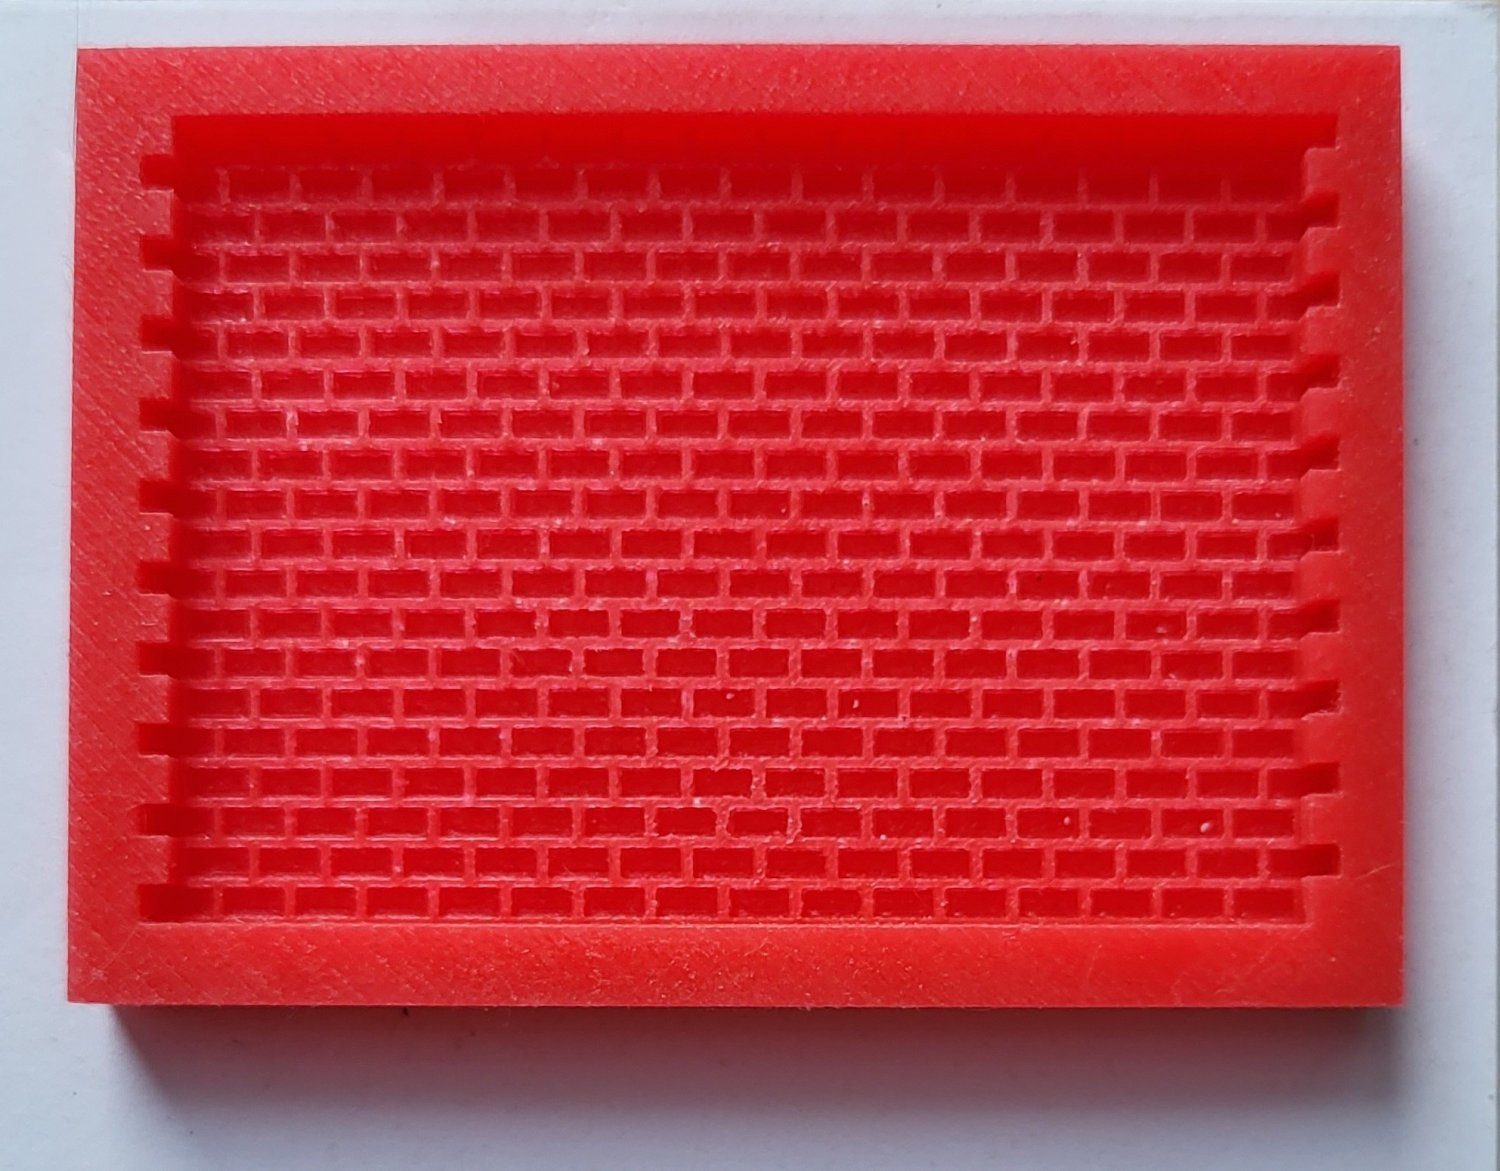
some remarks on the brick platform for the stove.
In the building instructions it is made of provided wood strips which are grooved, glued together and painted to resemble bricks.....I didn´t like that at all and looked for an alternative. I found a silicone casting mould for brick walls for rail modelling. The "bricks" cover an area of 72 x 49 mm and imo meet the size, so I made a cast and was content with the result. The rest was cutting to length and width, painting red and "washing" with grey.....
.thumb.png.0b161435cb20fae644429a38d0489cf4.png)
- WalrusGuy, abelson, Prowler901 and 2 others
-
5
-
-
14 hours ago, CiscoH said:
Man that looks beautiful
great job Werner
Thank you very much!
-
16 hours ago, mtaylor said:
Do you have a Windows PC by perchance? If so, download the photos to that and then use Paint (part of the Windows OS) to rotate, crop, etc. There might be something similar to Paint in the Apple world but I don't have any knowledge of those machines.
Hello Mark, thank you very much for your comment......meanwhile I could fix the problem. Yesterday I found a post in this forum (see below); I rotated the pictures four times as described there and it worked!
.thumb.png.ab586bd6bf0f28b463380e7fabb96d5c.png)
-
-
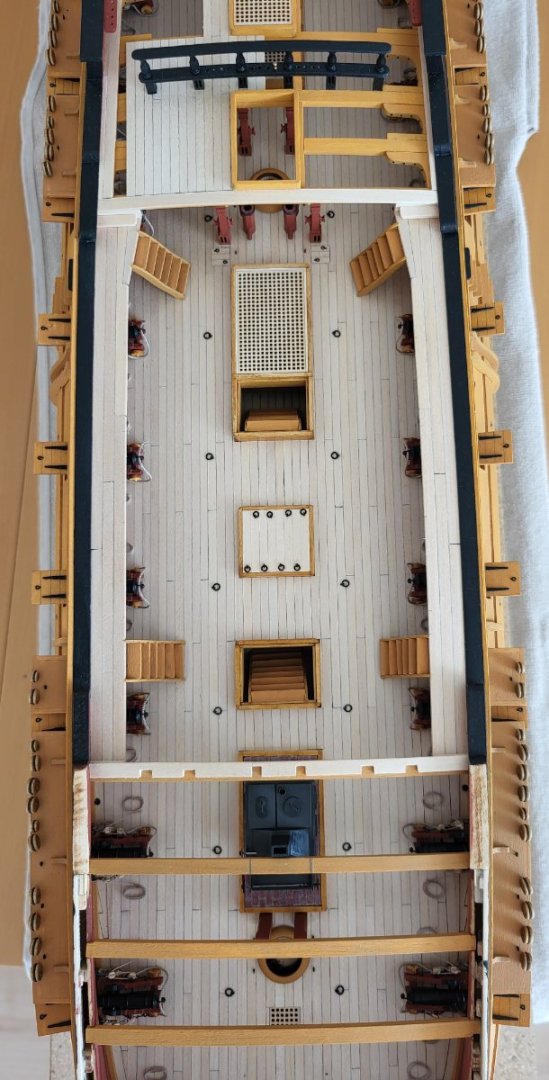
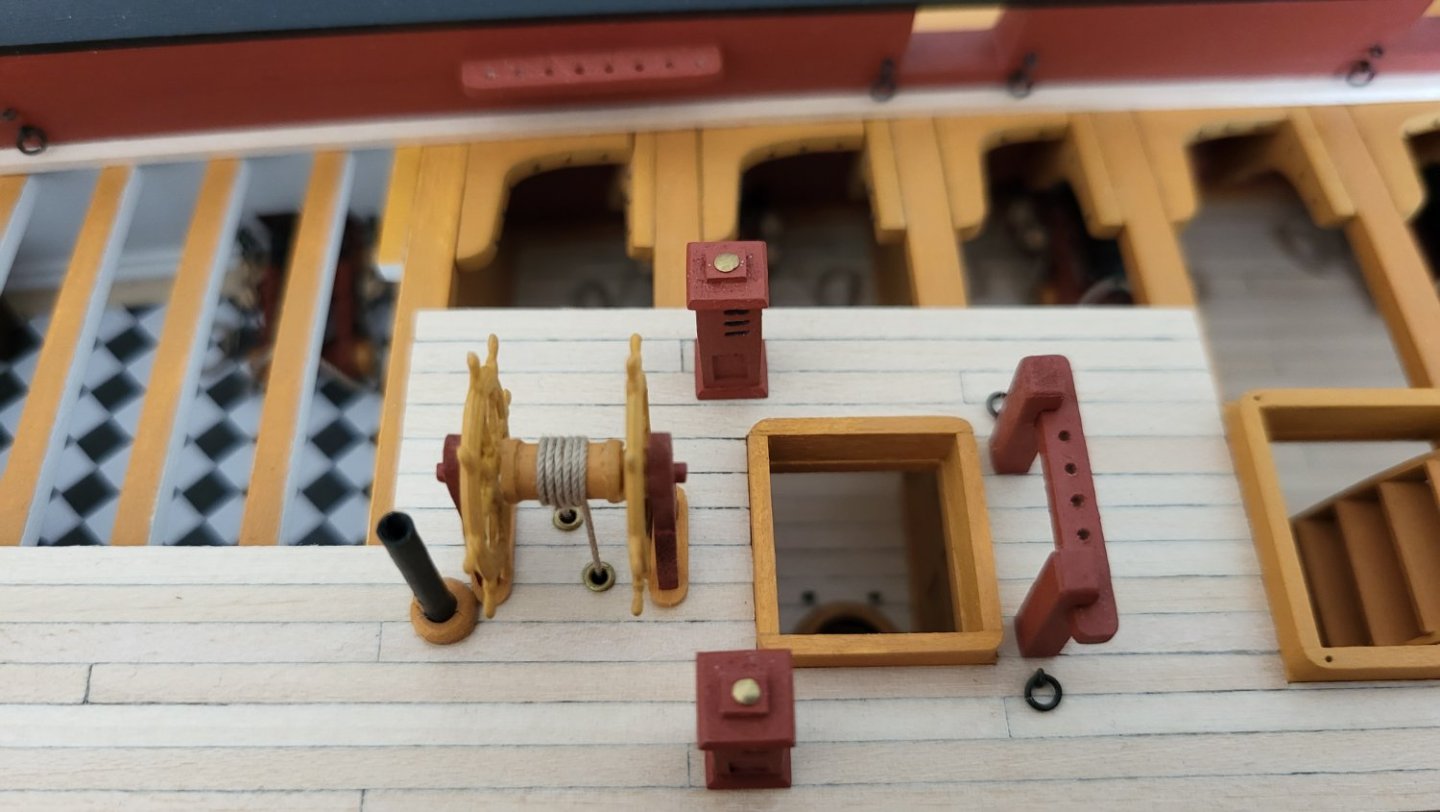
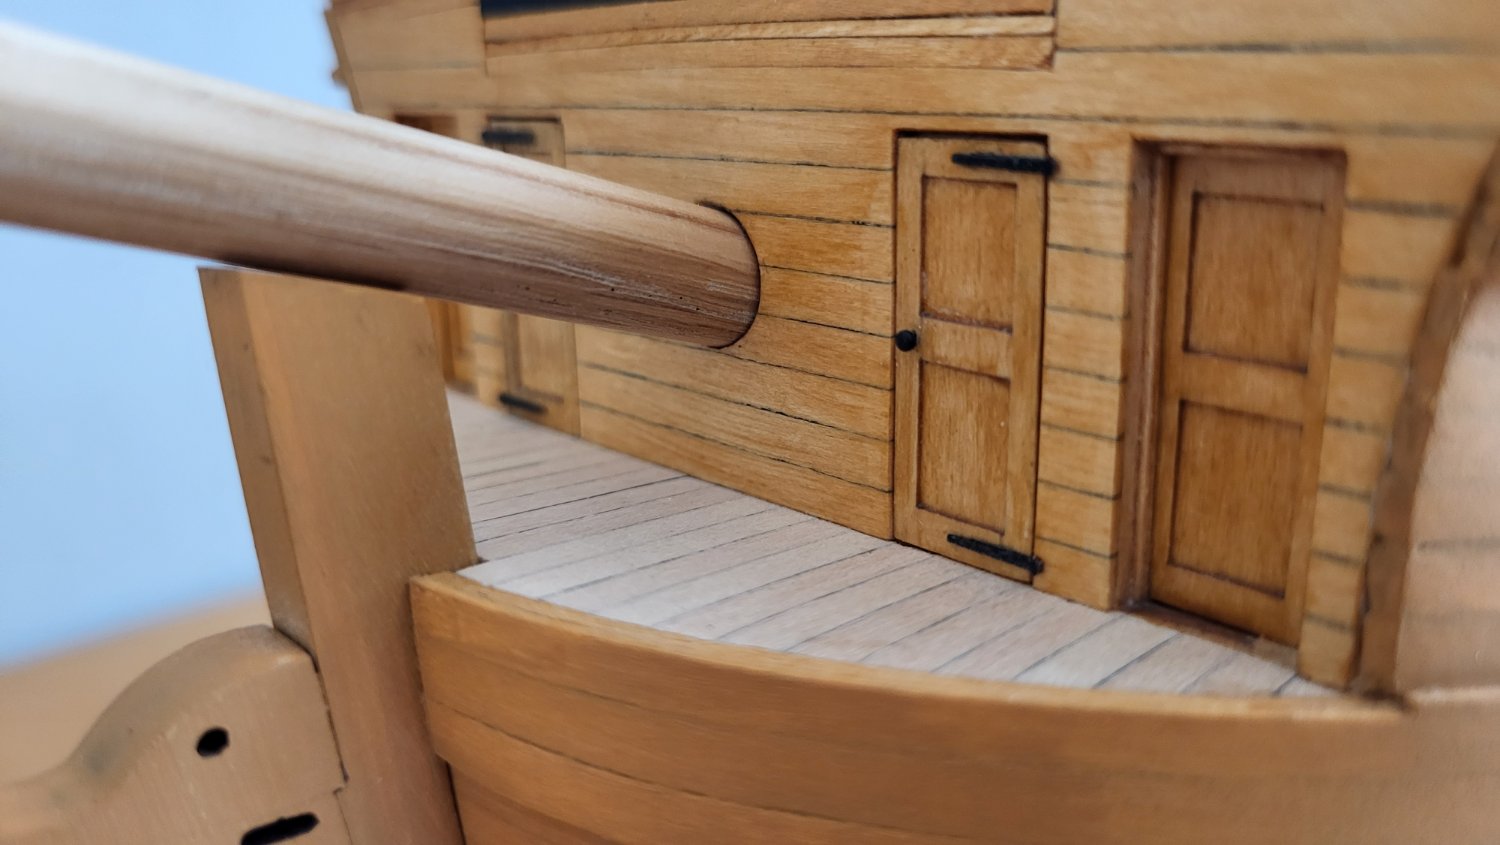
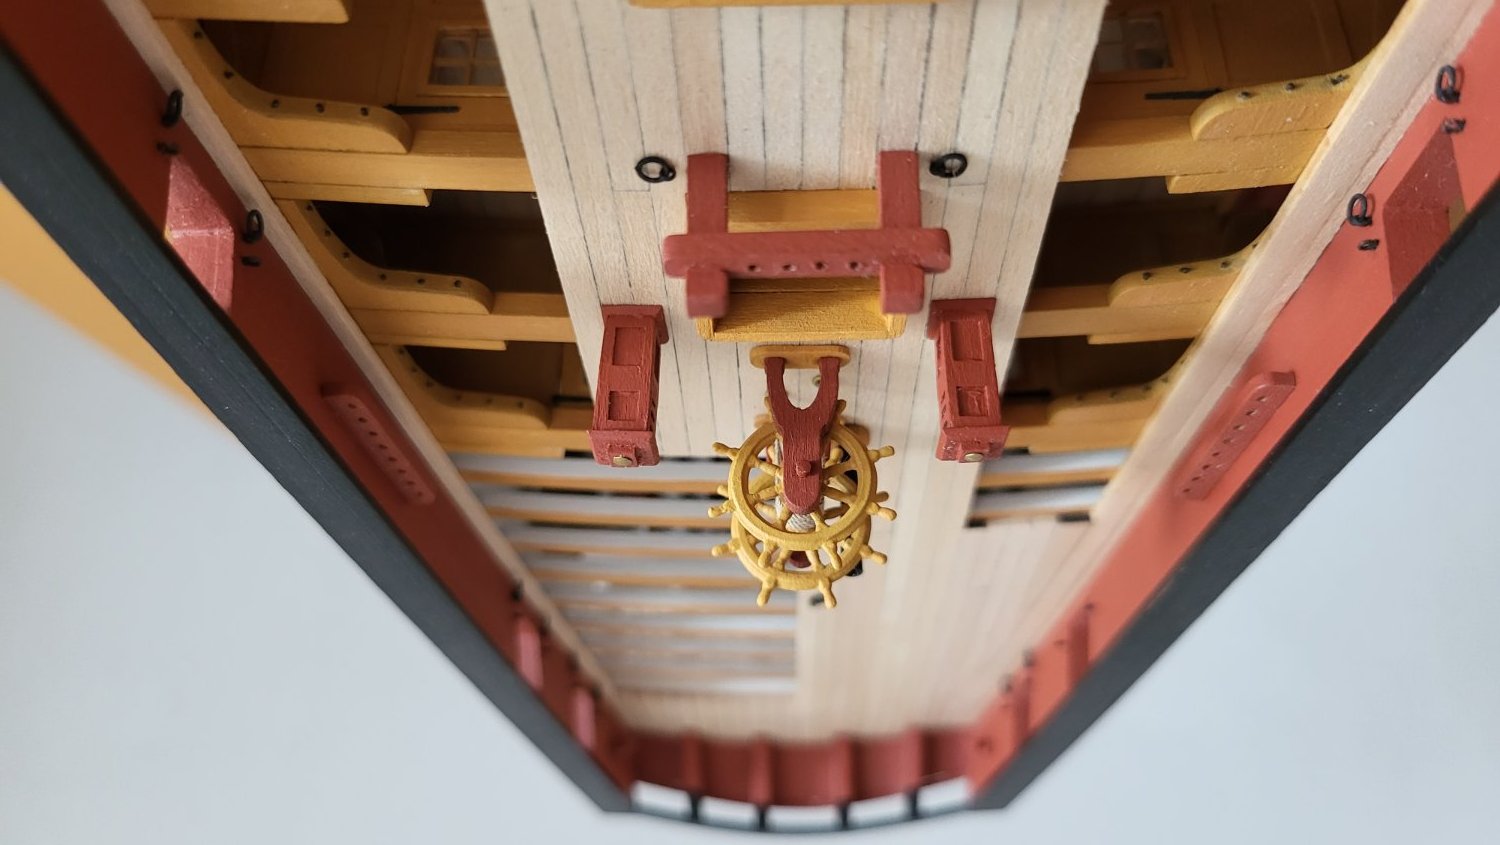
Hello modelers,
I made good progress with my model, and with this post I upload the latest pictures. I leave them uncommented but look forward to your remarks, comments and questions, don´t hesitate to ask....
Greetings
Werner![20221020_152214[3678].jpg](https://modelshipworld.com/uploads/monthly_2022_11/1411339207_20221020_1522143678.thumb.jpg.bfefab93efb113f624f0c4a61bf3446a.jpg)
![20221020_152239[3677].jpg](https://modelshipworld.com/uploads/monthly_2022_11/1777924909_20221020_1522393677.thumb.jpg.995b59d22b359faee30cf0819cfcfaa9.jpg)
![20221020_152445[3675].jpg](https://modelshipworld.com/uploads/monthly_2022_11/1645966660_20221020_1524453675.thumb.jpg.94d94f468f3da18cafa7dc6d08f56df3.jpg)
.thumb.jpg.3f5400d37e3b2a3286d09371f656c16b.jpg)
.thumb.jpg.7f65e2c6b515add4abb77cb594cce767.jpg)
.thumb.jpg.792d61f24ec6a991d102f914a599d2ad.jpg)
.thumb.jpg.db9164fe010561c624c2b689d3357dae.jpg)
.thumb.jpg.651cb9817e924c073ef97245dc55fde4.jpg)
.thumb.jpg.d78bbeb9bc9a31127a6032d76bfa229a.jpg)
.thumb.jpg.b7a4cd1a47b7aa22e7aa8fb468cf3064.jpg)
.thumb.jpg.02c0739bdbe131deb44ac77eb88b6402.jpg)
.thumb.jpg.be026cbc71d7f62748fc7827f6ad0b7a.jpg)
.thumb.jpg.ed20effc870d753a26f0f8c8dcd7ba9a.jpg)
.thumb.jpg.ea809b0ea9fa77b80cdf5bcdd639a6cd.jpg)
.thumb.jpg.e5848a037c288e513c8dced82fc45c7c.jpg)

.thumb.jpg.15bb0d2df1cf813c236f3b3b53f98562.jpg)
.thumb.jpg.56d134e8184fbbe9a95e7138c8cfd87a.jpg)
.thumb.jpg.bfcb2a1316aa343b2366a7548a73de1b.jpg)
.thumb.jpg.eec77f1ce6b6d74e4a3386037ea98f55.jpg)
.thumb.jpg.27d1b4336908b75814a8e0ca75ddb0a4.jpg)
.thumb.jpg.a6e4b1f7d4ee7857522c649494656621.jpg)
- whitejamest, Paul Le Wol, CiscoH and 9 others
-
12
-
Hello Robert,
thank you very much!
Fact is that however I hold the smartphone, all pictures in the smartphone file and later on my laptop - via e-mail - have the normal orientation, and rotating them left or right is intentionally. The problem came with the upload to the forum, when to my surprise some pictures appeared upside down. What I tried was to rotate these pictures before uploading hoping they would then appear normal, but that was not helpful....
What I must say is that in another forum the upload of these pictures is not at all a problem....
Werner
-
Hello at all,
meanwhile I got the answer to my problem. I learned that the reason why pictures which appear upside down when posted is that these pictures were taken with the smartphone held upside down.....it is a matter of the rotation data.
But what I also learned in this context is that in another forum in which I am registered all pictures are uploaded and posted unrotated.........
The solution for my problem I finally found in this post here in the forum:
.thumb.png.559253f2ee48f53a4ff6aa5ac192ccd5.png)
-
-
Hello at all,
perhaps somenone can help me with a problem that occured today. I had already written a few words and uploaded the next pictures of the Confederacy, but before submitting the post I saw that a few pictures appeared turned upside down. I don´t have any idea why; in my general Confederacy file they do not appear "overhead", so what shall/must I do? Strangely in other forums this does not happen......
Greetings Werner
-
Hello at all,
I just uploaded the latest pictures of my model of the Confederacy, but before submission I had to see that some of them appeared turned upside down - example see below -, and I absolutely don´t have any idea why.
Can anyone help me? Thanks in advance
Greetings
Werner

.jpg.4d8cf3f7f25f465f7e7a60e9d2464f91.jpg)

.jpg.ff54c496e92103aa12d30ada13360dc8.jpg)
.jpg.589eca1f57b3d1867d00275511fe5552.jpg)
.jpg.1e7784f4977e041fb0e693e12b616c40.jpg)
.jpg.c245b80af83e8de9d14a6082cc56d016.jpg)
.jpg.eecc33e49b0023ad687703d9812e2e45.jpg)
.jpg.6ab48e771b36315fdba874348de978cf.jpg)
.jpg.9d21e262a00580330fdf879c8ade07c2.jpg)
.jpg.df7412816148d6093e188ea9bd0f470c.jpg)
.jpg.0d35fdb4b77b83cd3e4518d5fad871a3.jpg)
.jpg.9069ded425b611358b3cf2fc61ccd4b9.jpg)
.jpg.fdd4e30088a3a1ec82ab8933ddee859f.jpg)

.png.705af26b342b8f58aeb5089117b2178f.png)
.png.5c74592fbe9f1a98909119f94ba2a864.png)
![20221020_152214[3678].jpg](https://modelshipworld.com/uploads/monthly_2022_11/1175120934_20221020_1522143678.jpg.7f346dba32b6ac814348a66581cd7c7c.jpg)
![20221020_152239[3677].jpg](https://modelshipworld.com/uploads/monthly_2022_11/276490150_20221020_1522393677.jpg.de3f0495d1188e2020b06fed600da0ea.jpg)
![20221020_152445[3675].jpg](https://modelshipworld.com/uploads/monthly_2022_11/1091557233_20221020_1524453675.jpg.858ebd4b23e01bc169cb9dbb42a7baf9.jpg)
.jpg.70b6007343d841342be09ace13538600.jpg)
.jpg.99b97ac2d8dd87c3cfabb917a8531122.jpg)
.jpg.6e94b9d8a195aa8cba06e0bd752f3470.jpg)
.jpg.2b071ab745493bce2751b8c576bd4e33.jpg)
.jpg.be41250135493ae54776ee86aa5b0f9b.jpg)
.jpg.4b4c1a01242530740462fefce4197a55.jpg)
.jpg.e5cabef8b6a2494a094601e85184843c.jpg)
.jpg.df055812645015cf4d235808ebf1ee8f.jpg)

.jpg.70ed569f8ce9de6aa648e42aa6fce1fd.jpg)
.jpg.0bbe4e7bc2ca9904ad52a0132a16ffd9.jpg)
.jpg.9fb6334cc2fbd7bc723d879ee4bb5a78.jpg)
.jpg.b9daed967c72b93192d817b9909d7038.jpg)
.jpg.deceed353d06e02b4be6a2f98a664d38.jpg)

.jpg.9cc89a4e2425126dbe46ab8481f8cc5d.jpg)
.jpg.38db8f50c43cbb7a255700b5c29cf820.jpg)
.jpg.31b269d4dc5b14c5508fa3ddabe808bb.jpg)
.jpg.f7633ab71aa4dd7bf9b1d974509a6b17.jpg)
.jpg.761a3a0974475c8ebac75debae6f95af.jpg)
.png.52a64cc1b1488ae7d0261514600c4808.png)
USF Confederacy 1778 by wernerweiss - FINISHED - Model Shipways - 1:64
in - Kit build logs for subjects built from 1751 - 1800
Posted · Edited by wernerweiss
Forgot to attach file
Helllo BenD,
I used the shown basic colors mix ratio 1:1