


toms10
-
Posts
897 -
Joined
-
Last visited
Content Type
Profiles
Forums
Gallery
Events
Posts posted by toms10
-
-
I got the appropriate number of colored bands on the appropriate oars so there will be no confusion when Moby appears on the horizon. 😜
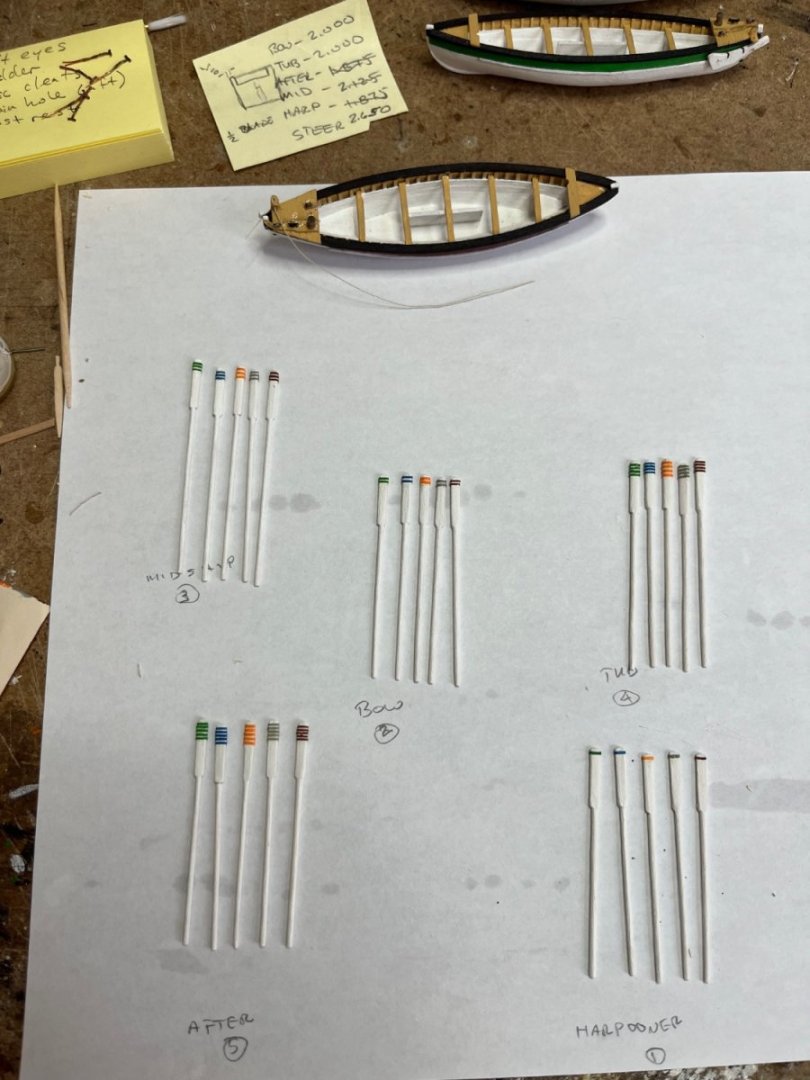
Now I need to make a bunch of harpoons, paddles and oar locks and then finally the mast tabernacle, mast and furled sail.
Tom
-
Still cranking away on the whale boats. Started to install the miscellaneous fittings like cleats, loggerhead, rudder in the stowed position, etc.

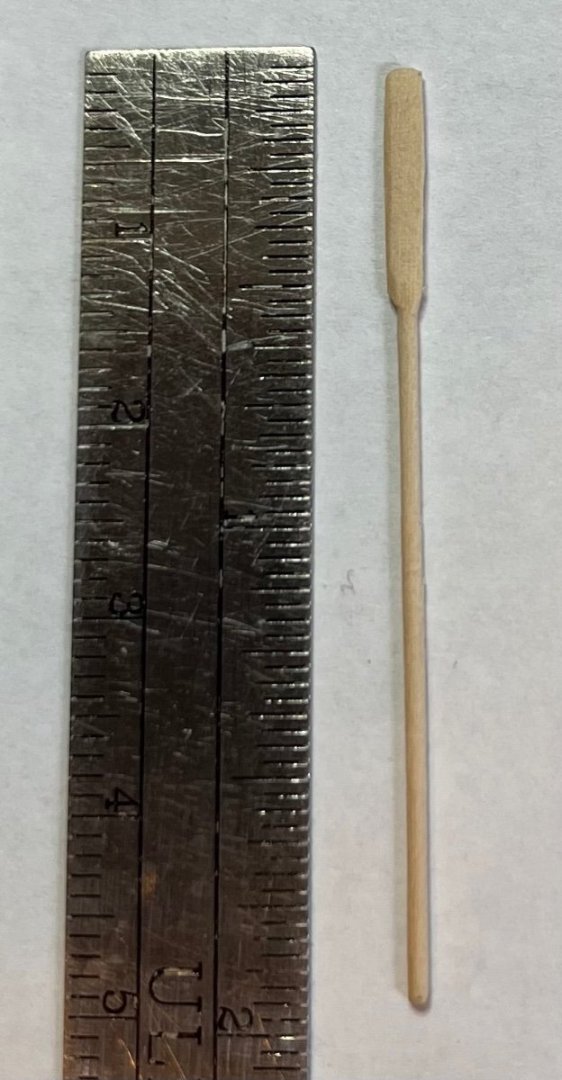
Also got started on making all the oars. At 1:96 scale it is a bit of a challenge to make “little sticks” look like oars but I came up with the following method for making 30 oars and 5 paddles.
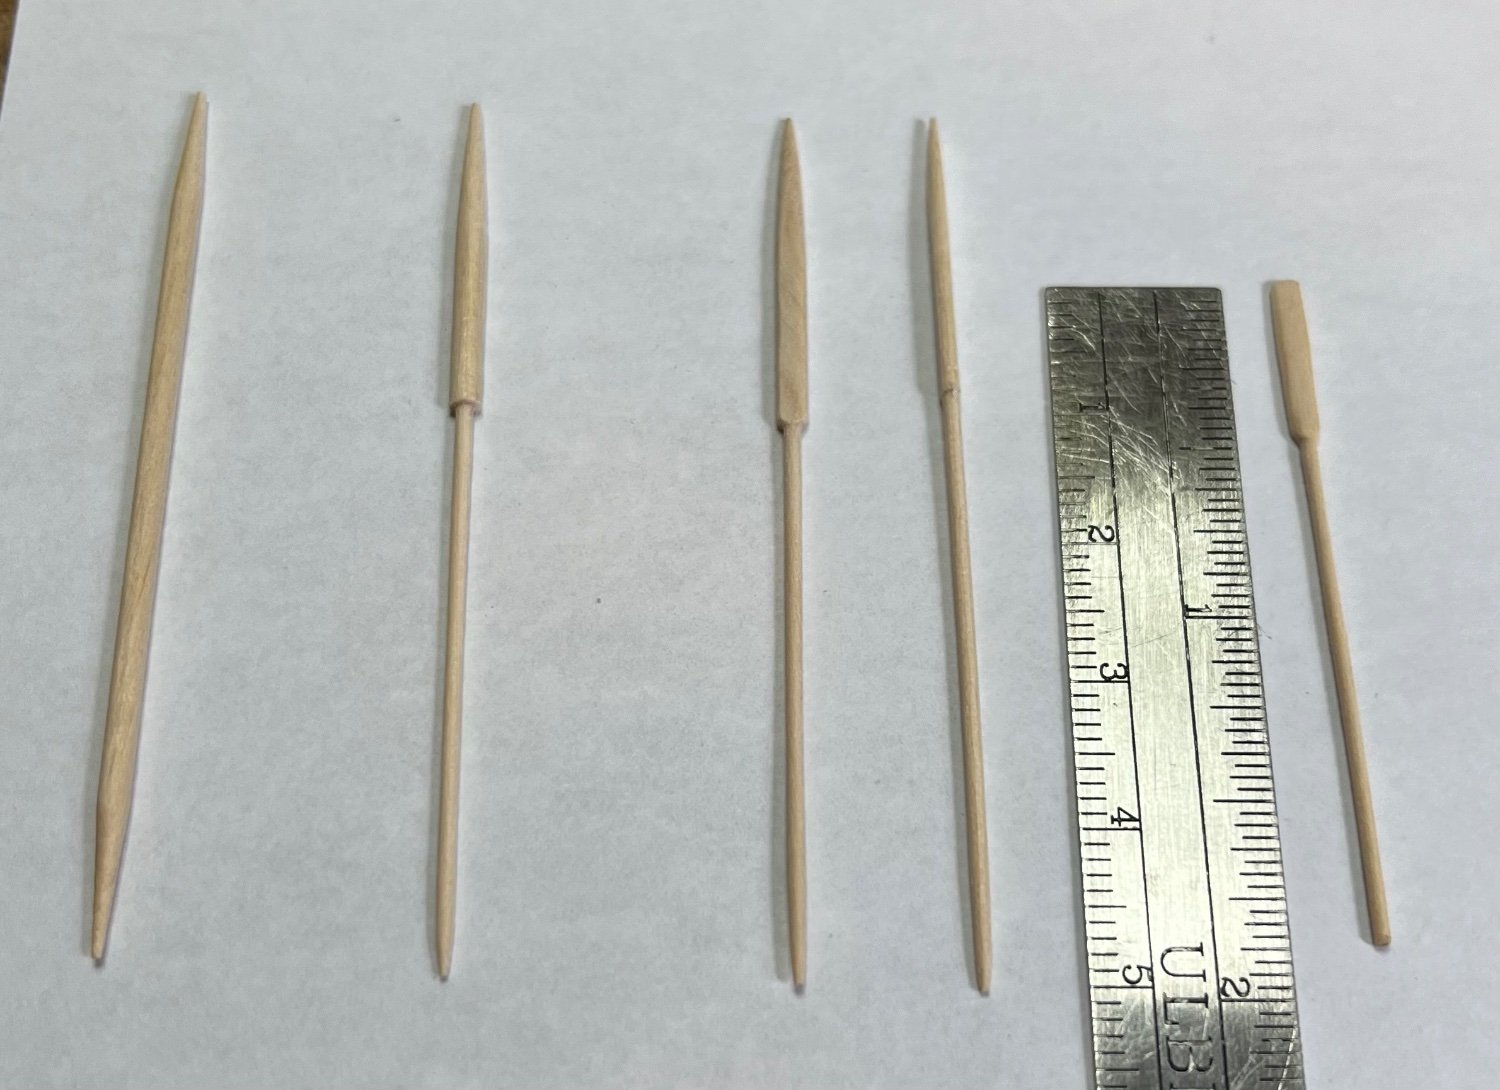
The picture below shows the 4 steps I used starting from a basic round toothpick.

The piece on the far left is step one, take the toothpick out of the box. 😜
The 2nd piece from the left shows step 2, turning (actually filing) down the loom to about .035” diameter. This took some patience because if you press too hard with the file you end up breaking the stem off. 😤😡
The next two pieces actually show the same step, one the front view and one the side view. The original diameter of .078” was sanded down flat to the loom on both sides to form the blade.
The last piece is the final oar after cutting to length, shaping and beveling the sides of the blade.
Below are closeups of each working step.
Step 2: Turning loom diameter

Step 3: Flattening blade
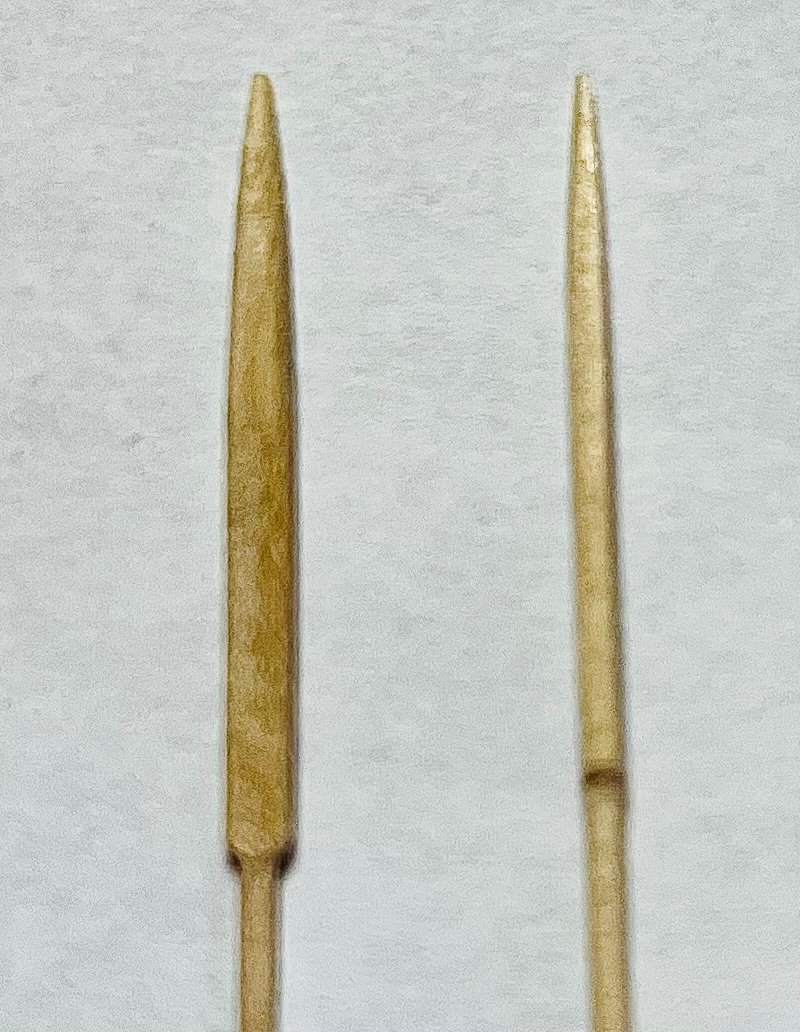
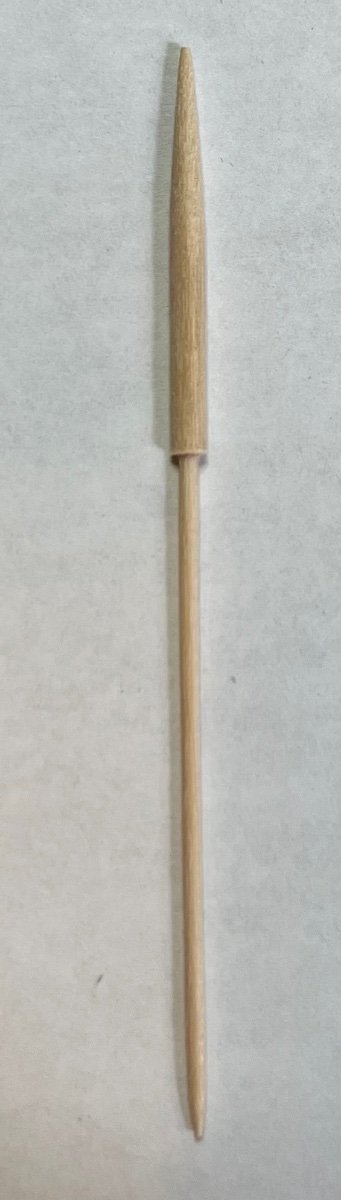
Final oar:
Now I just have to do it 29 more times!!! These boats are going to end up taking just as long as the Morgan itself!😂
Tom
-
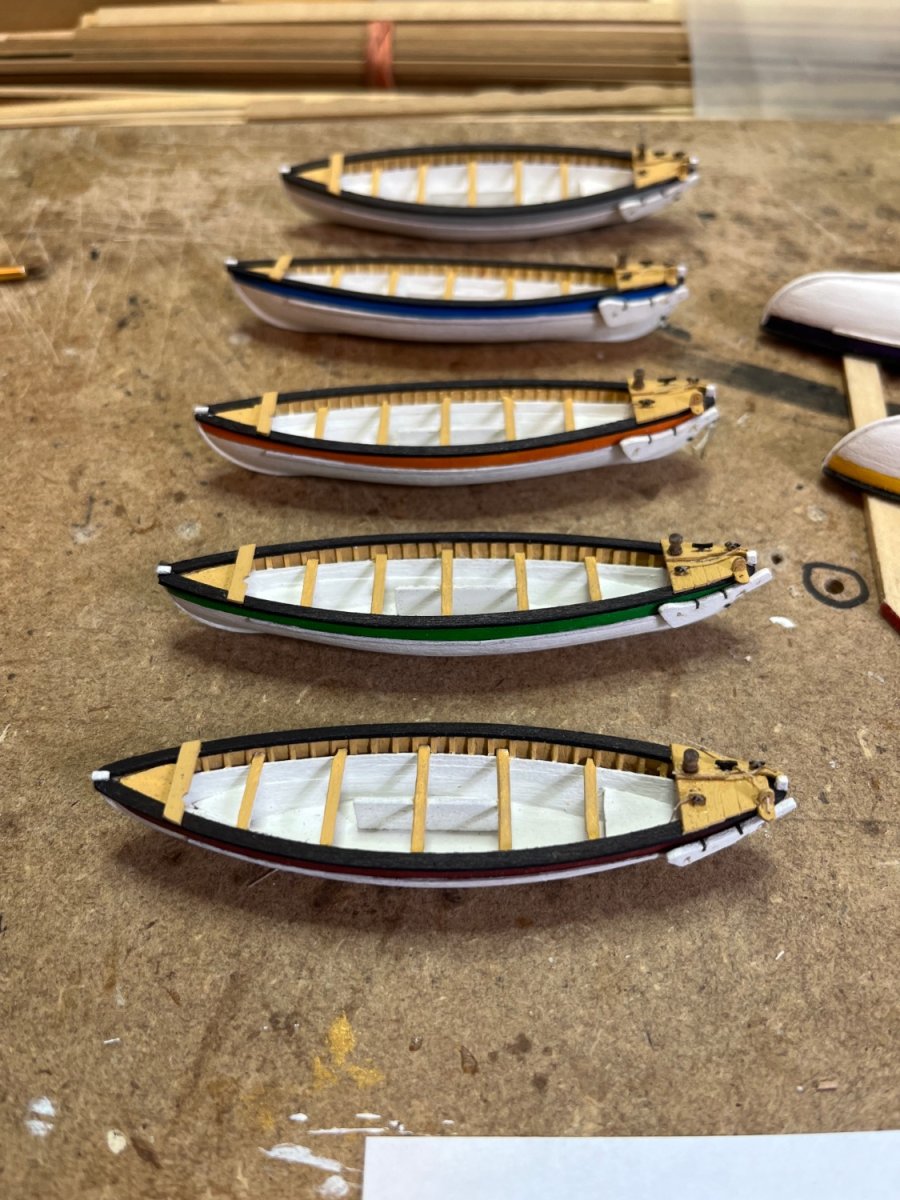
And then there were 5. 😁 Now for the fittings, mast and all the equipment. These are turning into just as much work as the Morgan herself! 😂
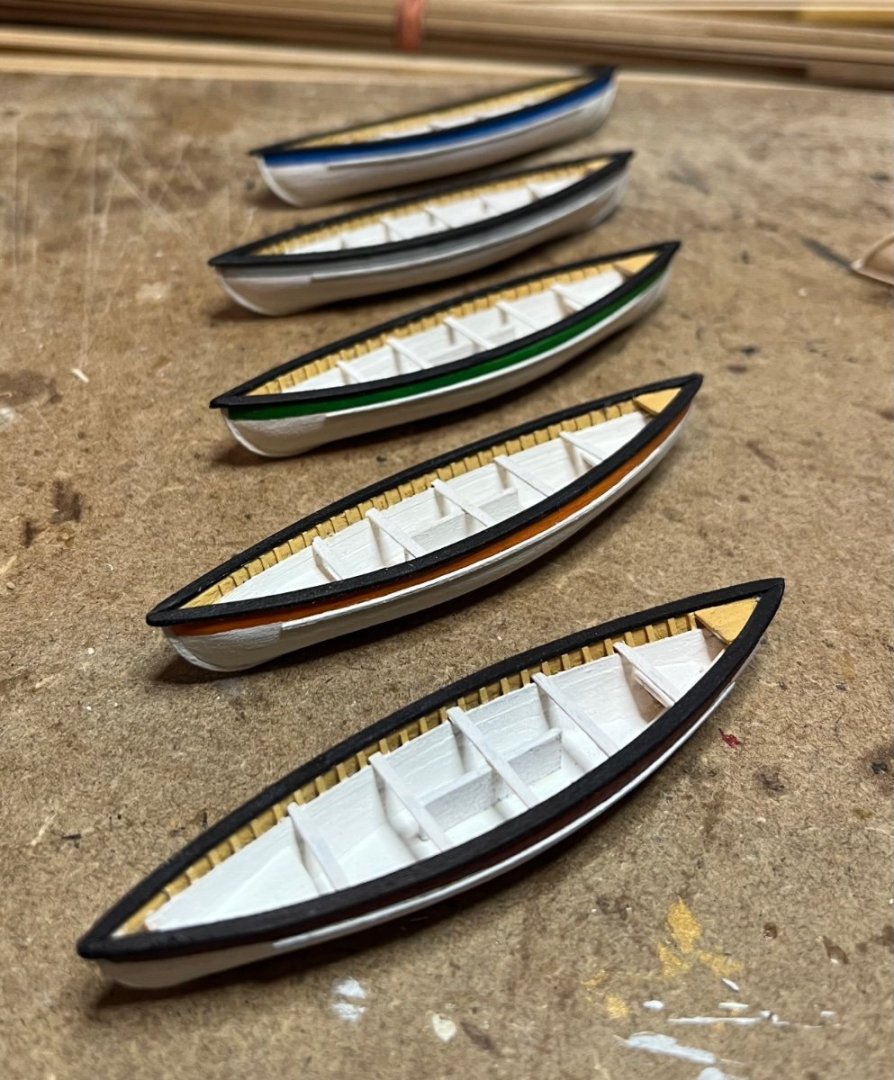
Oh yeah. Can’t forget about the 2 spare boats. Just have to do the outsides of the hulls on those so those should be much easier.
Tom- Jack12477, Ryland Craze, mtaylor and 2 others
-
 5
5
-
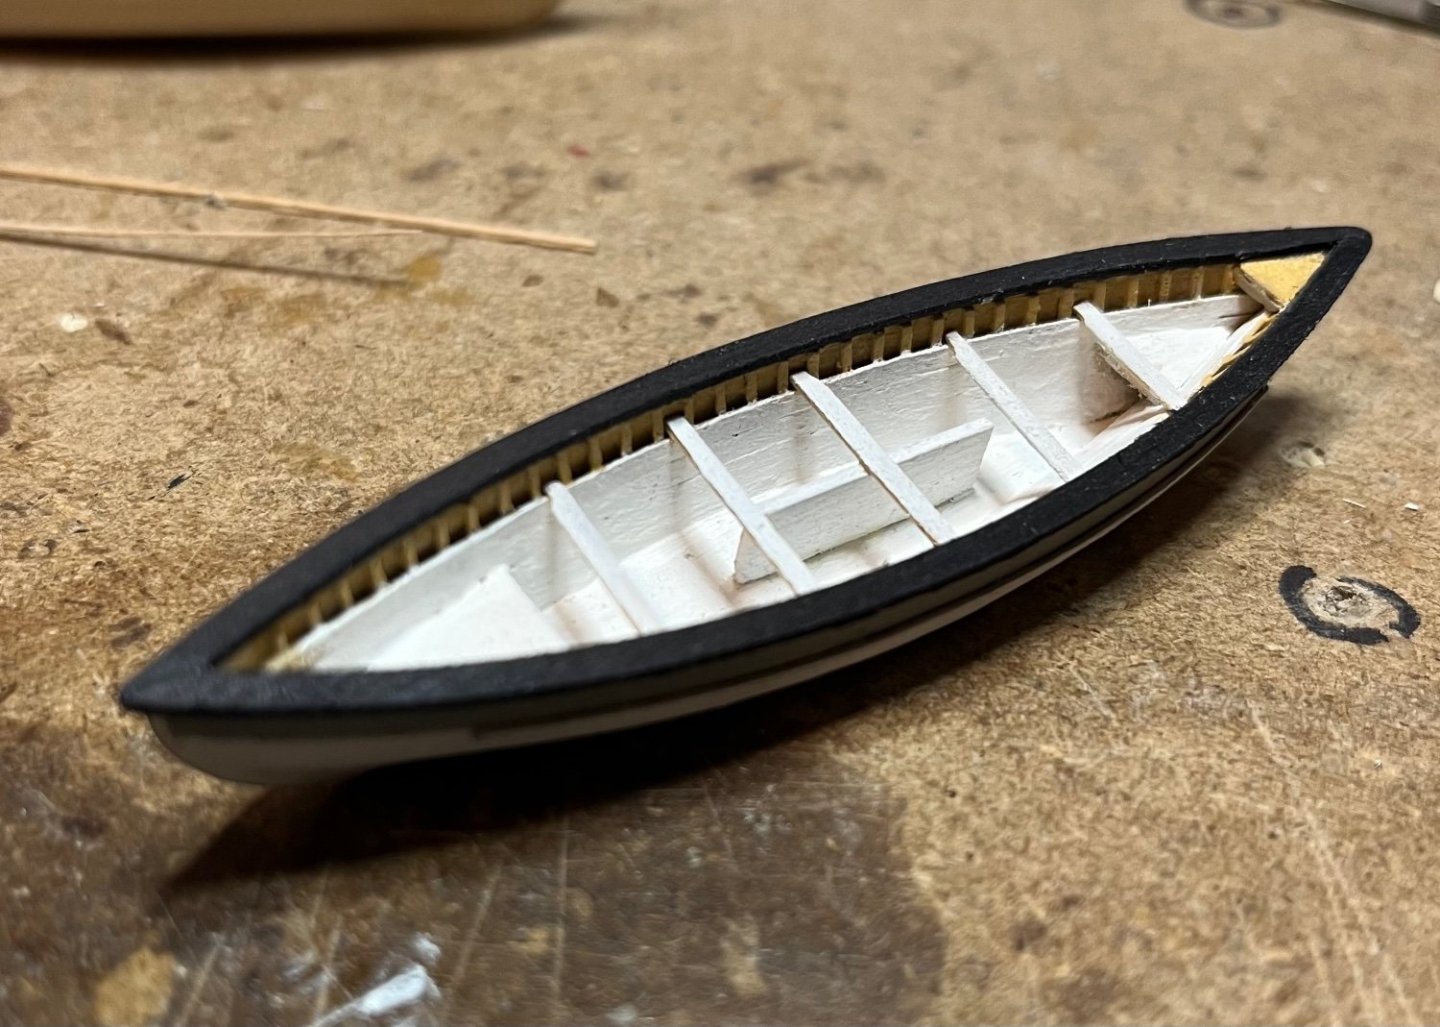
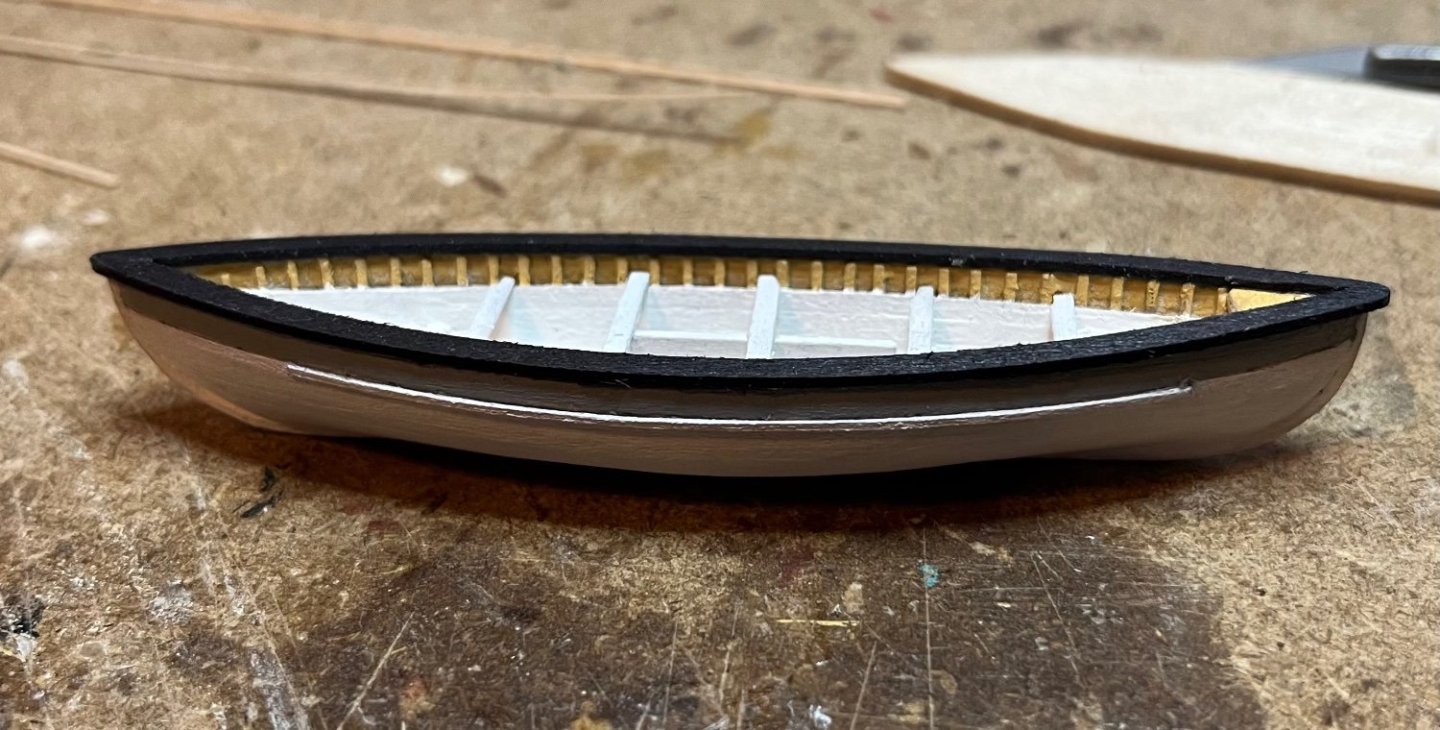
Made a little more progress on the whale boats. All 5 have the components made for the hull. I still feel like I am an eternity from finishing these. I still have to make all the gear that goes with each boat!
I went ahead and assembled one and gave it some color just to see how one would look. As I said, still have miles to go. 🤪
Tom
- mtaylor, Jack12477, GrandpaPhil and 4 others
-
7
-
The hulls now have keels. I am almost done putting all the “pseudo frames” on 5 of the hulls. Next I need to put inner planking up about 3/4 the way up from the bottom. That will be a nice change from putting in all those “frames”

I am using photos of the actual boats at Mystic as a guide.
Tom
-
-
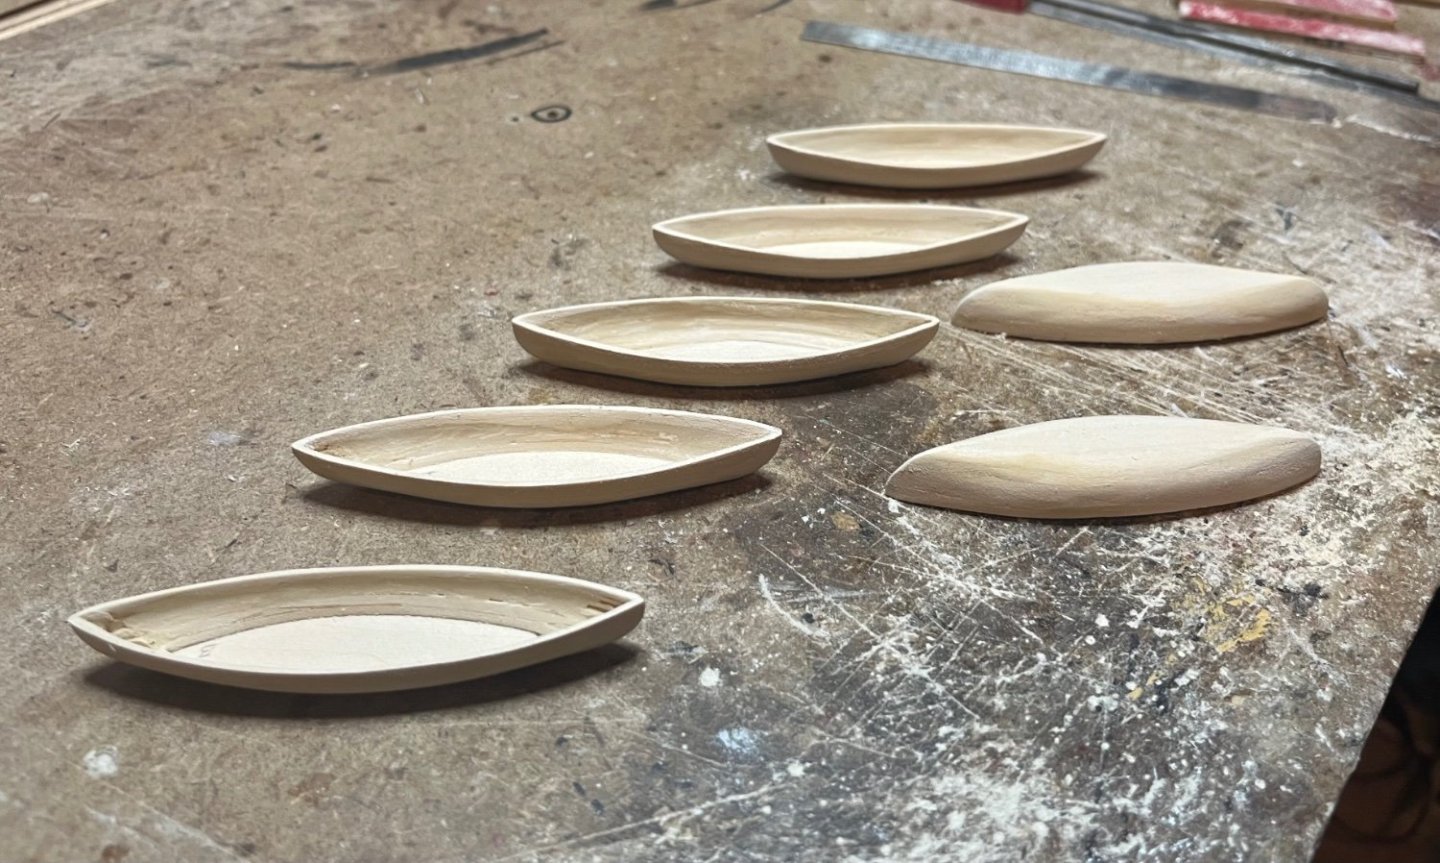
Well the 7 hulls are finally all shaped. There is still a bit of light sanding to do to smooth out the insides. I noticed there is nothing in the picture for a scale reference. The overall length of each is 3.450”. Now I can start making the pieces for all the detail work. 😁. I am sure that will be much more fun than all the sanding I just did for the past week 😜
Tom
- mtaylor, John Ruy, GrandpaPhil and 2 others
-
5
-
Some you gotta do what you gotta do. 😜. I don’t think anyone will catch that and I won’t say anything. 😂
Tom
-
-
7 hours ago, TBlack said:
Tom,
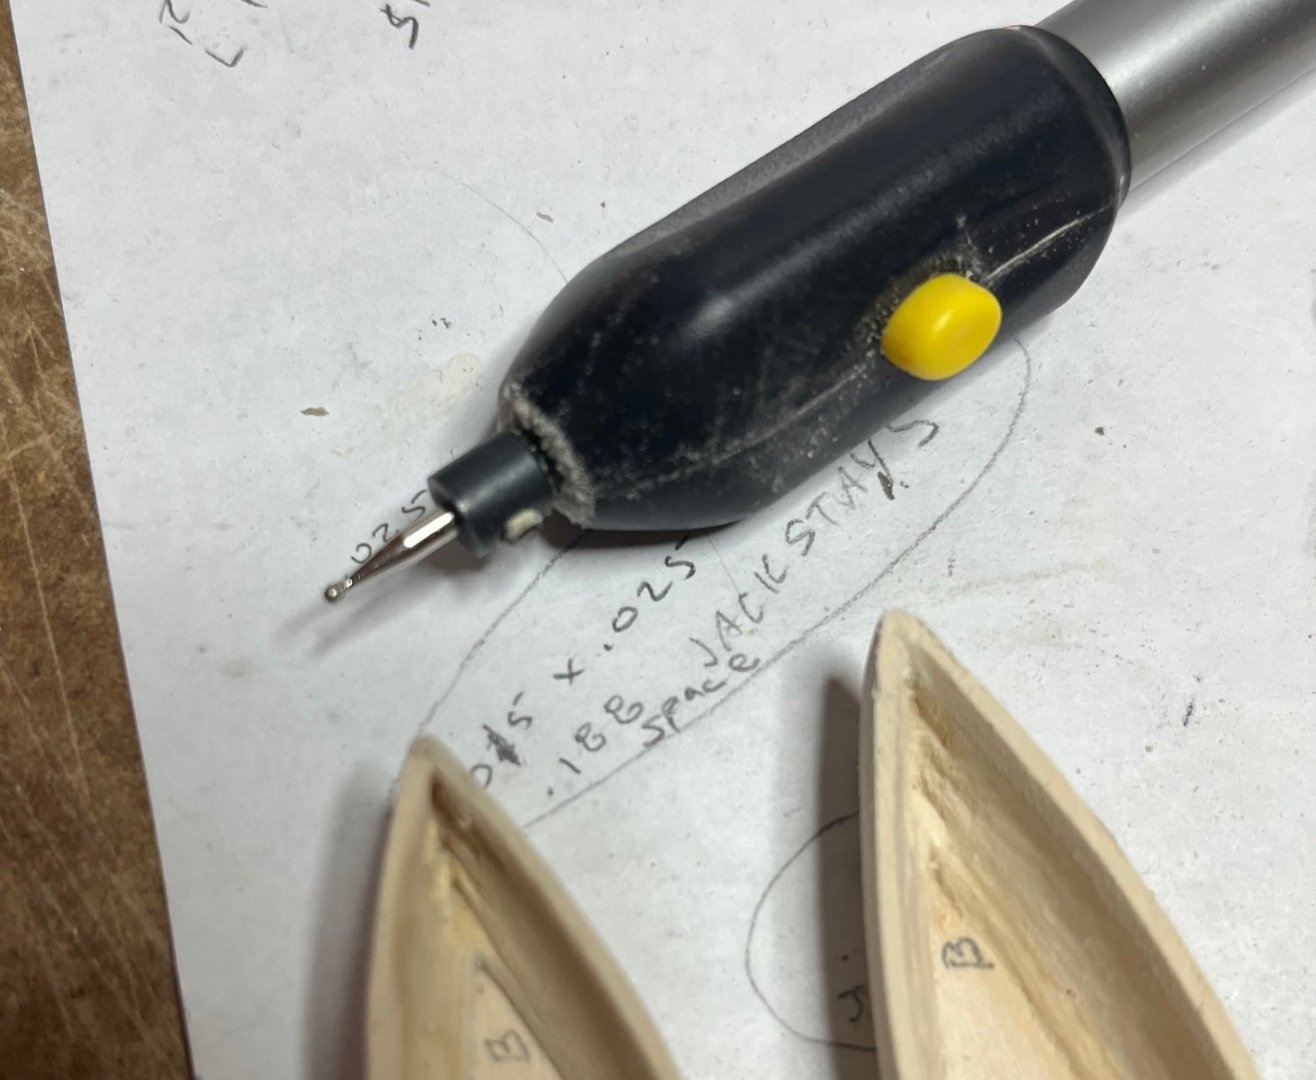
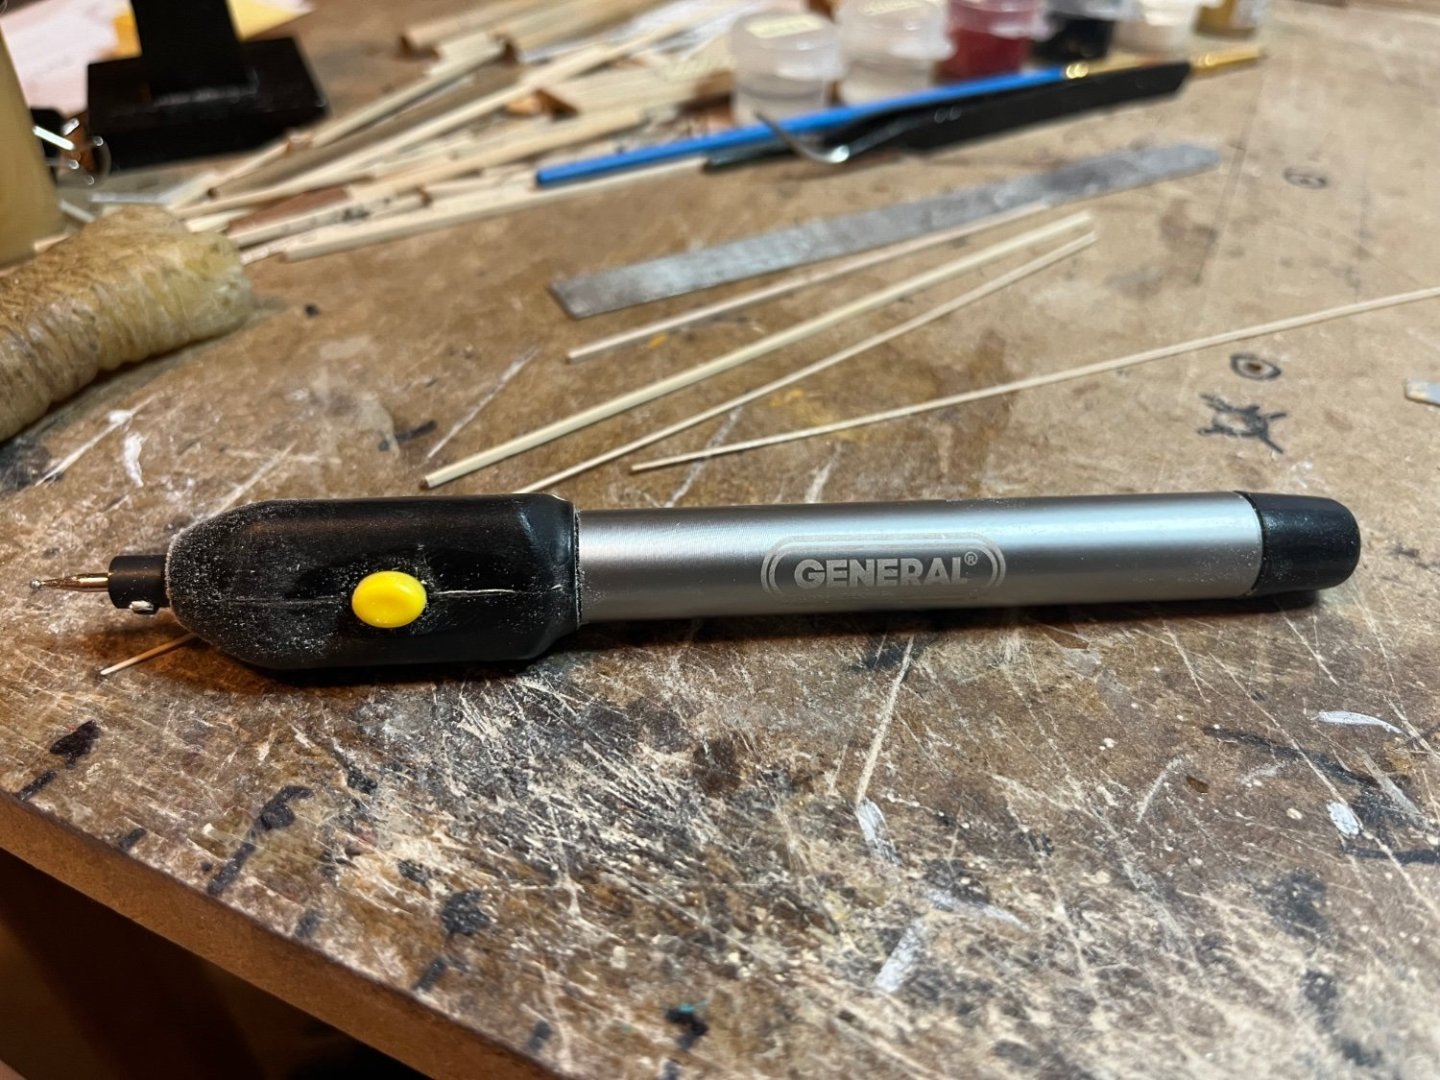
what kind of “pencil like hand engraving tool” are you using? BTW, the pictures didn't seem to come out on my computer. Am I alone?
Tom B.,
It was just some cheap engraving tool that I picked up at Harbor Freight but it does the job. It runs on 2 AAA batteries. It has a spherical abrasive metal tip that is about 1/16” diameter.
Tom
- GrandpaPhil, mtaylor and Jack12477
-
3
-
-
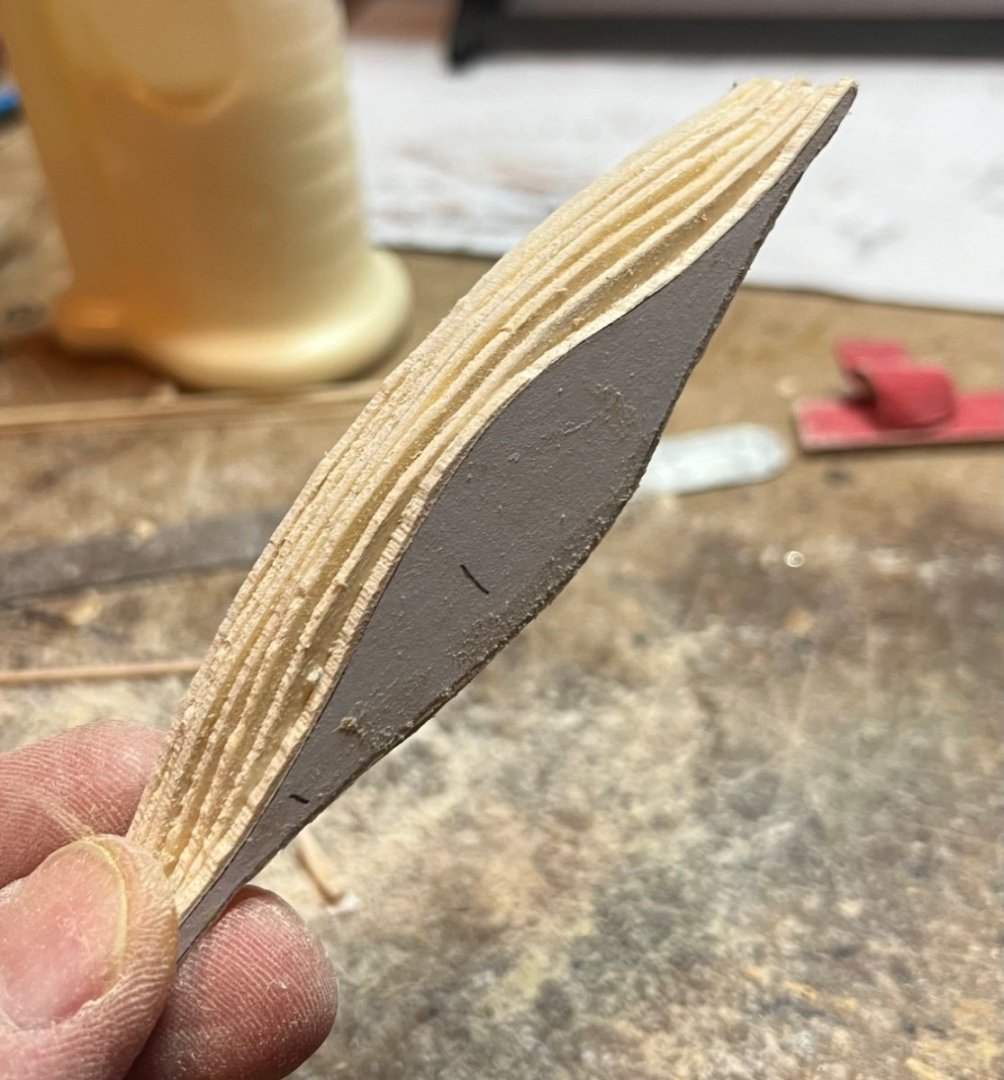
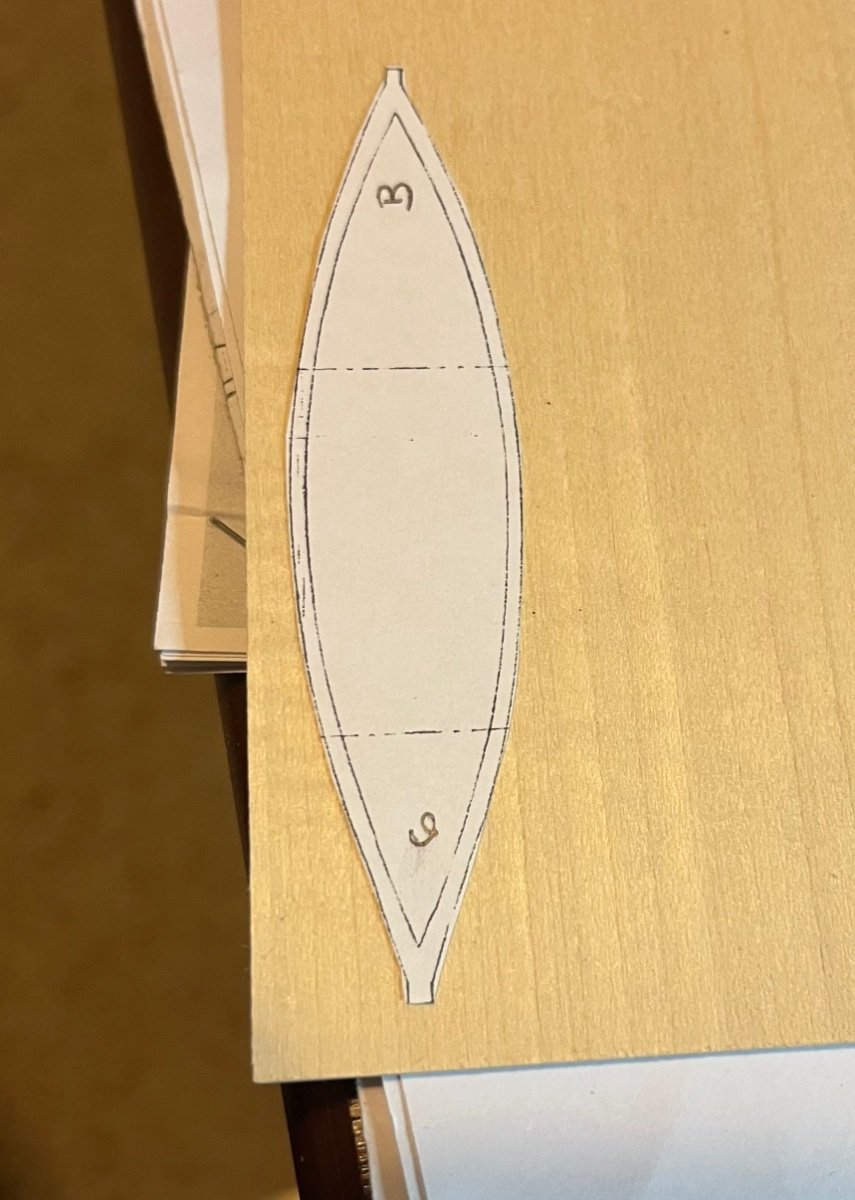
So I started on the whale boats. The plans suggested using what I call a “pancake” method. There are 7 layers that are to be glued together one on top of the other. Each layer’s outside contour is basically the waterlines of a half breadth view on a body plan.
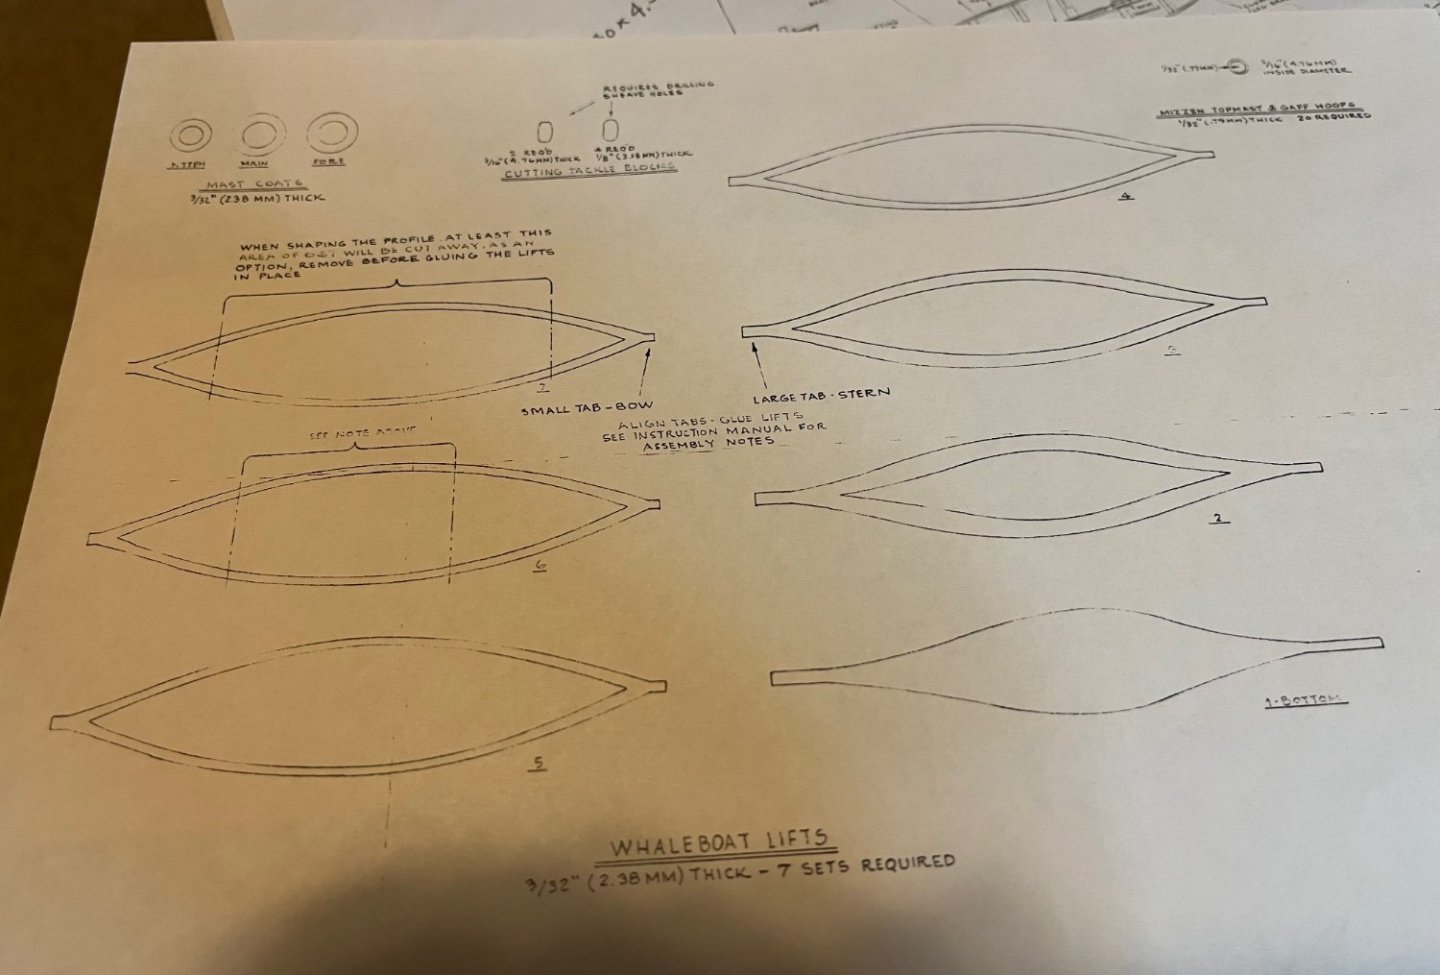
After making 7 copies I cut them out and rubber cemented them to a piece of 1/16” thick basswood. Note I only cut the outside contour at this point.

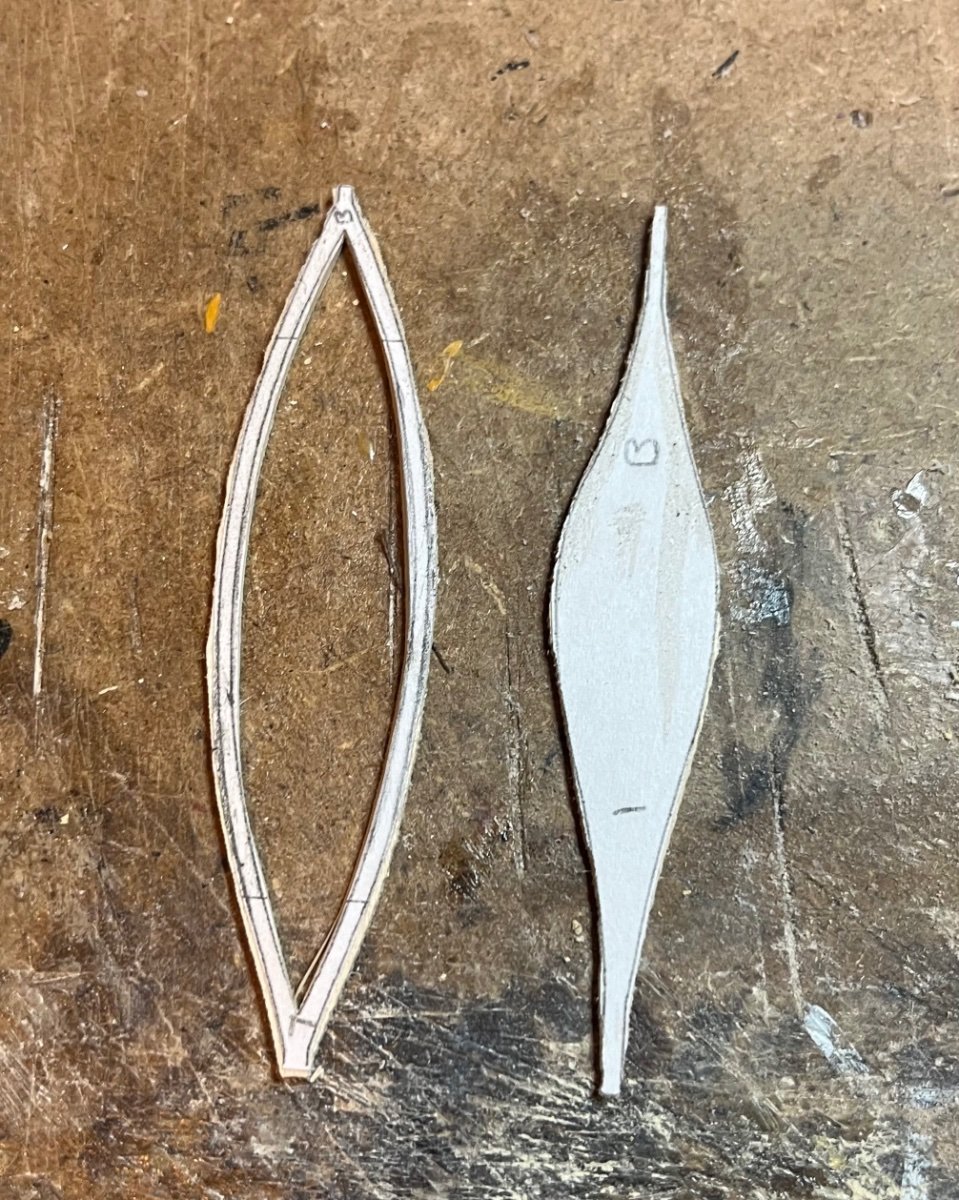
Next I used a #4 scalpel to cut out the inside contour. Unfortunately I forgot to take a picture at this point. This was a big tedious but I only had to cut out the interior on 5 of the 7 boats. Two of them will be stowed upside down on the boat bearer shelter.
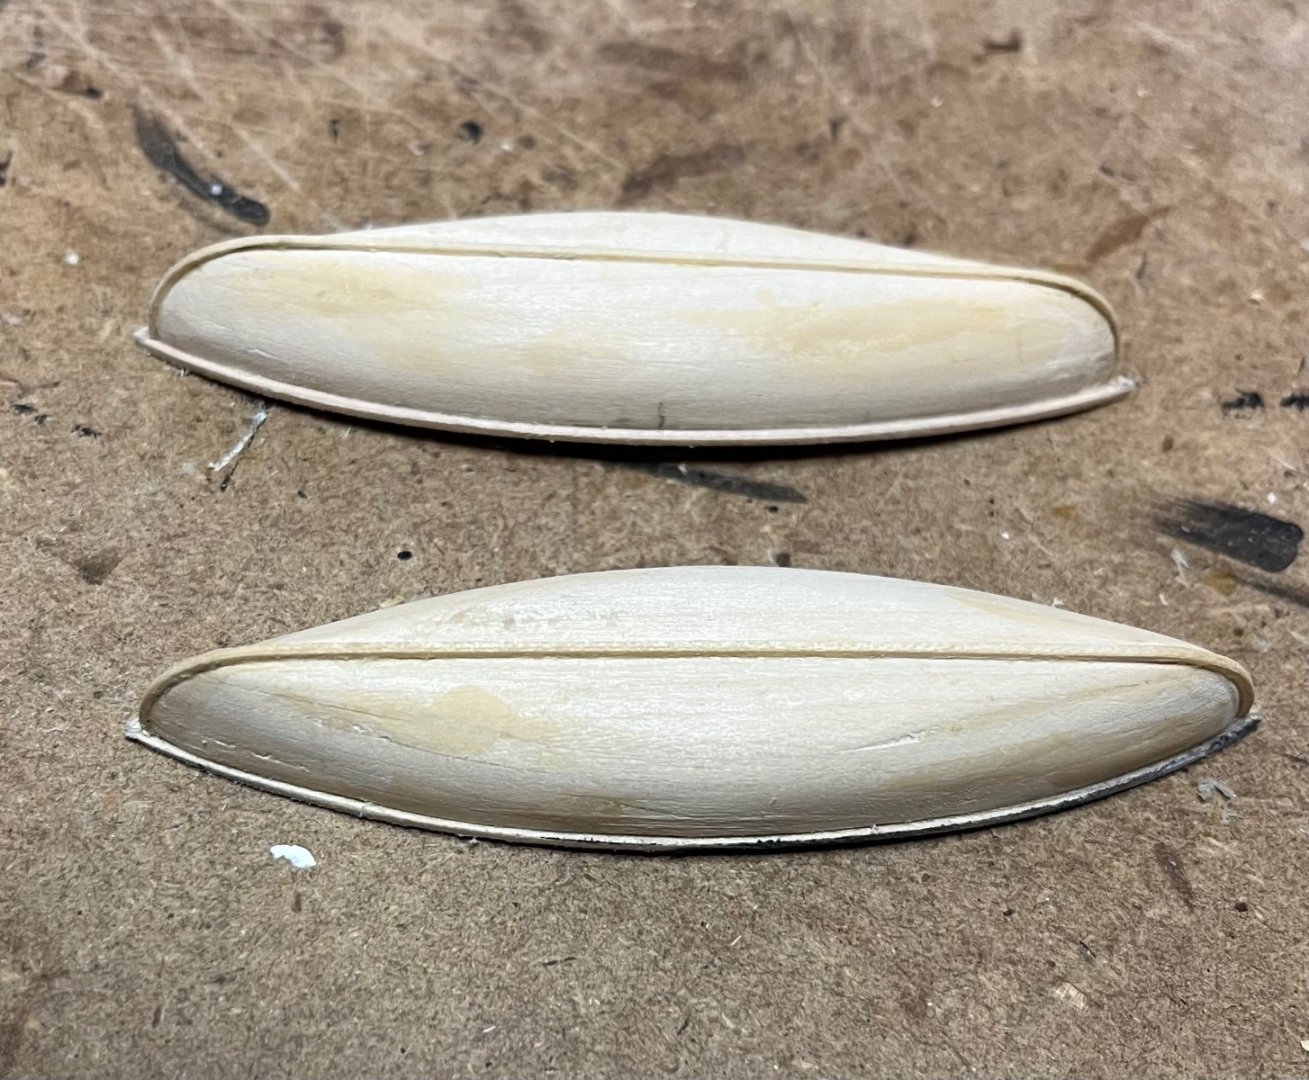
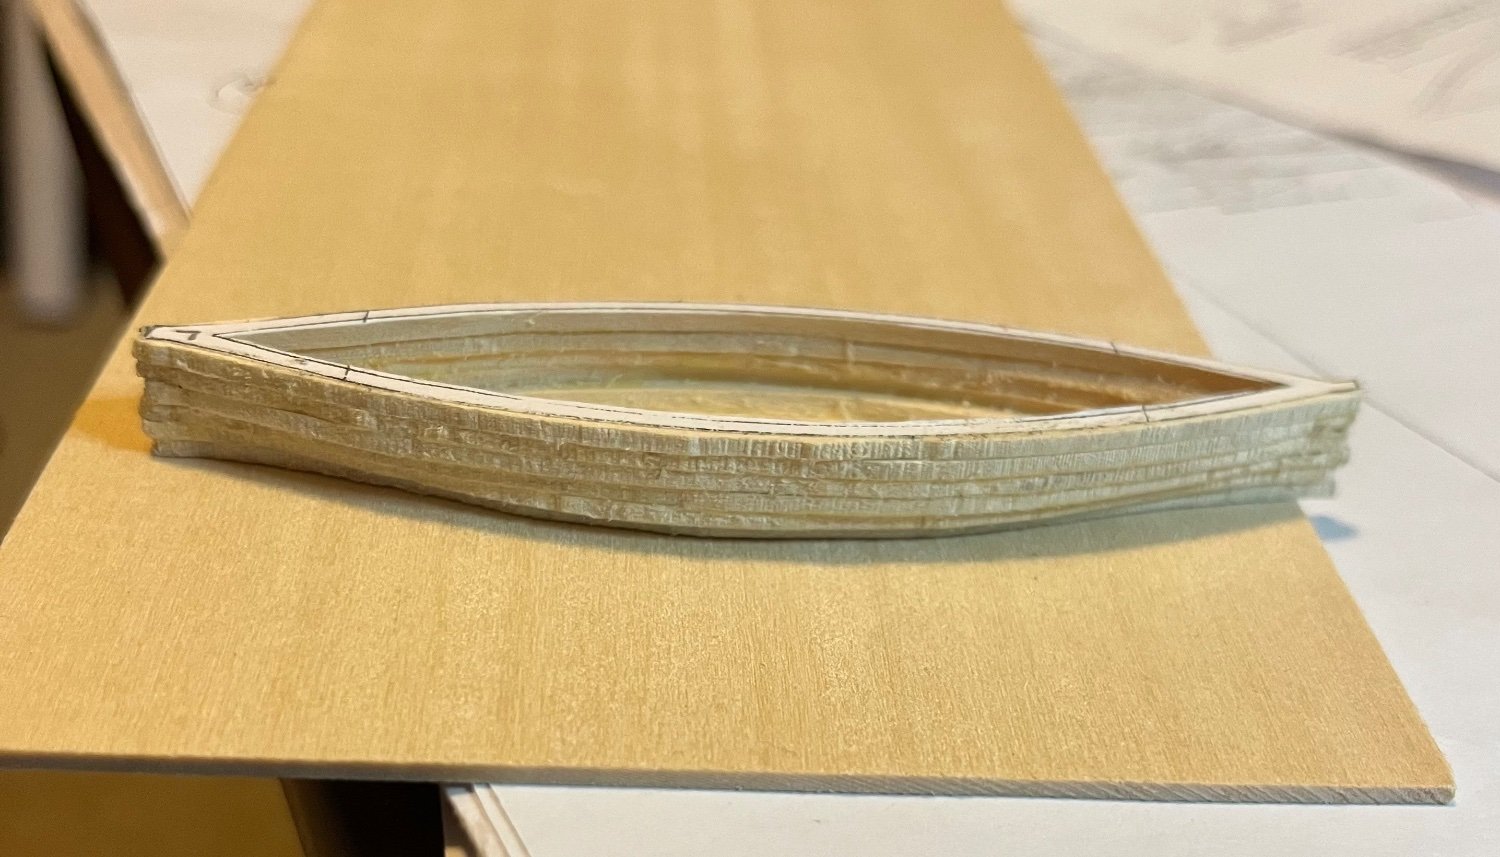
After all the interior contours were cut out I proceeded to use a band saw and cut all the outside contours as shown below. The one on the right is the bottom layer which closes up the bottom.

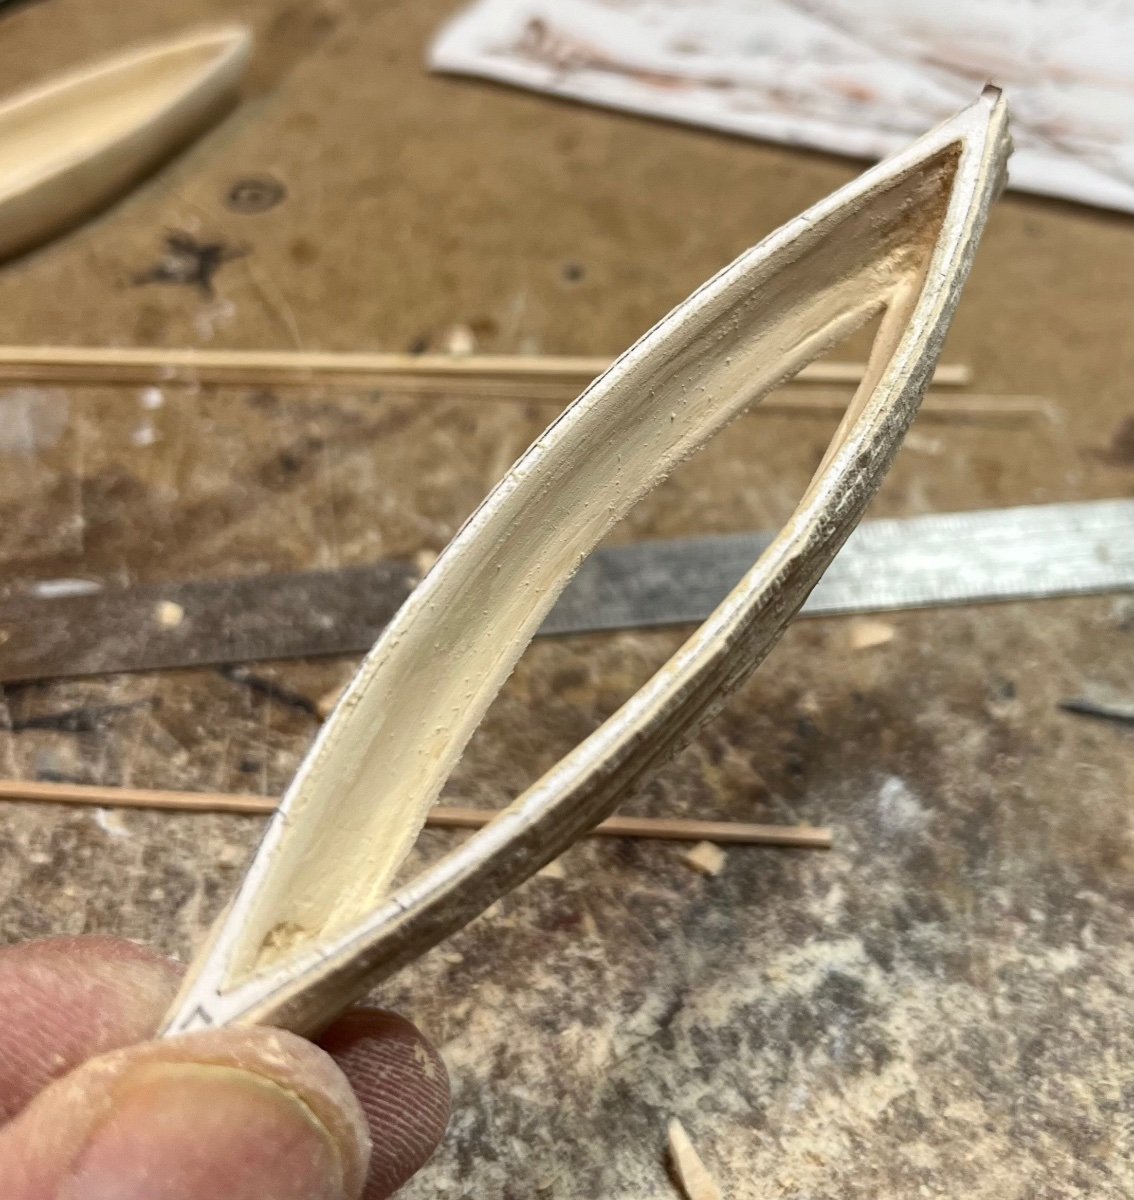
Next, all of the layers except the bottom were glued together. The reason I left the bottom off was to allow easier access to the inside contour for shaping and sanding.
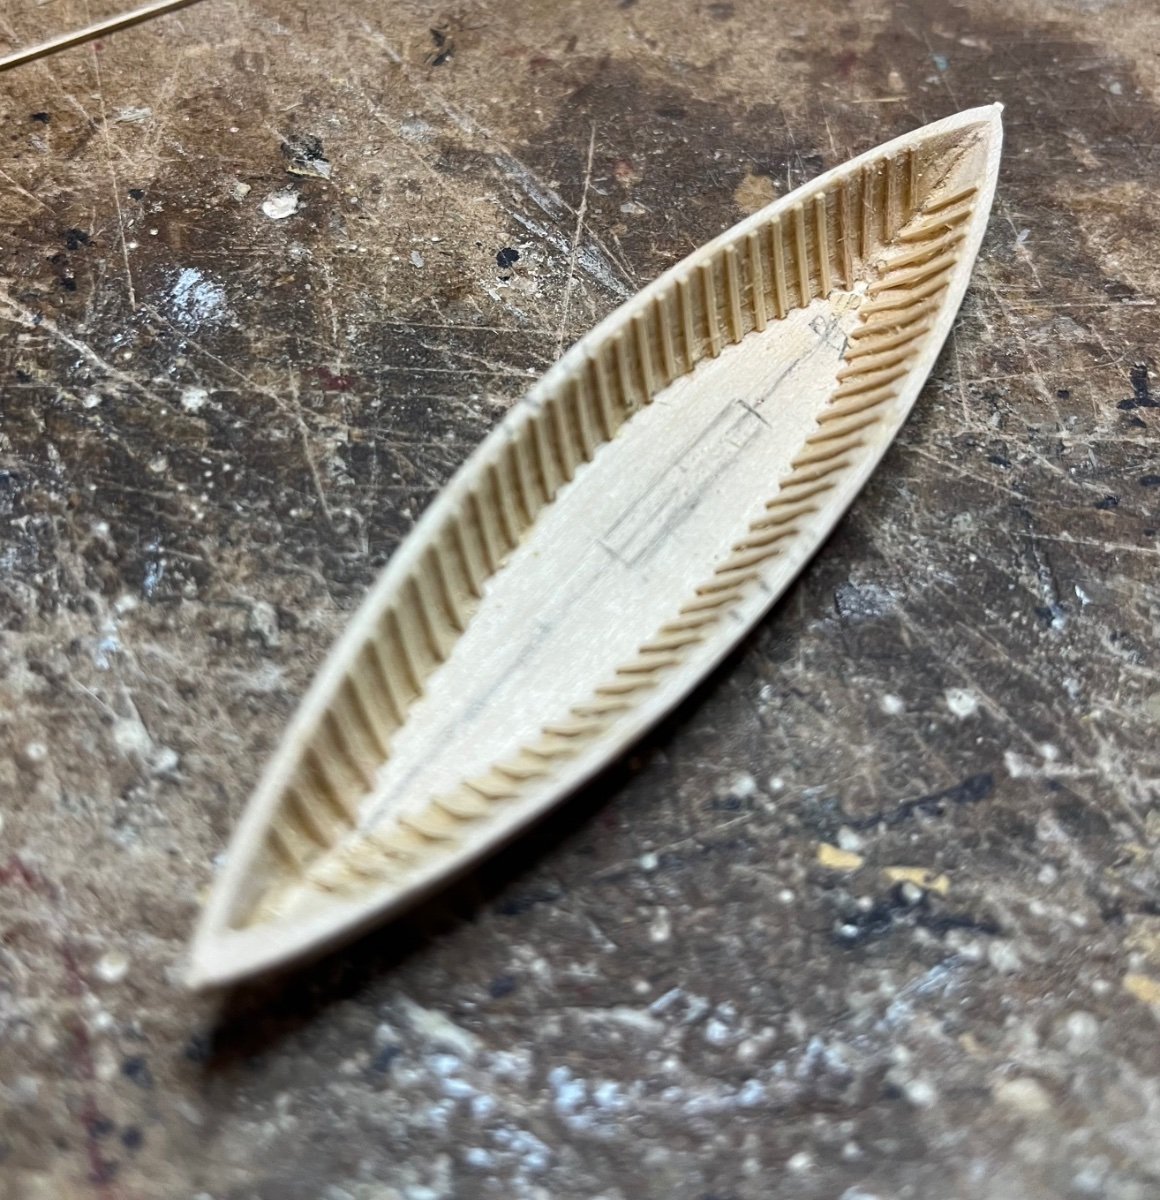
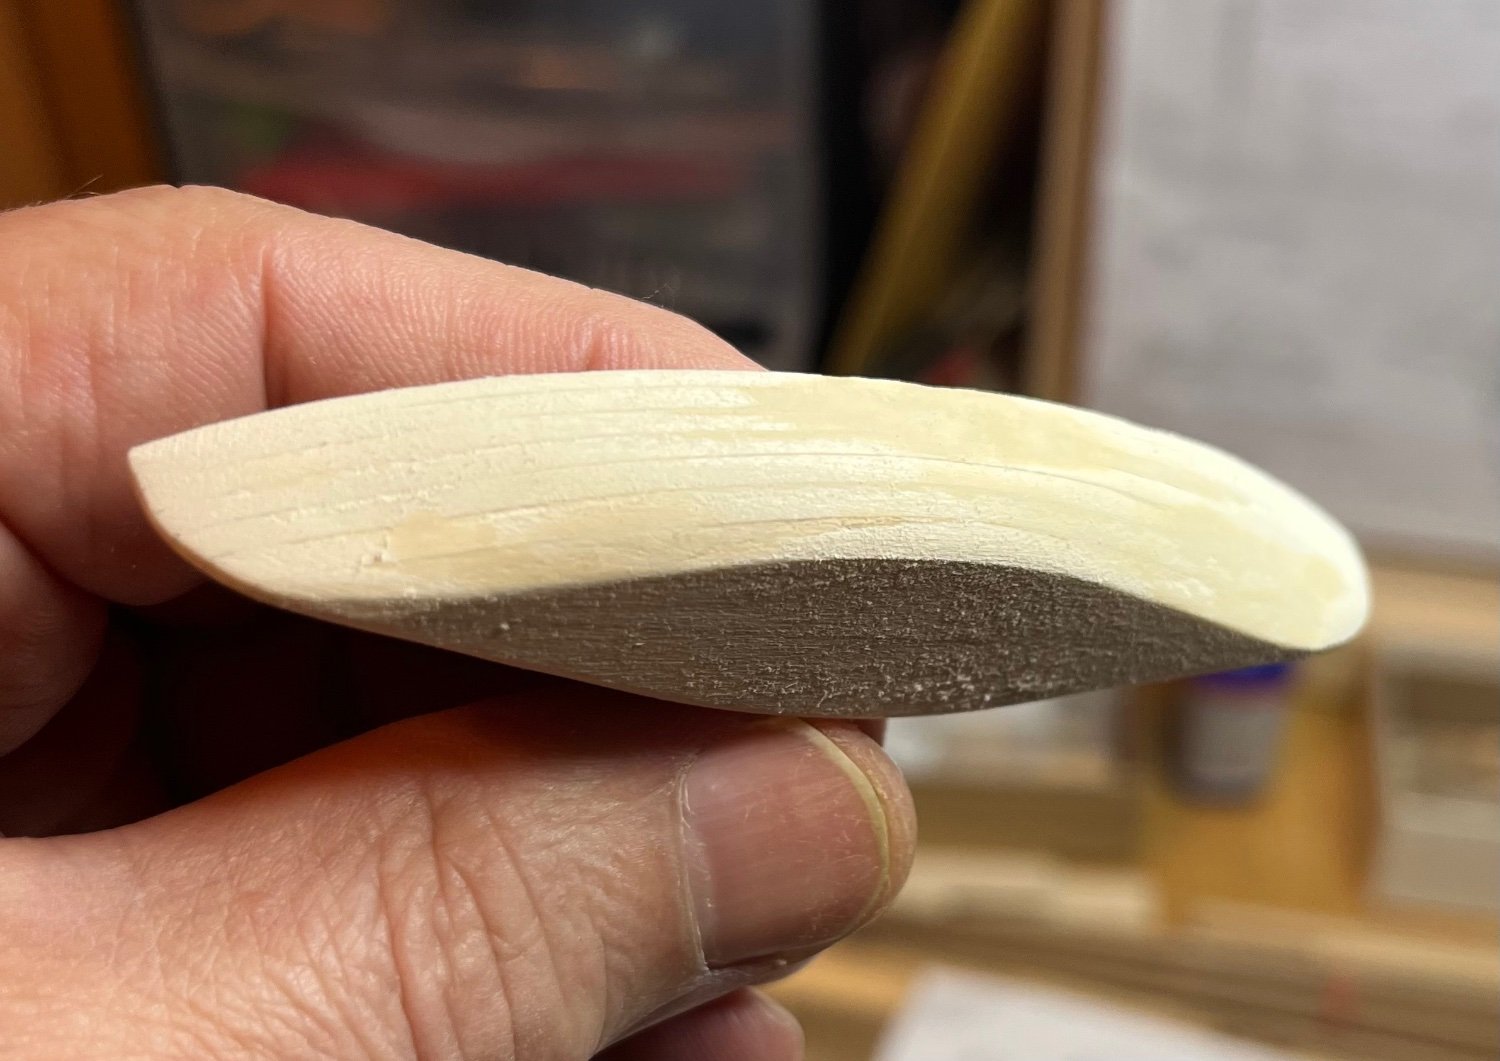
All the high edges need to be knocked down and sanded so each layer is flush with the next. That is easier said than done 😜. I used a pencil like hand engraving tool to do all the rough work and then rolled up sand paper. I needed to use a bit of filler in a few spots but it all worked in the end. It was a bit like taking an Aztec pyramid and turning it it into an Egyptian style one 😁. Here is a pic of the inside contour smoothened. These surfaces will all be painted so any filler will not be seen.

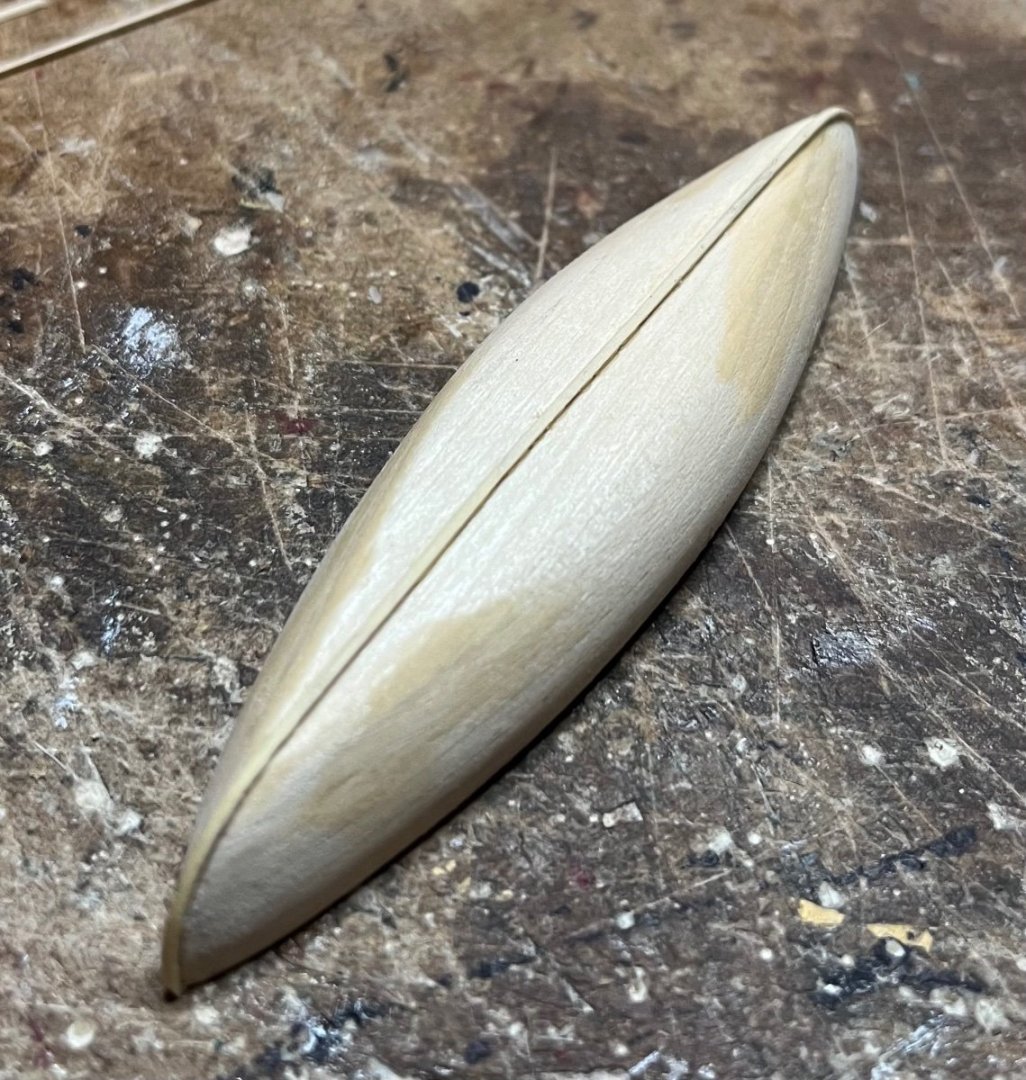
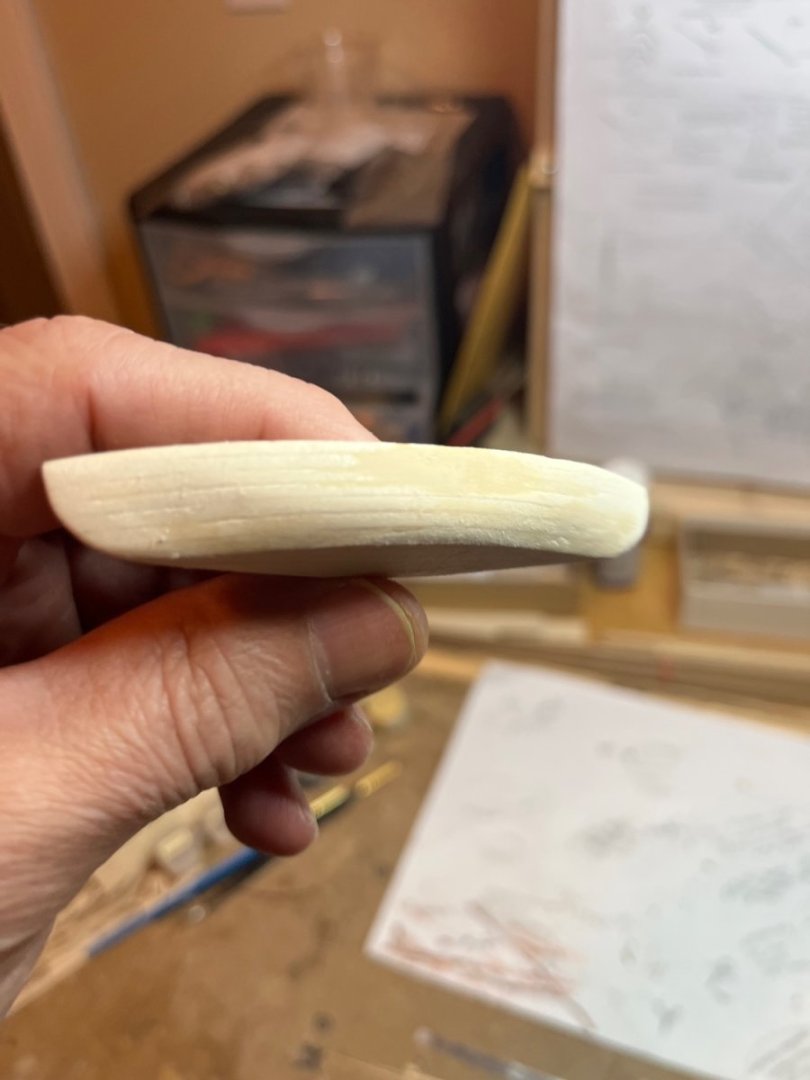
The bottom was the glued on and the outside contour was then shaped and sanded.
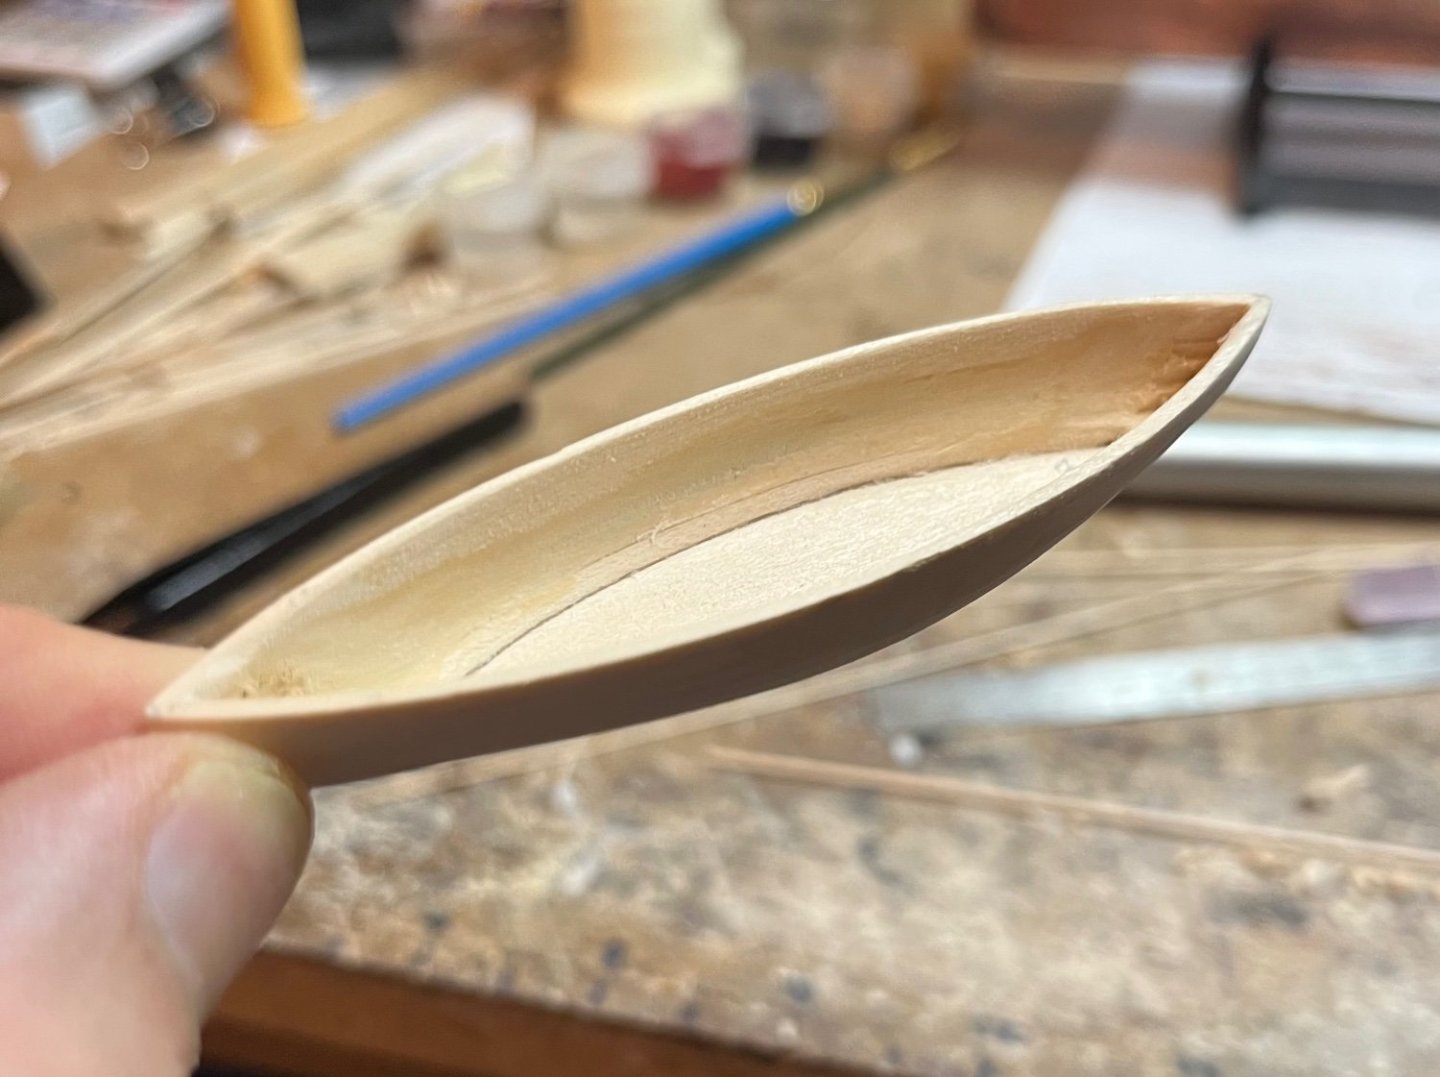
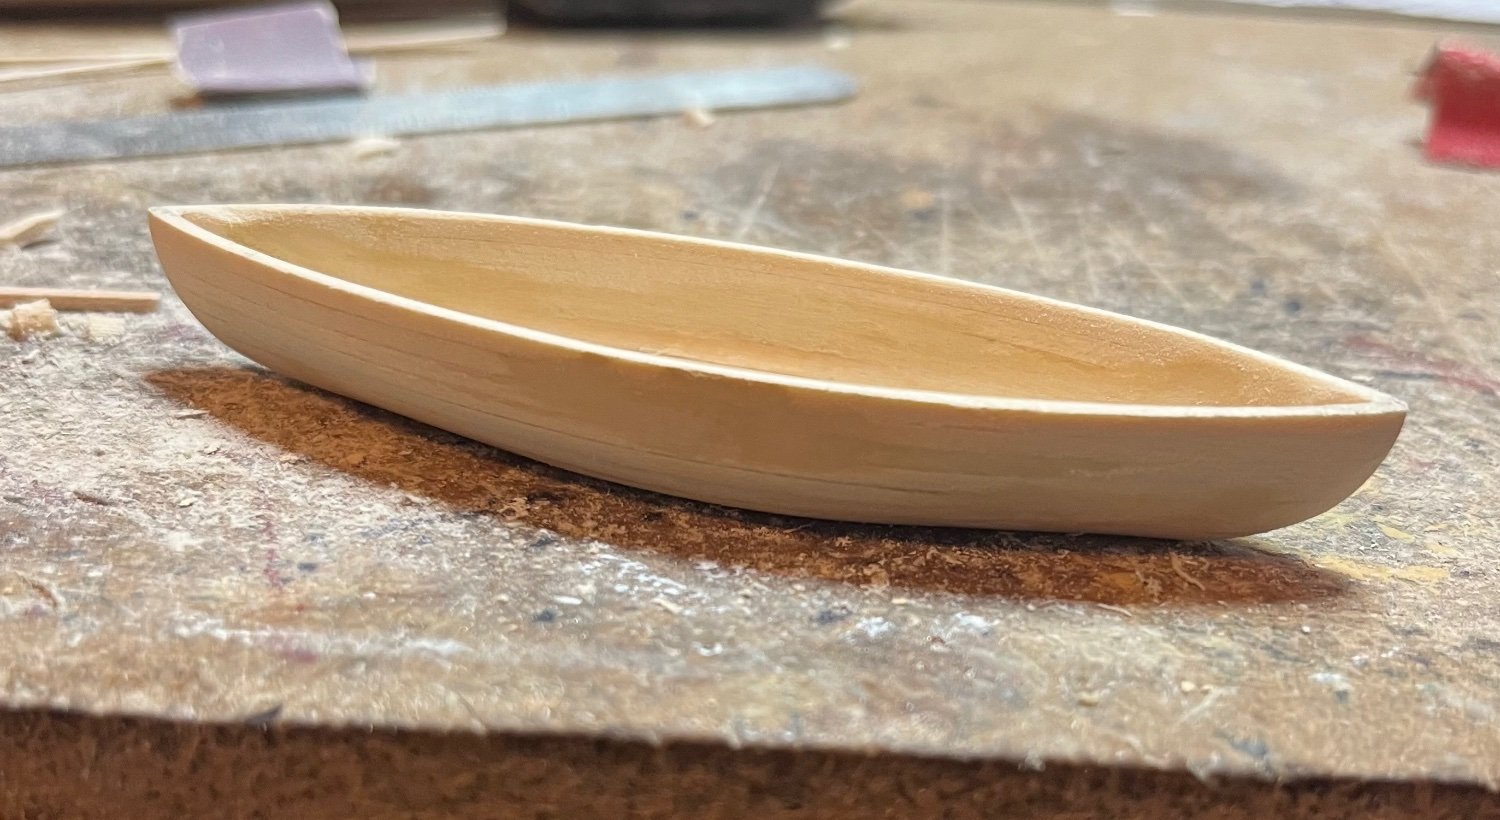
Finally the ends were shaped and curved to the final hull configuration.


Next I will put on the keel, top rail and the side rubs. Then eventually all the interior structures. When I get to that point I will post more pics. Right now I have 6 more boat hills to make.
Tom

-
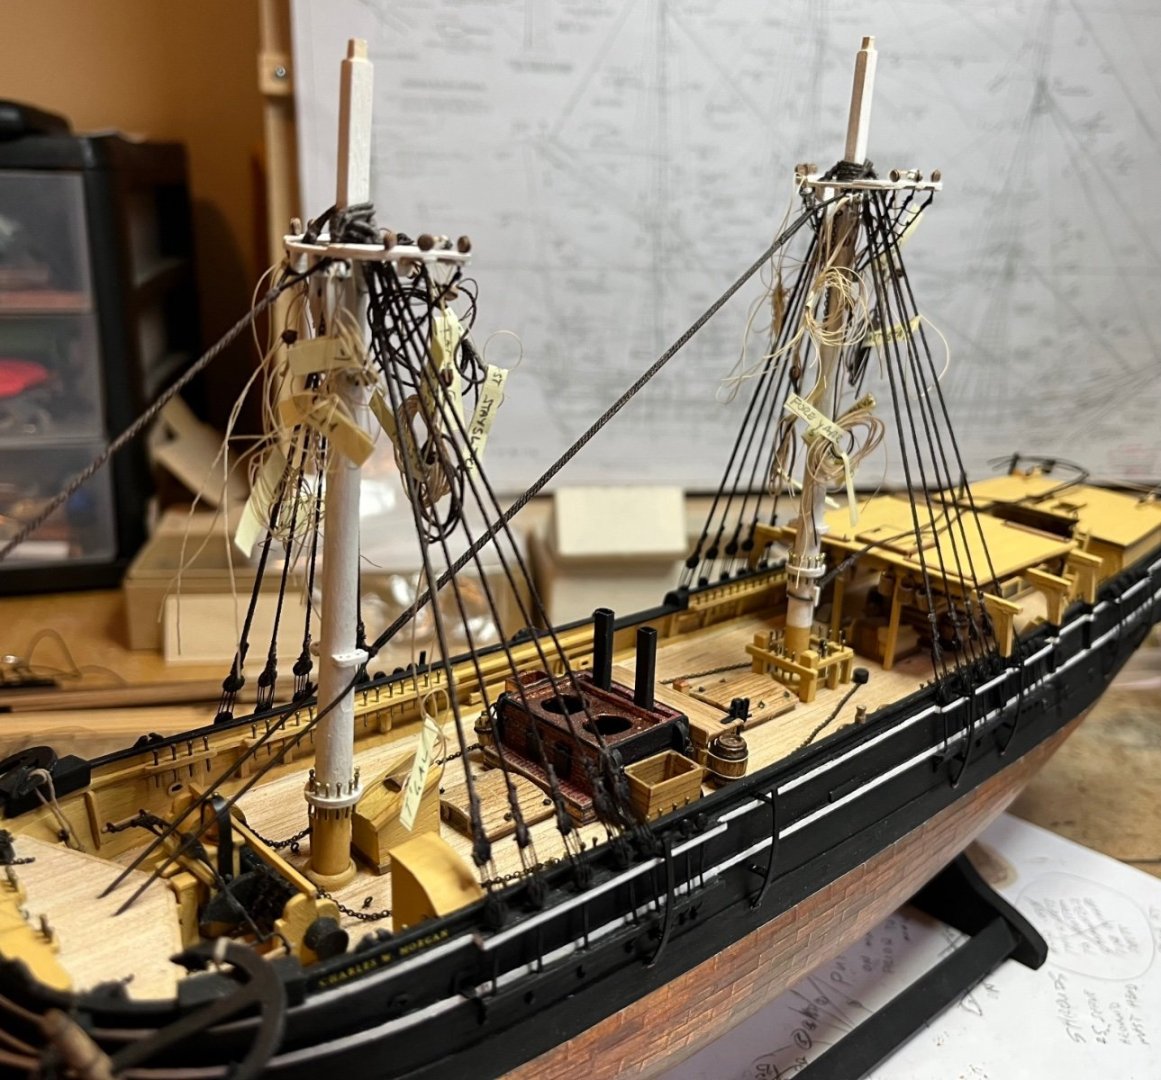
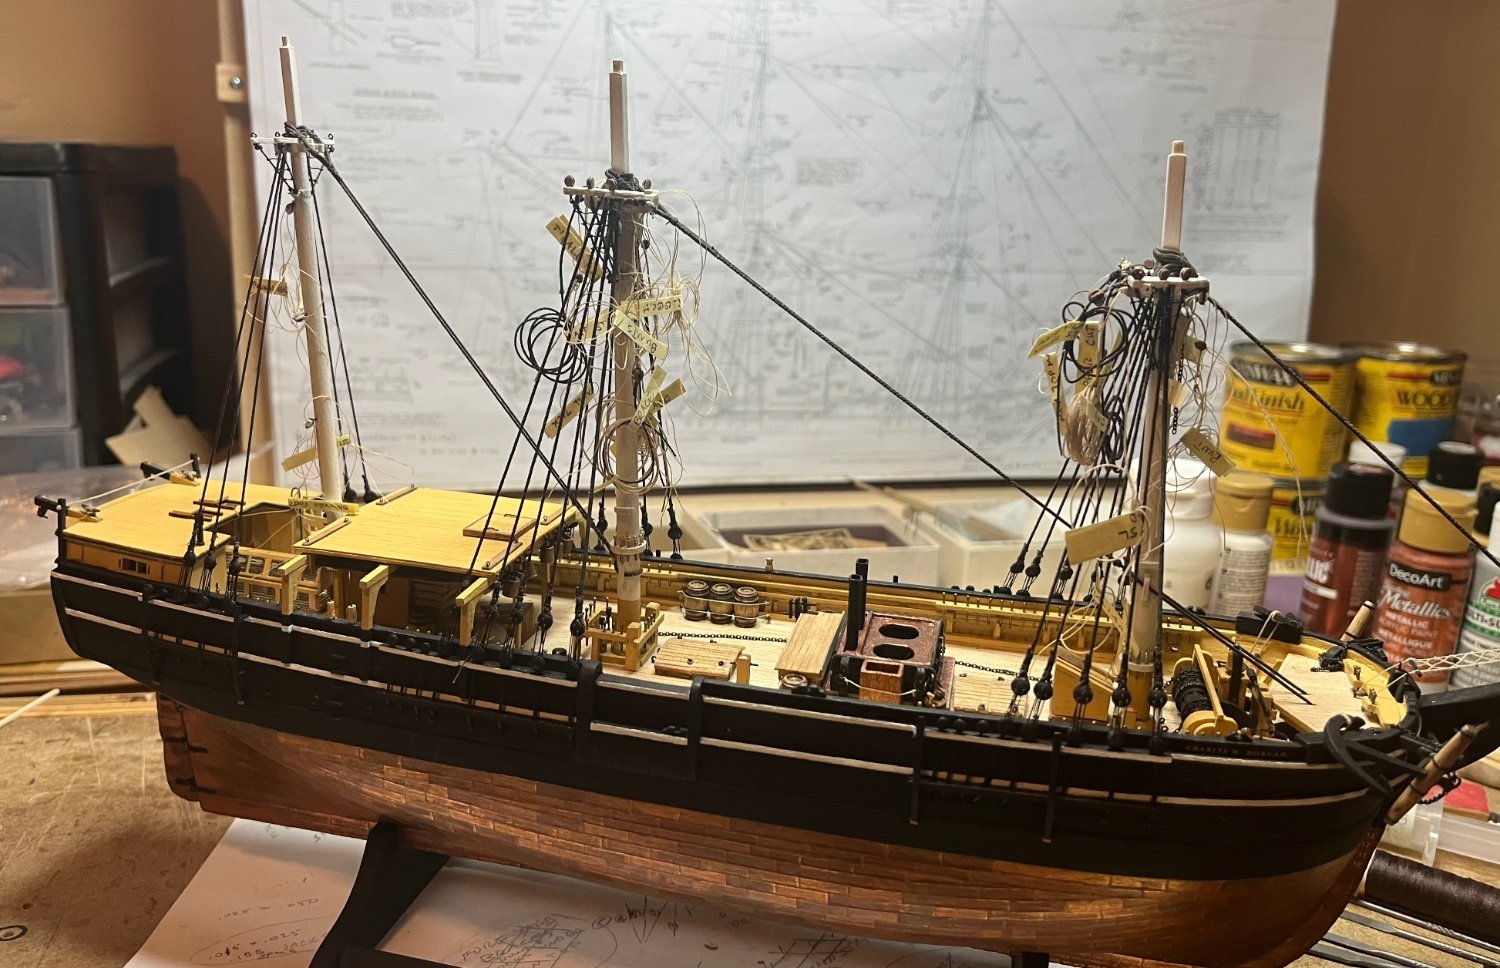
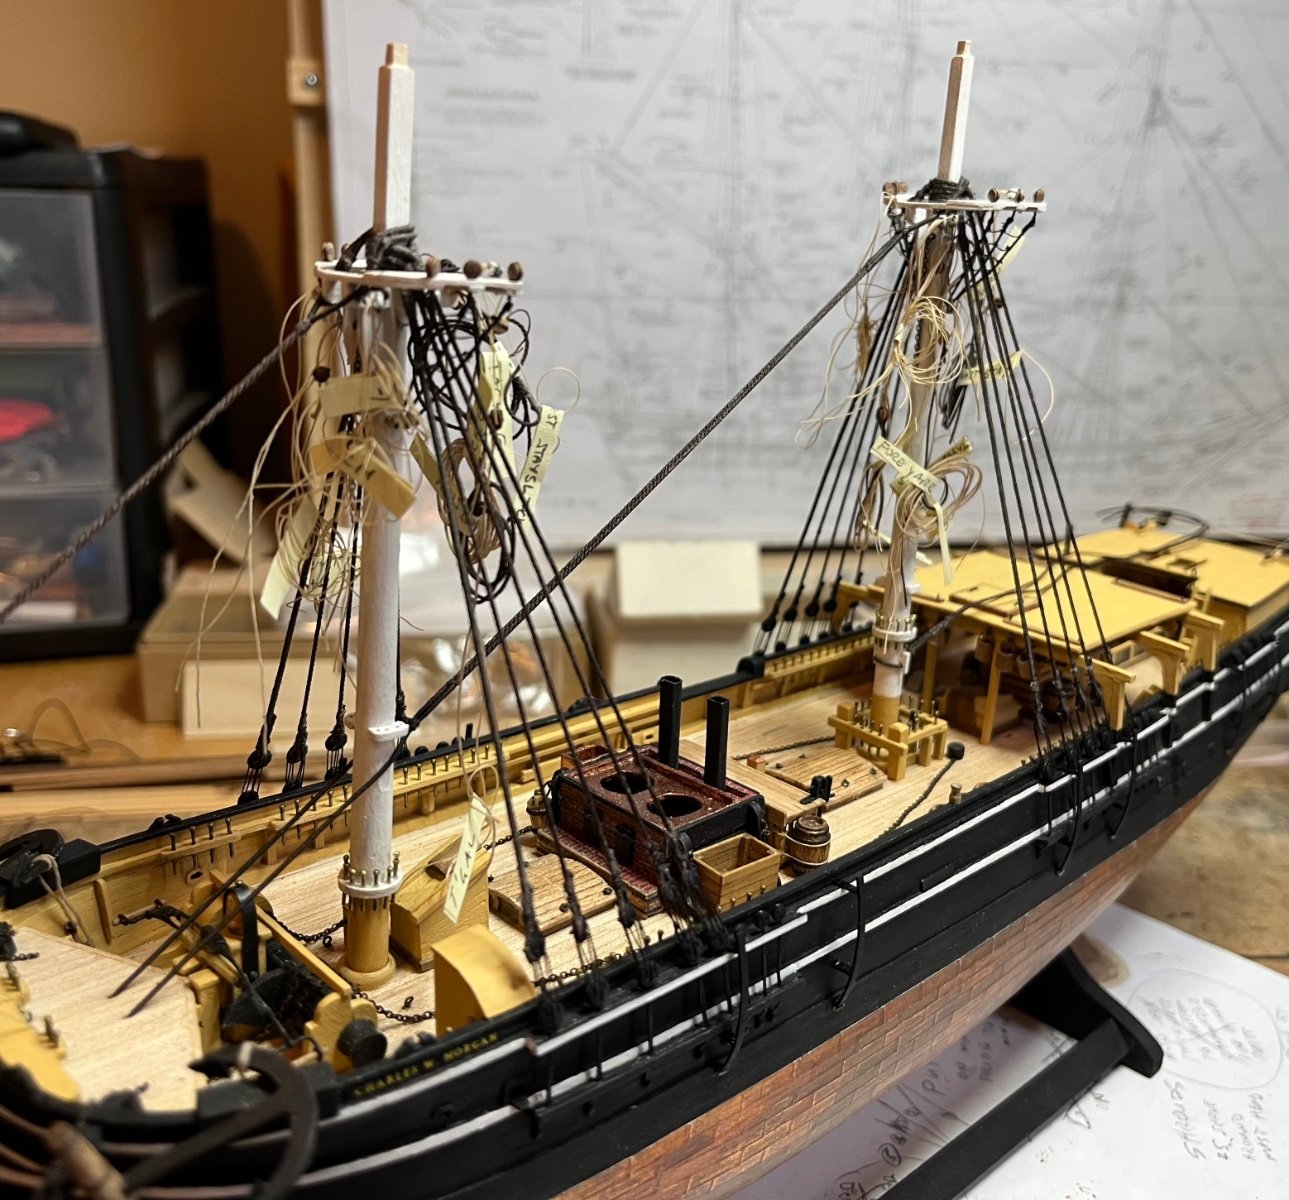
Well now I have all 3 masts set and shrouded with lots of little coils of rope (with little tags) hanging all over the place. Things are moving along somewhat smoothly, provided the little tags stay on. 😜😂. It looks like a nightmare with all the ropes coiled and hanging but I find it is much easier to Reece all the blocks before the masts are in place and then just uncoil each one as it gets tied to belaying pins and whatever is at the other end. As I am sure you all know and heard, “Do as much as you can off the model”. At least within reason.
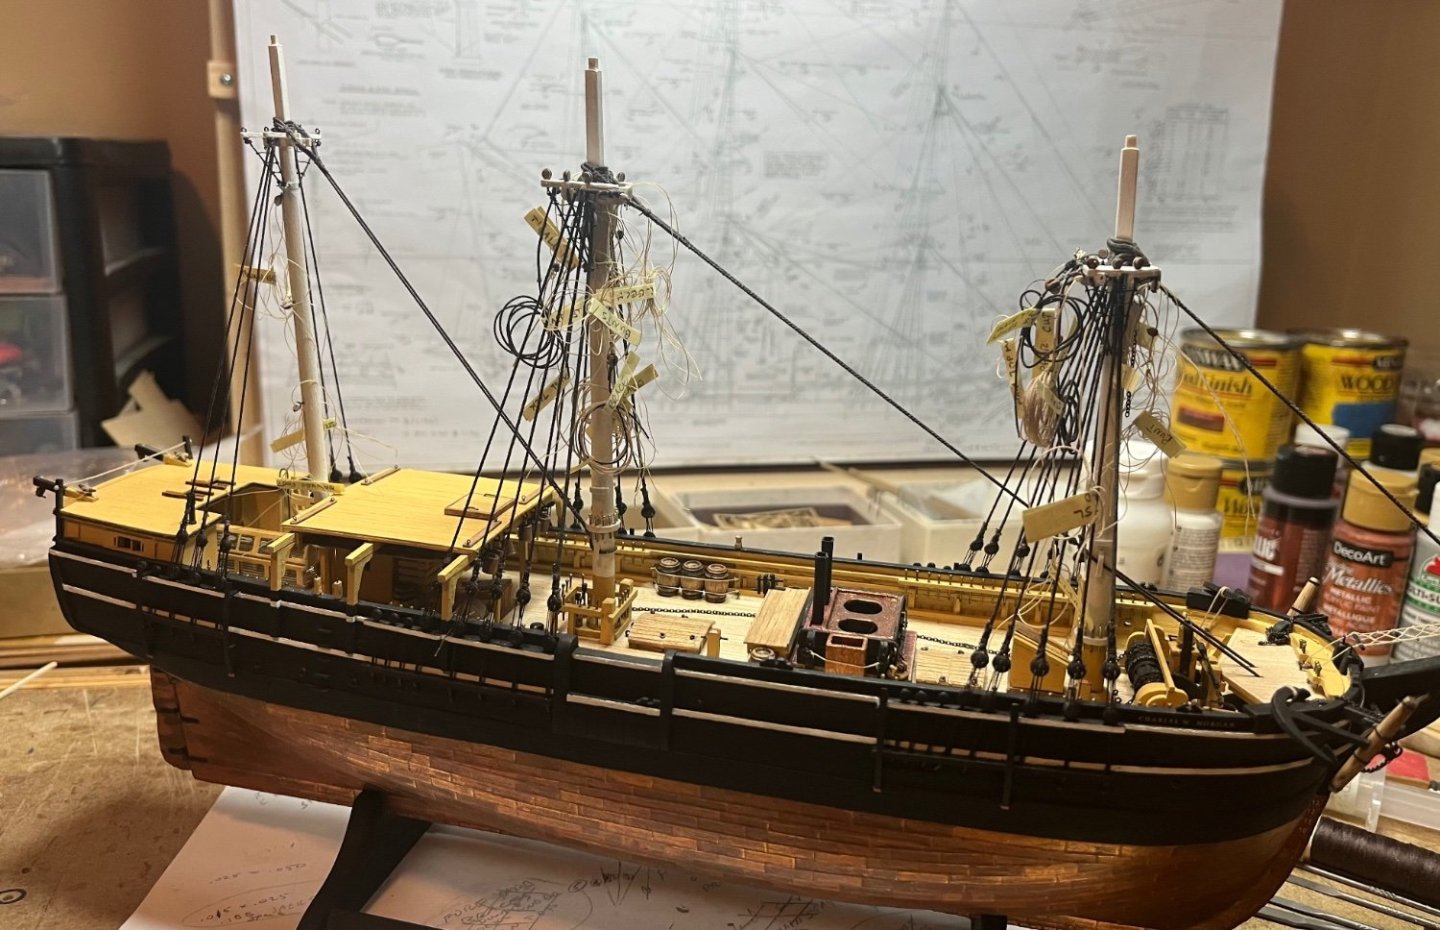
I think I will make a couple of whale boats to put on top of the boat bearer/shelter now as a change of pace.
I want to make sure I have everything done along the centerline of the deck and then work outward. That makes it a bit easier without having to reach around things to get at something in the middle.
Tom
-
Finished the main mast shrouds and the mainstay. Also put all the ropes through the blocks under the tops. At least I hope it is all of them. 😁. It now becomes a lot more difficult to add a block or eye that was overlooked.
The Northeast Joint Conference took place yesterday. A good time seemed to be had by all. The level of creativity and craftsmanship was inspiring. Thank you to the New York club for the work they did in hosting this year’s event.
Tom
-
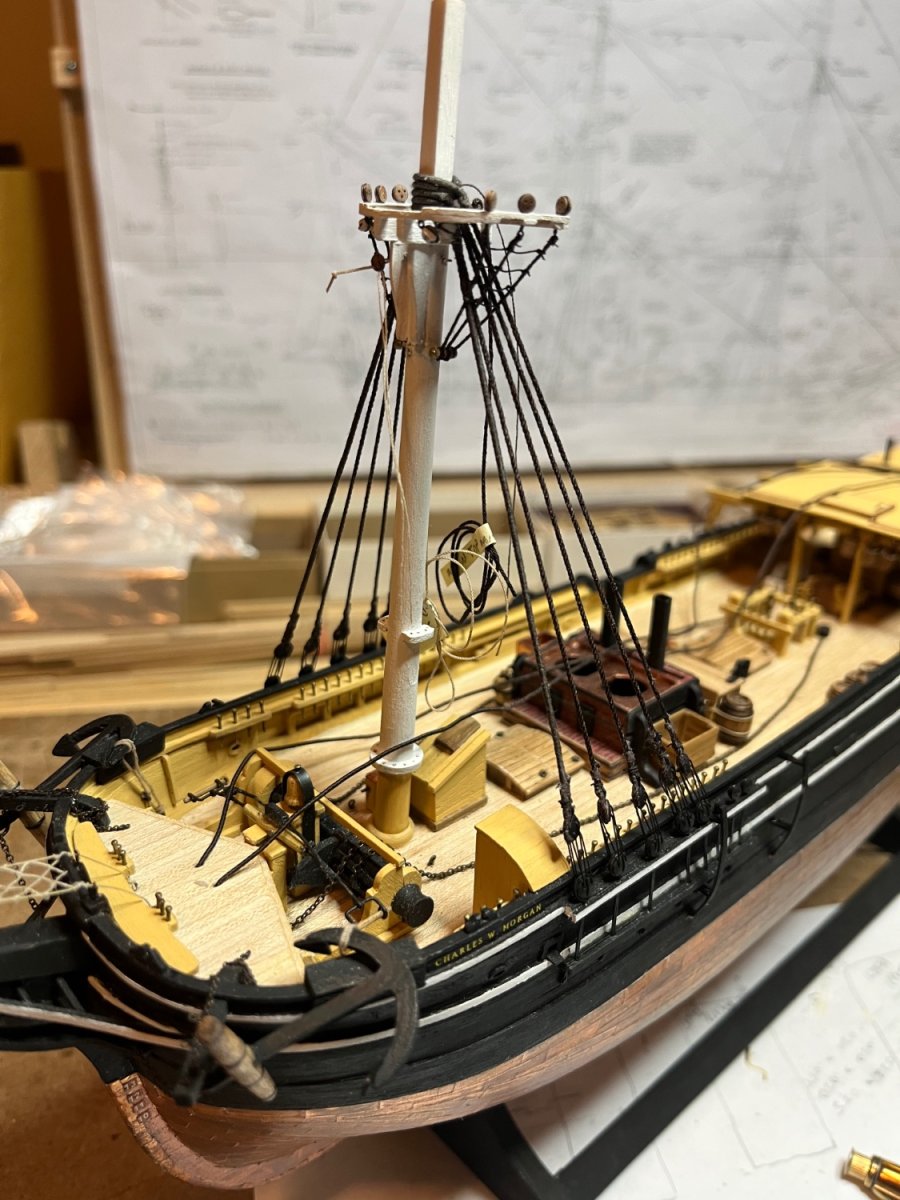
Okay. After completing my wife’s definition of yard work 😂😜, I managed to get the fore mast set of shrouds made and installed. Not my favorite task but the are in nonetheless.

Need to double check again to make sure I don’t need anymore eyes, blocks or other items attached to the fore mast. There is still plenty of room to work in now but later when I running lines for the running rigging I don’t want to try to add anything.
I do need to make a decision about main top mast and top gallant staysails. The Mystic plans don’t include them. There is a note on the plans saying they are shown on an earlier sail plan but no evidence they were used during the restoration period so Mystic does not display them. Even though I am following these plans I kind of think that they would make the ship a bit more complete looking. Right now the plans only show the main staysail.
Usually all the lower sails are shown furled or reefed so the deck details are more exposed. I am thinking that if the main top and t’gal staysails are omitted and the main and main staysail are furled there might be a big hole in the middle.
Anybody have any thoughts to persuade me to not include or include the top and t’gal staysails? I kind of need to know soon because there are blocks and eyes that would be needed to be installed prior to installing the appropriate masts.
Tom
- TBlack, GrandpaPhil, archjofo and 3 others
-
6
-
-
Yes, I don’t have a ton of experience but I definitely learned that same type of lesson after my first build. Now even though I may jump around a bit, I always try to work from the center of the deck outward.
Your Morgan is coming along nicely.
Tom
-
-
Managed to get the bowsprit netting done. Took a couple of tries but I think persistence paid off.
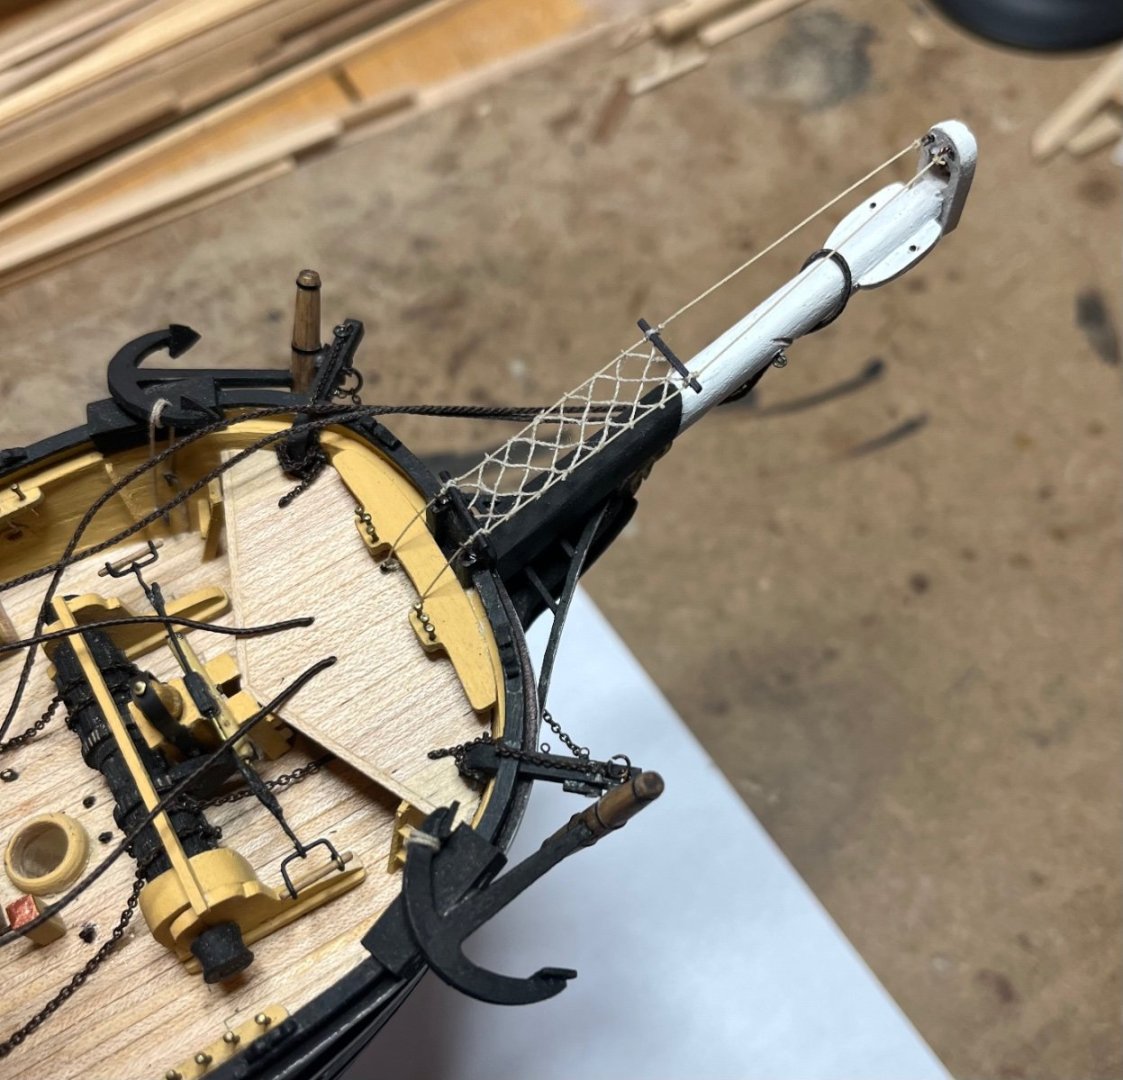
Here is a picture of the actual netting on the Morgan I took this past summer that I used for a guide.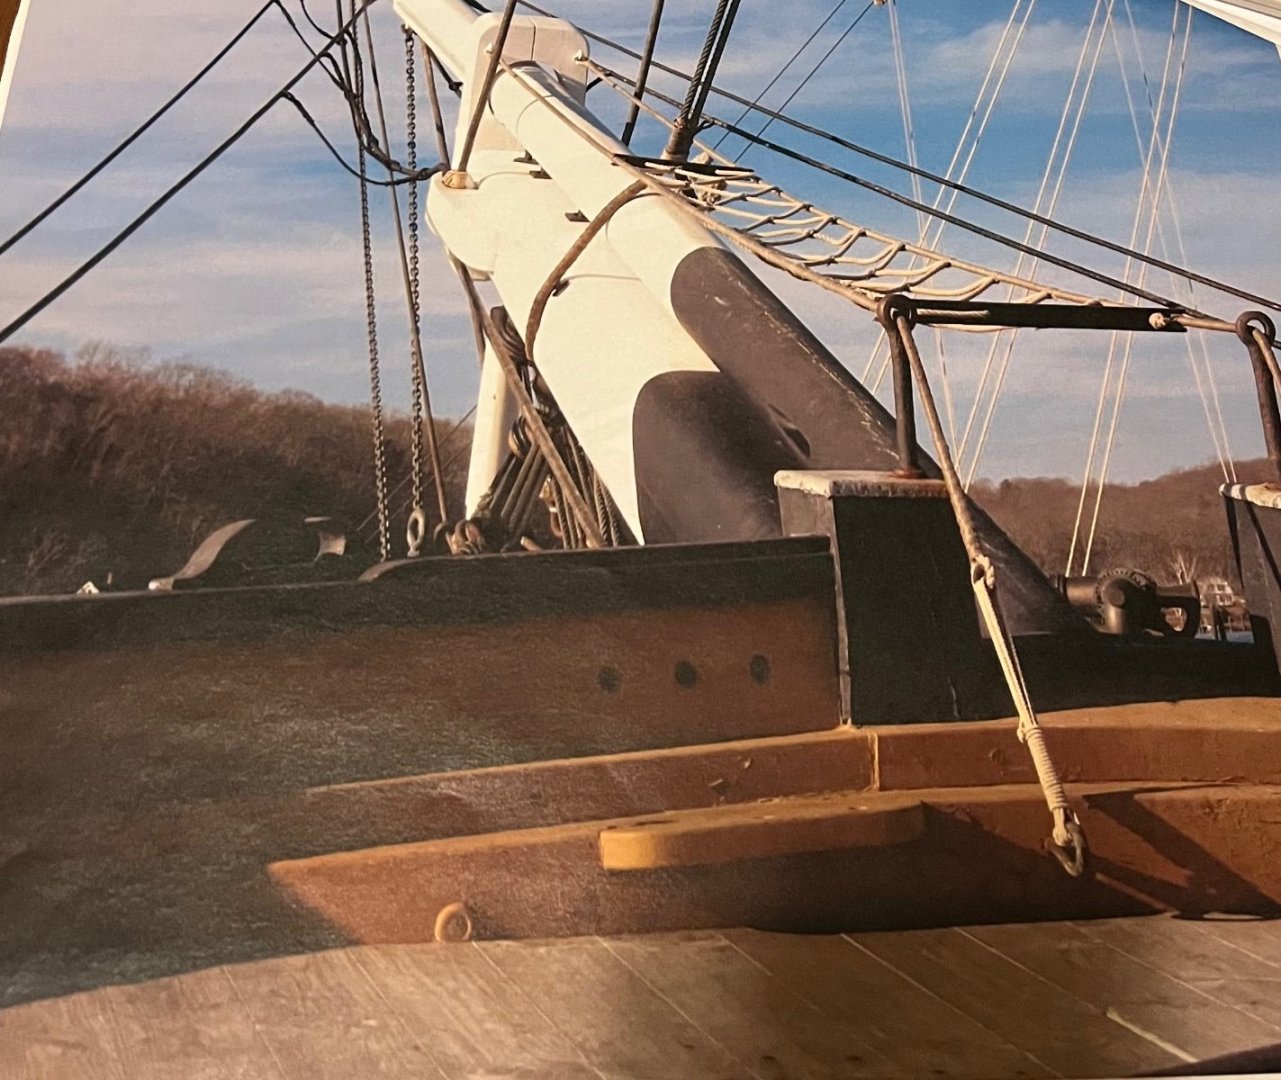
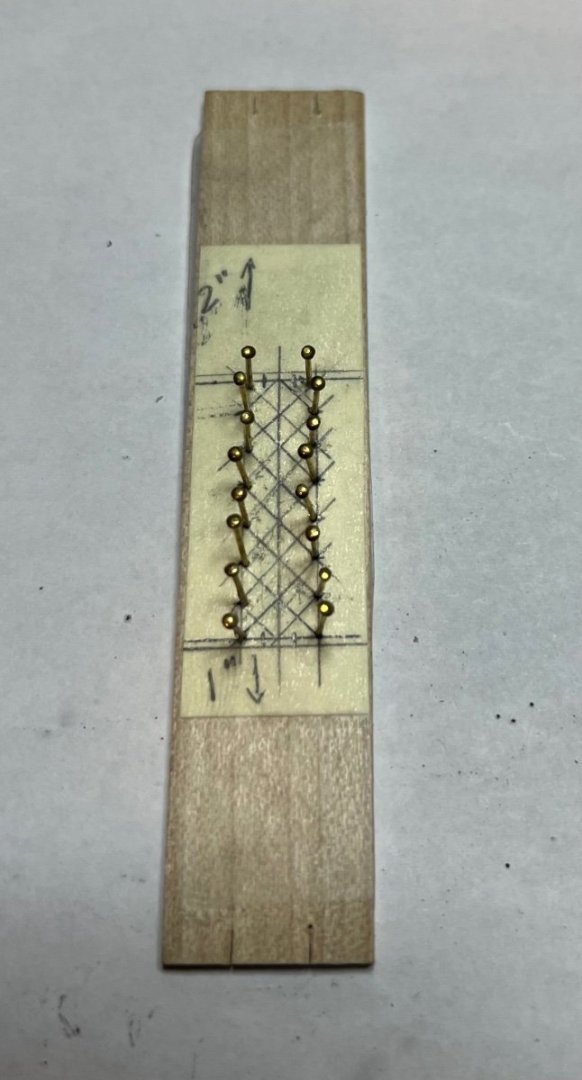
I made a miniature loom and wove the netting around pins that were placed at each intersection along the outside edges. The ropes on the edges were held in place using the slits in each end of the loom. After everything was woven, I took some Tex 10 thread and tied knots at each intersection to keep everything in place. Those knots are barely noticeable. 👍 Below is a picture of the loom. Nothing fancy but quit effective. 😜
Tom
-
Hi Tom
i am going to wait until it is finished before I put it on display. Last summer I was hopeful it would make it for this year’s show but life keeps getting in the way so modeling ends up taking a back seat. It will be there next year, at least that is the plan. 😜
Tom- Jack12477, mtaylor and hollowneck
-
3
-
Wow, I didn’t think I would ever get back to working on this model. What started out as a simple fix a shower arm leak and paint blossomed into a 3 week project. Ah the joys of home ownership. 🤪
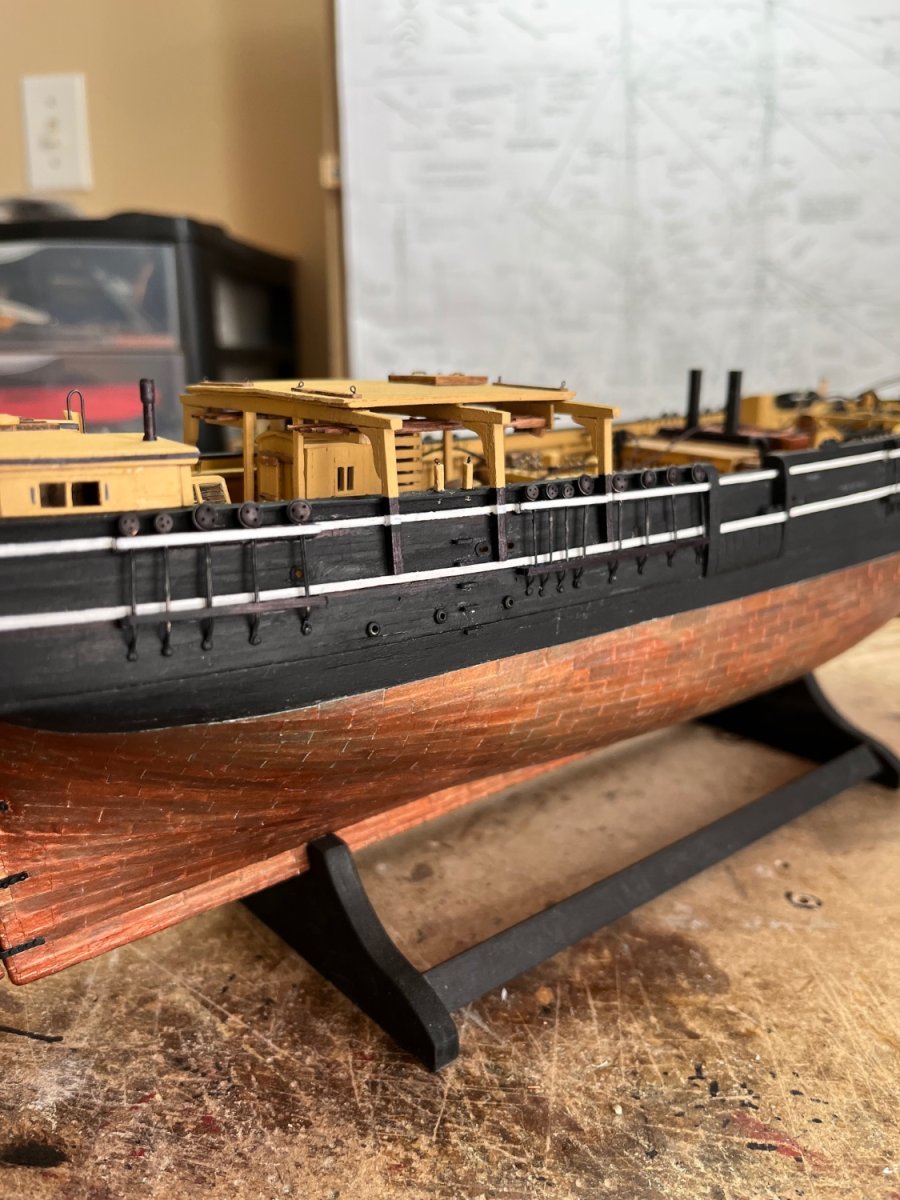
Anyway, I did manage to finish making and installing all the channels and chain plates.

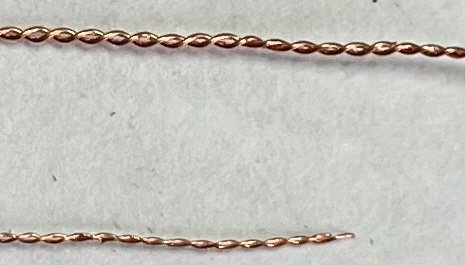
I did get in some finer brass wire to experiment further with making tiny “cheater chain”. Below are samples of 30 gauge (.010”) and 34 gauge (.006) copper wire. The 30 gauge seemed to work okay. Not surprisingly, the finished size is very similar to my earlier test with 28 gauge wire since the wire diameter is only .002” different. The 34 wire in my opinion is a bit too small to actually notice or perceive there to be links unless viewed under magnification. To the naked eye the twisted wire prior to separating the twists with a pin looks pretty much the same after creating the links with the pin. Since 99.9% of people looking at the model won’t be using an optivisor to look at the model, it probably would be fine to just twist the wire and leave it be.
The upper wire is the 30 gauge, lower is 34.
Hopefully, I can now put some time into modeling my Morgan instead of master bathrooms and such. 😁Tom
- Rudolf, GrandpaPhil, Jack12477 and 5 others
-
8
-
-
-
Hi Bob,
Thanks for the comment. I neglected to mention in the post above that it only works if you don’t twist the wire too tightly. The wire need to be able to open up around the pin when you insert it into the twist. I just received some 30 and 34 gauge wire to see how it will look. Might be too small to even notice the links versus just twisted wire.
Tom


Charles W Morgan 1841 by toms10 - FINISHED - 1:96 - POB
in - Build logs for subjects built 1801 - 1850
Posted
I have been off from work this week so I am putting a bit of time in the shipyard. I managed to make the 10 lances for the boats. Originally, I was going to just take a piece of wire and stick it into a wooden handle. I fiddled around a bit and managed to come up with a way to make them as a single piece with a barb from a toothpick. The handle is .040” in diameter and the iron is .025. They are 1.50” length overall.
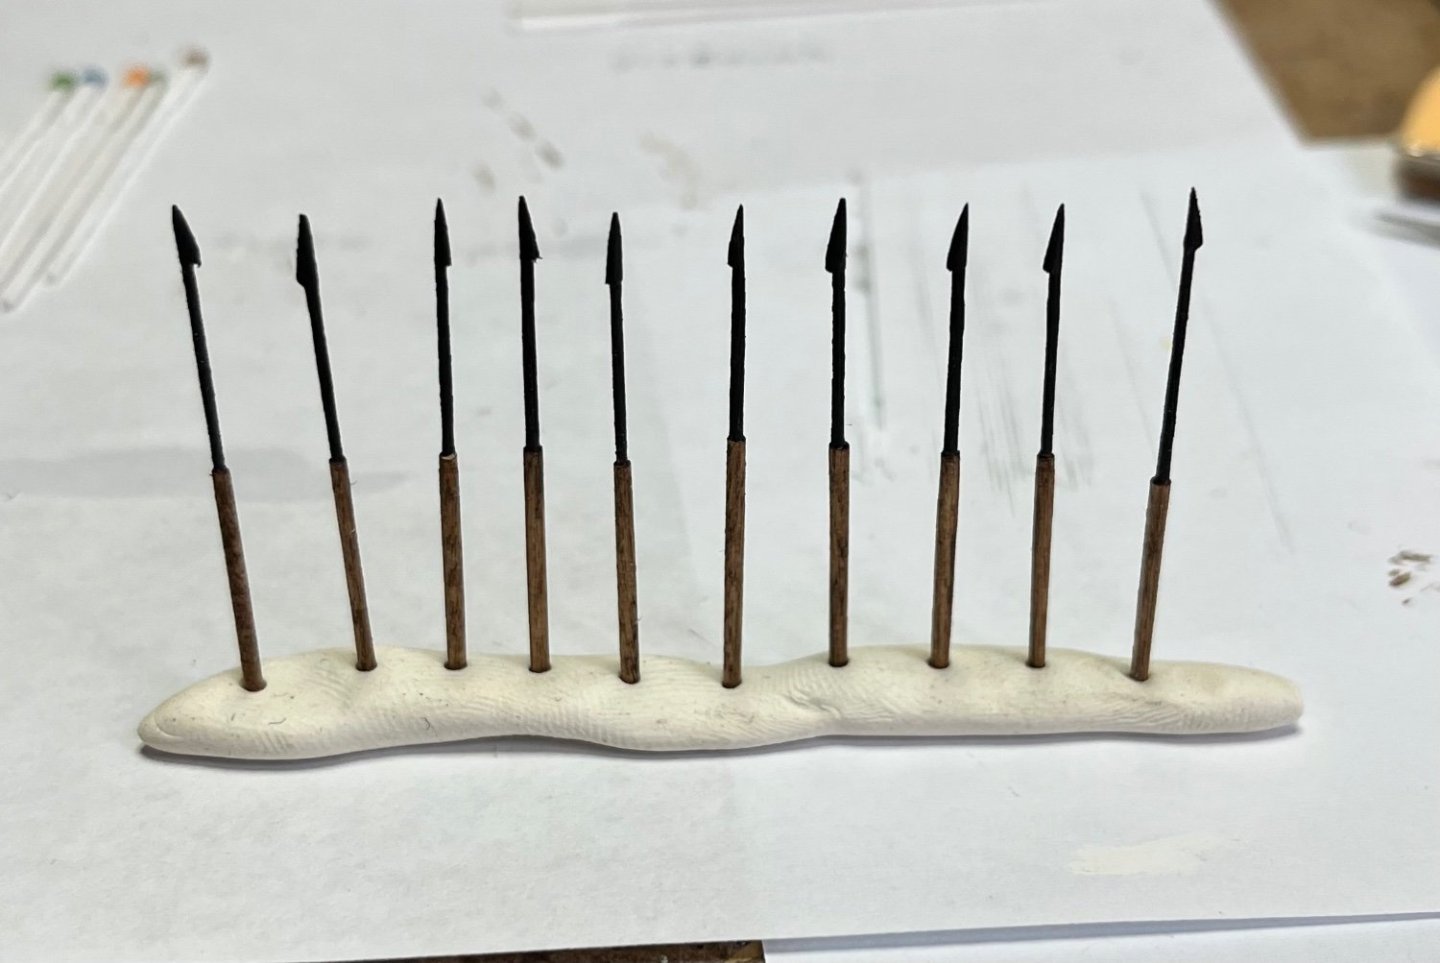
I just noticed the one on the right end has a slightly longer iron shank. If we run across an extra fat whale we can use that lance. 🐳😂😜
Tom