fletch944t
-
Posts
143 -
Joined
-
Last visited
Content Type
Profiles
Forums
Gallery
Events
Everything posted by fletch944t
-
Is there a better #11 blade handle
fletch944t replied to roach101761's topic in Modeling tools and Workshop Equipment
My review of surgical blades - so far. I ordered two different styles of scalpel handles and four different styles of scalpel blades to test as compared to Exacto blades. The scalpel blades I ordered were #10, 11, 22, and 25. The #10 & 11 scalpel blades are similar in style to the #10 and 11 Exacto blades and they fit the #3 scalpel handle. The #22 scalpel blade is similar to the #22 Exacto blade and fits a #4 scalpel handle. The #25 scalpel blade is the closest thing I could find to a #2 Exacto blade. It too fits the #4 scalpel handle. So, in all cases the scalpel blades are slightly more flexible than their Exacto counterparts. Sometimes I find that I like that and other times I prefer the stiffer blade. For me personally, I have small hands and I find that the scalpel handles feel better in my hand than the Exacto handles (regardless of which Exacto handle it is. The scalpel blades are very sharp and inexpensive. And finally, the blades don't slip - period. Often, if I find myself needing anything more rigid than the scalpel blade, I end up using a gouge or a chisel. However, having said that, I'll also say that I don't think I'll be abandoning my Exacto knives completely in favor of scalpels. I think I'll be using the scalpels at every opportunity simply because the blades are cheap and I can change them frequently without breaking the bank. But, I also know that there will be times that a very sharp, very rigid blade is called for and the scalpel blades just won't cut it (pun intended). So there you have it. My own impartial review of Exactos versus scalpels. -
I have a lot of power tools, including a scroll saw, and I use all of them on a fairly frequent basis. At the time I purchased my scroll saw, I felt I needed one right then but, I was short on cash at time. So, I bought a 16" Variable Speed Central Machinery Scroll Saw from Harbor Freight for $69. I bought it fully expecting to have to throw it away after a few months but, at that price I figured I could afford to throw it away and buy a better one when my pockets were a little deeper. To my surprise, it's been up the task for everything I've asked it to do. I guess if I were going to use a scroll saw more frequently than I do, I could see ponying up the bucks for the MicroLux or Proxxon scroll saws. But, since I only use it every couple of days, I'll keep using the CM scroll saw until it goes belly up.
-
Well Bill. All I can say is if my Connie turns out even close to yours, I'll be a happy camper. Incredible work. And again, thanks for all the help you've given me thus far. It has been invaluable.
- 335 replies
-
- 2
-

-
- Constitution
- Mamoli
- (and 3 more)
-
Is there a better #11 blade handle
fletch944t replied to roach101761's topic in Modeling tools and Workshop Equipment
I may have spoken too soon. All of my newer X-Acto brand handles are single slot. I have an older handle that has an X-slot collet. However, I can't identify what brand it is. Funny thing is, the handle is close in size to all of my handles that accept a #2 blade but, the #2 blades are slightly to large to fit into the handle. As far as the single-slot X-Acto handles, while I've had a great deal of trouble getting them to grip the blades, it may be attributable to the fact that, having surgery on both wrists just prior to the end of last year, my grip is not quite back to full strength and I may not be able to tighten them sufficiently to properly grip the blades. However, having said that, one design improvement that X-Acto could put in to make this easier is to knurl both the tightening nut and the handle next to the tightening nut. What I find is that while I can grip the tightening nut, the handle slips in my fingers when trying to tighten the nut. I also took another look at the Harbor Freight "deluxe hobby knife" set again. While almost all of the knifes use a plastic collet, most of the collets tighten near the blade. However, on two of the handles the plastic collet runs inside the entire length of the handle and are threaded on the end opposite of the blade for a tighten nut. While I detest the plastic collets, these two handles in particular seem to have much less trouble holding the blade. -
Is there a better #11 blade handle
fletch944t replied to roach101761's topic in Modeling tools and Workshop Equipment
That's interesting Walter. I think I have some old X-Acto handles buried away somewhere and I do remember that the older handles have a single slot instead of the X slot on my current handles. I'll have to give them a try (assuming I can find them). -
Is there a better #11 blade handle
fletch944t replied to roach101761's topic in Modeling tools and Workshop Equipment
For me, the answer to these two questions does not shed any light on the problem nor reveal a solution to the problem. Regardless of how I hold the knife or what I'm using the knife for, the X-Acto handles currently on the market don't grip the blades very well. -
Is there a better #11 blade handle
fletch944t replied to roach101761's topic in Modeling tools and Workshop Equipment
I did a similar thing yesterday Phil. Except on eBay. I bought 2 stainless #3 handles and 2 stainless #4 handles. 100 each of the #10, #11, #22, and #25 blades. Total was $30.15 with free shipping. The reason I bought 2 of each handle was so I could keep a #10 and #11 in each of the #3 handles and a #22 and #25 in each of the #4 handles. That way I won't have to be changing blades all the time. We'll see how it works out. -
Is there a better #11 blade handle
fletch944t replied to roach101761's topic in Modeling tools and Workshop Equipment
I bought the Harbor Freight "deluxe hobby knife" set and it's completely worthless IMHO. In fact, the Harbor Freight handles are actually worse than the X-Acto handles at gripping a blade. To the point of being dangerous. That being said, I too am not happy with the way the #2 and #11 X-Acto handles grip a blade. I'm constantly having to tighten them as well. I think I'll give the scalpel route a try. -
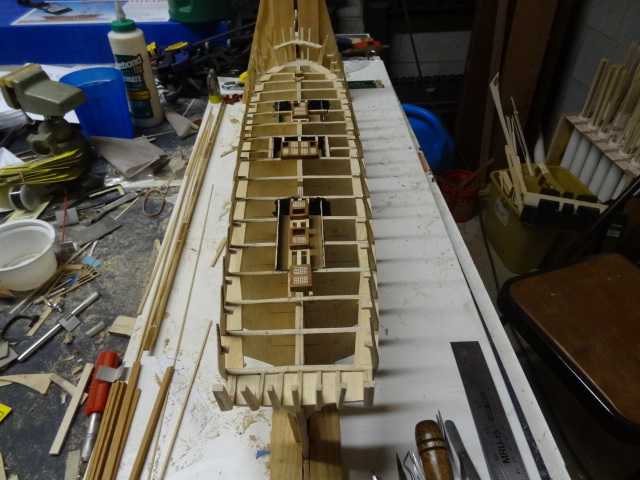
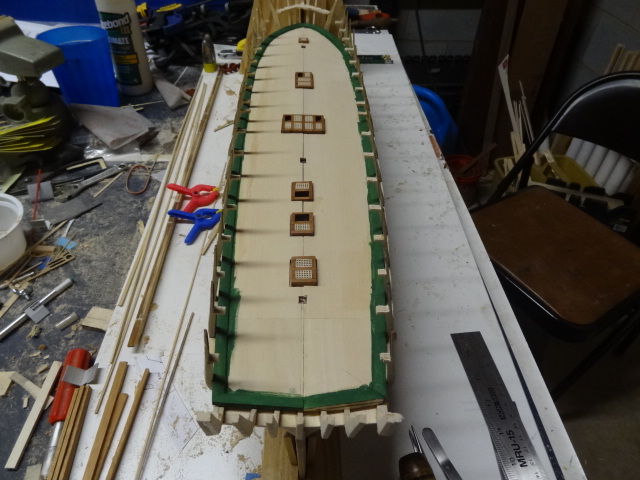
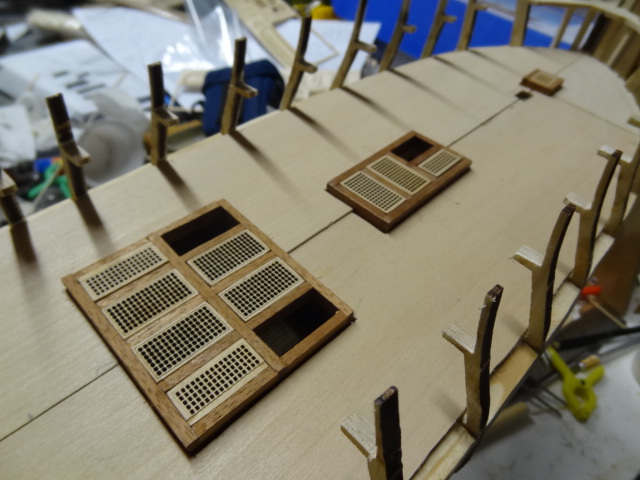
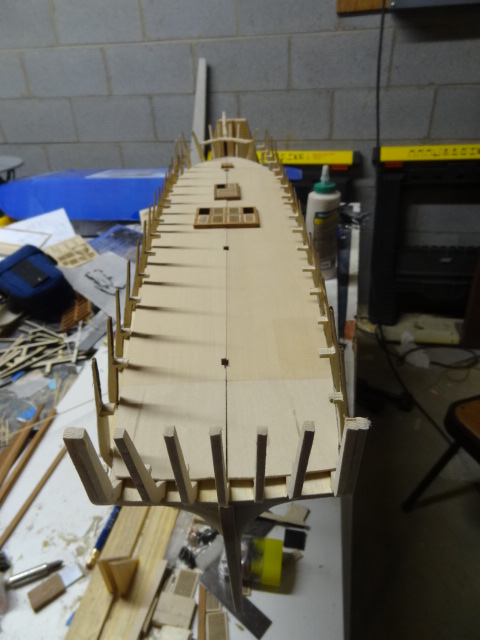
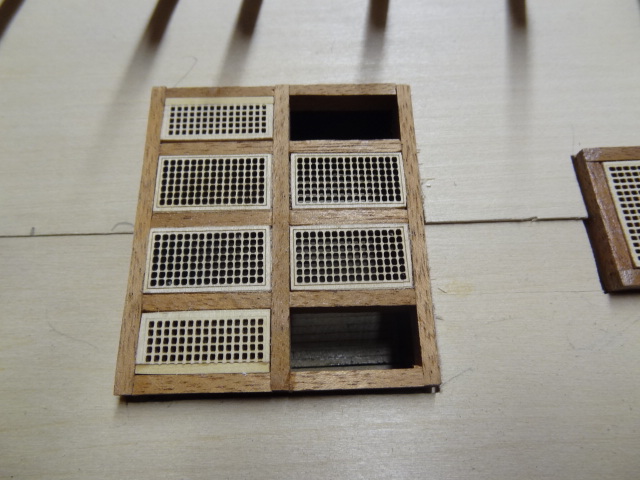
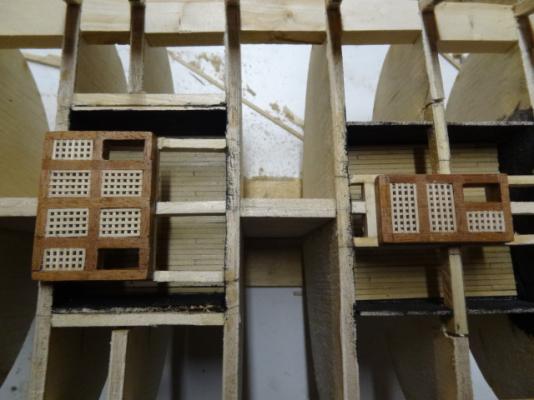
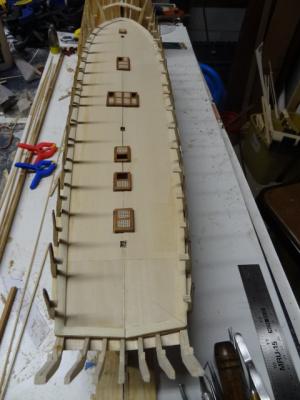
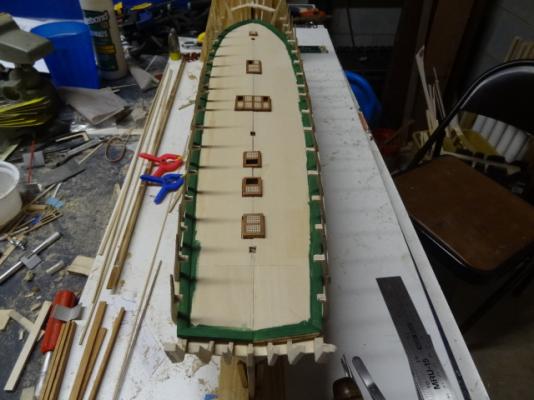
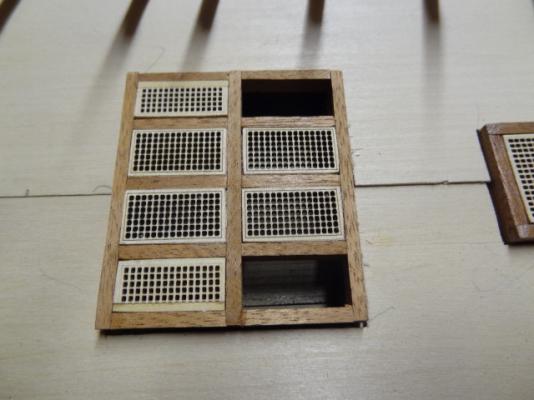
It's been sometime since I've posted but, the last few weeks haven't been a complete waste. Just to give you a little history, it WAS my intent to construct the gun deck hatches using the same grating provided in the kit. I wanted the grating on the gun deck to appear identical to the grating on the spar deck. So, I contacted Model Expo and ordered two extra sheets of the grating sheet provided in the kit. As you can see from the previous pictures, I was already well into constructing the gun deck hatches using the kit grating. After constructing all of the gun deck hatch coamings, I started locating them on the gun deck and came to a disturbing realization. That being that the gun deck hatches were entirely too large. I knew when I made the decision to go this route that the hatches were going to end up being larger than they should be. This was due to the fact that even using the smallest gratings available in the kit, the hatches would be larger than scale - even cutting some of the gratings down to a smaller size (which I didn't want to do). But, I made a conscious decision to go ahead and give it a shot. Well, had I gone through with the plan, there would not have been enough room for all of the gun deck hatches and it would have crowded other equipment on the gun deck. So, I reluctantly went back to the drawing board on the hatches. I had previously printed copies of all of the Constitution deck arrangements from the Plans CD. And, I already had measurements of the gun deck hatches which I had converted to scale by comparing the main hatch measurements from the CD and the MS plans to get a conversion factor. This is how I knew my original hatches were going to be larger than scale. So, I ordered boxwood grating material from Model Expo (1mm grating holes) and fabricated all new hatch coamings and gratings for the gun deck. This also required me to cut new sub-flooring for the gun deck and rework the hatch support framing. As a side note, I'll be using the same grating material on the spar deck in place of the grating provided in the kit (again for consistency in appearance). I've also completed the gun deck waterway, attached the waterway to the gun deck sub-floor, and painted the waterway. You won’t see it in the pictures yet, but I’ve also started planking the gun deck. One of the reasons that I decided to install planking over a basswood sheet sub-floor is so that I can plank the gun deck sub-floor with it removed from the model. I did this because I thought it would make the job of planking easier, especially with regards to using scale length planks. One problem that it does create is that the center line plank on one half of the sub-floor must overhang slightly to ensure the seam between the sub-floors is properly concealed (assuming all goes according to plan). So, here are the pictures of the progress thus far. I’ll post pictures of the deck planking when I’ve made enough progress to take some decent pictures.


-
Man, I'd sell dirty pictures of my mother to be 39 again. Happy Birthday you scurvy dog!
-
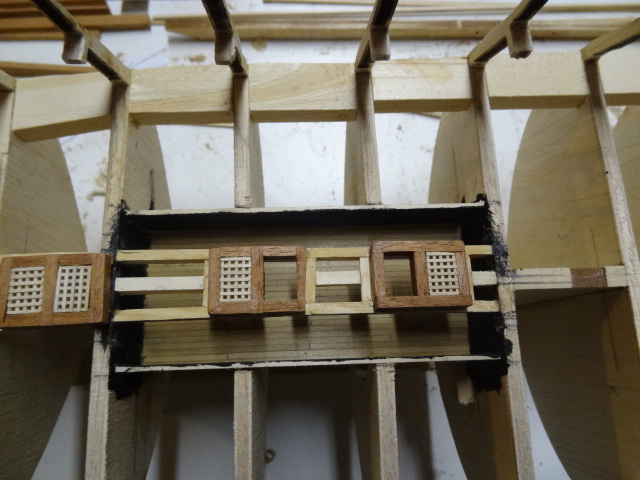
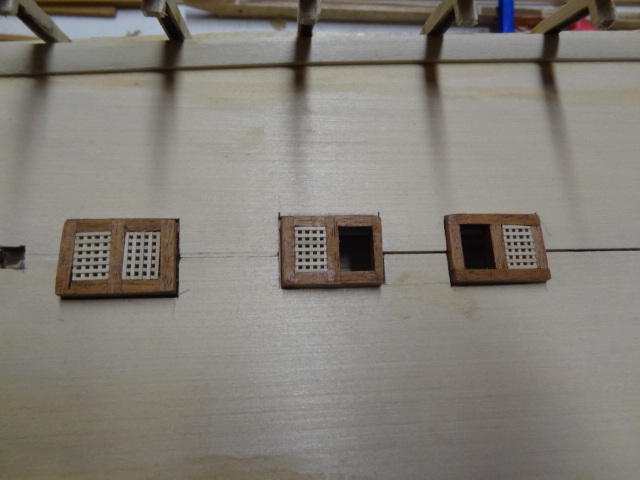
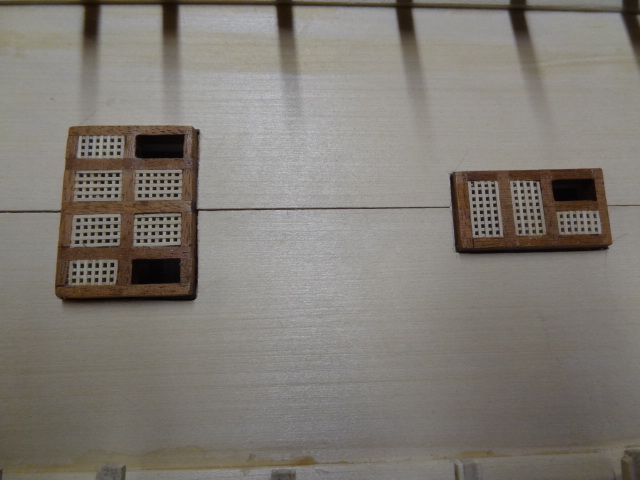
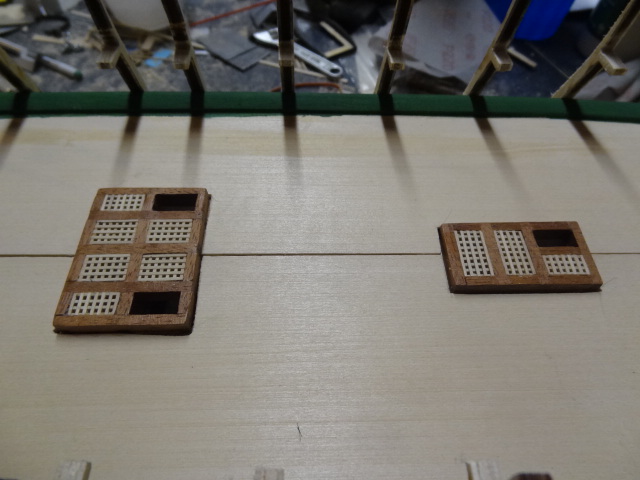
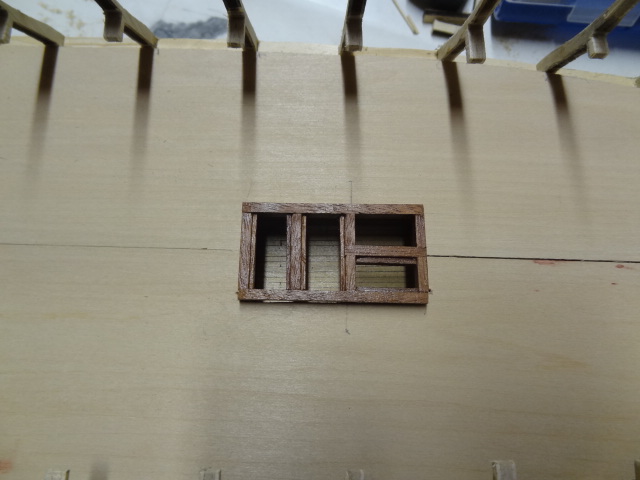
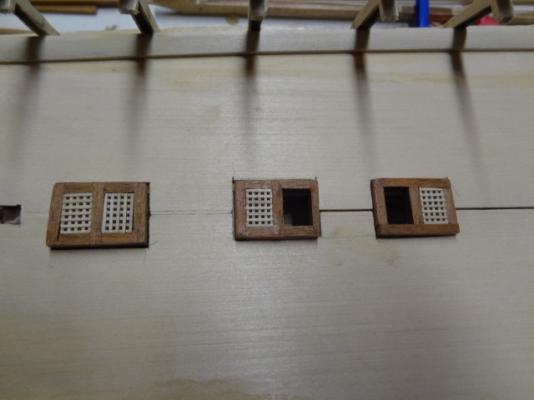
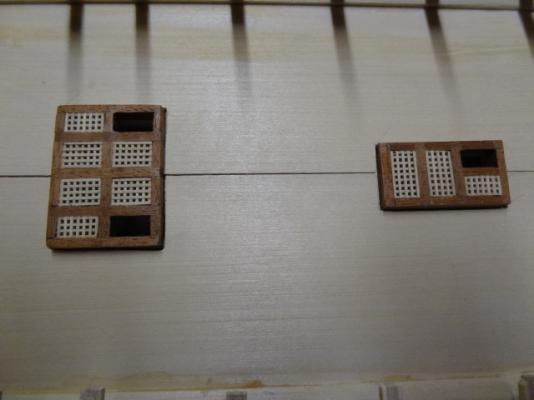
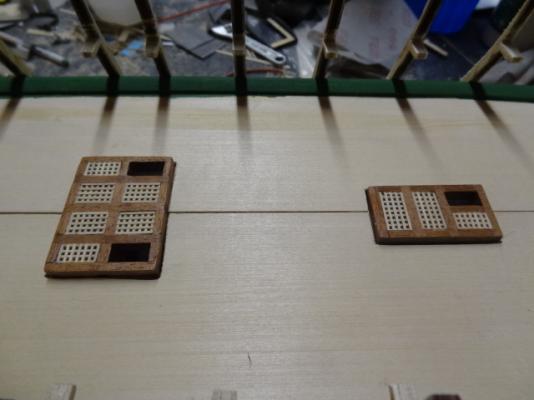
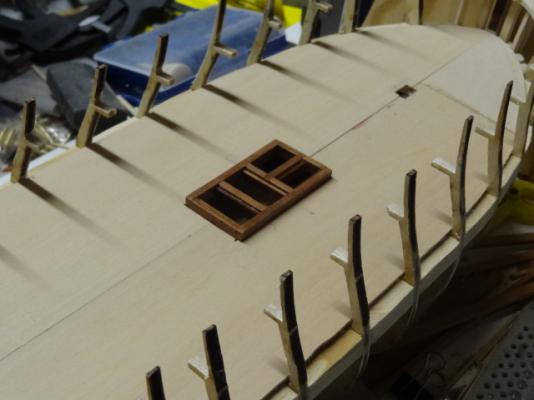
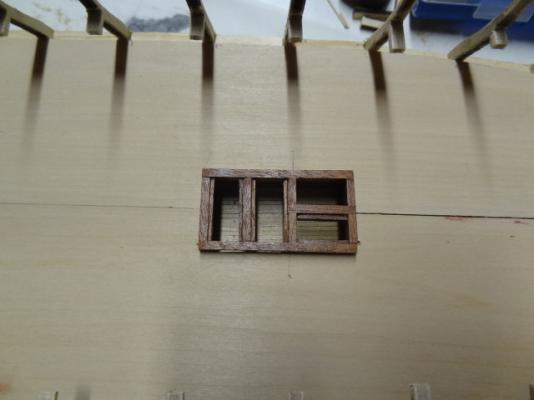
While I've had very little time to work on the model this week, I've made some minor progress. I finished another one of the gun deck hatches and I finished the fore-most scuttle. As far as I can discern, I have three more gun deck hatches to complete (unless I've missed a hatch or scuttle somewhere). Then I'll be able to start working on the gun deck planking. I've yet to apply the acrylic satin sealant to the larger hatch or the scuttle. That's why the middle hatch is darker in appearance than the other two.

-
Hi Jon. Bob's Practicum will serve you well. IMHO it is a must have for folks, like you and I, who don't have a huge amount of experience with plank on bulkhead modeling. However, also realize that frequently there is more than one way to accomplish a task and sometimes it may be easier for you to do something your own way than it might be following the practicum to the letter. I have found that to be true on several occasions with the practicum. Just realize that this is YOUR build, not Bob's build and you can do whatever you want. I'm very early in my build and I've already made a ton of mistakes and broken a lot of stuff that I had to fix. I was honestly petrified getting started on my build. However, I quickly learned that every mistake is a learning experience and that every mistake is fixable. I've also come to realize that your skills as a modeler will develop quickly once you start and you'll find yourself making fewer and fewer mistakes as time progresses. Good luck on your build.
-
Thanks Patrick. The only place I plan to do any of the berth deck is for the hatches that will have at least one opening with a ladder going down. For example, the next hatch aft which is directly below the aft end of the spar deck main hatch will have two ladders going down. So, I'll try to model some berth deck planking there. However, the forward-most hatch on the gun deck is really just a scuttle. So, I'll have a hatch and hatch grating there with black paneling underneath. As soon as I finish all of the hatch coamings for the gun deck and cut the sub-floor panels to accommodate them, I'll start planking the gun deck. I need to do that so that when I get one of the 24 pound long guns put together I can set it on the gun deck to determine the appropriate height of the gun deck ports.
-
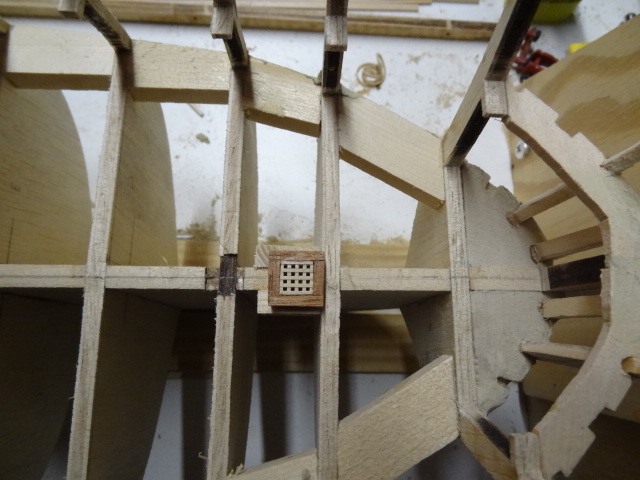
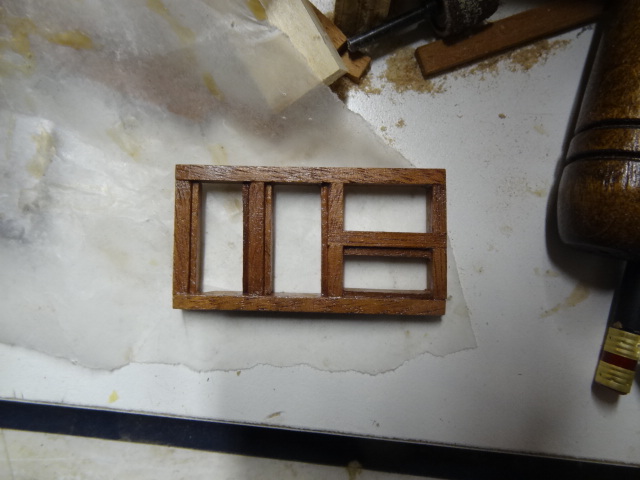
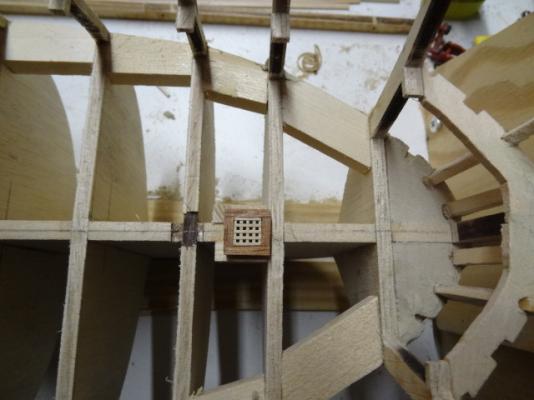
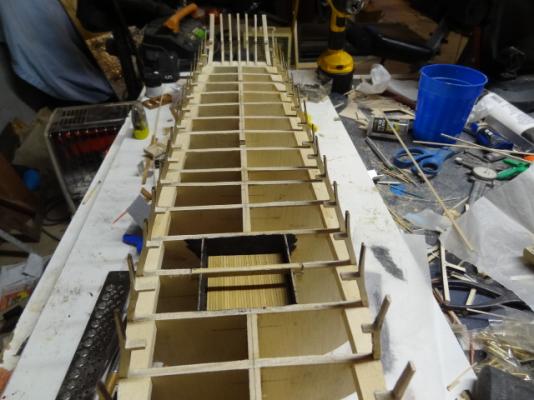
Gun deck sub-floor with forward hatch coaming.
-
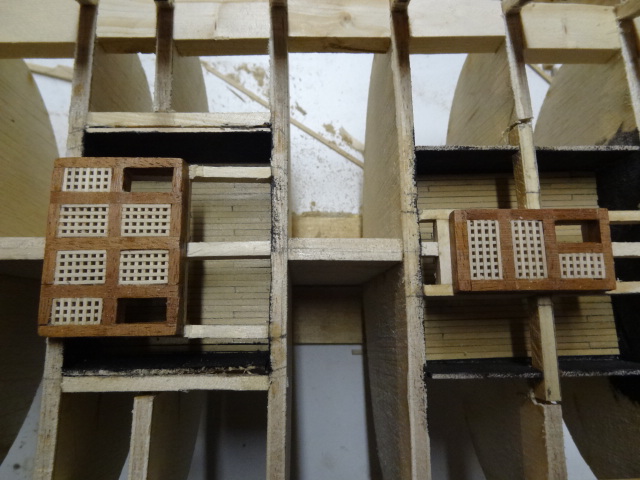
An attempt at a hatch coaming for the gun deck.

-
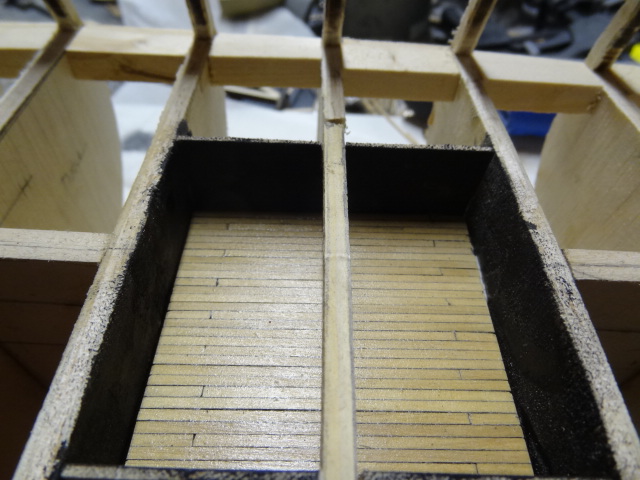
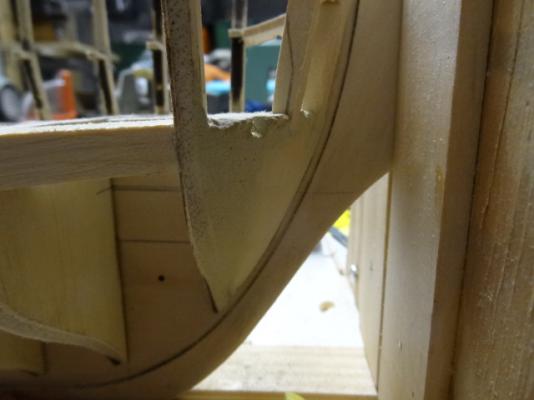
Cutout in keel for gun deck hatch opening to berth deck.

-
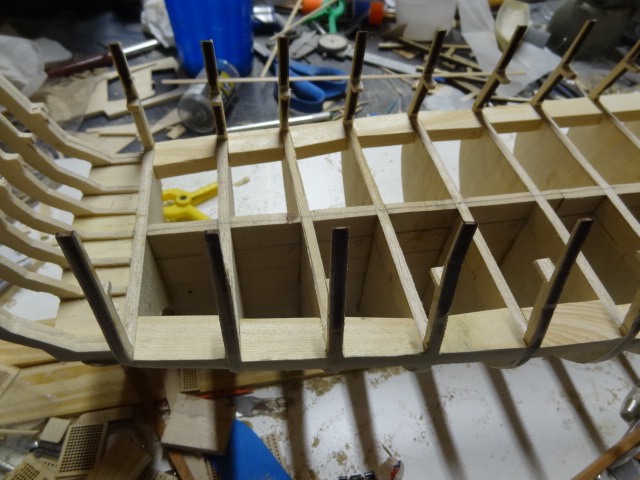
Spacer blocks between bulkheads.

-
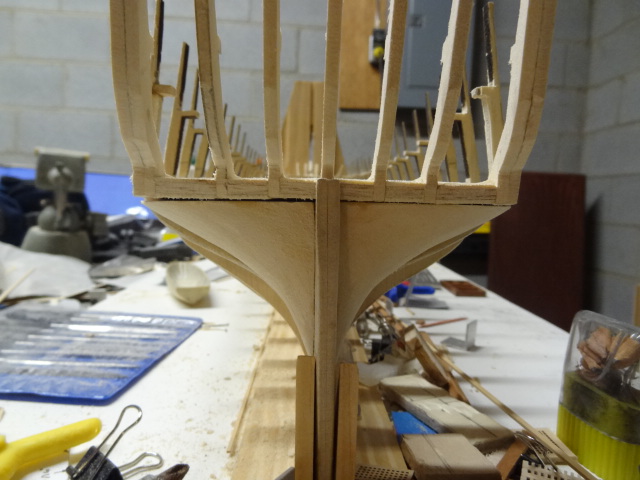
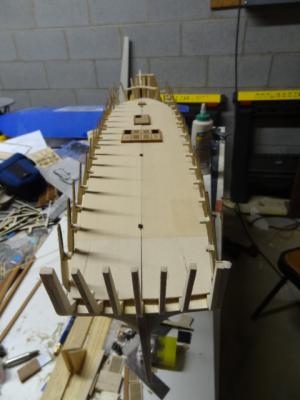
Finally got around to taking a few pictures of the progress. Stern and bow filler blocks.

-
I've been working an hour or two here and there on the model over the last week. Things at work are crazy right now and I simply haven't had a lot of time to devote to the model. However, I'm getting ready to have a few days off and will be able to post some pictures of what I've accomplished recently. I did get the stern filler blocks done and attached to the boat. I still have some work to do on the counter but, I decided to work on something different for a while. I cut and shaped the stem filler blocks, attached them to the boat, and completed a good portion of the stem framing. I'll likely finish up the stem framing this weekend. I also cut and installed support blocks between all of the frames at gun deck level. Not only will this provide for the bulkheads but, for my build it will also provide additional support for the gun deck planking. I know that some folks don't install the bulkhead support blocks but, after doing it myself, I highly recommend it. One of the benefits of installing the blocks is that it allows you to see if your bulkheads are square in relation to the keel. When I started measuring and cutting the blocks to go between the bulkheads I was finding that the distance between the bulkheads was not the same on both sides. The odd part is, I was extremely cautious about making sure the bulkheads were square when I glued them to the keel. I cut pieces from aluminum channel which I used with clamps to square the bulkheads when I glued them and I still ended up with this problem. But, installing the support blocks allowed me to true everything up. Finally, I've started working on hatch coamings, primarily for the gun deck. I cut some strips of mahogany to use for the hatch coaming framing. Then, I started cutting grooves for rabbet joints in the mahogany to assemble the coamings. It was at this point that I came to realize just how out of practice I am at working with the router. I had done a lot of router work in the distant past but, never with anything this small and I've discovered that I'm going to need a lot of practice and patience to get the coamings cut correctly. Fortunately, I have a lot of scrap wood to practice on. Again, I'll post some pictures in the next day or two. Fletch
-
I too am going to fabricate the gratings out of boxwood. Some of the pieces for the coamings are indeed very small but, since they're for the most part straight with no intricate detail, I might be able to get away with making the coamings out of mahogany. Heck, I can at least give it a shot. Worst case scenario is I'll have to re-do them out of some other material. But, at least we'll all know if it's achievable.
-
The last few days I've spent studying historical drawings of the Constitution to determine the size and precise location of hatches on the gun deck in relation to other equipment, to the spar deck hatches, and to the MS kit bulkheads. I'm going to have to fabricate additional hatch gratings for the hatches on the gun deck. In the process, I may fabricate all new grating for the hatches on the spar deck rather than use the laser cut grating provided in the MS kit. It may be a matter of seeing how closely I can match up the grating I fabricate to the grating provided. Once I've fabricated the gratings for the gun deck, I'll be able to determine the exact dimensions for the gun deck hatch coamings and will start fabrication on those. And, once I get all of the gun deck hatches fabricated I'll be able to lay them out on the gun deck subflooring and mark the associated cutouts. Just curious as to whether anyone has ever fabricated hatch coamings out of mahogany? I ask because I have a boat load (pun intended) of mahogany left over from a bookcase project from many years ago that I thought I might try to use somewhere. My only concern is that the contrast between the hatch coamings, hatch grating, and deck planking might detract from the overall appearance. I may fabricate a few mahogany coamings as a test just to check the appearance.
-
Absolutely Bill. That makes all the sense in the world. I know walnut can get pretty pricey but, if you're building the case out of walnut to match your décor, the additional walnut to construct a new base shouldn't significantly increase the overall cost of the project. As much time, effort, and attention to detail as you've put into the model thus far, I don't think you'd be completely happy doing anything less. You can always use the mahogany base for the next build.
- 335 replies
-
- 1
-
-
- Constitution
- Mamoli
- (and 3 more)
-
I like your plans for the case. I think the research you've put into it reflects the effort that you've put into the model (which certainly shows). Just my two cents on mounting the ship directly to the base of the case. Assuming that there isn't a drastic difference between the current base on your model and the base of the case, I would make every effort to retain the current base and secure it to the base of the case as you've already proposed. My reasoning would be that it would greatly simplify things down the road in the unlikely event that you should have to remove the model from the case for repairs or cleaning. Also, no matter how careful you are, removing the model from its current base and attaching it to the base of the case increases the likelihood that the model will get damaged. Again, just my opinion but, the difference between the two bases would have to detract greatly from the display to make the risk worth the reward. All that being said Bill, I'd just like to add that your work on this model has been nothing short of inspirational - at least it has been for me.
- 335 replies
-
- 3
-
-
- Constitution
- Mamoli
- (and 3 more)
-
Thanks Bill. I think I've seen one or two models with gray fighting tops. I may end up changing my mind but, I'm inclined to go with the white fighting tops.
-
Thanks Bill. That is very interesting. I had already concluded that I was not going to put a fixed berth in the Captain's Quarters (based solely on a video tour by the crew). But, in that video, they simply mentioned that the Captain would have slept in a hammock or a cot. There was never mention of a hanging cot. That's a great picture of the hanging cot. I had also never seen that configuration for the Captain's Quarters either. And, I'd never read anywhere before that the bulkhead forward of the four cabin guns was removable. I'm leaning toward using this configuration as opposed to the current configuration.