-
Posts
23 -
Joined
-
Last visited
-
 Red reacted to a post in a topic:
HMS Warrior by StuartC - Billing Boats - 1:100 - started 1/1/2014
-
 Kevin reacted to a post in a topic:
HMS Warrior by StuartC - Billing Boats - 1:100 - started 1/1/2014
-
 jbwok reacted to a post in a topic:
HMS Warrior by StuartC - Billing Boats - 1:100 - started 1/1/2014
-
 jbwok reacted to a post in a topic:
HMS Warrior by StuartC - Billing Boats - 1:100 - started 1/1/2014
-
 mtaylor reacted to a post in a topic:
HMS Warrior by StuartC - Billing Boats - 1:100 - started 1/1/2014
-
 mtaylor reacted to a post in a topic:
HMS Warrior by StuartC - Billing Boats - 1:100 - started 1/1/2014
-
Thanks once again: I'm off to the garage to try this. Foolishly I started this job on the starboard side, which is the one I'm planning to display, and I fear even substantial amounts of paint aren't going to cover the mess I've made. It's a shame the Warrior never fought a battle, as I could have done a post-engagement version!
-
It's a pleasure to see your super work as usual - the bridge looks fantastic! I regret, though, that I have another plea for help. Although I haven't been updating my page I have a reasonable hull now, but as I struggle with the chain plates I'm slowly messing it back up again. I notice you say you'd pinned them - can I ask how you did that, given how narrow they are, and what did you use for pins? I've tried glueing them, but it looks terrible and then springs off...
-
 jms777 reacted to a post in a topic:
HMS Warrior by jbwok - Billing Boats - 1:100 - started October 2014
-
 popeye the sailor reacted to a post in a topic:
HMS Warrior by jbwok - Billing Boats - 1:100 - started October 2014
-
 Rudolf reacted to a post in a topic:
HMS Warrior by jbwok - Billing Boats - 1:100 - started October 2014
-
 Rudolf reacted to a post in a topic:
HMS Warrior by jbwok - Billing Boats - 1:100 - started October 2014
-
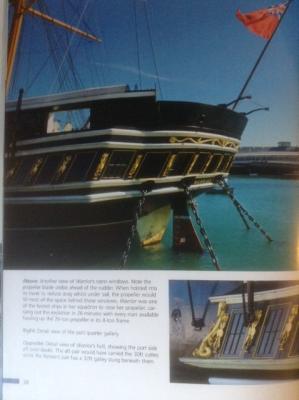
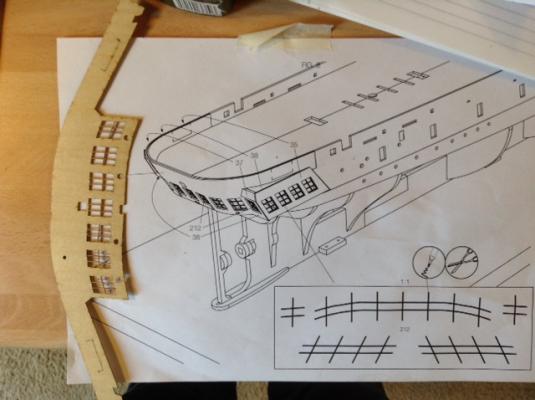
I am going to be boring about windows. First, the pane layout shown in the instructions is wrong; there is only one horizontal piece and two vertical ones in each window. See the page from the wonderful book by Davies and Dennison attached. Second, using pen to draw the lines on the windows is not going to look very good, particularly as some of the windows are actually fake and should have a blank background. So I've rooted in my spare wood drawer for some thin strip and started doing the frames properly. So basically the whole of Figure 8 is tosh. At least it's a break from sanding the hull, which is now about a micron thick and entirely composed of filler.
-
 gjdale reacted to a post in a topic:
HMS Warrior by StuartC - Billing Boats - 1:100 - started 1/1/2014
-
 Mirabell61 reacted to a post in a topic:
HMS Warrior by StuartC - Billing Boats - 1:100 - started 1/1/2014
-
Hi Nils - as you were kind enough to visit my log, I couldn't resist having a look at your builds, and I'm really impressed. Such wonderful work!
-
Hi Nils - thanks for the encouragement! The way I feel about the planking at the moment is that I'm never going to get it right! Perhaps another couple of hundred hours or so... I just can't wait to have the hull finished so I can start on all the fun bits. Stuart - I think tomorrow may be given over to preparing a cunning smoothing tool for inside curves which may end up looking VERY LIKE sandpaper wrapped round a pencil!
-
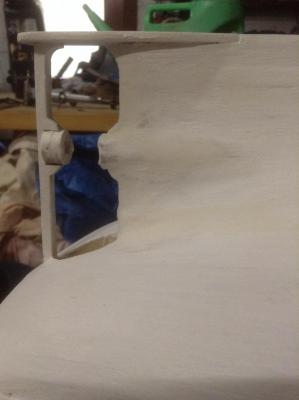
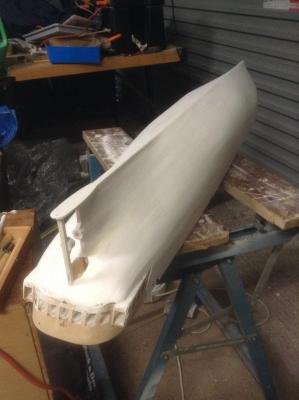
Nearly five weeks into the sanding/filling, and going mad... I have painted it with primer to give me an idea of how I was coming along (it was difficult to get an idea from looking at the small patches of wood between the massive swathes of filler) and find I've done a reasonable job on the flat and convex sections, but I'm really struggling at the stern. Every time I try to shape the shaft fairing I create a worse and worse mess! Anyone got any useful advice?
-
Hi - the sanding block has worked for all the flat and convex bits, but I'm struggling with the concave curves at the stern. I'll take your advice, though, and put up some photos on my pages and see what other people suggest. I've never come across Billings paints (and my son works in a model shop!) - I'll probably just use a Tamiya gloss black.
-
Good to hear from you again! I'm really struggling to get a smooth hull despite four weeks of continuous sanding, filling, sanding, filling...! I've bought the red paint to encourage myself that I'm getting near the point I can use it, but it ain't happening until I can sort the area around the stern. Incidentally, which black did you use?
-
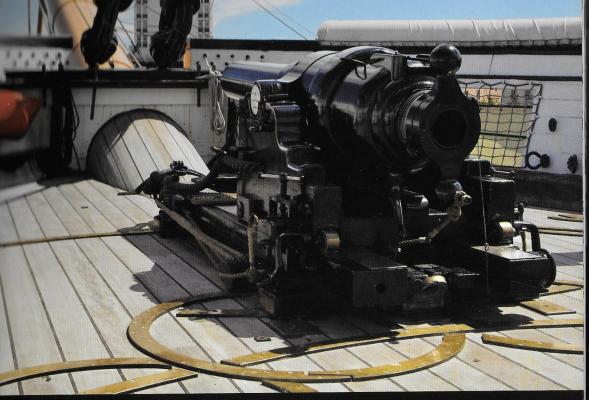
Hi Gary, good to hear from you: I wish I'd used balsa blocks from the start as it would have made shaping the planks much easier. As it is I'm getting better at the planking as it as I go along (about 12 to go), so I may end up with a finished product which can only be viewed from the starboard side! I like the idea of having the citadel open, and thanks for the hint on the barrel lengths - does the same apply to the 40pdr guns which had the same nominal length of 120 inches as the 100 pdr?
-
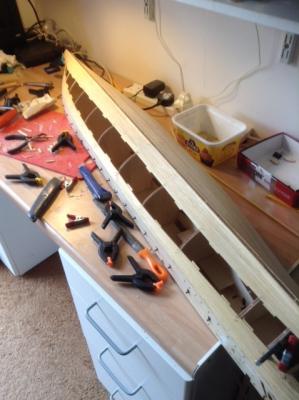
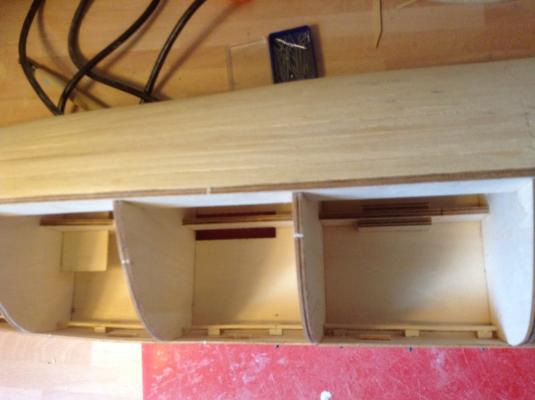
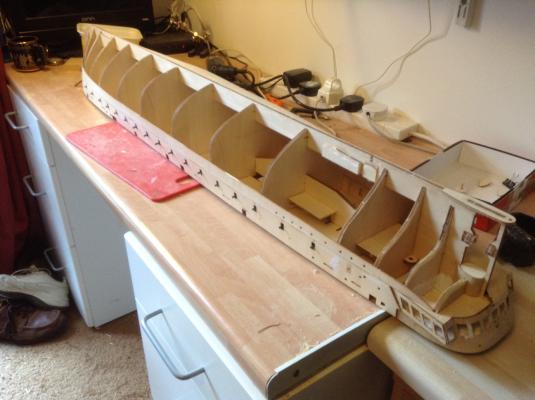
Hi Stockholm tar Thanks for getting in touch. The spacing is indeed a problem; the worst section is the one between the 4th and 5th frames from the stern, which are nearly 140mm apart, just at the point where the shape is starting to get very complex. To get round this I'm gluing small strips of thin wood inside the midpoints of the more curved planks to keep the edges aligned, and this tends to mean I have to wait for each one to dry before I do the next one. It's a very slow way of doing things, but I wish I'd done more of it on the side I've already done as there's a bit of sagging between frames which I've going to have to sort out. You'll see that I've also placed a couple of wooden blocks to strengthen the keel between these frames as the join was otherwise very weak. Another frame at this point would have been a big help - new builders please note that if I was building the model again I would have put one in.
About us
Modelshipworld - Advancing Ship Modeling through Research
SSL Secured
Your security is important for us so this Website is SSL-Secured
NRG Mailing Address
Nautical Research Guild
237 South Lincoln Street
Westmont IL, 60559-1917
Model Ship World ® and the MSW logo are Registered Trademarks, and belong to the Nautical Research Guild (United States Patent and Trademark Office: No. 6,929,264 & No. 6,929,274, registered Dec. 20, 2022)
Helpful Links
About the NRG
If you enjoy building ship models that are historically accurate as well as beautiful, then The Nautical Research Guild (NRG) is just right for you.
The Guild is a non-profit educational organization whose mission is to “Advance Ship Modeling Through Research”. We provide support to our members in their efforts to raise the quality of their model ships.
The Nautical Research Guild has published our world-renowned quarterly magazine, The Nautical Research Journal, since 1955. The pages of the Journal are full of articles by accomplished ship modelers who show you how they create those exquisite details on their models, and by maritime historians who show you the correct details to build. The Journal is available in both print and digital editions. Go to the NRG web site (www.thenrg.org) to download a complimentary digital copy of the Journal. The NRG also publishes plan sets, books and compilations of back issues of the Journal and the former Ships in Scale and Model Ship Builder magazines.


