


ca.shipwright
-
Posts
483 -
Joined
-
Last visited
Content Type
Profiles
Forums
Gallery
Events
Posts posted by ca.shipwright
-
-
-
-
-
Fantastic job. I am totally entranced with your stand. Is that a map of the world from the Endeavour years?
Regards
- ggrieco, popeye the sailor and mtaylor
-
 3
3
-
-
EJ,
Get the Byrnes' table saw and the thickness sander. With those two, you will never again have to buy milled lumber.
There is a log called "Can I Live Without a Byrnes' Table Saw." It has some very interesting comments. It resides in the Tools and Equipment Forum.
Regards
-
-
-
-
Hervie,
It's not sacrilege. But, it is a lost opportunity to develop a skill that will be needed throughout you modeling career. There is nothing more pleasing to the eye than a well planked hull. Well, maybe the rigging.
Regards
- FriedClams, Elijah, hervie and 1 other
-
4
-
Rowan,
I had the same thing. It manifested itself by my missing my mouth with the fork when eating. I had to have surgery. The problem resolved itself. A lot of physical therapy exercising the arm using a resistance band and squeezing a rubber ball brought strength back rapidly. Good luck with your recovery. I look forward to your log continuing.
Regards
-
-
-
-
Hervie,Look up this build log and go to page 24. Scroll down and you will see a picture of a modified binder clip used to clamp planking to bulkheads. I've also used these very effectively. Sorry, I can't get the picture to paste in.Dunbrody Irish Famine Ship by Mahuna - 1:48 Sectional Model
Regards
-
Hervie,
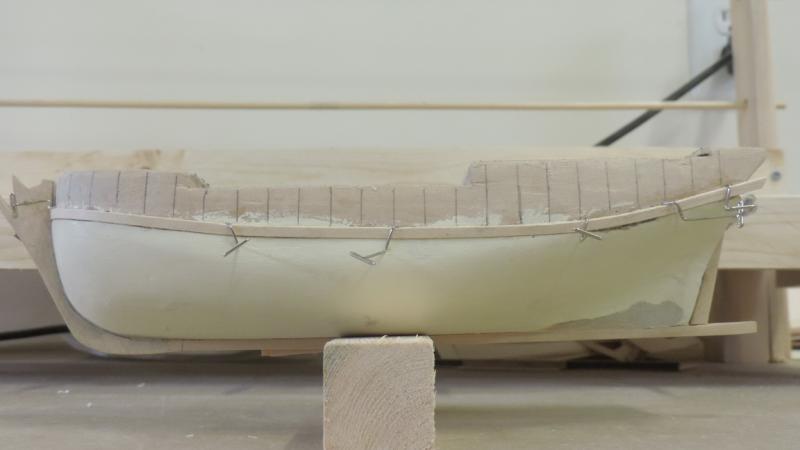
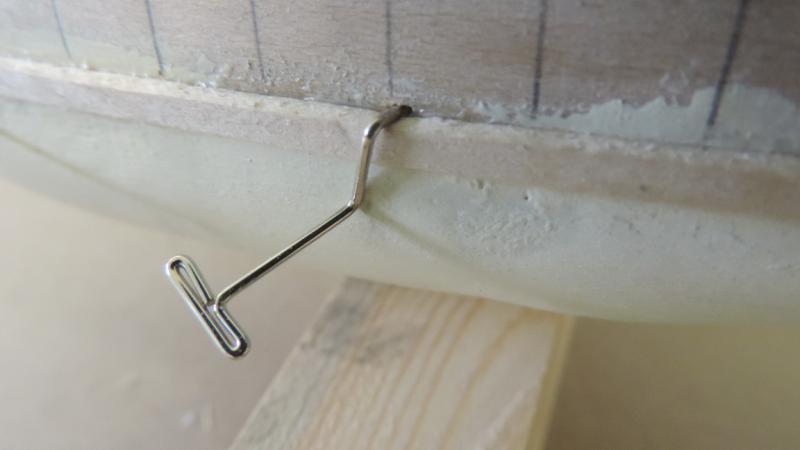
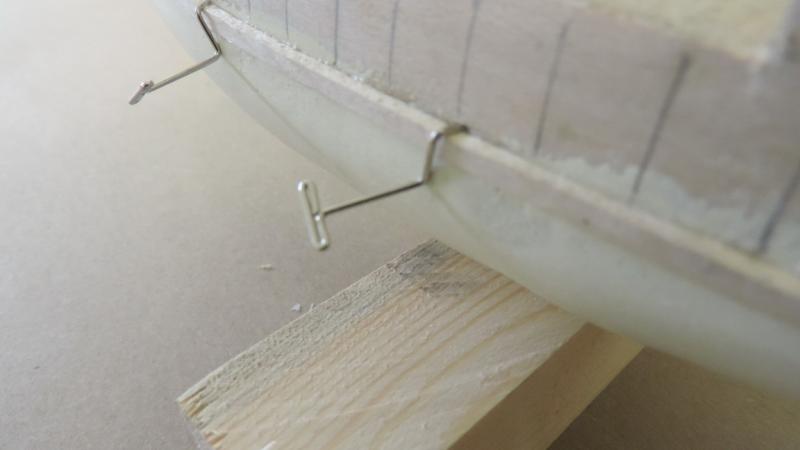
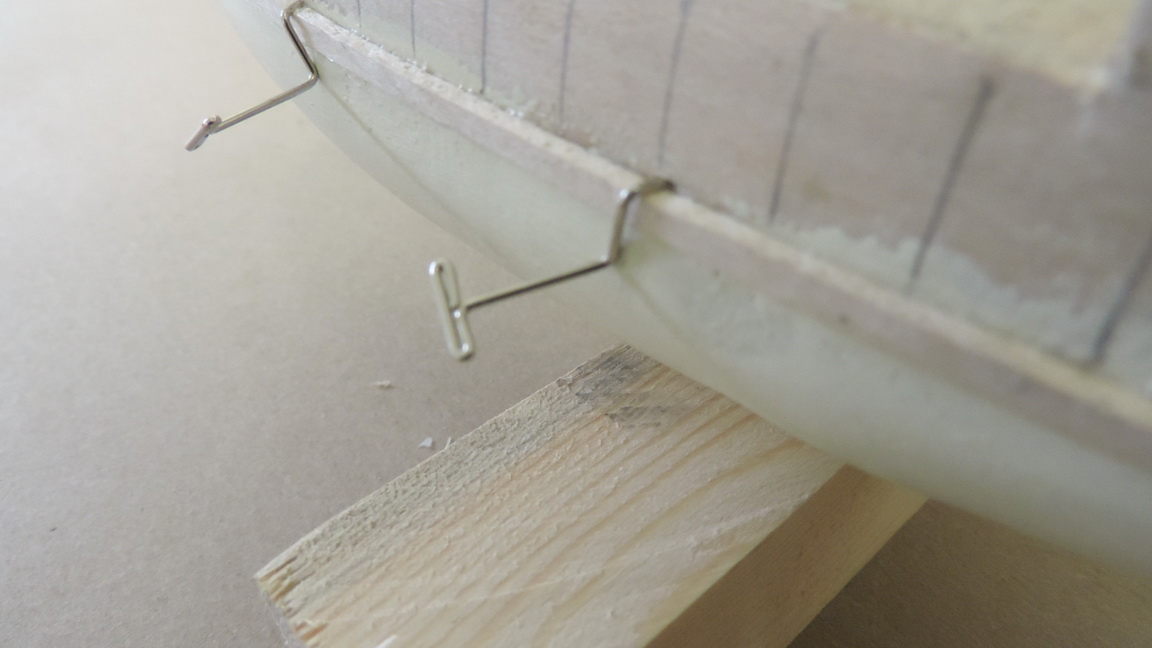
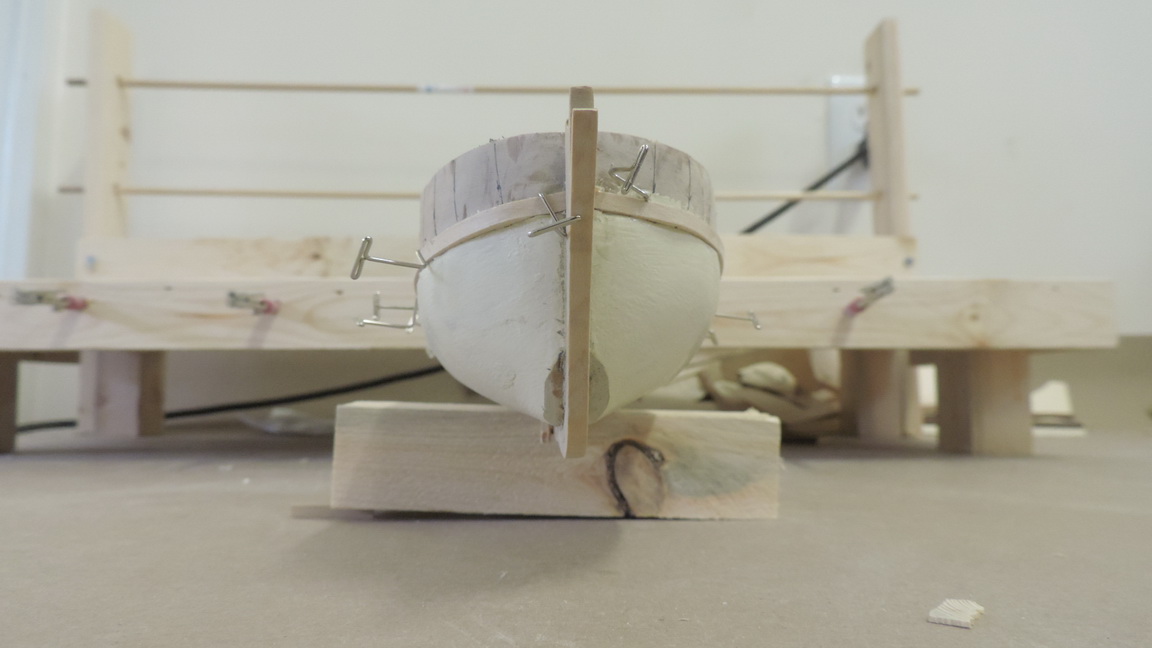
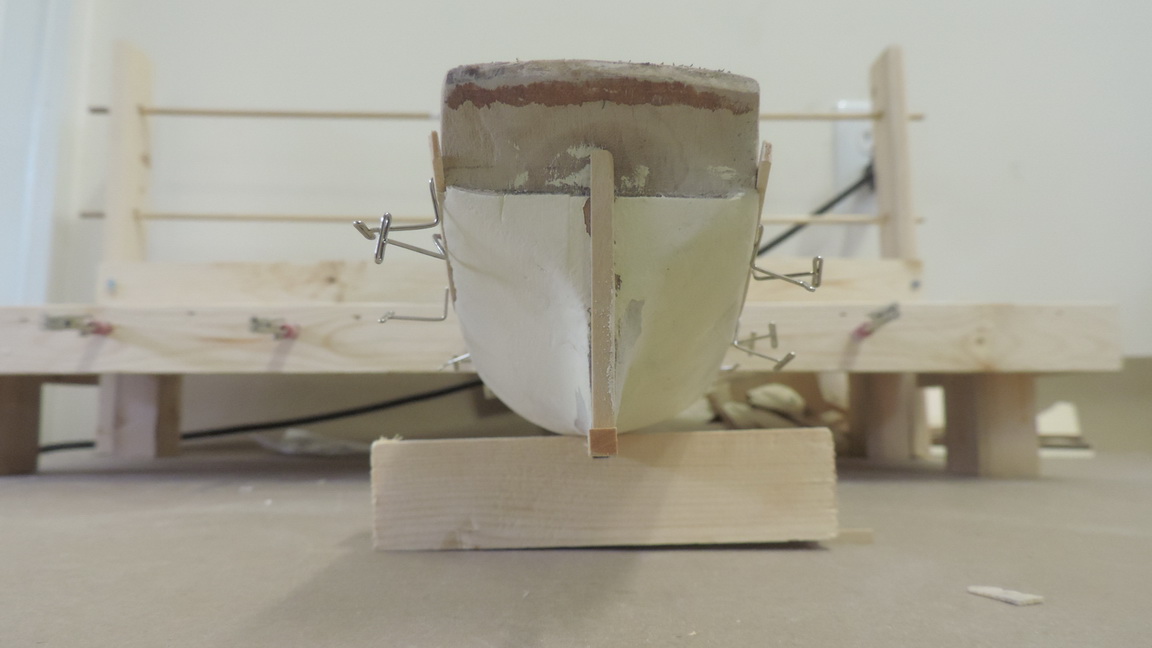
Here is a photo of my bent T-pins that are stabbed into the bulkhead to hold the plank. You can turn them so you get pressure on the plank with the bend.

- GaryKap, EJ_L, GrantGoodale and 2 others
-
5
-
-
-
Jesse,
Your gratings are beautiful. How did you get the metal corners on the rope locker grating to come out so realistic? This is probably an item that I would have never considered modeling. Way beyond my skill level.
Regards
- mtaylor, popeye the sailor, Elijah and 4 others
-
7
-
David,
How did you stain your masts without getting the stain all over the tan bands?
Thanks
-
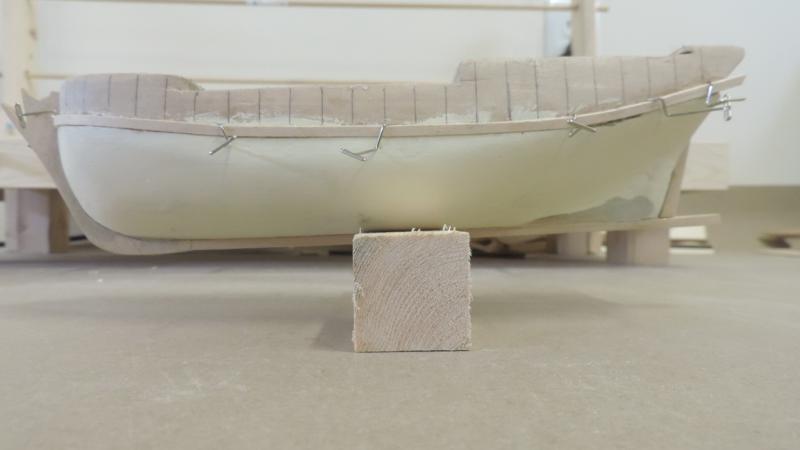
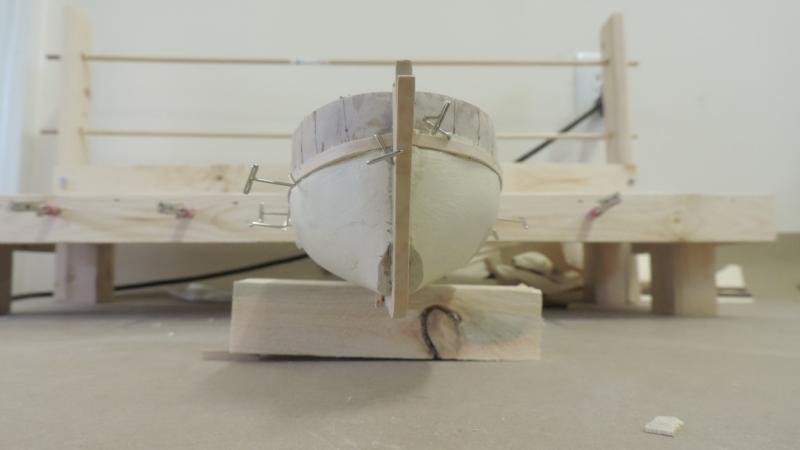
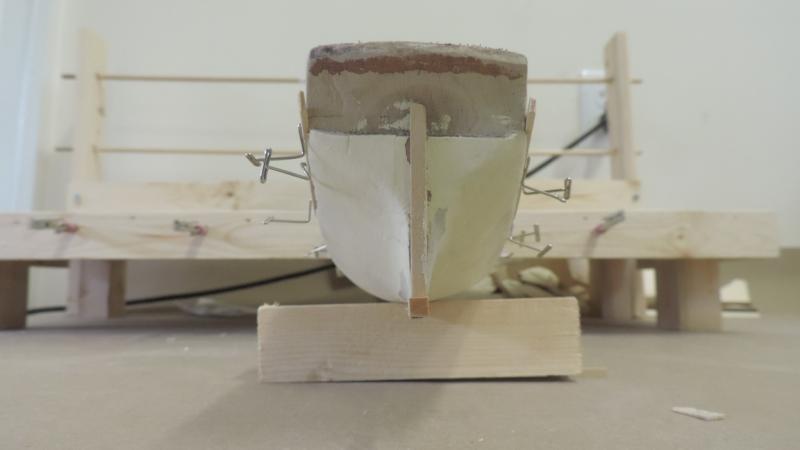
Hello again,
Time for another report. Working on Sultana and HMB Endeavour simultaneously means both move kind of slowly.
The last photo was the first of several wood filler corrections. Several followed and now am within 1-2 mm on the critical measurements. I’m pretty well satisfied at this point until something shows up that will not mate like it is supposed to.
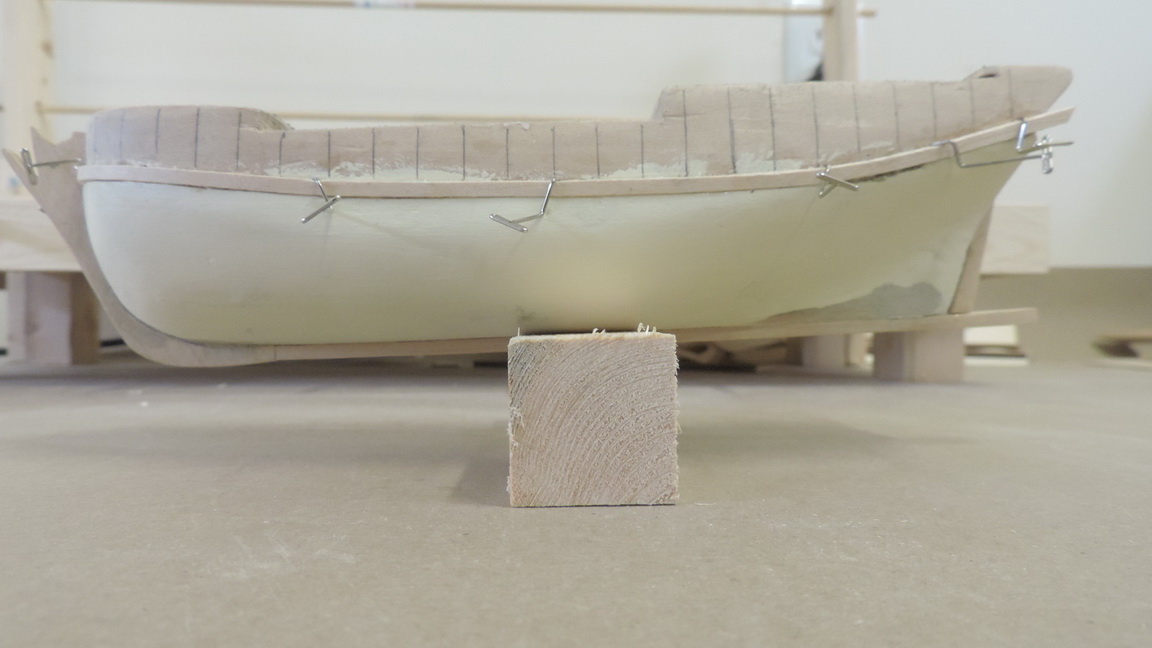
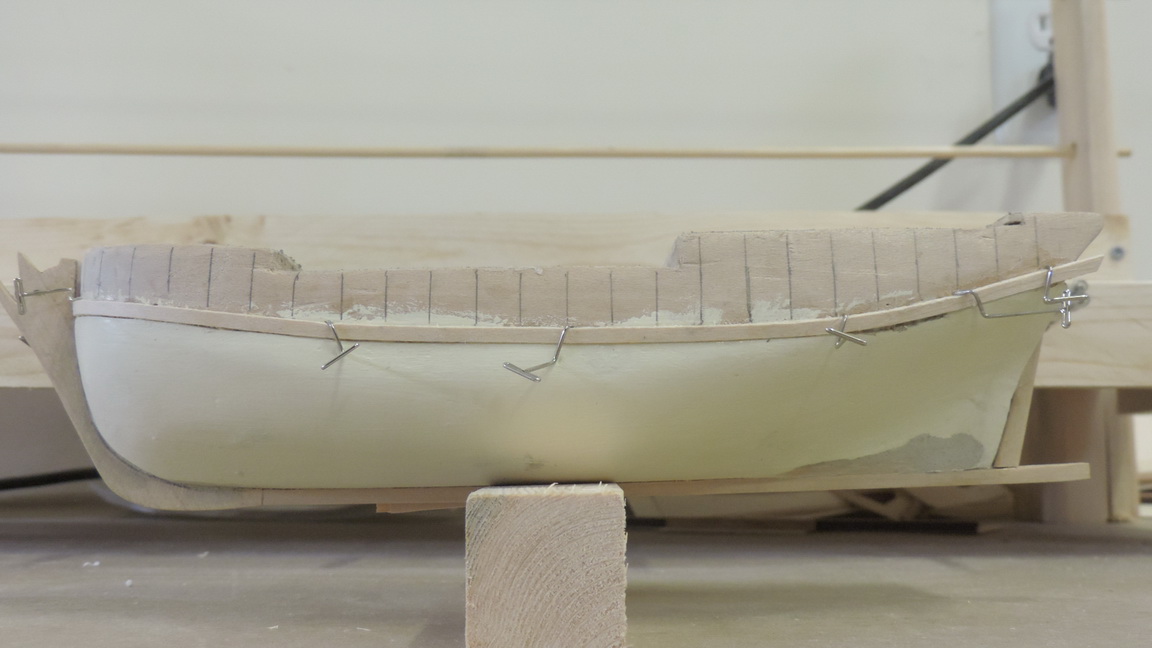
Carved the 1/16th inch rebate down to the lower wale. Almost got it perfect. Another small touch up job for the wood filler. Painted the hull below the rebate with an acrylic tinted to get the tallow color. Not too bad a match but I may wind up painting the bottom white. Installed the keel, stem and rudder post. I made them out of boxwood. I like the edge-holding property of boxwood more than basswood. Started bending planks using a jig. This is not an easy chore with the 1/8 x 1/16 basswood. The well soaked strips have a tendency to kink in the curve. We’ll work it out. Managed to get the first planks installed P & S; marked the planks as per John’s practicum. Again, the symmetry not perfect but good. A little filler on the seam and all will be well.
I am using the bent T-pins to hold the planks down as the glue dries as shown in the photo. Very easy to do with basswood. Not sure how easy they would be on a plywood bulkhead. They work well with double planked hulls as well because you can pin them anywhere on the 1st planking.
In the photos, it looks like Sultana has a little list to starboard. This is due to the slot in the stand being slightly oversized. Also it looks like there are flats near the stem and stern post. This is filler where final touch up sanded through the paint, an optical illusion.
- Ryland Craze, EJ_L, Chuck Seiler and 1 other
-
4
-
Amen Yancovitch!
E.J.- I also use your #2 method. I had trouble keeping the eyes the same using the rounded pliers so I switched to wrapping the wire around a drill bit of the diameter I wanted; grabbed the 2 ends of the wire in my right hand and rotated the drill bit with my left hand. Works like a charm. Either way, these are probable the strongest eyebolts you will ever need.
I make 20 of these a day to warm up my fingers for the days work.
Regards
-
-
A clean desk is the sign of a very sick mind.


US Brig Niagara by 6ohiocav - FINISHED - Model Shipways - Scale 1:64
in - Kit build logs for subjects built from 1801 - 1850
Posted
Nice work Darrell. I'm just about where you are on the HMB Endeavour. Things move rather slow now.
A?
What is the purpose of the upper brass rod and gear on the Syren Serving Machine It looks like the lower gear and handles do all the work. Am I missing something?
Thanks