DaveyJones
-
Posts
18 -
Joined
-
Last visited
Content Type
Profiles
Forums
Gallery
Events
Everything posted by DaveyJones
-
Back in 1970’s I started, but never completed, a kit model in which I used CA liberally to secure rigging knots and splices. The model had been stored for 40 years in a box in darkness since that time. On recent examination, many of the knots have failed, with lines hanging loose or lying on deck. The remaining rigging is brittle and disintegrates on contact. My advice would be to avoid CA for rigging at all costs. These days I use dilute neutral pH PVA adhesive exclusively for securing rigging. I avoid regular PVA formulations because of their initial acidity when in a liquid state, which presumably becomes more neutral as the glue polymerises and hardens. As all chemical reactions are reversible, I think I read somewhere, that over time, hardened PVA can depolymerise to produce polyvinyl alcohol and acetic acid. The acid could be deleterious if it come in contact with cotton rigging. I have also used acrylic matt medium at times for securing rigging lines. However, on testing the particular formulation I was using, found it to be extremely acidic (pH <4). I would advise those using Matt medium to check the pH of the formulation they are using. Dave
-
Byrnes Table Saw Tips (requested)
DaveyJones replied to Matrim's topic in Modeling tools and Workshop Equipment
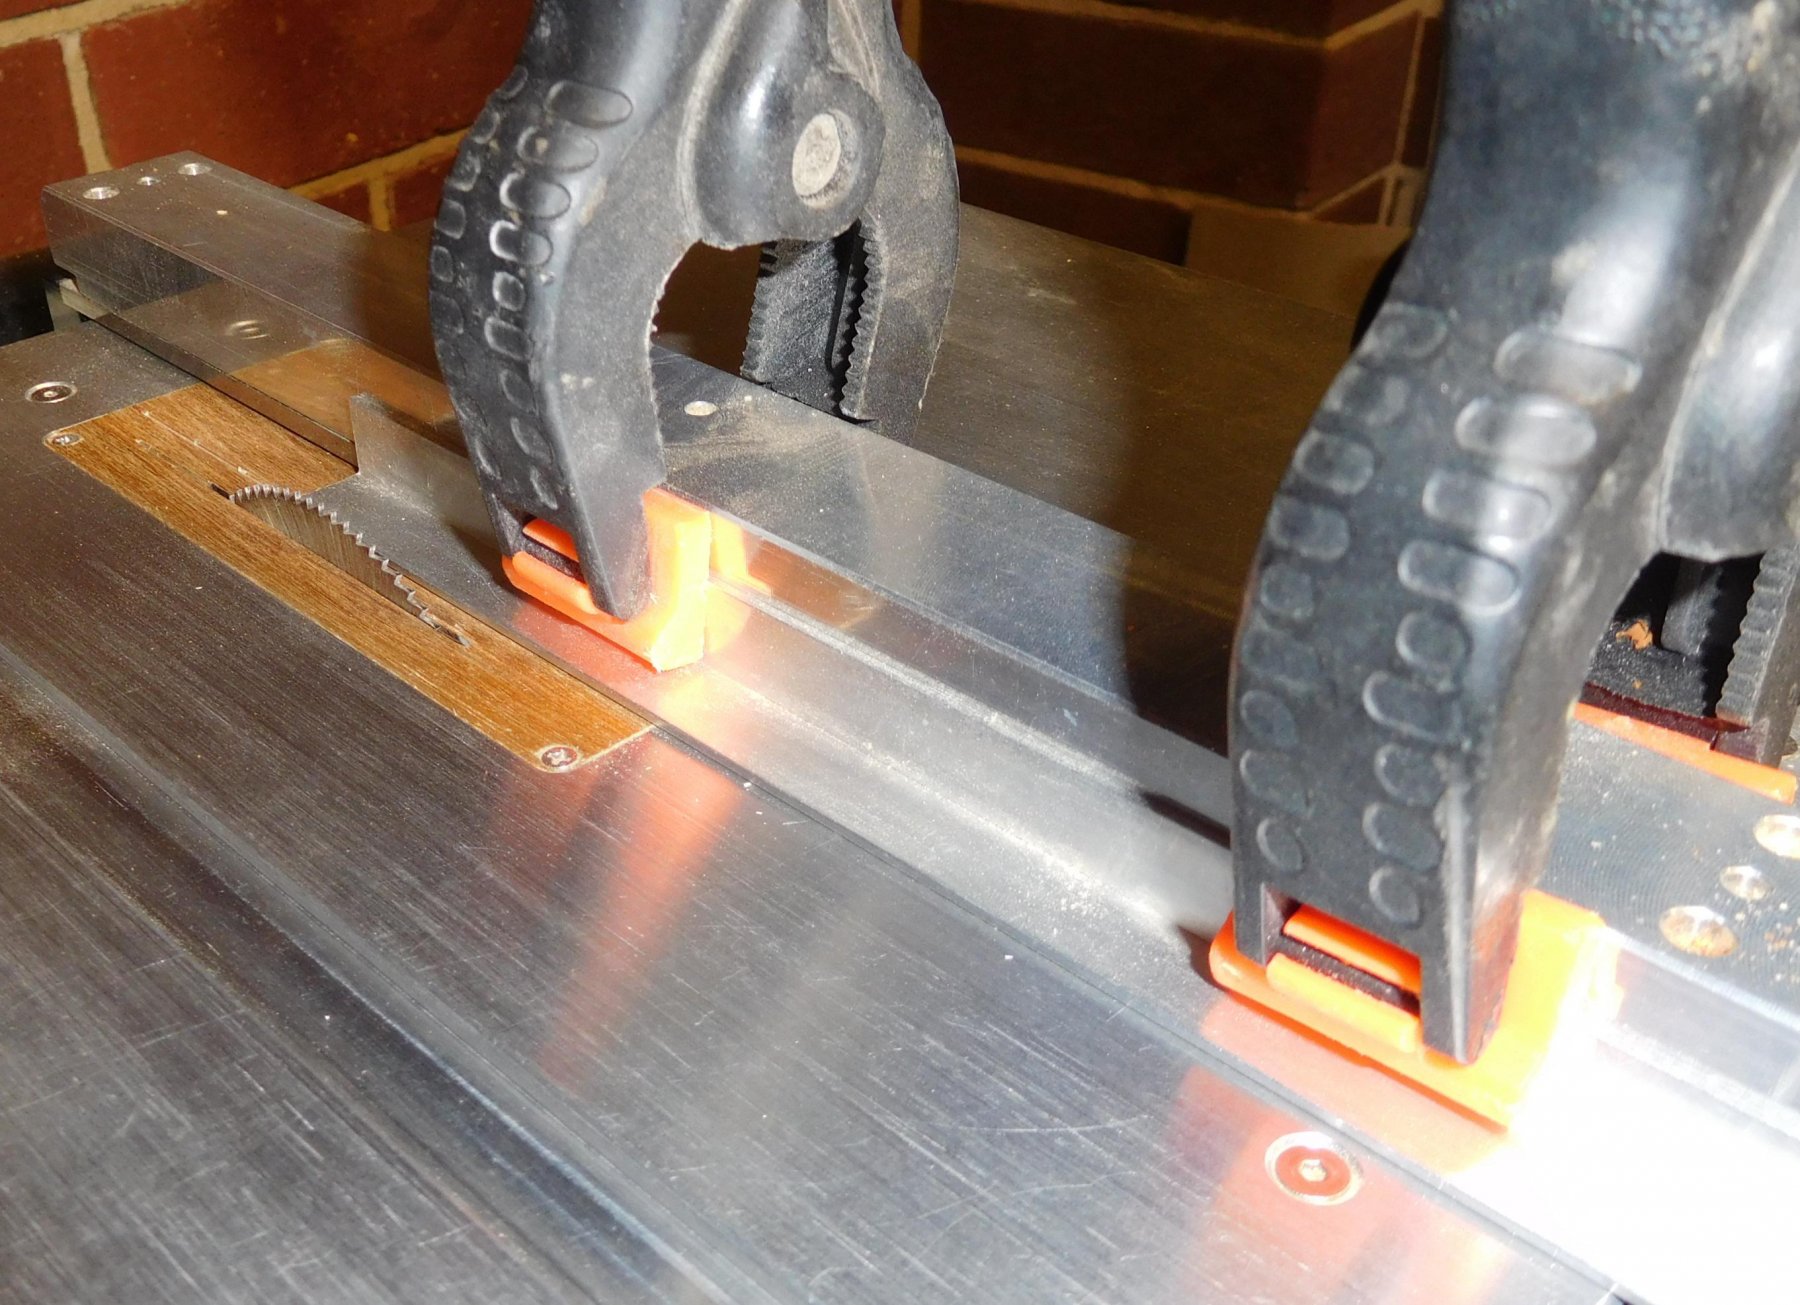
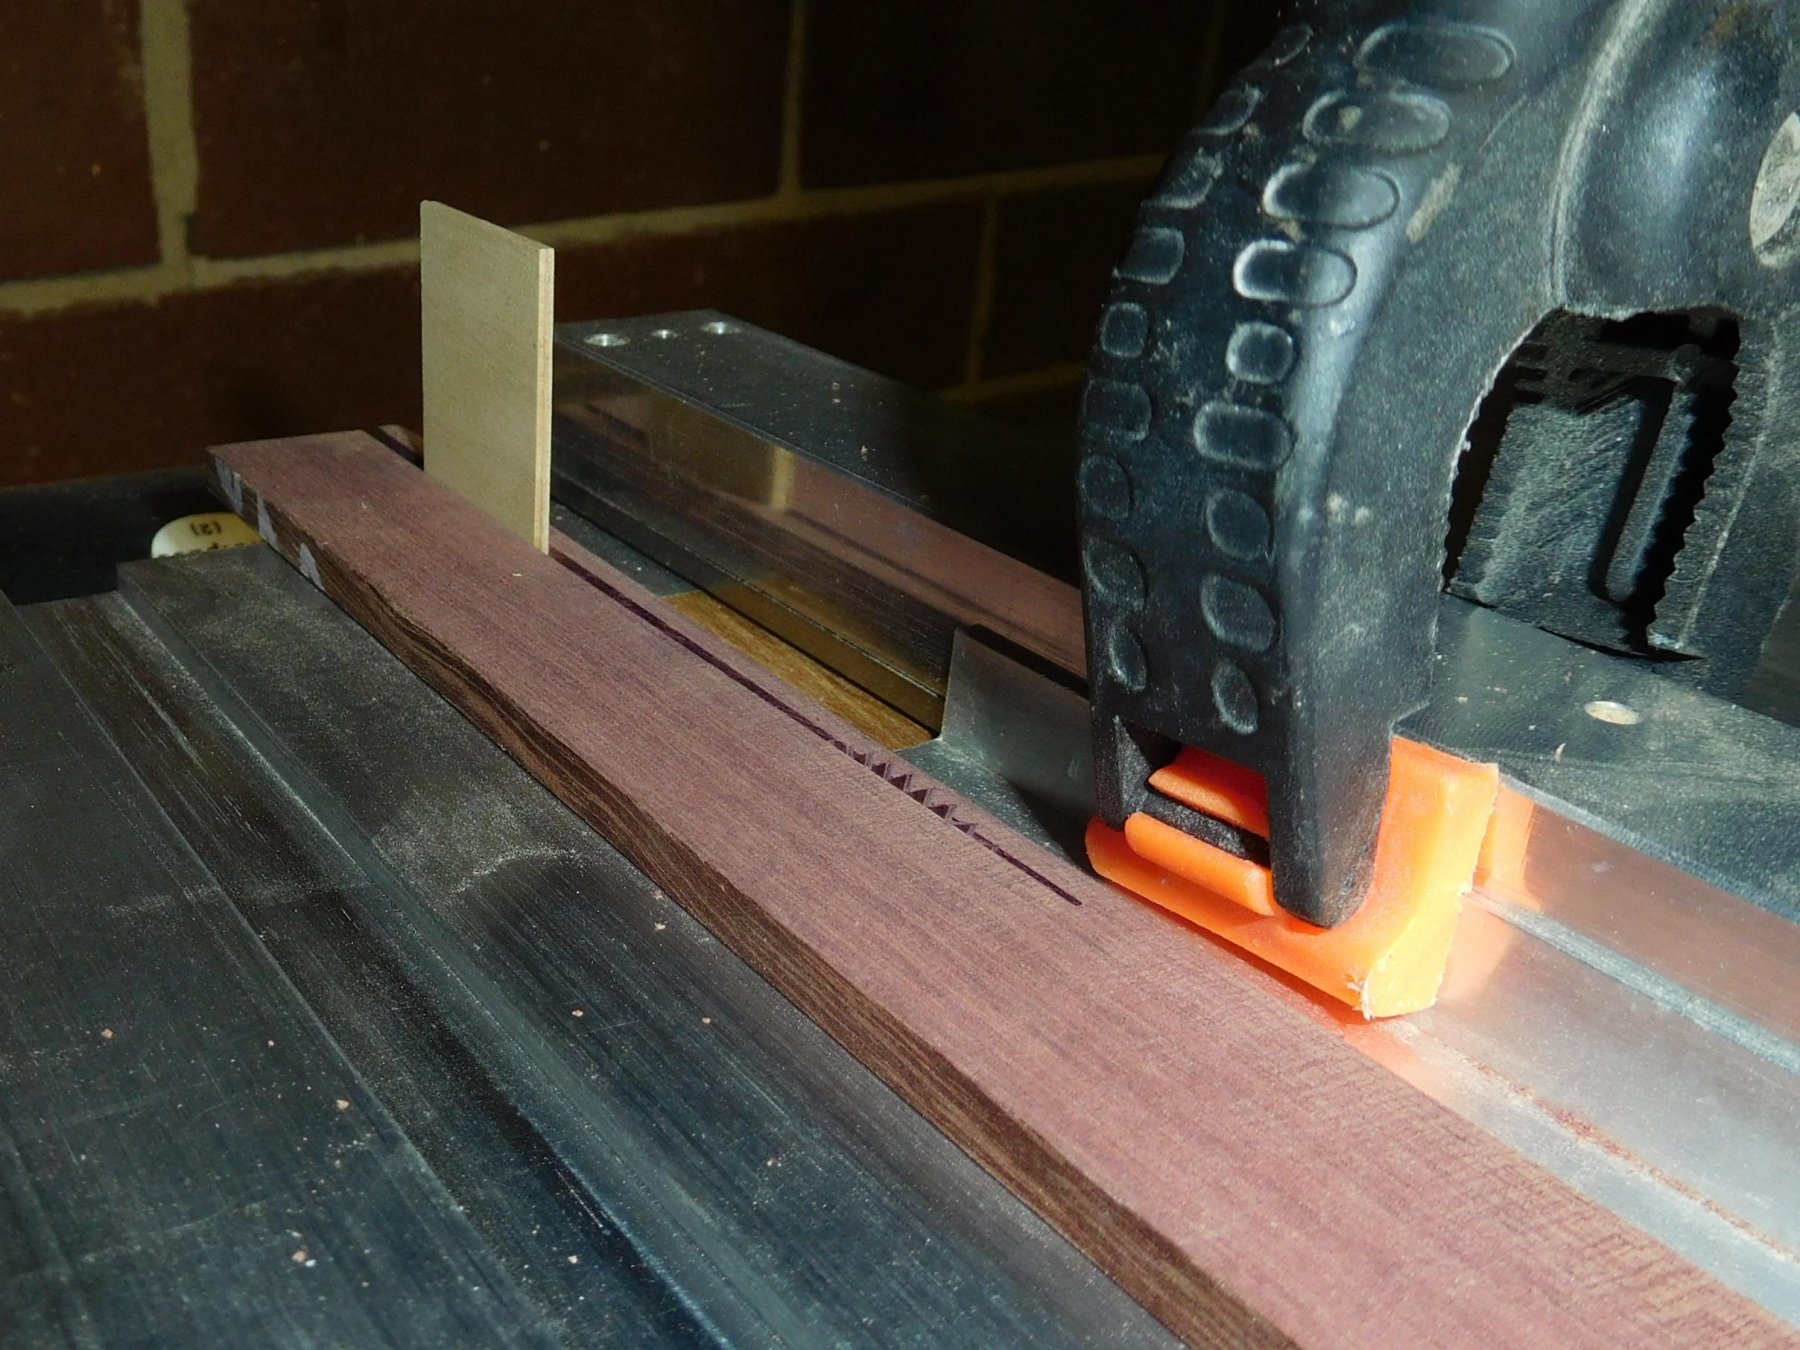
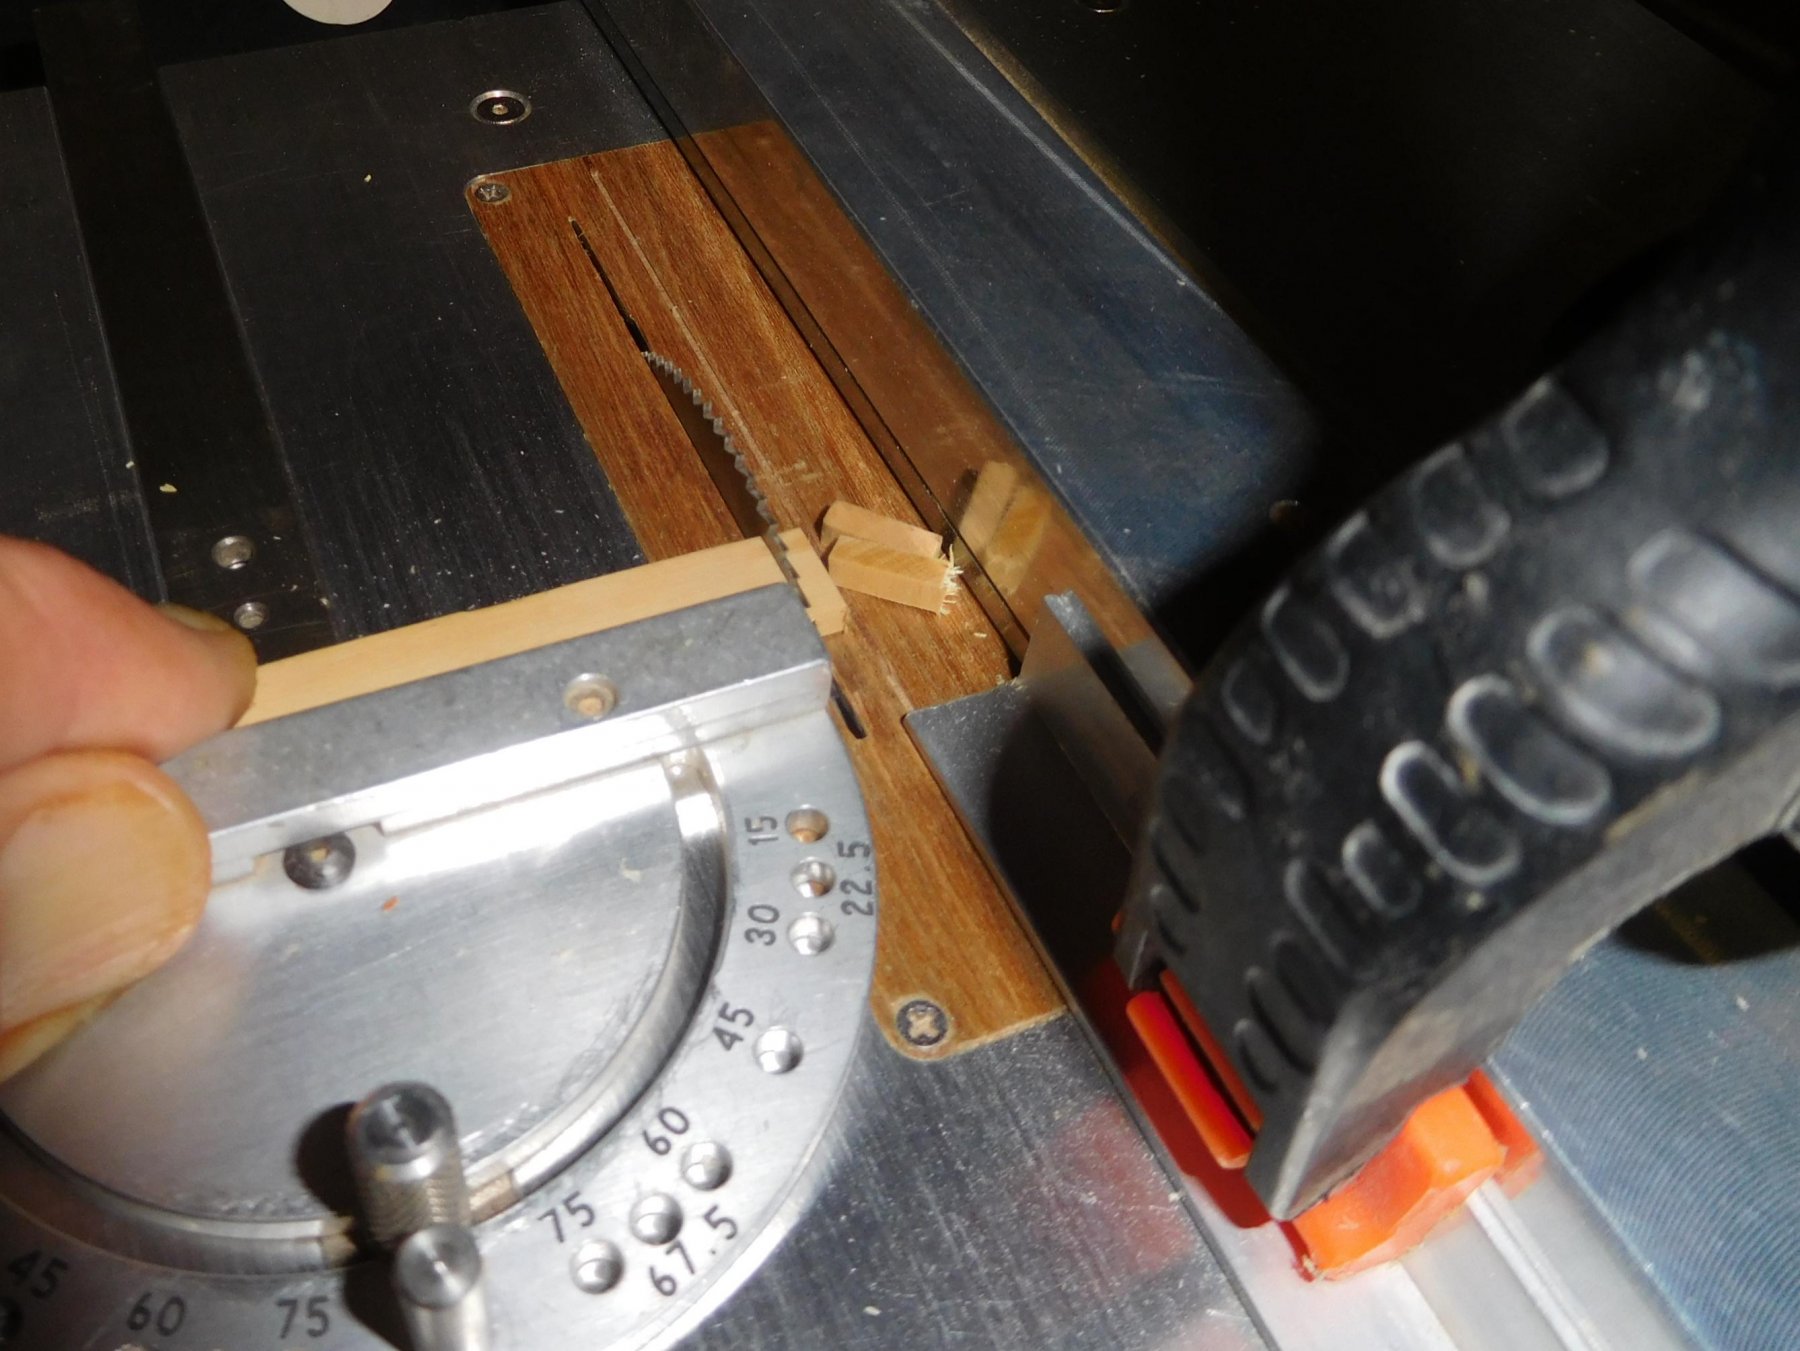
Because the Byrnes saw lacks a splitter or riving knife, binding and kickback is always a possibility when ripping using a zero kerf blade, something these blades are not designed to do. The procedure described by Jeff Hayes whereby the fence is set at a slight angle is one way to minimise binding. Another technique that I have used for many years is to use an auxiliary fence. This is simply a short length of aluminium angle held against the Byrnes fence using two spring clamps. The end of the aluminium is set just short of the back edge of the saw blade as shown in the following image. This arrangement seems to work well for most straight grained timbers. Binding will still occur in difficult timber such as ebony and boxwood (Buxus). In these cases, I simply insert a wedge to relieve the pressure. There is one other use for the auxiliary fence. If you require a number of small identical pieces to be cut from stock, simply move the fence so that it sits short of the leading edge of the saw blade. The stock is then held against the mitre attachment and slid forward into the saw. The cut pieces (mostly) accumulate beside the spinning blade. I hope this information is of some use. Dave


- 53 replies
-
- 13
-

-
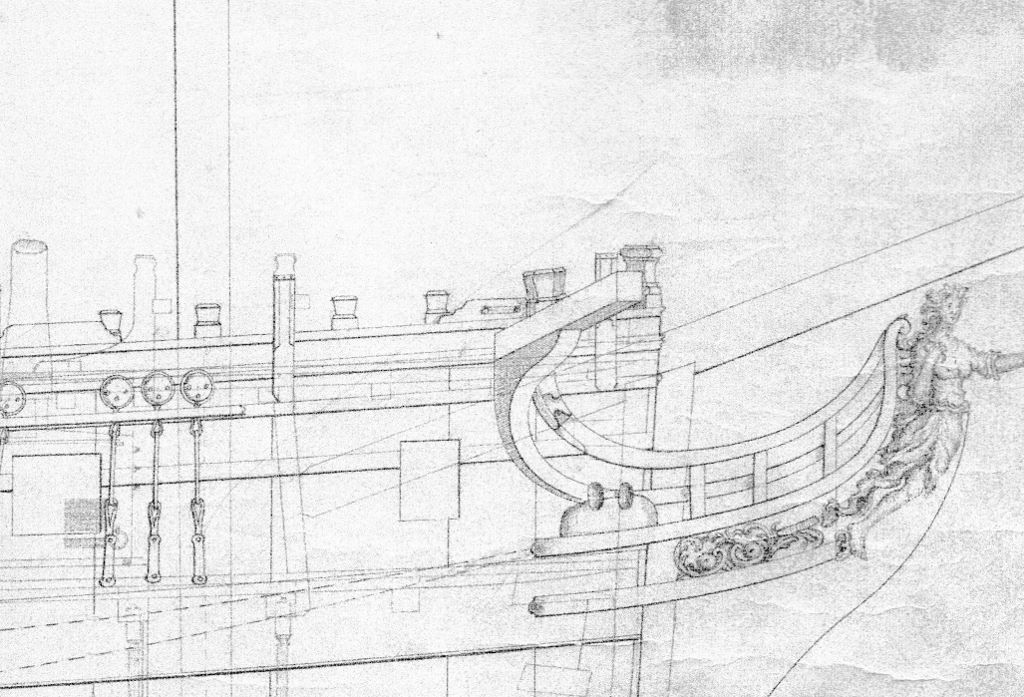
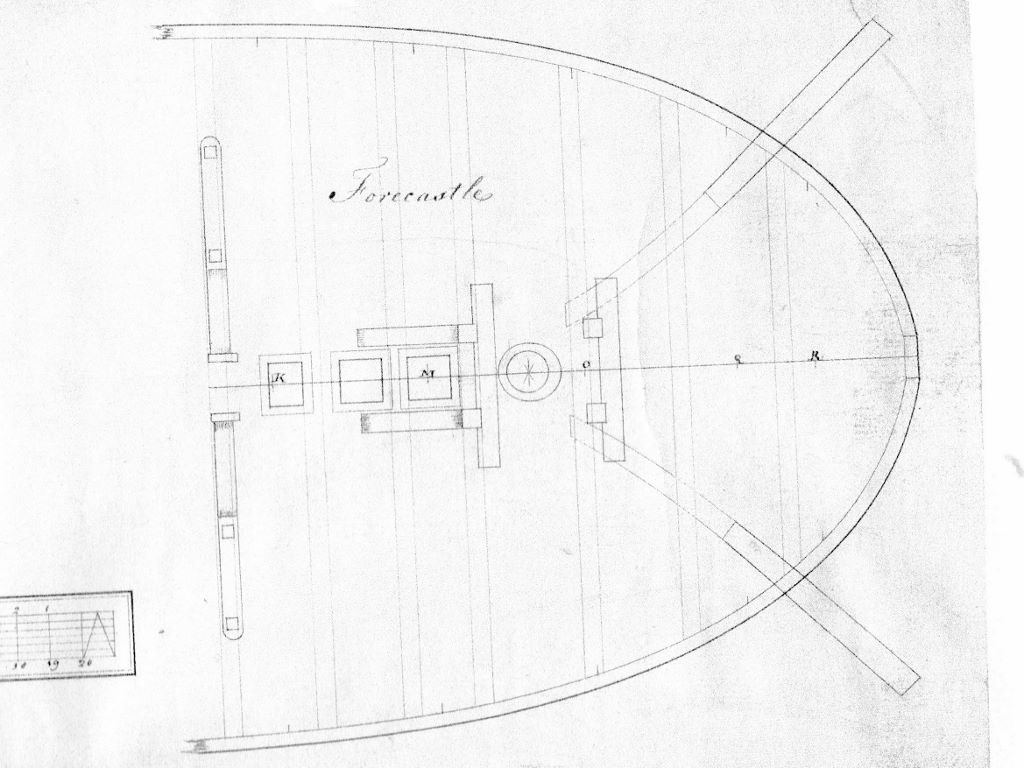
Toni - with all due respect, we must be looking at different admiralty draughts. The images below are taken from my copies of the Atalanta NMM plans, and would seem to indicate that the fore topsail sheet crosspiece and the jeer bitt crosspieces are about the same size. Dave


-
Toni - Beautiful work as always. However, I am concerned that your new crosspiece fitted to the fore jeer bitt is out of scale. It should measure about 7 x 5 inches in section. That new piece looks larger than that to me. Dave
-
Thanks to everyone for the likes and comments. The’re very much appreciated. Toni, There is no build log. When I started this model there were already a number of excellent Swans (yours included) under construction by people with far more experience than myself. I felt that I would be just replicating the work of others. Dave
-
Chris (Cabbie) wrote: At the risk of hijacking Erik’s topic, here are three images of my swan class, HMS Fly The general consensus seems to be to be that leaving the planking in its natural state is preferable to paint. In which case I shall leave well enough alone. Dave

- 45 replies
-
- 17
-
-
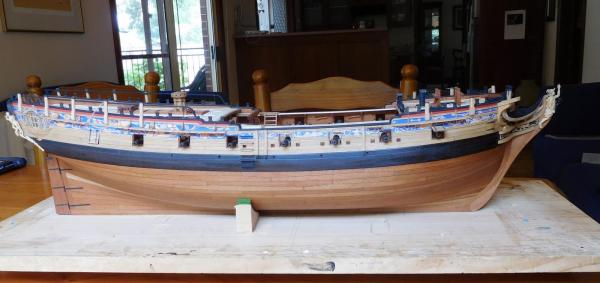
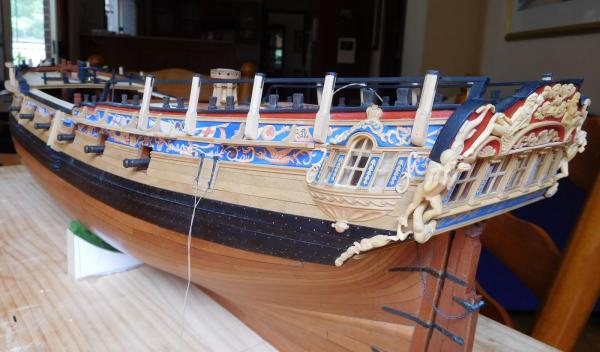
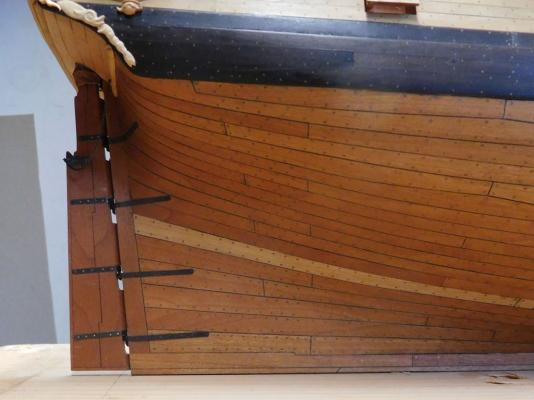
A word of caution when using cherry. I chose this timber to plank my current build, because I liked the dark reddish brown colour it takes on as it ages, The batch of timber I used showed some colour variation that was not too obvious during construction. However, a couple of the planks made from the lightest coloured timber completely failed to darken, as seen in the attached photo. I am so disappointed with the result that I will most likely paint the hull white below the waterline. Dave
-
I have just become aware of your build log of the Alert. Several years ago I constructed a fully framed model along similar lines to your build, photographs of which were posted on the old MSW website. Perhaps this is the model referred to in your first post. For those interested, I have today uploaded a few photographs to the Gallery of Completed Scratch-built Models. You have made an excellent start to your build, Christian. Very precise work. I shall follow your progress with great interest. Cheers, Dave