t5956ws
-
Posts
52 -
Joined
-
Last visited
Recent Profile Visitors
1,180 profile views


-
 Hello, You mention that your PDF drawings are available. I am seriously interested. How would we proceed? Bill Schultz in South Carolina.
 -
 Canute reacted to a post in a topic:
Metal sanding Disc 1.25"
Canute reacted to a post in a topic:
Metal sanding Disc 1.25"
-
mtaylor reacted to a post in a topic:
Metal sanding Disc 1.25"
-
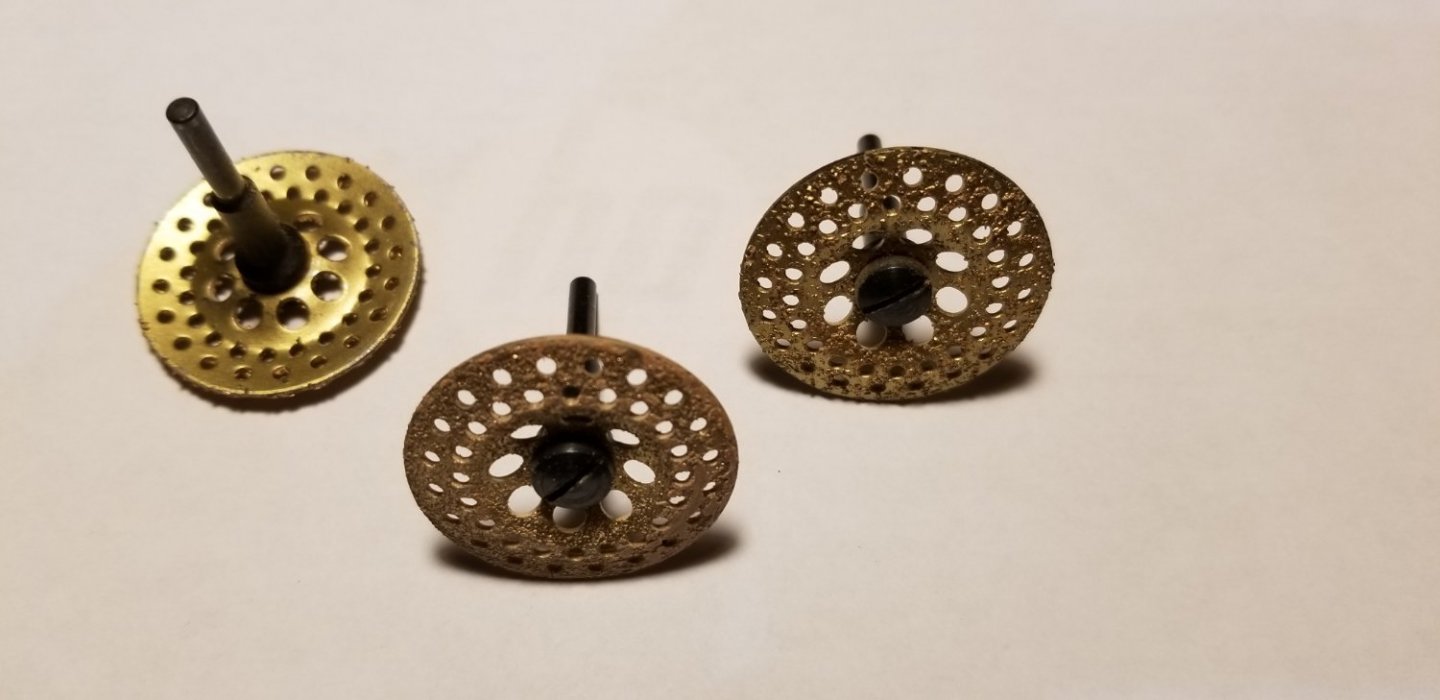
Metal sanding Disc 1.25"
t5956ws replied to t5956ws's topic in Modeling tools and Workshop Equipment
That's it!!!!! Thanks. -
Does anyone know who sells these? I have three with different grits. I cannot find them anywhere. They are 1.25" sanding discs. The discs are atttached to a mandrel that is 1/8" diameter and fits dremel type tools.
-
Keith Black reacted to a post in a topic:
Pivot Gun Ports circa 1862
-
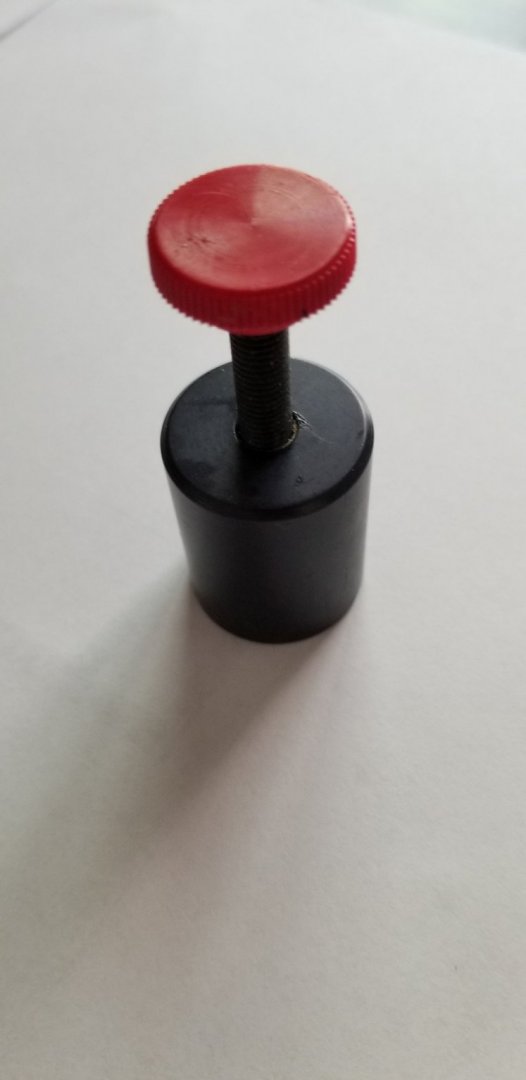
DVM2, Thanks for your response. I must be dense or there is more to it. I know what it is now but I, for the life of me can't figure out how to attach it. The photo shows 2 knobs. The one I can see is going into a much smaller diameter cylinder. Is there a schematic or manual that can be found? Possibly a photo from the bottom from someone.
-
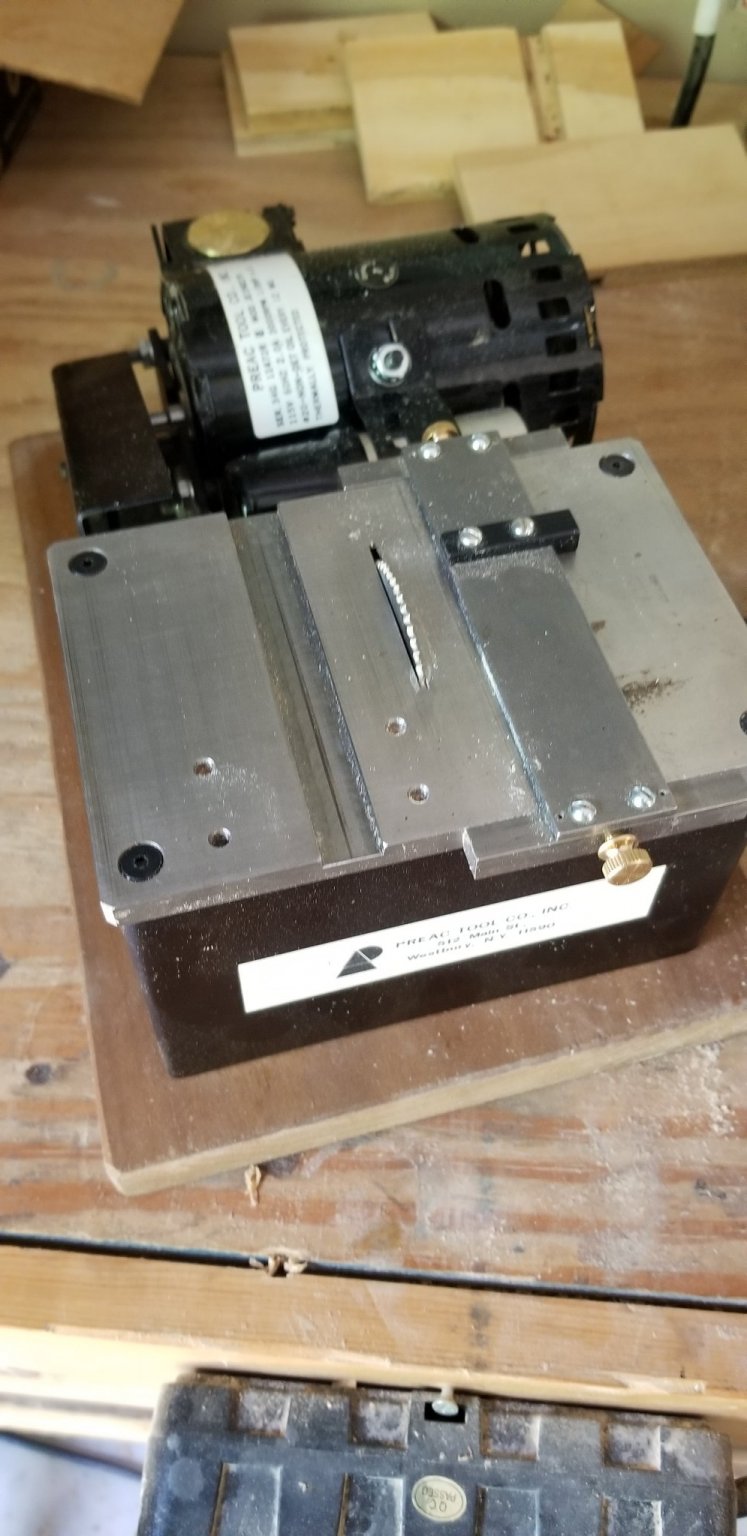
This may deviate from the theme of this thread a bit but it's about the Preac. I recently purchased one. Needed the arbor bearings replaced and was missing some supporting pieces. The thumb screws for the fence. They were #8-32 threads easily found lamp brass lamp screws. The guide is missing. Will make me a sled My question is; "What is this item in the pic"? How to use it? Can anyone shed some light? Thanks in advance.

-
Hello all here's my inquiry; Does anyone know of a technique and or material source for canvas covering the ship's boats? I've gone through all of the U-Tube stuff and picked through the threads here. I believe there must be someone out there that has done this. My project is the Housatonic. (Ship sunk by the US Civil War submarine Hunley). It's 1:64 scale scratch built and I am near completion. I have a detailed steam launch and a dinghy. To streamline the project I'd like to display the other 4 cutters and whaleboats canvas covered with reasonable detail. Anyone, any thoughts? Thank You.
-
Hello, I could not find Gutermann Mara 120 in 2899. What is the nearest code to that? I can just change all to that color. I should just pick one but colors displayed on a computer are almost never accurate to the actual color.
-
Mark & Pat. The illustrations are terrific and satisfies a solution to my issue. Many Thanks. Bill
-
Hello, I am building the Housatonic. The steam sloop sunk by the Hunley in 1864 during the American Civil War. I am using drawings from US Nat'l Archives of the Ossipee, a sister ship . I need advice and opinions on a feature of the ship or similar ships. The feature I am having problems with is what looks like to be a hammock rack that covers the railing of the main deck. On the drawing and photos of similar ships (Kearsarge) that rack traverses the total length of the railing including over the main pivot gun ports. That rack obstructs the firing line of the pivot gun. In the photos and my reproduction the pivot gun is too tall to shoot under that rack. That leads me to conclude that the rack was not permanent over the pivot gun ports. Does anyone know how that rack was removed or cleared during combat? Thanks Bill
-
t5956ws reacted to a post in a topic:
Simple Framing Question
-
t5956ws reacted to a post in a topic:
Simple Framing Question
-
t5956ws reacted to a post in a topic:
Simple Framing Question
-
t5956ws reacted to a post in a topic:
Simple Framing Question
-
Simple Framing Question
t5956ws replied to t5956ws's topic in Building, Framing, Planking and plating a ships hull and deck
The project is for a row Galley circa 1799. The "Beaufort". -
My next project I plan to show exposed frames. Nowhere can I find how thick frames should be. Width and positioning I get. It appears that there is a certain amount of taper as you move up from the keel. So there must be some formulation for that too. There must be architectural standards somewhere. Can someone point me in the right direction?
-
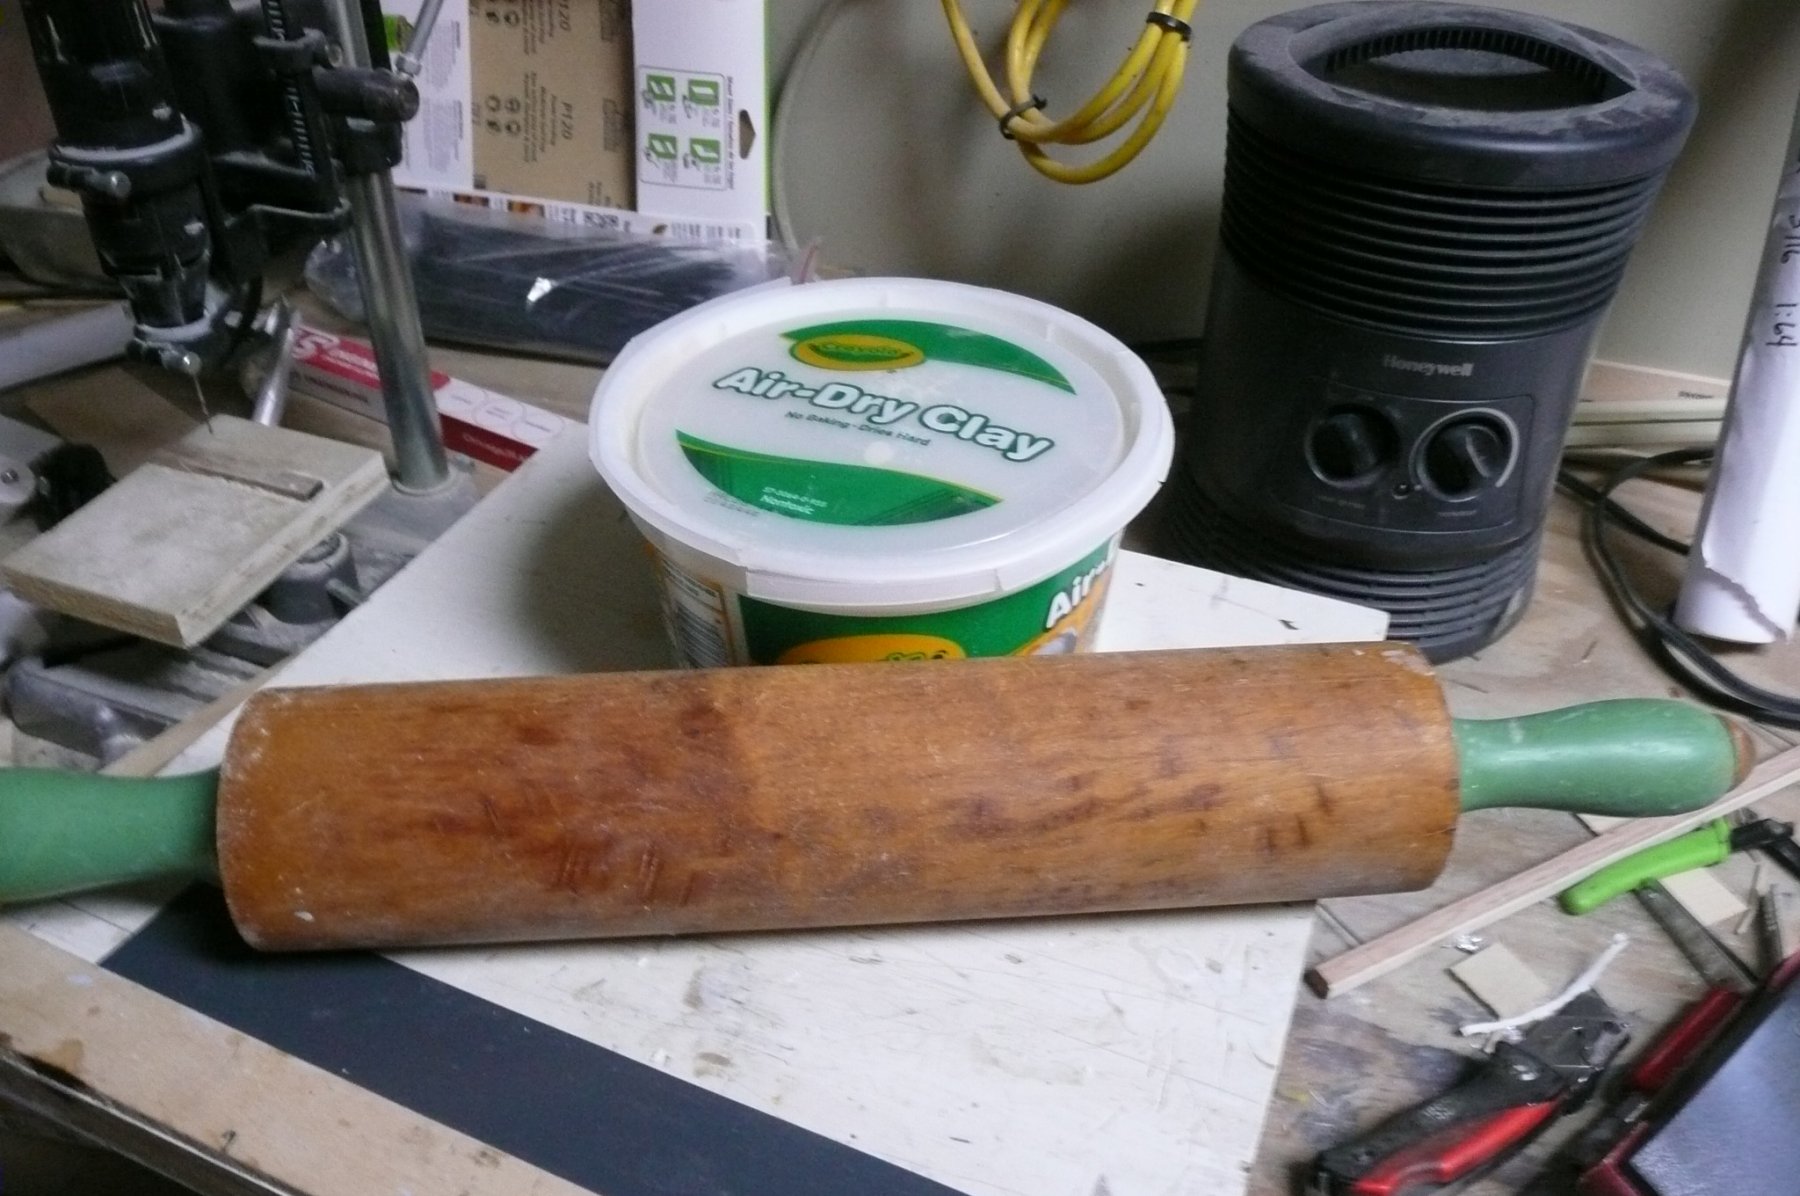
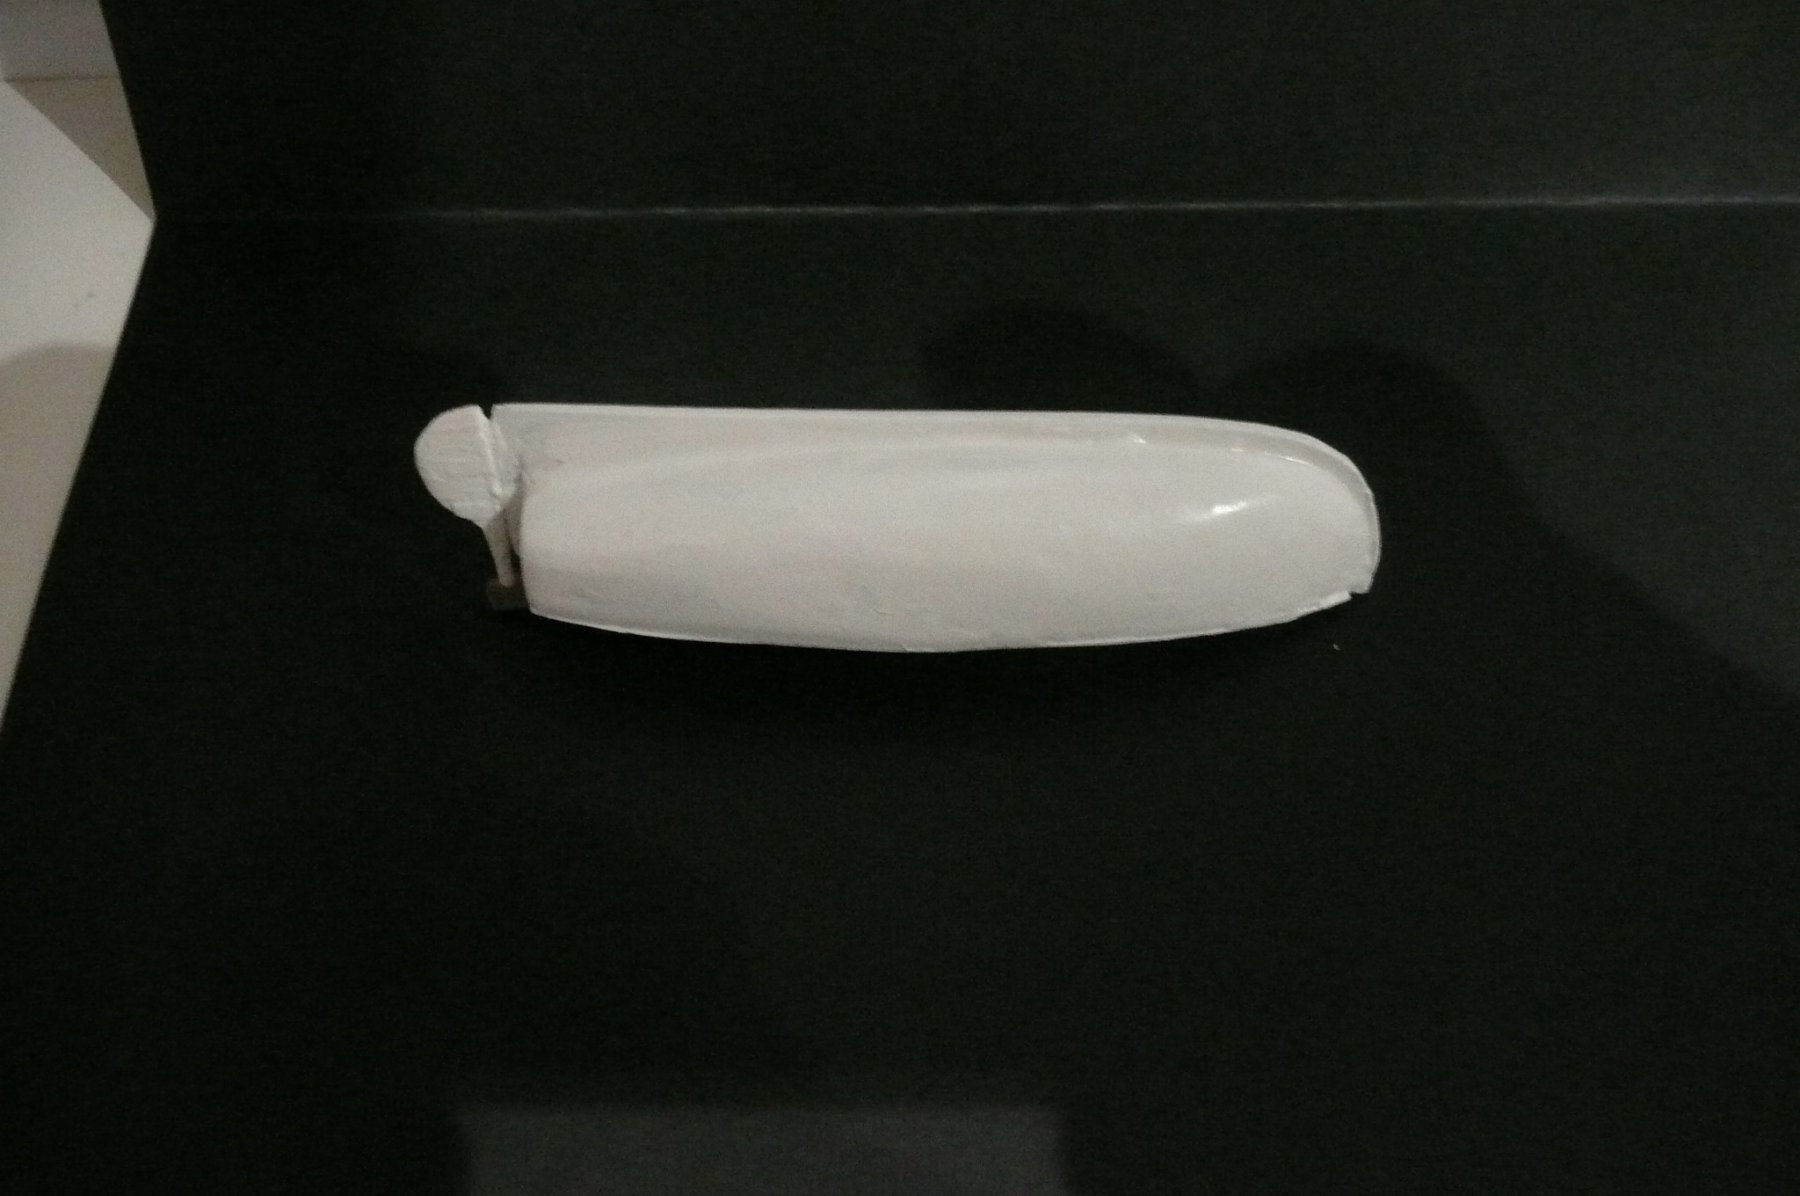
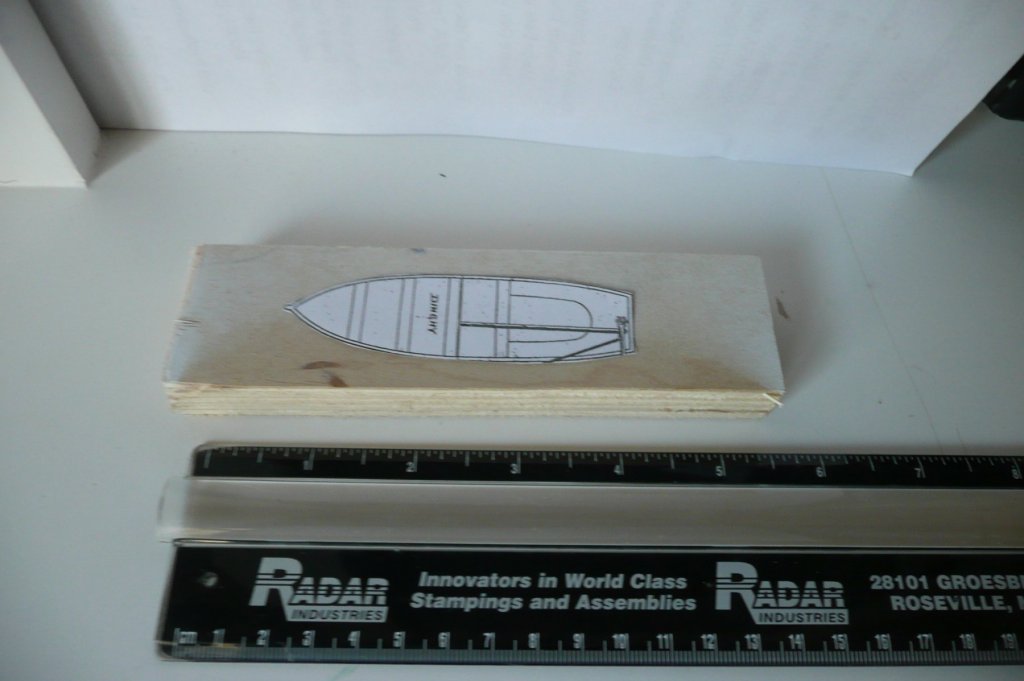
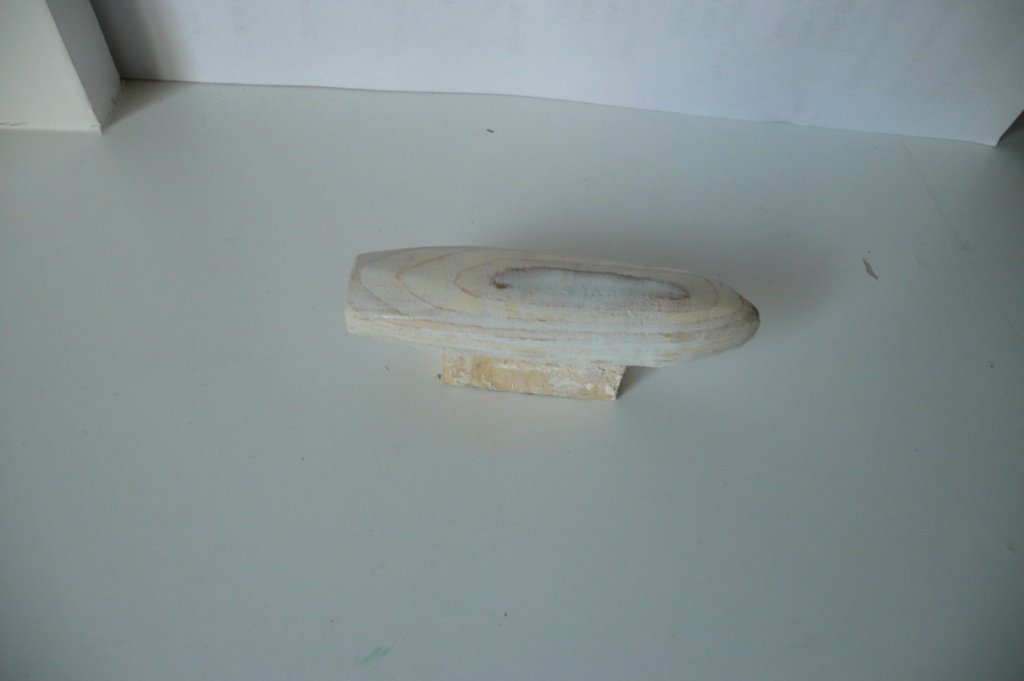
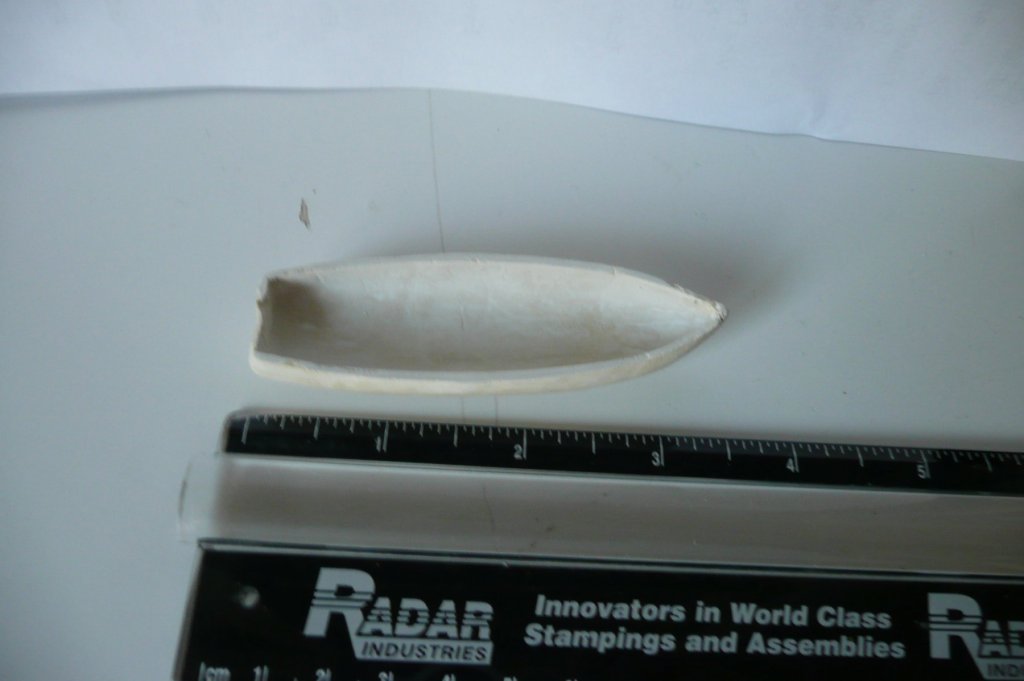
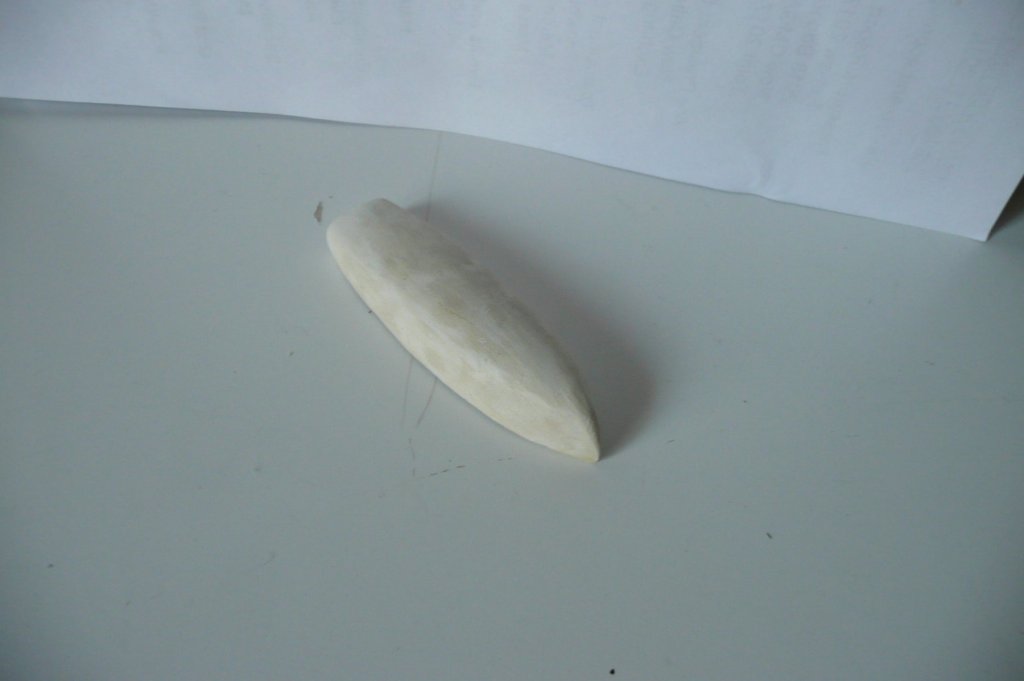
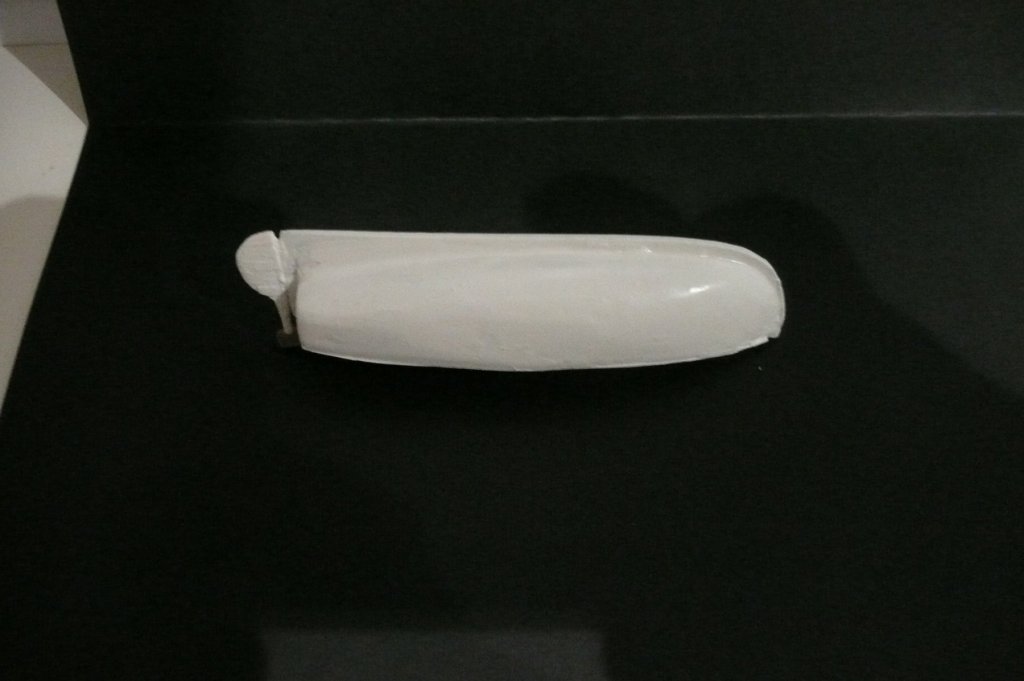
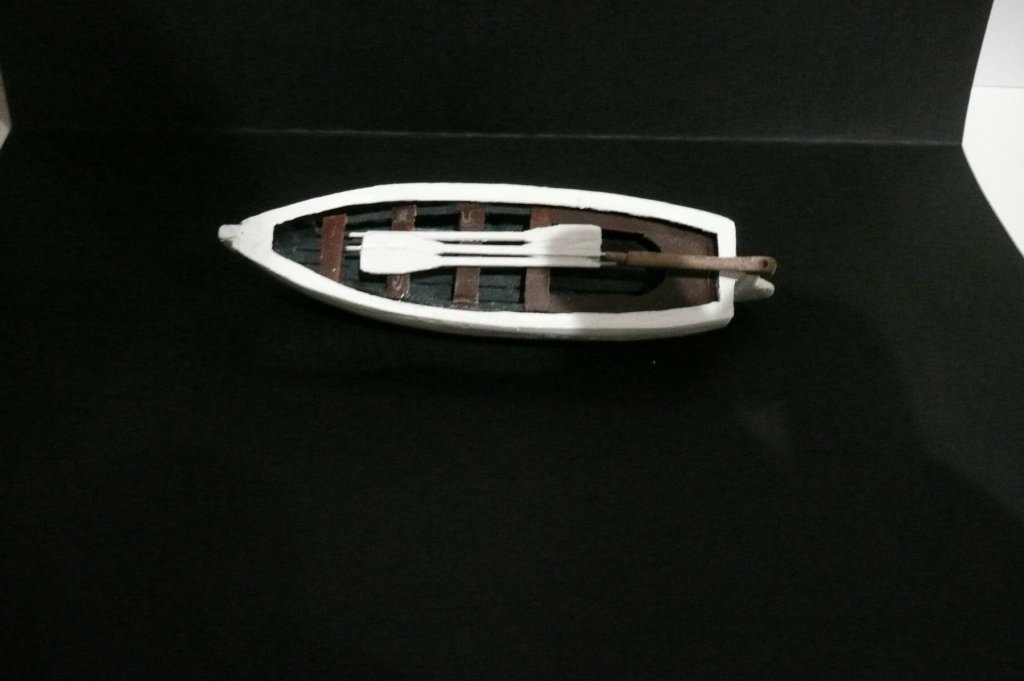
I am working on a scratch built model of the Housatonic. The first ship sunk by a submarine. Housatonic was sunk by the Hunley in 1864 outside of Charleston's harbor. Anyway the ship has 8 launches on 7 sets of davits. Two of the boats I've decided to show the interior details. The others canvased. The point of my note is the I tried to make the dingy out of clay. It worked!!! I used this method because of it's small size. First I made a top profile full size to scale. I applied it to a plywood piece to make a die of the interior. The profile was cut and sanded. The basic shape of the dingy was sanded to it's final shape. I used comon air dry clay purchased from a hobby store. I applied aluminum foil on the plug so it would release from the wood die. I rolled the clay to about 1/16 of an inch. Easily done with a rolling pin or large dowel. I formed the thin clay around the plug. It shaped rather easily. It cured for about a half hour so that it was stiff but not hard. I trimmed it to the top of the plug with an xacto #11. It released easily after trimming. I did some preliminary shaping and sealing with a Q-tip and water. I let the form cure overnight. I pulled out the aluminum foil and the raw plug was ready for final trimming. To finish I was able to sand. To stabilize I hardened the piece with a few coats of spray laquer. To finish the transom was sanded off smooth with a flat disc sander and a wooden transom applied. A keel and all of the interior trim parts were crafted and applied. Below is the finished product. Gunnel was finished with poster board to give it a clean finish.

- 1 reply
-
- 7
-
-
Chinese Laser Engraver/Cutter
t5956ws replied to t5956ws's topic in Modeling tools and Workshop Equipment
I believe the actual beam is about but <1mm. As for focus distance, there are different lens. Stock is a 12mm lens with a 50.8mm focus. There are aftermarket lens that are 35mm. I have not fooled with adjustments yet. If there are not, I'll use spacers in the lens mount or on the work piece bed. There are three upgrades I intend to execute. #1 is air assist. That will keep smoke and debris off of the beam and cool the part quicker. #2 a water flow indicator to protect the tube. The tube is water cooled. #3 A cabinet light. I found a 13" LED that will attach with a double sided tape in the cabinet. My use for this is repetitive accuracy. All in all, for the price, I'm well pleased. -
t5956ws reacted to a post in a topic:
Chinese Laser Engraver/Cutter
-
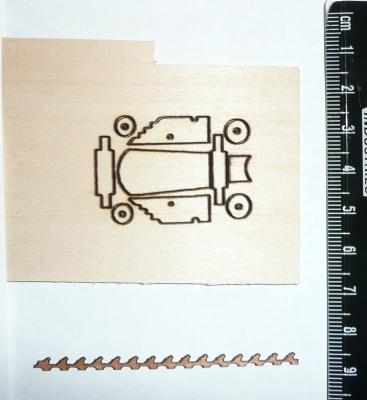
Hello all. Last February I started a scratch build project. My second. It's the South Carolina/L'Indian circa 1777-1781 as pictured in "The History of The American Sailing Navy" Chapelle. It's quite a project for my skill level. There is much repetitive detailing on this ship that I have little skill for. Anyway, with that in mind I started to gain interest in laser cutting. Hoping that it may solve this problem. On E-Bay I discovered the one flooding that site for around $370 USD. I U-Tube'ed it to death and was quite satisfied with what I saw. I have NO CAD skills but what I saw at $370 was worth the challenge. At this point I am delighted I bought it. I'll briefly share with you my initial experience. The unit is a 40w CO2 laser cutter. It is quite large and weights 67 lbs. It took me about 5 days to set up, test and operate. I have attached a photo of my early results. The two attachments are Bitmaps I created using the computer's "Paint Shop" tool to drive the laser. In the photo are the parts for a gun carriage cut from 1/16" basswood. These piece I did not separate so I could show the detail. The other part is a decorative wales detail is cut from 1/2mm cherry veneer . For more detailed info on how it runs or specs, that can be found on U-Tube. There are at least 20


-
Stern Details
t5956ws replied to t5956ws's topic in Discussion for a Ship's Deck Furniture, Guns, boats and other Fittings
Thanks!!