cheetahhouse
-
Posts
24 -
Joined
-
Last visited
Content Type
Profiles
Forums
Gallery
Events
Everything posted by cheetahhouse
-
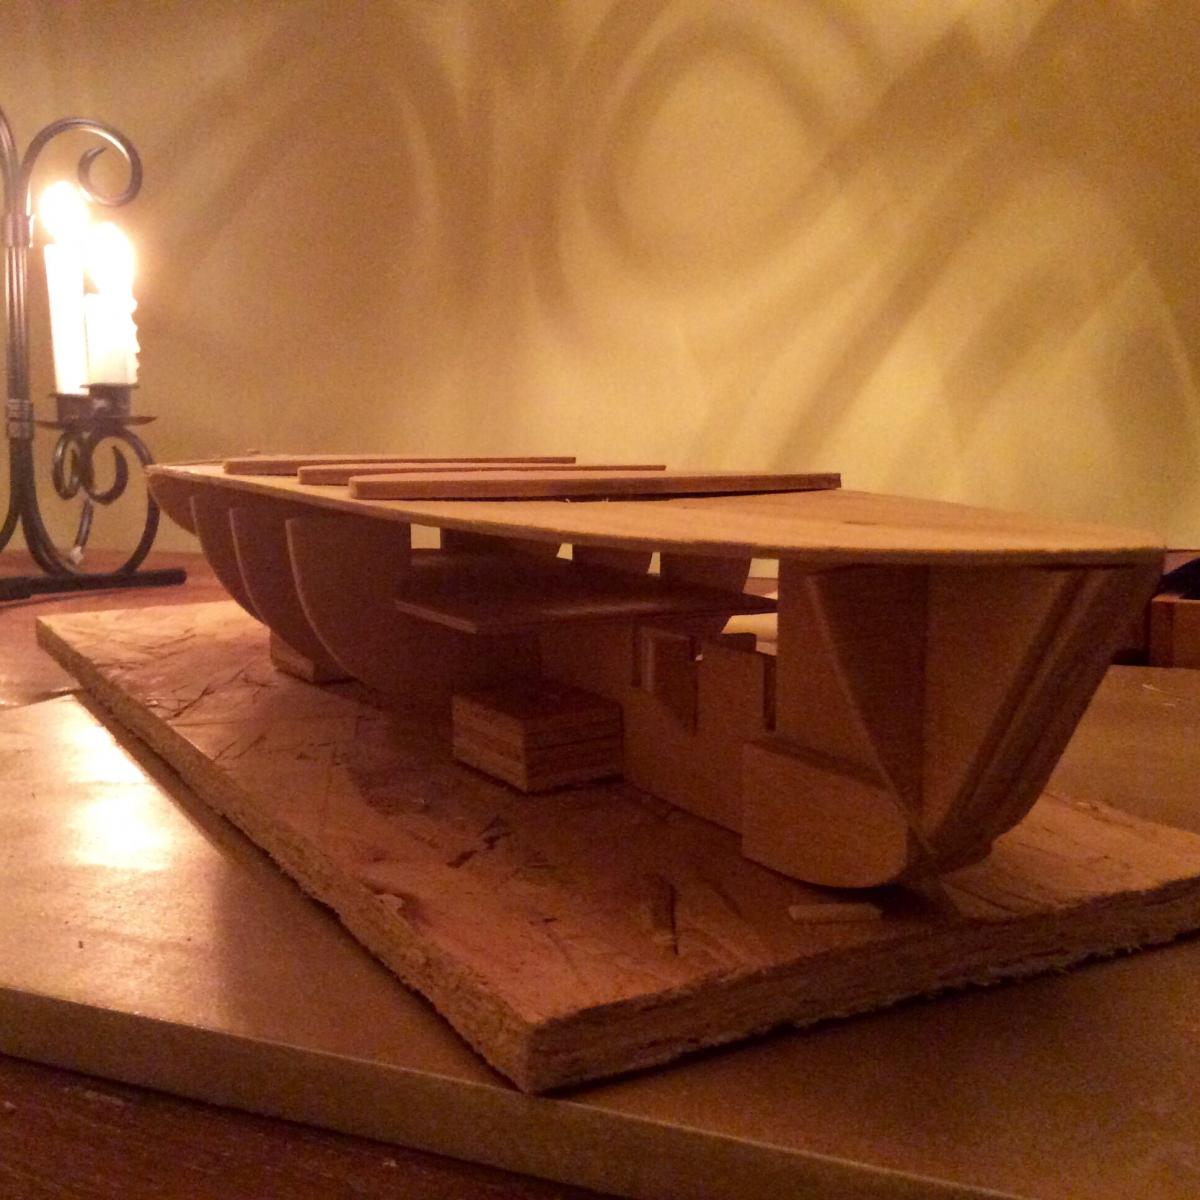
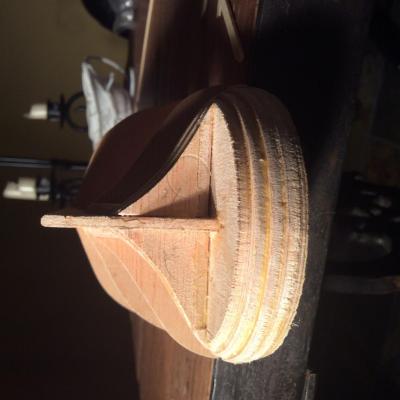
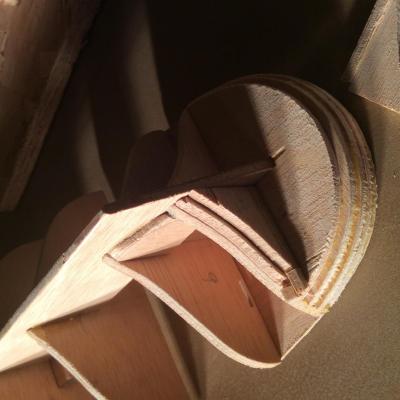
 Your deck looks great without any bumps and dips like mine. The deck camber is challenging on Le Hussard. With planks already glued , it is 20mm thick. You can see the unevenness of my deck line...its those middle bulkhead frames that are causing the most grief in lining it up. I am almost thinking to do away with the camber look and just start shimming the middle frames to be level with the others...unless it is supposed to be like this? The elastics work , but need a bit more tension to pull down the deck which has been soaking in water for last two hours. Deck is not glued at this point ...
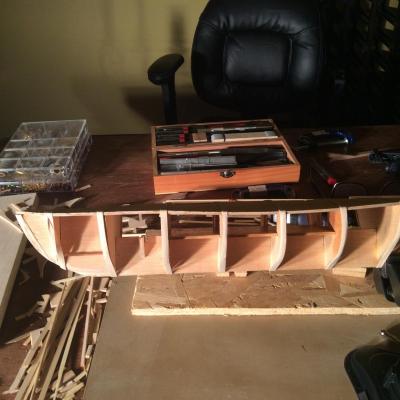
-
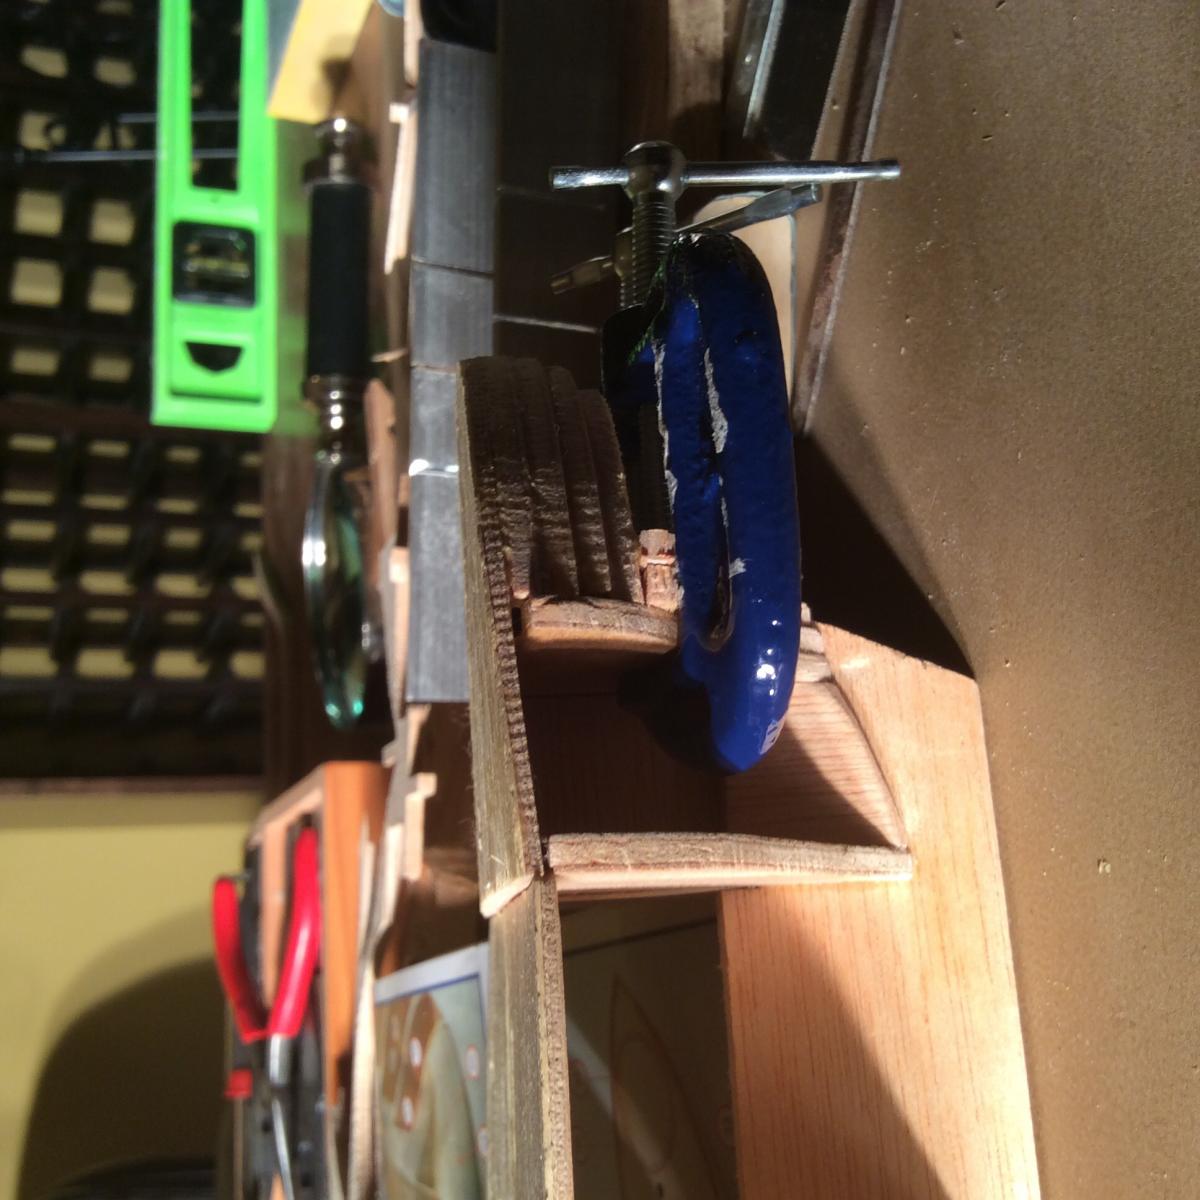
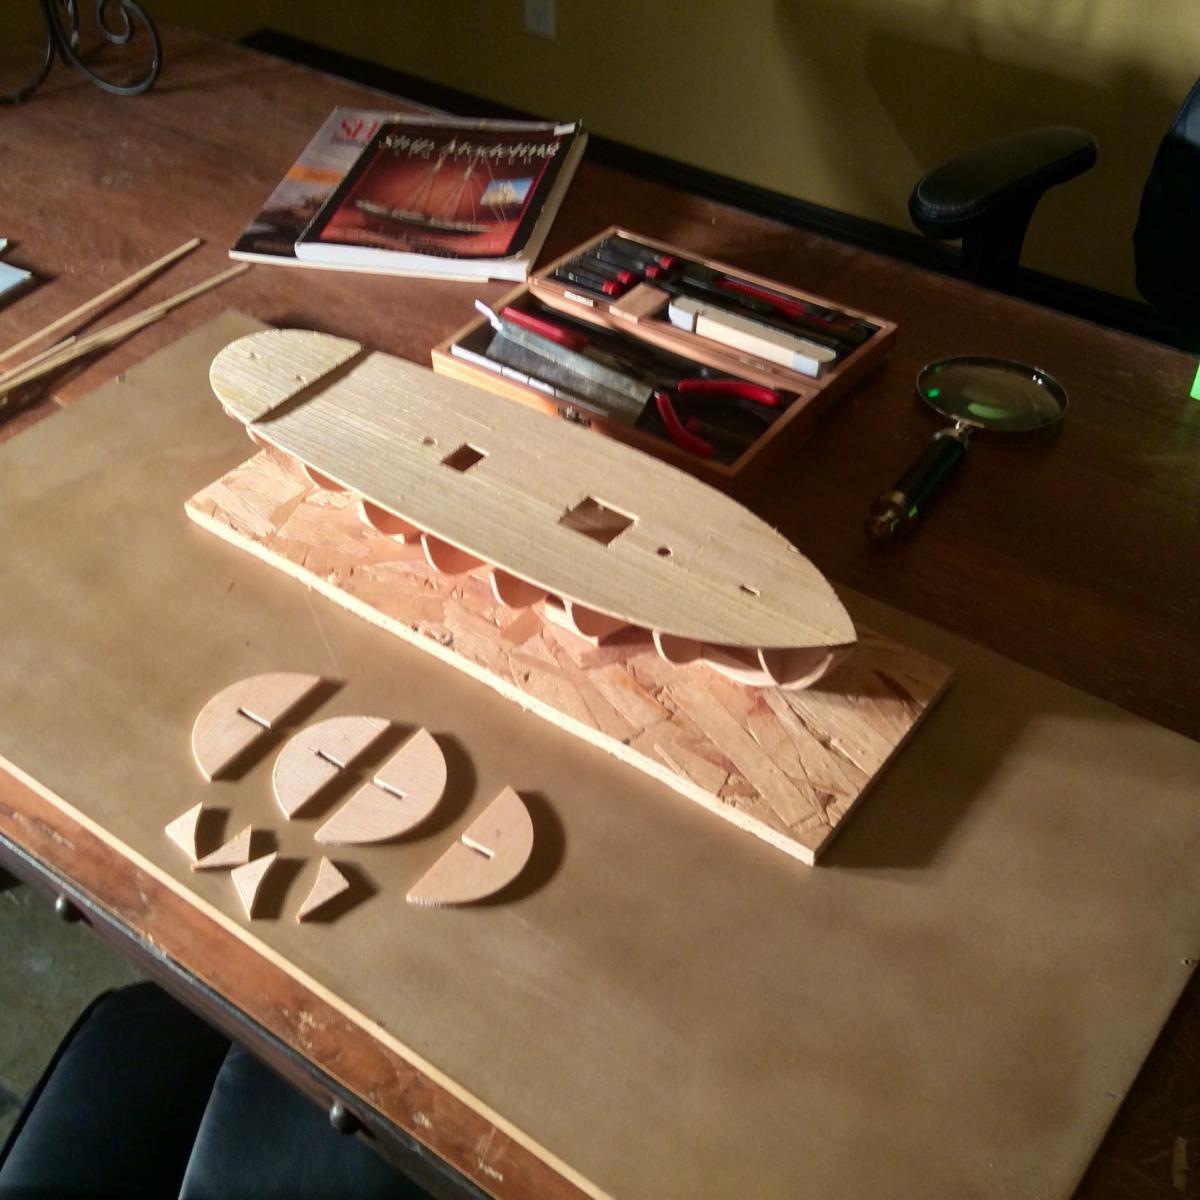
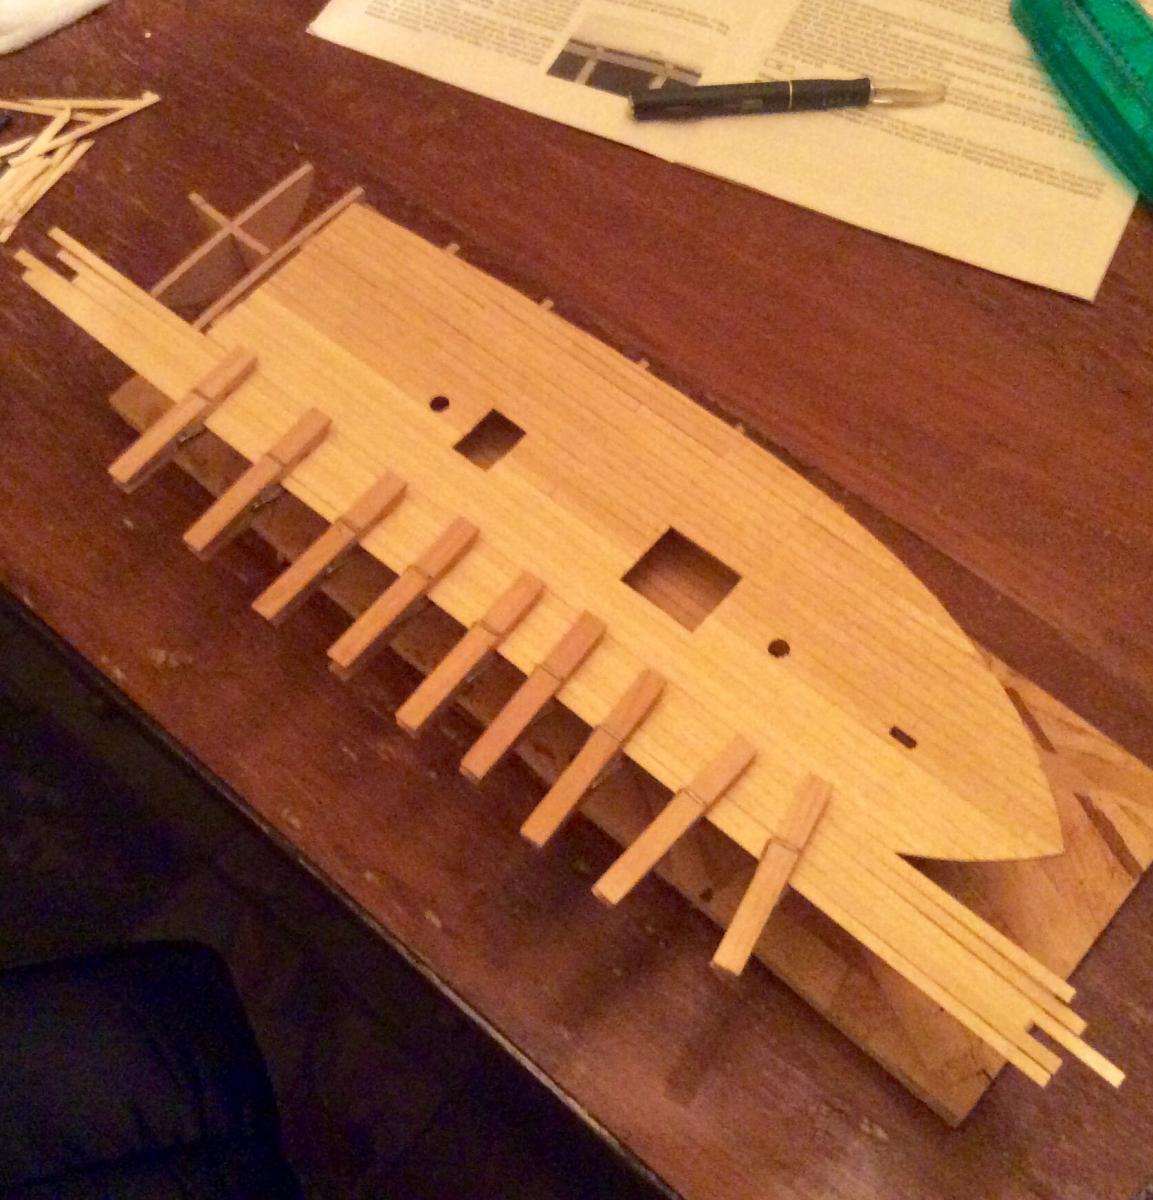
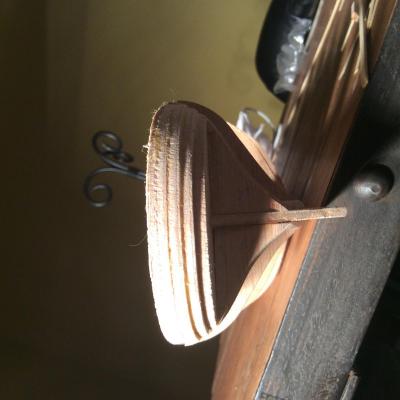
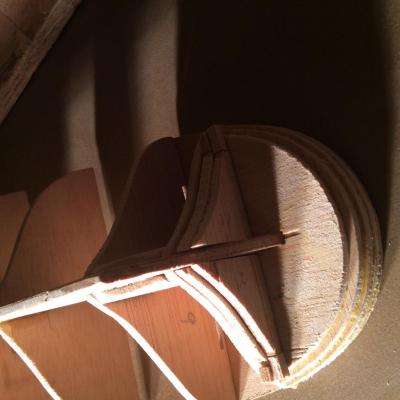
Today I chose to go ahead with gluing the deck on to the frames before the process of planking the hall. As the instructions do not give me any clue as to when the actual deck should be glued, my thinking is the lines will be truer with the deck in place. My question involves the most effective clamping method given the deck's camber especially amidships? I see some use elastic bands or tying towels around the deck. I find The c clamps just do not grip properly given the curvature of the bulkhead frames. At this time the deck is in a bucket of water prepping for the bend procedure.

-
Thank you Harvey, I made a bunch of copies of the plans this week...will try what your suggesting on marrying the two plan elevations...All along I was hesitant about using the chisel especially now that I am feeling more comfy cutting the wood with sand paper and filing. You are right about the 80 grit paper as that is what I used on the bow and stern...mind you with some good ol elbow grease Gettin back at it this weekend...looking forward to it...will keep you posted.
-
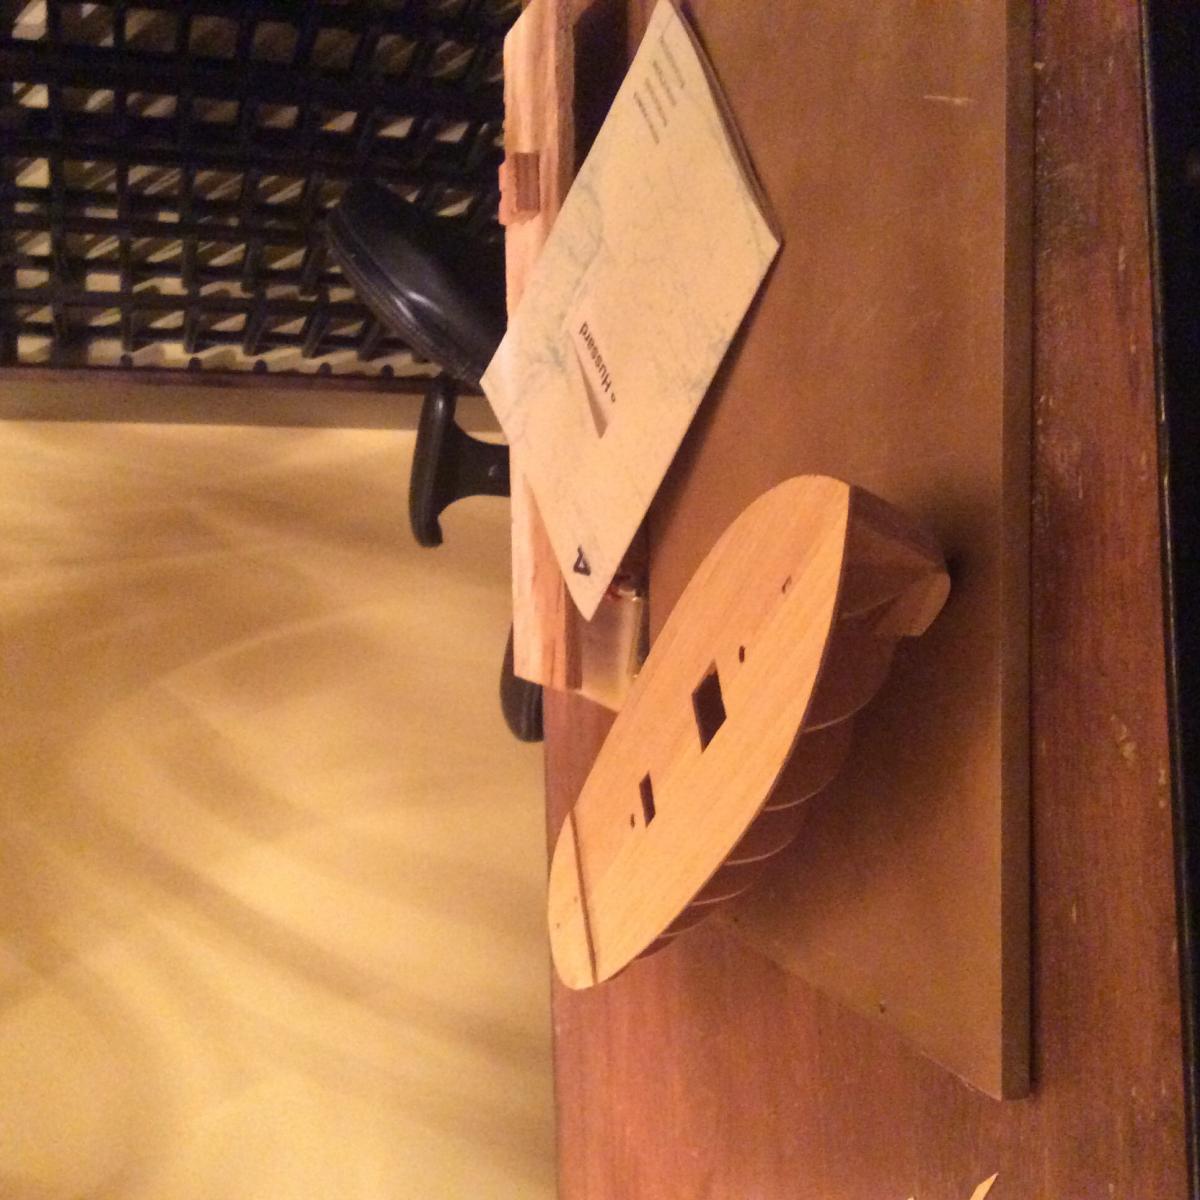
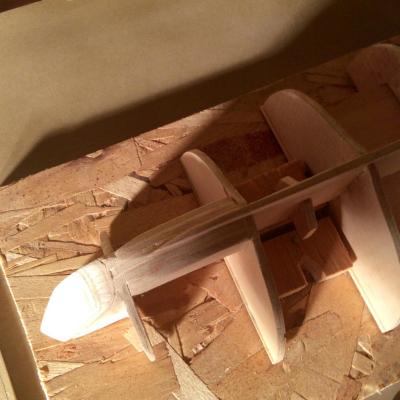
Thanks Brian, That's an excellent point as you are right the perspective is from upside down....hmmmmmm this is why I can see it is best to do this model to plan comparison step at the very beginning stages... One thing is for sure, the cut line on stern to main decking is a little crooked and needs to be shimmed a bit. Does it look as though I have the model placed or lined up properly on the plan? I plan to focus on the stern area tomorrow and will post more pics.
-
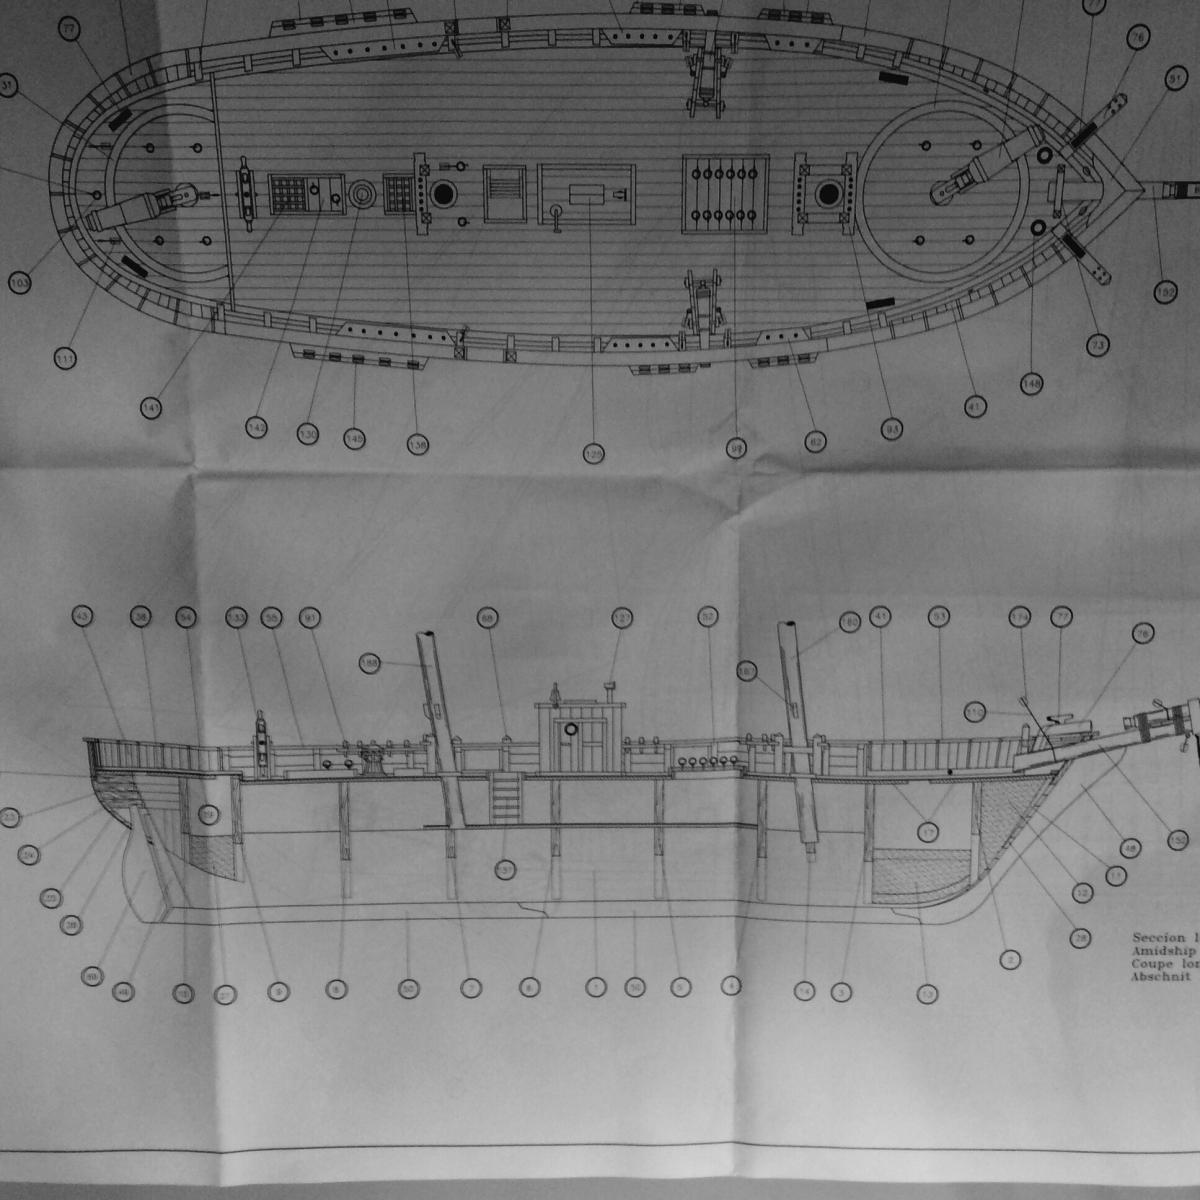
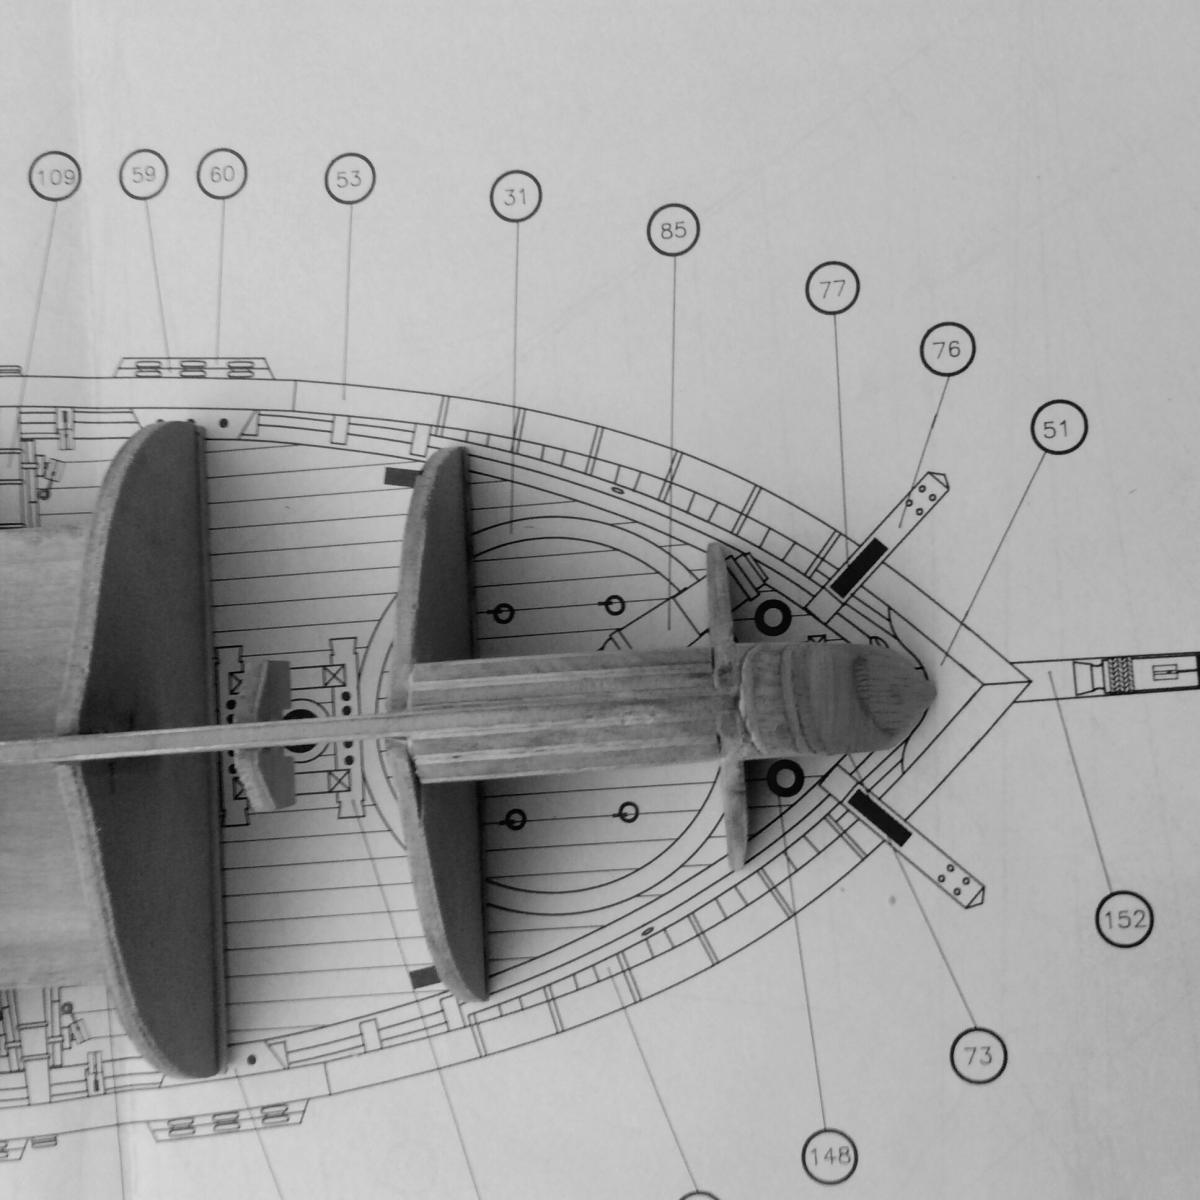
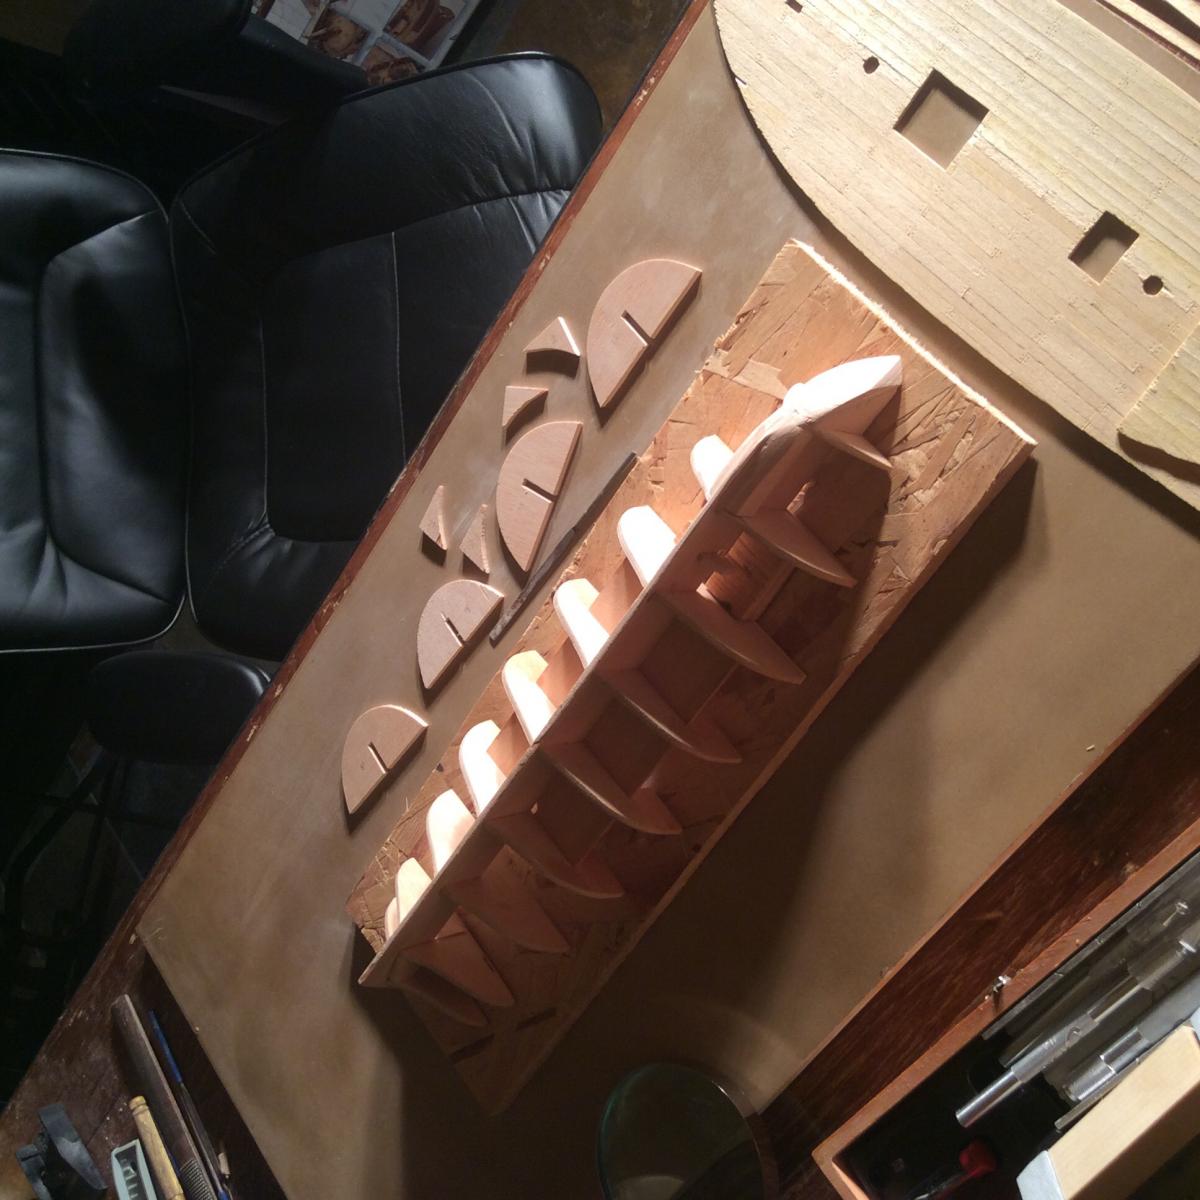
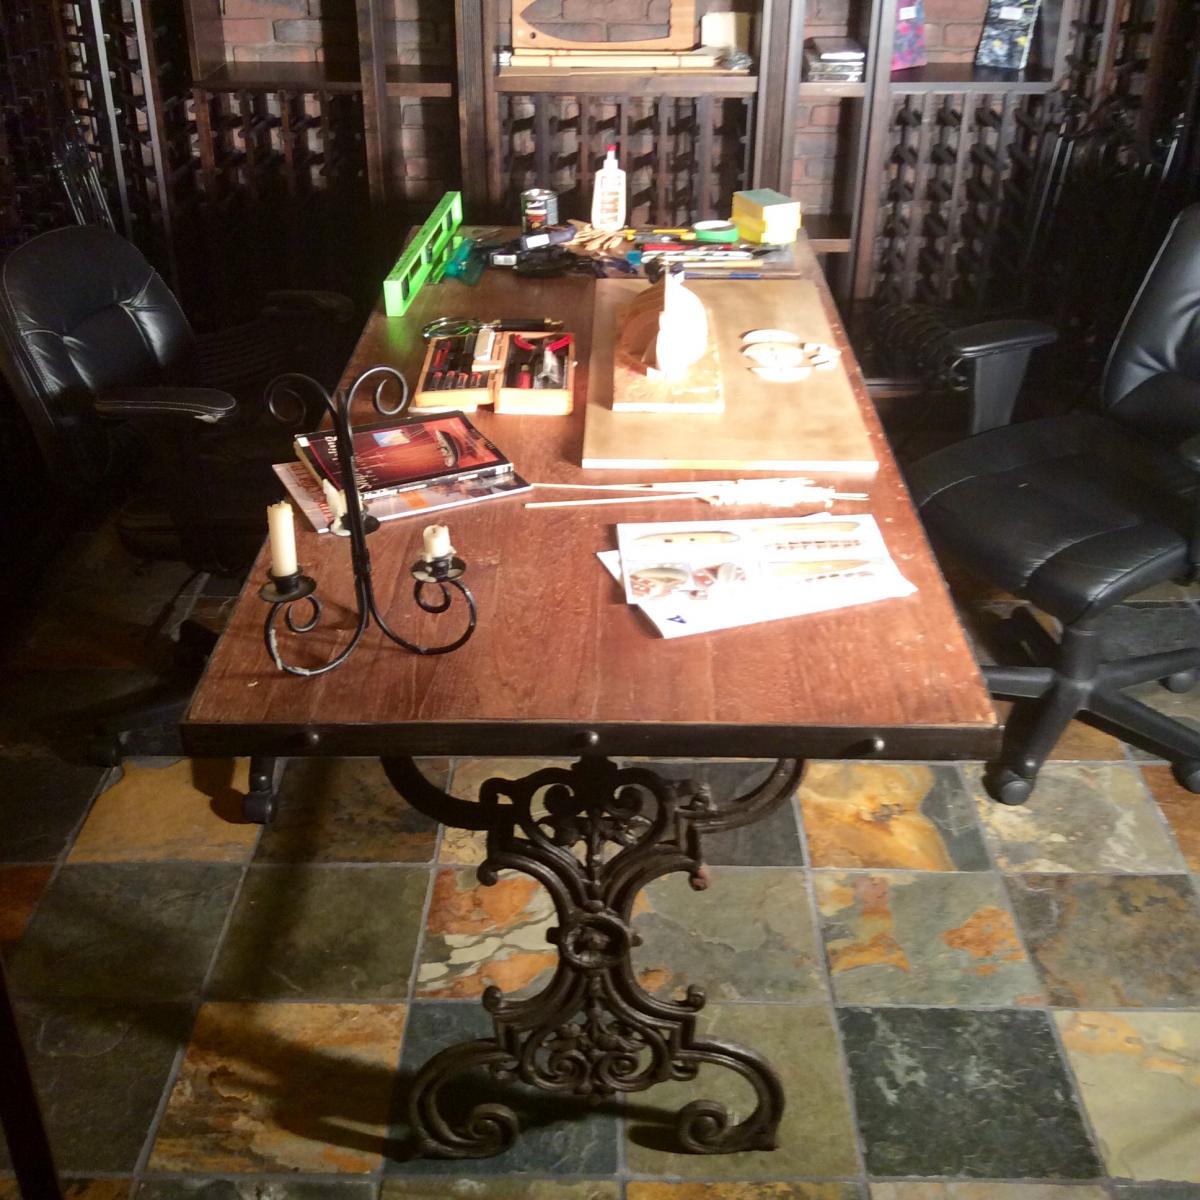
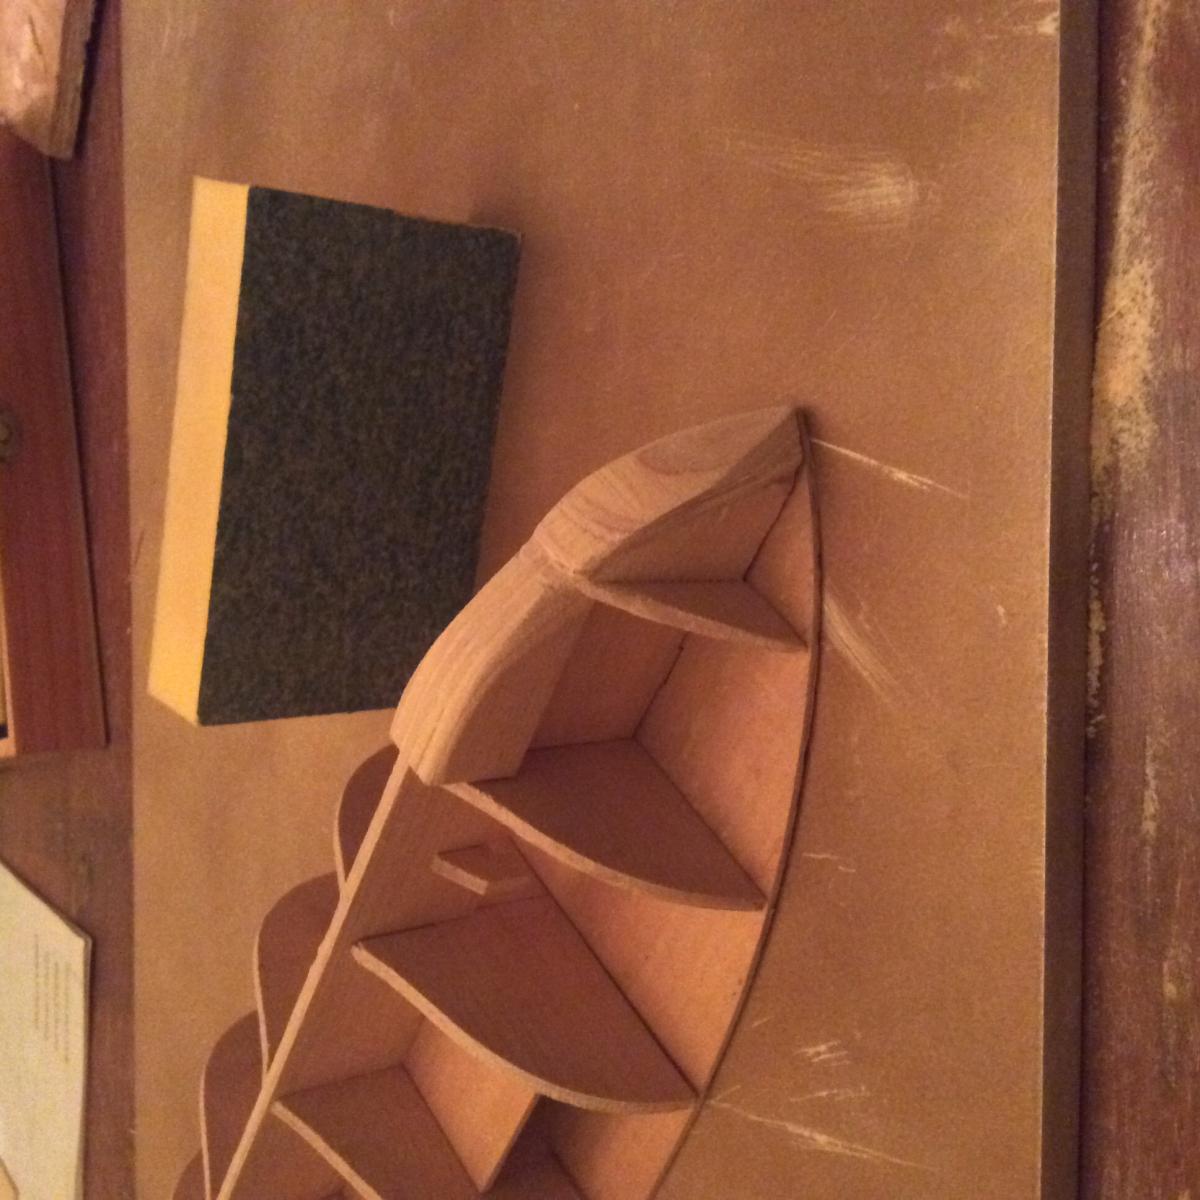
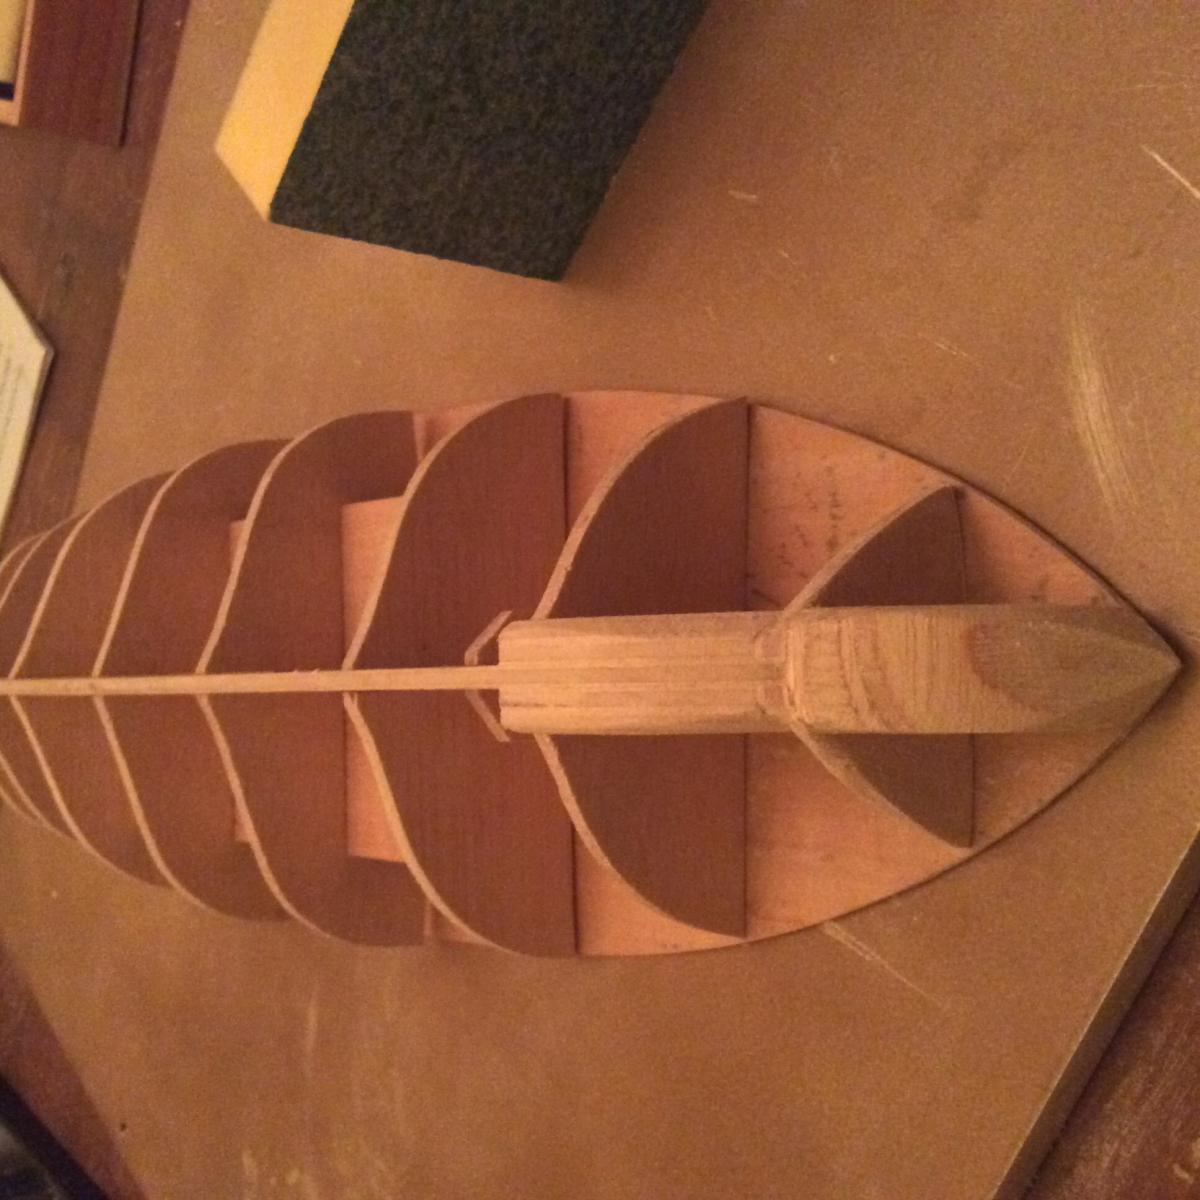
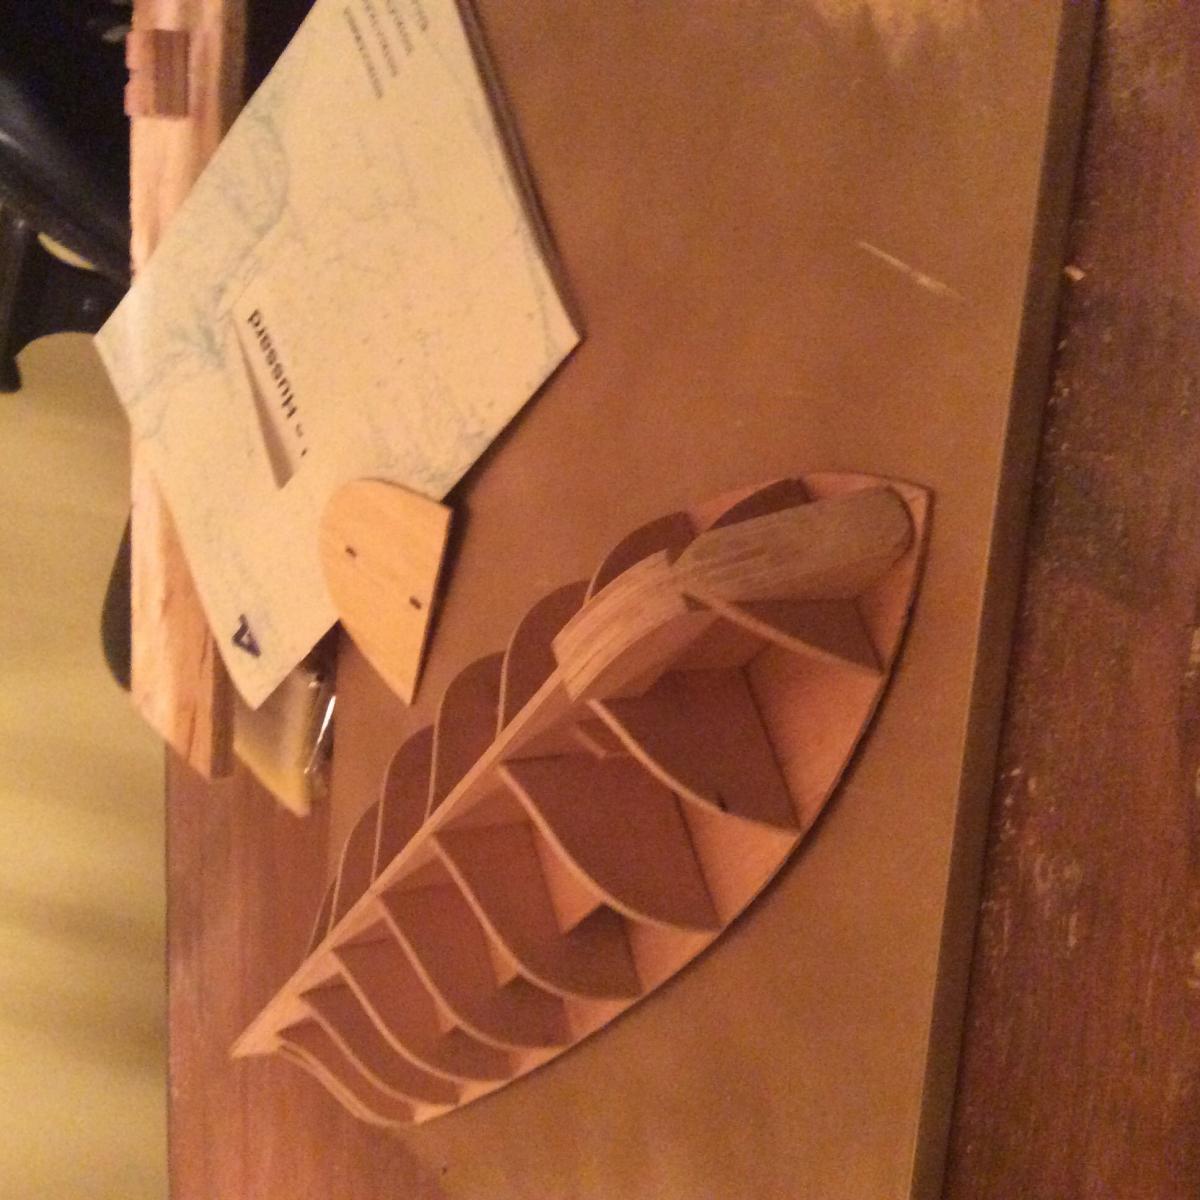
Tonight was mostly made up of preparation for the task at hand on faring the frames. I need more tools (small vice and electric plank bender, large photo copies of the plans) before getting started on this process, I thought to pull out the plans. Low and behold the plans to the model are a perfect one to one ratio. With this new discovery, I placed the model on the plans as you can see from the pictures below...NOTE to self...next time do this before glueing anything together. Tomorrow I will cut out the stern decking from the copies and then use it as a guide to shape the perfect curvatures...more sanding and some shimming on the cut line of the decking is necessary. It is apparent that I need to not only bevel, cut, and trim but also shim the stern, bow and bulkhead frames. Additionally after looking at the picture, am I correct in assuming the curvature on the model needs to emulate the curvature on the plans? For example if we look near the areas of numbers 73 and 148 on shot of the bow we can see the curvature and lines. Presumably in order for me to finish a nice flush fit of the plank on frame this angle needs to be carried through the entire length of the frame.


-
You are right about that the instructions even after translating with Google ...still remiss in many of the steps. Thank you for the black marker tip as it is the first time I have heard about this. The part about beveling the bow and the stern is going to be interesting as this will be a first in working with a chisel on such a crucial part of the ship. Anyway one thing I have learned from all of the reading and helpful feedback is to take my time on every step. This I will surely follow. Thank you for the helpful suggestions... I also found an excellent article on the faring process depicting excellent diagrams and illustrations...I will circle back with the link shortly. Faring/Planking Beginner Instructions: http://modelshipworldforum.com/resources/Framing_and_Planking/plankingprojectbeginners.pdf
-
It does help me a lot as i never thought about using google translate or following other AL builds...great idea! Thank you for your feedback and suggestions! Plus it is encouraging to hear I am not the only one that doesn't get what the author or translation is instructing. Cheers!
- 31 replies
-
- 2
-

-
- le hussard
- artesania latina
- (and 1 more)
-
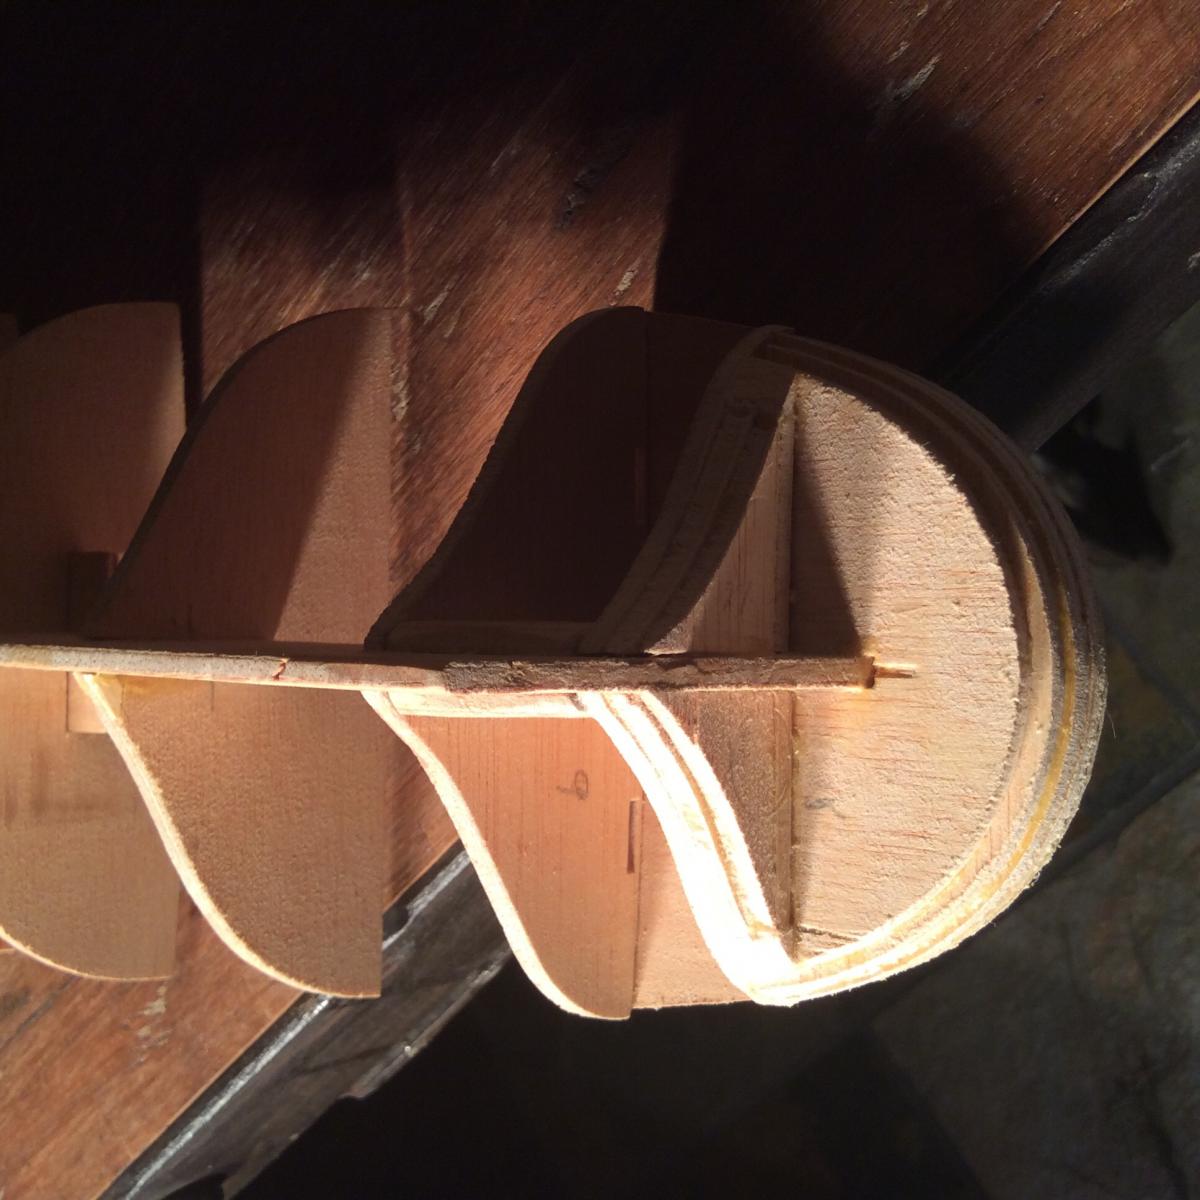
Pleased with today's start as I finished tapering the stern and reinforcements. Working with wood for the first time is turning out be gratifying especially when shaping into form through shimming of all things... Working through the instructions I have hit another road block...this one I have been playing over and over and just can't come to a comfortable level on what exactly the author is trying to say? Hopefully somebody can shed some light for me on the following excerpt of the instruction manual. "With a half round file sharpen with extreme care, at port and at starboard , false keel no 1, reinforcements number 11, 12 and 13, as well as frames number 2 and 5. Follow the same procedure for reinforcements number 21 to 27 and stern frames number 6 to 10. Bevel carefully the edges of the frames. You will realize that the more curvature the hull takes the more would you rough-plane. With the planking strake number 28 check the correct alignment lengthwise and breadth wise the hull. This way you will know up to where you have to bevel for the correct placement of strakes number 28. At once take the opportunity to file the excess of the decks." Sharpen and bevel by how much, shape etc.

- 31 replies
-
- 1
-
-
- le hussard
- artesania latina
- (and 1 more)
-
Thanks for the words of encouragement! Model ship world website truly is a prerequisite source for the novice builder. Bravo!
- 31 replies
-
- 2
-
-
- le hussard
- artesania latina
- (and 1 more)
-
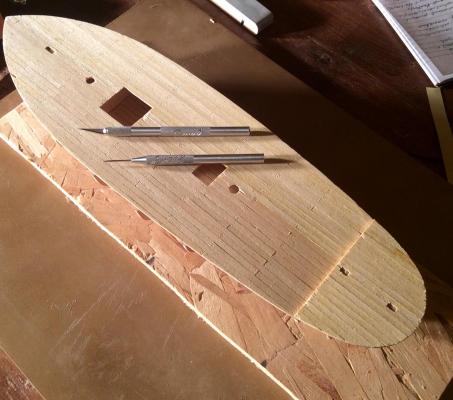
Last night I glued the stern deck to the hull followed by the reinforcements. Note to self: mistake as you can see from the pics below. It would have been much better for me to exercise more patience by letting the stern deck sit overnight...another lesson learned. I am going to just wing it this time and hopefully cover the prominent gap between the decking and top of bulkhead frame with some shimming or filling. Lots of stories to share when Le Hussard is complete and standing proud in her display case....one day...not soon! Tonight involved more glueing of reinforcements followed by shimming due to a terrible job of measuring and cutting by AL. The reinforcements were each about 0.50 centimetres too short. She is tightly clamped in the back and will sit for the night. Tomorrow I expect to cut and trim the reinforcements to be nice n flush with the bulkhead frame.

- 31 replies
-
- 3
-
-
- le hussard
- artesania latina
- (and 1 more)
-
Where do I find chuck's practicum?
cheetahhouse replied to jah's topic in How to use the MSW forum - **NO MODELING CONTENT**
Thank you - As I am at the all important pre-planking stage of Le Hussard, this practicum is a much welcome addition! Hip Hip Hooray on the movie too! -
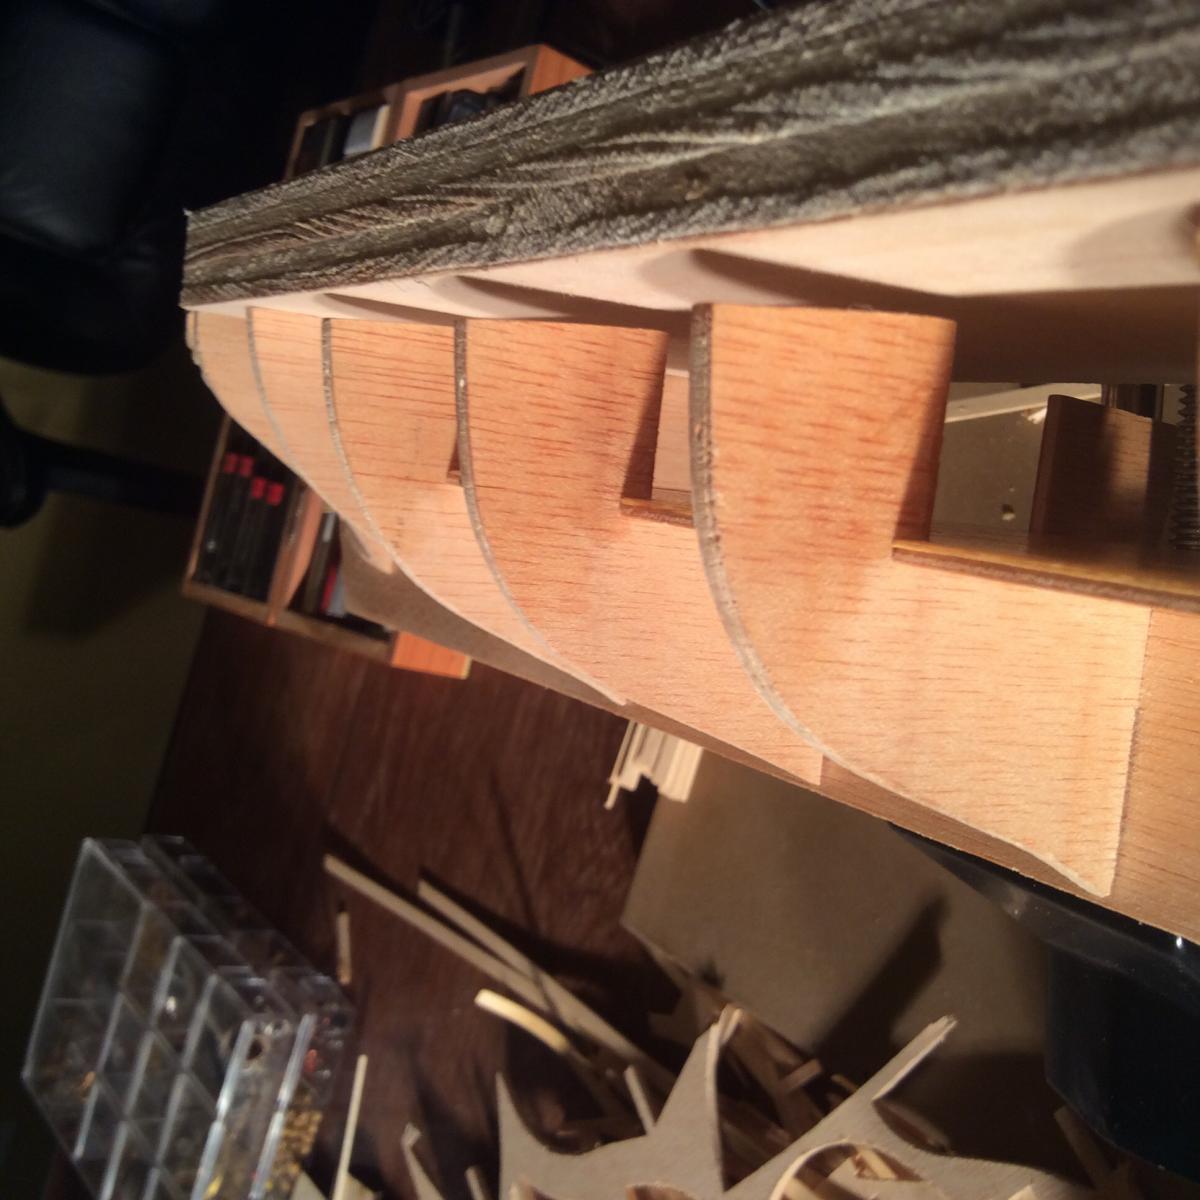
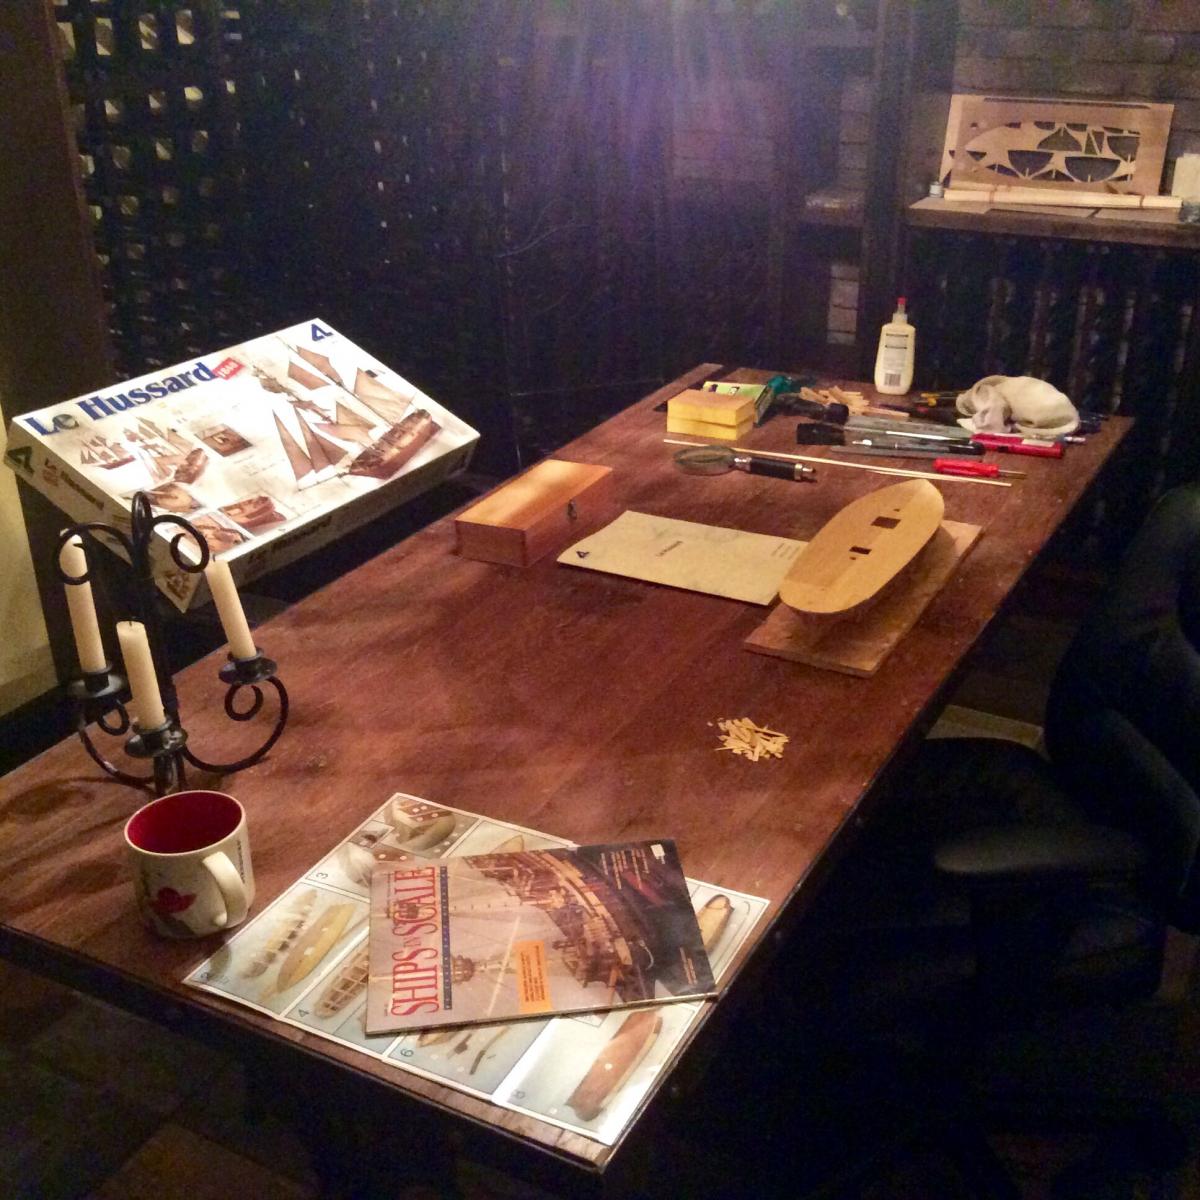
Working on shaping port side of bow support frames...I still feel uneasy on whether or not I am doing this right? Trying to file/sand the perfect half circle based on my eye alone has me concerned? I'm also noticing that the instructions are hard to follow. It is mentioning to sharpen with extreme care and use a half round file on the port and starboard side of the false keel and balance of reinforcements. Without any pictures to follow I am baffled? Is there a pictorial or better yet a video on how to best go about this next task? It is beginning to feel as though I am swimming upstream and alone as there are no practicums or working examples online of Le Hussard. I am at the beginning of this project and fully realize the shaping of the hall is paramount to being able to finish the planking. Given the pieces in the kit are not cut to plan...it is calling for much customization. If this is par the course in wood modelling...it is all good...but wish instructions would be more specific.


- 31 replies
-
- 2
-
-
- le hussard
- artesania latina
- (and 1 more)
-
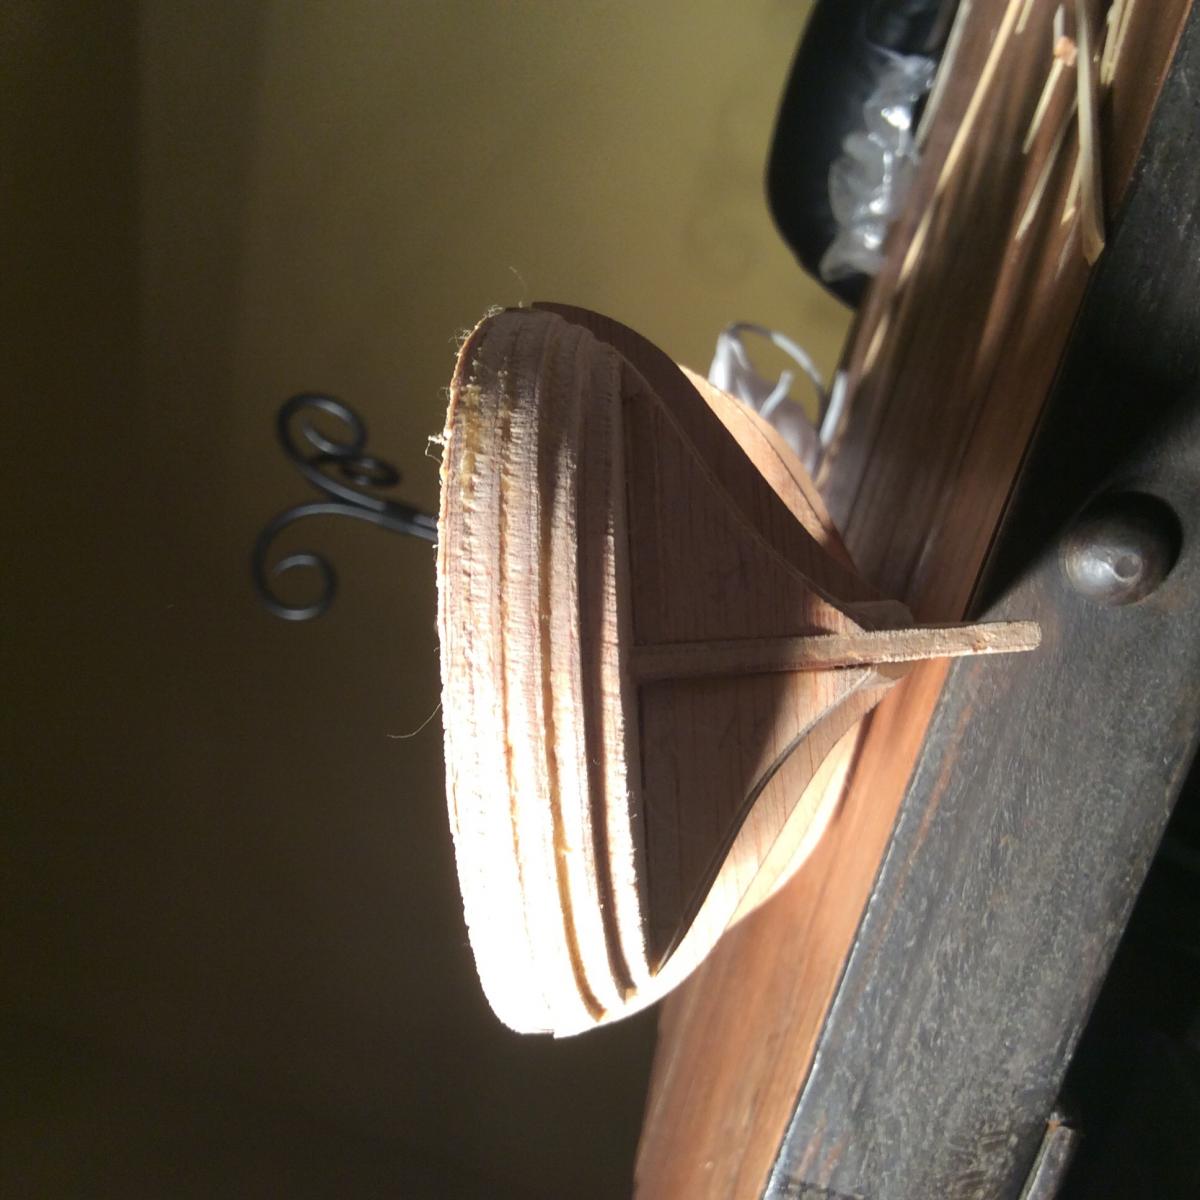
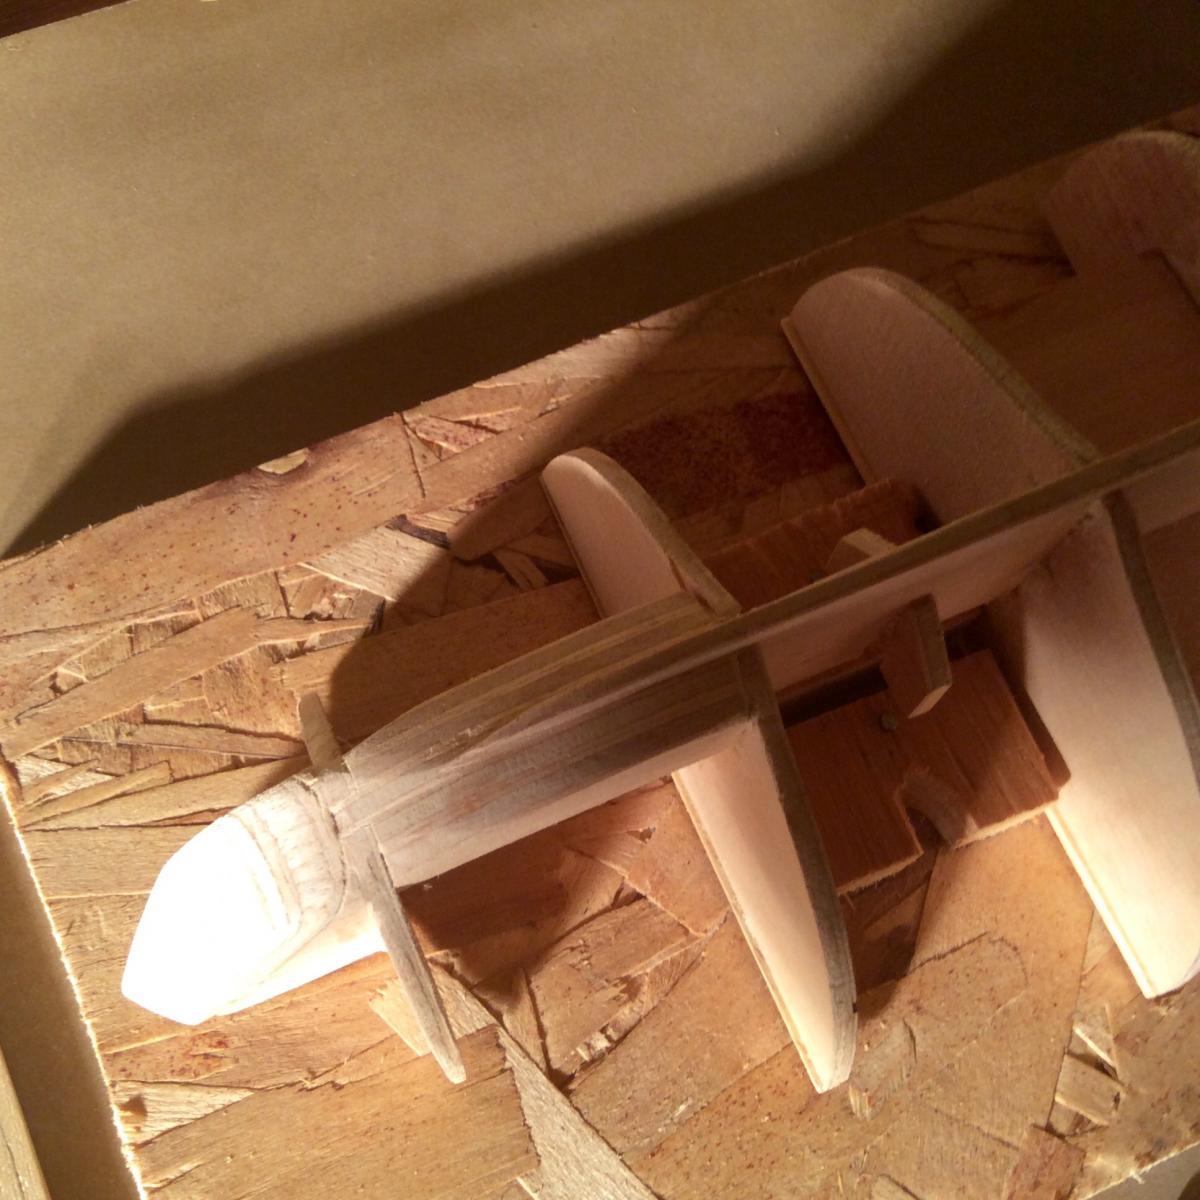
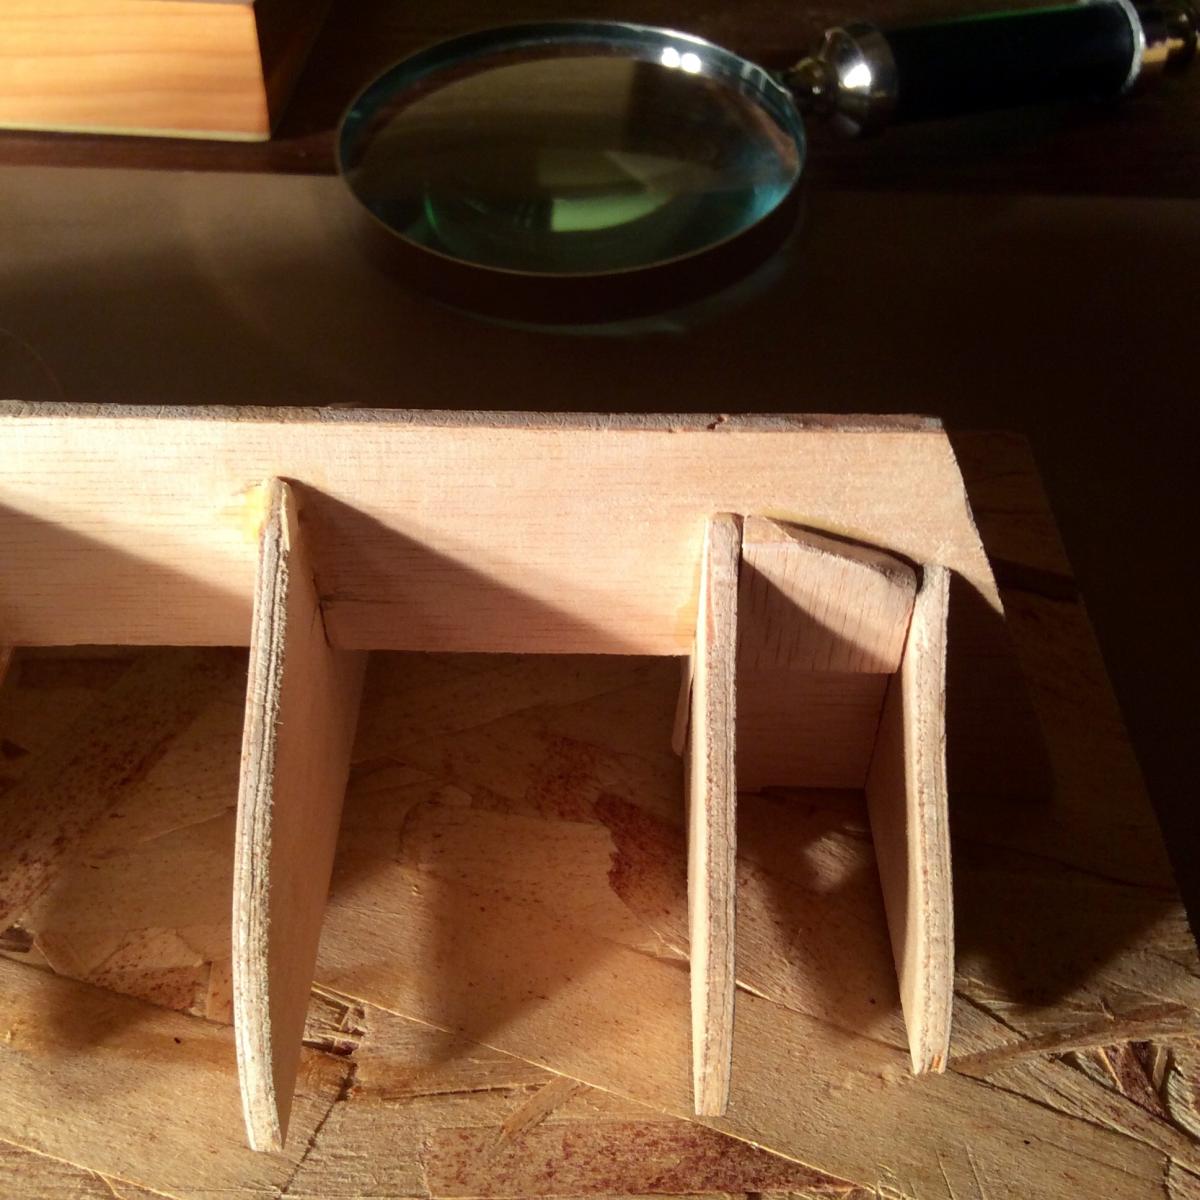
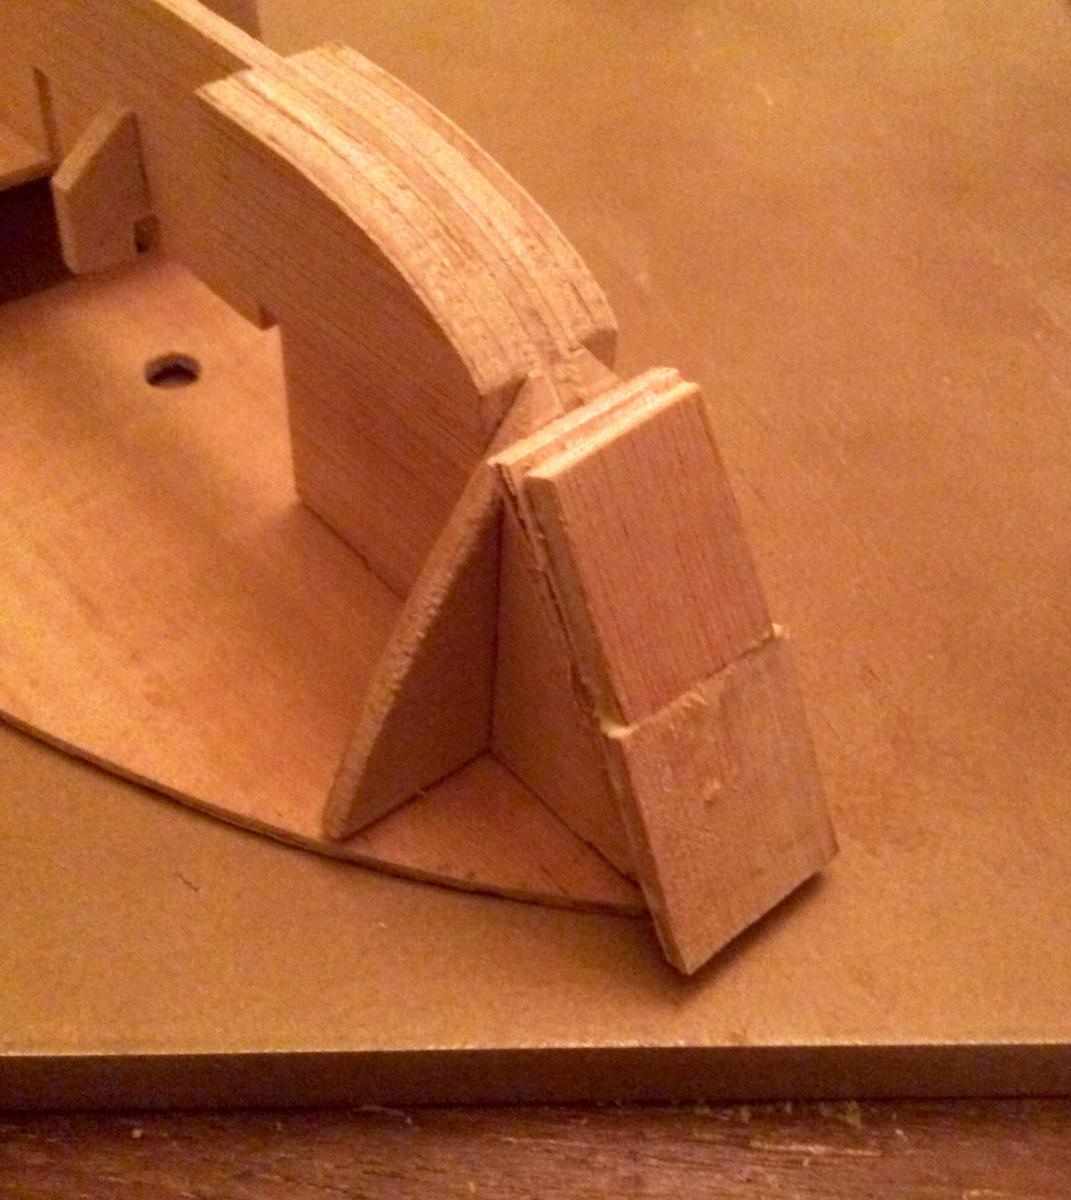
Today I shaped the two support frames between bulkheads 9 and 10... It appears the laser cut pieces are not as accurate as it was expecting...requiring more sanding/filing to line with bottom of frames...as this is my first wood kit...taking some getting used to all the adjusting necessary on the pieces included in the kit...a complete learning experience from plastic modelling...but nevertheless quite enjoyable and therapeutic o say the least... Tomorrow's task involves sanding and filing bow support frames to be aligned with bottom and angle of bulkhead frames? Easier said than done... In pic #2 and #3 you can see I started on the starboard side. Am I going about it the right way? The instructions with kit are devoid of any reference on this.. The rear support frames to be assembled after bow treatments: Not sure if this bow shimming repair/assembly is coming along as it needs to? Trying to keep it clean and tidy...making it easier to find tools:


- 31 replies
-
- 1
-
-
- le hussard
- artesania latina
- (and 1 more)
-
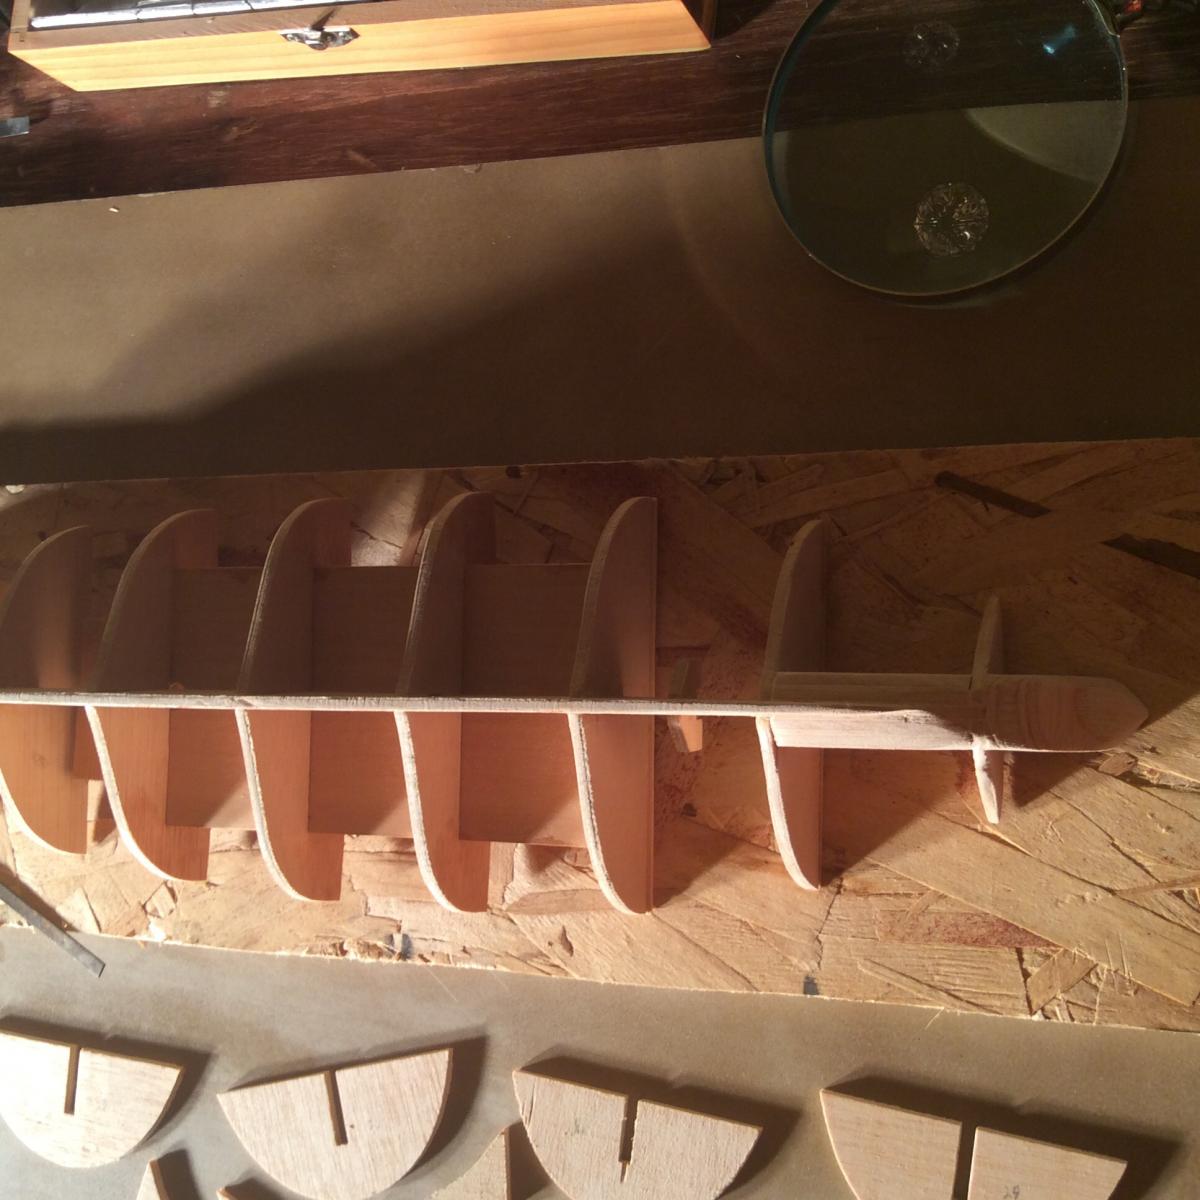
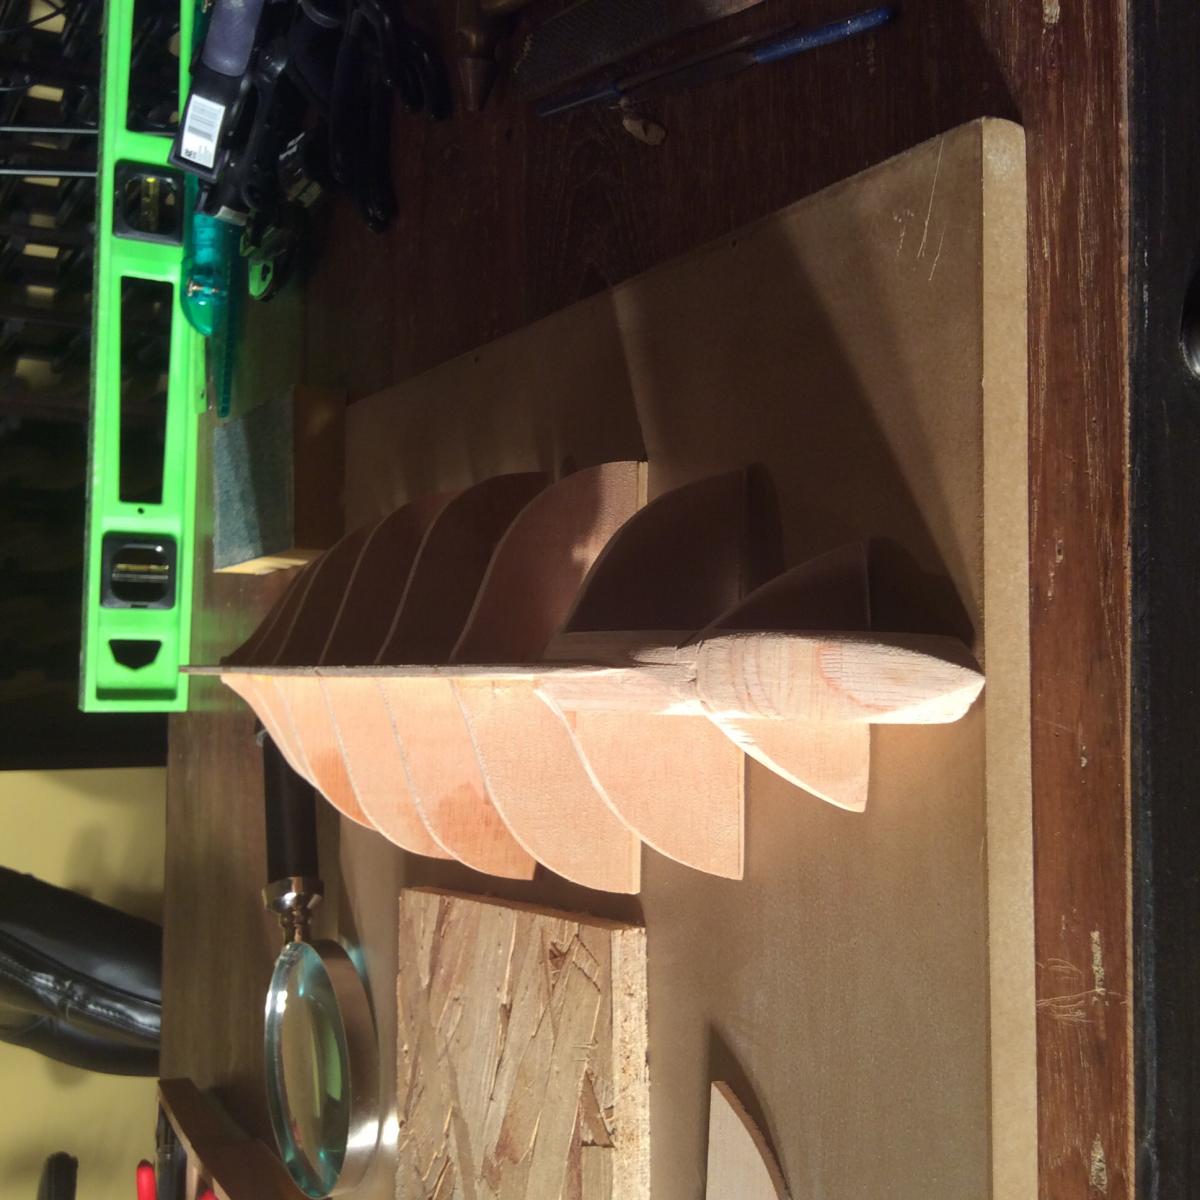
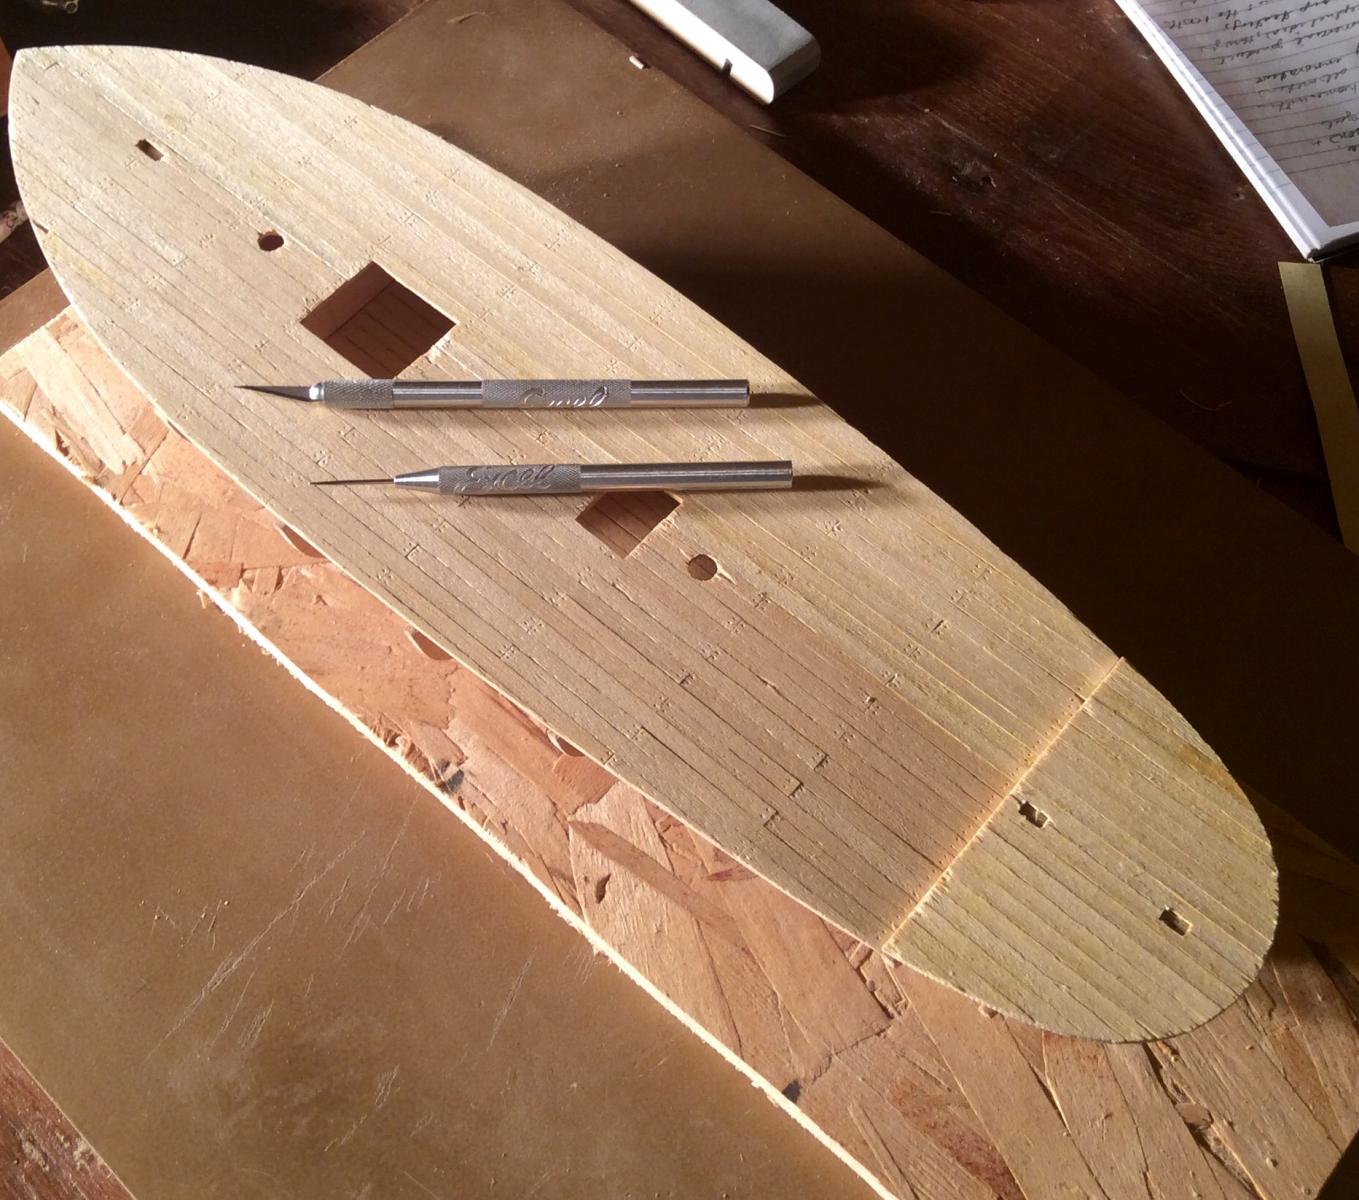
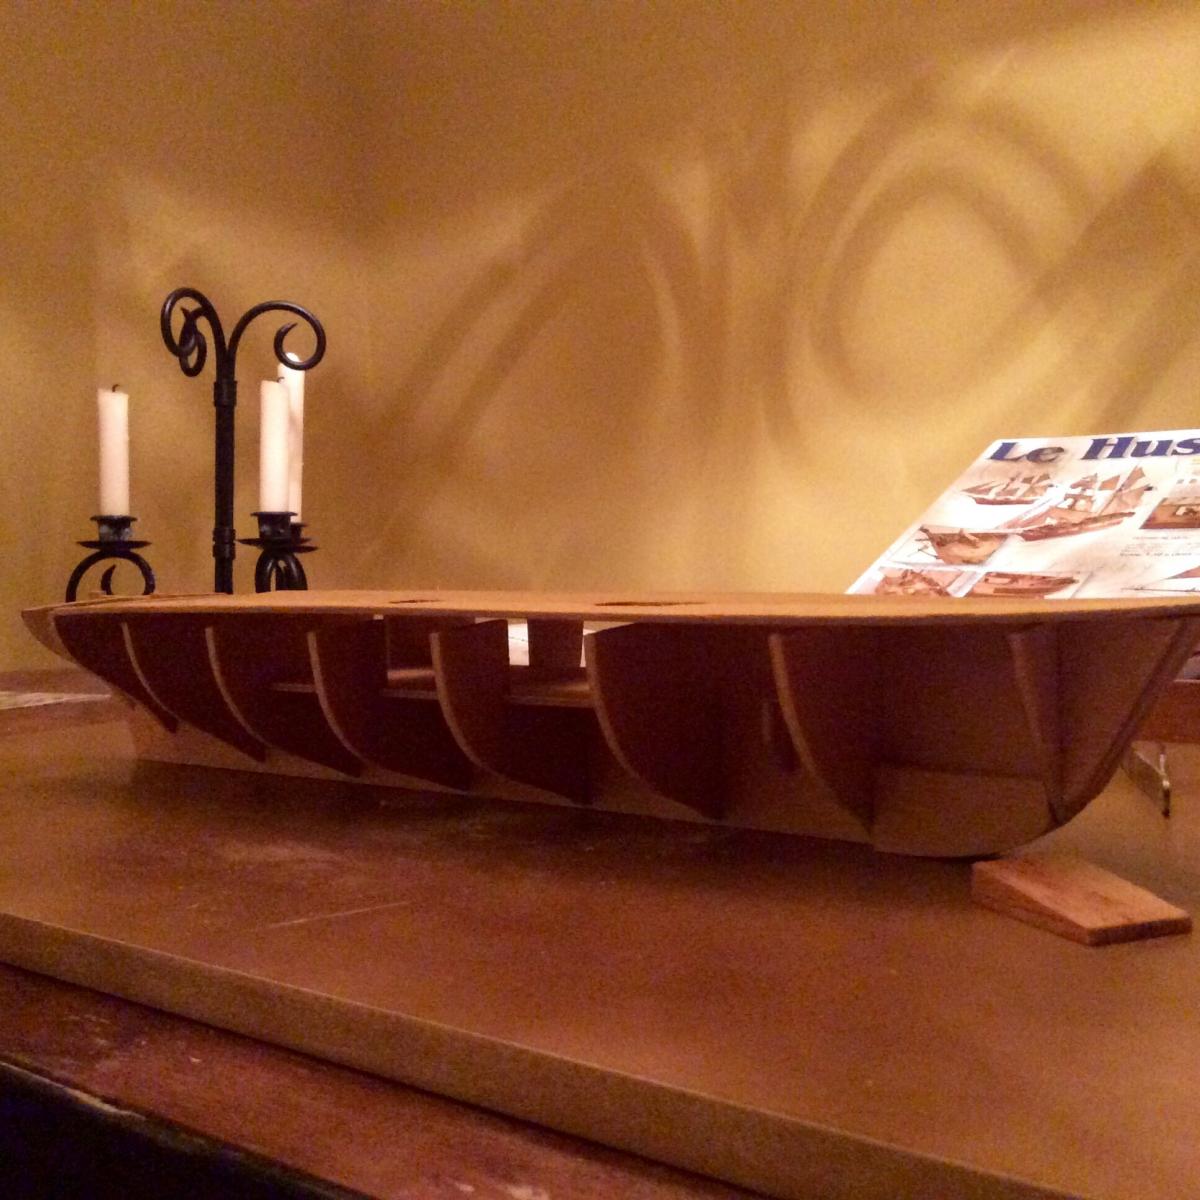
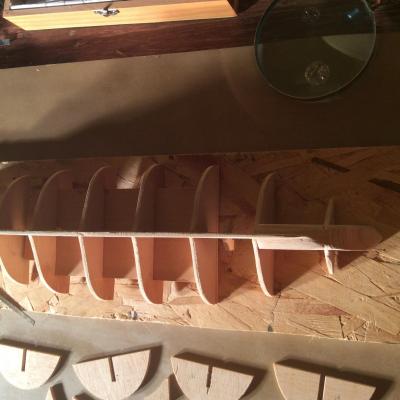
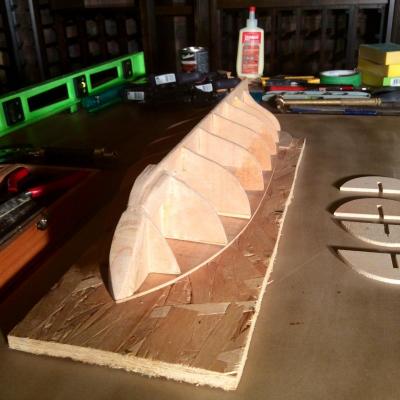
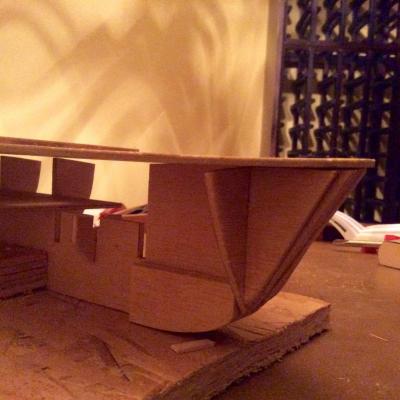
I am starting to feel like I am riding a roller coaster with the ups and downs of this hobby. Admittedly Friday was a tough day as I was feeling doubt on my abilities to do this right. Saturday rolls along and my thoughts are deep in to whether I should scrap this model , completely remove and re start from scratch or just get through it with many scars, bumps and bruises it is sure to reveal. I chose the latter. Thankfully my good buddy from over 30 years dropped in unannounced after his hockey game. A pleasant surprise no doubt. It was neat to be able to show him my progress thus far. He happily joined in to my build and good thing as we put the frames on together...which when thinking about it would have been very difficult to manage on own. It was an up day to say the least! My day: - Check for perfect symmetry along sides of bulkhead frames; use construction paper; trace each bulkhead frame; cut-out and fold along center line (place frame over paper to find center line); check to see if sanding is needed; amazingly this AL kit provided perfect lines without any sanding or filing necessary; - Re-insert bulkhead frames without glue; line up tops to top of keel; use level; mark frames with pencil; re check for perfect level and alignments; attach with white pro carpenters glue - Emulate real size deck planking (use tools in pic; mark cut lines and nail holes to reflect staggered deck plank look); - ALERT: remember stern frame with two notches sits highest...
- 31 replies
-
- 2
-
-
- le hussard
- artesania latina
- (and 1 more)
-
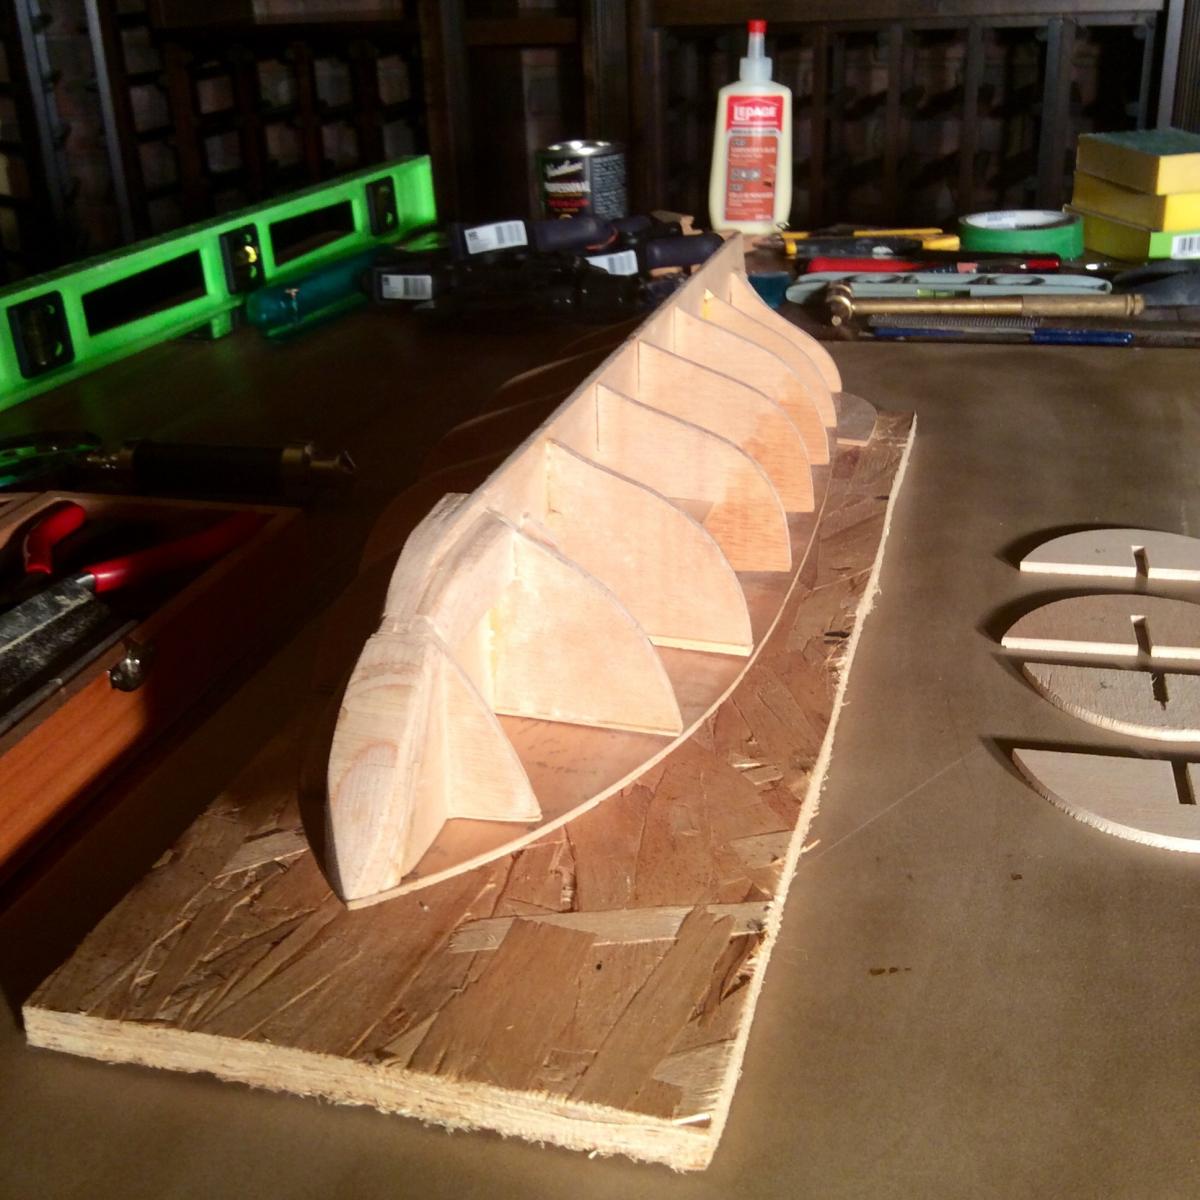
Well last night was an eye opener....I started to attack the stern support frames when I realized the three end frames still need to be glued on to the keel. Thinking I best read my trusty Ship Modelling Simplified book before jumping in...well admittedly after the read, I knew rough waters were ahead...Le Hussard's keel juts out in the middle making for a difficult levelling process for the untrained eye...I understand from the author (Frank Mastini) if the frames aren't perfectly level (mine are not)...I may as well throw away the entire model ship...I am in it to finish it...meaning...today I will remove all the frames and start from scratch. I am looking high and low for examples, pictures, videos anything on how to do it right this time, but have found nothing on Le Hussard specifically. Another setback...

- 31 replies
-
- 2
-
-
- le hussard
- artesania latina
- (and 1 more)
-
No it is not glued down to the frame. I will not put too much emphasis on the warped deck as it will be glued down shortly anyway. There is deck camber amidships, but not so severe at the ends. I need to invest in some good sturdy clamps when I tackle this next step. Tonight I will attach the frame supports at the stern.
-
After reading your post I couldn't wait to get started on the shimming tip! Today was a good day as I had a lot of fun shimming the forward frames...not sure if my angling eye will prove to be sufficient for the planking of the hull, but that's for another day. In any case, I was seriously considering ripping them off and hounding AL for brand new sheet...forget that! However, I regretfully have to take back my homemade deck straightening technique used the other night...today the deck appears to be taunting me by warping with a vengeance....showing more of a cupping formation than before! Shimming of the bow frames: (See before and after below) - cut out pieces of wood from model sheet that included frames; - white carpenter glue 4 new pieces to front frames; - wait about 20 minutes; - use #80 sand paper; - go for it! - total time enjoyed - 3 hours Now start plotting next task...


- 31 replies
-
- 2
-
-
- le hussard
- artesania latina
- (and 1 more)
-
My situation is worse than I thought as now I have tapered too much off the bow frames. At this point I will be forced to search out another frame sheet from AL. I understand Le Hussard model is discontinued and parts will be a problem to come by. Given this latest setback, I will work on other parts of the ships while waiting for the new parts. Alternatively I could cut the decking to match the bow frames if it doesn't affect the balance of the ship? Now for a small victory...over the years my deck warped forming a cupping shape in the wrong direction. Last night thanks to the added inspiration from following this site and its members, I took it upon myself to come up with a solution to flatten it ...I took my deck and ran it under hot water on both sides for about 15 seconds...followed by placing my tool box and metal Texas hold 'em poker case on top of it...success as today I found it to be not perfect, but much better than before....a small victory.


- 31 replies
-
- 1
-
-
- le hussard
- artesania latina
- (and 1 more)
-
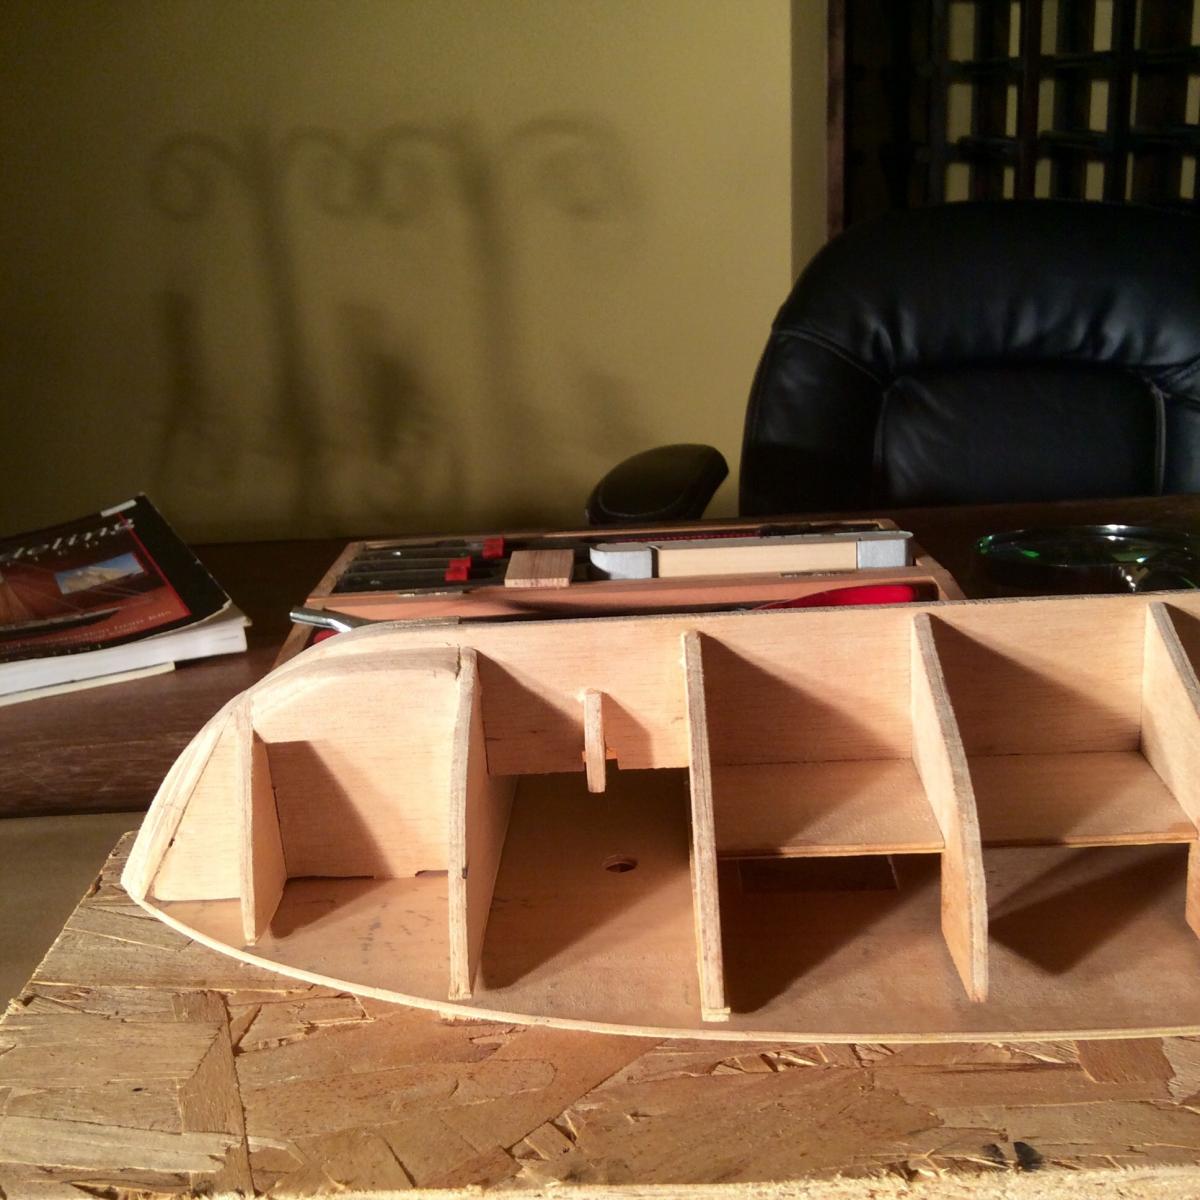
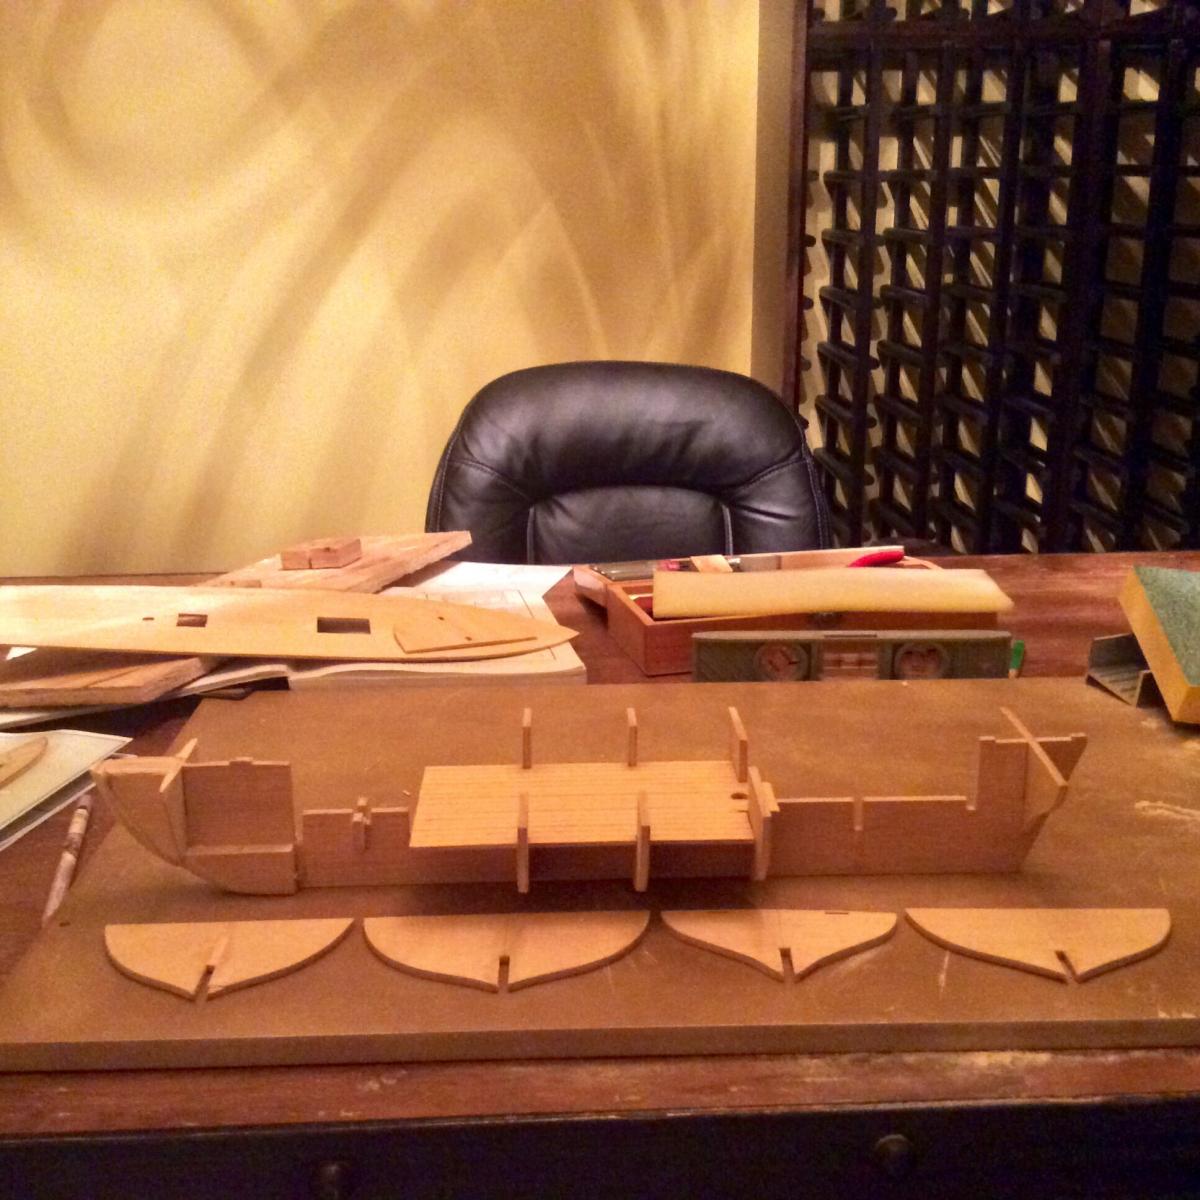
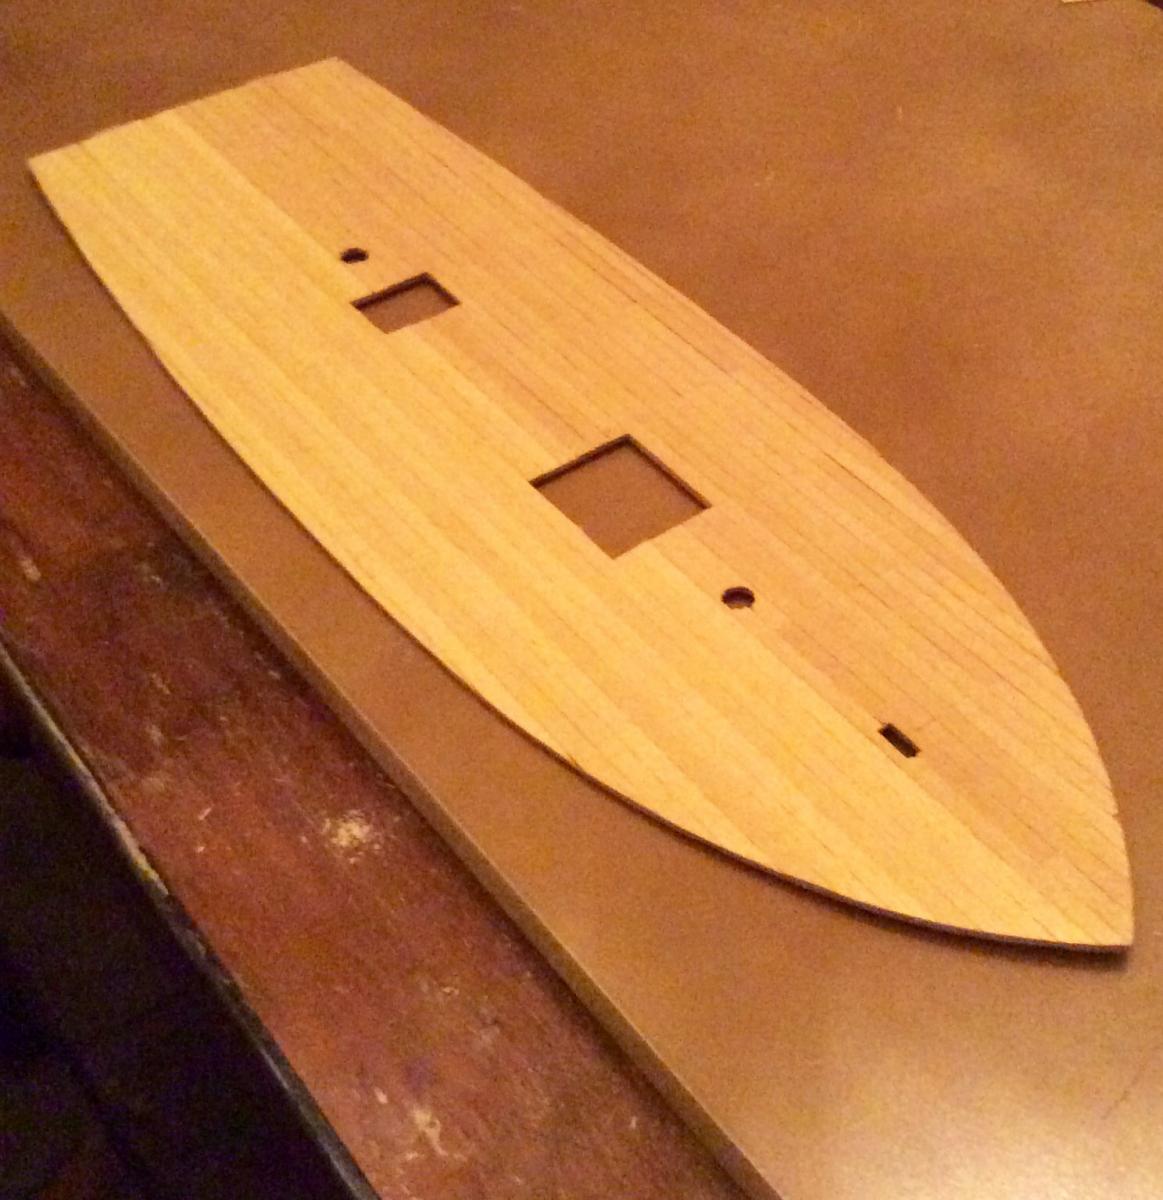
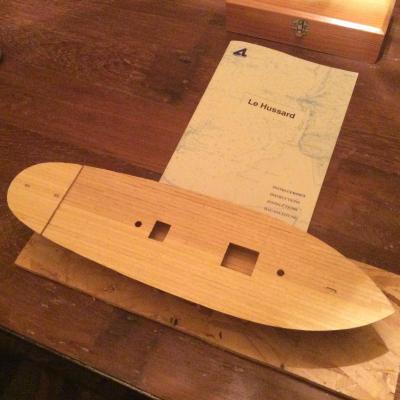
Hello - Welcome to my first build log on the mighty little Le Hussard, feared by the enemy for superior mobility and firepower from two carronades standing guard at both her bow and stern...now I need to build it...she may not be the prettiest gal to sail the seven seas, but she will be sea worthy Captain! i recently with much enthusiasm renewed my model ship building campaign which has sat idle for almost 20 years. Regrettably at that time I charged forward with zero experience at hand thinking with my vast WWII plastic model ship building glory days would give me a head start on wood models...well that proved to be a massive mistake! I took it too far without paying enough attention to the necessity of patience and research which I believe is par the course behind this incredible hobby. At this time I plan to take my time in a logical and unhurried approach. My situation is I may have too much of a challenge in fixing the poor judgement and workmanship from years past. The bow and support frames are not level due to excessive amount of sanding. The deck does not sit level on the frames near the bow...which is a shame as the cutouts are a nice perfect line...what was I thinking back in the day! Is it best to start all over and remove frames or can one use a filler type of method? Perhaps glueing some planks on top of the frames to fill in the gaps. Is it a major problem if the decking does not sit perfectly flush with the tops of the frames? You will note from pictures attached I removed the #3,4 and 8 frames in order to finish a nice square cut, but now I have the problem with the bow. I welcome your feedback, comments and critiques.


- 31 replies
-
- 5
-
-
- le hussard
- artesania latina
- (and 1 more)