jerome
-
Posts
58 -
Joined
-
Last visited
Content Type
Profiles
Forums
Gallery
Events
Everything posted by jerome
-
Wood is fine in an unheated space. Your paints definitely want to be in a warm space. oils would be fine with freezing temperatures but not acrylic paint, Acrylics and glues too should be brought into a warm area. the models maybe fine. there are a lot of variables in model construction so some can be frozen with no damage but other not so much.
-
 Thanks Micha, I have been tossing the longevity of this project around for a couple of weeks. Having sailed deep sea on oil tankers years ago I have first hand knowledge of the strength of the ocean. I have also spent years boat building real boats. So am well aware of products for building real boats. But the Eternity / Longevity is an issue for a 30” long model boat. I would be highly surprised if this model even drifted as far east as the European continent before being overwhelmed by the ocean of something else floating in the ocean. The fiberglass idea is looking much easier and tried and true in my building eyes. Waterproofing this model should be pretty easy. gasket material and screws will hold the hatch in place. The possibility of building watertight bulkheads into the boat is also viable idea. I suppose I’ll have to have a build log of this interesting project so everyone can give more and better ideas. Thanks for all the help and questions.
 -
To answer the question of why I thought one may be of use in the upcoming project. A gentleman whom is dying has wished to have a model boat built that his ashes will be placed in and the model will be launched into the Gulf Stream. So that he may cruise the Atlantic for eternity. My thoughts on the eternity thing made me think of marine growth overwhelming a wood model boat in a pretty short time. hence: copper bottom plating. Copper will keep marine growth from attaching itself for a good long time. The model will be a rounded bottom fishing vessel similar to one’s he fished on years ago. I thought an English wheel would make forming the copper easier on this type of hull. I will start with using a hammer, as the copper doesn’t need to be very thick. Hope this answers some questions. Thank you for all the insight. It’s a wonderful thing!
-
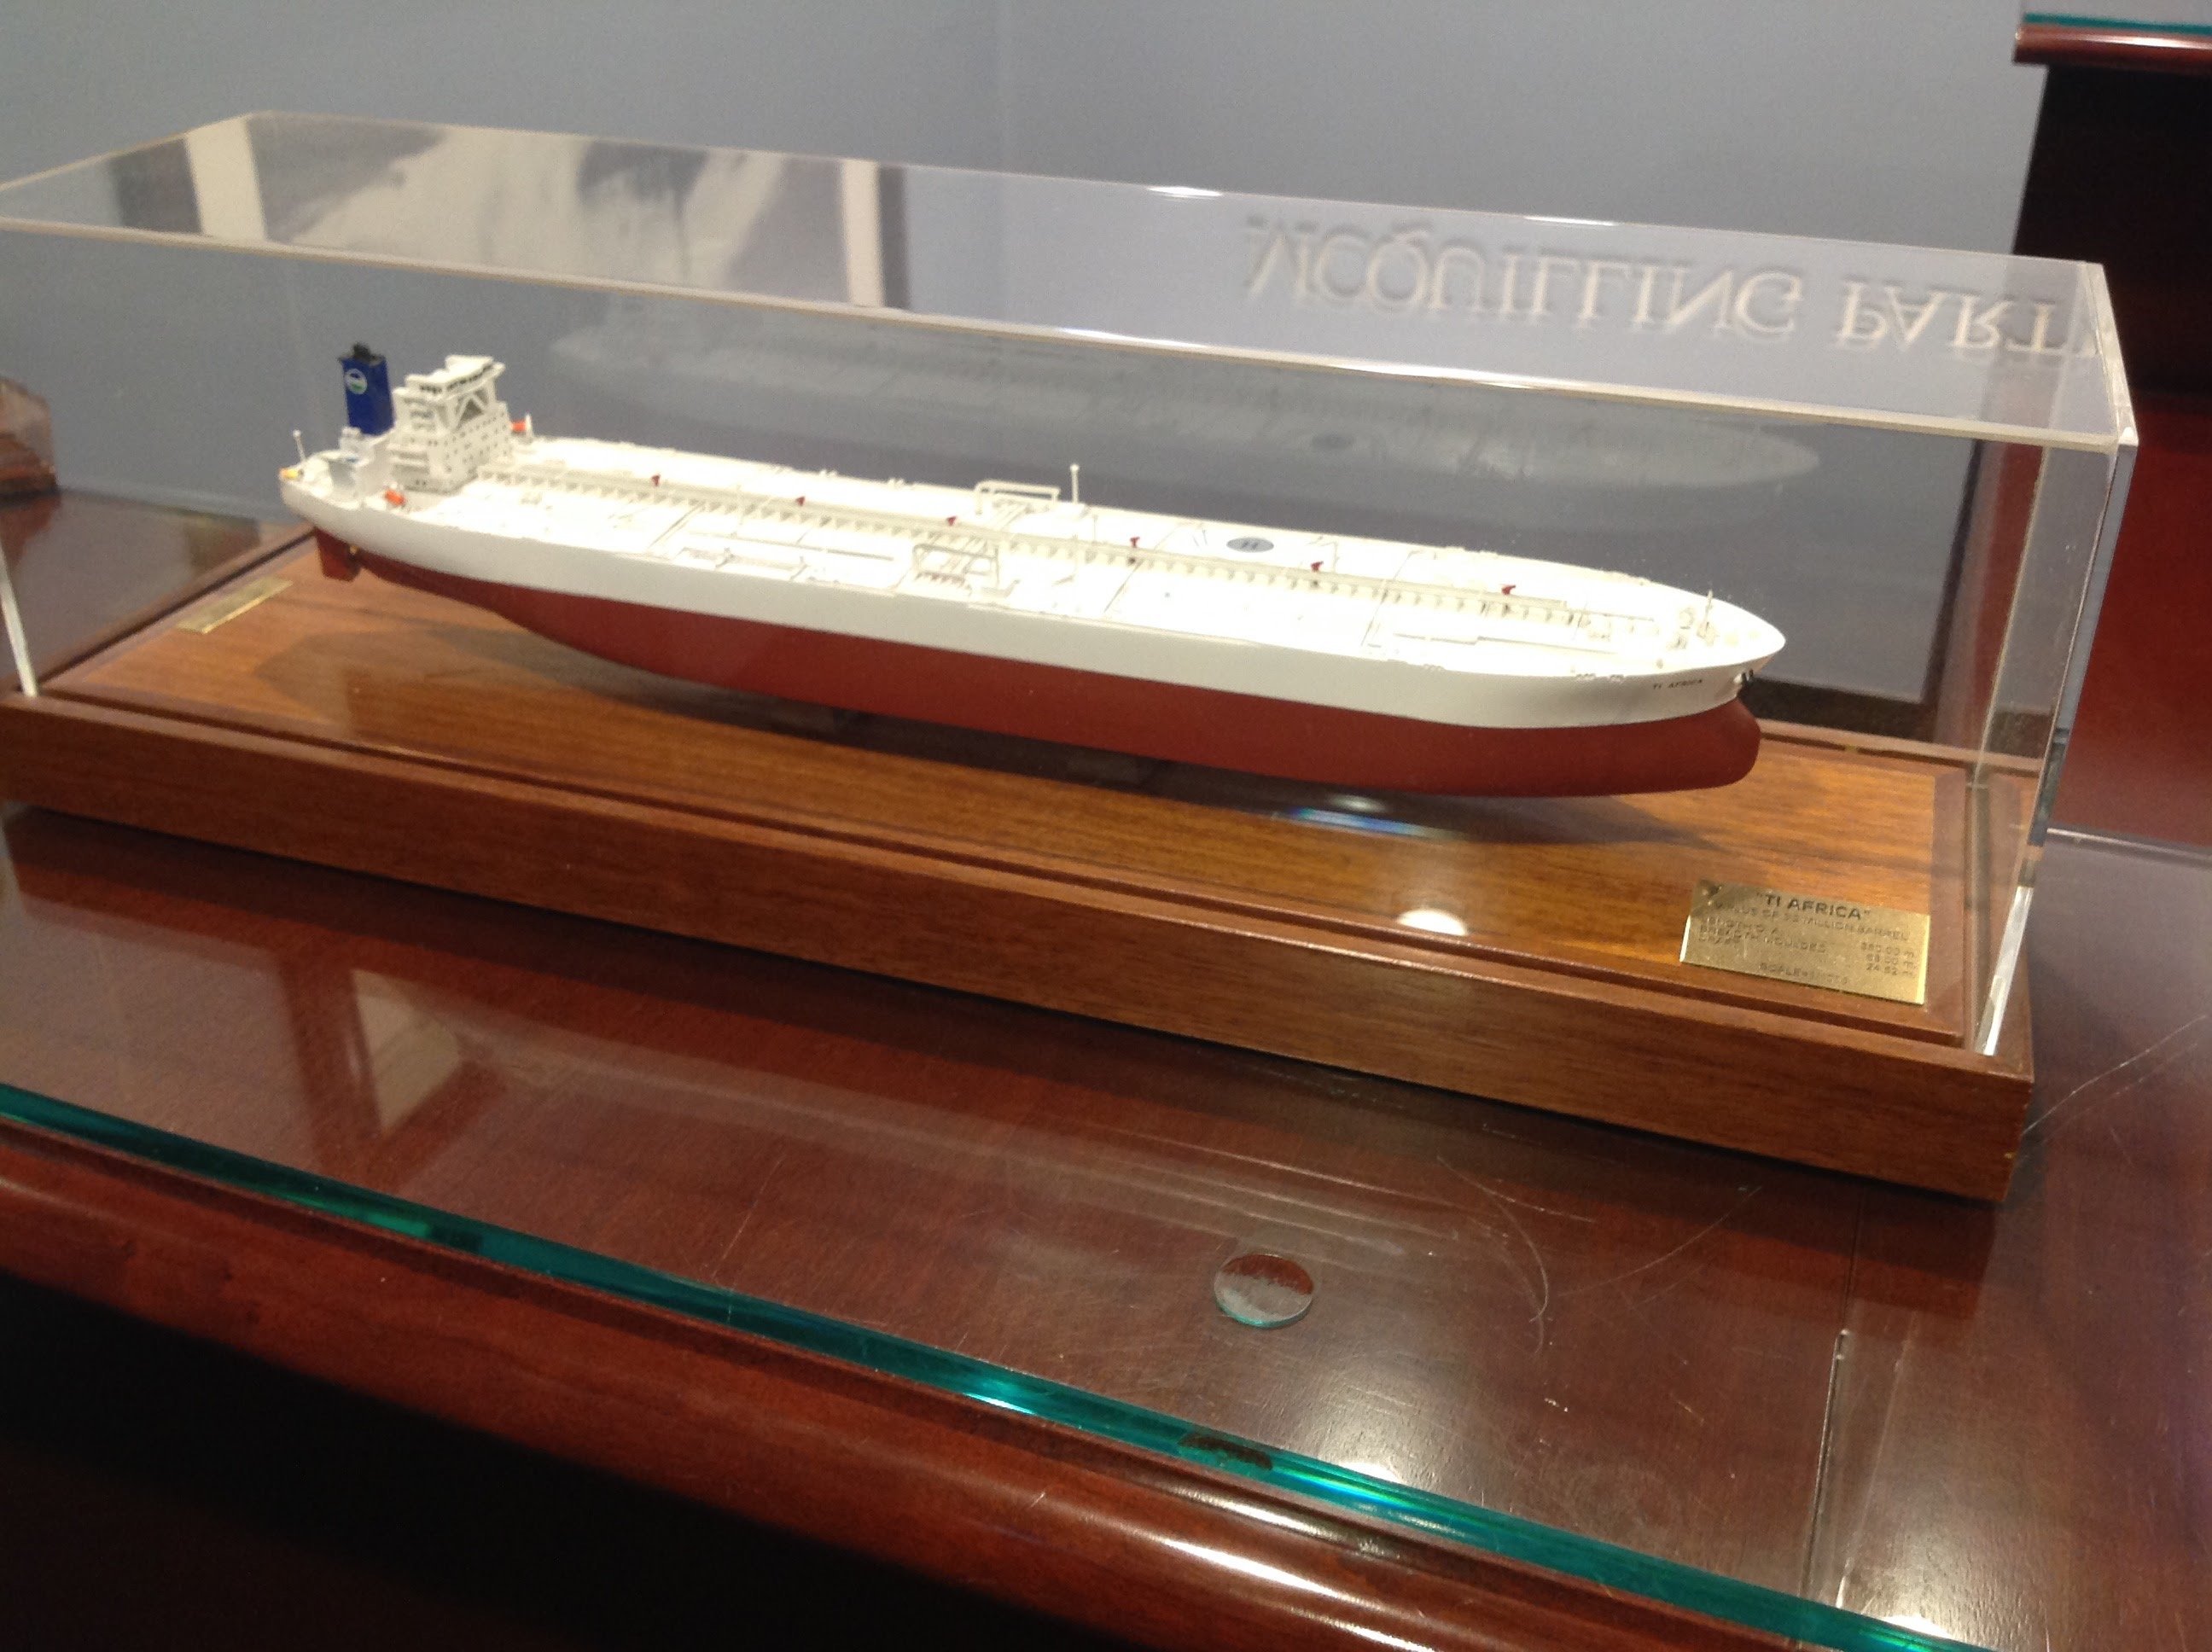
Lovely! I found these ship fascinating as they were SO HUGE. And to think how much white paint it took to cover the hull and decks. I did some work for a chartering outfit in New York that had a 6 foot model of one of these. I did take a photo of it. if I can find the image I will post it here. well I couldn’t find the images of the big model the charterer had but did find the tiny model they had.

-
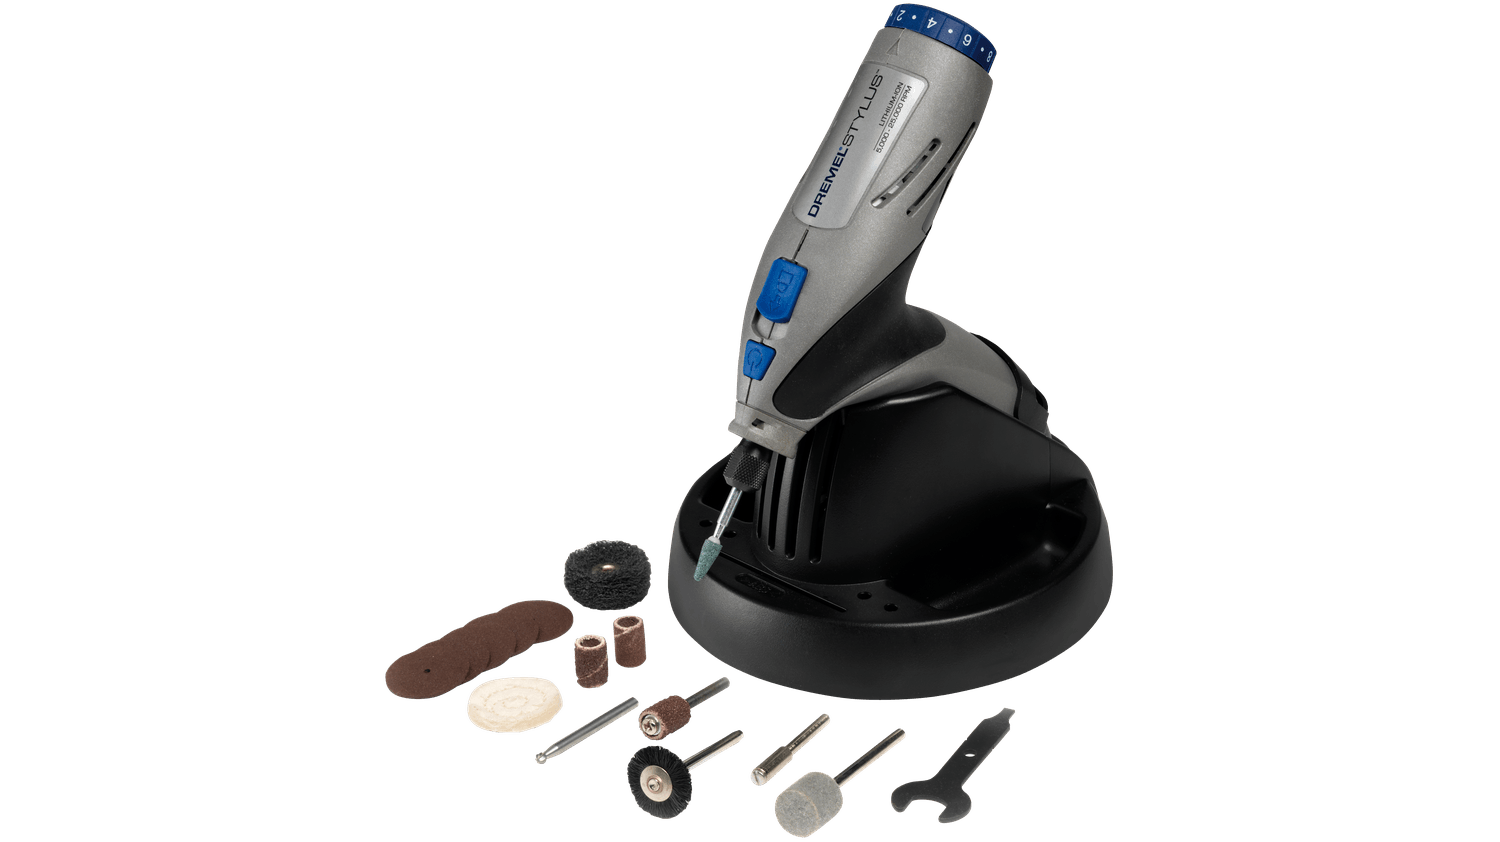
OUTSTANDING Mini Drill
jerome replied to Bill Jackson's topic in Modeling tools and Workshop Equipment
Years ago I bought one of these Dremel stylus type tools just for drilling small holes. I was so pleased with the tool that when it broke I went to eBay and found another one. Dremel had discontinued the manufacture of this tool. I have contacted Dremel concerning the ship model usefulness of this tool in hopes they bring it back. The speed was adjustable and would turn very low. I’ve broken very few drills in it. I drill a fairly large amount of holes during repair work (most of my model work is repairing sailing ships) And the tool is small enough to get into the models rigging and do its job. The handle fits your hand perfectly. The drill doesn’t wobble at all. If this second one breaks I will indeed buy another one.
-
Micha, Thank you so much for your help. You have given me the food for thought. I will pursue the hammer work before thinking of a English wheel. the pieces to be made will all be less then 30” long. and fairly thin lengthwise. I’ll use a wooden former to hammer the copper against.
-
This is indeed the tool I was talking about. Could anyone enlighten me on whether the top wheel being able to pivot be of any difference? And it would probably be a one time job to use this machine. my though was it might speed up curving the copper material as opposed to hammers and the marks left by them. I have seen a couple for less then $200 US dollars. simple machines. quality would be questionable. we will see if the hammer works better first go round.
-
Has anyone used one of these? I’ll be coppering a model soon and have thought one of these maybe just the ticket. using thicker copper as this model will be cast adrift into the Gulf Stream for a long time.
-
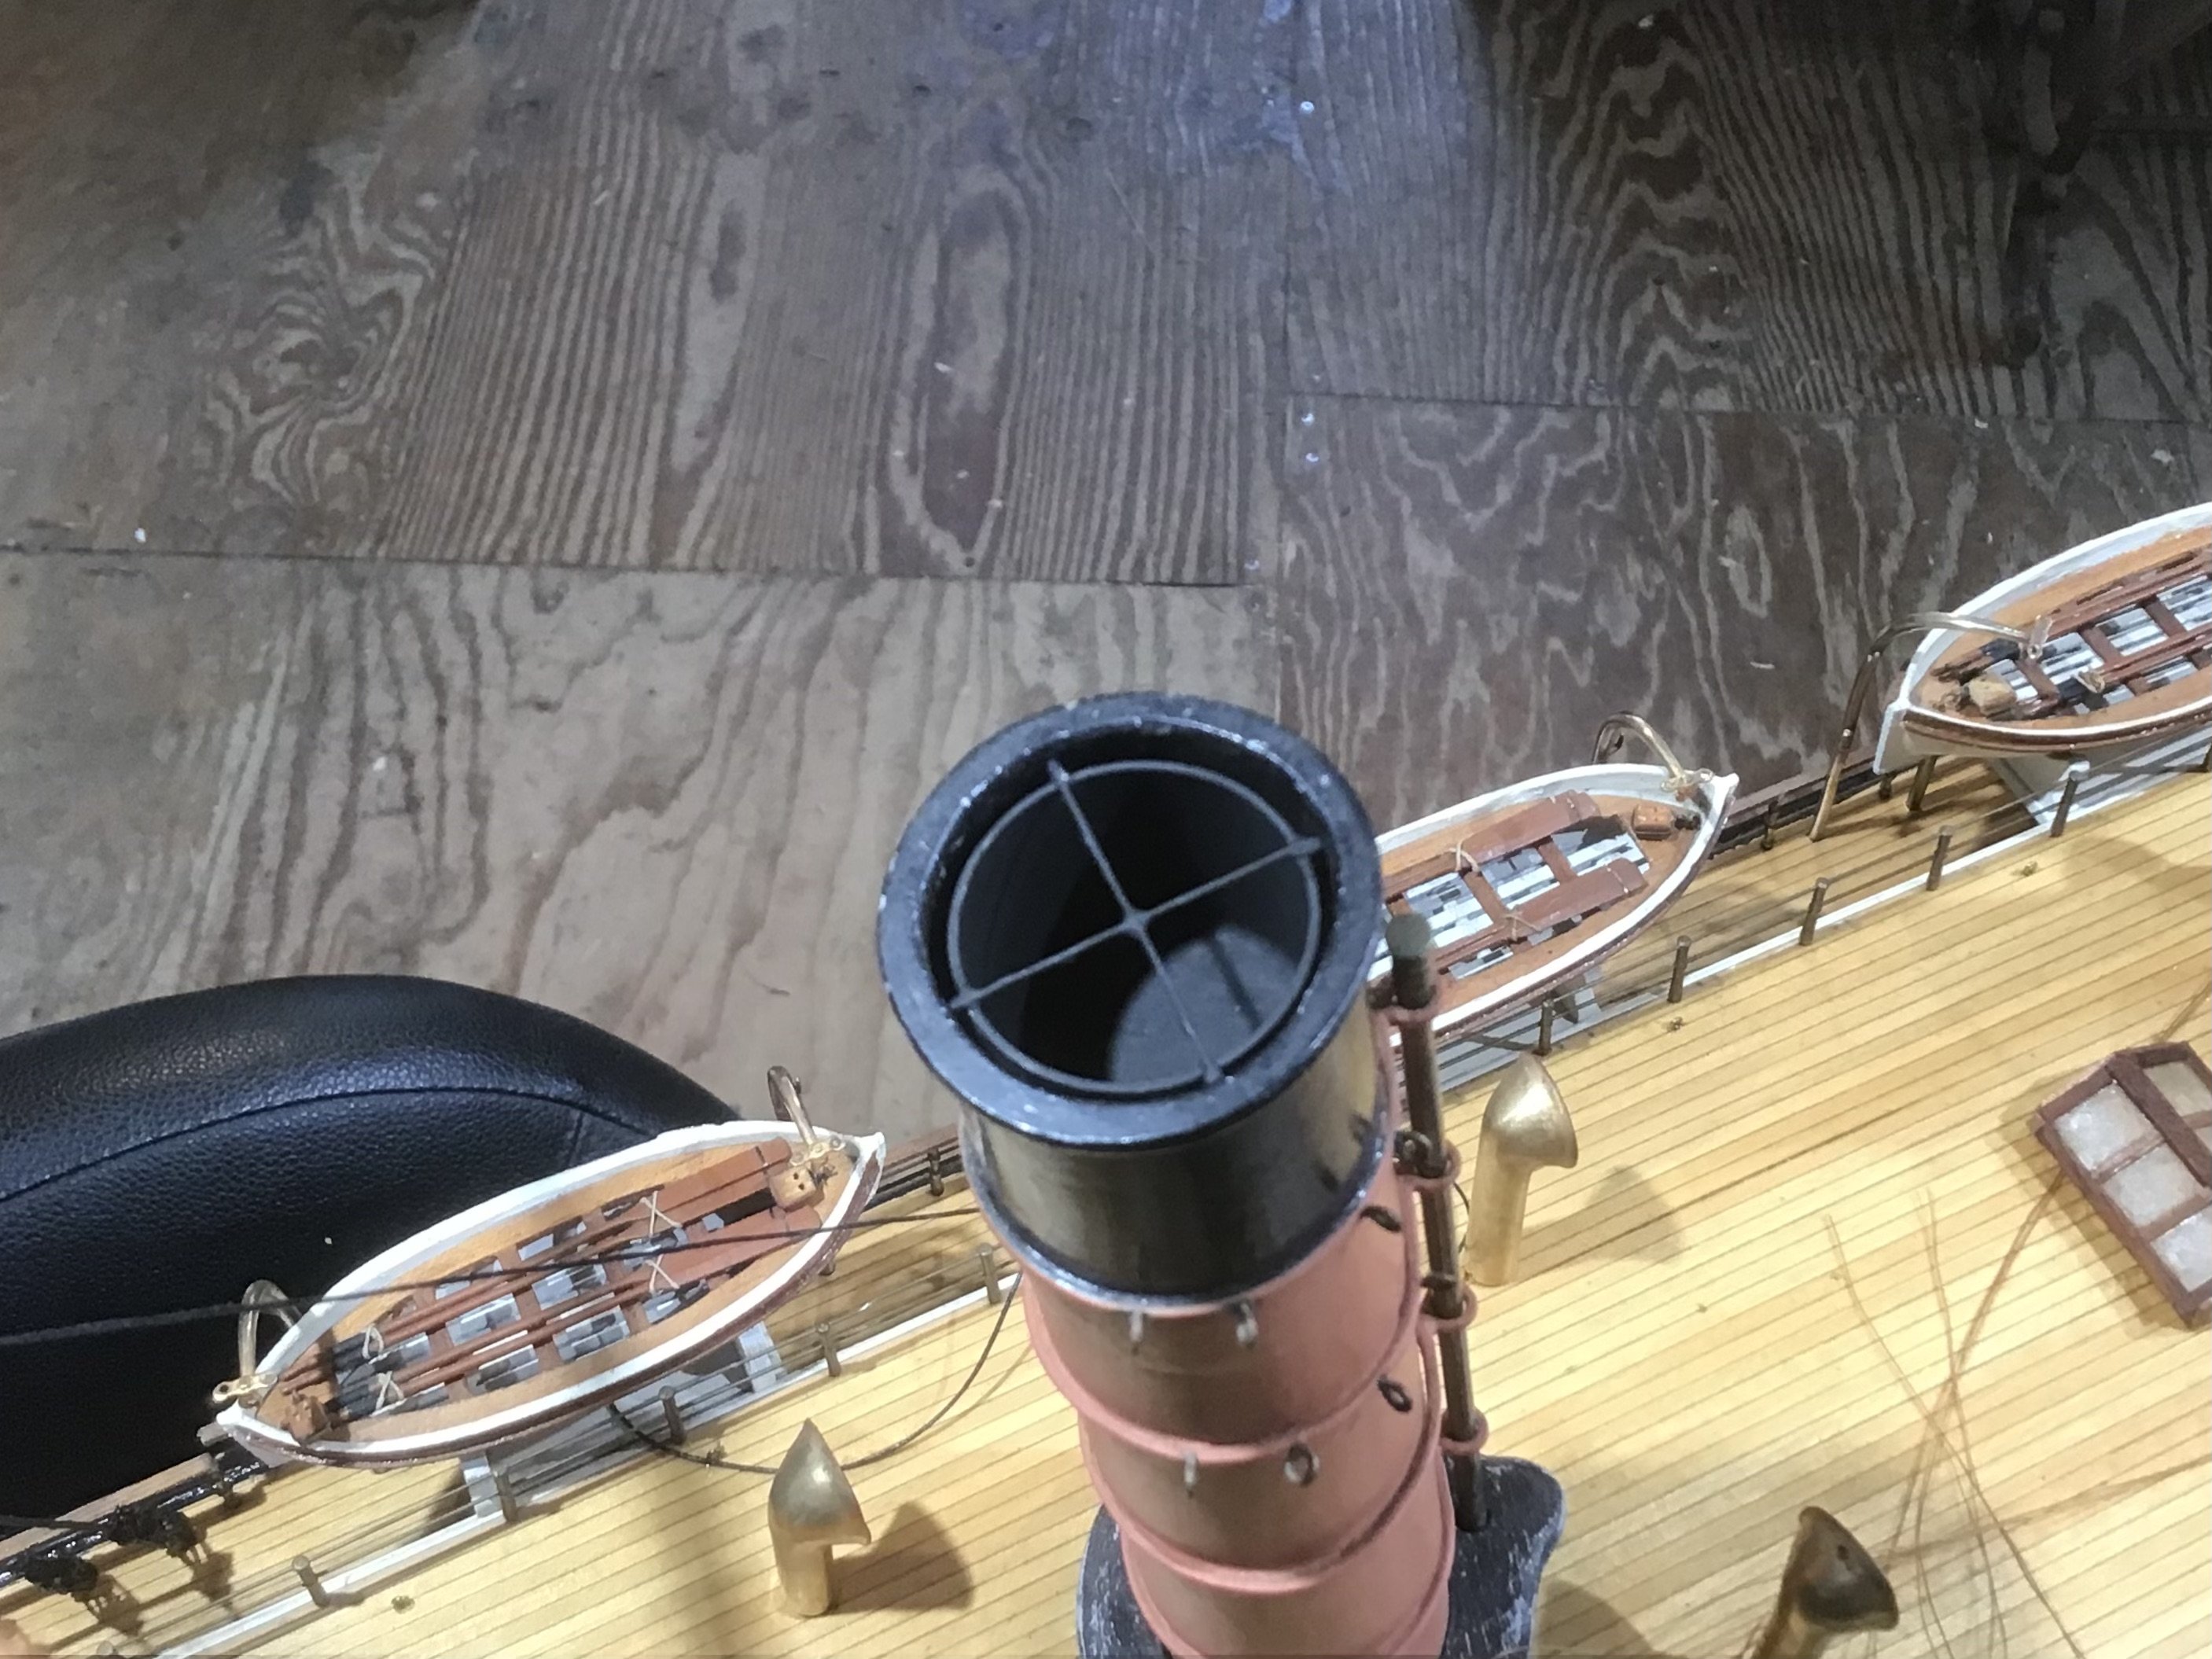
Have just read through this beautiful build and I can add some insight to your smoke stack question. You are correct in thinking they had a liner inside the smoke stack. this liner is the actual chimney for the boiler exhaust gases. The smoke stack we see from outside is sort of decorative. Getting back to the liner inside the smoke stack. At the top of this liner there would have been slots cut into the liner’s perimeter just below the top rim. this would help with draft of exhaust smoke. these slots would be a few inches wide by a few more inches high. if you think about it. heat rises. the vacuum created by the much hotter exhaust gases would pull cooler air up through these slots creating even more of an updraft. this would have helped keep the decks clean of coal cinder as well by pushing these cinders more into the hot air exhaust and hopefully dropping them into the water around the boat. I had seen this on a derelict ship years ago and have never forgotten it. Here’s my take on the liner aboard a restoration I’ve recently completed. probably not 100 percent accurate but it gets the idea across.

-
P-51D Mustang by CDW - FINISHED - Dragon - 1:32 Scale
jerome replied to CDW's topic in Non-ship/categorised builds
Gorgeous! -
Very nice workmanship Jeff. a note for you regarding the thinning of Liquitex paint. they do make a product that is specifically for thinning Liquitex paint so you can airbrush it. I have never used said product but did see it on the display shelf.
- 29 replies
-
- 2
-

-

-
- Nantucket Lightship
- BlueJacket Shipcrafters
- (and 1 more)
-
Nic, Something you may want to consider is mounting the model as is, under a glass coffee table or such. I’ve seen models mounted like this. This way you can display it, it will stay somewhat clean and you have no model building to do.
-
Great subject John. Rare to see models of northern paddle wheelers. happy building!
-
Beautiful work! And so nice of you for donating your Underwood model to the historical society. Next time I’m in Jonesport I’ll swing by to look her over.
-
I’ve been offshore fishing (short lived luckily)and I too feel much better about driving to the fresh fish store to pickup a filet of haddock or cod fish for supper. Its much easier.
-
Perhaps you could sand the ink runs off with 400 grit? light pressure on the sand paper of course.
-
Beautiful workmanship! I hope you are sending images to the Captain. he will be very impressed. Is Barry King still Captain?
-
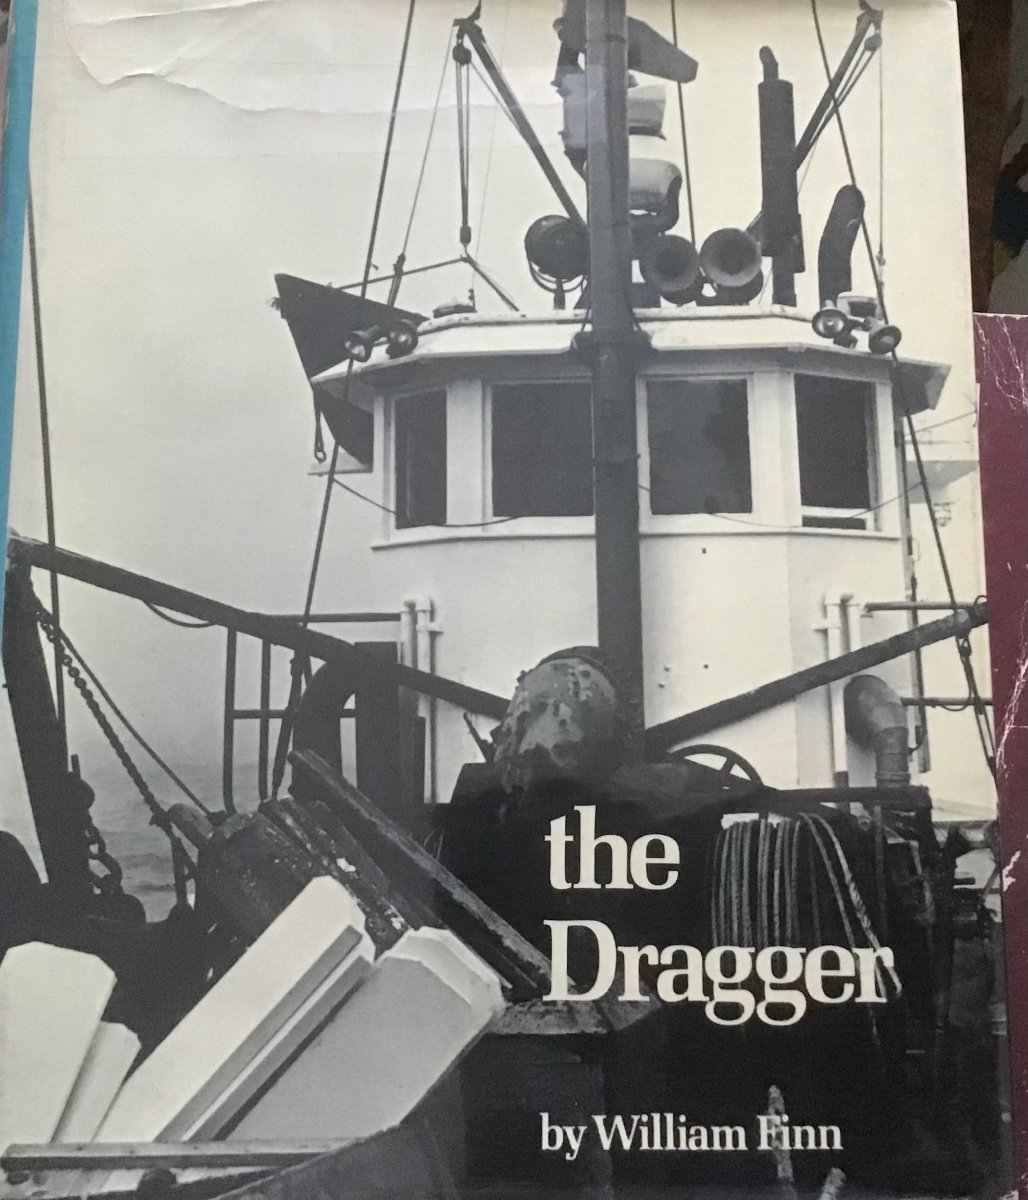
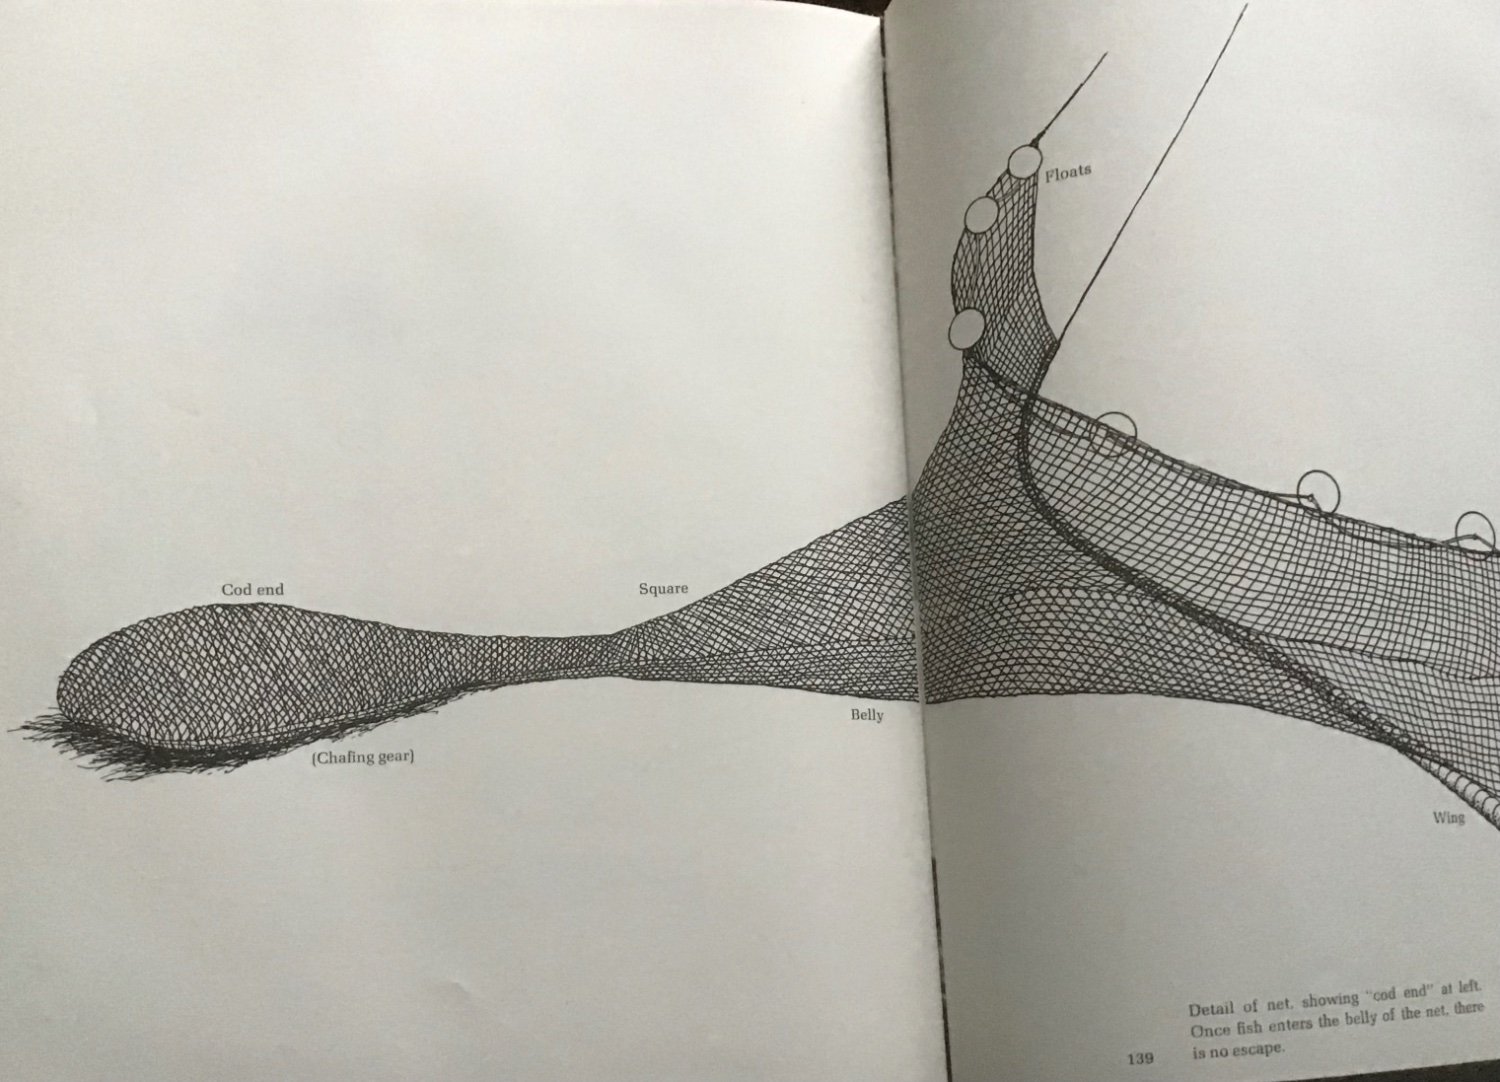
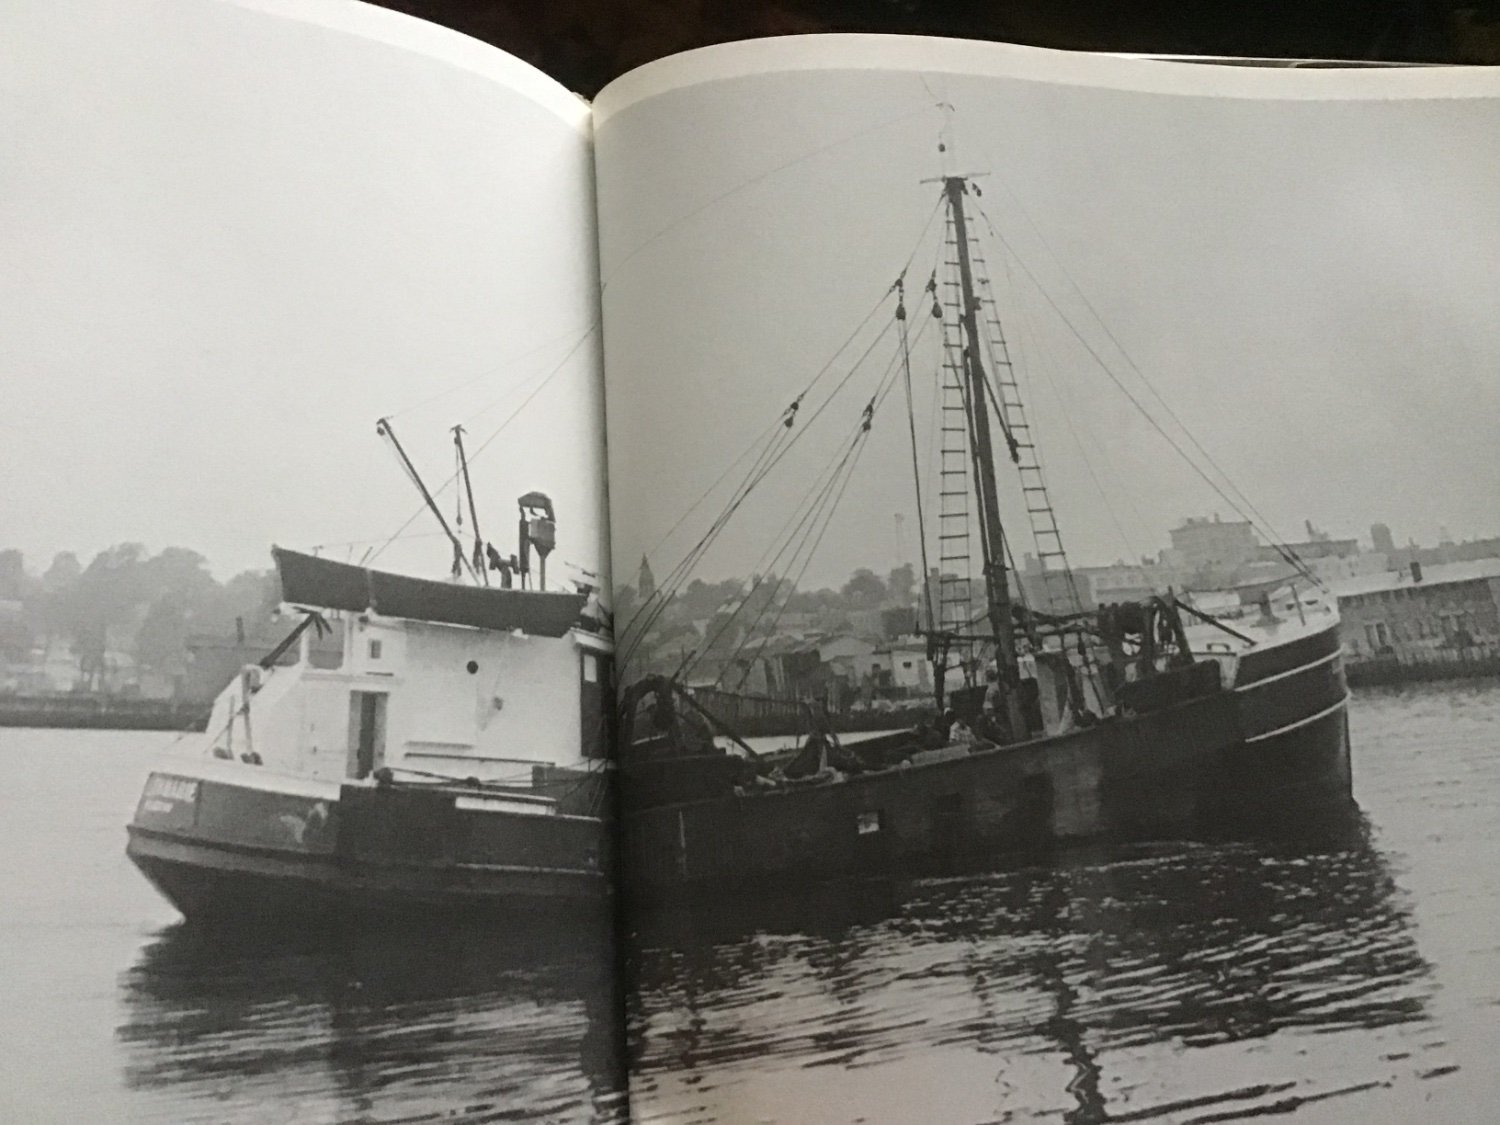
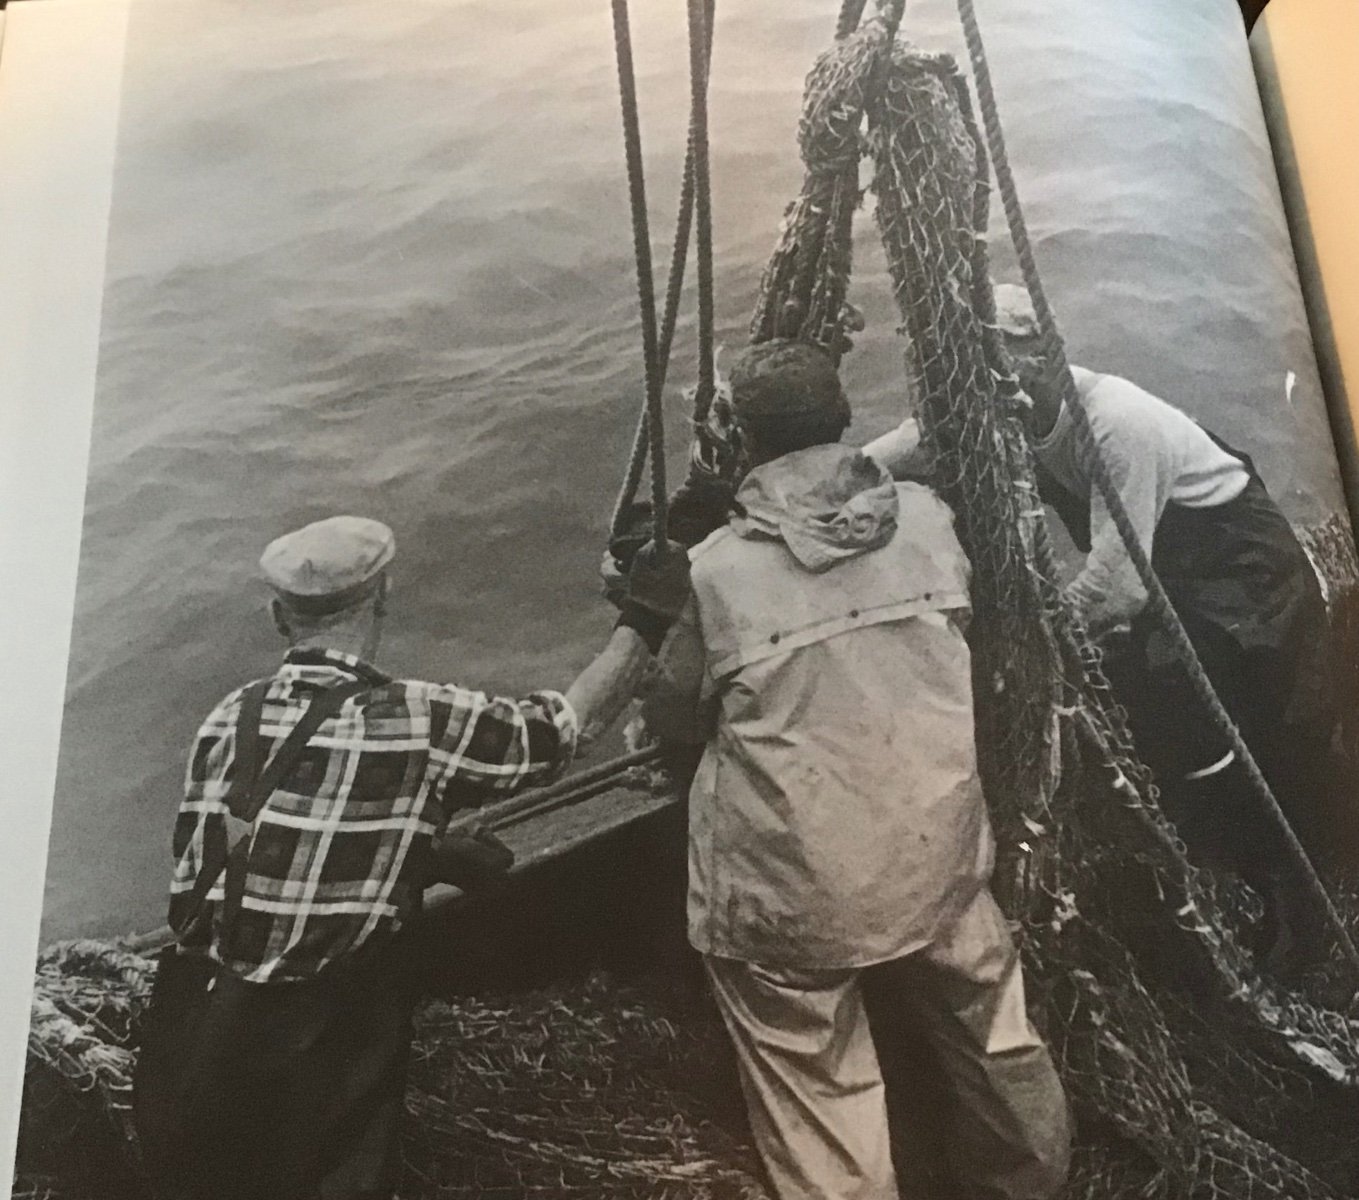
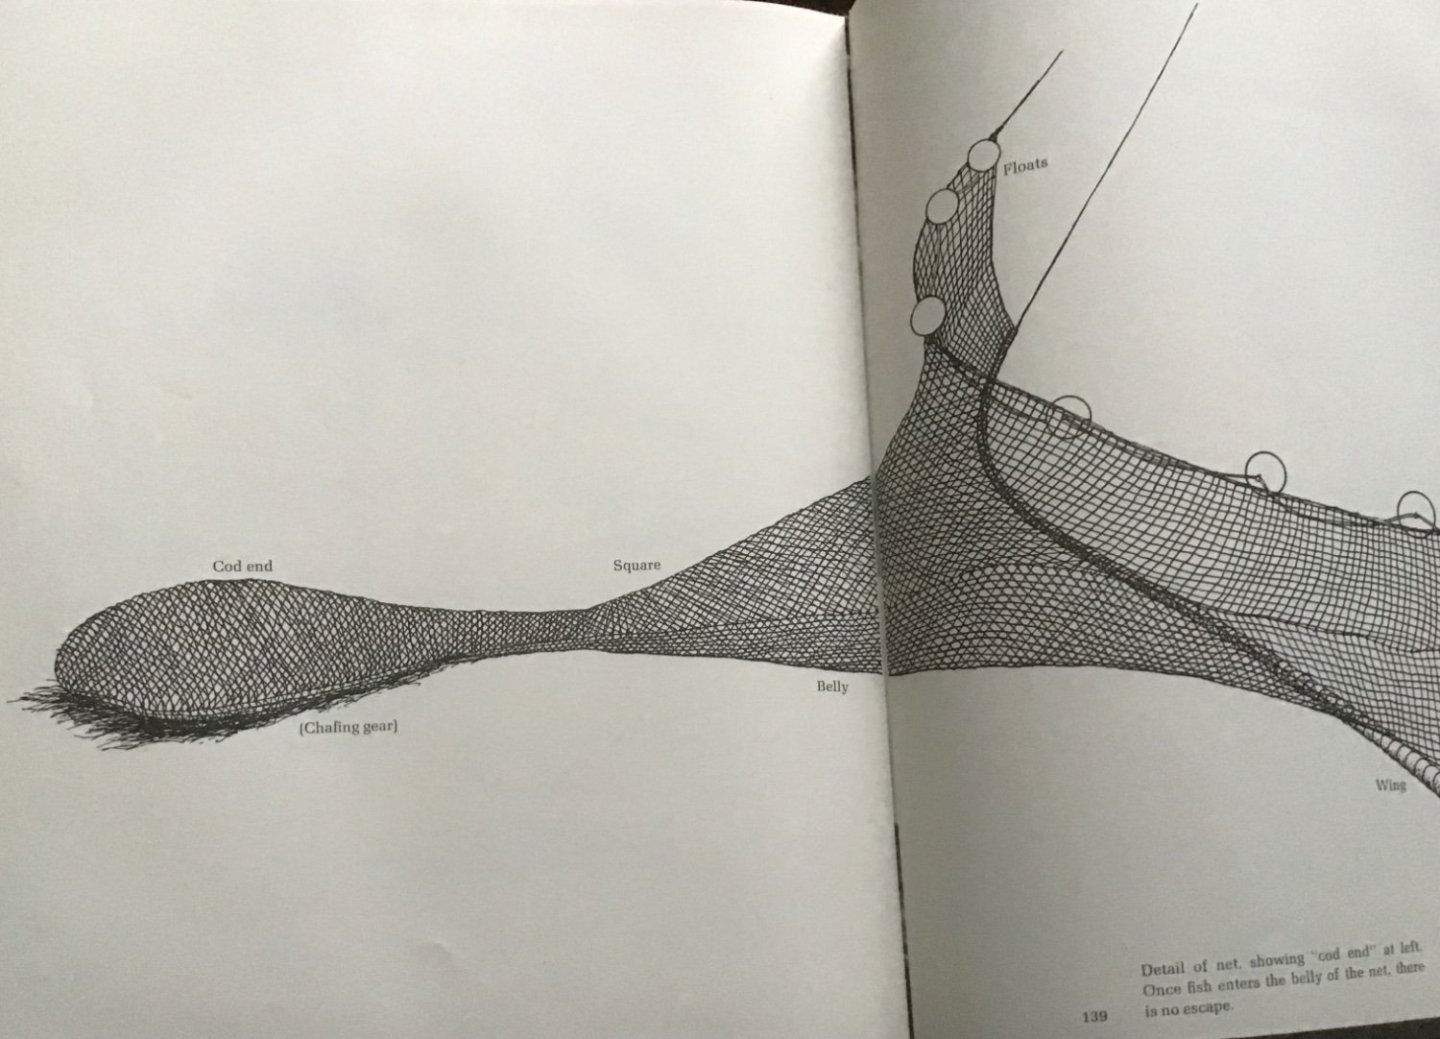
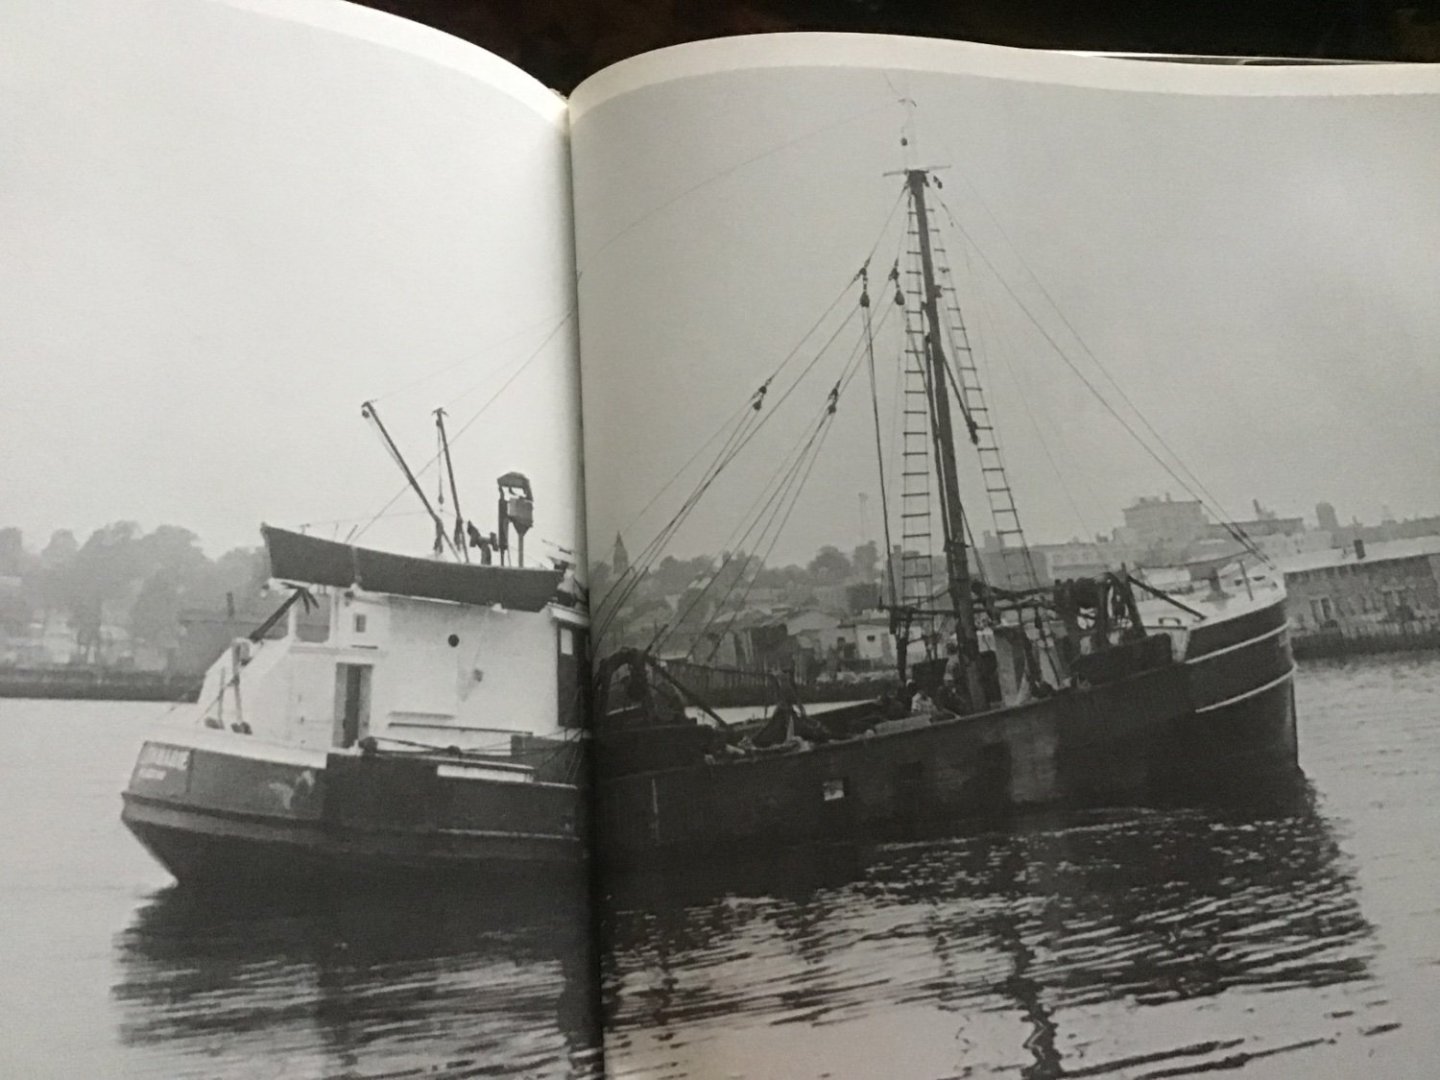
Hi Jon, The line coming off the fore mast with the two double blocks is what’s known as the fish tackle. When hauling the net full of fish back aboard they would take the bottom double block which had a hook on it and attach it to a really heavy rope which is tied around the “top” of the cod end of the net. The cod end is where all the fish end up in the net. the crew then haul up the cod end high enough to clear the rail and with the boat rolling in a seaway, time it so the cod end swings inboard, once that happens the quickly drop the cod end down on deck. At that very moment one of the crew jumps in and pulls the line that ties the cod end closed. once the line comes loose all the fish fall out of the cod end and spill onto the deck for the crew to sort. after all the fish are out of the net the cod end is tied shut and either reset for trawling or laid inside of the rail to be stowed. Images from The Dragger by William Finn. You can see the fish tackles on the fore mast in the image, the vessel has been fishing with 2 nets. One to port and one to starboard. They would fish with two nets if they were fishing rocky bottom as one was bound to get torn up. This gave them the advantage of staying on the grounds and continuing to catch fish. You can see in the last image the crew has just attached the double block with the hook (the fish tackle) to the cod end.


-
Jon, I can guarantee you that the main wires for the trawl net were steel cable. when that net was being hauled back full of fish you were talking tonnage! rope would have parted quite quickly. The main wires wouldn’t have been rusty either. winding them through the trawl blocks and deck blocks kept them quite shinny. they would have got a little rusty when the boat was heading in to sell the catch but these boats never spent much time at the dock. They spent more time off shore then at the dock.
-
Did you show these photos to the company or at least the officers and crew while you were sailing? I think the #2 boat is the lifeboat. #1 is on the port side. #2 is on the starboard side.
-
Very nice! Red Jacket was a beautiful ship. built just down the road a piece.
-
What do you do with your unusable rigging line?
jerome replied to capnharv2's topic in Masting, rigging and sails
If it’s really crappy line I would toss it. or perhaps a resale shop could find a use for it. some crafter might be able to use it. -
Such beautiful details Javalin for a radio controlled model. You are building a very fine ship model. its nice to to hear about the improvements on the actual ships. The 1958 built tankers I sailed aboard back in the 1980’s were adequate but a long ways from SOLAS compliance. open life boats. no inert gas system.