M. Pajulahti
-
Posts
126 -
Joined
-
Last visited


-
 GrandpaPhil reacted to a post in a topic:
USS Constitution by M. Pajulahti - Model Shipways - Scale 1:76
GrandpaPhil reacted to a post in a topic:
USS Constitution by M. Pajulahti - Model Shipways - Scale 1:76
-
Altduck reacted to a post in a topic:
L’Etoile by glennreader - FINISHED - Billing Boats - Scale 1:50 - Updated to represent her current fitting out
-
M. Pajulahti reacted to a post in a topic:
Guns of History Naval Smoothbore by Osmosis - FINISHED - Model Shipways - 1:24
-
tasmanian reacted to a post in a topic:
L’Etoile by glennreader - FINISHED - Billing Boats - Scale 1:50 - Updated to represent her current fitting out
-
usedtosail reacted to a post in a topic:
USS Constitution by M. Pajulahti - Model Shipways - Scale 1:76
-
CaptainSteve reacted to a post in a topic:
USS Constitution by M. Pajulahti - Model Shipways - Scale 1:76
-
 Glenn, I really like this ship, looking very good and you've built her very well. Markku
- 101 replies
-
- 3
-
-
- L Toile
- Billing Boats
- (and 1 more)
-
Tigersteve reacted to a post in a topic:
USS Constitution by M. Pajulahti - Model Shipways - Scale 1:76
-
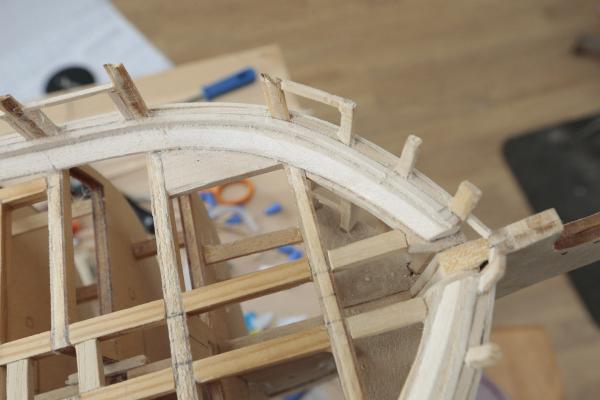
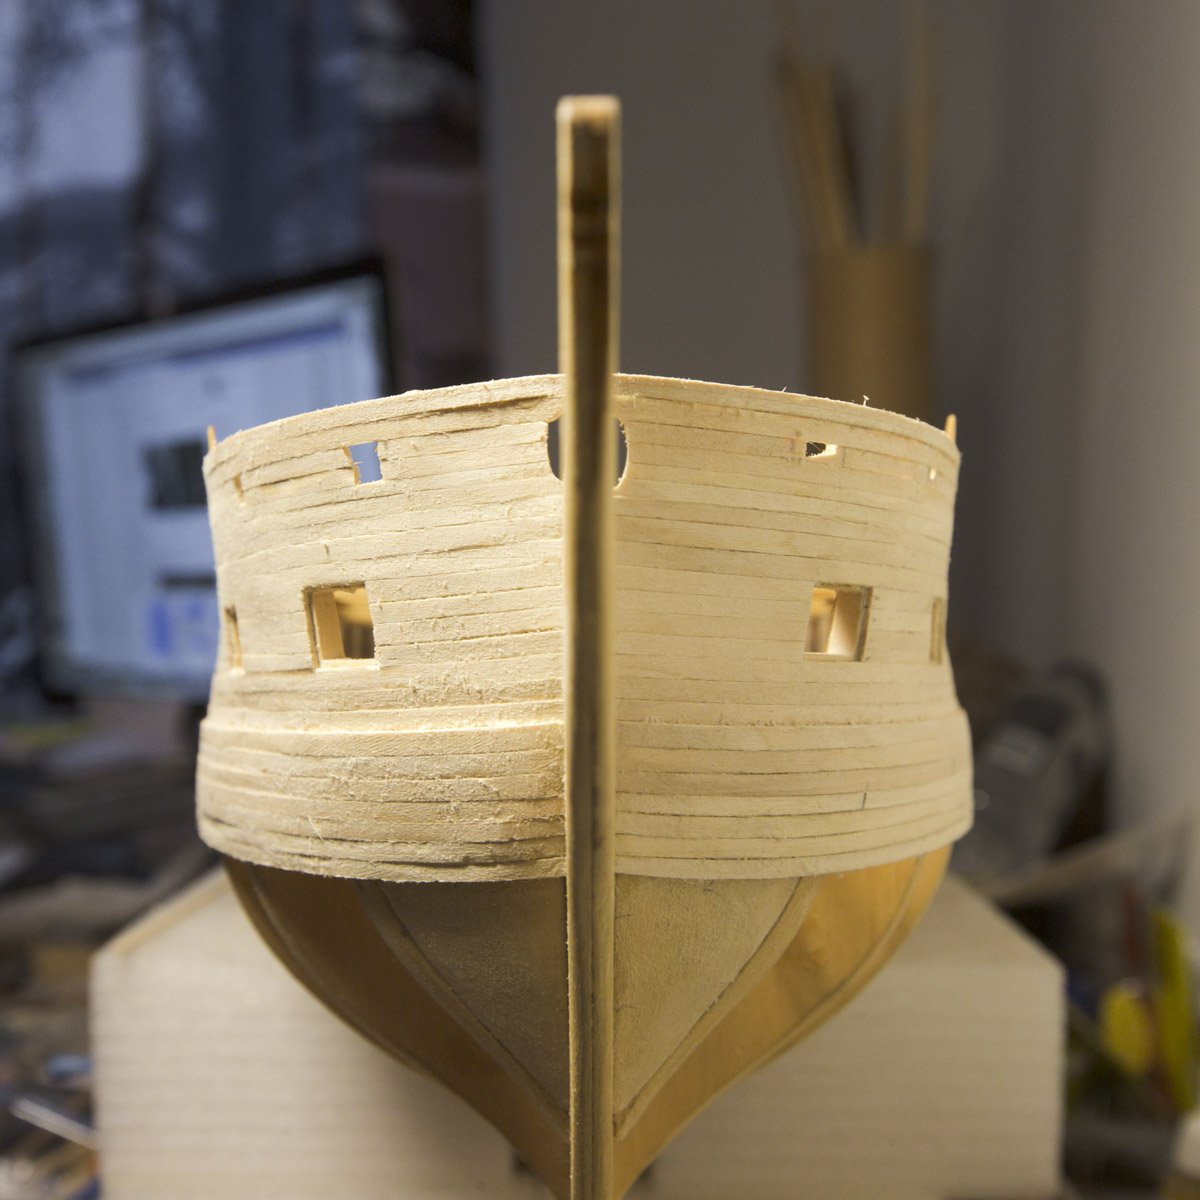
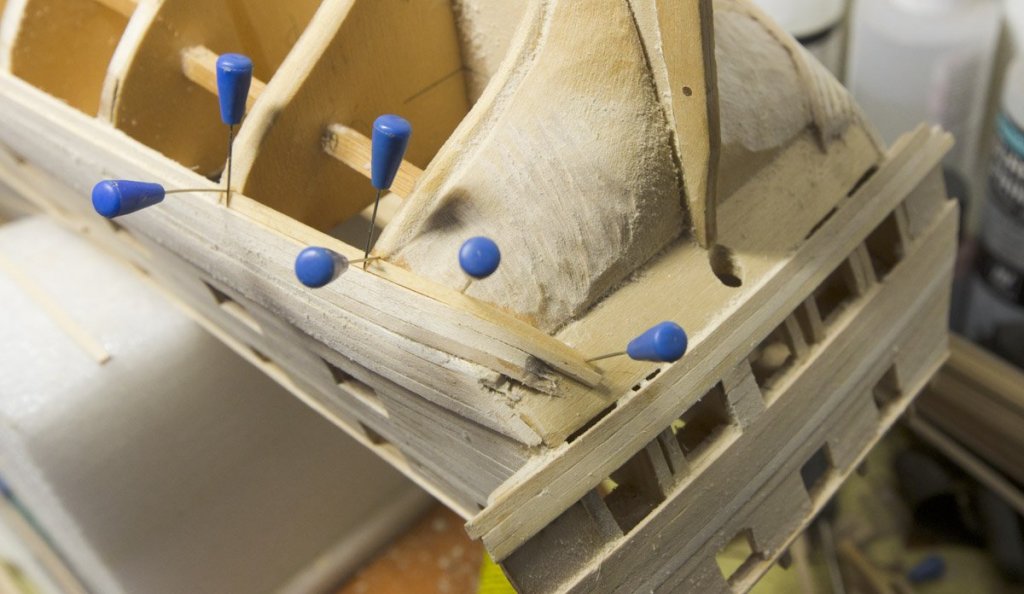
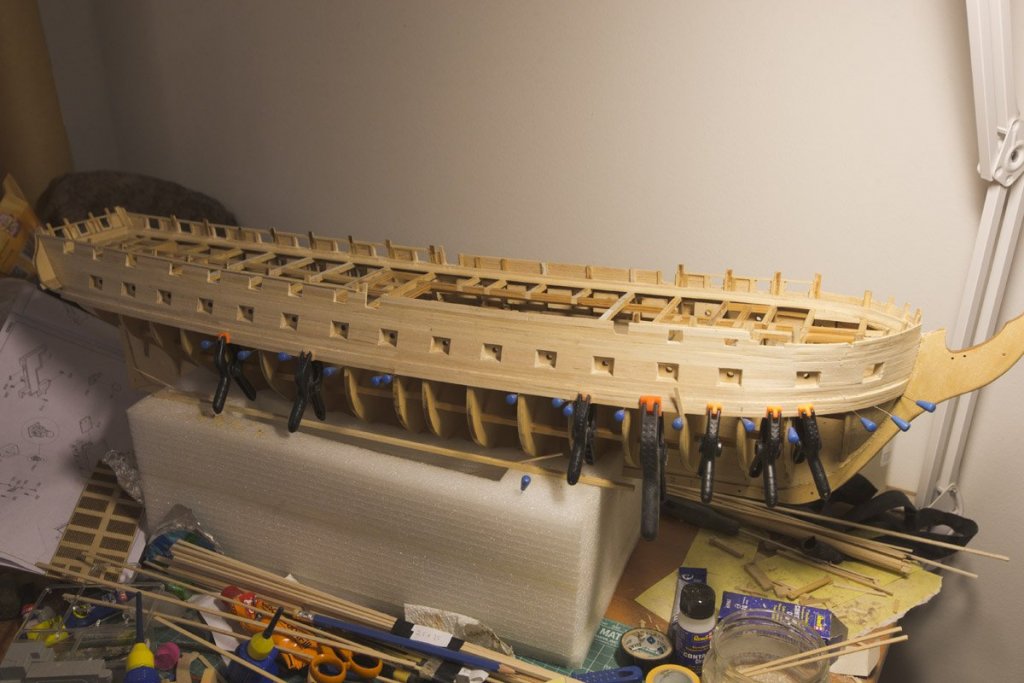
Wales are done! Now i can start the actual hull planks on the bottom. For me, trickiest part was the stern where wales has very extreme twist and tight angle, but sanding them very thin they did twist better. Markku

-
CaptainSteve reacted to a post in a topic:
USS Constitution by M. Pajulahti - Model Shipways - Scale 1:76
-
Tigersteve reacted to a post in a topic:
USS Constitution by M. Pajulahti - Model Shipways - Scale 1:76
-
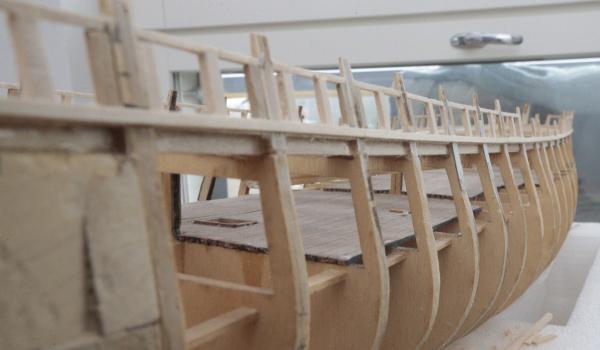
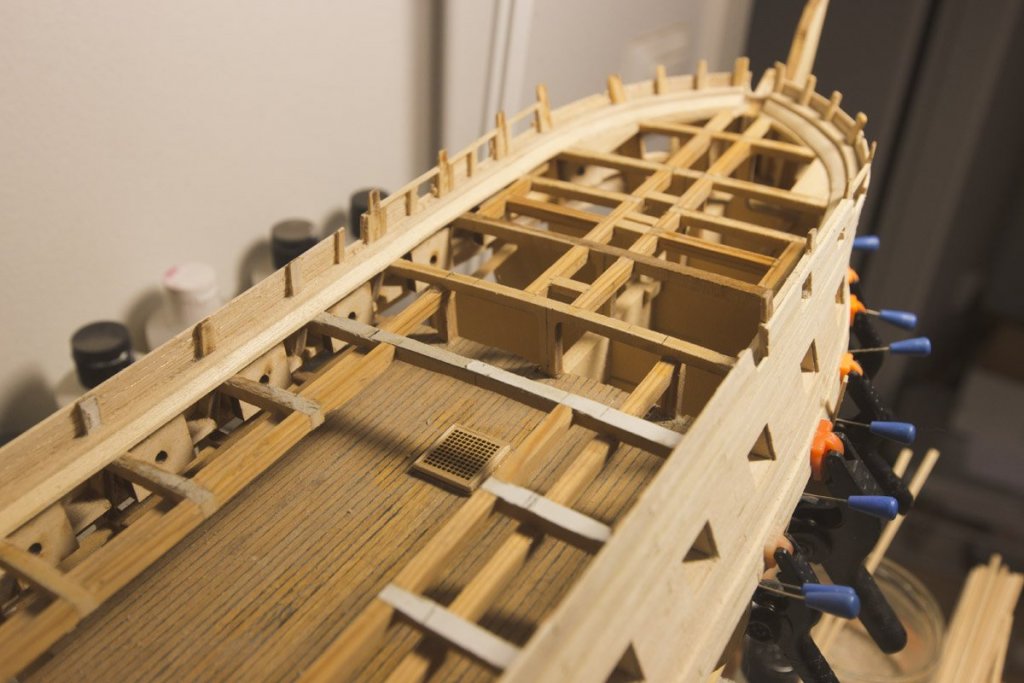
I've been doing wales now. And added one hatch to gun deck. It might be visible thru the companion ways, or not, but it's there now. Markku

-
M. Pajulahti reacted to a post in a topic:
USS Constitution by kmart - Model Shipways - scale 1/76
-
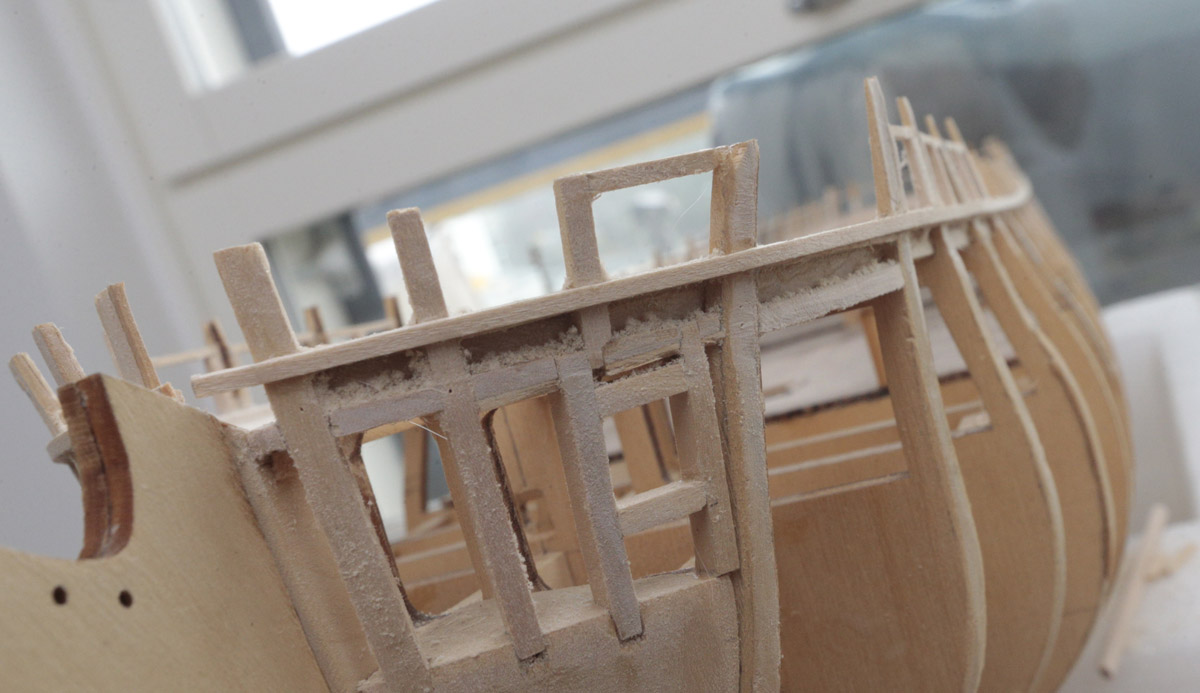
Hey K, When you laid your frame parts on the plans, did you turned them around also? I did with mine, and they were nonsymmetrical. Just for a tip, if you really want to make sure your ships other side will not be larger than other side. I have some photos about that problem in my Constitution topic. Meaning there is a mistake in the plans and that way you can check that out. Good luck with your build. Markku
-
M. Pajulahti reacted to a post in a topic:
USS Constitution by usedtosail - FINISHED - Model Shipways - scale 1/76
-
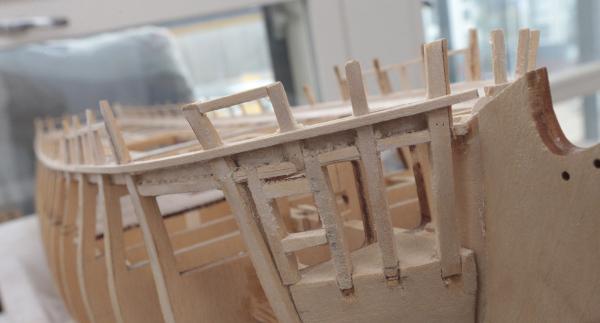
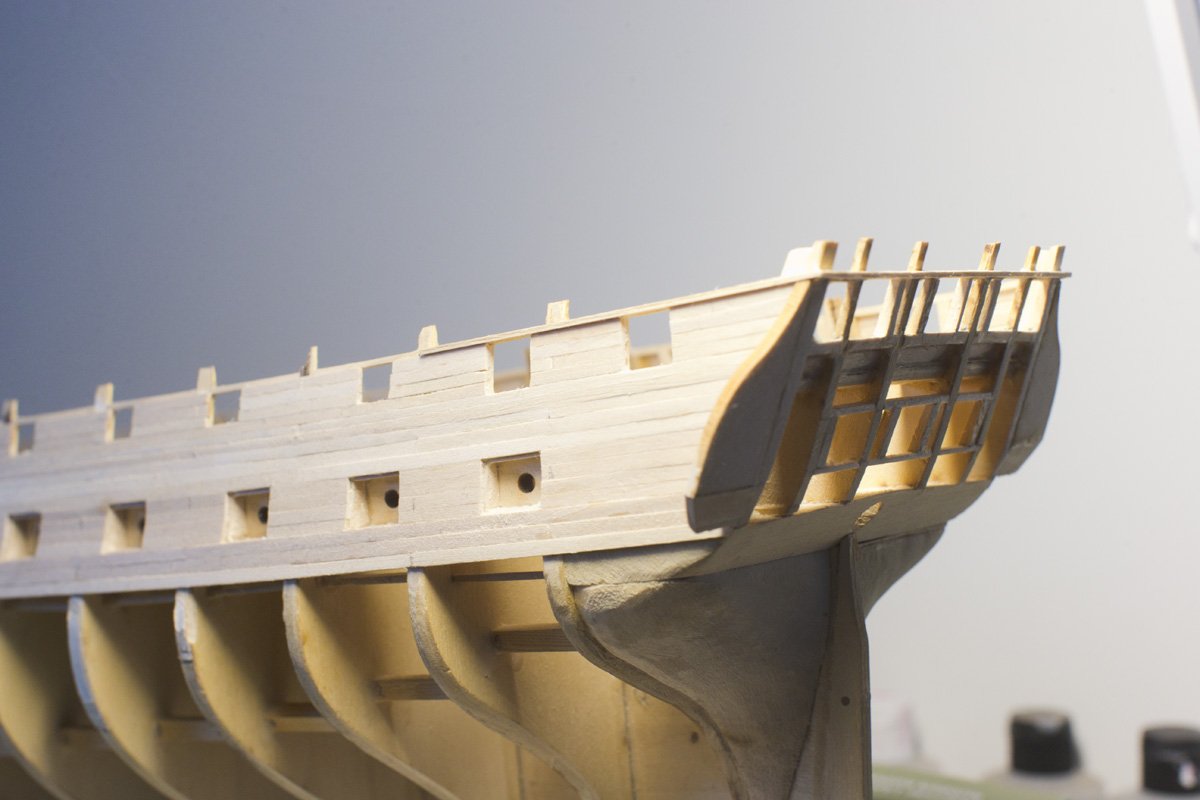
Thank you Steve. Well, there should be more curved on the stern. On the plans it's pretty curved under the main rail. And comparing to lasercut topgallant rail -part, which is a lot more curved, but nothing I can do about it anymore. Other thing what i've been thinking is those bulwarks in the midship. On plans they are solid, but in the real ship they are removed, which seems to be common way to do it in models. As i am building this in current (after 1870) version, maybe i should remove those also? Markku
-
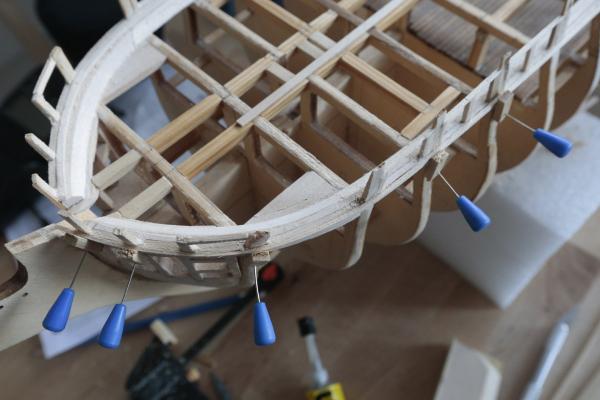
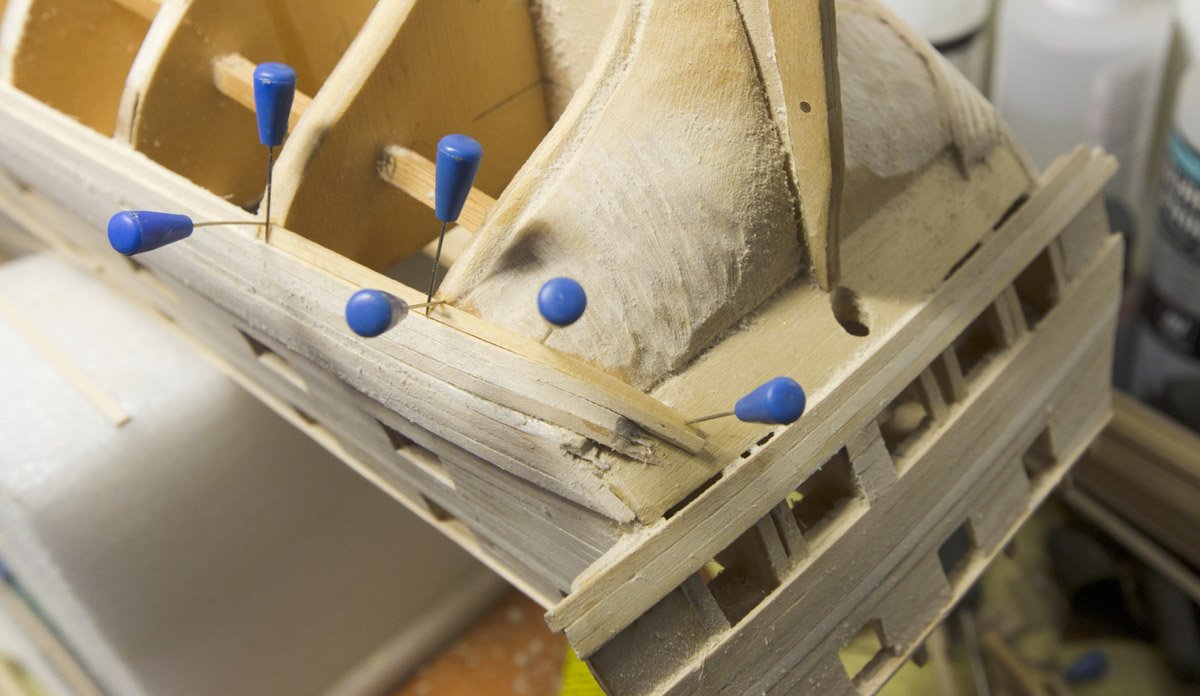
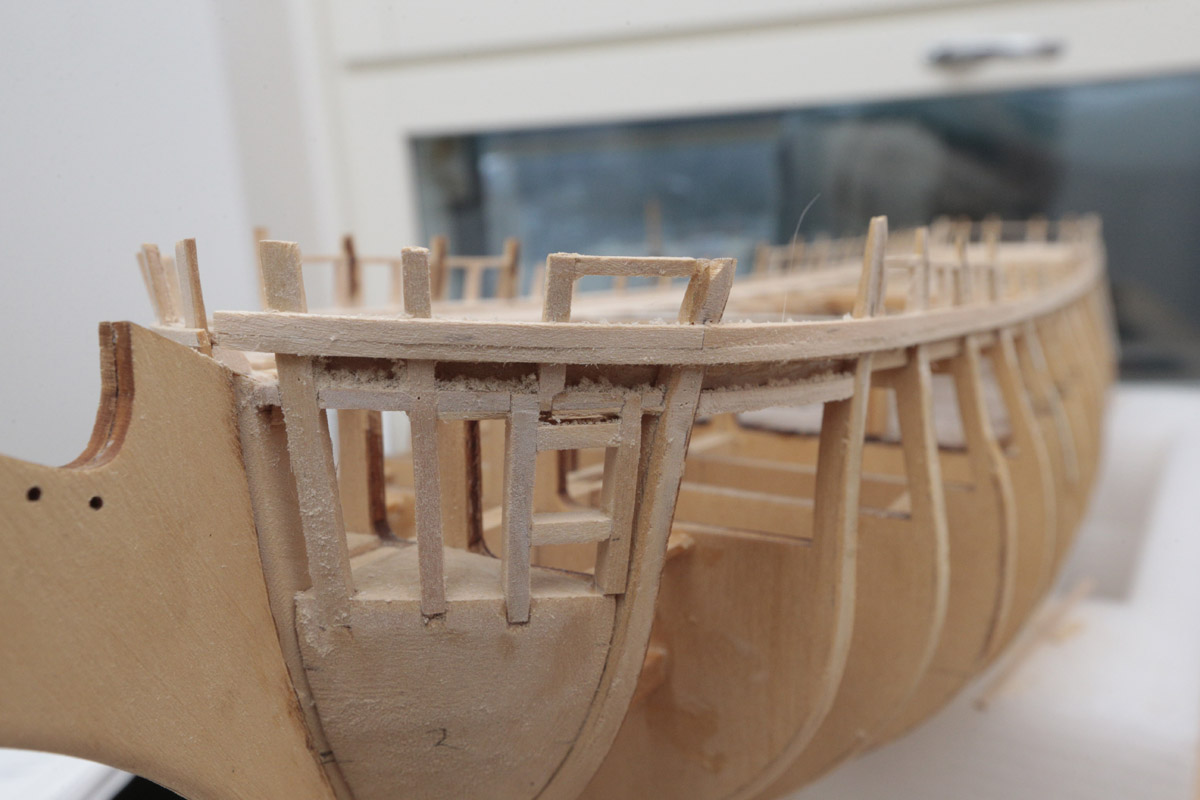
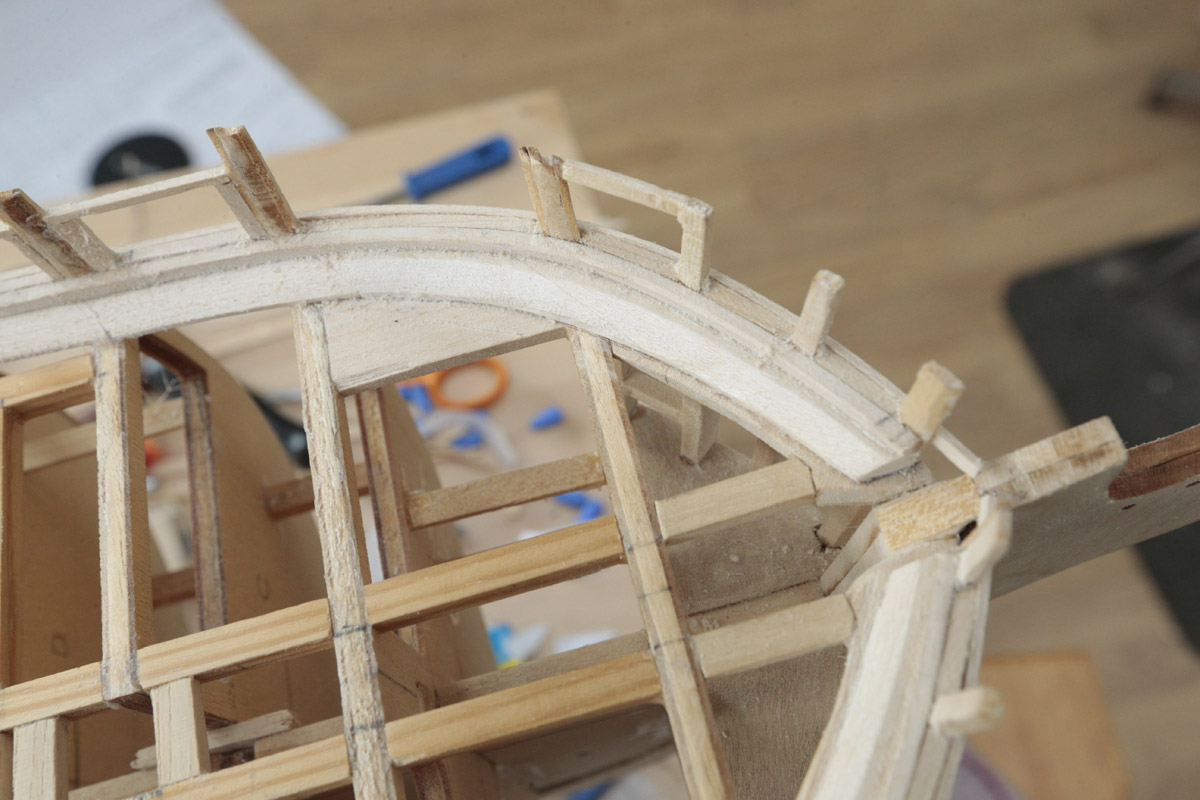
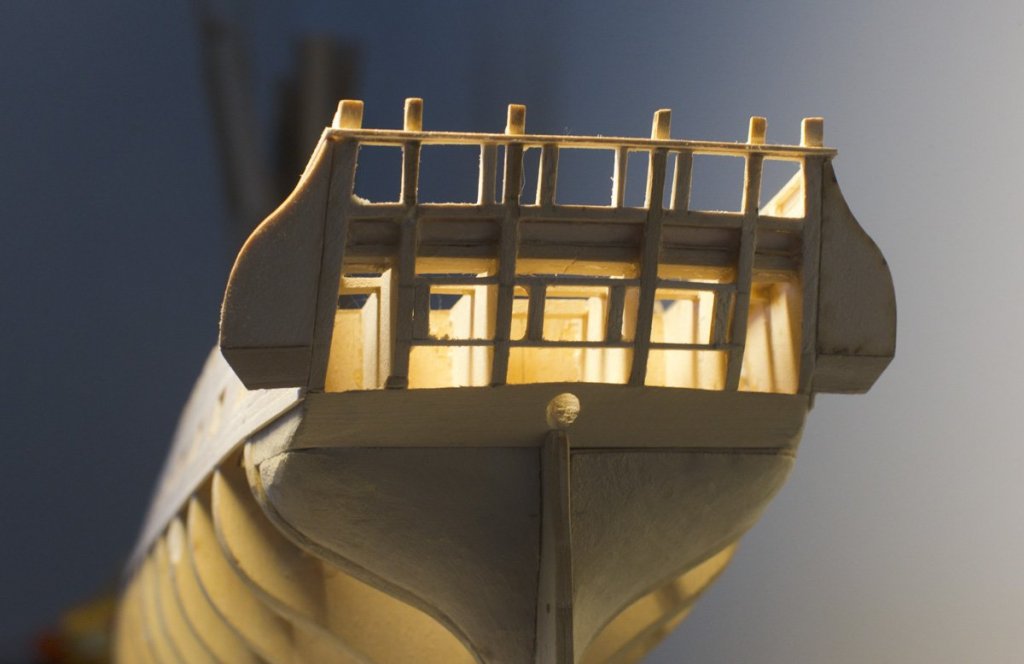
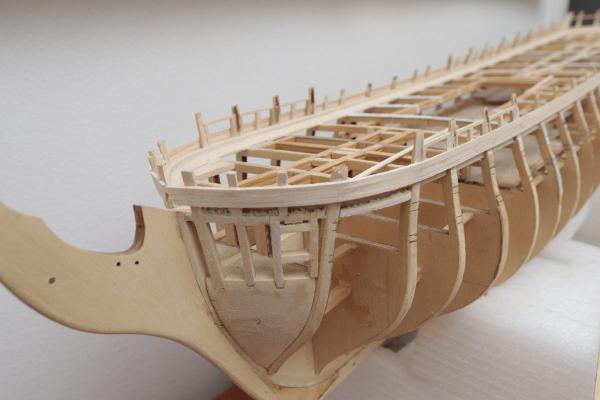
Slow progress here, but it goes on. I've continued the planking and also added the transom extensions. Markku


-
That is very interesting way to do the stern framing! Looking forward how it will look like! Markku
-
M. Pajulahti reacted to a post in a topic:
USS Constitution by CaptainSteve - Model Shipways - 1:76.8 scale
-
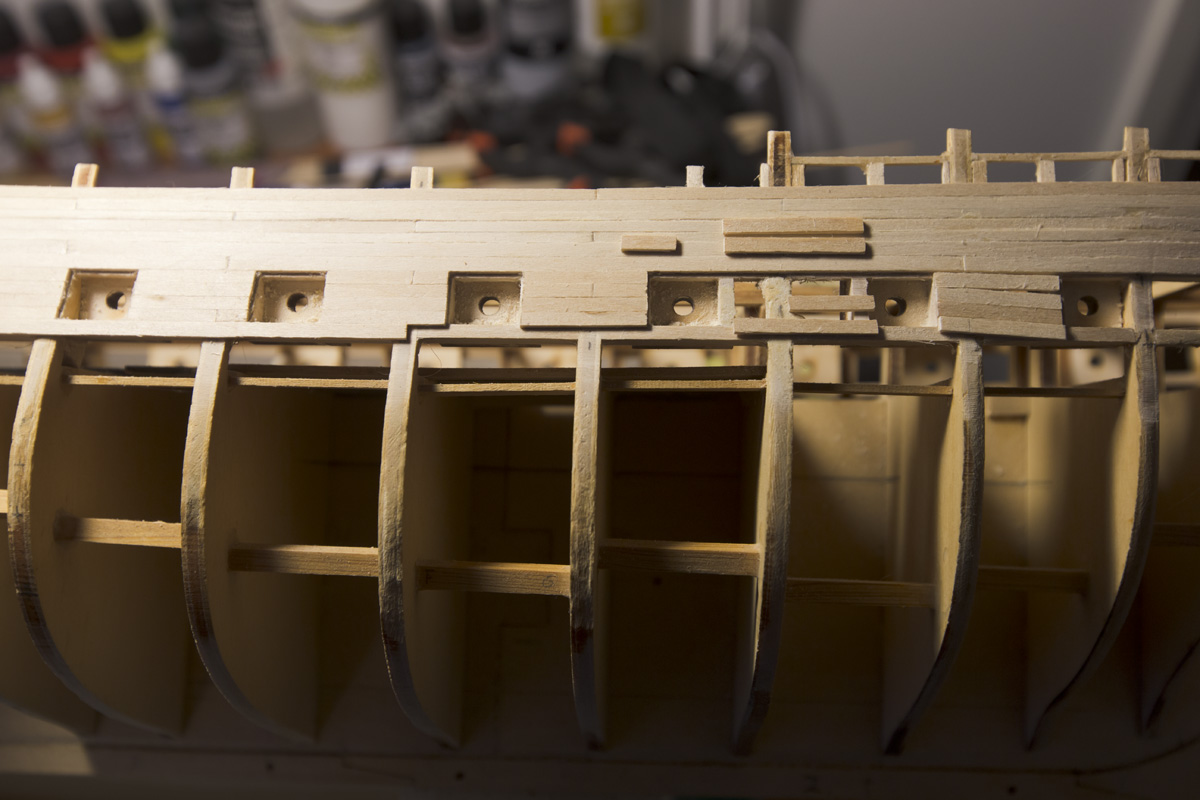
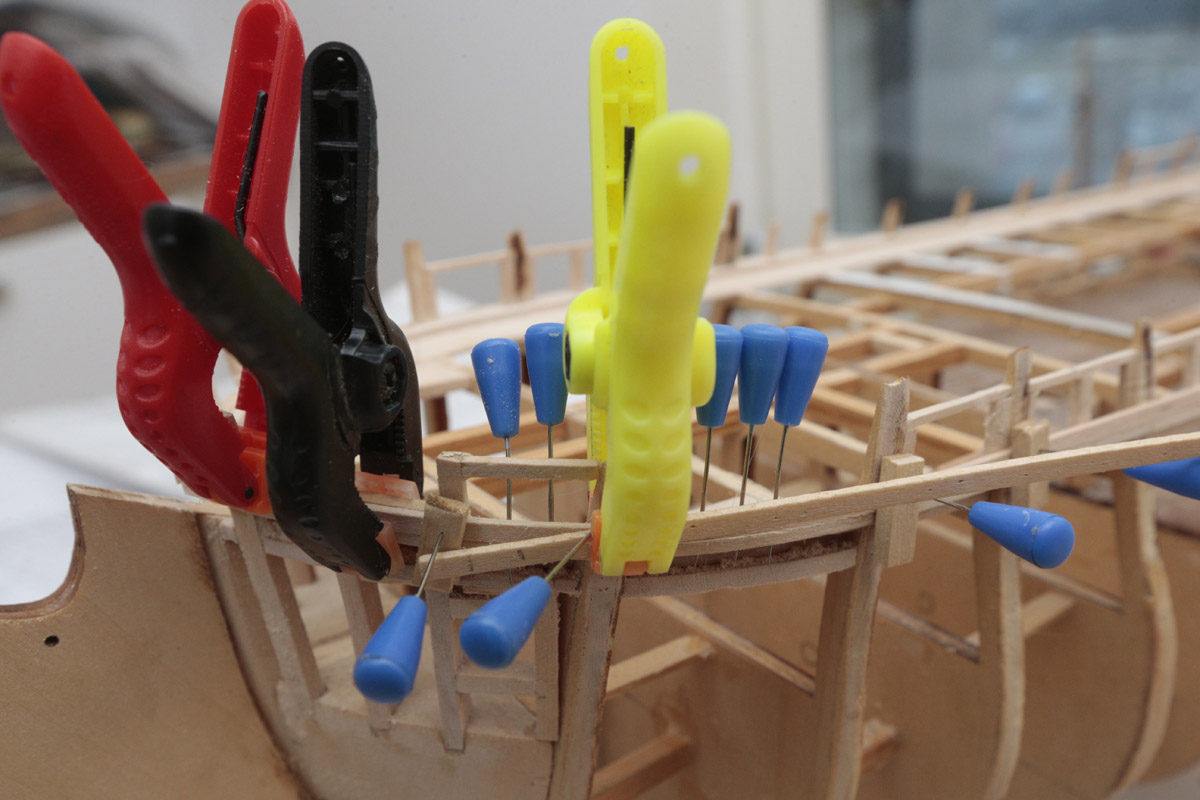
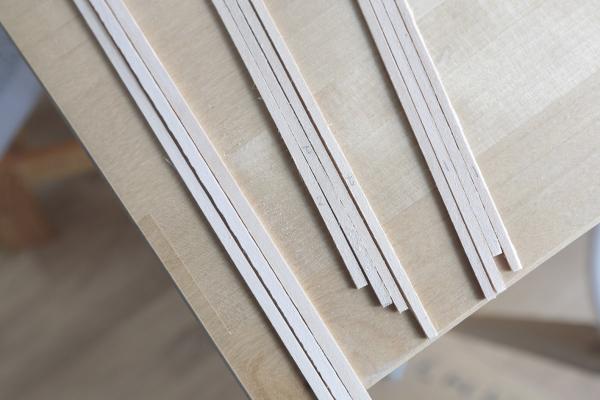
Wow, is it really been almost one year since my last post? I need to post something new So... the planking has started. Here are some photos There should be 4 planks in row between gun ports, so I've sanded the planks to get perfect fit: ...And so the planking continues. Markku


-
I've built that few years ago, it was my first wooden kit also and that was excellent choise for a first timer; Mare Nostrum is easy enough and there is many different things that allow great learning what becomes working with wood and metal fittings. Good luck with your build. Markku
- 134 replies
-
- 2
-
-
- artesania latina
- mare nostrum
- (and 1 more)
-
M. Pajulahti reacted to a post in a topic:
Hermione La Fayette by TheDutchShipBuilder - Artesania Latina - second wooden ship built
-
Thank you all. Your kind words will help me to continue this build Markku
-
M. Pajulahti reacted to a post in a topic:
USS Constitution by M. Pajulahti - Model Shipways - Scale 1:76
-
Hi Ken, Your ship looks good, and I'm also following your build with great interest. Markku
-
M. Pajulahti reacted to a post in a topic:
USS Constitution by M. Pajulahti - Model Shipways - Scale 1:76
-
M. Pajulahti reacted to a post in a topic:
USS Constitution by M. Pajulahti - Model Shipways - Scale 1:76
-
M. Pajulahti reacted to a post in a topic:
USS Constitution by M. Pajulahti - Model Shipways - Scale 1:76
-
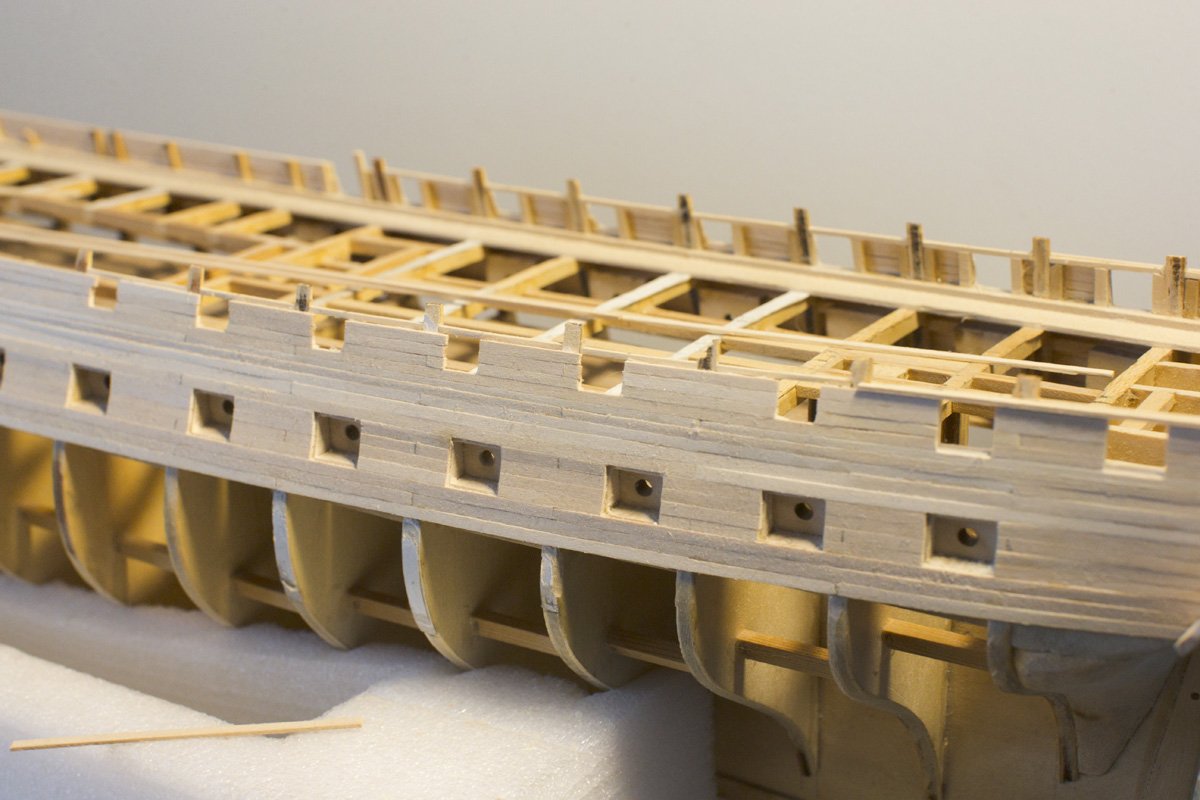
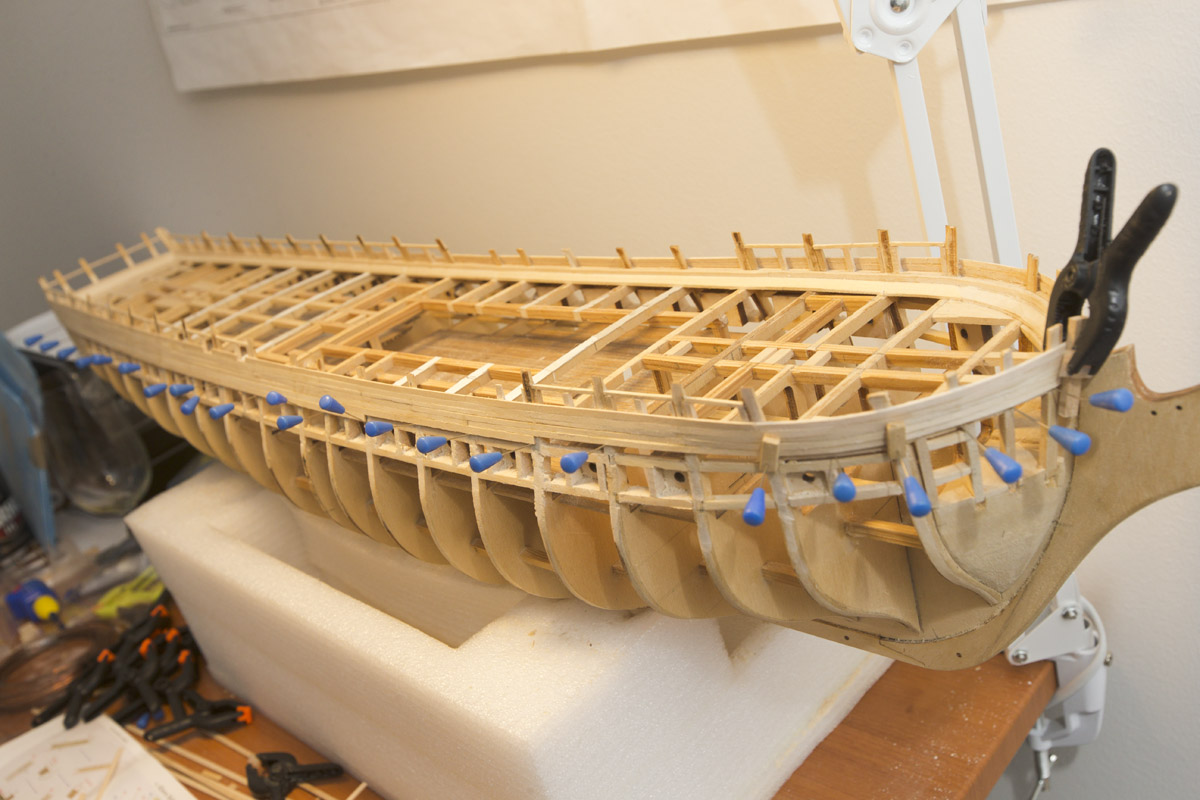
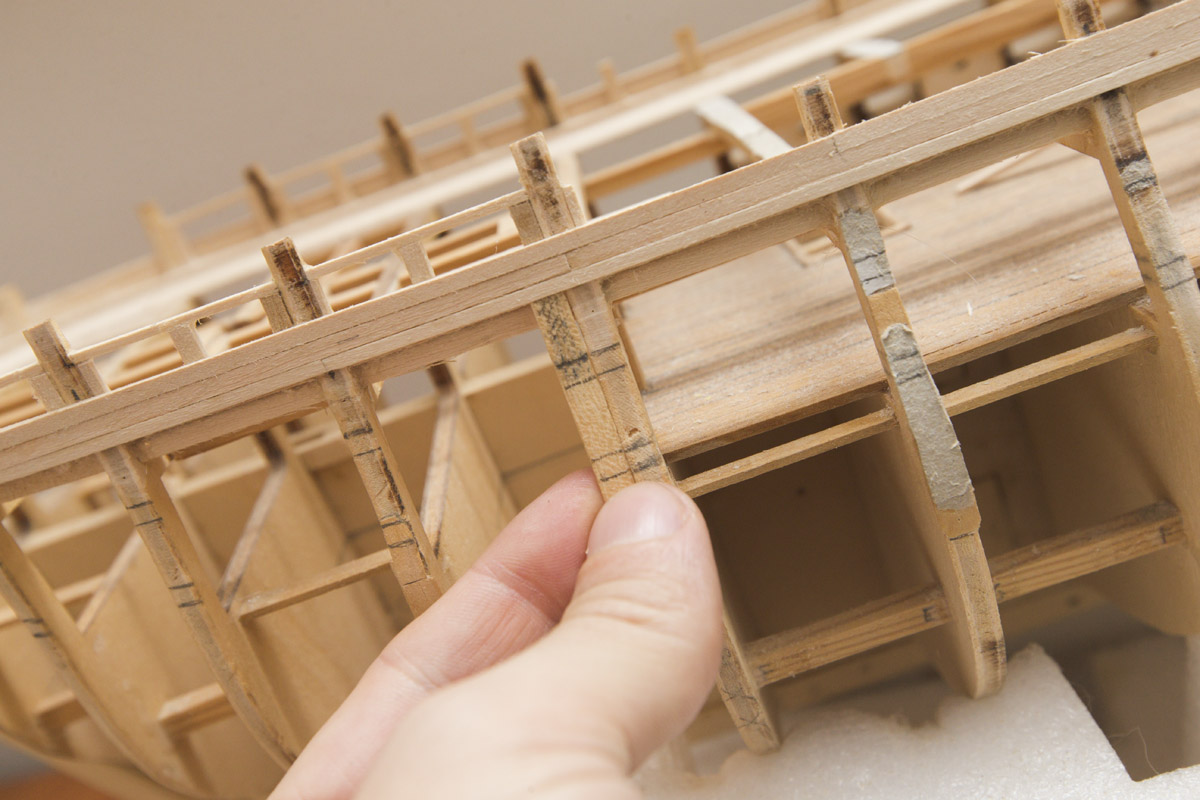
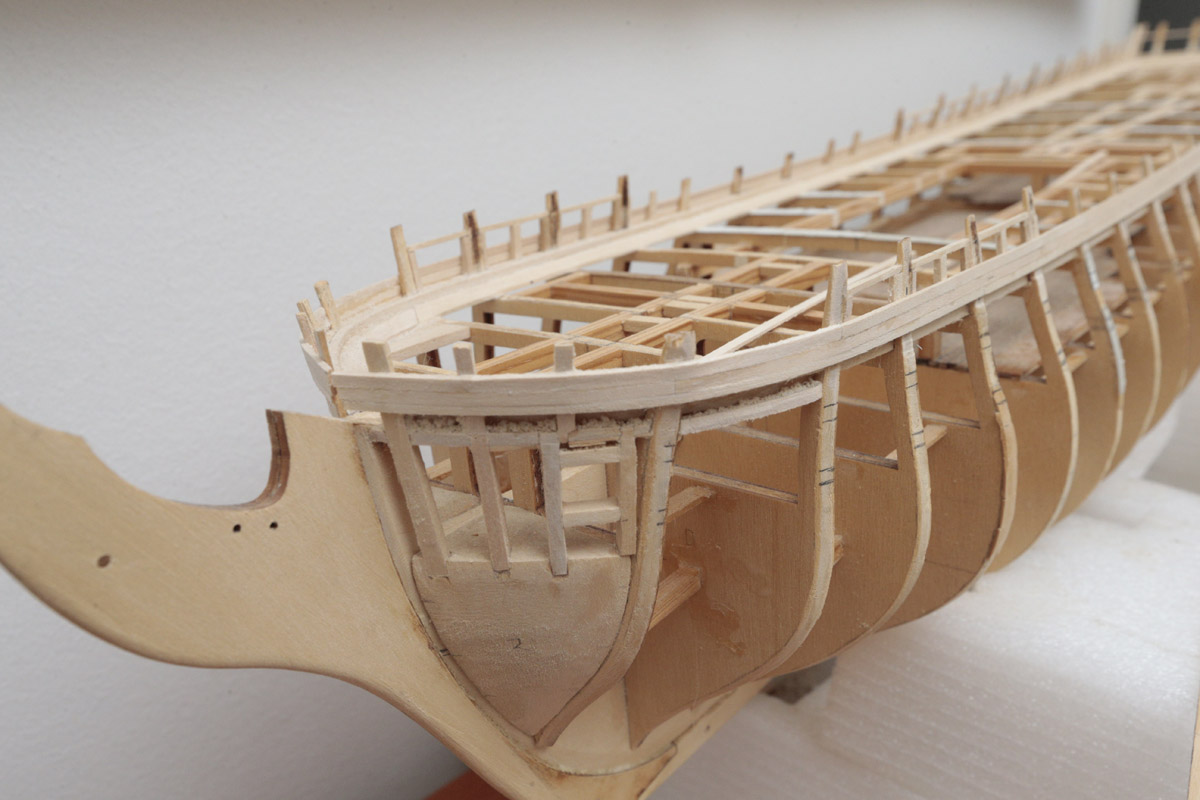
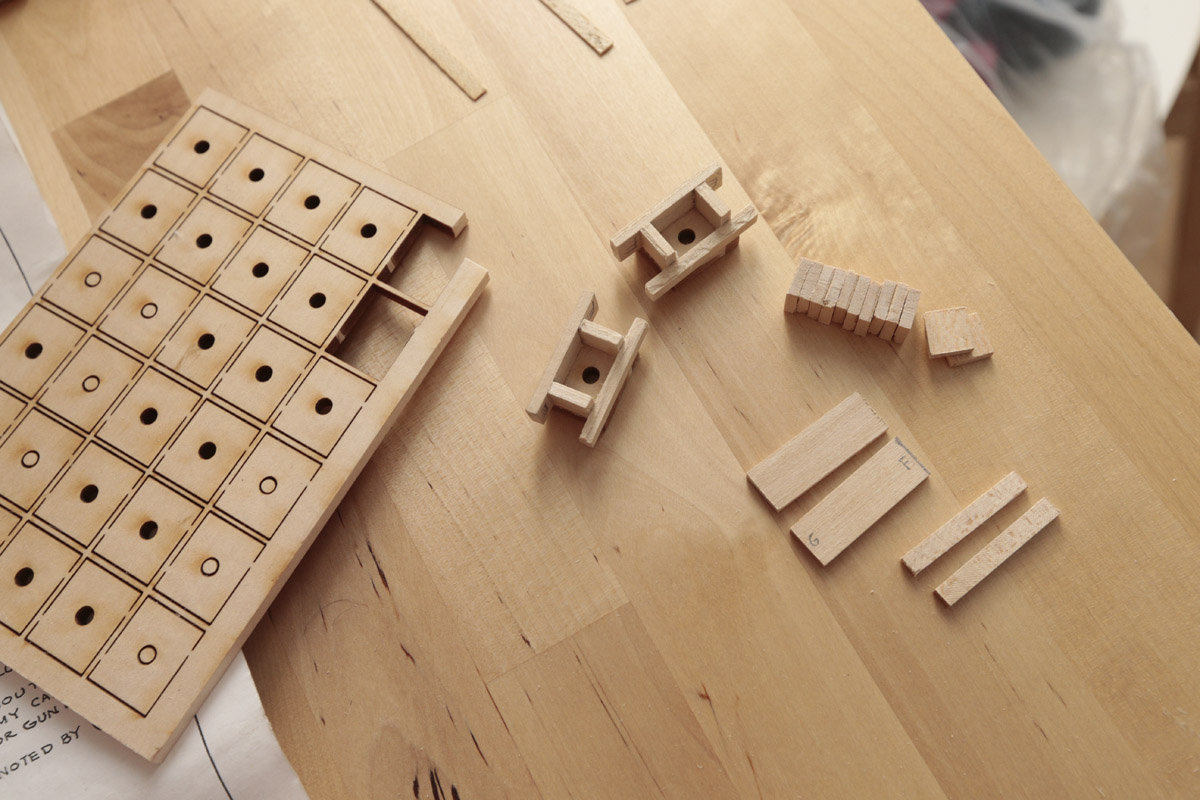
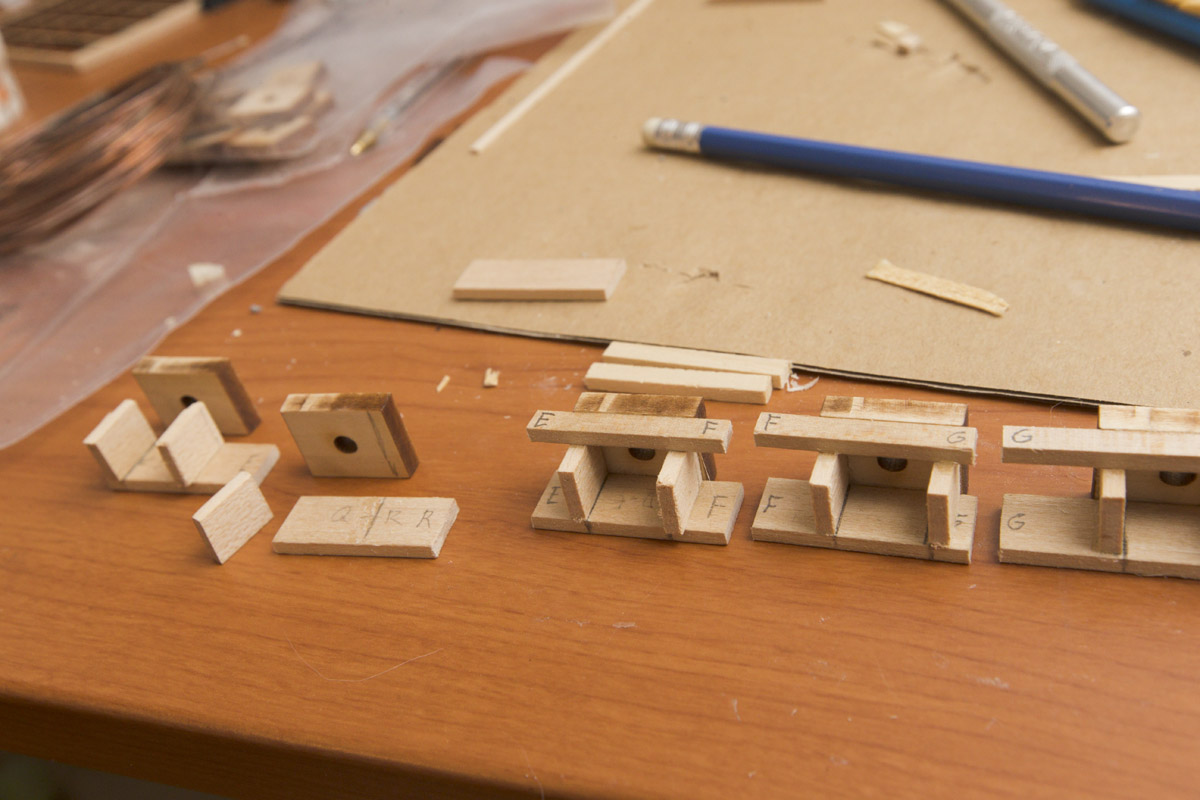
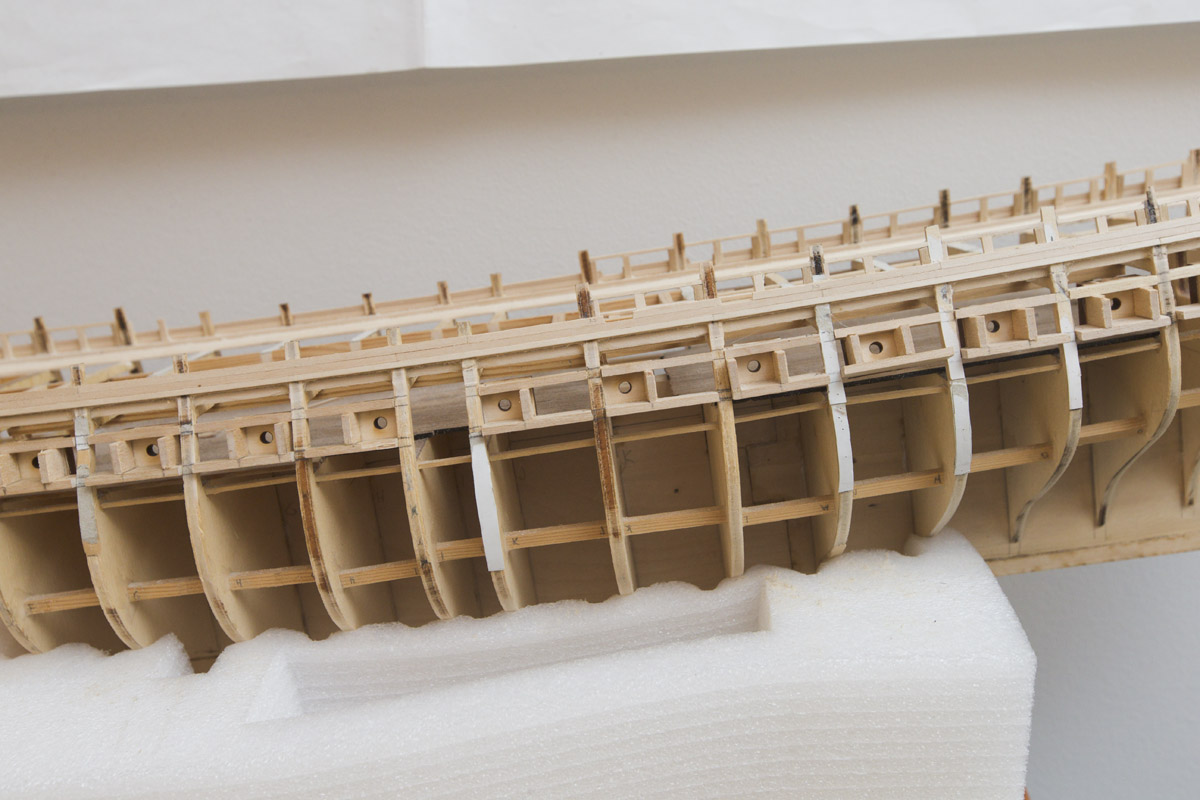
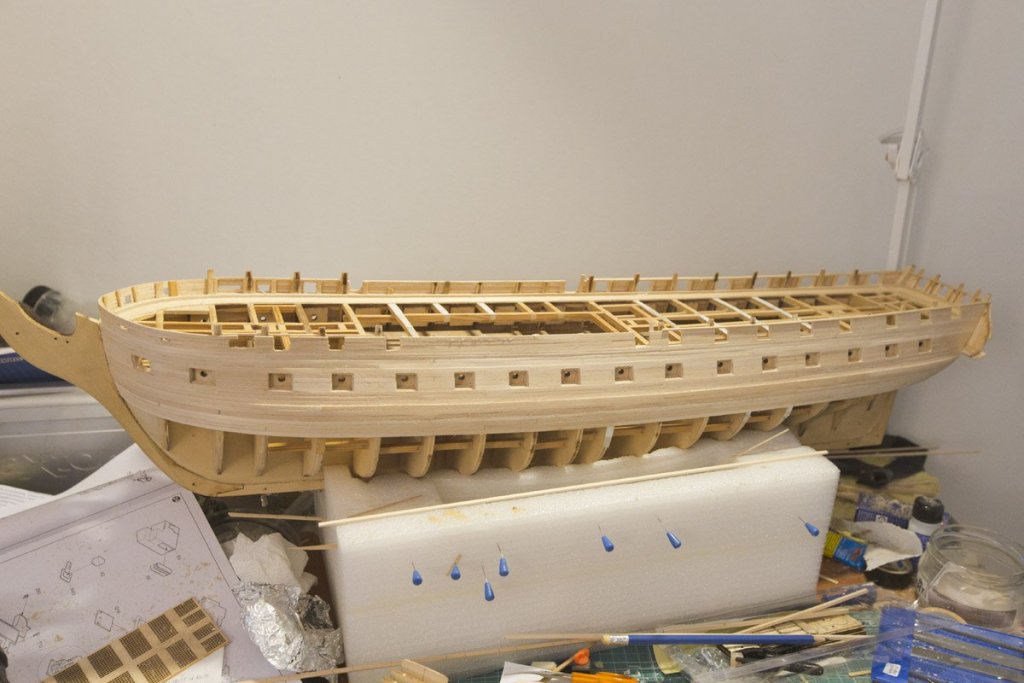
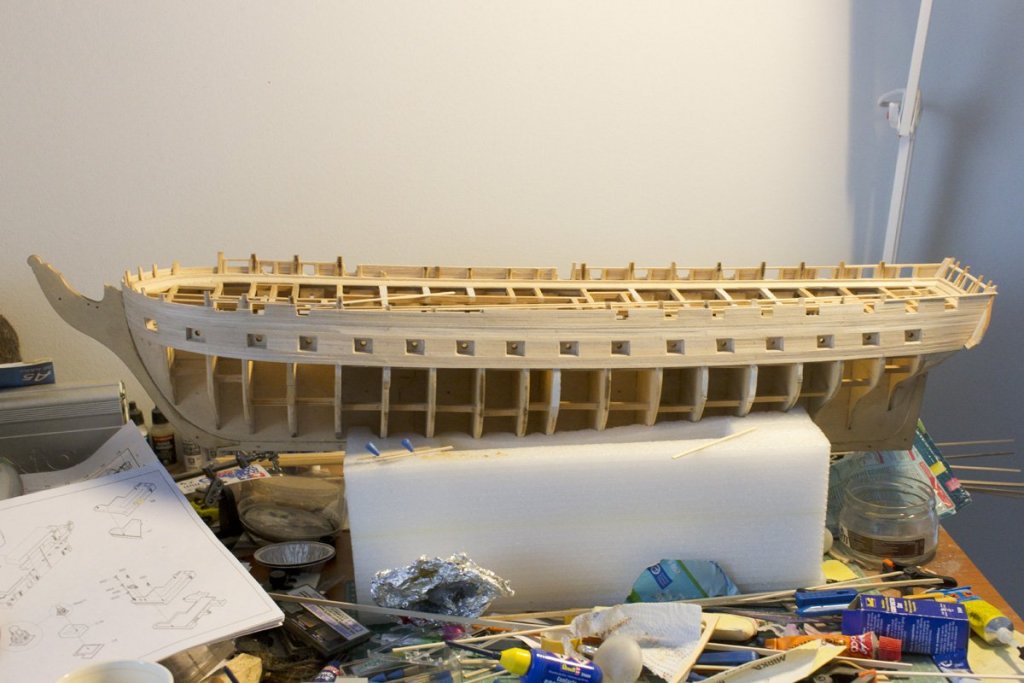
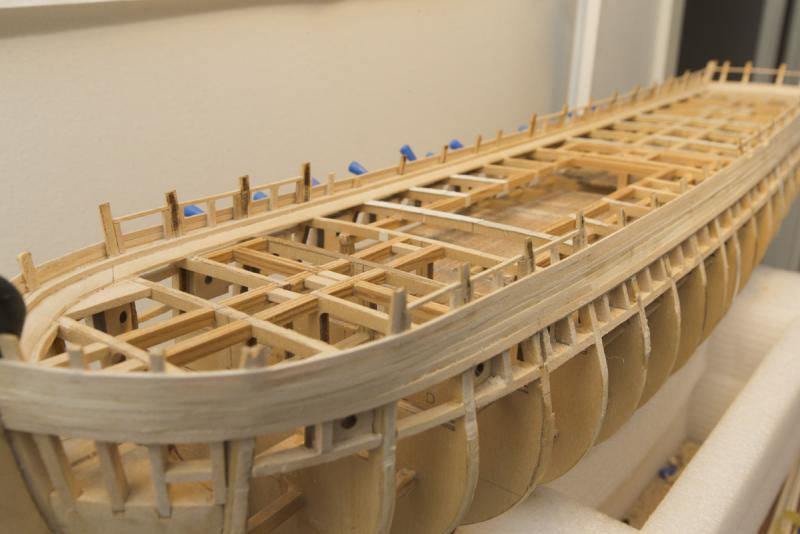
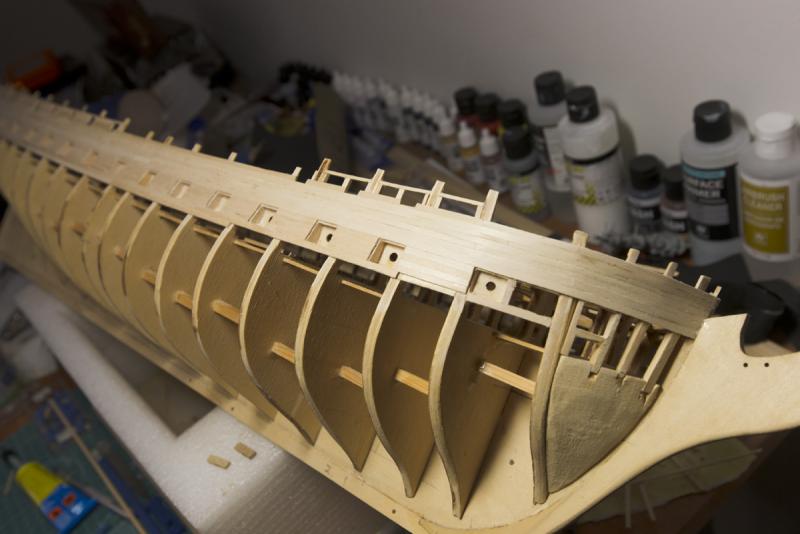
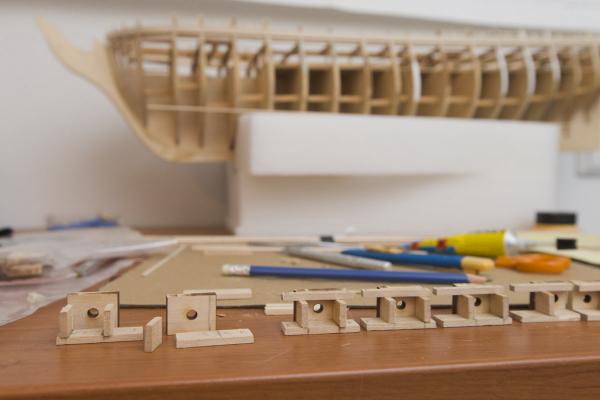
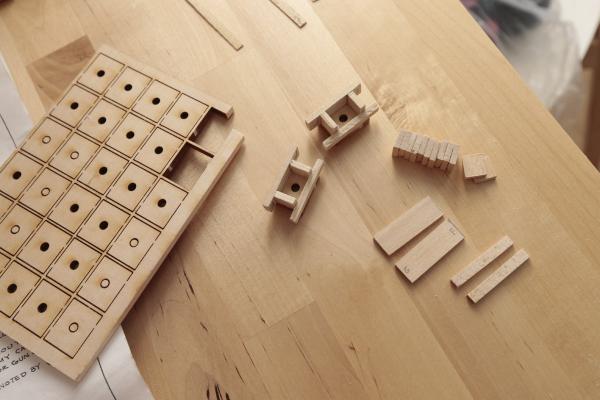
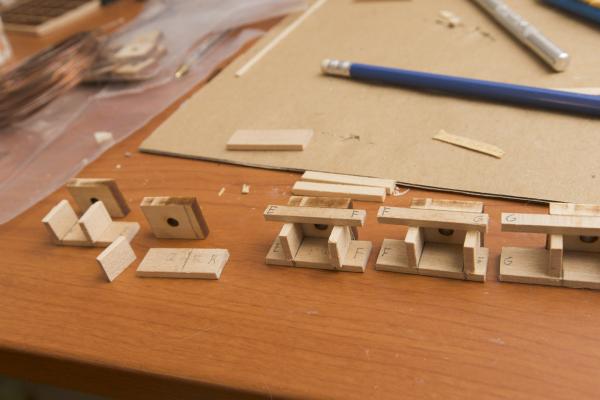
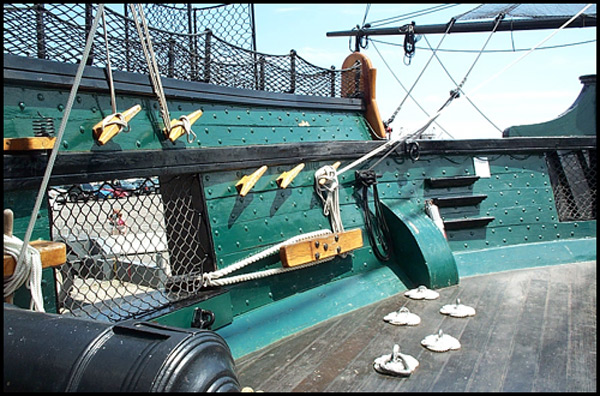
It's been a while from my last post, so it's time to continue this build again. I've added the outside planksheer and 2 ceiling planks above it. And now it's time to start making the gunboxes! Here we go... After adding the outside planksheer strip, it's very easy to find out the right position for gunboxes. I used one strip to transfer the marks: And same here. This is how I know the distance of gunports goes right: Nice row of gunboxes there already. Not glued yet. Markku

-
M. Pajulahti reacted to a post in a topic:
USS Constitution by M. Pajulahti - Model Shipways - Scale 1:76
-
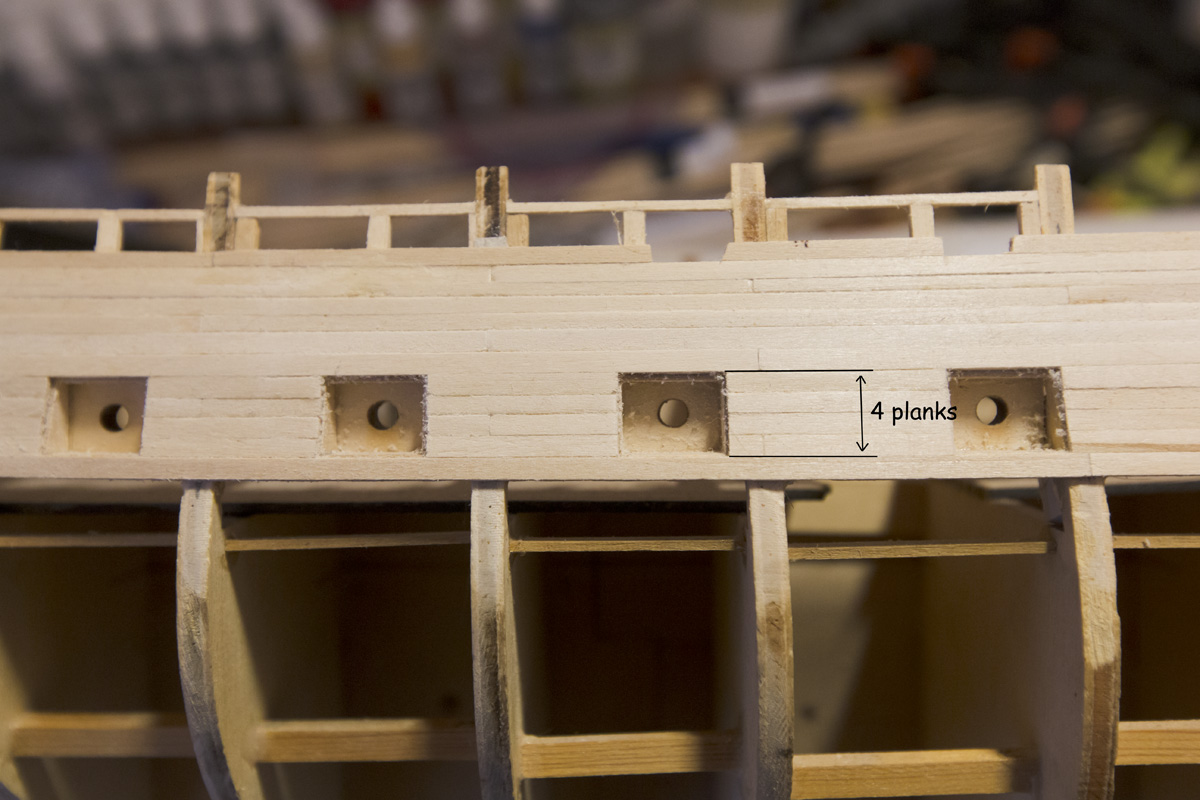
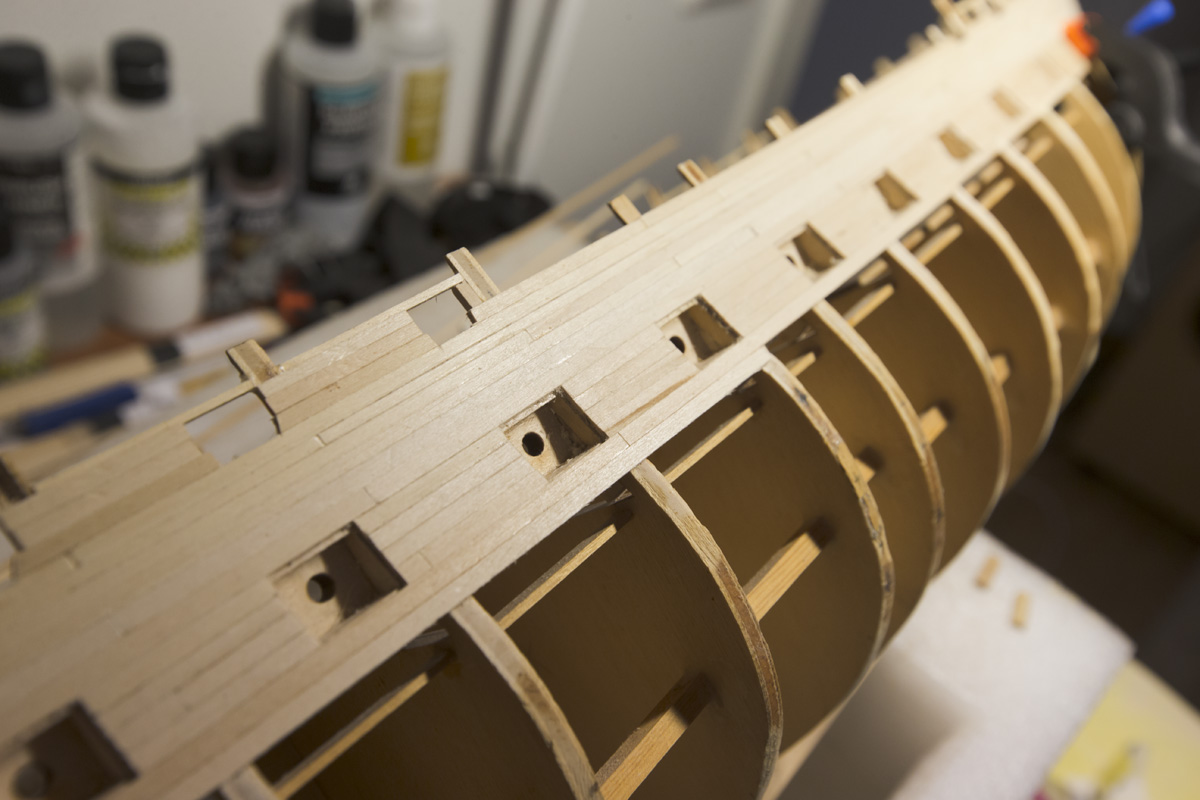
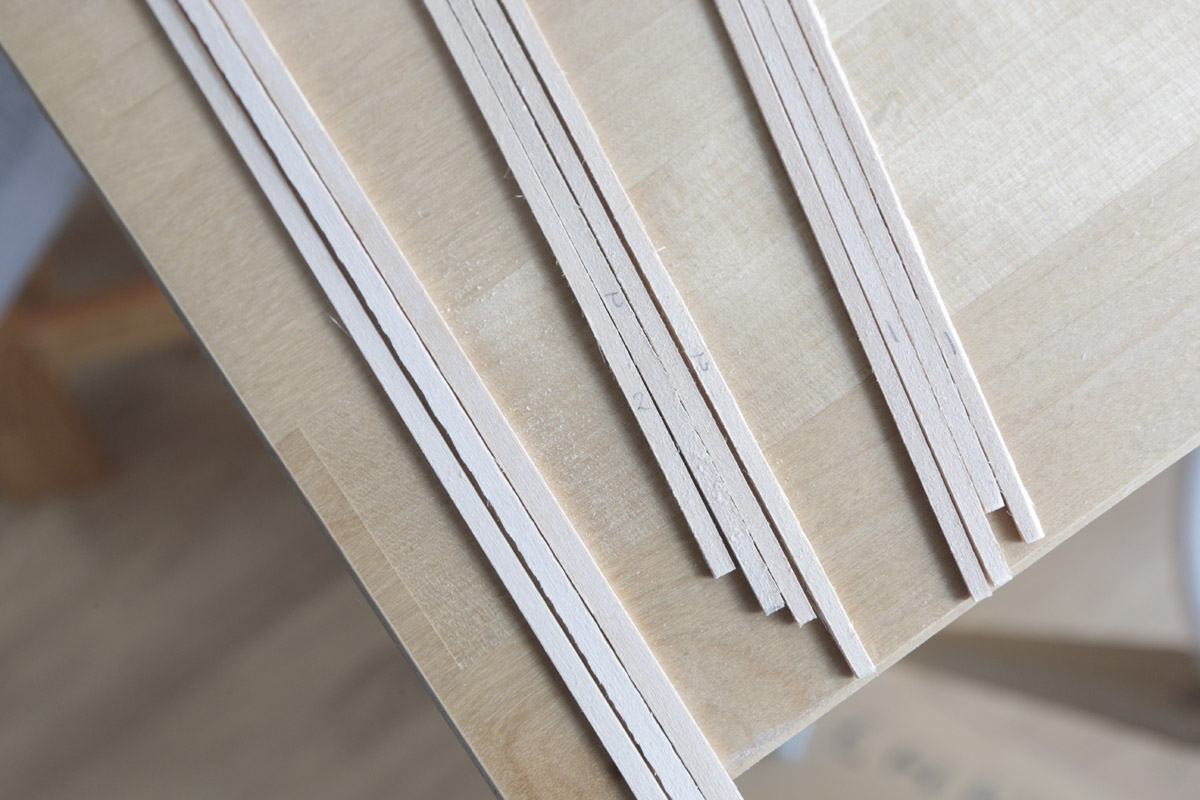
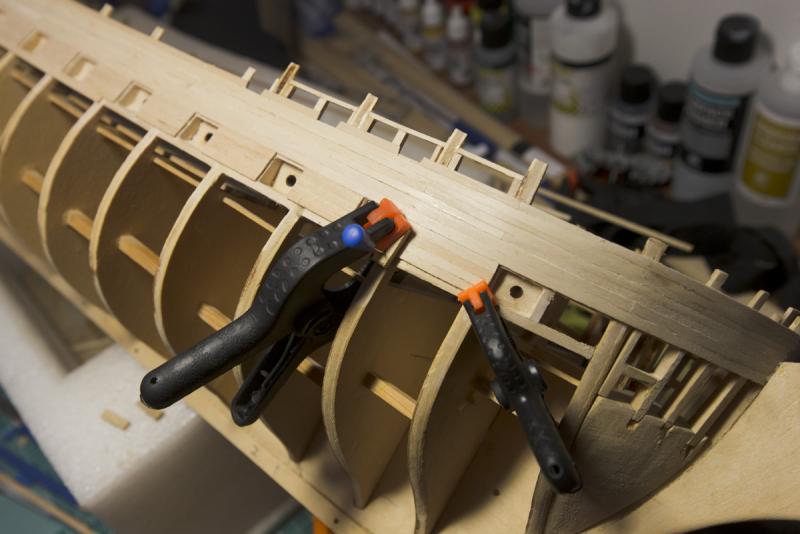
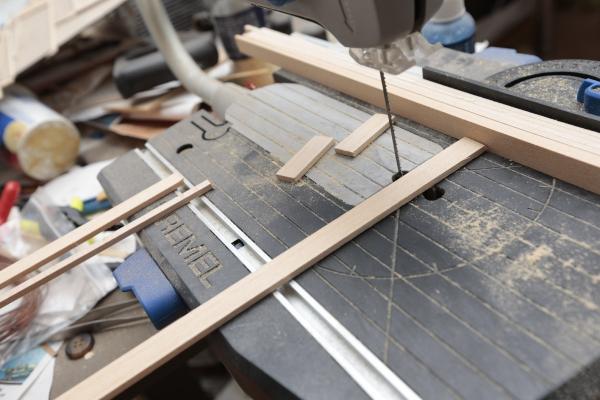
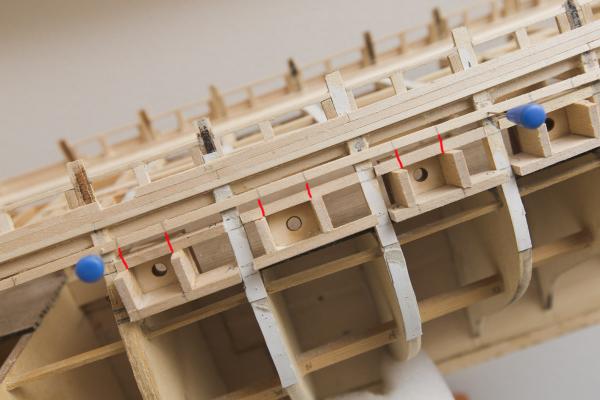
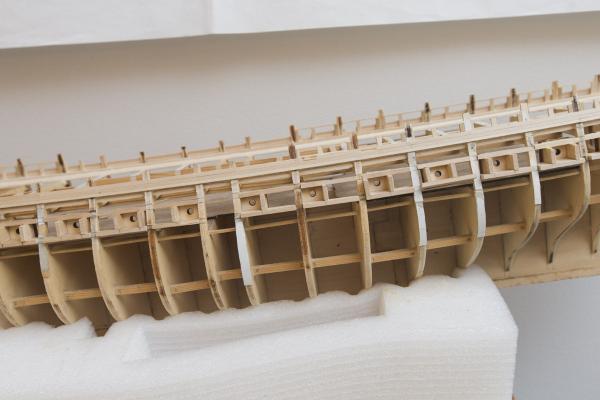
So I found out the bulwark planks are supposed to be 3/64" x 1/8" based on directions, but in reality they are too wide to fill the height of gun ports, where should be 4 planks: So to get the real dimensions, those planks need to be tapered thinner, like this, original ones on the left: Now my 4 planks fill the height of gun ports. And here we go, first planks: End result in bow: Markku


-
Thank you George. Yes, the gun boxes will be soon in my working table. Some small strips also need to add, and I thought maybe couple planks of bulwark planking to make the bulwarks stronger. Markku
-
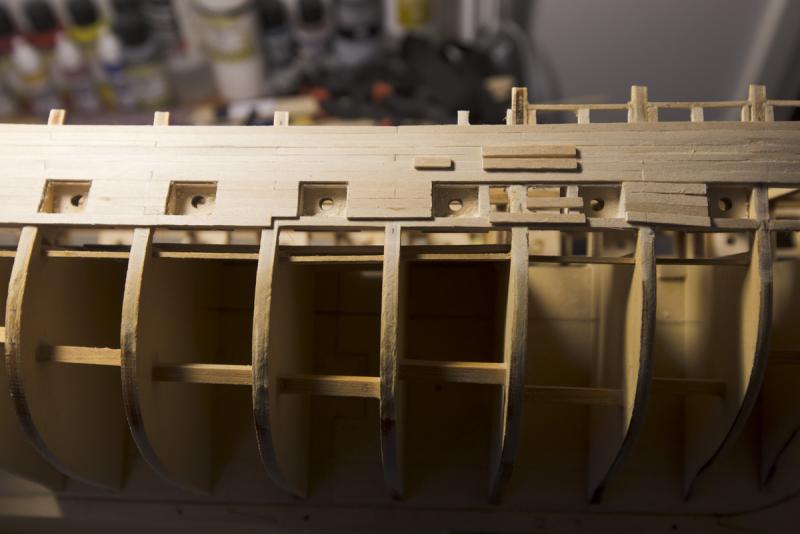
Planksheer done, inboard and outboard. I like the result. This old ironside really has pretty thick sides. Markku