


Jason Builder
-
Posts
213 -
Joined
-
Last visited
Content Type
Profiles
Forums
Gallery
Events
Posts posted by Jason Builder
-
-
Goedenavond vrienden,
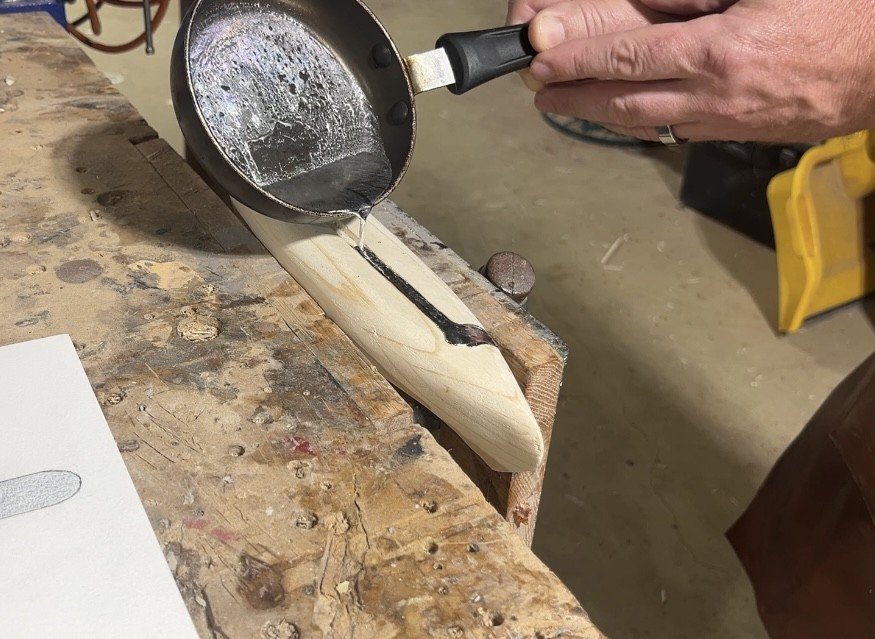
Tonight was a special night because I got to light a burner, melt metal, and do my best to pour it into my model! At the point I was at in carving the hull and installing the rest of the pieces permanently, I figured I better pour the metal into the ballast slot in the bottom of the hull in case it went haywire and wrecked it.
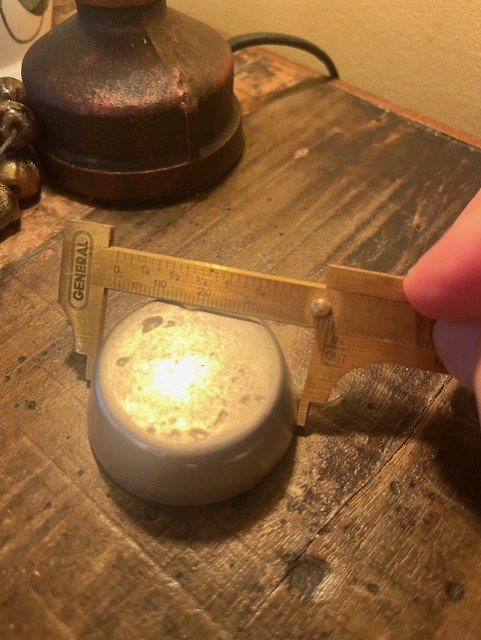
Micromark Type 280 model casting metal. tin/bismuth alloy with no lead or cadmium (I know a deviation from the lead used by the boy in the book). Melting temp 280degF. I bought two 1 7/8" pucks to melt down but only needed one.
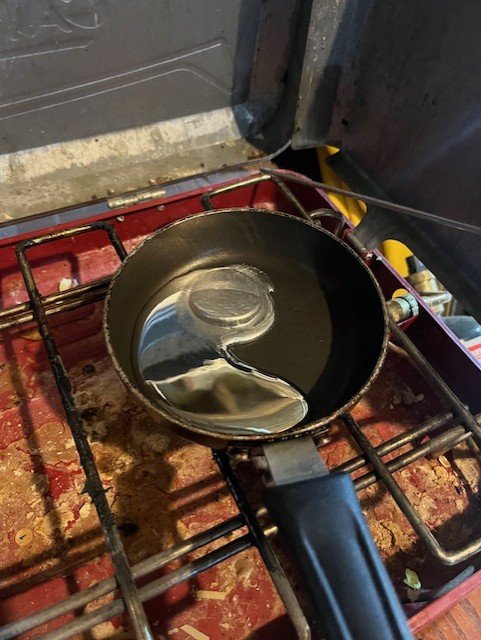
I melted the metal down in a tiny pan, which unfortunately had no spout for pouring. It worked well for melting the metal. I have a heavy pot and ladle for melting lead but did not want to contaminate this "toy" with lead. A simple camp stove was used to melt this low temp model casting metal; it melted quicker than you'd fry bacon. The "camp stove" is not the cleanest in the world as this is the stove I use to melt and make beeswax candles, not for cooking, so there is too much wax residue in the basin of the stove which I need to clean up. Back to model making....I will need to remember this handy alloy for future projects.
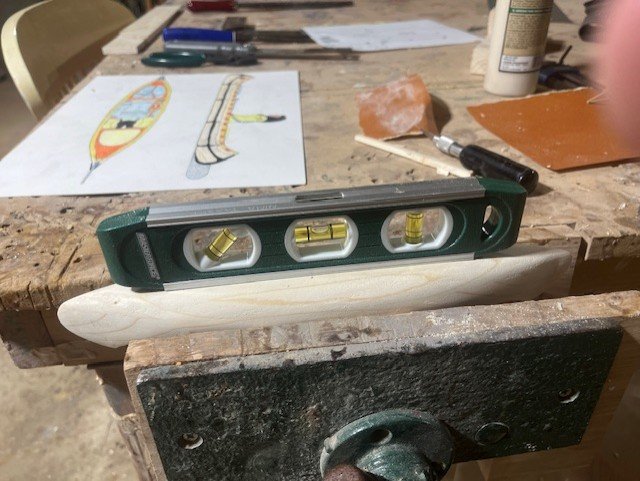
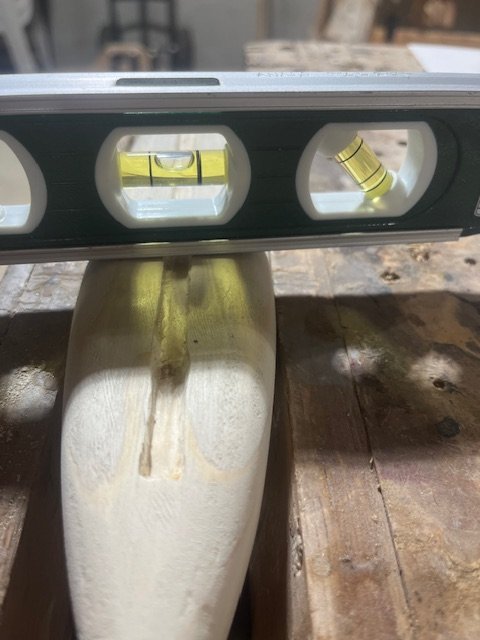
But now, to back up a bit, before melting the metal, I levelled the hull in a vise in both directions.
Then, with the metal melted, I walked as quickly as I could, the 20 feet from stove to overturned hull. In that time the hot metal formed a semi-solid skin on it's surface which I had to overcome when pouring, and which caused an overflow over the cavity intended for the pouring of the metal. This is visible in the photo. After this initial spilling of the milk, the pour went perfectly and I will be able to remove the metal from the overflow spill. All told, it would be better to use a deeper melting pot with a spout for this task.
Now I will wait for this to cool and I will file and sand off the metal and all will be well. I had a fire extinguisher at my side during this step.
- GrandpaPhil, ccoyle and Scottish Guy
-
 3
3
-
hi Chris, Great idea!! I, too, would love to see that and I have hte book here, of course, in front of me as I build the model.
To all: even though this is a kids book, anyone with a inquisitive interest in industry of the great lakes in the first half of the 20th century (canal locks, sawmills and such) would love the illustrations in the margins of this book! Thank you for the note, Chris.
-Jason
-
Hi Everyone!
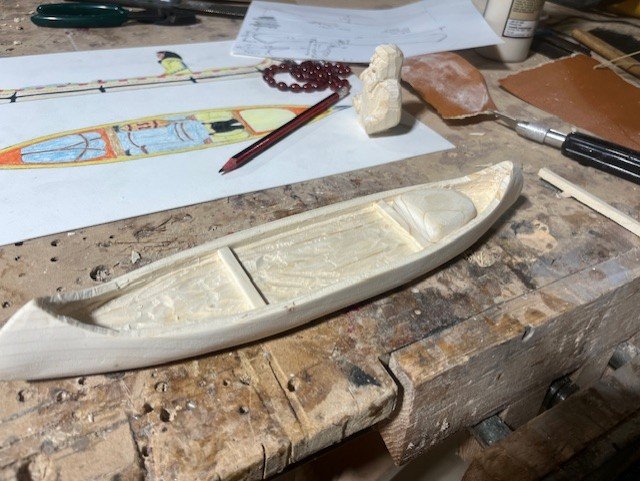
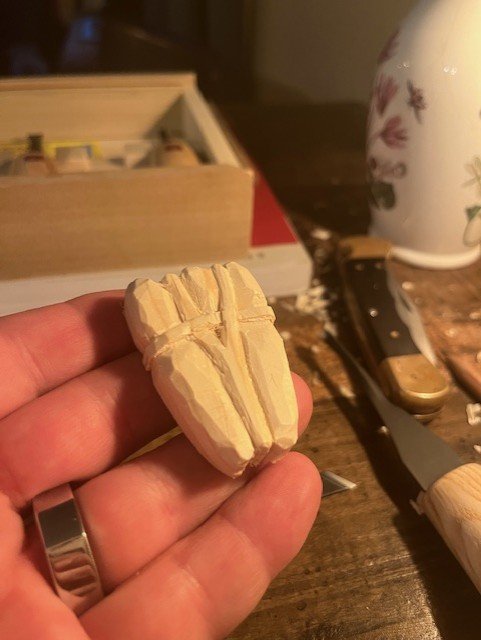
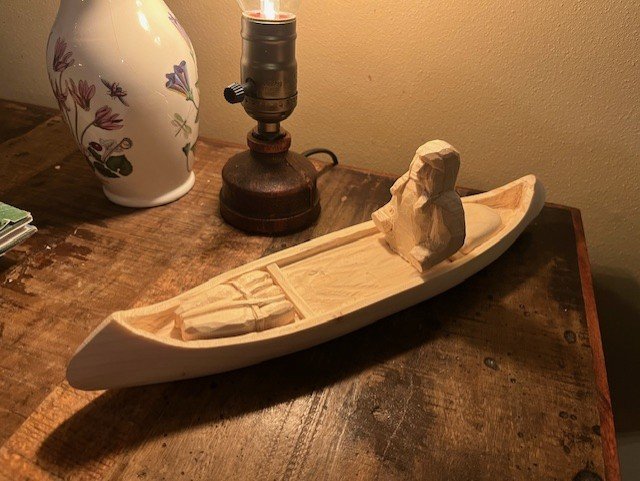
Got around to some sanding, carving the packs at the bow and stern, and made/installed the thwarts. Continues to be a very fun project.
- ccoyle, Thukydides, Harvey Golden and 4 others
-
7
-
Thanks so much for the responses and for sharing your connections to the Paddle to the Sea story!!
Tonight I continued some carving.
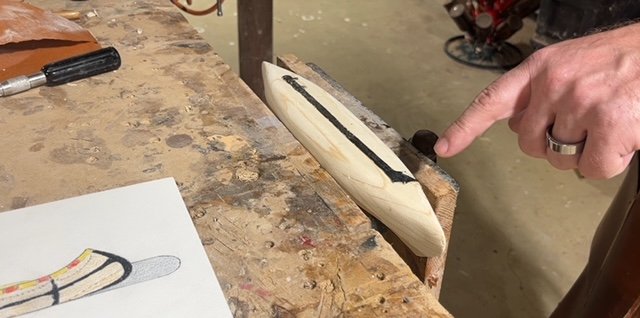
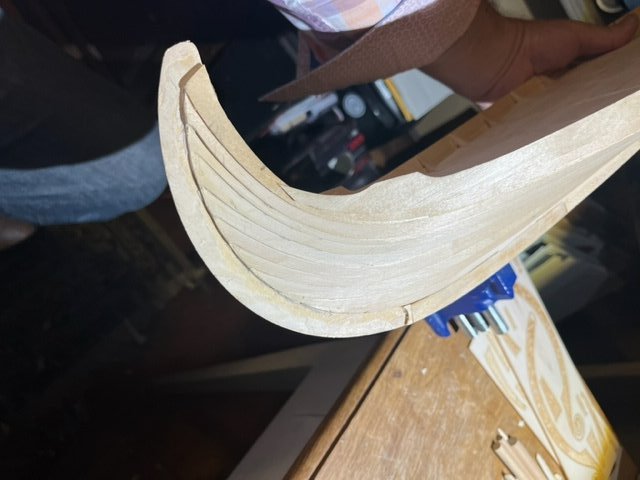
I laid out and then carved the recess for the ballast.

I have alot of lead left from past projects wherein I would melt lead and use it in projects. Considering the known health/brain damage risks we now know from lead exposure, I will make a variation from the originally described Paddle to the Sea. I will use low temp model casting metal from Micromark, type 208. I will melt this metal and fill this cavity.
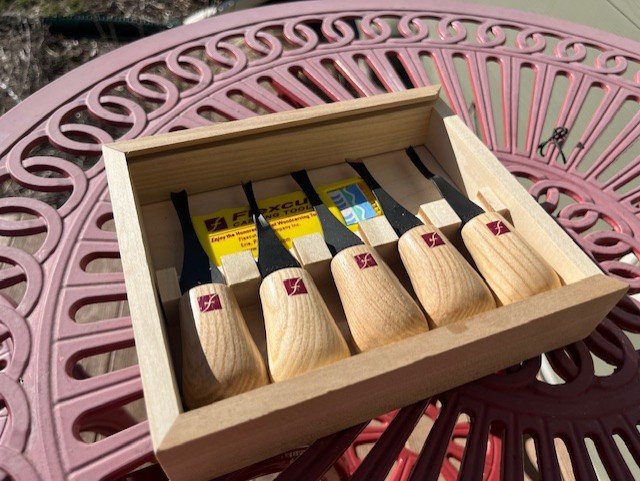
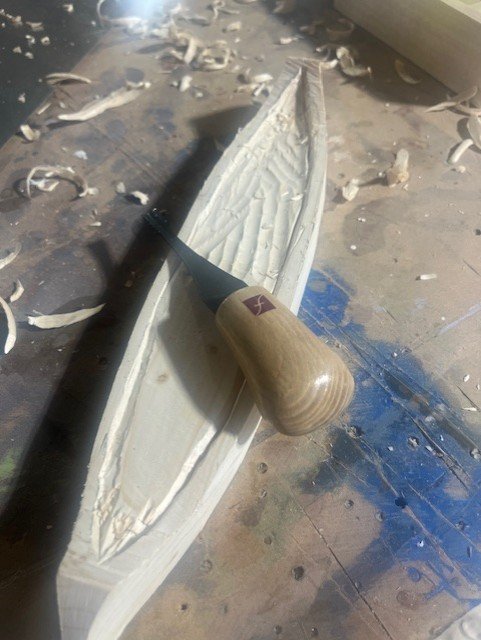
These Flexcut carving chisels are awesome!!!
I am also using my Helle knife:
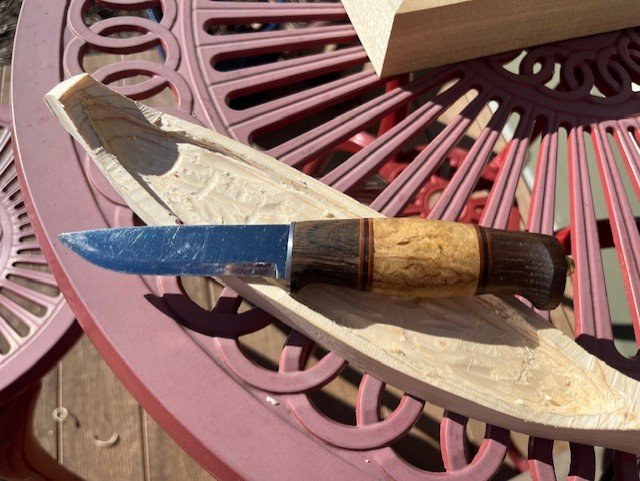
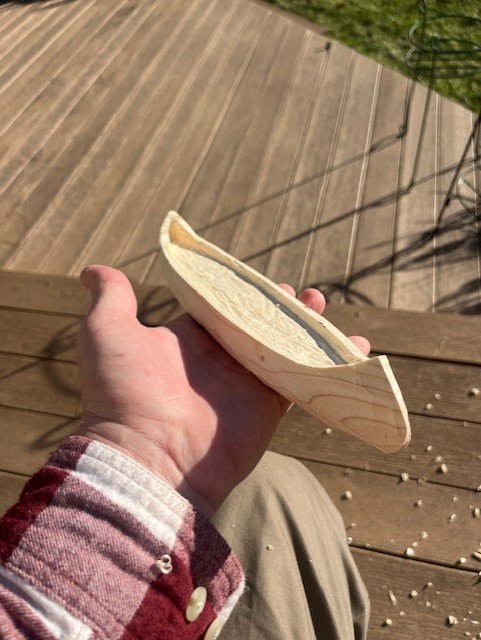
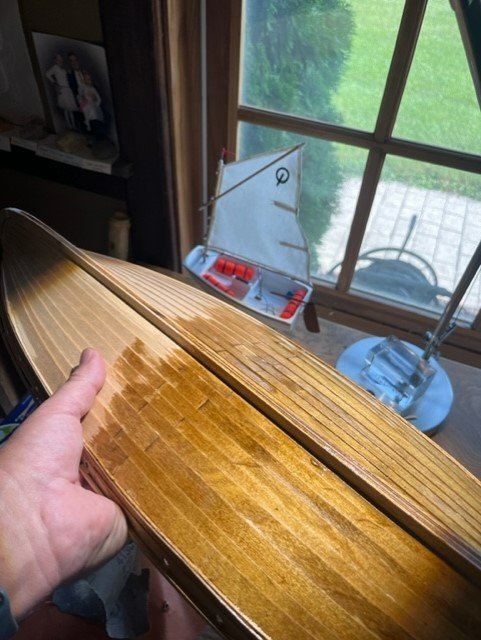
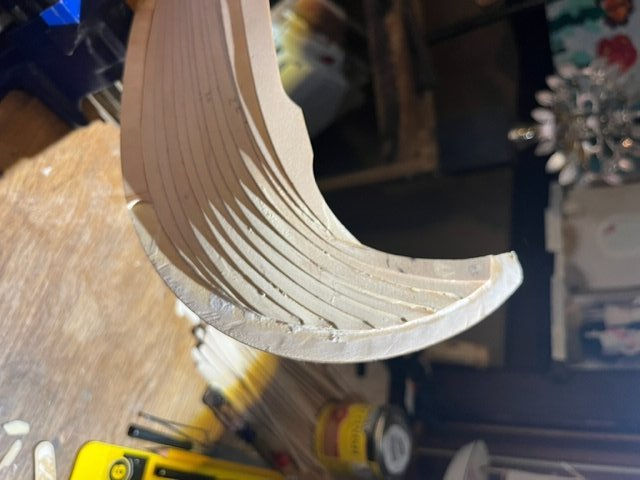
Hull after rough carving:
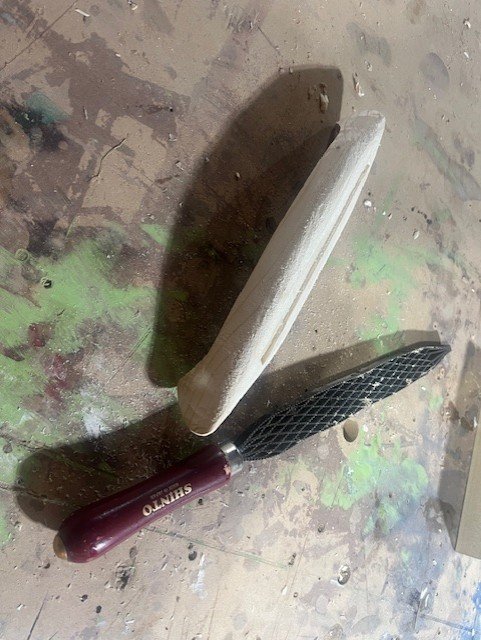
Another amazing tool for wordworking, is the SHINTO RASP" pictured below. Amazing, efficient, tool with two different aggressiveness faces.
-
The pictures of the model clearly show a shallow recess in the interior of the canoe. Here I am carving that recess.
And here is the current rough carved status:
- NavyShooter, GrandpaPhil, ccoyle and 3 others
-
6
-
Hi!
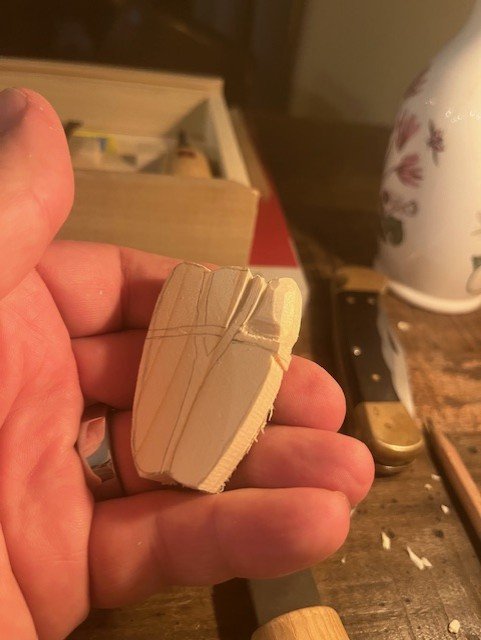
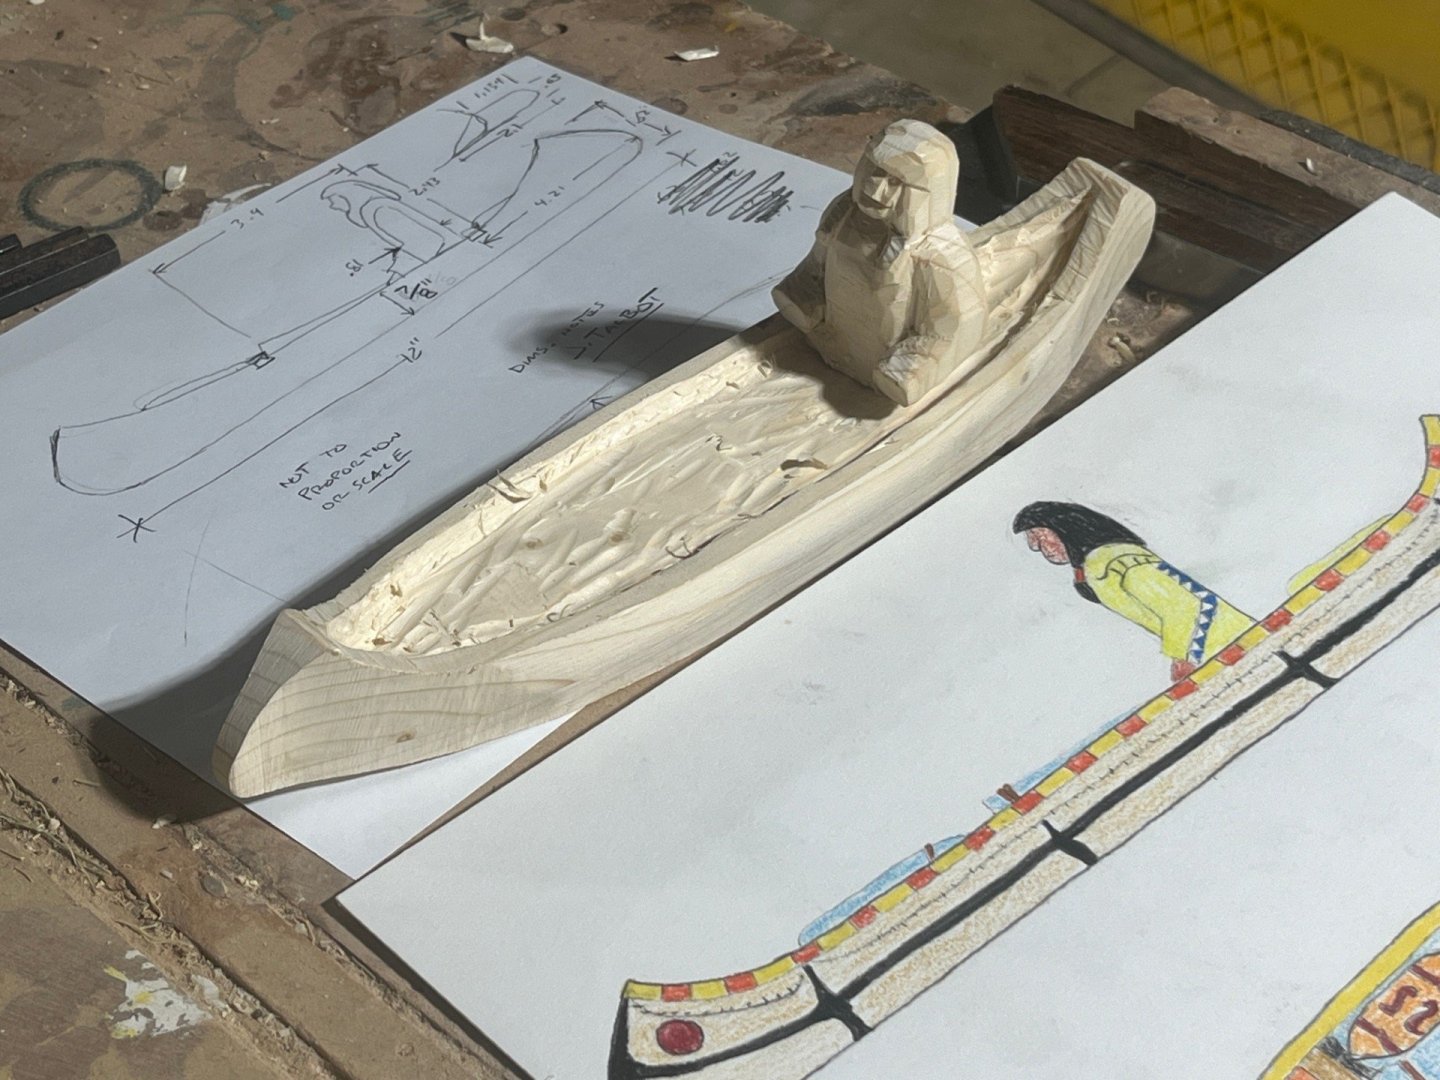
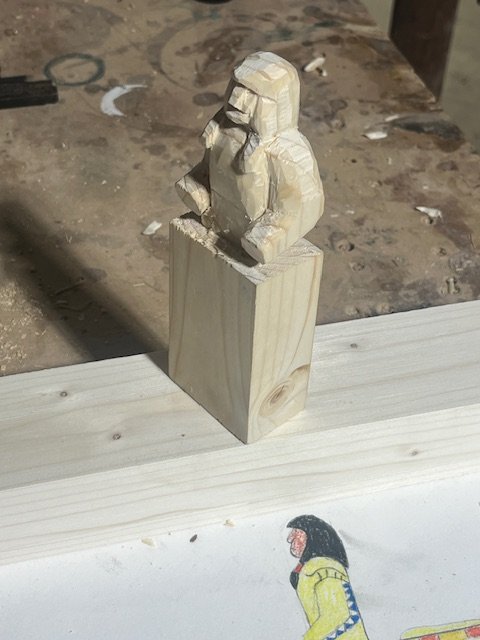
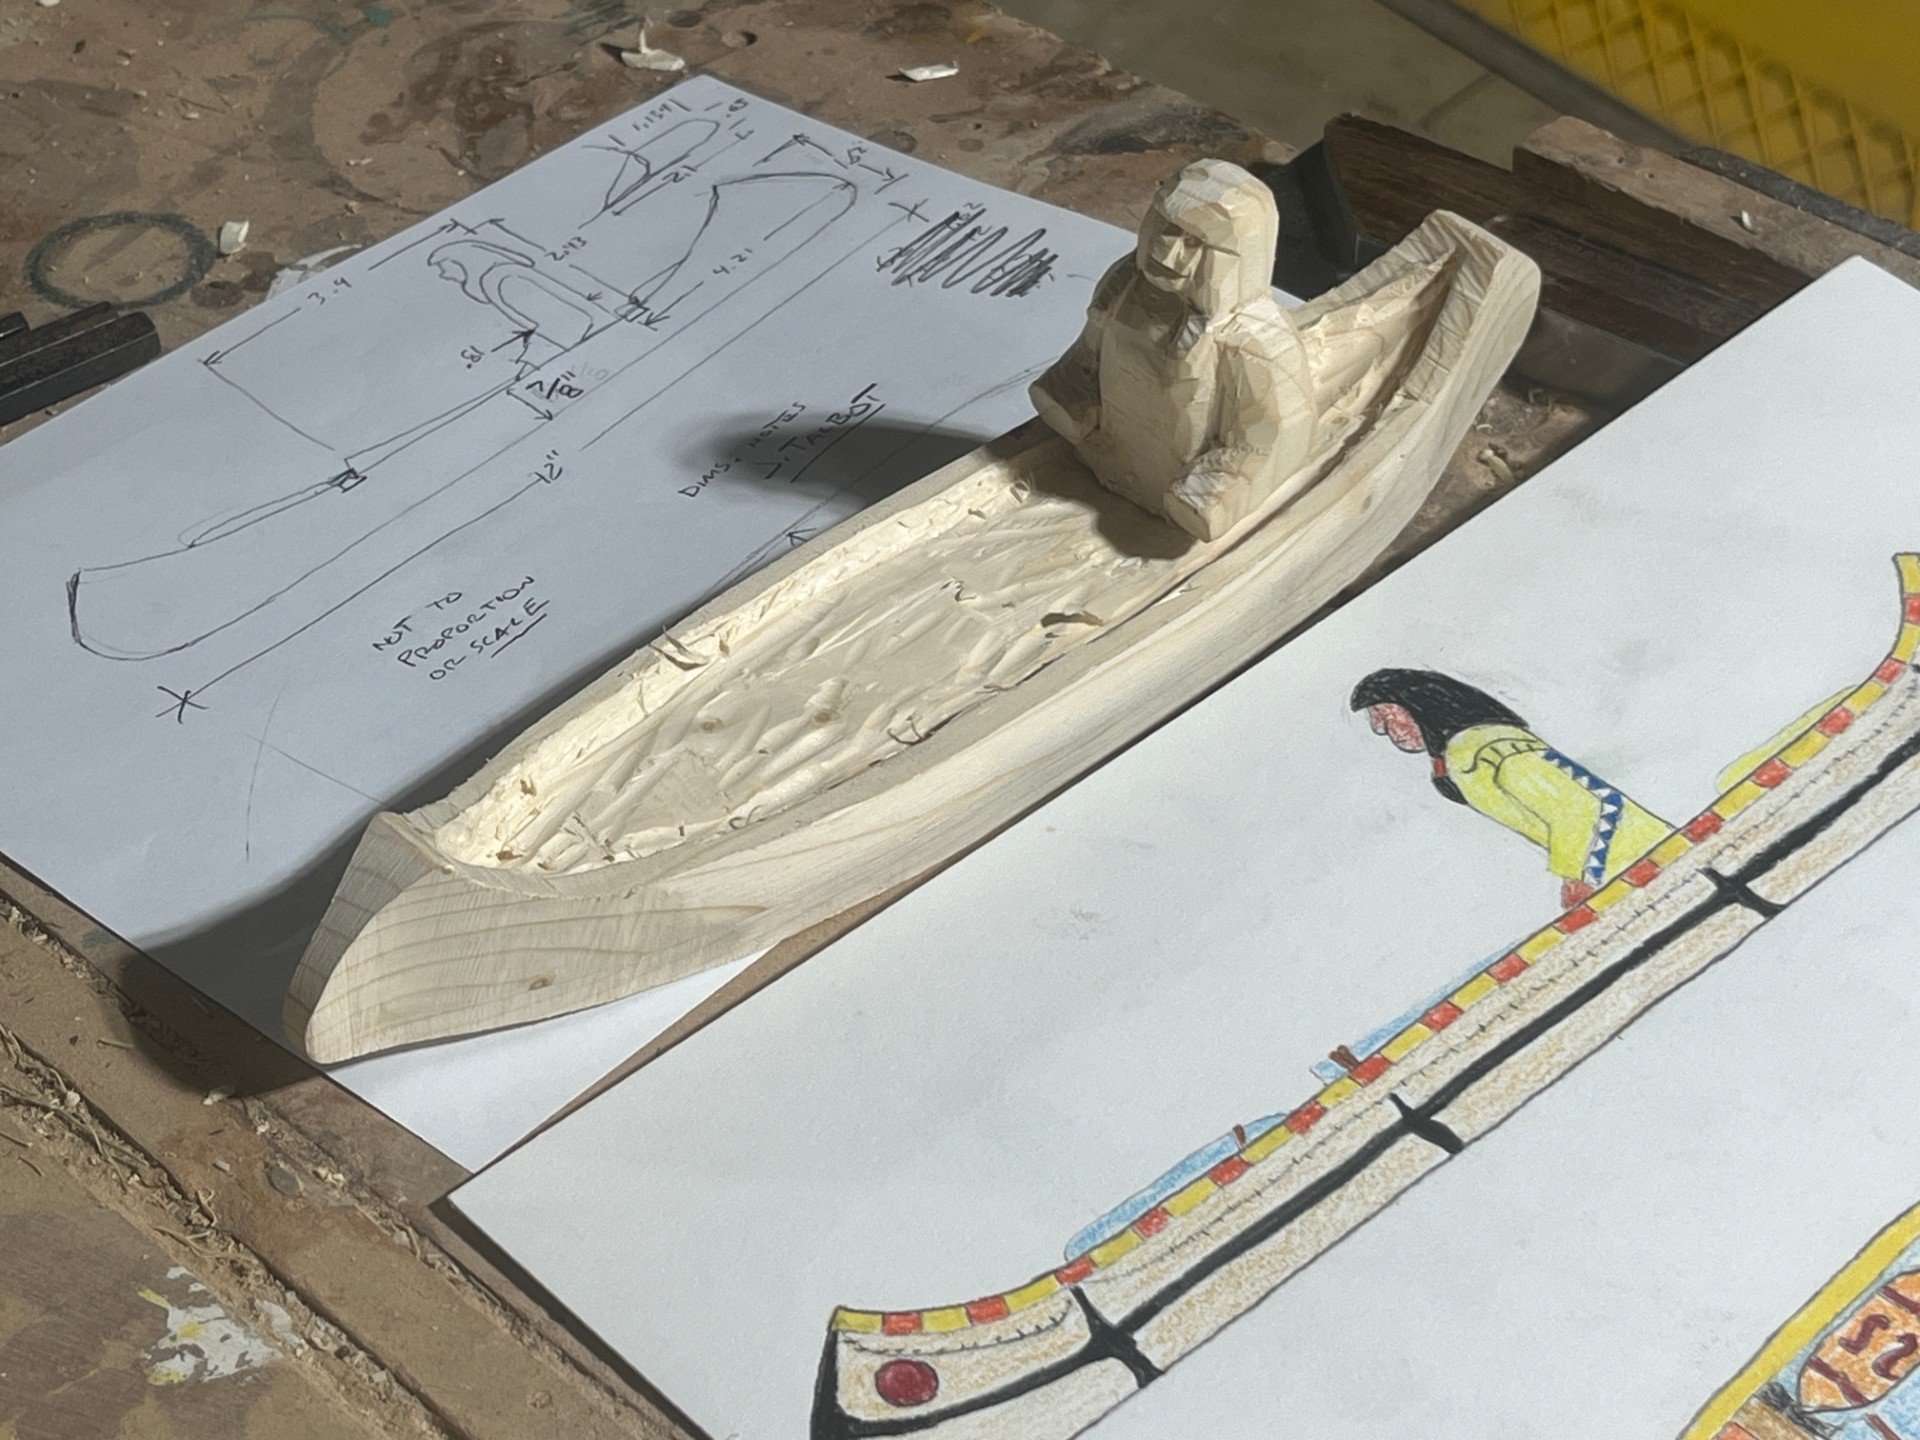
Starting on the paddler himself. Also of pine.
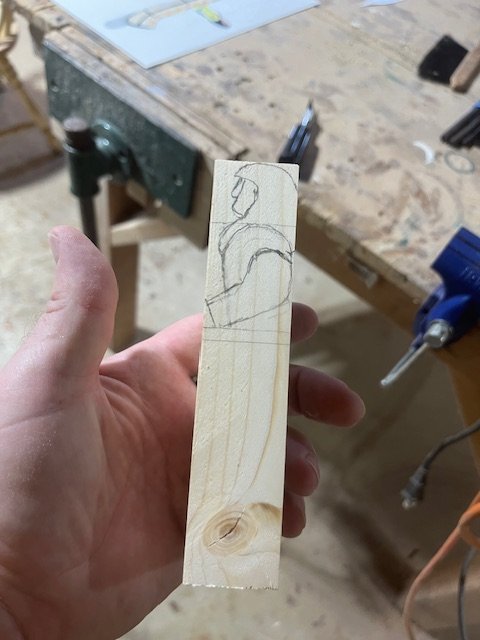
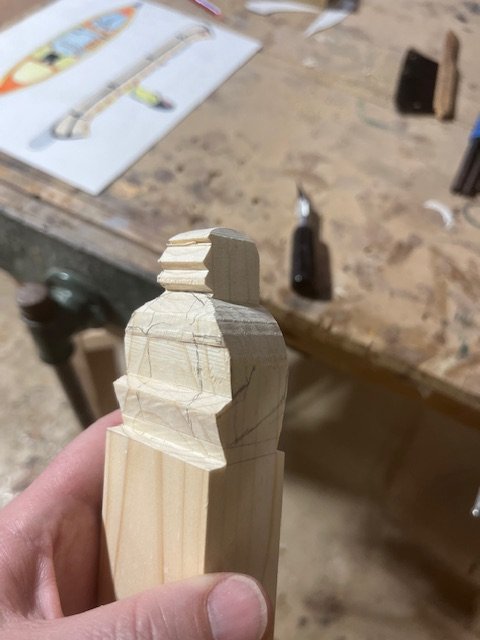
With the blank cut out on the bandsaw, I started rough carving the figure.
- thibaultron, GrandpaPhil, Marcus.K. and 1 other
-
4
-
Hi Everyone,
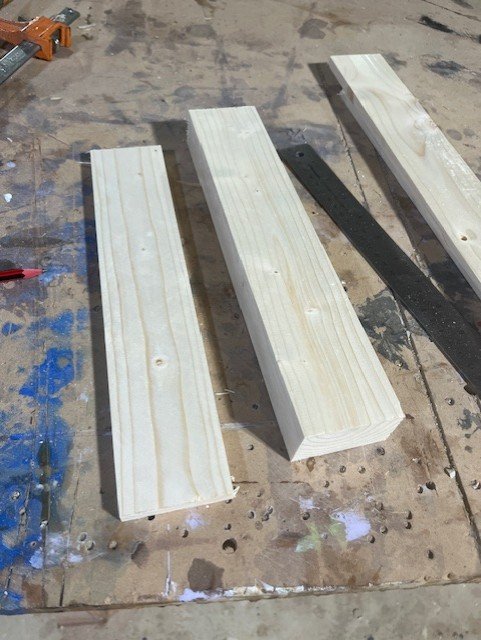
The book states the model was made from a piece of pine, so here is my raw material, scrap 2x4 from the shop:
The 2x4 is not quite thick enough, so I sawed and planed two blocks which I will glue together to make the hull blank.
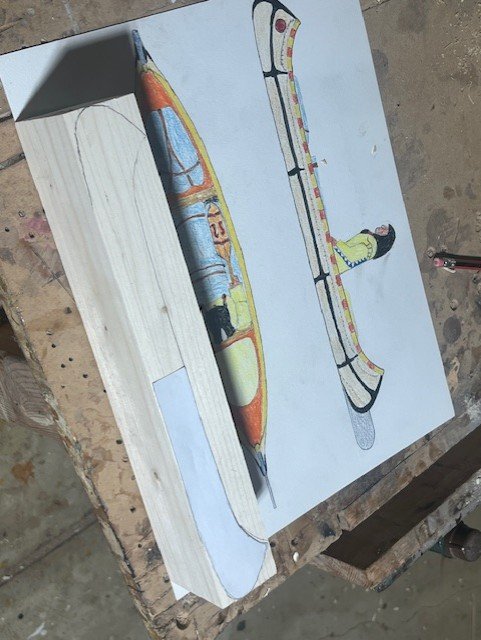
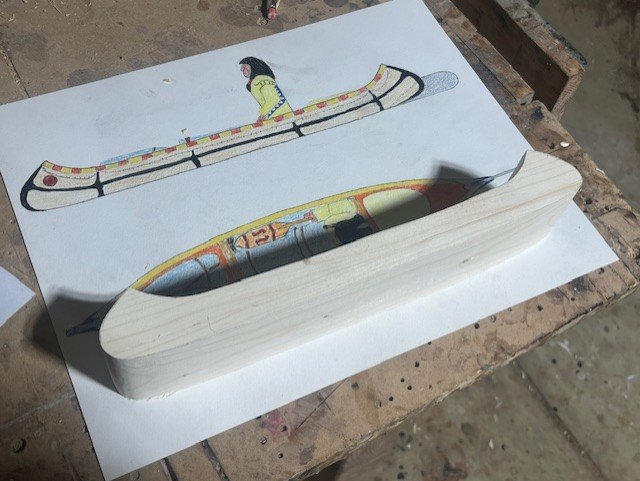
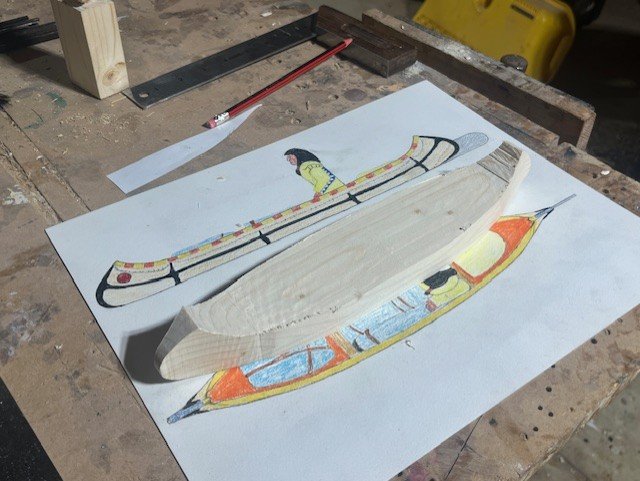
Here is the hull blank glued together , and cut and planed to finished length, width , height. I made some paper templates of the plan view and profile shapes of the hull. Tracing the profile here.
Profile cut using the bandsaw:
Tracing on the plan view shape:
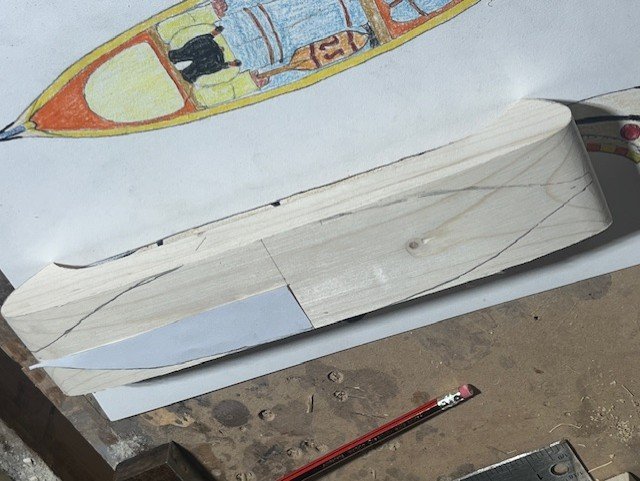
Here is the blank cut out on the bandsaw.....all carving from here on out:
- GrandpaPhil, thibaultron, Marcus.K. and 1 other
-
4
-
Greetings!
And now I return to the dreams of adventure of my youth! "Paddle to the Sea" is a childrens' book, written and illustrated by Holling Clancy Holling, and published in 1941. It tells the tale of the voyage of a small carved wooden canoe and it's paddler as they follow the currents of the Great Lakes, from Nipigon country out to the Atlantic Ocean. A Native American boy carves the canoe and it's stoic captain, paints it, and places it in the snow, high in the hills over Lake Nipigon. When the snow melts, it takes "Paddle to the Sea" with it, and the book tells the story of all the people, machines, technology, animals and natural wonders that the little canoe models seas on it's epic journey through the Great Lakes to the Atlantic. I loved the book as a boy, and I still have the book. I live in Wisconsin, not far from Lake Michigan, and the book has always been special to me. As a boy I thought how cool it would be to make this canoe and paddler model......now I have decided to do it! Below is documented my best attempt at building as close to accurate a model as possible of the actual "Paddle to the Sea" canoe model from the book.
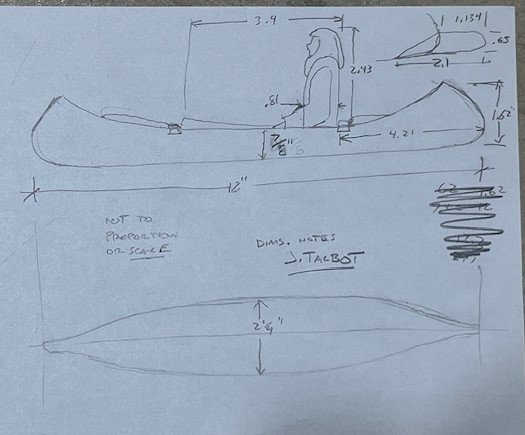
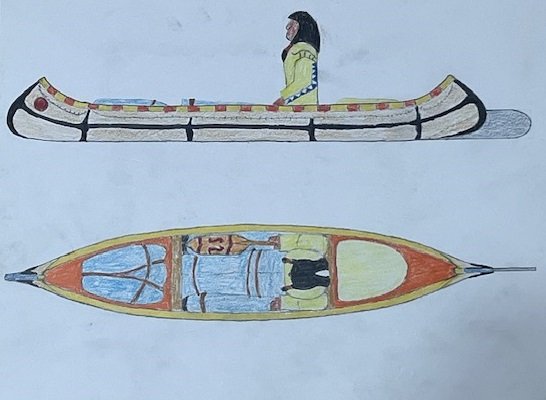
Making the drawings: There are illustrations throughout the book of Paddle to the Sea, and there are also good clues as to materials, dimensions, and finish. The book tells of the young Native American boy in Nipigon Country (North shore of Lake Superior, around Lake Nipigon), who take "many days" whittling a "piece of pine" into a "canoe one foot long". It also advises of a rudder made of tin and lead ballast. The book also advises "oil paints" were used to paint it, along the with words carved into the bottom of the hull , "Please put me back in water, I am Paddle to the Sea". Starting with the known length of 12", I scaled other dimensions from the many pictures in the book and calculated the various dimensions. Then I took those dimensions and created a life-size, to-scale, color drawing of the model, which I will use to take dimensions from as I build the model.
- thibaultron, Knocklouder, Marcus.K. and 2 others
-
4
-
 1
1
-
-
Thanks very much for the kind words all! It was a fun project!
-
-
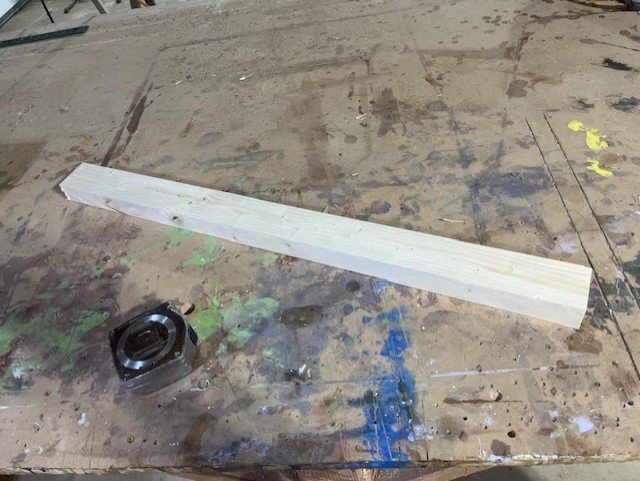
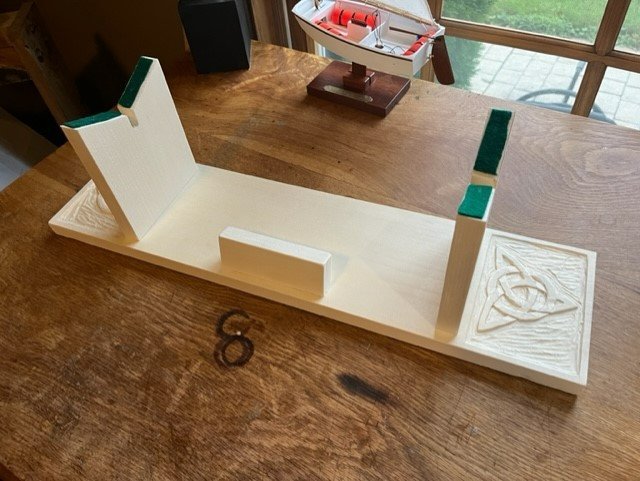
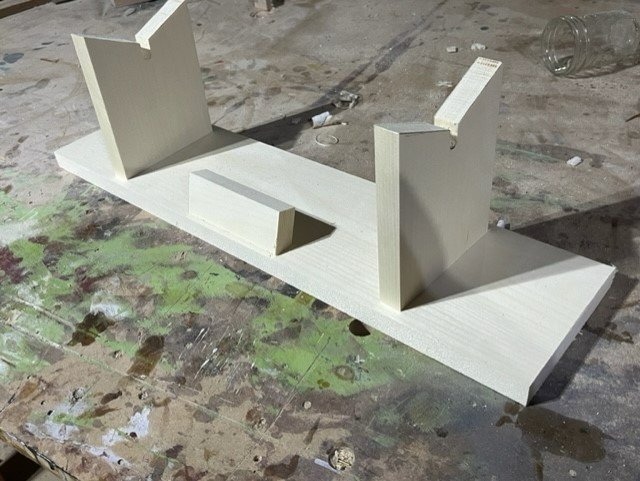
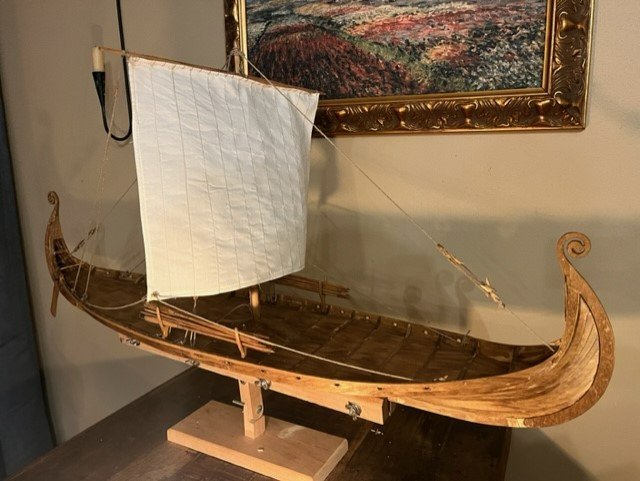
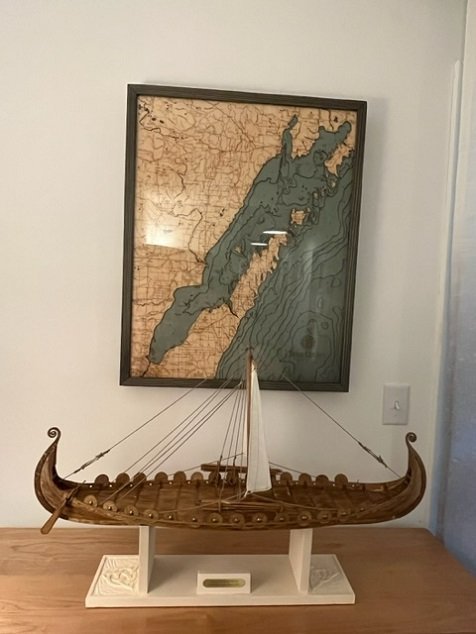
Greetings!
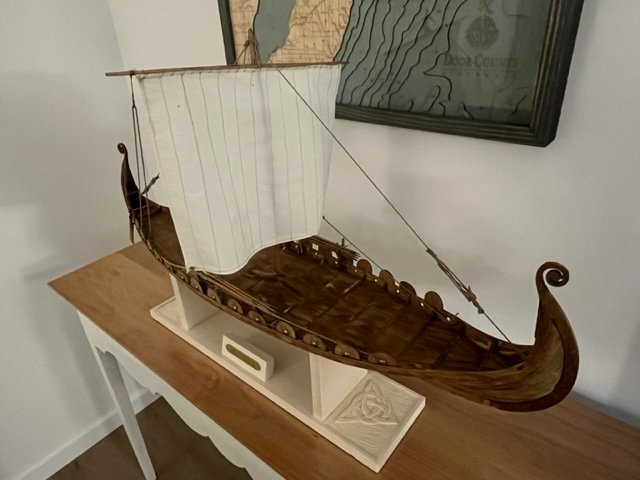
Here's the finished stand:
- berhard, Knocklouder, Glen McGuire and 4 others
-
7
-
Hi Everyone!
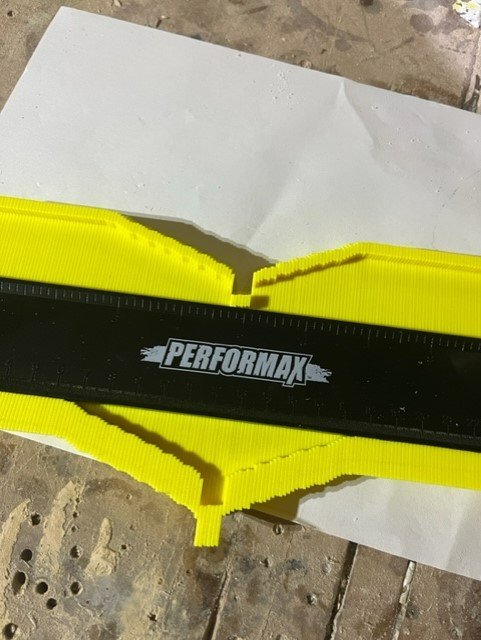
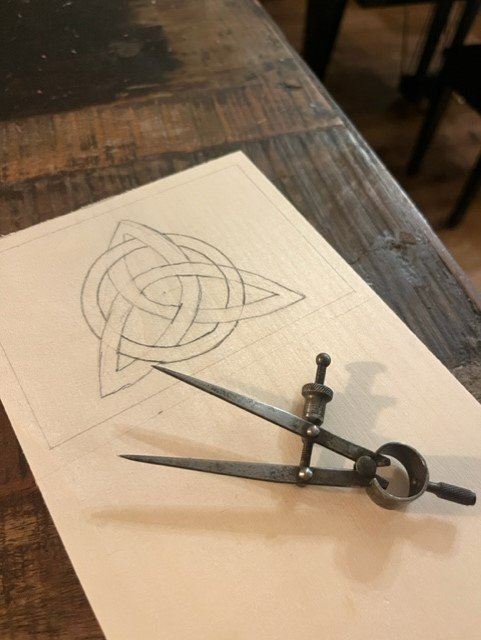
Working on the stand for the model tonight. I will make it out of Aspen, which is a bright white clear grained nordic softwood. I will be adding some celtic carving to the stand base for fun. I used a profiling gauge to draw out the angle of the bracket stands.

-
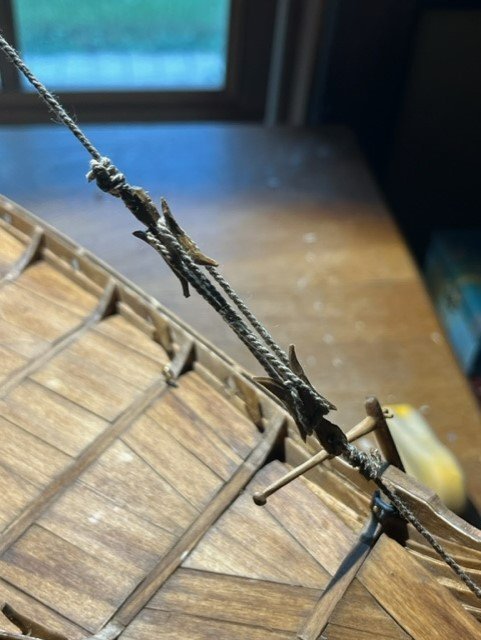
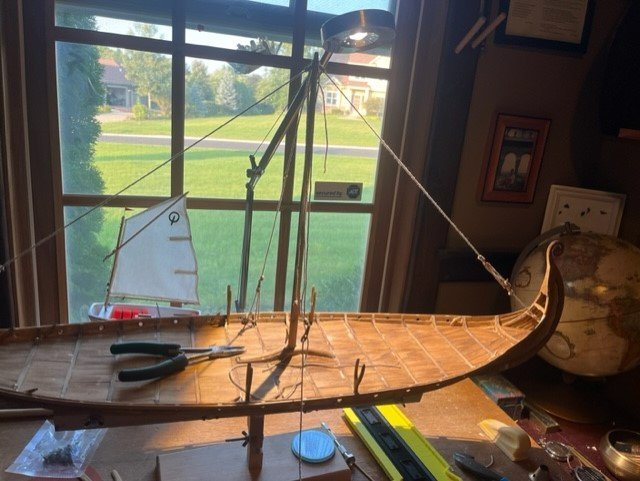
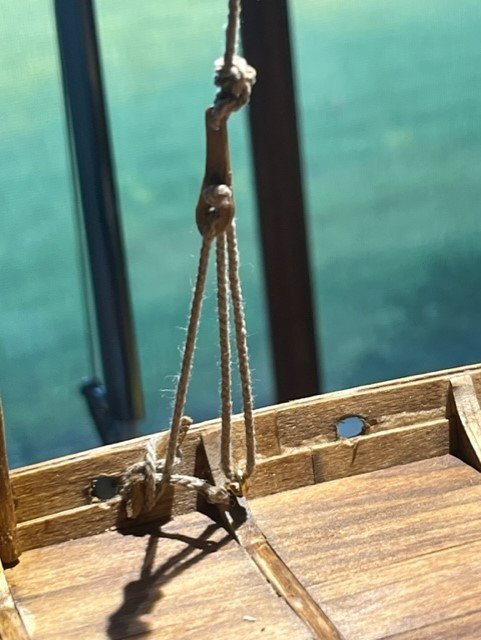
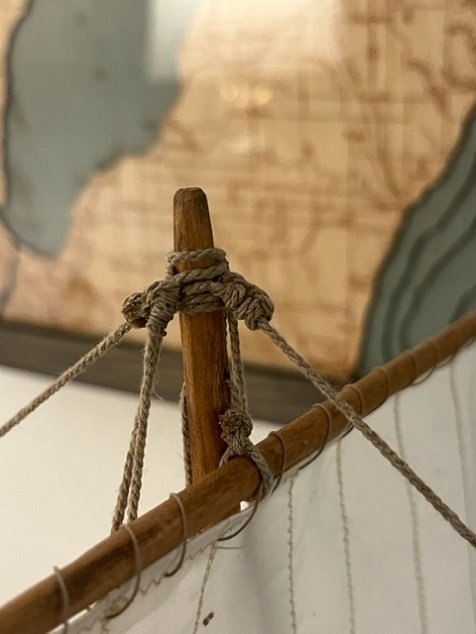
Hi All!
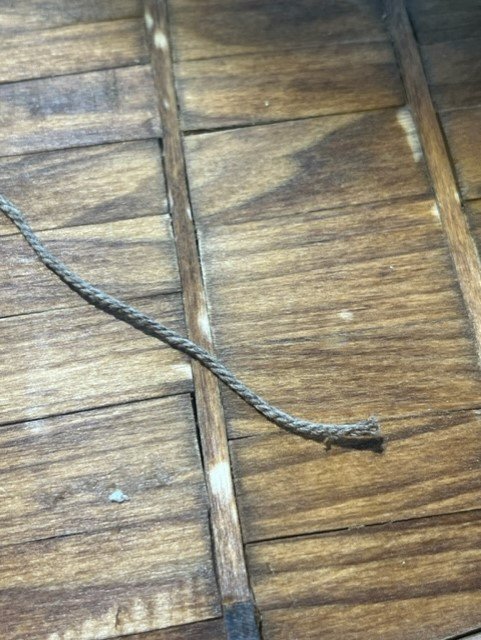
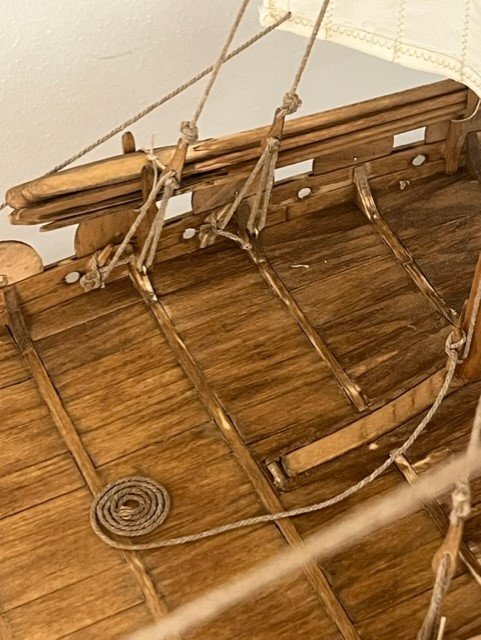
The rigging on this ship is quite limited and simple, making for a one-afternoon project to complete it. I used some smaller scale rope I had in stock for some lines, but mostly used the cotton rope supplied in the kit. I started rigging the ship using the very white rope in the kit but it was too bright white in my opinion so I took the whole spool of rope and dunked it in the can of stain and the pulled the rope out of the bucket through a rag to press the stain out and this resulted in a nice color rope for the ship. The holes in the standing rigging fittings needed to be enlarged in diameter, which I accomplished with a small round file.
Here is the rope after staining it:

-
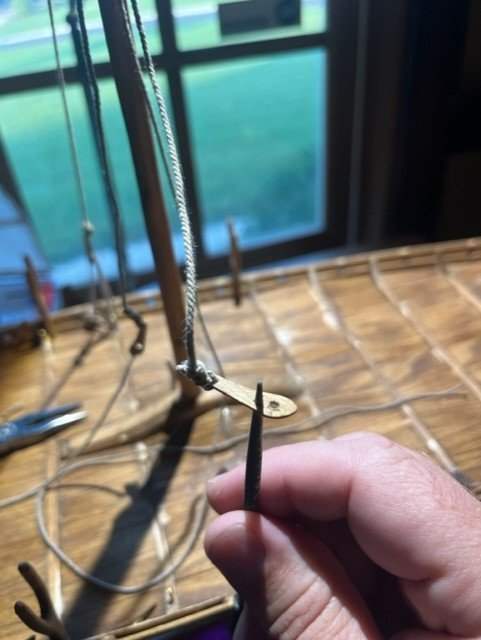
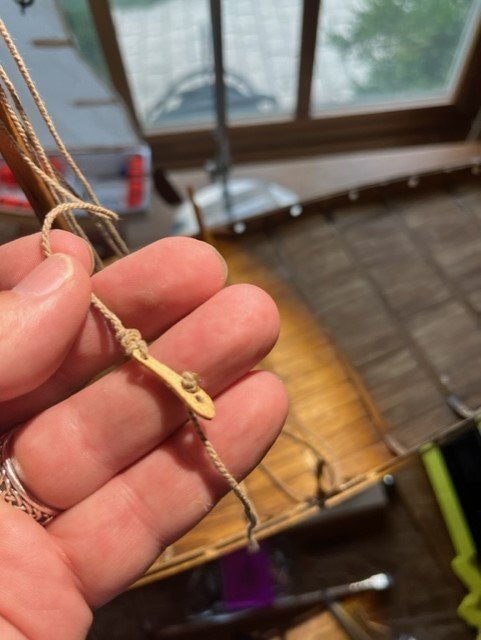
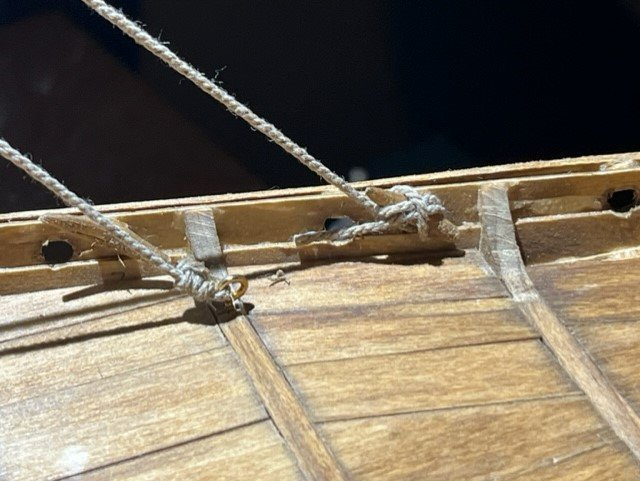
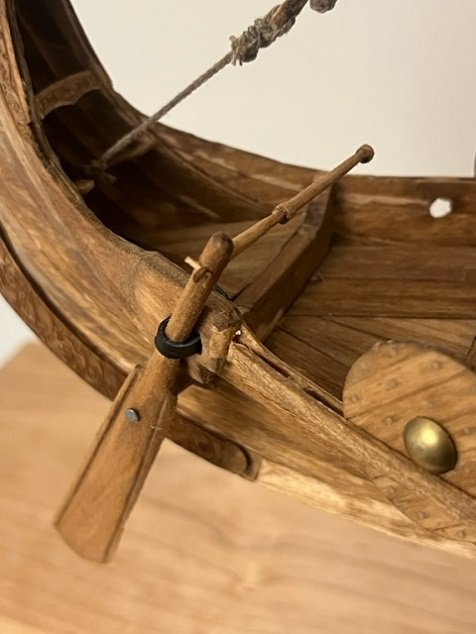
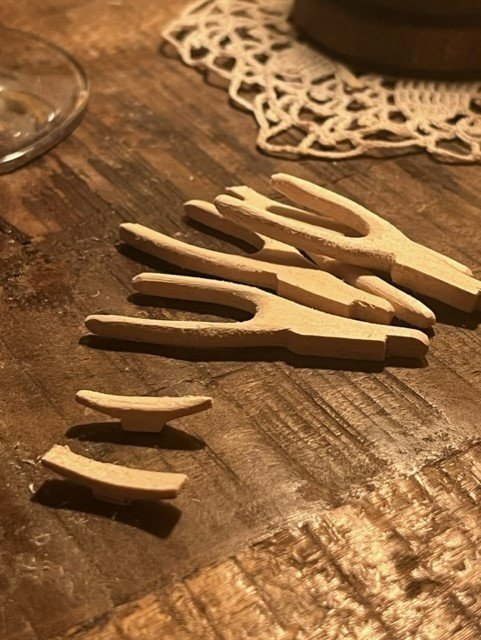
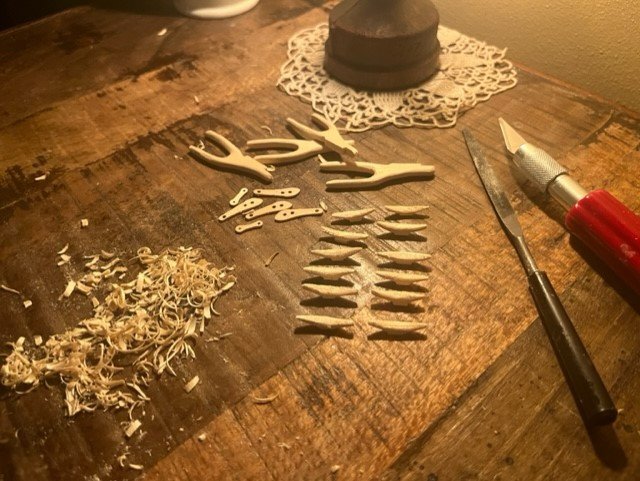
Ég er næstum búinn að klára þennan bátI carved the rigging cleats for the standing rigging out of basswood. Also , I am at the point where I stained the boat! Fun step. I am going with Minwax Golden Oak stain. After staining the parts I installed the rudder, I got a longer wire nail than what was included in the kit for this purpose. All worked out nicely.

- Archi, Glen McGuire, Ekis and 2 others
-
5
-
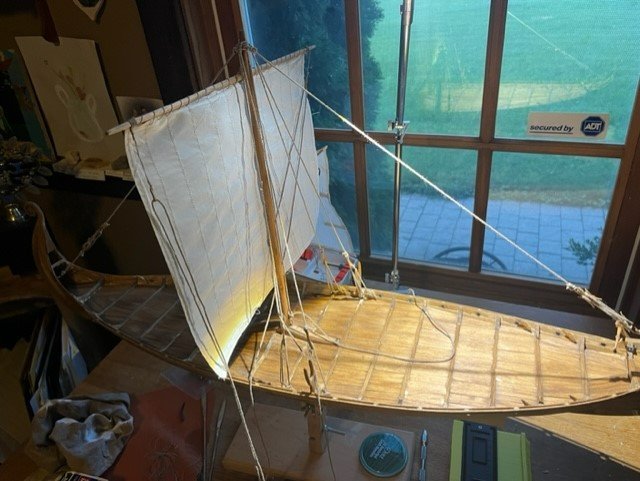
Hi Everyone,
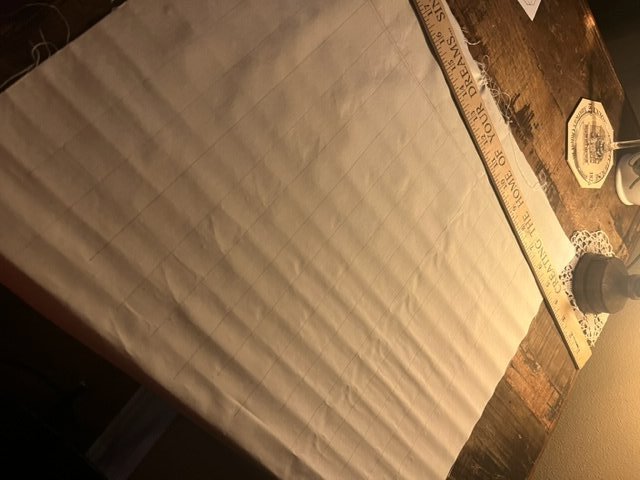
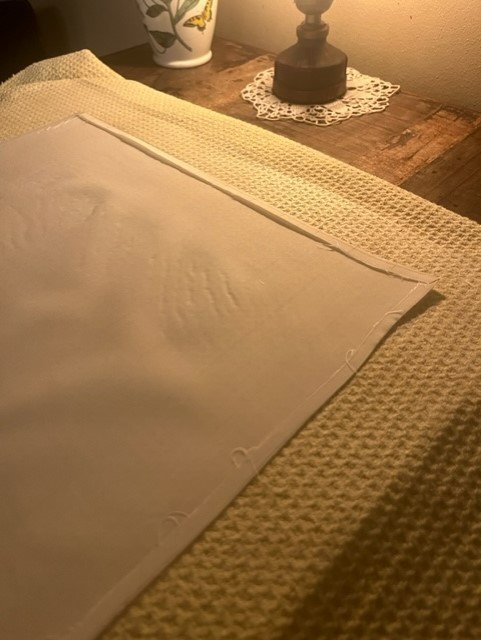
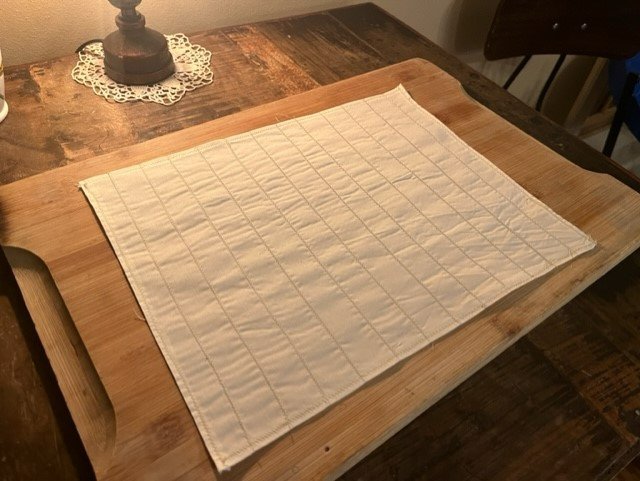
Made the sail tonight.
- sketched out the size and the vertical seams in pencil on the fabric from the kit
- cut out the out line with a sharp scissors
- ironed the fabric, including ironing the folded over hems around the edges, to make the sewing of those edges so much easier
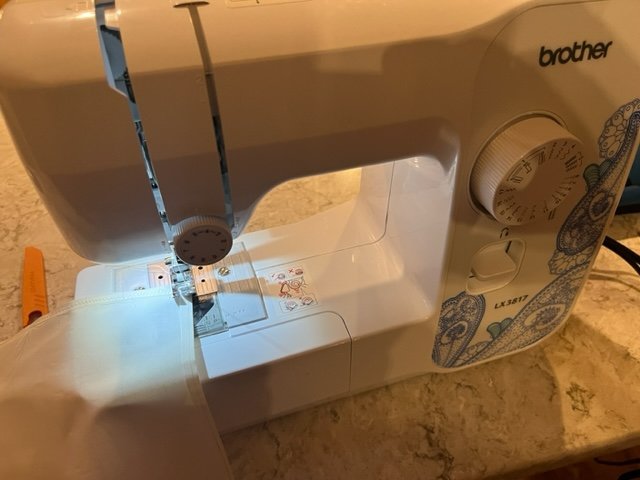
- stitched the perimeter hems and the vertical lines on the sewing machine in a zi-zag pattern
- Ironed the whole thing again
In overall finish, I will going for a lighter stained/caramel colored woodwork and an all-white sail.

- Scottish Guy, Cathead, Glen McGuire and 4 others
-
5
-
2
-
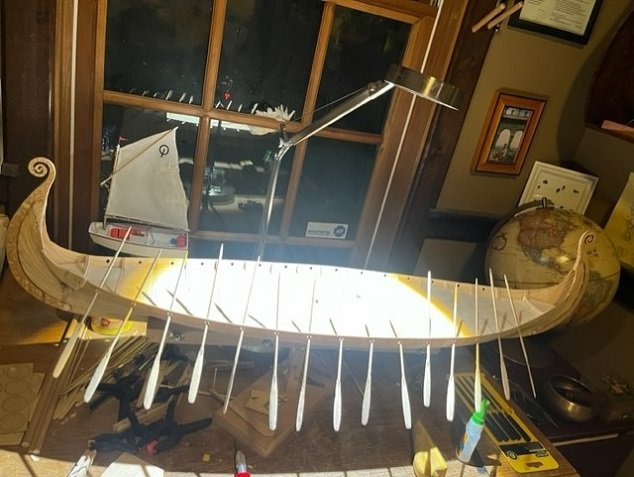
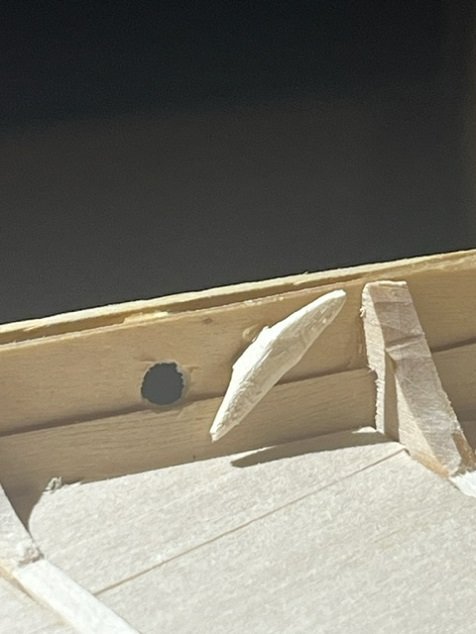
Final wooden pieces to be attached to the ship....some trim pieces at the stem and stern. Note which edges of these pieces stand proud of adjacent woodwork and which are flush.
- Glen McGuire, Archi, Cathead and 1 other
-
4
-
-
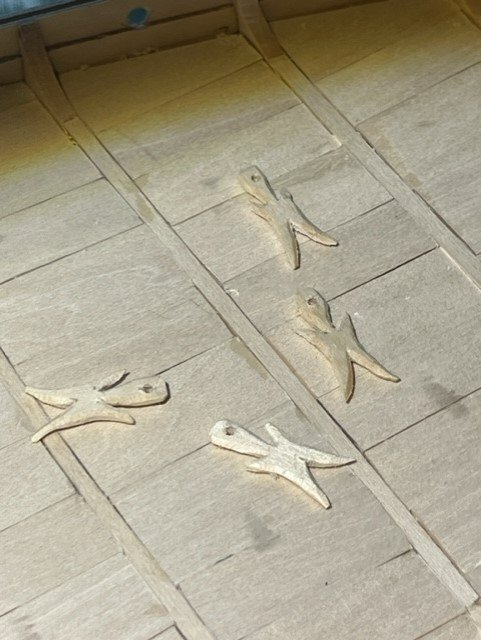
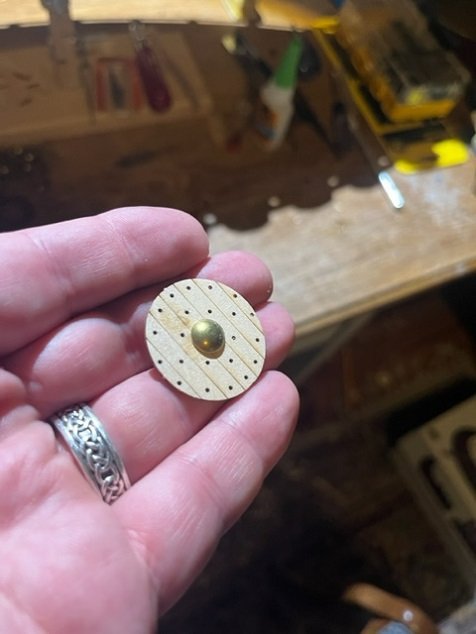
Aloha e ka poe hana waapa,
Tonight some work in the armory....shield building. First a note on an interference problem. I used what I thought was the right wood stock from the kit to make the little blocks above that create the spacing for the shield rail. Then I tapered down the ends of the shield rail and glued it in place. I then went to go install my happy little shields only to find that the shields were too thick to fit into the space. Uf-da. I wasn't about to rip off the rail so I sanded the shields down slightly and they now fit. Downside was that in the process of sanding, the little nail holes etched/laser-scribed into the shield faces became actual holes. I will fill these with a nice darker color wood filler and will wind up OK. Just be careful to check the thickness of the blocking material vs the shield thickness. 3/8" diameter furniture upholstery tack used for center of shield; I picked a bronze type color, but I think the vikings used iron for these parts; I wanted the bronze color to look better with the stain I will apply so permit me this inaccuracy of metals......the bronze age ended at least 1000years BC and this ship is from 800AD. But then again the Vikings painted their shields so I am going with that the Vikings on this ship painted the shield centers this color. Now I have some cleanup and sanding to do on the shield rail and the shields.


- berhard, Scottish Guy, Cathead and 1 other
-
4
-
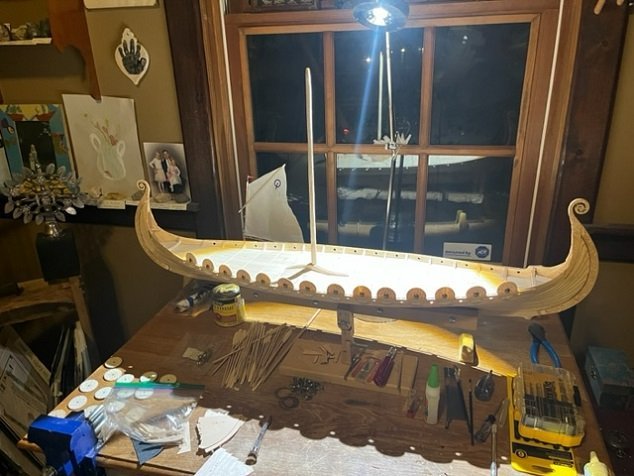
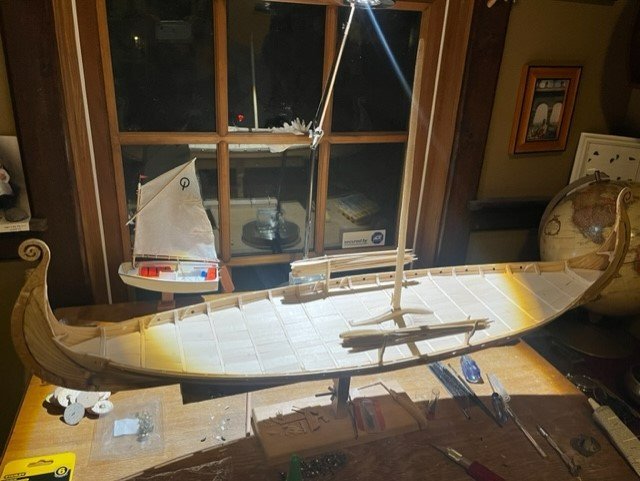
G'day Mates!
I can smell blood in the water on this project, the end is near and I am working now every day after months of working once a month.
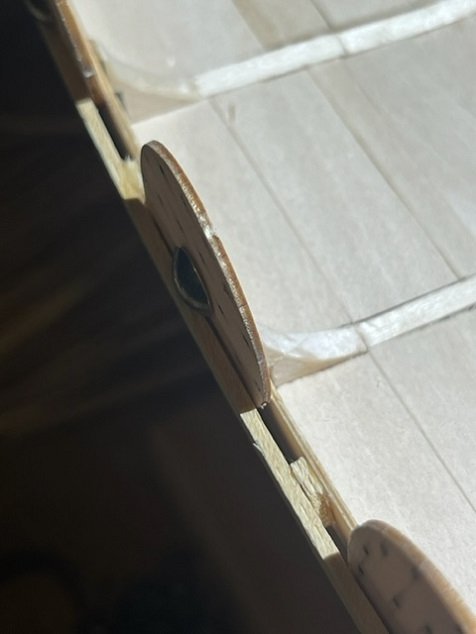
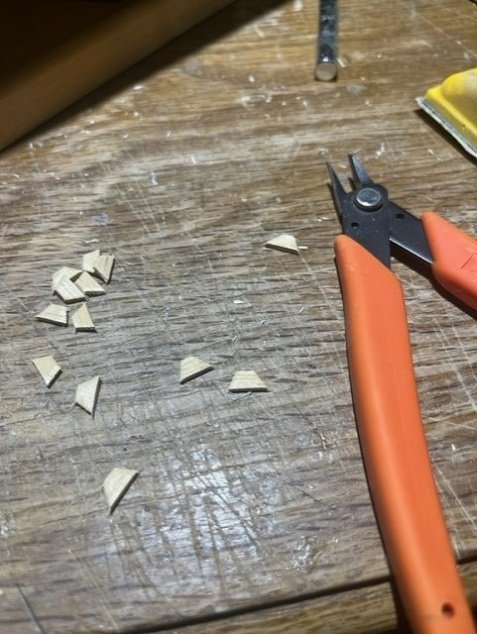
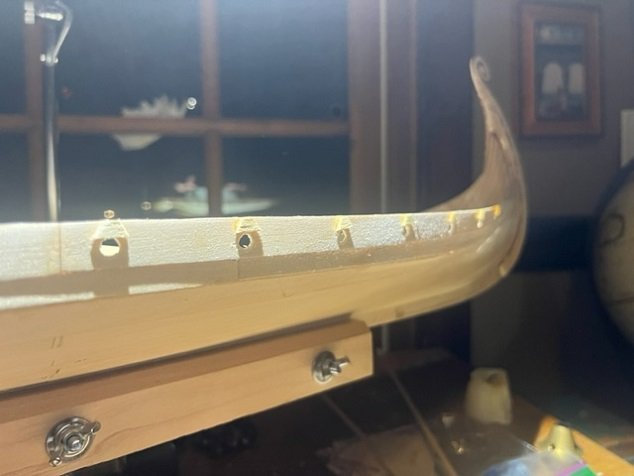
Latest progress includes drilling holes for oars (pilot hole followed by final hole diameter using a drill) and installing the blocks for the shield rail. I made those using a hand-snipper.

-
Hello Model Ship Builders!
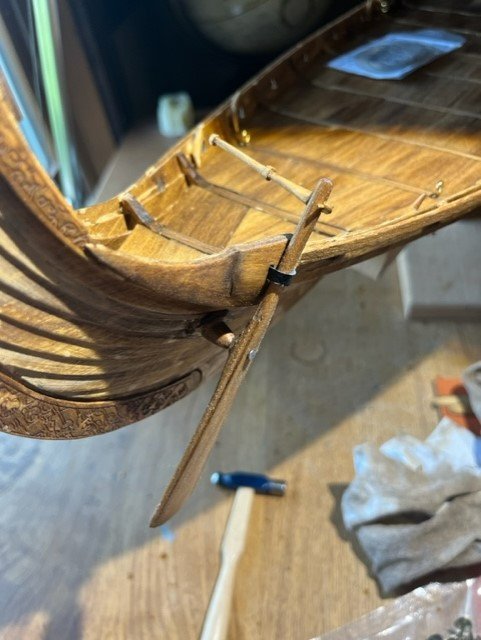
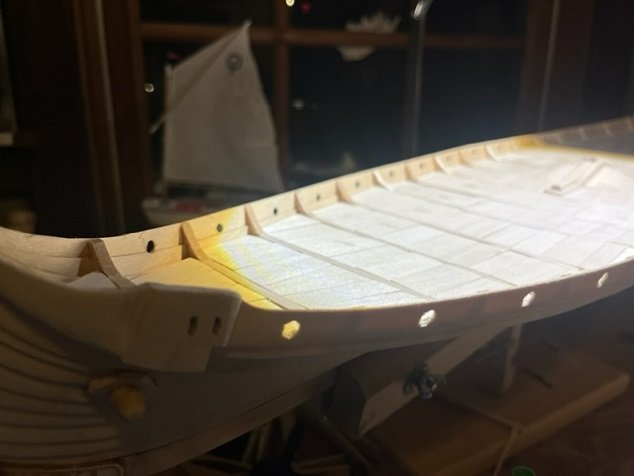
Couple projects tonight. 1. Finish attached bow and stern fancy carved trim pieces. 2. cut off the un-needed raised section of planking on the port side in the steering gear area.
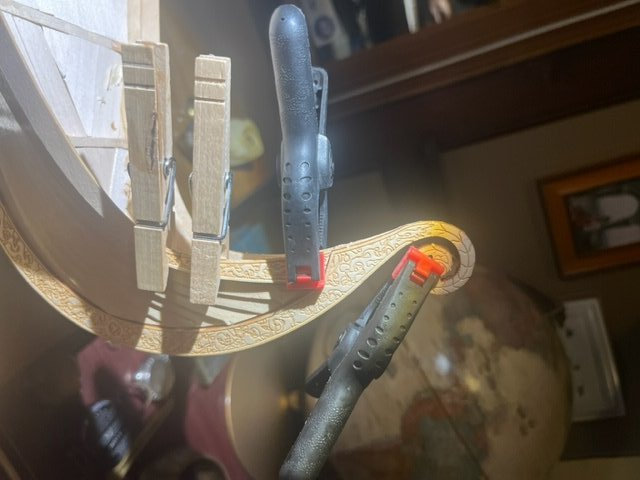
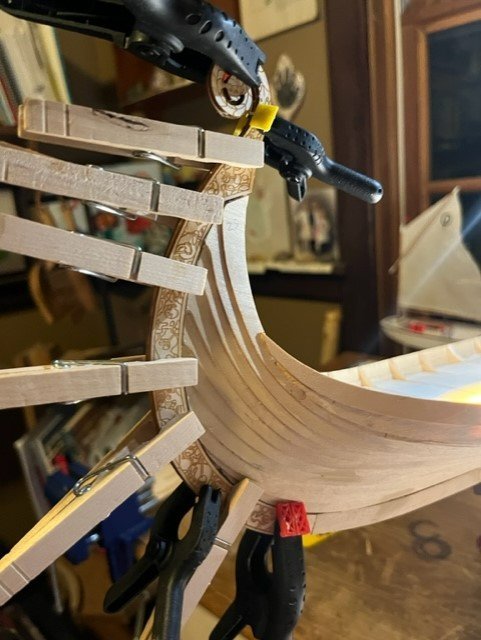
In order to have flush installation of these nicely burned trim pieces at the bow and stern, I found that the trim piece and the underlying plank should both be carved and tapered down.
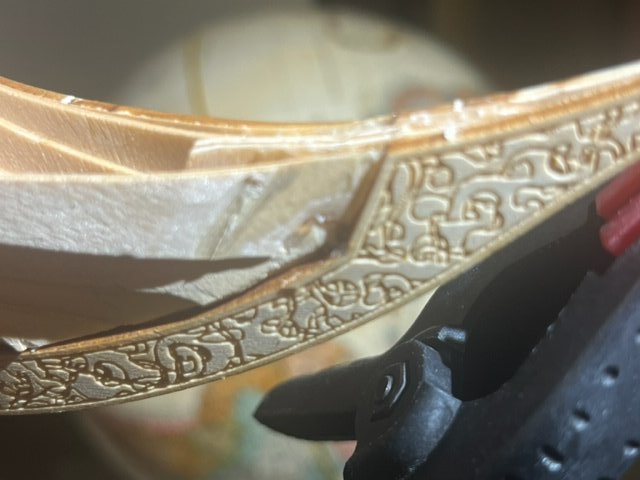
And here is that piece being glued on:'
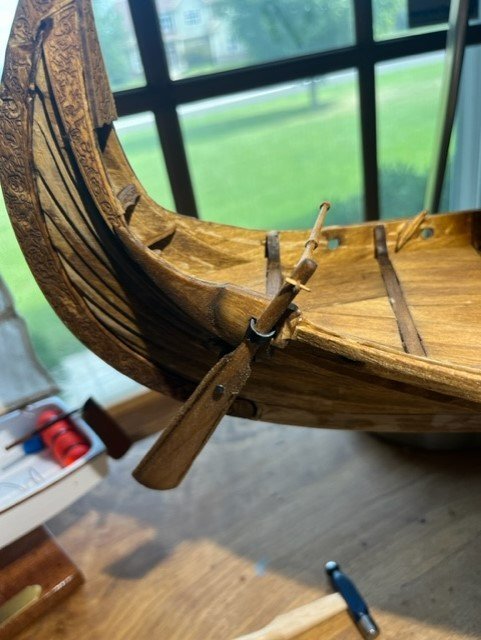
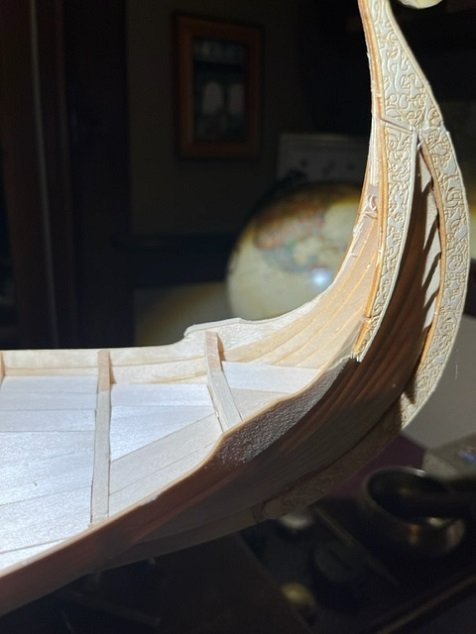
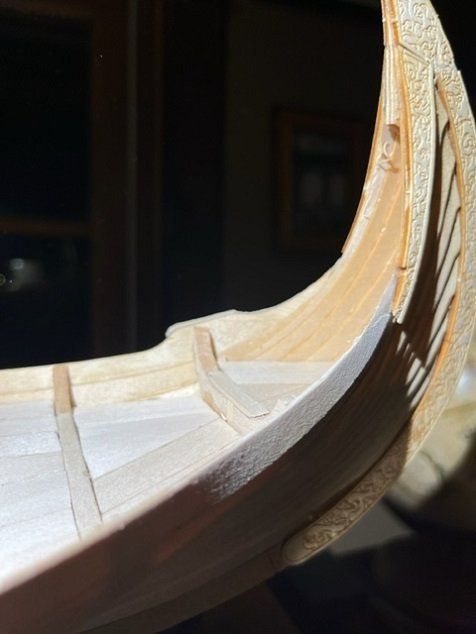
Next, the uppermost planks from the kit, on the starboard and port sides, both have a raised section near the stern that is designed to accommodate the steering gear for the rudder. These extra parts are only needed on the starboard side. I cut away this raised section from the port side, as seen in the photos below.
-
Thanks for the encouragement , Steven. I see you’re in Ballarat, I seem to remember visiting a quarry there once on one of my trips to Aus. Also bought an MSM steam engine kit which I believe used to be made in Melbourne. Nice part of the world you are in!
jason
-
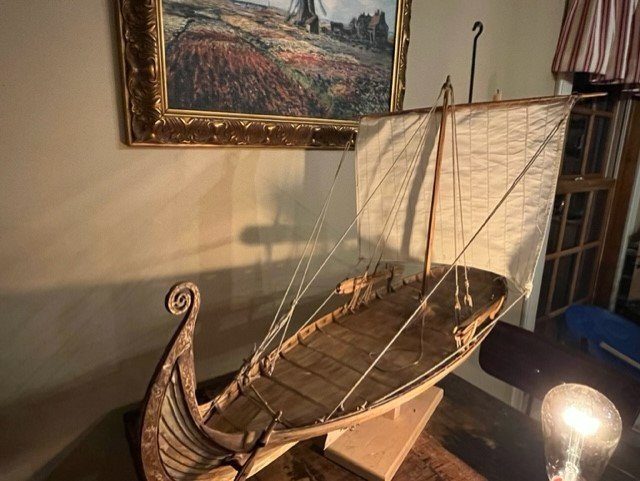
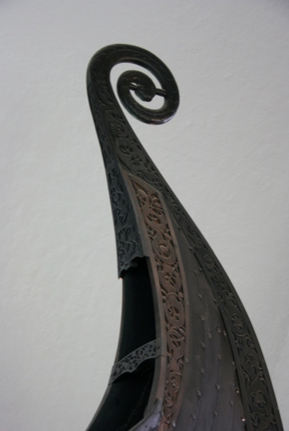
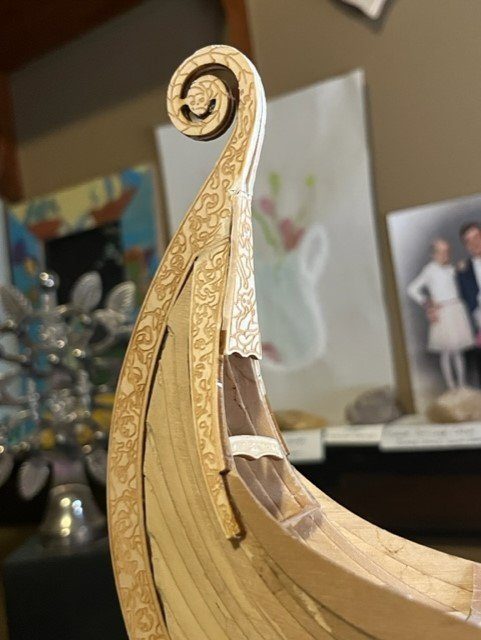
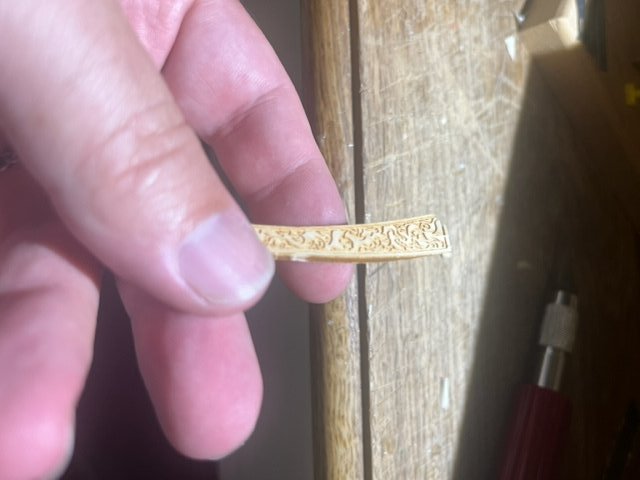
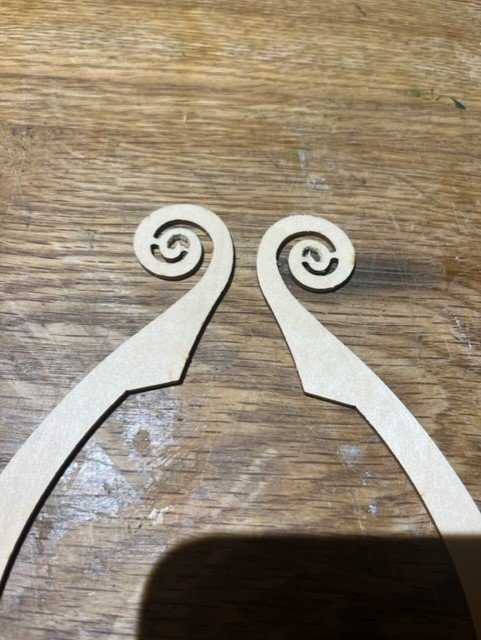
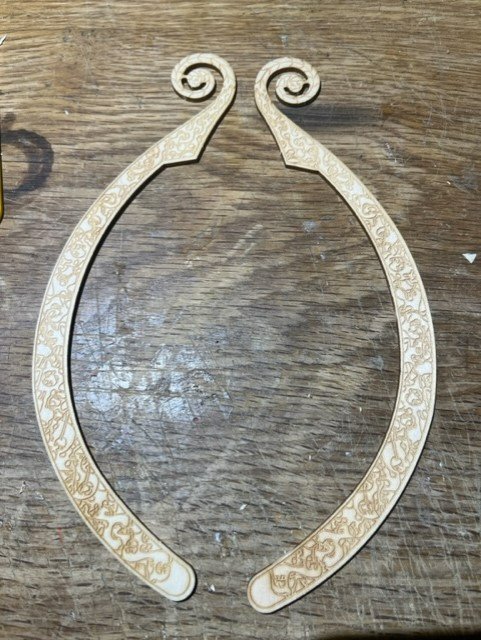
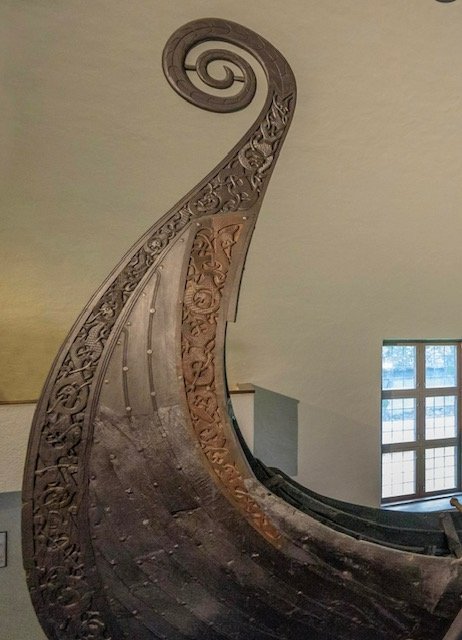
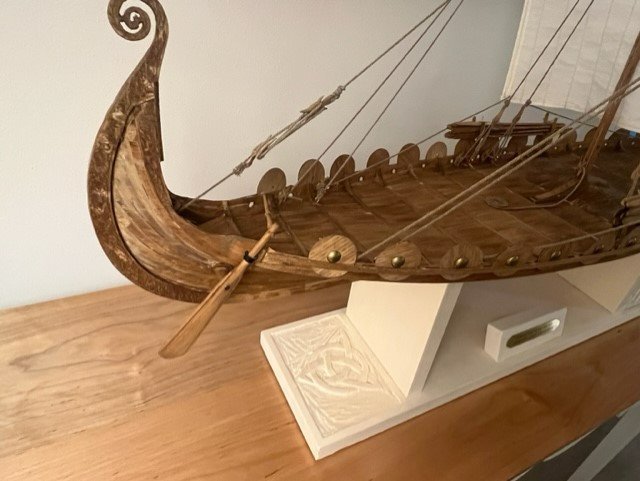
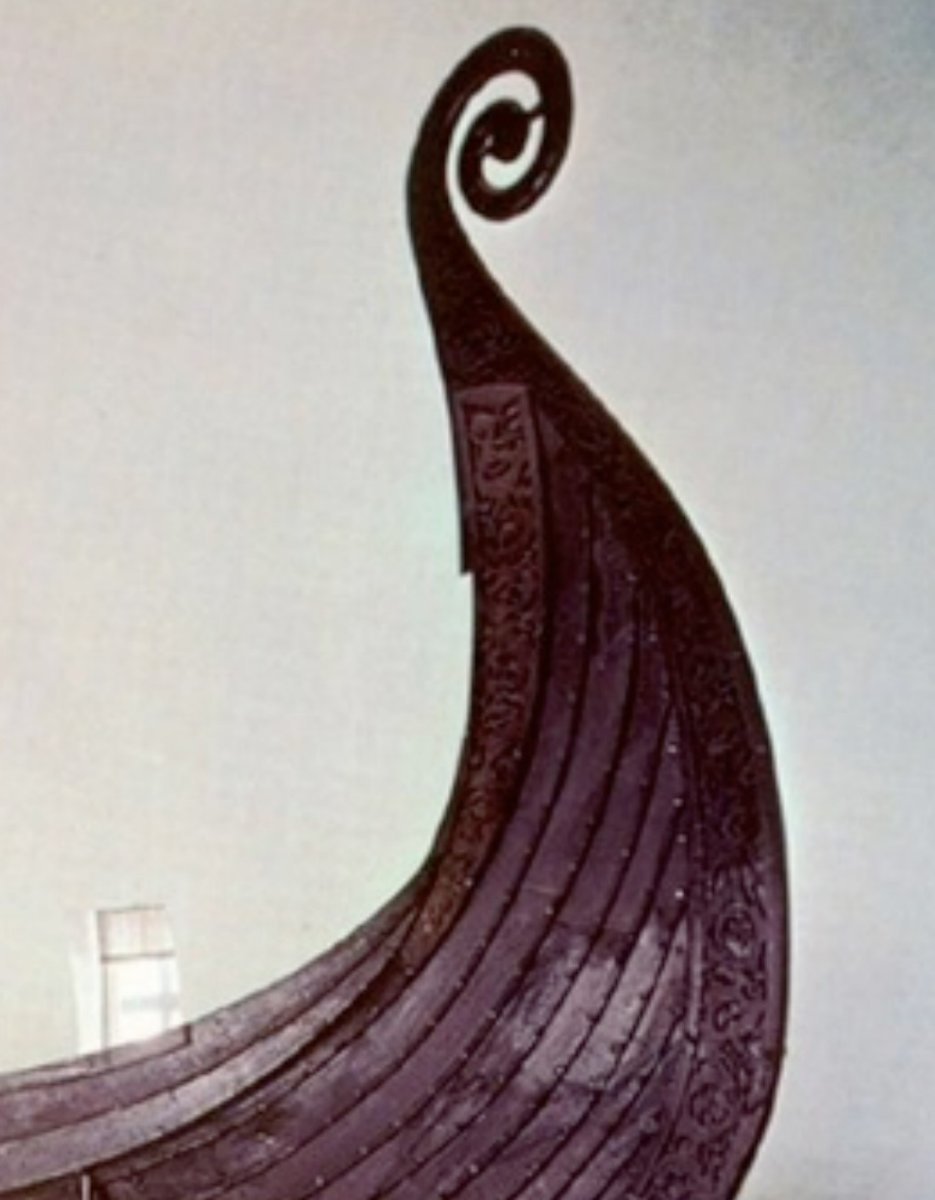
The nice laser burned stem and stern are a nice feature of the kit, thanks Billing Boats! The bow and stern planks are the same in the kit, but for the two stern pieces, the dragon head in the part must be turned into a tail via your carving work! Below I show some photos of the actual ship. The dragon head is of-course at the prow and the tail at the stern. Here are my parts and installation:

-
Hello Model Ship Building Fellows,
Here are photos of my model as I used a razor knife to remove width from the bow and stern frame/keel, as others have done, to prevent the stem and stern edges from being TOO WIDE as they would be if following the kit. This was a bit of work, but not too much,


Paddle to the Sea by Jason Builder - Solid Wood - 1941
in - Build logs for subjects built 1901 - Present Day
Posted · Edited by Jason Builder
Notes on deviation from original design:
I set out to build an accurate reconstruction of the model from the book, I think I will succeed and fail in various ways.
1. Dimensions and accuracy of shape, form and color: I believe I will be very accurate in these areas. I watched the movie clip above of the ship provided by Navyshooter, and I see three thwarts in the model used in the movie, and I fully respect that model, but I do not see three thwarts anywhere in the book, so I will stick with two. Each interpreter of a model must make their own decisions, and whoever made that model for the movie did an outstanding job in my view.
2. Materials:
a. All wooden parts in the book : pine. All wooden parts in my model: Pine.
b. Lead ballast in the book: Tin/Bismuth in my model....a deviation for safety purposes
c. "tin" rudder in the book, I will use a piece of aluminum, a deviation for long term corrosion purposes.
d. "Enamel" paints in the book, I will use same.
3. Tools: from Chapter 1 in the book , I see a hatchet and two different knives for carving the model. I used a table saw and planer to form the pine blank, and I used a bandsaw to cut out blanks for the various pieces as shown in my photos.....maybe I should have used a hand jigsaw which would have been doable. I did only use knives and chisels for carving, no dremels.
4. Construction: It is not clear from the book how the model was exactly constructed, but the impression I get from the early pages is that the boy carved it out of a single piece of pine. I made my hull from a piece of pine and am making the thwarts, packs, and man, from separate pieces which I am gluing to the model. This may be inaccurate, but! I submit the illustration from the 2nd page of chapter 26 to support my decision to make the man from a separate piece of wood with the grain vertical along the upright plane of the man. For copyright purposes I will not post the illustrations here. The illustration supports that the boy built the model with the man made from a separate piece of wood with vertical grain perpendicular to the grain of the hull. I will use wooden pegs to attach the perpendicular-grained pieces of the man and the canoe.