Mtoriordan
-
Posts
21 -
Joined
-
Last visited
Content Type
Profiles
Forums
Gallery
Events
Everything posted by Mtoriordan
-
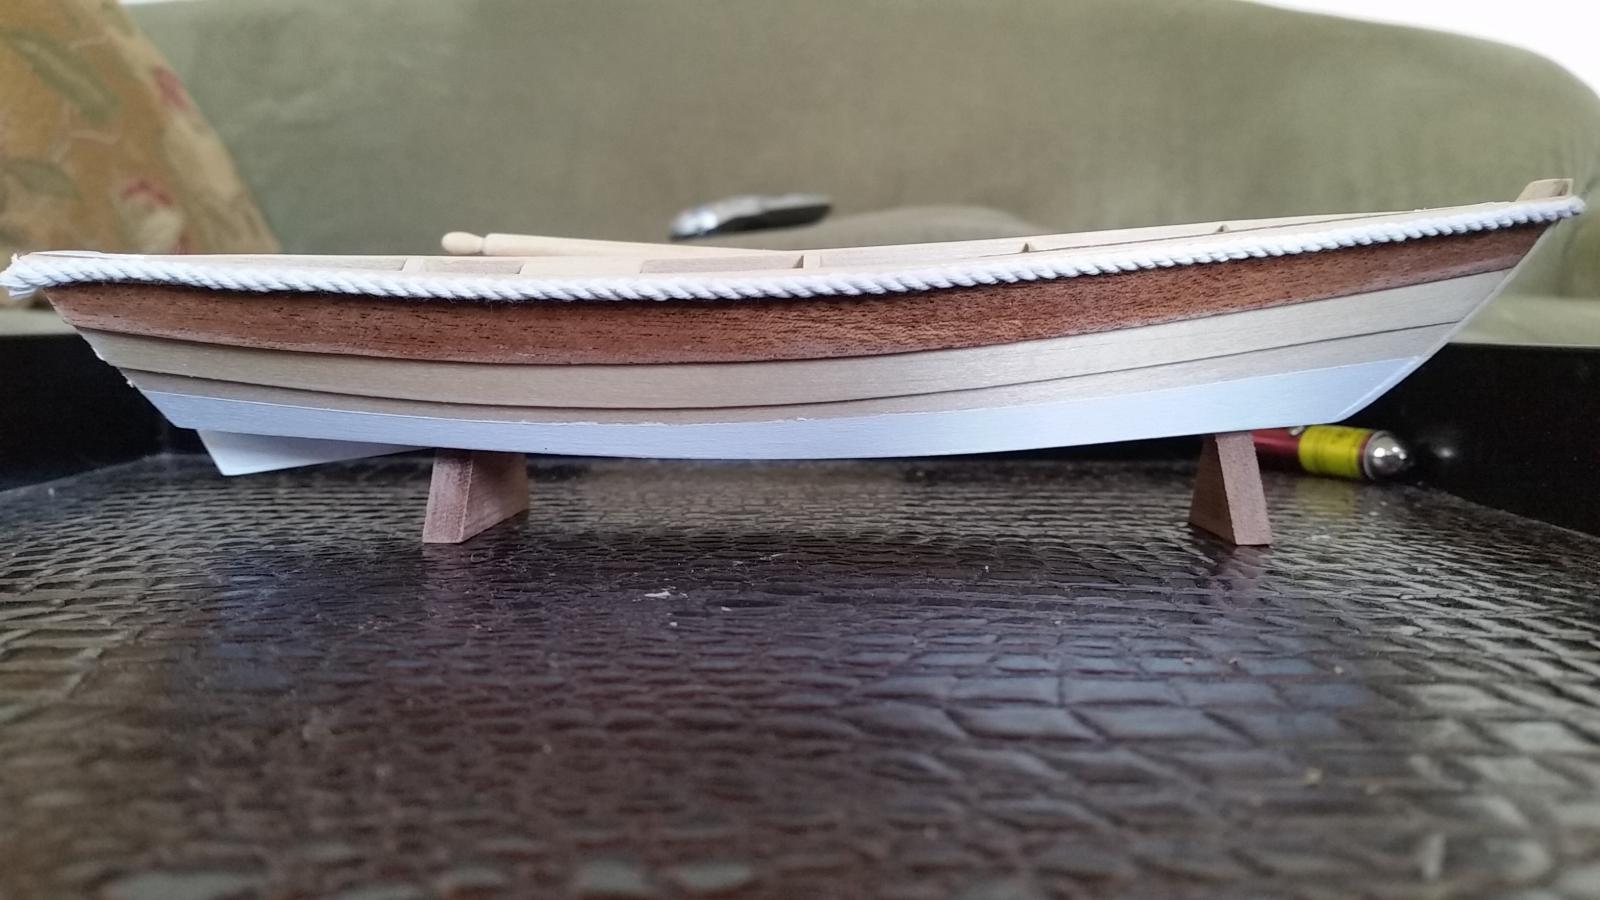
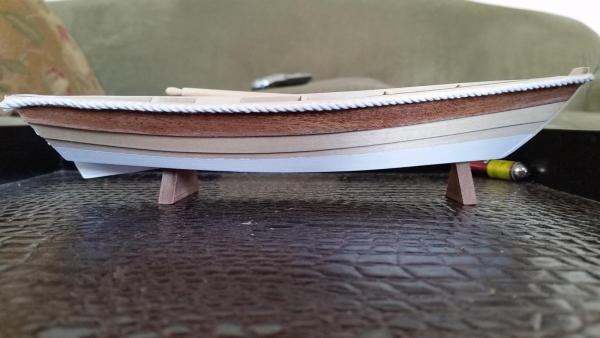
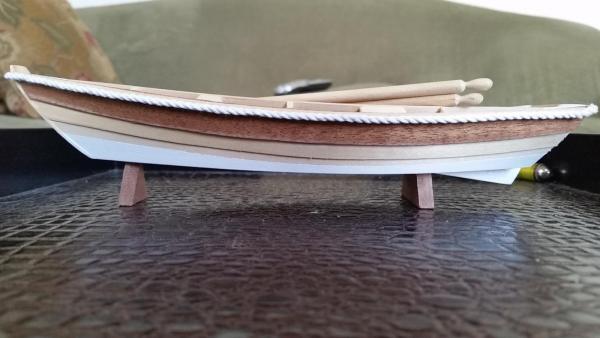
 Thank you for the advice Russ. I experimented with a clear coat, as well as getting some painting practice in. Stains, varnish and paints, oh my. An aspect of this hobby I had not thought about much and boy do I have a lot to learn! I totally enjoyed building from this kit. It was perfect as a second build. Similar enough to the schiff build and i was able to apply skills learned. It also stretched some of my newly acquired skills with a few new techniques. Another enjoyable Midwest build experience. I wish to express my gratitude to everyone for all the likes, advice, kindness and the very warm welcome. Midwest, Chesapeake Bay flat tie should be arriving next week.
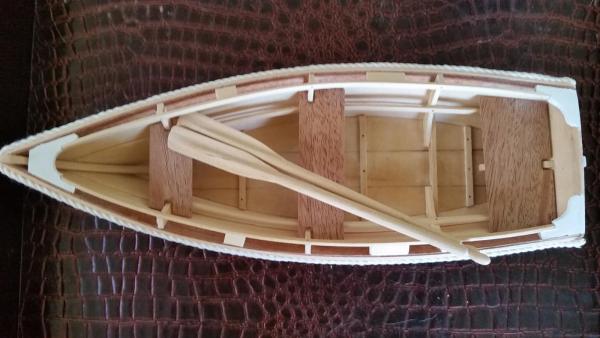
- 46 replies
-
- 10
-

-
- dinghy
- Midwest Products
- (and 2 more)
-
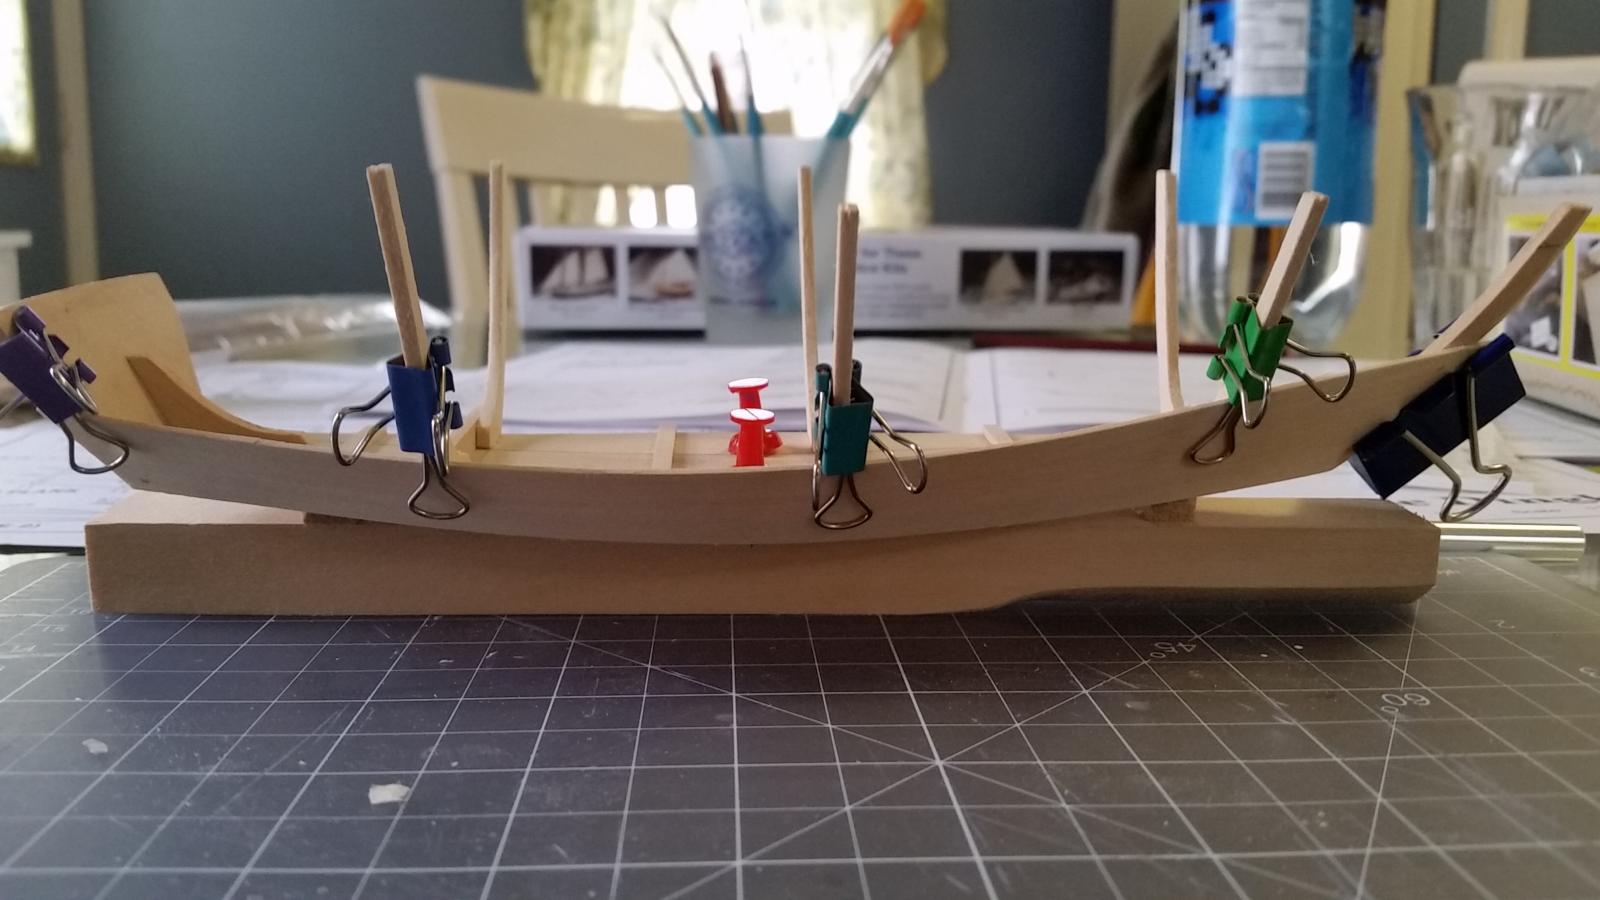
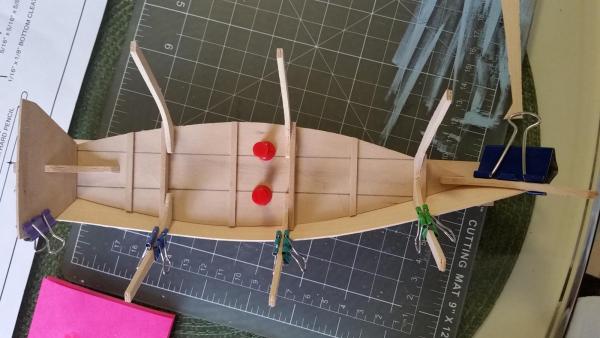
Jparsely, thank you for the advice. I know nothing about stains and varnishes. I also could never have put this together in two days and have it resemble a boat. I think I will be going with Russ' suggestion of a clear coat..perhaps a painted waterline. I googled clear coat and now know what it s I hav attached the inwales. There are a few more parts to attach before the instructions advise painting or applying varnish. Another lesson learned, plan an end game while previewing instructions. The inwales and risers don't leave a lot of room to work in

- 46 replies
-
- 9
-
-
- dinghy
- Midwest Products
- (and 2 more)
-
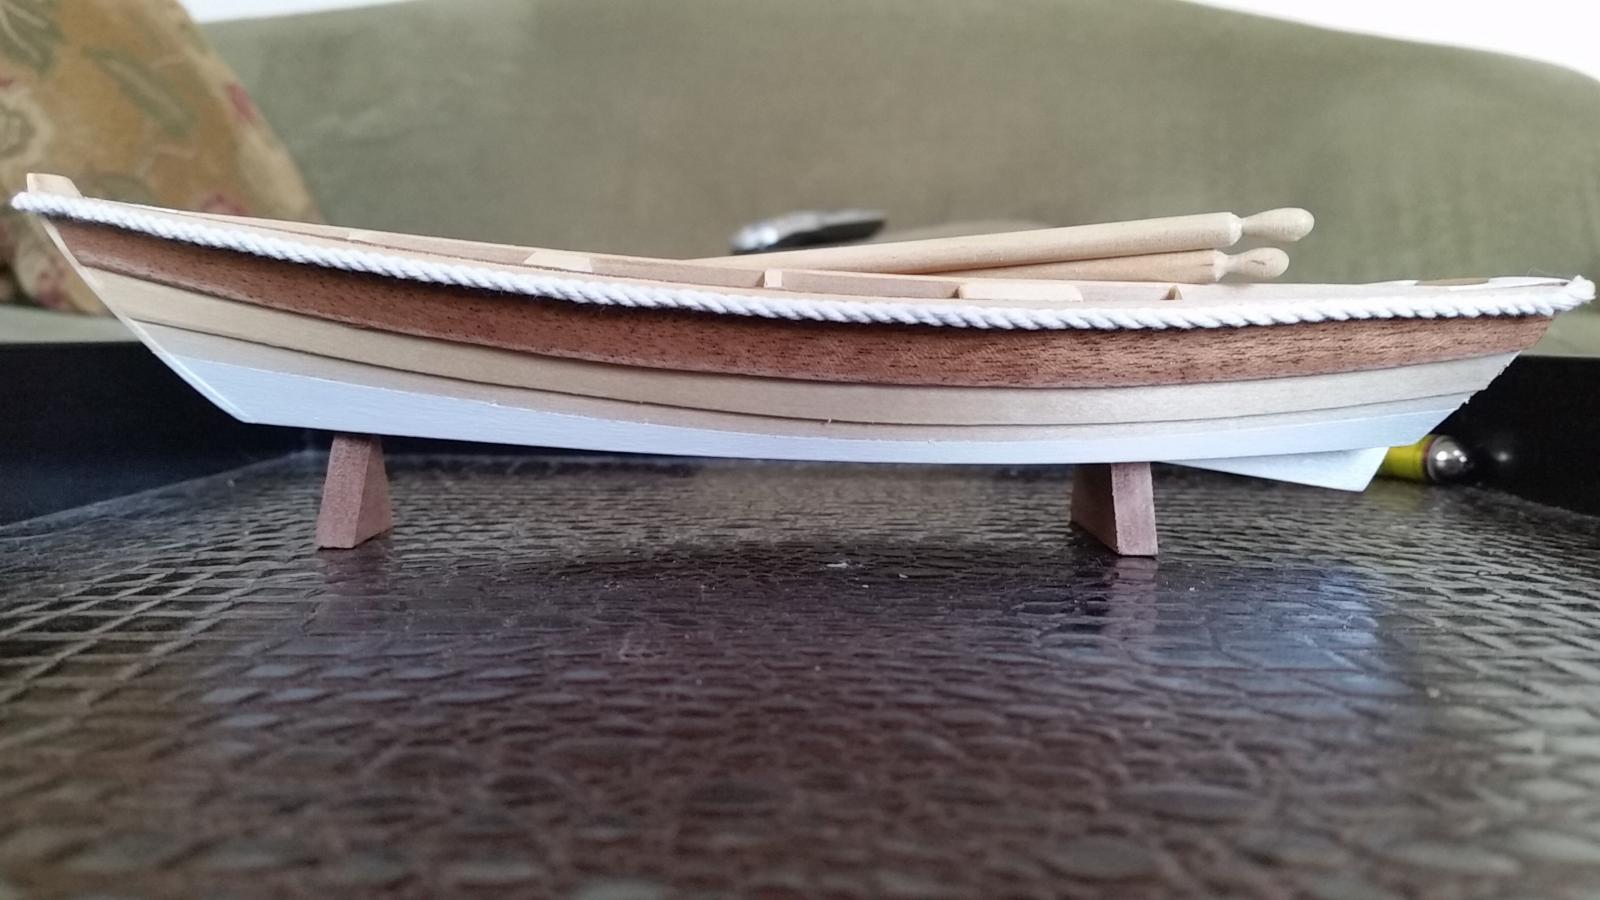
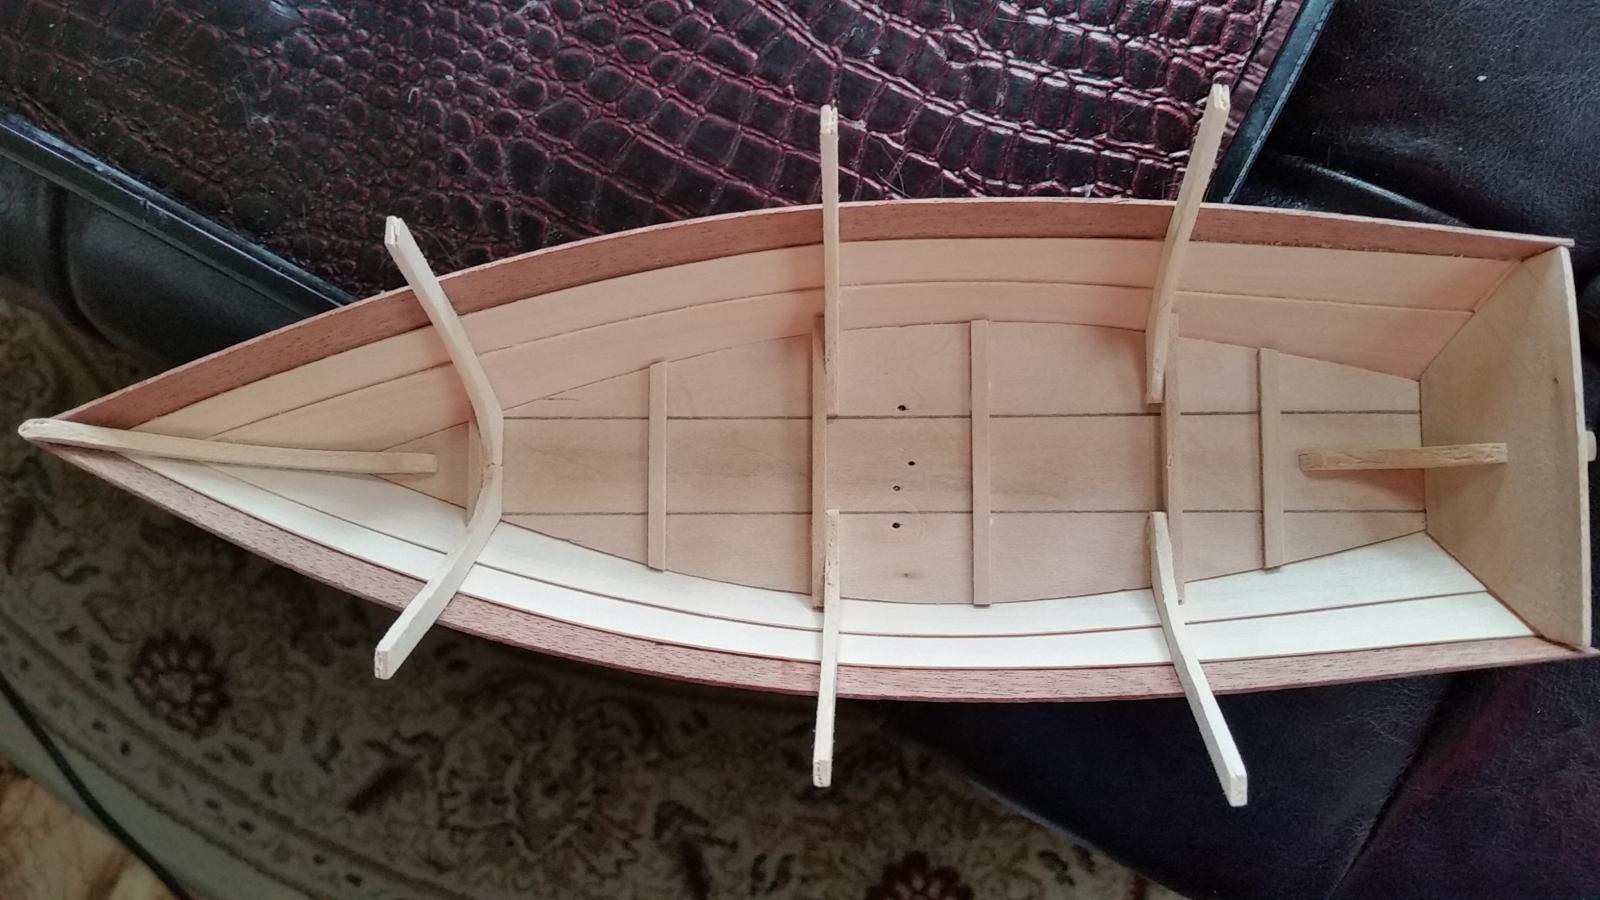
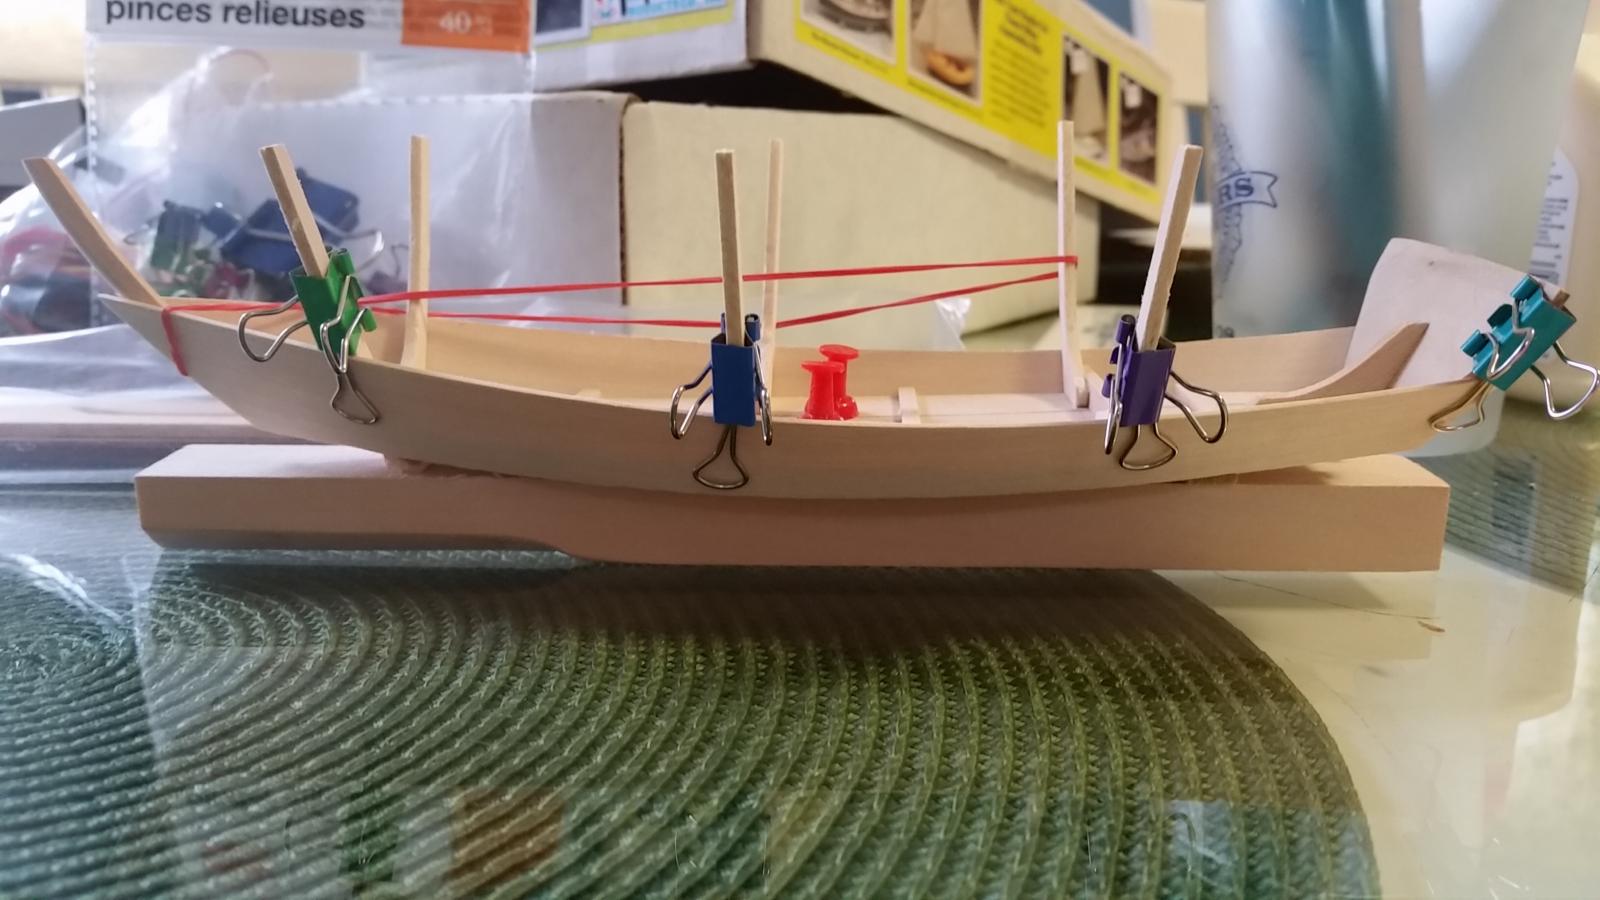
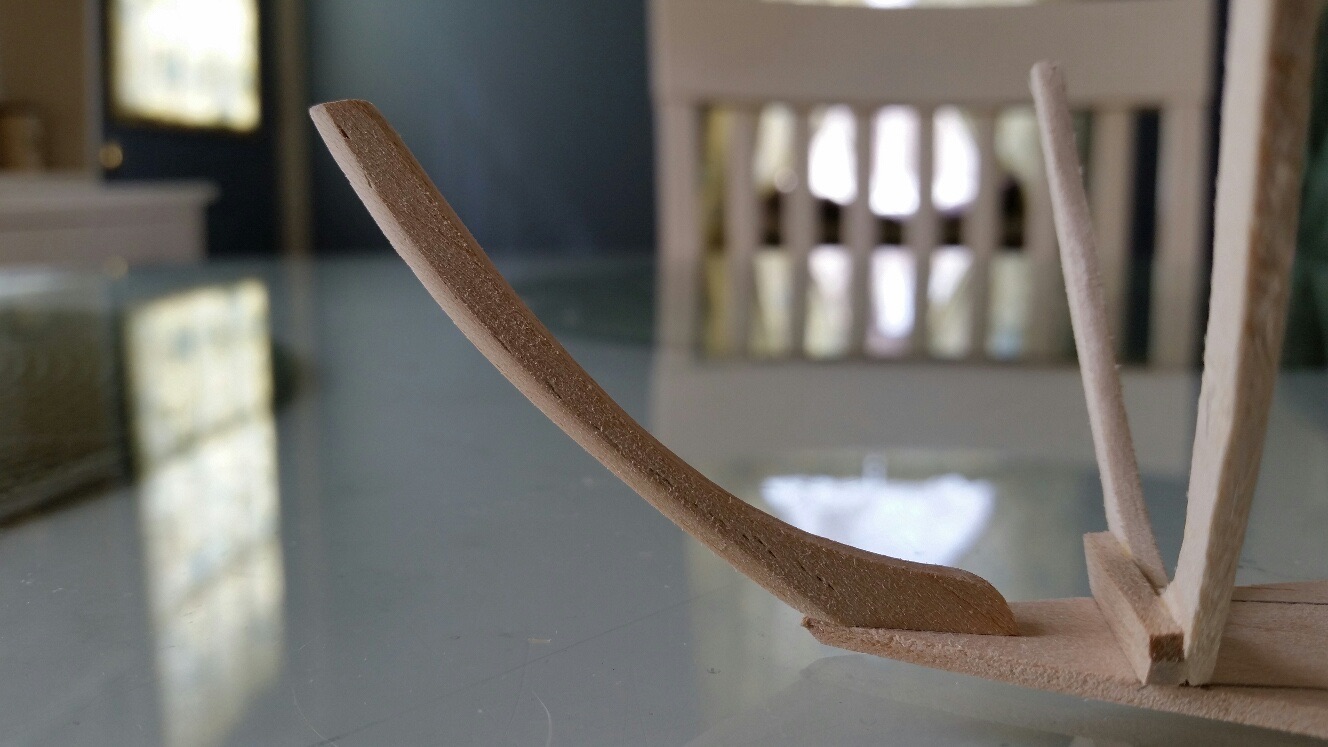
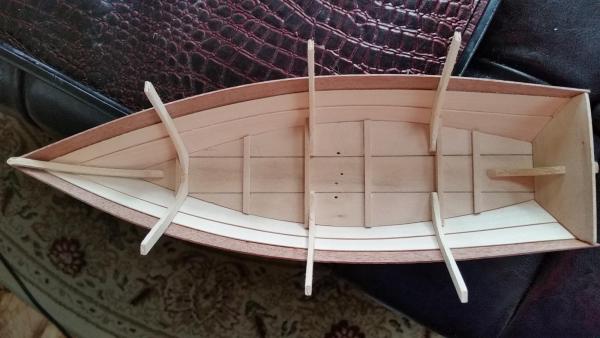
I had measured the recommended height for the seat risers and attaching them was easier than I thought they were going to be. Preplanning the clamping was key. The next day after taking a good look, the risers seemed too high. Placed a seat across the rail and imagined a person seated there...definitely too high. Compared the placement of the risers on the plan to mine and they looked to be high by about 1/4 inch. I did not have any trouble gently prying the risers off. After installing them at the height similar to the plan, I was much happier with the appearance. I then began shaping the seats and had a really good time with that. After a lot of cutting and sanding, am very pleased with the seats. Found the process very gratifying. In between risers drying and methodically working on the seats, I also accomplished some major sanding on the hull and transom. Have some spots that need some cleaning up, but am making some great progress. Have gotten the grip attached. The very top of it bent at a slight weird angle, will have to get a photo of it up. Have not decided if it is something that will annoy me enough to remove and attach a new one. Thank you all for the likes. The seats have yet to be glued. I believe I am getting to a point that I will have to make painting decisions. Not quite sure where I am going to go with that yet.

- 46 replies
-
- 11
-
-
- dinghy
- Midwest Products
- (and 2 more)
-
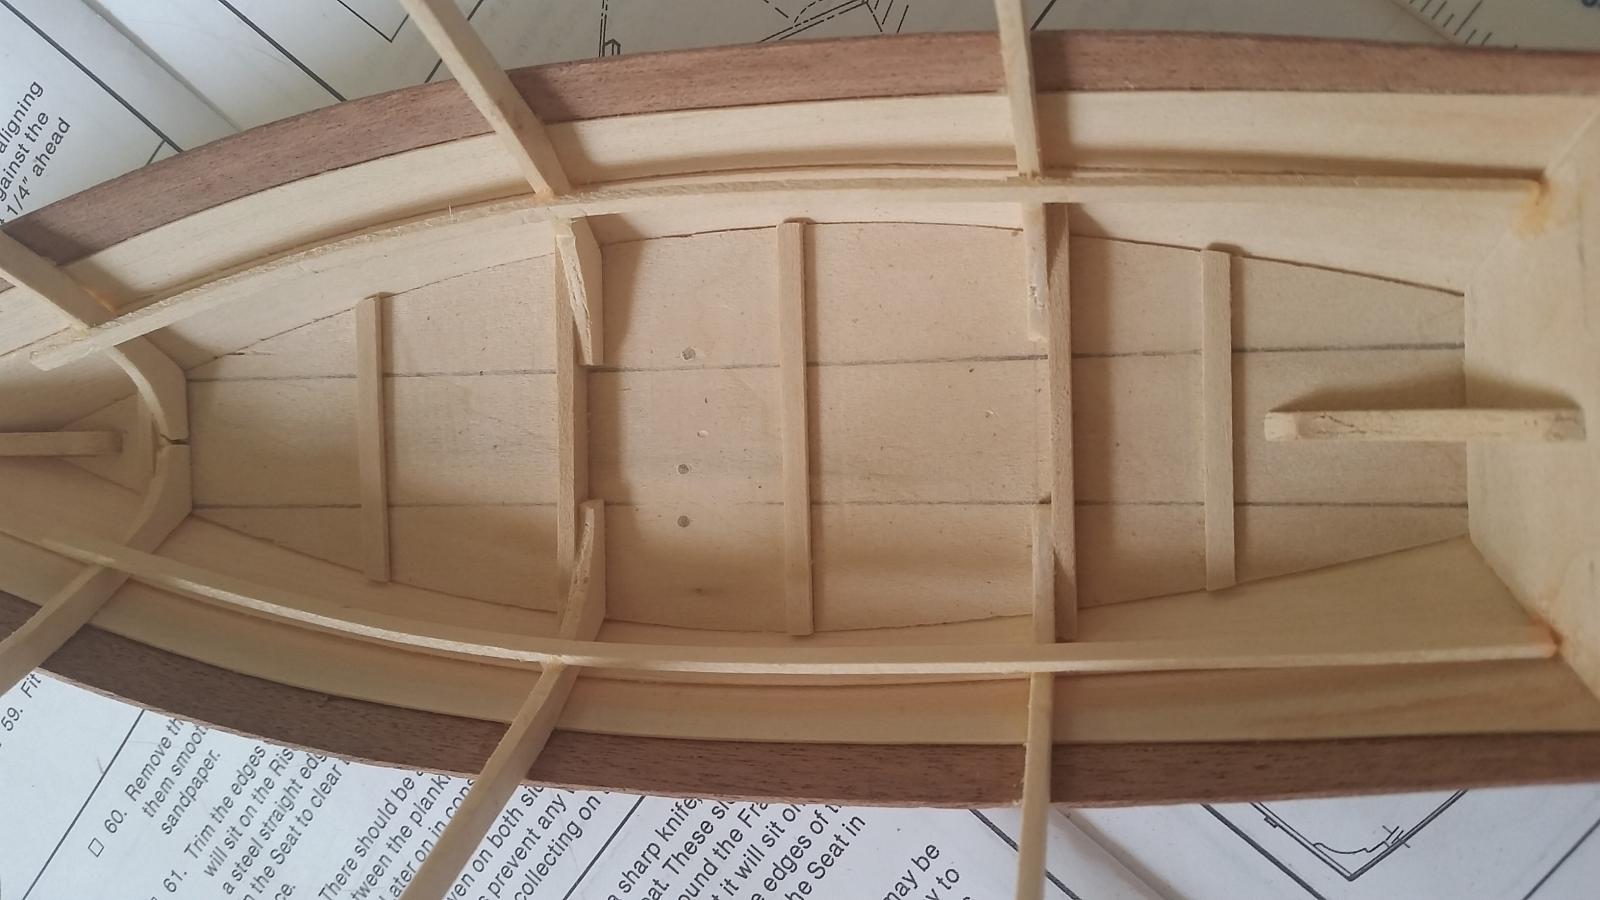
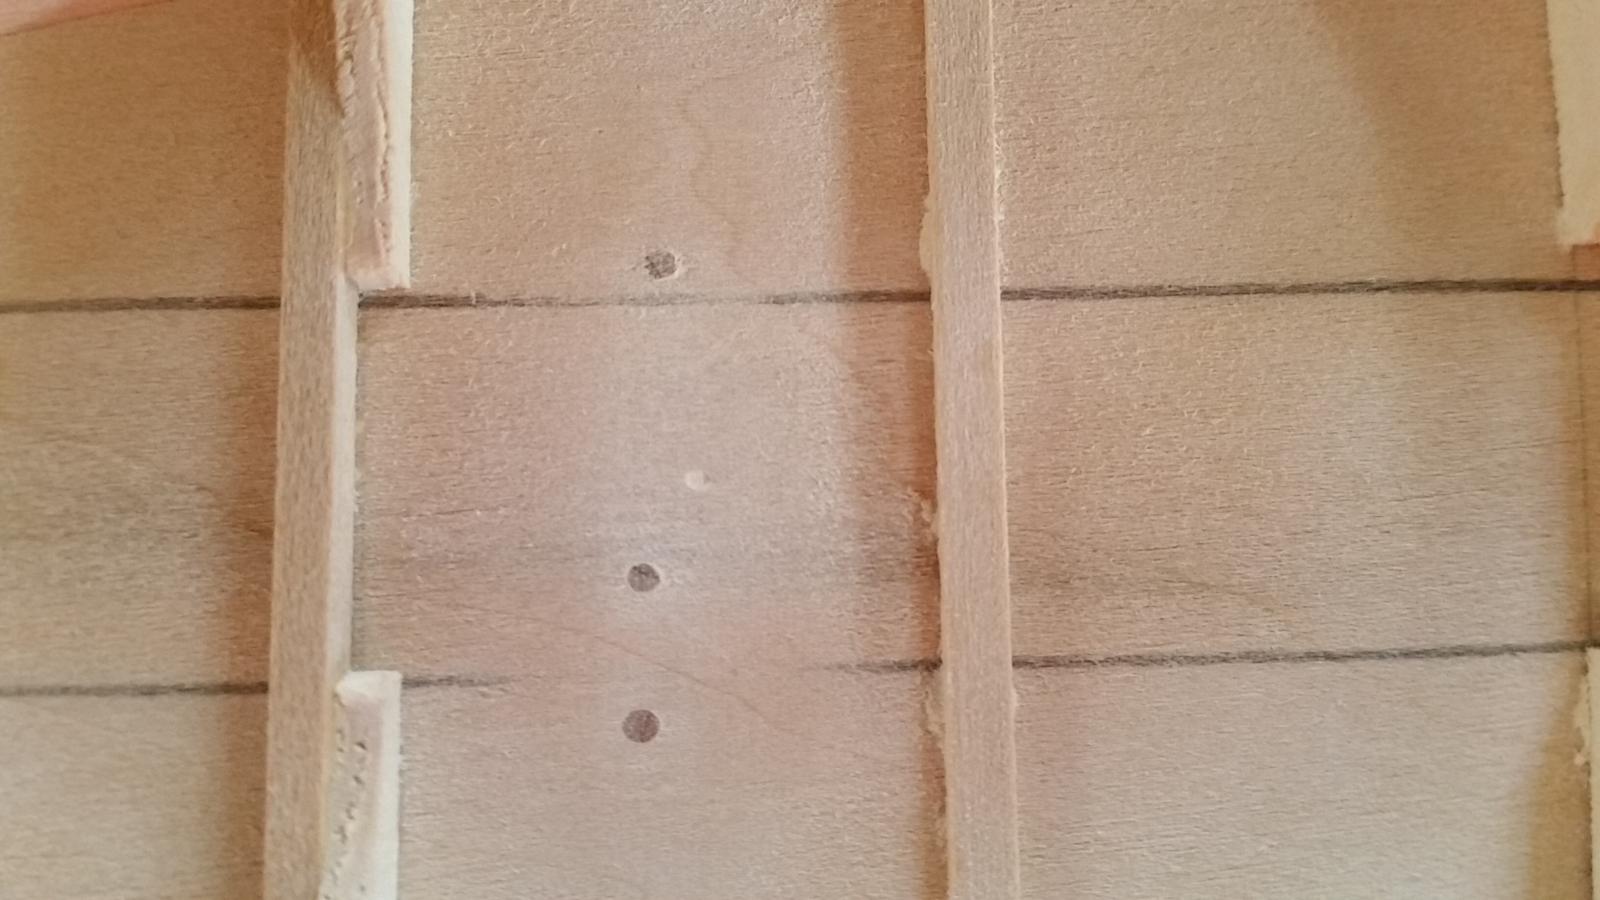
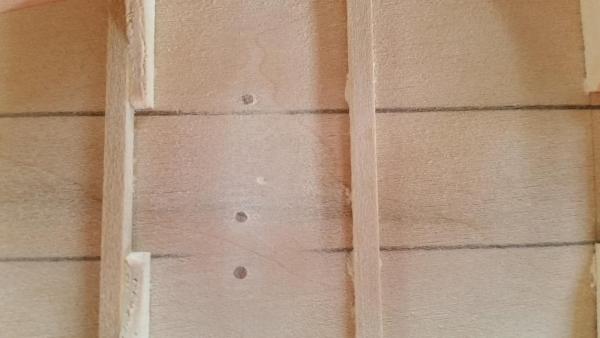
Russ, 'tapered' the exact word I had wanted to use but my brain would not provide. Are planks tapered to adjust for the curves? My tapered planks hung low in the center, running pretty deeply into the center plank. Mario and Brian, much appreciate your checking in and the kind words. Mario, I will be looking at the Flattie build you did. Thinking I would like to try that in the future. I had used push pins to attach hull to strong back. This is my repair job, pretty sure a seat will cover this area. I pushed a toothpick into the hole, trimmed the excess ofF and then sanded smooth.
- 46 replies
-
- 4
-
-
- dinghy
- Midwest Products
- (and 2 more)
-
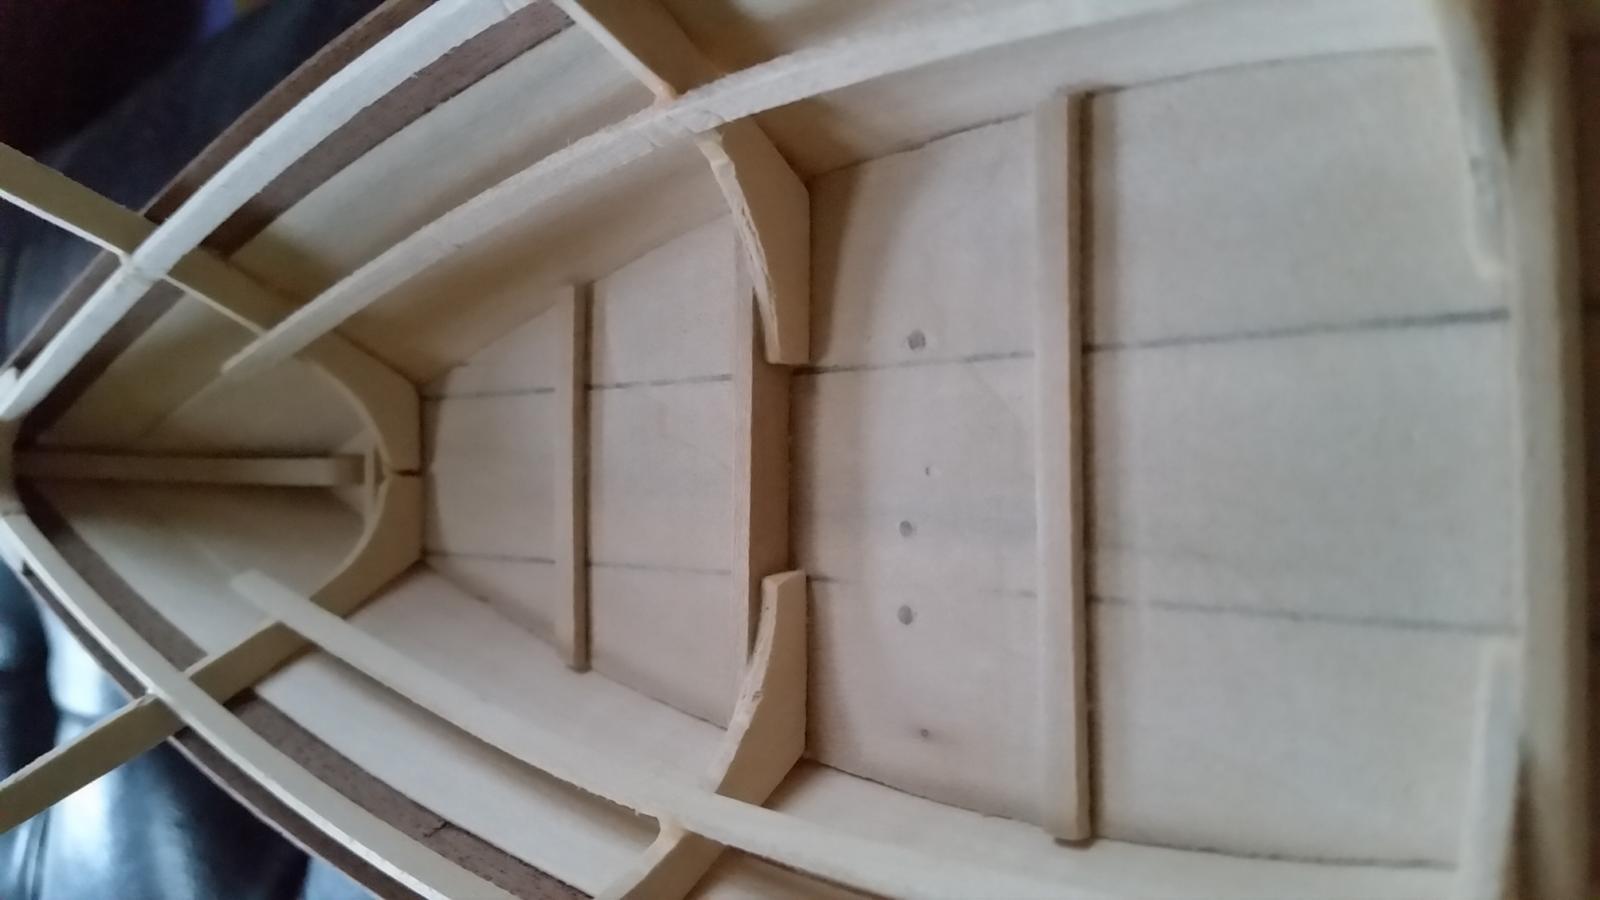
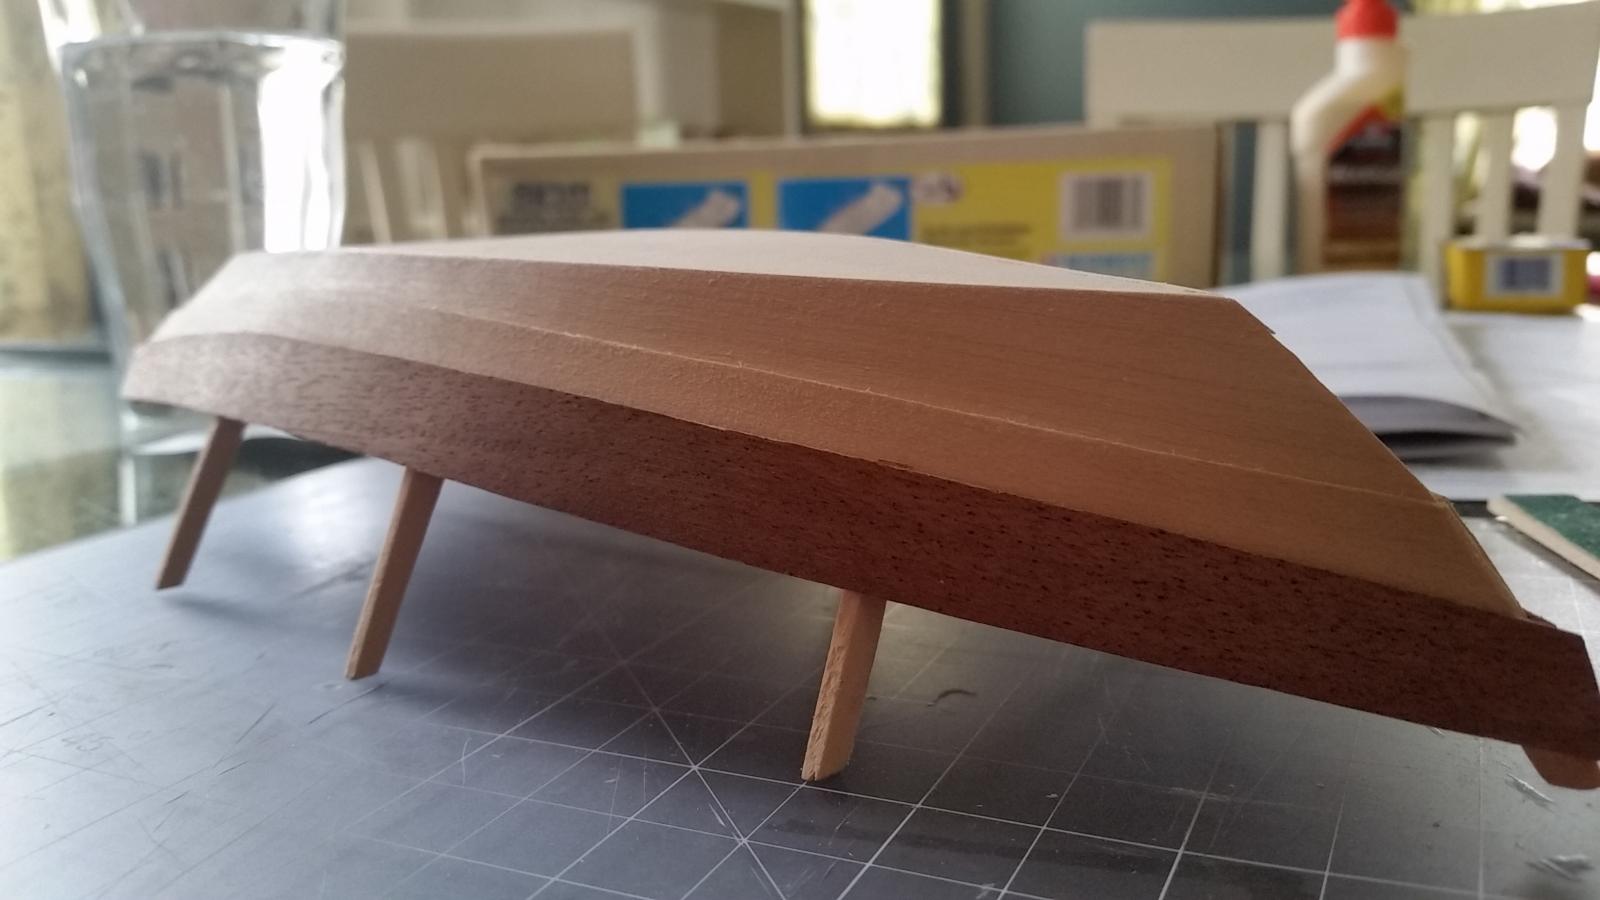
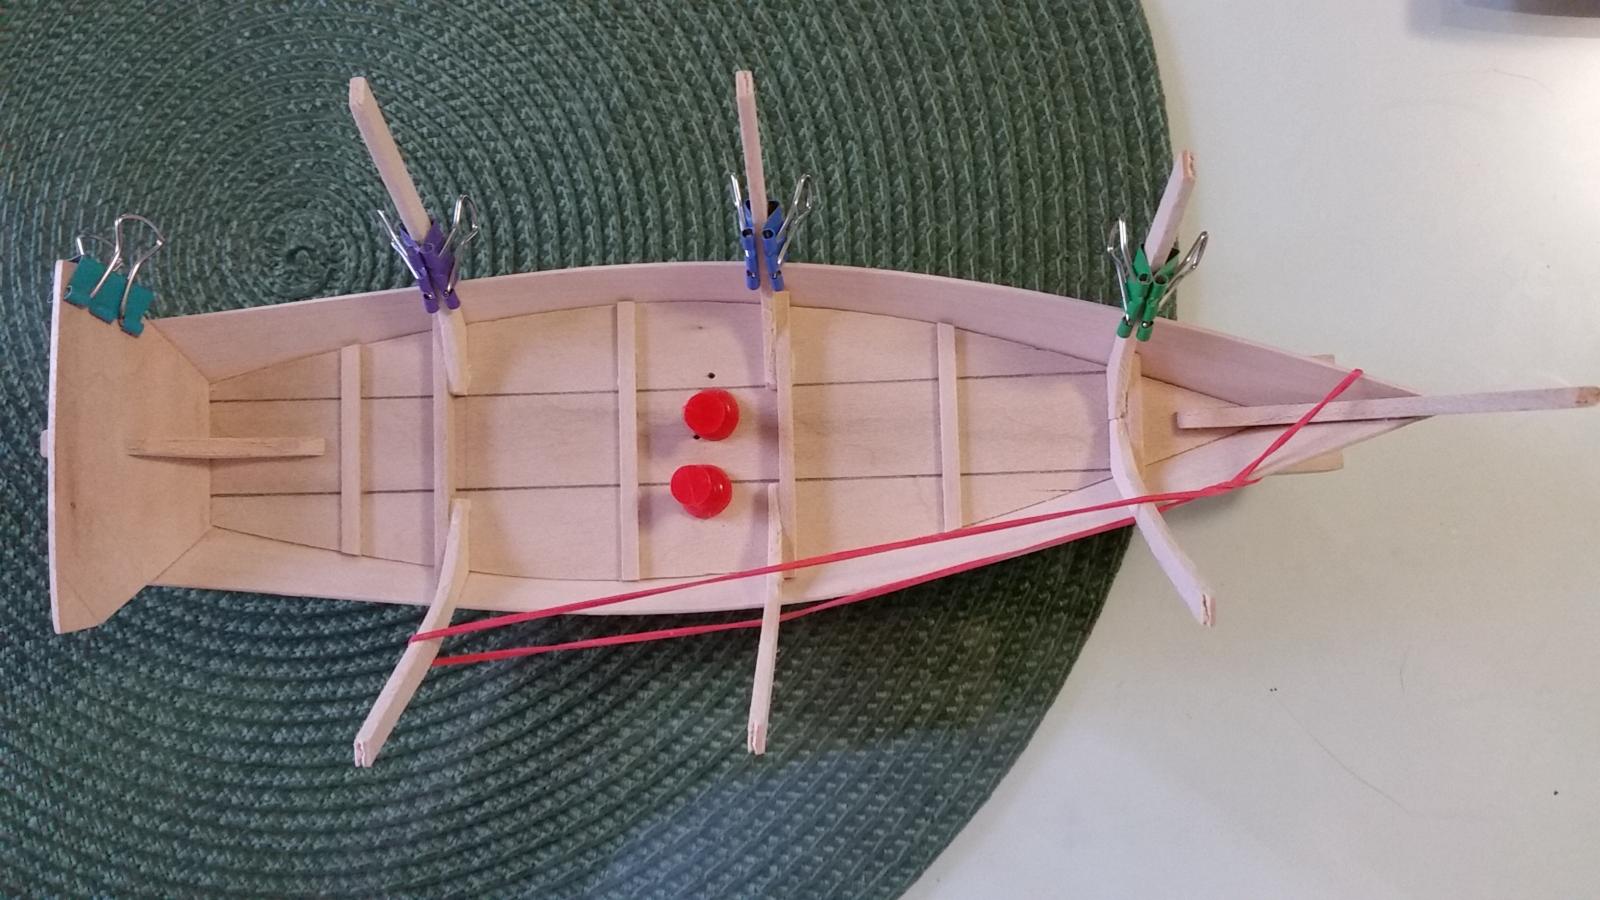
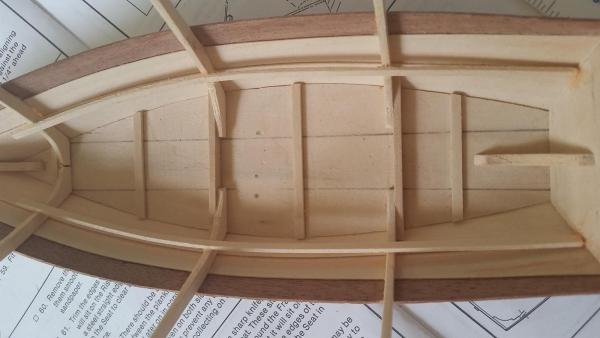
The second planks went on beautifully after putting a bevel in the upper edge of the bottom planks. The final planks were not cut straight as the other planks were. They had what I would describe as a wave cut, the center being much wider than either end. I had attached them and decided a day later to remove them and reposition. The planks were just visually unappealing as they were. Switching sides and flipping the ends around improved the look. The photos showing where the third planks looked just off were great, but have gone missing. As of now, she is planked and off the strong back. Have a little damage to tend to from the pushpins.

- 46 replies
-
- 12
-
-
- dinghy
- Midwest Products
- (and 2 more)
-
Pulling up a chair, novice builder also. Am considering this as my next build.
-
Thank you Russ for the kind words and encouragement. Thankfully , wood is also very forgiving! I am very much enjoying the process.
- 46 replies
-
- 1
-
-
- dinghy
- Midwest Products
- (and 2 more)
-
Port garboard attached, after much fitting and sanding. The work has been paying off, both planks lined up nicely and the height also matches. Whew. Moving along to the second planks.


- 46 replies
-
- 9
-
-
- dinghy
- Midwest Products
- (and 2 more)
-
Thank you Russ and Buck, appreciate you guys keeping an eye on me. Also, thank you everyone for the likes.
-
Gluing supplied blocks onto strong back, no problem, everything lined up nicely. A clamp, sould have run out and purchased a proper clamp. I went with the pushpins as I had them on hand. The small block I pinned into split in half. Had another smal block of equal size, which also split. Finally got hull pinned to a block and did end up with one more pinhole than I wanted. I will be using a toothpick to plug those holes and they should fill in nicely. I then placed the gar board to check for fit. I had a LOT of sanding ahead of me. The transom hung over the bottom ny a hair, the first frame was short of the edge and frames 2 and 3 hung over. I took my time sanding, fitting, more sanding, fitting and glued the plank on. Another lesson learned, pre plan the clamping! Slowly but surely, progress continues.

- 46 replies
-
- 12
-
-
- dinghy
- Midwest Products
- (and 2 more)
-
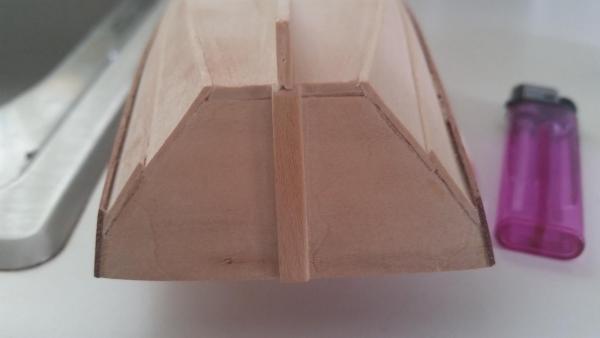
Thank you Buck, will give it a try. Attached the strip on the transom, stern post I believe. I am trying to learn the appropriate terminology. The next steps have small blocks glued to a build board, the hull then pinned to blocks to create a slight curve. Looks like the planks are applied while still attached to build board. I really like to pick the model up and look at it from different angles while I fit various parts. I plan on spending a little time sorting out something else...probably attaching to a block of wood.

- 46 replies
-
- 2
-
-
- dinghy
- Midwest Products
- (and 2 more)
-
Am very much looking forward to the planking, thanks for the heads up adjustments are normal. Will be hoping it will only be a few
-
Hi Buck, Thank you! Do wish I had seen your post before I glued it on my own. Would have saved me a bit of time and a little frustration. Yes, did have it leaning side to side. Scrounged up a few small boxes and that set it up nicely.
-
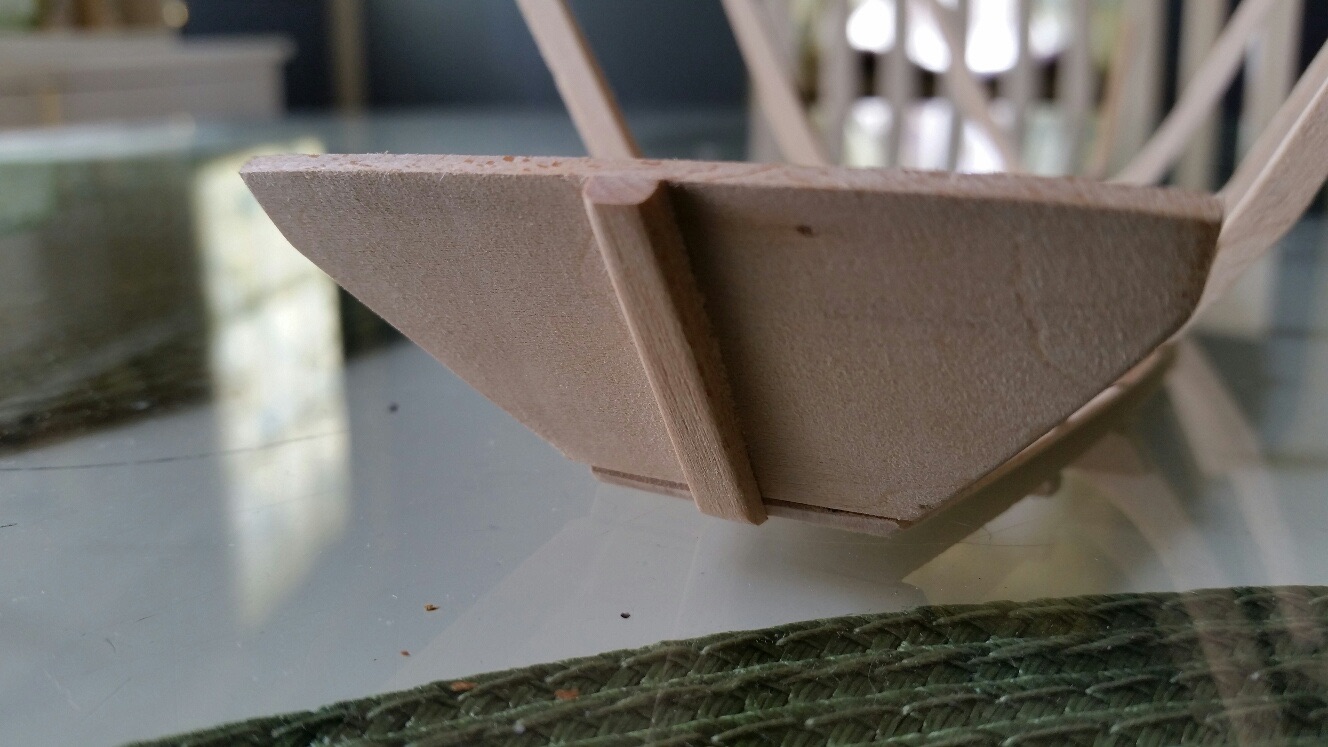
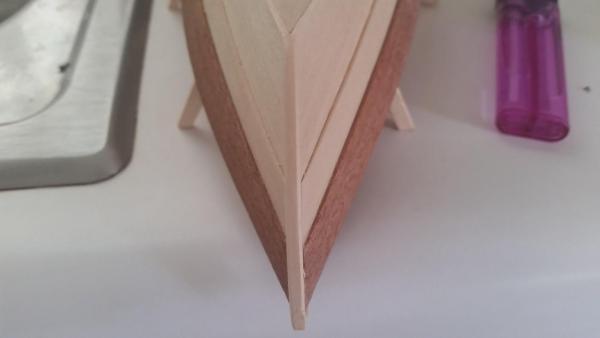
Thank you Mario, am having a good time with it. Spent a good amount of time shaping the stem today and quite happy with the way it turned out. Won't have much time for a few days to make much more progress, unfortunately.

- 46 replies
-
- 6
-
-
- dinghy
- Midwest Products
- (and 2 more)
-
Augie, so sorry, autocorrect changed your name on me. Do appreciate your checking in.
-
Thank you Russ, was not quite 'getting it' until I saw it. Angie and Gunther, appreciate your taking a look. Am very much enjoying myself. This kit is definitely novice friendly and quite an education for me.
-
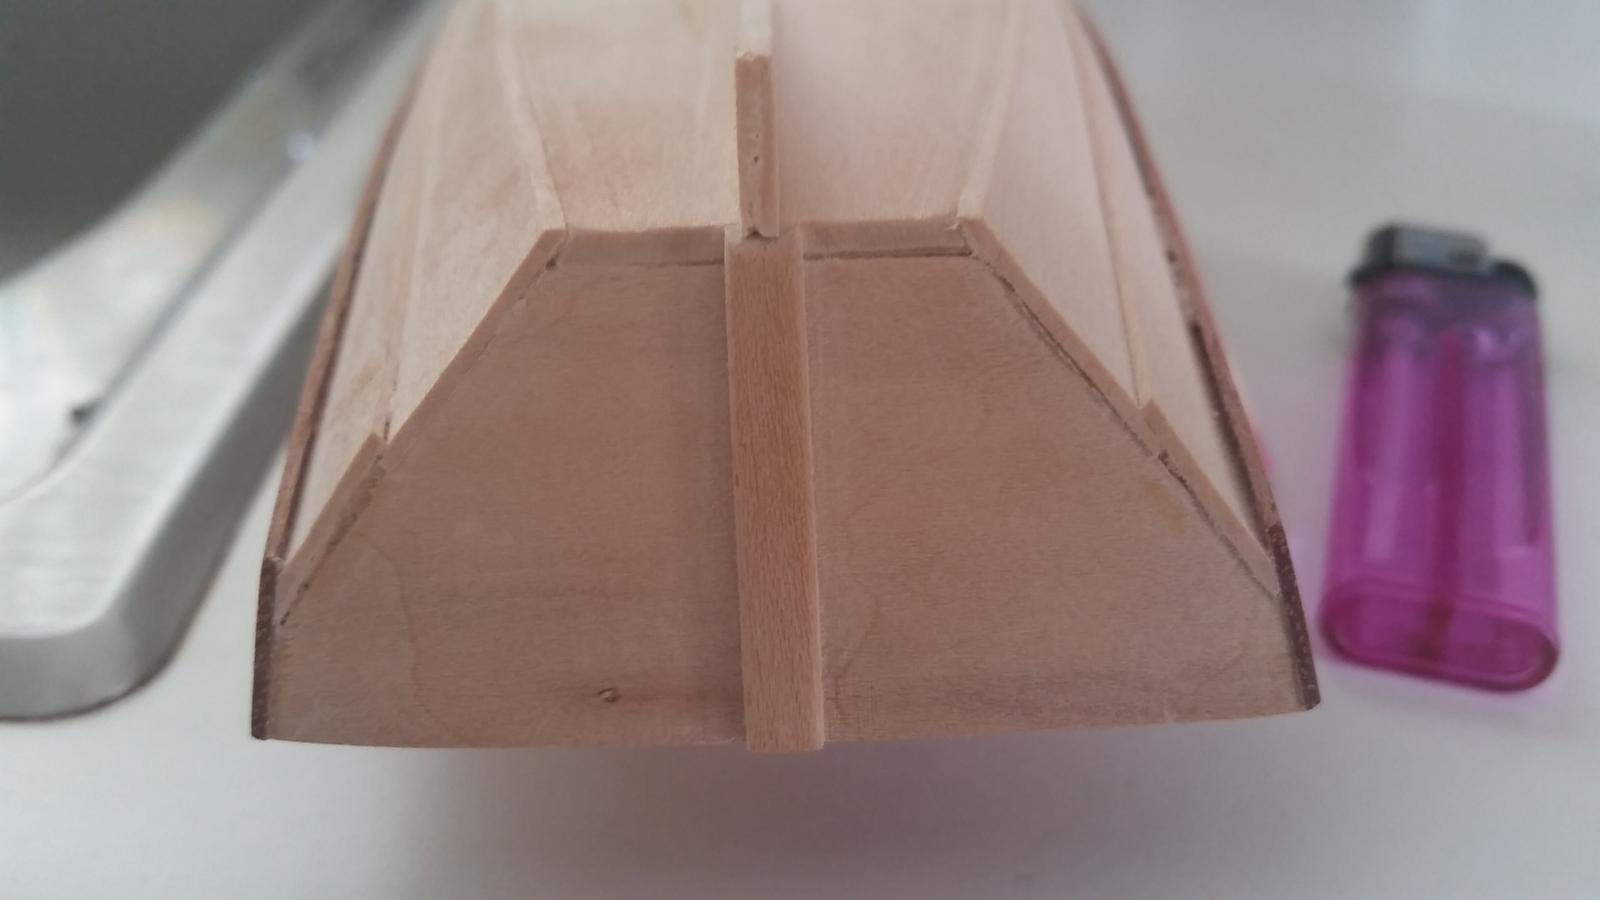
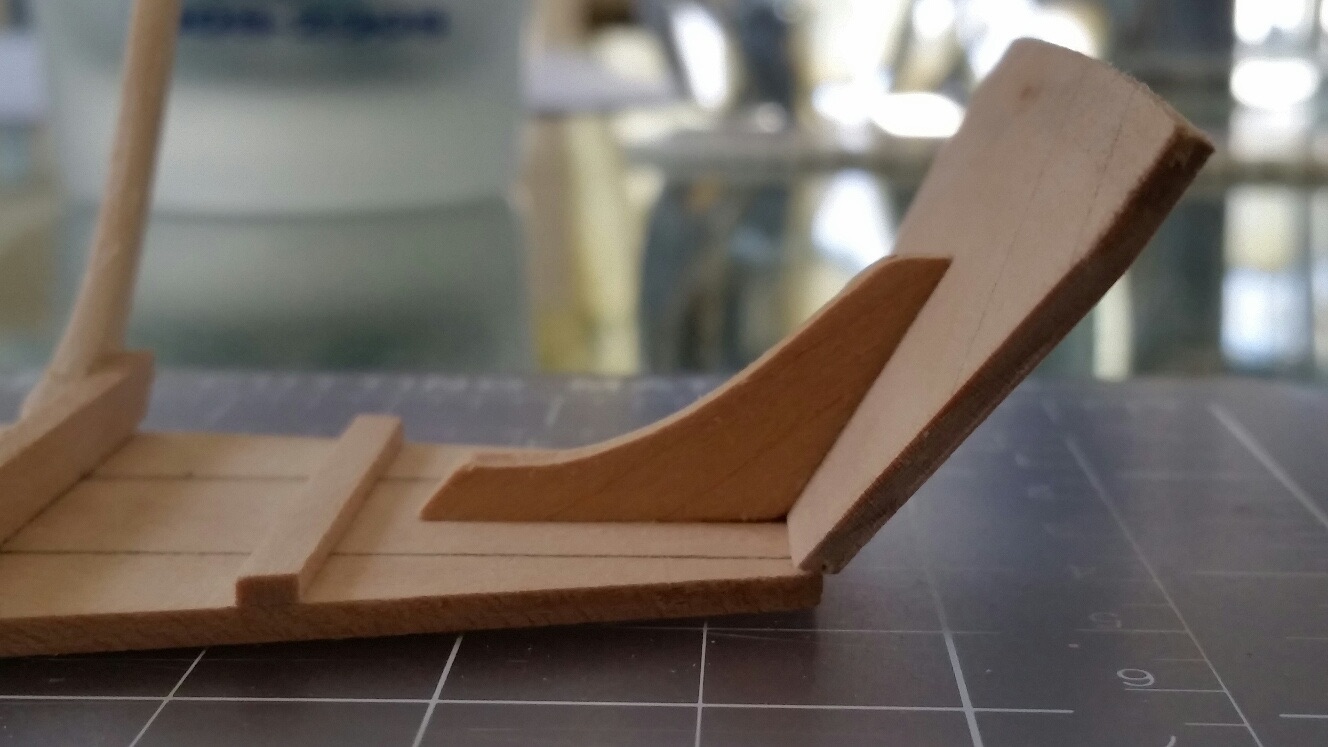
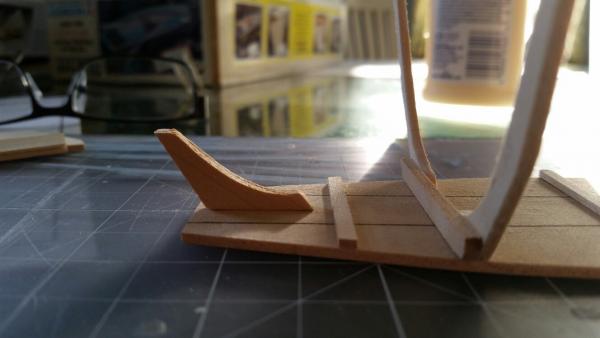
I placed the bottom on the supplied blocks to put a bend in, just to get an idea of what angle frame 1 and 3 needed. The bevel was as described slight... Also placed the knee and transom.


- 46 replies
-
- 8
-
-
- dinghy
- Midwest Products
- (and 2 more)
-
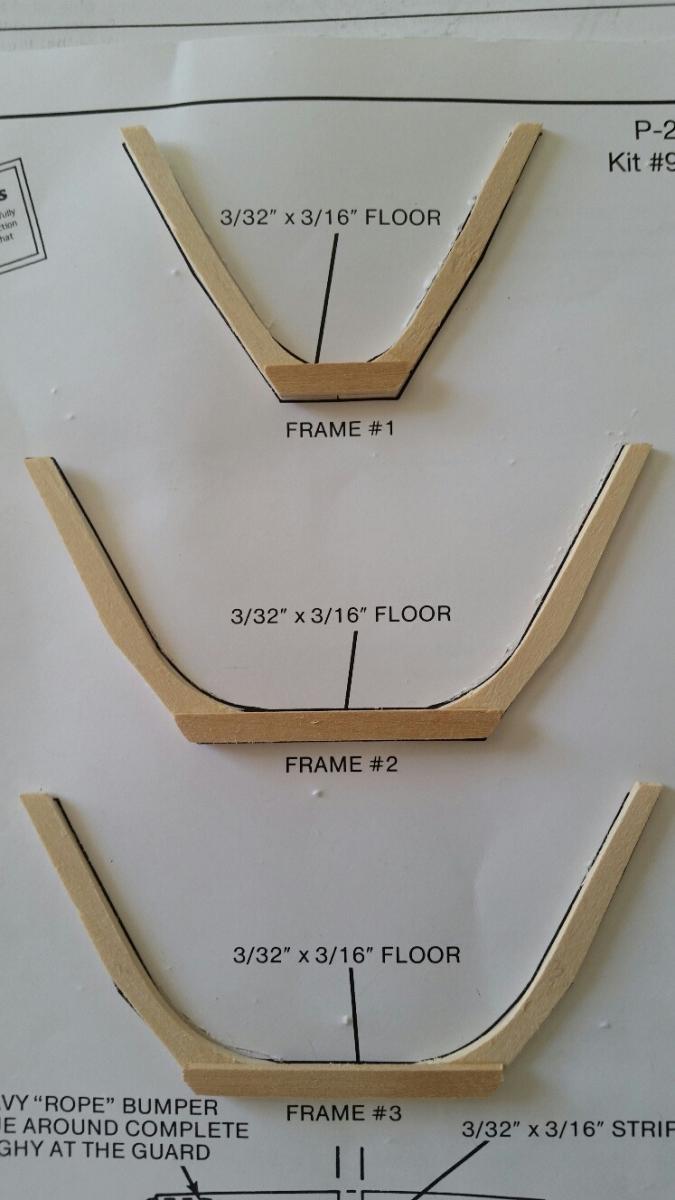
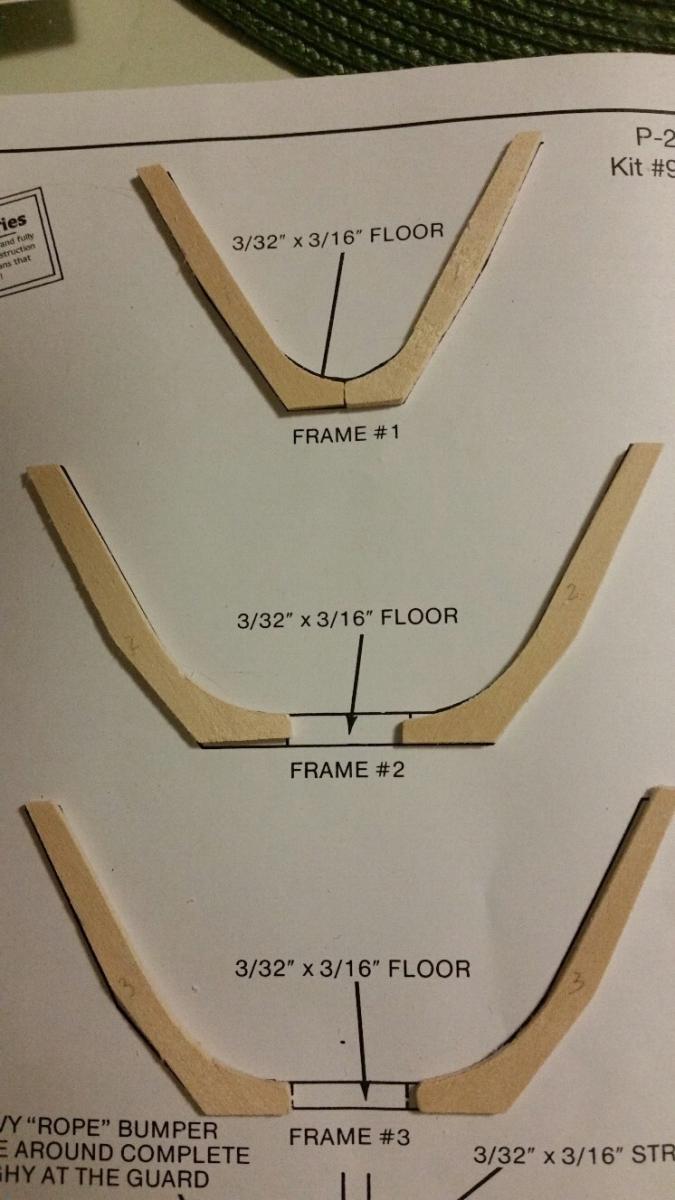
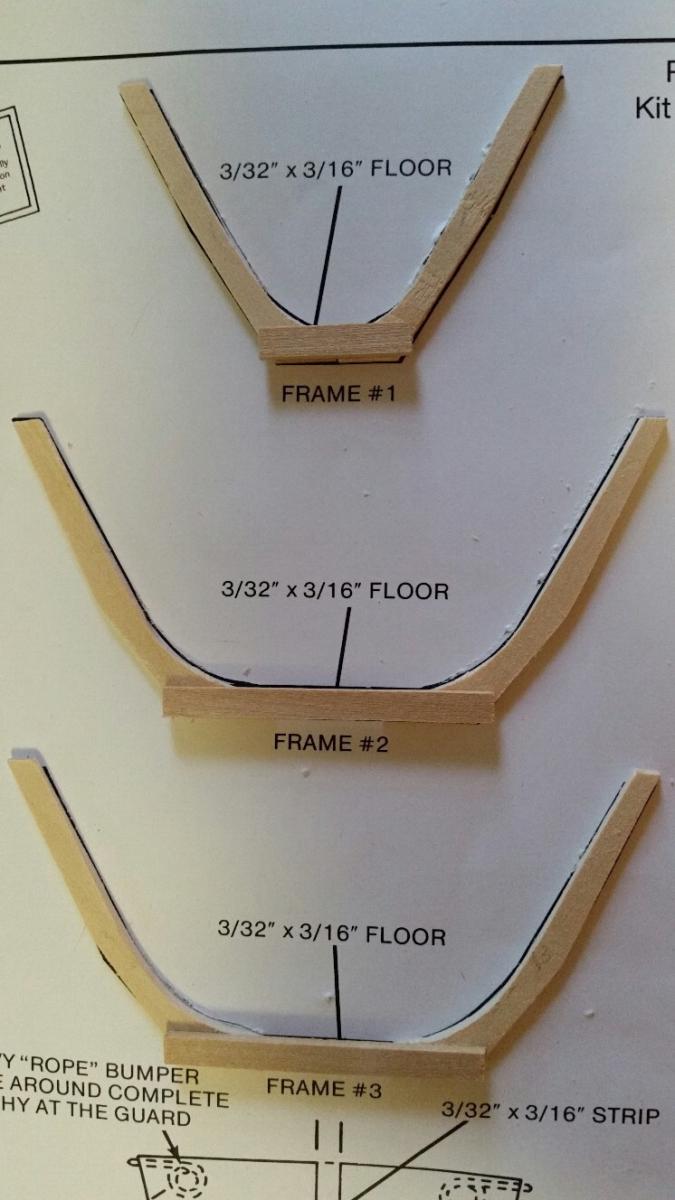
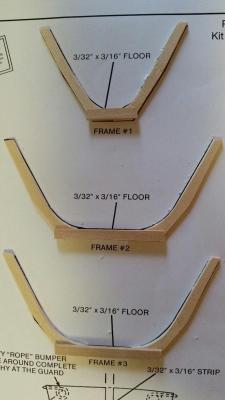
QA and Russ, thank you for taking a look and I so appreciate the likes from others. Had a bit of quiet time this morning and sanded the frame floor flush with the frames. Next step is setting up the frames. Frame 1 and 3 require a slight angle, so when bottom plank is bent they become upright. I understand the concept, just very unsure how much of an angle is 'slight.'
- 46 replies
-
- 5
-
-
- dinghy
- Midwest Products
- (and 2 more)
-
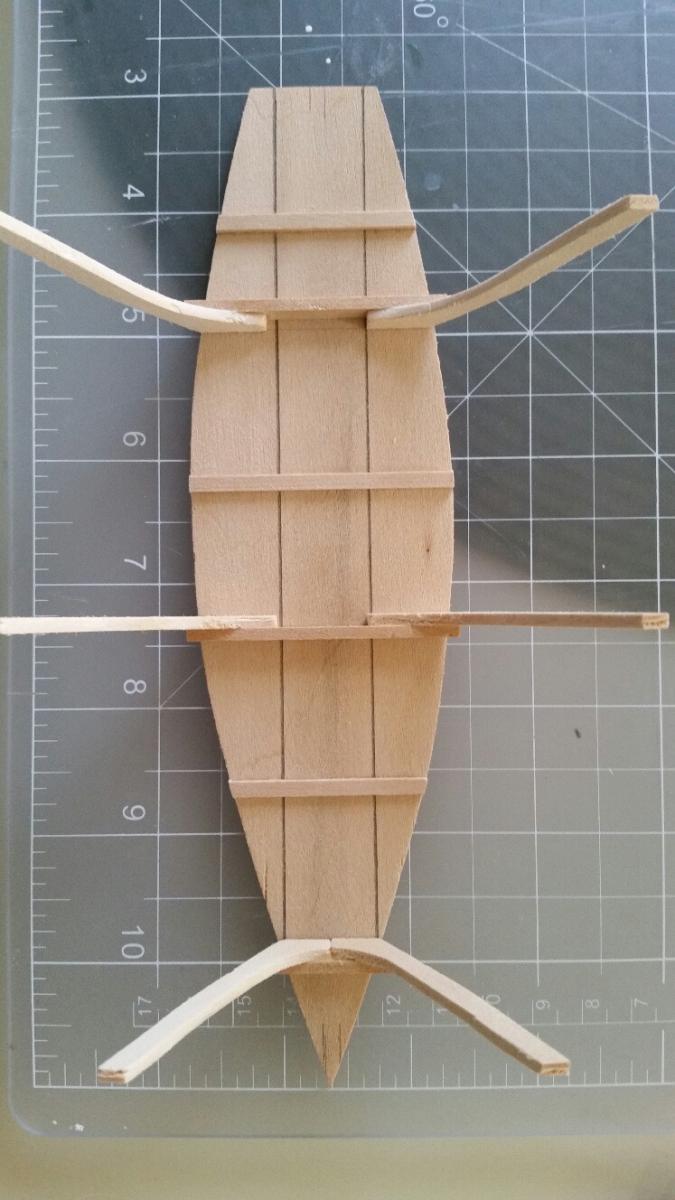
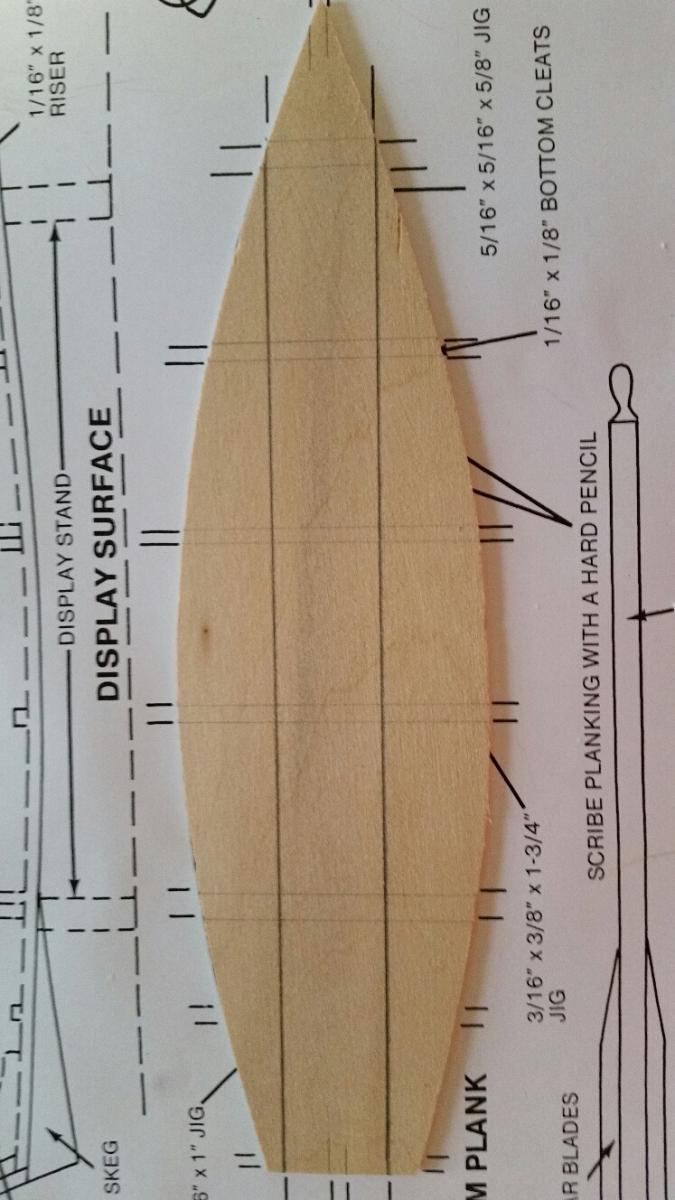
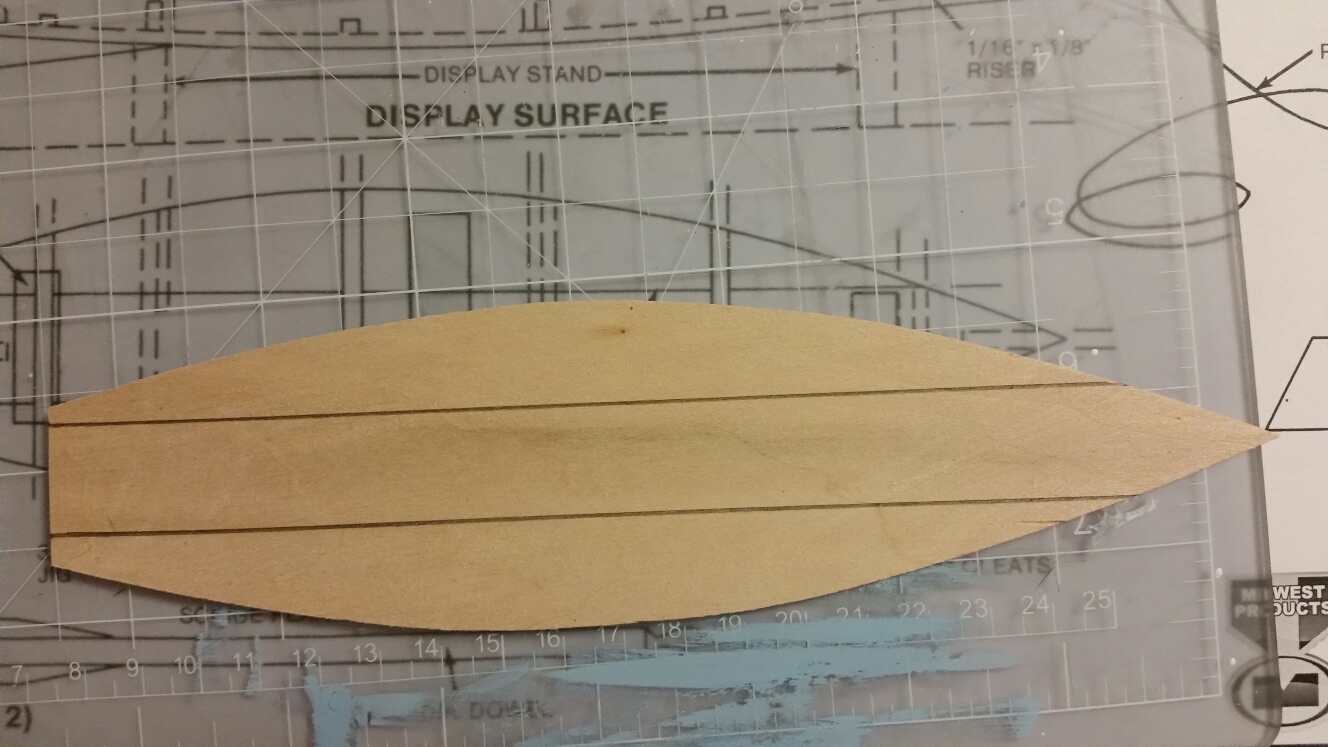
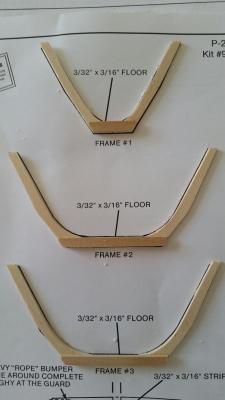
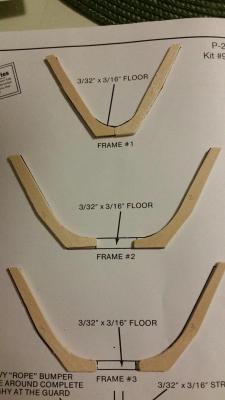
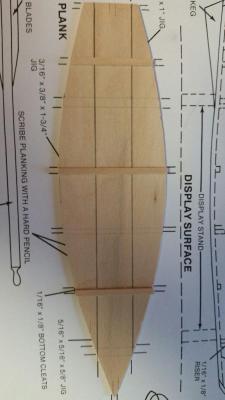
Removed the six frame pieces from the die-sheet and placed them on the plan. I spent quite a bit of time today cutting, sanding and placing the frames back onto the plan to check my progress. I was glad I had remembered numbering the frames from my skiff build, the dinghy instructions did not mention it. Came in quite handy when I had taken a break and a furry freeloader in my residence mistook the frames for a new cat toy. Believe I have gotten the frames as near to identical for each set and moved along to attach frame floors. Am using wood glue, so will place a little weight on the frame floors and put them aside until tomorrow. Scribed the frame and cleat lines onto the bottom plank and also marked locations for the knee and stem. Attached the three bottom cleats. Also will place a little weight on top and set aside until tomorrow.
- 46 replies
-
- 7
-
-
- dinghy
- Midwest Products
- (and 2 more)
-
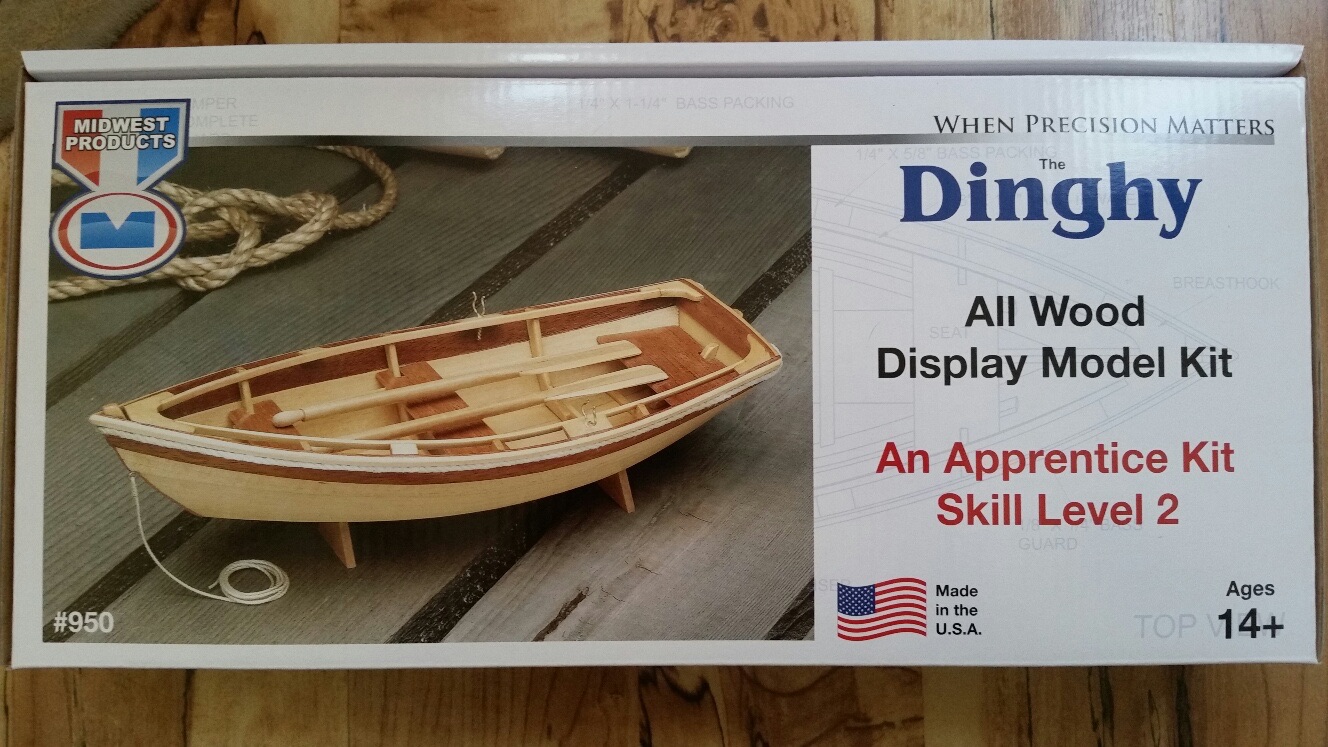
Hi John, Happy to have you along for the ride! I have had a great experience so far with Midwest. The instructions have been quite detailed and easy for me to understand. I was also happy with the wood supplied, as well the supplied finishing details I.e. oarlocks. I also found the pricing very resonable.
-
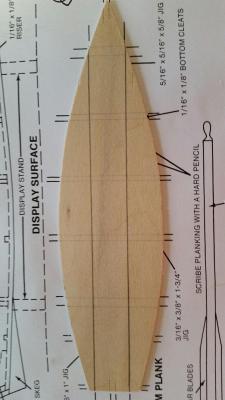
Hello all, I have always been intrigued by wood model ships. During the past winter, I decided to attempt my first build and began doing some research as to what kit would be best for a novice builder....particularly one with zero knowledge, experience or skills. MSW has been an amazing resource and greatly contributed to pointing me in the direction of the Midwest apprentice line. Thank you! My first build was the Midwest skiff. The experience was so gratifying and I was overall very pleased with the completed project. This is quite an addictive hobby and I had to start another. Midwest, The Dinghy, arrived the other day and I decided to make the leap and post the build....so here goes. 400 grit sand and scribed plank lines to bottom plank. My first build was a slow one and I expect this one will be as well. Slow seems to be a pace that suits me. I will be tackling the frames next and will continue to post progress or any problems that arise. Any advice and/or comments are always welcomed.


- 46 replies
-
- 10
-
-
- dinghy
- Midwest Products
- (and 2 more)