ken3335
-
Posts
314 -
Joined
-
Last visited
Content Type
Profiles
Forums
Gallery
Events
Everything posted by ken3335
-
 Hi Kelp, For the ports I first drilled a hole then filed it out to shape, I don’t remember having an issue with the brass around the hull, it’s a while now since I built it but I’ve just had a look at mine and it seems to have gone around the bow neatly. On another note I don’t follow MSW site any more so if you could use the other site you will find my complete build log there. Regards, Ken
 -
Hi Kelp, I scratch built mine, a small piece of brass wire hammered flat at one end then filed to shape. Just a few minutes work.
-
Hi, I have never bought or built a Chinese kit of any kind and I don’t intend to, even those that are deemed acceptable, It is out of personal choice not because of anyone’s policy. The reason I stopped doing my log here was that there was so little interest and no interaction that it didn’t seem to be worth the effort, I tried SOS and there was a good reception and lots of interaction and advice, I now have many interesting people following my builds. I have also completed an Amati log and am currently doing another Euromodel build on SOS, not Chinese. If that excludes me from this site I am saddened, I am a modeller and don’t want to get involved in other peoples politics, it’s a sure way to put people off. Ken
-
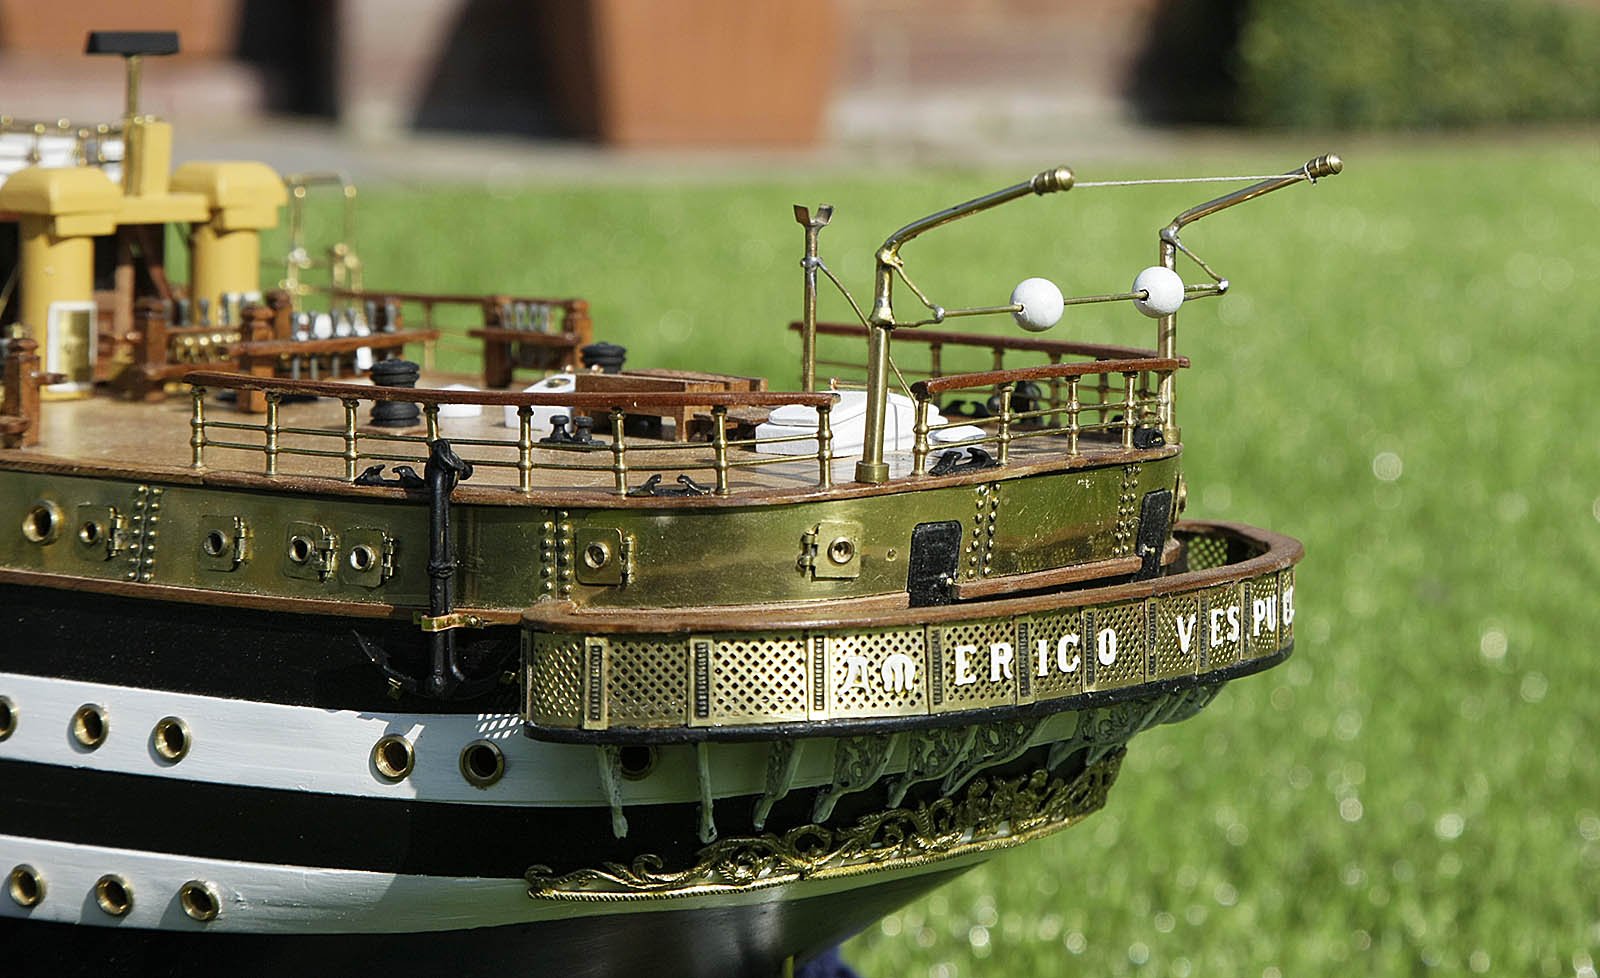
Hi Kevin. Nice to hear from you. I finished my Amerigo Vespucci, it was a very successful outcome, however I completed my comprehensive log on Ships of Scale.
-
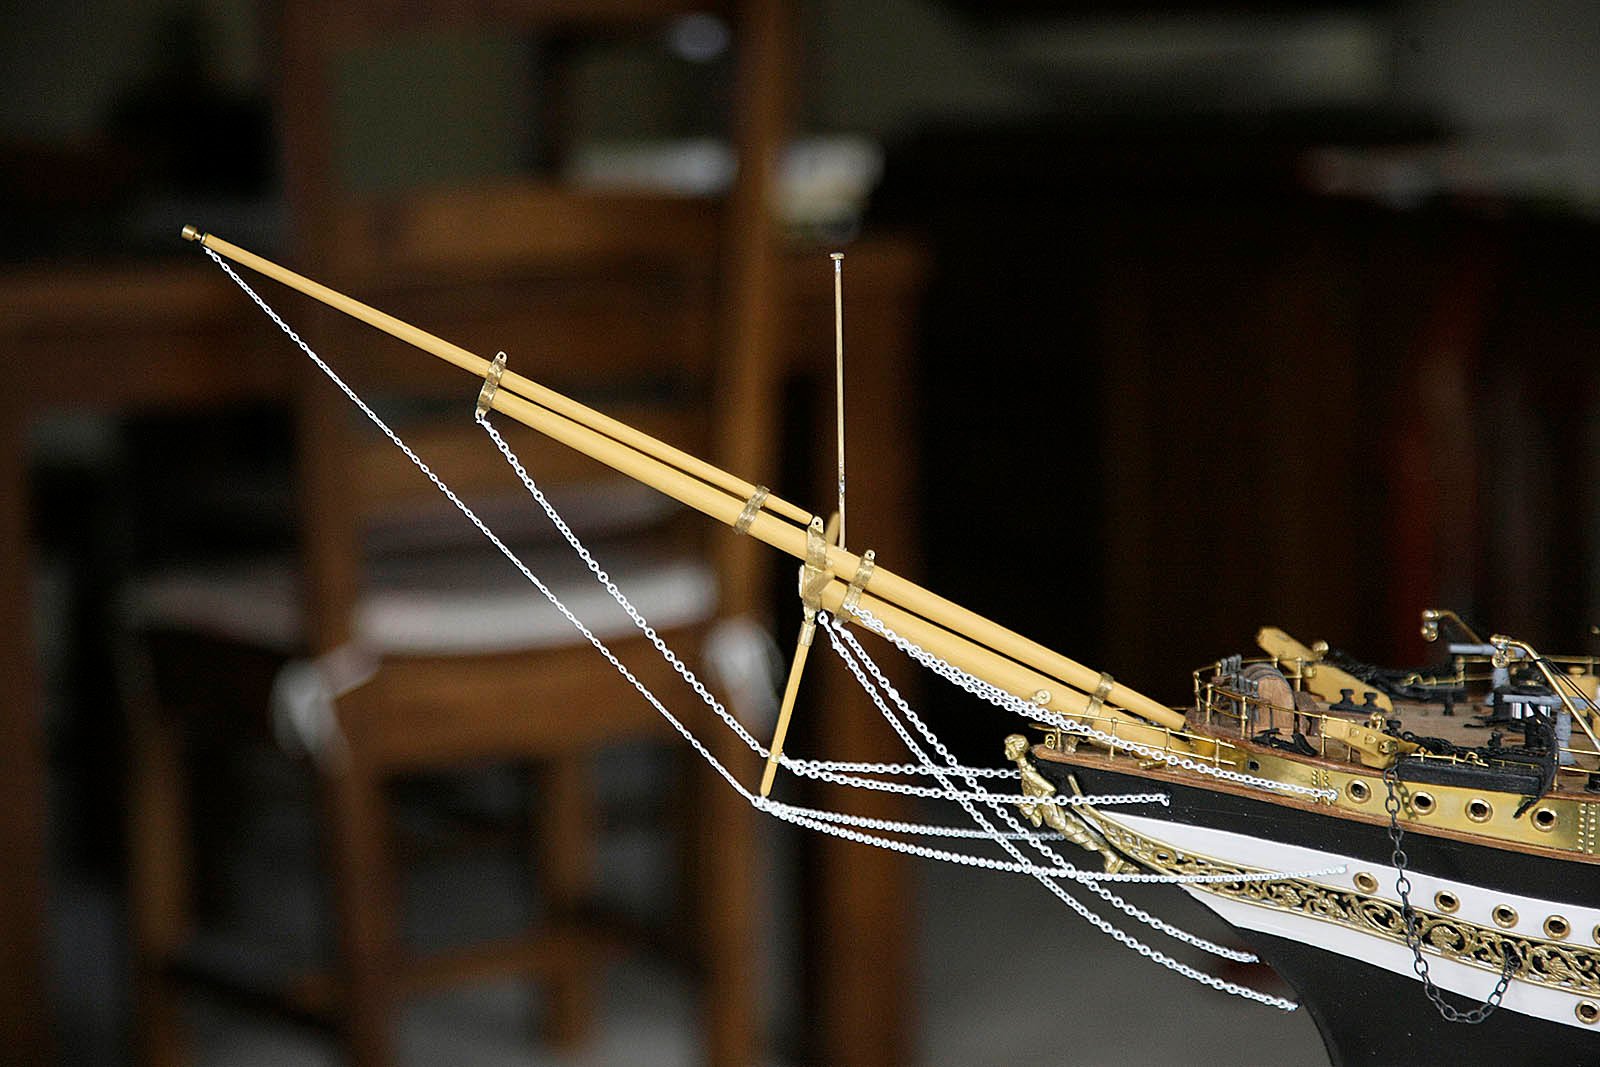
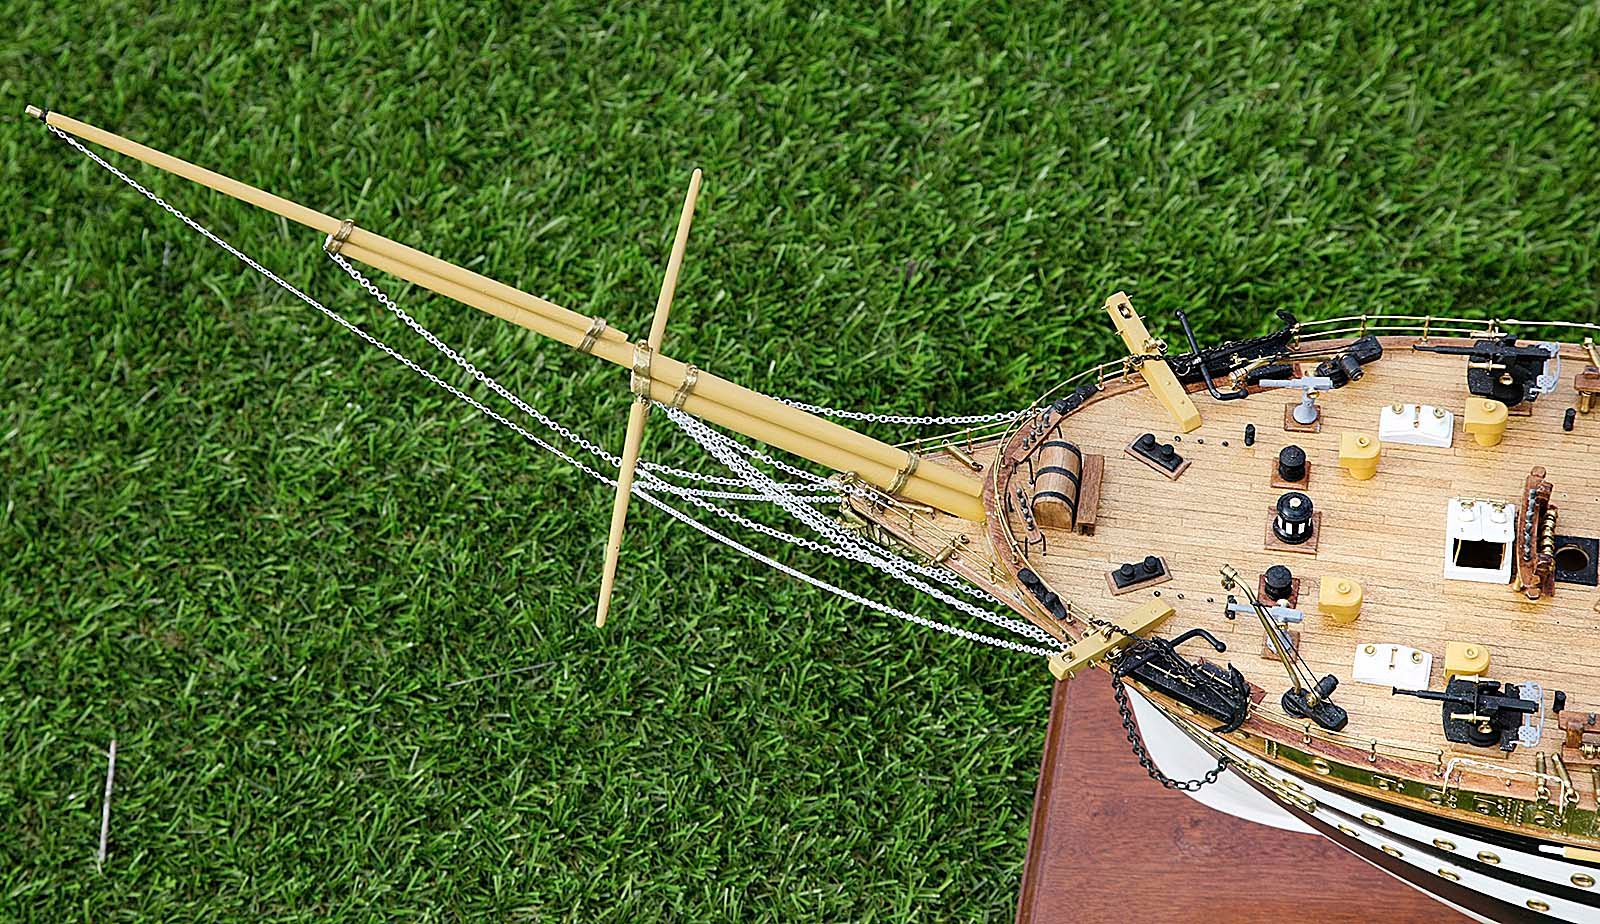
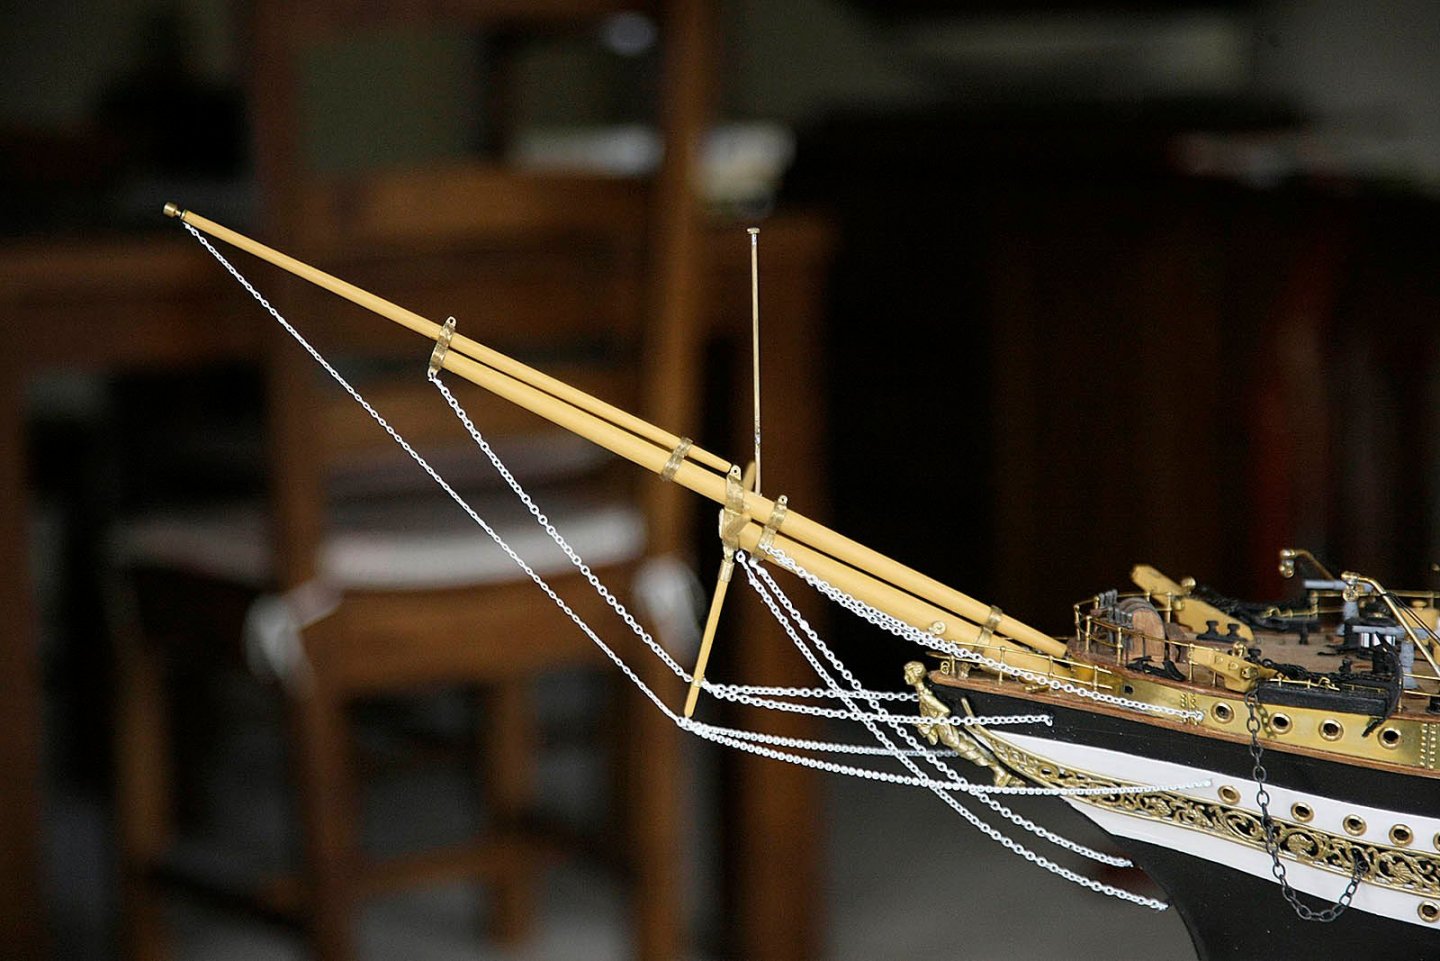
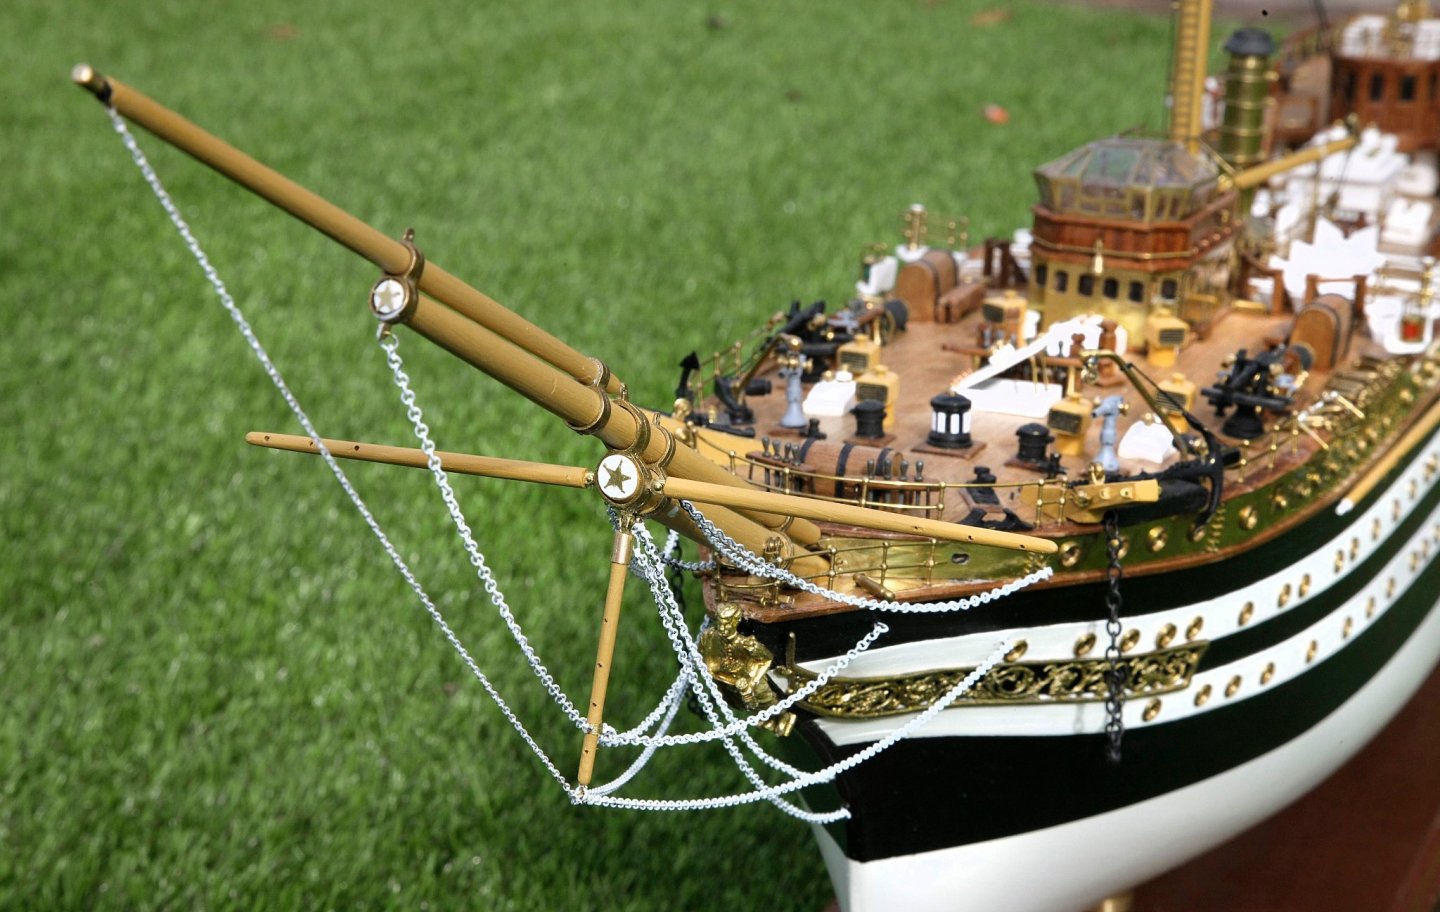
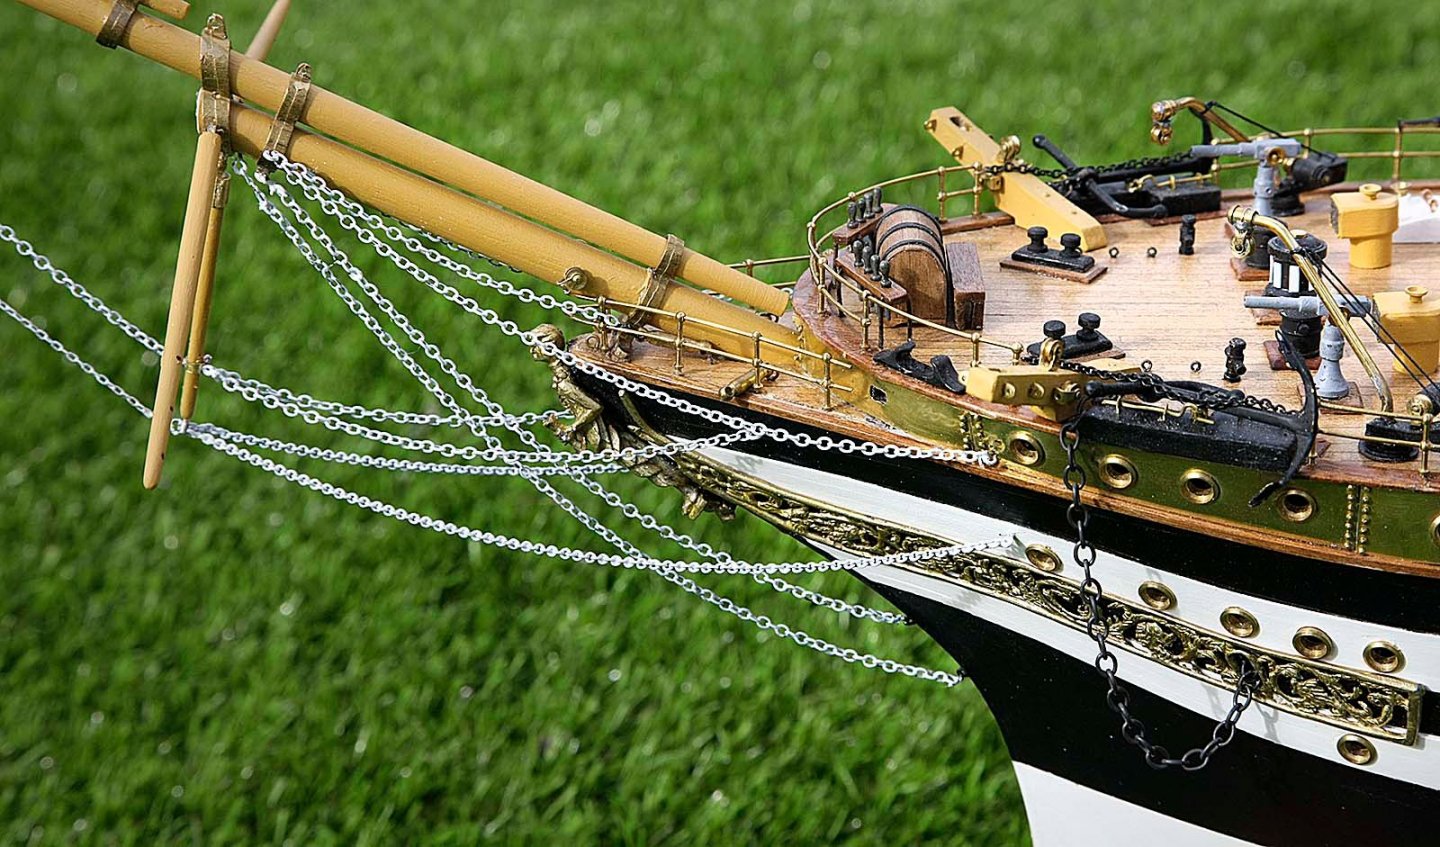
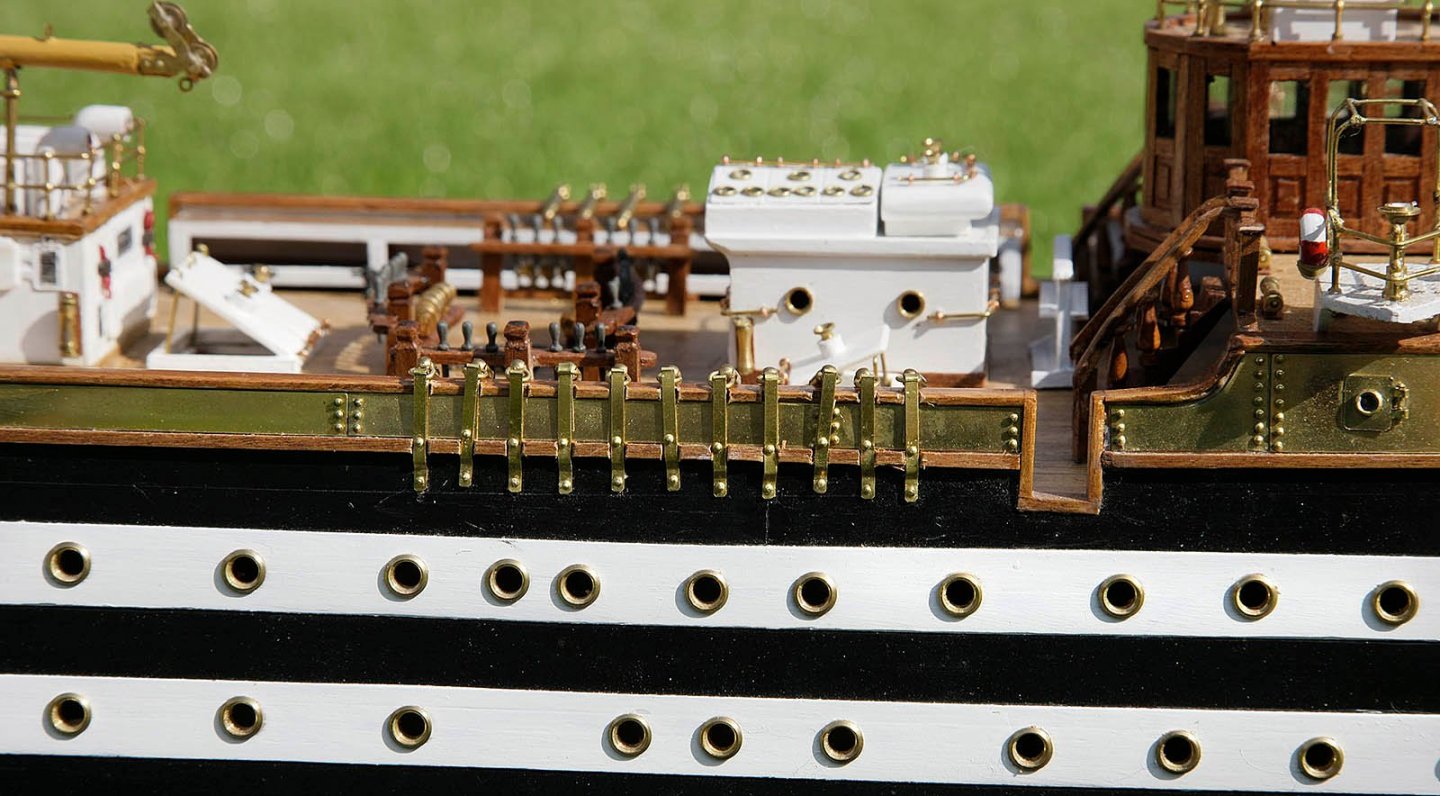
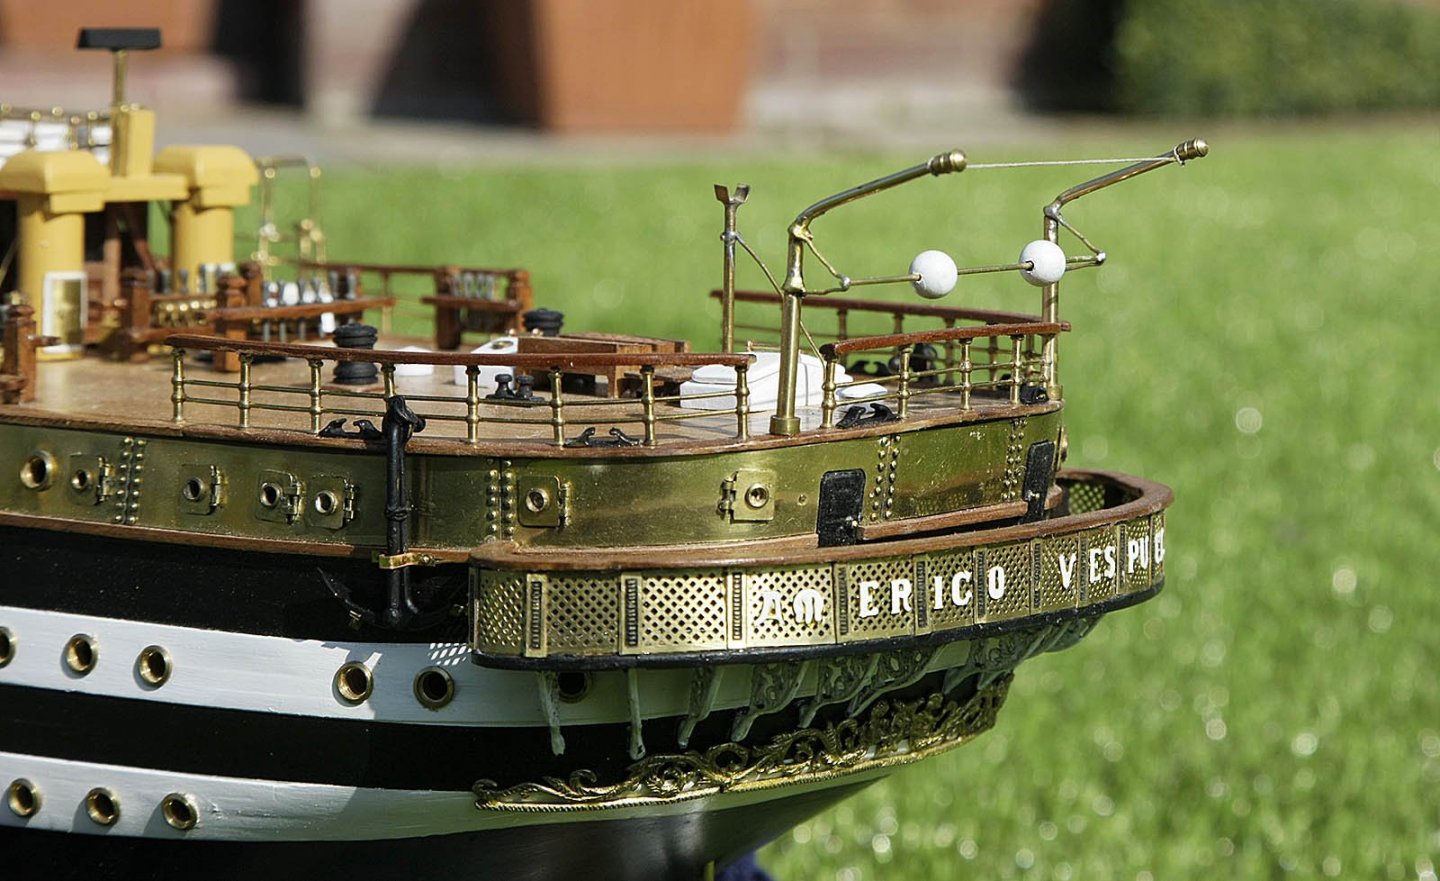
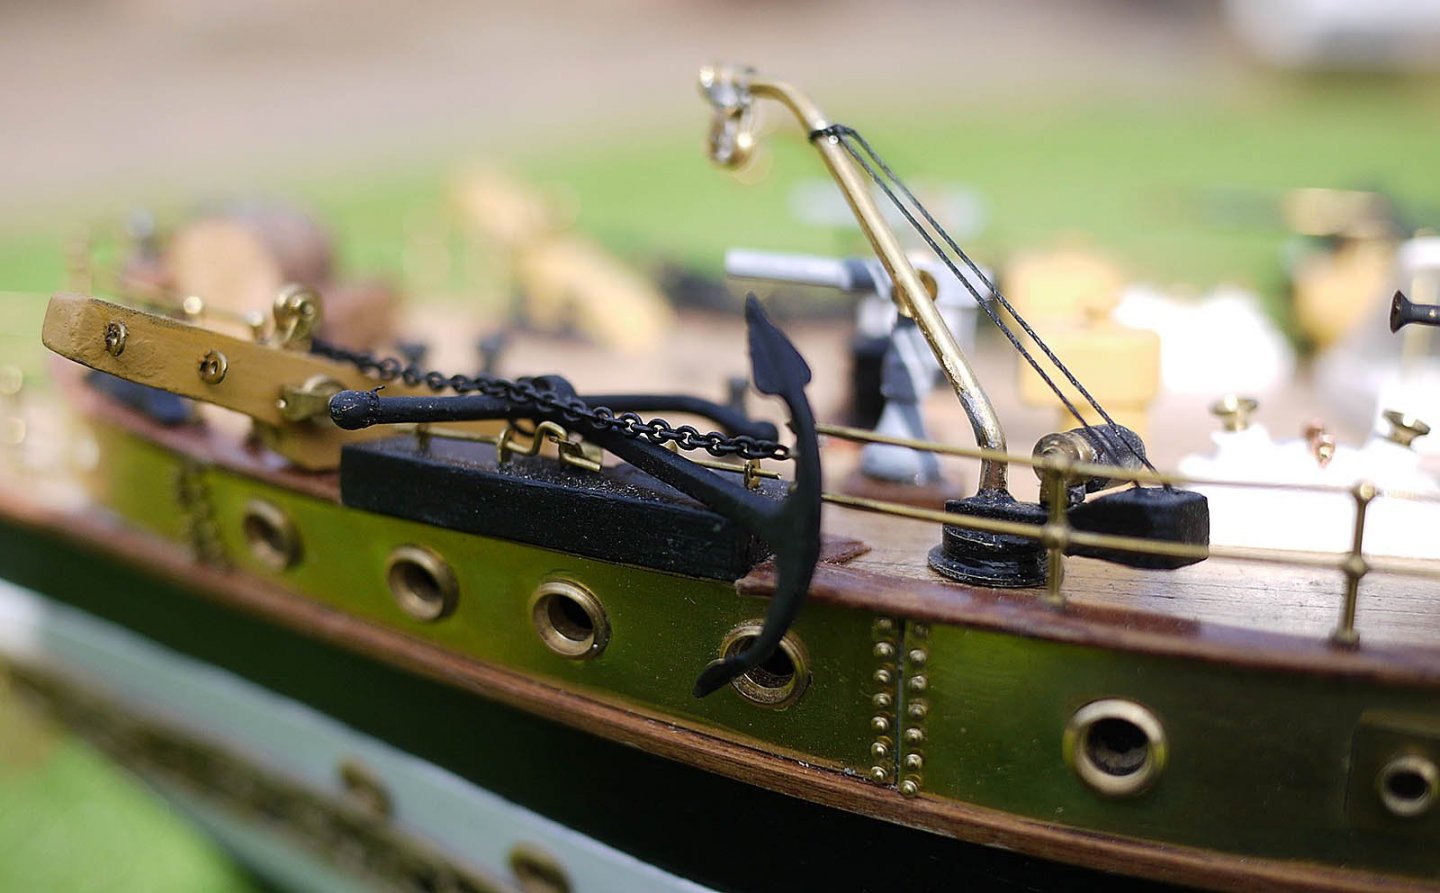
Hi, After seeing some pictures of the actual ship I decided to alter the tension on the chains, mine looked too slack. The picture shows how it looks now after re tensioning.
-
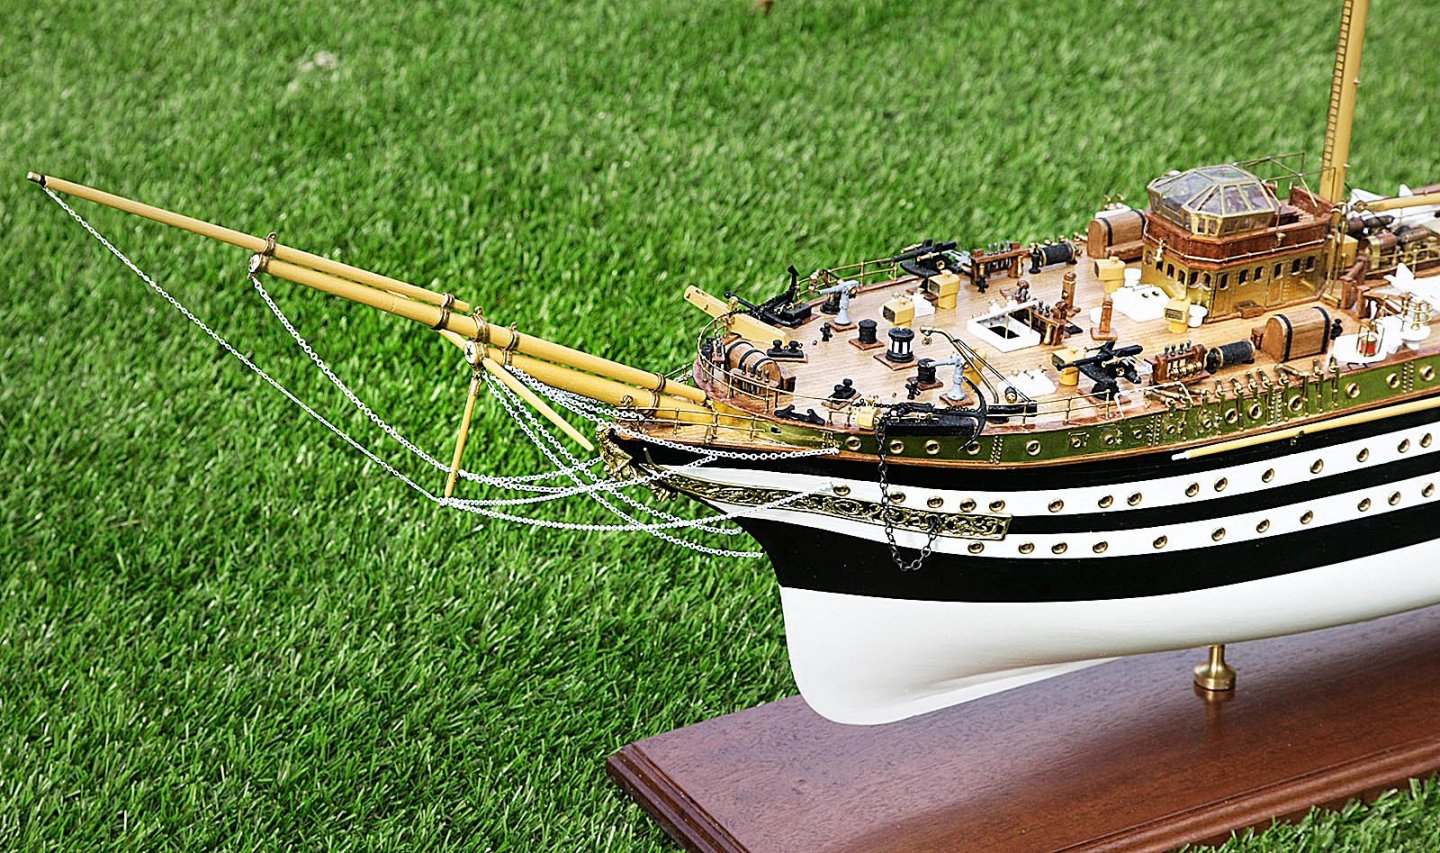
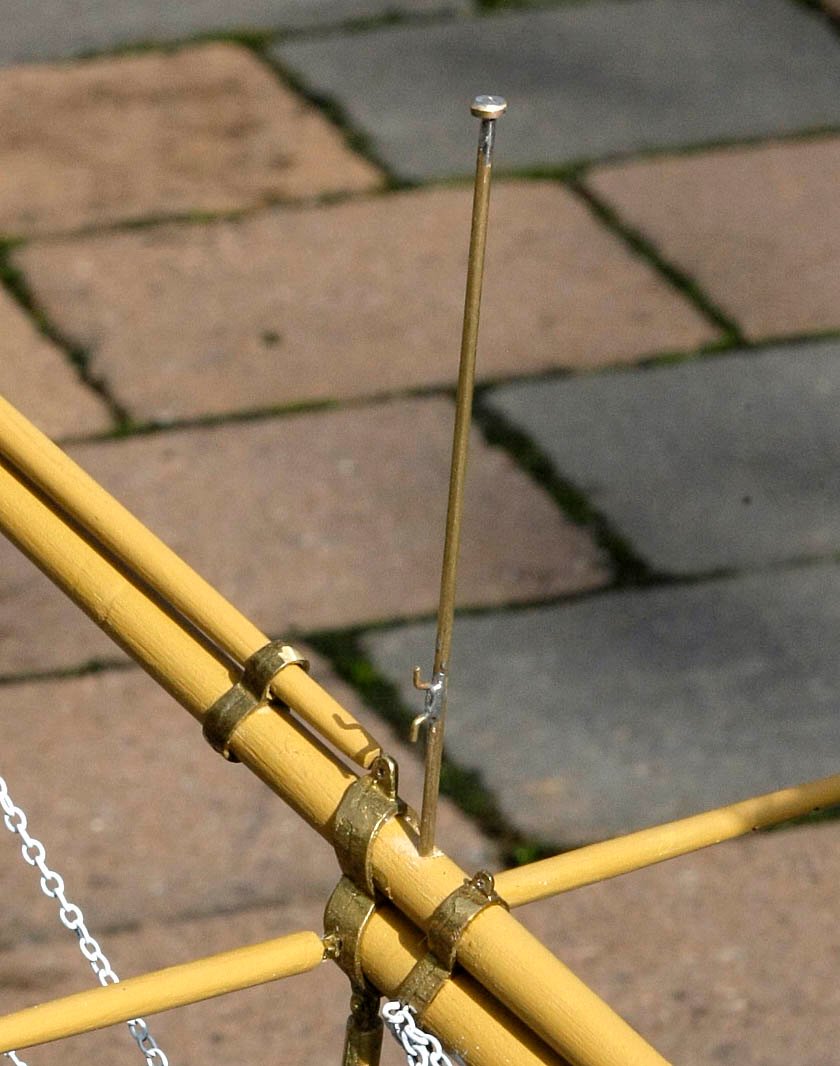
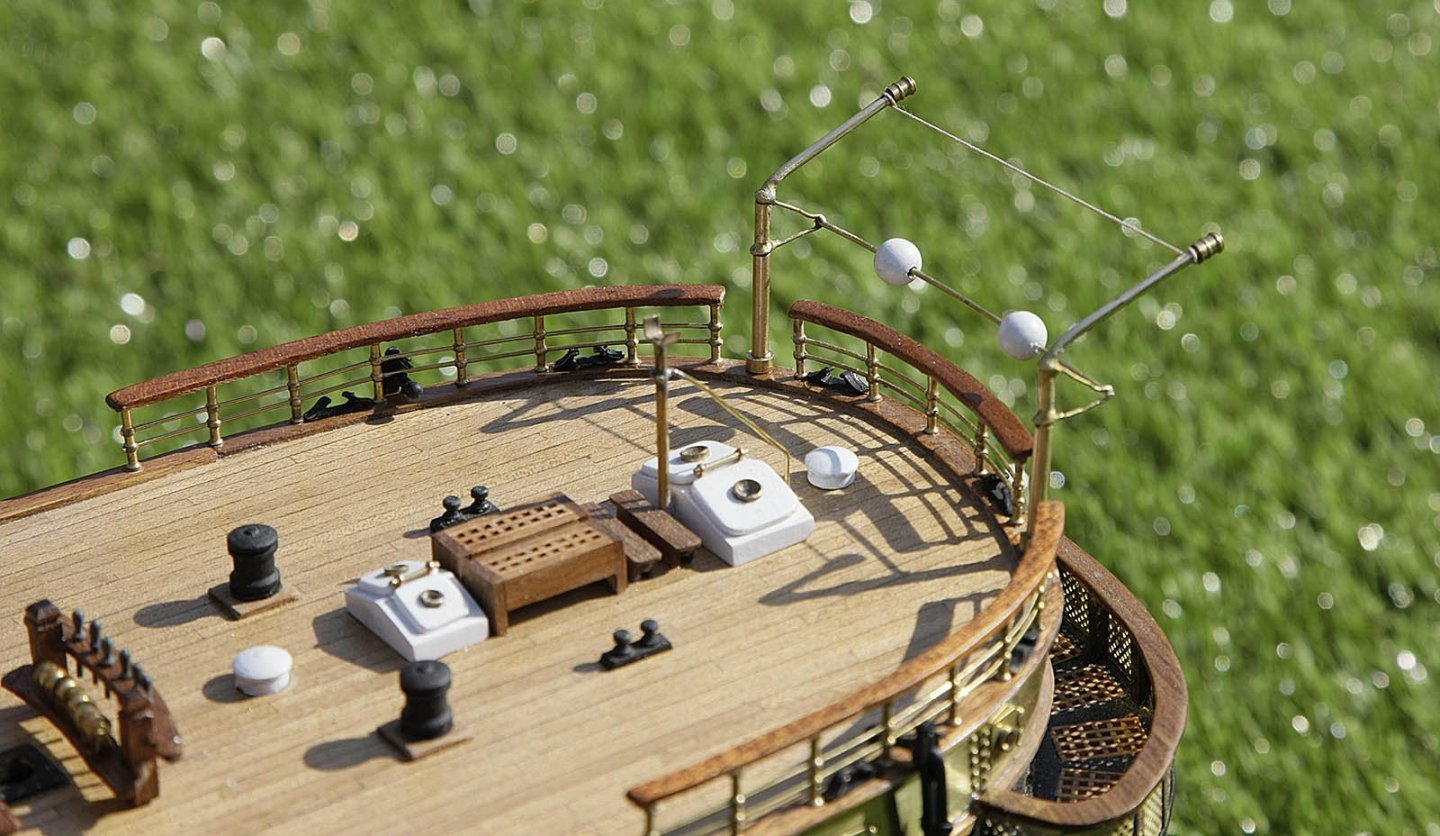
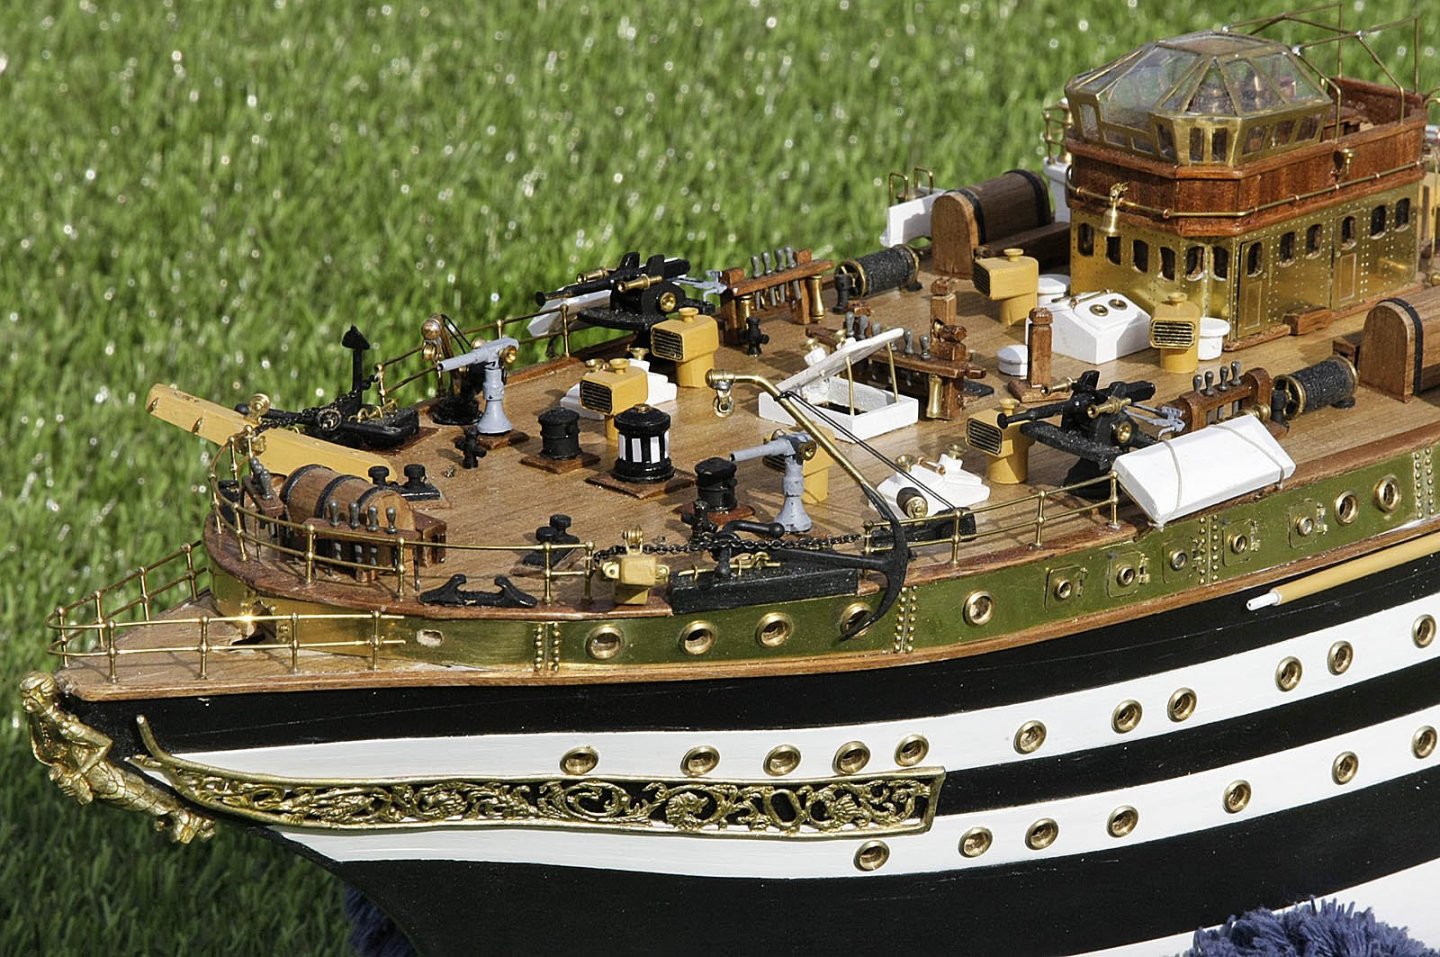
Hi, More updates, I’m really flying through this build, really enjoying it and can’t put it down. I’ve made, painted and fitted the bowsprit along with its bracing chains and flagstaff. It all went okay. The dolphin striker and side spars proved just a little awkward as they are attached on hinges which needed to be made up, the chains had to be just the right tension each side so as not to pull them out of alignment. The flagstaff was an afterthought which I made up from a welding rod topped off with one of the small portholes that were left over, I'll remove it when I do the rigging then paint it white when fitted. Ken


-
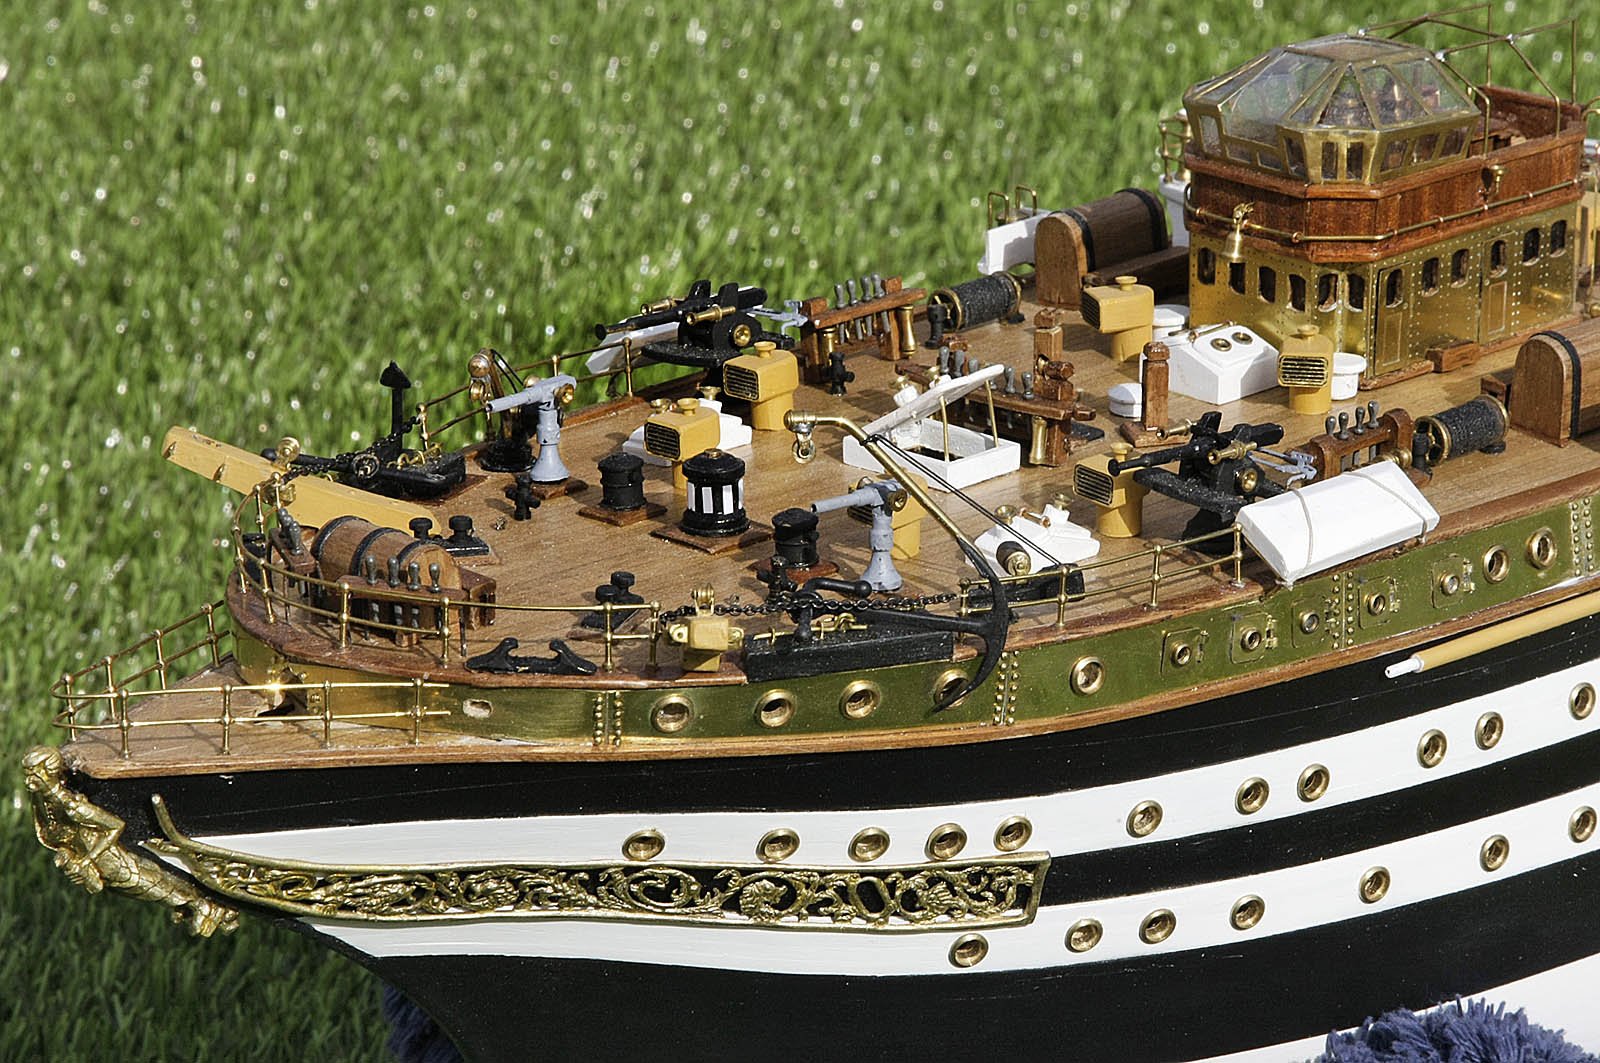
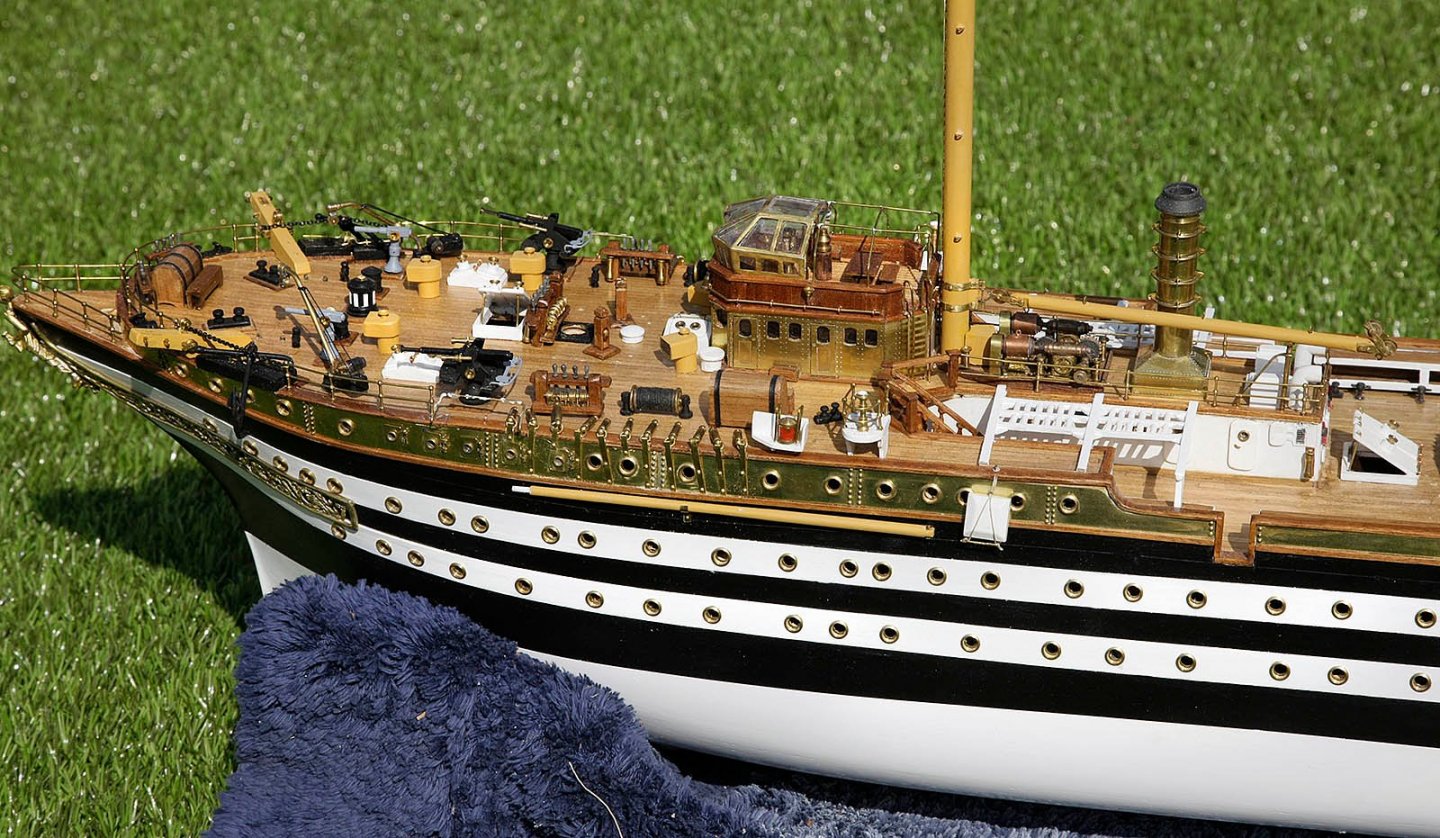
Hi, Again thanks for your likes, please keep them coming. Another short update on my progress. I have now finished and fitted the strops and turnbuckles along the sides. They were easy to make, just folded over brass strips trapping a brass ring in the fold with the turnbuckle attached then nailing them to the hull. The difficulty came with positioning and spacing them. You will see that there is no way of avoiding the portholes, most models of this ship that I have seen have the strops at what looks like unrealistic angles to keep them the same length and avoid fouling the ports, they didn’t look right. I decided that I would keep the angles all the same and just cut them short where they would foul. I think that they came out well and even if they are not right they look more aesthetic. Ken

-
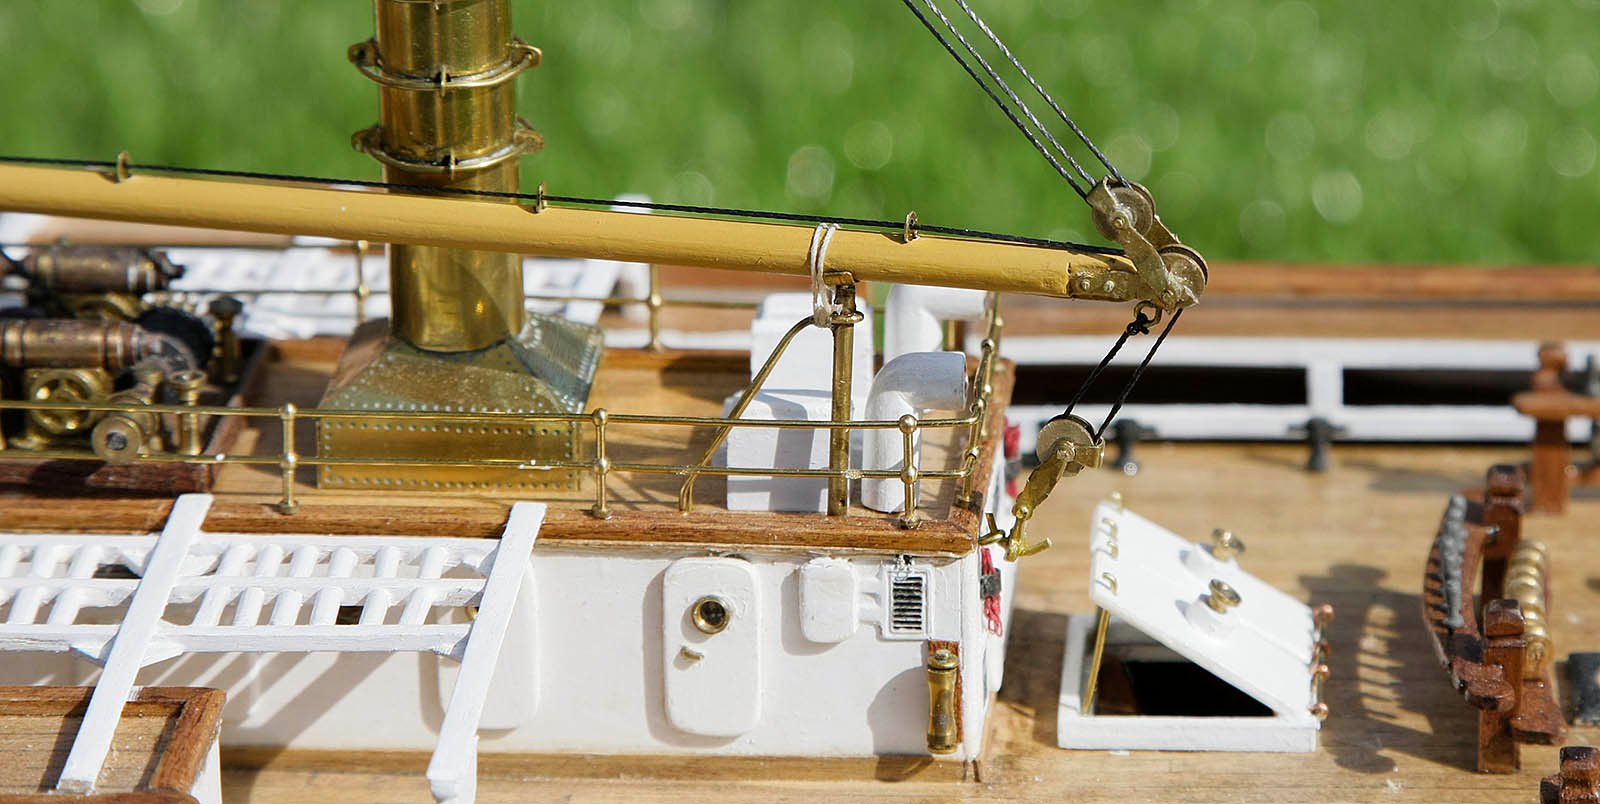
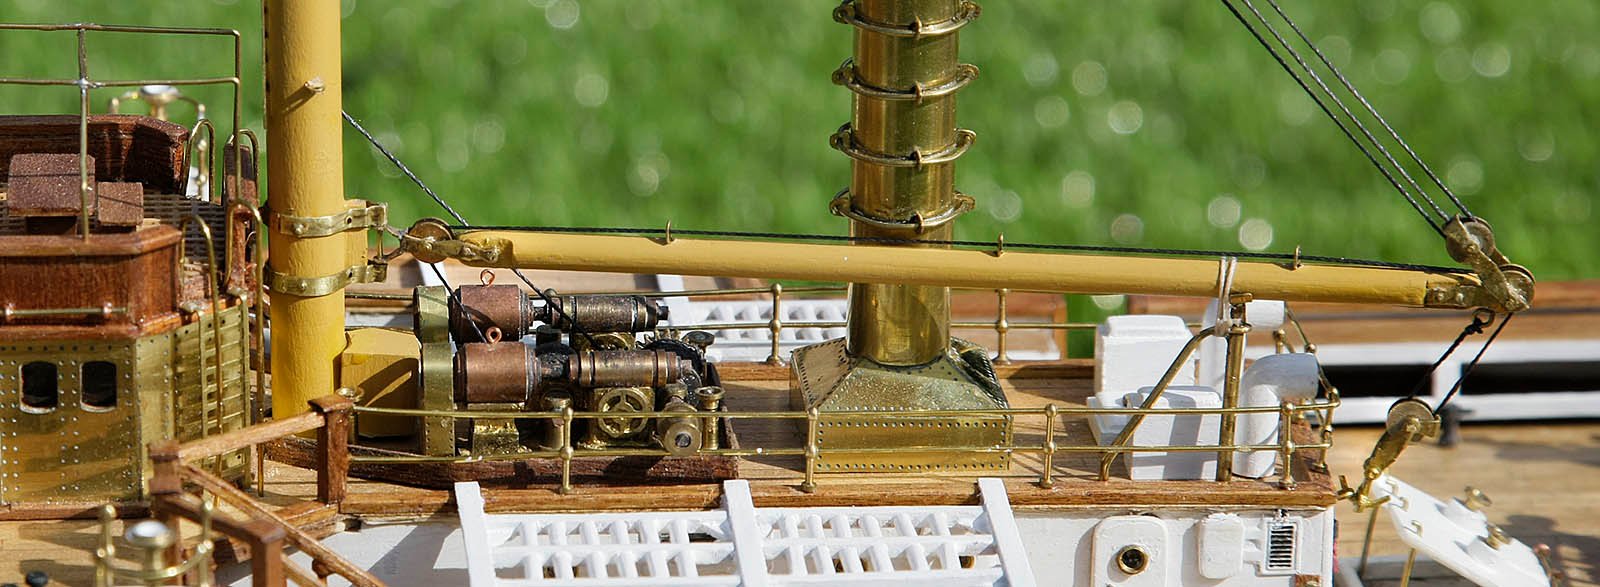
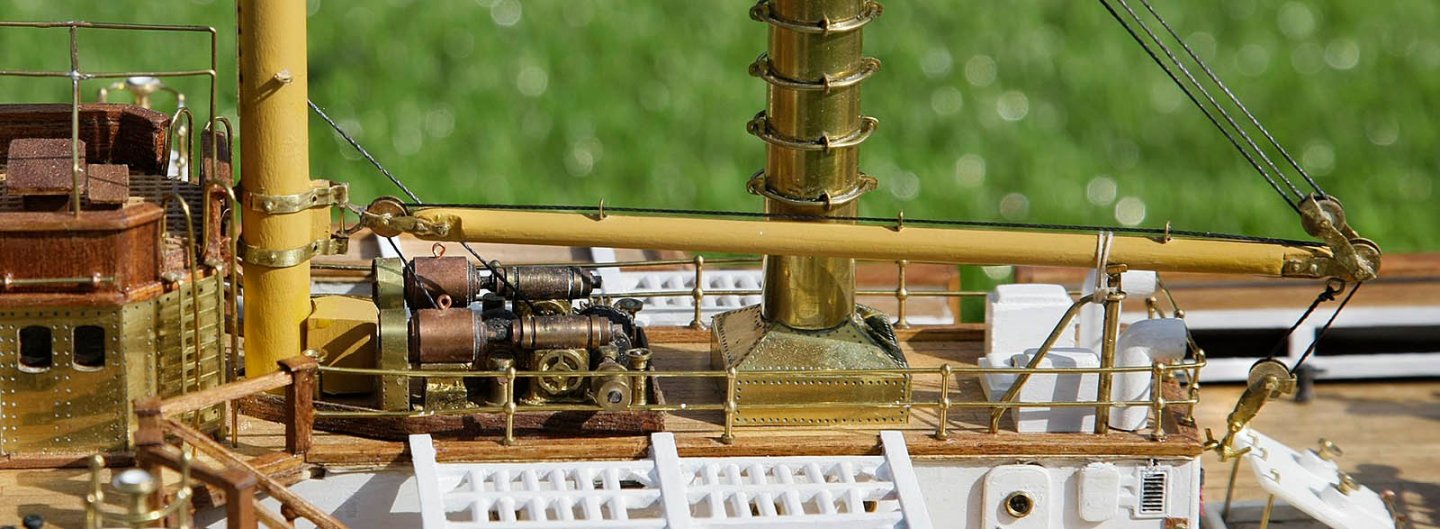
Hi, Here's the derrick fitted and rigged. Ken

-
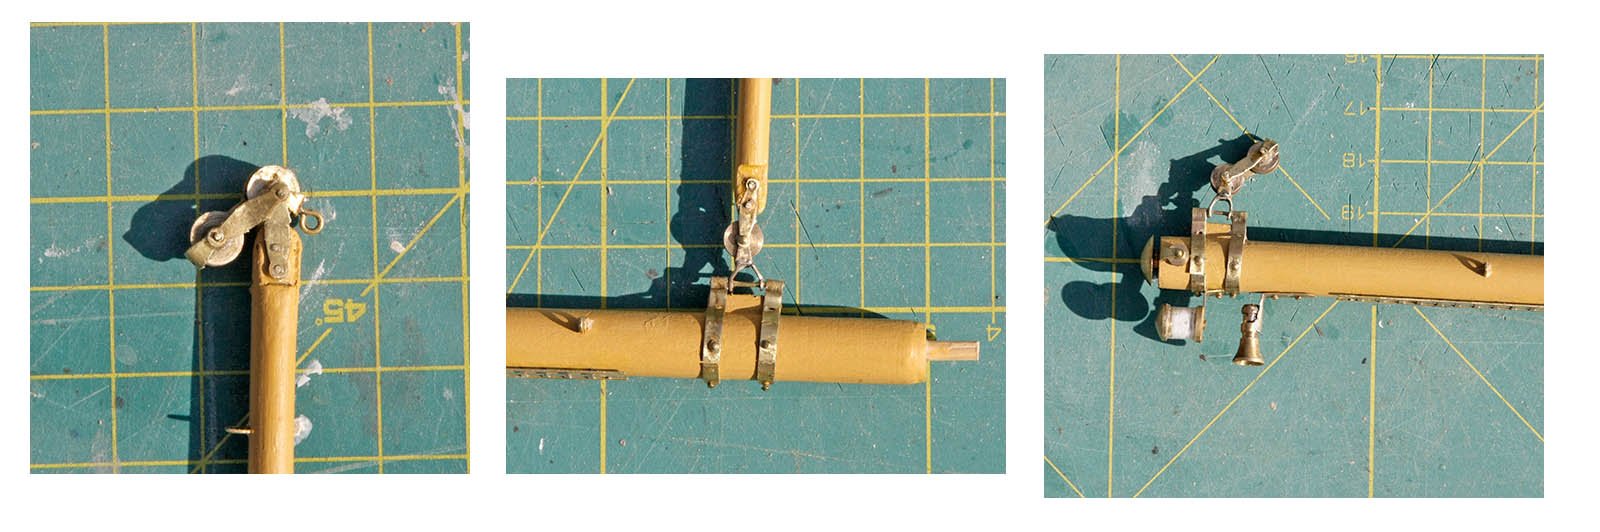
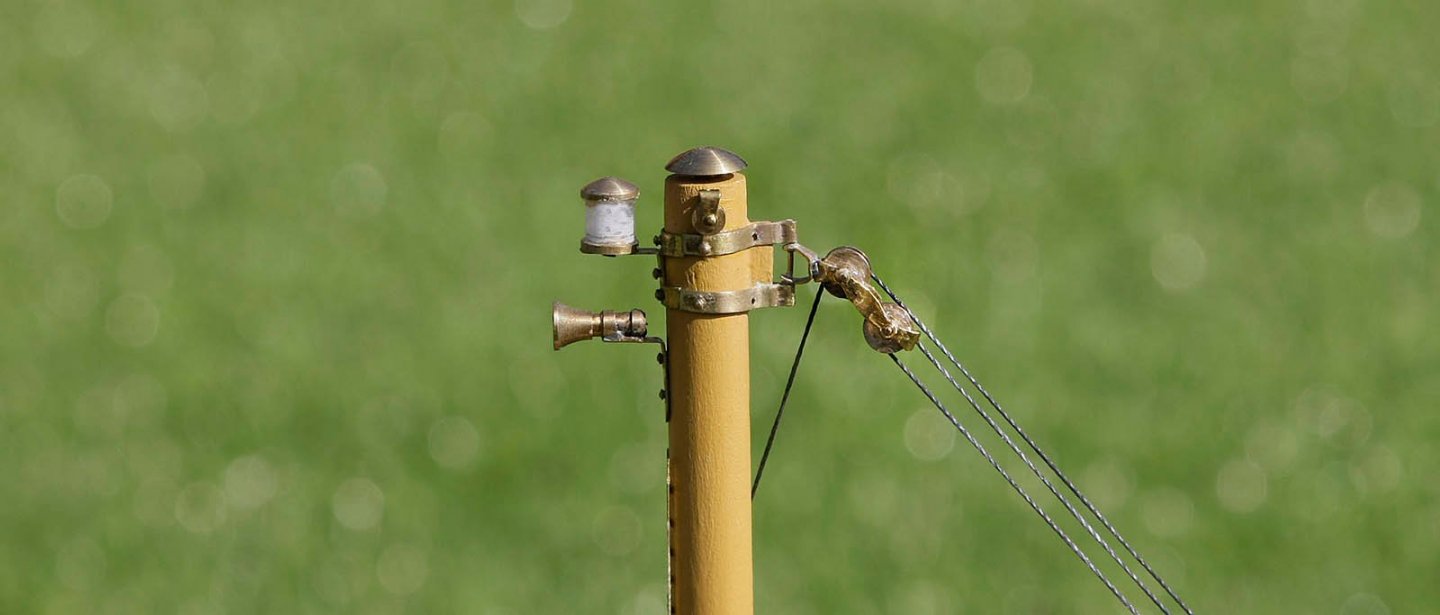
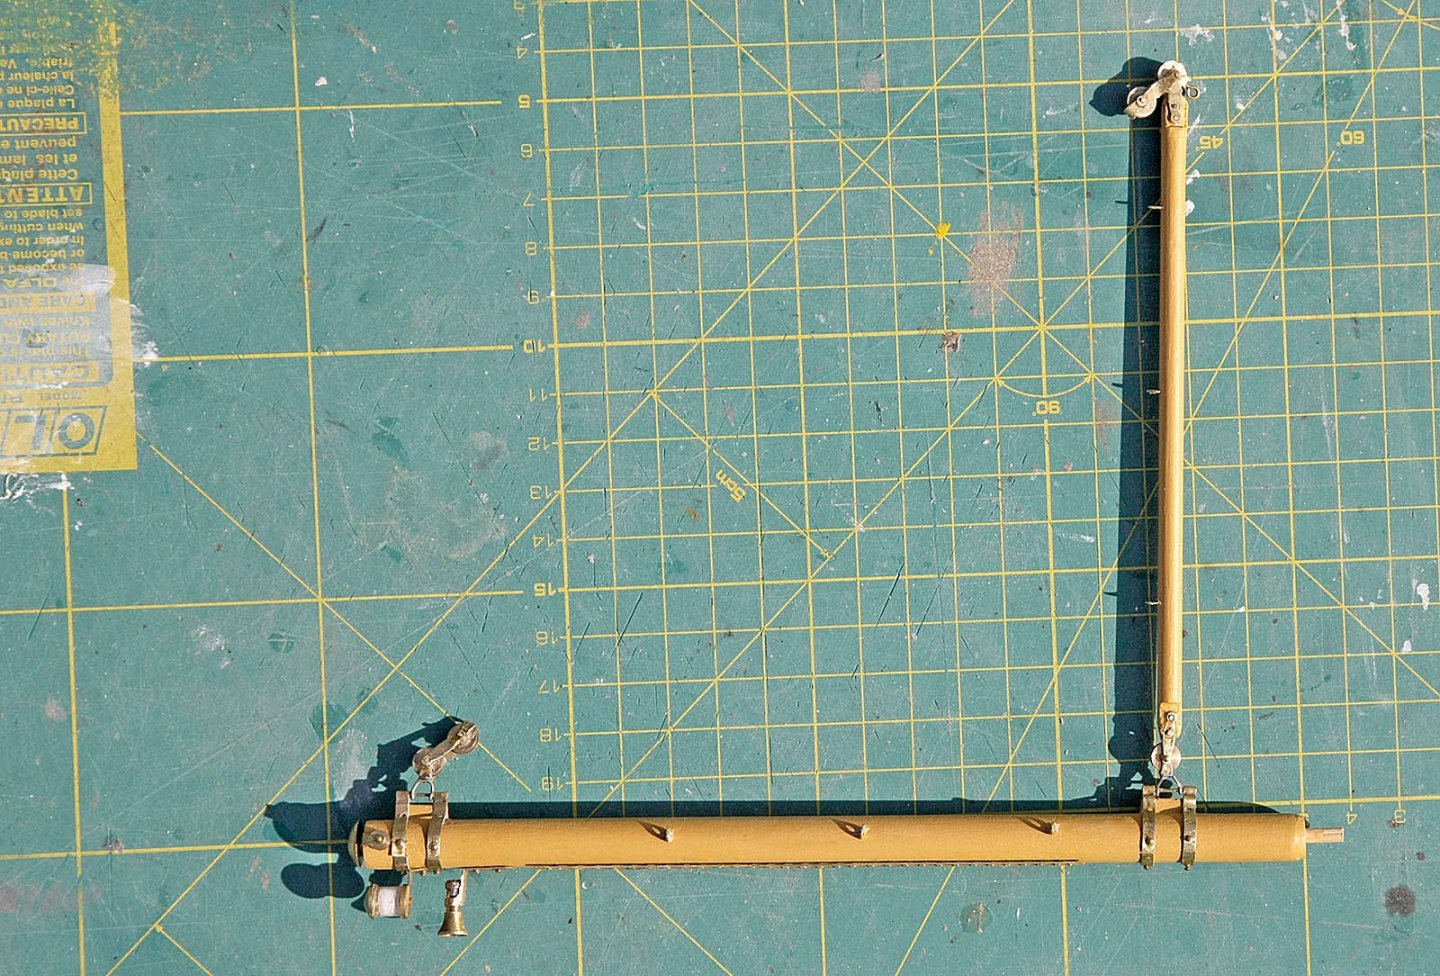
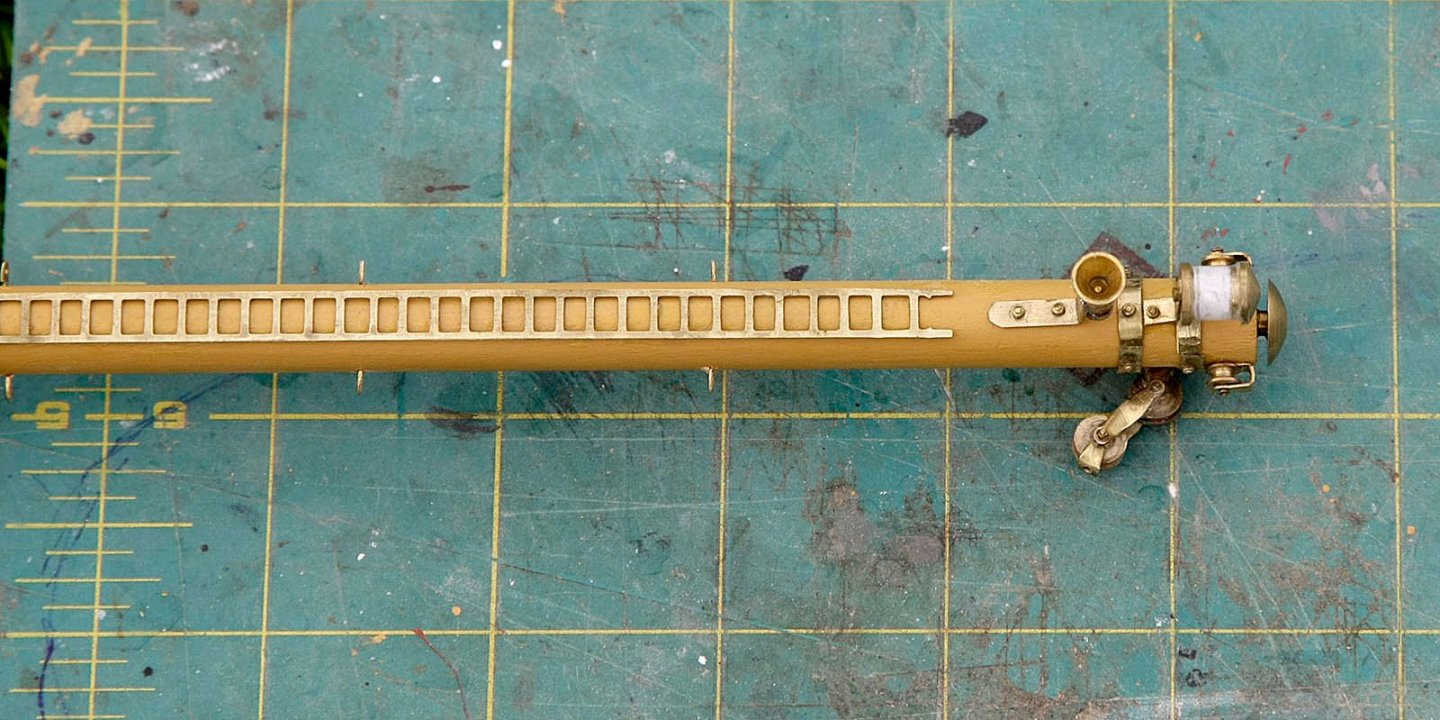
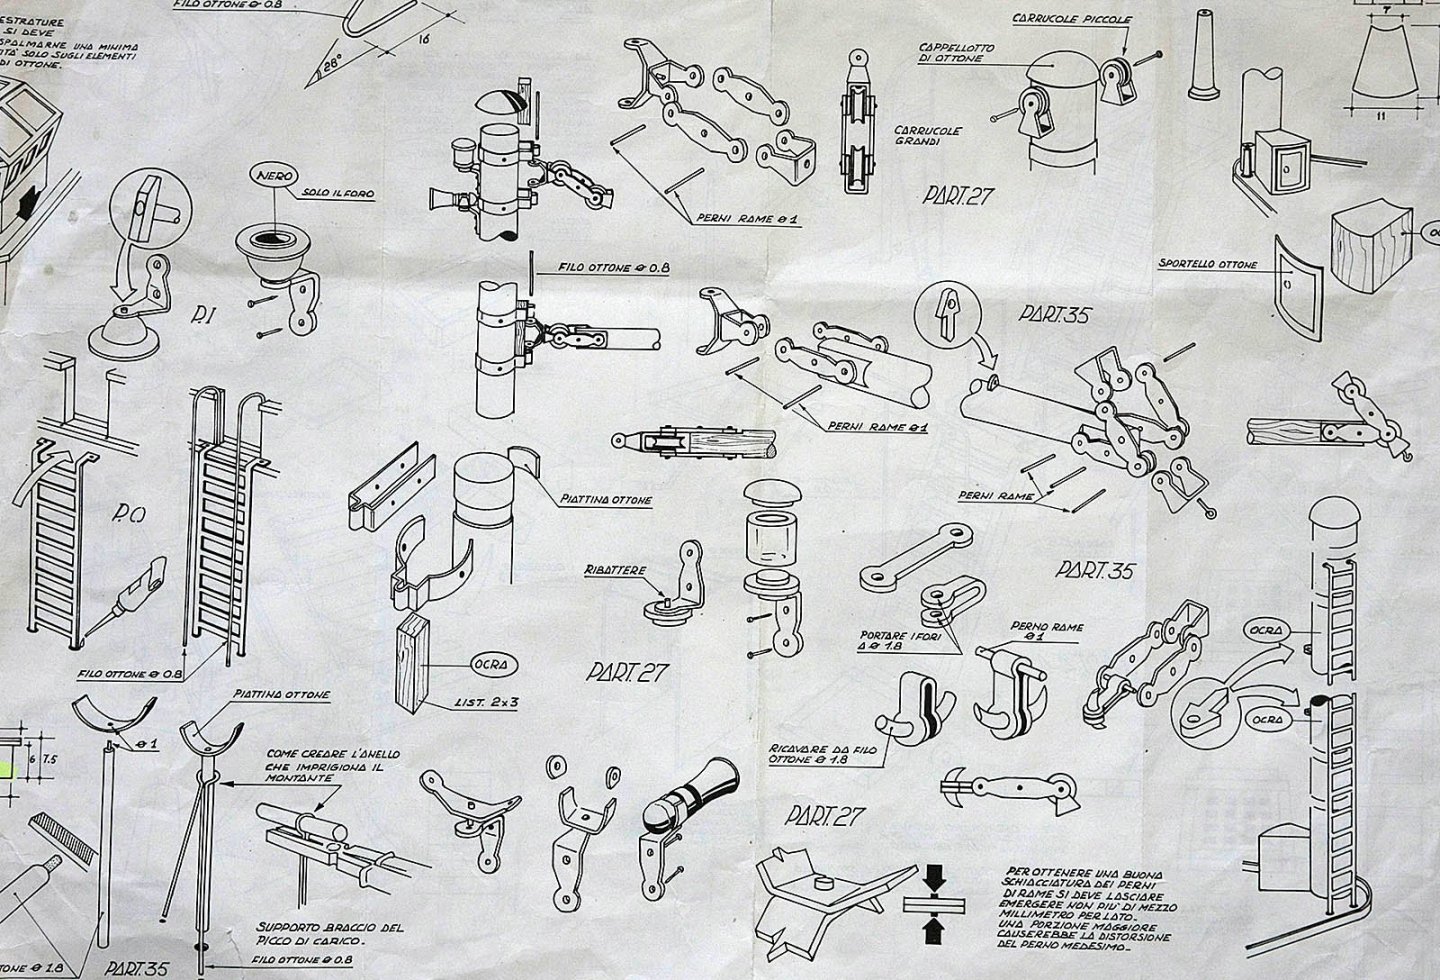
Hi, Once again thanks for your likes. Next I decided to make up the large derrick that’s used to lower the ships pinnace and motor launch from the midships. The plans for this at first glance looked easy enough but they were like a Chinese puzzle, almost impossible to interpret. First problem was that the plan was not to scale and only the diameters were given, there are three different size rollers supplied but no indication as to which size went where. There is no rigging guide for it so it was difficult to understand how it would work which would have helped understand how it all fit together. It eventually came together and I now understand its concept. At times there were up to seven pieces that needed to be held together so that all the holes for the holding pins lined up, all of them very small and tricky to hold, I had to get my wifes help with this as I just don’t have enough fingers. I completed the unit by painting, adding lights and horn and the cable guides, it is now ready to mount and rig, but I’ll do that in another session. Ken

-
Hi. Carrying on from my last post I continued making up the stern davits. I’m getting quite a bit of soldering practice on this build and improving all the time. The davits were made up of thirteen pieces of brass rods and wire of various sizes, shaped and soldered together, again not to be painted. I won’t do the other davits just yet as I think that they would get in the way of the rigging. You will notice that I have also made and added the brass boom support. I also made and attached the reserve anchors at the stern and the lifebelts. Next week I’ll be doing the strops and turnbuckles for the shrouds ready for the masting. Ken
-
Hi, Thanks again for those likes. This is just a short update on my progress. Only the rails at the stern to show, but progress is progress. You may notice that I've started the rear boat davit, one of many, there are eleven ships boats on board, something to look forward to building, ( or not ) Ken
-
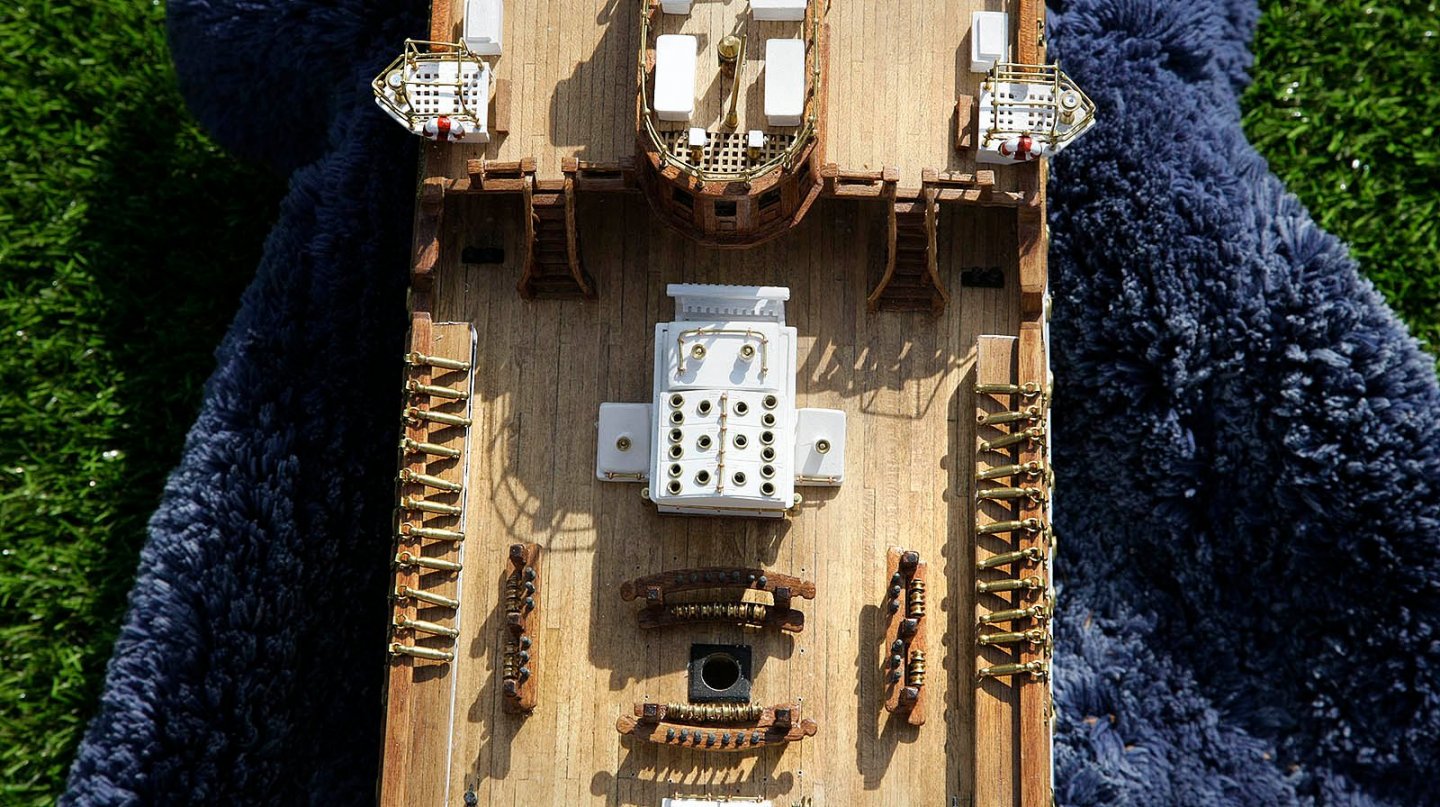
Hi. The build continues, this time it’s the platform that the two large pinnace sit on, a bit fiddly to make because of the round slats but no real problem. I’ve also made and fitted some small parts but these now seem not worth mentioning. I’ve attached some pictures. Ken

-
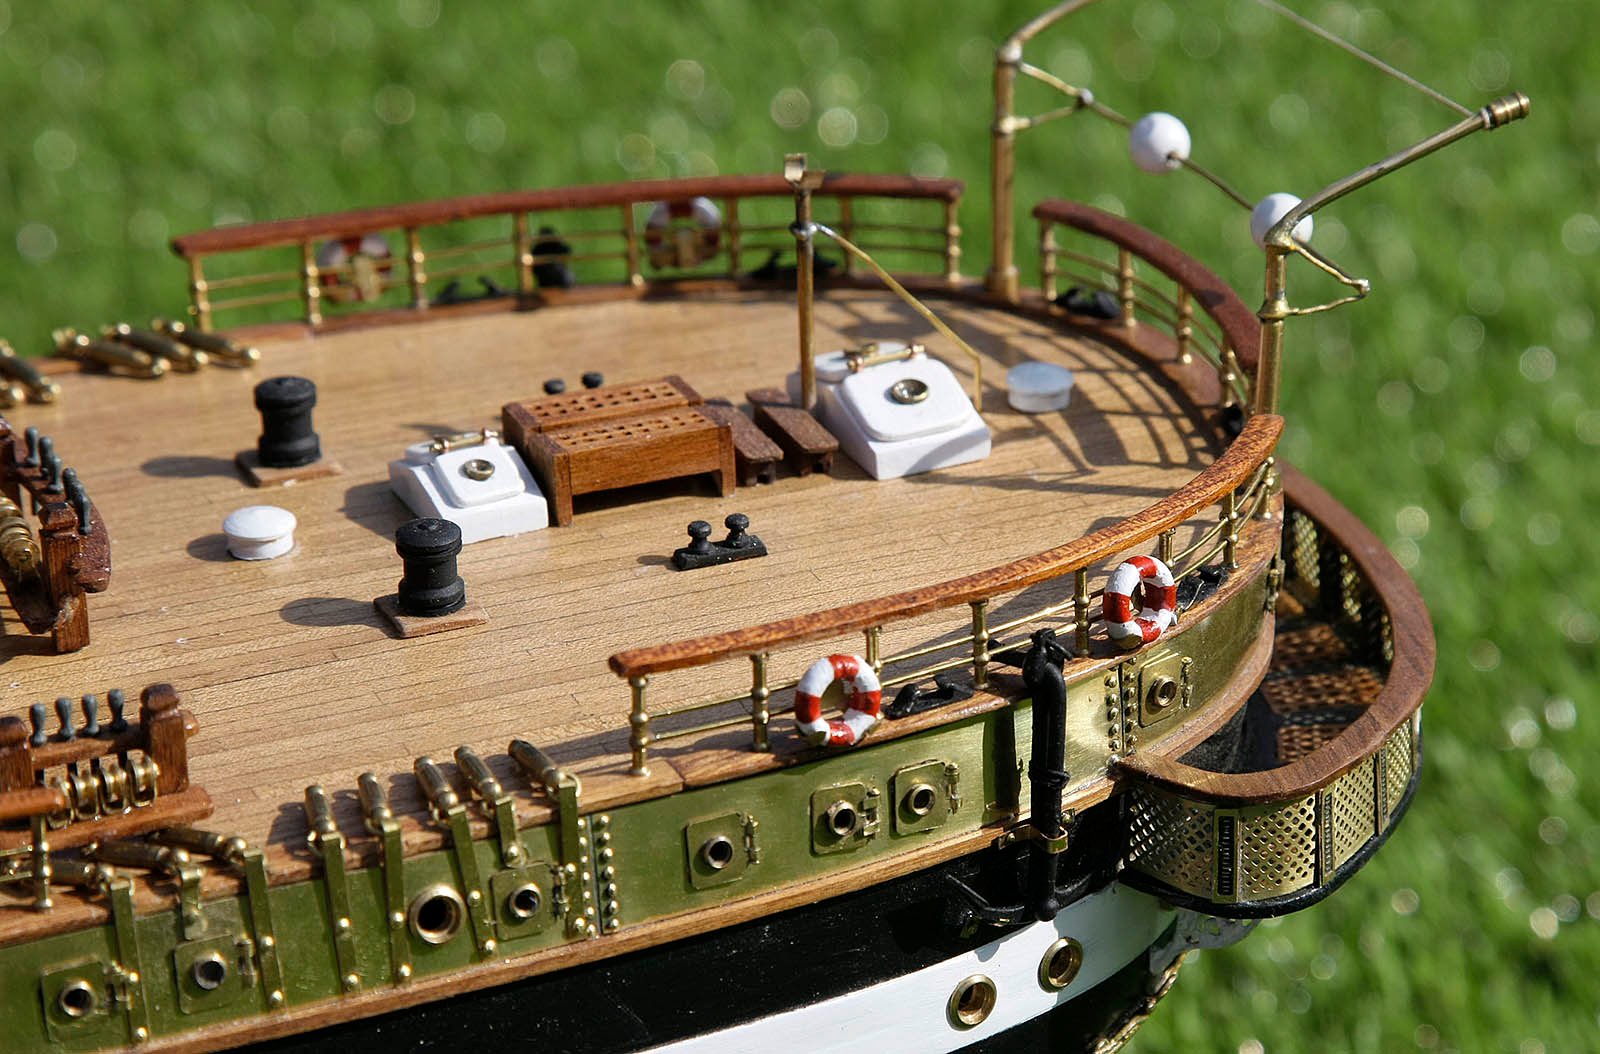
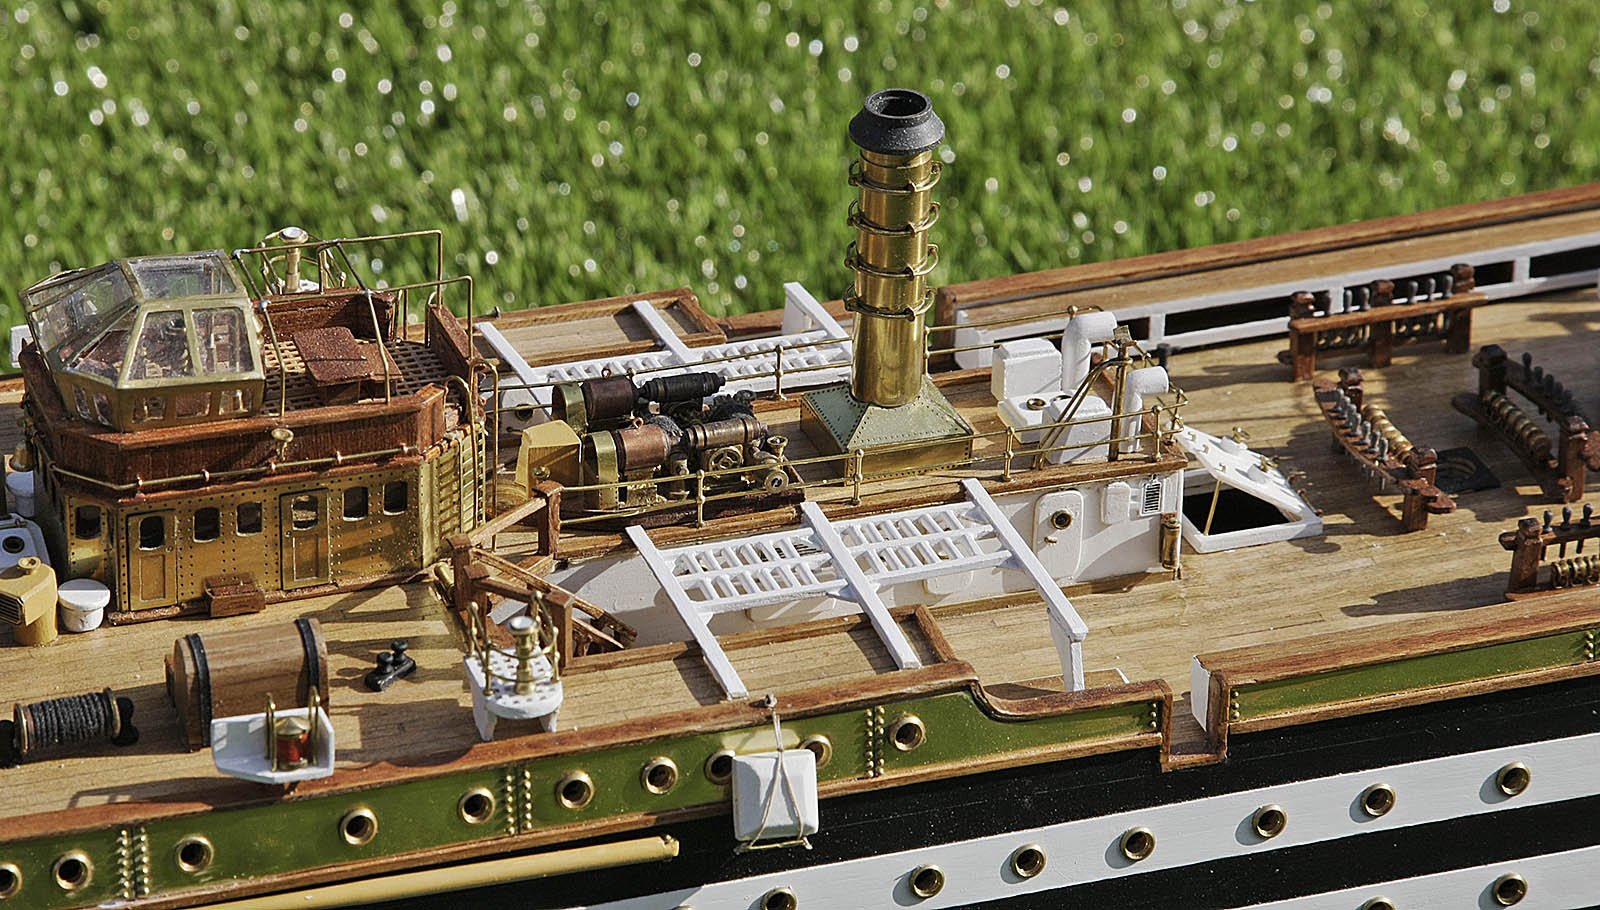
Hello again. Progress is being made fairly quickly, this build gets addictive once into the small detailed bits. I’ve now completed the rails at the bow end and around the funnel deck and a few other bits, the forward decks are now completed. You will need to look closely at what’s been done as I’m losingo track of the sequence of, build, photo, log as I’m doing bits everywhere at once with no particular plan in mind, a bit like a mad woman’s diary. Ken

-
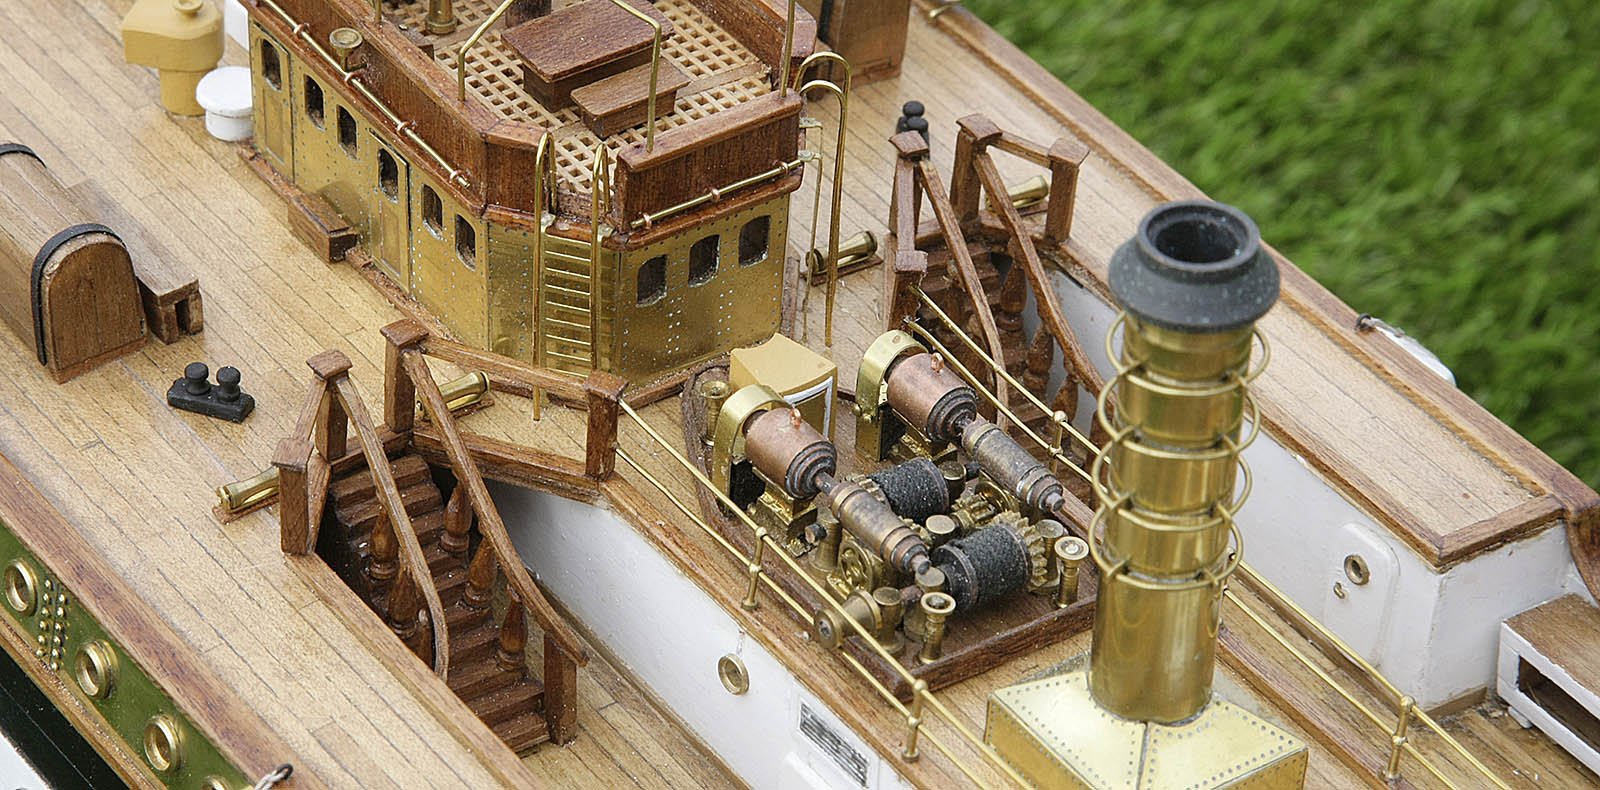
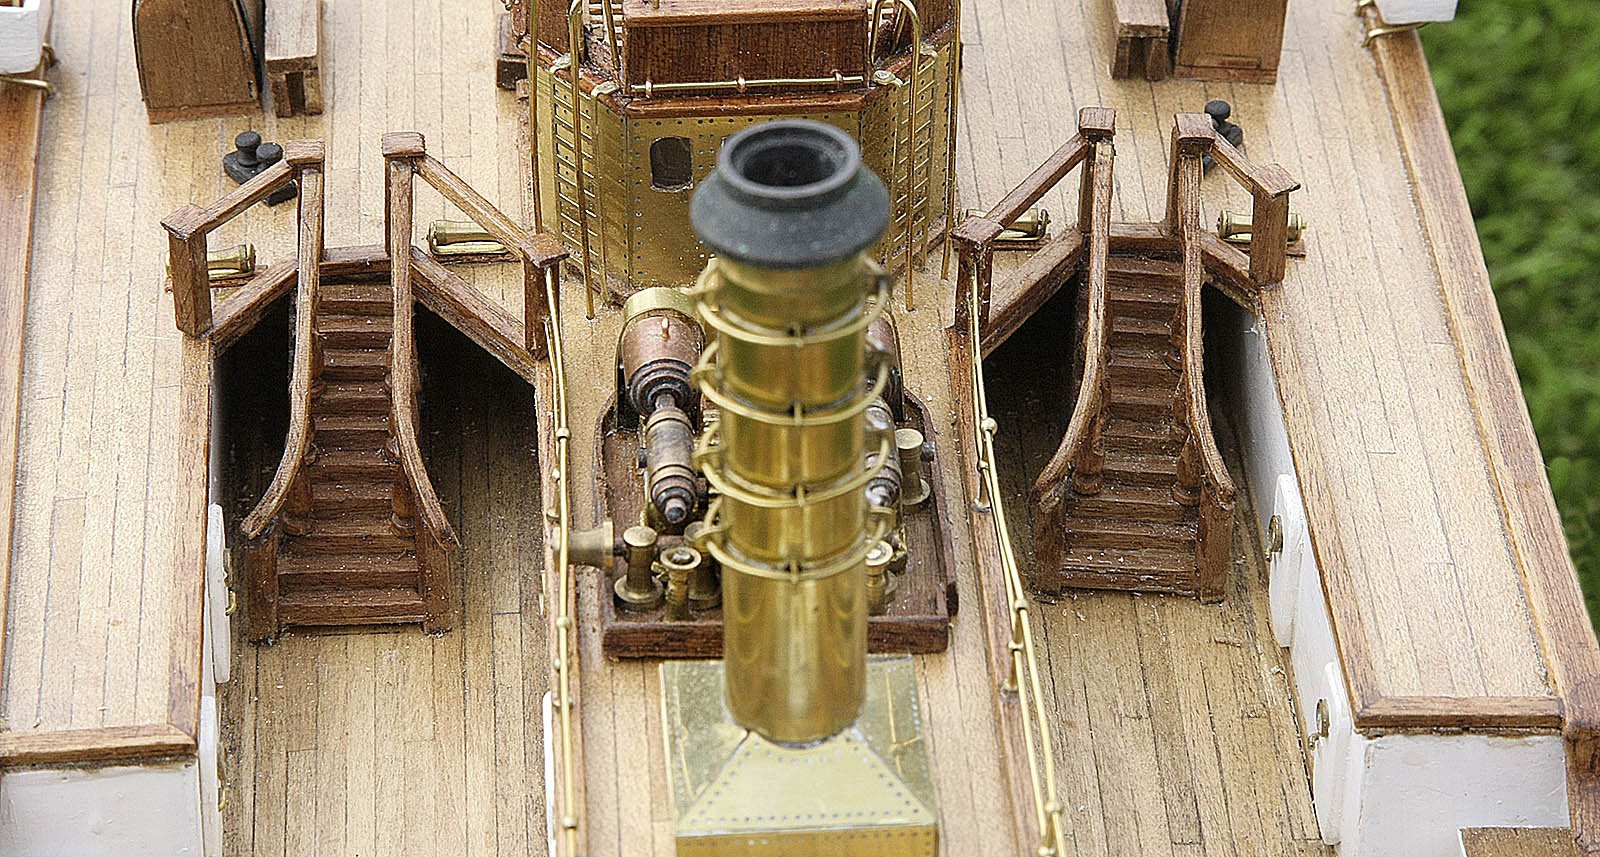
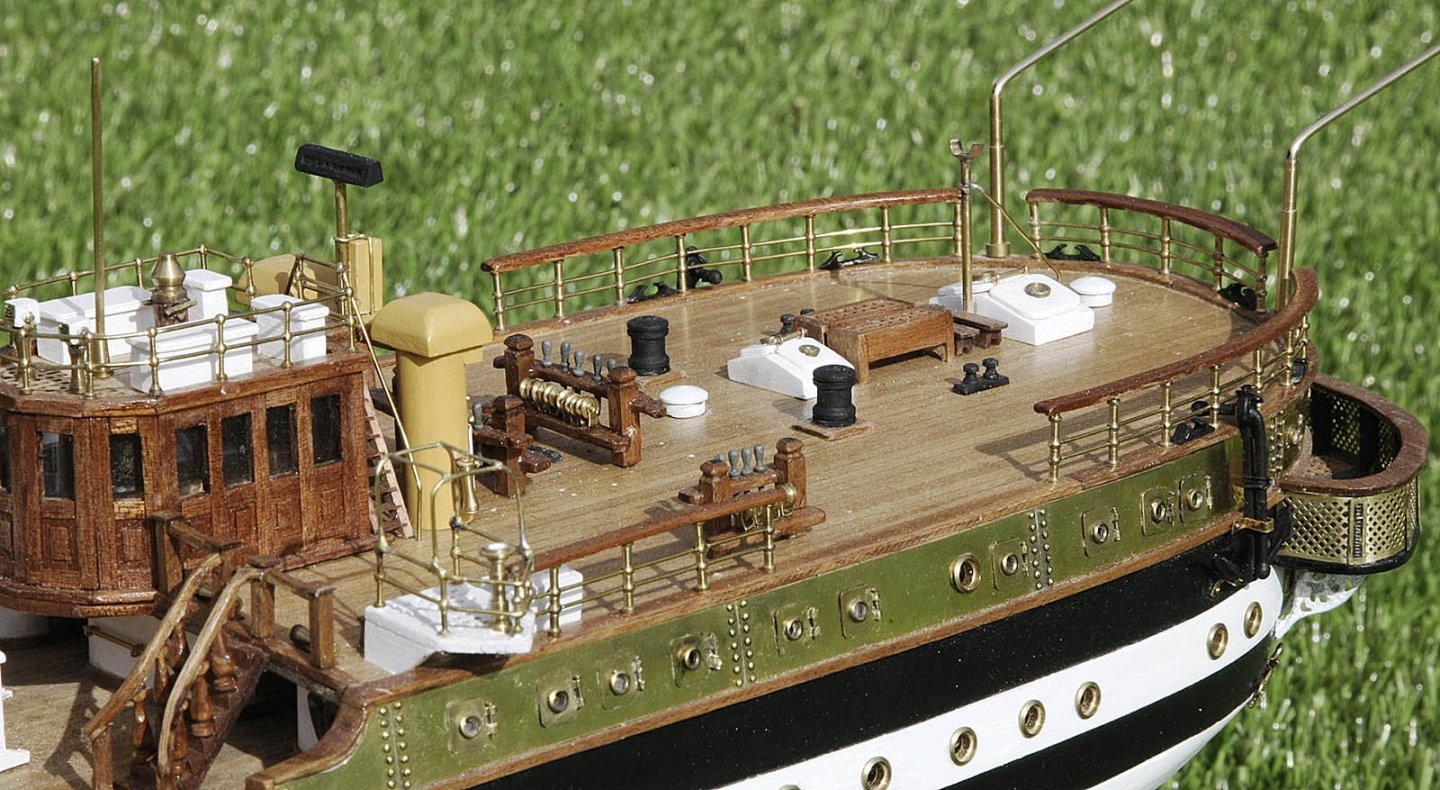
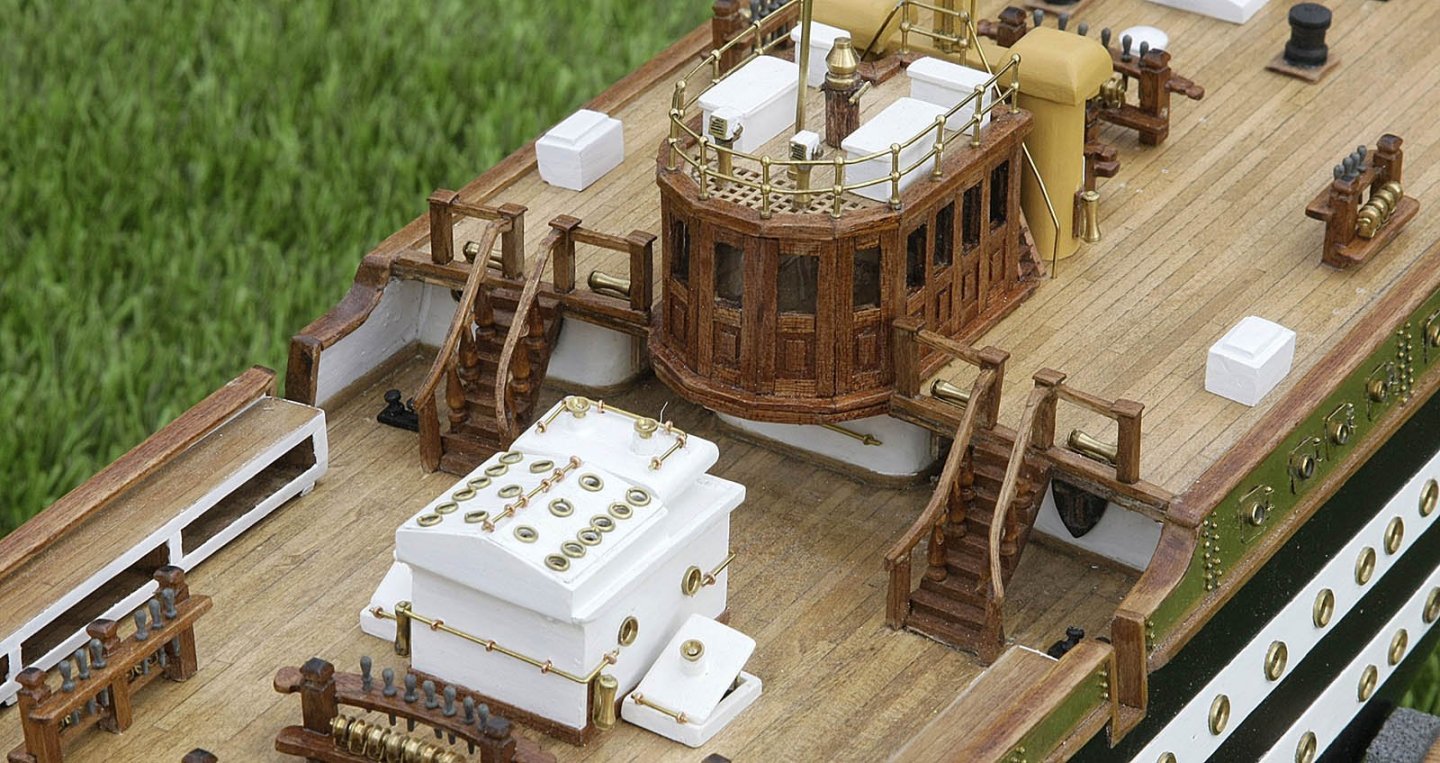
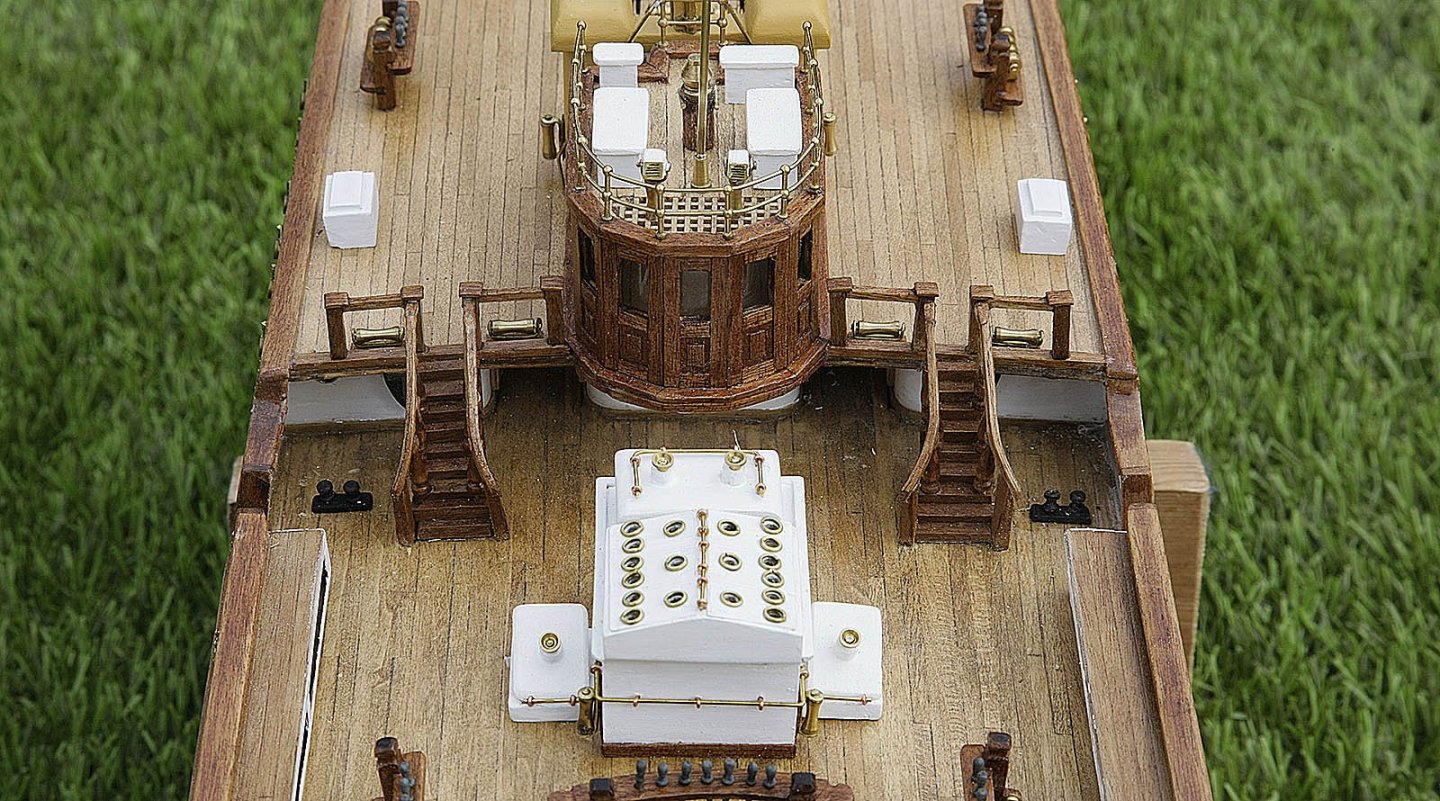
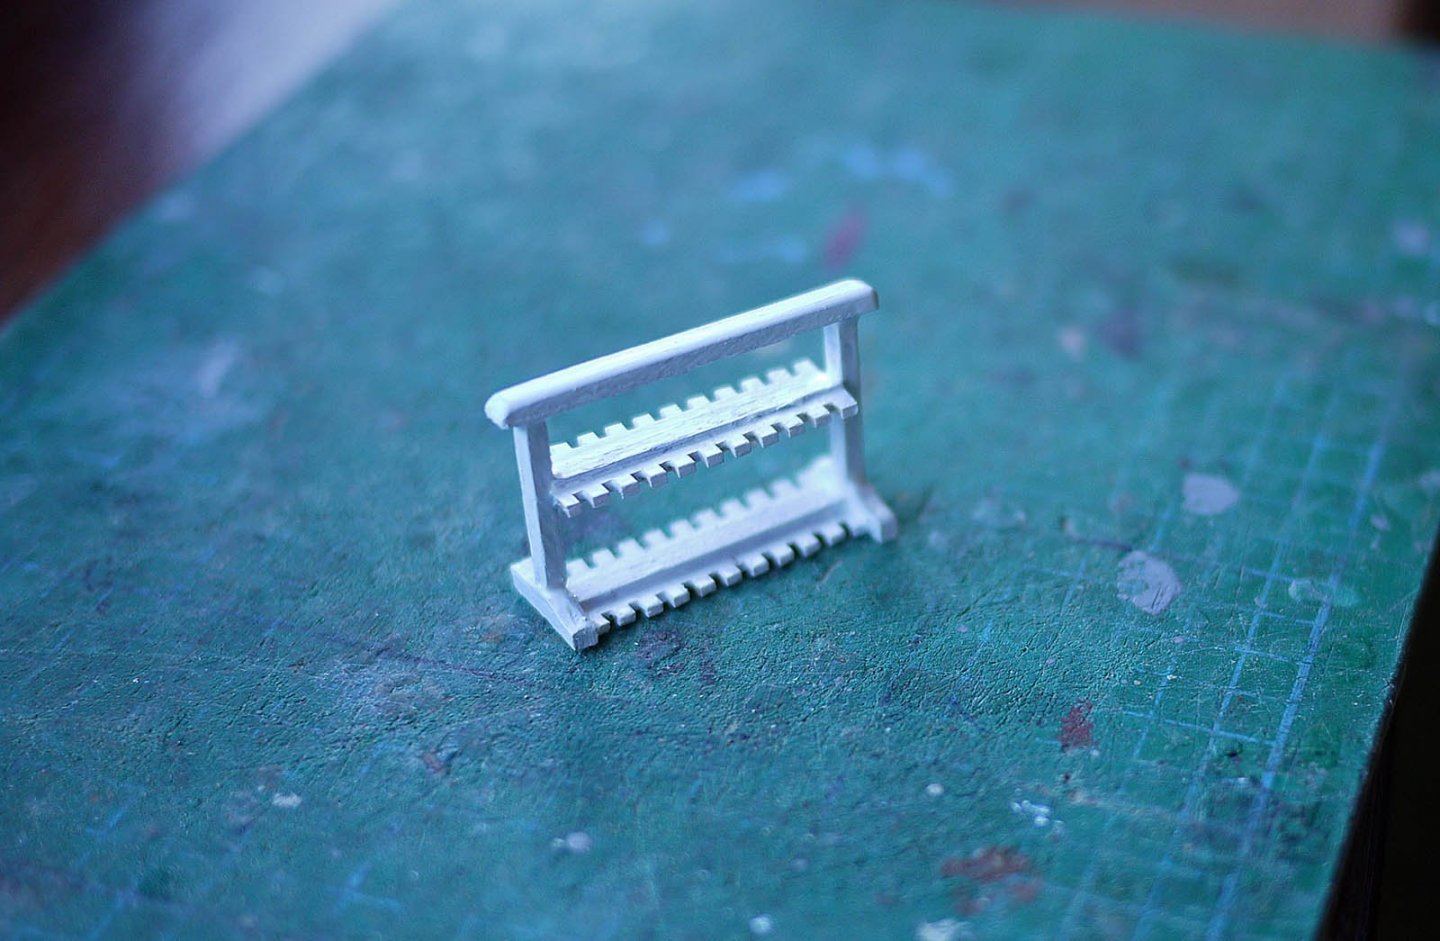
Hi. Again thanks to all who gave their likes to my build, and welcome aboard Tom, Mad Dog. It’s still progressing well, here’s the result of the next session. You will know that I had built the staircases earlier, now I have glued them into place and built up their rails as well as the rails on the upper decks. I have also started to make up the brass rails around the funnel deck, you can just about see part of them in the pics, again I’m pleased with the result. I’m also still making up the smaller parts which add to its character. I have made up pike racks before but never a riffle rack so this is a first for me and I think a nice touch that you wouldn’t expect. Ken


-
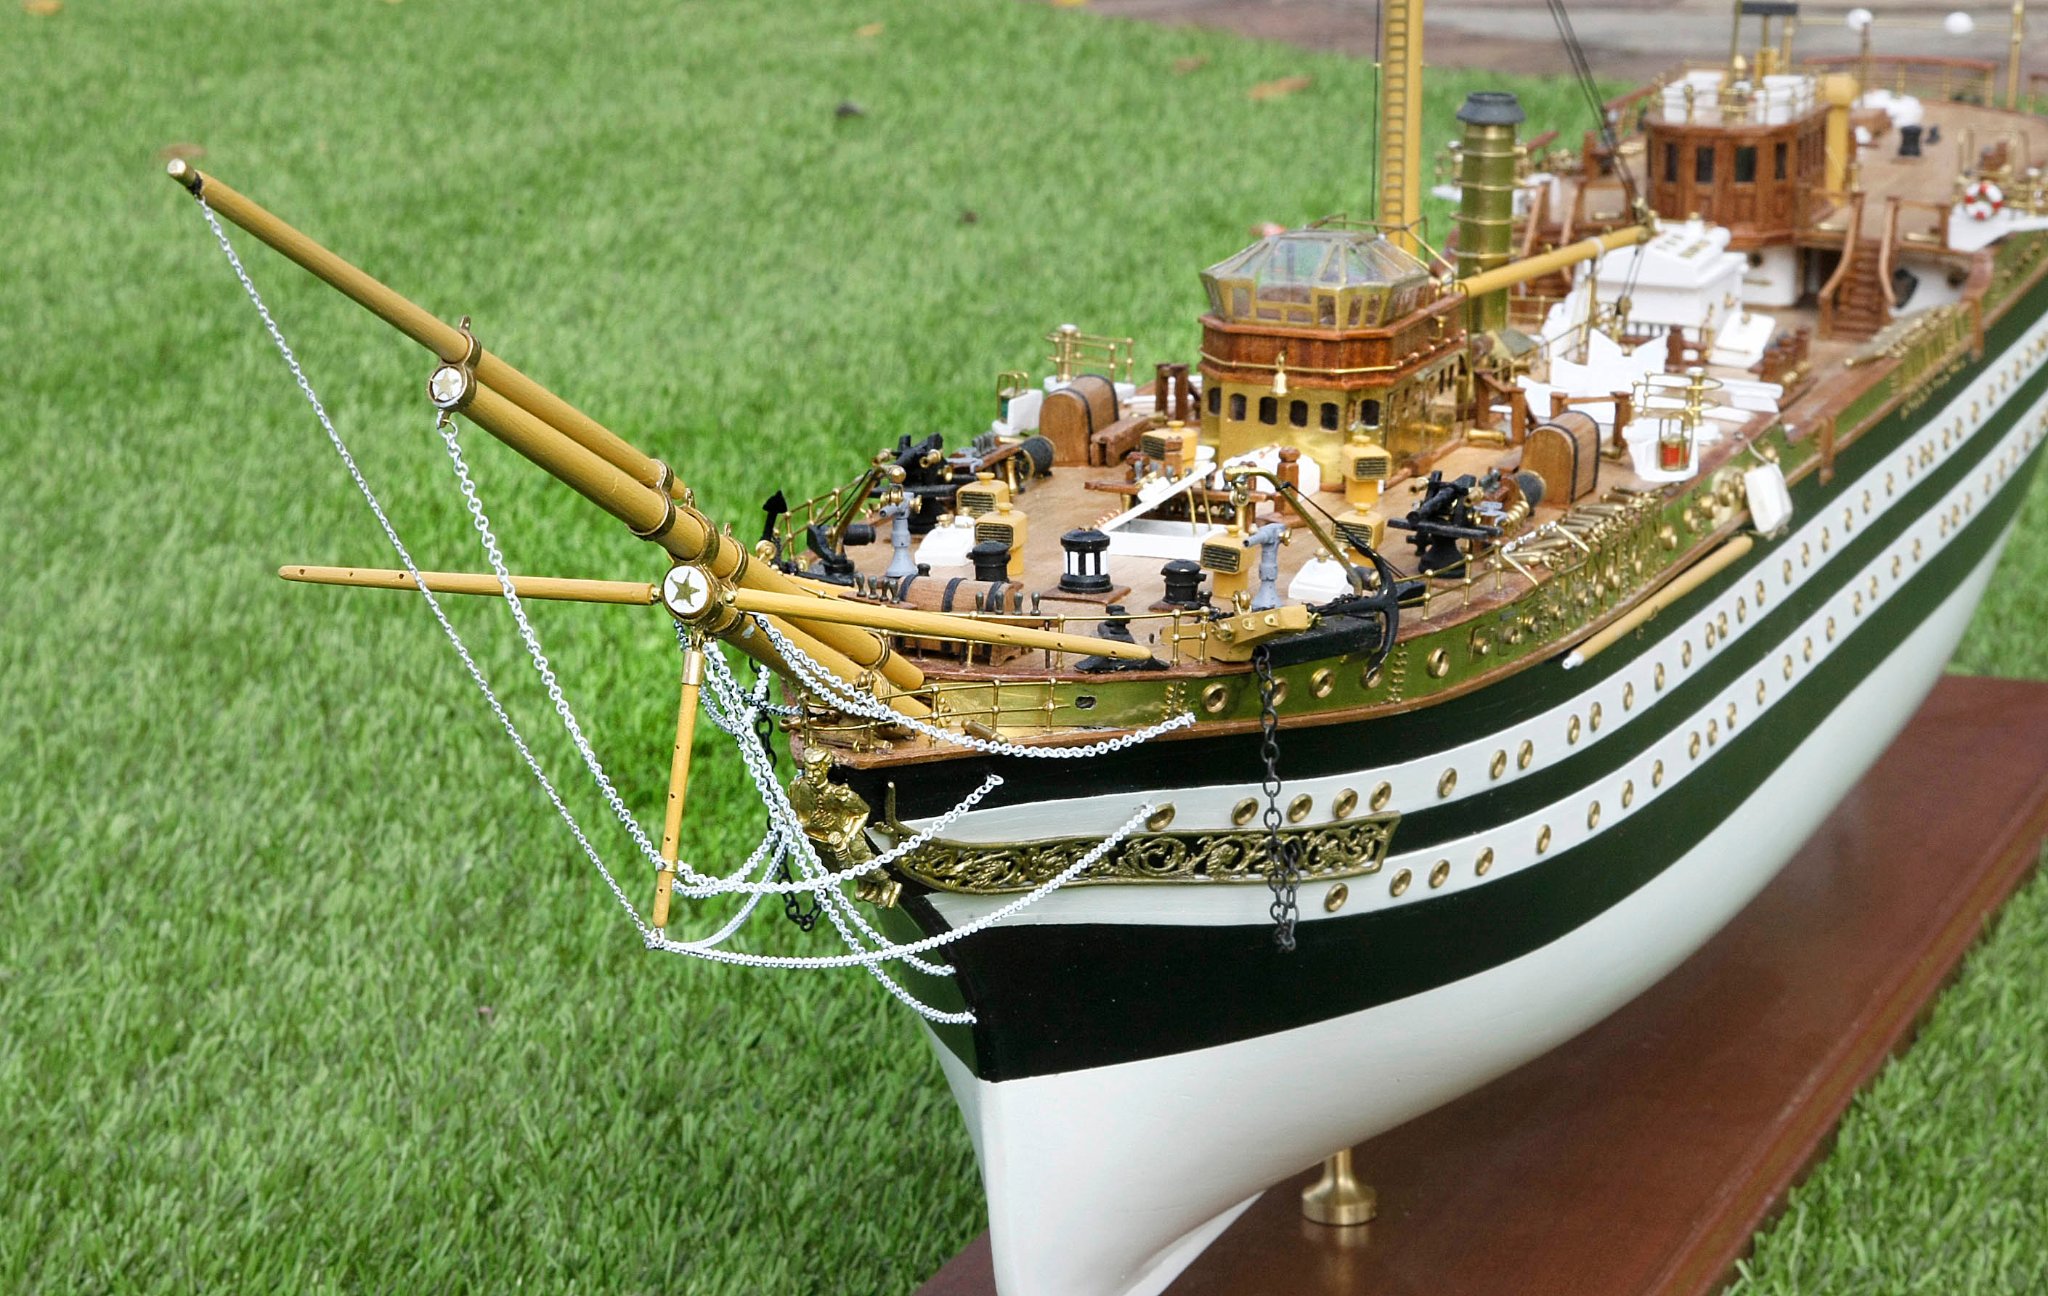
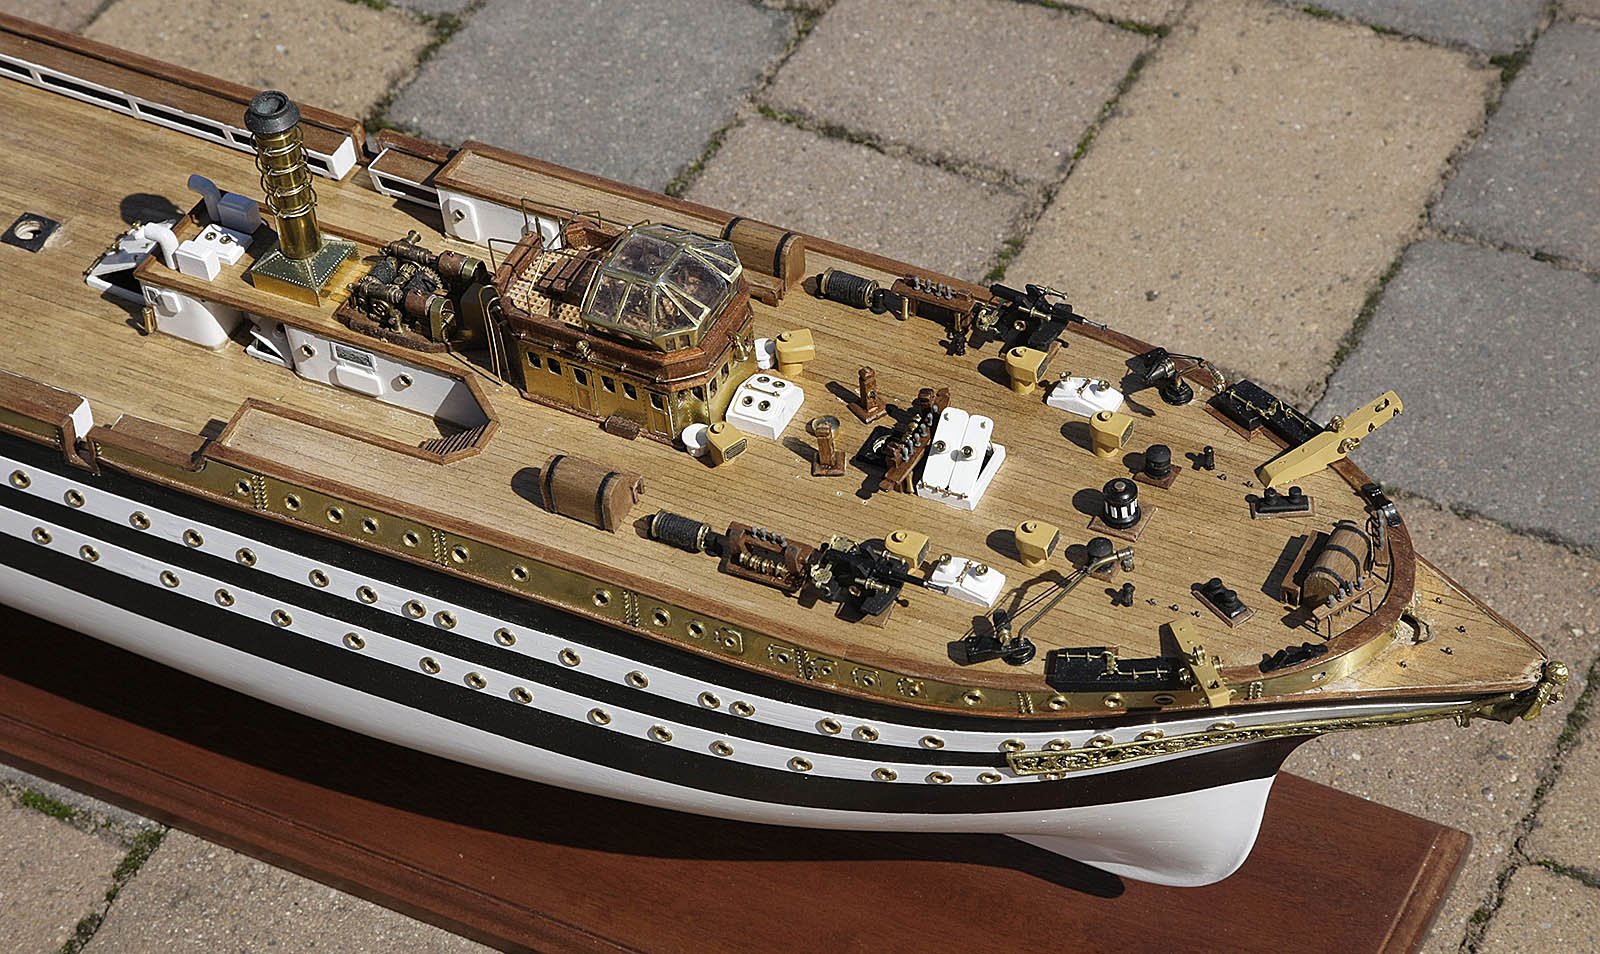
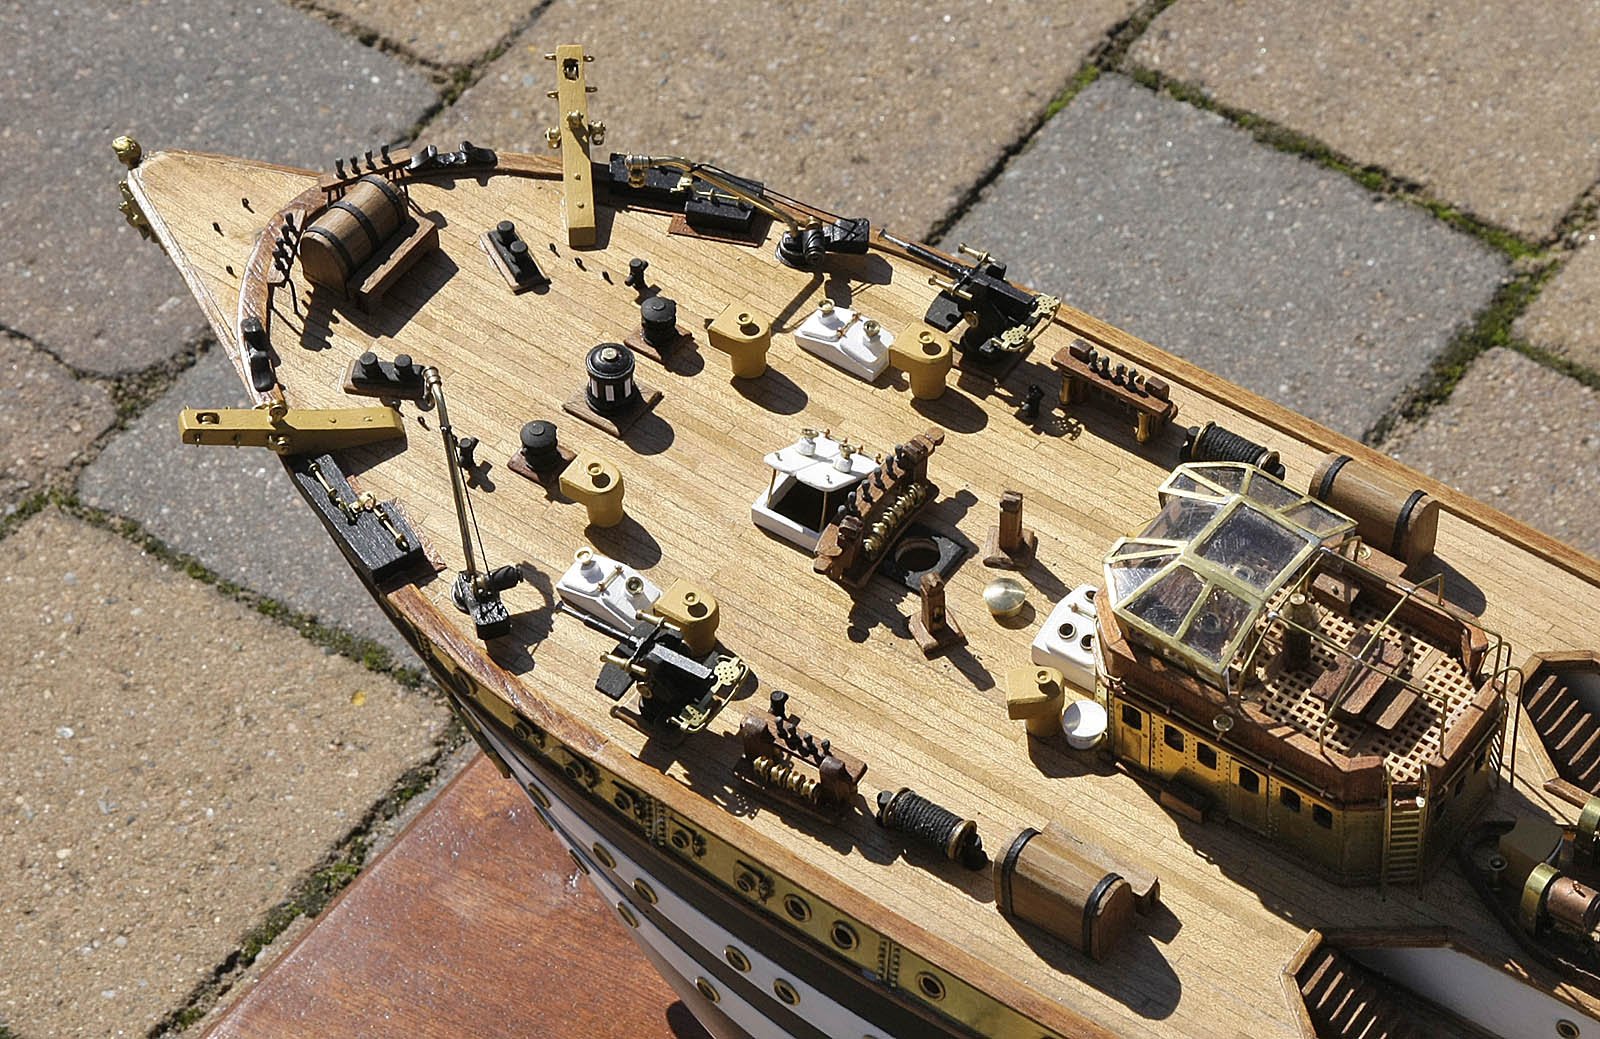
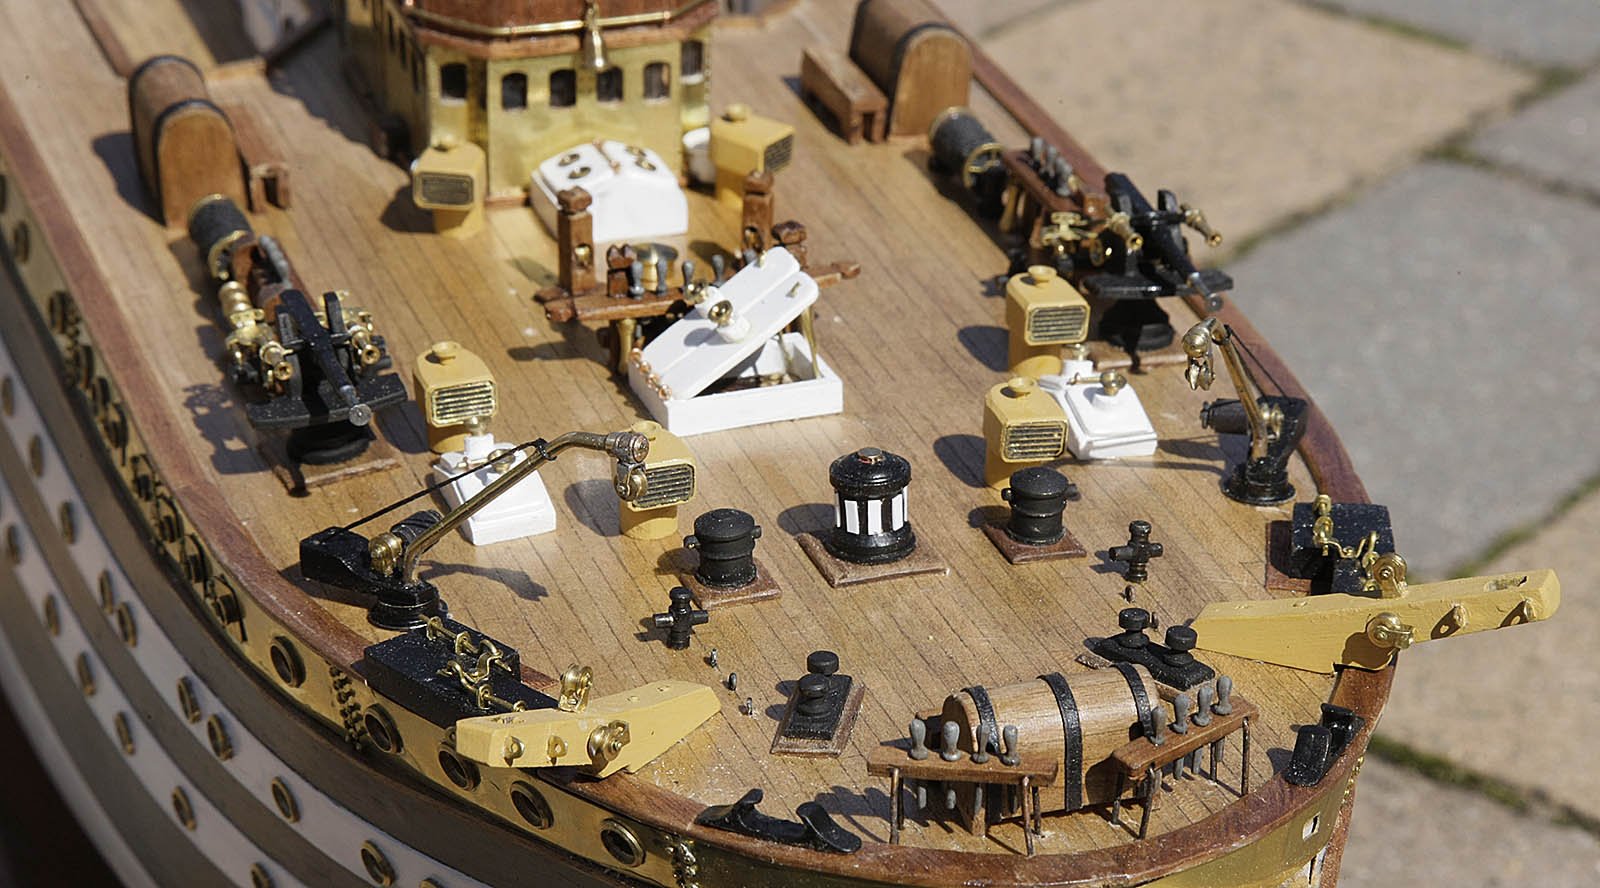
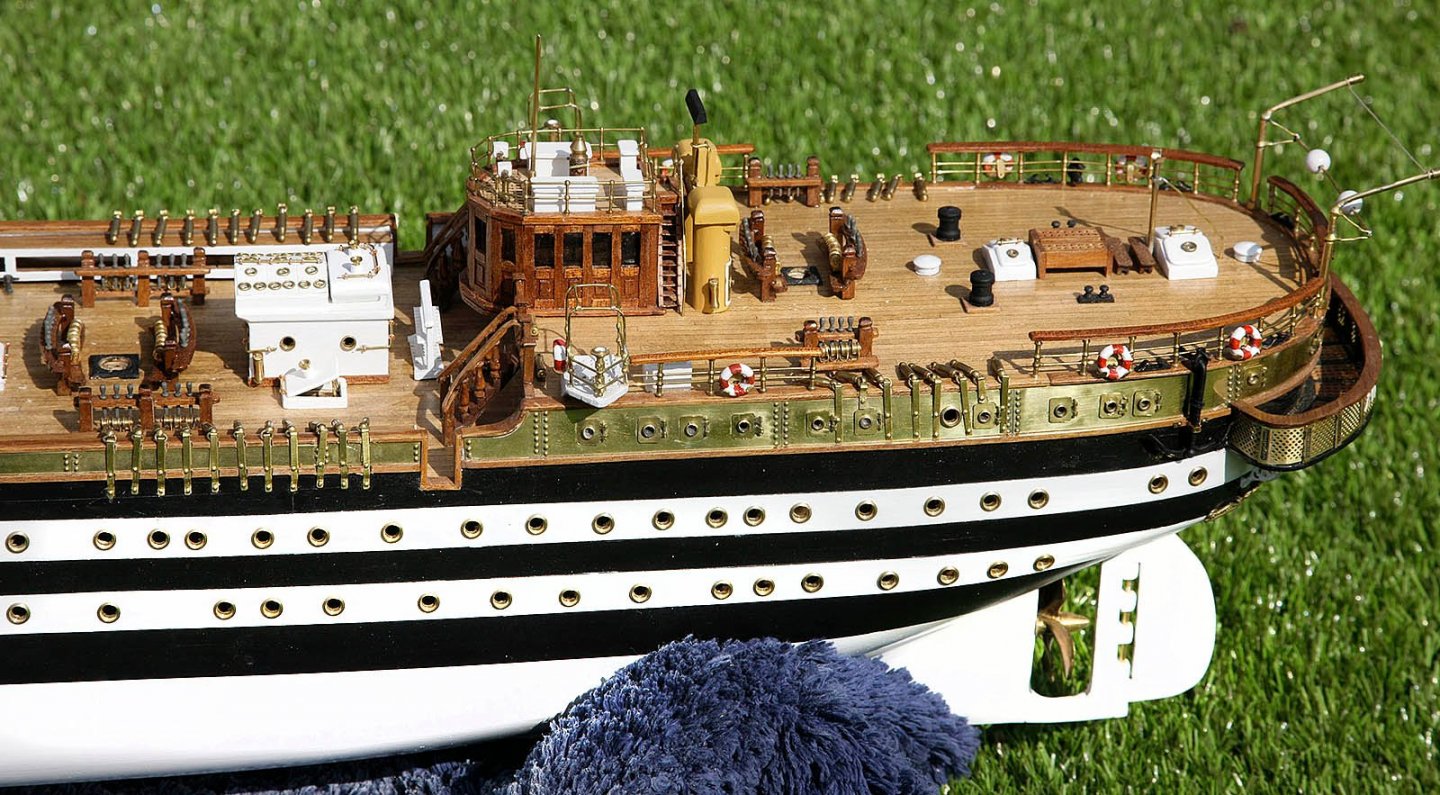
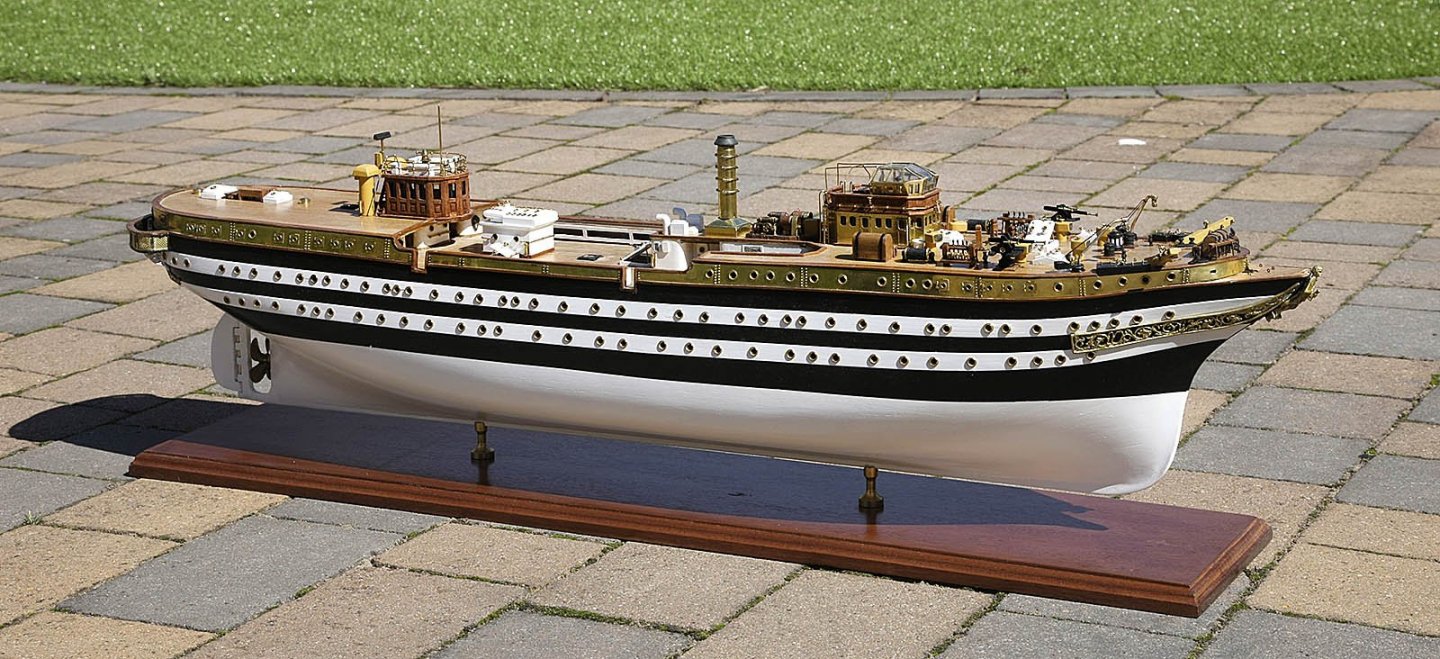
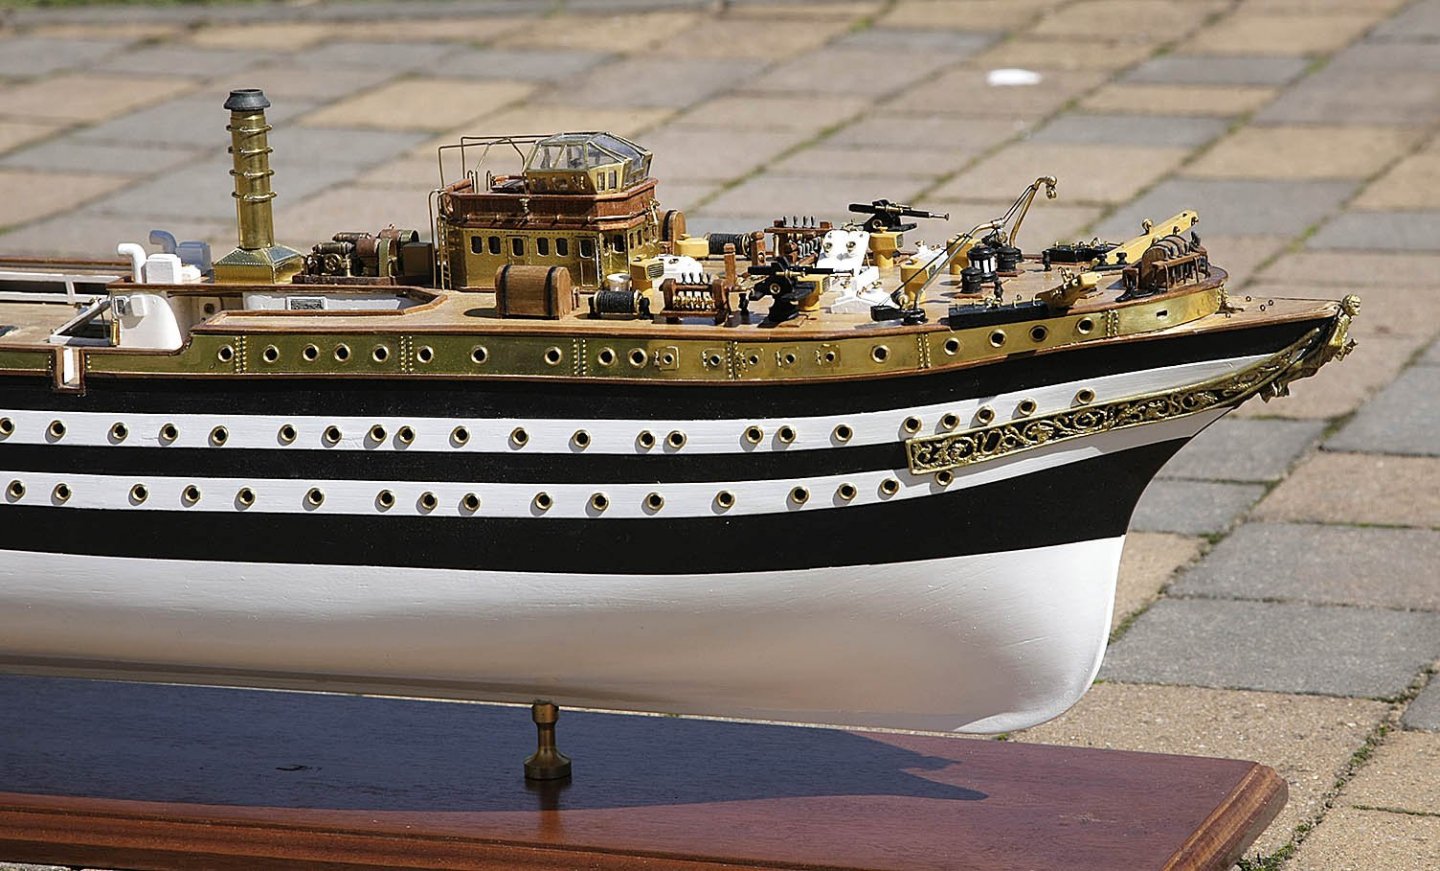
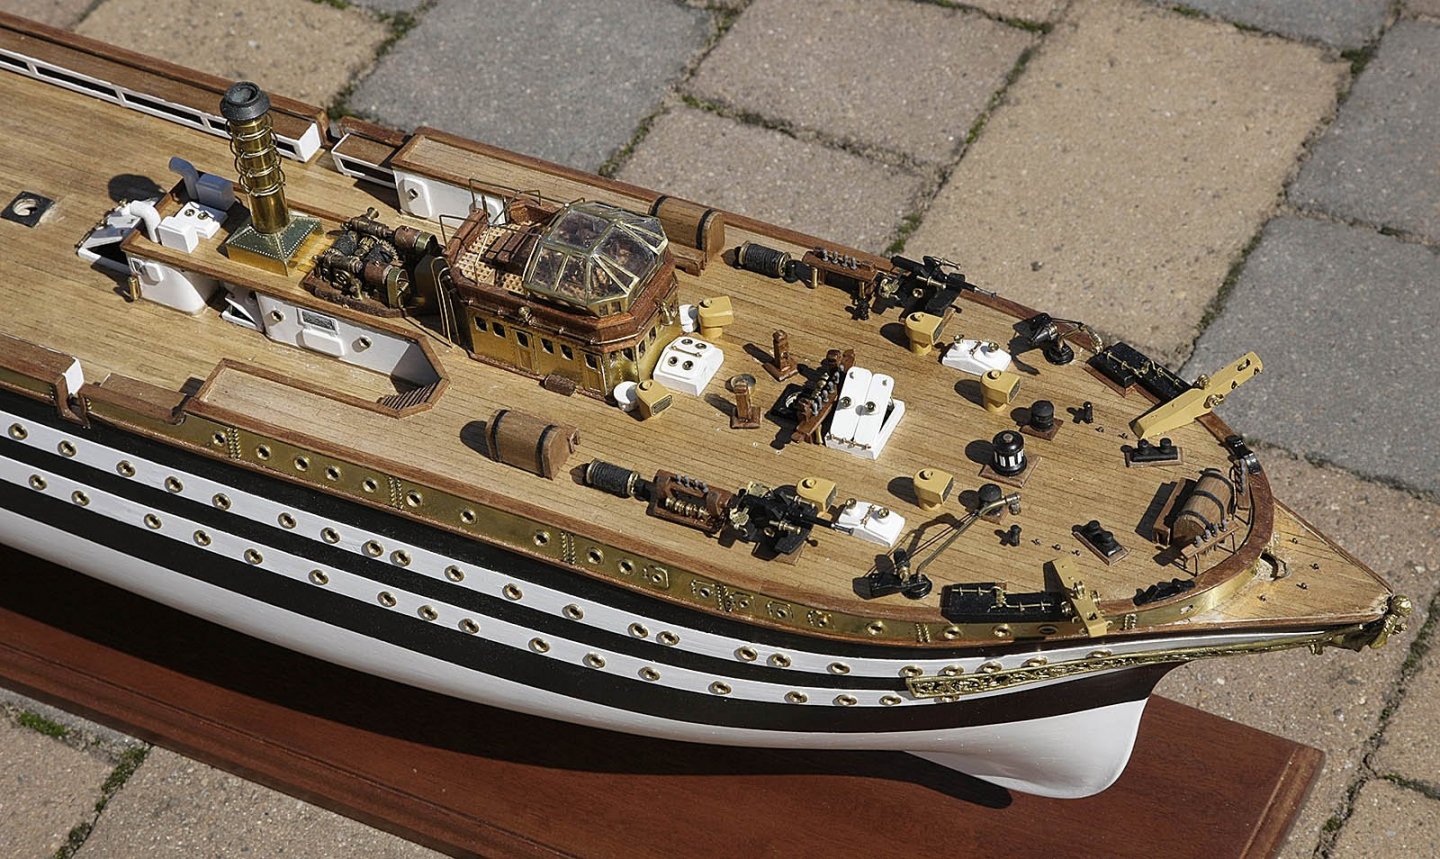
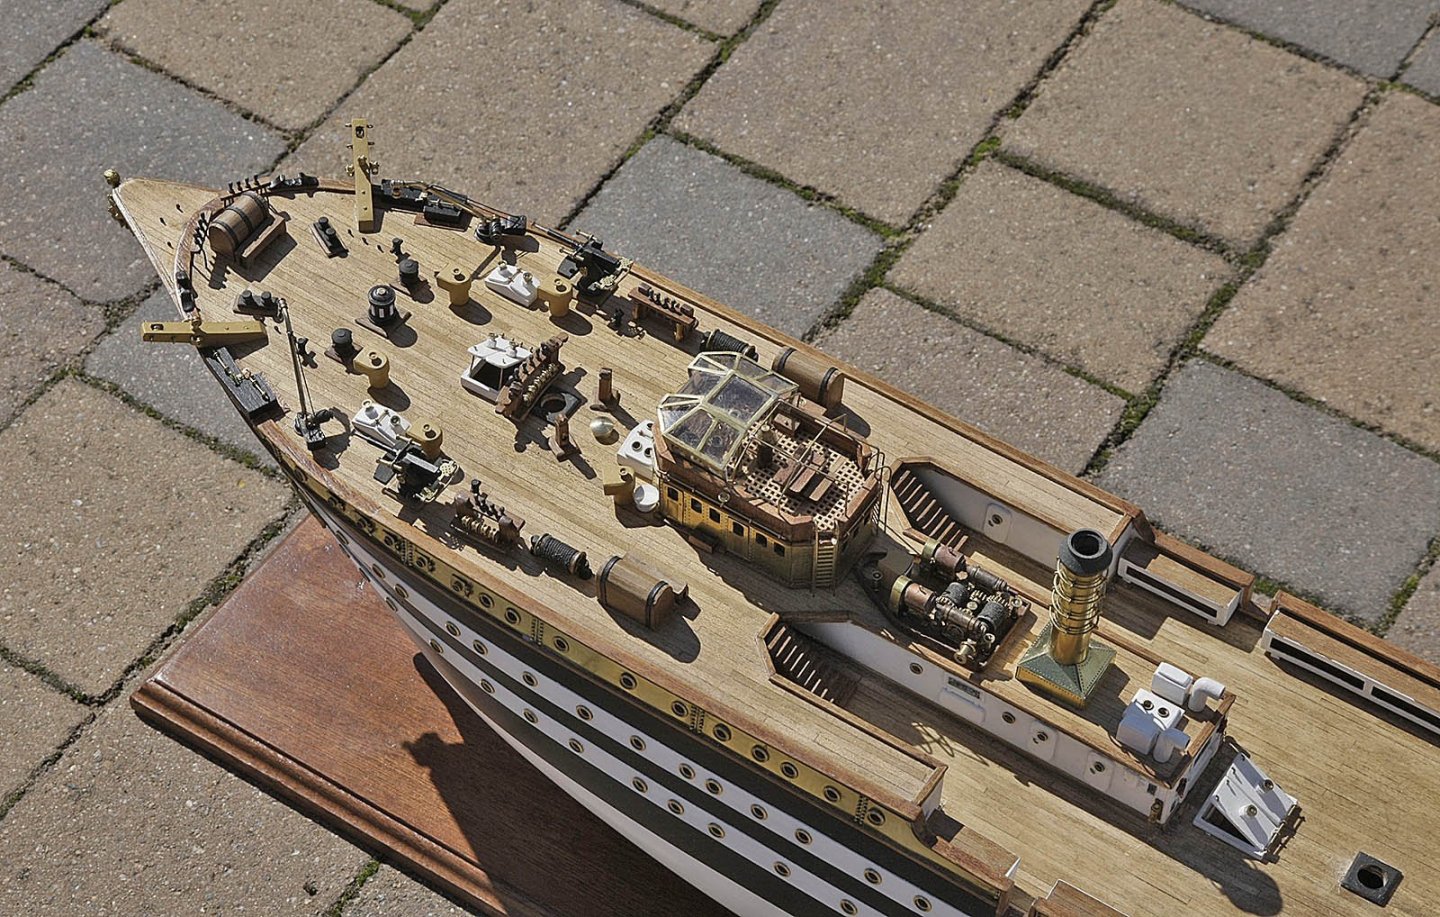
Hi. Again thanks for your many likes. Welcome Chris, thanks for taking the time to view and like my build, it really gave me a boost to have your approval. I promised a few shots of the overall state of the build so far, well the sun shone and I was able to photograph outside. The foredeck looks finished but that’s deceptive, quite a bit to do on it, even a couple more guns which I hadn’t noticed earlier on the plan. There’s the rails, some life rafts, platforms nav lights etc. After these I’ll start on the staircases so still plenty to do. Ken


-
Hi Steve, I just thought that you might be interested in my current build Amerigo Vespucci, worth a look. Ken
-
Hi vince, I just thought that you might be interested in my current build Amerigo Vespucci Ken
-
Hi Pete, Just thought that you might be interested in my current build, Amerigo Vespucci Ken
-
Hi, I just thought that you may be interested in my current build log of Amerigo Vespucci. Ken
-
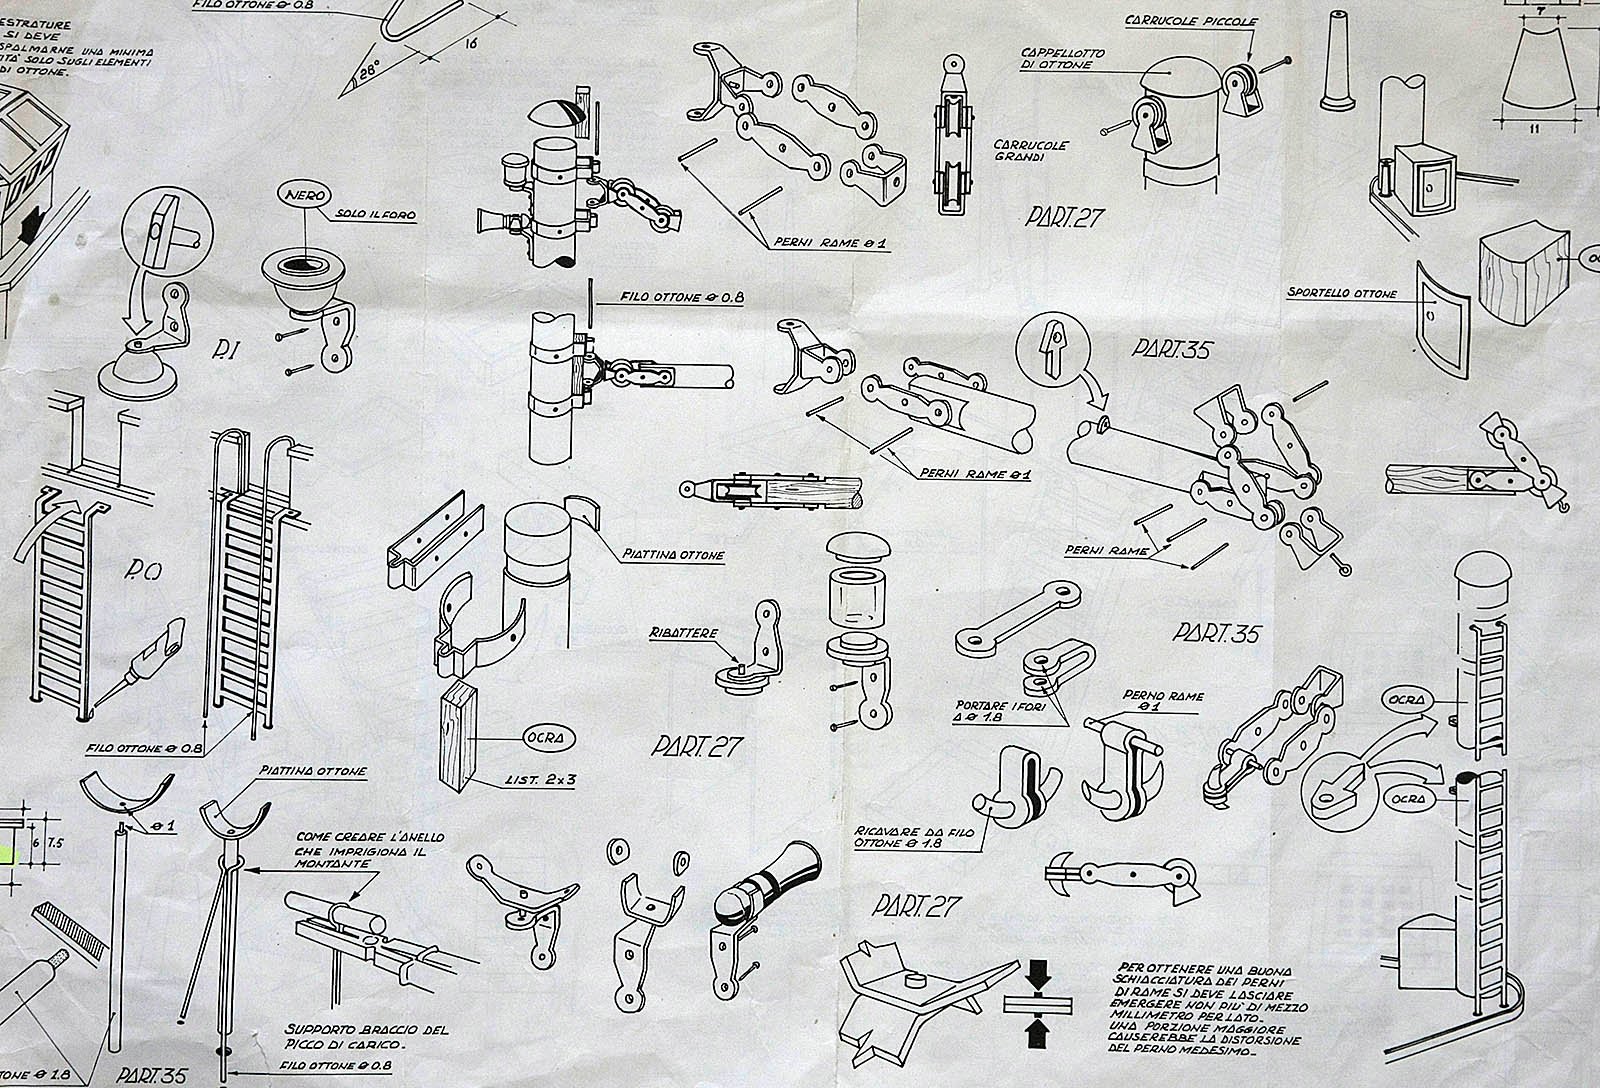
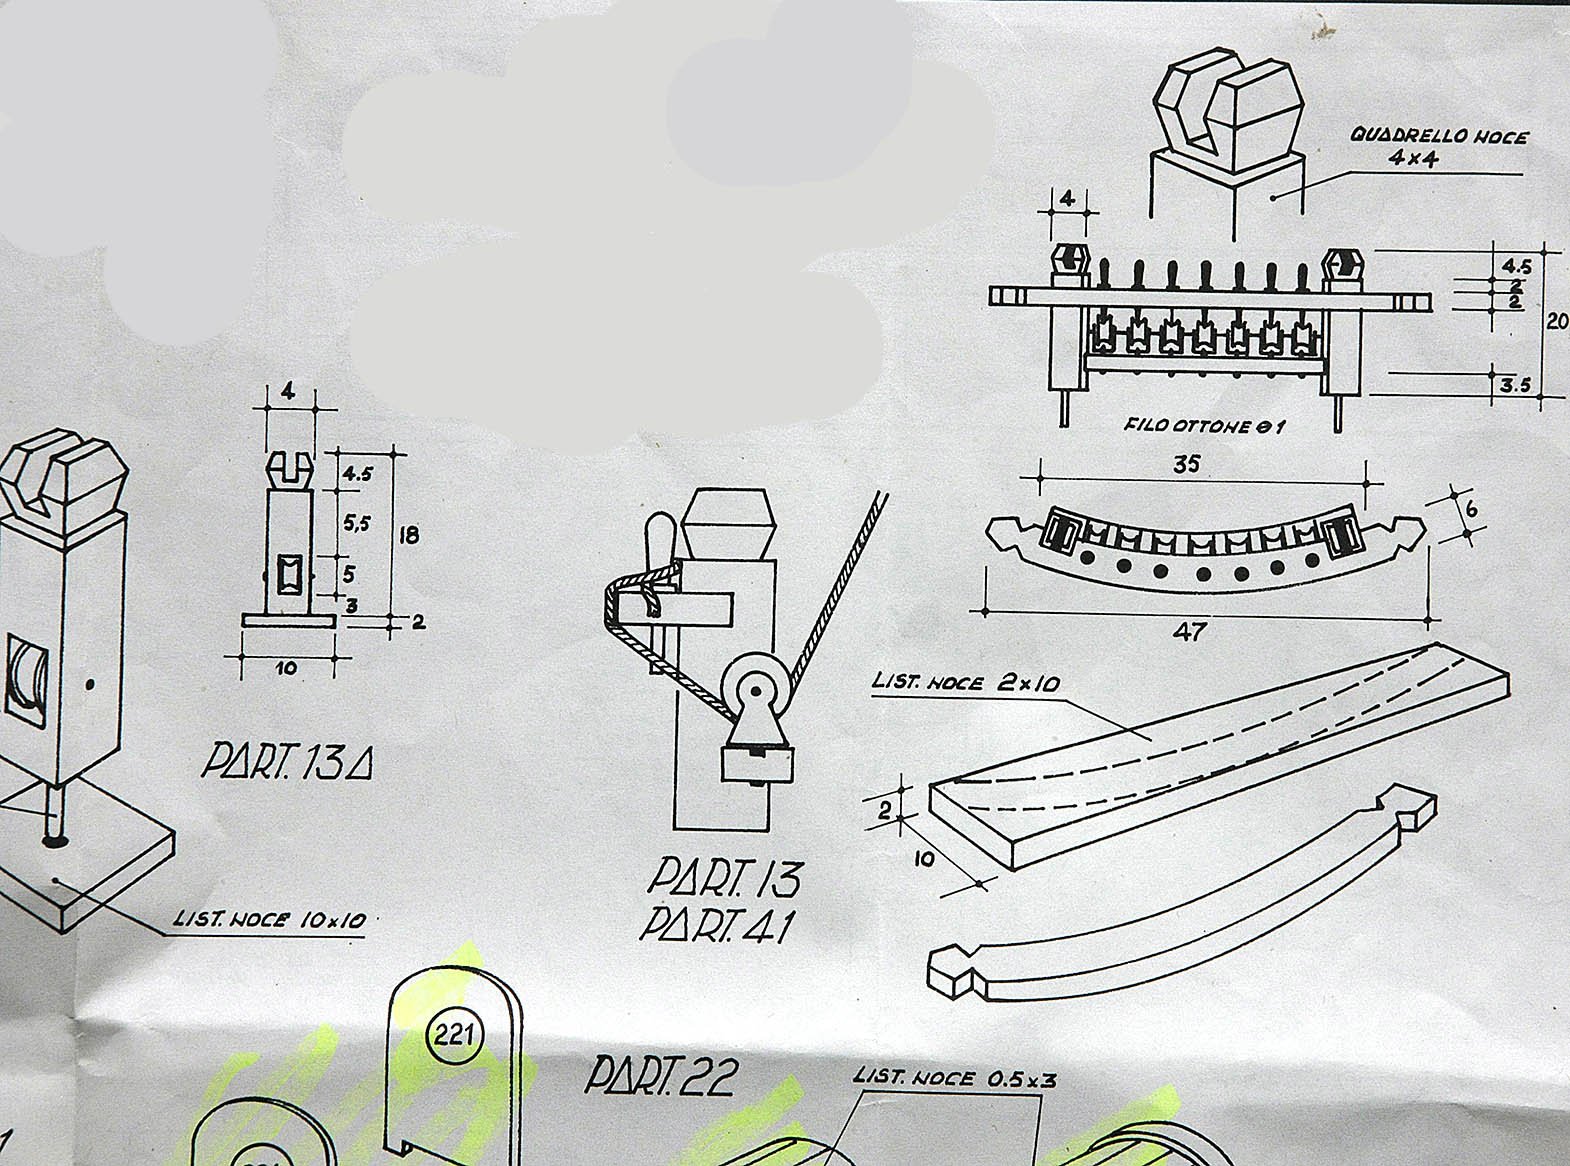
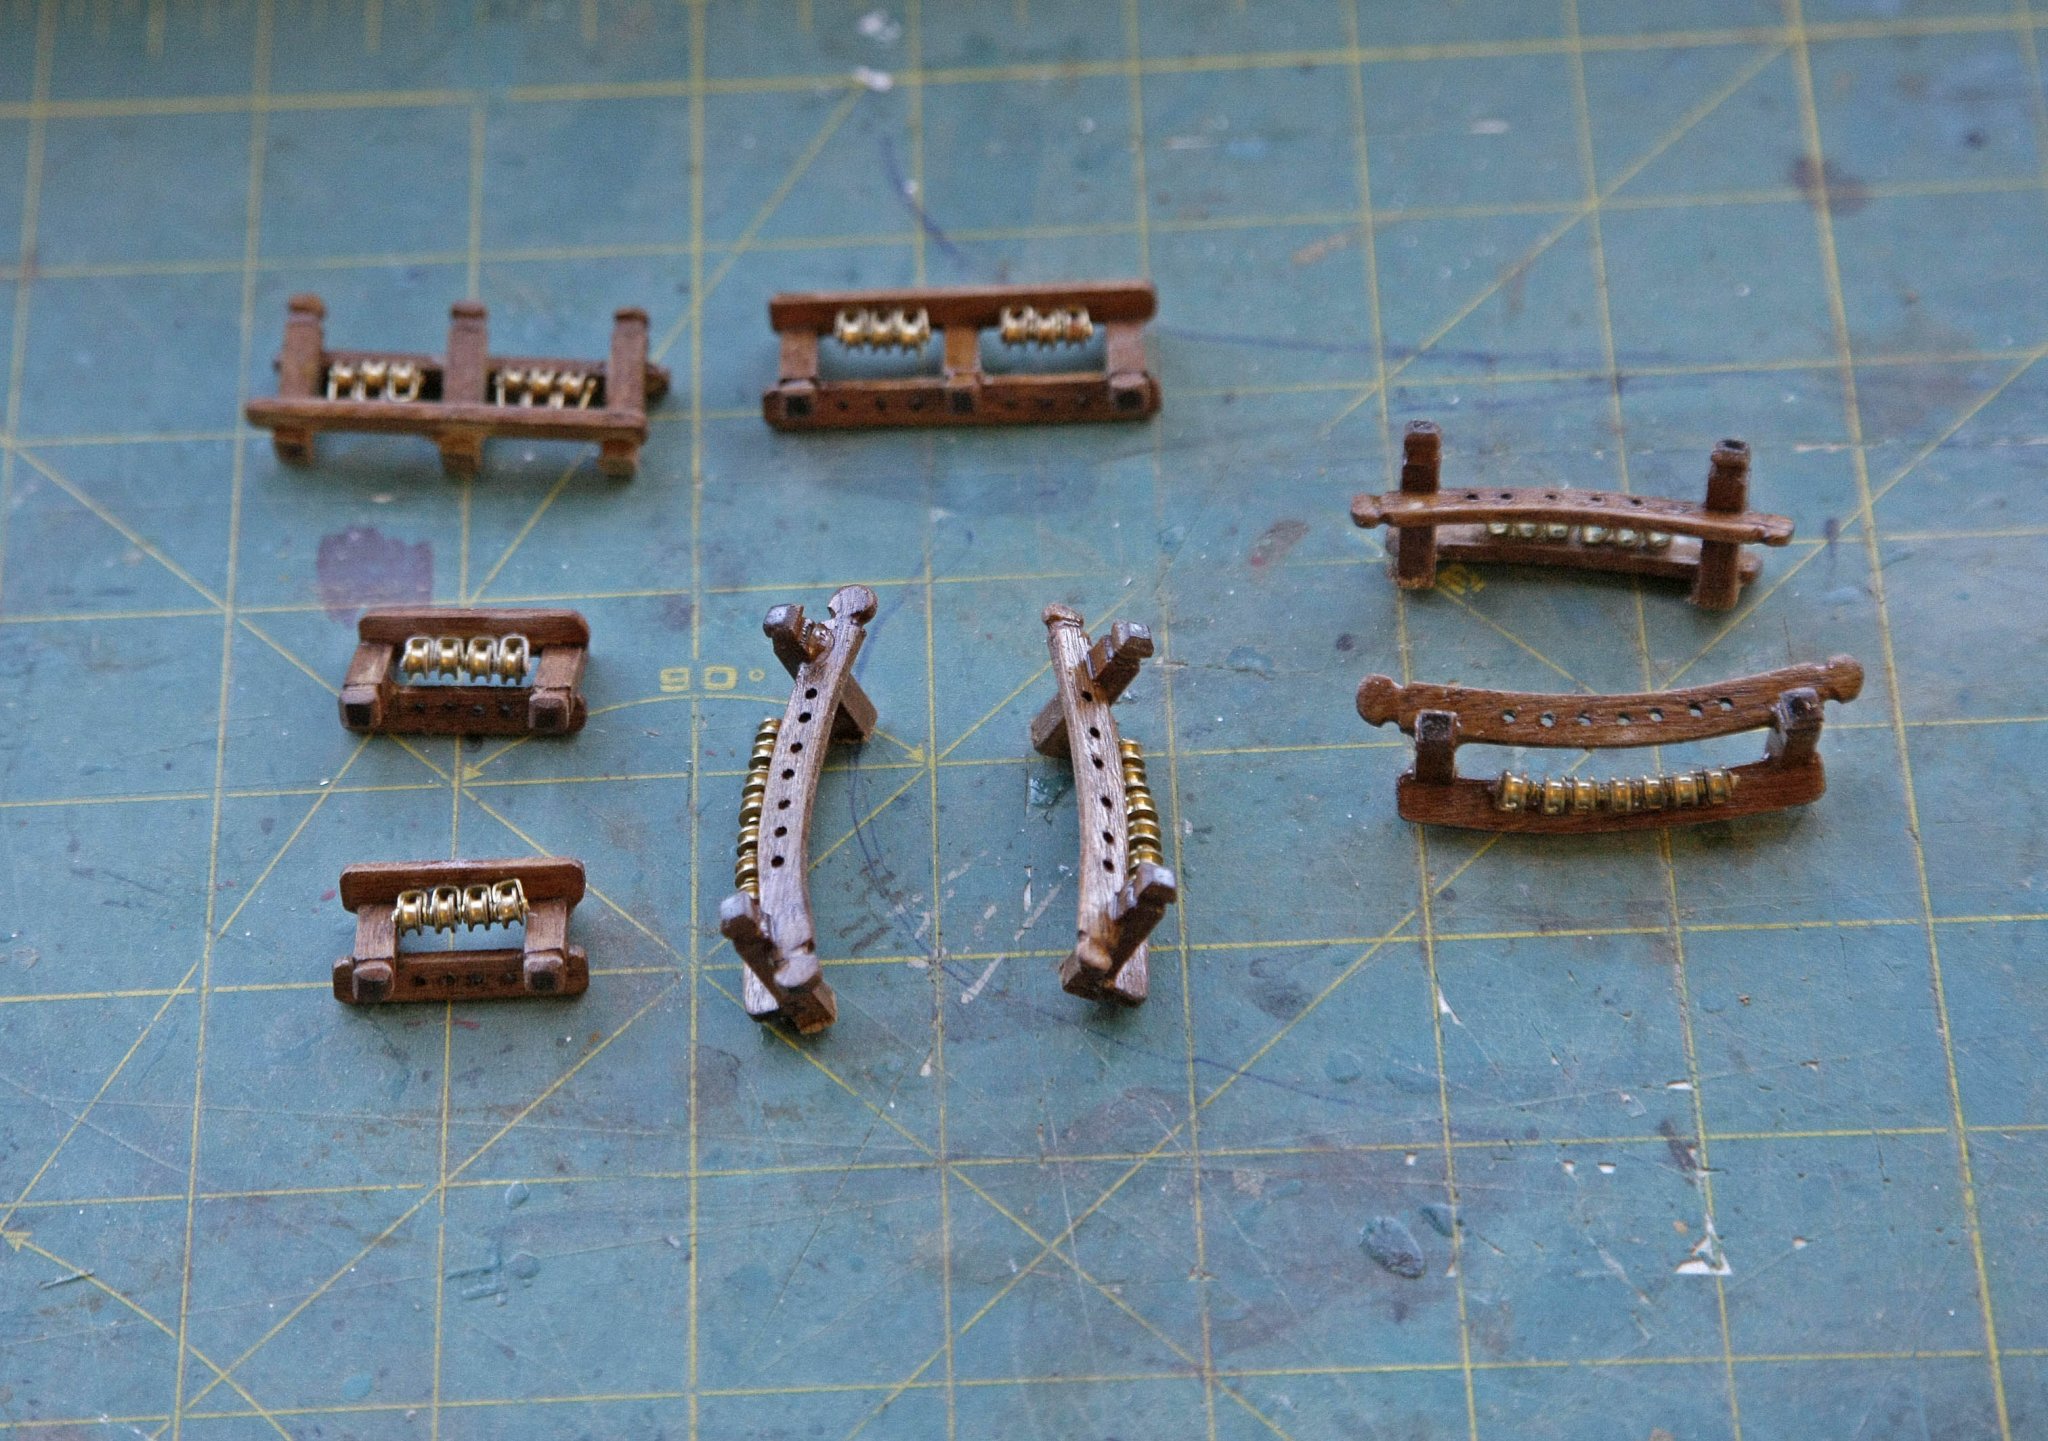
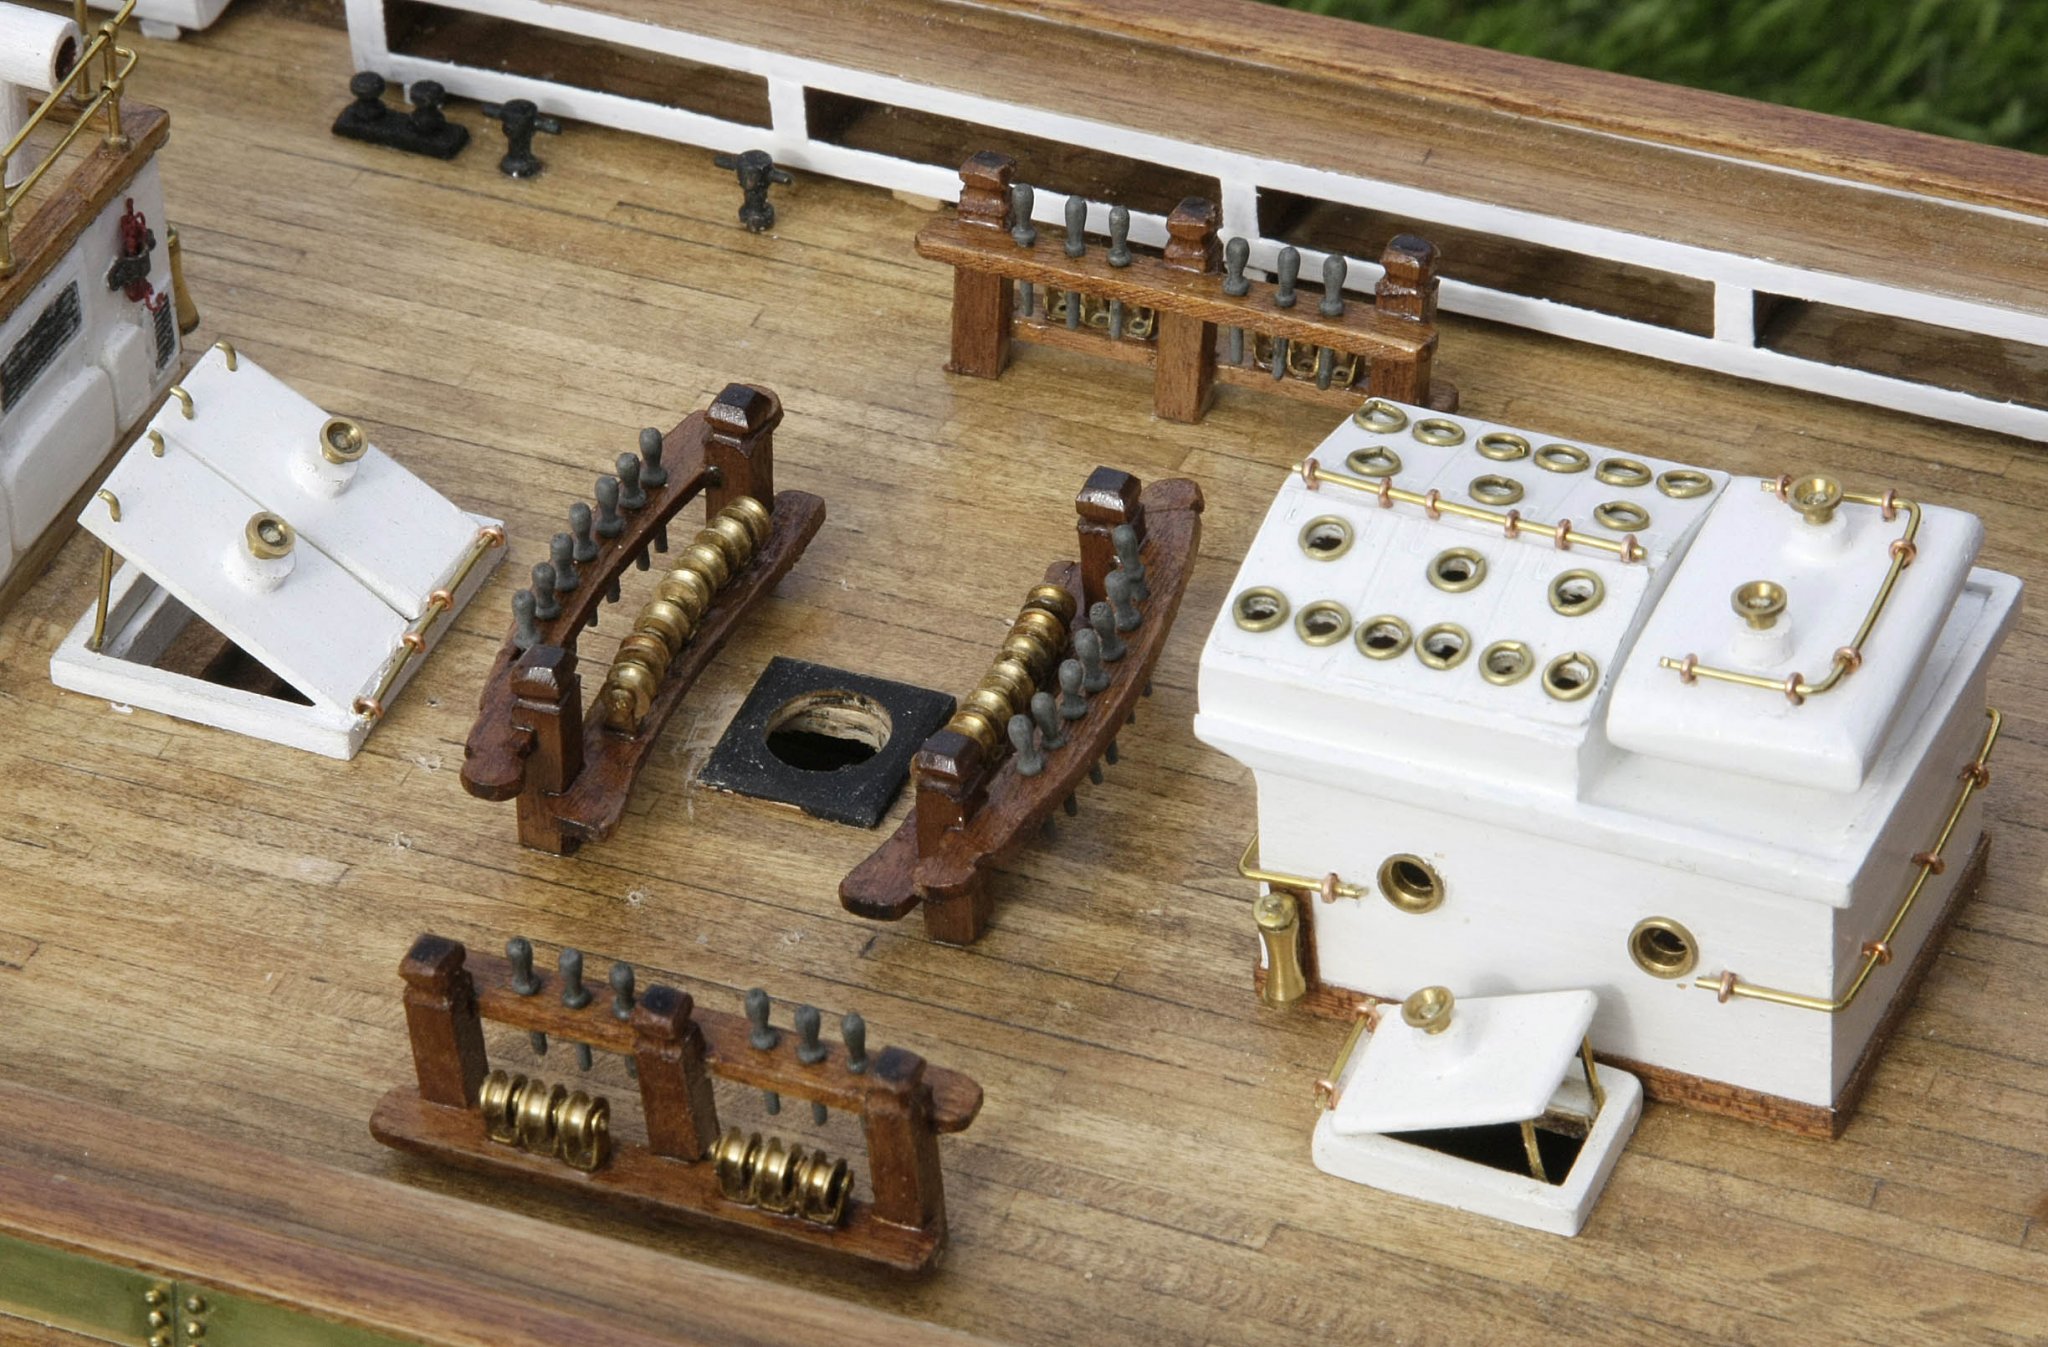
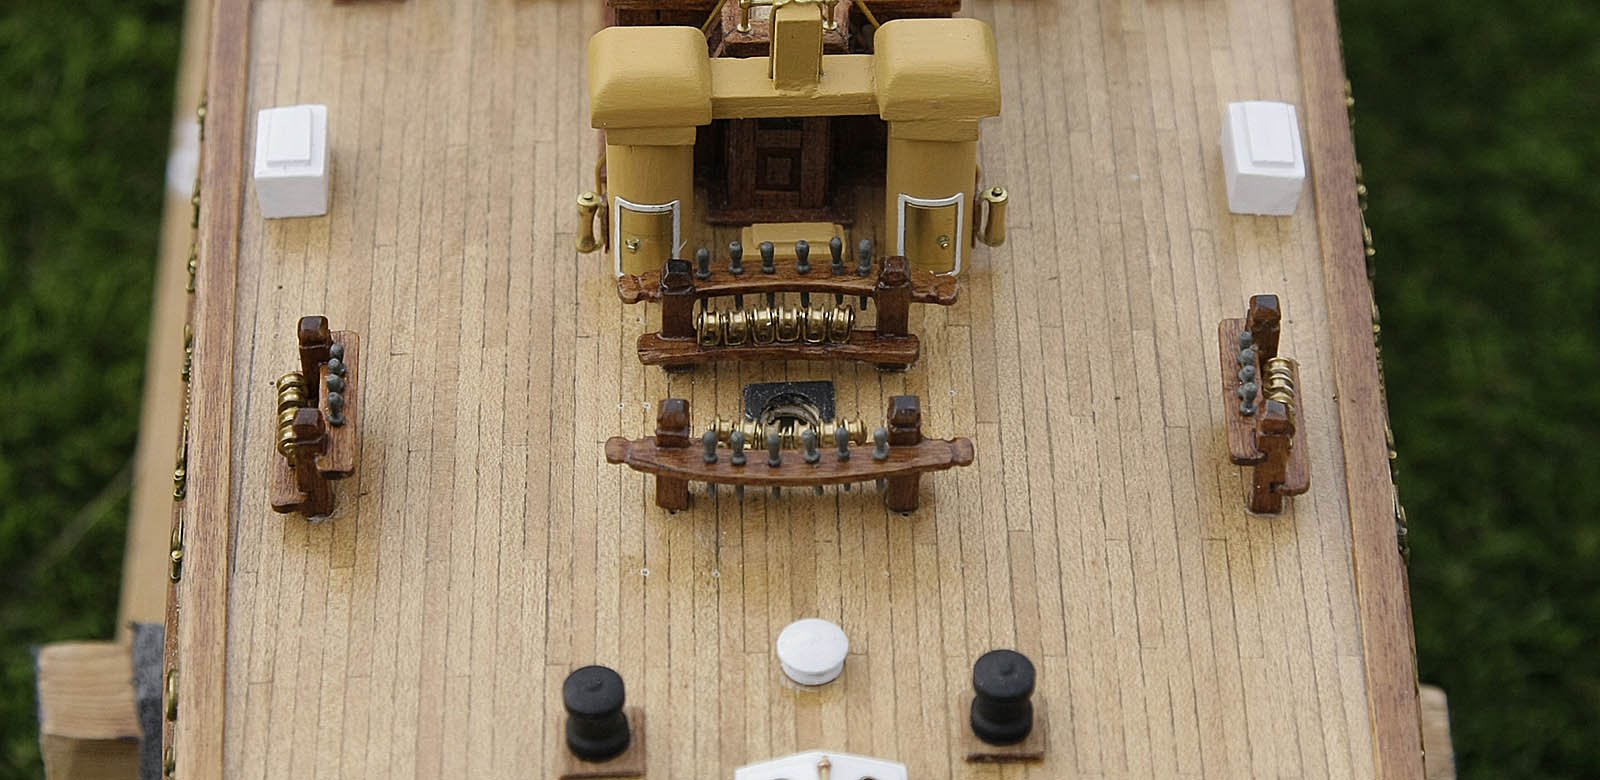
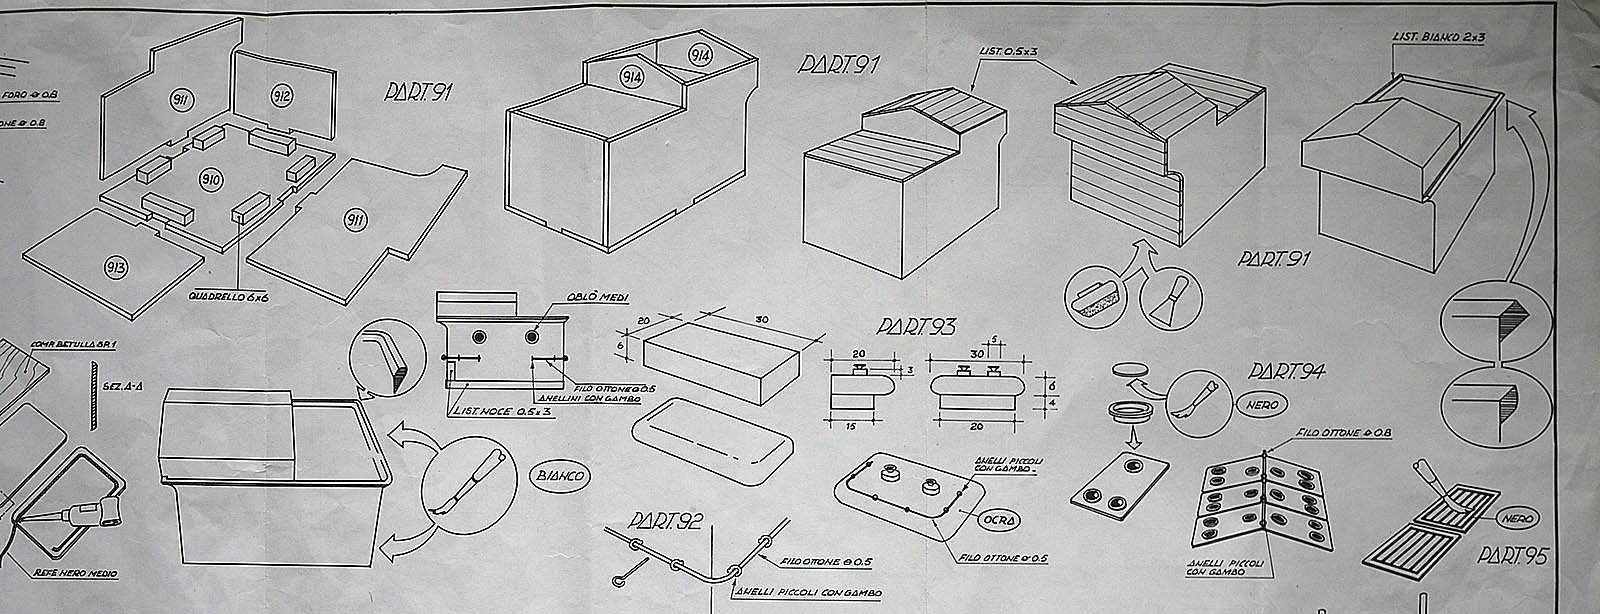
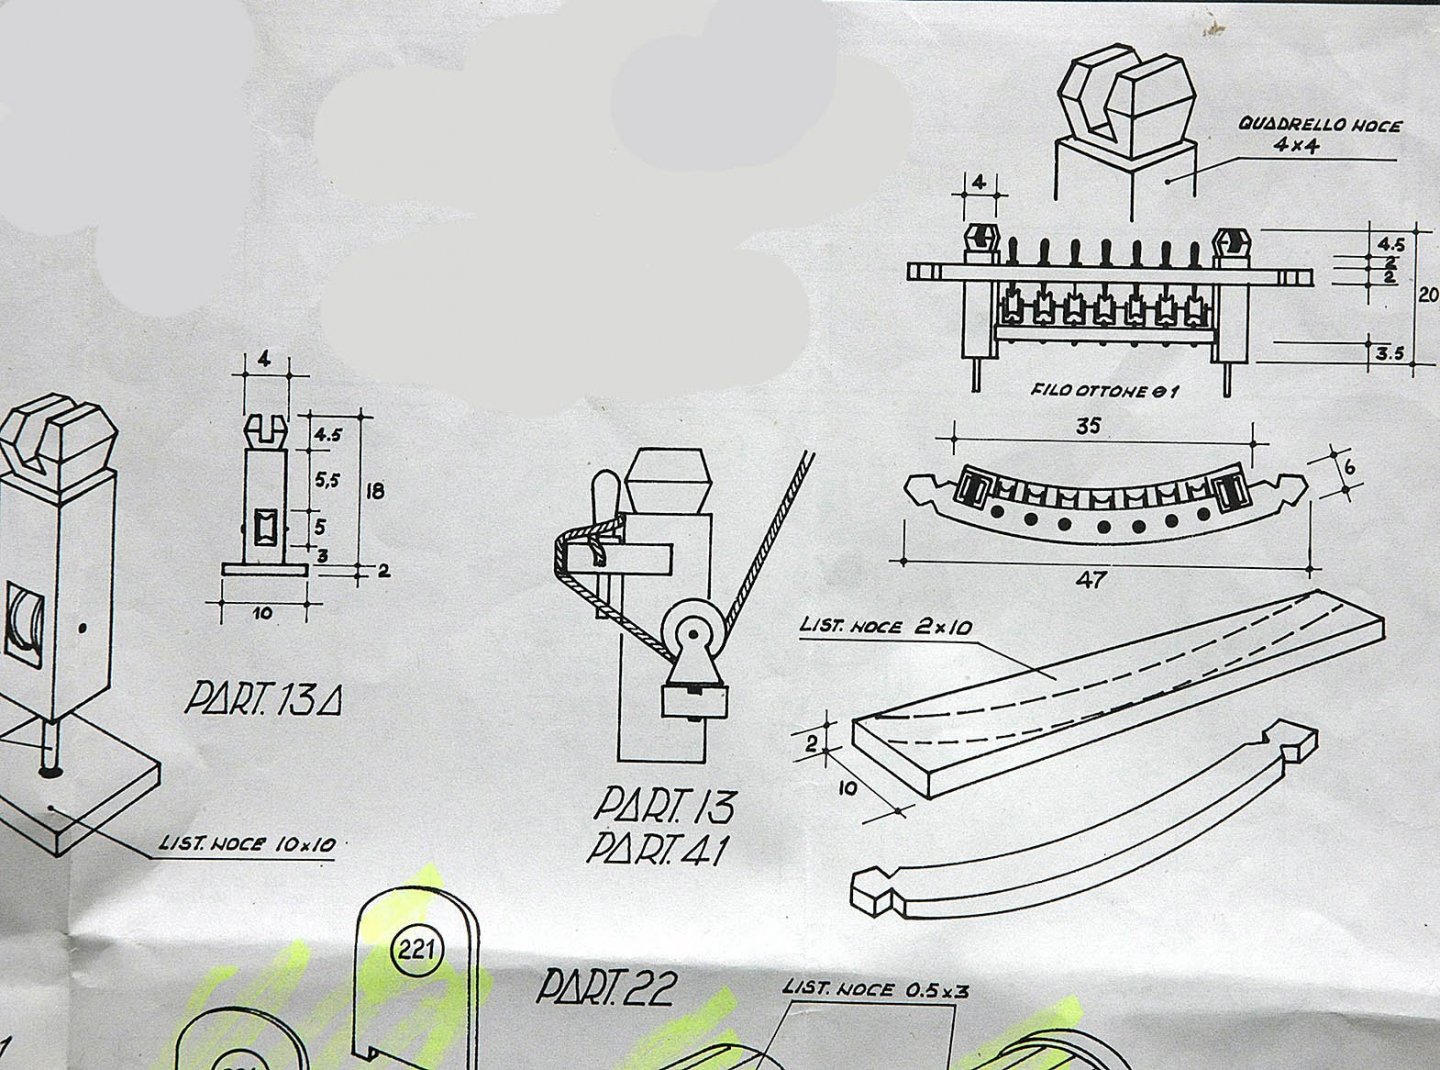
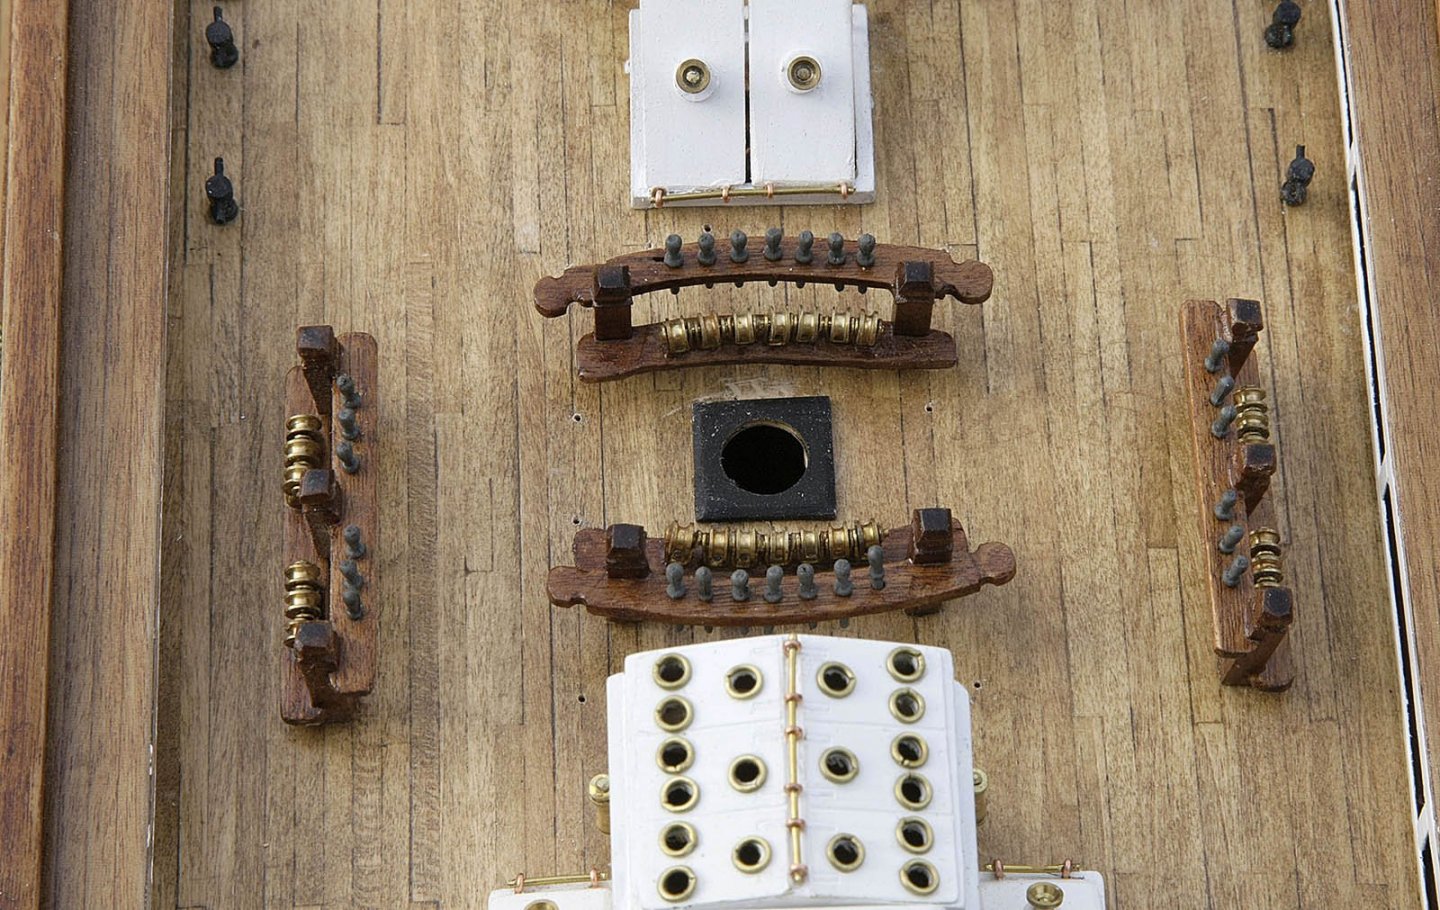
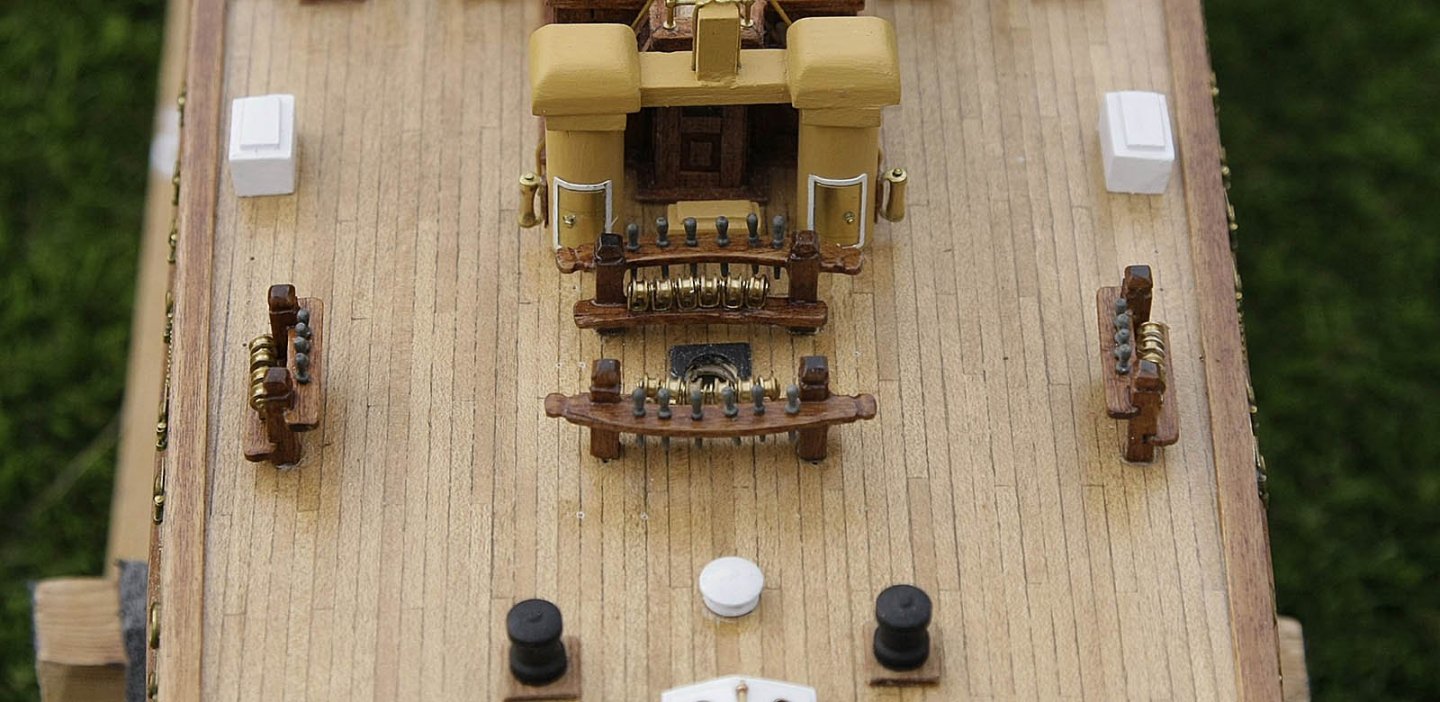
Hi, Thanks for those likes. I’ve been busy working away on the smaller items that fit around the decks, there are a lot of them and they take a surprising amount of time given their size. There are too many to show the making of them individually but you’ll probably notice them around the deck without them being mentioned. I’ll show you the pin rails and you’ll perhaps understand the time it takes on this model of what is normally a quick and simple task. There are thirteen pin rails with a total of 68 belaying pins, each pin has its own brass roller in its brass housing mounted on a shelf below the main rail. As you can see in the plan the roller mount should be first nailed onto the rail then the roller can be fitted with a pin. Here’s catch 22 if you do it this way you can’t fit the roller pins because the other rollers get in the way and you don’t have enough room, it looks simple on the plan but in reality it isn’t. Now if you pin the roller into its mount first you then can’t nail the mount to its shelf. My solution was to use a length of wire and thread all of the rollers with mounts onto the wire like a bead necklace then cut them to the right length for each rail, bend them to suit the shelf curve an attach using thick cyno. I find brass doesn’t hold well when glued so if I’d glued them on singly I think that I would have had issues of them coming off during rigging, but glueing them on strips I think that their combined strength will be sufficient. I’ve also been fitting a lot of the small items that I’ve made to the fore deck and it’s starting to look very busy, in a good way, I’m surprised at just how good its starting to look, I’ll get a good photo session in when it’s sunny, the metallic nature of the brass shows up much better in natural light than in my work area, I’ll post these pics quite soon. Ken


-
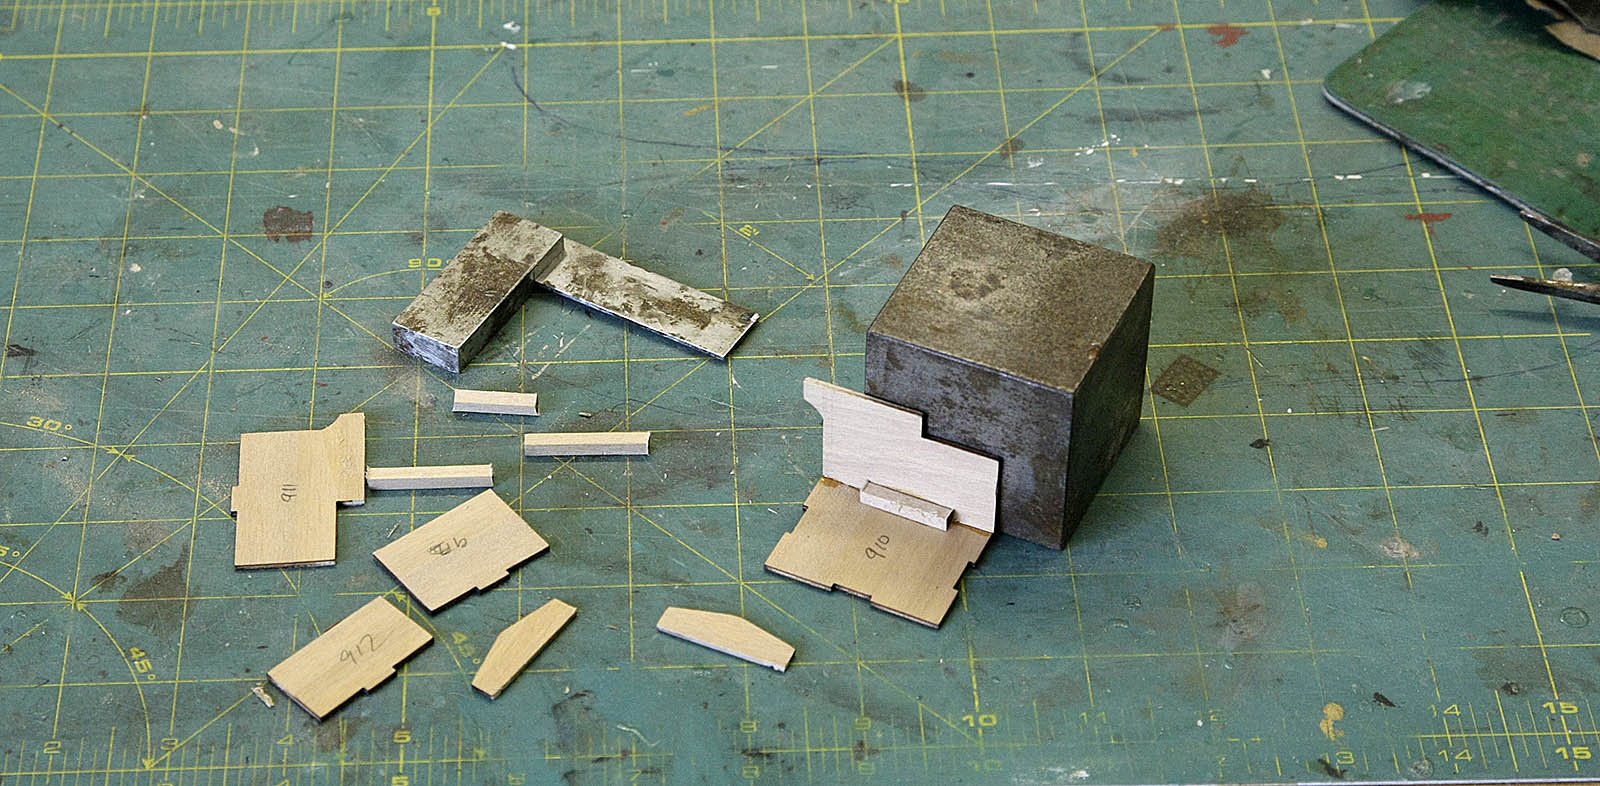
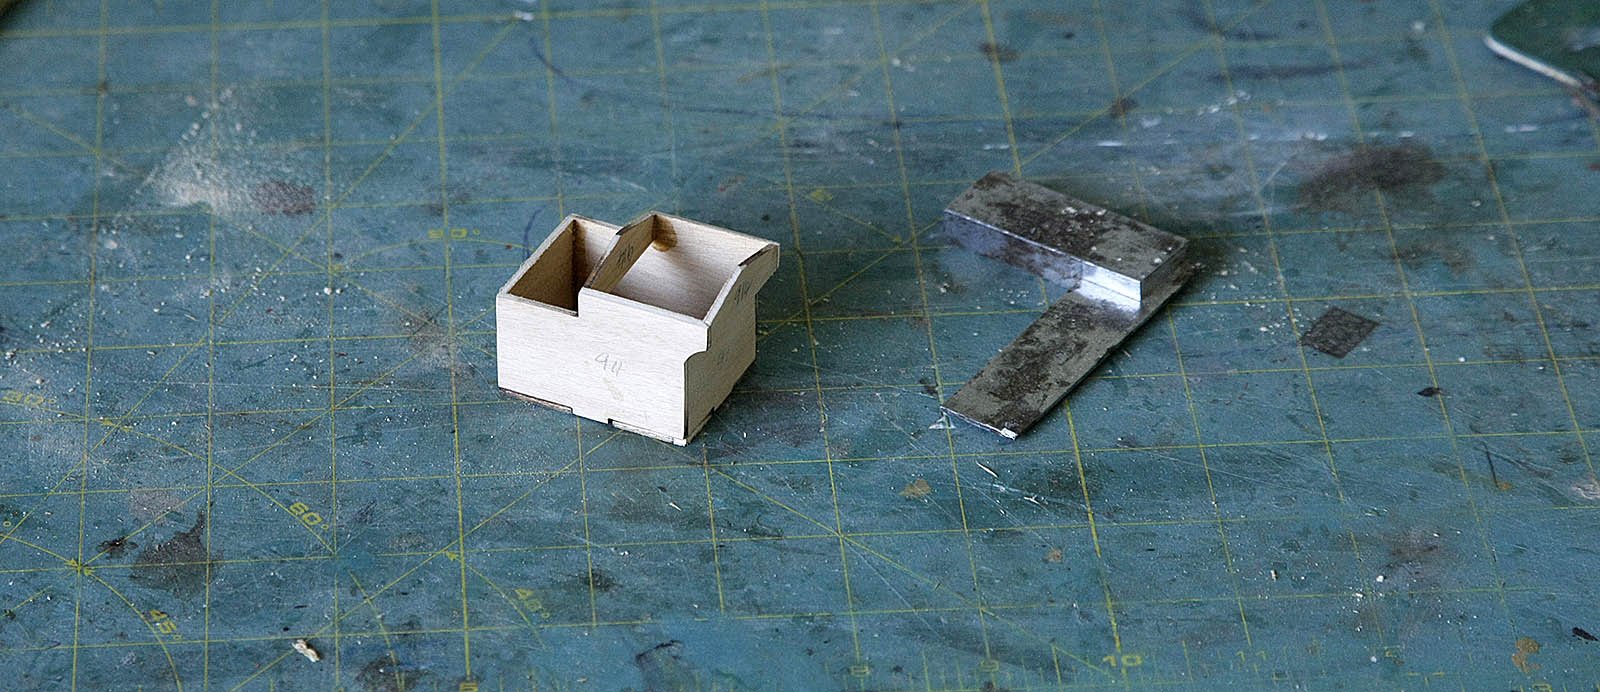
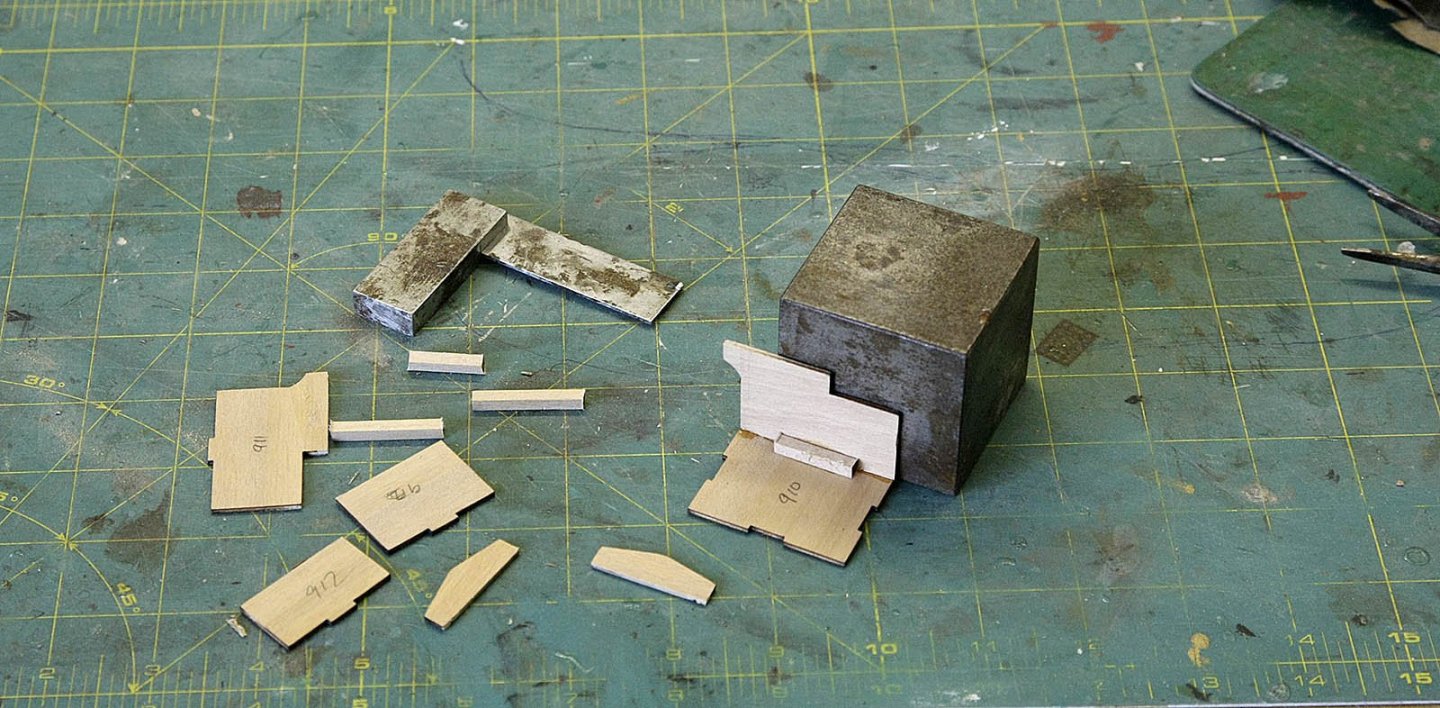
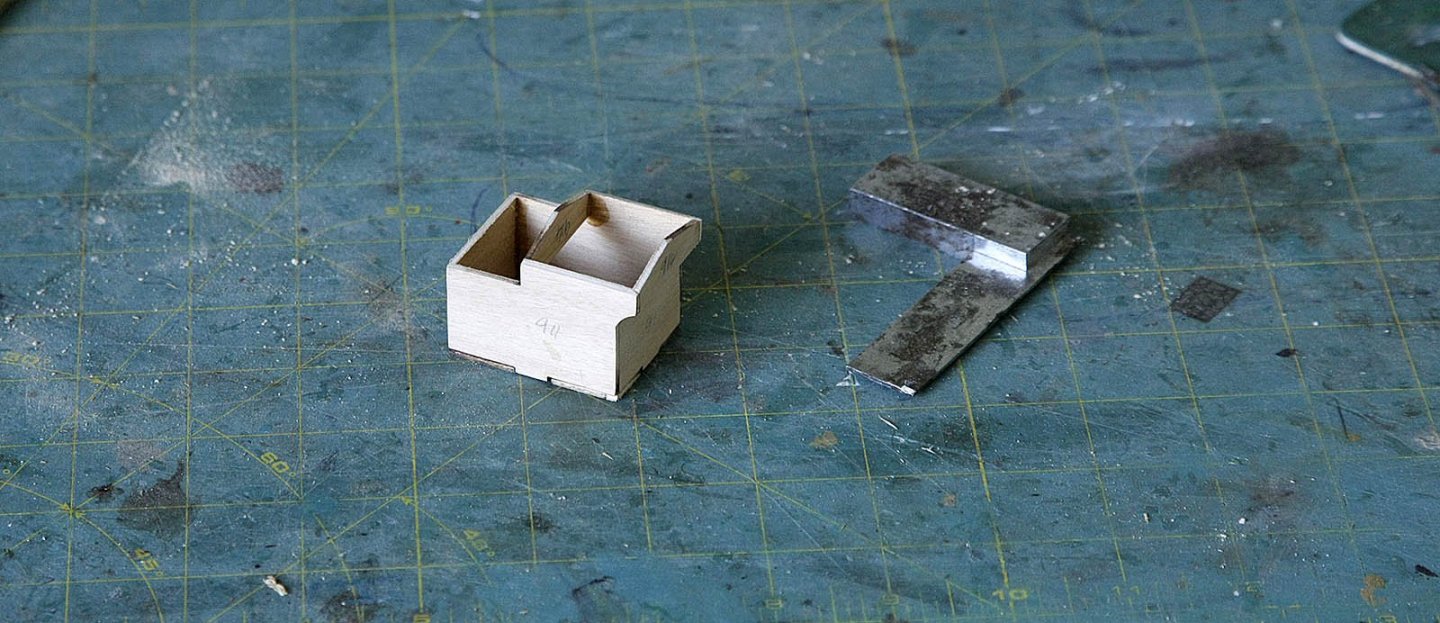
Hi Dilbert, Glad to have you along again on another build, I hope you enjoy it. You’re right to spot the square, I found it in a car boot sale, most people wouldn’t know what it was, just a piece of metal, I recognised it as an engineers square and for £1 a bargain. I use it quite a lot, for 90 degree angles, as small anvil and as a flat weight. I often look out for old tools and it’s surprising at what I find to add to my hoard. Ken
-
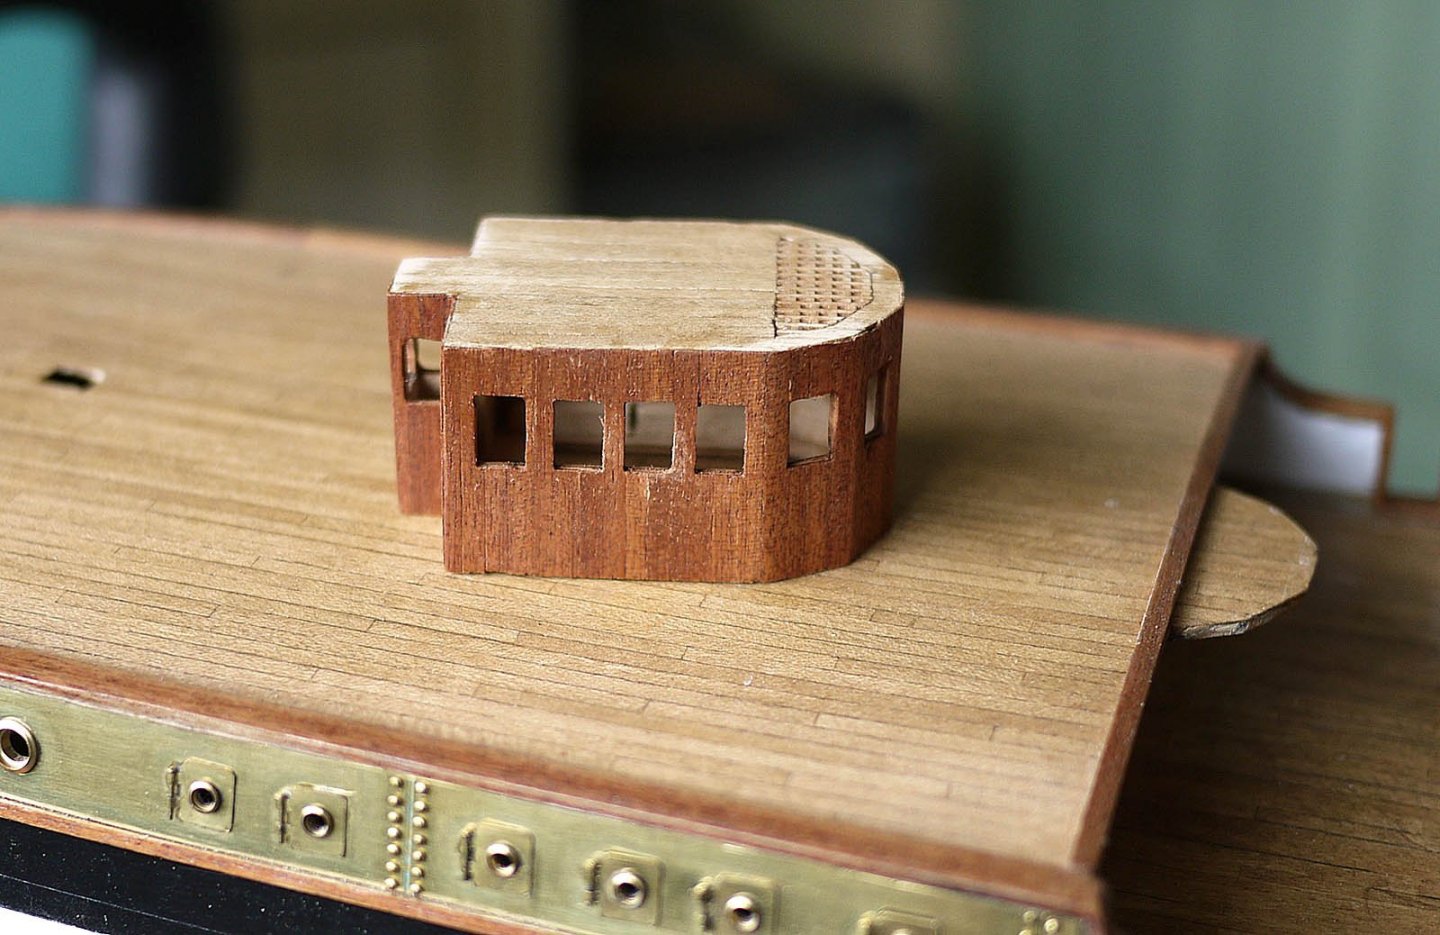
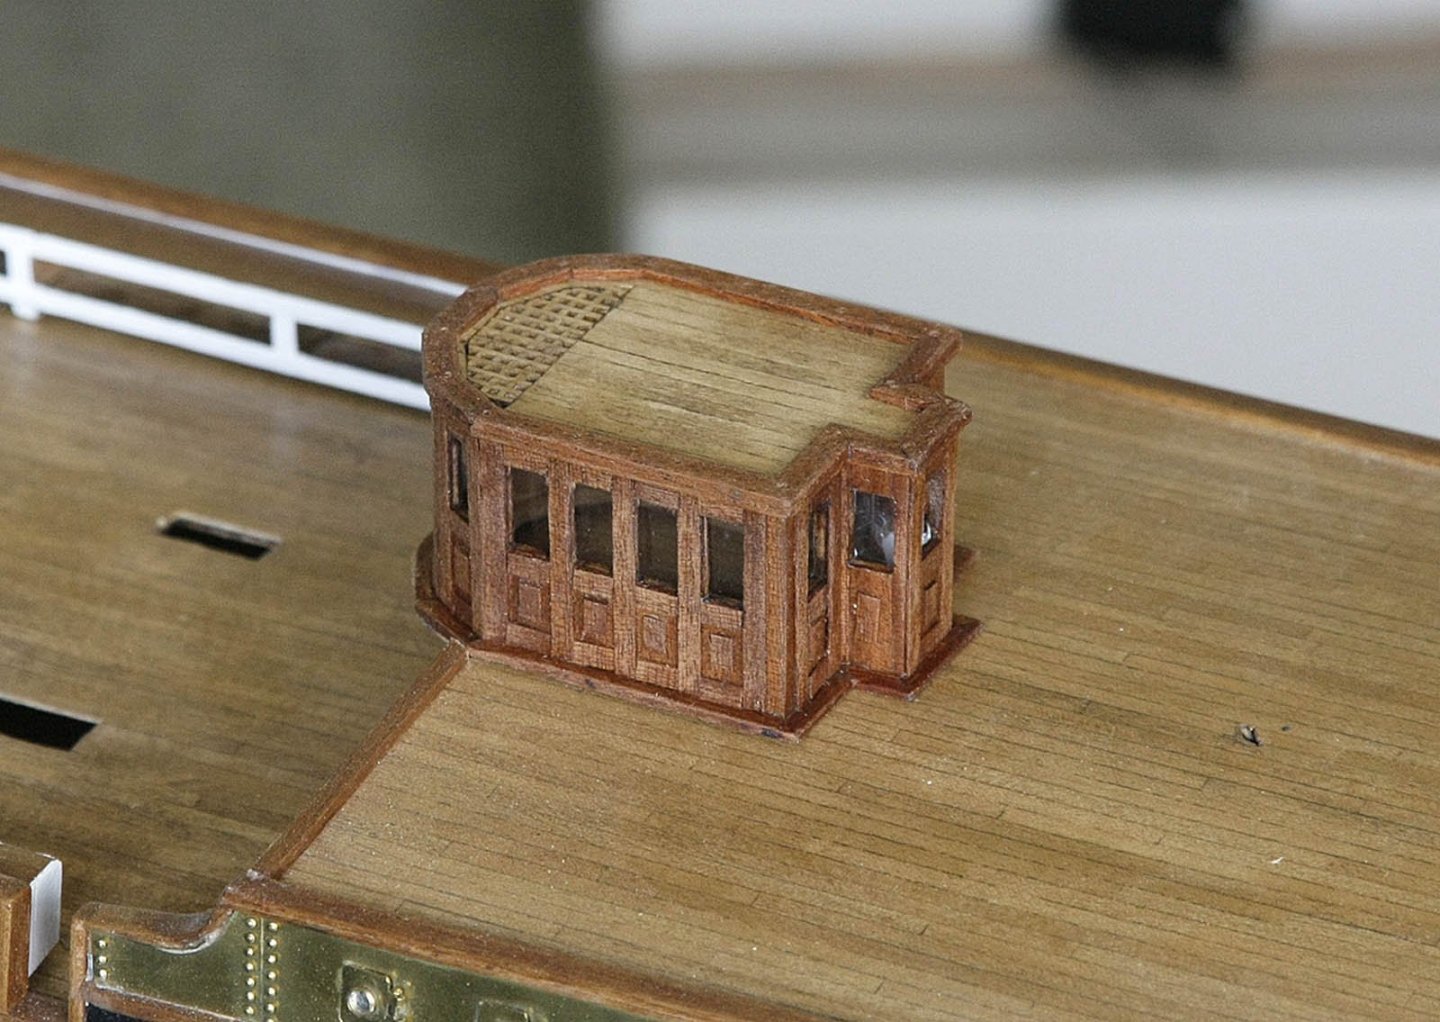
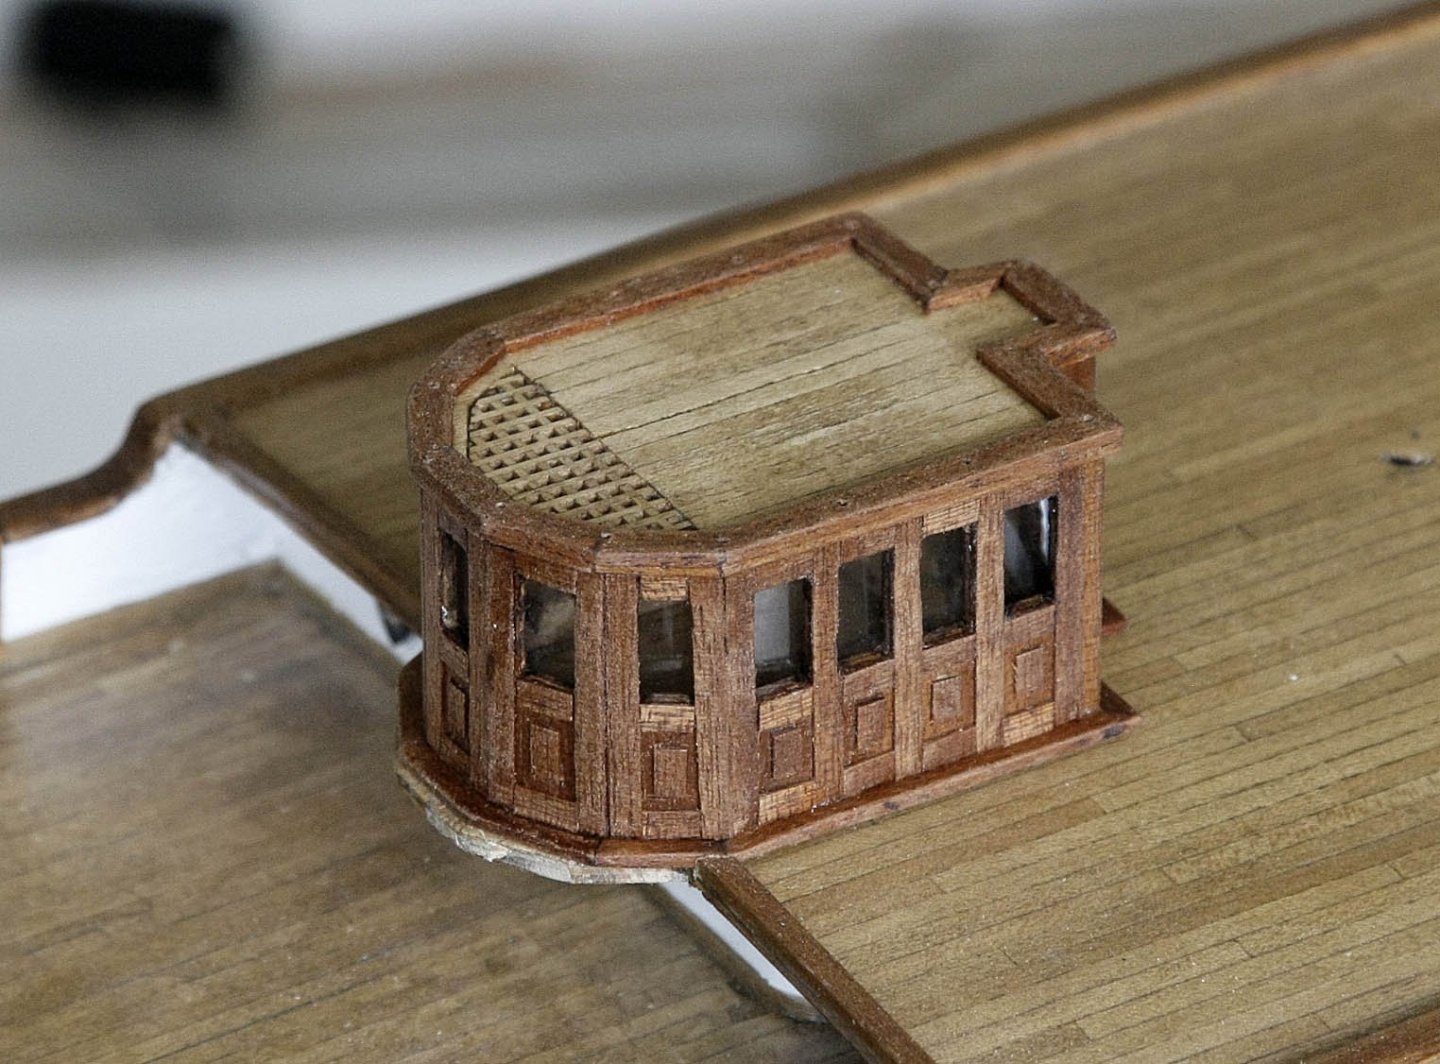
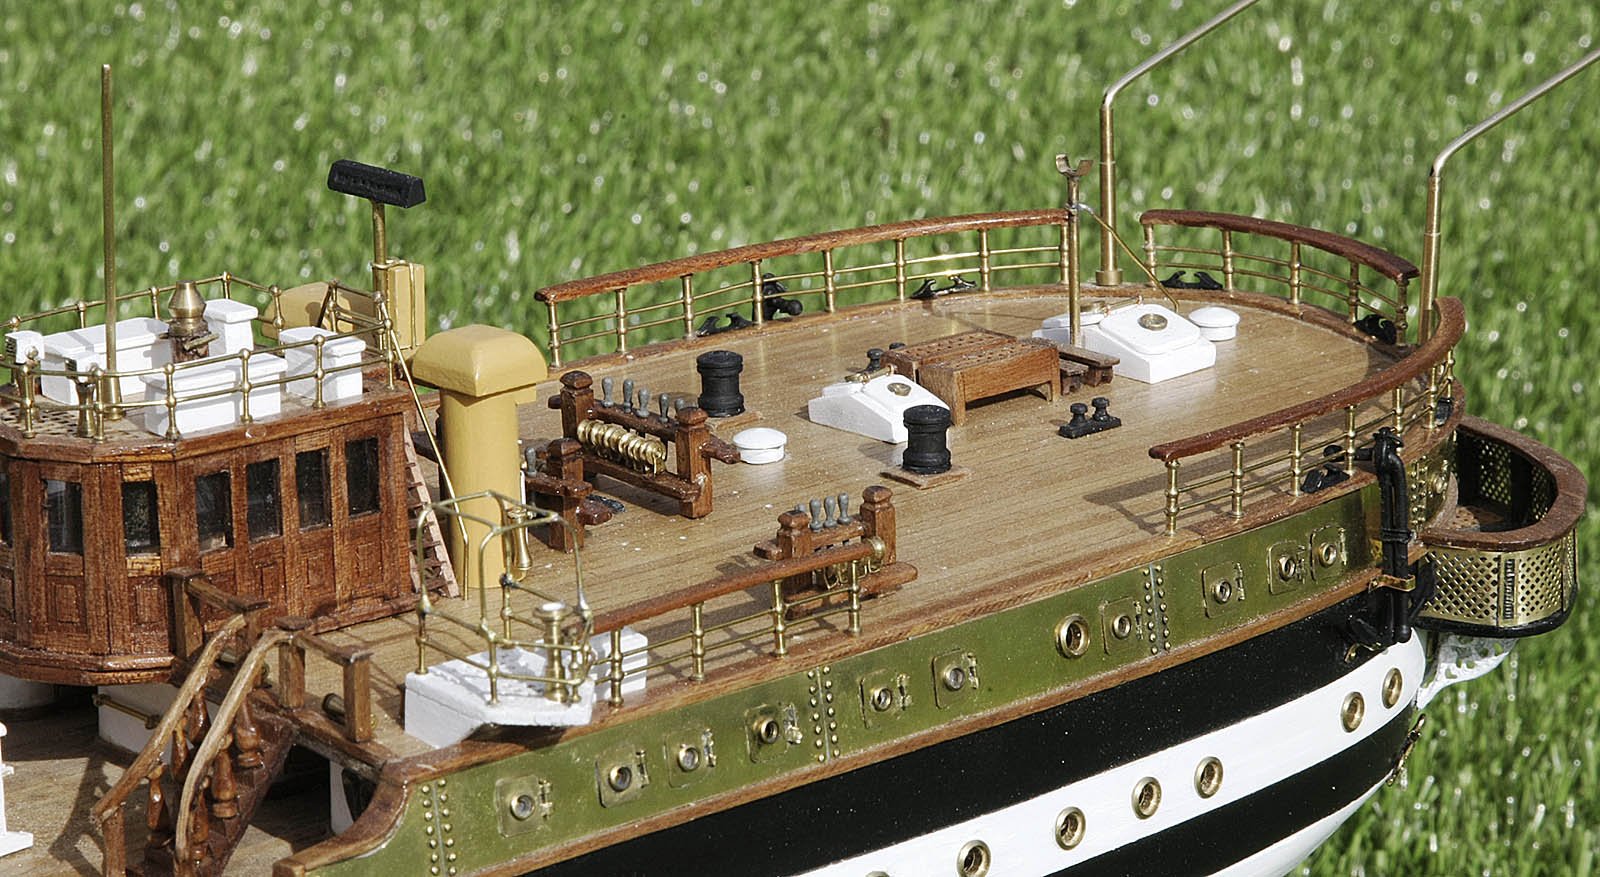
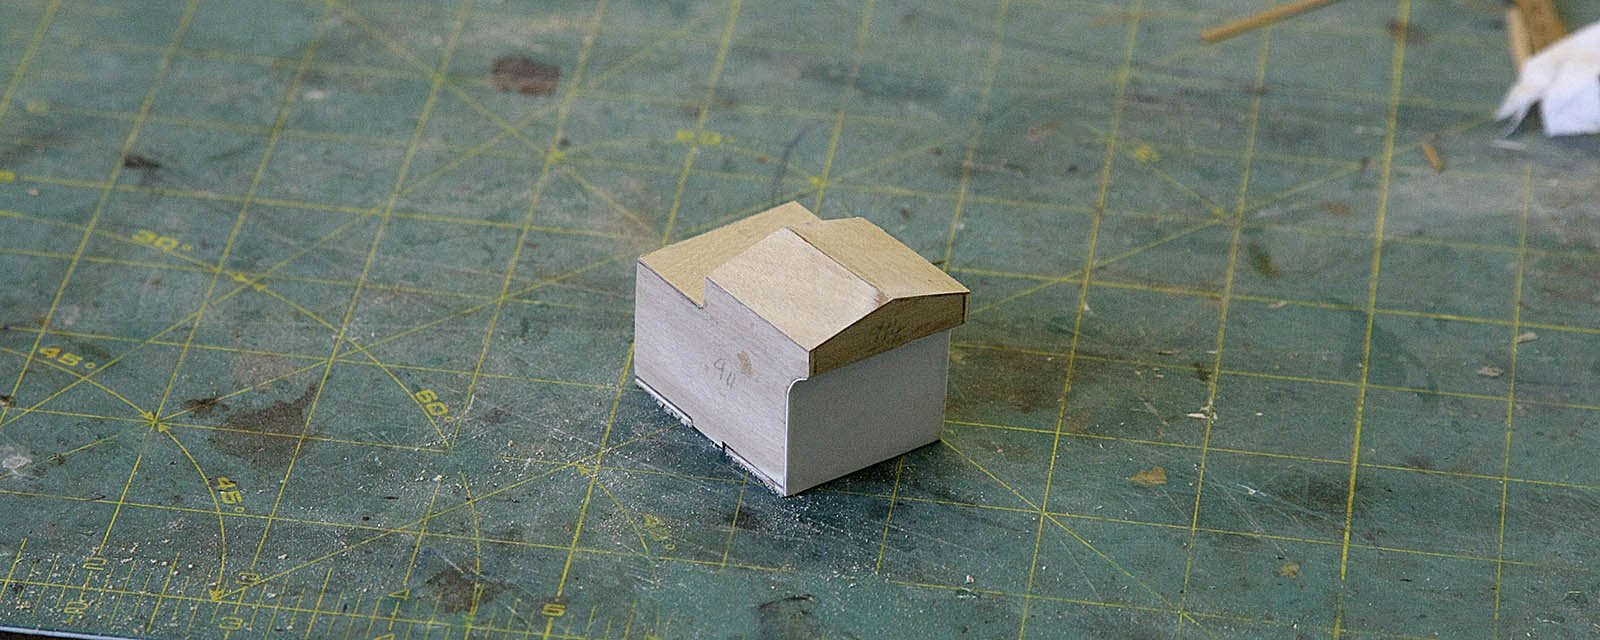
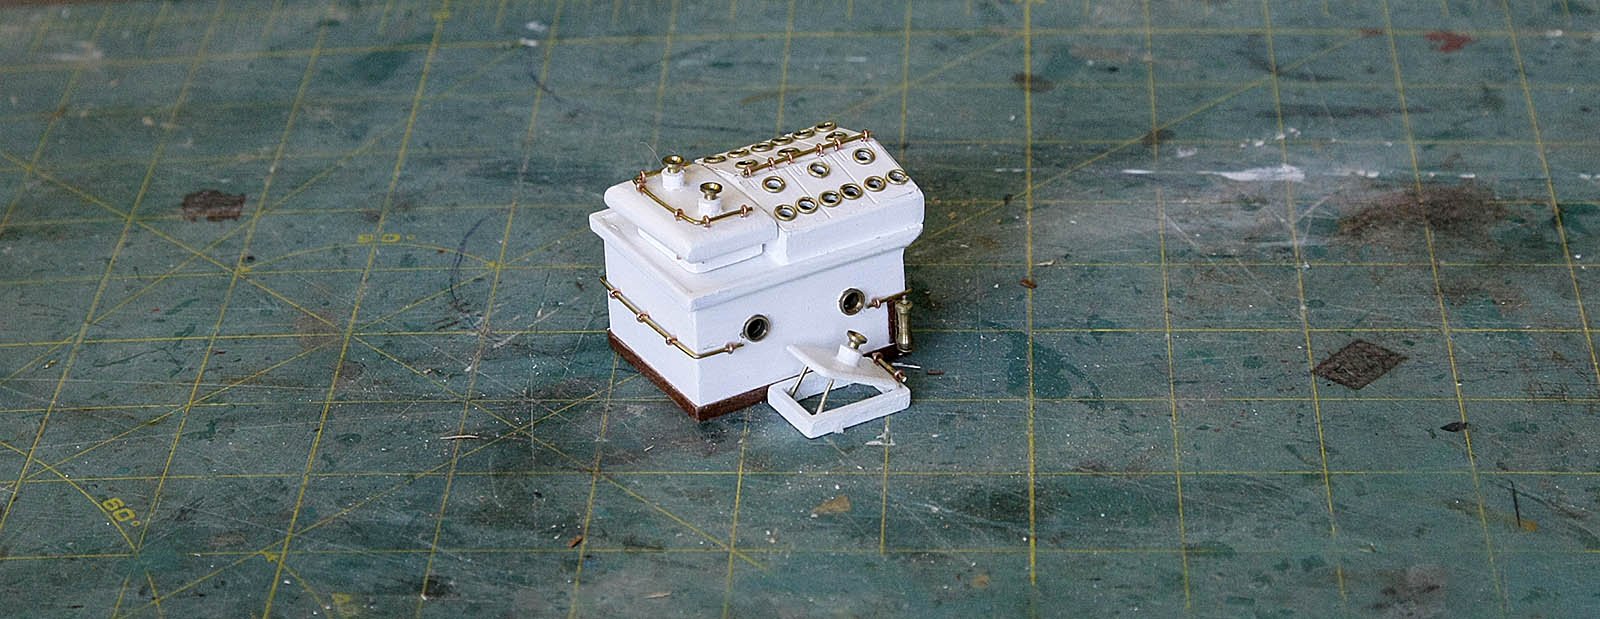
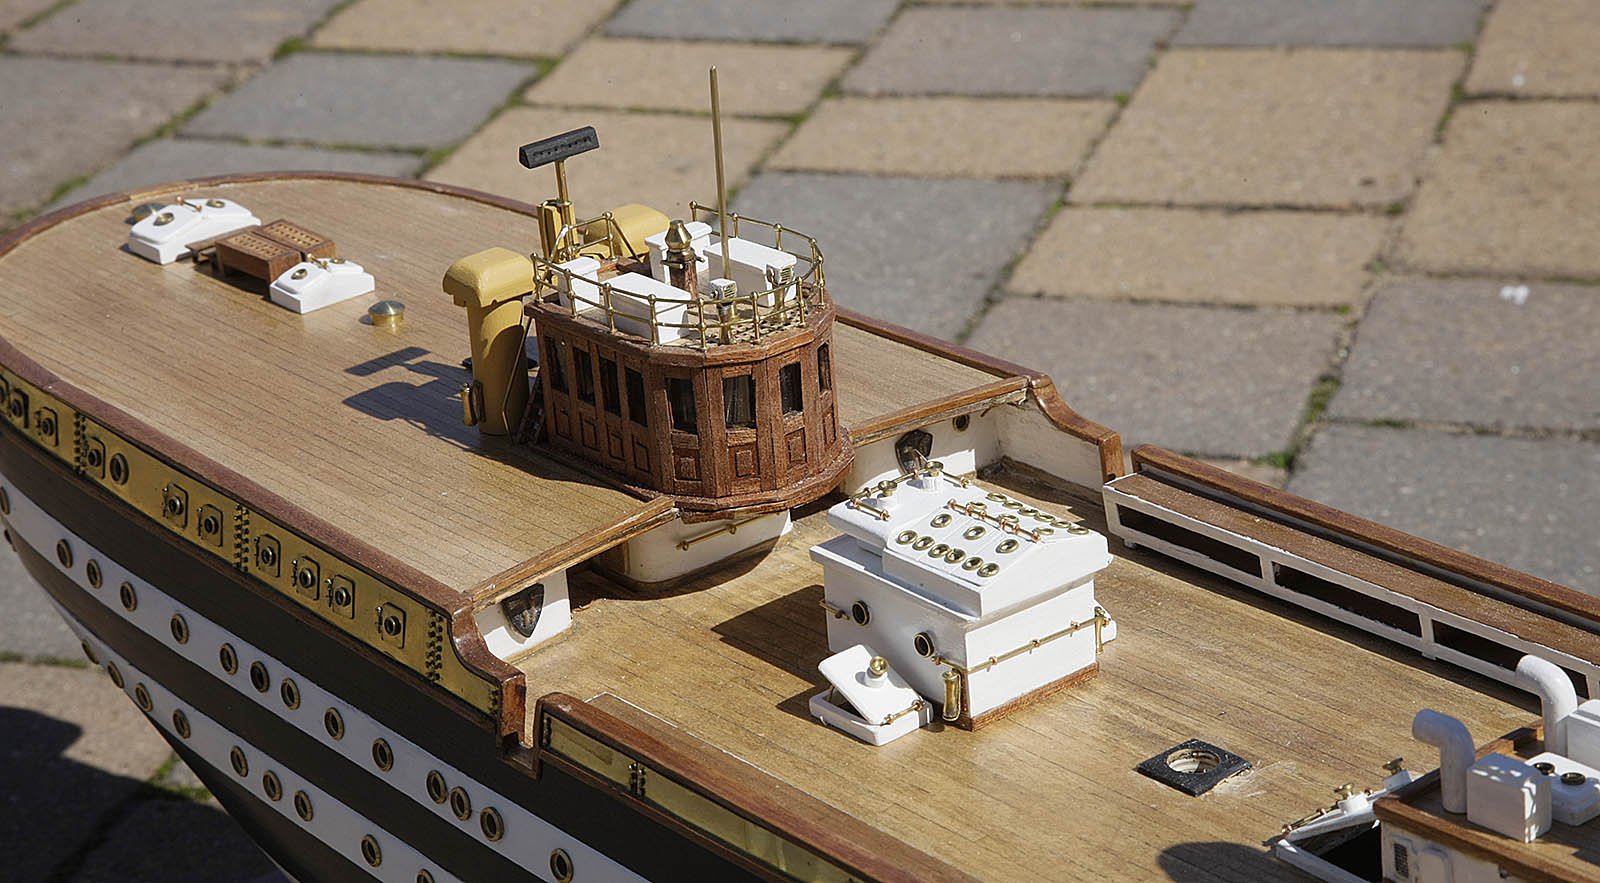
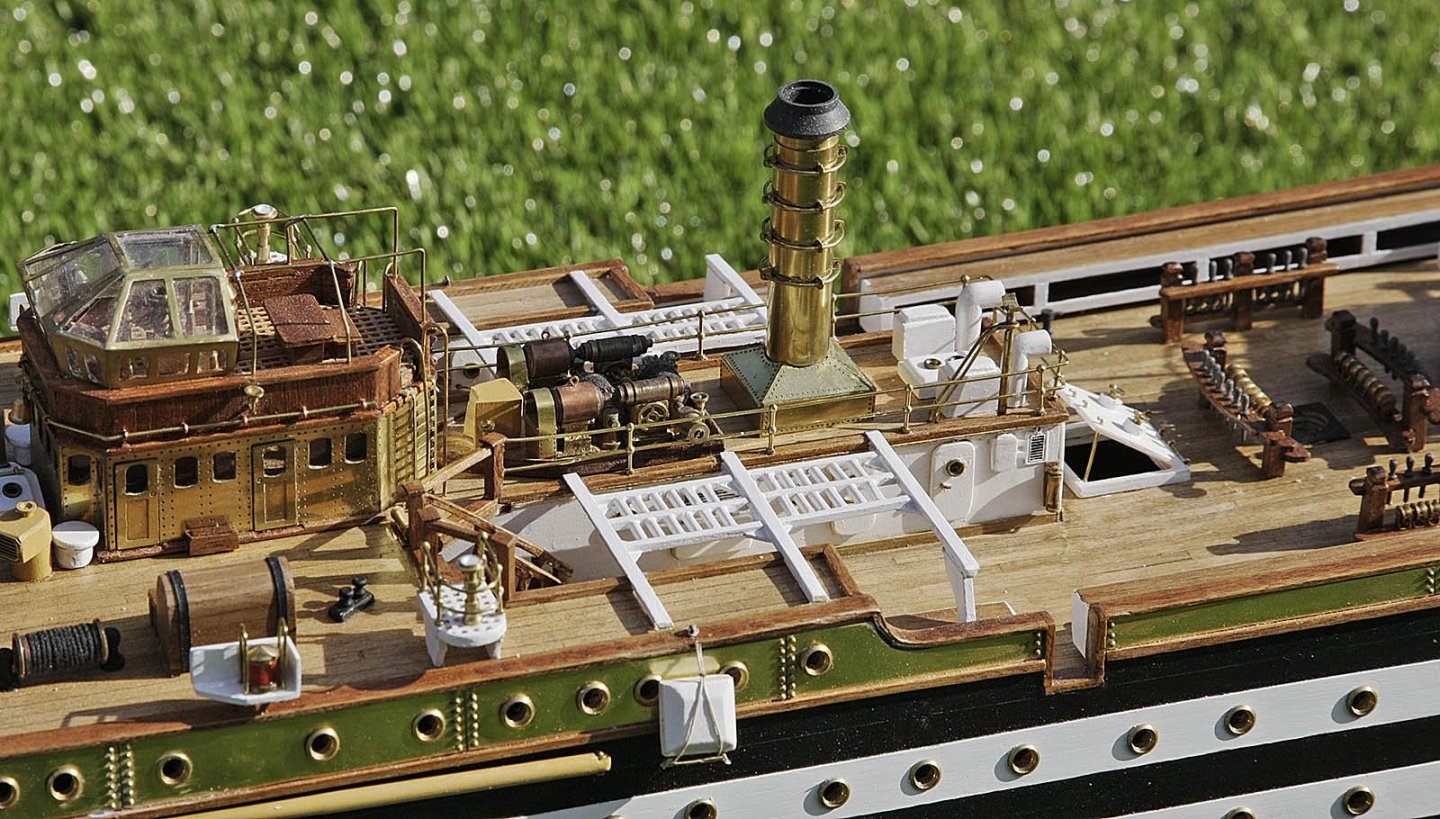
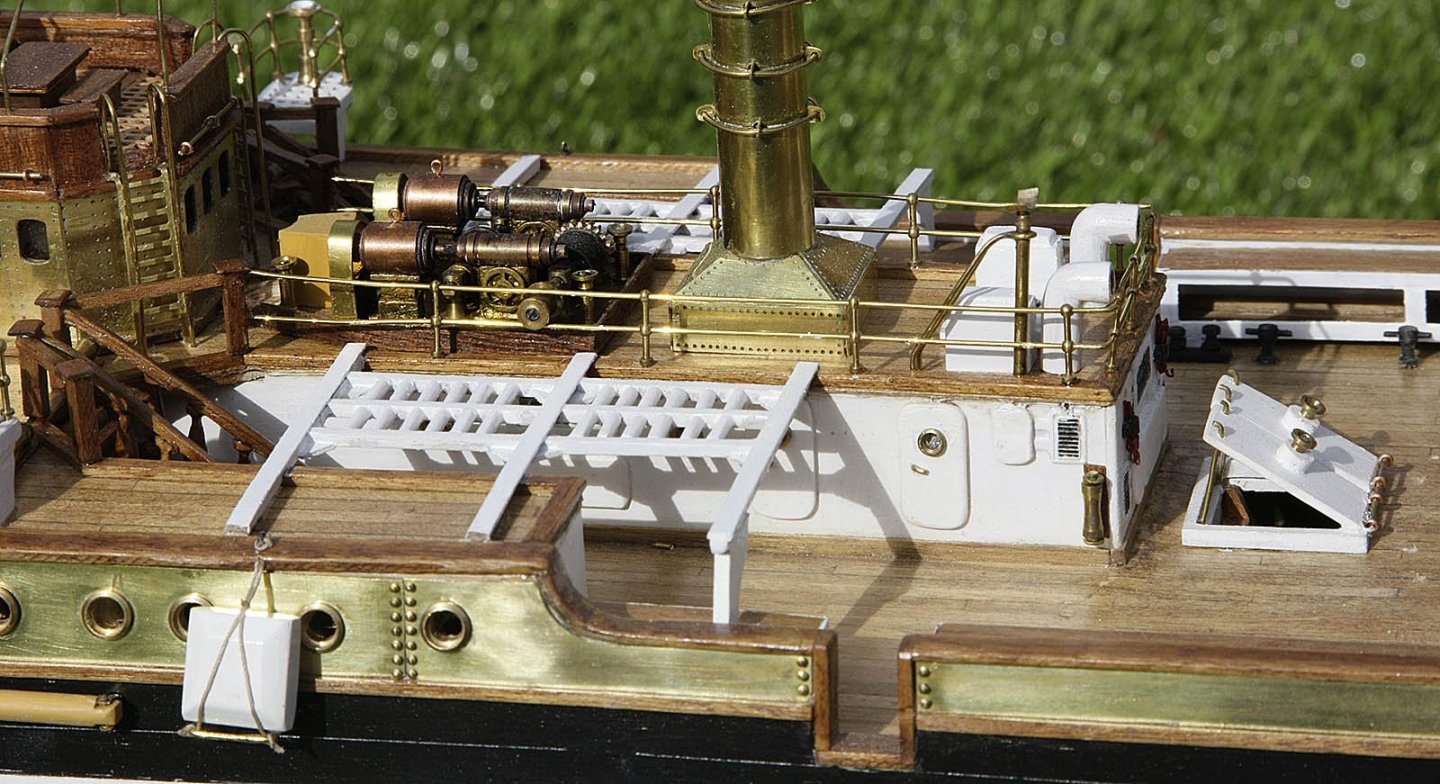
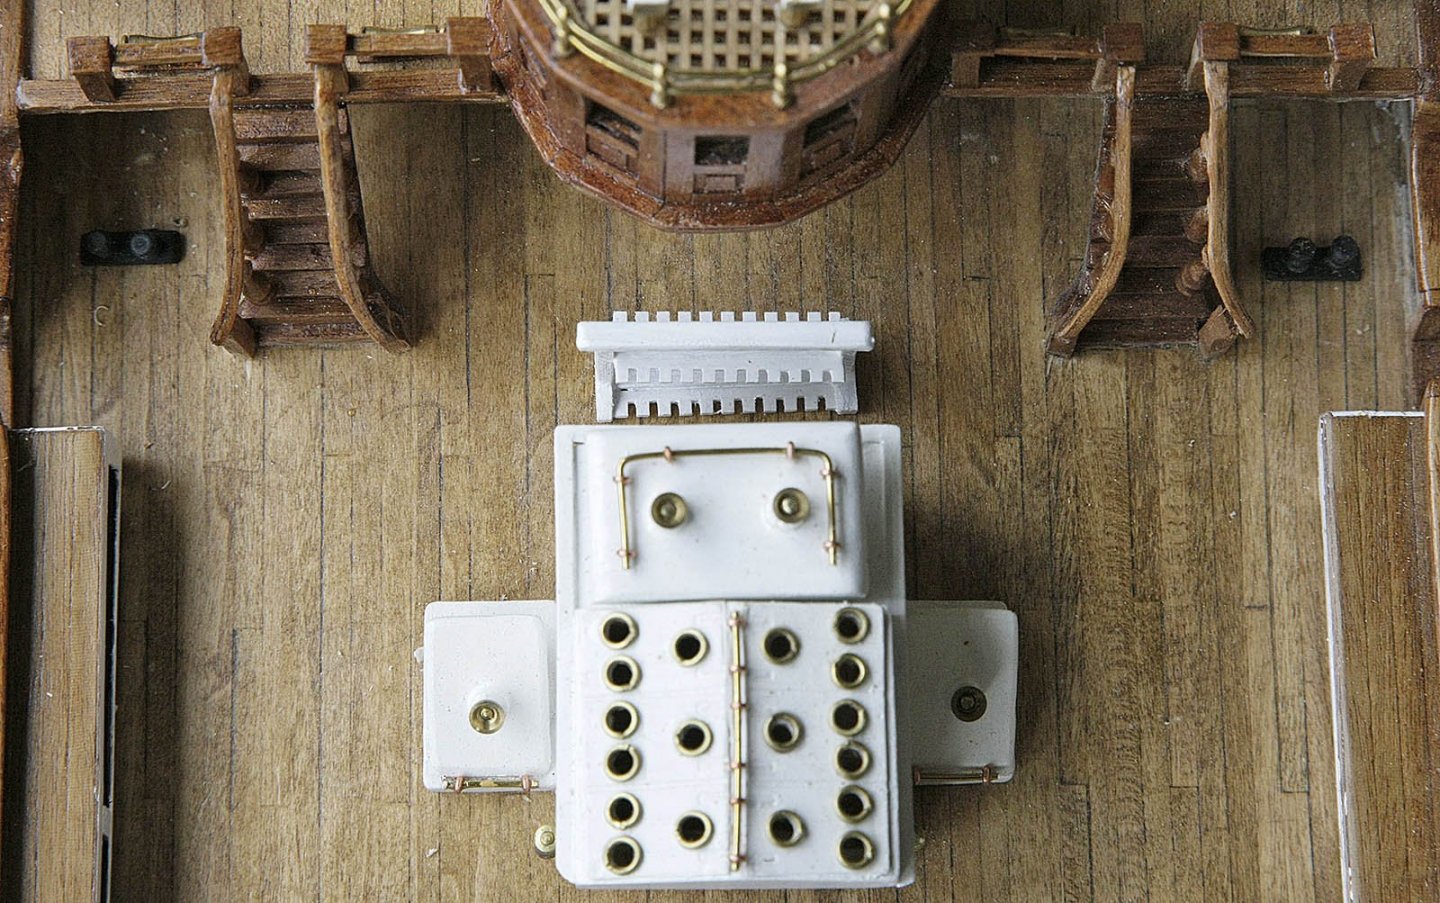
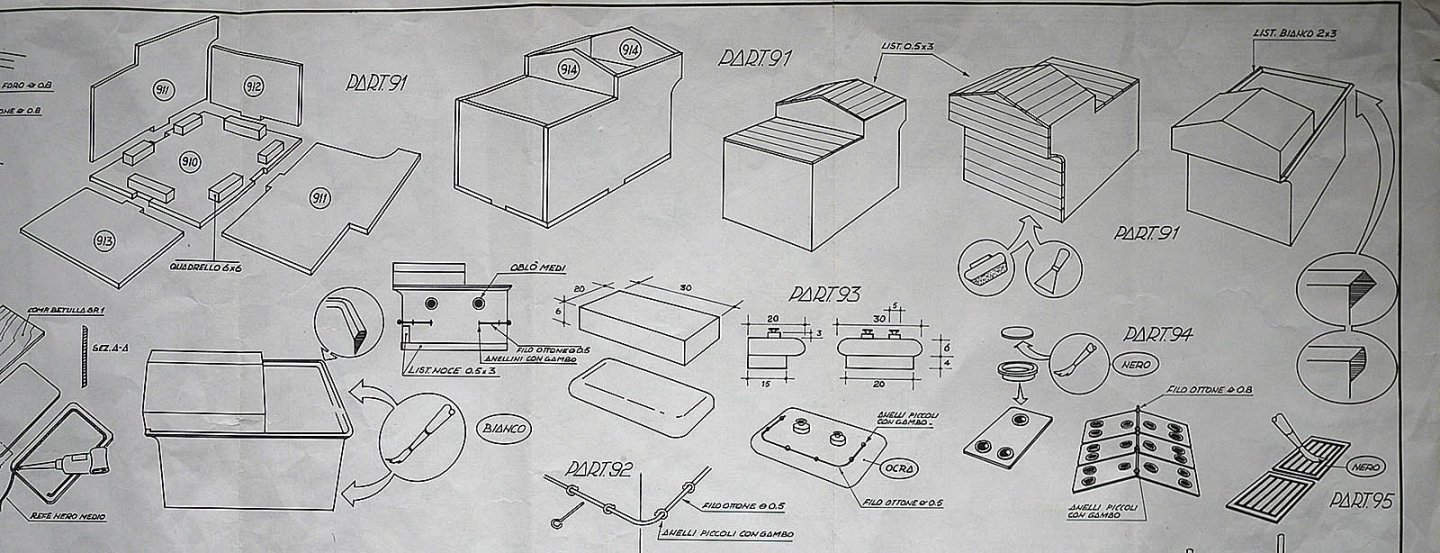
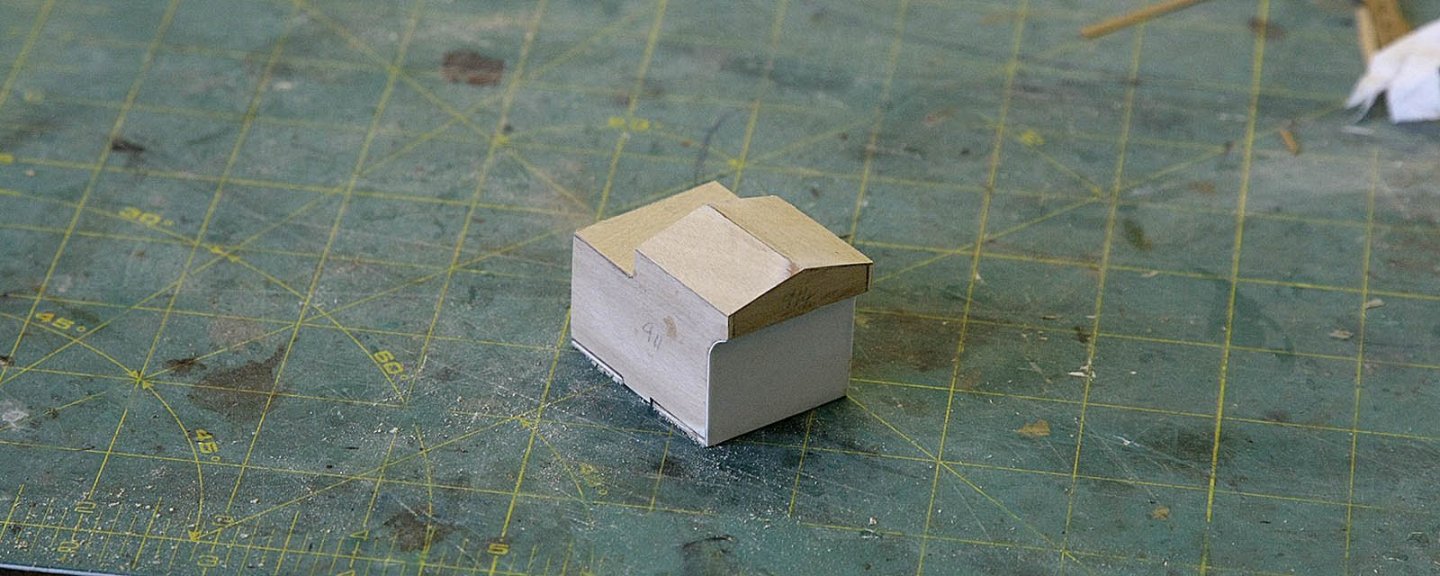
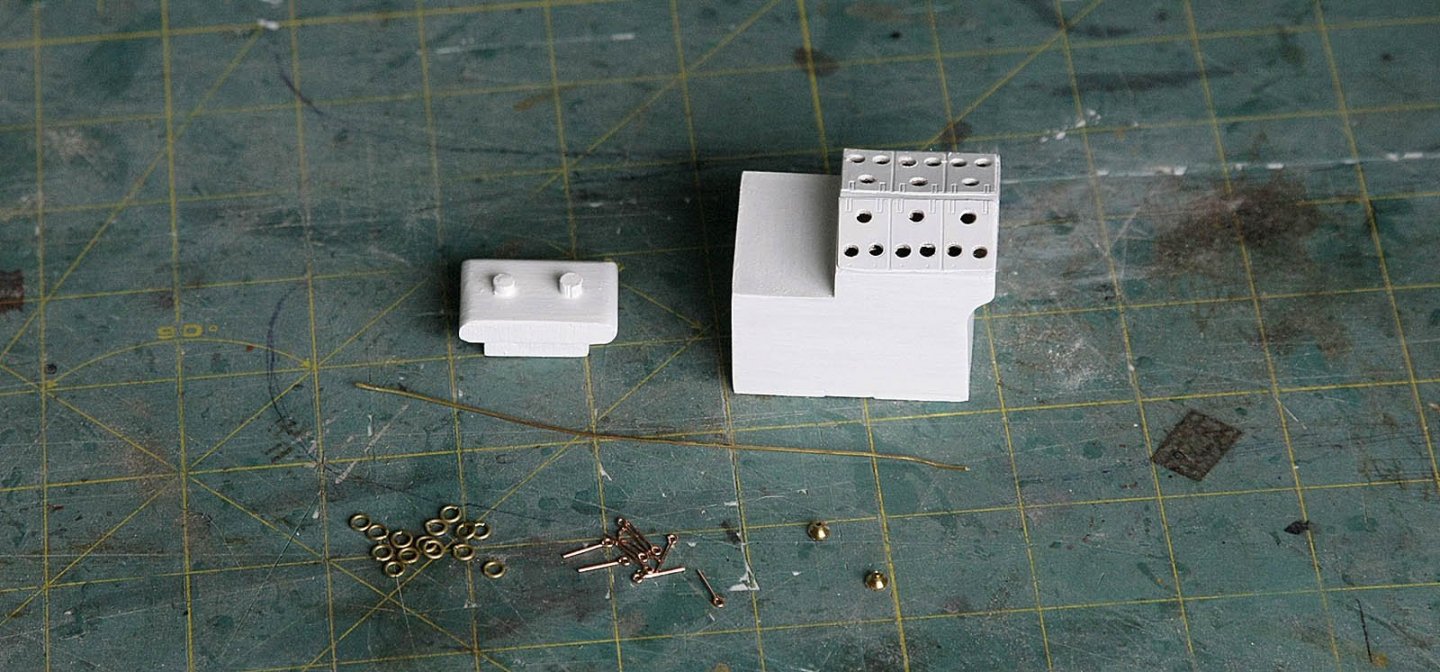
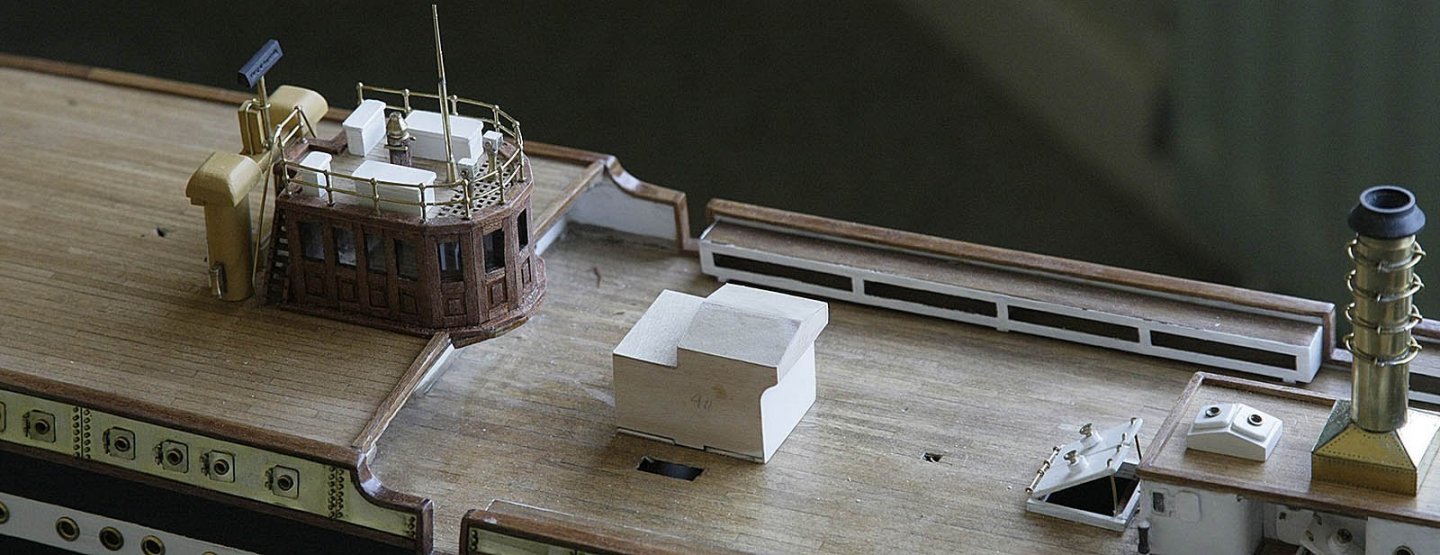
Hi, Again thanks for those likes. The build continues apace, I feel that real progress is now being made as the deck fittings are starting to give it real character, I’m now very enthusiastic and look forward to each time I can get to it to continue. I have now finished the waist deck cabin and a couple more hatches and skylights. These were a project of their own, they took a bit of time but presented no issues. The walls were made up from ply which was then added to as per the plans. There weren’t enough brass portholes supplied in the kit so for the skylights I used small brass rings, with all the other stuff going on I think I’ll get away with them. I painted it, again using Humbrol enamel then fitted it in place. Lots of pictures this time. Ken

-
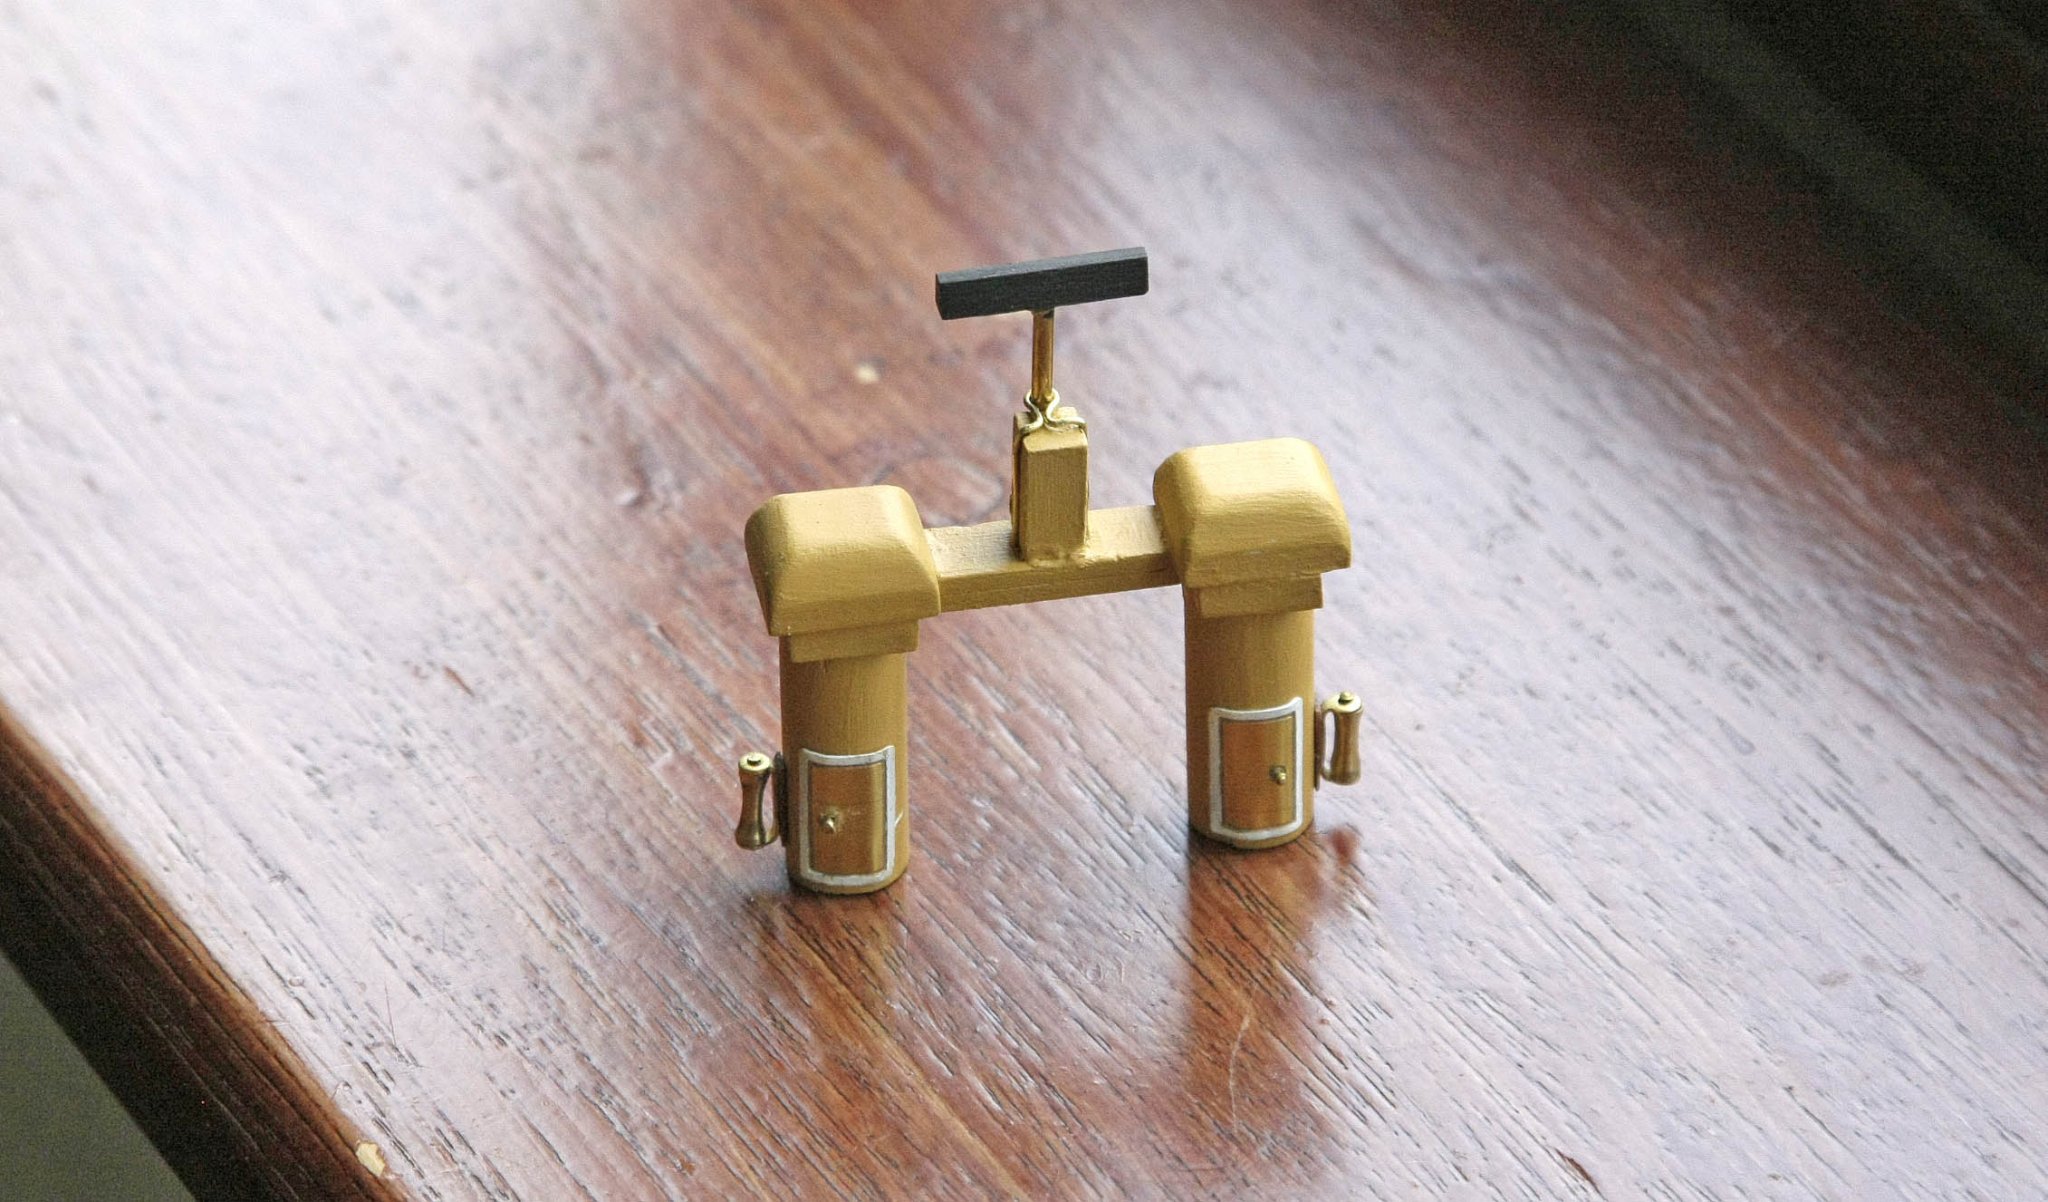
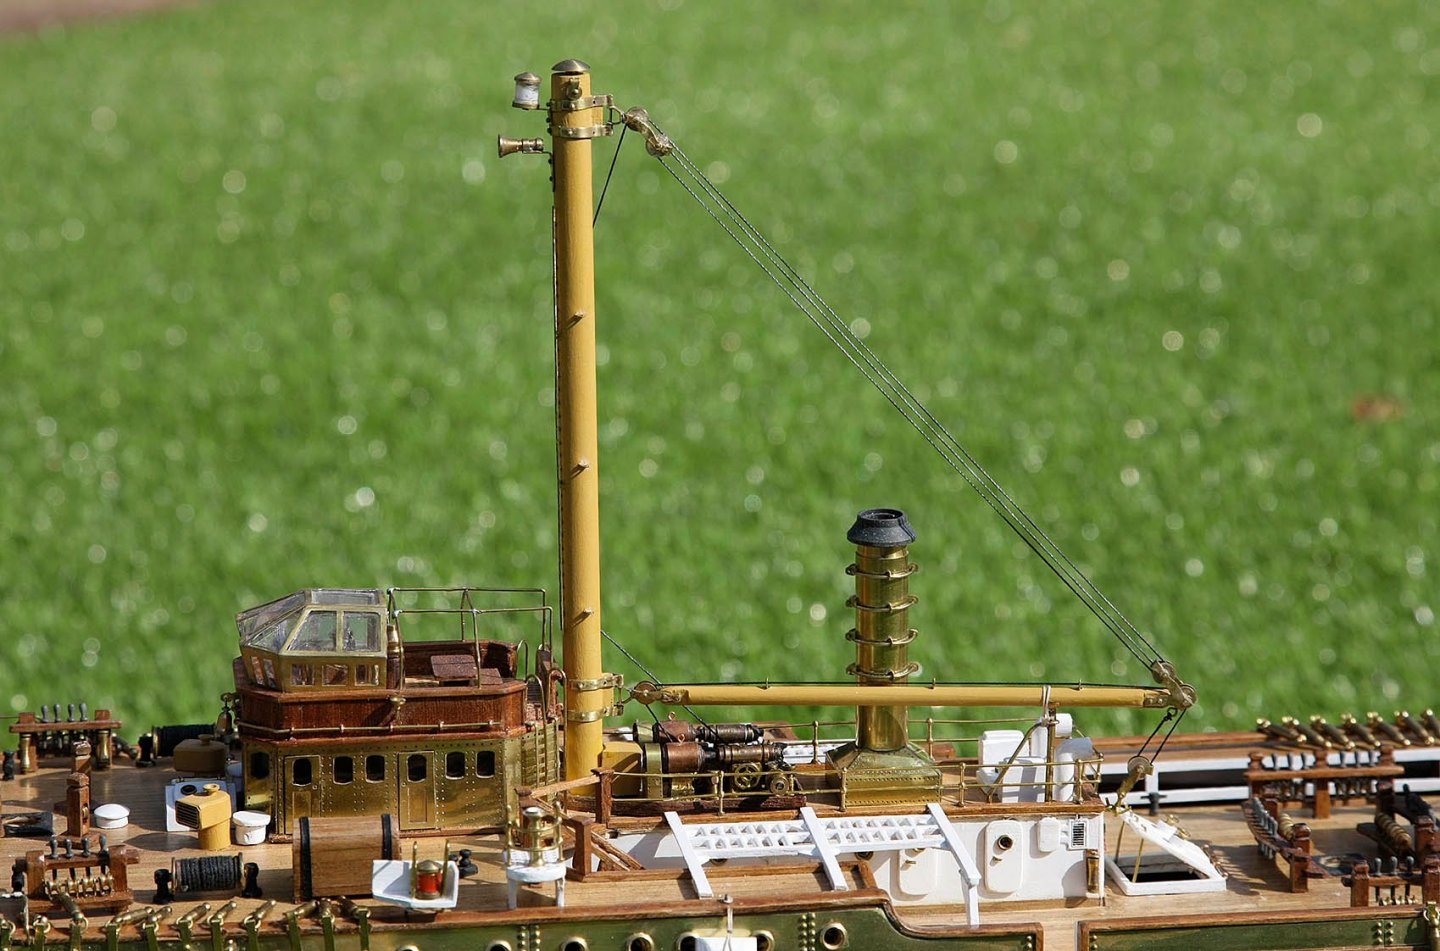
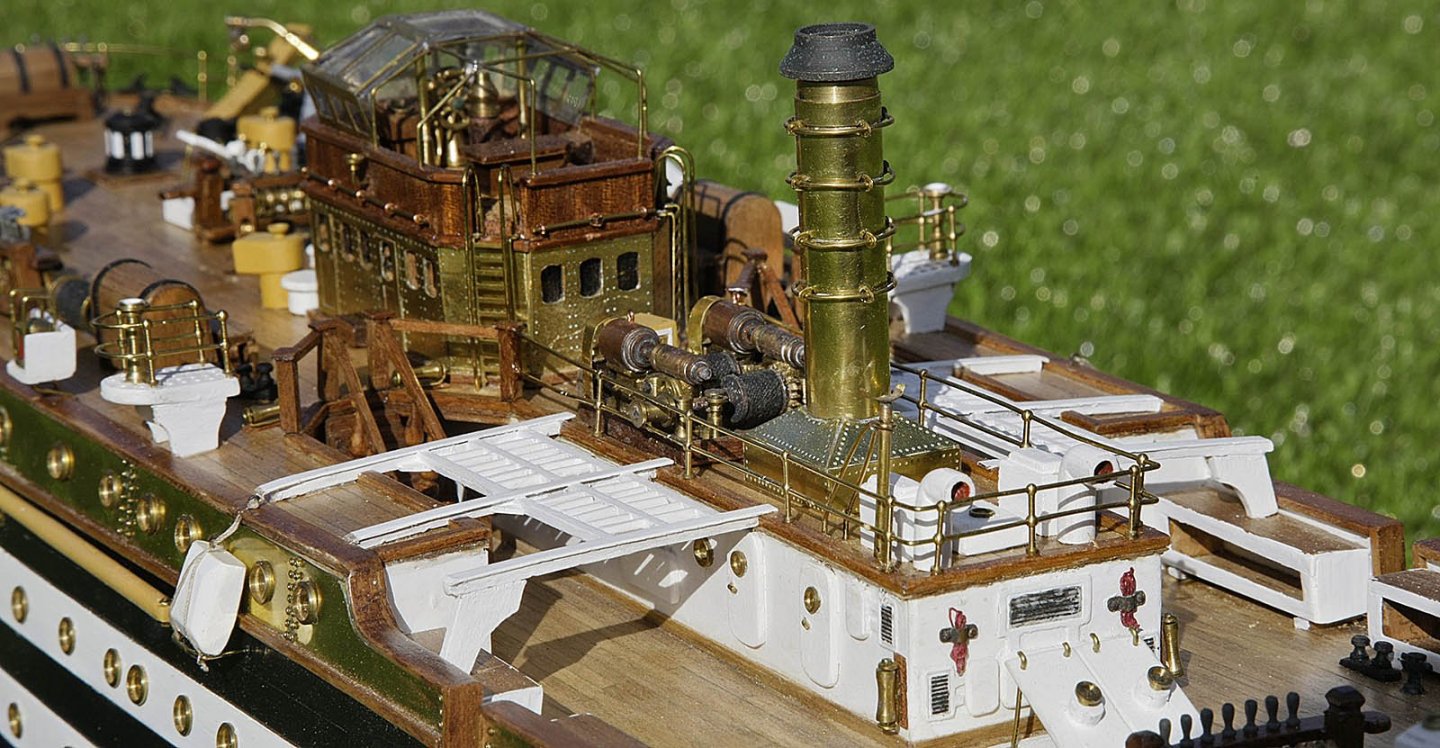
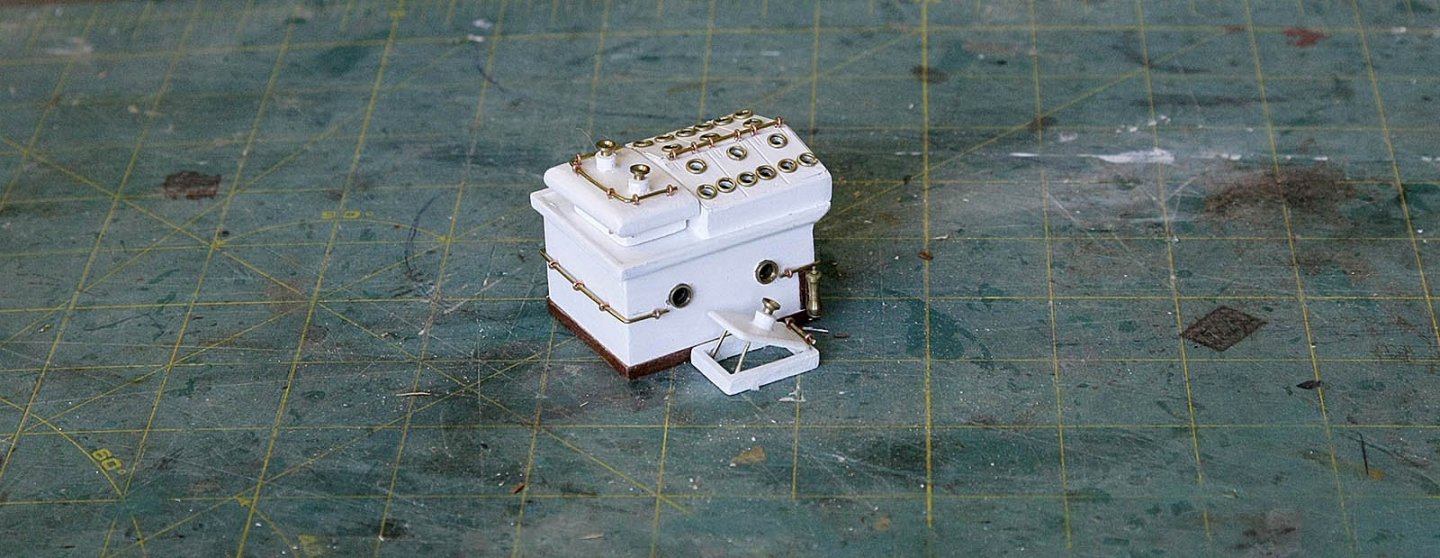
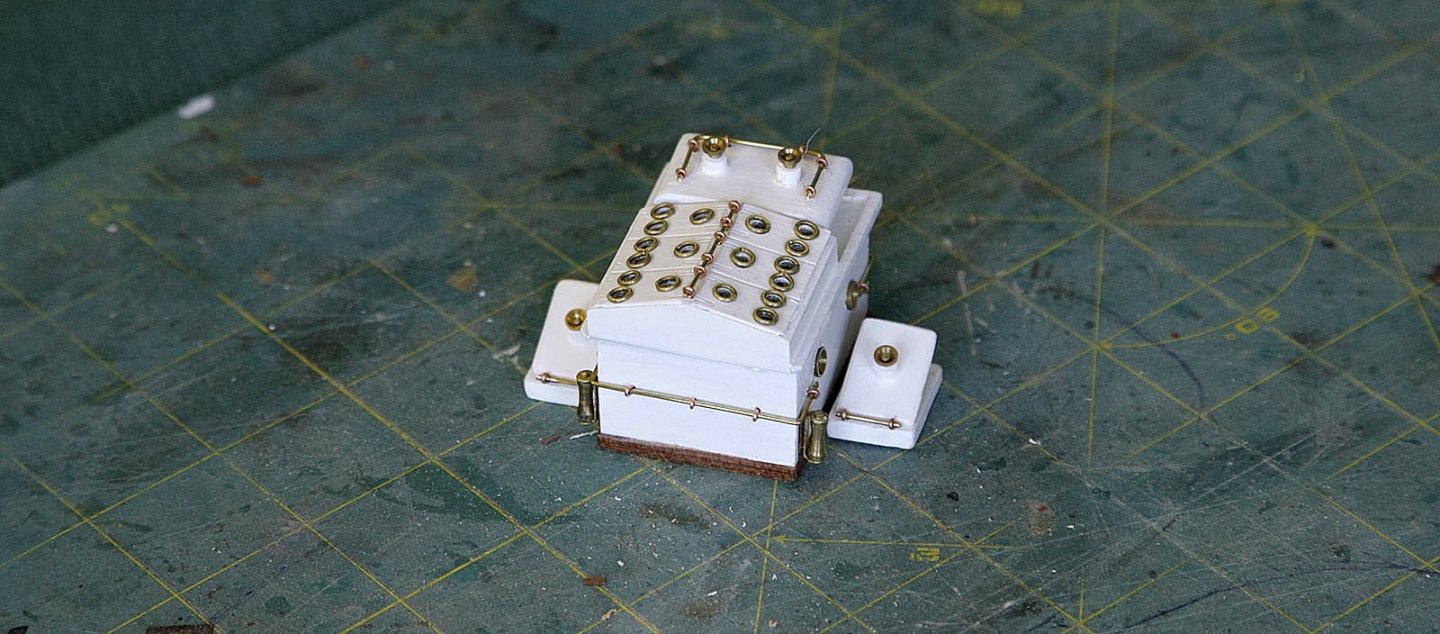
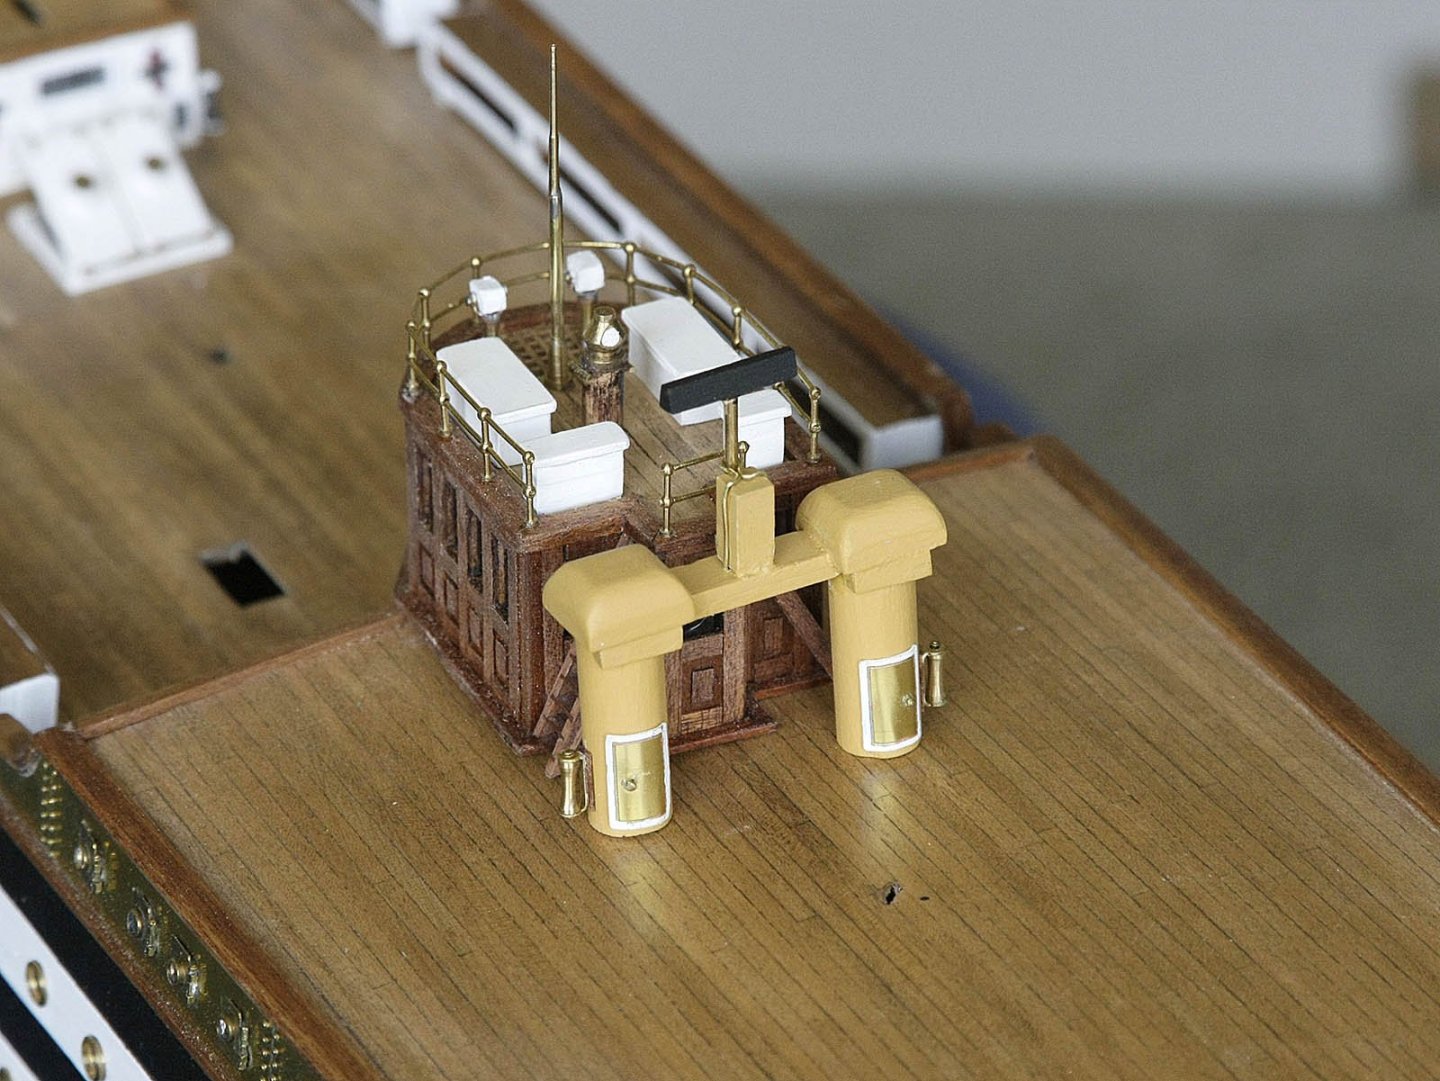
Hi, The next little project was to make and fit the two column radar structure that sits behind the quarter deck house. It was made up from dowels with sanded to shape tops and joined using strips, finished off with some brass wire to support the radar dish. I brush painted it with Caldercraft occre acrylic, before putting on some doors. I like this paint and the colour is perfect so I’ll be using this for some deck fittings and the masting Ken


-
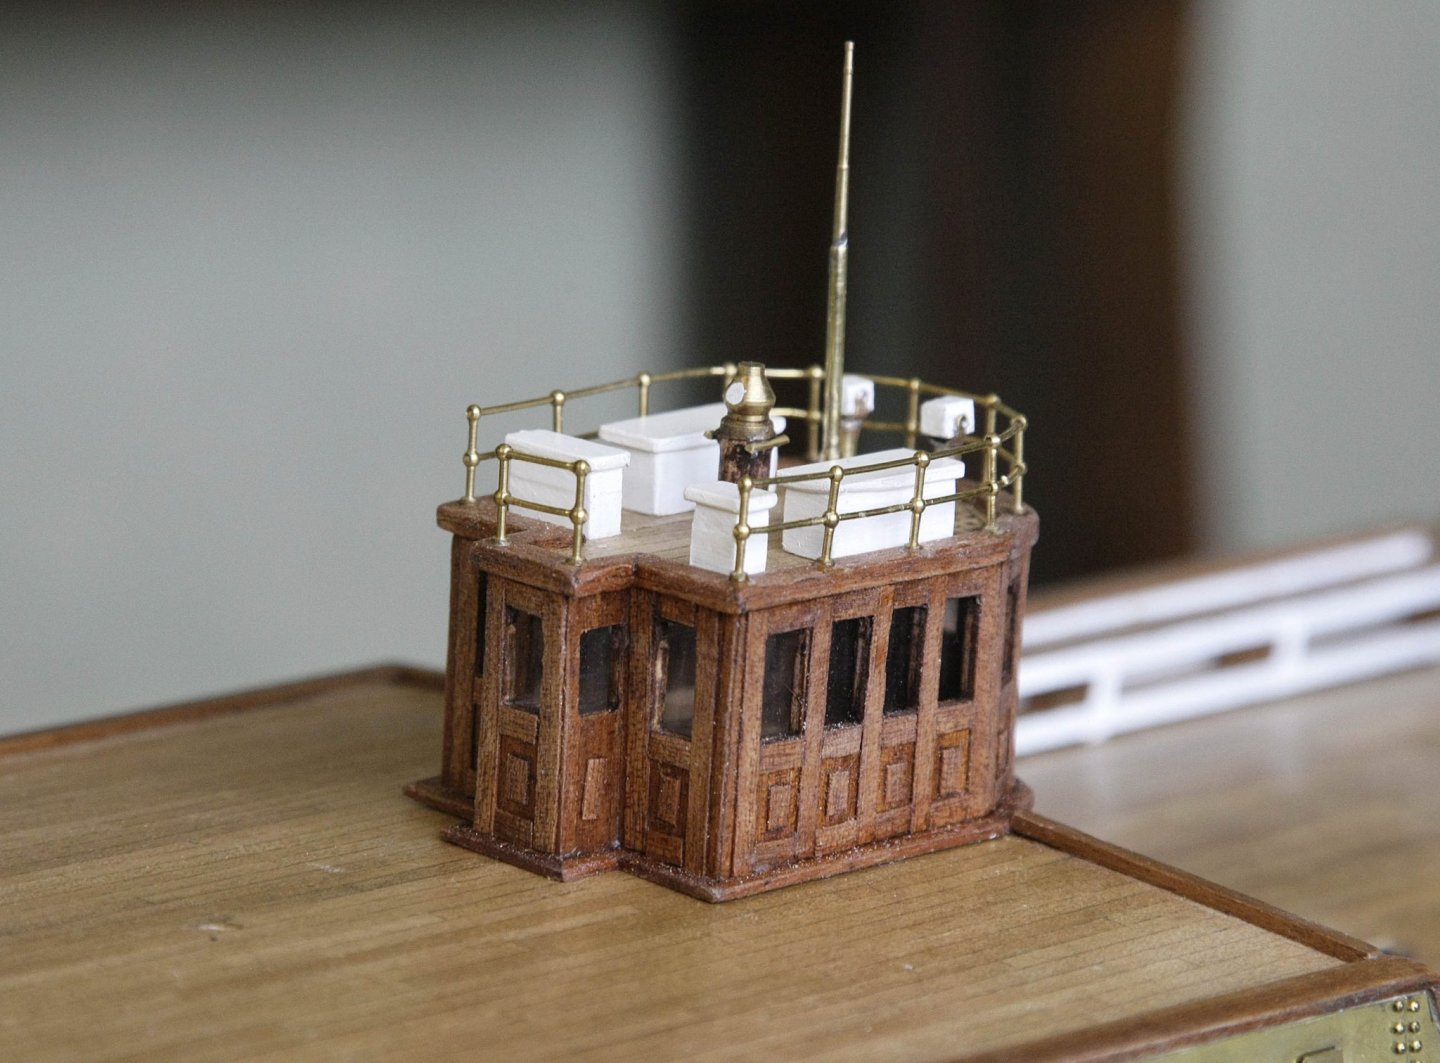
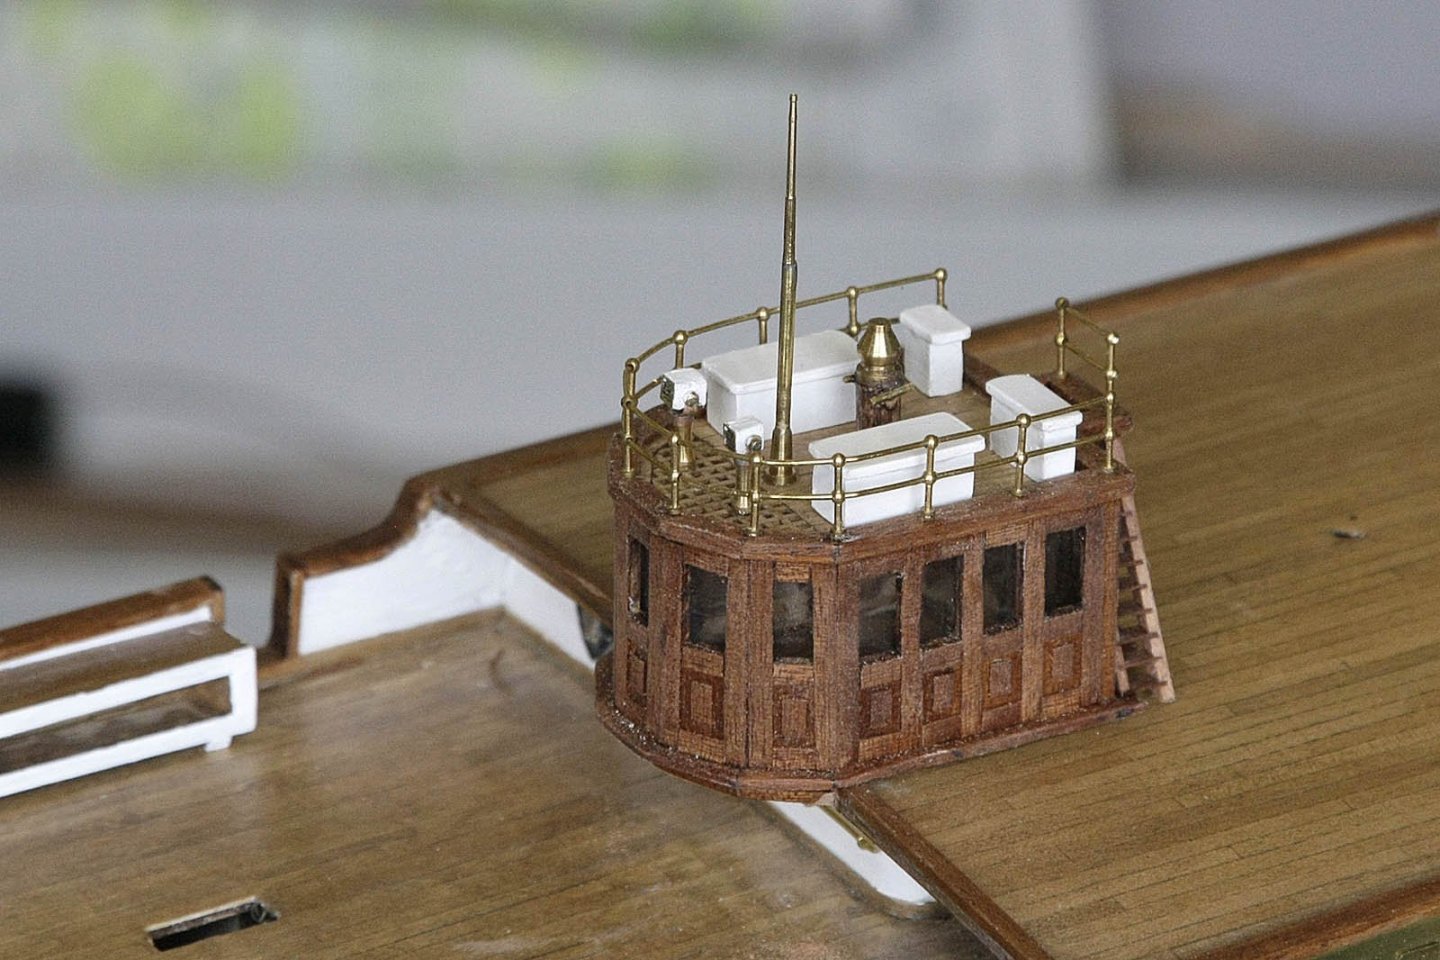
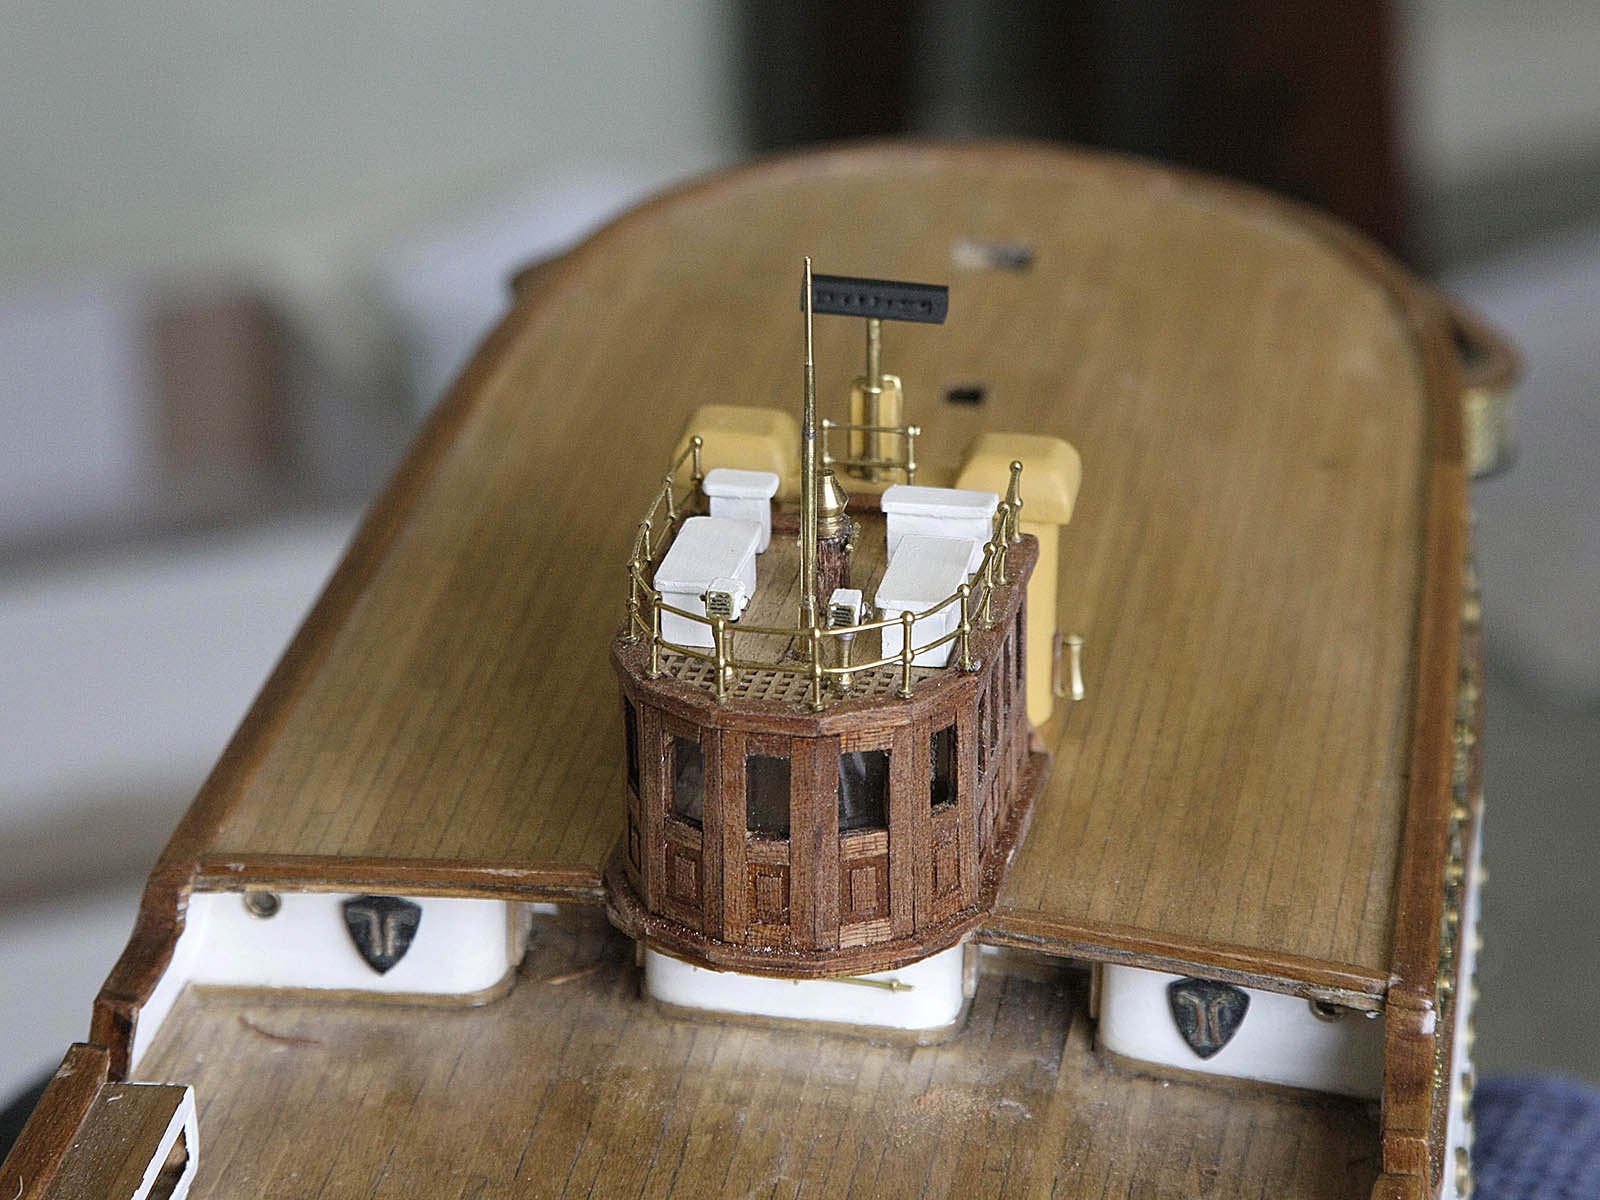
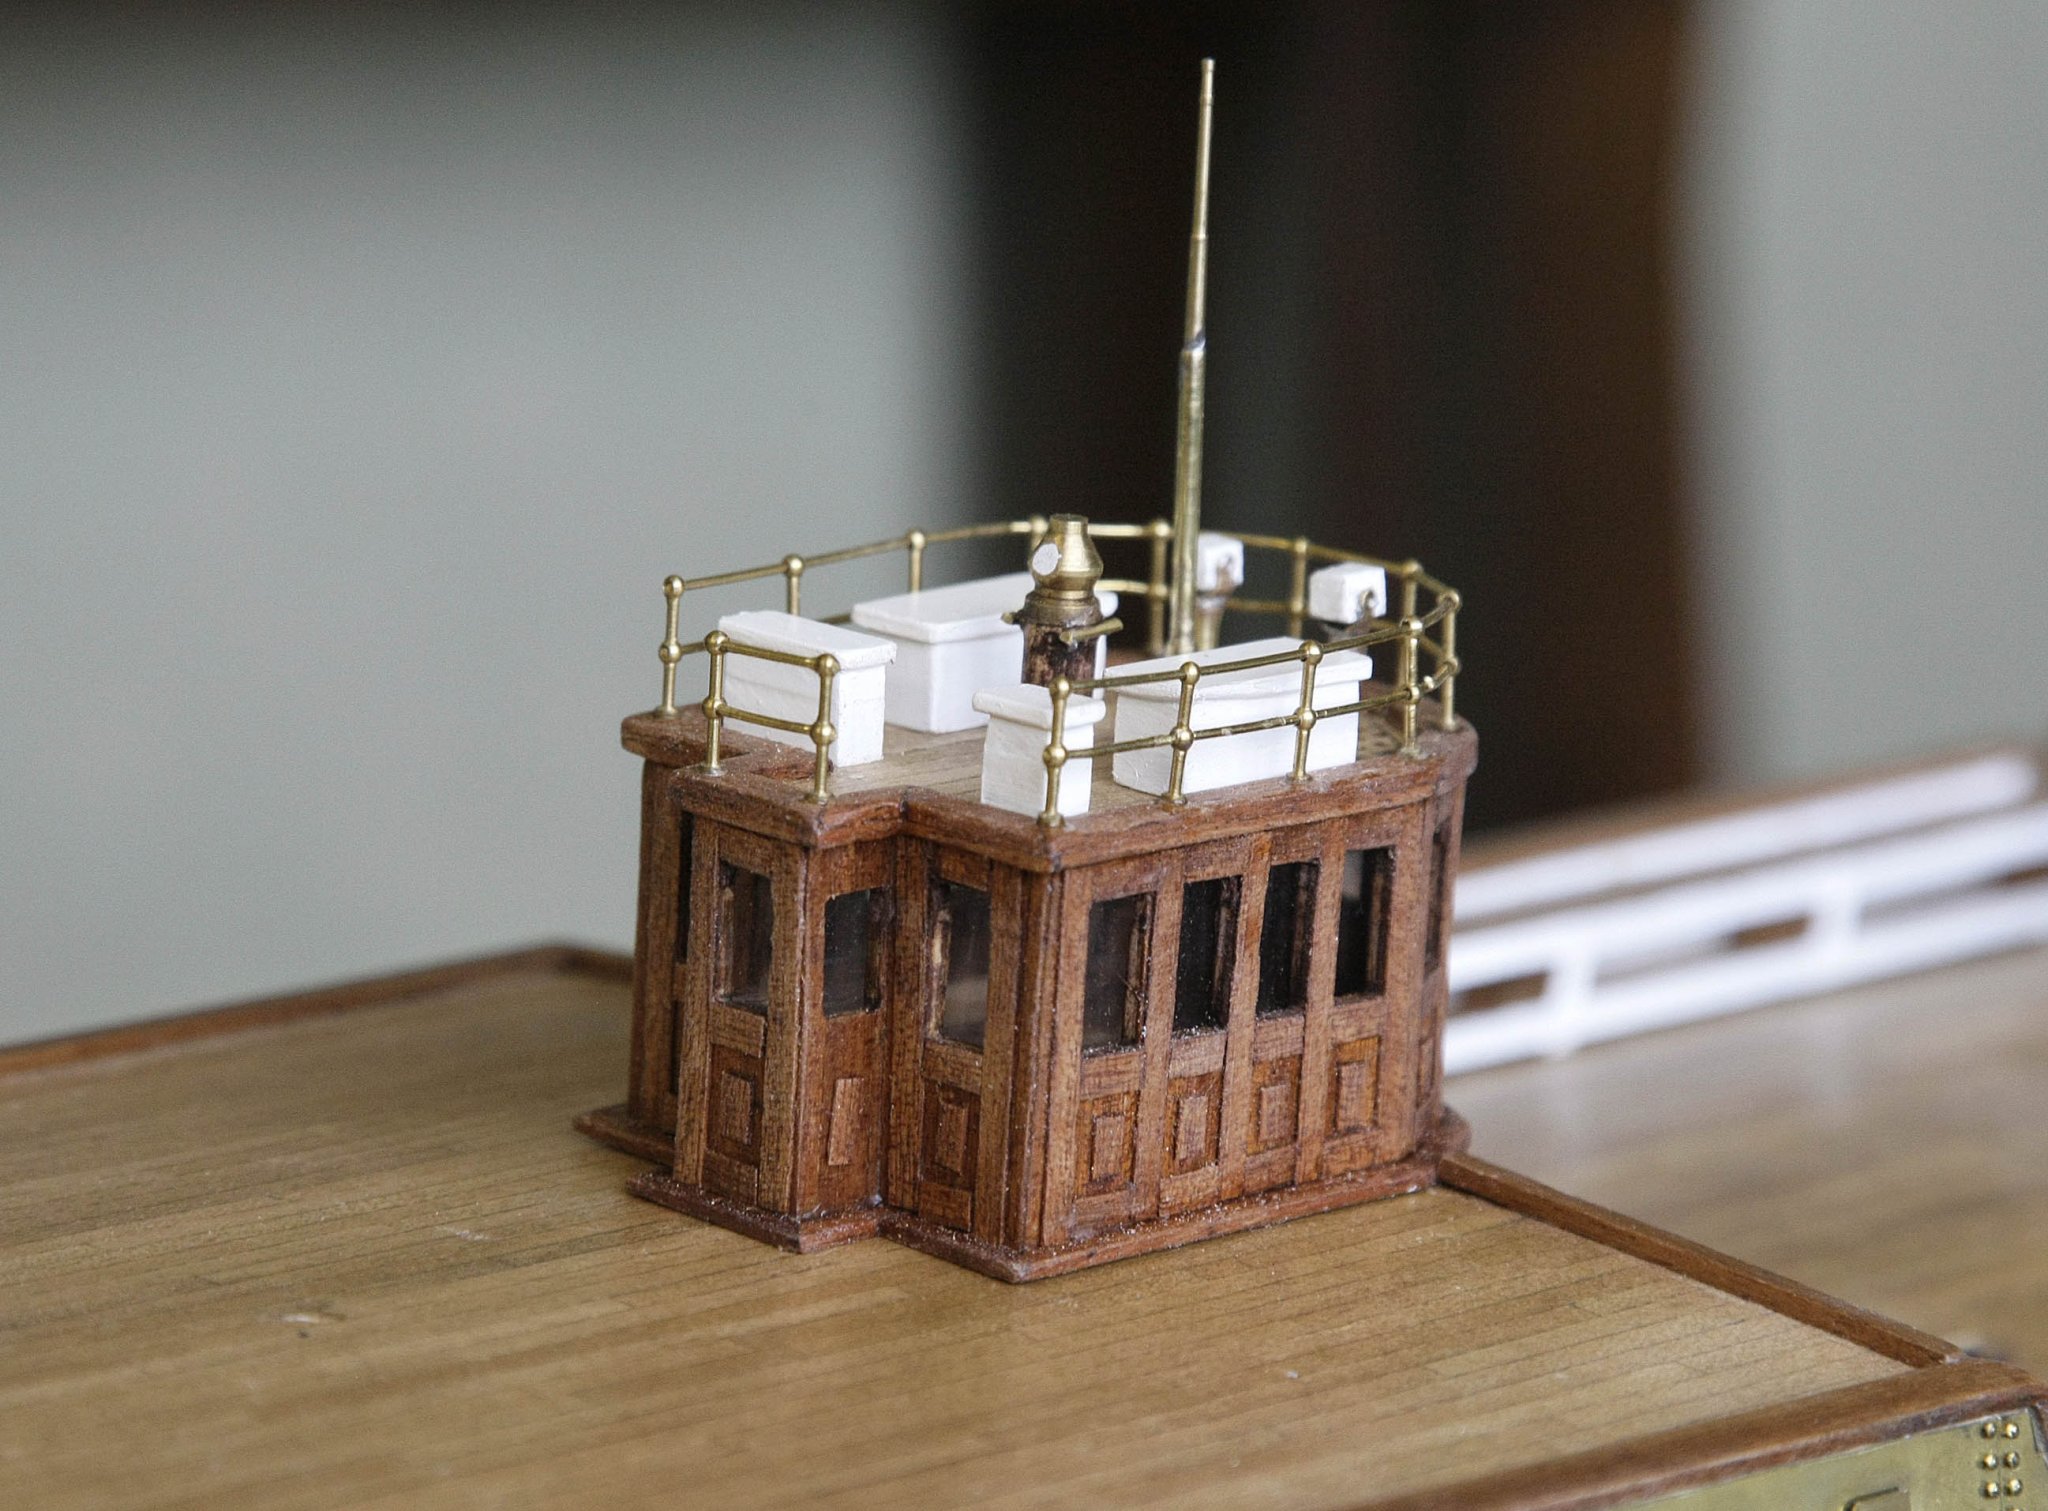
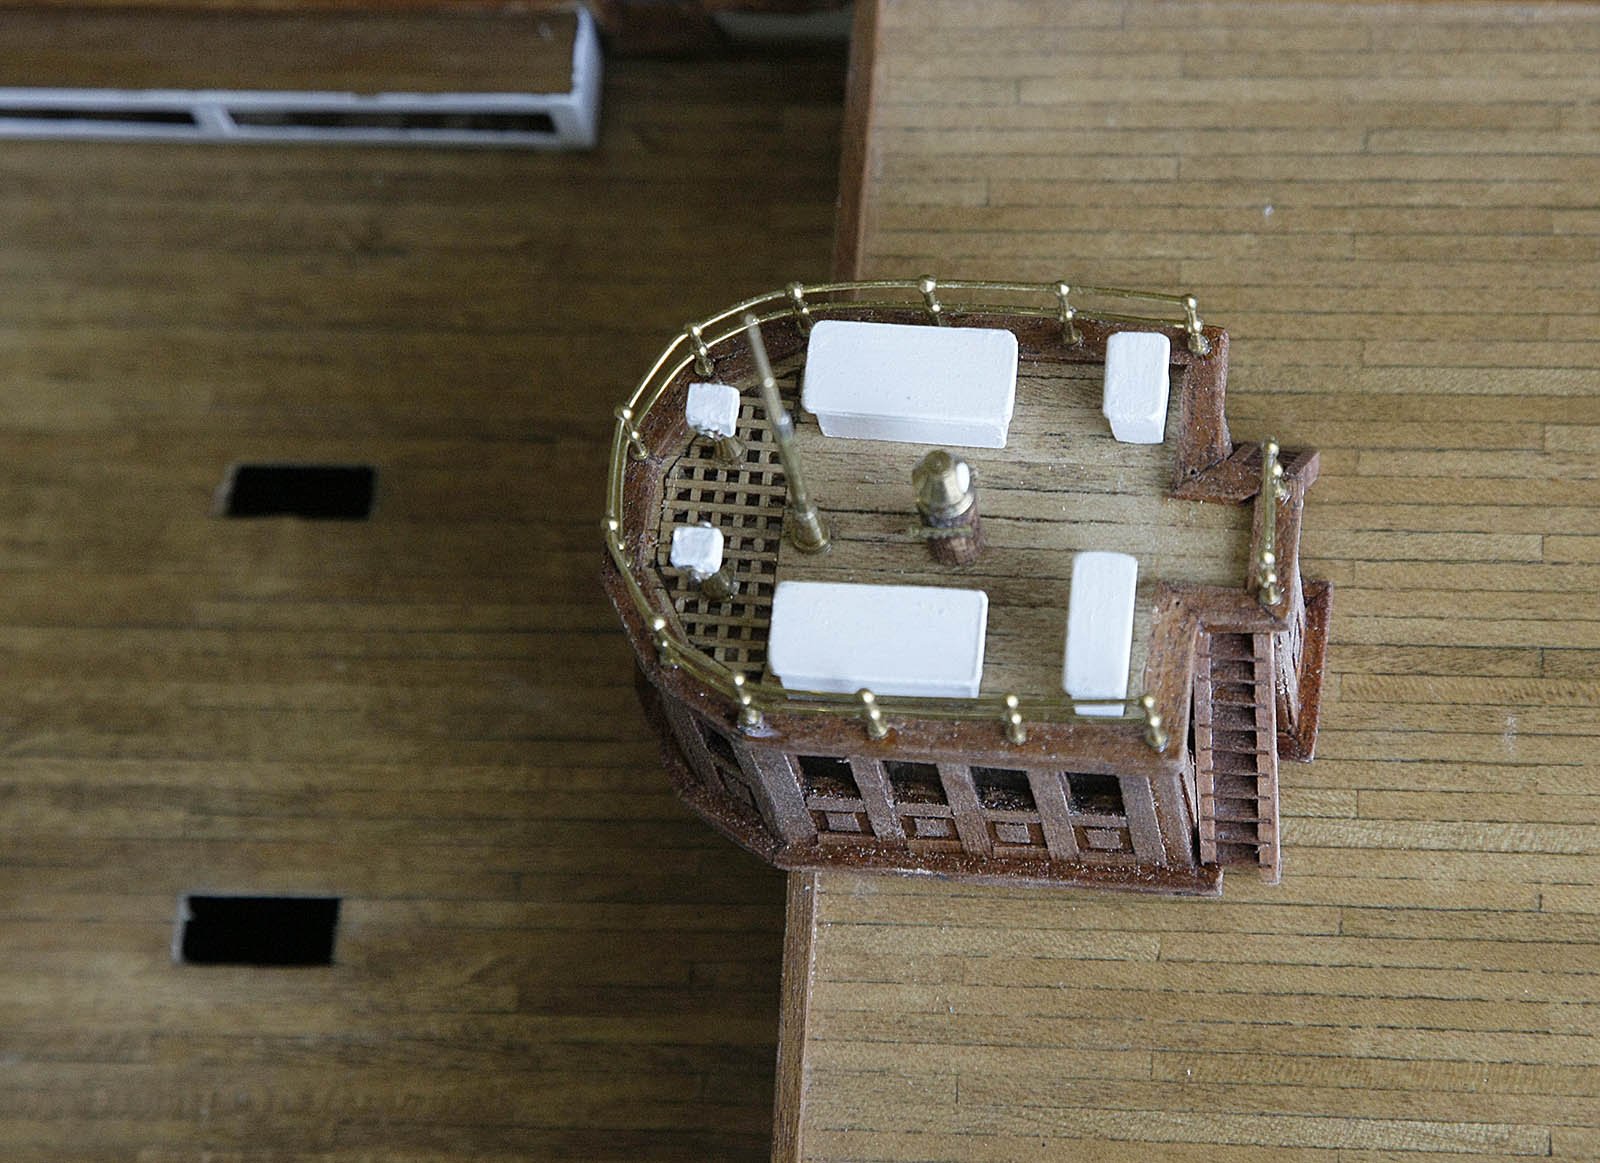
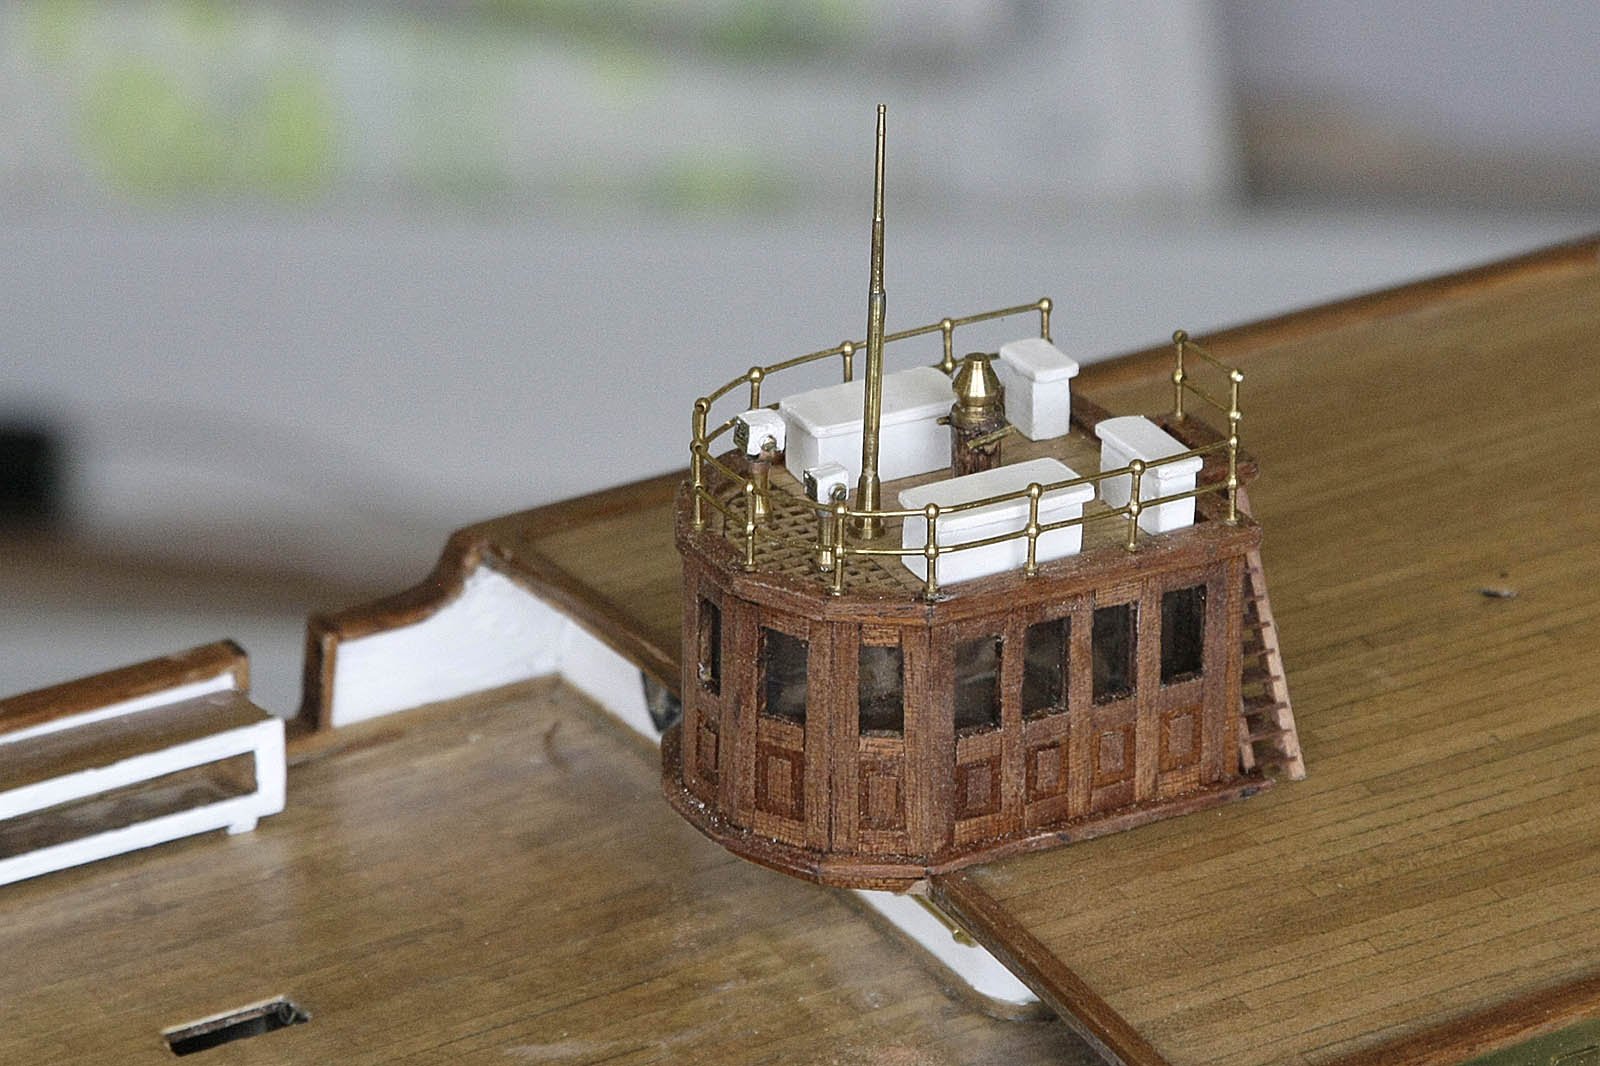
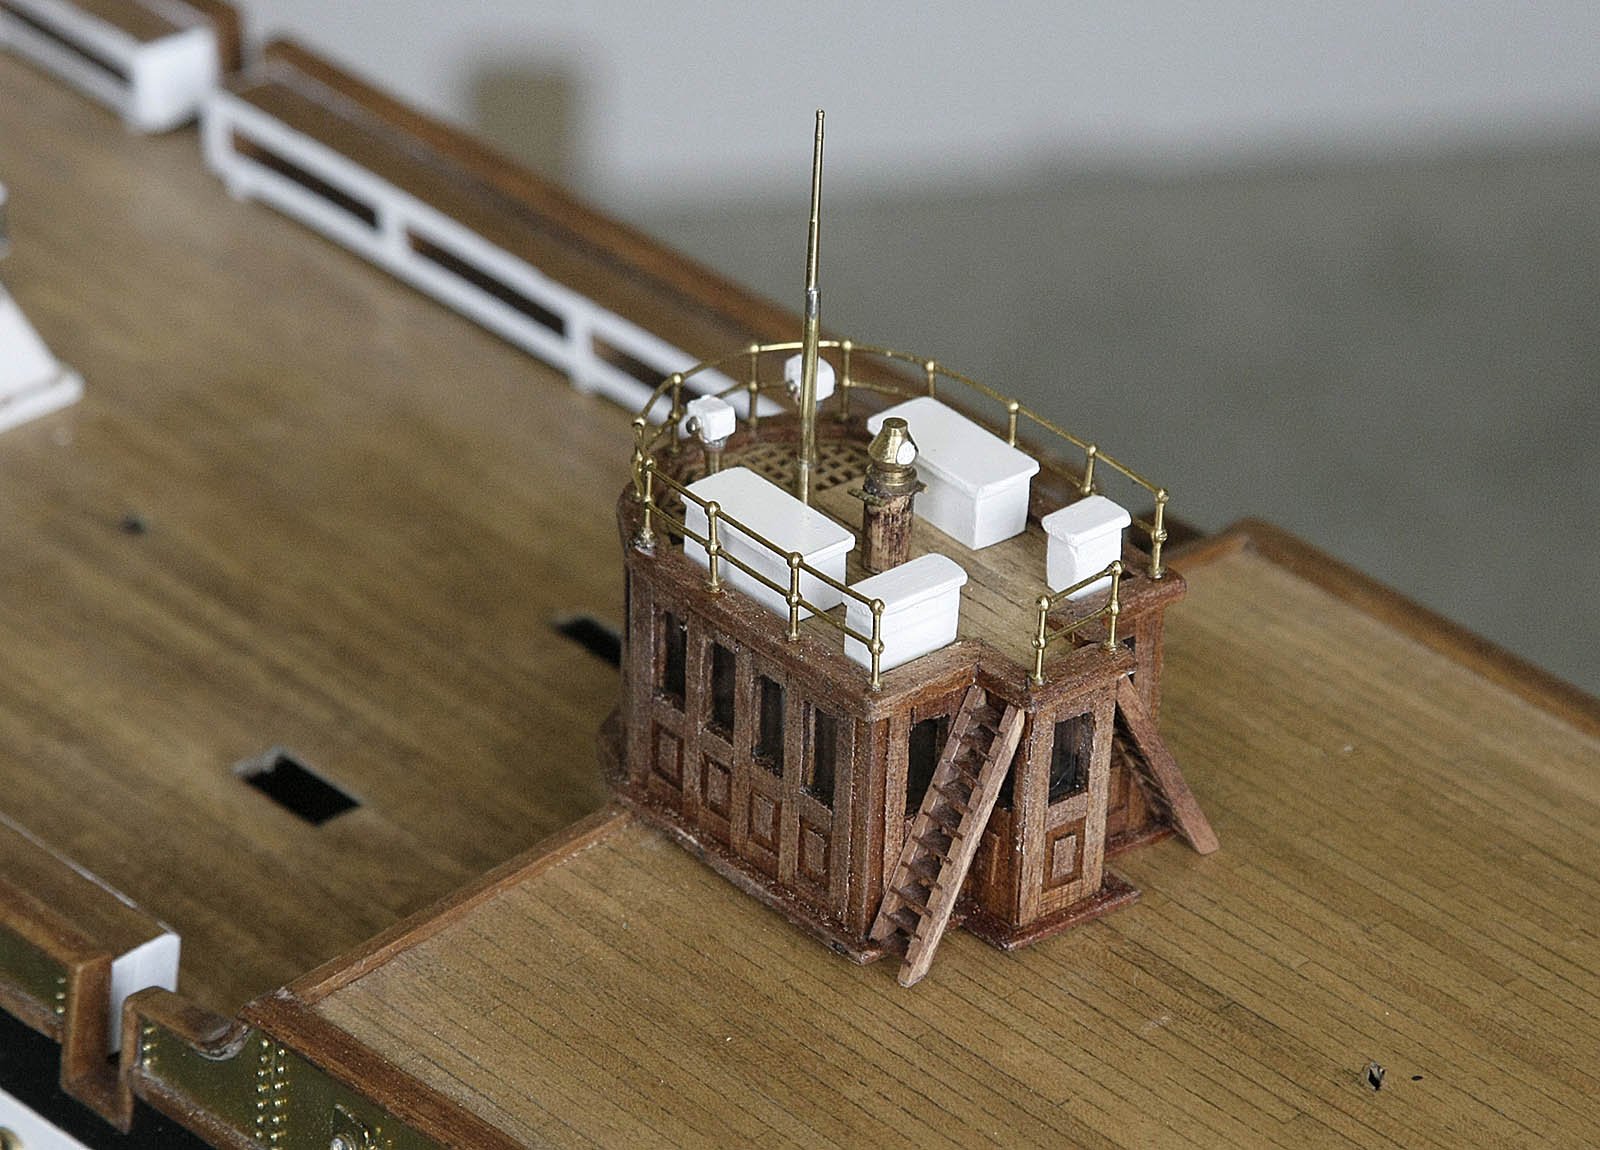
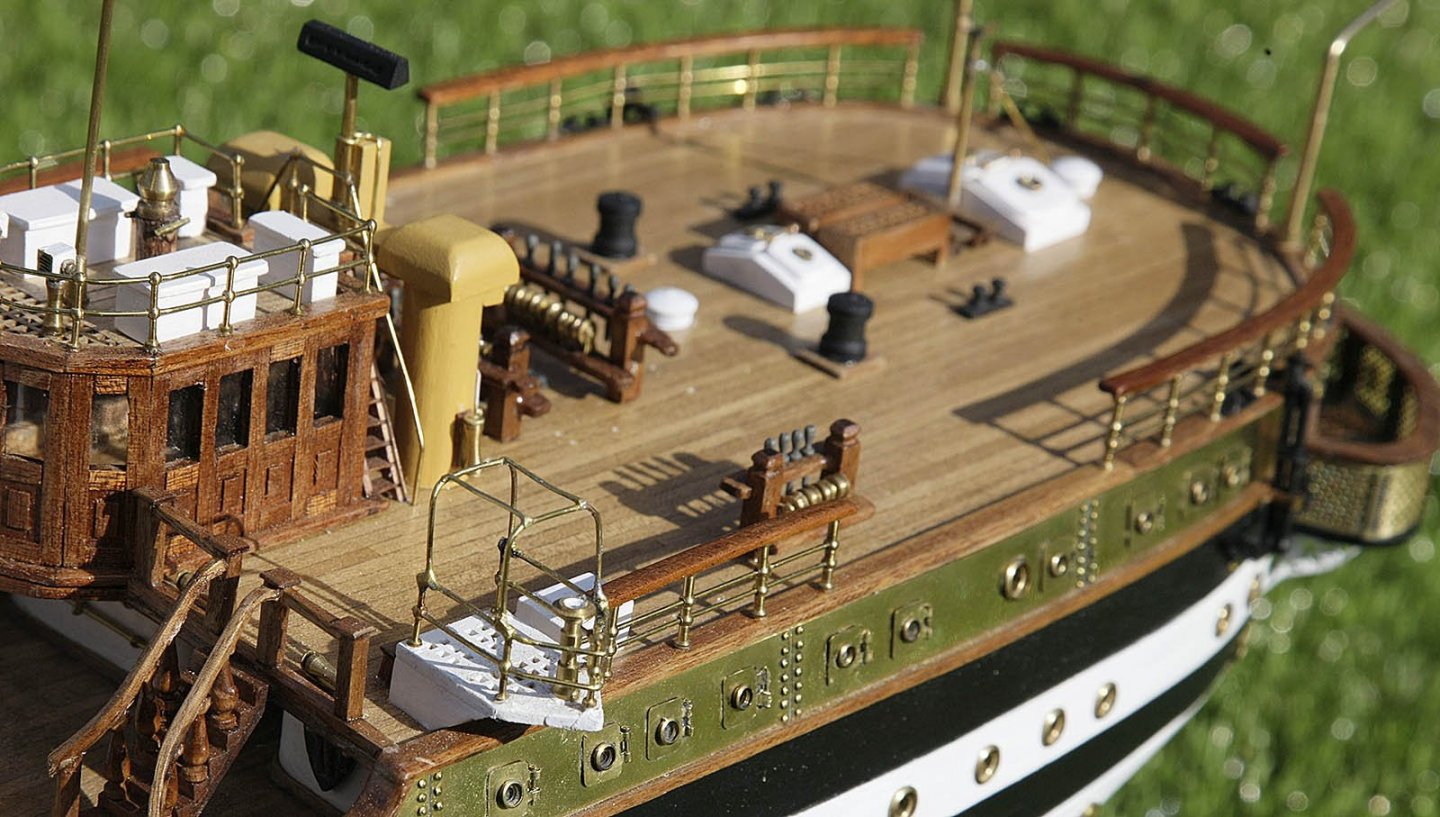
Hello to those following my build, and again thanks for your likes. I have now finished the stern house ( or whatever it’s called ) It was made up initially from pre cut ply sides which were then covered with mahogany strips. I then used the same strip wood cut up to make the panelling. I added the skirting, made the upper detailed items from the plan, I added the rails and ladders then I glazed the windows before adding a coat of poly. Job done. I’ve attached a few photos for you to see. Ken