-
Posts
37 -
Joined
-
Last visited
Content Type
Profiles
Forums
Gallery
Events
Everything posted by barryww
-
I bought the Occre kit from Ages of Sail today here in the States...should arrive next week. It is a retirement gift to myself and I plan to work on it beginning later this year. It appears to be a good buy. I have been fascinated by HMS Terror and HMS Erebus since doing a report on them back in junior high school in the early 70's. And now I have a kit on the way to my house. None of this would have been possible without you and your simply amazing work. Thank you so, so much. I'm sure I will get a lot of enjoyment from this.
- 346 replies
-
- terror
- polar exploration
-
(and 2 more)
Tagged with:
-
Such great craftmanship. Thank you for this practicum, the plans, all the mini-kits I've bought for this model, and teaching that patience is my guide.
- 1,048 replies
-
- syren ship model
- cheerful
-
(and 1 more)
Tagged with:
-
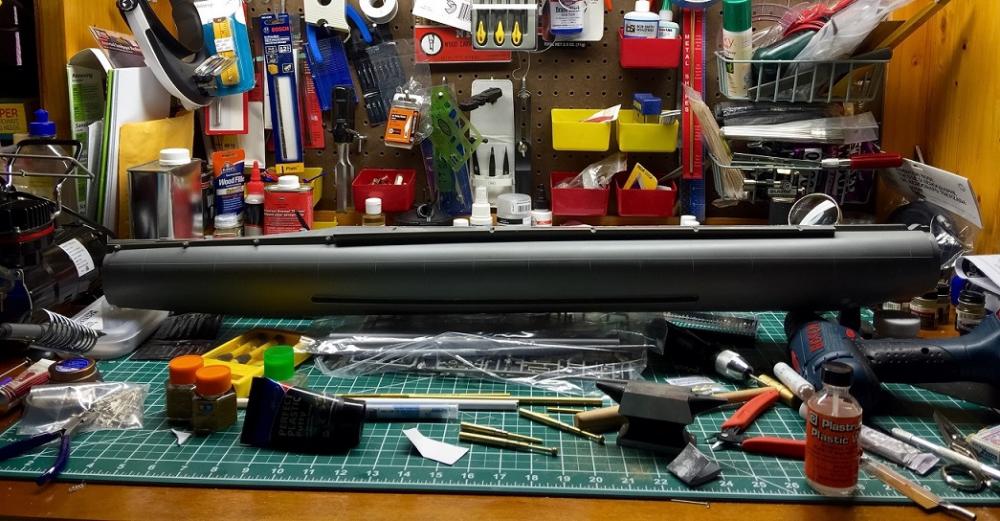
Glued hull halves together after attaching the bilge keels. This thing is big. There are still the bow and stern sections to be glued to this main hull section. I will need to clean up the hobby table so this thing will fit....never takes long to get into disarray does it? Will start on the bow section next, which will include some photo-etched parts to solder and fit.
-
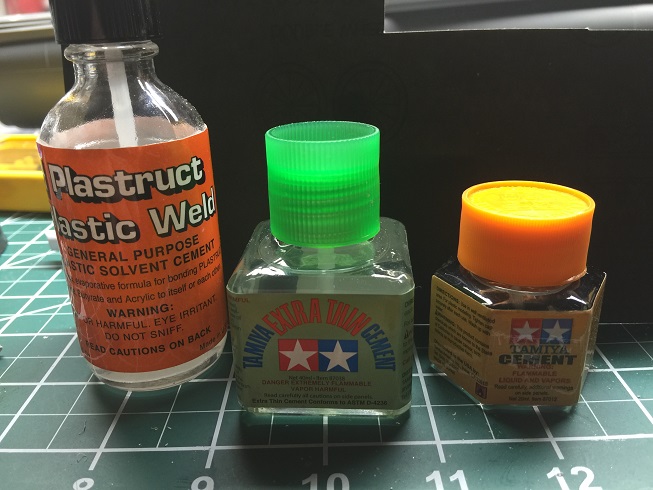
I have built plastic models most of my early life, but have been away from the hobby awhile. One thing that has changed are the glues available. No longer restricted to the familiar Testors cement in the tube, I really like Tamiya's Extra Thin cement that you apply after holding the parts together to be glued and allow capillary action to flow the glue along the seam. Good stuff!
-
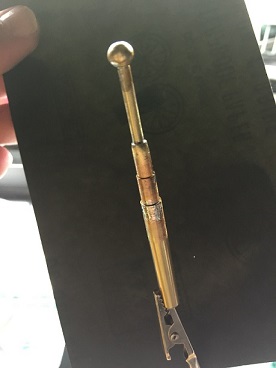
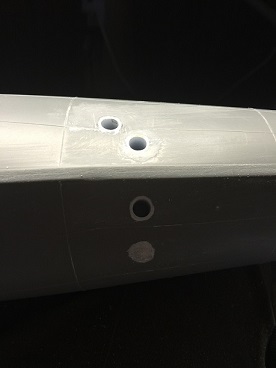
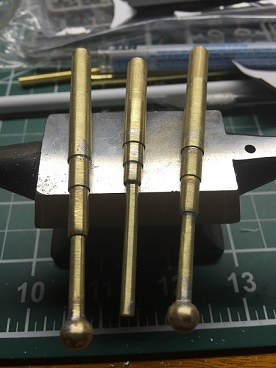
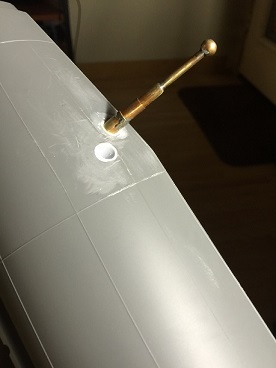
I wanted to model the sonar booms that lower from the bottom of the hull. These were not included in the kit, so I decided to fabricate them with various sizes of brass tubing. The recesses were made by gluing 1/4" I.D. plastic tubes into the hull after drilling holes first with electric drill. In the second picture, you can see where I had to patch a hole as I drilled one too many.
-
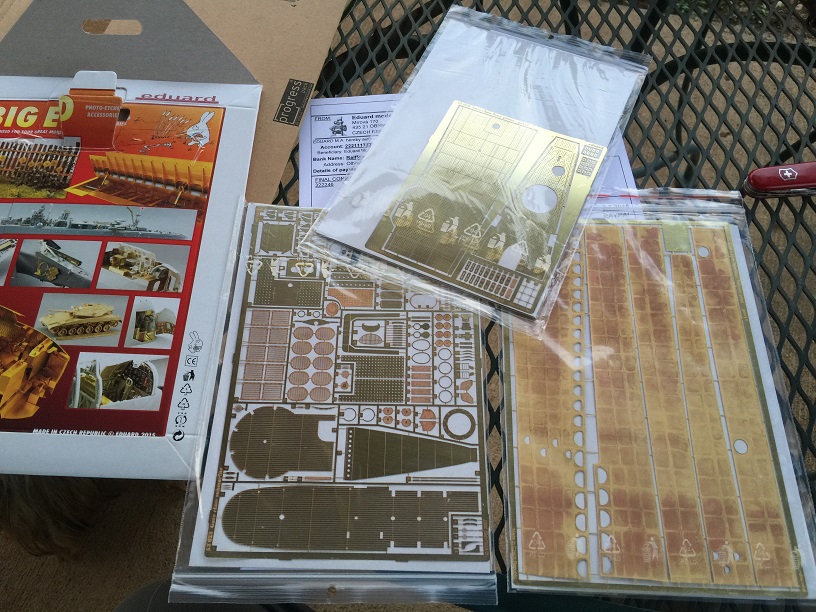
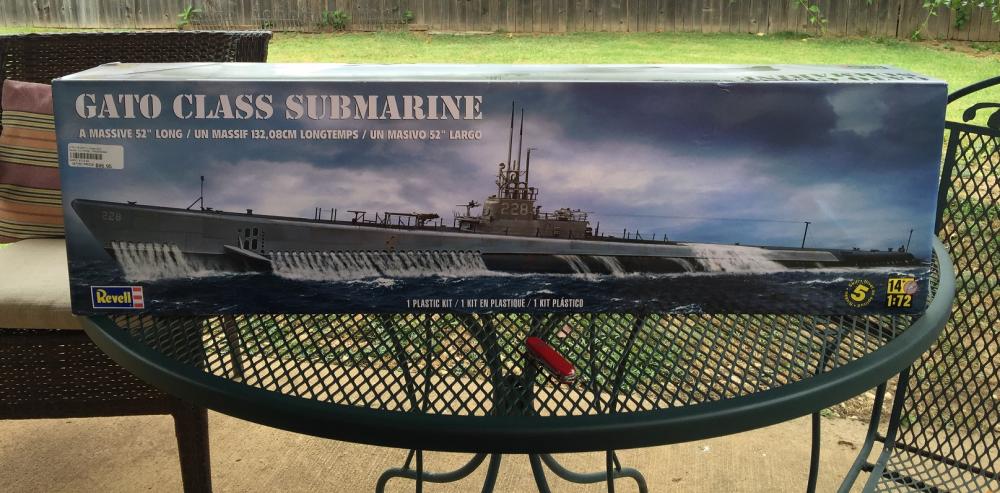
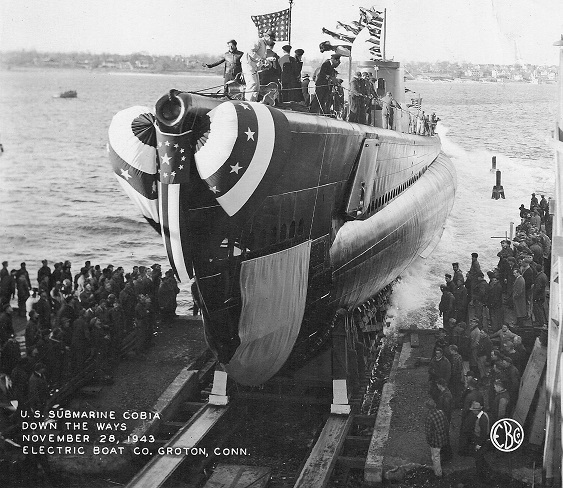
This build log will cover my building of the 1:72 Revell plastic kit of the Gato class submarine. The decals that come with the kit are for the USS Drum and USS Albacore. However, the fairwater, or conning tower, does not match either boat. But it does match that of the USS Cobia, which is what I will model here. Besides the kit itself which is 52 inches in length when completed, I have also purchased the complete "Big Ed" set of brass photo-etched parts for this kit from Eduard. Where I will display it I haven't decided yet, but it will be on the work bench for quite some time. Painting will mostly be done by airbrush, which I am quite the novice at using. But it should be fun to build. While not needing the skills to build like the wooden kits, I wanted to add this particular model to the log entries due mostly to the size of the model itself. (From Wikipedia:) The United States Navy Gato-class submarines were launched 1941–43 and were the first mass-production US submarine class of World War II. Together with their near-sisters the Balao and Tench classes, their design formed the majority of the United States Navy's World War II submarine fleet. Named after the first vessel of the class, USS Gato, the Gato class and its successors formed the core of the submarine service that was largely responsible for the destruction of the Japanese merchant marine and a large portion of the Imperial Japanese Navy in World War II. Gato's name comes from a species of small catshark. Like most other U.S. Navy submarines of the period, boats of the Gato class were given the names of marine creatures. USS Cobia (SS/AGSS-245) is a Gato-class submarine, formerly of the United States Navy, named for the cobia. Cobia (SS-245) was laid down on 17 March 1943 by Manitowoc Shipbuilding Company, Manitowoc, Wisconsin. She was launched on 28 November 1943 (sponsored by Mrs. C. W. Magruder), and commissioned on 29 March 1944, Lieutenant Commander Albert L. Becker in command. On 1 July 1970, the Navy struck Cobia from the Naval Register, and she was towed to Manitowoc, Wisconsin to serve as an international memorial to submariners. In 1986, Cobia was incorporated as a part of the Wisconsin Maritime Museum, declared a National Historic Landmark, and placed on the National Register of Historic Places. Cobia is permanently docked at the Manitowoc River's mouth at Lake Michigan.
-
Yep. They all look good to me. I think they look great in perfect pristine condition as they match the condition of the ship itself. If one was going to weather the ship, then something else would be in order. But I like it all as is.
- 1,048 replies
-
- syren ship model
- cheerful
-
(and 1 more)
Tagged with:
-
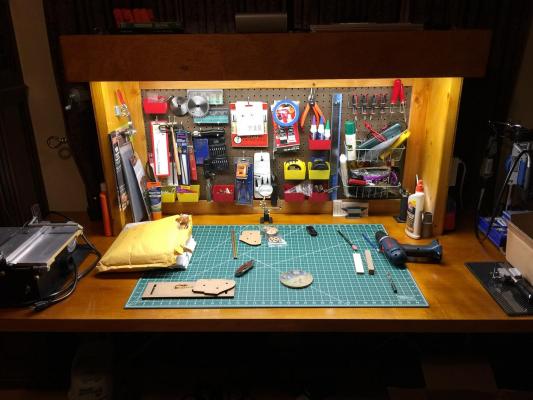
A small update. I needed to build a workspace for constructing the Cheerful, and over the past several weekends came up with this. A solid core door from Lowes completed the benchtop. I'll start posting my building photos this week of the Cheerful, but will be taking my time as I'm in no hurry. Feel free to comment or just follow along as I'm most interested in just creating a visual build log of my progress for myself. Critiques are more welcome than cudos, so use a critical eye as you watch, please, and thanks.
-

Harbor Freight Mini Wood Planes
barryww replied to grsjax's topic in Modeling tools and Workshop Equipment
I just ordered some of the Harbor Freight planes to try out. For the price, I haven't really lost anything if they don't past muster. I always use the Scary Sharp method for honing chisels using finer and finer grades of emery cloth. An easy cheap method for honing that gets me a really sharp blade. -
Great technique on the chainplates. I've learned a lot of building methods by just following along. Congrats on the milestone and I will be watching for your subsequent posts. Which reminds me that I need to order some of your deadeyes, blocks, and rope at some point. But I'll wait and see what you end up using. I'm not in any hurry.
- 1,048 replies
-
- syren ship model
- cheerful
-
(and 1 more)
Tagged with:
-
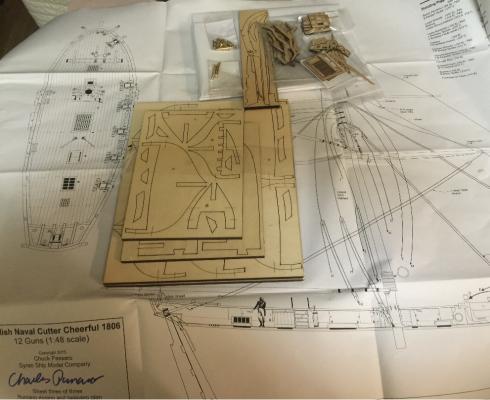
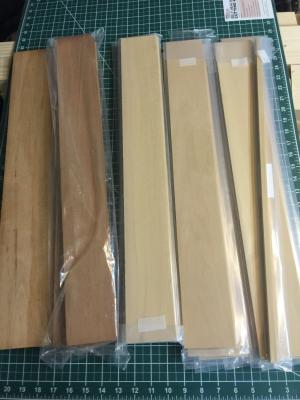
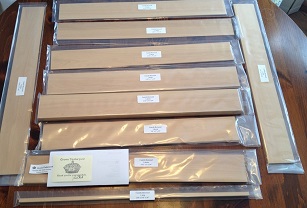
Just a small update. I'm presently working on a 6 ft hobby table as well as awaiting delivery of my Byrnes table saw, so no gluing has been done yet. But here are a couple pics: A pic of laser cut Cheerful parts from Chuck, plus another pic of some mahogany and boxwood sheets on top of a new large cutting mat. I also just bought locally a 3" x 3" x 24" castello boxwood piece of finished lumber for $17, so even though my Byrnes saw hasn't arrived, I'm already saving some dough, because I know what milled sheets cost. Wish they had more than one piece 'cause I would have bought every one they had. Heck of a deal!
-
I was thinking about the horseshoe bracket. I understand it's function, but was wondering if it had any superstitious connotations, like a good luck charm would by the ship's builders?
- 1,048 replies
-
- syren ship model
- cheerful
-
(and 1 more)
Tagged with:
-

Jim Byrnes Model Machines
barryww replied to Mahuna's topic in Modeling tools and Workshop Equipment
Jim, your wife emailed me yesterday. Looks like mine will be in next week's batch. Really looking forward to it. -

Jim Byrnes Model Machines
barryww replied to Mahuna's topic in Modeling tools and Workshop Equipment
Other than the dust chute I can't see many differences. The blade cover assembly is a little different, but he didn't change much over the years. Guess he got it mostly right the first time. The biggest difference is you have one and I'm still awaiting delivery. Thanks. -

Jim Byrnes Model Machines
barryww replied to Mahuna's topic in Modeling tools and Workshop Equipment
JohnLea, the "regular" fence on the new Byrnes saw is just 1/8" high. The extension fence add-on makes the total fence height around an inch apparently. So your fence appears to be as high as the new extension fence. I'd like to see a photo of your machine. Can you post one? I'd like to see what the first saws looked like and the differences. -

Jim Byrnes Model Machines
barryww replied to Mahuna's topic in Modeling tools and Workshop Equipment
Well, I got off the fence and ordered the Byrnes table saw with the standard micrometer, extended rip fence, miter gauge extension, spare belt, four Thurston 3" blades, 4 zero-clearance inserts, and the little bag of extra miter pins and screws. I used the advice and link given above for the Hobbymill site to help decide which blades to get. I'm so glad I ordered the Cutter Cheerful boxwood package in sheets. My mahogany is all sheet goods as well. Now I'll have something to cut it....very excited indeed! I feel all warm and fuzzy. -

Jim Byrnes Model Machines
barryww replied to Mahuna's topic in Modeling tools and Workshop Equipment
It pays to be a good boy, doesn't it? Marc, how long was the turn-around from ordering to receiving? -

Jim Byrnes Model Machines
barryww replied to Mahuna's topic in Modeling tools and Workshop Equipment
Thanks mtaylor....exactly the info I was looking for. By the way, my little lady said "yes, as long as it doesn't cost thousands!" I think I can get one for somewhat less. -

Jim Byrnes Model Machines
barryww replied to Mahuna's topic in Modeling tools and Workshop Equipment
I bought a $49 dollar "mini table saw" and already broke it. Talk about getting what you pay for. I'm going to do some sweet-talking and convince my wife that I NEED the Byrnes. What a fine machine. You all that use it.....what's the best blade Byrnes sells that you use for ripping planks? They have a 3" 110T blade with a .02" kerf all the way to the 4" 36T blade with a .055 kerf. I'll be cutting sheets of castillo boxwood. Would like to know what you use......thanks. -
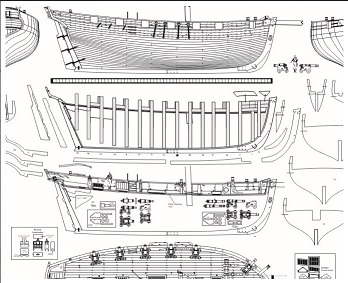
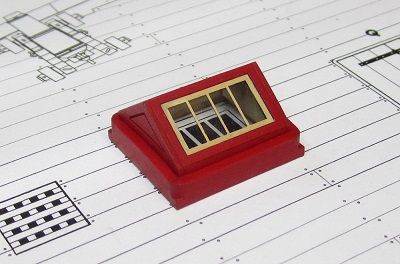
It's time to muddy my boots and wade into the waters of logging my attempt at building the HM Cutter Cheerful by the Syren Ship Model Company. I fretted over several different ships to build. But in the end, it was an easy decision choosing this model, as Chuck Passaro's on-going log will certainly provide instruction for me like no other kit out there could approach. It won't be a scratch-build per se, however, although like any model there is a certain amount of that involved. I purchased the Cheerful plans along with the laser-cut bulkheads, keel, stem, and stern frames. I also purchased the windless mini kit, turned brass carronades and long guns, their carriages, plus the skylight mini-kit. That should help this novice builder's chances of success. All this is presently in-route for delivery. I have contacted Jason over at Crown Lumberyard and am ordering the complete Cheerful Castello Boxwood package...all sheets...as I'll cut my own planks (hey, that's scratch-building!) as needed when I line off the hull. That should provide plenty of wood for all the building. But I also have some real nice sheets of mahogany that I also plan to use as it suits me. OK, I've read many articles, followed along with many builds here. I think the best advice I've read anywhere is to slow down, and don't put any piece on the model until I'm satisfied...and to have fun. All I have is time, and I'm going to follow that advice. Hope you'll follow along.
About us
Modelshipworld - Advancing Ship Modeling through Research
SSL Secured
Your security is important for us so this Website is SSL-Secured
NRG Mailing Address
Nautical Research Guild
237 South Lincoln Street
Westmont IL, 60559-1917
Model Ship World ® and the MSW logo are Registered Trademarks, and belong to the Nautical Research Guild (United States Patent and Trademark Office: No. 6,929,264 & No. 6,929,274, registered Dec. 20, 2022)
Helpful Links
About the NRG
If you enjoy building ship models that are historically accurate as well as beautiful, then The Nautical Research Guild (NRG) is just right for you.
The Guild is a non-profit educational organization whose mission is to “Advance Ship Modeling Through Research”. We provide support to our members in their efforts to raise the quality of their model ships.
The Nautical Research Guild has published our world-renowned quarterly magazine, The Nautical Research Journal, since 1955. The pages of the Journal are full of articles by accomplished ship modelers who show you how they create those exquisite details on their models, and by maritime historians who show you the correct details to build. The Journal is available in both print and digital editions. Go to the NRG web site (www.thenrg.org) to download a complimentary digital copy of the Journal. The NRG also publishes plan sets, books and compilations of back issues of the Journal and the former Ships in Scale and Model Ship Builder magazines.


