Revier
-
Posts
41 -
Joined
-
Last visited
Content Type
Profiles
Forums
Gallery
Events
Everything posted by Revier
-
HMS Naiad 1797 by albert - 1/48 - Finished
Revier replied to albert's topic in - Build logs for subjects built 1751 - 1800
This built is, like the builts of EdT, a very good example of woodworking and a exquisite model at every time on its way to the launch. Very impressive work. Thank you for showing! -
I am so thank you, wish all the best for you and your projects!
- 2,625 replies
-
- 3
-

-
- kaiser wilhelm der grosse
- passenger steamer
- (and 1 more)
-
Very nice proect! I see forward with greatest interest, because an grand-uncle of me use "Kaiser Wilhelm der Grosse" in August/September 1913 on a passage from Bremen to New York. Can you send me a photo of the Body-Plan-Cross-section (length-cut)? I will illustrate the story of my family and search for pictures of interest. Sorry, but my english is only for the kitchen... Best regards! Revier.
- 2,625 replies
-
- 4
-
-
- kaiser wilhelm der grosse
- passenger steamer
- (and 1 more)
-
EdT, i will watching. I learn so much from your excellent work. I will say thank you for showing your builds here!
-
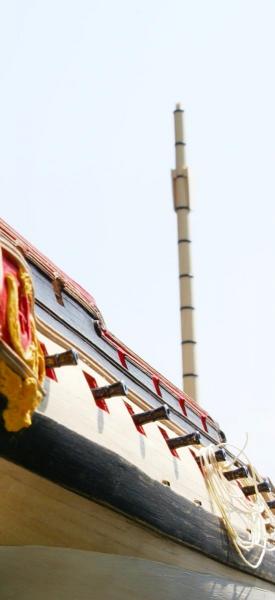
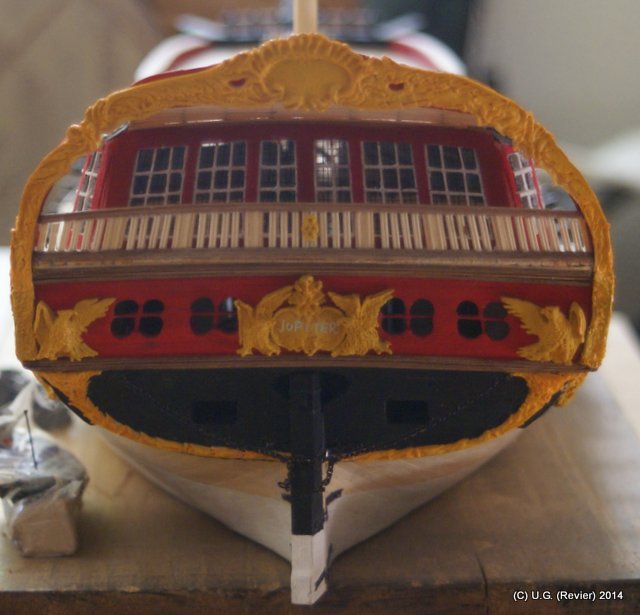
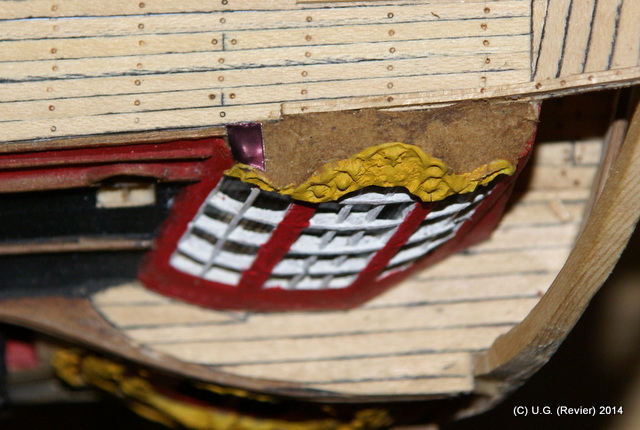
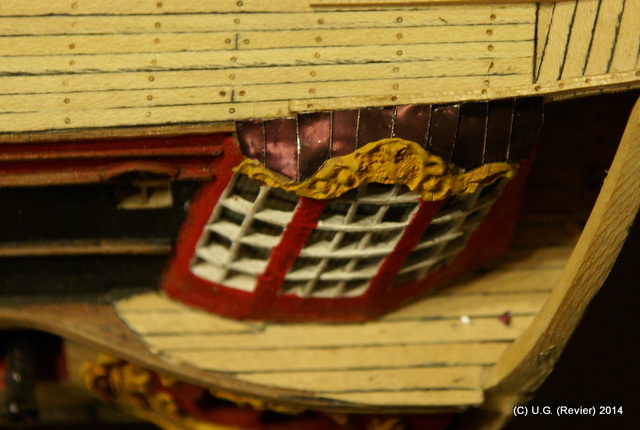
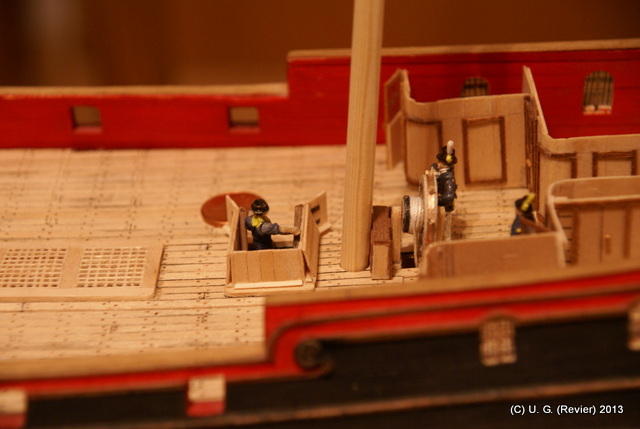
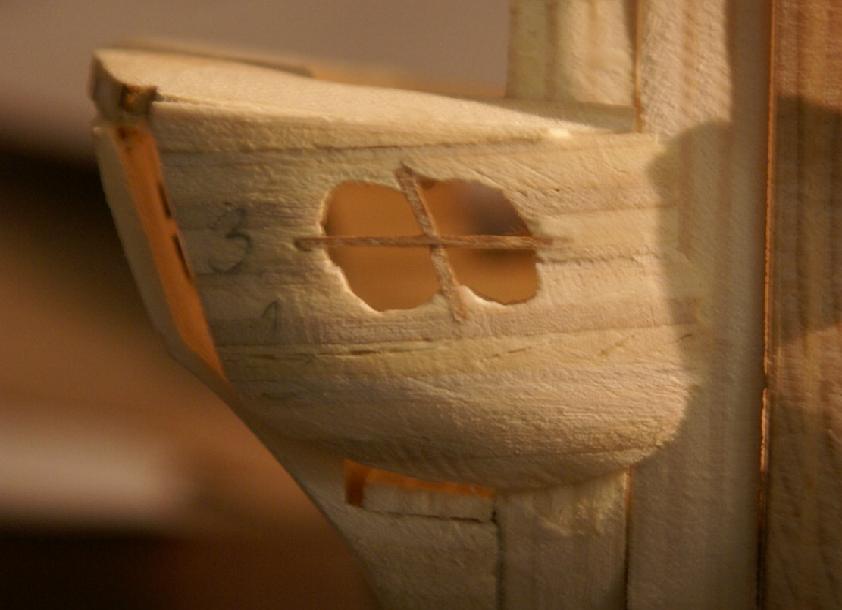
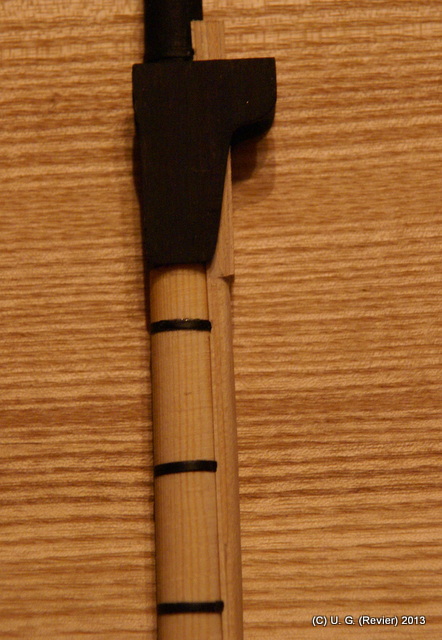
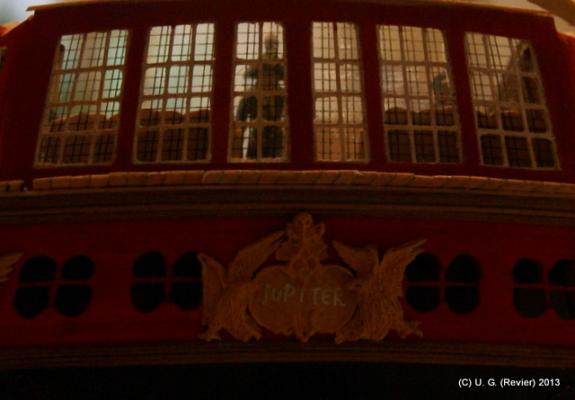
Now, i made a little finish on the stern. I glued my FIMO (means sculpey)-work on the rigth place and coloured this with yellow. Seems like a new golden Stern... ;-) Small steps, but steps forward. Will be continued... Best regards!

-
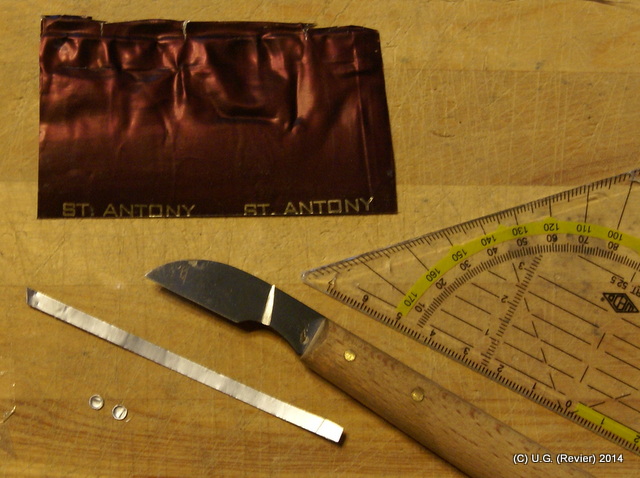
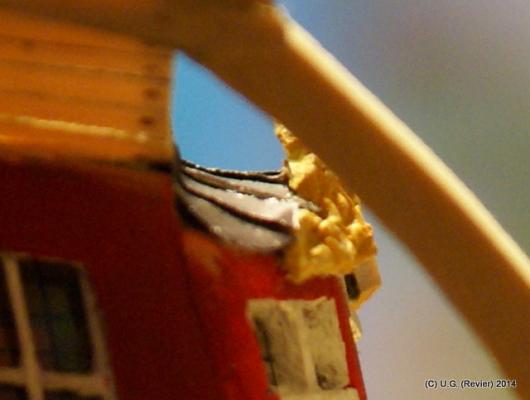
Thank you all for your interest! I made the roof for the small cabins beside the great cabin. I use metal-folie from a good bottle of wine, cutted into 4mm stripes. Glued with UHU-Glue and ready is the roof. Looks like a copper roof nearly new, not with greenspan. A view trough the great cabin into sunset will close the post. Best regards!


-
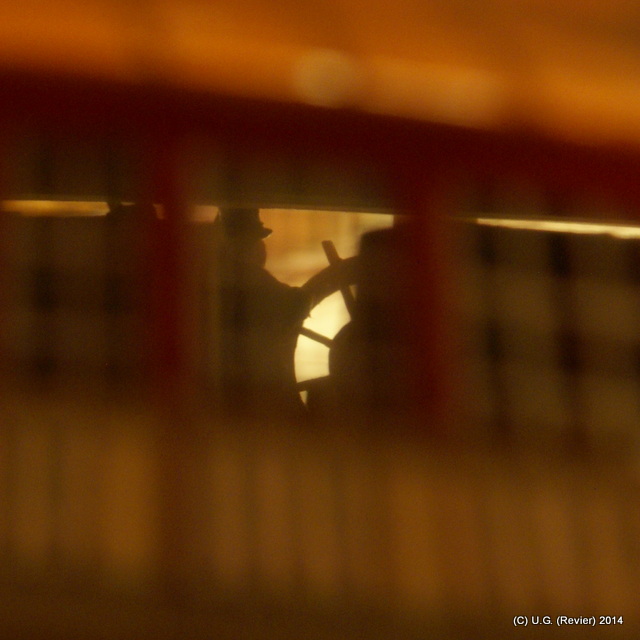
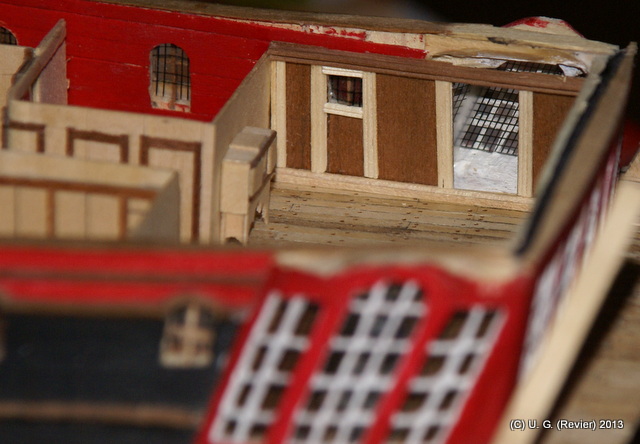
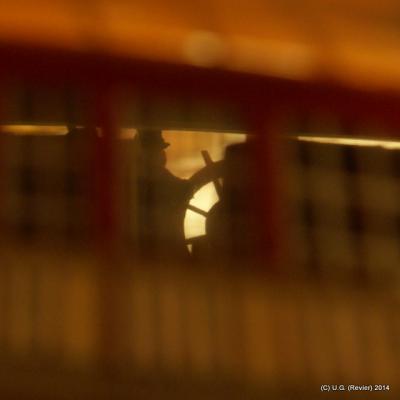
Thank you Dida, i am still working... A couple of months later i can show you new results. Small steps, but steps... Inside the great cabin is now only darkness and the light comes only trough the windows. Poopdeck is glued, ladders to Upperdeck are in position and ready for use. And the reeling on the balcony is fixed. Now i am showing street ahead, new horizons to reach. Best regards!


-
Absolute high quality base! I am very impressed. Thats the style, i prefer for my "JUPITER" as well. But only the problem with the dust. Wats your way to keep all clean? Best regards!
-
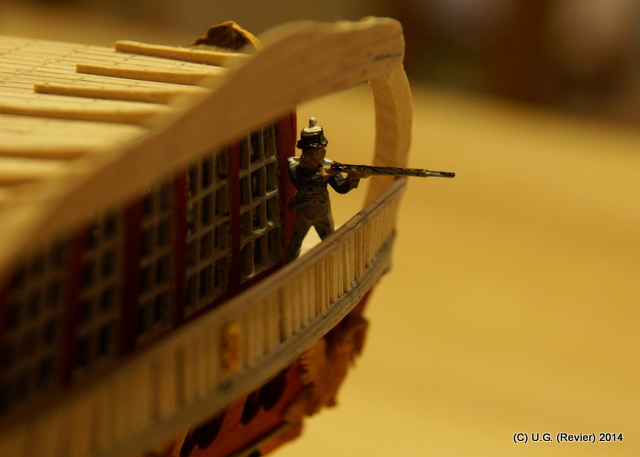
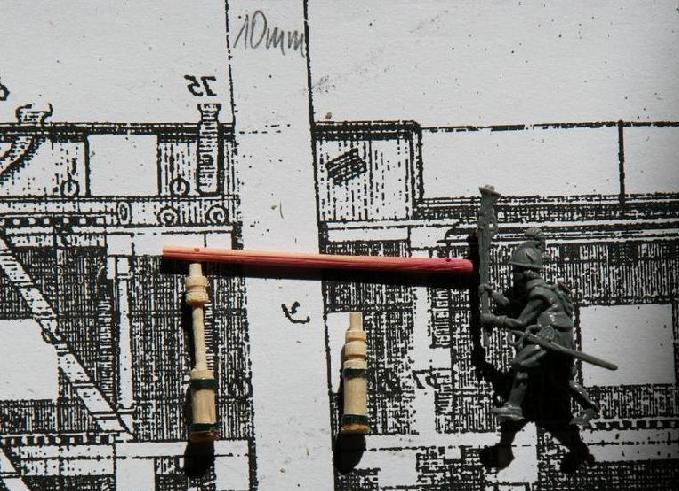
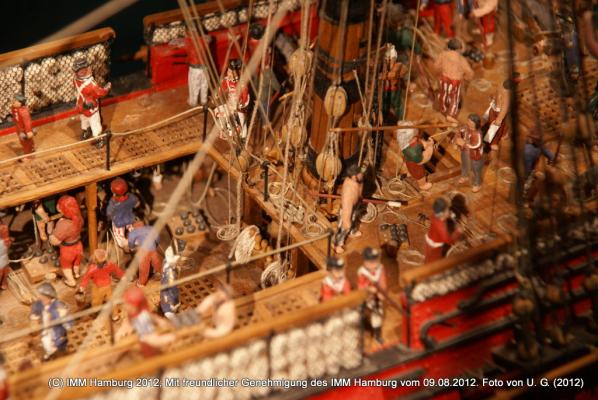
Thank you, aykutansin. The seamen and infantry are: HaT No. 8098 and other figures are: HaT No. 8091. Regards!
-
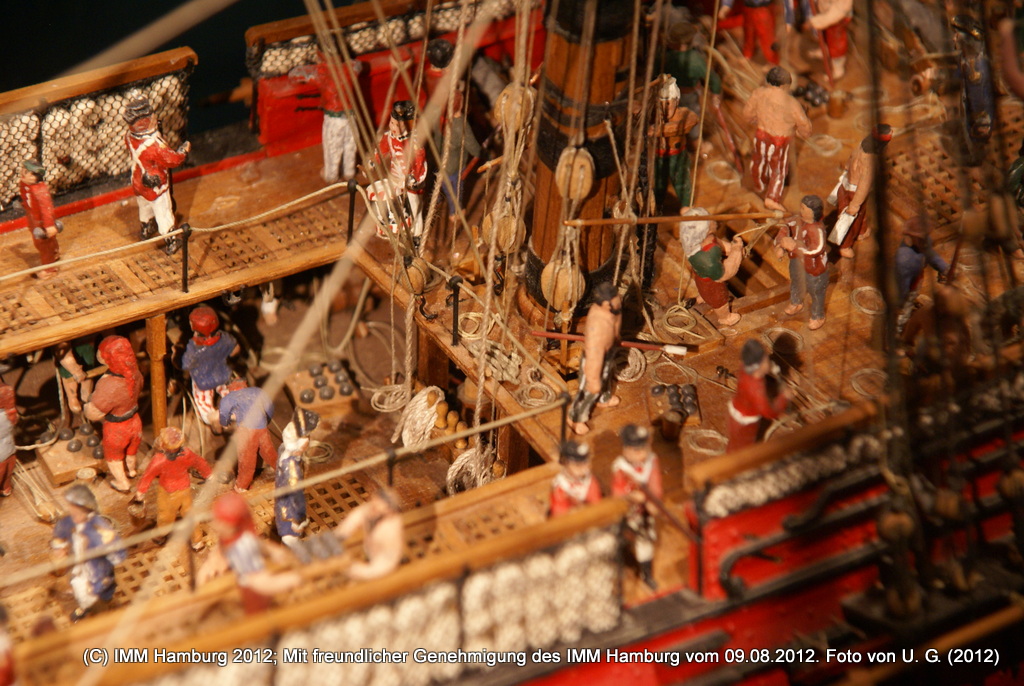
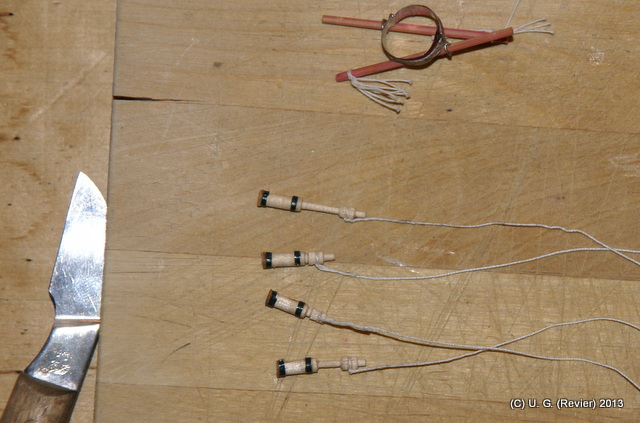
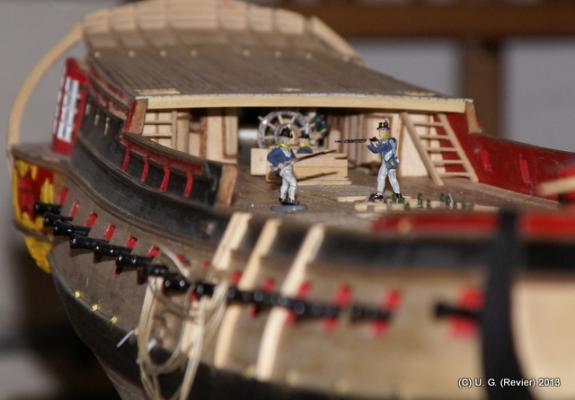
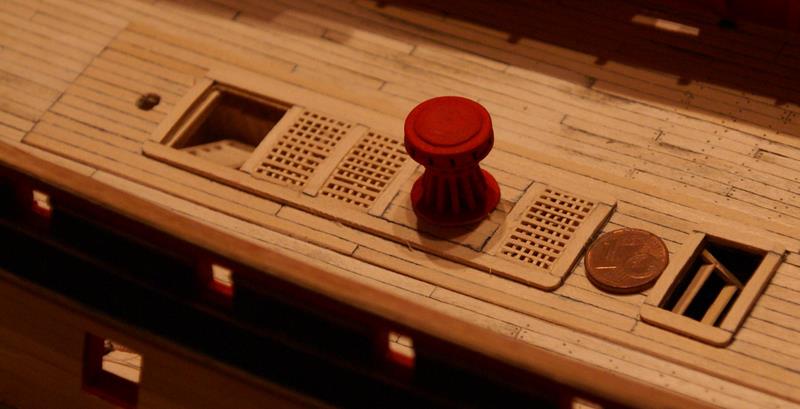
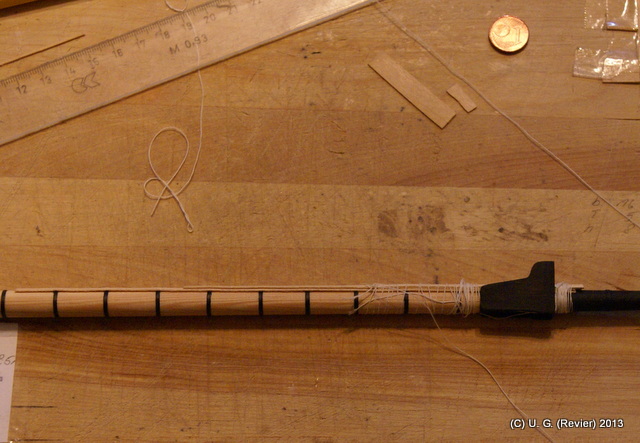
Mark, i think, the pump shaft is made from wood. The hourglass shape is used for fix a rope, going through a gat to upper deck, here fixed on beams for some hands to pump water. If you pull on he beam, you will pump water, if you let the beam go, the balls (iron) will punch he shaft into the pump. (Oh god, my terrible english...) I will show you a picture from a frigat ater CHAPMAN plans (XXXI and XXXII of the fabulous Architectura Navalis Mercatoria) a IMM Hamburg. You will see the principe. Two seamen pumping and you see the gat in deck for the pump-shaft. Also you can see those pumps here Best regards!
-
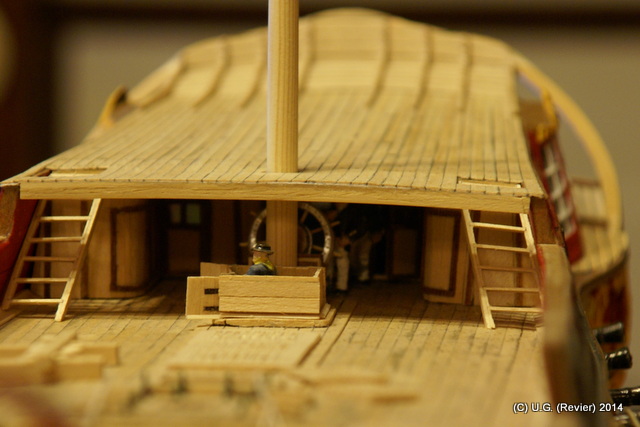
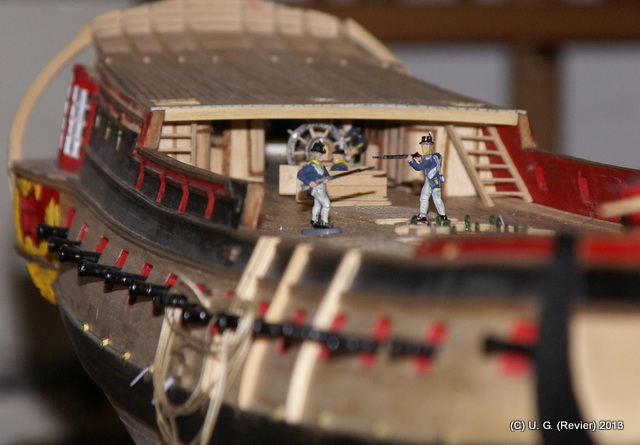
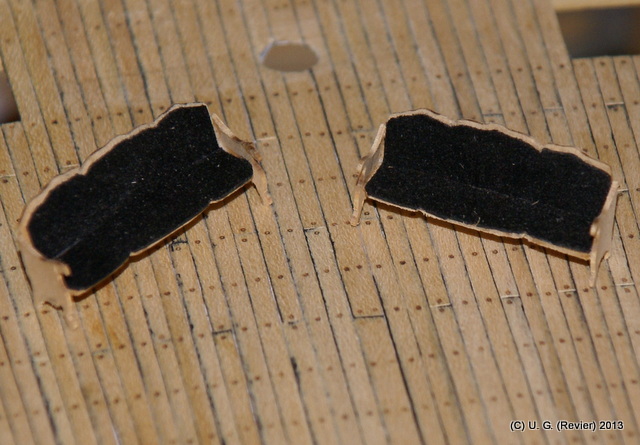
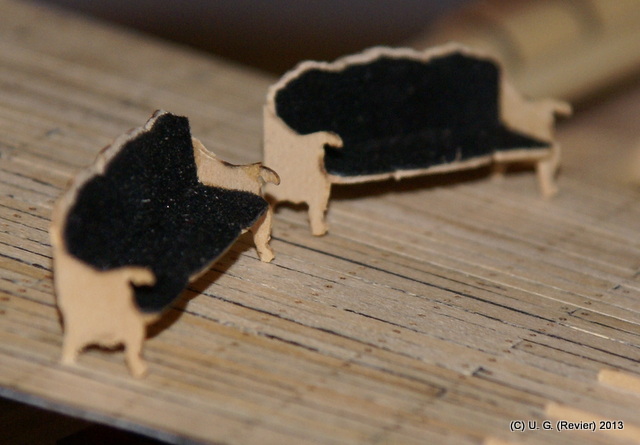
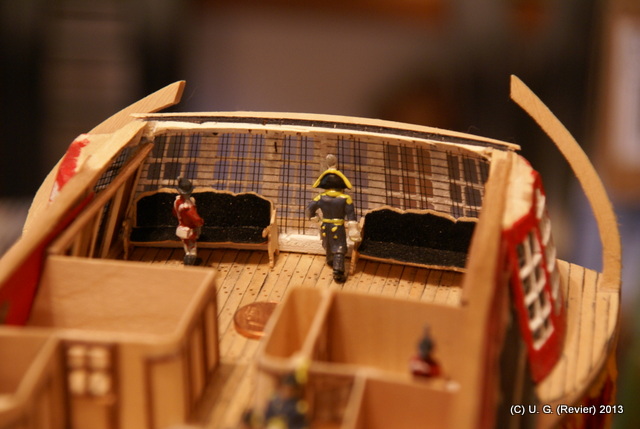
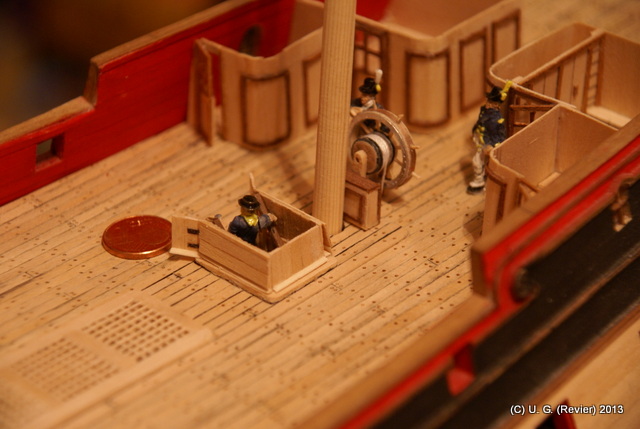
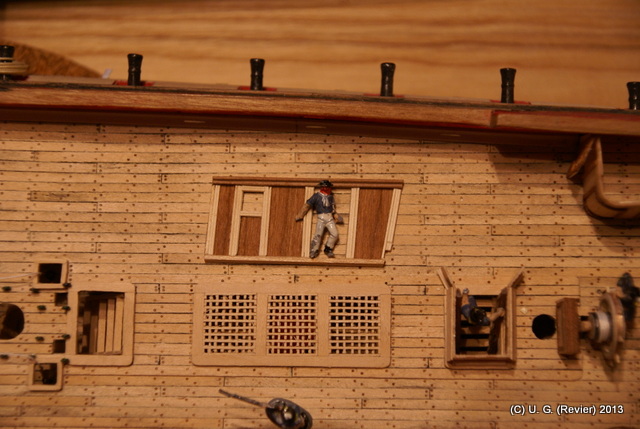
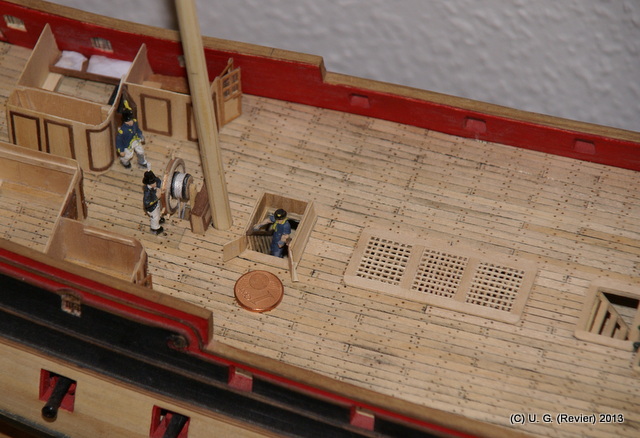
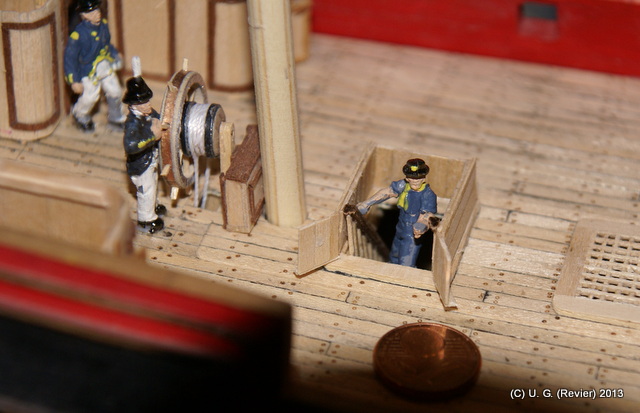
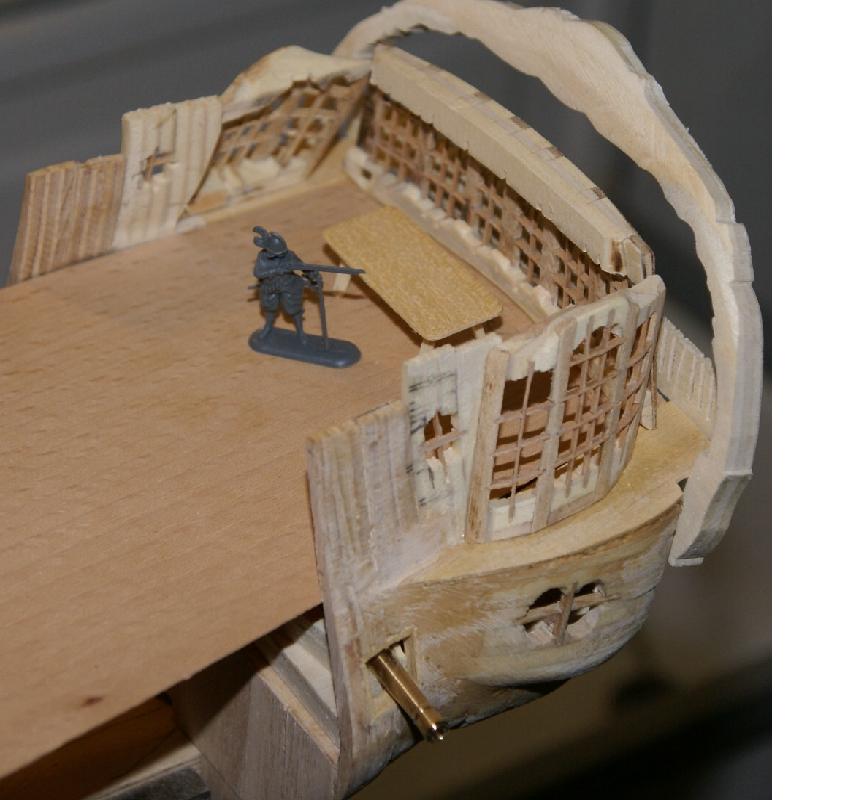
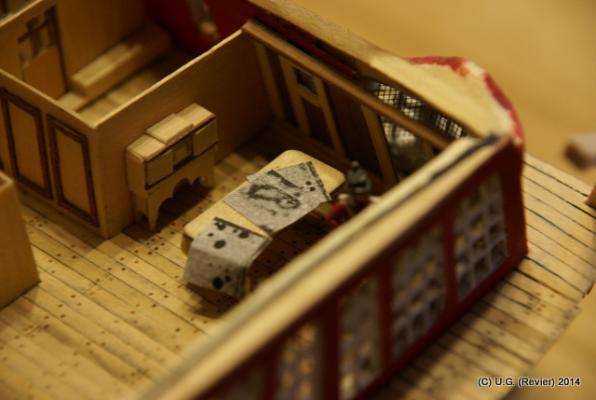
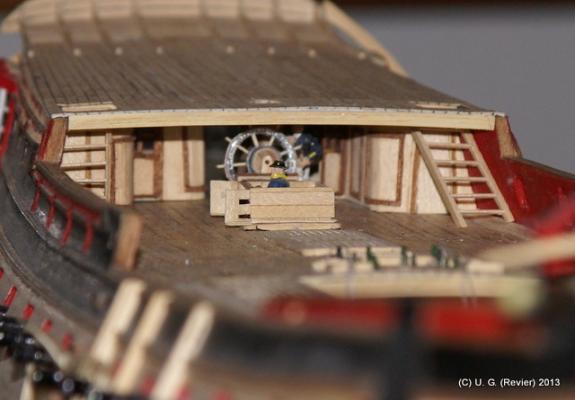
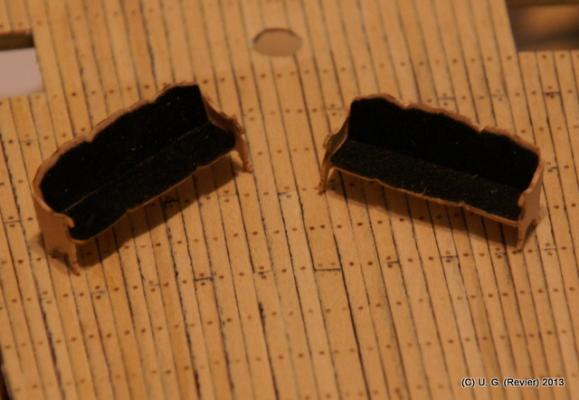
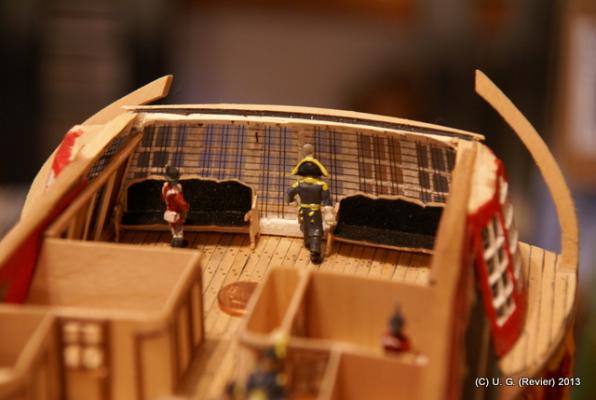
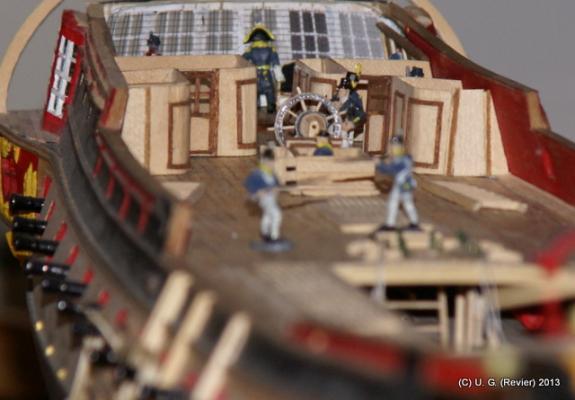
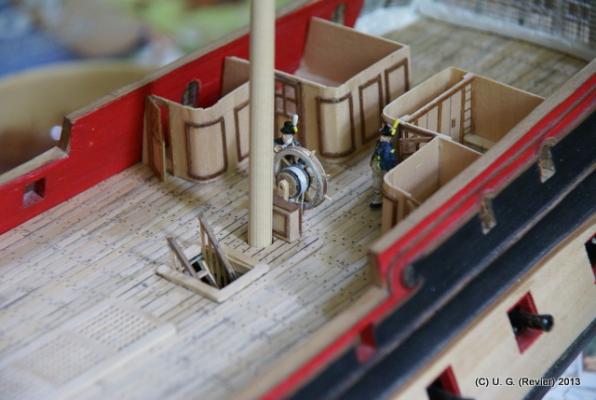
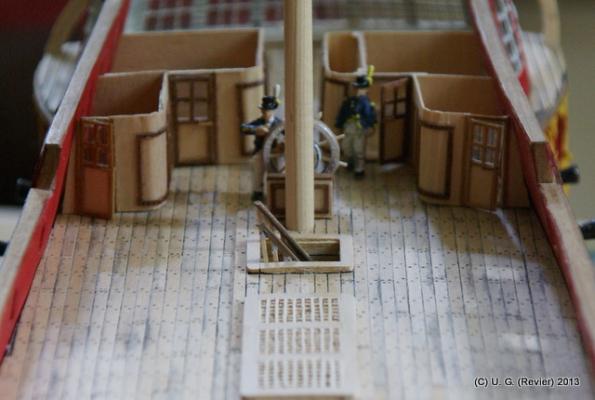
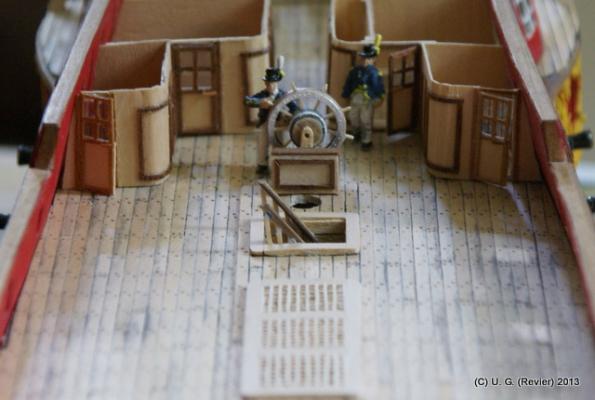
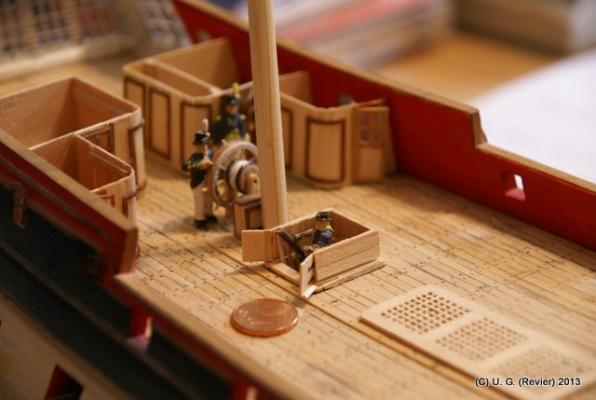
Hello shipmates! Great cabin is ready to use. Ladder to poopdeck also. I must rebuilt some doors and walls of the small cabins, because i made a mistake. Doors under ladder- that doesnt work! I rebuilt the ladder with some stripes of veneer, glued first and last step together and fix on deck to become the rigth form. You will see the difference! The great cabin becomes more comfort (canapees are made from maple veneer (some stripes fixed together and use the DREMEL eraser) and some Officers and the Captain. The "Samt" is made from waste of plastic amd floor) And after glueing poopdeck, all is gone in the dark... Best regards!


-
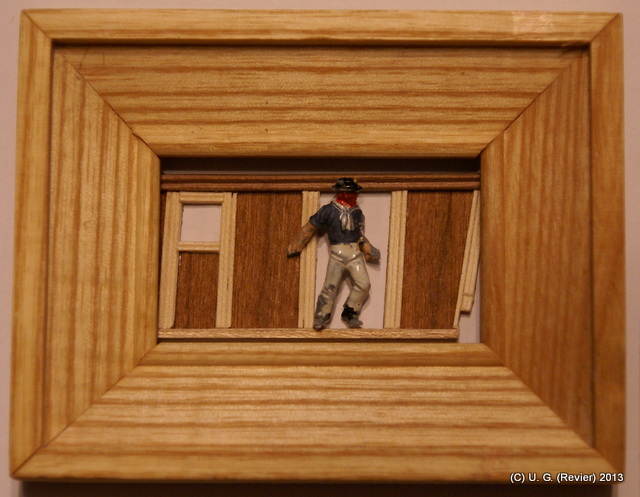
Thank you so much, Ed and Mark, i am happy to "entertain" you. I show you the other side of the decks-house. I do a little work on the wall of the great cabin. This will also work on a small vignette... Maple, walnut veneer and a steward, light modified on the left arm. Only furniture is missed, coming soon. Unfortunately, above is the poop-deck, you will only now see into the cabin. Later, you will see contour and shadows... Best regards!


-
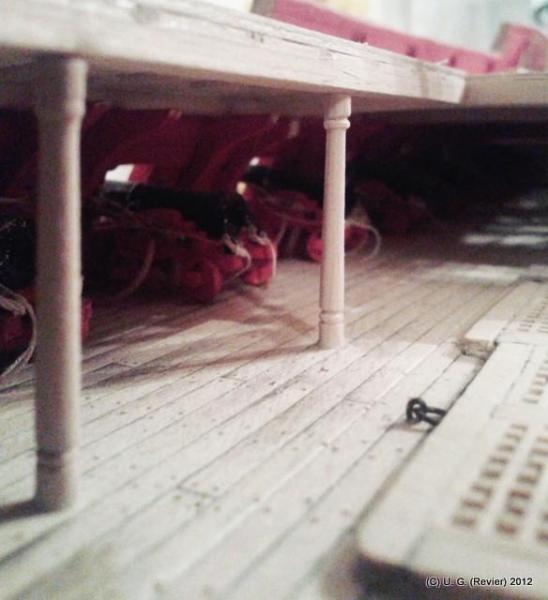
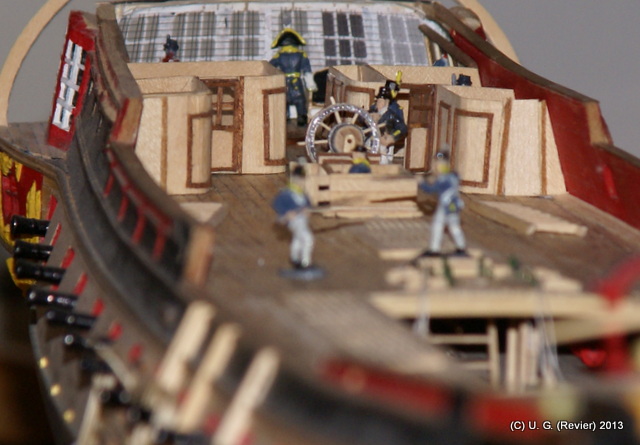
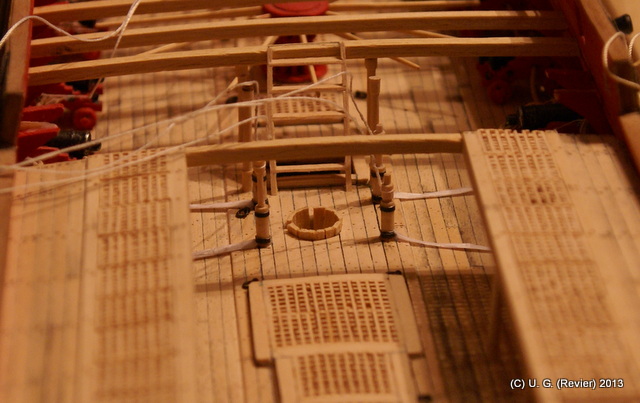
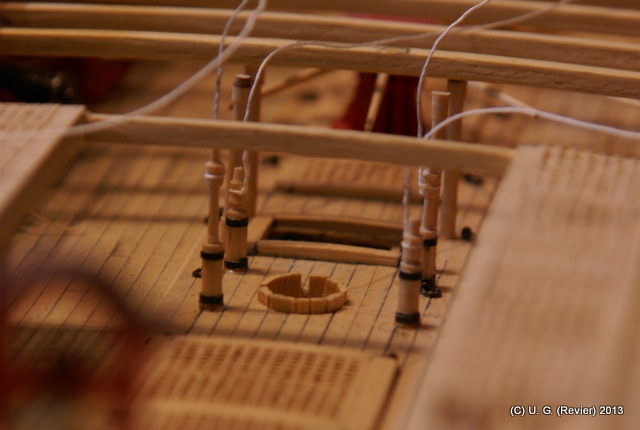
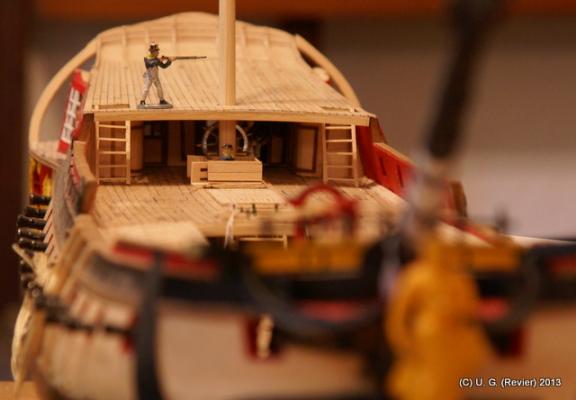
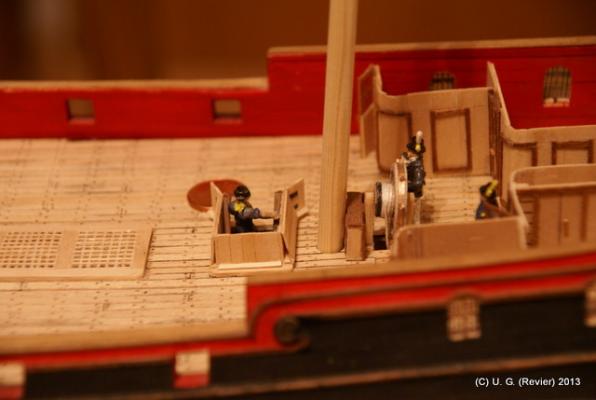
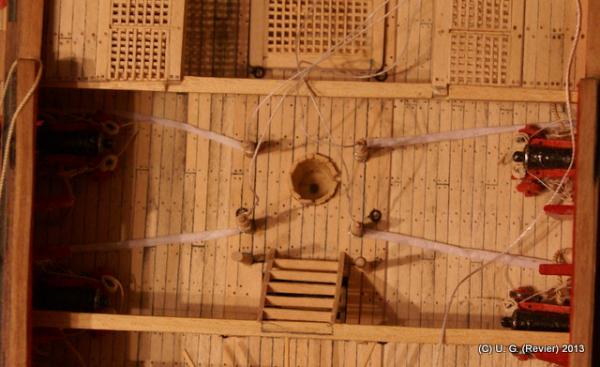
Pumps in action! I forgot to post this before my last post... Pumps, i search many times, because the plan was nearly poor on details. I found a way, i think, this is possible and will work: Only the beams for pumping must fix a deck higher on upper-deck. o fix the beams, i use rope in the same way you see here. Between the deckbeams above are gats for the rope. And i think abouth the lovely smelling water from deep inside the ship and found (thanks, schiffebastler) a way with very simple work. A hose will work fabulous! I glued the pumps before i fix the upper-deck. Regards!


-
Very nice and inspiring work.
-
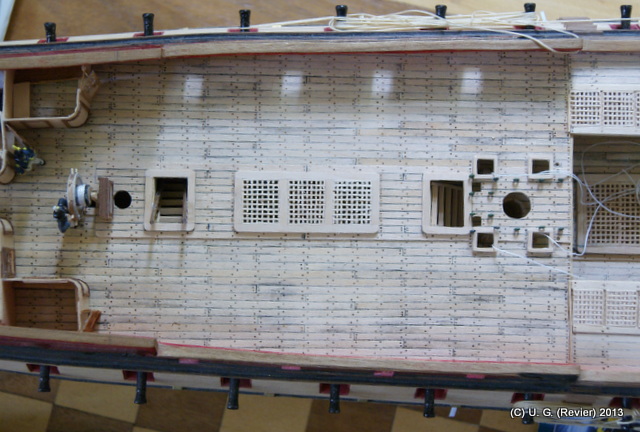
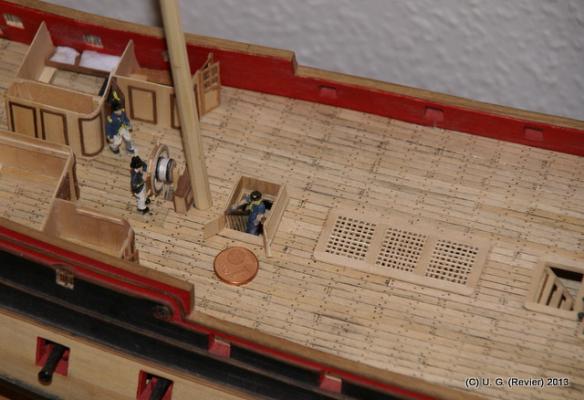
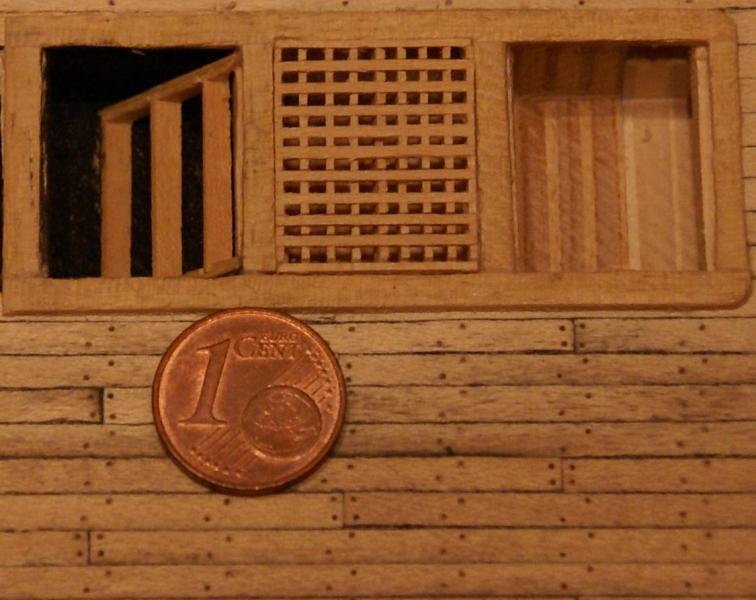
Hello folks! I glued upper deck and cabins on their place. Puuuuh, that is a little nigthmare for me because i dont know, was this the rigth time? Small partts on he way to the gundeck and gratings are finished. All ligth wood is maple veneer and dark wood ist from walnut. Metal is from a top of a bottle of wine, blackend with EDDING. Regards!


-
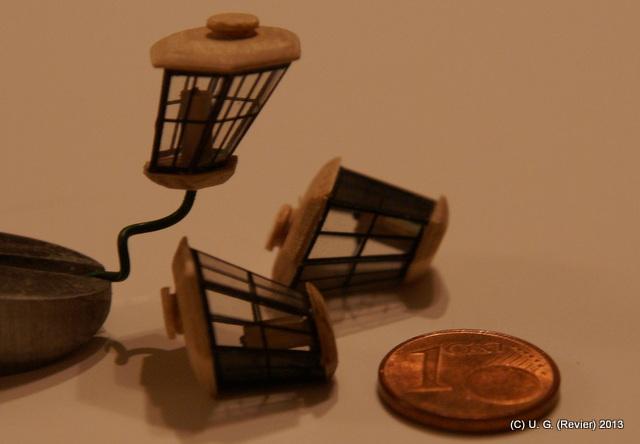
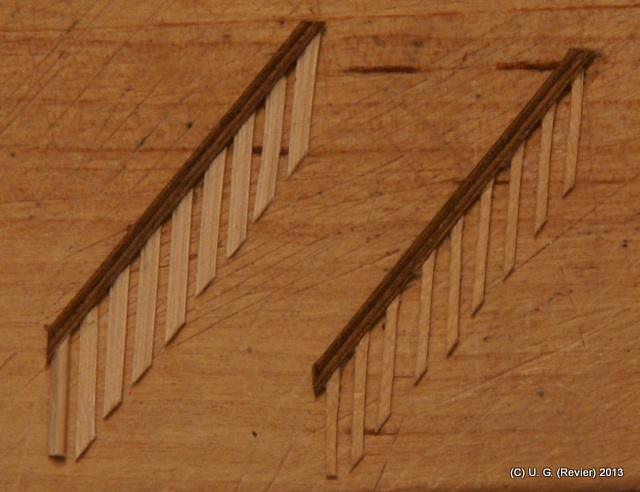
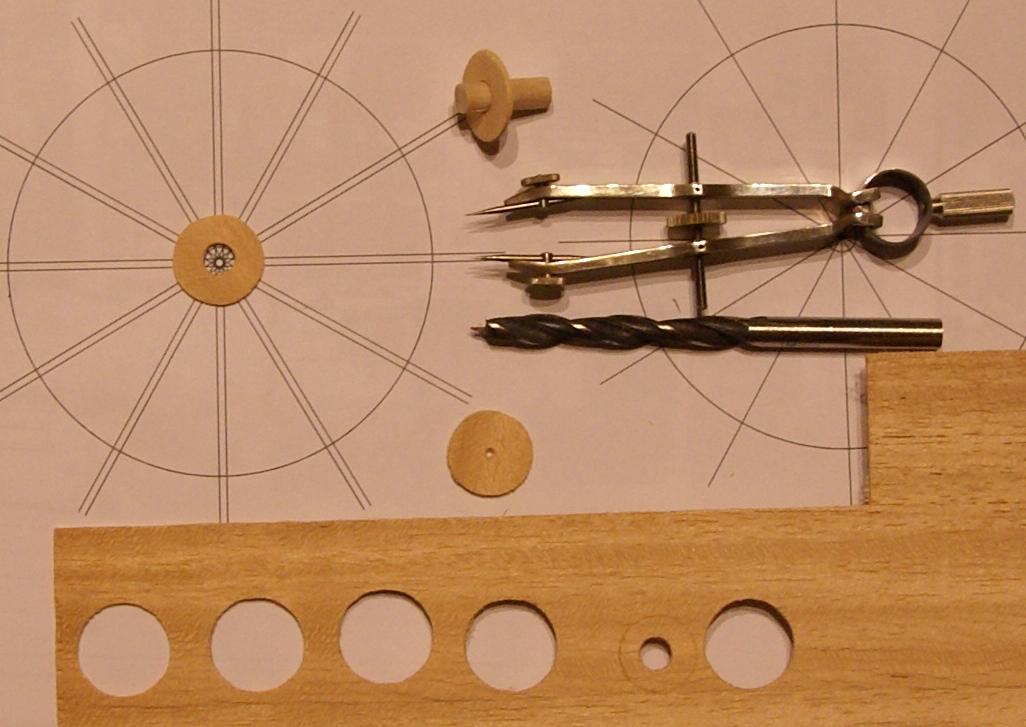
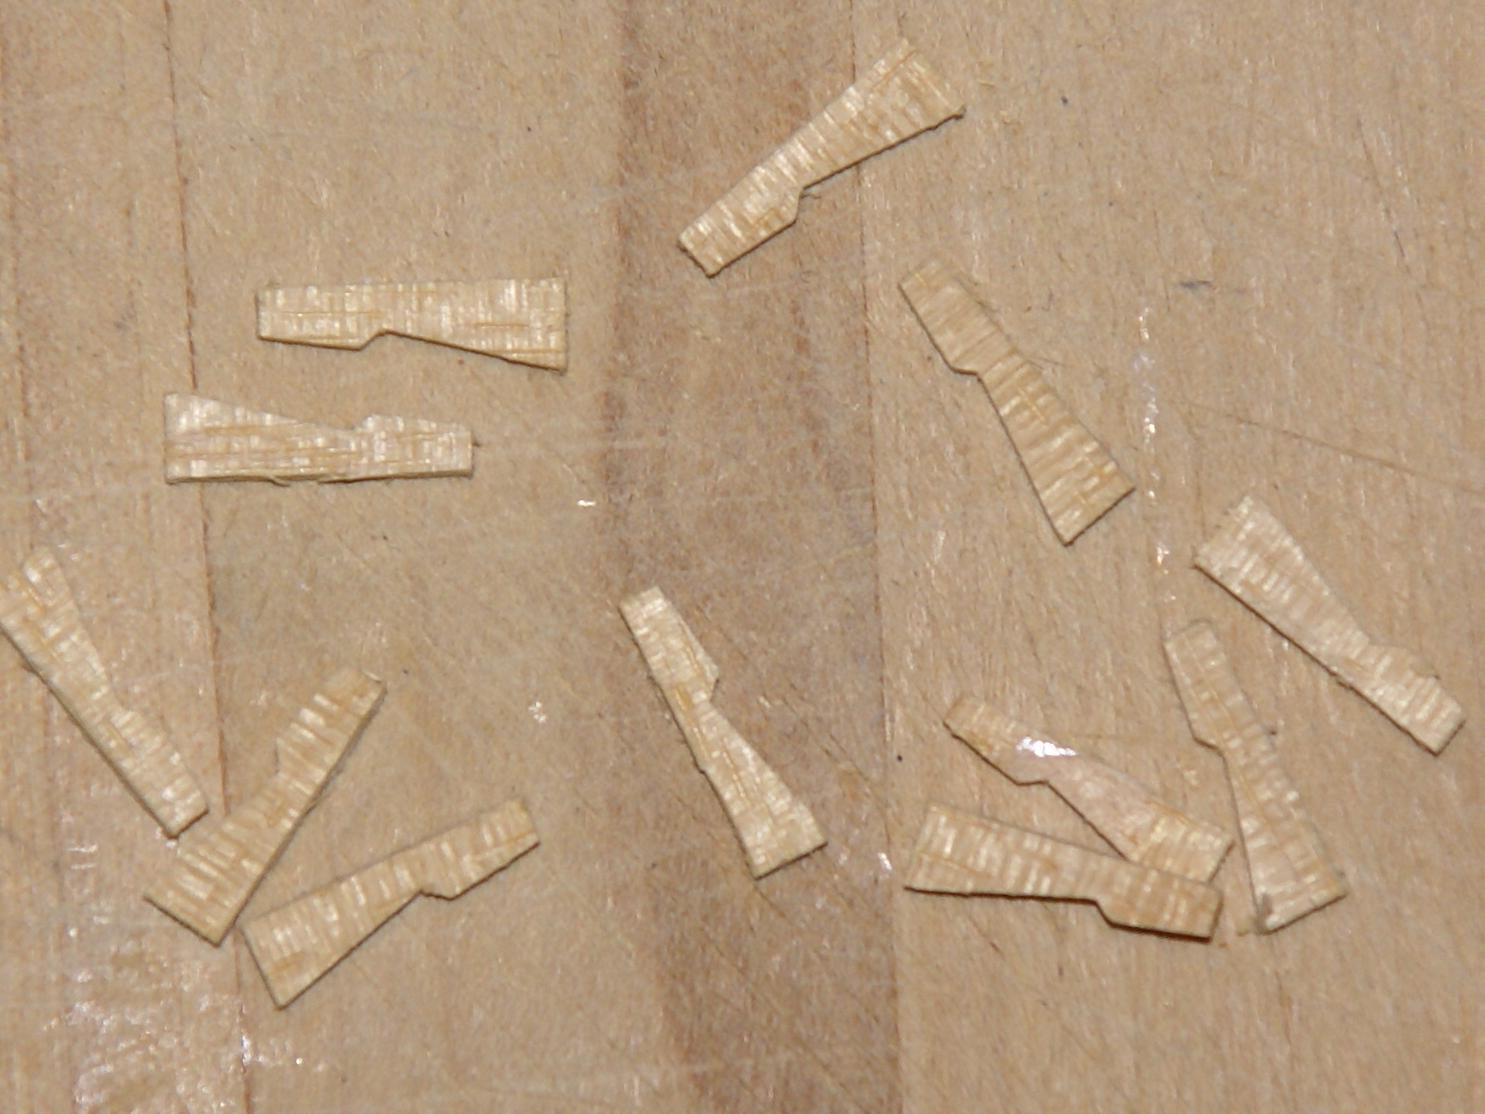
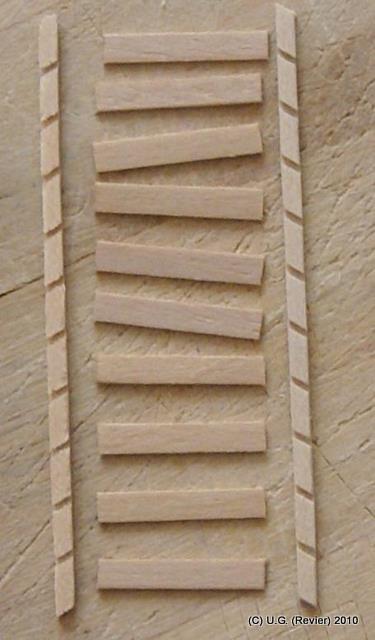
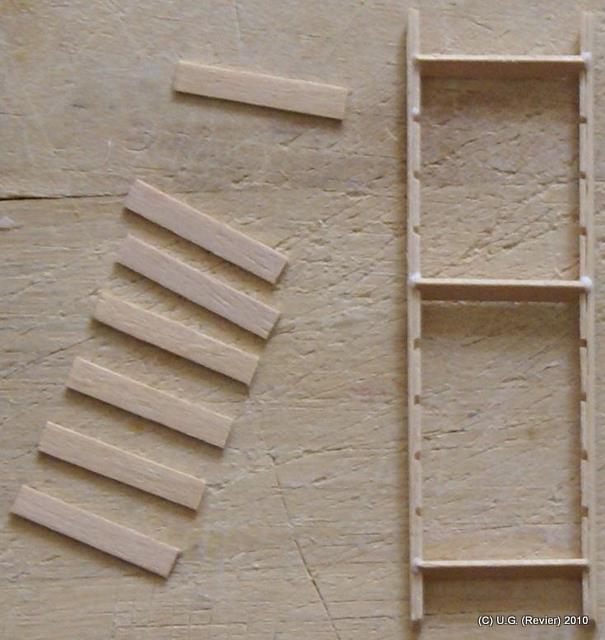
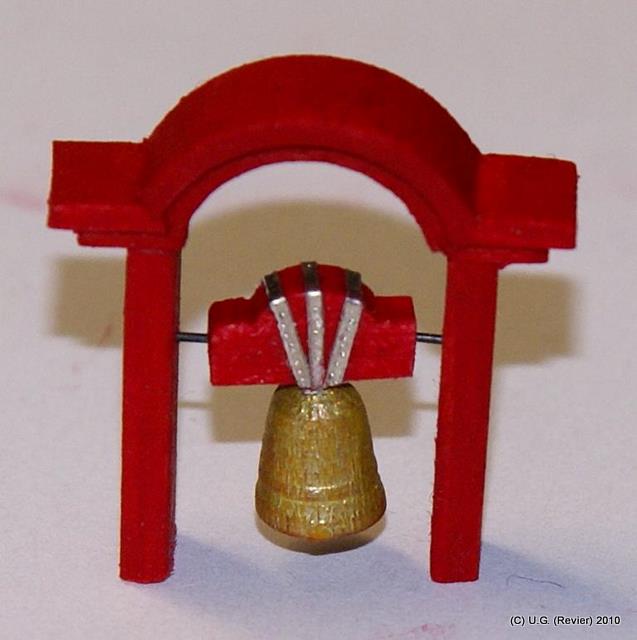
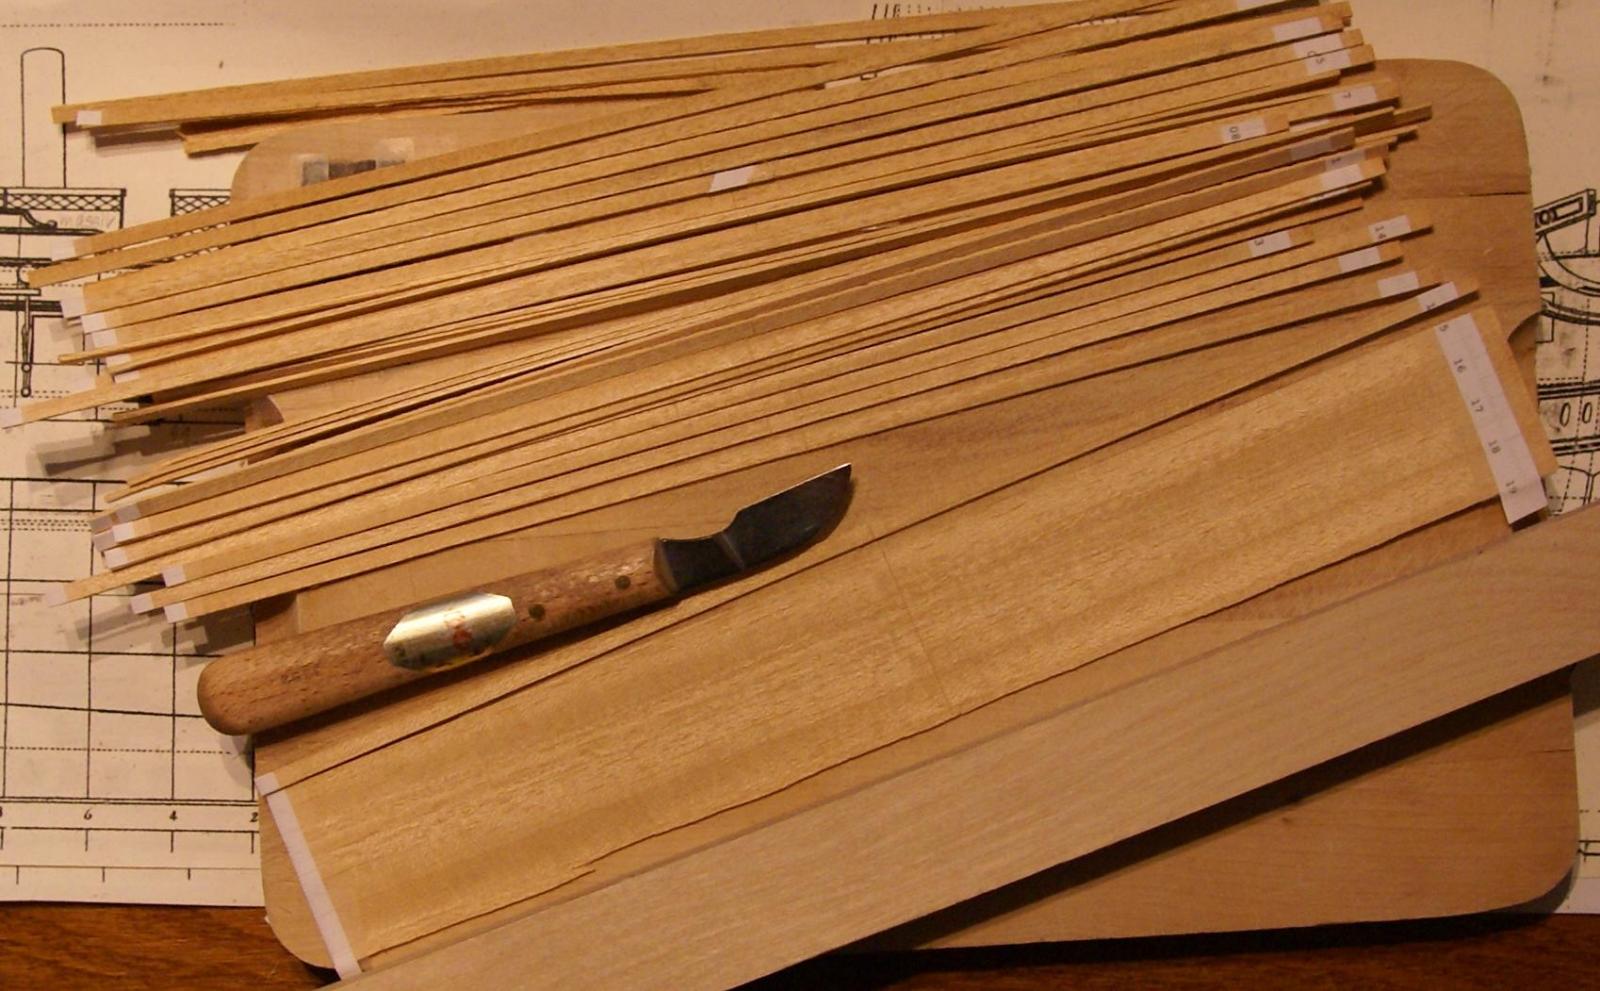
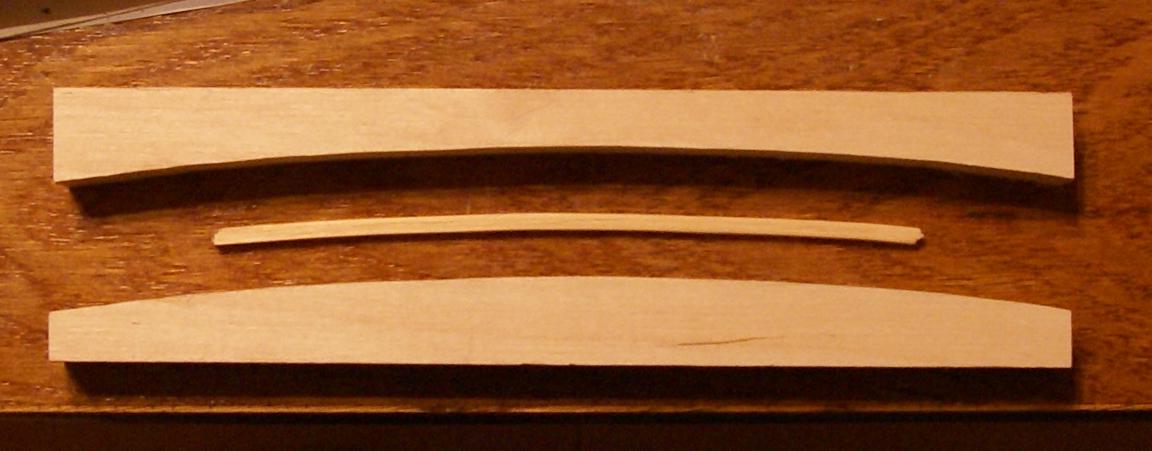
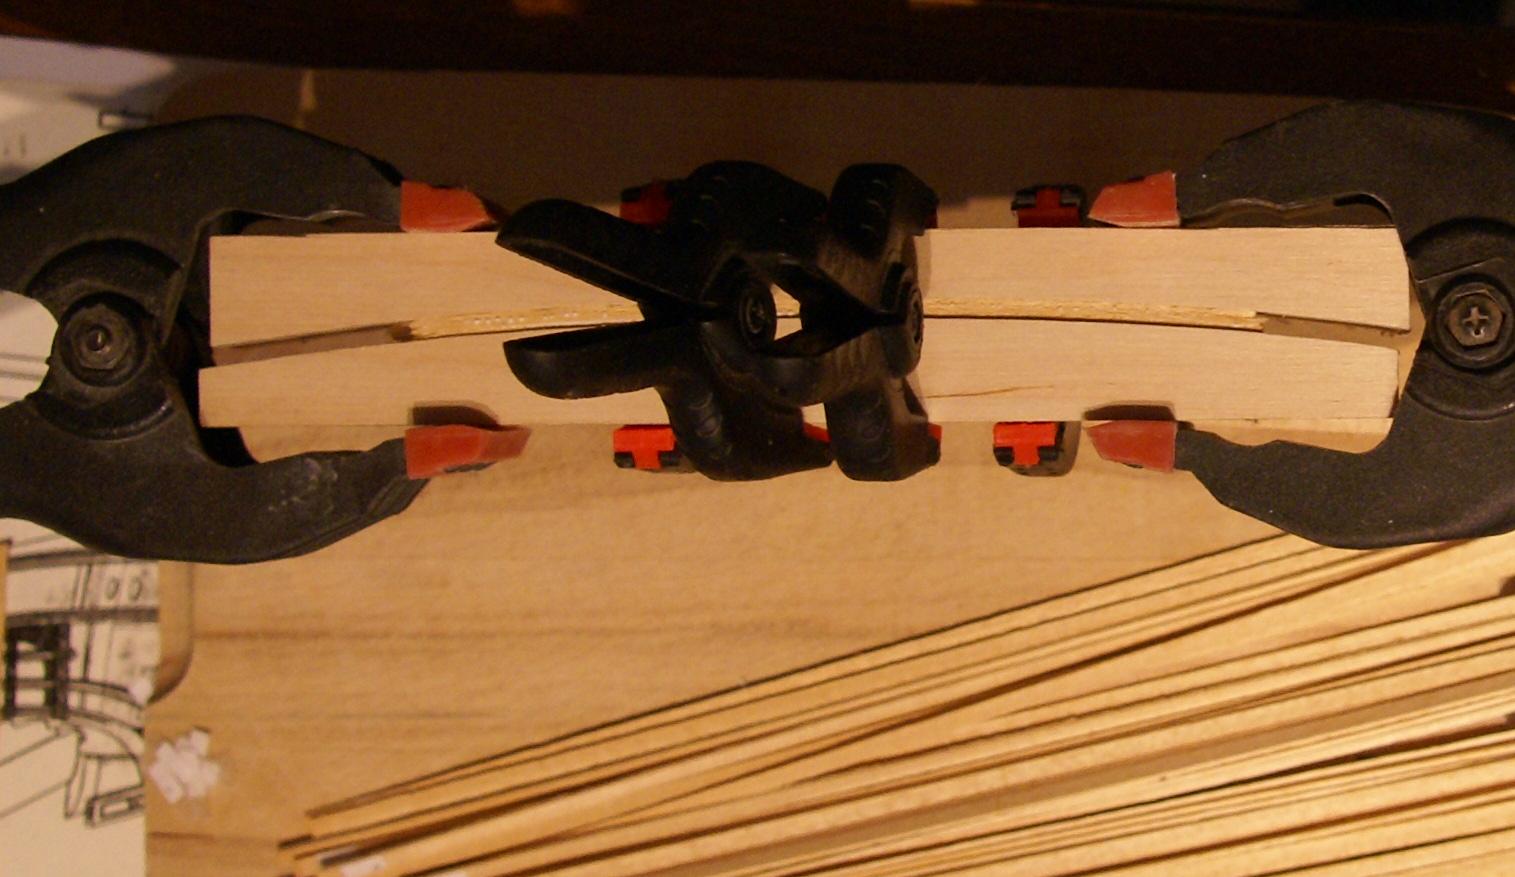
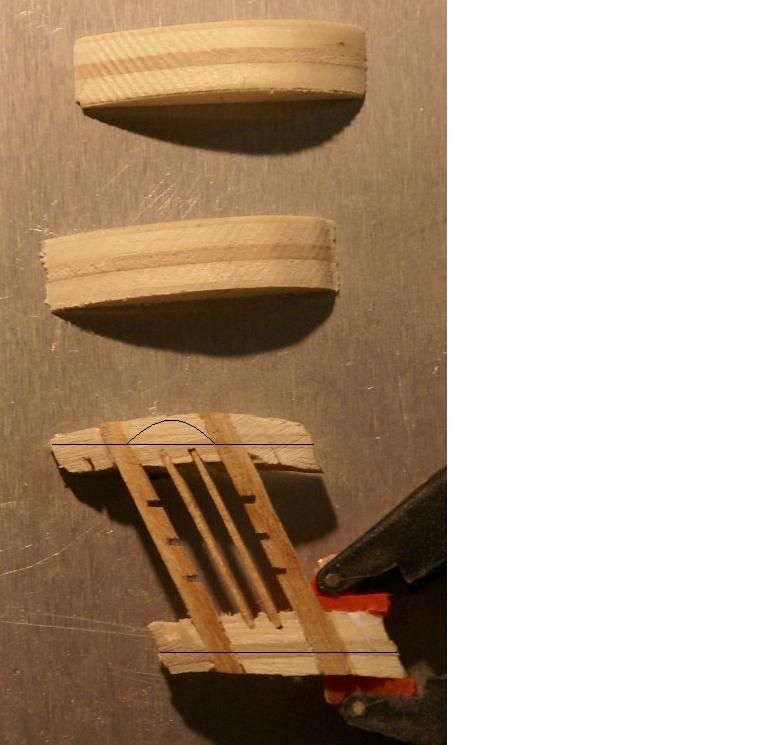
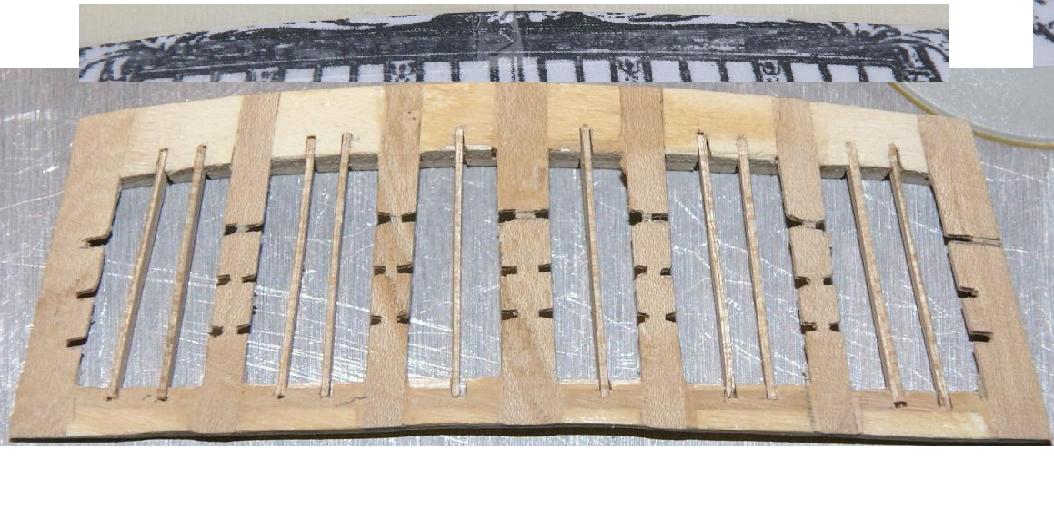
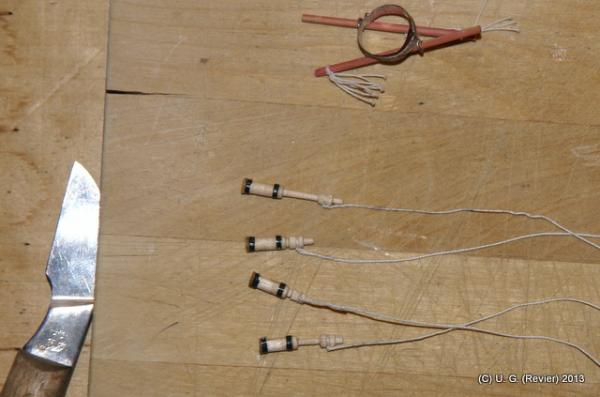
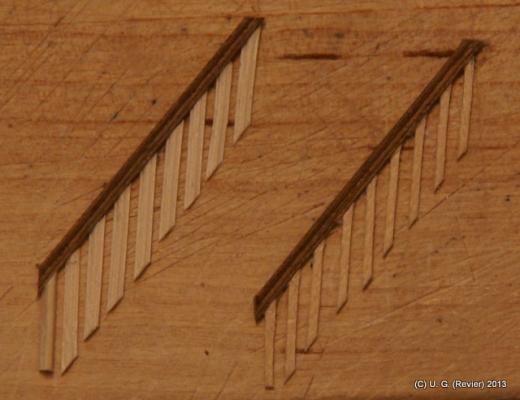
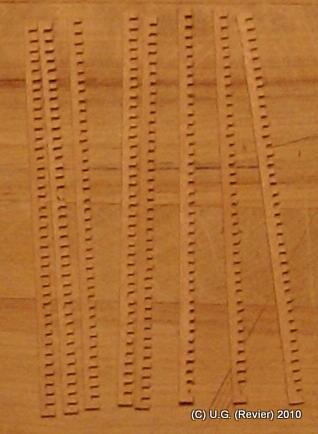
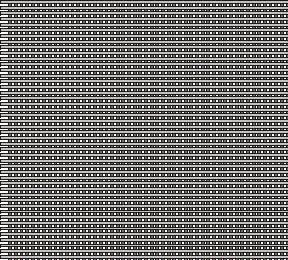
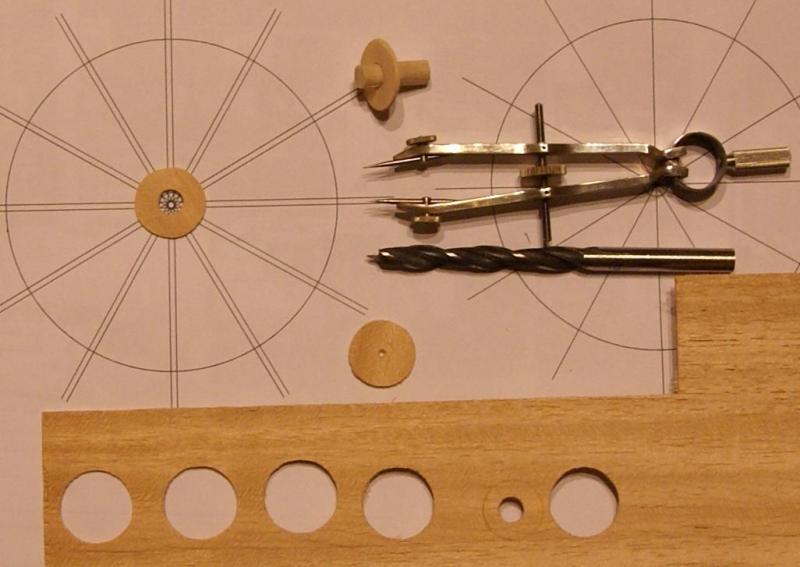
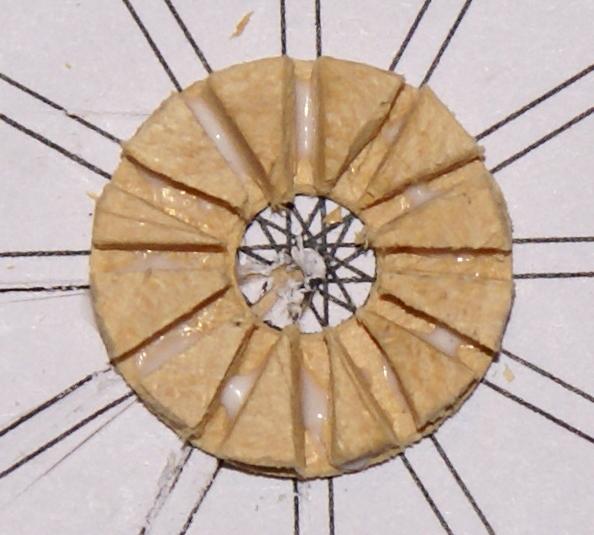
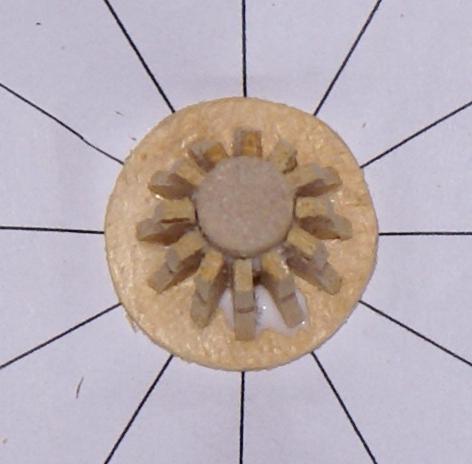
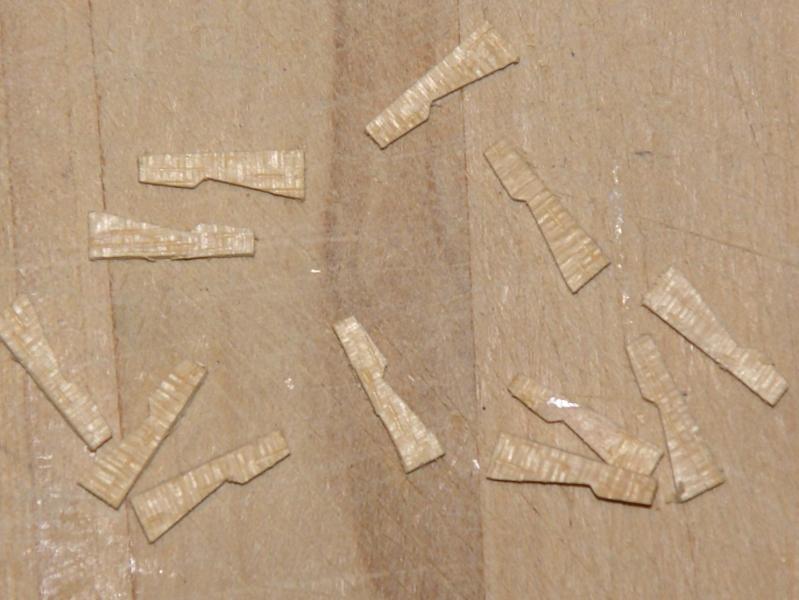
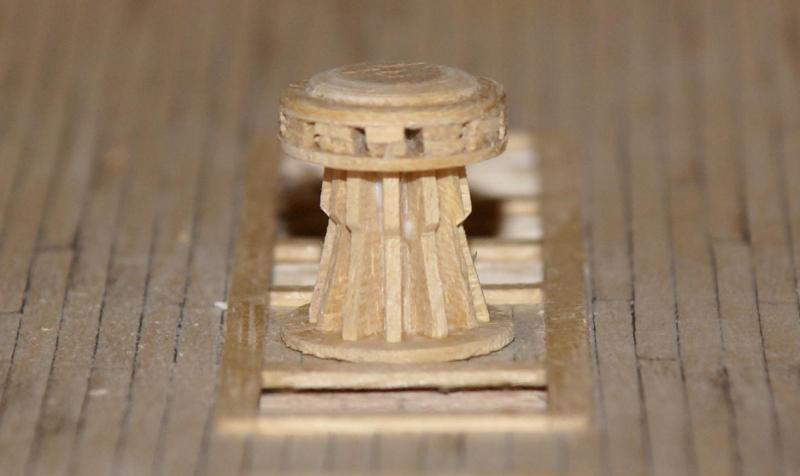
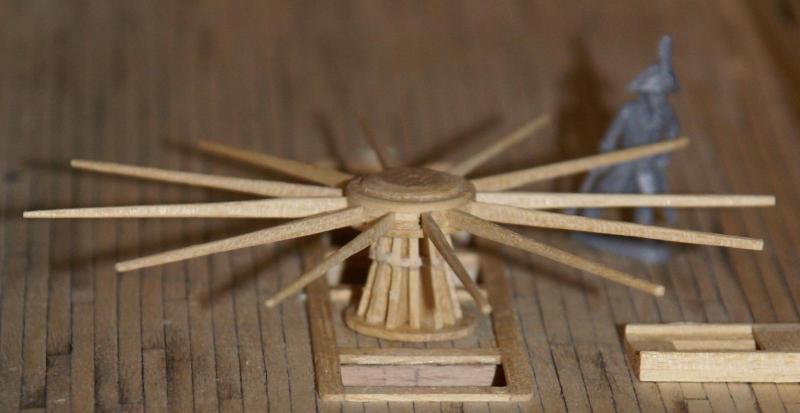
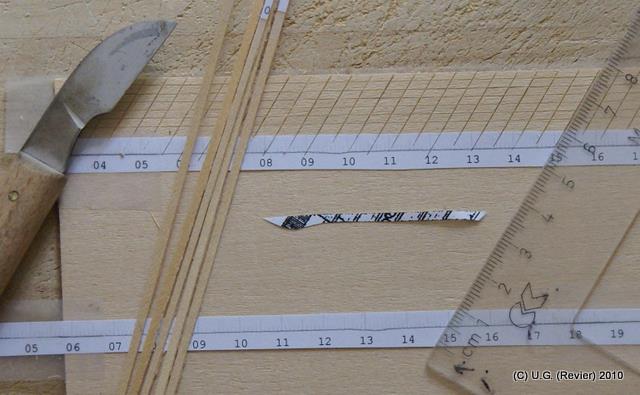
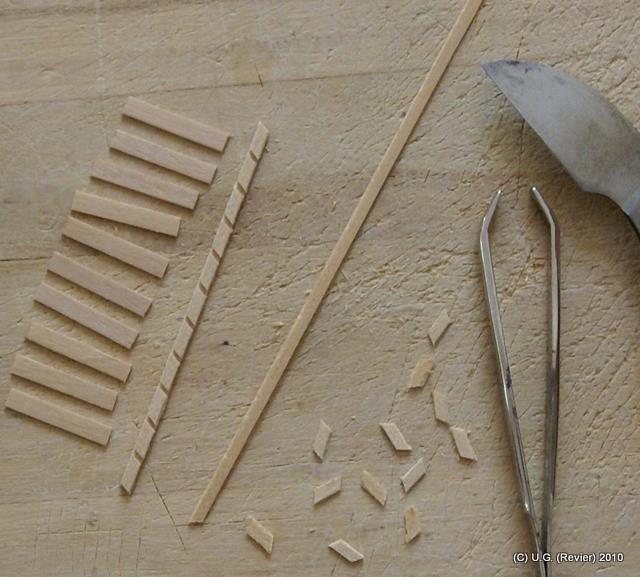
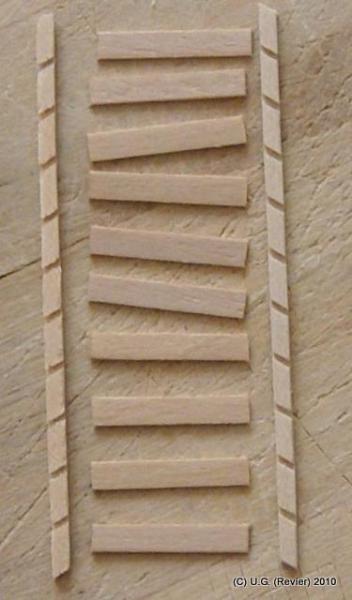
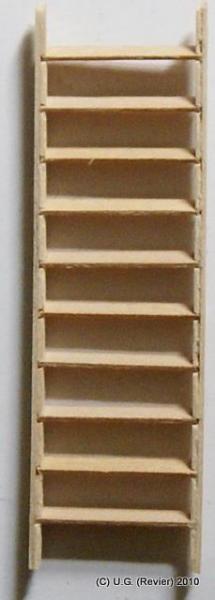
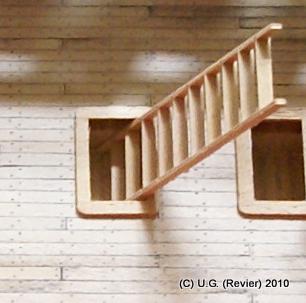
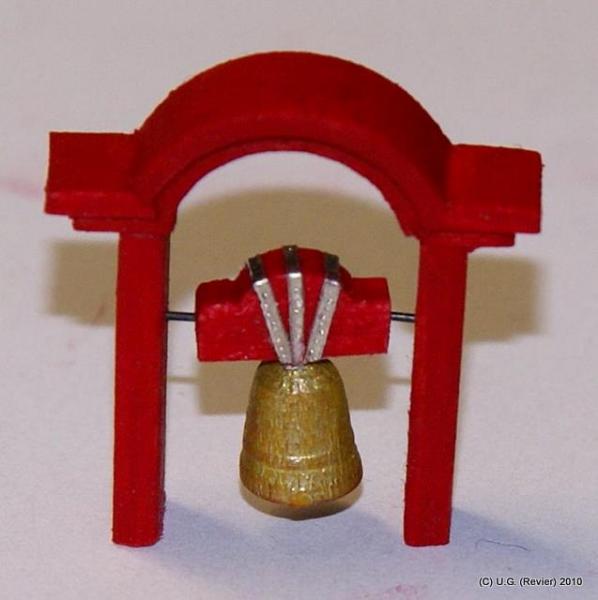
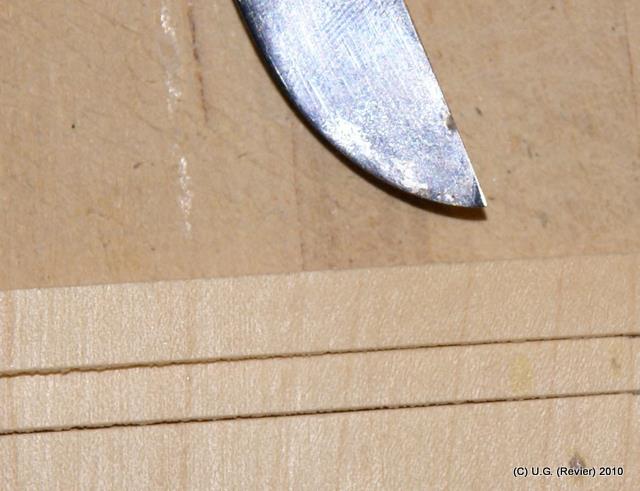
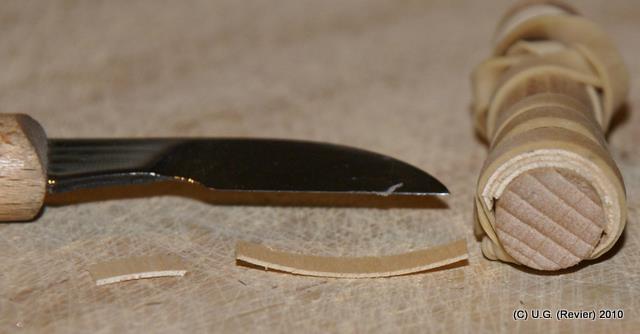
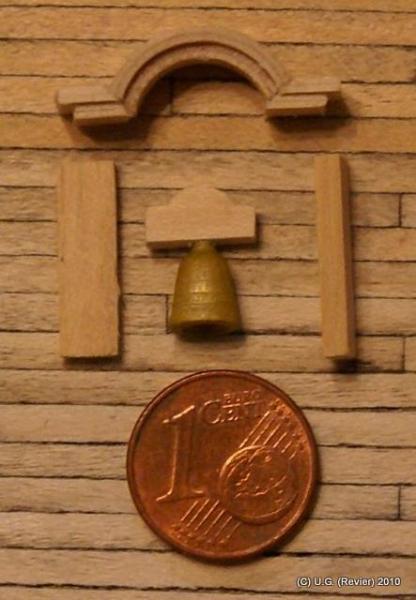
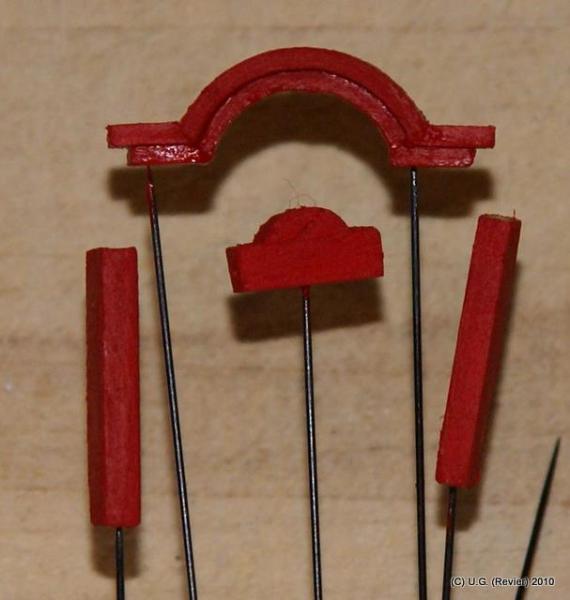
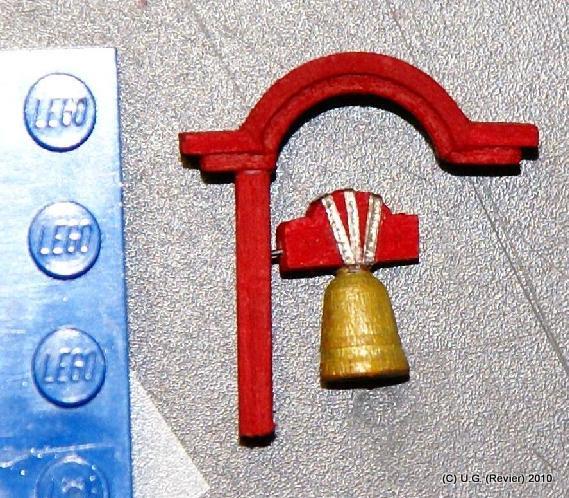
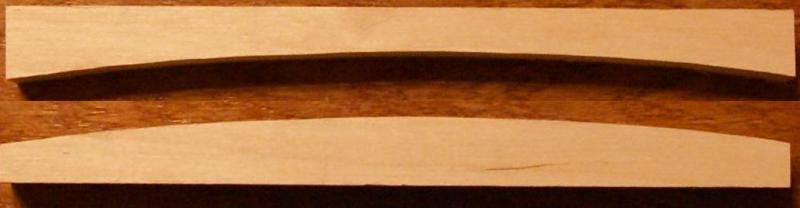
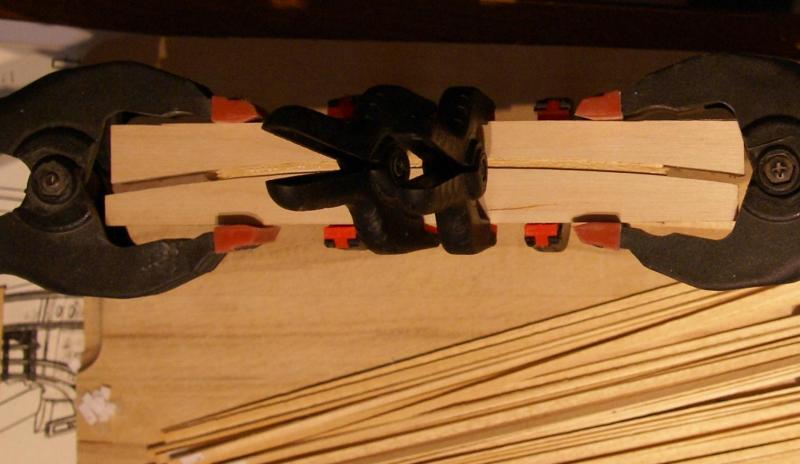
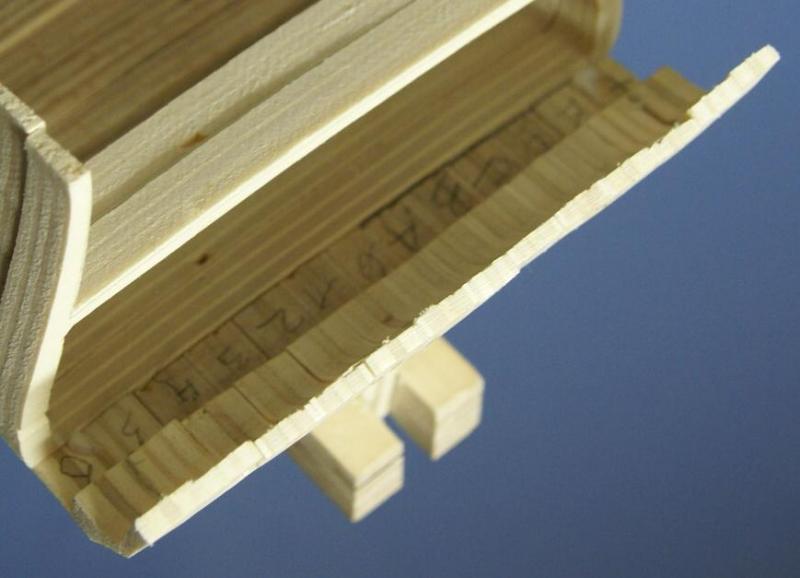
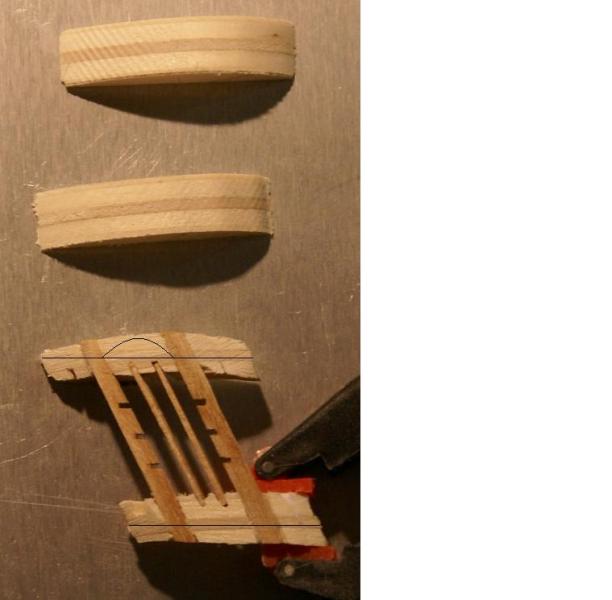
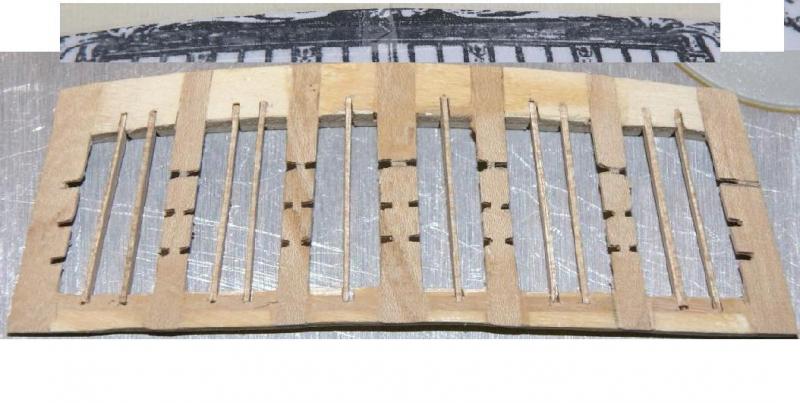
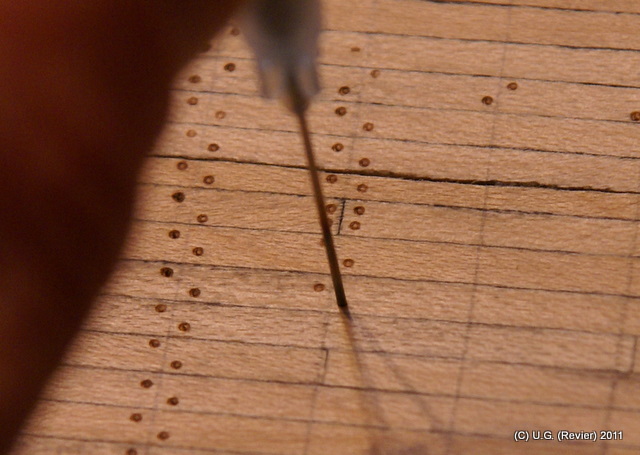
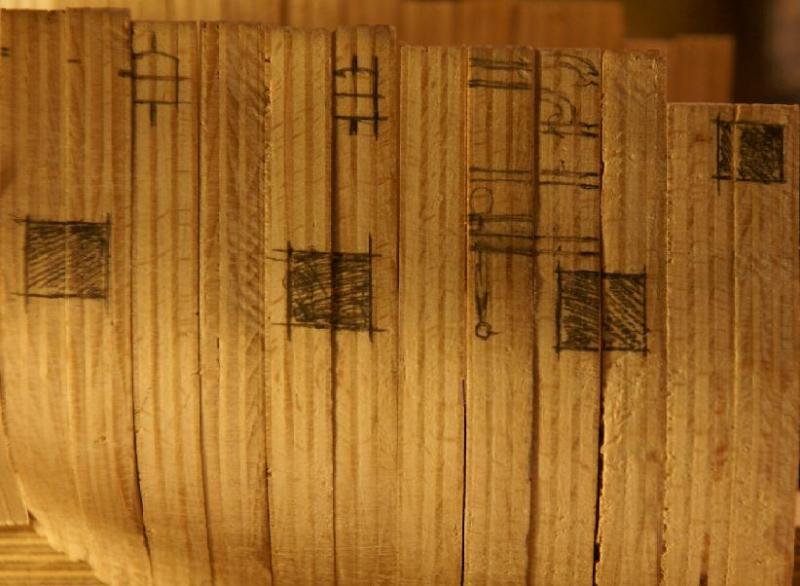
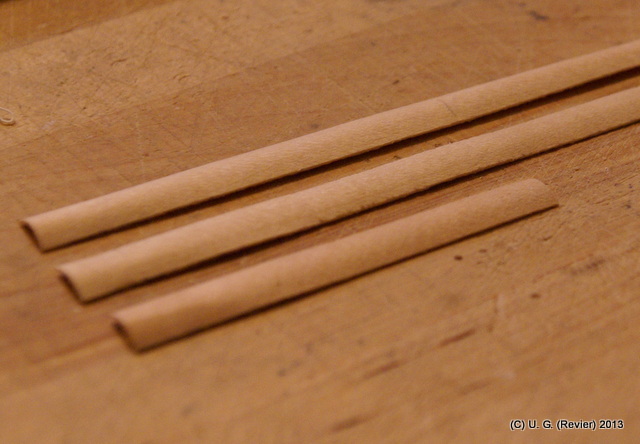
Yessssss, amateur. We are alive. All MSWér round the world... The hull stand alone and i will do som litle work on thousands of pieces for several groups to build. First of all, i start wih my gratings. I made gratings from maple veneer. I cut a few stripes nearly 2mm breadth, 0,6mm thickness and 100 or 150 mm long. Five or eigth or ten of the stripes are packed to a bundle, to fix them i use TESA, and on top a glued paper with a scale of mm. Then i place the bundle in front of a wooden block, so i had a rectangle jig and i saw every second mm a one mm slut into the front of the block. Be sure, the block must fixed strong because some broken veneer will be during sawing. Oh god, my terrible english... Here pictures for understanding: The result is nearly good, the costs are very very low. I made 1mmX0,6mmX 150mm long stripes of maple veneer for completing gratings. To glue the new stripes and the cutted stripes together i use the print (above) and a needle to put the glue on the wood. After the gratings are hard, i sand all sides and fix they on deck. On deck i sand the gratings very smooth to the bowline-form. Be sure to work with the cutted stripes, because some smallest parts will break! Next step is the capstan. Here i use a side-view of the plan to find the length, width and high of it. Then i use a circle with two needles to cut round parts of veneer. Works very fine and made the parts exactly round! Into the round plates i cut a hole in the same way, ready to use with a round stick. Then i made a few isosceles triangle and glue they on the round plate. Another round plate glued on top, the head of the capstan is ready. The body i made in the same way. Stripes of veneer fixed into a bundle, on top a copy of the plan and cut out on the PROXXON, then glued on a round plate. Now. Wedding between body and head! And with some sticks, waiting for the sailors... Forward with some ladders and companionways. I use veneer. What else... Stripes and small parts cutted and glued together. So i become easy a large ladder and can cut every ladder when i need. Here are some pictures: This way makes you build a companionway without a circular saw. Next is the bell and their hold. The bell is sanded on a borer. For the round part of the frame i use veneer, cutted in stripes rectangleto the wood. With a little bit water the veneer can easy wrapd around a round pencil or stick. After drying, i cut some parts and glued together, ready for ringing he bell... All other parts are veneer, Metal band is made from the foil of a good bottle of wine, cutted in small stripes nearly 1mm breadth and tipped from backwards with a needle to bevame som "nailheads". LEGO is very good for a rectangle when glueing parts together! And now: Making deckbeams in the same way! First i made a jig for the rigth bowline. I saw plywood, glued with a copy of the plan, and became a press. Then i cut stripes of KOTO-veneer a few, i need many beams... I glue three stripes together and press into the press-jig. After 15 minutes a deckbeam is ready. When you made 6 or 8 beams and press all together in the press, so you will have 6 or 8 beams in 20 minutes all the same. Looking forward, nex update will coming soon. Best regards! Revier


-
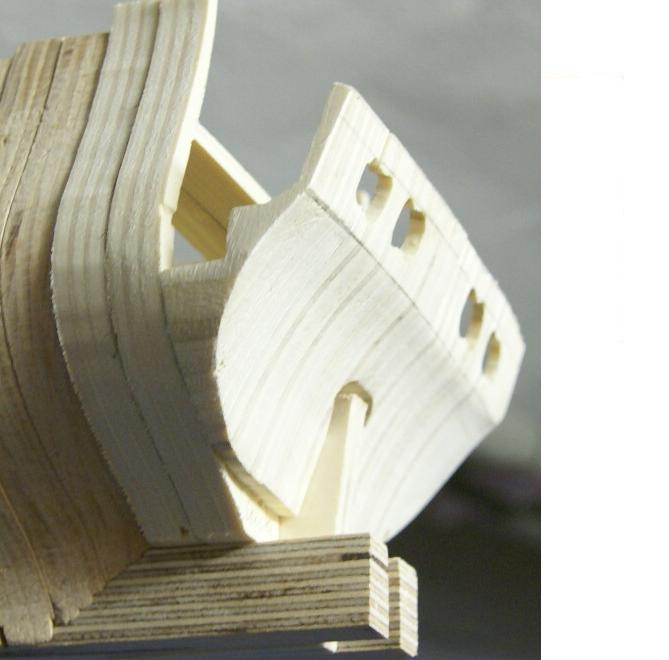
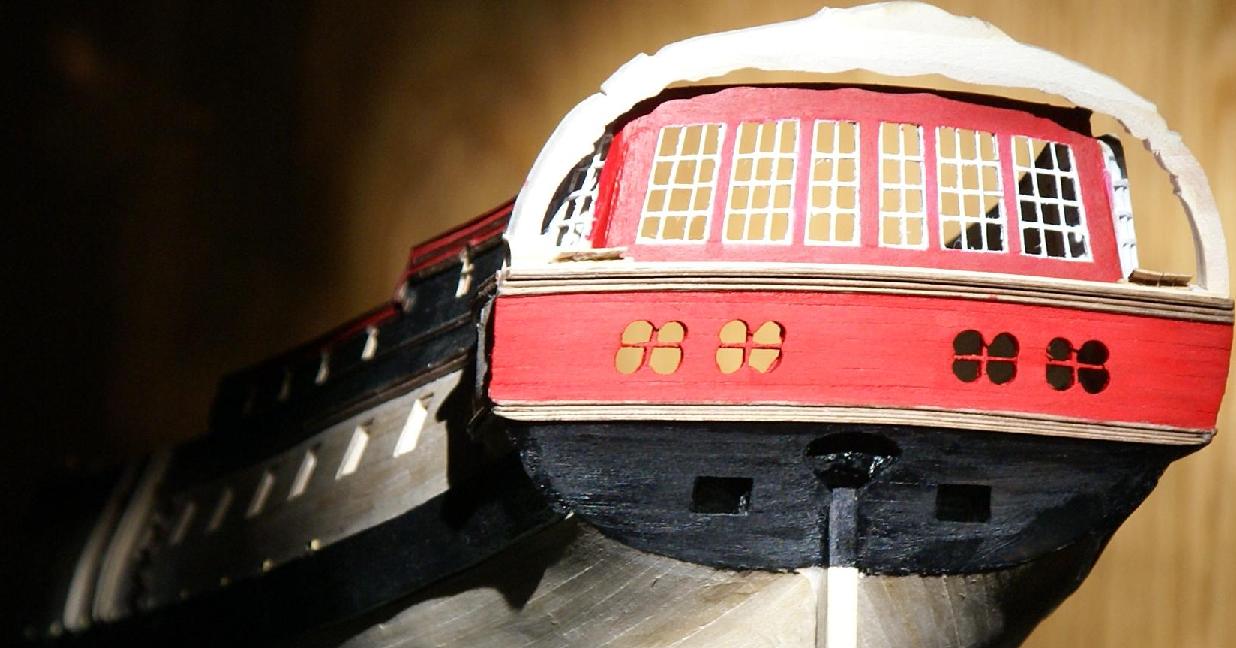
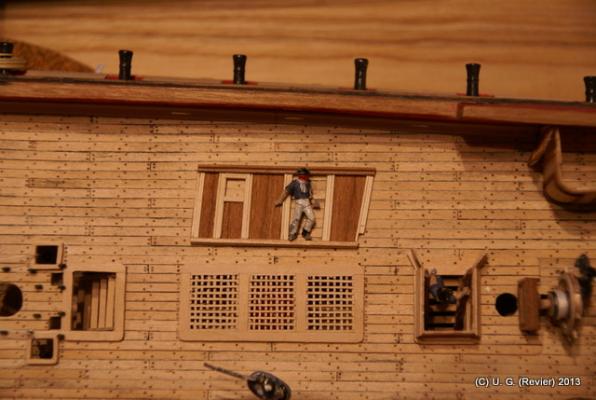
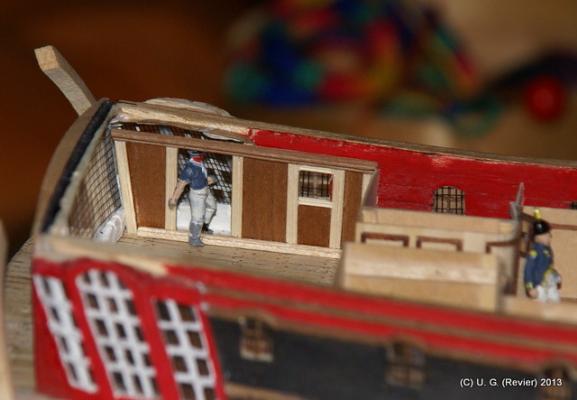
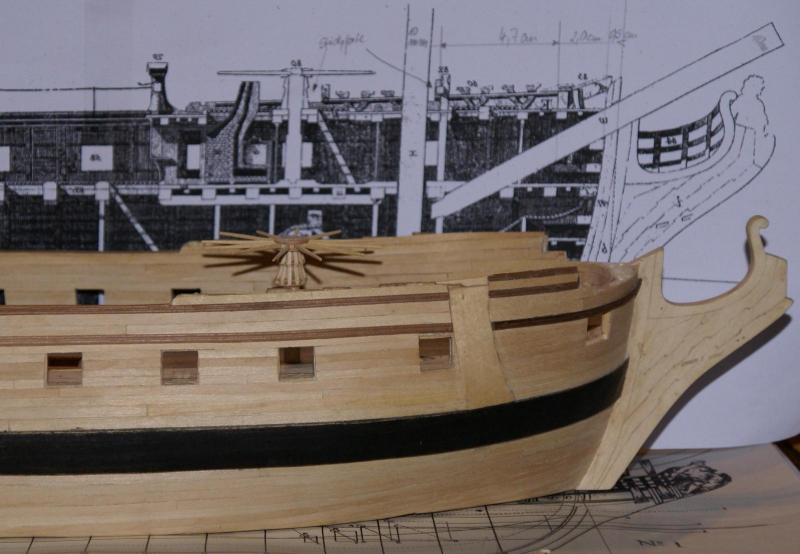
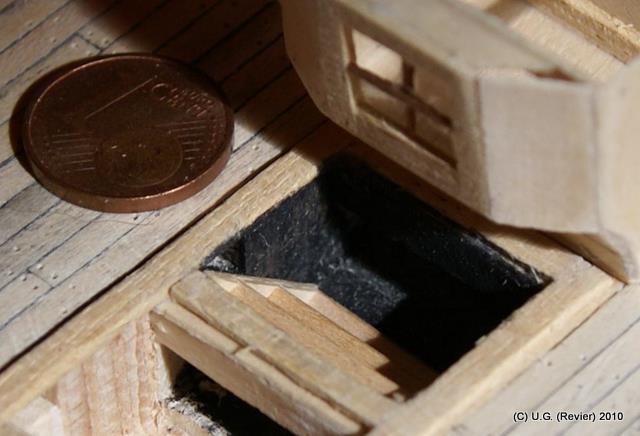
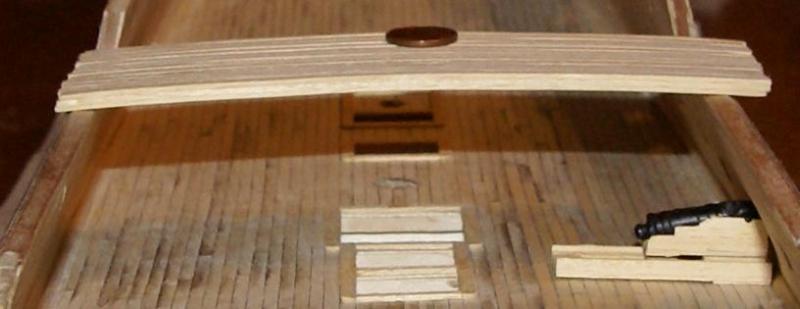
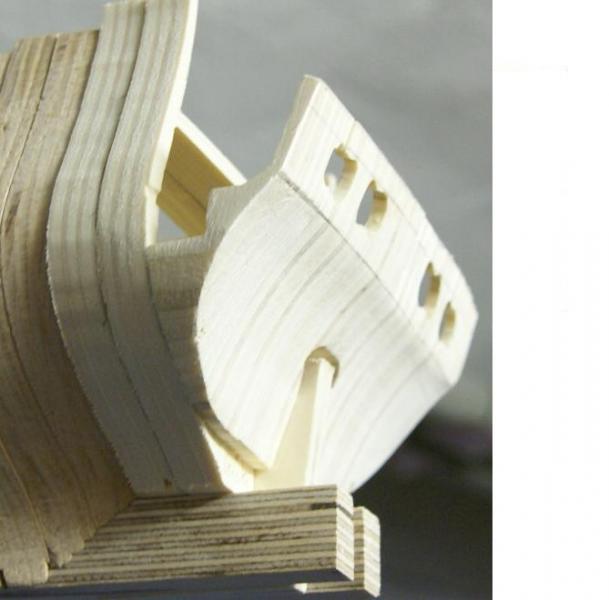
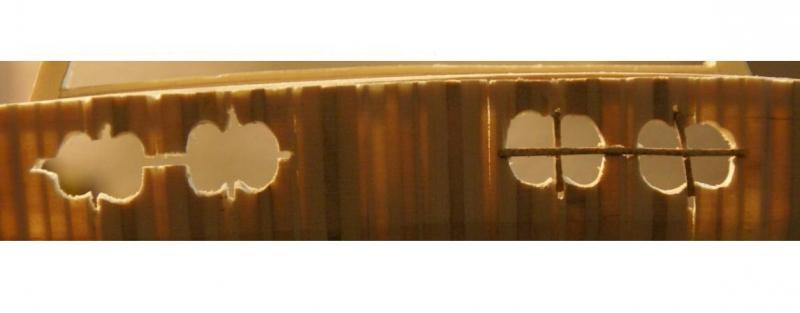
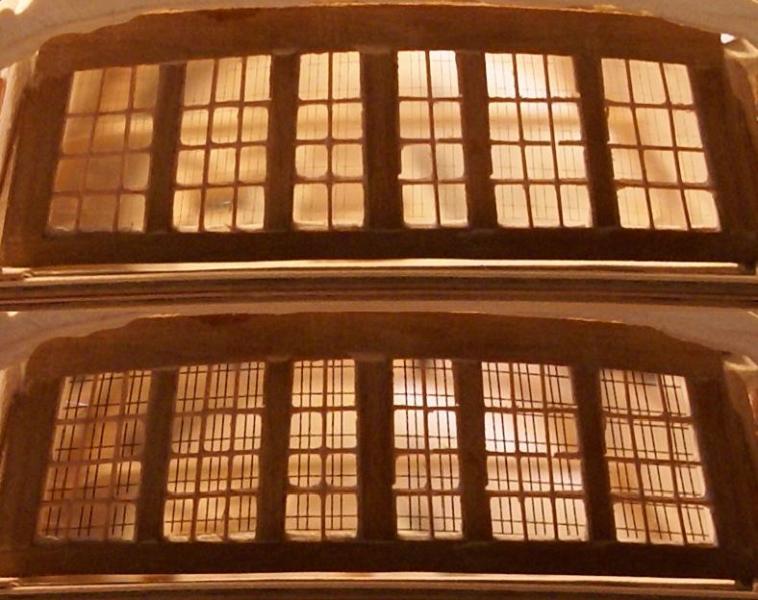
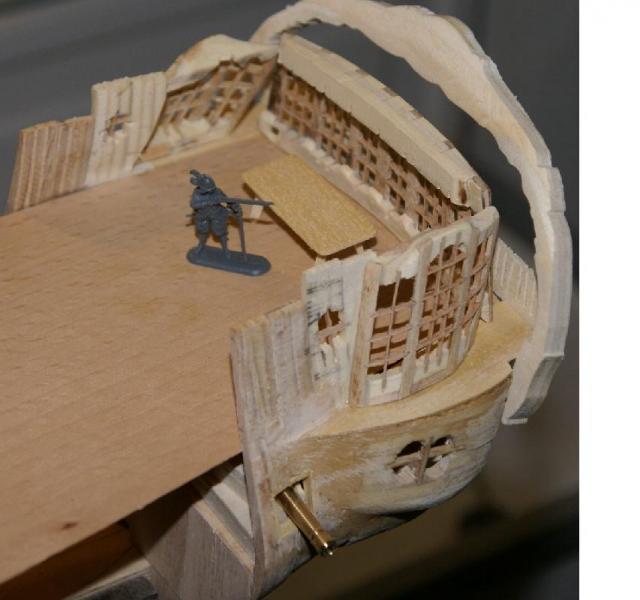
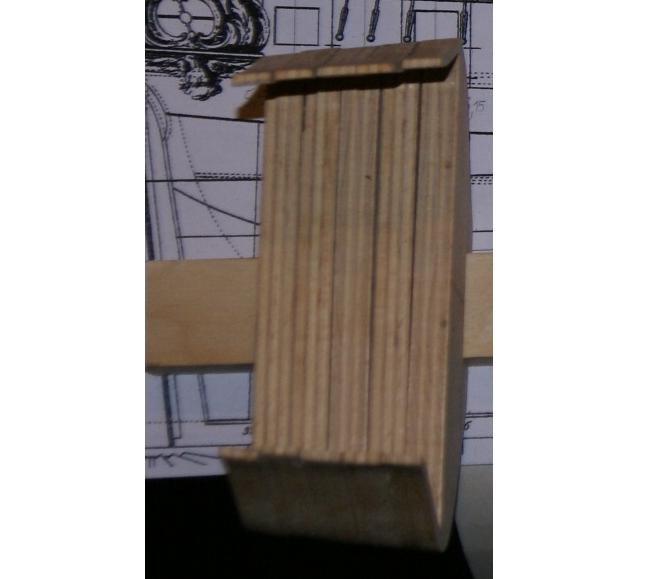
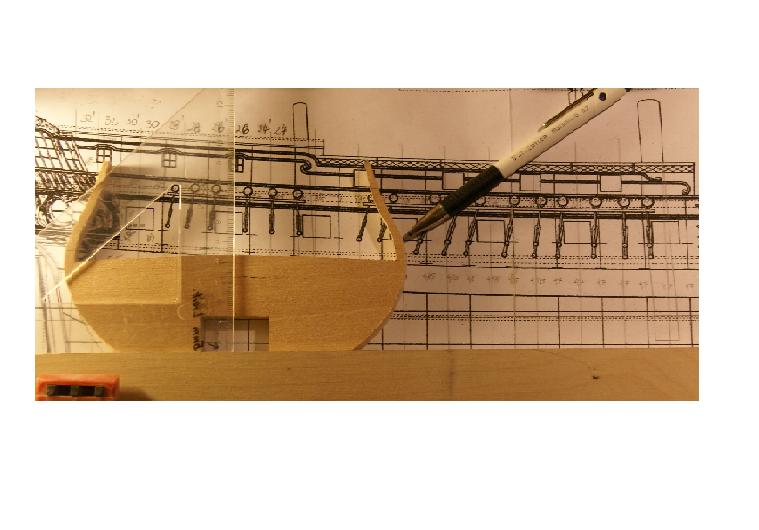
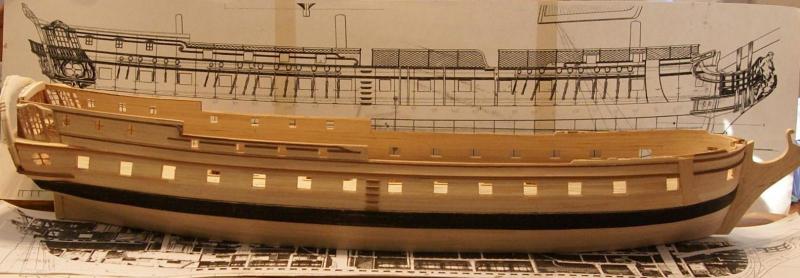
Thank you, blue ensign, i hope, i can serve you with my log. On he last picture, the stern-section is build and i will show you my way. First, i think about a simple key to build those section. I found a way on the modellboard.net. The plywood i saw in various parts, all parts a little bit different (the foot was longer) from the other and glue the stern together on the last bulkhead. So i became a smooth bowline and i have enough plywood for sanding the rigth form. Sanding was very easy, because the bulkheads are removeable and i can easy replace them for sanding and control. After the stern is sandet, i saw holes for the windows in it. To find the rigth position i use the plan and mark the windows with pencil and cut out with my Proxxon. I saw small cuts into for the frames of the windows and glue veneer stripes (0,6mm thickness, 1mm breadth) and the first windows are ready. For the galleries on the side i use he same procedure. You can see the various plywood sections glued together and cutted for becoming a window. On Upper-Deck i will have a large front of windows and doors, i made them nearly in the same way, only stripes of plywood and Veneer and glued on the plan to find the rigth positions. Cutting sluts for frames are easy way for making windows. And making windows directly on a copy of the plan makes it very easy. The glass of the windows will be lead-glass. I print the glass on my laser-printer on printer-foil. To find out the structure, i construct the glass by using a scan of the plan in COREL DRAW. Easy to make various glass with a laser-printer! Thicker and thinner lead, you must only change the thickness of the lines. Next step is glueing the glass into the window-section and glueing the windows on the rigth place. Here you can see inside the captains cabin. Later, you will only remember, because you will see only shades. Here is the stern with colour and "glass" planked in the same way like the body of the ship before. After a big failure, i cut the stem and stern and replace they with newer parts, a work for round twoo weeks... But, i learned more and more during the build and is use several hints on your logs, so i will thank you for showing and posting your ways in modelling! Now, the hull is nearly ready, i begun to plank the gundeck. In the same way like the hull i cut a few planks and i use black colour (charcoal for painting) to black the sides of the planks. I glue the planks on deck with PONAL-EXPRESS, so i can glue a few in one hour. After glueing i sand the deck and the charcoal makes an "used-look"-effect. I try to make "treenails". A way i see in this forum and i bougth some hypodermic needles and cut the tip, so i have a round ring on tip of the needle. Then i use candle-ligth and heat the tip of the needle nearly yellow-red and a half second later i press wih ligth pressure on the position of the "treenail" on the plank. Thats all for now, update coming later. Best regards!


-
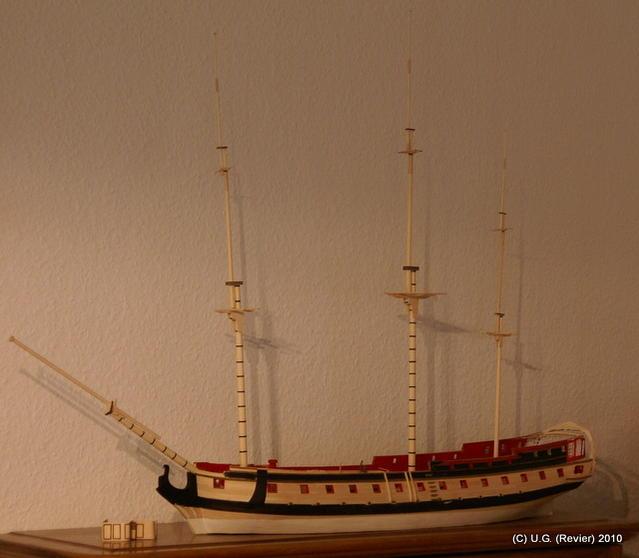
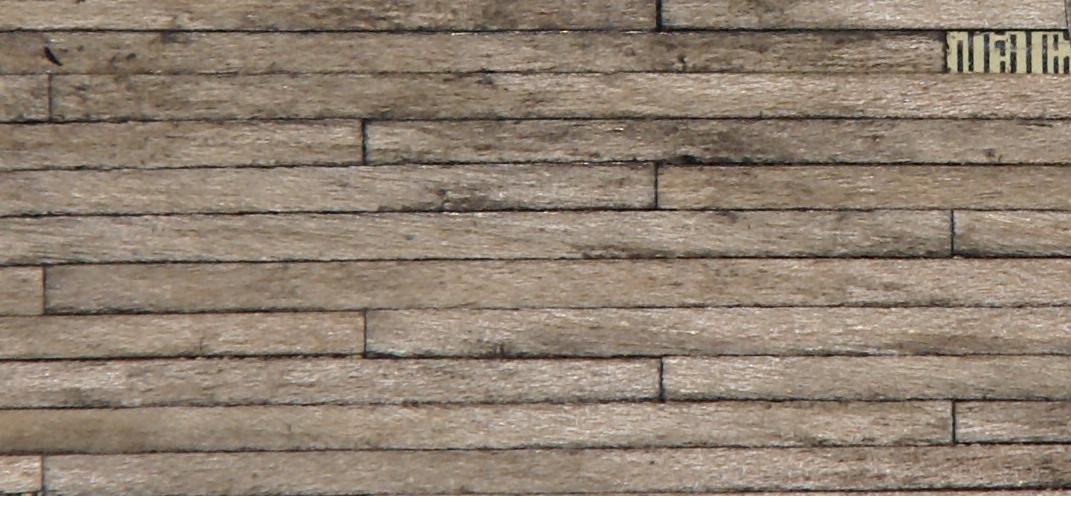
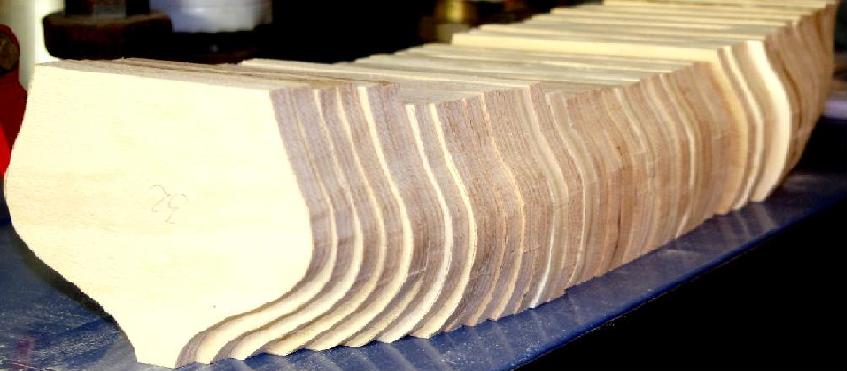
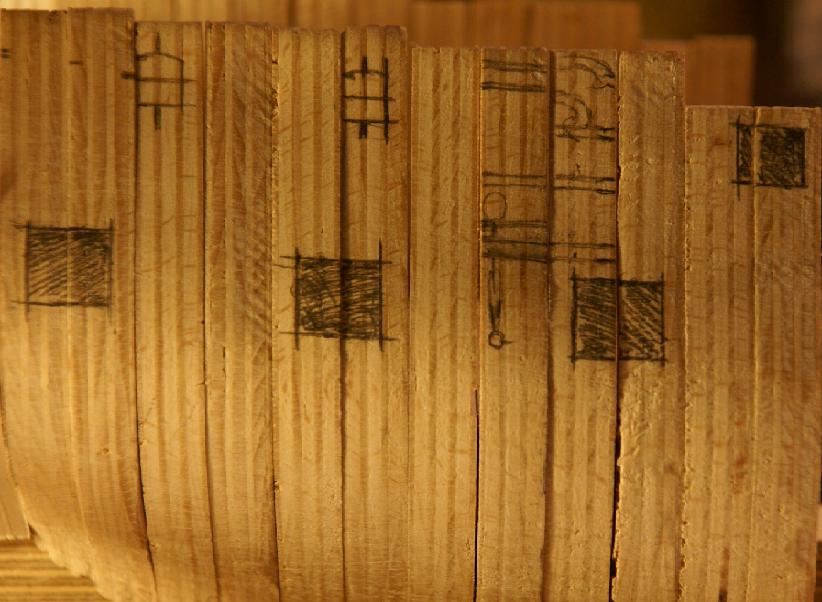
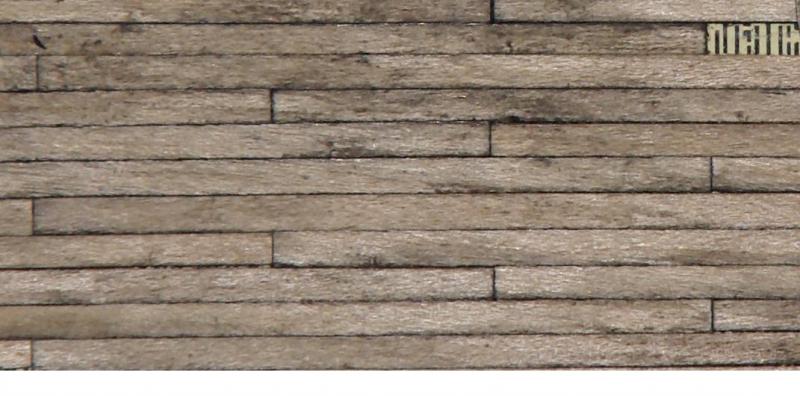
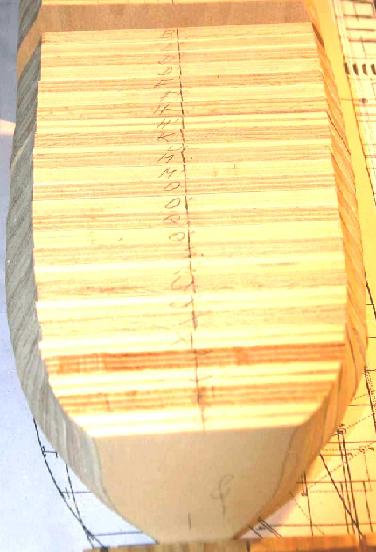
Now, i will research some datas and post it after a translation by babylon 10. I hope, this will work. The beginning. I start the build after an massive infection by a build-log on modellmarine.de I bougth some plywood, the famous "Architectura Navalis Mercatoria" and a bottle of PONAL-EXPRESS. First of all, i scanned the plan and resize it to my scale 1:72. This will be a waterline-model. I found, in 1:72 each bulkhead is 10mm in thickness. Wonderful, every trader for plywood in germany has 10mm ply to sale! Then i saw all (round 60) bulkheads (i bougt a PROXXON DSH for sawing) and he first step was done. I marked he line of the middle and sand the body step by step to the form. Not ready, the last sanding will start afer glueing. At this time all bulkheads are free removable and this is a great hint, when i must saw a new one after a failure... Plywood comes from poplar (ligth wood) and beech (darker colour). his is for good stability and easier sanding. Next step was the gundeck. I use the plan and cut a paper for the rigth bowline and mark those with a pencil. Then i saw along the line. No problem, i saw always beneath the line, so i can sand all bulkheads to the rigth form. After sawing i controlled the form by placing the bulkhead beneath the others. The removeable bulkheads makes the easiest way walkable to find positions for gunports and other marks. I use the plan, places the bulkhead on the rigth position and mark with a pencil all positions. Cutting is very easy and each bulkhead can easy rebuilt afte a failure. 62 bulkheads later, the body is ready for planking. The planks are cutted from maple veneer, using a sharp knife and a ruler. I made a few and cut all 3mm in breadth, 60mm in length and the veneer is nearly 0,6mm thick. For cutting it is very good to use paper-rulers. I made a few with my laser-printer using CorelDraw. I show you the picture, you are free to use a print of it. Or you search in IKEA, their paper-rulers are nearly 100mm long and free. Be sure you use the rulers in the rigth way. The rigth position is 90 degrees to the wood grain. So you will become easy a few of planks in one or two hours. Note: call a carpenter for veneer, sometimes they will have litle quantity useless in ther firewood... Here you can see the jupiter planked. The thicker and blacked planks are only three planks glued together. So i can use one plank for all types... Coloured with oil-colour for painting like Schmincke or others. Thats all for today. Will updated in some days. Hope, you will enjoy my way of modelling. Best regards!


-
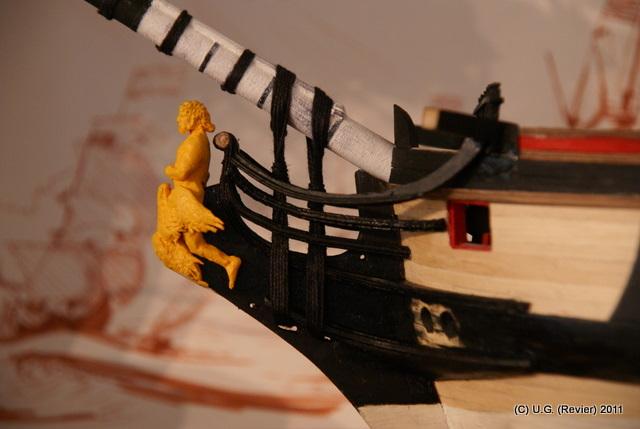
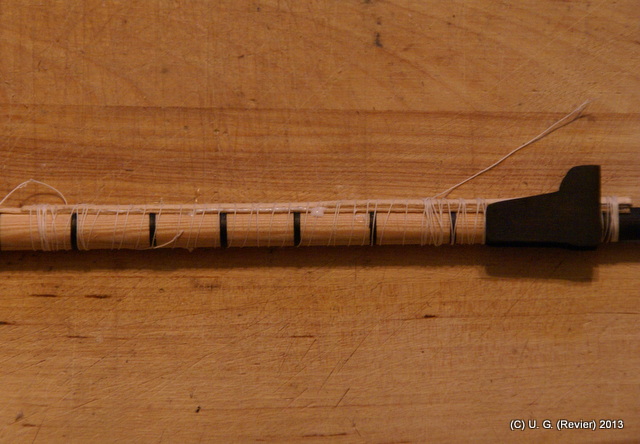
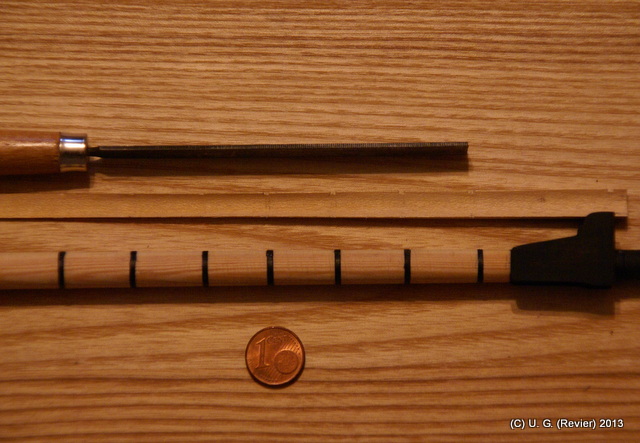
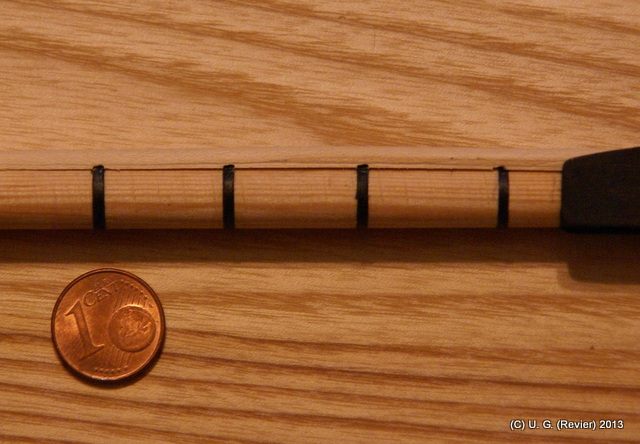
Thank you all, (10:40 min)Here i show you the last part, i made for the foremast. This par seems very difficult, but with a little time, i find a simple way with veneer. Here are all steps, i show you pictures for understanding. In front of every mast is a part, i dont know his name, with a round and (inside) hollow form. I use veneer and water, first i cut stripes of veneer (width nearly like the plan says, a little bit larger) and use water on one side to make the wooden veneer softer. The wet stripes i fixed with some rope on the mast for drying, then the veneer will stay in form. The part had several hickness (lower side thinner than higher side). So i use three various stripes and glue they together. After the glue is hard, i remove the rope and the body of the part is ready for sanding. First, i sand all "stairs" flat, and then i made some sluts for the rope to fix the part on the mast. I use the plan as measure and mark the place to sand with pencil. After sanding i controlled the form on the mast. Better more than less control! Between the upper pars on the mast, i must find a rectangle form, because the body of the part will change from round to rectangle. I use PONAL EXPRESS-Glue and several sripes of veneer and after drying, i sand this to the rigth form. Now, the first is ready but two others waiting. This will takes a little time, because the family is still alive nearby. ;-) Best regards!

-
EdT, thank you for reposting your log. I learned and readed often on your log and now i am happy to find you here again. Very good work! Best regards! Revier.
-
Very nice way for making wooden sticks. Thanks for showing us!
-
B.E., i am very impressed. Amazing work. Congratulations.
-
Hello everybody! Unfortunately, my build-log crashed with the old forum and i have no copy except pictures. So, and my terrible english is the second reason, i restar he log now in the middle of the work, updated today. (no new work, all is build since he work starts in 2009...) I hope, you will enjoy my little frigat and give some comments for me important to learn more about shipmodelling... Thank you all and especially the forum owner for his work! MSW is still alive! Regards, Revier. Plans are available and download is possible at sjöhistoriska.de (klick) (Number 31 and 32).