Alexi
-
Posts
10 -
Joined
-
Last visited
Recent Profile Visitors
283 profile views


-
 Duanelaker reacted to a post in a topic:
USS Constitution by Alexi - Model Shipways - Tribute to the Conny
Duanelaker reacted to a post in a topic:
USS Constitution by Alexi - Model Shipways - Tribute to the Conny
-
CaptMorgan reacted to a post in a topic:
USS Constitution by Alexi - Model Shipways - Tribute to the Conny
-
cookster reacted to a post in a topic:
USS Constitution by Alexi - Model Shipways - Tribute to the Conny
-
CaptainSteve reacted to a post in a topic:
USS Constitution by Alexi - Model Shipways - Tribute to the Conny
-
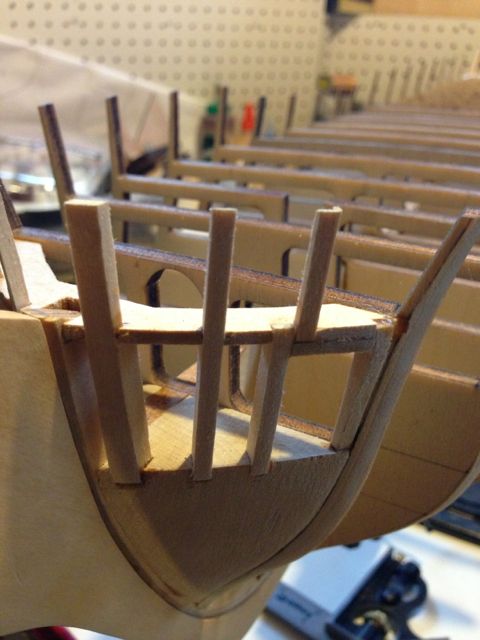
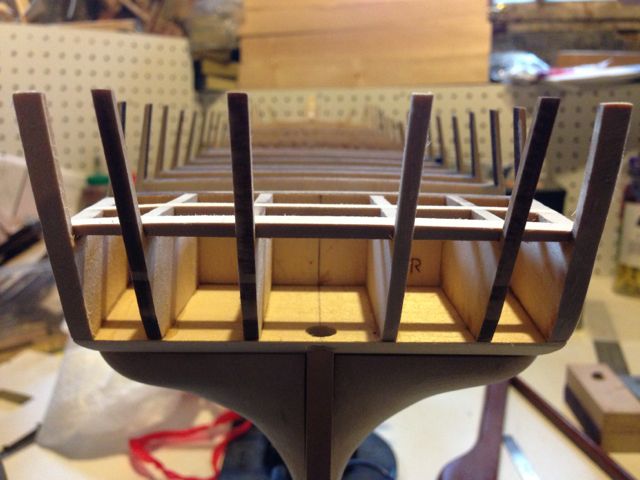
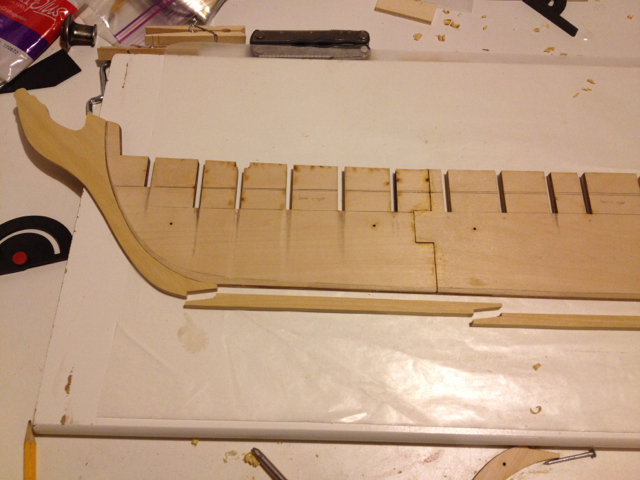
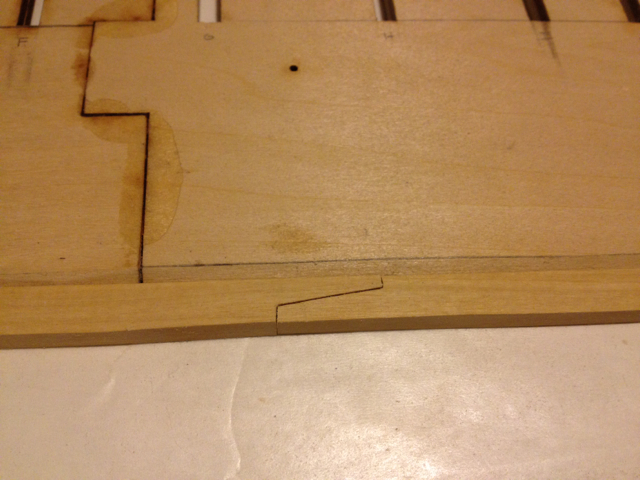
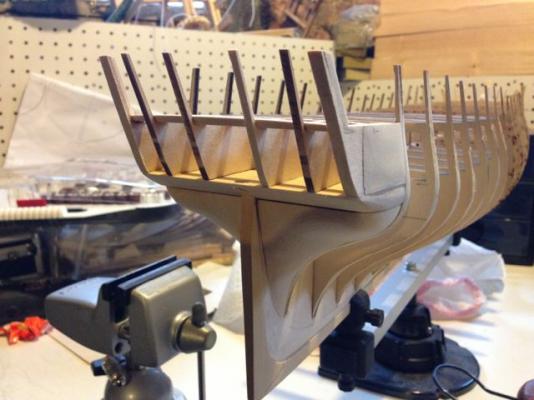
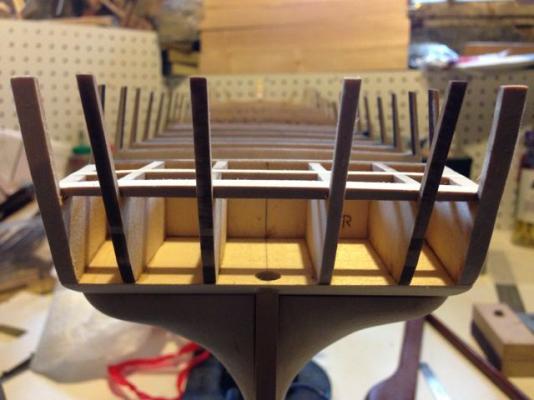
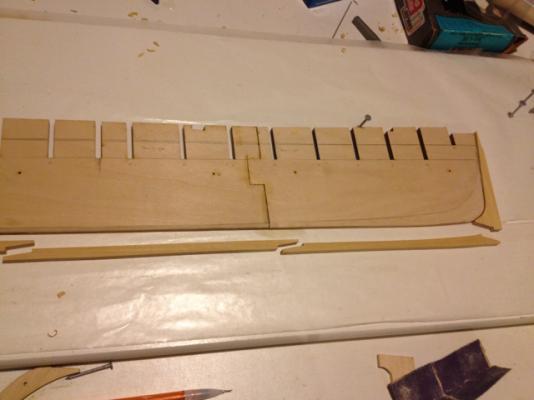
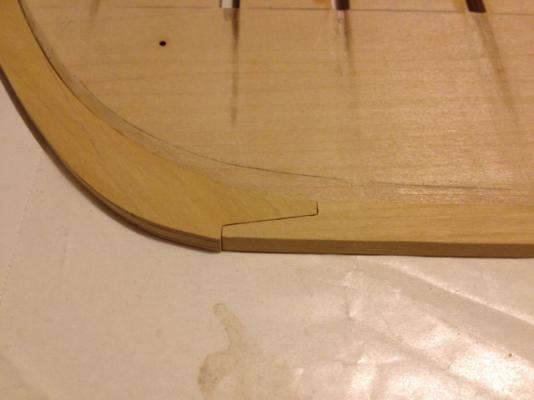
 Update: planning for gundeck. I can't stand the idea of spending so much time and effort on this model only to put in the "dummy" guns with their blind boxes as supplied in the kit. No judgement on any other builders who went that route, just for me - the whole appeal of the Constitution is in her fighting history and significance for our nation's history. Her design was unique in her era in that she was faster than most ships larger than her, and much stronger and well armed than ships her size or smaller. Her array of 24 pounders is one of the most important details of her design and therefore my neurosis won't let me follow the kit for her guns... In order to build out her gundeck, I have had to take into consideration some structural changes and additions. The spar deck beams and center supports from the kit supplied bulkheads must be removed in order to have adequate access to the gundeck. Also, the model is constructed such that the top of the bulkheads at the level of the gundeck actually corresponds to the top of the gundeck planks on the real ship (see sheet 2 of the plans). Also, Bob Hunt's practicum uses the spar deck waterway as the point of reference for all the hull planking. This waterway sits on top of the spar deck beams, which must be removed. Therefore, a lot of careful planning is needed in order to not destroy any dependencies. I started the process by adding basswood blocks between the bulkheads at the level of the gundeck to strengthen the hull, as the bulkheads will become much weaker and prone to warping or breaking after the spar deck beams are removed. This process also gave me the opportunity to correct small errors in alignment in the bulkheads. These elements are structural only and I didn't care if they are perfectly symmetric or aligned. My 5 year old son, Sam made one of the pieces and put his name on it. I purchased a set of plans from the USS Constitution museum which contain numerous sheets from various times in the history of the ship. I believe most of the plans are from the 1920 restoration, but I could be wrong. In any case, they show a different configuration to the spar deck beams than the MS 2040 kit, and also show that there was a series of hatches through all the decks that were positioned directly above and below each other to allow cargo and supplies to be winched from the hold all the way to the spar deck if necessary. I plan on leaving the main hatch on the spar deck open so a portion of the gundeck can be easily seen. I thought it would also add depth to the model to leave this 'cargo' hatch on the gundeck open, so a small portion of the berth deck could be seen. I plan on leaving the berth deck hatch closed (although going down to the orlop deck was a temptation). In order to do this some minor surgery was required. The following photos show in sequence removing the spar deck beam and center support of bulkhead J (taking care to leave enough at the bulkheads to allow correct placement of the spar deck waterway), removing a portion of the center keel down to the level of the berth deck beams, and finally removing a good portion of bulkhead J. I have cut a piece of cardstock that simulates an open main hatch. In some of the photos you can see how I try to envision the final appearance of the model using this 'guide'. Here you can see the added depth that will be seen down to the berth deck. Then I added larger stengthening blocks at the level of the berth deck which will eventually hold the planks and closed berth deck hatch. This photo shows the support blocks being placed with a slight slant to keep the curvature of the berth deck. Fairing and sanding is still required, but I hope this will form a solid structure to base the finished deck planks on. Next is more structural work to support the bulkheads prior to removing the spar deck beams and center supports... Merry Christmas, everyone! Alexi
 -
CaptainSteve reacted to a post in a topic:
USS Constitution by Alexi - Model Shipways - Tribute to the Conny
-
Ed, A joy to watch your progress as always. One question: I may have missed the explanation somewhere, but it looks like one of the frames on the port side of the model doesn't extend above your temporary ribband, creating a gap in the current appearance. I couldn't help but wonder what this is for - seems too far aft for an anchor port. Just curious.
-
EdT reacted to a post in a topic:
Young America by EdT - FINISHED - extreme clipper 1853
-
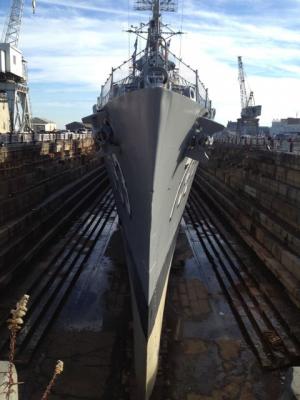
Wow, Ed - that last picture really shows the sharpness of the bow, and the grace of her lines. I am struck with how shipwrights through the centuries gradually realized that sharper bows led to more speed. The evolution from a 18th century ship like Naiad or Constitution with Young America is striking. For an additional comparison from about another 100 years later, look at this shot of the USS Cassin Young - a WWII era destroyer: She sits in the Charlestown Navy Yard next to USS Constitution and the difference in hull shapes could not be more striking. Wonderful work as always, Ed.
- 3,596 replies
-
- 1
-
-
- young america
- clipper
- (and 1 more)
-
cookster reacted to a post in a topic:
USF Constitution by cookster - Model Shipways - kitbashed to 1812
-
Geoff, Can I ask what you would have done differently? Very curious to learn from those that have gone before. I am constantly reminded that this build is a big one, and could always use the insight.
-
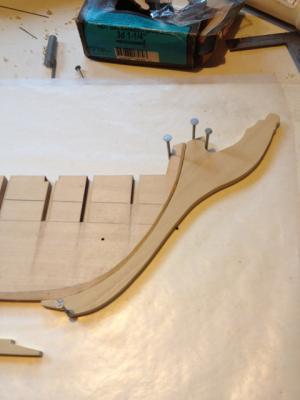
Bow and Stern framework. This will take me up to the current level of progress. There are no special adaptations to this part - just following the practicum and the plans. Bow framework. Cutting the mortises and getting the fit right was a bit of a pain - but my skills are growing through the process. Stern framework with the additional filler pieces added and shaped. View from stern. You can just make out the curve of the deck that I took some time to ensure carried over onto the stern framework. The photo makes it look like the starboard-most stern transom is canted inwards more than the other, but it is much better than it appears in the photo. I spent a long time measuring and agonizing over these difficult angles to ensure symmetry. In the next update I will start discussing my thoughts on building a gundeck. I admit that there are a few challenges. Has anyone built a gundeck for this kit? I would love to learn from anyone who has experience tackling this challenge.

-
Thanks, Wes. I think I'll probably just take off a small amount of wood by fairing the top of the bulkheads, use thinner planks for the gun deck (1/32), and make any other adjustment necessary in the construction of the gun carriages - as you suggest. We'll see how it goes.
-
Wes, Great to see you are going to leave some of the main hatch open. I am also planning on leaving the hatch open and making fully rigged guns (for those that will be seen). In planning it I ran into a note on the plans that states the height of the bulkheads in the kit are equal with what would be the top of the gundeck planks. So, if I plank over the stock bulkheads, the gundeck will be about 1/16th too high - which will mess up the relationship between the guns and the gunports. I suppose it doesn't matter if you are using the dummy guns supplied in the kit, but I was wondering if you agree with my interpretation of the plans and this problem? I have been toying with the idea of removing 1/16th of wood from each of the bulkheads and center keel, but haven't committed to this bit of surgery yet.
-
Thanks, Harvey. I plan on doing the majority of the planking in pau marfim, with some black accents (either ebony or dyed swiss pear) for wales, cap rails, etc - similar to the color scheme on Chuck's Confederacy. I hope to create the white gunstripe in holly if the contrast with the pau is enough. I plan on doing some tests soon to see if I like it. I won't do the copper bottom - as I like the look of the wood better. best, Alexi
-
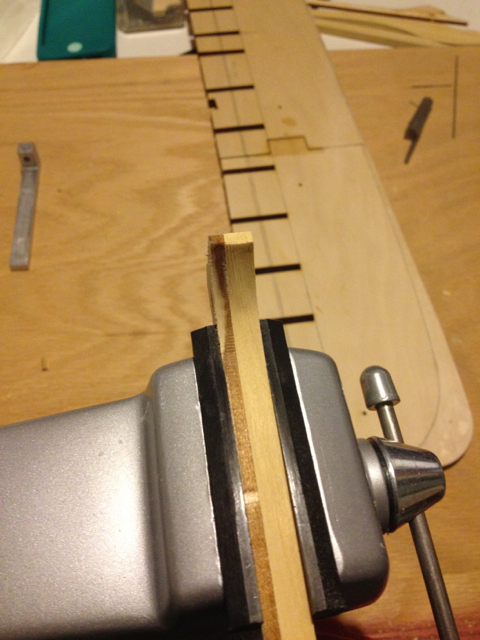
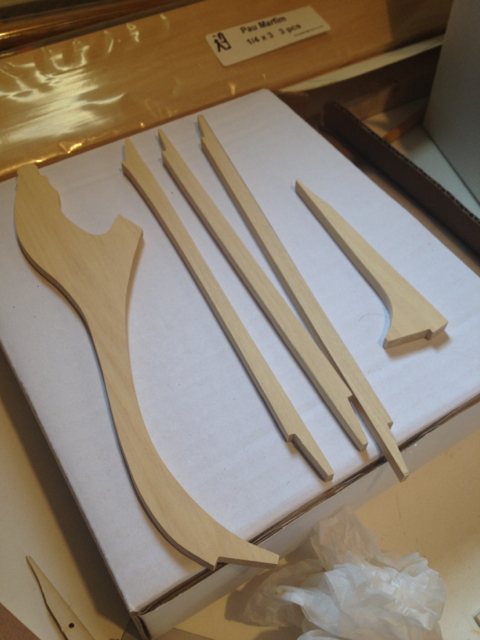
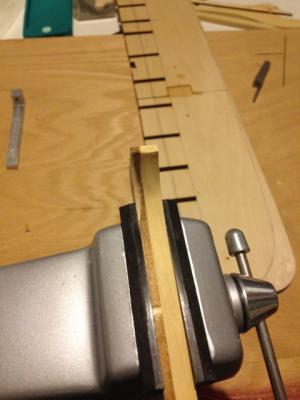
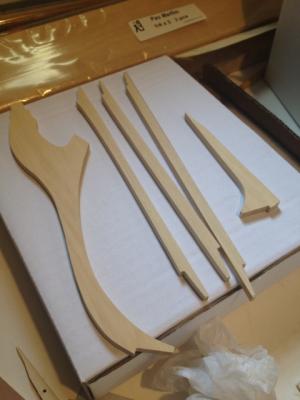
So my first modification was to use a different wood than the basswood supplied in the kit on visible portions of the ship. This build is more of an artistic tribute to the Constitution rather than a historically accurate re-creation. I plan on playing with the color scheme a bit. I decided to go with Pau Marfim for most of the exterior as I liked the color and slight variations. I was especially inspired with the color Gary (garyshipwright) got out of the pau on his build of Alfred. The MS kit keel, stem and sternpost are formed from two 1/8 inch thick basswood pieces sandwhiched together. I cut and shaped 1/4 inch thick pieces from Pau instead. I'm using dark brown Titebond glue to accentuate the joints. This photo shows the pau sternpost being shaped in the vise, using the basswood from the kit as a guide. All the alternate pieces.


-
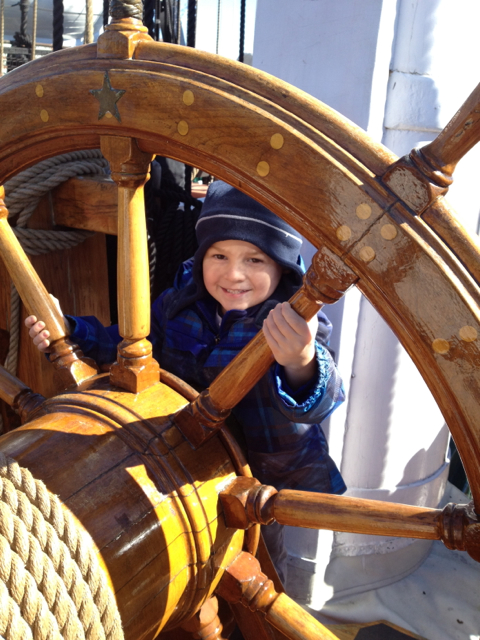
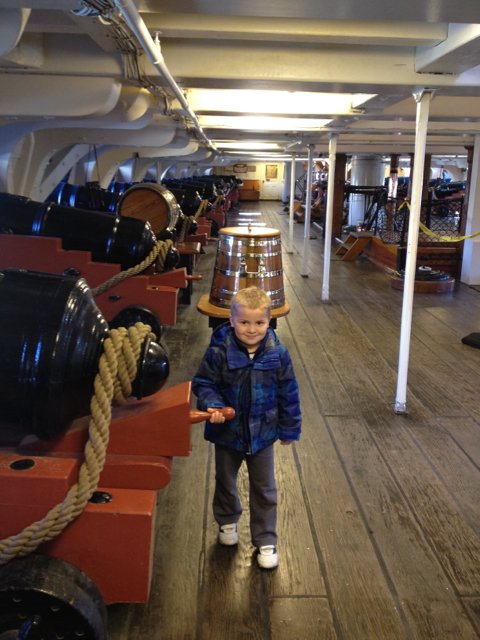
I've wanted to build a wooden ship model since I was 6 years old and staring at my neighbor's model of the Golden Hind. Last year I finally took the plunge and started this build. The Constitution has always been the ship I wanted to build. I may only have time to do one wooden ship model in my lifetime, so I figured I should just jump in and start this one, rather than building up to it. I picked the MS2040 kit because it was more common and larger than the Bluejacket one. I plan on attempting several modifications - and hope to hear advice from all the more experienced modelers on this site. As this kit build is very popular and there are many excellent examples on MSW, I'll primarily be posting things that deviate from the plans or Bob Hunt's practicum. Hope you enjoy. Alexi I live in Boston and visit the ship regularly. This is my son Sam who enjoys the ship as well. Pictures of the build to come soon.