greatgalleons
-
Posts
794 -
Joined
-
Last visited
Content Type
Profiles
Forums
Gallery
Events
Everything posted by greatgalleons
-
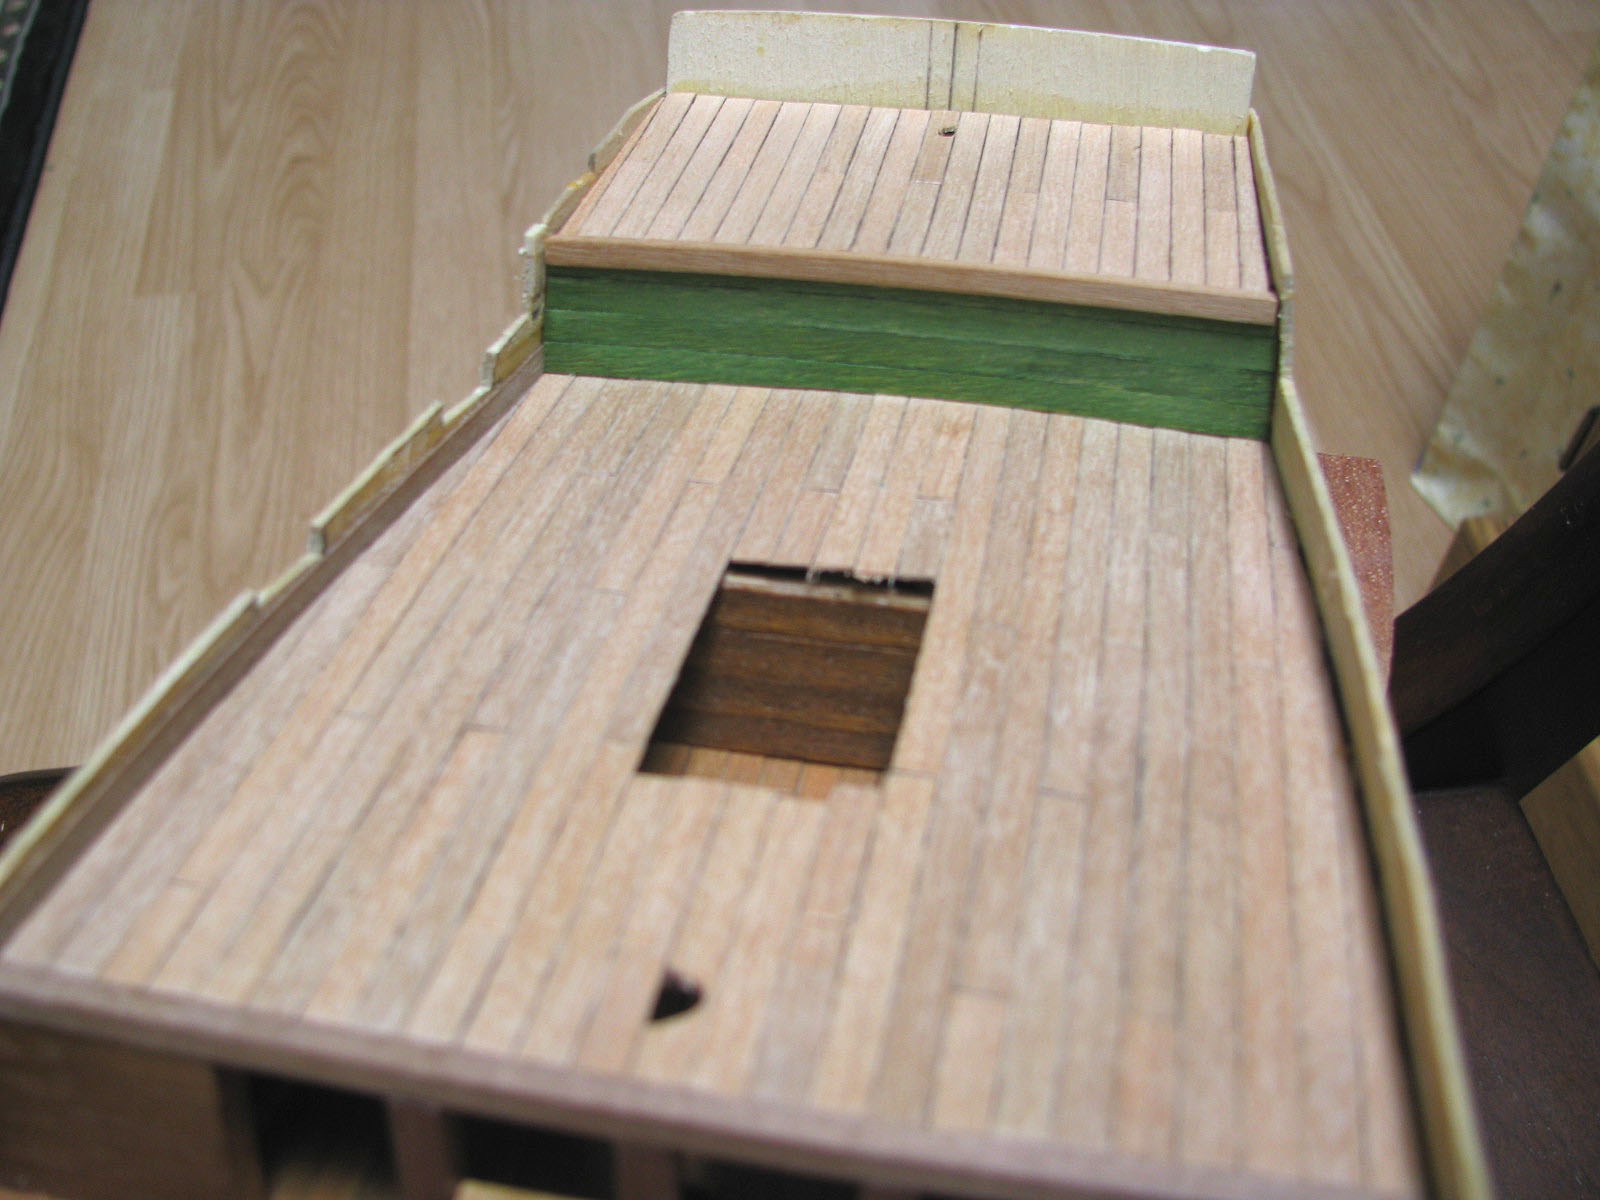
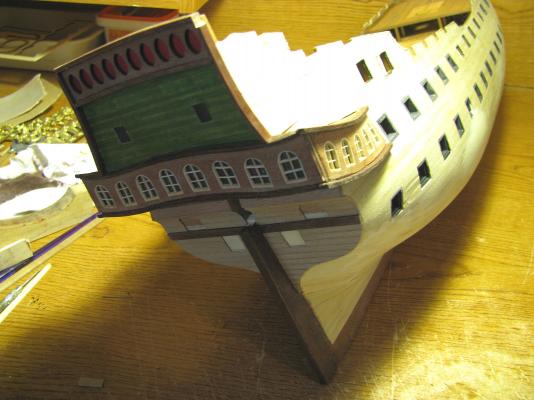
 so after sanding and smoothing the green laths I had to re stain them using green waterproof ink
 -
these areas will remain in a rough state until I can finish the hull planking , will refine and detail the tafrail area overall , this has been one step forward and two back since the begining
-
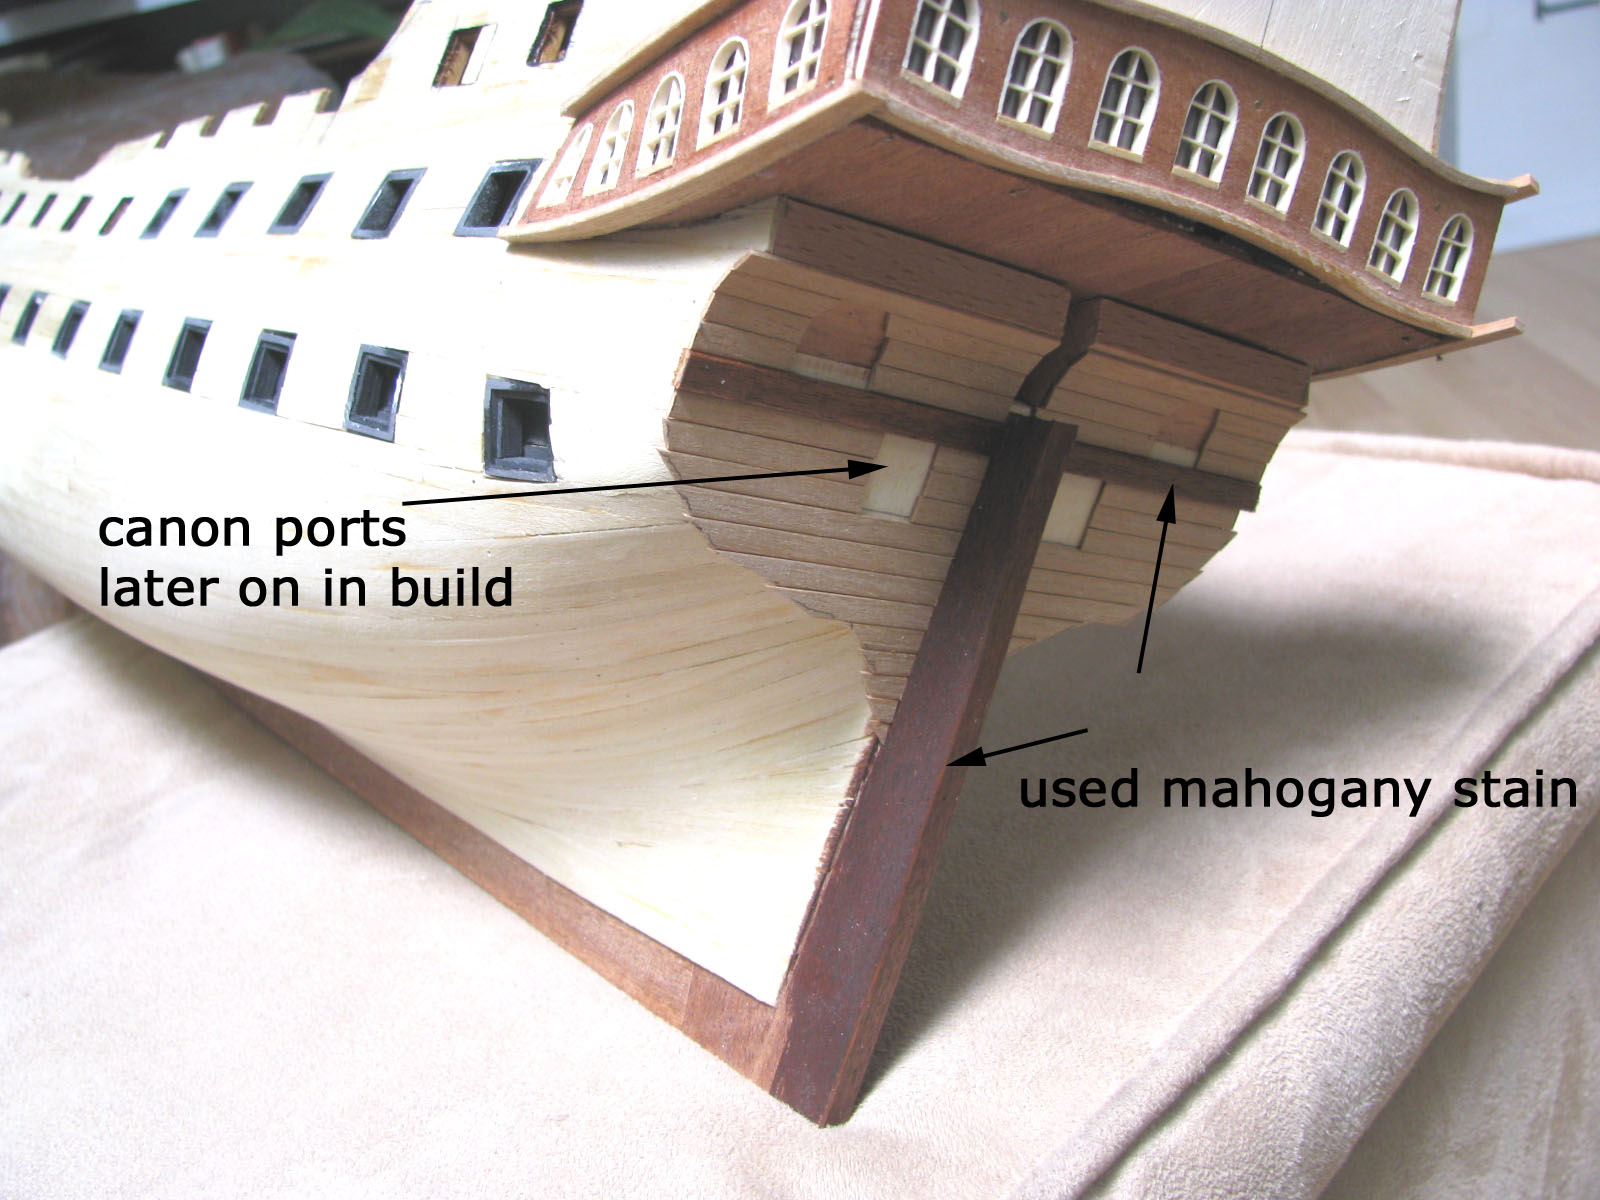
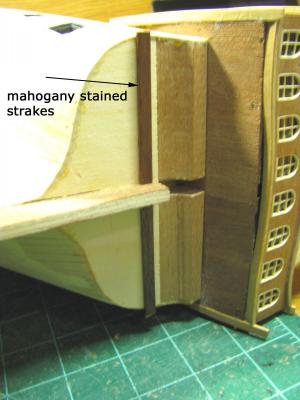
using mahogany stain to darken keel and strakes


-
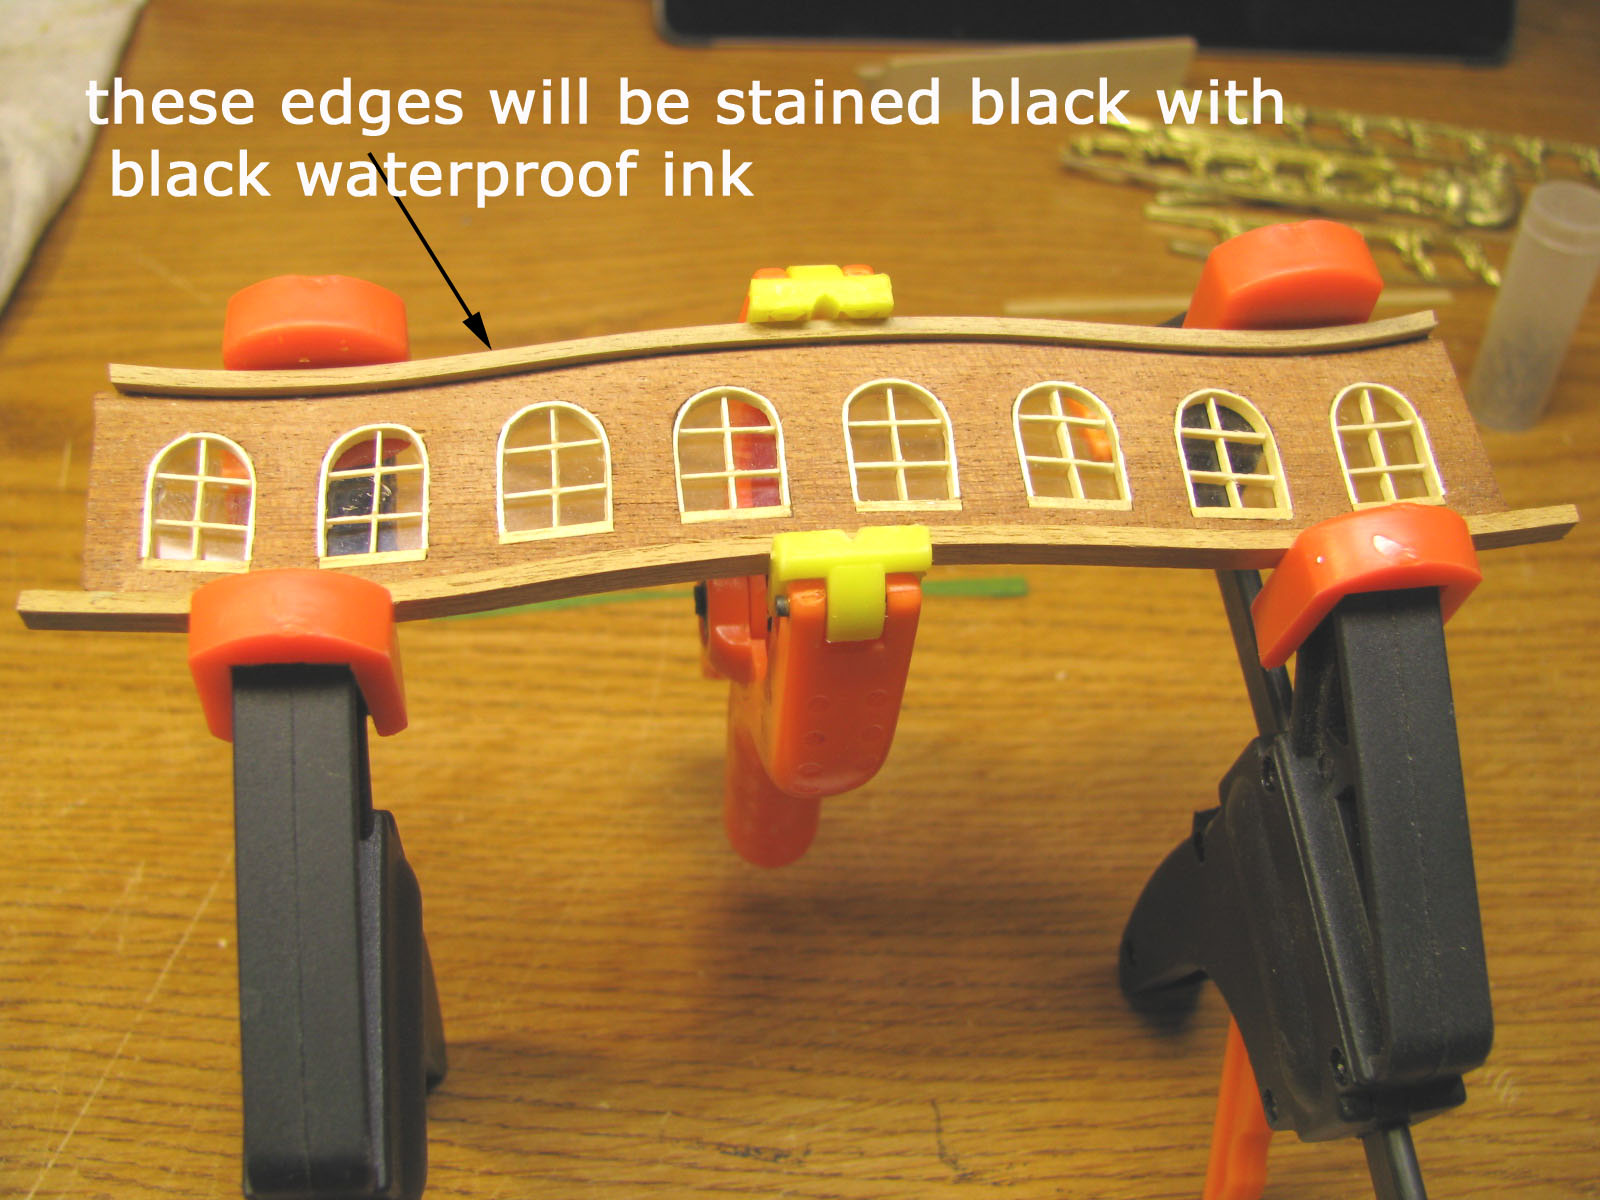
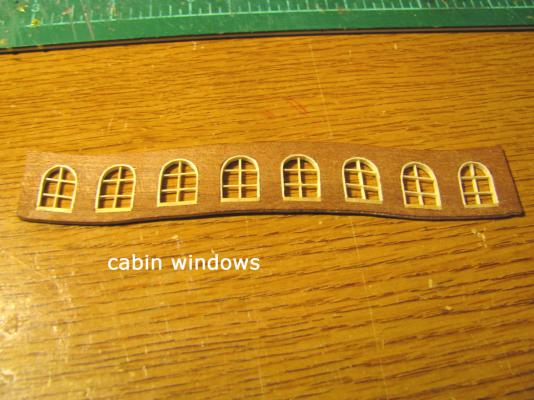
work on cabin windows. It's a good time to decide what colors will be used in build, I'll be using Ph.Dr.Martins black waterproof ink on some areas like on hull strakes . I do not use any paint on wood only on castings. The inks will not dissolve when using clearcoats like paint does. I will use stains on the keel and rudder.

-
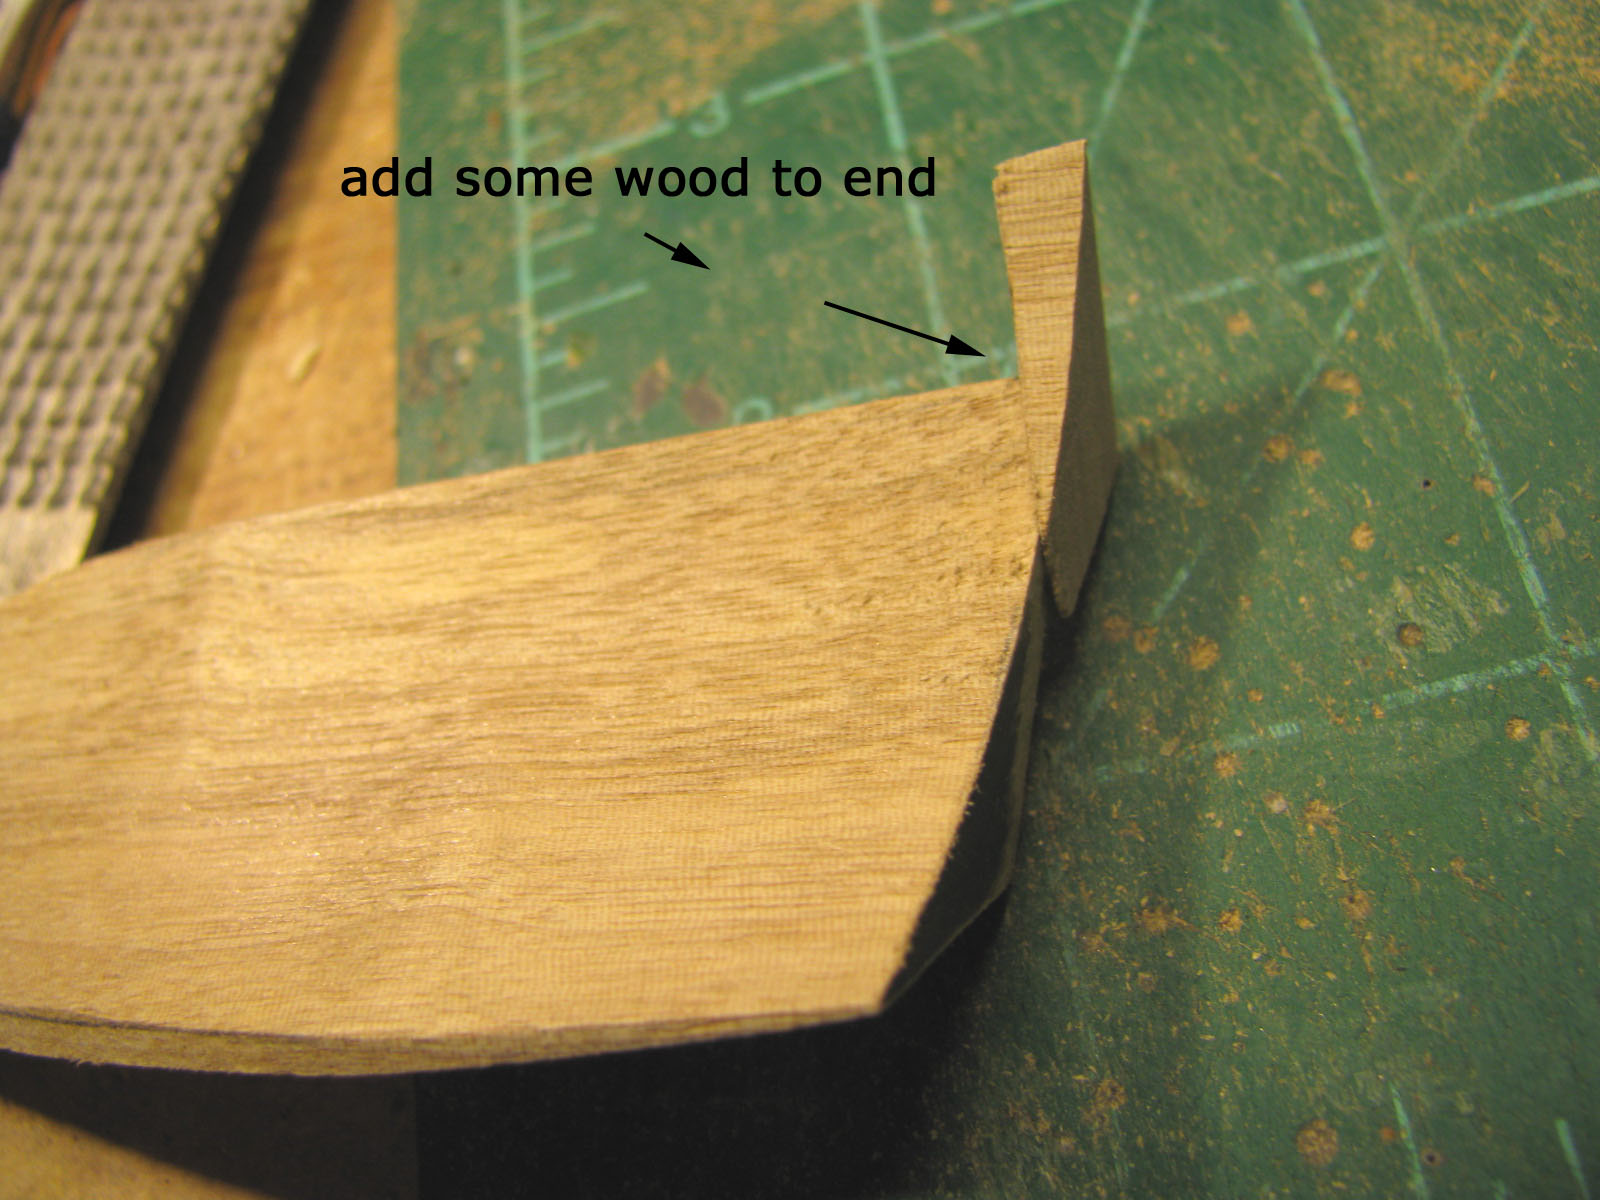
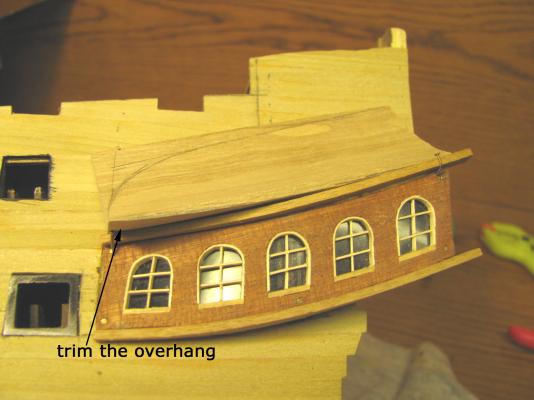
make the piece flush with the castings , add some material to create edge which was trimmed off to make the bottom flush


-
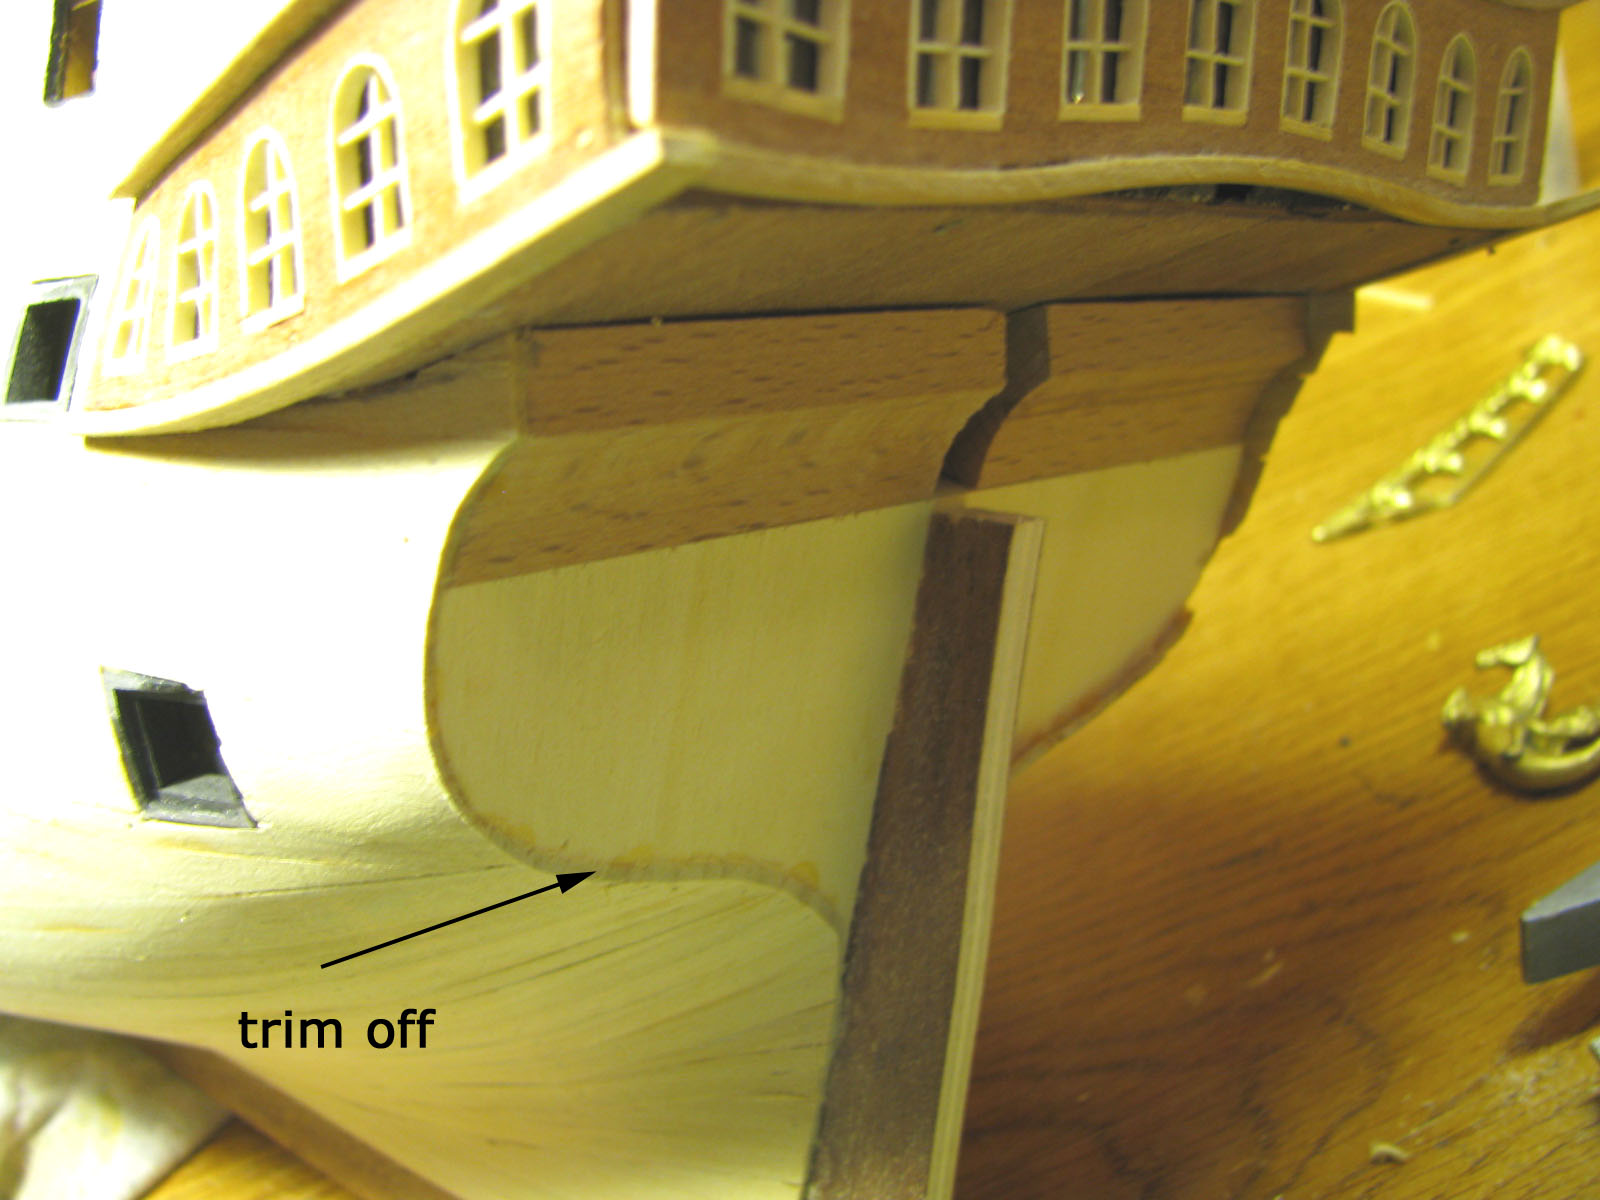
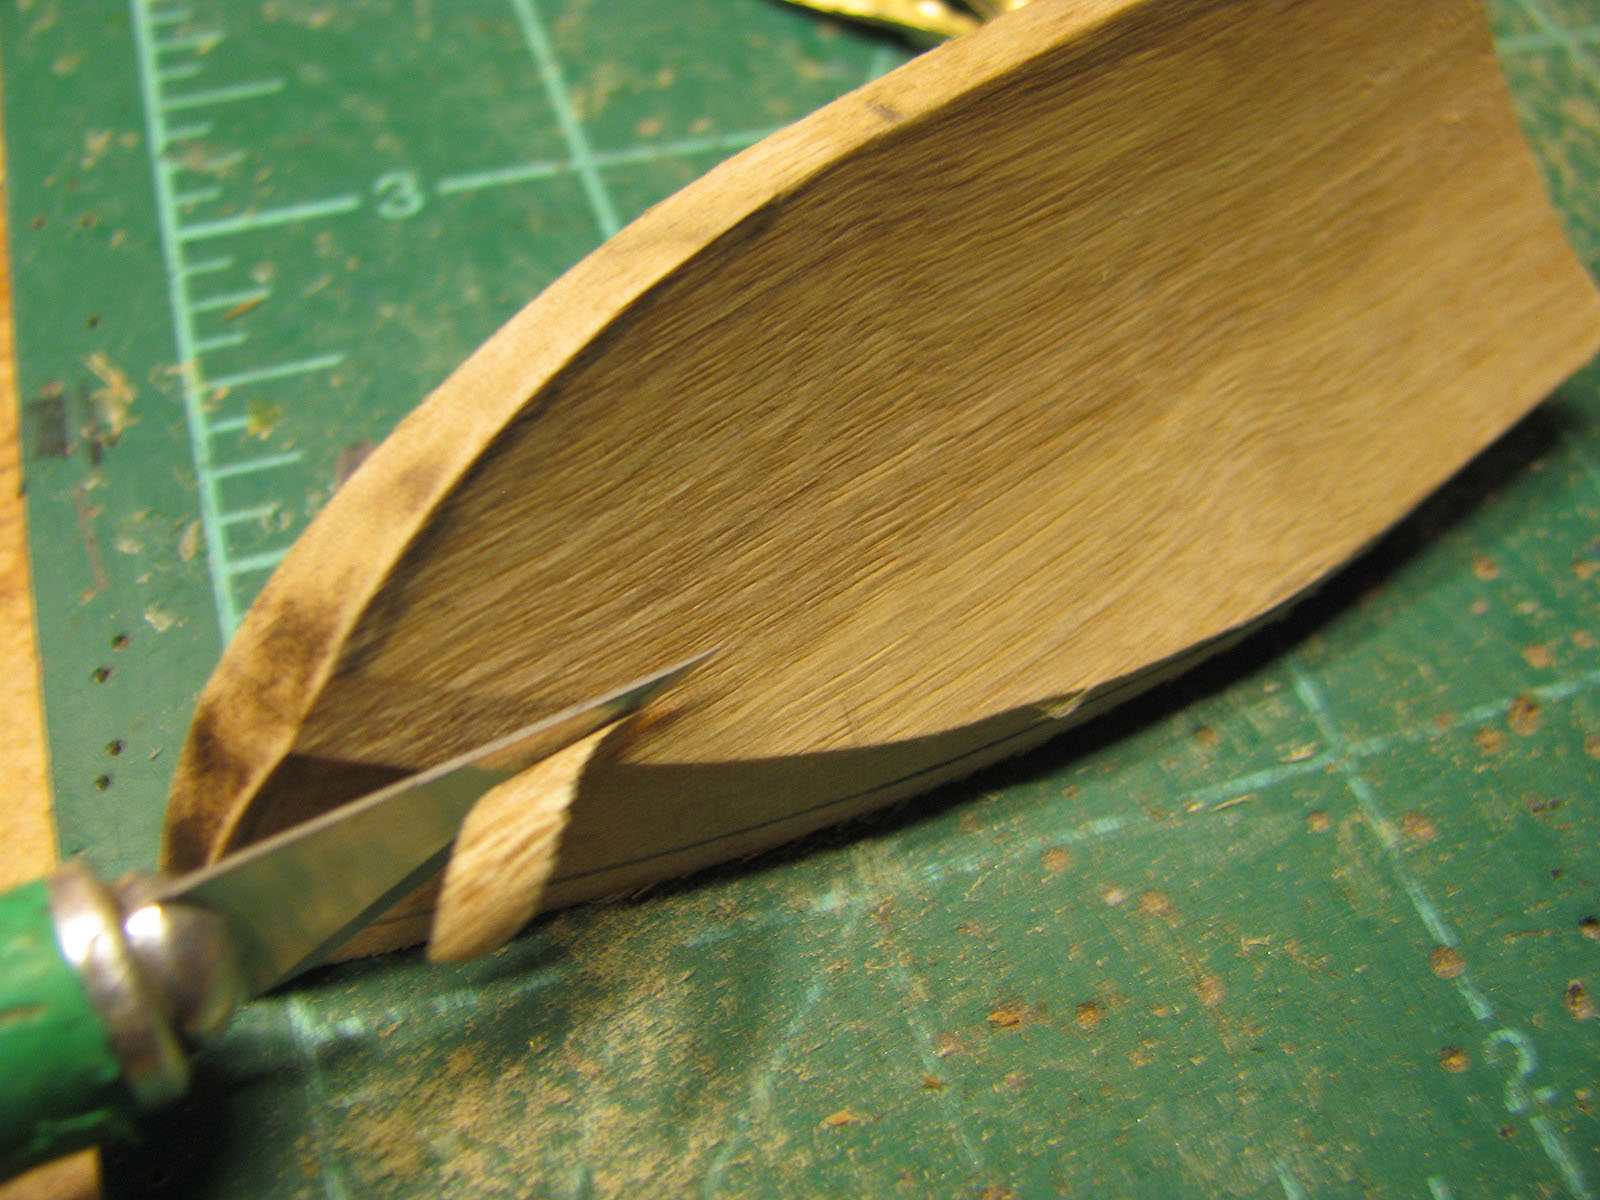
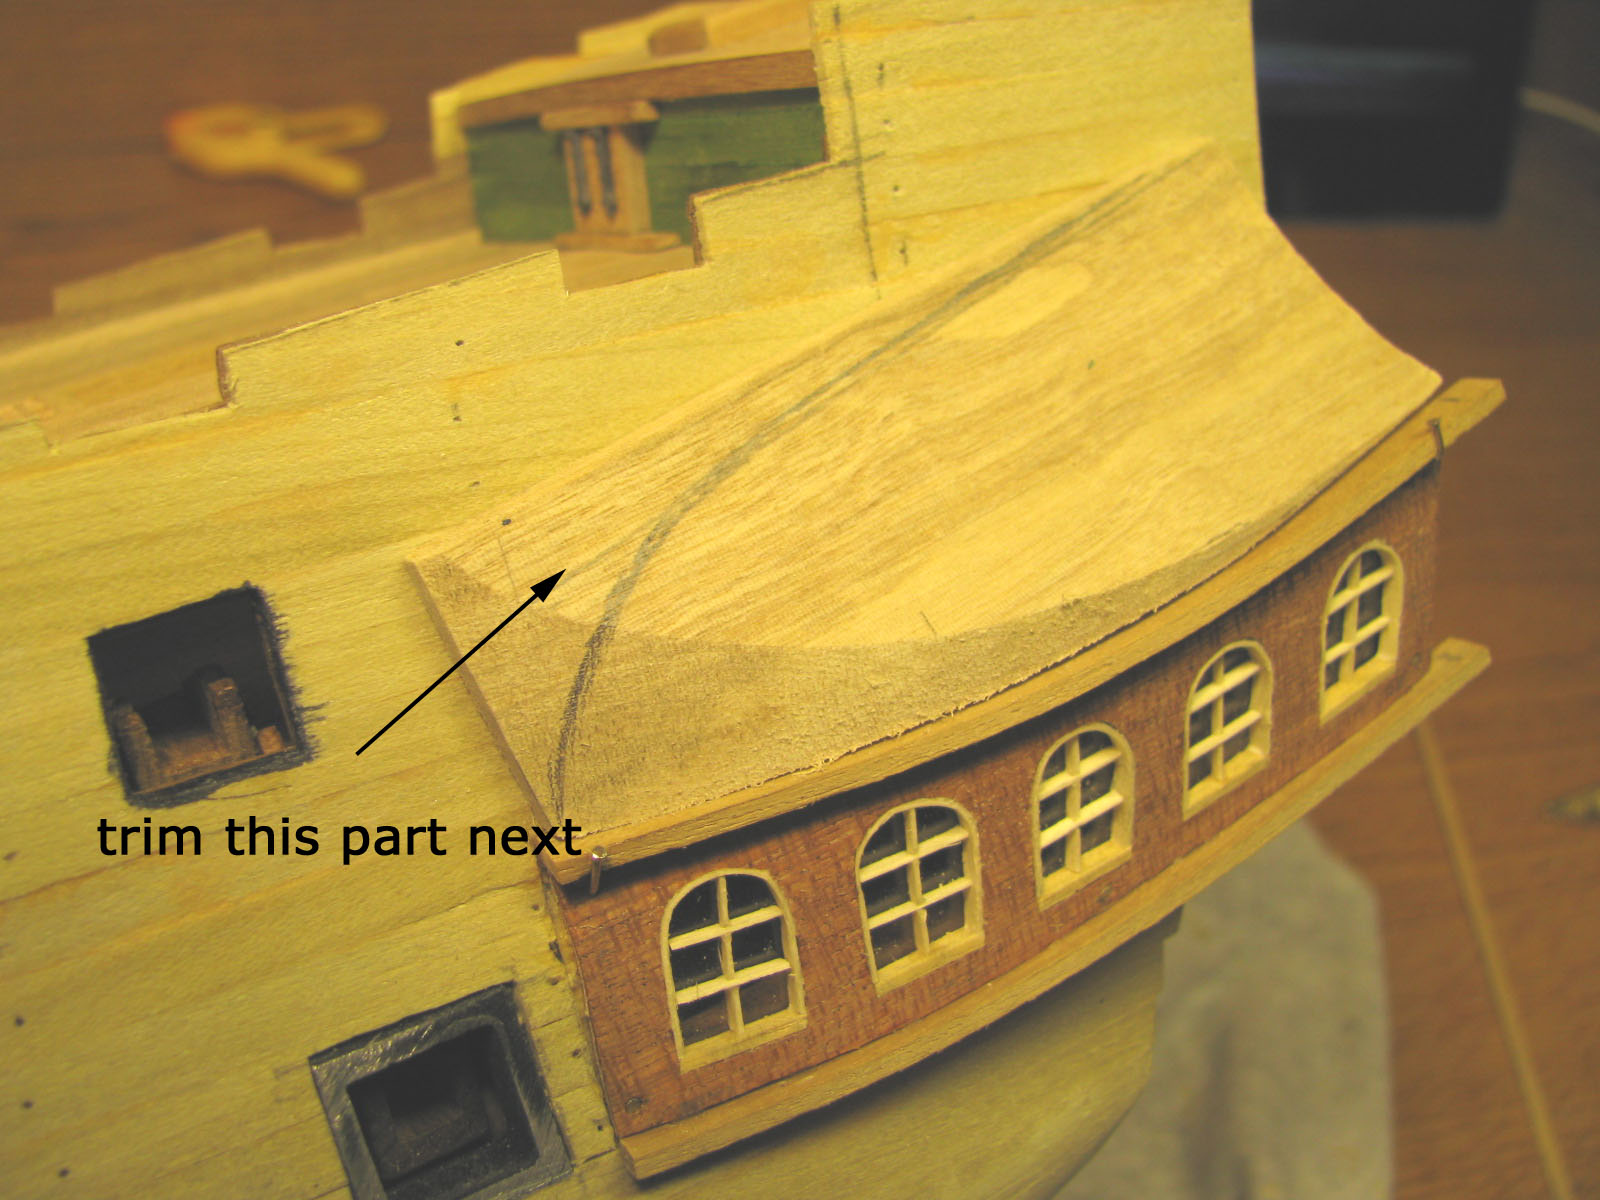
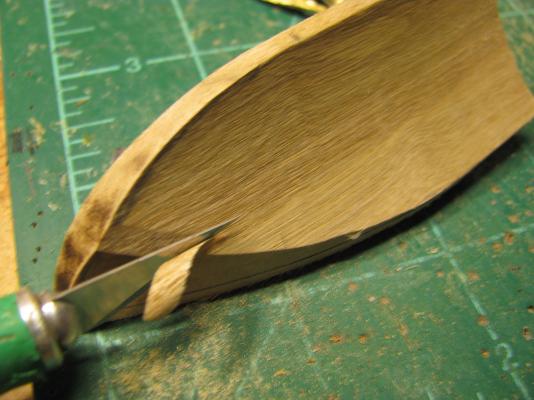
trim and contour this piece

-
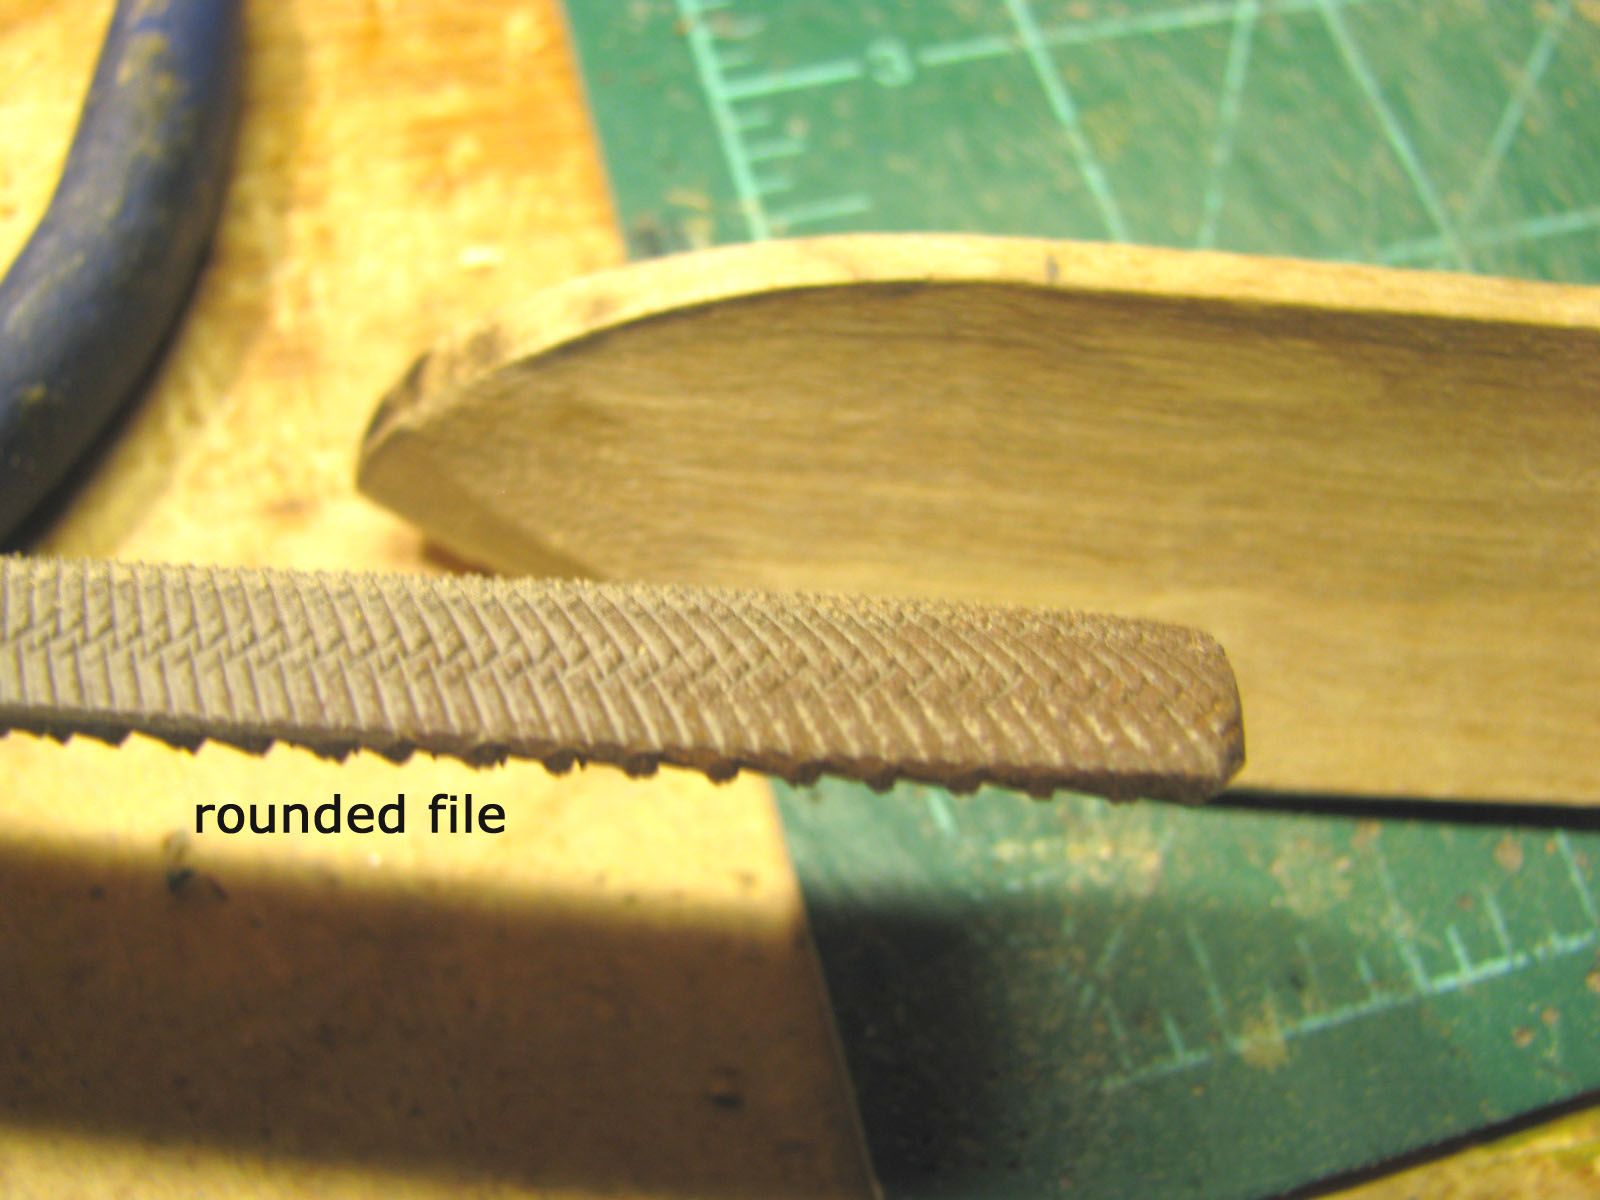
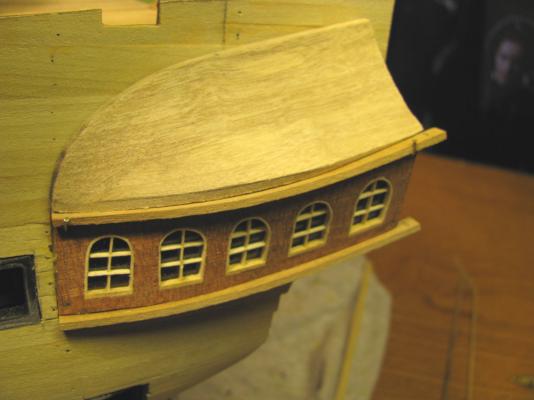
forming the upper parts

-
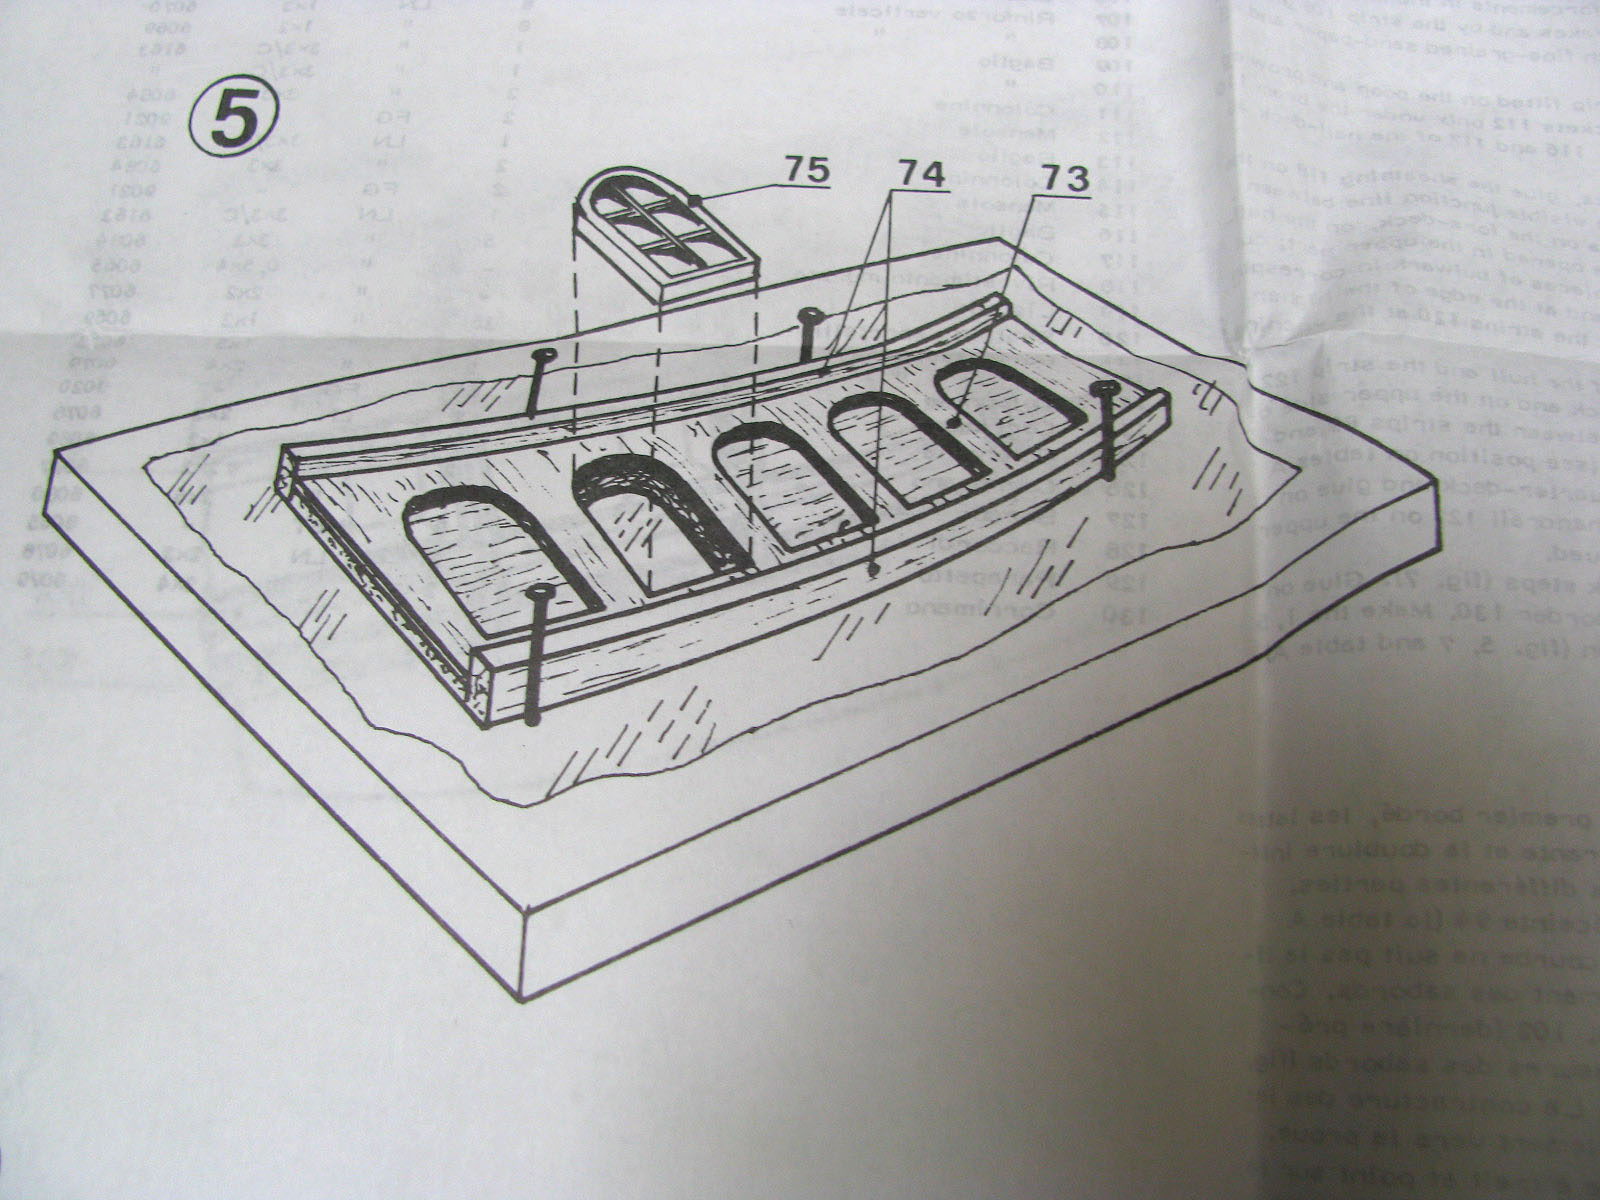
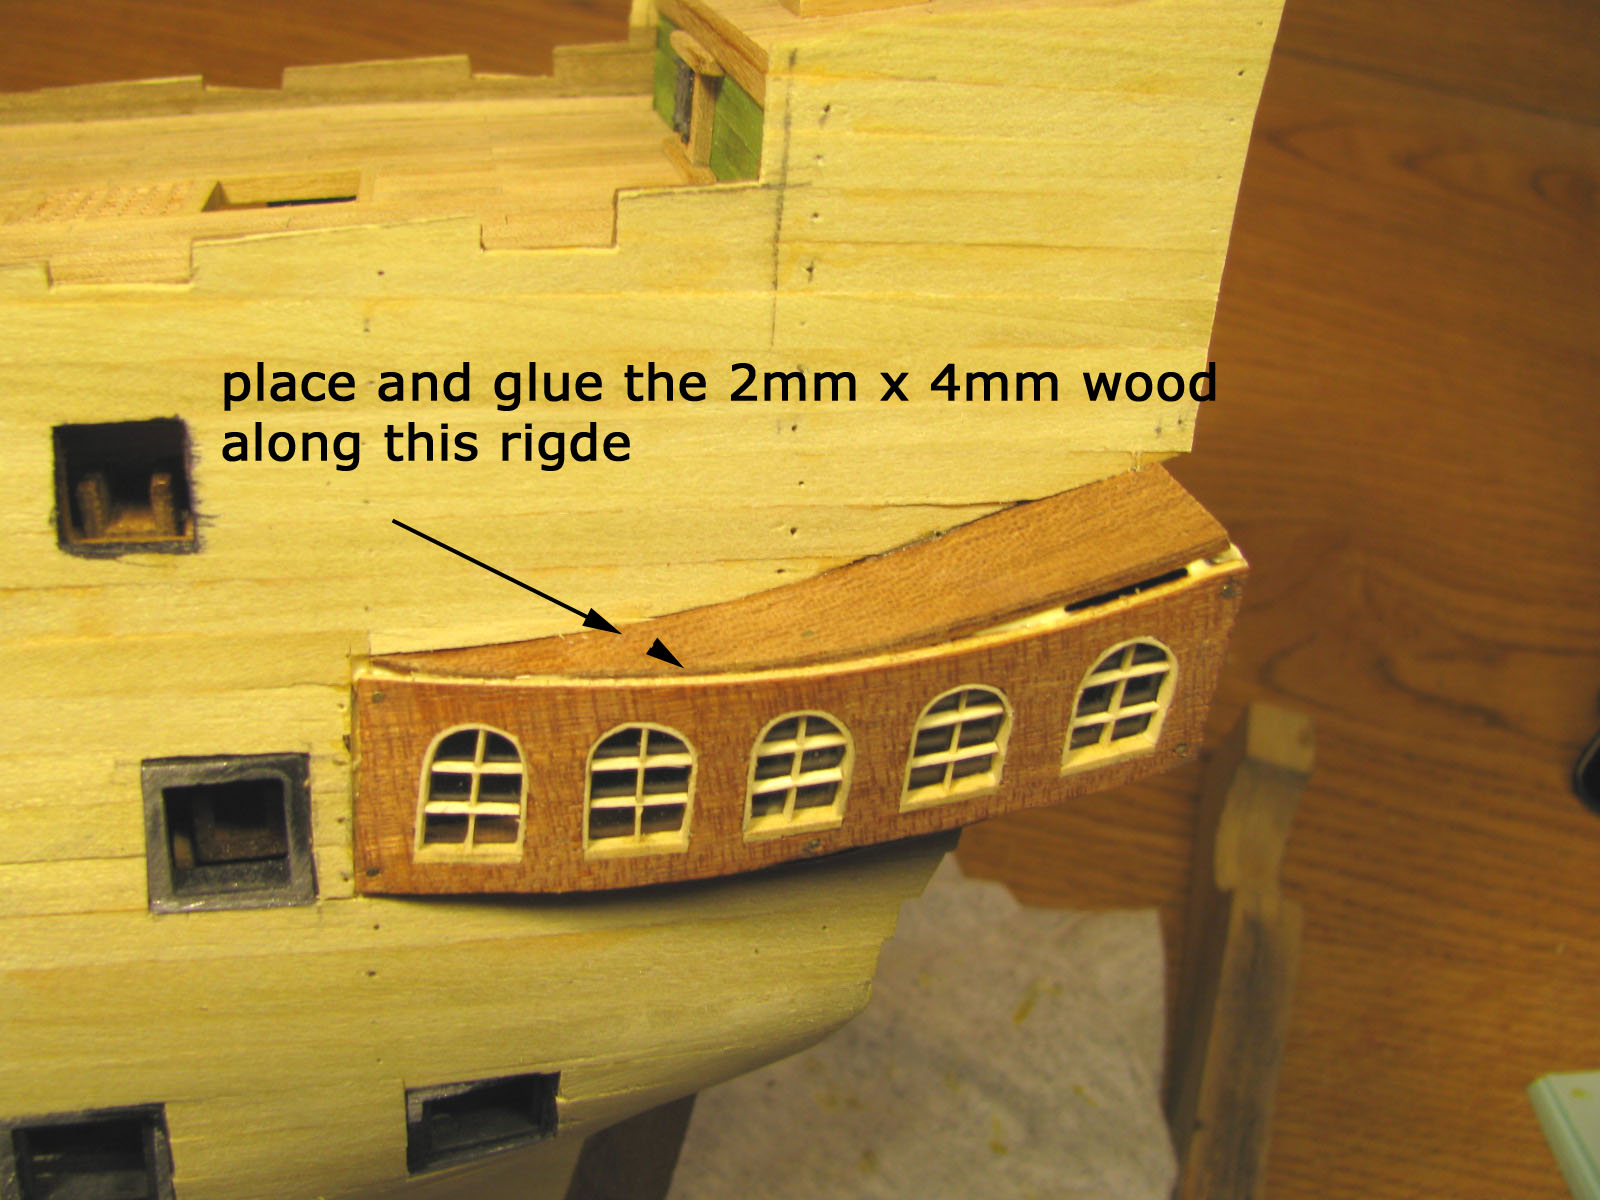
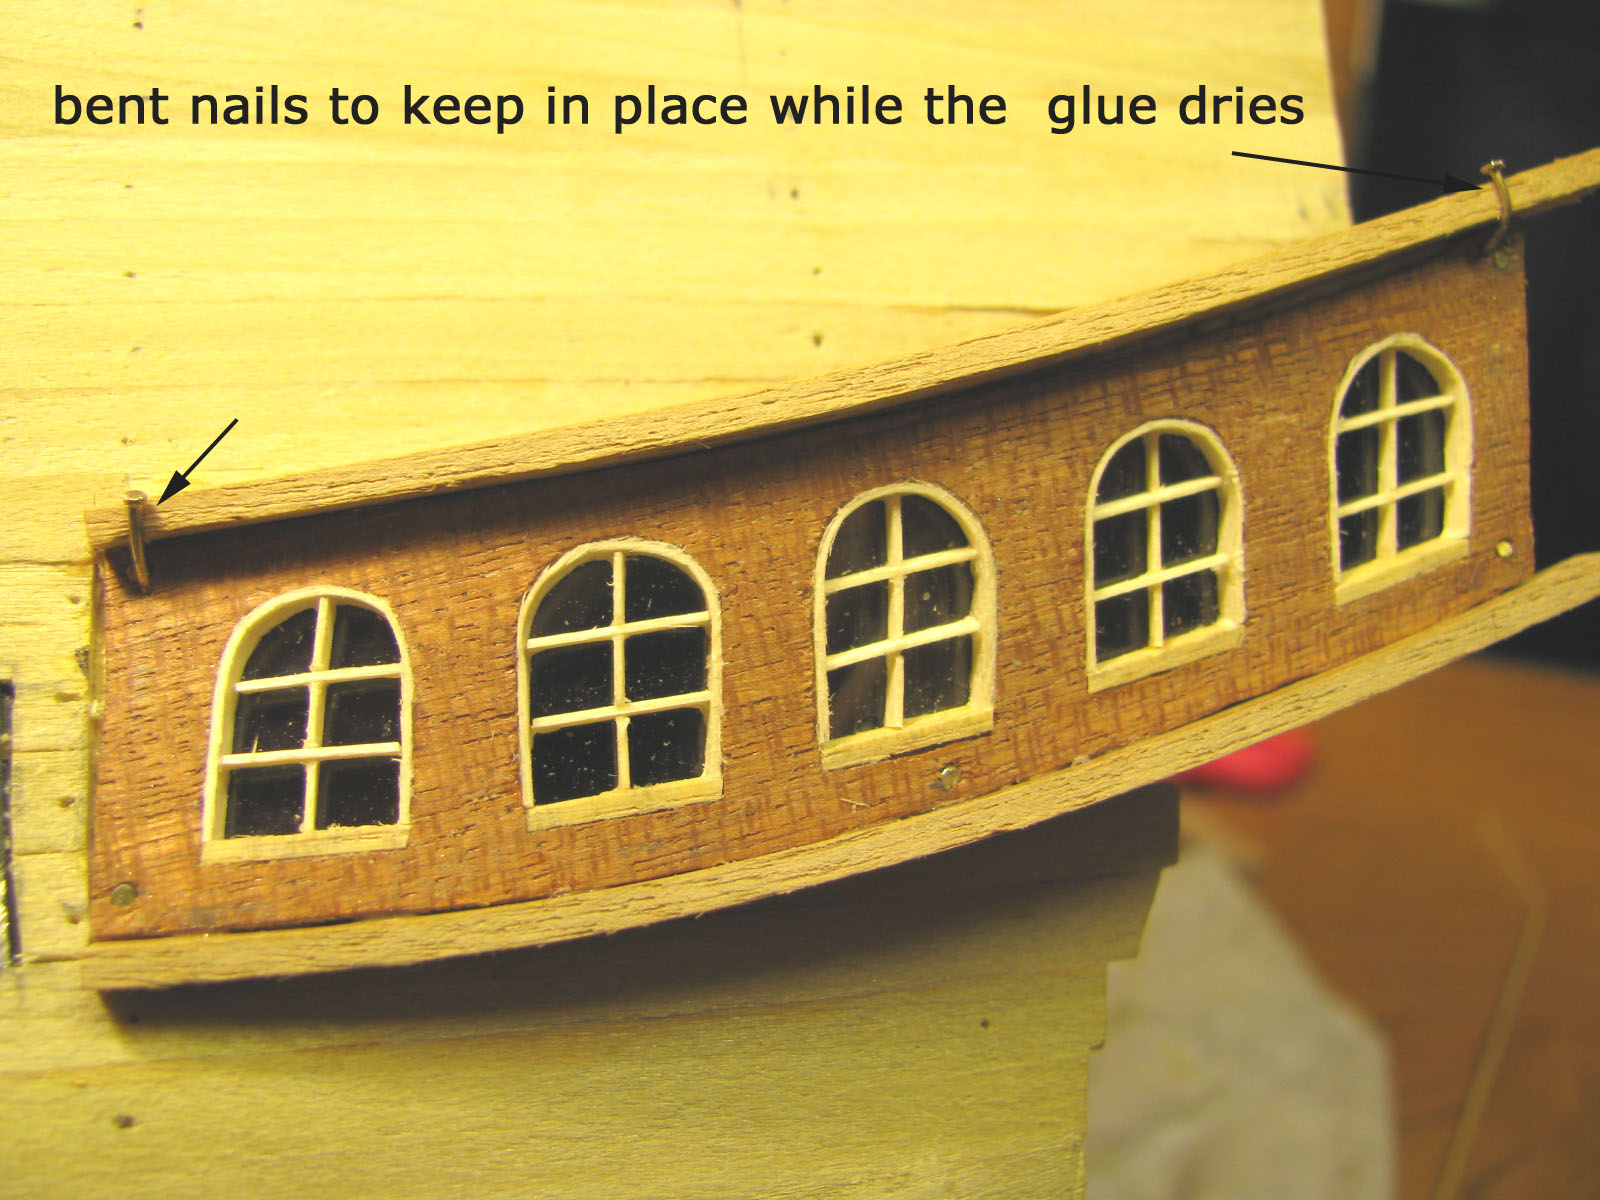
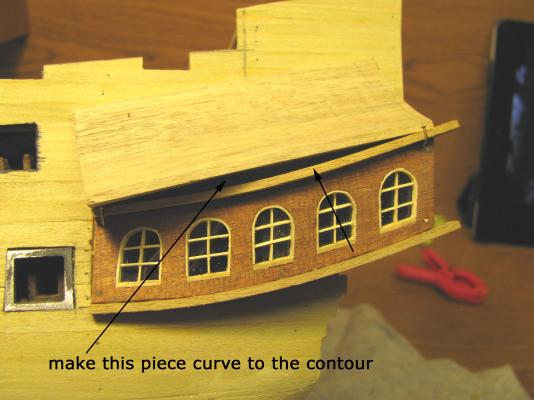
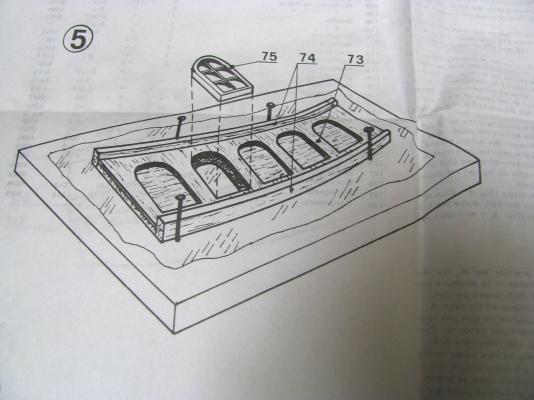
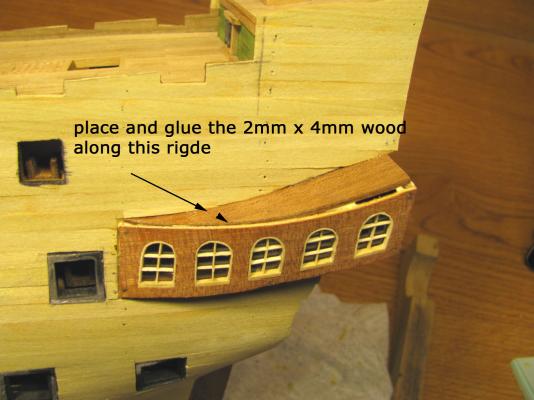
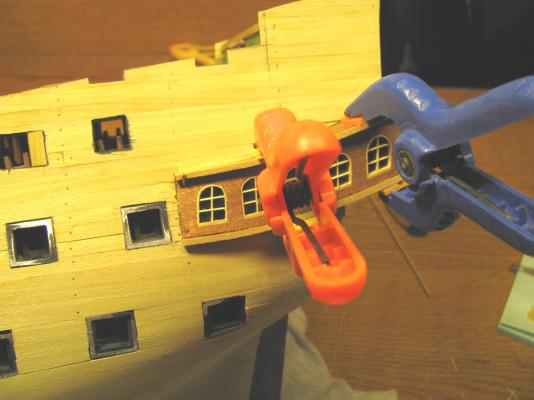
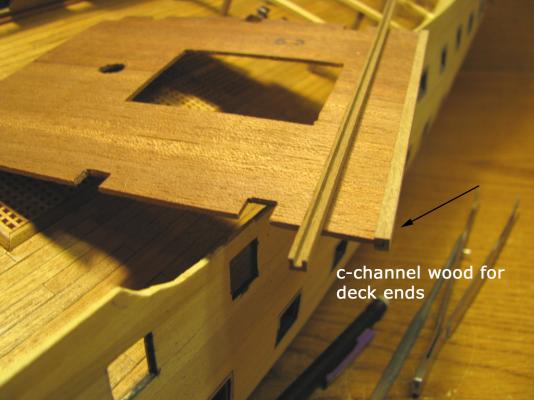
the instructions for placing the 2mm x 4mm wood require making a jig vice to glue the pieces together. This would probably work but the pieces need to be curved and twisted on the framing. I'll use a different method.

-
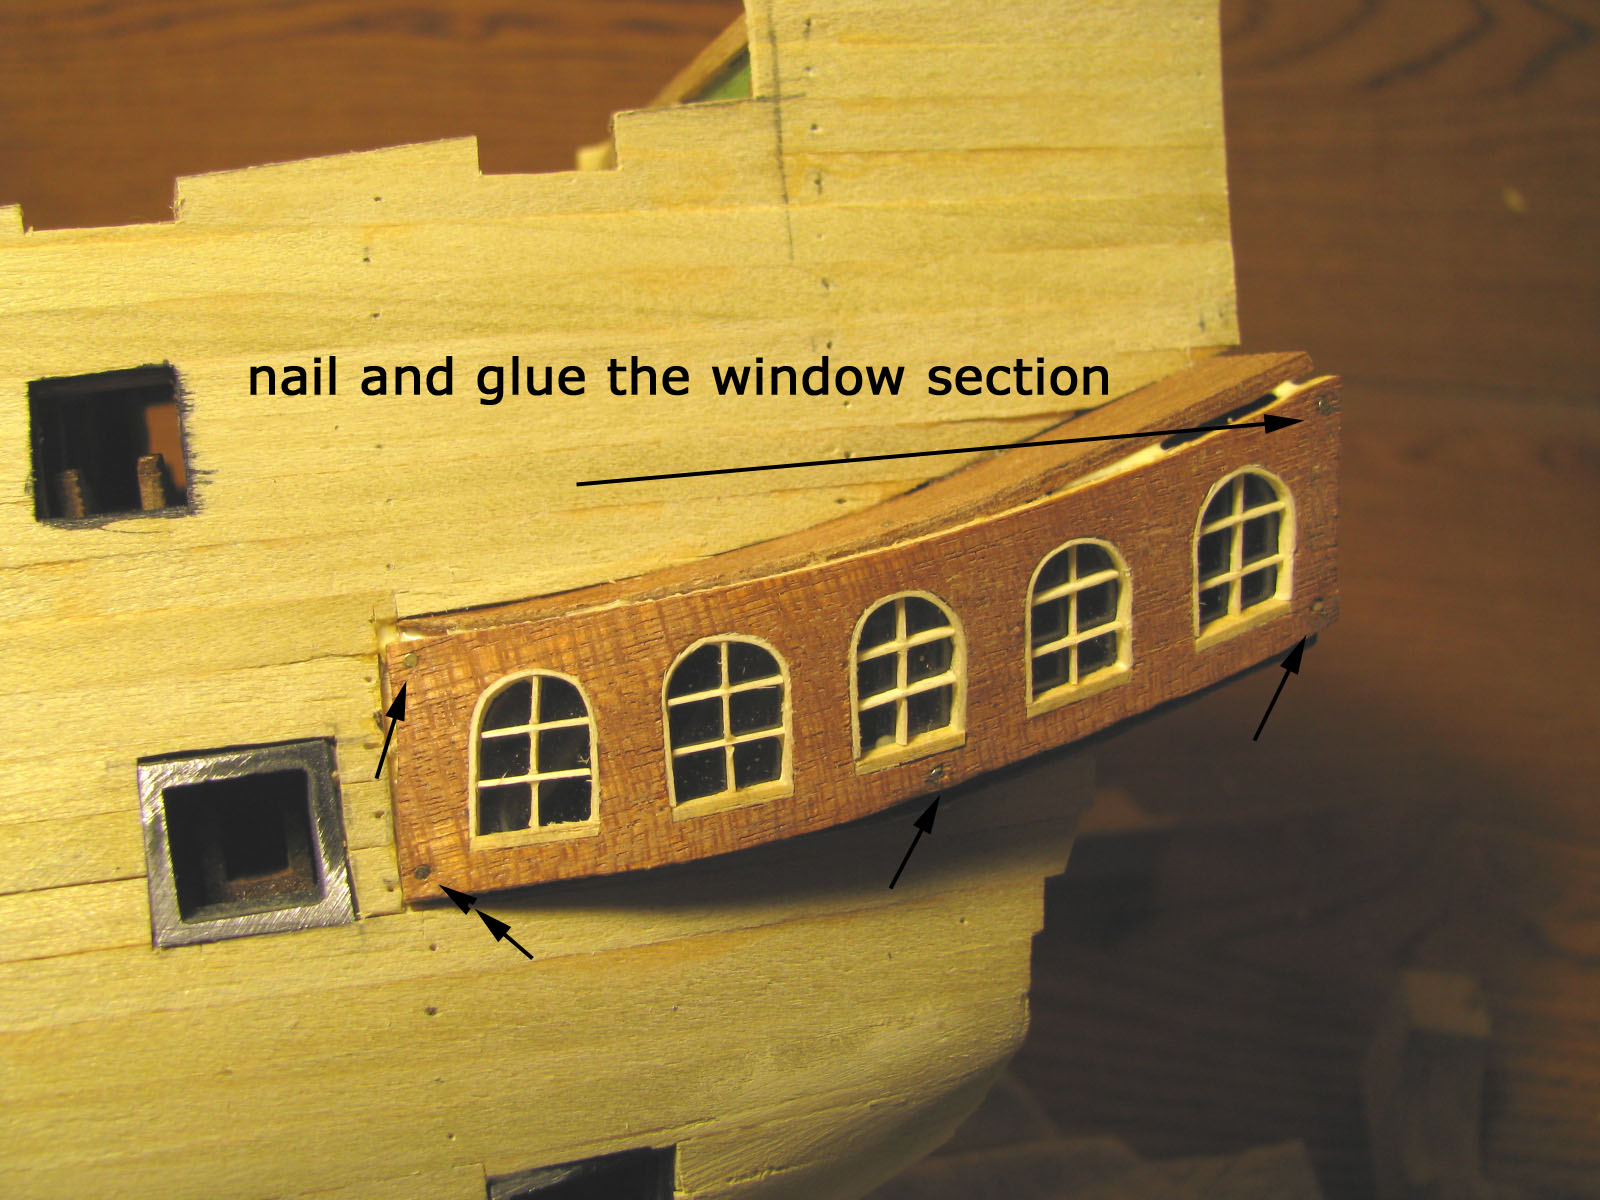
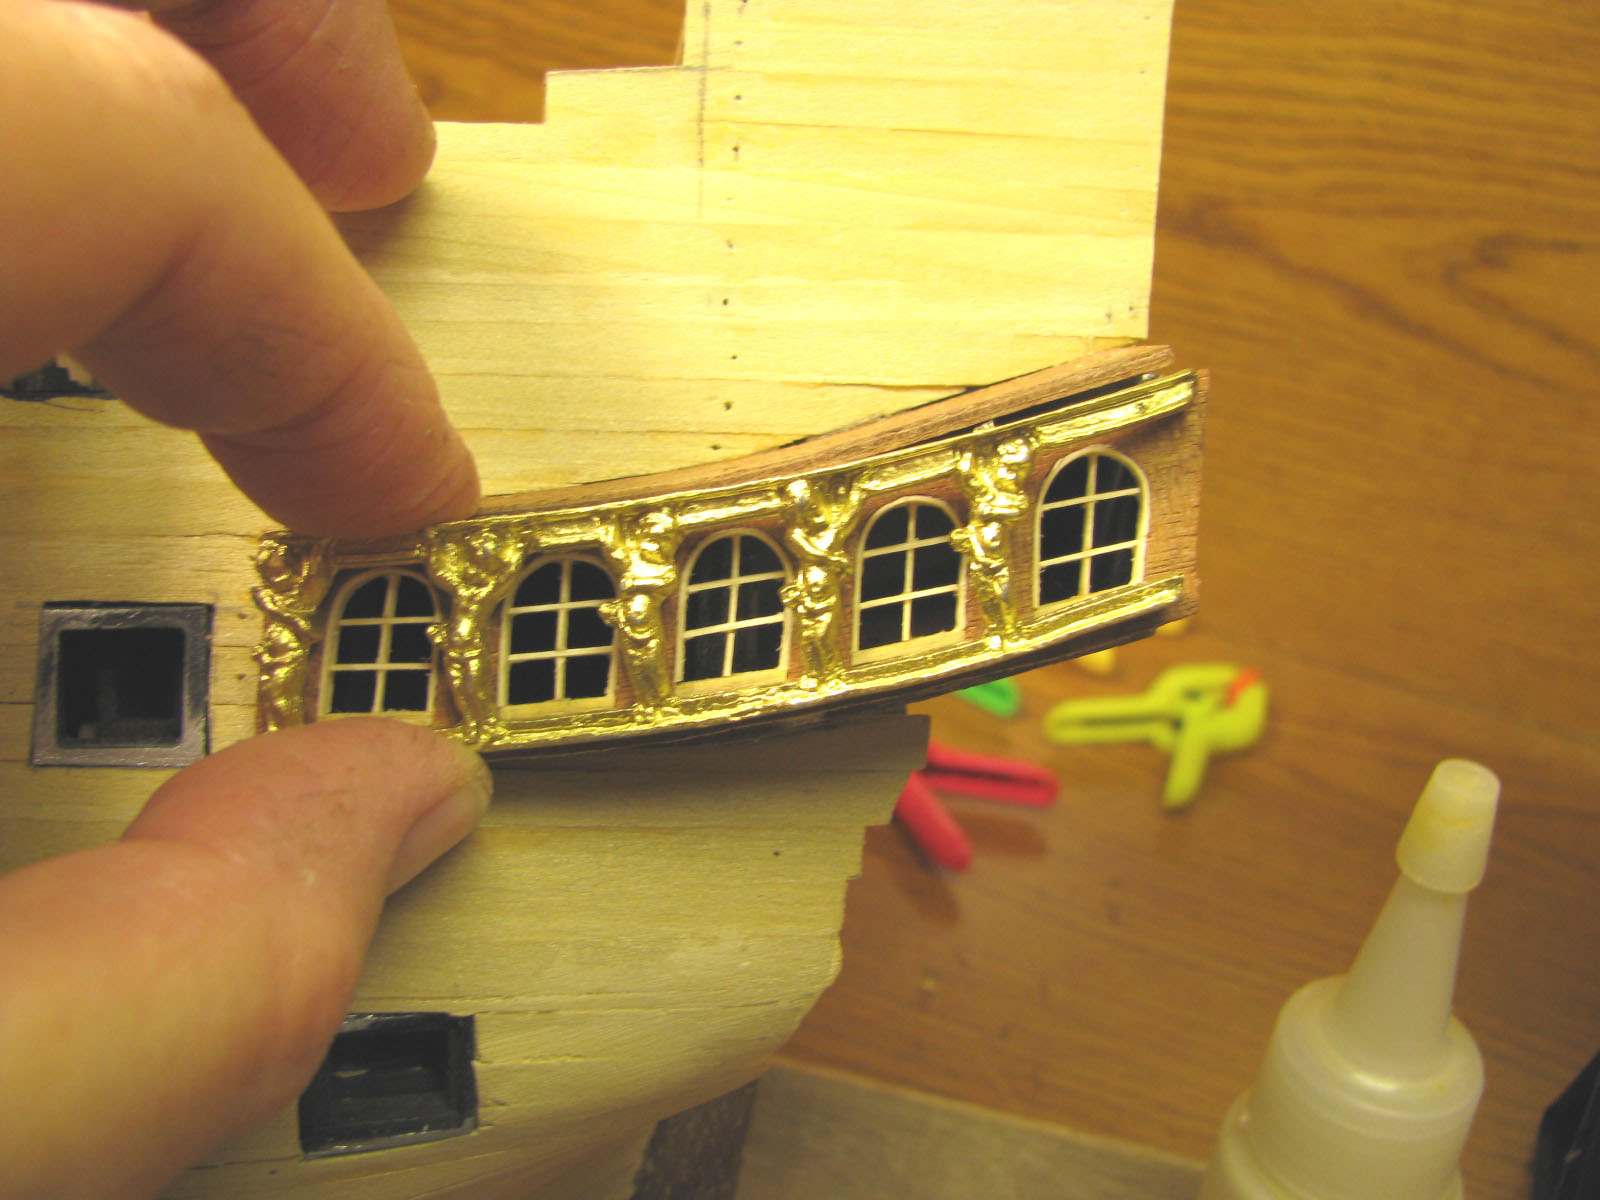
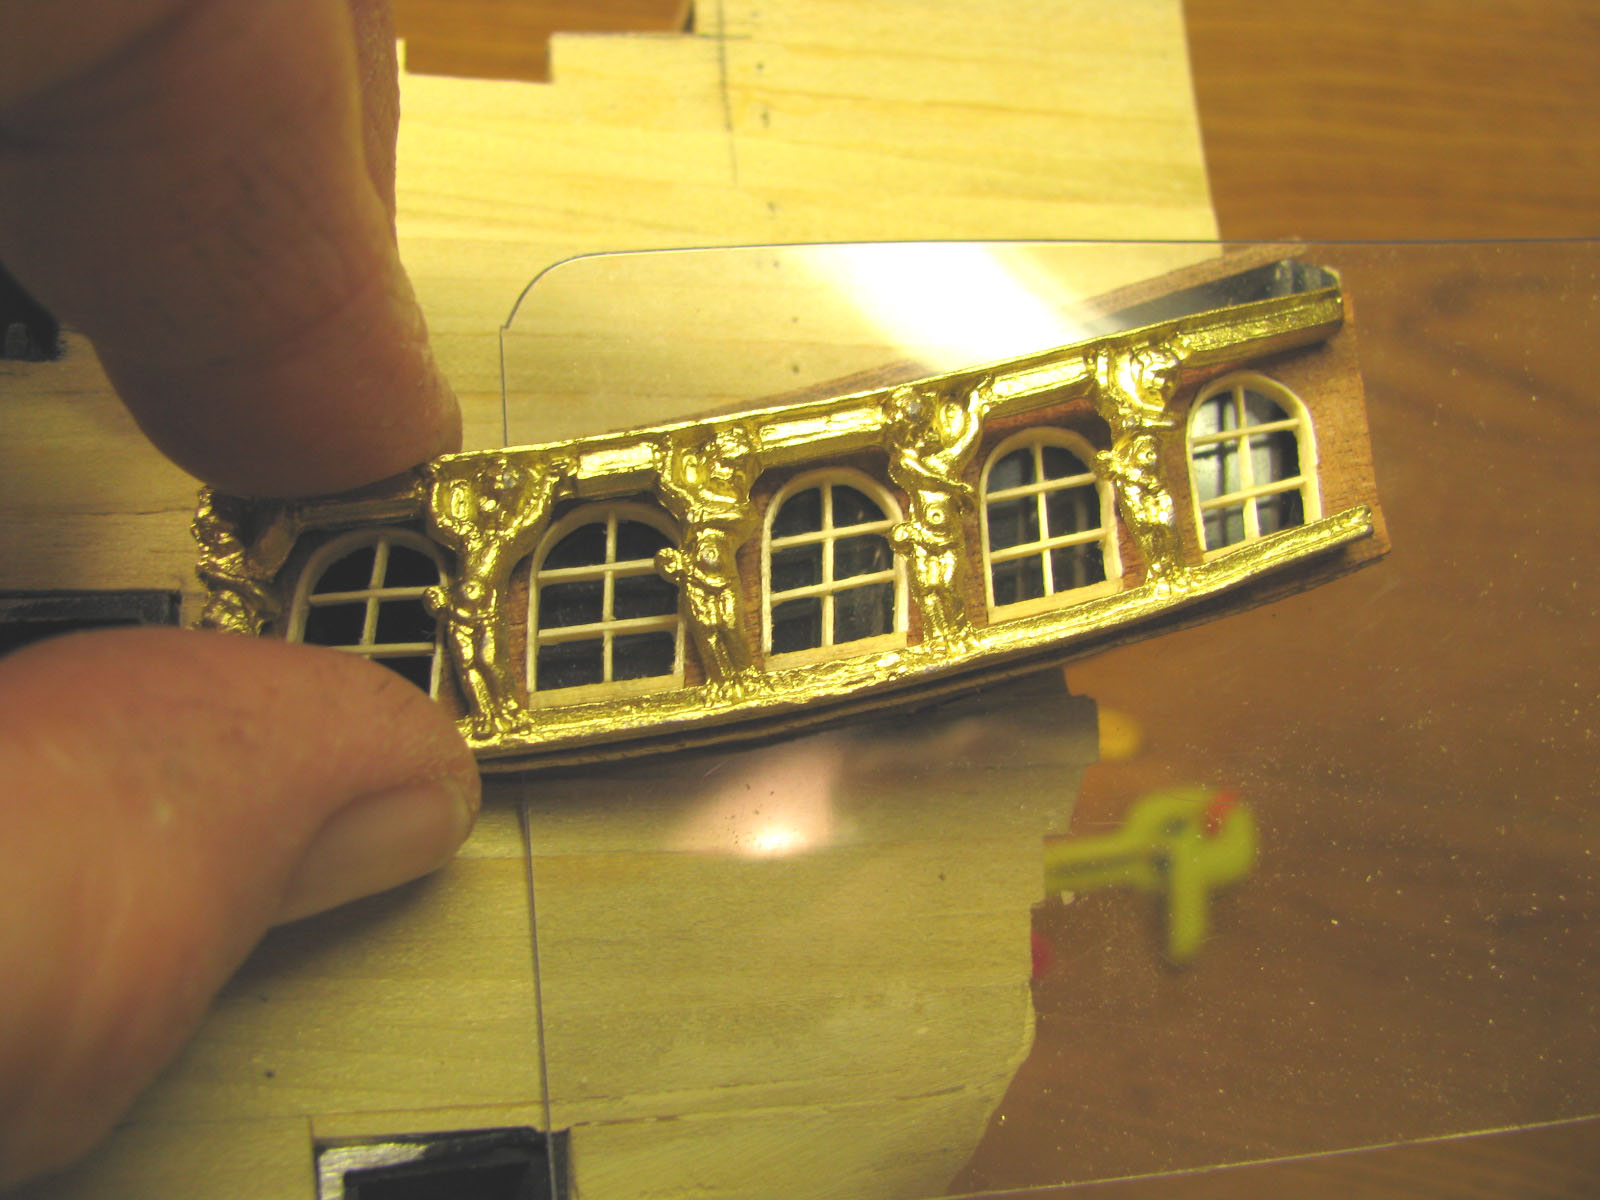
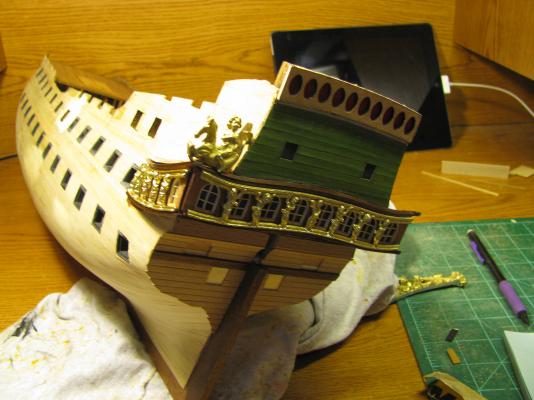
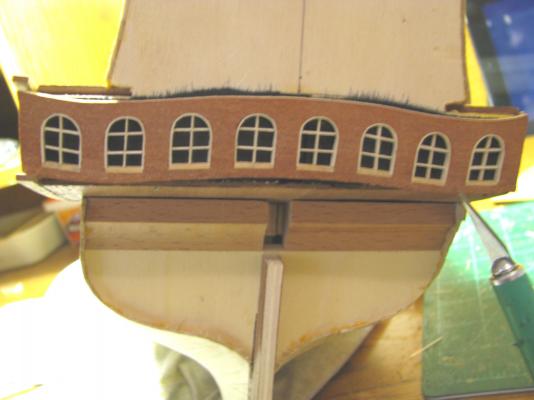
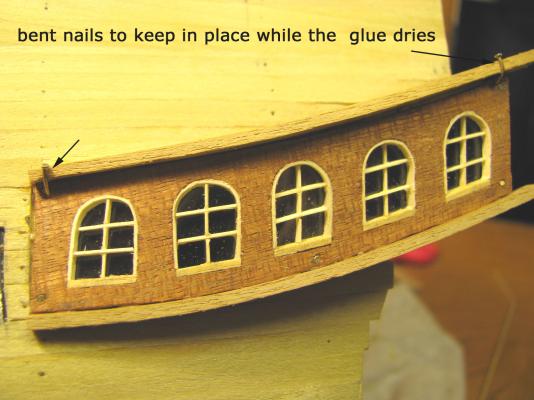
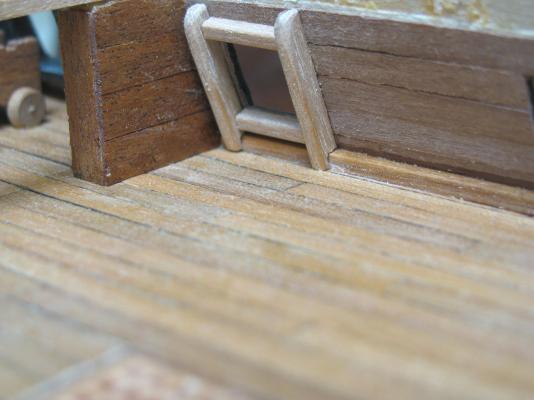
these will look better on the build, I have some clear plastic to place behind the openings , will give some reflection and depth

-
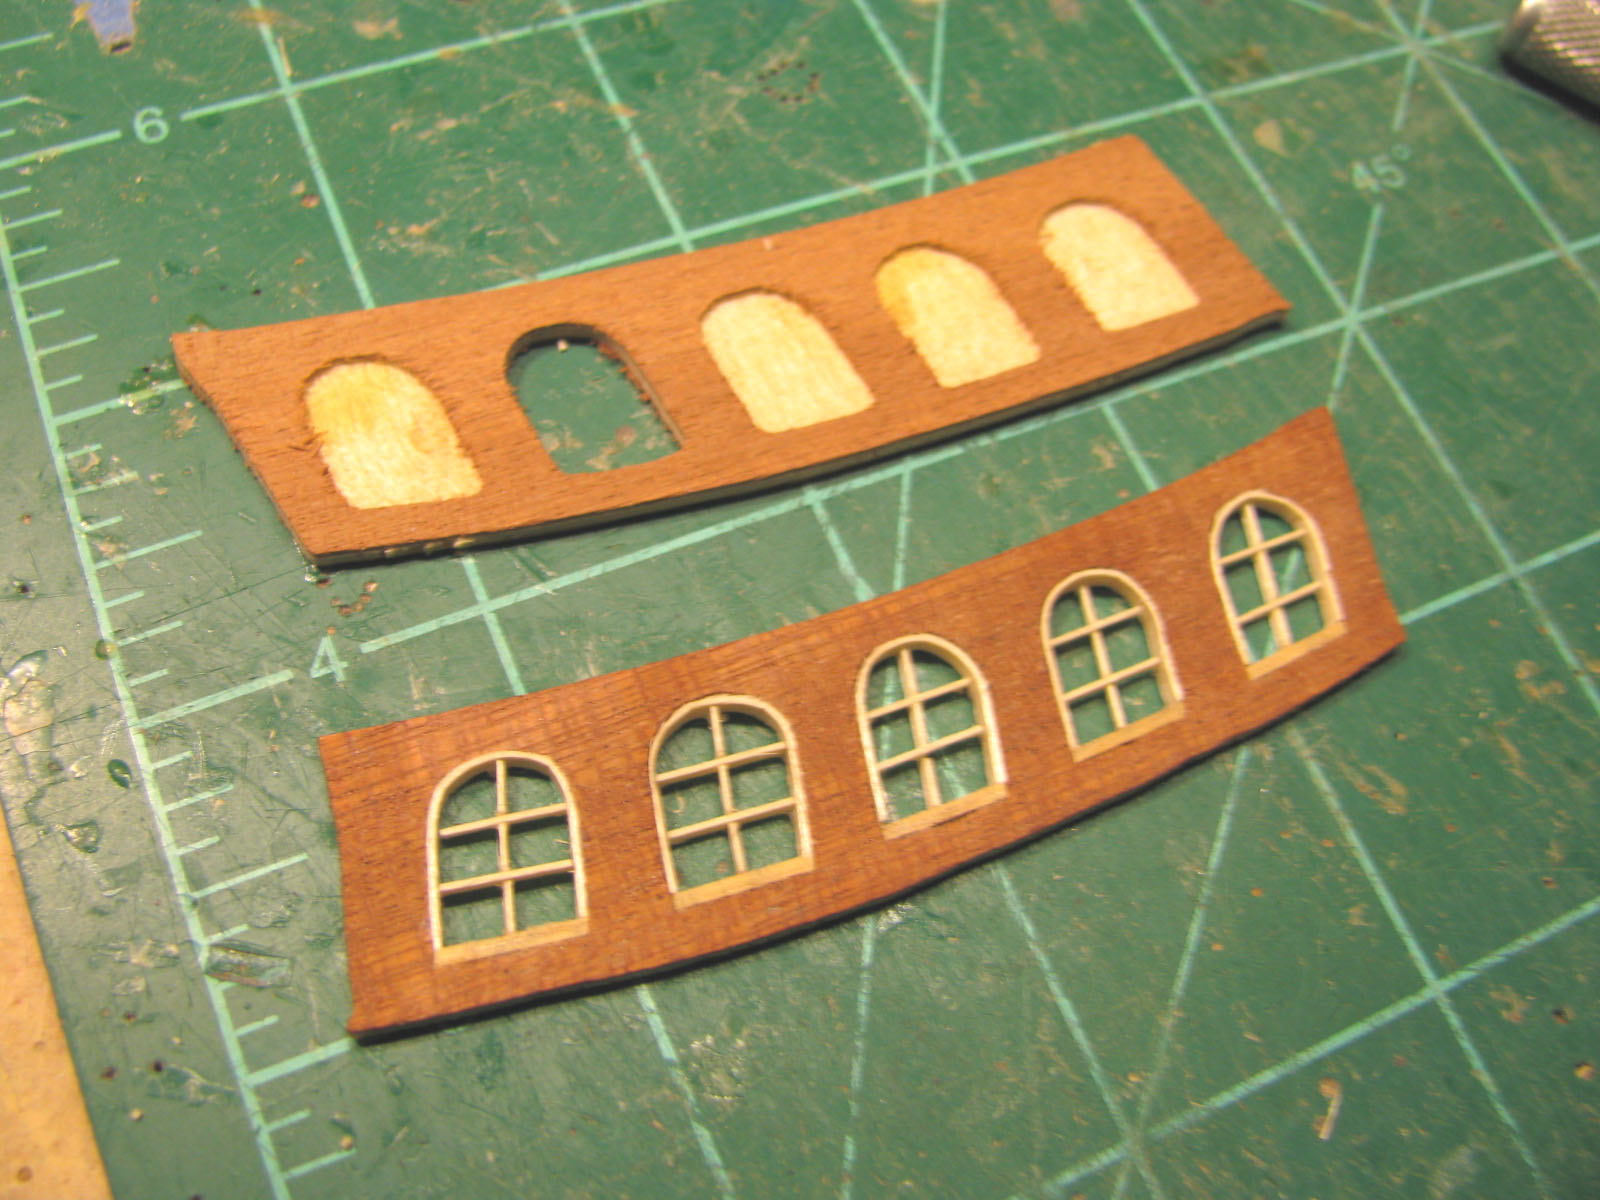
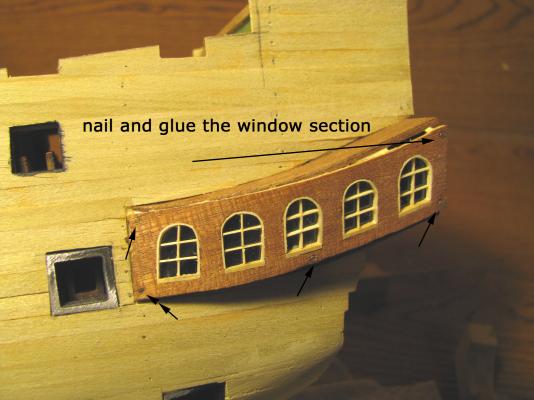
I have added some lighter colored wood for window frames and supports

-
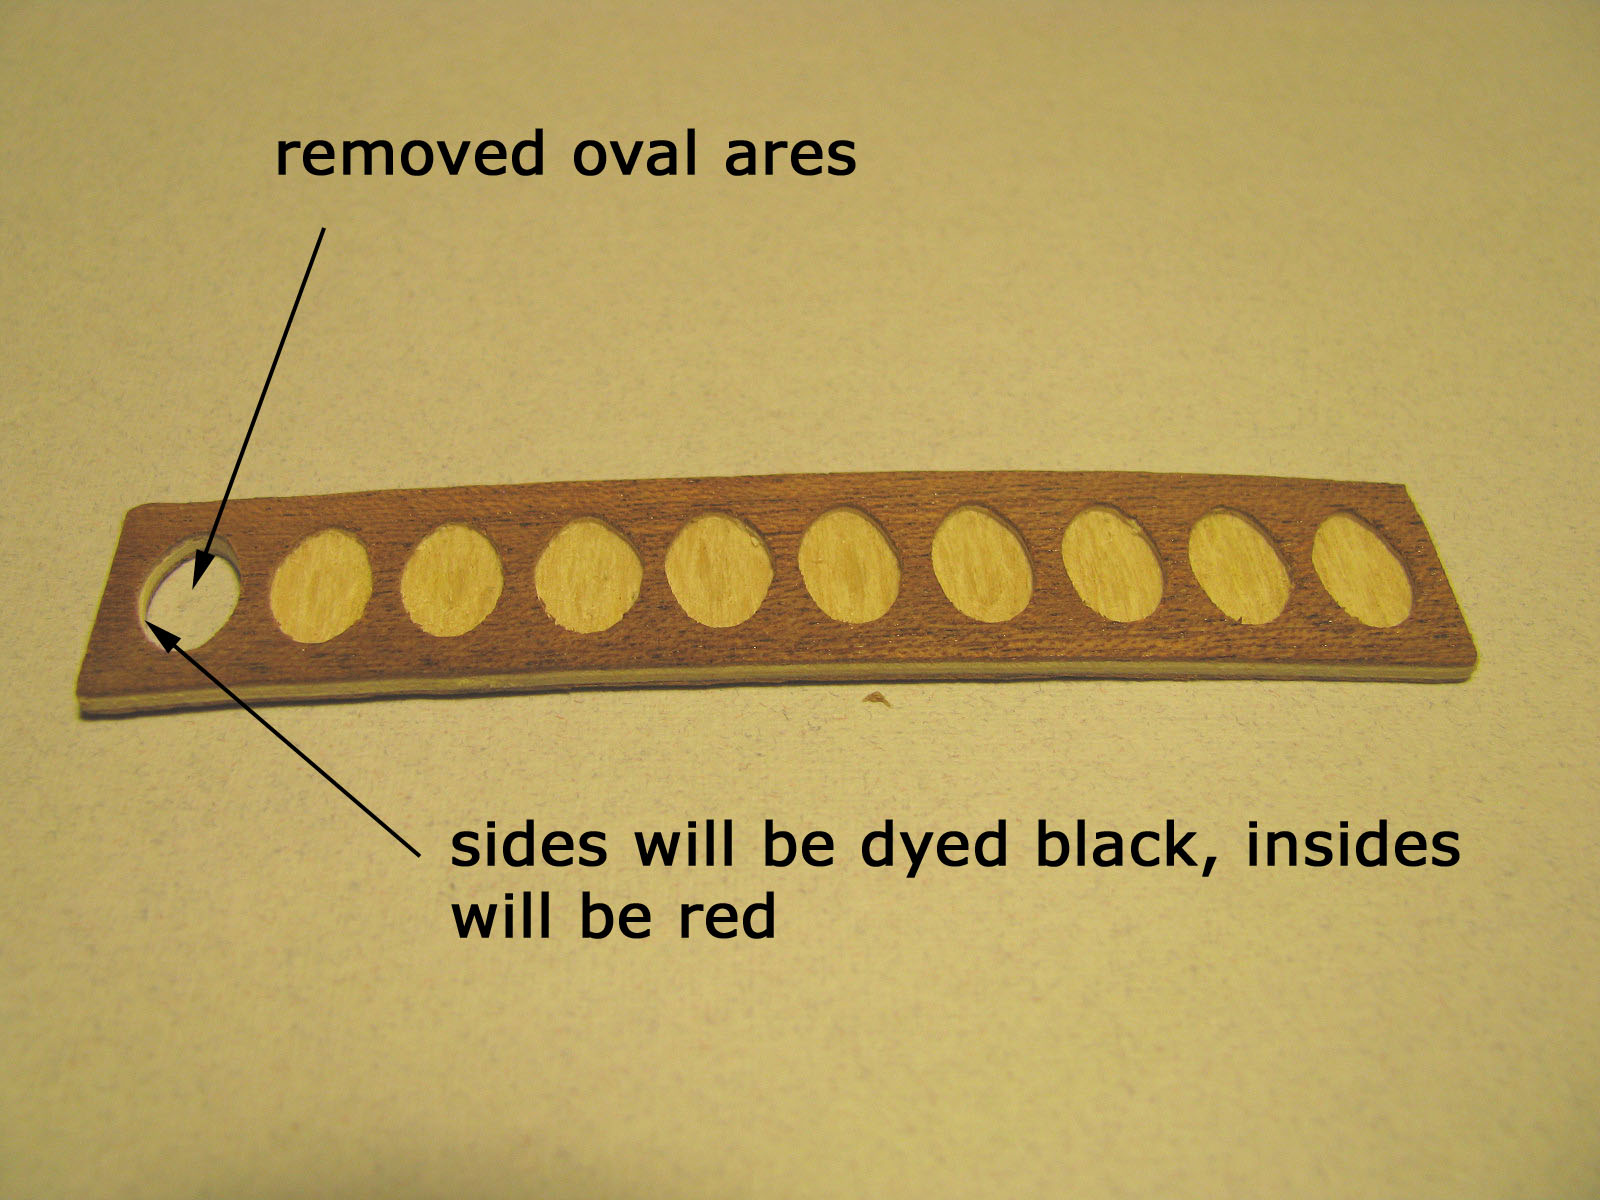
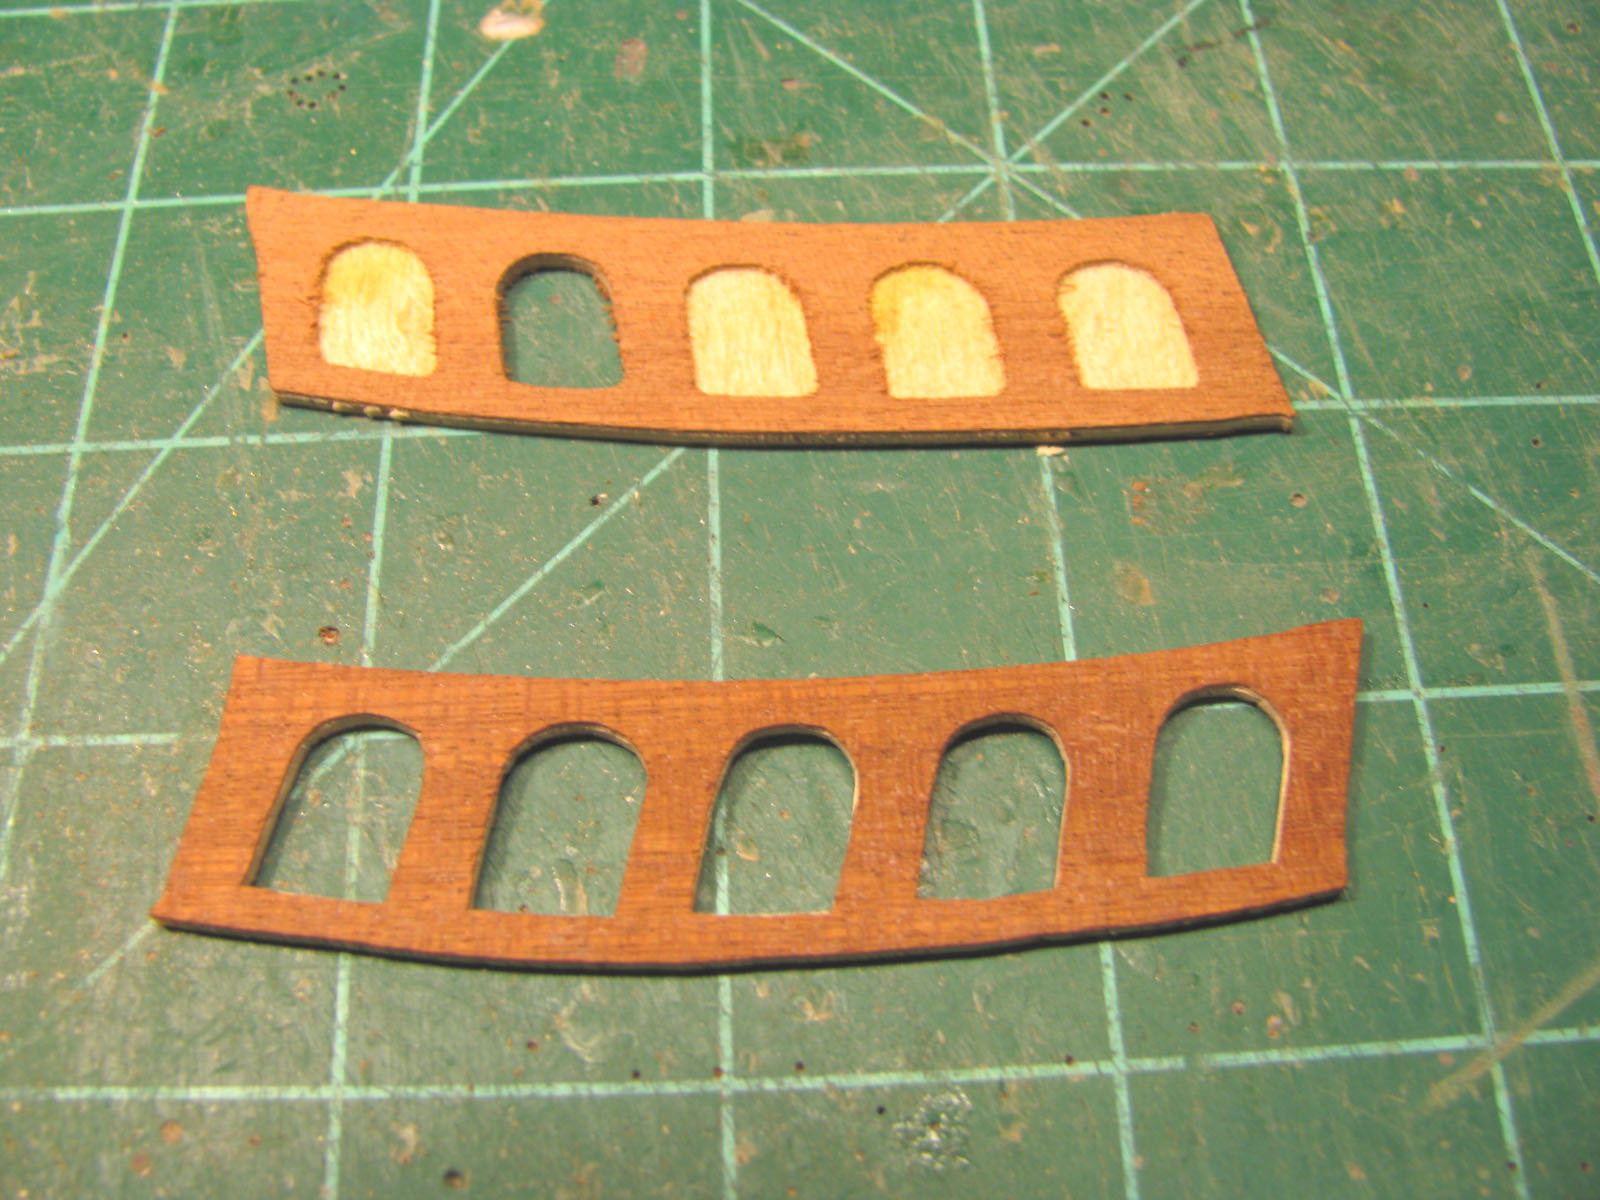
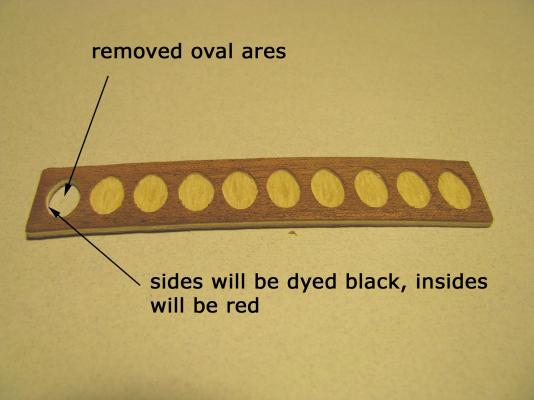
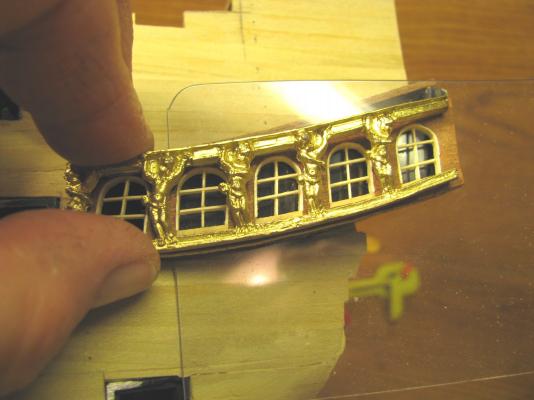
I have removed the wood from each section, cleaned up the edges

-
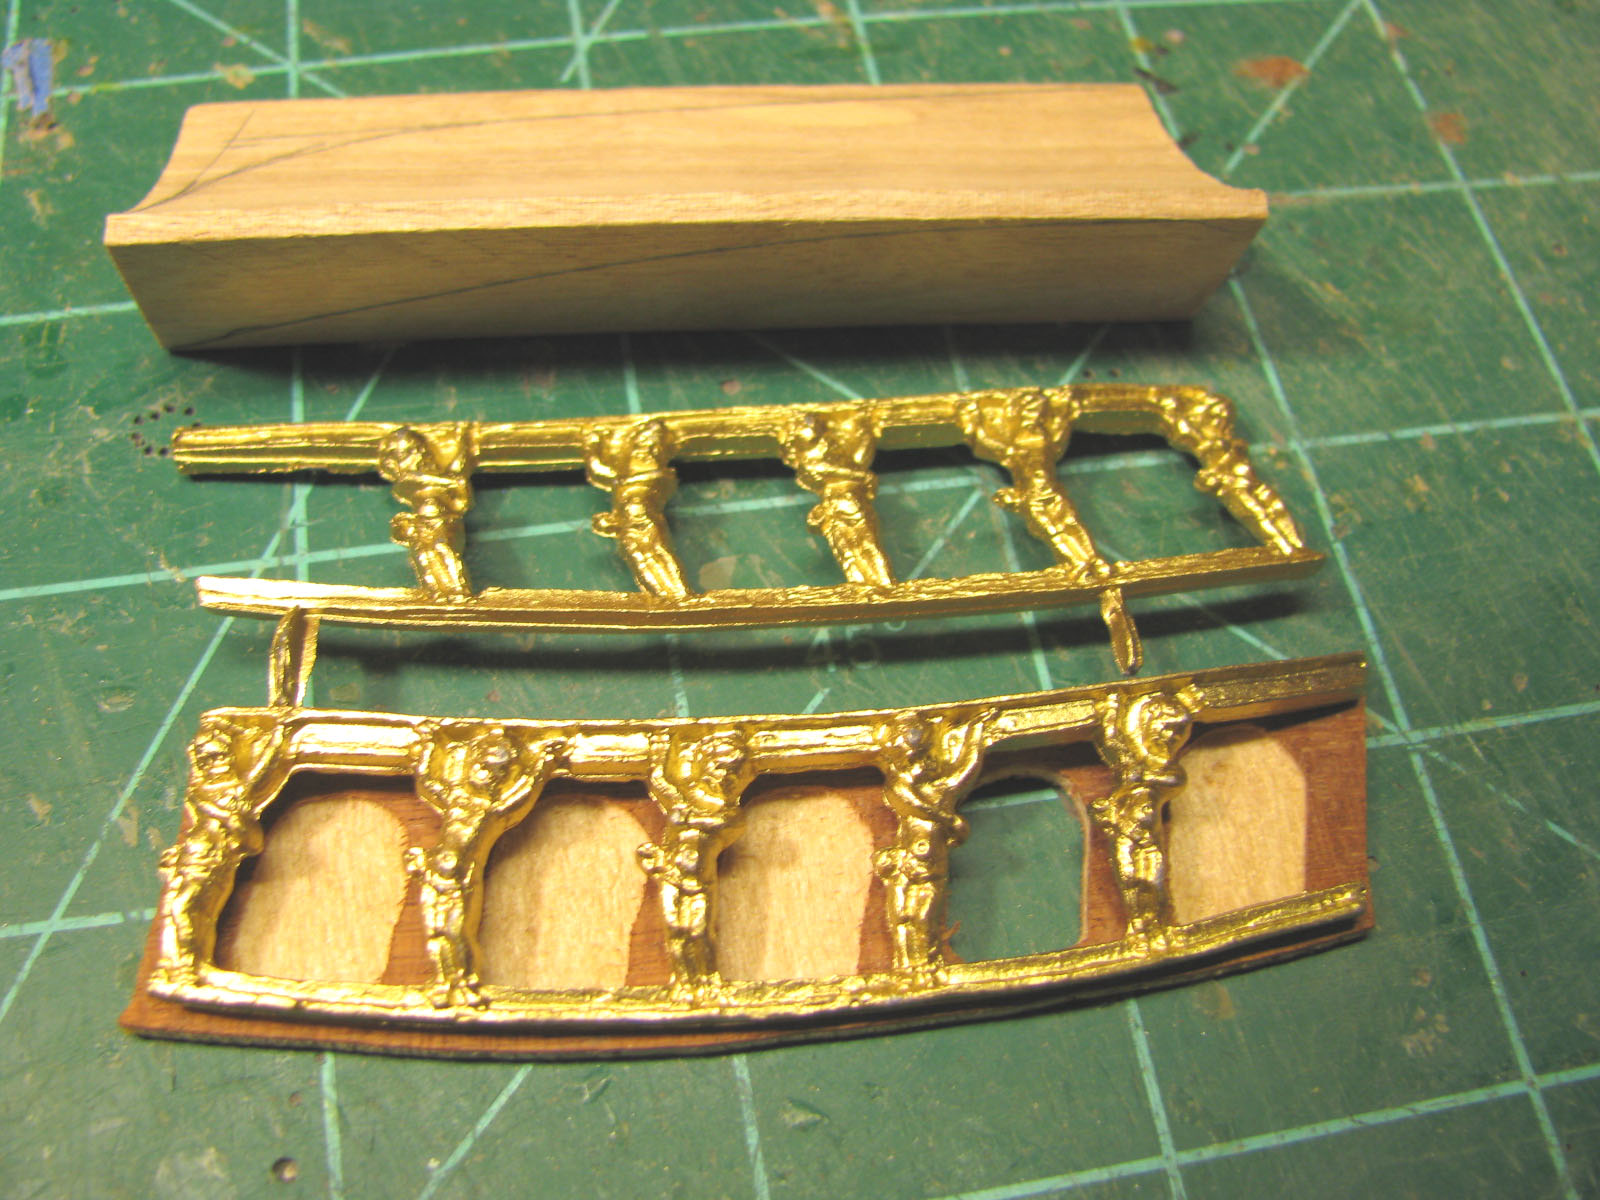
the windows are made from green plastic and only one is called for, supposed to paint the others green, That's not going to happen , I have other ideas.


-
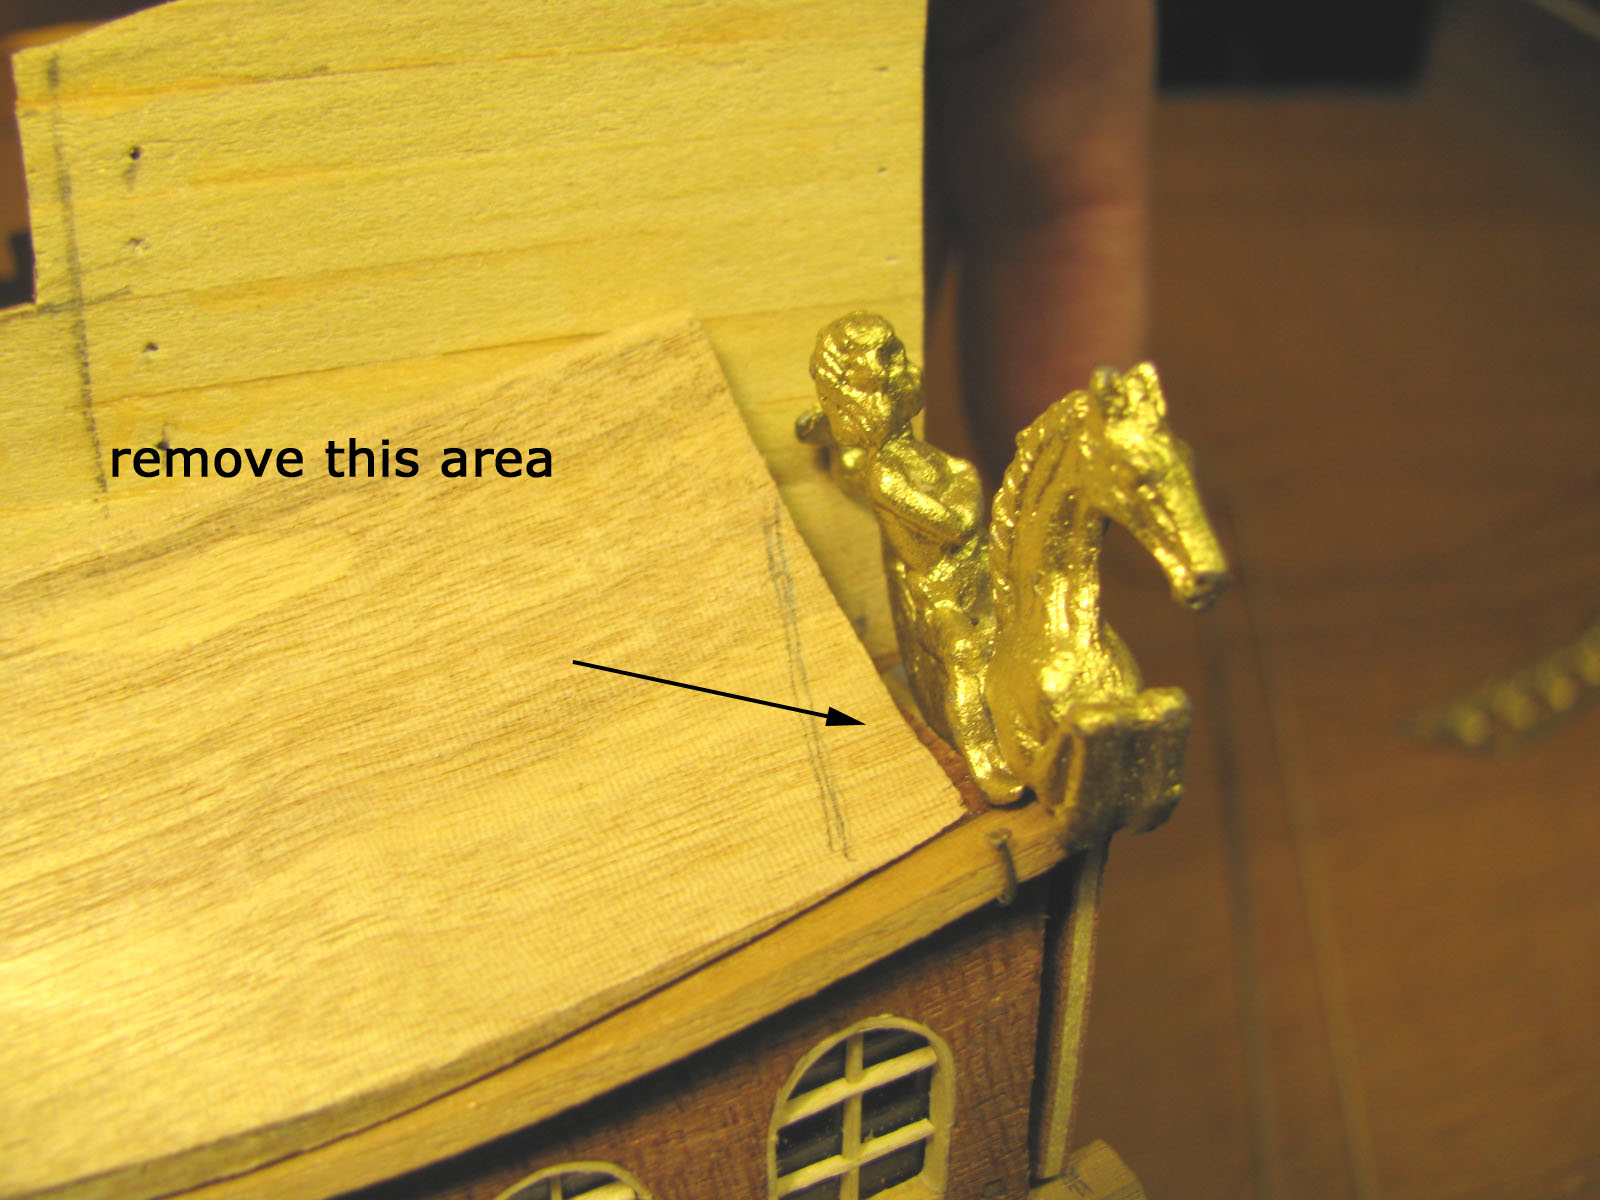
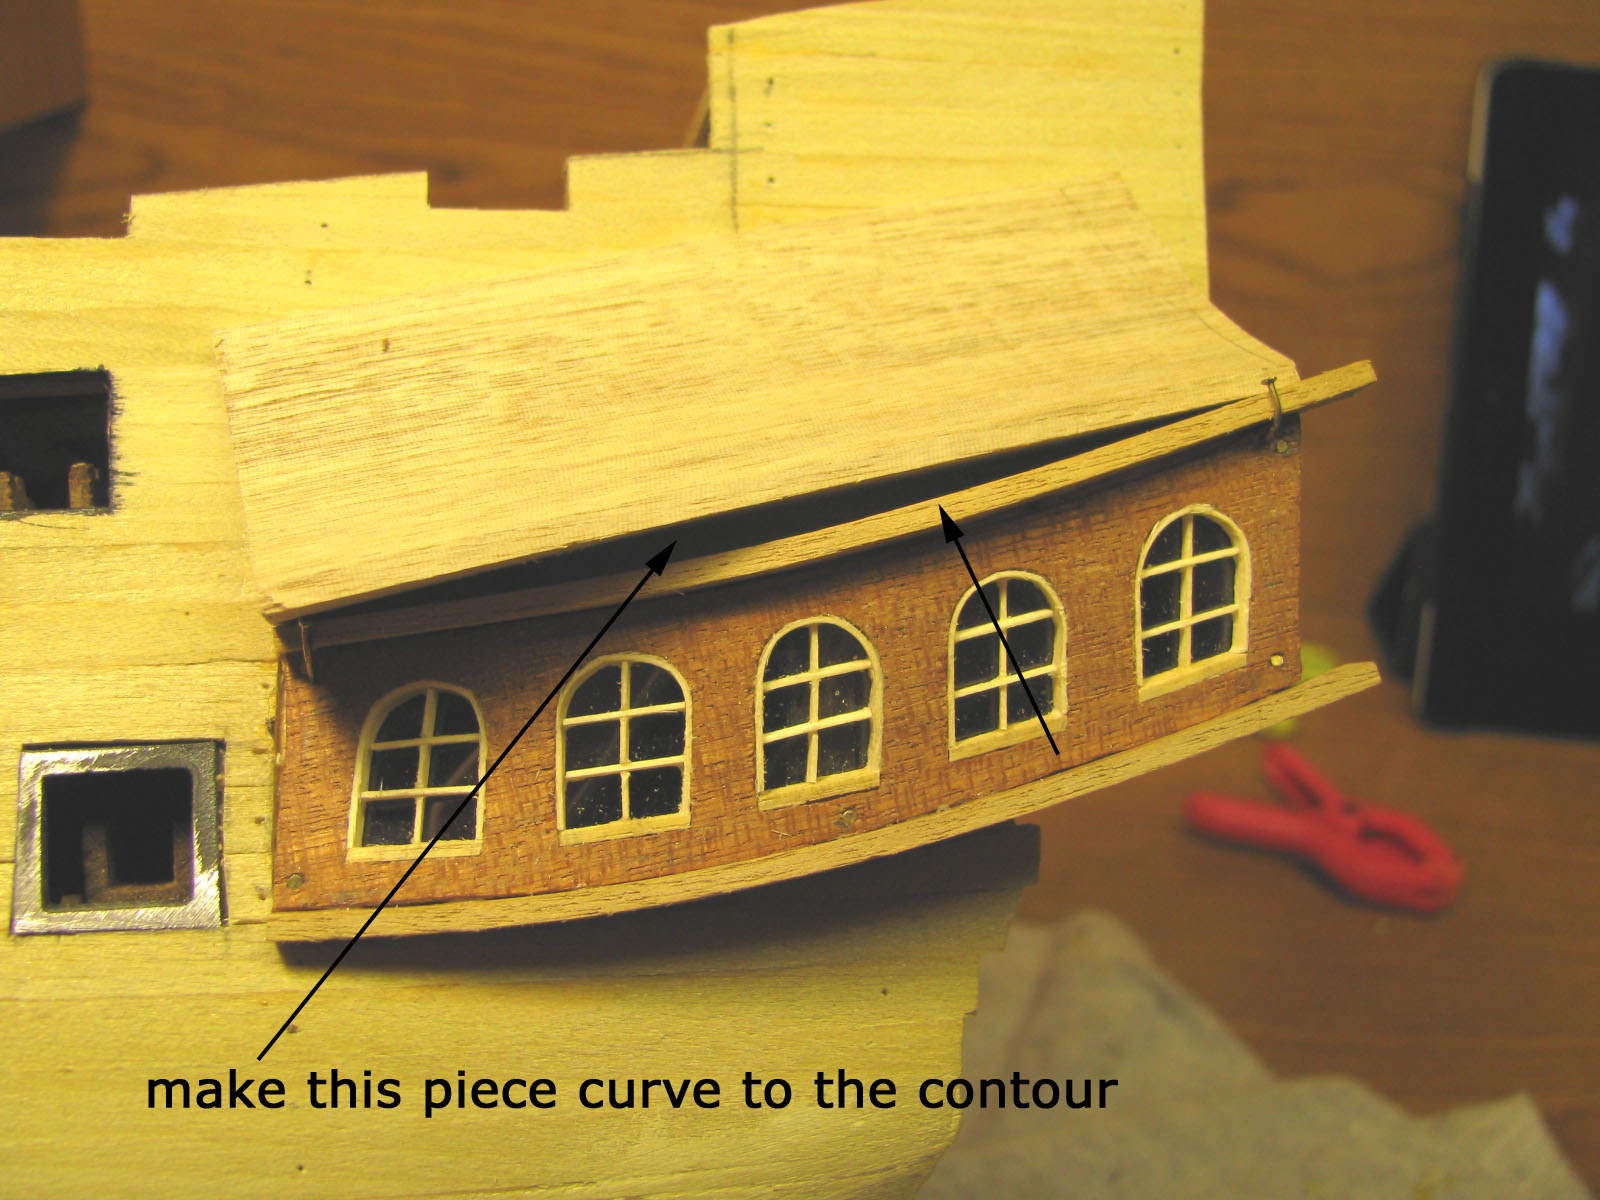
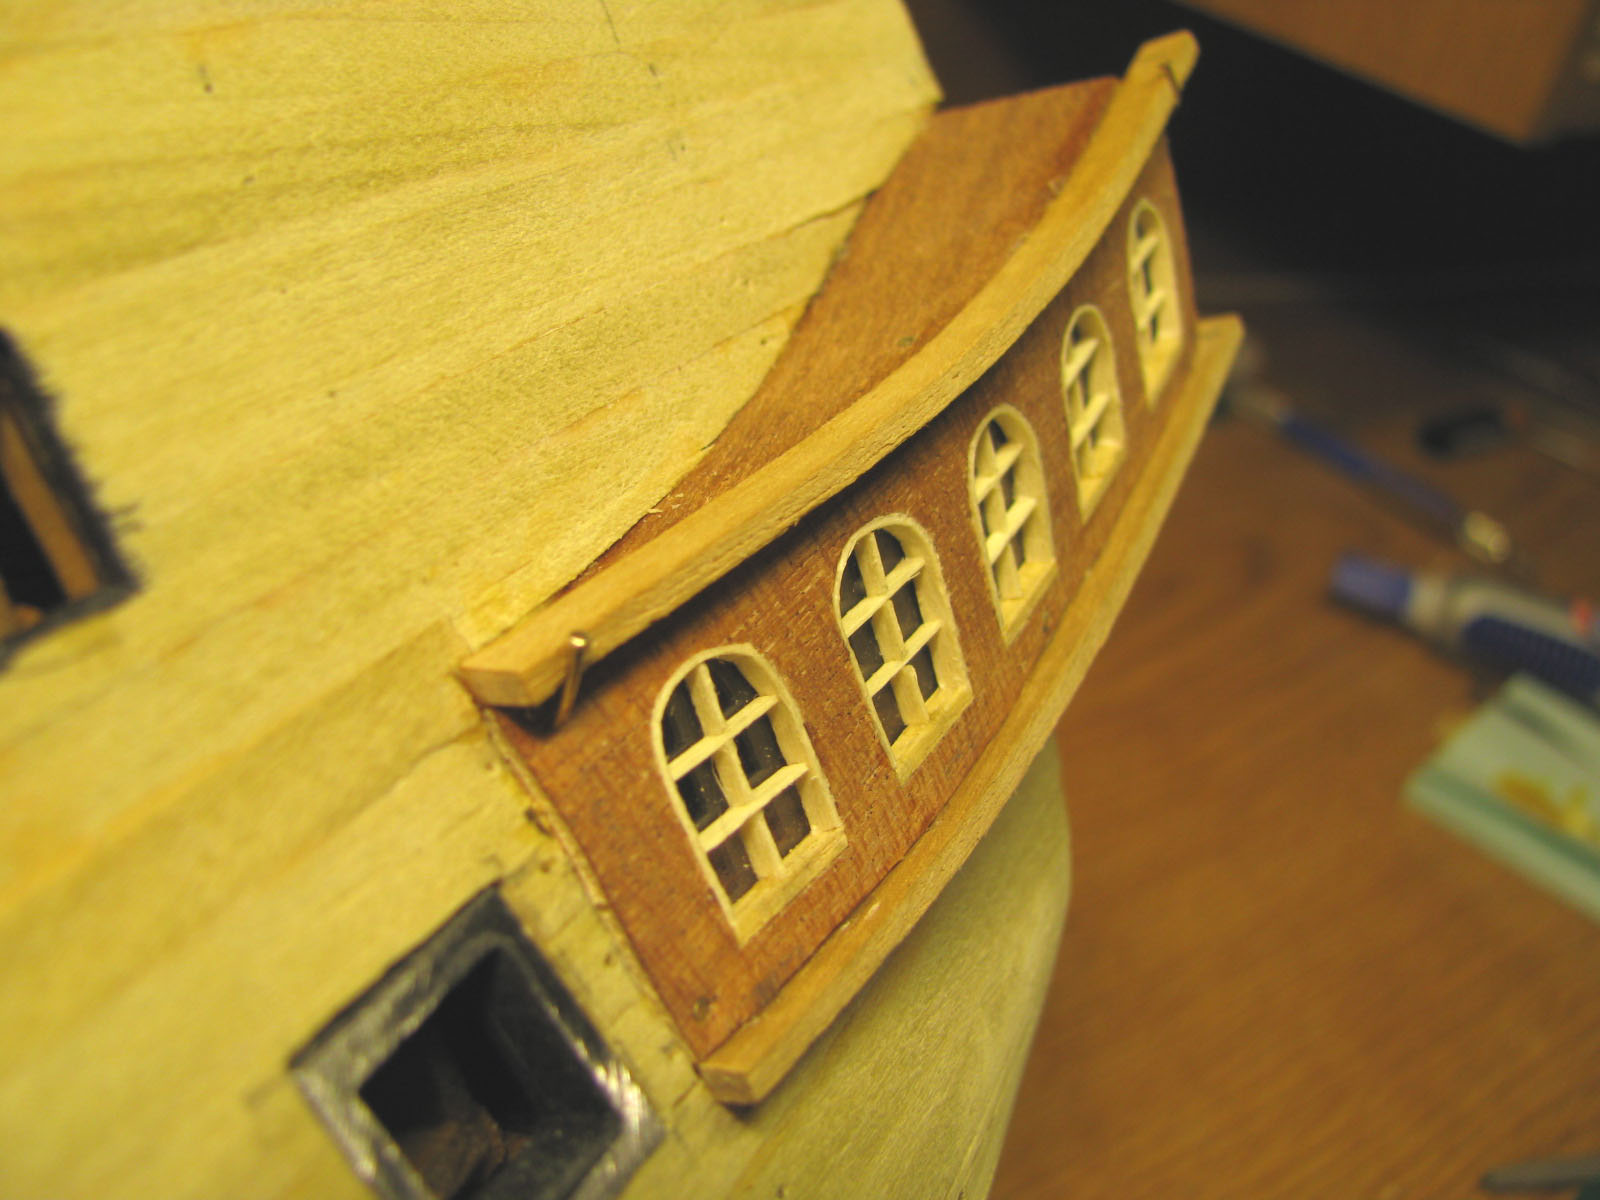
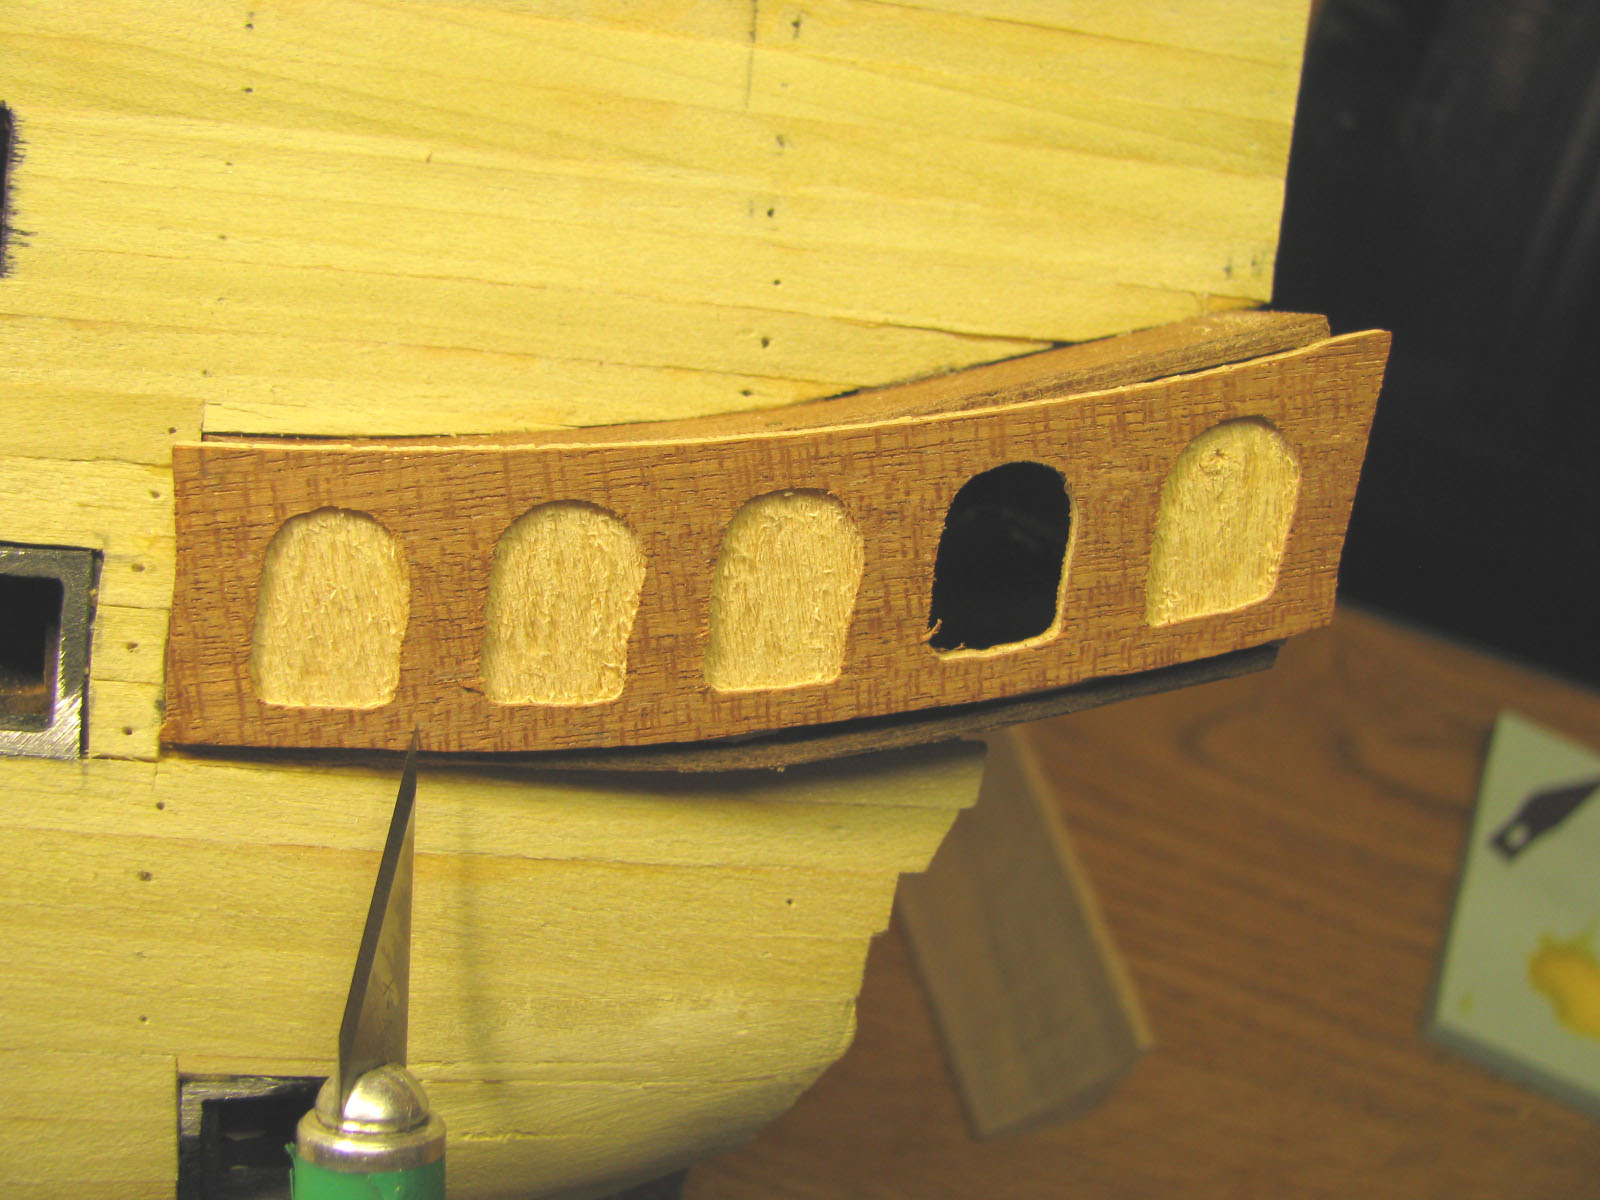
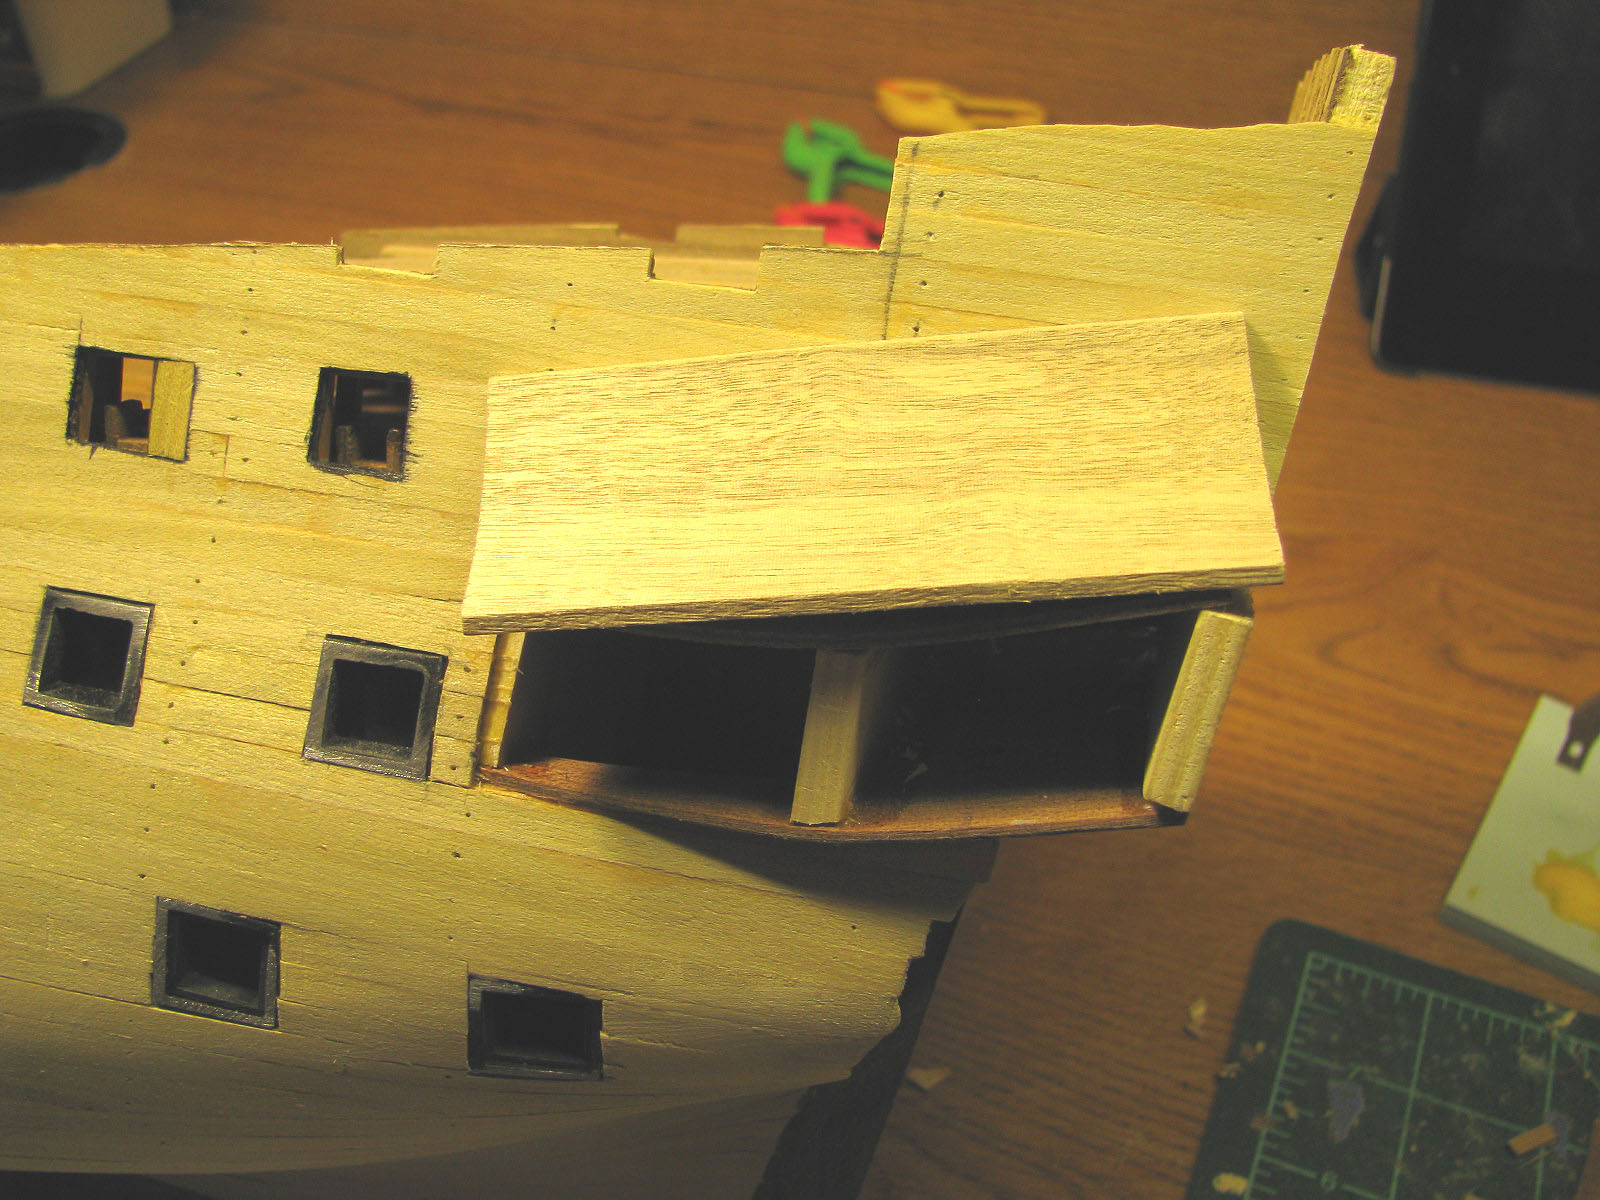
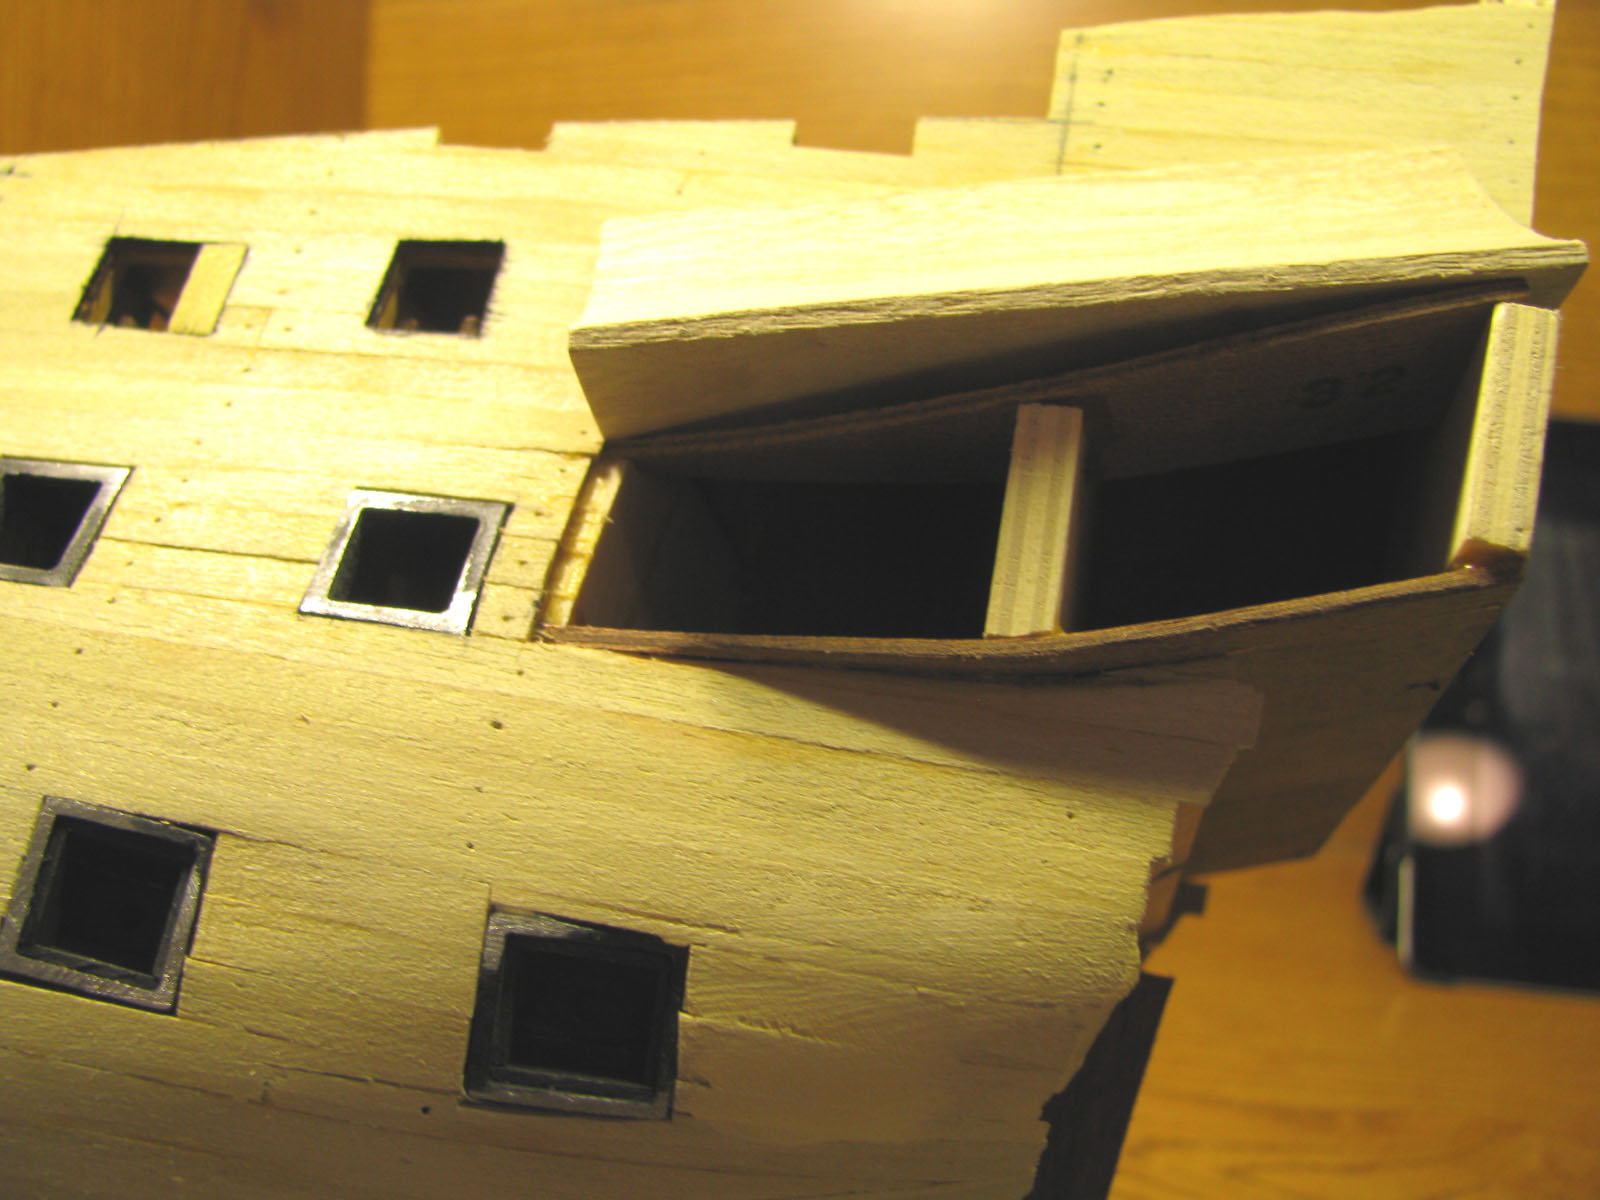
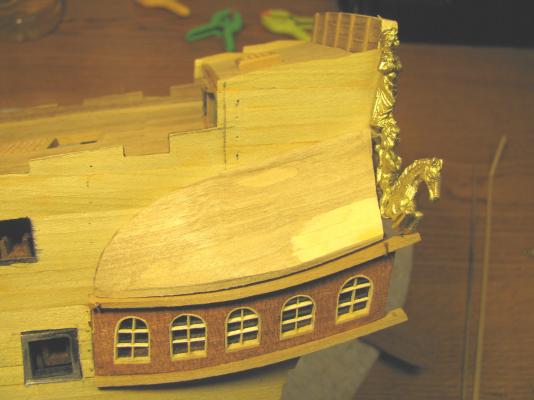
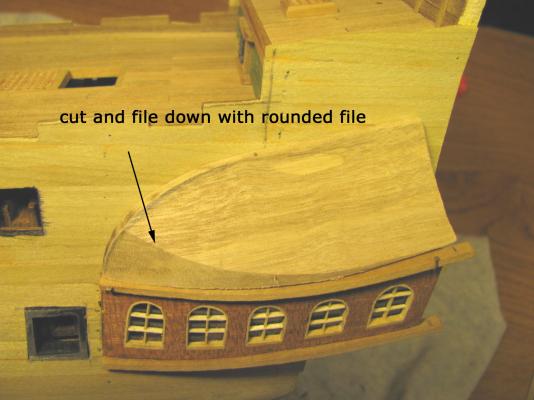
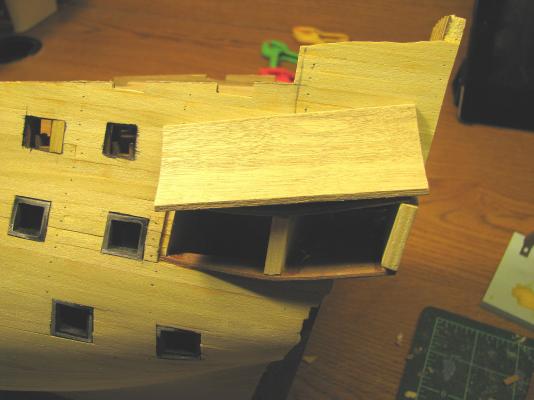
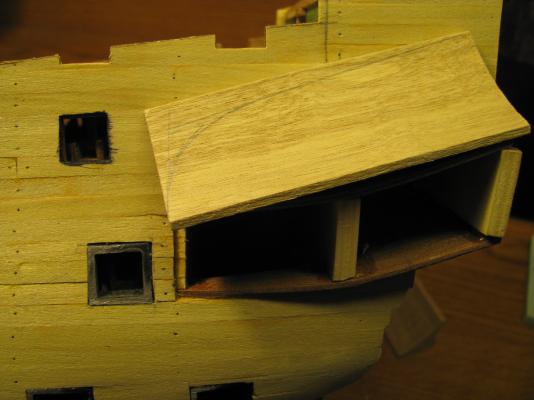
so next on the build is this area of interest. I'm not sure how they intended these pieces to fit, obviously with a whole lot of refinement this curved block is going to look good I hope. I do not have any step by step references other than the instructions and they are still vague to me. I'll move to the window sections for now.

-
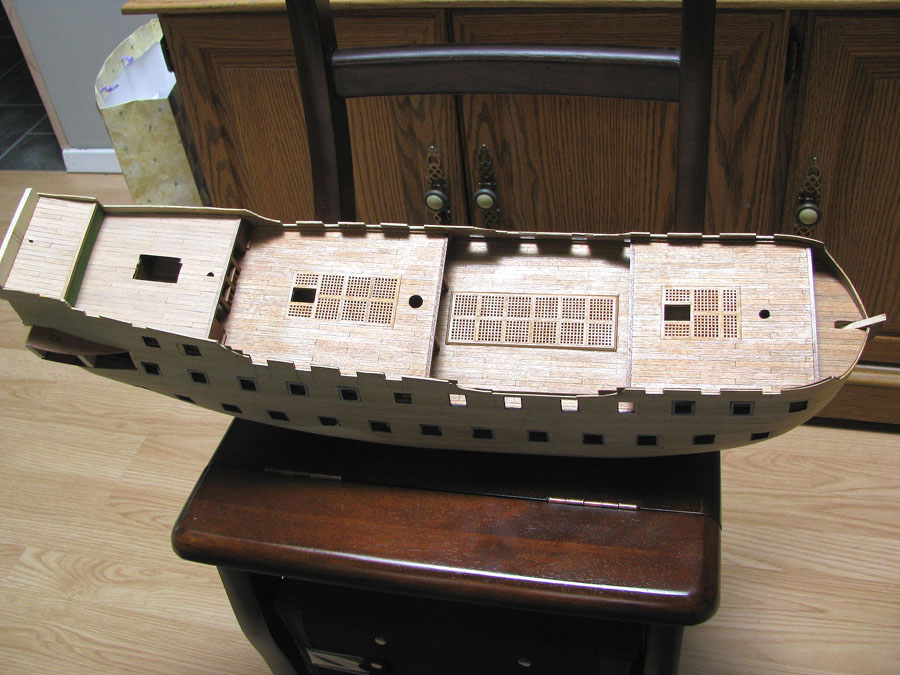
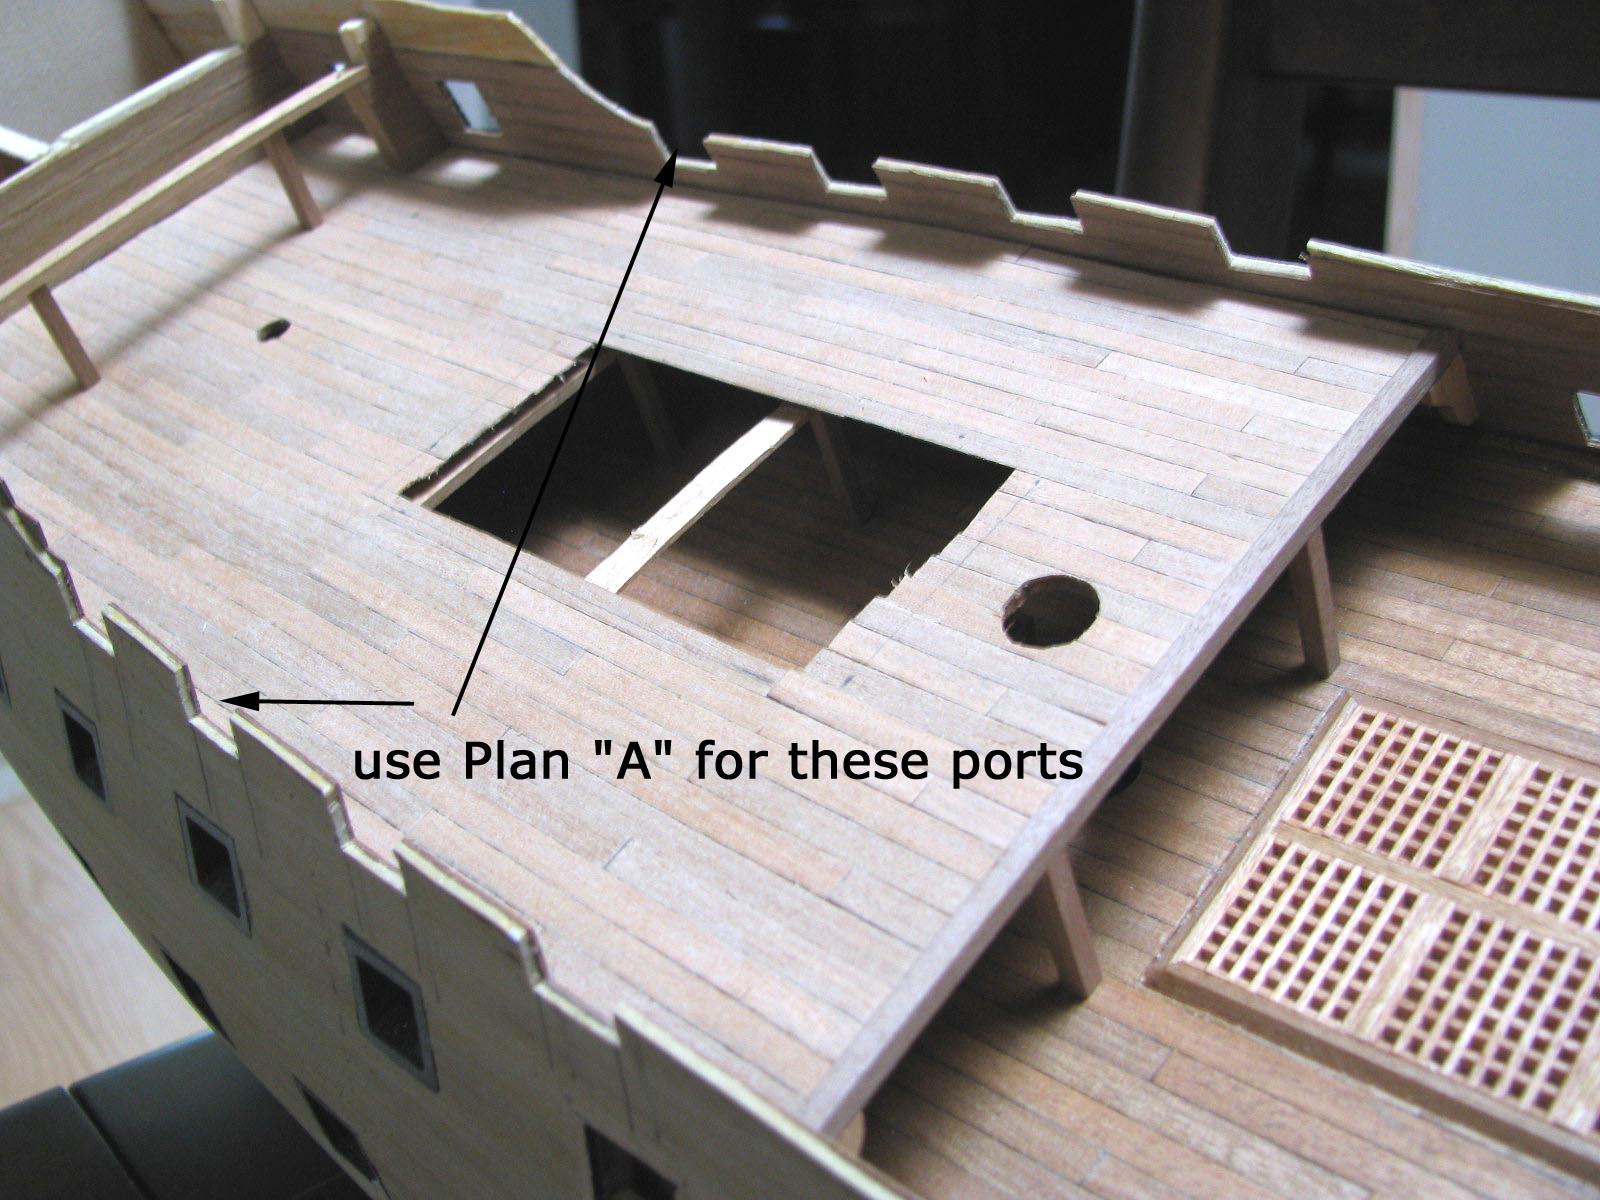
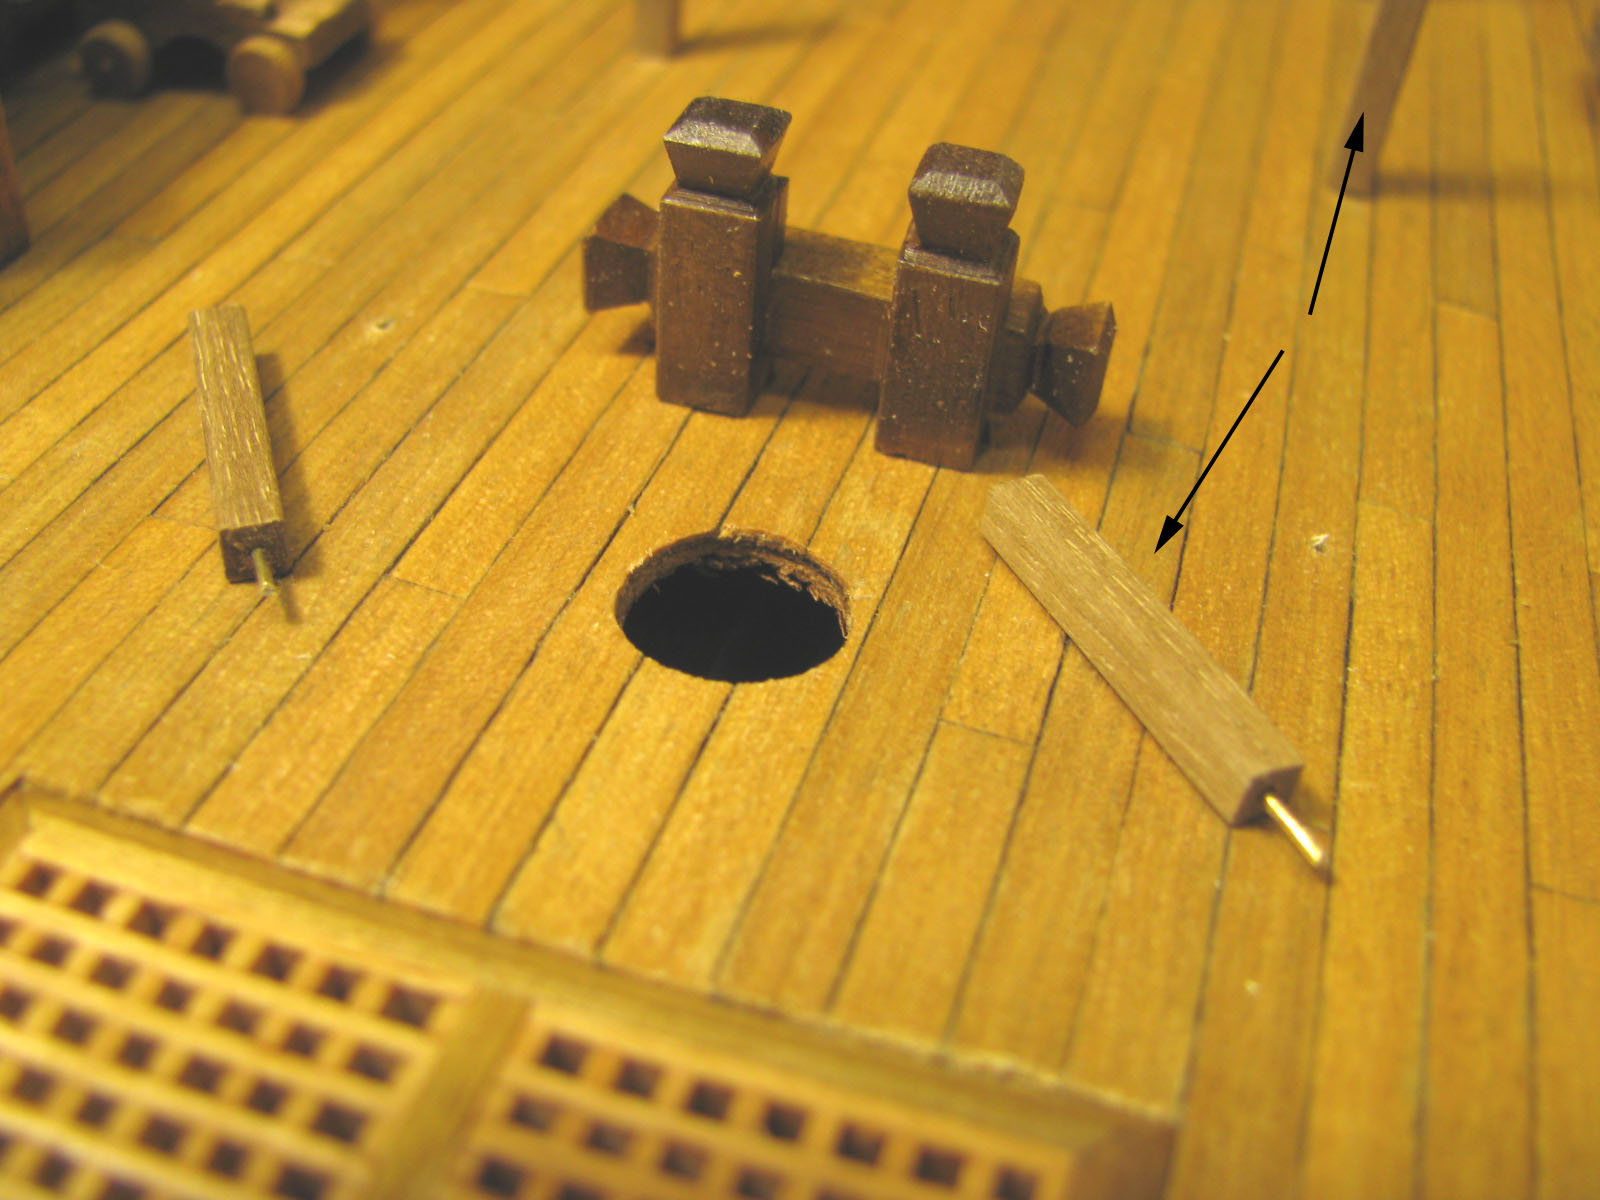
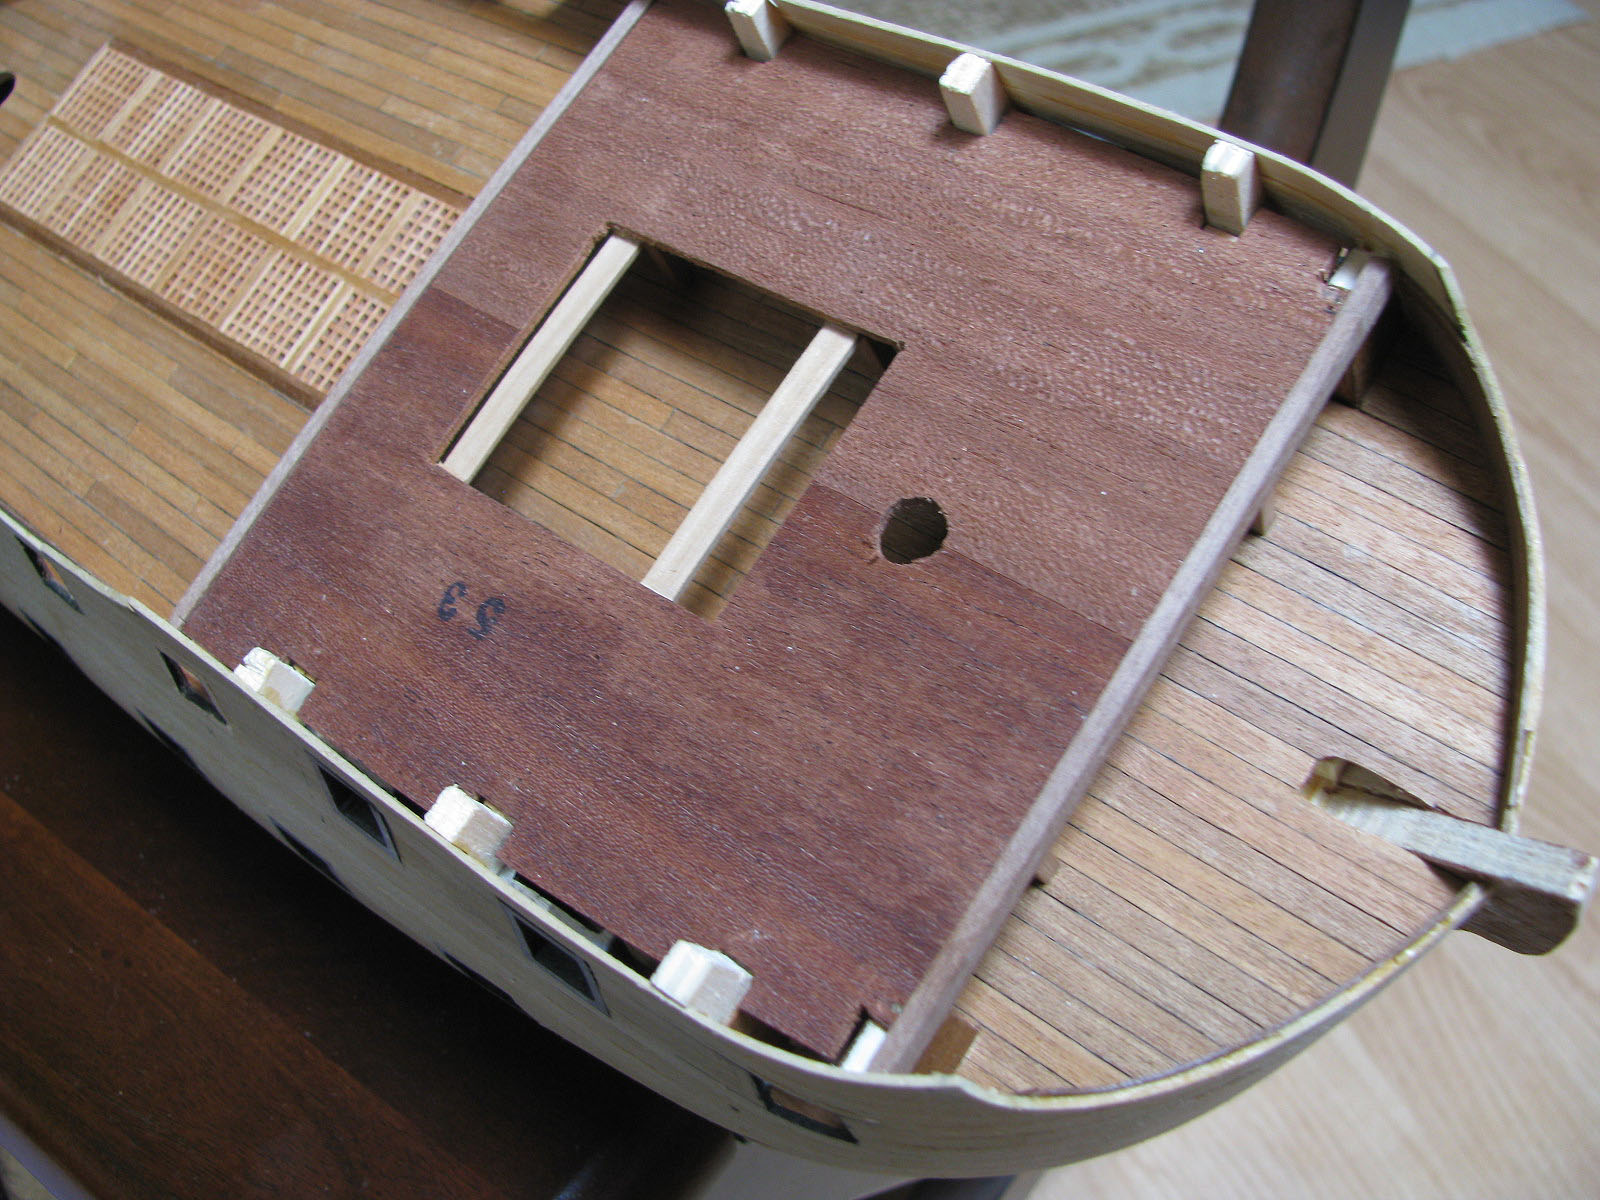
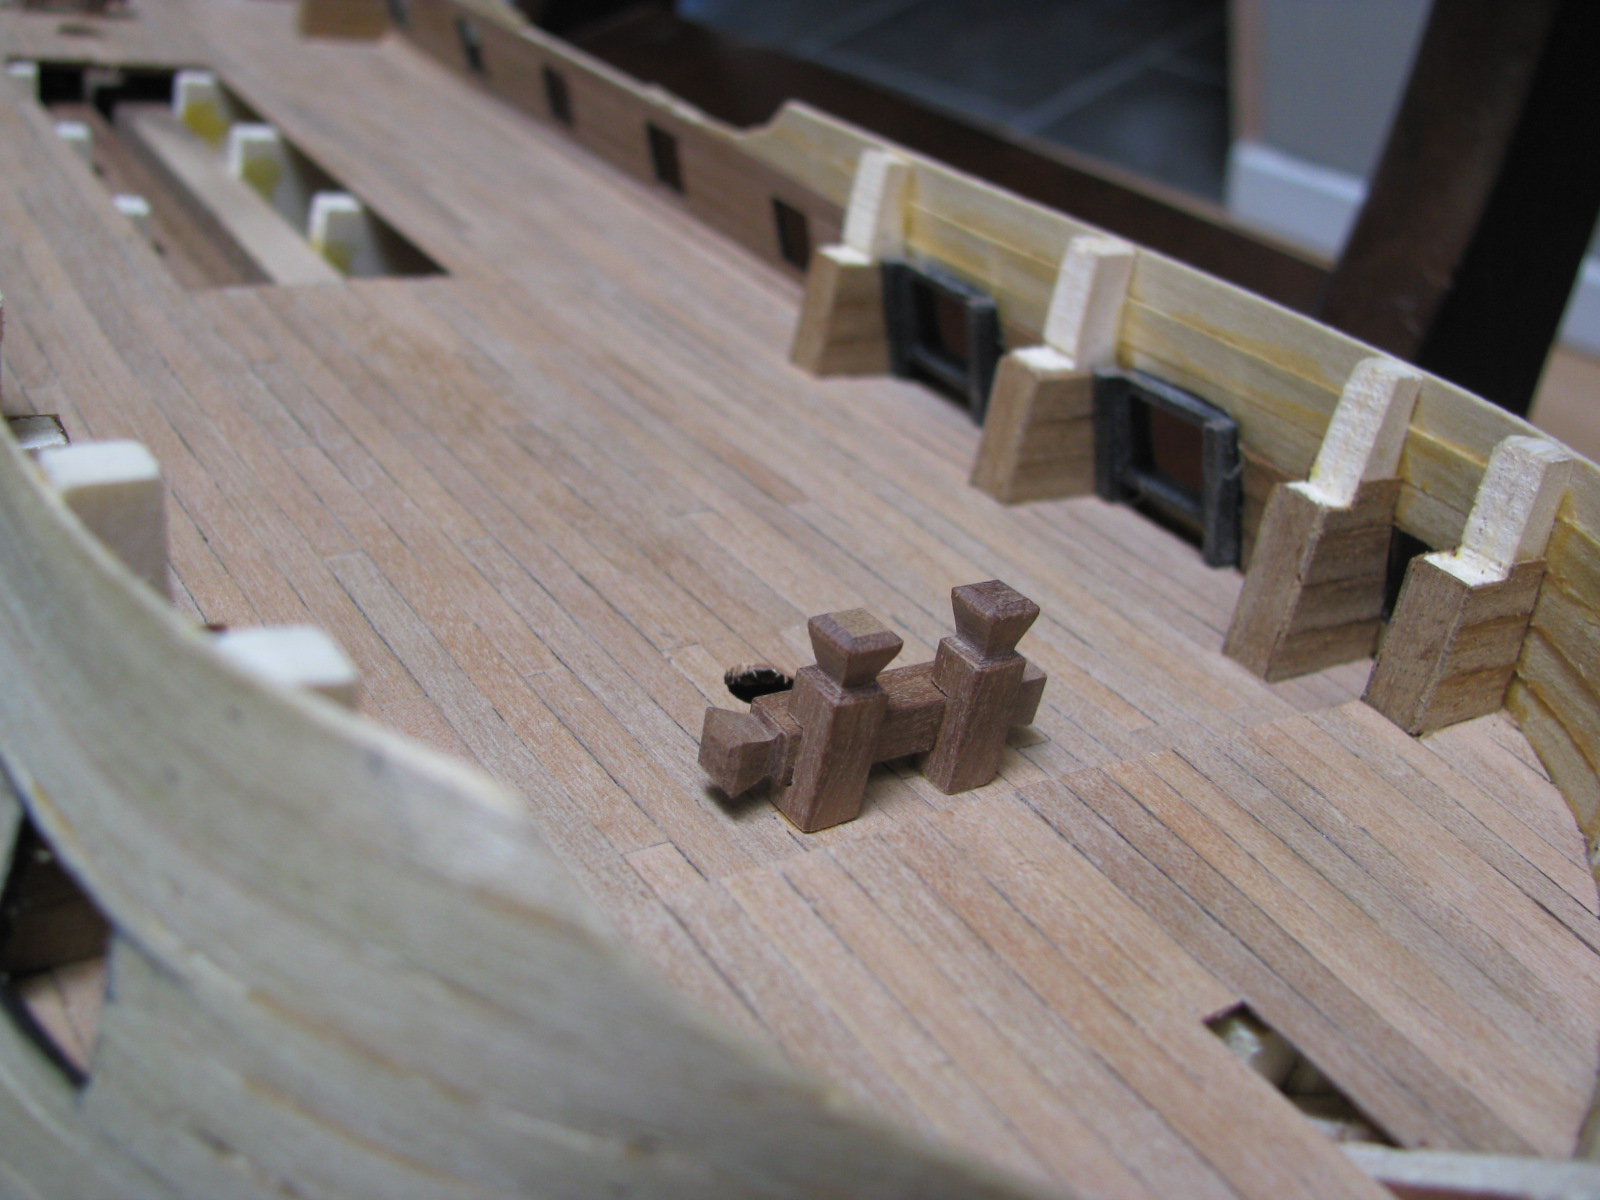
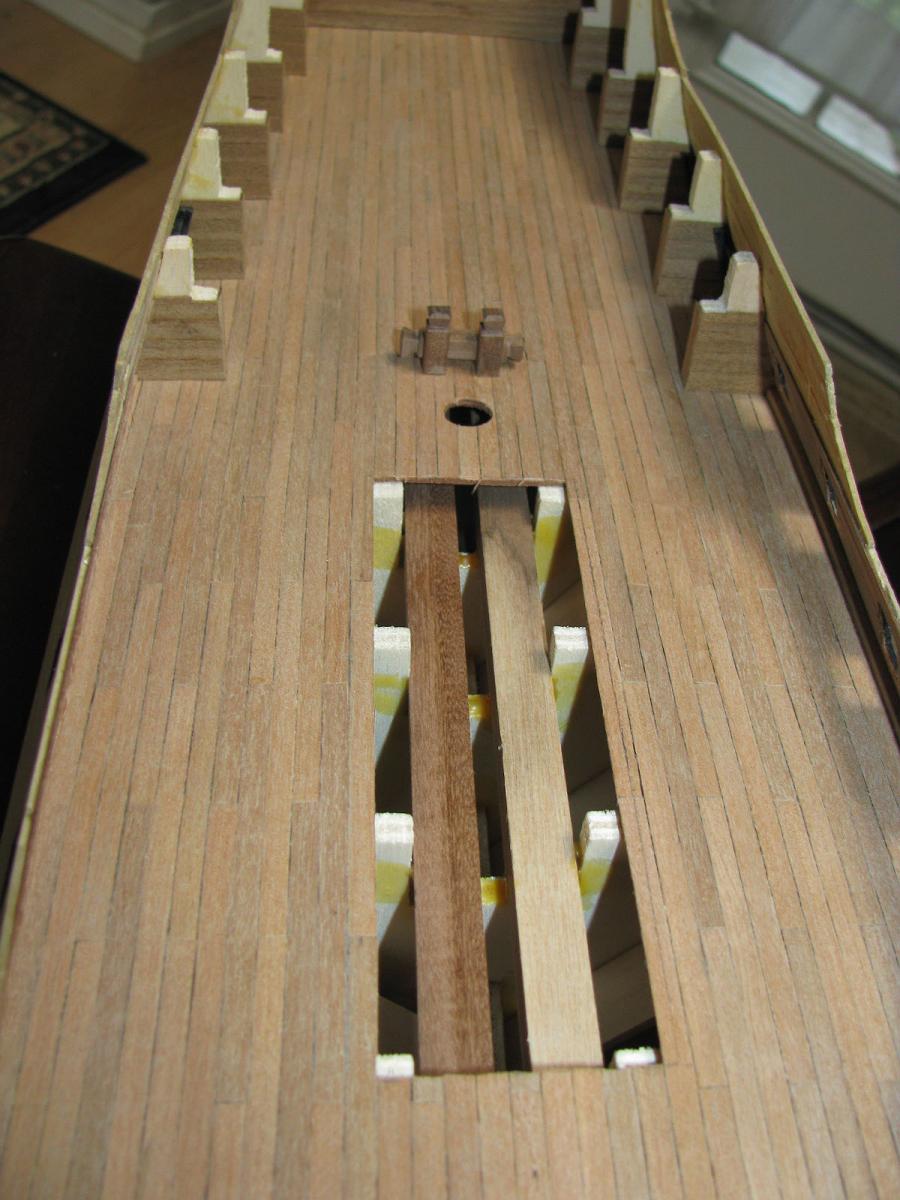
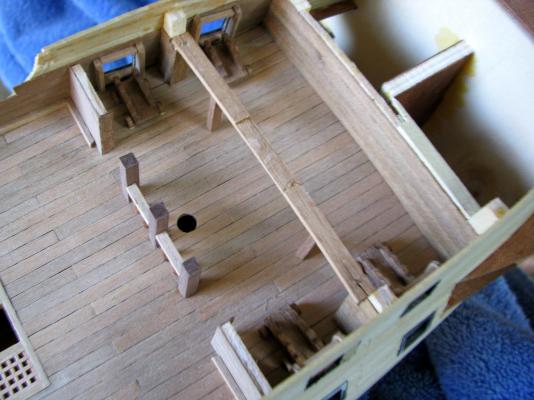
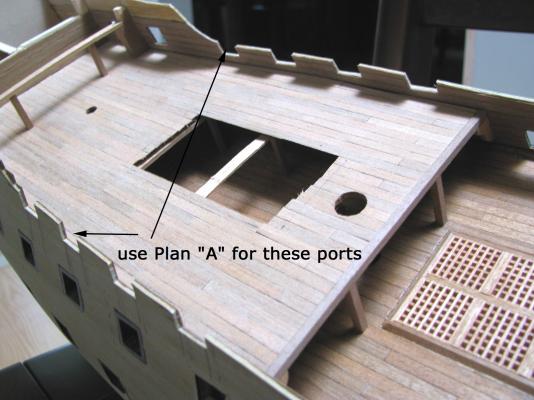
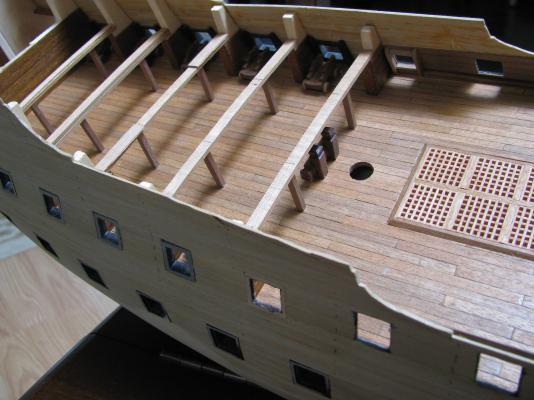
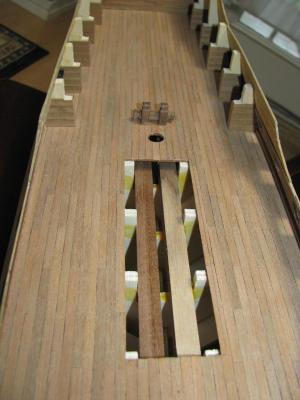
the last deck in place and planked, right below is require a canon hatch with some castings , the castings will be permanently glued later on in the build

-
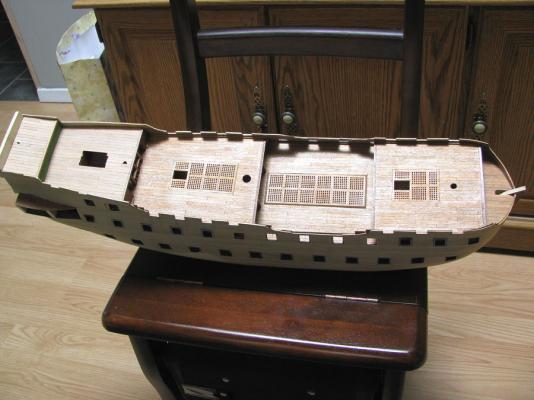
overall planking
-
finished planking 3rd and 4th deck planking,


-
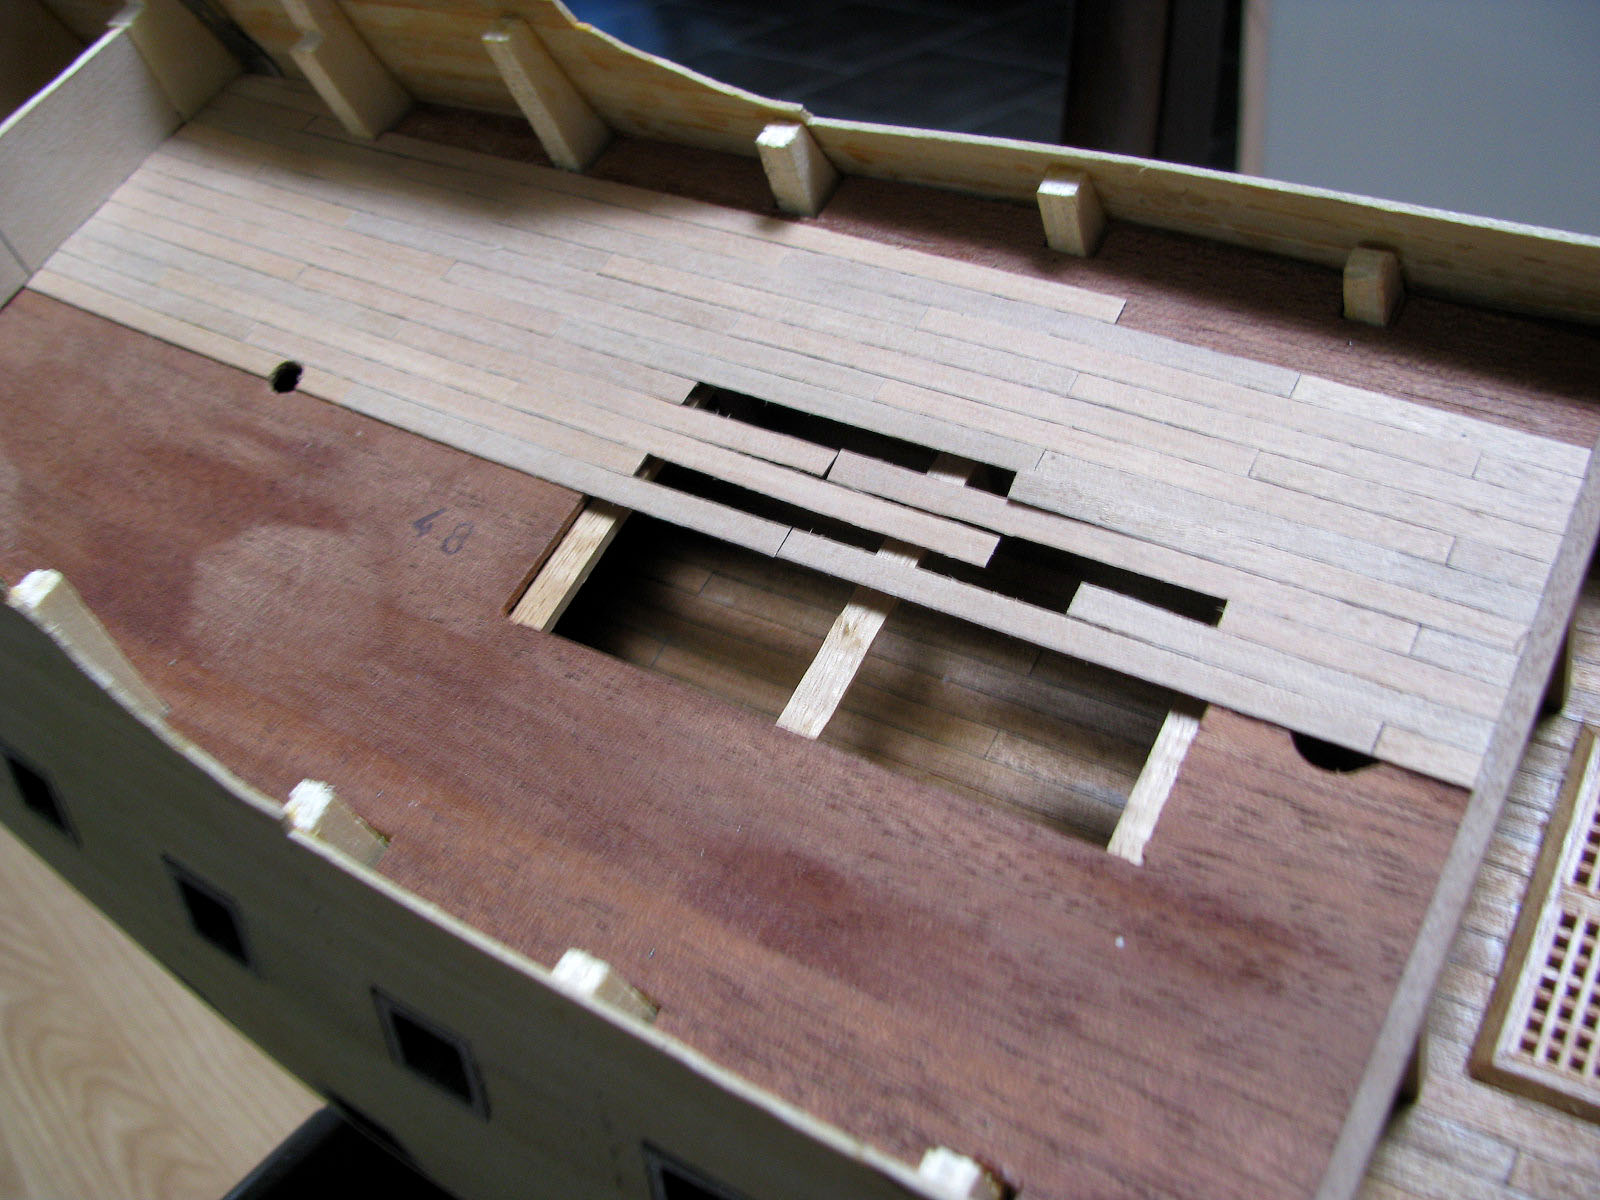
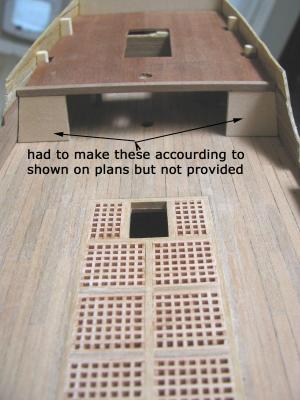
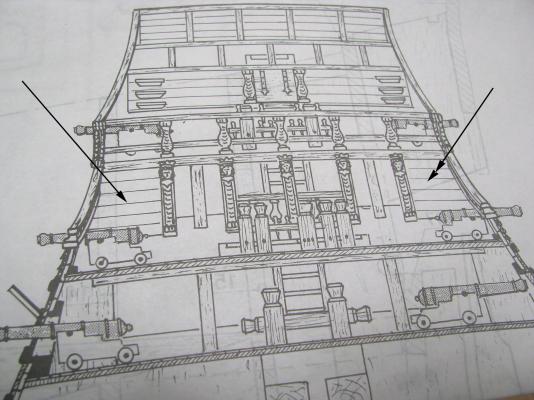
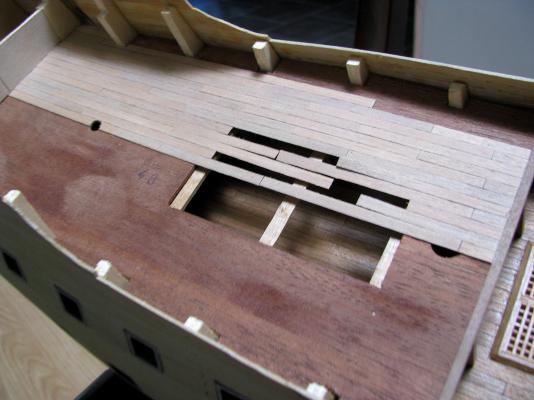
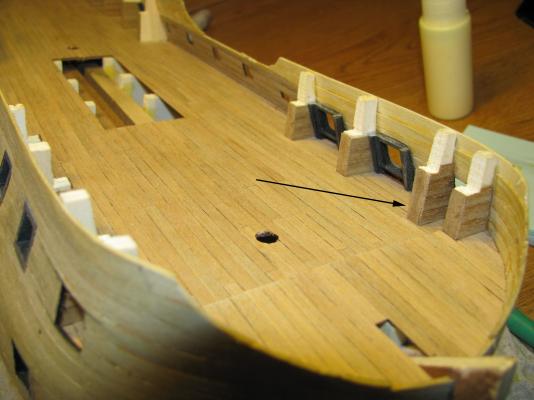
there was only one issue with the next level of decking, the photo on the plans show the sides of the deck support but do not provide any pieces to make them, so you will have to use some scrap wood and plank over it with the laths. before securing this deck , must not forget to place the canon carriages in .

-
finished the grading on these levels , flush with the deck


-
finished second deck planking

-
started planking on next set of decks

-
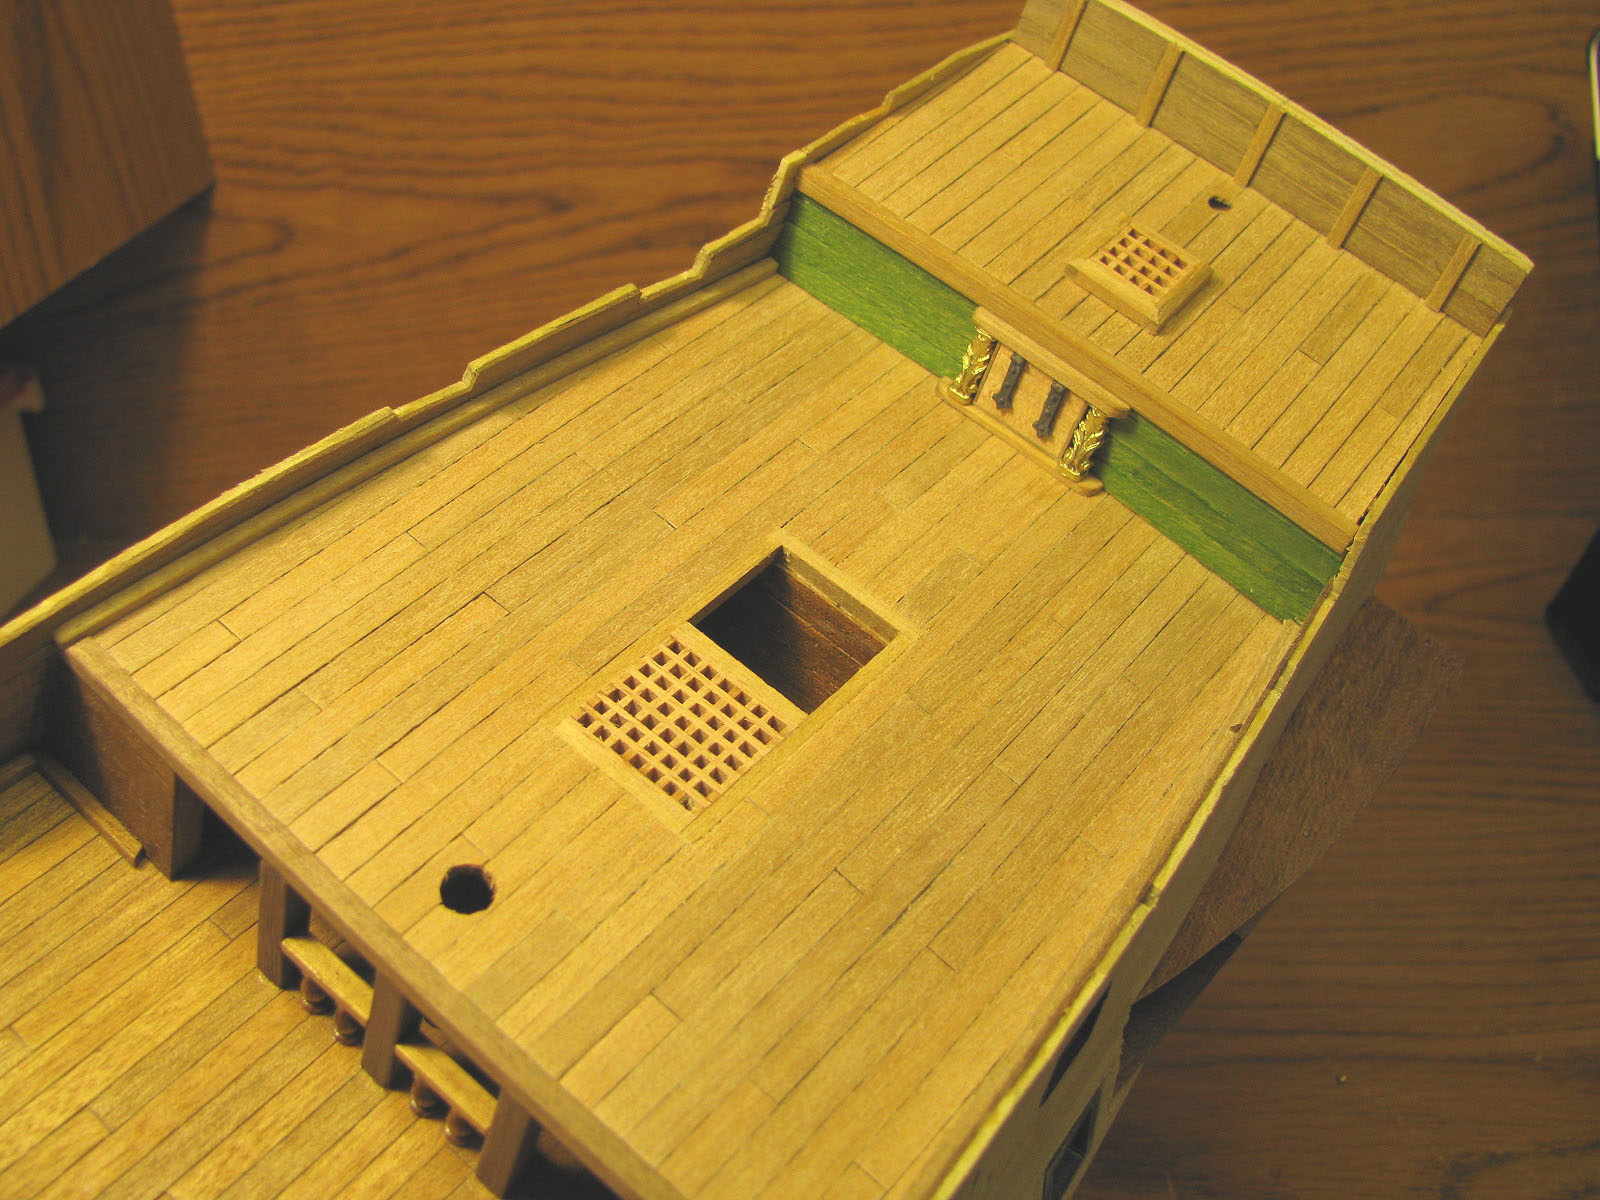
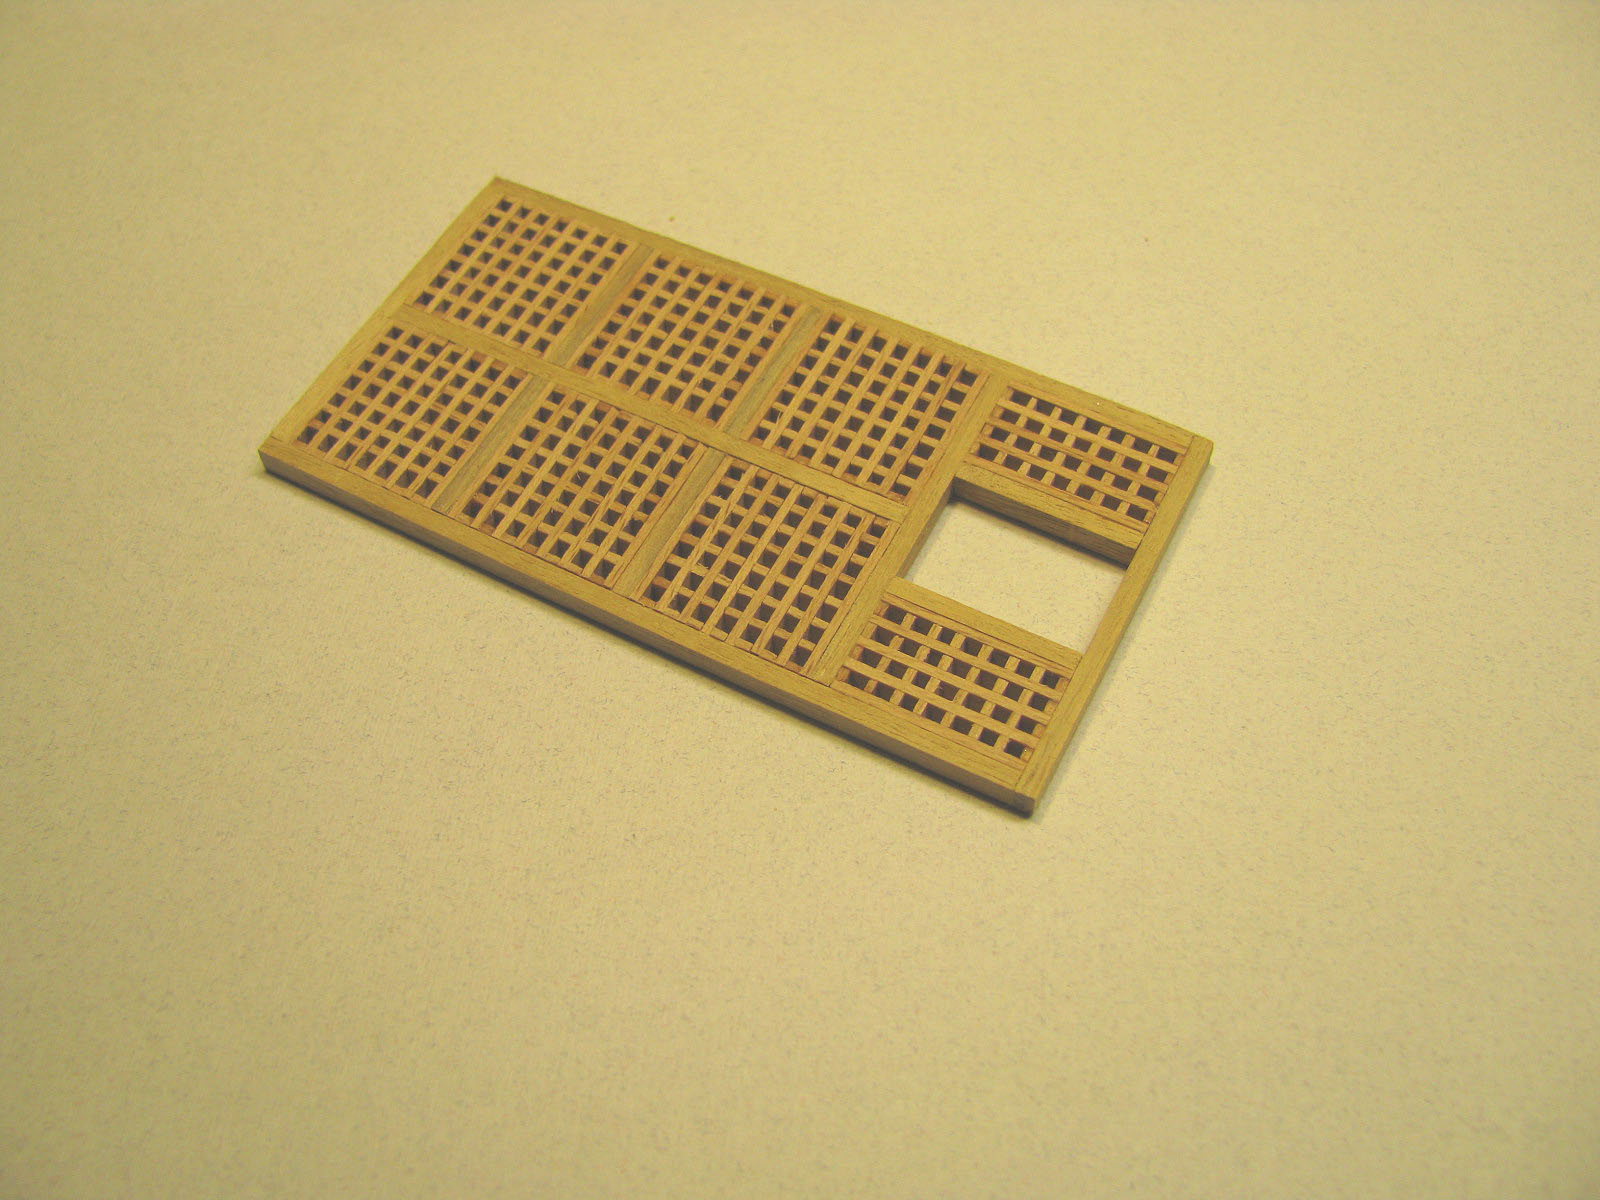
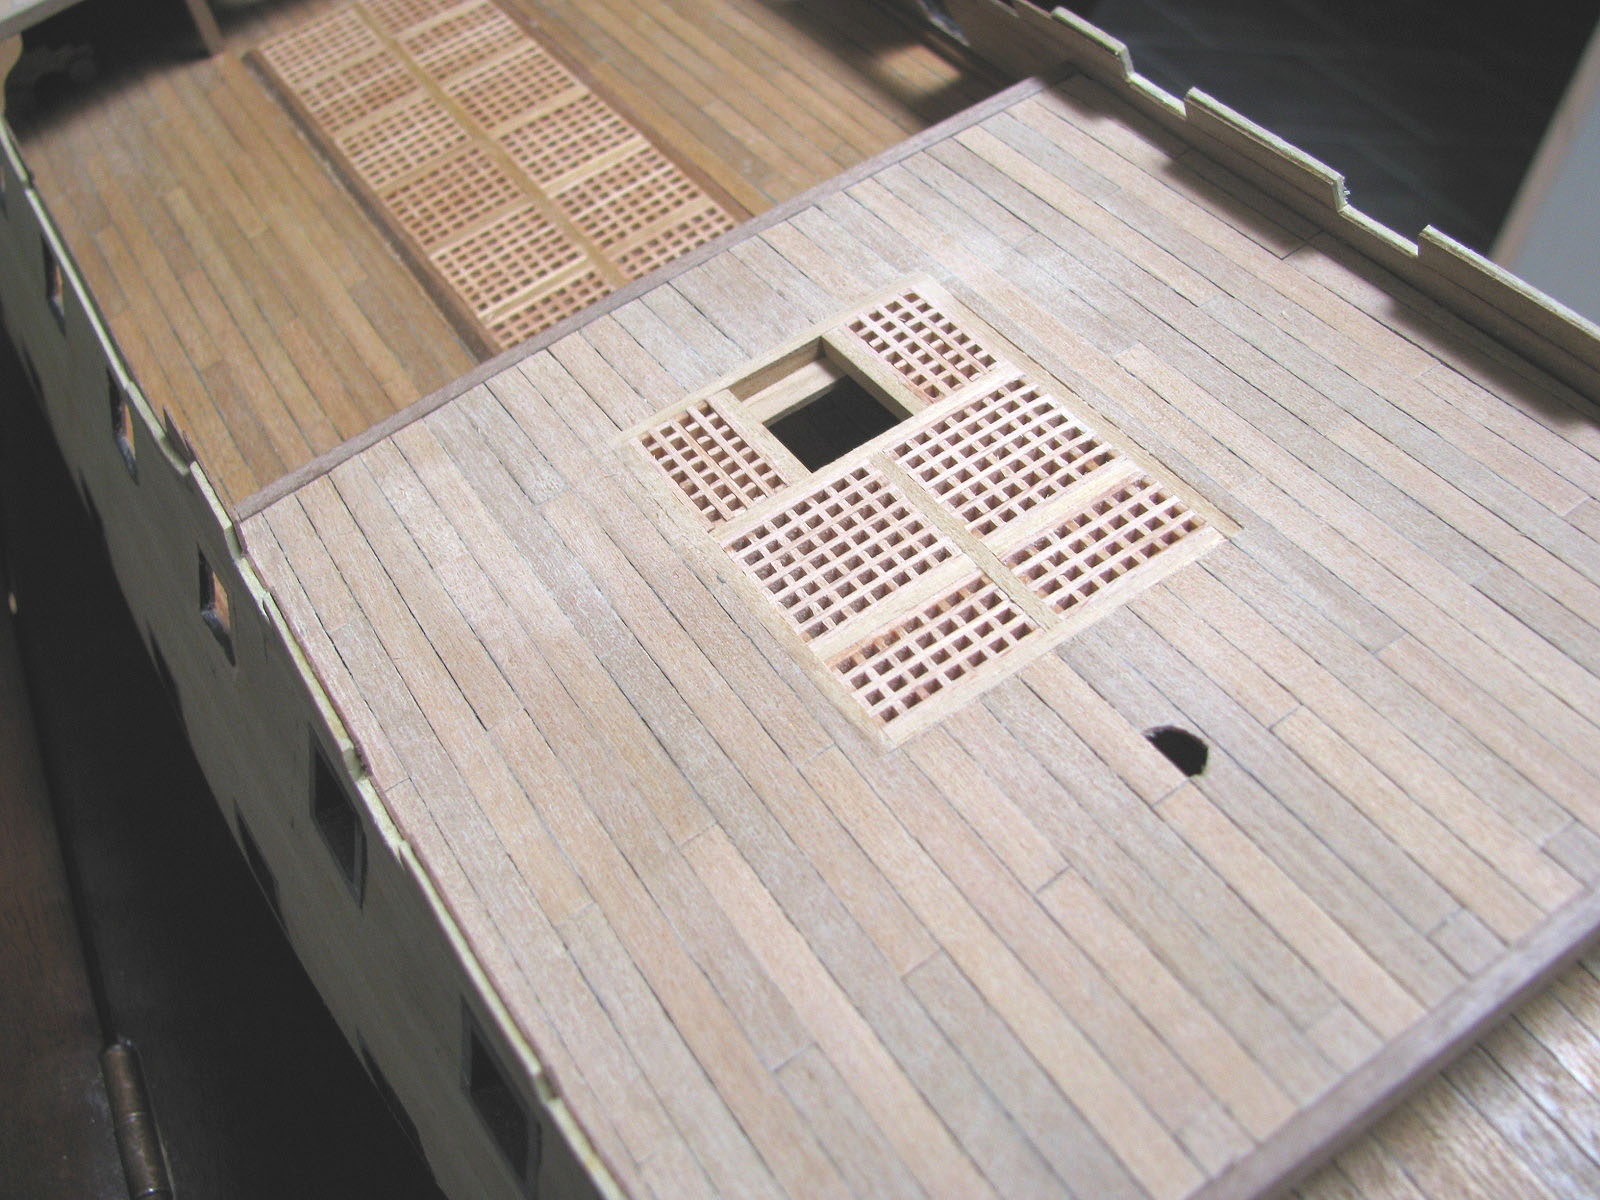
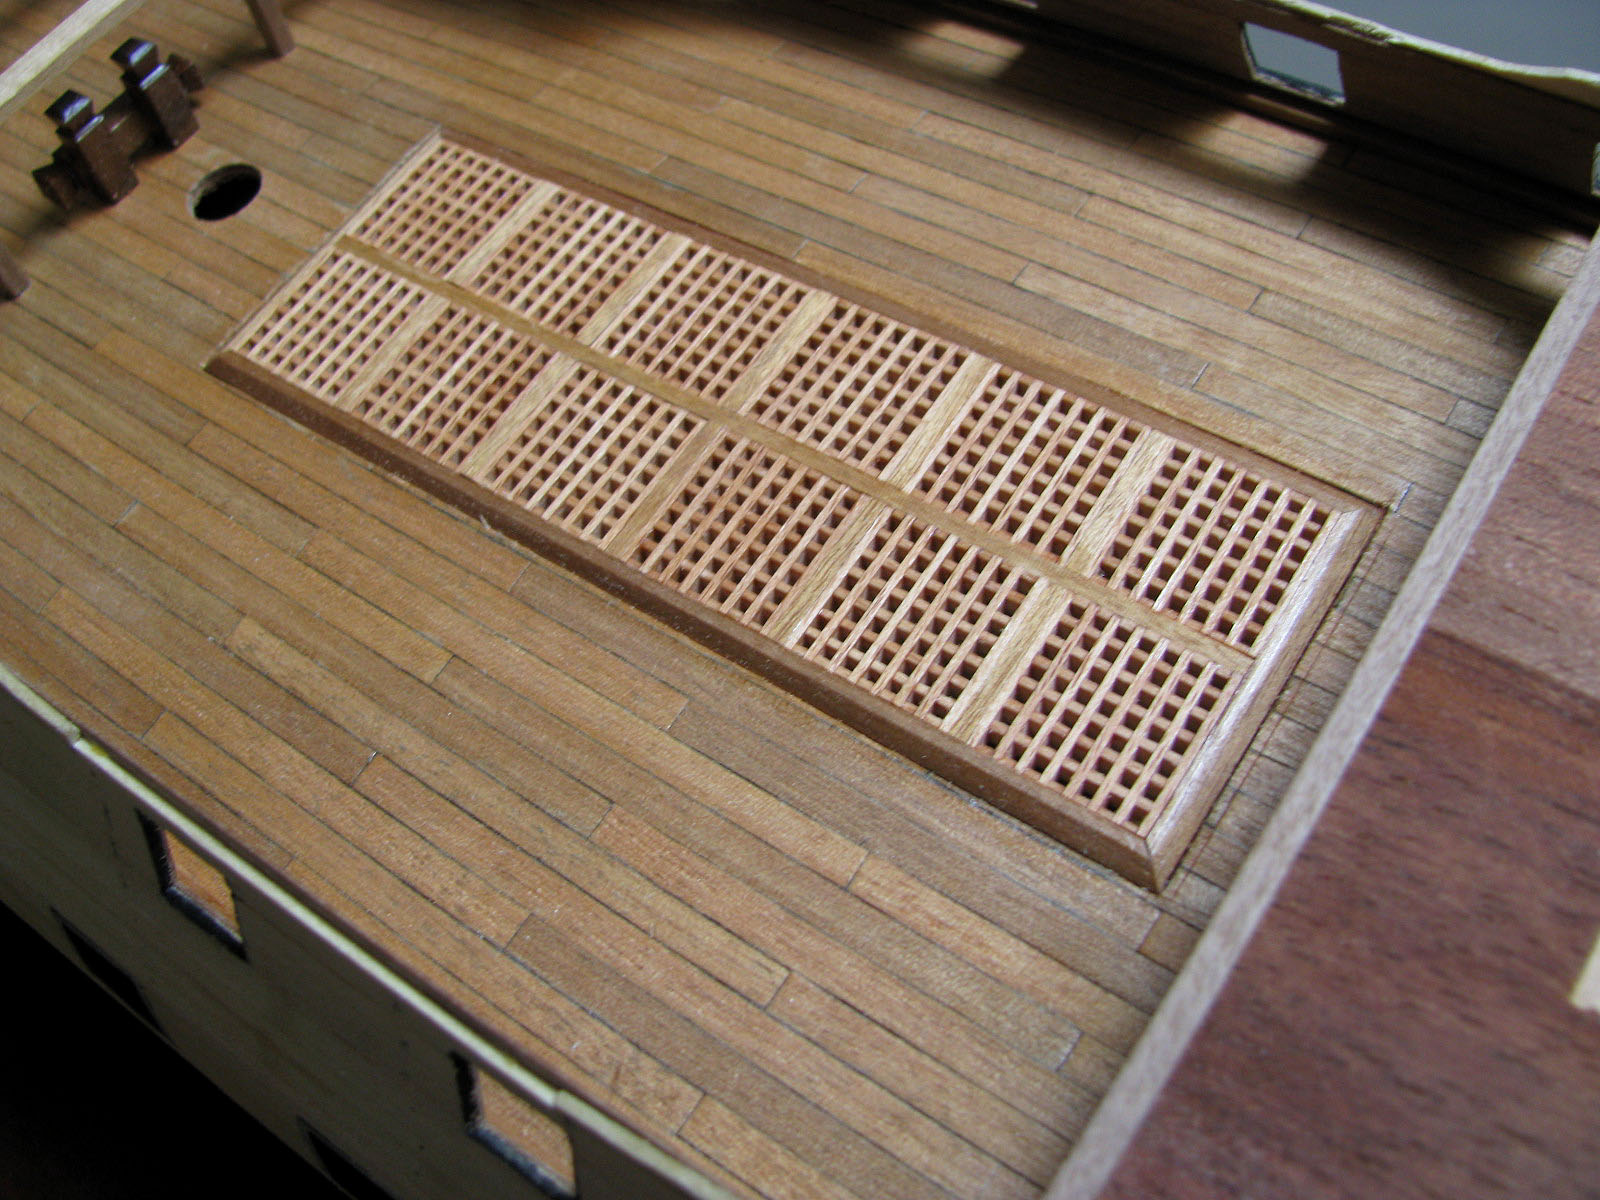
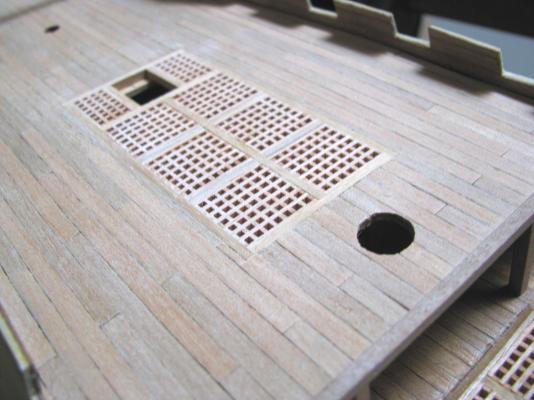
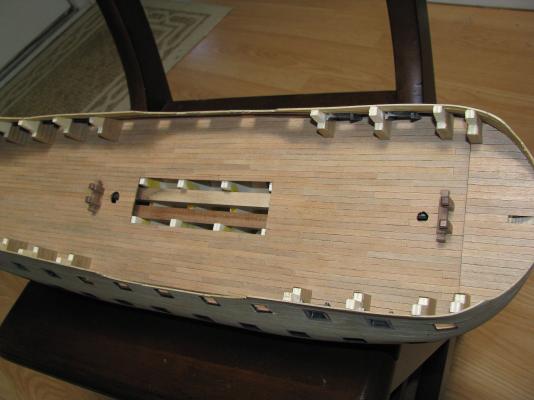
One note, the grating for each deck according to the instructions need to be flush with each deck, I chose to raise the main deck grating a little, the others deck gratings will be flush.
-
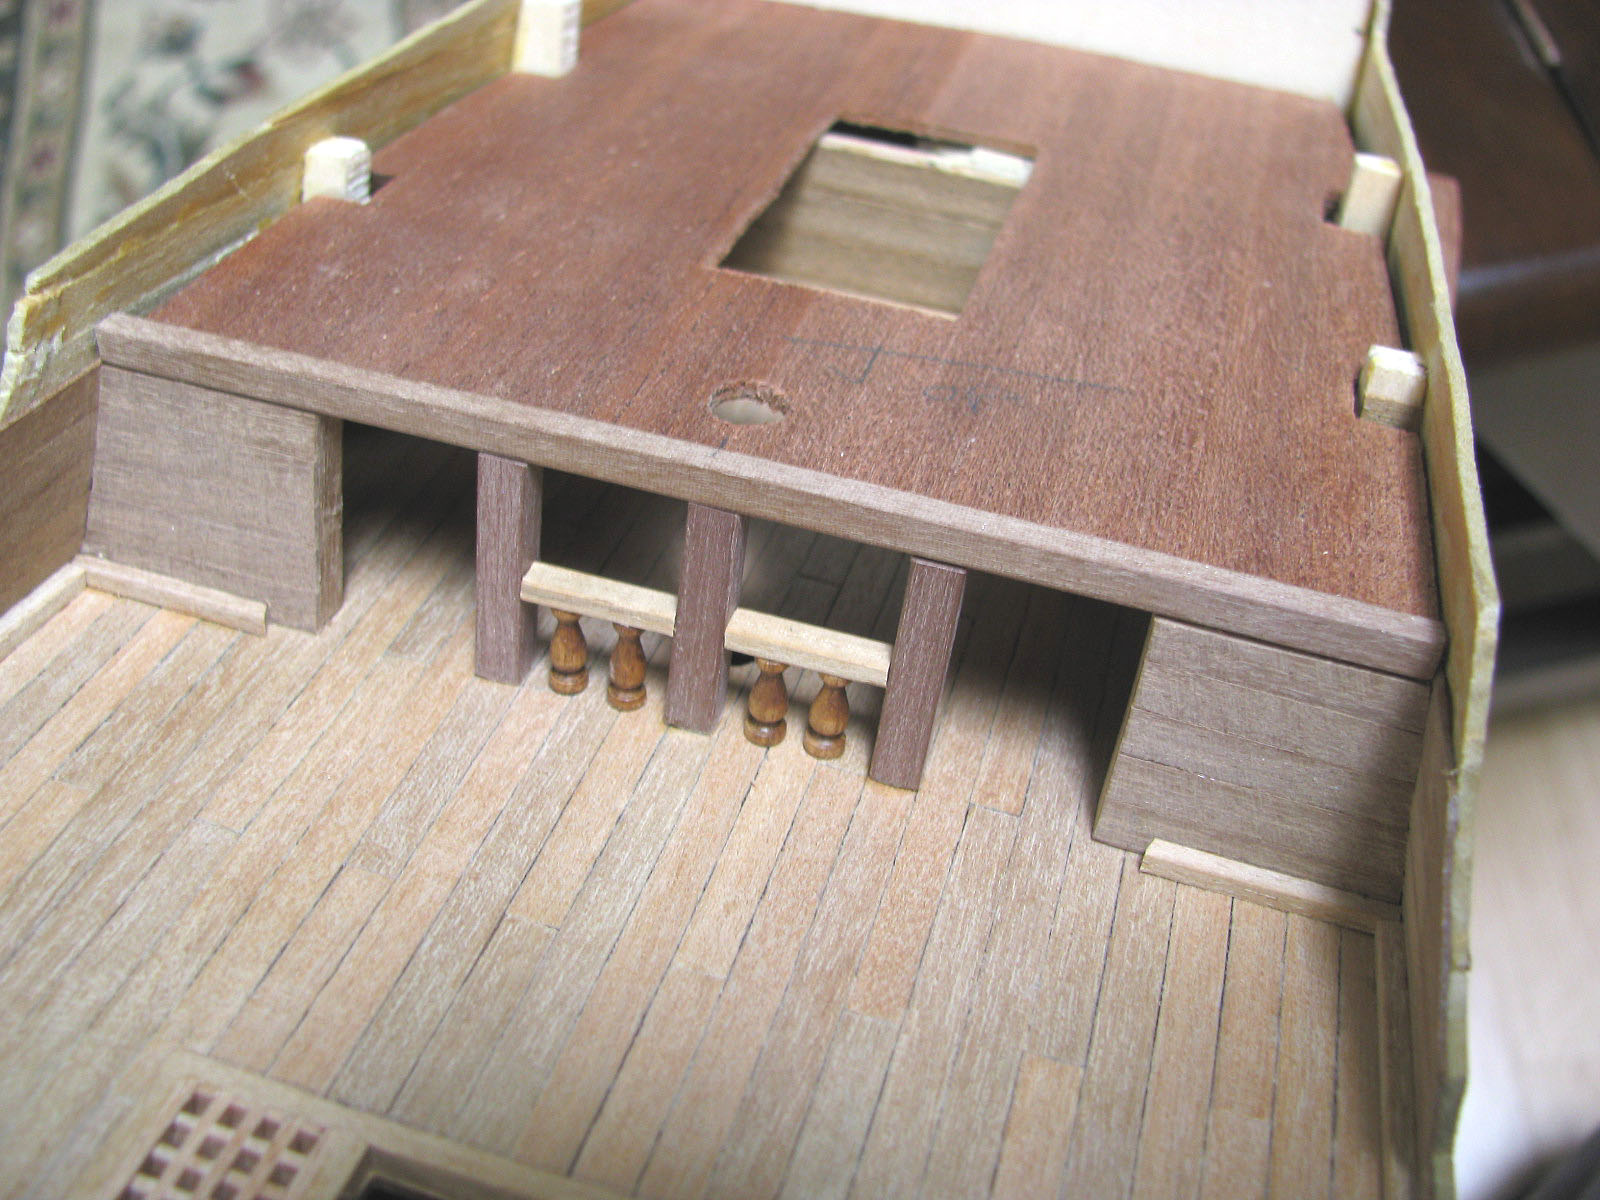
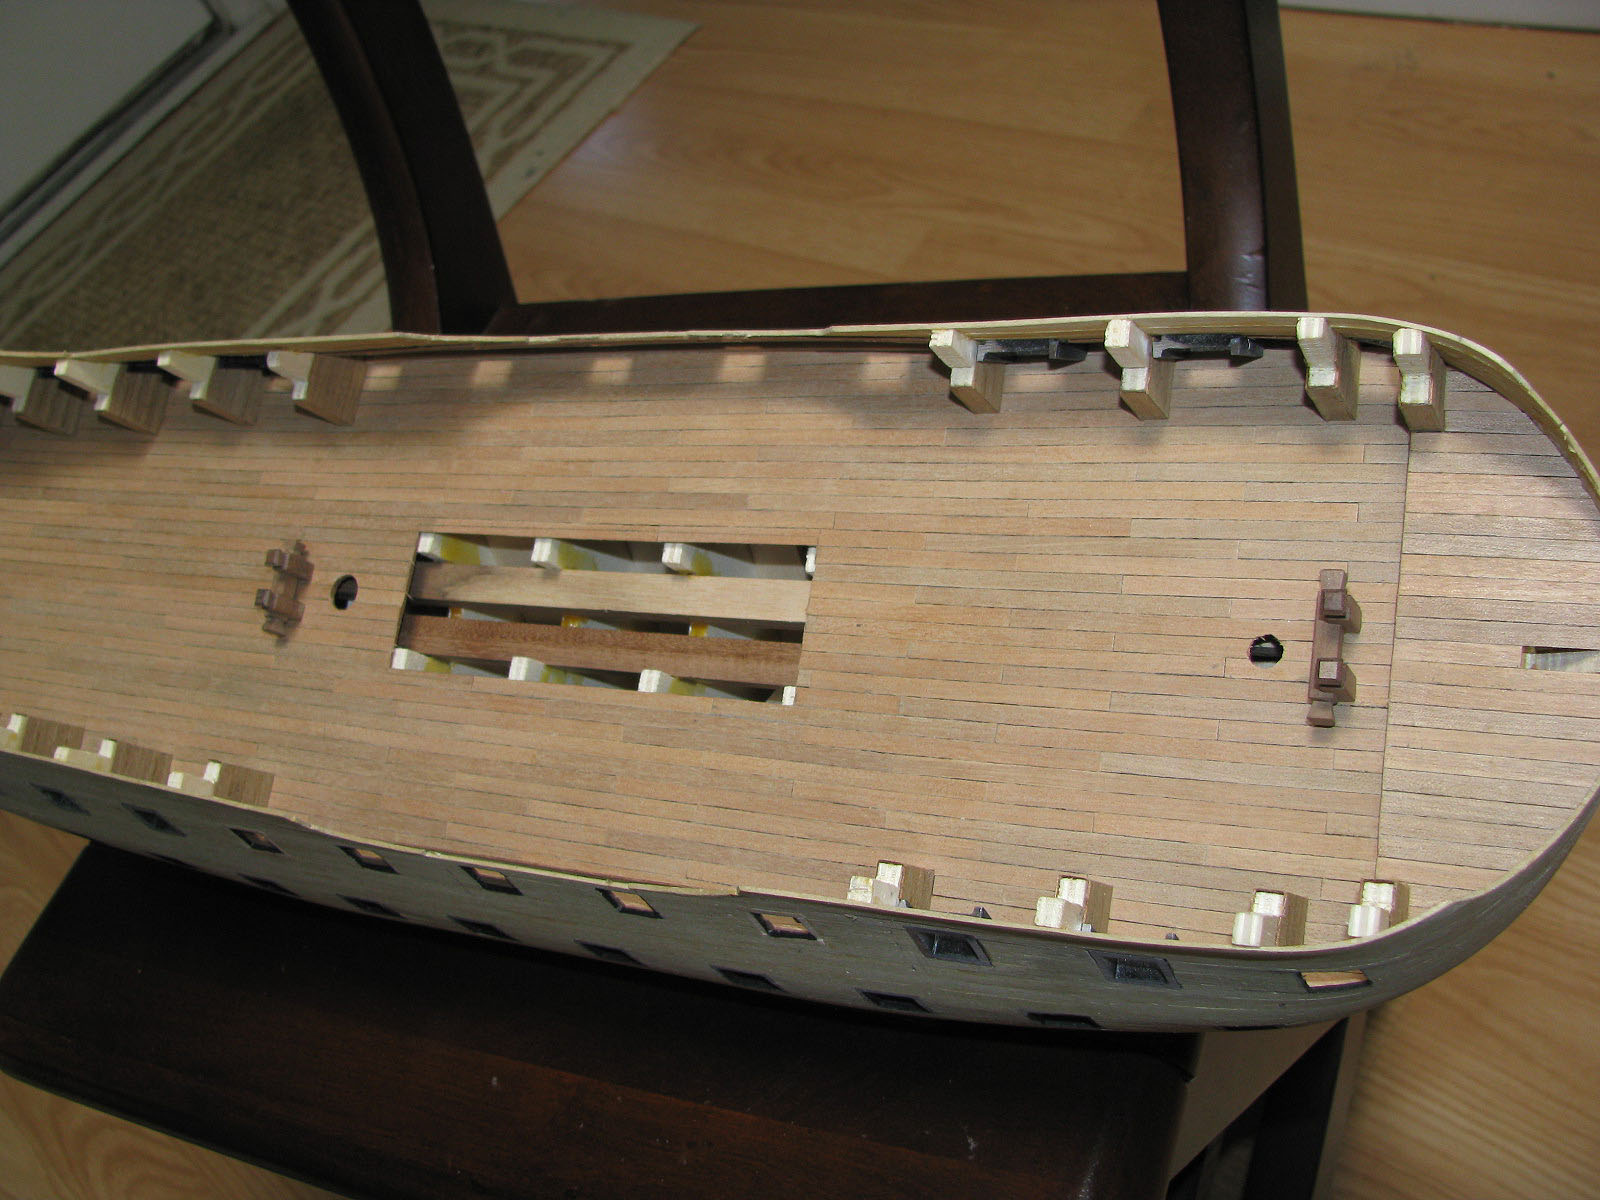
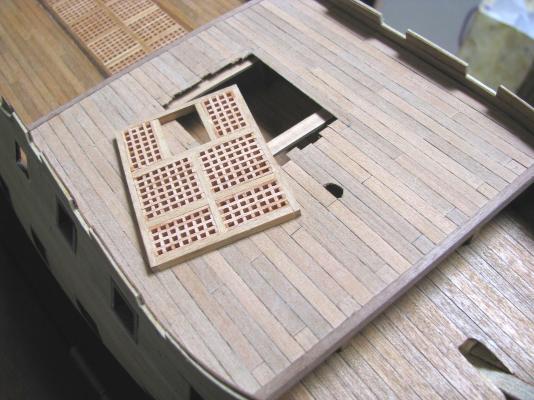
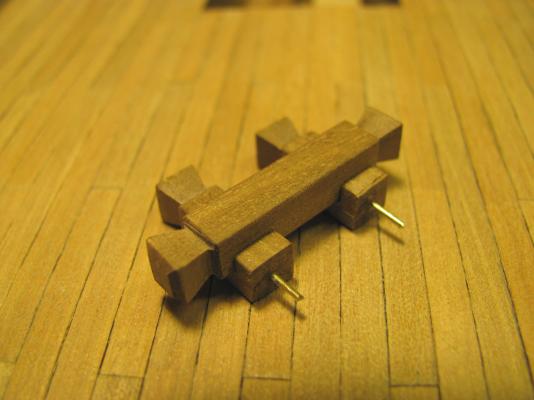
I used a very light coat of clear satin on the main deck planking, placed the grading and made deck columns, also placed cannon carriages on the main deck, will placed the barrels in through the ports later. started placing canon port supports - scratch made.


-
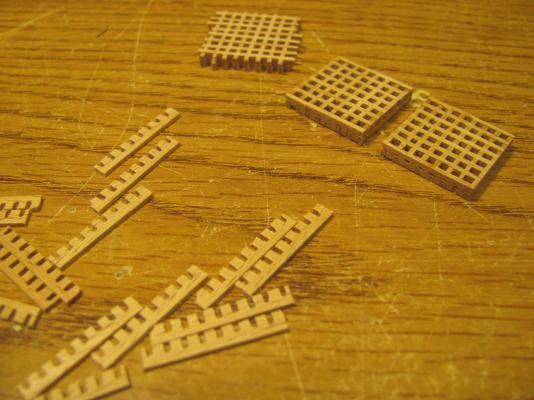
main deck grating
-
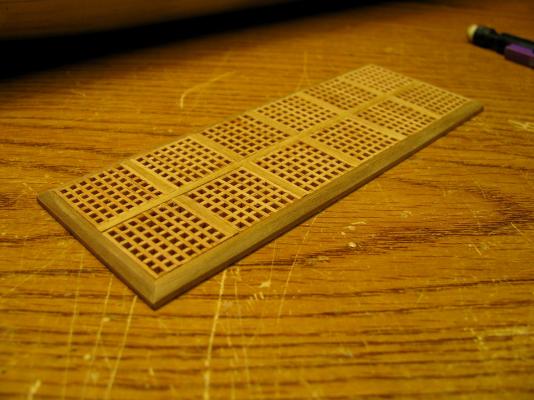
Finish Main Deck planking, added some wood around the bulwarks upper sections which will be visible , started main deck furnishings, will make 12 separate gratings for the main deck


-
Before placing each plank on the decking I use 400 grit sand paper to sand down the surface of each piece , it will be to hard to get into all the corners with sandpaper once the planking is glued. I'll use a matt finish on the deck once it is complete before adding the upper deck, I try to steer away from using gloss finishes.