ZevEisenberg
-
Posts
54 -
Joined
-
Last visited
Content Type
Profiles
Forums
Gallery
Events
Everything posted by ZevEisenberg
-
 Me too! I hope I can salvage mine as well one of these days. My uncle had a half-finished model plane hanging in his house for years that got put on hold when he got married and had kids. Recently, his son was old enough that they rediscovered planes together and he finally finished it. Maybe if I have kids some day, I can do the same with my Ratt.
 -
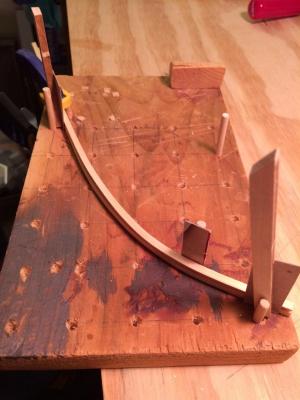
Fantastic! I love the simple stand. I've been lurking, following along, and your photos of the finished Rattlesnake have inspired me to get back to mine after a nearly two-year hiatus. I posted a new question on my build log, and was wondering if any Rattlesnake vets (not the other kind of rattlesnake vet) would mind having a look at it?
-
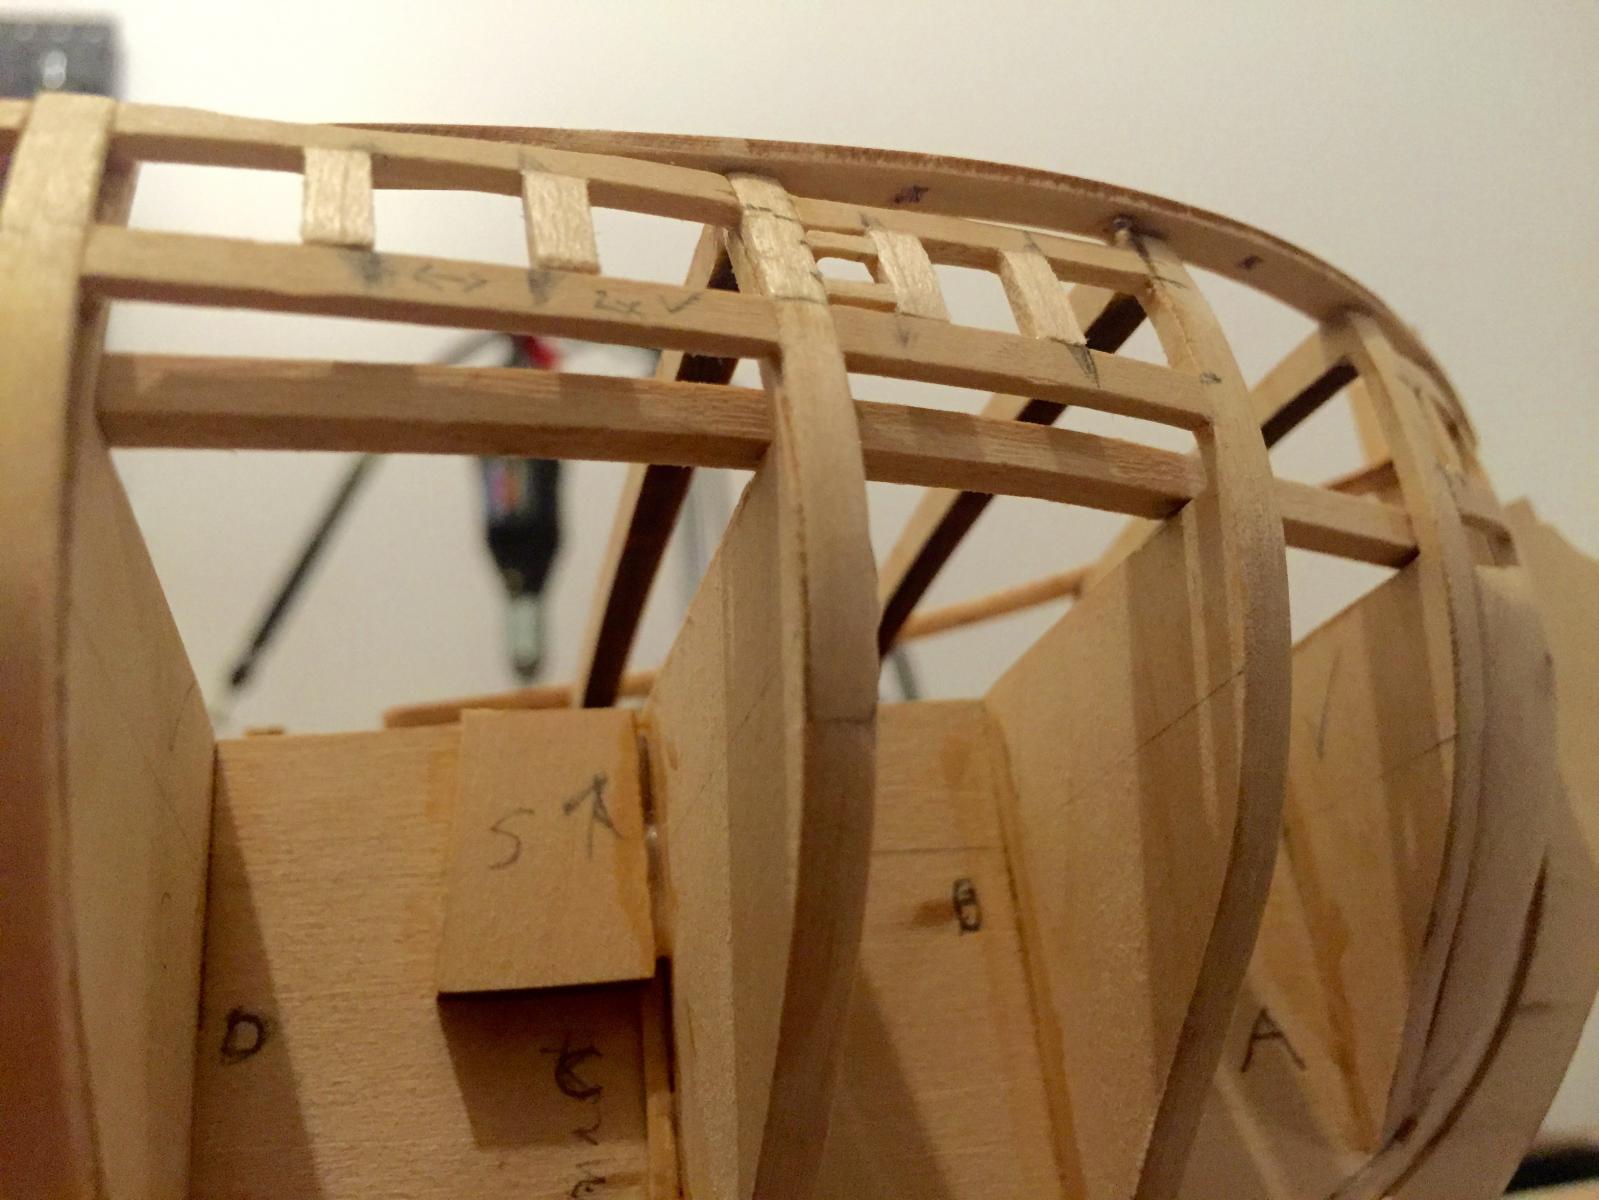
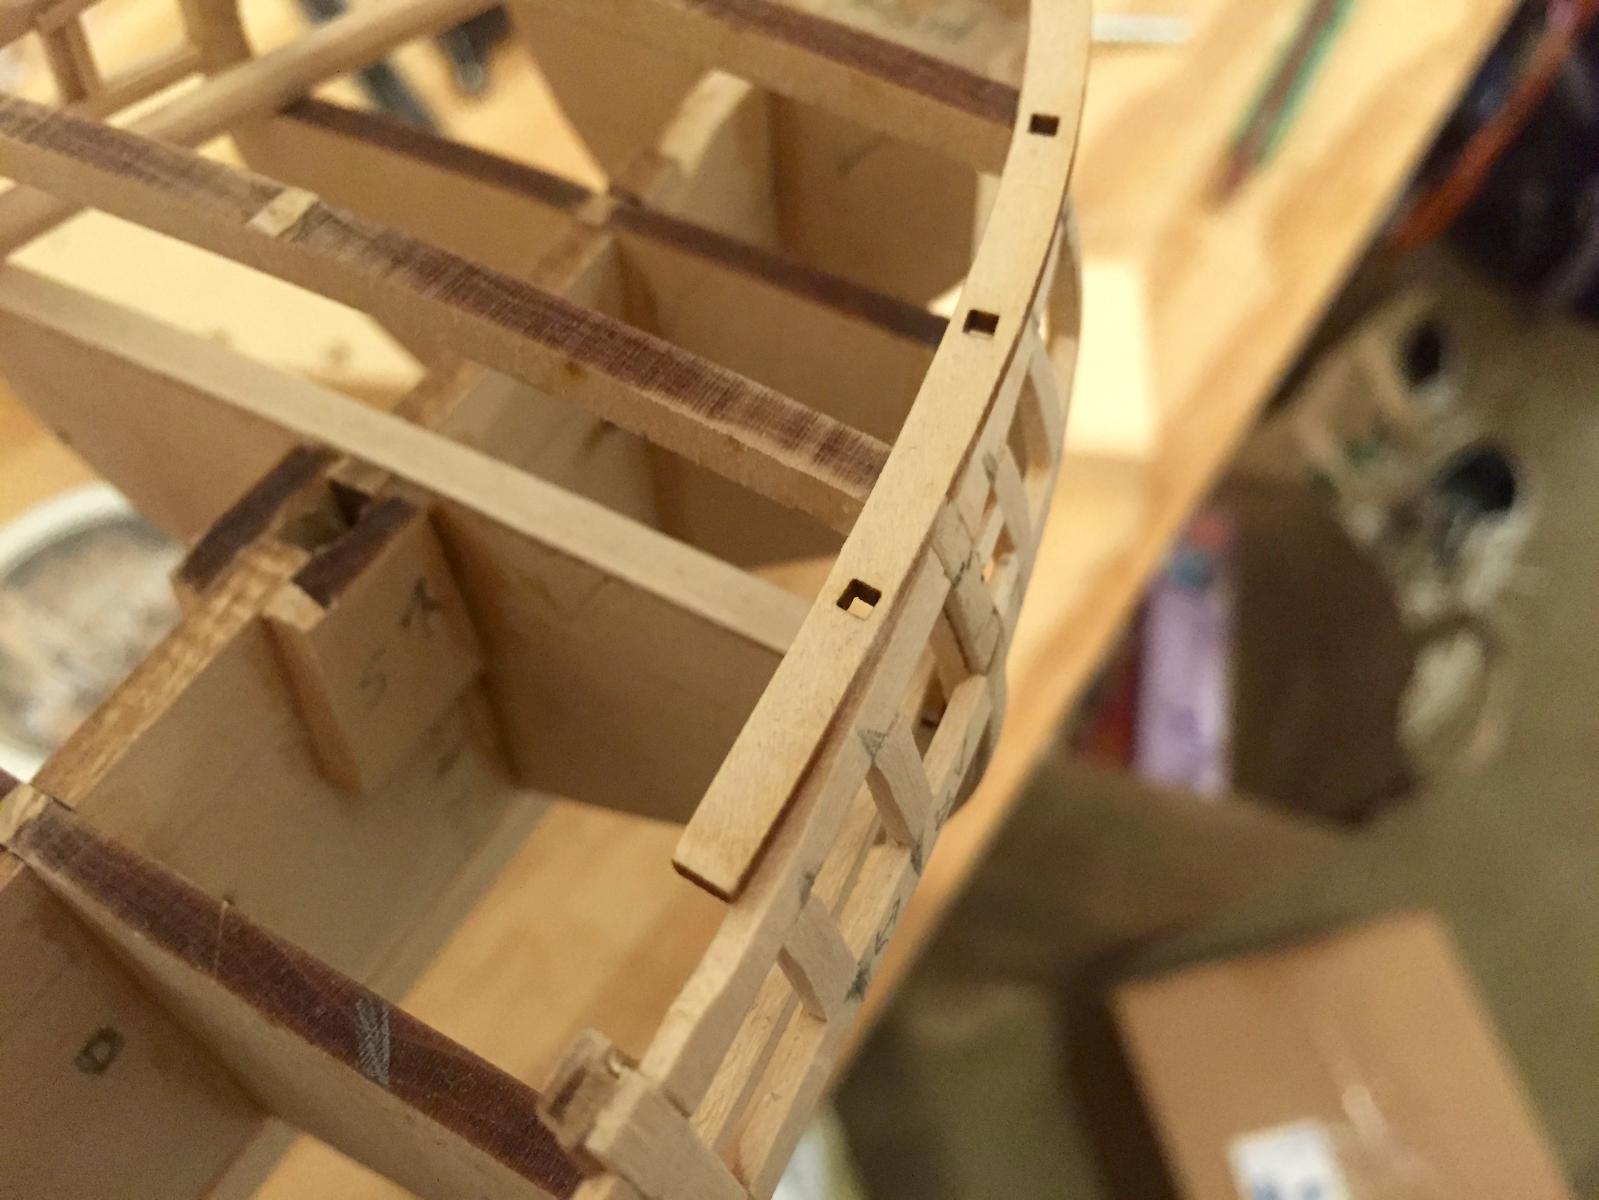
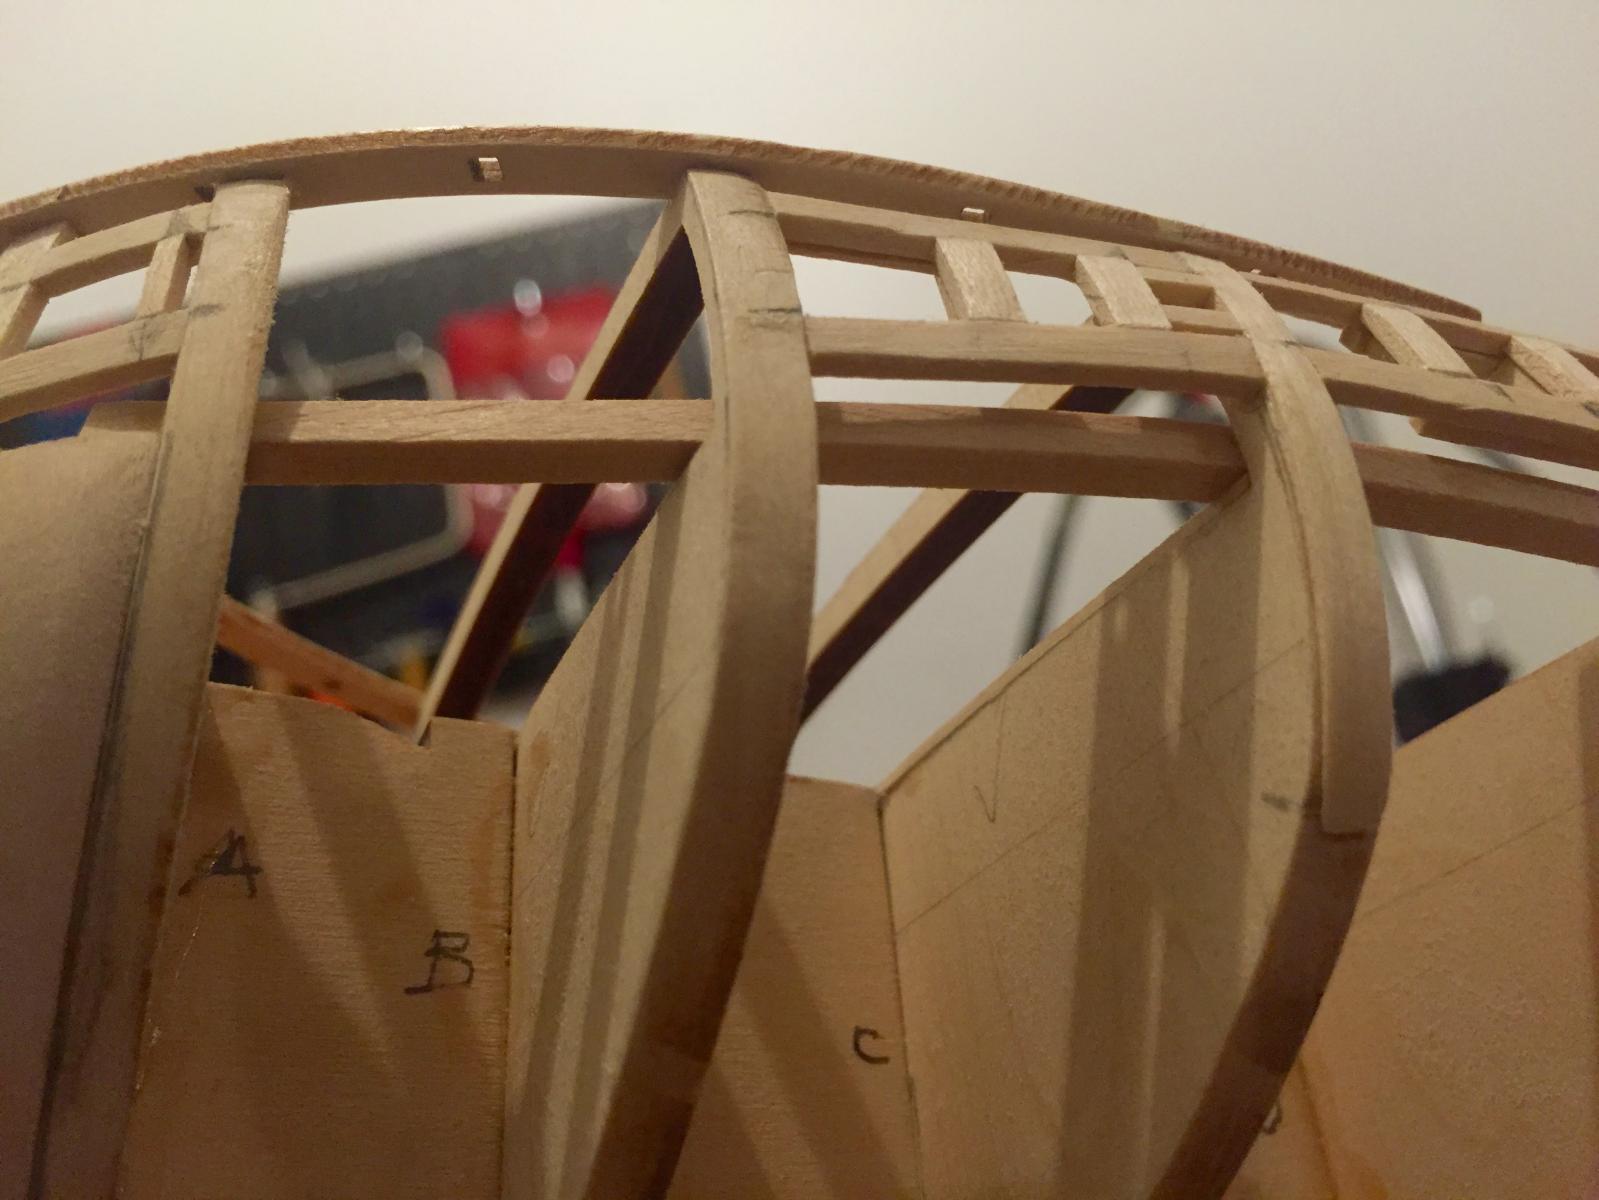
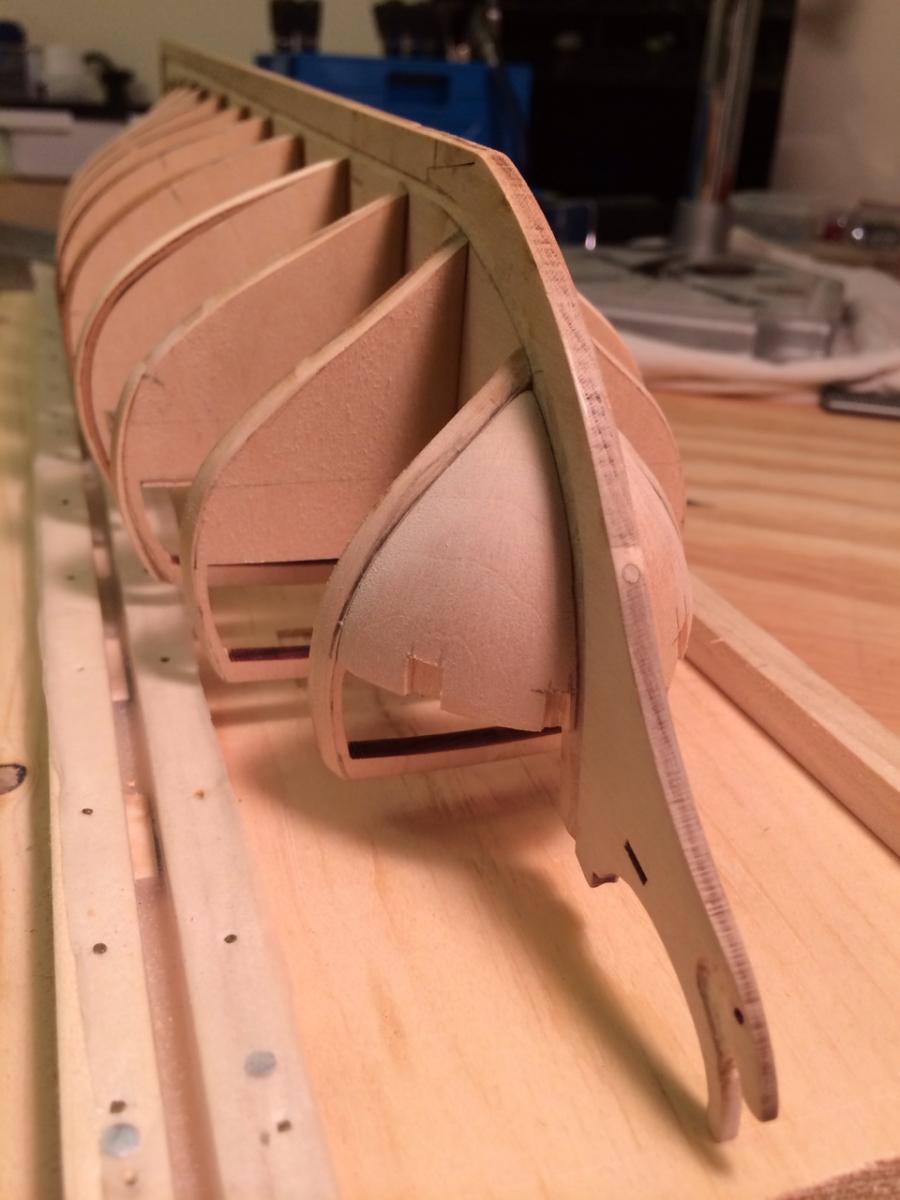
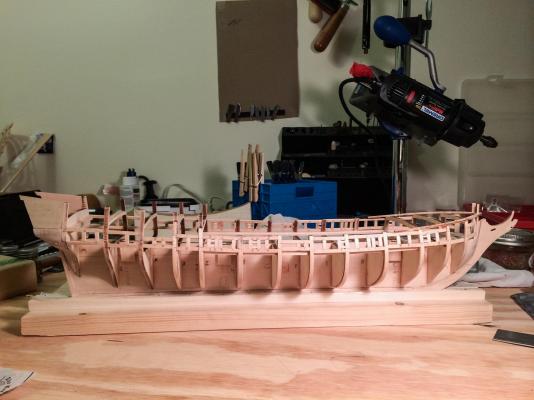
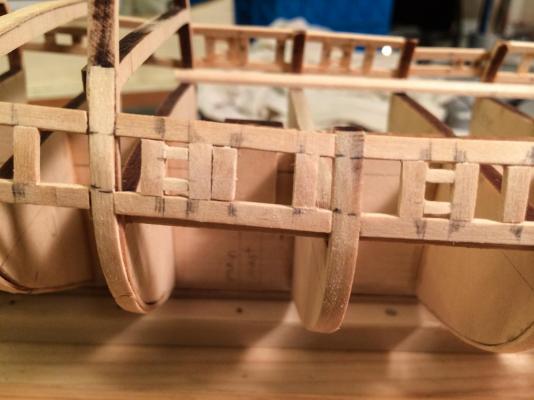
I don't know if I'm "back" quite yet, but I had a few minutes, so I'm finally getting around to posting about a possible mistake/error/problem that was just annoying enough that it caused me to let the project languish for nearly two years. I've had plenty of stuff to keep me busy in the meantime (new apartment, new job, got married - the usual ). The last time I was working on the project, I had just attached the laser-cut forecastle covering board (page 13, fig. 14 in the Model Shipways instructions). The problem is, the laser cut pieces don't seem to quite line up with my ribs. Towards the back, the rails curve in slightly too far, leaving the ribs and gun port framing sticking out. The pictures should make this clear. My question is: can I continue like this? Or should I remove the laser-cute forecastle covering boards and modify them (or re-make them from scratch) so that they more consistently follow the curve of the underlying structures? How far should the forecastle covering board overhang the un-planked hull?

-
I'm moving. Going to pack up my build table and move it to Boston. Excited to get back to my Ratt once the move is over! And I got my girlfriend a small plank-on-frame ship's boat kit for Christmas to see if she's interested in model boat building.
-
Scott, I'll answer your private message here, in case anyone else can benefit from it. Yes, the tops of bulkheads I, J, K, and L do not quite match up on my kit, although they are very close. I see that you had some trouble early on with fitting the bulkheads all the way into their slots, so I would double check that. I'm not doing the top rails yet, but when I do, I'm going to shim and sand the tops of the bulkheads to match the plans as best I can. I think in that case, it will be more important to get clean, fair lines than it is to match the exact scale on the plans, and besides, they're only off by about a millimeter on my kit.
- 264 replies
-
- 1
-

-
- rattlesnake
- model shipways
- (and 1 more)
-
Thanks for the heads up. What do you recommend? I think I will use 1/16″ strip to re-frame the gun and oar ports only, rather than doubling up all the framing pieces.
-
I don’t know how much I’ll get done before the holidays, and I want to take it slow and do it right, but the next step is planking. I am excite.
-
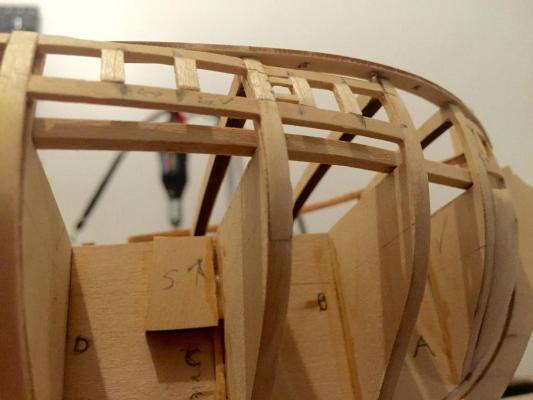
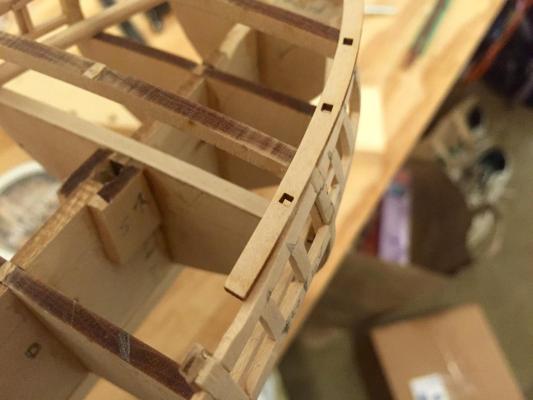
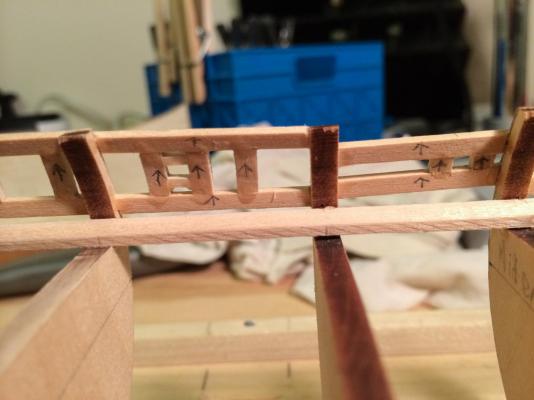
Finished the gun port framing. Got a lot of help from JPett’s build log. In the closeups, you can see the arrows and triangles that I drew onto the parts to keep track of how they were supposed to be oriented so I didn’t lose track between bending, cutting, and gluing.
-
Jpett, Your answers have been quite helpful. I just re-read your tale of gun port woe. You showed admirable dedication to getting them right! You have (hopefully) saved me some strife as I start my own gun ports. For example, I’m going to skip right ahead to using repurposed deck planking instead of 1/16″ square strips at your recommendation (and it makes sense - 1/16th seemed too flimsy when I read it in the plans). As to my previous questions, I am going to try to leave the quarter deck and forecastle supports in for now and not break them but we’ll see. And it looks like I will be skipping the main, forecastle, and quarter deck rails and the forecastle and quarter deck breast beams until after I have finished the hull planking. It doesn’t seem like they’re needed until before the deck planking, and the rails seem to make much more sense after hull planking. Your pioneering build has helped to pave the way. Thank you!
-
Now that I understand stern covering boards (the instructions are a bit murky), I’ve decided to leave them for later. The outer one has to go on after the hull planking, and the inner one seems to be part of the quarter deck planking. It seems like these will be much easier after the hull planking. It also seems like they would get in the way of planking if I do them first. Possibly same story for the breast beams. The order of these instructions seems weird to me.
-
@JPett, I’ve gone through your build log (skimming, so maybe I missed something), and I have two questions: 1. You seem to have cut off the horizontal part of the bulkhead that will hold the quarter deck. Why? Were they just getting in the way? I know I’ve accidentally snapped and re-glued a couple of mine already. Did you keep the parts so you can reattach them, or are you going to recreate them from scratch? 2. I’ve reached the part in my instructions (step 9, in case you have the same ones) where I need to install the covering boards. I had no problem with the bow ones, but I am confused by what the instructions are saying for the stern covering boards. I see only snippets in the plans, and as far as I can tell from your photos, you’ve omitted them entirely. Do you know what the story is here?
-
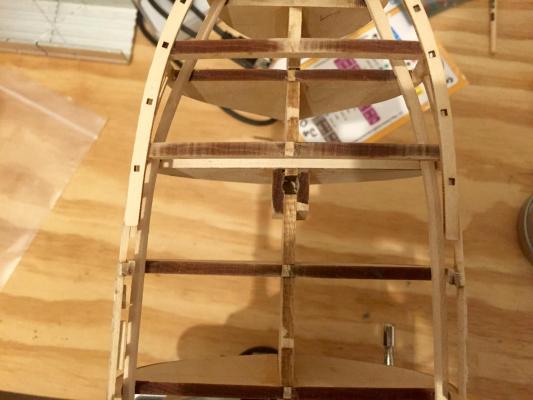
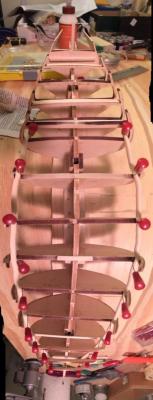
Using grip pins to hold the waterways while glue dries. Experimenting with sideways iPhone panoramas.
-
Thanks for the tip. This filler definitely dries harder than the stuff I used when I did my first small model boat a few years back. I will probably drill holes for the pins if I can. Are you painting your hull, or leaving it bare to show off the treenails? Do treenails show through paint?
-
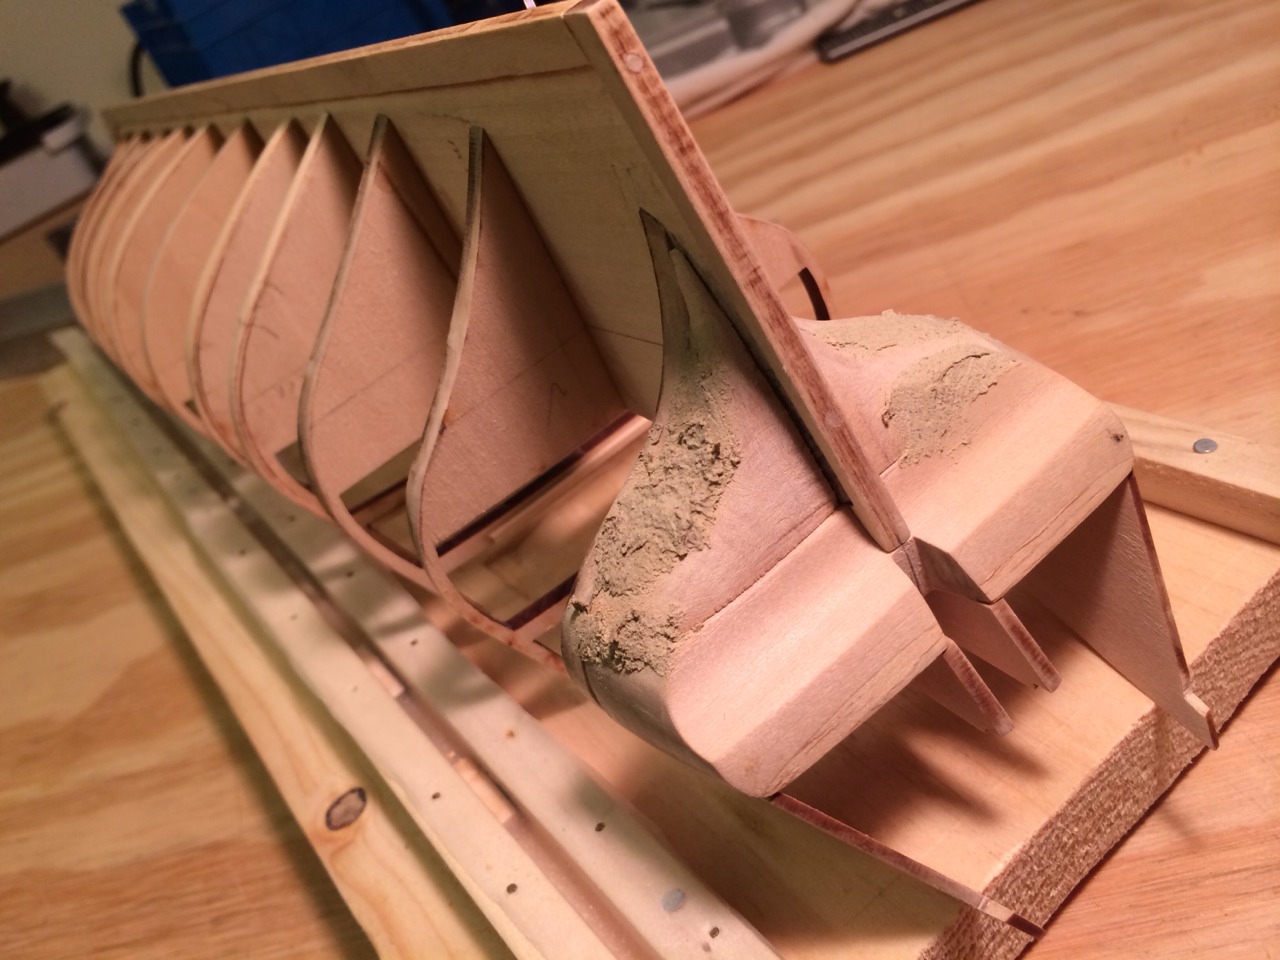
Thanks for the tips, @JPett. I like your solution of making the timberheads thicker, and I believe I’m correct in thinking that they won’t be seen because they are on the inside anyway? I was looking through your build, and as far as I could tell, you haven’t yet installed the waterway? Is there any particular reason for this? It is next in my instructions, so here it is being bent on a pegboard I threw together. Also, my finished bow and stern filler blocks. Some of my carving on the stern blocks was a bit aggressive, hence the wood putty.


-
After a long hiatus, I’m back! I took a break for a few months to work on another hobby of mine. Now that’s done, and I’m resuming work on my Rattlesnake. When I left off, I was carving and sanding the bow and stern filler blocks. I think that part of the reason that I took a break was that it seemed like these things were taking forever with no real progress being made. Now, coming back to it, they needed only a light touchup before they were good to go. For anyone reading this who has built the Model Shipways Rattlesnake recently (lookin’ at you, @JPett), I have a question. On page 12, steps 7 and 10 in my instructions, it talks about the knighthead and timberhead. I can’t find any mention in the plans or instructions as to which wood stock to use here. Should I just take my best caliper-assisted guess? What did you use on yours?
-
My other hobby has temporarily taken over. I’m also an iOS developer, and with the announcement and imminent release of iOS 7, I’ve been spending most of my free time playing with that. Fear not; I shall return to Rattlesnaking!
-
Russ, not quite sure what you mean by this. Do you mean the large gap in the first picture? If so, yes, that’s one of the things I want to fix when I repair or redo these. Or do you mean a different part?
-
Thanks for the tips, everyone. I think I'll end up combining bits of all of them. I'm going to try squaring off and regluing the chipped corner, and I'll pick up some wood putty tomorrow. I got a couple of spare blocks of wood today, just in case, but if I can salvage these I'd prefer it.
-
Wow! That looks amazing. I'm glad this thread exists; knowing I can go back and read it will bolster my confidence when it comes time to planking my own Ratt.
-
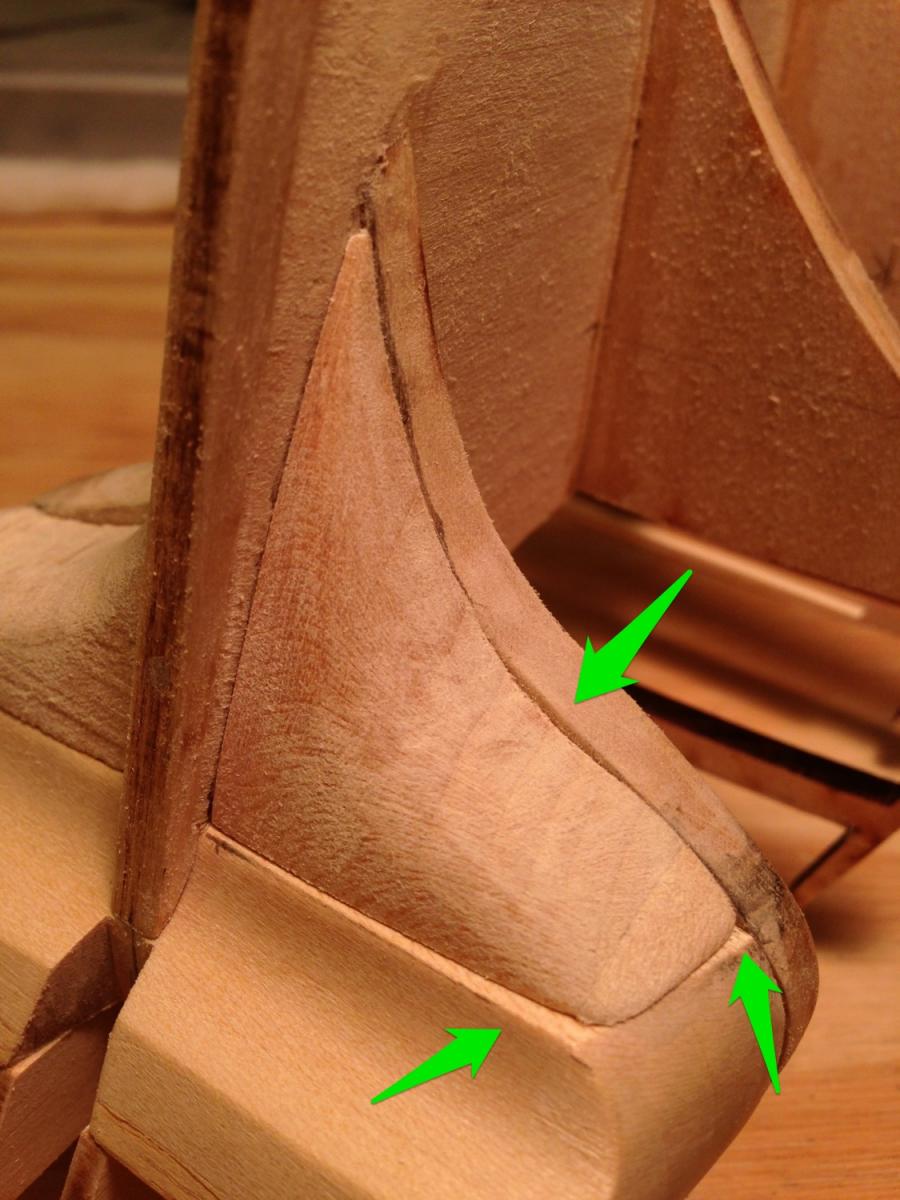
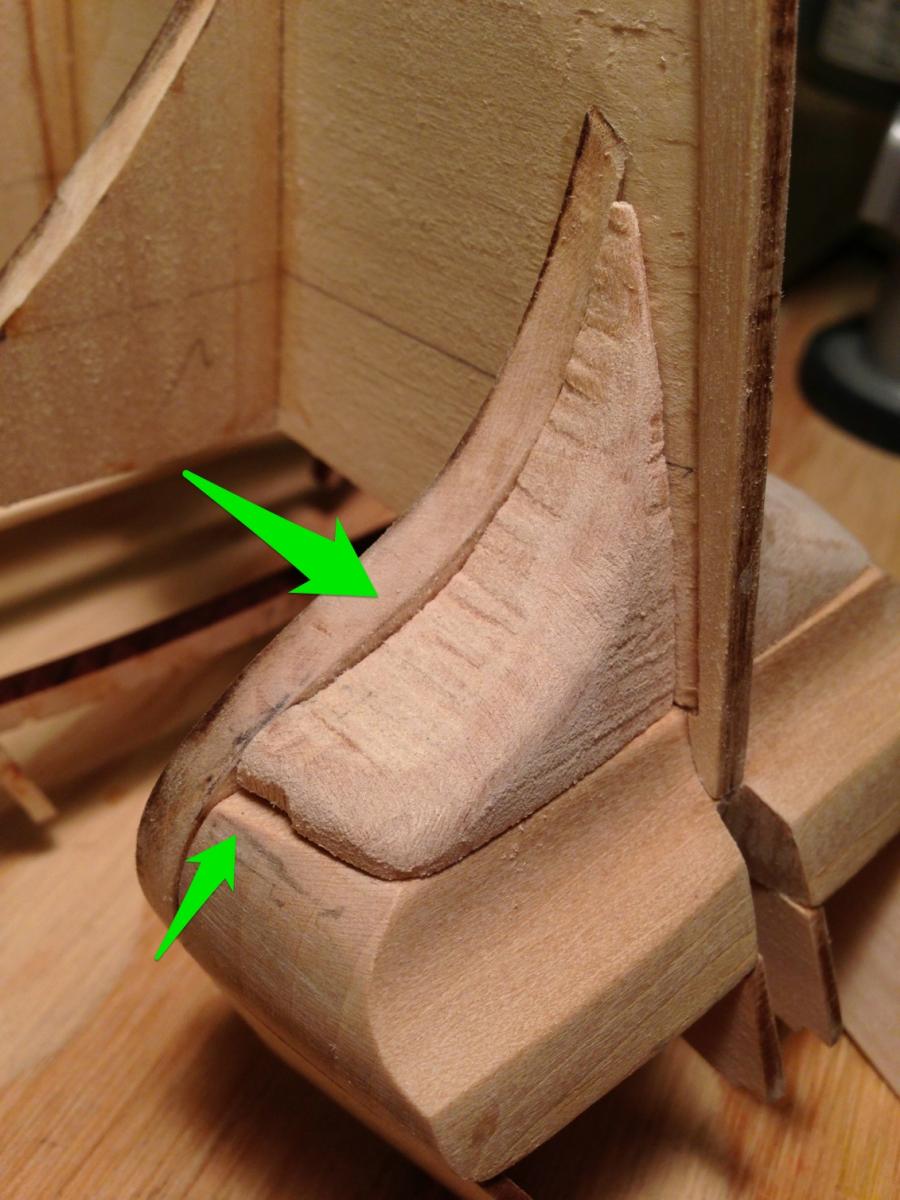
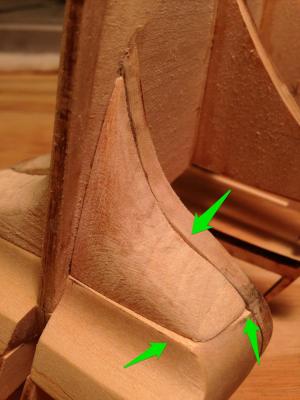
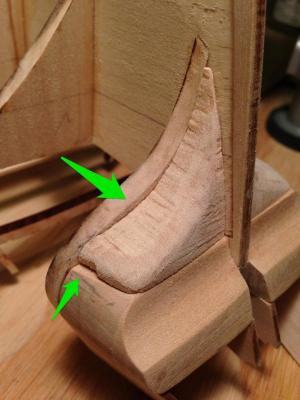
I’ve been having some trouble with the tricky curves on the stern filler blocks. I don’t have an electric saw, and when I cut them with my coping saw, I must not have been perfectly vertical because they went inside the lines on the side that was on the bottom when I was cutting. It’s more obvious on the starboard block, which is not finished, but you can see how much extra wood I took out. I’ll probably get a new block of wood and try again. I will also use my Dremel to speed up some of the shaping. Does anyone recommend any particular techniques for this type of carving and shaping, other than a Dremel and a couple of sanding sticks and files? An alternative would be to sand them to shape as best I can, glue them, and then patch up the gaps with a wood putty that hardens enough to sand it. Is that a viable option? What kind of wood putty is best? This section will be planked over, so color and paintability is not important.
-
RiverRat, that totally makes sense! Surprised I didn’t see it myself while dry-assembling things. sport29652, my cannon wheels seem OK, although I haven’t cut them out yet. The cannon themselves are decent, except for the seam from metal casting. I don’t have a lathe, nor the lathe fu required to make my own. As this is my first build of this scale, I’m trying to keep it by-the-book as much as possible until I find my sea legs, so to speak. Martin W, I actually have a draw plate, but it’s a pretty lousy one I got on Amazon. The holes are inconsistently cut and unmarked. If I end up actually needing it for anything else, I will likely buy the one you linked to.
-
I think RiverRat is going to post a more authoritative answer, but I was in Boston recently and I happened to walk by the Boston Tea Party museum. There is a ship very similar to the Ratt berthed next to it, and it had a false window! It was night, and the other windows were lit from within, but that one was dark.
-
That’s it for the tumblr backlog. New posts coming as I do more work.
-
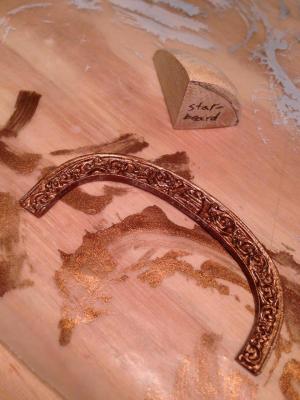
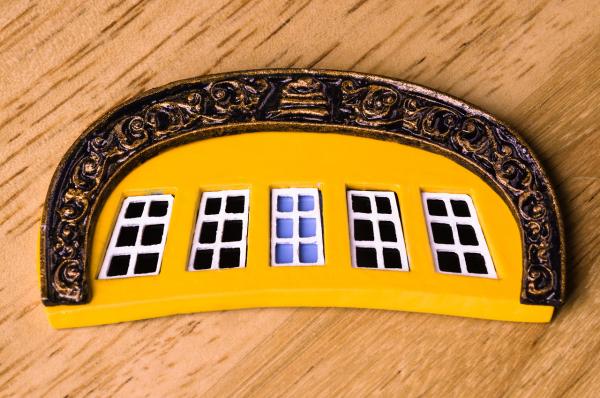
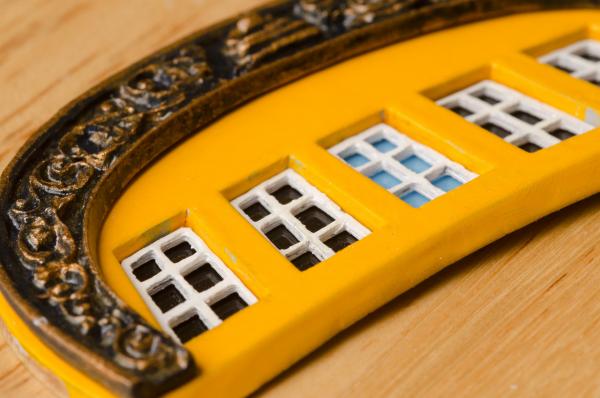
Stern carving, painted but not yet glued to the transom. Paint was a coat of gray primer, two or three coats of brass Testors enamel, allowed to dry at least 24 hours between coats. Then, a mixture of blue and black acrylic gouache (left over from a college art class) was brushed in between the cracks, allowed to dry for 24 hours, and then a final detail coat of bronze on the raised bits to bring back some of the shine that the acrylic had suppressed. Finally, two coats of a spray gloss finish. Very pleased with how this turned out.
-
Two works-in-progress: the carved wood starboard bow filler block, and the half-painted stern carving. I’m trying a technique that @JPett described, where you prime, paint with brass enamel, let it fully set, paint on blue acrylic, wipe it off after it has partially set, and end up with a realistic, mottled metal texture.