After cleaning up the shipyard a bit, here goes.... New framing wood has been ordered but due to Jeff at Hobbymill's schedule it won't be here until late (very late) April. I'm planning on using up my existing stock of swiss pear, ebony, pear, silver maple, and cherry and maybe some boxwood if I see fit.
At this stage, I'm poring over the plans and notating such things as wale, gunport, and deck clamp locations on the individual frame drawings as I'm planning on putting some reference points on the frames physically as I cut them. This should solve some of my previous issues.. With 60 frames, this is going to take a bit.
I have a new build board laid out and prepped but not cut. The frame reference board is ready to go.
I'm still making a final decision on whether to stick with cherry or go with boxwood for the keel, stem, and stern items. Version 1.0 sits forlornly in another part of the shipyard waiting for various bits and pieces to be cannibalized. I'll be re-using my old fabricated measuring tools and making some new ones.
Hopefully, by the time the framing stock arrives, all the plans will be annotated and scanned, all the bits and pieces from V 1.0 will be cannibalized, and bunches of new bits will be fabricated and then ready and waiting.
It's time to do this beast right and proper... and to have some fun doing it.
Footnotes to the build: I'm adding to this as I discover things.
The Hahn plans lack a lot of details so additional sources will be needed.
a) Hahn's "Ships of the American Revolution" is a must to understand the building method.
b) I also recommend the "La Belle Poule" monograph from ANCRE. This has period bits and pieces along with the proper rigging as Hahn used La Venus which has pointed out to me as being from a later period.
1. Open the Edit Box by clicking the "Edit" at the bottom of the Post :
2. Click on the "Full Editor" button :
3. Click on the "Choose Files" button :
This will open a Dialog Box to your Computer Files. Select the picture file you want to add and click "Save" (or "Open") to upload the picture.
4. Place the Cursor where you want the picture added. You can use the Icons (circled) to position it on the line :
5. Click on the "Add to Post" text under the Thumbnail of the picture. This adds the Attachment Code into the message at the position you selected :
6. You can add more Text after the picture if you want, or add more pictures (limit of 8 per Post).
7. Click on the "Submit" button. You can use the "Preview" button to make sure your layout is OK before clicking Submit. If you need to Edit your Post again simply restart the process by clicking on "Edit" again. You MUST use the "Full Editor" to post extra Pictures.
A view of the completed Post with Text and Picture Added :
.
PLEASE NOTE THAT THIS TUTORIAL IS FROM THE PREVIOUS VERSION OF MSW AND NO LONGER WORKS AS DESCRIBED. AN UPDATED VERSION WILL BE POSTED SHORTLY.
Dear forum and modelers
Scratch build ABYTHISTOS –French 1784- was really a dream for me.
The building Idea has come 3 years ago while me and my son were watching photos and video from R/c models, and old time ships.
Yea I used to have a 2 mast wooden ship but I was not the builder ,I knew how to sail her how paint her and repair any engine easy damage but build one? how do we start? …sure from keel but then?…
Thanks to all people on this forum that keep on writing giving ideas tips solutions, and answers
I have spend almost a month reading and watching your articles and tips before I decide to build my project
I have found scanned on the internet a collection of plans
Easy to imagine .Difficult to build ?
What wood or other material to use for a certain part on the ship on the other hand. from where do we start? A plan to begin and a thought how is going to be at the end?
manual skills required patents
and ingenuity but most of all, patience
A cutter, nice curves with single deck one mast and less construction details comparison with a warship
CUTTERS de 4 CARONADE de 12 [1784]
I have acquired a set of plans body, sheer ,half breadth to start plus a general plan for riggings I choose enlarge photo method you can alter plans to any size you desire, then copy to a memory stick and, you have as much copies as you need for photo copying
But important point ,the lines on the original drawing must be very fine
MODEL SPECIFICATIONS
NAME -ABYTHISTOS-
LOA:0.73 cm bowsprit included
LBP:0.44 cm
MAX,BREADTH :0.17,5cm
MAST HEIGHT measured from deck roof :0.65 cm
Bowsprit length:0.21 cm
DRAFT Keel to white waterline :0.15 cm ,
Water line to upper deck top rail :0.10cm
Watertight compartments 3
1 electric motor 6v , 1 gig LOA 0.10cm
4 Sails./ 2 anchors continental type18th century/
1 French gun x18pounder
First day I bought various strait pieces of wood and finally
After watching a lot of dif ships plans I decided the cutter
The build method I used I call it COPY-PASTE
Choosing the keel, a strait piece of wood [beam]0.80 mm thick
Lots of calculations with Microsoft world program till I reduce the plan dimensions from the original minimize to the desired plan and also couple of photocopies I will need them to cut and glue on wood pieces so I have exactly similarity according to original ships plans
More building details I took also from other similar cutter ships
KEEL assemblage
The backbone of the whole ship. It also includes the rudder post and the stem mounted together with glue and a dowel
Small angle pieces of wood vertical installed on keel as floor will secure in place the ribs-frames.
Keel assemblage procedure finished
next step I made an adjustable keel holder using a baseboard and 2 aluminum angle to snug the keel as picture below
Tips
I made my own carpenters wood saw machine simply and cheap way without limits
I used an electrical hand saw with RPM adjustment
And screw it at the 4 hole edges of its base as photo below
Mine has open holes at the metal basein case there are not in yours just remove the base [allen screw usually used]and make the necessary holes with your drill
Tightly fasten with screw or chuck the two ends of an angle iron or wood ,parallel to blade and set your cutting mm distance according to desired
There are 2 types of blade Choose long blades. And For hard wood try iron blade and not the blade type for wood REMEMBER start slowly with low RPM don’t rush and .in case of hard wood also lubricate the blade with oil drops.[i use a wet with transparent -no cooking- oil
piece of cloth] You may destroy the first wood piece till you find the better way but when you do you will be rewarded
…sand paper will do the rest
and don’t forget to remove wood dust close to blade after, use
I have not used plank from storehouse Timber balsa wood is soft and fragile for planking
unknown behavior to sea water
Seawater ?
Yes me and my son wanted to sail with
So I need harder and good quality wood
Dry furnished Pitch pine medium hard long fibred tough doesn’t break easily with the tip I mention before I manage to cut several 2mm thick planking
good white glue quality 2 types express and waterproof
FRAMES
Making frames copy paste method with cheap plywood…
A keyhole saw is good for accurate plywood cutting
A triangle piece of plywood has been removed from the interior of each frame so I can freely move my fingers between
George my son came forward as volunteer to help me cut out frames –piece of cake- he said.
Well he did well but I had to cut 4 pieces twice due to his badly cut
The above picture 7 shows how does the frame look like after I have cut them to right size
With some careful sanding the resulting pieces are nice and accurate
On the same picture 7 you can see the frame on top and middle of witch I drilled a hole [blue arrow]
CENTER LINE
I have discovered a new method to connect frame with keel
Picture below –a long machine screw will connect at middle all frames top
Assembling the stern with frames most difficult for me
Due to the curvature
stern has been cutted for propeller use
even my wife’s clothespin in use
Plank on frame
Plank bending has been made with the simply way of ,wetting them first
And place them later bowing and buckling on the wooden board with rustproof nails
Holding the plank in position on the model while the glue dries is a test for my nerve
by the way thats my roof garden next to my small workshop
Some who favored the old ships
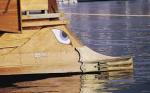
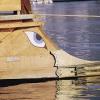
Thats from today ,during my trip i met this yacht waiting outside Hydra island Greece
a little further away and meeting her you can see the sailors up in masts
well thats enough for today i have lots of things to do more .I must work my solar oven also.
Im back
uffff..... in every step i must think about leaving space for servos motor shaft how to set up steering.Never did it again.The whole building is in my mind ,but next steps have been made longer
After placing frames things are getting better with hull planking. When job finish plywood frames will be removed and replaced by real wood pieces
Planking, clean work pleasant time lots of pinball holes
A small sandpaper machine will give a fine surface
Looks a bit ugly but timber is 2 mm thick,this ship is going to meet poseidon at see water so must avoid any bending
Picture below showing
Extra strength
Small plywood supports have been set vertical between frames [as guides and stoppers] to avoid movements
Patience and ..planking finished
Before I remove plywood frames I replaced them with new 2mm thick ribs made of curved solid wood [blue arrows picture above]
I did glue them tight to inner hull planking
Hull has completely covered by planking
I m starting to remove Plywood frames.Τhe inner part must be clear.
Now I have free space enough for motor shaft servos steering
I have painted the internal with first a coat of white waterproof glue and the next day a second coat of fat oil primer Before the electric equipment installation
The interior has been sealed’ I could also use polyester.
Gives you hardness but also weight.
Once I made a small boat i used liquid polyester it smells awful and also its hazardous
Patience
Now sitting on a chair I’m holding the ship on one hand
On the other hand a special bosh electric tool a handy multi sander
and rolling it slowly with low rpm in all around the sides
don’t forget wood planking is tough for this timber
last sanding and my hands replaced the tool by a very thin sand paper 180 grit so at the end of the day I had the desired smooth shape
Now I have got strength to continue
I will need to putty the body but that’s not urgent
I kept some wood dust I will need it later. to make my own colored putty
Hmm ,,midnight again and everybody on this house went to sleep all ? no ..except..my partnerships 2westy dogs watch carefully every step i do Quiet.. time… to consider my next steps…
Deck construction
I forgot to mention that deck beam supports of wood have been added at all around last upper planking
Beams will guide me and support the roof deck later
A plywood piece of 1.3mm thick took place as deck flat base on top of which I did glue with fine barbeque round wooden meat sticks --wonderful result ideal for decks you may try it--
The special bosh multi sander with 100 grit first 180 later sand paper gave me the desired flat deck surface ready to varnish
Deck divided in 2 pieces for reasons of installation servo..moteur,,battery
Forward deck piece is 1/3 of the whole length glued to beams
Aft deck piece 2/3 of the total length can be easily remove
With 4 inox screw of 6mm
Time for putty and ballast keel
as ballast a weight of 1.2 kg 0.8mm thick long lead[yellow line under ship]
glued with epoxy and 3 inox screw under wooden keel
and under the lead a thin false keel 2mm has been added to protect the lead
RUDDER CONTRUCTION DETAILS
this plan showing how connected the steering wheel
[red letters -hole fore secure pin -]
[orange letters- inox tubes or hard plastic filled with grease-]
I know i post pure and sort details but i always hurry to do something else and my hands are still covered with glue. CHEERS.
From a bunch of wooden stirrers I had bought I have made the deckplanking of the lowest deck, and some oak beams (glued 4 of them on each other). These Beams are the base of the seats (made out of beech). Two small undeep holes plus some oak stain make the dowel-mounting of the seats:
For the planking a rather strong curving is neccesary. As I have planned to make the hull out of oak I first tried to bend some oak strips 6 x 2 mm over the "wrong" side, but even after two days in water this did not work.
After some adjustments on my circular saw I now can make oak strips 3 x 3 mm - will try out the next days if this will work.
After finishing my first scratch build - VOC Retourship Batavia - I will now start with something completely diffirent, a Greek Trireme.
Trireme means literally three oars - three rows of oars placed above each other.
For one of my sons, who is studying archeology and has a great interest in the ancient Greek culture I already made a Bireme - two oars. This one is in scale 1:35.
The European modelbuilder Krick also has a Trireme in its program, so we decided to buy and built this one:
But this is in scale 1:72 and built it will be about 51 cm long. About the same as the Bireme.
So we decided to lay the kit aside and use the plans to upscale the thing to 1:35 scale - making it twice as big as the Bireme, but in the same scale.
This means a model of over 1 meter (3 ft) and making everything yourself - keel - bulkheads - planking etc.
Therefore this topic in the scratch-build section.
First step to do was to upscale the plans, with my copier and some old fashioned carbonpaper:
After that the jig saw and after sawing and fitting the first result:
Thank you all that you followed this short log of mine and for your kind words.
Photos of completed model you can see in gallery: http://modelshipworld.com/index.php?/gallery/album/376-tsernikoperama-from-greece/


 ioannis reacted to mtaylor in Licorne 1755 by mtaylor - 3/16" scale - French Frigate - from Hahn plans - Version 2.0 - TERMINATED
 ioannis got a reaction from IgorSky in Cutter Abythistos by ioannis - FINISHED - Scale 1:48 - RADIO