


kmart
-
Posts
170 -
Joined
-
Last visited
Content Type
Profiles
Forums
Gallery
Events
Posts posted by kmart
-
-
Amazing job with the ships boats.
As for how to use the oak....Grains to big for scale on the model.
Should be seen so not an internal piece
and I wouldn't want to paint or copper over it.
So my vote is that I would use it to make the cradle.
I've just started my Connie build as well so I'm eager to watch your progress as we are at the same point as far as the ship proper goes. (I'll build my boats last.)
-
Thanks for the encouragement everyone.
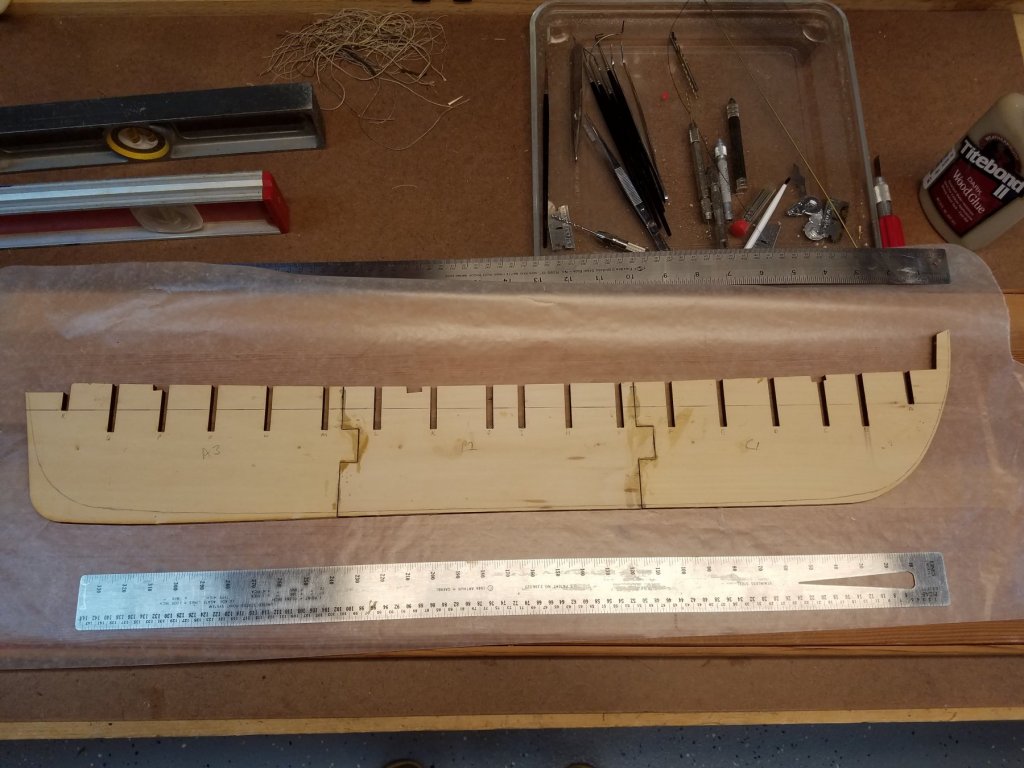
Now that the three frame pieces are together. I wanted to dry fit all the bulkheads. Without a good deal of clean up, most wont fit in.
So I took my dremel tool with a straight router bit and touched up the slots on both the frames and the bulkheads. I followed that with a small file.
I took just enough off so that they would be a snug fit, (not overly tight) fit. But still have a just enough play so that they can be squared up when gluiing without a lot of pressure. So this is Dry fitted.
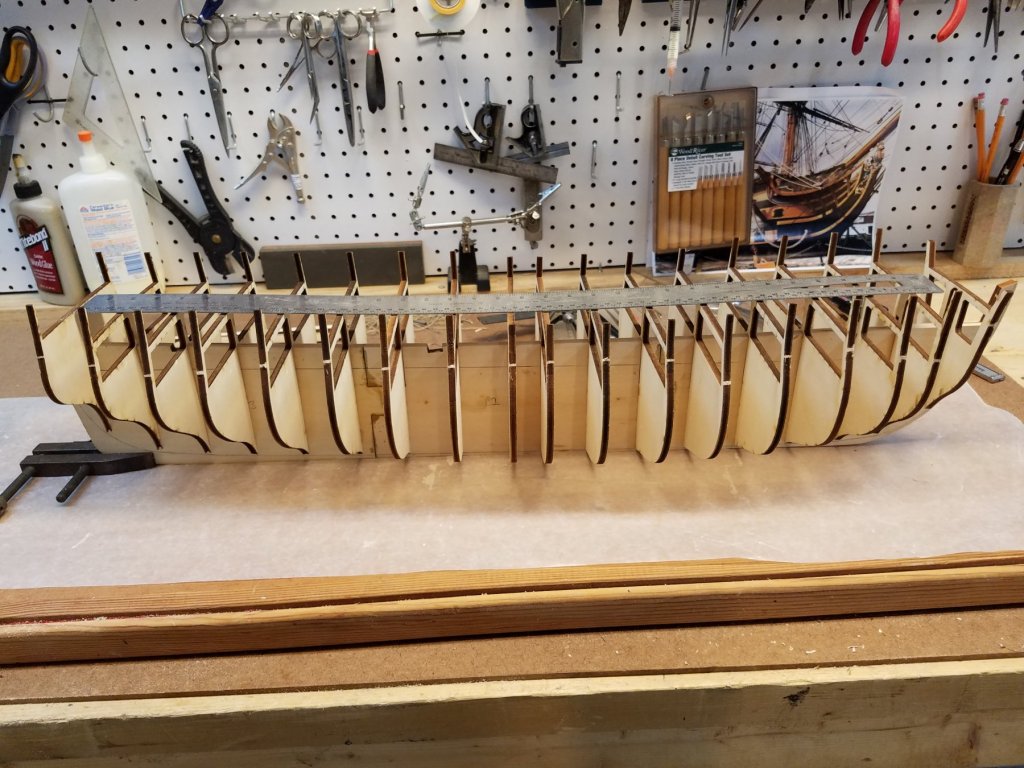
Latter I'll transfer all the reference lines to the bulkheads to ensure they sit at the right height. But for first pass.. they look fairy good.
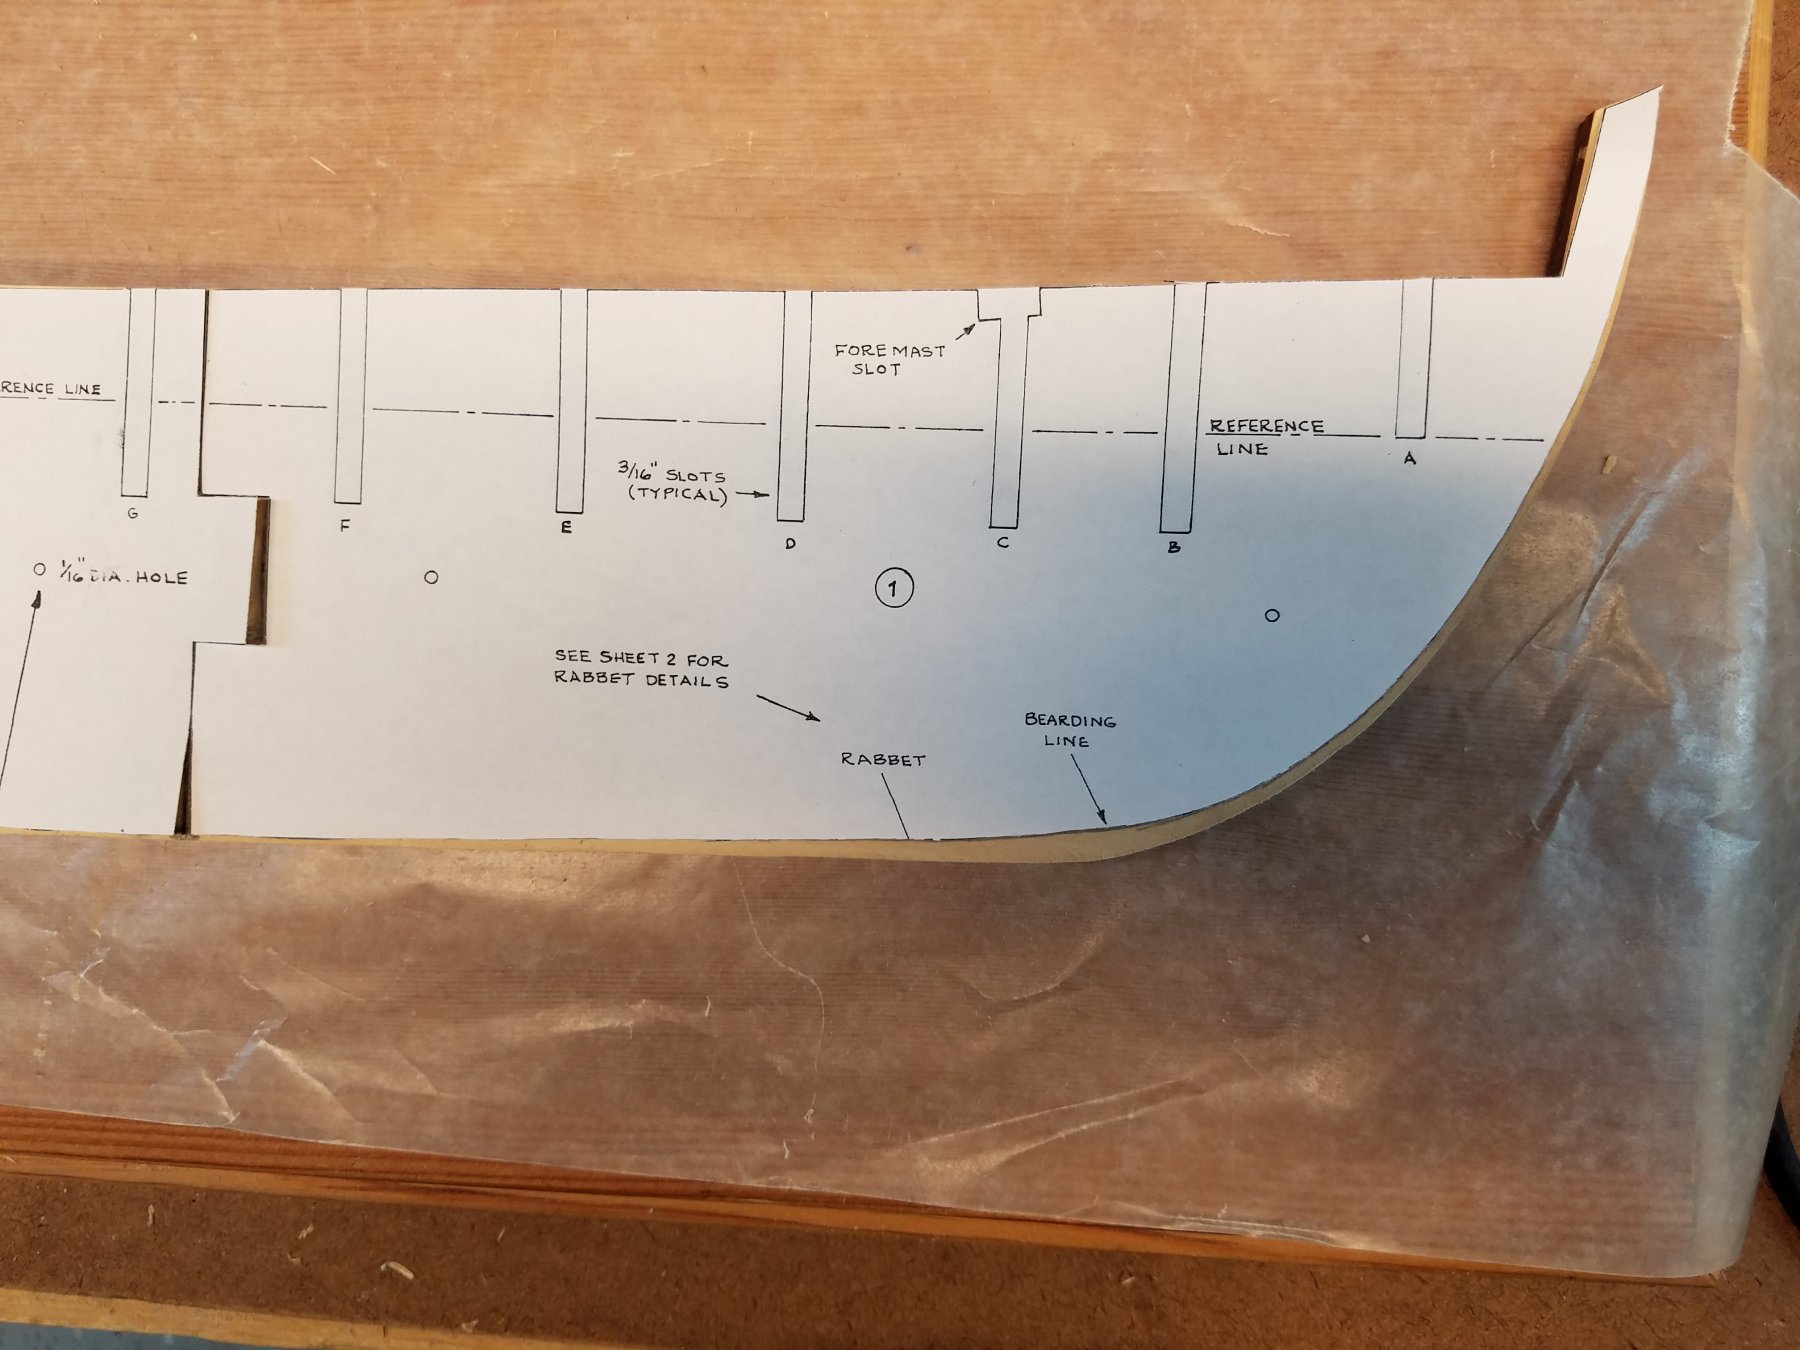
As for reference lines on the frame. I cut out the template from the plans. I cut the plans at the bearding line. This let me just lay the template on the frame and trace the edge.
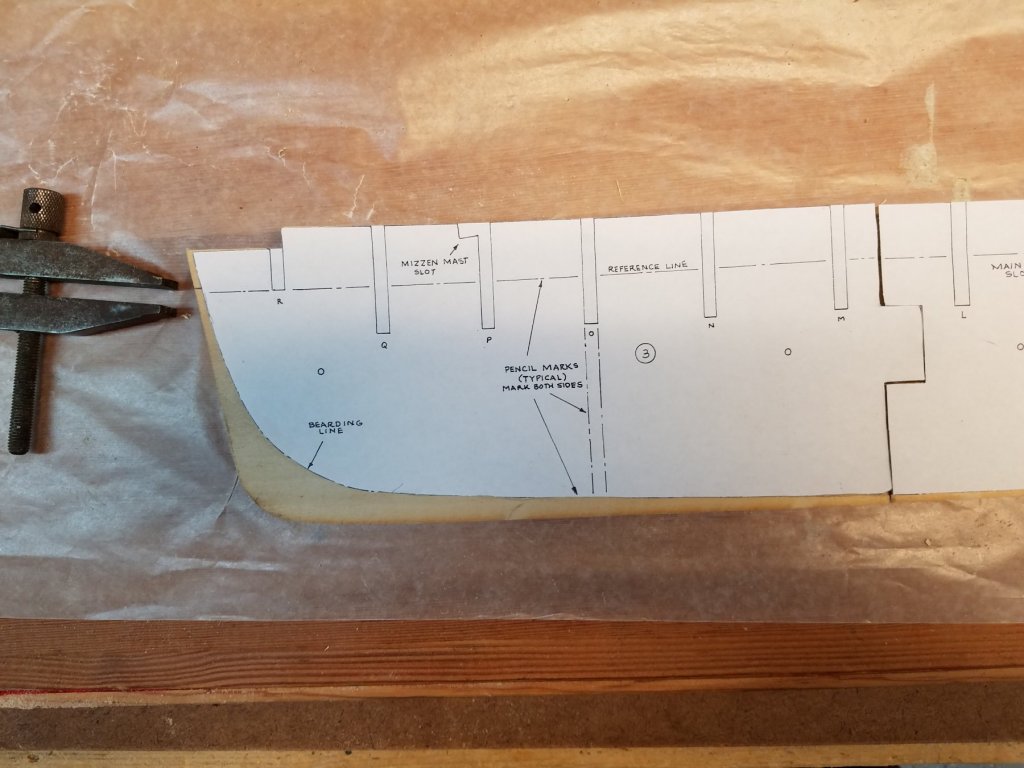

Yes, I know in the pictures, the template is not lined up correctly. It was when I traced the lines :-)
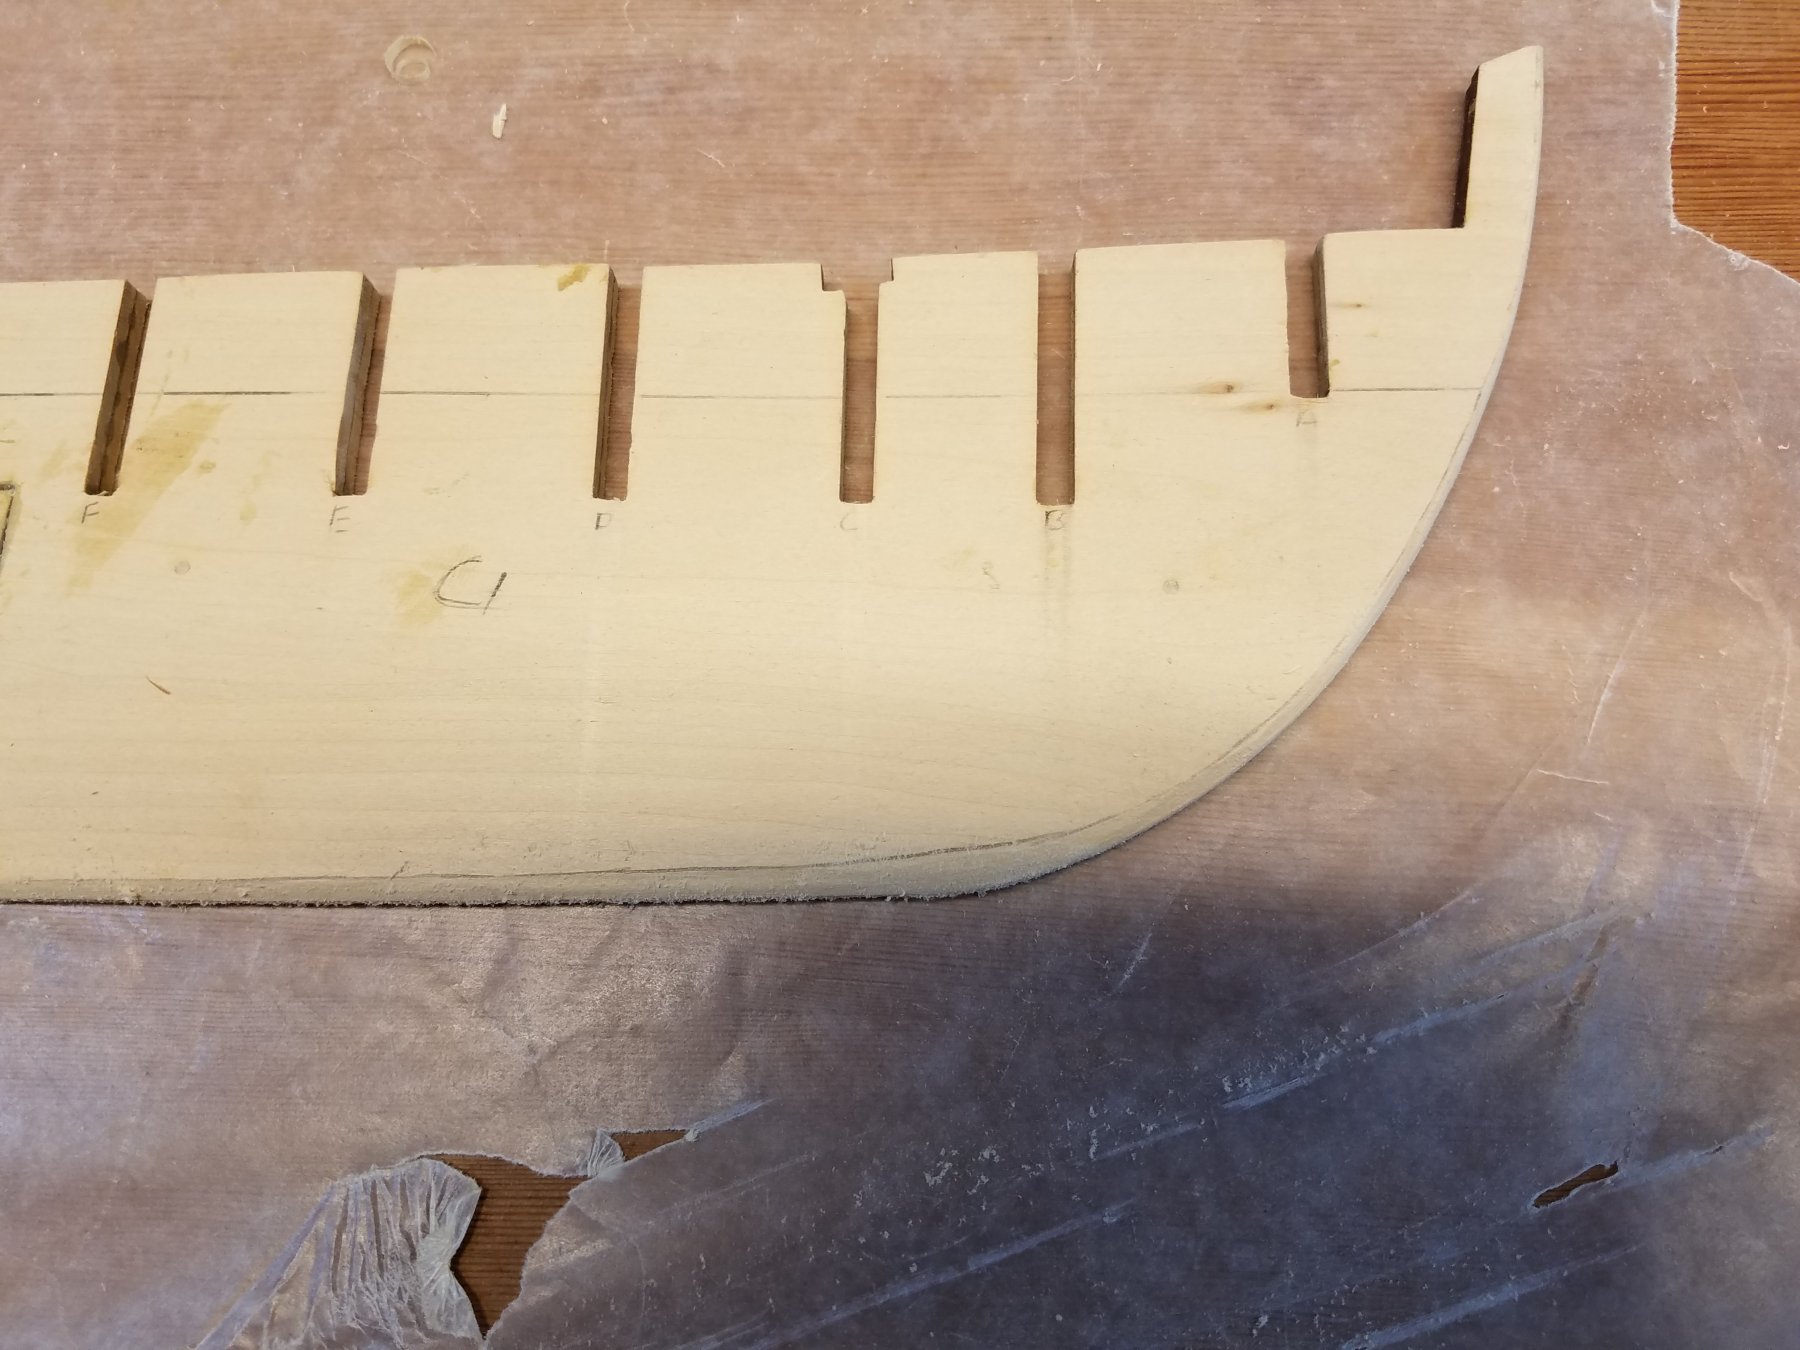
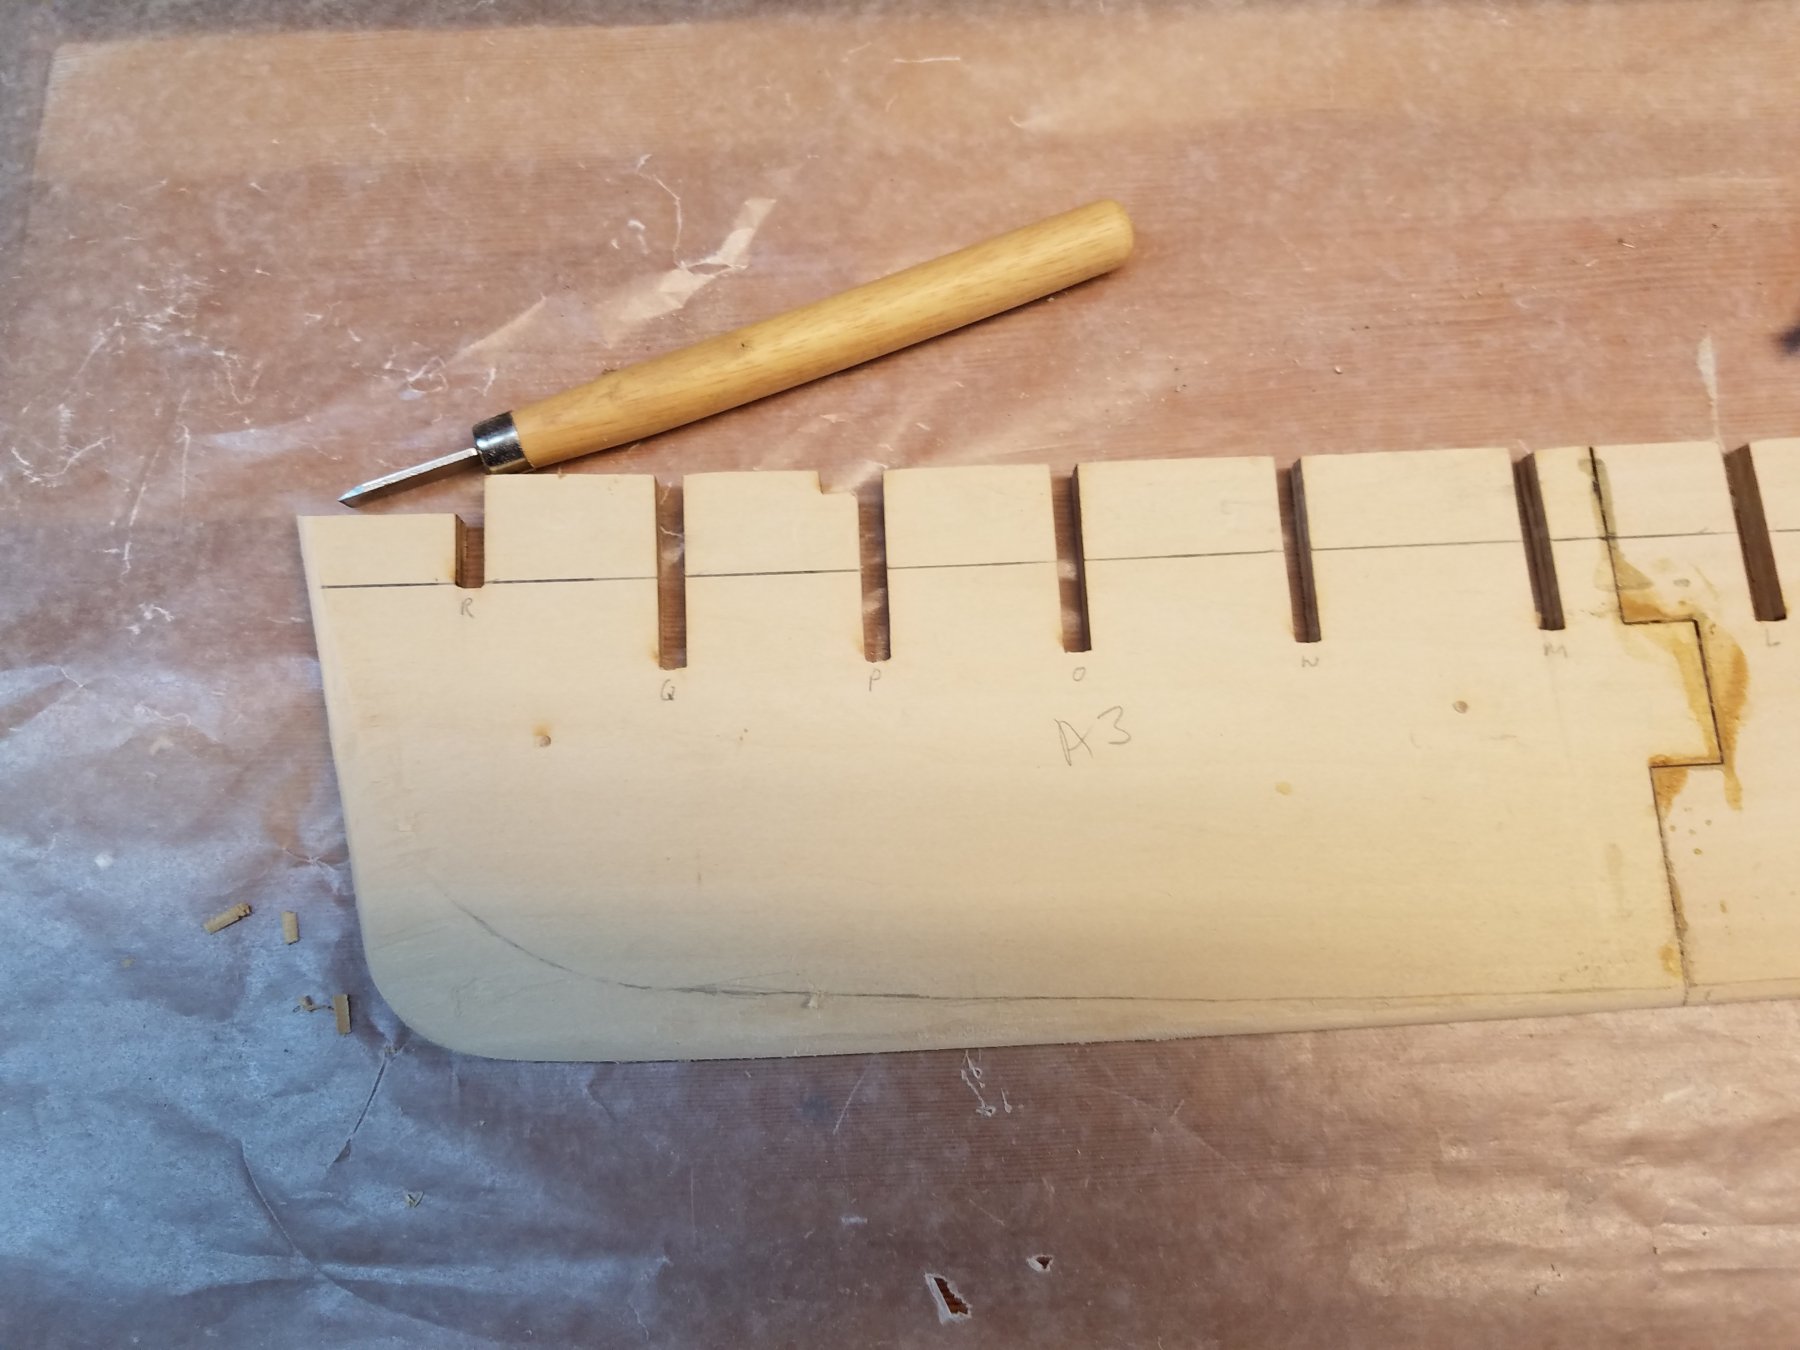
After I traced the lines. I cut the rabbit and bearding line using some mini carving knives


After those were cleaned up (both sides) I went to work on the Stem.
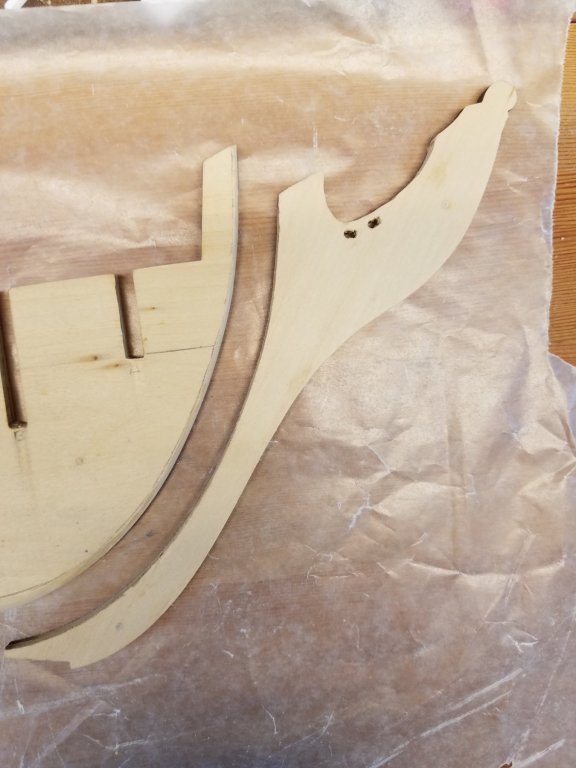
Notice the two enlarged holes on the stem. That allows for the rope gammoning?? on the 1812 ship vs the smaller hole for chain on the current ship and model.
And here I'm gluing on the stem,
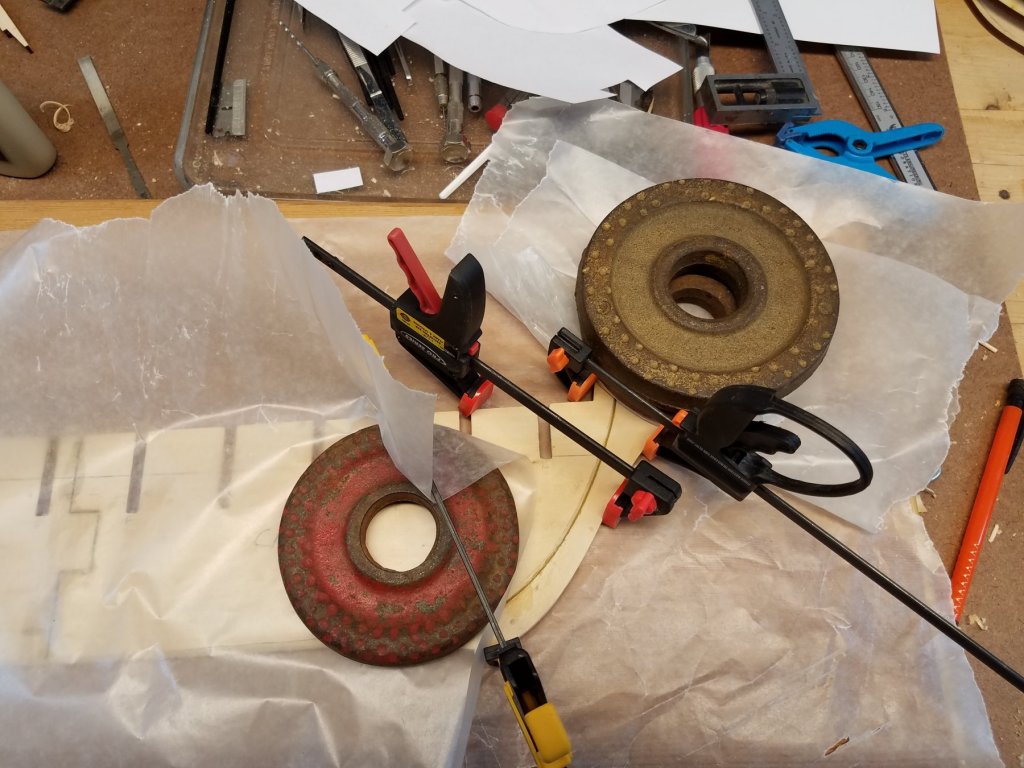
A couple of things I'll point out.
1) The joint between the three frame pieces need to be re-enforced. I will do that after the Stem, Keel and stern-post are attached and doweled to the frame.
But by leaving them off for now, It was easier to cut the rabbit and bearding line when the frame is flat on the board. Likewise when attaching the keel, stem and stern pieces, if you add the re-enforcing pieces first, then the frame wont be flat on the board.. keeping those pieces square when gluing harder.
2) The stem and stern pieces need to be tapered and have the edges rounded.. I am gluing them on first. Will taper then afterwords. My thinking being. The square edges are easier to clamp against. Being un-tapered its easier to keep them flat to the board and square with frame when gluing. And if the clamps mar the wood.. they will be sanded out when I do taper them. The question then is....how hard will it be to taper them once there all attached. I'll find out soon enough.
Thats it for now.
- Tigersteve, MEPering, etubino and 8 others
-
 11
11
-
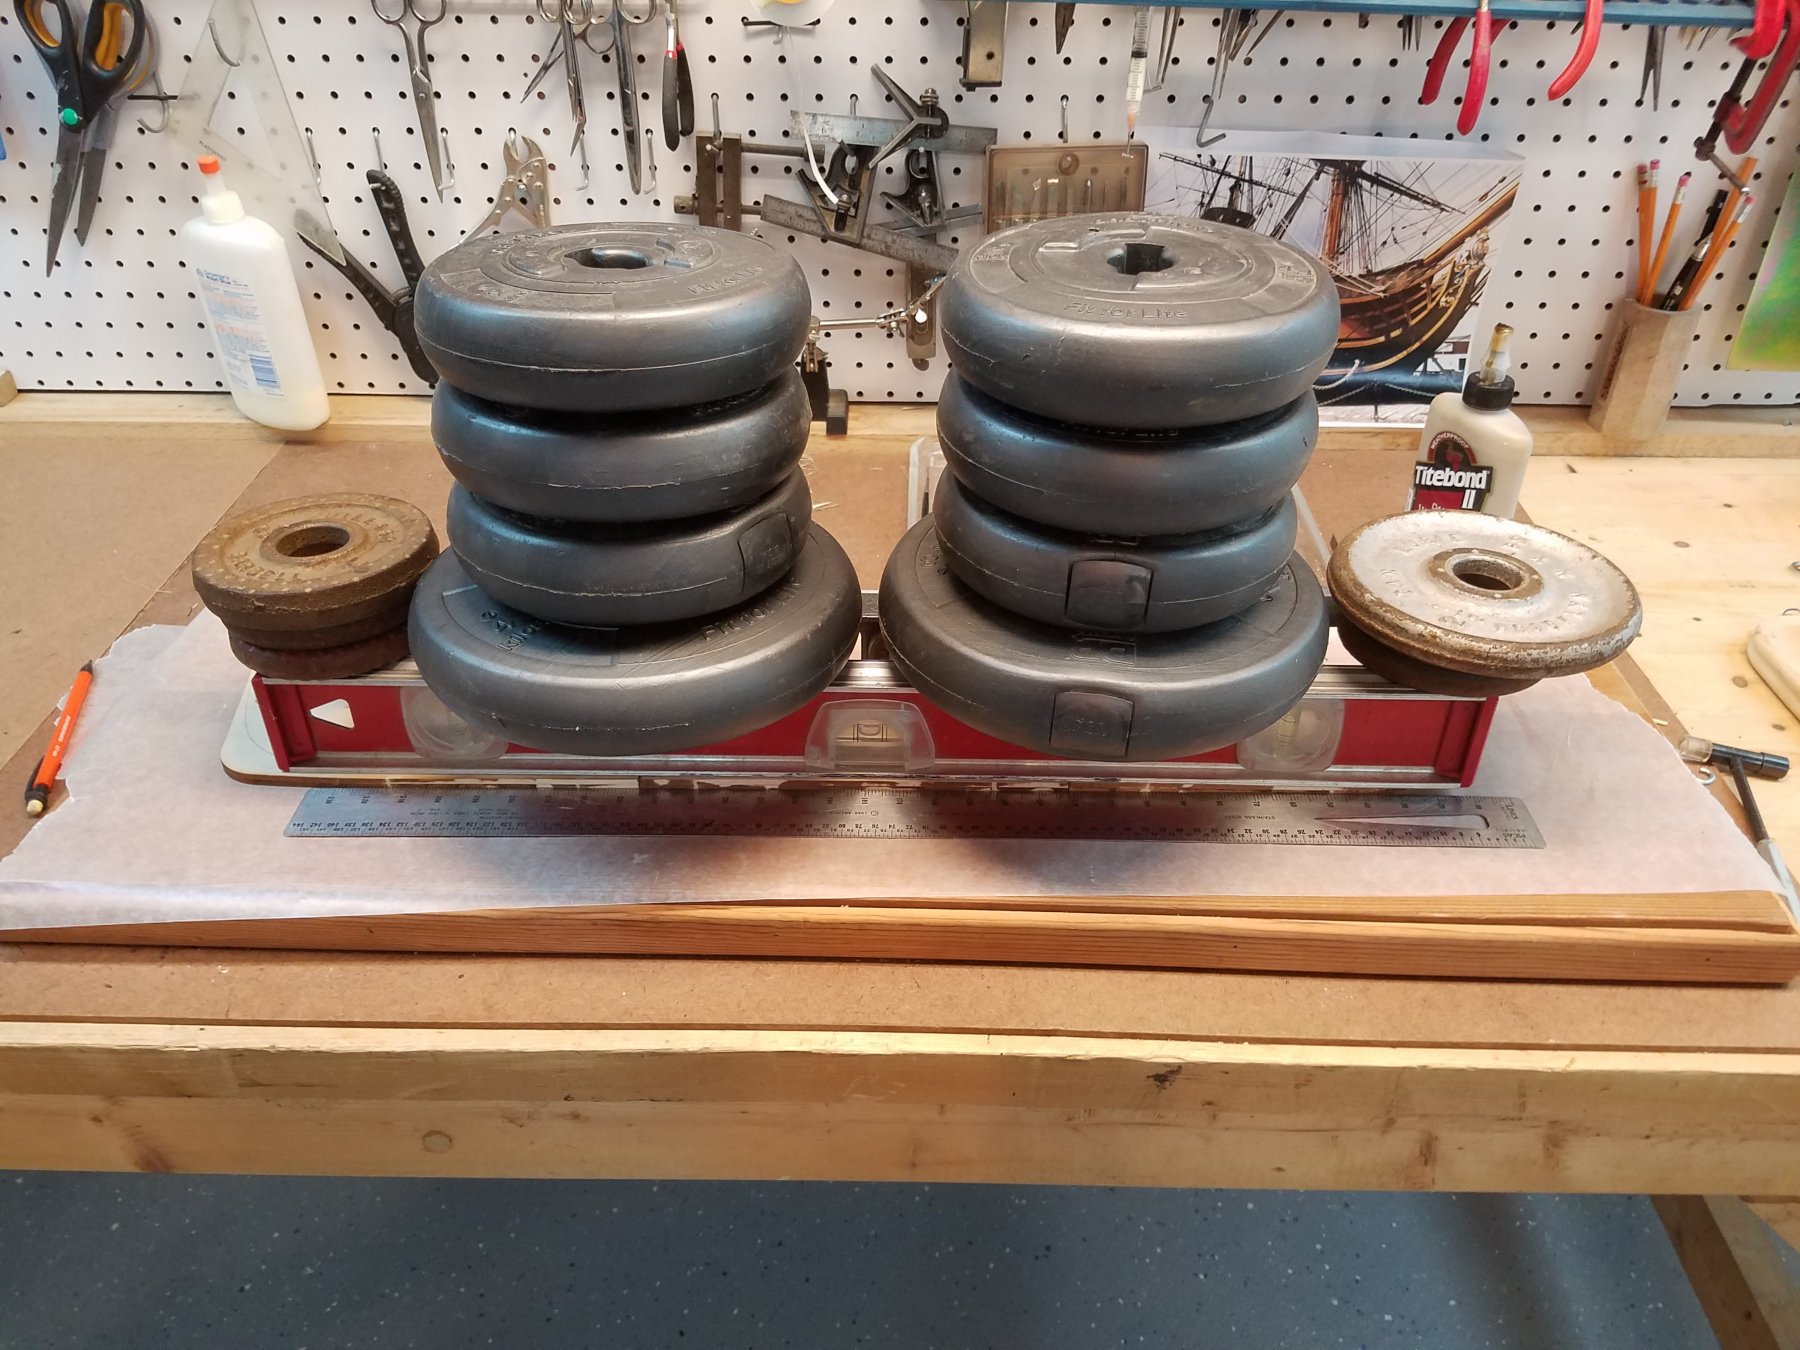
Gluing the 3 frame pieces together.
After cleaning and fitting (and gluing the joints)
I used two levels to hold the pieces down and square. Worked great because the level kept the pieces dead flat over the whole length.
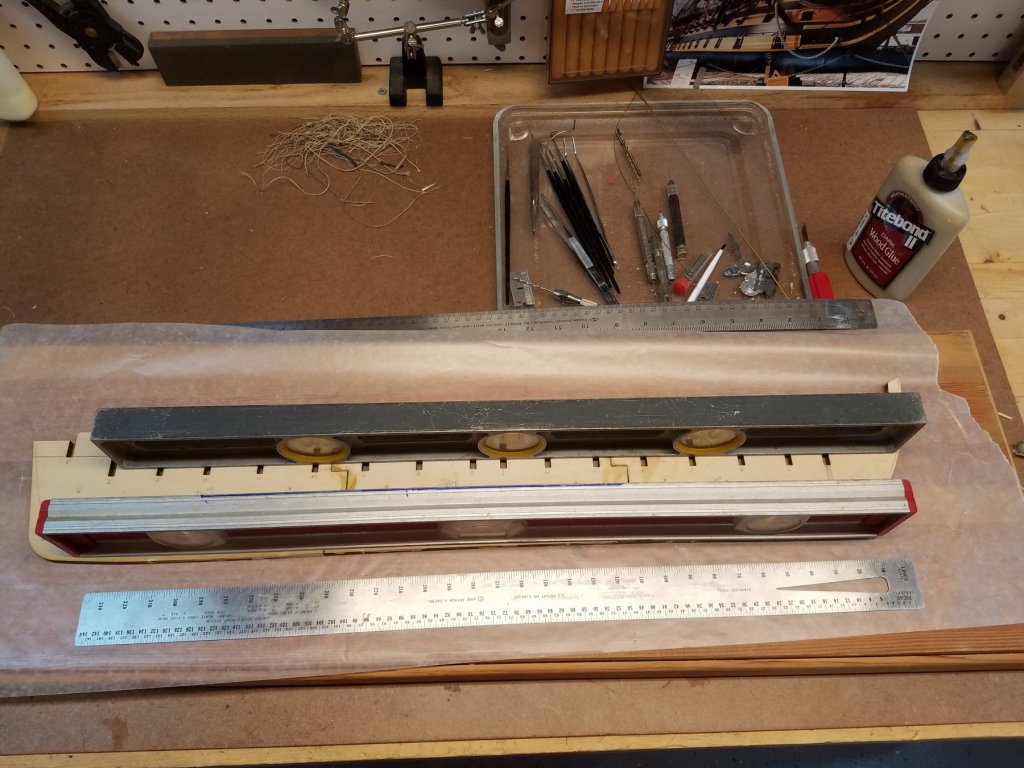
And then I added weights to hold everything down.

After glue dried
- MEPering, alde, Geoff Matson and 5 others
-
8
-
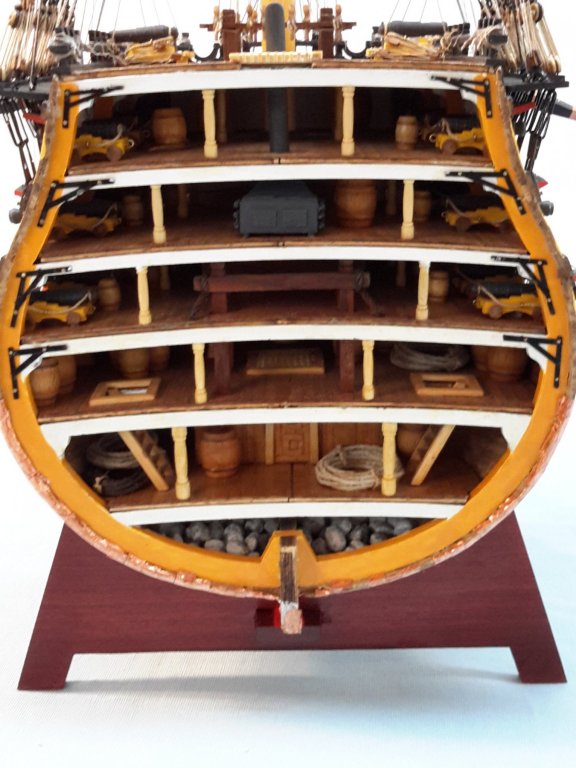
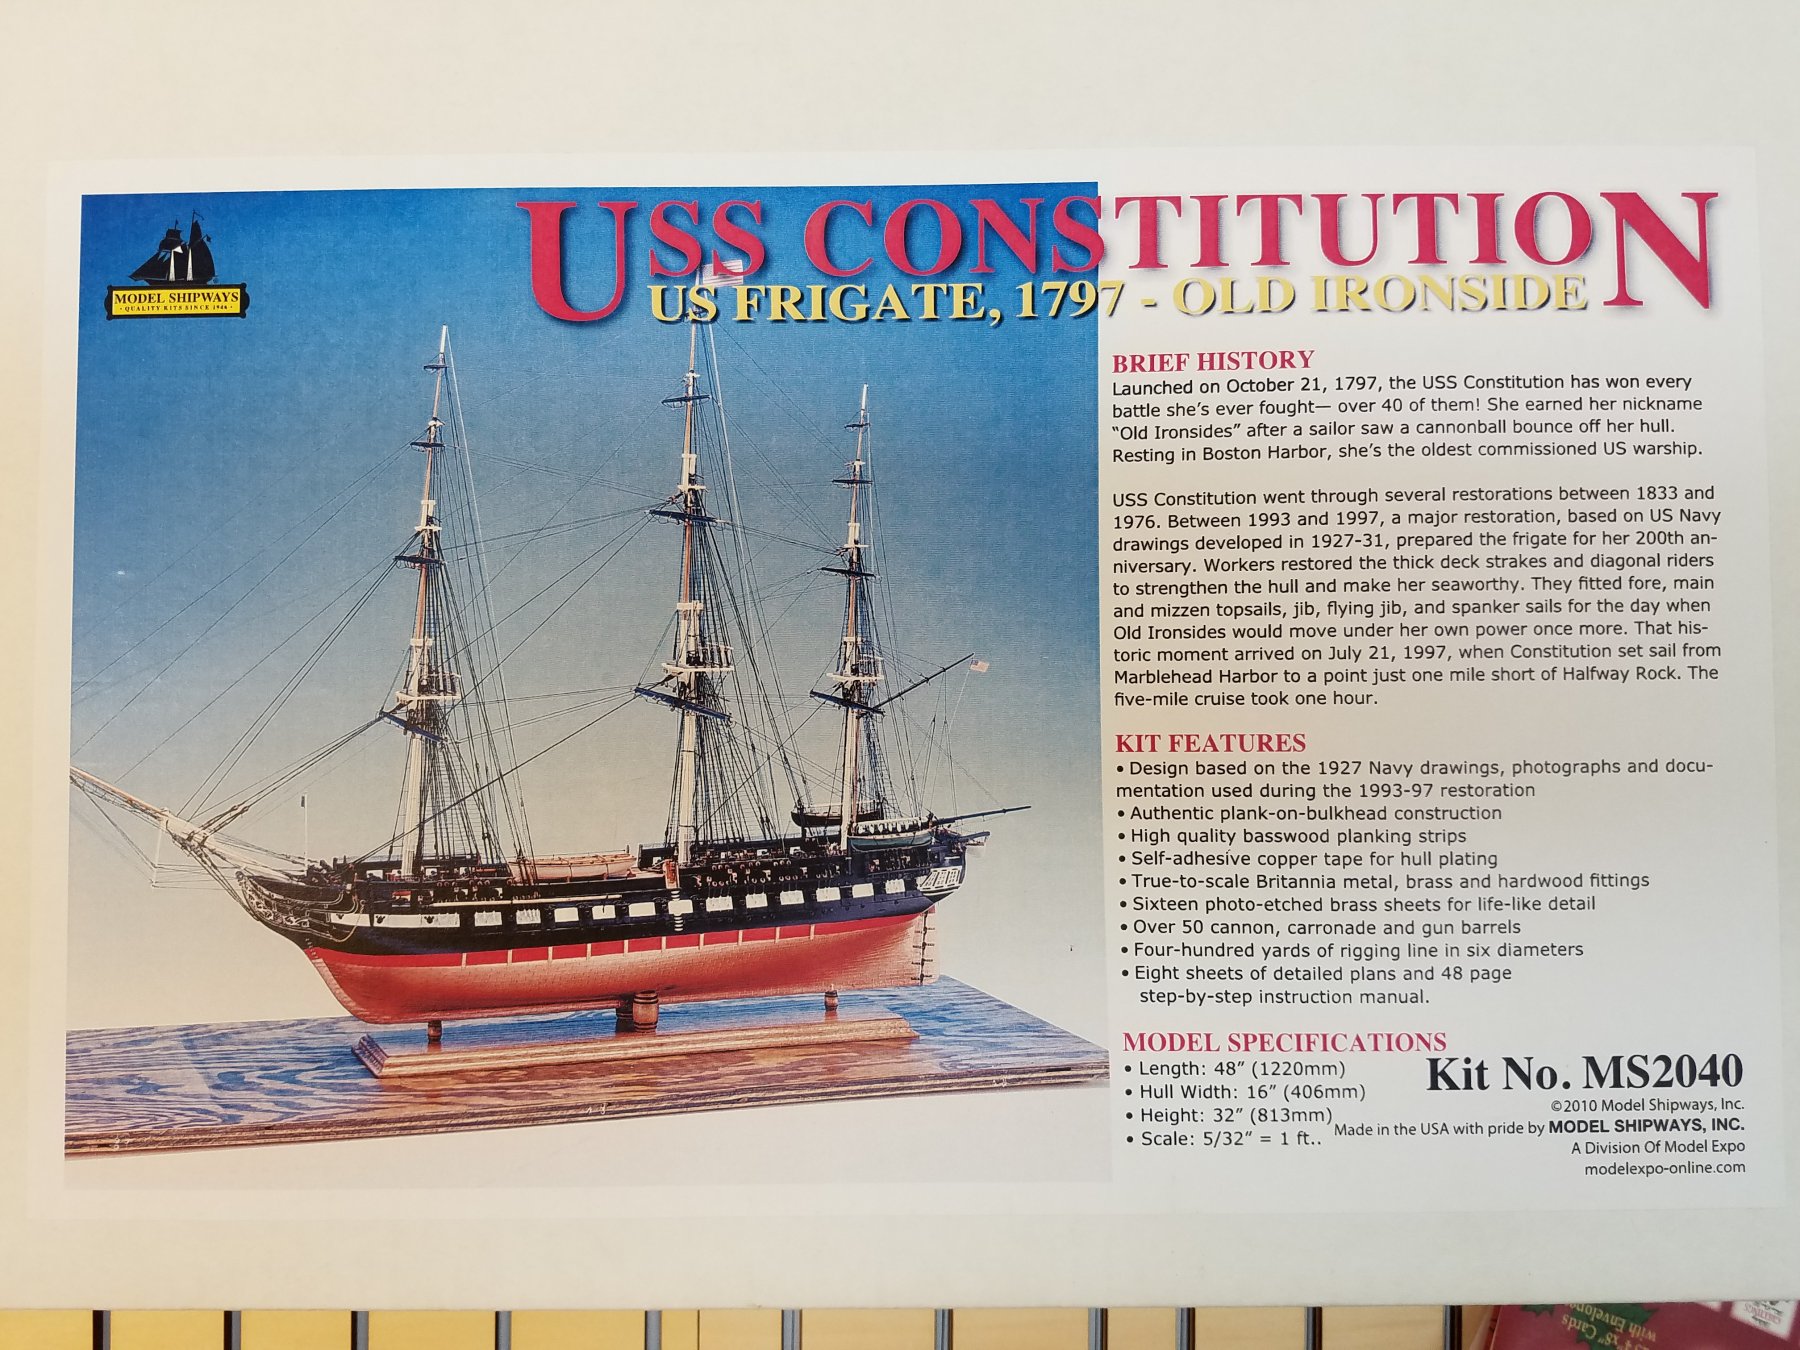
So' I'll start with the box cover

And some Reference material
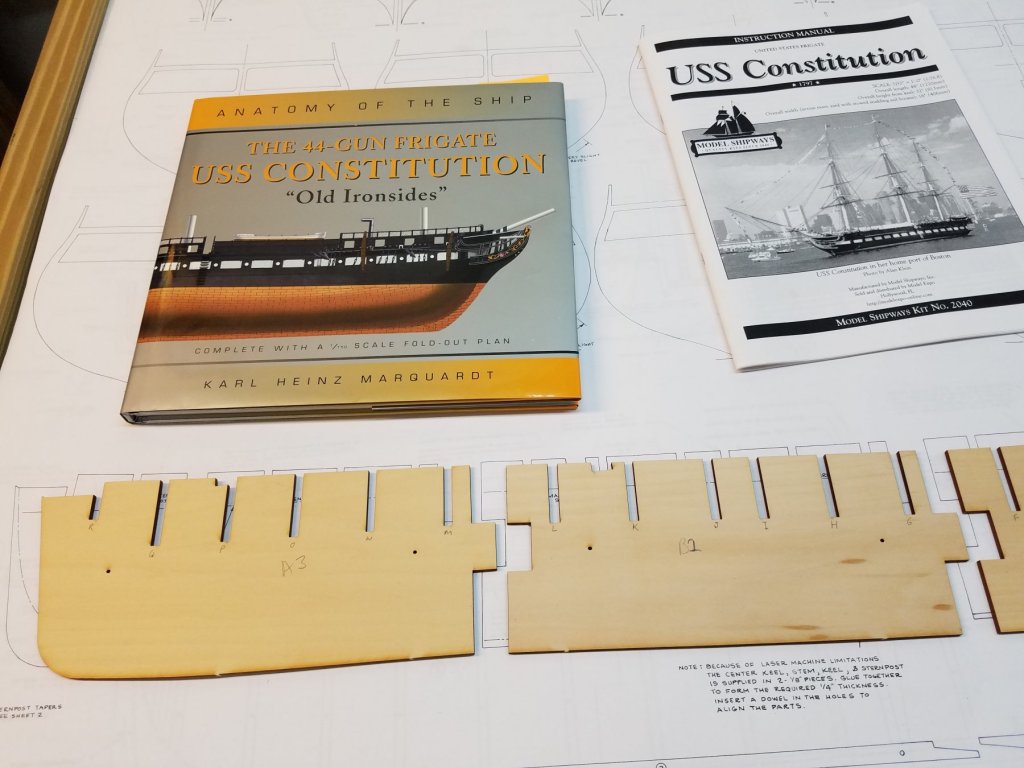
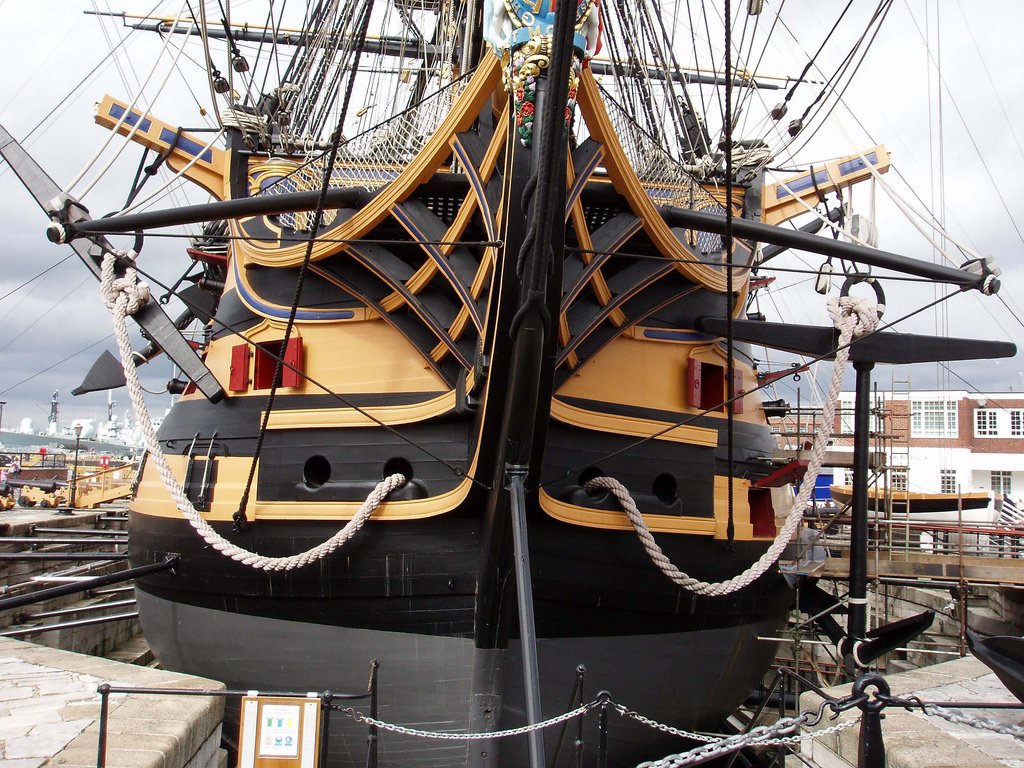
I also have The History of the American Sailing Navy by Howard Chapelle in my library.
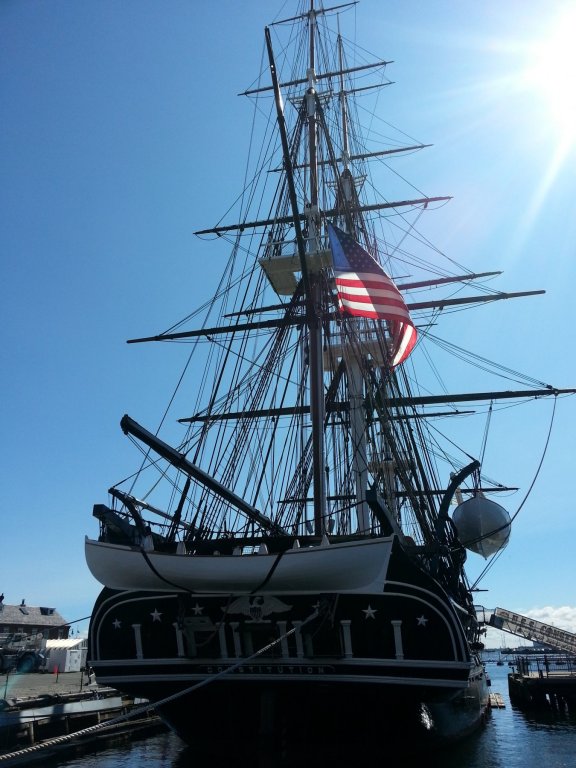
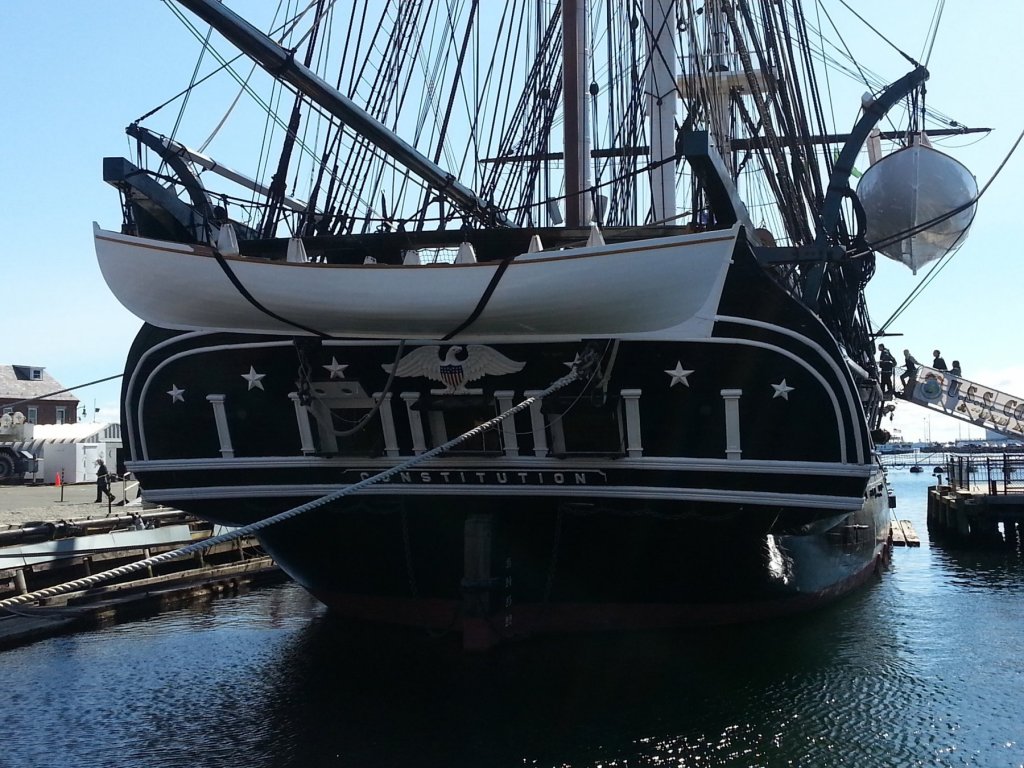
And best of all. I live South of Boston. So I can regularly visit the Real ship
And I'll probably join the Constitution Shipwright Guild .
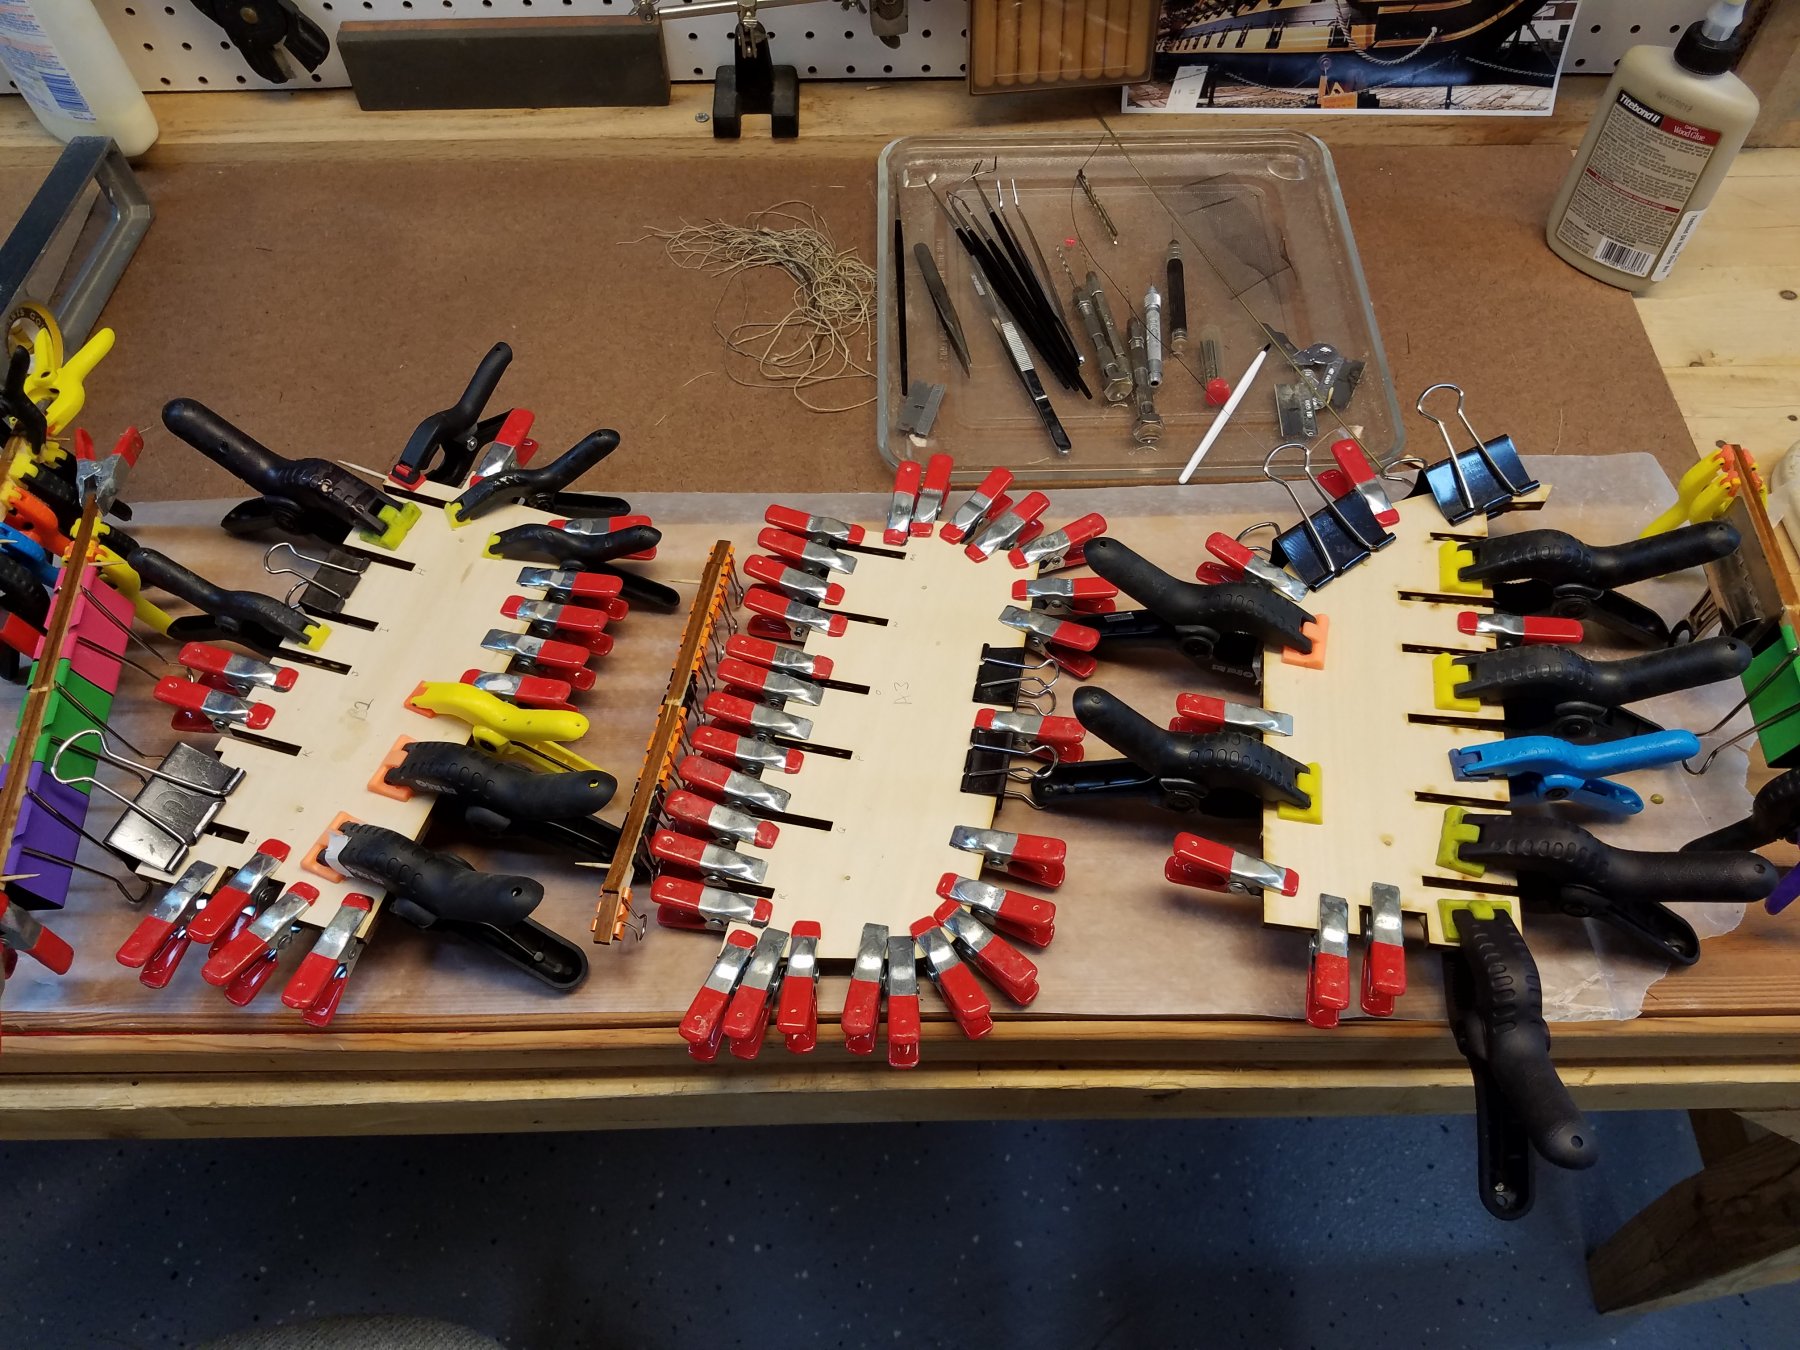
So the build begins....
Frame and Keel pieces laid out on plans
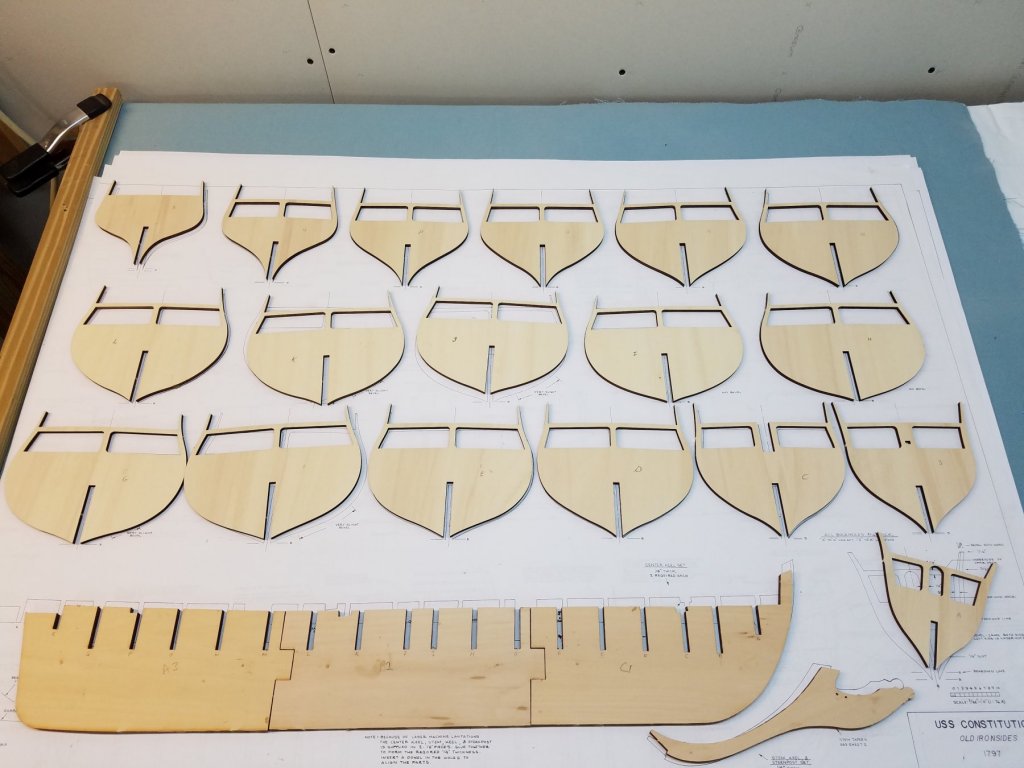
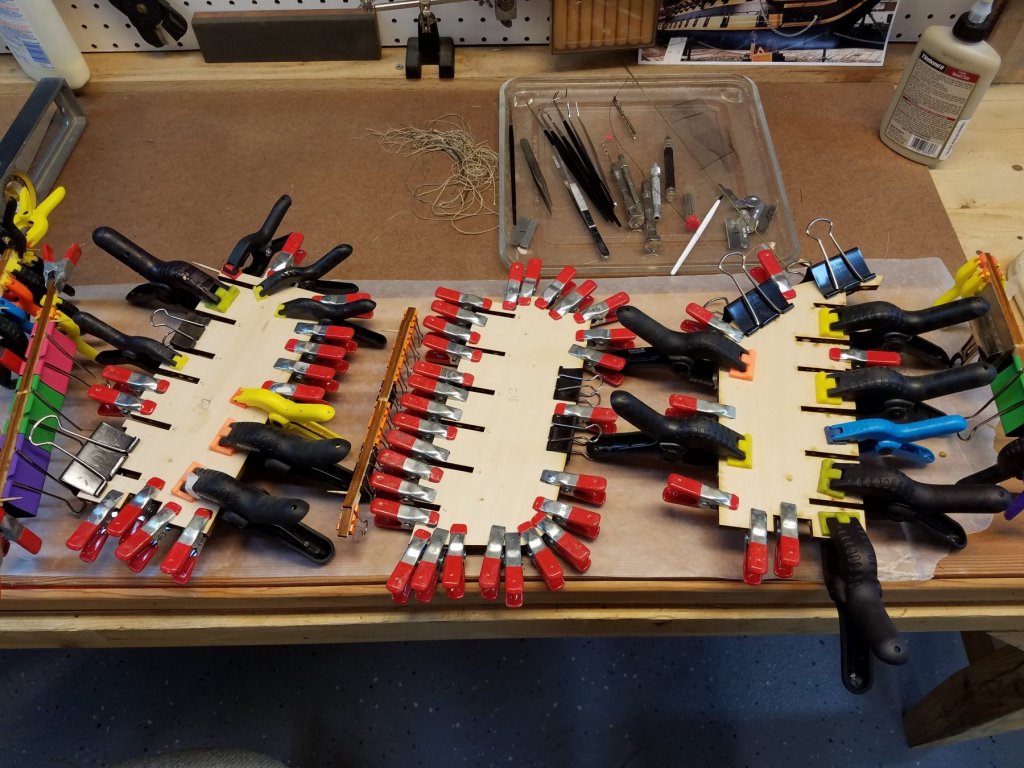
gluing and clamping the pieces together. Used pretty much my entire inventory of clamps. HeHe
- etubino, Tigersteve, CaptainSteve and 2 others
-
5
-
-
So I've had Model Expo's Constitution on the self for over two years now.
I had been waiting until I finish my last build (HMS Victory Bow Section) before I start.
Well I just finished The Vic and am wasting no time in jumping right into this one.
It will be good to get away from tying knots and back to wood working.
I've been following some of the other Constitution builds (UsedtoSail, CaptainSteve and others.. and getting inspired!)
And I'll be shamelessly borrowing ideas from their logs to apply to my own build.
So I'll start with the typical early decisions to be made when doing a Connie build :-)
--Aiming for a 1812 version or reasonable proximity (of course)
--Open waist
--5 window stern
--White stripe (not the yellow)
--Gun deck with deck and real cannons. (Not the dummy barrels.).
That's all I got for now, but I'll be posting pics soon as I start to assemble the frame and bulkheads.
K.
- zappto, Tigersteve, Robin Lous and 3 others
-
6
-
-
-
Been awhile since my last post. But I made a lot of progress over the summer.
Basically Finished the model except for some minor touch ups to some of the paint that got dinged.
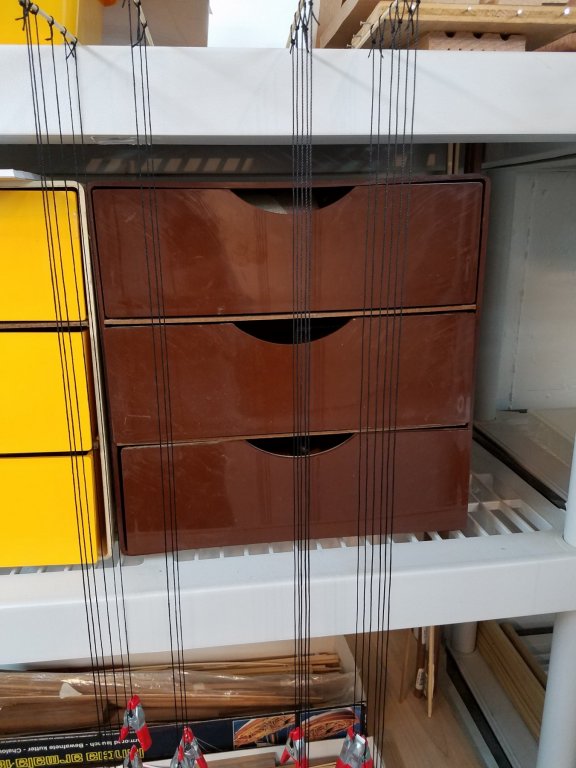
Also going to try and make some coils to go over the belaying pins.
And of course... need to buy a name plate.


.thumb.jpg.de2ff6f8267d23b537f107bb853d8a04.jpg)
- GrandpaPhil, captgino, Mr Whippy and 1 other
-
4
-
maturin52,
I'll pull up a chair and watch. MS Connie is my next built. will start in a month or two. So I'm eager to follow your build along.
Best ith your build!
Ken
Manturin As in Dr Stephan Manturin from Master and Commander :-) ?
-
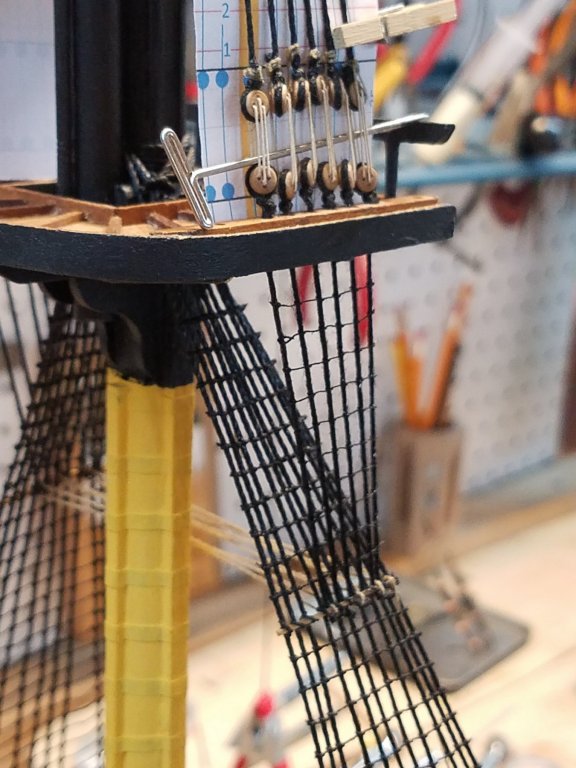
Making progress. Ratlines on the foremast is all done. 900 knots....
The topmast dead eyes and shrouds are in. Did similar method of using Visio to lay out proper spacing of ratlines.
And although the plans did not show it. I did rig the Carpathians. Prior to that the shrouds were really pulled out from the strain of the topmast dead eyes.
The Carpathians really helped pull them back in.
Whats I think is cool and enjoy with the rigging process is the balancing of forces. As more rigging goes on, it really helps take out any slack and tightens everything right up. From the chain-plates to the fore top. everything is taunt but not over tight. The mast is night as straight and solid with the hull all do to the rig tension.
Now if I could only tension my real sailboats rig as well as the models. :-)
Question for everyone. My topmast dead eyes keep wanting to twist and not stay facing forward. You can see in the third picture I have a T pin in place to try and keep them from turning all cockeyed. Any tricks to keep them from turning? I cant see a way to glue them in place.

- hof00, shipcarpenter, captgino and 1 other
-
4
-
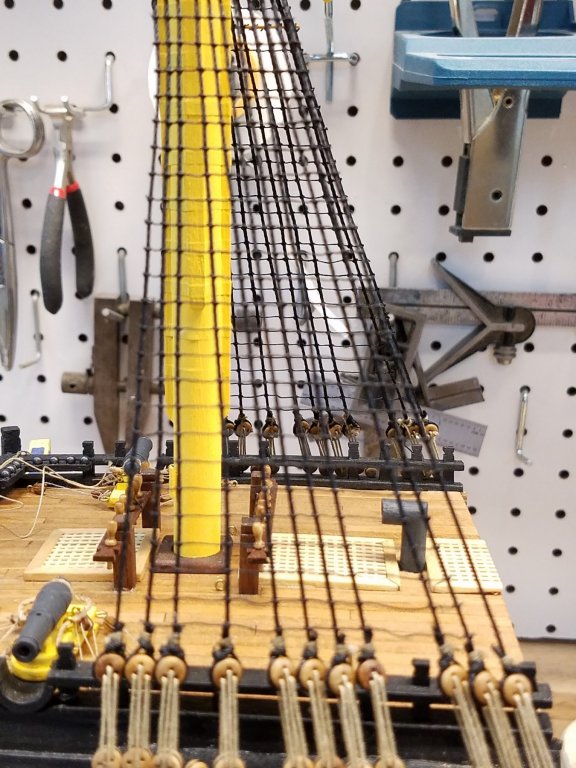
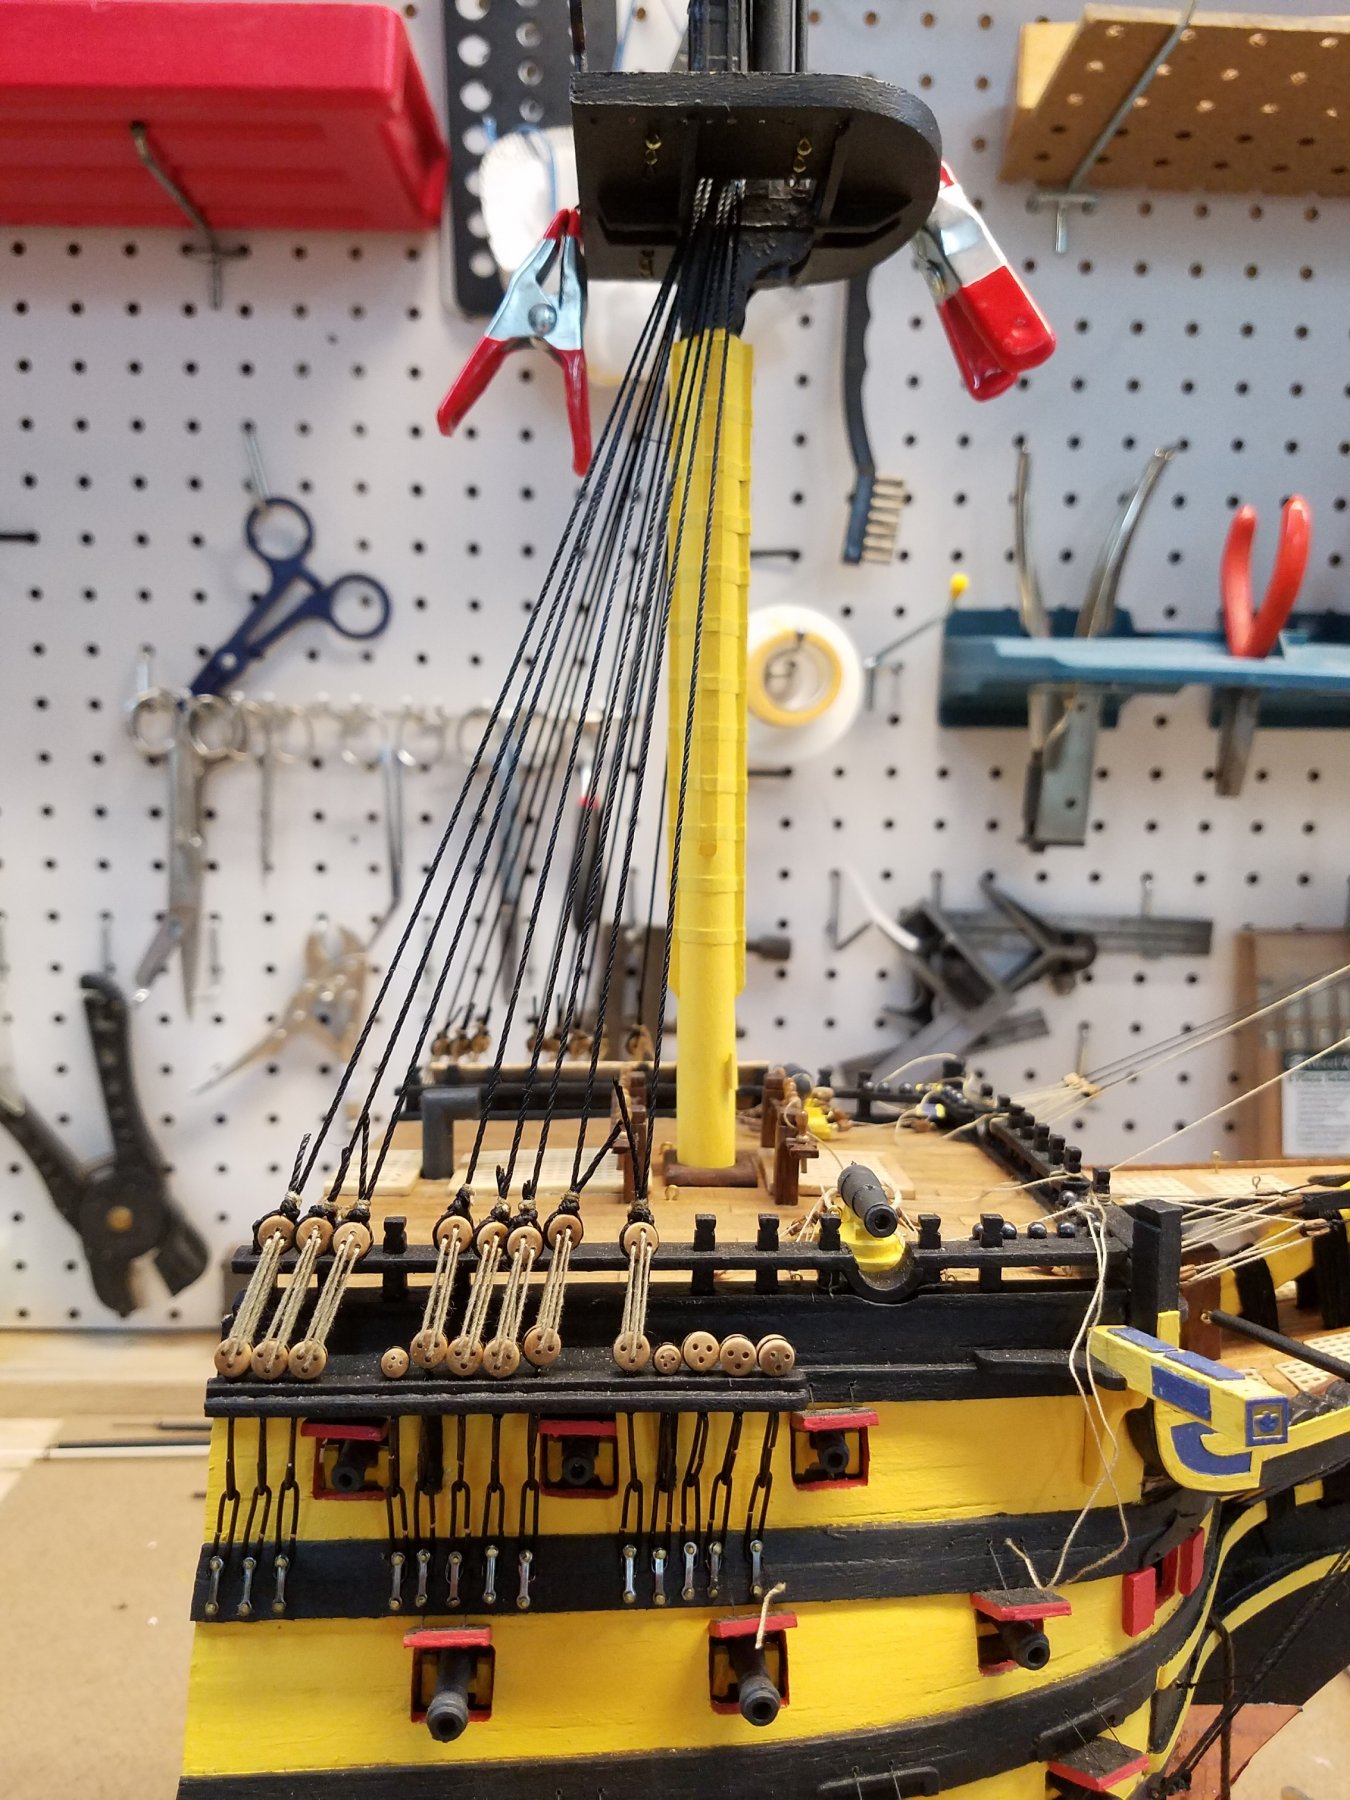
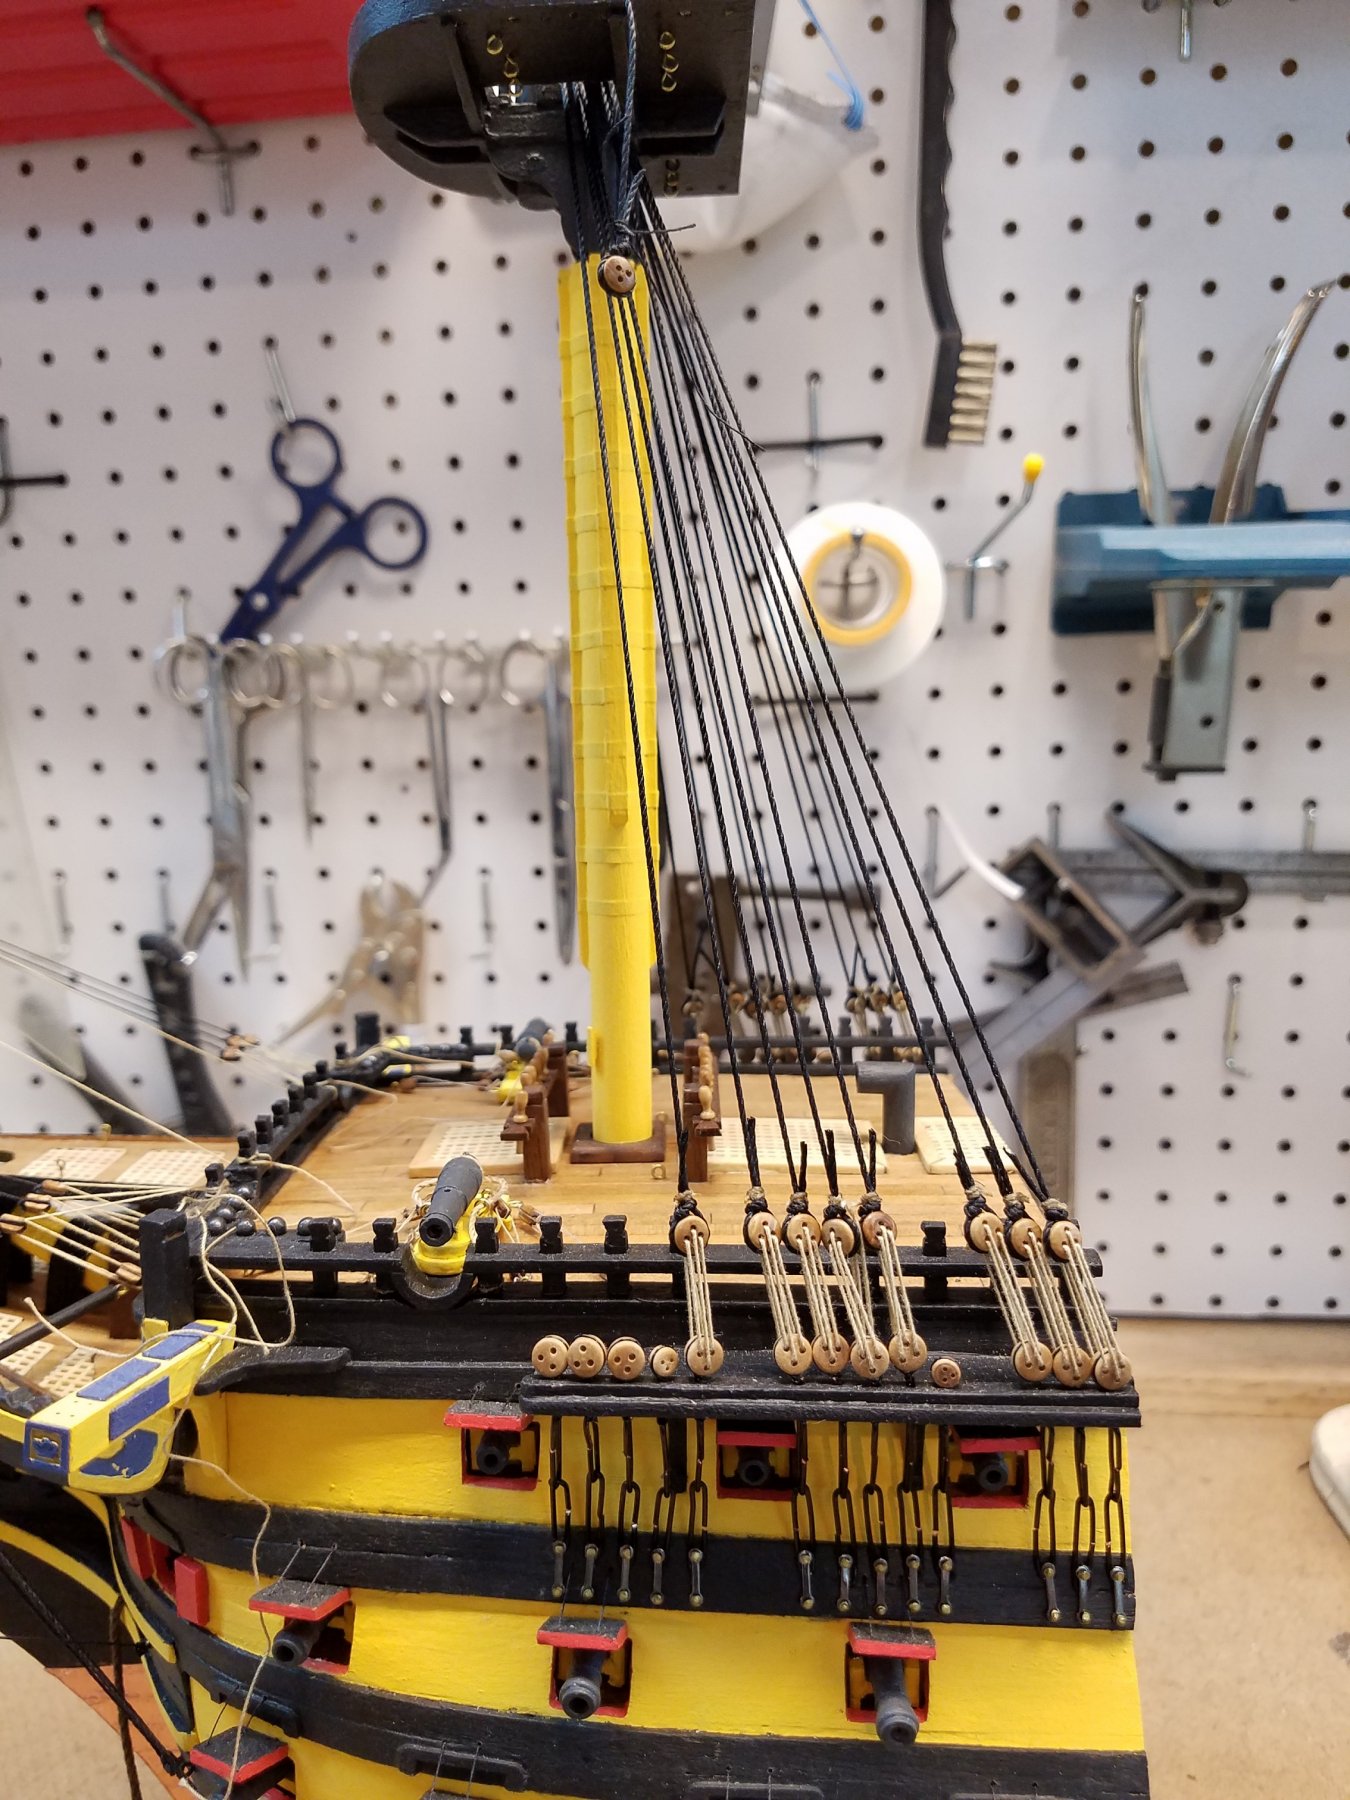
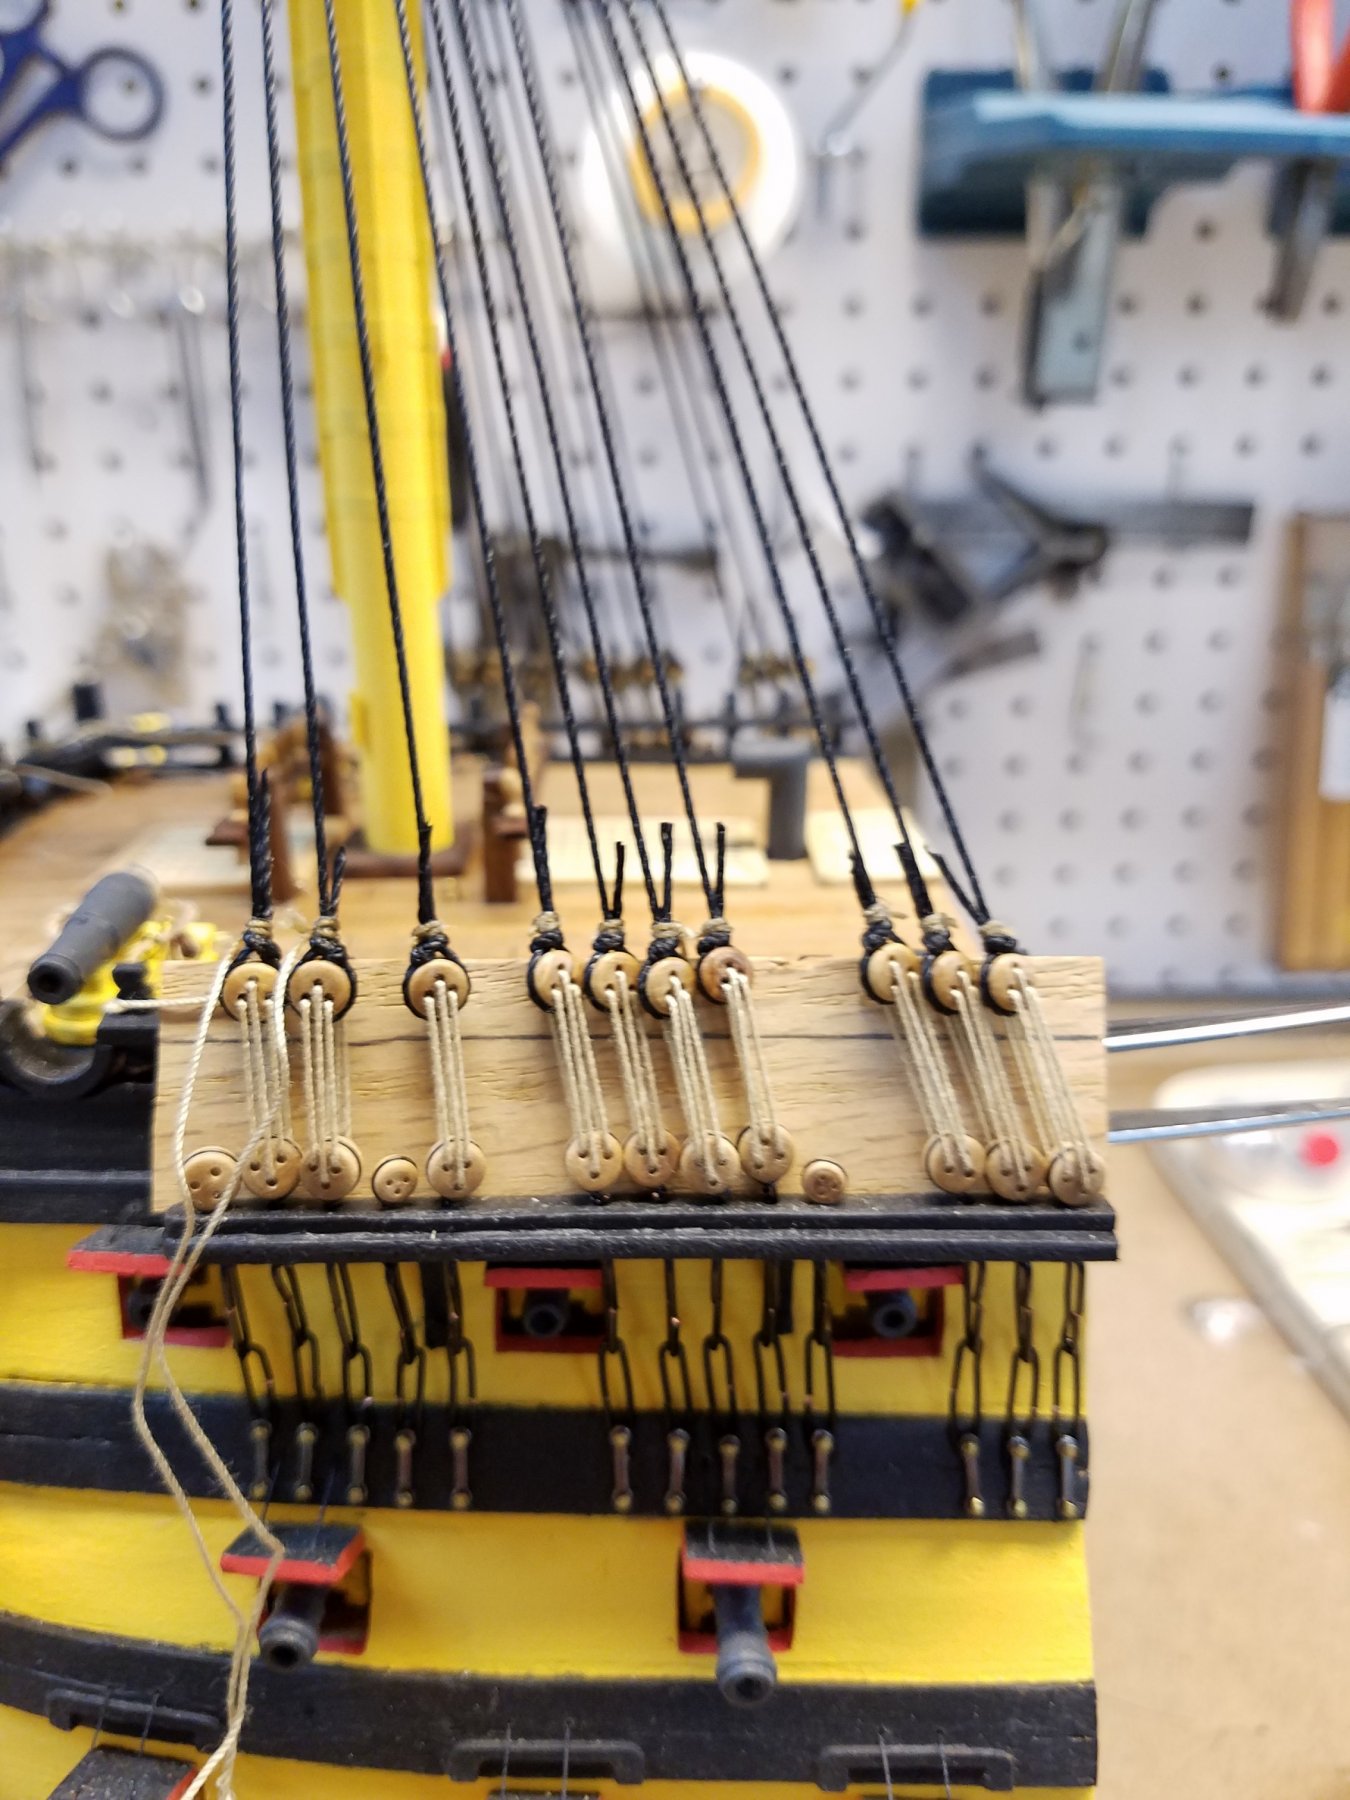
So .. Lower shrouds
Started by making a jig. Well t's not really a jig per se.. more like a measuring guide.
I used a piece of wood cut and marked marked to spaced from bottom of chain plate to where the top of the dead eyes should be.
(Visible in the third picture) As I tied in the top dead eye into the shroud.. I used the wood spacer to make sure it was at the proper position.
The shroud goes from chain plates to mast head and back down to chain plate on the same side. (Except the fist shroud that goes from port to starboard)
I would tie in the first dead eye to the end of the shroud. Lash the dead eyes in while keeping tension on the bitter end. (Using the wood to space it properly).
Once that end of the shroud was lashed up, it was easier than expected to add the dead eye on the other end at the right height. I left the dead eye height / short by about 2 -3 millimeters. Then I was able to really tighten it up the lashings and make both sides snug. Both the lashings and the shrouds ended up taunt but not overly tight. and the Dead eyes close enough to being aligned, and evenly spaced. The lower dead eyes had a bit more play from the chains so a couple are not quite as inline as I like.
Ratlines...
I took a bunch of measurements of the mast, shrouds and dead eyes.
Based on that, I spend a few hours using Microsoft Visio and drew up the spacing of the ratlines. ( 4th picture)
I printed and cut up the layout and placed behind the shrouds (one for each side)
Now I have an easy guide to rattle down and keep then properly spaced. (5th picture)
By the way.. there are 11 shrouds and 37 ratlines per side. That is 11 x 37 x 2 makes 814 knots to tie.... And that is just the lowers.
And the spacing between ratlines is 5mm.
uggg. I like rigging, but I go crazy, and my eyes go buggy with this part. :-)
K


-
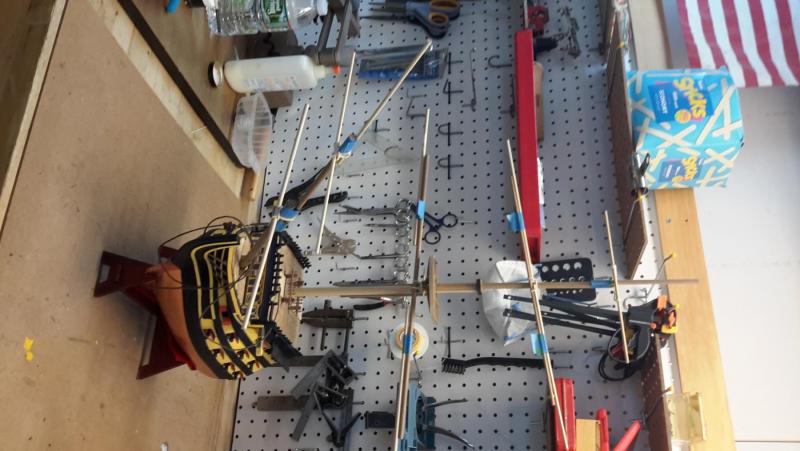
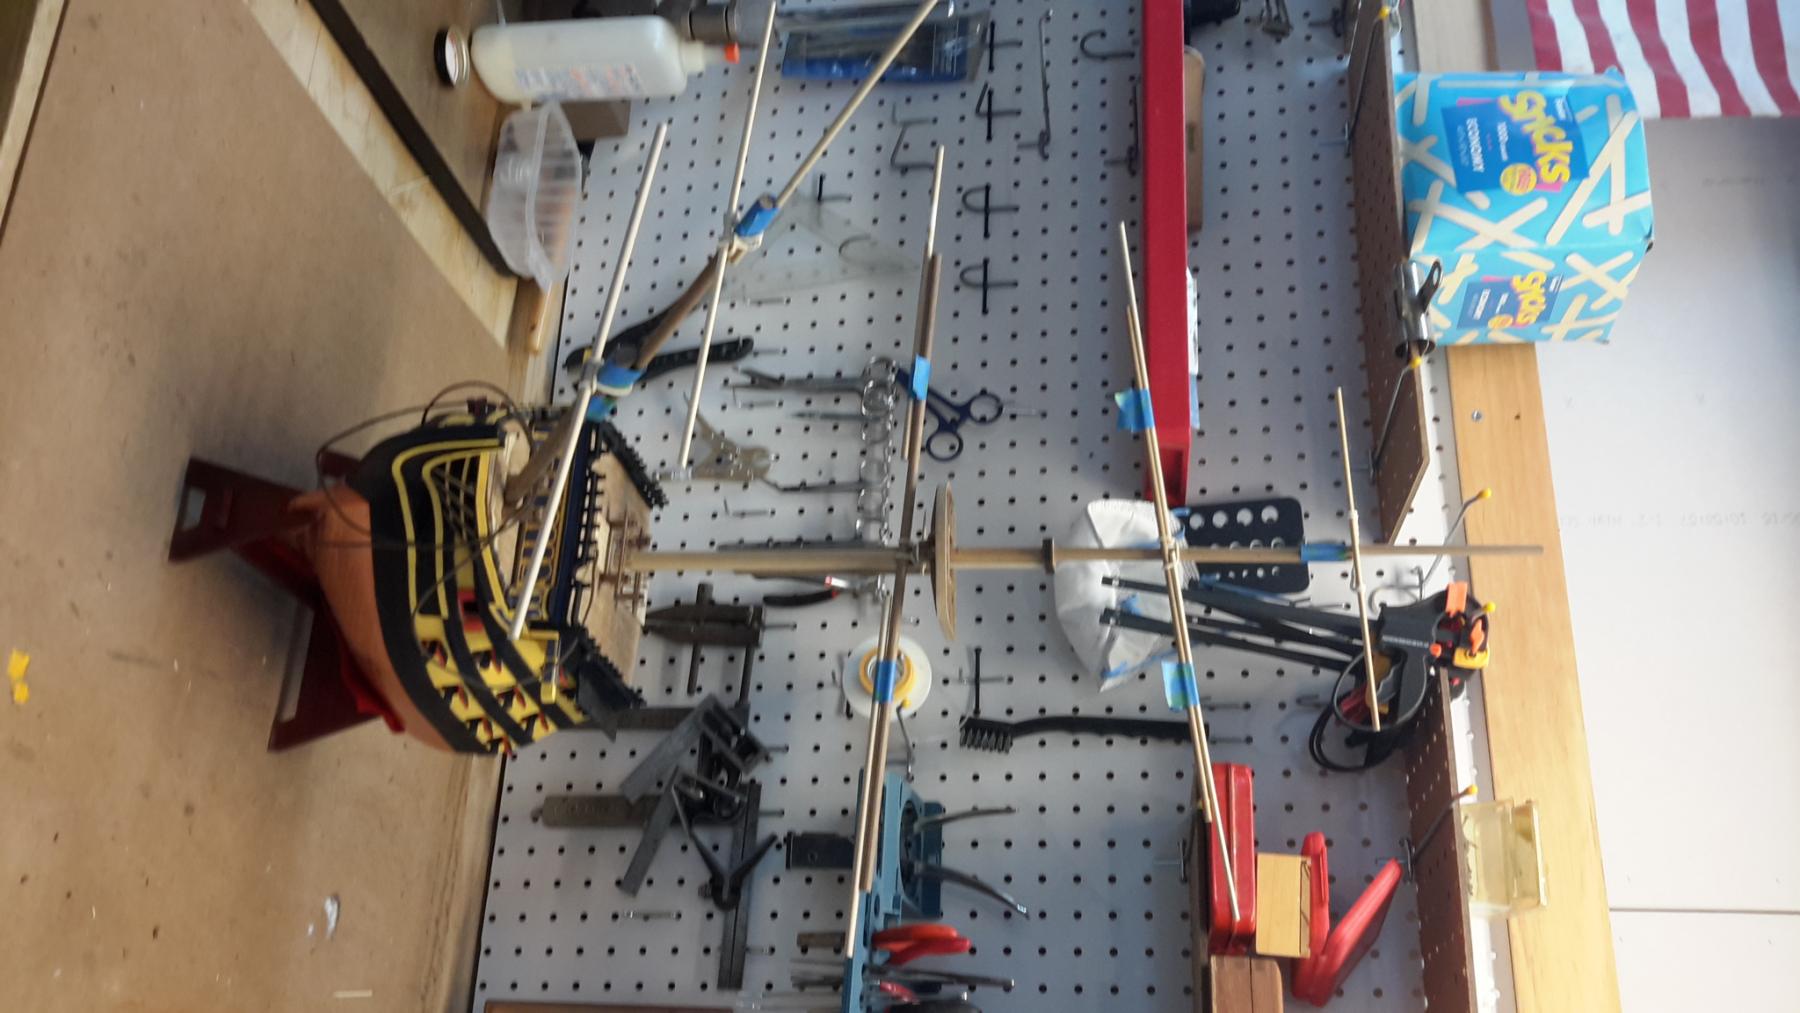
Major milestone completed! All the woodworking part of the model is essential done.
Officially into the rigging phase. Its all strings and tying knots from here on out.
I am using three sources for rigging info...
The instructions that came with the kit. (Very simplified and incomplete.)
Shrouds doesn't even have ratlines???
The book..Masting and Rigging English Ships.
Excellent... but the info is spread all over the book.
Great to look a specific point up. When you know what you looking for.
A set of Victory Plans (PDF) that I found on the internet
1:72 scale with 8 very good , detailed sheets on just the rigging.
Not sure what manufacturer / kit the plans are from.. Not indicated on the plans.
But they really helpful, quite detailed.
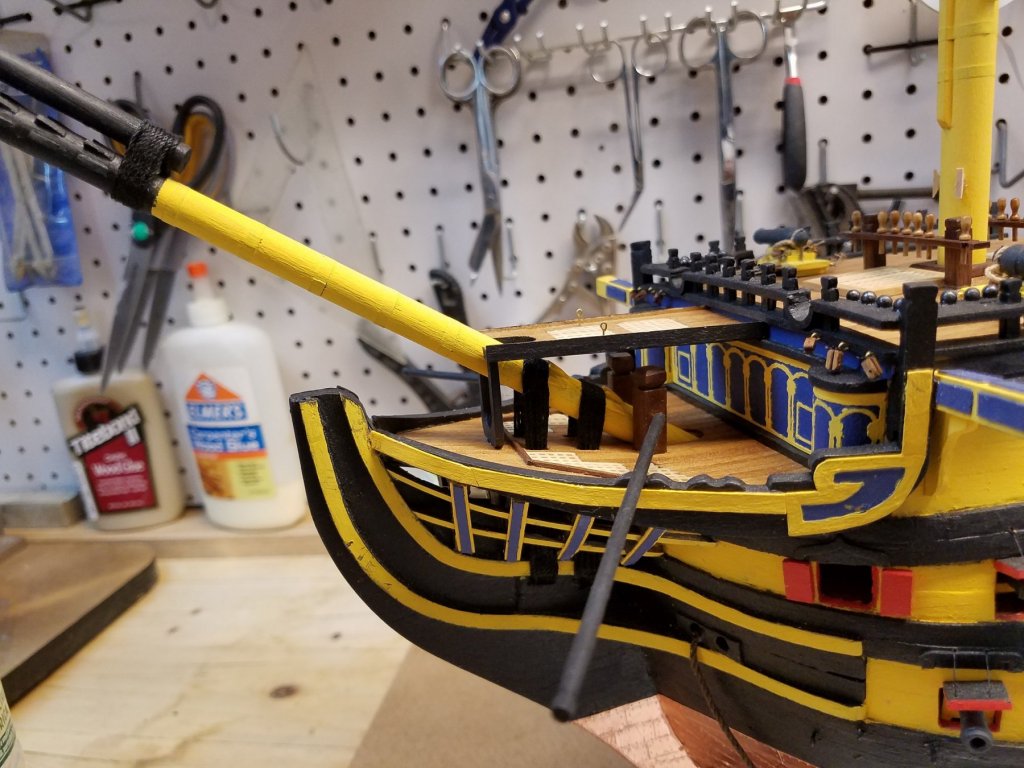
Started with rigging the bowsprit first. As you can see in the pics. that pic, I've progressed fairly quickly on that.
Now of course... I have already found several conflicting points between the three sources.
Wheres the fun if they all matched :-)
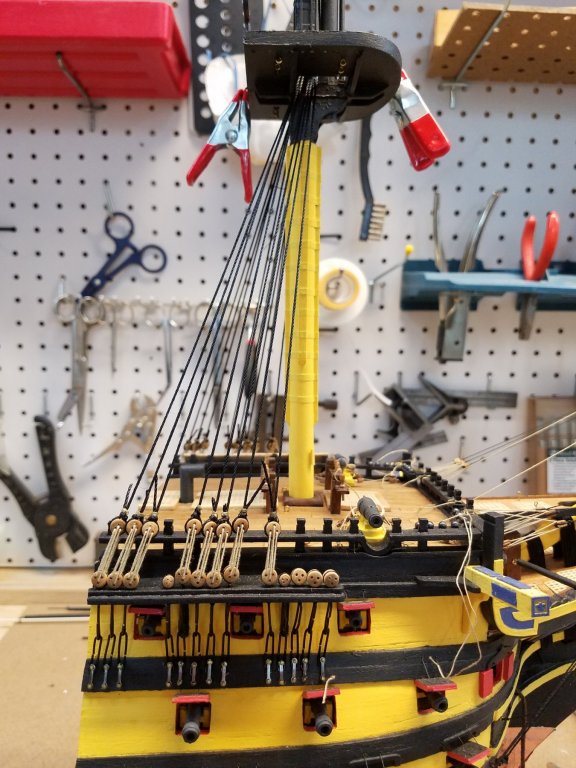
The last picture is the prepping the shrouds. Both 11 lower and 6 upper per side.
I soaked them in hot water for an hour. then hung them to dry to get the stretch and twist out of them.
Next up...make a jig to properly space the dead eyes when laying up the shrouds.


-
Thanks Steve.
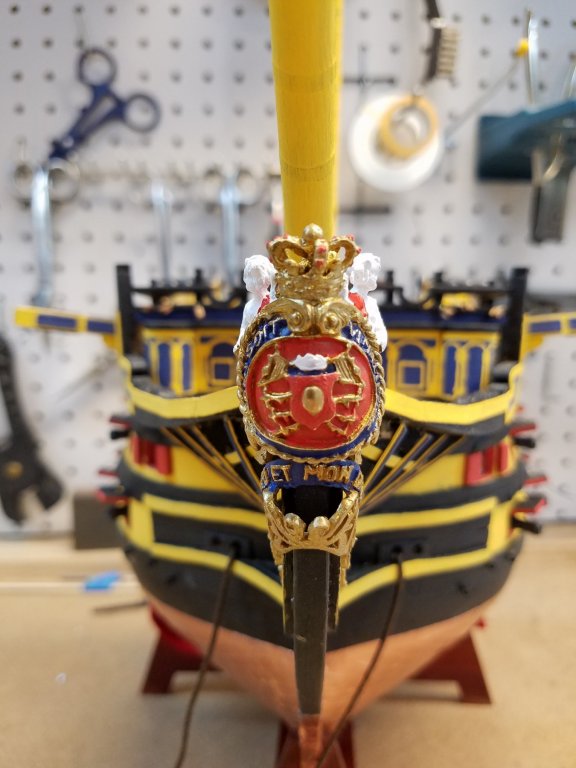
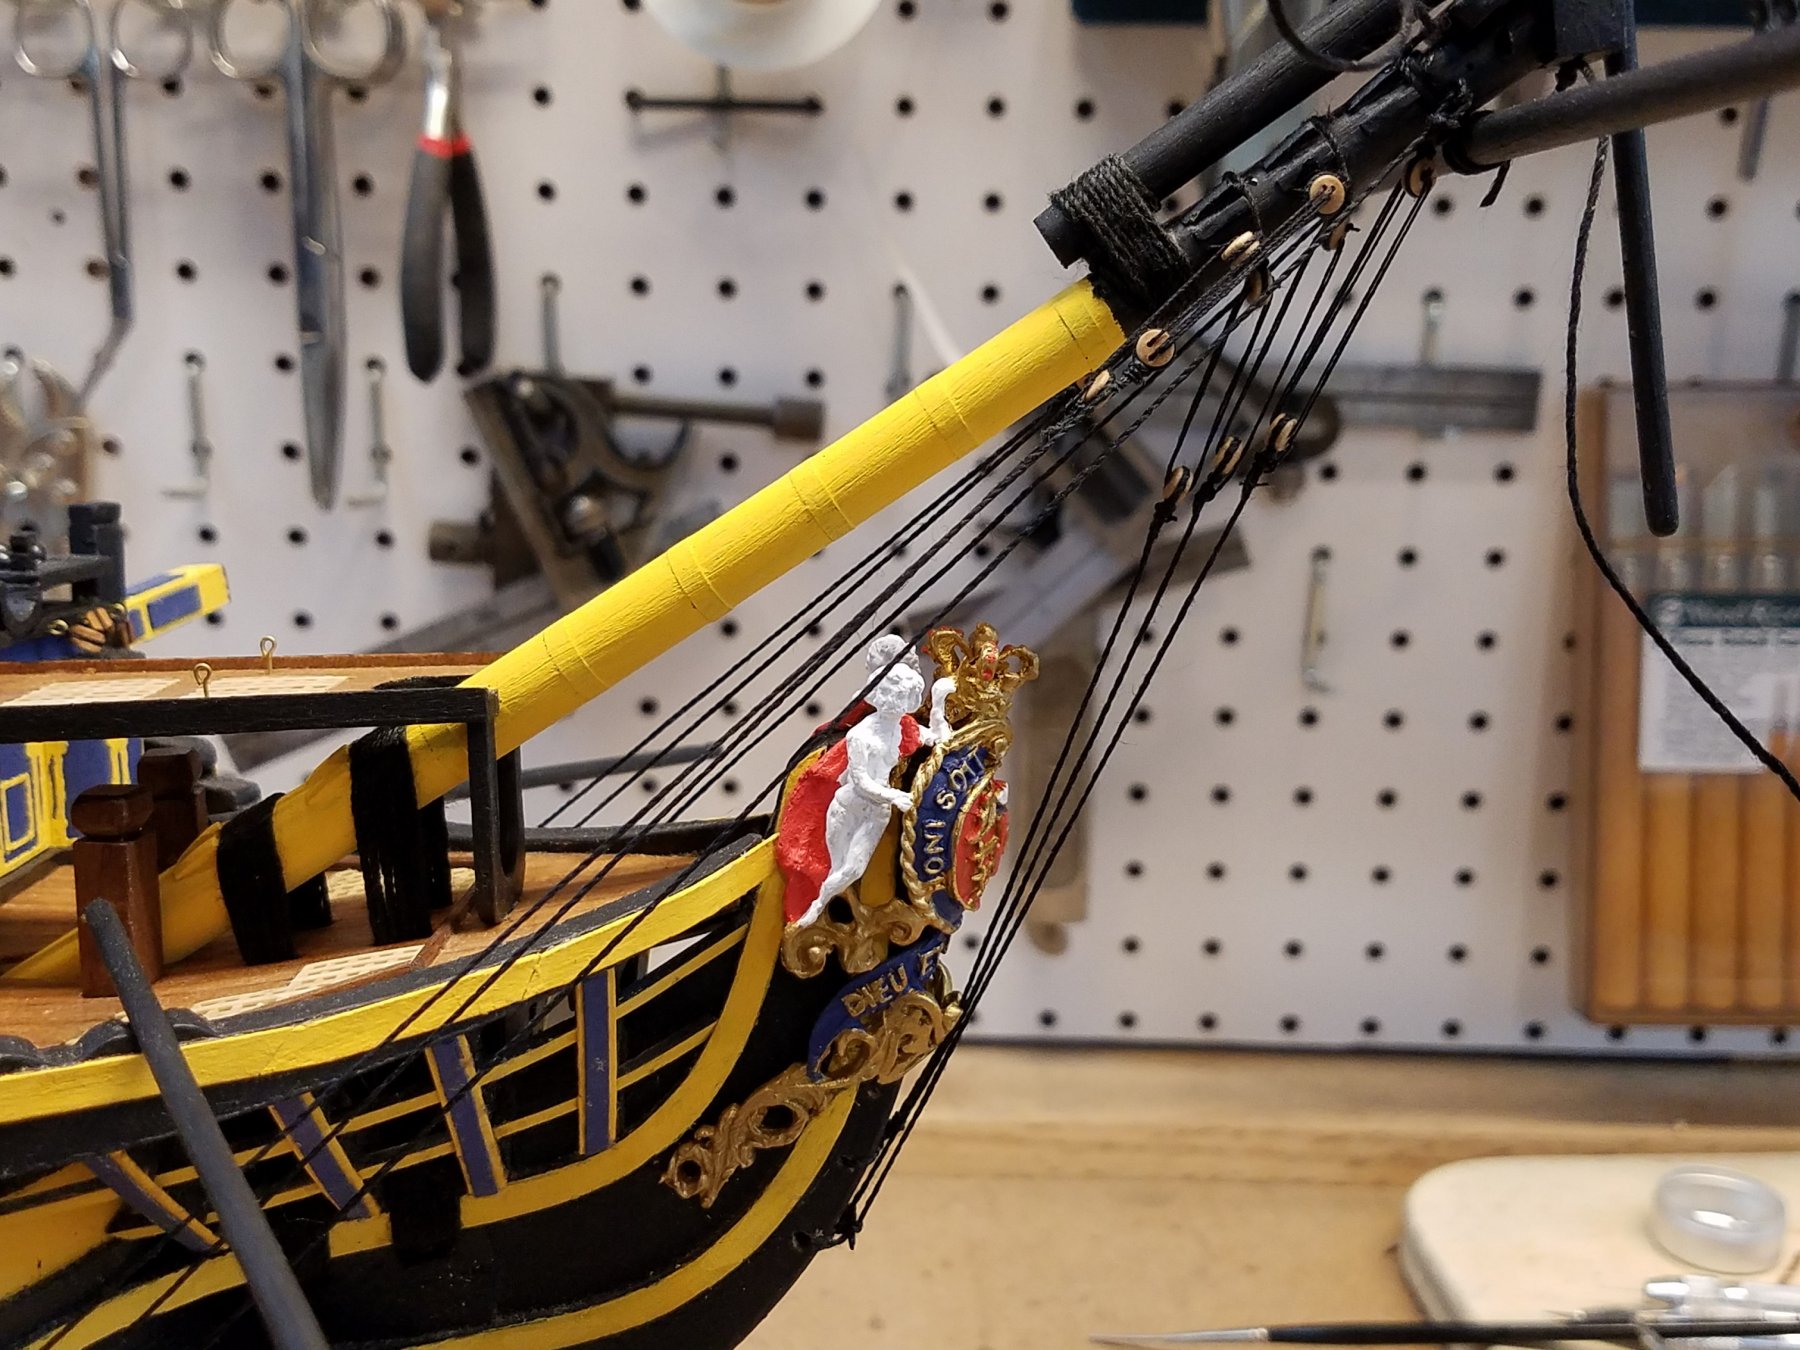
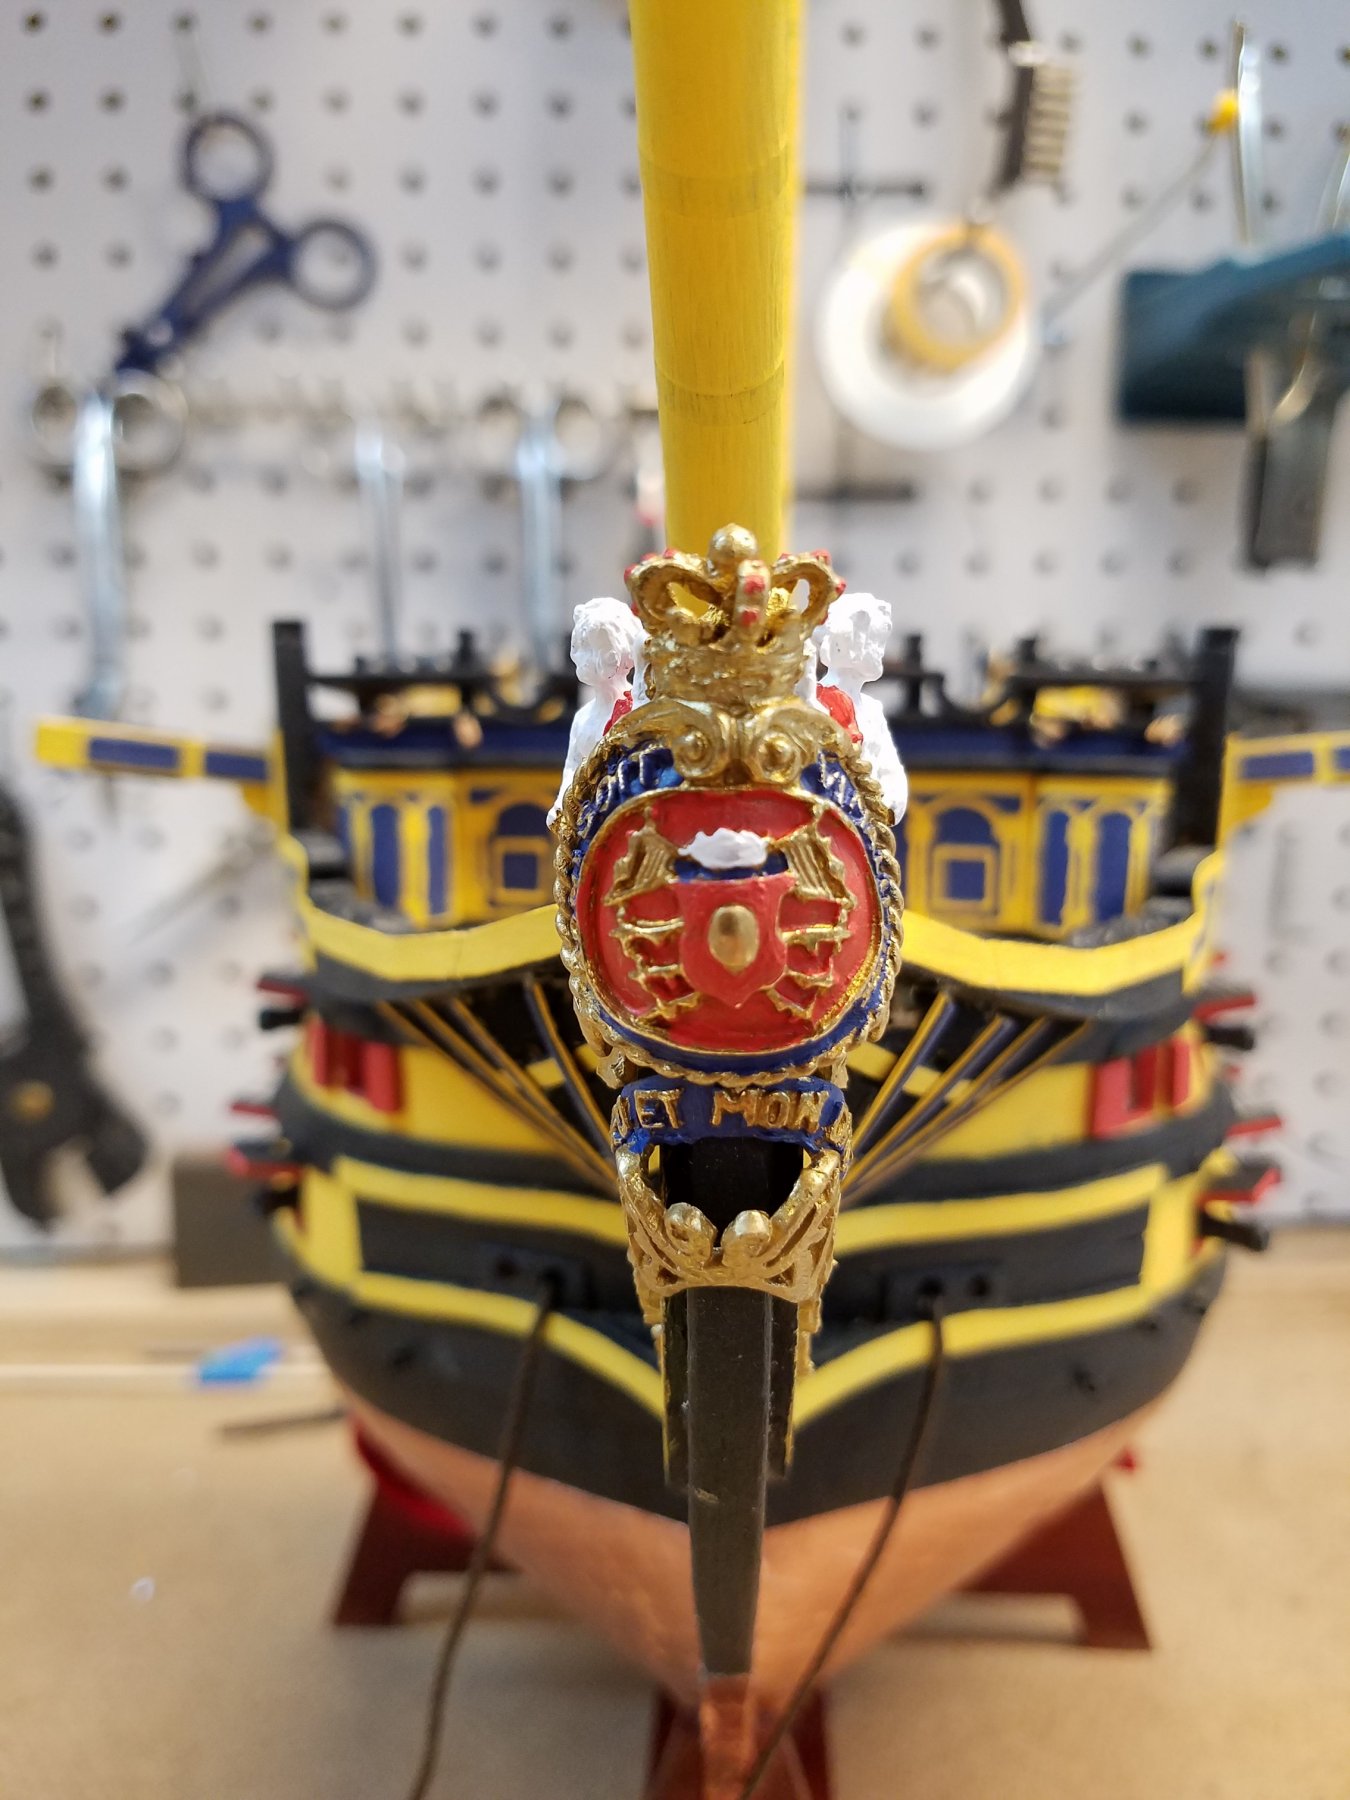
Well today in New England... snowstorm.. so after shoveling.. spent some more time in the shipyard / shop.
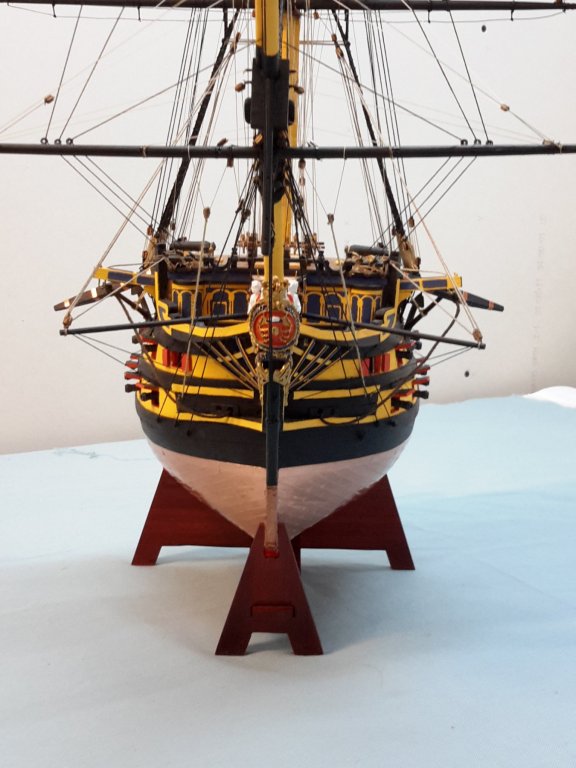
The figurehead is painted. My freehand isn't great....but I could have done a lot worse. :-)
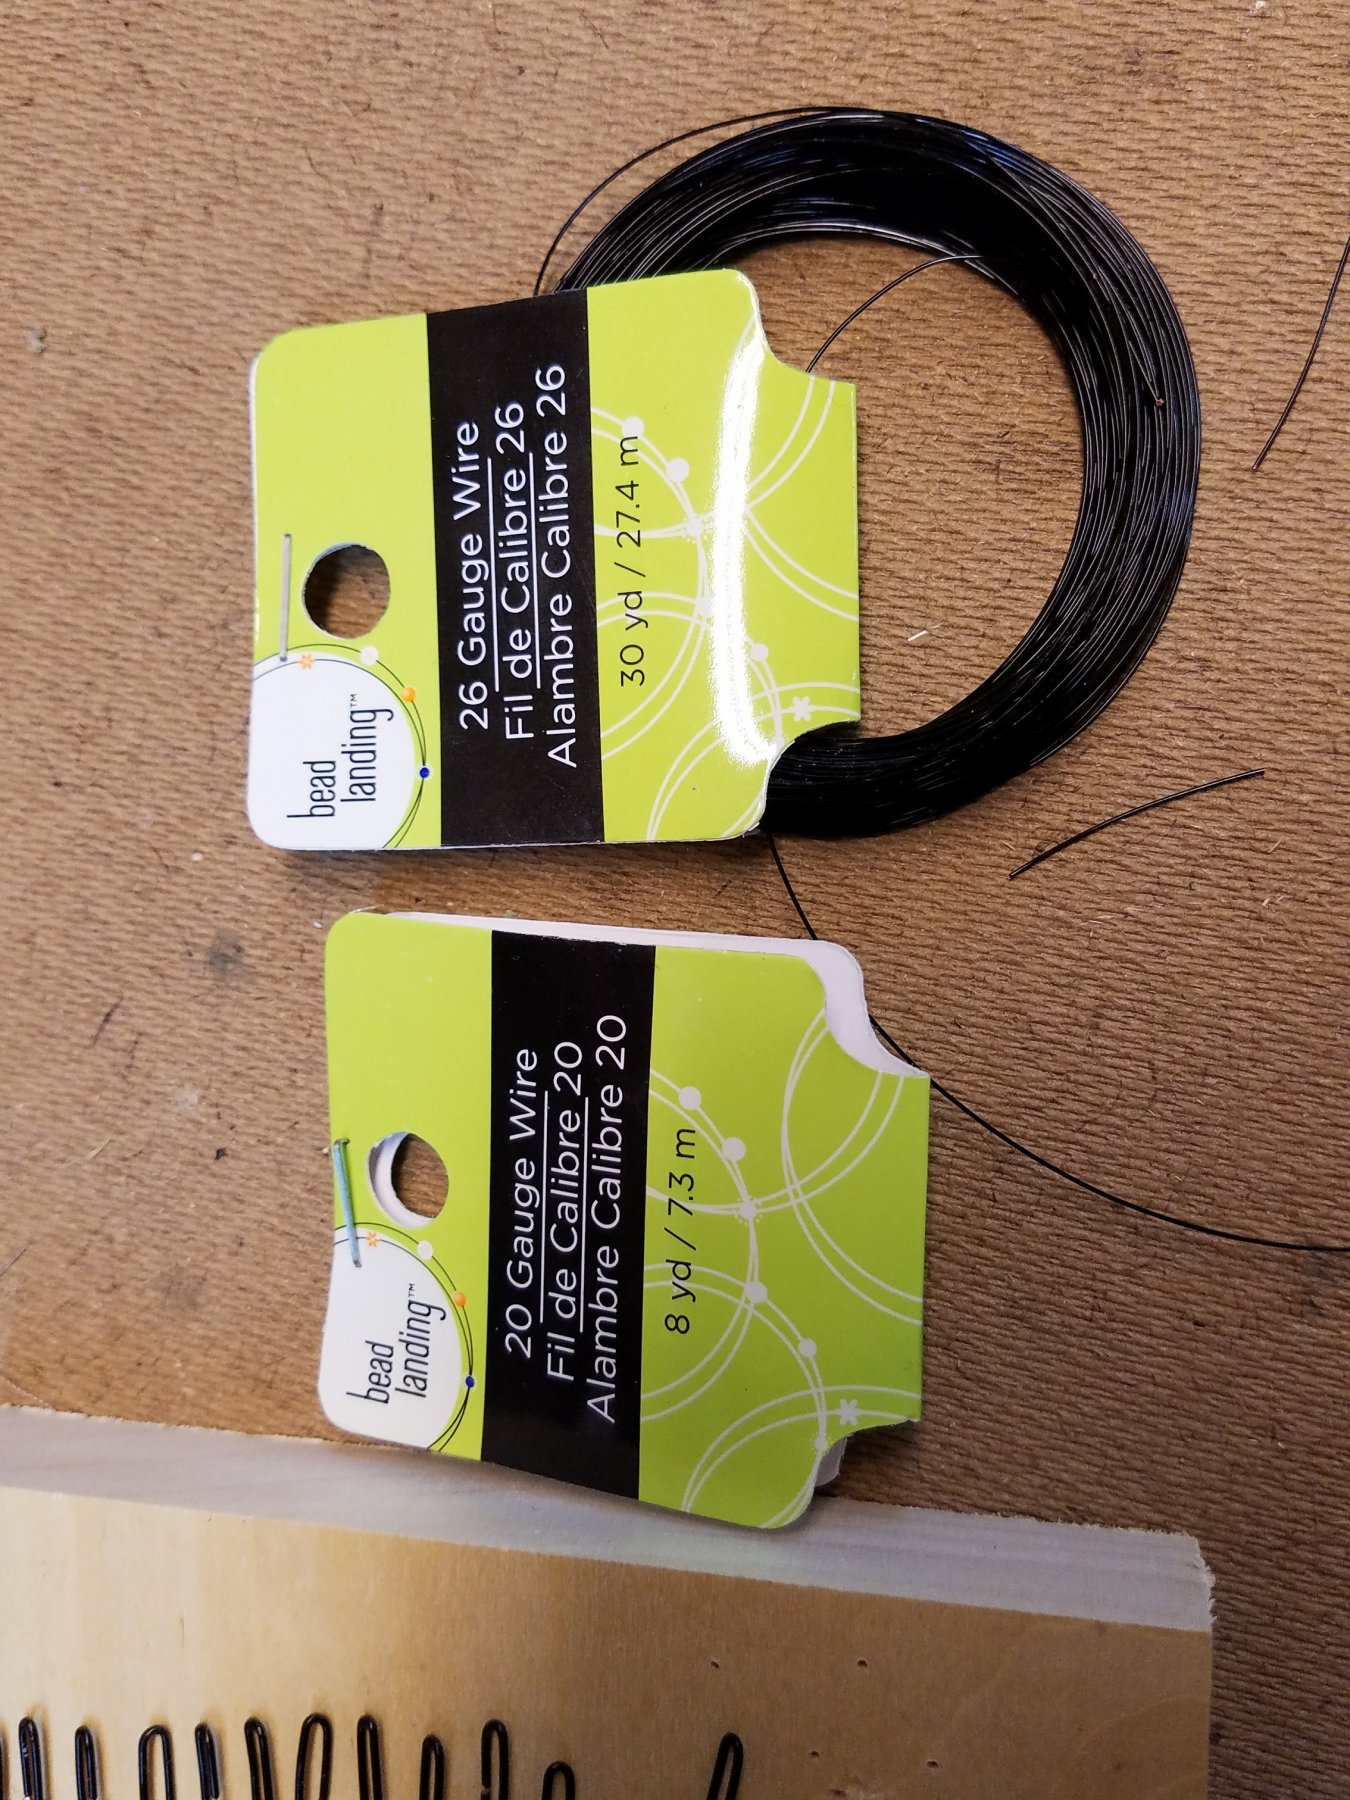
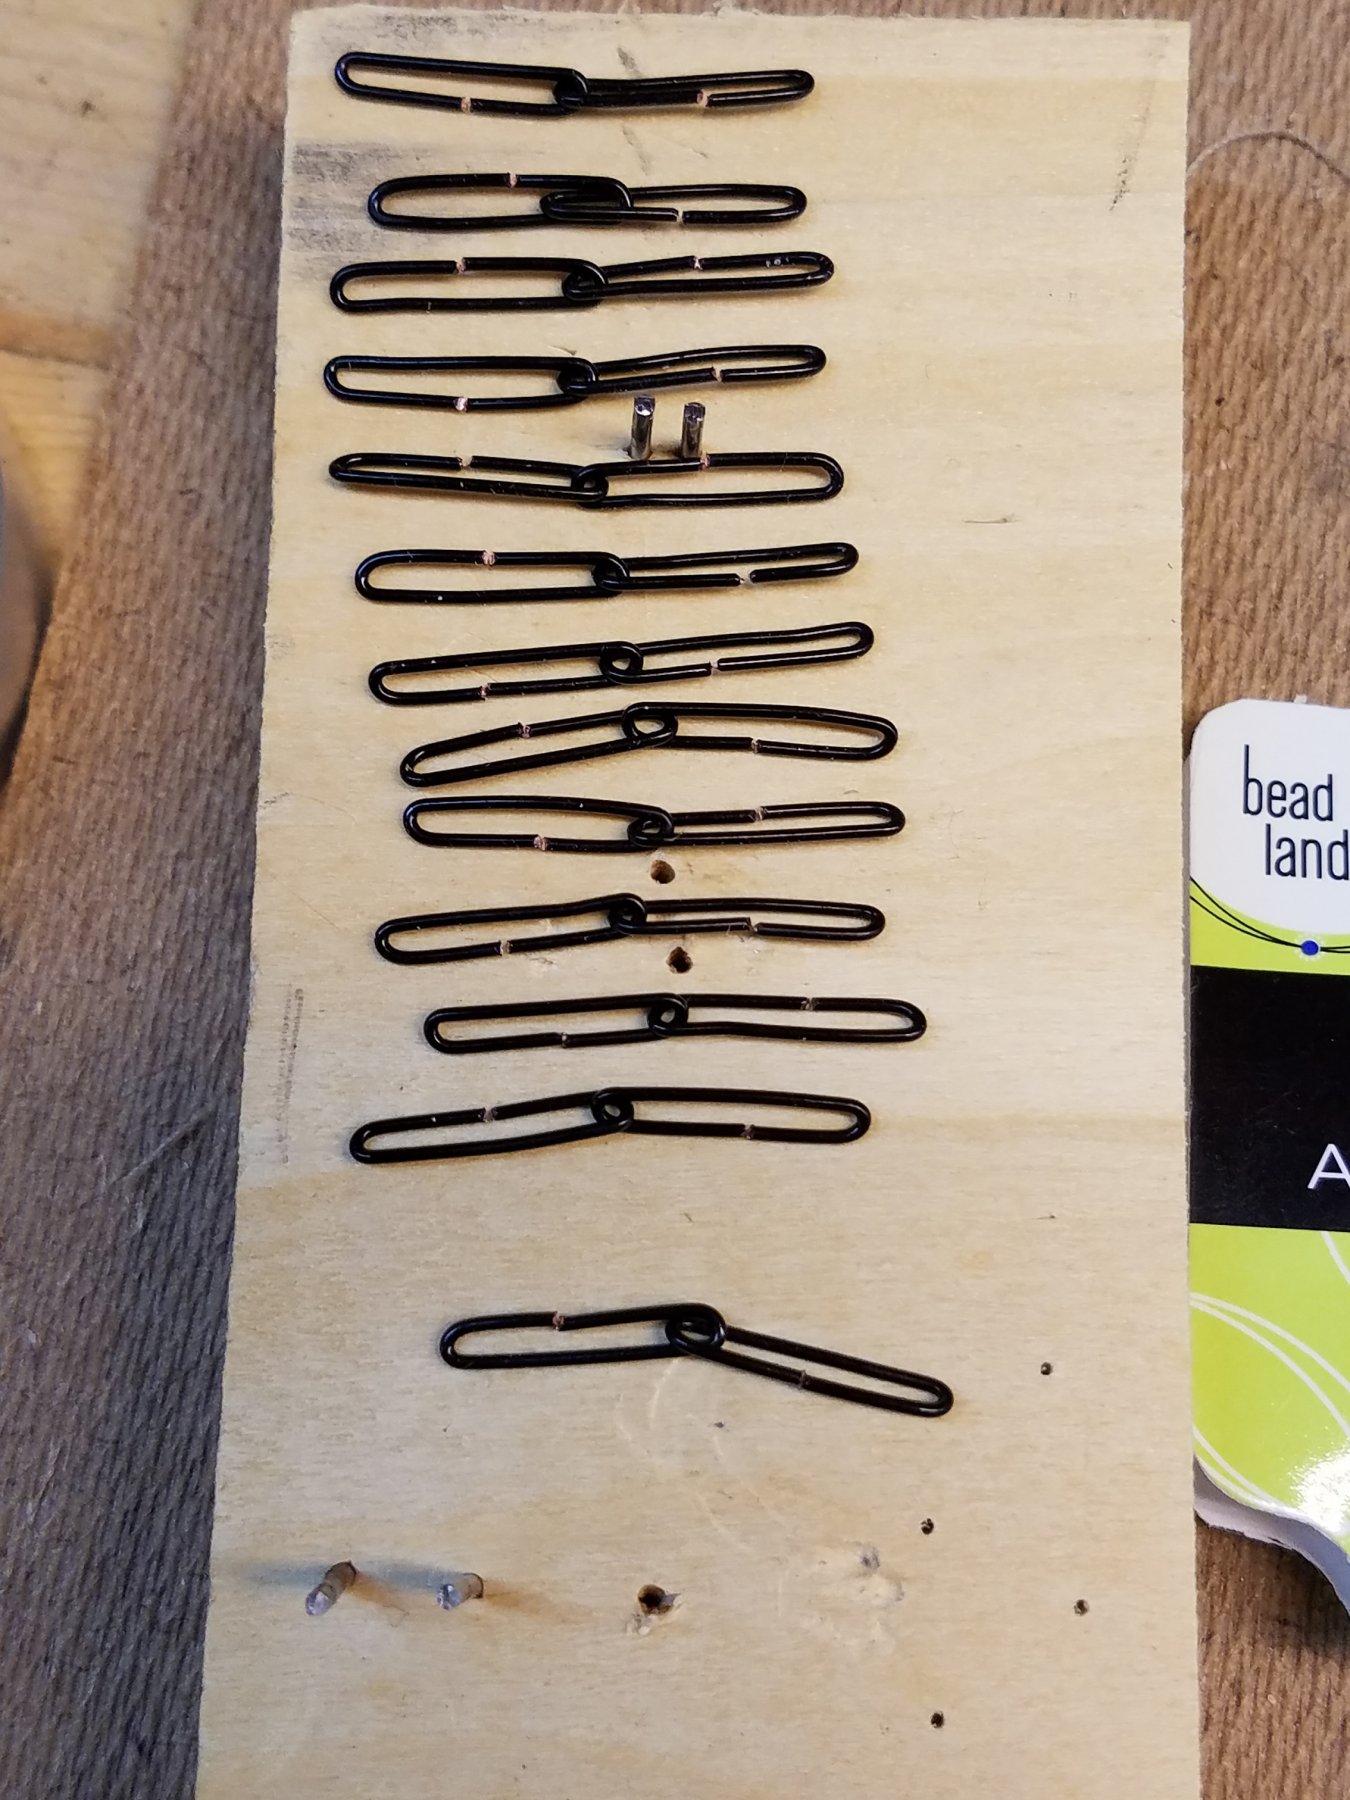
On to the Chain plates and dead eyes...
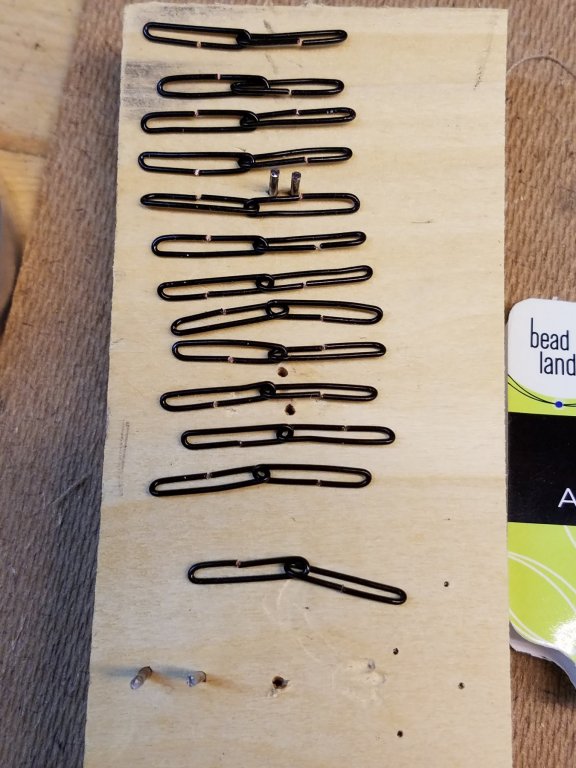
Used 20 and 26 gauge wire from Micheal's craft store to make the chains.
I need 26 links in total all the same size .... so its a process to make them consistently. Used a simple jig with 2 nails properly spaced.
1/2 way done... Port side chains installed.
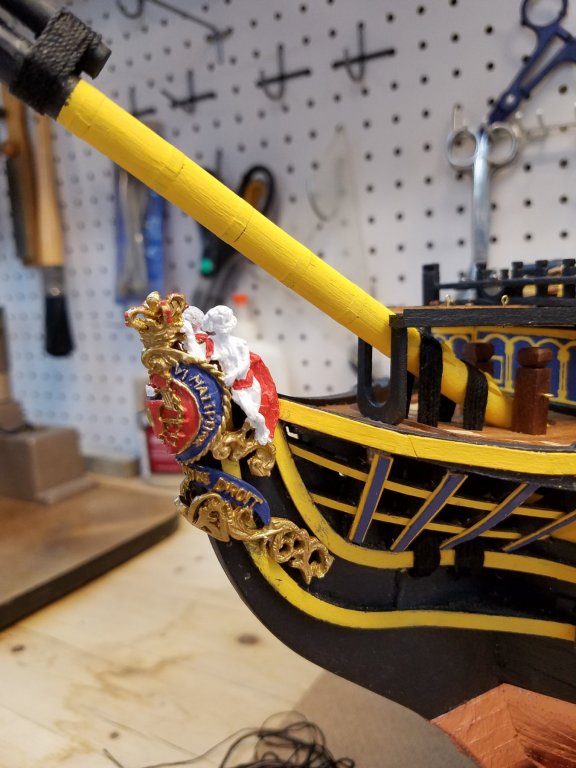
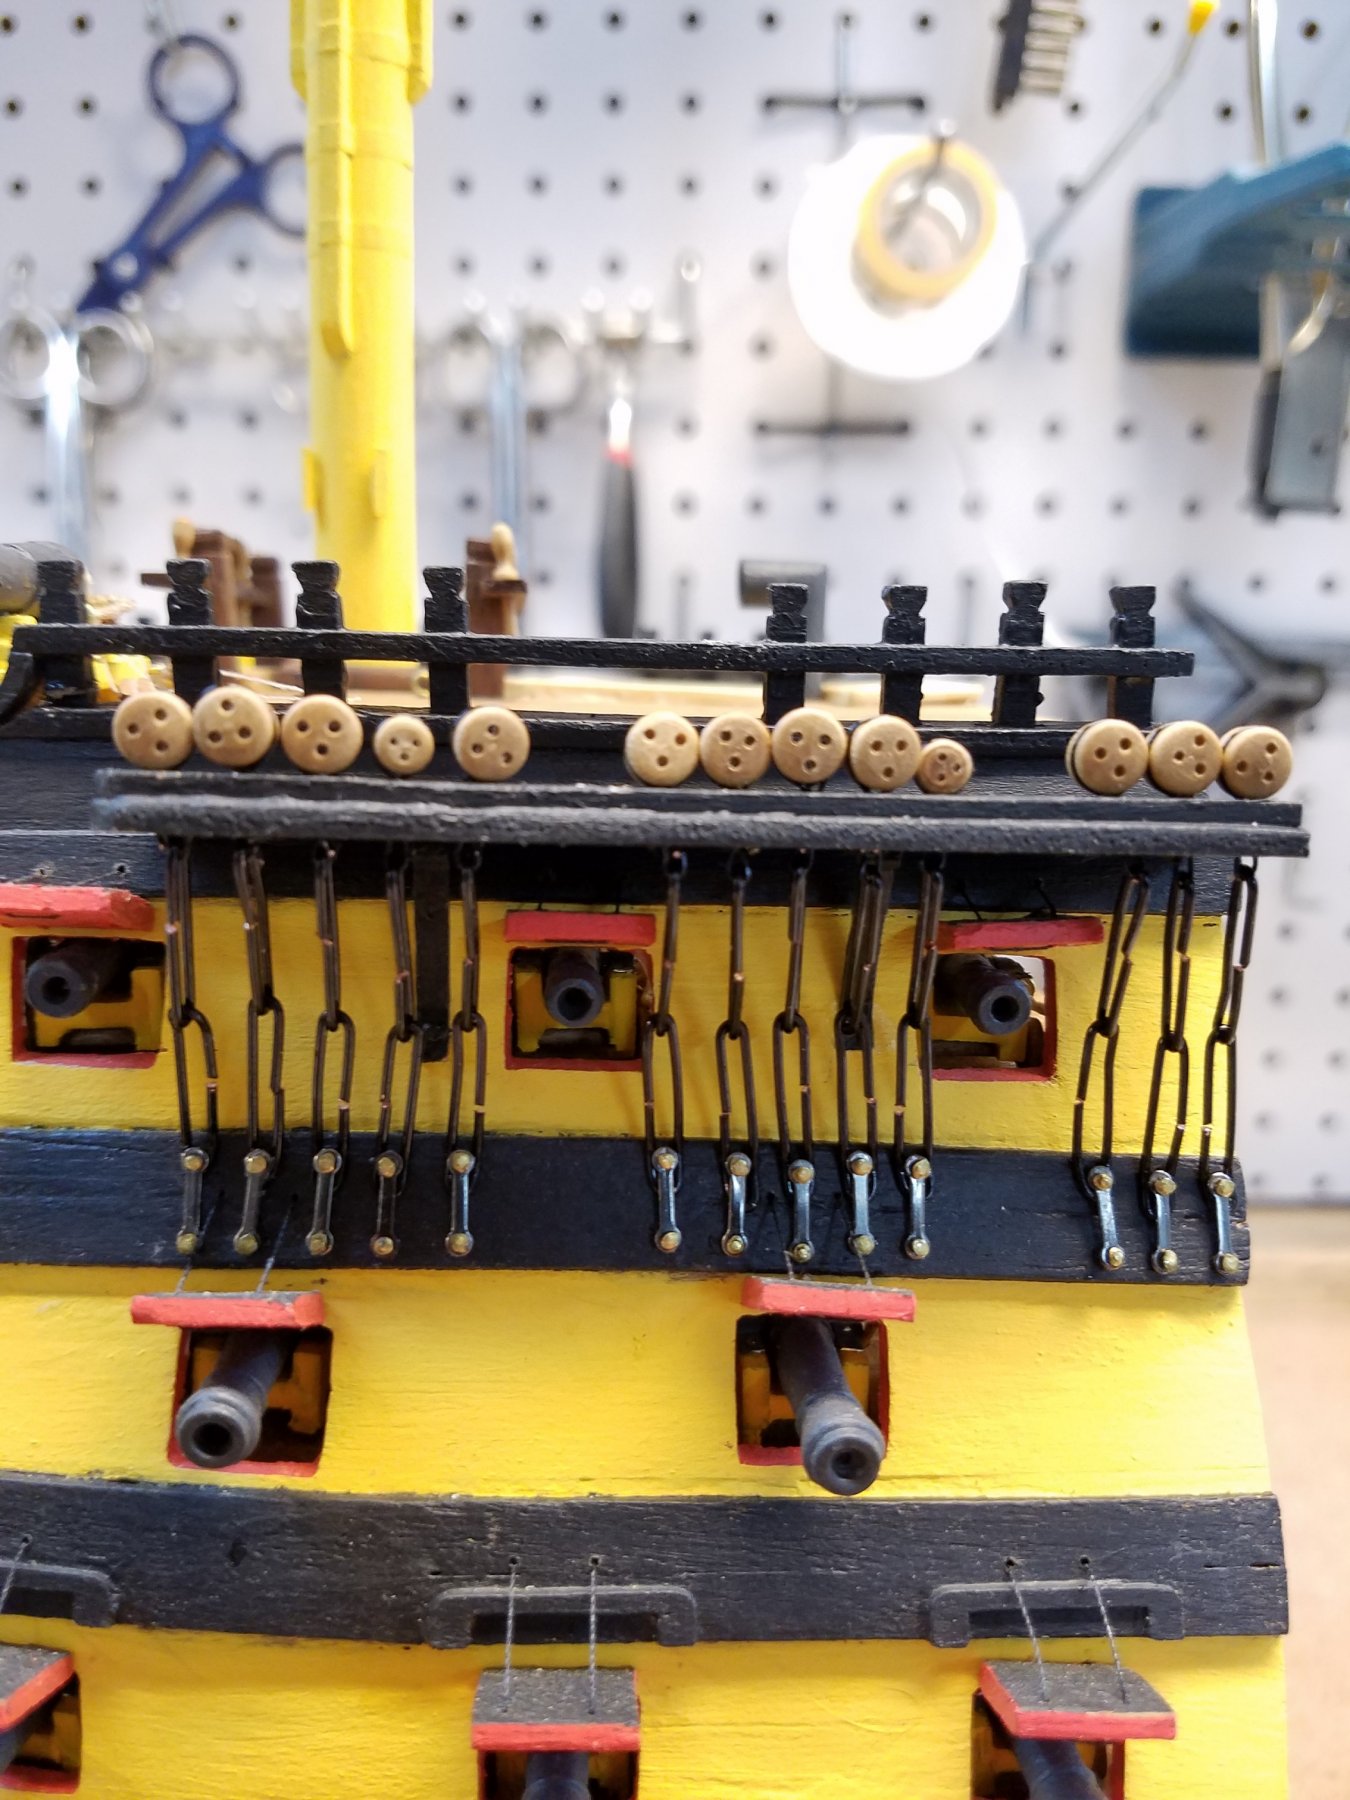
As mentioned in earlier post. The chain plates as per the kit were drilled with 8 holes per side. This is incorrect as Victory has 15 dead eyes in the fore chain plates.
With the model being only the bow section, the chain plates are not the full length of actual, and I can only realistically fit 13 dead eyes. I'll need to leave the top galleon back stays off. I also downsized the kit supplied 7 mm dead eyes to 5 mm ones to make them all fit. They look closer to scale now as well..
The holes on the existing chain plaits needed to be re drilled / relocated. I didn't want to remove/replace the ones I already installed I would do more damage than good.
They are very well secured with several rodes secured into the bulkheads. Plus they are very close proximity to the gun port lids. I would do significant damage the model to get them out.
Soo... To fix I cheated. I cut a long thin strip of walnut to fit over the existing chain plate as a covering board. Drilled the appropriate spaced holed for the dead eyes And glued this over the existing chain plate holes. The strip is just wider than the holes. This also raise the dead eyes 1.5 mm which compensates for the smaller sized dead eyes.
It's Not exactly authentic, but it fixed the issue relatively easily and and looks like it belongs. (At least to non - ship modelers :-))


-
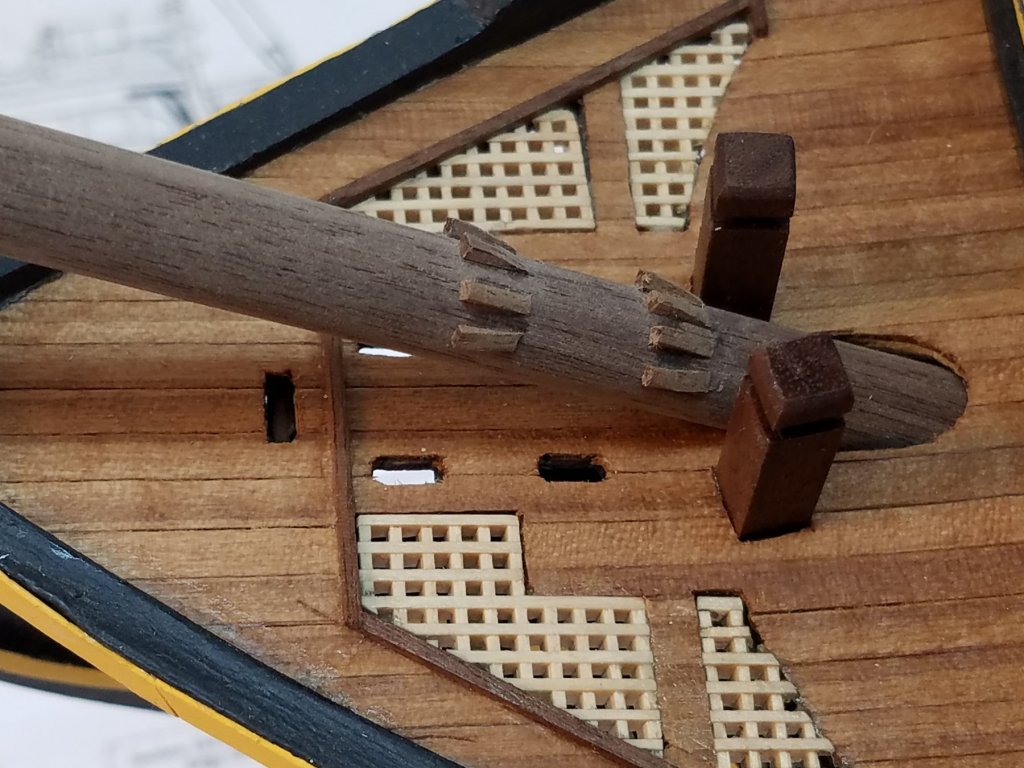
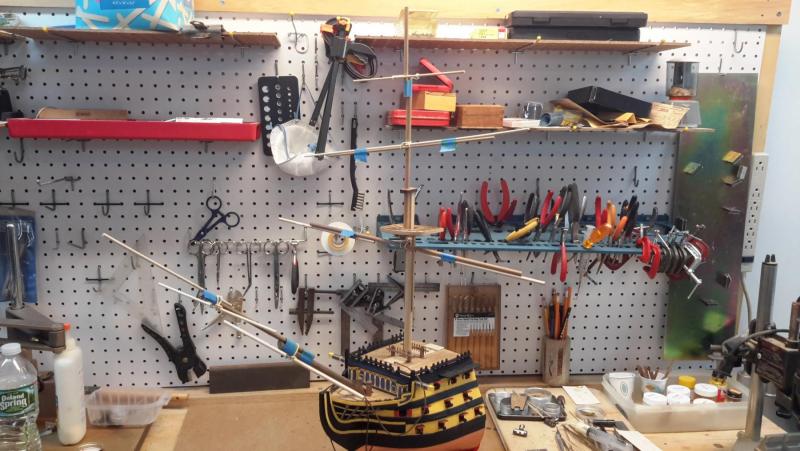
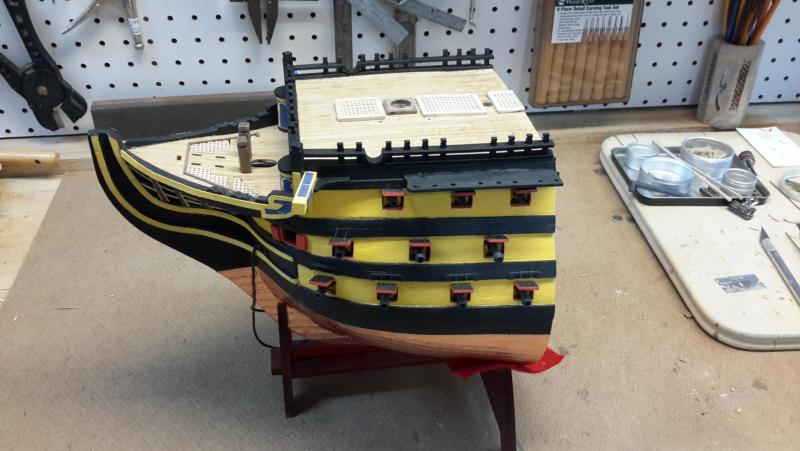
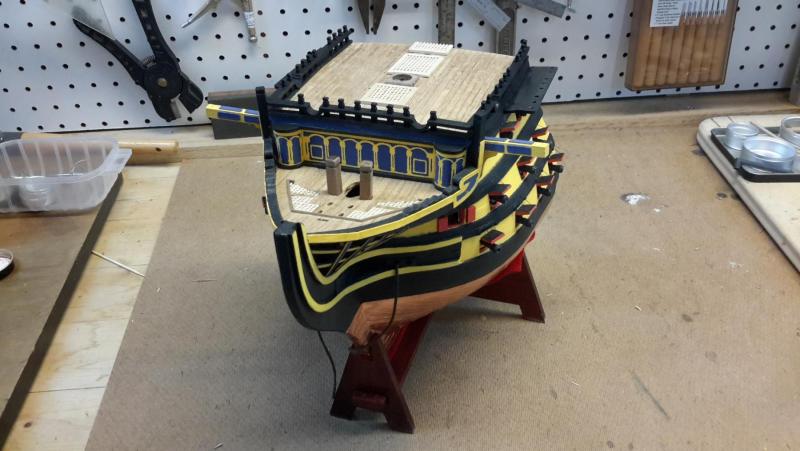
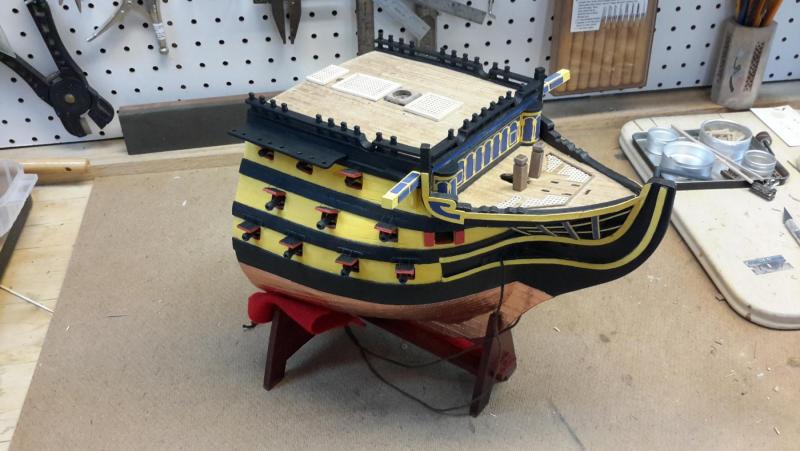
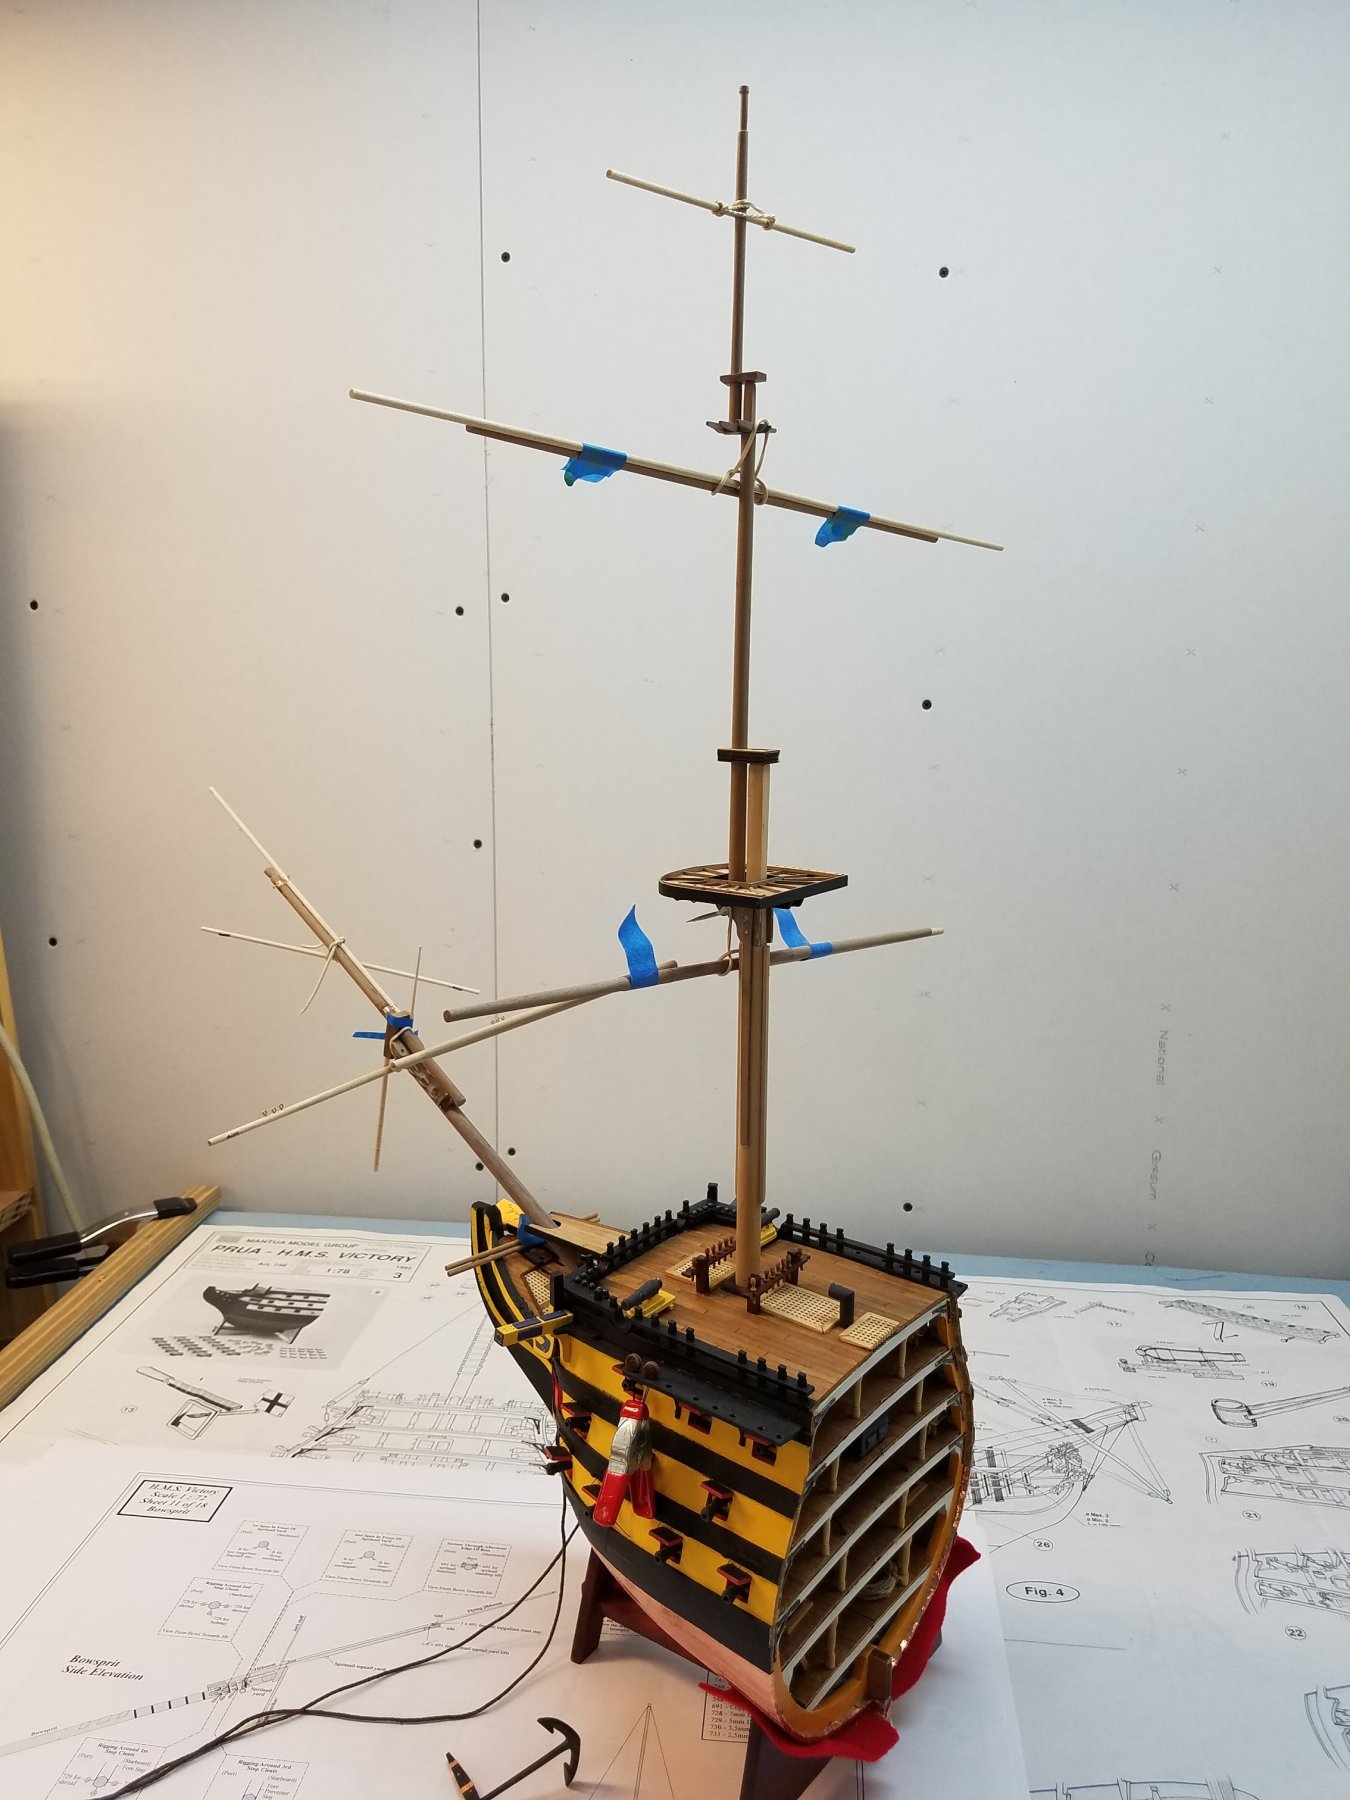
Next Update.
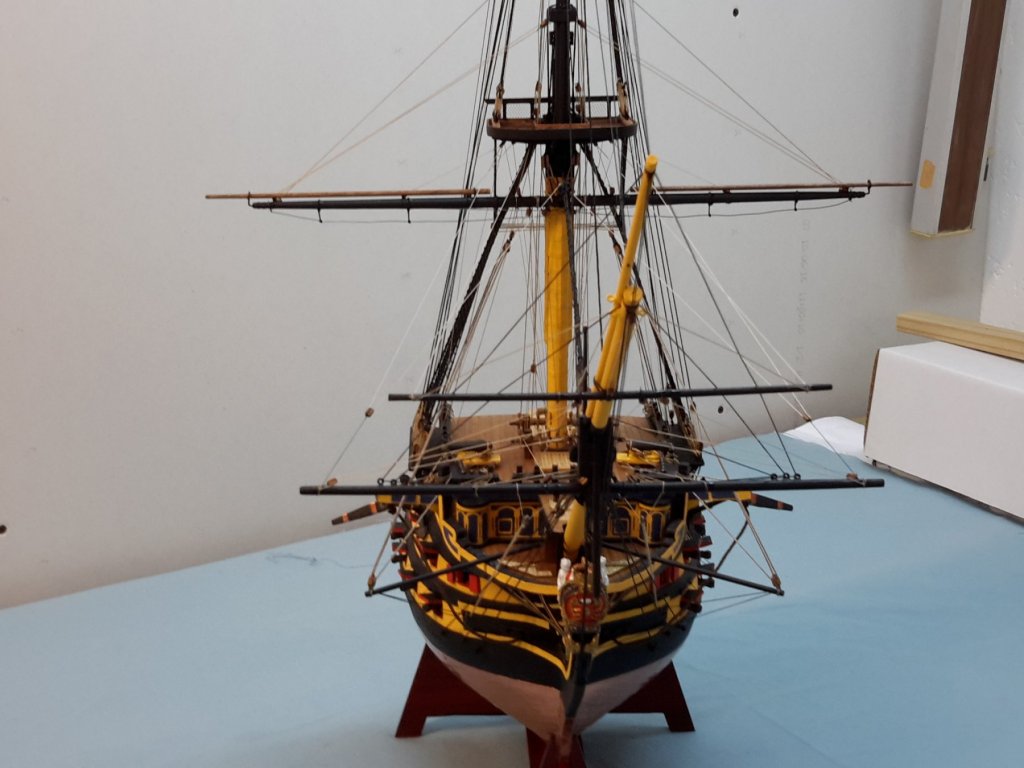
My spars now have some paint.
Connondale on deck is now all rigged.
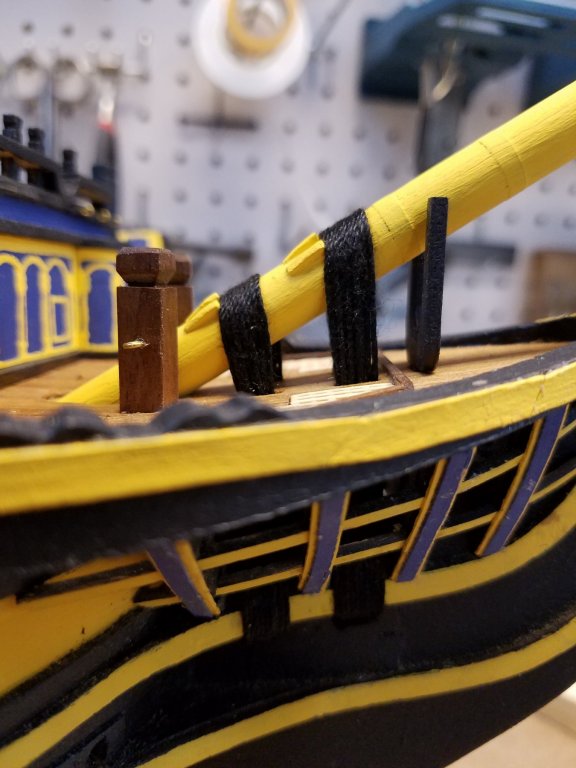
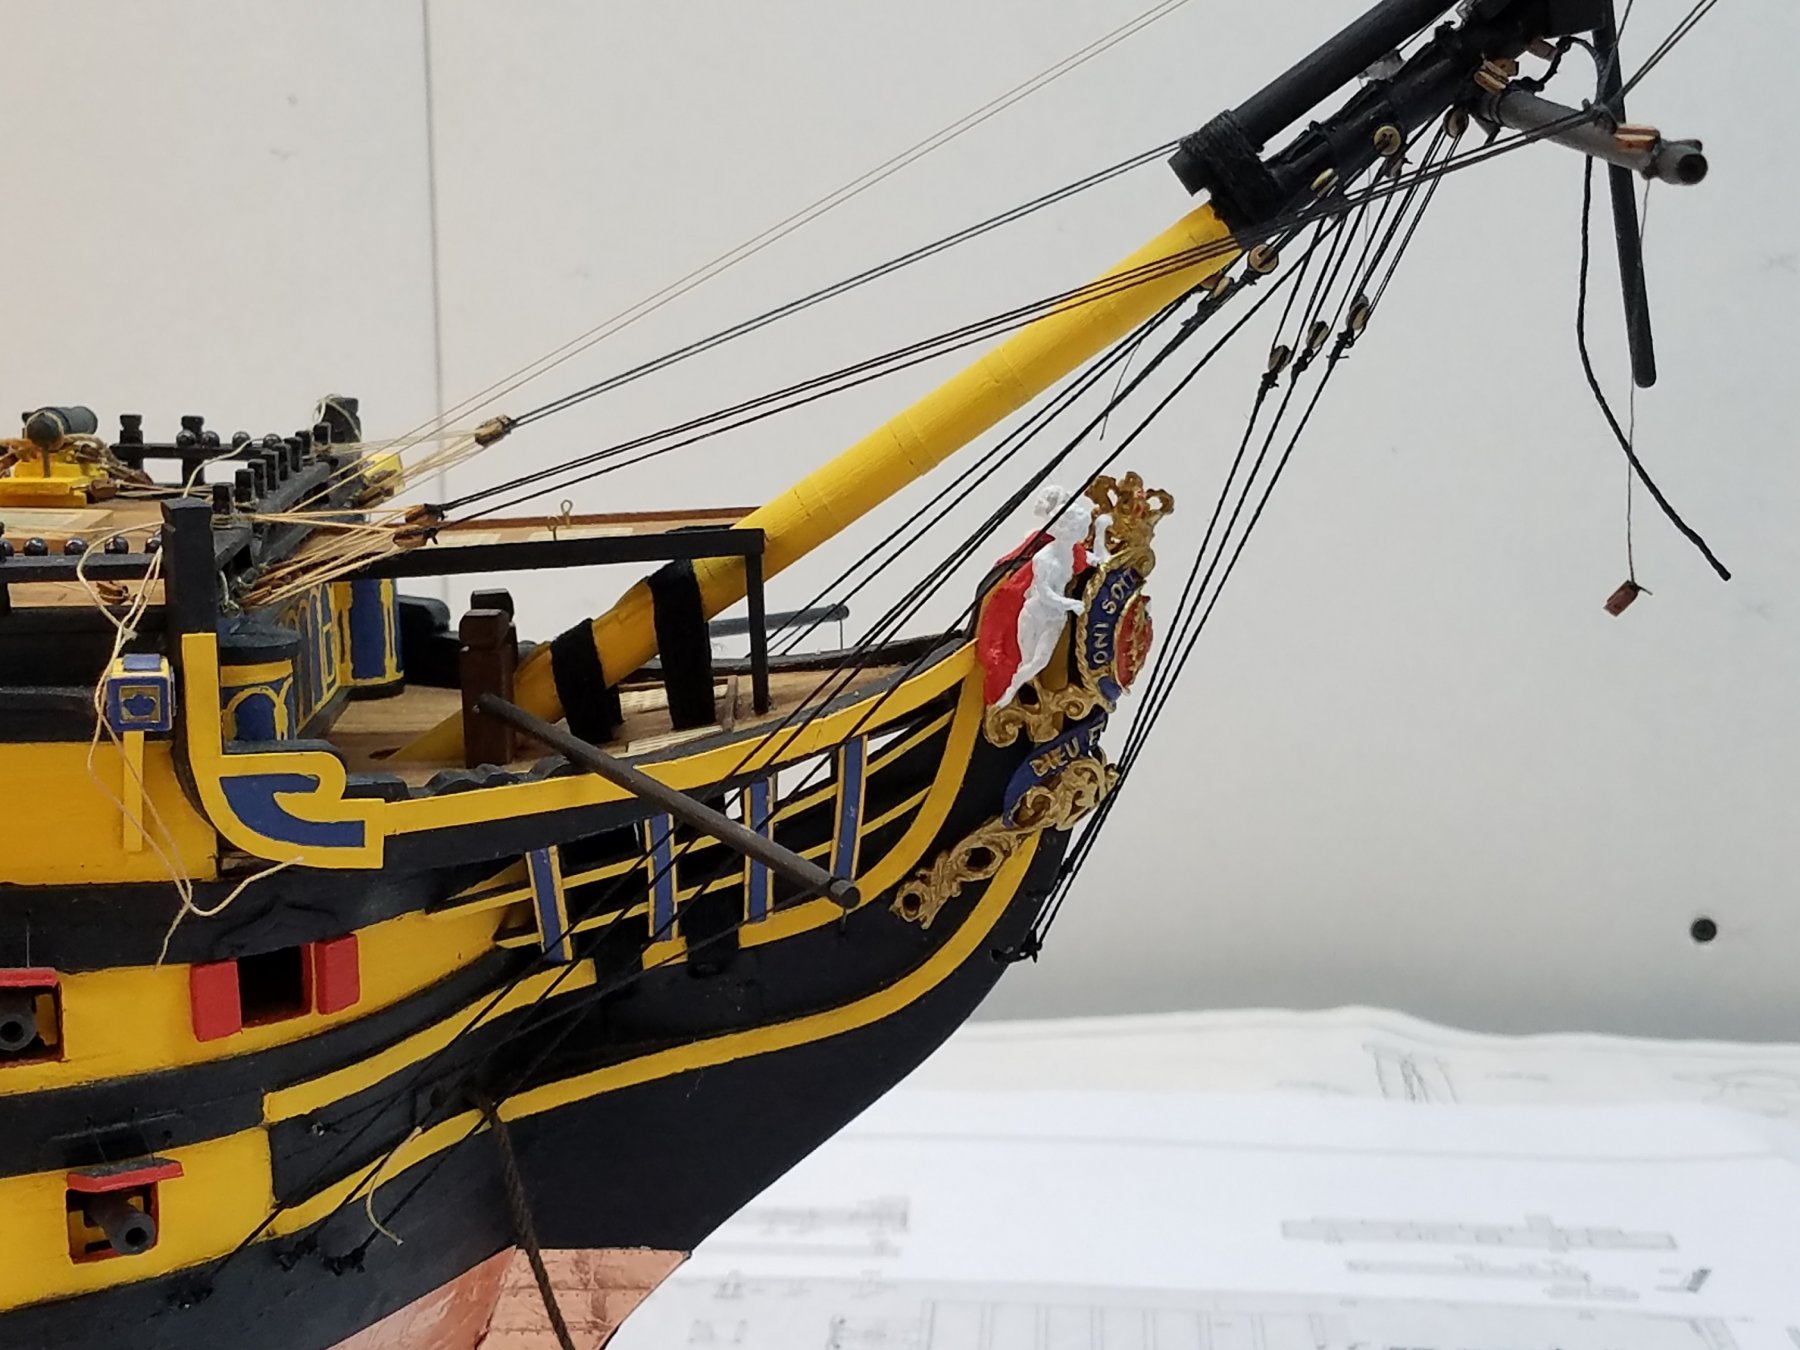
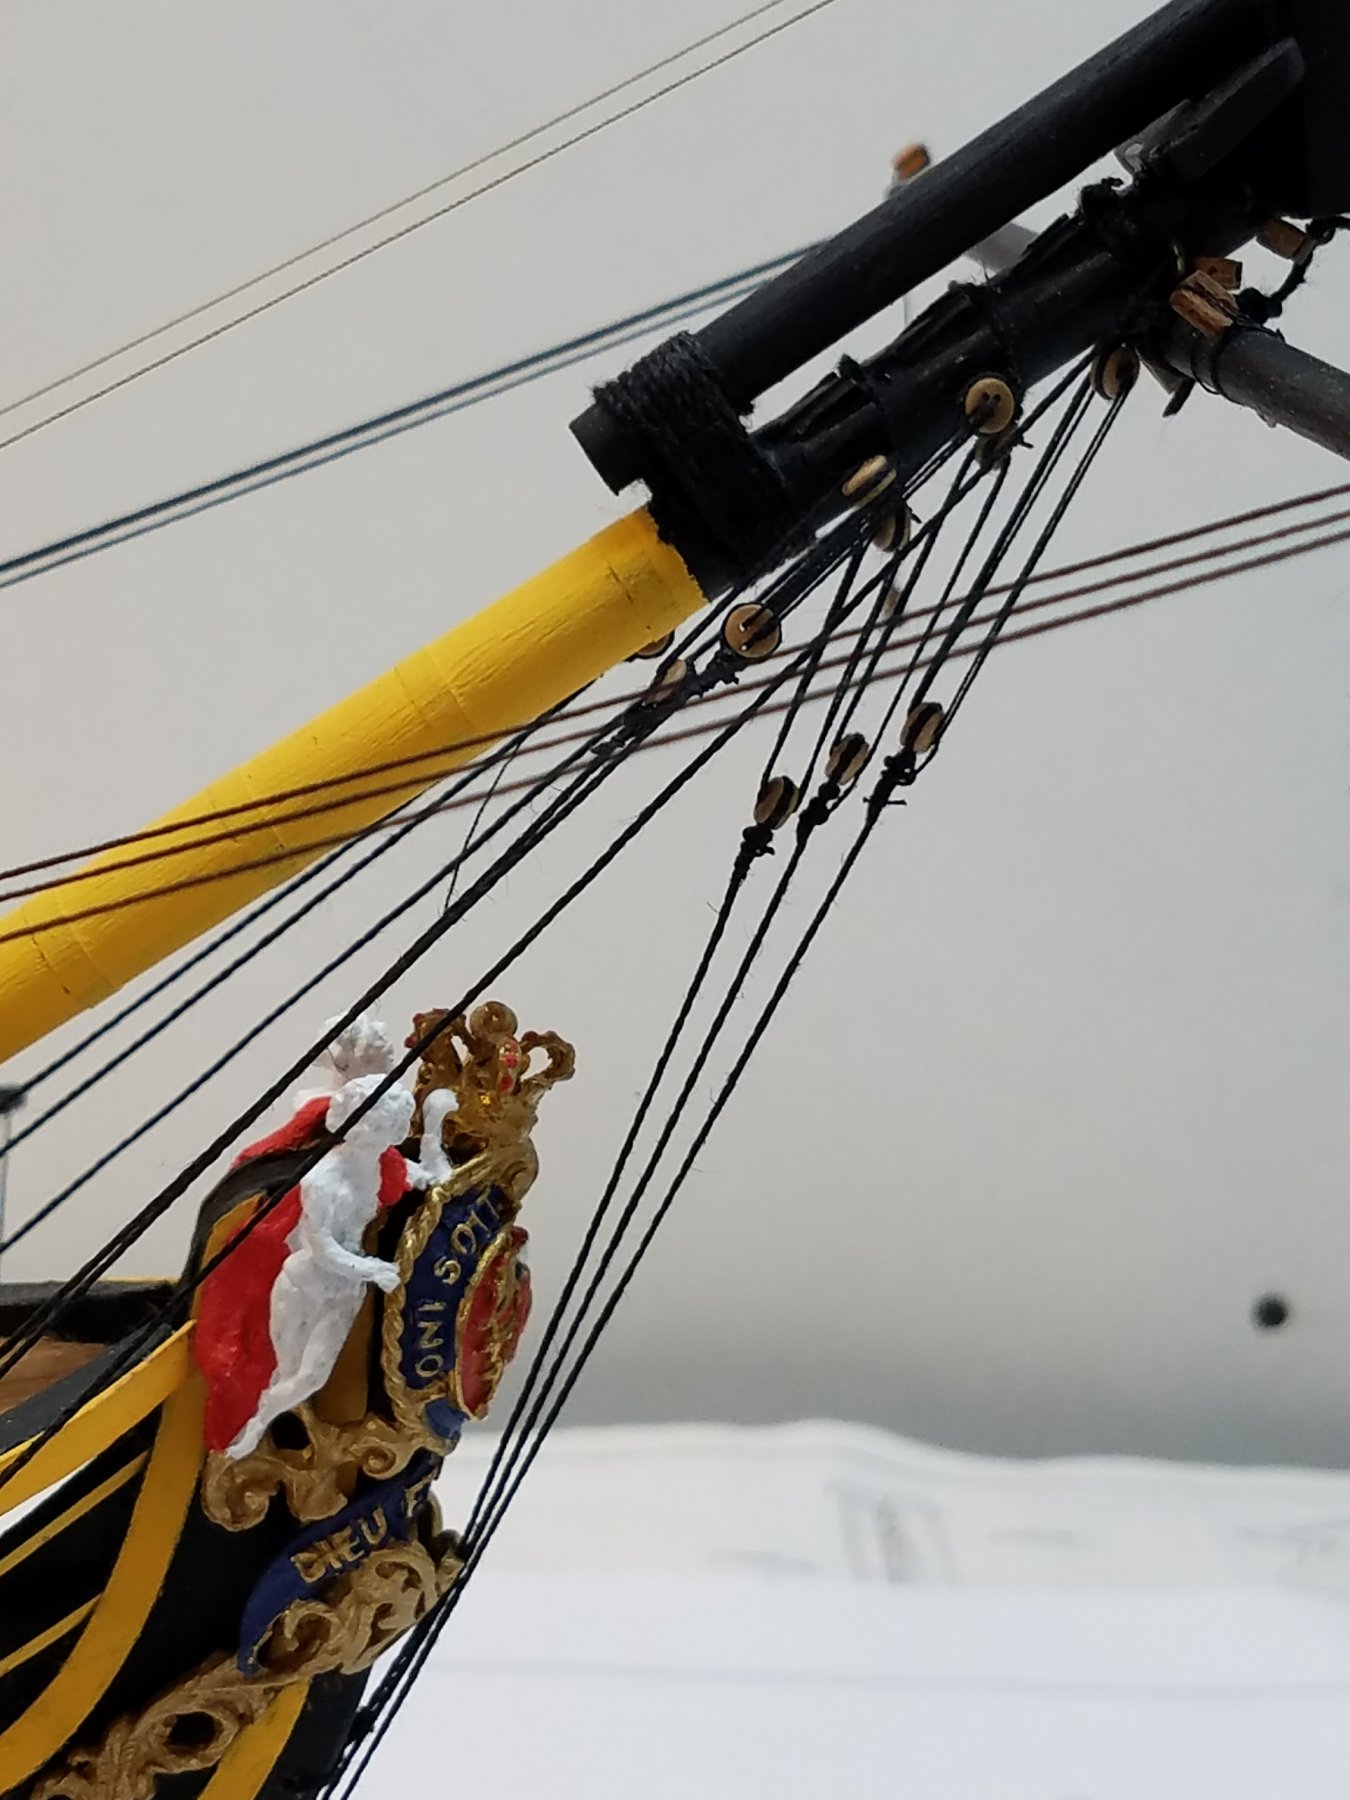
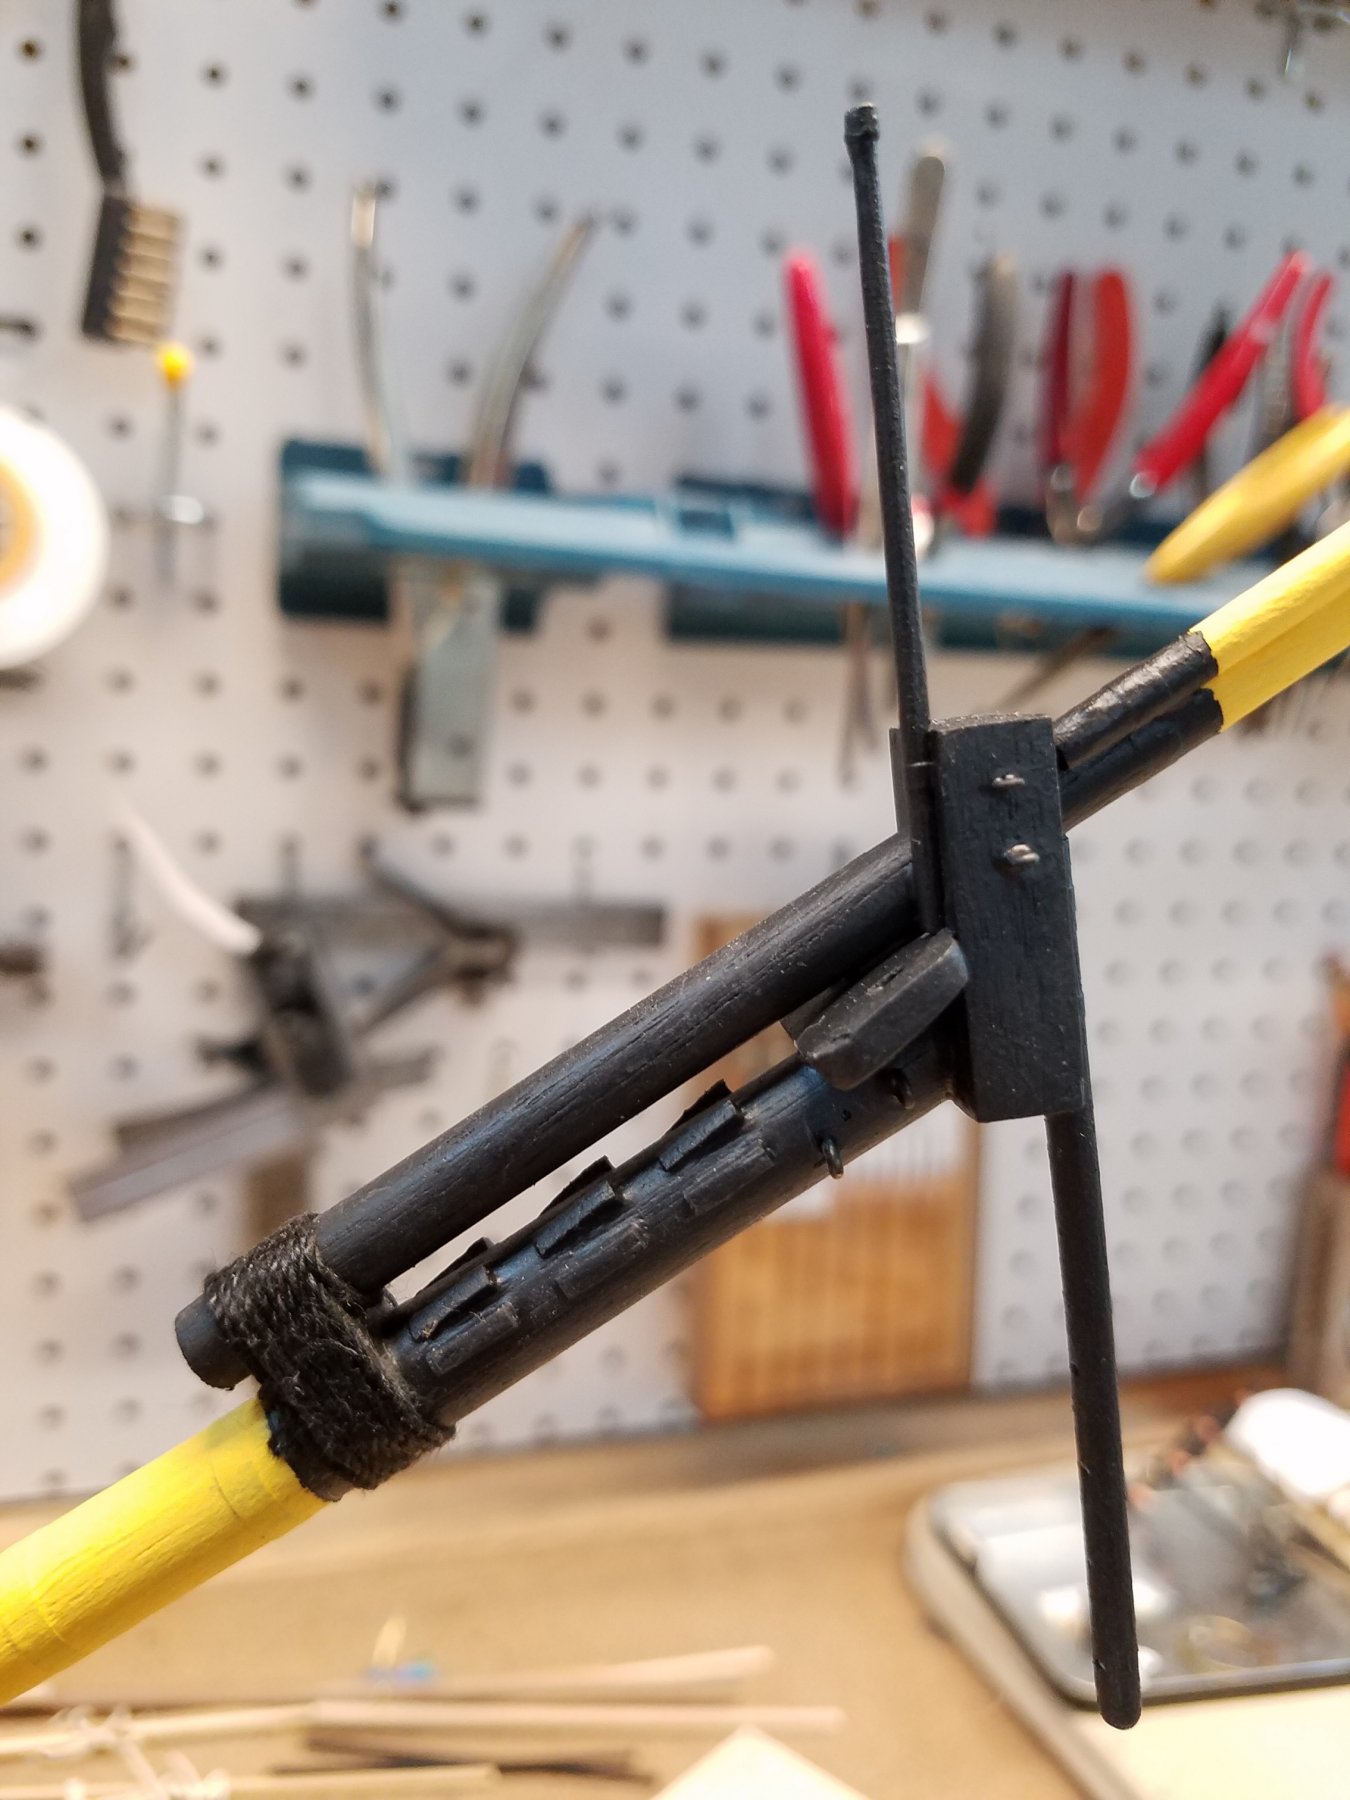
Bowsprit is now attached and lashed down
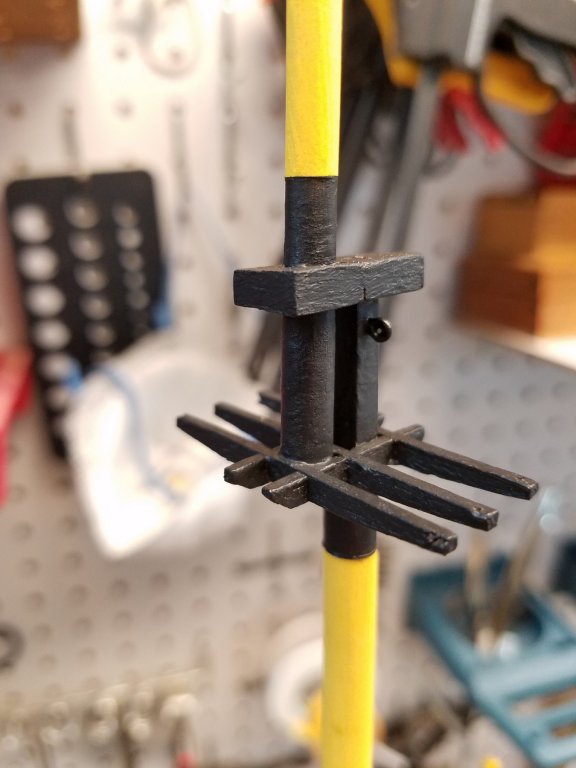
Bowsprit head with Jib boom, Dolphinestriker and flag staff
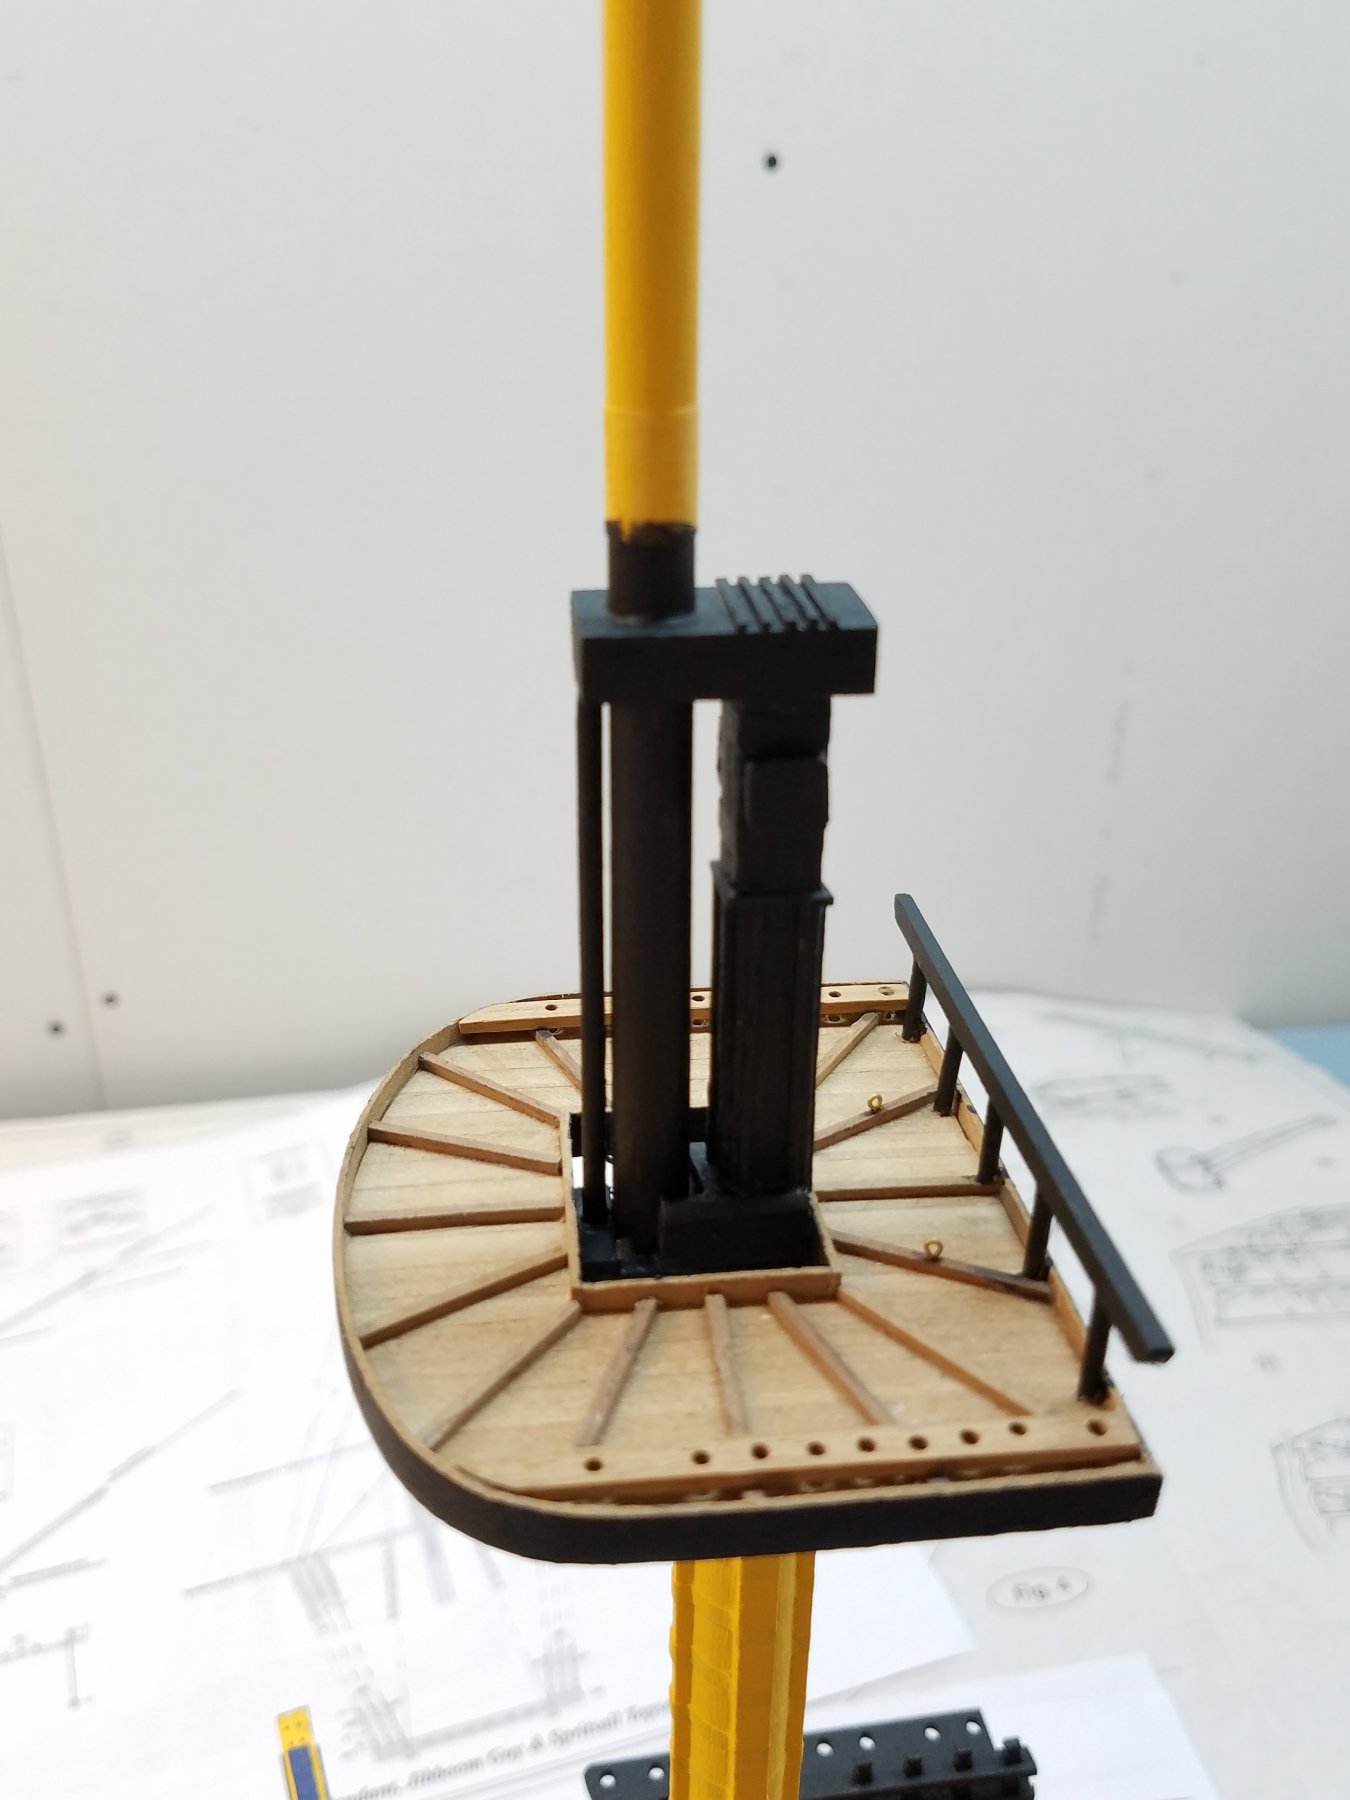
Fore top
Top galleon head
Currently I'm working on painting the figurehead.
Experimenting the best way to make dead eyes strops.
Note the kit out of the box the chain plate only allow for 8 dead eyes per side. See my last pic
The Vic has 13? per side. I discovered this recently long after the chain plates were firmly already attached to the ship. I really dont want to take them off and remake them at this point. So to correct...I need to carefully drill more properly spaced holes in place. Also going to need to go down from 7 mm dead eyes to 5 mm dead eyes to they will fit.
Hopefully I don't mess this up too bad. I'll update with more pics after the model surgery is done.


-
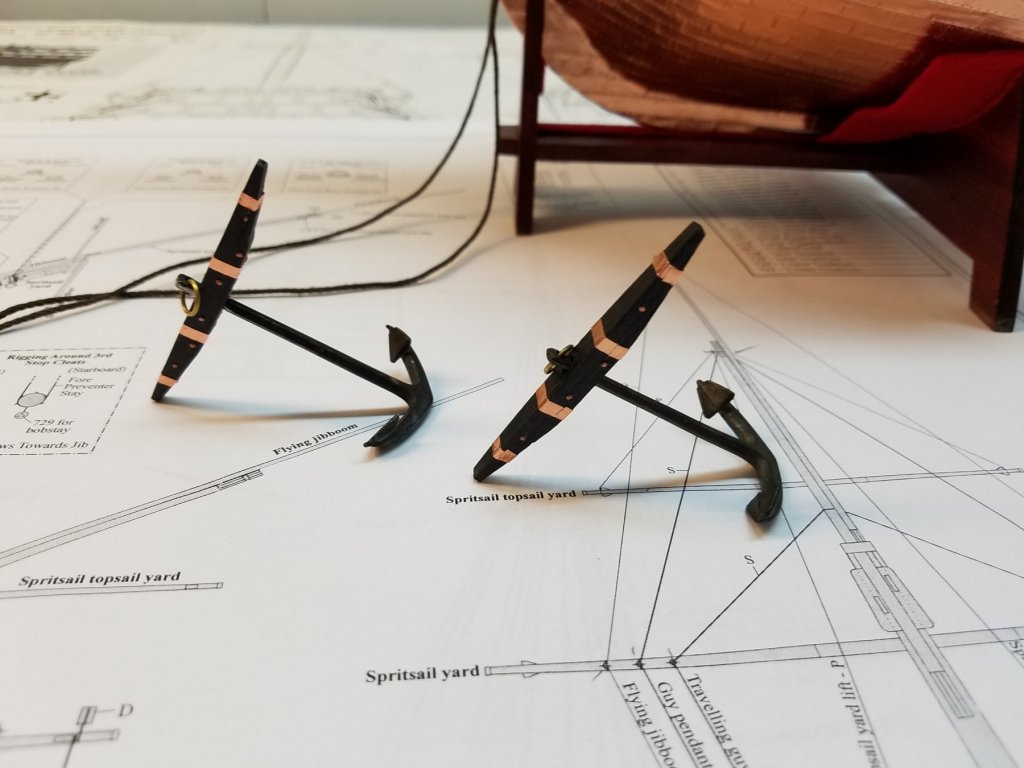
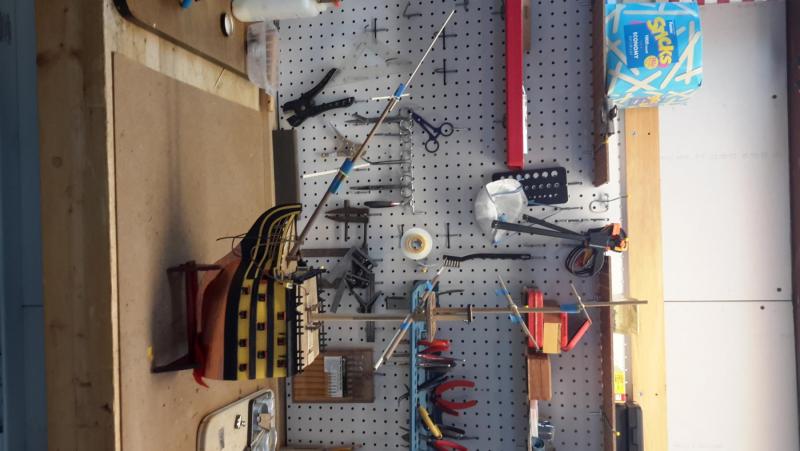
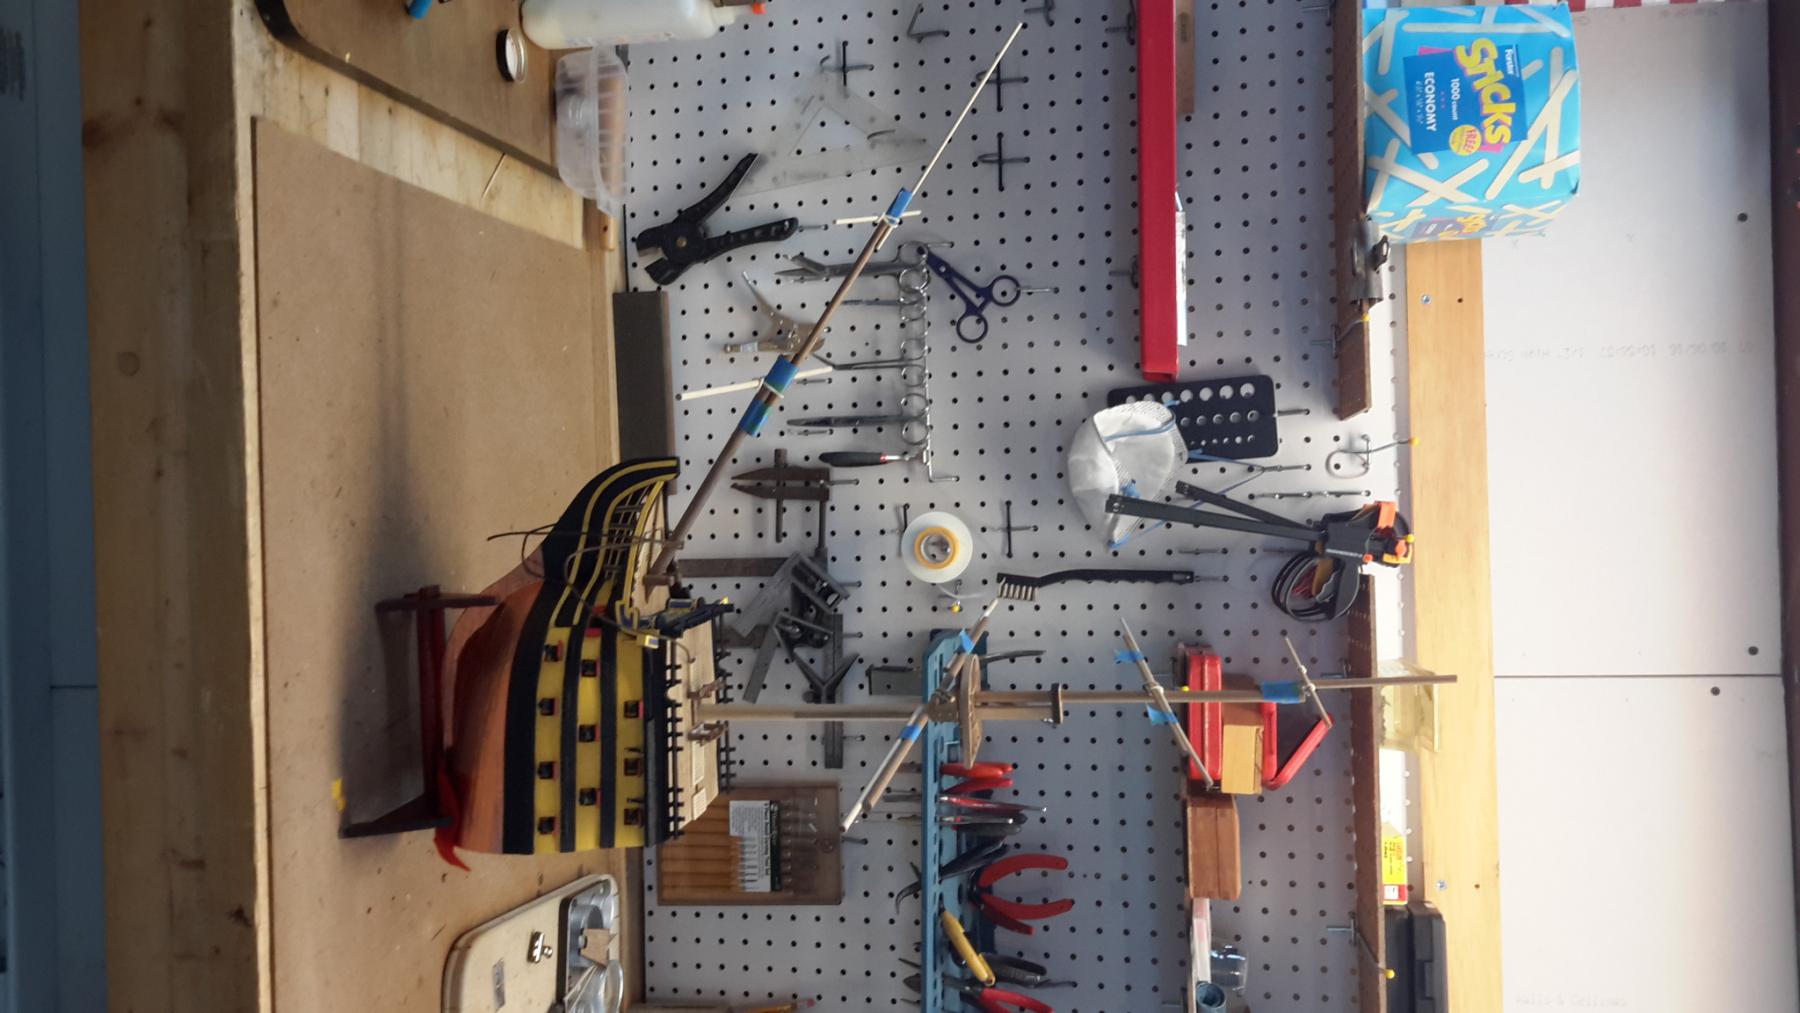
Work on the entire foremast continues. Spars all mostly roughed out to the right length and tapered. Need to detail them out now.
Anchor also made. I was planning I painting the copper black as is authentic... but leaving it shiny is starting to grow on me. Haven't decided yet which way to go.
Yes... I know Yards are all ahoo. (Reading too much Patrick OBrien :-). Picking up Jacks vocabulary)
Oh yeah, Gotta start working on the figurehead.
Just ordered a bunch of stuff ( lots of tiny blocks, dead eyes and string) from Model Expo so I can move on to rigging very soon.
I'm tempted (probably won't .. but thinking about it.. This might be a good model to rig sails on. Hmmm.. Do I really want to do that?
I know its my model, my choice... BUT What would you do??? Anyone?

-
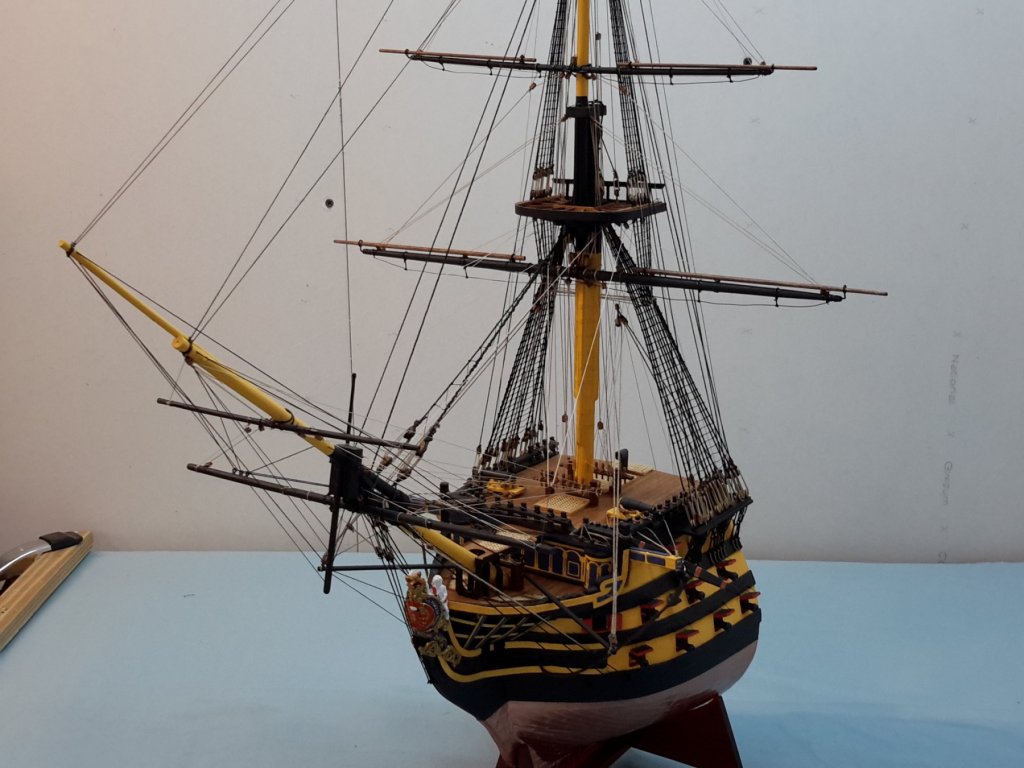
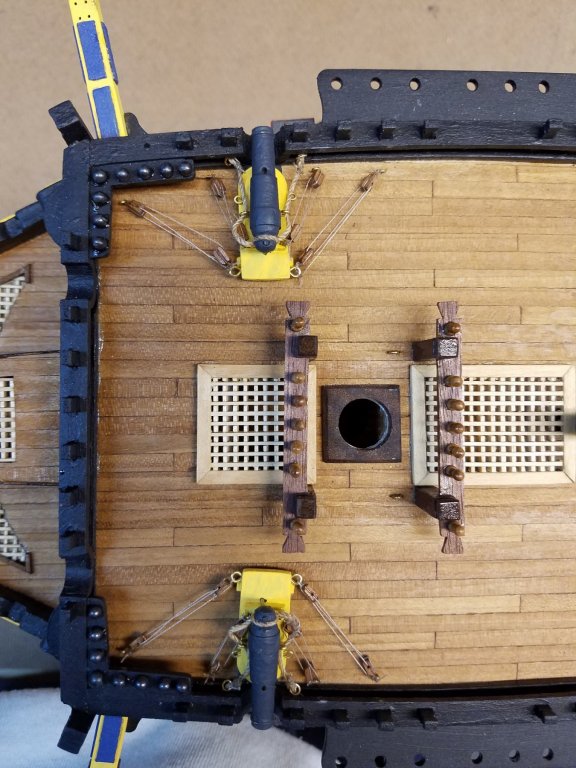
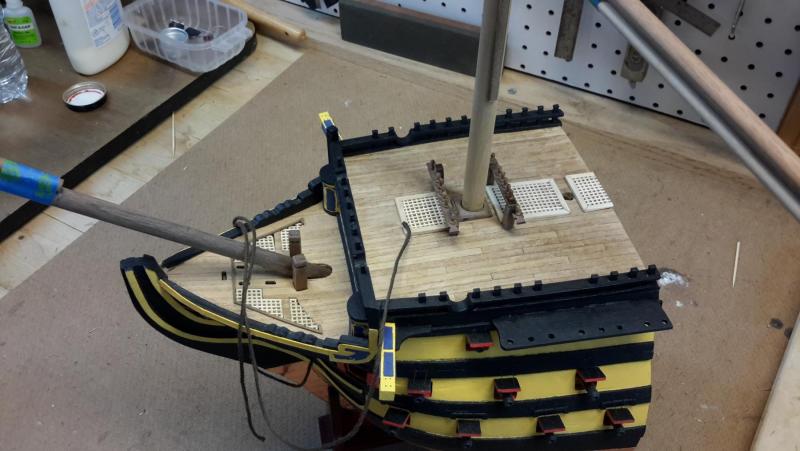
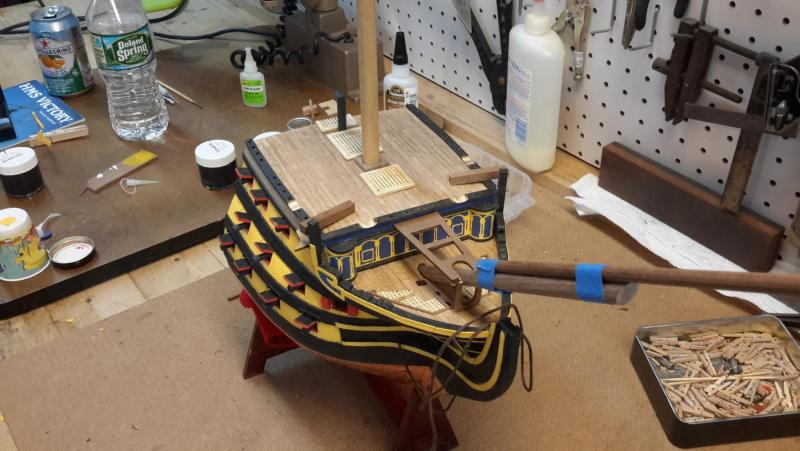
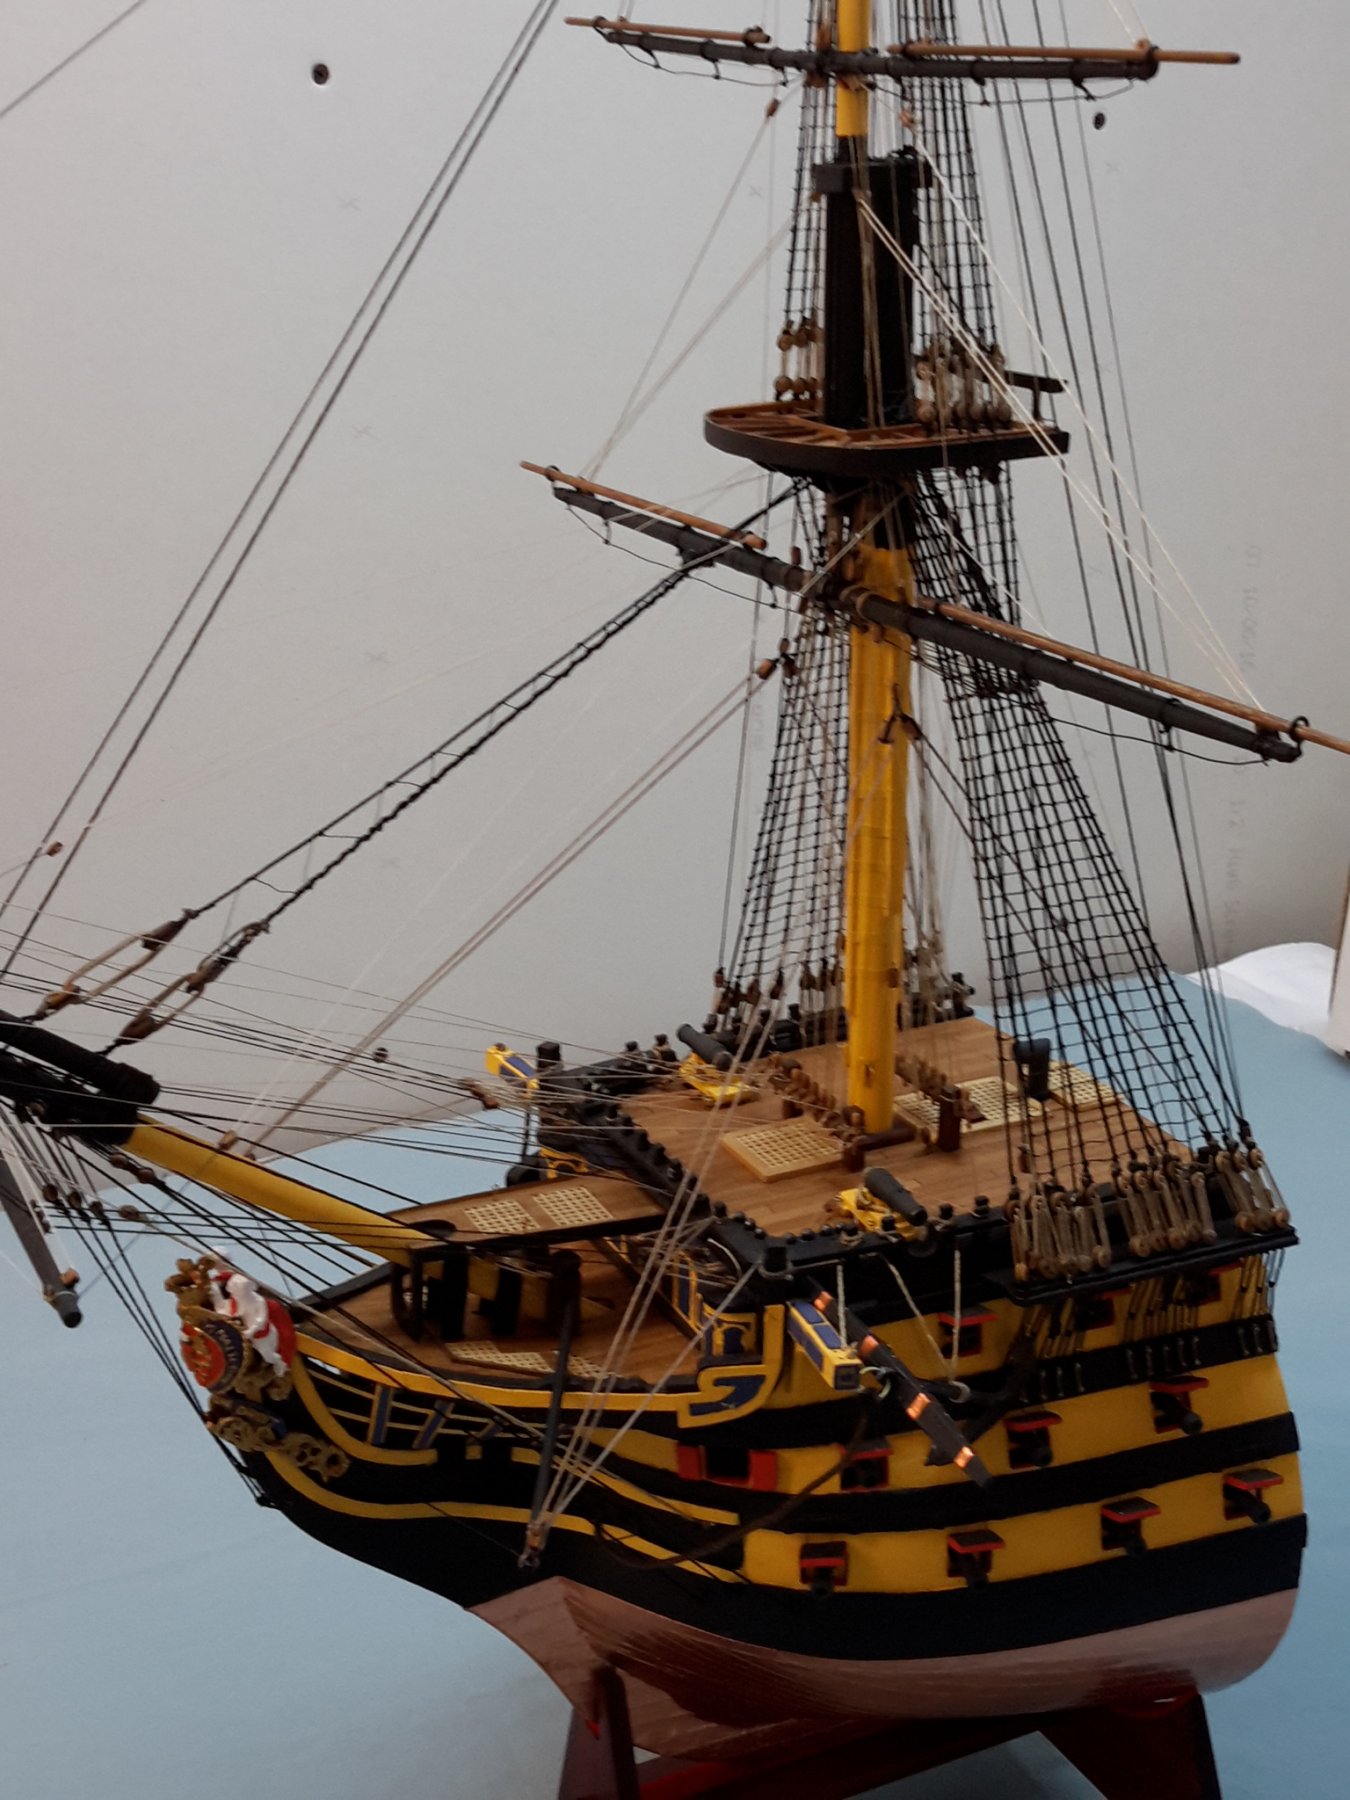
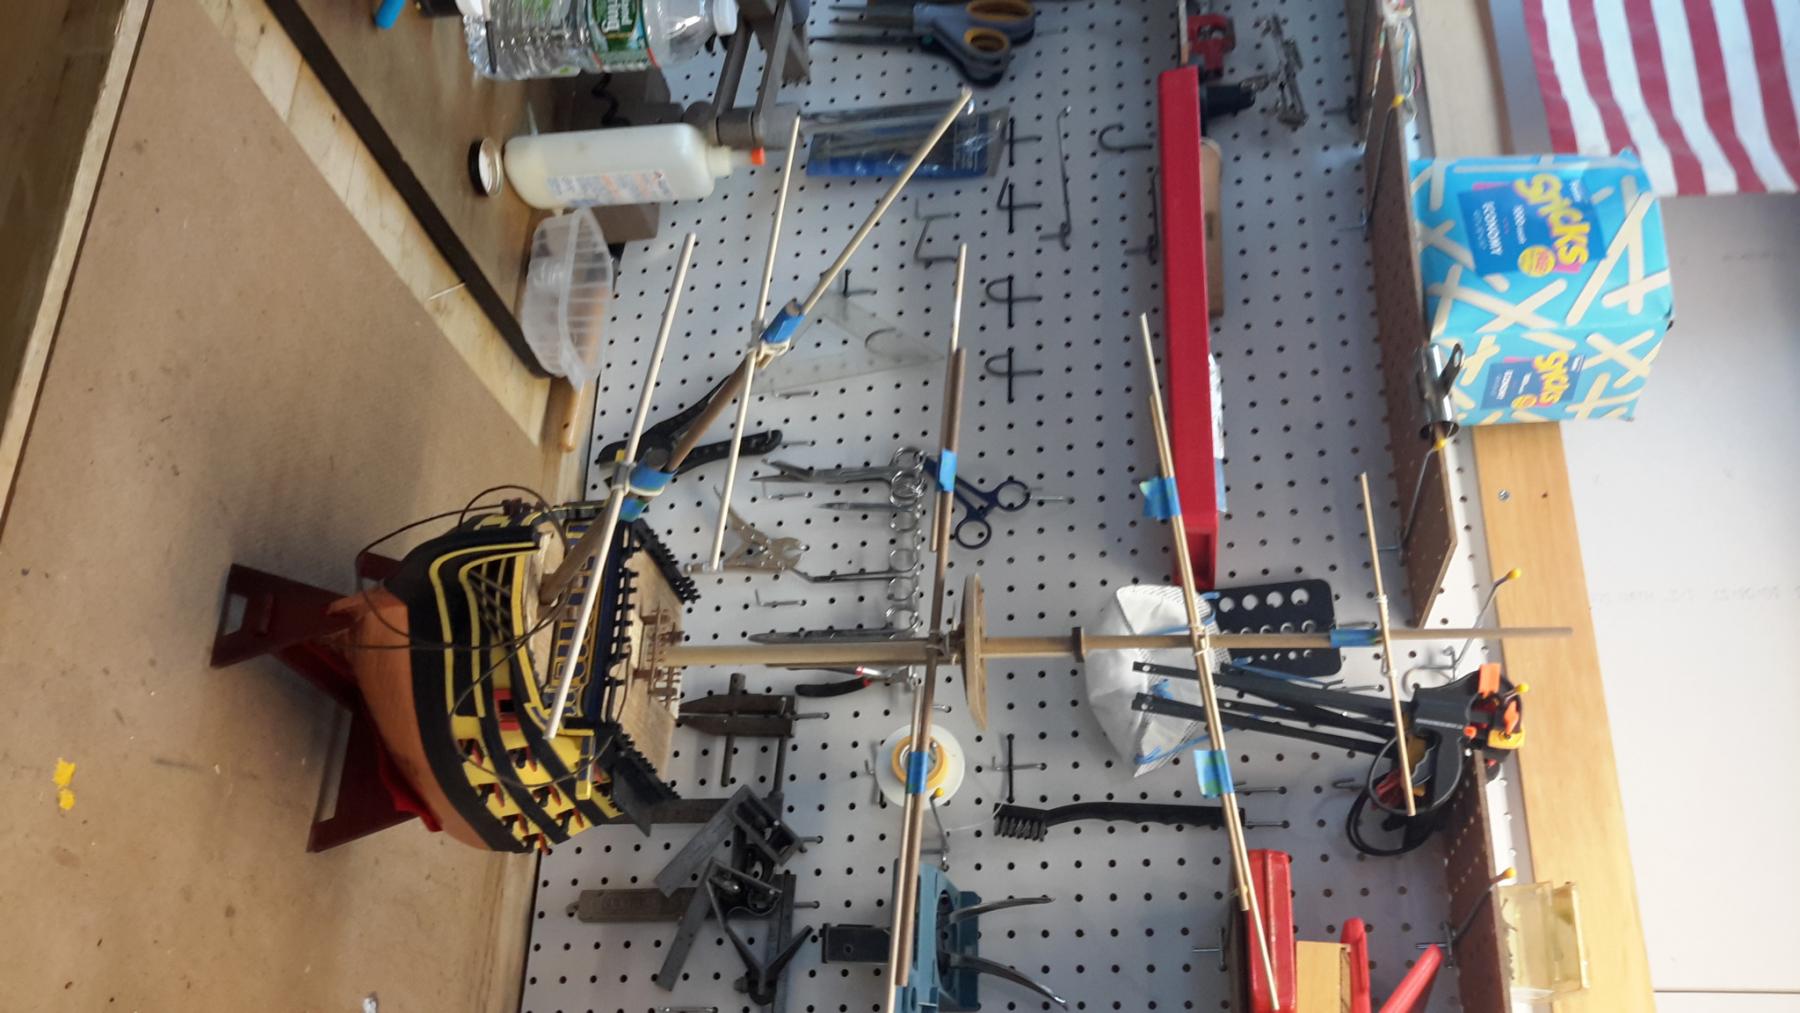
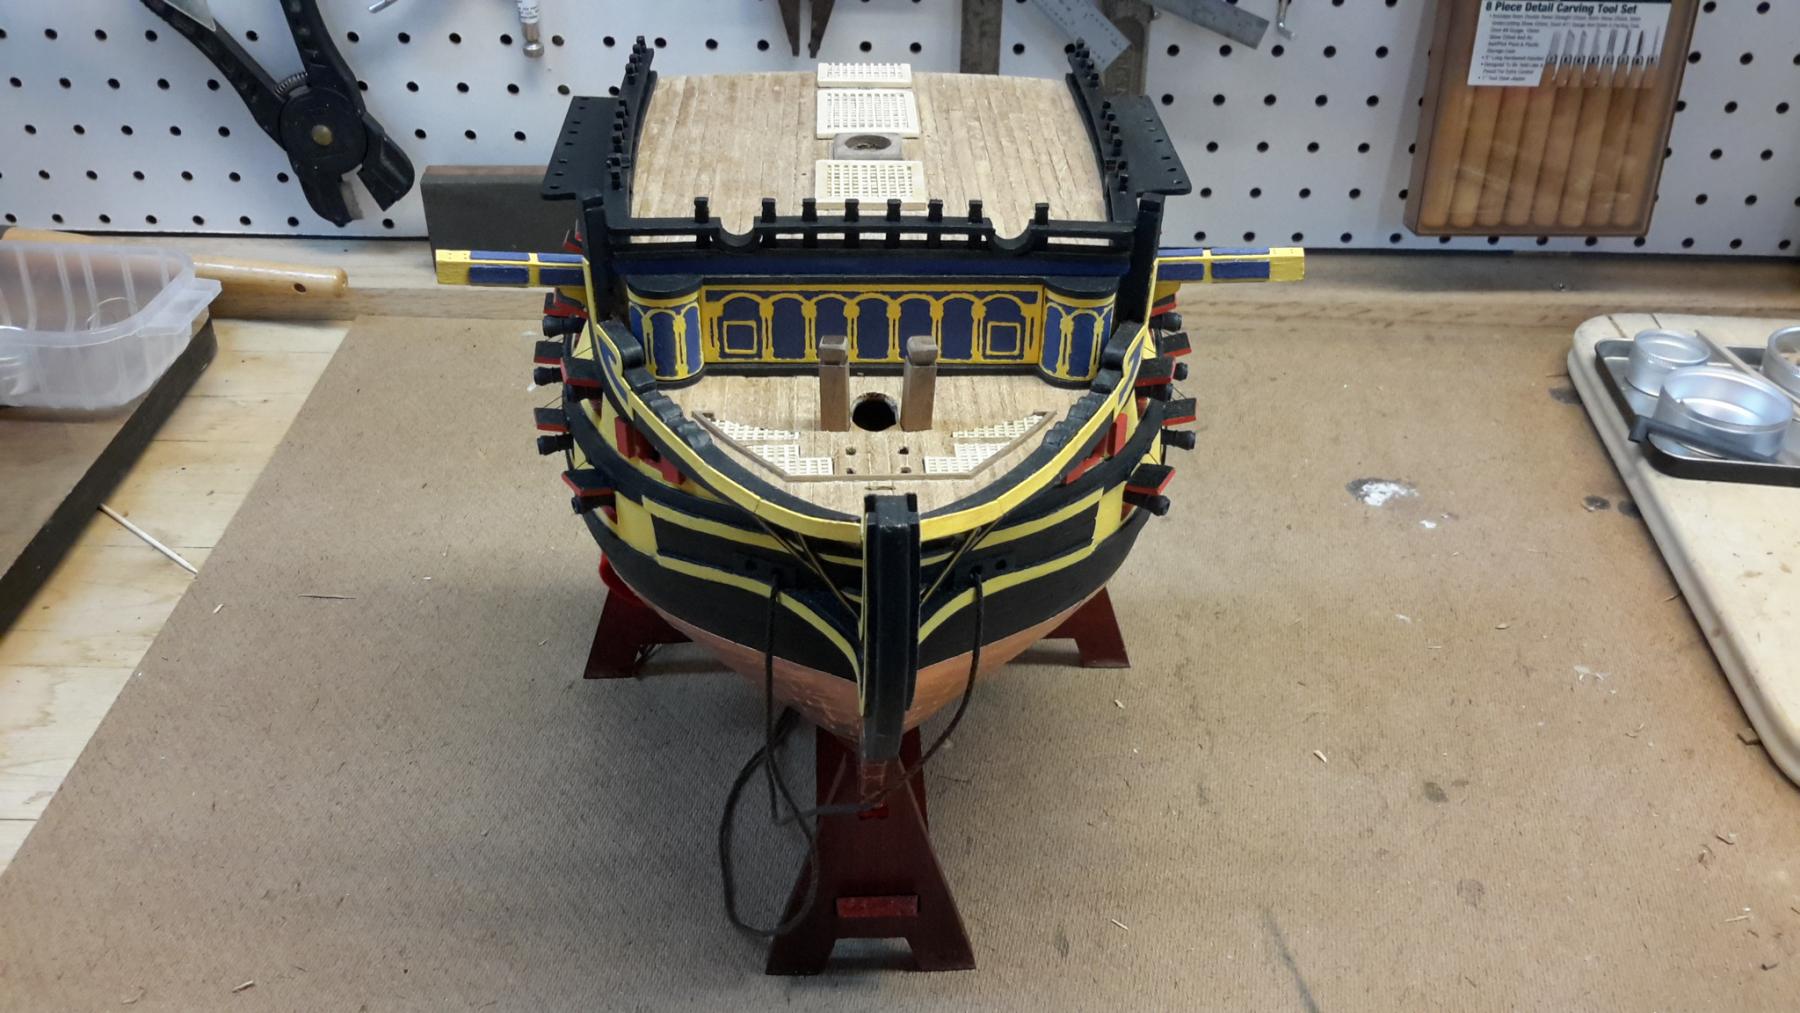
Time for next update. Making progress... Very close to finishing the this phase of the build.
The Ship proper is just about done. Some smaller things to finish up like rigging the main deck canon and a lot of paint touch-up.
the deck 3 plank shift came out well. Caulking simulated by using the dark brown Elmer wood glue when putting down the planks.
Canon balls are a bit oversize.. but they were the smallest ones I had in my stash
Cleats? to hold the lashings on the Jib Boom
- yvesvidal and Steve 12345
-
2
-
Robert... Looking fantastic. A few posts pack you showed the figurehead that you painted. I'm just about at the step where I need to work on my figurehead as well. I'm also terribly lacking in freehand painting. but if mine comes out anywhere near as good as yours... ill be very happy.
I'm using yours as a guide!!!
K
- WackoWolf and robert22564
-
2
-
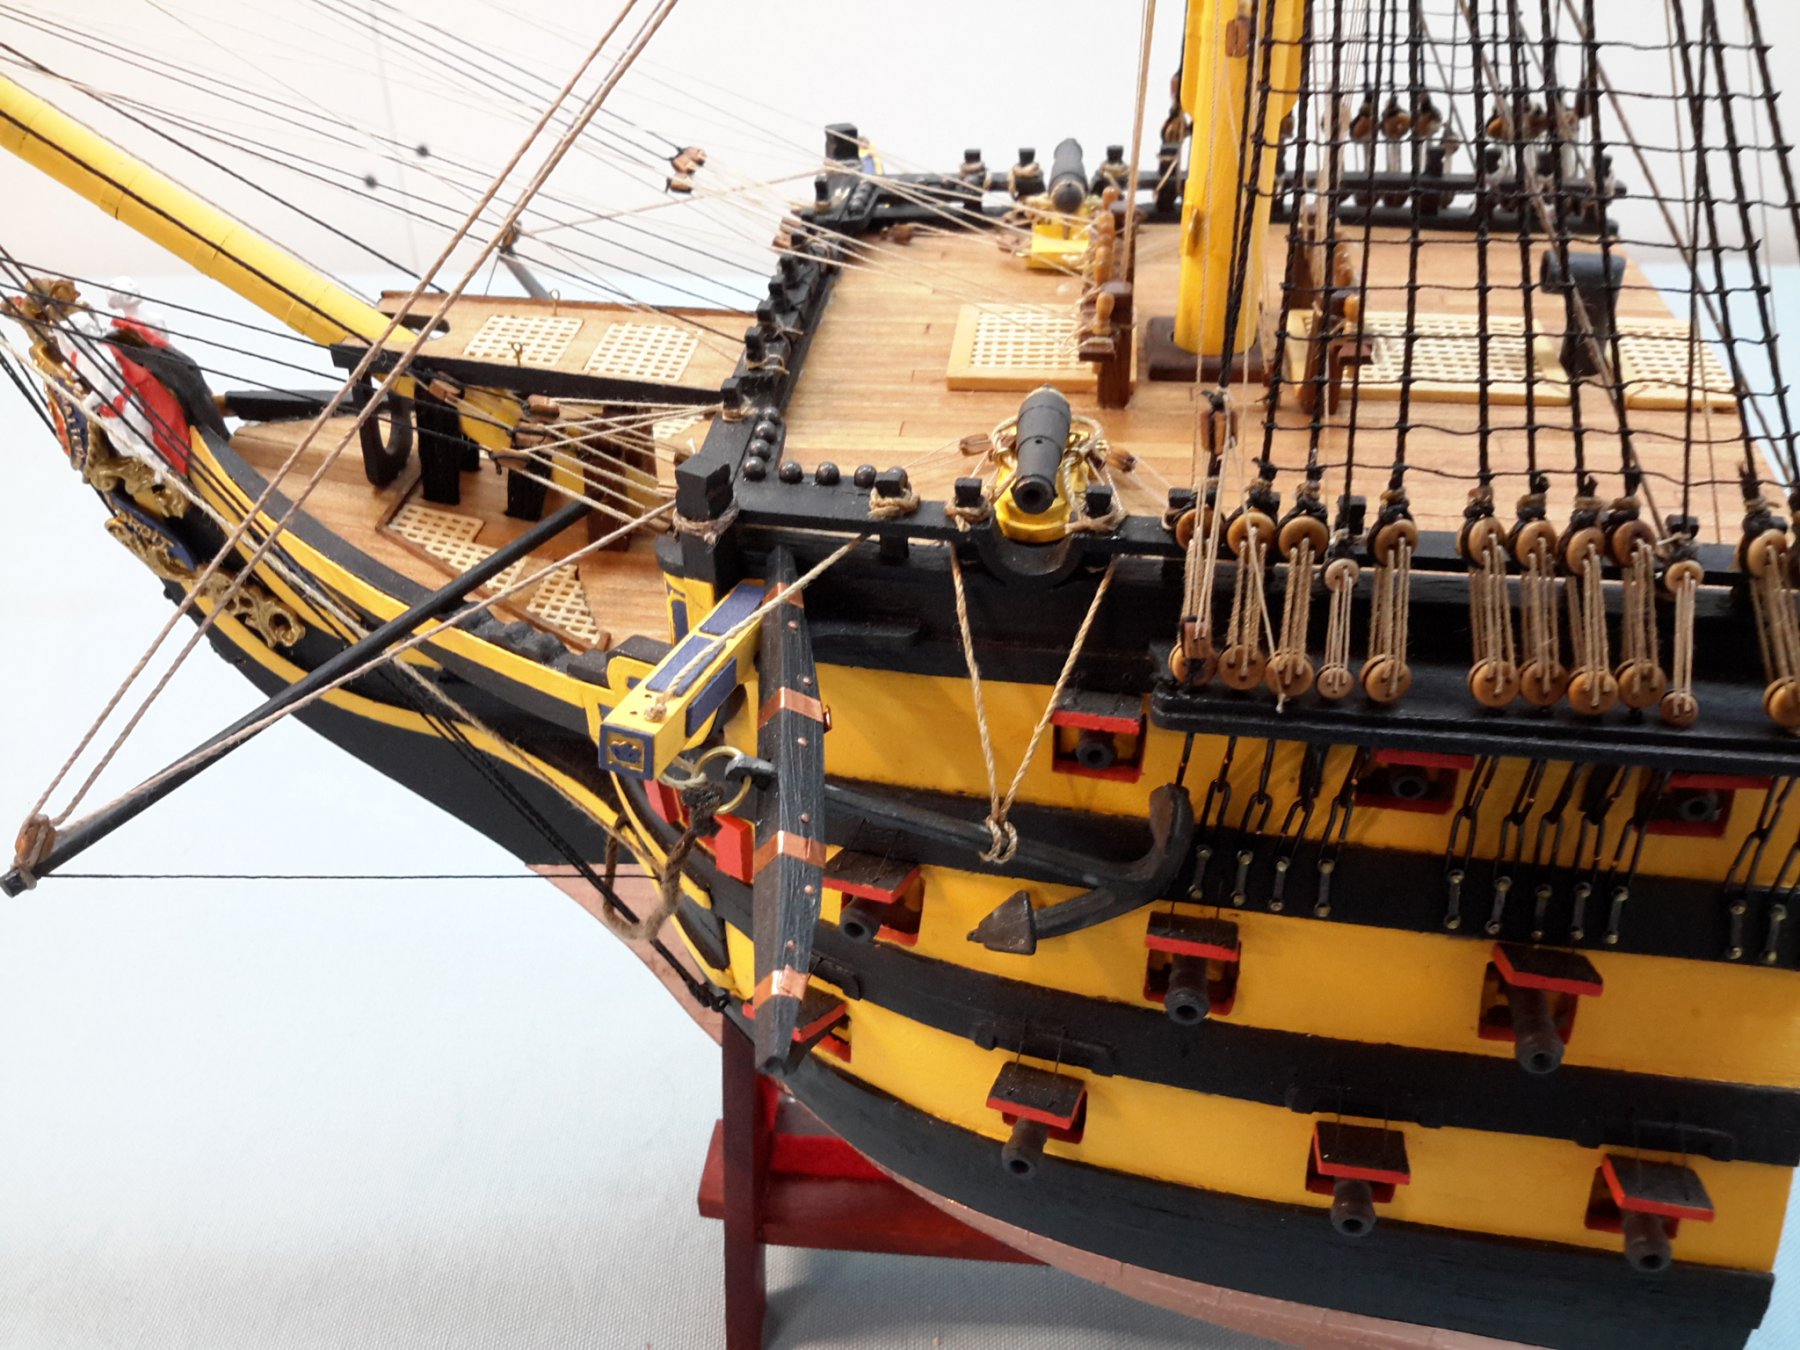
Beautiful.... Very inspirational.... Congrats!!!!
K
-
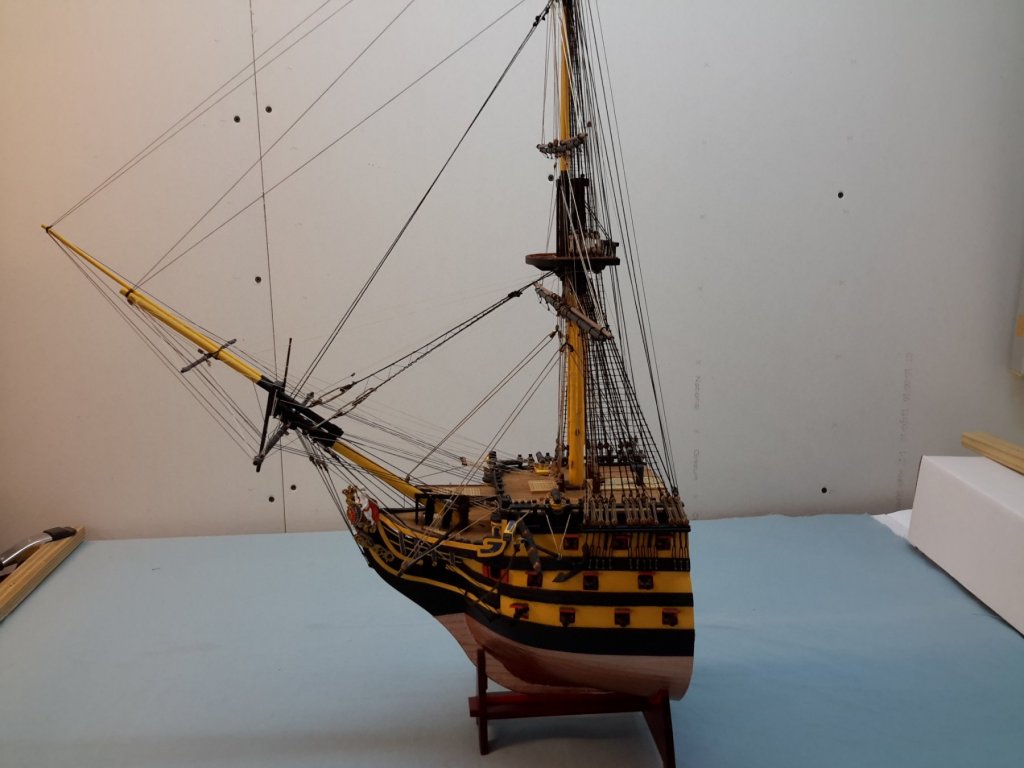
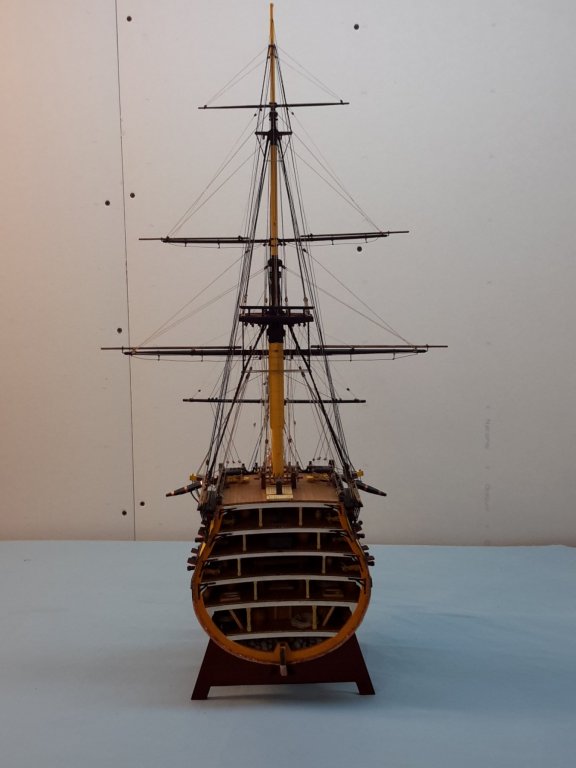
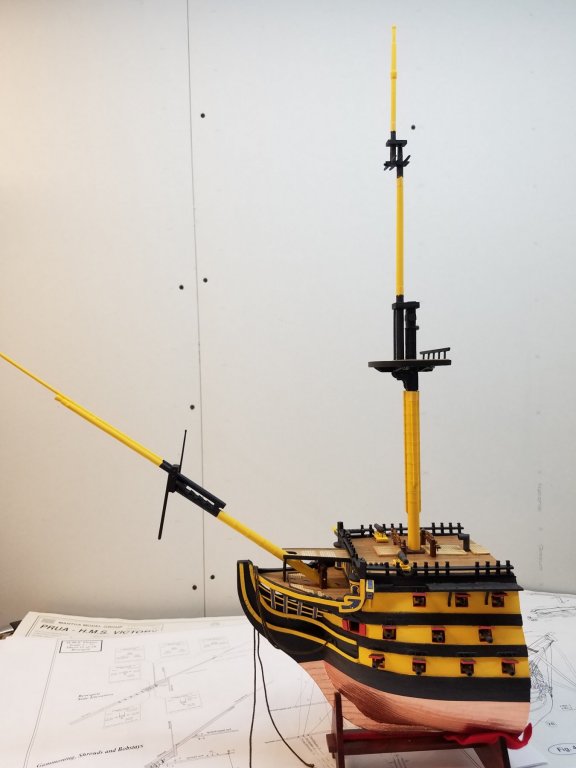
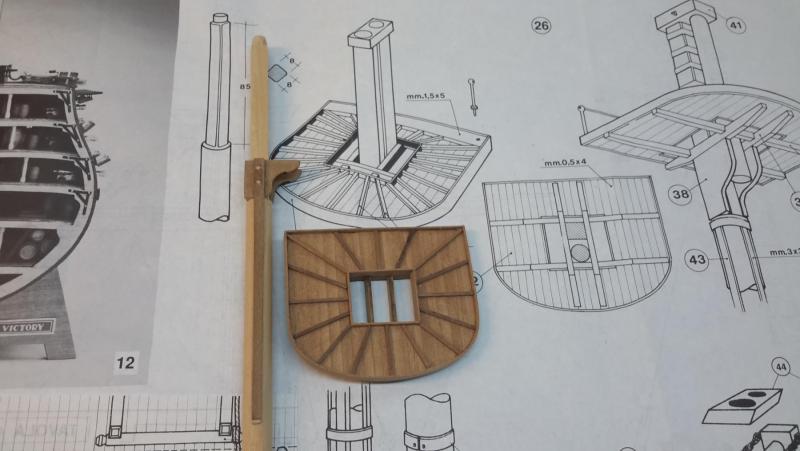
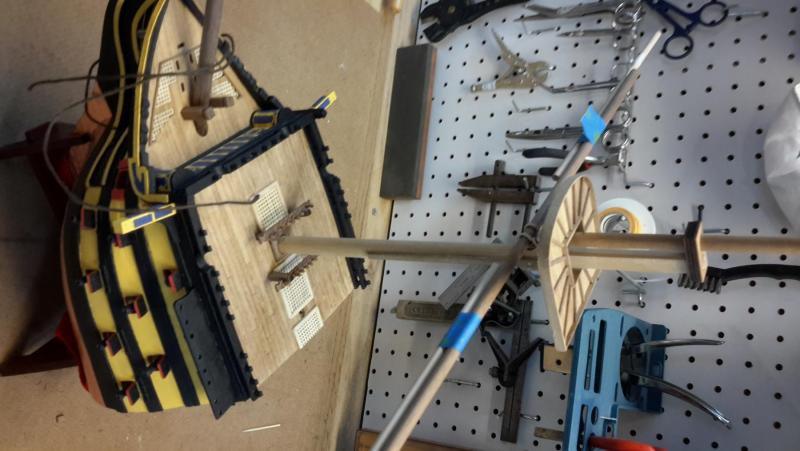
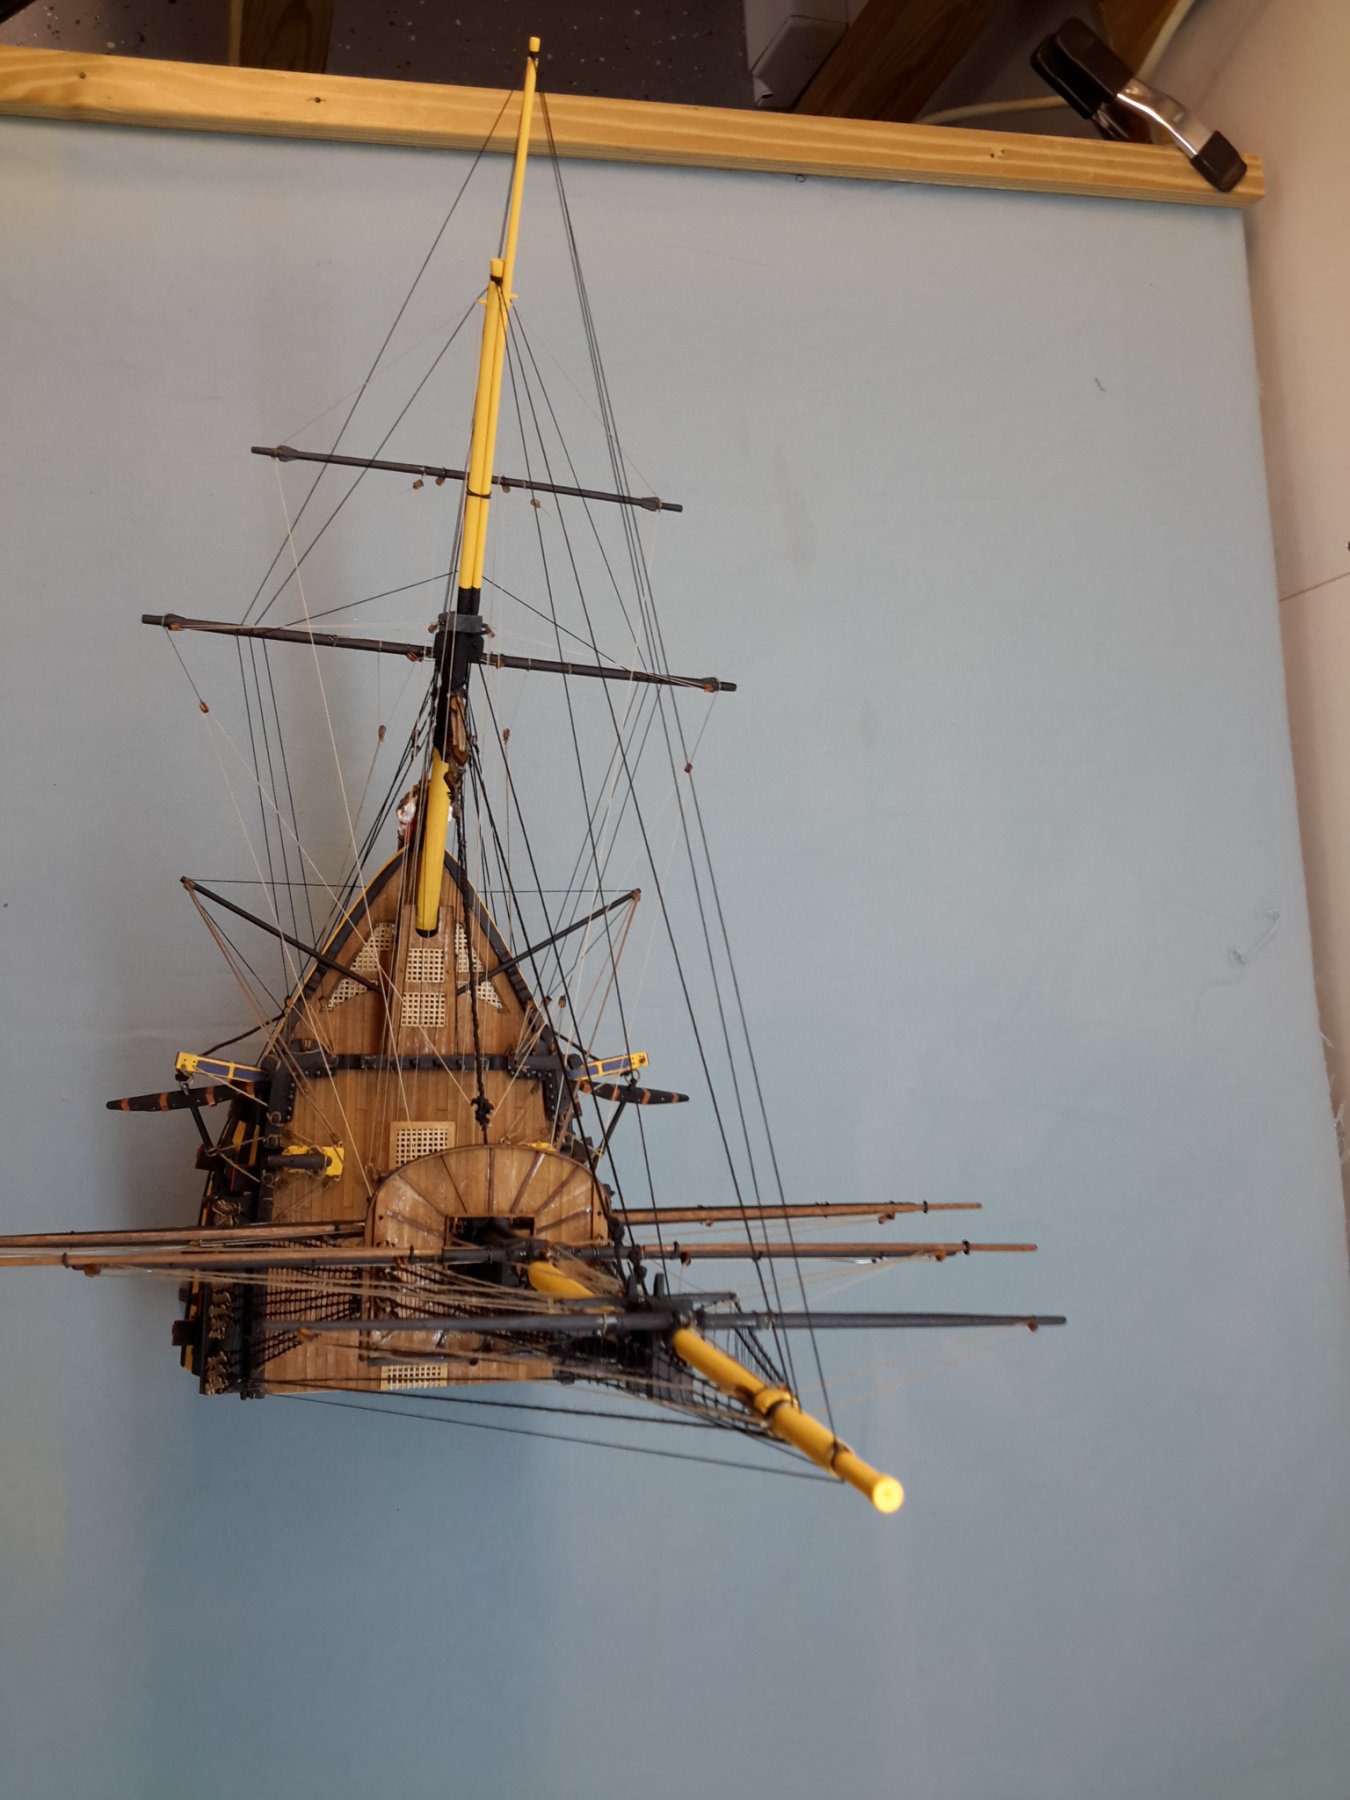
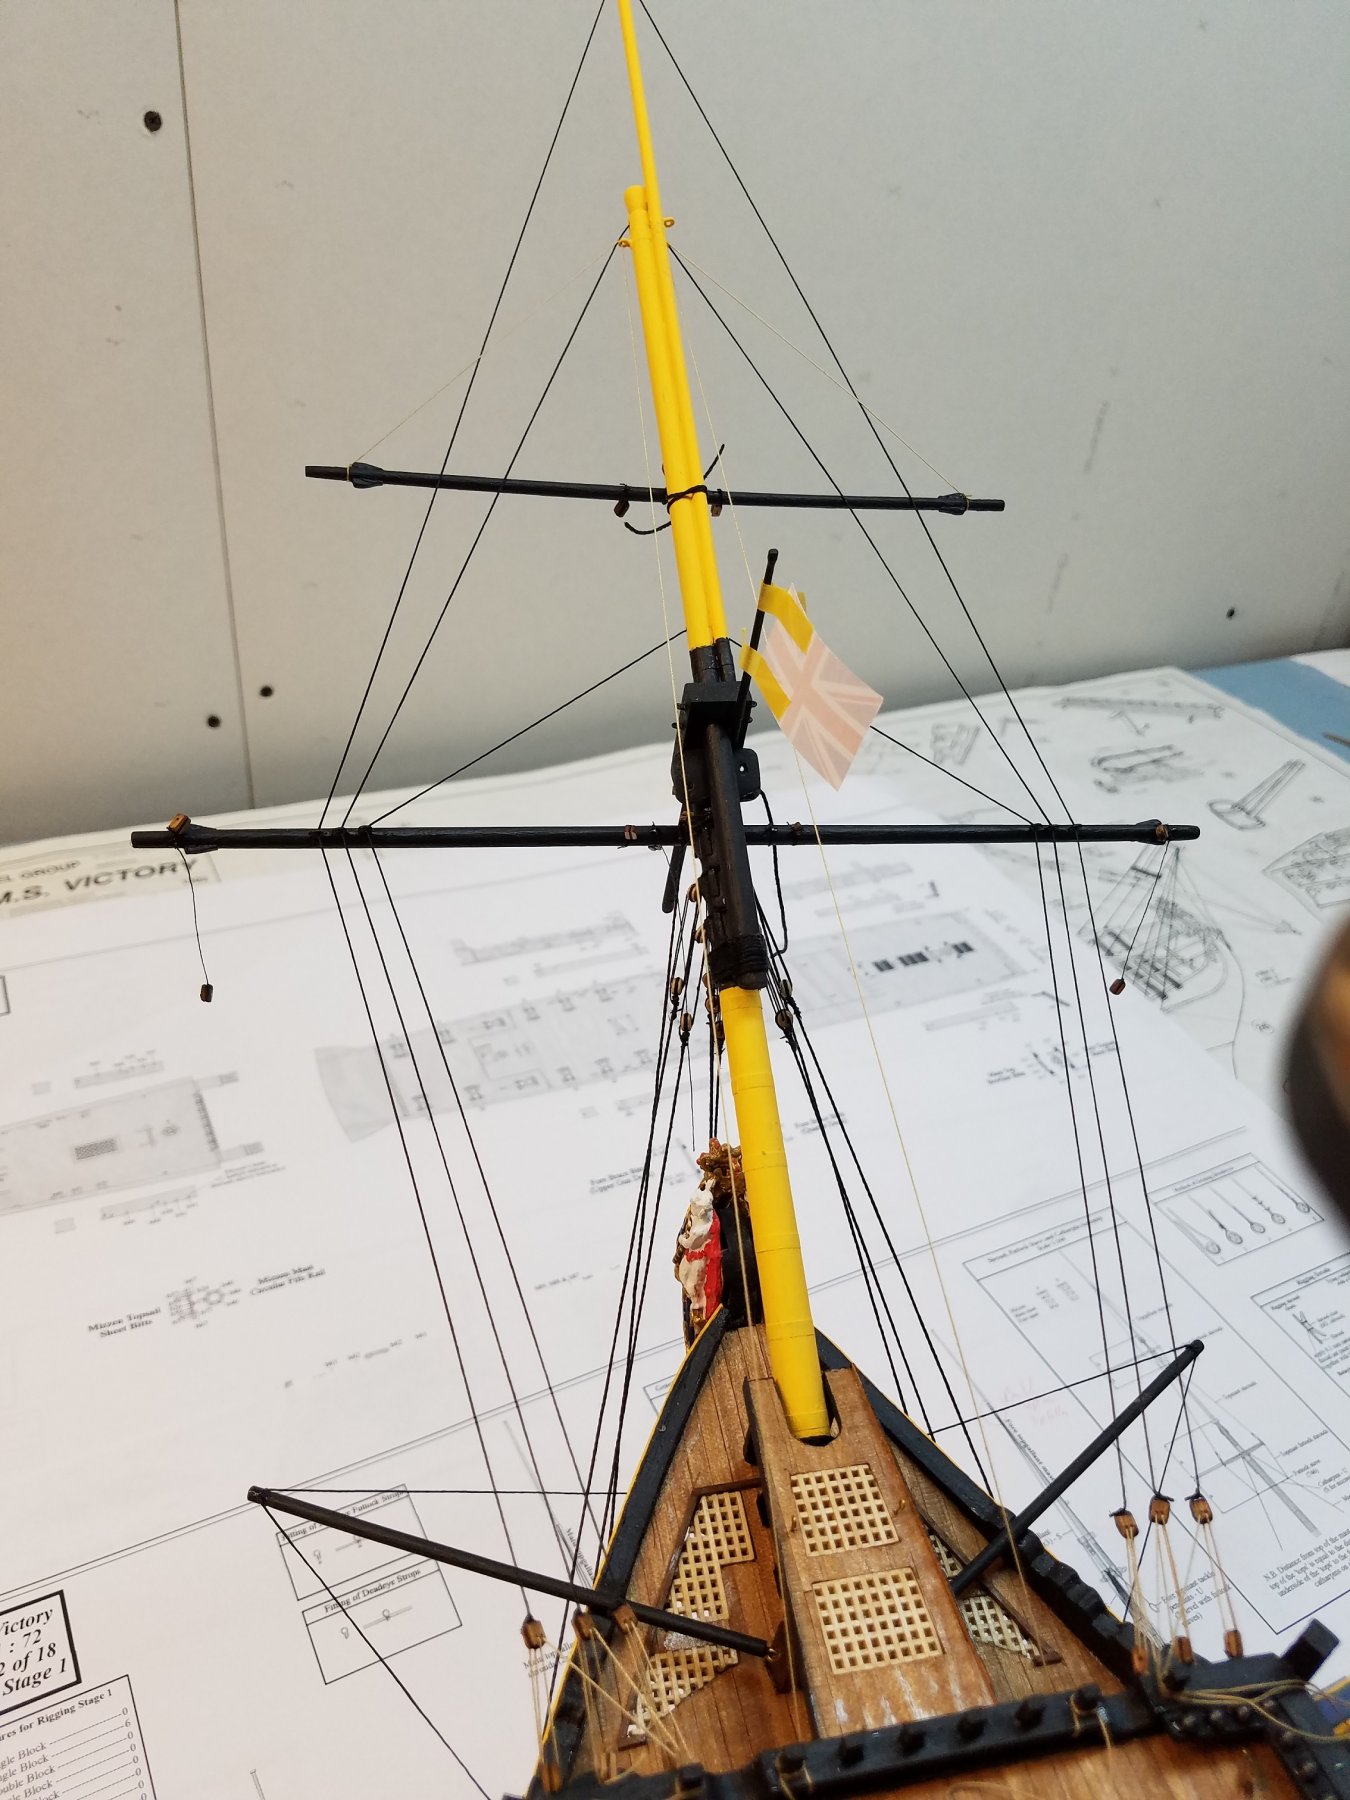
Sorry some of the pics didn't show to well. This one shows the proportions of the masts the best ..
You cas see the top gallon sorta looks like its a stub/ not tall enough ..but its 1/78th of 31' ~= 121 mm
I couldn't figure out how to rotate it 90 deg
K

-
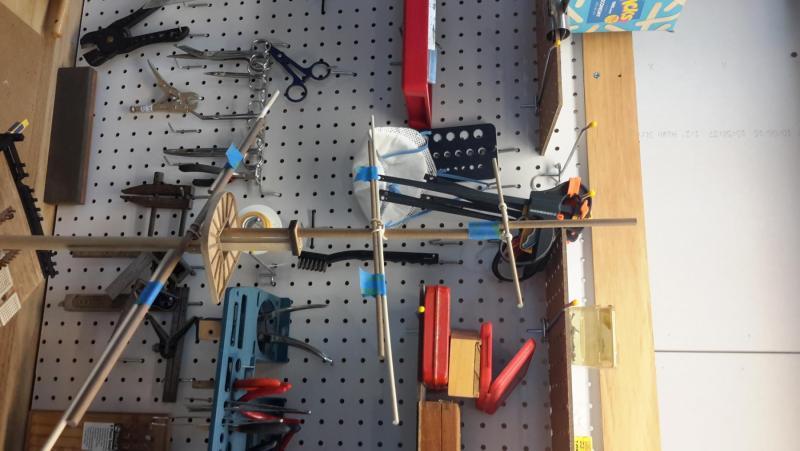
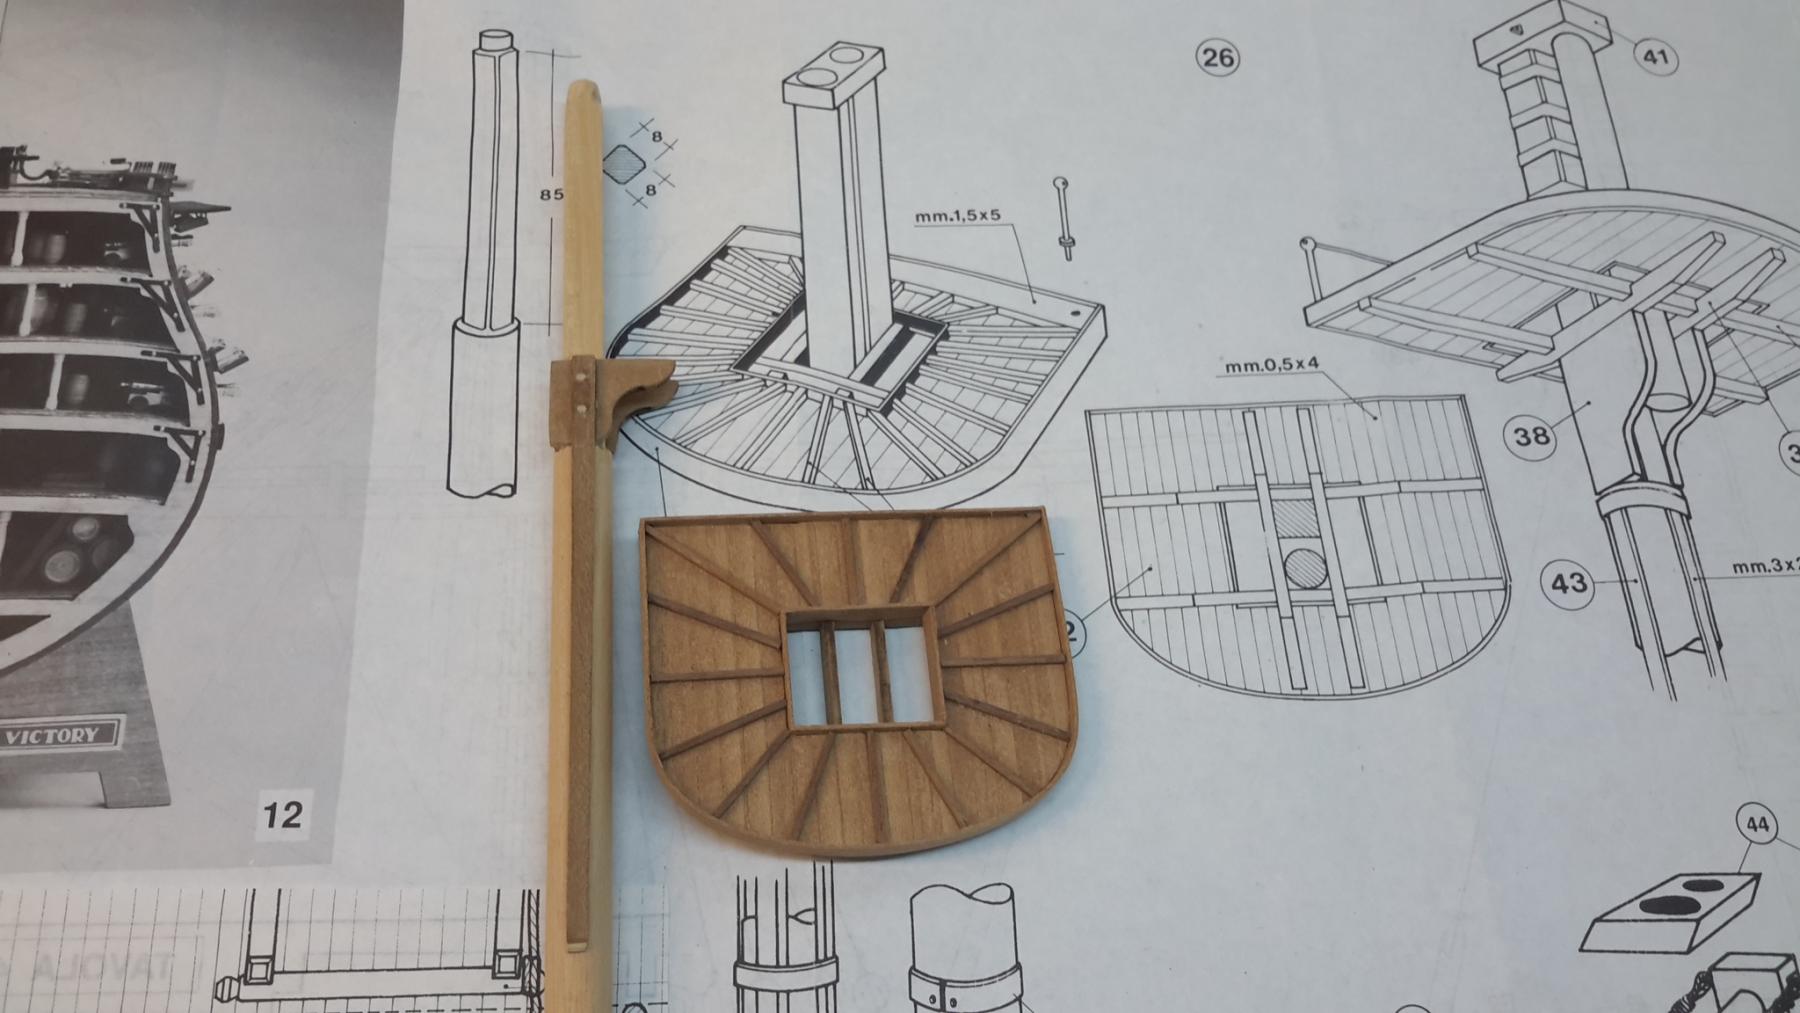
And I have started work on the fore mast.
The fighting top is together.
Now the kit/instructions as provided only has the fore mast and then a stub for the fore topmast. and then the bowsprit and a stub for the jib boom.
I don't like the look of her with stubs...she looks .. only half dressed to me. So I plan to build out the entire foremast, fore Top mast and Fore top gallant. As well as the bowsprit , jib boom and flying jib boom. And of course all the associated yards and Stunsail yards.
As the kit doesn't provide this info or plans ... I have been referring to my copy of James Lees "The Masting and Rigging of English Ships of War" As it turns out page 198 table 8 has all the actual spar dimensions for Vic. I plugged all the numbers into excel spreadsheet and converted from the listed actual feet to mm and then scaled down to 1/78
I used those sizes to rough cut all the spars and yards to the right sizes as you can see in my pics.
One observation is that the Bowsprit, jib boom and flying jib boom once assembled are huge! I got that sense from photos of the real ship... but seeing it on the model is surprising. This went from a small model to a large one in terms of shelf space the finished model will take.
Next is that (to Me) the Top gallant looks way to short and out of proportion to the rest of the foremast. From all the pictures I've looked at of the real ship.. It looks like the top gallant should be twice as long as it is on my model.
Per Lee the top mast is 62' 10" and the Top gallant is 31'. So the top gallant is half the length of the topmast.
So my measurements are right per the book. But it still looks way to short to my eye compared to pictures.
Anyone's thoughts? Other Vic builders does the sizing seem comparable to your builds. it gallon is 1/2 the length of topsail ?

-
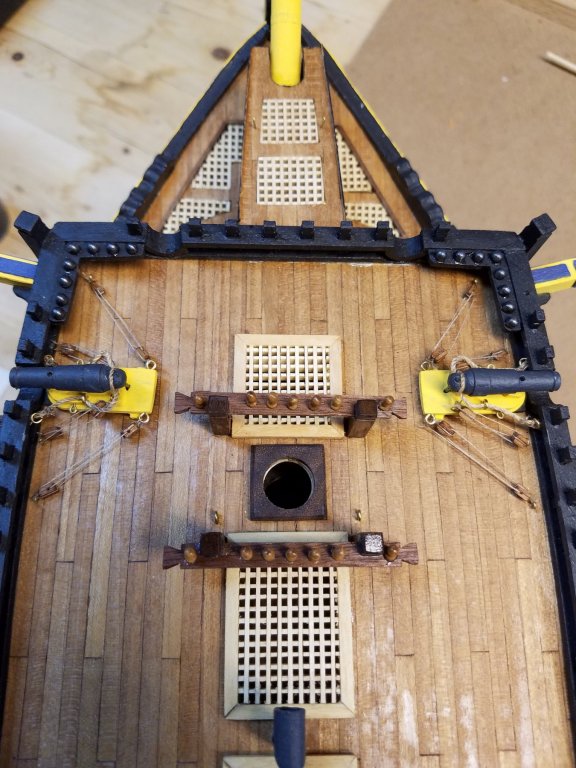
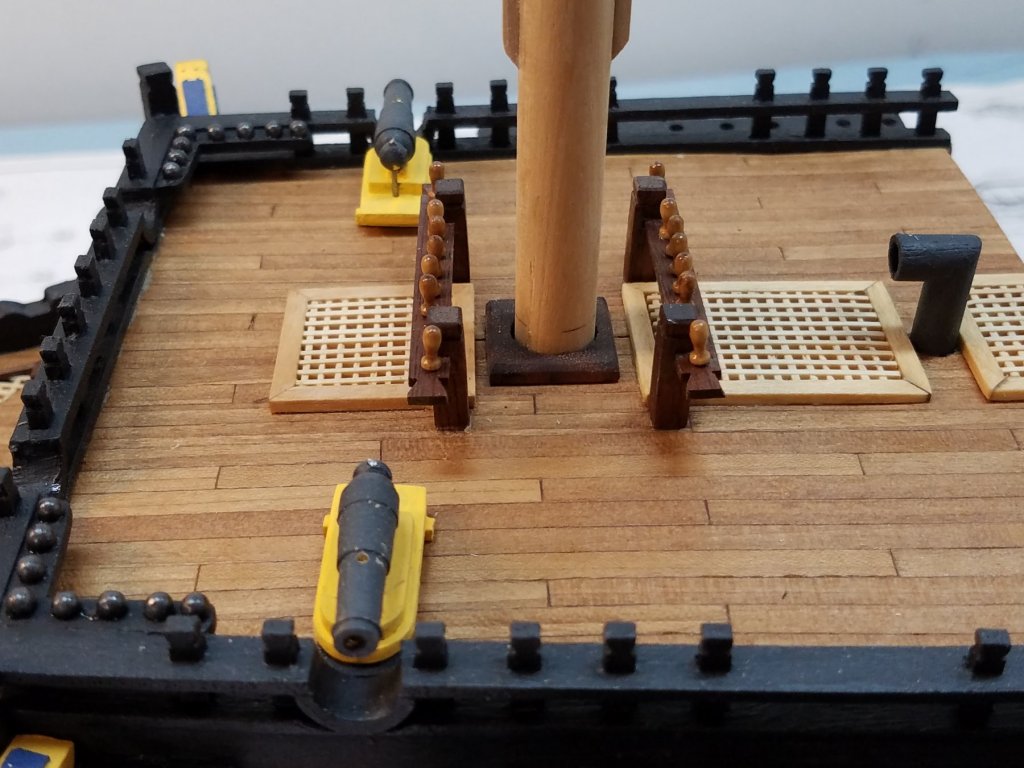
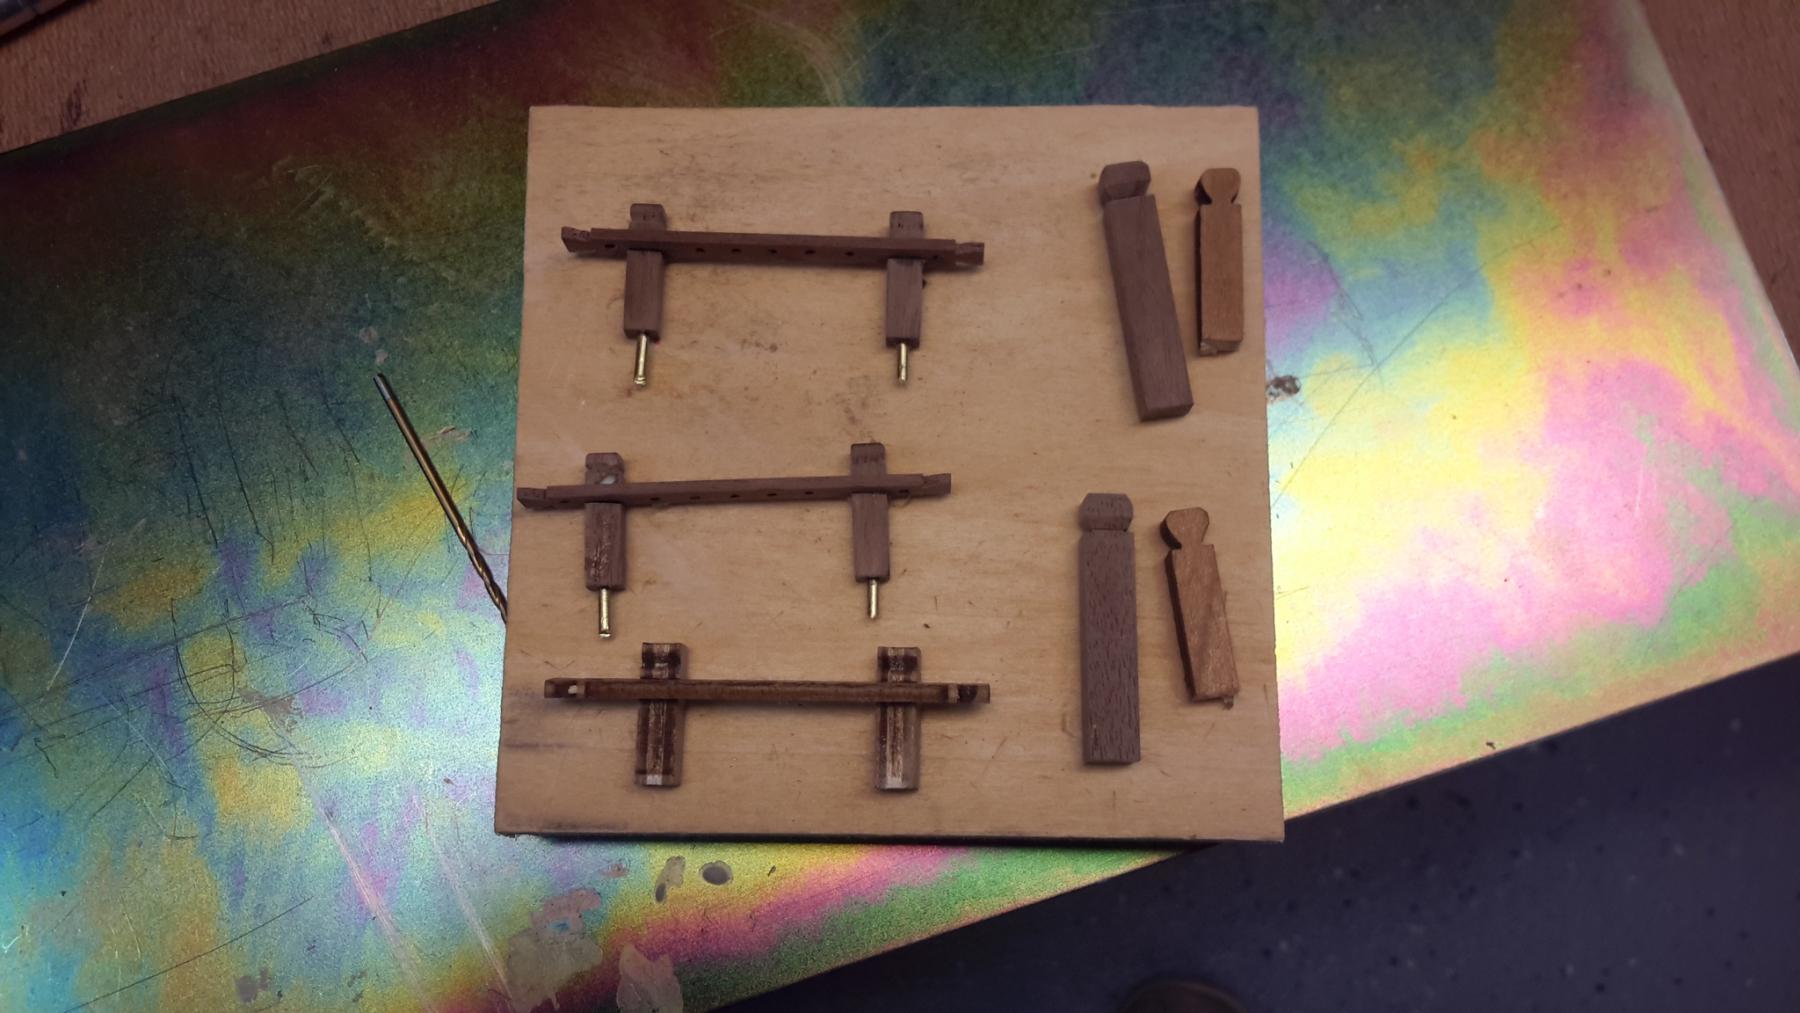
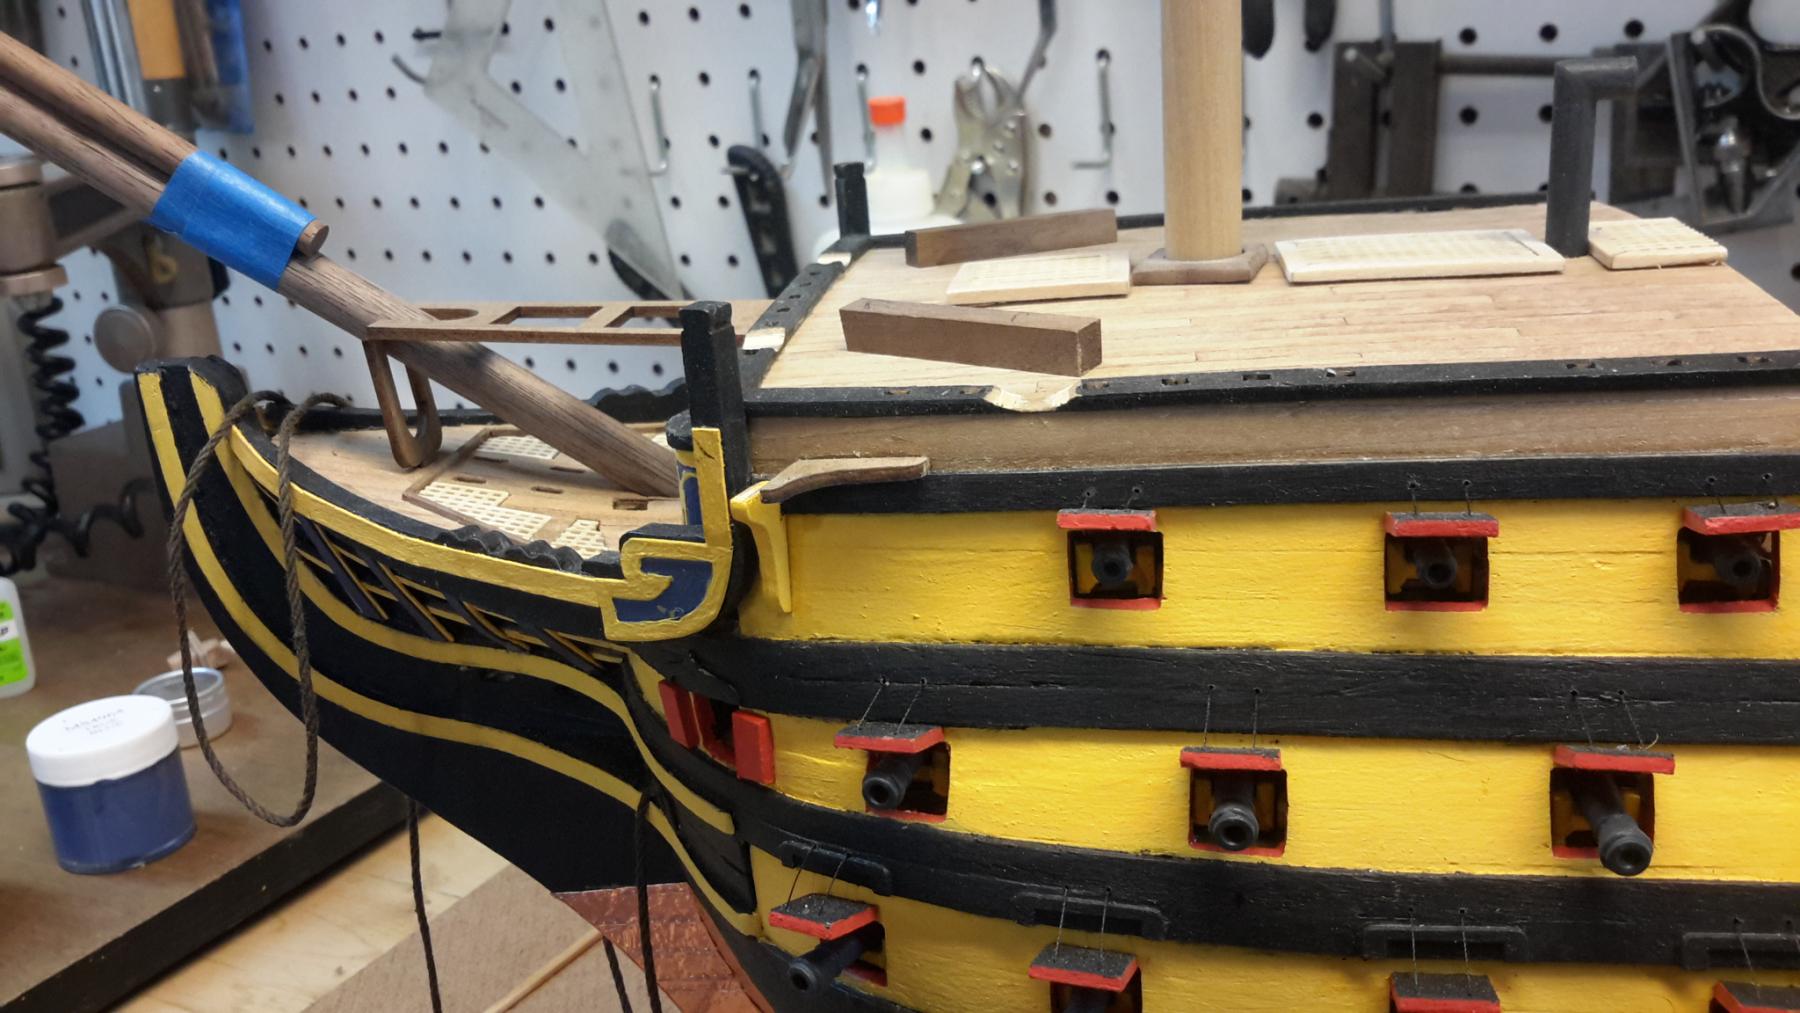
Finishing up work on the rails and most of the fore deck proper.


-
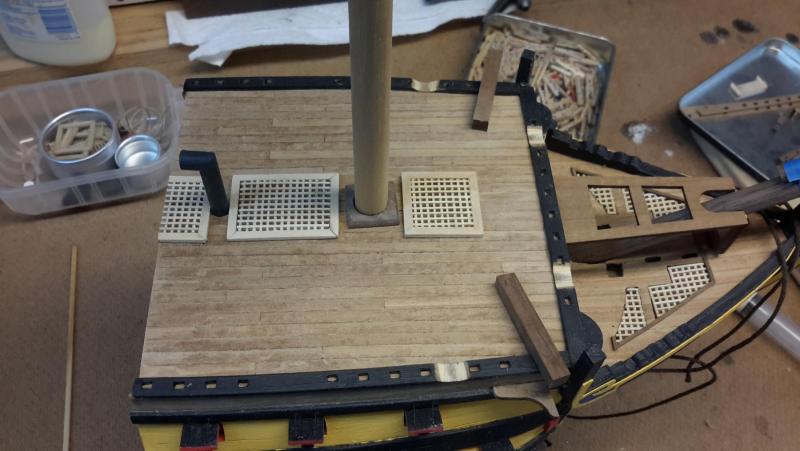
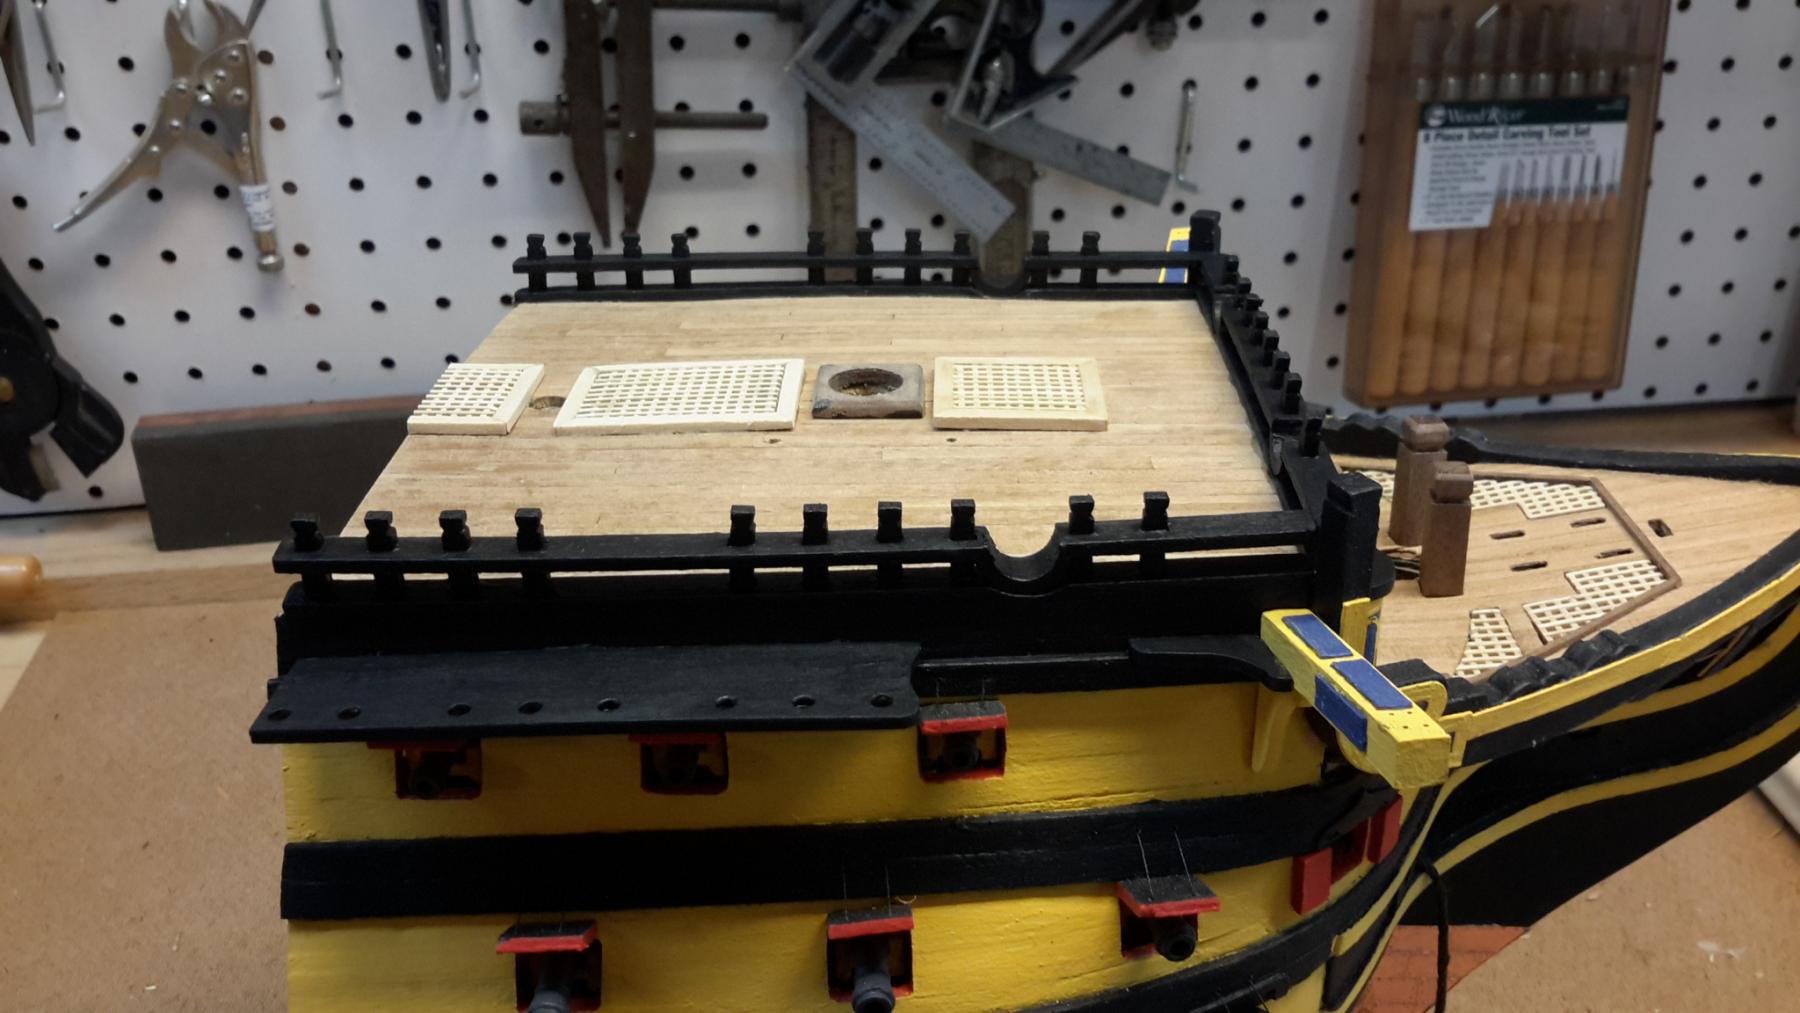
Some more updates. Top deck added, planked. Gratings assembled but not glued.
I didn't like the pin rails that came with kit. I'm going to leave them natural / vanished. Not black. So the kit supplied plywood won't do. Remade new ones in walnut.
Also made progress on the rails and cat heads


-
Some more updates. Top deck added, planked. Gratings assembled but not glued.
I didn't like the pin rails that came with kit. I'm going to leave them natural / vanished. Not black. So the kit supplied plywood won't do. Remade new ones in walnut.
Also made progress on the rails and cat heads


.jpg.84ab91aff3f9568606204dc7ec261409.jpg)


USS Constitution by kmart - Model Shipways - scale 1/76
in - Kit build logs for subjects built from 1751 - 1800
Posted
Markku,
I had heard about the nonsymmetrical issue with some of the frames from other builds logs. So I'm going to watch for them when I put the reference lines on the frames. Thanks for pointing me to your build you're log. You have the best/clearest description of the problem I've seen. I'll definitely use that info to fix mine.
TomS, Also welcome to the Connie Club as well. I think Me, you and Markku will all be in roughly the same phase in the build together ...so it will be great encouragement and motivation. Also search the forum. There are a large number of Connie builds to draw knowledge and inspiration from.
I'll singe out usedtosail among many. Check out his log.. He not only has a incredible build.. but he turned his log into a practicum for us to follow. :-)
No model pictures today, but I did make some progress. I have the rest of the keel and stern-post glued on.
Sad day for a sailor though... End of season, My non-model boat got hauled for winter today. After Connie, I may need to make a model of her for the day I become Usedtosail II. but that's a long way off.