laps
-
Posts
115 -
Joined
-
Last visited
Content Type
Profiles
Forums
Gallery
Events
Everything posted by laps
-
 Base plate I made a simple base for Mary Ann. It's amazing what a piece f wood thrown out by somebody else can turn into. Walnut is fairly nice but crazy expensive to buy in Denmark as it has to be imported from North America. Don't mind the third hole - that was caused by Mr Boozo. It will be covered by the pedestal mount 🙂 I re-painted the inside of the bulwarks and I'm now ready to give the outside of the hull some primer - and then color. /Lars Peter
-
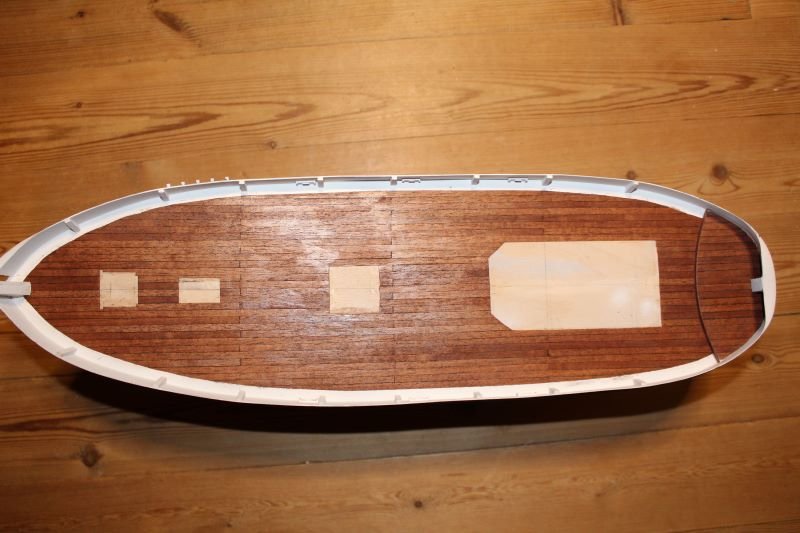
Deck planking complete I just completed planking the deck of Mary Ann. I used the kit supplied mahogany strips for this. They are 5 mm wide and probably a tad too wide scale-wise. I decided to plank around the various structures on the deck that give access below deck. Also, this hides any gaps. For example, I found it quite difficult to make the wheel house sit flush with deck because of the curvature of the deck. Caulking was simulated with a black marker pen on both sides of the planks. I then sanded the deck with 240 grit and gave it a coat of satin varnish (not quite dry when I took the photos). What's next? I want to completely mask of the deck and paint the waterways and bulwarks again - this time with proper thinning of the paint. I manage to make quite a few scratches to the paint while trimming the deck. Once this is done, I believe it is time to paint the outside of the hull. I have ordered some more paint as I was not quite happy with sky blue Vallejo - too blue 🙂 It is Humbrol duck egg blue + white (50/50) - at least I'll give it a try. So, hopefully I'll find the color I like. /Lars Peter

-
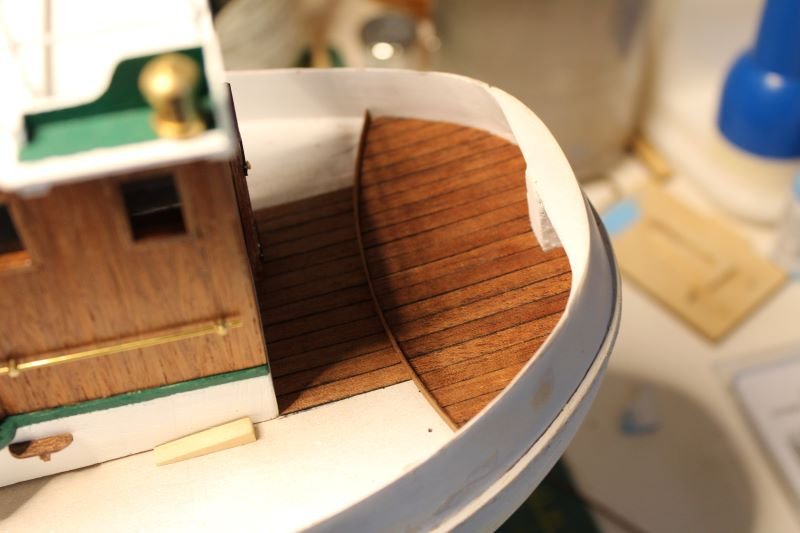
Planking the deck I've made a slow start on the deck planking. I started with the raised platform at the stern as per kit instructions. On the main deck I intend to plank around the wheel house, deck hatch and various items. This is a bit tricky as I don't have a scale plan. I tried to establish some reference points and then work from that, starting with positioning of the wheel house. I glued some temporary blocks to the deck to get the exact position. My intention is then to place the deck planks around starting aft and then moving forward. It is a bit tricky but the advantage is that any gaps where the deck items doesn't sit completely flat on the deck will be hidden if the gaps are less than 0.5 mm. I have now planked behind the wheelhouse. I can then remove the forward location block and start again from the middle and working my way forward and outwards. I have marked the waterways at one side and will mark it with masking tape to establish the outer side of the decking. We'll see how it goes. /Lars Peter
-
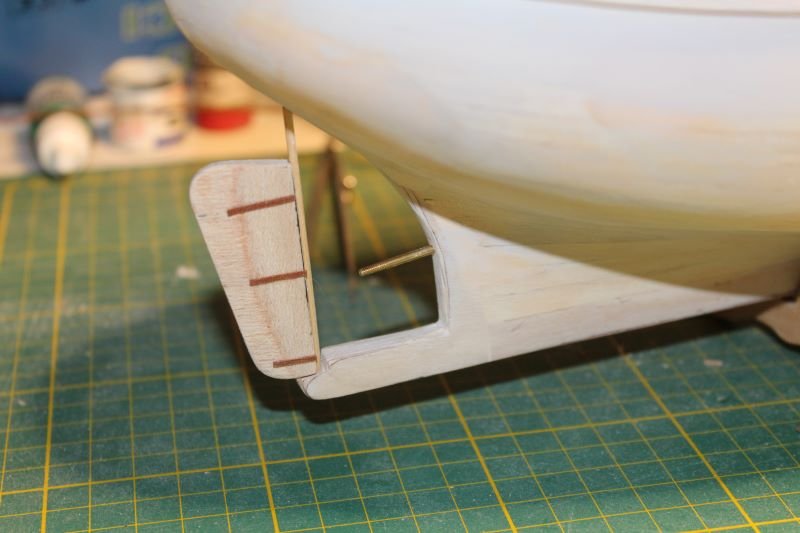
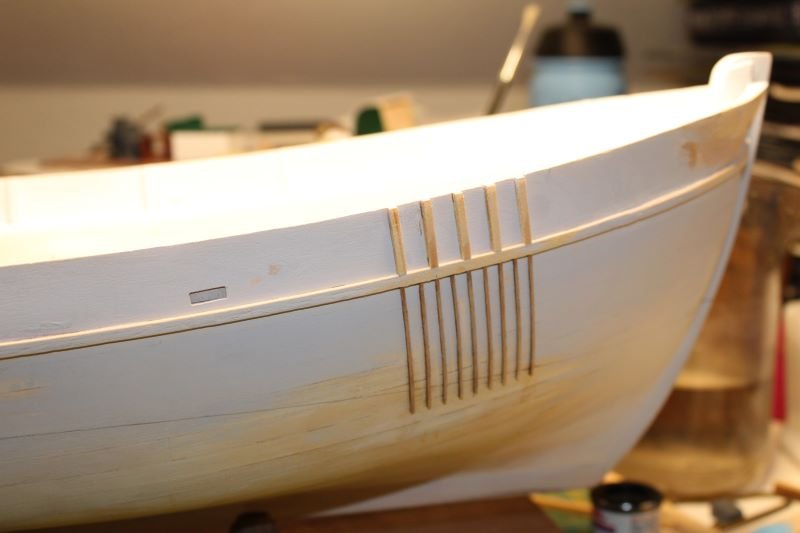
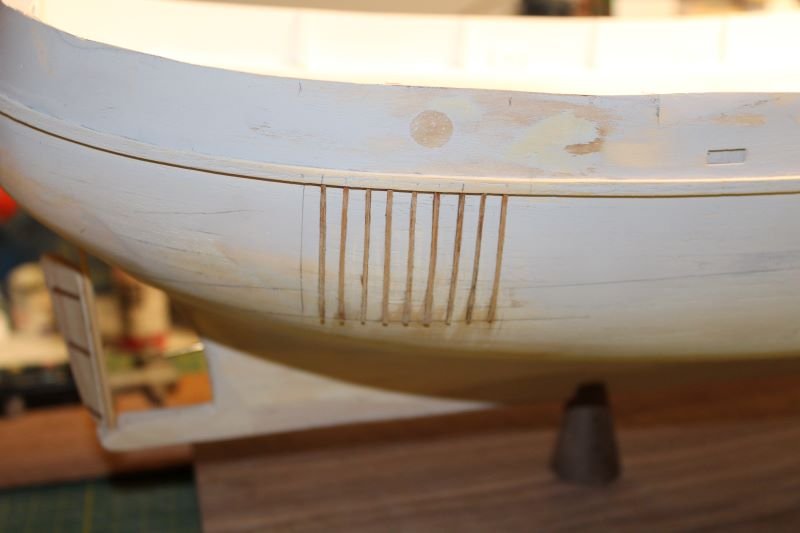
Thank you Niels. I have seen your restored Hjejlen. I have a very old kit in my stash which I will probably start when I finish Mary Ann. Nevertheless, Mary Ann is progressing well. I'm at stage where I have added the first paint to the model. Following up on the anchor pulley system, I now feel I have the correct shape. I cut out one of the cap rails (which I will not use) and use that to get the final shape. I tried to take a photo of this but it doesn't show much besides the previous pictures. I added the rudder as per kit instructions - two pieces of plywood glued together. The instructions doesn't mention anything about tapering the rudder, but I sanded it to half thickness at the rear. Also, the hole for the prop shaft was drilled. The shaft points downwards a bit which it should. The last to be done on the outside of the hull was to fit some vertical reinforcement strips to protect the hull when hoisting the trawl scoops on board. The last picture just shows the painted inside of the bulwarks. I'm using Vallejo acrylic - but still learning. It took a while as I didn't thin the paint before airbrushing. In hindsight that would have been preferred, but I didn't have distilled water for thinning. I've been debating whether to paint the outside of the hull before I do the deck planking. I will do the the deck planking first so I don't have the risk of damaging the paint. Also, I have not been able to find the right color in acrylic so I will stick with the old an trusted Humbrol enamel for the upper part of the hull. I have started with the small raised section of the deck at the stern. The provided mahogany strips are of very good quality but too wide scale-wise (5 mm). But I will use them anyway. I use a permanent marker on the sides and glue them on with super glue. The glue makes the ink bleed a bit if I'm not careful - so I am careful 🙂 /Lars Peter

-
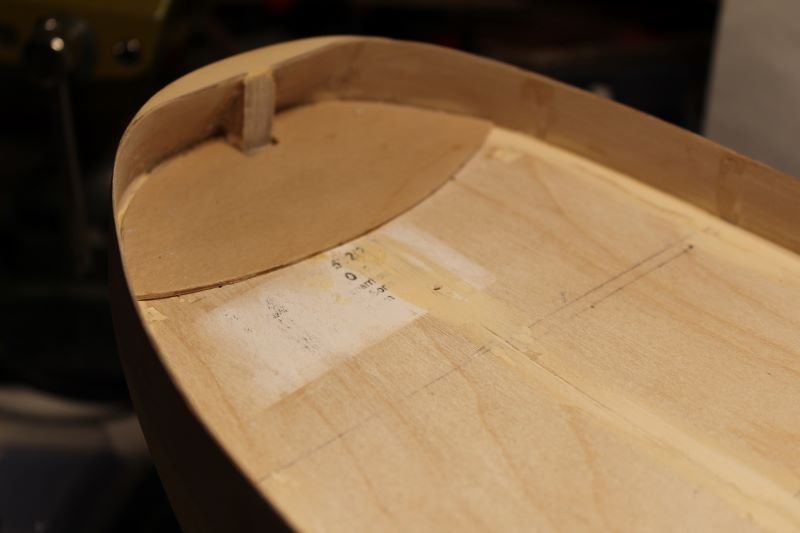
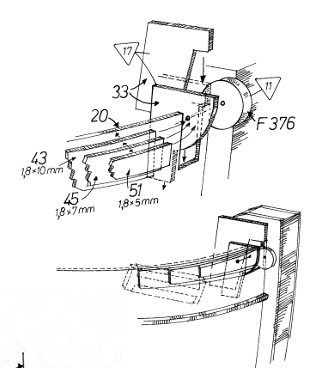
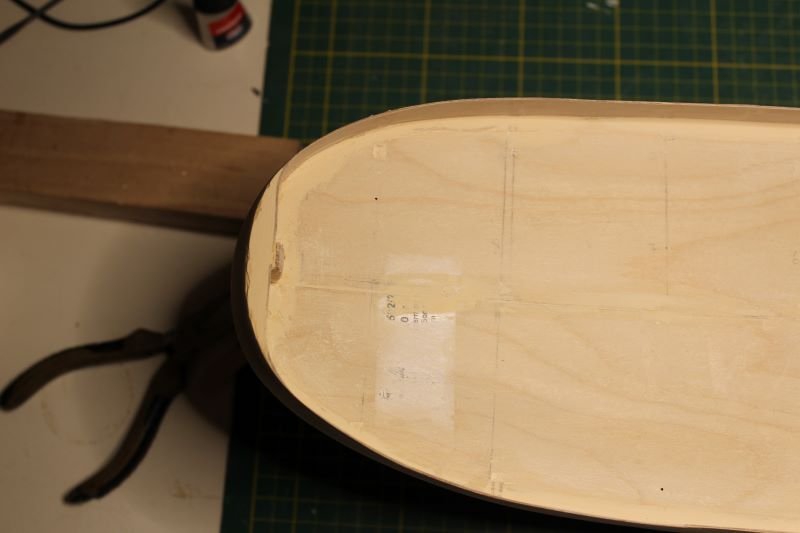
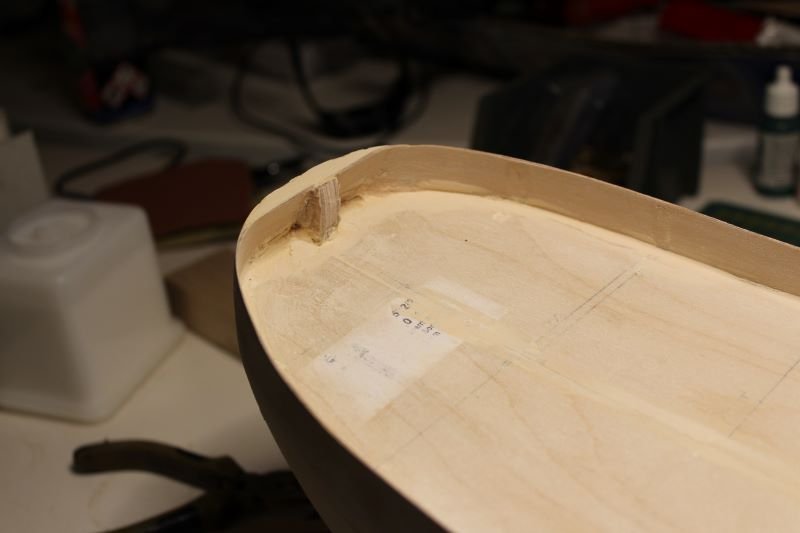
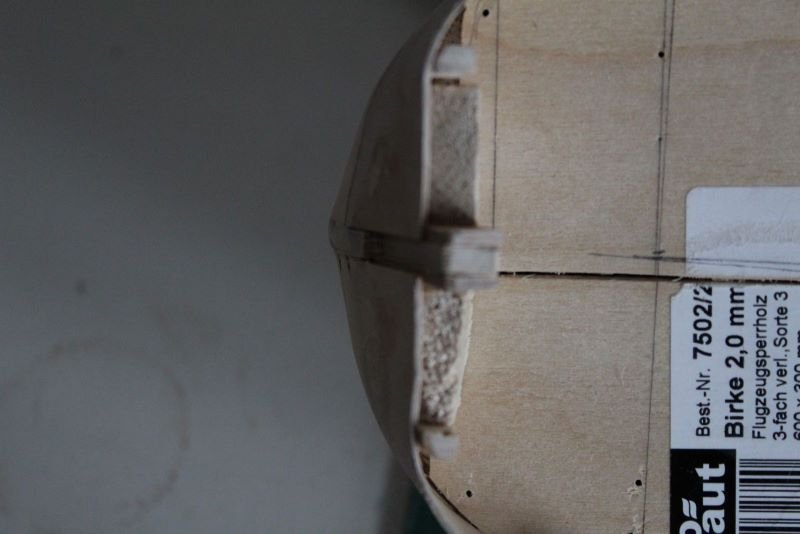
Anchor pulley system I've been working on the bow making room for the anchor pulley system. The bulwarks were build up using layers of wood strips and some sanding to shape. I cut the bulwarks to make room for the pulley system. Everything is just dry fitted for now. Now I can see the final shape of the bulwarks reinforcement. This I can build up with putty. After some final sanding I need to glue the pulley support into place without the pulley, I need to paint the bulwarks before I can put the pulley into place as this needs to be a different color. More to follow. /Lars Peter

-
Hi Peter, Thank you for the pictures - very nice model. I think it makes sense now what I need to do. My model is about the same age as your. It has just been hiding in box for a while before it was given to me. Funny though, I have seen many finished versions of the Mary Ann, and every model seems to be different. Mine is no exception. Kr Lars Peter
-
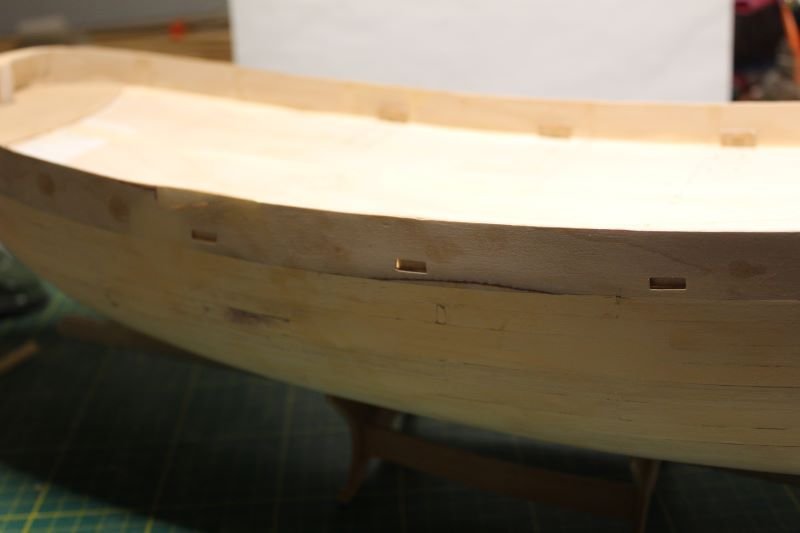
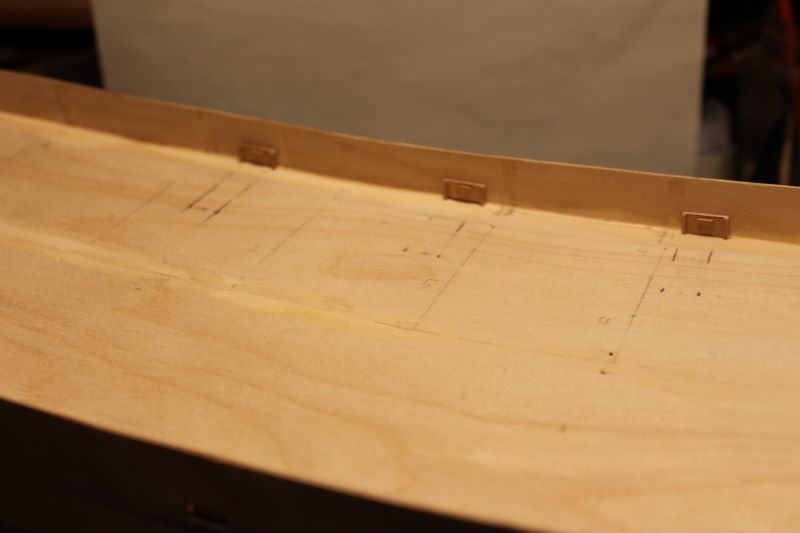
Scuppers and rear deck I have cut holes in the bulwarks for the scuppers - 3 on each side - and added the scupper gates (is that the name?) Also, I have added a piece of plywood at the stern deck to act as foundation for the slightly raised stern deck planking. Right now I'm trying to figure out how arrangement at the bow for the anchor pulley should work. It is not easy to see from the instruction how this should look exactly, so I will have to use my imagination a bit. So far, I have added the pulley support closest to the keel piece. Before I cut a hole in the bulwarks I'm going to reinforce the bulwark with layers of wooden strips of different widths, sand to shape and then cut the hole - hopefully without distorting the bulwarks. Still need to add the bulwarks support pieces. /Lars Peter
-
I think I got the right shape of stern now. I have build up layers of filler and then sanded to shape. Test fitting the cap rail pieces, it seems to be ok. However, this creates a new issue that needs to be solved. The top of the stern bulwark is now to thick to be covered by the cap rail. The top part of the keel pieces is a bit to bulky anyway, so I have started to cut this back a bit. It's a bit awkward but I don't want to rush this and risk damaging the bulwark. I have also started to remove the top of the frames (the plywood is to ugly and bulky, I think) and fill some gaps between the deck and the bulwarks. I consider painting the waterways brownish red and the bulwark themselves the same color as the hull. Painting is easier with the top of frames out of the way. I will add the new bulwark supports once the bulwark etc. have been painted. Also, I need to cut holes for the scuppers. I believe there are 3 on each side. The gates for these will also be added after painting. So, the sanding and filling continues. /Lars Peter
-
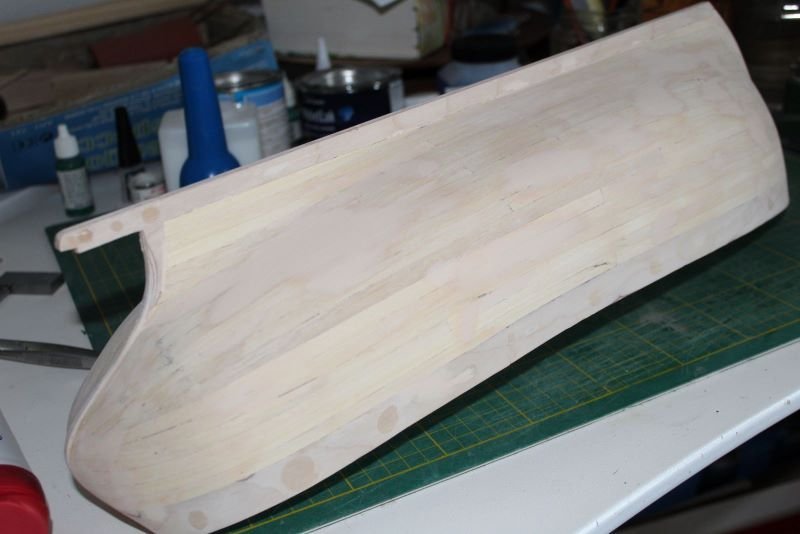
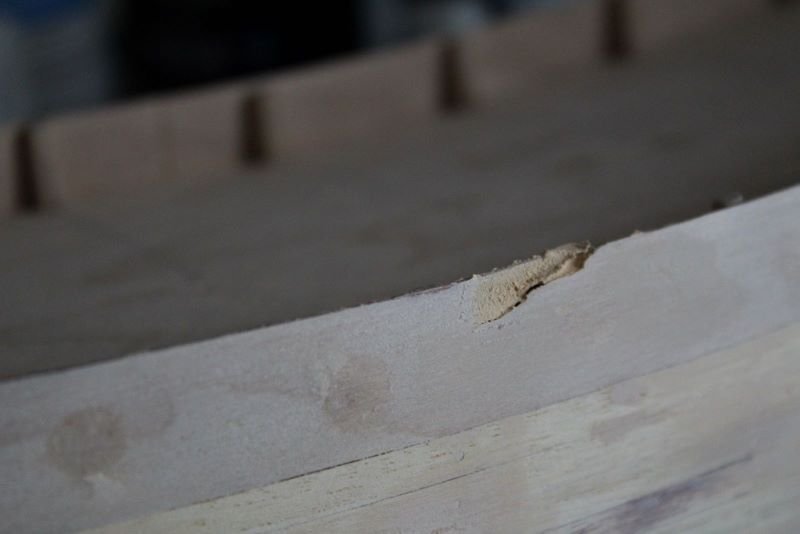
I have completed planking of the hull for Mary Ann. It has now been sanded and filled where needed (nail holes etc.). I will go over it again once I have applied primer to the hull. I manage to damage the bulwark during the sanding progress, so I need to fix this. I'm not quite satisfied with the stern of the ship . When I compare with the railings the stern is to square. It is not an easy fix. I can build up the middle a. Then I will remove the two support pieces on either side of the keel piece two get the plywood to move a bit more inwards. I guess I made these a bit two big when I made the skeleton the second time around. I may also cut the plywood with a saw just to get a bit more room. Some filler is definitely required. /Lars Peter
-
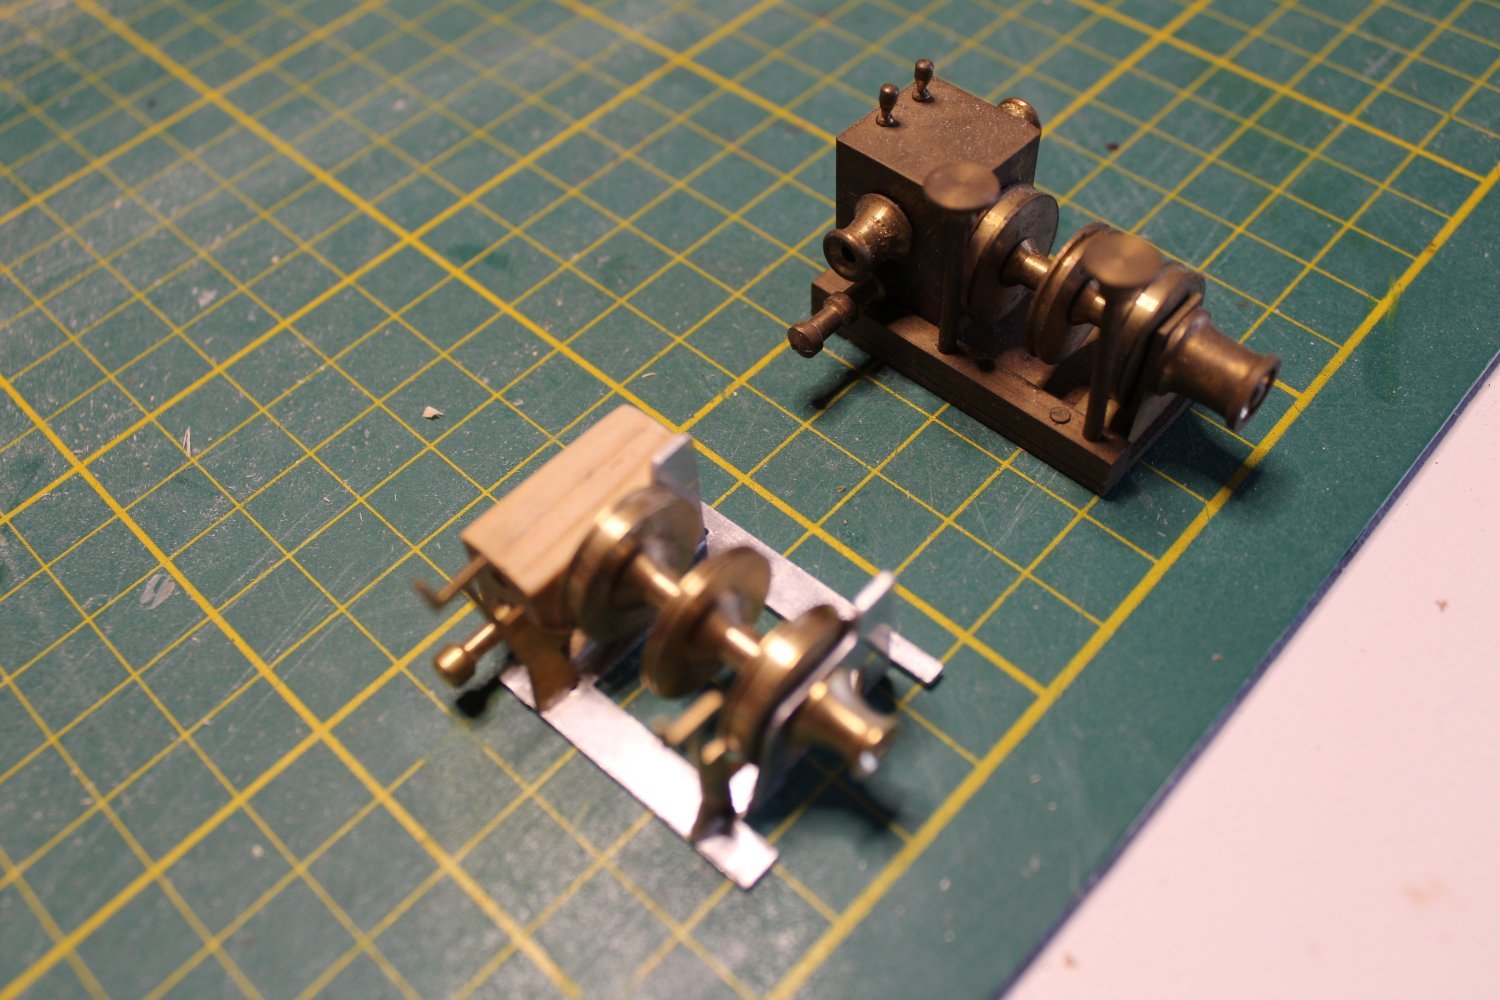
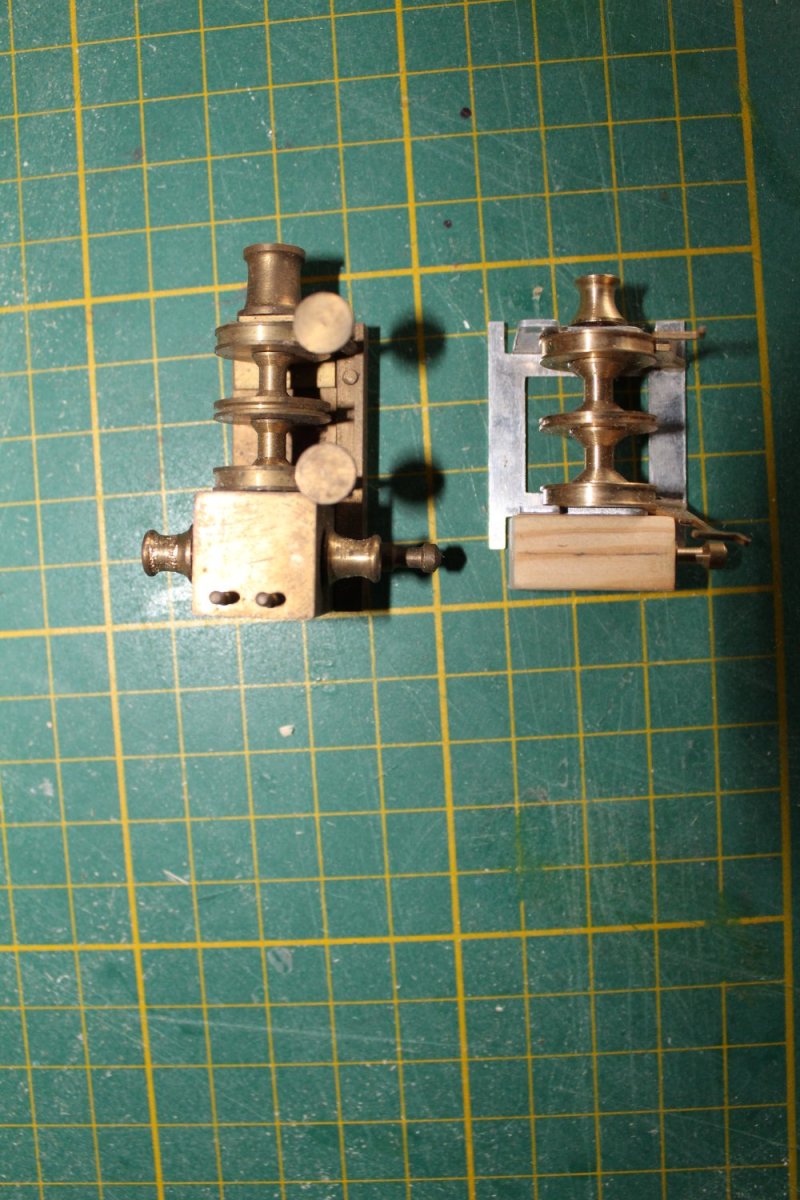
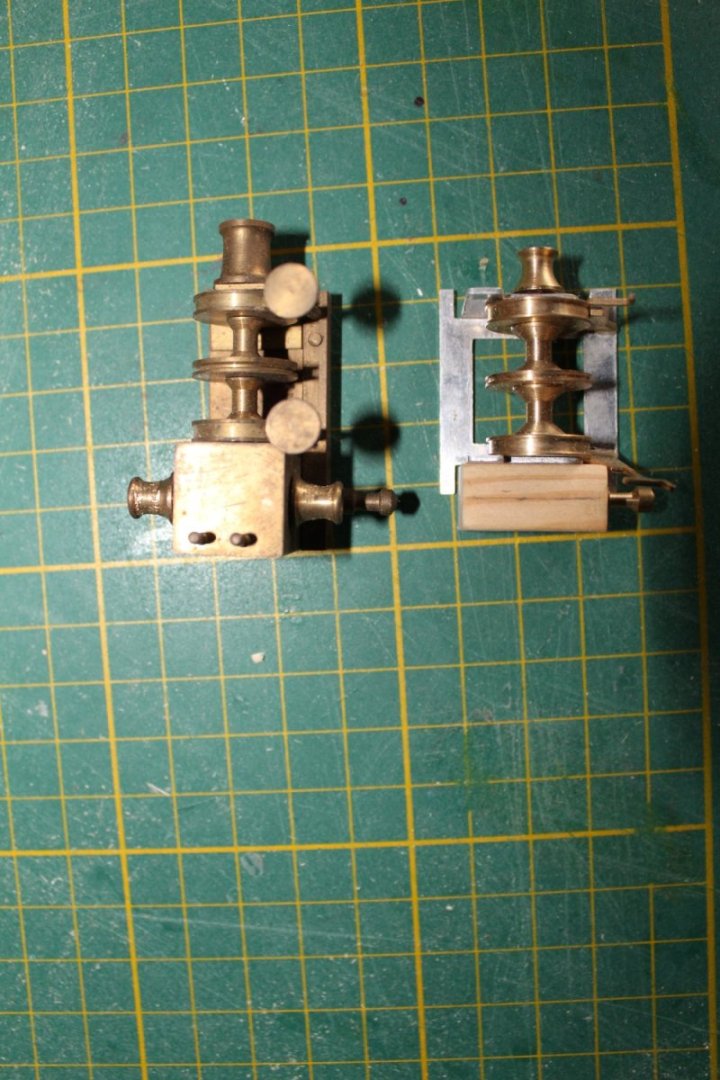
Winch issue In my first post I mentioned that I was given this old kit and some parts were missing. Most of the parts for the winch was included - a few pulleys are missing which I can still get. However, in the big box of fittings I was given with the kit, there is a complete all brass winch which look a bit similar to the one in the kit - just nicer and bigger. I am tempted to use the bigger one but would like to hear your opinion 🤔The brass version could be from an even older version of Mary Ann. She was the first model released by BB in 1958. I should mentioned that the rope drums are identical. So what do you think. Should I continue with the kit part (the one with the wooden gearbox) of swap it for the all brass version? /Lars Peter

-
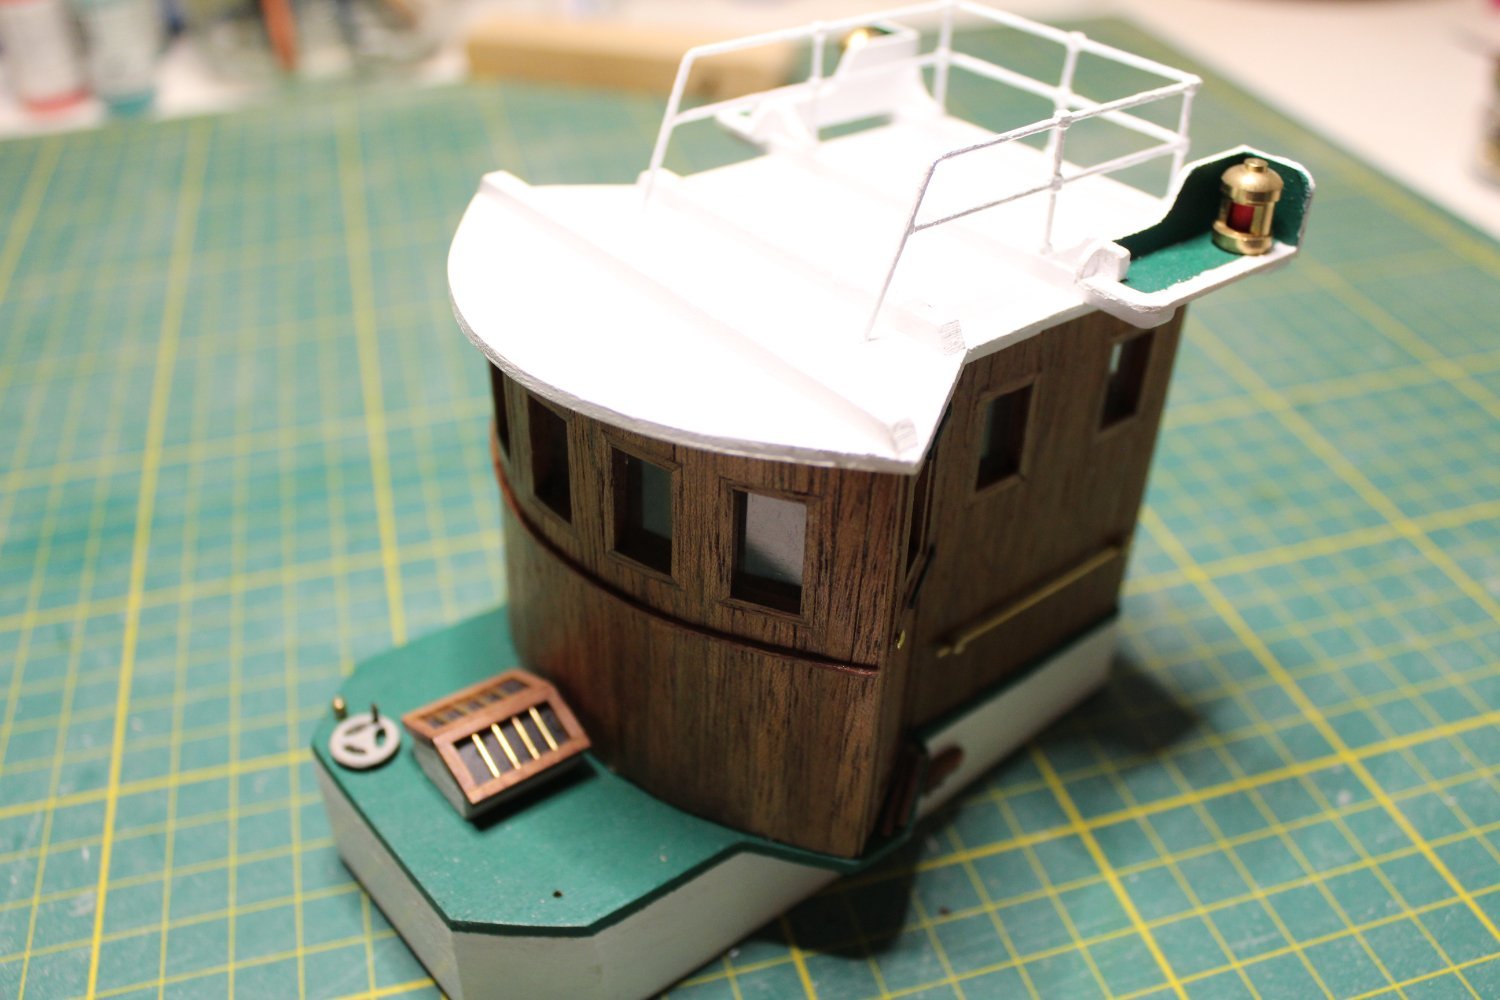
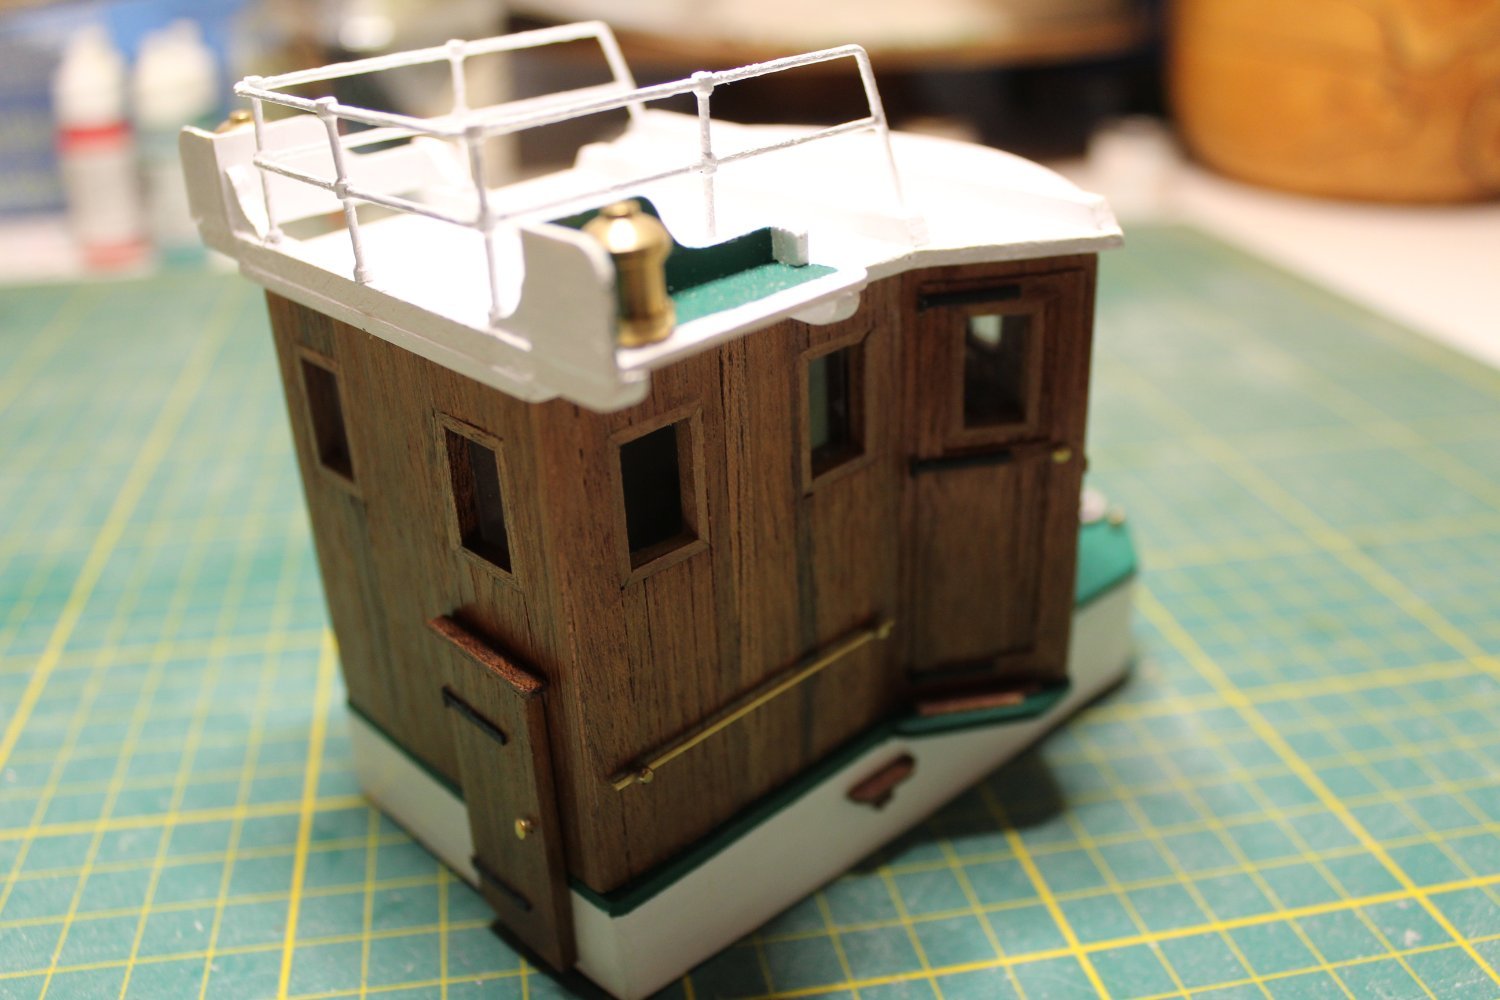
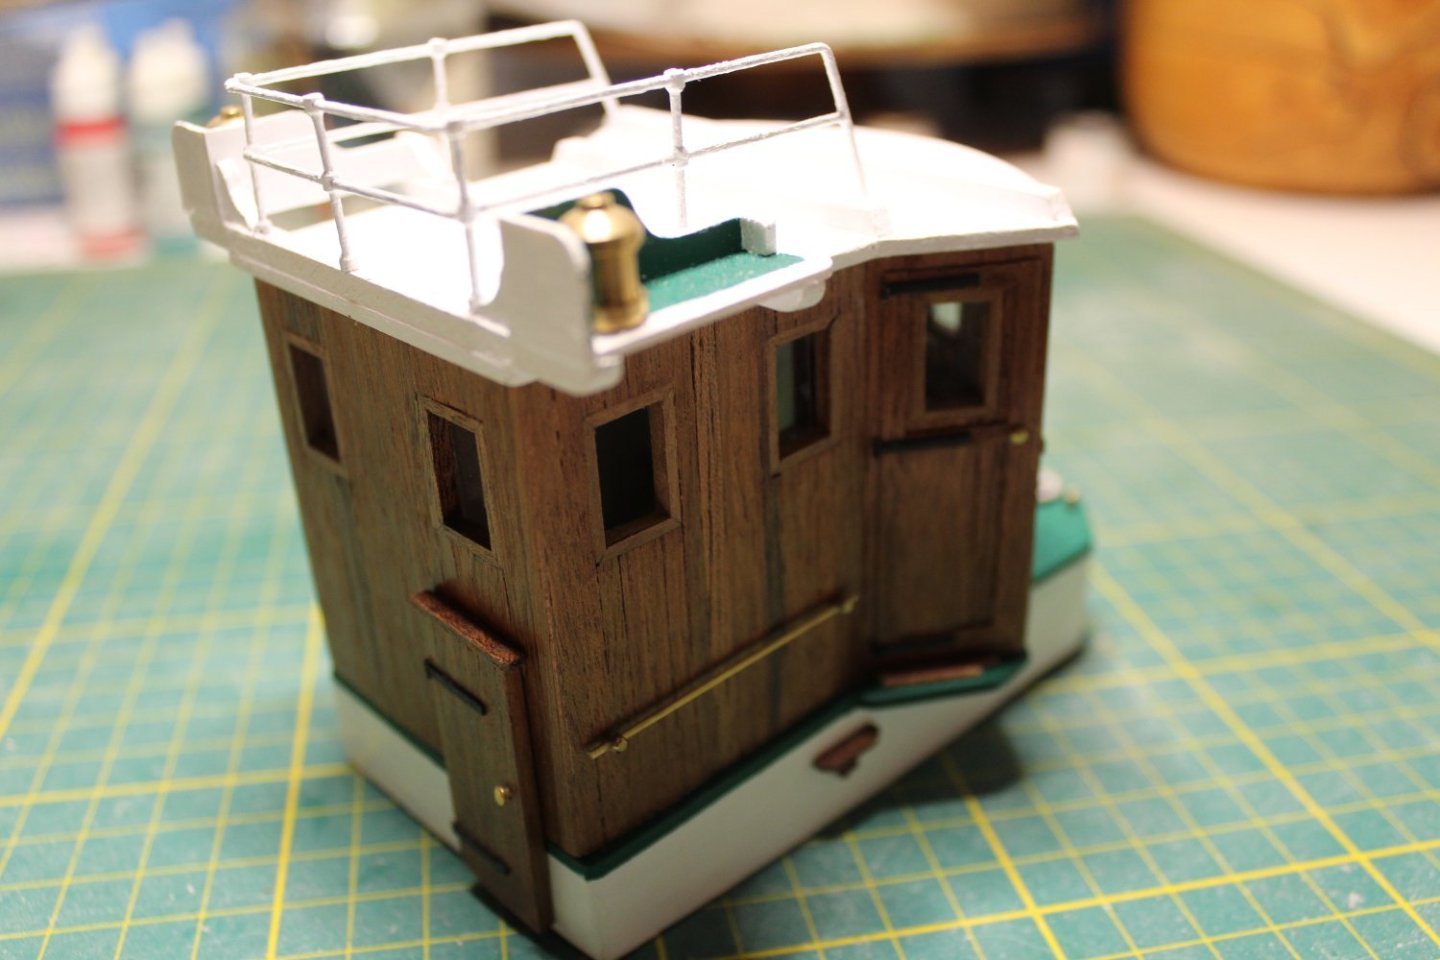
We continue where we left back in 2020. I'm almost at the same level with hull no 2 - just need to fit the plywood bulwarks. Then I can start the planking for the second time. The wheel house is almost done. I basically followed the instruction but instead of just using the printed plywood I covered the entire thing in mahogany strips. Hinges for the doors are made from a thin styrene strip. I glued the windows with wood glue. It is not very strong and of course I manage to push out one of the window which I cannot recover unless I tear the entire thing apart. Just imagine there has been a severe storm ... The engine room ventilation cover was made from a mahogany frame, brass wire and black paper as a backing instead of the printed plywood. The hand wheel was part of the kit - plywood that needed to be cut out - a bit fiddly. Handle made from a piece of brass wire. It seems like the newer kit include a plastic handwheel instead - a bit easier I will post more as I progress with planking of the hull. /Lars Peter

-
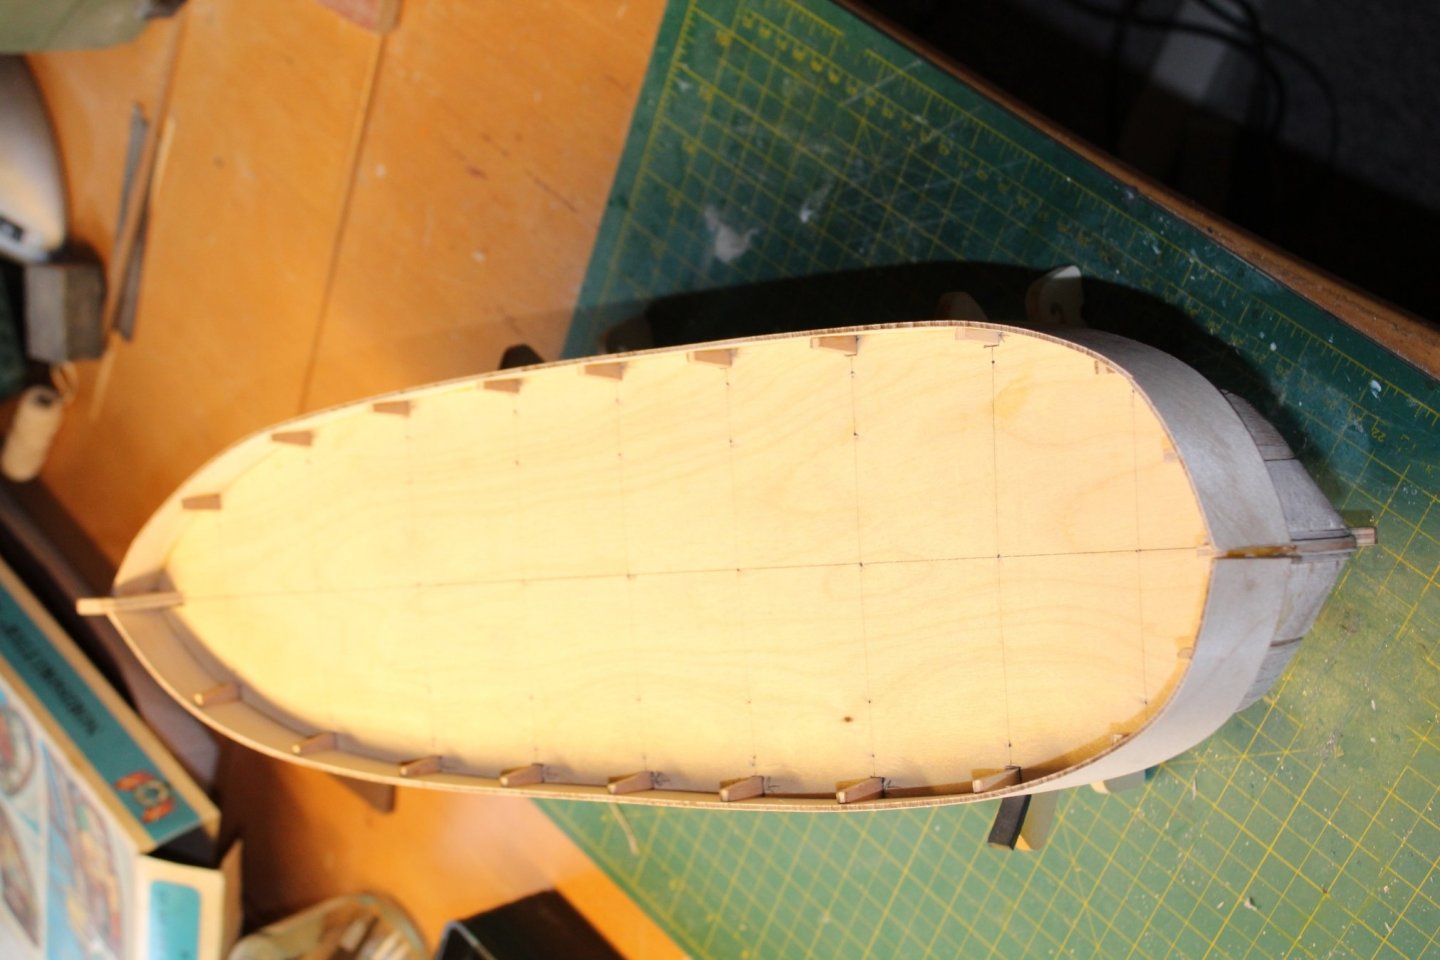
Hi All, Guess I'm back. Life got in the way of ship building - moved to a new house, got a family, renovations and lots of other things.😉 Weather is bad so I have dug out my ship building materials again and decided to continue with the Mary Ann... Well, basically start all over. The half-planked hull has been tossed around in my temporary workshop for the past 4 years, and I discovered that the keel was broken. So, I have made an entirely new skeleton and has now come to the phase of adding filler blocks before starting planking for the second time. And why is it than when you do things a second time, it is never as good as first time. At least that's my feeling. However, it will probably be ok in the end I have almost completed the wheel house. I will post some picture very soon and then hopefully continue with this model until it is done 😀 /Lars Peter
-
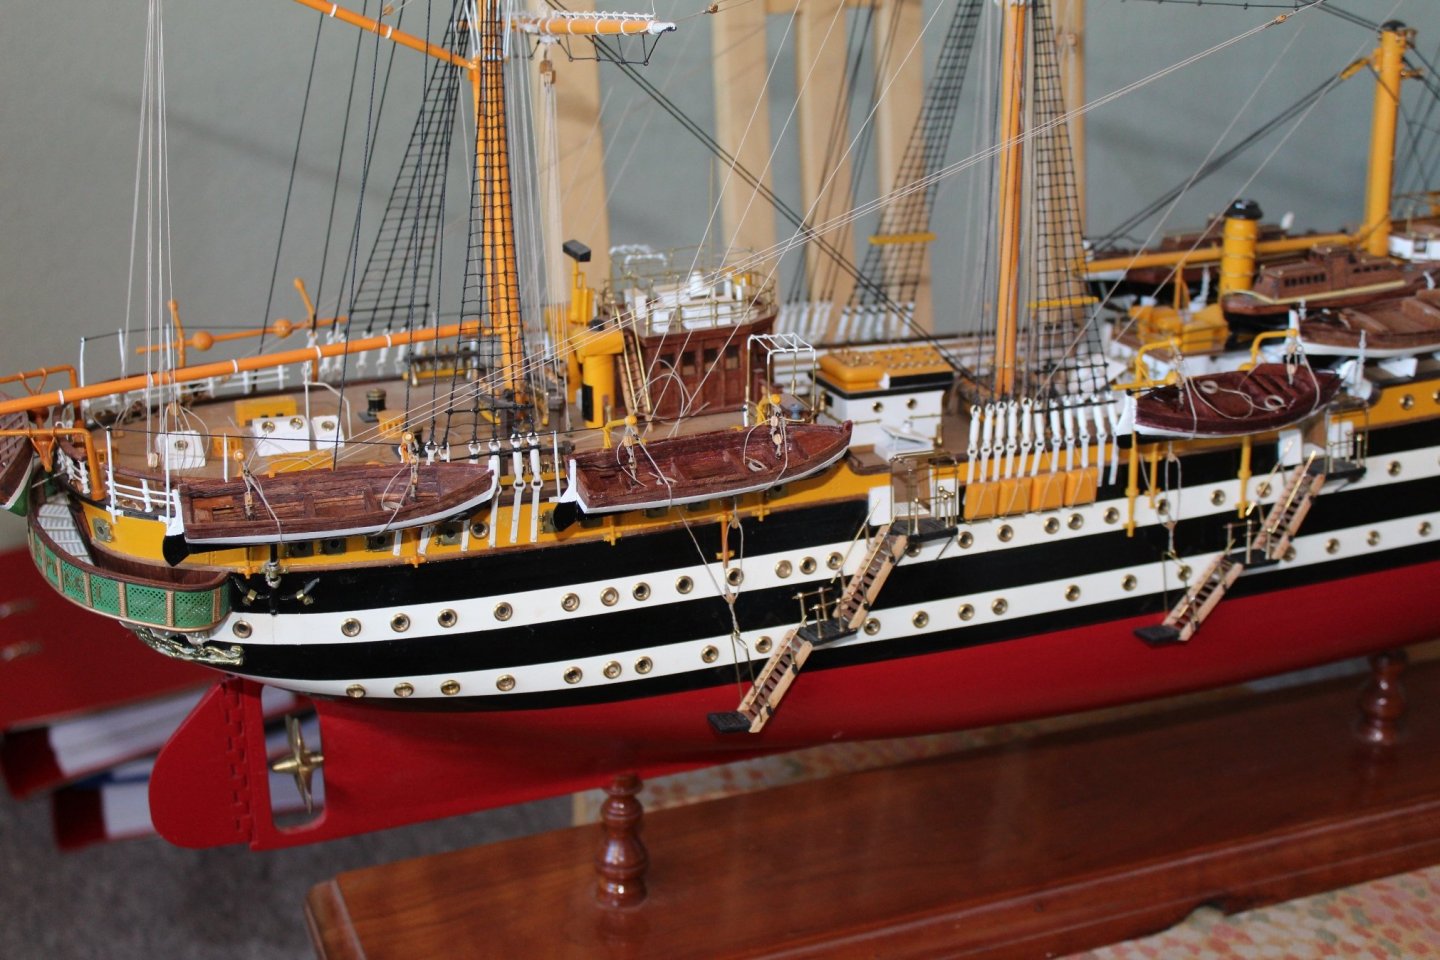
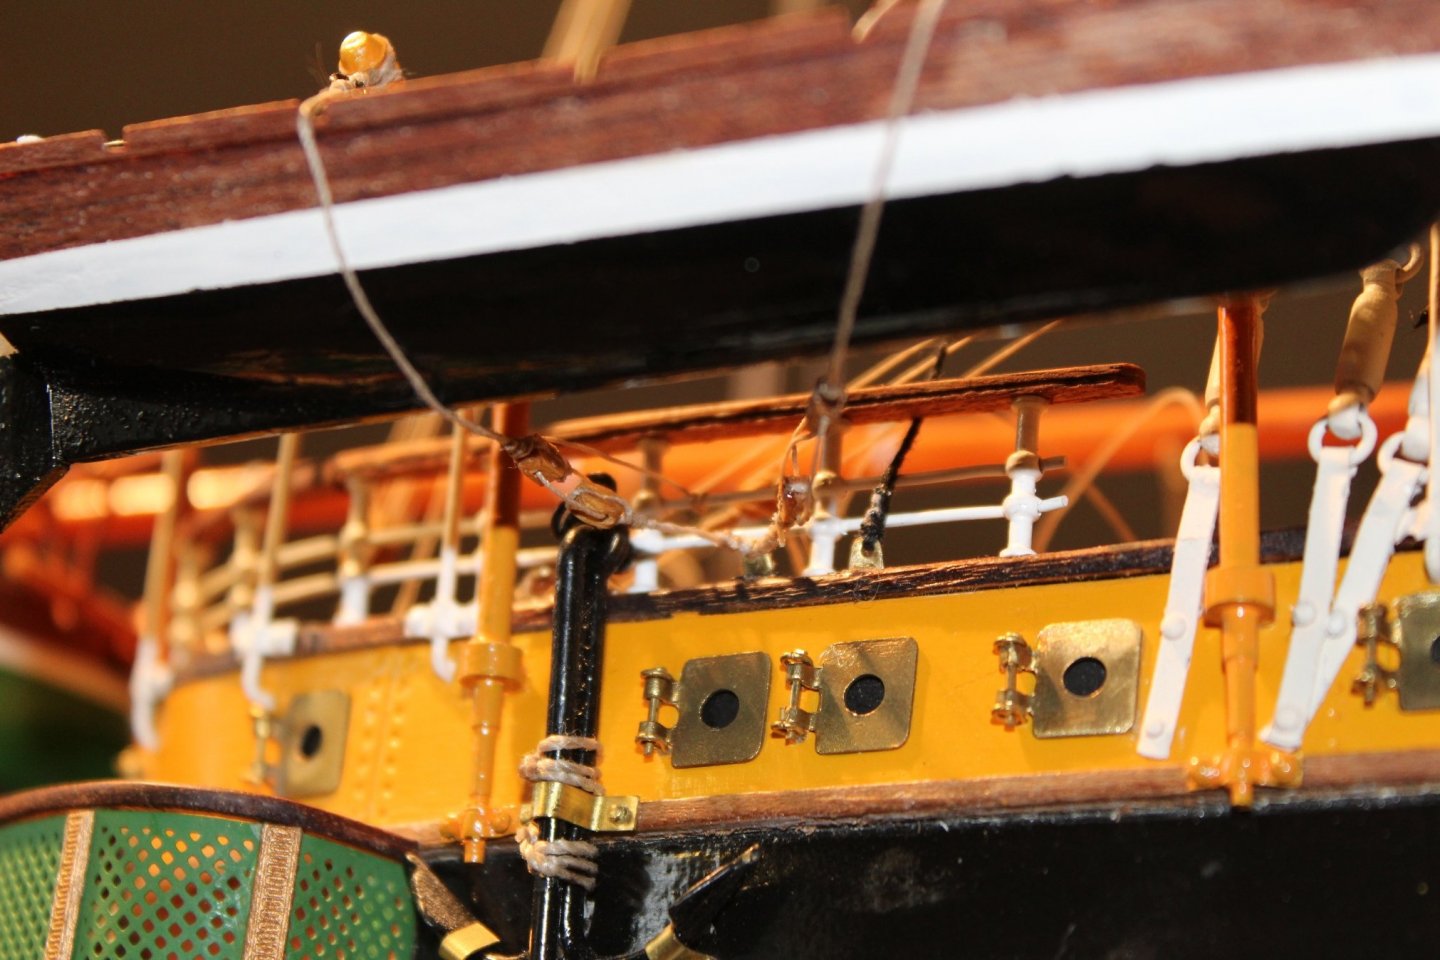
The starboard side of my AV is now more or less complete - just have to fit a few life preservers. The three small boats are in place in their davits and the stairs are complete. Now I can start all over with the port side 😄 /Lars Peter

-
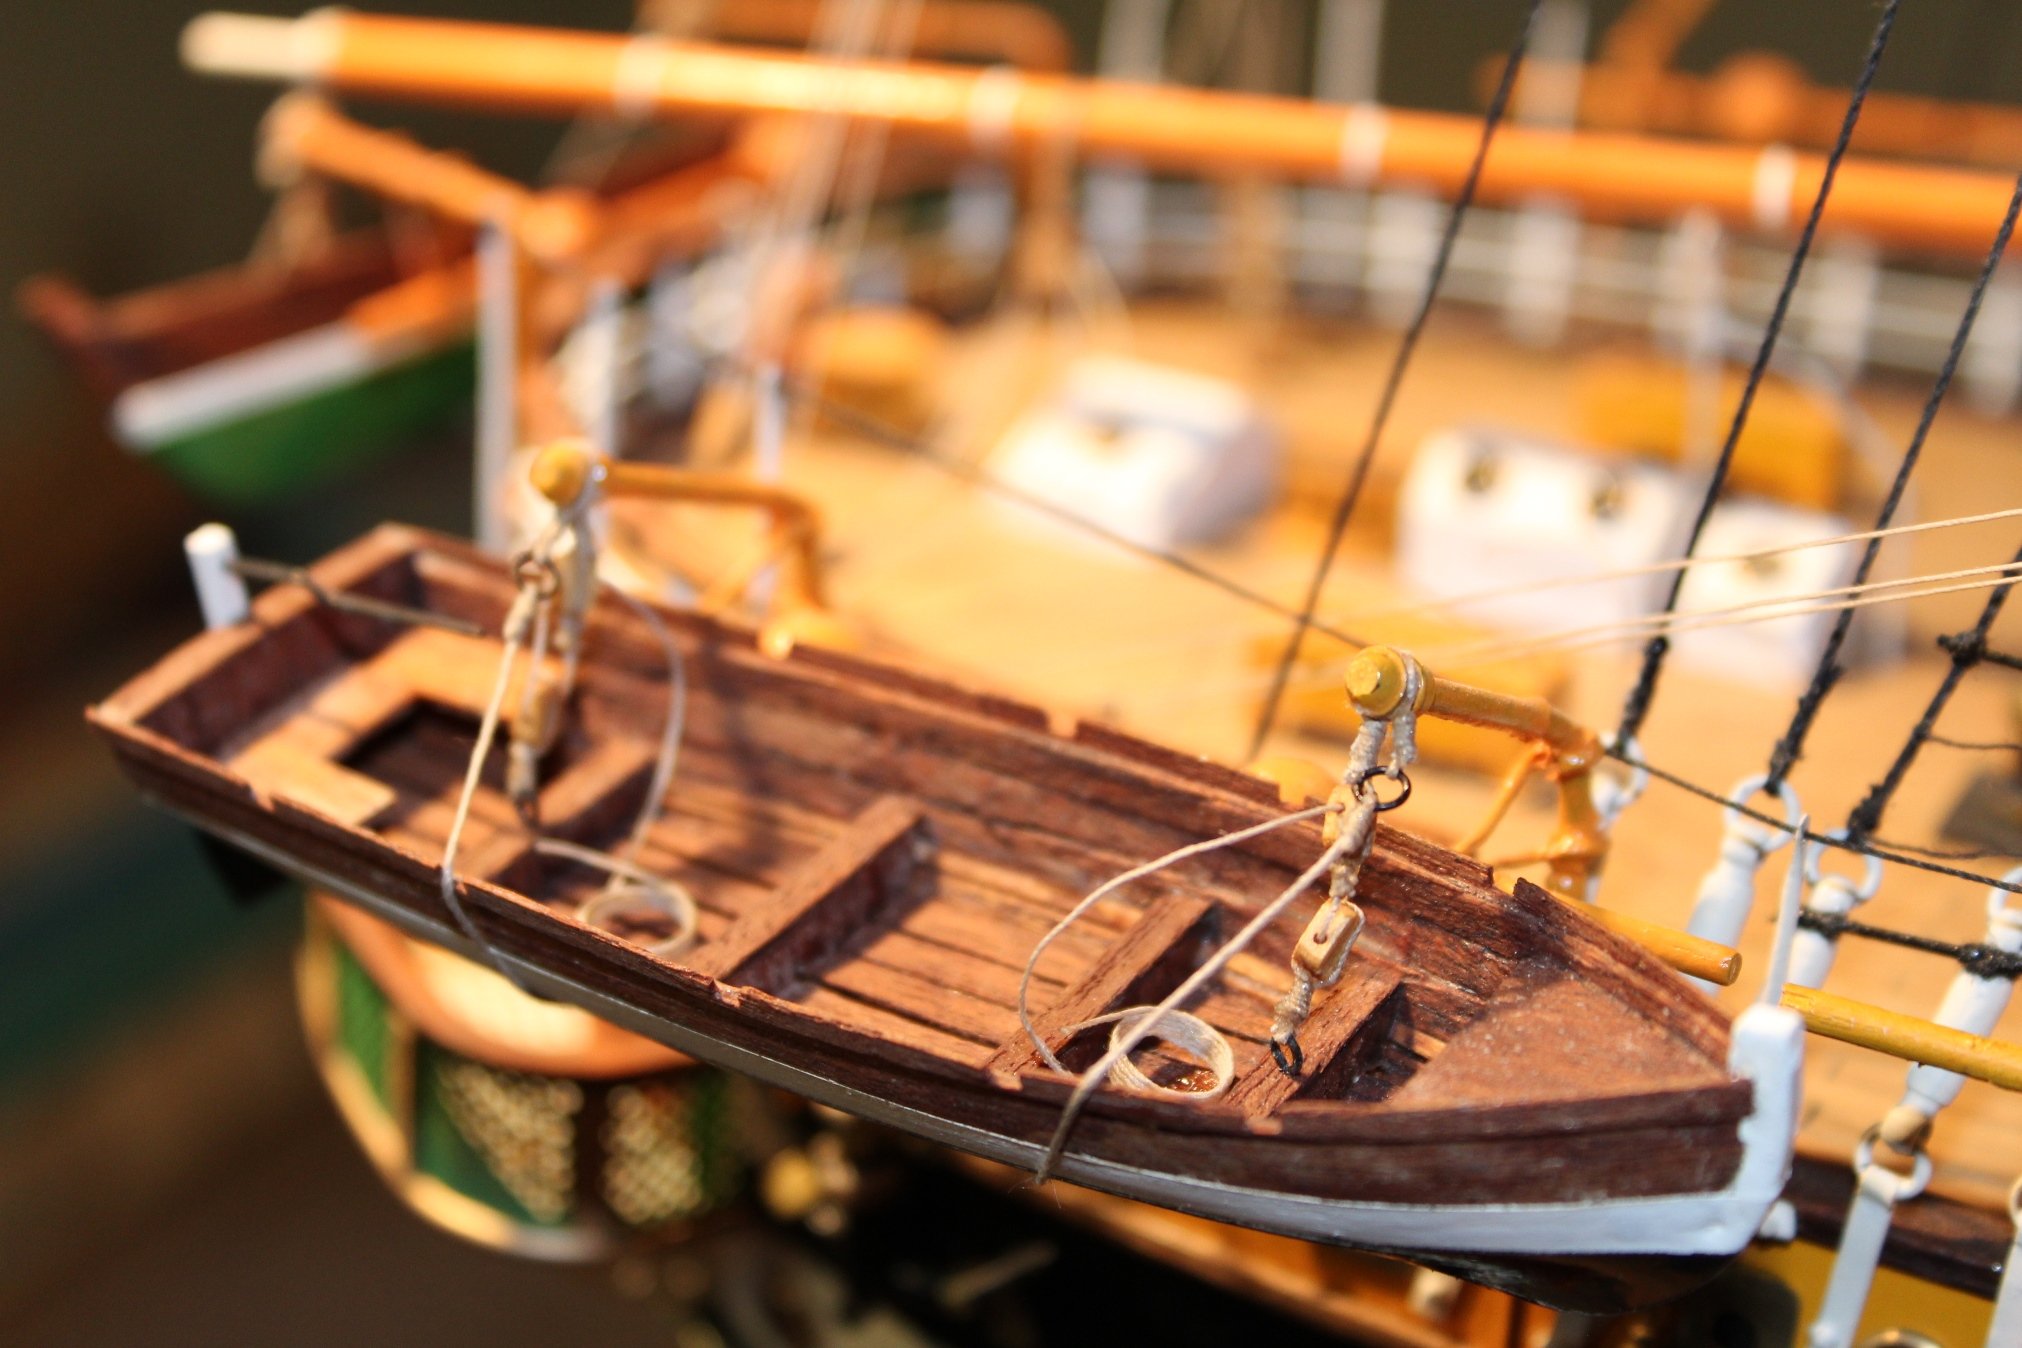
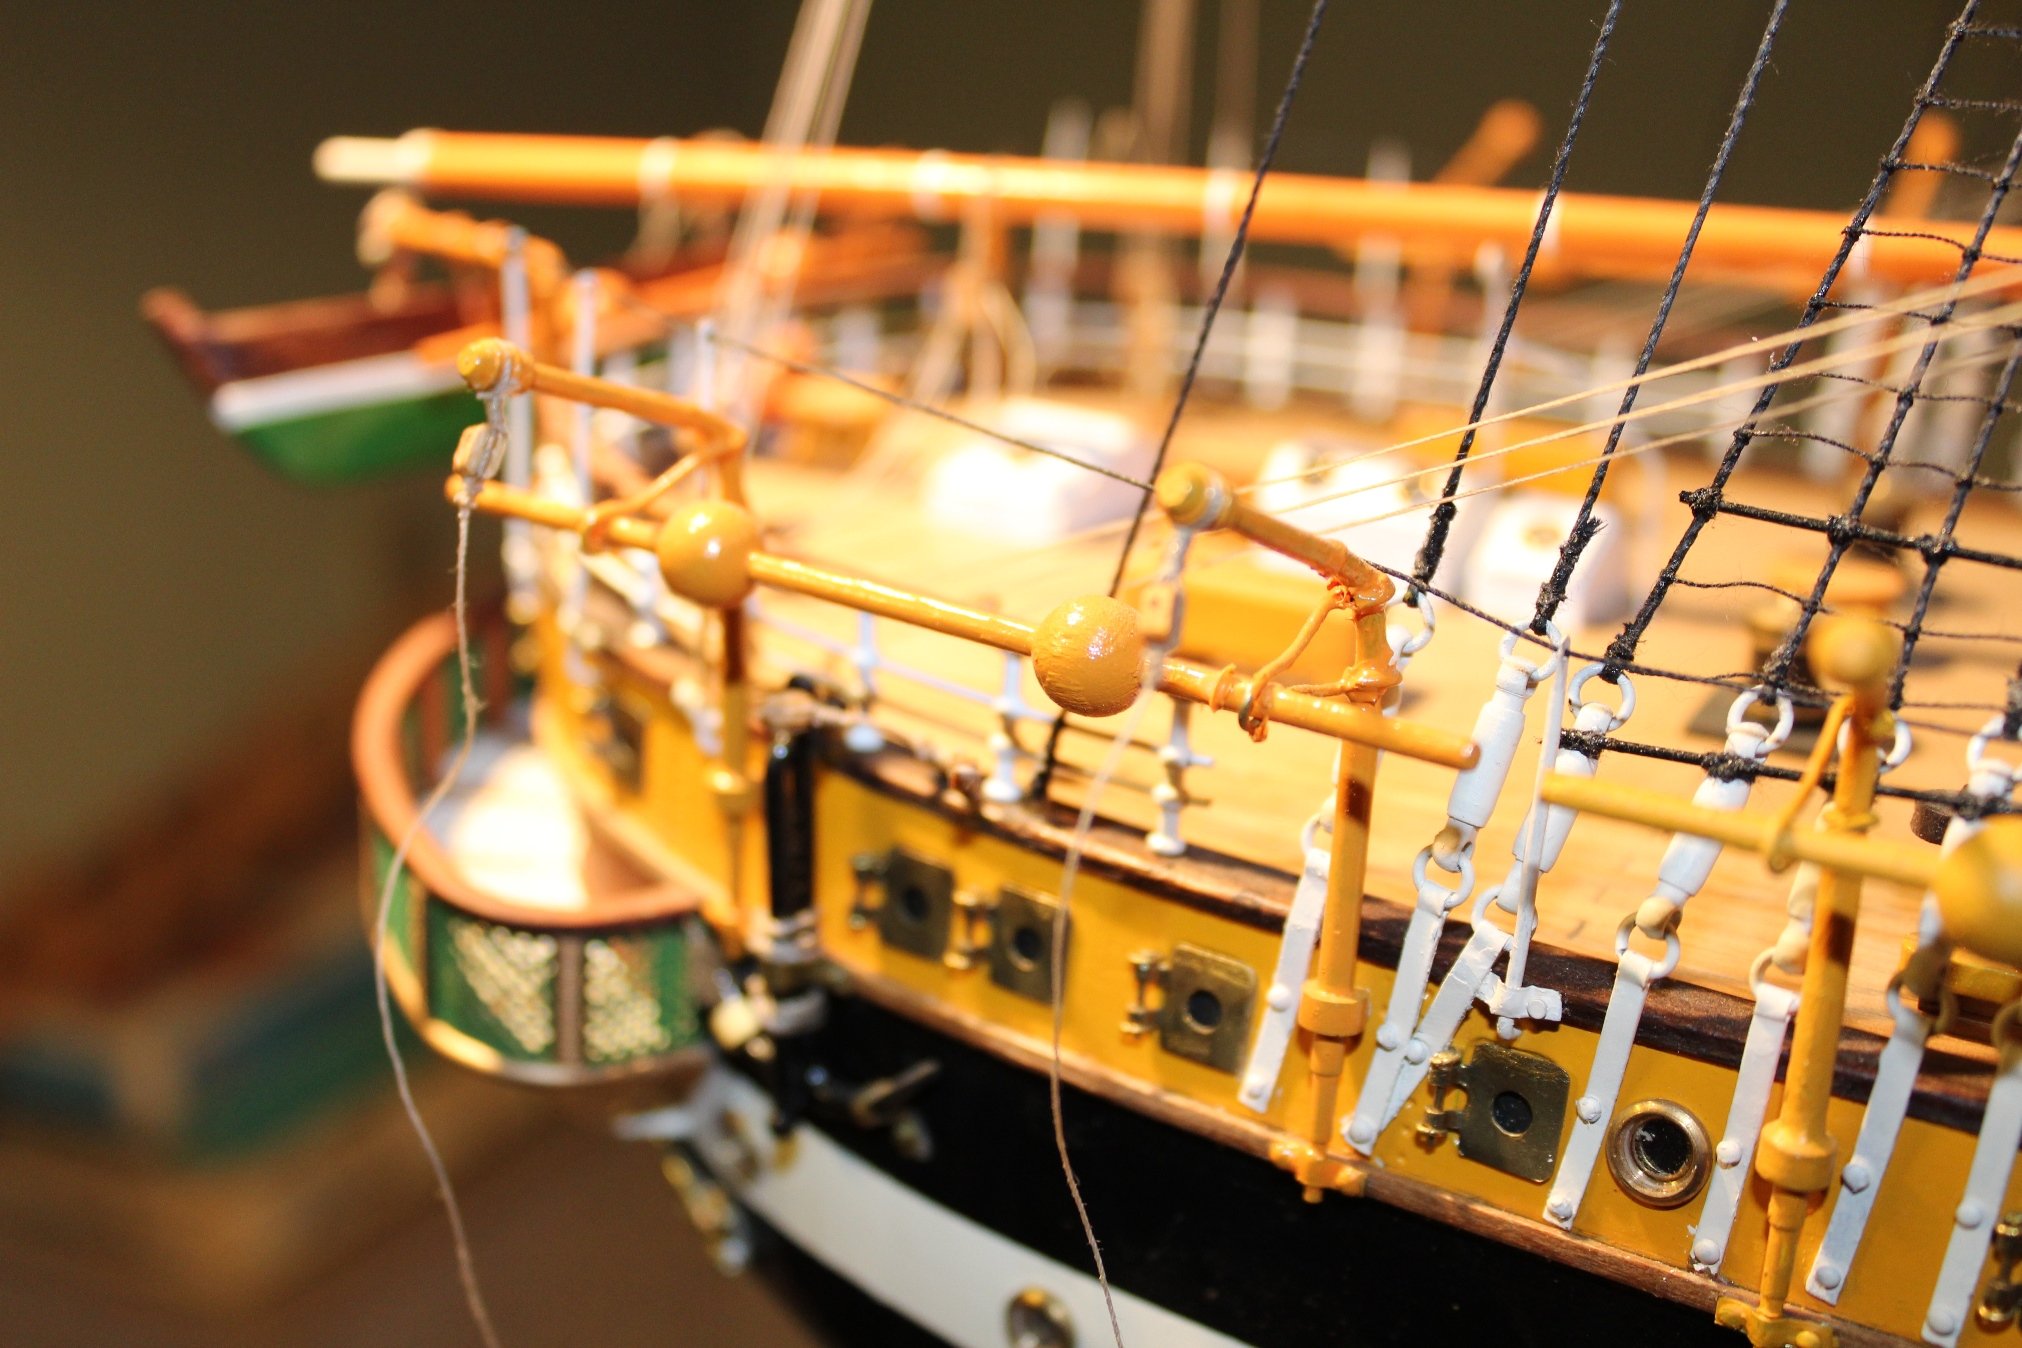
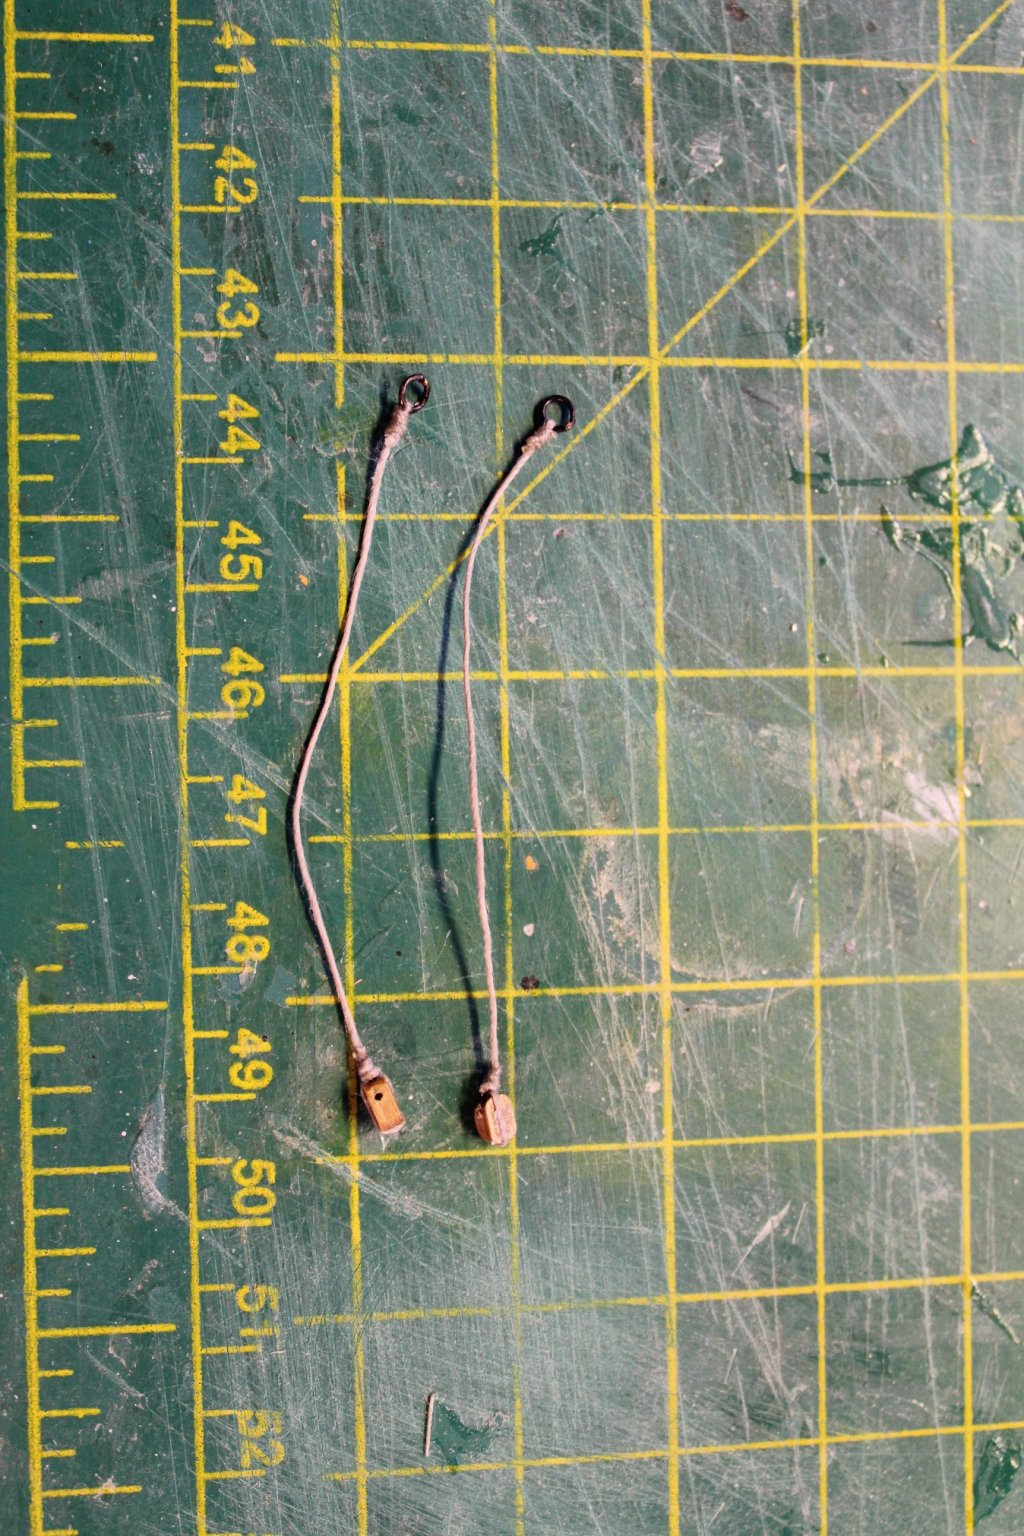
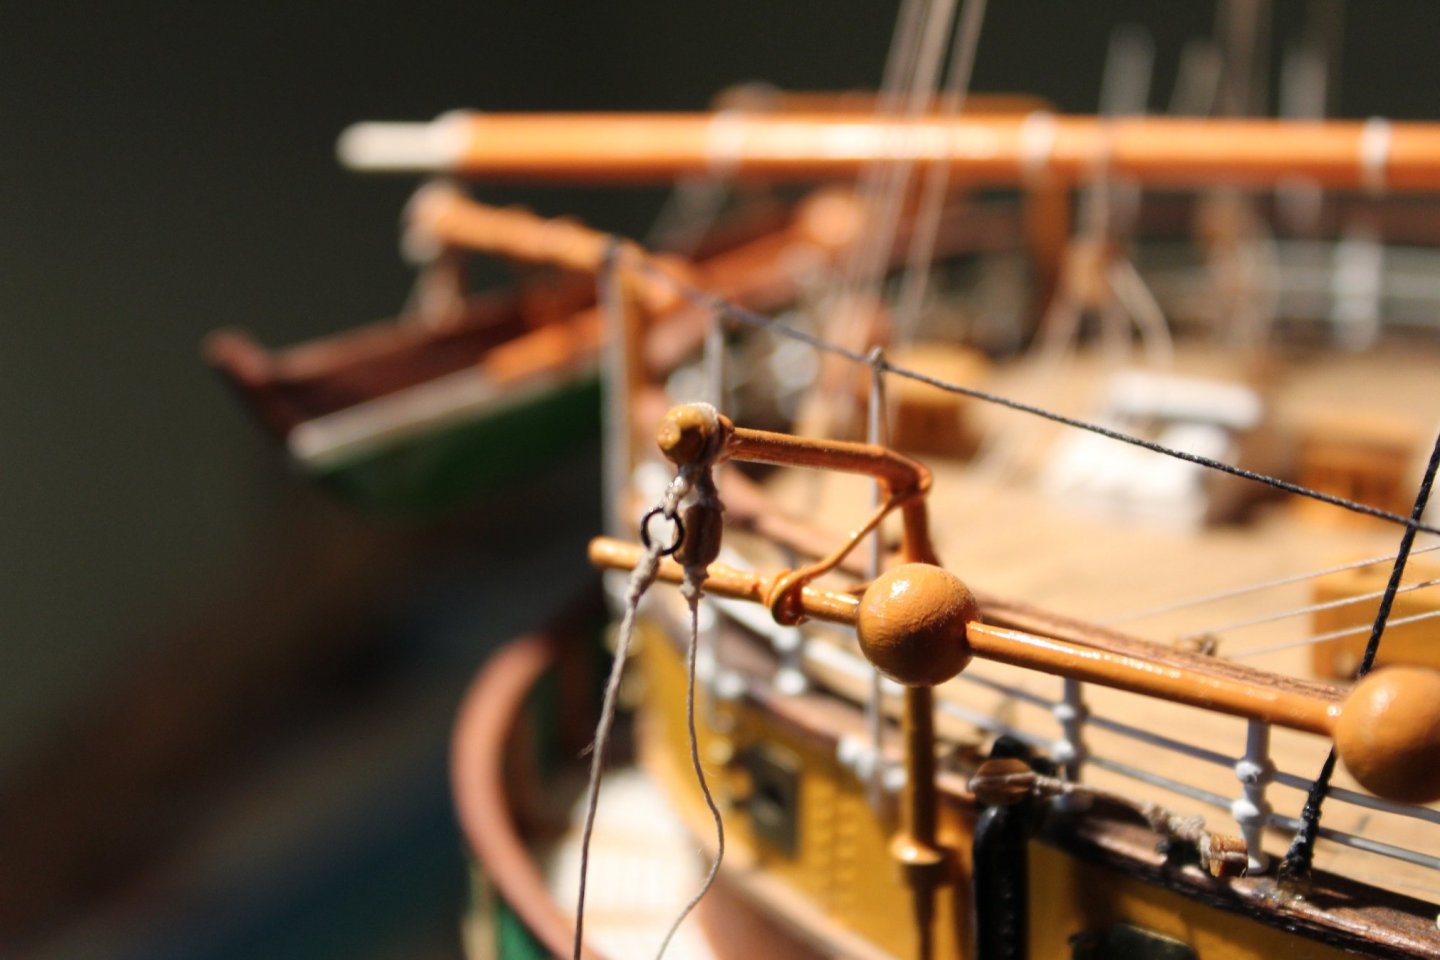
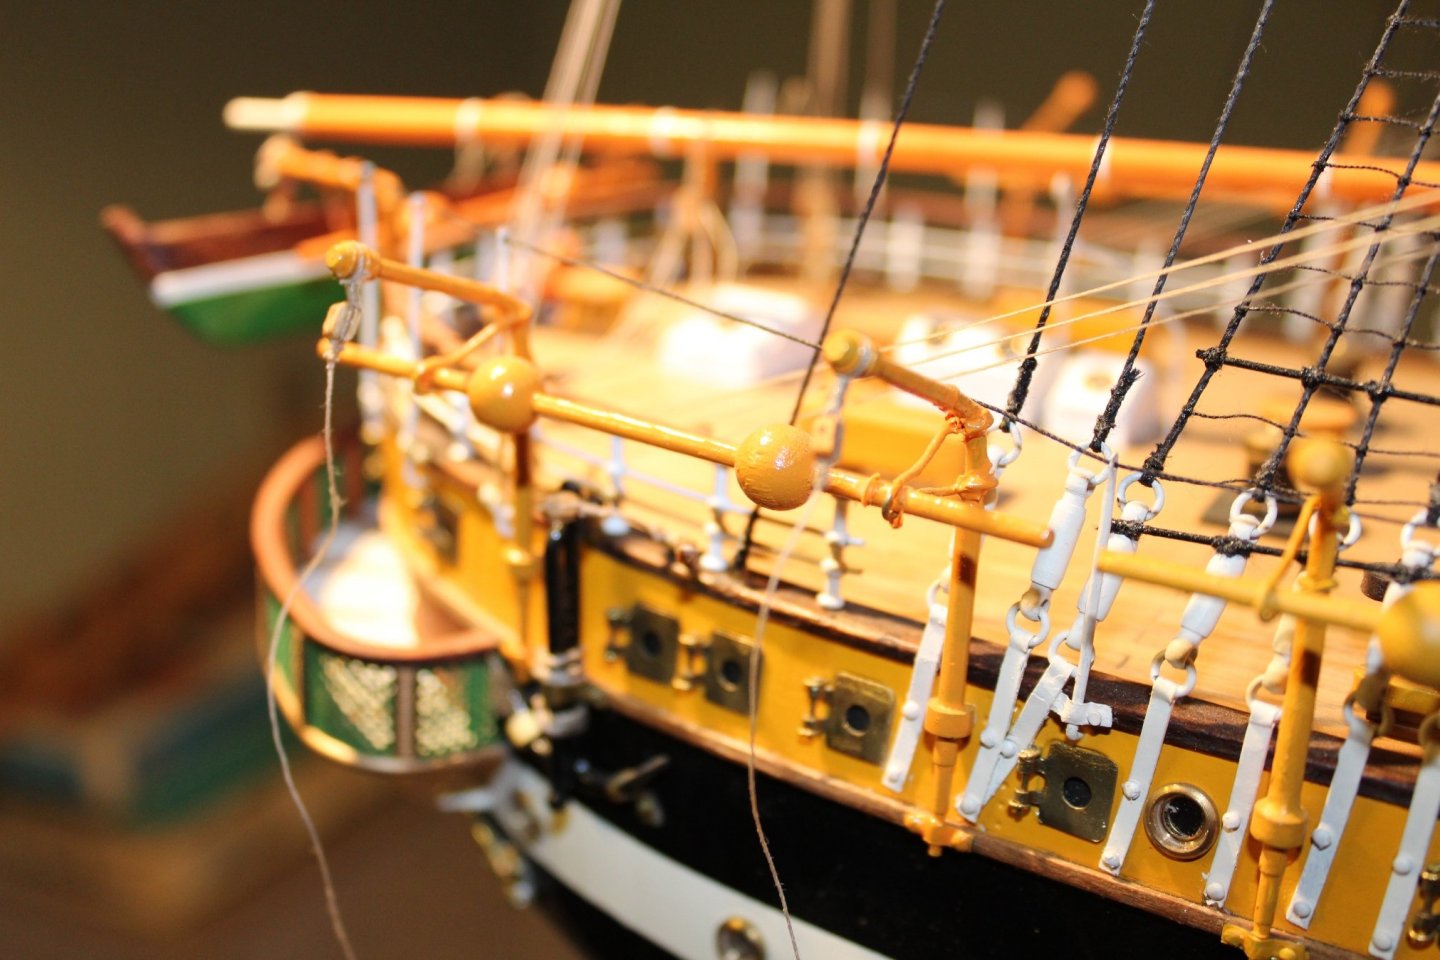
Rigging small boats I have started hanging the small boats from their davits, starting with the first rowing boat. This is time consuming work, took me around 3 hours for the first boat. A total of 8 blocks are needed per boat. First picture shows the attachment of the line to carry the weight of the boat. Next picture shows the two slings that will hold the boat to the davit. The slings are tied to the davit. Boat in place. The last picture shows the blocks for for the slings. I'm not sure where the lines for these should be tied off so for now I just tied them to the railings. Only 5 more to go 😩 /Lars Peter

-
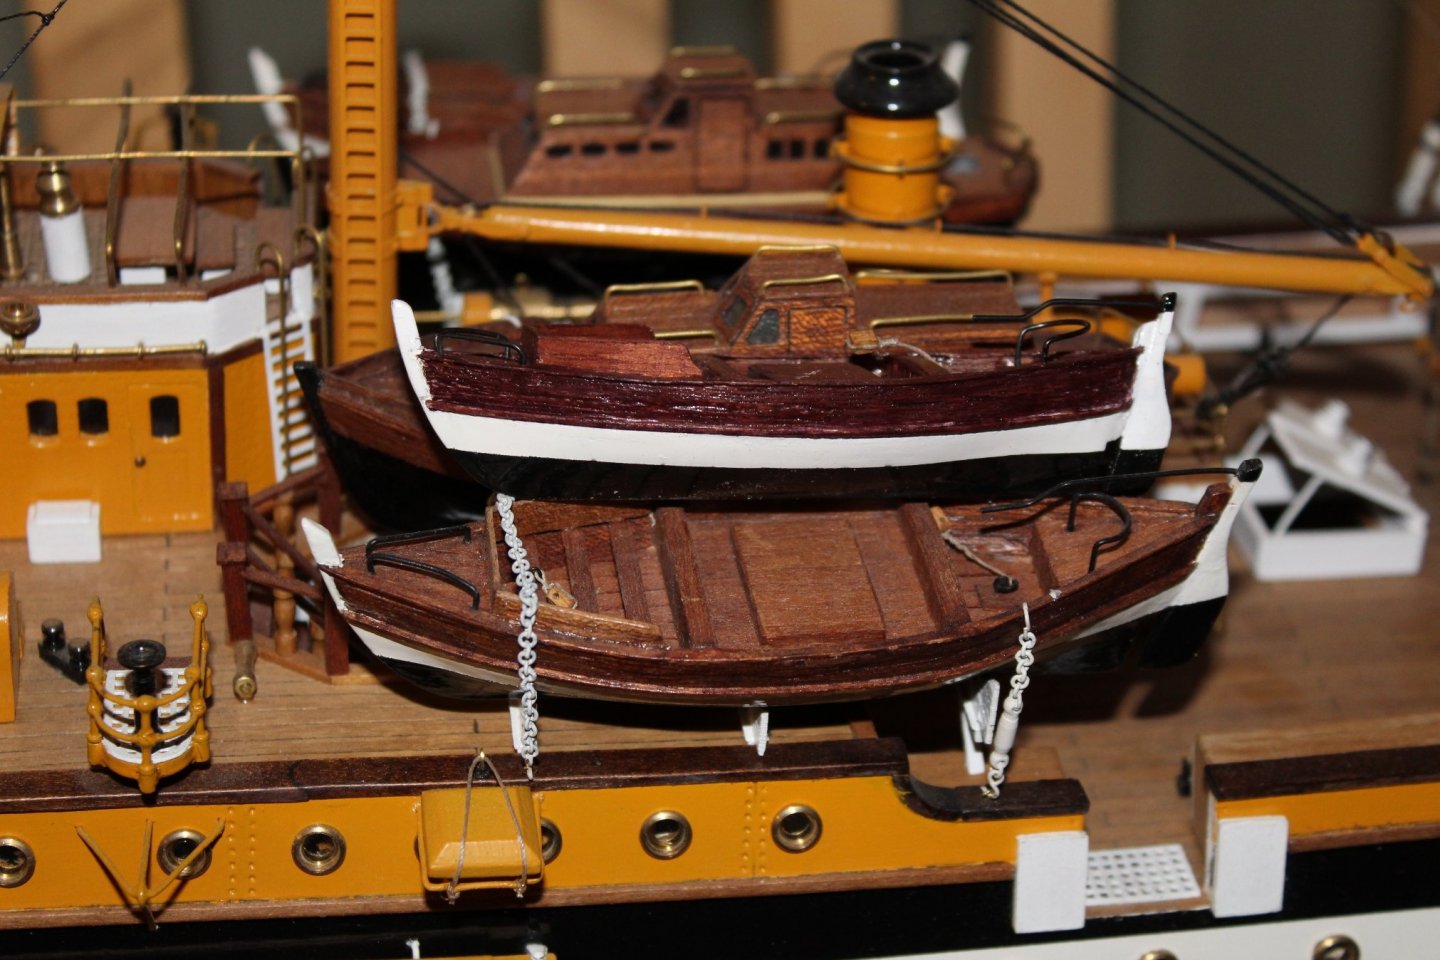
Just a quick update. I have completed the first small motor boat. The next picture shows the size compared to one of the large motor boats already in place on my AV. It is simply a scaled down version. The last rowing boat is waiting for paint and then I have one last small motor boat to make - almost done 😊 /Lars Peter
-
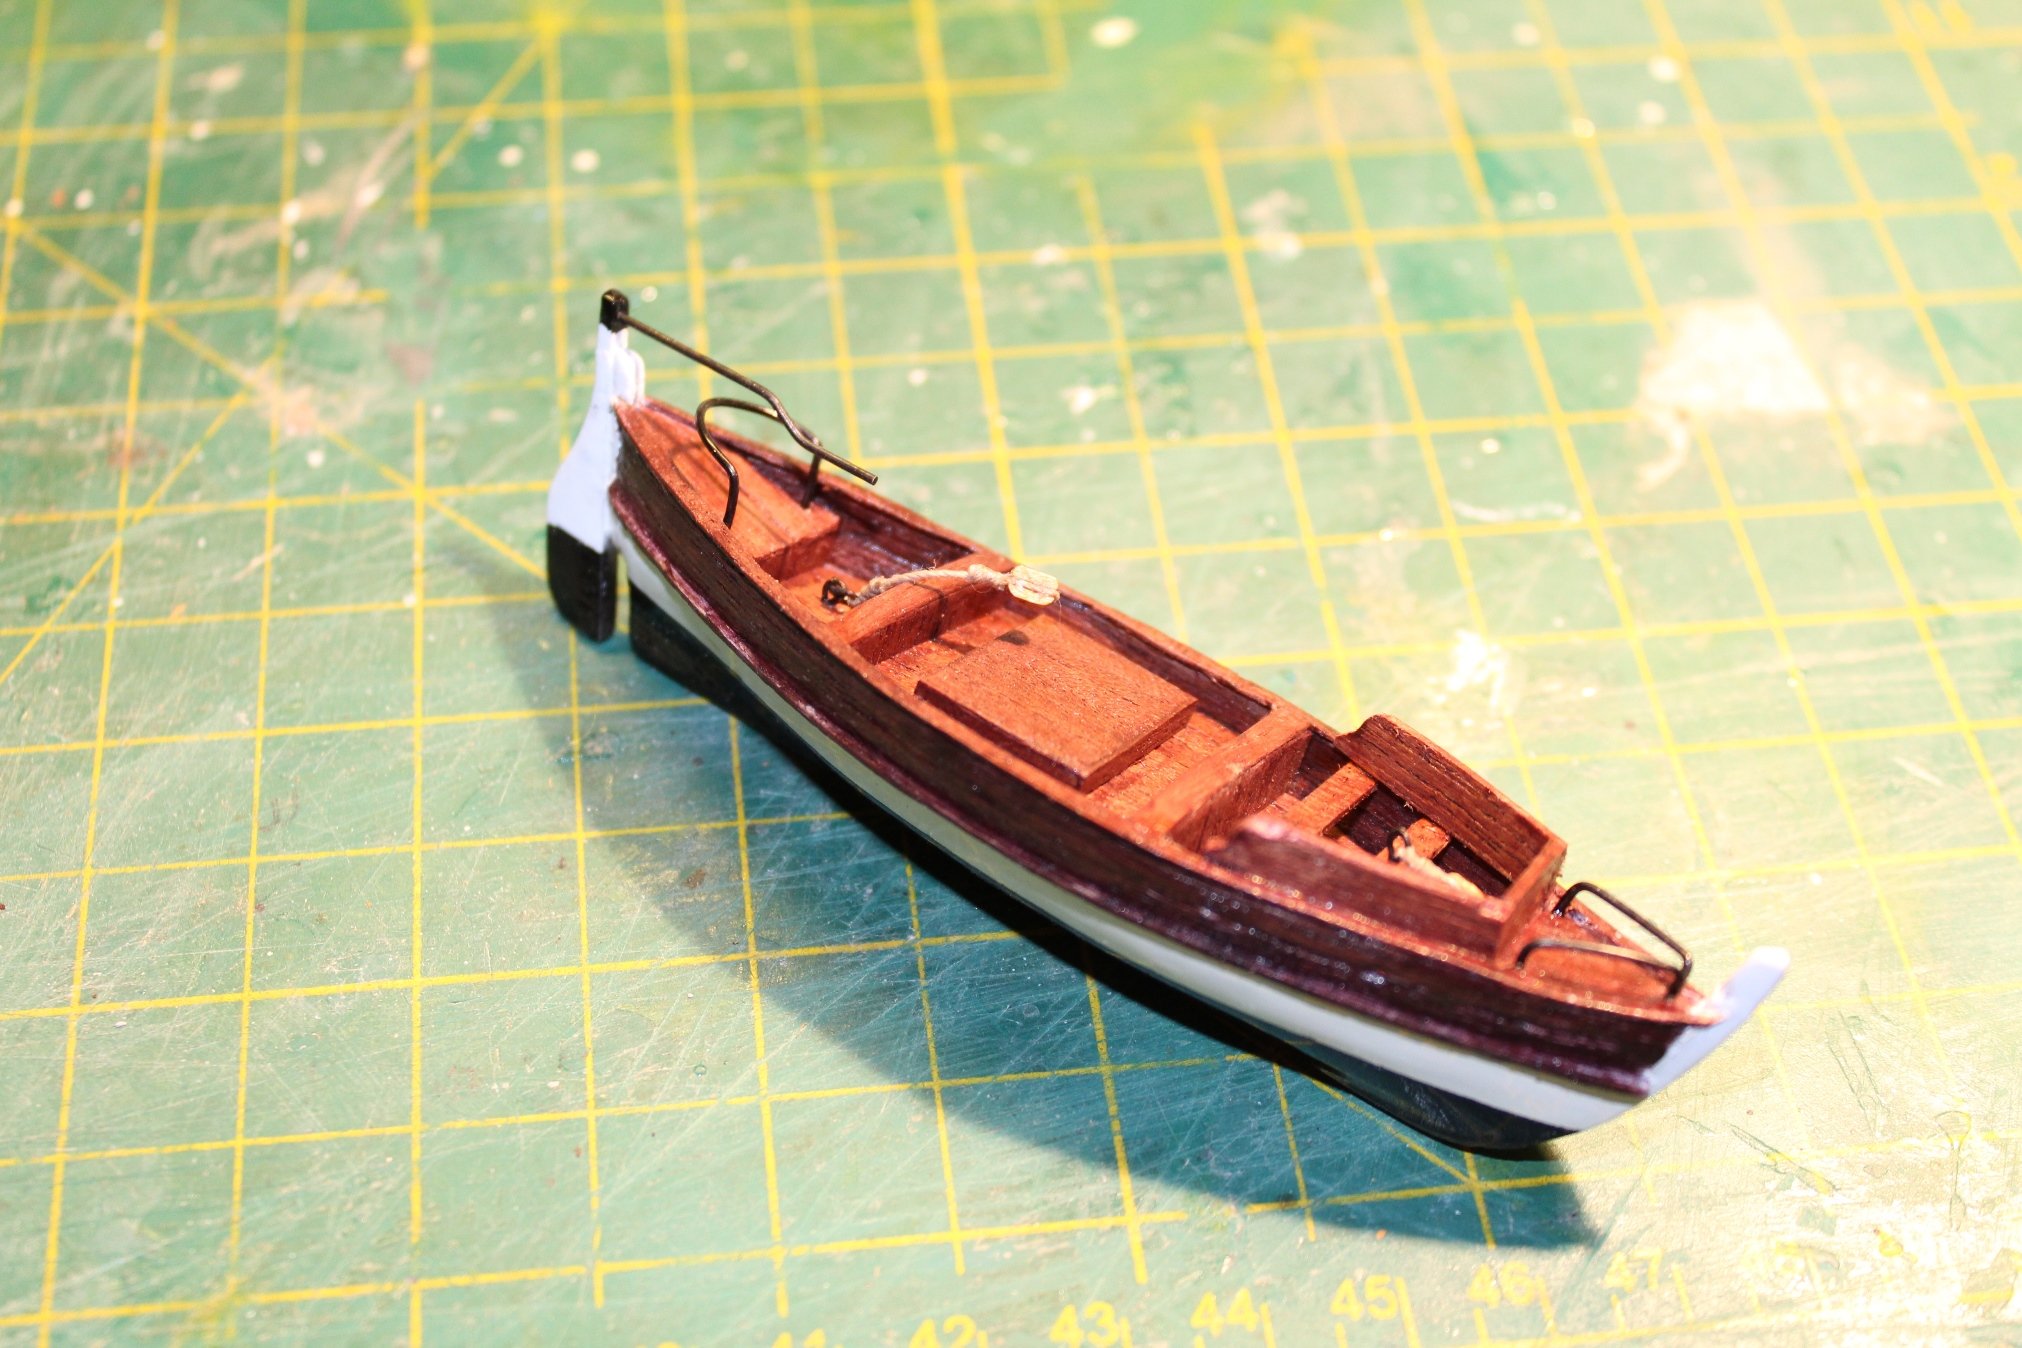
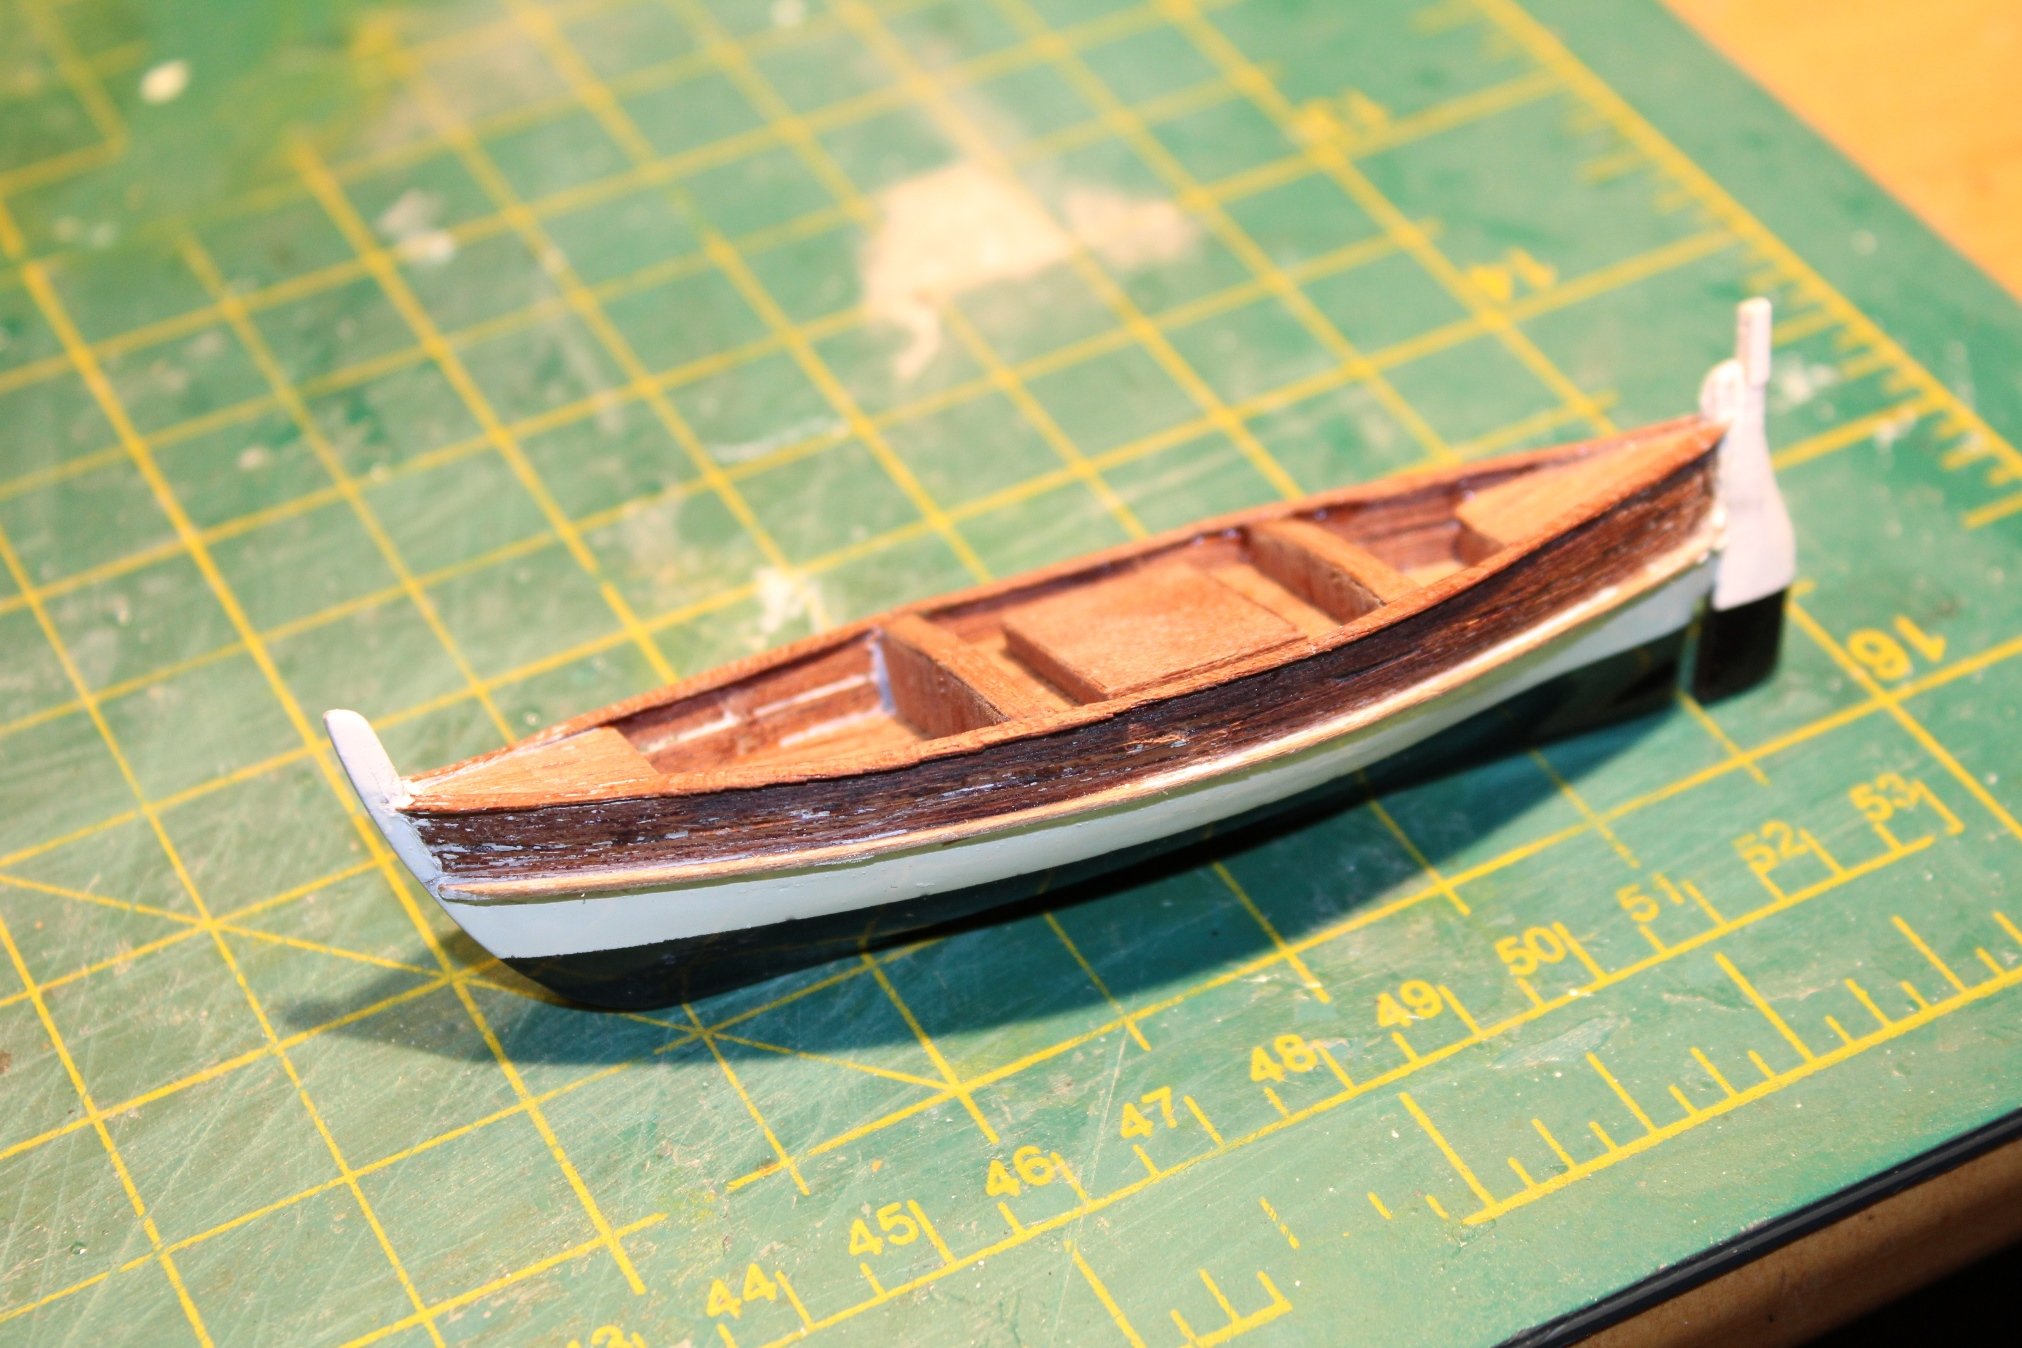
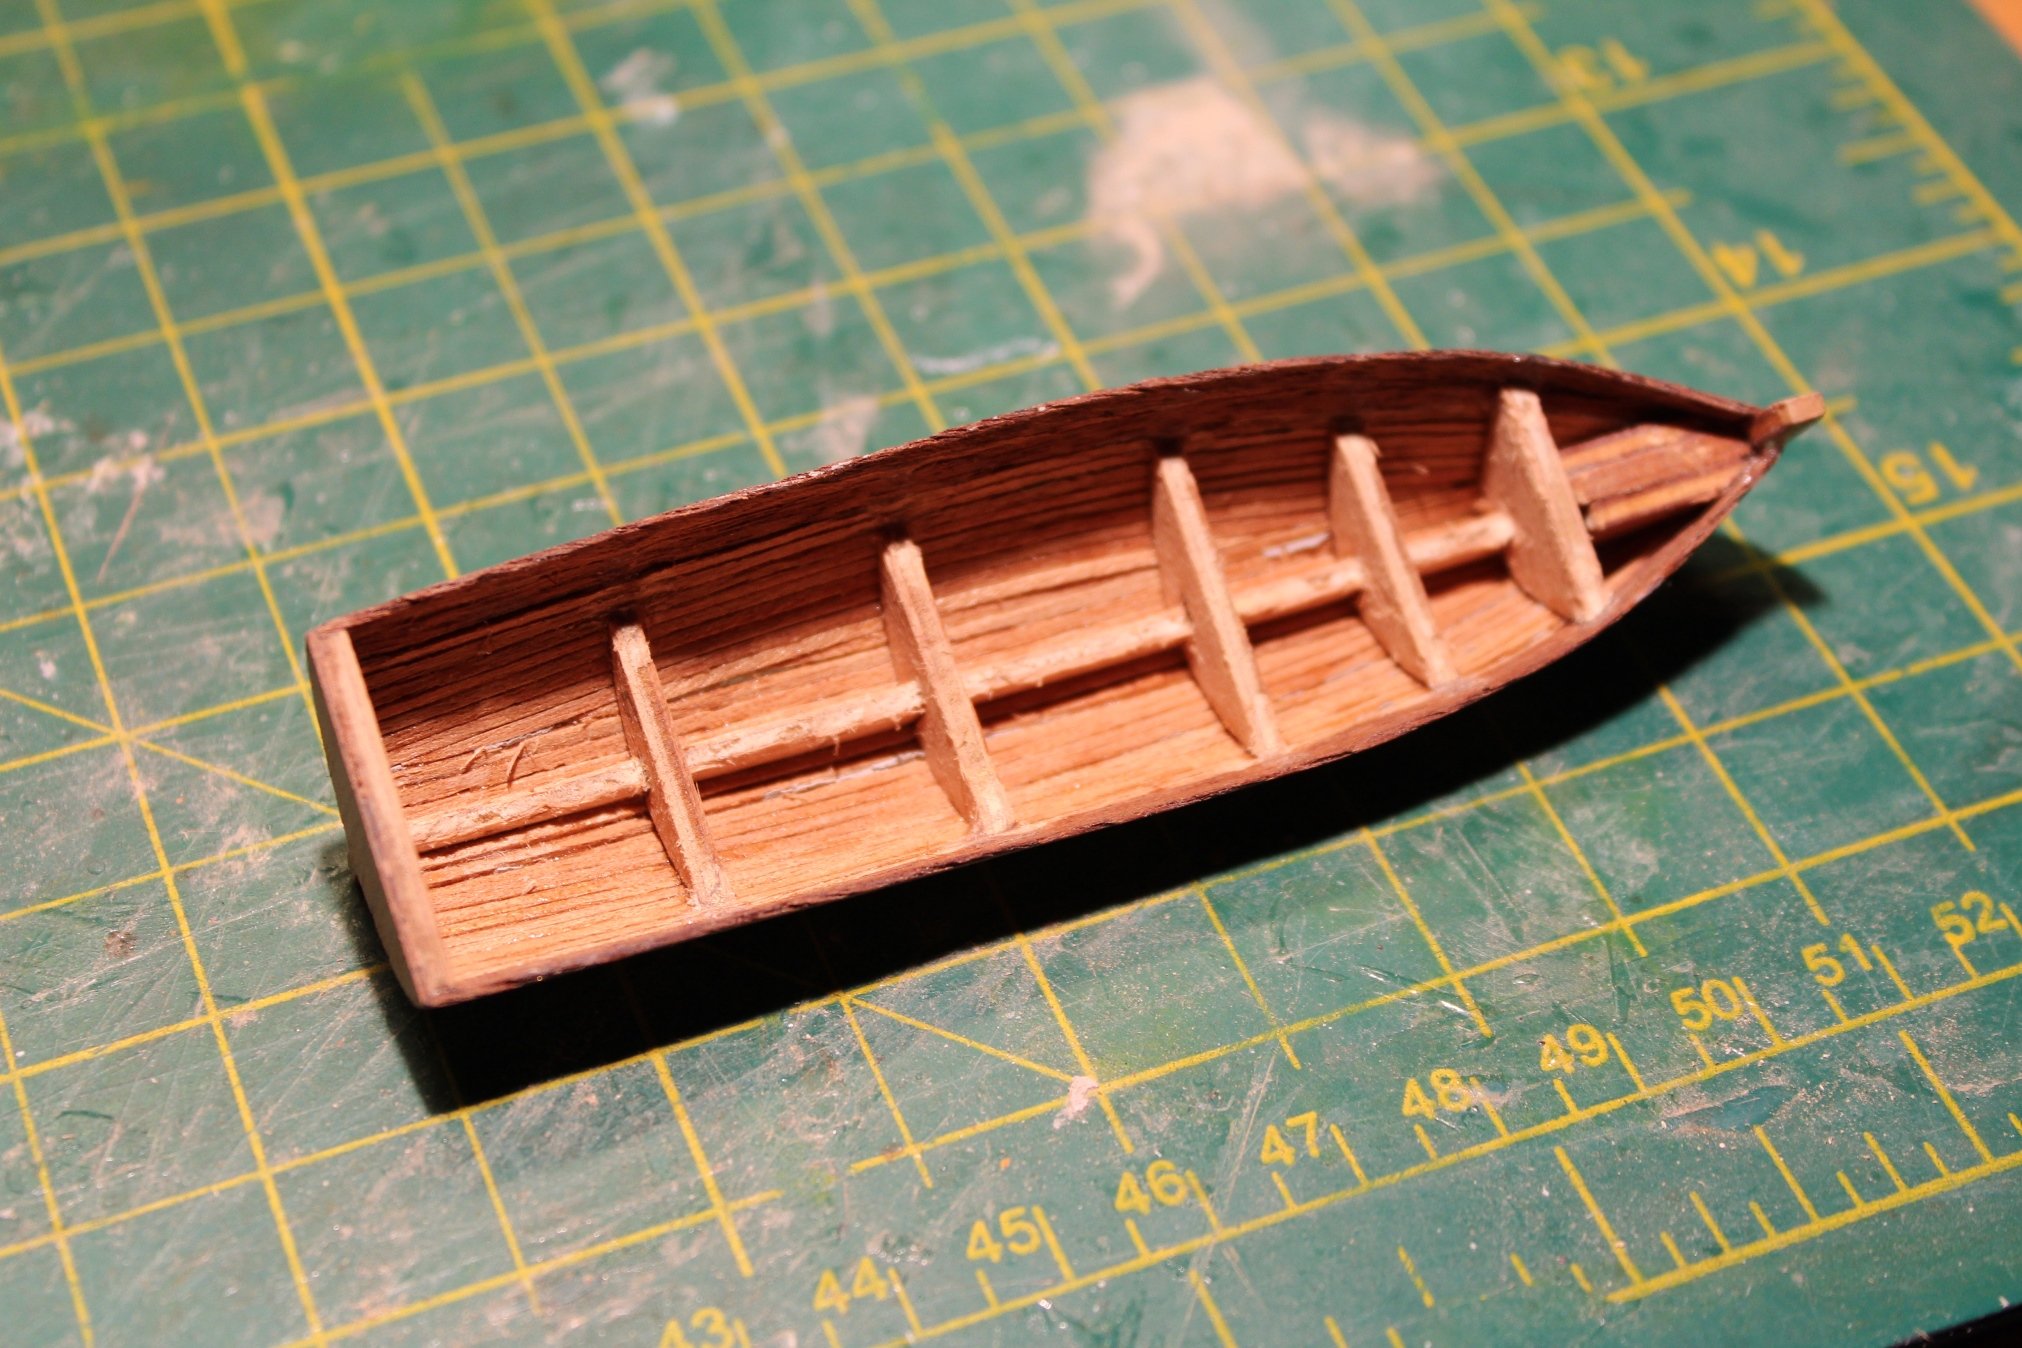
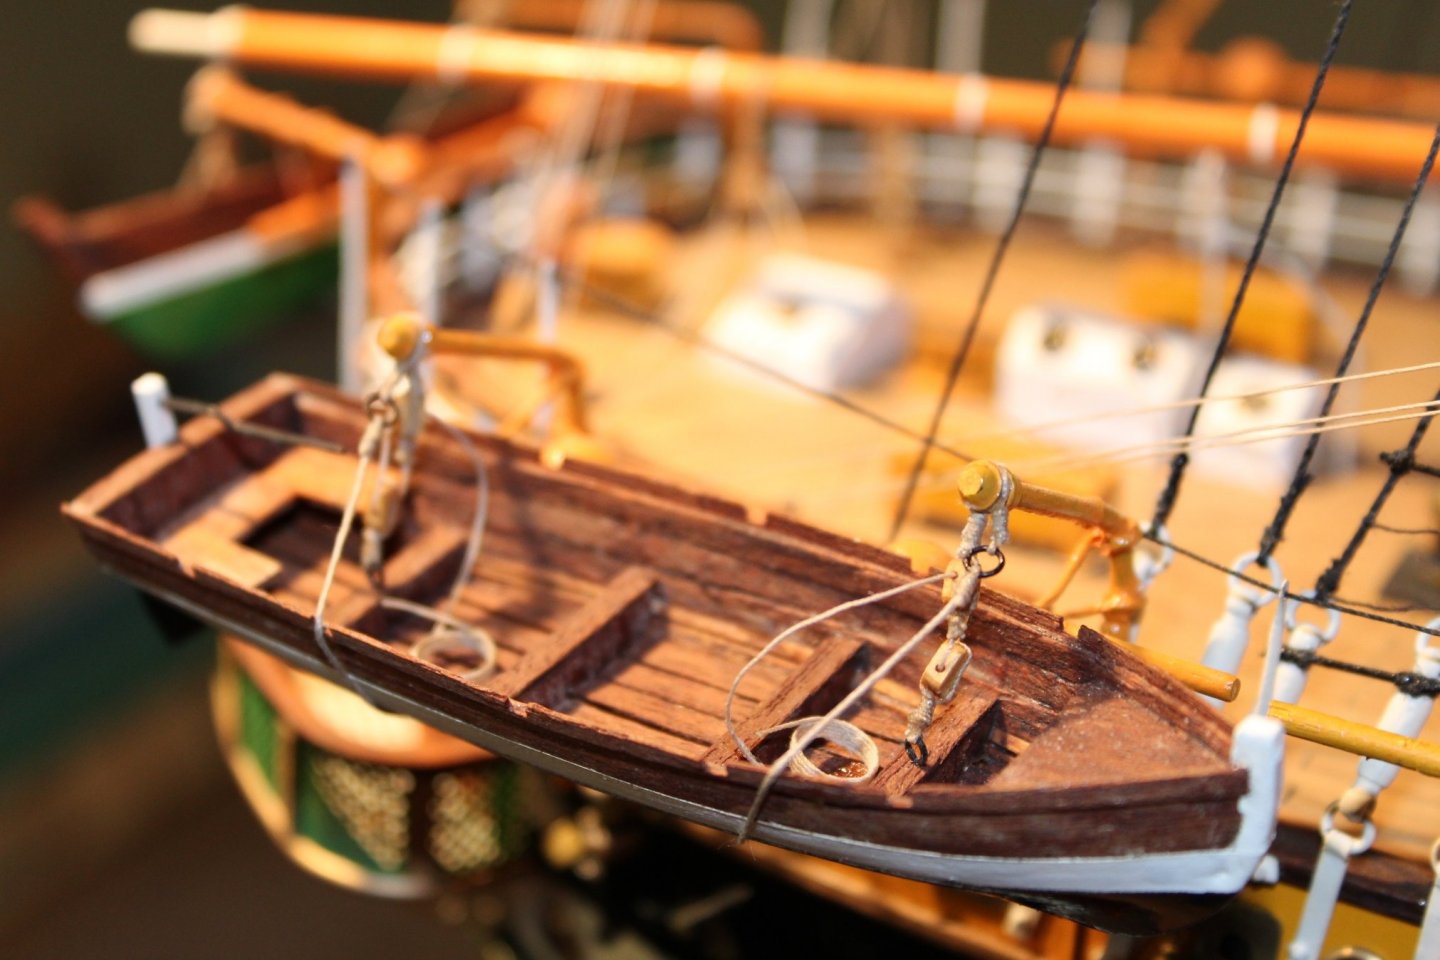
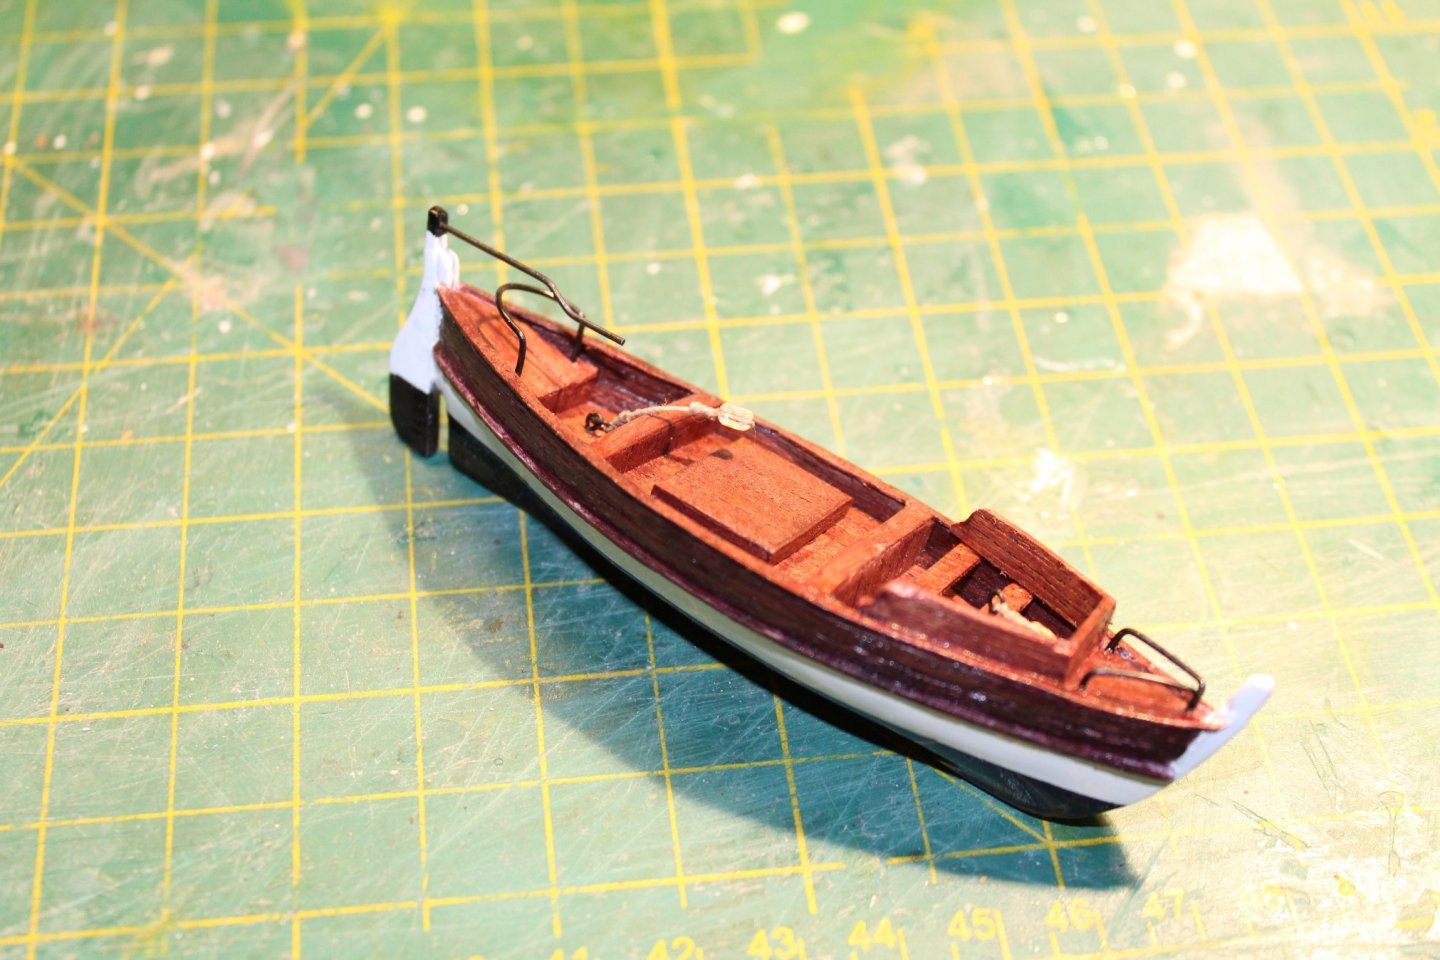
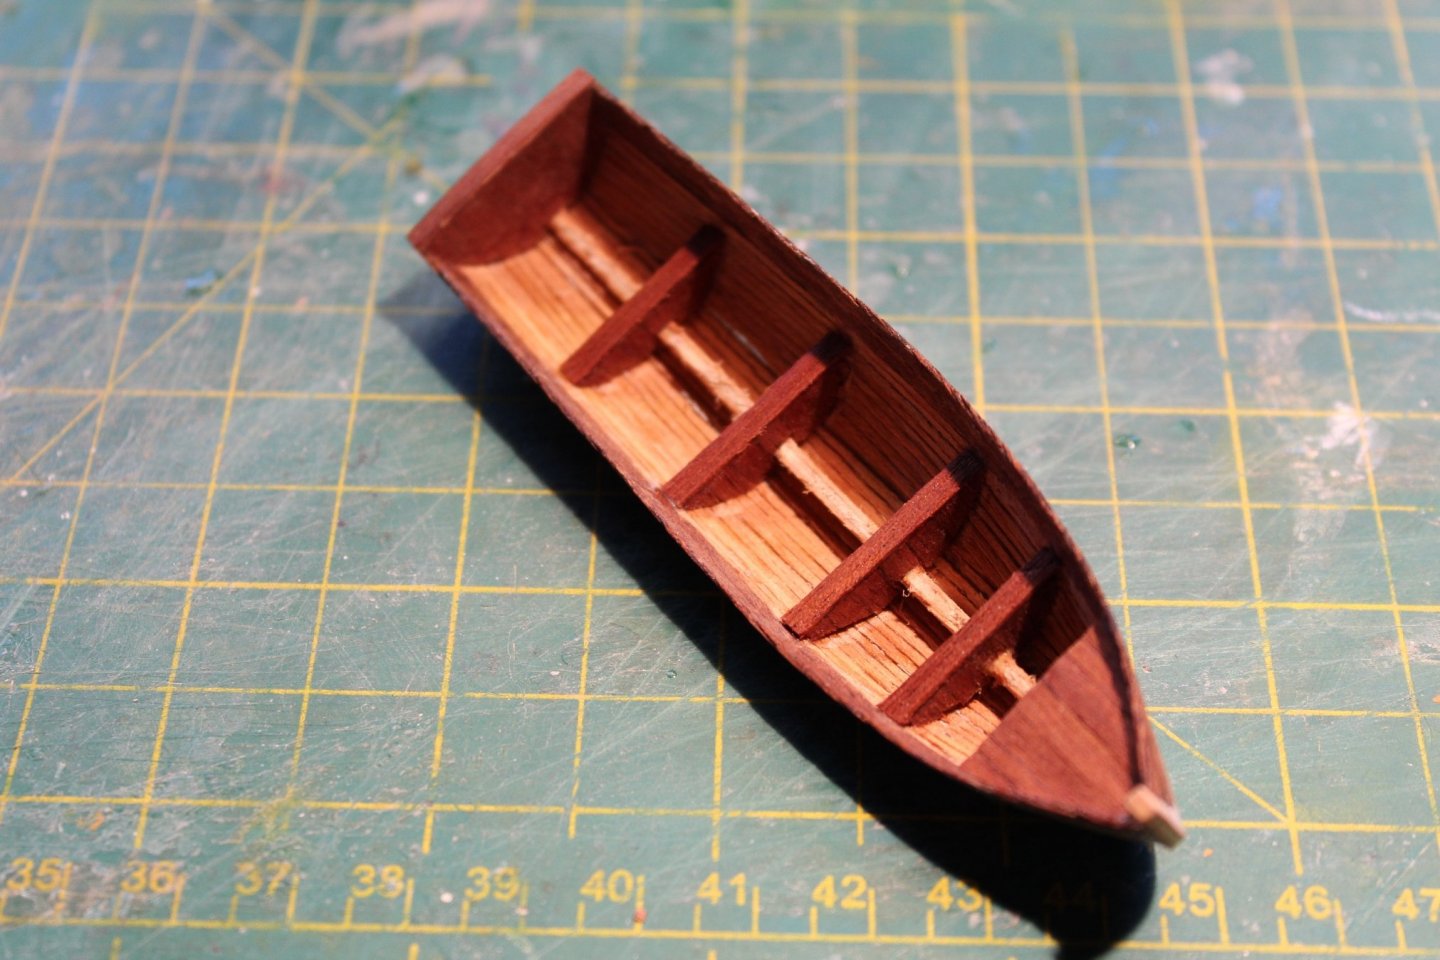
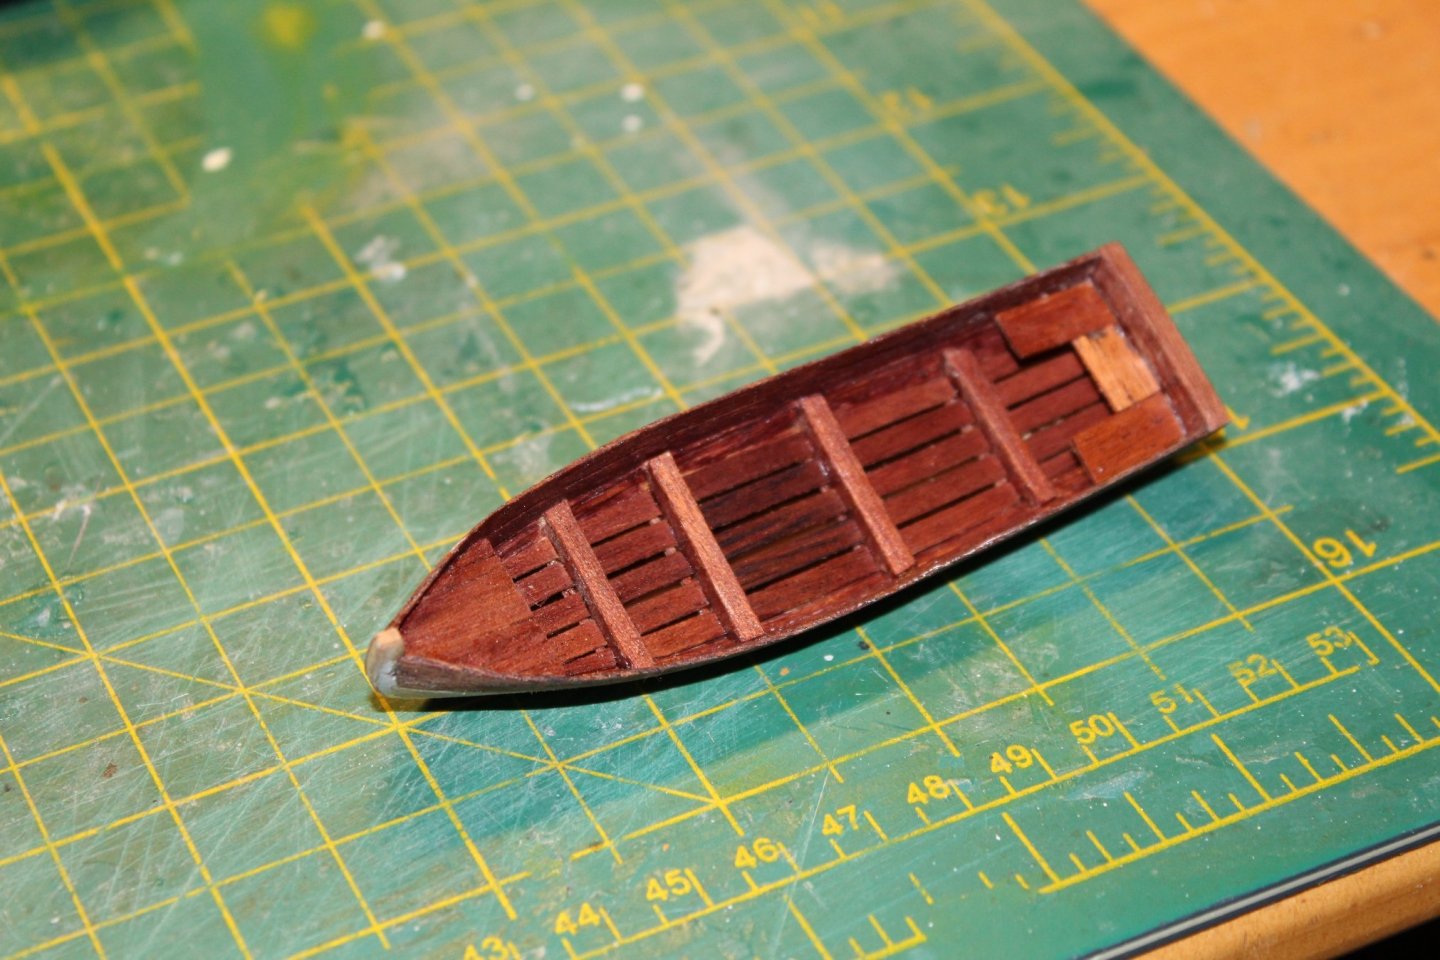
Work continues on the rowing boat. The inside of the boat is more or less done. The bottom of the hull has gotten a coat of mahogany stain as the 1x1 mm strips of mahogany were of a different color. Everything else has gotten a coat of satin varnish. I'm considering staining the bench seat in back also as the wood was of a lighter color. Is may not look like much but more than a 100 small pieces of mahogany have been used for the inside of the boat. The first of the small motor boats has now been painted. There is quite a bit of bleed through of white paint I will have to remove. I will then stain it in some areas and give everything a coat of varnish. I broke the top of the rudder when I removed the masking tape. So I will have to do a bit of touch up here as well. The top of the rudder will also be painted black. Only thing remaining is to add the hardware. Only the last motor remains to be build which bring the total number of small boats for my AV up to 11. /Lars Peter


-
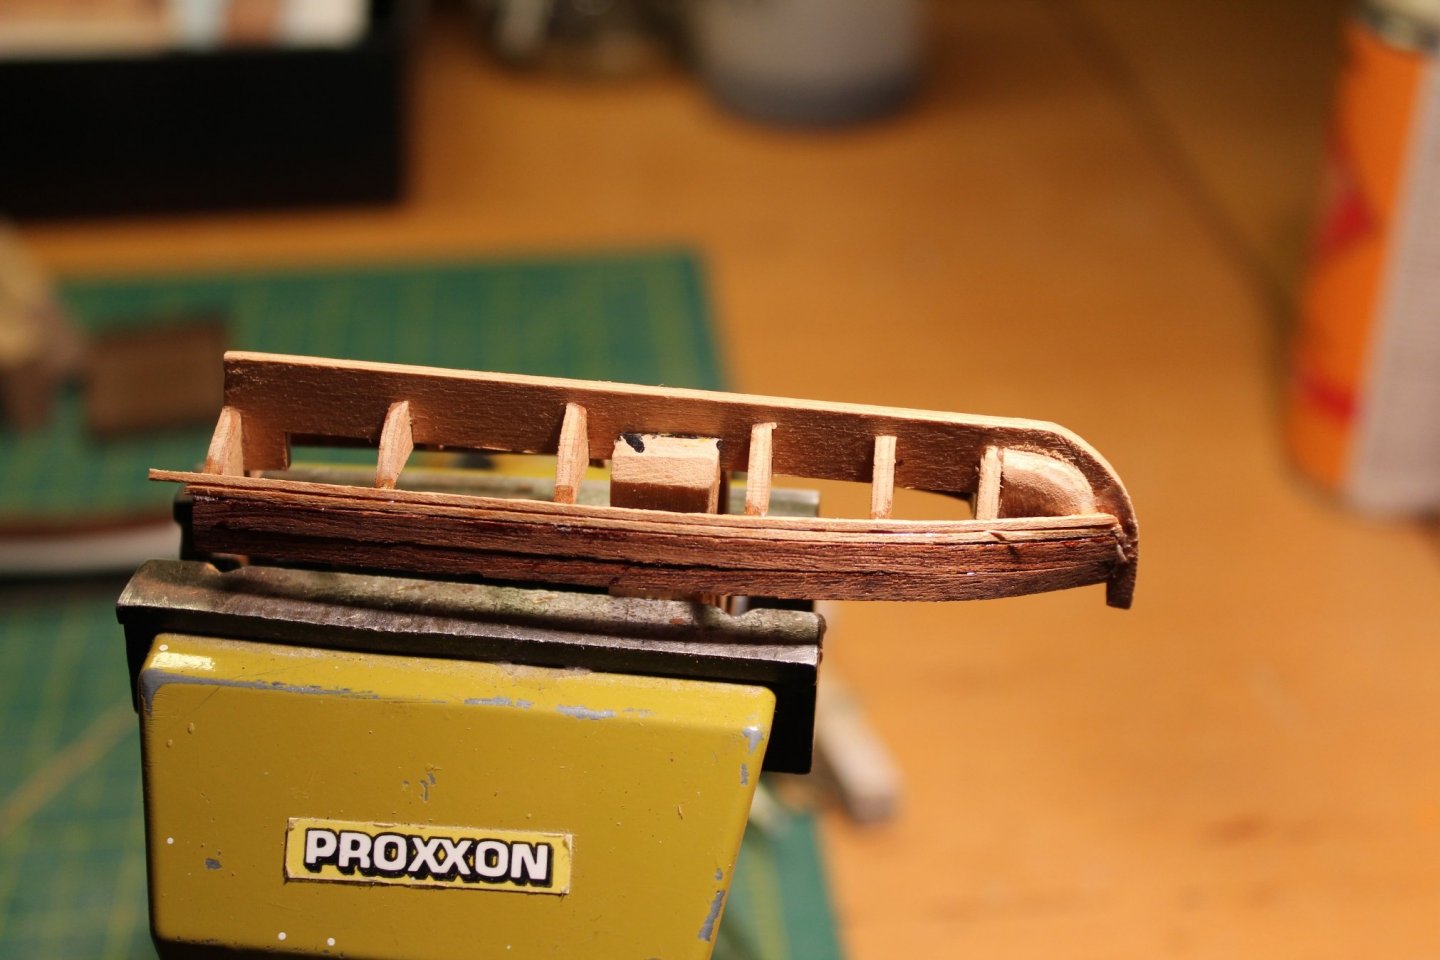
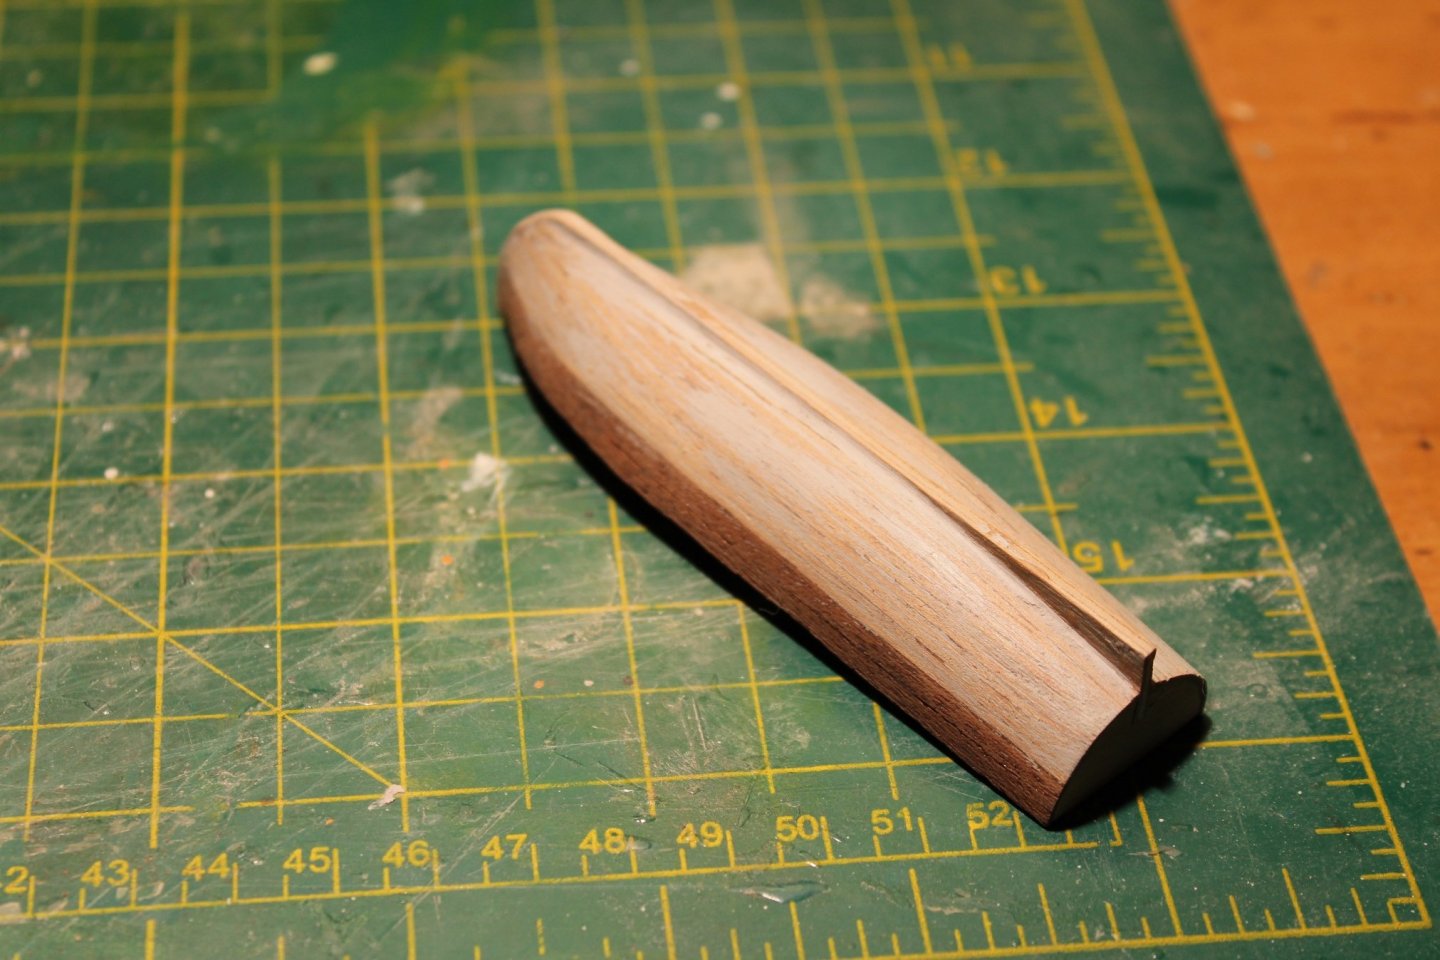
Rowing boat 4 of 4 I still have 3 small boats to finish for my AV. 2 small motor boats and 1 rowing boat. I started on one of the motor boats which is currently being painted. I'm currently waiting for some small disposable pipettes to arrive as I'm having trouble transferring paint from the small paint can to the airbrush. It just results in a big mess! So I decided to finish the last rowing boats. It is a small plank on frame structure. Everything is glued with CA and accelerator to be able to secure the mahogany planks. The first picture shows the planking in progress. The boats is around 4 inches long. Once planked I did a rough sanding and covered everything with filler. The bottom will be painted. Once dry I sanded everything as smooth as possible with some 240 grit sand paper. I covered the stern with mahogany strips and turned my attention to the inside. First job was to remove the top of the frames and approximately half of the keel. Access is limited so I decided to use my Proxxon drill with a diamond burr. It worked out great for removing the remaining plywood and CA residue. Next up is to cover the vertical parts of the frames with mahogany strips. I remember this as quite a fiddly task. To be continued ... /Lars Peter

-
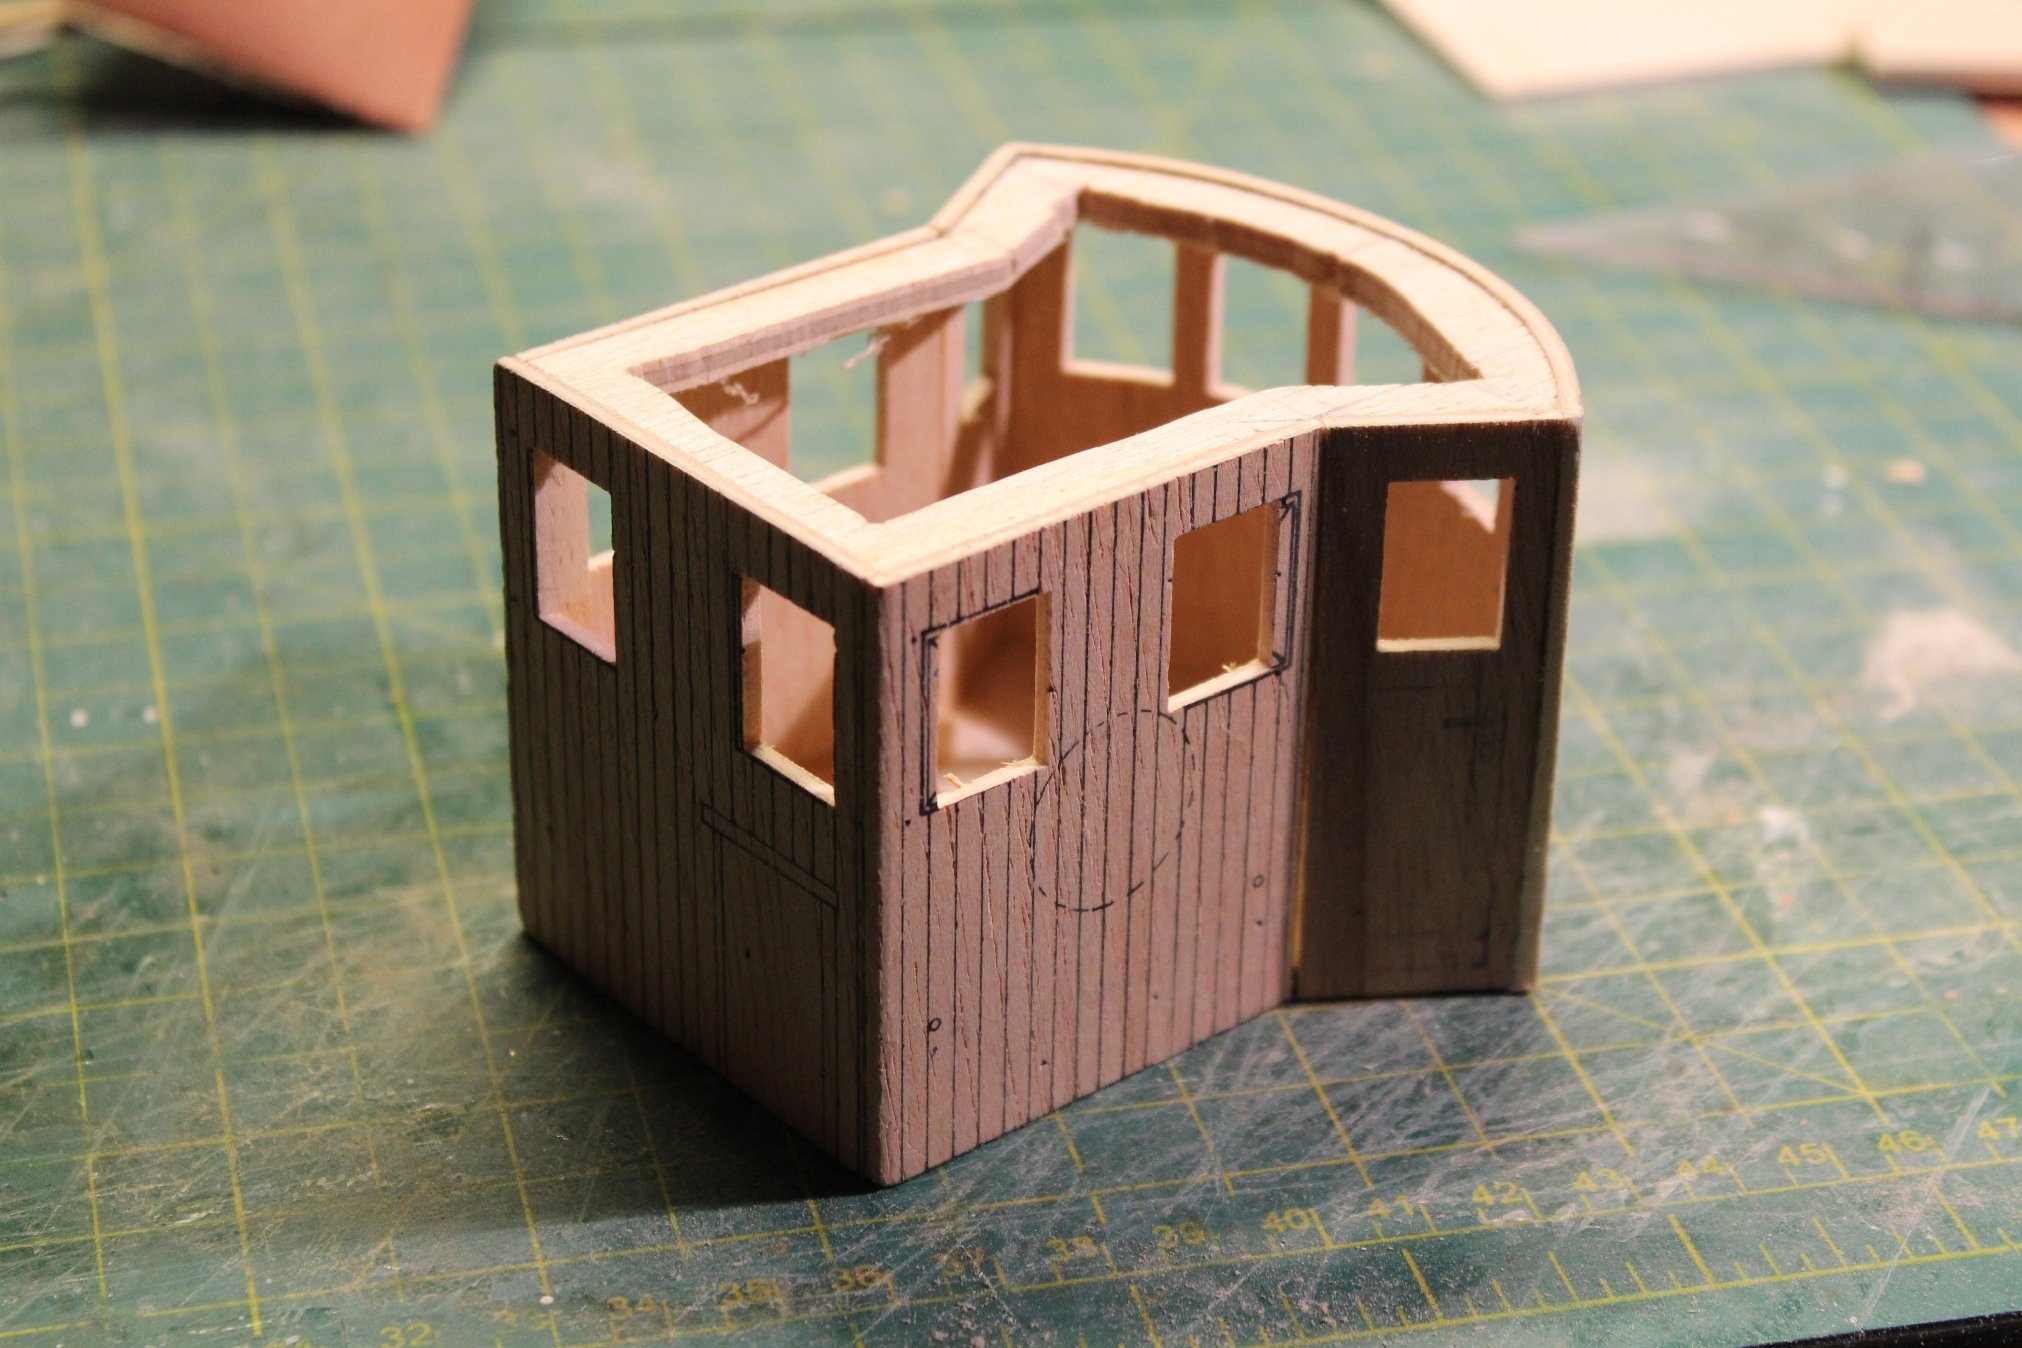
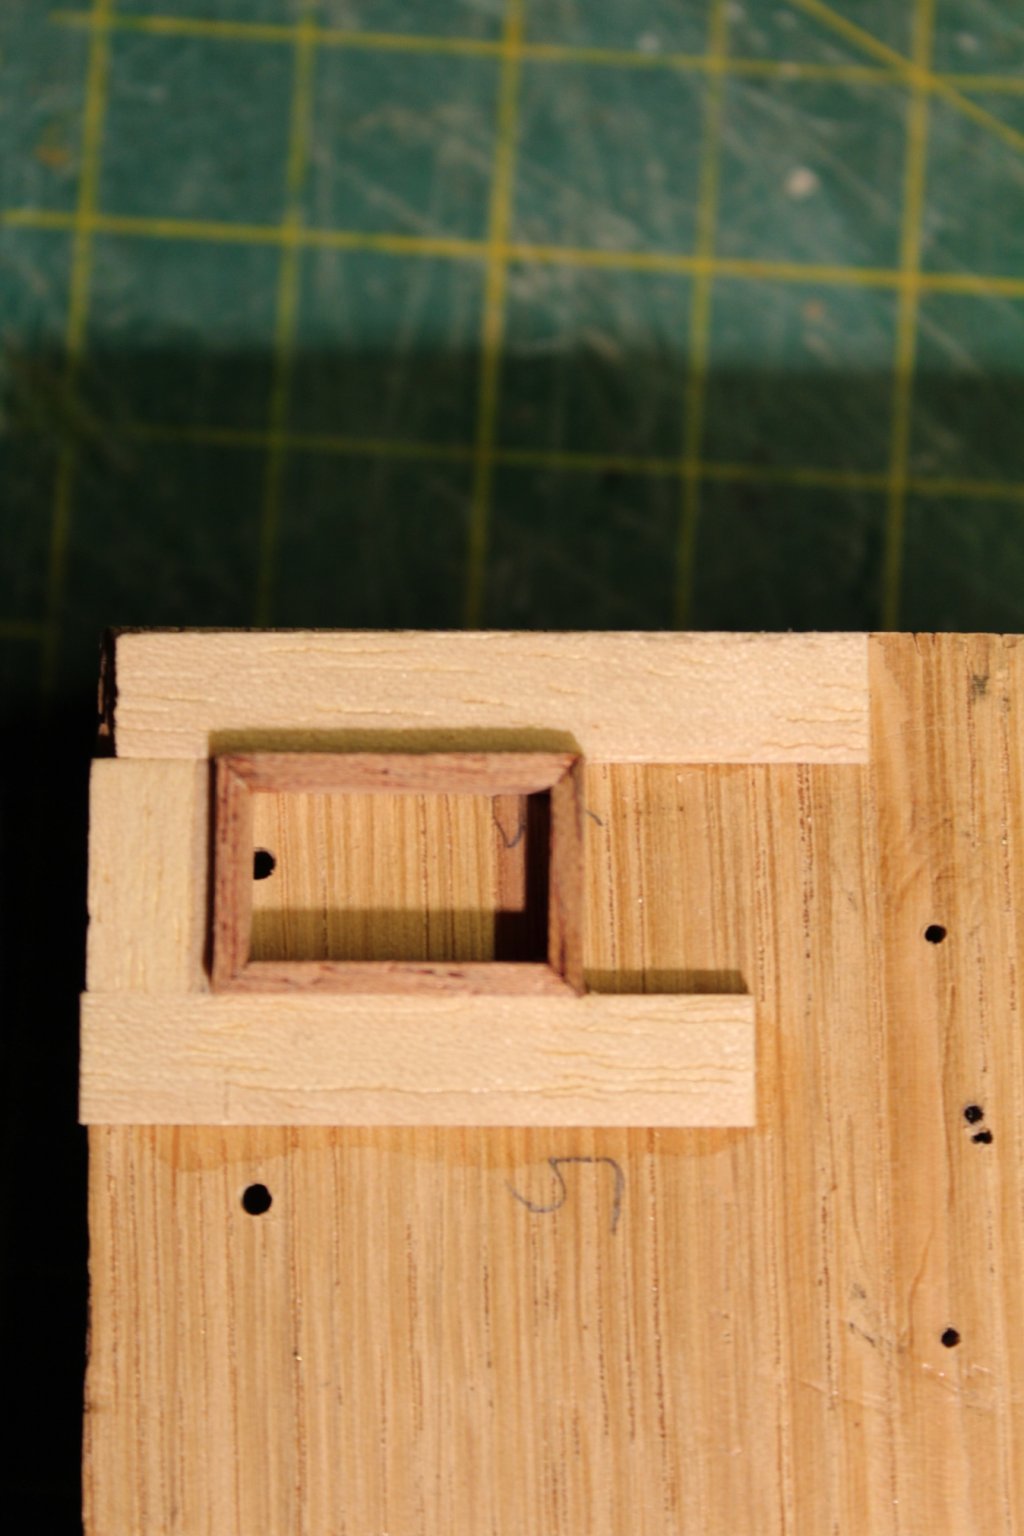
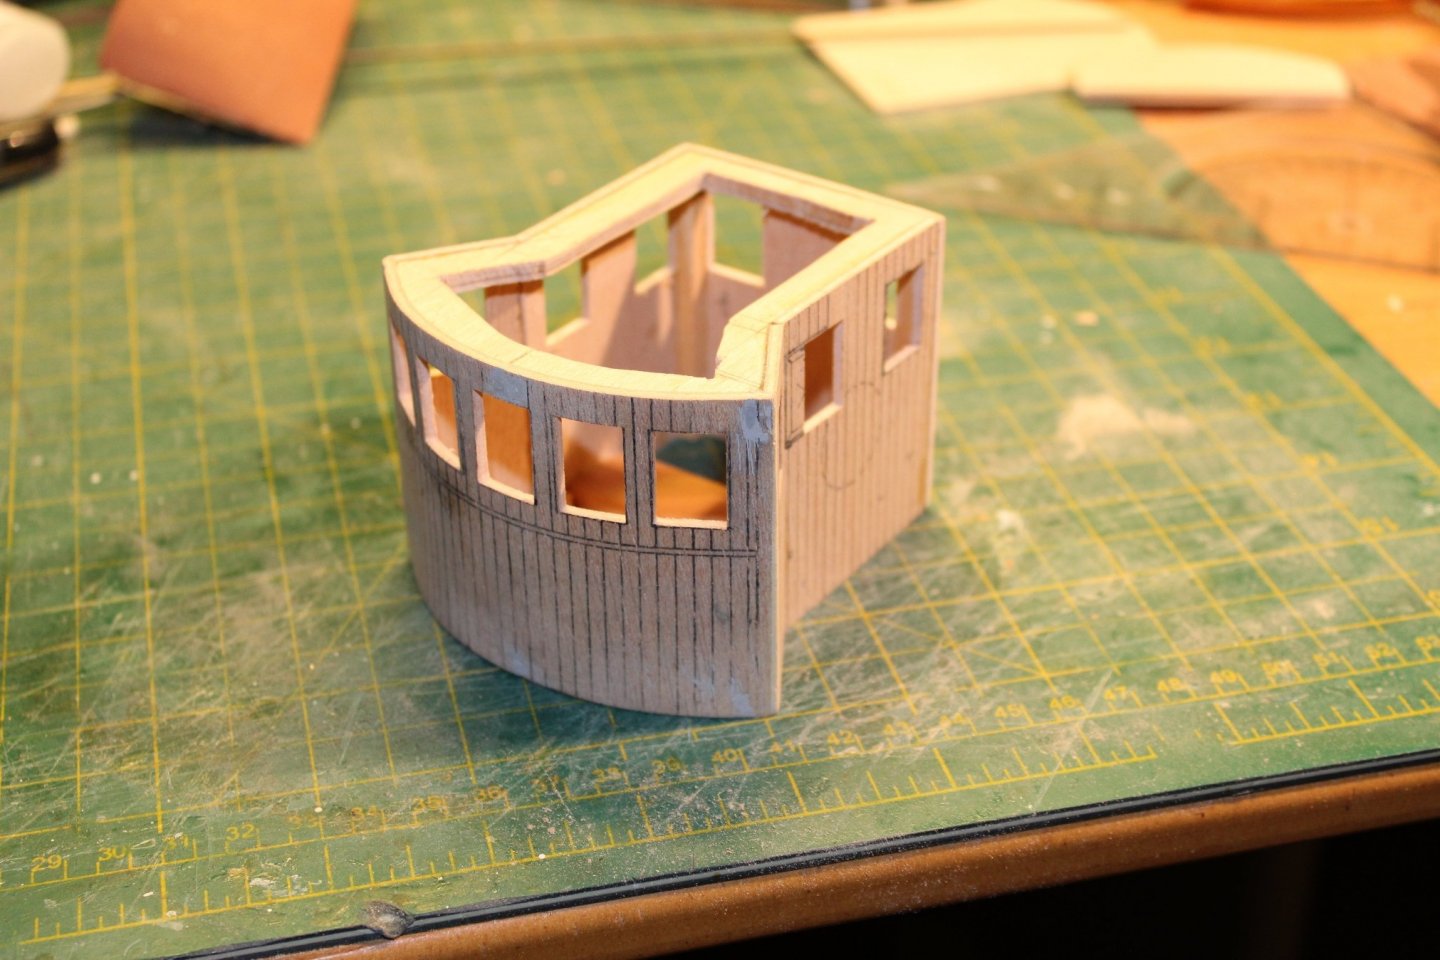
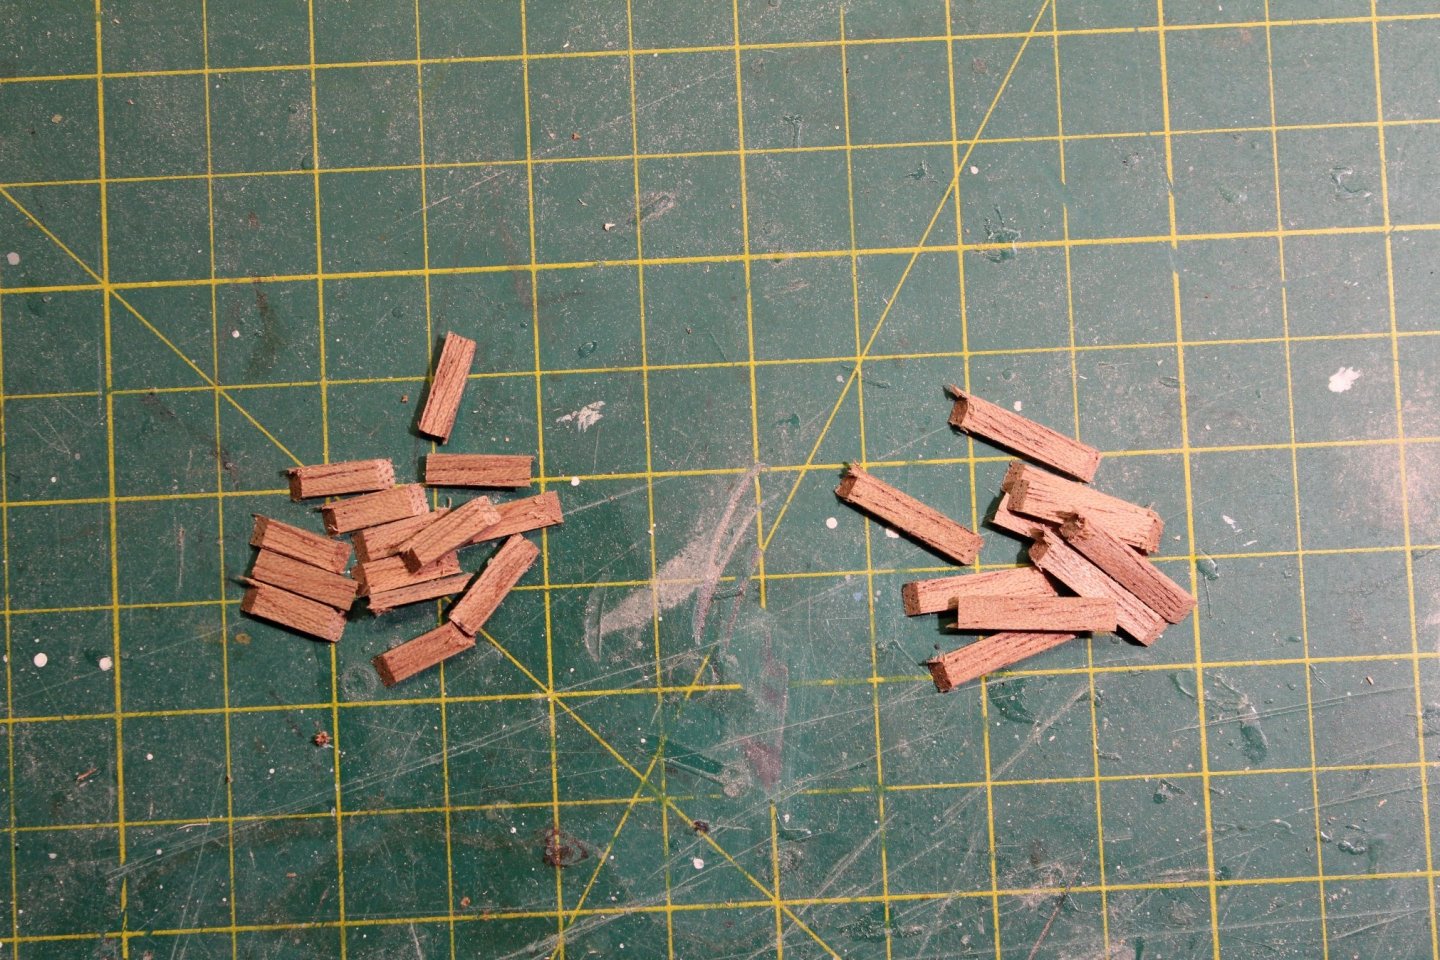
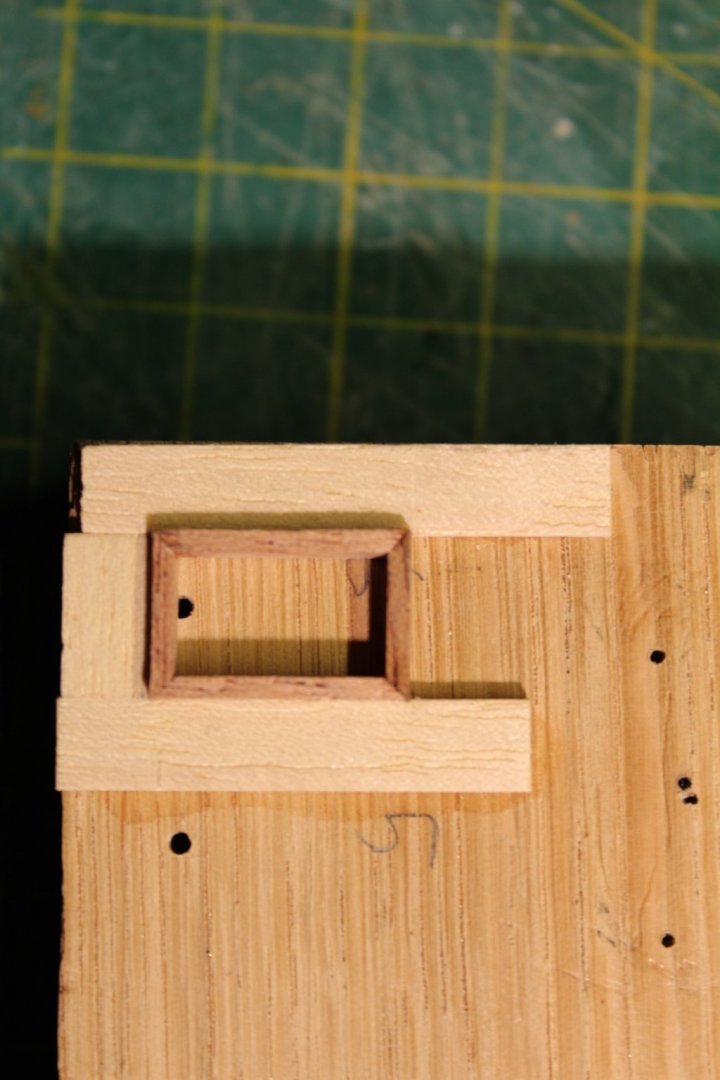
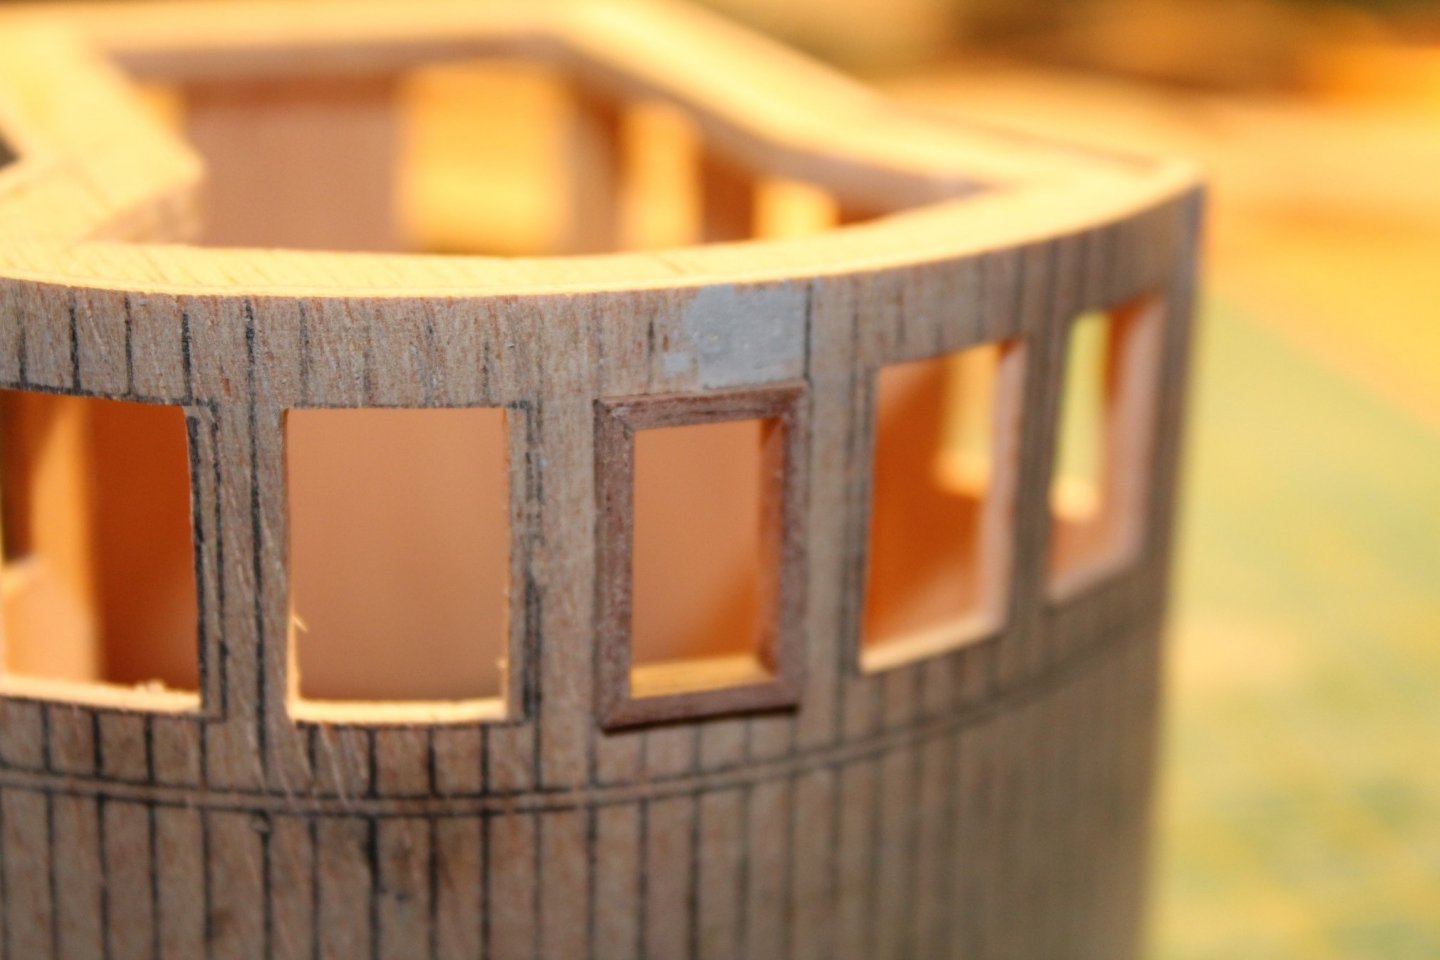
Work on the deck house continues. With the reinforcing plywood I added to the top and bottom I realized that I was now unable to access the inside for adding glazing later on. So I cut a hole in the top. It will be covered by the roof anyway. I carefully marked out all the the windows and cut them out and gave the whole thing a light sanding in preparation for adding the mahogany siding. The 5 front windows have a thicker frame than the rest so I decided to start with these. The frames are cut from my own stash, carefully measured and cut off on the table saw using the miter gauge. They only need a light touch up with some fine sandpaper. The frames will be 12x18 mm. The window holes are slightly undersized and will be sanded to fit the frames. I quickly made a jig from some scrap wood to able to hold the frame together while the glue dries. I first add the bottom slat, put some CA glue on each side and slide them into the jig. Before the glue dries I add glue to the top and push it down into the jig using a small machinist square. This action squares up the frame and push the sides against the jig. I just have to be careful not to add too much glue to be able to remove the frame from the jig. I push it out using the square from the bottom side. The frame was then cleaned up using a small sanding block with some 240 grit sandpaper. The first hole was filed to fit the frame and the frame was pushed in until the frame protrudes 2 times the thickness of the side planking. I think it will look decent once given a coat of poly. /Lars Peter

-
I will follow this very closely. I have the complete kit in my stash, so it will be nice to get ll the knowledge I can. /Lars Peter
- 38 replies
-
- 3
-

-
- billing boats
- hjejlen
- (and 2 more)
-
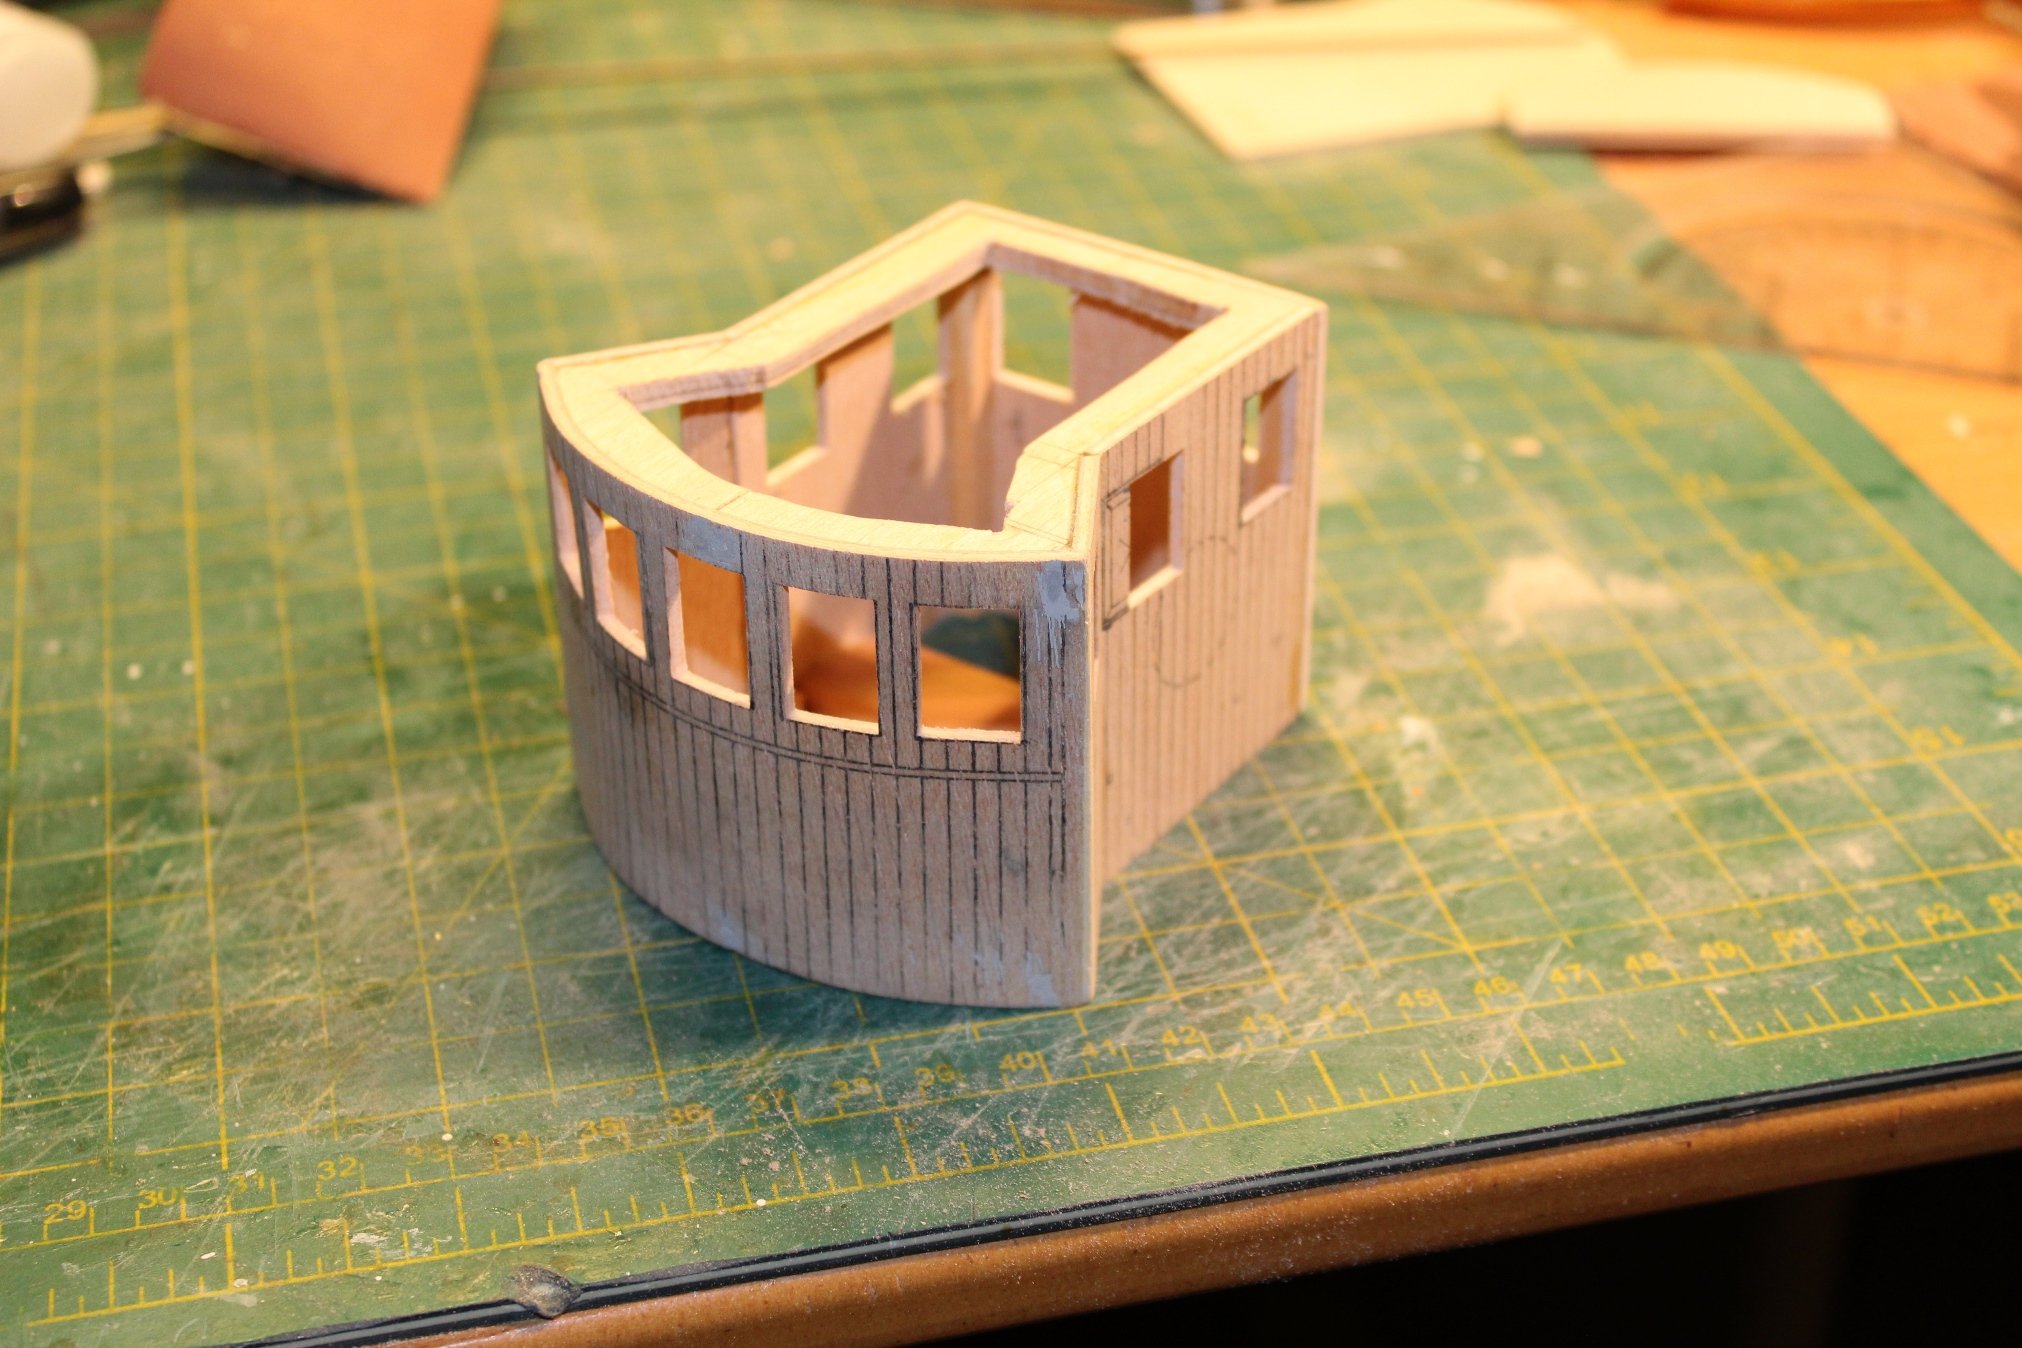
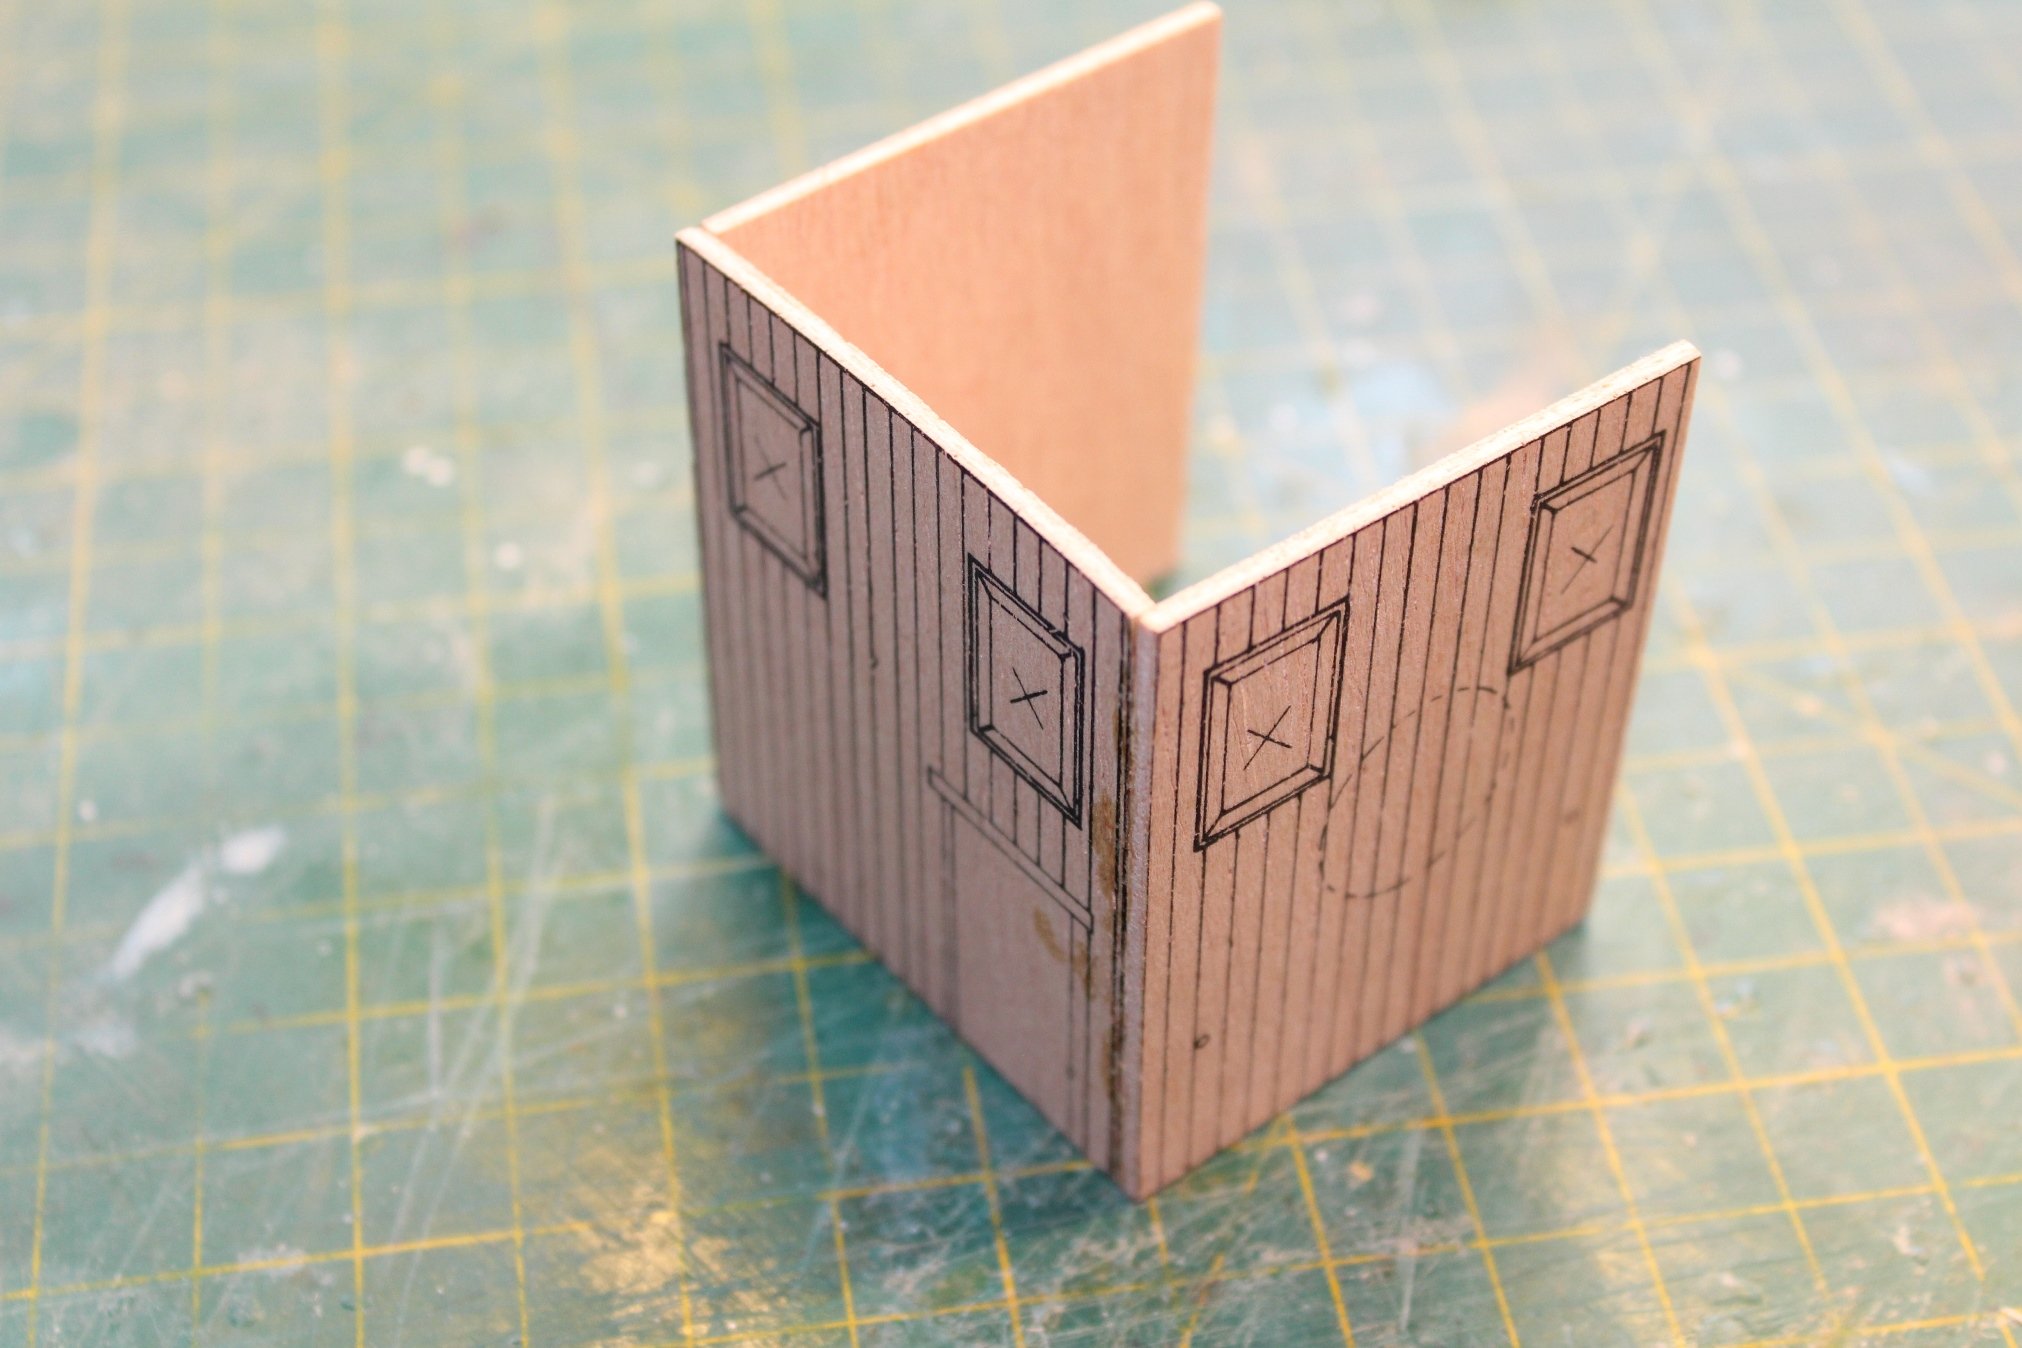
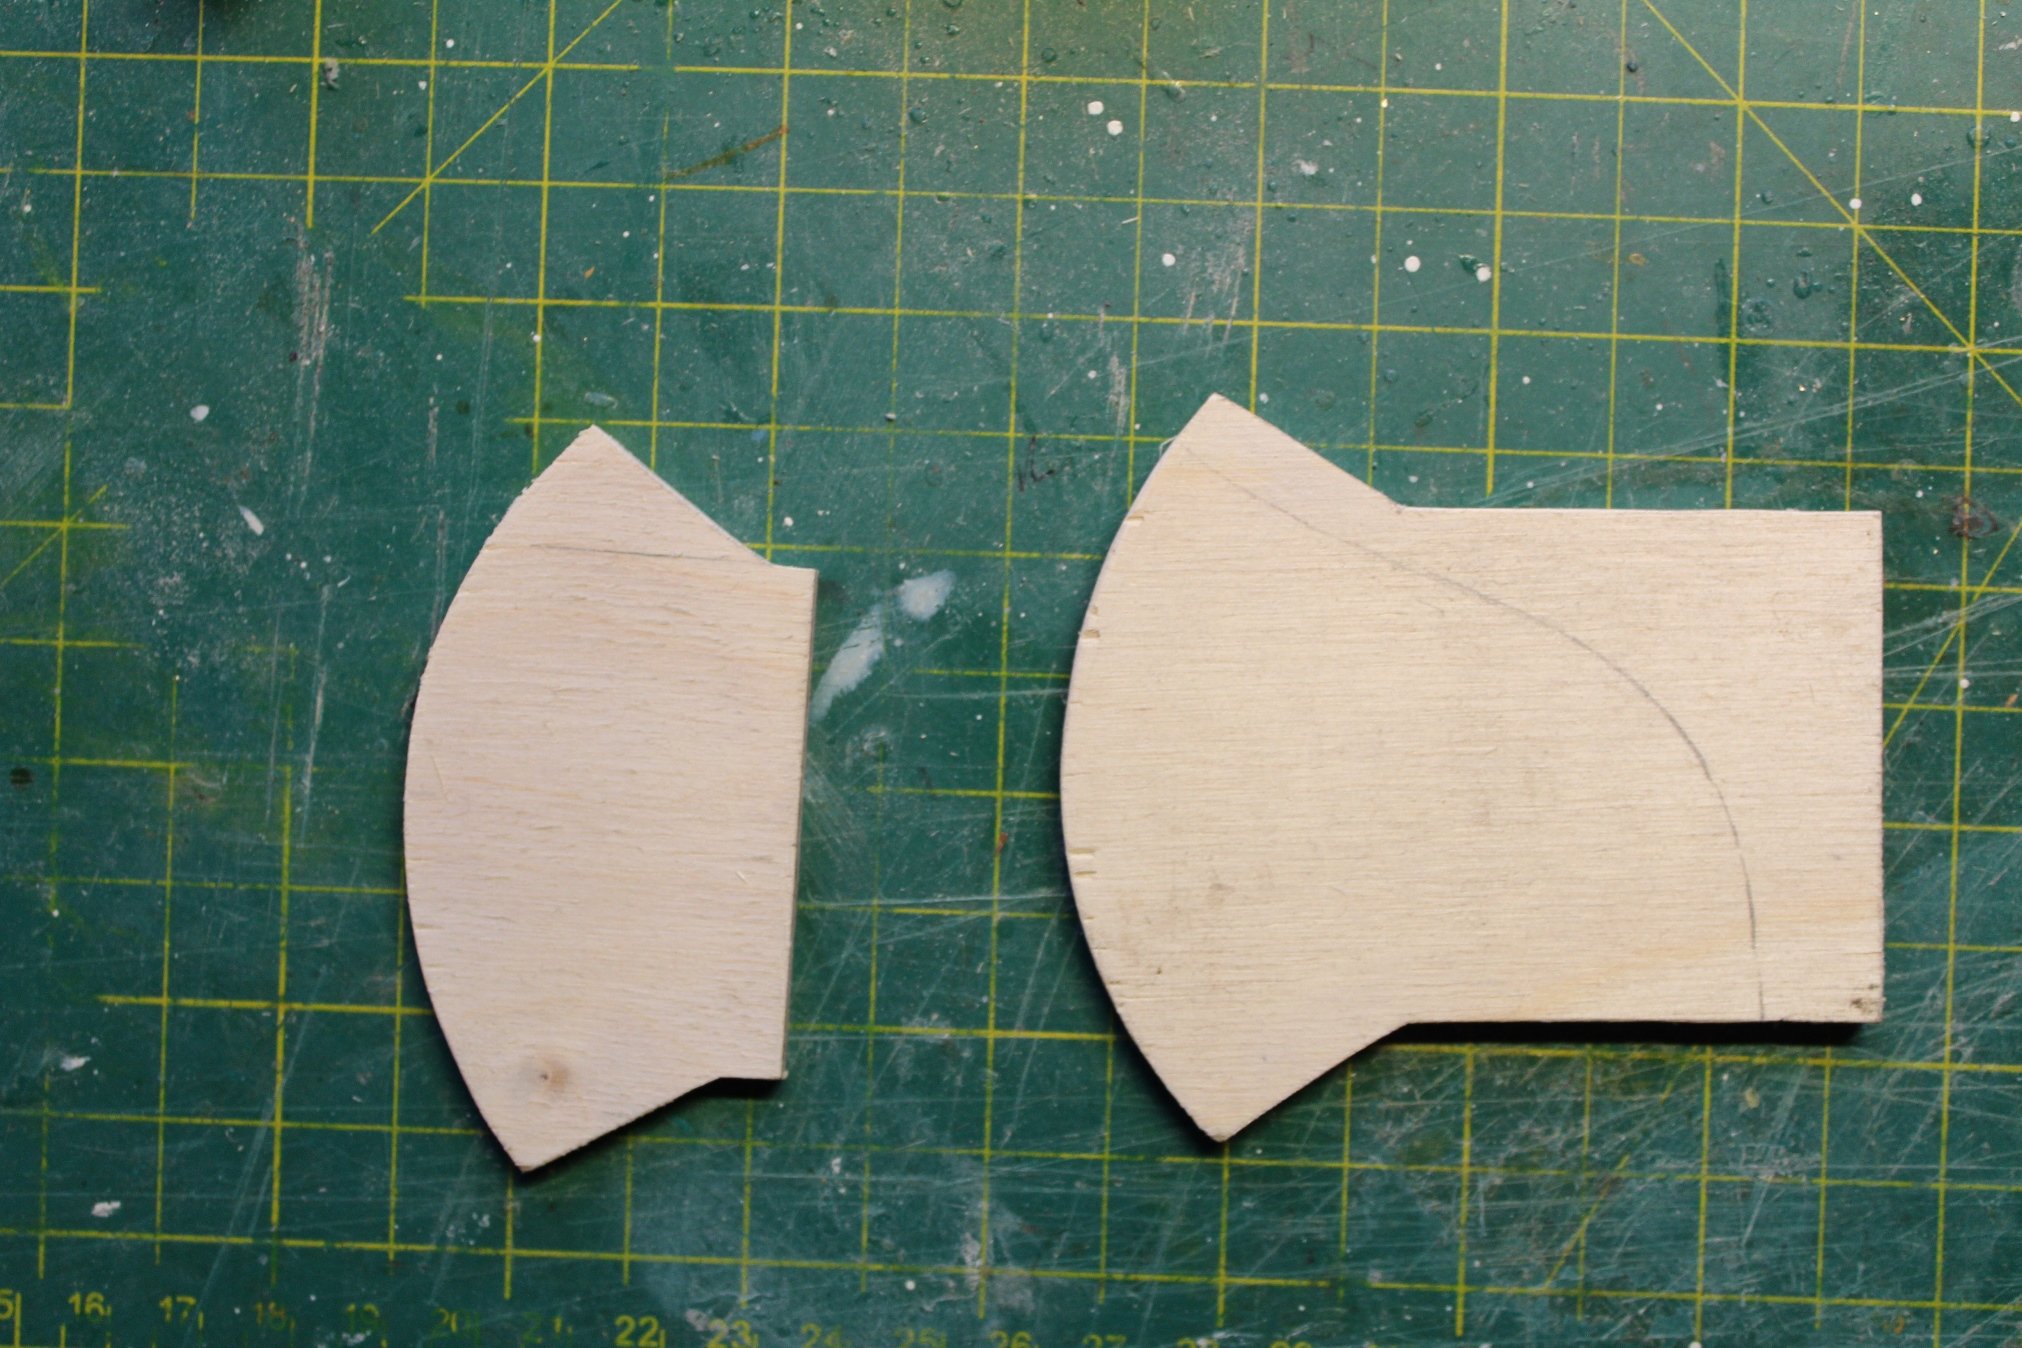
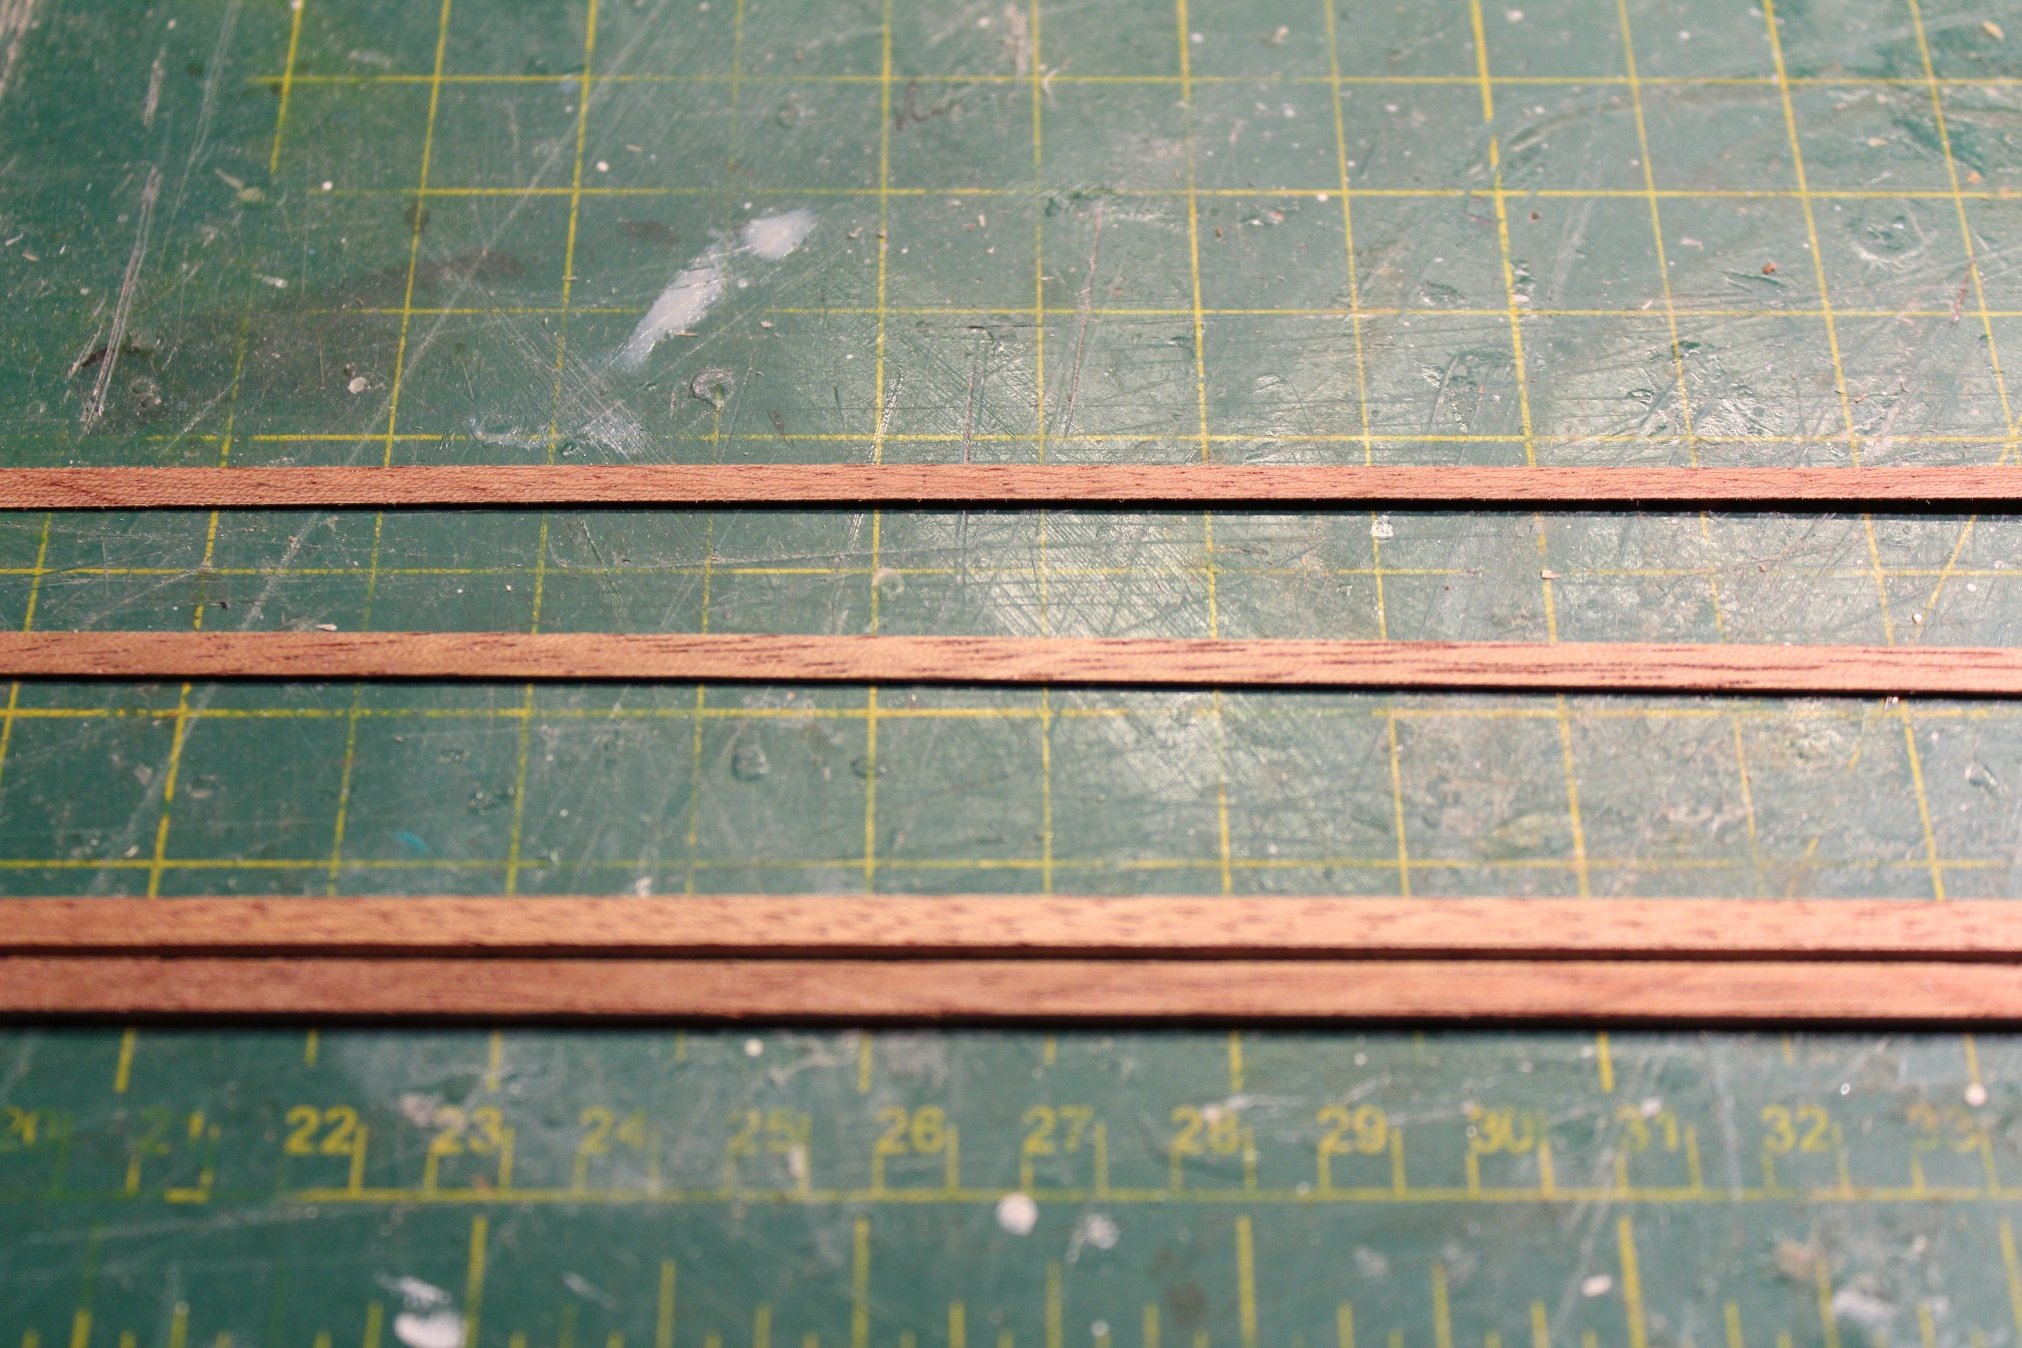
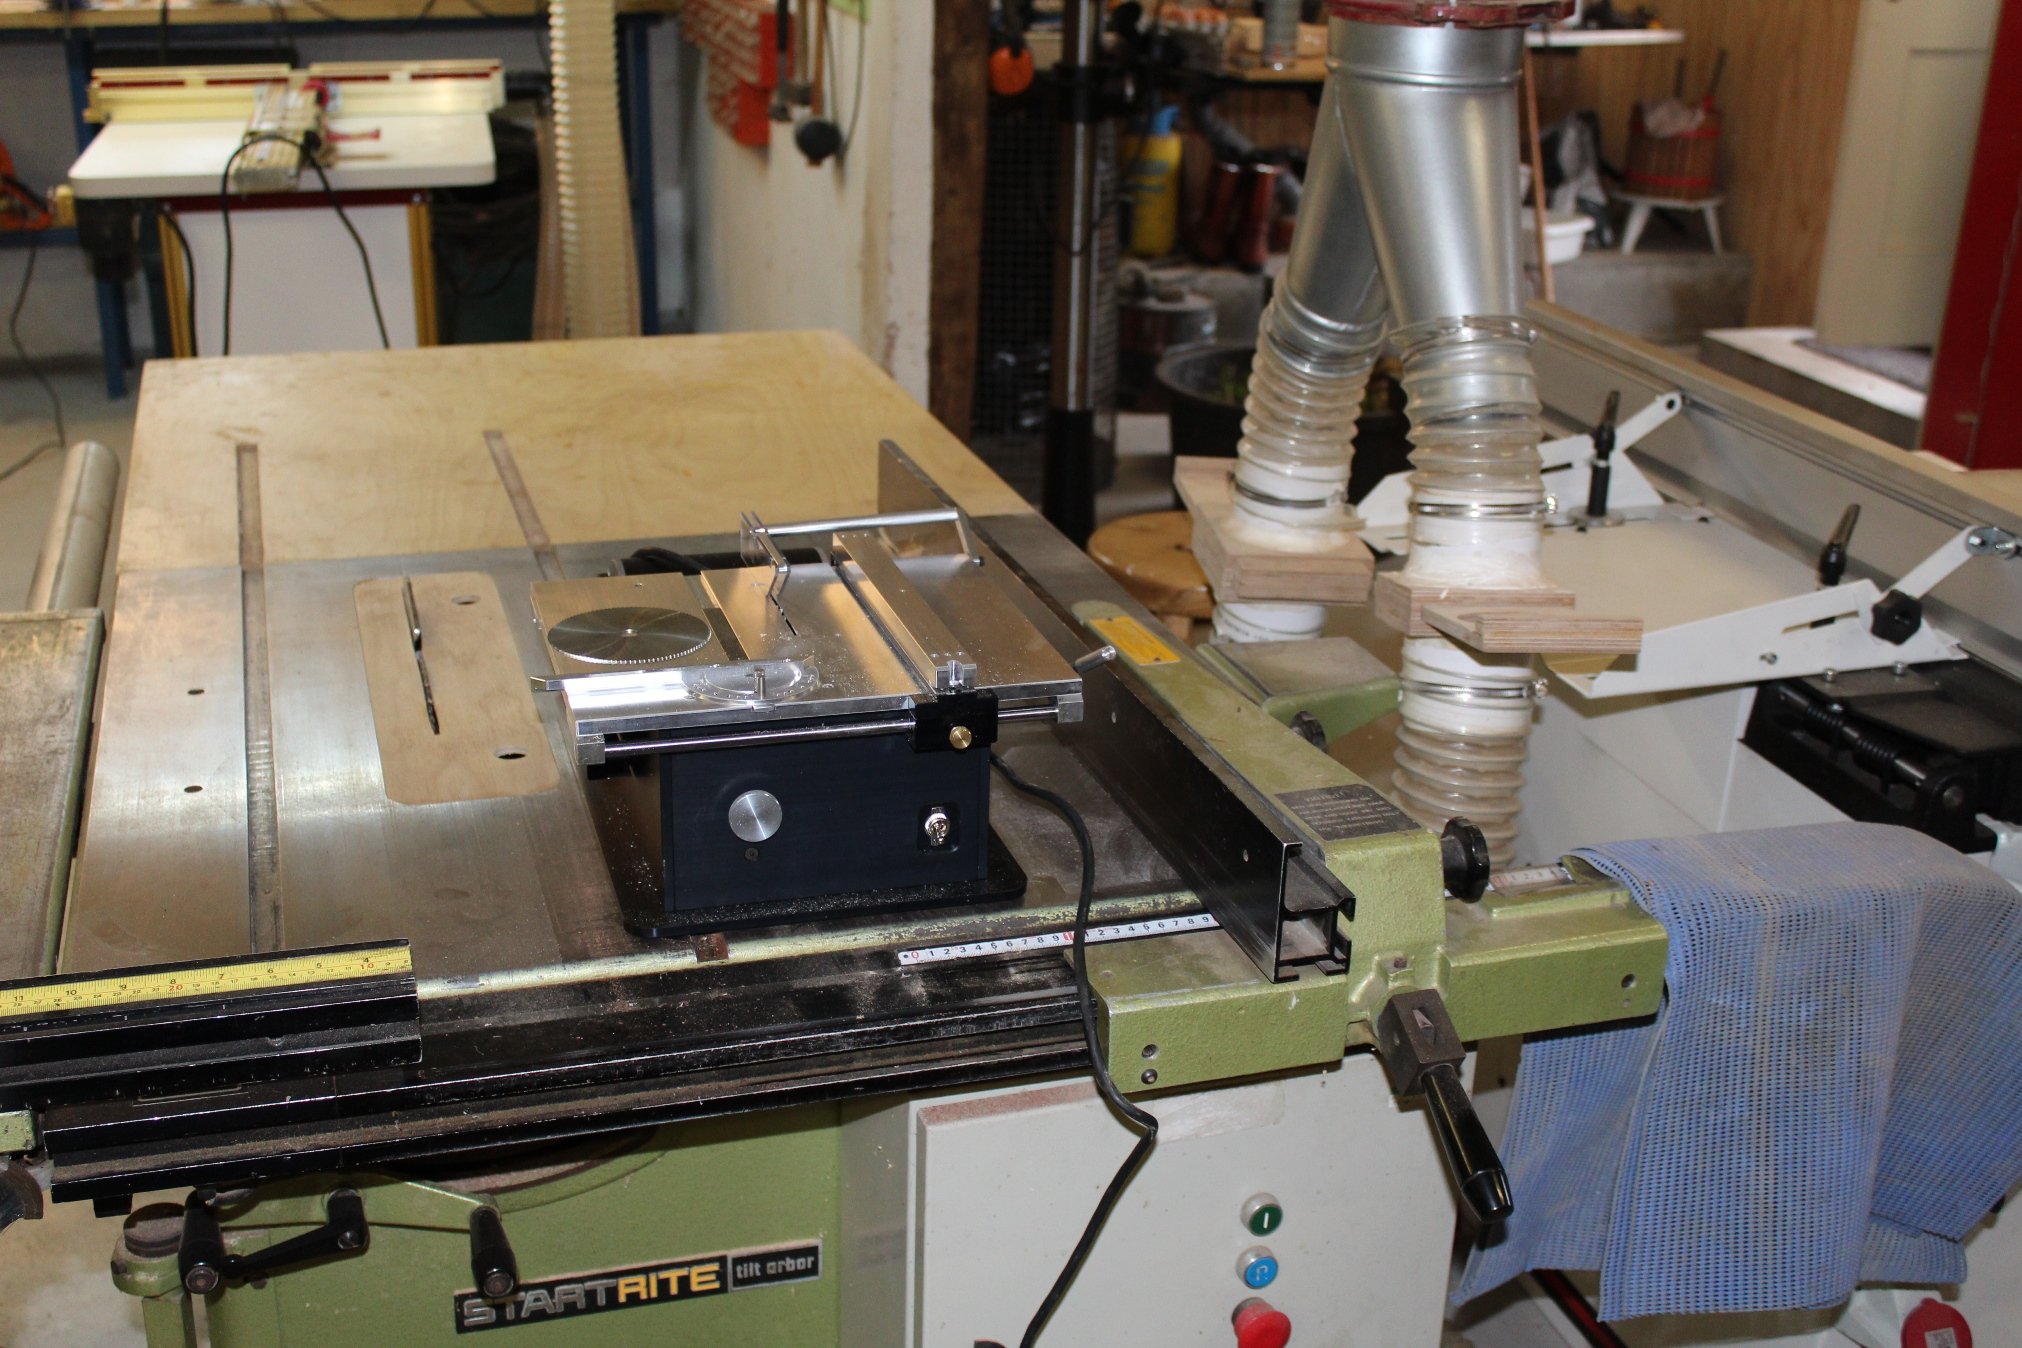
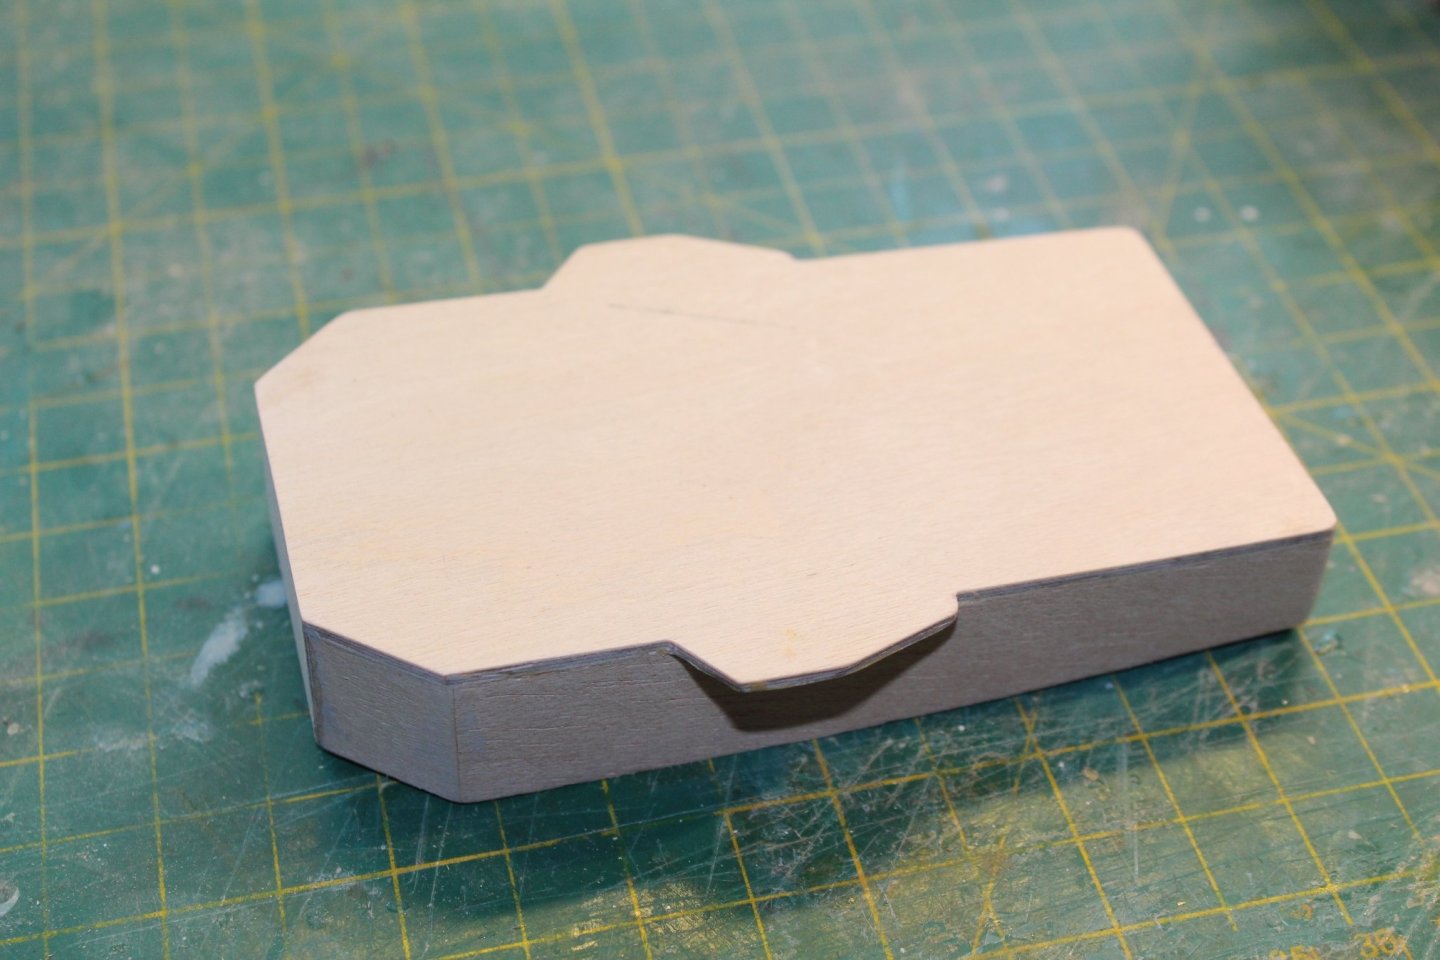
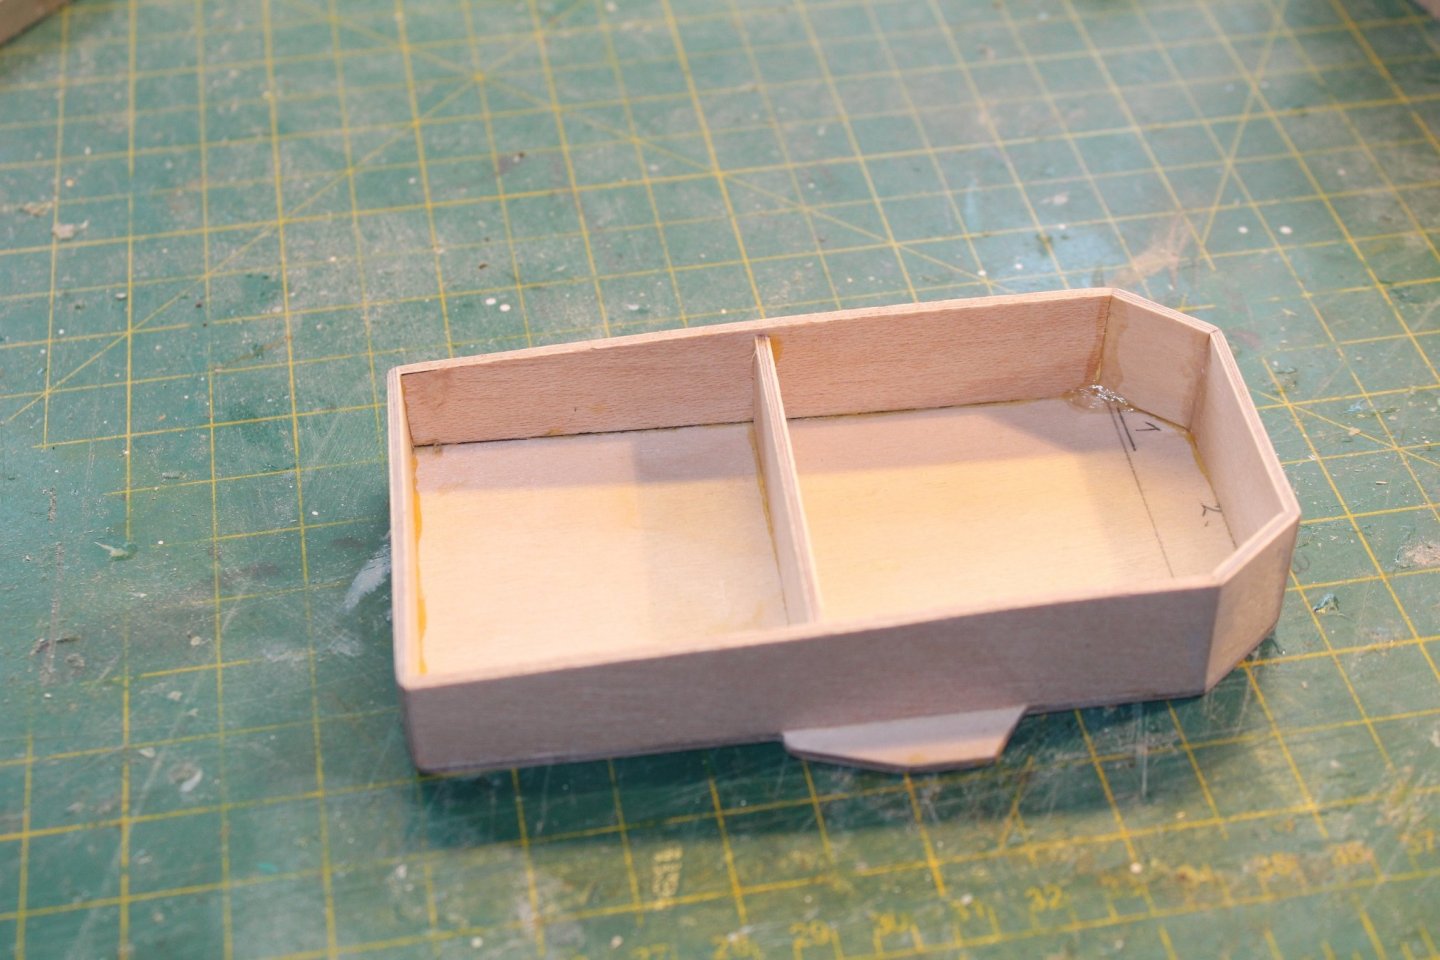
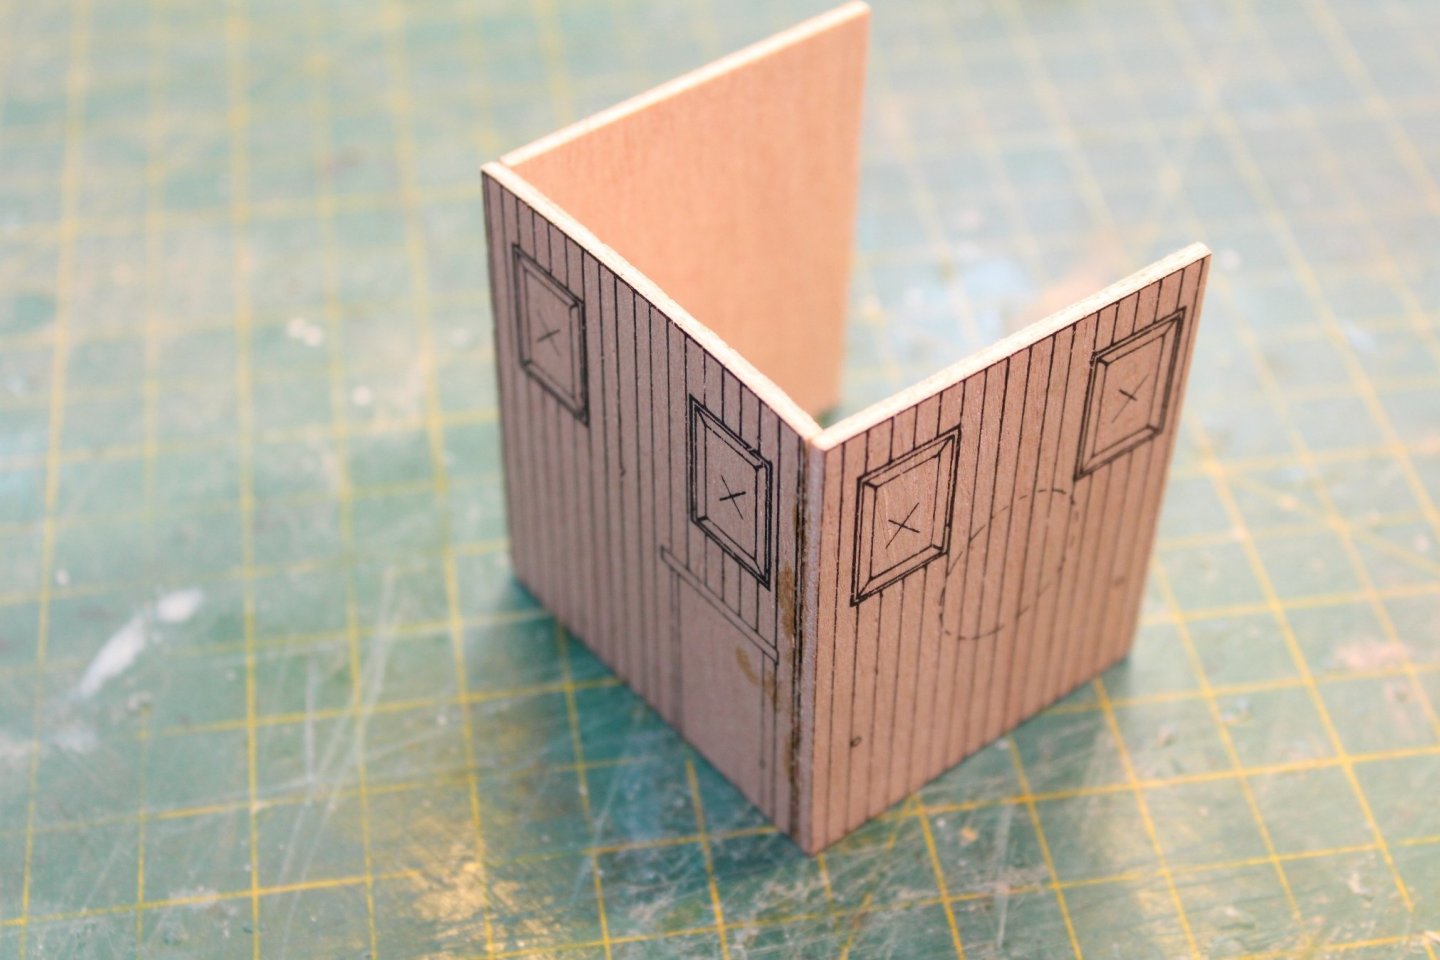
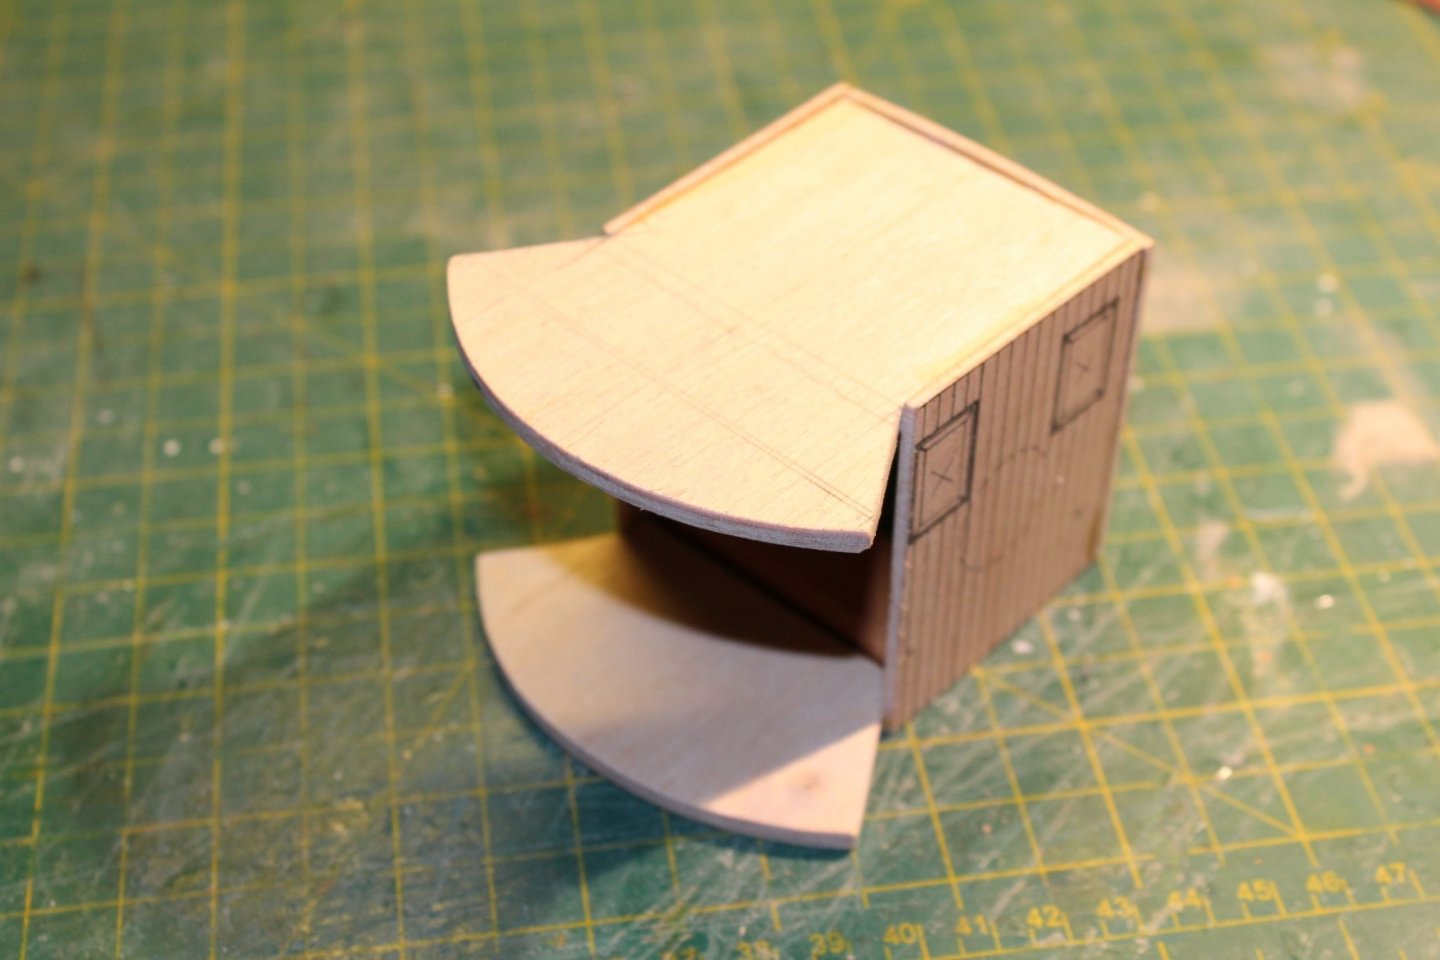
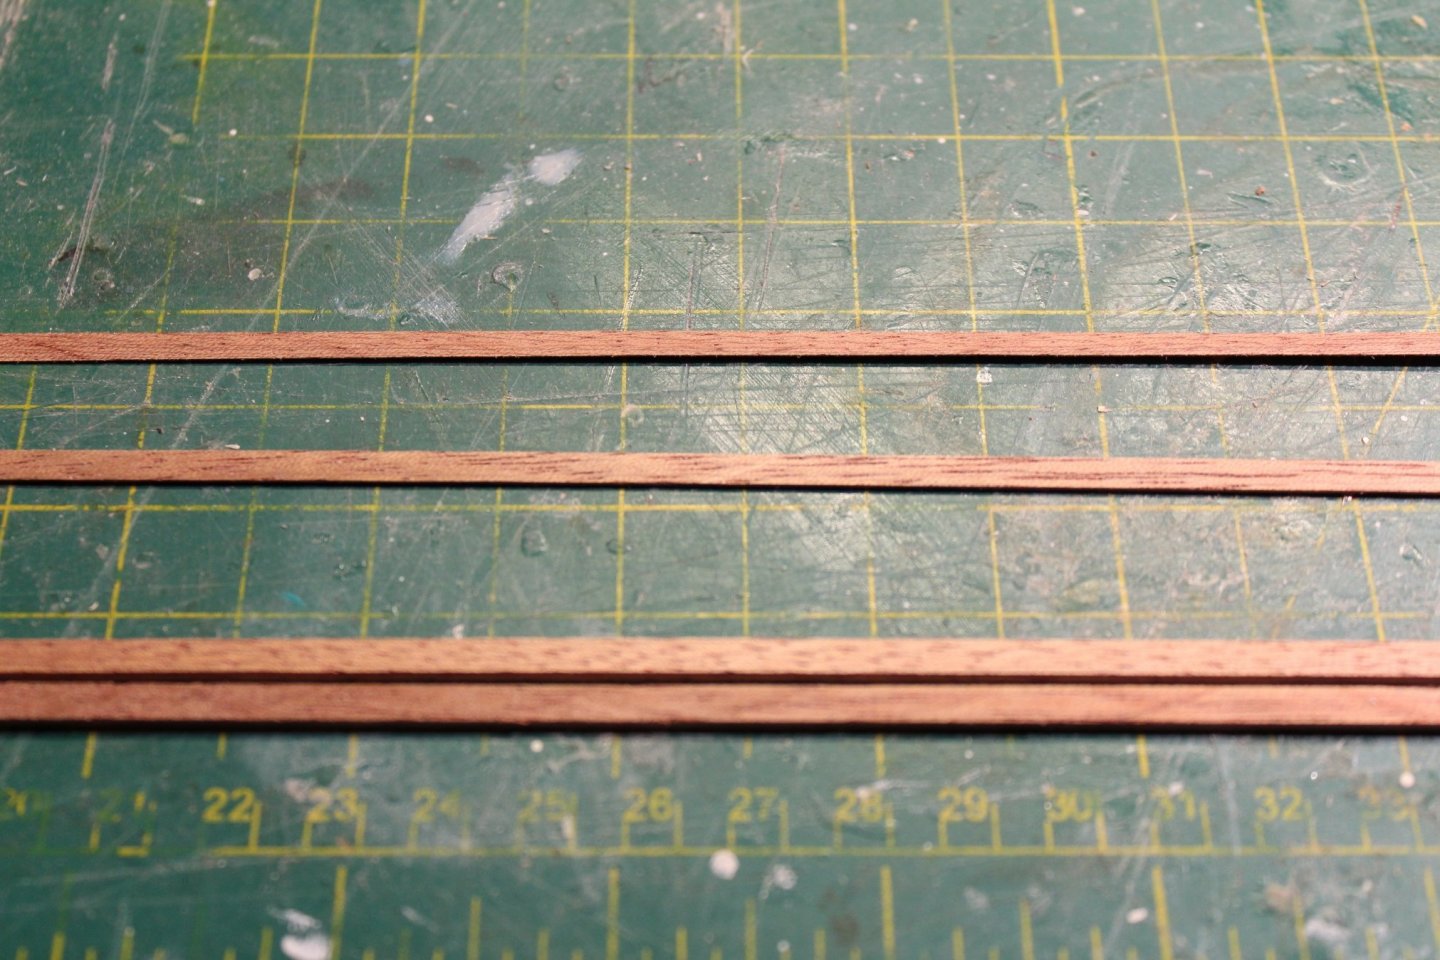
Time for an update. Planking of the hull is progressing well. I now have 6 planks laid on each side - plenty too go. I will post pictures of the hull once the planking is complete. The Abachi wood, I use for planking, is rather soft, so I'm actually considering covering the hull in fiberglass cloth once it has been sanded, filled etc. I did the same with for the Church ship Denmark restoration and it provides a very nice surface for painting. But more about that in the future. Alongside the hull planking I have started work on the deck house, starting with base. I replaced all the plywood for this as it was twisted anyway. From the box pictures it seems like the top of the base should overhang the side a little. I missed that until it was too late - so the top is sanded flush with sides. And no one will know how it should be except me (and you of course). The bottom was sanded to fit the contours of the deck. It went quite well and sits nice and flat without any gaps. I added a reinforcement strip on the inside to keep every straight as the 2 mm plywood isn't completely flat. For the deck house itself I choose to use the plywood supplied with the kit - I have glued the first 3 sides together adding some square stock in the corners for reinforcement. Mr. Boozoo came to visit 😒 - you may notice that I have not glued the sides on the same way. So I had to sand one side back 2 mm. It is no big deal as I will cover the deck house with Mahogany strips anyway and try to mimic the doors somehow. Openings will be cut once the deck house is assembled completely. A "door" will be glued to each side at a 22.5 degree angle which again will be glued to the curved front. After a bit of head scratching I came to the conclusion that to achieve a nice curved front I needed something a bit more substantial than the kit supplied "formers". So I made two "formers" of 4 mm plywood which accomplish both the angle for the doors and the curved front. It will not be easy to use clamps for the front so nails will be used until the glue dries. "Formers" glued in place. The deck house will be covered in 3.0x0.5 mm mahogany strips. Looking through my wood stash, I realized that I was running low. So a good opportunity to play with my new Byrne's table saw. I basically have an unlimited supply of Mahogany off-cuts from a local window production facility. So, I ran a plank through my planer. It has a helix head so the surface is nice and smooth. I then ripped a 3.0x30 mm strip on my big table saw. On the small saw I changed to a fine-toothed blade and started cutting away. I made some 1.5 mm strips (bottom), a 0.7 mm strip (middle) and a 0.3 mm strip. I cannot believe how accurate this saw is. Nice consistent thickness even for the thinnest strip. As I'm cutting on the left side of the blade I need to come up with a good way of moving the fence the correct distance for the 0.5 mm strips. That would be the thickness of the strip + the thickness of the blade = 1.5 mm. I only have a pair of digital calipers at the moment. I cannot get a good measurement between the blade and the fence with the fence extension in place. So, I'm actually planning to remove the extension, set the calipers at the correct measurement, put the calipers between the fence and the blade, move the fence over, tighten it and cut. For the next cut I will reset the calipers by subtracting 1.5 mm and repeat. /Lars Peter

-
Drilling holes with crisp edges in wood
laps posted a topic in Modeling tools and Workshop Equipment
Hi All, When drilling larger diameters holes in the hull of model ships for portholes, masts etc. it can be a challenge to get a nice clean hole without damaging the wooden edges. Also the drill can wander off-center if the material underneath consists of different materials, for example plywood and balsa below the same hole. It is possible to start with a smaller diameter drill and then enlarge the hole with bigger drills or files. Drills for making holes in metal is to me a no-go in wood as they tend to wander off-center, especially in woods like pine. Drills specially designed for drilling holes in wood should be used. They usually have a point to ensure that the hole is drilled where it is supposed to be. Also, the circumference has sharp cutting edges (spurs); the purpose of these is to cut the wood fibers and secure a sharp edge. There are a lot of different manufacturers of brad-point drill bits for wood; they can all cut a hole but the quality of the hole varies a lot. As with a lot of things - the more you pay the better quality hole you get. So I thought I would share my preferred go-to brand of brad-point twist drills: https://www.fine-tools.com/holzspiralbohrer.html The spurs are very sharp and leaves a nice clean edge in any wood I have tried. The smallest diameter with spurs is 2 mm all the way up to 20 mm. As you can see, they are a bit pricey but they will last a life time for any modeler. If you are worried about the longevity, you can also get these drills with tungsten-carbide bits from 3 mm. /Lars Peter- 7 replies
-
- 12
-
-
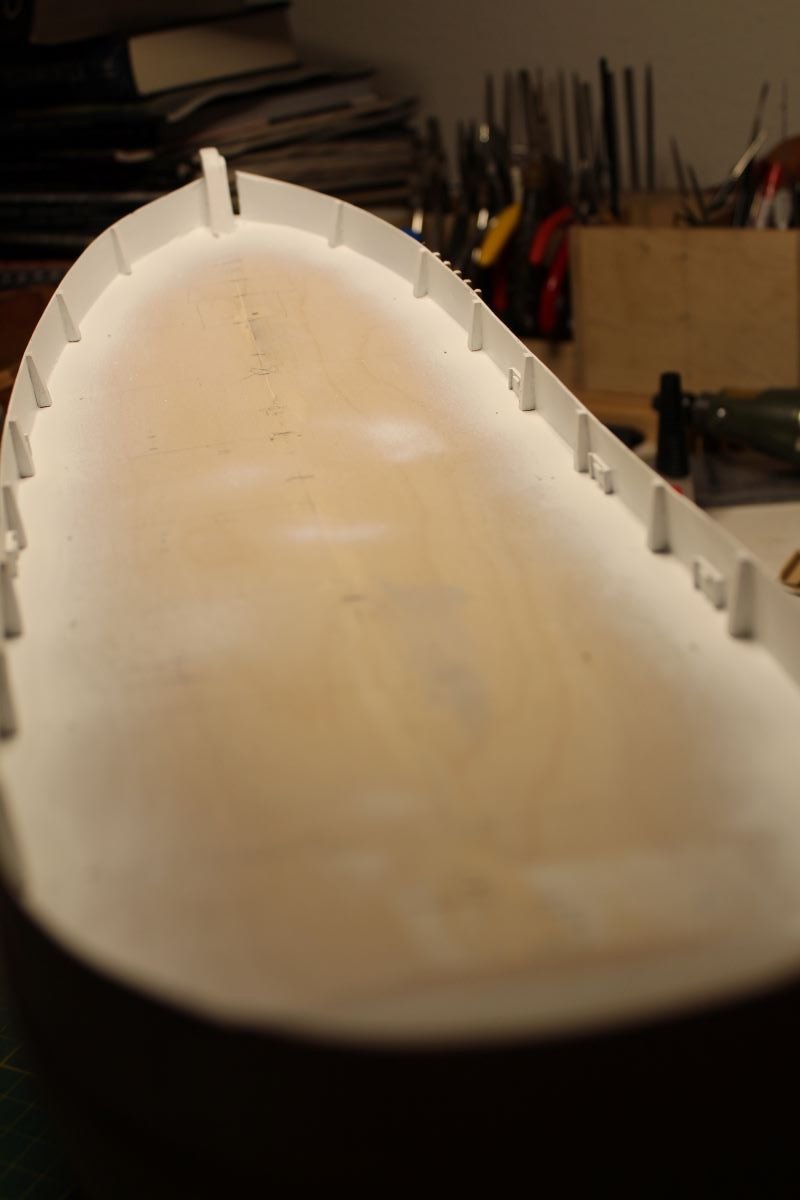
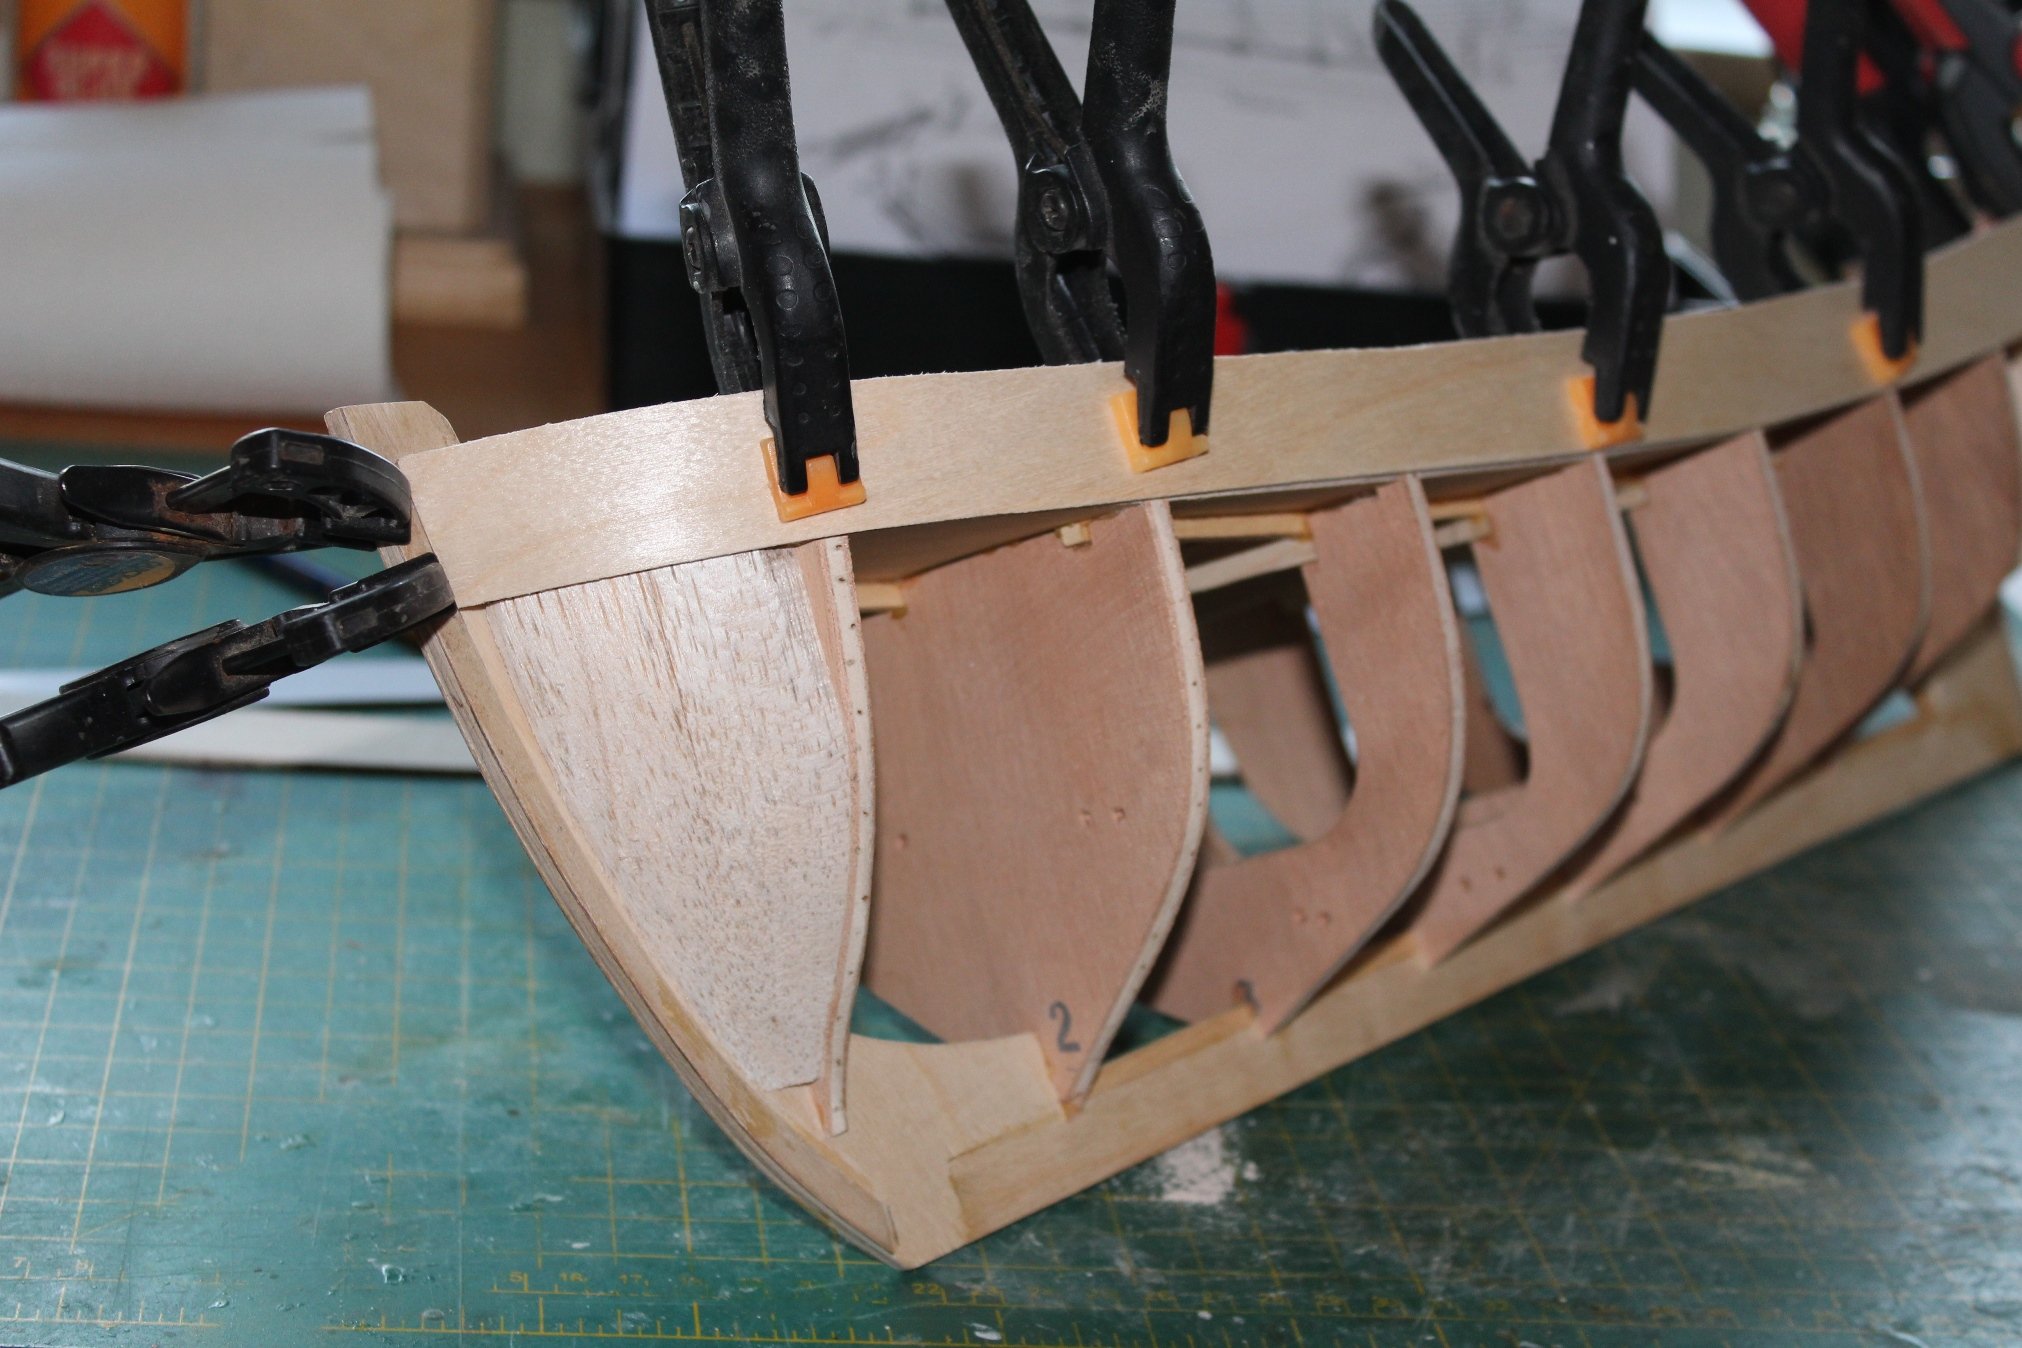
Both bulwarks are now glued in place. I cut both pieces a bit too short so I will have to add a filler piece at the stern. The top sides still remain to be sanded flush with the top of the frames. That's going to take some time. I will now start the planking process. It's a single planked hul - and it is big - so it will take time. But I don't foresee any big issues here. Abachi strips will be used. They are kind of course grained so I'm thinking about adding either a treatment of diluted wood glue or sanding sealer after planking and sanding. I believe the original Mary Ann had a steel hull so it is important to get a smooth unblemished surface before painting. Yesterday, the postman delivered this cute little thing 😊 It cost a small fortune in shipping and taxes but I will now be able to dimension my own lumber for model ship building. My Dad and I have quite a nice stash of different kind of lumber so I guess some money can be saved in the end. My current push sticks are a tad too large to be used with the small table saw so I will have to make some smaller ones preferably with a kind or rubber surface to prevent slipping when feeding small stock through the blade. Mr Byrne does not disappoint - I'm very impressed with the quality so far. I will purchase both the sliding table and the tilt table at some point - just to have the complete package. The main reason I bought the saw is to be able to make some customized grating for the Hjejlen paddle steamer project (Hjejlen) . Can wait to get started on that one in the future. /Lars Peter

-
I also have written instruction for Hjejlen (the old VHT kit). It is 5 typewritten pages in Danish but I can translate it is necessary. Just say the word. /Lars Peter
-
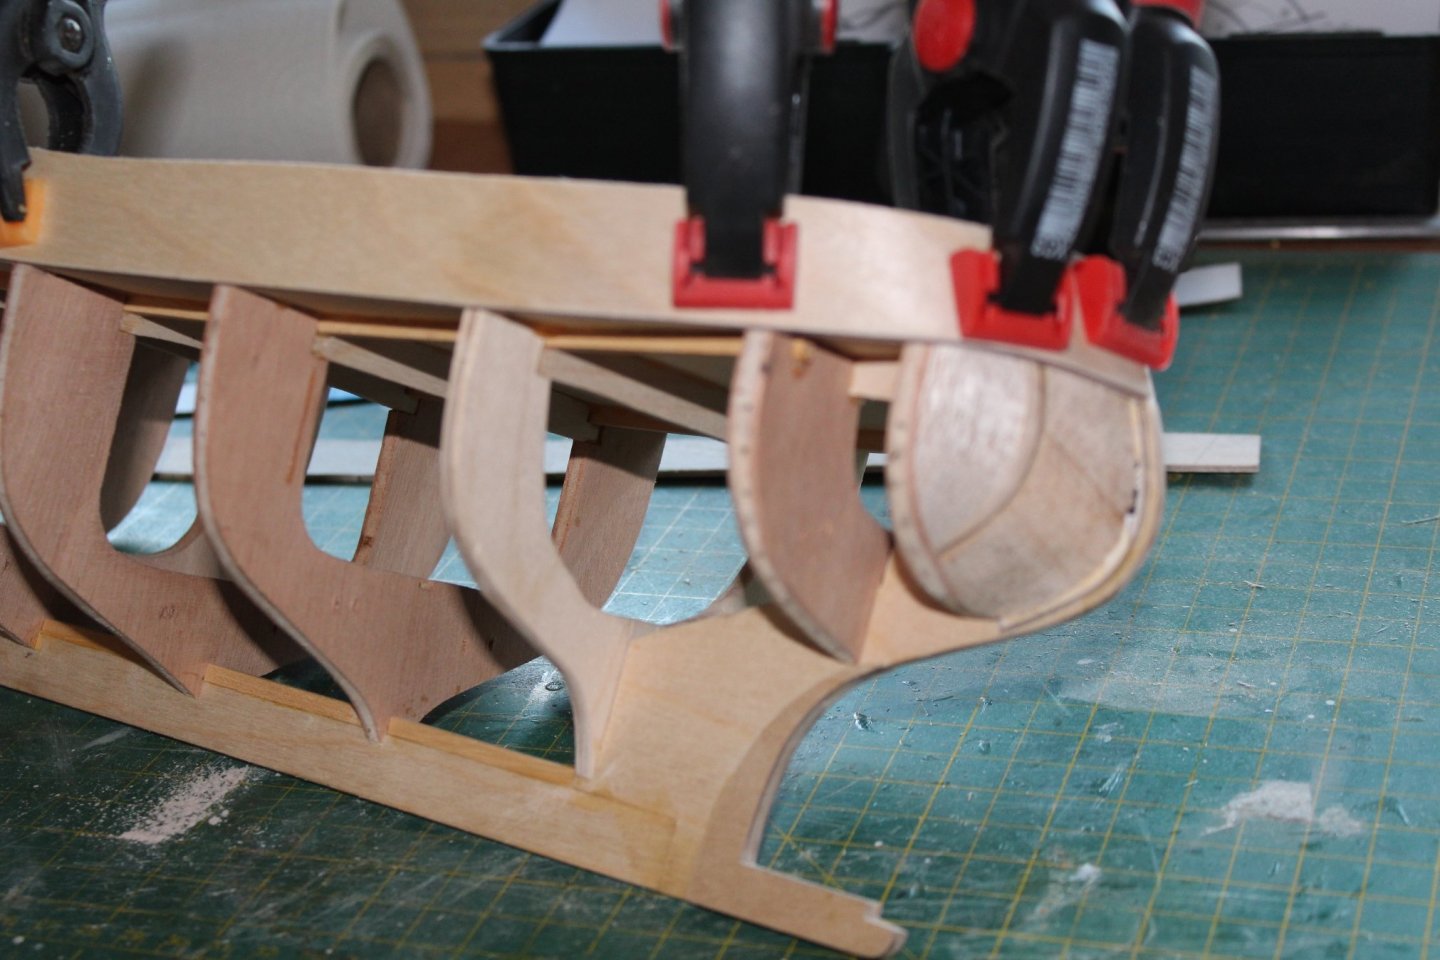
Thank you Popeye. I think the filler pieces were a wise choice. The 2 mm birch plywood held the shape nicely. I have now started gluing the first in place. I do this in two steps - mainly because I do not have enough strong clamps. I'll post a picture once both pieces a glued in place. /Lars Petet
-
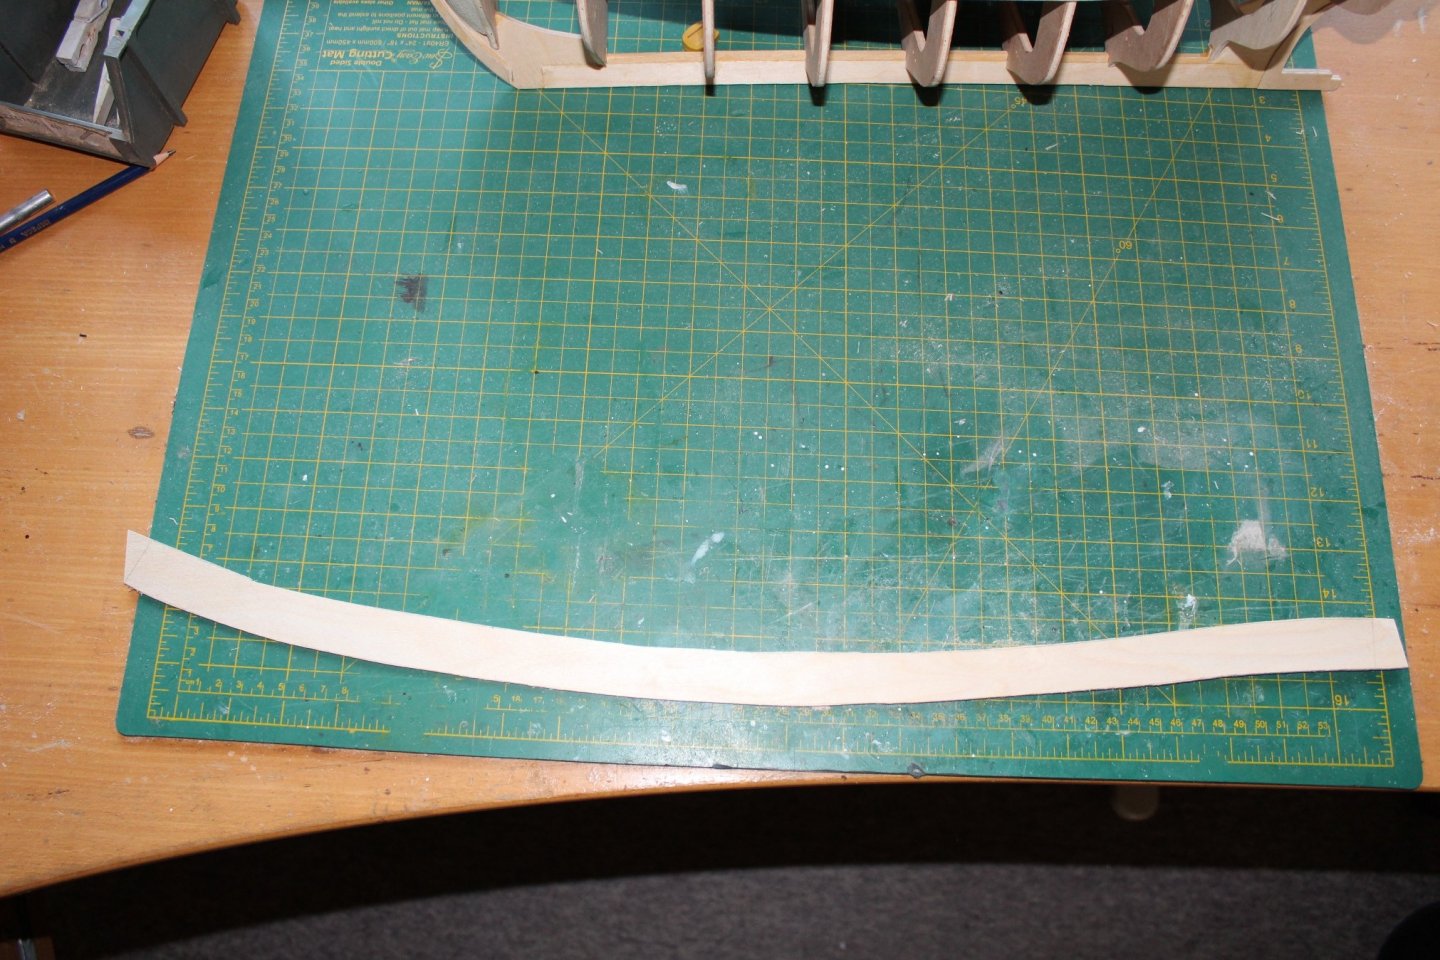
I've made a cardboard template for the bulwark walls. In the kit each wall was supplied in two pieces, probably because of the dimension of the plywood sheet. My 2 mm sheet were big enough to make the walls in one piece; thus the odd shape. The wall sits flush with the false deck. The top will be sanded flush with frames once the walls are glued in place. I soaked the ends of the wall in hot water and clamped it to the hull. It went quite well - no kinks or other issues. Once dry I will glue it in place. No I'm off to Finland for a couple of days so the model will have to wait. /Lars Peter