sailboat392
-
Posts
51 -
Joined
-
Last visited
Recent Profile Visitors
580 profile views


-
I am in the process of building "Dark Harbor". Could you tell me what you used for the bronze port holes? Thanks, Patrick
-
 grsjax reacted to a post in a topic:
Lightning Sailboat by Andrew J. - Dumas - Scale 1:12
grsjax reacted to a post in a topic:
Lightning Sailboat by Andrew J. - Dumas - Scale 1:12
-

New to Modeling, still prepping for my second build
sailboat392 replied to CosmicRust77's topic in New member Introductions
Like Kevin, I need to find advice on painting. (I used Home Depot spray pain one my last builds.) How is the wood prepped?...sanding sealer? Oil or Water Base paint? What's next..Primers? Do I thin and apply how many coats? Does clear finish come next? Where is this information to be found? -
mandolinut reacted to a post in a topic:
Lightning Sailboat by Andrew J. - Dumas - Scale 1:12
-
Andrew J. reacted to a post in a topic:
Lightning Sailboat by Andrew J. - Dumas - Scale 1:12
-
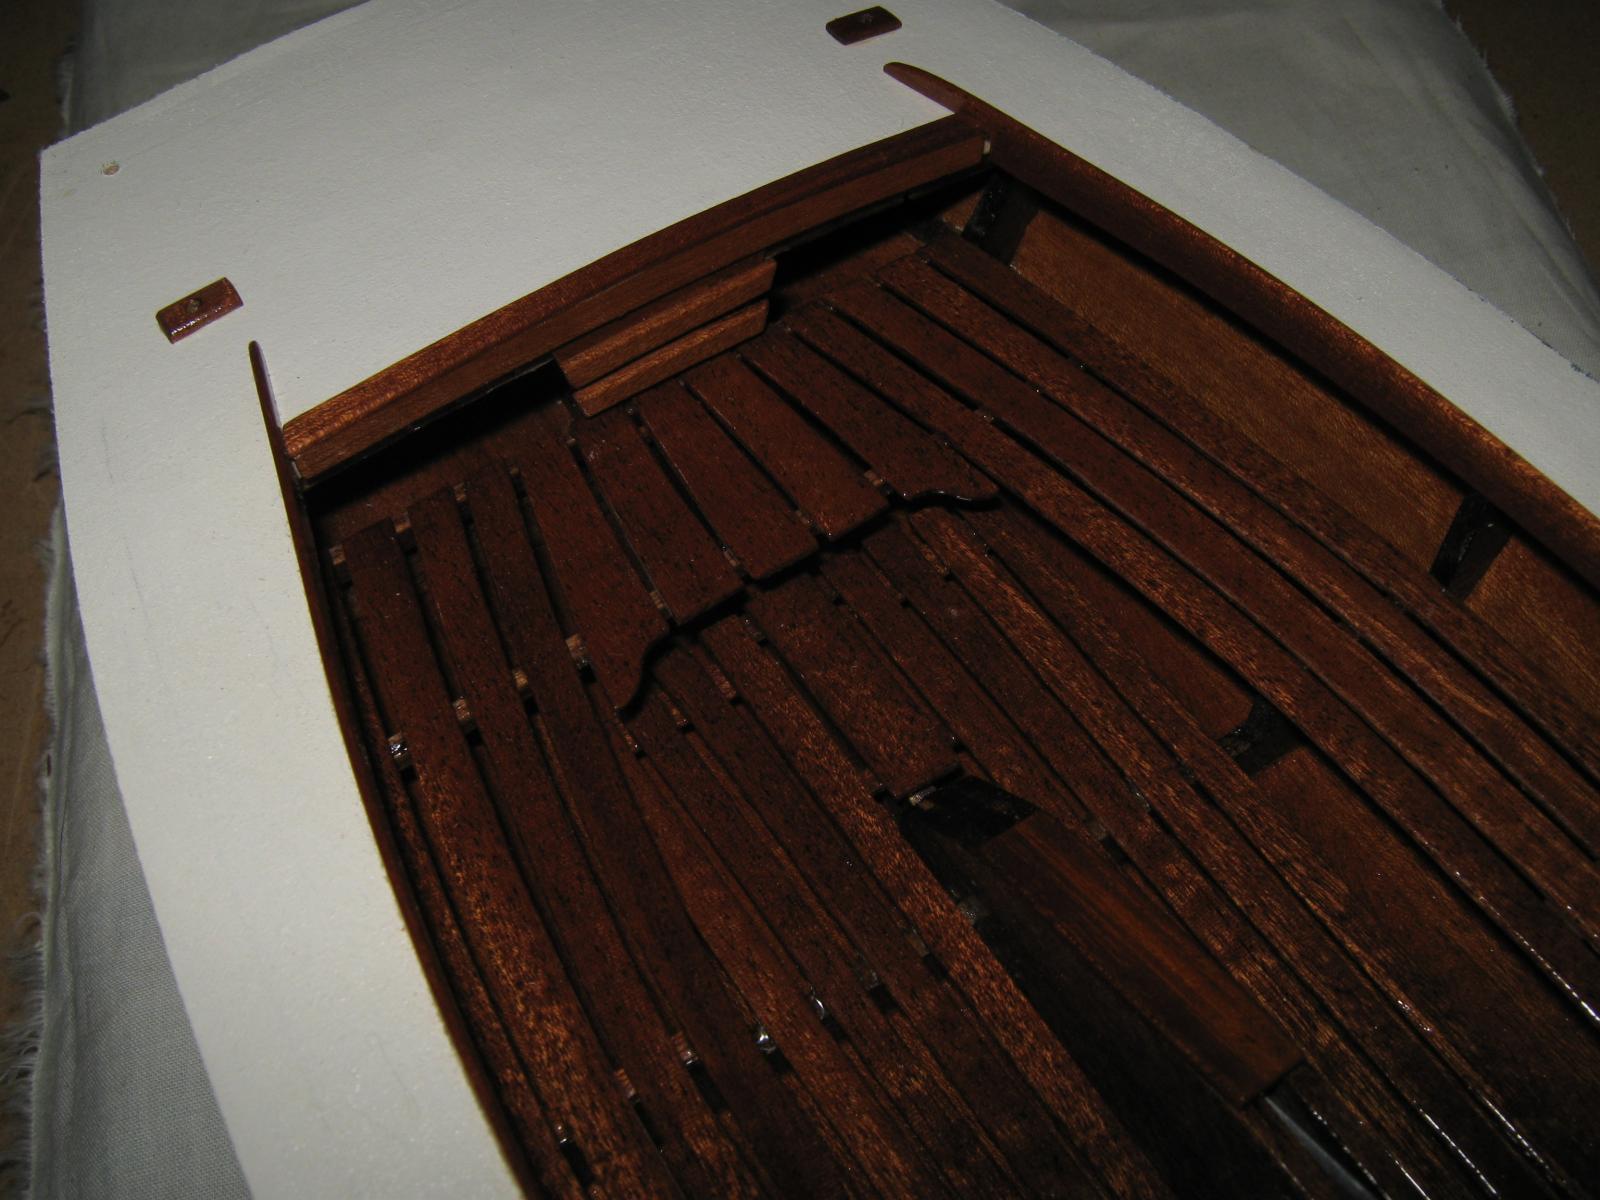
Andrew I can't wait to see your scratch-build hull. As I may have said, I used the Dumas kit just for the hull, cutting away openings in the solid bulkheads to open to the fore and aft belowdecks. The rest of the wood in the kit was used a stock and the Dumas people were happy to provide (at no cost) additional wood that was needed. For the side seats, I used the solid seat material provided in the kit and exacto-knife cut it to four planks, sanded to 2 1/2" wide. The rear seat just matched what was in #392. So, sorry, no templates. I put the boat away for months at a time to lets my internal juices build up for additional attacked at the project, so just hang in there.....keep a simple boat project going off to the side...that seems to help.
-
thibaultron reacted to a post in a topic:
Lightning Sailboat by Andrew J. - Dumas - Scale 1:12
-
thibaultron reacted to a post in a topic:
Lightning Sailboat by Andrew J. - Dumas - Scale 1:12
-
I just looked at a photo of #167. There is a wench forward and appears to be used for the jib sheet. I'll send some cautionary advice if you are using the Dumas kit, just let me know.
-
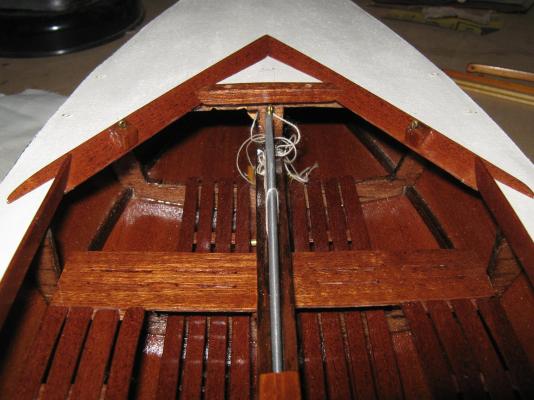
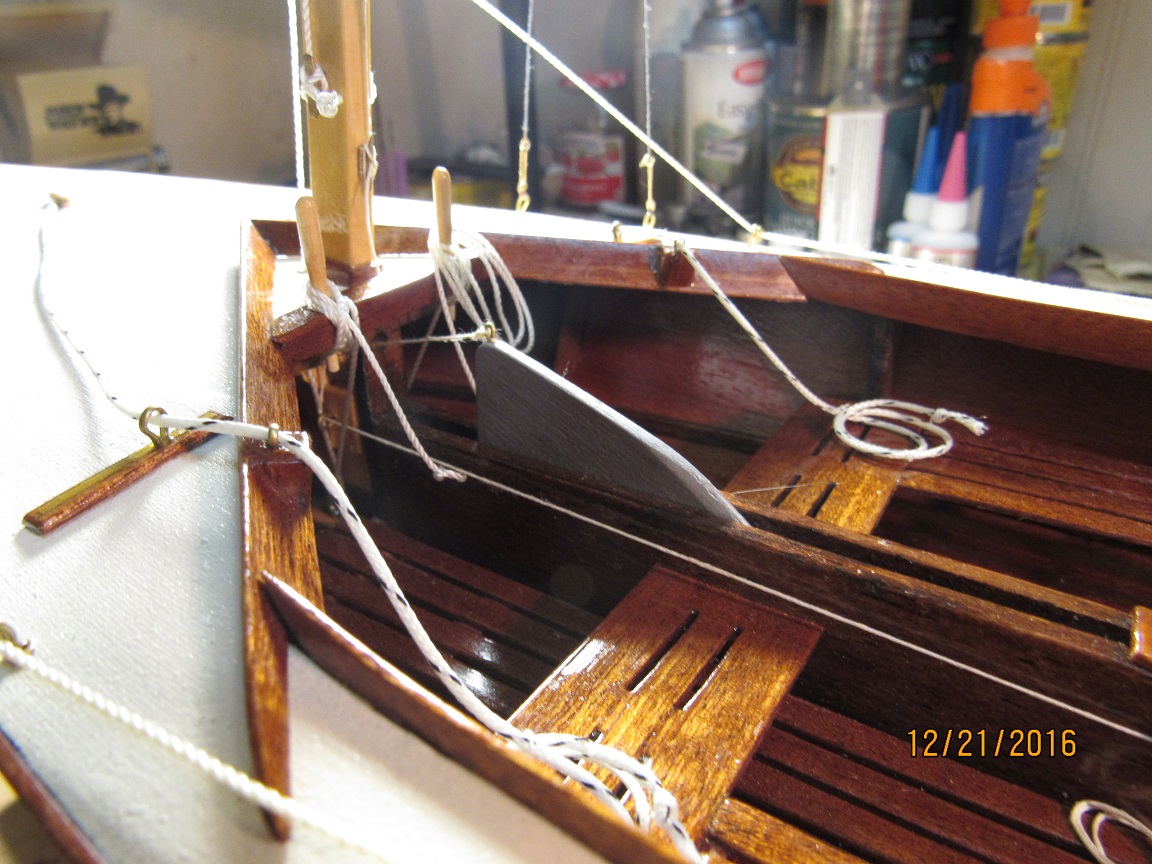
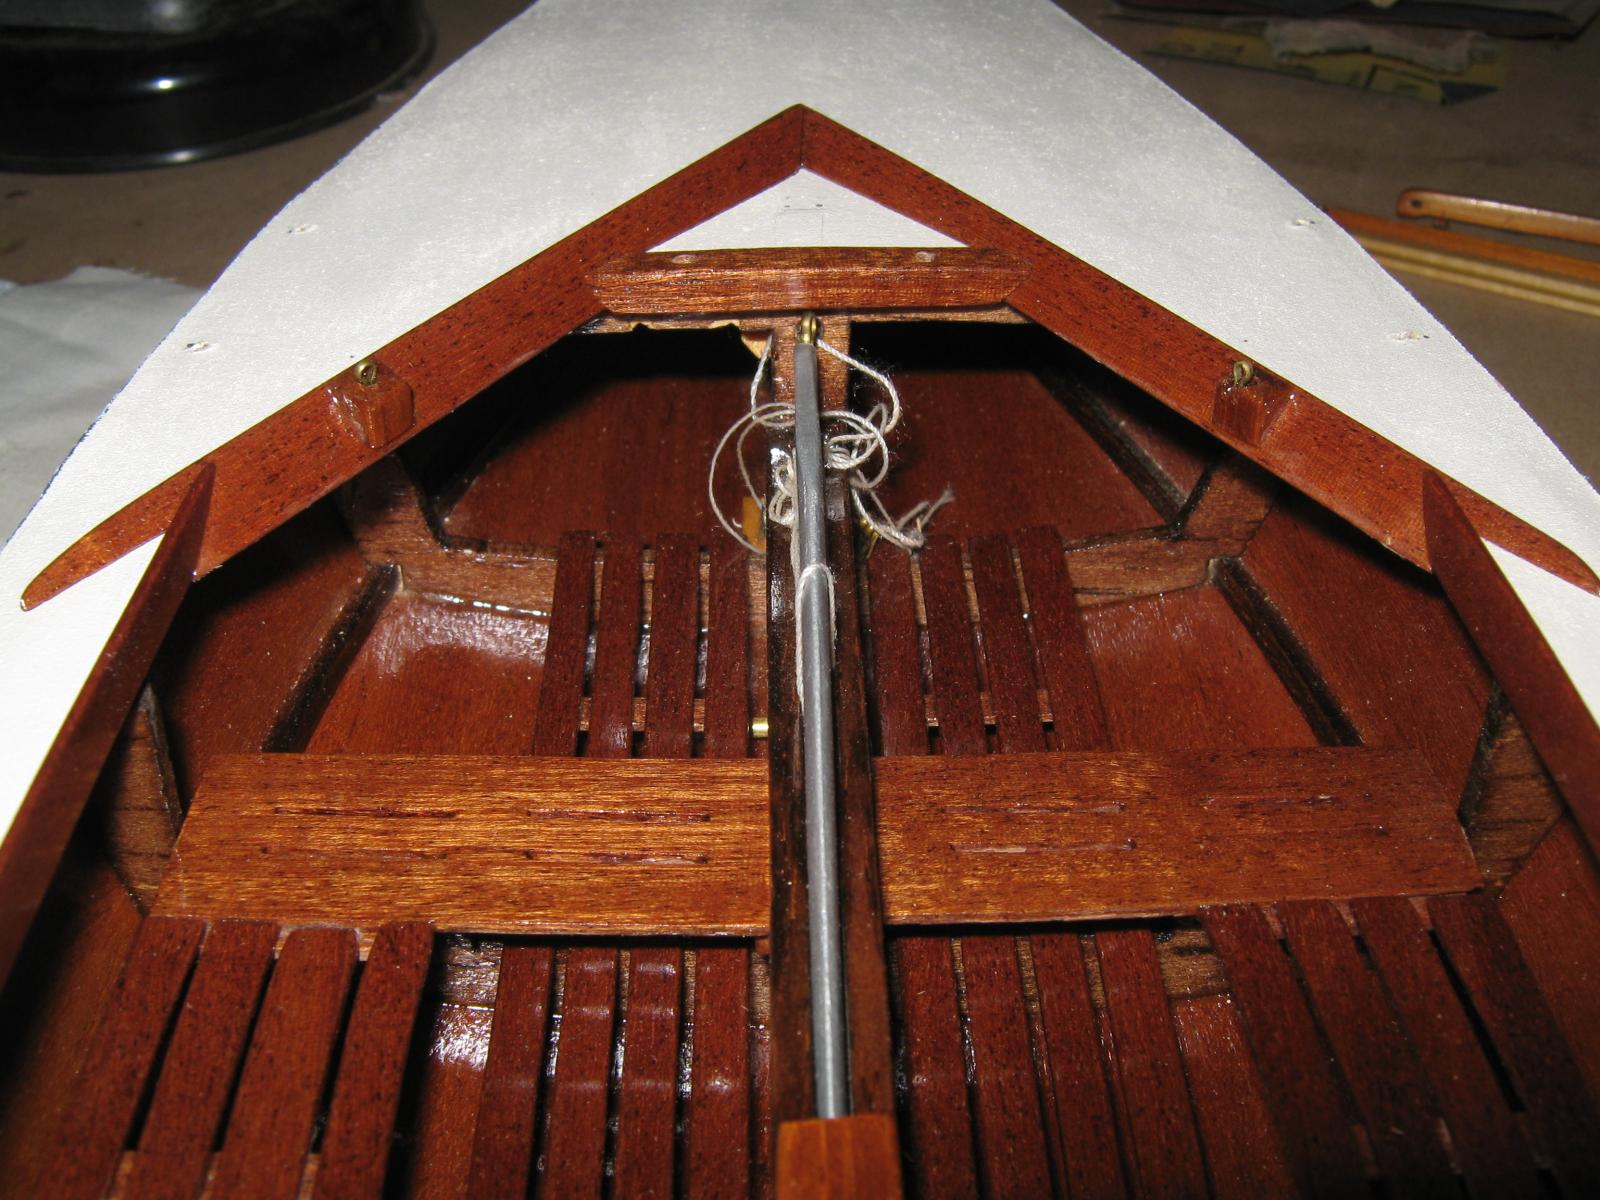
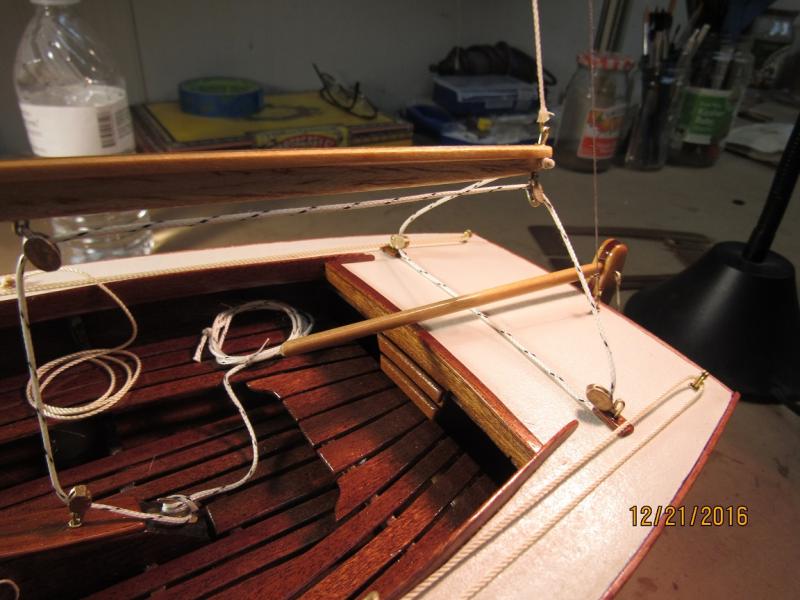
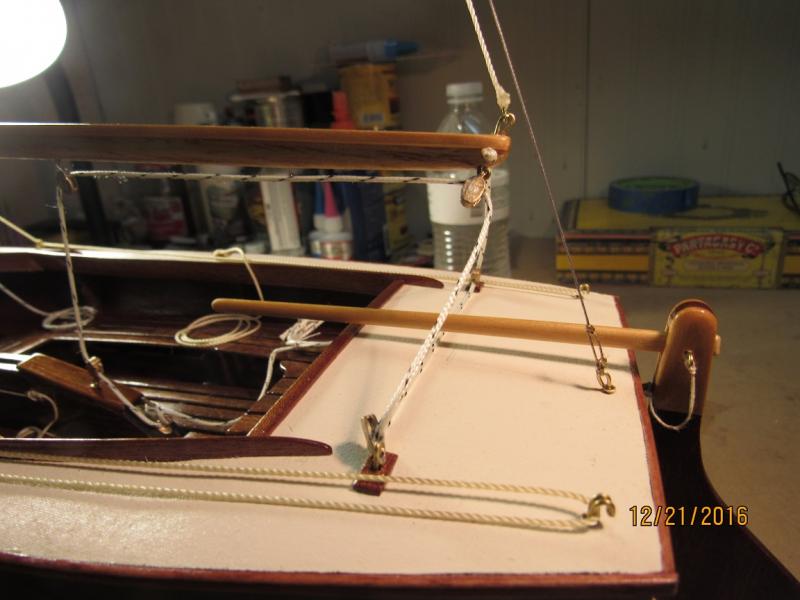
Dee is correct. The two blocks furthest go forward and aft of the mast. Seen in the hole for the mast are the loose blocks for the sides. I'm not sure what the closest T-block is for. I had the pleasure of sail on #1 during the "Ryan Years" while owning #392 built 2 years later. Because #1 was the prototype, there are some differences not found on later boats. Specifically and as seen in the photo are the four belay pins and the wench. The wench was deleted from this position and moved to the back of the center board trunk, facing aft, I assume for the main sheet. My boat had witness holes indicating it was once there and a 1958 Skinny Lightning I know had the wench still there. My boat only had belays for the main and jib halyards. I have seen a third used to tie off the spinnaker. I'm at a loss for what the fourth was for, perhaps the spinnaker pole up haul. I also think the bronze support seen at the front of the combing was only on #1.
-
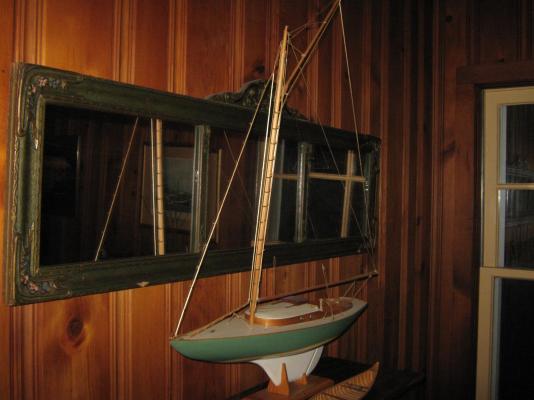
Mine is finally done! I'm not a master builder, but I'm happy with the results. Let's see yours.....

-
Stick a dowel in an electric drill and spin it. just add sandpaper.
-
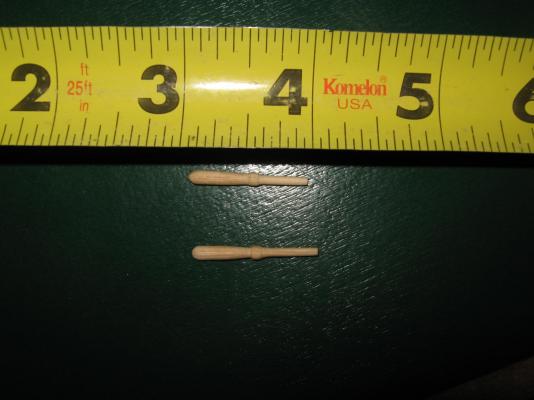
It's ok to lecture me, in fact, I encourage it. But finding 1:12 fitting for seems to stymie me. You'll feel the same way if you hope to find a 1" long belay pin. What I can't seem to find are single blocks and halyard lead blocks at that scale.
-
Just a helpful hint. Additional wood for your build can be ordered from Dumas. This will insure the best color match to the mahogany. I need help in locating a source for deck and mast fittings....most in need of 1:12 halyard pulleys and boom hardware.
-
Does this mean we raced against each other?
-
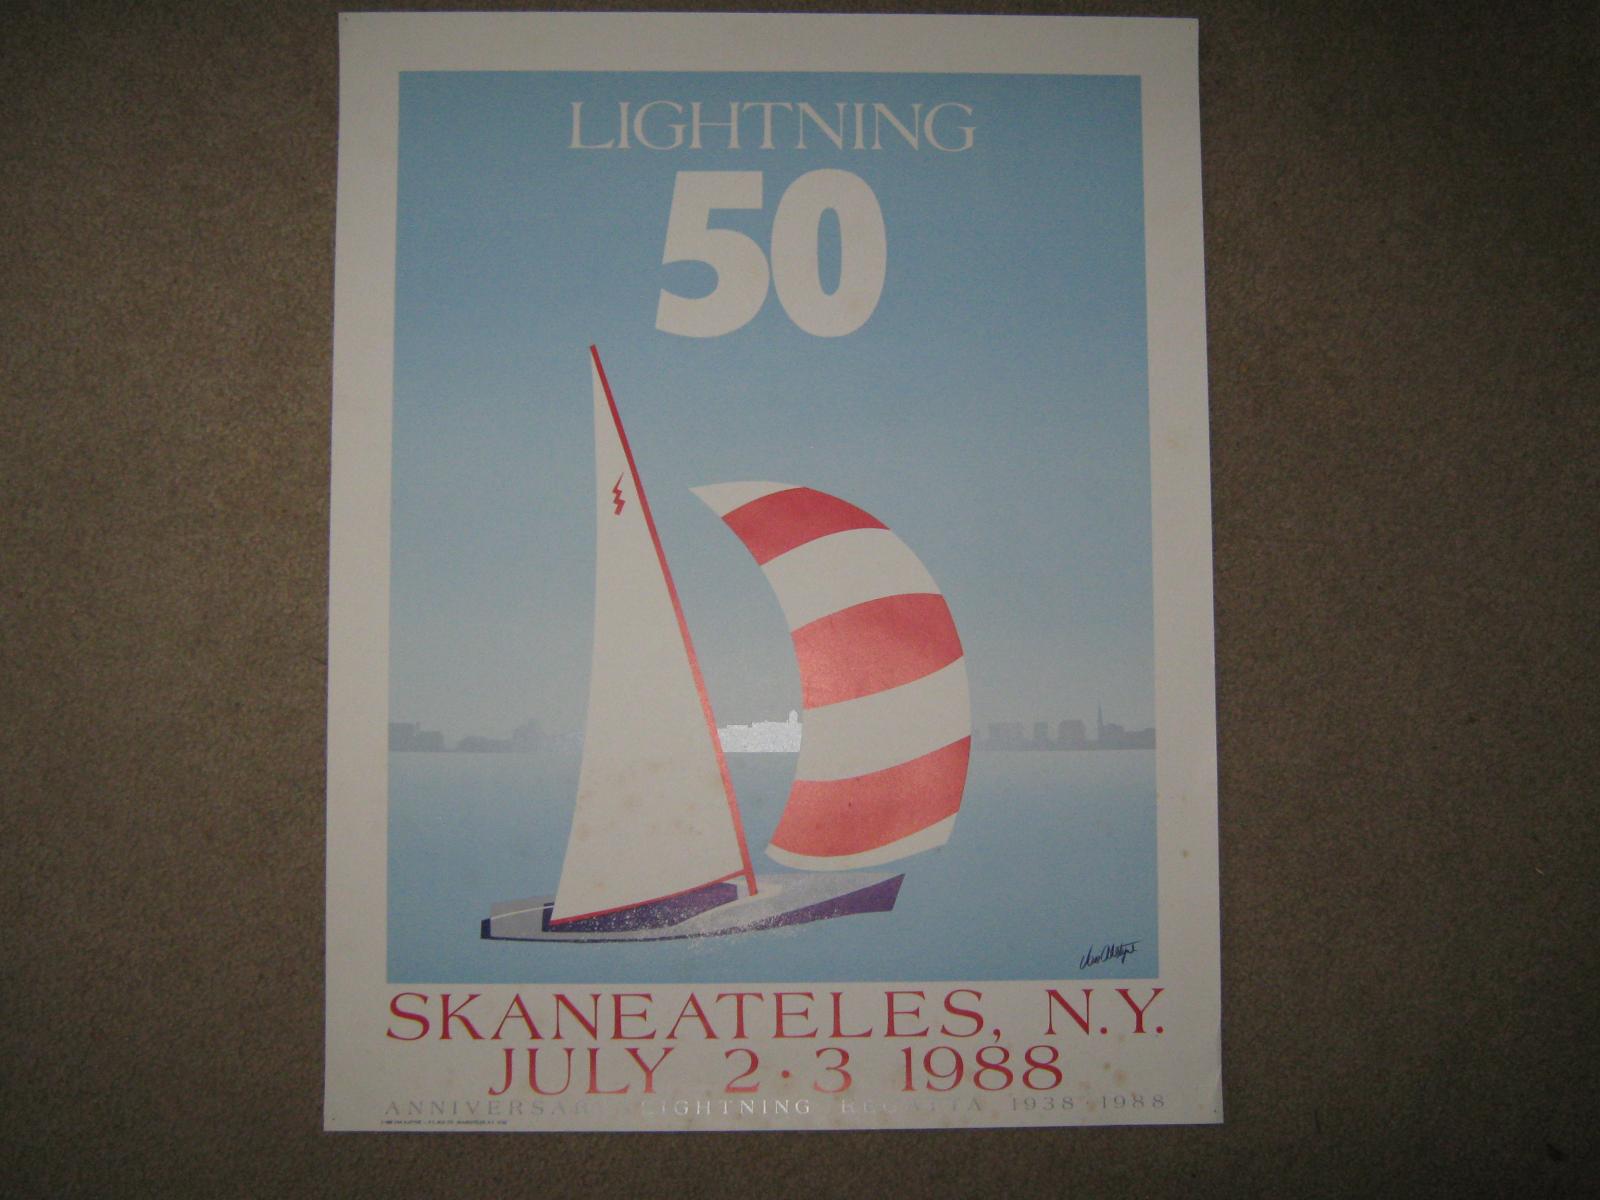
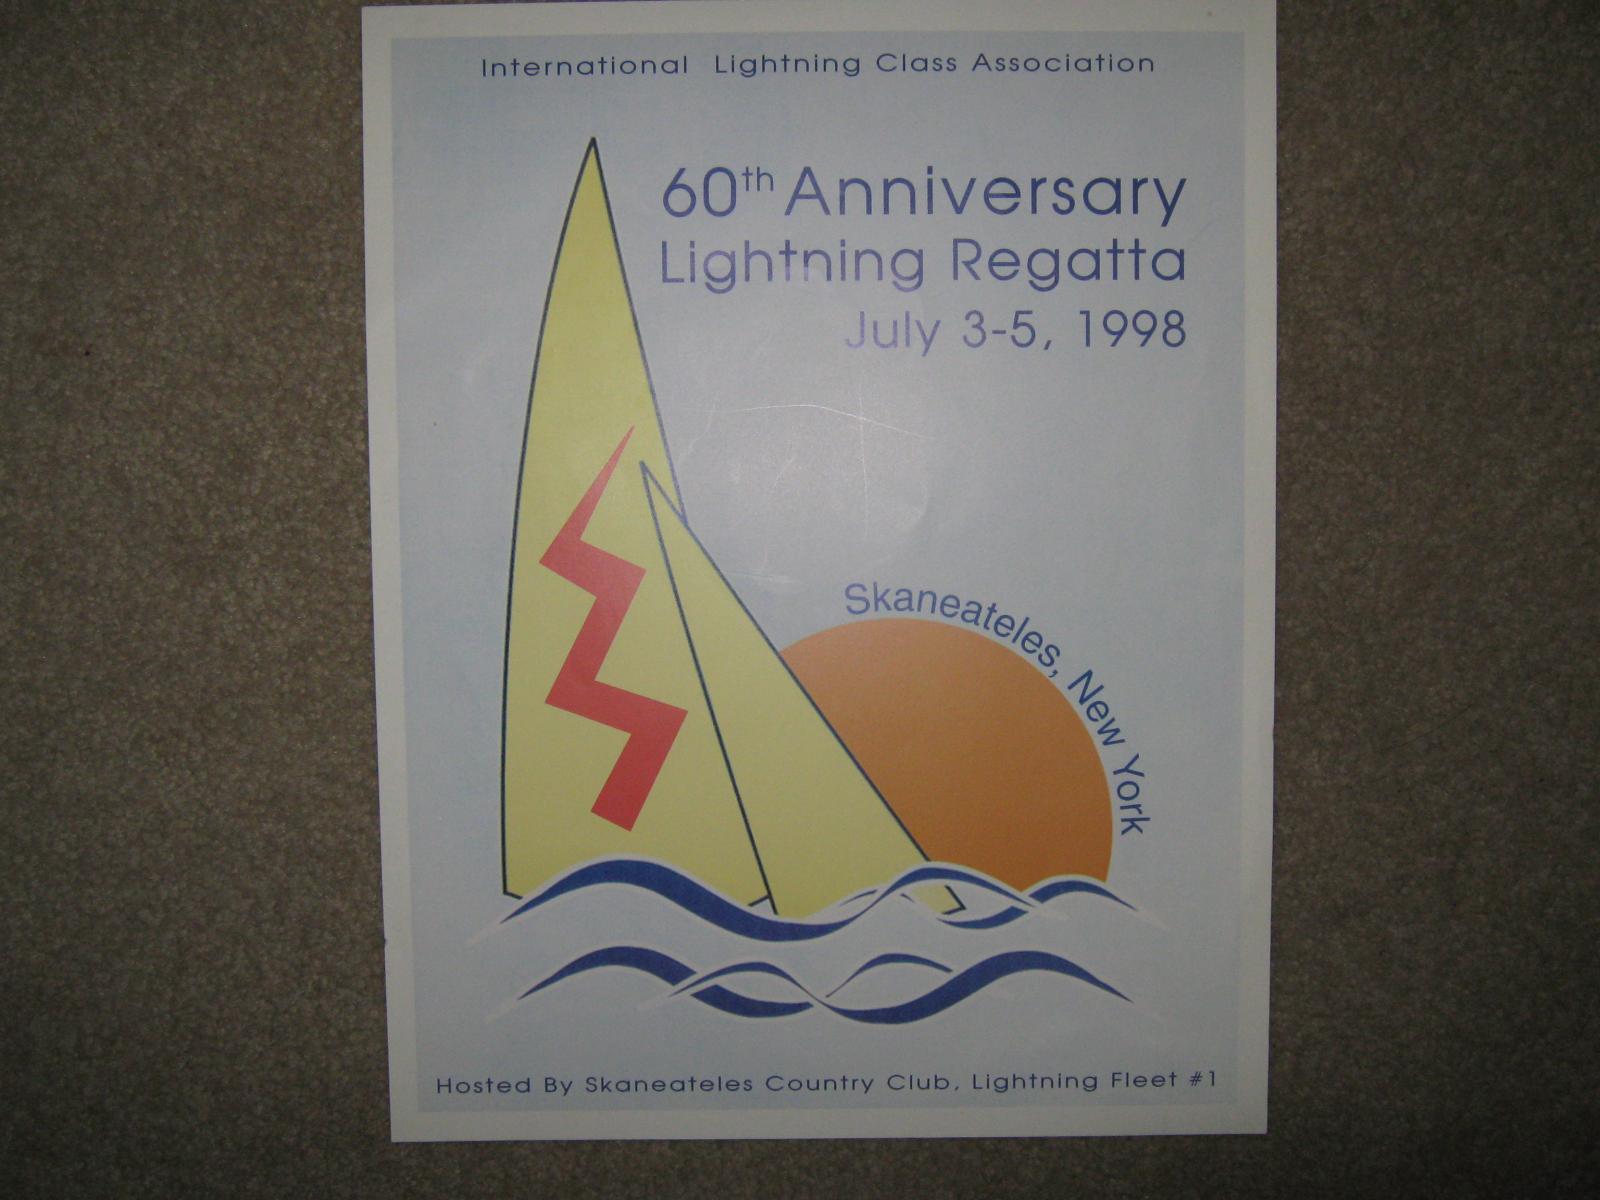
I thought the reader's may get a kick out of seeing these. Poster's were give-aways to the regatta skipper's and crew.


-
Andrew You may find this site helpful. It's for those restoring old woodie lightnings. https://groups.yahoo.com/neo/groups/Wooden_Lightning/info Dan
-
sailboat392 reacted to a post in a topic:
Lightning Sailboat by Andrew J. - Dumas - Scale 1:12
-
Micheal I can't quite get the idea of how you are making those. Could you make six more quick fakes, about 1/2" long, and send them to me for review. (tongue in cheek)
-
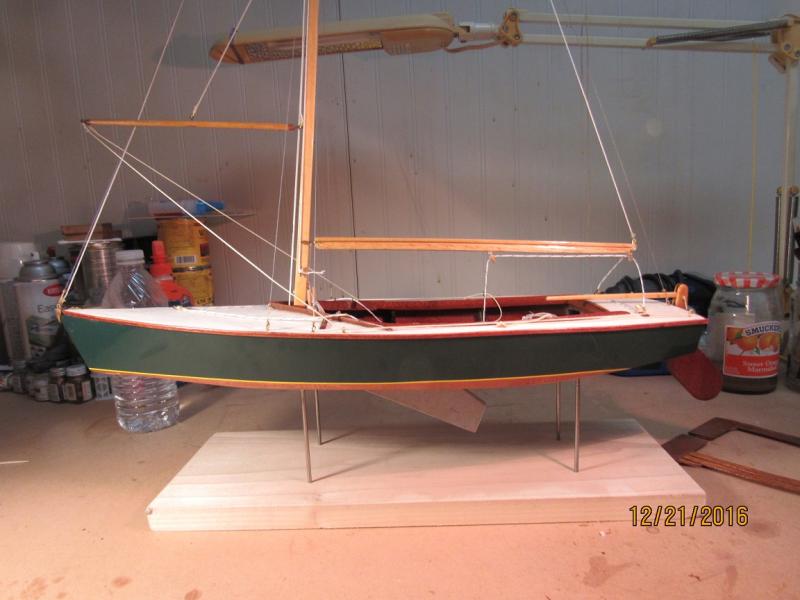
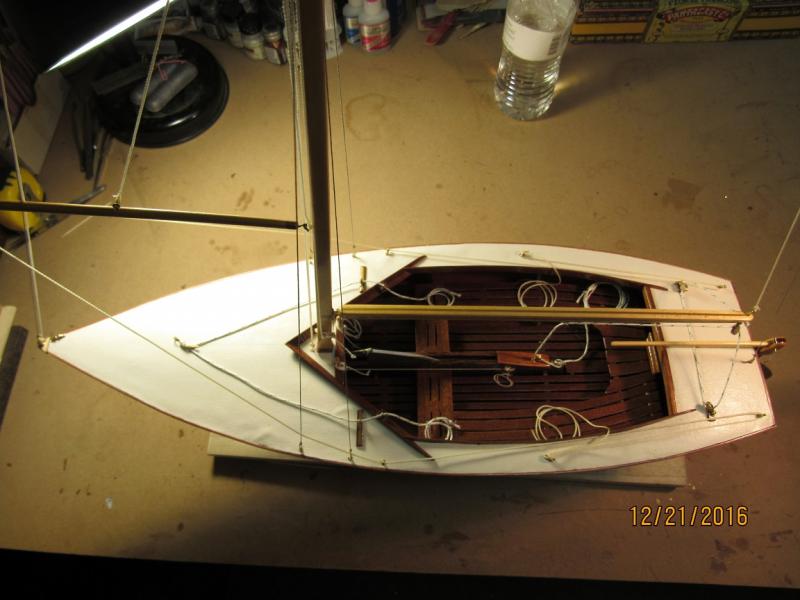
Andrew How do you plan to attach the sail at the Luff and the Foot? The kit is really set up for "pond boar" mode at the mast and the boom. I'm not a fan of displaying the cloths, as I feel the artistry of the standing and running rigging shows better. On the lightning, I'm just using copper tape to represent the tracks and showing the boat "at mooring", unless you can lead me to a better solution. I took a different approach on my Dark Harbor 17, using thick line to create an outline of the sail plan. This allowed me to follow my instinct to not include the sail, but show the gaff and jib spars in "on water" position.
-
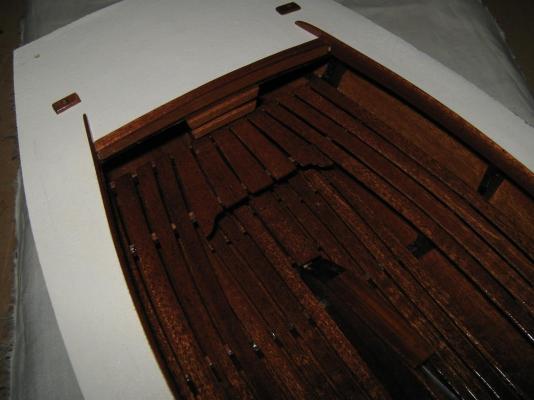
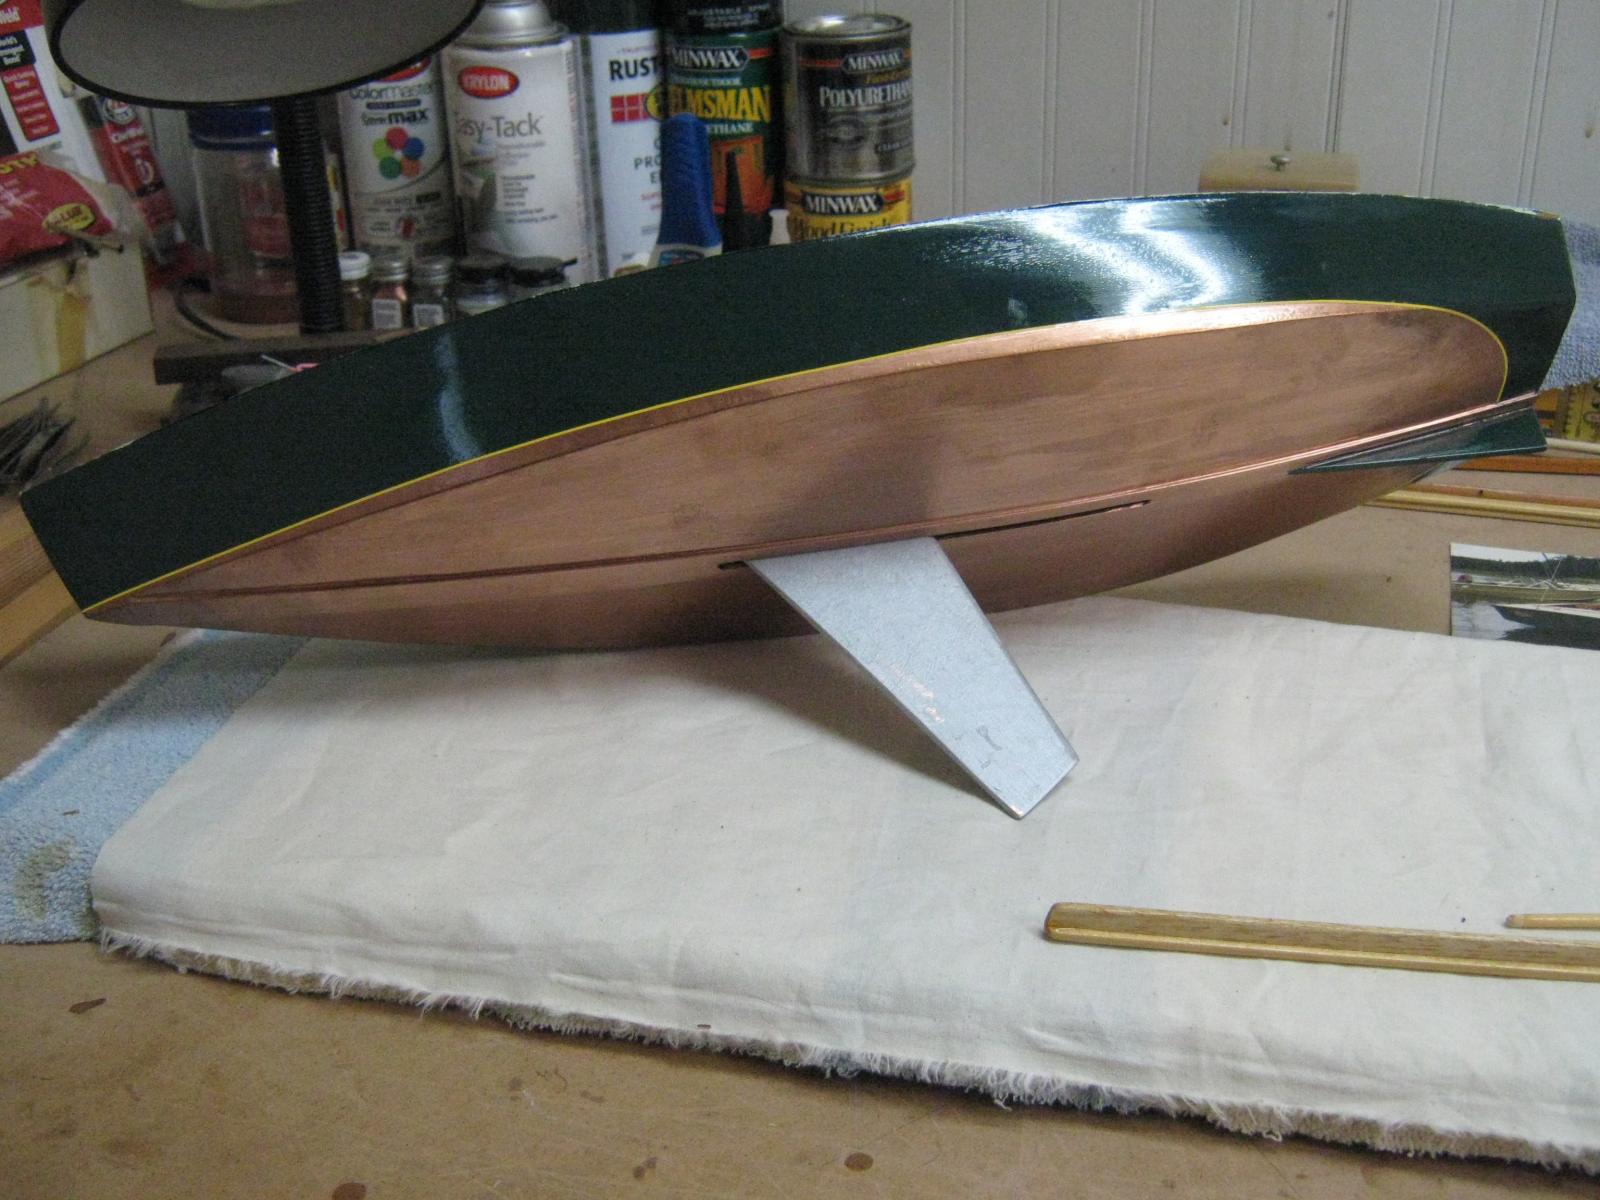
(sorry if this is posted twice..i'm new here) Andrew Thanks for the offer on the turn buckles. The one's you have are not a match to the type used in 1938/#392, which had an open housing instead of the tube type. I found no resource for the canvas, although there MUST be one somewhere. I used the thinnest fabric I could find with a weave that would not get lost in the painting. I stretched it over a wood frame and lightly spray painted it, front and back, till i got an even coat. If the pain got a bit heavy in spots, I quickly rubbed it down with a cloth/paint thinner. Painting it first it the way to go. I used white glue to bed it. I've yet to attach the rub rails. This is my second build of this model, my first try was 20 years ago. Back then, the frames were made of mahogany plywood. I wish that had kept that because one of my balsa frames broke during the setup, putting a slight warp in the deck line between the last frame and the stern. Luckily, i was able to correct this with the thinnest of deck wedge across the stern deck. This sin is hidden by the canvas. I've stained the centerboard trunk. I'm impressed with your "S" bow fitting. For mine, I covered the bow with Saran Wrap and used bondo to form the rough shape, I'm in the process of sculpting it to shape..my third try. One hint: The keel top (K3) behind the centerboard trunk sits up to the same height as the floor boards. You'll want to pare this down and cover with a flooring strip to achieve the best look. Additional photos below. Stern detail includes the drawer i added to my real boat and was not standard. These old woodies needed to be kept wet to stay tight, a copper paint was used below the waterline. Here's a thought. Instead of building 1:8 next, why not try 1:1?