Etcher
-
Posts
114 -
Joined
-
Last visited
Content Type
Profiles
Forums
Gallery
Events
Everything posted by Etcher
-
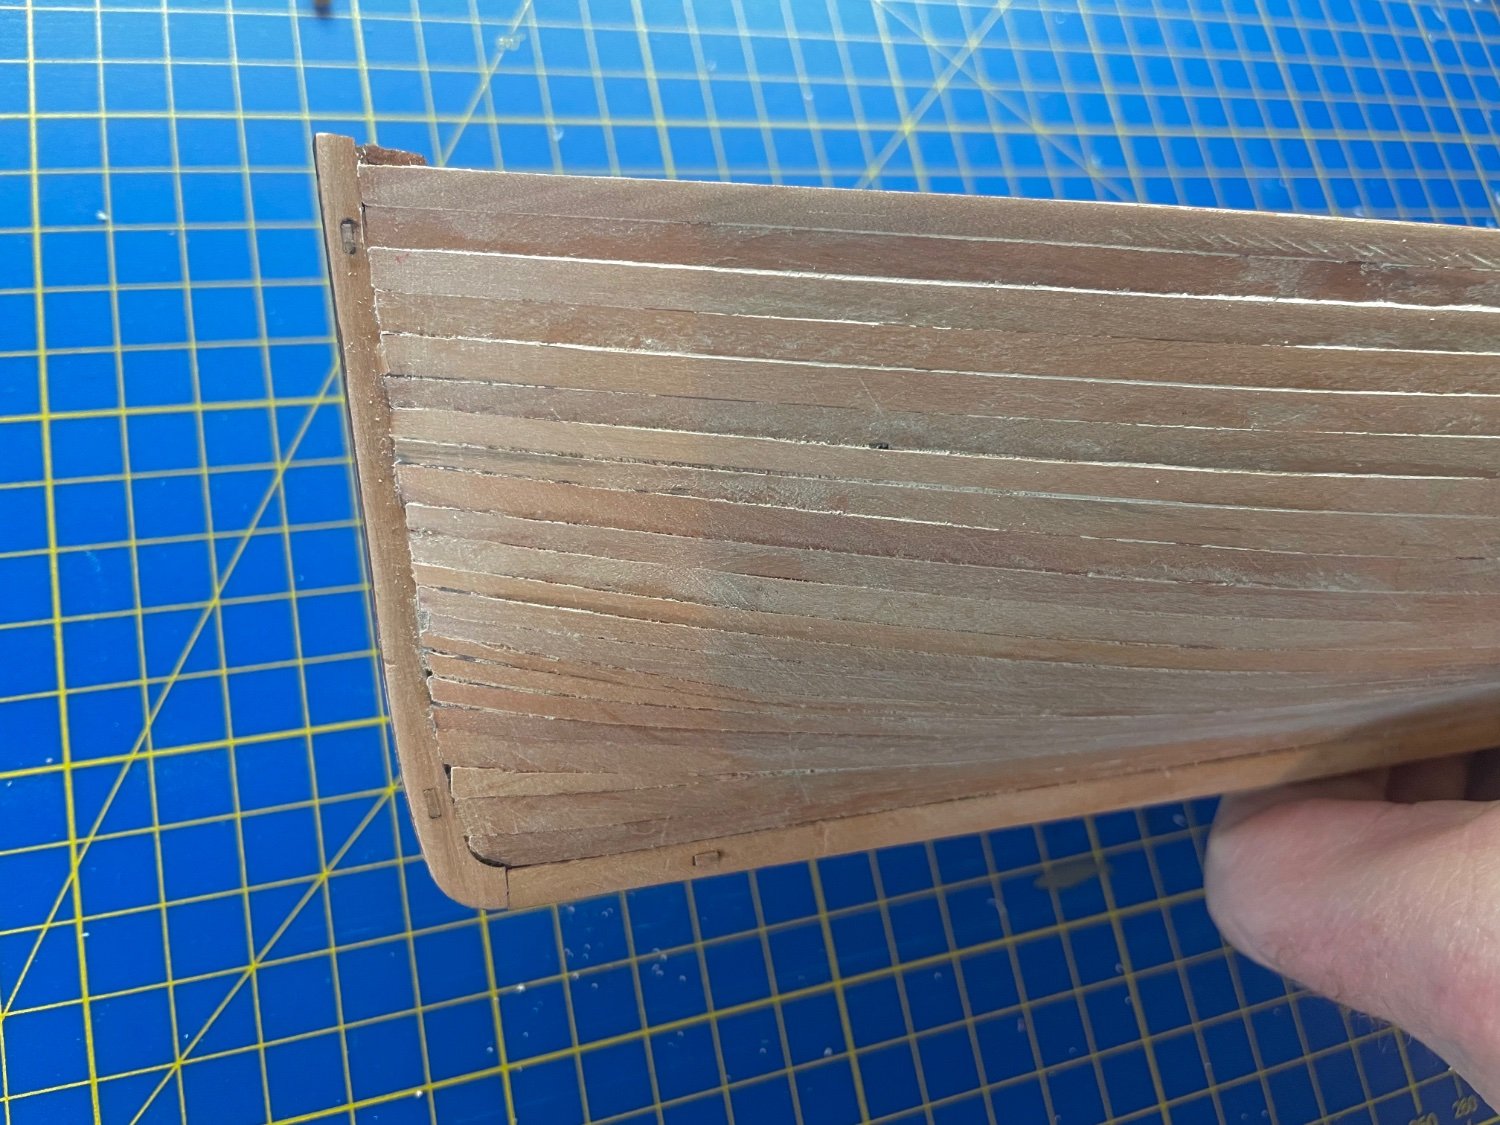
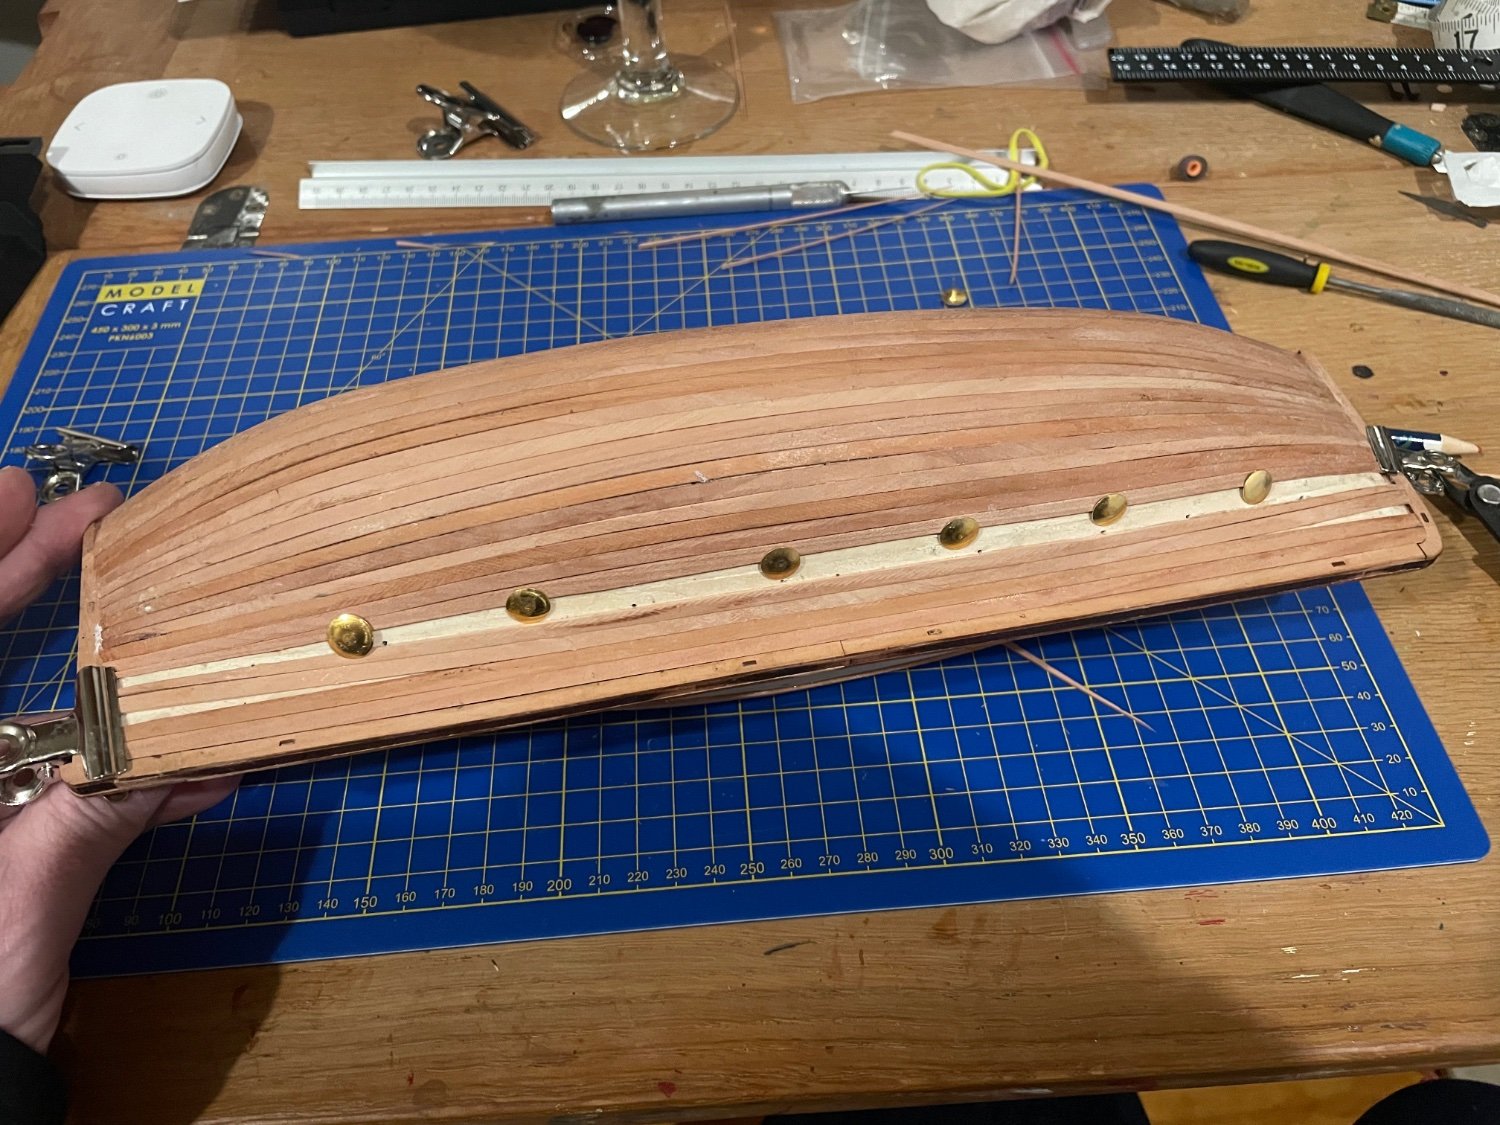
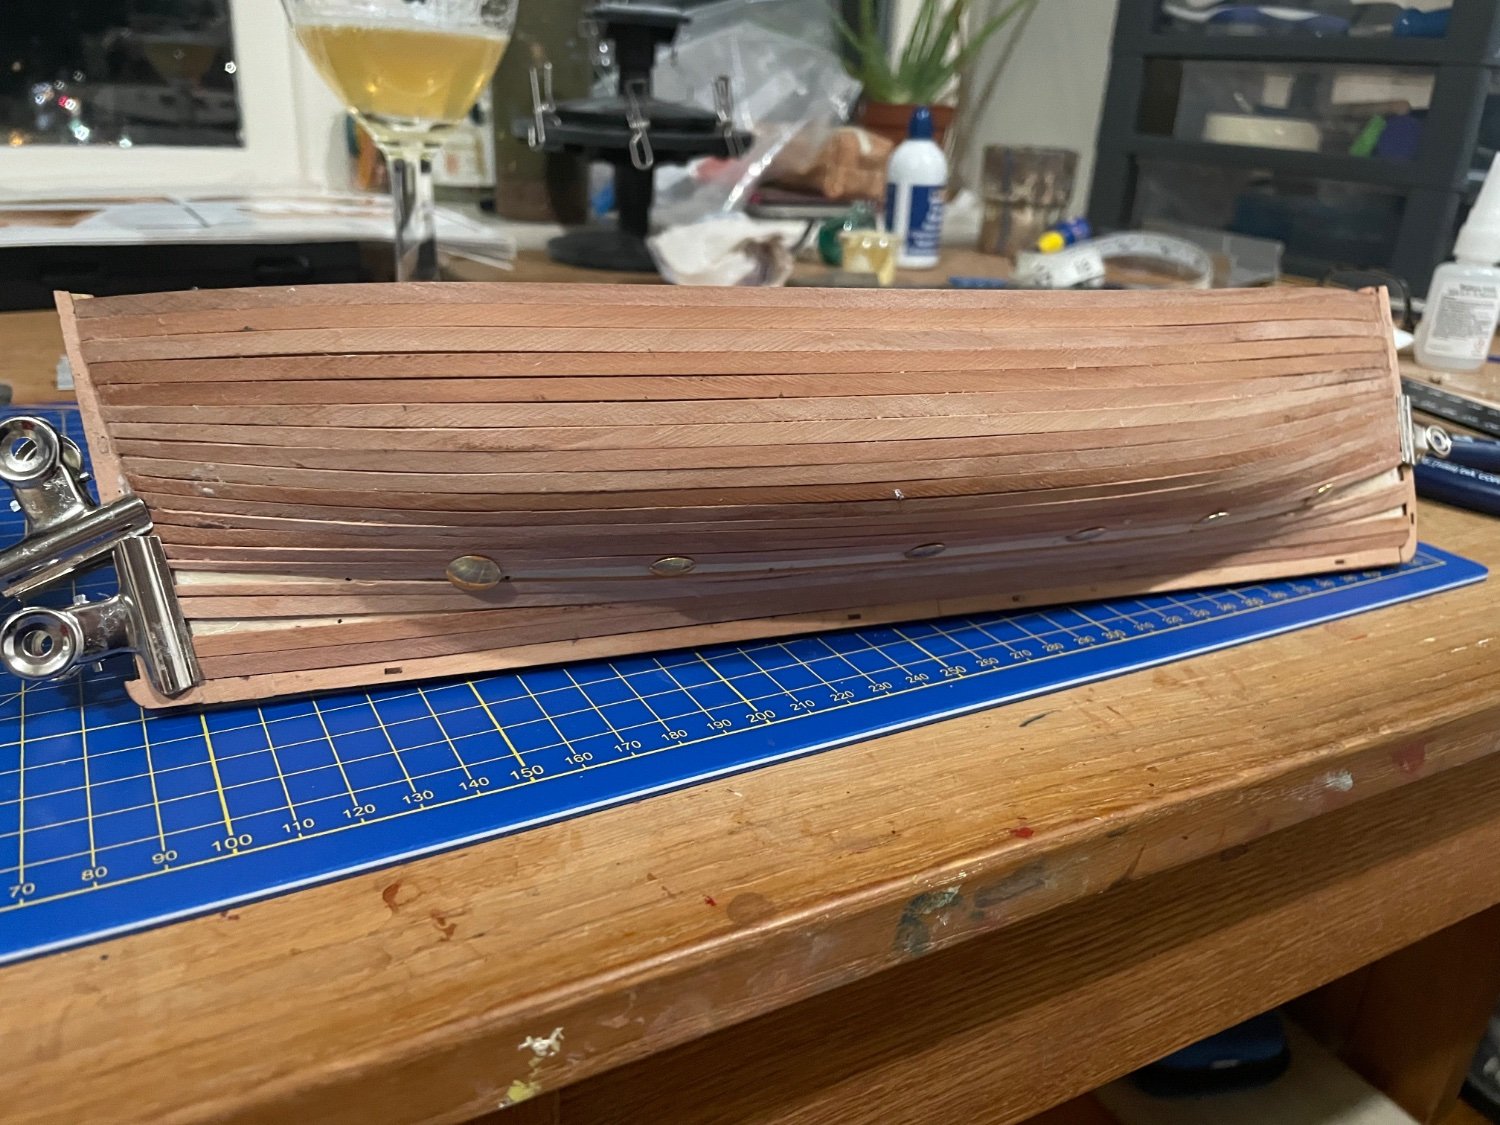
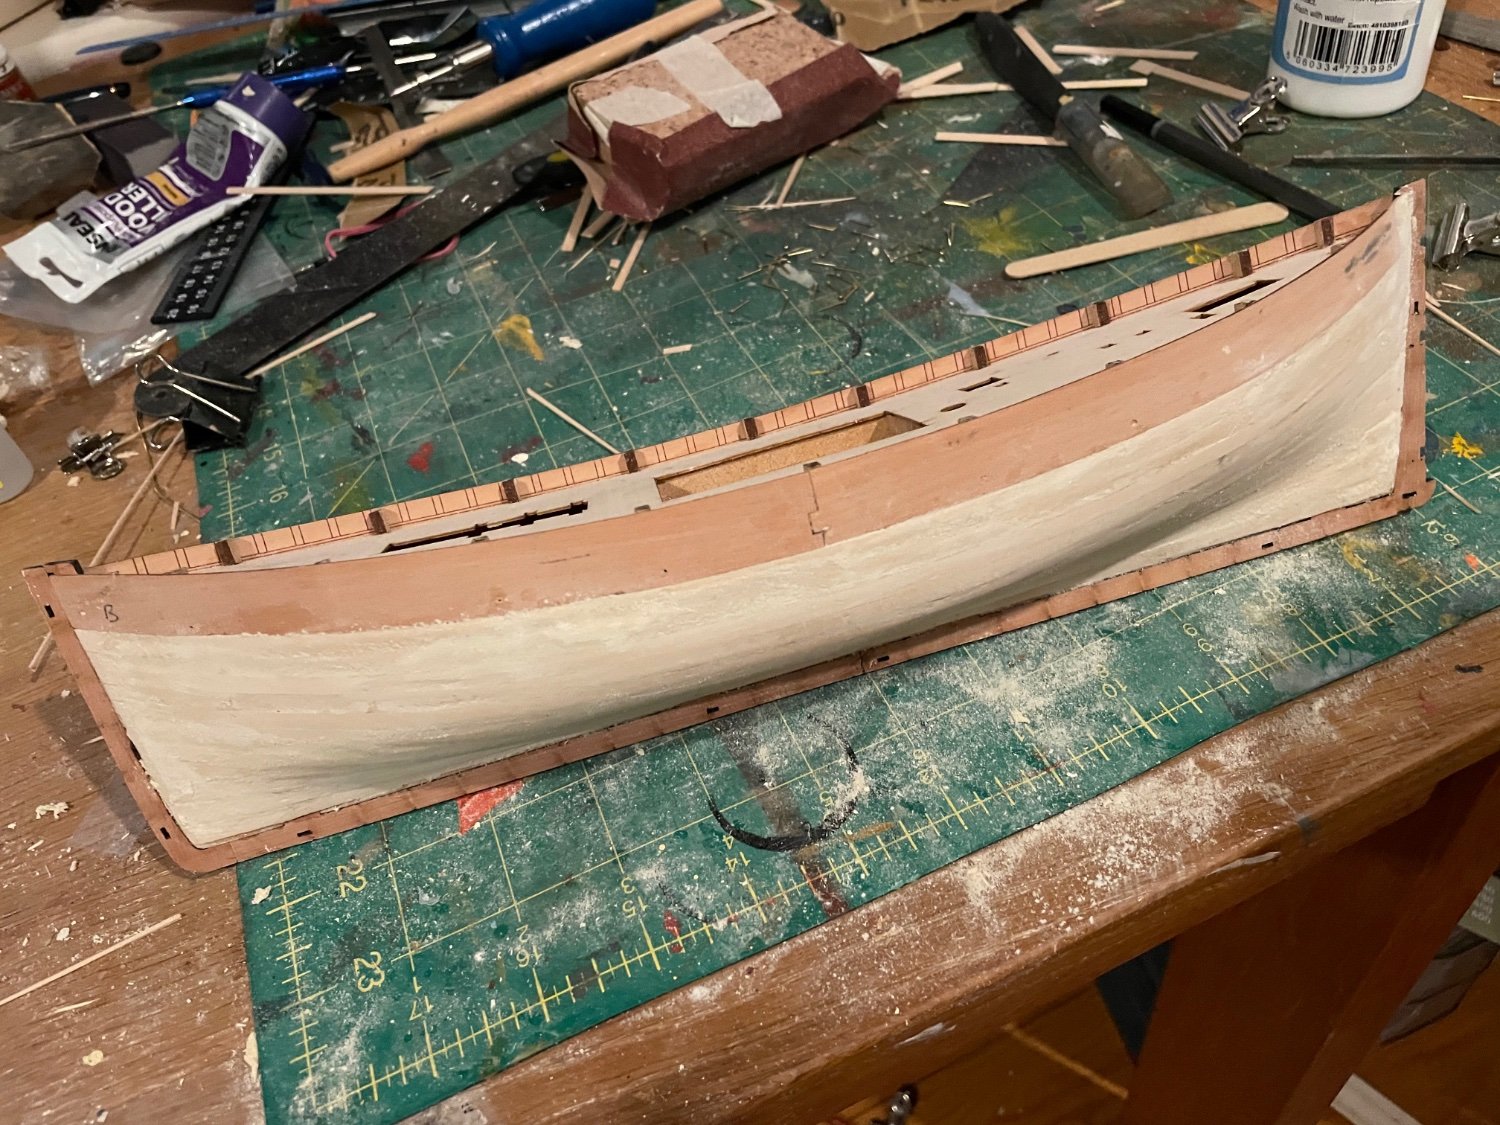
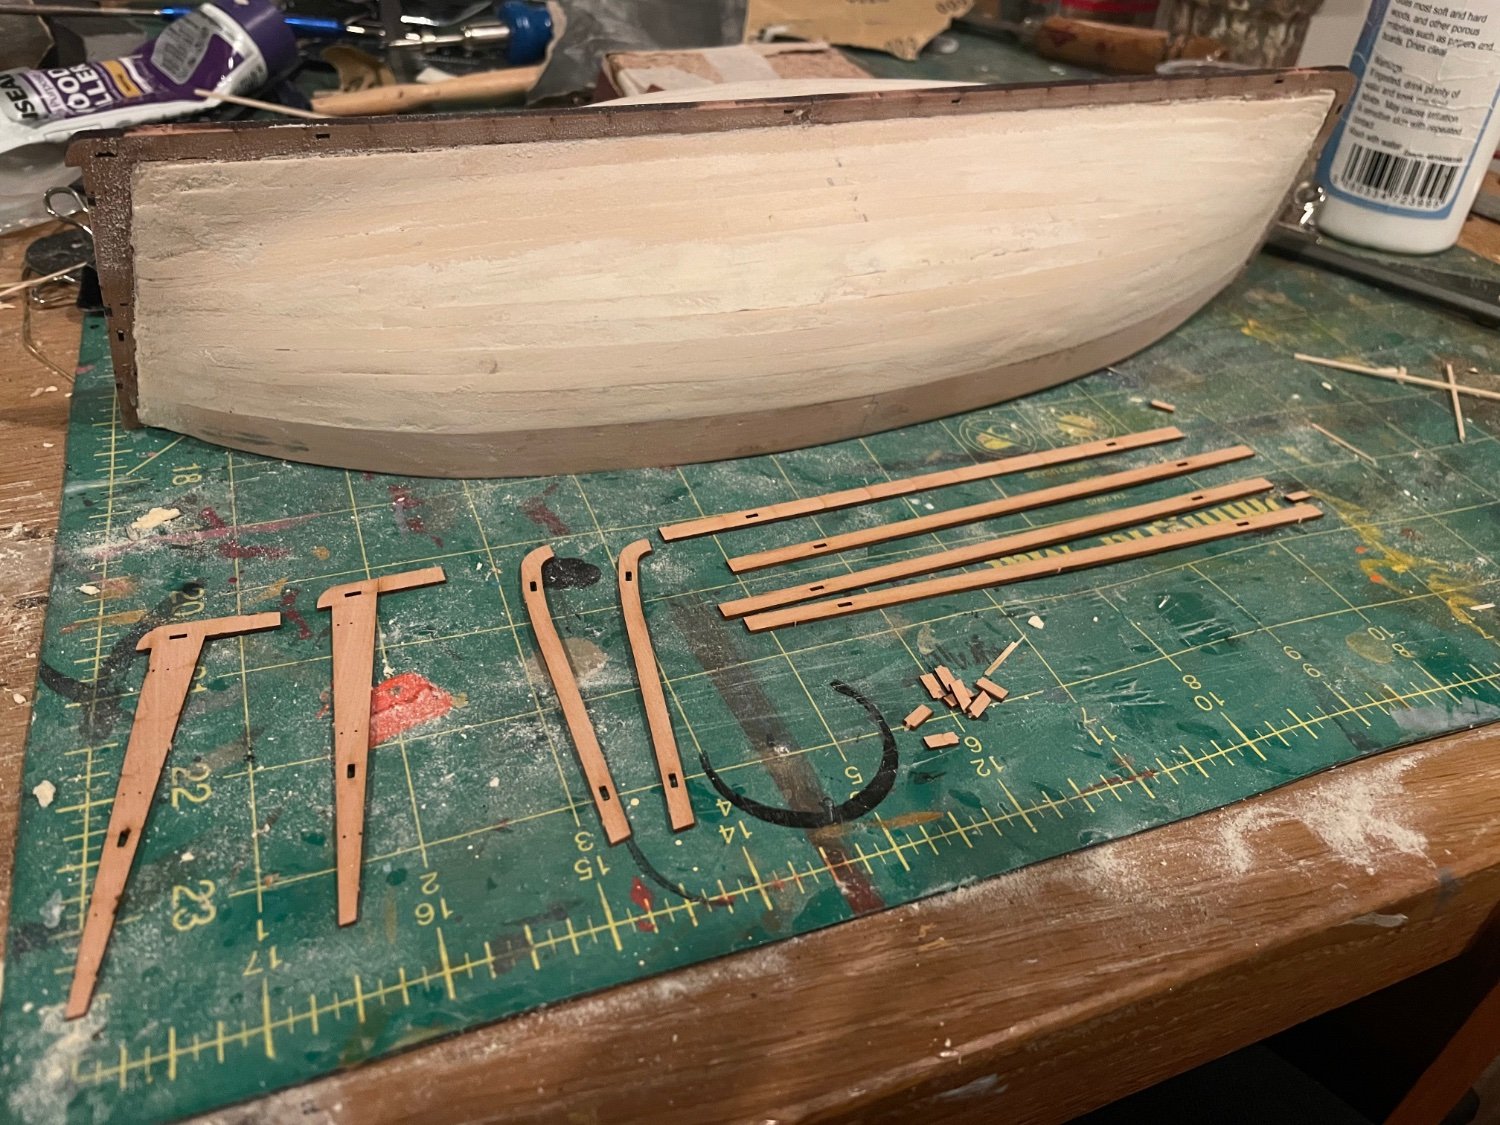
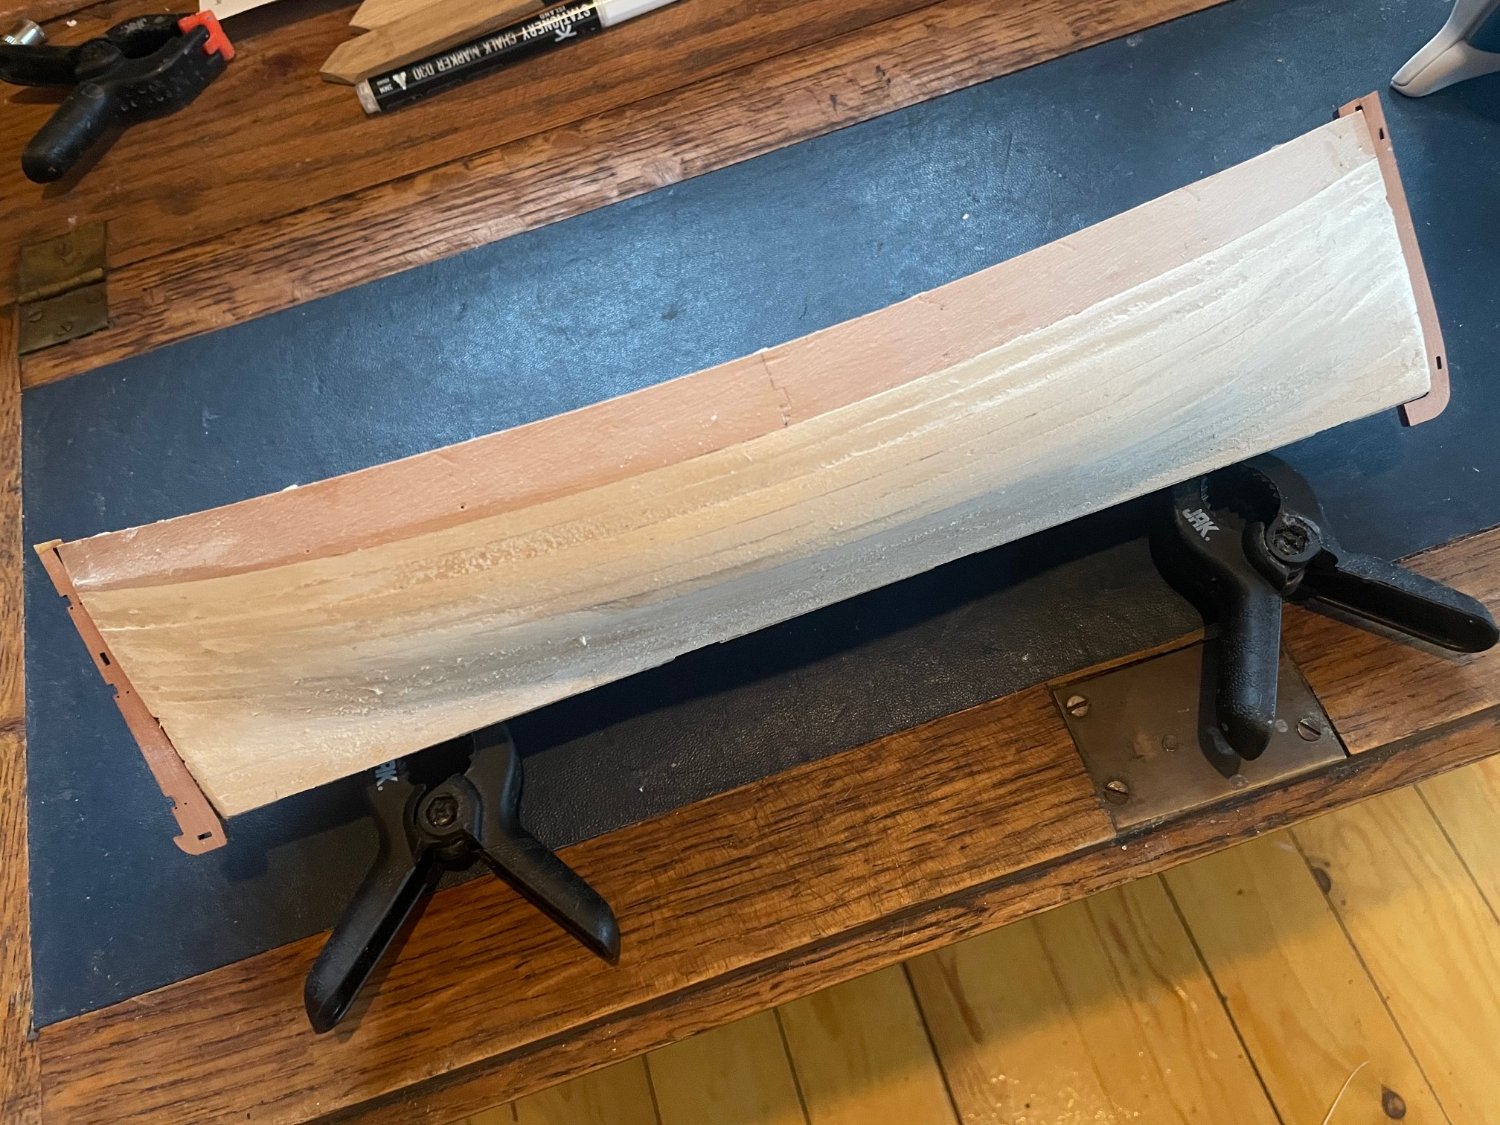
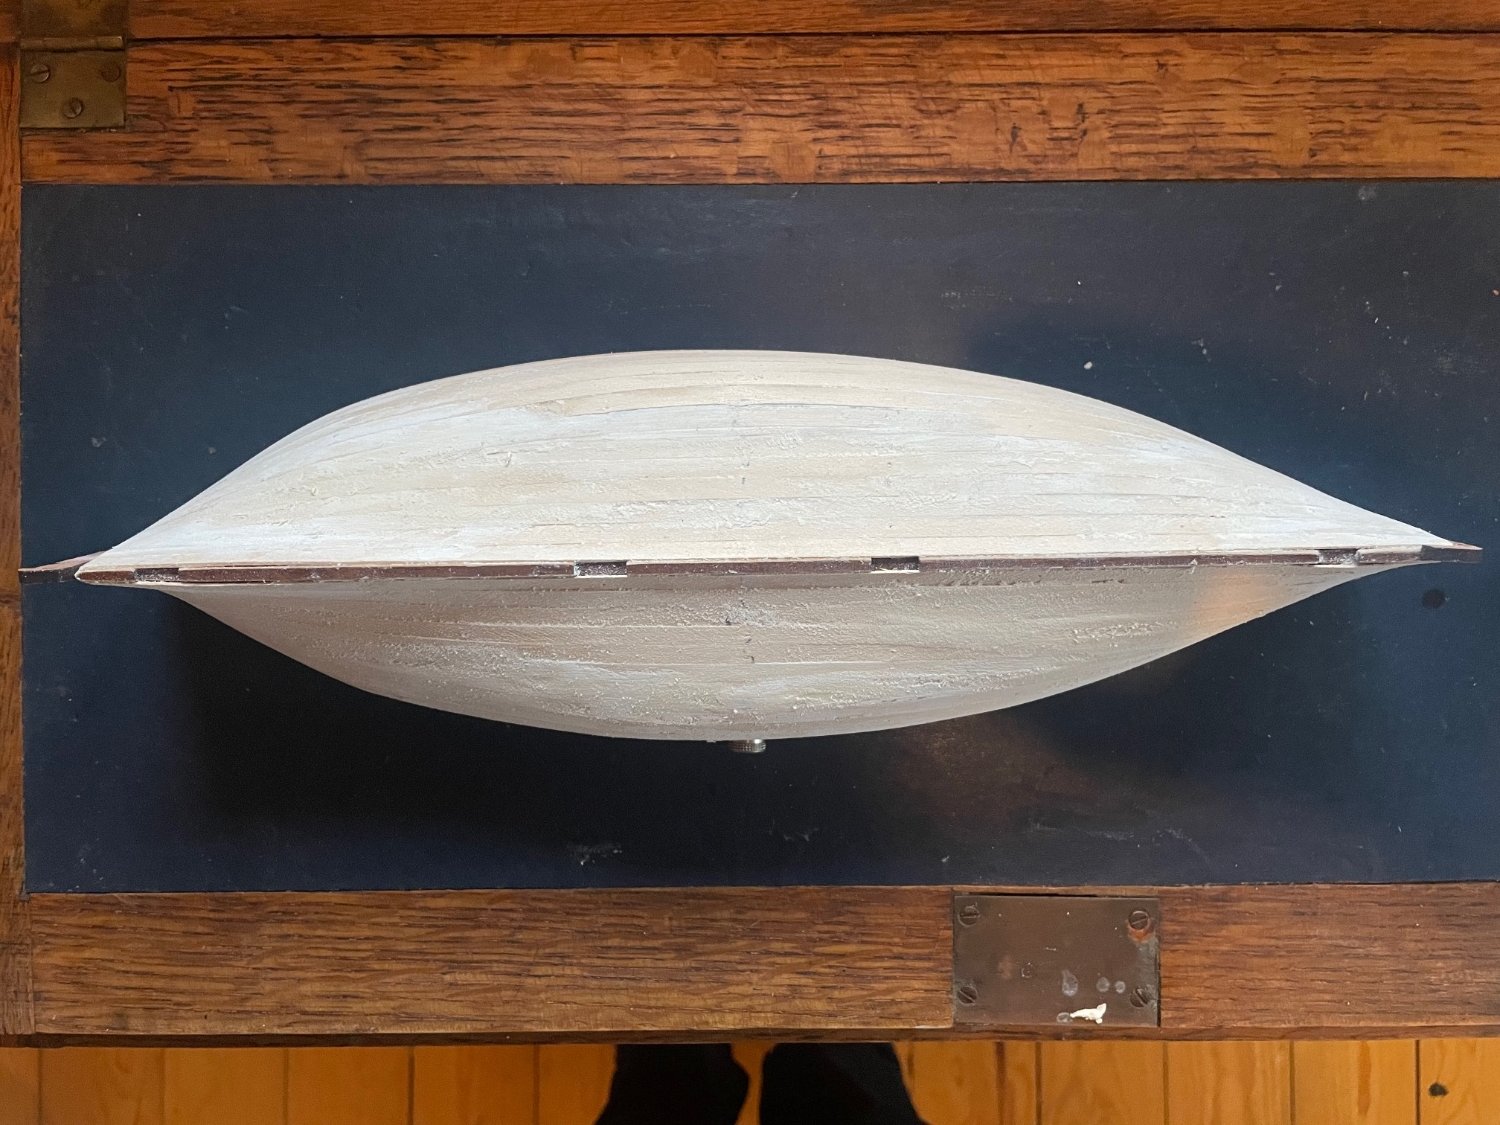
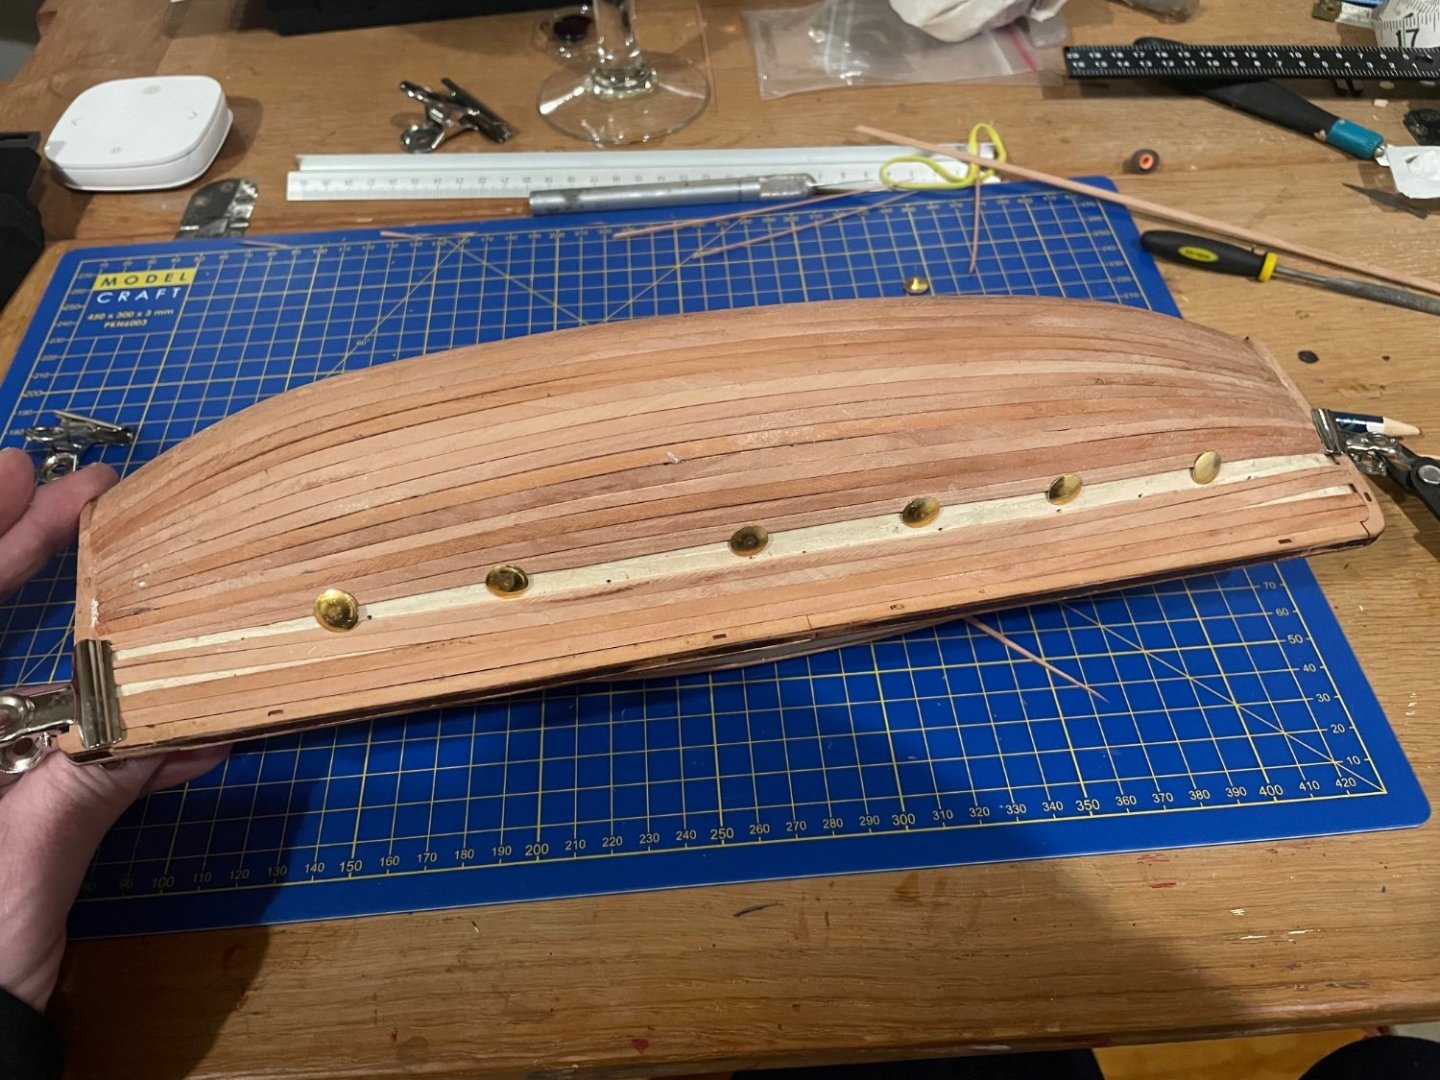
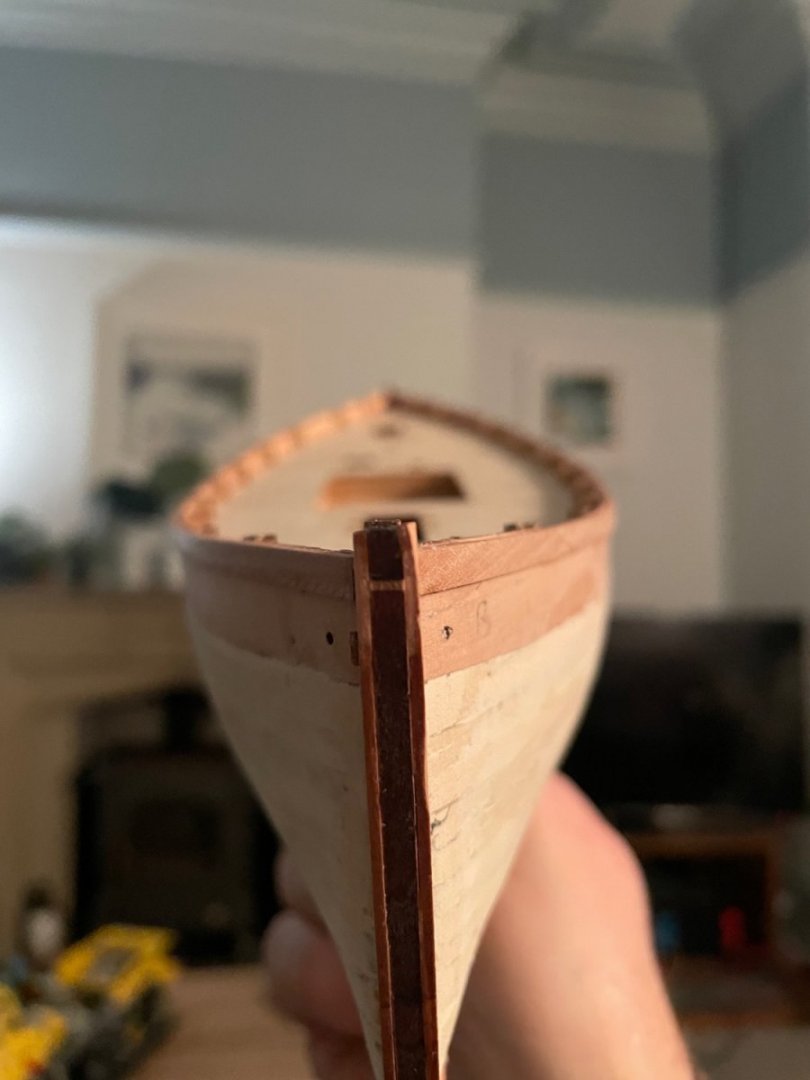
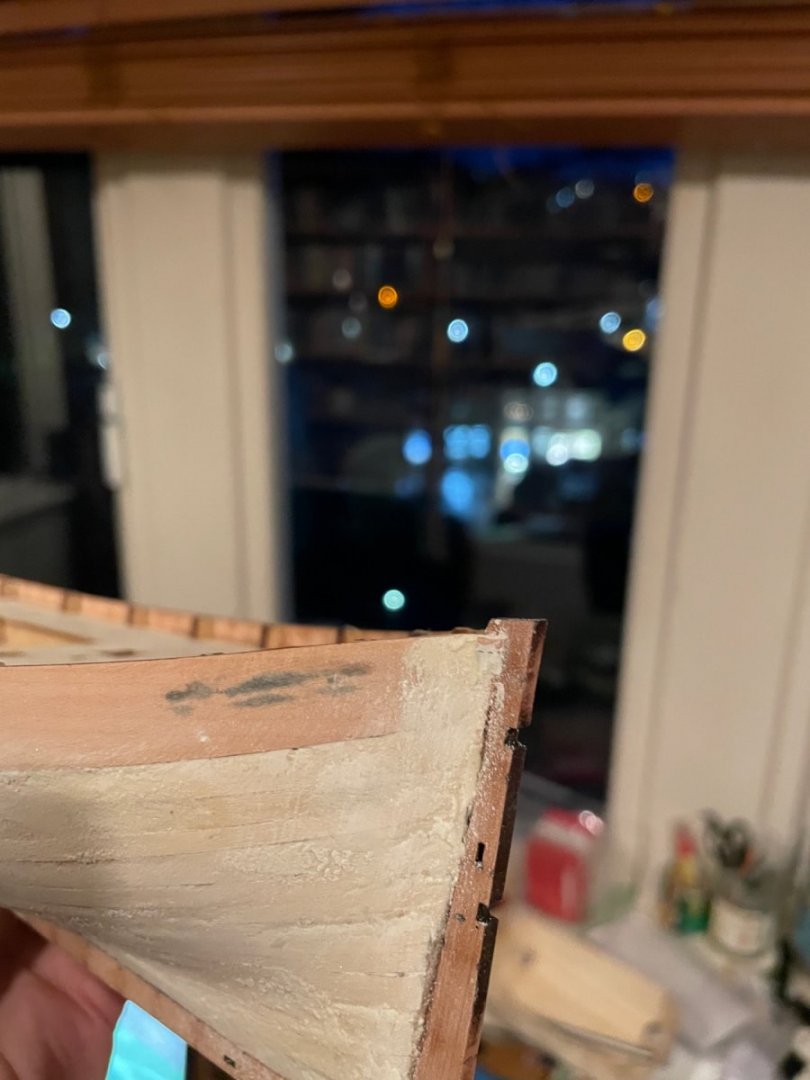
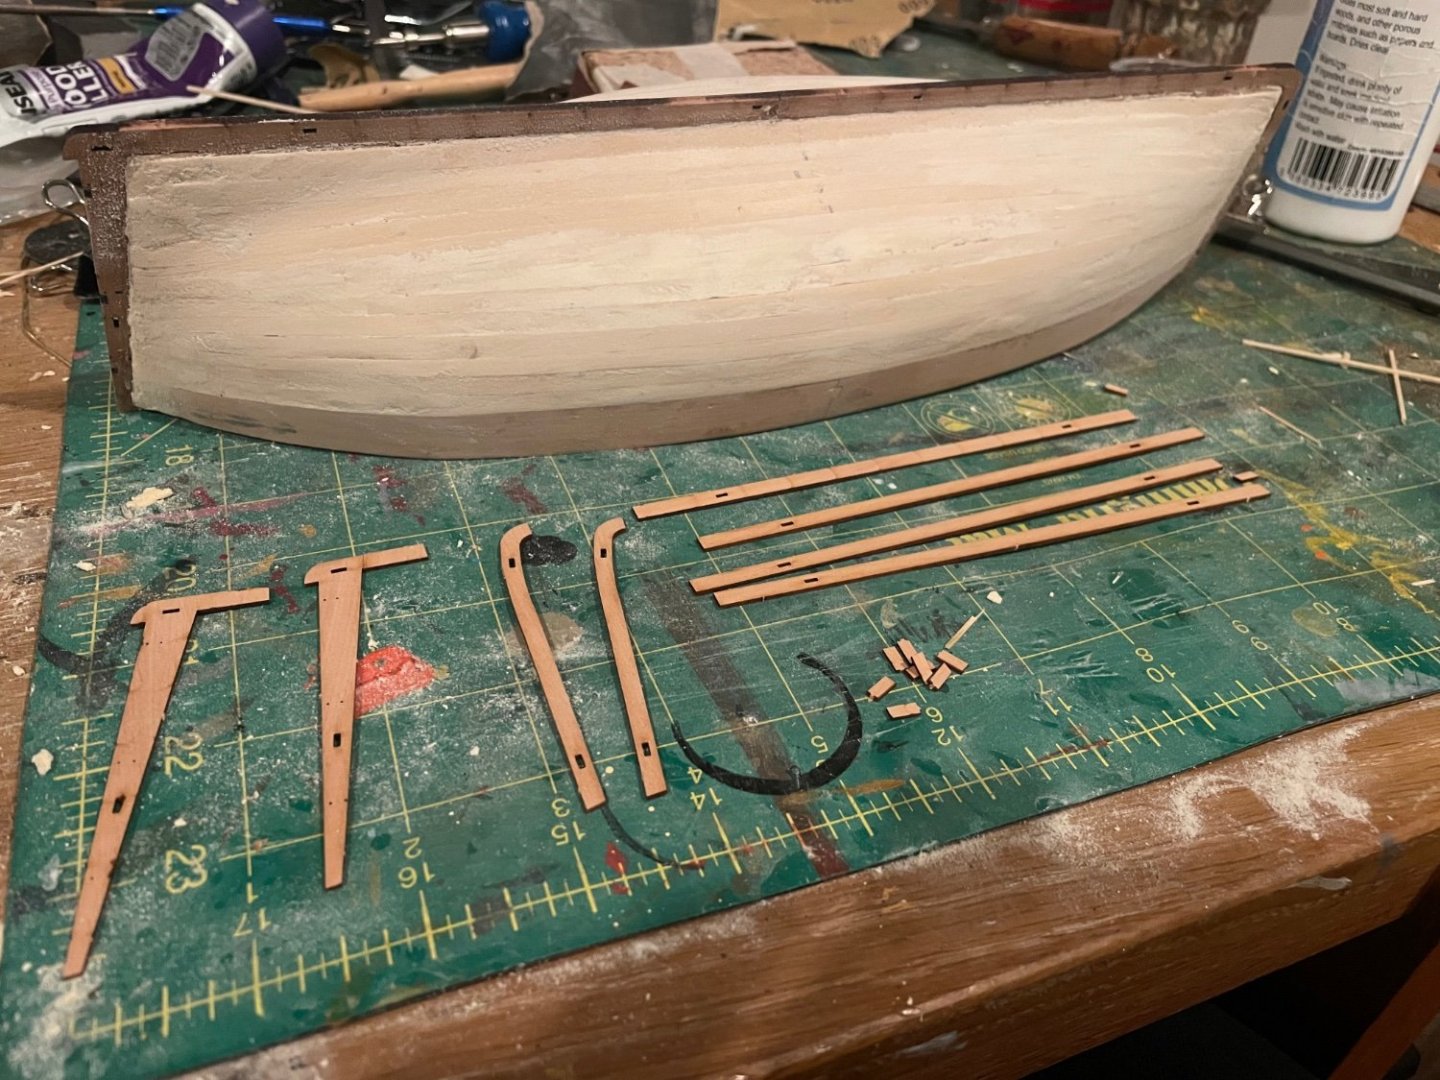
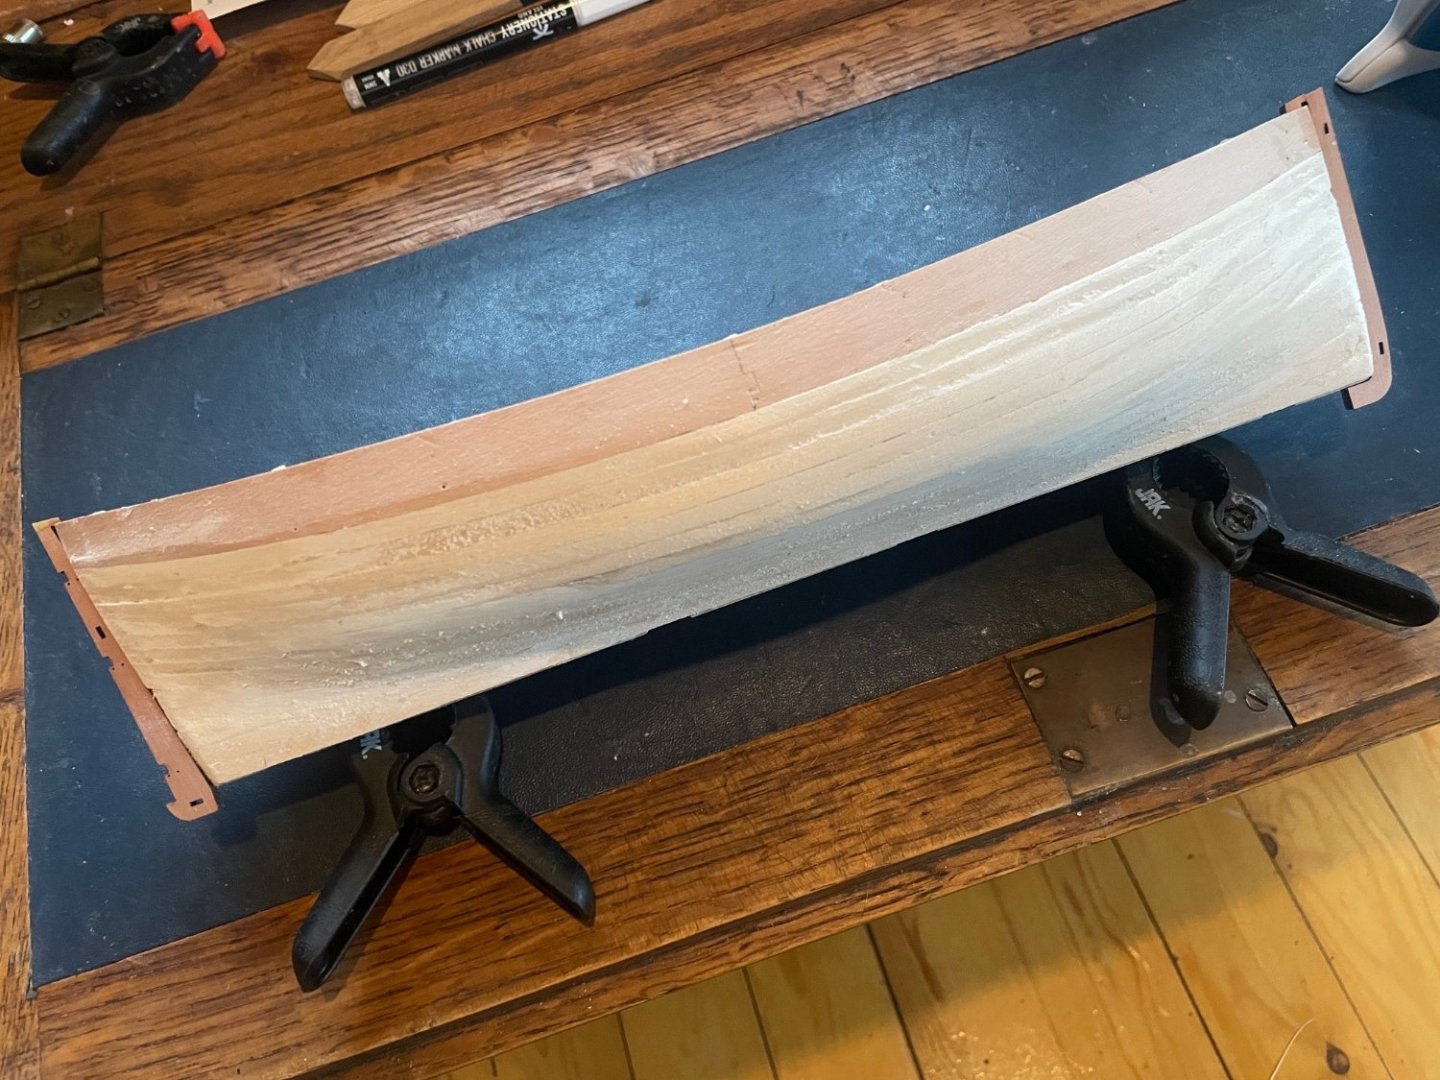
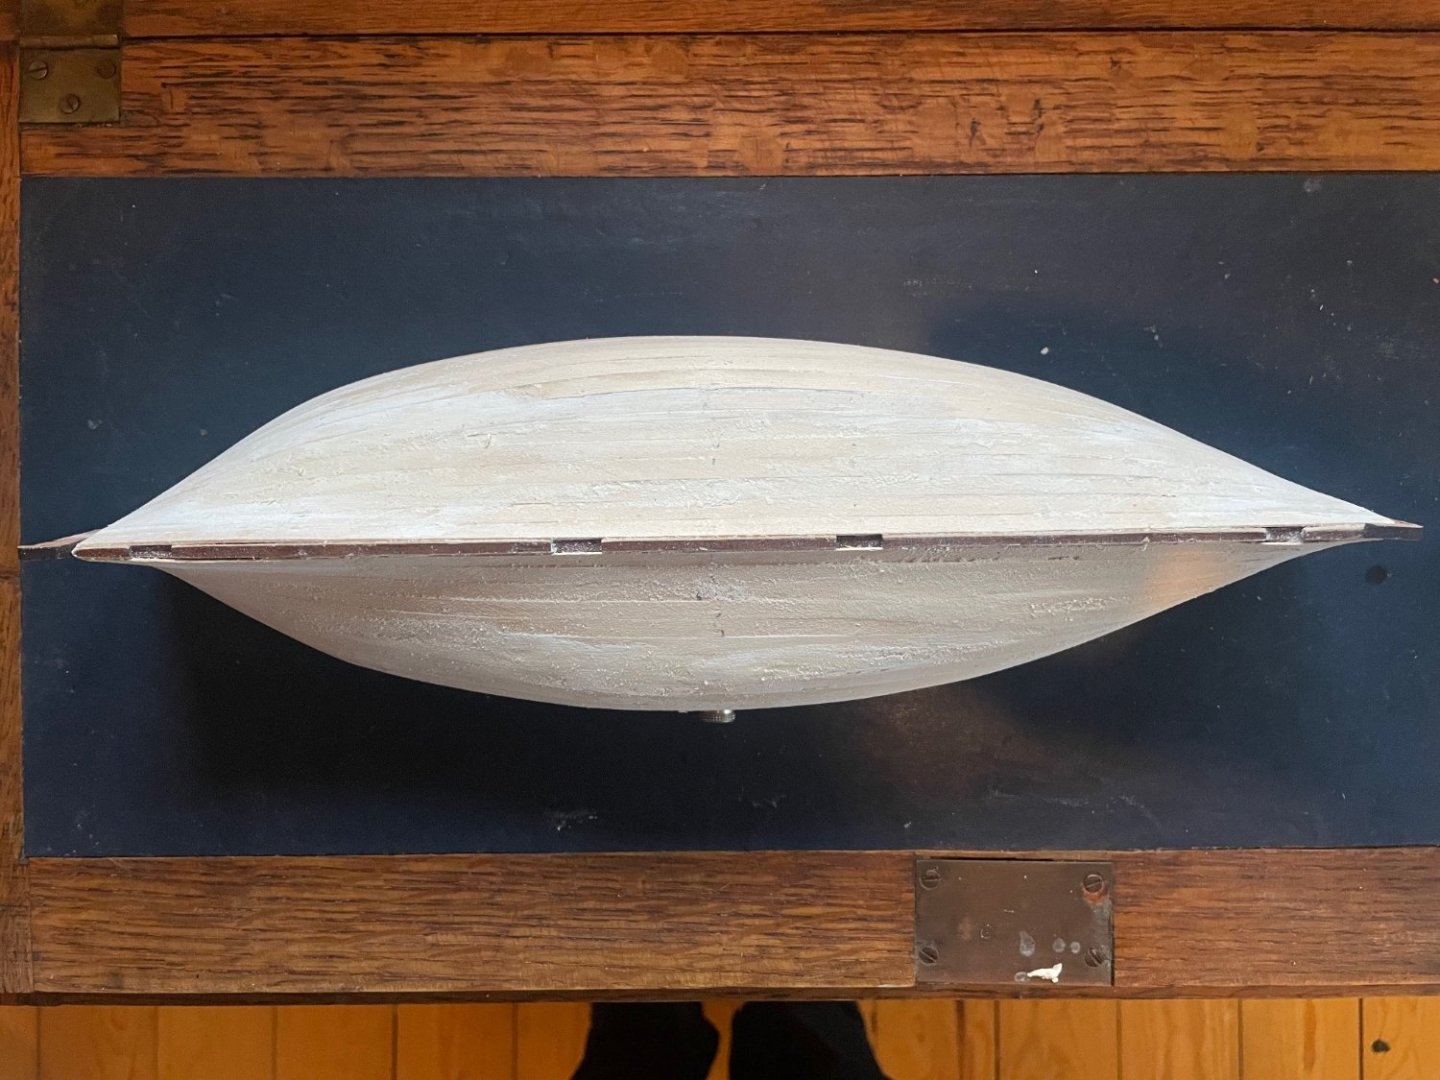
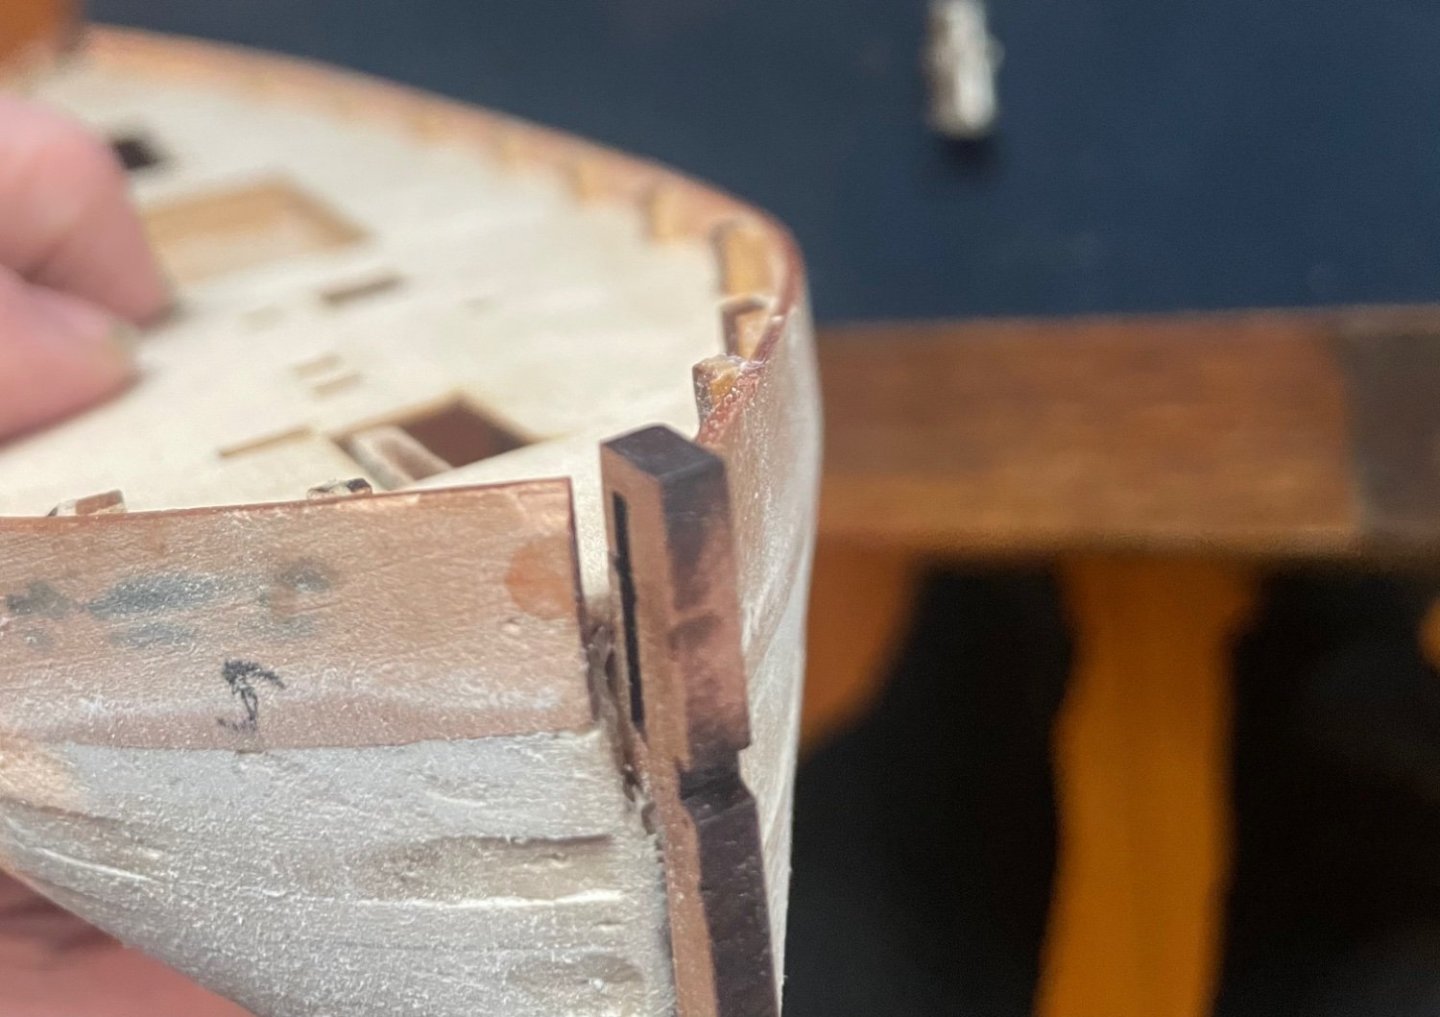
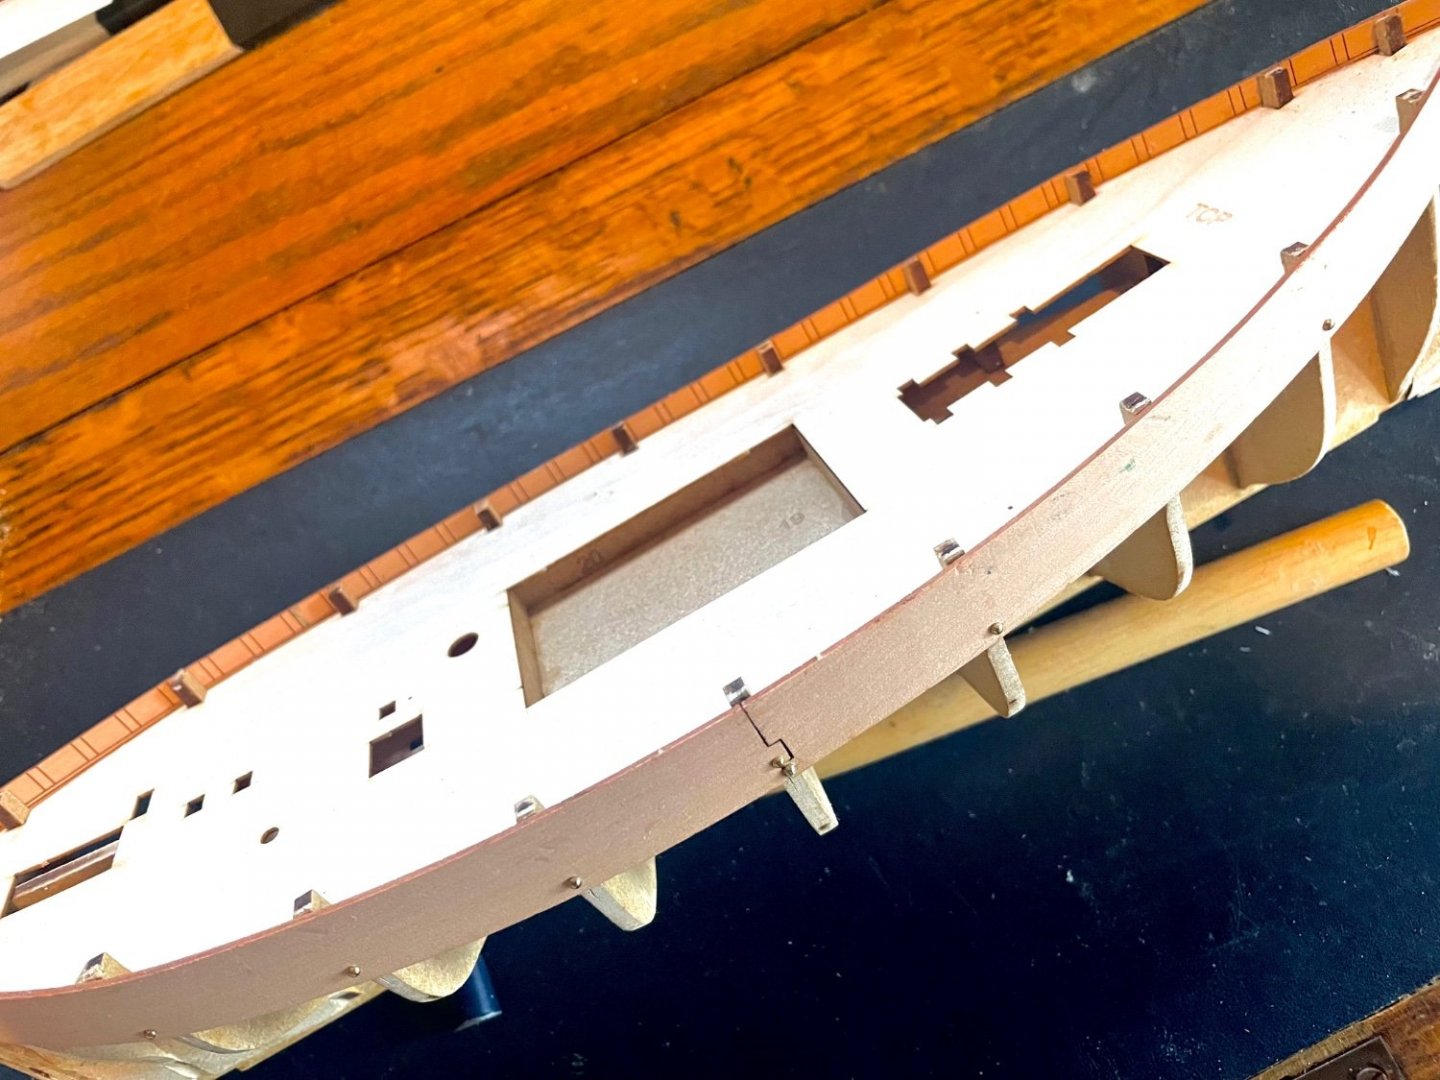
 I’ve completed the second planking and sanded it. I’ve yet to apply 240 fine grit and I think maybe it needs more sanding before that, but I’m not sure how to tell when to stop. Here it is. As you can see, where to planks meet the prow and stern could be neater. I’ve also removed the top of the bulkheads from around the inside of the bulwarks above deck. Once I think the sanding is sufficient the next job is to add the rubbing strakes and rudder. Then I need to think about the paint I’ll use for the red part of the hull. Oh and I need something to use to create the waterline.
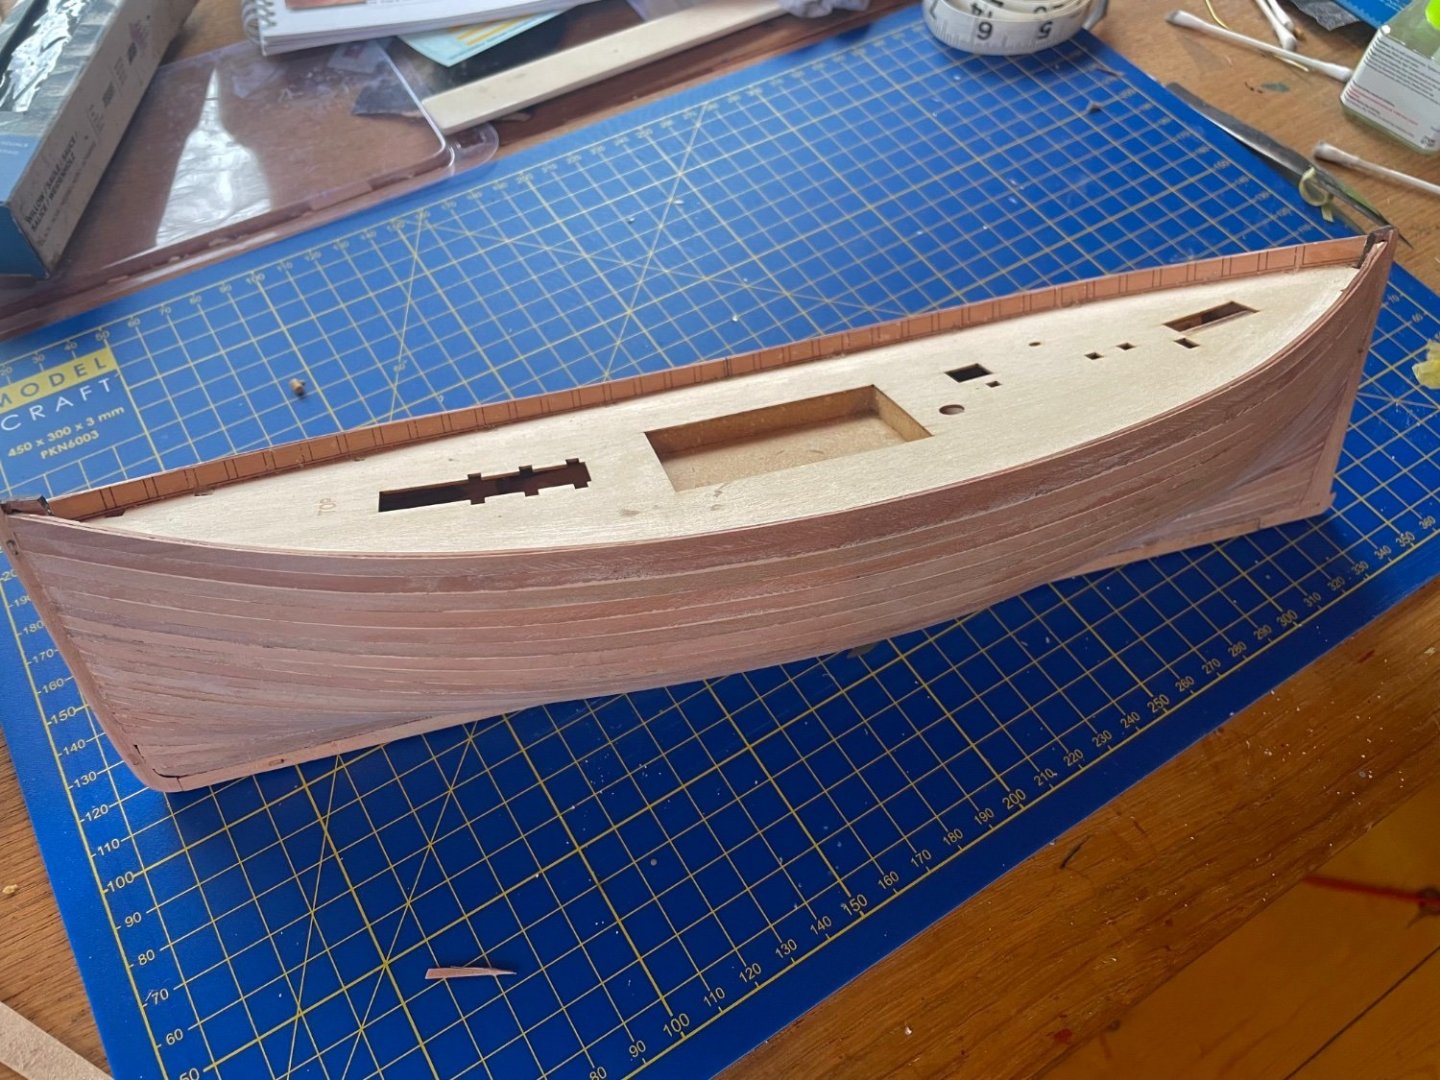


-
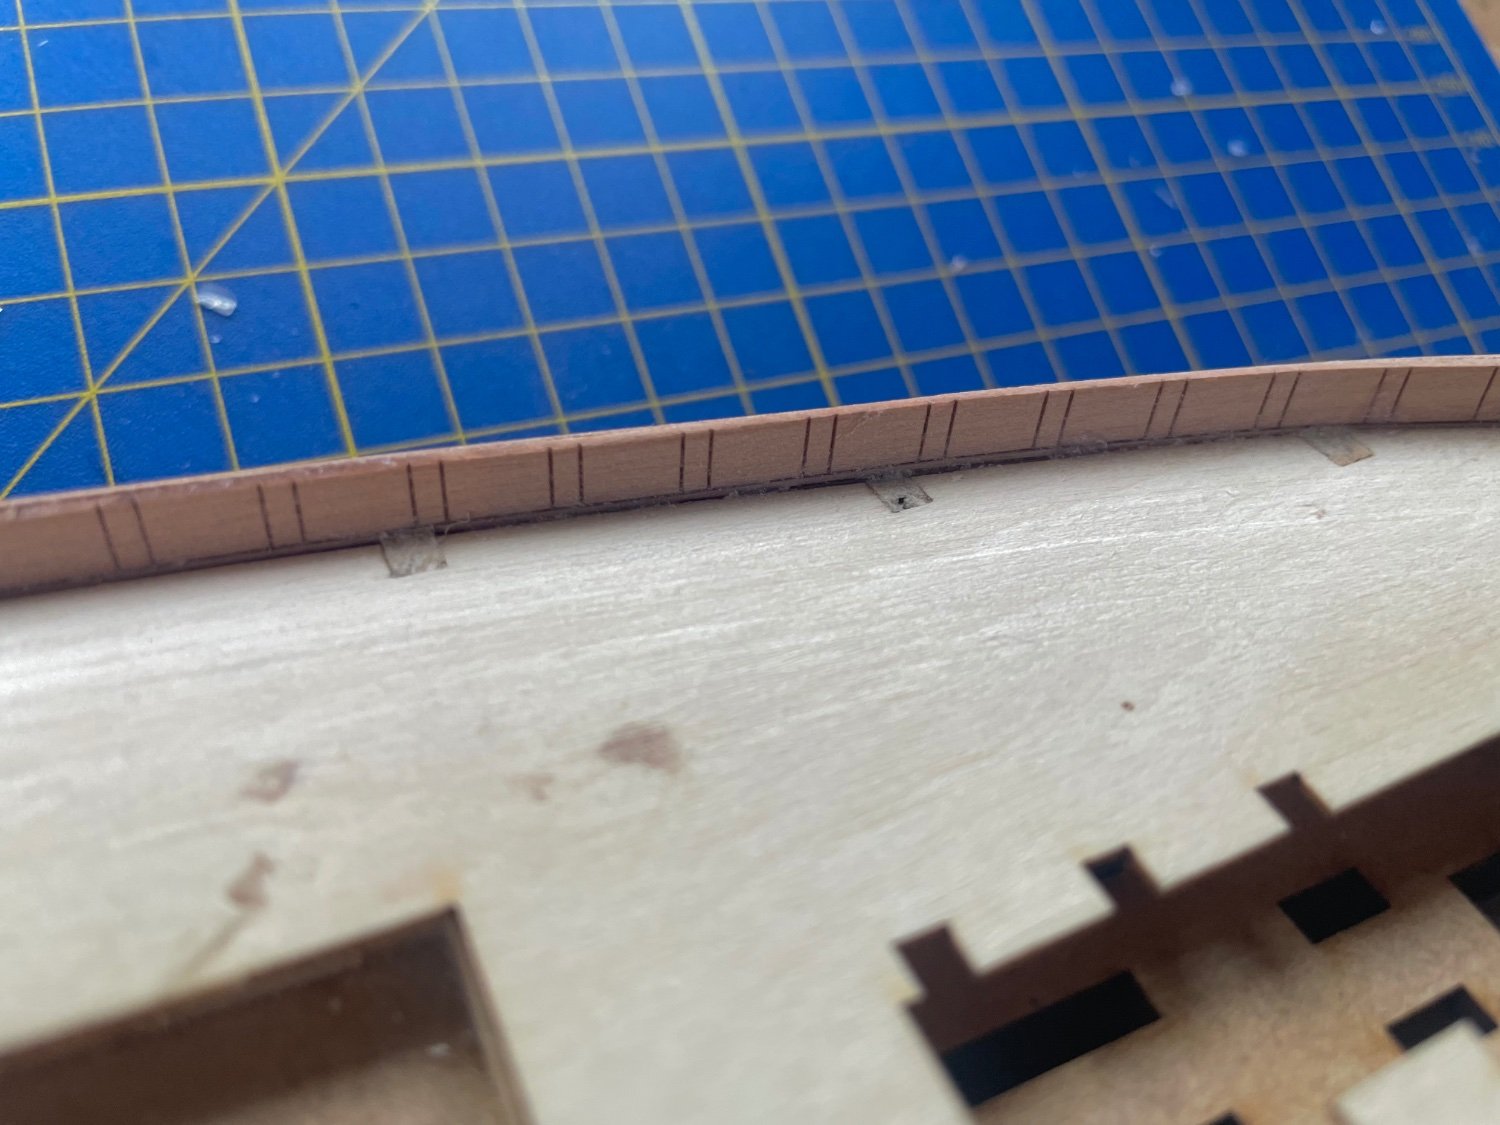
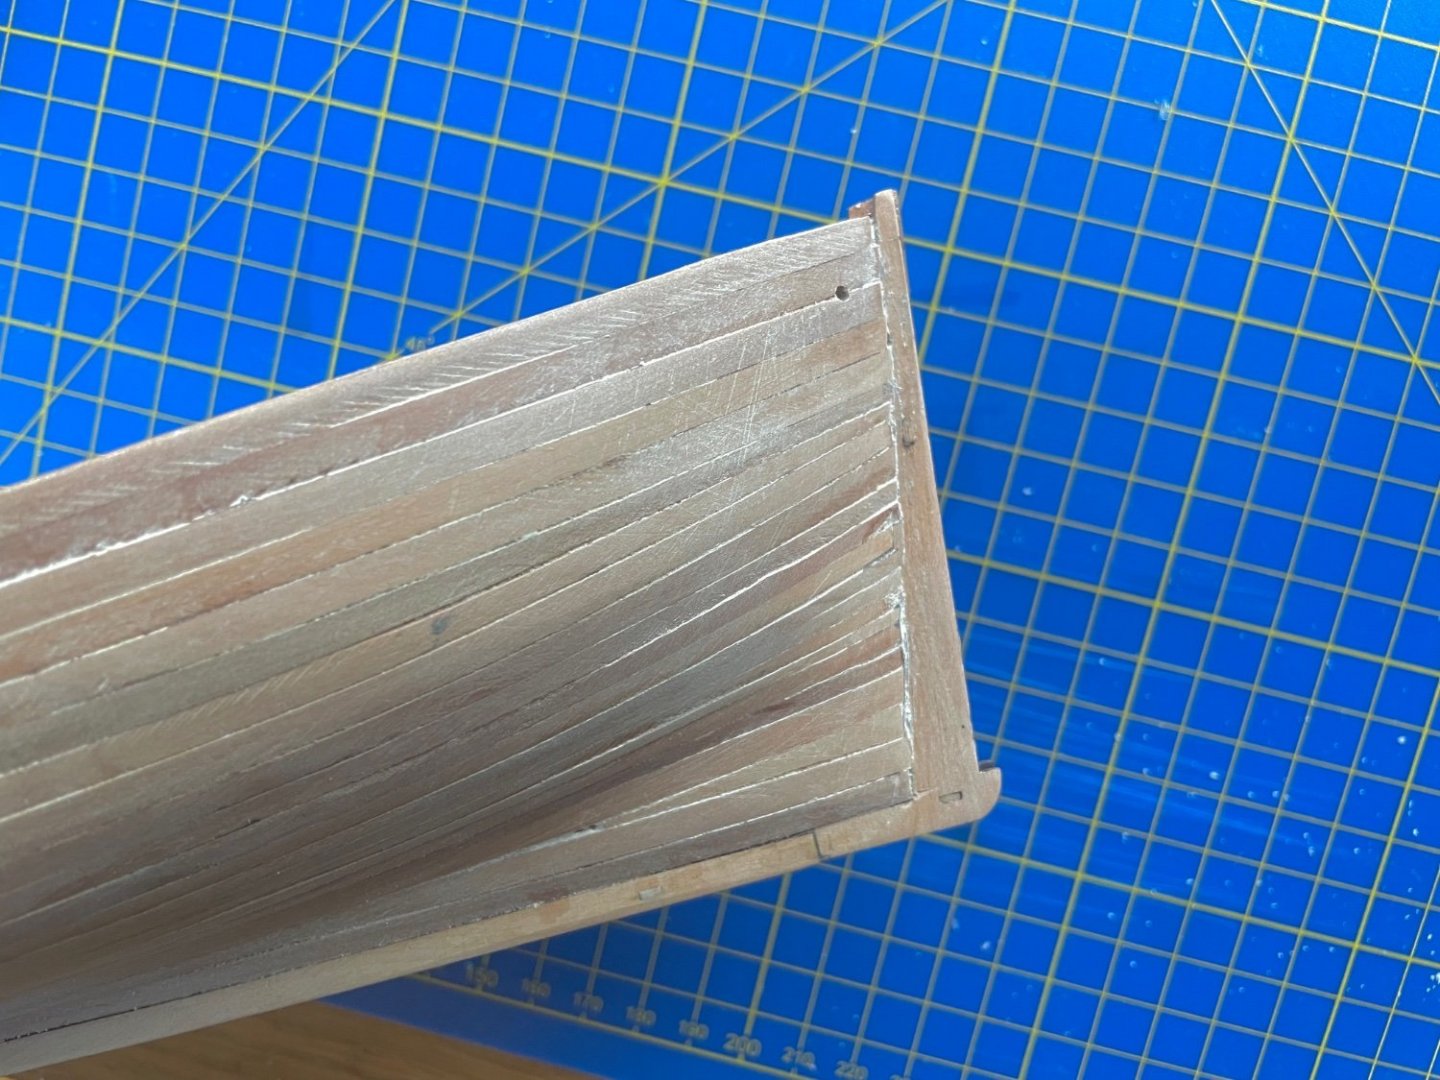
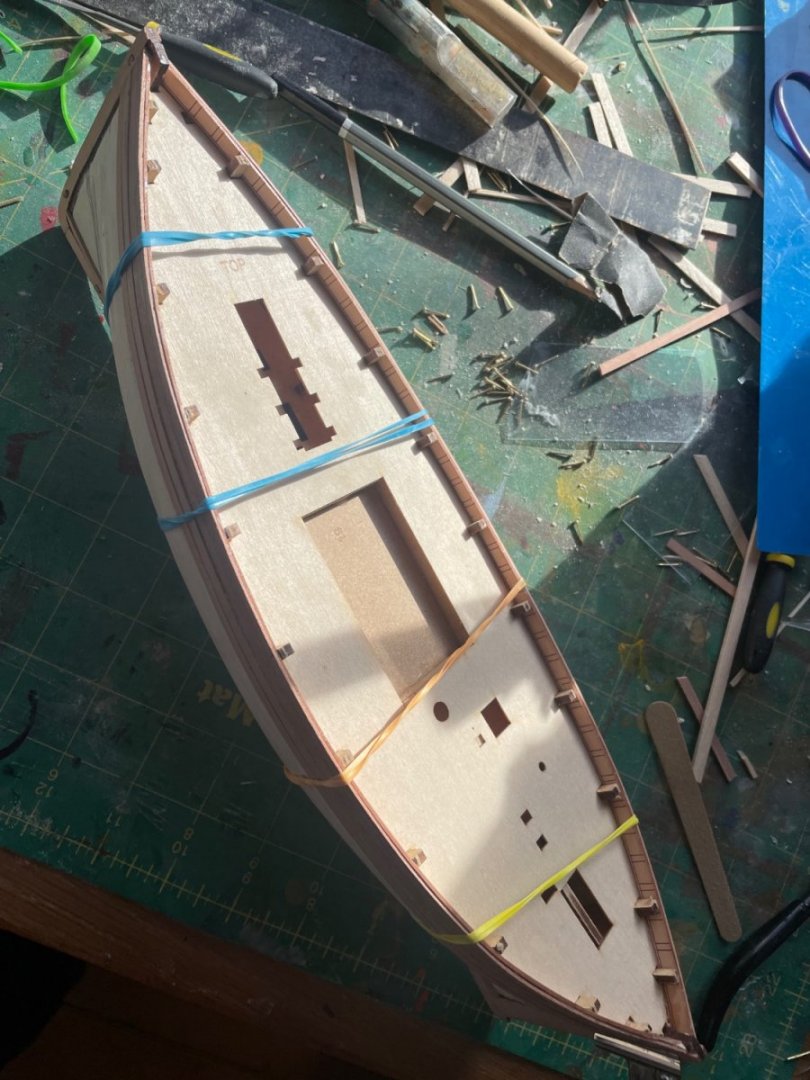
Okay I’ve nearly finished the second planking. No major problems, although not every plank fit neatly into either end. It’s difficult judging the correct length before fixing the plank in place I find. Easy to fill and it’s mainly in areas to be painted. See how it looks when sanded down. oh and new cutting mat!


-
Air brush vs paint & brush
Etcher replied to jefferyt's topic in Painting, finishing and weathering products and techniques
Thanks Tim, yes you seem to have understood the problem. My explanation probably lacked clarity! I’ll try to do as you say. Thanks! -
Air brush vs paint & brush
Etcher replied to jefferyt's topic in Painting, finishing and weathering products and techniques
Actually that is how it is meant to be. That is the way the nozzle is. Anyway the issue is with the adapter being stuck in the tube.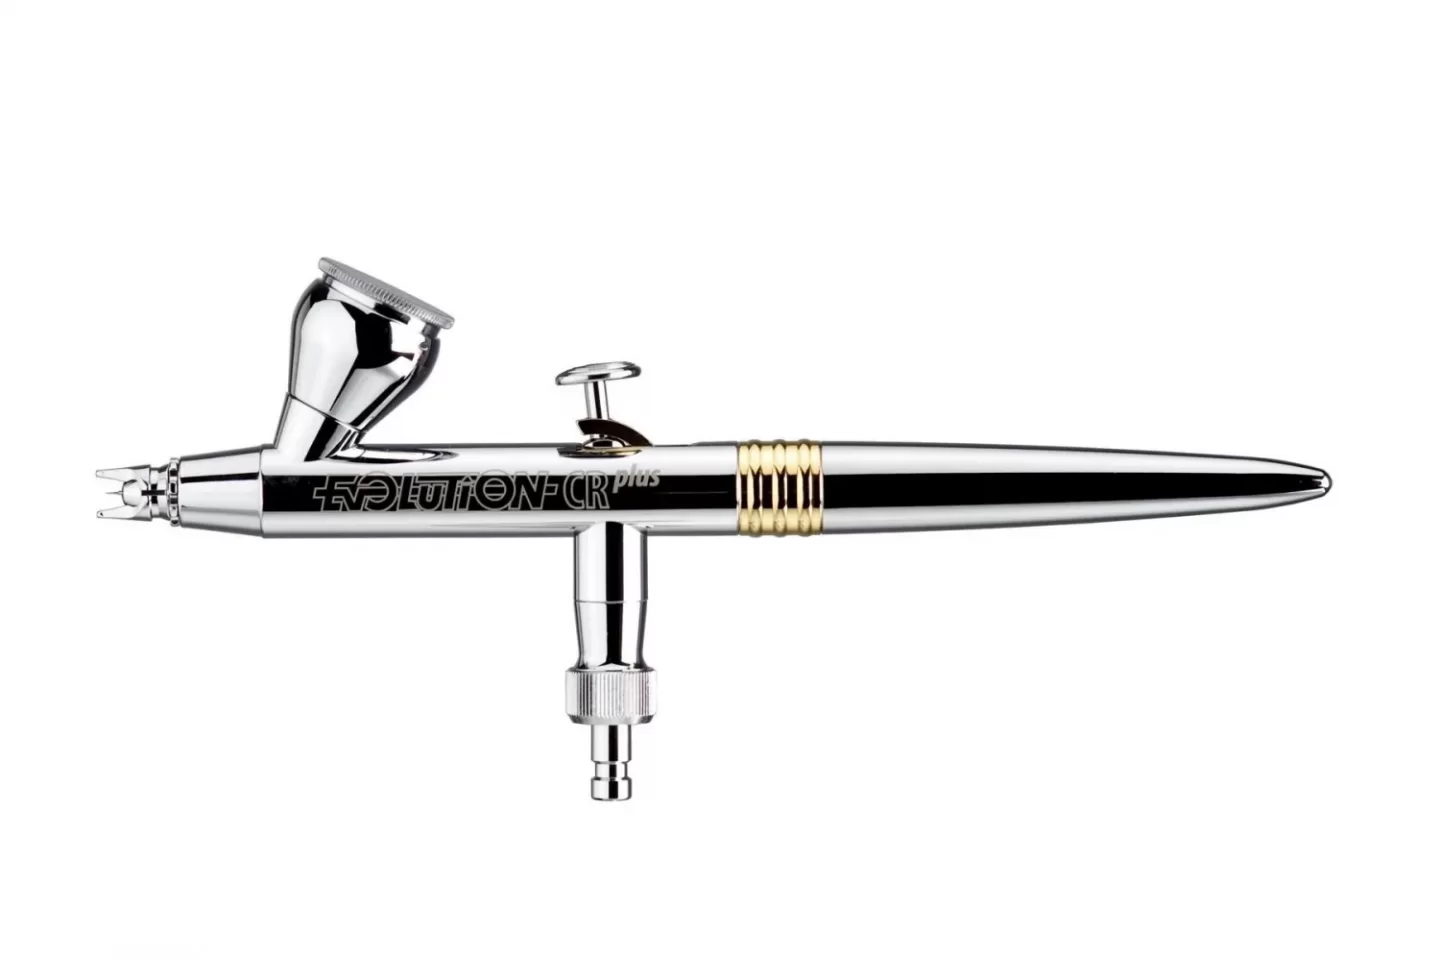
-
Air brush vs paint & brush
Etcher replied to jefferyt's topic in Painting, finishing and weathering products and techniques
Yes the nozzle is in the box. I haven’t used it for over a year. -
Air brush vs paint & brush
Etcher replied to jefferyt's topic in Painting, finishing and weathering products and techniques
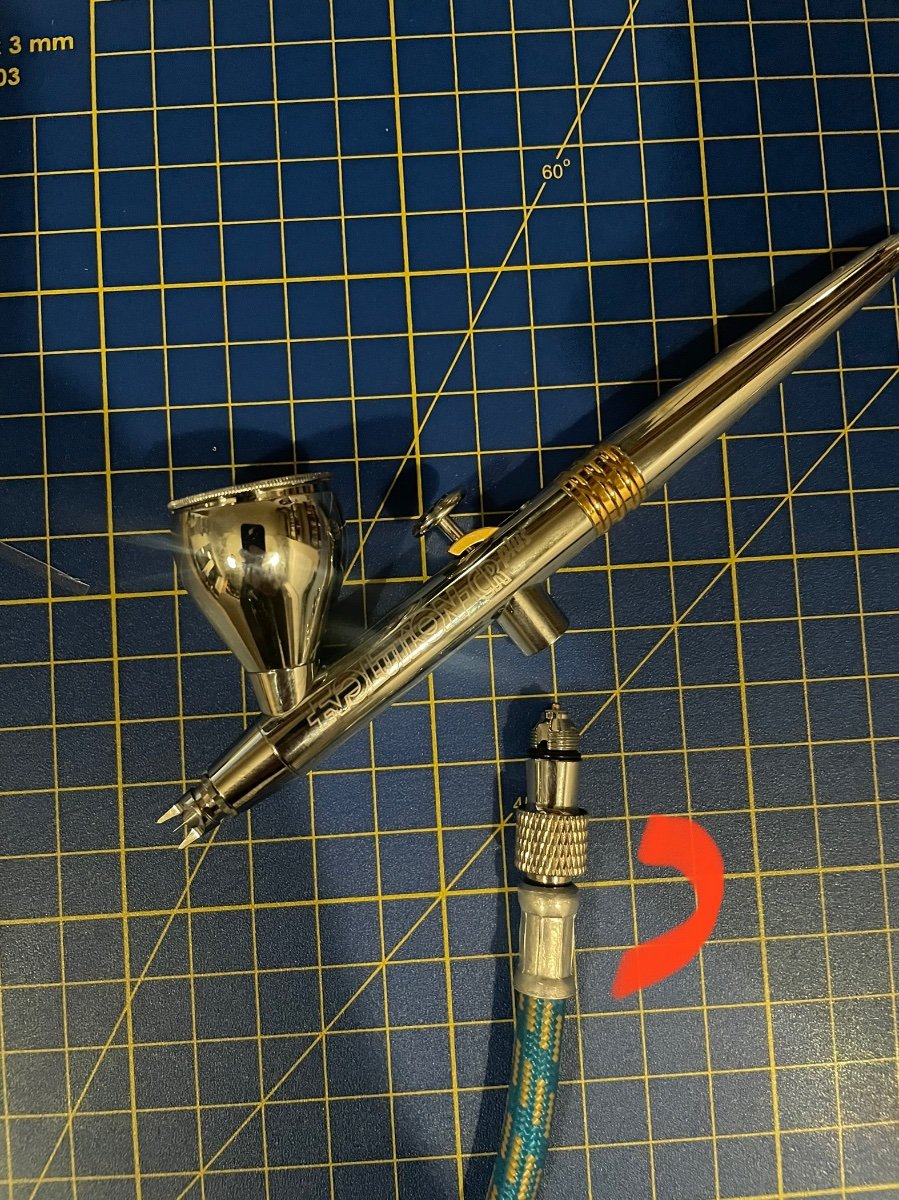
Okay, having expressed misgivings about using airbrushes above I’ve decided to give it another go and get mine out of the box. I bought an Evolution Cr plus to to replace the cheaper passche I had previously. I still have the same compressor though, which probably isn’t up to the job. One problem I have is that the part that connects the airbrush to the tube(?) is jammed in. It happened first time I tried to use it. Here’s what I mean. The red line shows the parts stuck together. Apart from that I had trouble getting the hang of the double action but didn’t really persevere.
-
My build of this kit started 7 years ago and it’s not planked yet, so yours is fresh by comparison! 😂 You made a much better job of meeting the bulwark pieces at the bow. It looks a lot neater. Like, ‘This is how it should look’!
- 204 replies
-
- 1
-

-
- kitbashing
- Woodcarving
- (and 4 more)
-
Has anyone had experience using a wooden kit for a diorama where it basically becomes a waterline model? I’m thinking of building OcCre’s Terror in the future but in a diorama based upon the Dan Simmon’s novel, with the ship stuck in frozen water. This will be doubly attractive to me as I’m not keen on the lower hull of that ship anyway! 😂 I was thinking maybe of building it as normal with bulkheads and basically not planking it from a bit below the waterline. Then inserting it into a wooden support. It would be a quite deep surface but I intend to maybe having text from the novel around the sides of the wooden support, probably white text on black background, with ‘Terror’ at either end. I might do a drawing of it to further plan it out. 🧐
- 1 reply
-
- 1
-
-
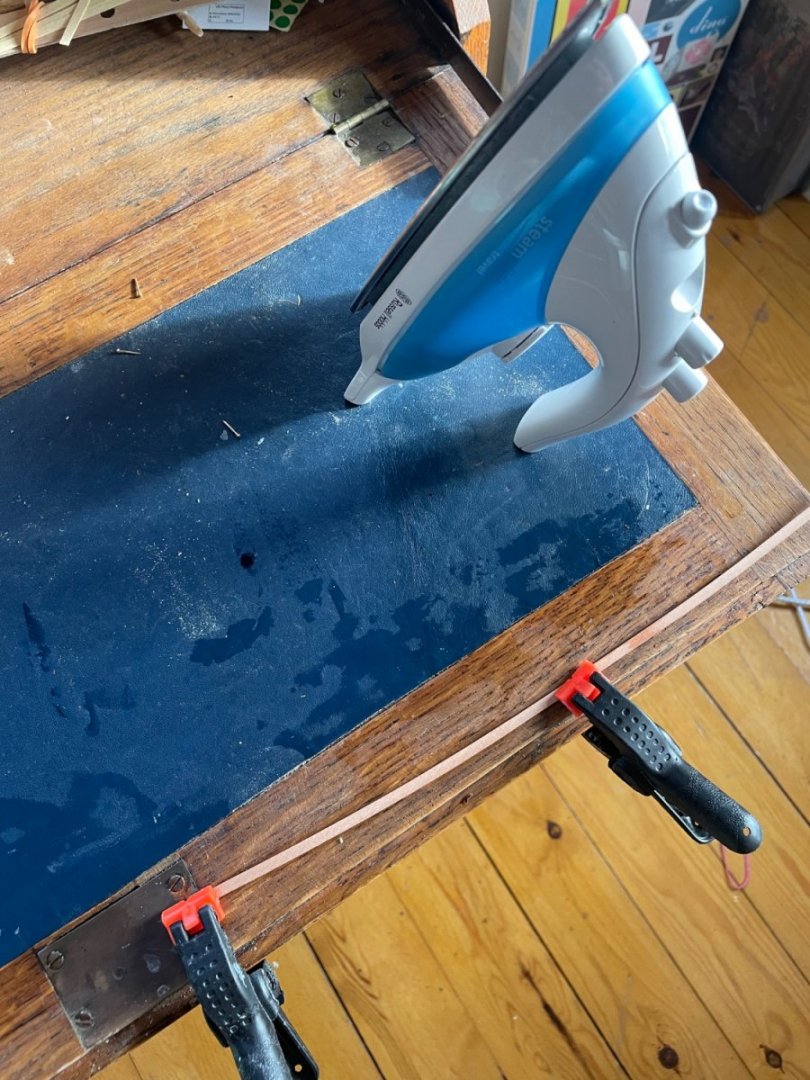
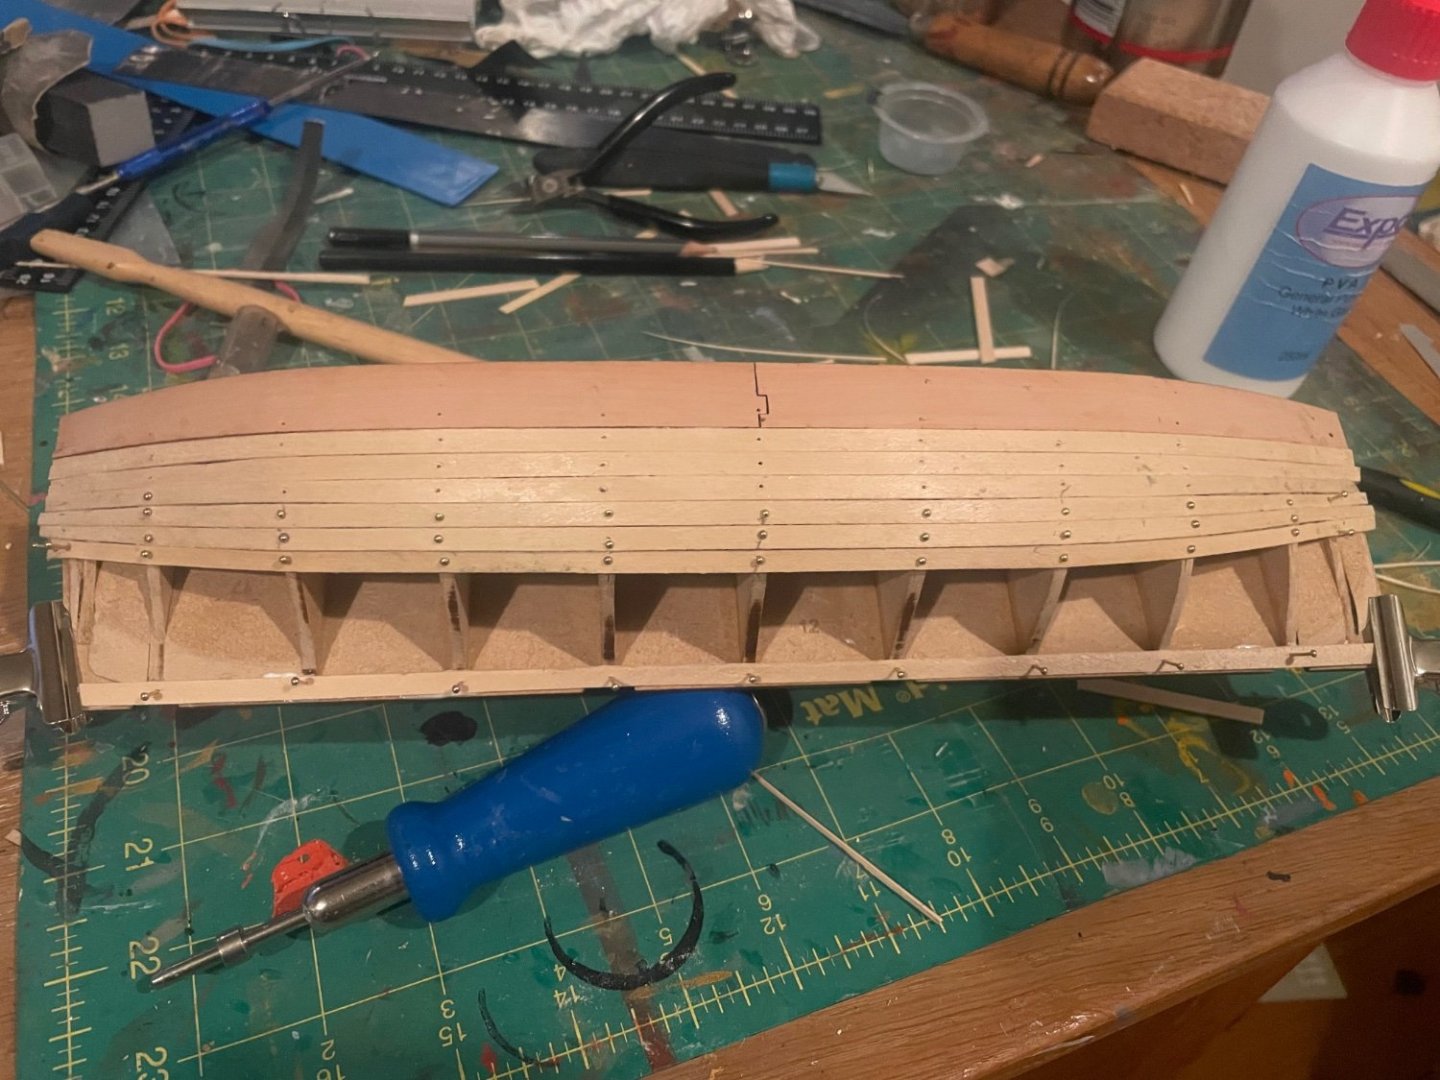
I started the second planking. I’m pre-bending with a £10 travel iron I bought recently, making the pack bender I also bought recently redundant! The iron is more useful I find. I’m mainly using elastic bands to hold planks in place and glueing with PVA, with a dab on CA on the end of the planks for fixing against the prow and stern. Now I’ve started to taper the planks as I progress down the hull, and I’ve fixed on the garboard plank.

-
This is a kit I’m interested in building. The only thing that puts me off is the odd shaped hull. During builds it always looks like it’s wrong!
-
I think Vanguard kits are a good choice for someone new to the hobby. Their instructions don’t assume prior knowledge and are very clear.
-
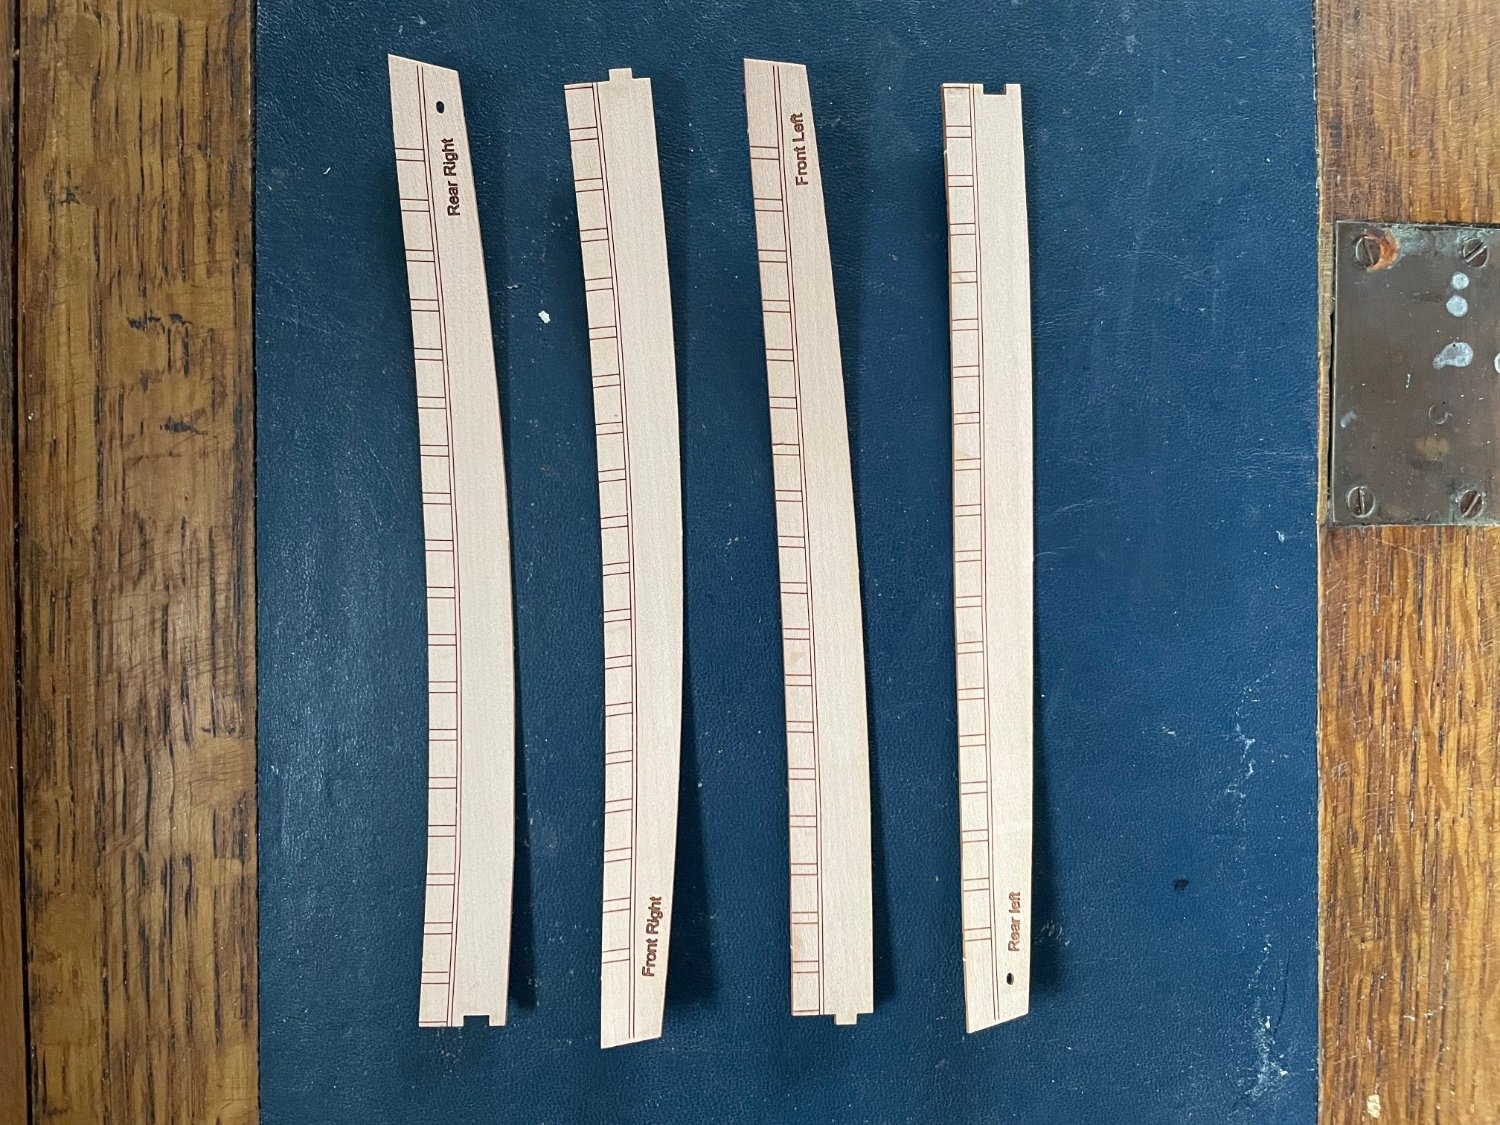
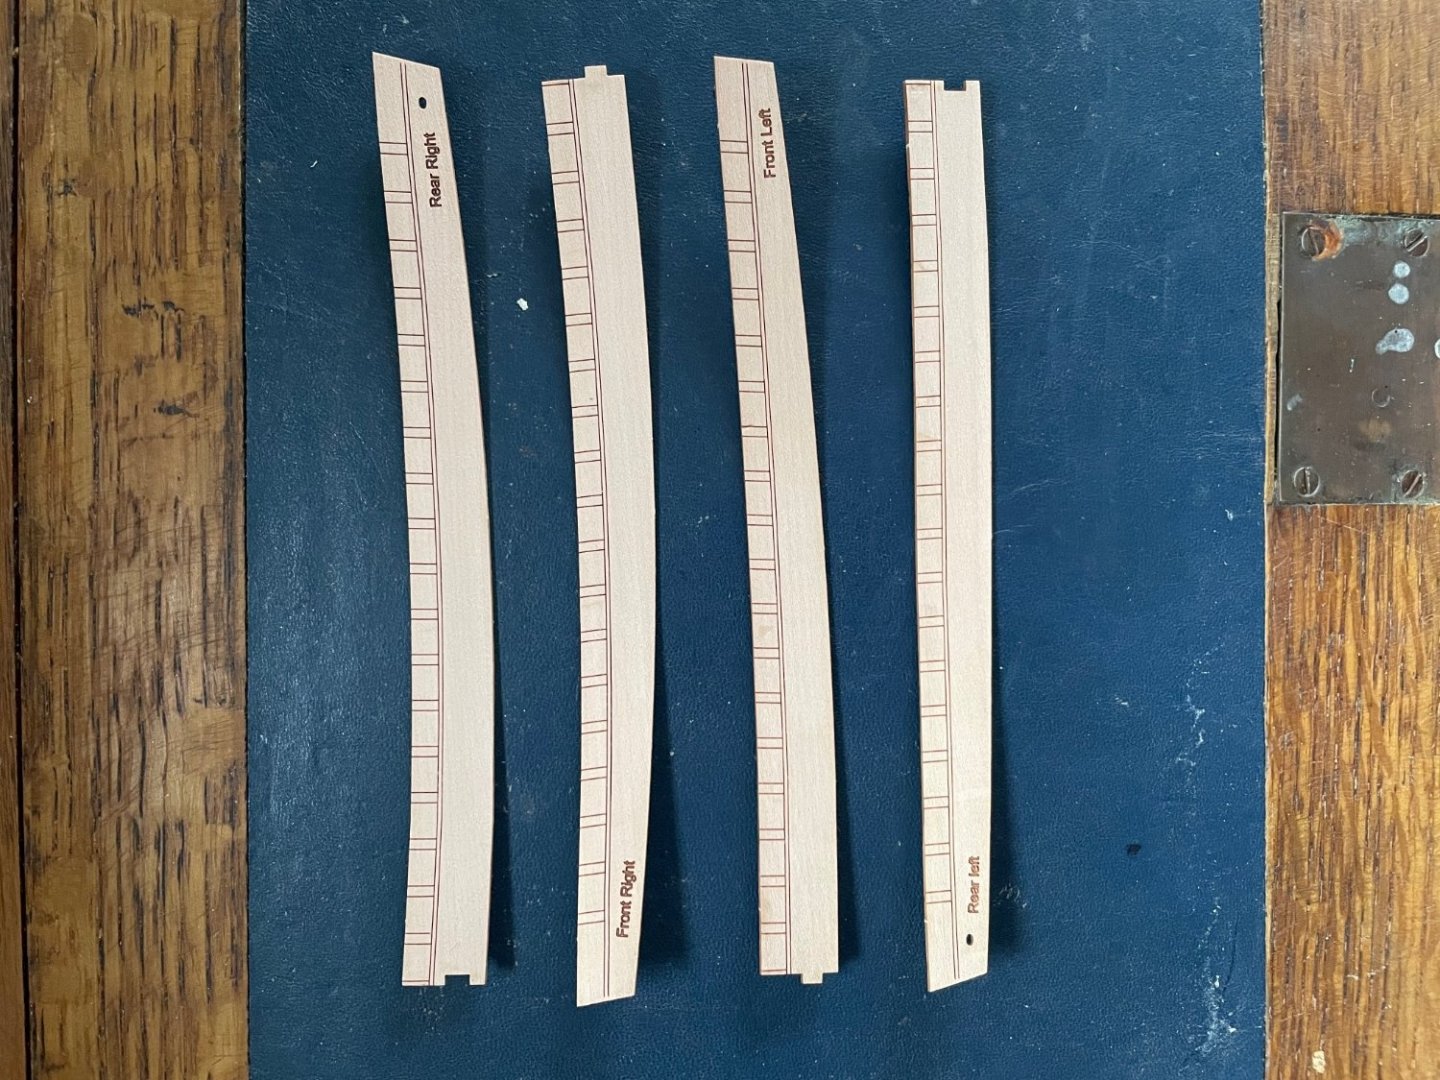
I filled the gap between the bulwark and sternpost okay. It was straightforward. And I’ve also glued the front and back keel pieces in place. Next I need to fix the rabbet in place for the keel, sternpost and prow. Here are the pieces cut from the 1mm pear sheet along with the alignment pins that secure them correctly.


-
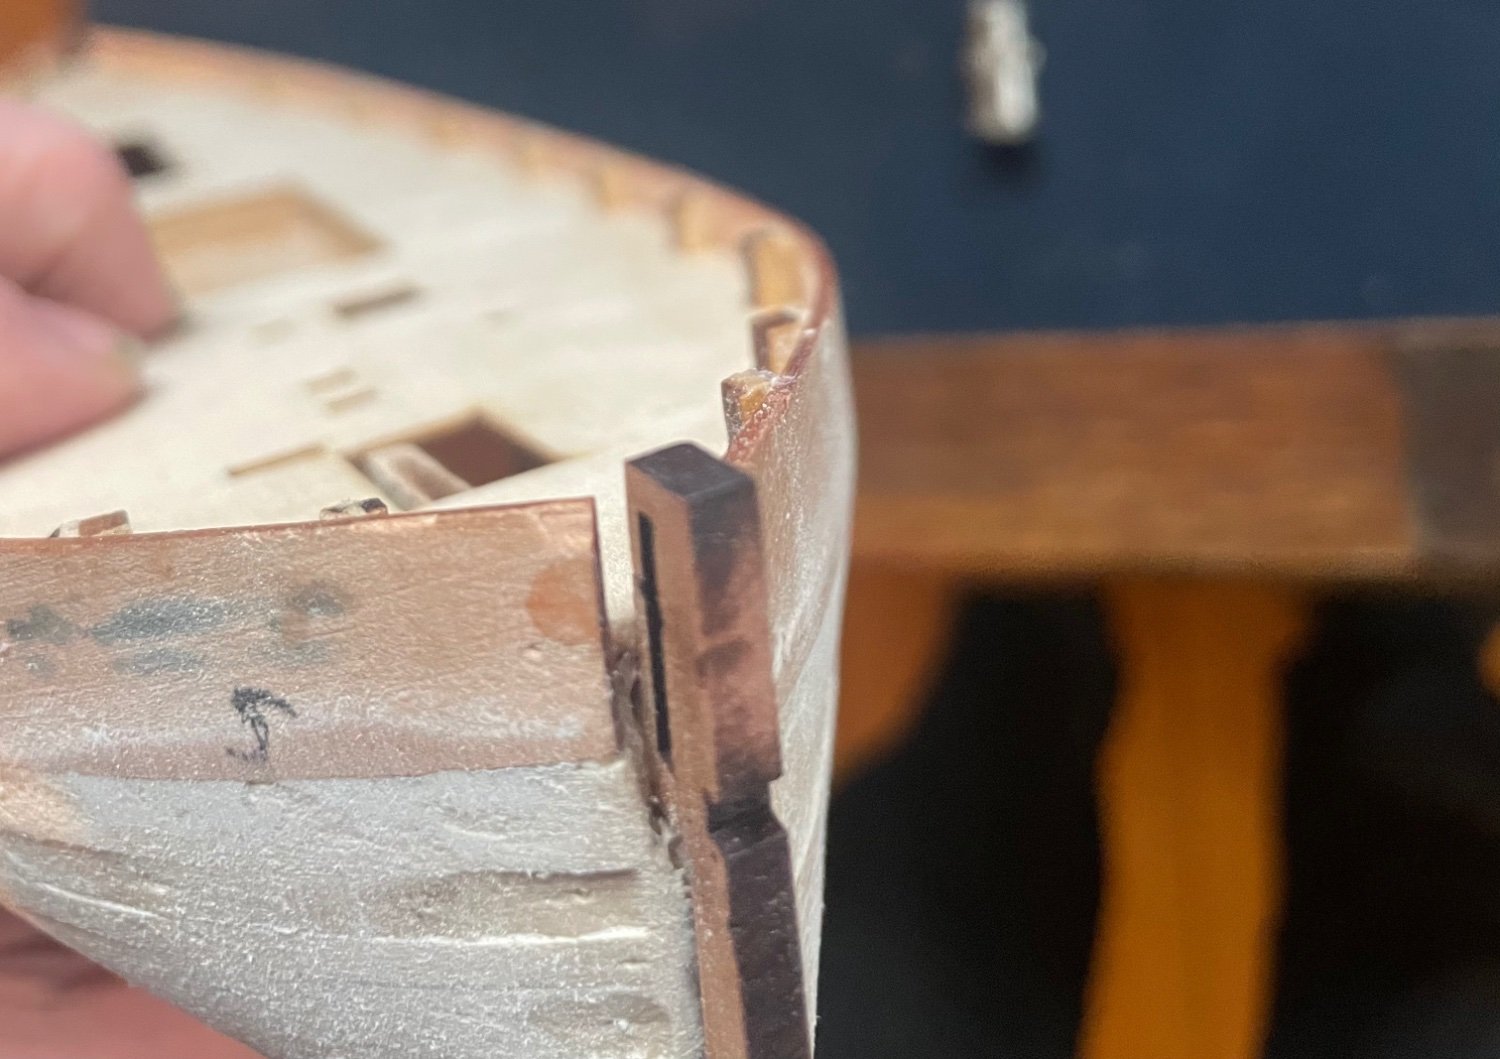
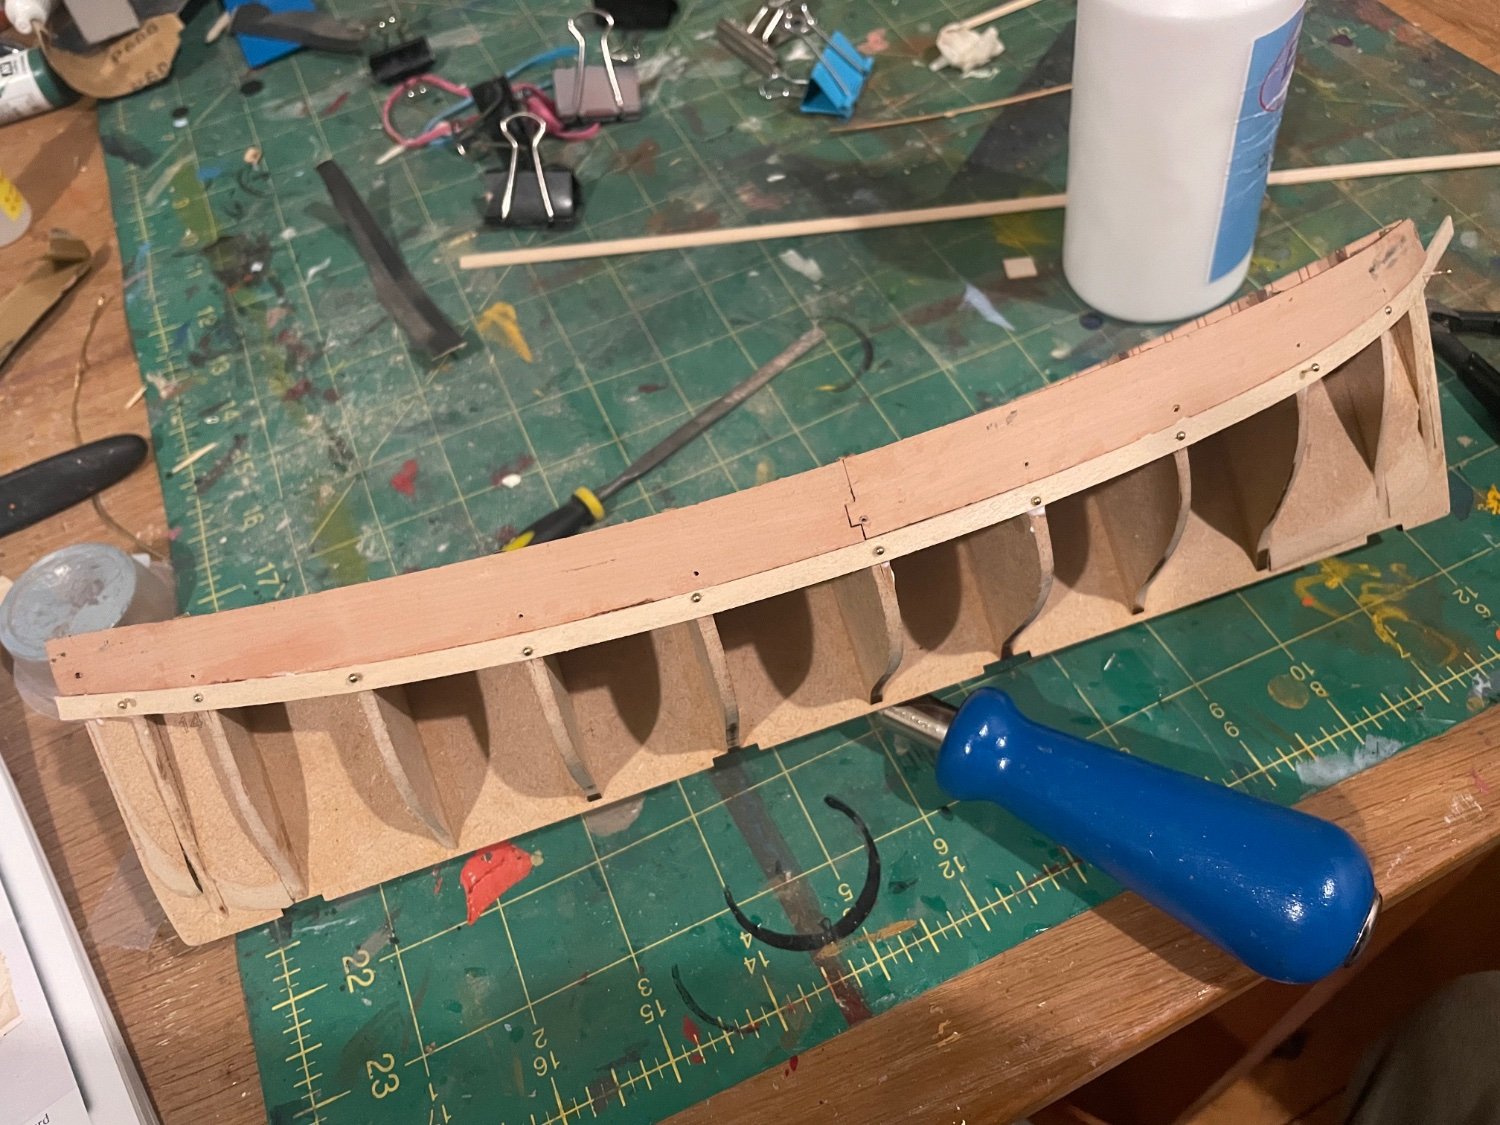
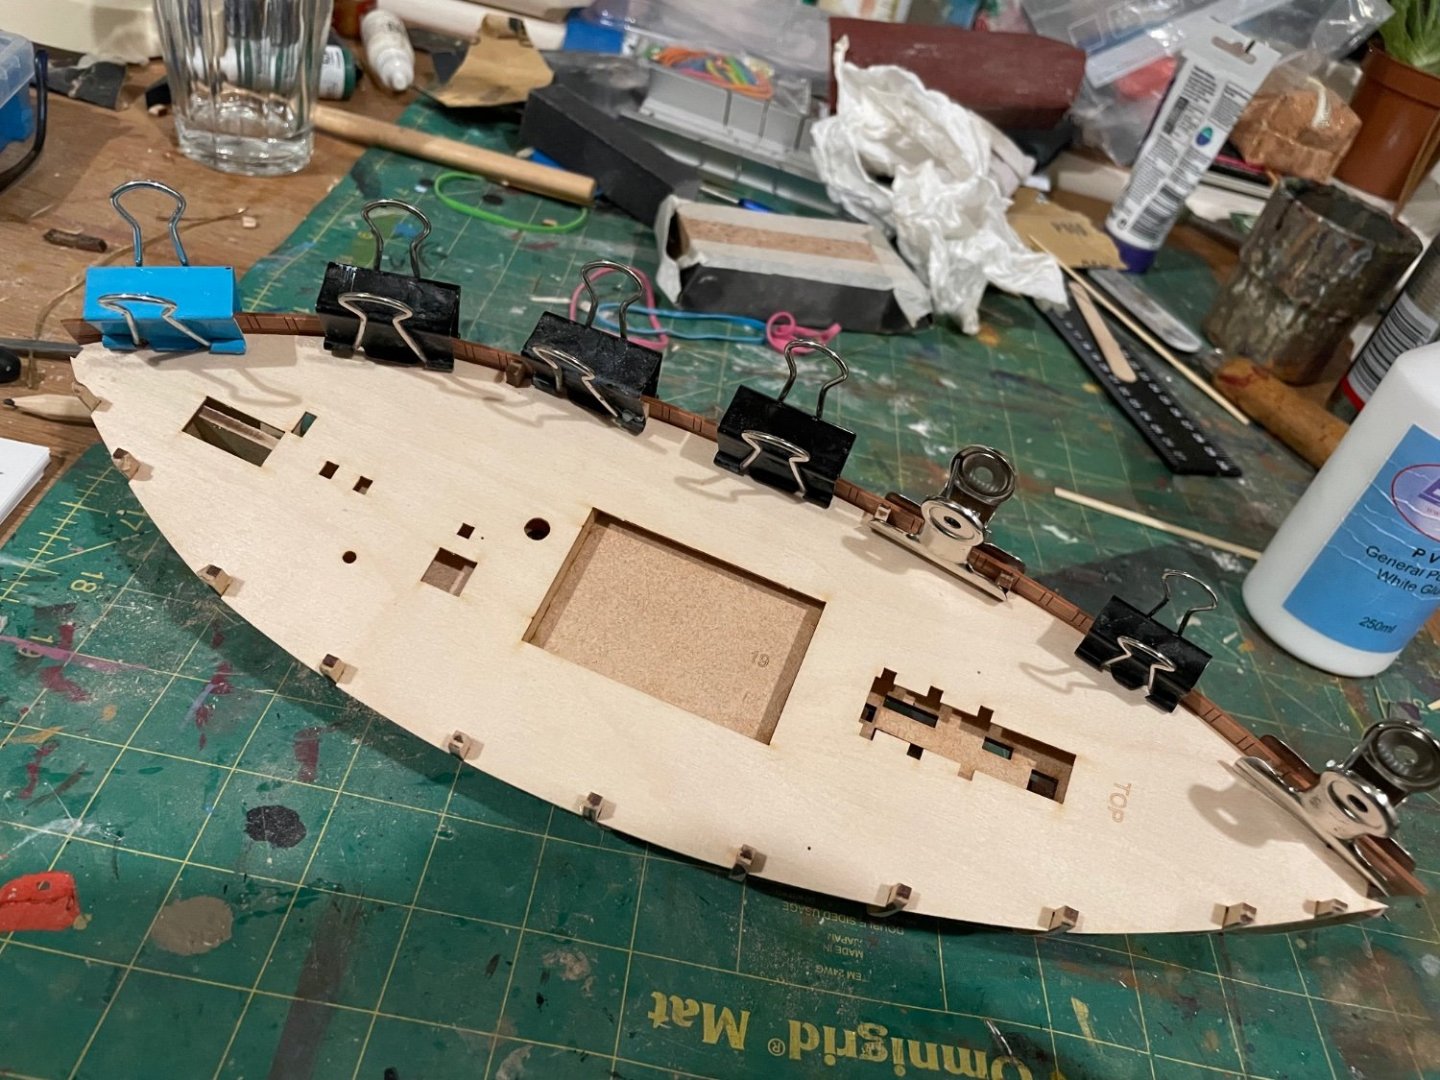
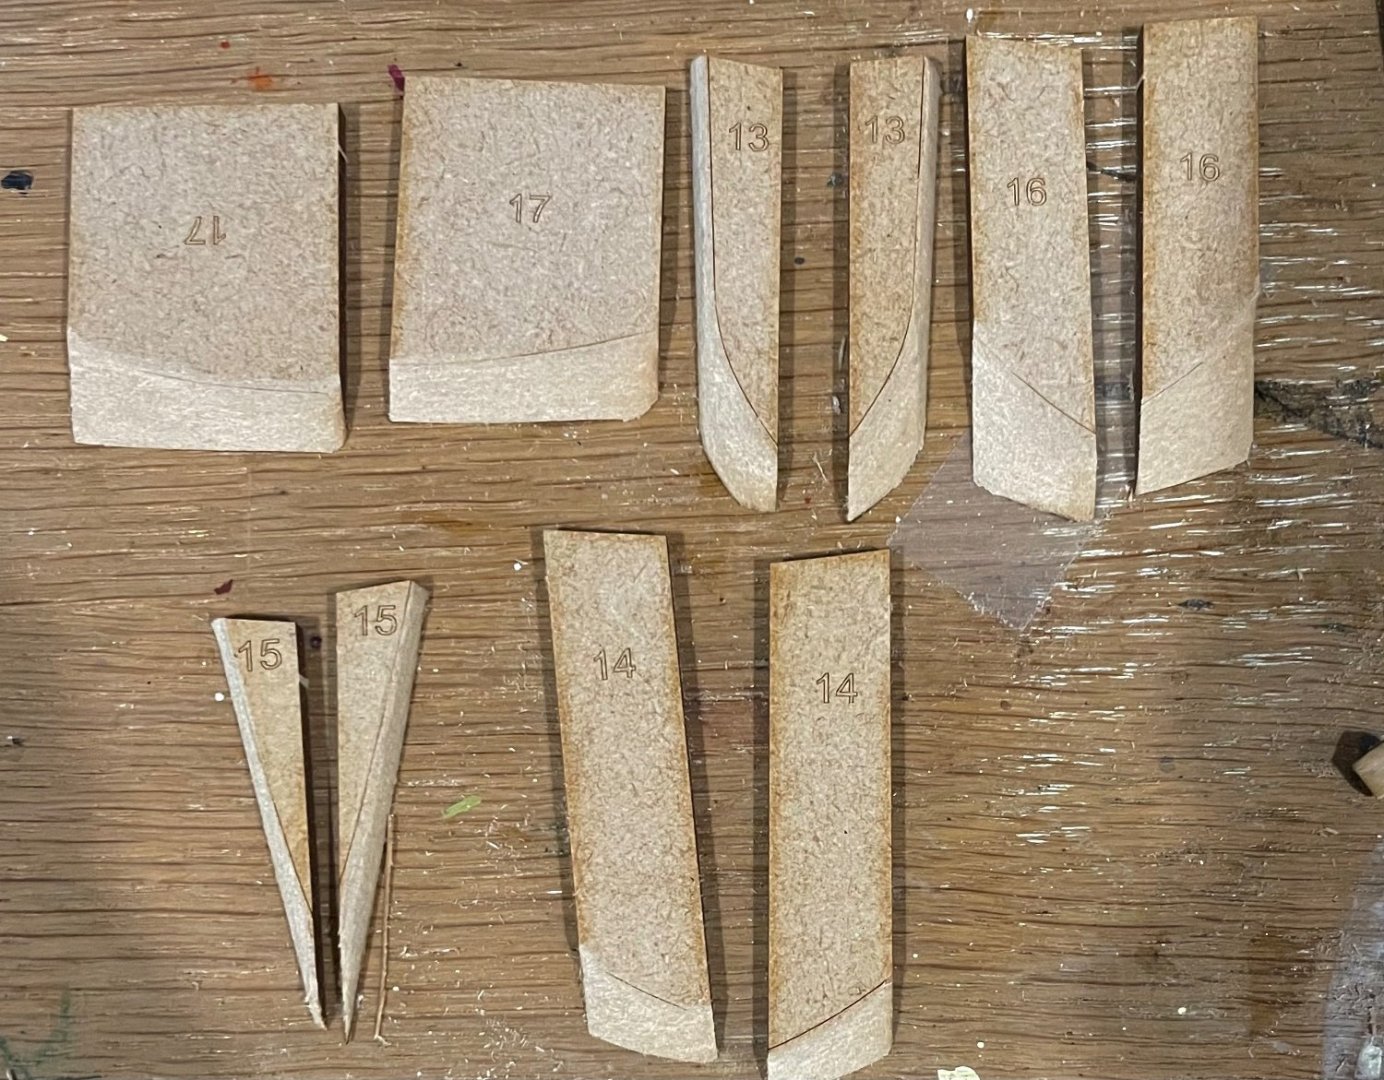
I have a problem! But first, I continued planking up towards the bulwarks until they met the ones coming down. Then I created stealers to fill the gaps created. I used wood filler in any uneven areas and then sanded it down and added the prow and sternpost. It still needs a bit more sanding but I’m not overdoing it. I think it will be a decent surface for the second planking. Now the problem. There is a gap where the bulwark should meet the sternpost. I’ll try to fill it with a spare piece of plywood I think? There is another piece to go on the sternpost that creates the rabbet that will reduce the gap slightly. The other end is fine. Not sure how I arsed it up!
-
I continued to plank both sides in the way described in the instructions, tapering from where the plank seems to want to cross the one above. I thinks it’s gone okay. I intend to use a more methodical approach for the second planking I think. After laying down planks from the bulwarks downwards I have added the garboard plank. Now I’ll work upwards. As you can see there’s a bit of stepping here and there. Hopefully sanding and a bit of filler will create a decent surface for the second planking.
-
Watching this build is making me want to get the kit myself. Then I looked up the price! 😂 Love the interior details!
-
Thanks Andrew. I did, in fact, buy a travel iron just last week for that purpose. So I will do some pre-bending. I did use it a bit when attaching bulwarks, applying heat while holding them against the bulkheads. I’m not sure how I’m going to measure necessary tapering yet. Having tried laying a plank across the previous one and marking off where to cut I’m not confident I’m seeing where the taper should start. I know Chuck and other modellers mark off where the planks should go on the bulkheads. Maybe I should be more methodical and look at that. I’m naturally more inclined to wing it, which is probably a habit I should break to improve my modelling!
-
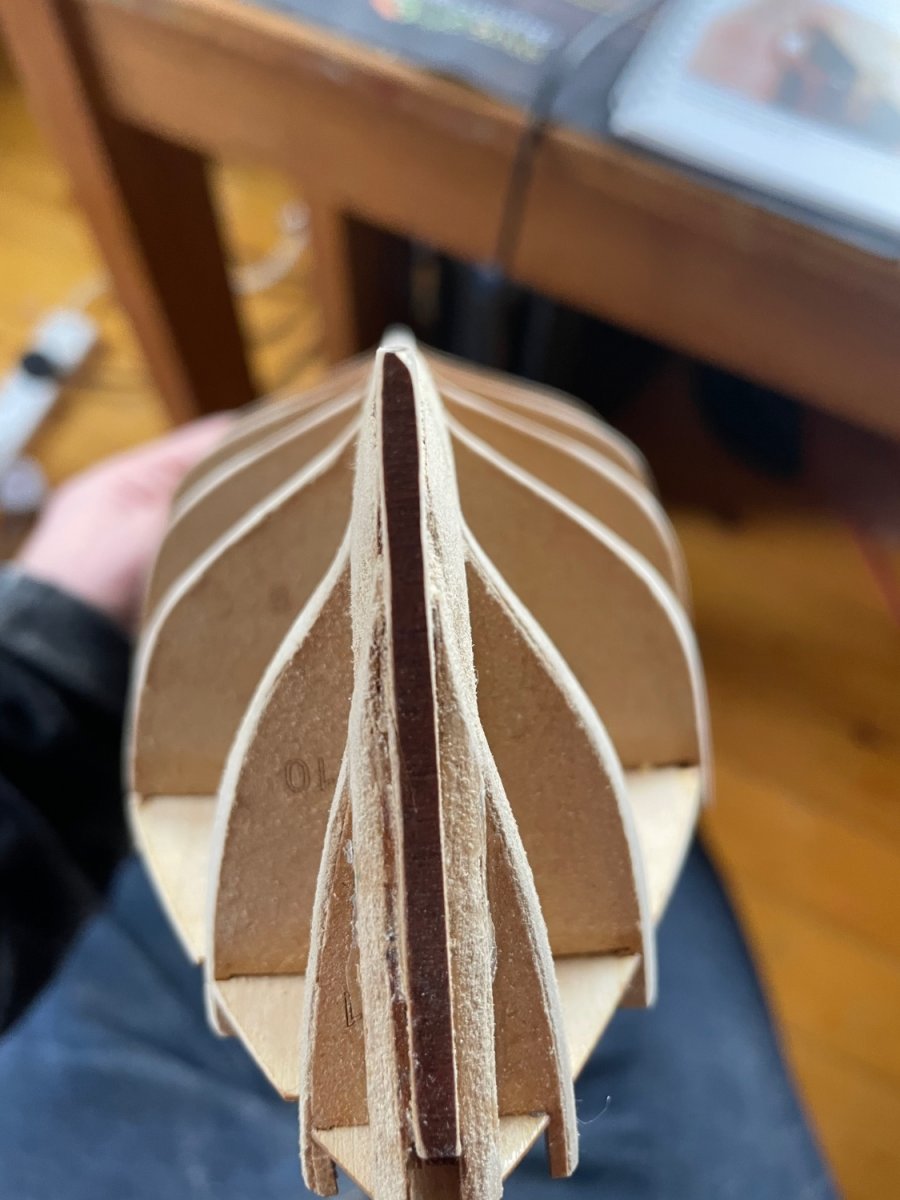
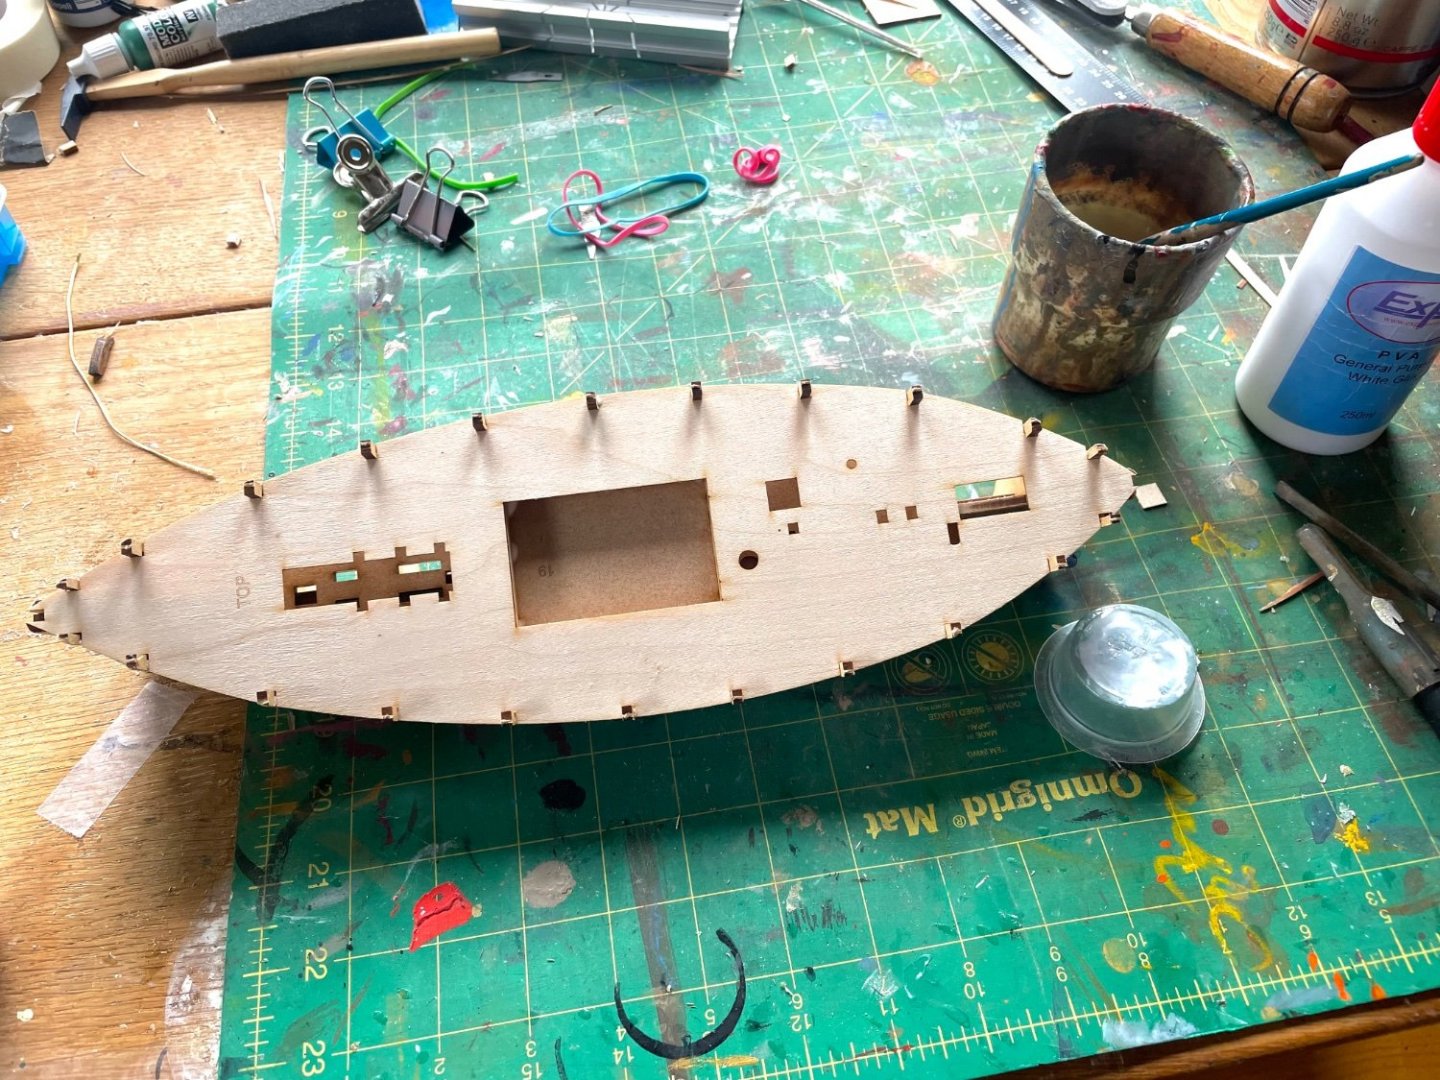
The instructions suggest soaking the bulwarks, which come in two halves on either side, and clamping them in place to dry so that they retain the correct curvature. This makes them easier to fix in place while the glue dries. So I did this. Then I glued them in place. The only slight problem I had was to keep the lower line on the inner bulkhead level with the deck all the way along whilst keeping the join between the two halves tight. As you can probably see from the second photo below it tends to be slightly higher at either end. Hopefully not enough to matter. And now it’s onto planking. The scary bit! First plank on and drying.


-
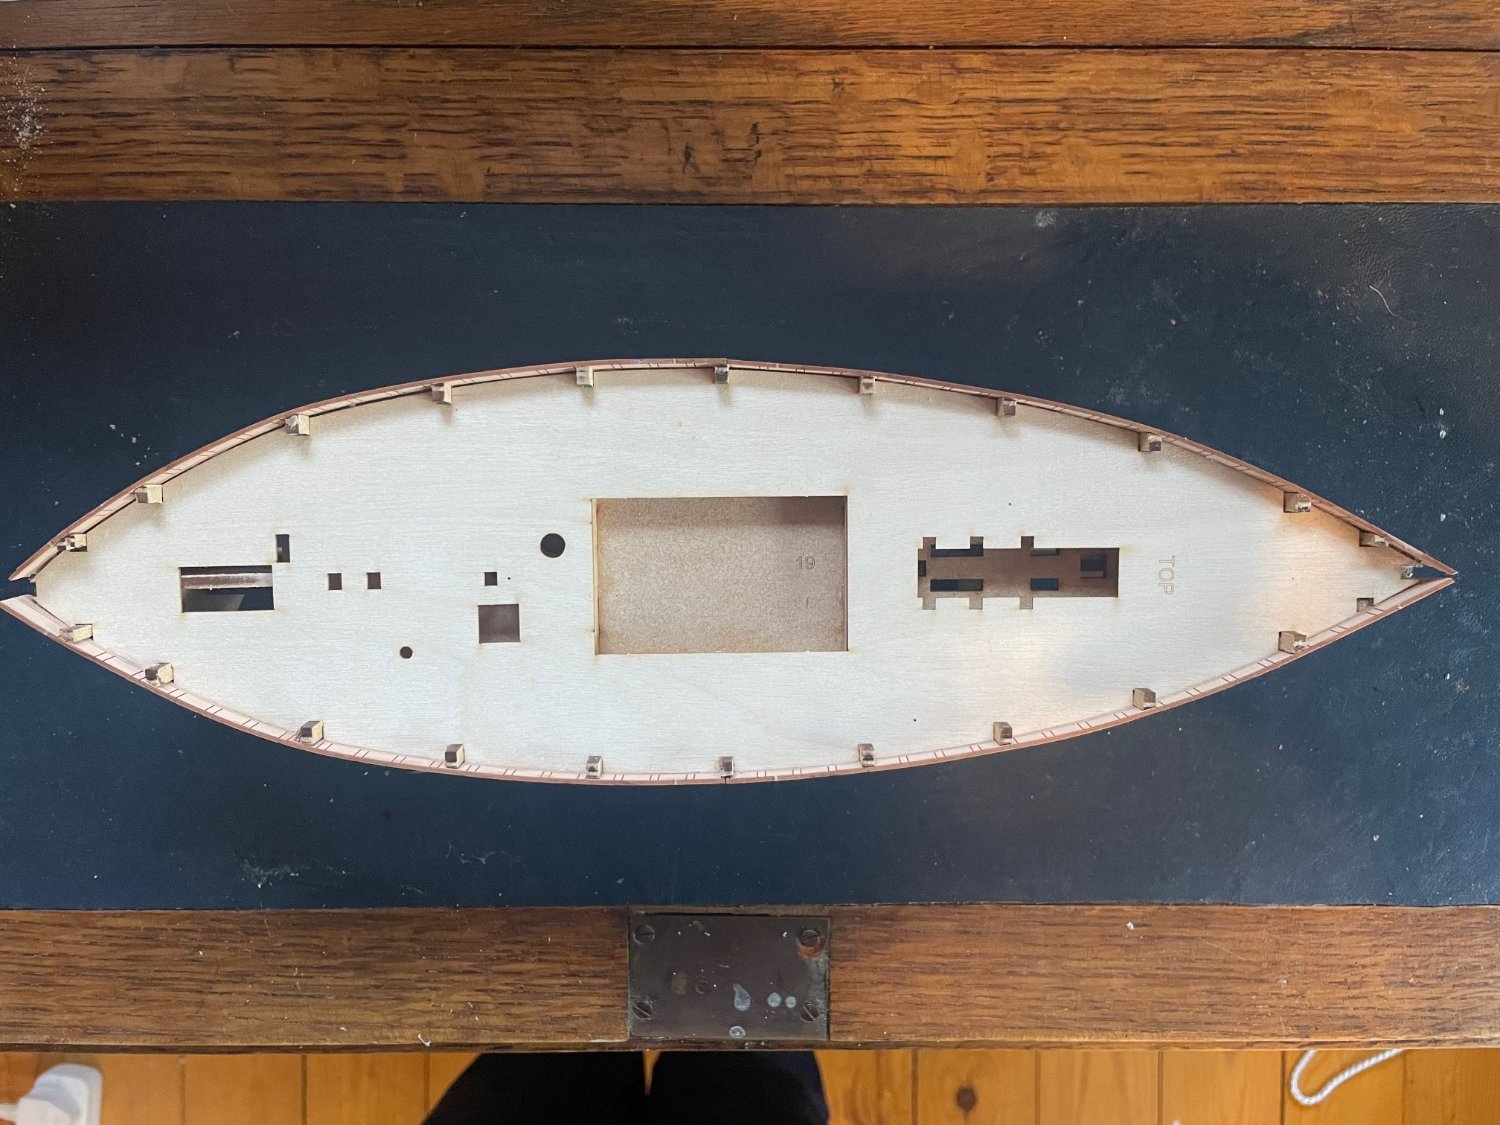
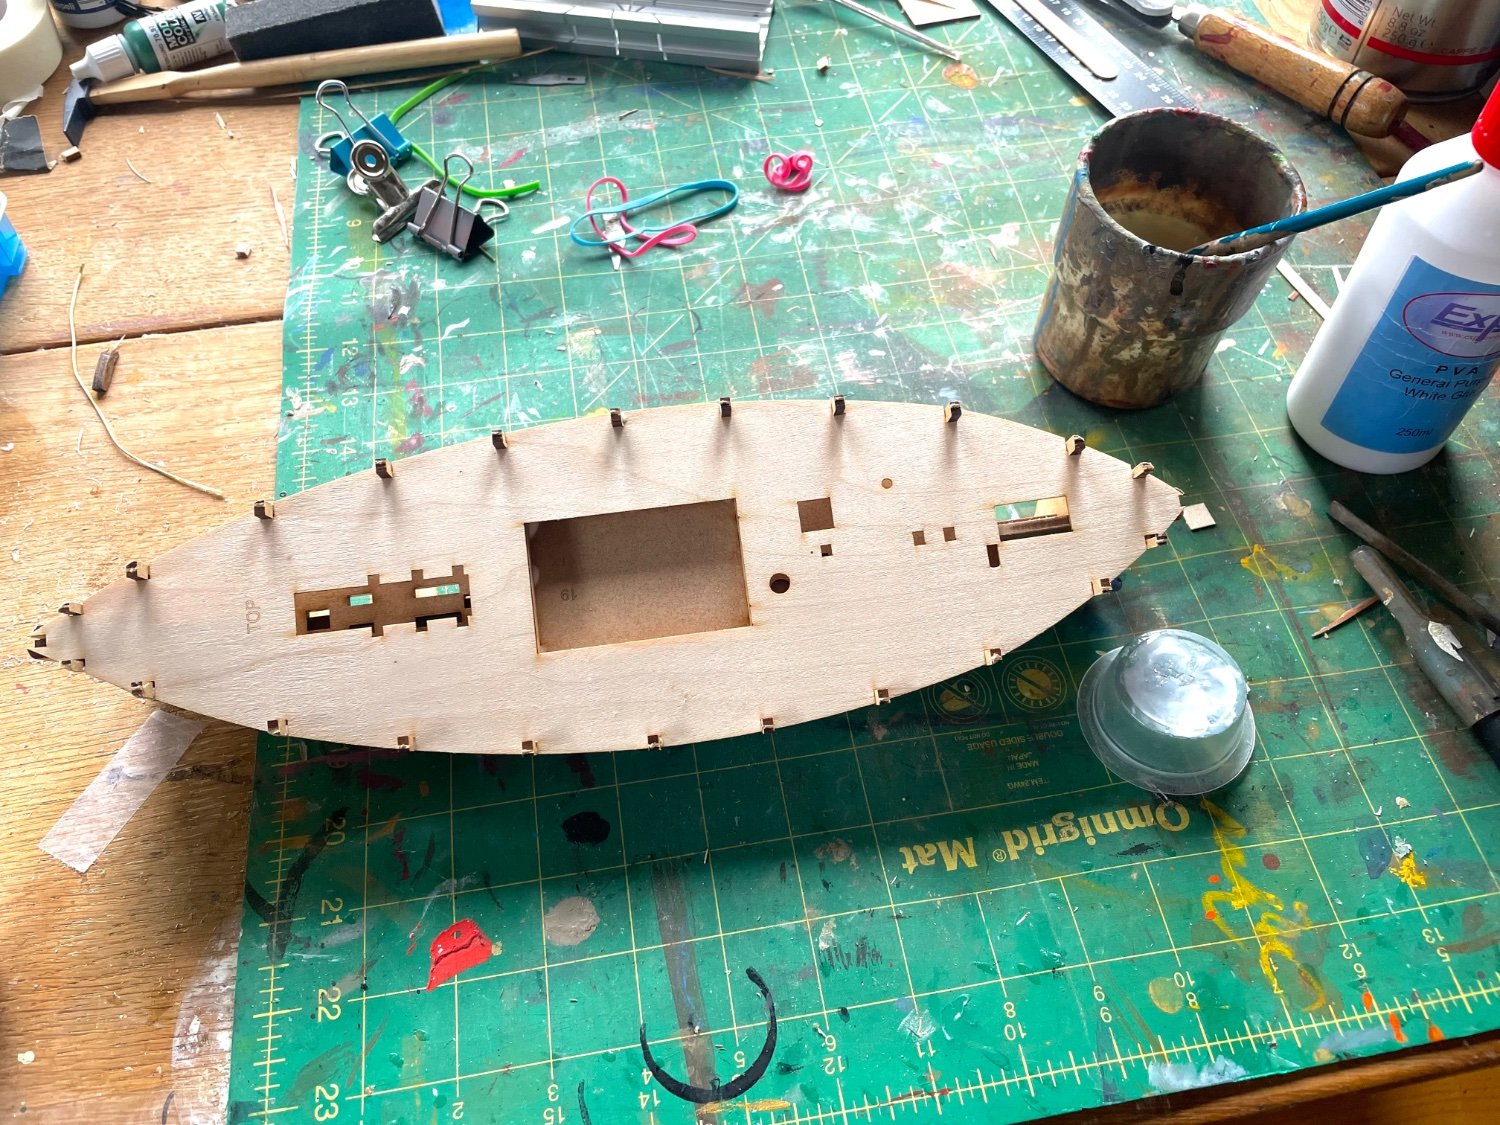
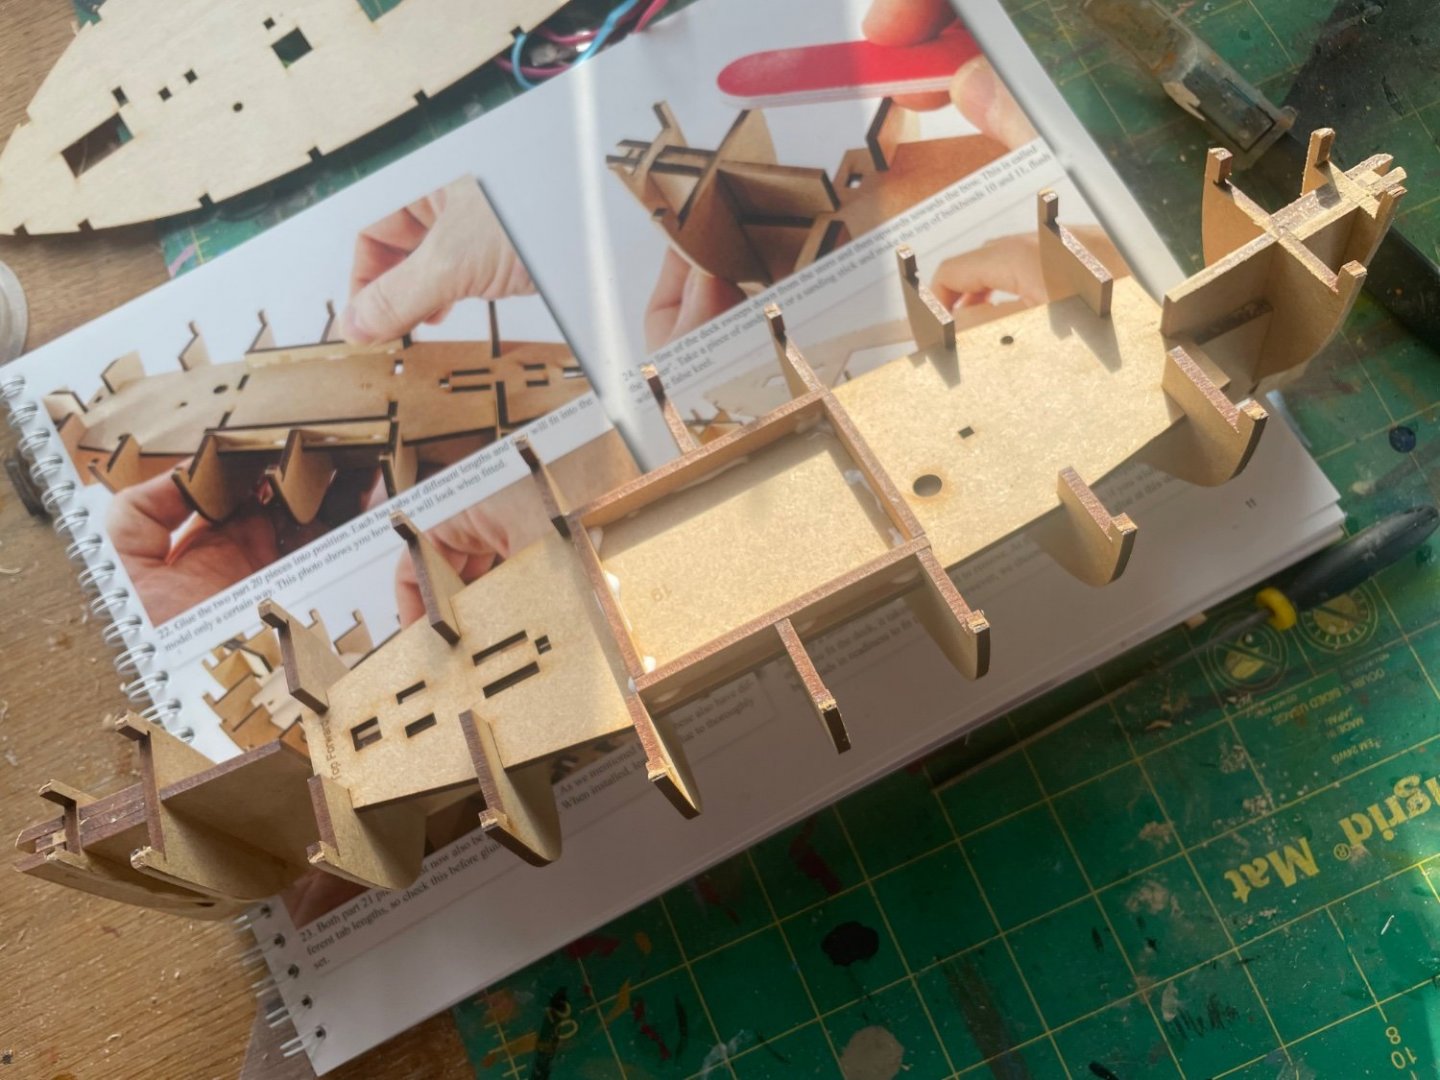
Thank you Bob and Andrew! It’s certainly looking like a great kit. Next the dremel came out again and I bevelled the edges of the fillers that would go at either end of the ship between bulkheads. After glueing those in place I glued the lower deck between the bulkheads and then created the rectangular space as shown. Next the first deck piece is fitted in place. I recall in another build thread about this or another vanguard trawler kit that they had trouble fitting it between the bulkhead, worried it was going to break. It does buckle as you push it between the bulkheads but you have to be brave and exert a bit of pressure and it clicks into place. Very snug! (I really need a new cutting mat 😂) After applying glue to the deck/bulkhead joins I sanded the bulkheads to bevel them. Next the bulwarks…

-
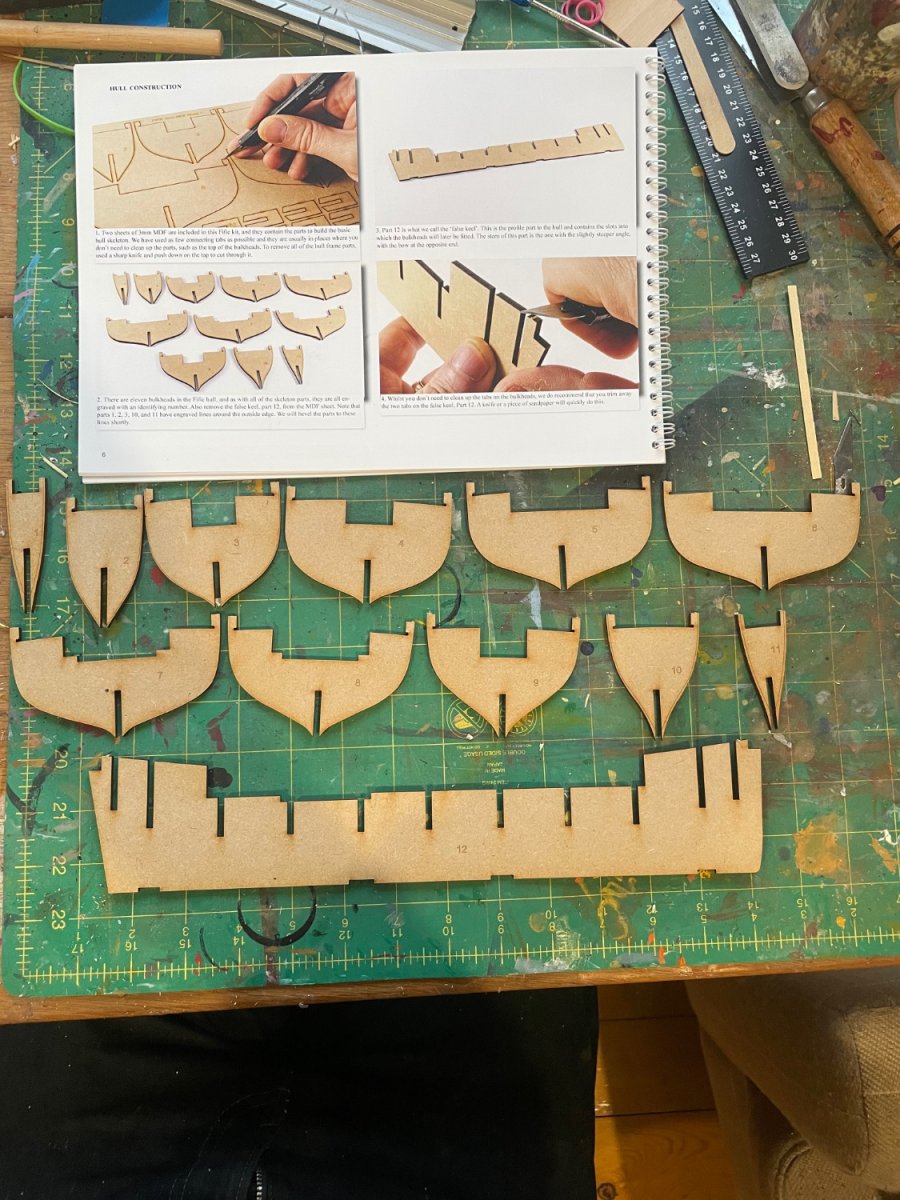
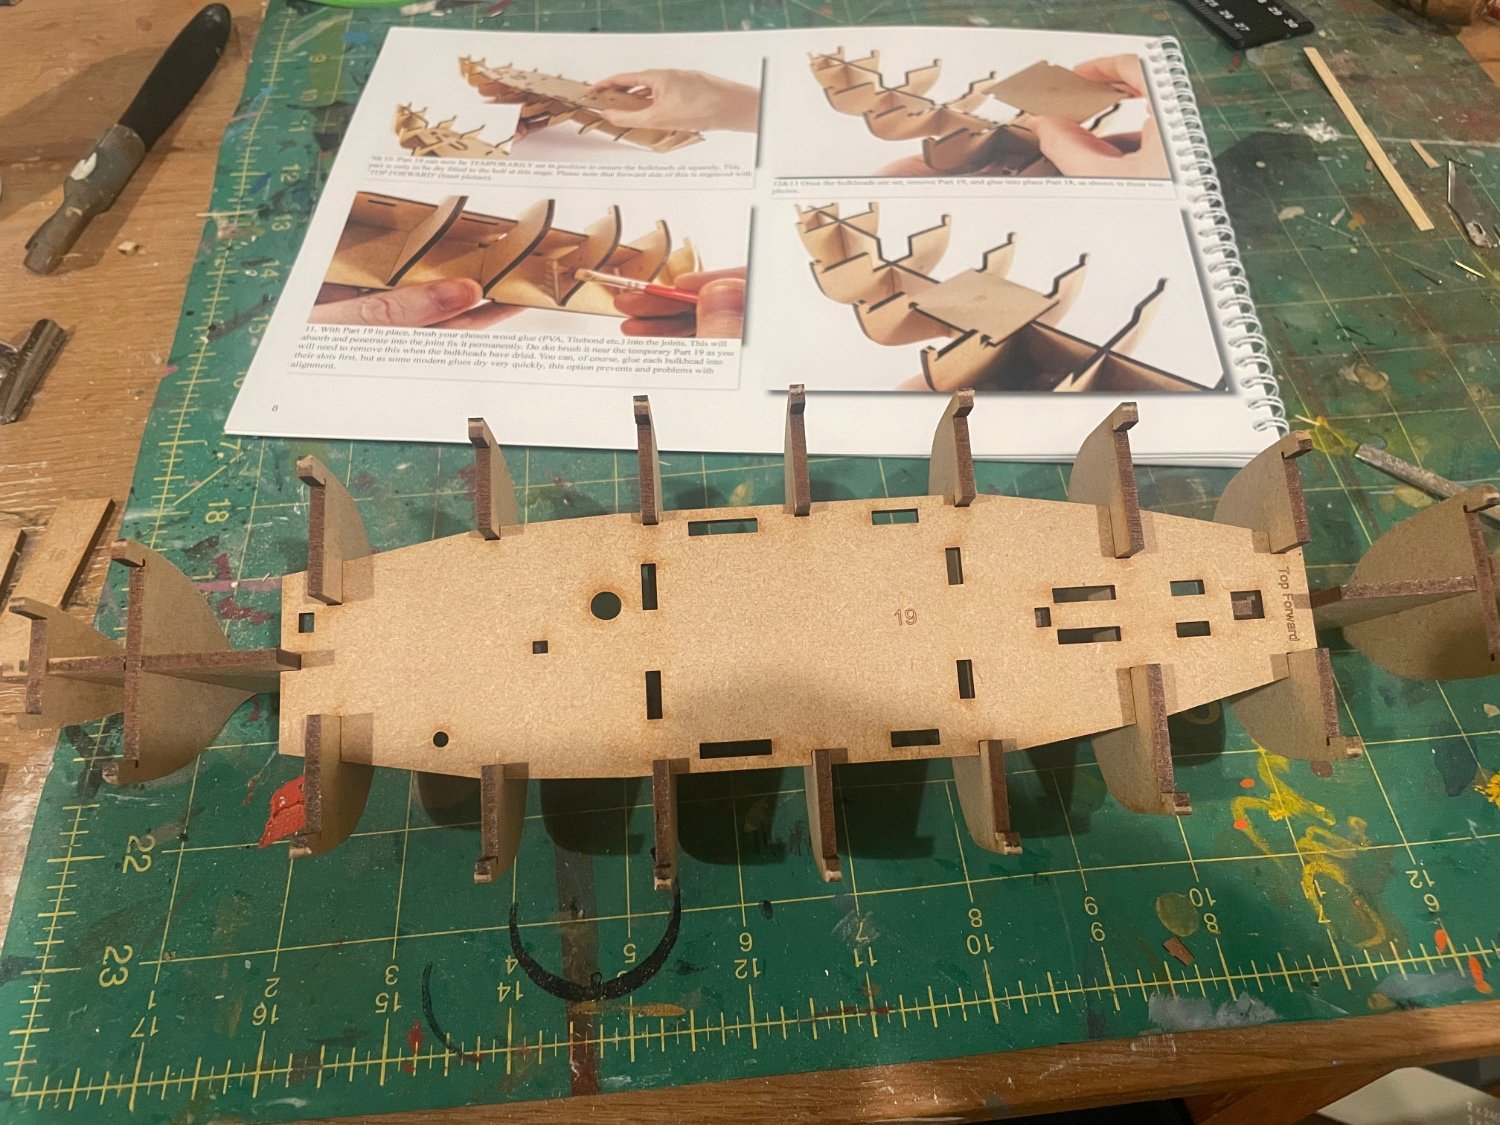
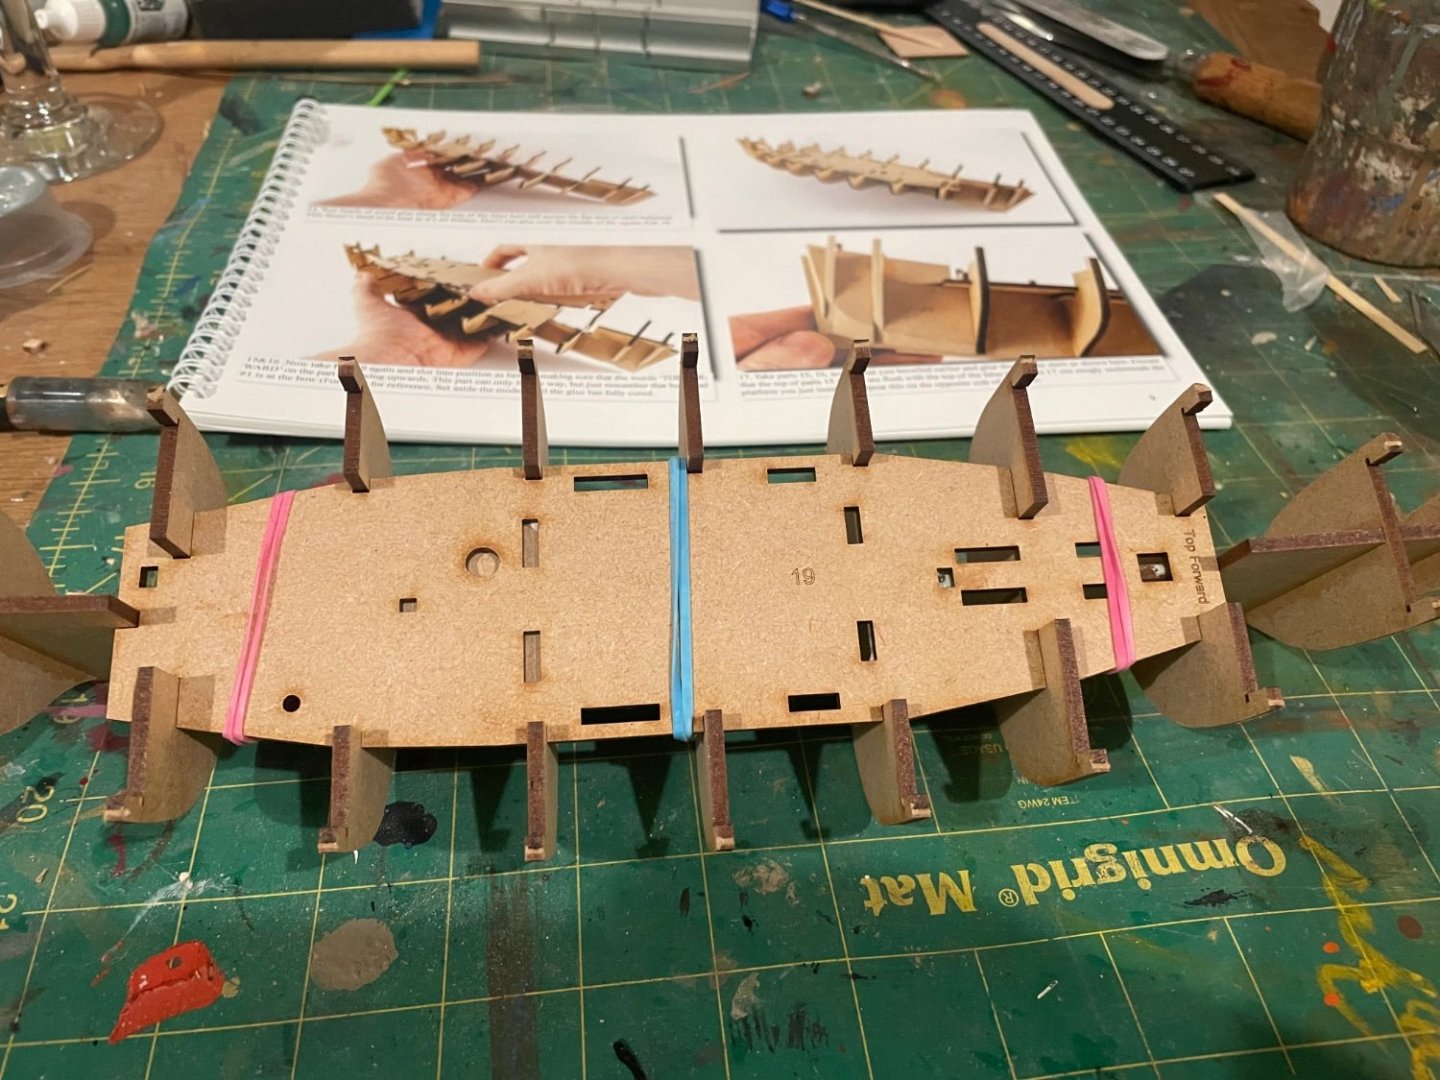
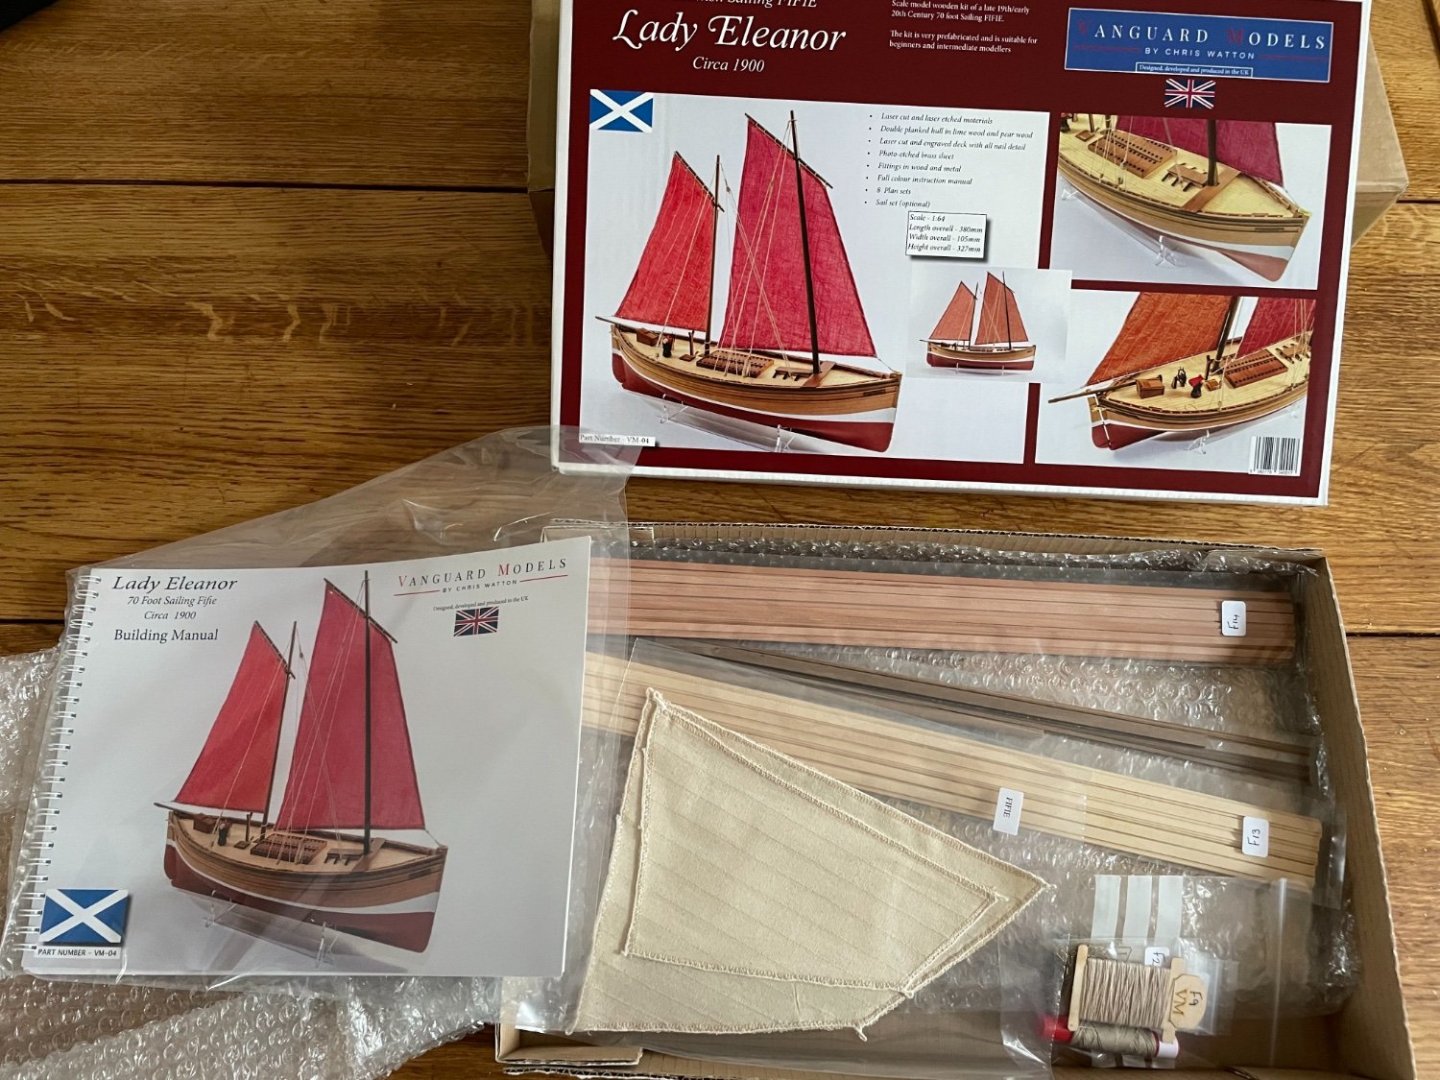
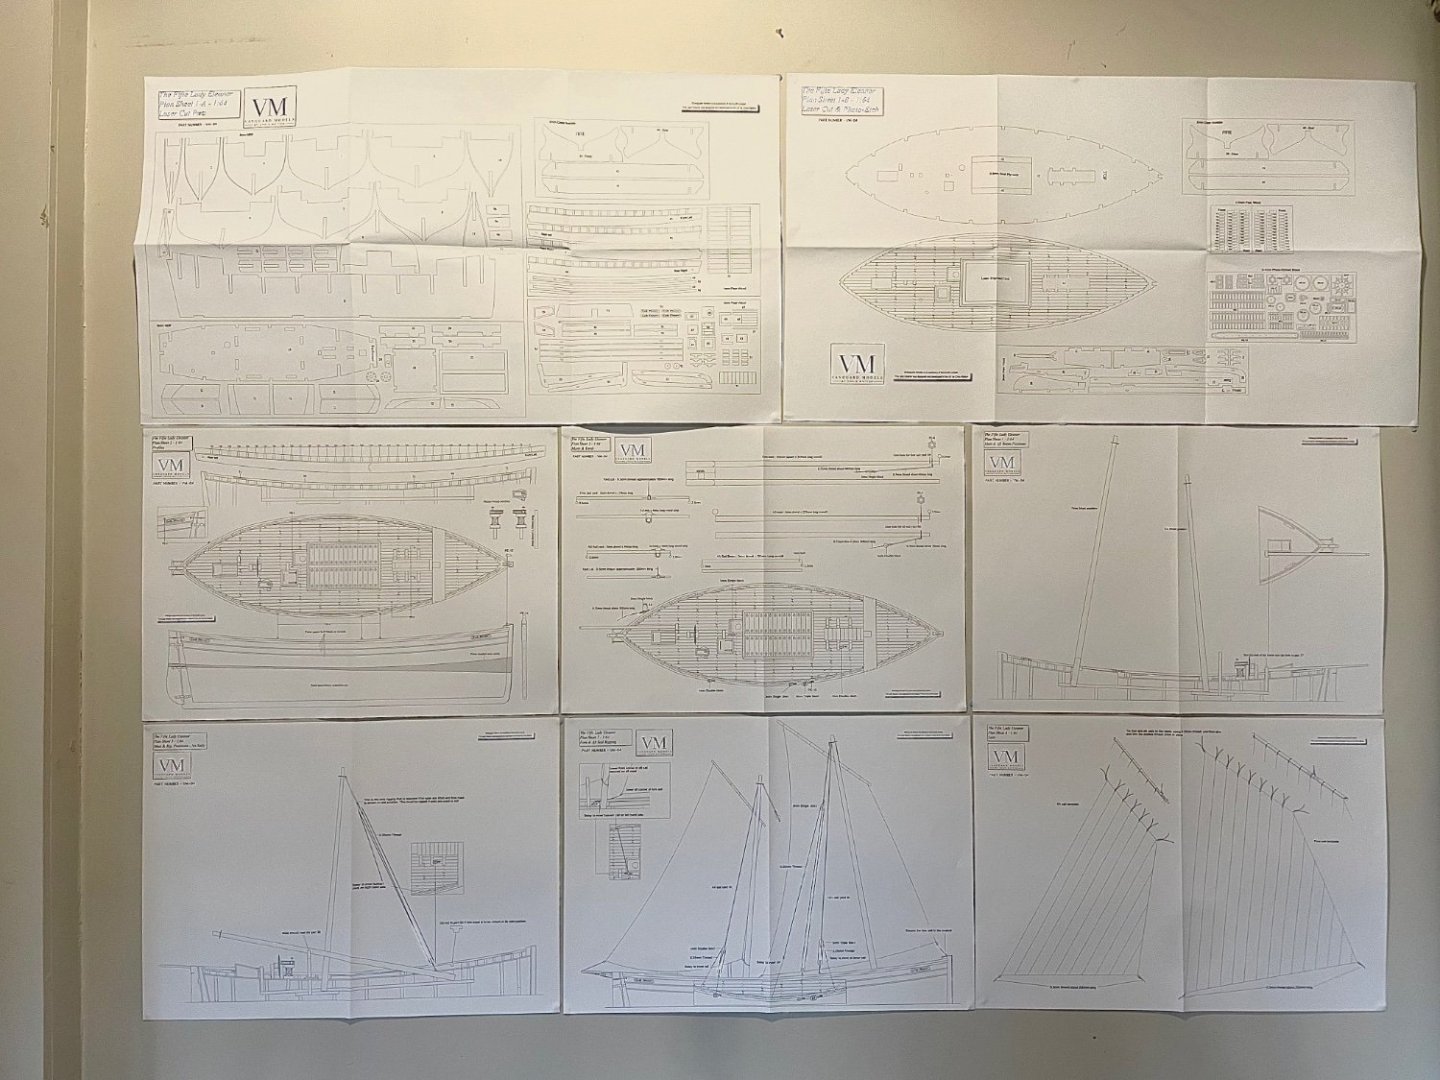
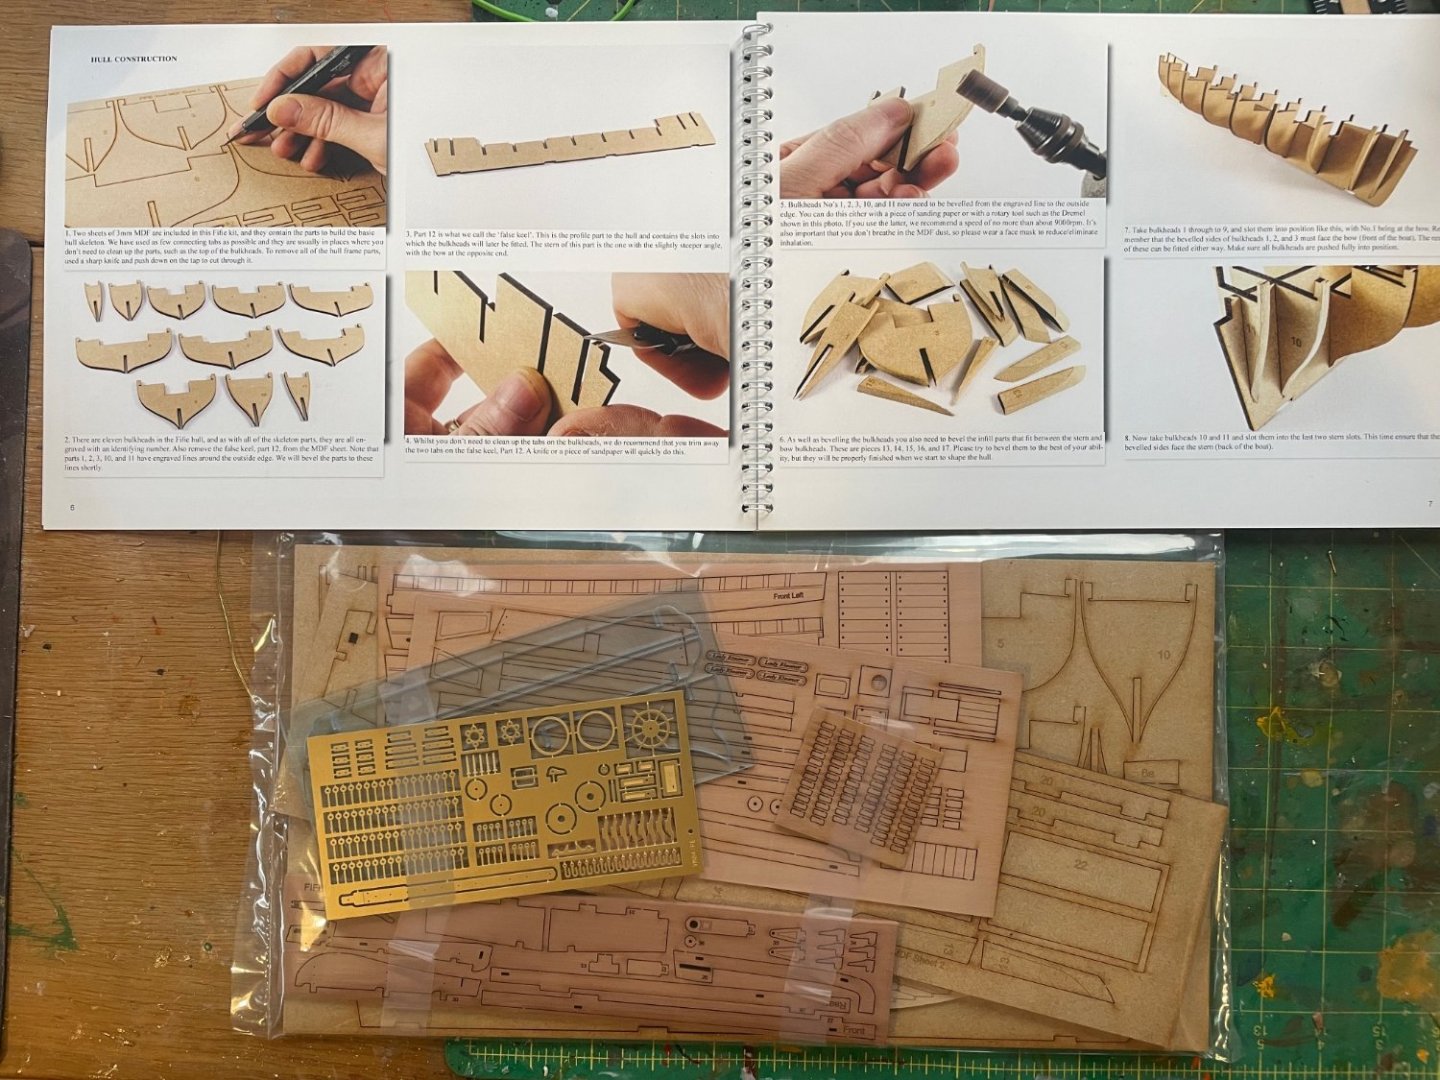
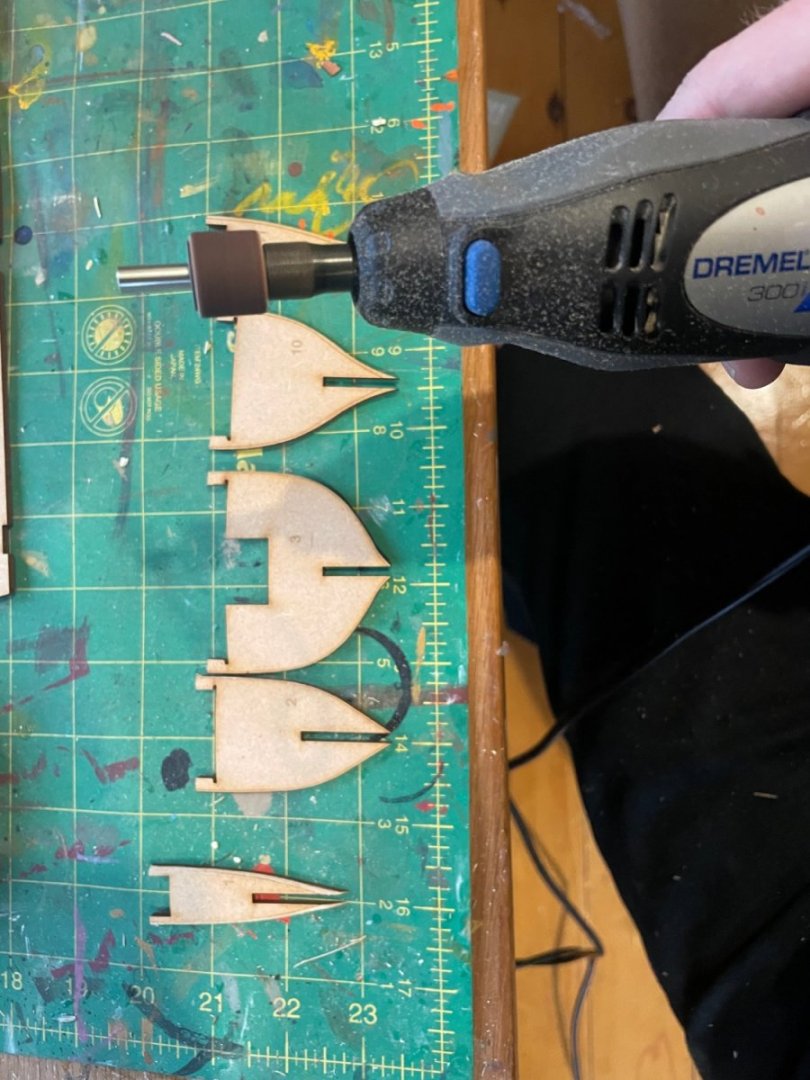
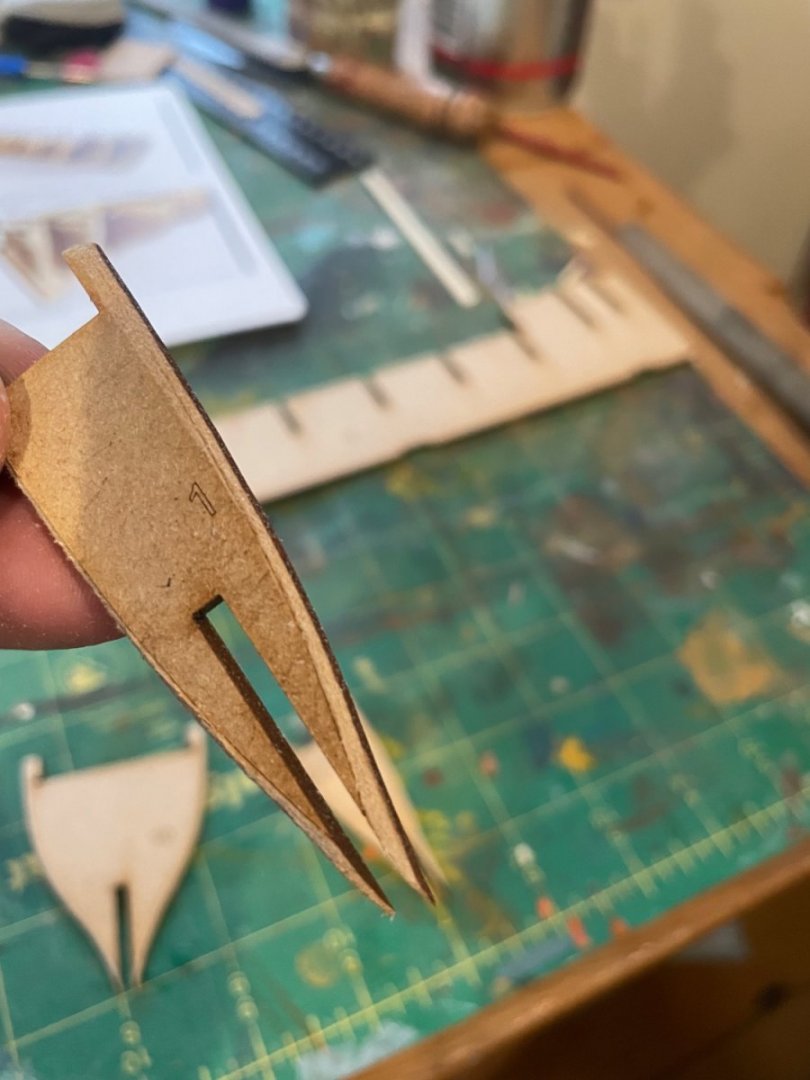
This isn’t the first build of this kit. Hope I can add something along the way! As described in the instructions with the kit, fifies had almost upright stems and straight keel. This shape appealed to me so I chose this Vanguard Models kit over the others available. And I was advised that it was one of the best kits to learn planking on. I have planked a hull before but that was over 15 years ago! It’s a really well presented kit and was packaged well. The instructions, which I’d perused online beforehand, are better than any I’ve come across in my limited experience of wooden boat building. The materials are obviously great quality too. It comes with 9 plan sheets. Here are 8 of them (the other is of the sails and won’t be needed for a while and wouldn’t fit neatly on my wall 😂) The 3mm MDF false keel and bulkhead pieces are of better quality than I’ve seen before, with numbers engraved on them and even lines to bevel to! The tabs that connect the pieces to the sheet are generally in places where they won’t need removing. So I started by removing the bulkhead pieces and bevelling the edges with my now-ancient dremel. Next I placed all the bulkheads in position on the false keel and dry-fit the lower deck to hold them straight and glued the bulkheads in place. It is currently drying while I have a nice, cold Pale Ale!


-
Oh yeah, I intend to read them in order. I just wondered what seasoned readers thought were the high points of the series.
-
Does anyone have favourite novels from the series? I’ve only read the first two.
-
Thanks Andrew. That’s what I’m intending to do really. Although I might work on mini projects for the Cazador, I’ll plank the Vanguard kit before planking this one. I’ve looked at the instructions for the Vanguard kits and as you say they’re very good and far superior to OcCre’s instructions. thanks!
-
Berlin Tram by Etcher - OcCre - 1:24
Etcher replied to Etcher's topic in Non-ship/categorised builds
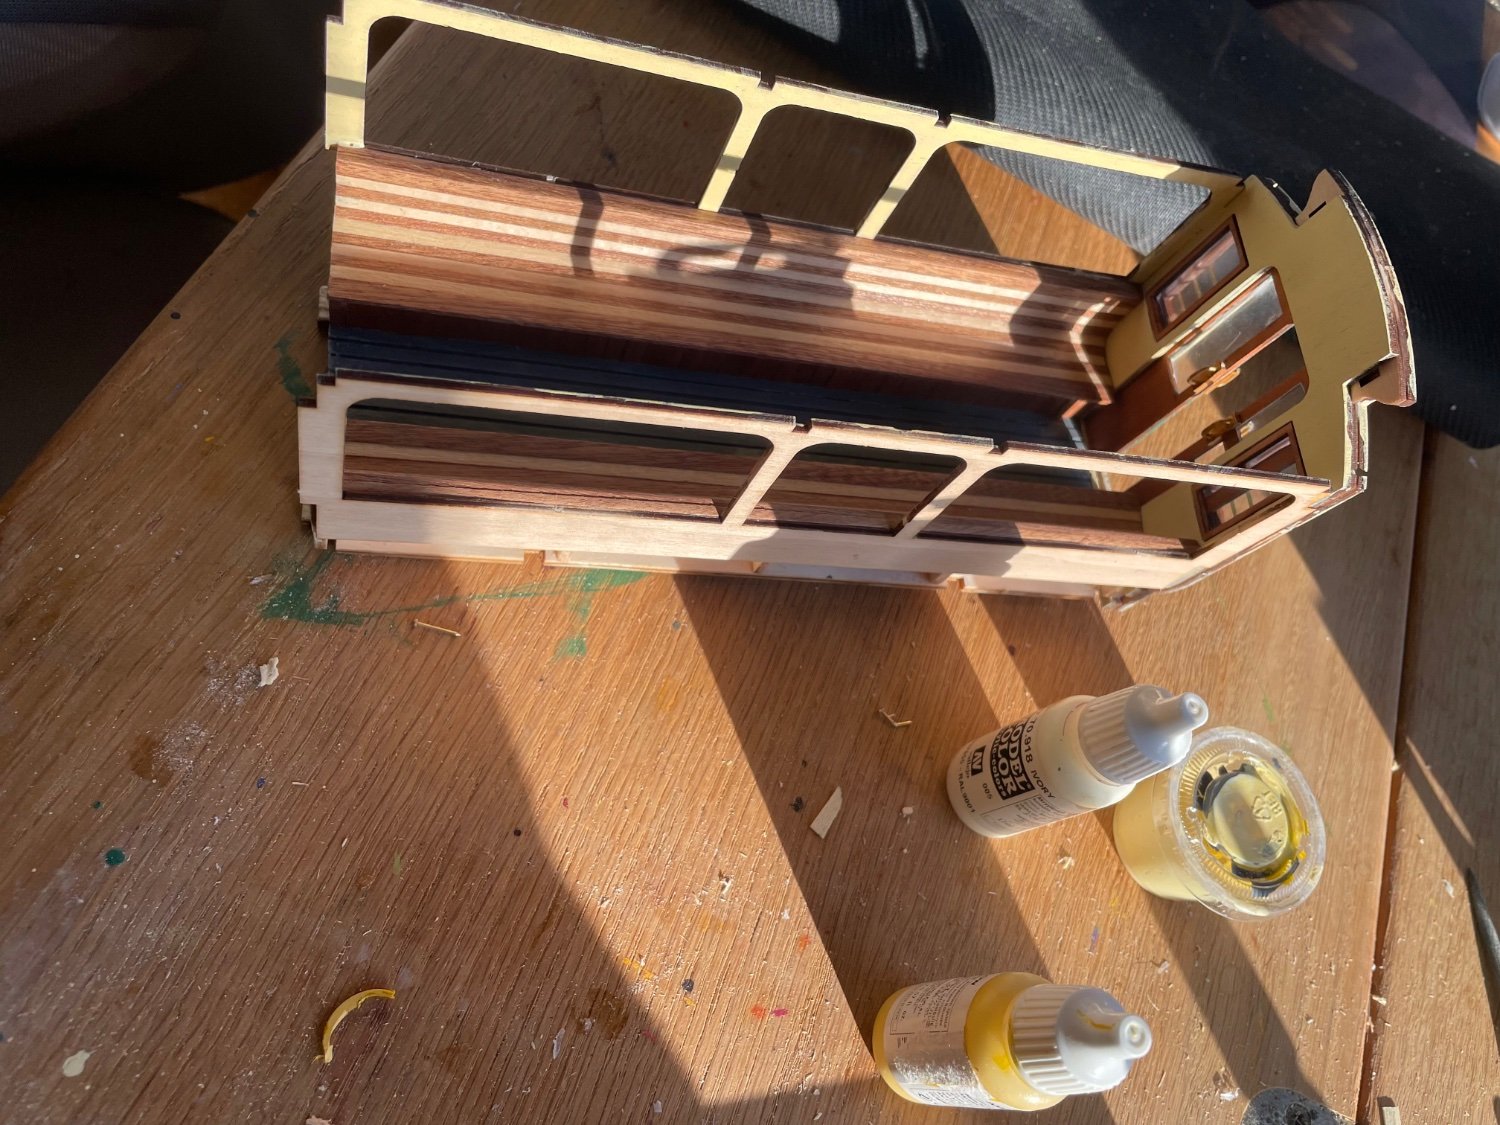
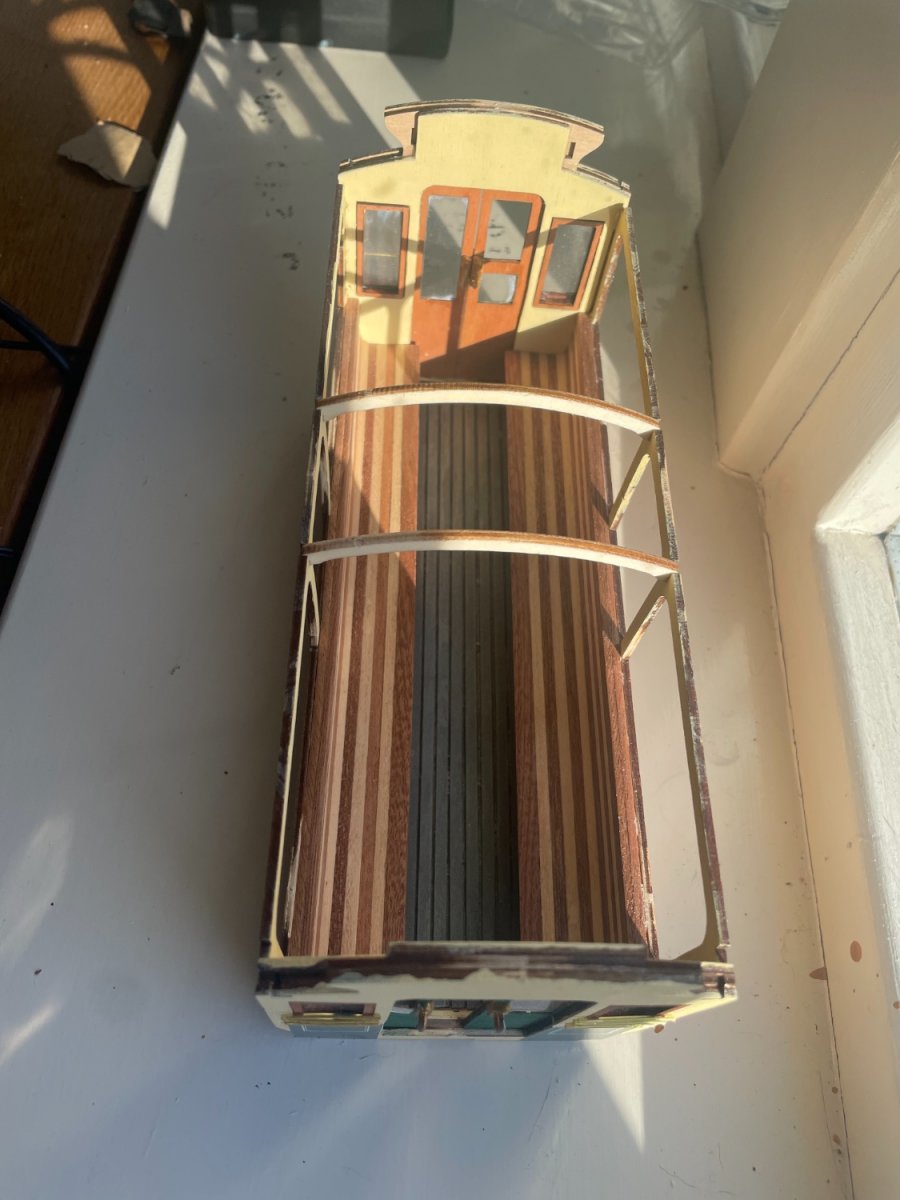
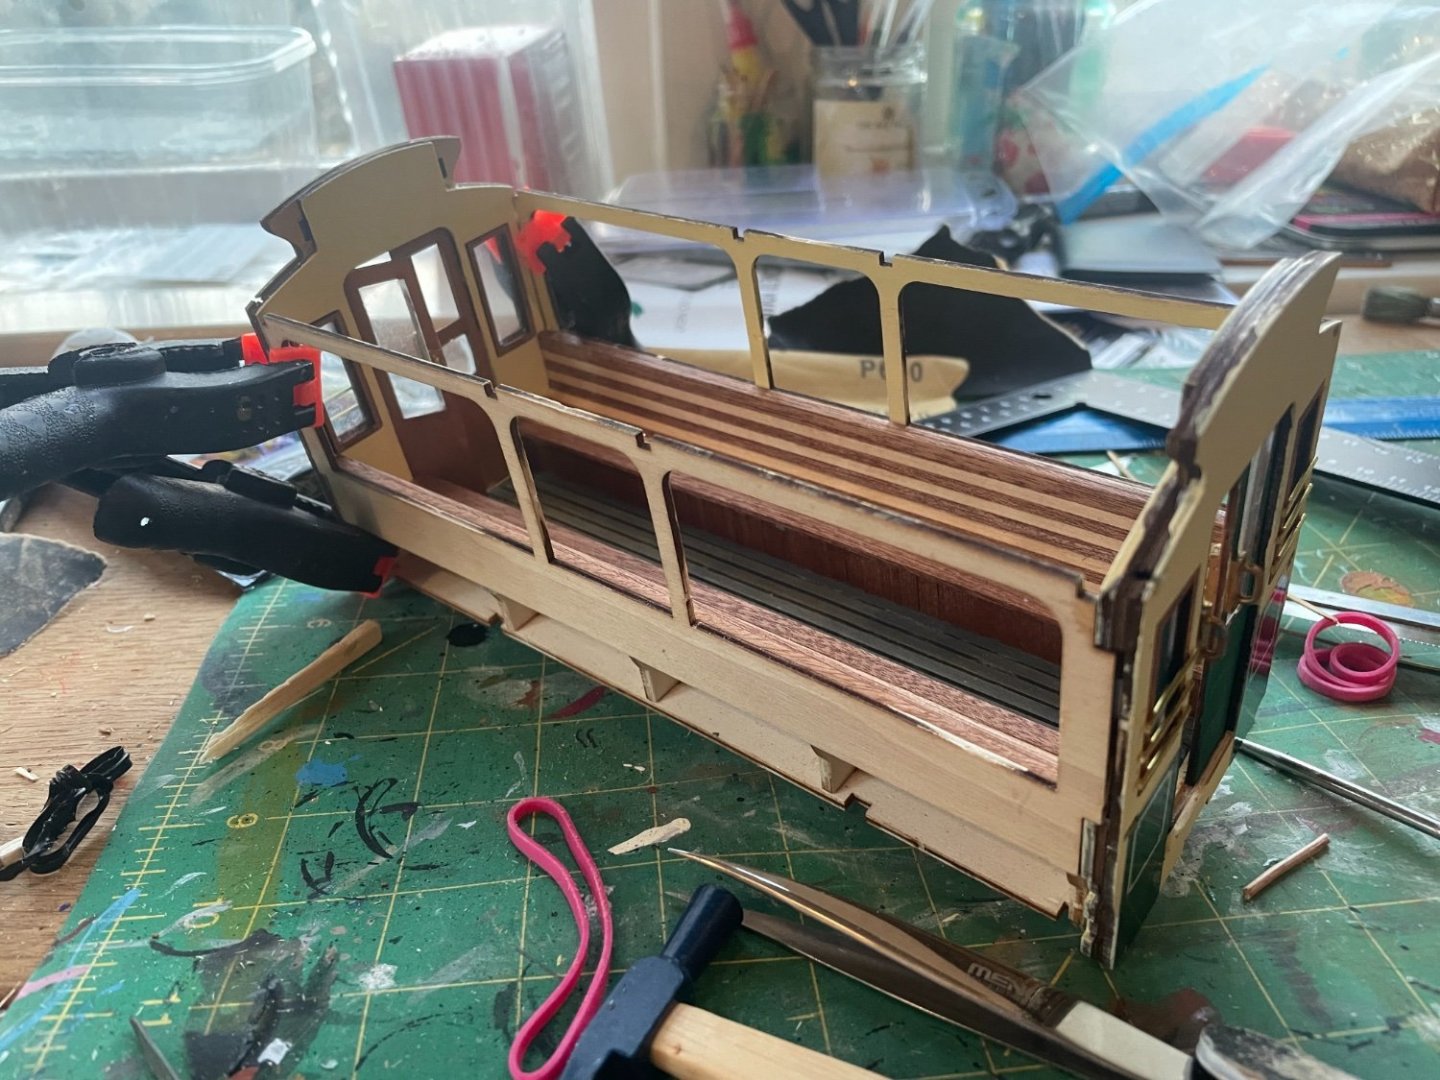
Before adding the other carriage end I painted the interior the same cream colour used elsewhere. Then I added the other doors/carriage end. This didn’t fit correctly. I had to sand two or three millimetres off the end of the benches and floor to get the tram sides to fit snugly. Whether the precut plywood piece was slightly short or my building is slightly off somewhere I’m not sure! You’ll notice that one of the doors stands open in this pic. This was obviously incorrect as the benches would prevent them opening properly. At the point this photo was taken I realised this. They are sliding doors! I did it this way as that was how it was portrayed in the instructions picture! This wasn’t the first time the pictures were misleading. A bit frustrating as OcCre’s instructions rely heavily on the photographs. This is the tram assembled correctly (I think!) I’ve also added the two roof supports at this point. You can just see through the far windows that only one piece of wire remains attached across the windows. I’d recommend anyone thinking of building this kit to attach those after putting the carriage together as they easily fall off during the process. Or they do if it’s a struggle to fit them together as it was for me! Next, planking the sides and then the roof, I think…

- 8 replies
-
- 11
-
-
Okay, I’ve ordered the kit and sails now. Look forward to receiving them! thanks