


EJ_L
-
Posts
2,227 -
Joined
-
Last visited
Content Type
Profiles
Forums
Gallery
Events
Posts posted by EJ_L
-
-
Congratulations and well done!!
-
OC, too kind. I despise building ladders. Those to me are more frustrating than rigging! One of these days I will take the time to make a jig to help build them, but like so many things, it takes time and I have not yet allocated the time for that project.
Good call on that railing Marc. I camera and room lighting are really not the same! I knew they were different but I did not see it as that bad until I looked at the pictures on a larger screen. I should have some more of the darker wood in the pile.
Thank you and OC as well as all of my continuous followers. I have had a lot on my plate lately that model building has been limited to only a few hours in a week. I try to make the most of them when I get them, but it does make for slow building of a slow build. Poor Royal Caroline is fairing even worse as she has been on the sidelines for months. All for a good cause and I will have my free time back in about 5 more weeks.
-
Good choice on the change for the seats of ease. Those appear much better both in scale and design.
On the pin rails, I think that the rails themselves were used, or a like-wise rail for the rigging, but I also do not believe that the pins themselves were in use until the mid 1700s as Allan said. I ran into this issue when I built La Couronne as she was before the use of pins also. I would leave the rail as the ropes still had to belay to something, just leave off the pins themselves.
- FrankWouts and md1400cs
-
 2
2
-
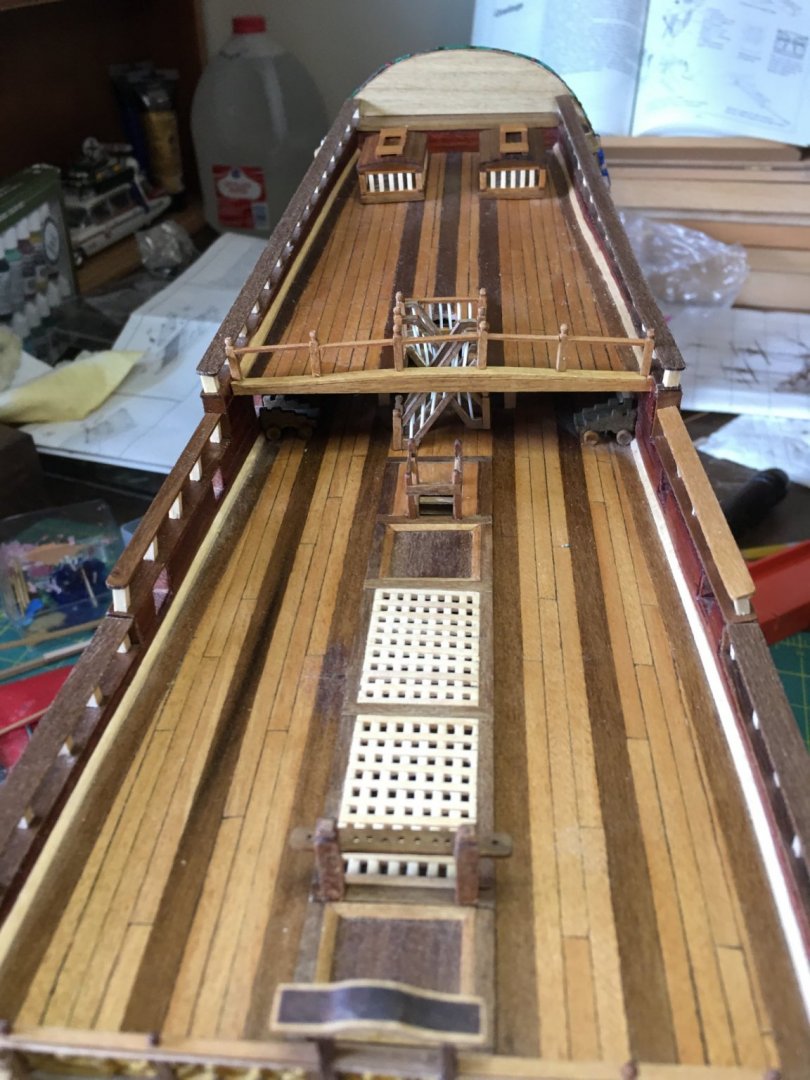
It’s been a while since my last update. Been busy with other projects plus a much needed long vacation with my wife. Still busy but I have managed to get some work done with railings, ladders, bits and animal pens. Skylight is next.


-
-
I just got back from a much needed vacation and break myself. WOW! Seeing her set up for display is jaw dropping. It has been a while since we last saw her in full, I think back nearly at the beginning before you cut her all apart. Seeing those various pieces reformed and whole again is amazing.
Taking time off from the build is good. I know I was getting bogged down with too much myself and had not been in the mood too much modeling. Now after a couple of weeks away from both the work shop and work, I am ready to get back at it.
-
-
Still picking my jaw up off the floor. Amazing. All these long months of modifications, design and creation are coming together. Can't wait to see the rest of the bulkheads up clear to the stern.
-
Wow! Simply incredible.
- Keith Black, md1400cs, Nek0 and 2 others
-
5
-
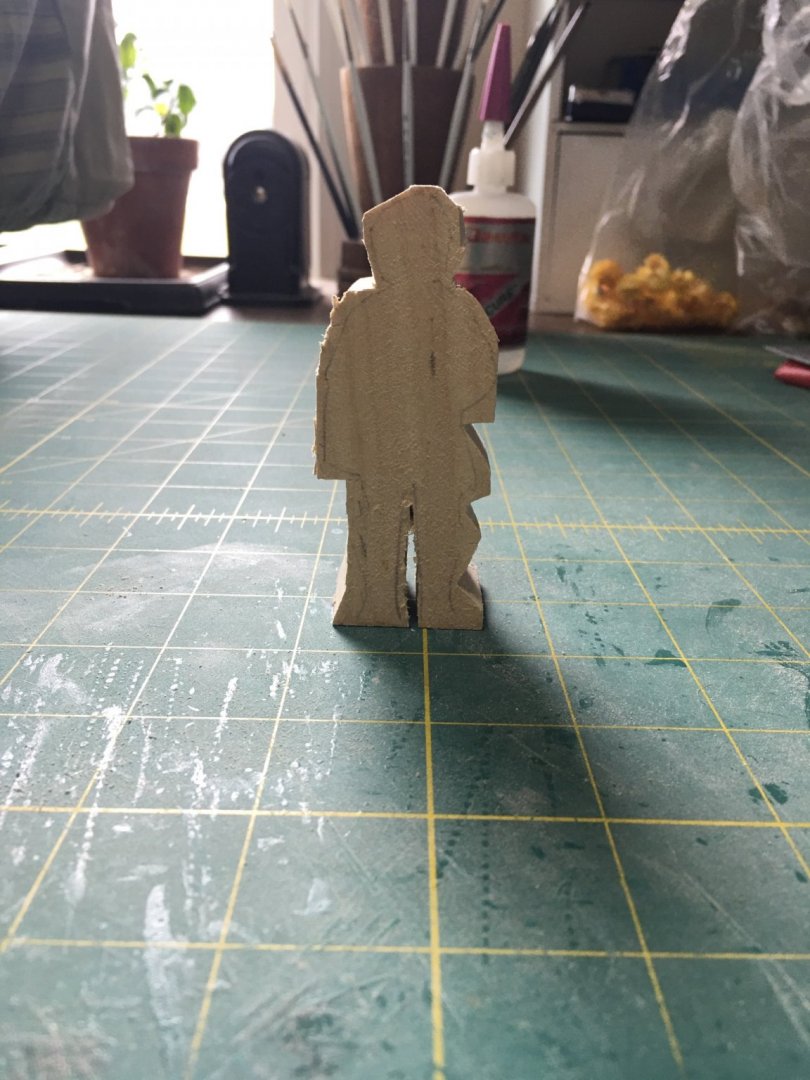
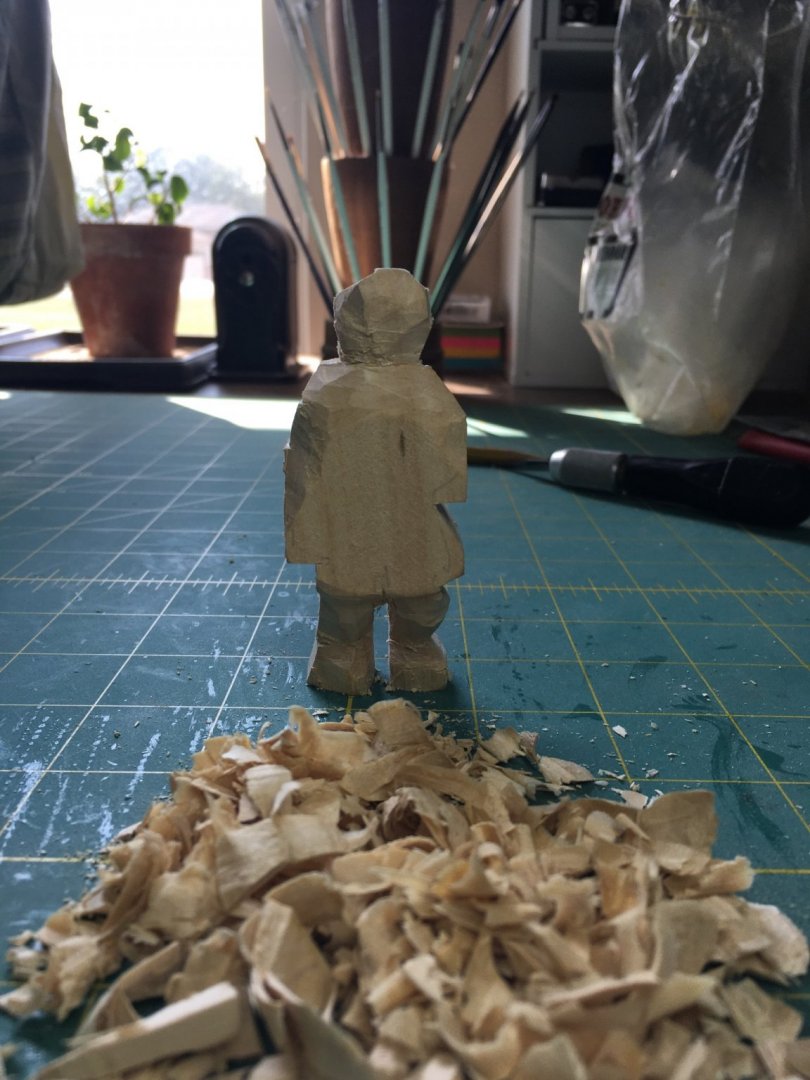
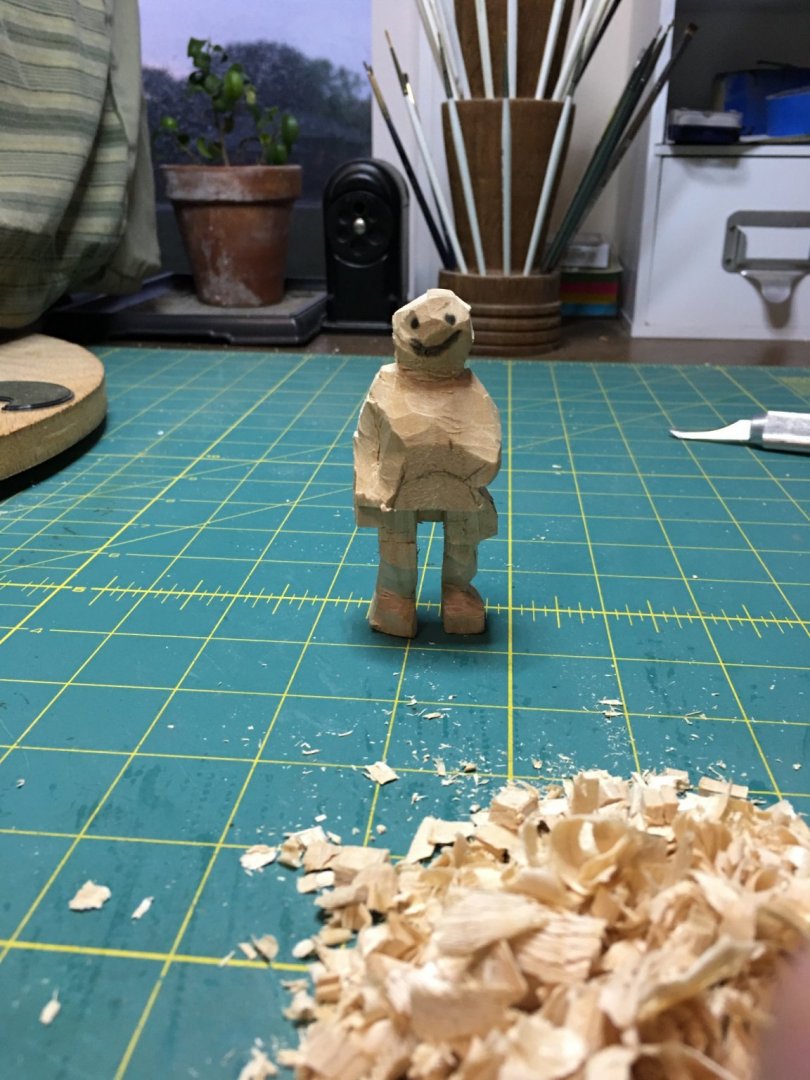
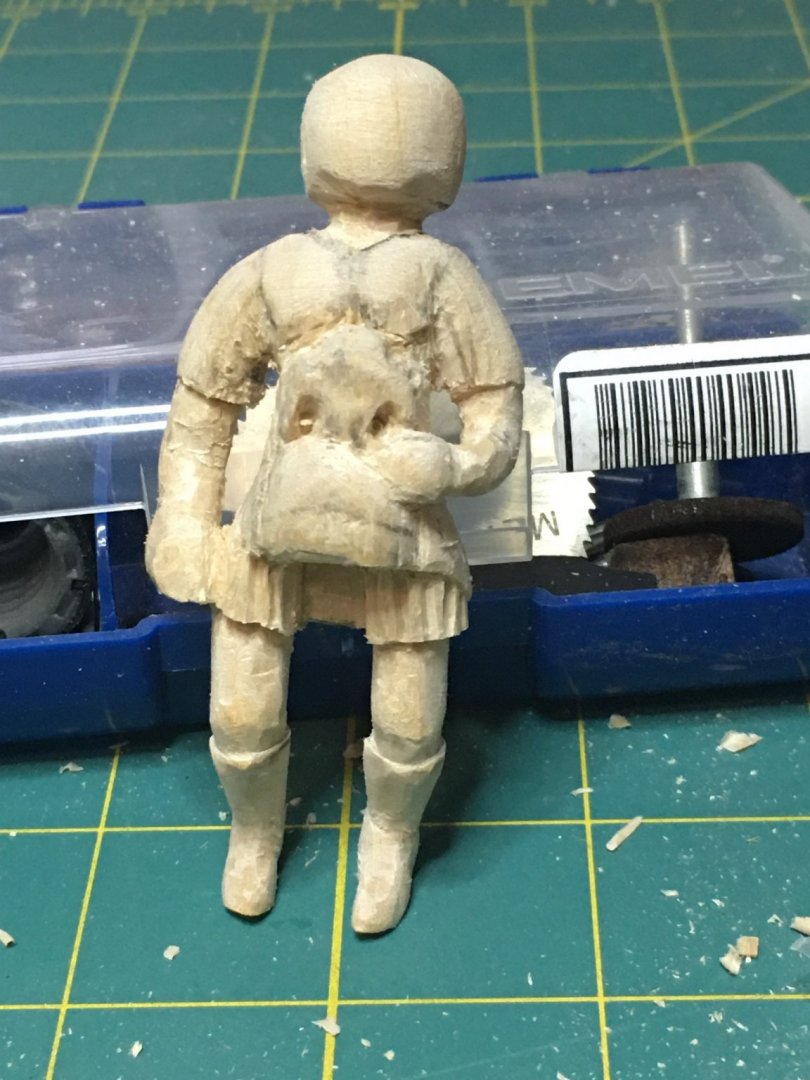
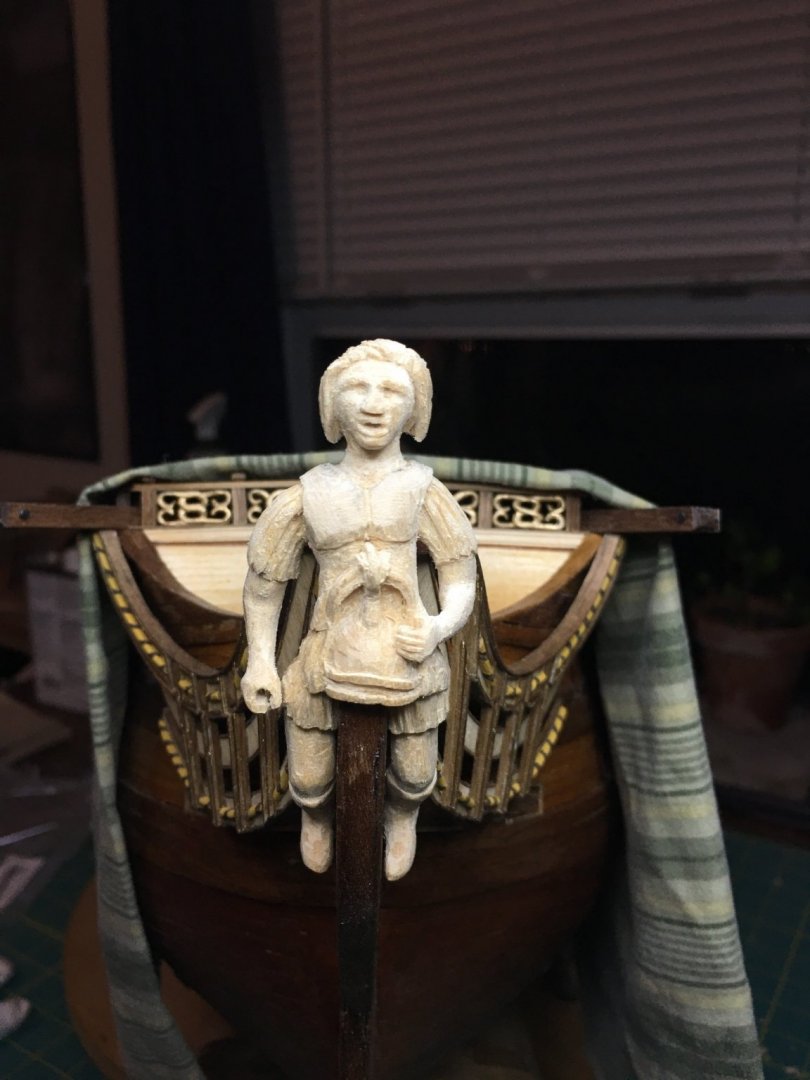
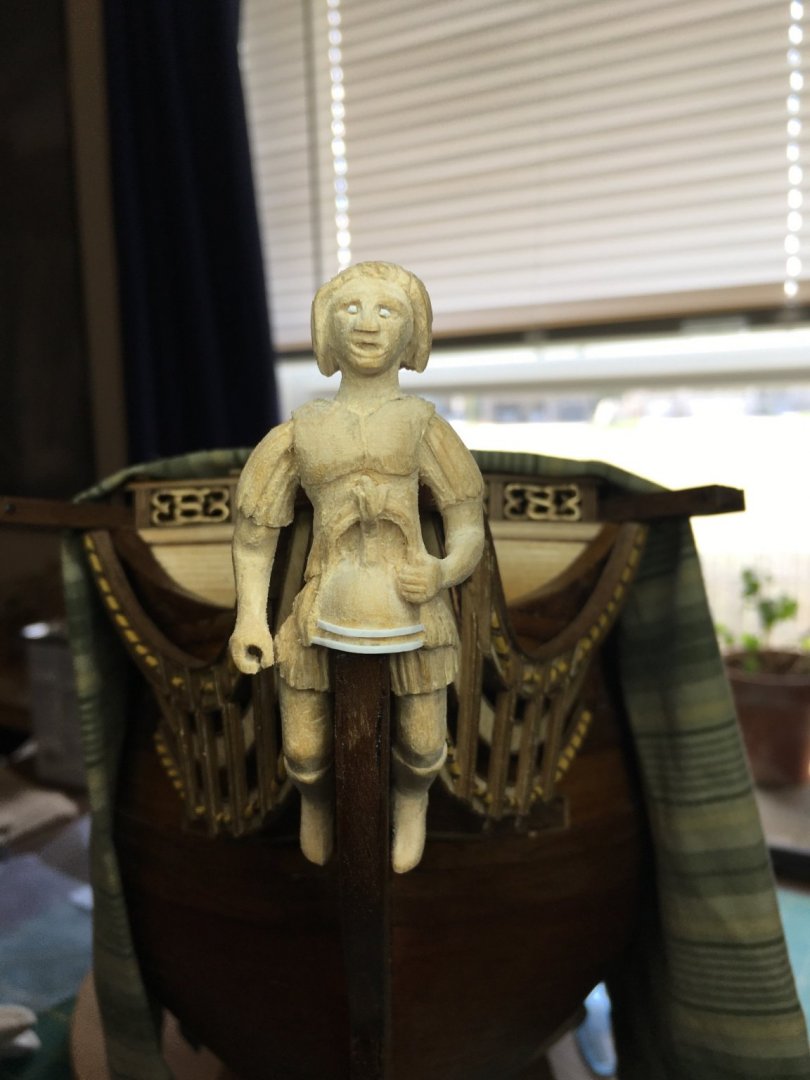
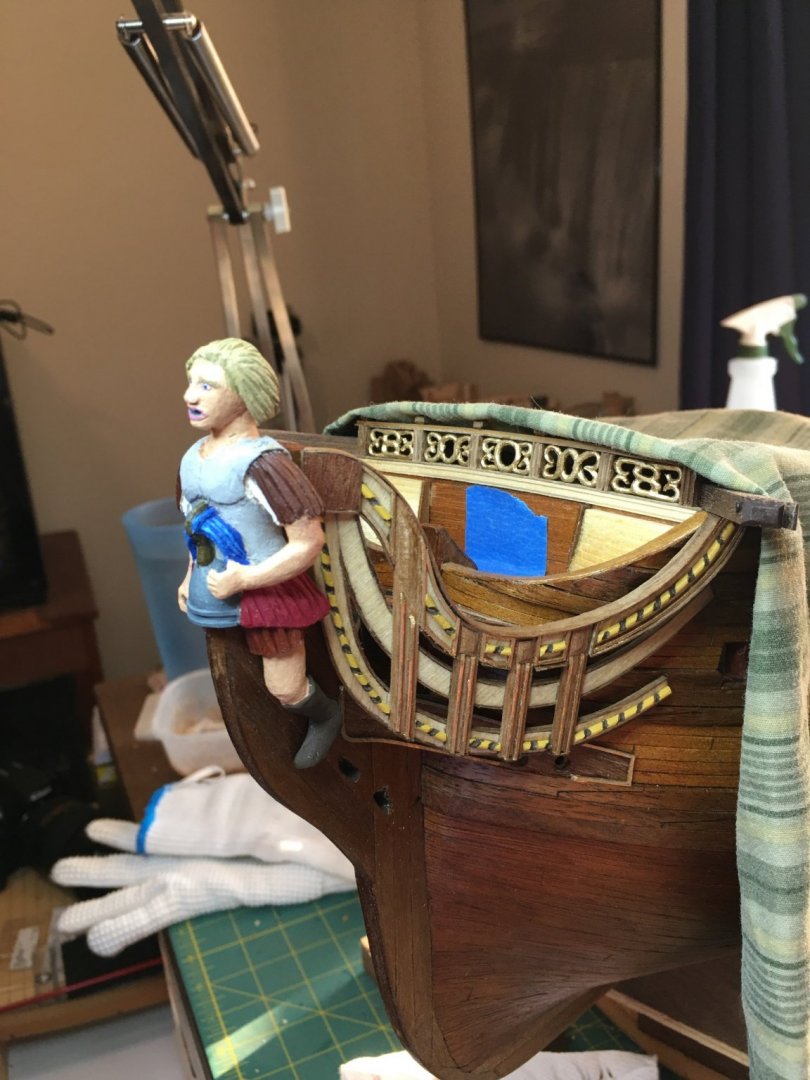
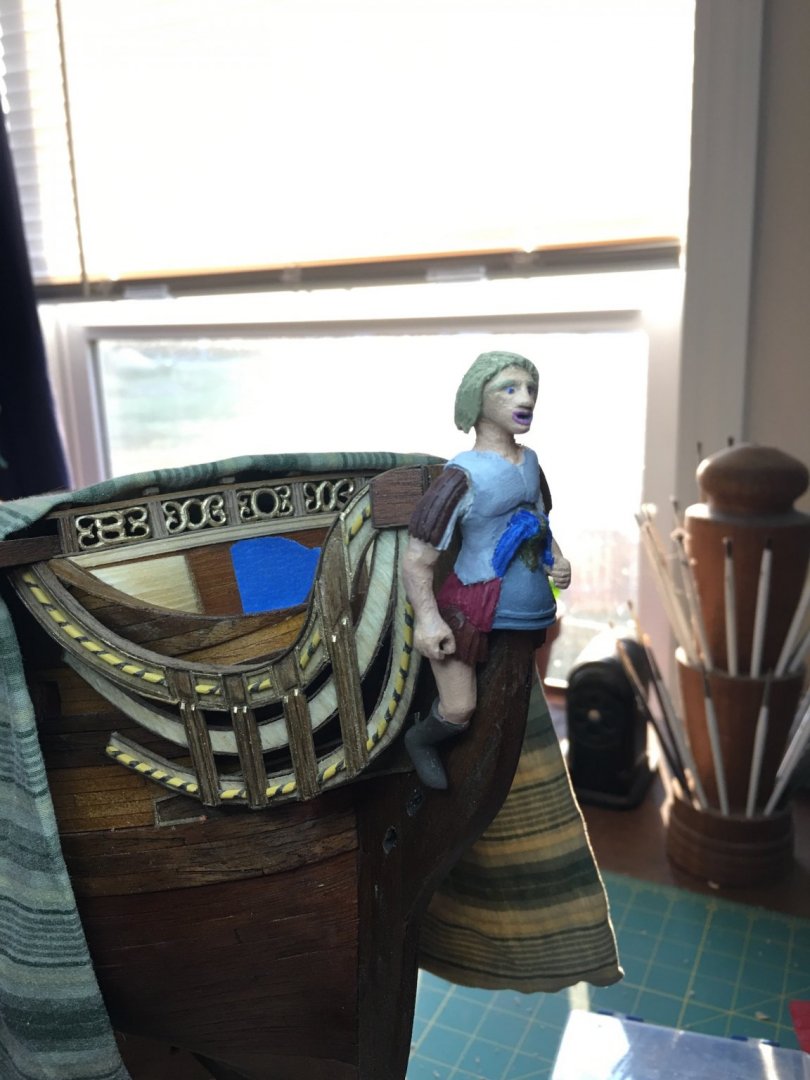
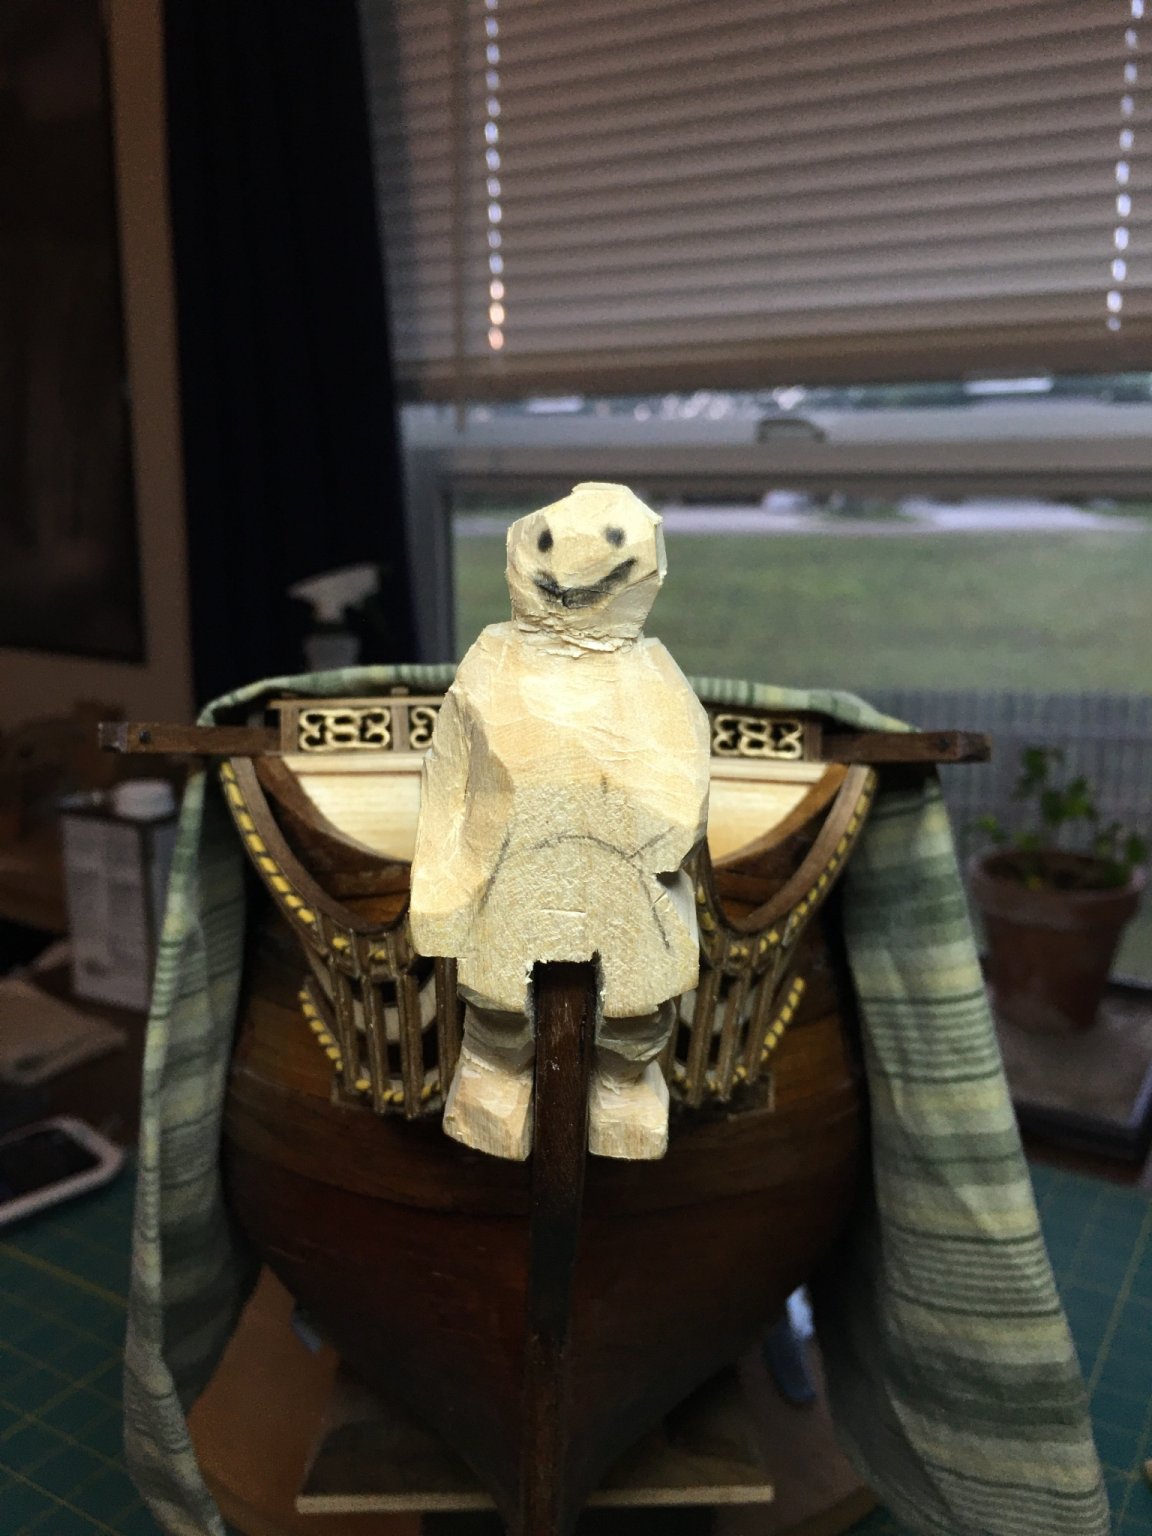
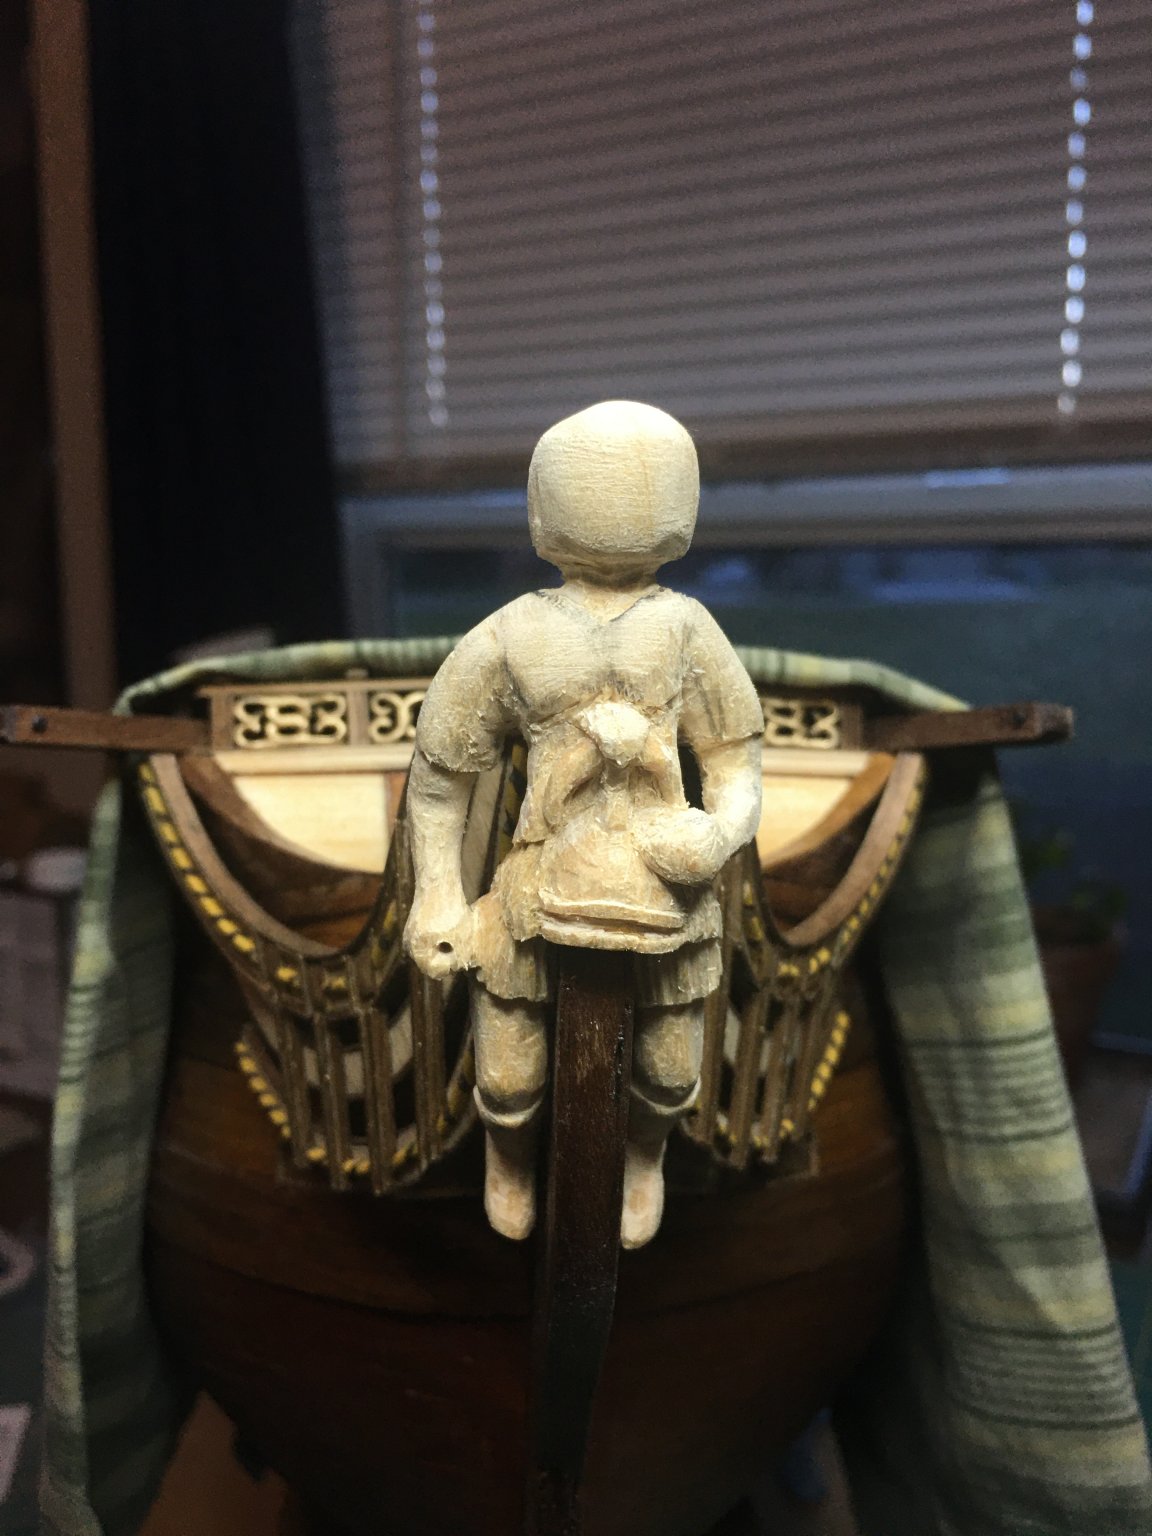
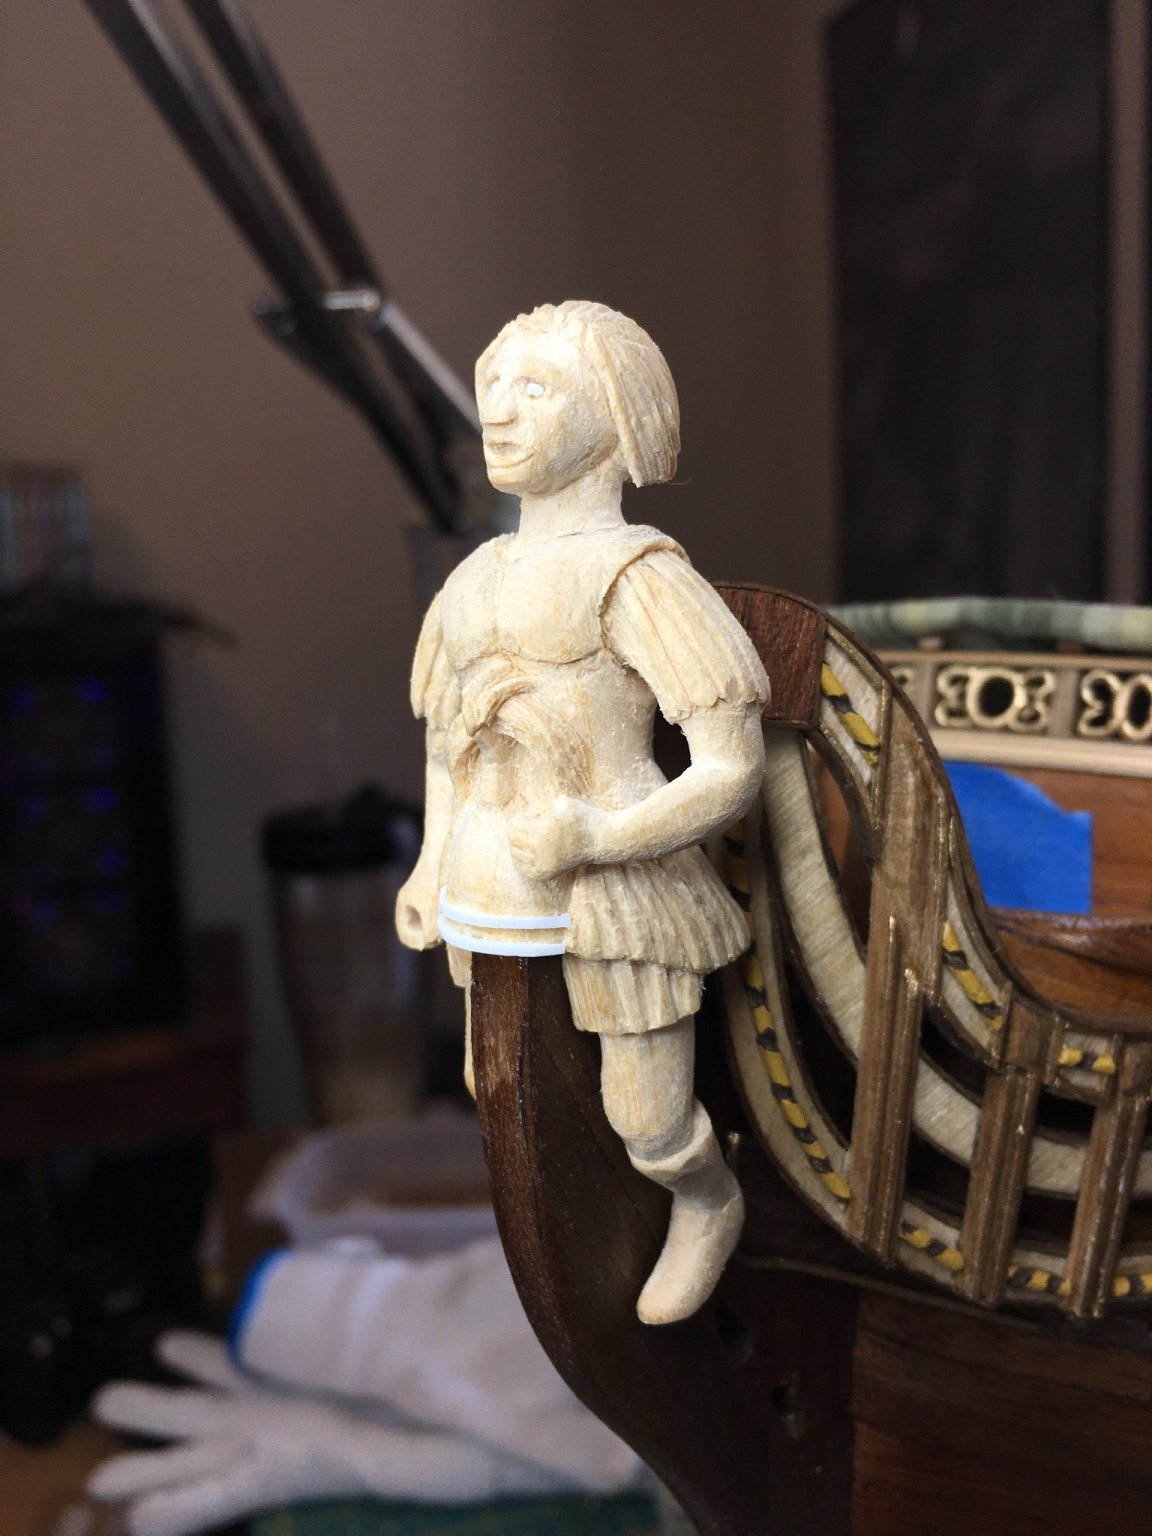
Last few weeks I have been working on the figurehead. Here are the progress photos carving it out of a block of basswood.


- BLACK VIKING, md1400cs, RichardG and 8 others
-
11
-
-
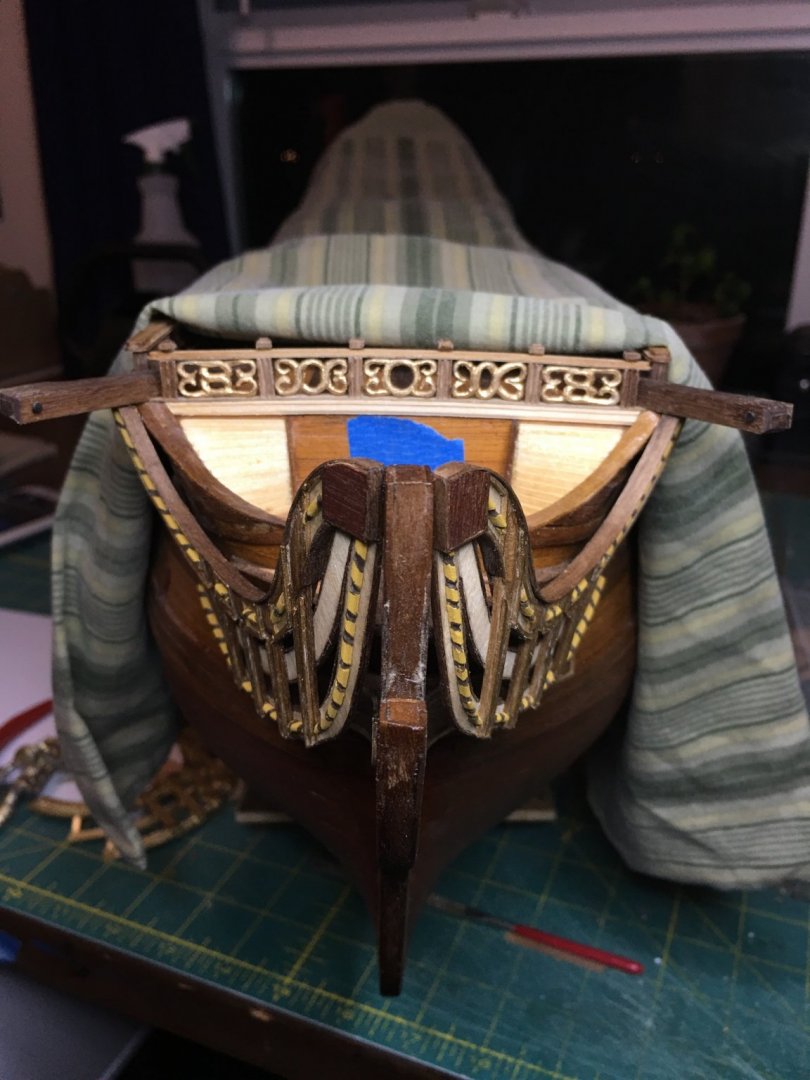
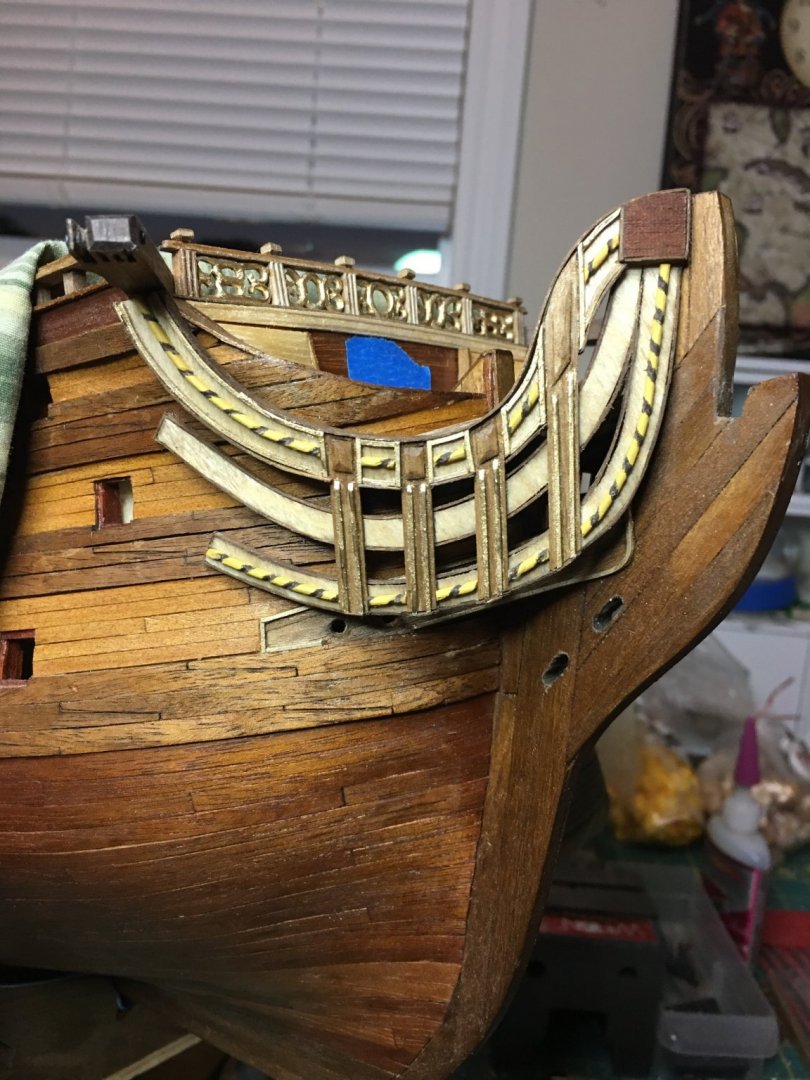
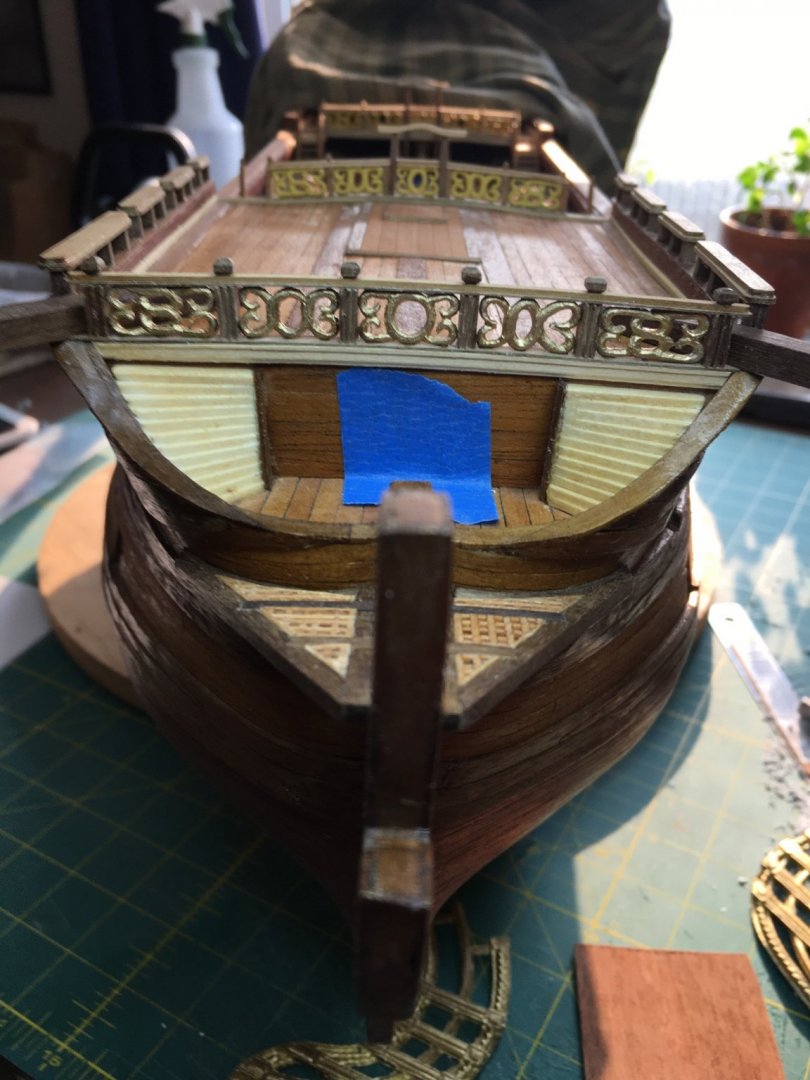
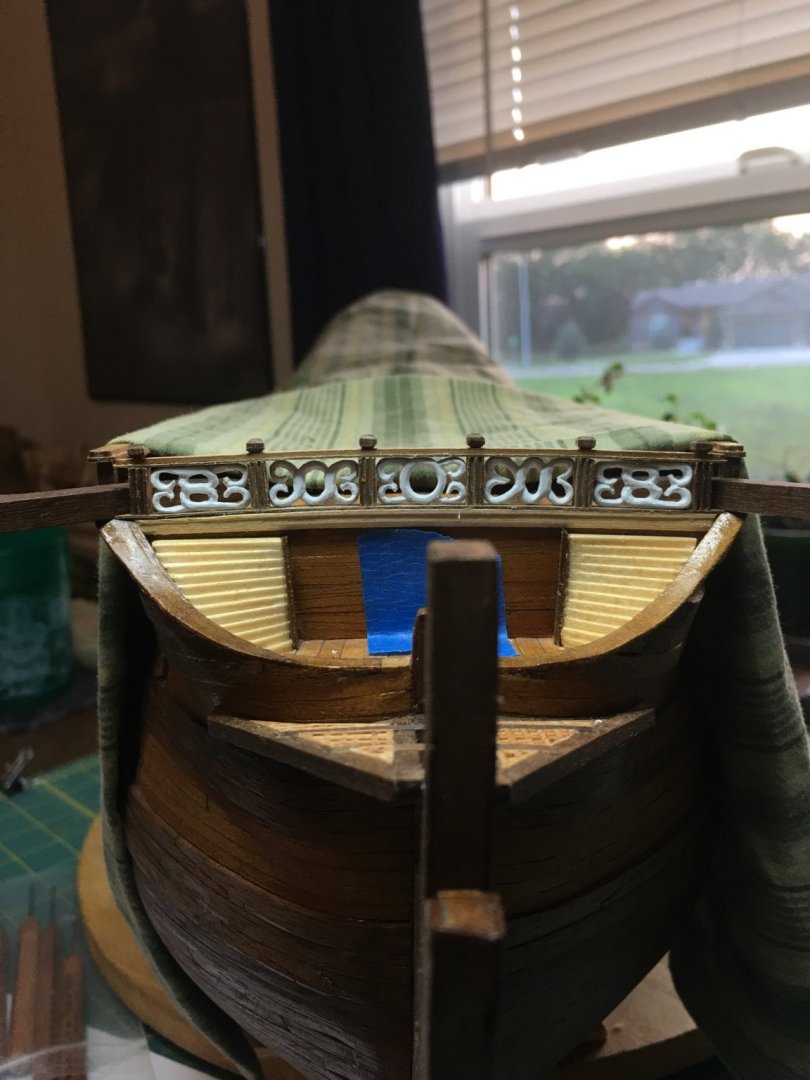
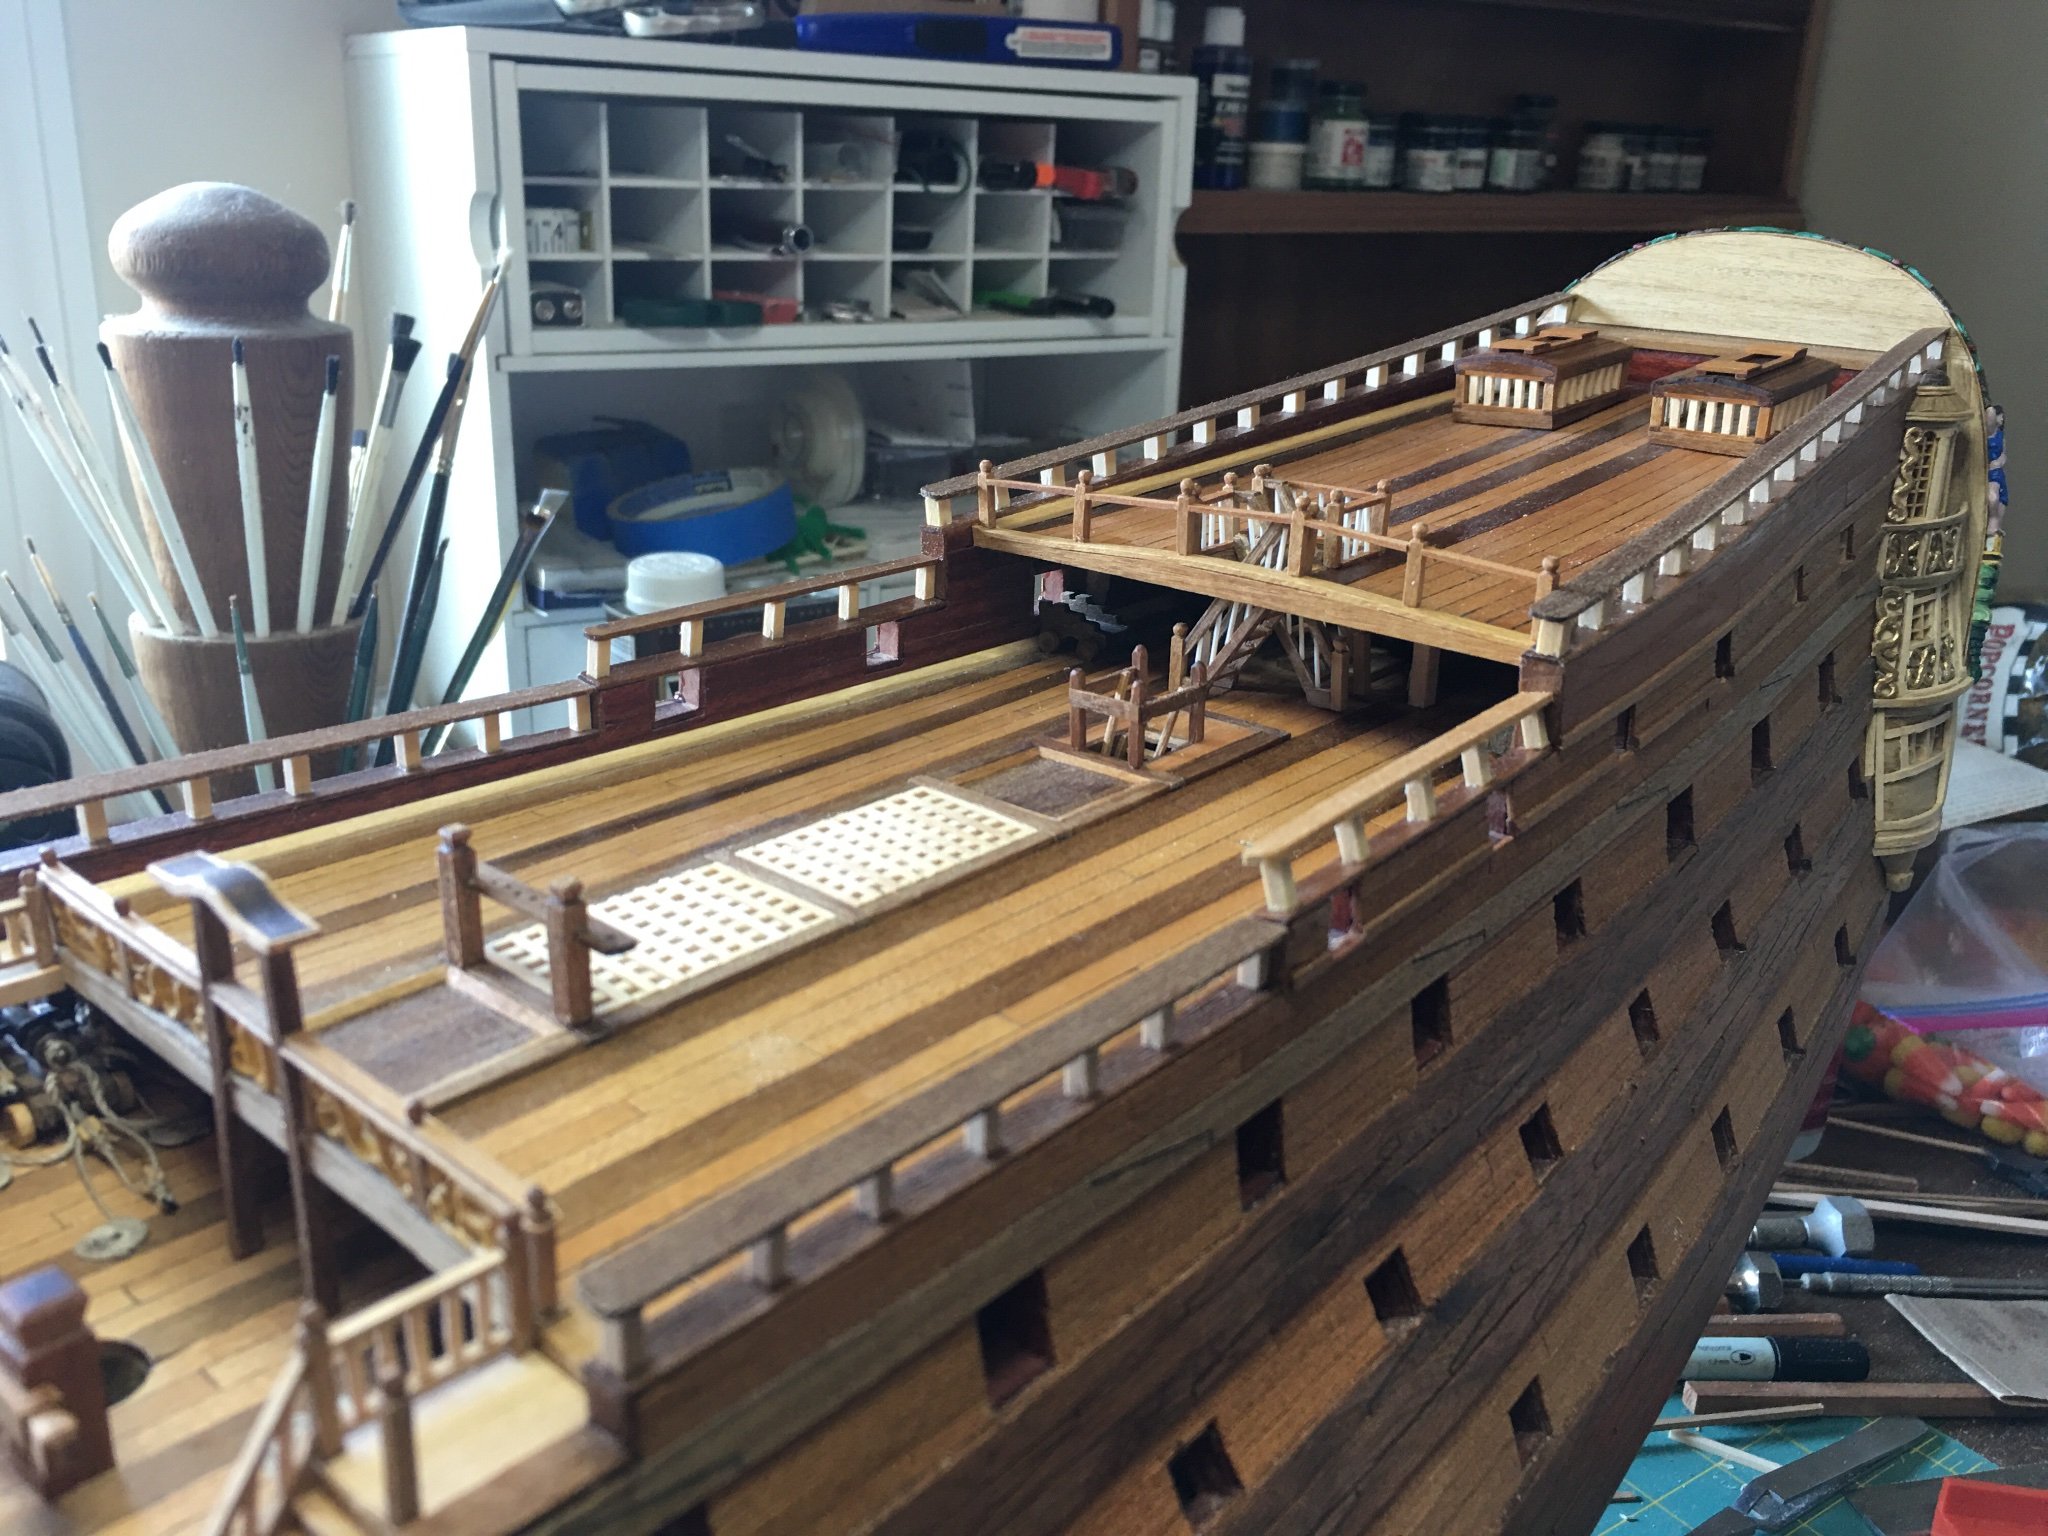
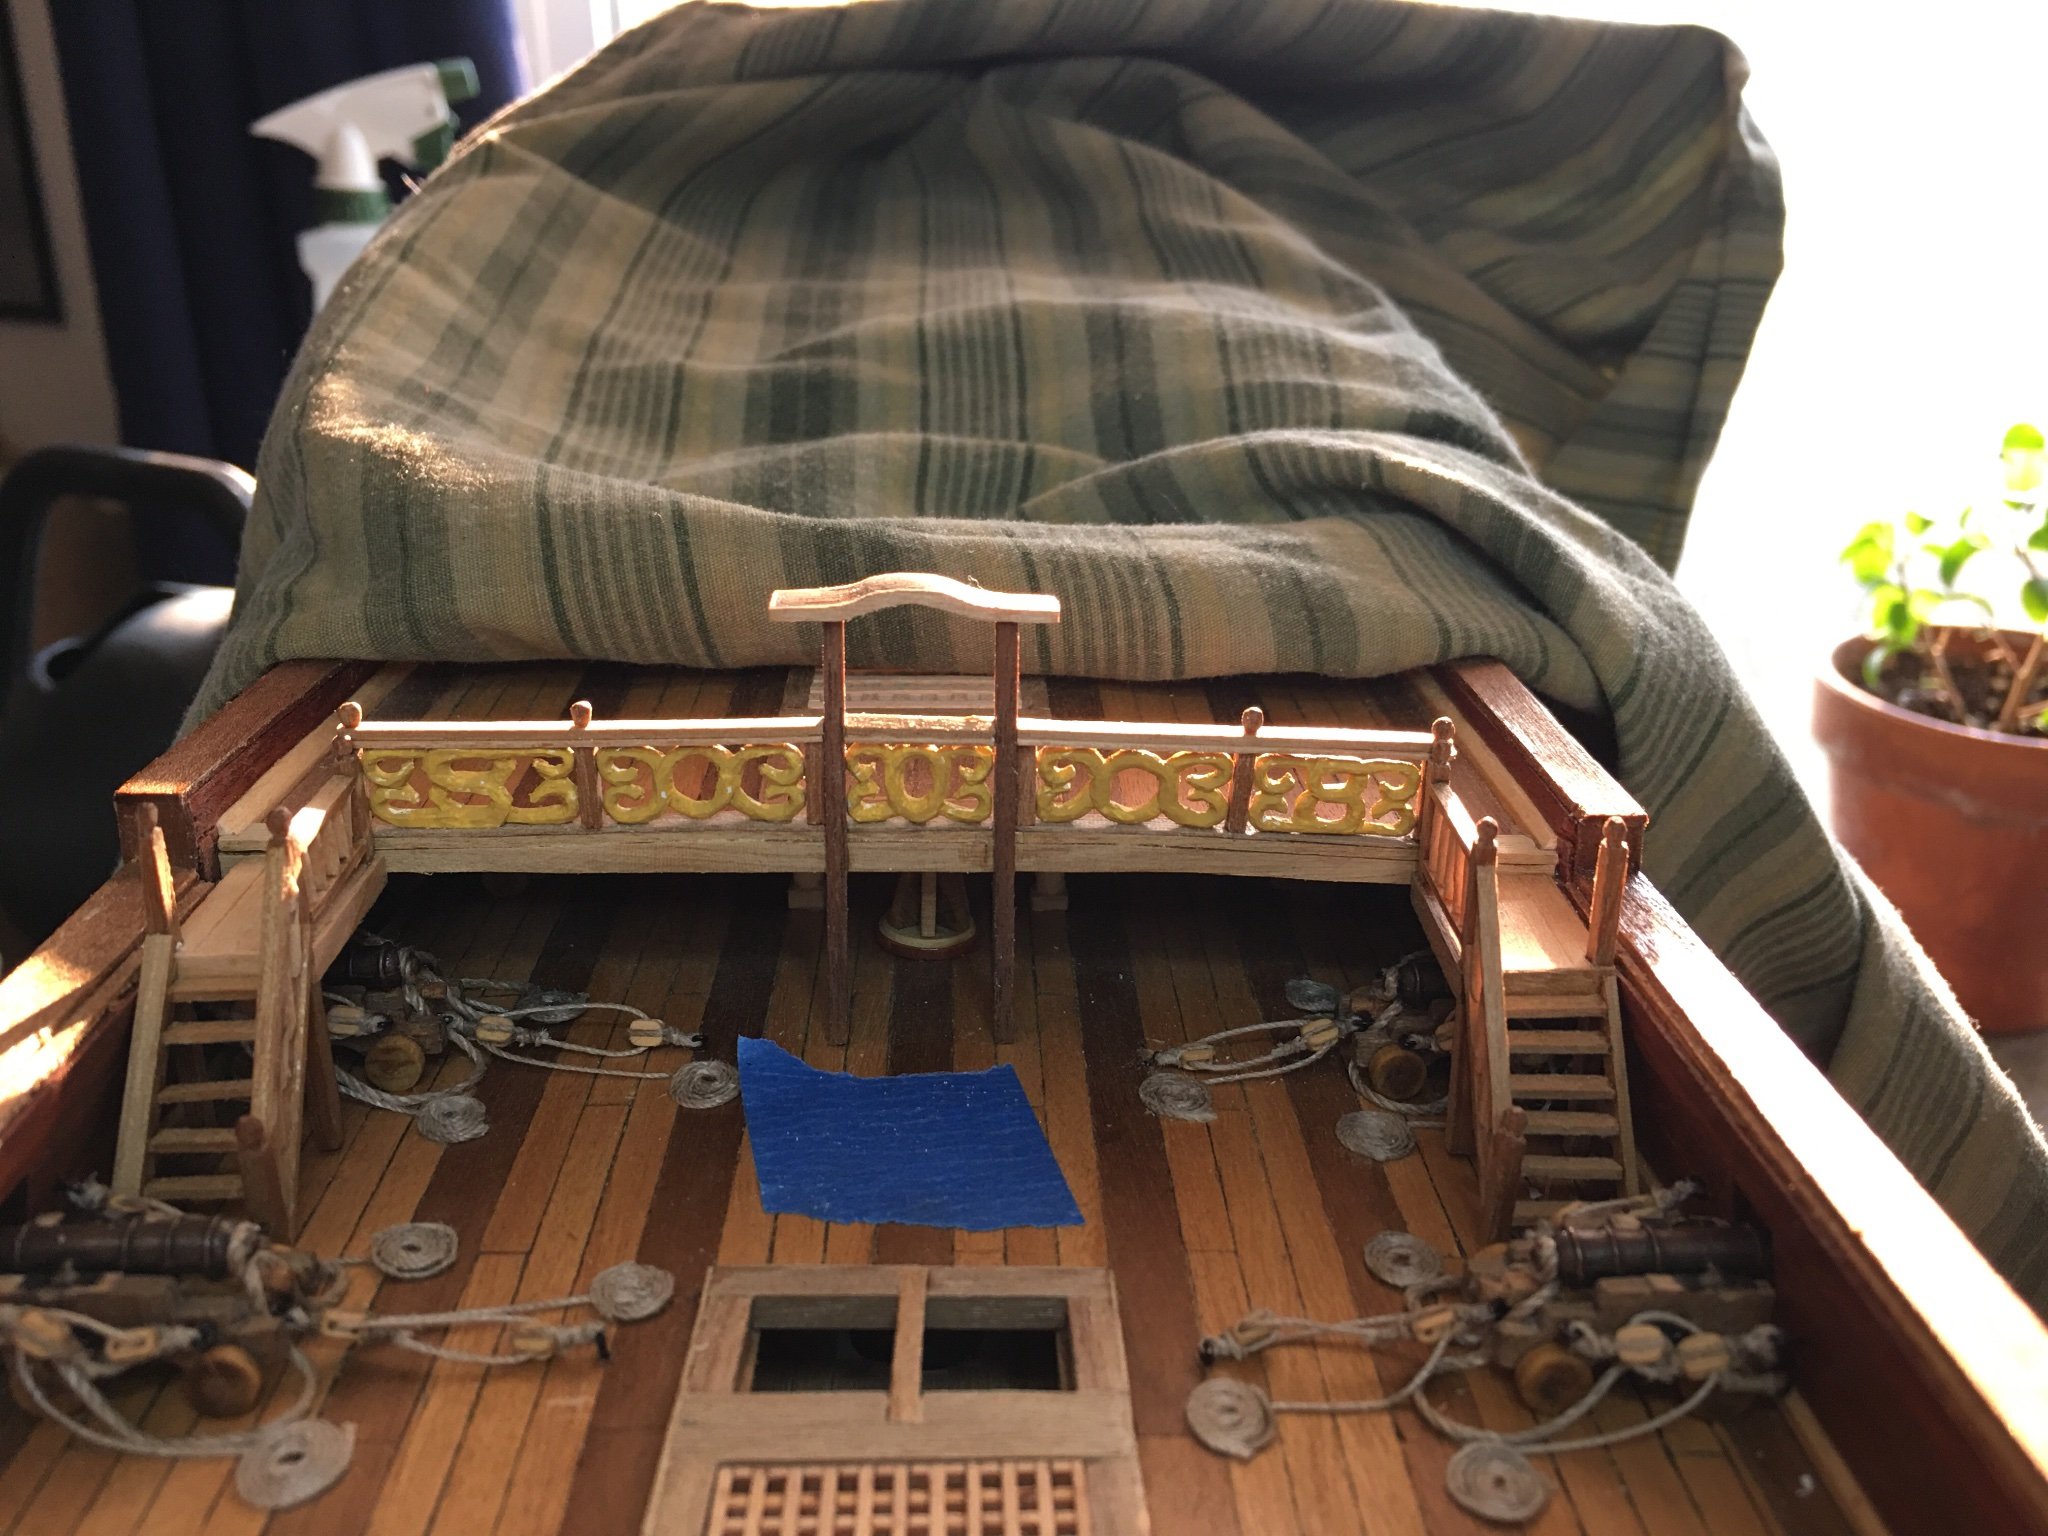
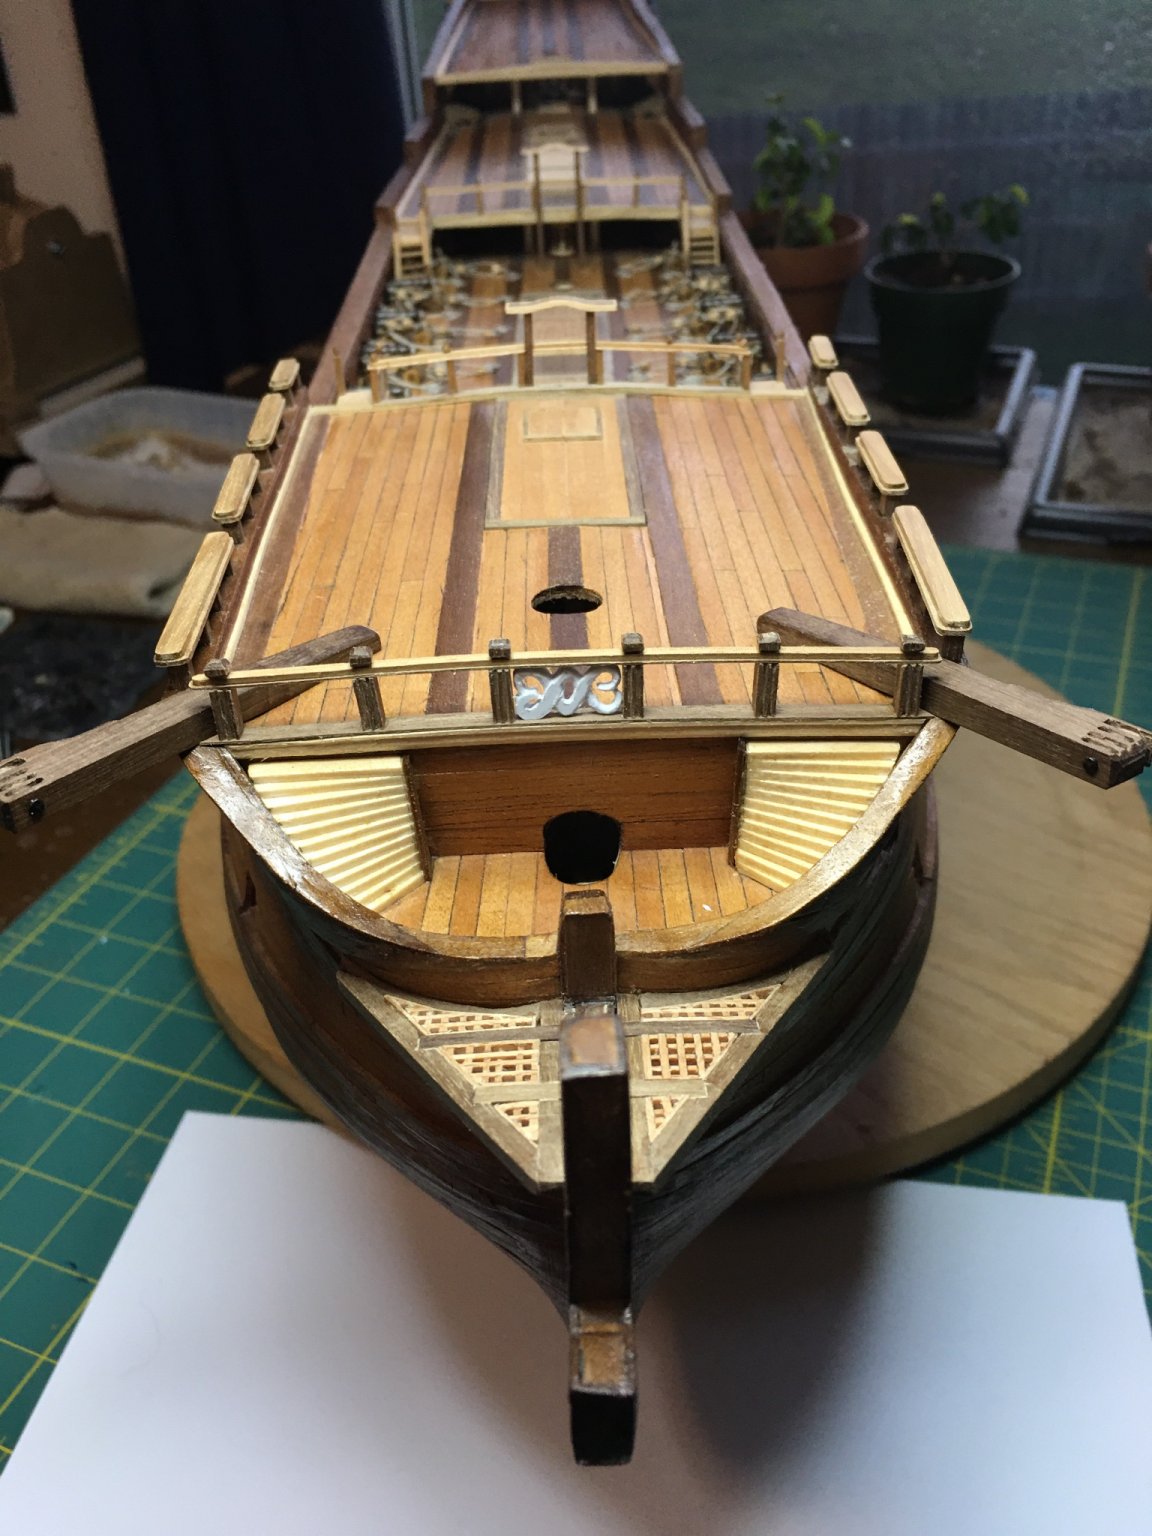
More work on the bow. Added the decorative rails to either side and the thickened planking around the hawse holes.

- Old Collingwood, md1400cs, coxswain and 5 others
-
8
-
Unfortunately for beginning ship model builders, many of the available kits have instructions that are more like reading blueprints than traditional instructions. I think that the plastic kits by Revel and Heller etc., do a better job of providing more step-by-step instructions than wooden kits. Finding those easier kits is good as they will give you the basics needed to make the harder ones easier to understand. Most kits at their base levels are the same. A plank on bulkhead goes together in much the same way regardless of scale or size. The main differences come in the amount of details, guns carvings and rigging.
Use the community as well. Most of the common models available have logs, lots of pictures and people that can offer advice and guidance when something is unclear.
- Scottish Guy and mtaylor
-
2
-
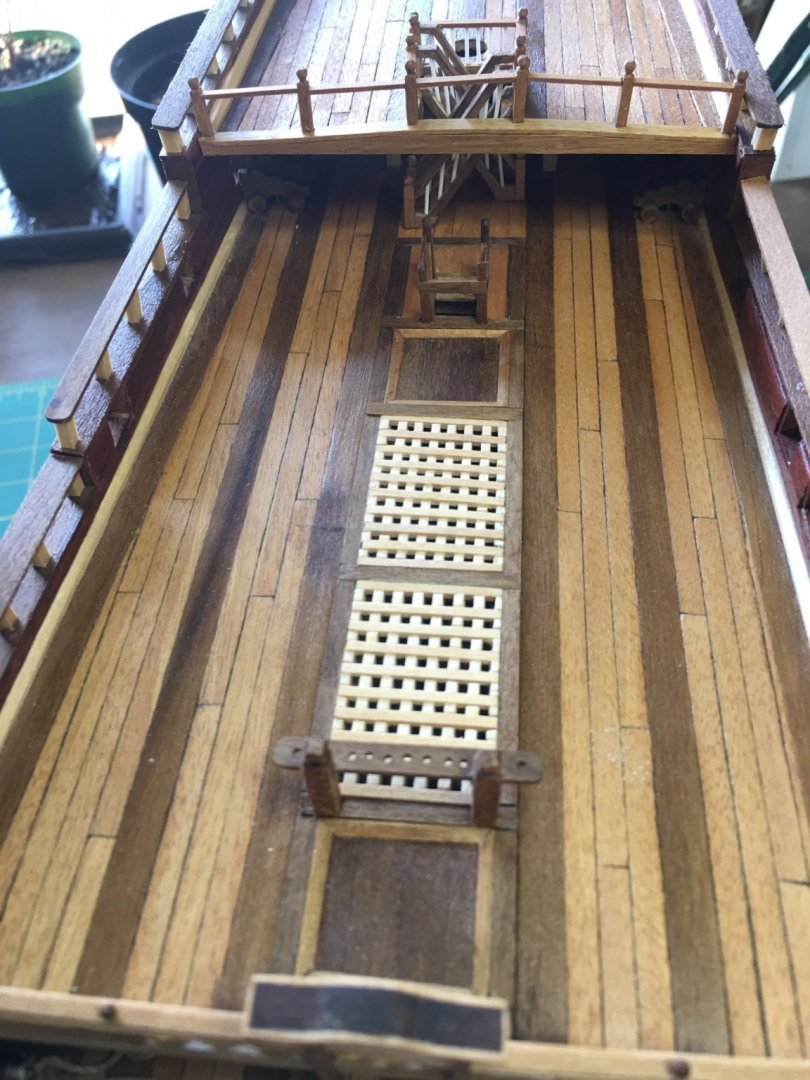
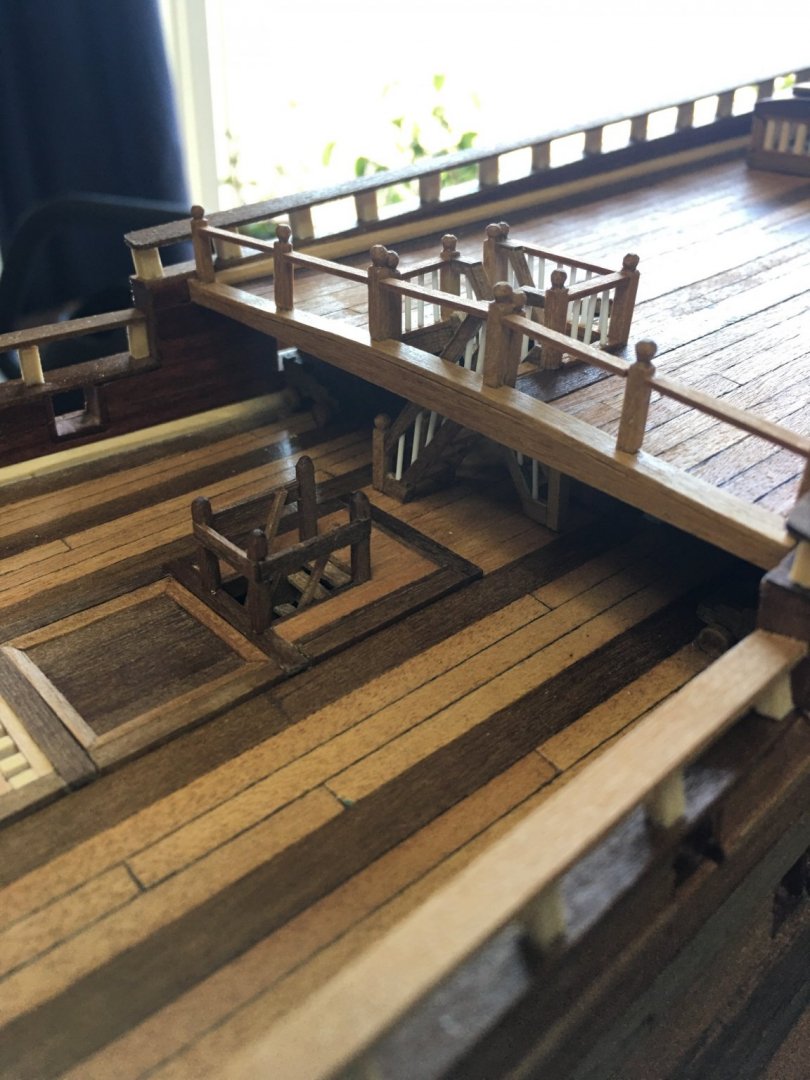
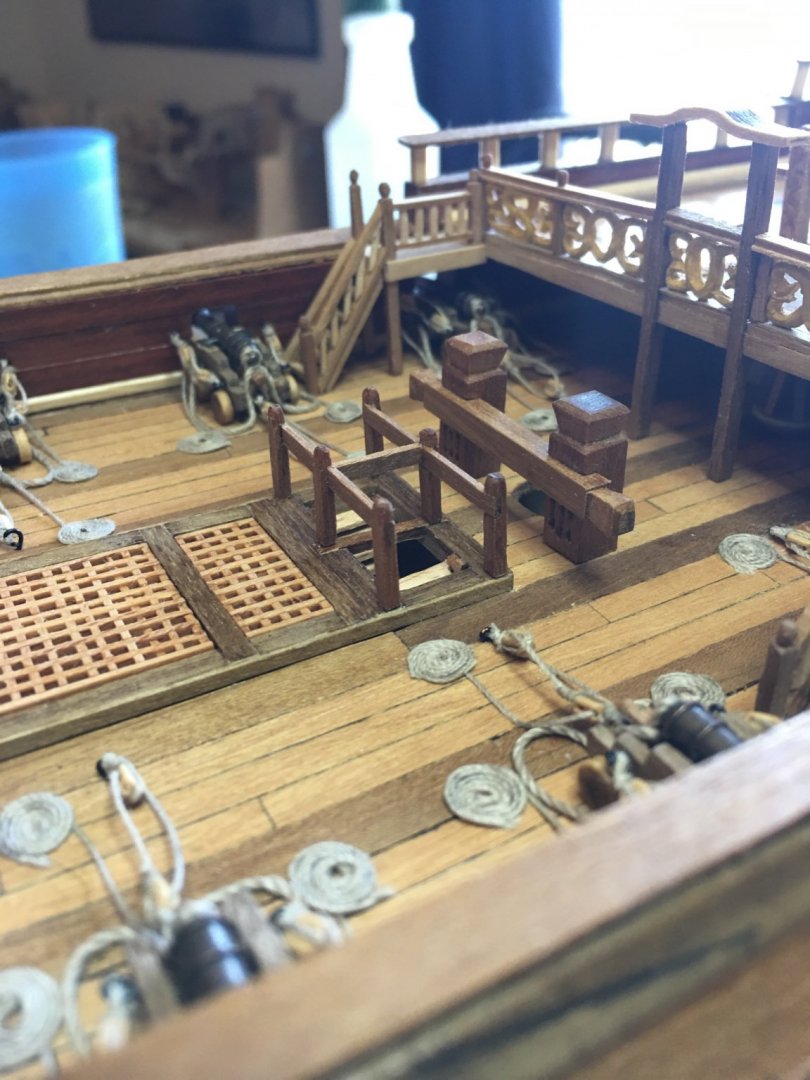
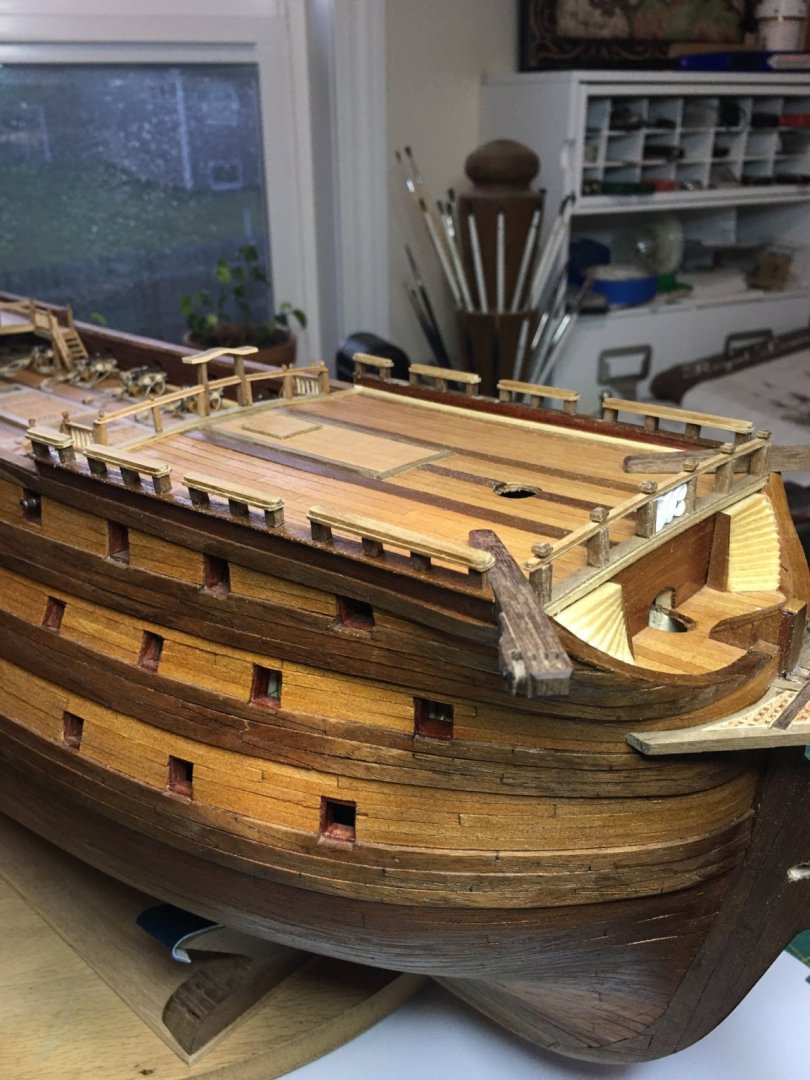
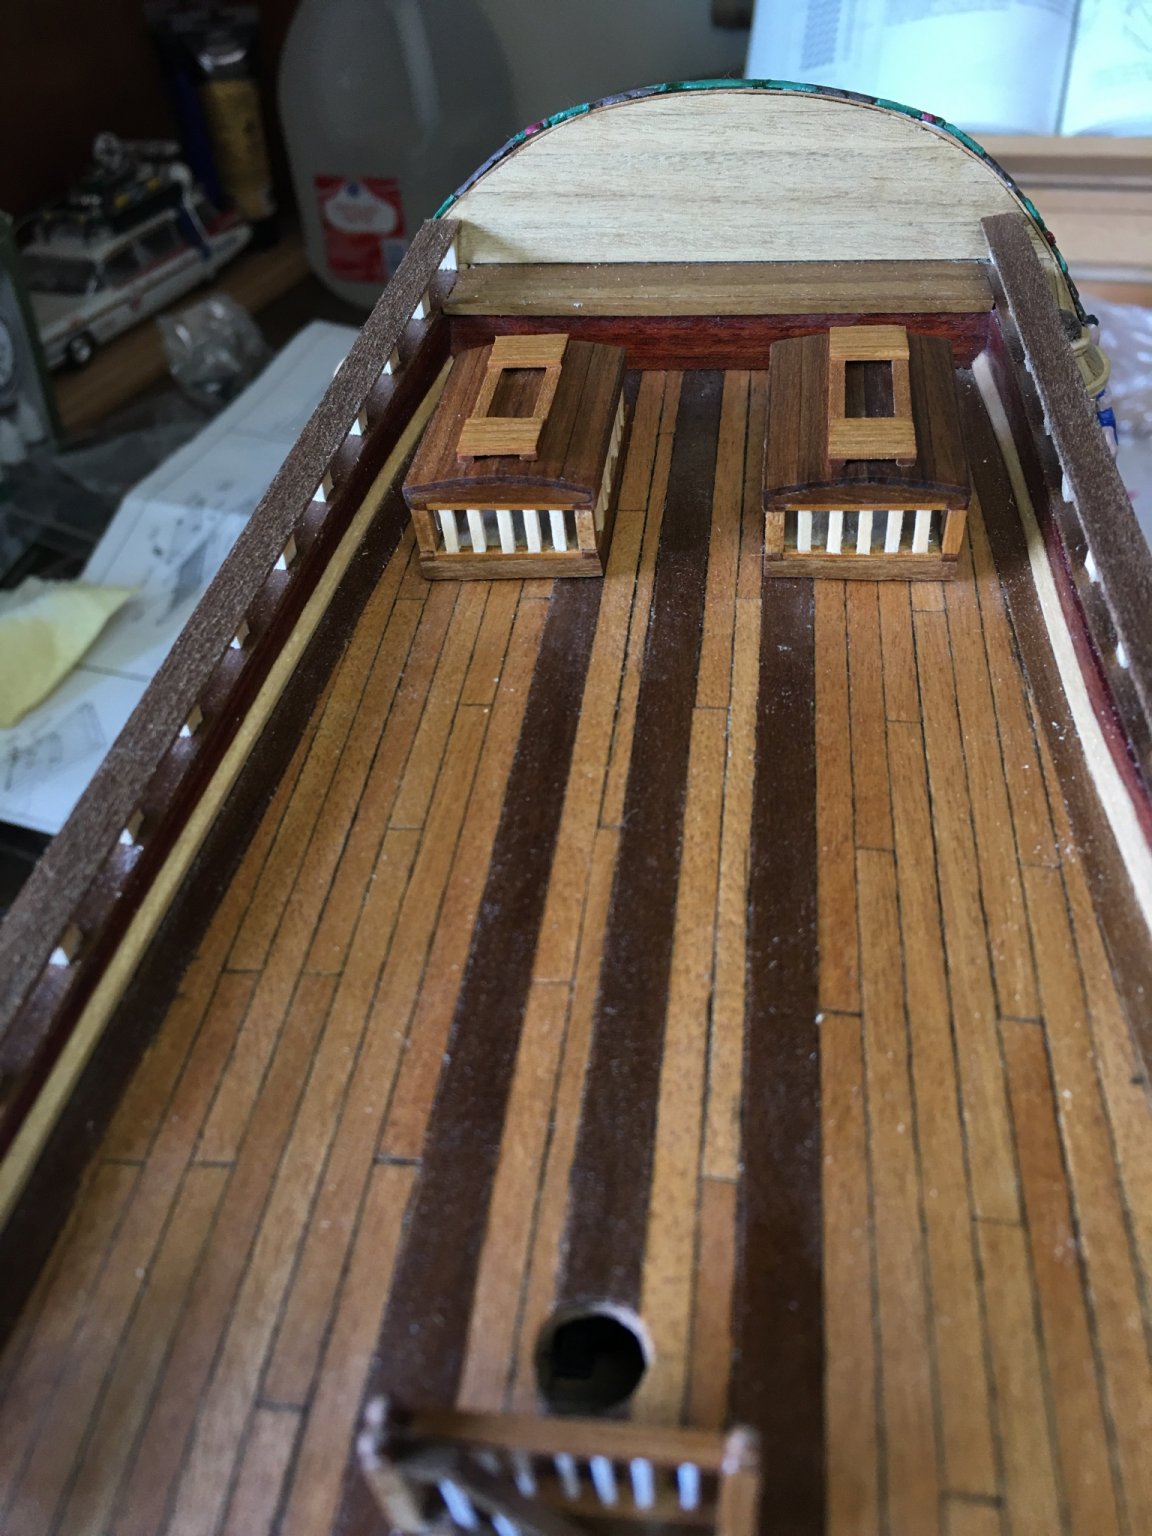
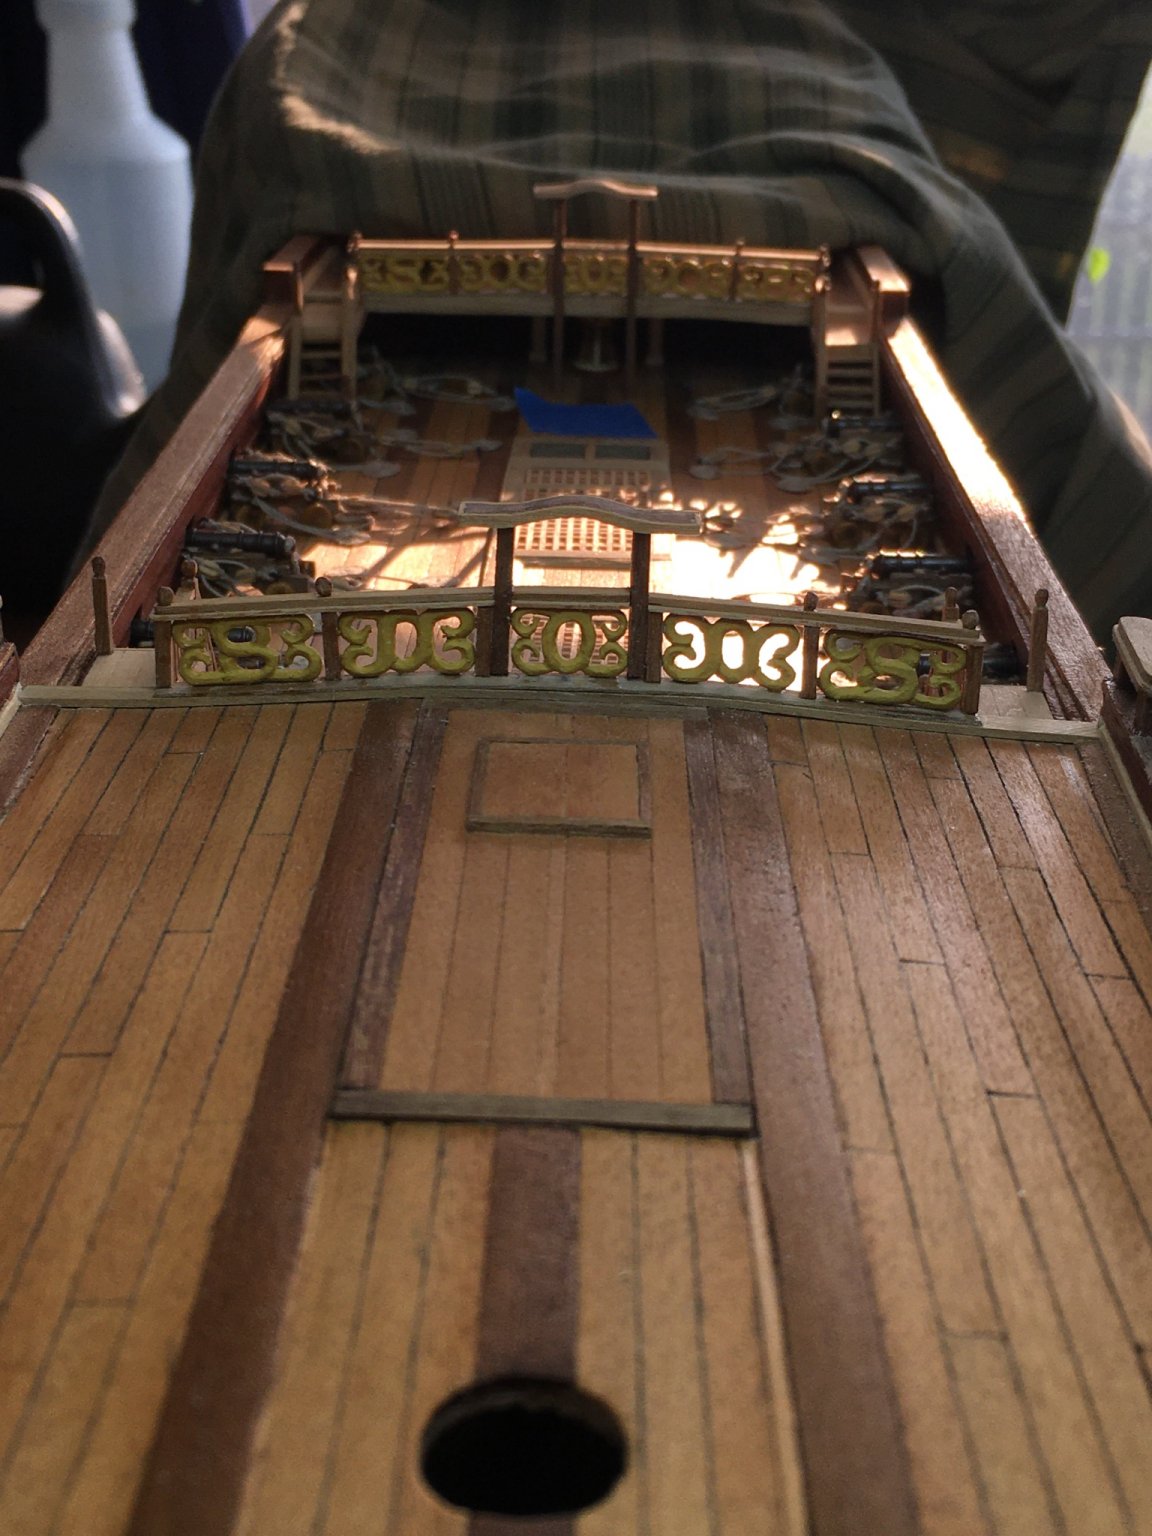
Three of the railings are complete. On to the next assembly.


- Edwardkenway, md1400cs, coxswain and 6 others
-
9
-
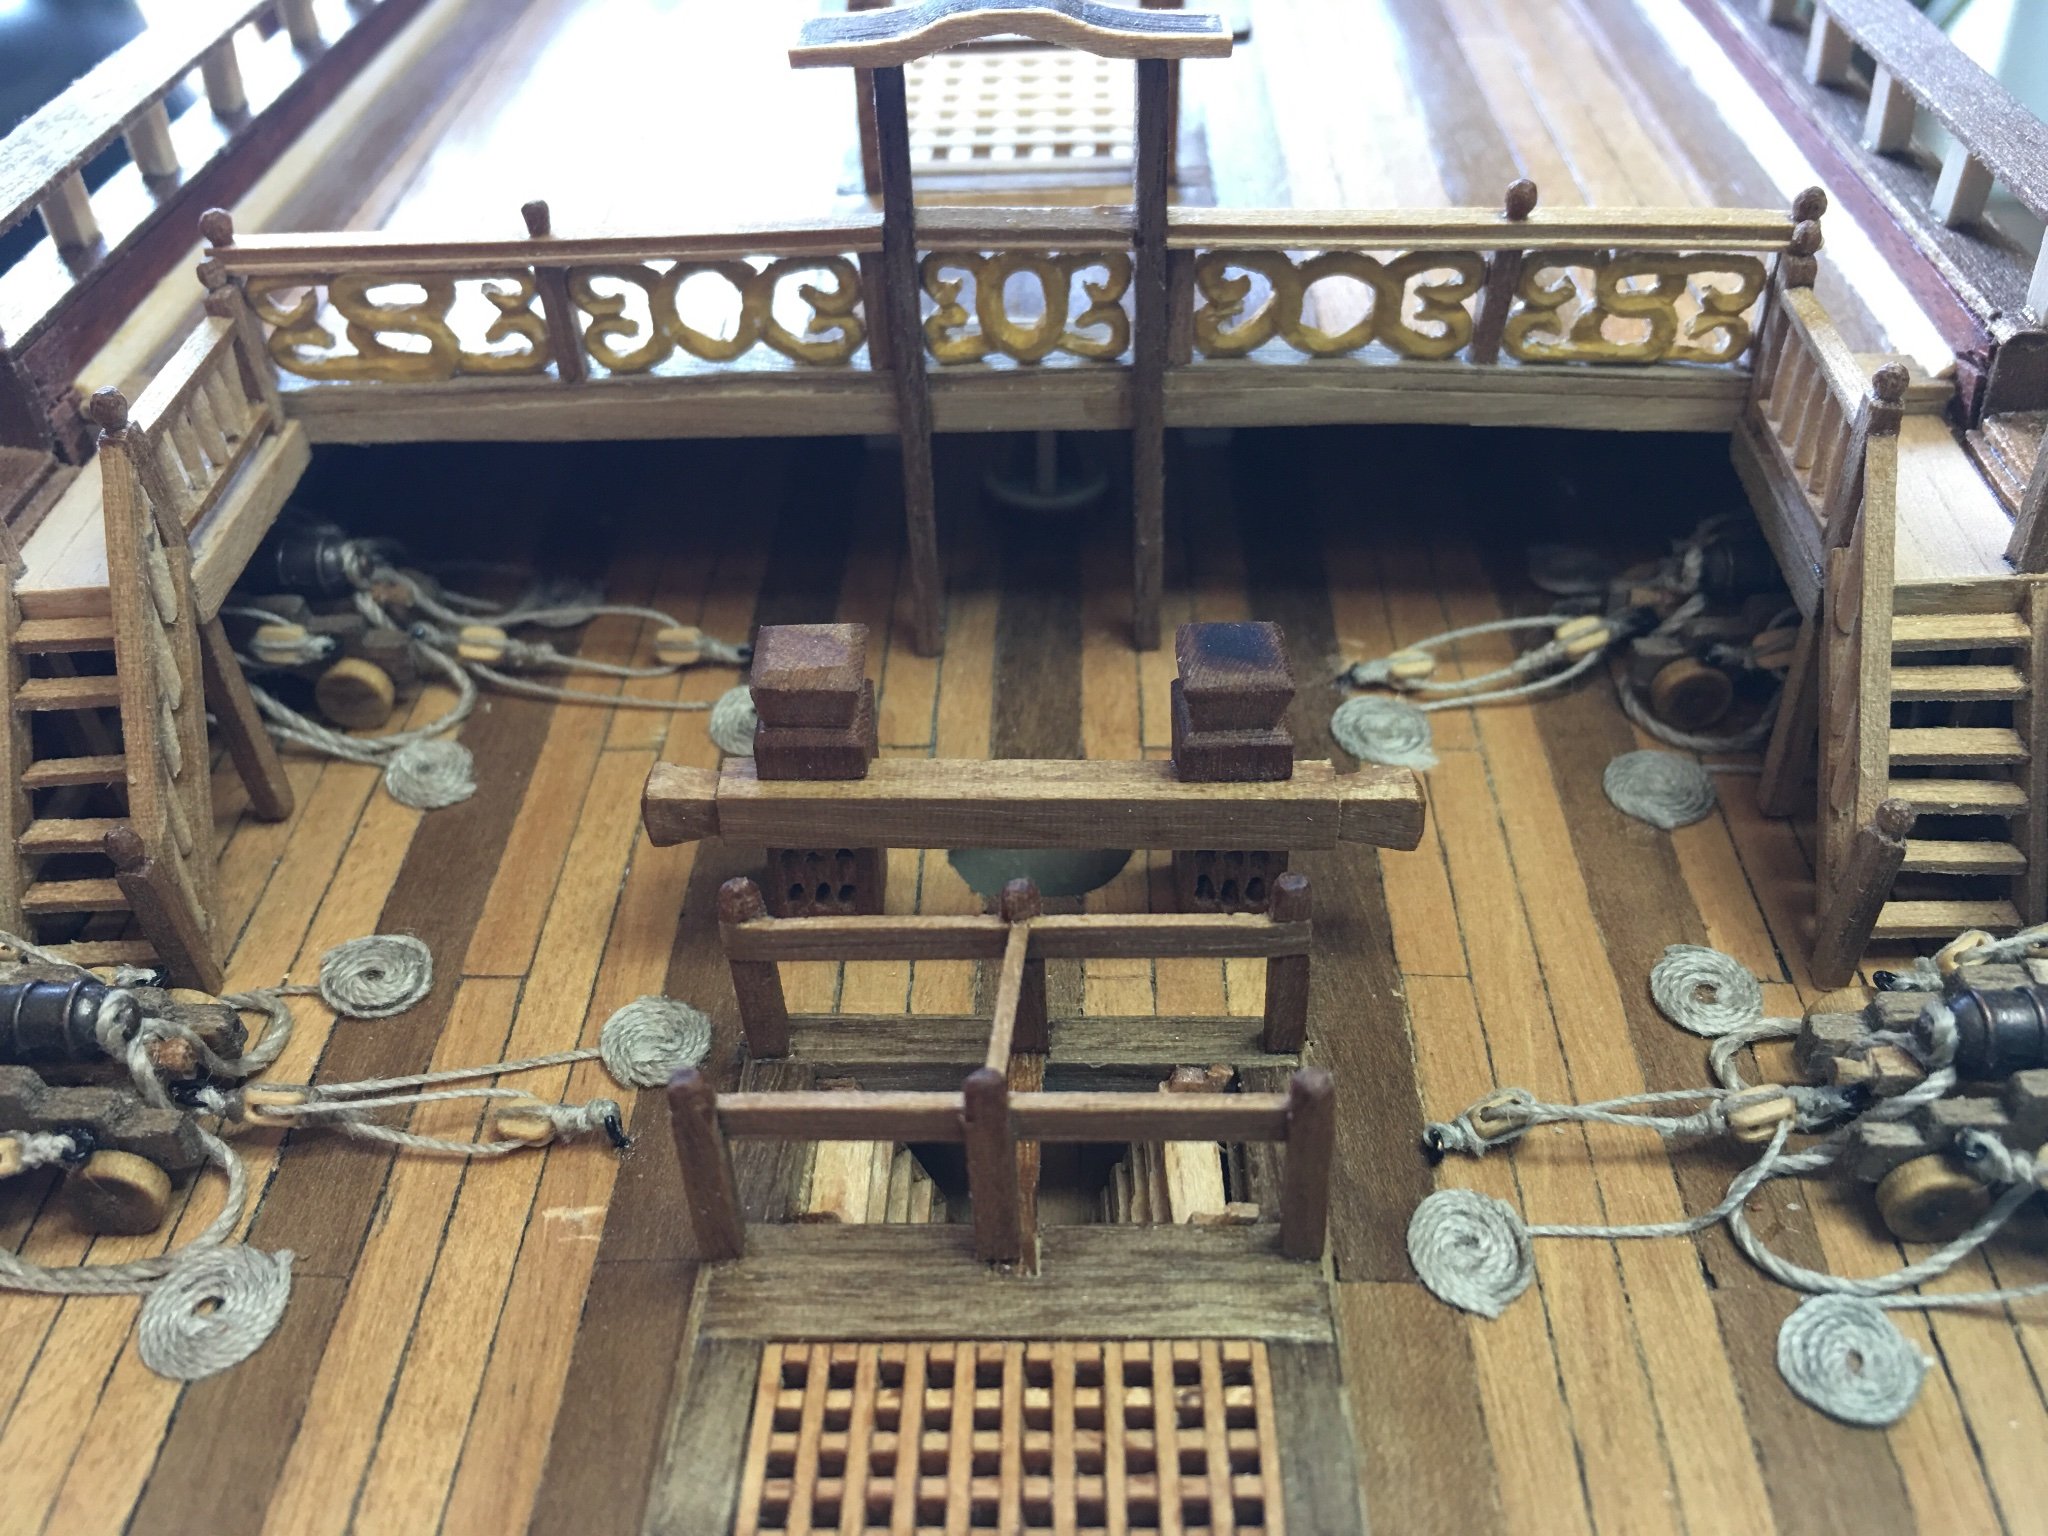
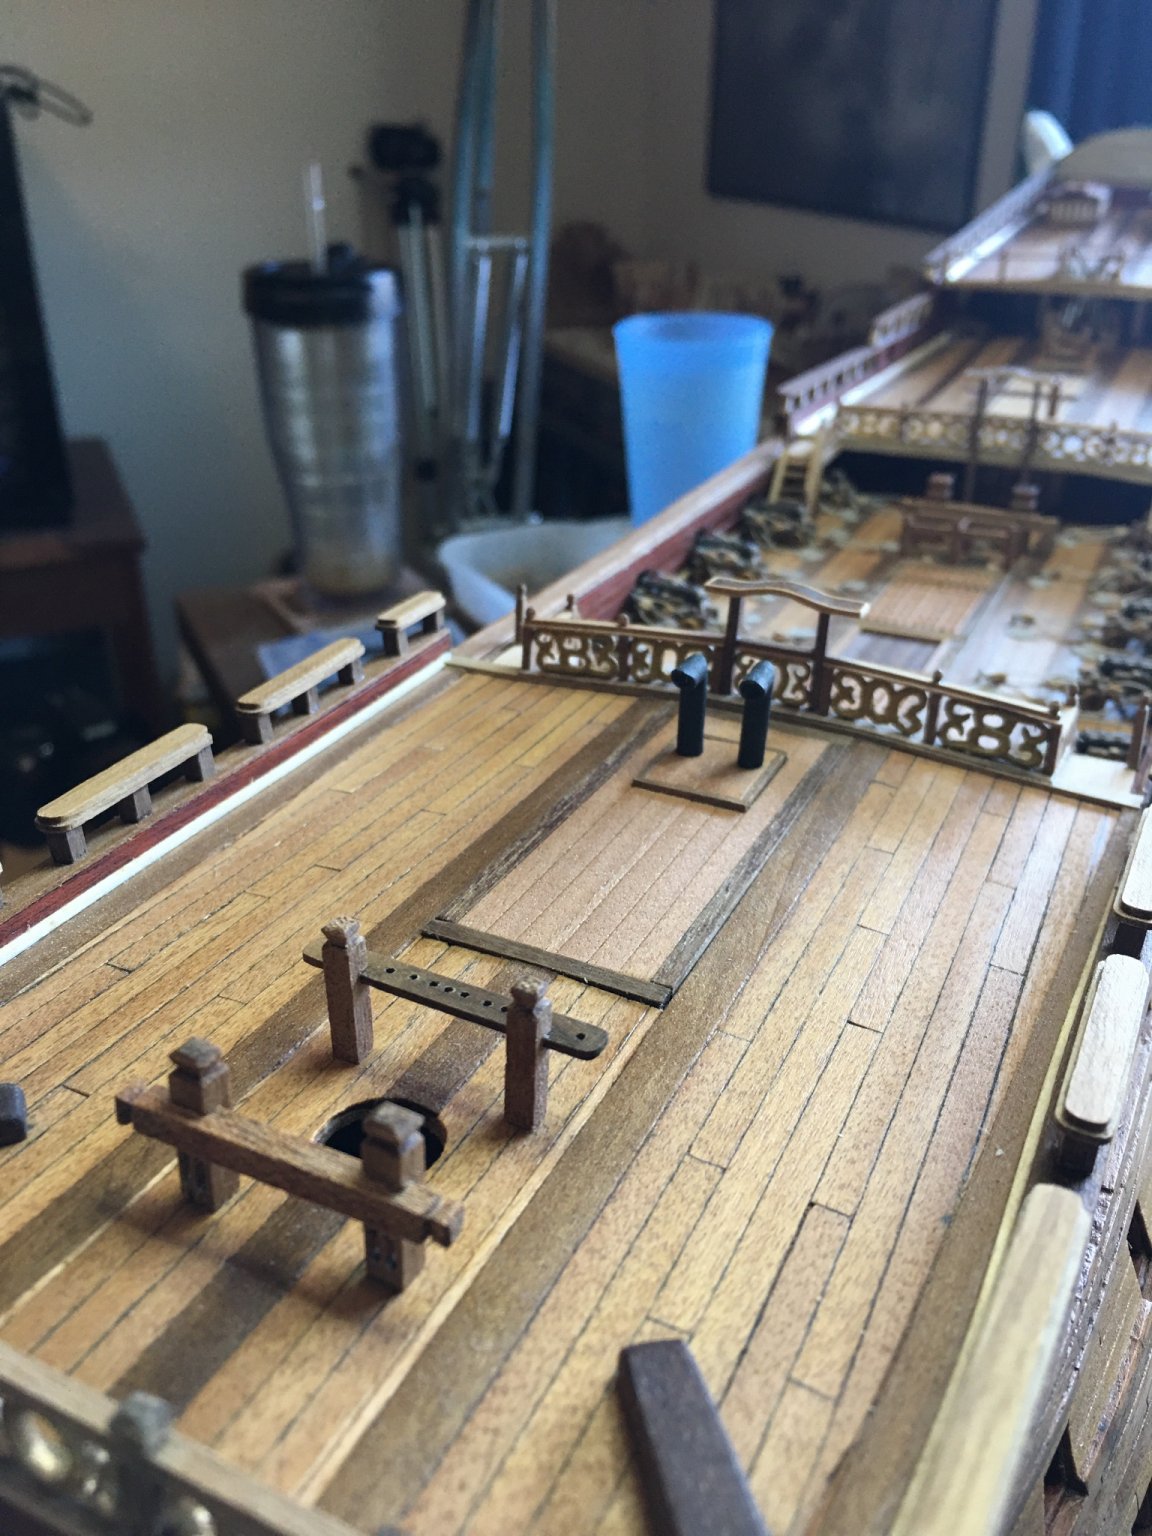
First set of rail decorative carvings are ready for paint. Will have to repeat these three more times for the other rails. Not sure if I am going to paint them gold as the kit shows or a yellow ochre. Thinking that I may reserve the gold for the forecastle for country showmanship, and the quarterdeck for flag status and do the midship rails in the ochre.
-
Marc, OC, thank you both very much for the kind words. And thank you as always to all the likes and those following along.
Another update as I have had a productive weekend. Rails are up around the bow and now I have started a in-filling the decorative pieces in the rails. These are being carved out of polystyrene sheets as I did for the other carvings.

-
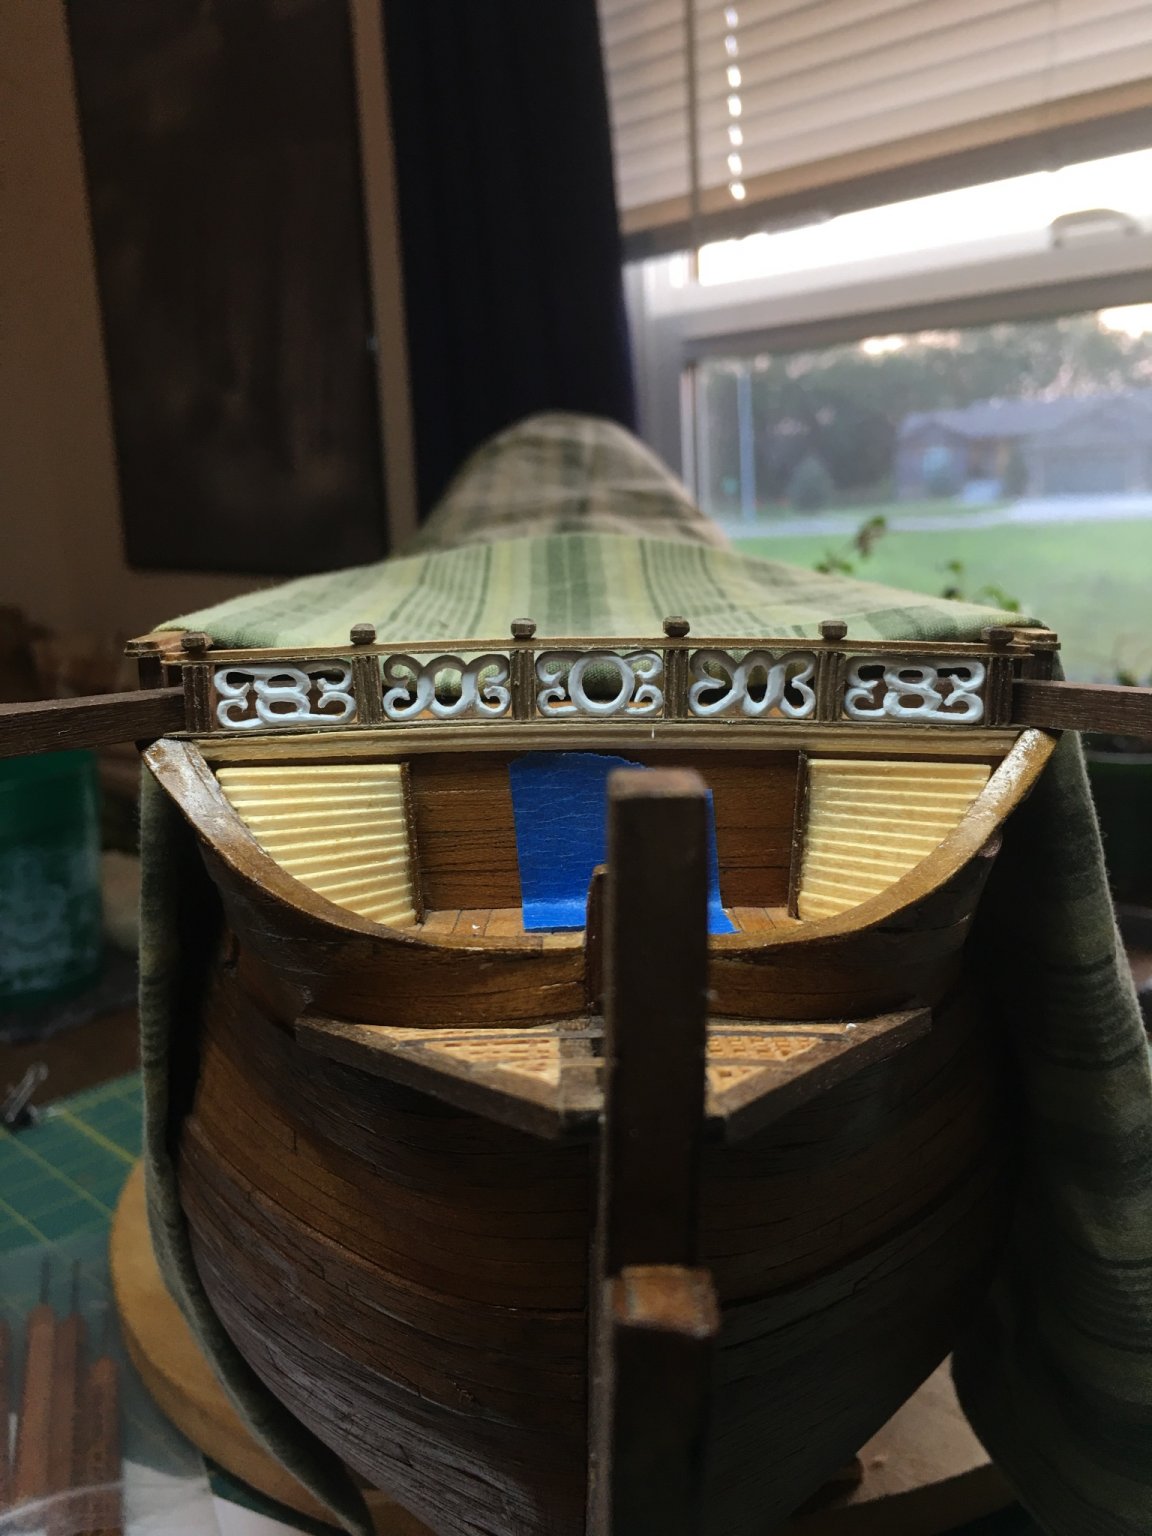
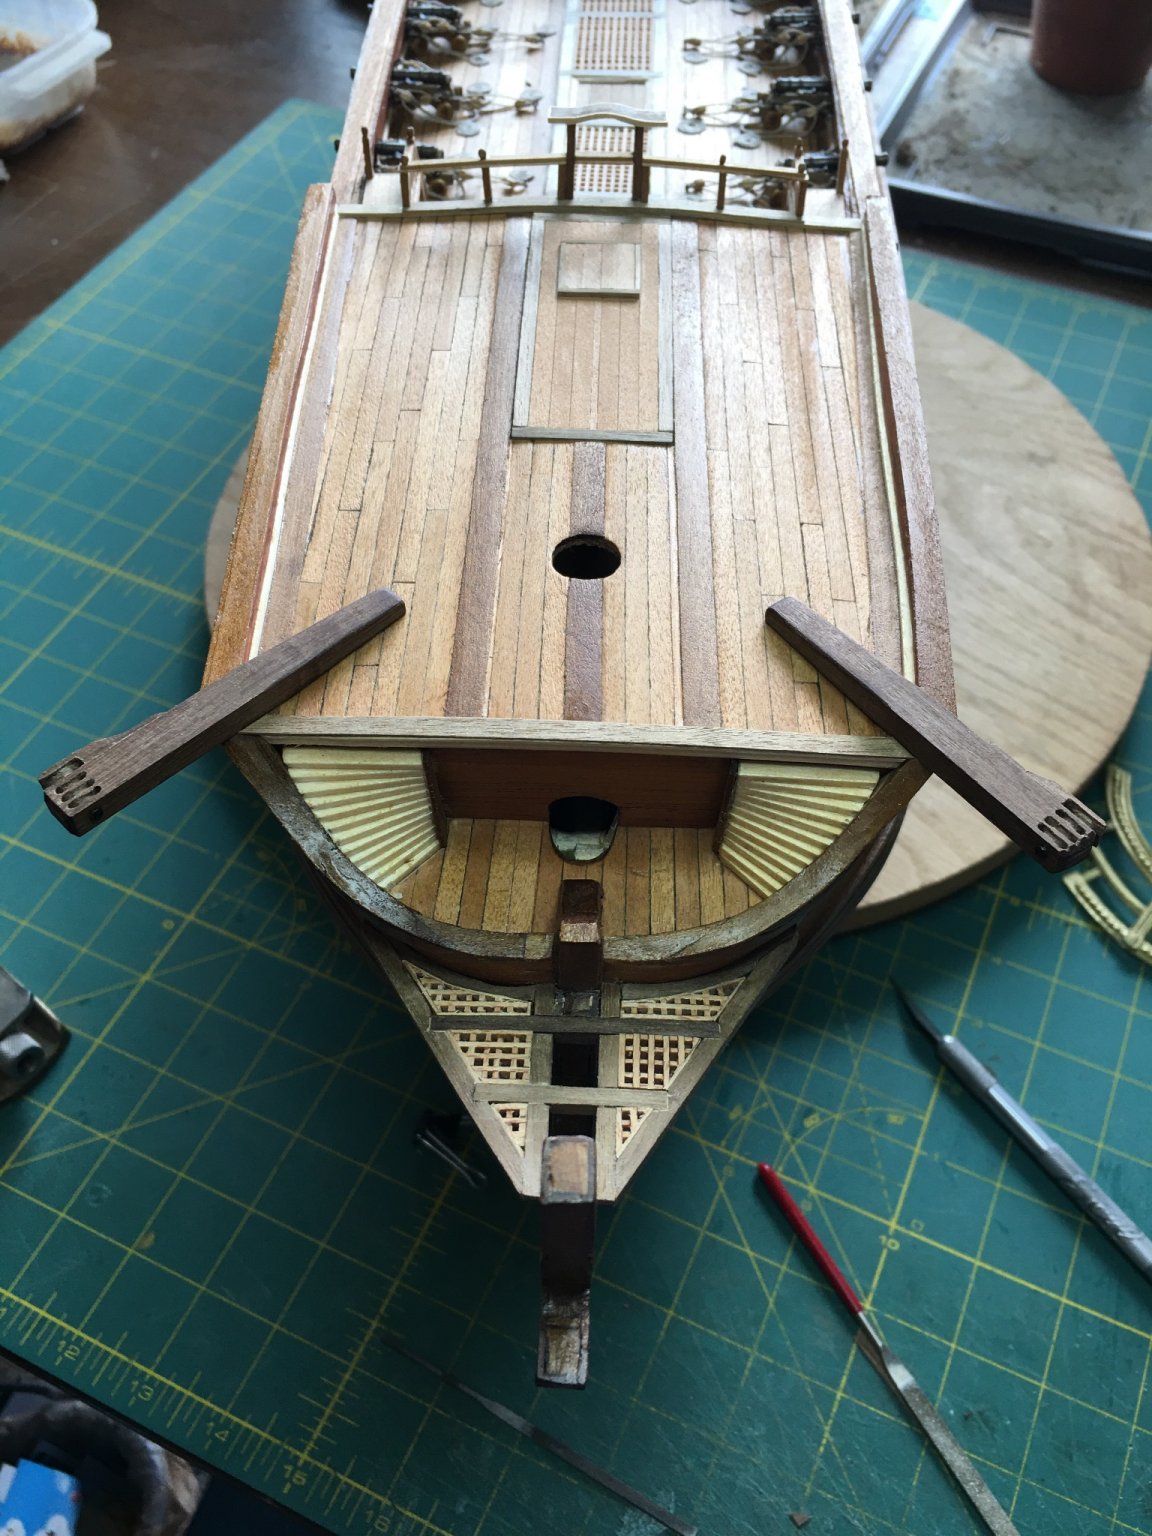
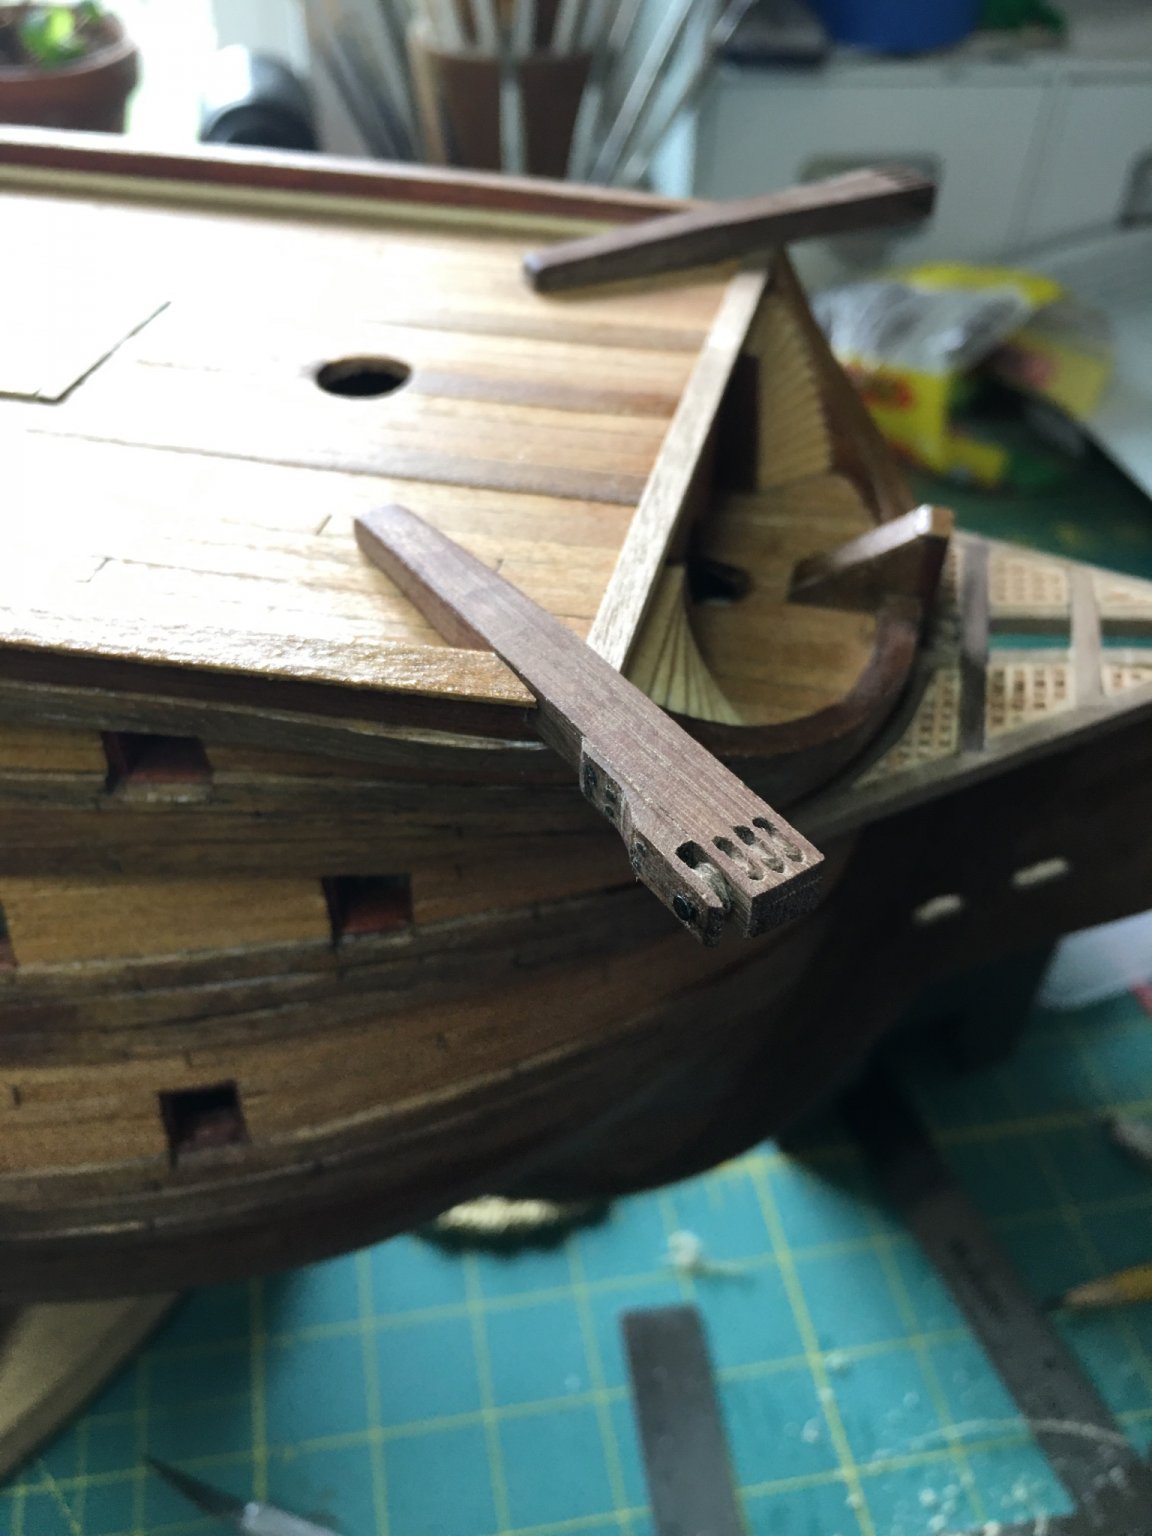
Been working on the bow. Added the gratings under the bowsprit and built the catheads. Will install the forecastle railings next and some details on the beakhead.


- GrandpaPhil, md1400cs, Edwardkenway and 4 others
-
7
-
Indeed! Please continue the build! You were working on something truly incredible. I have loved watching the framing come together as a fully framed ship is something I greatly want to do myself but have not yet worked up the courage to go for it.
There are always those who would rather criticize than support, but something that I have loved about MSW is how wholesome the community here is towards each other. It is comforting to have such warm place of welcome in the cold landscape of the internet, especially social media platforms. You have many friends here waiting to see you continue!
- Fernando E, egkb, mtaylor and 4 others
-
7
-
Beautiful!
Are you thinking to paint the inside of the bulkheads a red? I know the paint scheme on the insides has been contested over what color or even if all ships were painted on the insides. I have seen whites, greens, reds and natural wood colors used on models with seemingly no consistency so I am curious on which direction you plan to go or if you have learned something that gives a more solid explanation.
-
Welcome aboard all!
I do plan on carving the decorations again. With the larger scale I am hopeful that I can get better results. I also plan on using a mixture of mediums to carve from. I have been getting nice results from polystyrene on Royal Louis as it is more forgiving than wood. I will likely use wood though for the large carvings such as the figure head as the larger surface is easier to handle and work with. I am thinking about giving modeling clay a try on this one as well. After seeing Doris' masterpieces and watching her videos of how she made many of her decorations, I feel that may be a good route to try. I was always better at carving in clay than wood and am always in favor of using the materials that work best for the modeler.
I have a ways to go and time to think on that however. I'm working steadily through the frame modifications and will begin fairing the hull next. This is what I call the "dirty work" of ship building as it flings saw dust everywhere, but once it is done and the hull is ready for planking, I intend to go back to Royal Louis for a while to continue working on her. She is about ready for another series of decorations to be carved and added on the bow and deck railings.
-
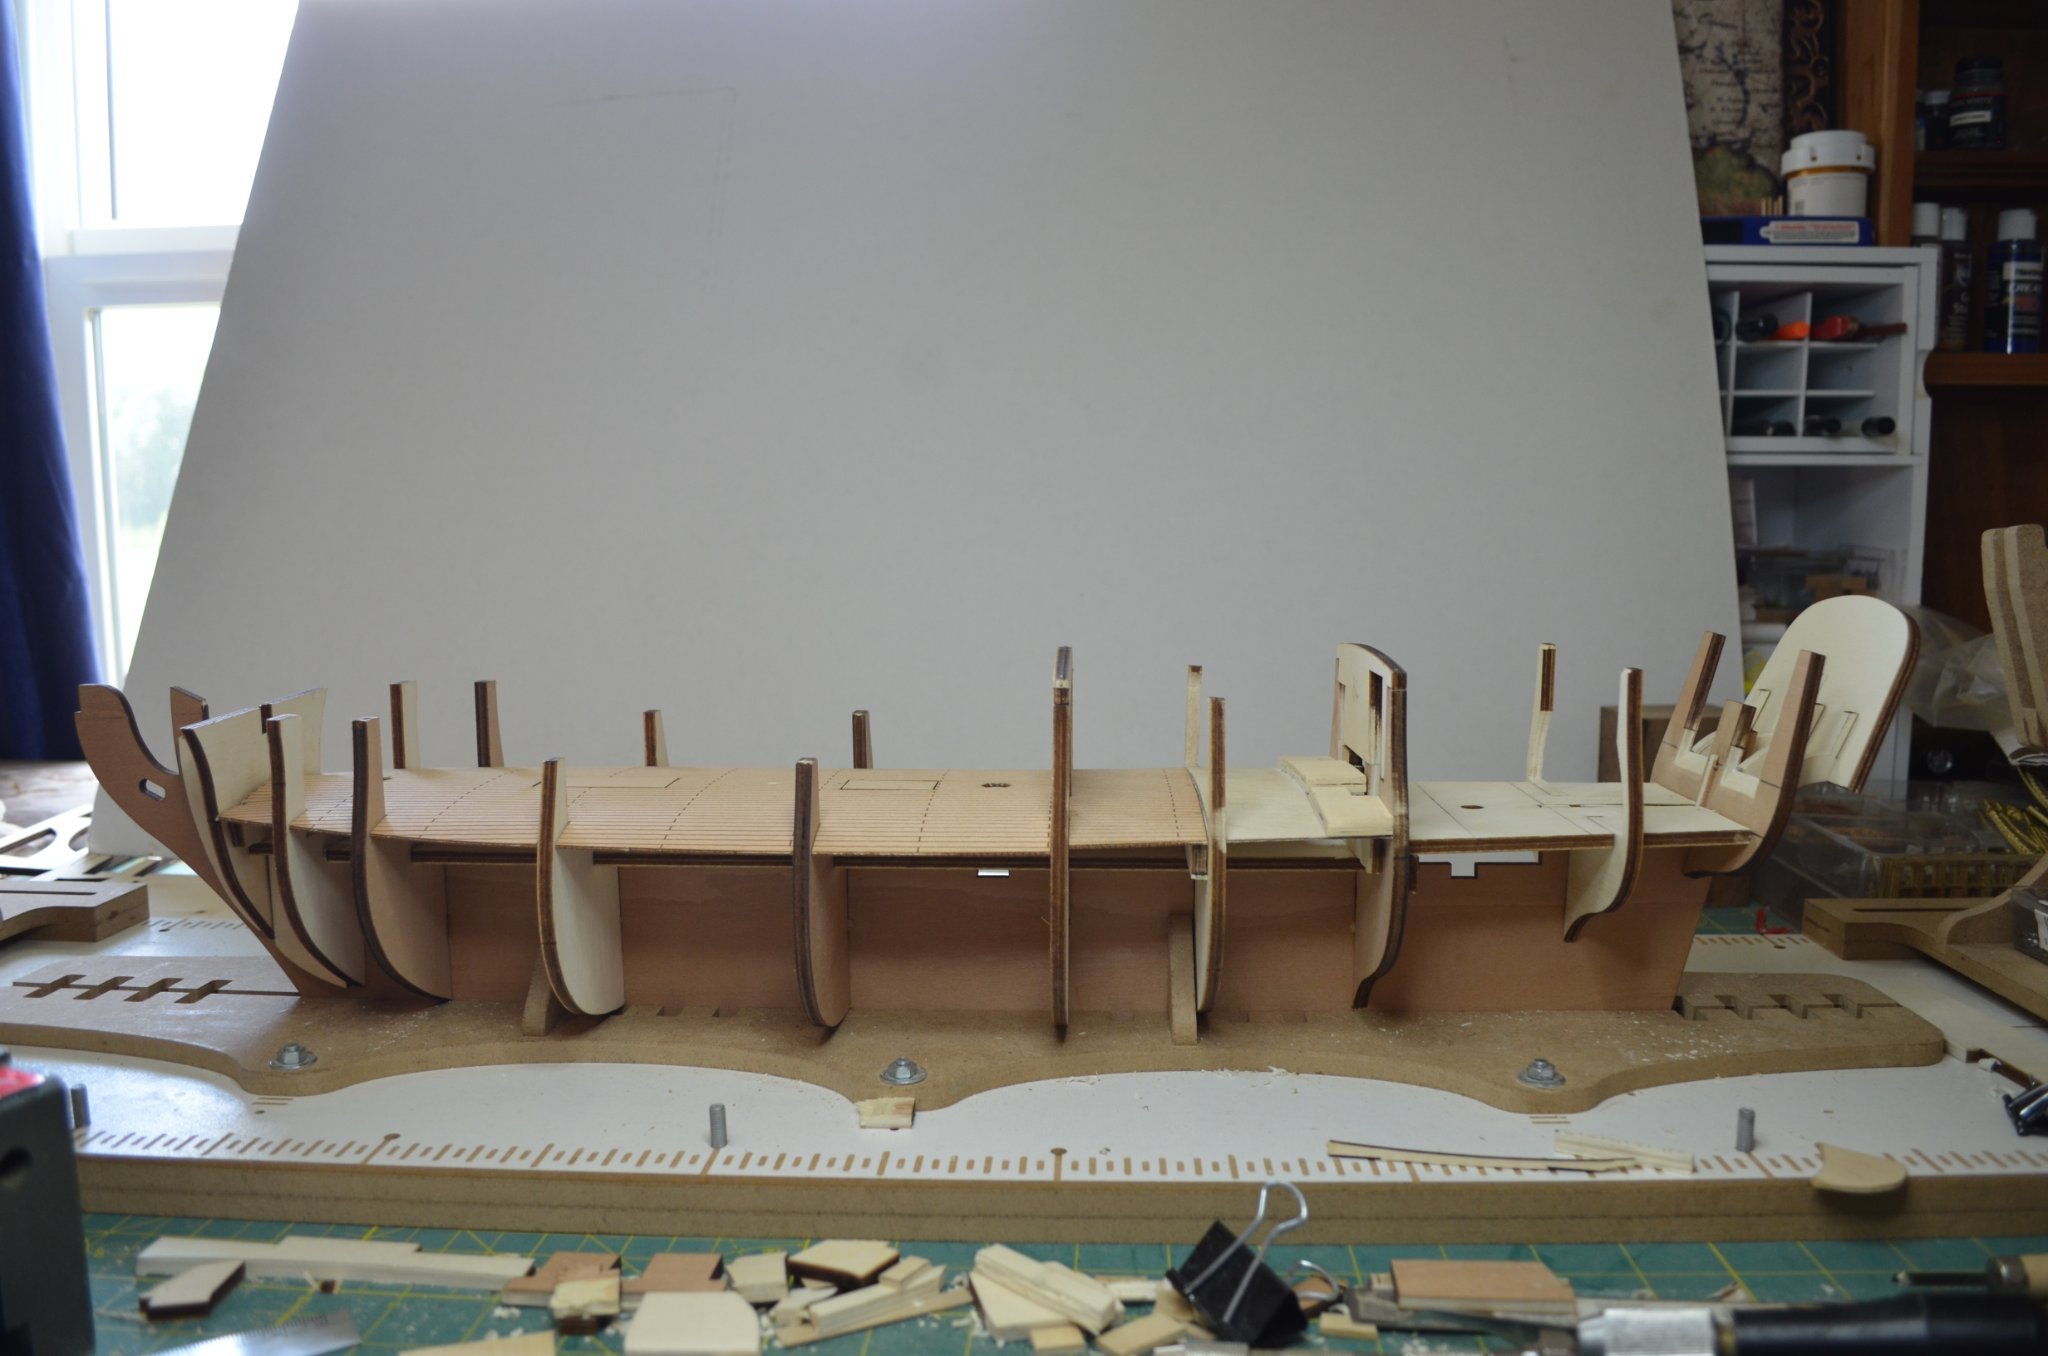
Frame modification is well underway. Before modding I did square up and secure all the bulkheads that were not being altered and I nailed down the scribed decking that came with the kit. This will be covered by a second layer of planking so I am using it as an underlayment.
I started the modifications by cutting away the bulkhead in the center cabin and extending the deck aft one more bulkhead. This will provide the space for the center cabin and stair wells to the aft cabin and hold.

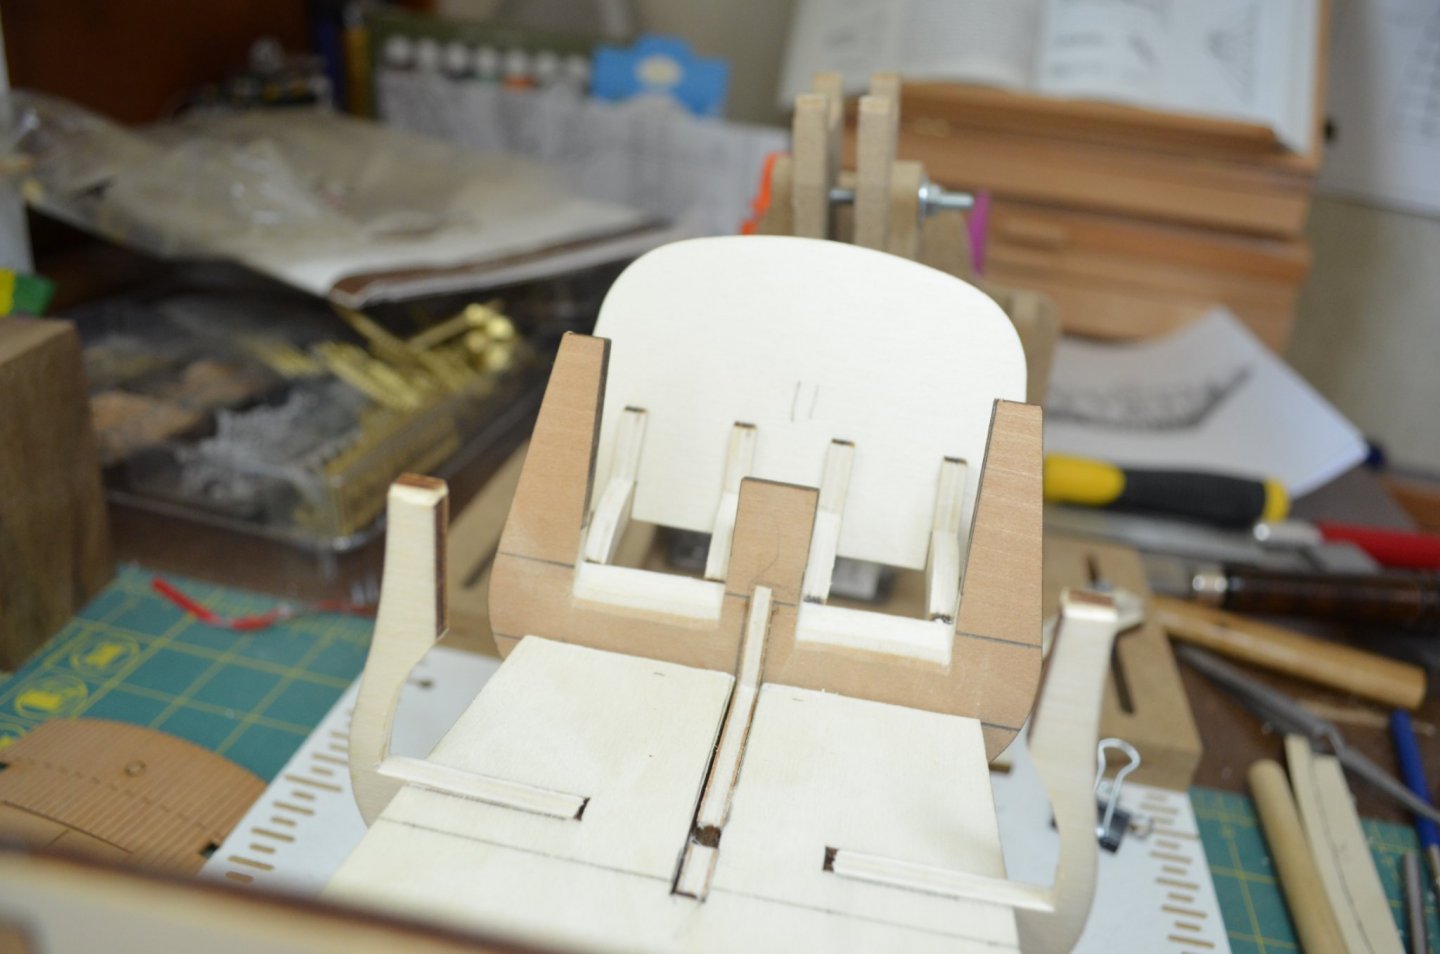
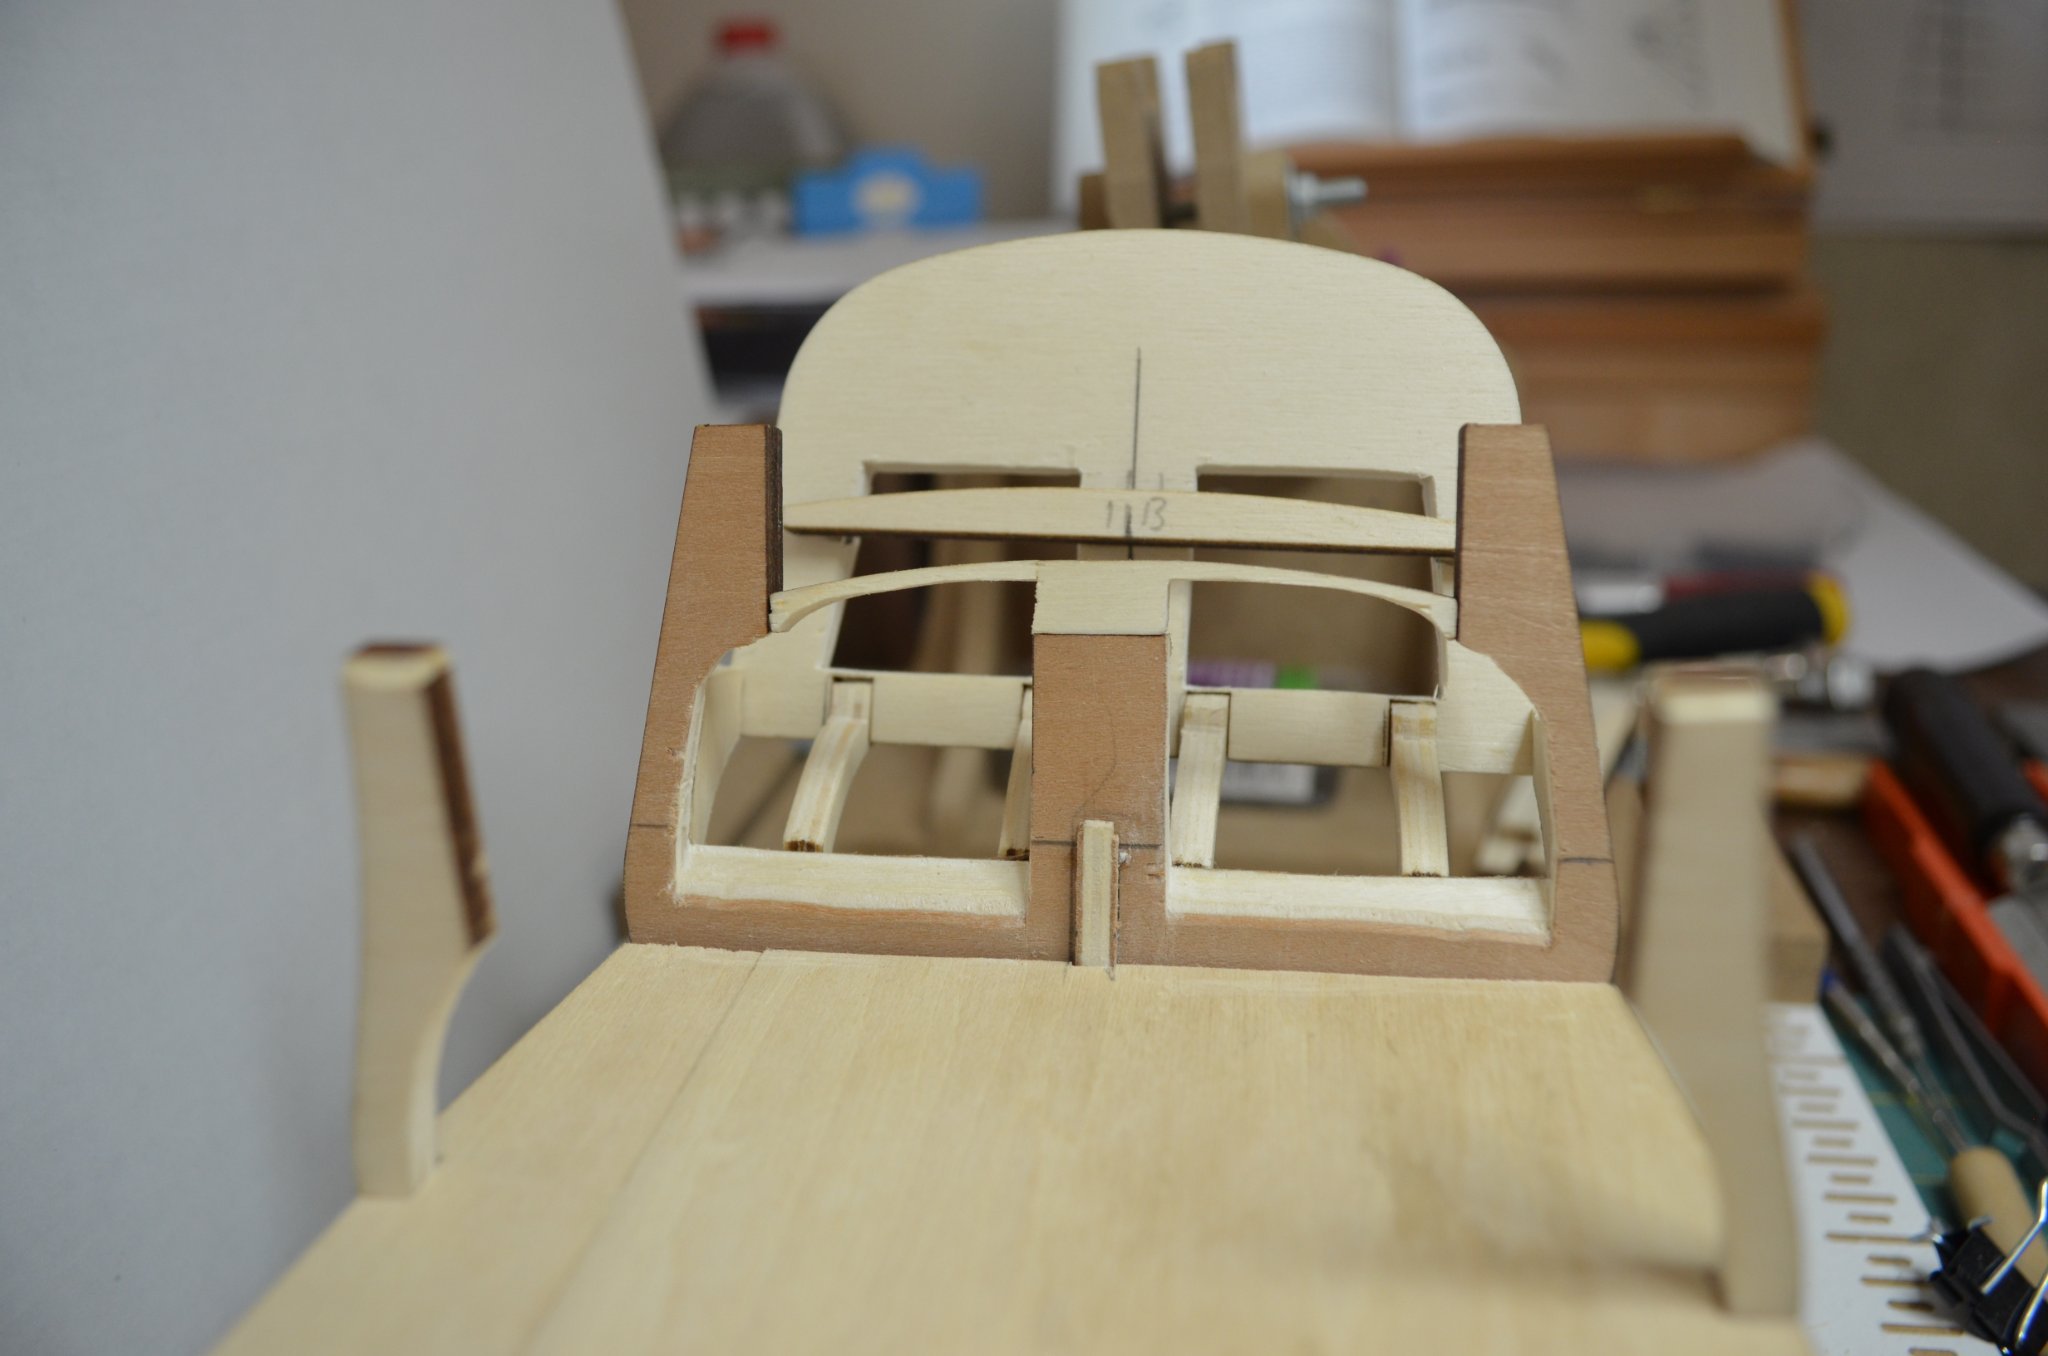
Next I moved to the aft cabin where the majority of the work takes place. I began by cutting down the stiffening board provided in the kit as well as the 2nd to last bulkhead and the false keel to create a new deck.
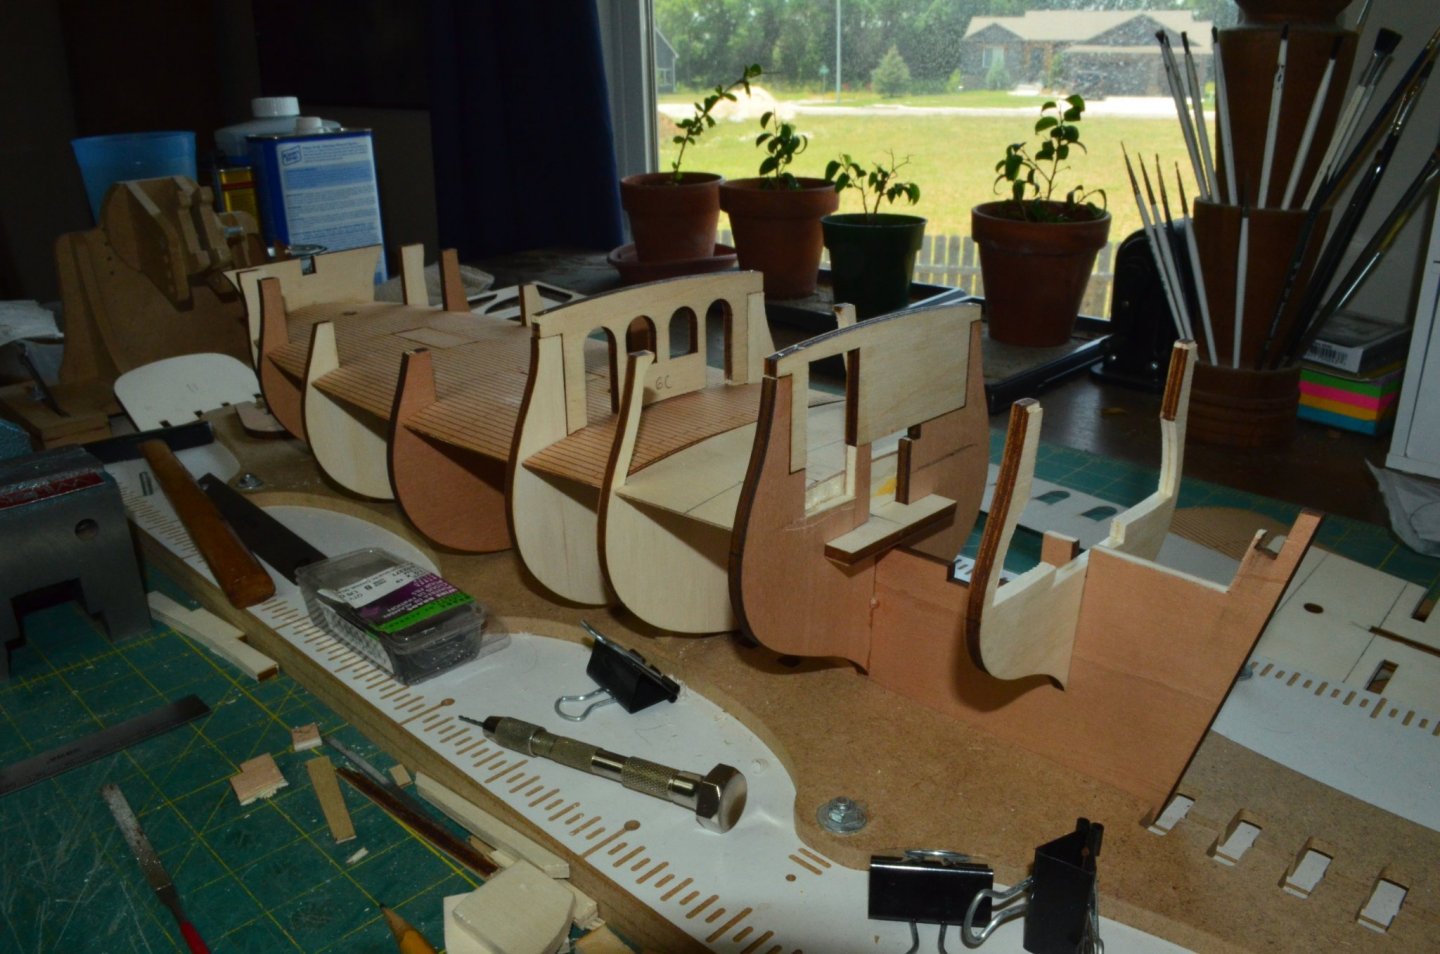
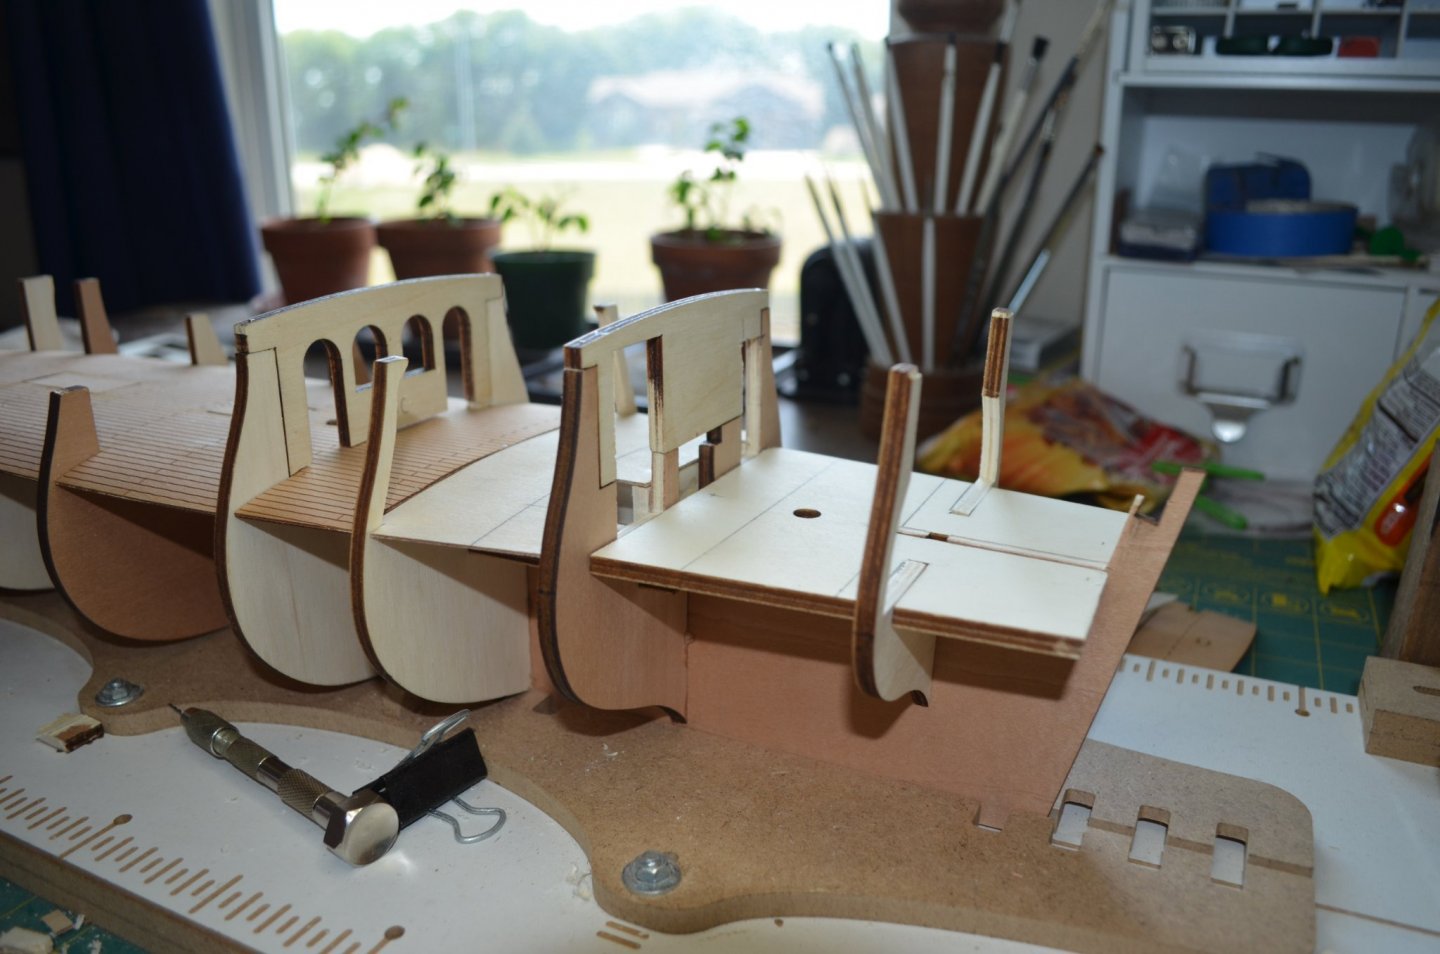
Now the main deck runs evenly the length of the ship. However, this is still not accurate. The stair well area is raised above the middle and aft cabins and the aft cabin is sunk lower in the ship than the rest of the main deck.
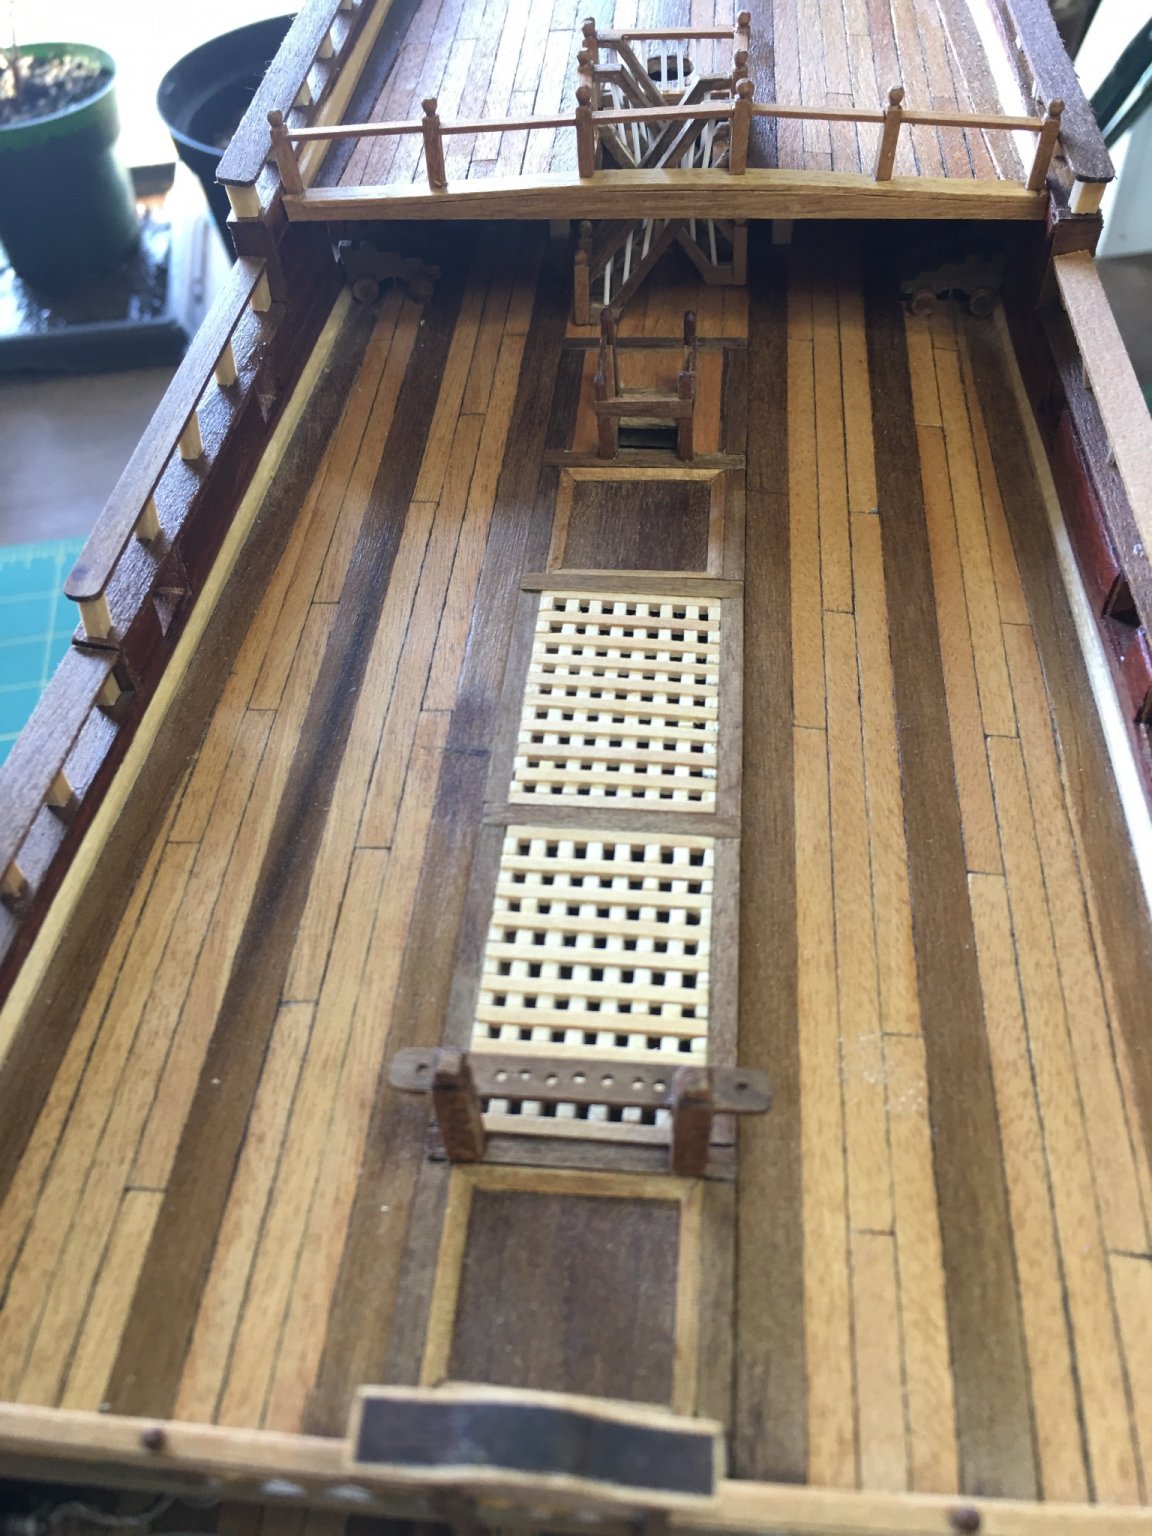
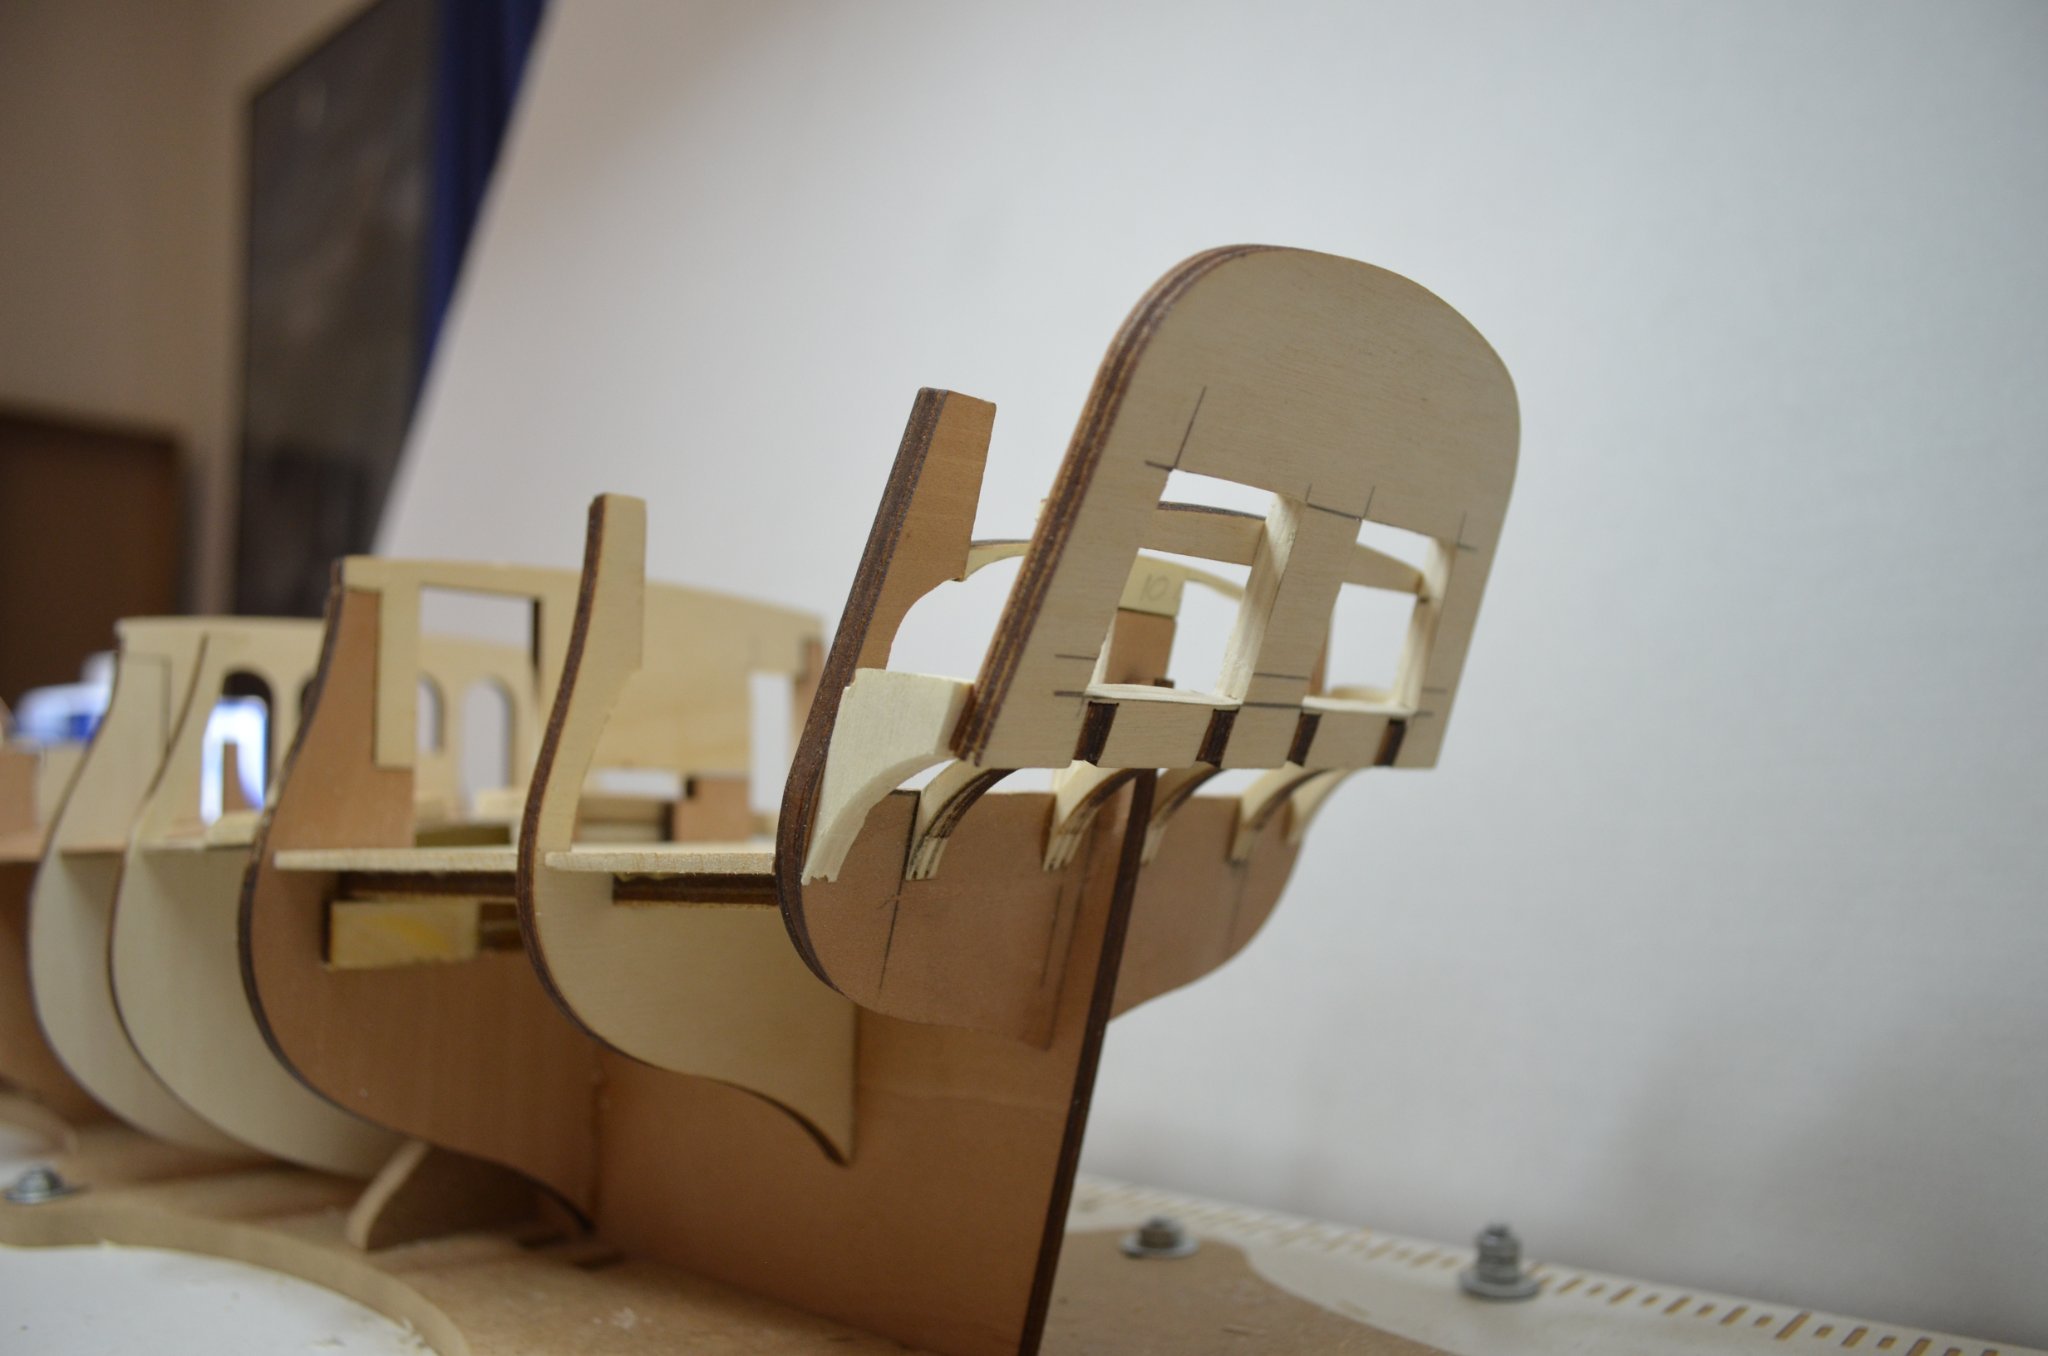
So, I layered some wood to make a raised area for the stairs. Nothing will be visible below this area so the elevated deck can be false here. The notches are where descending stairs will eventually go. Though it is hard to see in the photos, the aft cabin subfloor was lowered again both to achieve proper elevation and to provide room for a new full sized deck underlayment.
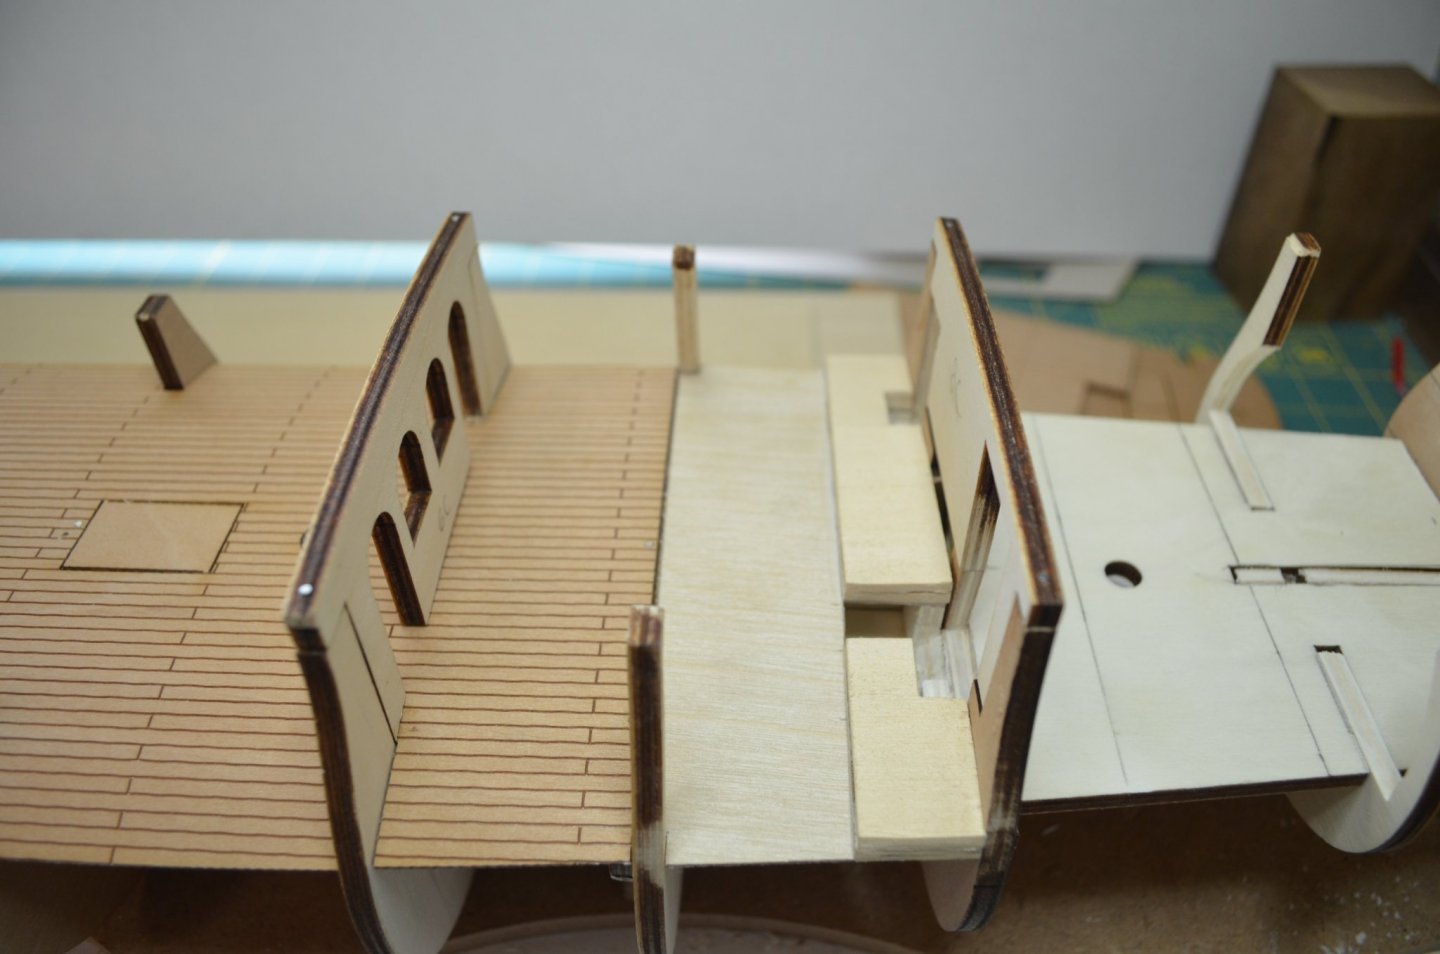
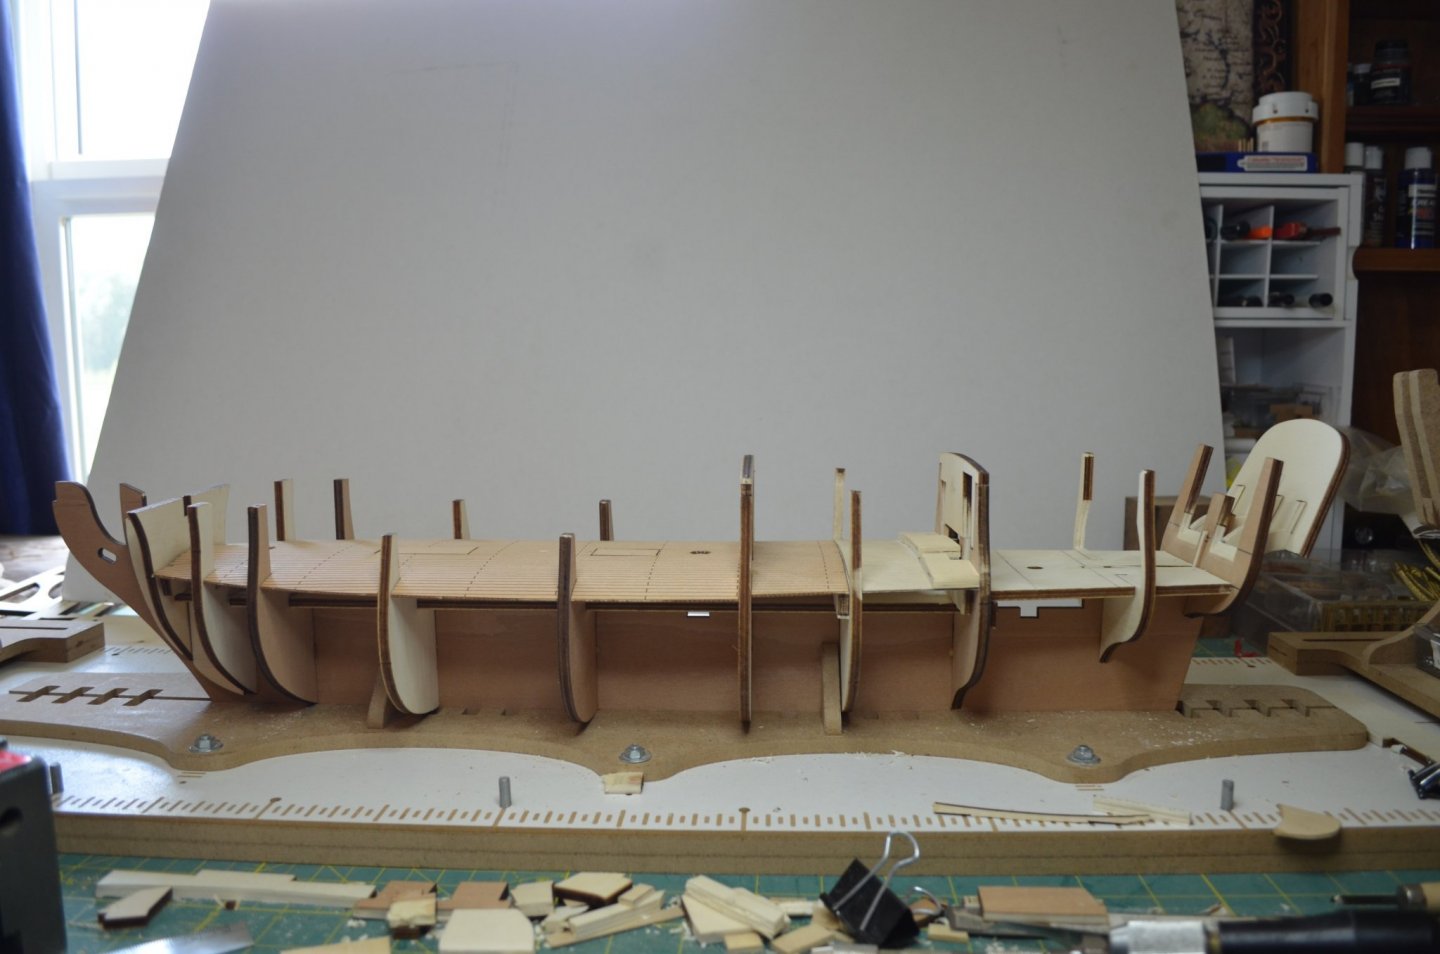
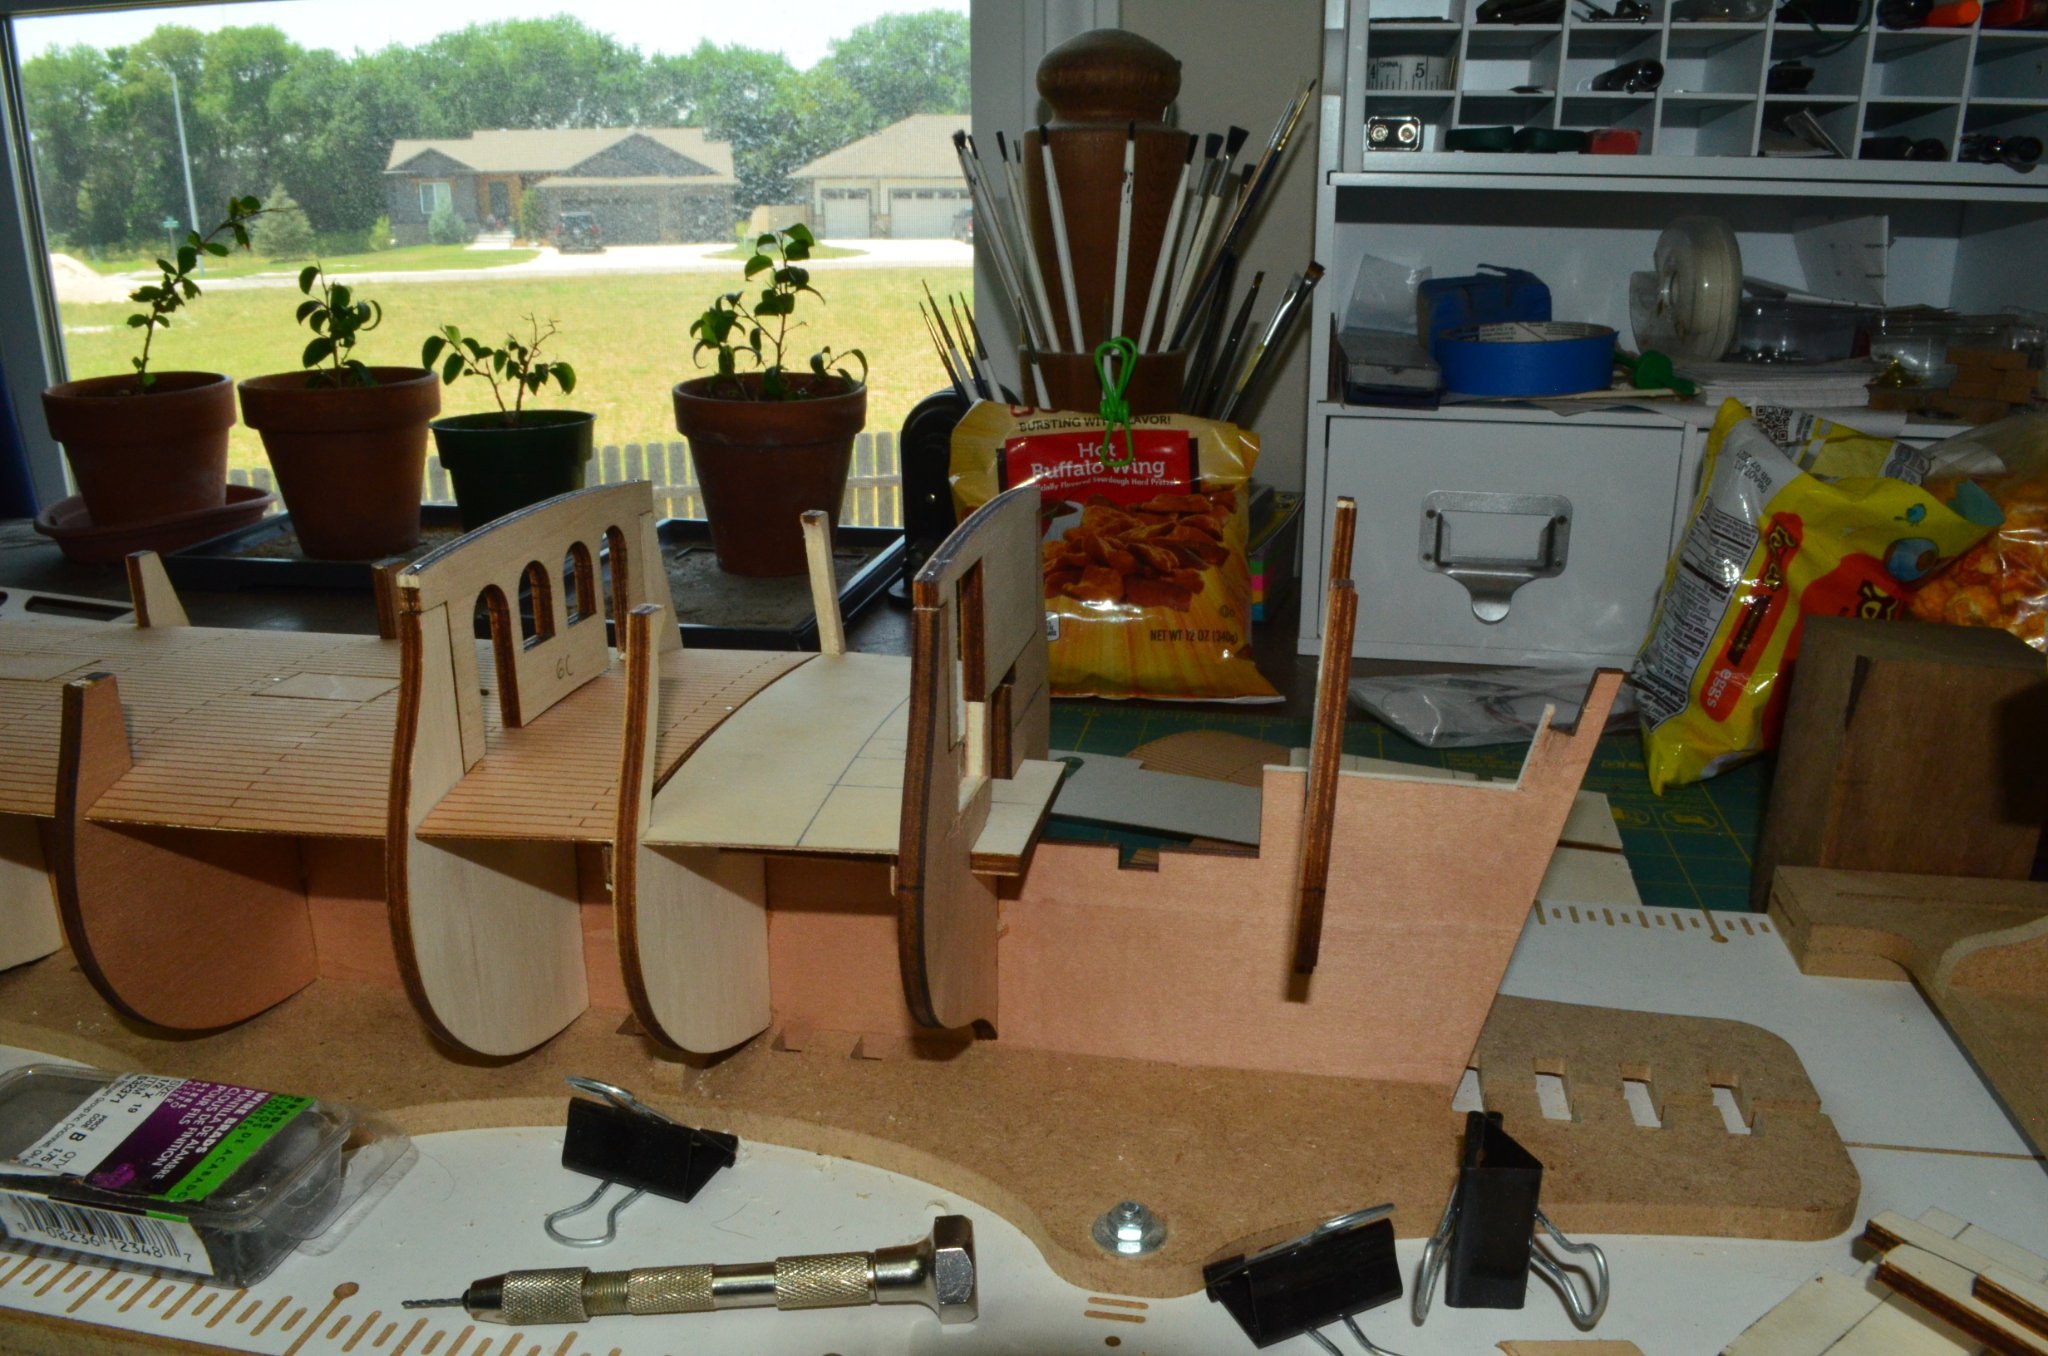
Moving further aft, it was time to start cutting out for the stern lights and bench seating. This has been the trickiest as the arched supports for the counter were never designed to be exposed and as such, were far overbuilt. Many hours have been spent slowly and gradually cutting them down and coming up with new supports that will not impede the interior space. A lot of the concerns with the new design also impact the deck above. To determine elevations, I had to start to reshape the upper deck beams to more appropriate thicknesses.
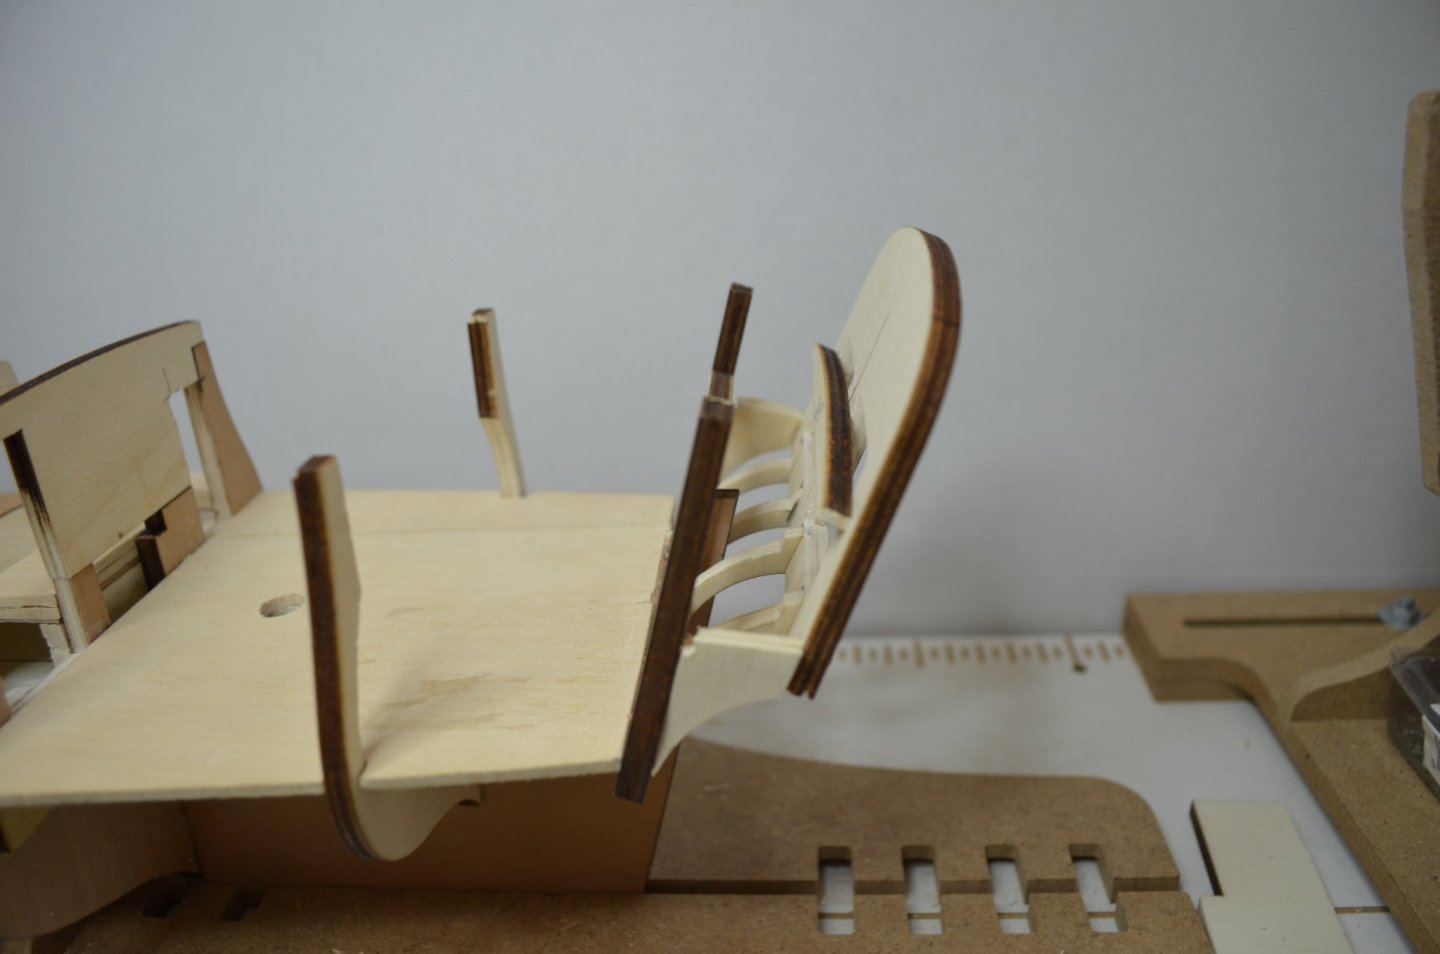

I also cut out the stern lights. These are oversized right now to allow for better shape and fit of the actual window panels later. This bulkhead we become largely reduced in thickness also. The reason is to allow for better contour of the stern decorations without making the windows appear to be tunnels in an overly thick bulkhead. This thickness reduction will also take place on the sides as well where windows will be placed.
Still lots of modifications and redesign to do. Once I am satisfied with the new cabin areas, frame fairing will take place to get the hull in final shape. there will likely be a lot of added reinforcement that will need to be faired with the frames to accommodate the changes as many weaken the original frame design.

-
To see what I am working with, I dry fit the bulkheads and decks together and this was the result. I'm going to have a lot to do. I have been working on this for a week now and I will show the modifications that I started on the next post.

- JeffT, GrandpaPhil, Old Collingwood and 3 others
-
6
-
Hello all!
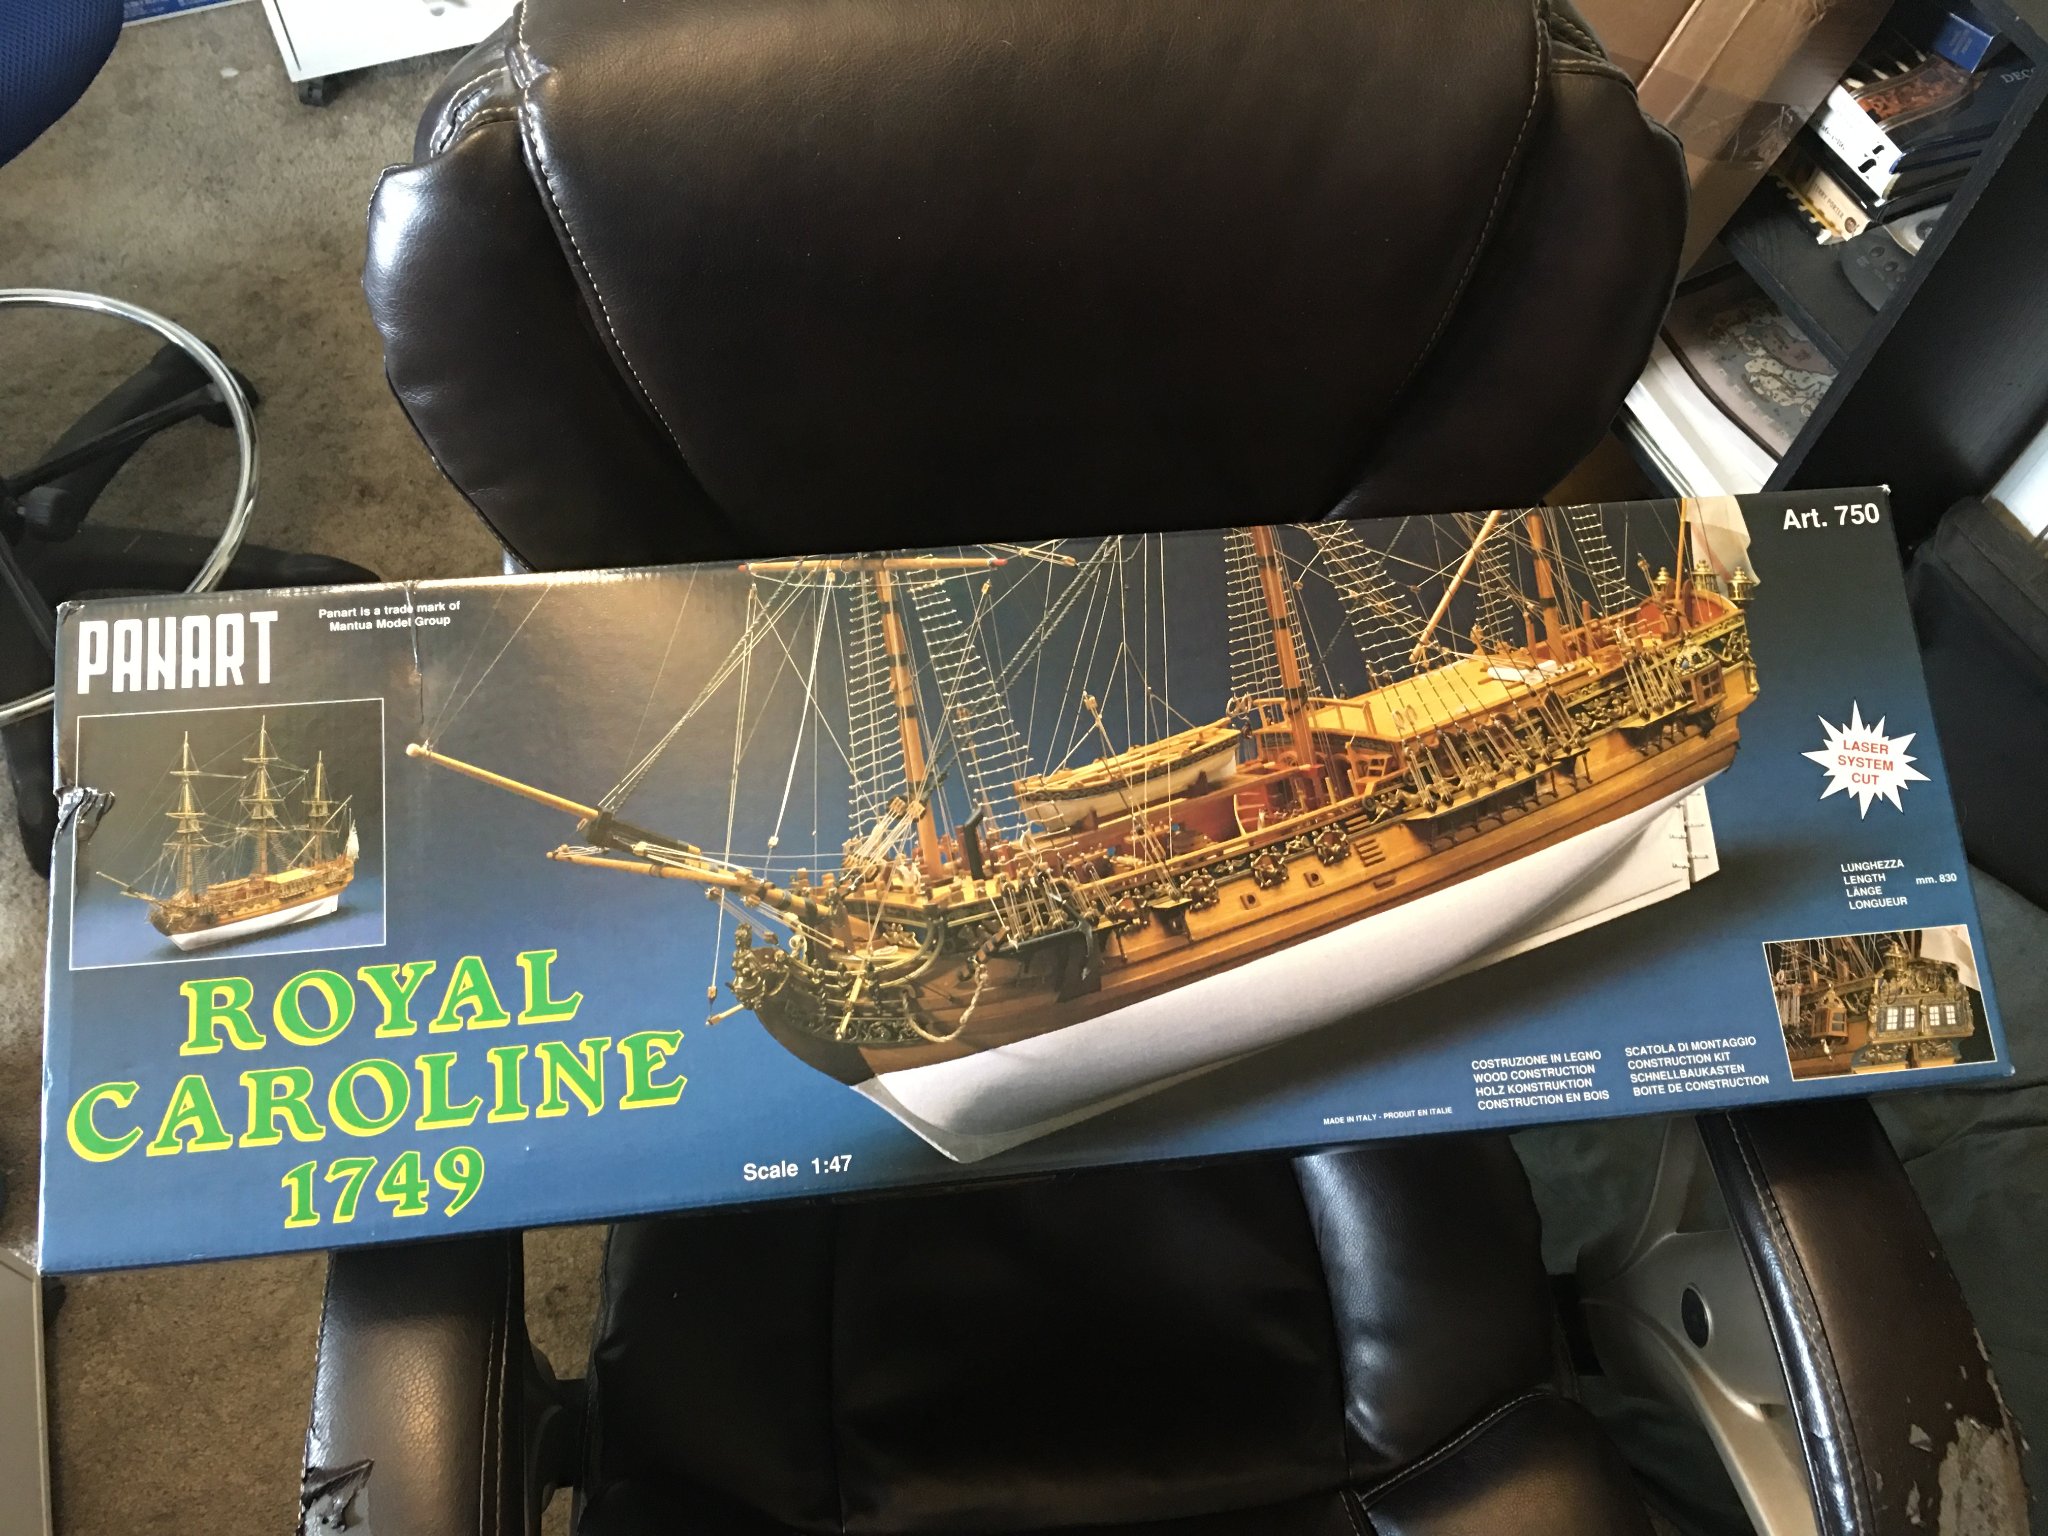
I have discovered a long time ago that I cannot simply build one ship at a time. As I am only working on Royal Louis right now, and am nearing the halfway point, I found myself with the itch to start a new build. I do enjoy doing things this way as it allows me to switch back and forth between builds when I get to a point where I need more research or am simply bored with what I am currently doing. I was originally going to build Sovereign of the Seas, but every store I checked was currently sold out with no expected date of restock due to global shipping conditions. The one I found was priced far higher than normal and so I passed. Thanks particularly to Doris' breathtaking build of Royal Caroline, this beautiful yacht had been at the top of my wish list for some time and so I decided to go for it.
As usual for me, I intend to heavily bash this kit, particularly to build out the interior cabins and provide lighting to illuminate those details. Working with a far larger scale than I am usually accustomed to, 1:48 compared to my other current build of 1:90, means that I will have ample opportunity for showing those details with clarity, and far less excuses for shoddy work... 😬
So please, pull up a chair and join me if you like. I build slow, so get a big bucket of popcorn and settle in. I hope you enjoy the journey.
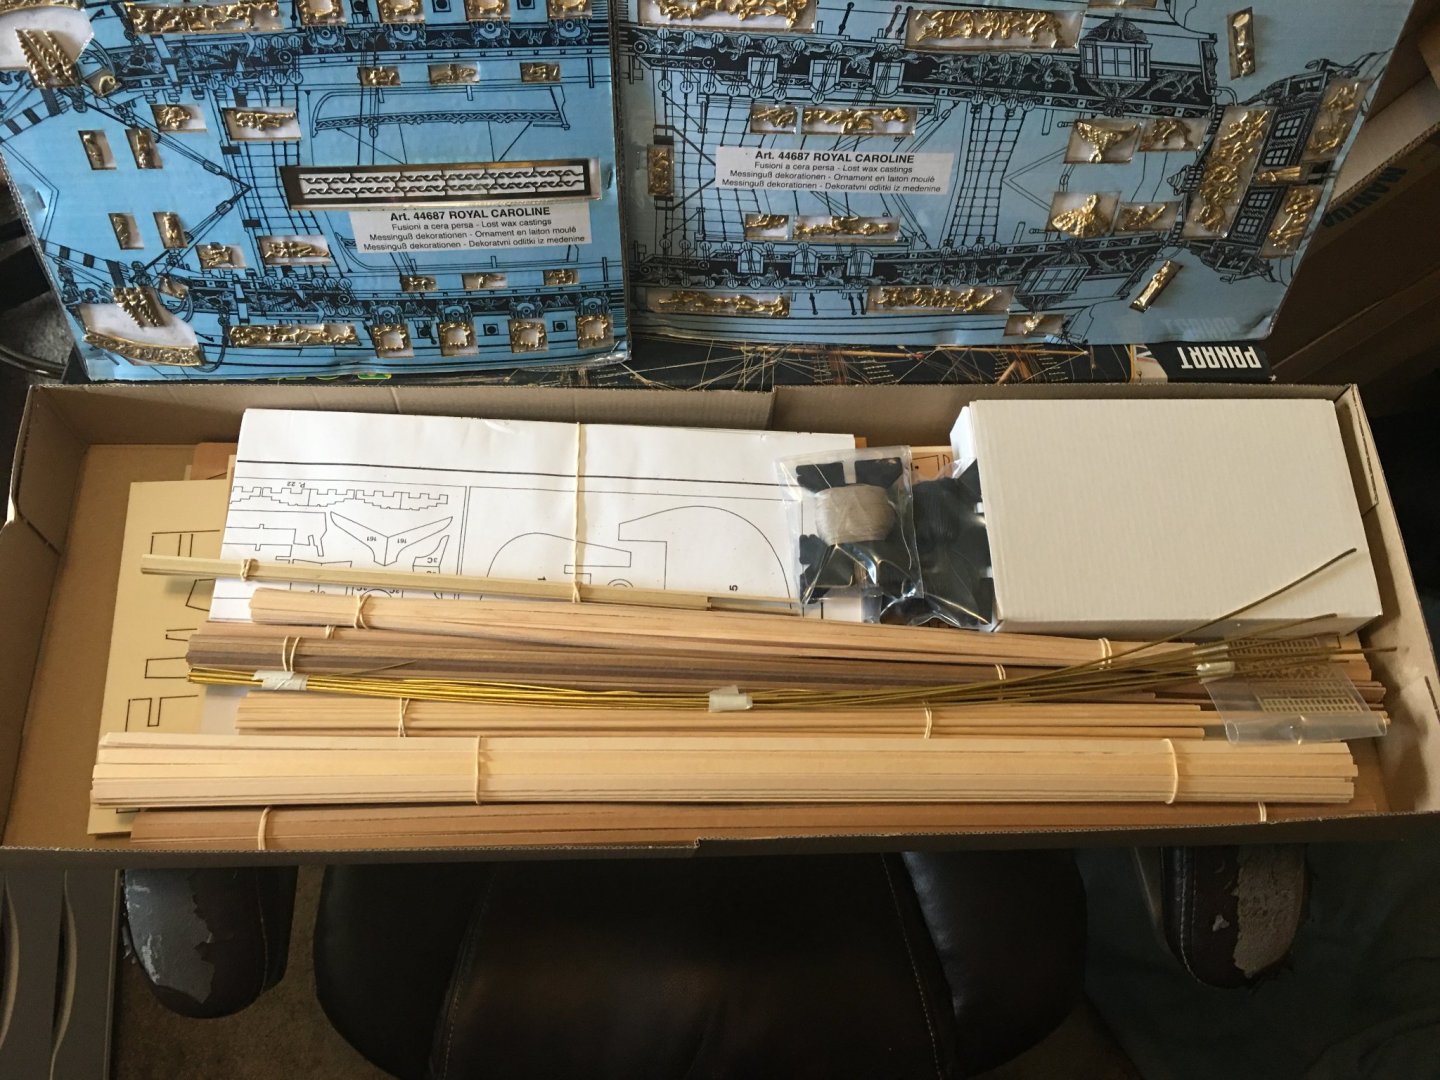
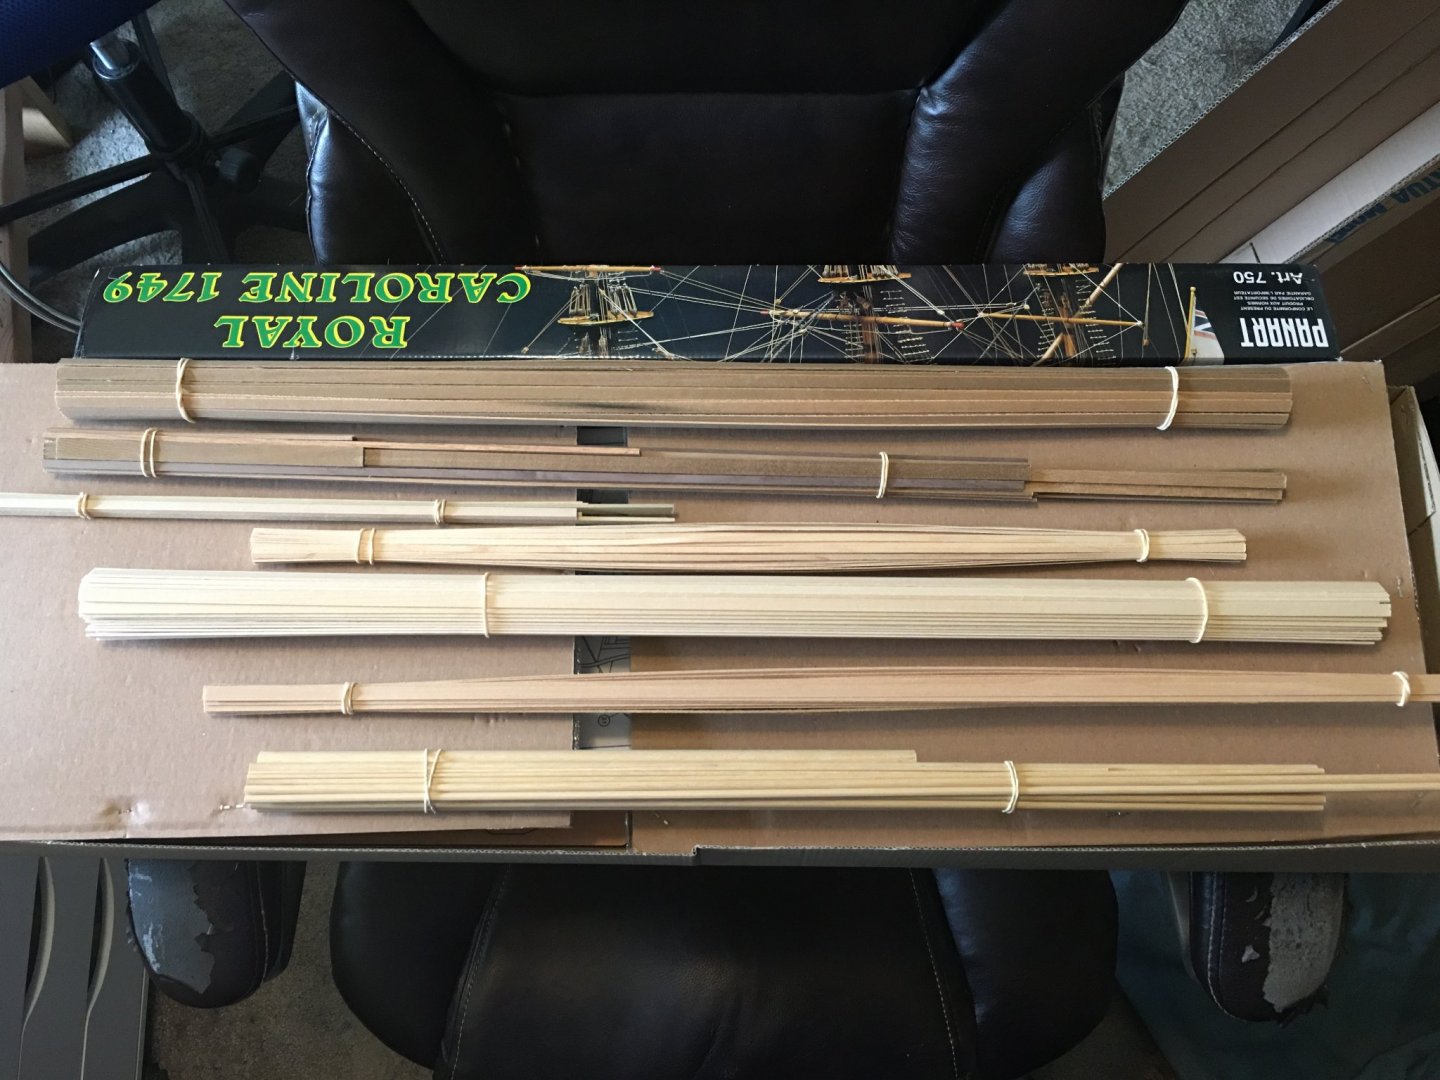
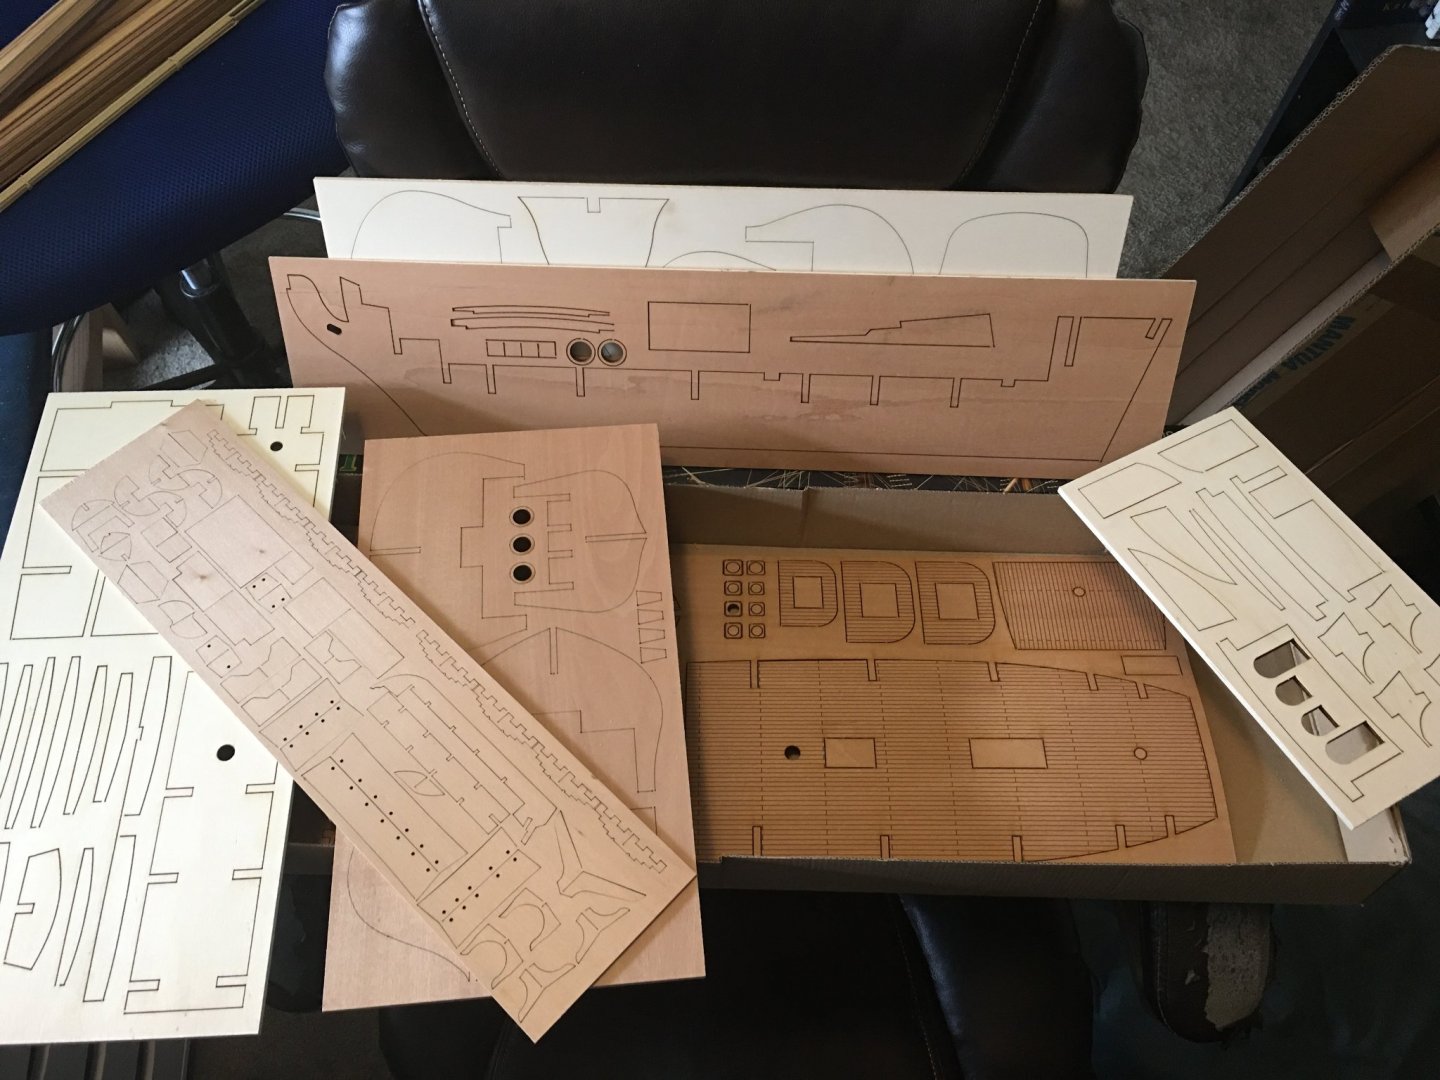
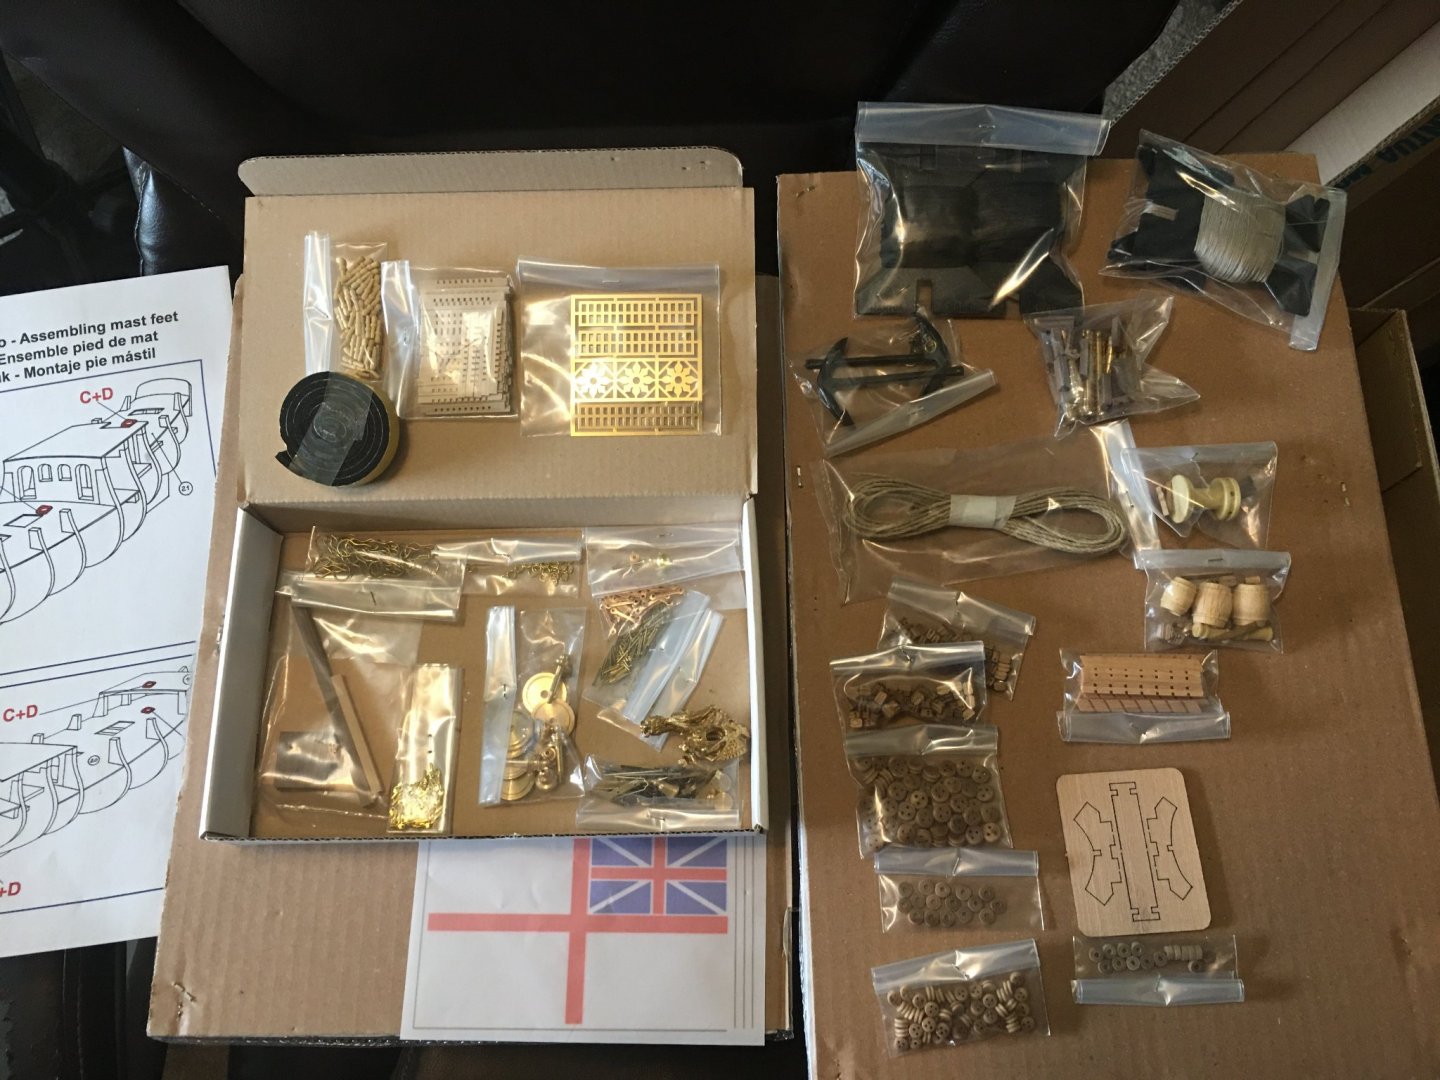
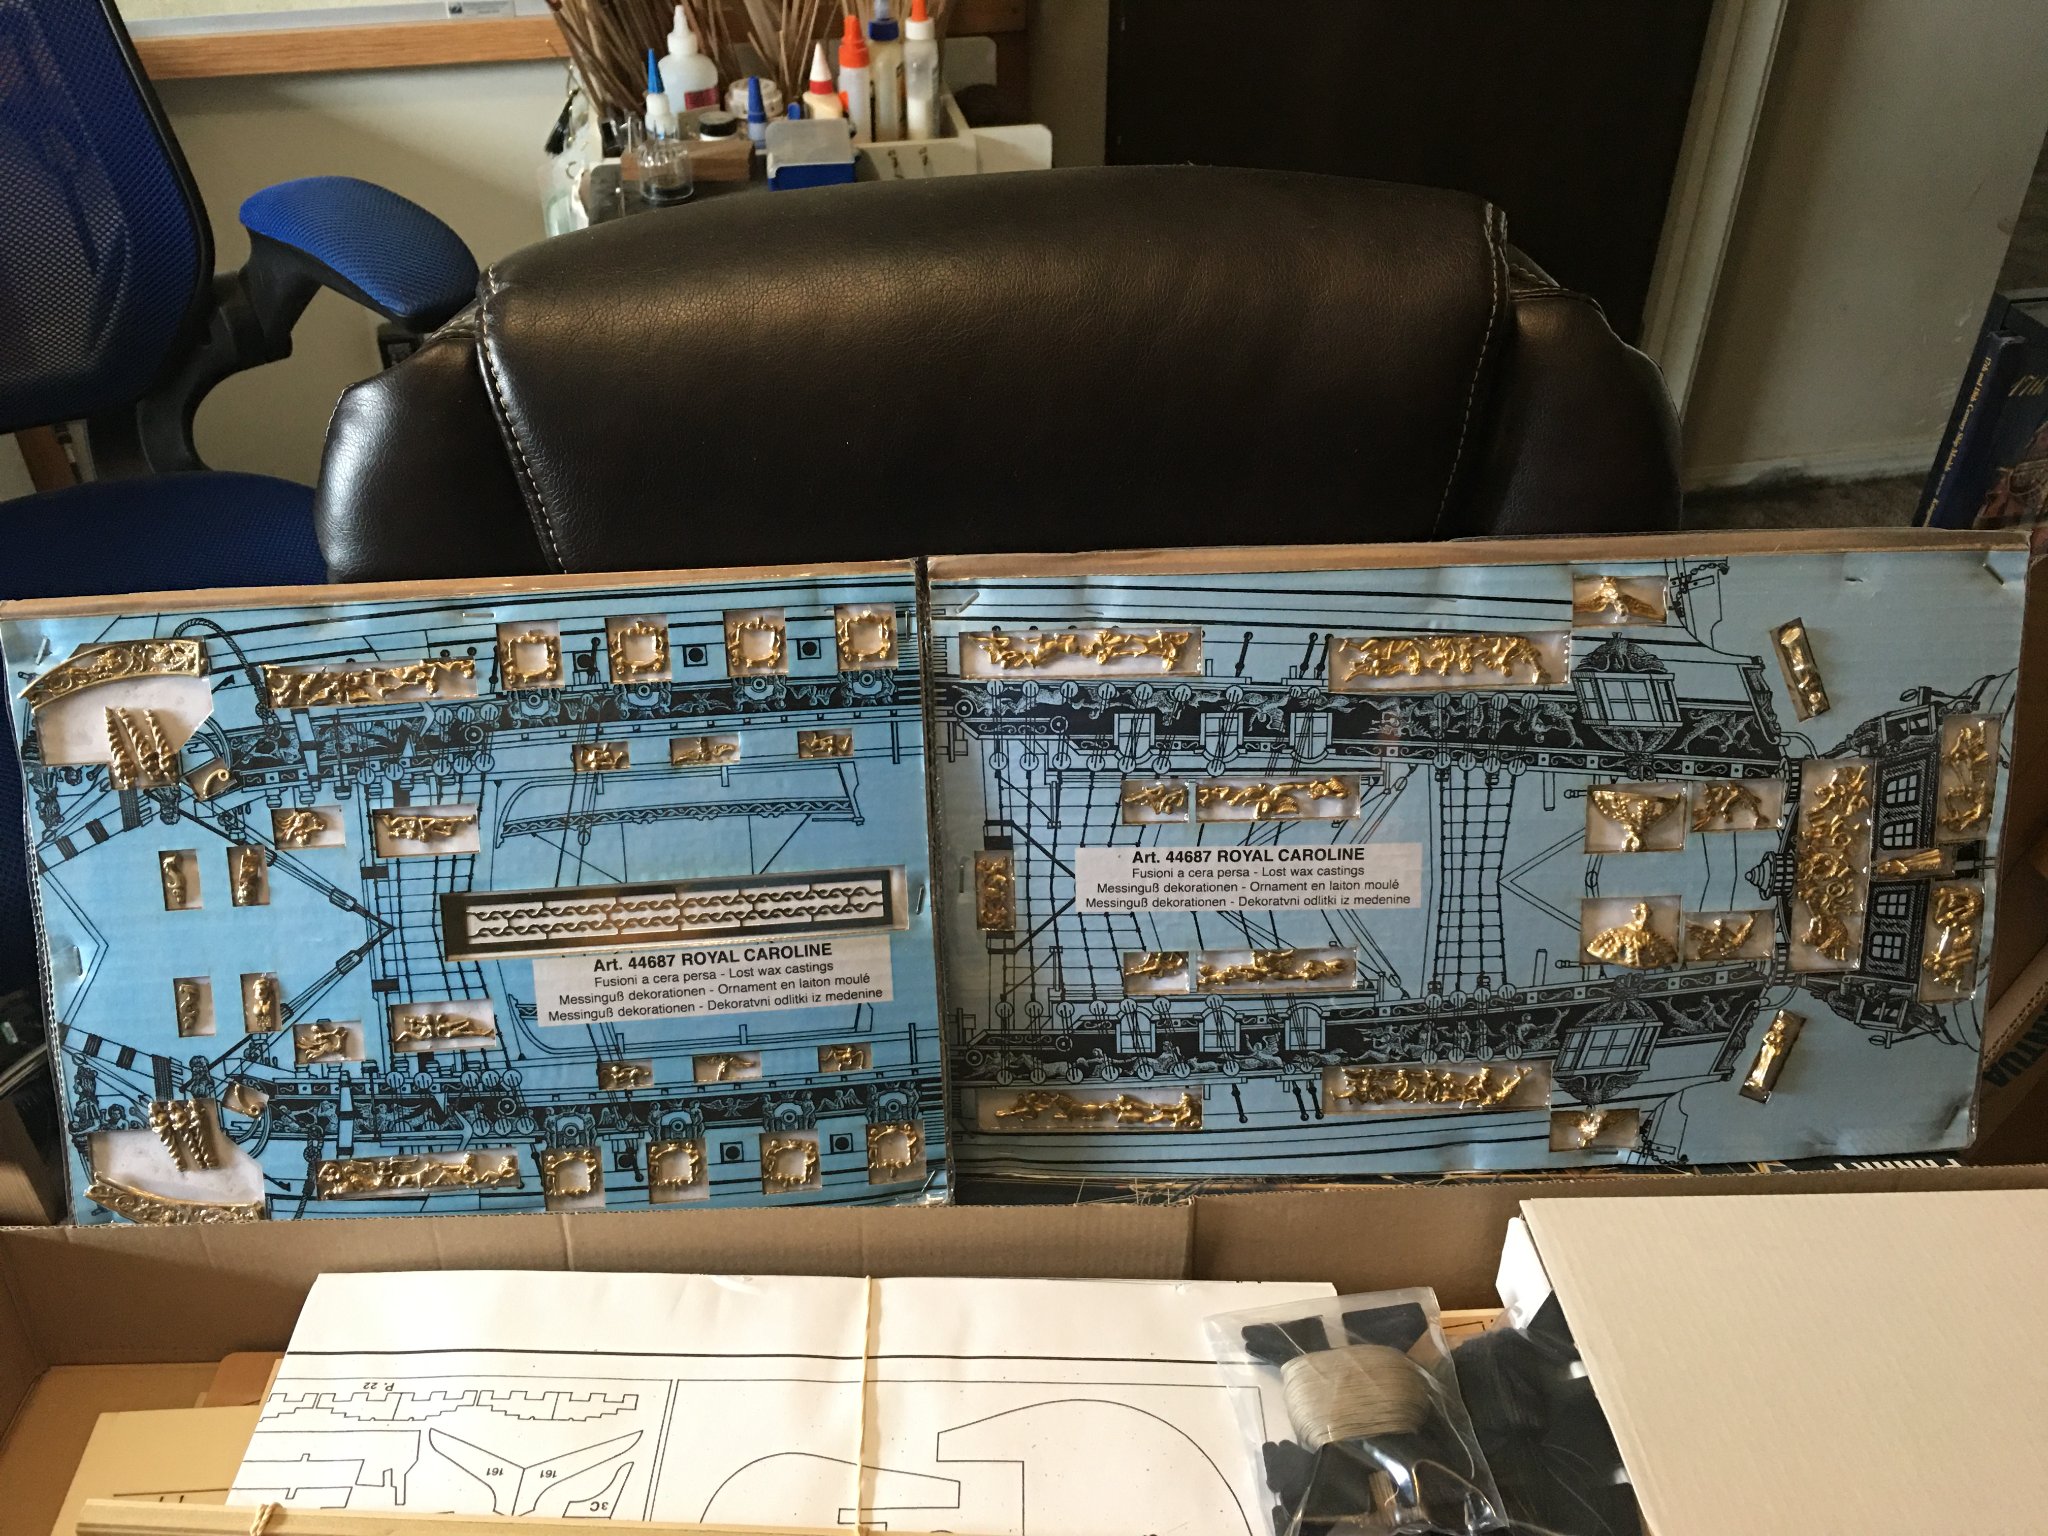
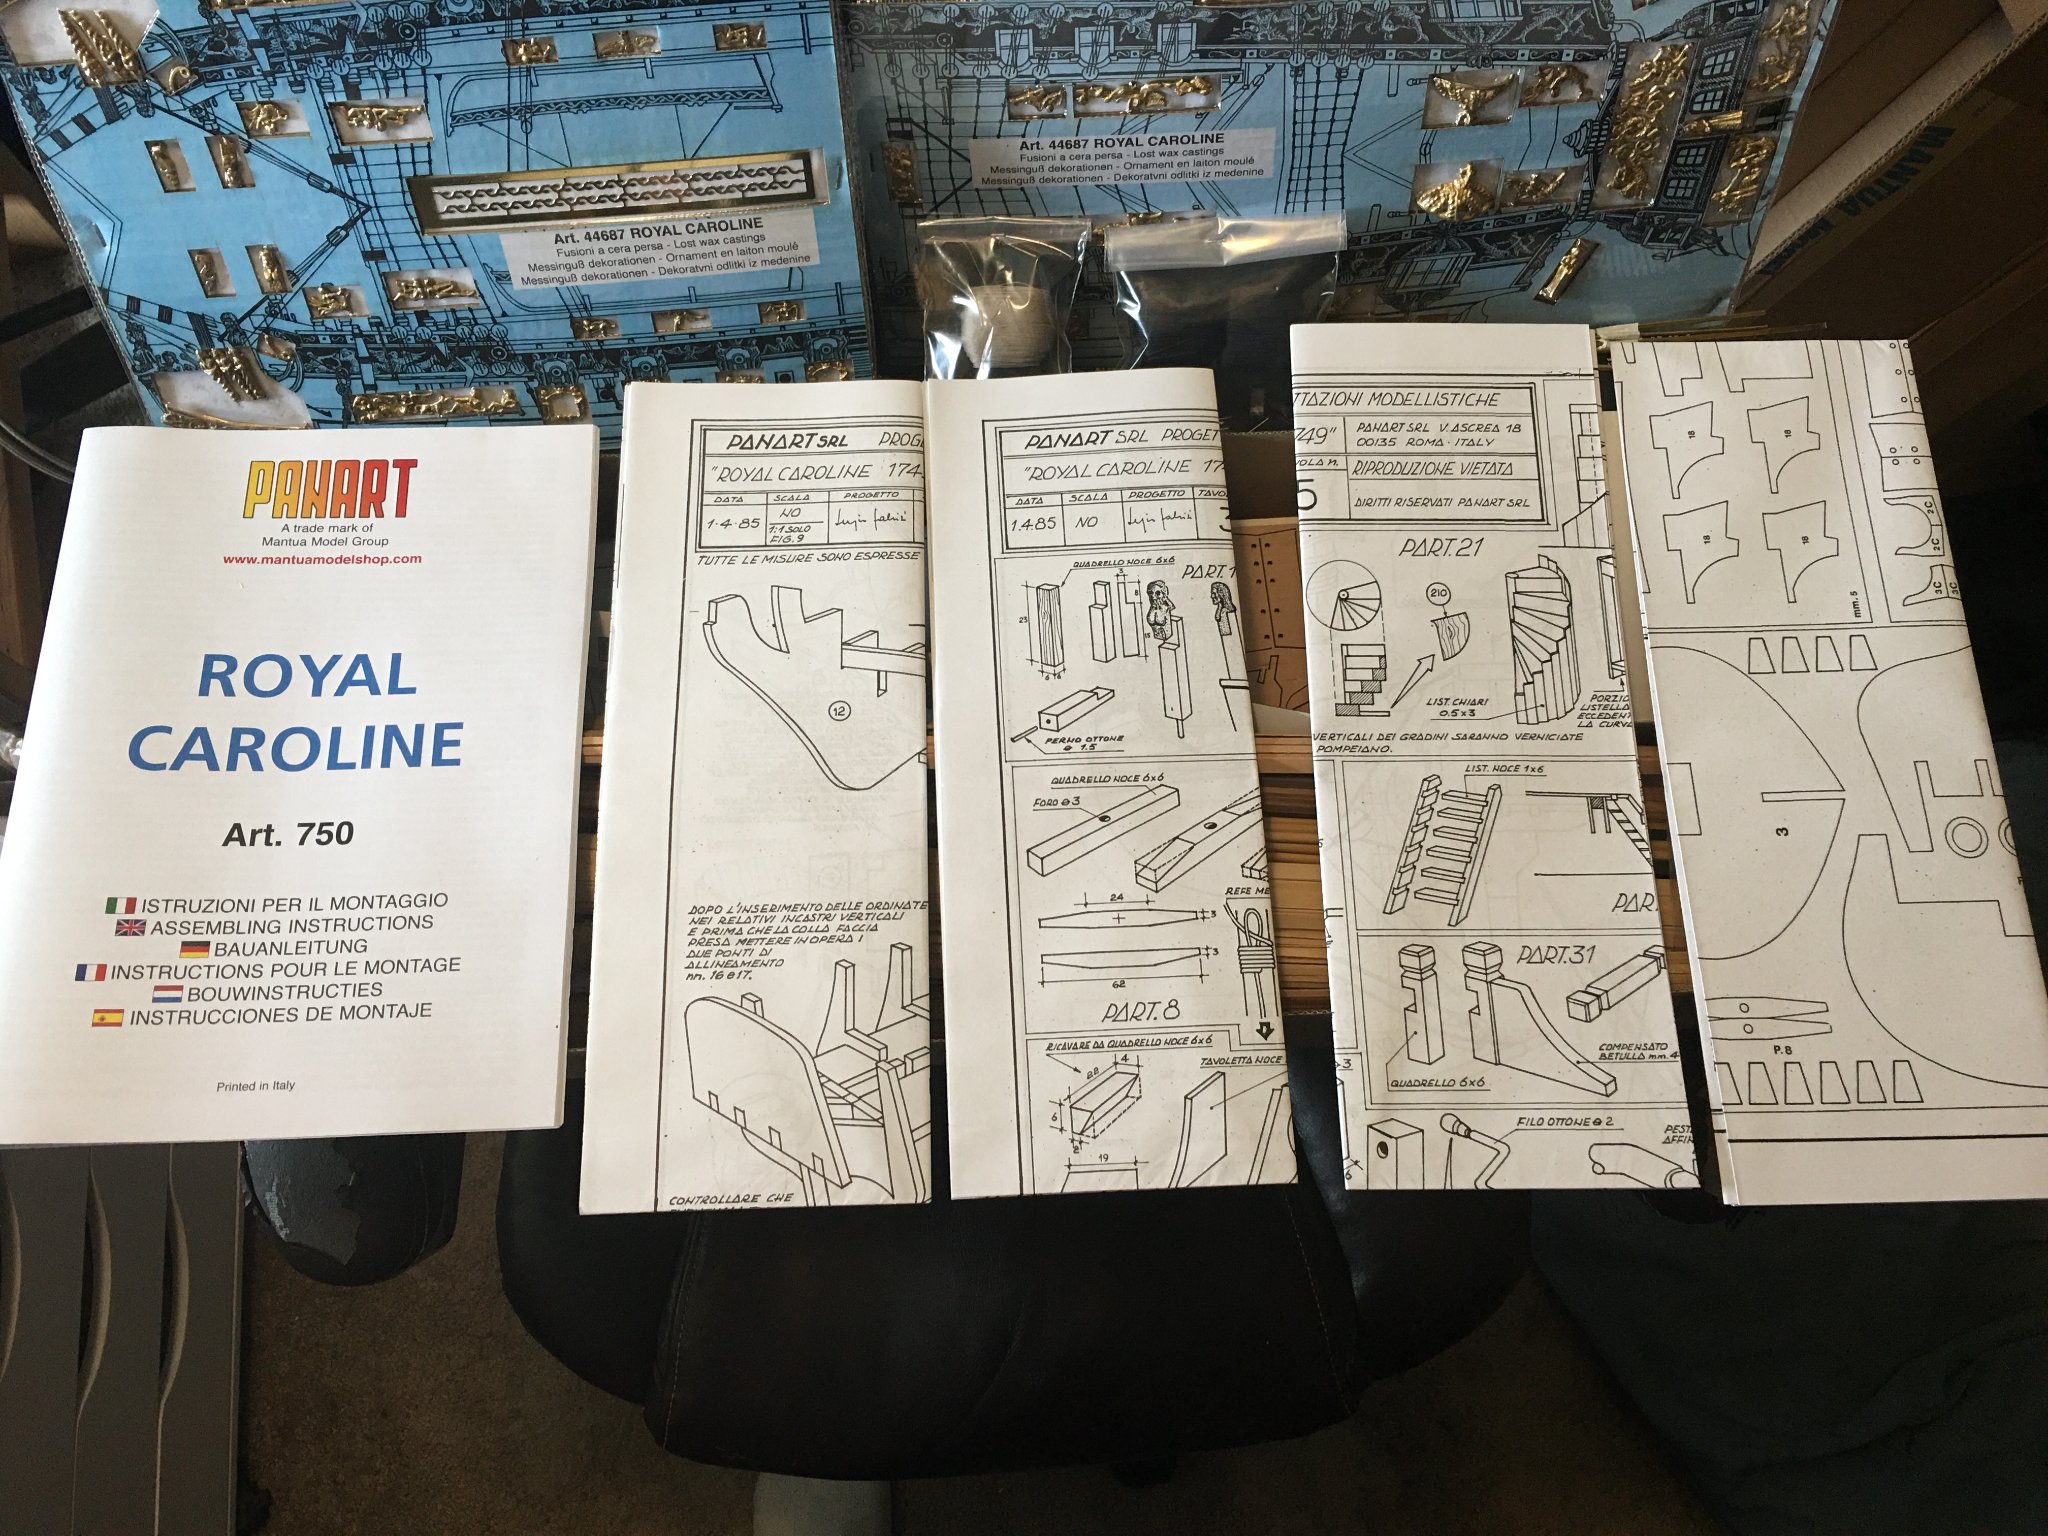
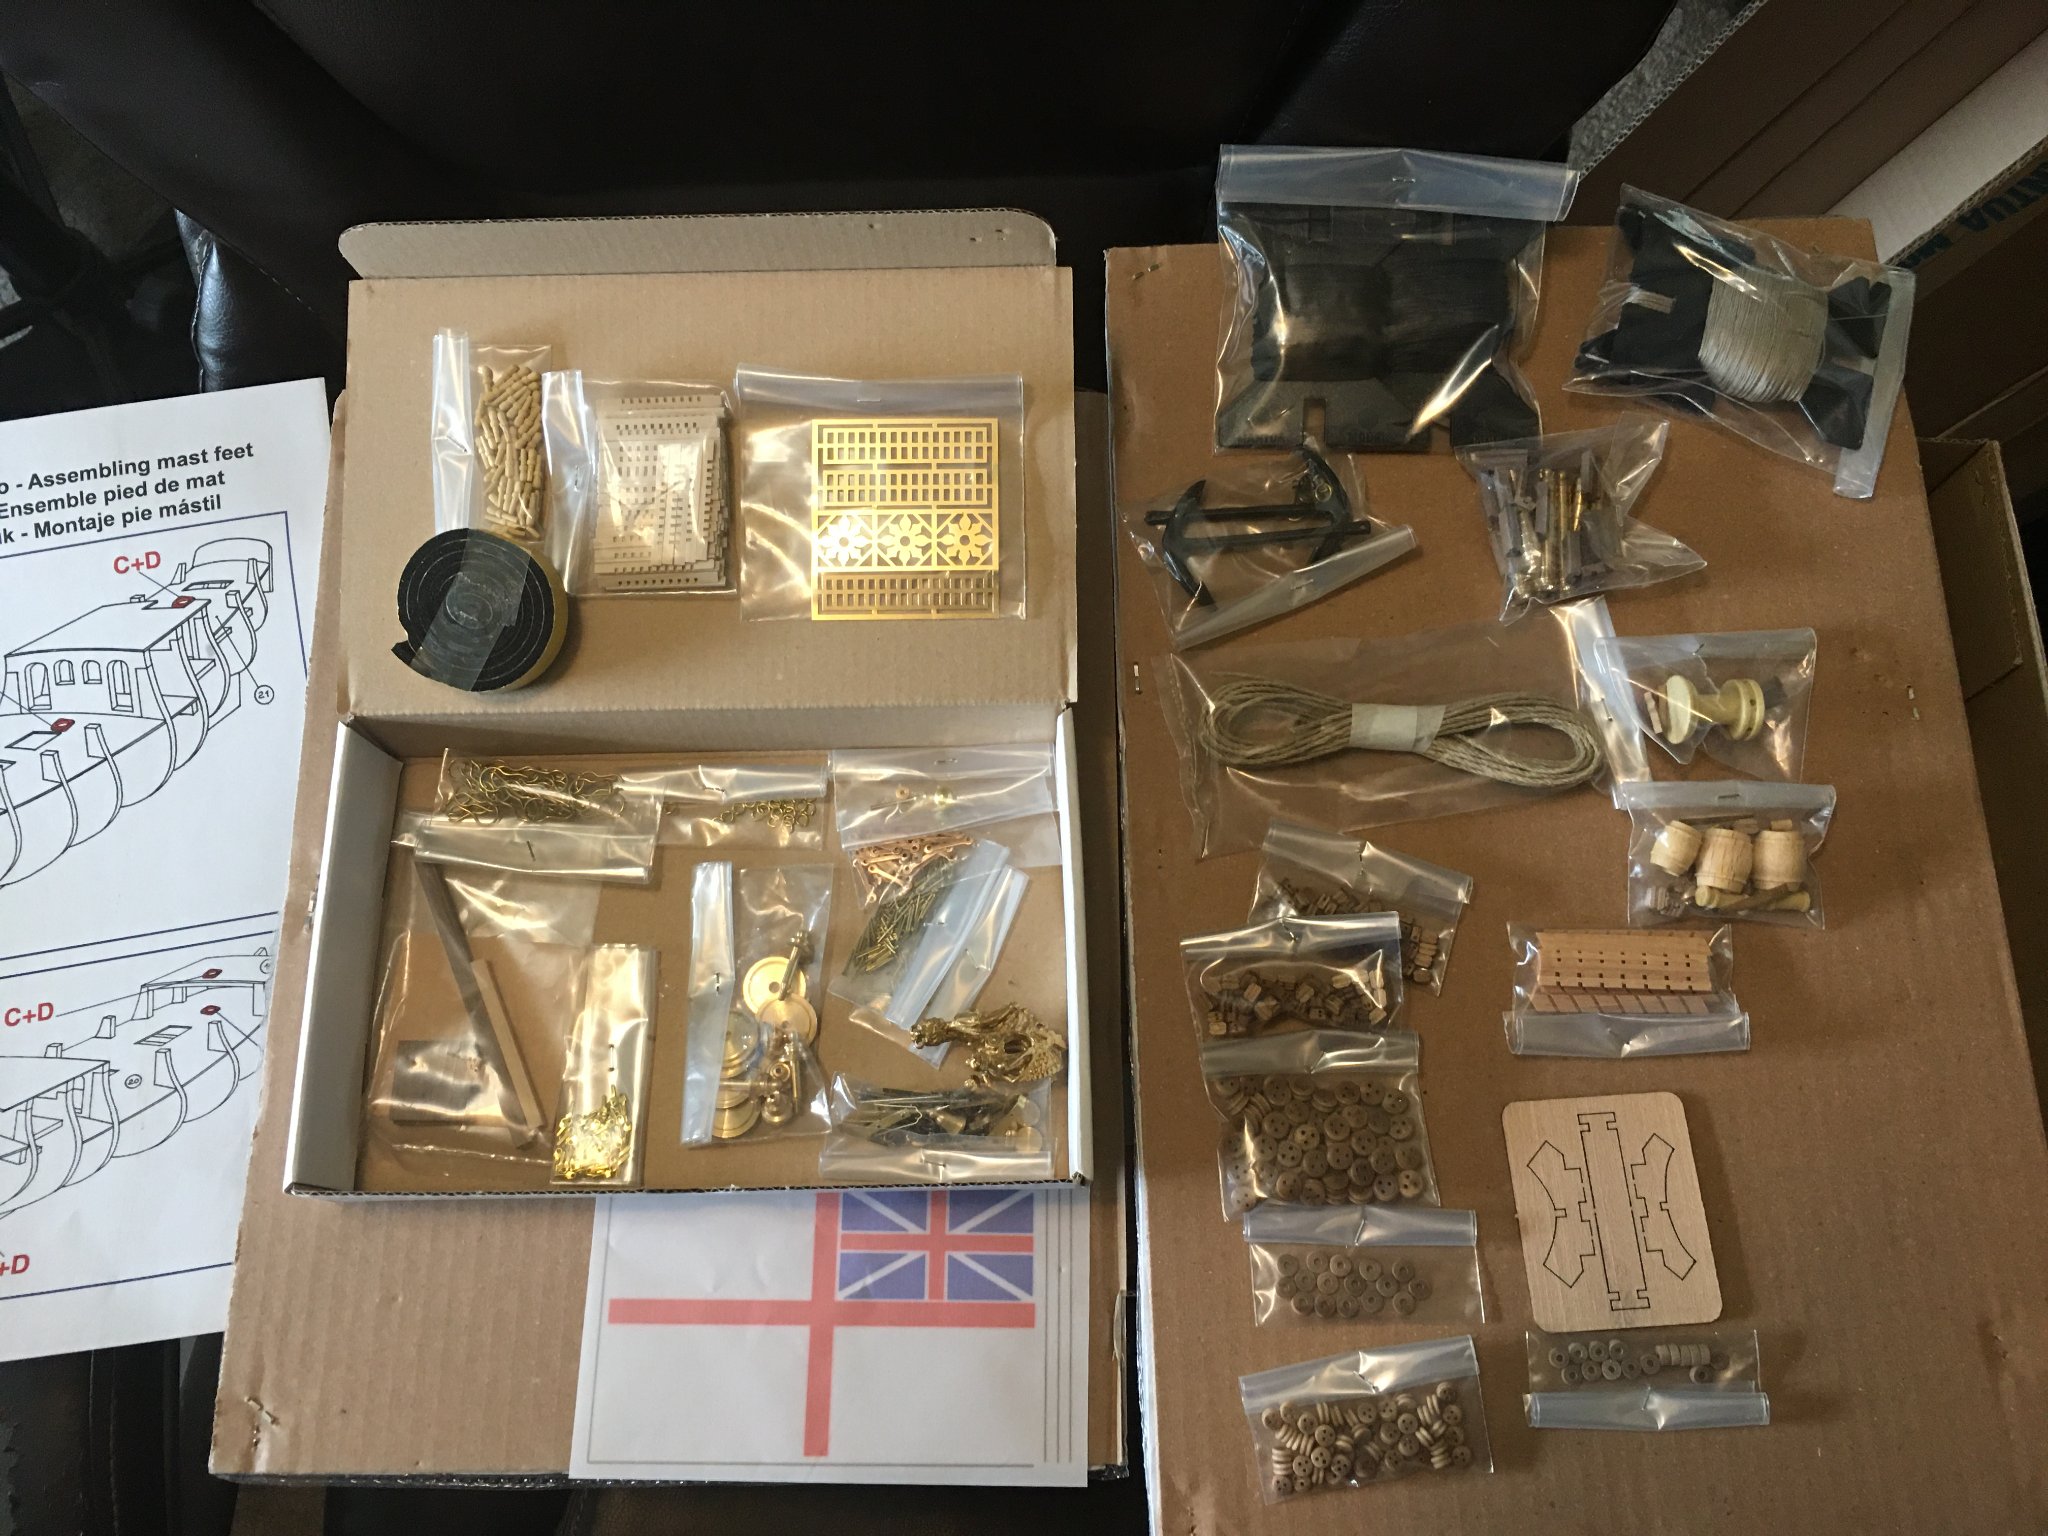
First off, the unboxing. I will not go into too much detail here as these are all largely the same. What is inside is typical for a Mantua brand kit. Decent laser cut parts, clean wood and fair castings, fittings and some line for rigging. Nothing spectacular but the components will make a fine model out of the box. Some stuff I use, some I do not and will be explained as the build goes on.


- Old Collingwood, JeffT, GrandpaPhil and 4 others
-
7
-
Steve, beautiful work! Something to be proud of for sure. I am just starting a kit bash build of this very model kit and I can see that I will be taking some inspirations from your build. I hope your troubles resolve themselves well for you and life gives you some peace again. I look forward to your return!
- Bedford and Keith Black
-
2


Royal Louis 1780 by EJ_L - Mamoli - Scale 1:90
in - Kit build logs for subjects built from 1751 - 1800
Posted
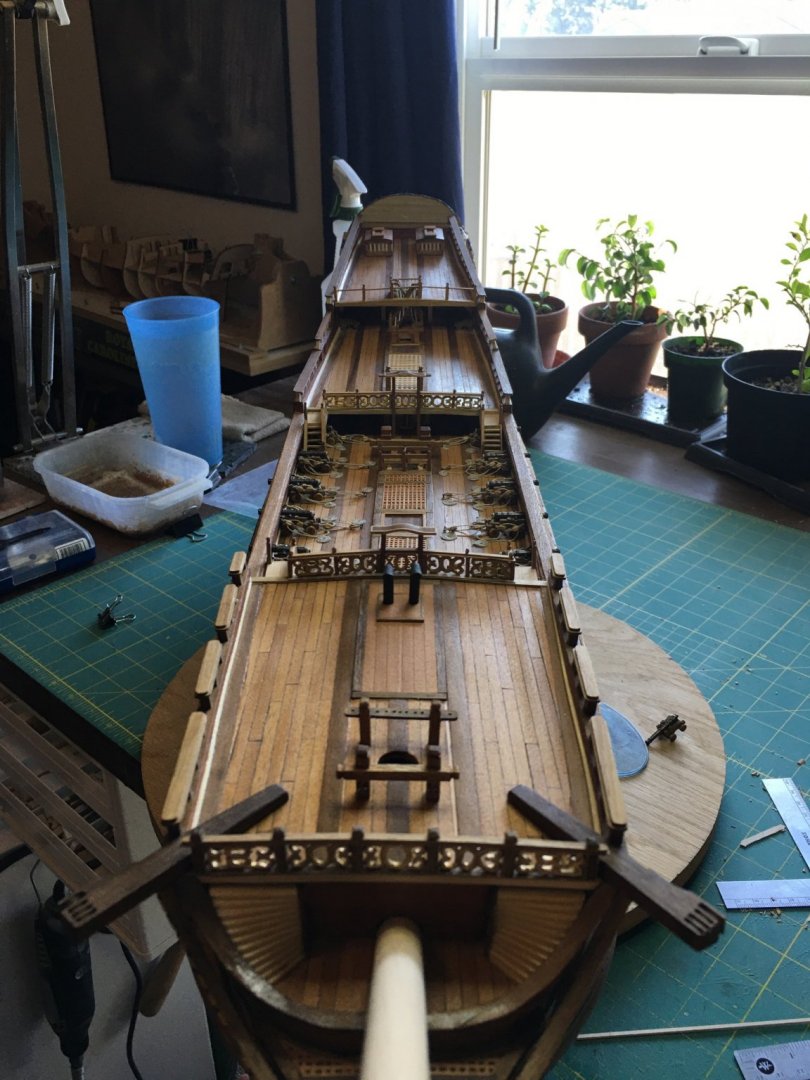
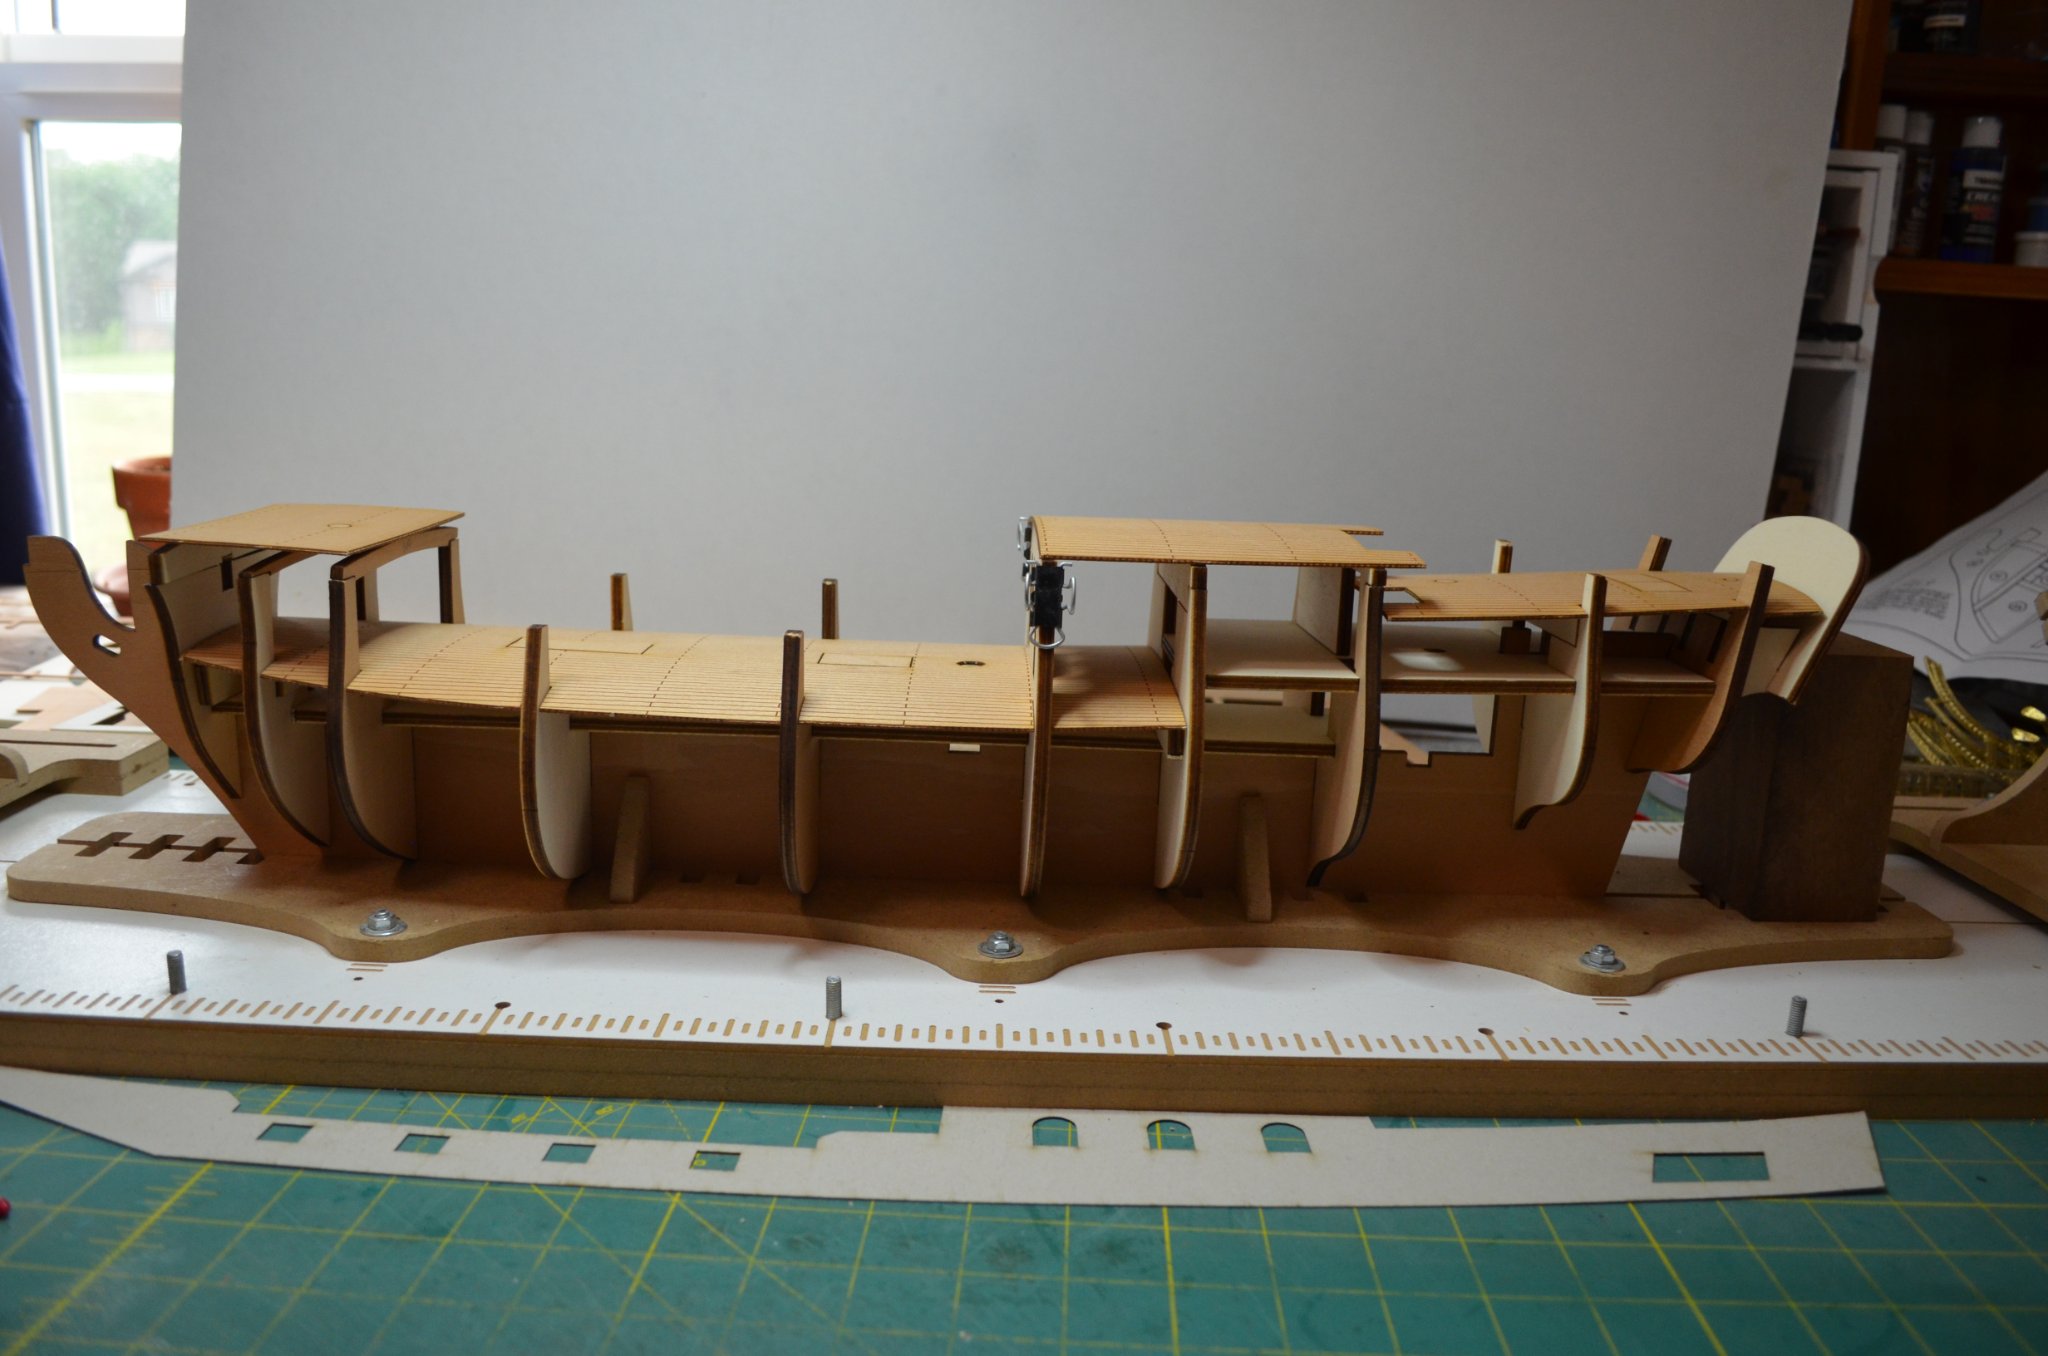
Major milestone weekend as Royal Louis crossed 1,000 hours of build time!
Reaching this point was the installation of the skylights, the rest of the inboard carvings on the railings and building the upper decks gun carriages. Now I am working on gun tackle. I had to order more blocks though as I did not have nearly enough. With 6 blocks per gun and 20 guns, 120 blocks to strip is a lot. Makes me glad the majority of the guns on this ship are modeled dummy guns.
I will likely be taking a break from Royal Louis though soon as my LEDs for Royal Caroline are scheduled to arrive this week. With those I can begin hull planking and after so much tiny detail work lately, I am ready for some easier planking.
As always thank you to all for stopping in and following along!