-
Posts
2,227 -
Joined
-
Last visited
Content Type
Profiles
Forums
Gallery
Events
Everything posted by EJ_L
-
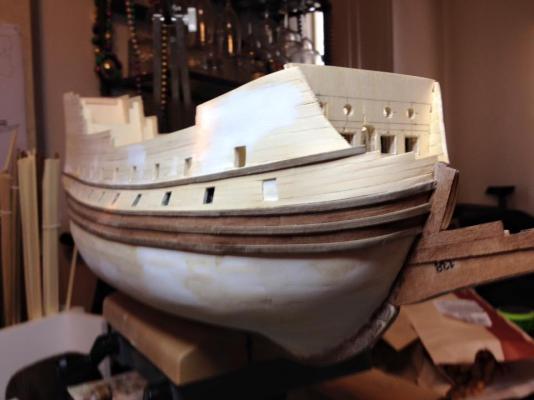
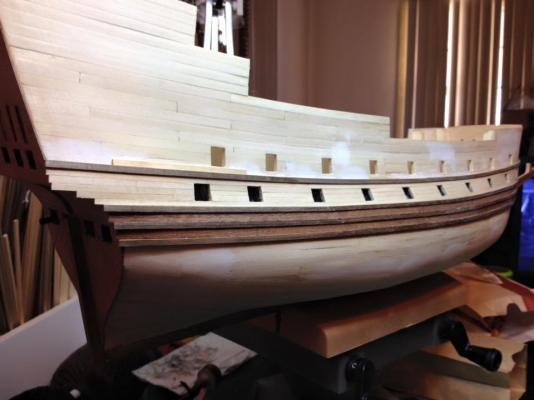
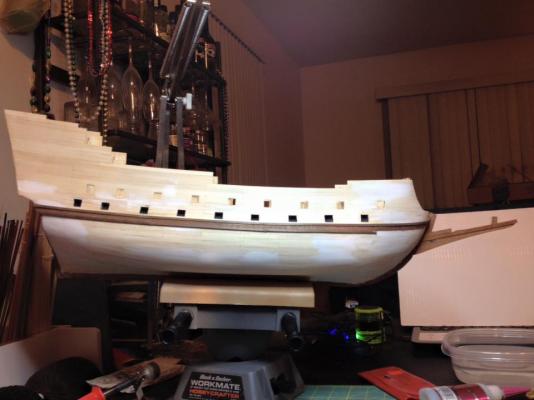
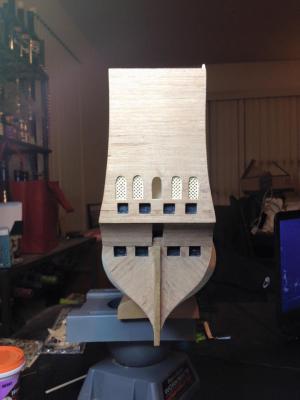
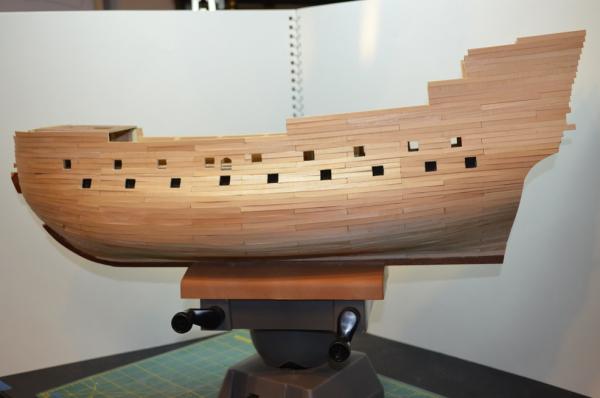
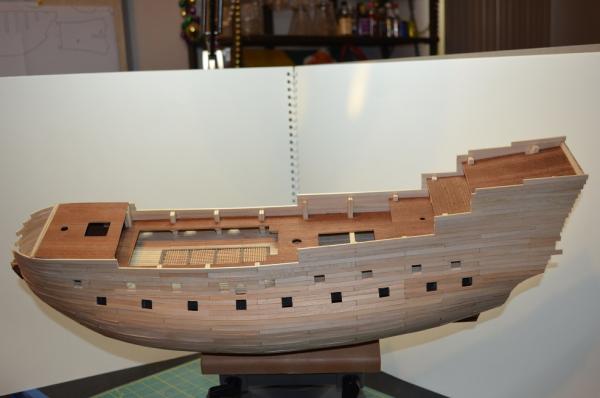
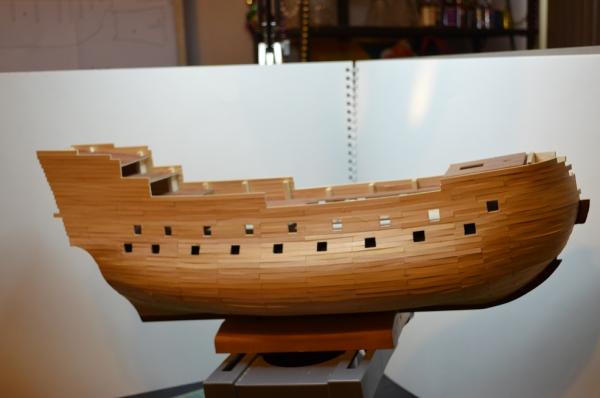
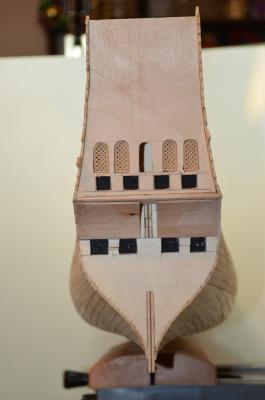
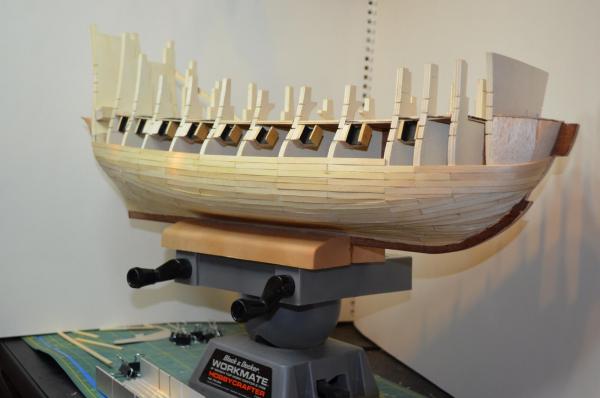
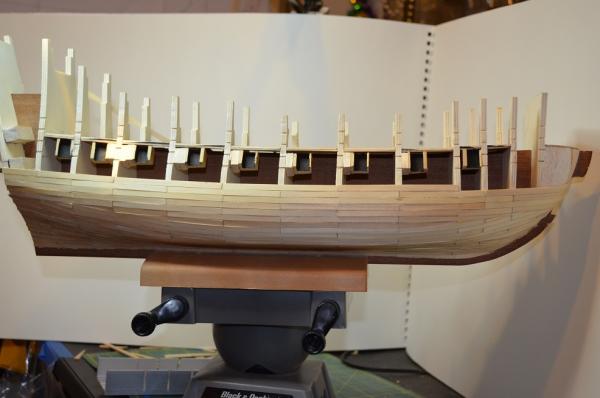
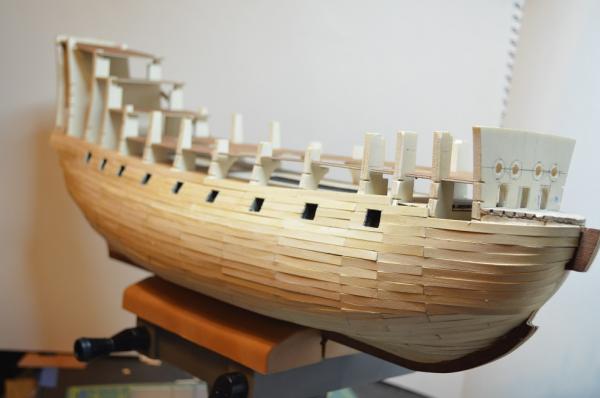
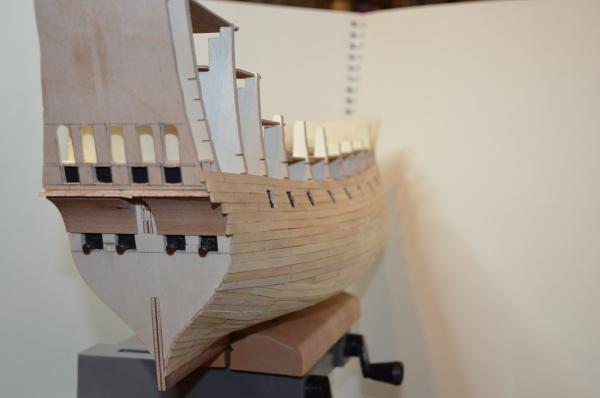
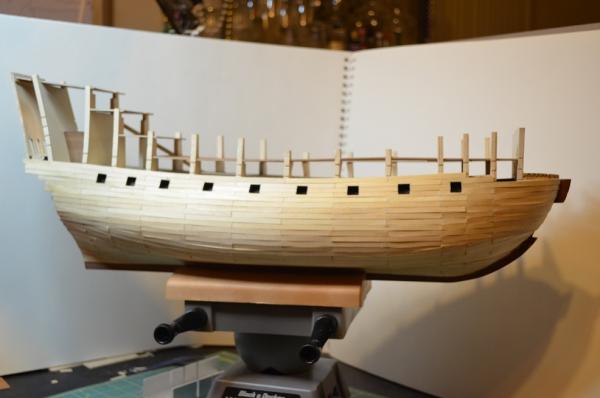
More work has been taking place in the shipyard and la Couronne is getting her 2nd planking. I am using mahogany for the majority of the planking. The wales and some of the trim is walnut and the white sections at the gun ports are maple. I am trying to have minimal paint and so I want the wood's natural colors to do the job. There is an exception to this as I am using a dyed blue boxwood for parts on the upper hull. I like the look of the blue dye over paint in this case and as it is a small area I think it will look good. Might have some of that on in the next update. I've stated mid ship installing the wales and working upward. I wanted to work on the "easier" part first before tackling the lower hull. I also needed to have good starting points and I've seen from other build logs and planking instructions that starting this way seems to be the most common route for planking. In the past I have tended to just do things my way and hope for the best. Although I am proud of my work, I have discovered a deep desire after viewing many remarkable builds on here to push myself harder to make a better ship. This has involved changing a lot my methods and habits and so far I am very glad I did. I have also discovered that the kit did not come with nearly enough mahogany to plank this ship. Luckily Jason at Crown Timberyard has come through for me and found what I was needing. They say that a bad review will travel faster than a good one and so I am trying to change that. This was the second time I have ordered from Jason and I have been very pleased with the service each time. The wood is excellent quality, and his service, response and shipping is very good as well. This was even more noticeable this time as it was a custom order and not "off the shelf." He wen out of his way to find the lumber to match what I needed. I will use him for all my wood needs for ship building and highly recommend anyone not familiar with Crown Timberyard to check it out if you are needing wood for your build. And now enjoy the pictures!
- 608 replies
-
- la couronne
- corel
-
(and 1 more)
Tagged with:
-
Very nice table. I'm fortunate to have a space for my model building in the house but in my very tiny wood shop, I use several similar setups to move tools and one of my benches in and out when more space is needed. I too have been there when I was racing the weather to get some work done and had several tools in the driveway when it started to downpour. I was thankful for wheels that day! When I move to my new place I will have more room and just might try out your table design.
-
Very nice rigging! Im paying close attention as my la Couronne will have a lot of similar rigging and it is even harder to find information about it compared to the Vasa. Your build is looking great. I have been looking at Chuck's rigging ropes from Syren and I too will be swappin most if not all of my kit supplied ropes for his. Much cleaner and what came in my kit was only one color, a very light tan and I would be forced to dye the restto make it work. Something I would rather not have to do. Keep up the great work! I look forward to seeing more as you progress.
- 249 replies
-
- billing boats
- vasa
-
(and 1 more)
Tagged with:
-
Thanks! I know a lot of people in MSW have built her but there are only a couple of build logs on here about la Couronne so I am trying to keep mine up to date and as complete as I can. What set of plans do you have? I have seen a couple different versions while researching this ship. I have seen a few discrepancies in the forward facing canons above the prow deck but from what I can tell all are in agreement that there are 8 canon in the stern. From what I have gathered for the 1637 version of la Couronne which was a 3rd rate carrying 64 guns, there were 8 on the bow, 8 on the stern, 24 on each side from lowest to highest decks, 10, 9 and 5. Finding reliable information on her has been a struggle so a lot of how I am making her look is based on what I have gathered of my plans (which are Corel), other sets of plans that I have found online, pictures of completed models and comparisons of the construction of other ships of her era. If you have something different that I have not seen I would be interested in looking at it as I may be building wrong.
- 608 replies
-
- la couronne
- corel
-
(and 1 more)
Tagged with:
-
Looking good. I have been enjoying watching your build come together as although it is not an unknown way of building a ship it is still rare to see someone building this way at home. That just may be a large part of the future of model ship building and although I do not think I will completely stray from wood ships, I see the huge potential to aid us in wood models with detail work such as sculptures and fittings that are very difficult to carve from wood. Looking forward to seeing more!
-
More progress has taken place on la Couronne and she is showing her shape now. I have finish the first planking which I admit I am not really proud of and shows why I am still part of the group that double planks hulls. I have decided though that this will be the last ship I build in which I only rely on the framing supplied in the kit. There simply are not enough connection points and the spacing between the frames is too great and uneven to get the desired shape of the hull in one planking. There may be some people who are very good at planking that can do this but for my skill level I am thinking that if I add more frames, somewhere a lot closer to what would have been on the actual ship, that having those extra connection point would help in allowing the planking to come out smoother. As for this ship, I will now begin the "cheat" stage in which lots of smoothing, planing, and wood filler followed by lots more sanding will take place. I want my veneer layer to look great and I know what I will have to do to get it that way. I have also been test fitting many pieces such as the upper decks for spacing and preparing others such as the window frames on the stern for installation as they will need to be in place before or ready for placement as the final planking goes on. I will be removing the all the decks down to the main again so I can detail it out. Also many of the planks have run long and will remain so until I can get all the bulkheads installed. It is much easier to leave wood longer than needed and trim it back to fit than it is to try to stretch it longer. I keep my eyes open for the elusive wood stretcher but so far it has not been seen. Well, I'm off to create a lot of wood dust. Till next update, drink up me hearties yo ho!
- 608 replies
-
- la couronne
- corel
-
(and 1 more)
Tagged with:
-
As always I find myself staring wide eyed and breathless when I look at the pictures of your build. The beautiful work and amazing attention to detail is inspiring. I find myself looking over your pictures again and again and each time I notice some new detail or feature that I missed the previous view. It makes me look at my own build which on the table next to me and take note of how it;s looking. Even though it is not the same ship I still question did I think to look into this or that to see haw it should look or how can I make something look better. Throughout your build log you mention at how long it is taking. I feel that it should take as long as it takes to make it right. That is something that I struggled with a lot was slowing down and taking the time to make it right. I have several models that I have had to rebuild over the years as I was so unhappy with the job I did largely due to rushing through it that I could not bear to look at it any longer. I have had to repeatedly tell myself that I have the time. Slow down and learn a new and better way and be happy with the results. Seeing a build log like yours and seeing the fabulous work that it contains is proof that fast is not always better and the results are most definitely worth it. Keep up the wonderful work as it truly is an inspiration to the rest of us.
-
Ken, those carvings look great! Way better than the cast mold looks, I know cause I used it and have been seriously considering redoing it one day. Definitely worth the effort. Great job!
- 481 replies
-
- rattlesnake
- model shipways
-
(and 1 more)
Tagged with:
-
Very nice work. I was in school for 3D design a while back and I fell in love with the possibilities of 3D printing in model building. I have not used it on any model ship builds yet but while I had access to a 3D printer I did make many custom parts and even a few people for my HO scale railroad. I have been thinking about buying a printer myself and trying it out for making many of the decorative sculptures on the stern or even some of the extremely small details such as hinges. I also think it would be a great tool for making sailors in the wide range of scales that we often work in and are not readily available in stores. The printers are fast becoming more affordable and it is really rather easy to learn the programming to make them work. Design can be a bit more challenging but for some it may be easier to learn to design on a computer than carving or sculpting the parts by hand.
-
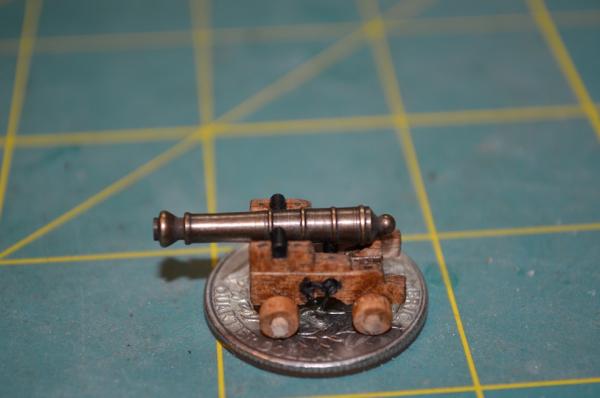
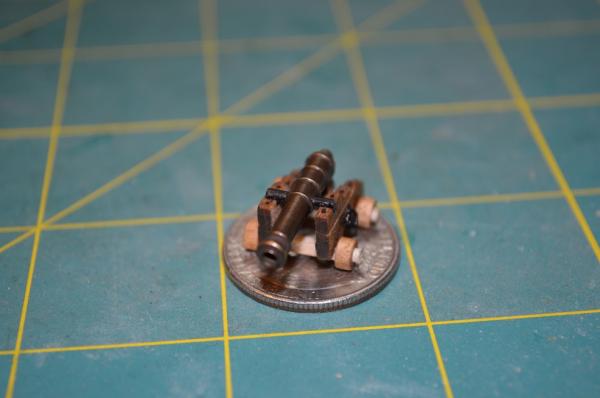
Today I built the first of la Couronne's canon. I needed one that I could use for laying out the main decks gun ports. I did not care for the kits supplied carriages so I ended up building my own that I am much happier with.
- 608 replies
-
- la couronne
- corel
-
(and 1 more)
Tagged with:
-
I do love CA glue for a lot of my build but after using it on a ships rigging years ago I will not do that again. I'm not as concerned with not being able to untie the not as often by the time I realize I have messed up the threads have been trimmed and the only solution is to cut through the knot and start over. The white residue that it leaves behind is the main reason I dislike it. Watered down white glue does take longer to dry, (heat guns can help speed this up if it's in a critical spot) but as it dries clear without leaving a film it is much better. Plus If I am doing a lot of knots in one sitting I like to make a small puddle of the glue that I can dip the tip of a toothpick into so I do not get an excess of glue on the knot or small part. I have not tried rosin but, I will be calling my cousin who is a musician and plays the violin to see if he has some I can try or where locally I can buy some. I have always used beeswax and have been happy with the results it gives.
-
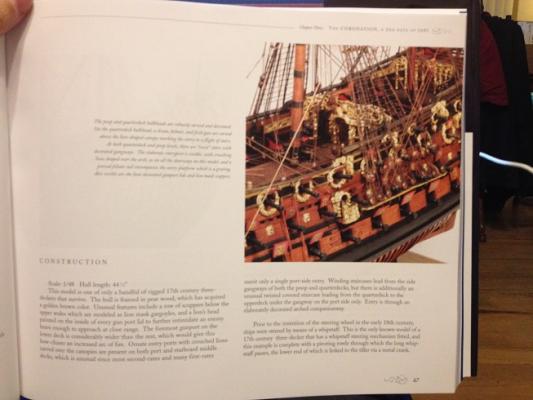
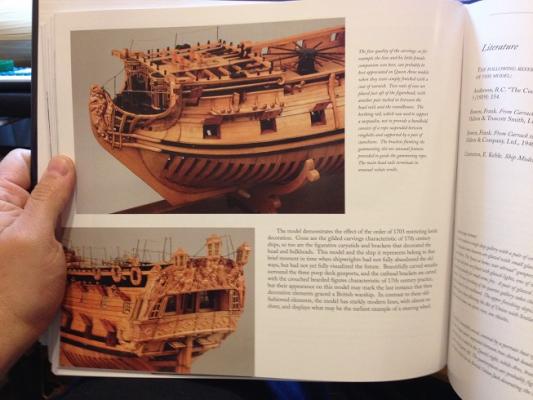
As an early birthday present I was given this book and although I have only skimmed through it so far I am impressed. I will write a full review once I have had more time to read through it. The model ships are very well photographed and the paintings have been cleanly scanned and with the pages being large it is easy to appreciate the models. I have included a few pictures from the book to show examples. I will gladly post more if anyone is interested.
-
Nigel, I have noticed this as well on a few different ships. I guess if you were faced with losing some rigging and/or a mast compared to losing the entire ship then that would be a worthy sacrifice. Kings were more likely to forgive a damaged ship if she came back with cargo intact or mission successful than if the ship was sunk or worse yet, captured by the enemy. I'm also thinking that in the case of the forward canons on the Couronne, I am sure that there was enough play in the angles of fire to clear the rigging and planking if only just enough. I think that I've got a plan for design on this. I'm currently working on some deck furniture to let my head clear to look at it with fresh eyes and to see if any new information surfaces and then I will resume building the bow. That is the nice thing with these larger ships is being able to stop working on an area for a few days and work on another part to get a fresh perspective on a problem area. Had to do that with the stern layout also. For anyone who is looking at starting this kit, it is a good kit and nice ship to build but, the Corel plans do leave a lot of detail out that requires additional research. I know this is typical for ship kits at least in my experience but if someone new reads this you have been warned.
- 608 replies
-
- la couronne
- corel
-
(and 1 more)
Tagged with:
-
Thank you for the pictures. You did a very nice job by the way. I have also wondered how the lower guns would fire without hitting the planking Or even the bowsprit itself Especially if the bowsprit was stepped off to the side. Maybe it was more of an intimidation look than actual functionality Though, that would seem unlikely given the excess weight.
- 608 replies
-
- la couronne
- corel
-
(and 1 more)
Tagged with:
-
I've come across an issue that I'm having trouble with. I'm laying out the openings in the forward bulkhead for the forward canons, and bowsprit and I cannot get a clear determination on their location. Two main issues are causing problems. The first is the stepping of the bowsprit and the second is the location of the 8 forward facing canon. From my understanding of the construction of ships in the early 17th century the bowsprit would be stepped off just to the starboard side of the fore mast. I'm okay with this except it seems to interfere with the positioning of the lower canon locations. The canon on the starboard side are now blocked. With the canon port themselves I am not sure of their locations. 4 of them I can tell are on the spar deck. The other 4 are a mystery as they do not seem to fit anywhere. If they are on the main deck then the offset bowsprit blocks them as well as the hatch way to get onto the prow deck. If they are above that then is there a between deck that should exist? That is almost my though given the amount of space I have between the main deck and the forecastle. The only models I have seen either have the bowsprit centered which I do not think is correct or they eliminated the 4 lower canon and only use the upper 4. Can anyone help me out with this? Has anyone seen another model of this ship somewhere that might have a better explanation or know where I could look for answers. Thanks,
- 608 replies
-
- la couronne
- corel
-
(and 1 more)
Tagged with:
-

Work station clutter
EJ_L replied to Senior ole salt's topic in Modeling tools and Workshop Equipment
I am going to get the privilege of designing a dedicated model room in the near future as we are in the process of building a new house. I will be looking closely at these modular units as they look promising but at the very least they give me some great ideas for the built in storage that I was already planning. Would be nice to see them become more easily available in the US as they look promising. I also agree with earlier posts that Jim's setup looks better stocked than my local hobby stores also. If you are into scrapbooks or RC anything they are great but other model hobbies are getting scarce. -
Thanks Ken! Yes, she is a very tall ship. Part of the era of ship building where ships were built much like fortresses were with tall turrets and high walls. Fortunately from what I have been able to read about her, she was a sound ship and did not suffer from inbalance much like the famed Wasa, which was of similar constuction did. Surprisingly though from her size she was actually considered a third rate ship of the line for only having a 64 gun armament. The first rates of the time carried over 100. This is largely, from what I can tell, what led to her short life span of only about 7 years before being decomisioned and scrapped. As with most things time moved on and ships got smaller and more powerful eventually making these larger ships unnecessary. Still, there was a beauty in their design that fadedaway also. And let's face it, if you were in the ocean staring at the broadside of one of these ships I think that the intimidation factor alone would at least make a person think twice before trying to stand and fight.
- 608 replies
-
- la couronne
- corel
-
(and 1 more)
Tagged with:
-
Your build is looking fantastic! The Rattlesnake, this exact kit actually, was the first wooden ship I built. I think that that was probably a mistake as I should have started with something simpler but that is not what I typically do. Still, I am very proud of how it came out overall and I learned a lot from building her. I have to say that yours looks a lot better than mine does. The clean lines and beautiful carvings are great. I've enjoyed reading through your build log and will continue to follow along as I look forward to seeing her come together.
- 481 replies
-
- rattlesnake
- model shipways
-
(and 1 more)
Tagged with:
-
Planking has continued and has now climbed over the lower gun ports on the starboard side. I have paused it there as I have had to build out the stern cabin spaces and gun ports. I temporarily set the upper decks so I could verify the spacing for all the openings in the hull. I'm also making sure I have everything in place that needs to be before the planking covers it up. My plan is to bring the planking up to the upper gun deck then I will start detailing out that deck before I continue the rest of the planking.
- 608 replies
-
- la couronne
- corel
-
(and 1 more)
Tagged with:
-

Work station clutter
EJ_L replied to Senior ole salt's topic in Modeling tools and Workshop Equipment
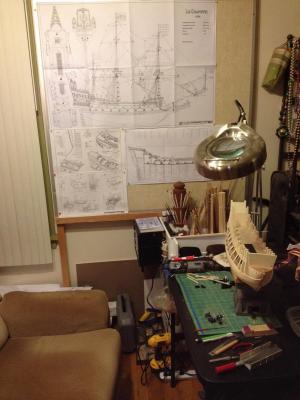
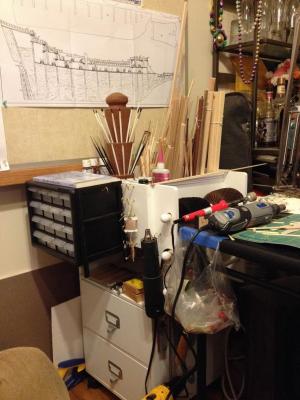
This is my temporary work station so it's far less cluttered than usual. I have a nice big area in my basement dedicated to model building but due to an illness that has made me much weaker than normal I no try to avoid going down stairs unless I have too. In the meantime I have set up a card table and along with this rolling cabinet that I modified to hold my materials and tools I am in business in my living room. I also got lucky at work and salvaged that 4'x4' tack board that has been great for a plan board. -

Work station clutter
EJ_L replied to Senior ole salt's topic in Modeling tools and Workshop Equipment
This is an issue that I feel all model builders struggle with. Over the years and largely thanks to my wife's love of shopping at craft stores I have received many different types of storage shelves, drawers, boxes, baskets, and a few things I don't really know what they are for. Using them remains an issue sometimes. What has helped to keep me organized the most is that I bought a small battery operated vacuum. I keep it directly under my table and try to use at the end of every session especially if I have been cutting and sanding. By forcing myself to clean up the dust and small pieces it also forces me to pick up tools and supplies so they are not in the way or don't get sucked up. So far this has been a fairly successful trial. -

Rigging tools how are they used
EJ_L replied to Telp's topic in Modeling tools and Workshop Equipment
I mostly just use my fine point tweezers but I did pick up a pack of dentist picks at Harbor Freight for a couple of dollars a few years ago. It was a 10 piece set that have a variety points and hooks that I have found useful on occasion. I have eyed that set that you are questioning and have been curious if it is helpful or not. I'm sure though that like most tools, it's what works best for you and trial and error is really the best way of finding out. If you do happen to try them, let us know how they work.
About us
Modelshipworld - Advancing Ship Modeling through Research
SSL Secured
Your security is important for us so this Website is SSL-Secured
NRG Mailing Address
Nautical Research Guild
237 South Lincoln Street
Westmont IL, 60559-1917
Model Ship World ® and the MSW logo are Registered Trademarks, and belong to the Nautical Research Guild (United States Patent and Trademark Office: No. 6,929,264 & No. 6,929,274, registered Dec. 20, 2022)
Helpful Links
About the NRG
If you enjoy building ship models that are historically accurate as well as beautiful, then The Nautical Research Guild (NRG) is just right for you.
The Guild is a non-profit educational organization whose mission is to “Advance Ship Modeling Through Research”. We provide support to our members in their efforts to raise the quality of their model ships.
The Nautical Research Guild has published our world-renowned quarterly magazine, The Nautical Research Journal, since 1955. The pages of the Journal are full of articles by accomplished ship modelers who show you how they create those exquisite details on their models, and by maritime historians who show you the correct details to build. The Journal is available in both print and digital editions. Go to the NRG web site (www.thenrg.org) to download a complimentary digital copy of the Journal. The NRG also publishes plan sets, books and compilations of back issues of the Journal and the former Ships in Scale and Model Ship Builder magazines.


