gonzz0
-
Posts
16 -
Joined
-
Last visited
1 Follower

Recent Profile Visitors
498 profile views

-
 gonzz0 reacted to a post in a topic:
HMS Pegasus by Mirabell61 - 1776-1777 - scale 1:64 - 16 gun - Finished
gonzz0 reacted to a post in a topic:
HMS Pegasus by Mirabell61 - 1776-1777 - scale 1:64 - 16 gun - Finished
-
gonzz0 reacted to a post in a topic:
HMS Pegasus by Mirabell61 - 1776-1777 - scale 1:64 - 16 gun - Finished
-
gonzz0 reacted to a post in a topic:
HMS Surprise 1790 by Ulises Victoria - Artesania Latina - 1/48
-
 gonzz0 reacted to a post in a topic:
Virginia 1819 by nikbud - FINISHED - Artesania Latina - Scale 1/41 - First Wooden Ship Build
gonzz0 reacted to a post in a topic:
Virginia 1819 by nikbud - FINISHED - Artesania Latina - Scale 1/41 - First Wooden Ship Build
-
GrandpaPhil reacted to a post in a topic:
Virginia 1819 by gonzz0 - Artesania Latina - Scale 1/81 - US Schooner - first POB effort
-
Elijah reacted to a post in a topic:
Virginia 1819 by gonzz0 - Artesania Latina - Scale 1/81 - US Schooner - first POB effort
-
gonzz0 reacted to a post in a topic:
HMAV Bounty By cobra1951 - Artesania Latina - 1:48
-
gonzz0 reacted to a post in a topic:
Virginia 1819 by gonzz0 - Artesania Latina - Scale 1/81 - US Schooner - first POB effort
-
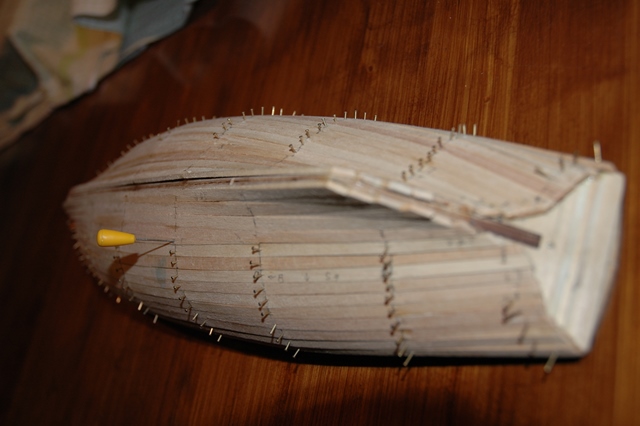
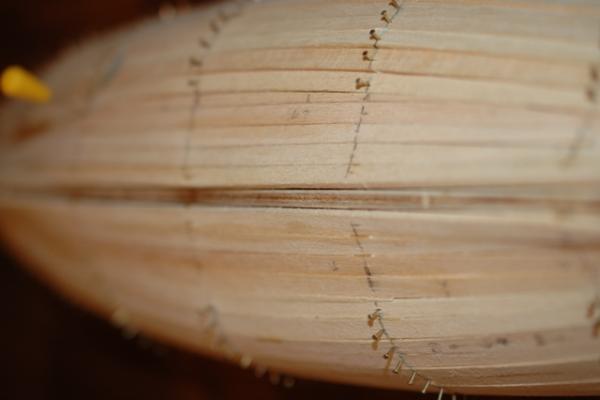
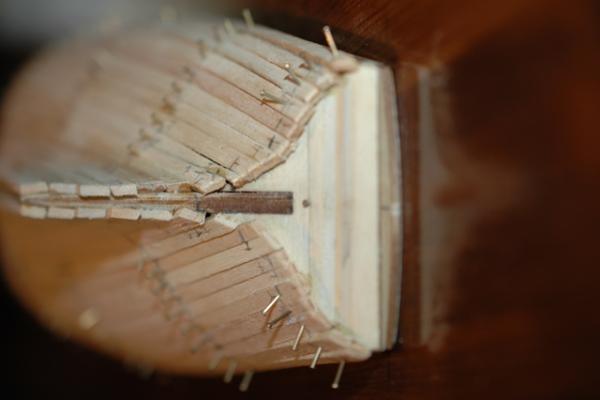
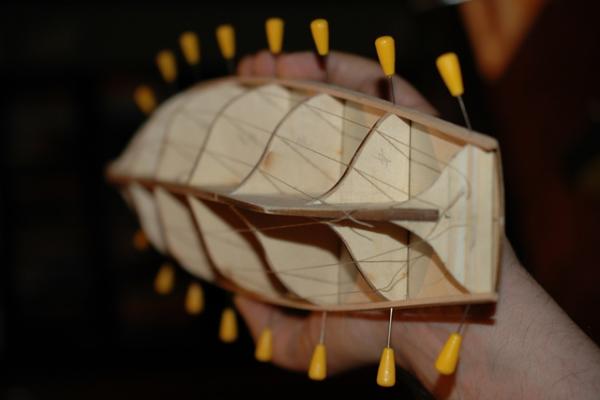
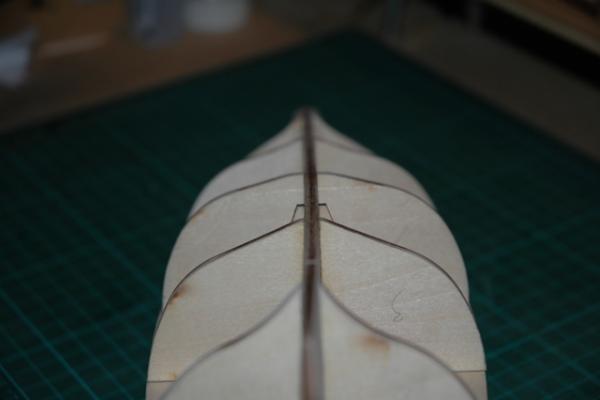
 Ahoy mateys; it's been a while; busy at work, busy at the 'yard, and much progress made: 1st layer of planking is done, just need to hammer home some nails, snip them off and start sanding & filling & sanding again... Pin is in the 'correction plank' between upper & lower bands. Bottom view; made some smaller errors but all in all very happy with the result, this being my first ship. Still, learned a lot that will not befall me next time Rear view fully planked hull; can't wait to continue. I'll keep you guys posted on the progress. Greetings, Ben
- 38 replies
-
- 2
-
-
- artesania latina
- Virginia
- (and 1 more)
-
Elijah reacted to a post in a topic:
Virginia 1819 by gonzz0 - Artesania Latina - Scale 1/81 - US Schooner - first POB effort
-
WackoWolf reacted to a post in a topic:
Virginia 1819 by gonzz0 - Artesania Latina - Scale 1/81 - US Schooner - first POB effort
-
Mirabell61 reacted to a post in a topic:
Virginia 1819 by gonzz0 - Artesania Latina - Scale 1/81 - US Schooner - first POB effort
-
dashi reacted to a post in a topic:
Virginia 1819 by gonzz0 - Artesania Latina - Scale 1/81 - US Schooner - first POB effort
-
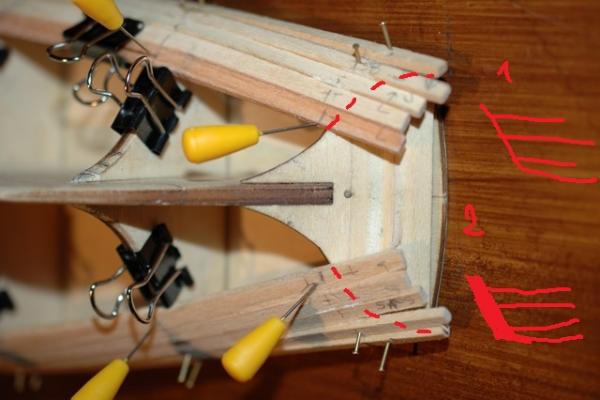
Okay; the keel correction worked and turned out almost perfect, thank you very, very much for this Nils!!; Onwards with the planking; I have another question, and I don't find an immediate answer anywhere, so here goes: Do I cut of the planks so the ends touch up with the transom and are flush with it (see red drawn option 2), or do I cut them off so they overlap the transom (See red drawn option 1) and therefor, if you take a stern view, you can still see the individual planks on the sides of the transom? I realise that in most ships you have a rabet line to solve this issue, but AL has seen fit to let you plank the ship (both layers) first) and only then fit the keel sections on there, so I do not see how exactly to proceed. Or is this a matter of taste? I think not, but I don't find this in the books or manuals I have... Thanks already!
- 38 replies
-
- 4
-
-
- artesania latina
- Virginia
- (and 1 more)
-
Elijah reacted to a post in a topic:
Virginia 1819 by gonzz0 - Artesania Latina - Scale 1/81 - US Schooner - first POB effort
-
WackoWolf reacted to a post in a topic:
Virginia 1819 by gonzz0 - Artesania Latina - Scale 1/81 - US Schooner - first POB effort
-
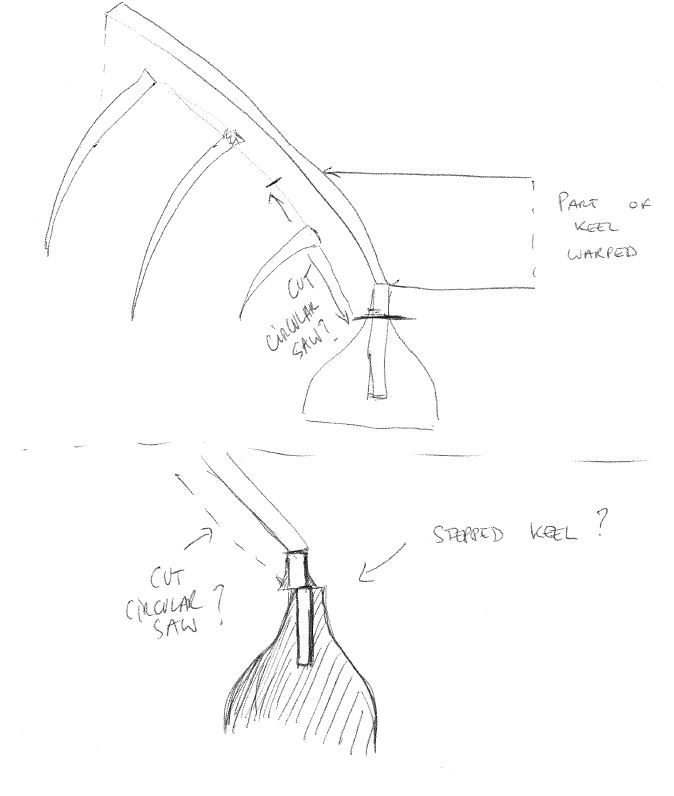
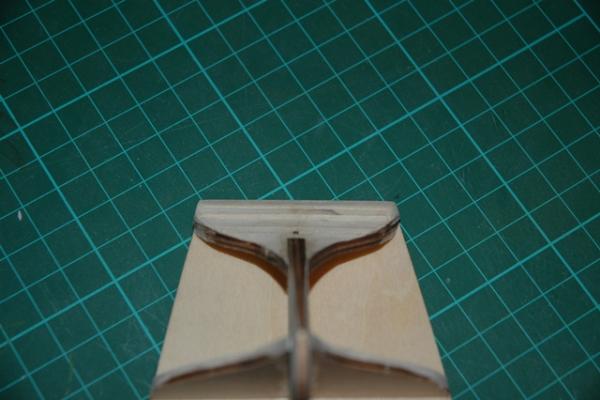
Hello again, Nils, I have a question regarding your proposed solutions; (I still did not correct it because this issue is still bugging me in my mind) I think your suggested method works perfectly if the keel is warped in the midsections; however, as you can see in my photographs, my keel is warped from the one-but-last bulkhead (BH6) over BH7 up to to the transom (T). If I use your method, I'd have t make a circulasaw cut from the start of the warp (BH6) all the way to.. the end (T)?? If i then correct the keel, will my transom not become stepped and look like this? : Or will it also be possible to correct the last section by only adjusting the part of the keel between the last two bulkheads (BH6) and (BH7 and the transom with your method? Because I'm afraid there's not enough wood there to keep it from splicing when I put force on the keel to adjust it after making the horizontal cut... As you can see, the last bulkheads don't go down to the bottom of the keel.... Sorry to bother you with this again, but I'm just afraid that if I do this wrong I'll ruin the model... thank you already, Ben

- 38 replies
-
- 2
-
-
- artesania latina
- Virginia
- (and 1 more)
-
Elijah reacted to a post in a topic:
Virginia 1819 by gonzz0 - Artesania Latina - Scale 1/81 - US Schooner - first POB effort
-
Elijah reacted to a post in a topic:
Virginia 1819 by gonzz0 - Artesania Latina - Scale 1/81 - US Schooner - first POB effort
-
Thank you Nils! Very well explained and don't worry about the pics, I get your meaning, they are clear. Just have to decide on which method now. I think because of the warp is small I will use the second method. Also, I've been thinking about making a 'keelholder clamp' with separate blocks inbetween the bulkheads instead of two long strips to clamp the keel; that way maybe I can get everything to dry into the correct position as well..
- 38 replies
-
- 3
-
-
- artesania latina
- Virginia
- (and 1 more)
-
Hey Dashicat, With this model I don't have the option for a keelholder (not enough false keel area to clamp onto..the bulkheads reach all te way down to the edge of the false keel). I did taper the deadwood area (even though the instructions said nothing about it). There is also the strangeness about the keel: according the instructions, I have to plank and double-plank the ship before attaching the keel pieces... So no option to have these keep the false keel straight, let alone use a rabbet... Installing he garboard strake might indeed be a valid option, but I don't know if it can counter the warp that is there now. I'm starting to wonder (Pirates of the Carribean, heheh) if we shouldn't consider the manufacturers 'Instructions' ("The Code?") more like... Guidelines?? since I've found more useful advice here already than in all the pages of their instructions..
- 38 replies
-
- 2
-
-
- artesania latina
- Virginia
- (and 1 more)
-
Hey Nils, Thanks for the encouragment. You are (sadly) correct, there is a slight warp in thee keel; the false keel was originally warped in the box. I soaked it and clamped in between two glass plates for a week and let it dry, which took out the warp (initially). I then attached my bulkheads and false deck, and everything was still ok. now I(-'ve glued on the deck planking and the warp shows again. I'm afraid the keel wasn't completely dry when I fitted it (I can't see any other reason). I have no idea how at this stage I can still correct this. It is a 0.5-1mm warp, and it is only noticeable when you align the key on eye level and look across it lengthwise (just like in the photo). Is it fixable without tearing out all my beautiful deck planking?? Ben
- 38 replies
-
- 1
-
-
- artesania latina
- Virginia
- (and 1 more)
-
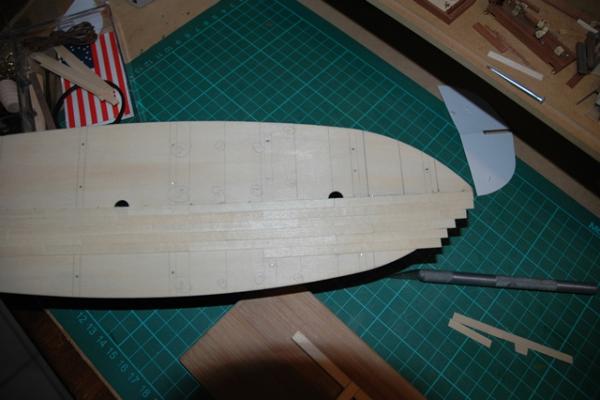
Thanks dashicat, I'll remember your advice when I get to the rigging. As for the wire, I have already decided to re-rig the caronnade blocks with thread for exactly the reason you give. I'll repost it when it's done. After much stalling and doubting, the first planks were cut, soaked and pinned into place. The decision for the amount of planks per band was a bit of an issue as 14 divided by 4 is sheer horror; I would either wind up with 3-3-3-5 (no good) or 4-4-4-2 (even worse) and since I didn't find any examples of 3 bands for a hull (always 4??) I decided to go with 3-4-3-4 because of the shape of the hull. Some stealers in the stern will be required I guess.. Guess there's no turning back now
- 38 replies
-
- 5
-
-
- artesania latina
- Virginia
- (and 1 more)
-
Hey Brian, Thanks for the links, appreciate the effort you did in answering me ; I have copies of some of these pdf's saved already, and bought the book about model ship planking by Donald Dressel and the one by Frank Mastini as well; these books cover the general ideas, but I still see a lot of different approaches; For instance, Chuck's beauties are all made with "spiled planks"; seems by far the most esthetical result but with a kit the wood will not do (it needs to be wider to be able to spile it if I'm correct). So to do that it means going to get additional wood; same for the garboard plank: not included in the kit; use the same plank width ? I guess on a smaller boat you can get away with it... As to the other approaches: some start by banding areas off, others at start planking away at the deck (wale) level, others again from the keel (garboard) up; Very confusing for newbee.. Especially as it looks like they all work... I'm thinking about just diving in and seeing where it takes me, and I'll think I'll use Chucks method.. better start off right **Update: Question: isn't Chuck's method meant for 1 plank layer only? My model is a two-layer ship, thick pine layer first with a mahogany 0.6mm finish; is the spiling worth the effort if you cover up the first layer? //***
- 38 replies
-
- 1
-
-
- artesania latina
- Virginia
- (and 1 more)
-
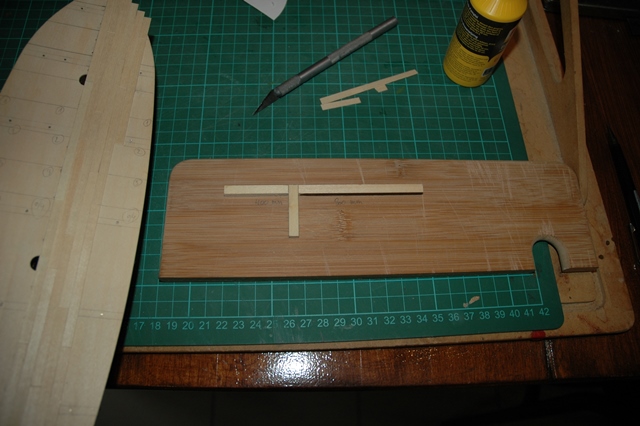
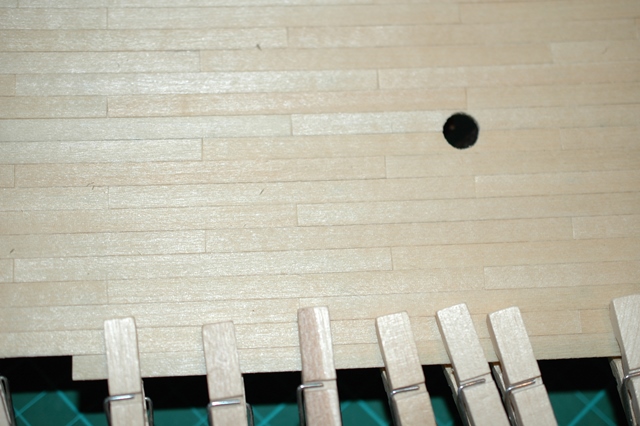
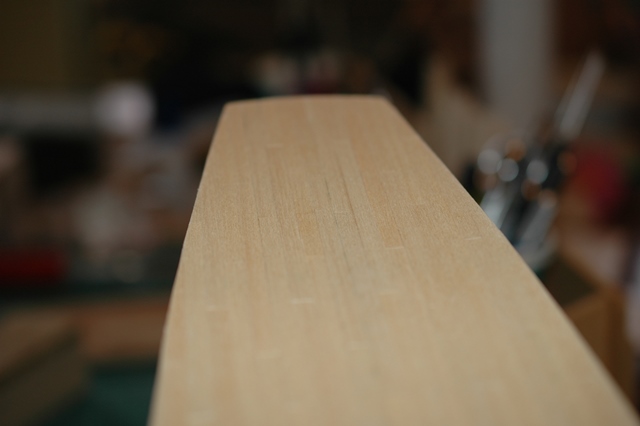
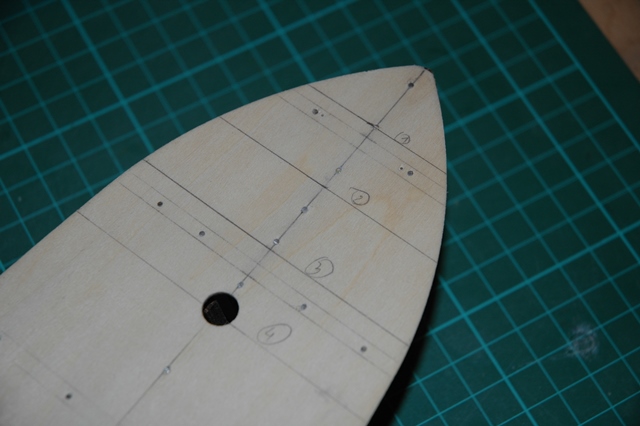
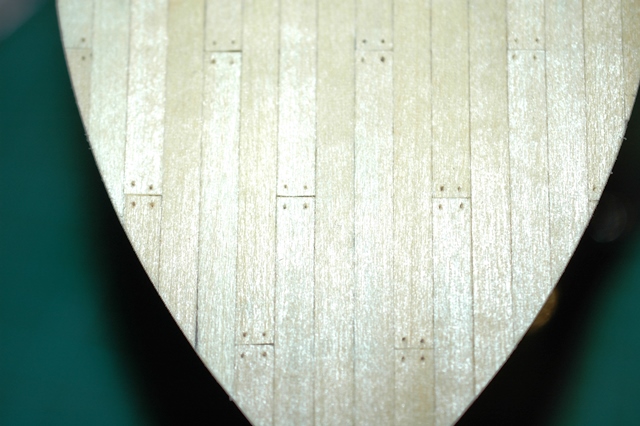
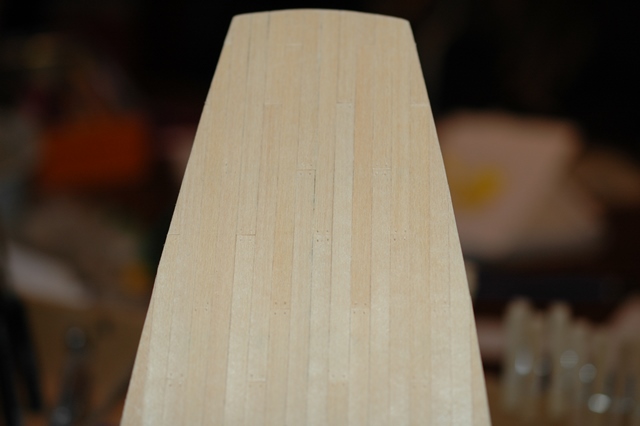
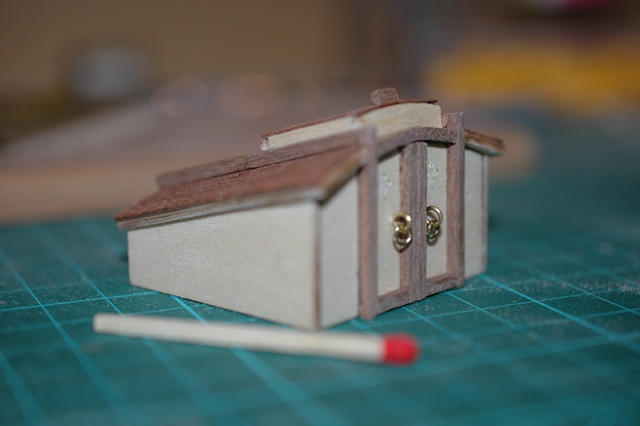
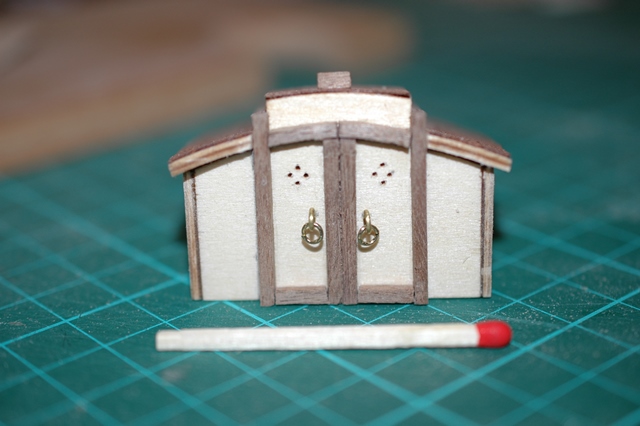
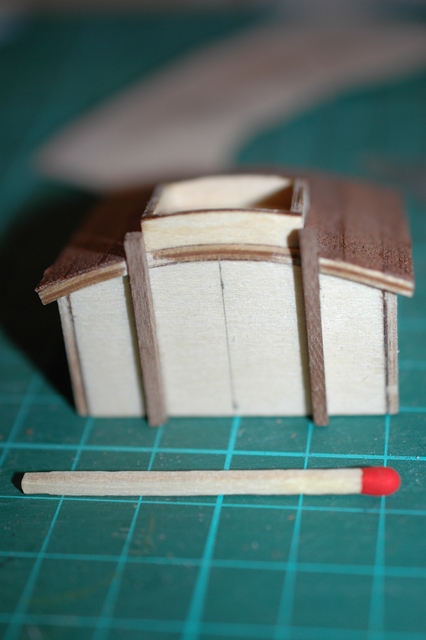
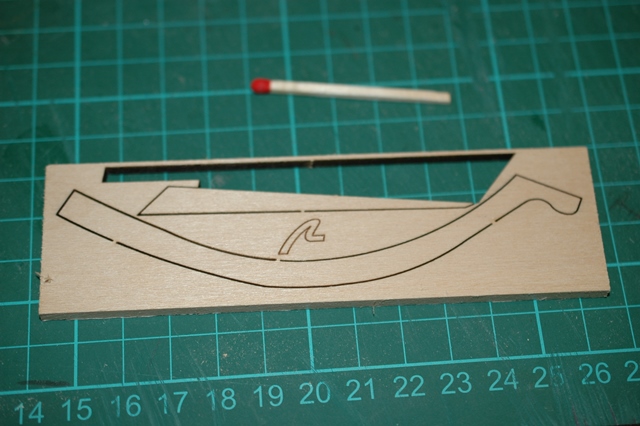
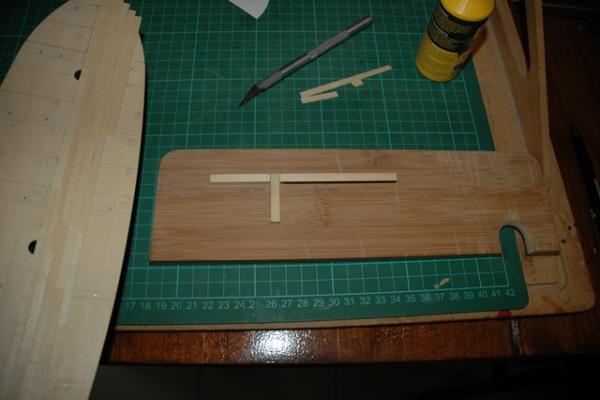
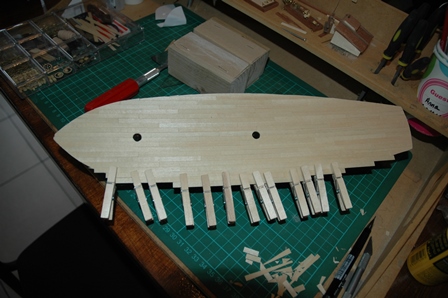
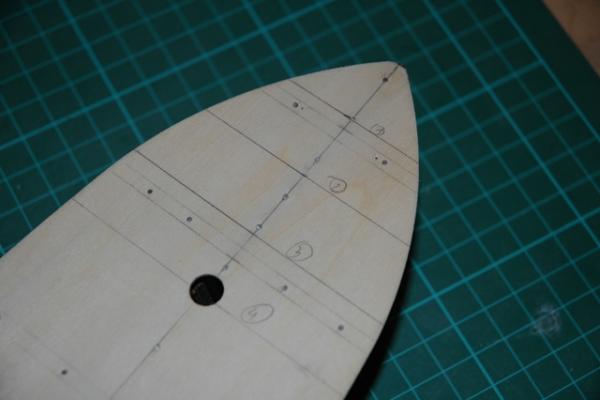
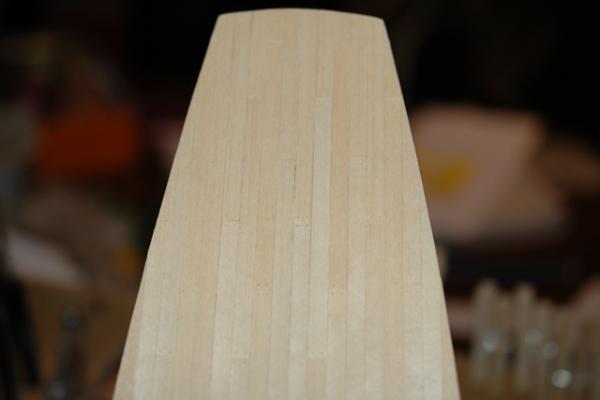
Update part two: So meanwhile I started the deck planking (want to be sure about that transom issue before I start my first layer of planking...) I found a nice tutorial for deck planking online and decide to go for a four-row repeating pattern (4-2-1-3) I drew out the first guidelines to start off with And off we go... As mentioned earlier, I built a plank cutting jig (from a broken bamboo bread plank and some leftover plywood ) Two hours later, I clamped down the last side layers When these were dry, I did I light first sanding run And then pushed all the treenail holes in with a brass pin; After sanding again, things look like this; I'll be putting on the first layer of PU varnish tonight, and then it'll be slow going for two days untill the second layer is done. See you then!


- 38 replies
-
- 2
-
-
- artesania latina
- Virginia
- (and 1 more)
-
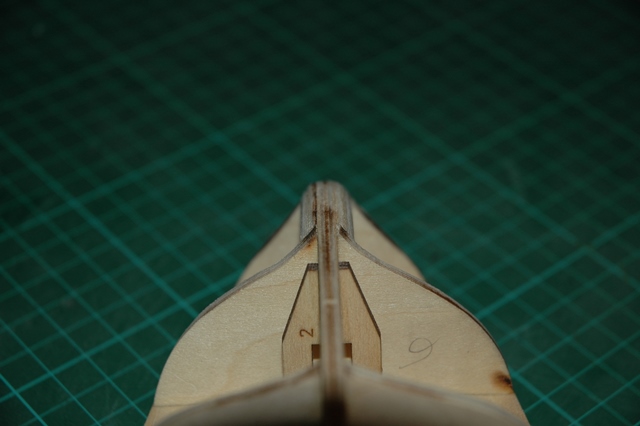
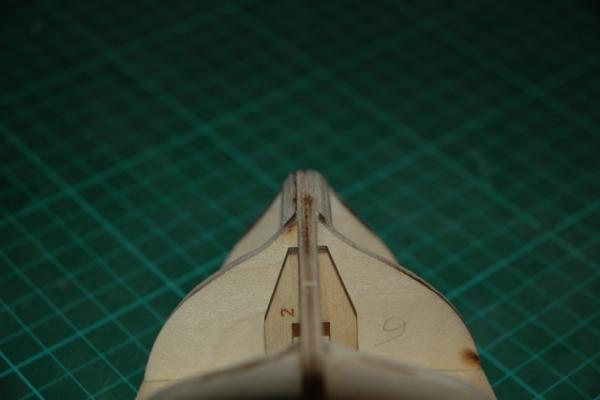
Hi guys, Thanks for the help and encourragement so far! Had a nice and productive evening and day so far, so here goes for an update: Did most of the fairing now, just have no clue on how to finish fairing the transom (or better: the part from last bulkhead to transom) ; can anybody post some pics of how the planks of the first layer meet the transom? Do these get beveled up front or do you file them to shape afterward? I also encountered a bit of a conundrum: as I mentioned earlier, I checked all my keel parts for symmetry; even so, after mounting everything onto the false deck, I have one bulkhead that's a millimeter short, even though the deck AND the bulkheadds are all centered AND symmetrical; I don't know what to do; I think shaving off the side of the deck is equally bad as adding wood to the bulkhead since both are then distorted? I even measured both sides and those are the same as well (deck to keel)... Strange indeed...


- 38 replies
-
- 1
-
-
- artesania latina
- Virginia
- (and 1 more)
-
I've been fairing the bulkheads the last couple of evenings and made a deckplank cutting jig for ease of use later on; I have one question however: when testing the flow of the hull (with a fairing batten), it seems that even my top plank (nearest the deck, that is) does not run parallel with the deck naturally; I thought the first couple of planks were always plug&play and should be able to be installed by letting them run their natural course? Is it normal/ common to have to taper even the first plank already? Or am I missing something here?
- 38 replies
-
- 1
-
-
- artesania latina
- Virginia
- (and 1 more)
-
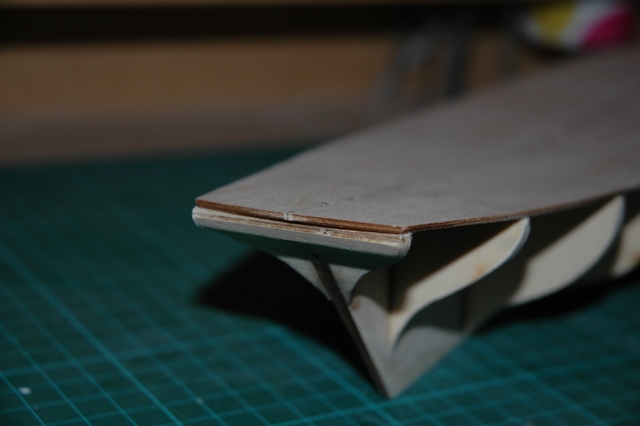
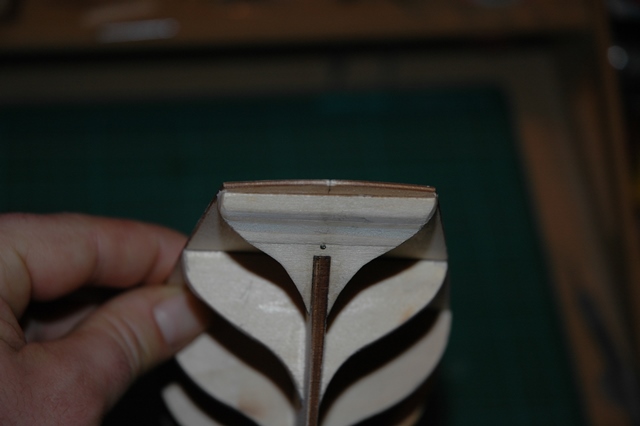
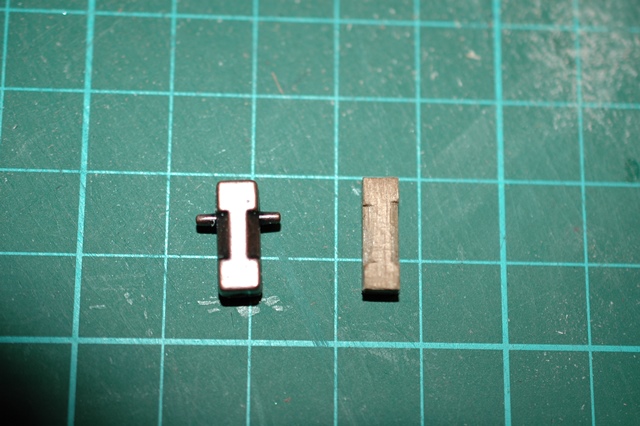
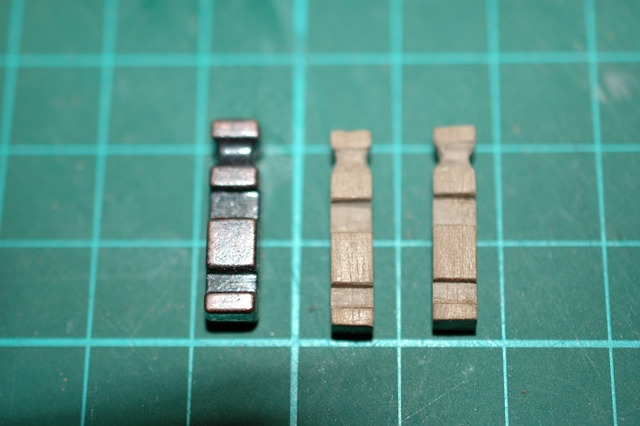
Okay; What AL calls the 'knightheads' (actually: reinforcements of the bow for the planking) are glued on and are drying; so I thought, let's look at those real knightheads; MAN! Are they ugly; cast iron and painted (?) to look like oxidized bronze?? Also, they seem too big (5x5mm); I had a go at them in 4x4 mm wallnut wood; think I'll use these instead.. Funny thing is, in the illustrated booklet, they seem to use wooden knightheads themselves... Here the originals, and what I made instead While busy, I also took the anchor posts along for the same ride; I'll post these too when they are finished; I'll probably run some brass wire through them to simulate the bars. (Does this mean I'm already won over by the scratchbuild-side ? ) More to follow soon (first ever attempt at planking.... *shiver*)

- 38 replies
-
- 5
-
-
- artesania latina
- Virginia
- (and 1 more)
-
Elijah, I angled the ship because it was the only way to get it in the clamp; there's not enough false keel to be able to lock it in a fullscale keelholder... I hope that was what you meant and that I didn't do anything wrong? Grtz; Ben
- 38 replies
-
- 1
-
-
- artesania latina
- Virginia
- (and 1 more)
-
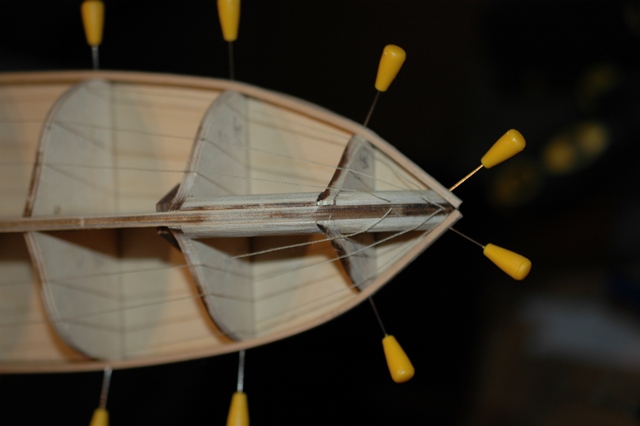
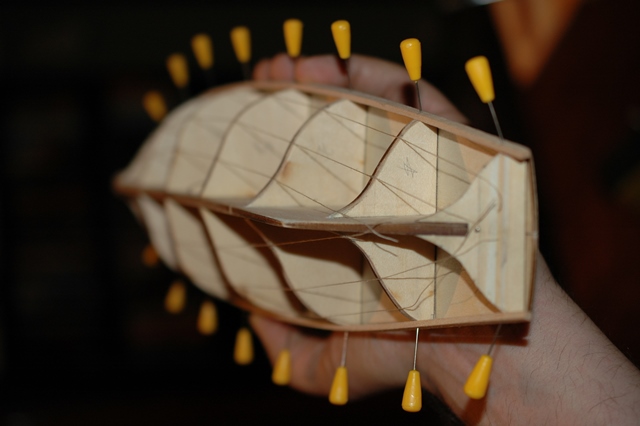
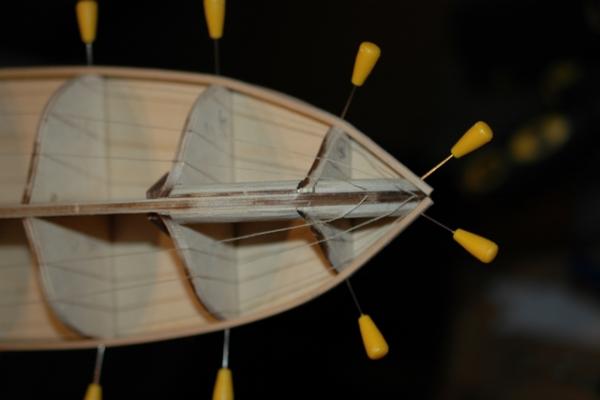
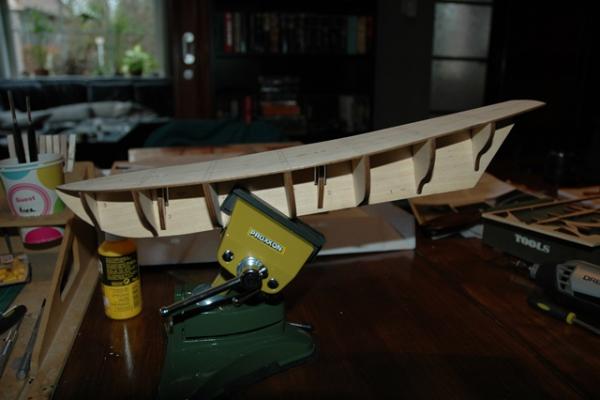
Elijah, thanks for the link. Some useful things there, though not exactly what I was looking for; however, thanks to one of the topics there, I learned that the proper term is "stropping" which led me to this : http://www.modelboatyard.com/stropping.html Anyhow, on with the build as I had a nice long weekend to indulge myself. Maybe one remark (for those who think I can work at the speed of light...): All this has been done over a span of two weeks, butI only started the build log last Friday... Next was the companion: After a couple of hours: Halfway: And finished; made a little measuring (and therefor cutting )mistake but have been able to camouflage it I then noticed that my straightening false keel was FINALLY almost dry, so I choose a very small ad interim project: carving the rudder into shape: Cut out of the frame Nicely shaped, notches made, and all sanded up; Almost didn't believe it to be that same lump of wood, so puzzle-check for fun Finally I could get my hands dirty with the bulkheads and the false keel; fitted everything, nailed some pins along te centerline of the false deck to align the false keel, and then started -very carefully - to nail down the bulkheads one by one.. Done! Now I could start glueing those bulkheadds in place! Things are looking great! Tomorrow evening after work, I'll get the knightheads into place, so I can start fairing the hull day after tomorrow.


- 38 replies
-
- 8
-
-
- artesania latina
- Virginia
- (and 1 more)
-
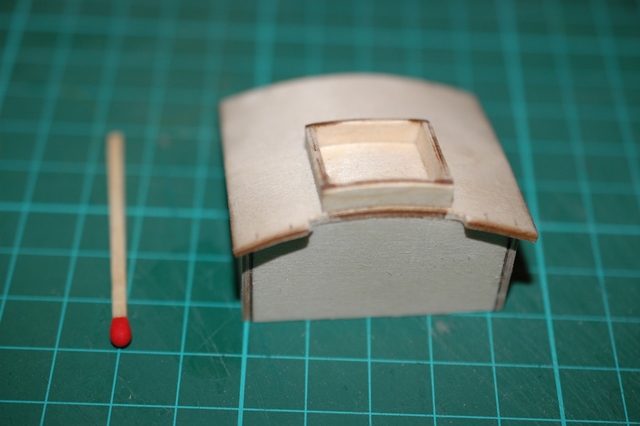
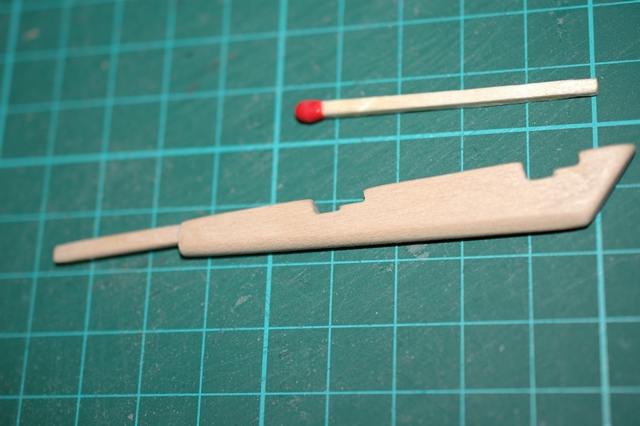
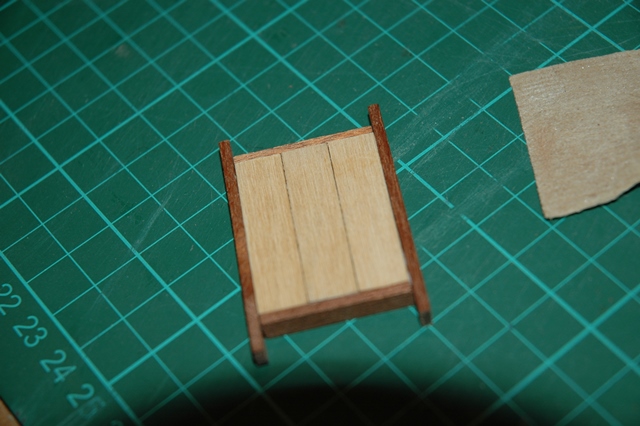
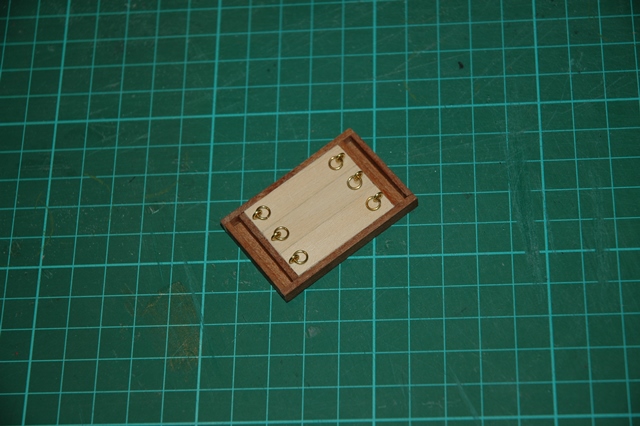
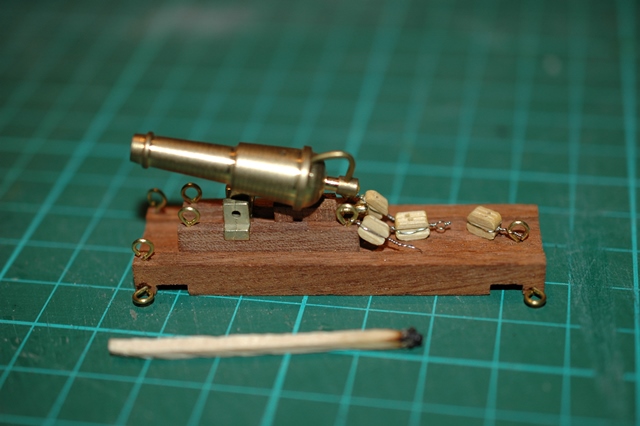
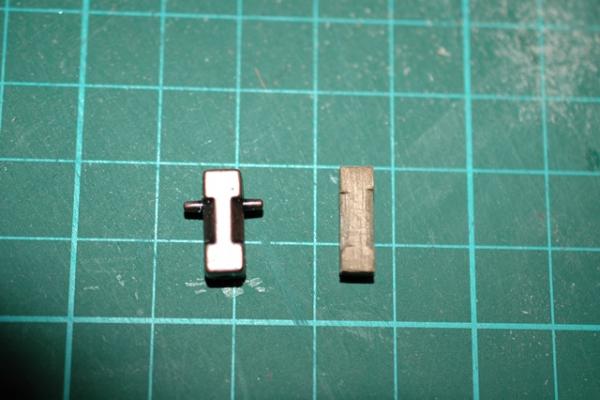
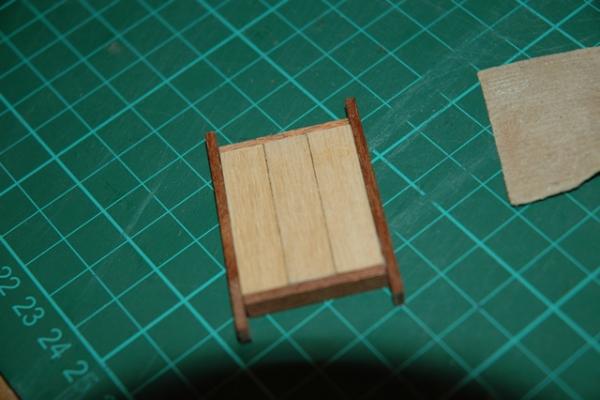
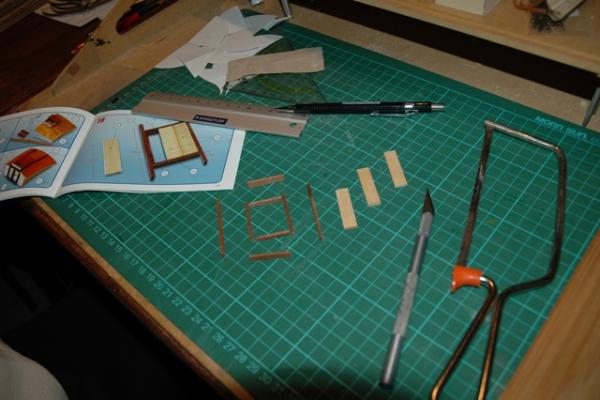
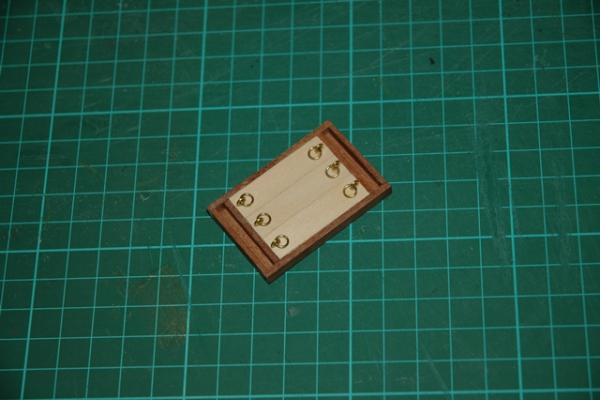
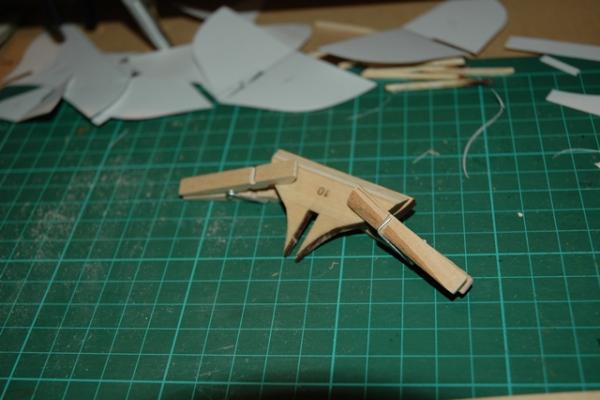
Thanks for the encouragement Elijah! So as I said, sub-projects while waiting: First task was to get the boom glued up and filed into proper shape; quite the challenge, as I met with the predicted unprofessionality of instructions by Southerrn European Manufacturers... Took me a while to interpret the -unfocussed!- photographs right.... While waiting for this to dry so I could file it down, might as well cut out the false deck and mark the position of the bulkheads on it... Saves me the time later on I then started to do the Cargo Hatch I was very pleased with this, didn't expect it to work out this well Then that little shiny caronnade started winking at me, so I caved and started on that as well. It also gave me the first real challenges: tying microscopic wire onto tiny blocks. I do have one question here: I had no problems wiring the blocks that needed a 'becket' or ring twisted at the 'closed end', but with the ones who need a ring on both ends I always had a lttle piece of twisted wire left over as a result of closing the second ring (is that a clear explanation? I'll mark what I mean on a separate photograph... ); is there any way of working around that, I haven't found one so far..


- 38 replies
-
- 4
-
-
- artesania latina
- Virginia
- (and 1 more)