


Brucealanevans
-
Posts
448 -
Joined
-
Last visited
Content Type
Profiles
Forums
Gallery
Events
Posts posted by Brucealanevans
-
-
Finished first planking. Got started on second planking when I was overcome by an irresistible planking fatigue.
put things aside until planking mojo returns. Almost there. -
Greetings from another modeler who spends half the year in Massachusetts (Marblehead) and half in Minnesota (Rochester). No snowbirds here!
- Dave_E, mtaylor, Keith Black and 1 other
-
 4
4
-
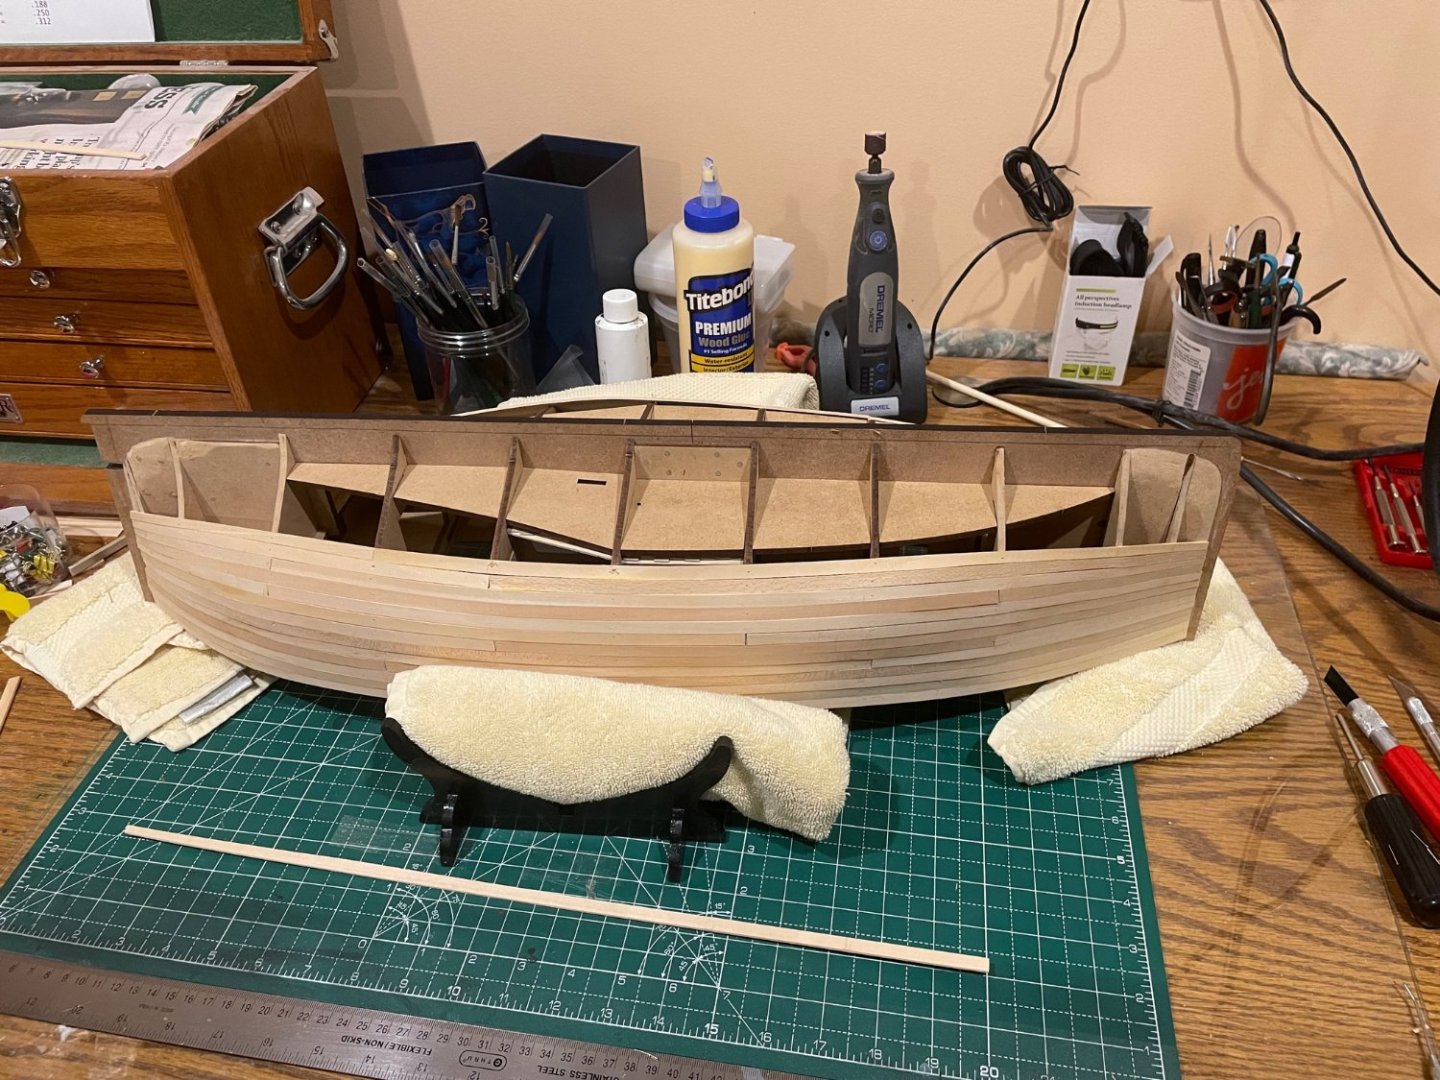
Moving slowly along with the first planking. It is hard to get these 7mm x 1.5 mm planks to follow the bulkhead curves as I approach 2/3 coverage. There will be vigorous sanding and wood filler use for sure.
Also, I've been anxiously counting the number of planks remaining and it will be close. I've only completely trashed one plank but figuring out the most conservative way to cut the planks given the hull is longer than the planks is an issue, as I do end up with a number of pieces too short to do anything useful with.
Here's where I am now - about 10 planks left to go. I think at this point I'll do the garboard planks next to facilitate measurement for the rest.
Having never done a "first planking" I was delighted to find rattling in my toolbox an Amati naildriver which has been incredibly useful, and so much easier and accurate than my initial use of a needle nose pliers.

- Dsmith20639 and Prowler901
-
2
-
At the risk of "carrying coals to Newcastle" I thought I'd share my process for first planking on this vessel.
I'm not a fan of "just getting it covered" for this, and am using the first planking as an exercise.
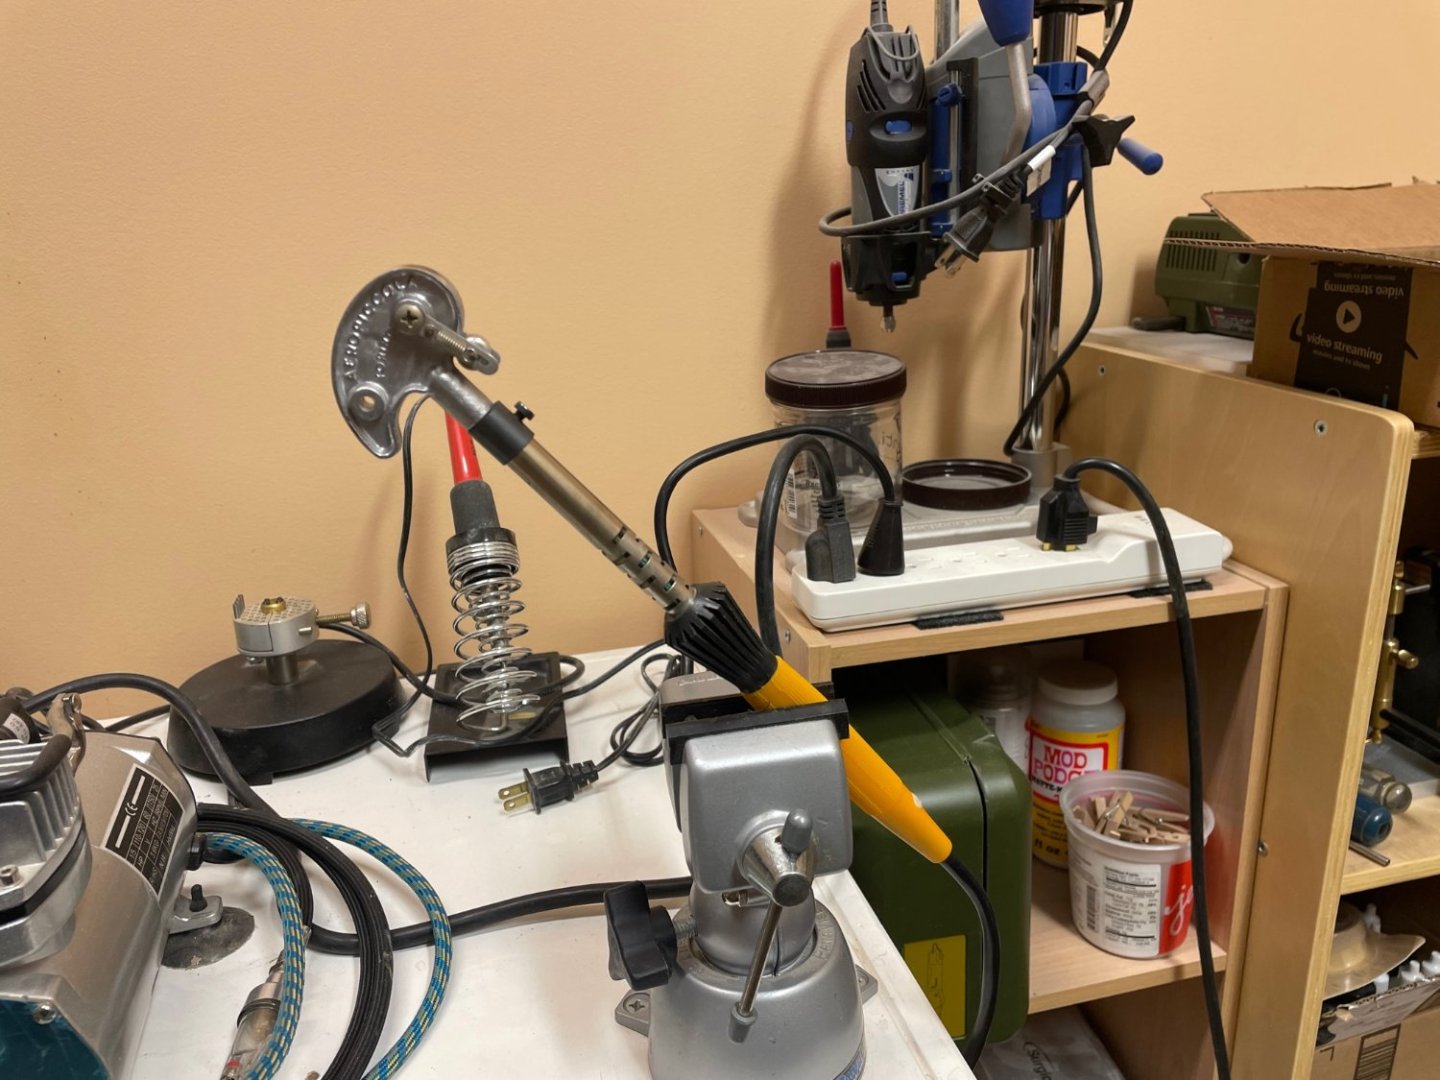
I measured (as mentioned above) the taper required of each plank if I want to be able to have them all extend end-to-end without patch planks in the middle. Since the boat is longer than the planks each course consists of 2 separate pieces. One end is marked with the required taper (7mm to 5.5mm) and the plank held in place at about the 4th and 5th bulkhead from the respective end. the end is bend over the bow or stern with an overlap of the plank above corresponding to the mark. the point at which the plank begins to want to overlap the one above is marked and a line drawn from that mark to the trim mark at the end, denoting the triangle of wood to be removed. I discovered as the instructions said that making this cut worked much better once the plank had been soaked. After soaking I make the cut, sand briefly, and then bend the strip on my hot iron bender (pictured) so that it lies neatly nearly in place without pressure (second picture). I fasten it in place and let it dry (to allow for shrinkage), before taking it off, putting wood glue on the bulkheads and the ends of the strip, and re-pinning it into place.
Forgive me if this is obvious to everyone.
-
Continuing with first planking. Probably only time for one or two planks per side each day. Measurements amidships suggest 22 more planks with taper to 5.5 mm from 7 at the ends.
I will update when there is something worth seeing. -
Todd:
The MDF used in this kit for structural pieces is great. No warping, easy to file and shape. As long as none of it is exposed in the final state of the hull since it can't be stained I'm very pleased with it as a construction material.
Mike:
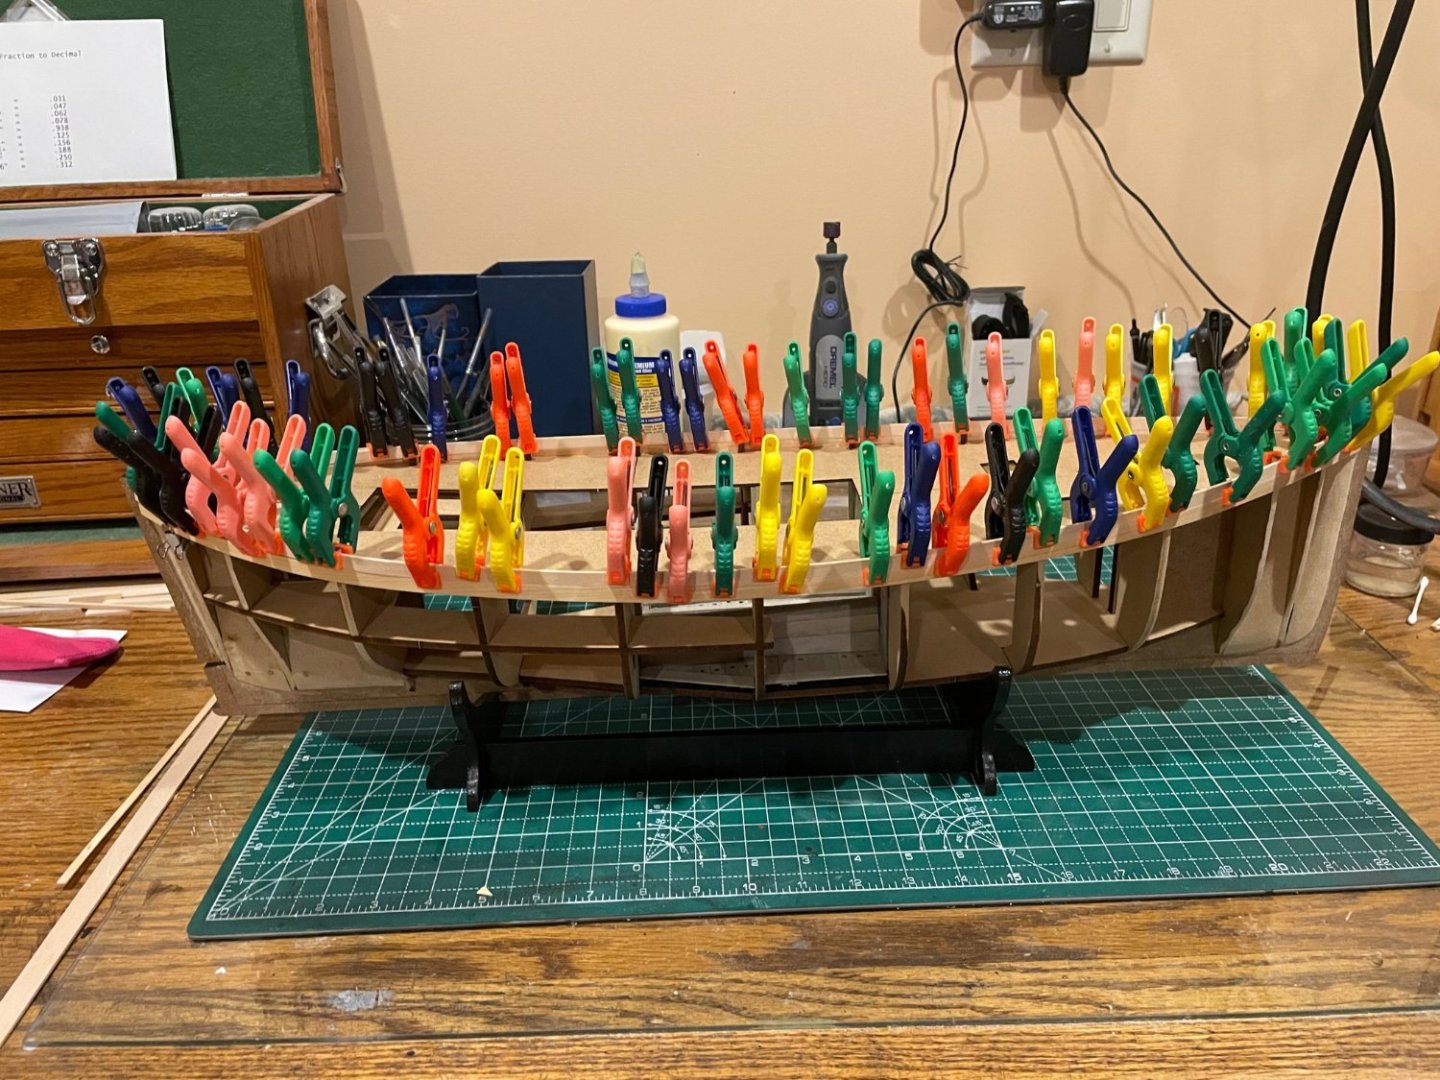
I got those clamps from MicroMark. I find them helpful in places my regular clamps can't reach, mainly because of the reach possible between the "jaws" and the length of the jaws themselves.
Mini Plastic Clamp Set (Set Of 4)
Item #: 80383
-
-
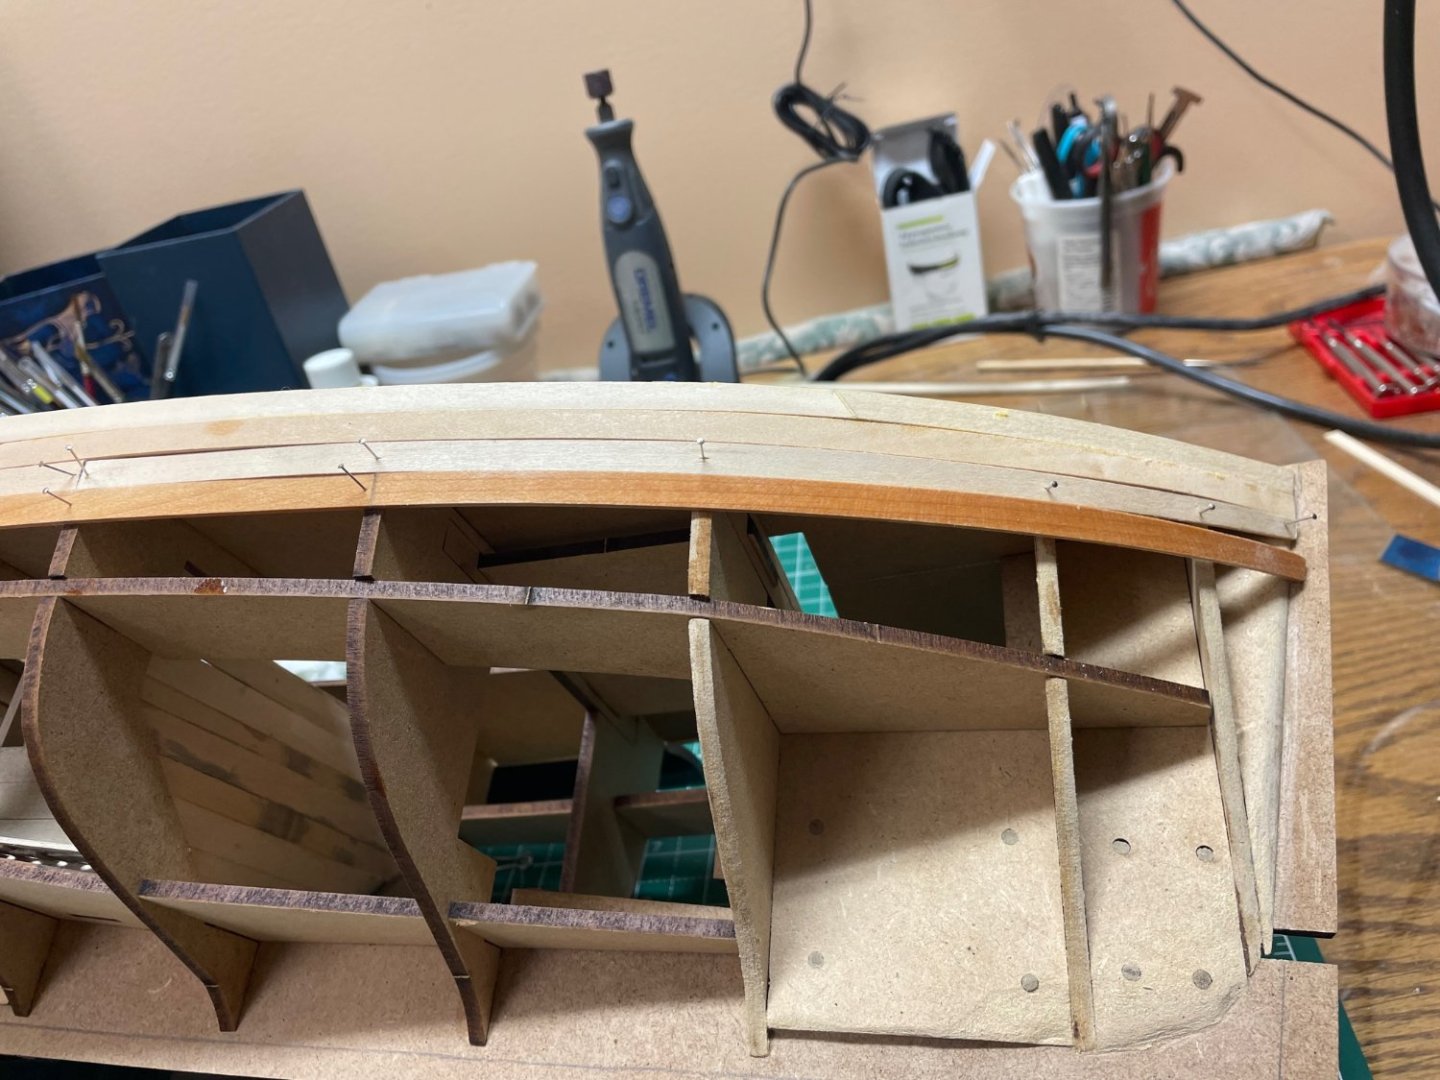
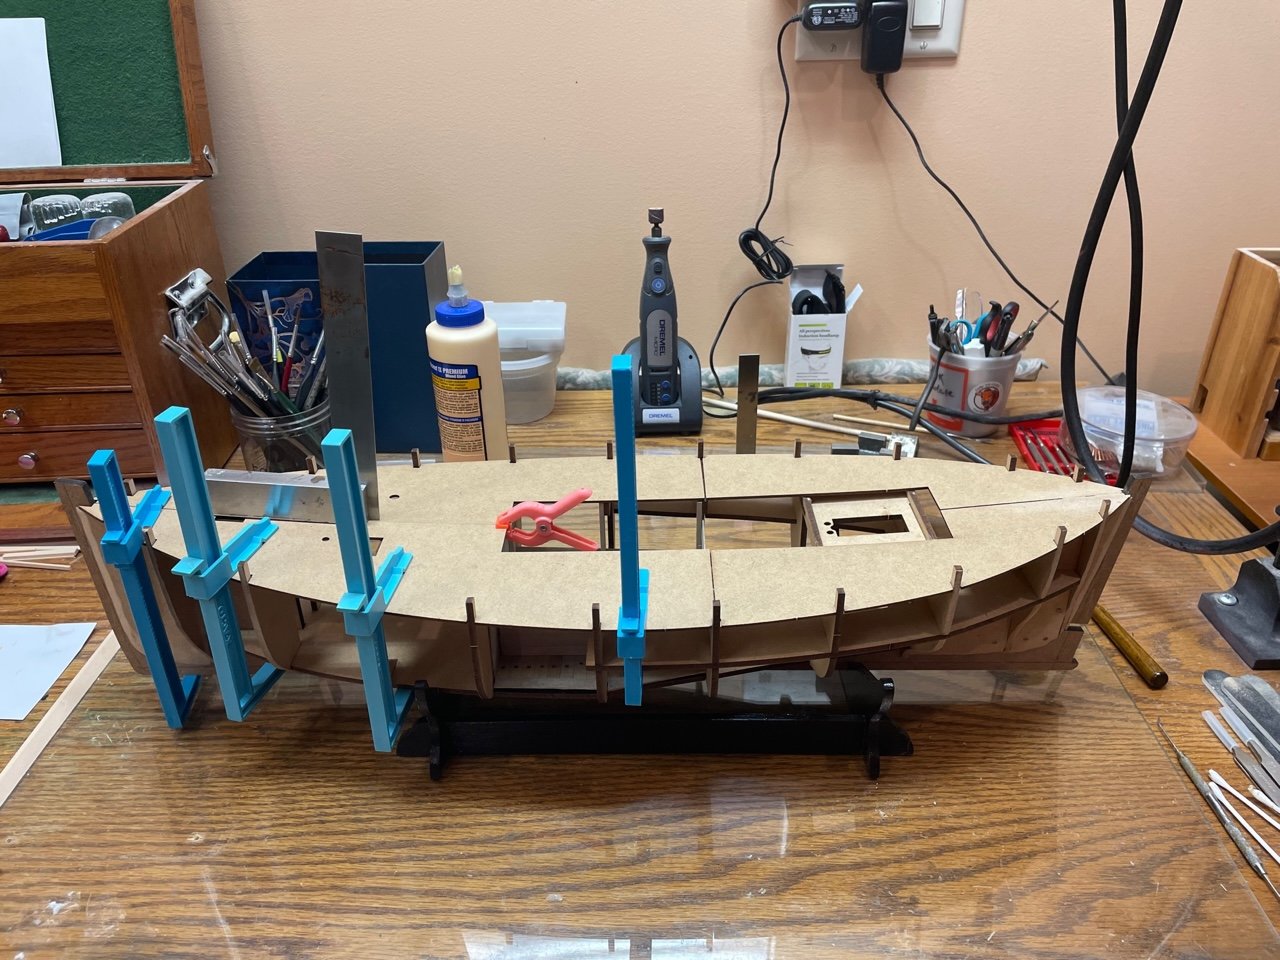
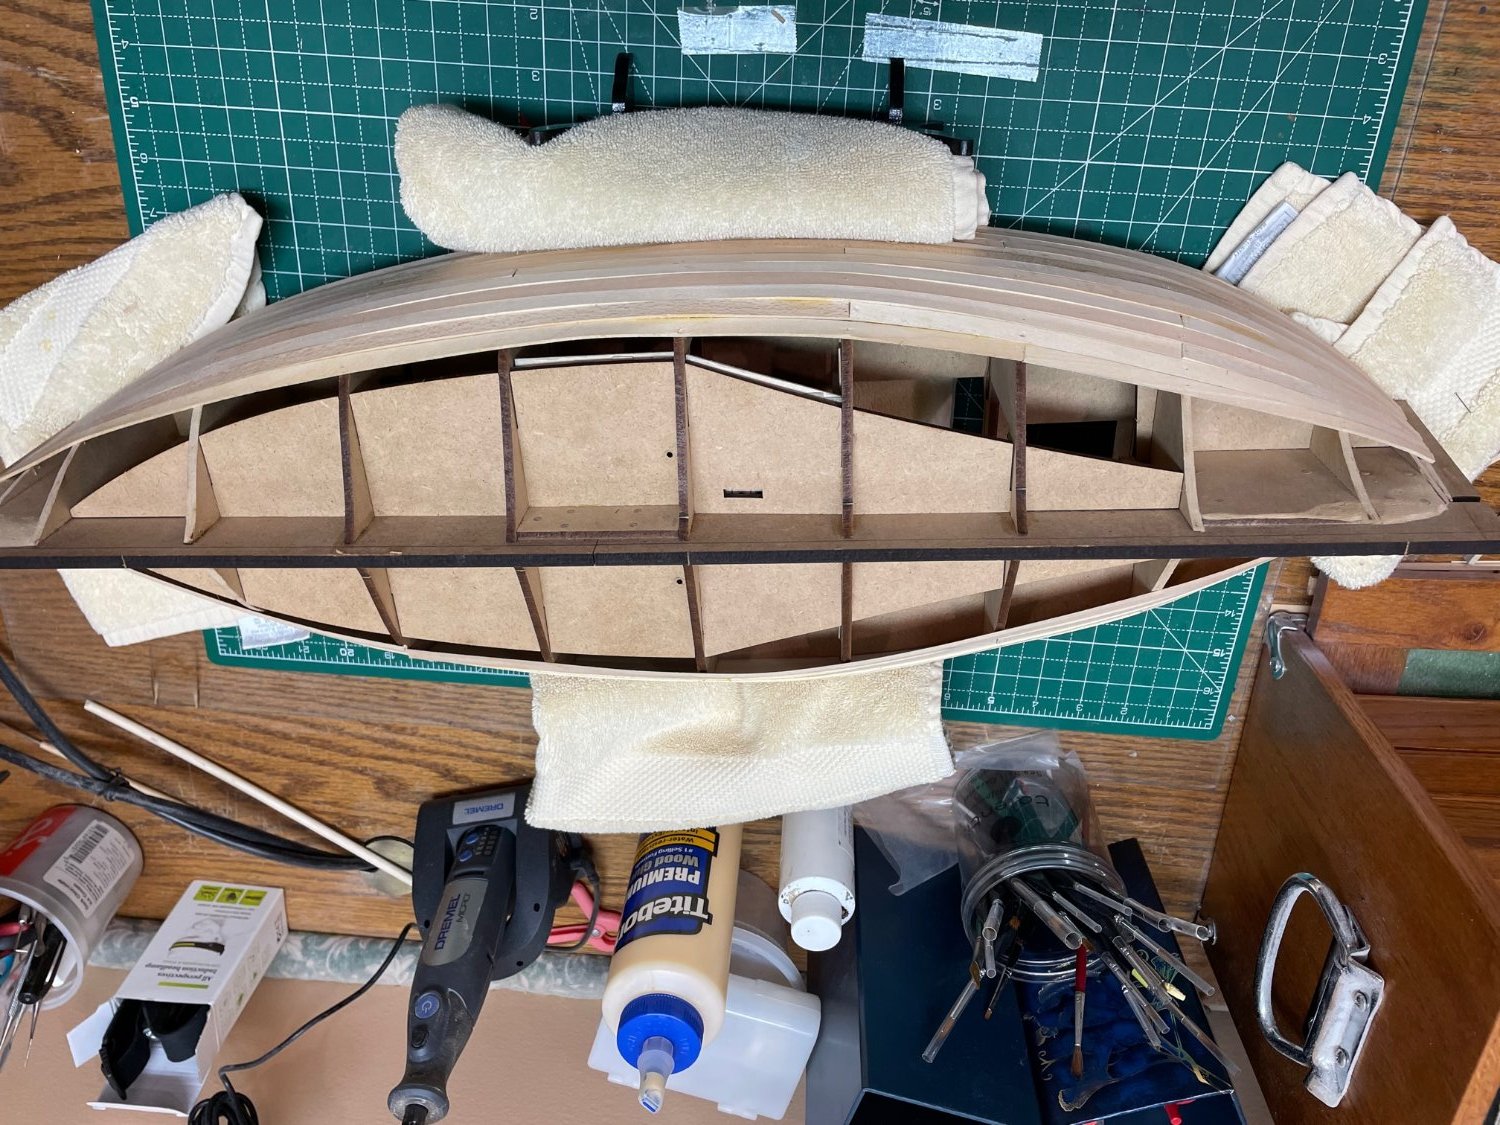
I didn't want to glue the first two planks to the bulkhead extensions since the extensions will be twisted/pulled off. Reading over some of the build logs I decided on this approach:
I clamped the first plank (made to 2 pieces) in place, and used that as a guide to place the second plank(s), gluing them only to the sides of the false deck and not to the bulkhead extensions except at the ends where they were glued firmly to the beak head and stem. I used multiple clamps the align this second plank with the first clamped-on-only plank. Used wood glue since the extent of the glued area would have had CA drying on one end while finishing applying at the other end. Also, last minute adjustments possible with that glue. I soaked and heat-bent the planks to about the right curvature, and then clamped in place until dry. This results in a near perfect fit without the need to use nails (which wouldn't really have been possible anyway for these 2 courses.
After that cured, I then glued the first planking in place edge-to-edge with the second plank (again with firm gluing at the ends). Multiple clamps to align the first plank with the now firmly held second plank.
End result as of today is 2 firmly glued courses without fastening to the bulkhead extensions.
From here on it should be more straightforward.

-
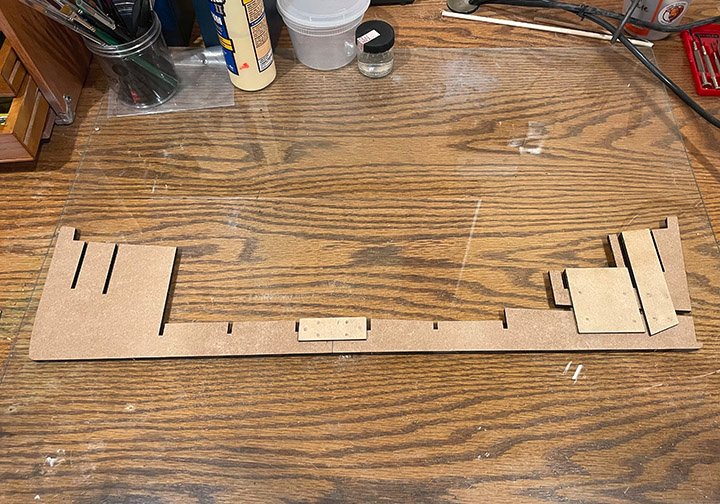
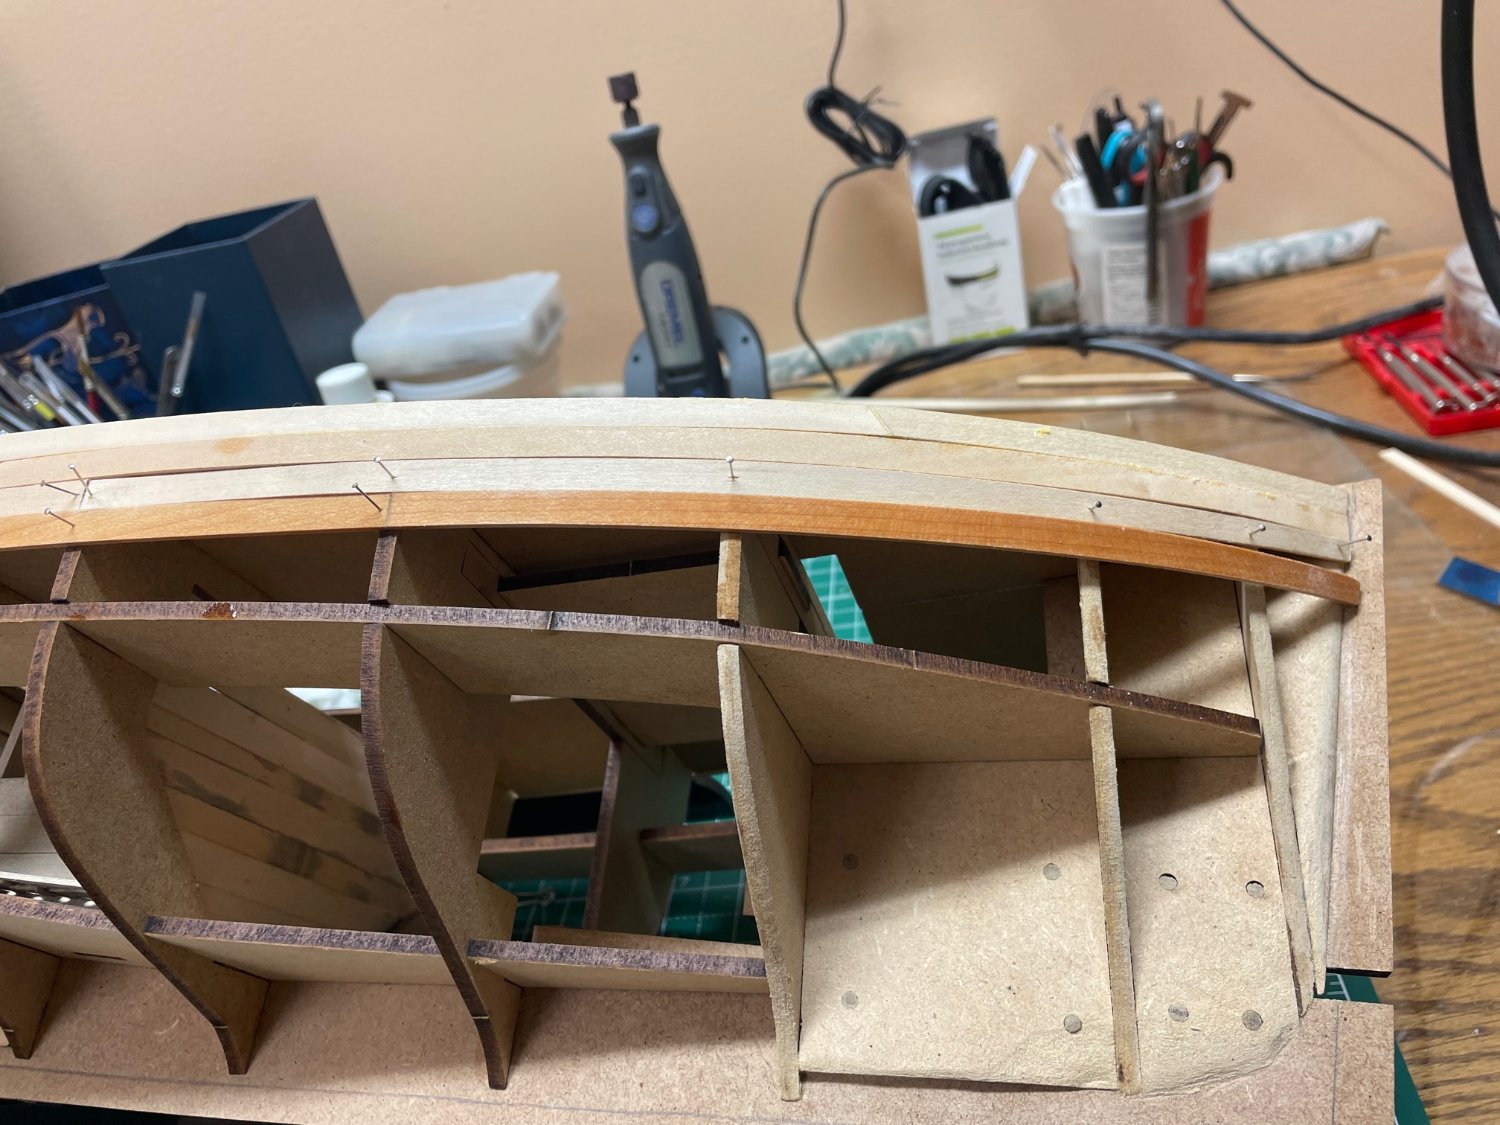
Before beginning the planking, I tapered the edges of the filler blocks.
Pieces of laser cut wood are glued to the sides of the beak head/keel/stem MDF, so I traced their "footprint" to guide where to end the first layer planking pieces. Once those ends are feathered the attached pieces will give a rabbet to land the second layer walnut strips.


- JpR62, Paul Le Wol and Prowler901
-
3
-
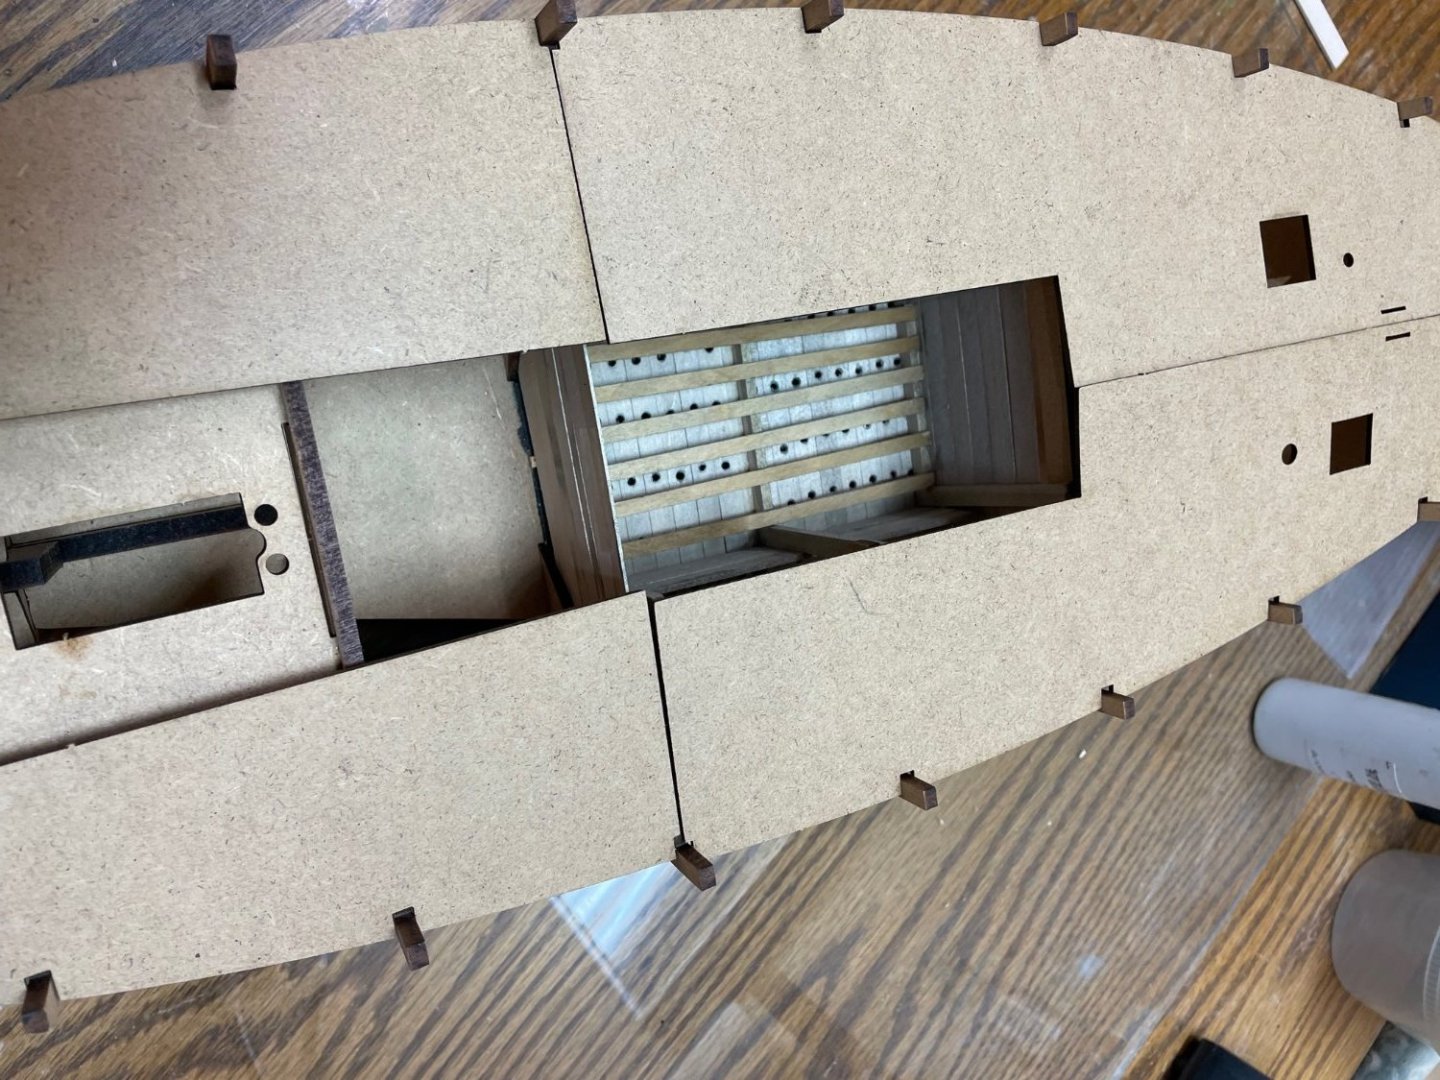
I like the idea of detailing the main hold so did that before fastening the false deck down. I didn't think it right to paint this area, so I just weathered the bare planks.
I doubt they were too concerned with looks down here, so didn't try to perfectly align the drain holes in the floor, which I raised a bit above the structural piece below it which I painted black to the holes look like holes into the bilge.
I think I will have the (drying) net stored in here, so not that much will be visible anyway. Will have to find an appropriate material for the net.
Then glued the false deck down with a variety of long reach clamps and small screw clamps.
- Prowler901, JpR62 and ccoyle
-
3
-
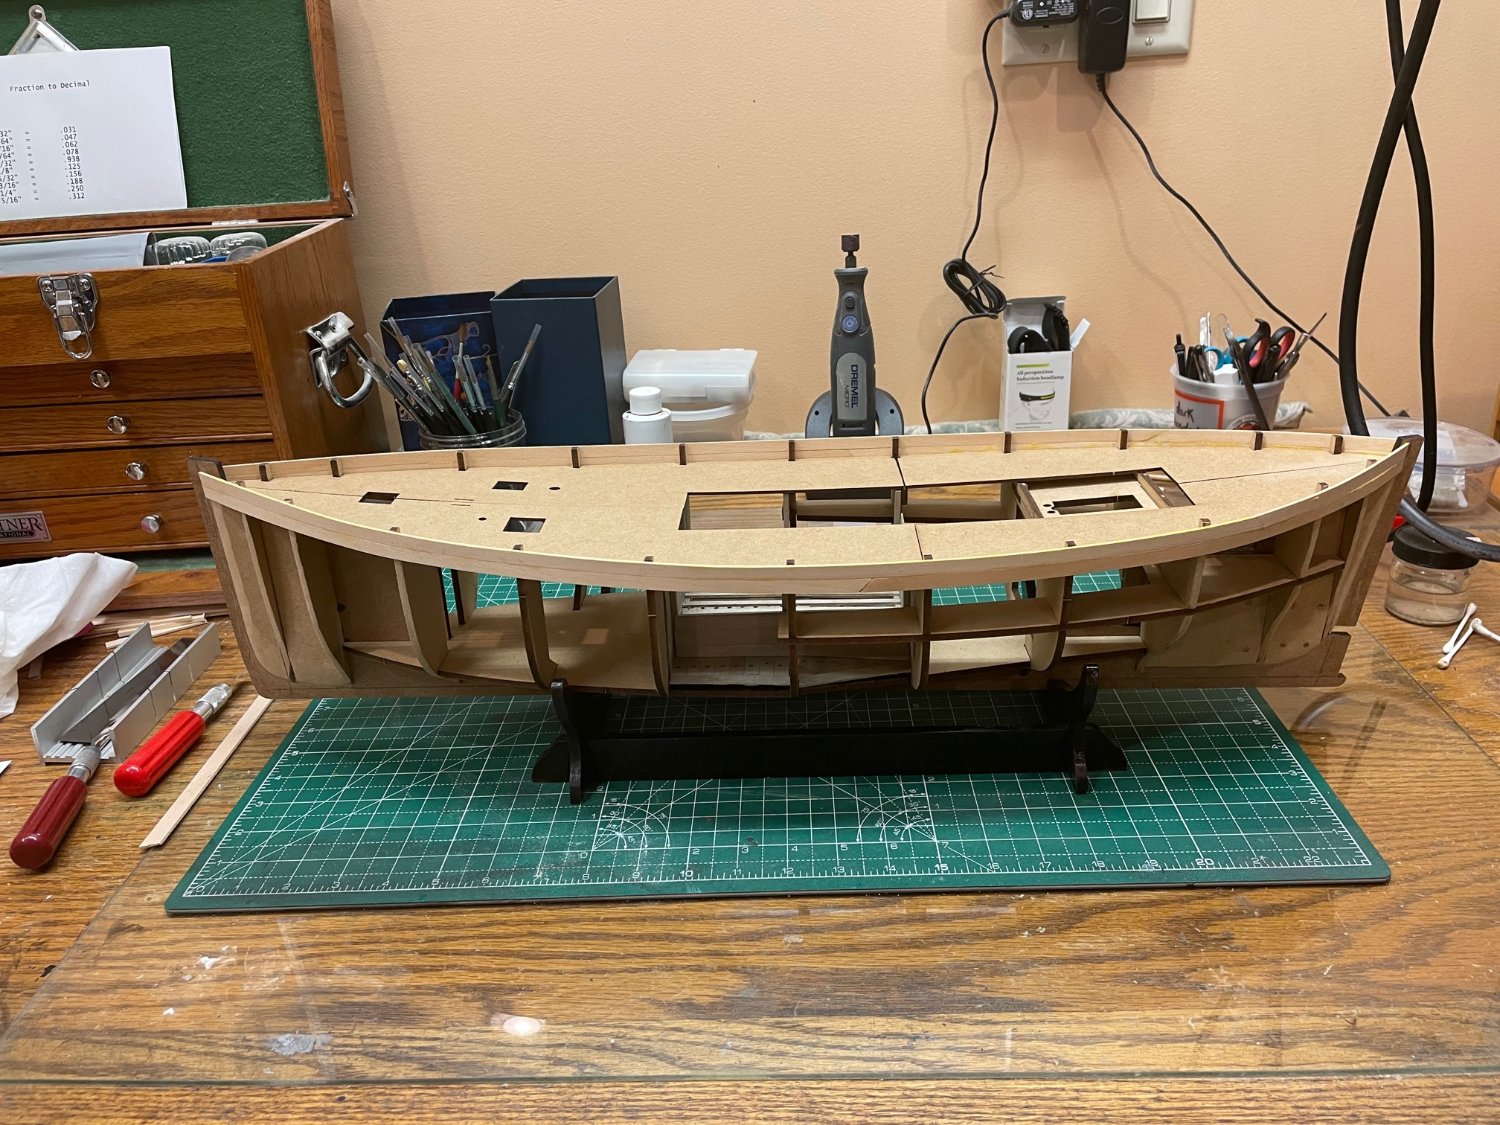
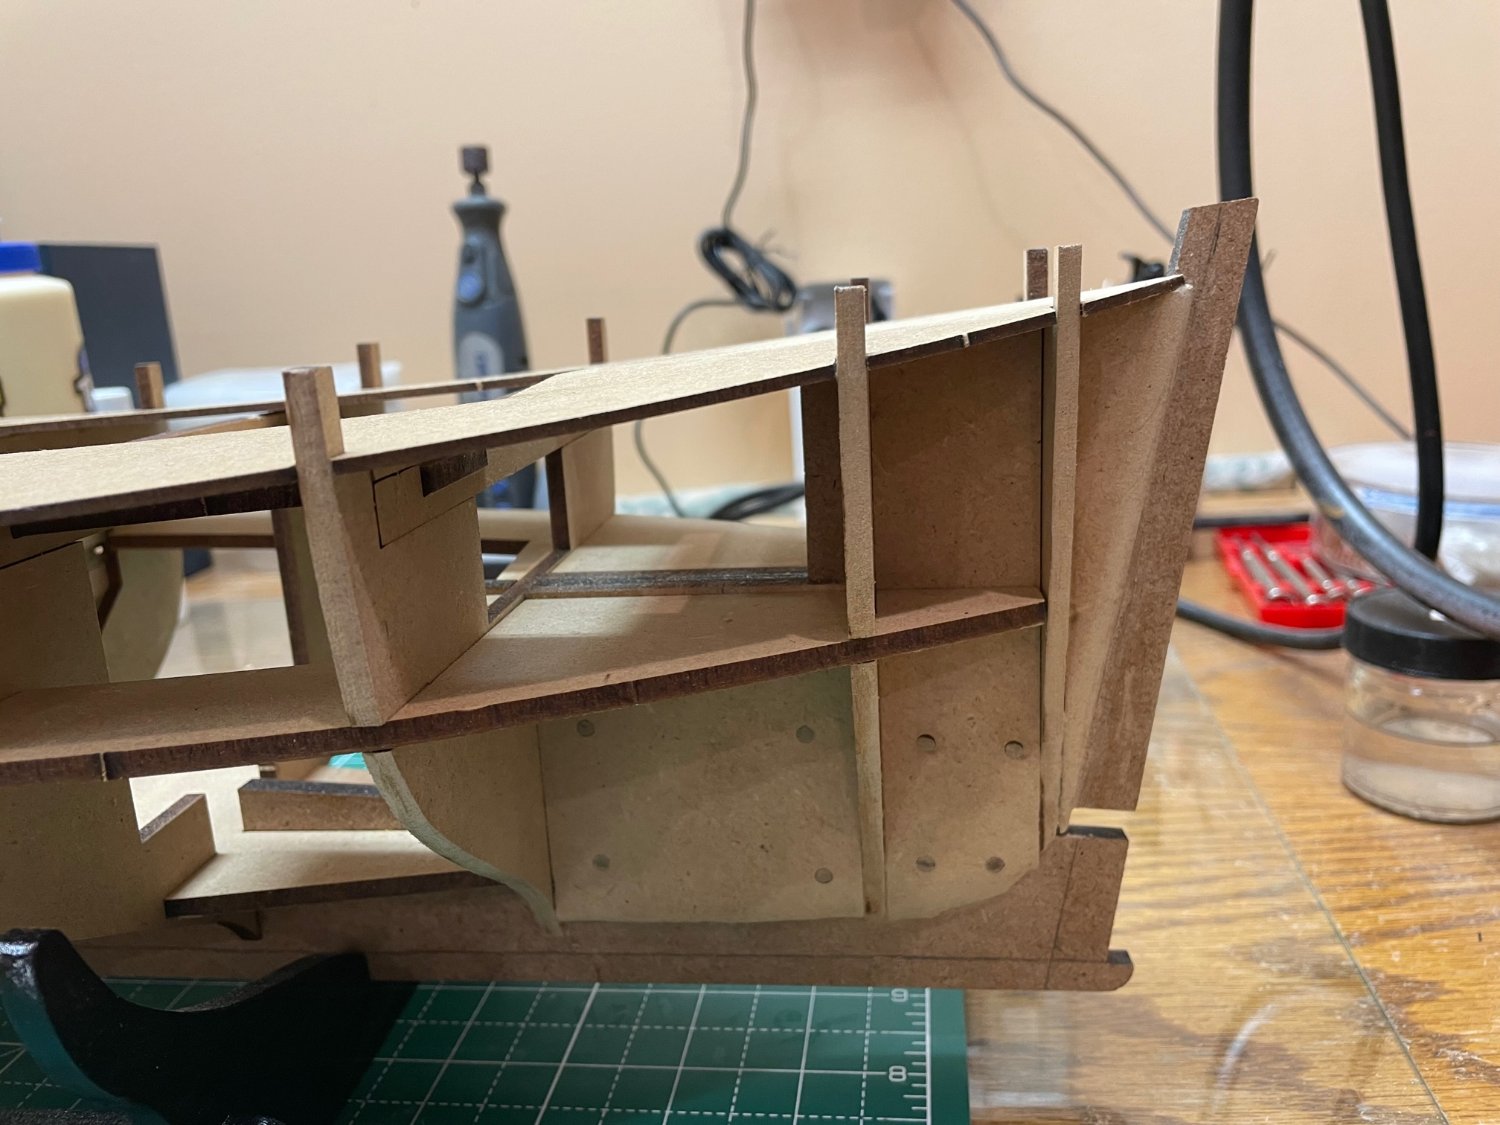
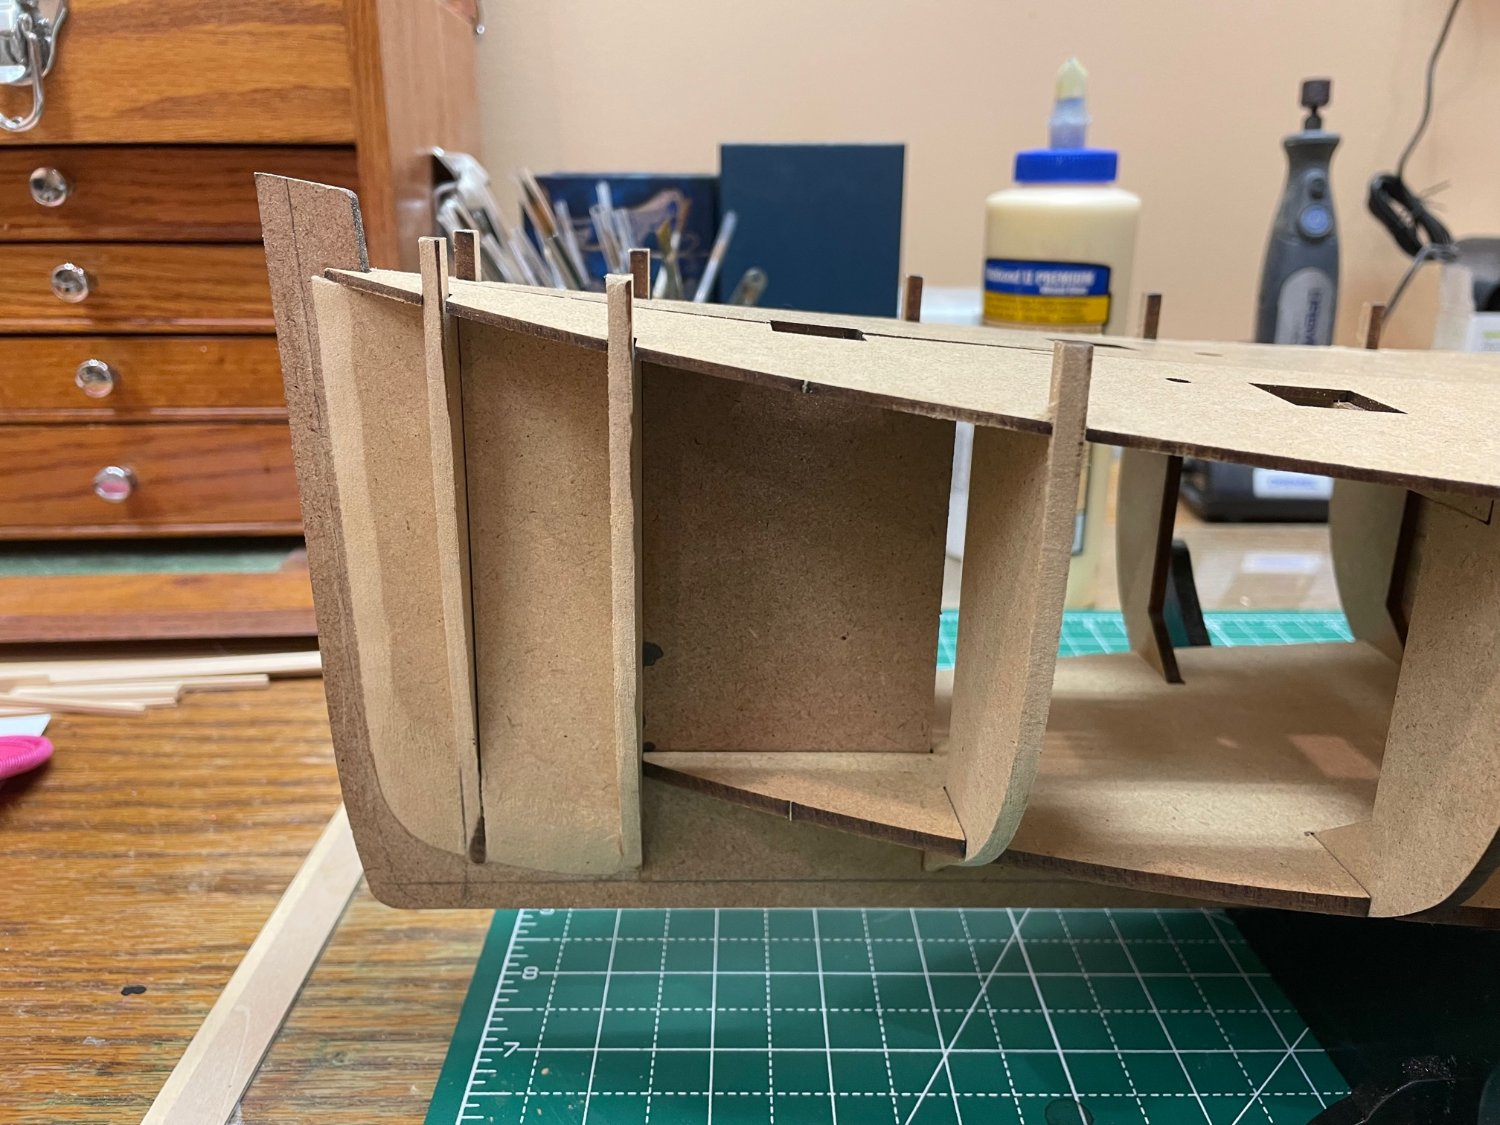
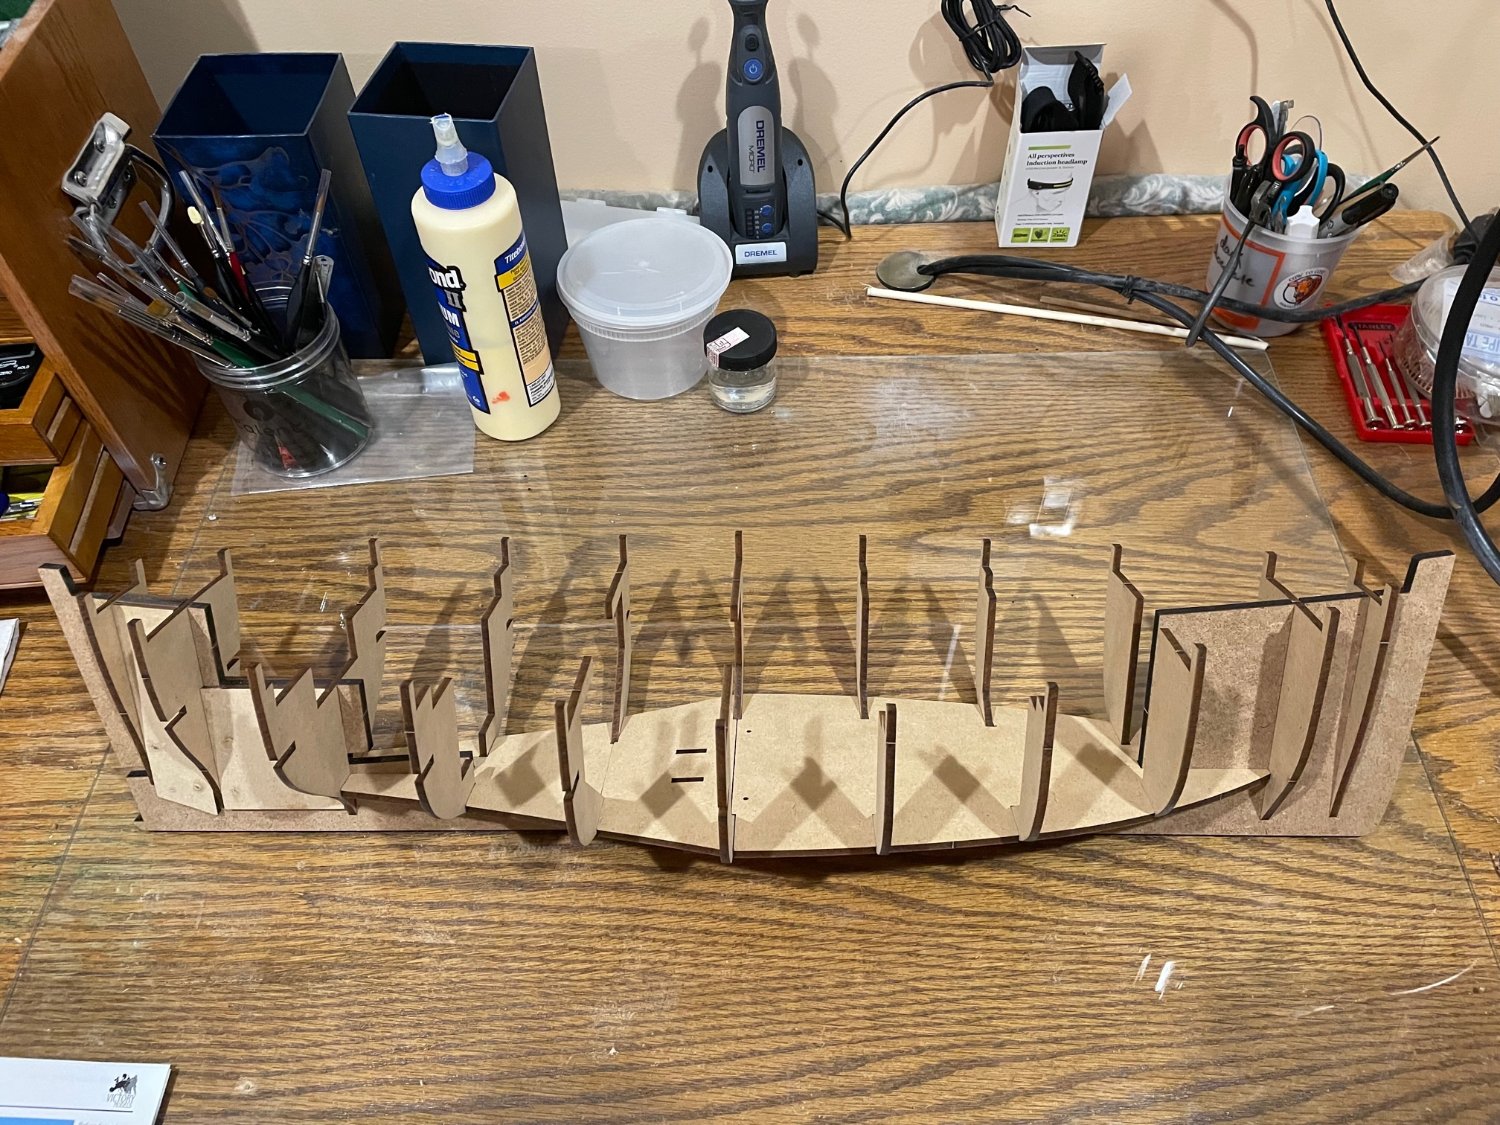
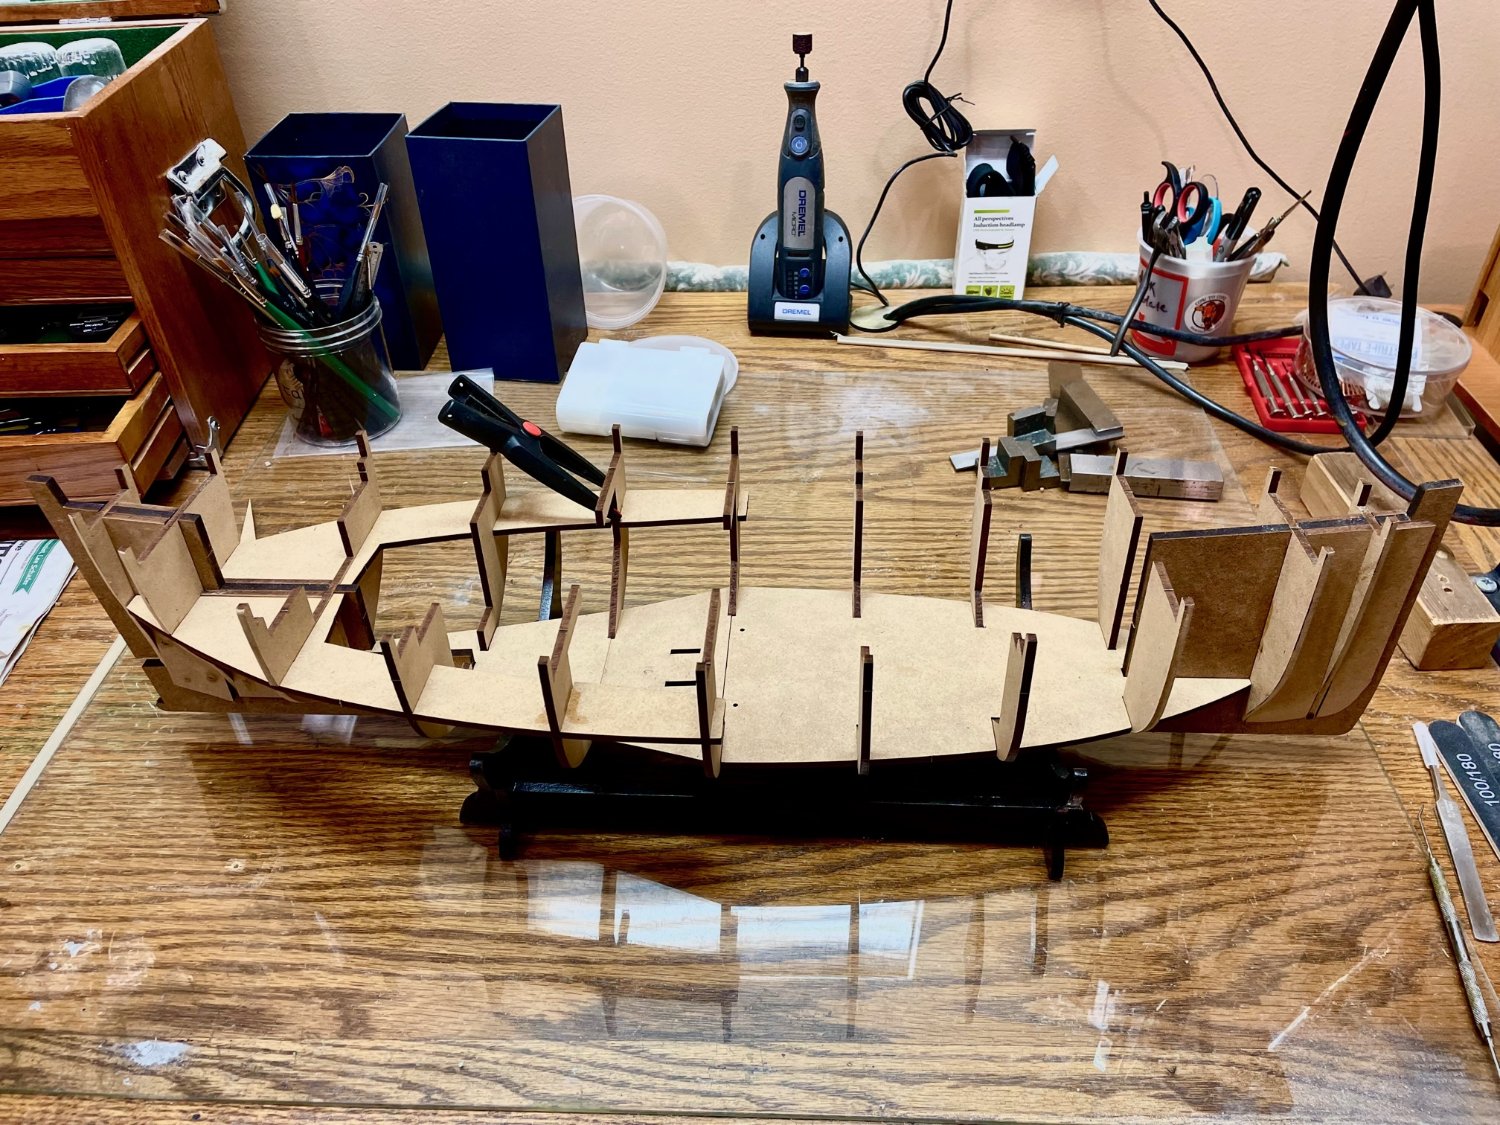
So, onward.
This is the first ship I've built where the whole structure is made from MDF. The keel piece(s) go together in a very firmly fixed manner with overlapping pieces and pegs. No problem. Dry fit the bulkheads which fit perfectly, glued them in, and added the additional structural pieces.


- ccoyle and Prowler901
-
2
-
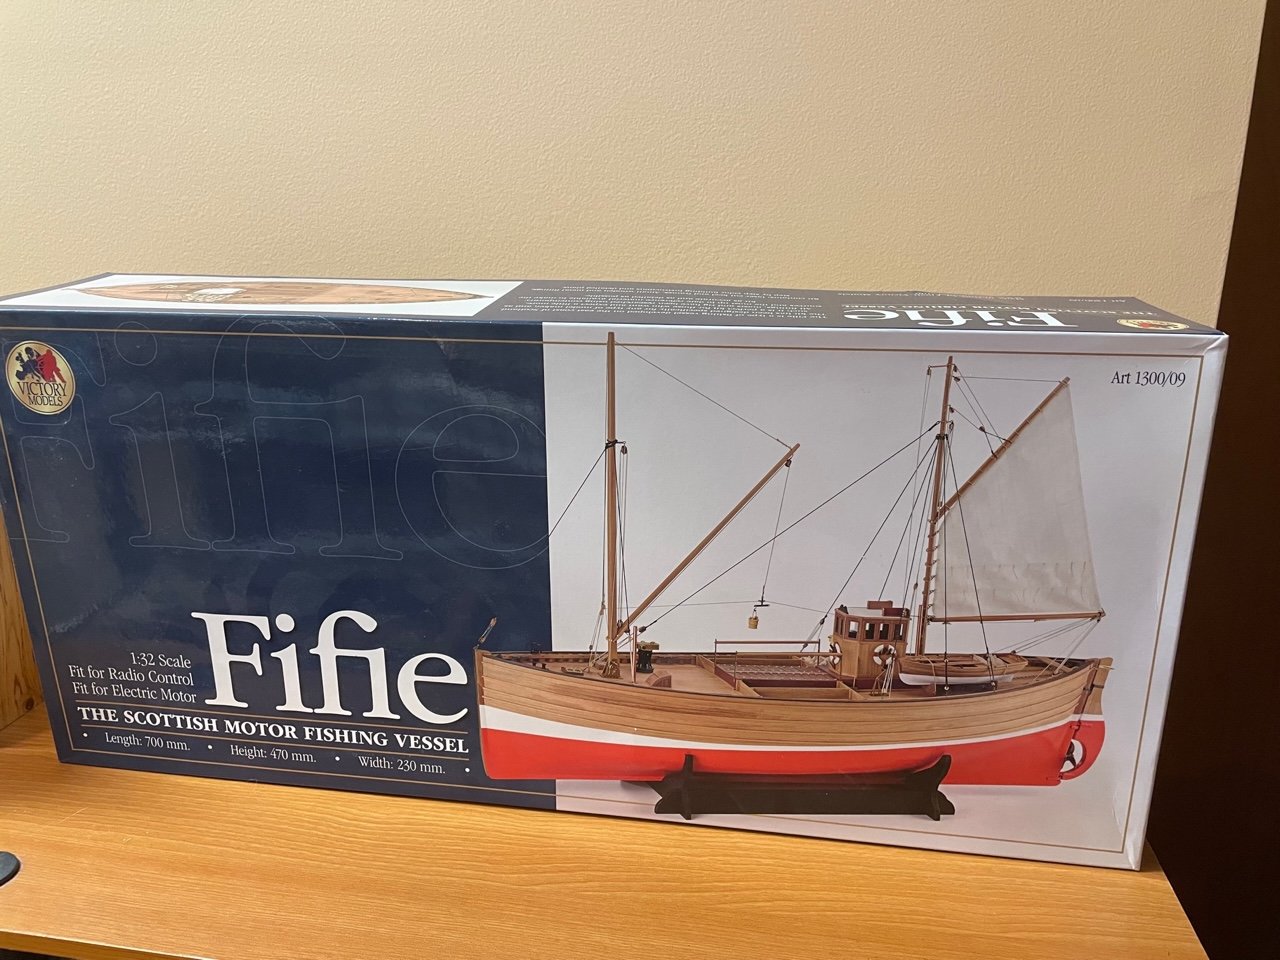
Started new build of the Amati Fifie. Several nice build logs on the forum w;hich I have reviewed and from which I will shamelessly filch ideas. I continue my trend of always have the next project chosen by the old Monty Python line: " And now for something completely different."
I'm out of display room here in Rochester, Minnesota, to this one will travel to our place in Marblehead, Massachusetts which seems a more appropriate home anyway.
- Prowler901, ccoyle and yvesvidal
-
3
-
OK, I have to stop browsing this particular forum. I want this.
This is exactly how I ended up with a 1 year Agora partworks Cobra Model.
Drat.
- gjdale, Old Collingwood, FriedClams and 6 others
-
2
-
 7
7
-
-
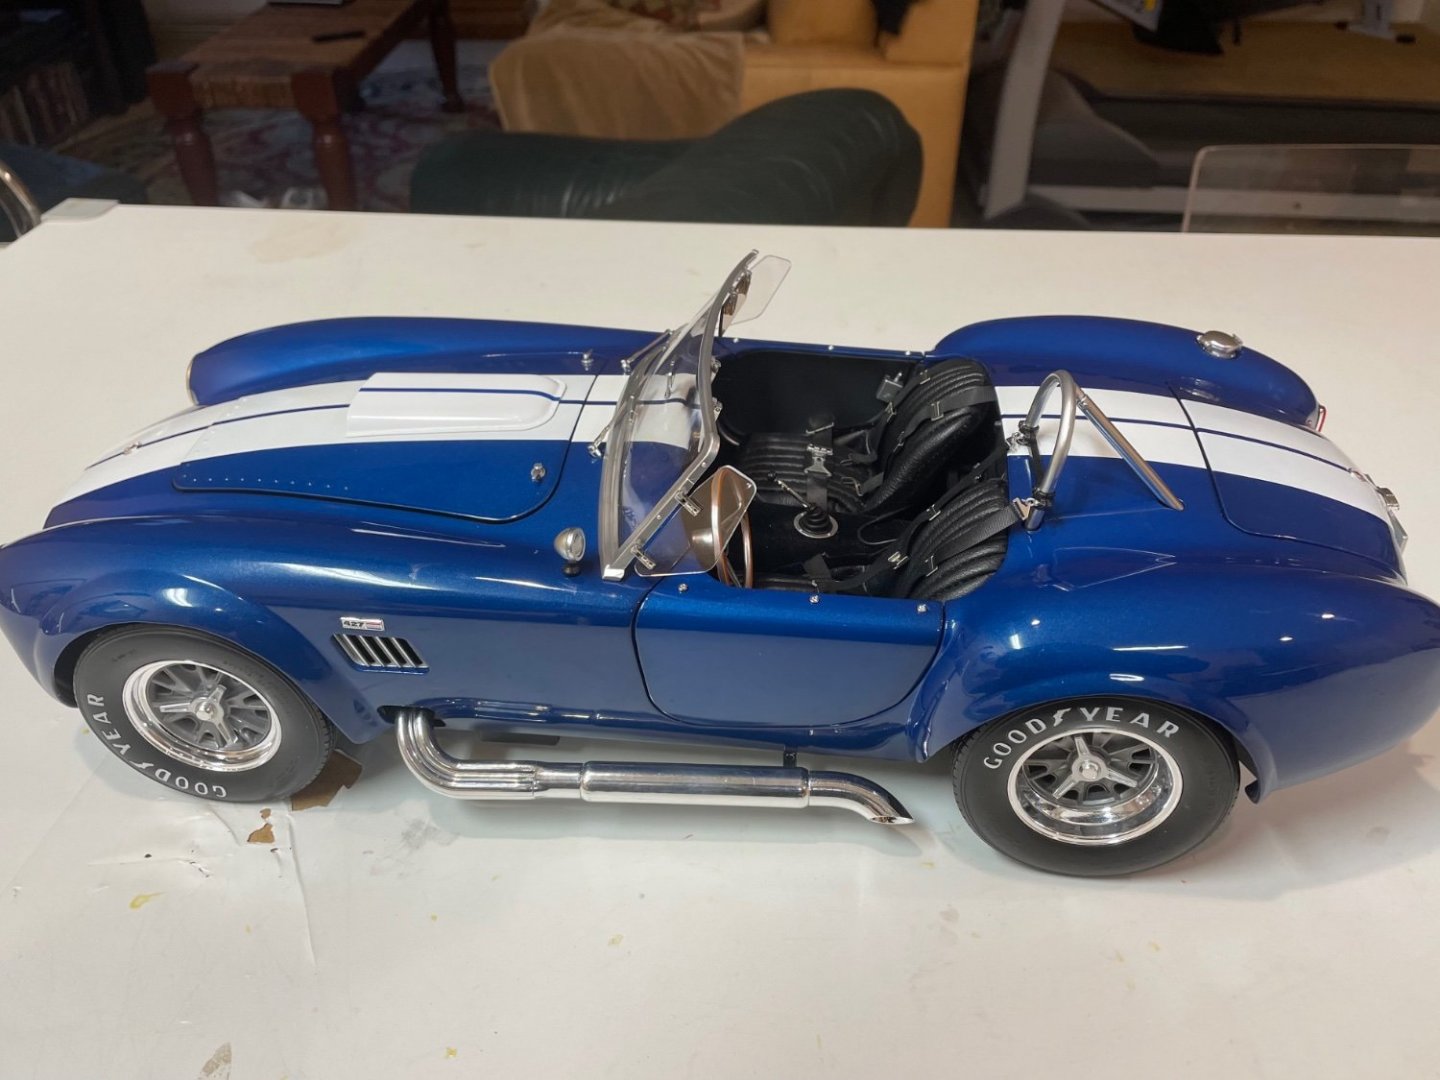
Thanks for the likes. It’s a cool model and I love looking at it. I’ve always been fascinated by them. Of course only the 0.1% can afford them now, and even the replicas are out of reach. Anyway I’d be scared to drive one. When I was in college- a LONG time ago - some rich kid showed up with one in the fall. It took him all of a week to total it …
It is said Bill Cosby got one of these 427 S/C models and promptly gave it back because it scared him.
-
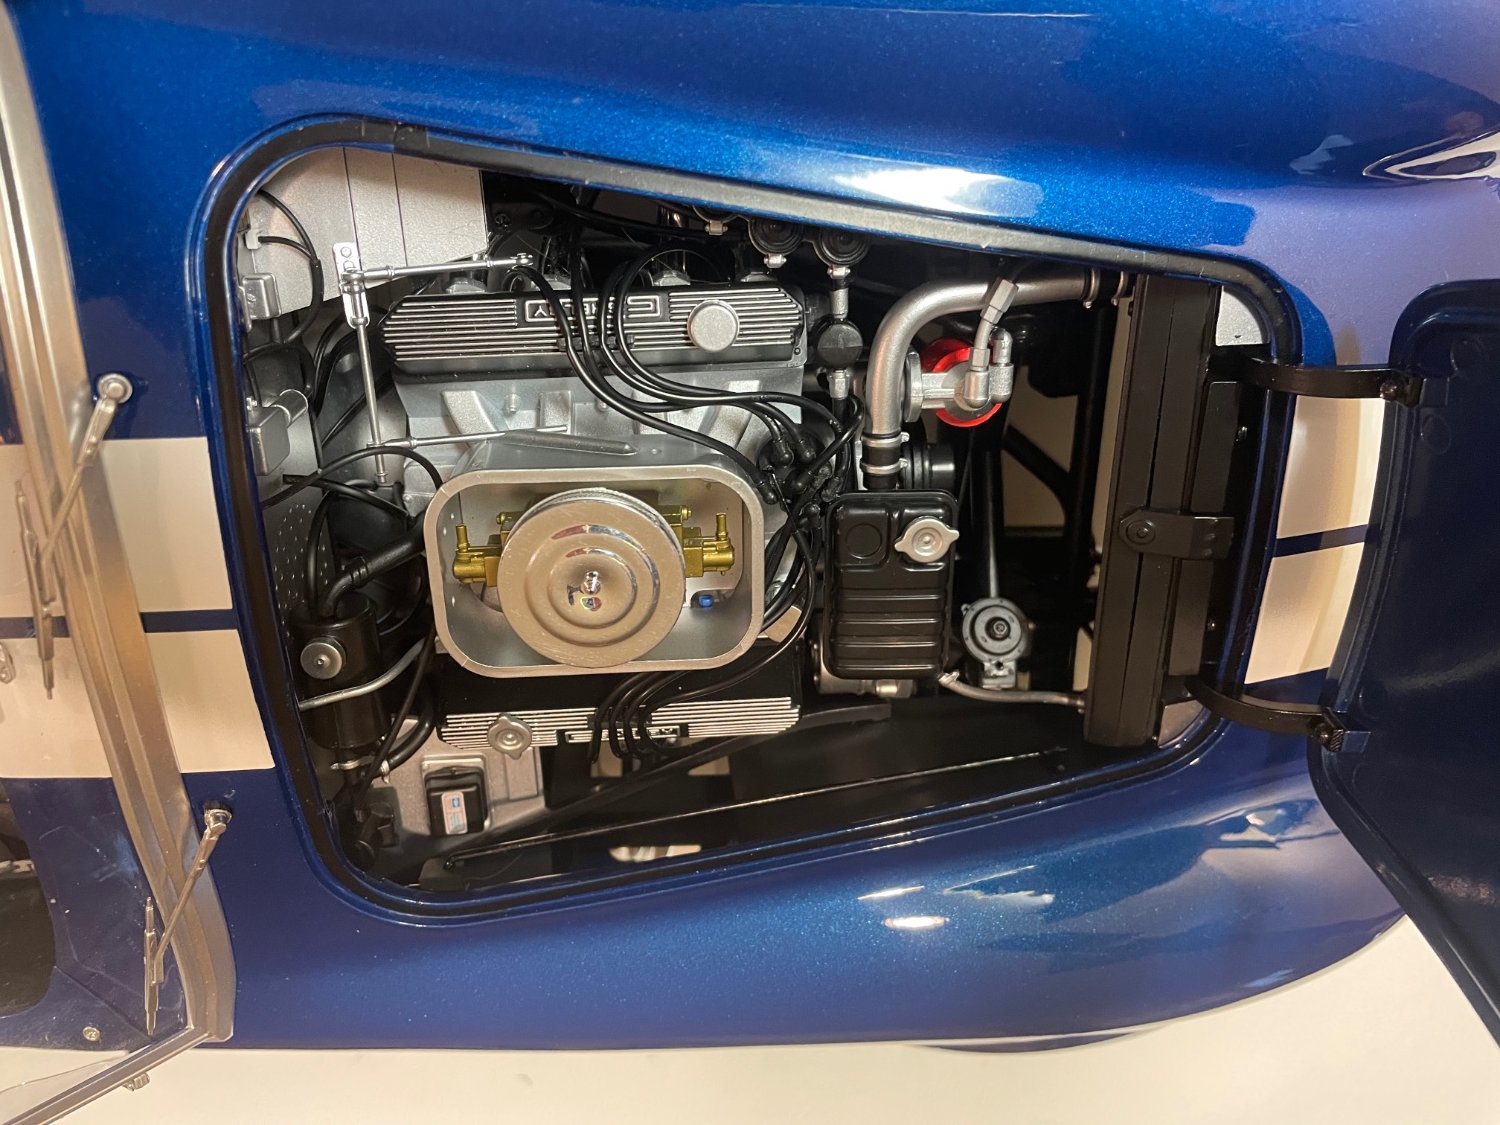
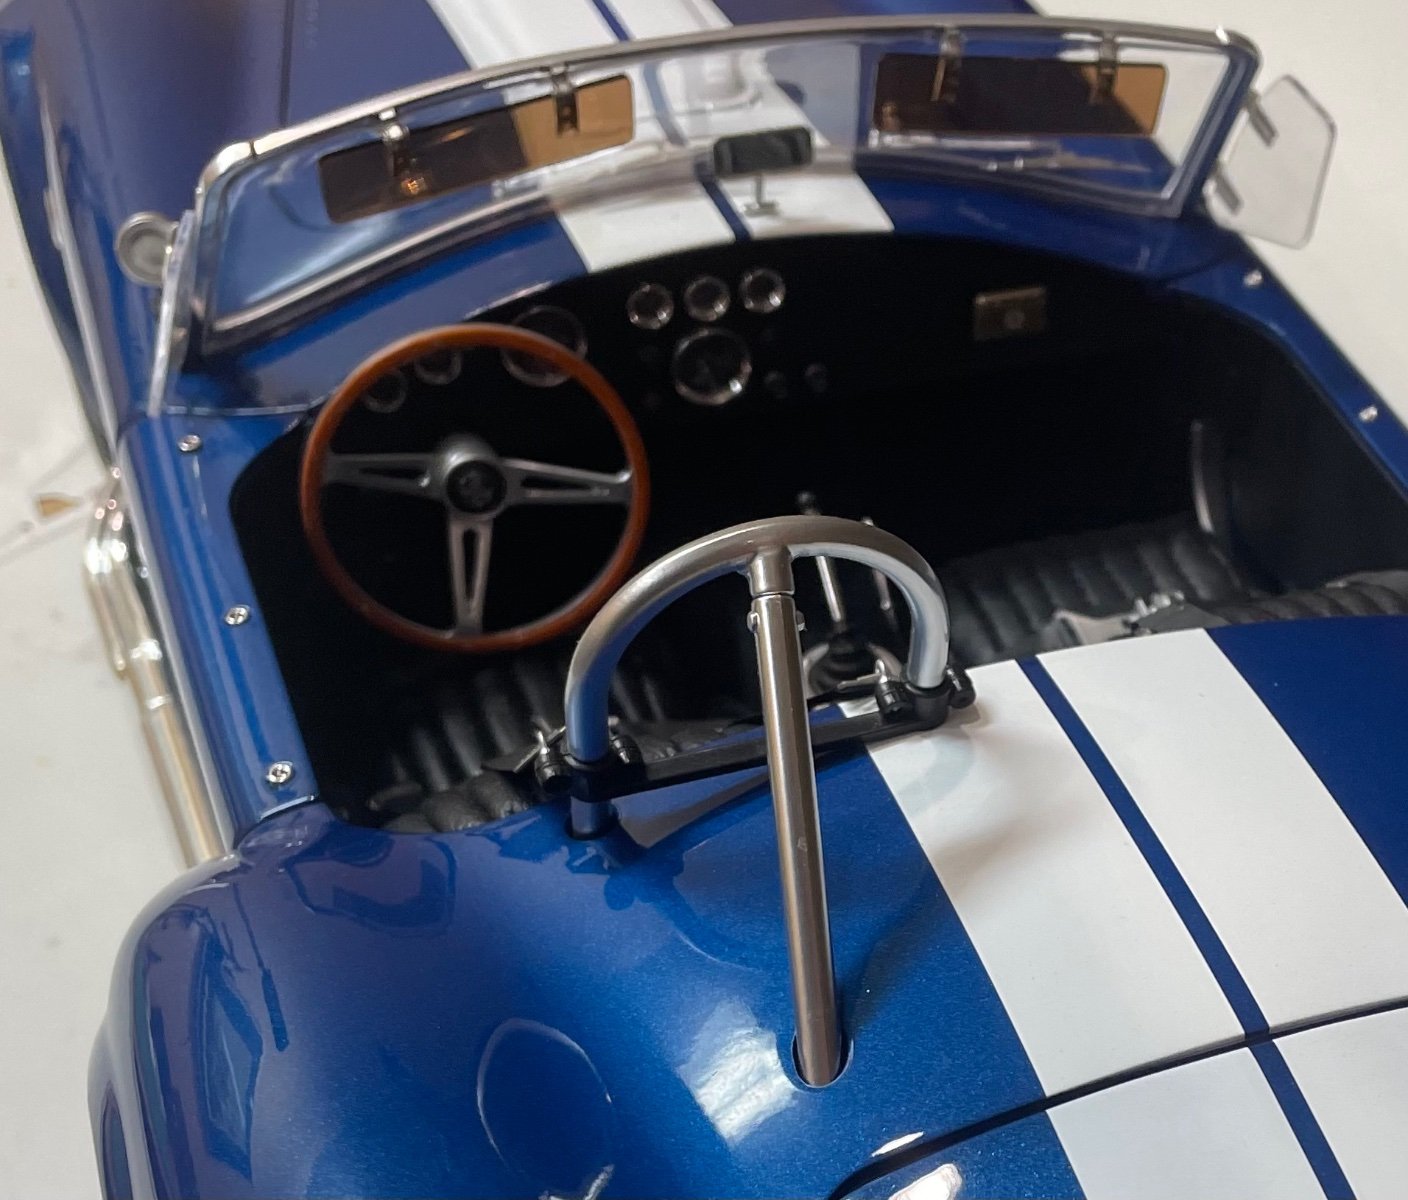
Finished the 427 Cobra S/C so here are some final views.
An enjoyable well-engineered model. Quite a different experience from wooden ship models for sure. More of a sometimes fiddly assembly of a large number of components that always fit just right if you can maneuver them into position and where required get the screws in while keeping the parts in position. Frequently wished for a third hand!
The hardest thing in the whole build was fastening the windshield wipers from below with a tiny screw thrust deep into the dark while holding the wipers in place from above. Took me an hour to figure out a way to make that happen!
Thankfully all the electrical connections worked - headlights, brake lights, horn, and engine noise (although the last is a bit pathetic).


-
-
Replacement bits finally in the mail to begin their transatlantic journey!
- Ryland Craze, mtaylor, Canute and 3 others
-
6
-
Just a note
the band aid over the right rear is to protect the gas cap lid which is a bit fragile when the car is turned over - much of the work is done with the car upside down.
Thanks for the suggestion about using wire. If I give up on agora or they send the wrong part I’ll do just that.- Egilman, mtaylor, Old Collingwood and 2 others
-
5
-
Here’s where it stands

- yvesvidal, Old Collingwood, Canute and 7 others
-
10
-
Almost done, but unfortunately broke two of the spark wire connectors to the distributor while fastening the steering column connector.
Requested replacement of these small plastic parts nearly a month ago and still not in the mail system’s hands. Build on indefinite hold as I don’t want to add the remaining engine bits for the last 2 stages of the last pack until that repair is done as they will get in the way and make a fiddly job harder. Frustrated by the delay but not much I can do but wait and hope the right parts eventually make their way to me. Unfortunately these replacements come from UK rather than the US warehouse so even more delay. Love the model but the replacement process leaves much to be desired in terms of customer service I’m afraid. -
Good fix.
My clamp pieces however fit perfectly as supplied ( to my great relief ) so some model to model variability likely at play here. -
-
Several have now asked, so the plans are spoken for.
thanks all.- mtaylor, Canute and thibaultron
-
3


Fifie by Brucealanevans - FINISHED - Amati - 1:32 - Scottish Motor Fishing Vessel
in - Kit build logs for subjects built from 1901 - Present Day
Posted · Edited by Brucealanevans
Finished the hull. I found the second planking difficult. The inability to soak, bend, clamp and dry; the stiffness of the walnut planks, and the necessity of using CA making fine adjustments for a snug fit difficult all caused problems. All in all, not my finest work. Also had a fail with masking when painting the white strip. Not a museum model, and I did not achieve the clean look I was hoping for. I believe that this will be my last planked ship model, and absolutely my last double planked model.
I did not opt for the bright red for the hull, but chose the red oxide look which I prefer.
I'm really out of display space for any additional ships (both our homes now saturated with ships). I have a Granado in my stash as well as a La Real galley from Dusek in pear wood, but I think I may well sell those on. I have a couple of WW1 detailed airplane kits, and a couple of HO scale dioramas from Sierra West that I believe I will turn my attention to when the Fifie is done and transported to our Marblehead Massachusetts home.
Oh well, it's done, and now I can get on with the fun stuff.