


ikkypaul
-
Posts
83 -
Joined
-
Last visited
1 Follower
Recent Profile Visitors
1,337 profile views


-
 aaronc reacted to a post in a topic:
Restoration of Full Rigged Sailing Ship Model by ikkypaul - FINISHED
aaronc reacted to a post in a topic:
Restoration of Full Rigged Sailing Ship Model by ikkypaul - FINISHED
-
 aaronc reacted to a post in a topic:
Restoration of Full Rigged Sailing Ship Model by ikkypaul - FINISHED
aaronc reacted to a post in a topic:
Restoration of Full Rigged Sailing Ship Model by ikkypaul - FINISHED
-
aaronc reacted to a post in a topic:
Restoration of Full Rigged Sailing Ship Model by ikkypaul - FINISHED
-
aaronc reacted to a post in a topic:
Restoration of Full Rigged Sailing Ship Model by ikkypaul - FINISHED
-
aaronc reacted to a post in a topic:
Restoration of Full Rigged Sailing Ship Model by ikkypaul - FINISHED
-
aaronc reacted to a post in a topic:
Restoration of Full Rigged Sailing Ship Model by ikkypaul - FINISHED
-
aaronc reacted to a post in a topic:
Restoration of Full Rigged Sailing Ship Model by ikkypaul - FINISHED
-
Speedy reacted to a post in a topic:
Restoration of Full Rigged Sailing Ship Model by ikkypaul - FINISHED
-
Ron Burns reacted to a post in a topic:
Restoration of Full Rigged Sailing Ship Model by ikkypaul - FINISHED
-

"Splice the mainbrace, me hearties!"
ikkypaul replied to Renown1980's topic in New member Introductions
Welcome Stuart, I sense that you are setting out on quite a brave venture, but will succeed with your approach. All the best, from Down Under (NZ) Paul -
Welcome to MSW! Regarding learning the rigging, you'll soon learn as you start doing it! To look at a square rigged vessel it can seem terribly complex but the reality is that it is quite logical. And good instructions for rigging a model should show the lead of each line from the point it controls down to the relevant belaying pin at deck level. Patience is a necessary attribute too! I am sure you'll enjoy the process.
-
Welcome Dave, One thing I have learned is that patience is of increasing importance as you progress with a model, especially when putting up the running rigging. Enjoy! Paul
-
History of Full Rigged Sailing Ship Model built by Julius Huffam.docx
- 53 replies
-
- 2
-
-
- restoration
- clipper
- (and 1 more)
-
Keith, many thanks for your generous and kind comment. This restoration has been one of the most fulfiling experiences in my life, and made the more so because I see it as a lasting memorial to my uncle Julius who built it before just before 1899 and after serving as a soldier in WW1 and finally in the occupation force in Cologne Germany, died there in that phenomenal influenza epidemic in January 1919. It has been such a pleasure to be able to share the whole story of the ship and its builder with modelshipworld members. Paul Huffam
- 53 replies
-
- 4
-
-
- restoration
- clipper
- (and 1 more)
-
To Granpa Phil, Barkeater and Louie da fly, many thanks for your kind remarks, and to those who "liked"my efforts and result, a warm thank you too. It has been one of the most satisfying things I have done in my life. One discovery I have made is to find that the ship Antiope is very similar to the Jane Jacobsen in many details of its righ and main deck arrangements. (Written on back of painting: "'ANTIOPE' - Type: Ship (wool clipper) (?). Builder: Reid, Glasgow; August 1866. Dimensions: 242' 3" x 38' 4" x 23' 7". Tonnage: 1443.") Very best wishes to you all, Paul
- 53 replies
-
- 4
-
-
- restoration
- clipper
- (and 1 more)
-
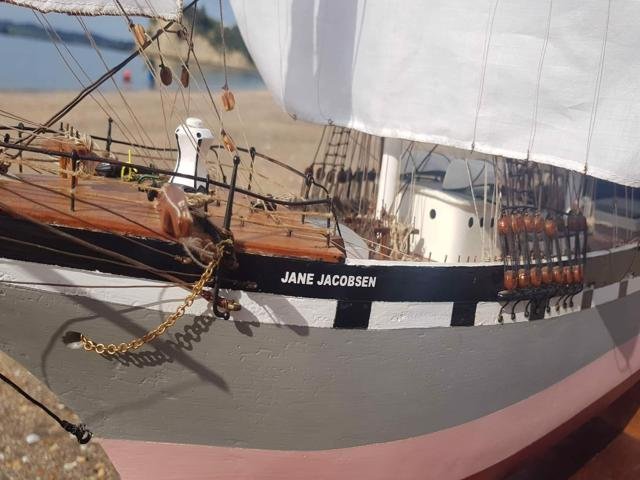
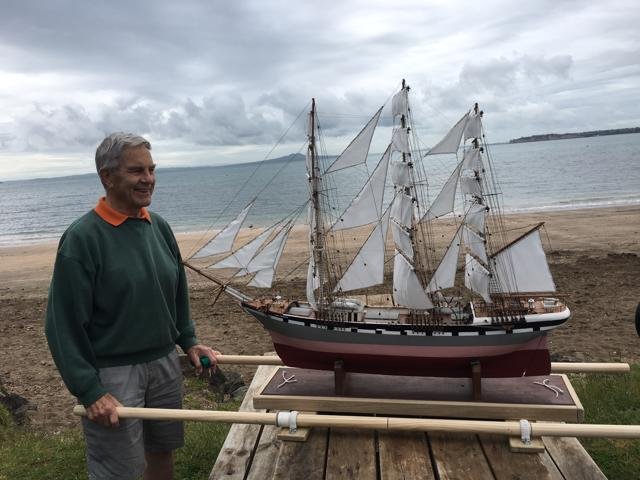
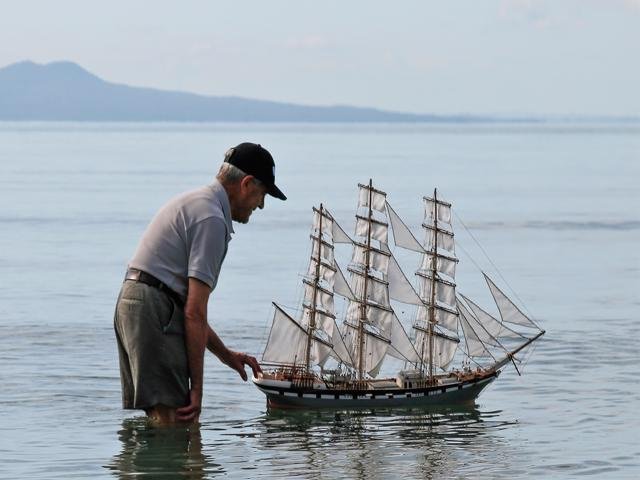
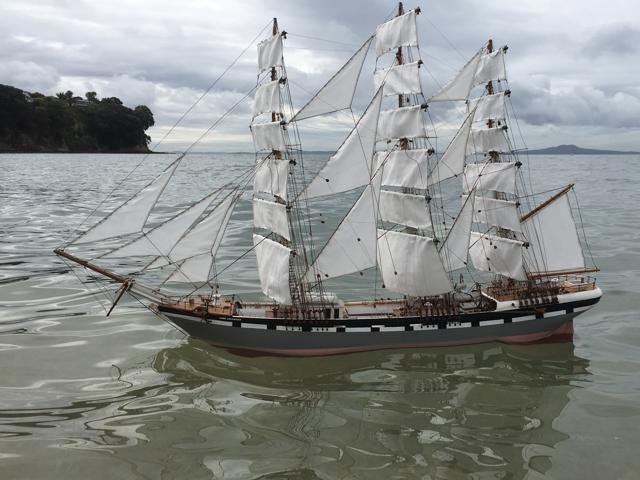
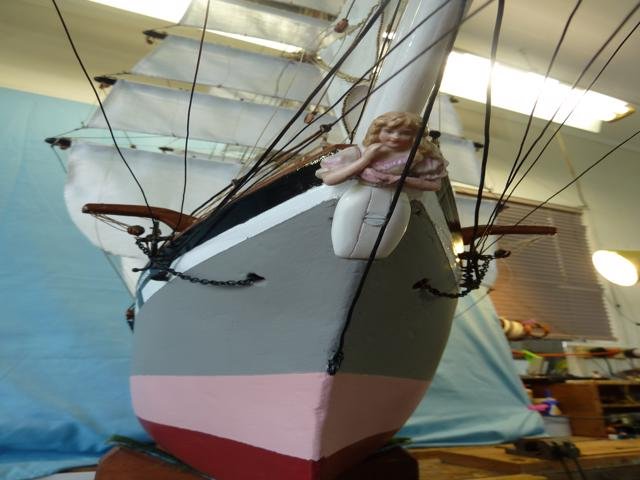
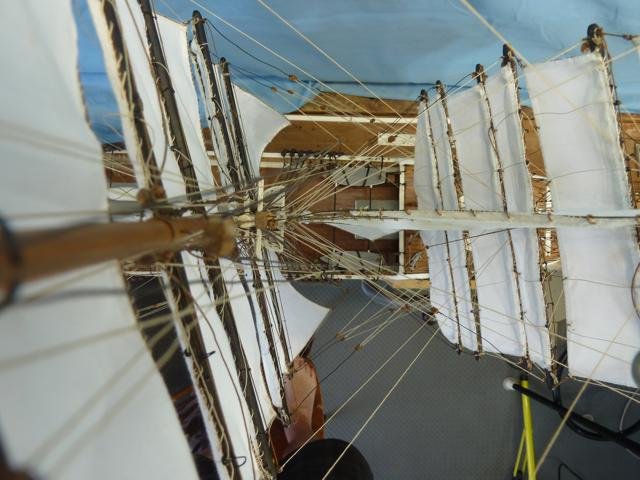
Build Log. Restoration of Full Rigged Sailing Ship Model Posting #11, 17 June 2019 – Final instalment. To those kind modellers who have been following this project so far, my apologies for taking so long in bringing it all to completion. In the months since my last posting the work was mainly inspecting, adjusting and tidying up all aspects of the rigging. Some of these tasks: - setting the sails for almost running free, for wind coming fine over the starboard quarter (my preference) and this exercise spread over a couple of days. You can imagine removing each belaying pin, bracing each of the 18 square sails around plus sheeting the 9 fore and aft sails, and then belaying them all tidily as practicable. - setting up the rigging associated with the ship’s boats – for stowing the two on top of the deckhouse, making gripes for the two amidships and their hoisting gear (falls). - installing anchor cable securing and slipping arrangements. - replacing some lines (eg. braces) which had become very chafed over time. - repairs jibboom (bowsprit) rigging. 1. The highlight of the project was her re-launch on 17 November 2018. With the ship weighing 11 kg (24 lbs) and cradle 4.7 kg (10.4 lbs), gentle transportation for this fragile vessel in a motor vehicle and subsequently carrying her over the sand to the sea was an issue. My solution was the stretcher carrier shown below. The ships original cradle sits in a tray which is slung between removable poles. At a point just forward of the mainmast the ship was lashed down for security. Removal of the 2 metre poles facilitates use of a people mover vehicle, in which the ship sits athwartships for travel. Below are a few photos serve to round off the restoration’s completion. Should any one like to see any aspect not pictured please ask and I’ll try to oblige. I do have a very brief video of the model sailing – again, give me an email address so I can email it to you. Photos: 1. Newly named JANE JACOBSEN (after Jules' mother's maiden name) 2. Original figurehead 3. View from top of Mainmast 4. Arrangement of transportation 5. Replication of 1899 photo - Paul - with Auckland NZ's Rangitoto Island as backdrop 6. JANE JACOBSEN starboard tacking. I have written the full story of this model and about the life of Julius Huffam, and how I decided to name her the Jane Jacobsen, which I will post in the appropriate place in modelshipworld if allowed. The model has been gifted to the Motueka Museum near Nelson New Zealand.
- 53 replies
-
- 18
-
-
-
- restoration
- clipper
- (and 1 more)
-
Welcome indeed Stevo79 great to have you with us. Go well, I am certain you will find much support in this group. Bestwishes from NZ!
-
Welcome Sodburybungy, you seem to be well attuned to this handcraft because the results look a fine job. Go well in your challenge. A model I have recently completed is the restoration of a ship that I've had sitting in my workshop for over 50 years! All my very best wishes Paul
-
Hello! Question About Rehoming a Ship
ikkypaul replied to Charlie B's topic in New member Introductions
Charlie, thanky oufor bringing this up foro discussion. Only last month I completed a full restoration of a 3 masted full rigged ship (estimated scale 1:55) - hull length 1 metre - it was a very profound experience for I was restoring this ship that had been built by my uncle then aged 11 years old in 1899 (repeat 1899). And I have sailed it on the sea! My point is that - agreeing with the suggestion of Bob Cleek - it may well excite a young person to have a crack at restoring this model. Such a lot would be learned in the process. Good luck - it may turn out to be a real prize ship. Paul -
Hello all and already looking for help
ikkypaul replied to Signode388's topic in New member Introductions
Iliya - Welcome to this ship modelling world. Some excellent advice above - from folk who in some cases - like me - have learned from experience. I think my most used tool is the pair of fine tweezers - especially useful in tight corners and in handling the rigging. As I have progressed I often made up another tool for either poking or pulling lines to work on them. The advice to get a tool when you really need it if very sound. All the best. Paul -
Welcome Rob! It might seem a good idea to set yourself up with a comprehensive kit of tools, but I recommend just the few really obvious tools to begin with. You can add other tools as you come to need them. And on-line shopping helps in this regard. My current project is restoring a one metre long 3-masted square rigger (118 years old) and my most frequently used tool is a a pair of fine angle-tipped tweezers. Often I find that it is neccessary also to make up suitable tools or jigs for specific jobs. To me it is all part of the challenge. My very best wishes for success in your modelling. Paul (Auckland NZ)
-
Welcome Ron. Now is the time to get cracking again. It took me from 1968 to 2010 to start the main work on my project! But it is all coming to fruition now with quite a few tasks to cmplete. Go Well! Looking forward to seeing how you go. Paul
-
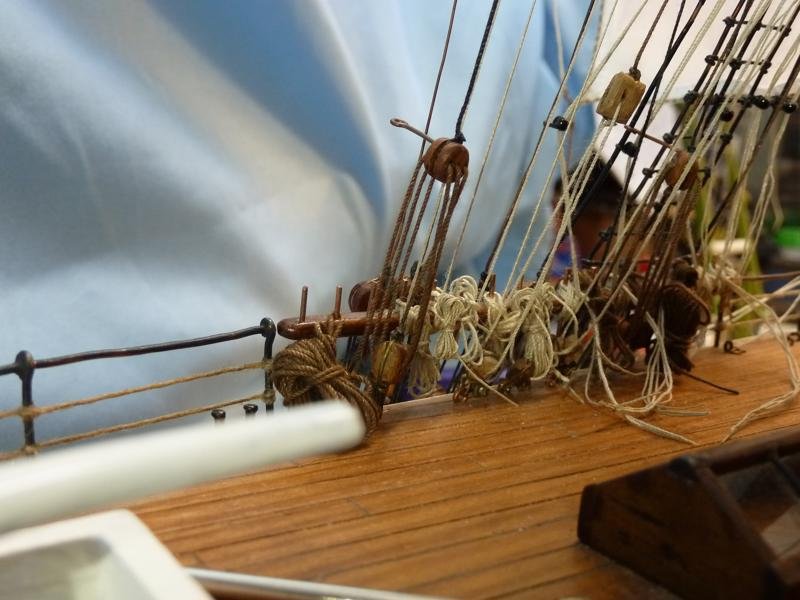
Members 71 posts Report post Pos Build Log. Restoration of Full Rigged Sailing Ship Model Posting #10 26 June 2018 By way of a supplement to my posting # 9, the photo of the Port poop fife rail shows what I was starting with – lines all over the place – very un-seaman like. For comparison of "before and after" I now place it here again along with a photo of the Starboard Poop Fife rail after belaying the lines using my line coiling device. Still not perfect but improving with practice!

- 53 replies
-
- 4
-
-
- restoration
- clipper
- (and 1 more)