Hill202
-
Posts
114 -
Joined
-
Last visited
Content Type
Profiles
Forums
Gallery
Events
Everything posted by Hill202
-
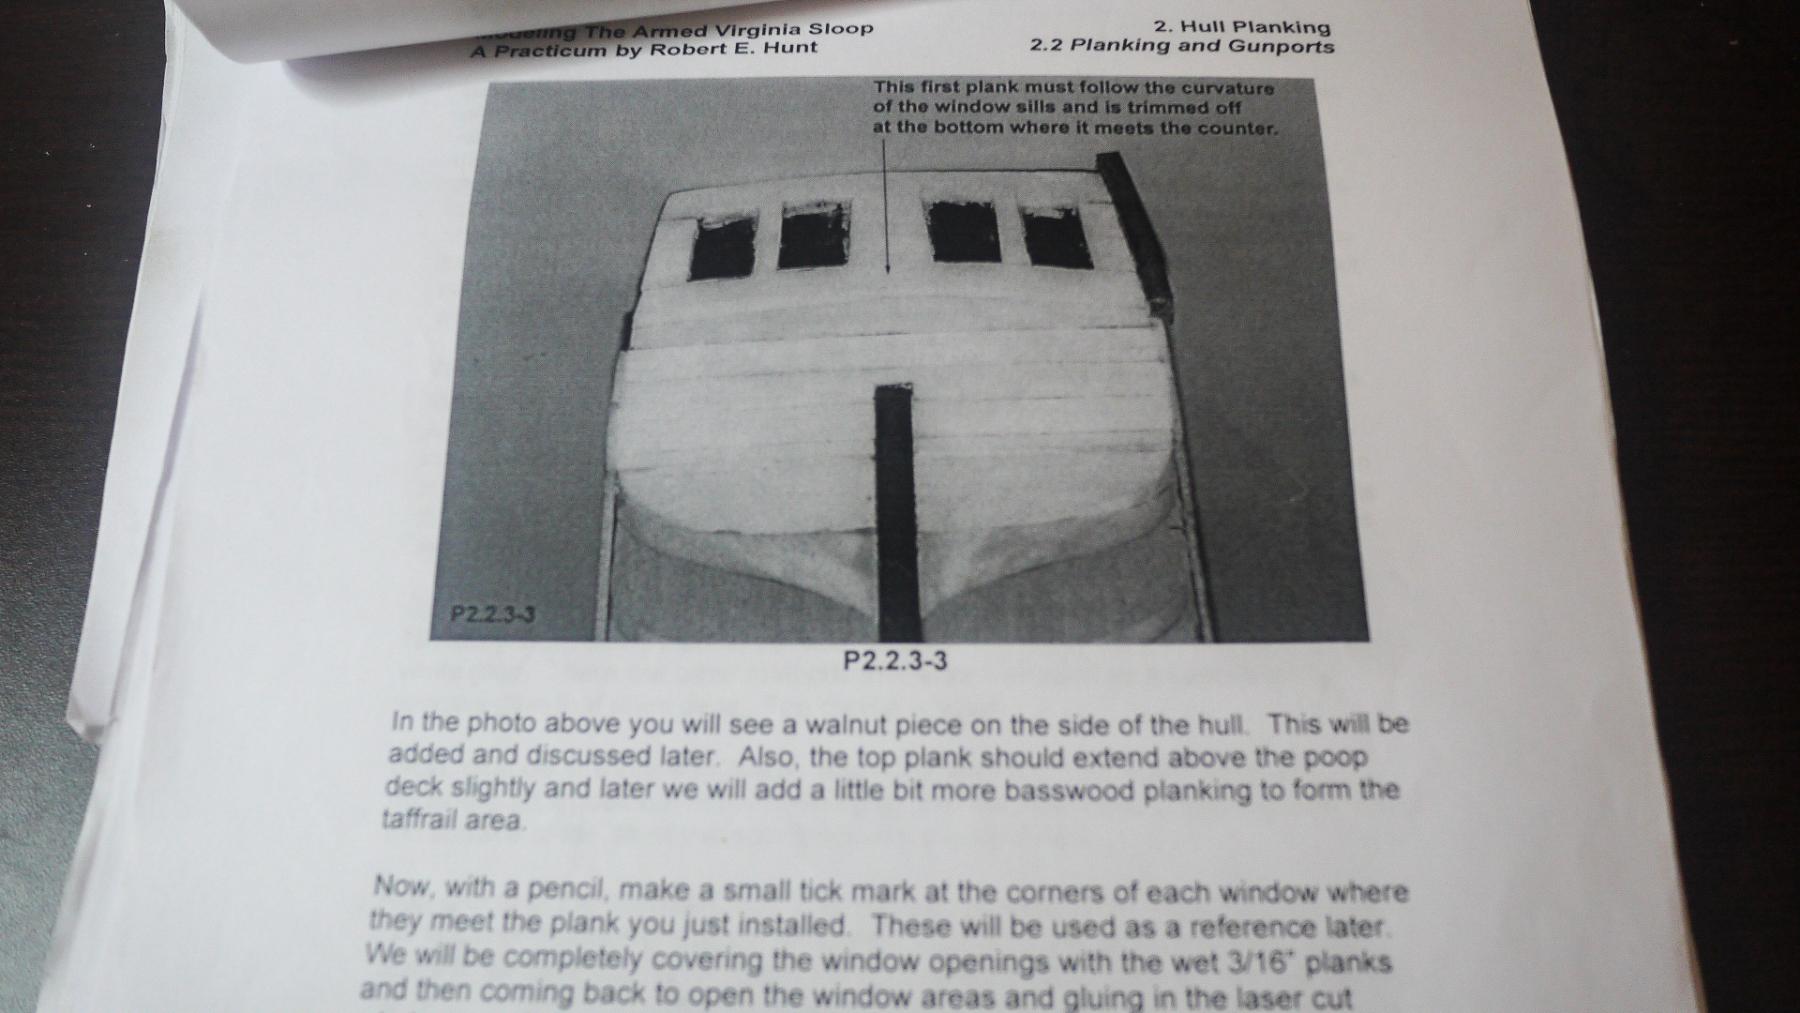
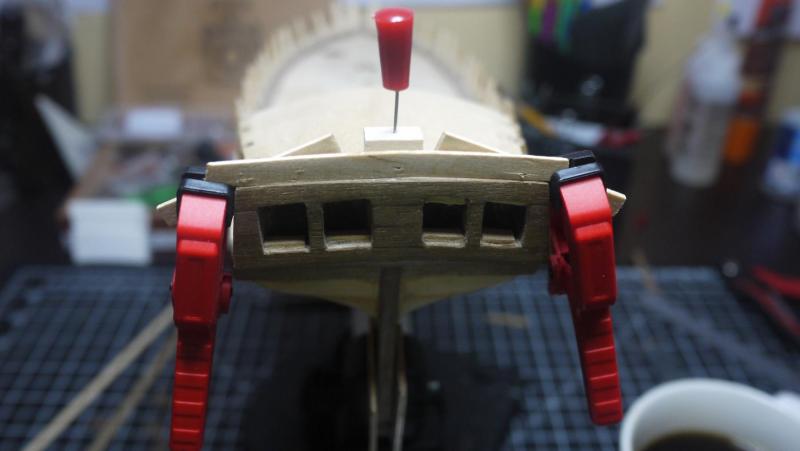
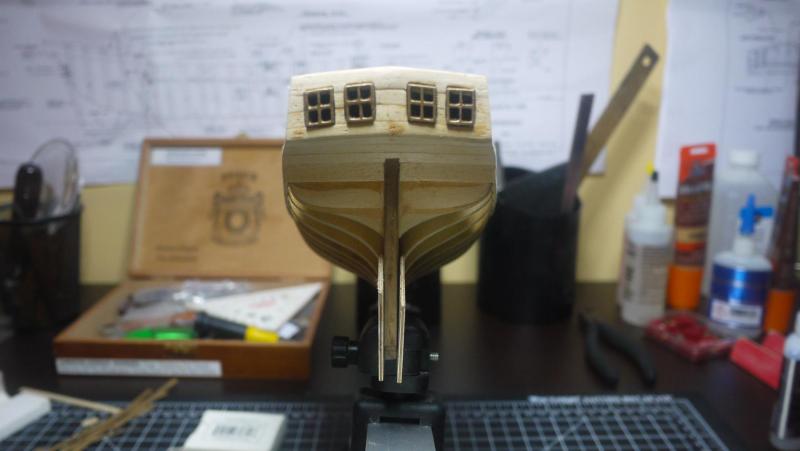
 The temporary braces worked. The top planks are on. I have to reinstall one window stop on the port side. I somehow managed to install the window stops after I painted the window cavities. I have no idea why I did that. I'll have to carefully paint those. It's time for the fashion pieces. All of you guys did great on those. I hope mine looks as good as ya'lls. Edit -As usual the pictures help to find the flaws. I have a little more sanding to do on the edge of the counter on the port side. I would like to sand that top plank a little more to flatten it on out but I'm concerned that I will sand thru the walnut.
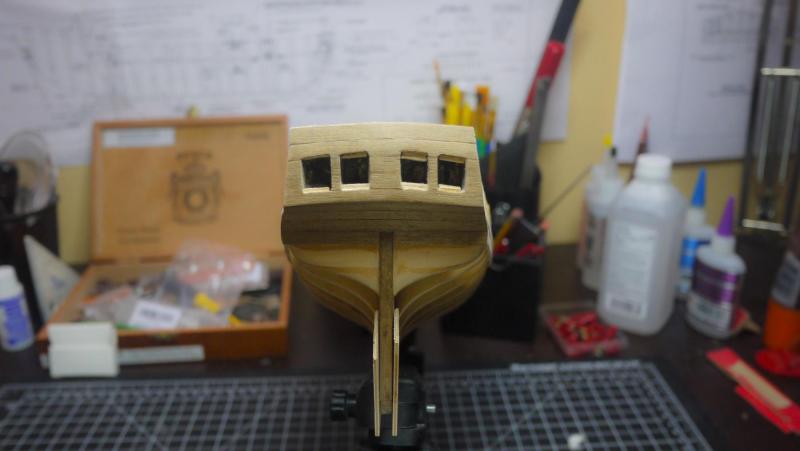
-
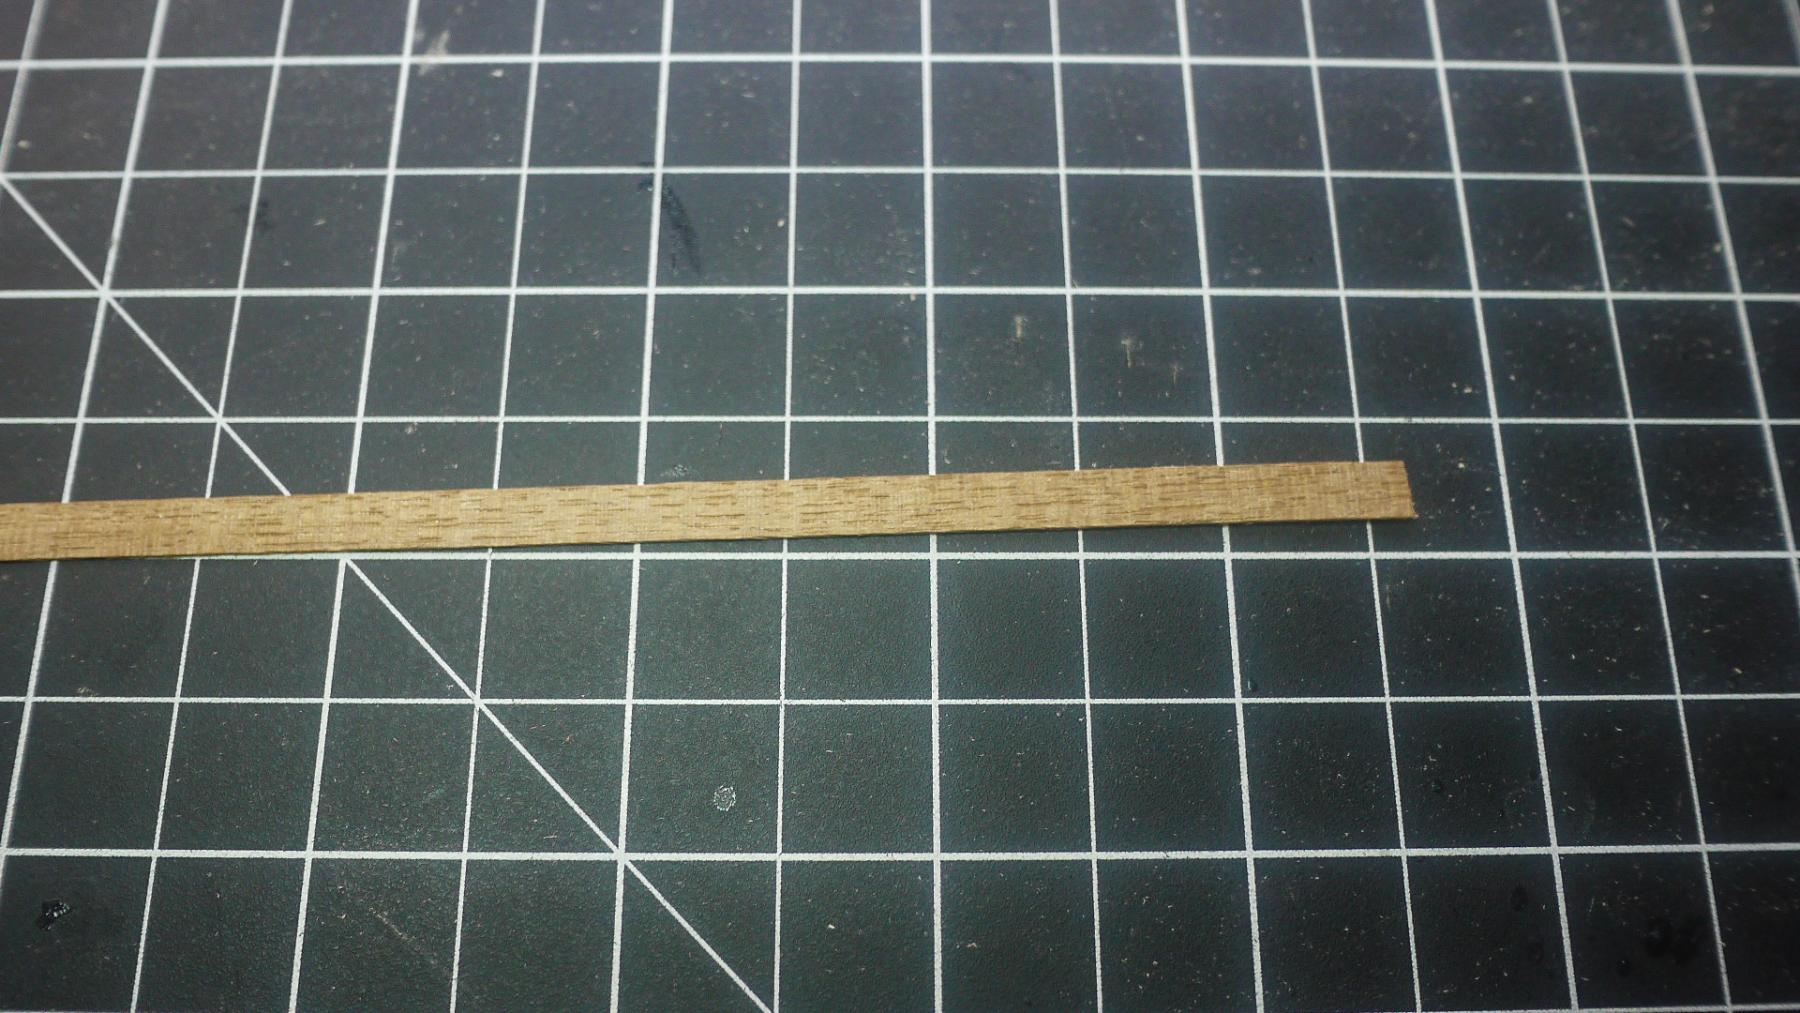
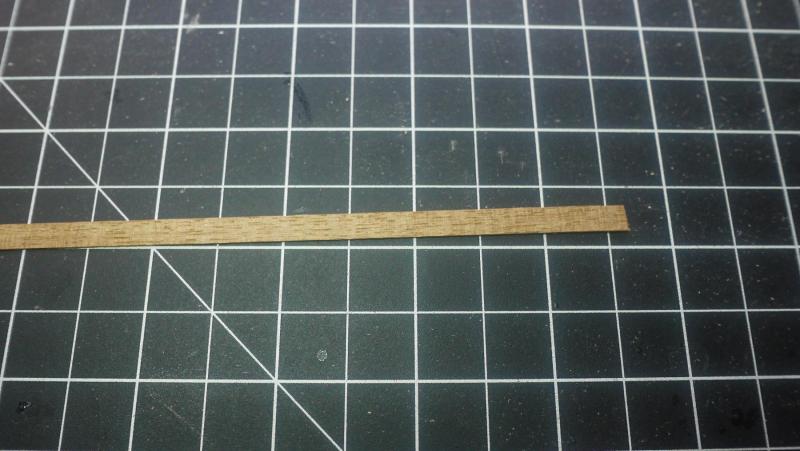
This is what I came up with. This was just a scrap plank, not glued in.
-
The mistake I made was I should not have trimmed the ends off until these last planks were installed. I would have the outer ends to clamp to.
-
That would probably work. Tact glued to the side and then removed. I'm getting pretty good at un-glueing stuff. Edit- The more I think about, I'm convinced that its the solution.The top plank has" wings" that extend above the deck. I can install a temp vertical brace to the back of it, on each side, to clamp to and keep the additional planks aligned. Thanks David B!
-
I don't understand how he stacked .030 planks edge to edge without something to help keep it aligned. Earlier in the practicum he shows a picture of the stern with a fashion piece attached before the outer planking is on and says it will be discussed later.
-
Thanks for trying Zoltan. I think the fashion pieces installed first may be the answer.
-
In the practicum he says that he installed the walnut plank first edge to edge with another walnut plank. How in the world did he manage to keep that aligned? 3/4 of that top, fifth plank extends above the deck line.

-
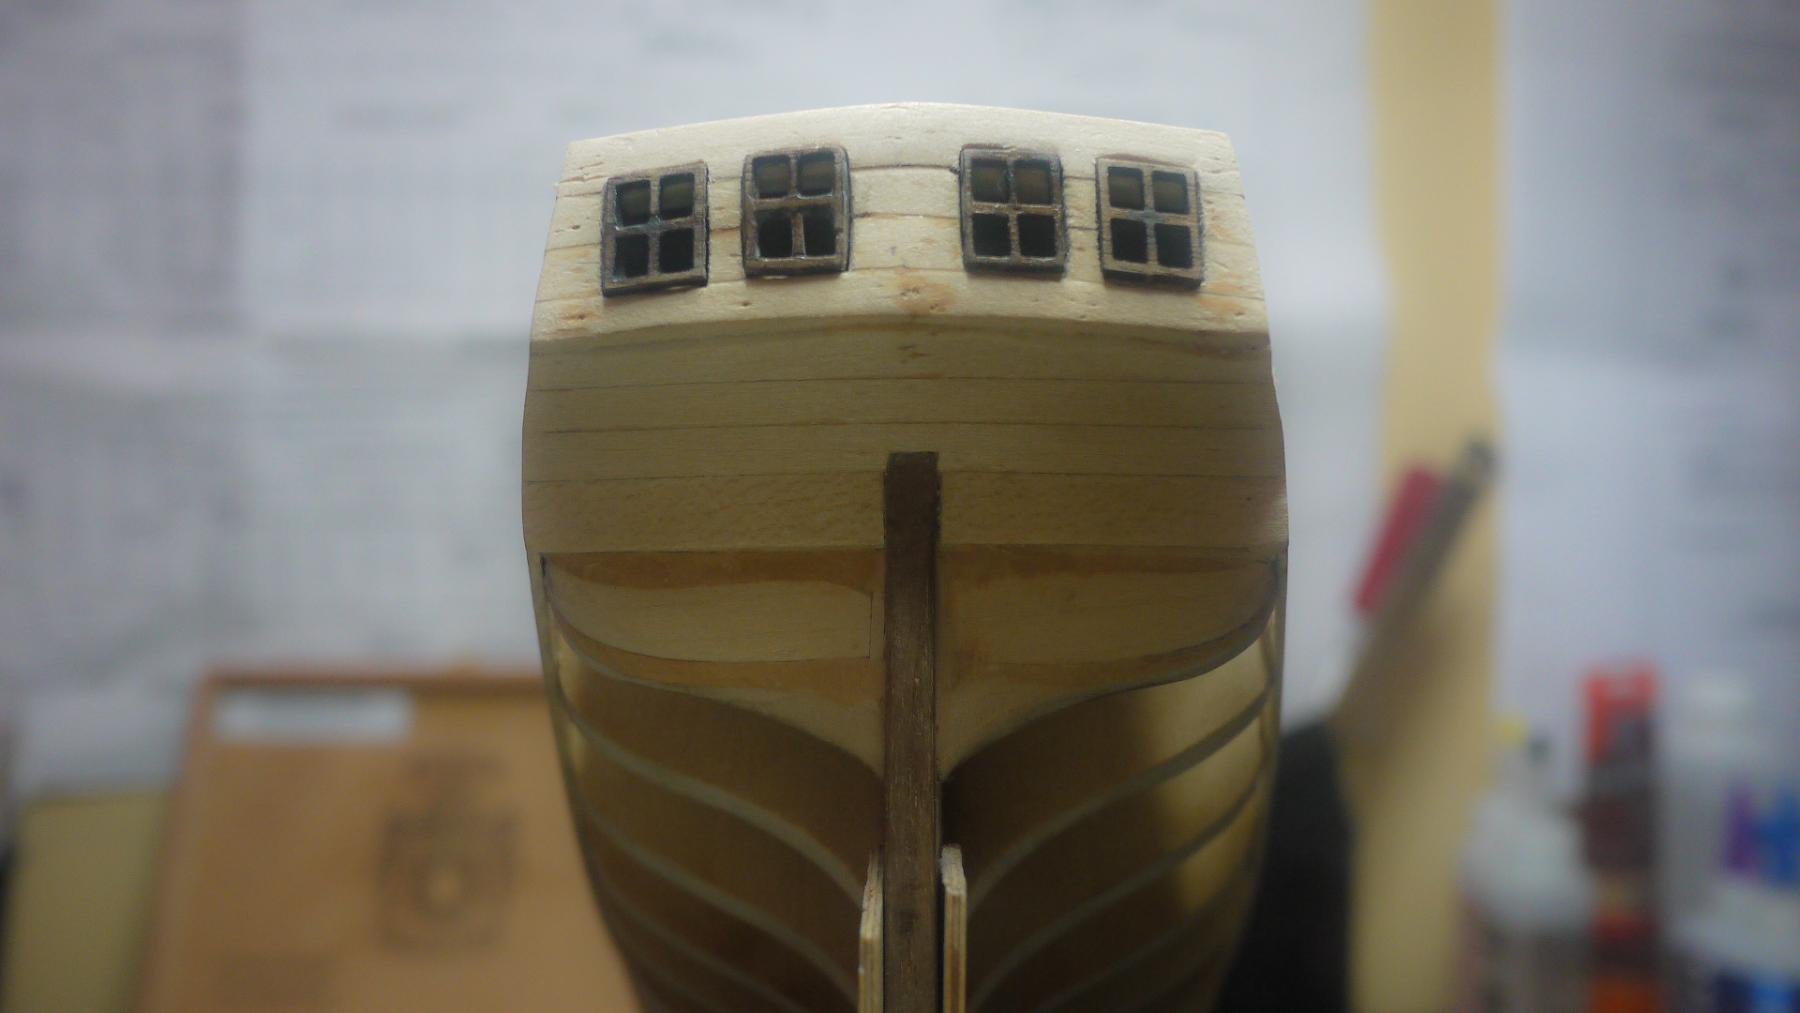
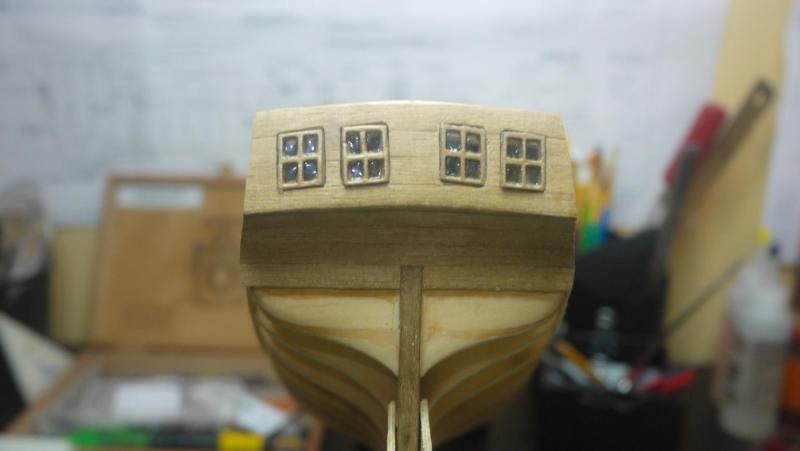
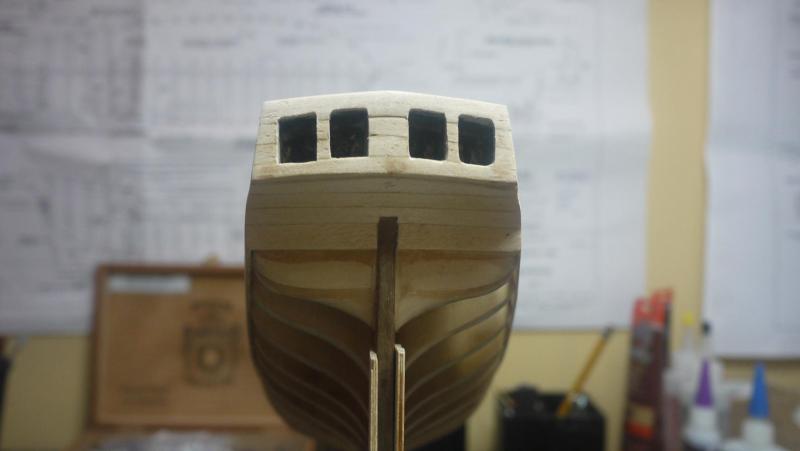
This is a dry fit with the windows. My problem is there is supposed to be another plank on top to extend above the cabin deck. There is nothing to glue to, other than edge to edge. How did you guys do that? I don't have the windows pushed all the way in yet. I also still need to sand the edges on the port side to match the starboard side. I think the gold paint on the windows will stand out more after the walnut has been sealed.
-
The practicum says to install an additional plank above the windows to extend above the cabin deck. There is nothing to glue to there. How did you guys glue that top plank edge to edge and keep it all lined up? The only thing I can figure out is to install the fashion pieces first to help line the planks up.
-
Thanks. There are too many variables for me to be able to put a time frame on it. I'm going on 2 months and I'm only half way through chapter 2 of 9 chapters. The rest of chapter 2 is planking the hull and I could see that easily taking 3 weeks or longer. Everyone builds at a difference pace. (edit, after thinking about it) - Three weeks? who am I trying to kid? It took me 2 weeks to glue 6 planks on the stern. I glued and unglued one plank 3 or 4 times, before I was satisfied.
-
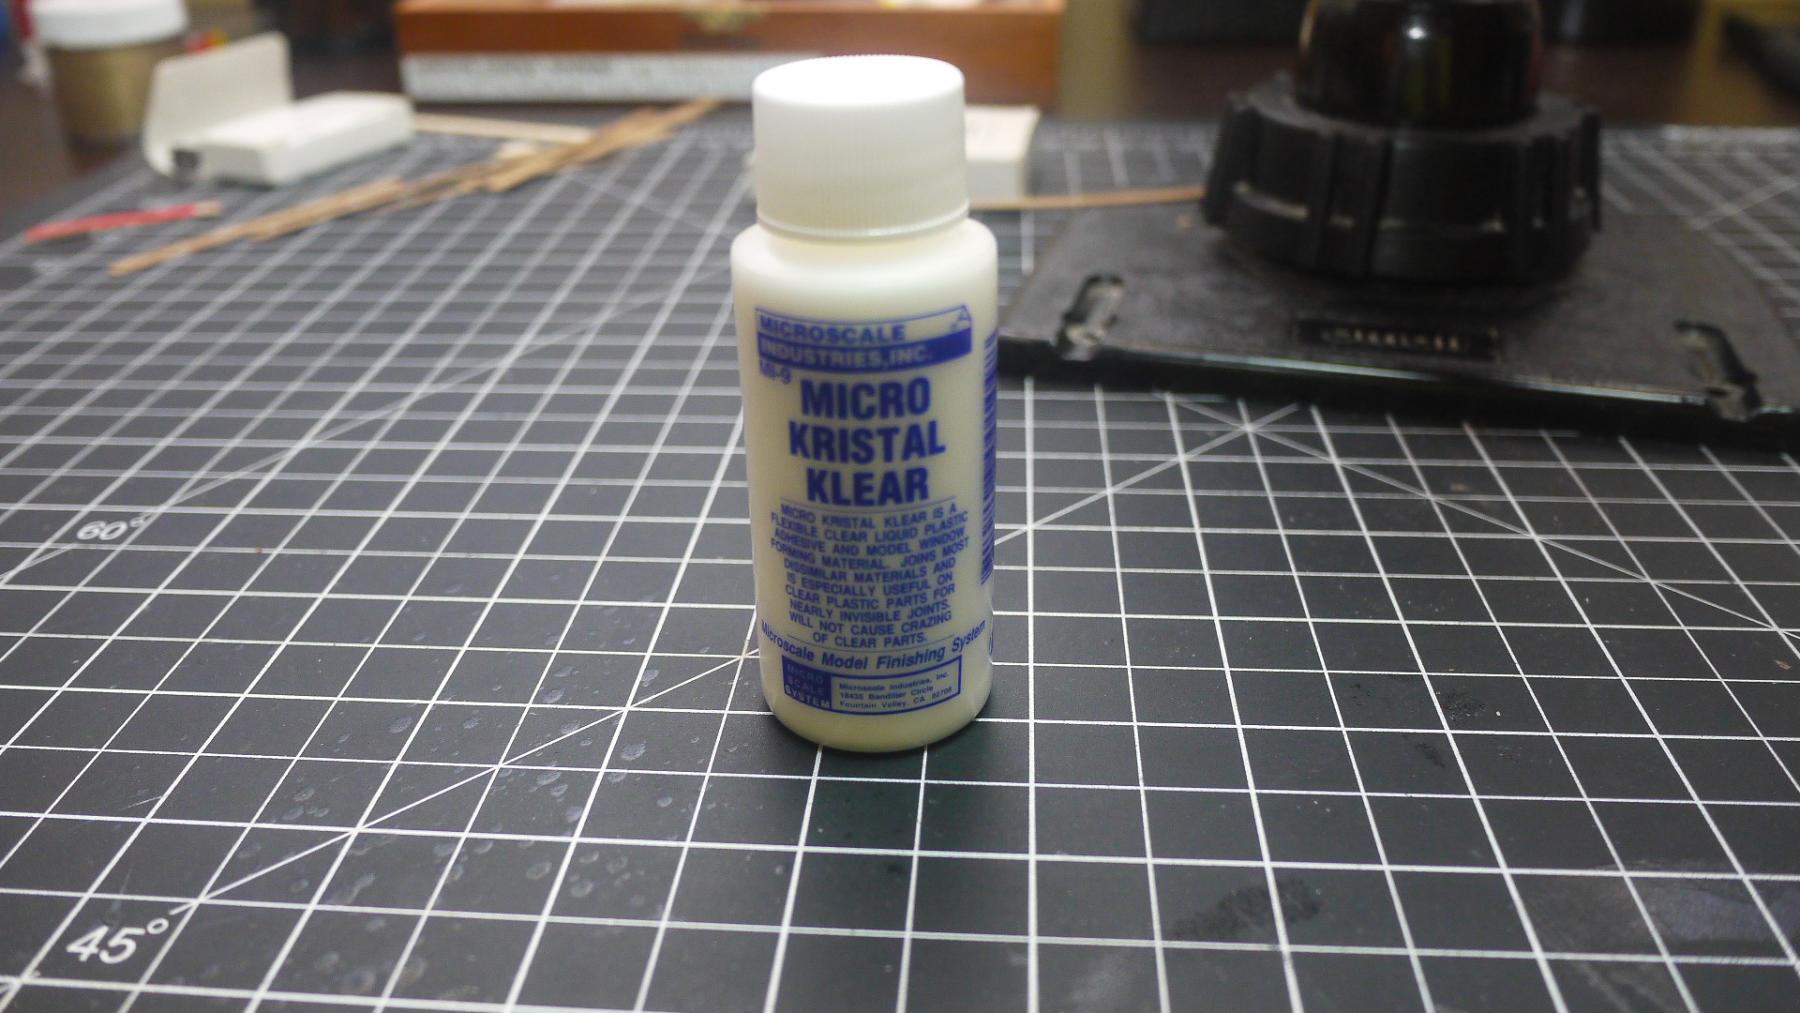
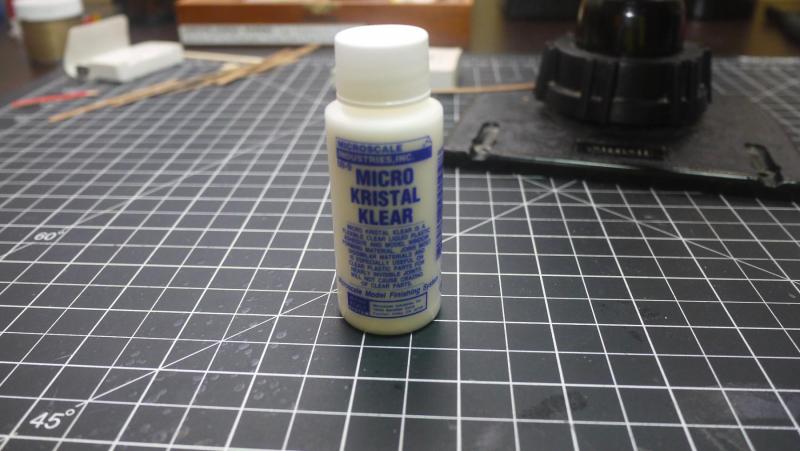
I thought about that Zoltan. I thought about black plastic from a cd case. I read that tip somewhere. It's out of sheer curiosity that I'm going to try this stuff. I do like the results others have gotten with it.
-
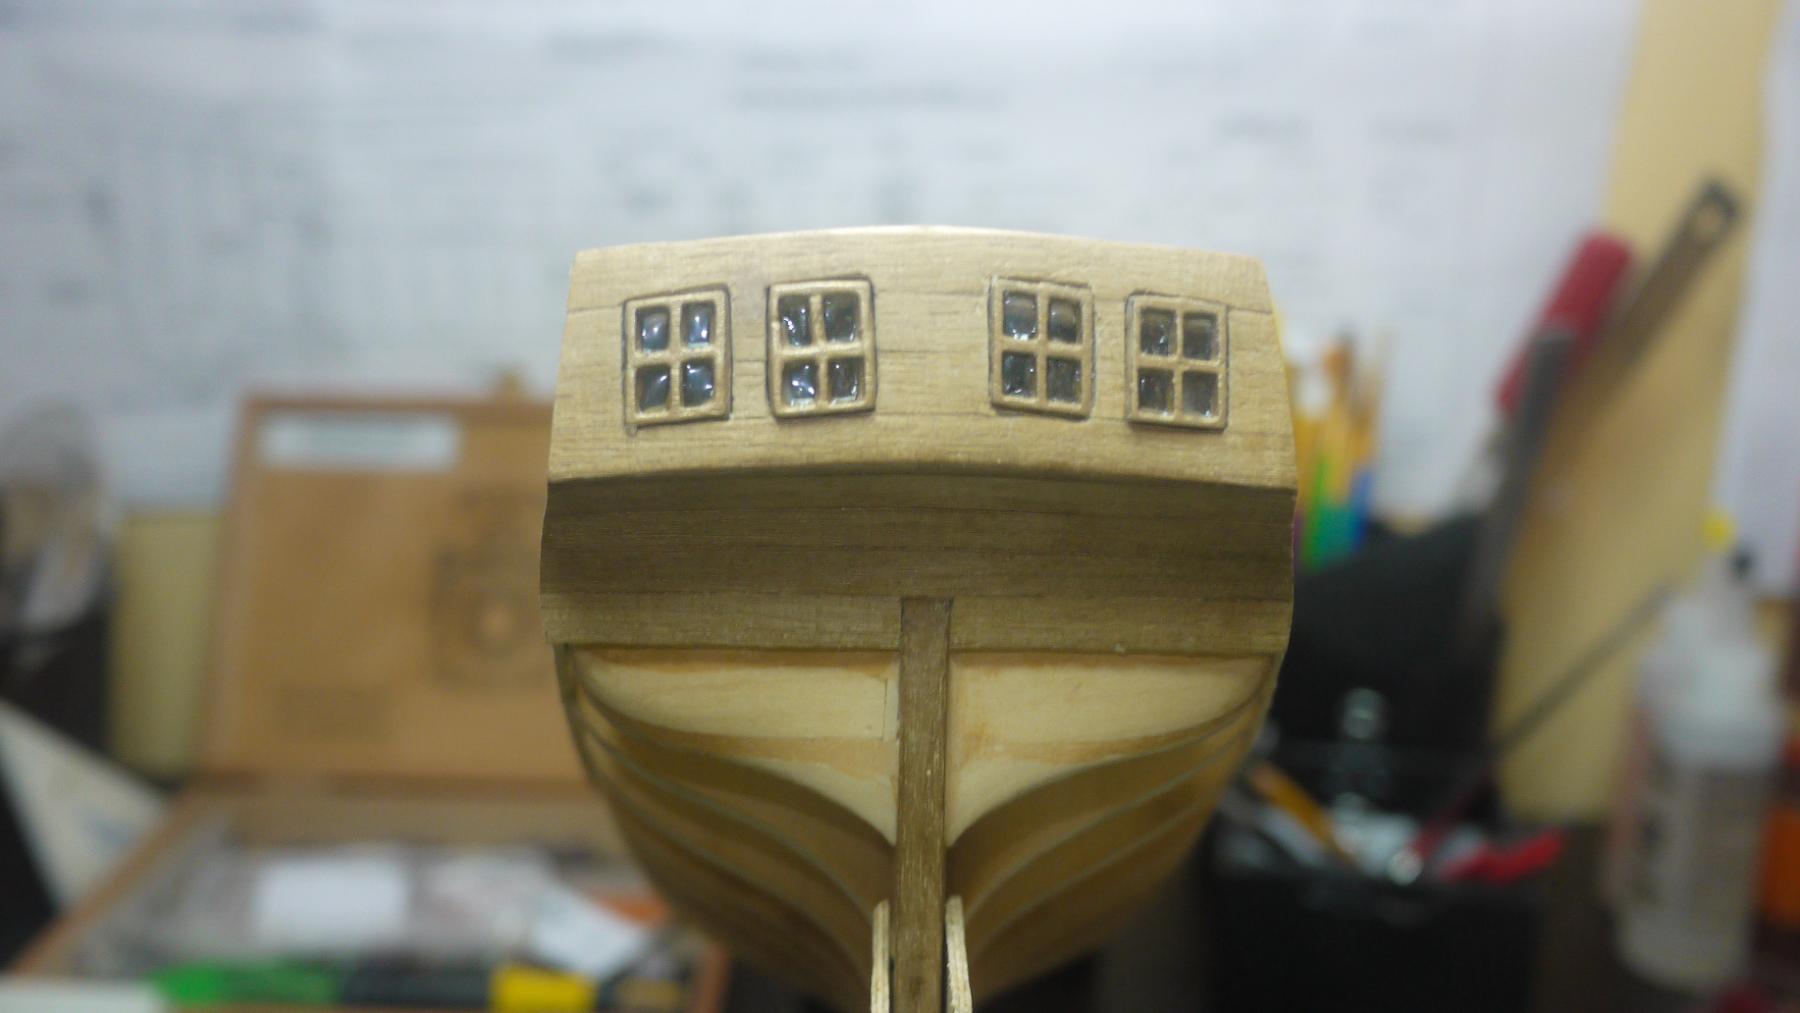
The windows are painted. Antique gold, as recommended. I am going to try to form some glass on the windows using the product pictured. Thanks Brian!
-
Amazing work!!
-
Thanks Dave. That mahogany sure looks nice. The thinnest they have is 1/32 that equals (I think) .031. That is a tad thicker than the stock walnut. I'm afraid that could create issues down the road.
-
The window stops are in. The windows are set to the proper depth ( or there bouts). They are not glued yet. I'm going to follow Zoltan's advice and wait until after the stern is planked. Happy Thanksgiving!

-
Thanks Dave, can you recommend a wood supplier?
-
Now is the time, if I want to consider using something other than walnut. I really would like to attempt to make a few changes like you did Dave, but on a smaller scale. I think I'm going to do a little research before I glue any outer planks on.
-
Until I'm ready to glue them, I stuck a little wad of tissue in each cavity to keep them from falling in.
-
The only place in the practicum that I could find it was on page 7 of chapter 2. There is a planking scheme that shows the thickness used. Its in small print on the plank ends in the scheme. It took me awhile to find it.
-
Thanks Dave. Wow, this is really thin wood. One thing that comes to mind is, sanding on this thin walnut will be a delicate process. I've been pinning the basswood. I won't be able to pin this stuff because the holes will show. It looks like I'll have to try the ca/weldbond combo trick.
-
That's a good point Zoltan. I was thinking that having them in, would help me in making sure that the planks were tight, without gaps. Your way would also allow me to get something done over the long weekend, in case the paint does not come in. Thanks
-
Thanks guys. Come on in Greg! I've referred back to your thread quite a bit. Your AVS is looking great. I really like the way your stern looks. I realize in the pics that you have already applied a satin finish to the walnut on the stern but for some reason the walnut planks in my kit do not look as good. I hope the satin finish brings out the grain in mine. I'm talking about the really thin planks. My parts lists states that they are .030. The plans and practicum say .020. After looking at yours more, your planks look thicker. Maybe I have been looking at the wrong ones.
-
I'm at a stopping point for now. I want to paint and glue in the windows before installing the walnut planking. I procrastinated and I am just now ordering the paint.
-
The first layer of planks is on at the stern.
-
Your AVS is looking great Ryland. I hope I can get my stern looking as good as yours does.