


drobinson02199
-
Posts
914 -
Joined
-
Last visited
Content Type
Profiles
Forums
Gallery
Events
Posts posted by drobinson02199
-
-
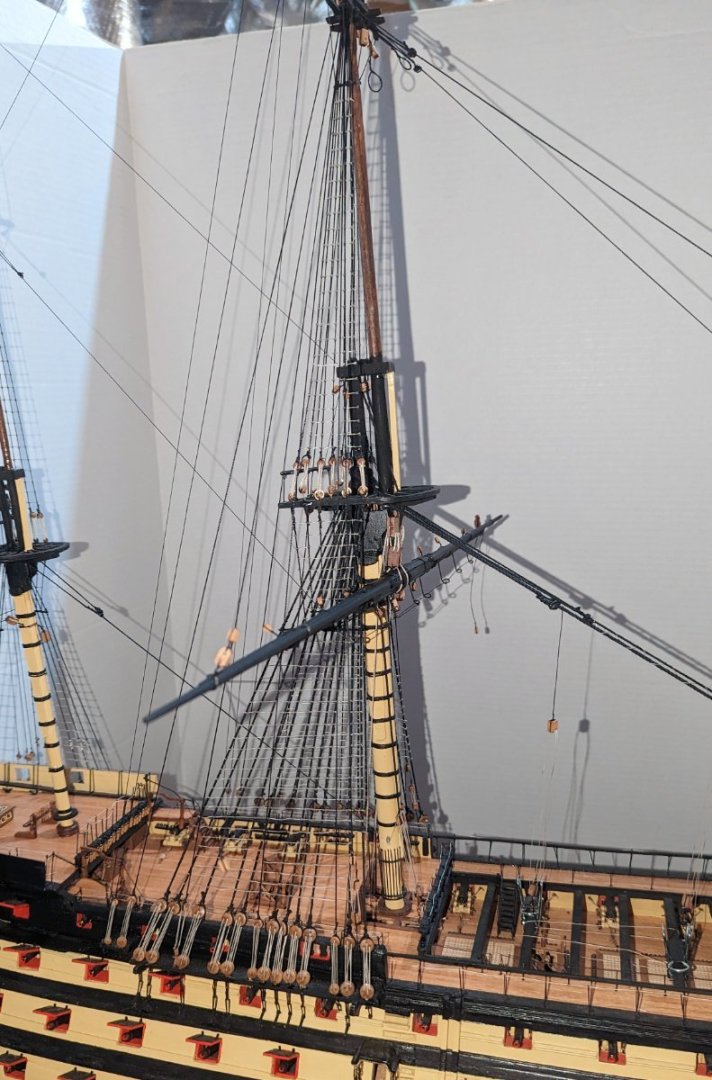
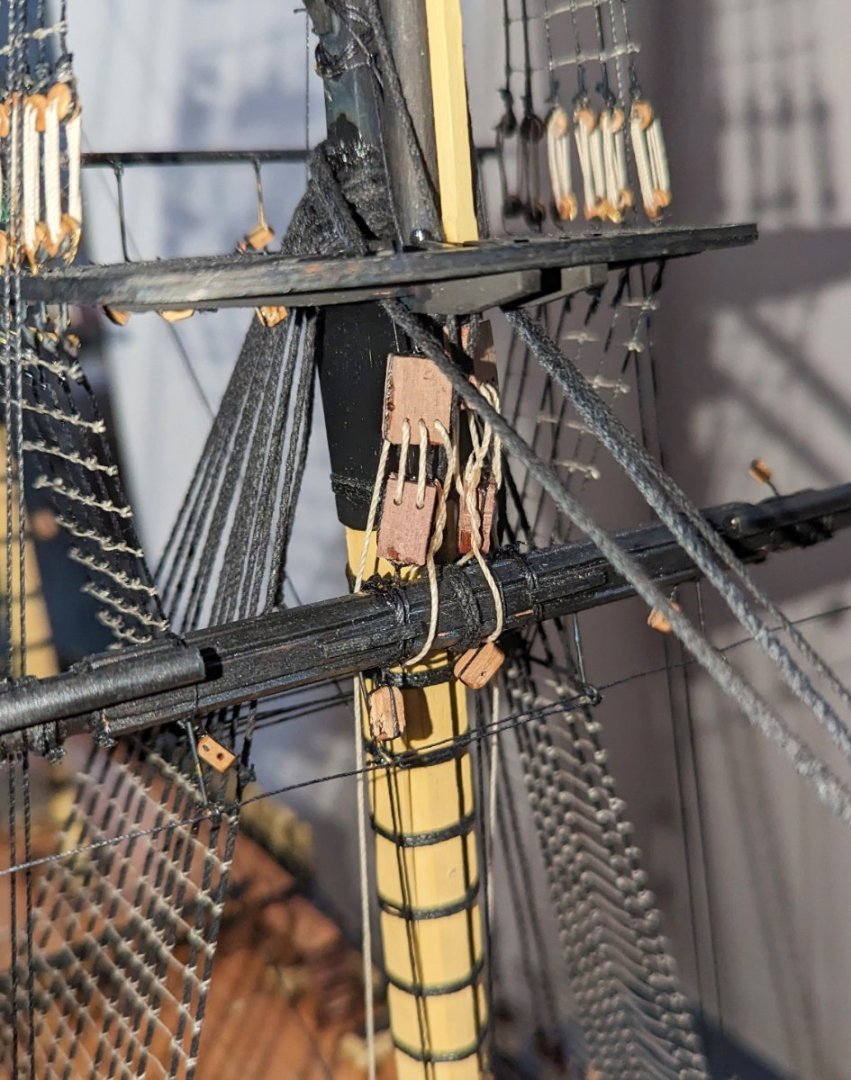
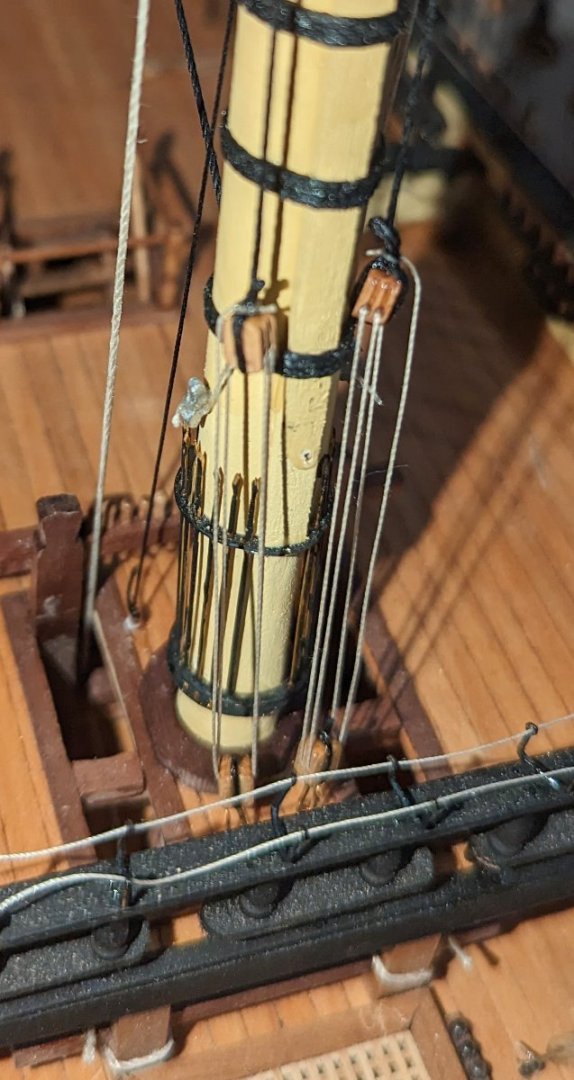
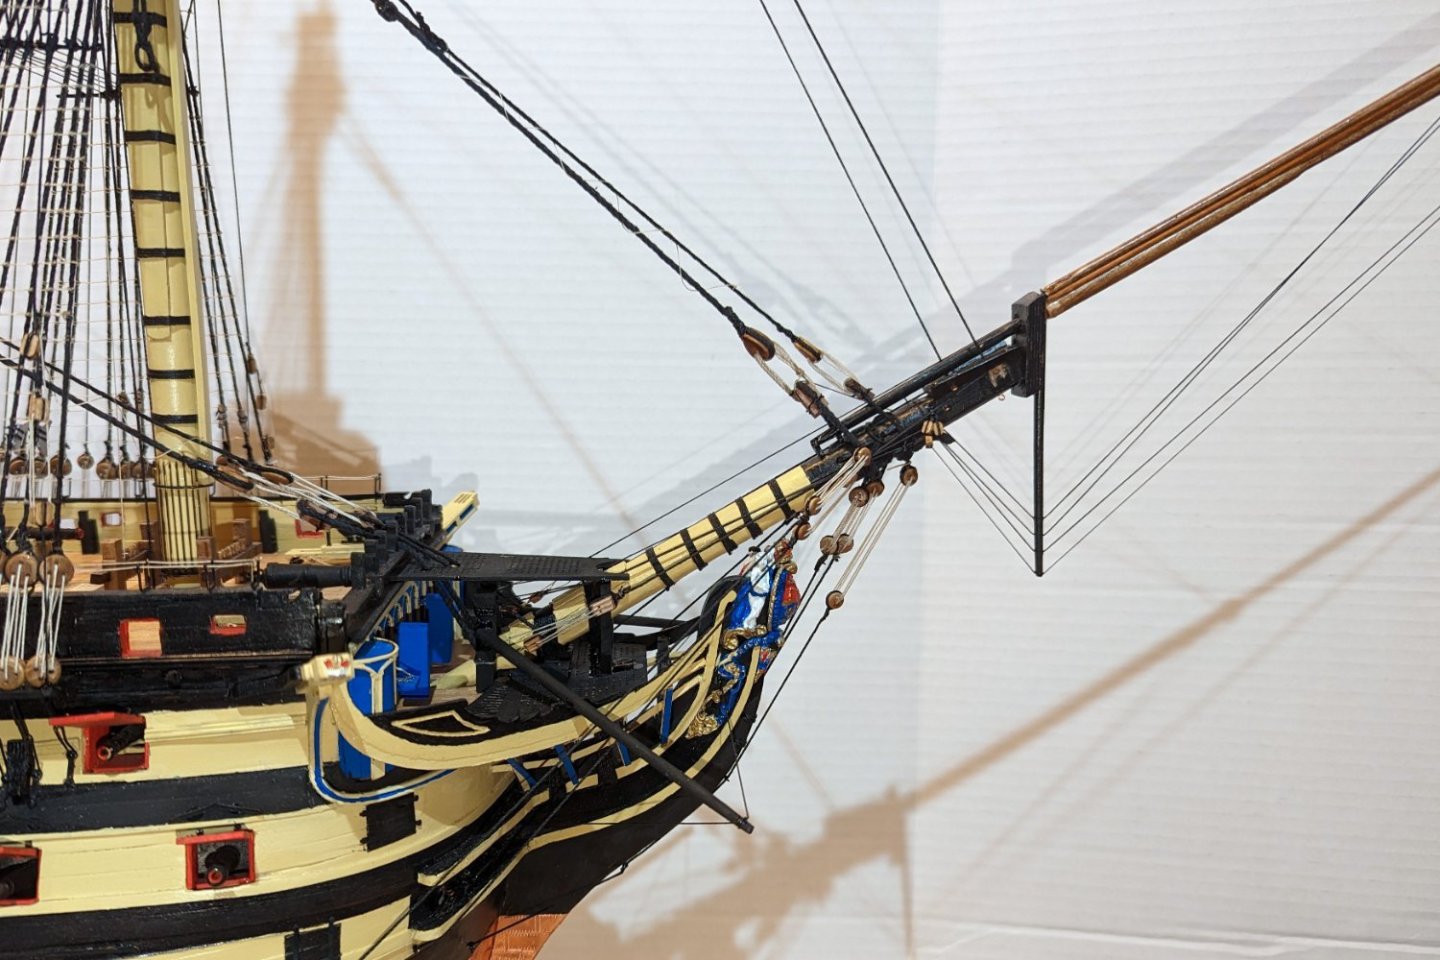
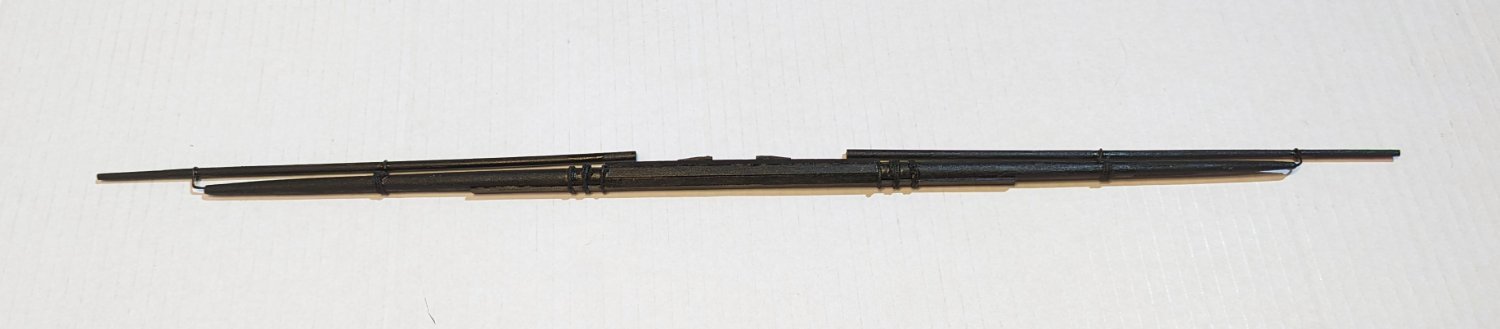
Finished and added blocks to the main yard.
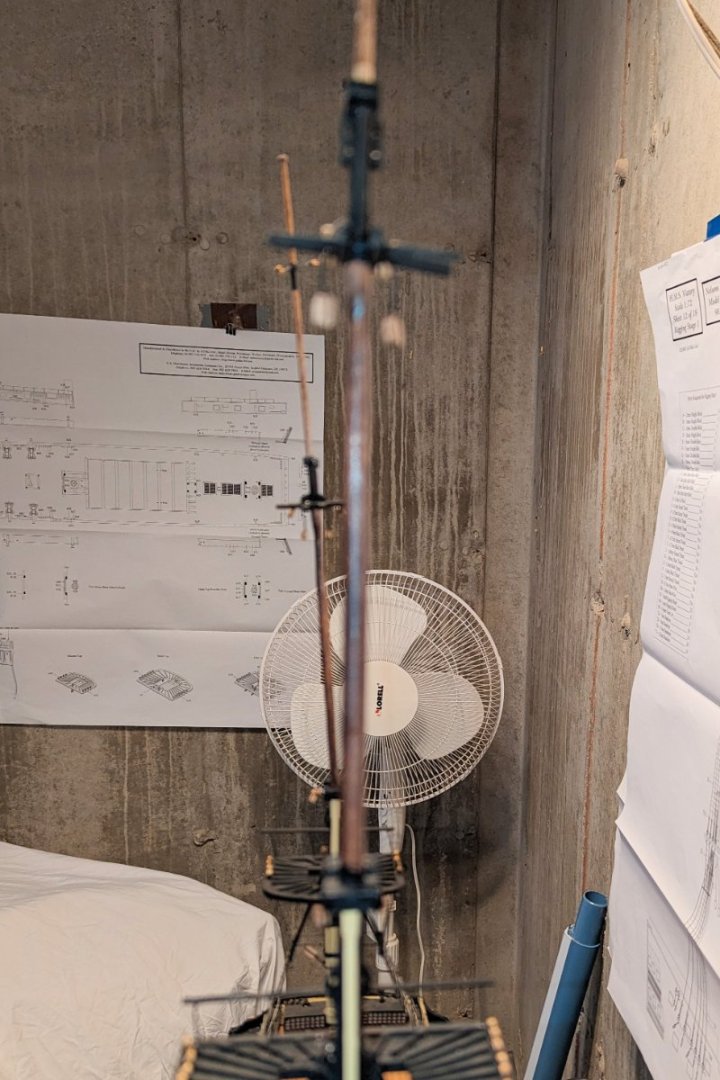
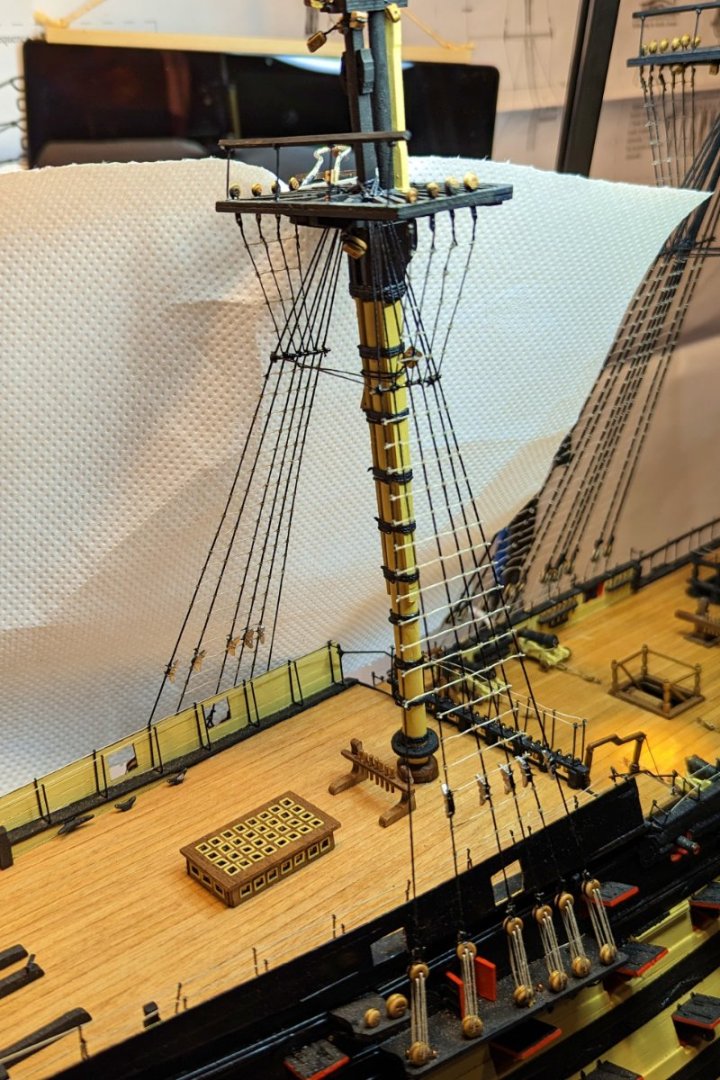
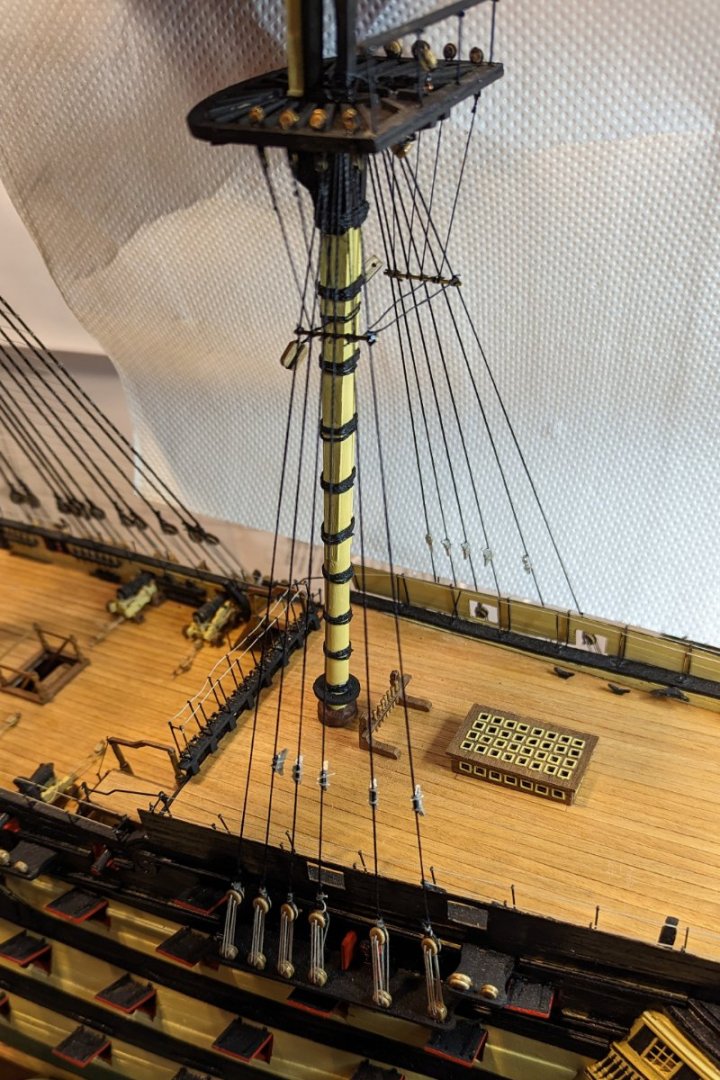
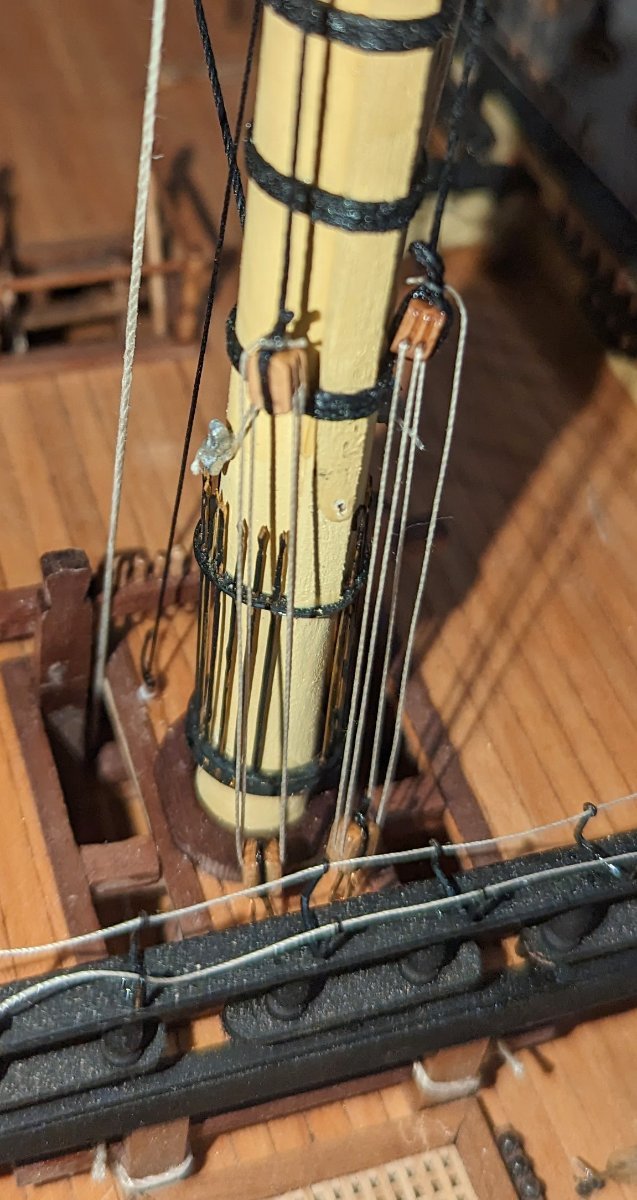
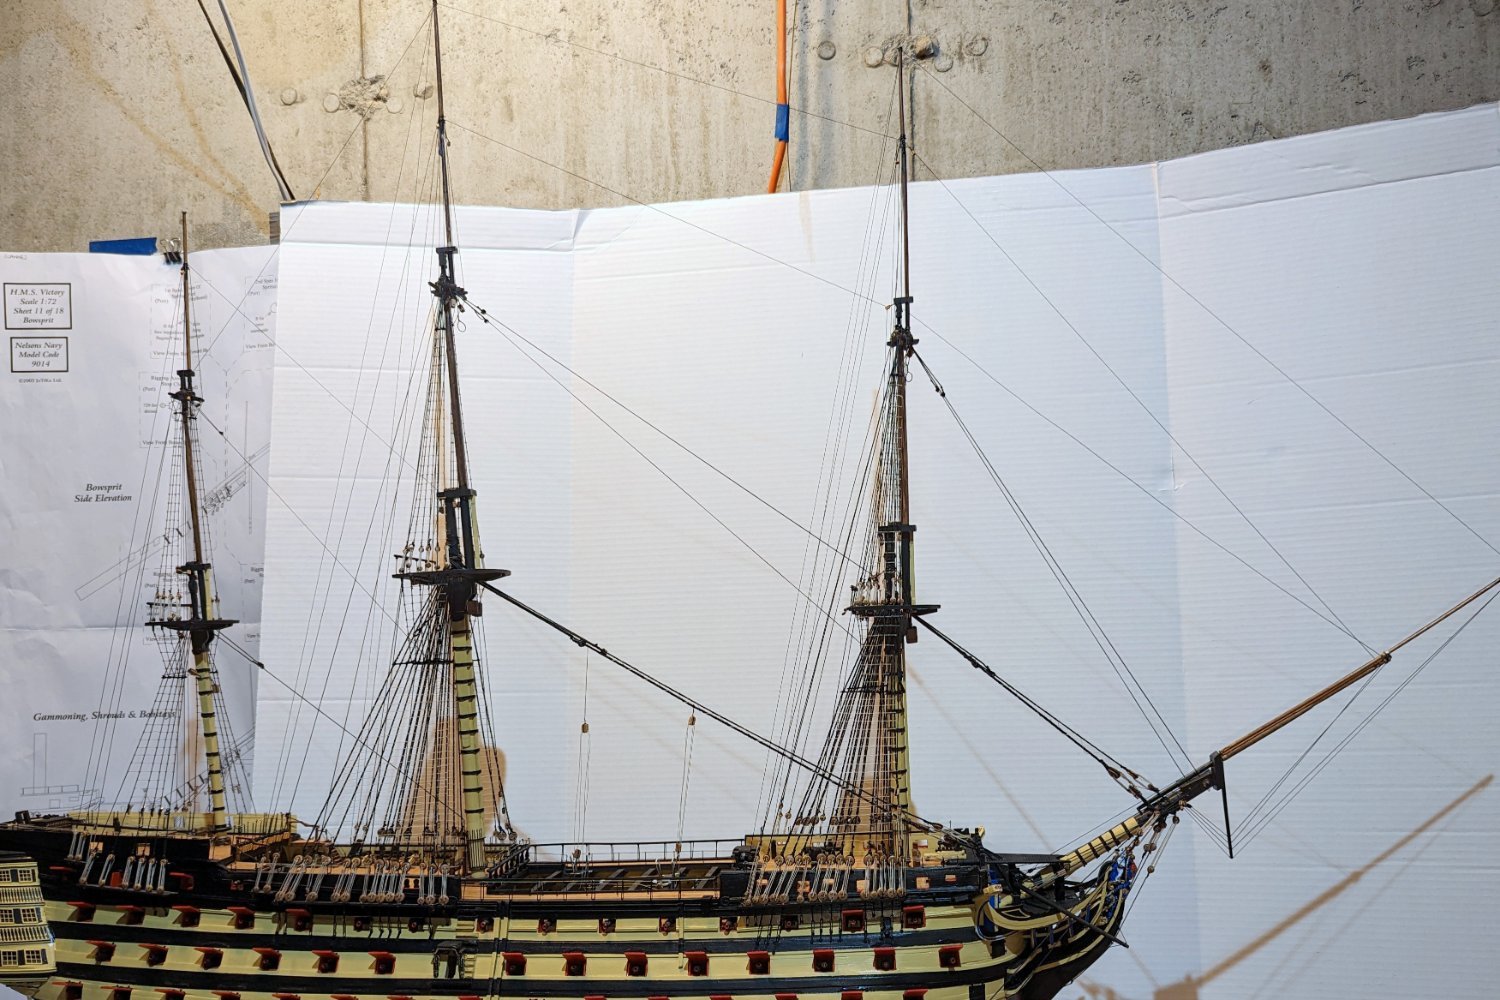
Because I need my workbench to make the yards, I have moved the ship across the room. I also need somewhere to store the yards as I build them -- so I will mount them on the masts as I go along. Pic of the first mounted yard is shown, along with some rigging detail.
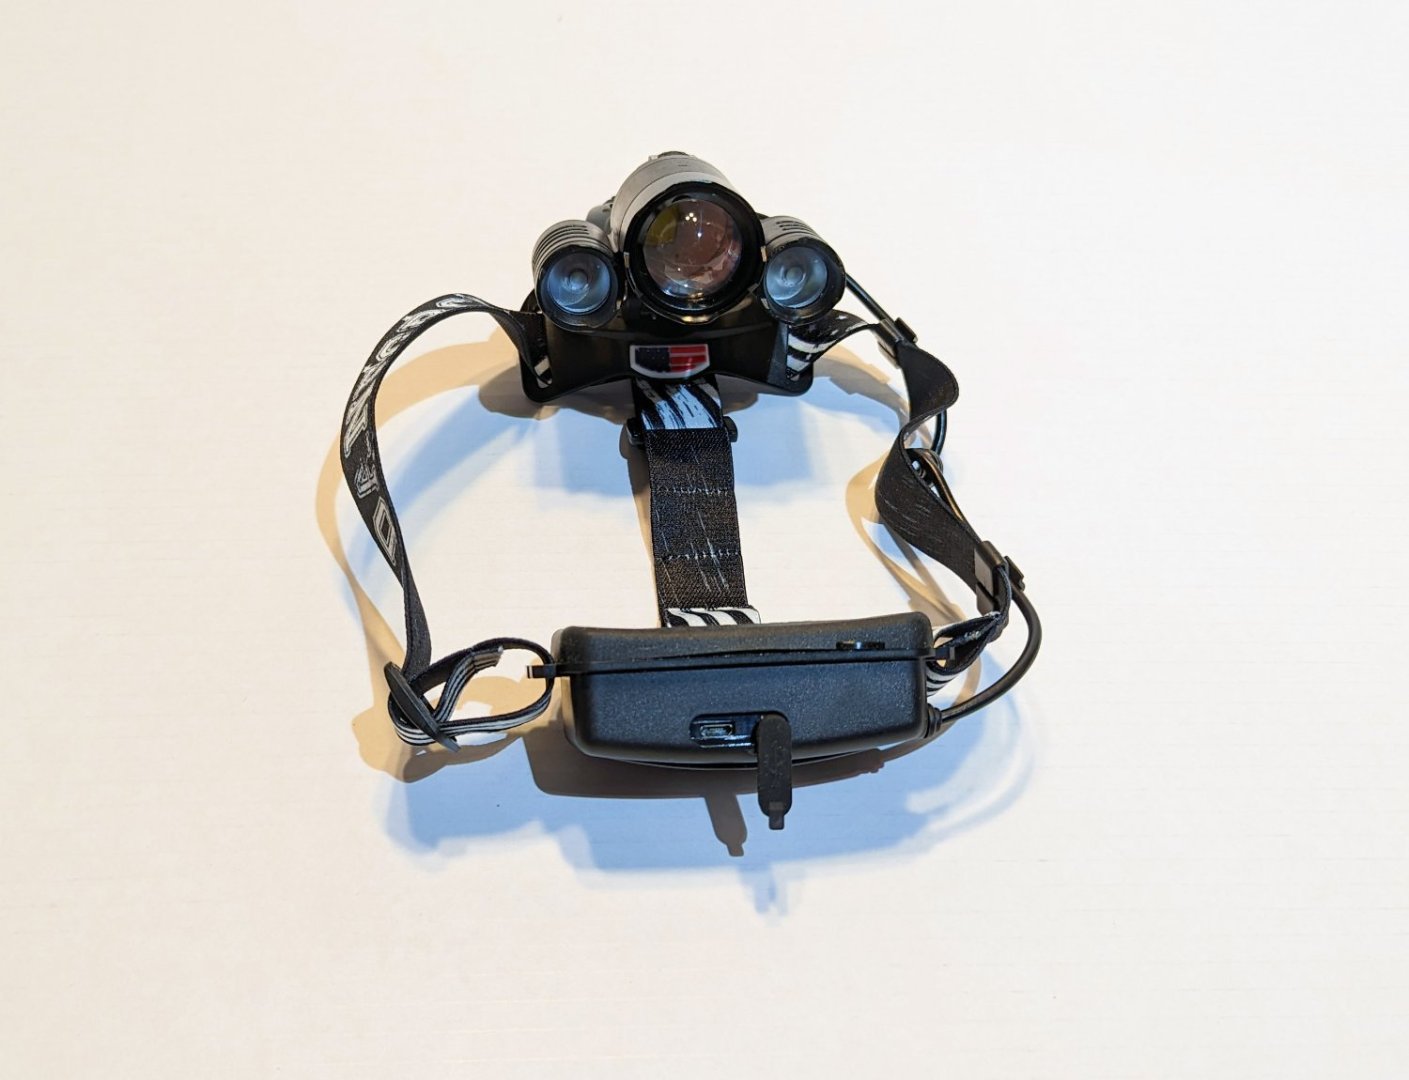
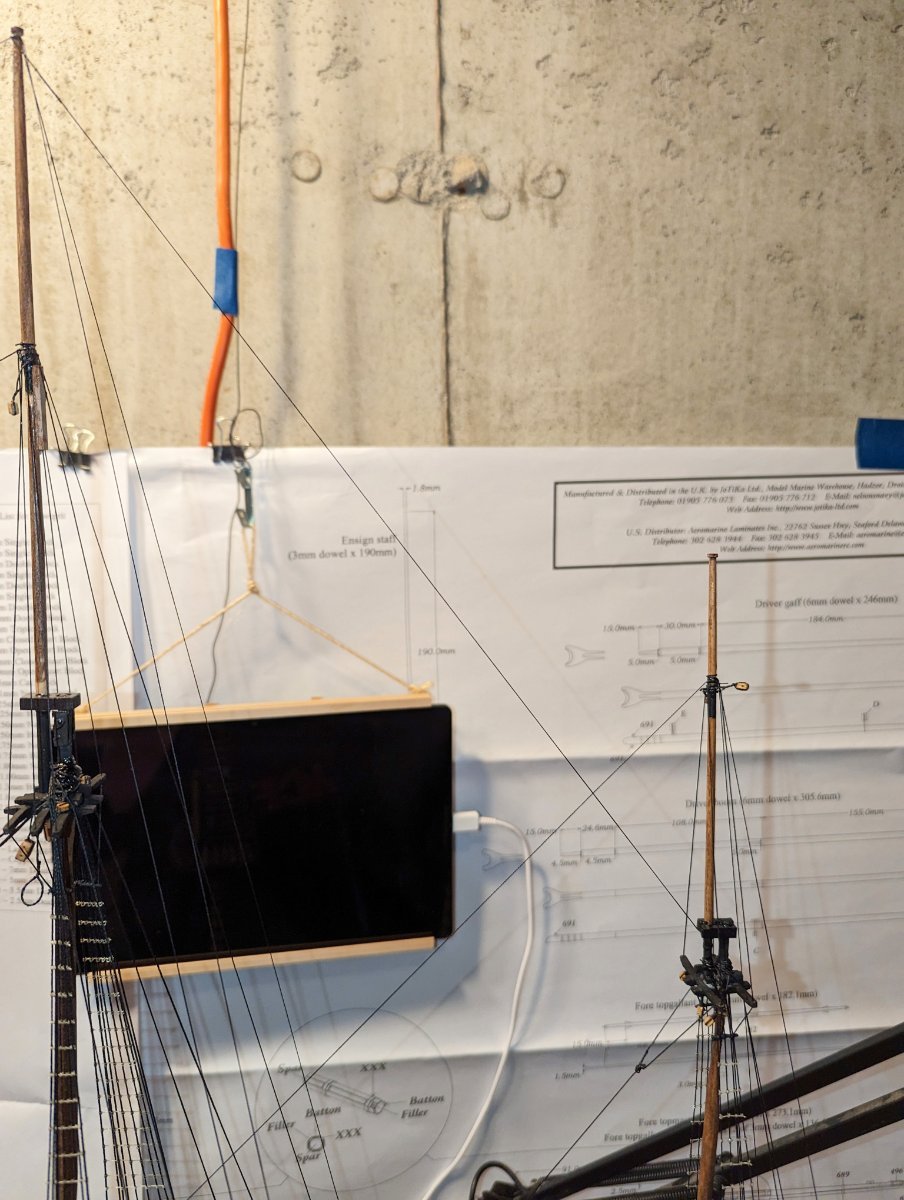
The light is not very good in the part of the workroom where the ship now is, so I bought a LED headset light (shown). Wow, what a godsend. Puts a ton of light just where you are looking. Only $30 at Amazon. Wish I'd had it sooner.
Regards,
David

-
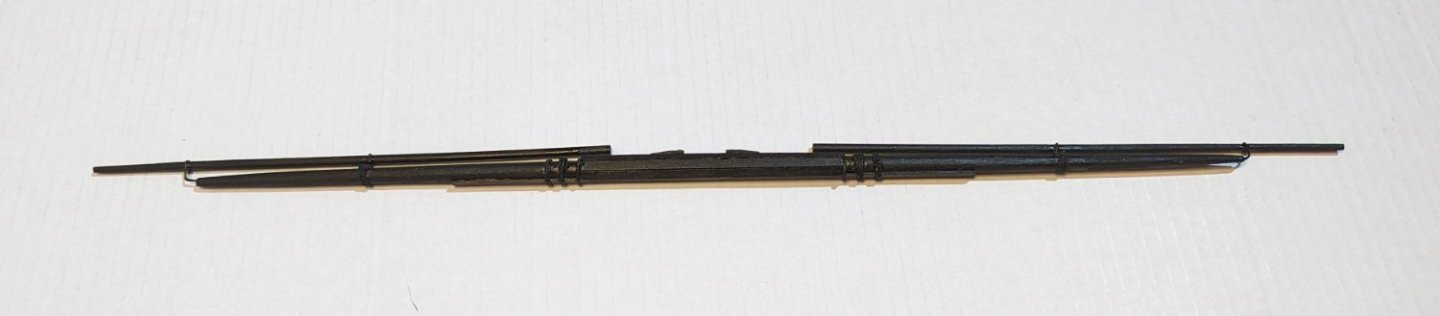
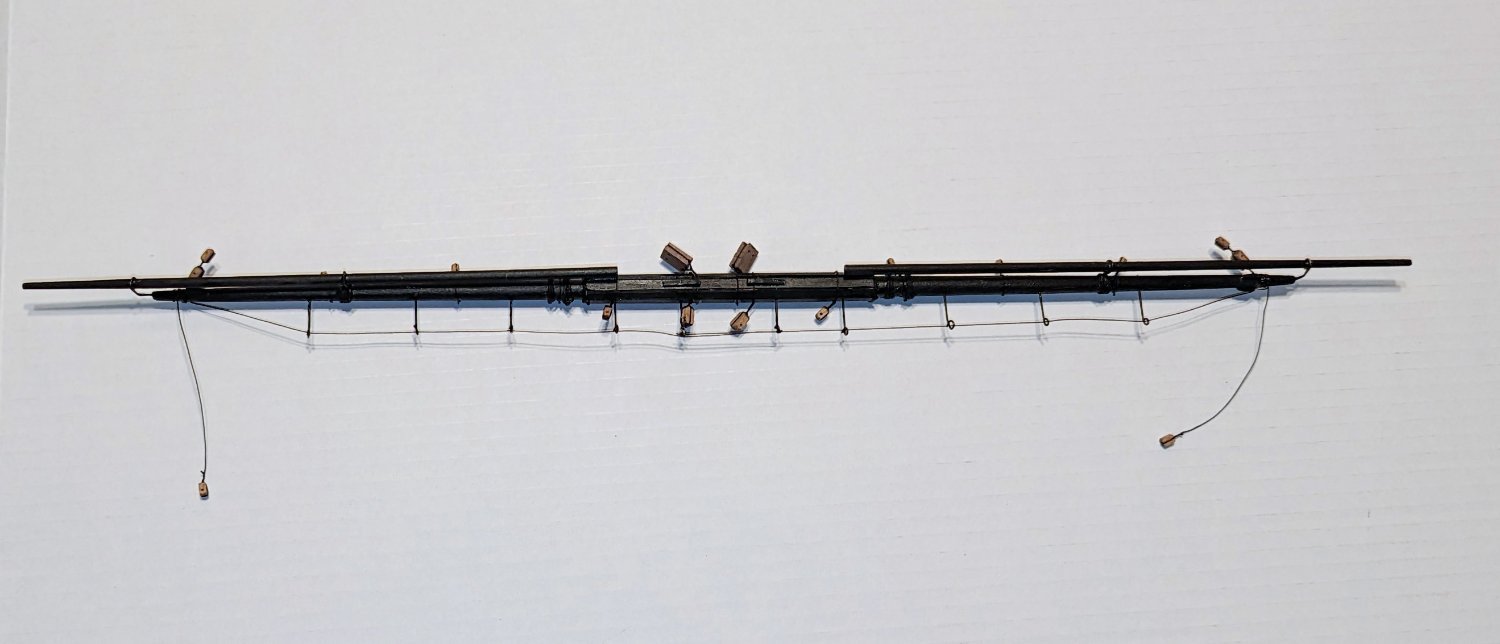
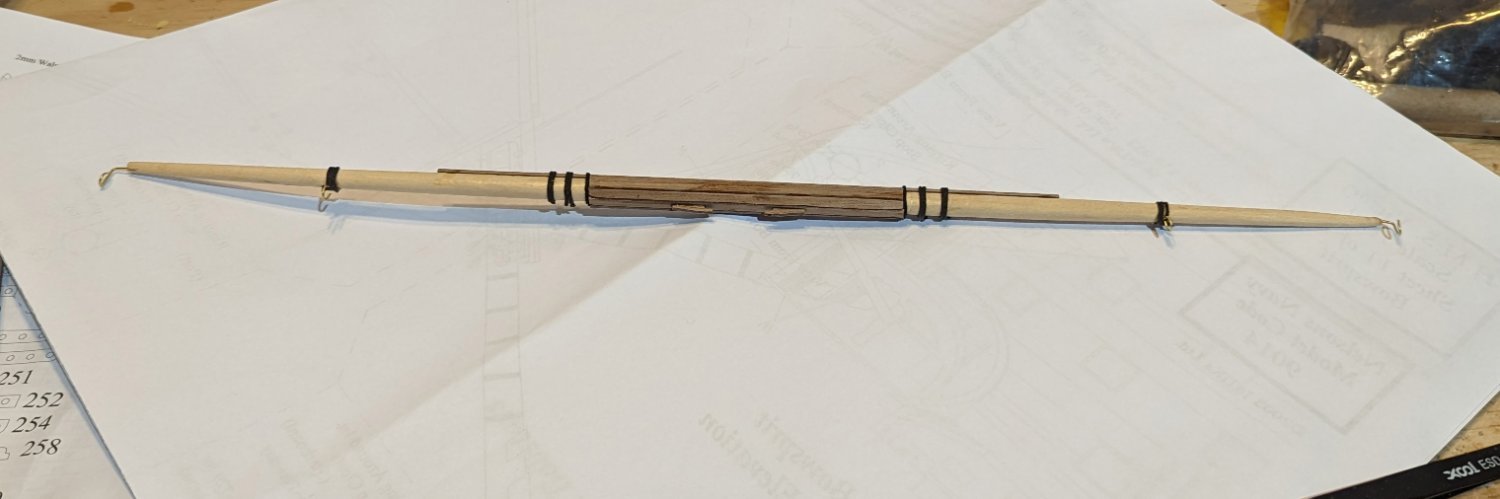
Built my first yard -- the lower main yard -- and thought I'd offer a few comments:
1) The plans show banding on the yards, but there is no indication there or in the manual what they are made of, so I used black thread.
2) For the life of me, I can't figure out the mast rings supplied with the kit. The inner diameters seem wrong, and the counts seem wrong. So I have abandoned them and made my own for the stunsail booms out of wire. It's all painted black at the end so it looks fine.
The finished yard (rigging blocks not yet installed) is shown below as well.
Regards,
David

- The Gimps Chimp, vossy, GrandpaPhil and 6 others
-
 9
9
-
Finished the standing rigging on the jib. Now all of the standing rigging is done.
I haven't built any of the yards yet, so now it's on to shaping and sanding.
Regards,
David

- kiwiron, mort stoll, CODY and 6 others
-
9
-
-
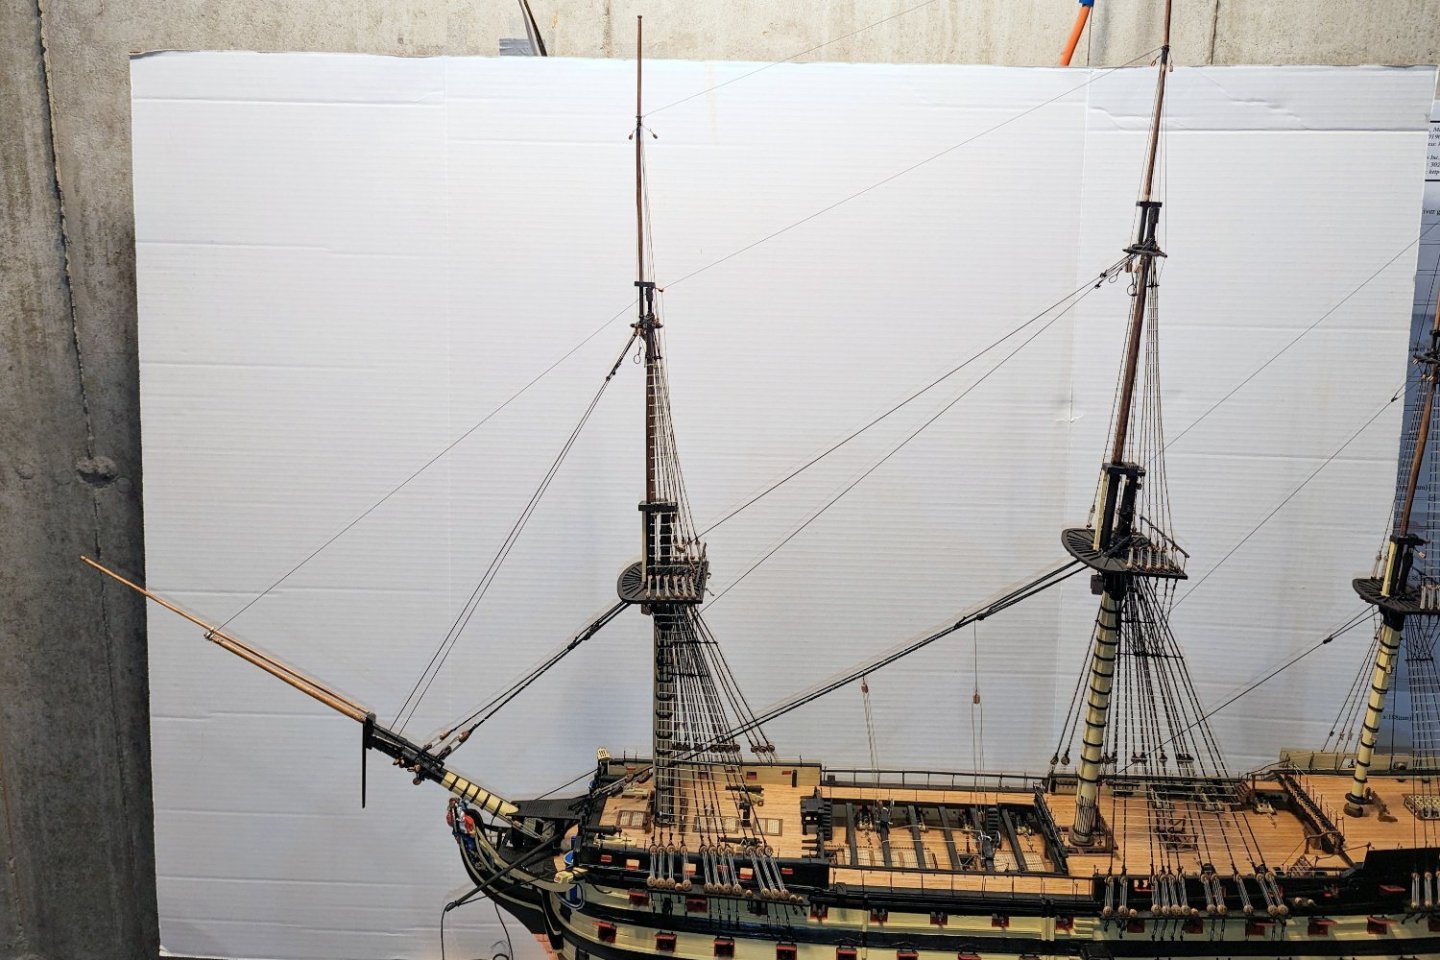
Backstays now done on all masts. Jib standing rigging next.
Regards,
David

- mort stoll, CODY, vossy and 5 others
-
8
-
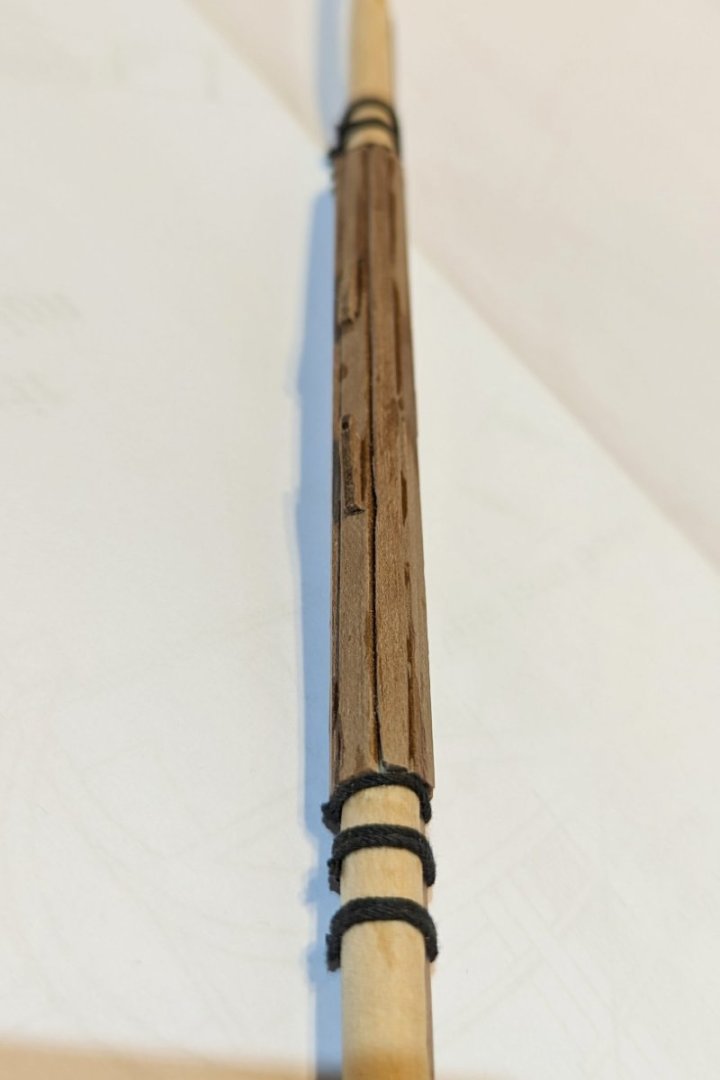
A couple of "not in the plans" mods:
- When I made the main topgallant mast, I messed up and created an area of the mast that was too narrow, and too weak. As I got into rigging the backstays, I saw that it might not hold the tension. So I added a small splint, which is virtually invisible at normal viewing distance, and that has strengthened the mast back to where it can handle rigging tension.
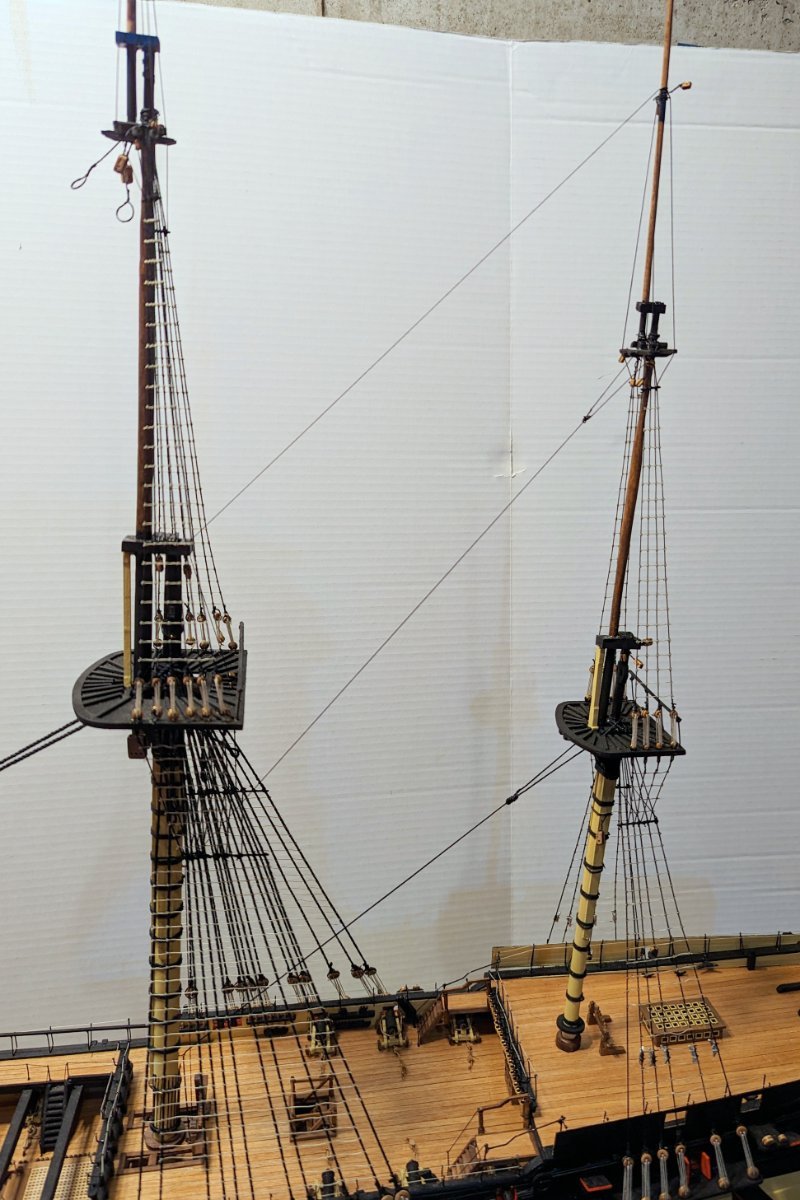
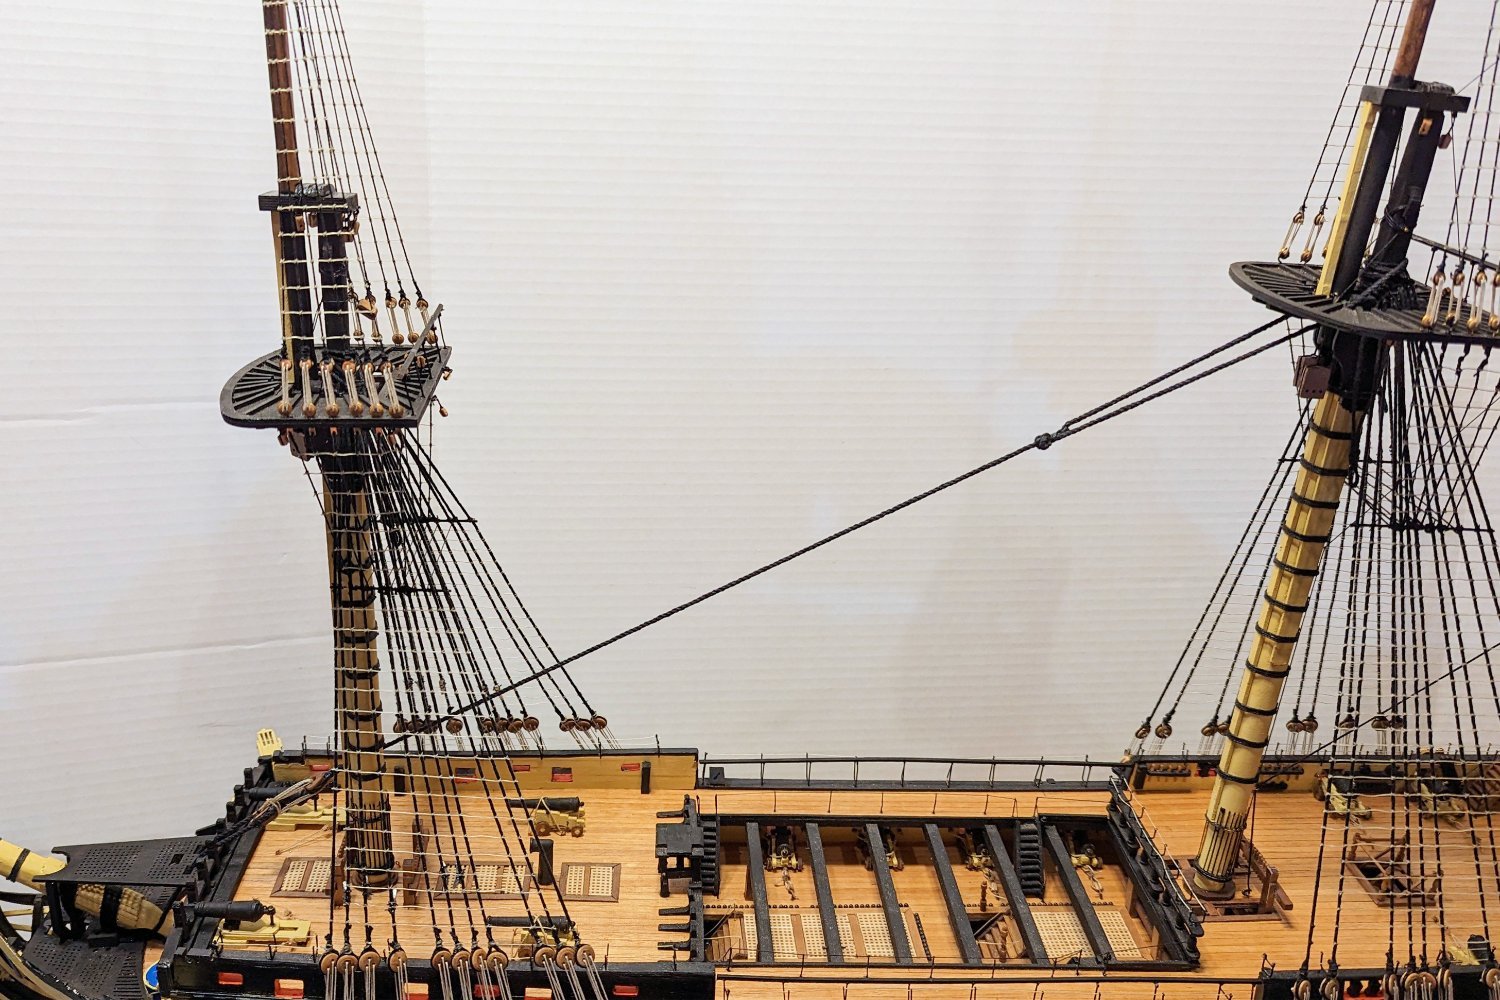
- I also added a backstay that isn't in the plans, running left to right from the top of the main mast down to the mizzen. The backstays that are in the plans run at too steep an angle to pull the topgallant mast back to straight, which is what was needed.
Regards,
David

- vossy, mort stoll, The Gimps Chimp and 1 other
-
4
-
Here is most of the forestay rigging done.
Last picture shows some lines I've temporarily rigged through the boomkins and up to the jib, to try to keep me from pranging anything else.
Regards,
David


- mort stoll, Sjors, vossy and 4 others
-
7
-
-
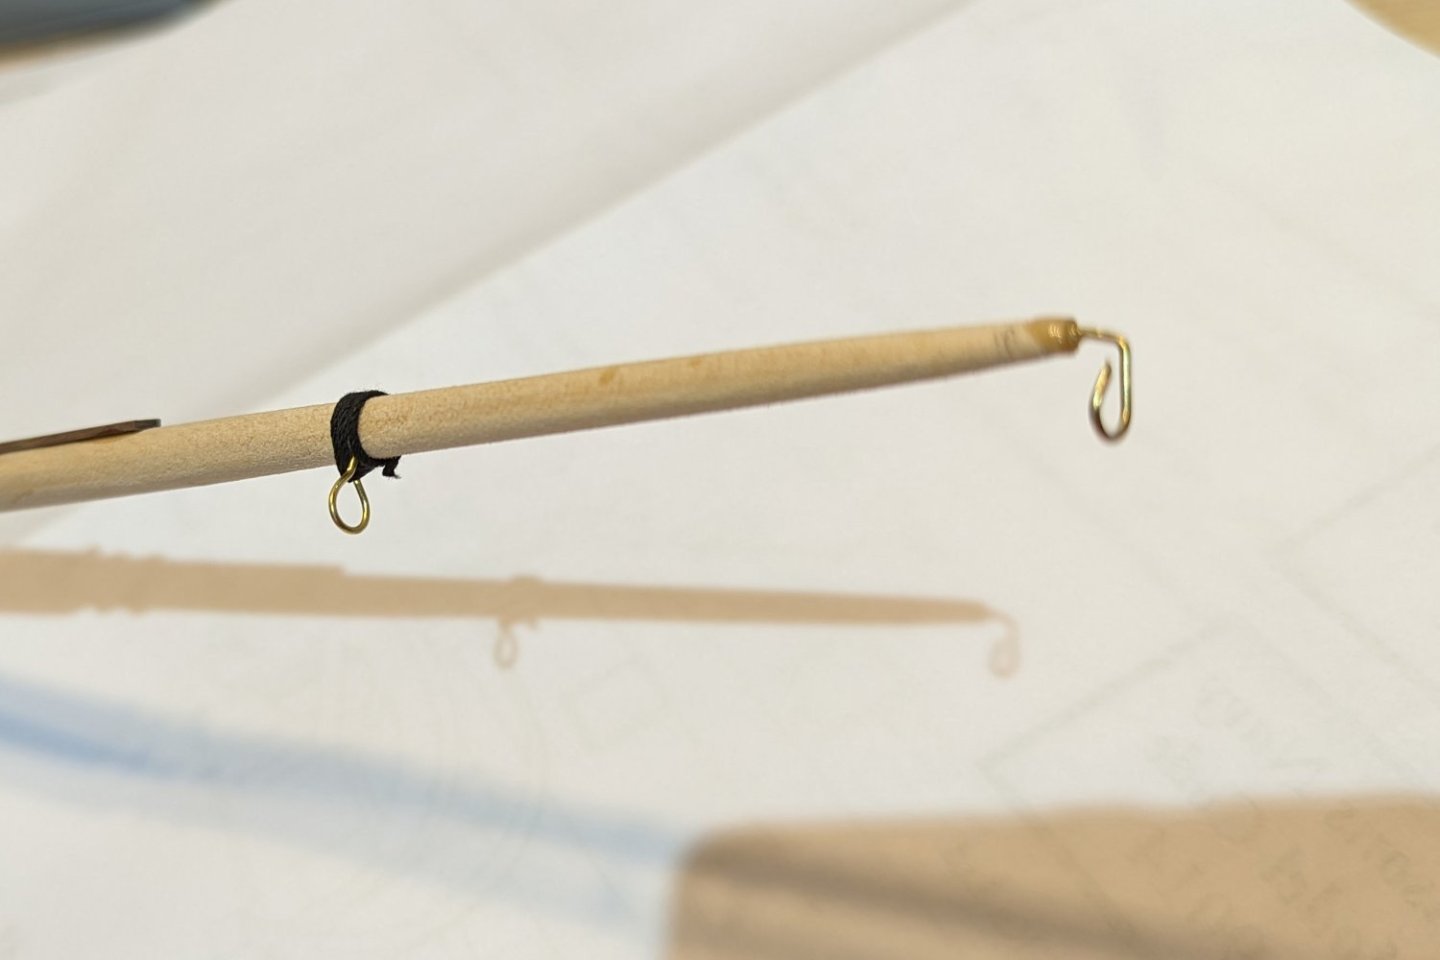
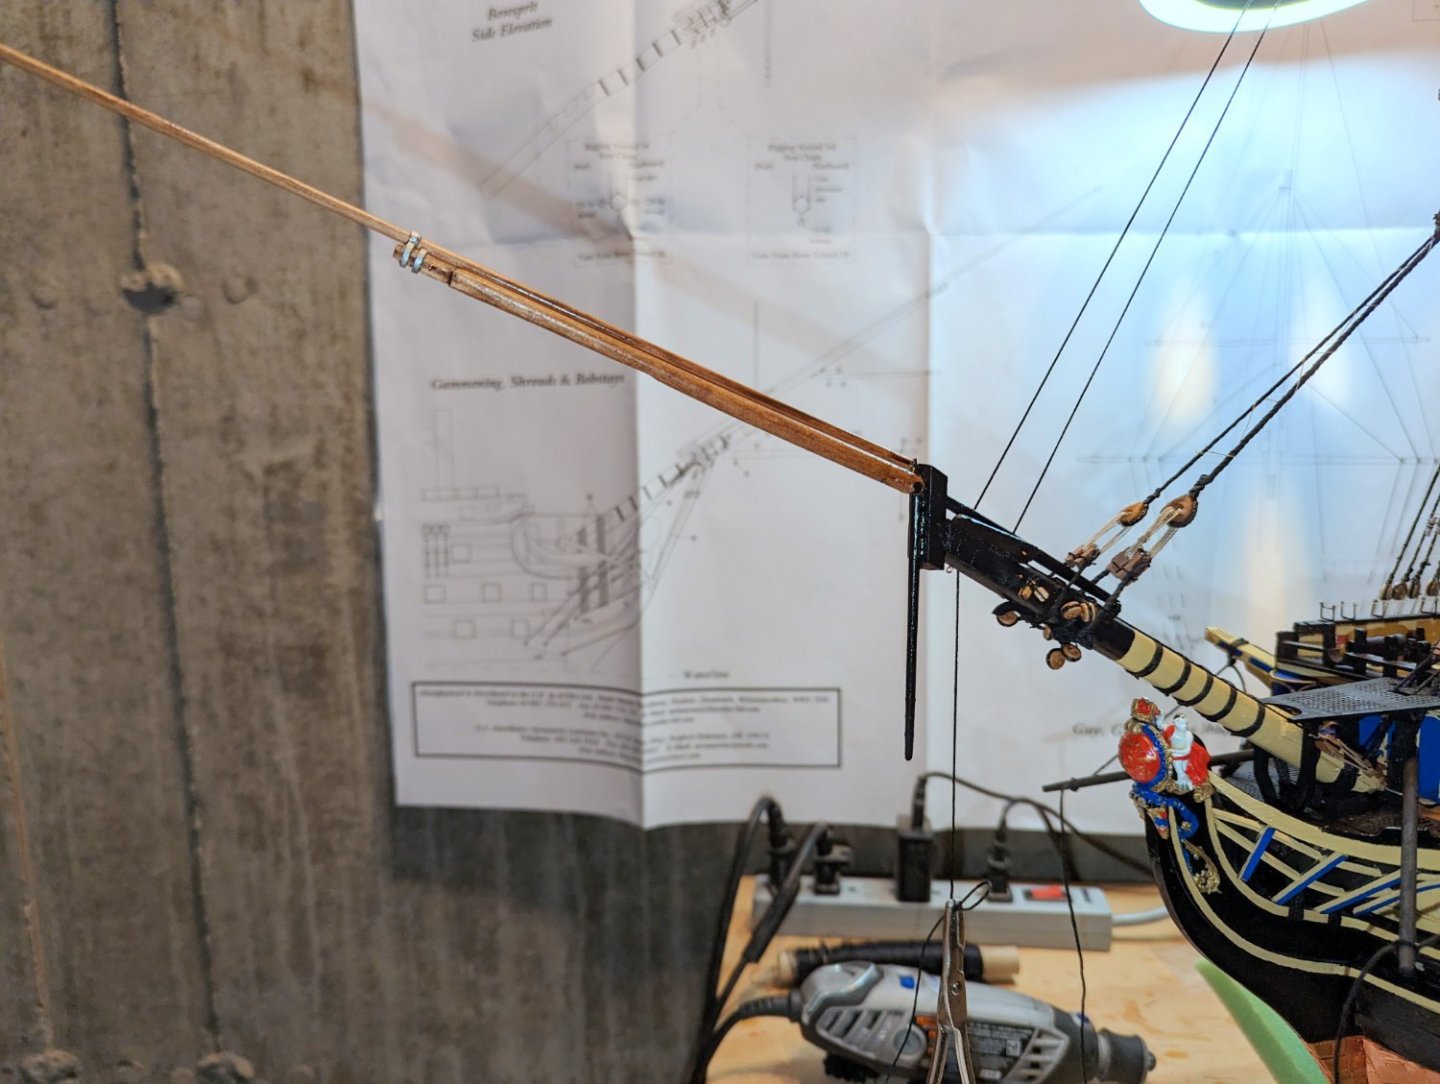
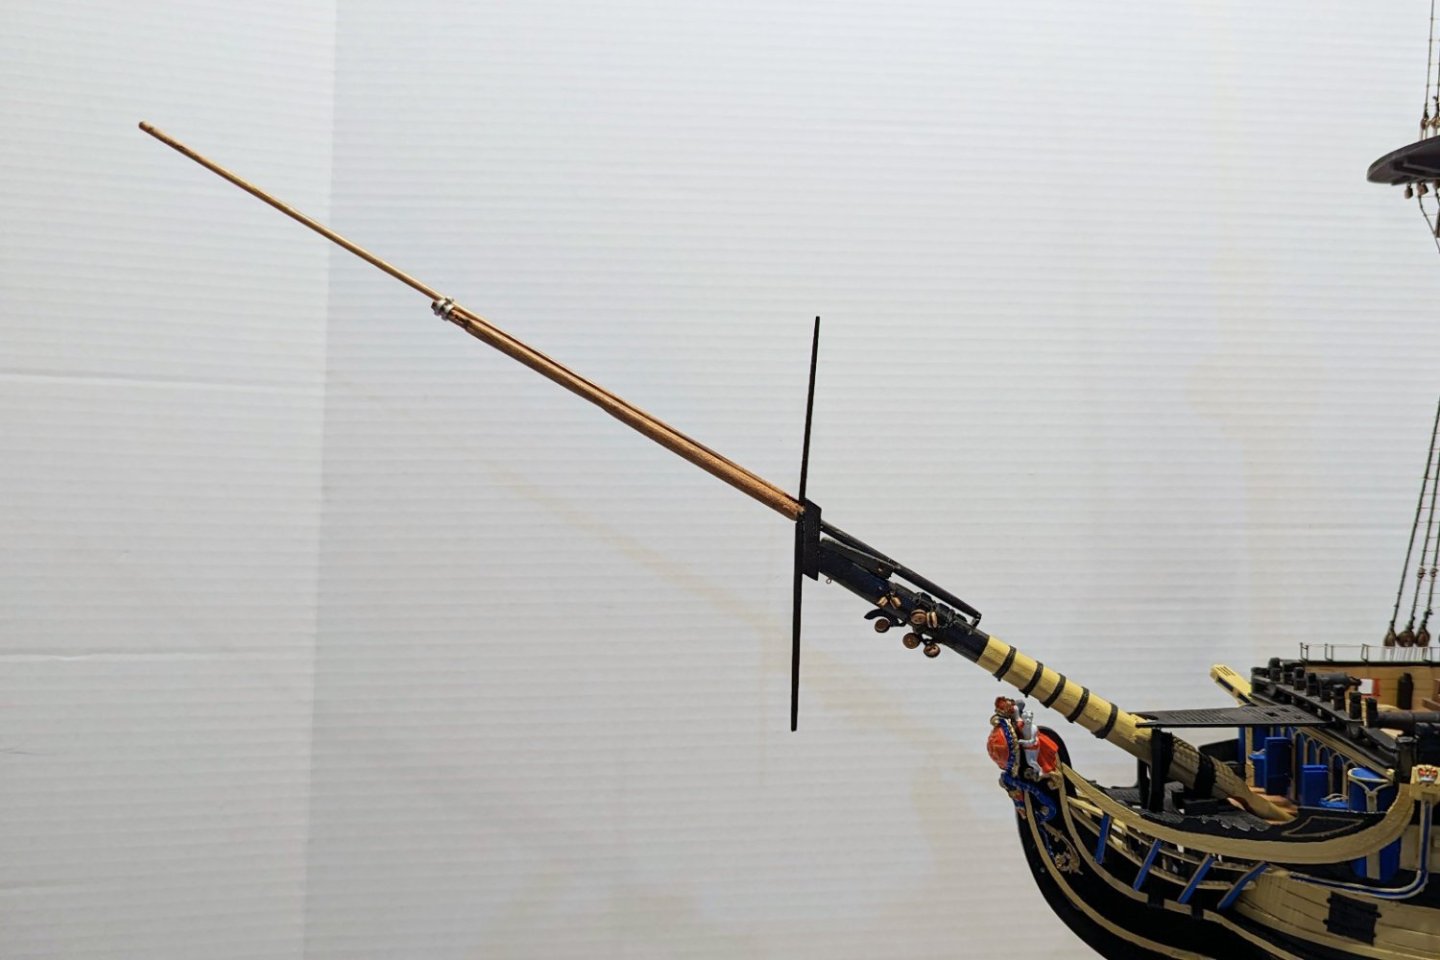
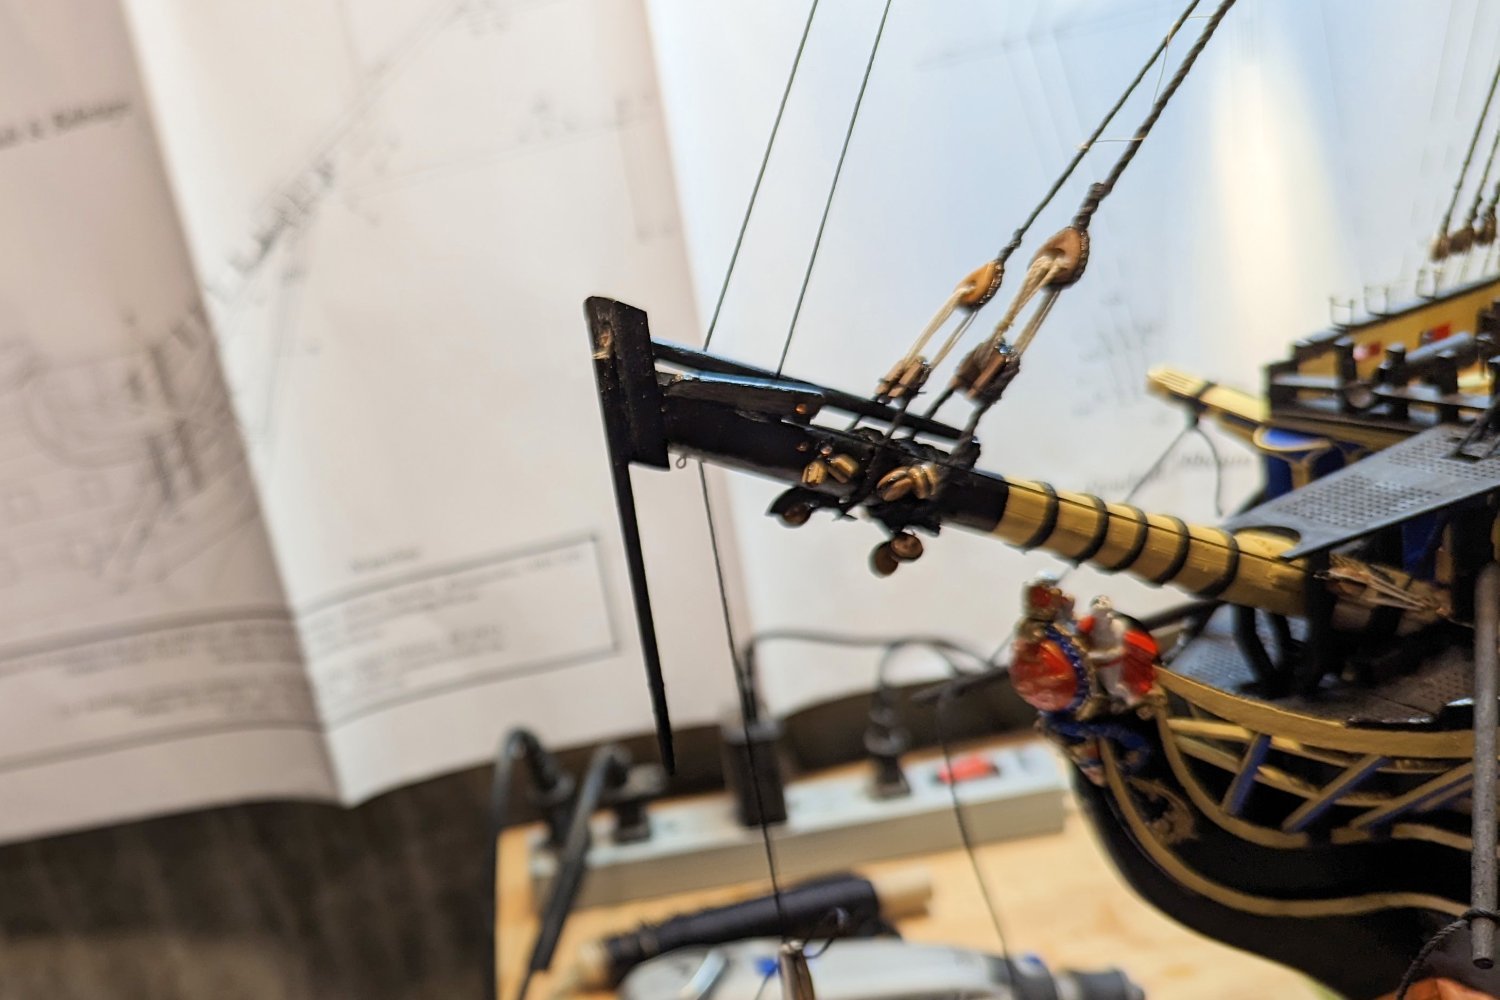
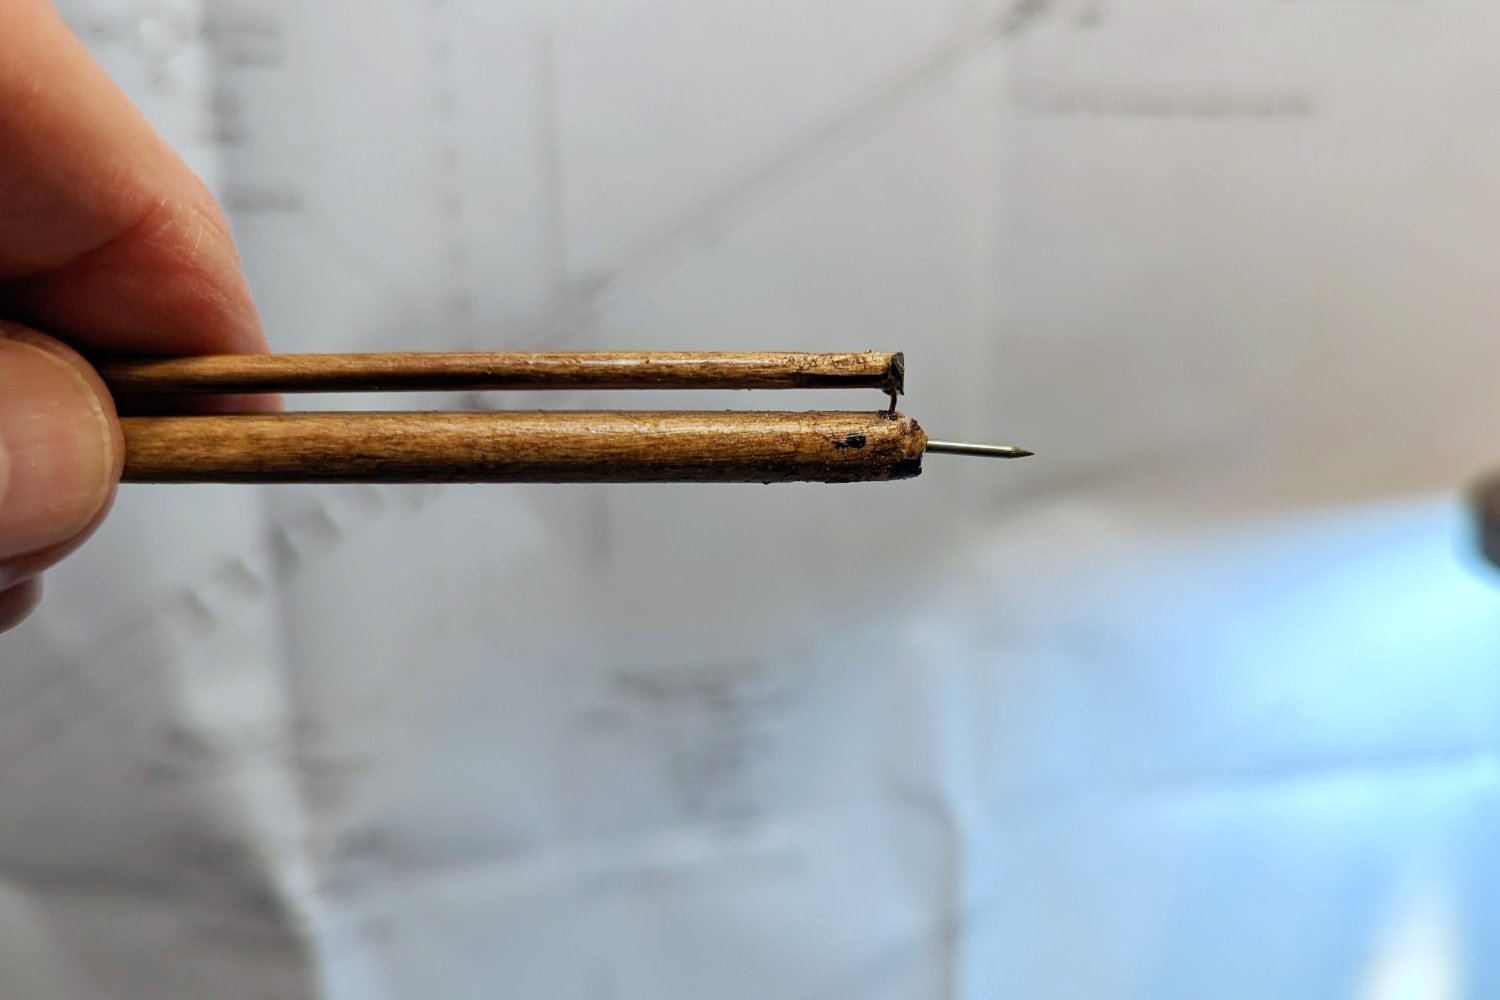
Well, it was bound to happen to me sooner or later -- a bad prang.
In this case, I was wearing a sweater while working around the bowsprit from the front. The tip of the bowsprit caught on my sweater without me knowing it, I moved, and SNAP.
I thought it would need a really stiff nail for repair, so I used a picture hanging nail, which is shown below. I THOUGHT I had it completely aligned when I dry-fitted the repair, but at the end of gluing it somehow had developed a slight downward cant -- which I'm going to have to live with since I'm not about to try to take it apart -- I really glued it on solidly.
I can think of worse disasters -- like dropping the whole model -- and all in all, this repaired fairly well given the total snapoff.
It took the jackstaff with it, and I'll probably add that back at the end of the build.
But there is that slight downward angle . . . Oh well.

Regards,
David
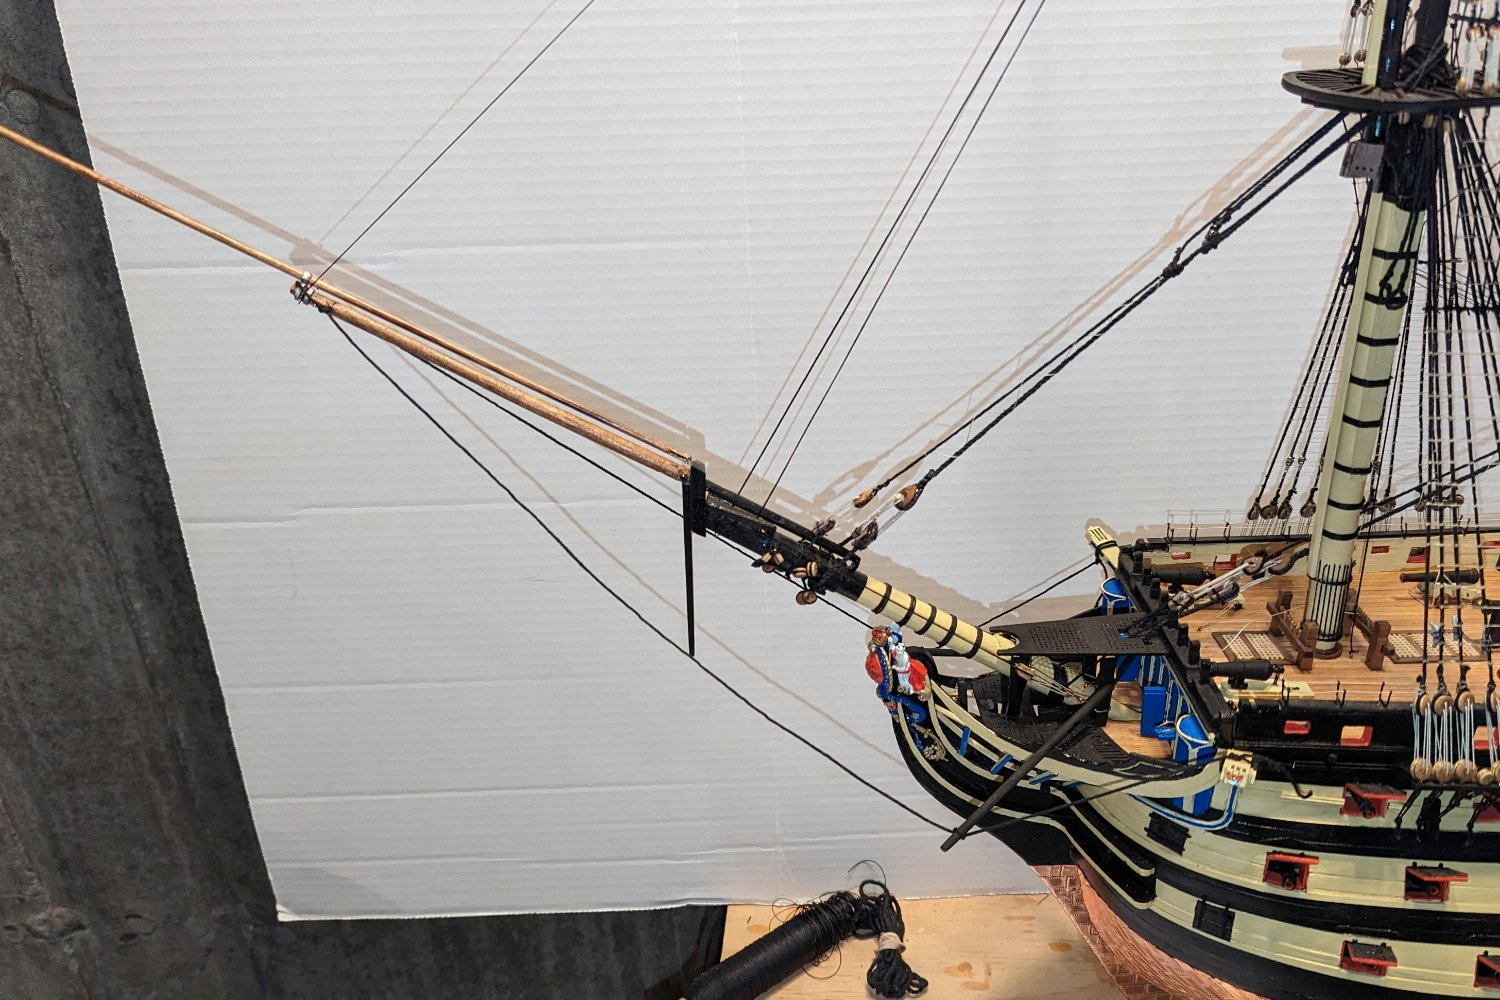
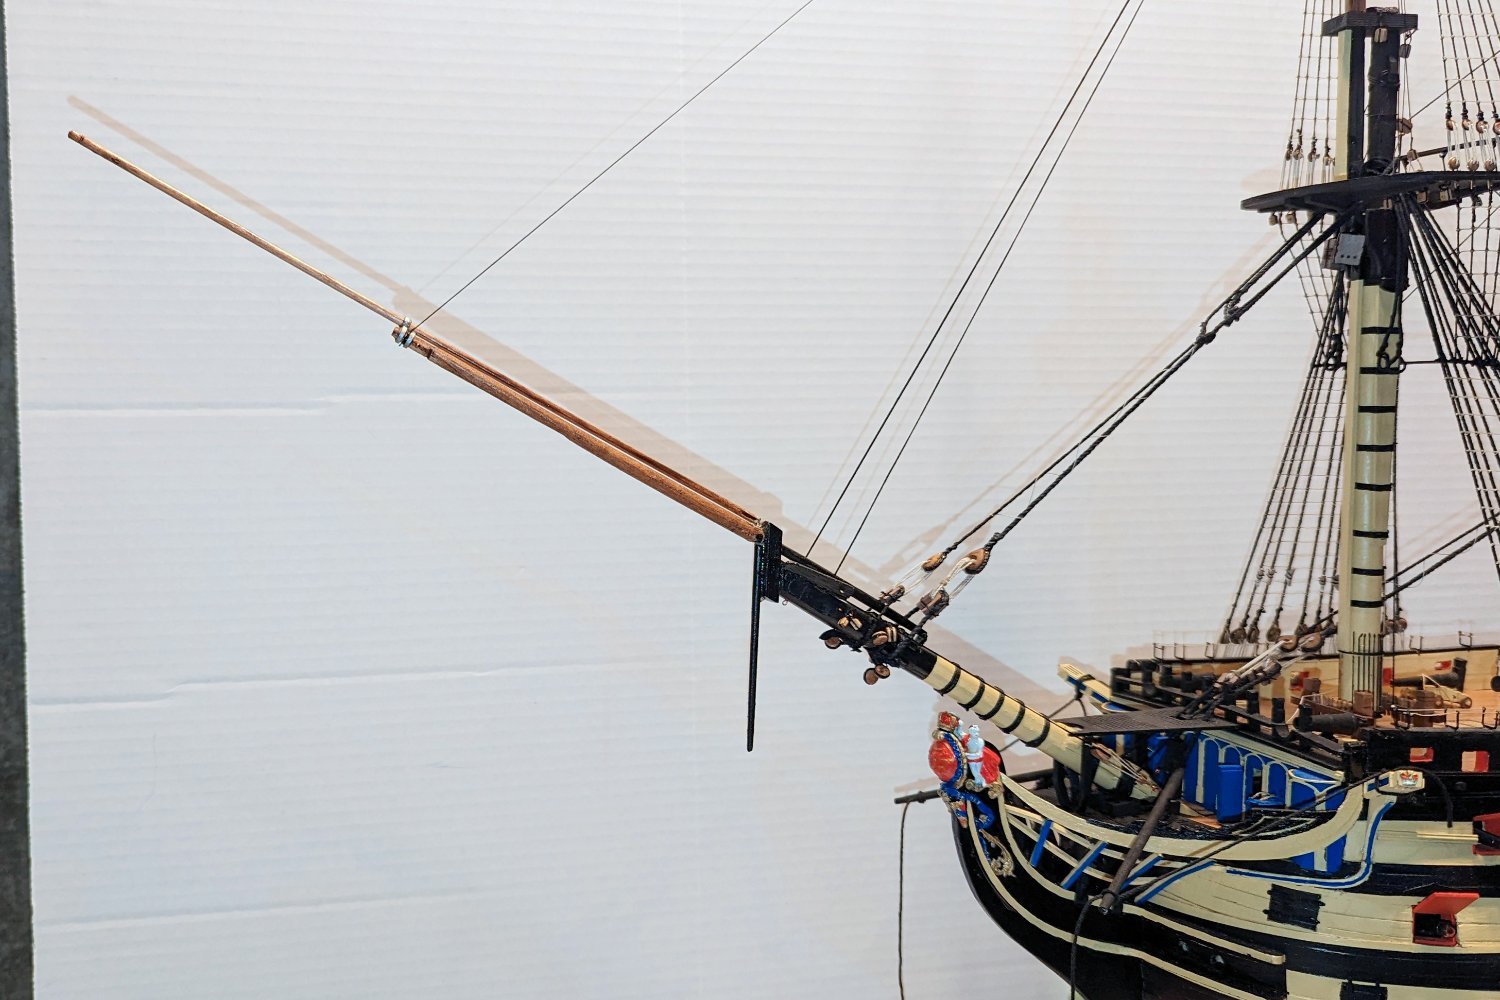
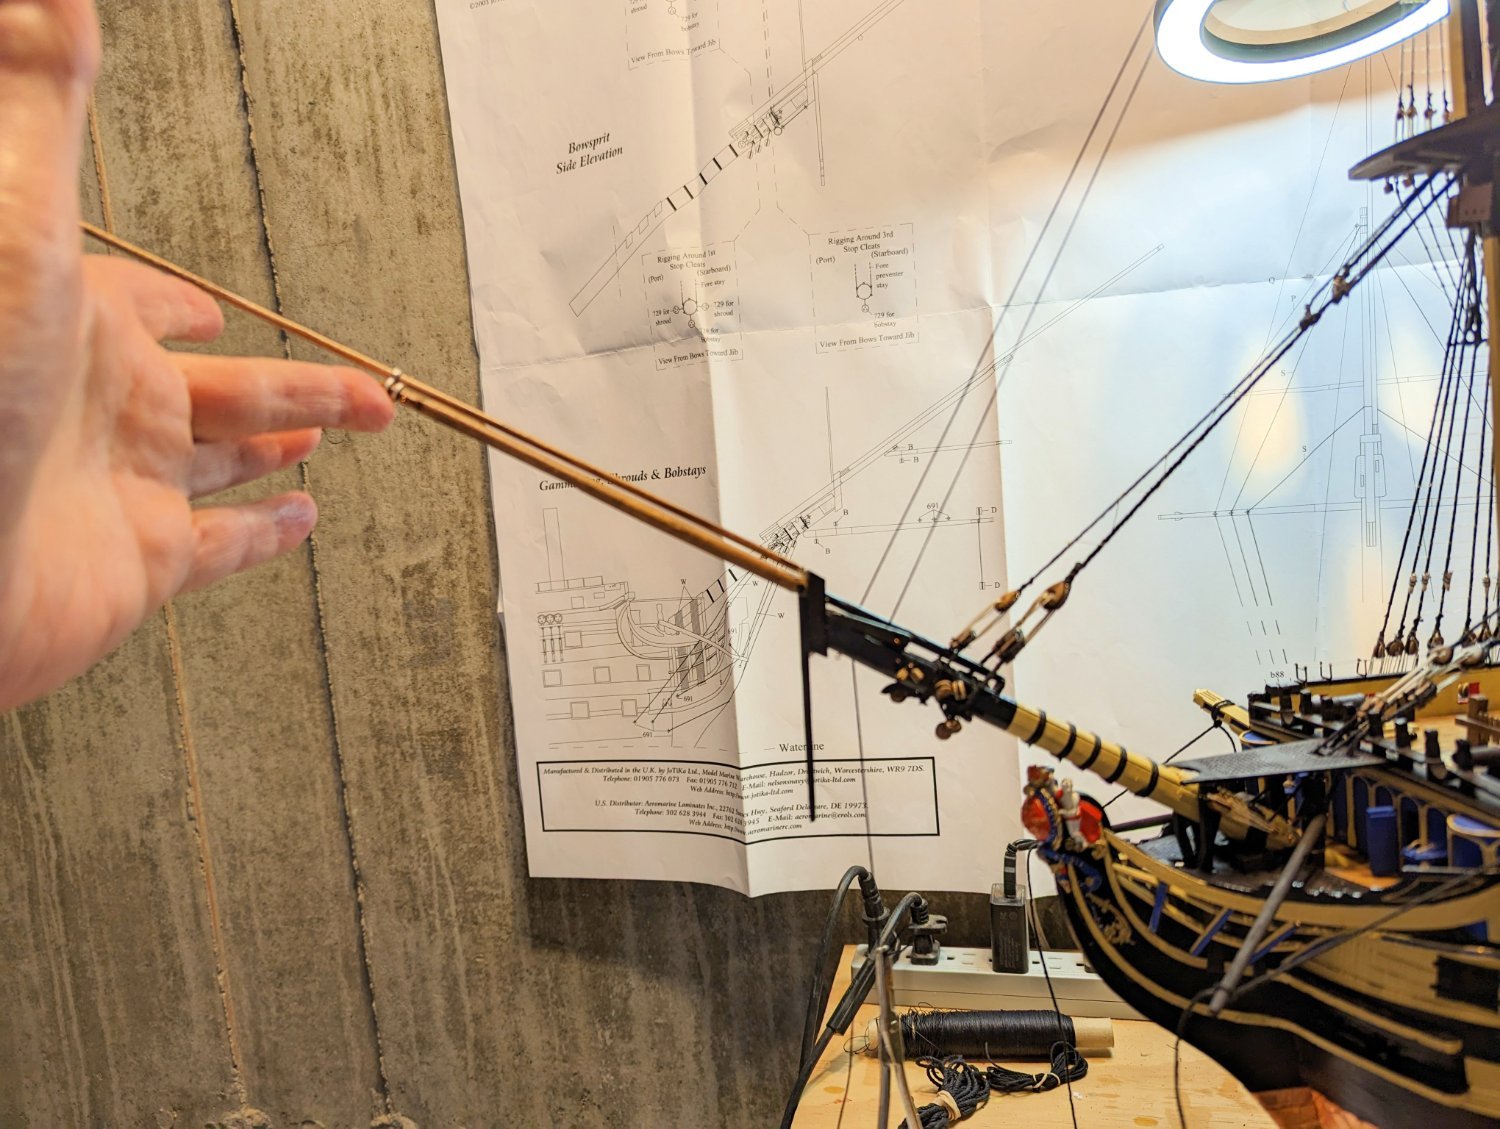
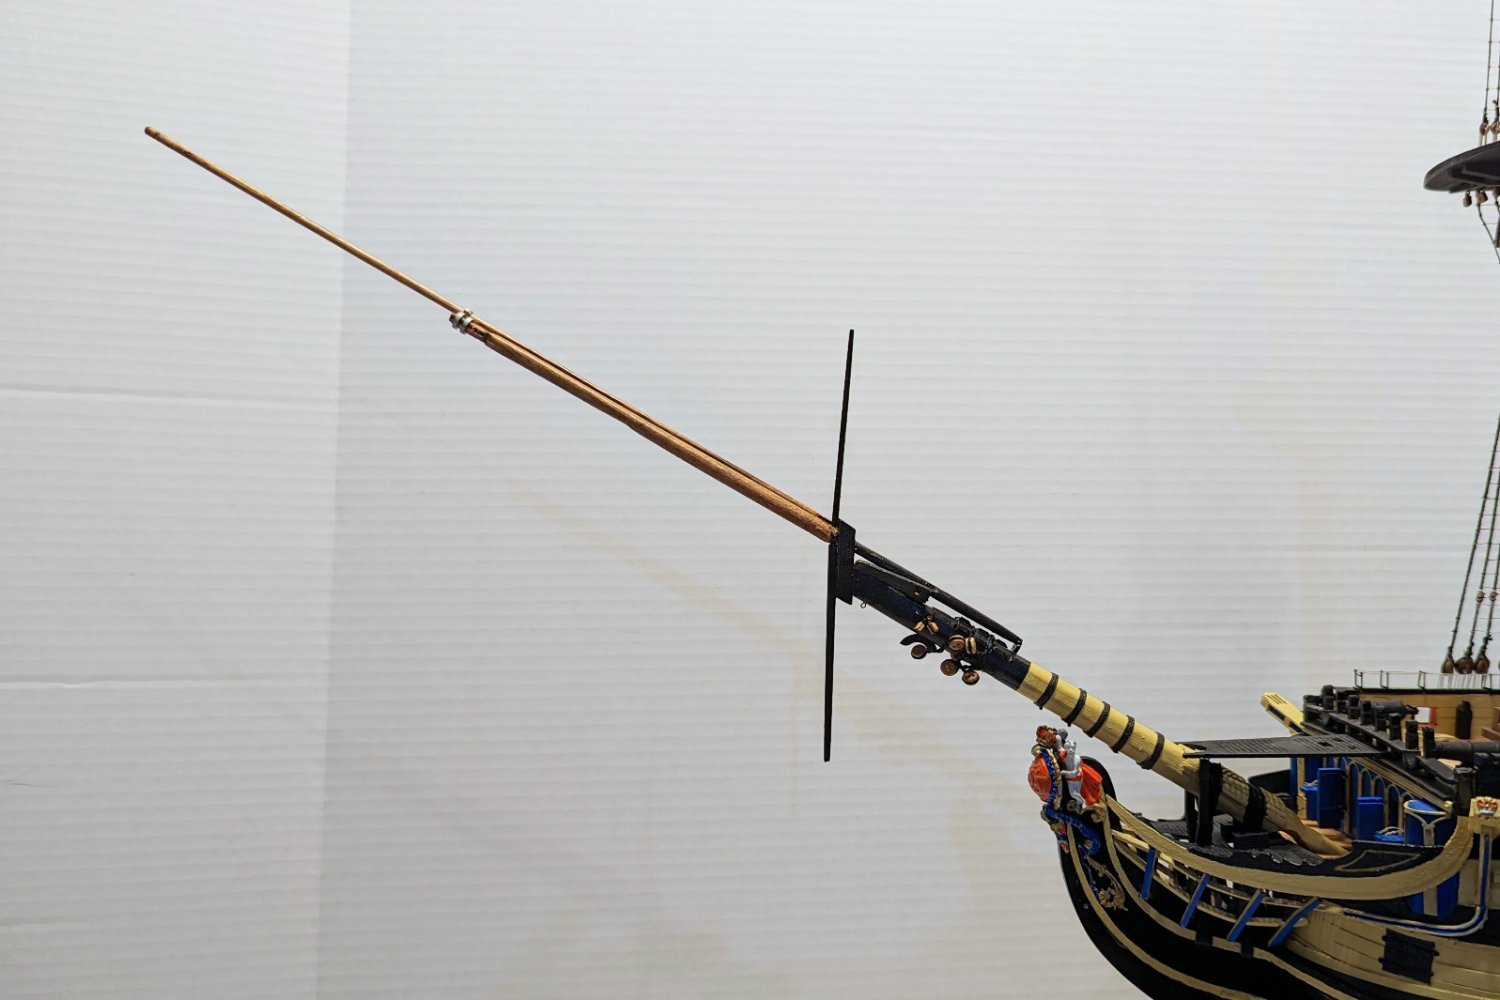
UPDATE: I was able to bend the sprit up some, and to a point where I can use the stays to finish the realignment. Final picture shows what it will look like when the stays are installed. I'm only putting a slight upward pressure on with my hand.
WHEW!


- Sjors, Haliburton, mort stoll and 4 others
-
7
-
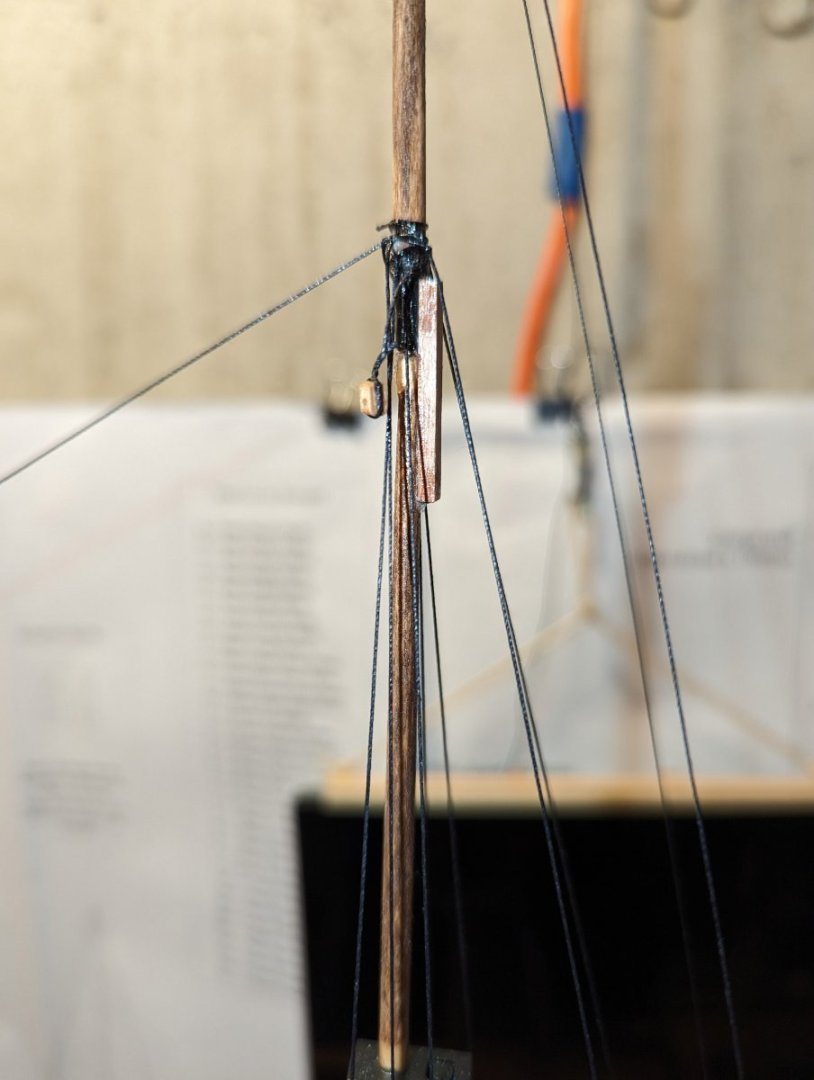
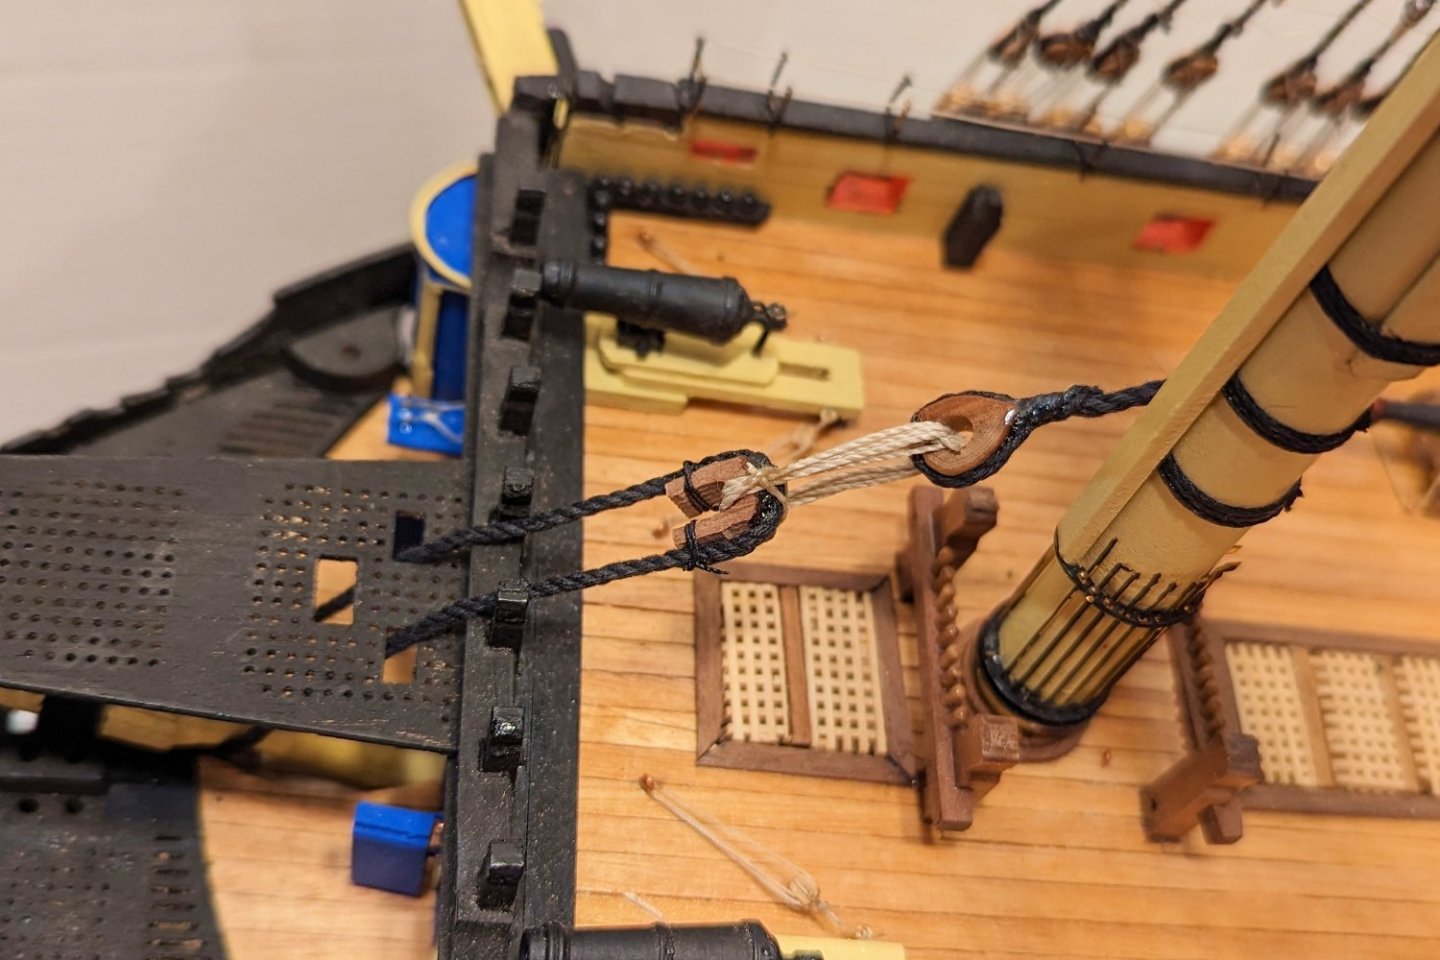
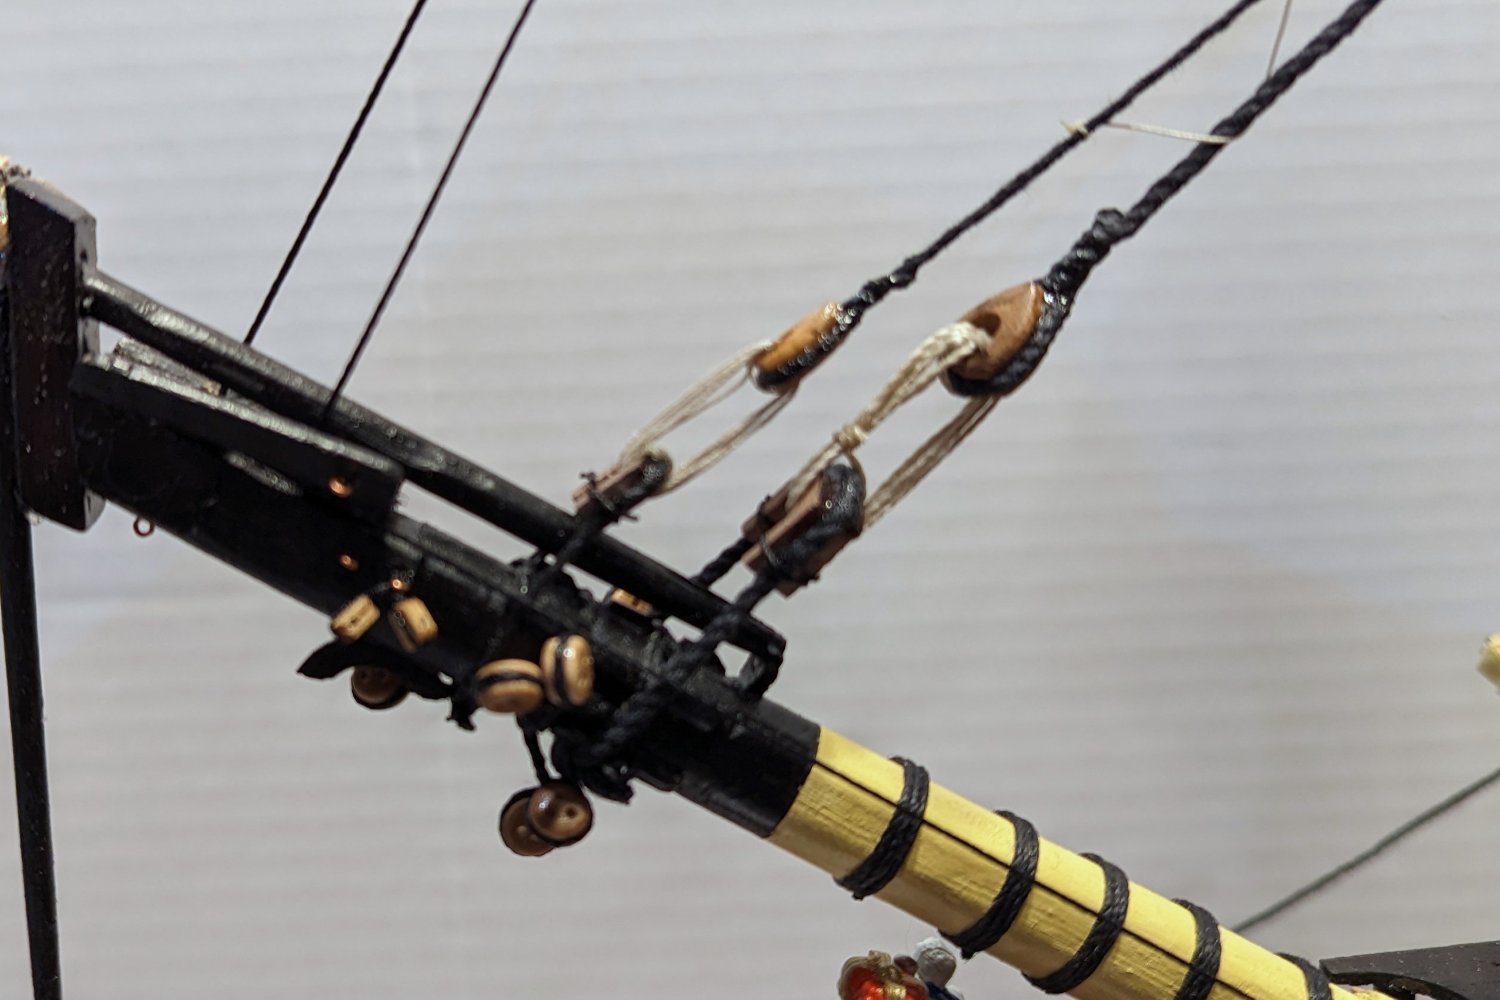
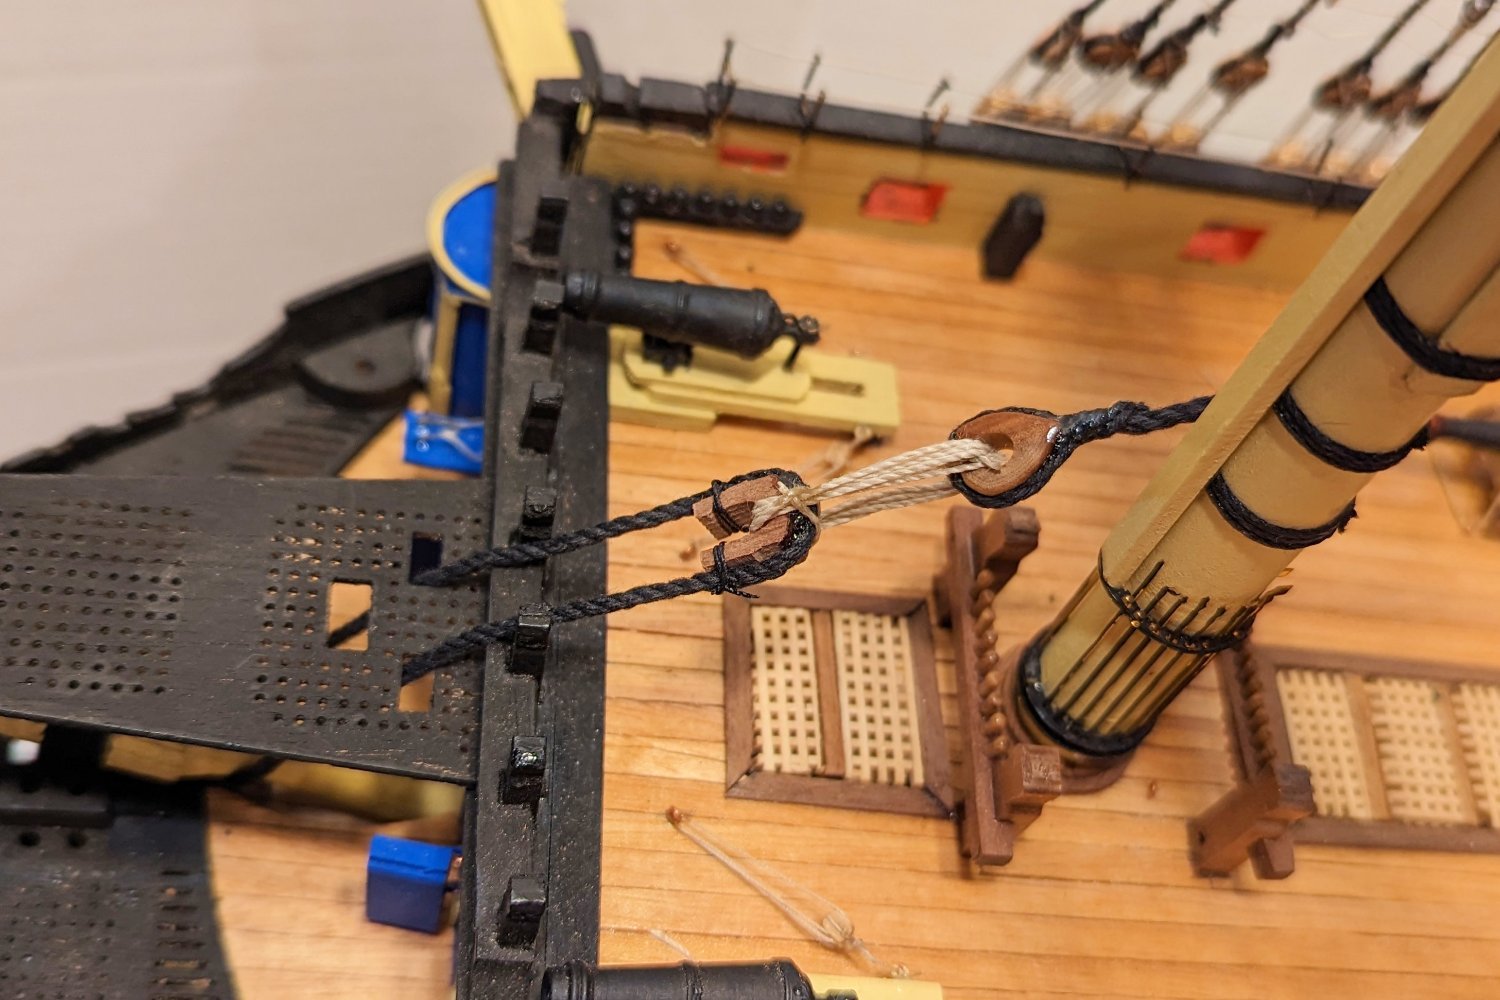
I've begun work on the forestays. Mizzen stays done; first main mast forestay installed. Closeup picture below of the heart blocks and lashings used to secure the main forestay.
Regards,
David

- CODY, mort stoll, Sjors and 4 others
-
7
-
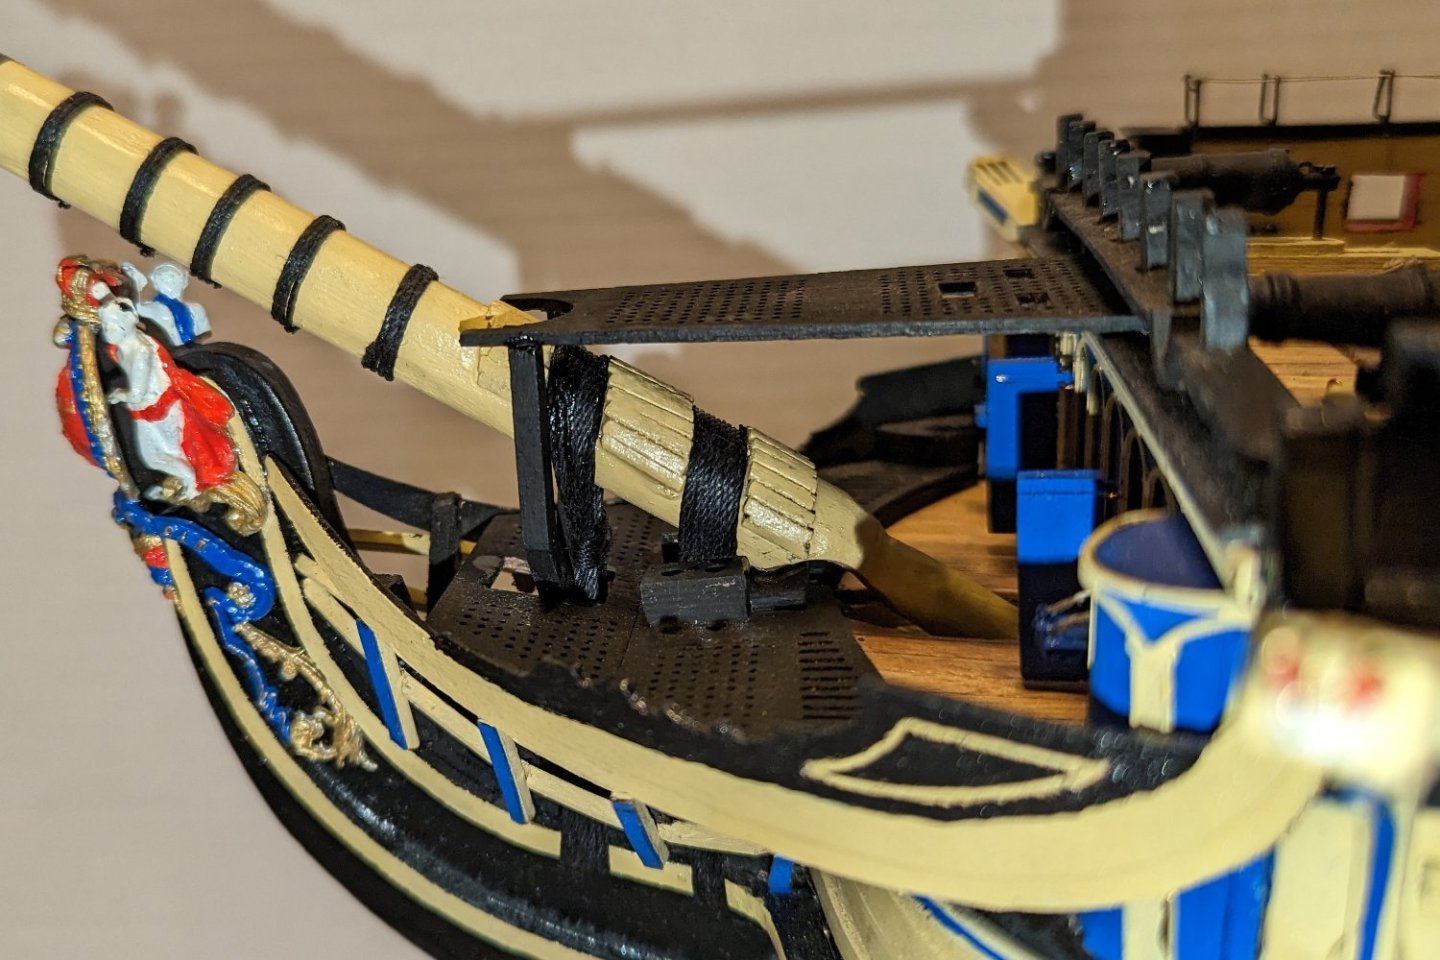
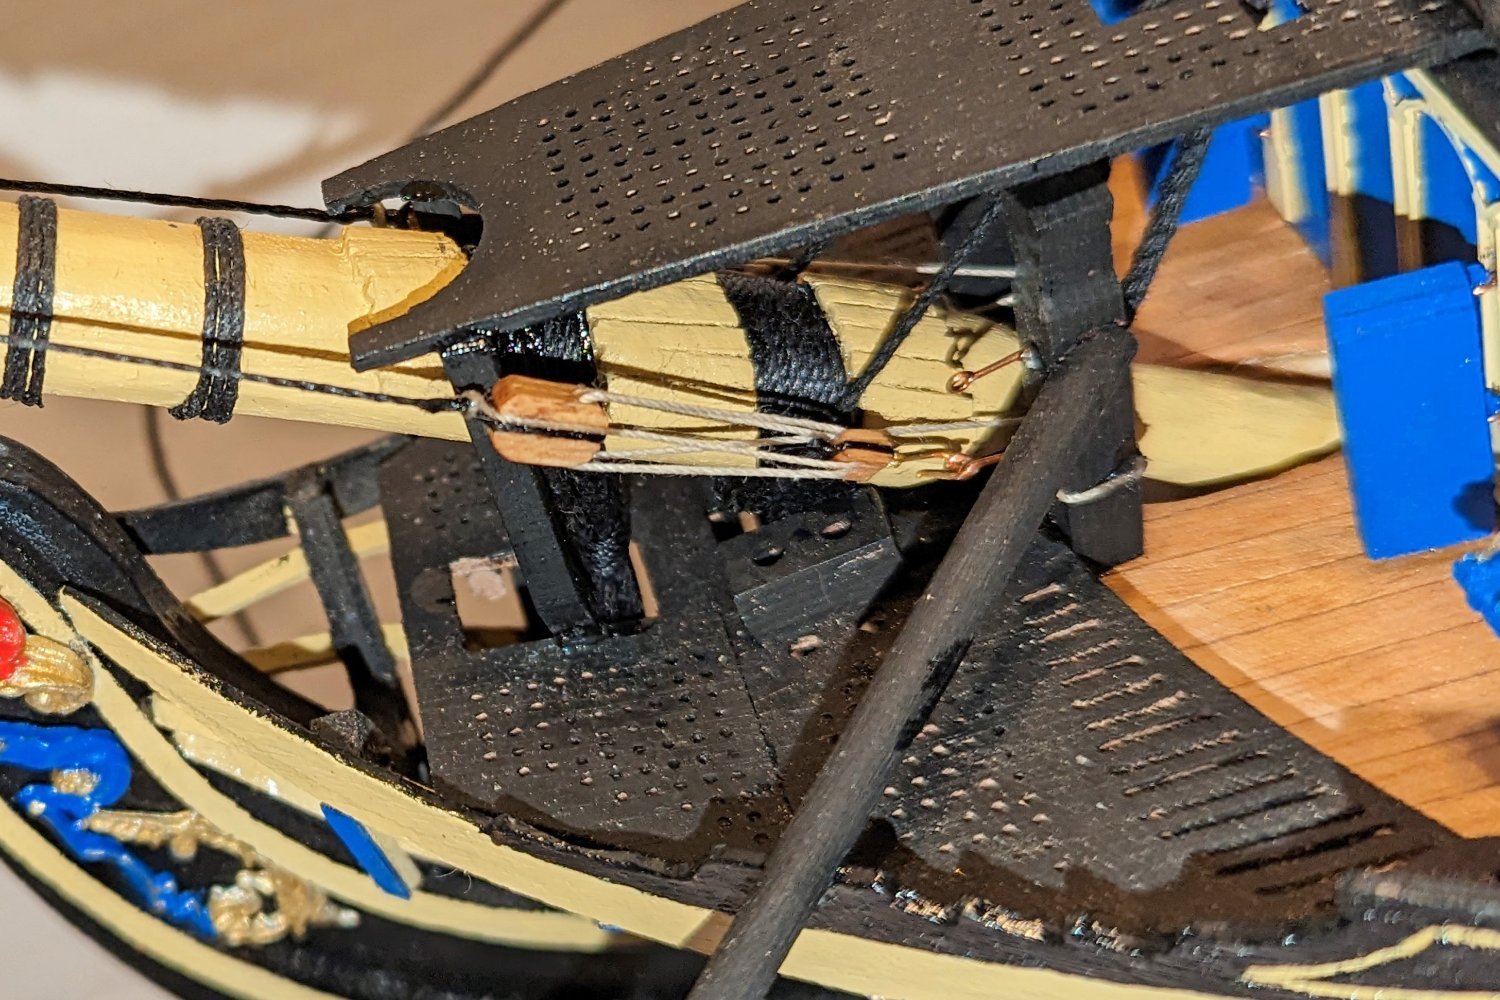
Bowsprit now permanently mounted and gammoning completed. The gammoning on this model is more than decorative -- it performs the same function as it would have done on the real ship: locking down the bowsprit tight.
Gammoning was tricky to thread behind the beak struts.
Regards,
David
-
Thanks, Mort. I need to find your build log and will do so.
Regards,
David
-
Finished the foremast topmast shrouds and ratlines, and THAT'S IT for ratlines on this model!😃
I looked back to when I started the shrouds, and removing the 6 weeks I was away on vacation, I was dong shrouds and ratlines for 4 1/2 months. That's as long as some other models I've built took overall. Not sure what it is about this model that makes things go so slow -- maybe the size?
Regards,
David
- BobG, mort stoll, vossy and 4 others
-
7
-
Finished the main mast topmast ratlines. Now on to the fore mast.
Regards,
David
- Sjors, The Gimps Chimp, mort stoll and 3 others
-
6
-
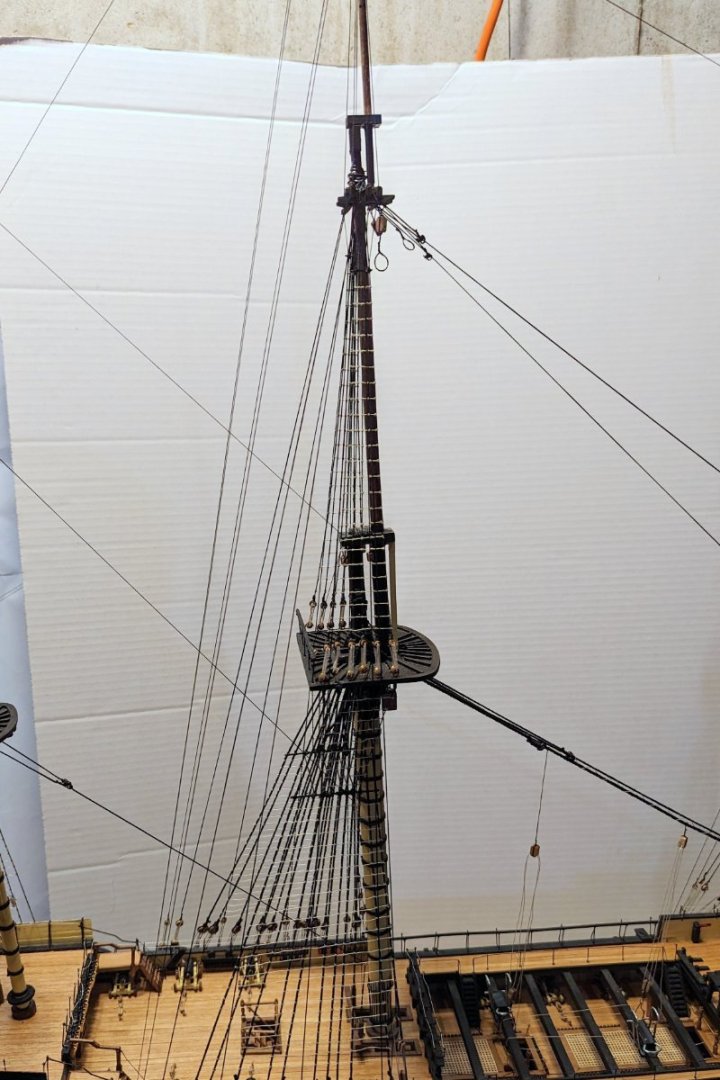
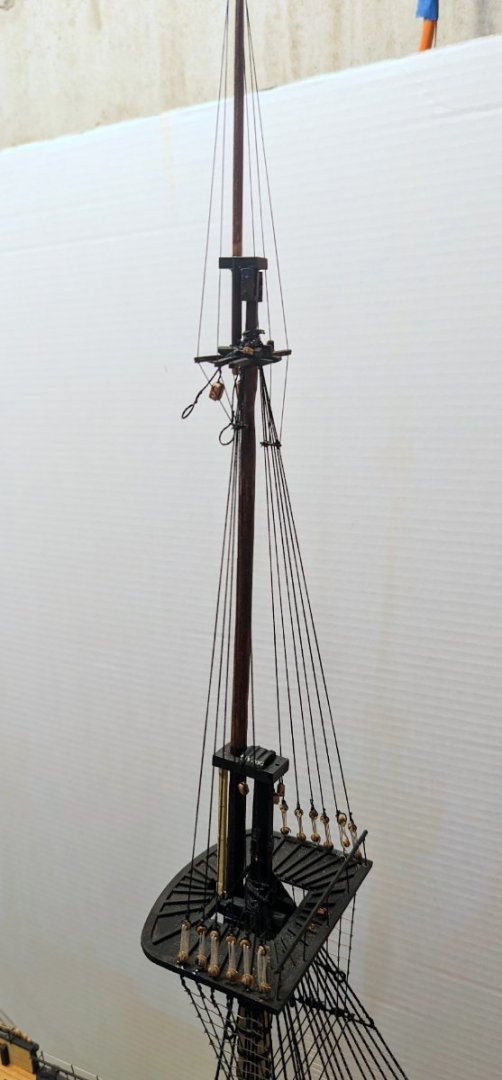
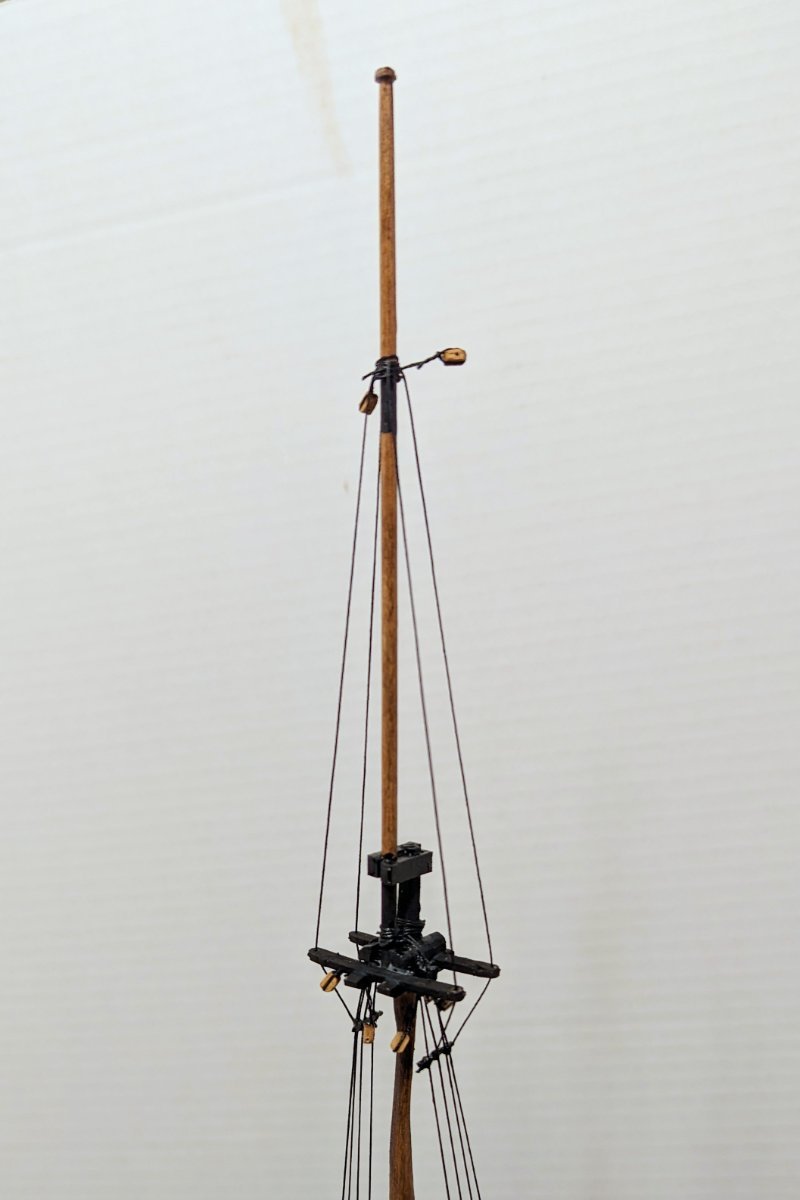
Finished the shrouds on the main topmast and topgallant mast.
And yes, for the sharp-eyed, the shroud attachments for the futtocks are not level with each other. That's just a goof. I find attaching those to the shrouds to be devilish, so my latest approach is to put glue on the bar and spray the shrouds with quick-set, then press the bar against the shrouds. Got them aligned on the mizzen, but missed here. I'm not worried about it because the ship on display will be viewed from one side (the one showing below), and the other futtock attachment won't be that noticeable.
Regards,
David
-
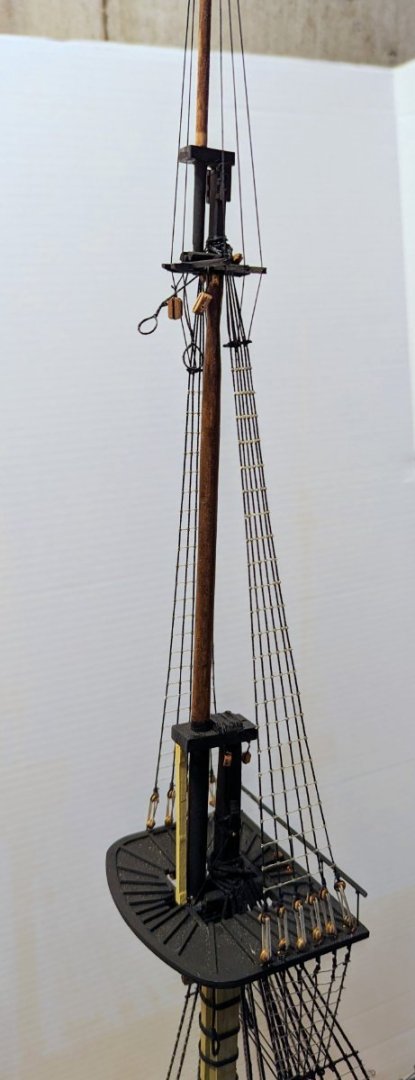
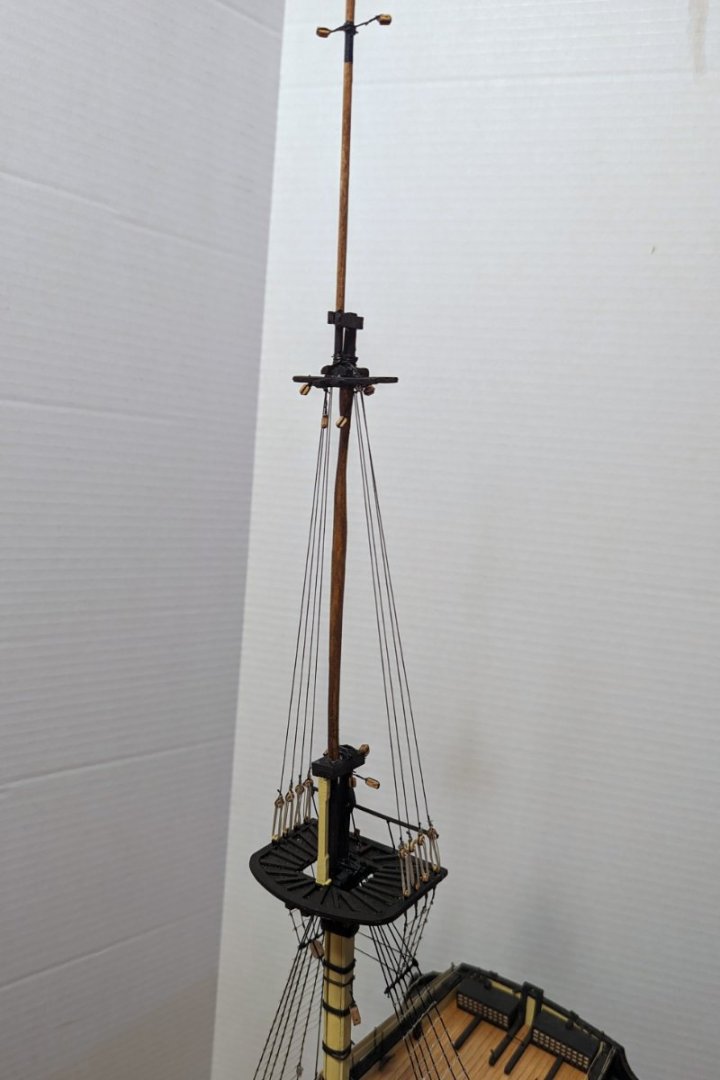
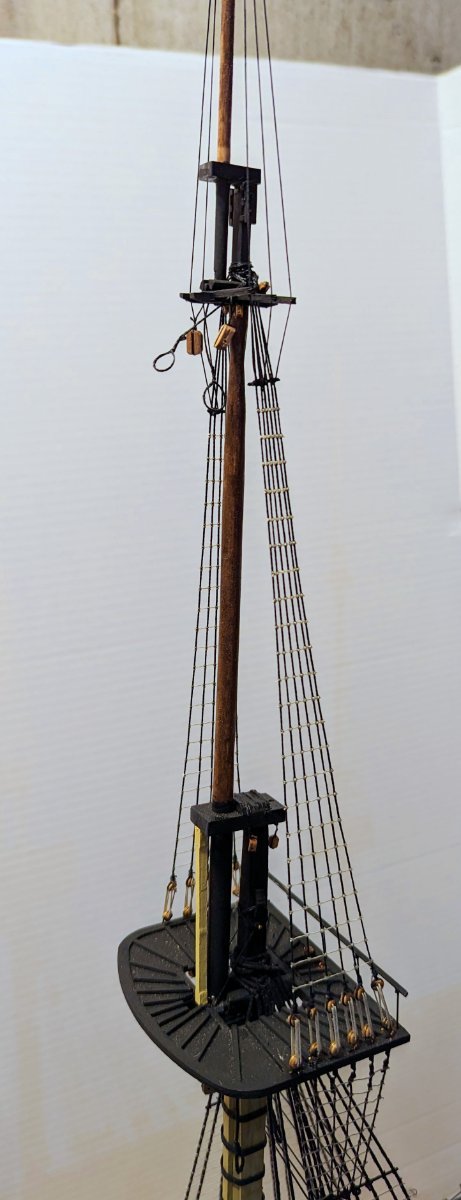
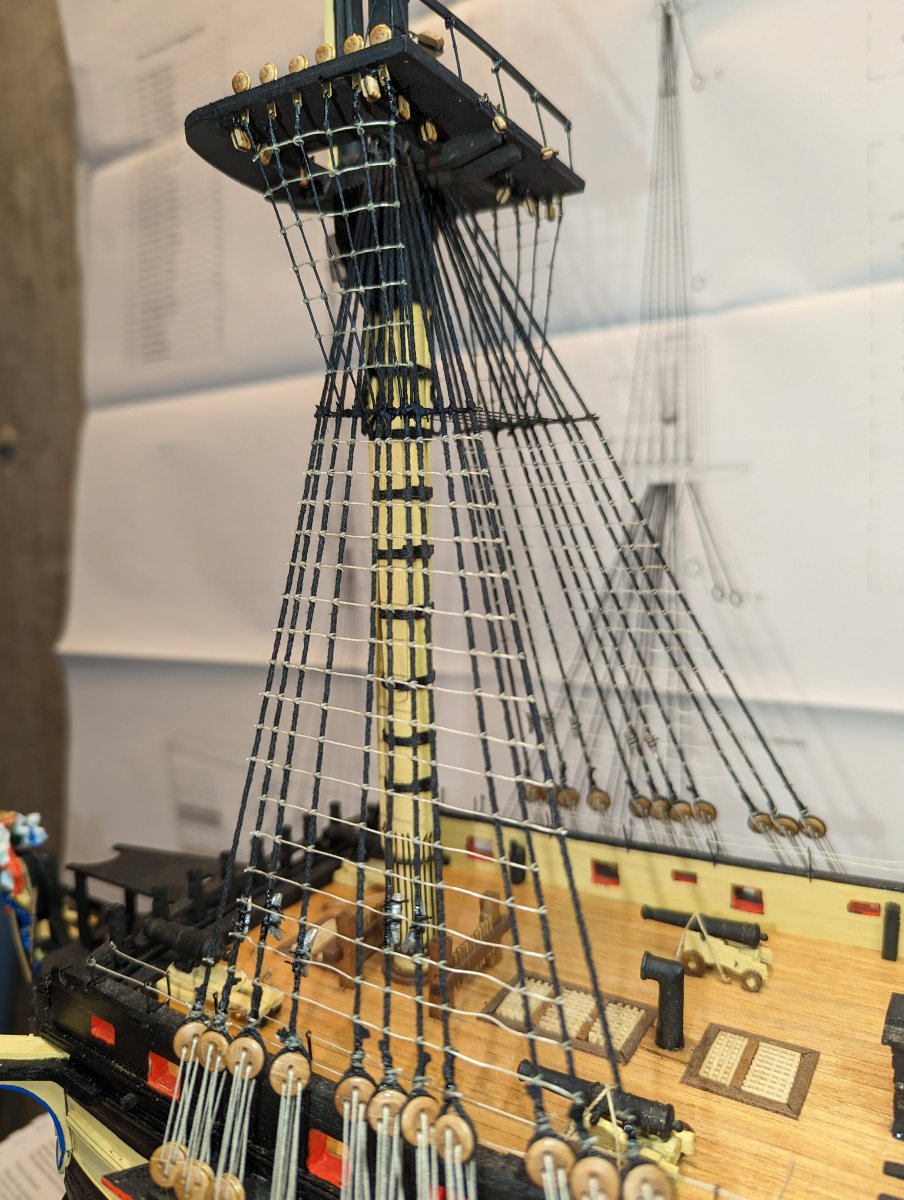
Finally -- one mast completed. This is the mizzen, all shrouds and ratlines done.
Regards,
David
- BobG, mort stoll, vossy and 4 others
-
7
-
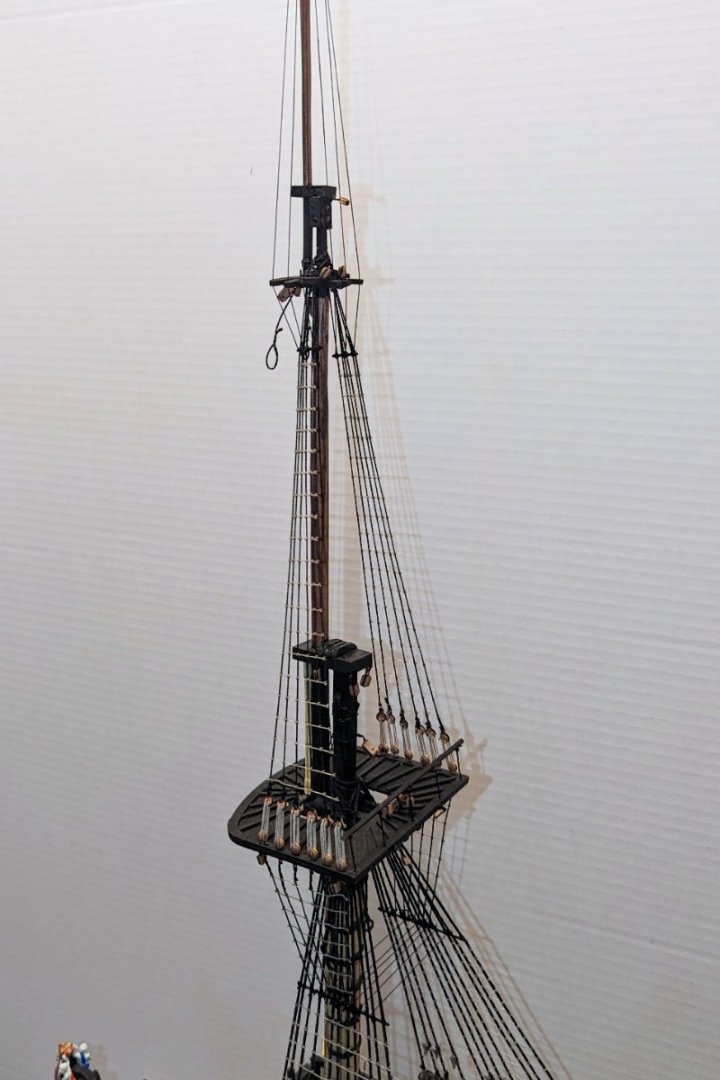
The topgallant shrouds run down through the topmast crosstrees and become the topmast futtock shrouds in one continuous run. The instructions aren't terribly clear about this. This is still the mizzen.
Regards,
David
- mort stoll, Prowler901, CODY and 4 others
-
7
-
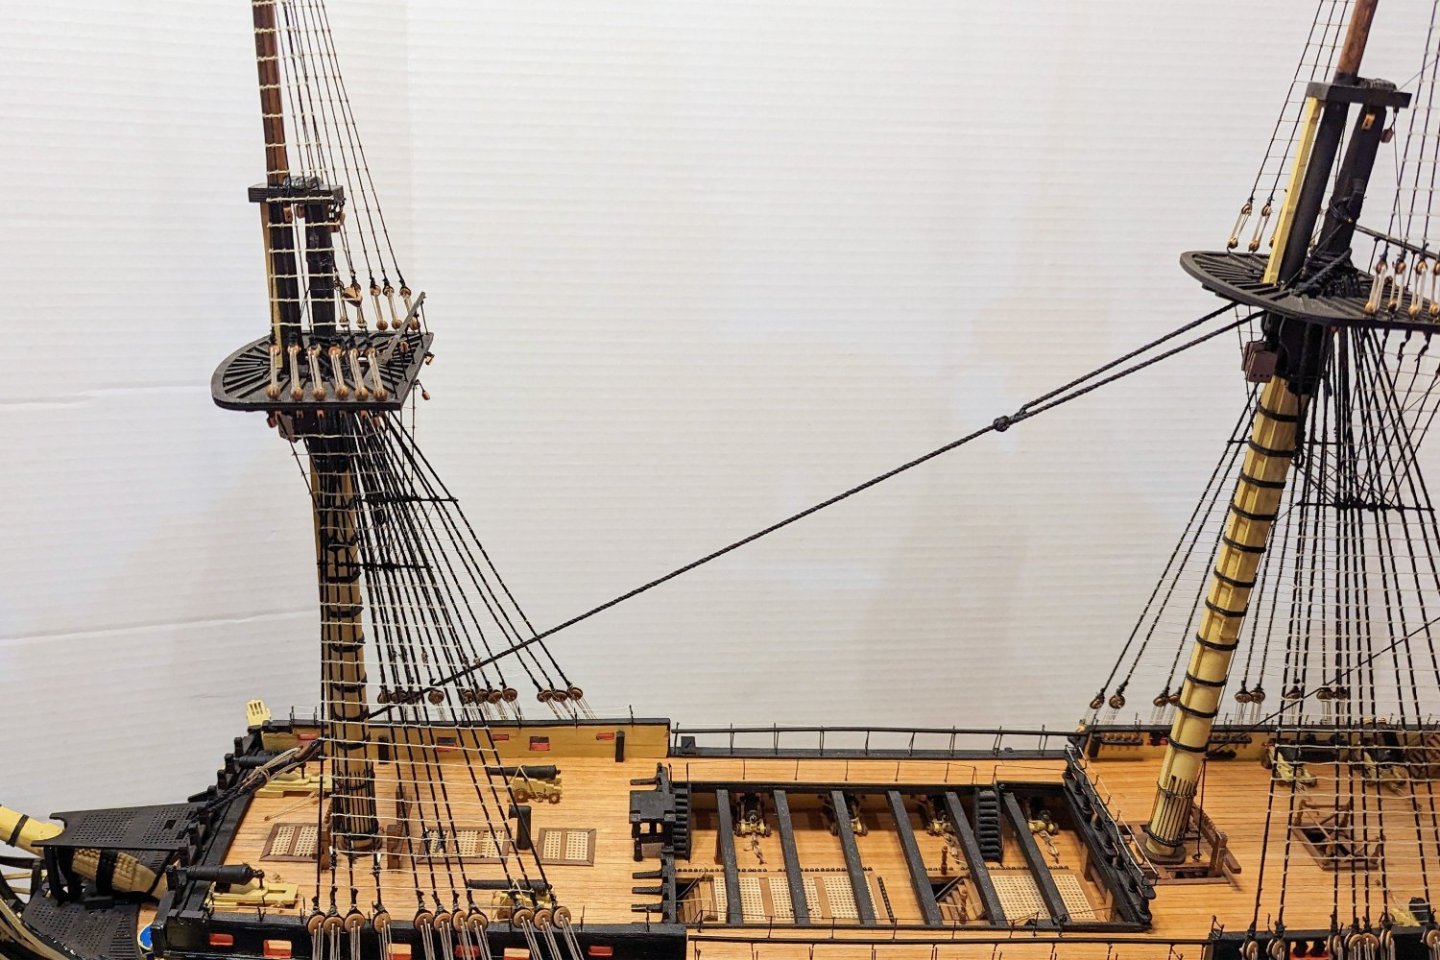
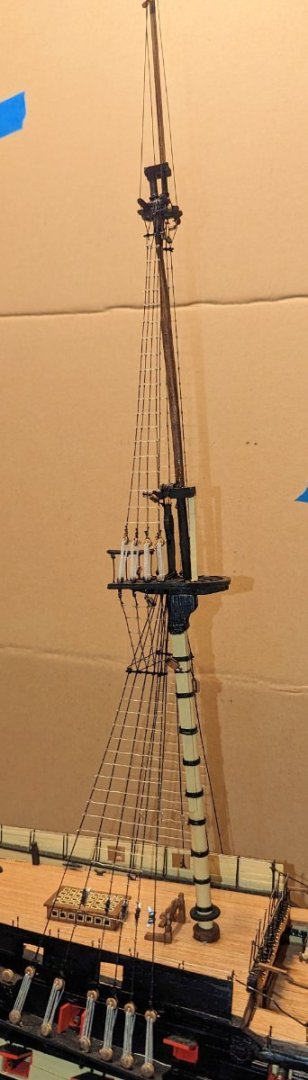
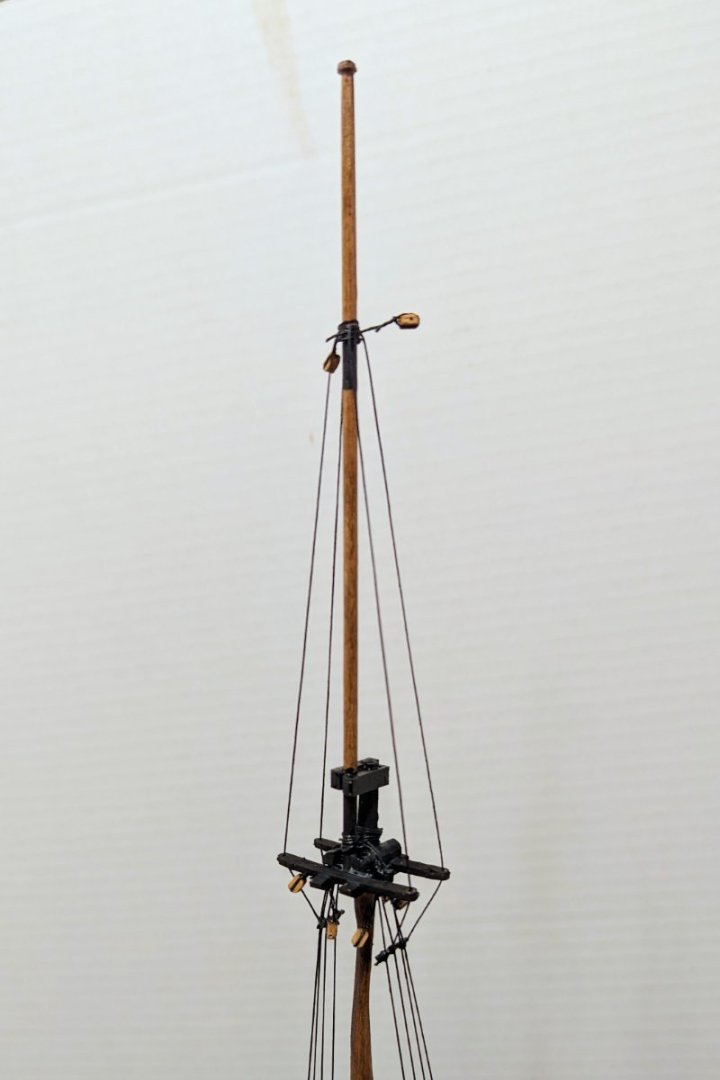
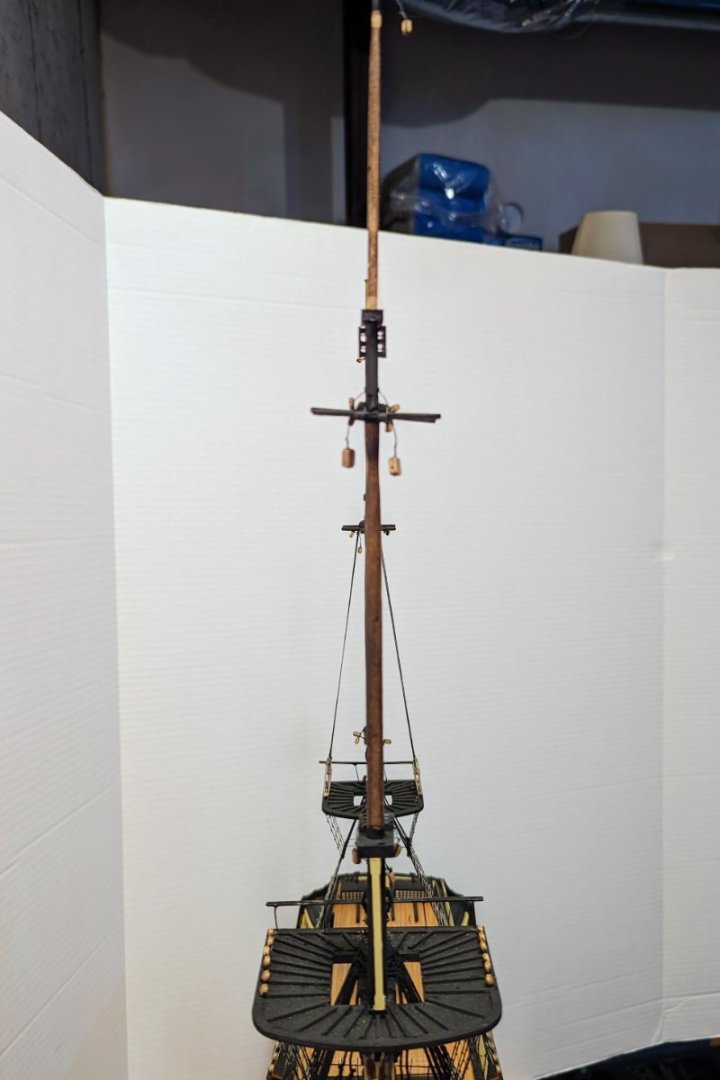
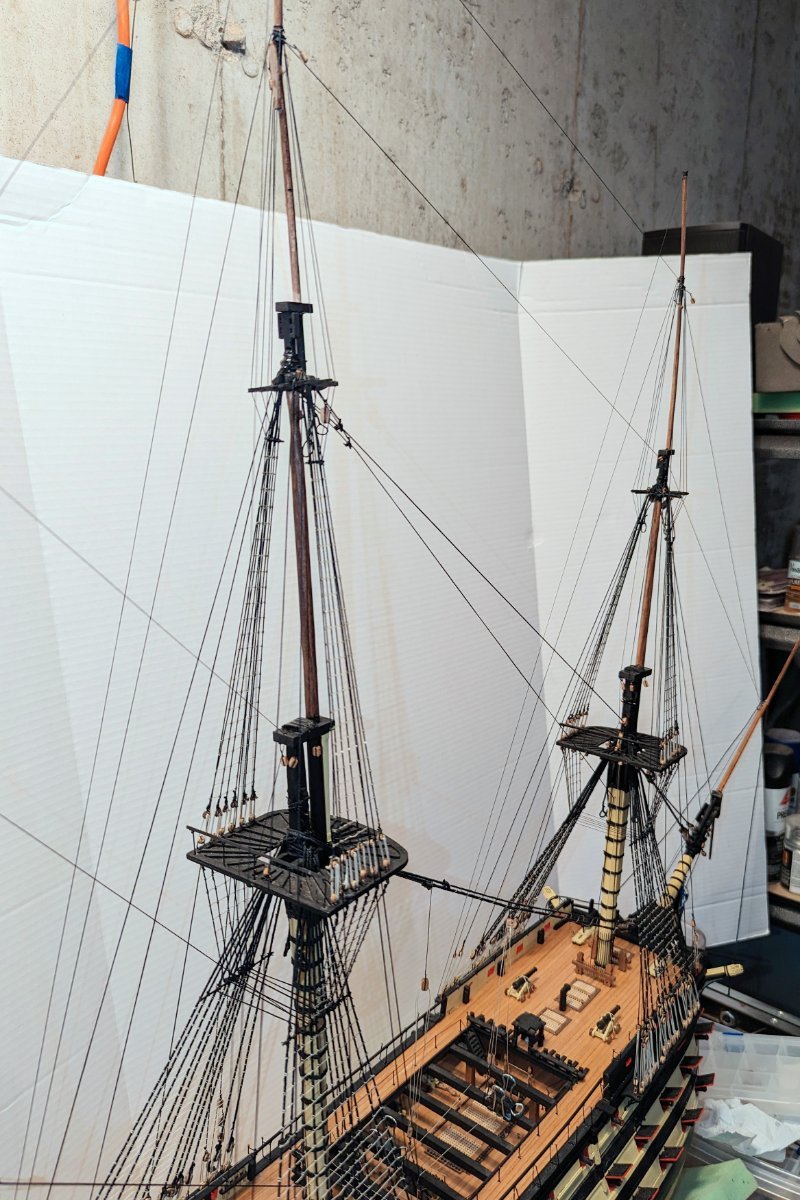
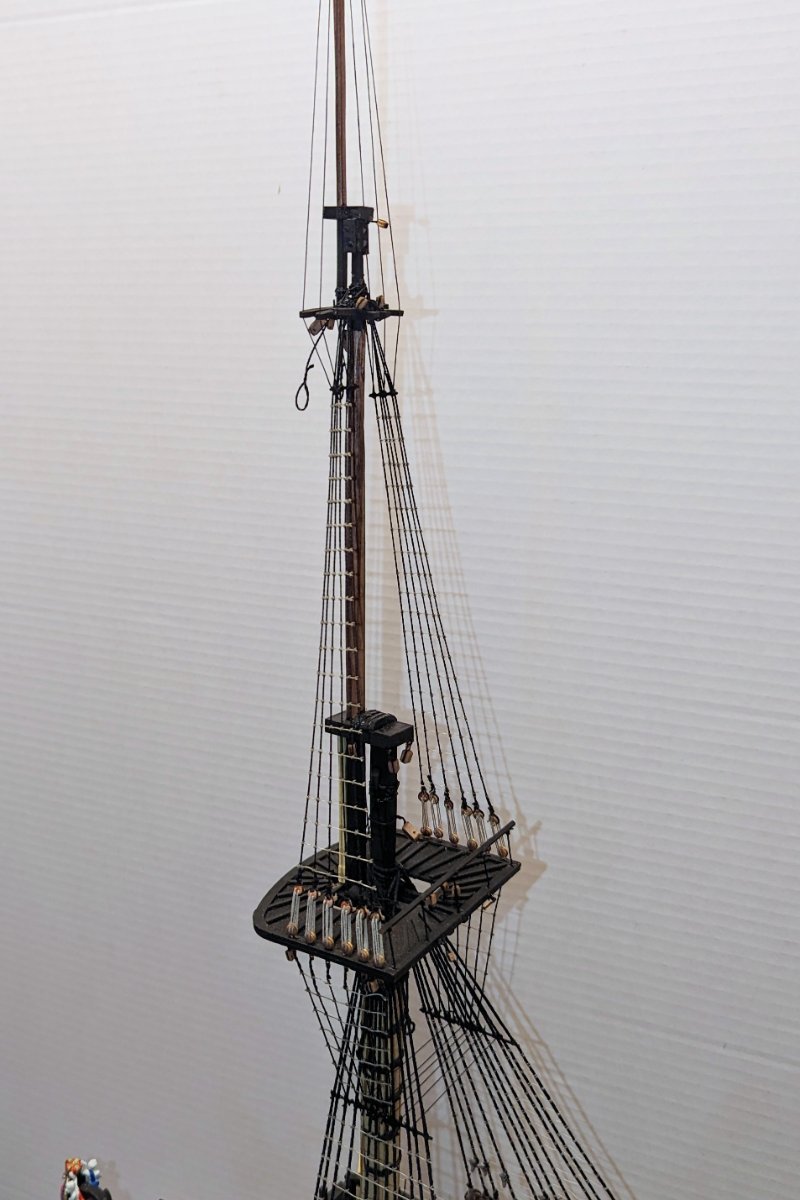
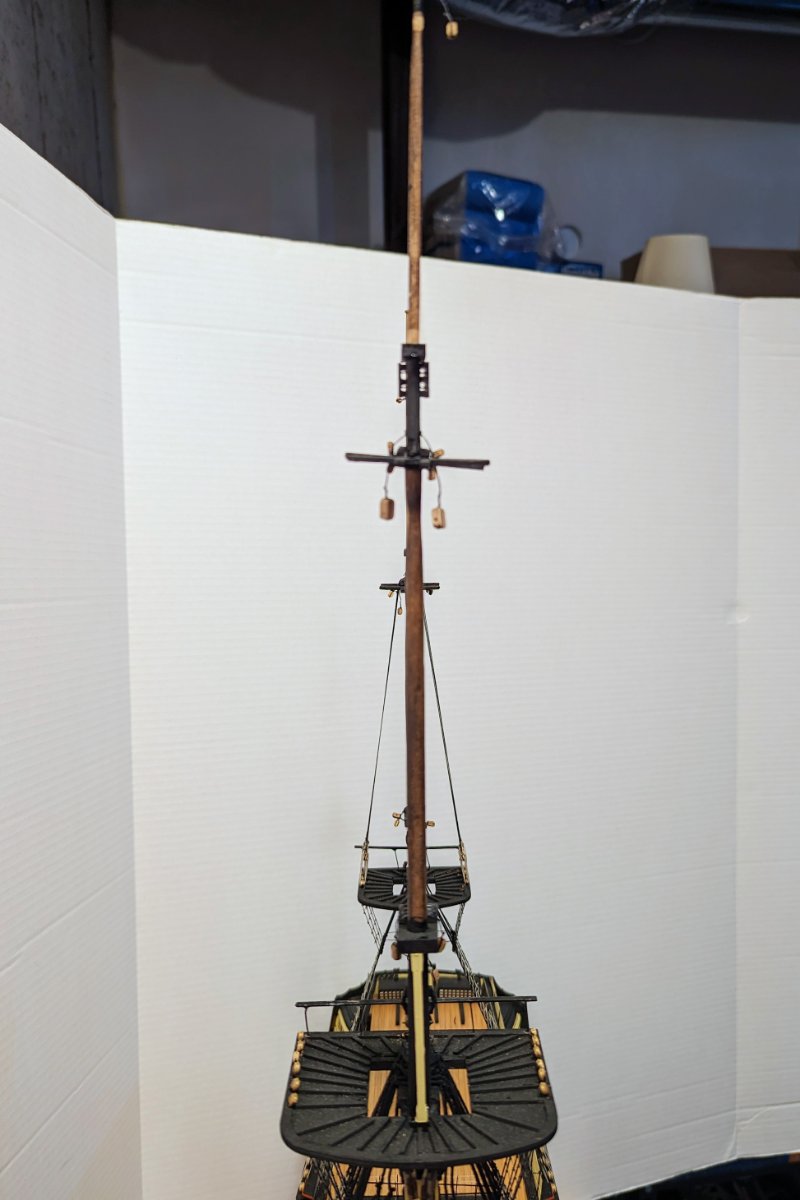
Here are the upper mizzen shrouds. I inadvertantly pranged the mizzen and the second mast broke, so I glued it -- but as you can see (in the picture with the bad background, looking aft from the main mast), it was misaligned. So I used the shrouds to pull it back into alignment, and it came out pretty straight. Pretty well aligned with the main now.
One of those few occasions when the rigging is functional, not just decorative.
Regards,
David
- The Gimps Chimp, BobG, GrandpaPhil and 2 others
-
5
-
-
Finished the lower mizzen ratlines, which means I have now finished the lower shrouds and ratlines for all three masts. Only took about 3 1/2 months 🥵 (subtracting my vacation time), and I have built some entire ships in that time. Not a reflection of difficulty per se, so much as my lack of appetite for ratlines.
Now I get to repeat the process for the upper shrouds and ratlines, but fewer shrouds so may go faster.
Regards,
David
- GrandpaPhil, vossy, The Gimps Chimp and 3 others
-
6
-
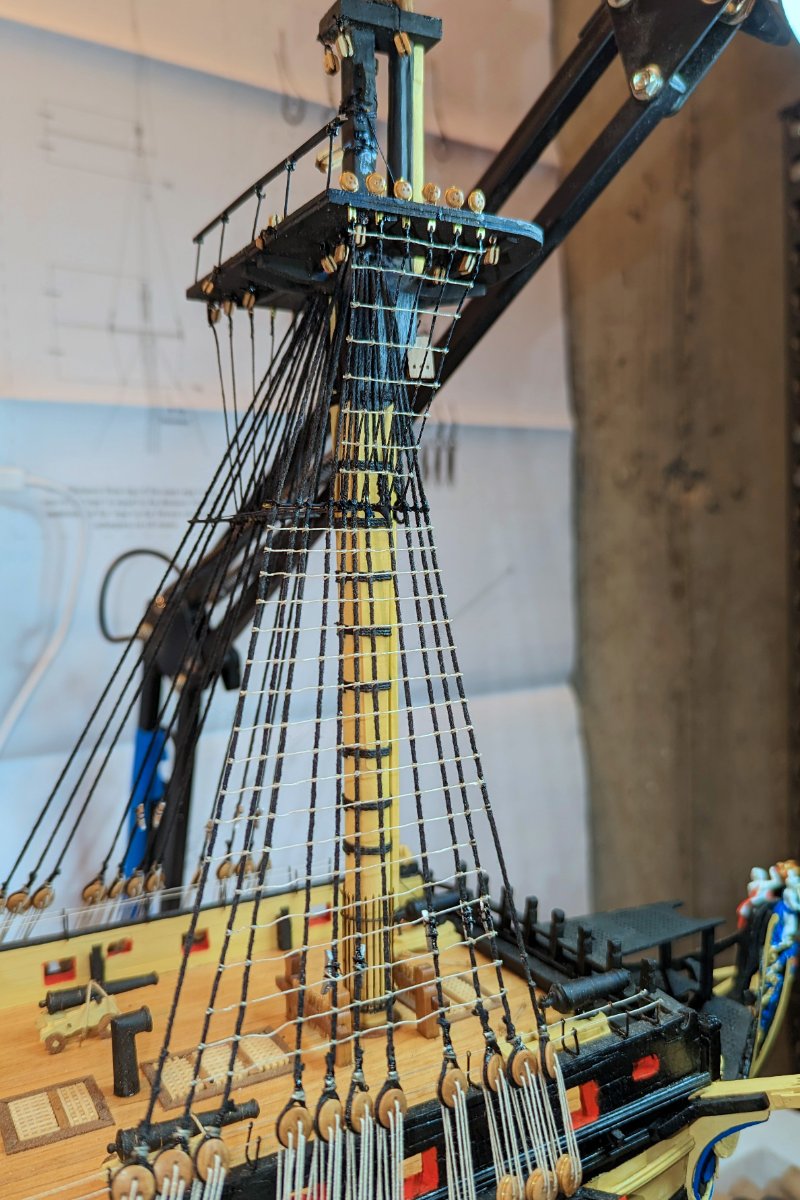
Finished the Mizzen shrouds. Pictures include the futtock shrouds and the shroud cleats.
I did the cleats by first gluing them to the shrouds, then lashing them.
Regards,
- The Gimps Chimp, etubino, mort stoll and 7 others
-
9
-
 1
1
-
Back from my winter trip and dug back into the foremast ratlines. Finished off the port side. Now onto the mizzen shrouds.
Regards,
David

- mort stoll, The Gimps Chimp, vossy and 7 others
-
10
-
-
Chris:
I'm set up to follow any of your logs, so I'll look for the pics in the gallery once you finish. At the rate I'm going on Victory, I'll finish her sometime late next year.
Best regards,
David


Mississippi 1870 by vossy - Sergal - 1:50 - Riverboat
in - Kit build logs for subjects built from 1851 - 1900
Posted
Yes, Chris -- agree. Have you done more?