

Sumner
-
Posts
33 -
Joined
-
Last visited
Content Type
Profiles
Forums
Gallery
Events
Posts posted by Sumner
-
-
Andy,
I always enjoyed following your progress on MSW v1.0, and very glad to see you moving ahead with your build on v2.0. Keep up the great work!
Best,
Sumner -
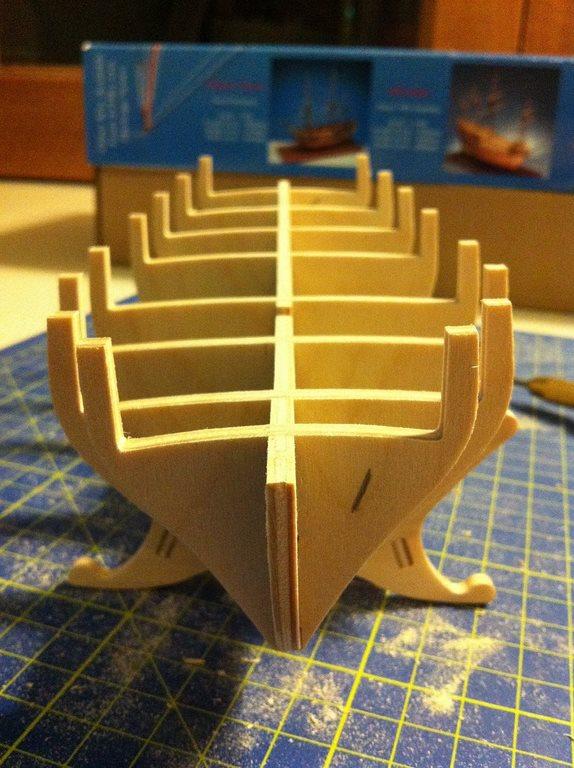
After finishing the keelson and stem, the next step was to glue the bulkheads to the keel. After doing that, I filled the spaces between the fore and aft bulkheads with balsa and then started to bevel/shape the bulkheads and filler blocks using sandpaper.
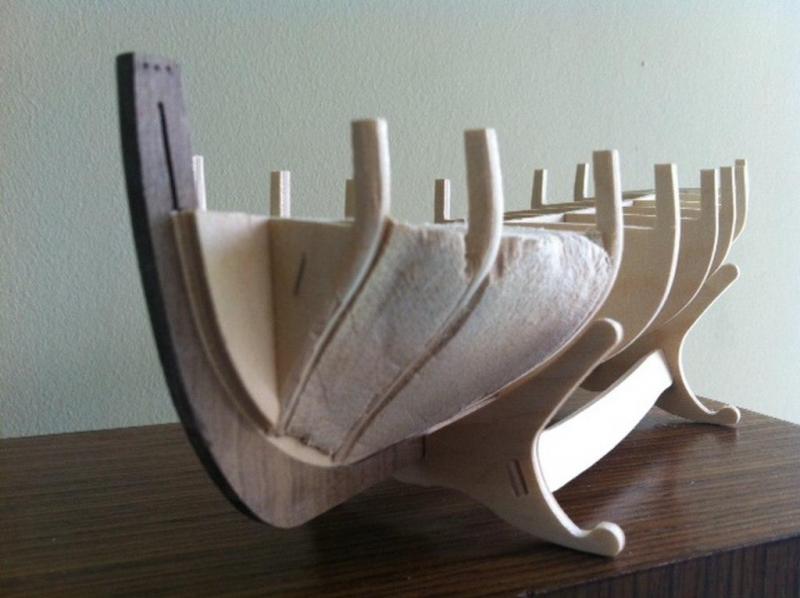
Next, I glued on the deck. I should add that I've used only PVA glue to this point. I know some builders prefer CA, but PVA can be easily debonded using isopropyl alcohol. PVA takes longer to set than CA, but the ability to correct and fix mistakes more than makes up for this difference.
By this point, I'd already experienced one seemingly major setback when drilling the forestay holes in the stempost (shown in an earlier post). When doing that, I managed to crack the stempost. It looked like a major setback but was easily fixed with PVA glue. That was the first point where I began to appreciate how forgiving and flexible wood can be as a building material -- an important confidence builder for any novice builder.
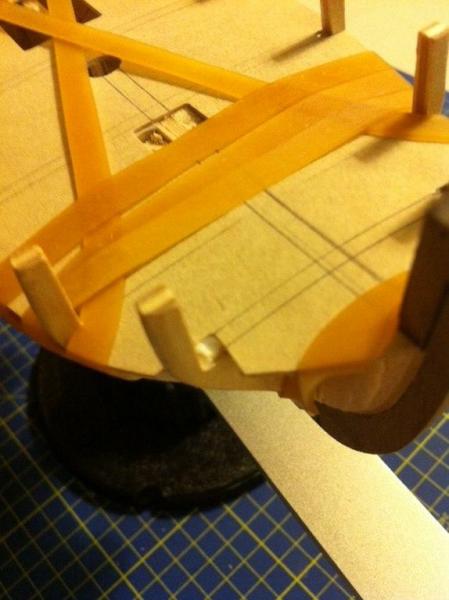
As a result, I wasn't very concerned when I cracked off a piece of the deck (as you can see in the picture below) when gluing it to the keel and bulkheads. I was using heavy duty rubber bands to glue the deck to the bulkheads and ensure it had the correct shape and camber. The damaged portion of the deck didn't have enough support for the rubber bands, and a small piece broke off.
This was easily fixed. I glued the broken piece to a larger support that was glued to the bottom of the deck. I probably could have skipped fixing this since it wouldn't make much difference to the build and would not be visible in the completed model. But it was good practice to fix this, and felt sloppy to leave it as is.
The end result was pretty good.
Next, I started to build the transom...
The next step was to paint all bulkheads and spacer blocks black below where the gratings and hatches will eventually be. This will hopefully create a better illusion of depth when the model is finished.
More to come.
Best,
Sumner
-
Dirk: Thanks for the note! Glad to see you've restored your build log, too. Your Sherbourne is a real work of art!
Kester: I know your very build well -- it's one of the inspirations (along with Daniel's build) for me to try a clinker hull. I share Tony's hope that you'll post pictures on MSW 2.0 soon.
Best,
Sumner
-
Thanks for the kind note, Tony! I've likewise been pleased to see your build log renewed on MSW v2.0, and I look forward to following your progress. I've really been inspired by all the modifications/enhancements you've made to the kit. Keep up the great work!
Best,
Sumner
-
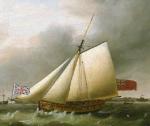
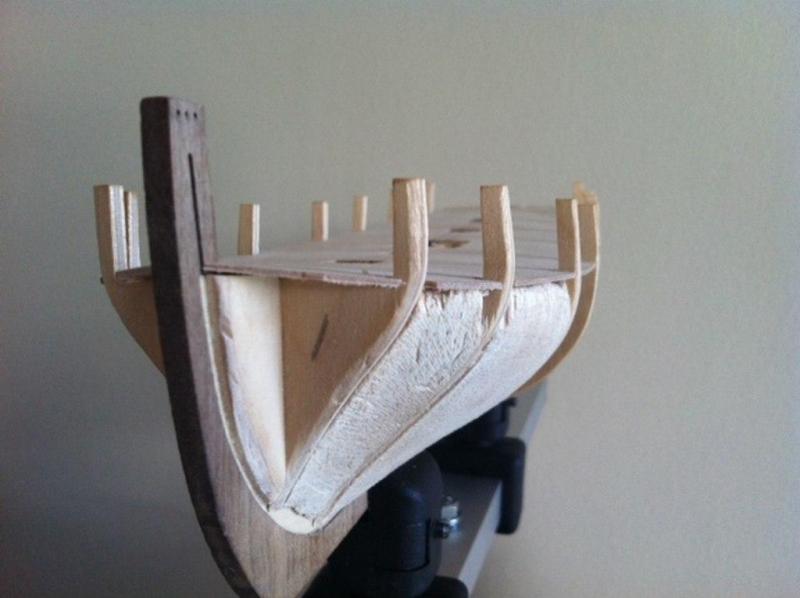
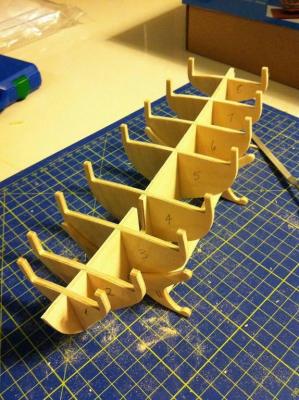
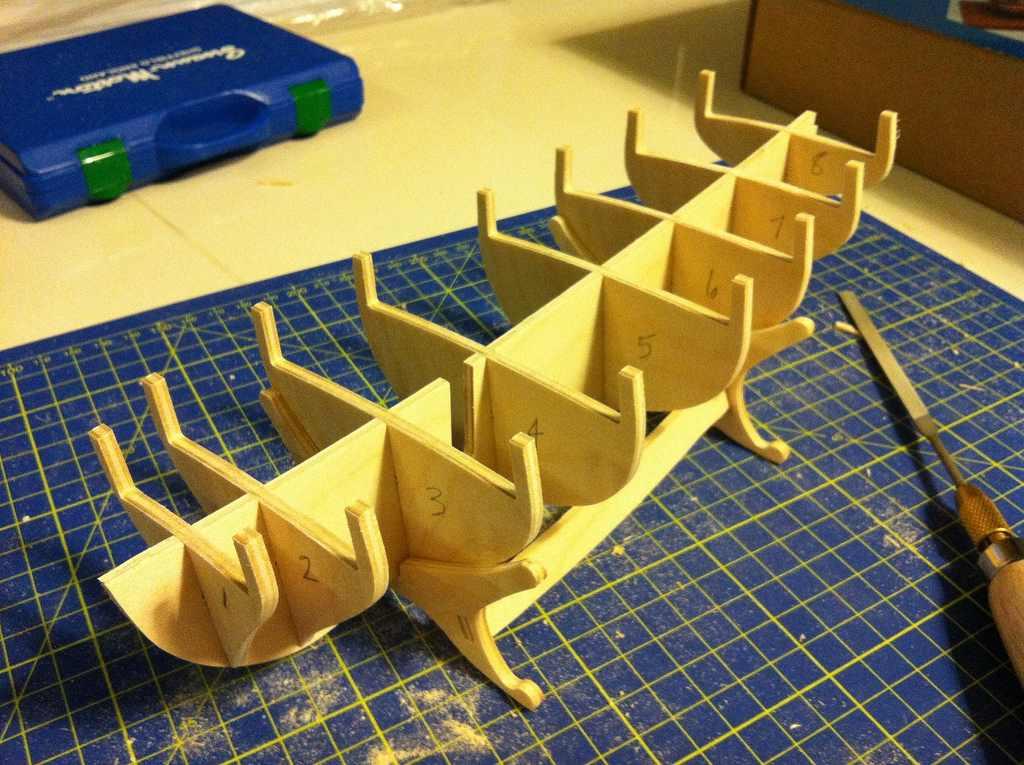
My first impression of the kit was good. Caldercraft kits have a good reputation (one of the factors I considered when choosing this kit) and they lived up to it. Before getting started, I dry fit the bulkheads (which I had numbered to help me keep them straight later on) with the keel. Everything looked pretty good. The bulkheads will need to be beveled, but that happens a bit later in the build.


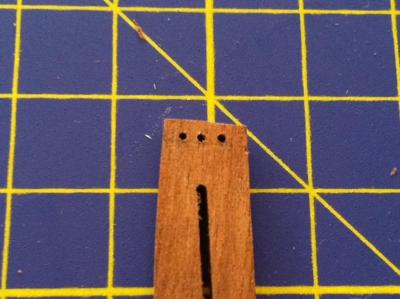
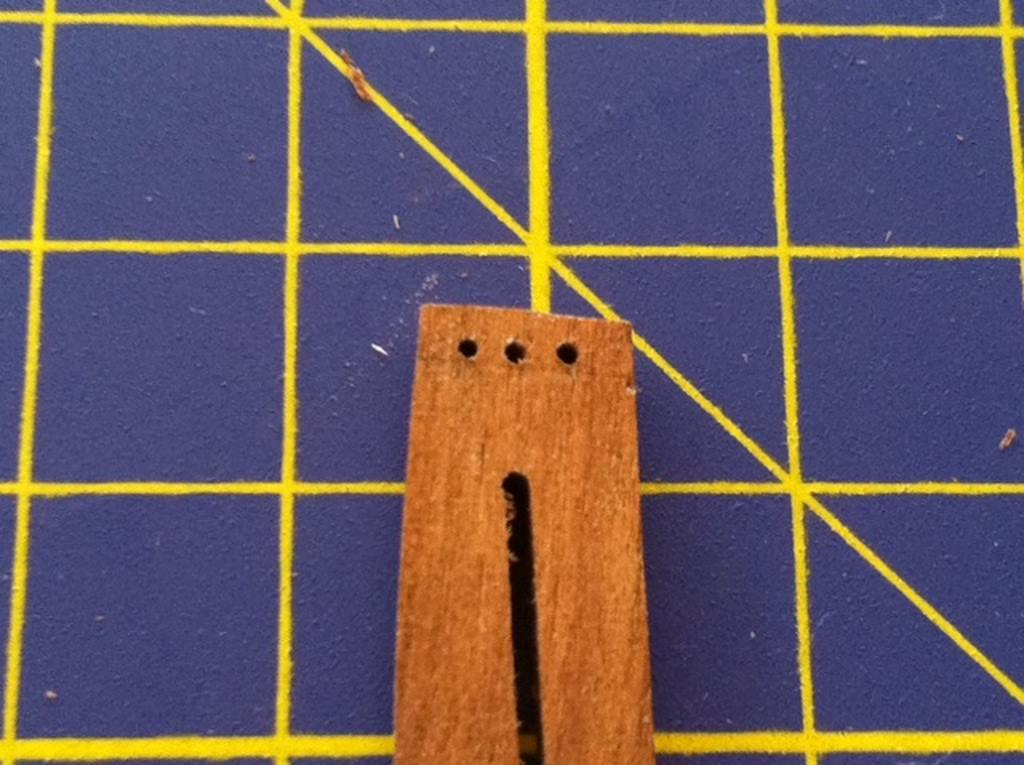
One of the key tips that I picked up from some of the earlier Sherbourne build logs was to drill three small holes in the stempost (I think that's what this is called) for the forestay. If you go by the instructions, these holes are meant to be drilled much later on. It's a lot easier to drill them now. So I did.
Next step was to glue the stem and keelson to the keel. In some builds logs (such as the excellent build by Daniel, which I hope gets reposted), these aren't glued until after the planking is complete. I'm not sure that it really makes much of a difference.
The key thing -- which I did not do -- is to create a rabbet at this point to ensure the smooth fit of the planks later on in the build. In hindsight, I wish I'd done that, and you'll see why in subsequent posts. The difference wasn't huge, but it's one of those additions that can help make the difference between a good build and a great one.
Fortunately, I did sand in a bearding line, which you can just make out at the aft end of the keel. This also helps to ensure the planks fit well, and makes a significant difference in a build like this with two layers of planking.
More to come.
Best,
Sumner
-
Thanks, John!
It's great to be back, and I'm pleased to see the new site growing so quickly.
Best,
Sumner
-
This is a reconstruction of the build log for my first wooden ship build, which I started in July 2011. Most of the construction on this model took place through the second half of 2011, before I took on a new role at work during early 2012 and moved to a new city.
I can't overstate how important MSW has been to me throughout this build. The MSW forums are a great resource and an ongoing source of inspiration for me, and I doubt whether I would have been able to get as far as I have with this model without this site and the community here. Like many, I was disappointed when v1.0 of the site crashed and everything was lost. But I've been impressed by the speed with which moderators and other members have come together to rebuild the site and reconstruct the wealth of information that existed in v1.0.
Given how much I owe to the MSW community of builders, I wanted to make my own small contribution to the reconstruction efforts and will document the course of my build here. Instead of re-creating every post, my aim is to post as many pictures as possible to chronicle the course of my build and highlight some of the things I learned along the way. Hopefully this will help future builders just as the many Sherbourne logs on MSW v1.0 helped and inspired me.
Now that we've gotten that out of the way, let's get back to the shipyard.
To start, the title of this build log is not a typo. Caldercraft sells this model as HMC Sherbourne but the name on the 1763 NMM plans is HMC Sherborne, so that's what I've decided to call it. (Edit: After writing this post, I noticed that one of the admins changed the title of this topic back to "Sherbourne" instead of "Sherborne," which is fine.) I chose the model as my first kit for a couple of reasons. First, I've always liked how cutters look. Second, the model seemed like a good starting point, with only a handful of cannons and relatively modest rigging.
I wanted my build to be historically accurate, within the limits of my own skill and the available resources, so I purchased copies of all the Sherborne plans in the NMM collection. They weren't cheap, but I highly recommend them. The plans highlight the many small differences between the Caldercraft kit and what the actual Sherborne probably looked like. My aim is to bash the Caldercraft kit to more closely resemble the NMM plans.
Early on, I made the decision to give my model a clinker (or lapstrake) hull. This was the type of hull construction used for most cutters during the last half of the 18th century. By the early 19th century, cutters were largely built using carvel planking. Suffice it to say there has been much debate about whether or not the Sherborne was built using clinker or carvel construction. I haven't seen any conclusive evidence one way or the other. I decided on a clinker hull because I think they look cool, and that style of planking seemed to me more typical of cutters built during this period.
Best,
Sumner


HMC Sherbourne by Sumner - Caldercraft - Scale 1:64 - kitbashed to 1763 NMM plans - First wooden ship build
in - Kit build logs for subjects built from 1751 - 1800
Posted
It's been a while since I posted any materials from my old build log. Seeing so many new Sherbourne builds underway has been a real inspiration for me to finish rebuilding my log. So, here we go ...
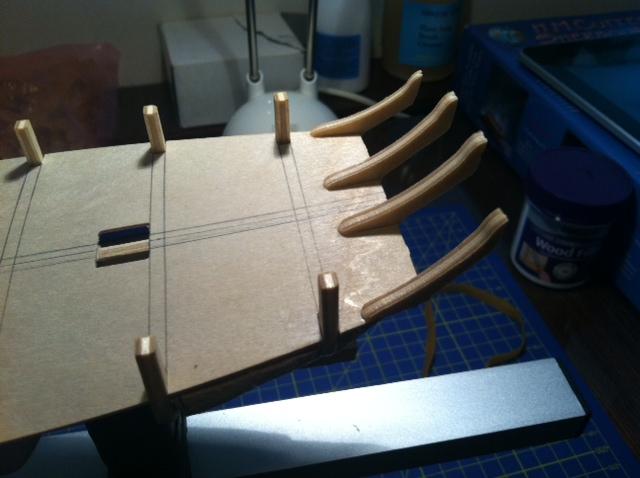
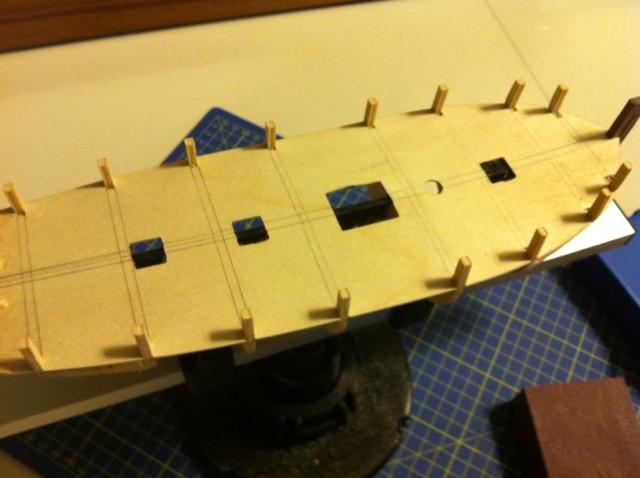
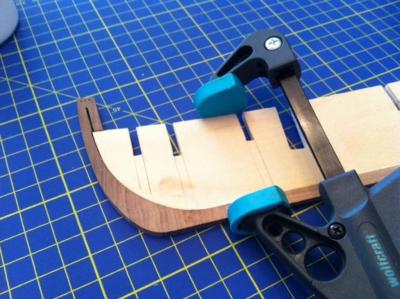
After installing and fairing the bulkheads, the next step was to install the gunport patterns. Before installing them, I soaked them in hot water for 10 minutes and then clipped them to a glass where the patterns would need to meet the curve of the bow. I let them dry in this position overnight.
Next up, I glued the gunport patterns to the model using PVA glue and a bunch of clips.
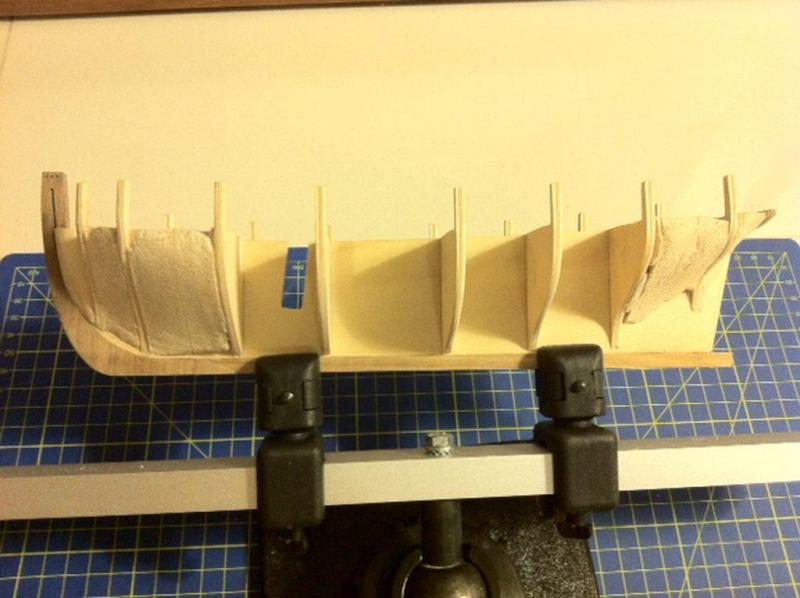
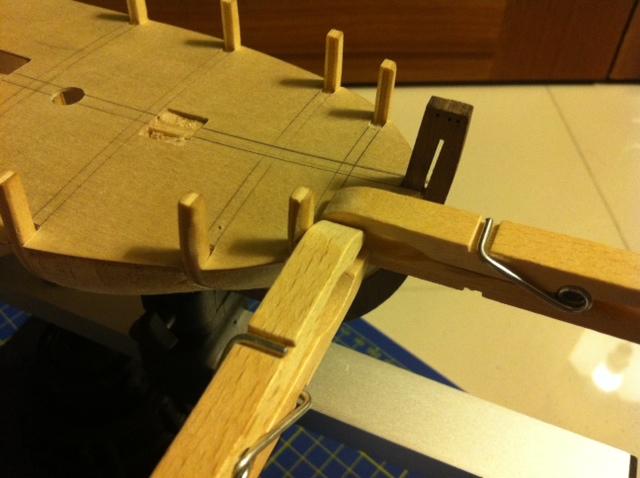
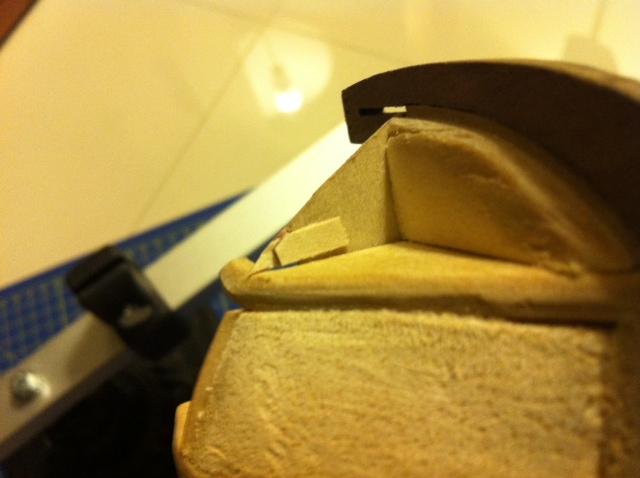
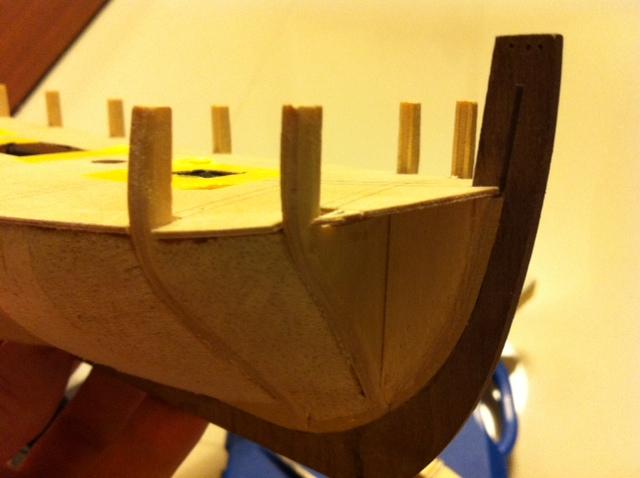
At about this point in my build (August 2011), I managed to crack and break the top of the bow post, where earlier I had drilled three holes for the forestay. At the time, it felt pretty serious -- as if I'd managed to ruin the model before I'd even got started. In reality, this was easily fixed using PVA and a couple of pins (visible in the pictures below) that I used to prevent the glue from blocking up the holes I'd earlier drilled.
I felt this was an important milestone to mention because every first-time builder will eventually reach the point where you'll need to correct a mistake or fix a shortcoming in the kit. These moments are great confidence builders and help us to grow and improve our skills.
The end result turned out pretty well.
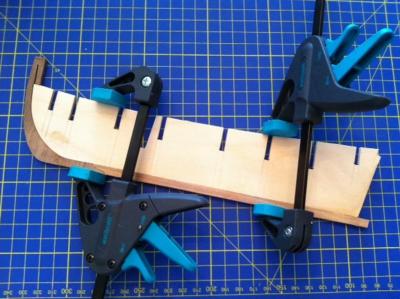
The key to this part of the build was to make sure the gunports lined up on both sides. It's important to make sure the patterns aren't too low, as they can interfere with the cannons. To test this, I assembled one of the cannons to test the height. Although I don't have a picture of the test itself, everything seemed okay and the top of the pattern was not too close to the cannon.
With the bulkheads faired and the gunport patterns installed, I was ready for the dreaded first attempt at planking.