Ekis
-
Posts
526 -
Joined
-
Last visited
Content Type
Profiles
Forums
Gallery
Events
Everything posted by Ekis
-
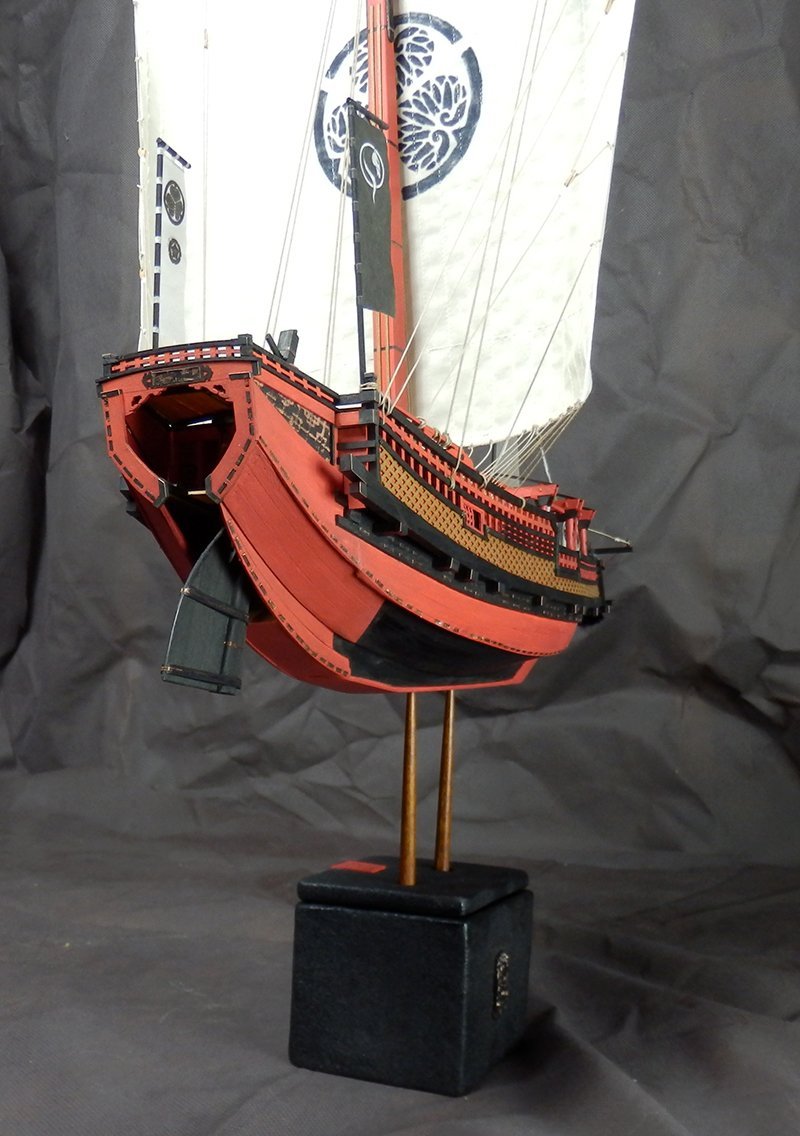
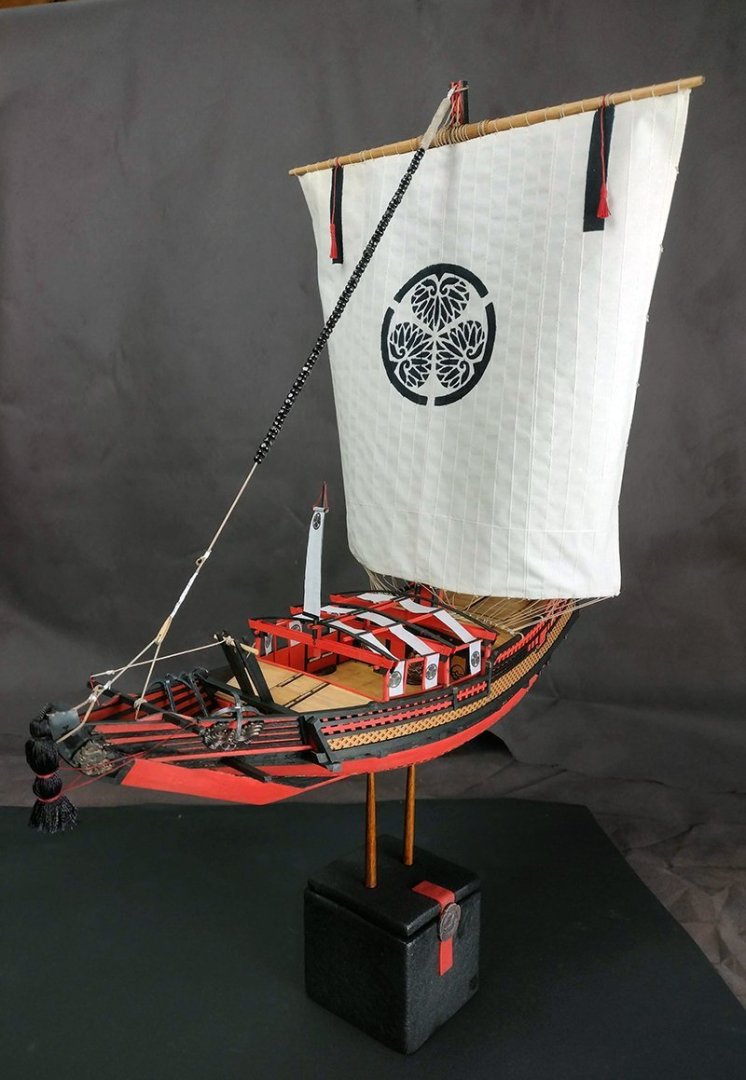
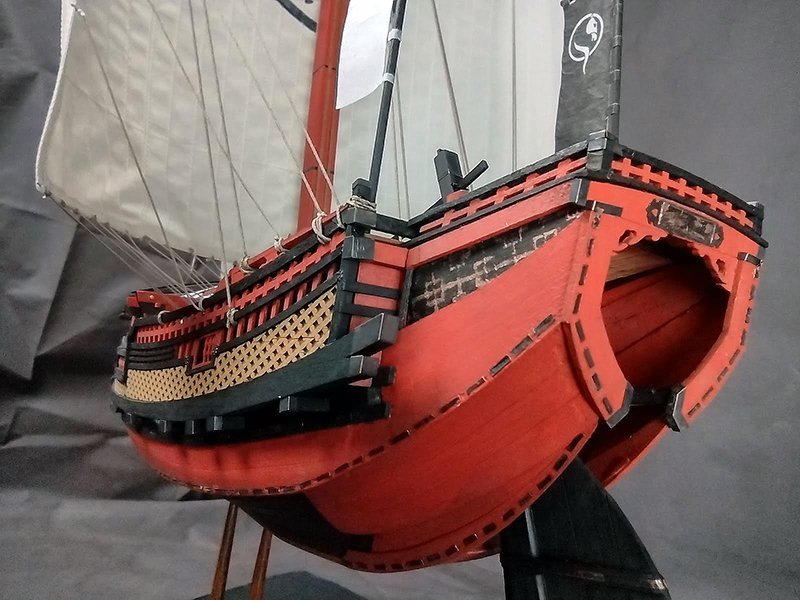
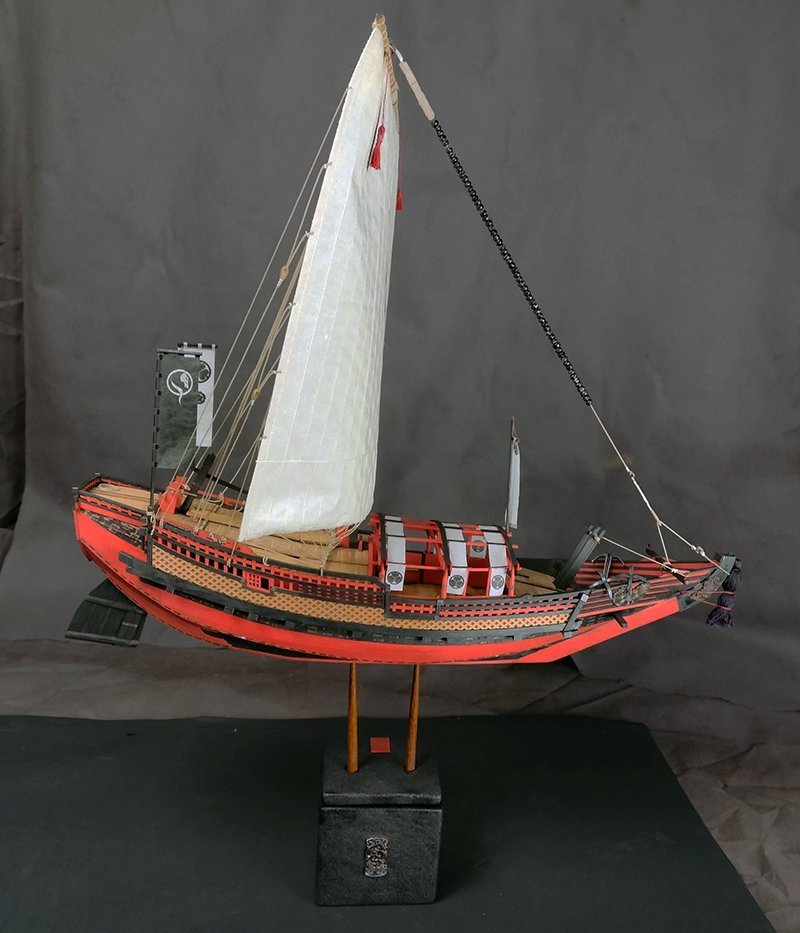
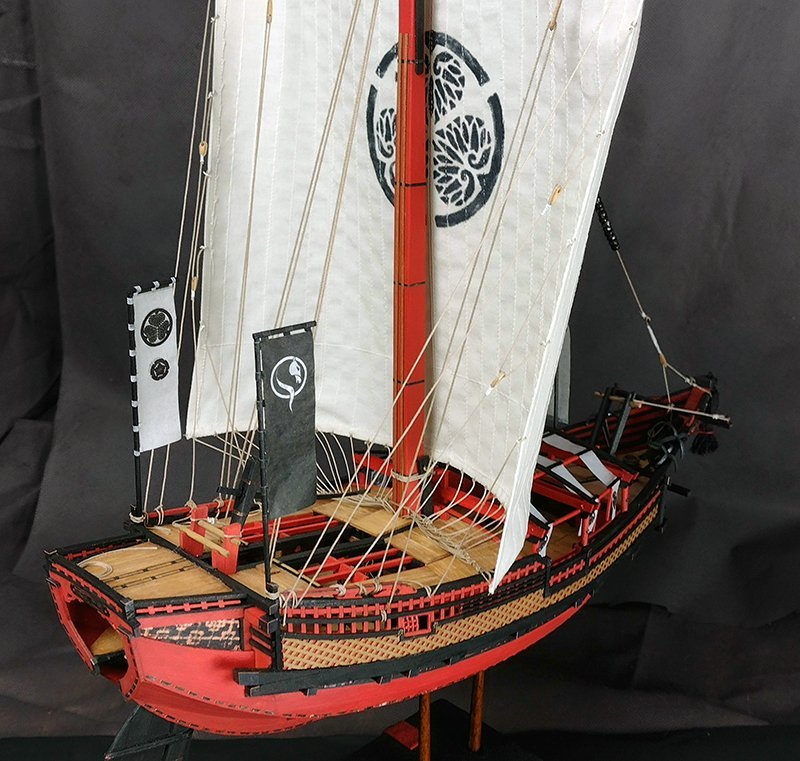
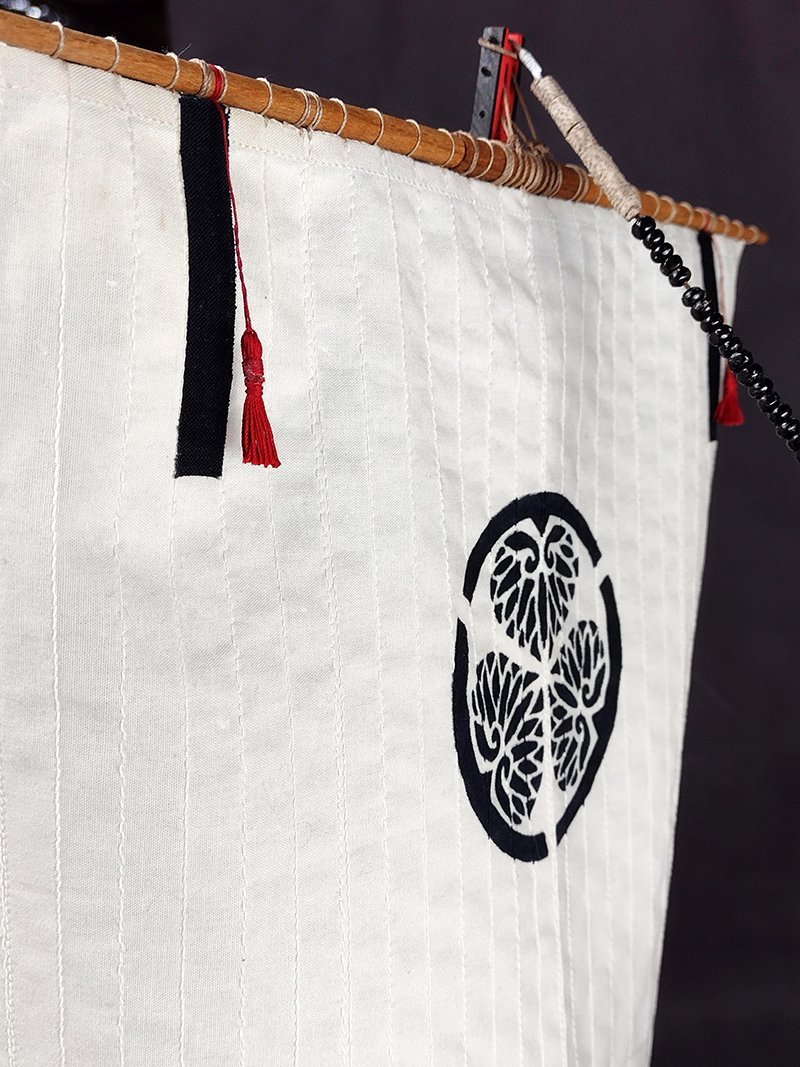
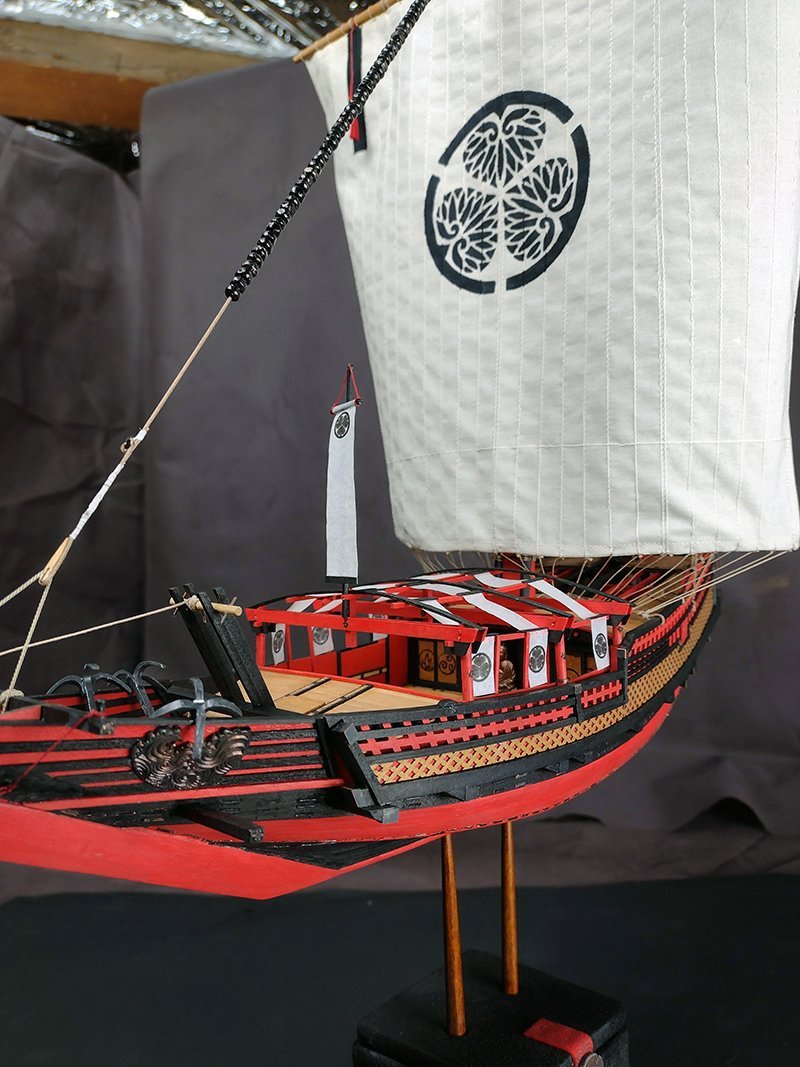
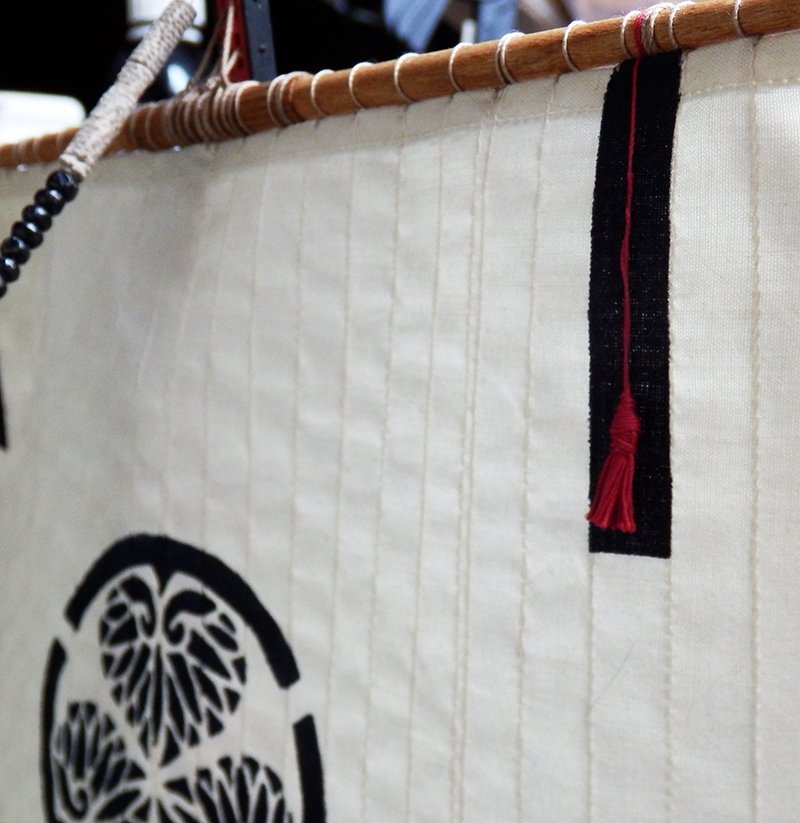
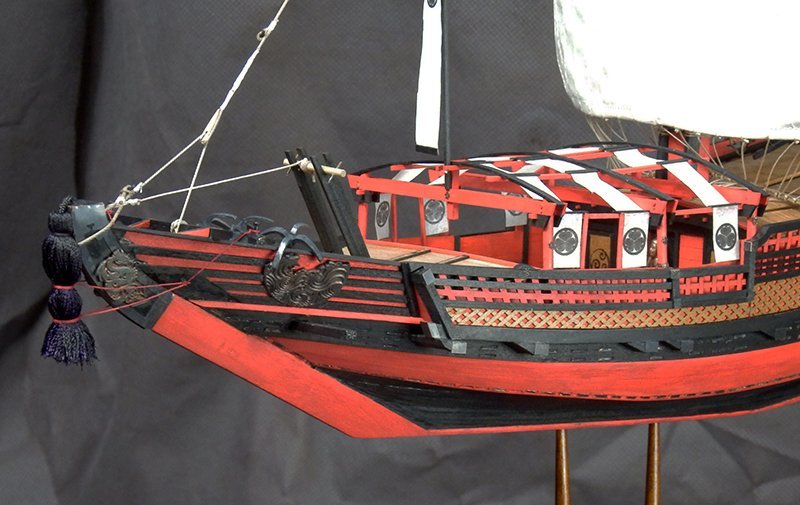
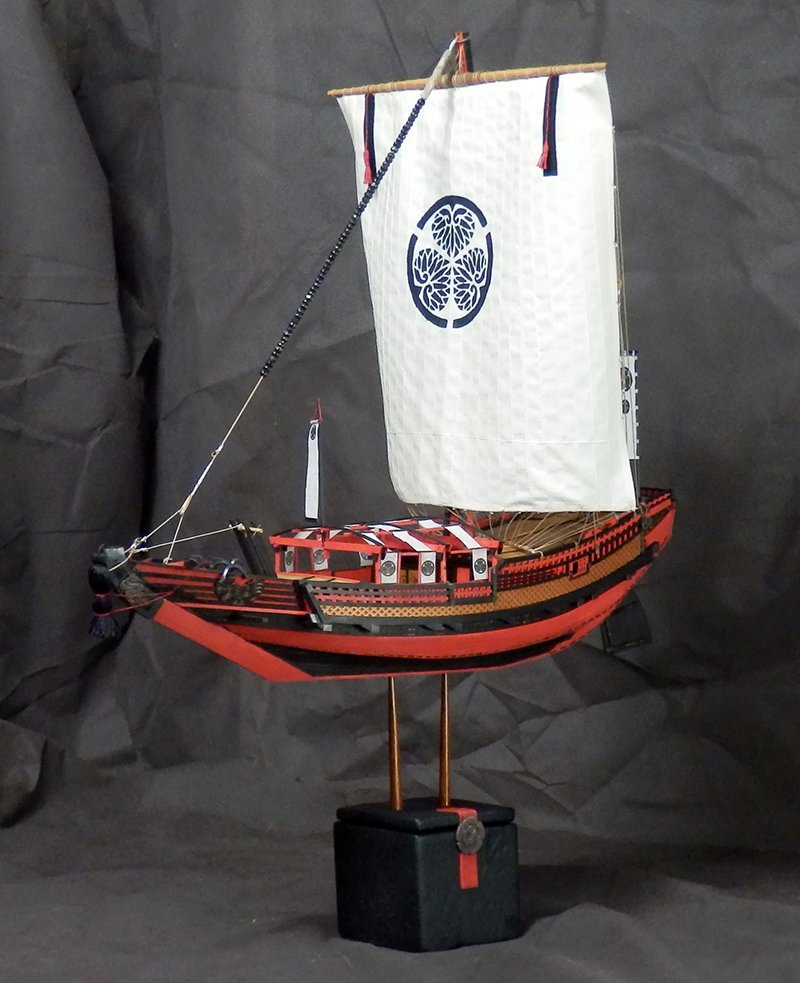
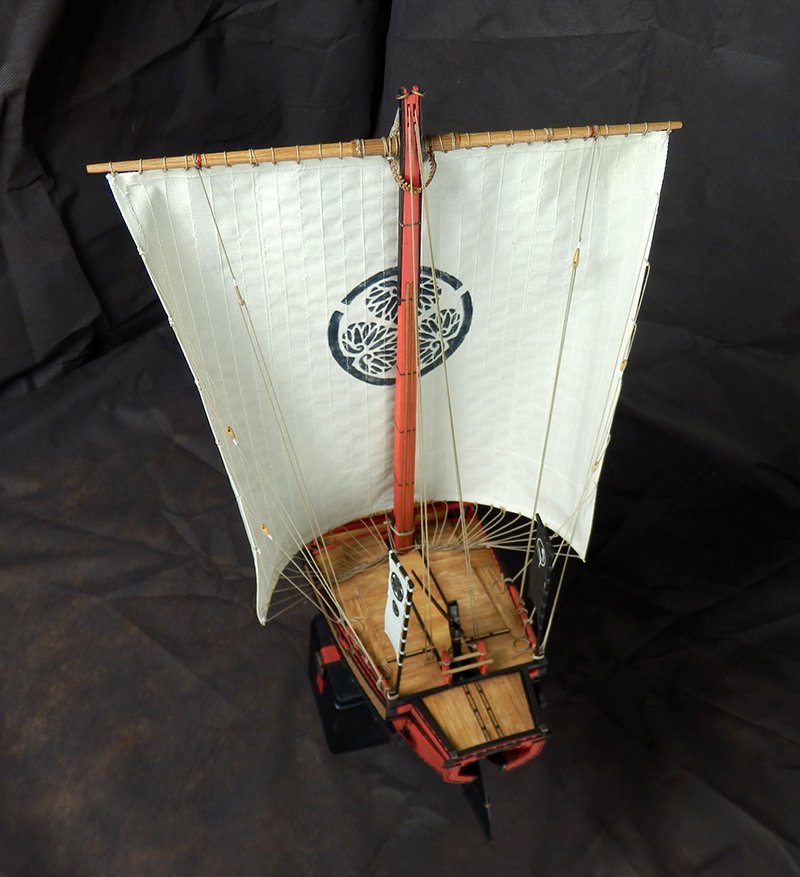
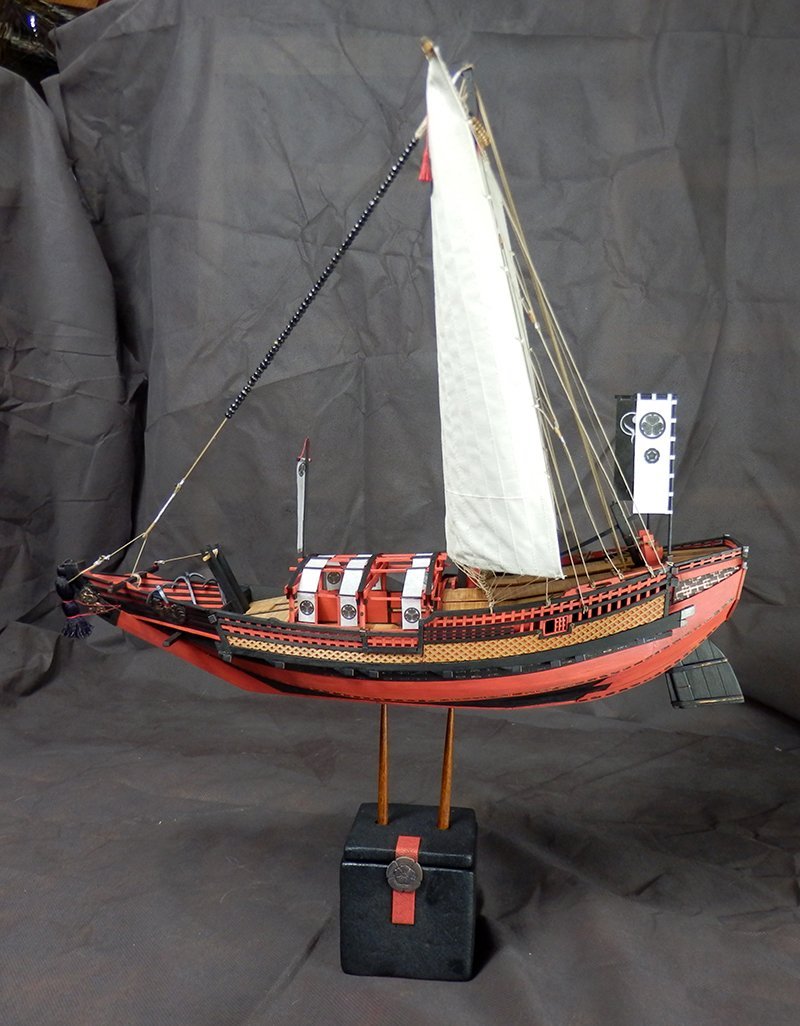
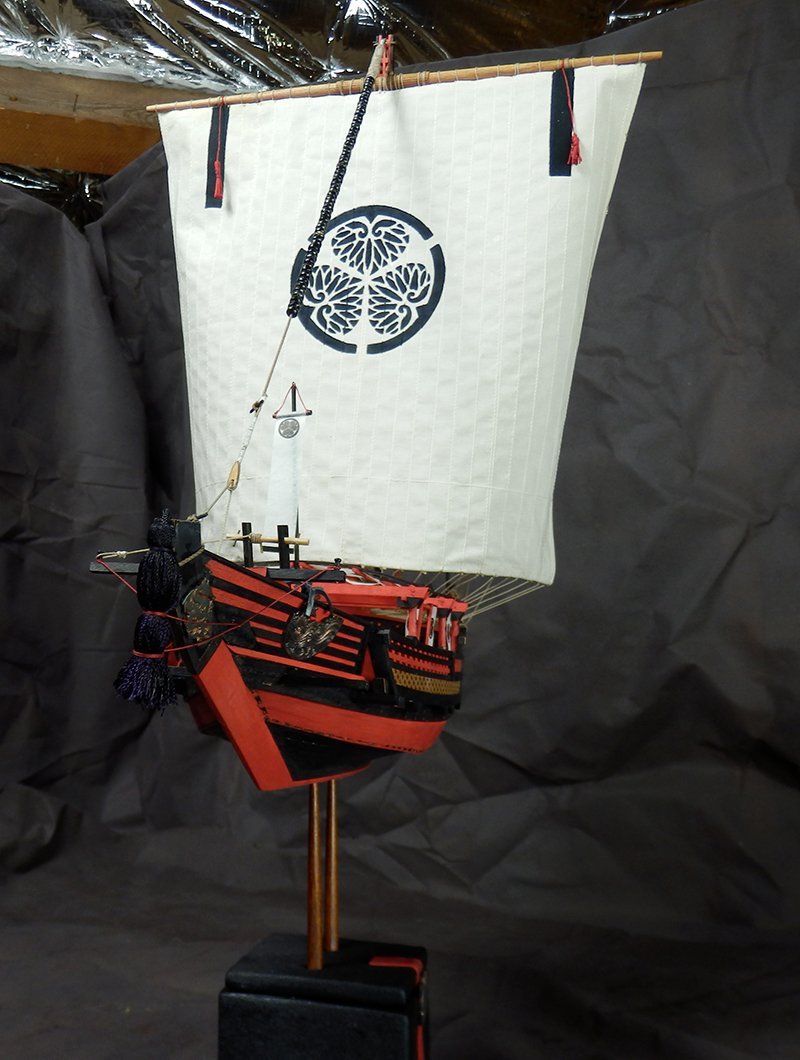
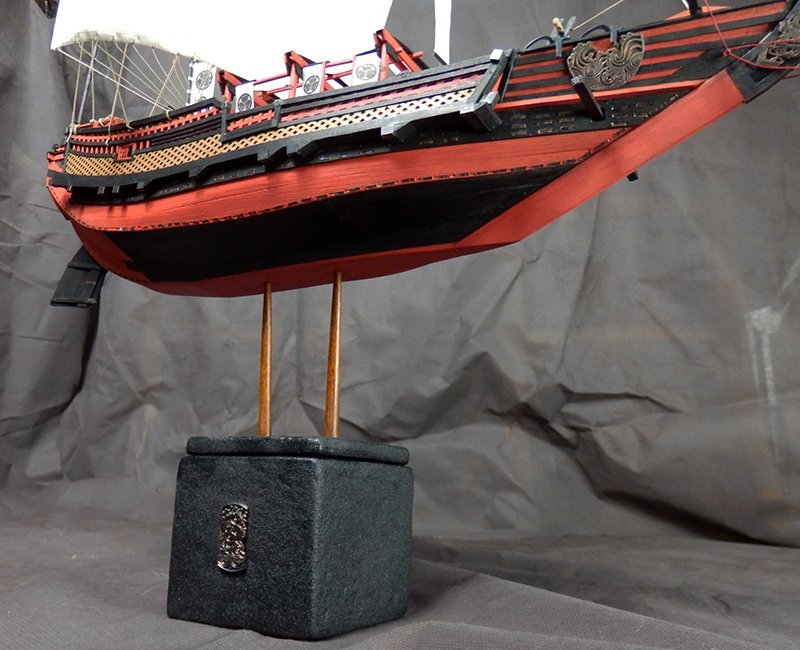
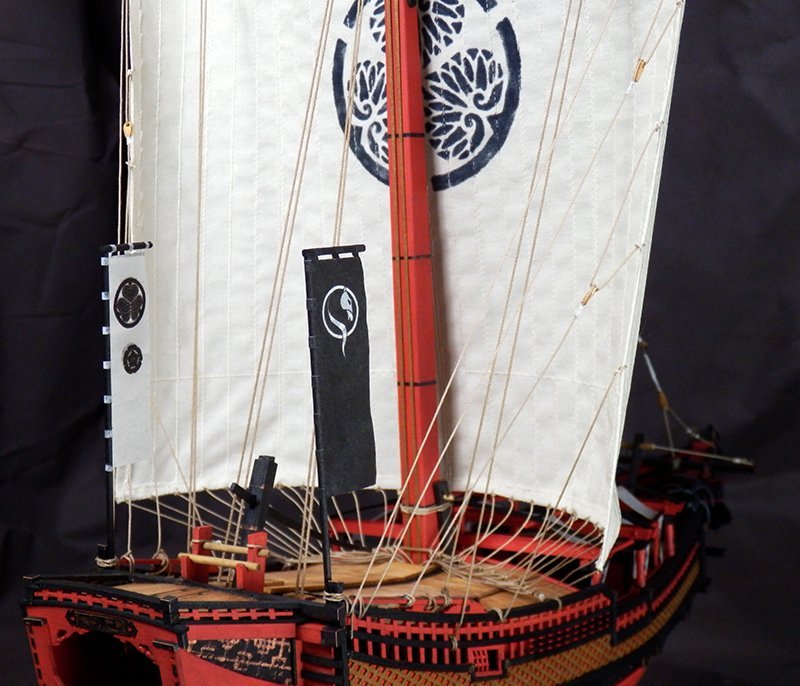
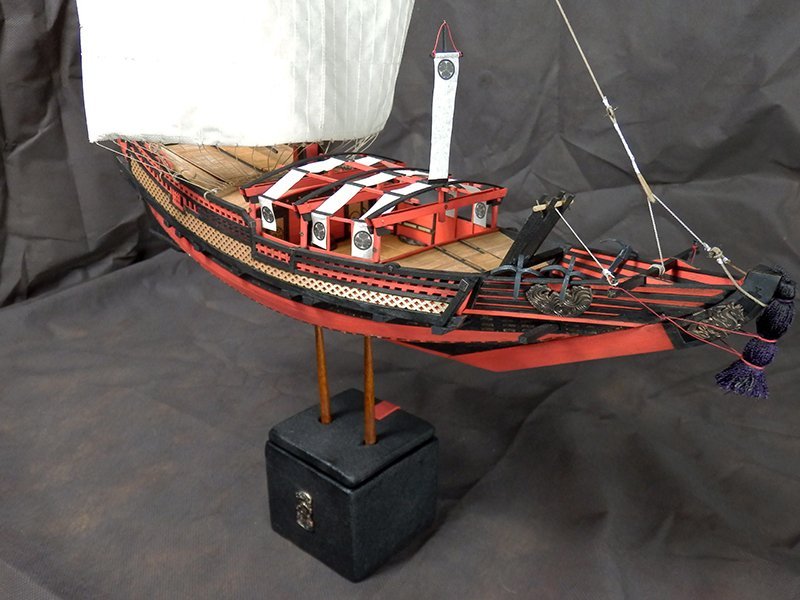
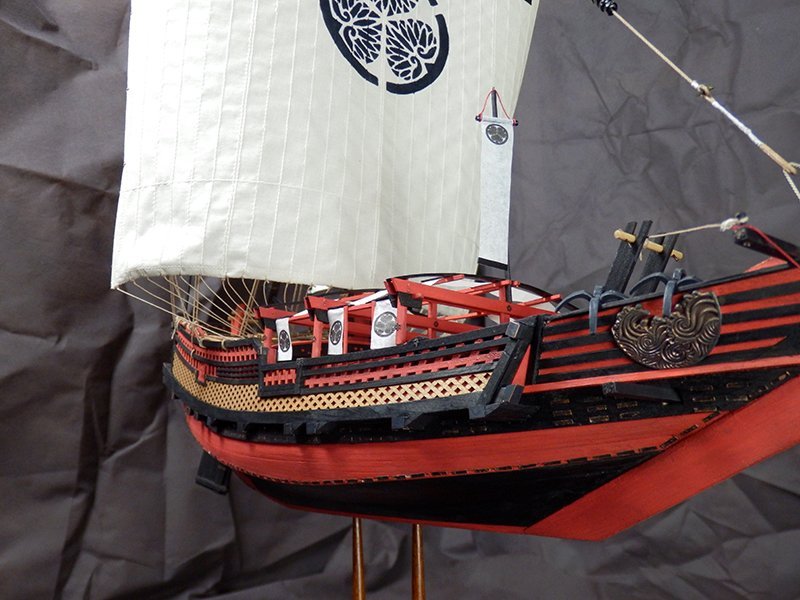
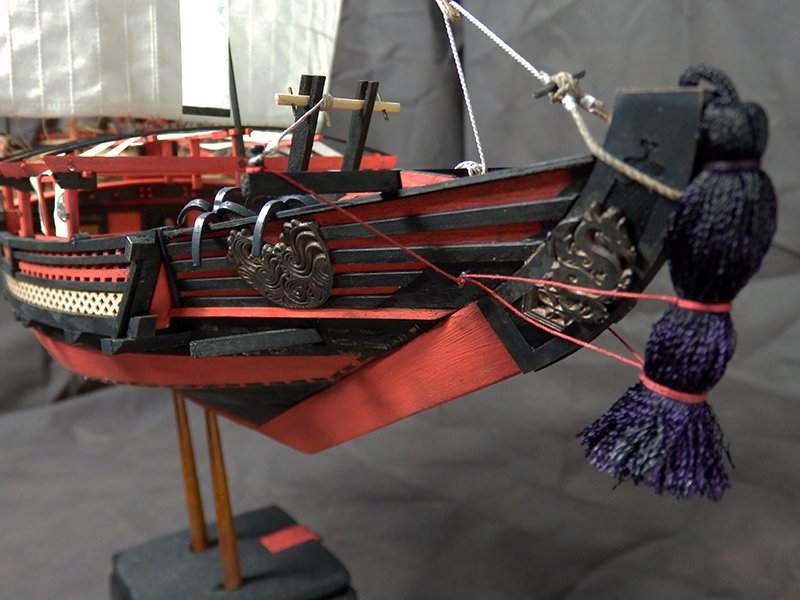
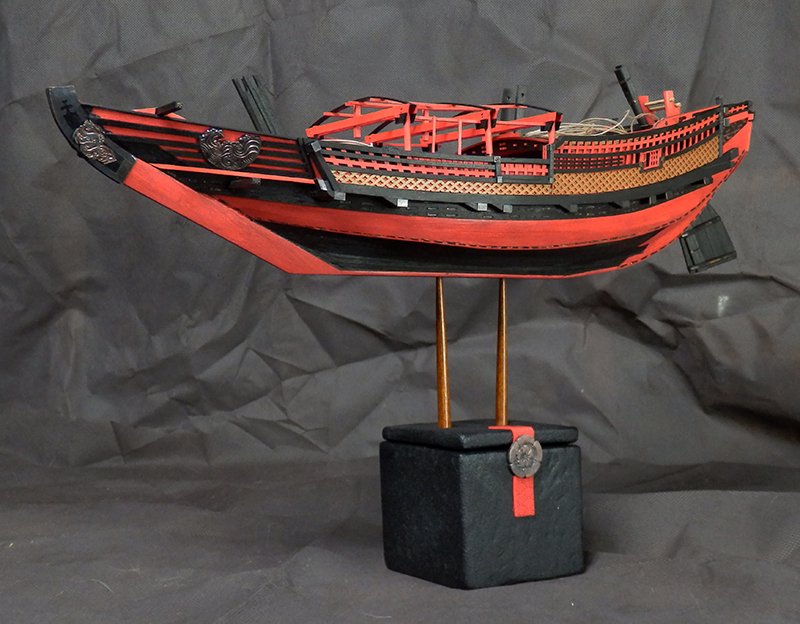
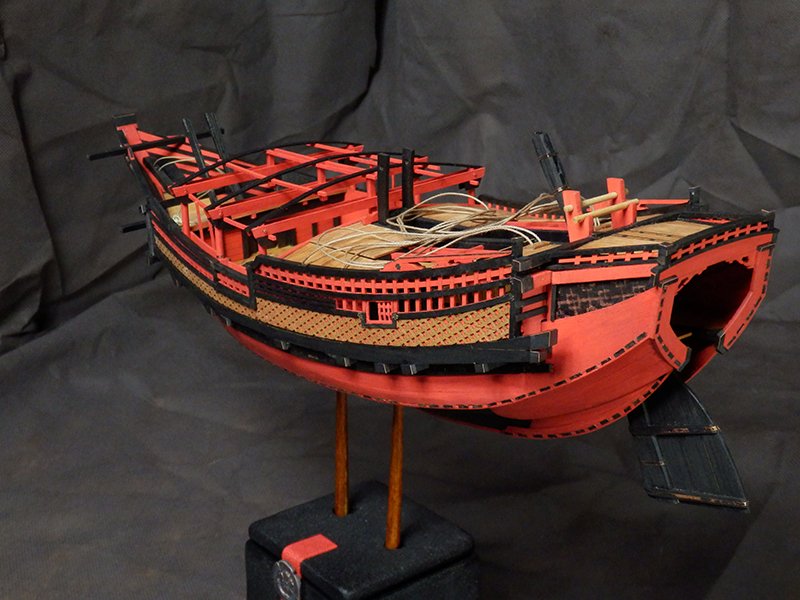
 This boat is now finished. I transformed and customized this WoodyJoe kit by adding color, an awning on the main deck, the creation of side windows, sculptures, a sail decorated with a "mon" corresponding to a real 18th century shogun, the hull fittings, a cradle from a traditional tea box, etc. This kit is demanding, requires a lot of patience and especially rigor to respect the particular geometry of these old Japanese boats. Here are the last pictures !
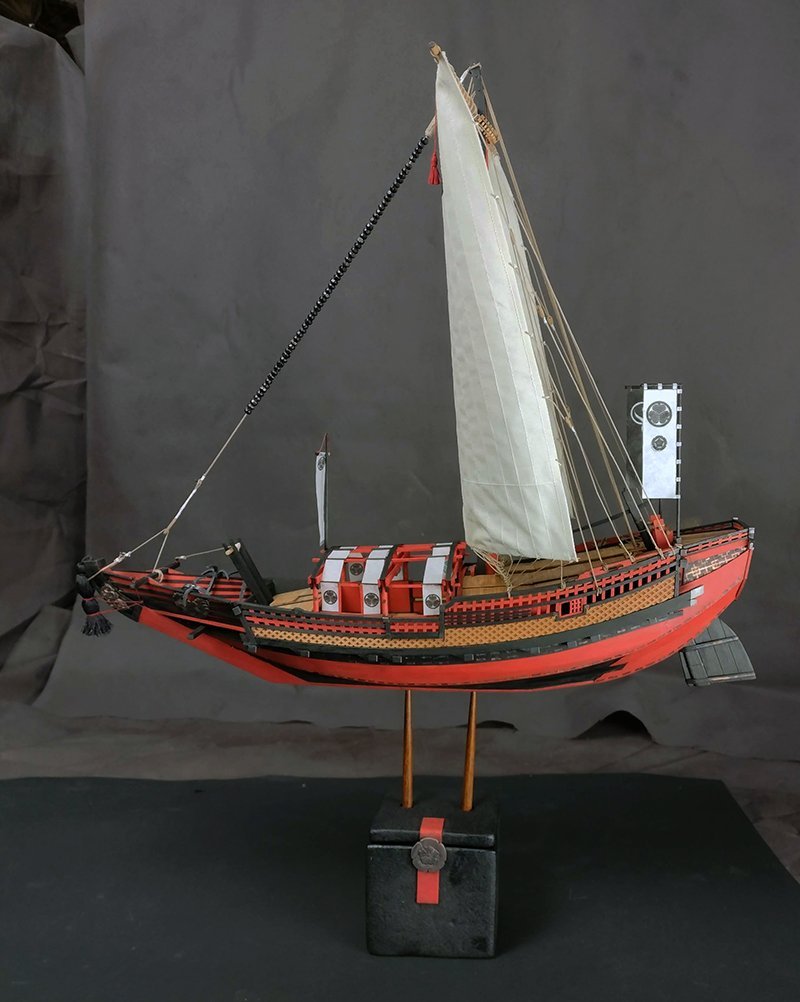


- 16 replies
-
- 7
-

-

-

-
- Higaki Kaisen
- Woody Joe
- (and 1 more)
-
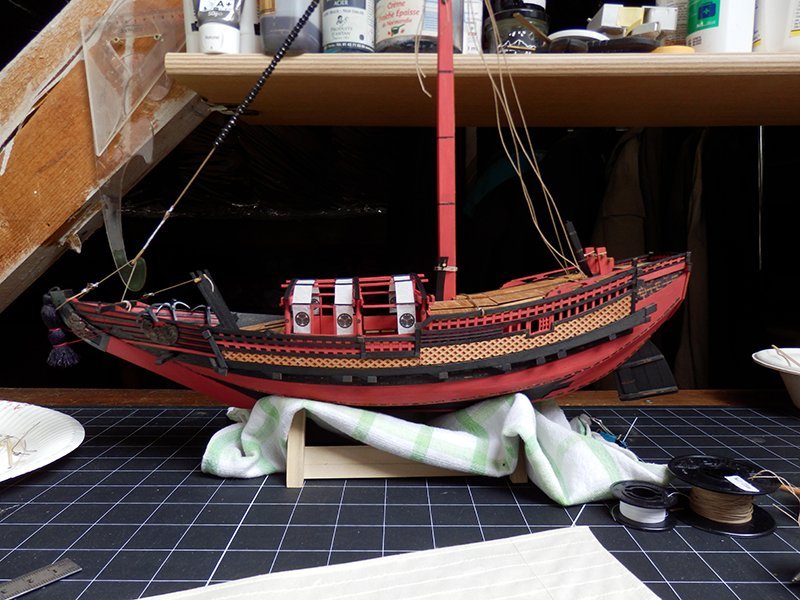
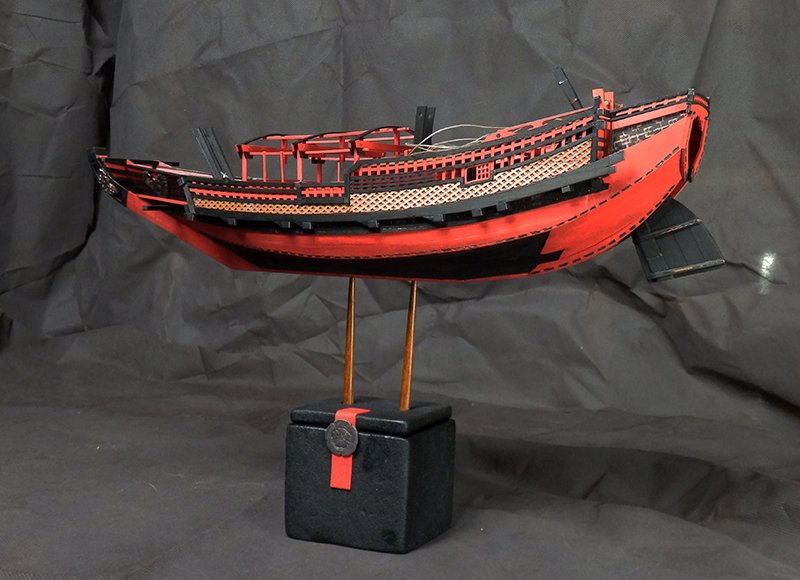
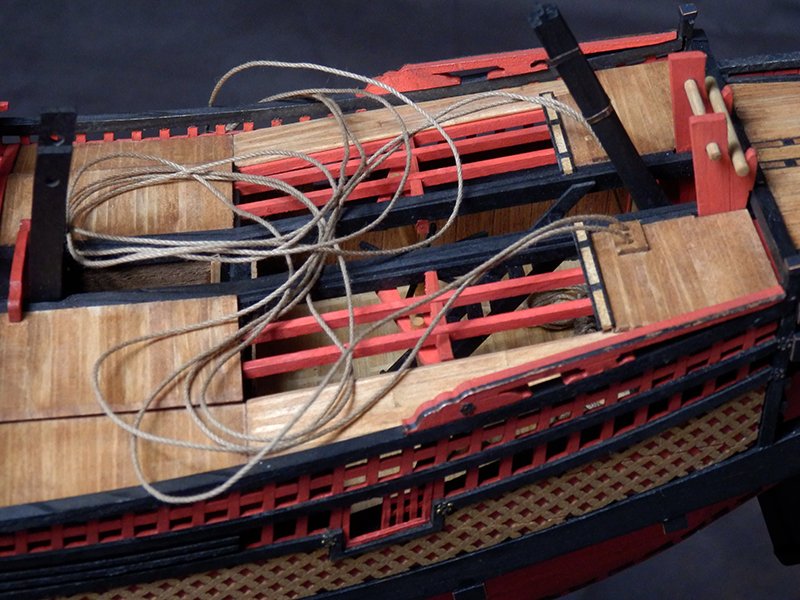
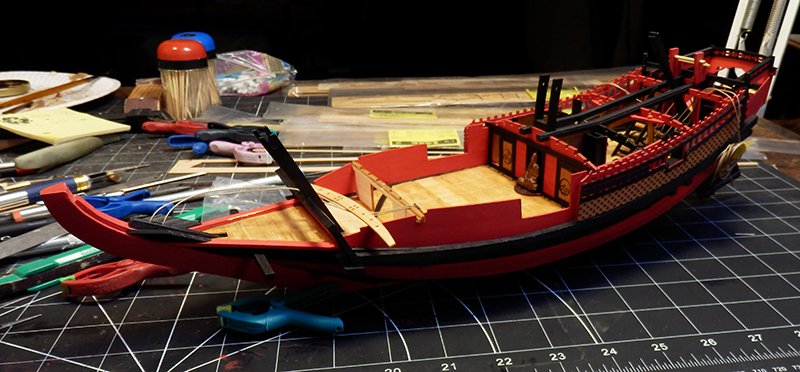
Well, this time, we are getting closer to the end of this project... So a small series of pictures !

- 16 replies
-
- 10
-
-
-
-
- Higaki Kaisen
- Woody Joe
- (and 1 more)
-
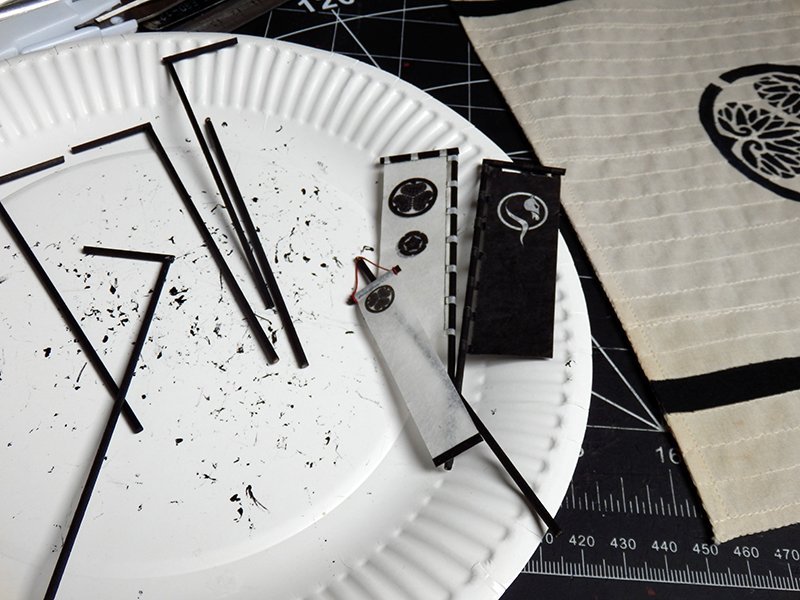
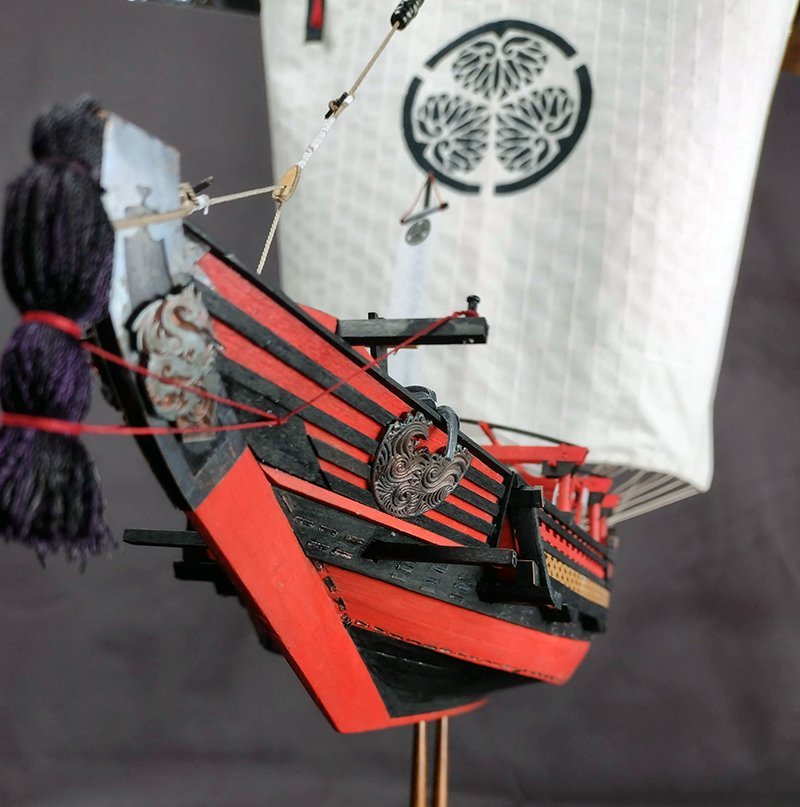
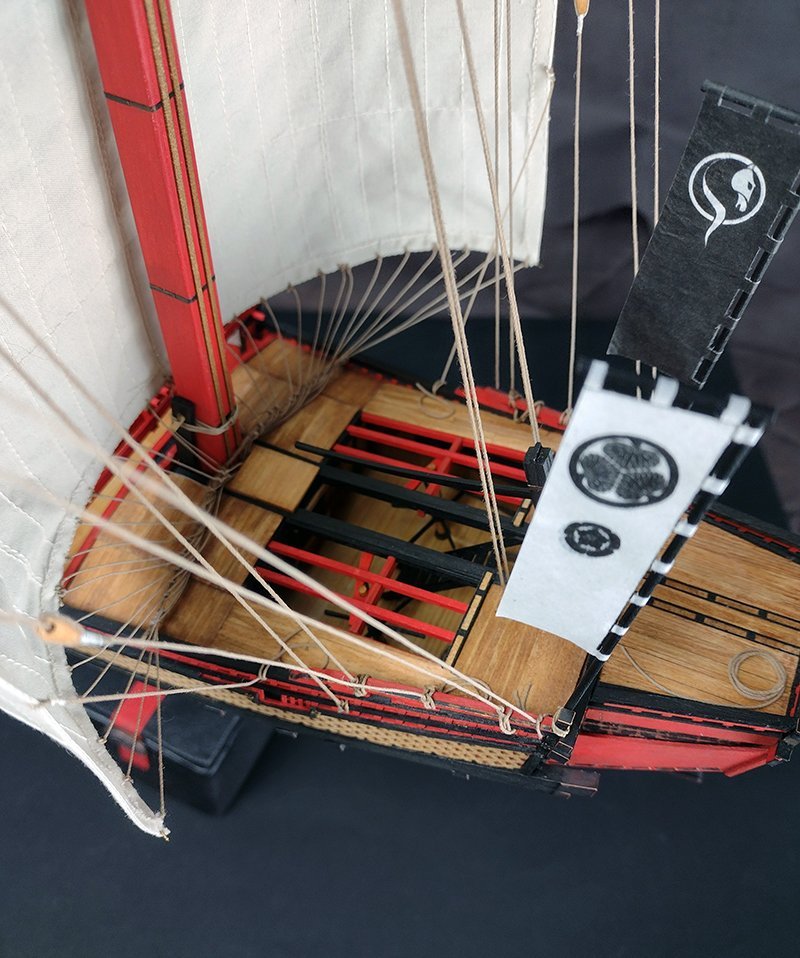
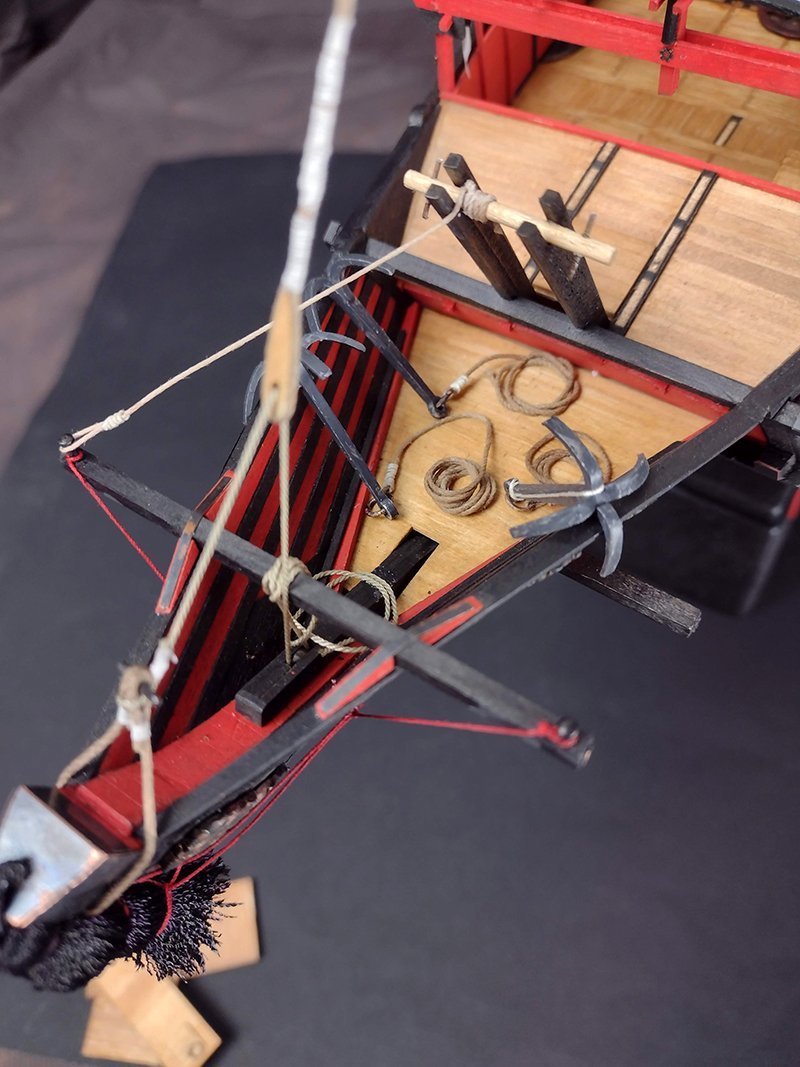
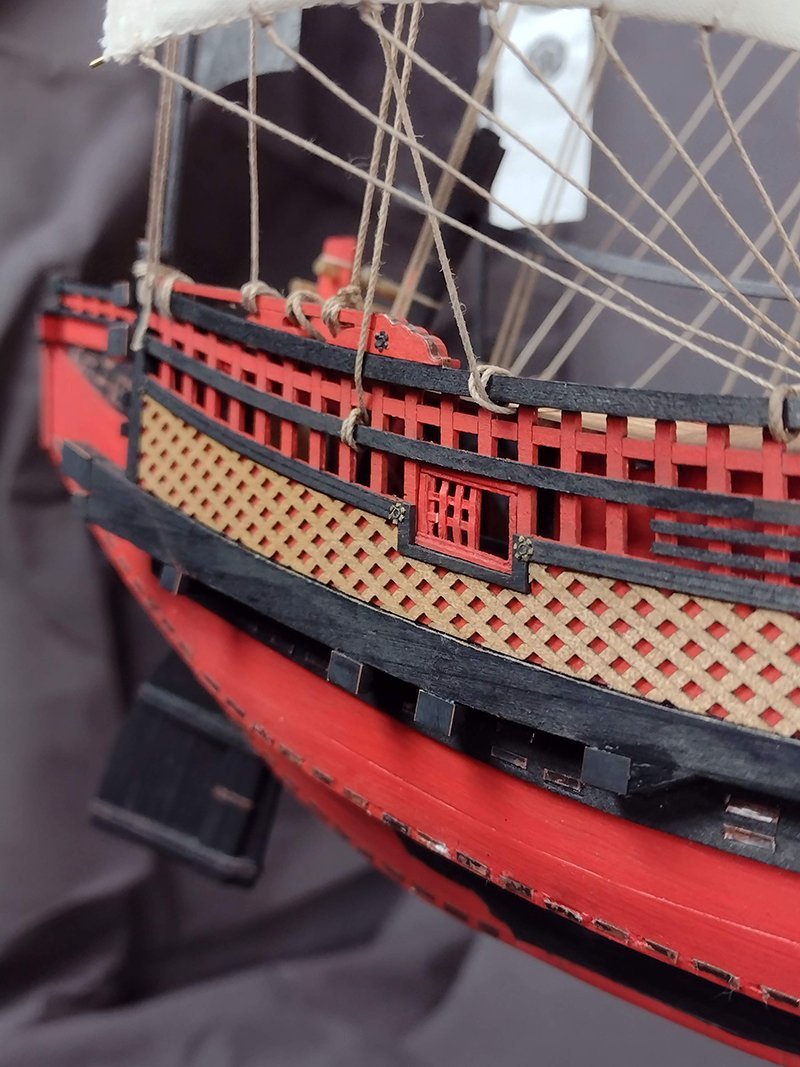
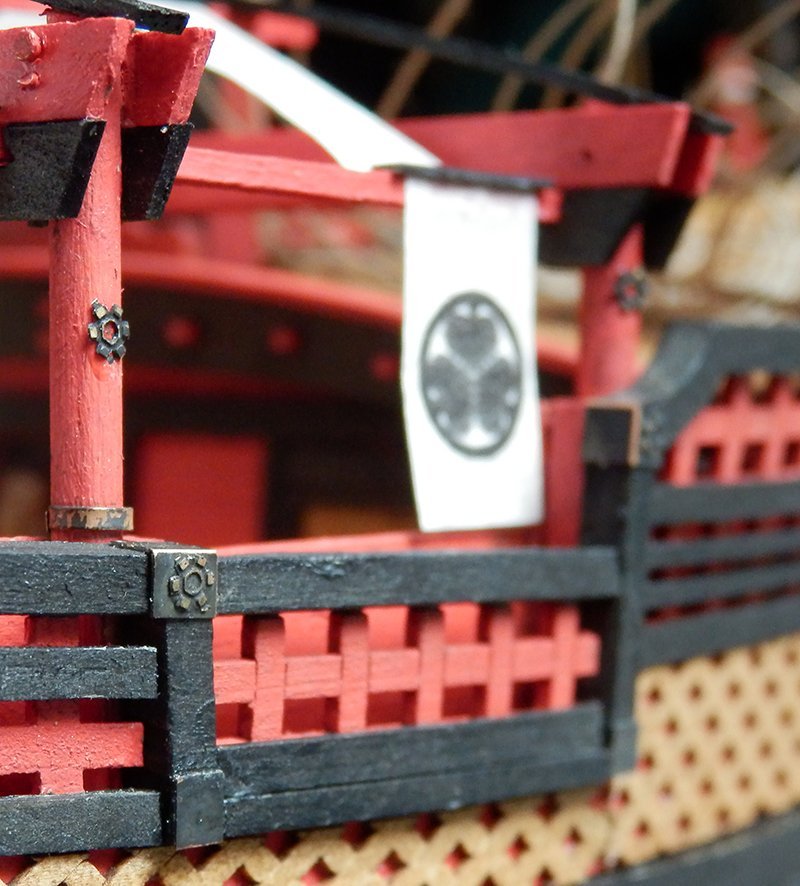
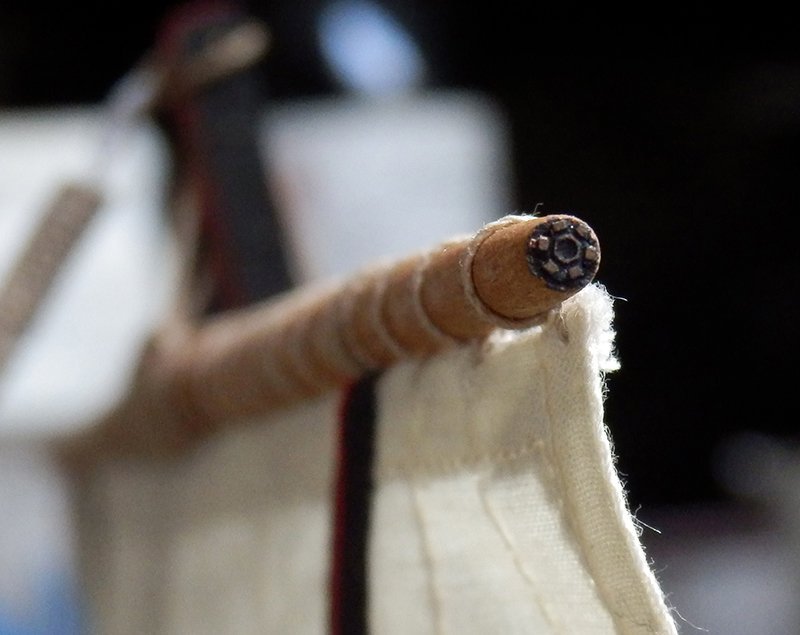
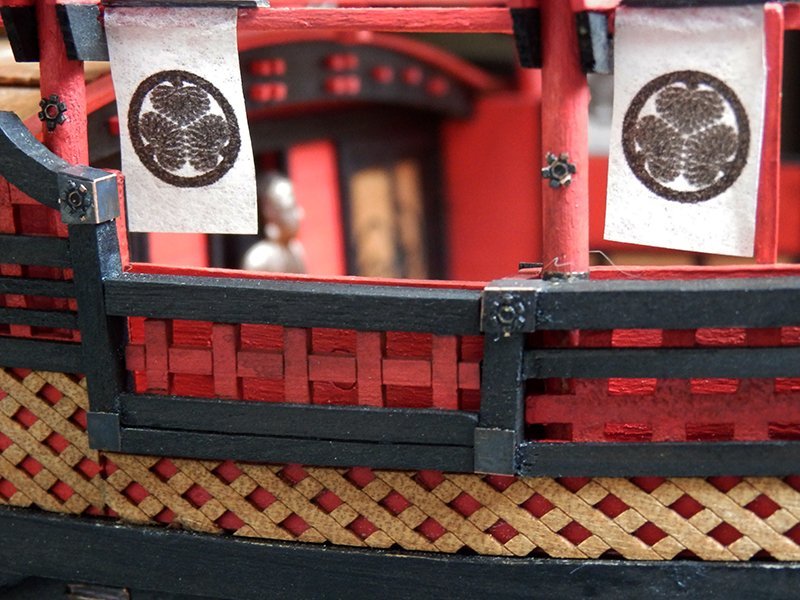
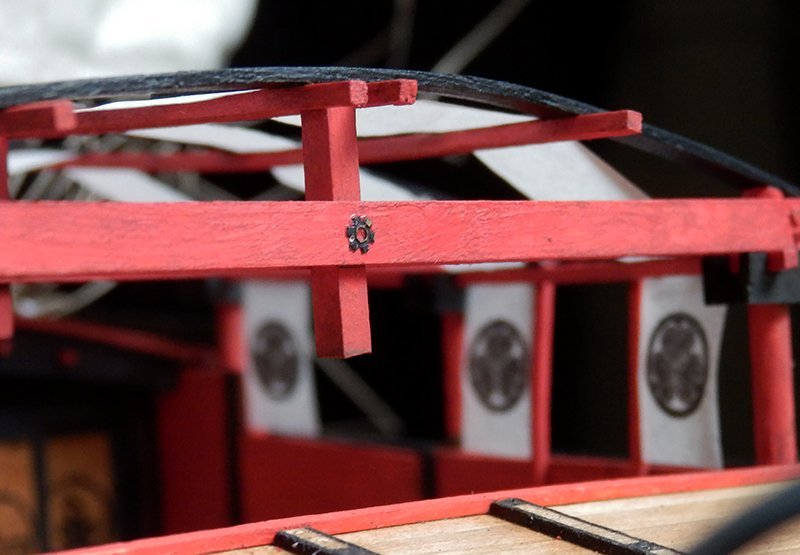
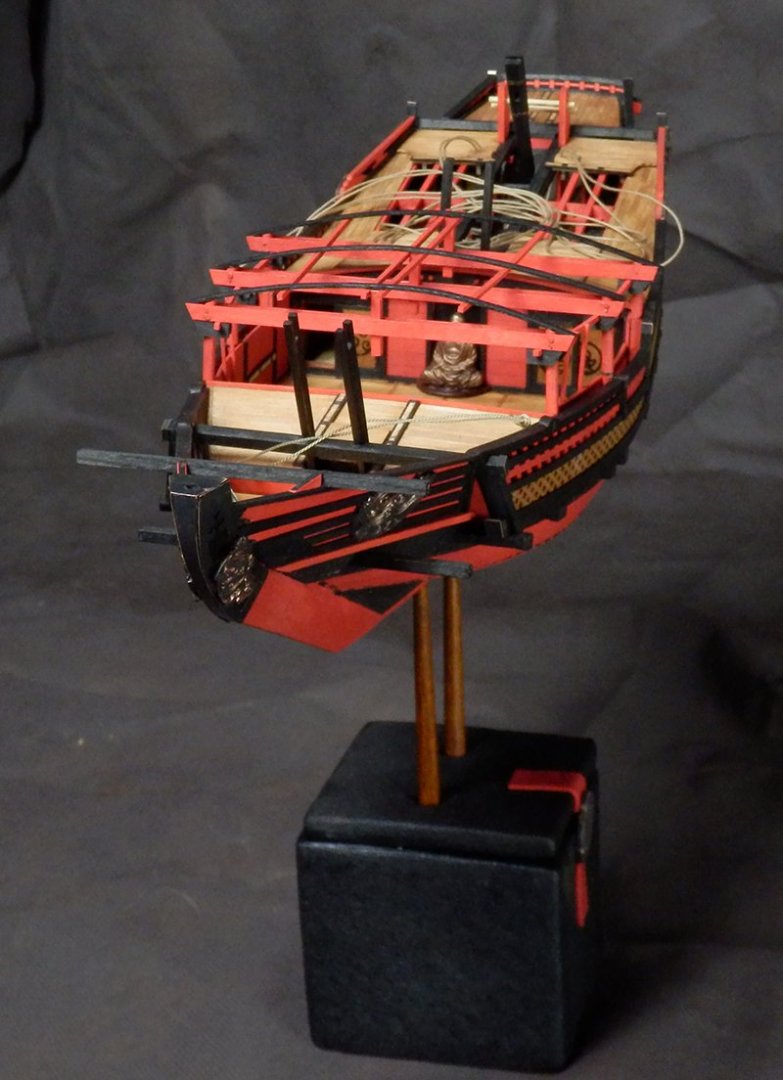
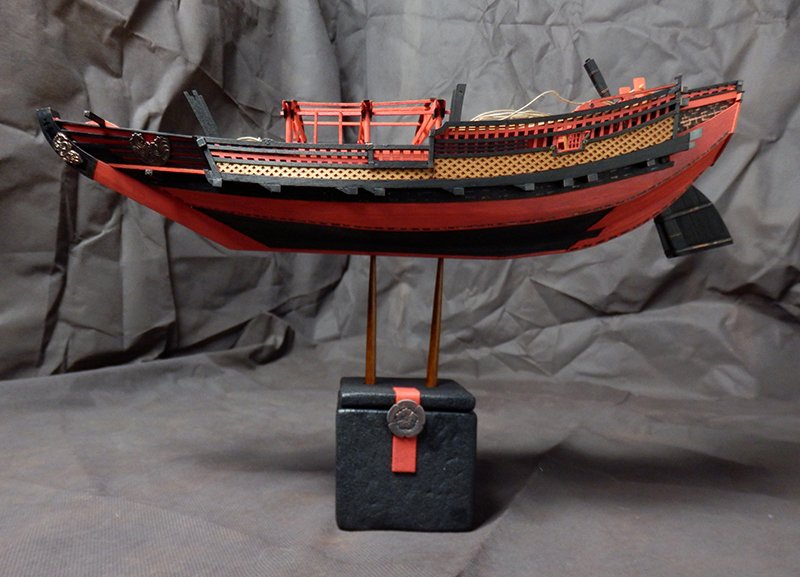
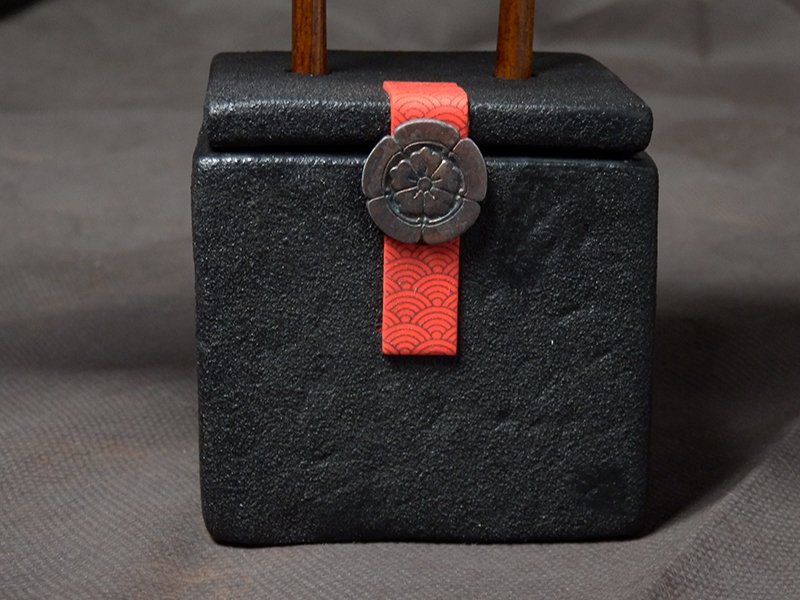
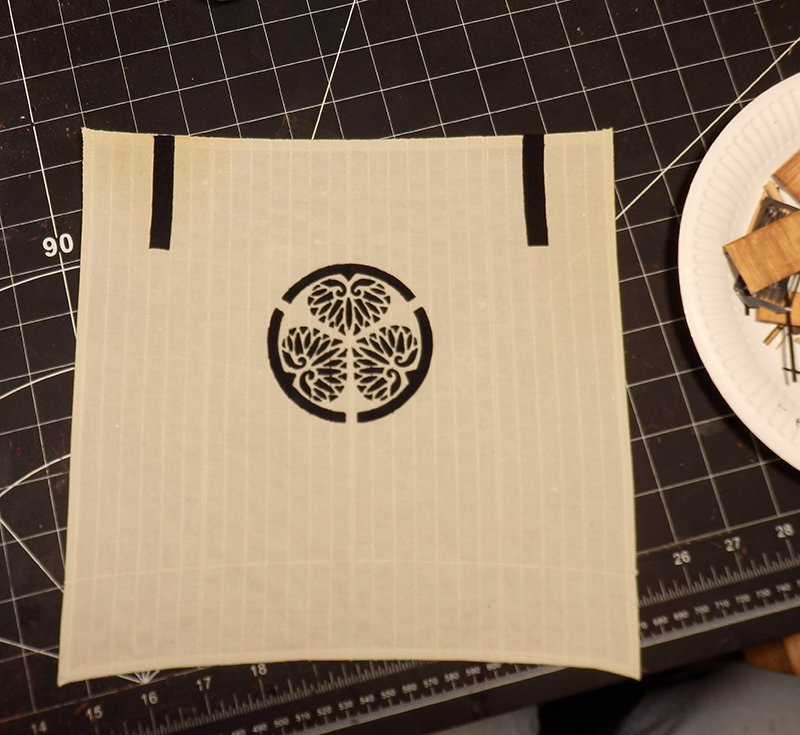
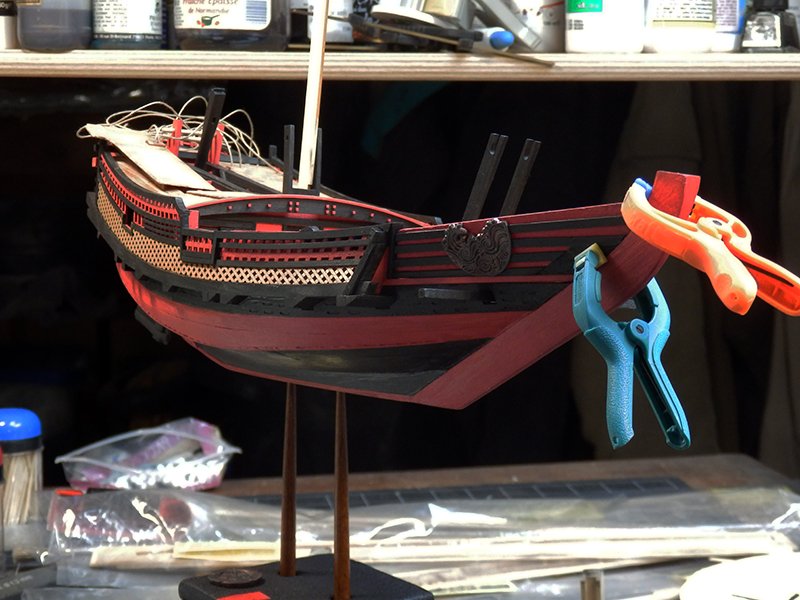
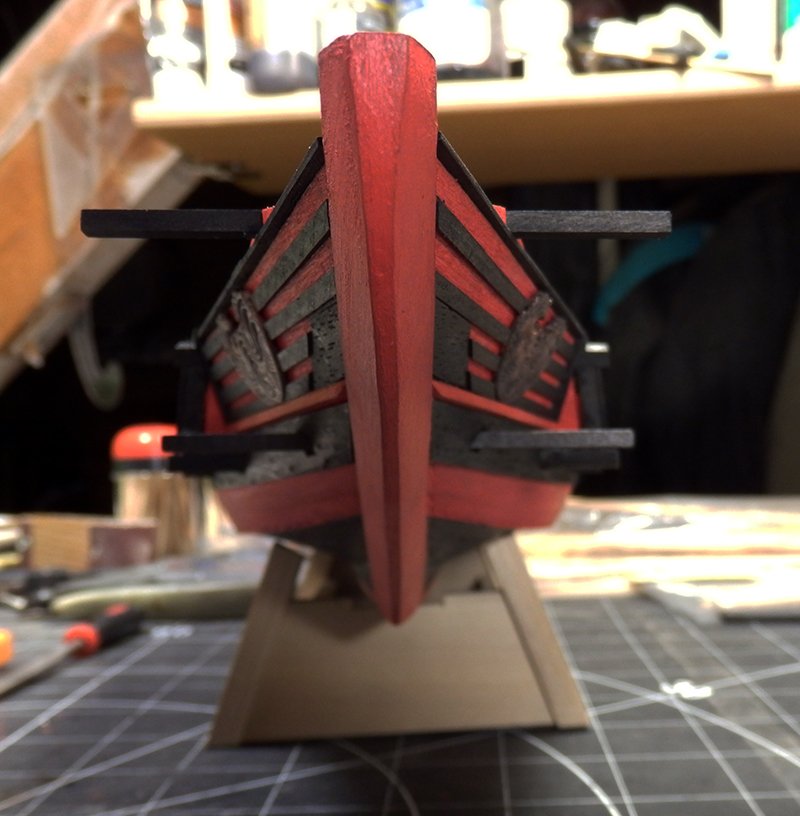
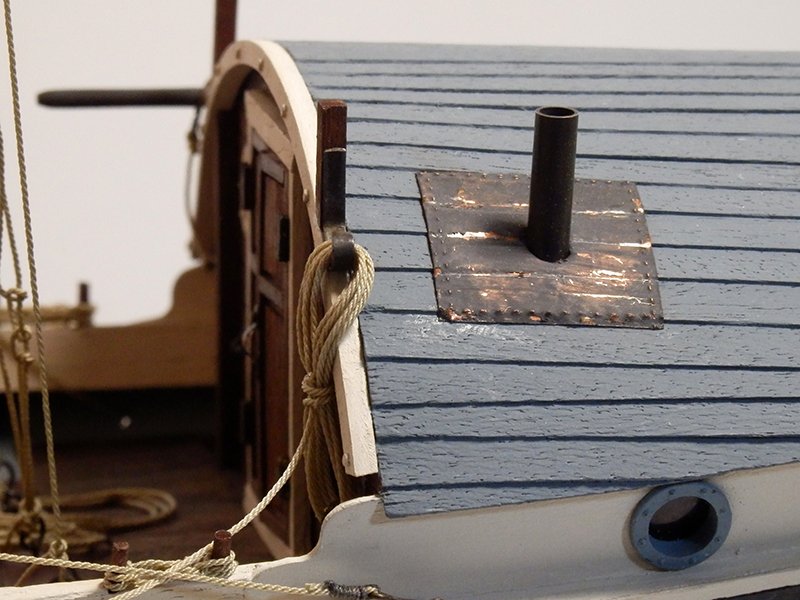
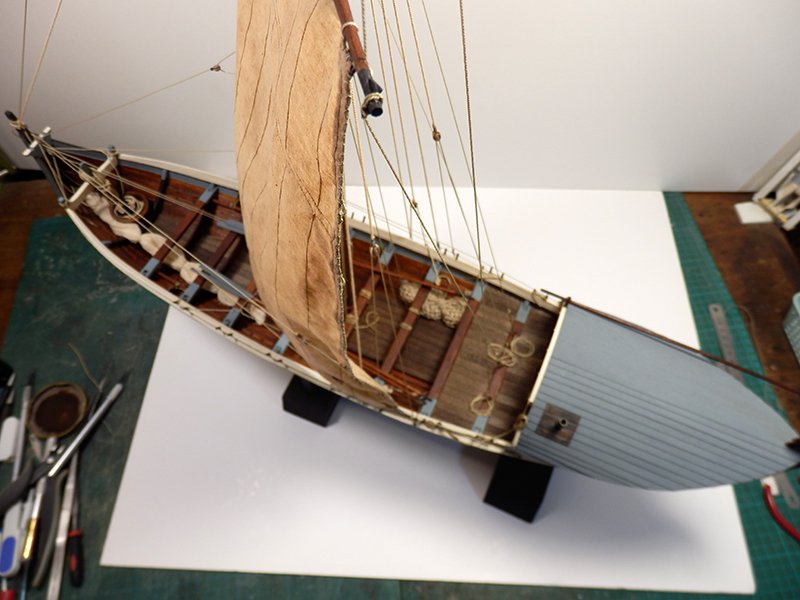
Some progress on this boat! The hull is almost finished: - all the fittings are installed (the hull is assembled by metal staples that I wanted to represent), each crossbeam is protected in metal. The bow is entirely covered with metal too. - the side windows are made of bristol board - the awning of this yacht is in place - the hull decorations (in polymer clay) are glued. The base is also done: - the tea box (painted with ink) and the Japanese chopsticks - the box is filled to fix the chopsticks, to weigh and stabilize the boat with self-hardening clay - closing the lid decorated with a mon (logo of a noble family) and a red polymer ribbon with a traditional sea motif. Let's make room for the rigging with a sail already worked with a stencil... The rest to come!
- 16 replies
-
- 13
-
-
-
- Higaki Kaisen
- Woody Joe
- (and 1 more)
-
Thank you for your answer! No problem for the clipper, I'll wait for the rest with patience. And especially that with this other project, you show us a very nice sloop!
- 153 replies
-
- 1
-
-
- Ancre
- Sail races
- (and 2 more)
-
Has this boat moved since your last post? This project is really exciting since the beginning, it would be a shame not to see the continuation...
- 153 replies
-
- 3
-
-
- Ancre
- Sail races
- (and 2 more)
-
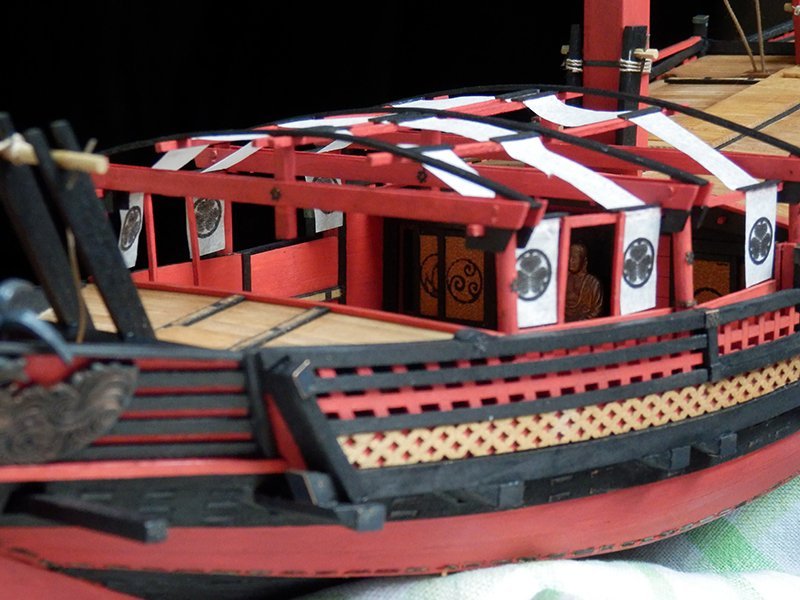
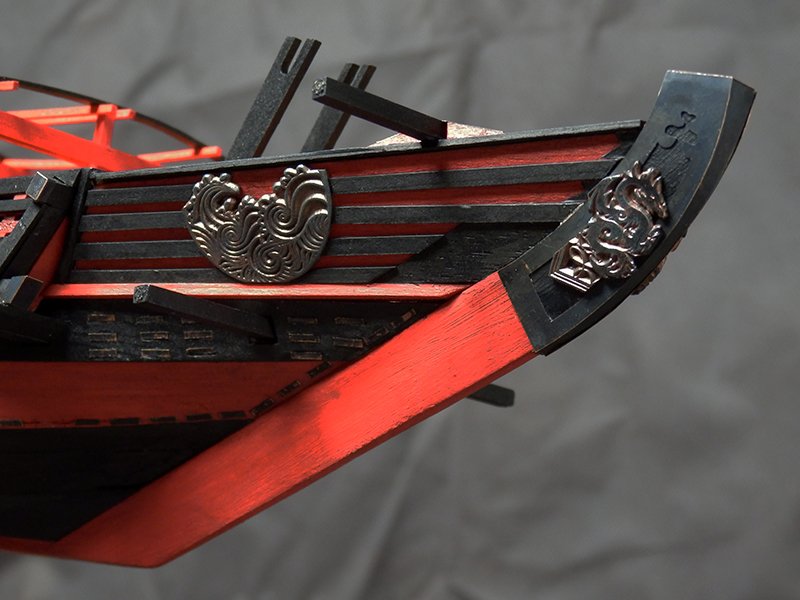
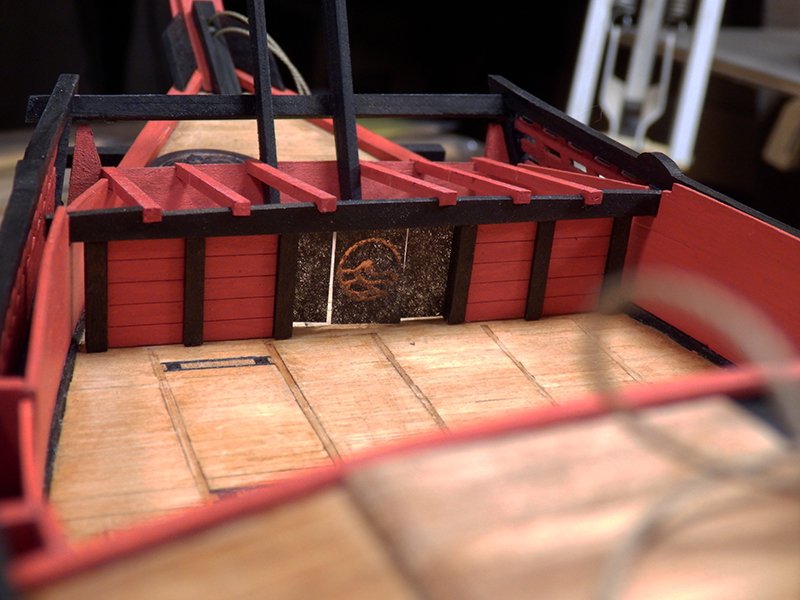
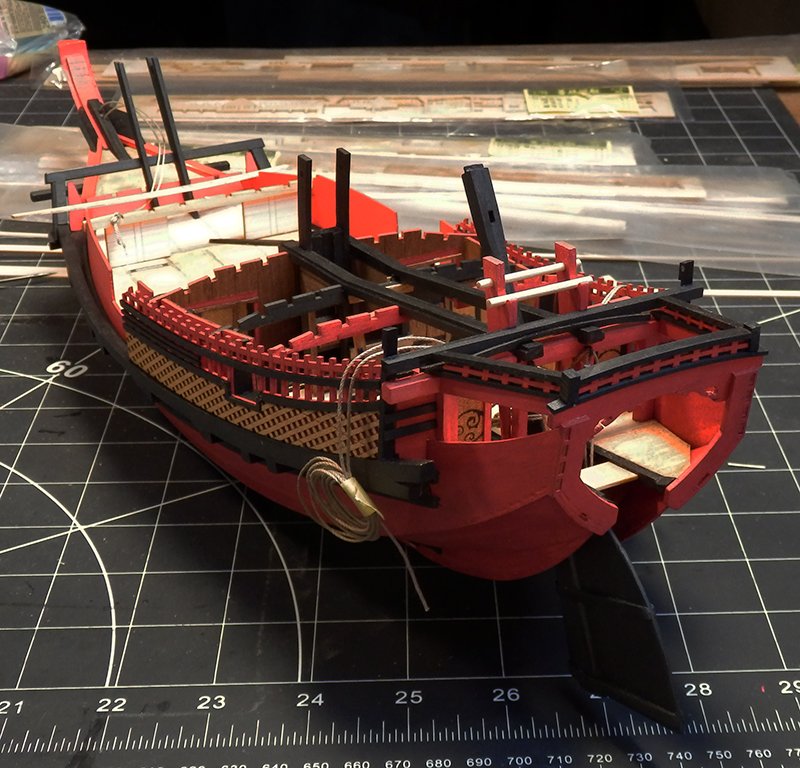
Last pictures of this week-end. I was able to finish the main part of this higaki by putting in place the decorated bow walls. I also took care of the base with this ceramic tea box and its 2 chopsticks from Japan. The tea box has a small traditional logo (Mon) that we will find elsewhere... I will be able to start the decorations everywhere (copper plates, staples, etc...), then the rigging.
- 16 replies
-
- 9
-
-
-
- Higaki Kaisen
- Woody Joe
- (and 1 more)
-
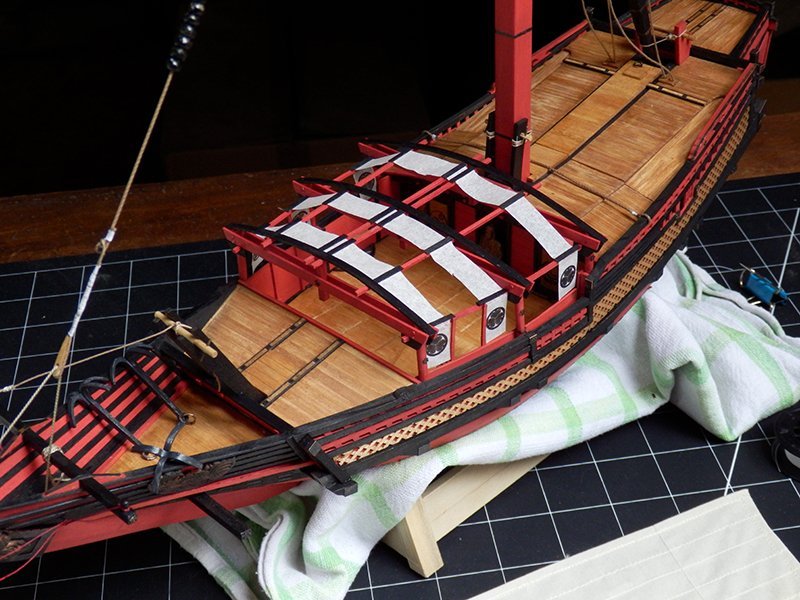
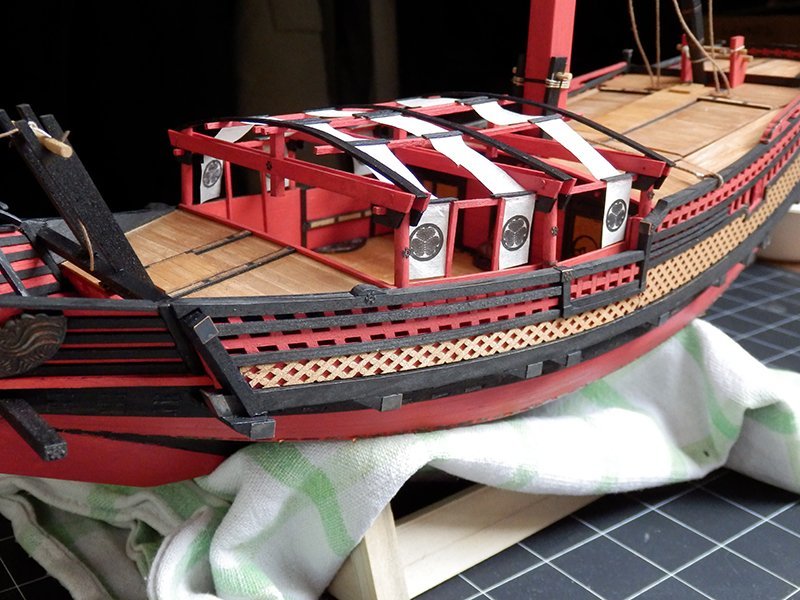
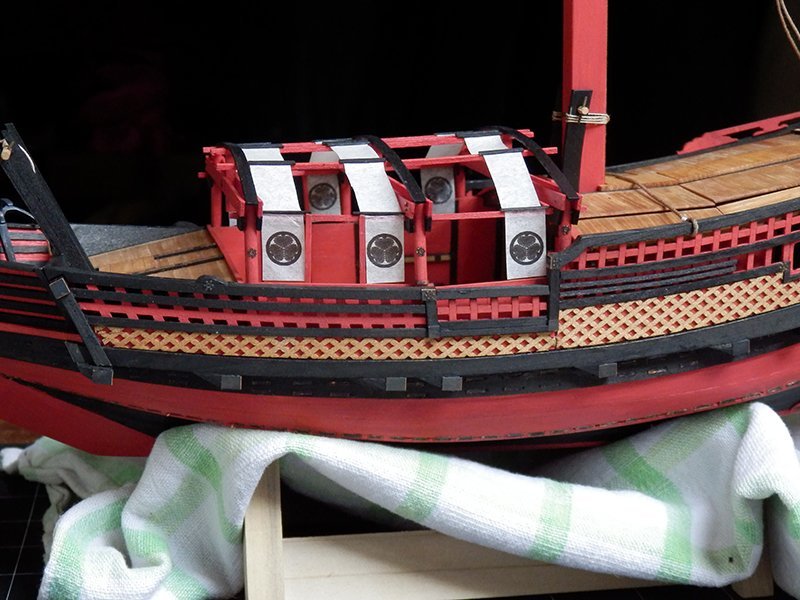
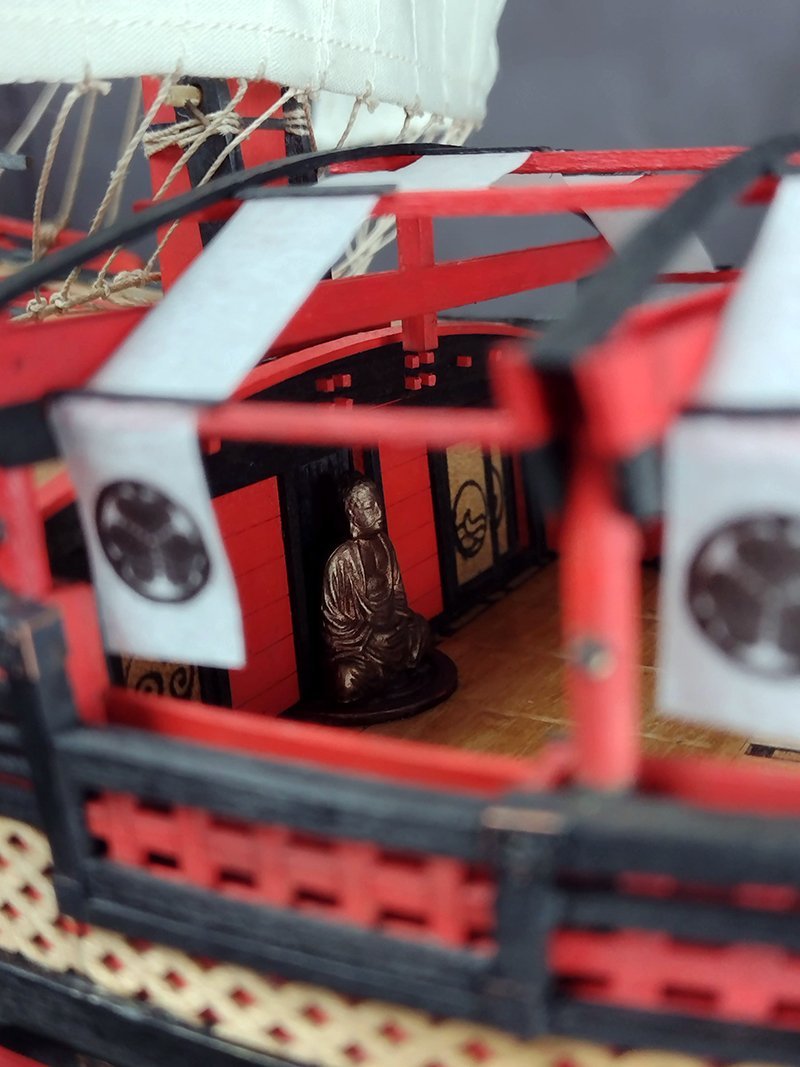
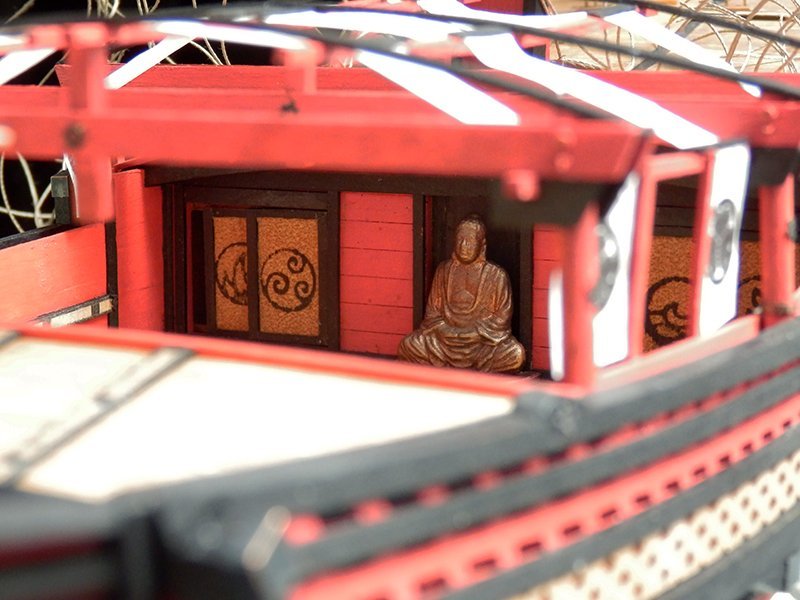
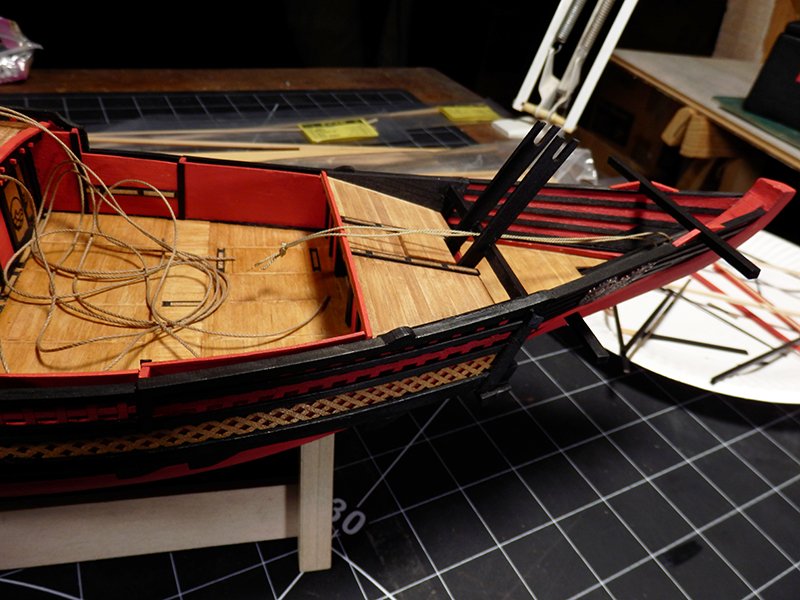
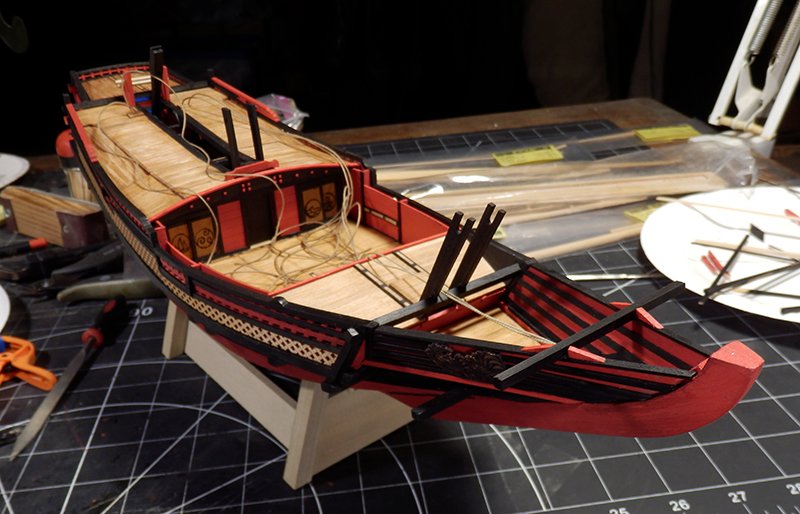
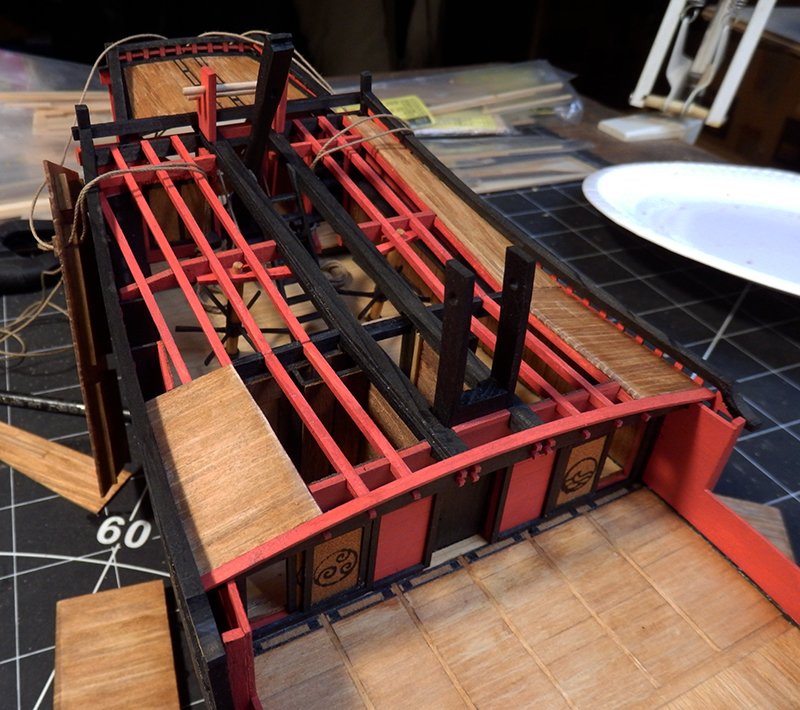
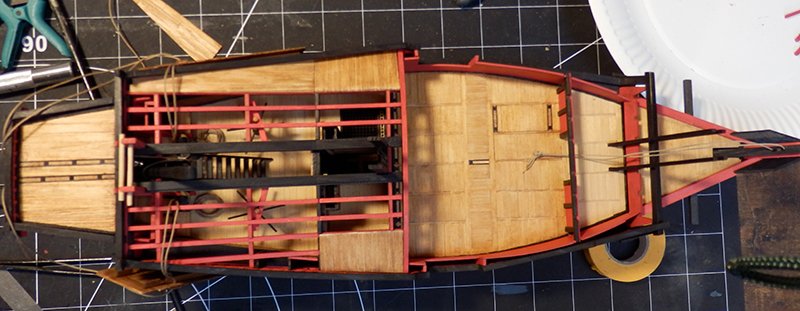
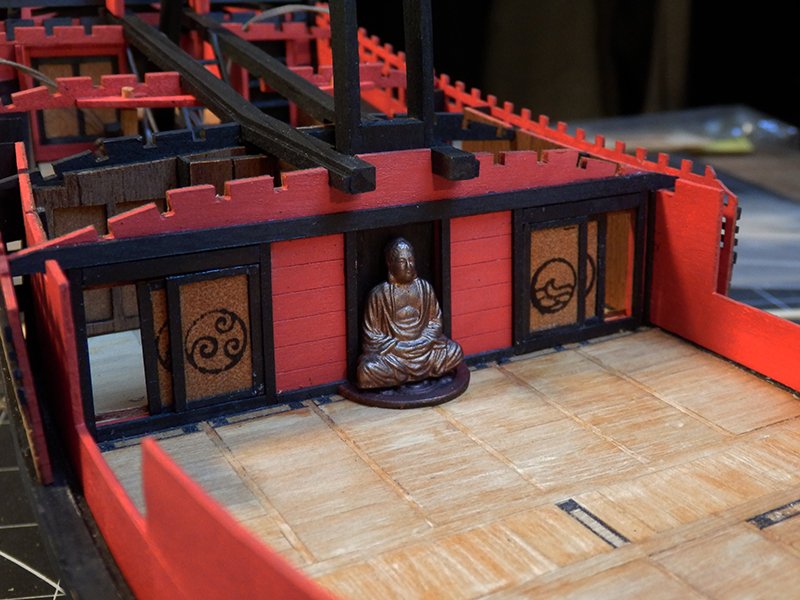
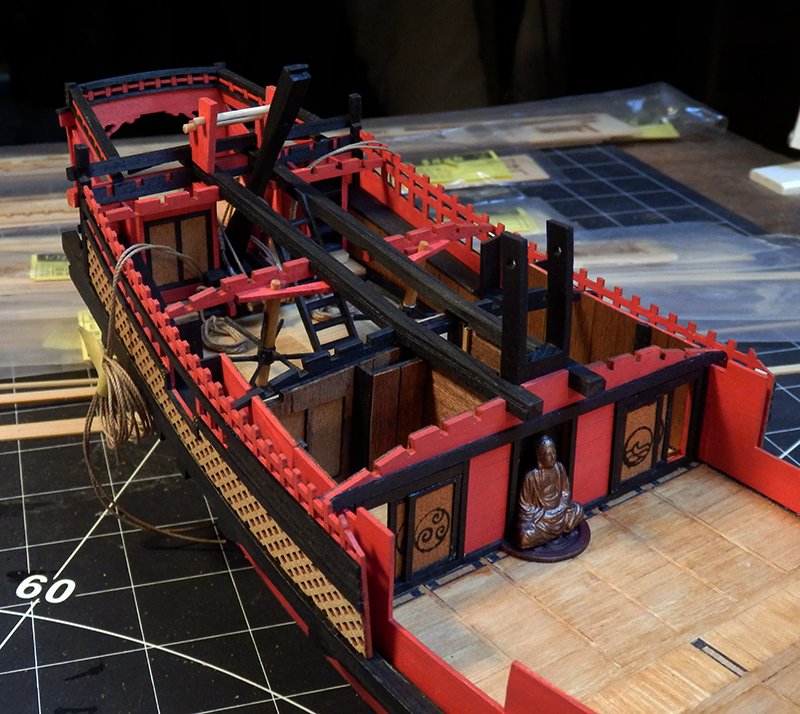
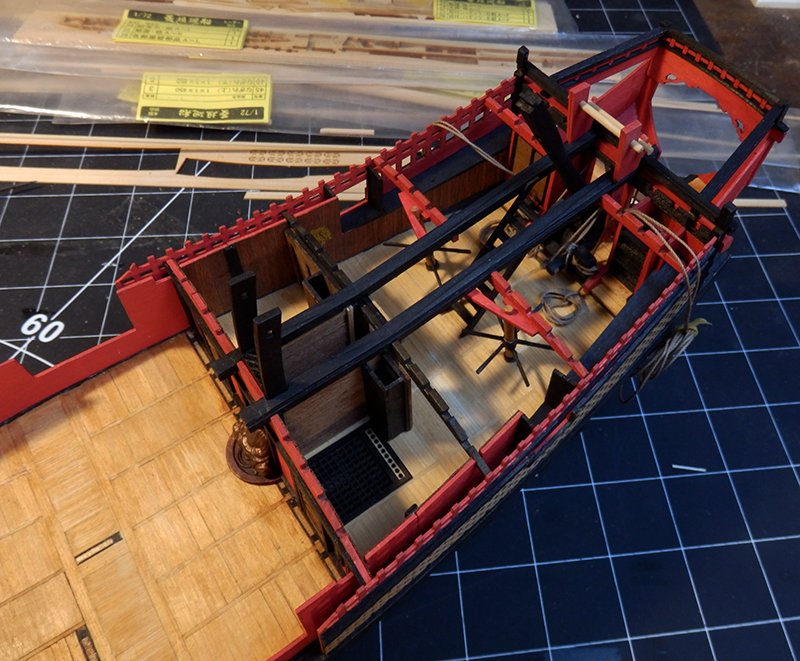
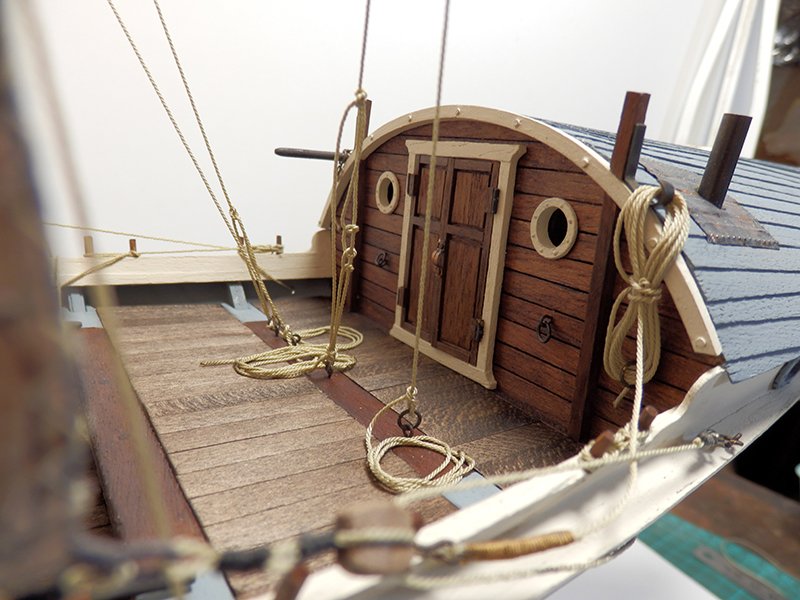
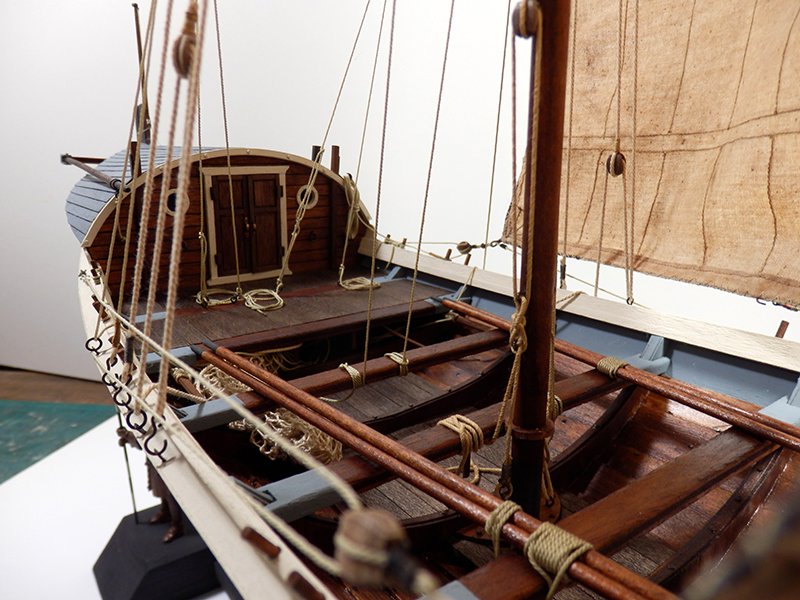
The rear deck is covered (but mostly unglued, I can't bring myself to hide it all, and I haven't thought about how to make it stay in place). The front cabin is done too, with a noren to close (Japanese curtain decorated with several vertical panels). The side rails are in place, some personal decorations are missing.
- 16 replies
-
- 7
-
-
- Higaki Kaisen
- Woody Joe
- (and 1 more)
-
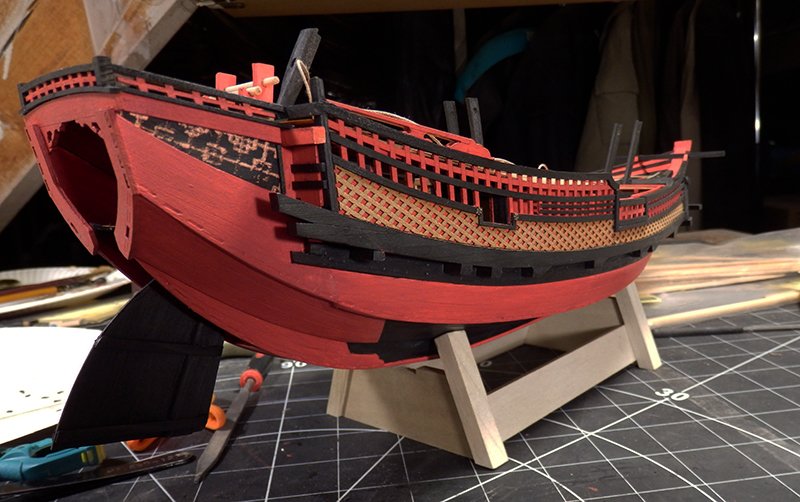
More about this bezaisen (coastal transport that I transform into a lordly yacht)! The aft cabin is almost finished, the decorations are progressing.

- 16 replies
-
- 6
-
-
- Higaki Kaisen
- Woody Joe
- (and 1 more)
-
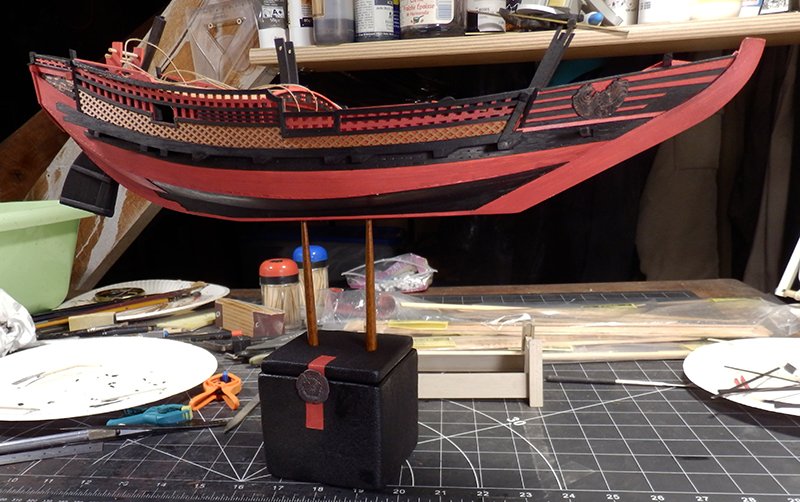
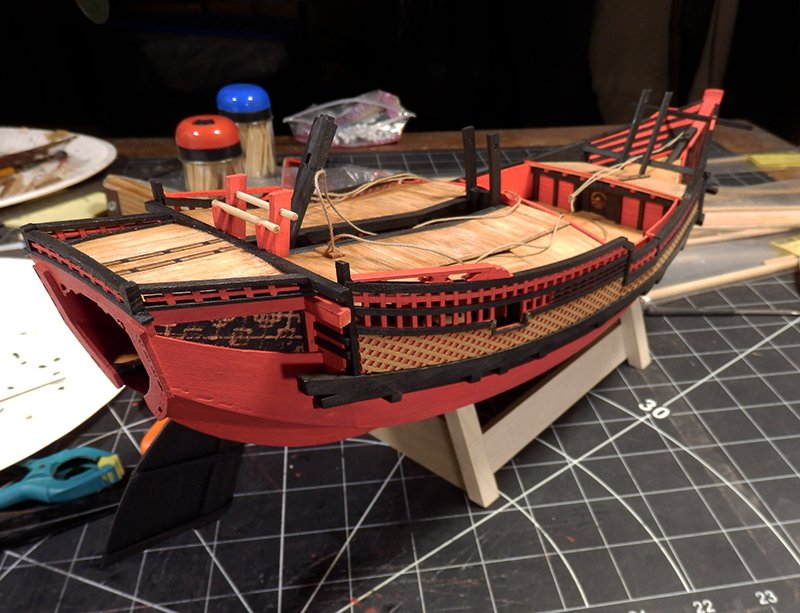
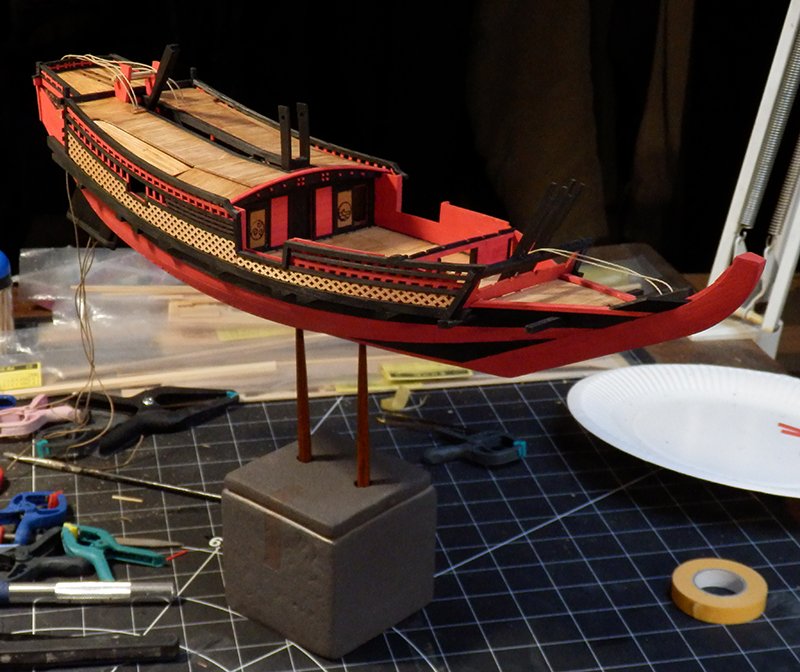
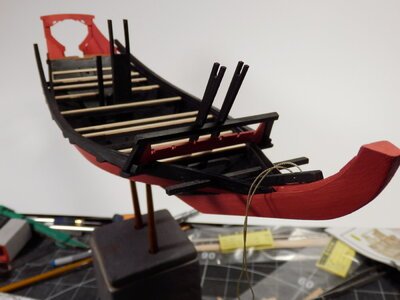
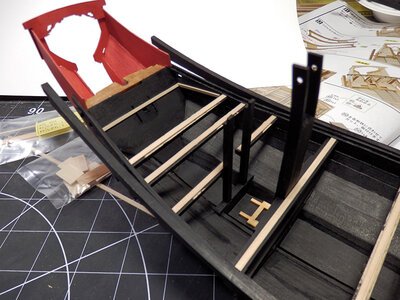
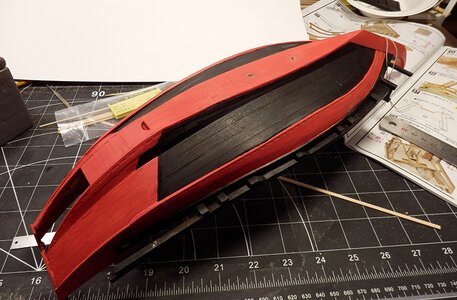
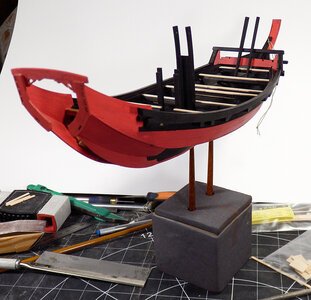
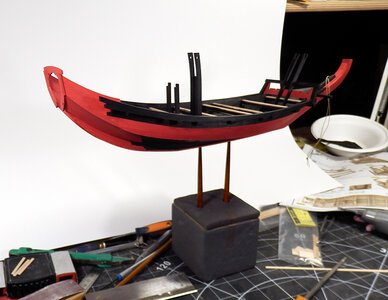
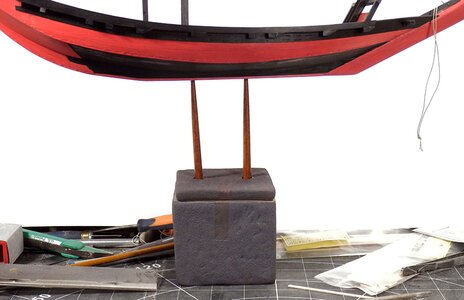
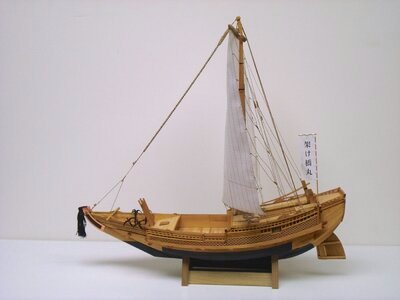
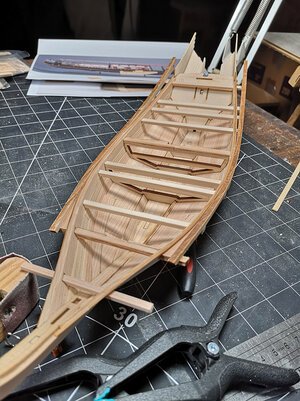
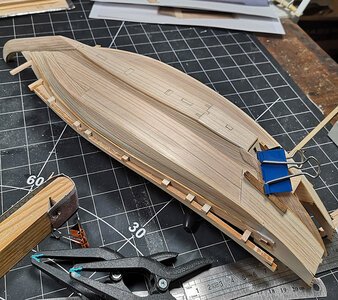
Most of the time, this model from Woodyjoe is left in its natural state and it looks great like that (see photos above)! But, as I don't like conformity, nor the lack of additional creative touch, I went as usual to customize a bit... The transformation consists in modifying this 18/19th century cargo ship into a Japanese daimyo's (lord of a province) prestige boat. This kind of boat existed to put forward some noble families and to establish the prestige with the others. So black paint (Indian ink) and red (acrylic mixture of 2 reds) which will be declined throughout the construction: it is really necessary to anticipate each step... Not to mention the final copper decoration and a little weathering to age. So, to give even more symbolism to this boat, I wanted to get closer to the shape of the Japanese torii. The base is composed of a ceramic tea box pierced by two Japanese chopsticks (real!) which will support the boat. It weighs a certain amount. But it will be filled with very fine white sand similar to Zen gardens (we might as well push the Japanese symbols to the end!), the whole thing sprinkled with a mixture of wood glue and water (a technique used for the medieval village) in order to definitively block the supporting rods. And here, I think that the stability and the weight will be enough for the boat, itself quite light because of its assembly with hinoki (Japanese cypress). We had to do this and drill the hull before attacking the very long deck lathing that will hide the bilge. The final decoration of the tea box is still under construction...

- 16 replies
-
- 6
-
-
- Higaki Kaisen
- Woody Joe
- (and 1 more)
-
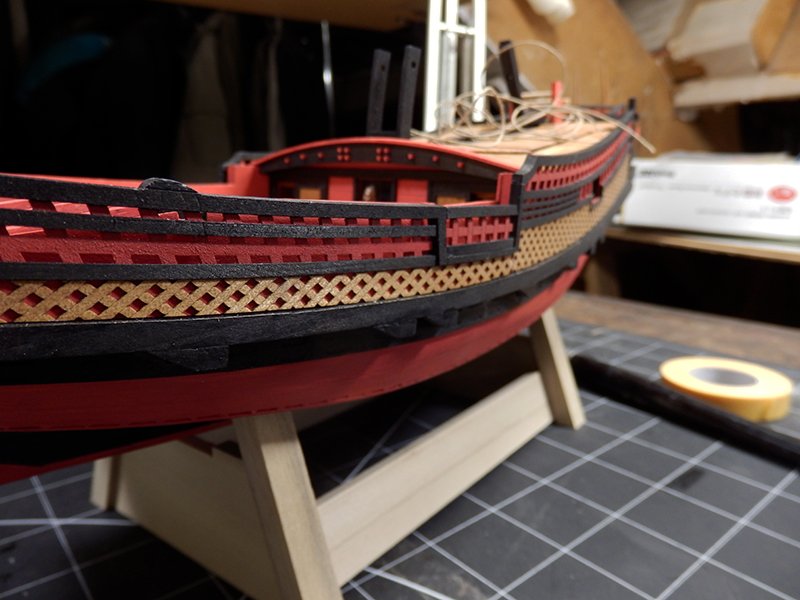
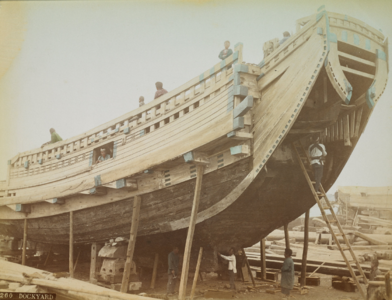
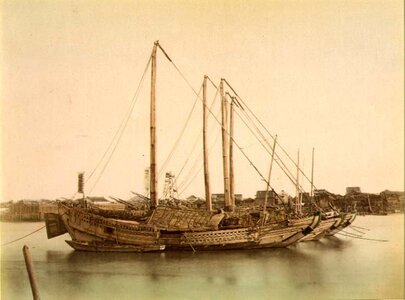
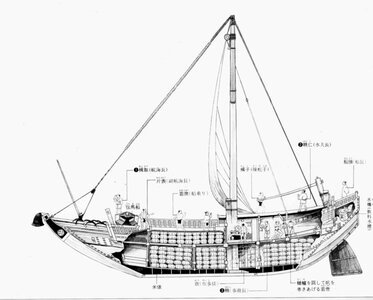
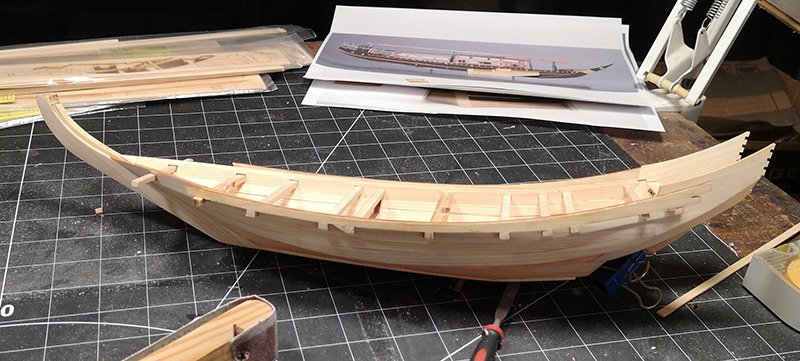
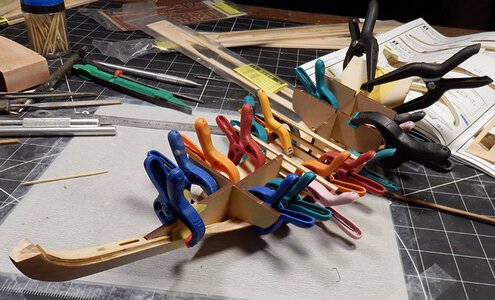
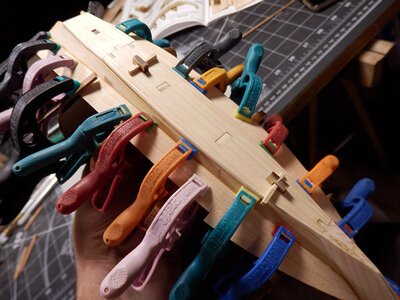
A new shipyard opens ! A little history... Two types of sailing ships, once used to transport taru (casks) of sake from Kamigata (上方, the present Keihanshin area of Kyoto, Osaka and Kobe) to Edo (now Tokyo). Until the Meiji period (1868-1911), movement from the center of the capital Kyoto to other areas was described with the verb kudaru (下る, to descend). For this reason, sake sent from Kamigata to Edo was known as kudari-zake (下り酒). Sake began to be shipped "down" in the 1600s, when it was sent overland by beast of burden, but it soon became necessary to switch to sea transport using sail in order to meet the increasing sales volumes. In the early 1600s, more and more shipping agents were established in Osaka, and they transported Nada sake and other goods to Edo on their distinctive higaki kaisen crafts. These boats had woven bamboo railings (higaki) along the gunwales, to prevent loaded sake barrels from slipping on the unstable decks and to increase the loading capacity. Because these higaki kaisen were designed for maximum loads without much thought for safety, sinking was an ever-present danger. Moreover, faking a shipwreck to allow the illegal sale of the supposedly lost cargo was commonplace. The trade became more and more lawless and in the early 1700s a new type of ship, entirely devoted to the transport of sake, appeared. These were called taru kaisen (樽回船, kaisen meaning a cargo ship). They were fast, stable, and elegant Japanese-style sailing craft, some of which by the end of the shogunate in the mid-19th century had grown to sizes capable of carrying 3,000 barrels. In the late 1800s, they were supplanted by the arrival of Western-style sailboats and steamers, but their contribution to Nada sake sales was enormous until then. The kit comes from Japan directly from the main distributor of WoodyJoe kits: Zootoys.jp. The scale is 1/72 and the wood is totally from Japanese species. It is perfectly designed and cut, with small numbered bags for each group of parts and a very illustrated assembly guide... but in Japanese for the texts! Google Trad is therefore mandatory to avoid making too much bullshit ! But maybe different for the final simply... Cool The first pictures of the construction site : Well, of course, those who know me a bit may wonder what I'm going to be able to transform in such a well designed and framed Japanese kit... I think that visually, I will try to get closer to the representations of the period paintings. But for the moment, it's a matter of building a boat that is culturally quite far from our western habits. So, the decoration will come later to make my Higaki Kaisen! (even if I have to anticipate a little the result...).

- 16 replies
-
- 5
-
-
- Higaki Kaisen
- Woody Joe
- (and 1 more)
-
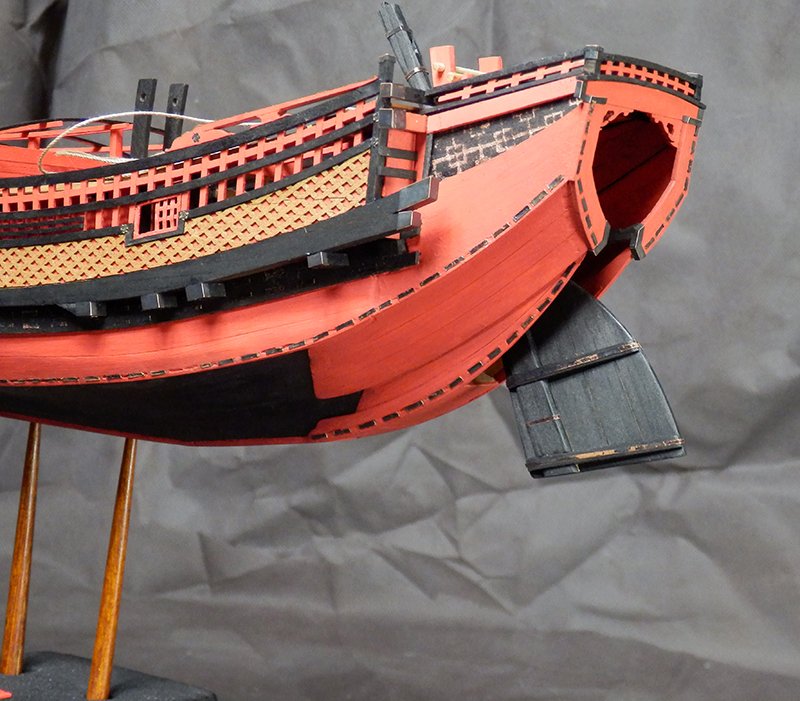
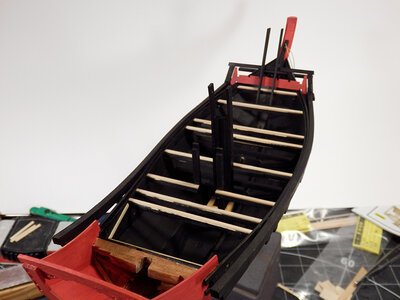
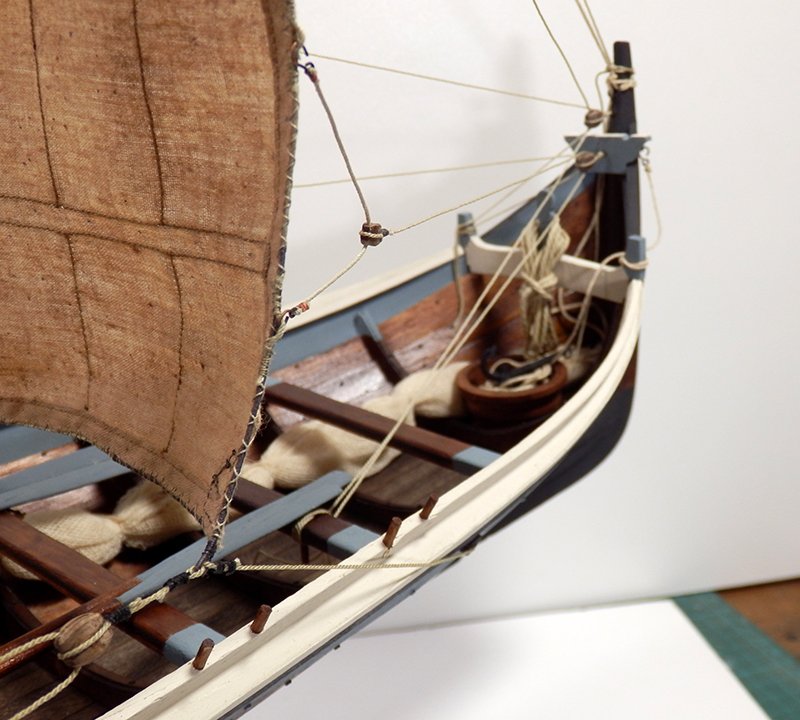
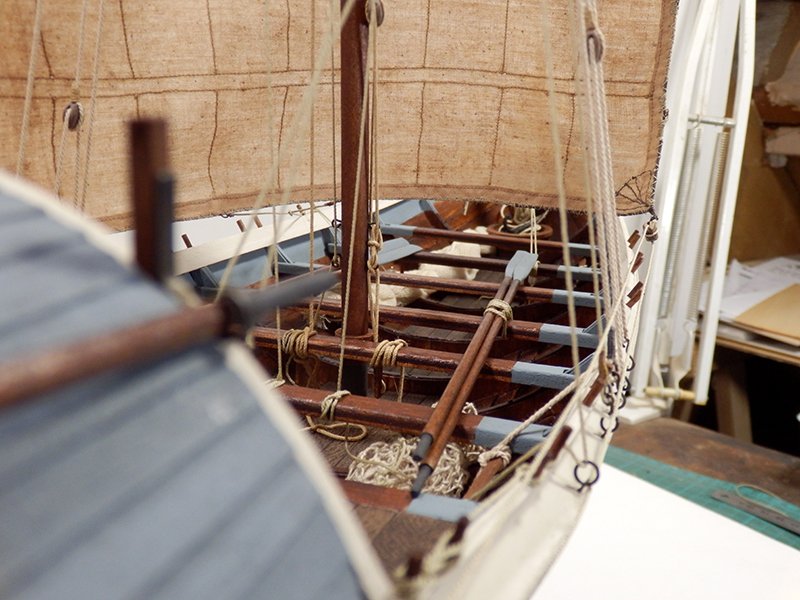
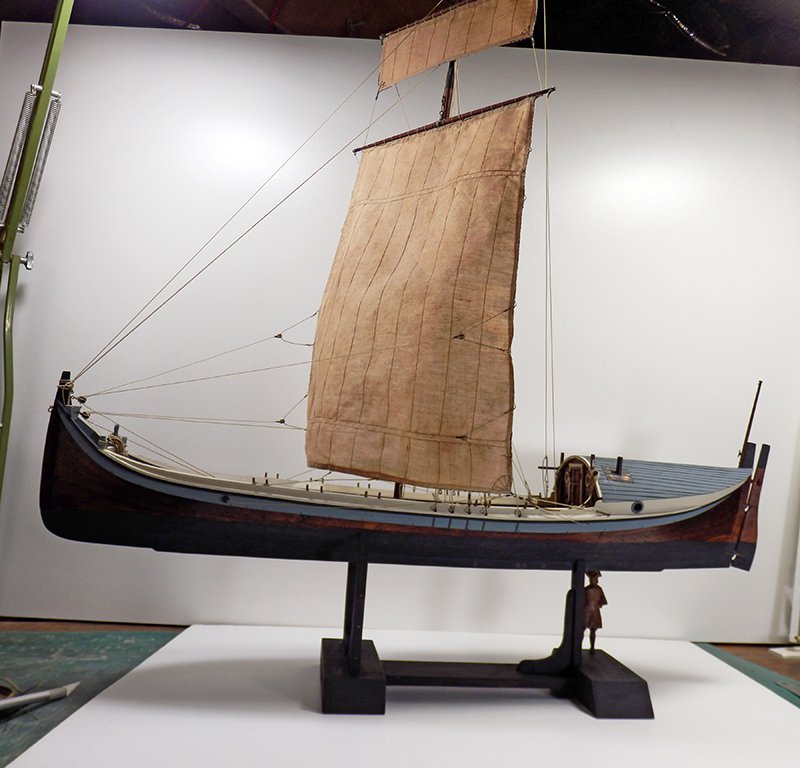
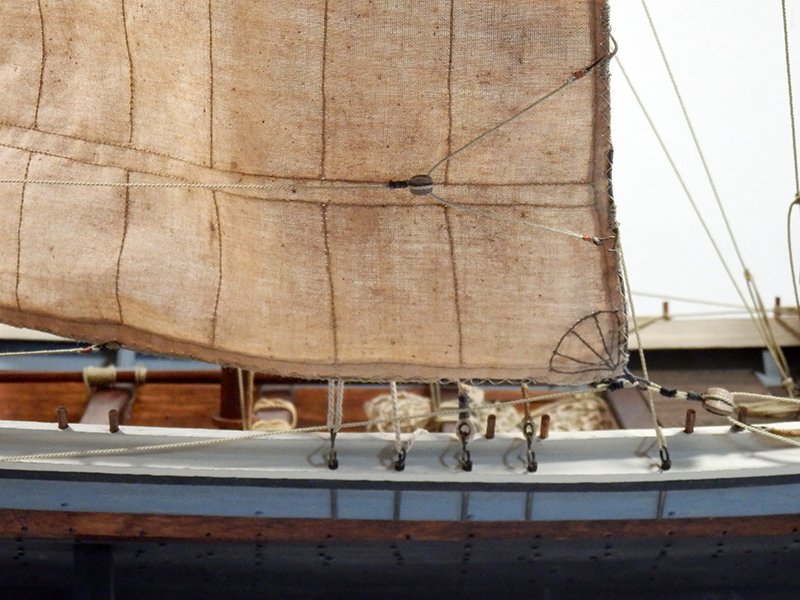
Thanks @Frodo! For the nailing, strakes are first glued (being very careful not to see glue inside the hull!). Then, I mark with a needle, then drill with a Dremel and finally insert small brass nails that have been blackened with Black Brass. The nailing is done only to fit the reality of the boat! In the same way, I added a lot of things by scratch, like for example the inner reinforcements of the couples, the rear platform (not foreseen in BB), etc... For the rudder, it's the real and traditional size of this type of boats: short, very narrow and a tiller on the side and over the back cabin!
- 39 replies
-
- 3
-
-
- Billing Boats
- Finished
- (and 1 more)
-
Indeed, the Del Prado kit disappeared a long time ago... And this village doesn't really look like the kit in the end (see the very first picture on the 1st page of the thread). Thanks again for the compliments : I'm always happy too when I look at it ! For the moment, I don't really have time to start a project : my job doesn't leave me any free time... But I'll come back as soon as possible on the continuation of this village, after one or two other projects. 😁 Well, I hope you will really show us this project and its construction!
-
You are right, we have very little information about the atakebune, and I just don't want to lose the aesthetics of Woodyjoe's model which is fundamental for Japanese boats! It's a real problem and I need to read up a bit on the maximum width of the possible strakes for the hull before starting it. Maybe looking at the Korean turtle boats which are more represented in the archives for their construction. Once again, I don't want to lose the Japanese aesthetics by transforming it with inappropriate details...😁
-
Yes, I think this Atakebune kit from WoodyJOE needs some improvements. But these are modifications that are mostly aesthetic to suit our own western culture. I think that Japanese people don't have the same approach as in the west for the reproduction of their boats in models. The Higaki Kaisen kit shows it well, this new kit of the atakebune is even more accentuated with extreme simplifications to be built more easily. In Japan, the model itself does not have to be the miniaturized version of all the details of the real version. The model must find its own aesthetics by keeping the concept of the boat for the essential, even if it means removing everything that could harm the original design. The model is the symbol of the historical boat, not the absolute reduction of the scale 1. In the West, and I am speaking in particular for Europe, we try above all to give an image as close as possible to the real thing, even if we have to lose the general lines in a swarming of details and aging. I do not judge what is better or not, but simply a difference. 😀 So for this Atakebune, I will have to find a balance between the Japanese aesthetic and my own criteria of reproduction and reduction of reality. We'll see as we go along, but to start with, I think I'll try to reproduce the hull with pieces of strakes at the scale of possible boards from the trees, and not huge plywood plates out of scale for example.
-
I am also building a Higaki Kaisen on my side. 😁 And then will come the Atakebune that I received 3 days ago! In other words, I'm going to look very carefully at your shipyard to see what I'm going to upgrade on it ! I think this model needs a lot of improvements... 😀
-
So no, no one came forward to offer their services (for a fee) to try to repair this Blériot. That's a shame... 😑
-
I have been following the development of the Atakebune for a long time and I was really waiting for its release... Mr. Kazunori Morikawa (Zootoyz.jp) informed me that I am the first customer in the world! 😂 So, I will be part of the adventure on this ship, transforming it a little visually to stick to the paintings and engravings of the time! But I may not be the first builder: I have first a Higaki to build, among other things. 😁
-
I really agree with you! But it's also satisfying to know that my California recipient didn't lose any money in the process. Likewise, it is also a comfort to know that a private individual can win from a company of this size and with such bad faith!
-
The model sent (and destroyed!) by UPS was well packed: triple cardboard box with triple fluting, wrapping the plane in tissue paper, then bubble wrap everywhere in double thickness, then polystyrene chips to fill the volume. The box was stiffened by an interior wooden frame on all edges. All the sides were lined with self-adhesive labels to indicate the side to be placed and to warn about the fragility of handling. I would add that the package was designated as fragile by the UPS services, and the shipping bill written by this company warned the various parties involved that the price included a special transport! But you can build the strongest box in the world, when it is thrown from the top of a truck or jumped on, or used as a base for tens of kilos on top, no wooden model inside can resist such treatment. This is just incompetence and disrespect of their own rules.
-
I'm bringing up this topic to give some good news. It's quite exceptional, but after months of persistence in France on my side and in the USA on the side of my recipient (who had received this completely broken Blériot), the totality of the insurance for damage was paid by UPS! The reimbursement includes not only the shipping cost, but also the total cost of the model and the assembly work. Carriers never reimburse individuals, even in case of insurance... It doesn't fix the Blériot, but at least there is no financial loss! We had to harass them since April!
-
Bibury Arlington Row by masa - Aedes ars - Ho scale
Ekis replied to modeller_masa's topic in Non-ship/categorised builds
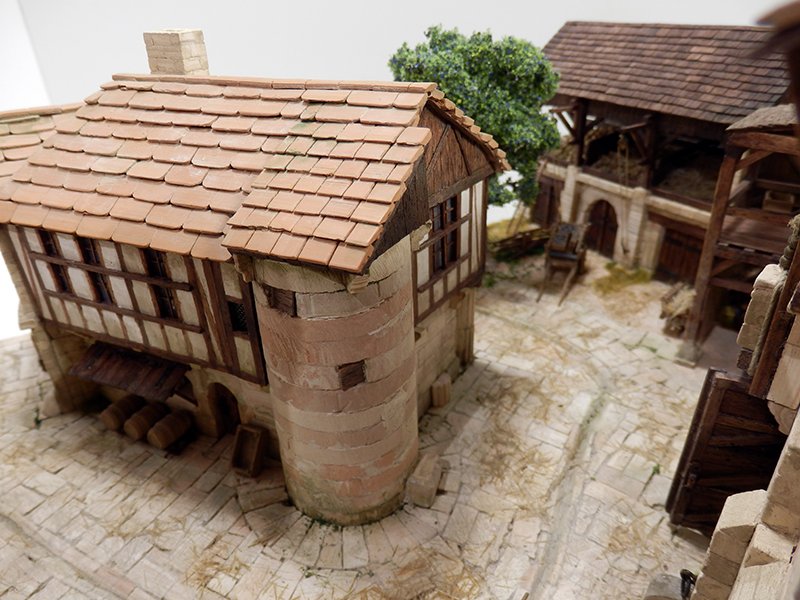
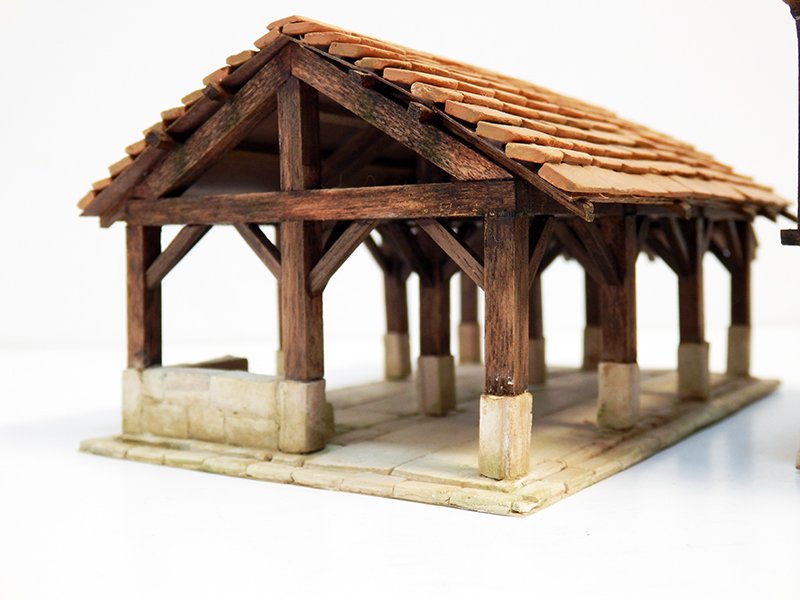
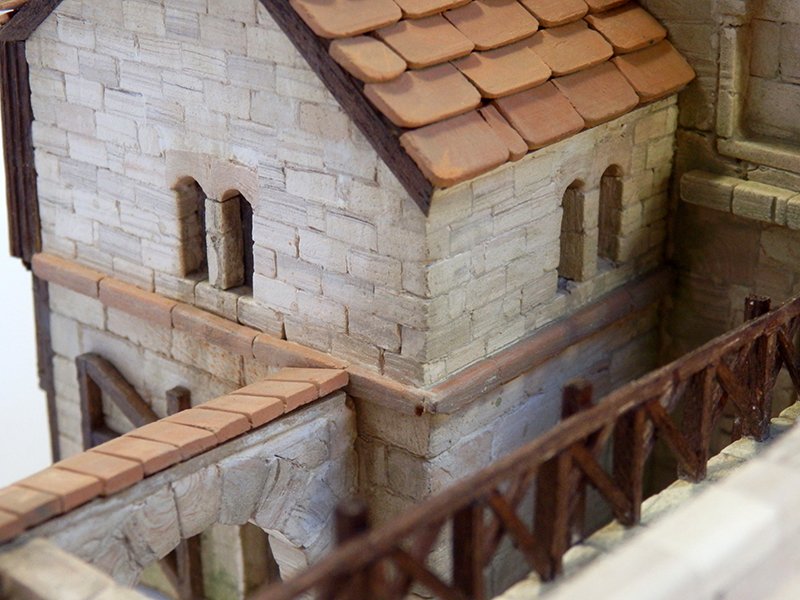
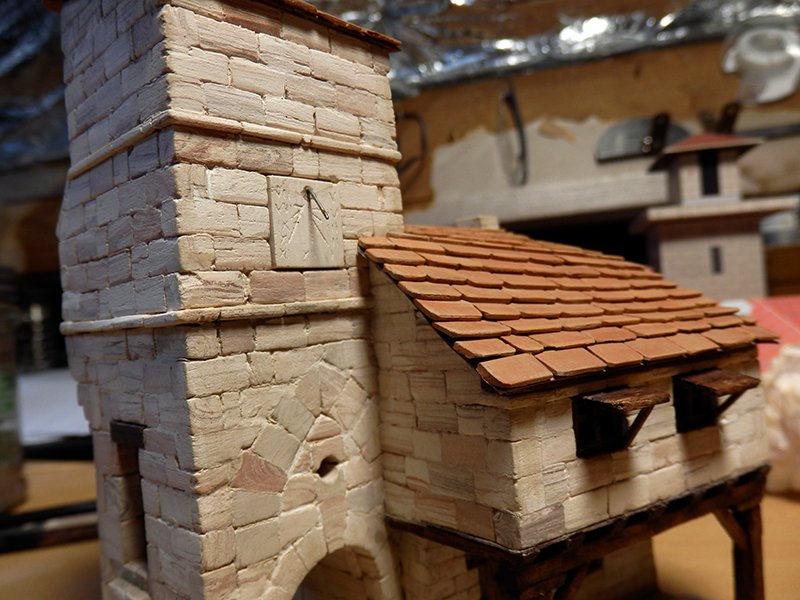
In fact, I see that you form a 45° angle on each tile in a very regular way on the front side. For the village, I preferred to make the angles more rounded, but more importantly, I sanded each tile on the front side so that they look thinner when they cover the ones below. The thickness seems to me more in harmony with the scale of the buildings. I also used different sizes of tiles for different uses and houses. I also deliberately left some broken or badly cut tiles to show roofs that are not all new. Here, if it helps you, I put some pictures to illustrate all this. Good luck ! It's long and quite tedious to do, like the sails of an 18th century sailboat... 😉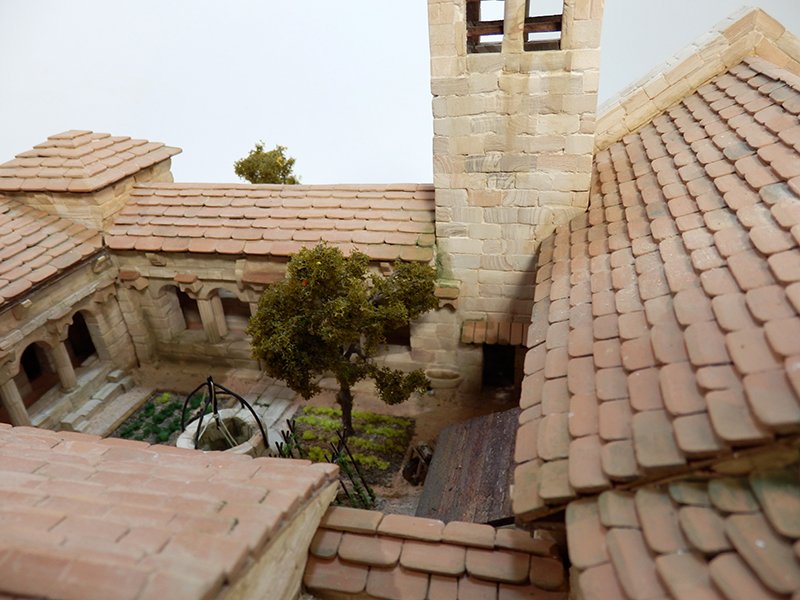
-
The result is impressive and the method perfect: bravo!
-
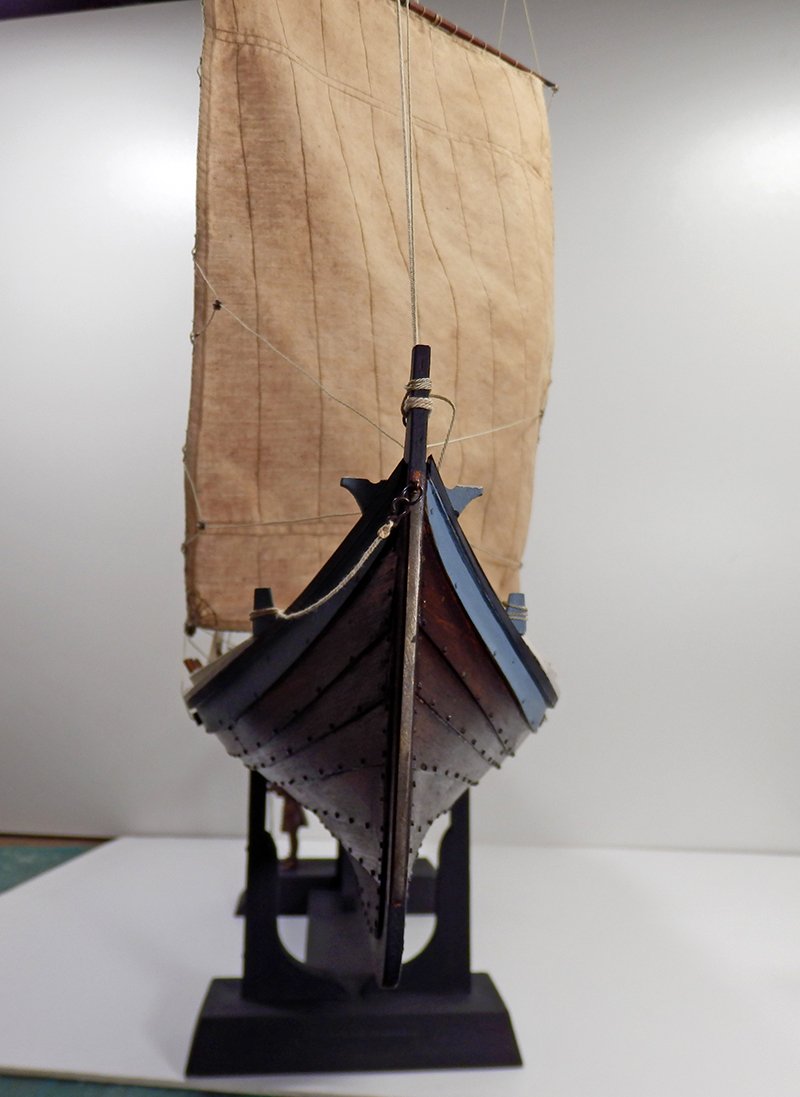
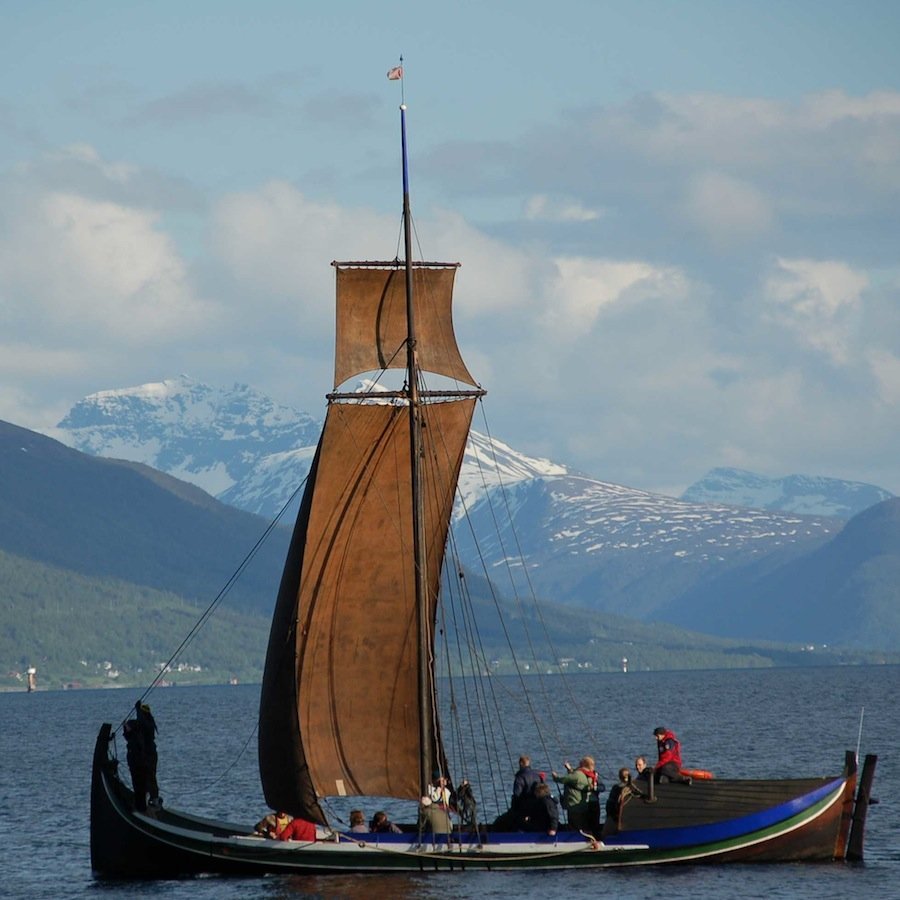
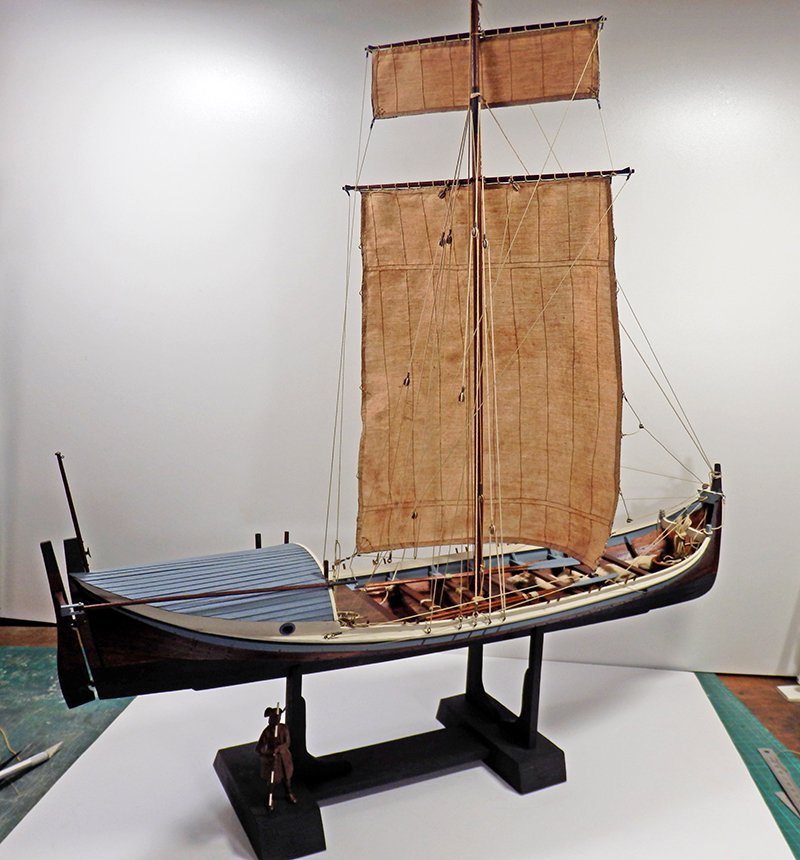
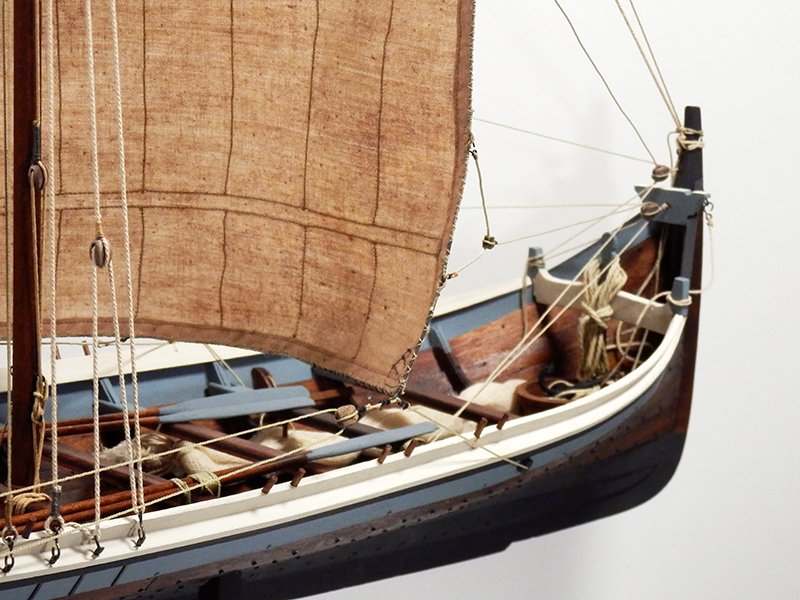
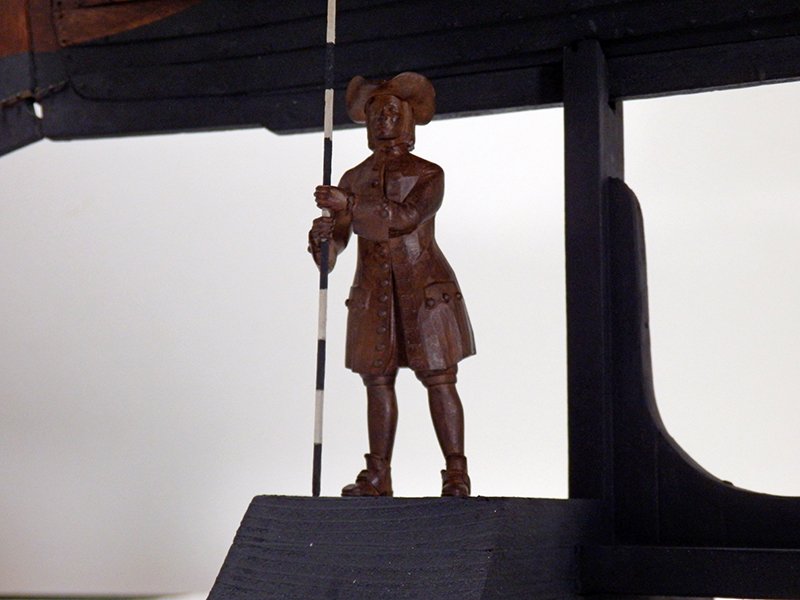
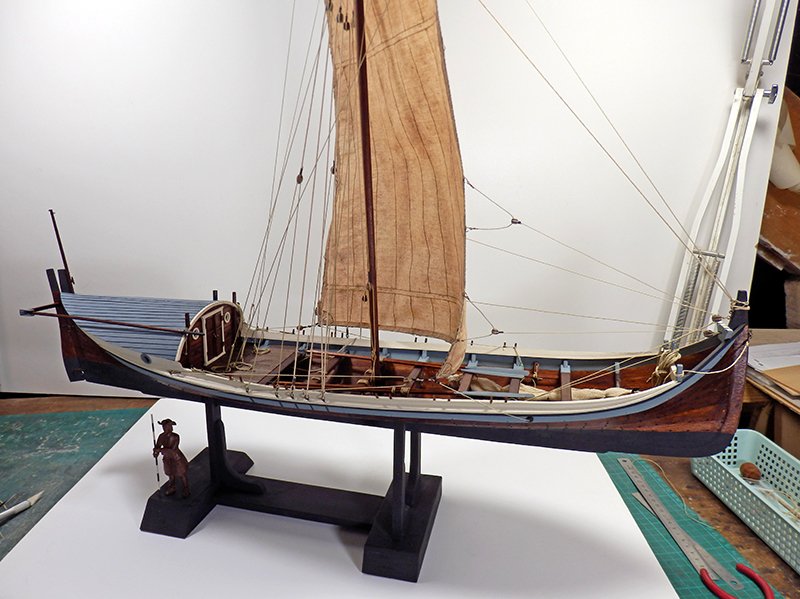
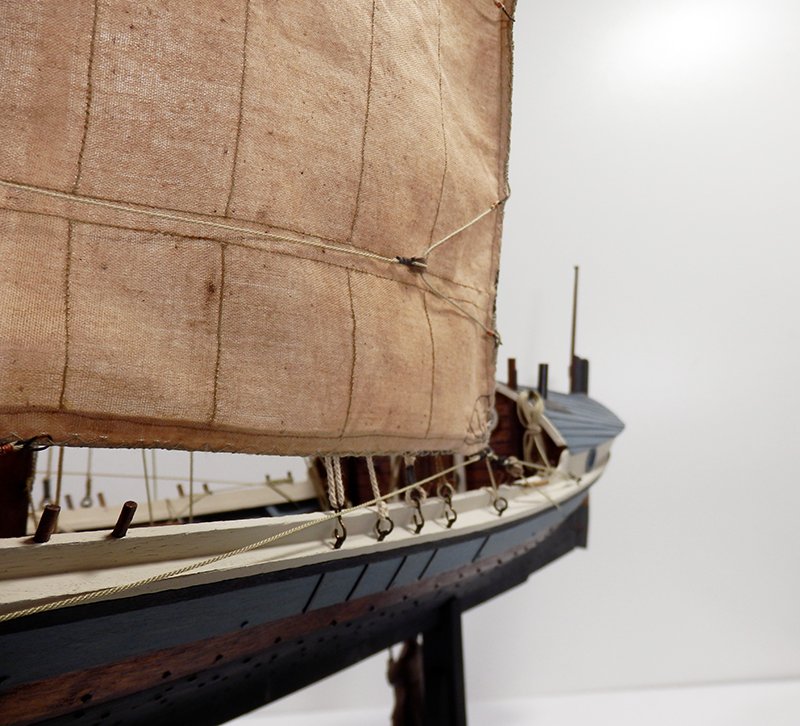
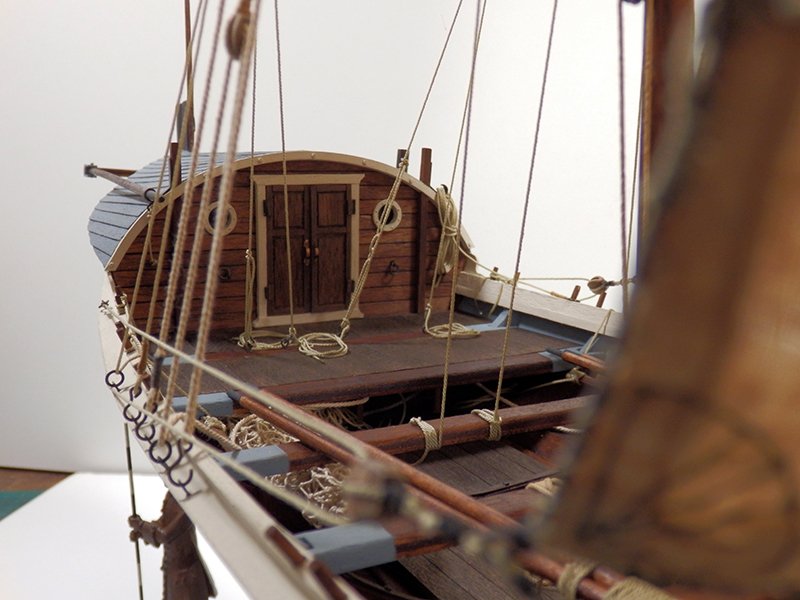
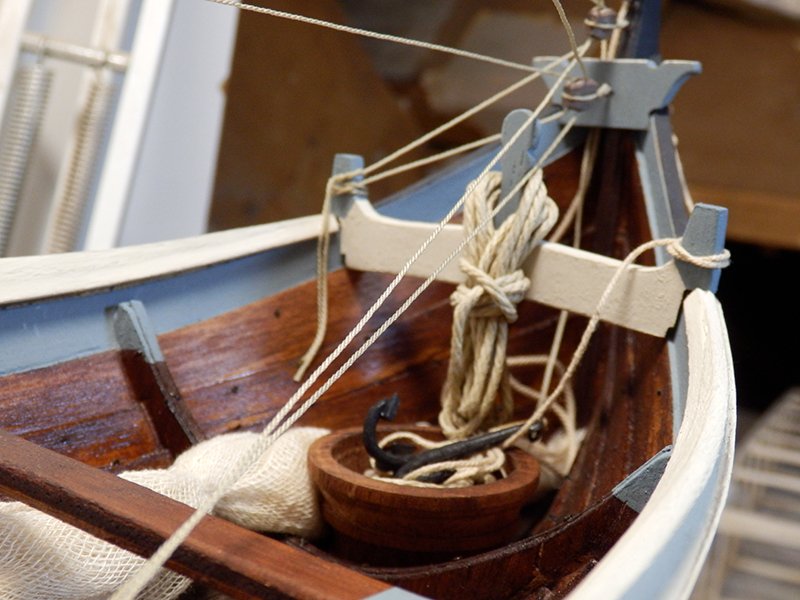
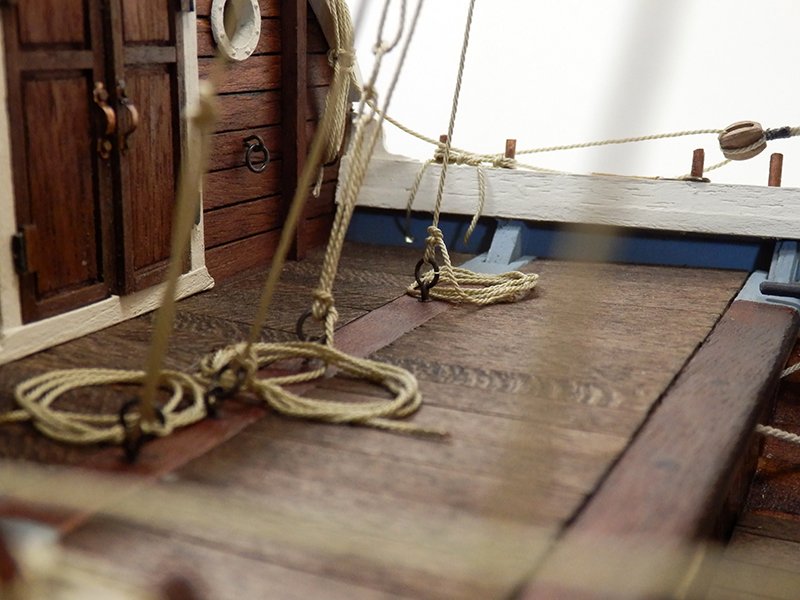
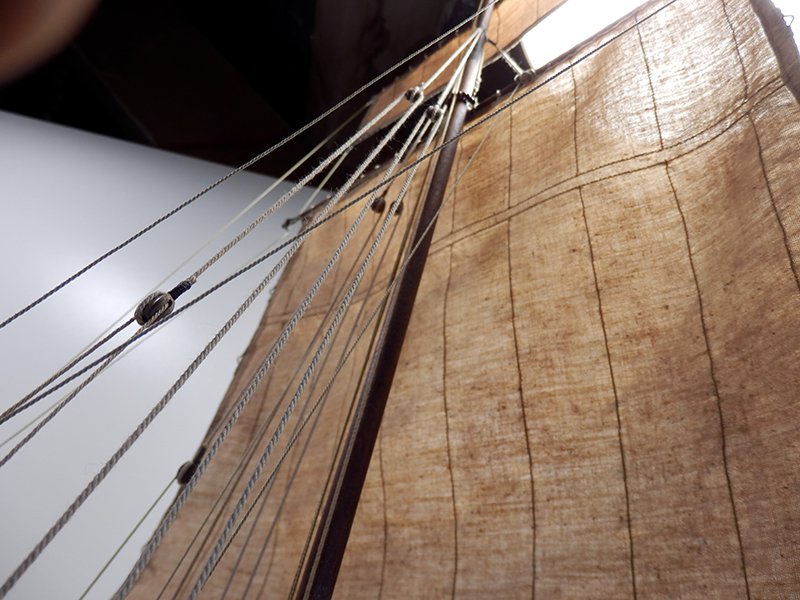
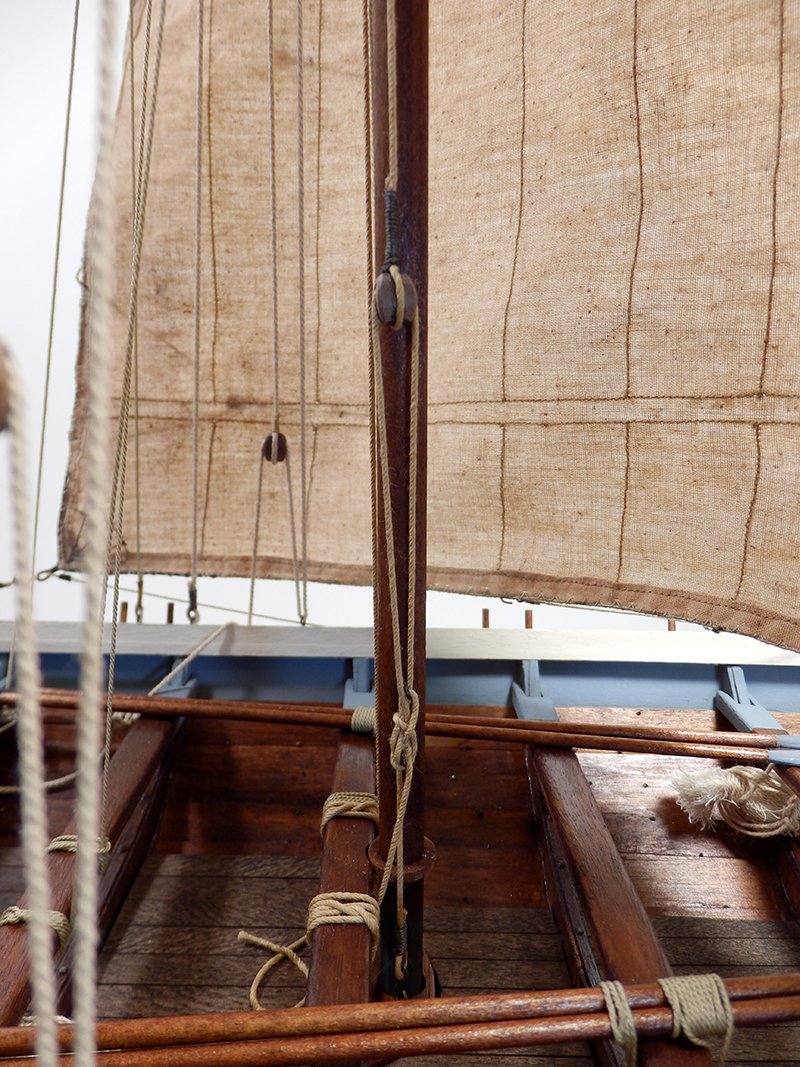
The continuation of the construction of the Nordlandsboat... It is almost finished: only the flags are missing. The shape of this boat is really beautiful, the rigging simple, but really efficient! I'll make some final pictures then.😎


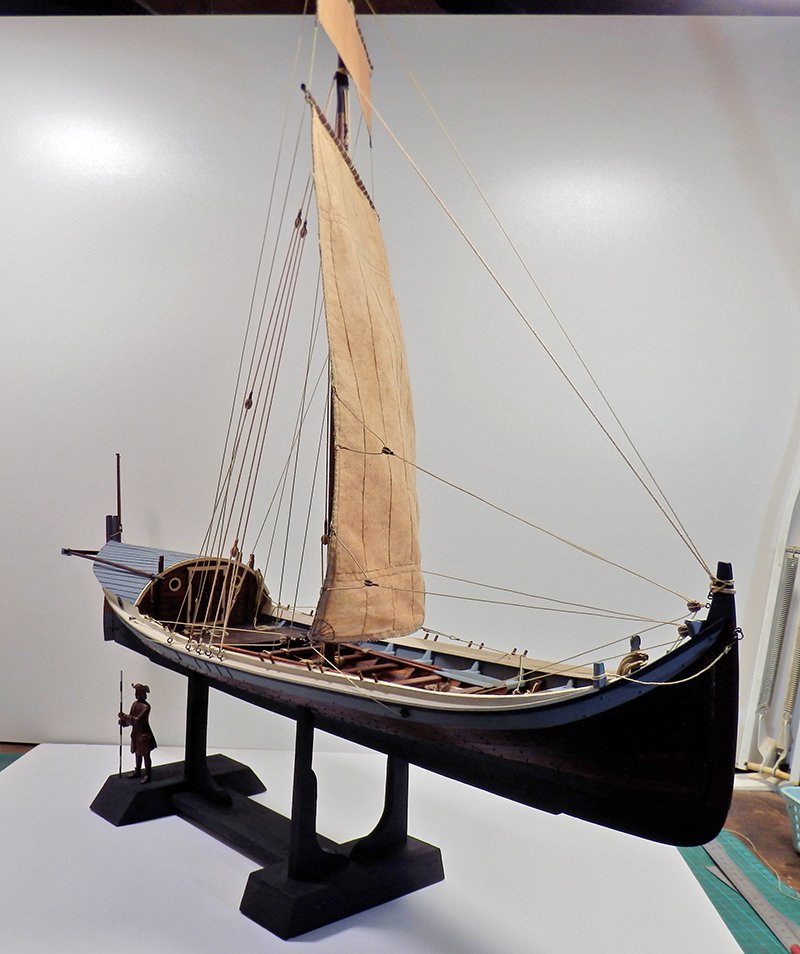
- 39 replies
-
- 13
-
-
- Billing Boats
- Finished
- (and 1 more)