josh44
-
Posts
112 -
Joined
-
Last visited
Recent Profile Visitors
1,100 profile views


-
 Montaigne reacted to a post in a topic:
Flying Dutchman by josh44 - FINISHED - 1/500 - BOTTLE
Montaigne reacted to a post in a topic:
Flying Dutchman by josh44 - FINISHED - 1/500 - BOTTLE
-
crowsbyte reacted to a post in a topic:
Search Function Example
-
GrandpaPhil reacted to a post in a topic:
Endicott Pond Boat by Josh44 - Ship in Bottle
-
GrandpaPhil reacted to a post in a topic:
Ketch Sail Yacht Parsifal III by Josh44 - FINISHED - Bottle - 1/750 scale
-
GrandpaPhil reacted to a post in a topic:
Ketch Sail Yacht Parsifal III by Josh44 - FINISHED - Bottle - 1/750 scale
-
GrandpaPhil reacted to a post in a topic:
Ketch Sail Yacht Parsifal III by Josh44 - FINISHED - Bottle - 1/750 scale
-
Omega1234 reacted to a post in a topic:
Ketch Sail Yacht Parsifal III by Josh44 - FINISHED - Bottle - 1/750 scale
-
 Thanks Patrick! I agree with your view and I do like how it looks offset like that. but truth be told, due to my miscalculation of the mast heights vs the bottle height, that position was as close to the center of the bottle as I could get her!!! 🤫🤣🤫🤣
 -
ccoyle reacted to a post in a topic:
Ketch Sail Yacht Parsifal III by Josh44 - FINISHED - Bottle - 1/750 scale
-
Landlubber Mike reacted to a post in a topic:
Shohei Maru by Josh44 - FINISHED - Bottle - 1/450 scale
-
Omega1234 reacted to a post in a topic:
Ketch Sail Yacht Parsifal III by Josh44 - FINISHED - Bottle - 1/750 scale
-
Thanks, Mike! Yes , he was very touched!
-
Thanks, Patrick! So glad to see your new luxury yacht in the works. By the way, when I made Parsifal for my MIL I remembered your haunting words: Once you make a luxury yacht, you'll never be able to stop! (or something like that! 😁)
-
Thank you, Phil!
-
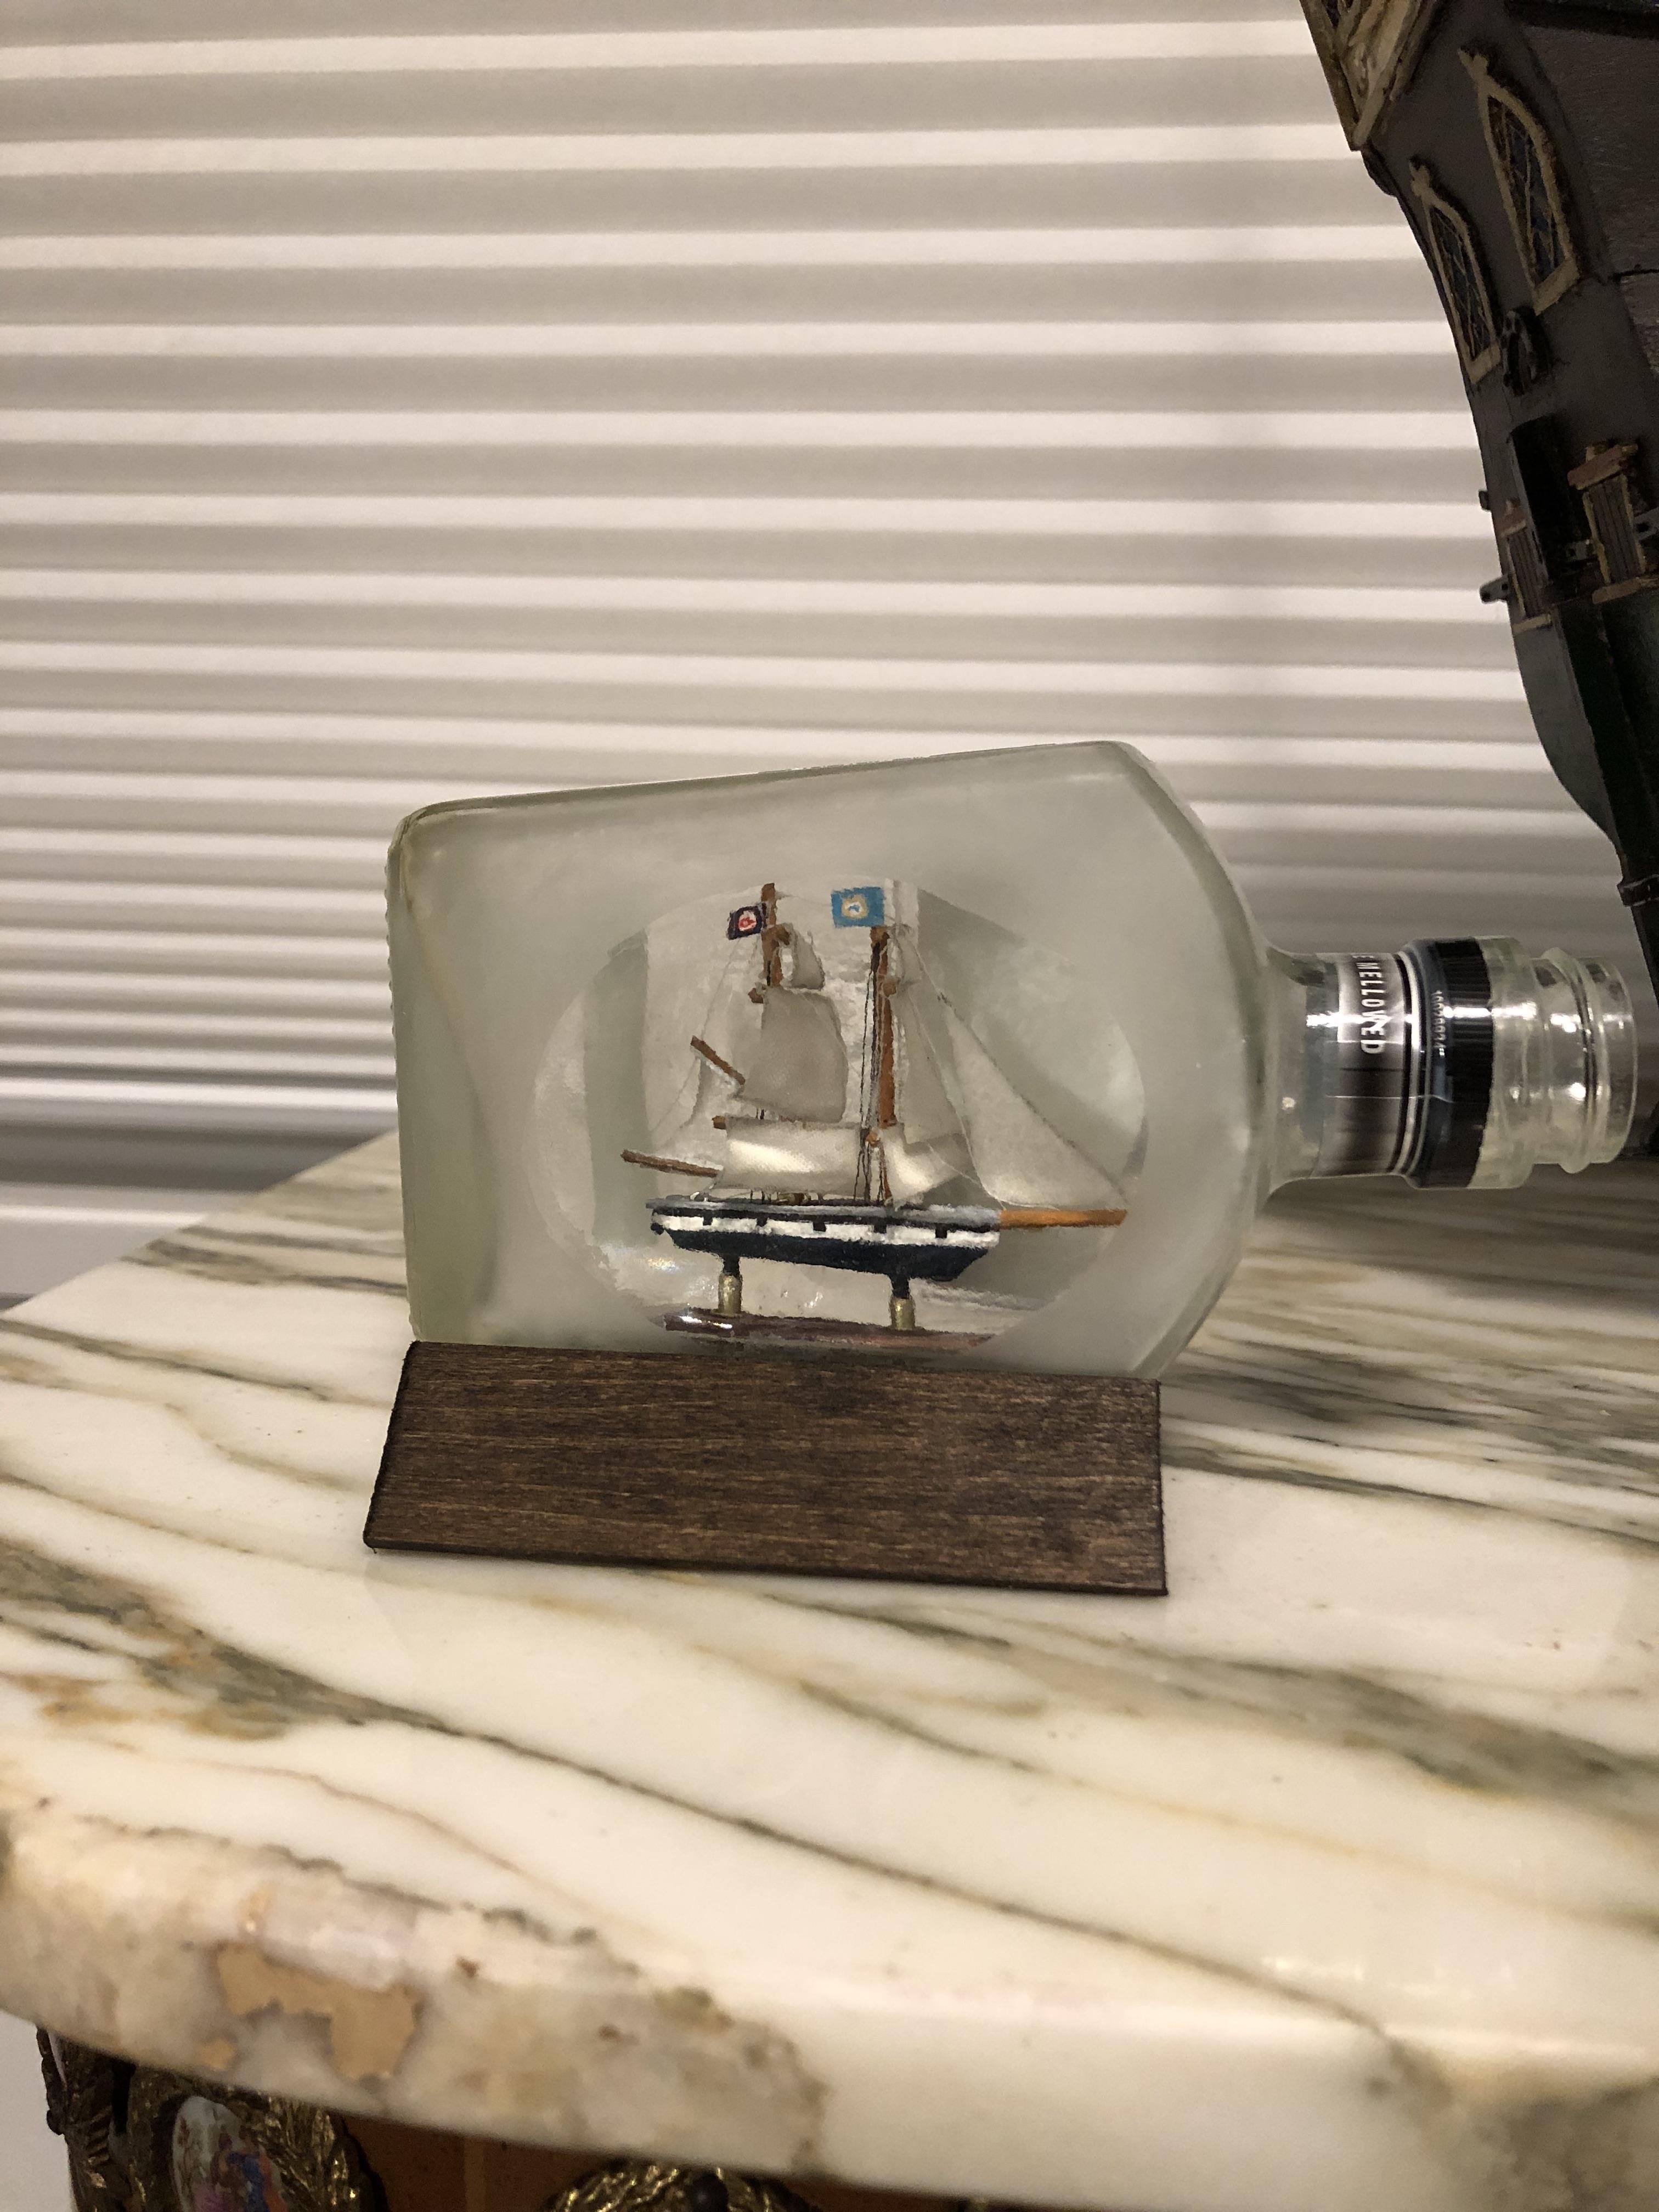
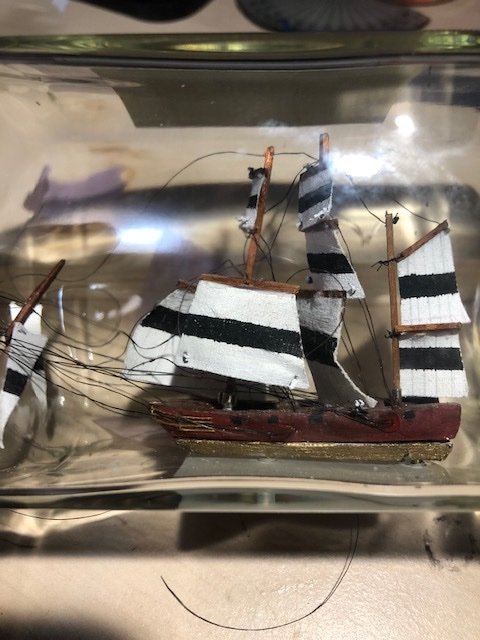
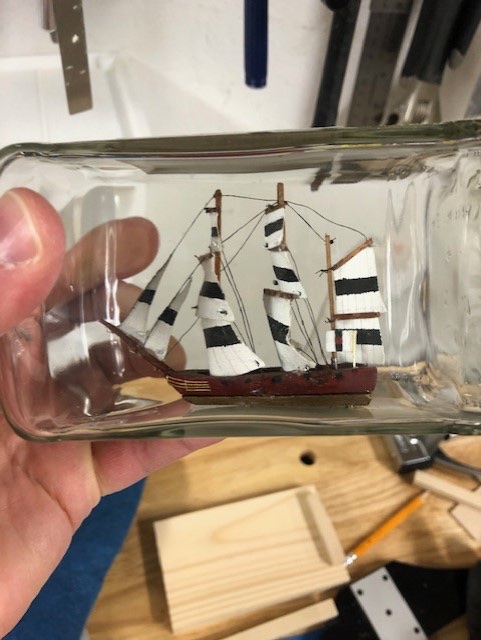
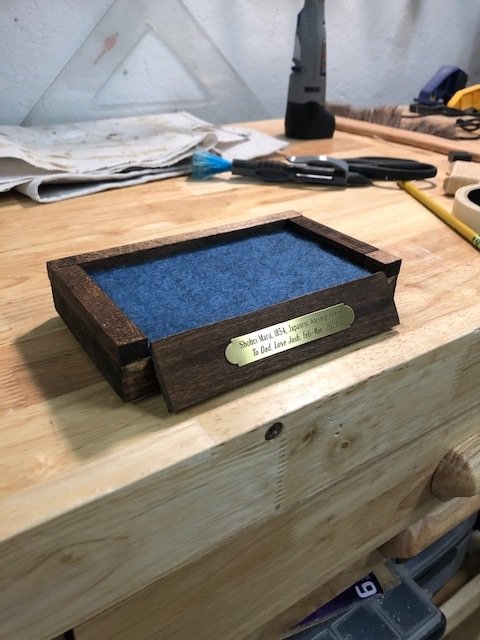
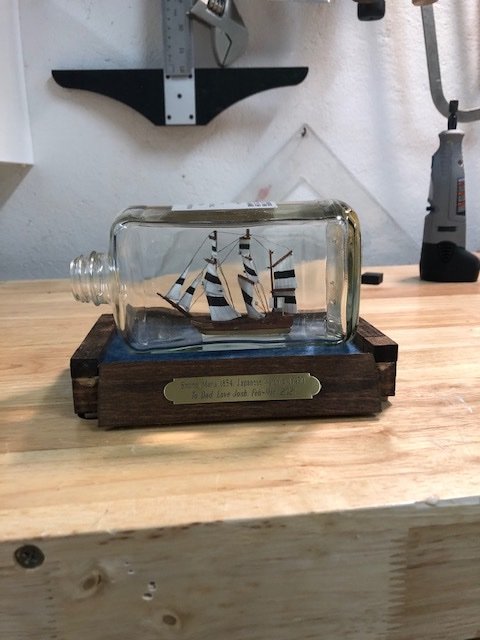
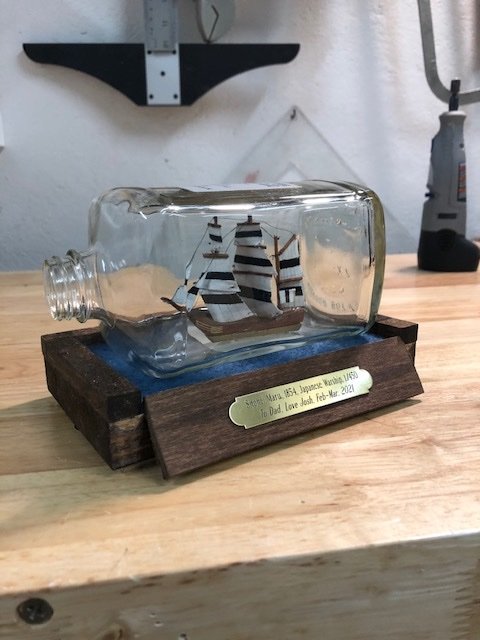
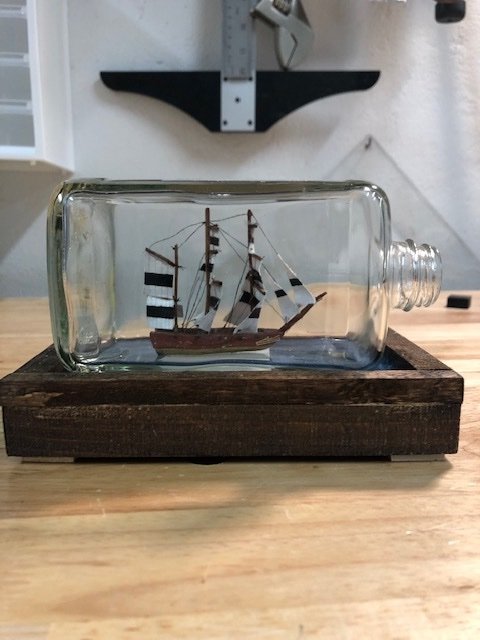
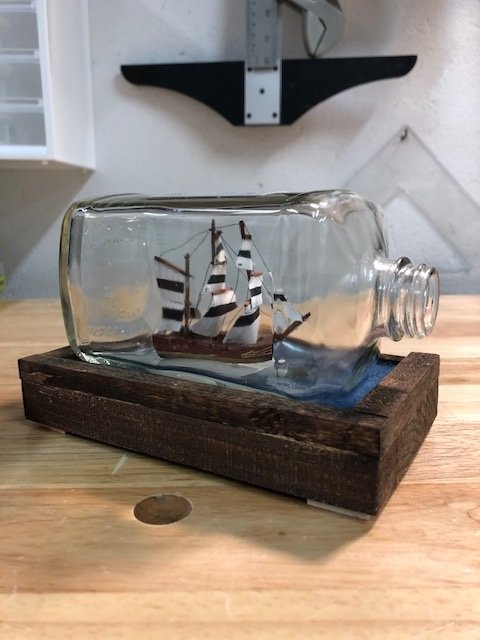
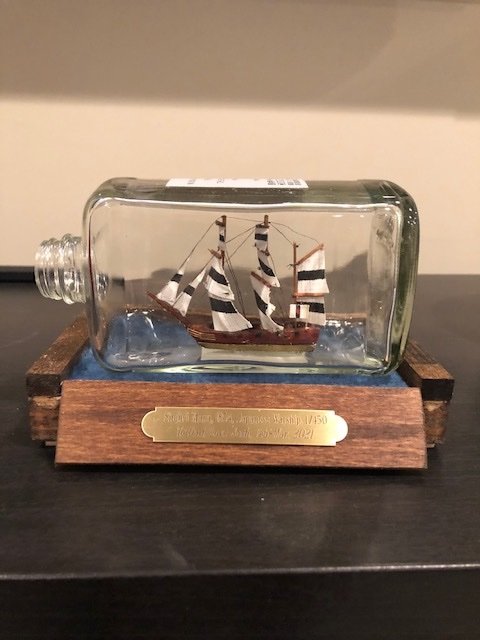
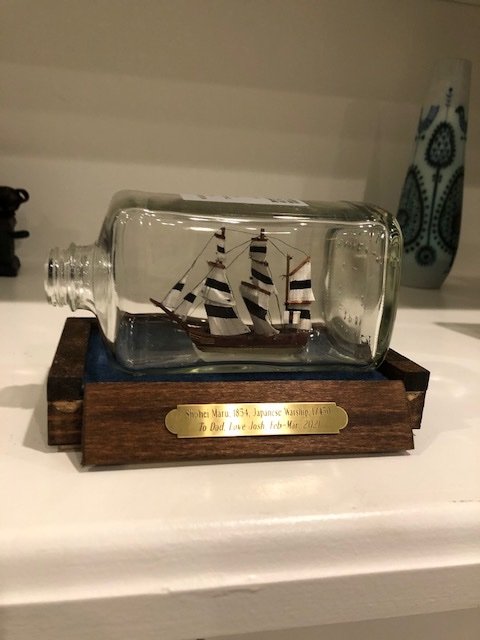
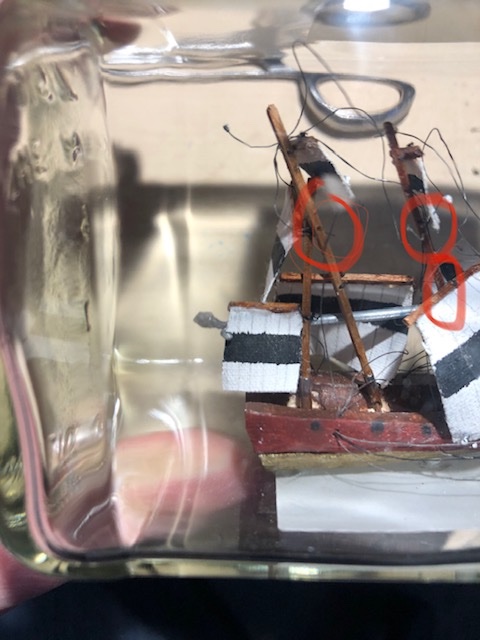
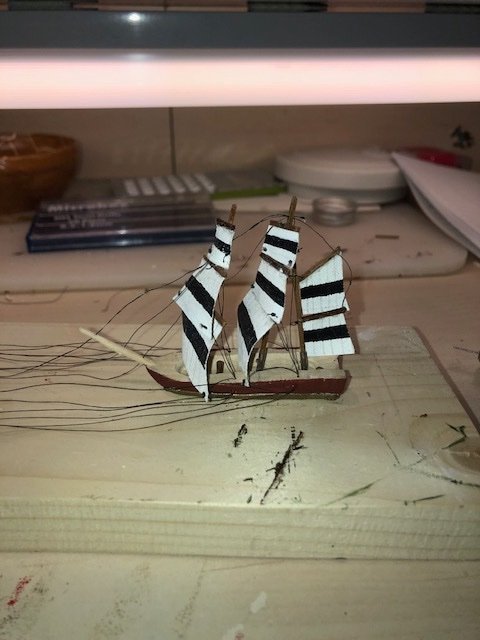
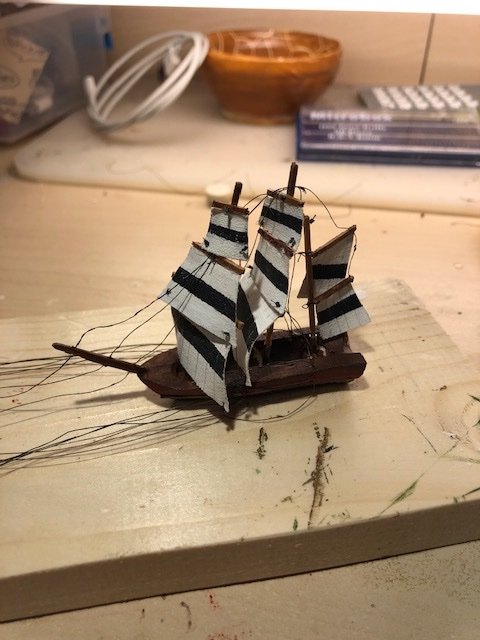
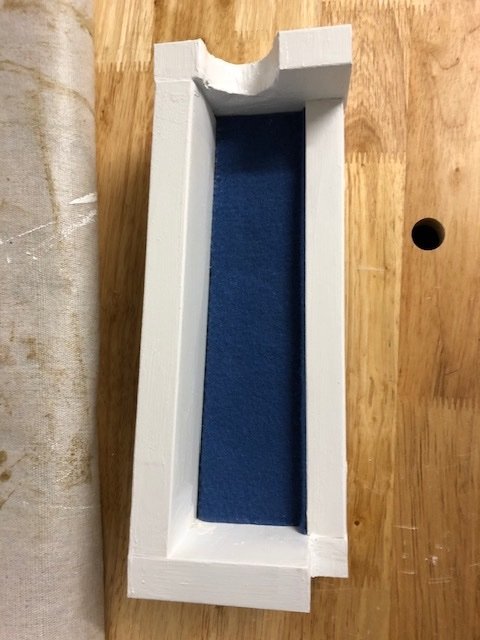
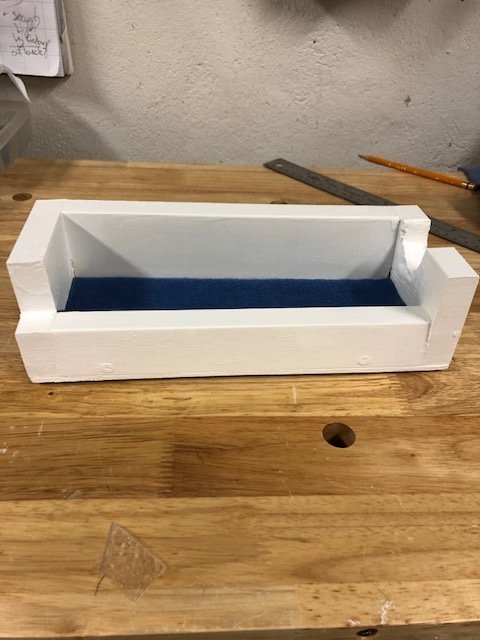
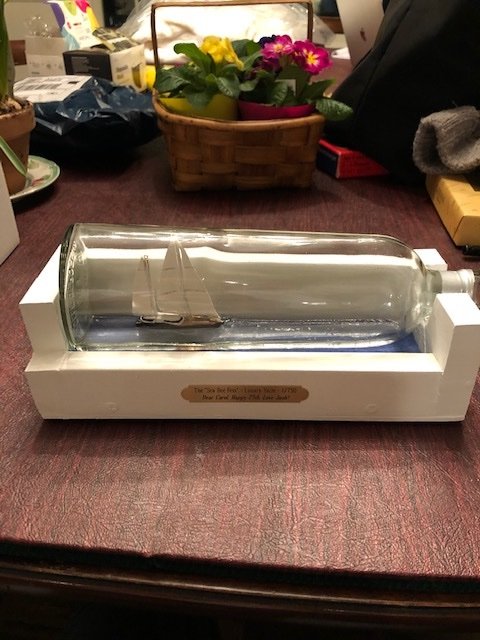
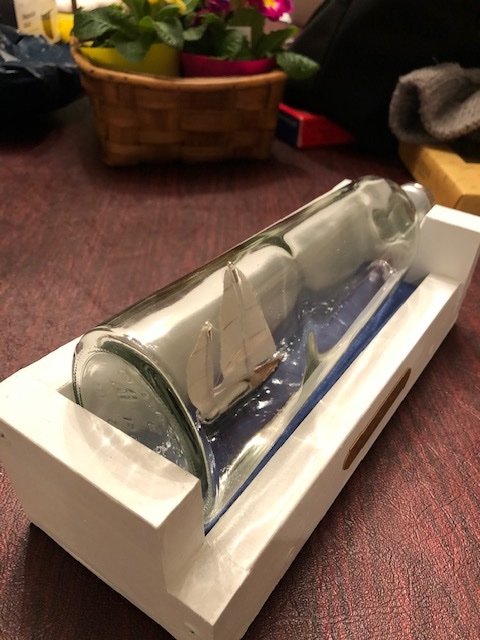
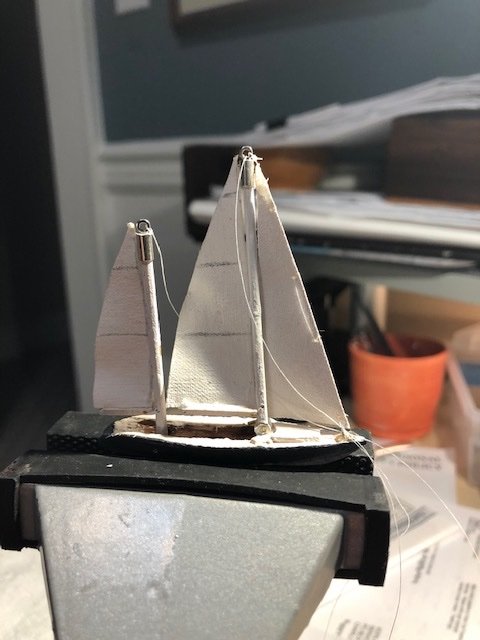
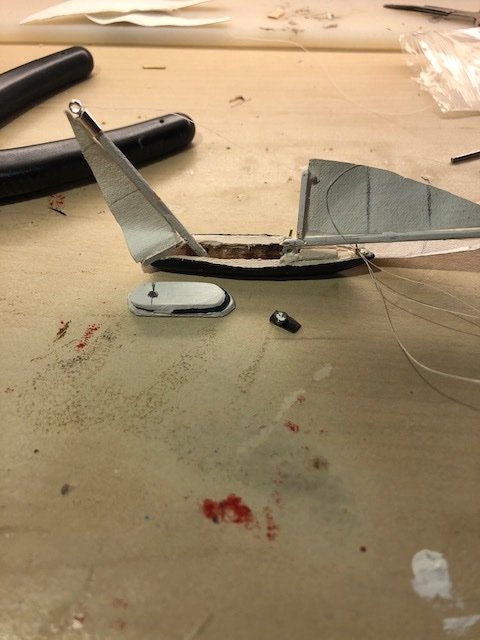
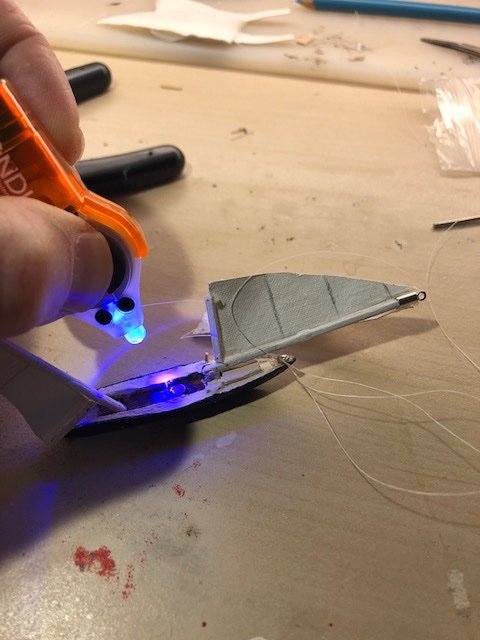
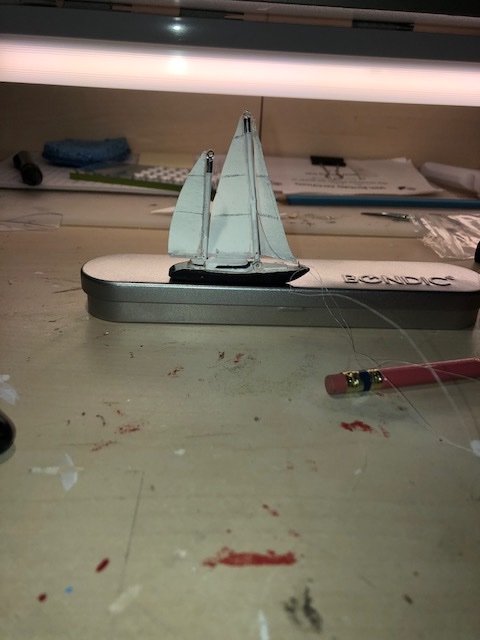
Part III: Launch, Repairs, and Finish She folds nicely - a good start! Even better! The Stern was too wide for the bottle neck, so I had to grind it down a bit. No snaps or cracks - music to my ears. Secured by CA onto the 2 posts drilled up from the bottle bottom. The next part - the fixing and finishing of the yards and rigging - is the where I experience the highs and lows of these projects. Inevitably, and despite my sometimes careful planning, there are major repairs. Some of these repairs ar a result from the folding, and some from the insertion: I always fix from stern to stem, so some damage is foreward from my attempt to fix aft in the bottle. Below, in red the major damage came from folding and squeezing into the bottle. Three sails, the main-lower , fore-lower , and for-upper topsails, all came off during insertion. This was probably because the knots I made in the fishing line were too small, and got pulled through the holes I drilled in the yards. I think I simply glued these yards to the masts. The more elegeant option of rethreading inside the bottle with hartmanns clamps was proving too time consuming and unnecessary. Here the mizzen is up, and the main mast is set and glued, but the bowsprit has inadvertantly been torn from the hull during the repairs. Because many of the rigging lines passed through the bowsprit, I had to get it reaffixed before I completed the Foremast. Many hours later, all is completed. I decided not to take pictures of the model in various states of repair and frustration. A proper custom base. My new thing is laying felt down tohave its color picked up and reflected, as if it were the ocean. I kept the whiskey label on the bottom of the bottle. I might choose to remove it to improve the optics of the feaux-cean. The Jibs look better from this - the windward - side. Can't wait to give it to Dad! He will Love it! Thanks for reading!

-
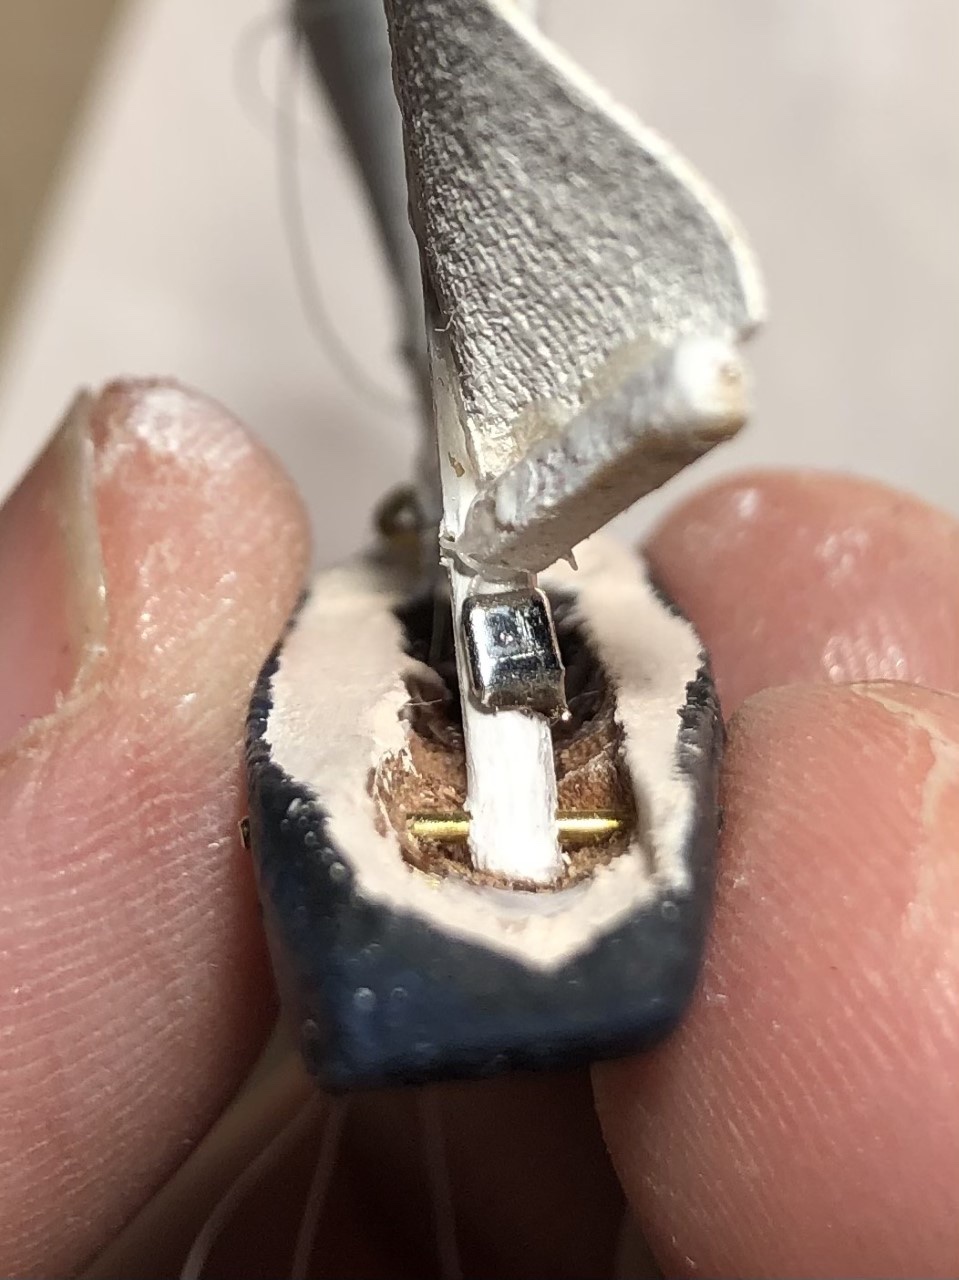
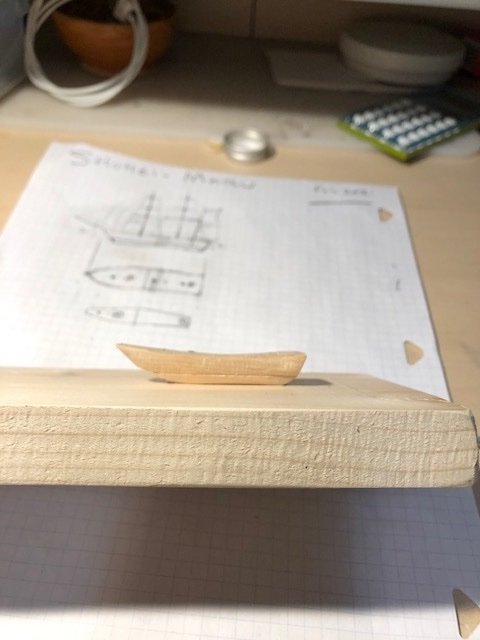
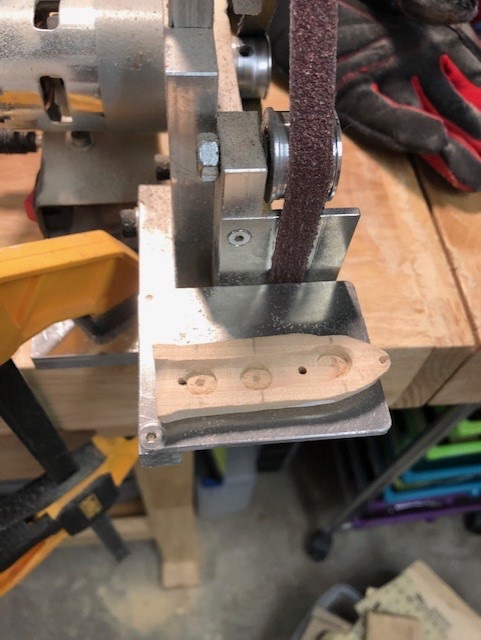
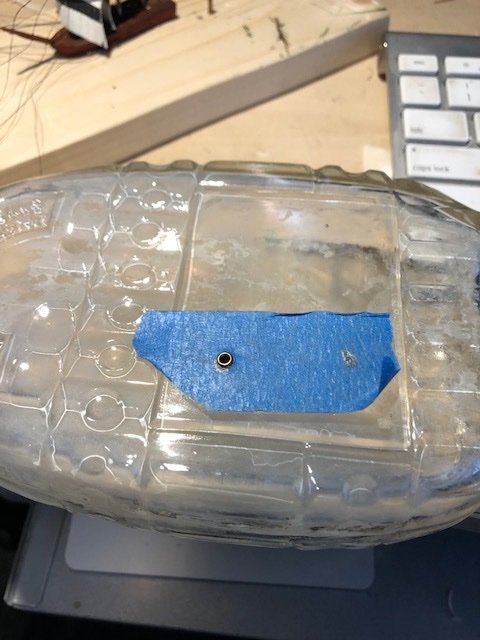
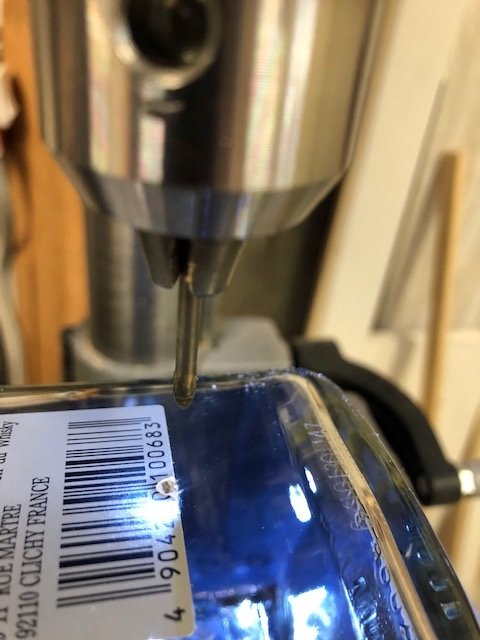
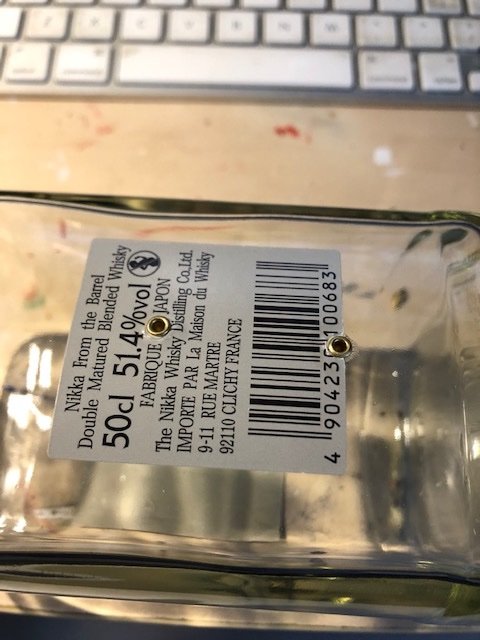
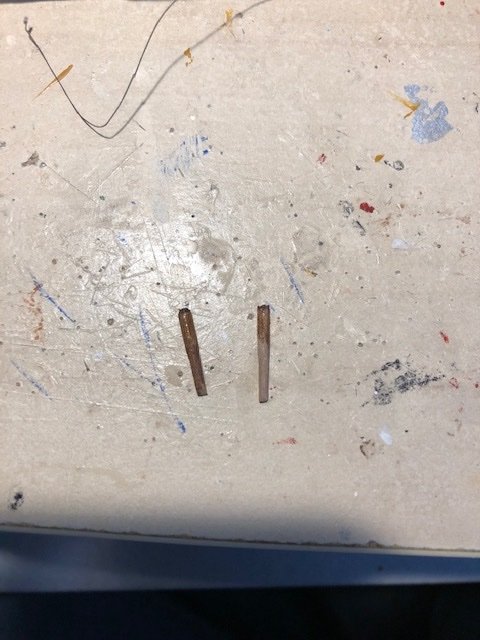
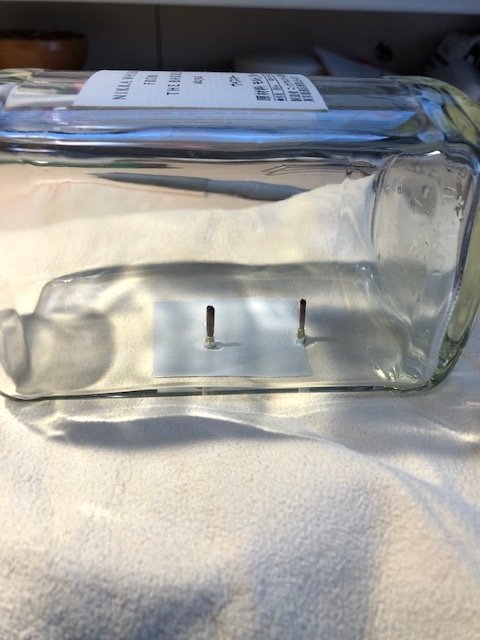
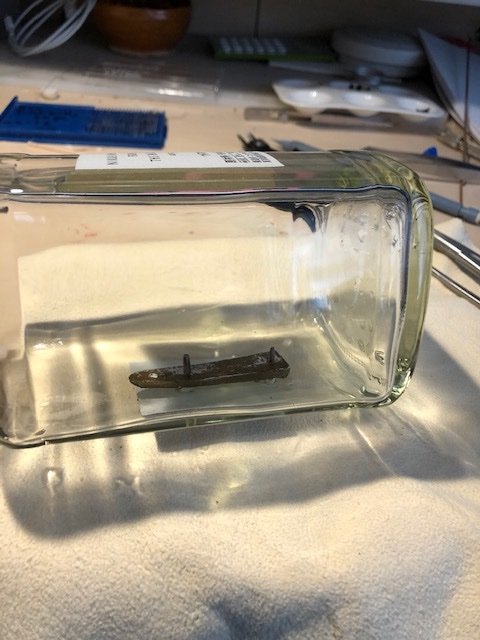
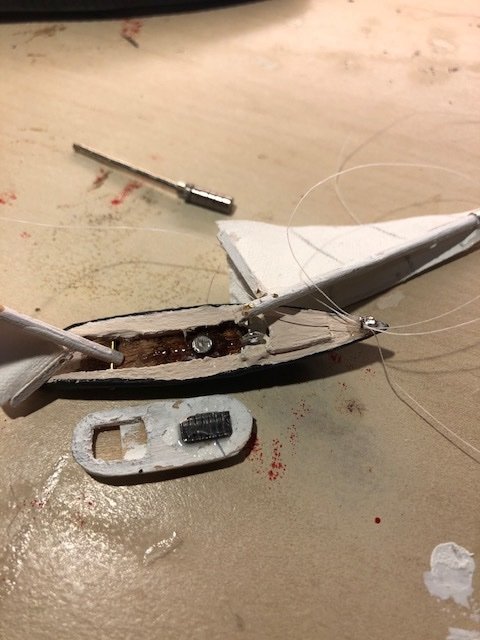
Part II - Hull, rigging, and bottle prep. The Lower hull on the working plank Upper and lower I decided to have the masts fold aft on a hinge rod running athwart the upper hull. I drilled out space in the hull for the masts and rigging to fold back, scooped out - not unlike - how the Missus likes her Subway sandwich bread! The Mizzen mast is fore and aft rigged with two gaff rigged masts. Main mast up, and Fore mast up. I tried to keep the rigging simple, leaving the yards alone, and attaching running rigging as beckets on the lower corners. Also no channels, dead-eayes of belaying pins for me; with my crude skill set, any attempts at those features would just be more ways for me to junk it all up. Instead, I drill some holes aft of each mast and uses them as pull-throughs. As for the bottle prep, I wanted to try something new for me: Drilling through the base, and inserting brass eyelets to secure the hull posts. The holes will be in the same configuration as on the working plank I exprimented on thos bottle of Calverts Special. Needed a bit for glass drilling, low speed, and lubricant for the bit. it worked well. Taping or having a label over the hole helps as well. In go the eyelets, CA'd. All part of the plan to create a firm base for the ship, for when I want to tighten the rigging after launch. Sturdy dowels are filed to fit into the eyelets, resembling a belaying pin! After much filing and cajoling, they are CA'd in as well. And finally, the lower hull snuggly sits upon the well-secured posts! Next: The launch

-
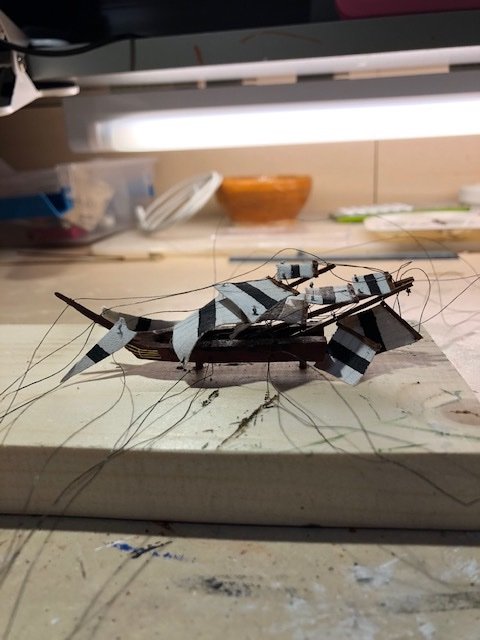
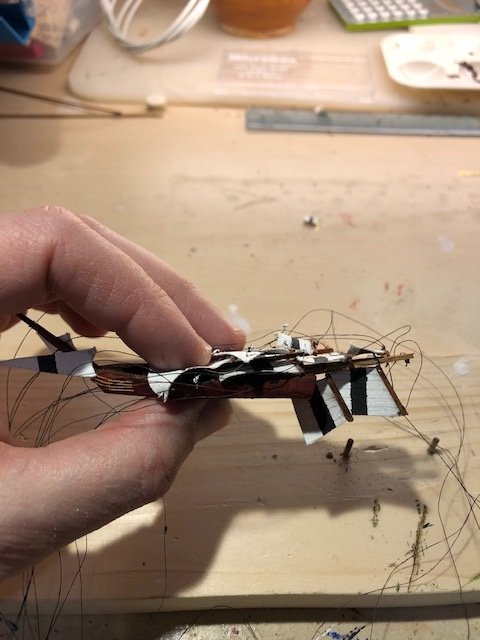
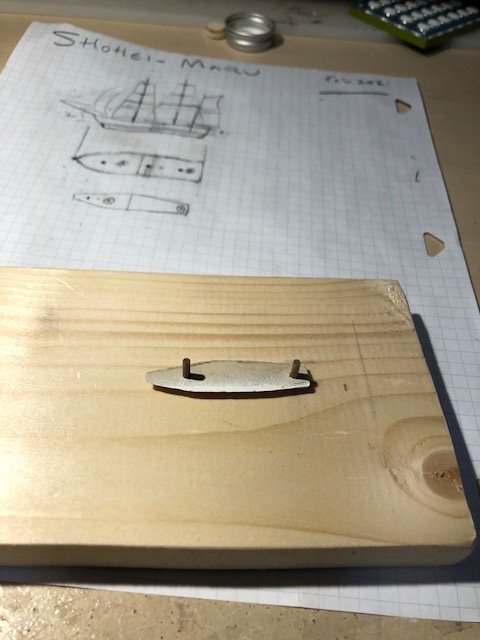
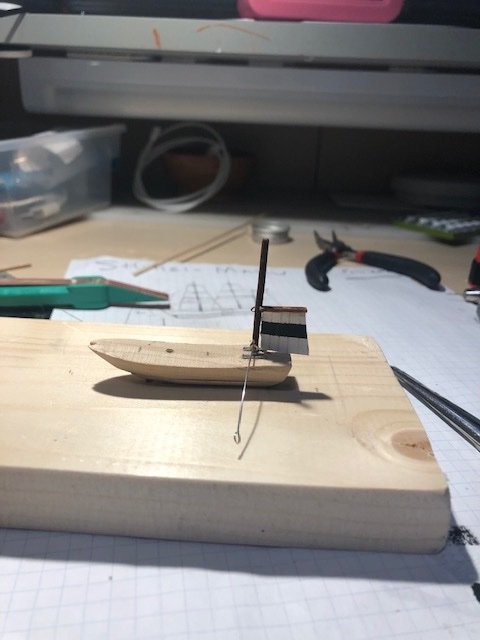
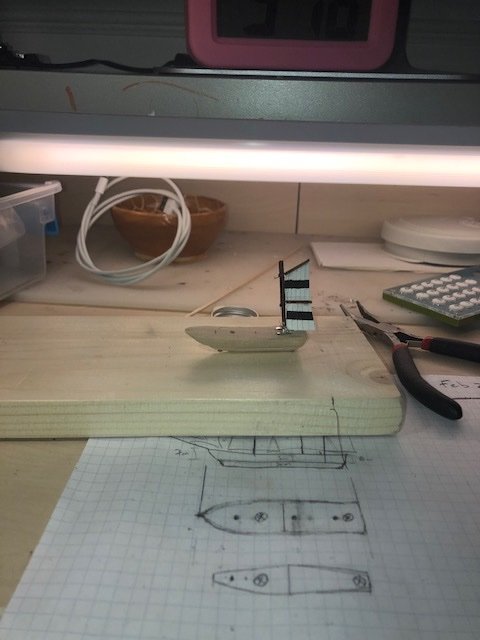
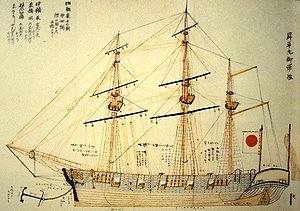
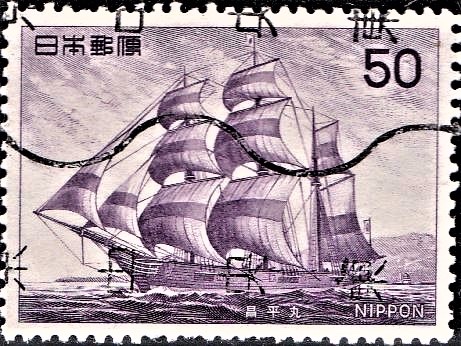
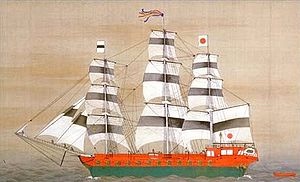
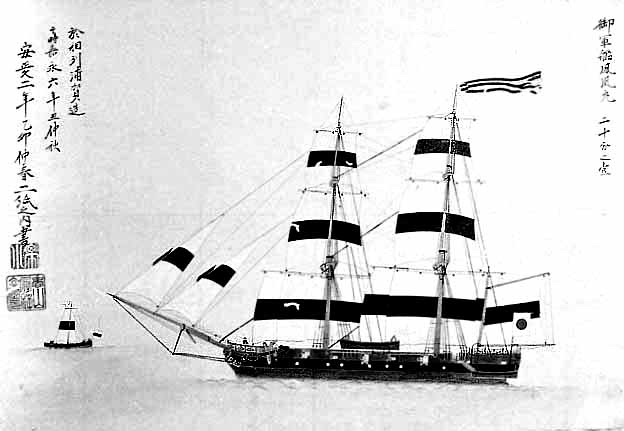
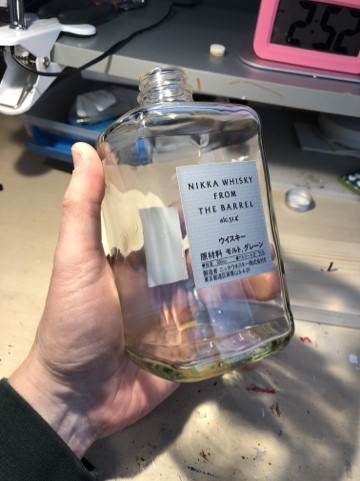
It was time for me to make a Ship in a Bottle for dear ol' dad. He's been through quite a bit recently, and I think a gift like this will do some good! Dad always liked a Japanese asthetic; when I was a boy, he designed and built a Japanese tea house in our garden in Connecticut , and his yards always feature a Japanesse Rock Garden. After a few fore and aft SIBs, I wanted to return to the square rigged ships, to see if I can improve upon my technique. Fore and aft SIBs are easier because you only have to worry about one plane of folding, ie the masts. The square rigged ships have the added challenge of all the spars folding or twisitng on the masts. It seems a perfect pairing to try a Japanese Warship from the 19th Century. According to my not-so-very-extensive research on Wikipedia, the Shōhei Maru " (昇平丸) was a sailing frigate constructed on orders of the Tokugawa shogunate of Bakumatsu period Japan by Satsuma Domain in response to the Perry Expedition and increasing incursions of foreign warships into Japanese territorial waters. She was built from 1853 to 1854 at Sakurajima in what is now Kagoshima Prefecture. Shōhei Maru should not be confused with the World War II passenger/cargo vessel of the same name, sunk by the submarine USS Spadefish off of Korea." "The Shōhei Maru was a three-masted barque-rigged sailing vessel, with an overall length of 31.0 m (101 ft 8 in), beam of 7.3 m (23 ft 11 in), and displacement of 370 tons. Of wooden construction, she was depicted in contemporary artwork as being armed with five cannon on each beam. Her sails had black bands, characteristic of Tokugawa naval vessels. She was depicted in an 1855 print as flying the rising sun flag. " The pictures above are the only representations I could find of Shohei Maru, but there were other similar Japanese Warships commissione during the same period of the Tokugawa Shogunate. These include Asahi Maru, and Hoo Maru, whose image was my true muse for this project. I really like these Japanese Nikka Whiskey bottles! Perfect for the job! To start, I decided to fashion and use a plank a working board. This is used in some American SIB kits, and should give me tighter control of the masts and sails as I make her.

-
Thanks, Mike! I dont know about your SIBs, but for me all the work comes down to the planning and execution of the launch. The better that is, then the less damage control and cleanup is required. Still havent figured it all out, but I have anew plan for the next one!
-
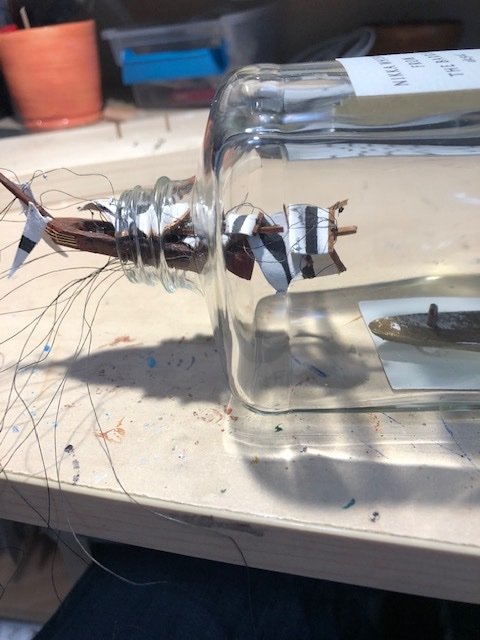
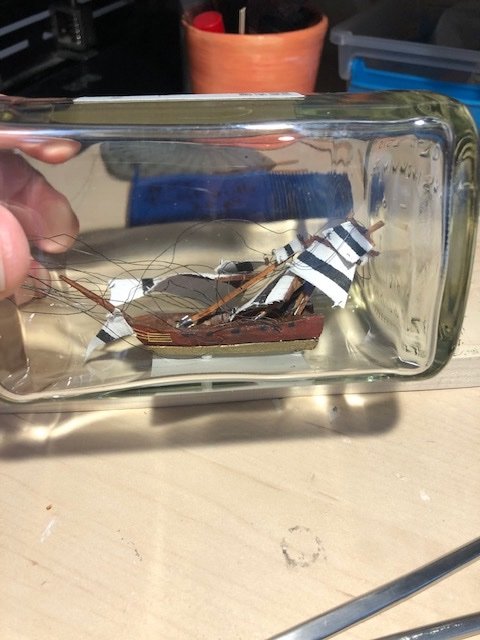
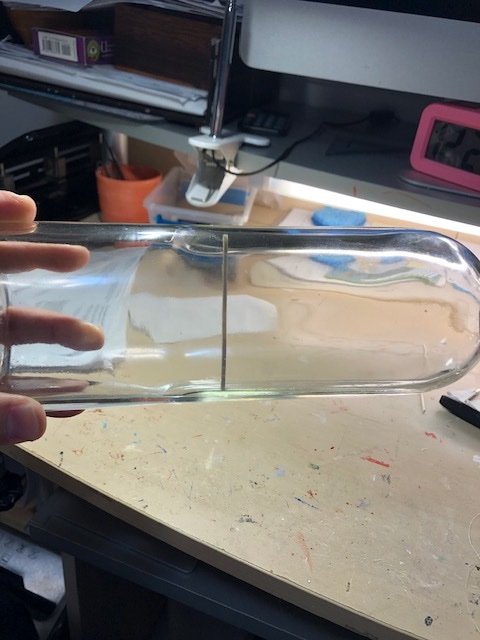
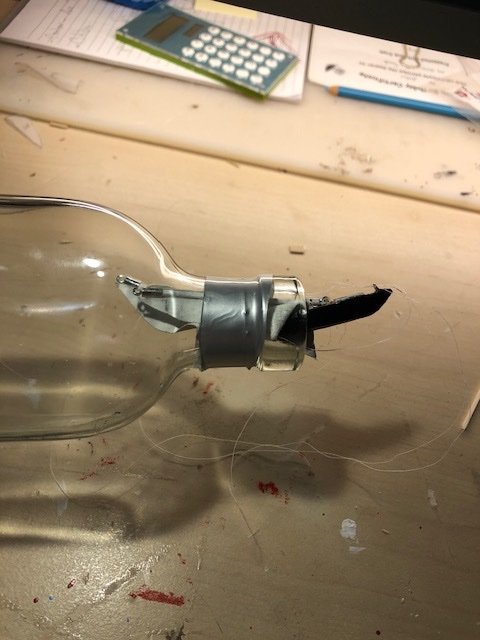
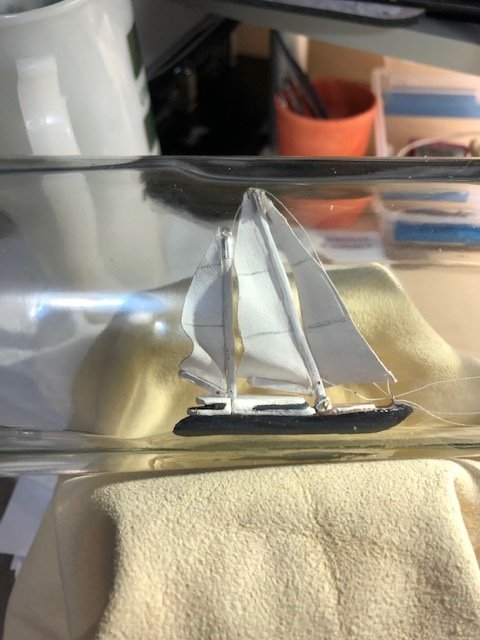
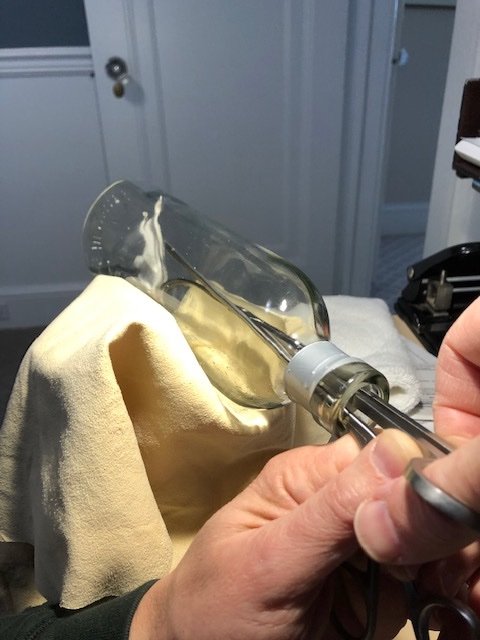
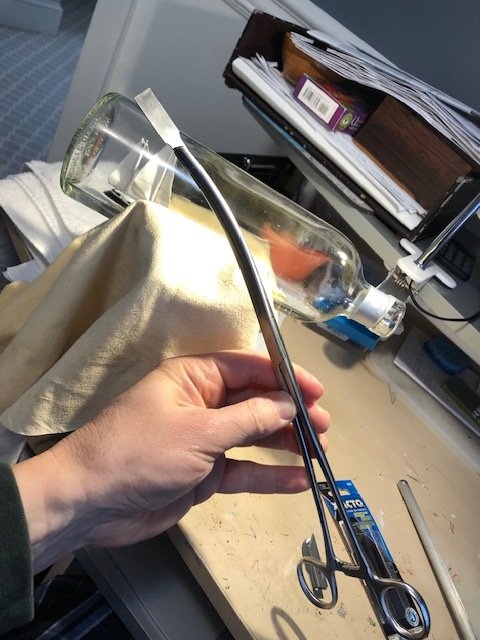
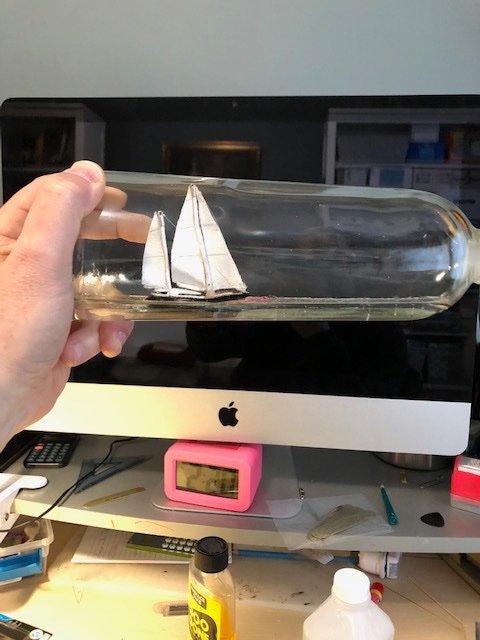
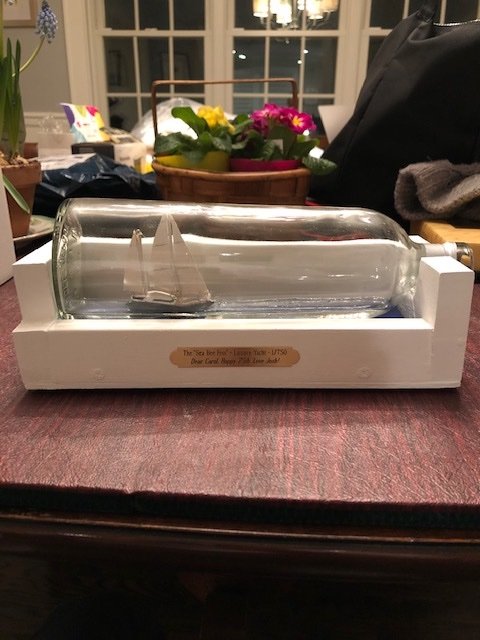
Part III: The Launch and Repairs I thought I was smart by measuring the height of the bottle with a stick. It's always hard to tell from the outside. I don't want too much space, but I certainly don't want the masts too tall. Once I was assured, I laid down a layer of sil-poxy atop the dry silicone base inside; It dries quickly The ship folds down easily, with no snaps or pops. The superstructure attached on well with the magnets. But, despite my stick measurement (!), the main mast is too tall (!!!). Still not sure how that happened. This error led to all my problems. By now the epoxy was curing, and I was trying desperately to move the ship back in the bottle where there was a bit more clearance for the main mast. Meanwhile, the sil-poxy under the ship is strecching out all over the place as I try to maneuver the ship aftward in the bottle. I tried getting more silicone-poxy where I needed it further back; but the more I put in, the sloppier things got. I still need the ship to be fixed on the base, so that I could pull the masts into position and straighten the sails. Out of desperation, I dripped in a thin second layer of clear silicone, to hopefullt set around the ship; it hardens very firm. Unfortuantely, as i saw with the Caroline, when I pour the Encapso-K into a non-pristine environment, eg with a boat and epoxy tainting it, I run the risk of silicone not curing. I was lucky that it eventually did cure, but it took several days instead of 24 hours. By then the new silicone base was covered in grit and particles, looking rather shabby. Eventually, I got her fixed in place in the back of the bottle. A 12" Hemostat clamp with a blade up top helped to cut the rigging in place. Looking much better after I cleaned the huge mess off the bottle. Cobbling together a base. Kind of oblong shaped, but totatally custom built for this SIB. Possibly my favorite decision in this entire process: Lining the bottom with dark blue felt. The blue gets pulled into the bottle, She sits nice and snug, in her cozy base. Both Mother in law and wife are very pleased! So am I! Thanks for reading!
-
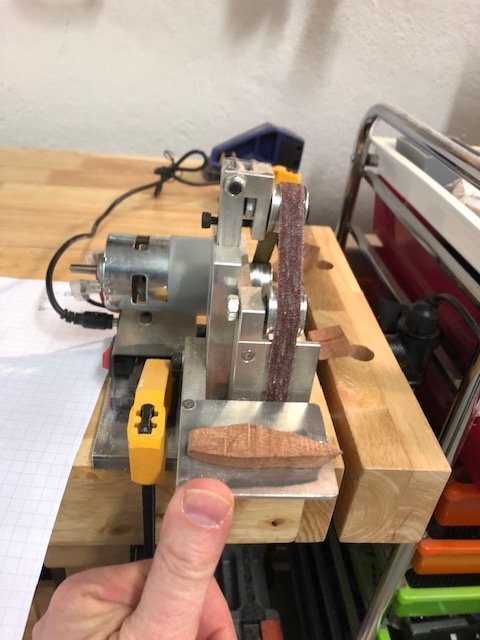
Thanks Mike! Everything was going great until the launch - as usual. I'll post the disaster and hopeful salvation in a few days once, the silicone dries and I clean up the mess. Re the sander, of course. the sander was a gift from my brother Harry. It has no names or brands or labels. I searched for it on the web and appears to be a no-name product from Hong Kong. If you look up 'mini belt sander' or 'mini polisher' you will see it.
-
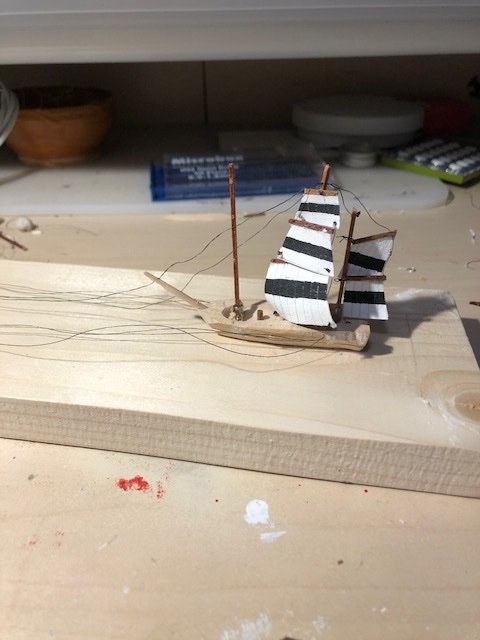
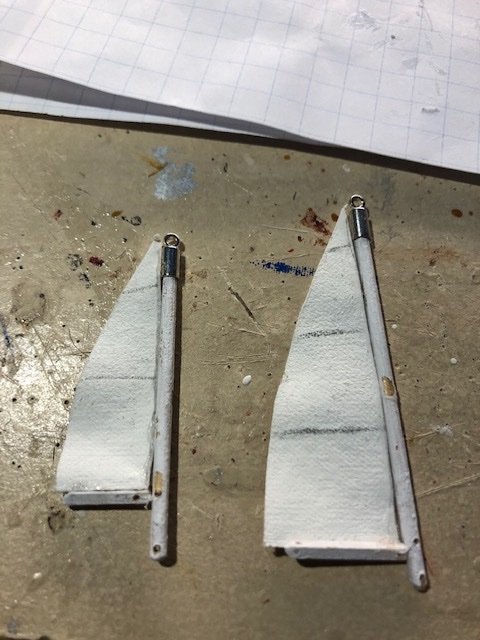
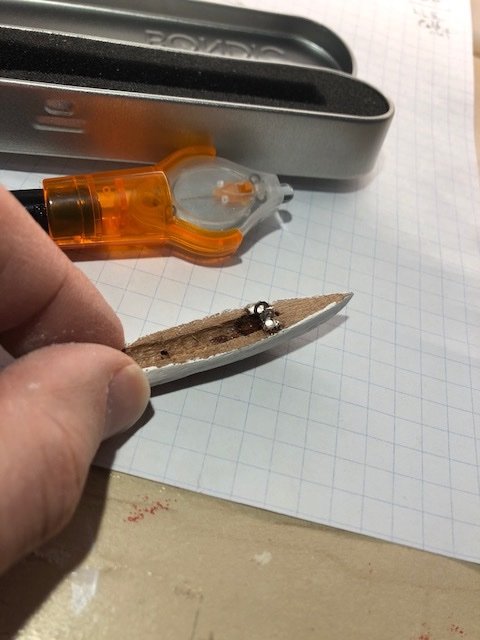
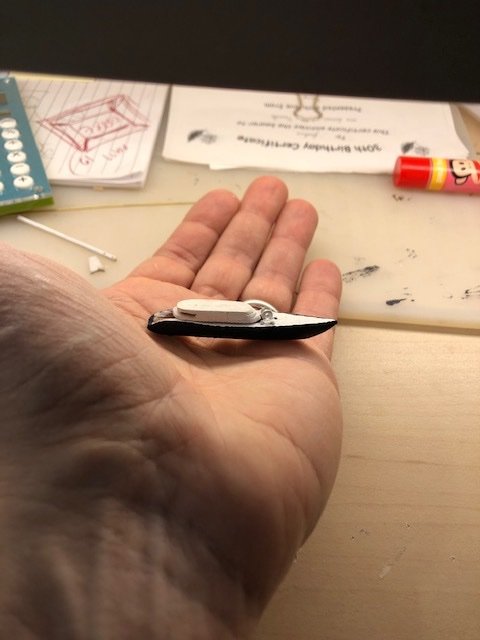
Part II: Masts and Rigging Main and Mizzen masts. I used sail cloth and painted it white with acrylic. Made it very stiff, but it think this workes to my advantage. I like cord ends atop my masts. Super structure - the fore is painted inlieu of glass, and the aft is truly aired out. simple hinge for the main mast - no way I could hide it. All three sails up. The mizzen mast is hinged a level below, athwart the hull. I had to figure out how to get the supr structure around the masts. I decided to drill a hole, and cut the roof across, then fit then on after the masts were up (in the bottle). I figured using the tiny magnets would be perfect here. Secured with Bondic plastic welding and CA. Here lies the Main Mast Magnet's Mate: A flat peice of metal on the underside. But this was the easy part. What about the aft part of the superstructure? This would fall apart after the cuting across. So I used Bondic on the port side - not the display side - to keep the top and bottom together after the cutting. Same as above. Successful drilling and cutting. The top and bottom did stay together. Again with the magnet, but this time I needed to secure it on the under side of the superstructure. Its mate: a small peice of metal on the mizzen mast. This is the idea; let's see how it goes inside the bottle. The masts and rigging are really rather simple, which is great! Practically fool proof. The Bottle was stripped and cleaned of its labels; then I put in about 5mm of Encapso-K silicone to create a flat base. The ship will be attached to the silicone with Sil-poxy, and even that I expect to go smoothly. But, it will be the attachment of the two superstructure pieces using magnets that will be the challenge, and all though a narrow and long bottle! Next: The Launch!


-
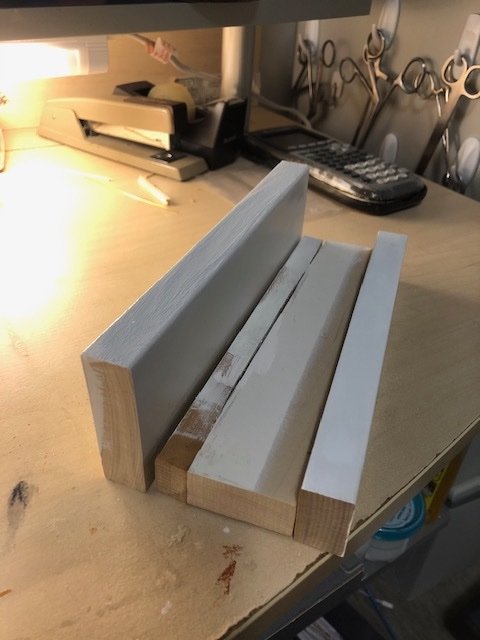
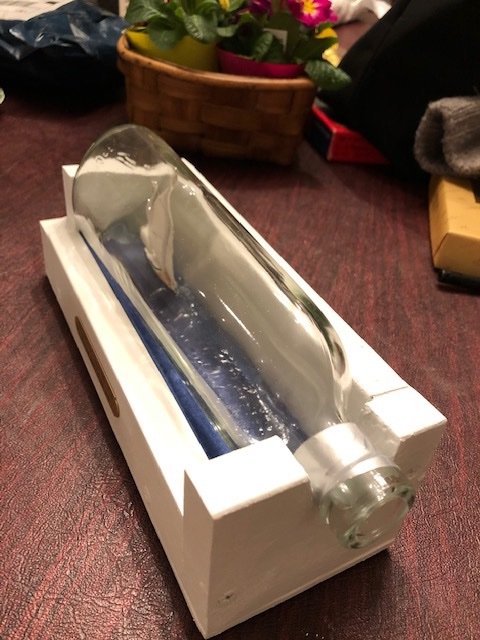
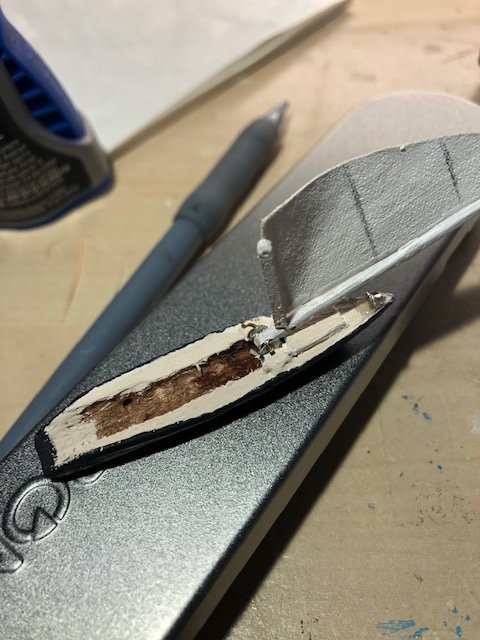
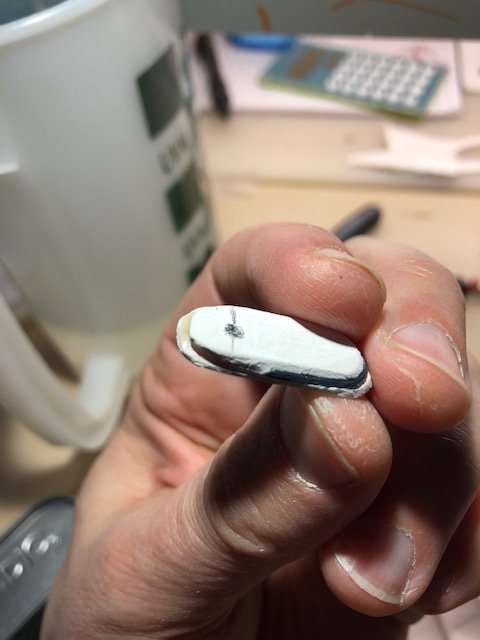
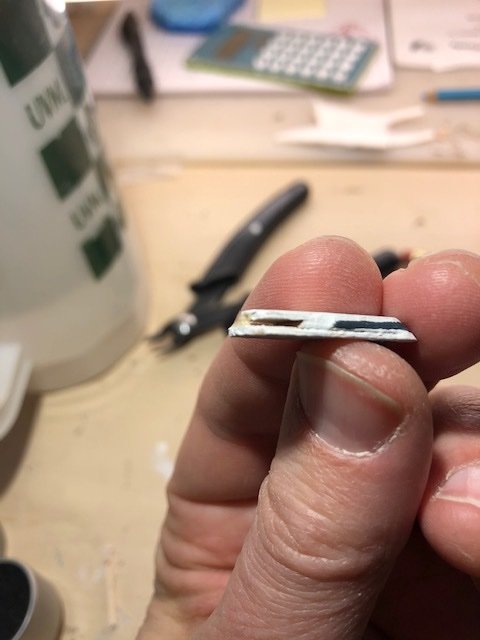
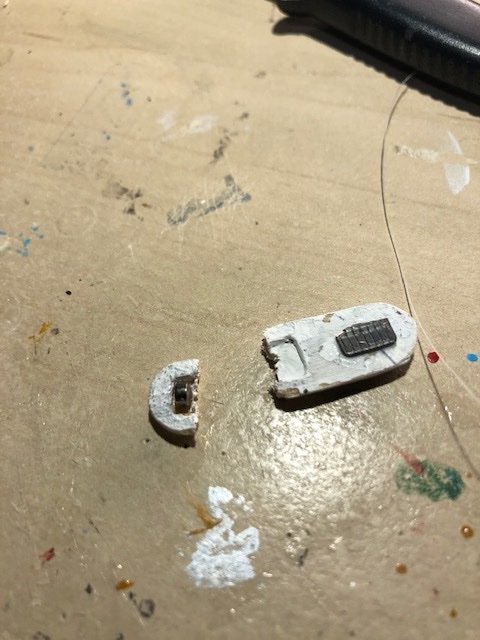
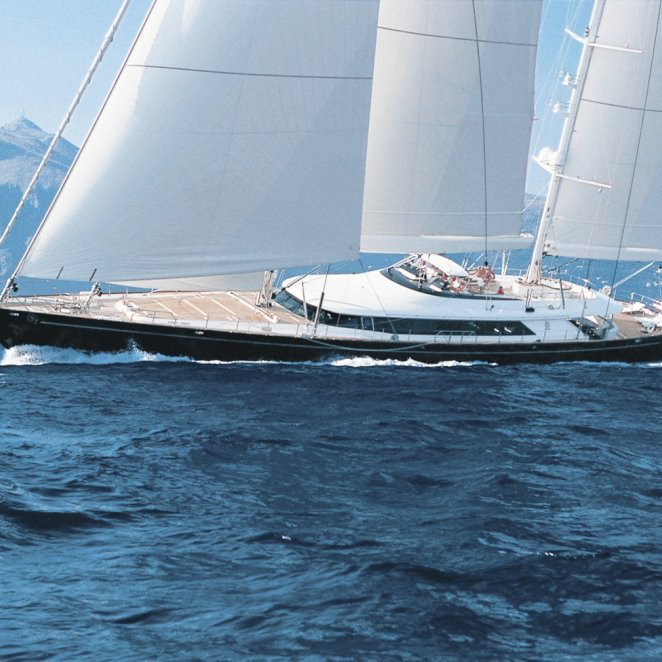
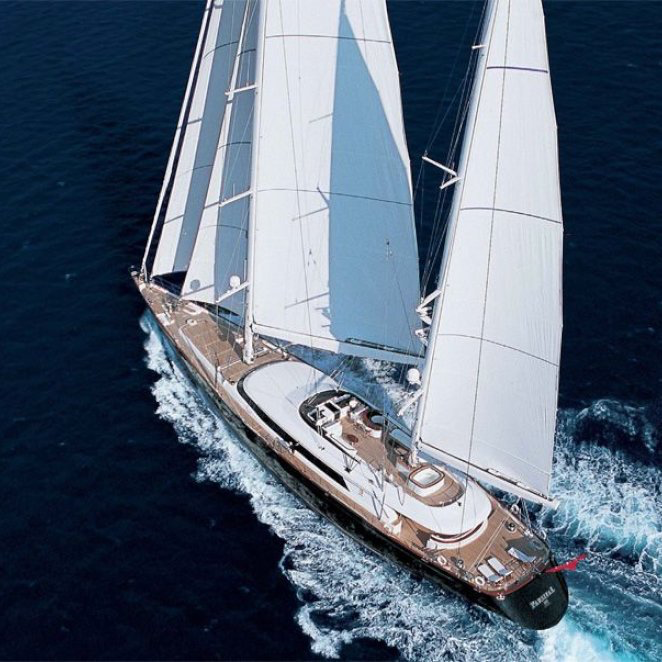
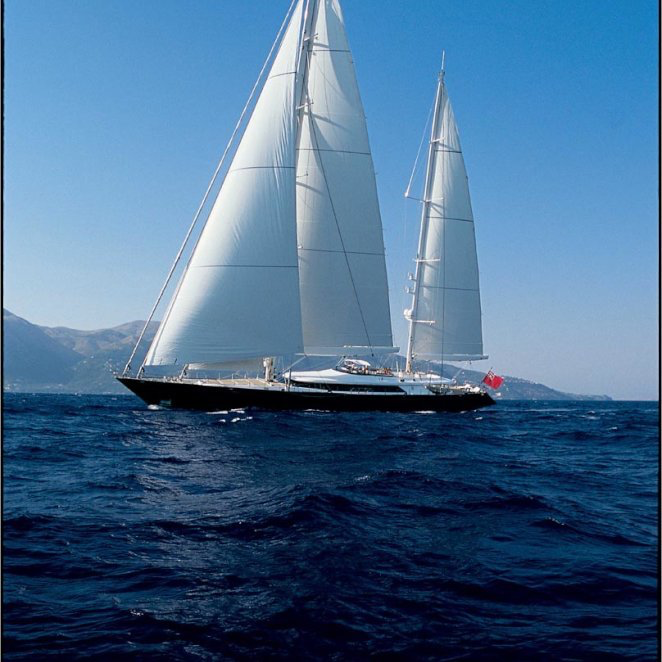
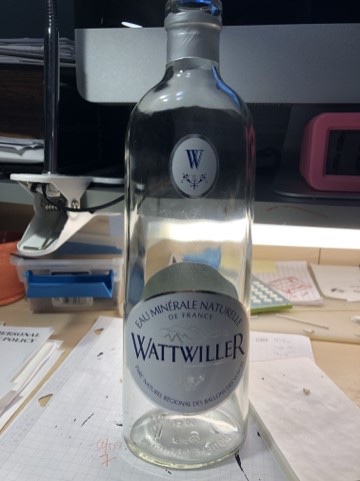
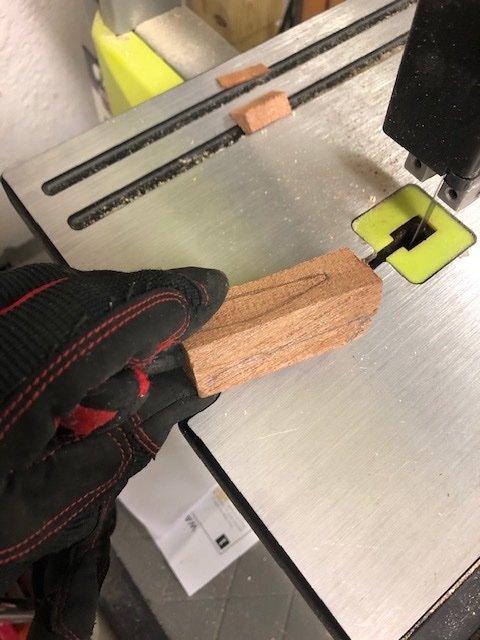
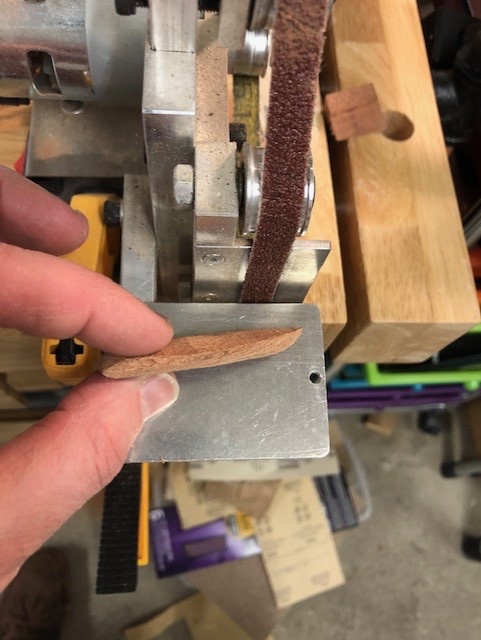
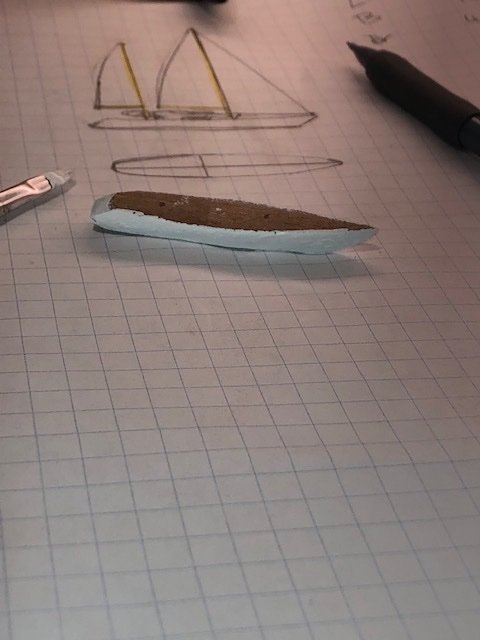
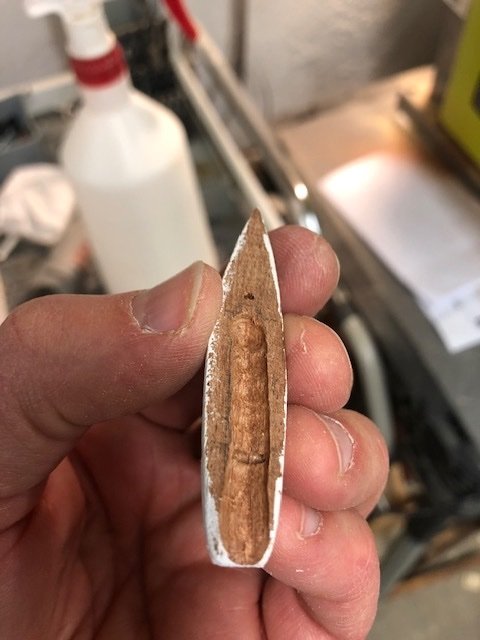
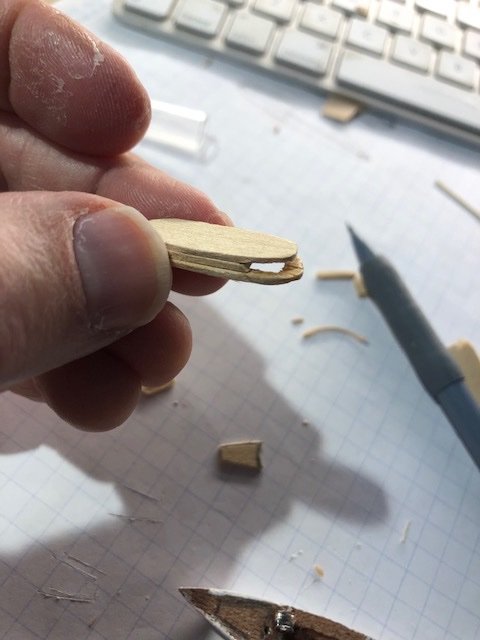
INTRO: I promised my mother-in-law that I would make her a ship in a bottle for her big birthday coming up. She deserves a modern sail yacht, not some crusty old schooner. The Parsifal III - built in 2005 by Perini Navi and refitted in 2012 - ought to do the trick. Similarly, my typical vintage whiskey bottles wouldn't fully speak to her charm; and since I cant find a proper size bottle of grey goose (!!) I will use this sleek french water bottle! PART I: The Hull and Superstructures Starting with a hull blank. I suppose this is more of an american style approach as opposed to european or japanese method using sagittal slices. Mini belt sander to grind it close. I do wear gloves. Sanded down to 320 grit, then primed. I decided once again to drill-route a channel into which the masts will lay flat aft. The two masts will each sit on their hinges at a different level from each other. Here the mizzen mast axle hole is drilled athwart, through the hull. While the main mast will hinge atop the deck. I hope this split-level approach to the hinges will allow for an easier fold. Making the cabin superstructure Straight lines are not my strong suit. But its beginning to take shape. Next: Masts & Rigging


-
I am looking forward to seeing this built!! My own sits patiently in the beautiful wooden box, waiting for a rainy day.
-
Agree with the Woody joe santa maria. The only other vertical SIB kits I know are not currently made anymore, and were made by Imai: The Golden Hind, Winston Churchill, and Santa Maria. and those were nice models, not exactly dirt cheap. You might be able to find them on eBay or similar. Although in some editions the instructions are only in japanese.