.jpg.c8fa72e875139f3ef801ecc2a3e2102d.jpg)
Matt H
-
Posts
170 -
Joined
-
Last visited
Content Type
Profiles
Forums
Gallery
Events
Everything posted by Matt H
-
.thumb.jpg.63af0ca81bbc689f4f2bee1cdb4b7b78.jpg) Good luck to you. It looks like it would be a great build. My son is into history and WW2, he'd enjoy seeing this when it's completed. I don't have the funds for it myself, but I hope you find a buyer soon, good luck.
Good luck to you. It looks like it would be a great build. My son is into history and WW2, he'd enjoy seeing this when it's completed. I don't have the funds for it myself, but I hope you find a buyer soon, good luck. -
Thank you, it's on a shelf in my living room. I would like to move it into my classroom, I just haven't gotten around to transporting it. I also share the room, I teach from two different classrooms, hoping to stop teaching in one of them and move into my computer lab full time next year, if that happens I'll definitely move it into my room.
-
Thanks Ric, it was a great kit and I too watched and just finished the Vikings series! Someone else had that question and I was tagged in their build log. Here is the link to my first response and a couple of posts down I provided a clearer image and an image of that part of the instruction book. I did NOT use the water/glue mixture before placing the planks, I just did a small bit of regular yellow wood glue on the part of the plank that overlapped. You can actually see a bit of glue that didn't get sanded before I applied the stain in the image in this link. If you have any more questions let me know.
-
At the top of the forum is a navigation bar and a tab/button/link for Articles Database. In that Articles Database is sub categories, one of which is for framing and planking. In that framing and planking is the following article written by Chuck and it is a pdf which includes a fan. Hope that helps. This was my first kit I assembled, I enjoyed the challenge of the small size and the well written instructions. https://thenrg.org/resources/Documents/articles/LiningOffYourHullPlankingTutorialAndFan.pdf
- 162 replies
-
- 2
-

-
- 18th century longboat
- model shipways
- (and 1 more)
-
Are these the same plans that were printed when they were printing them? I purchased the full set of books and plans not too long ago.
-
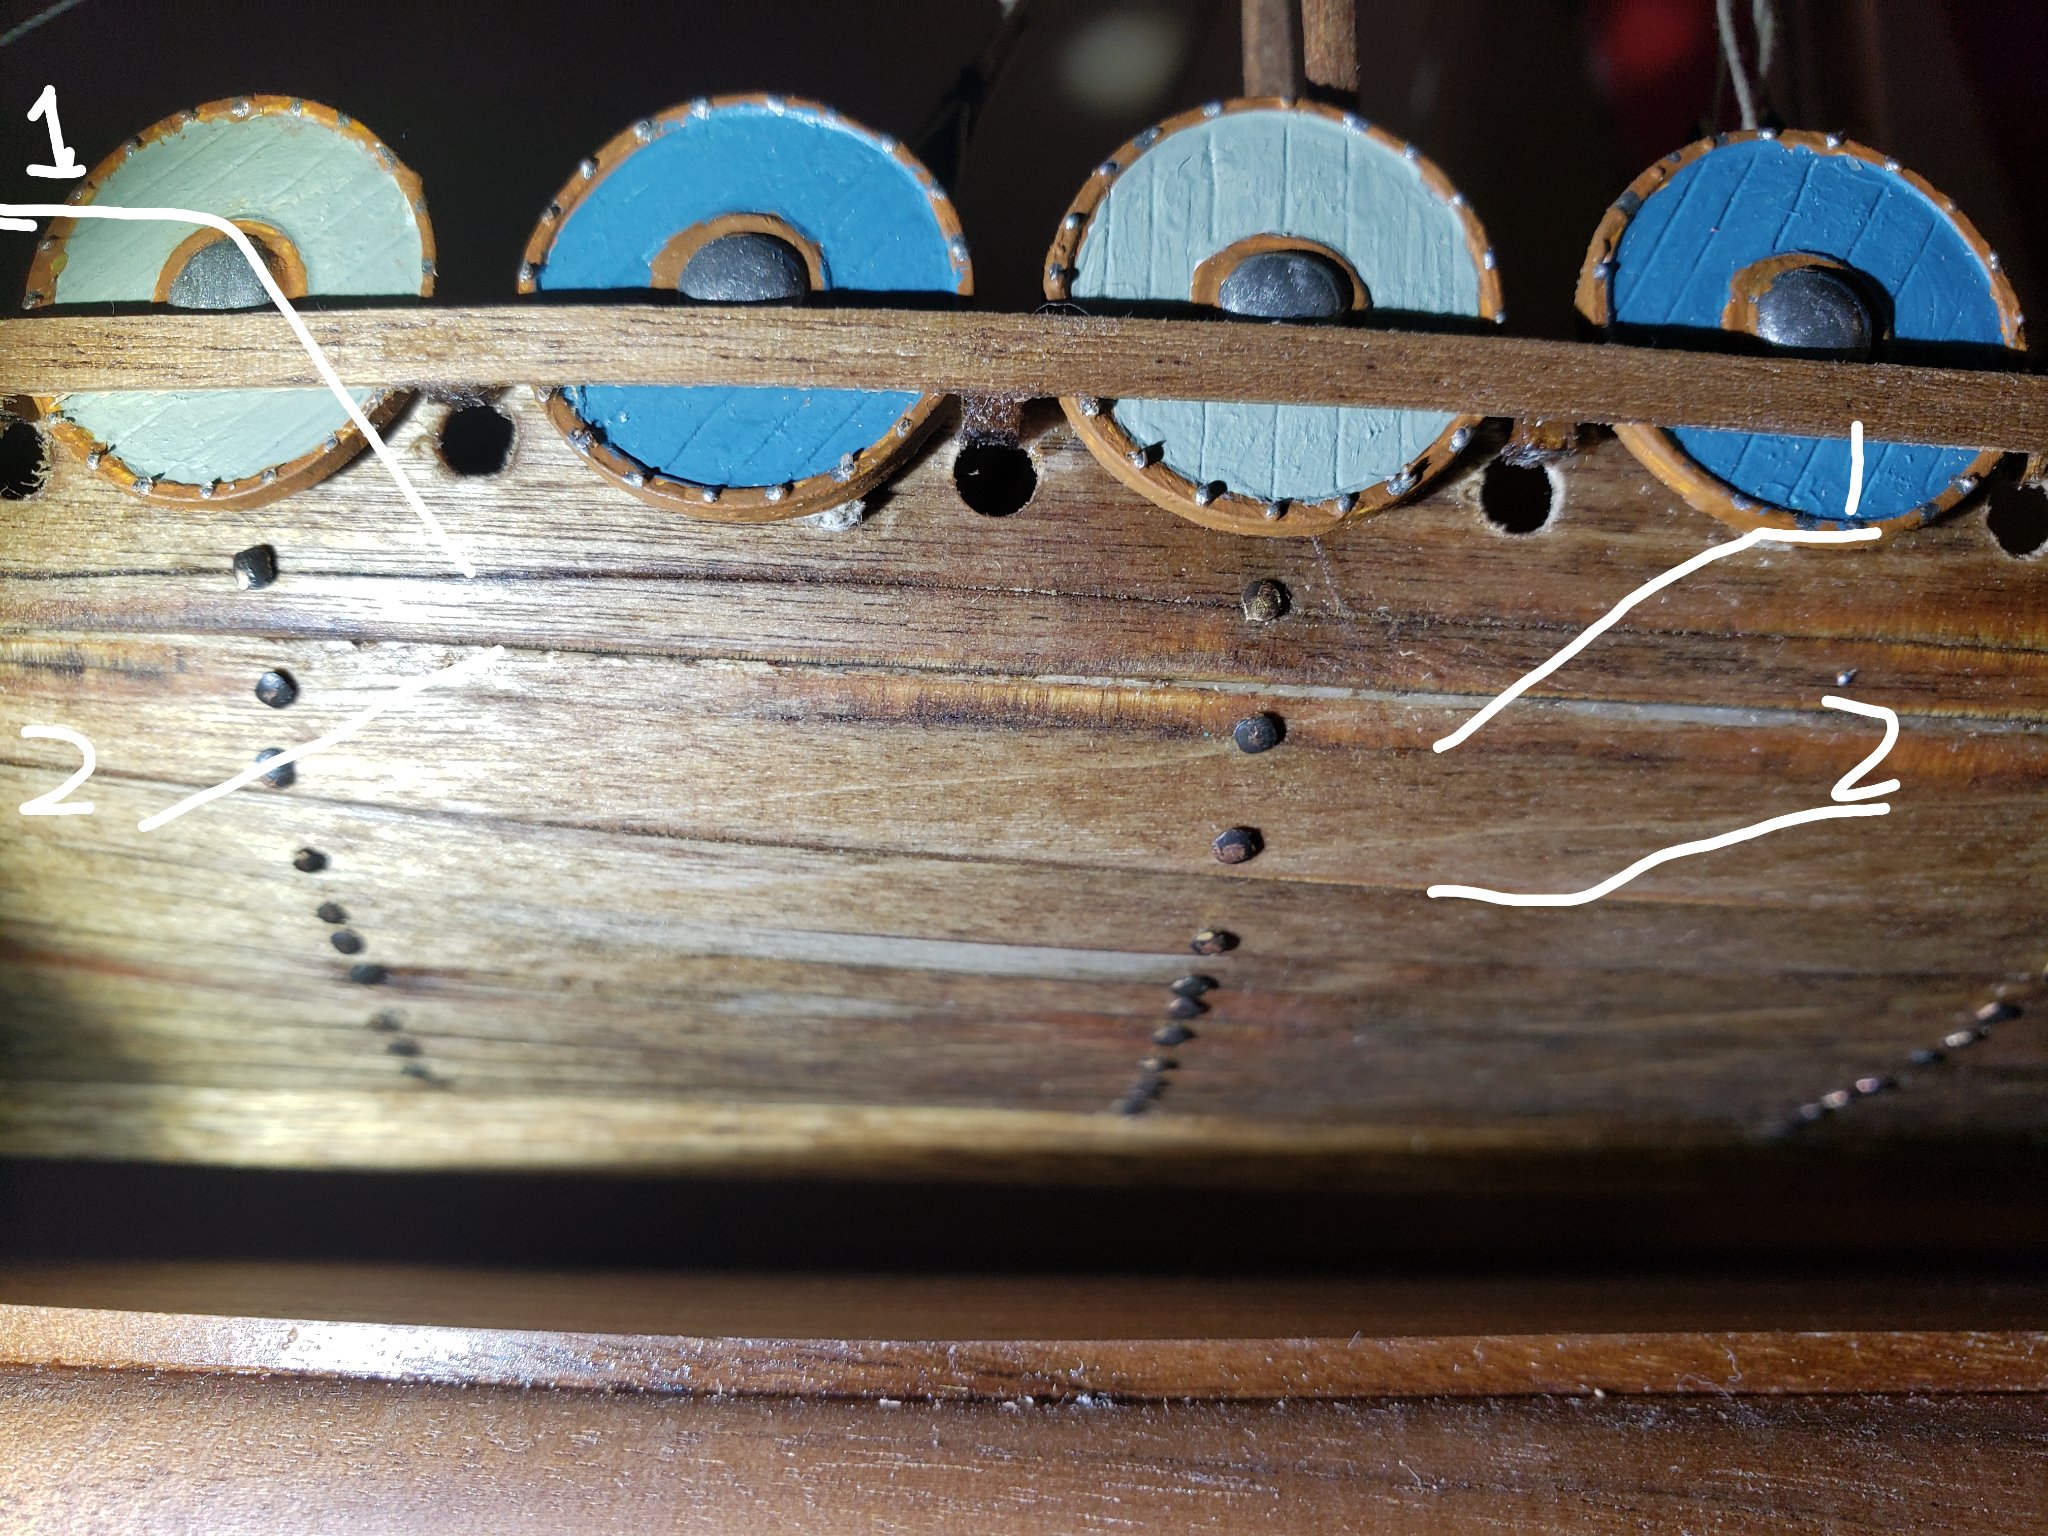
You're right the photos weren't very good so I snapped this one and the instructions. Here the number 1 is pointing to the seam where I cut partway through the plank so it could be folded along the cut. The number 2 indicates where the bottom edge of the plank is. Hope these help, the pictures portion of the instructions are in Italian, and a separate instruction sheet is printed in English. **Edit - Nope, no relation to James J as far as I am aware!


-
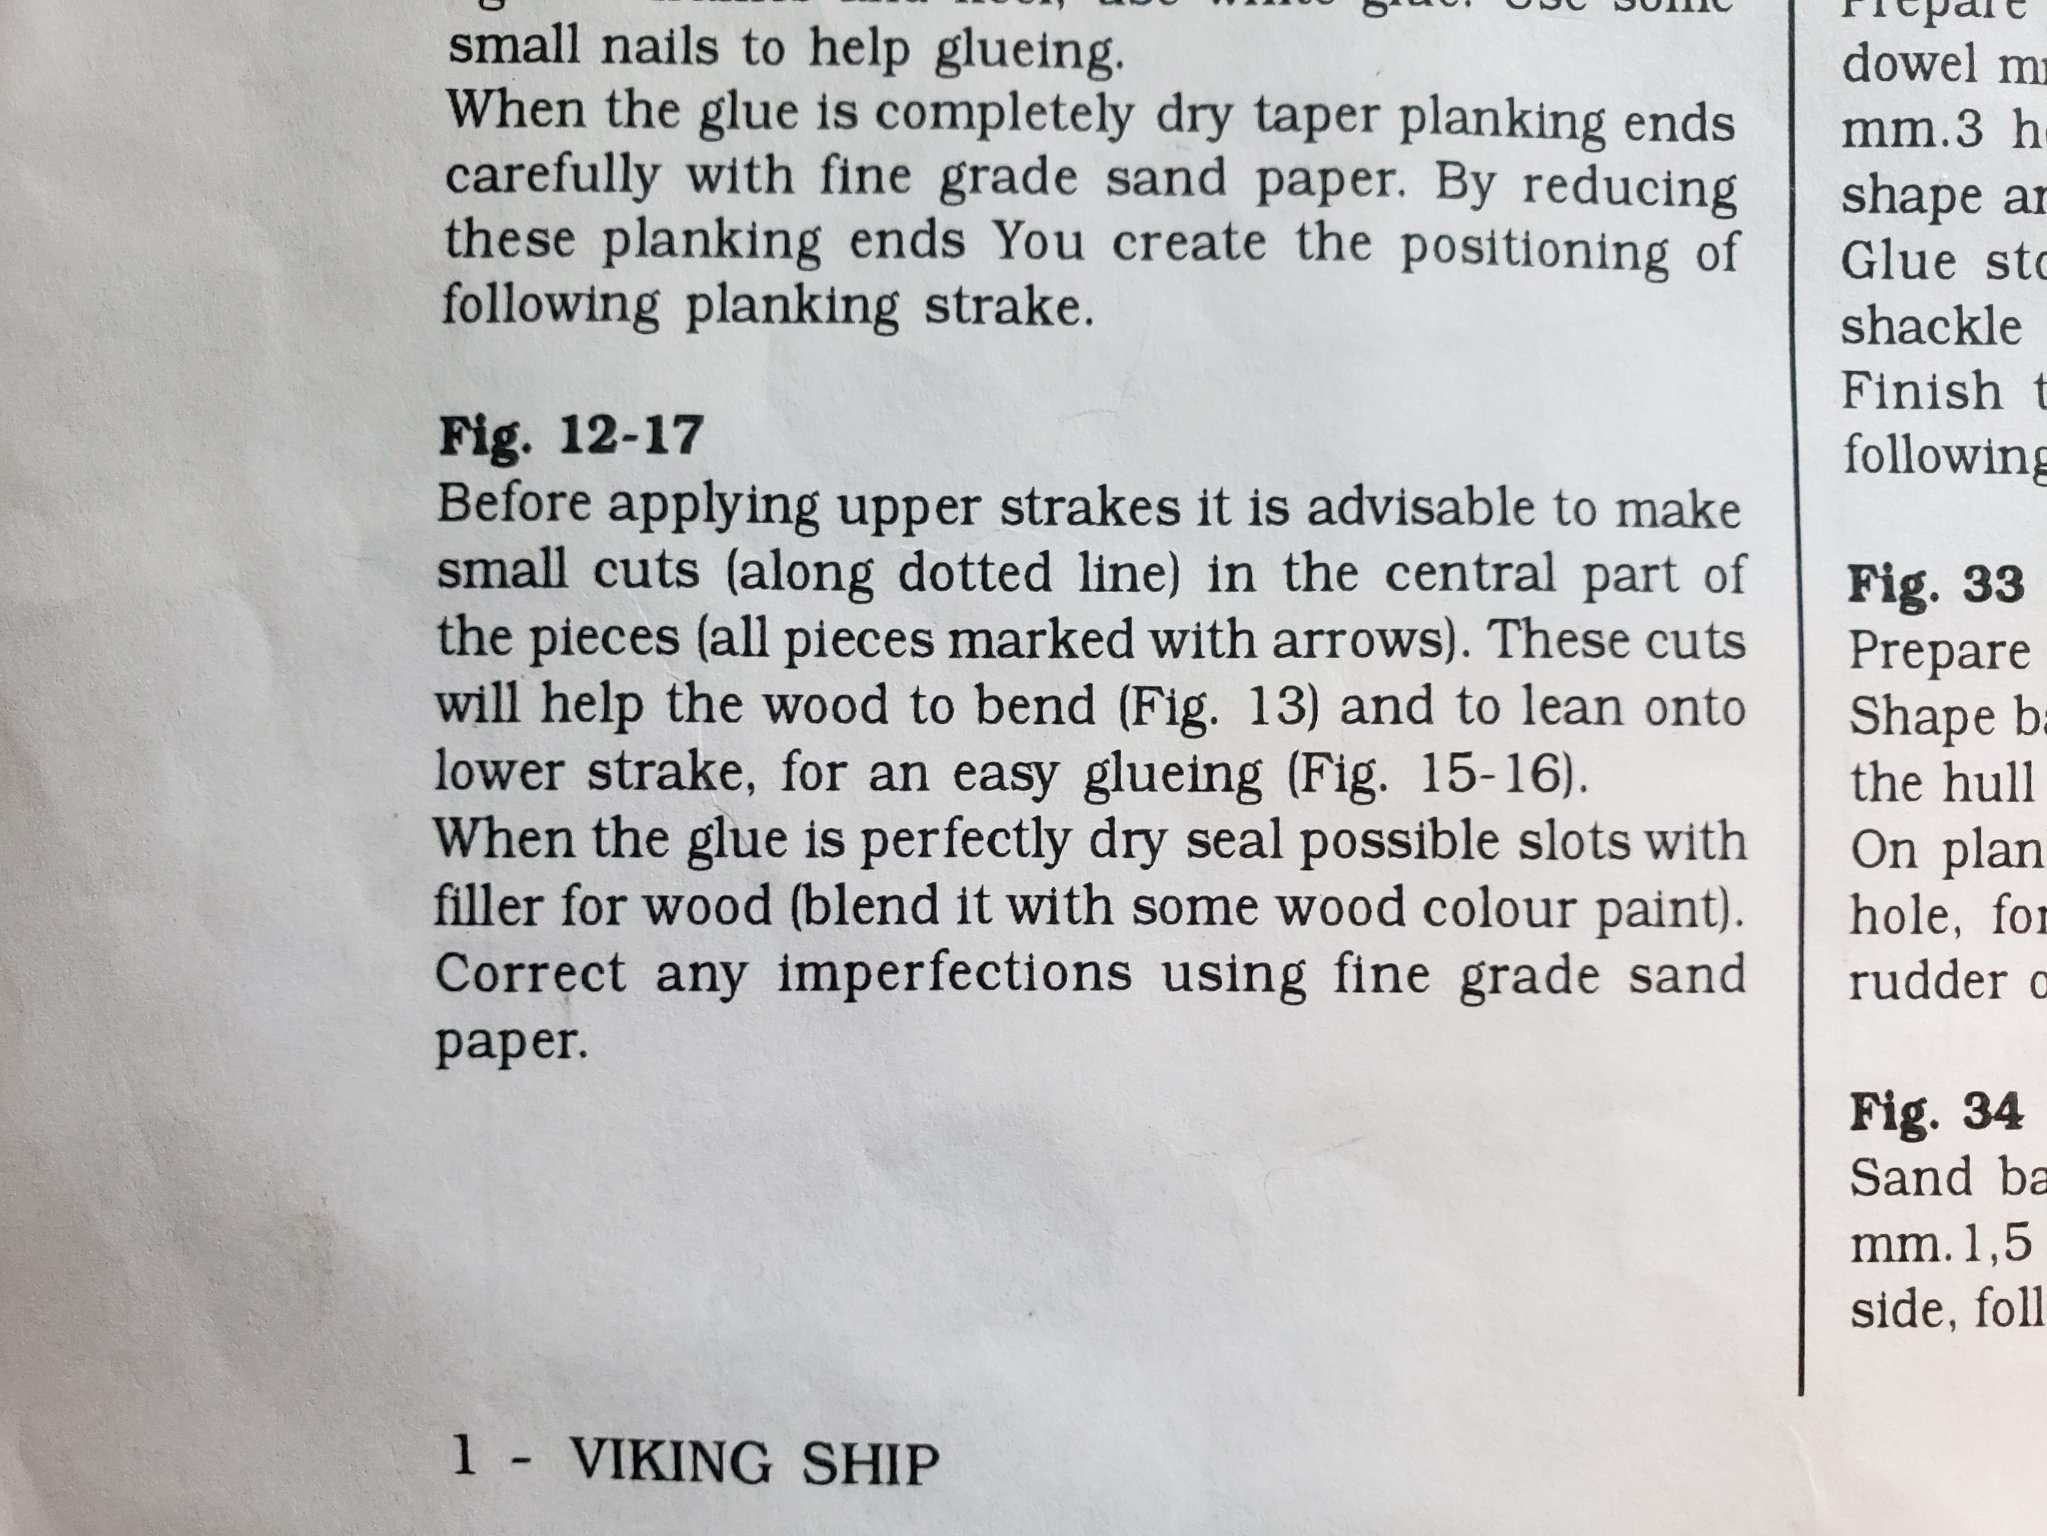
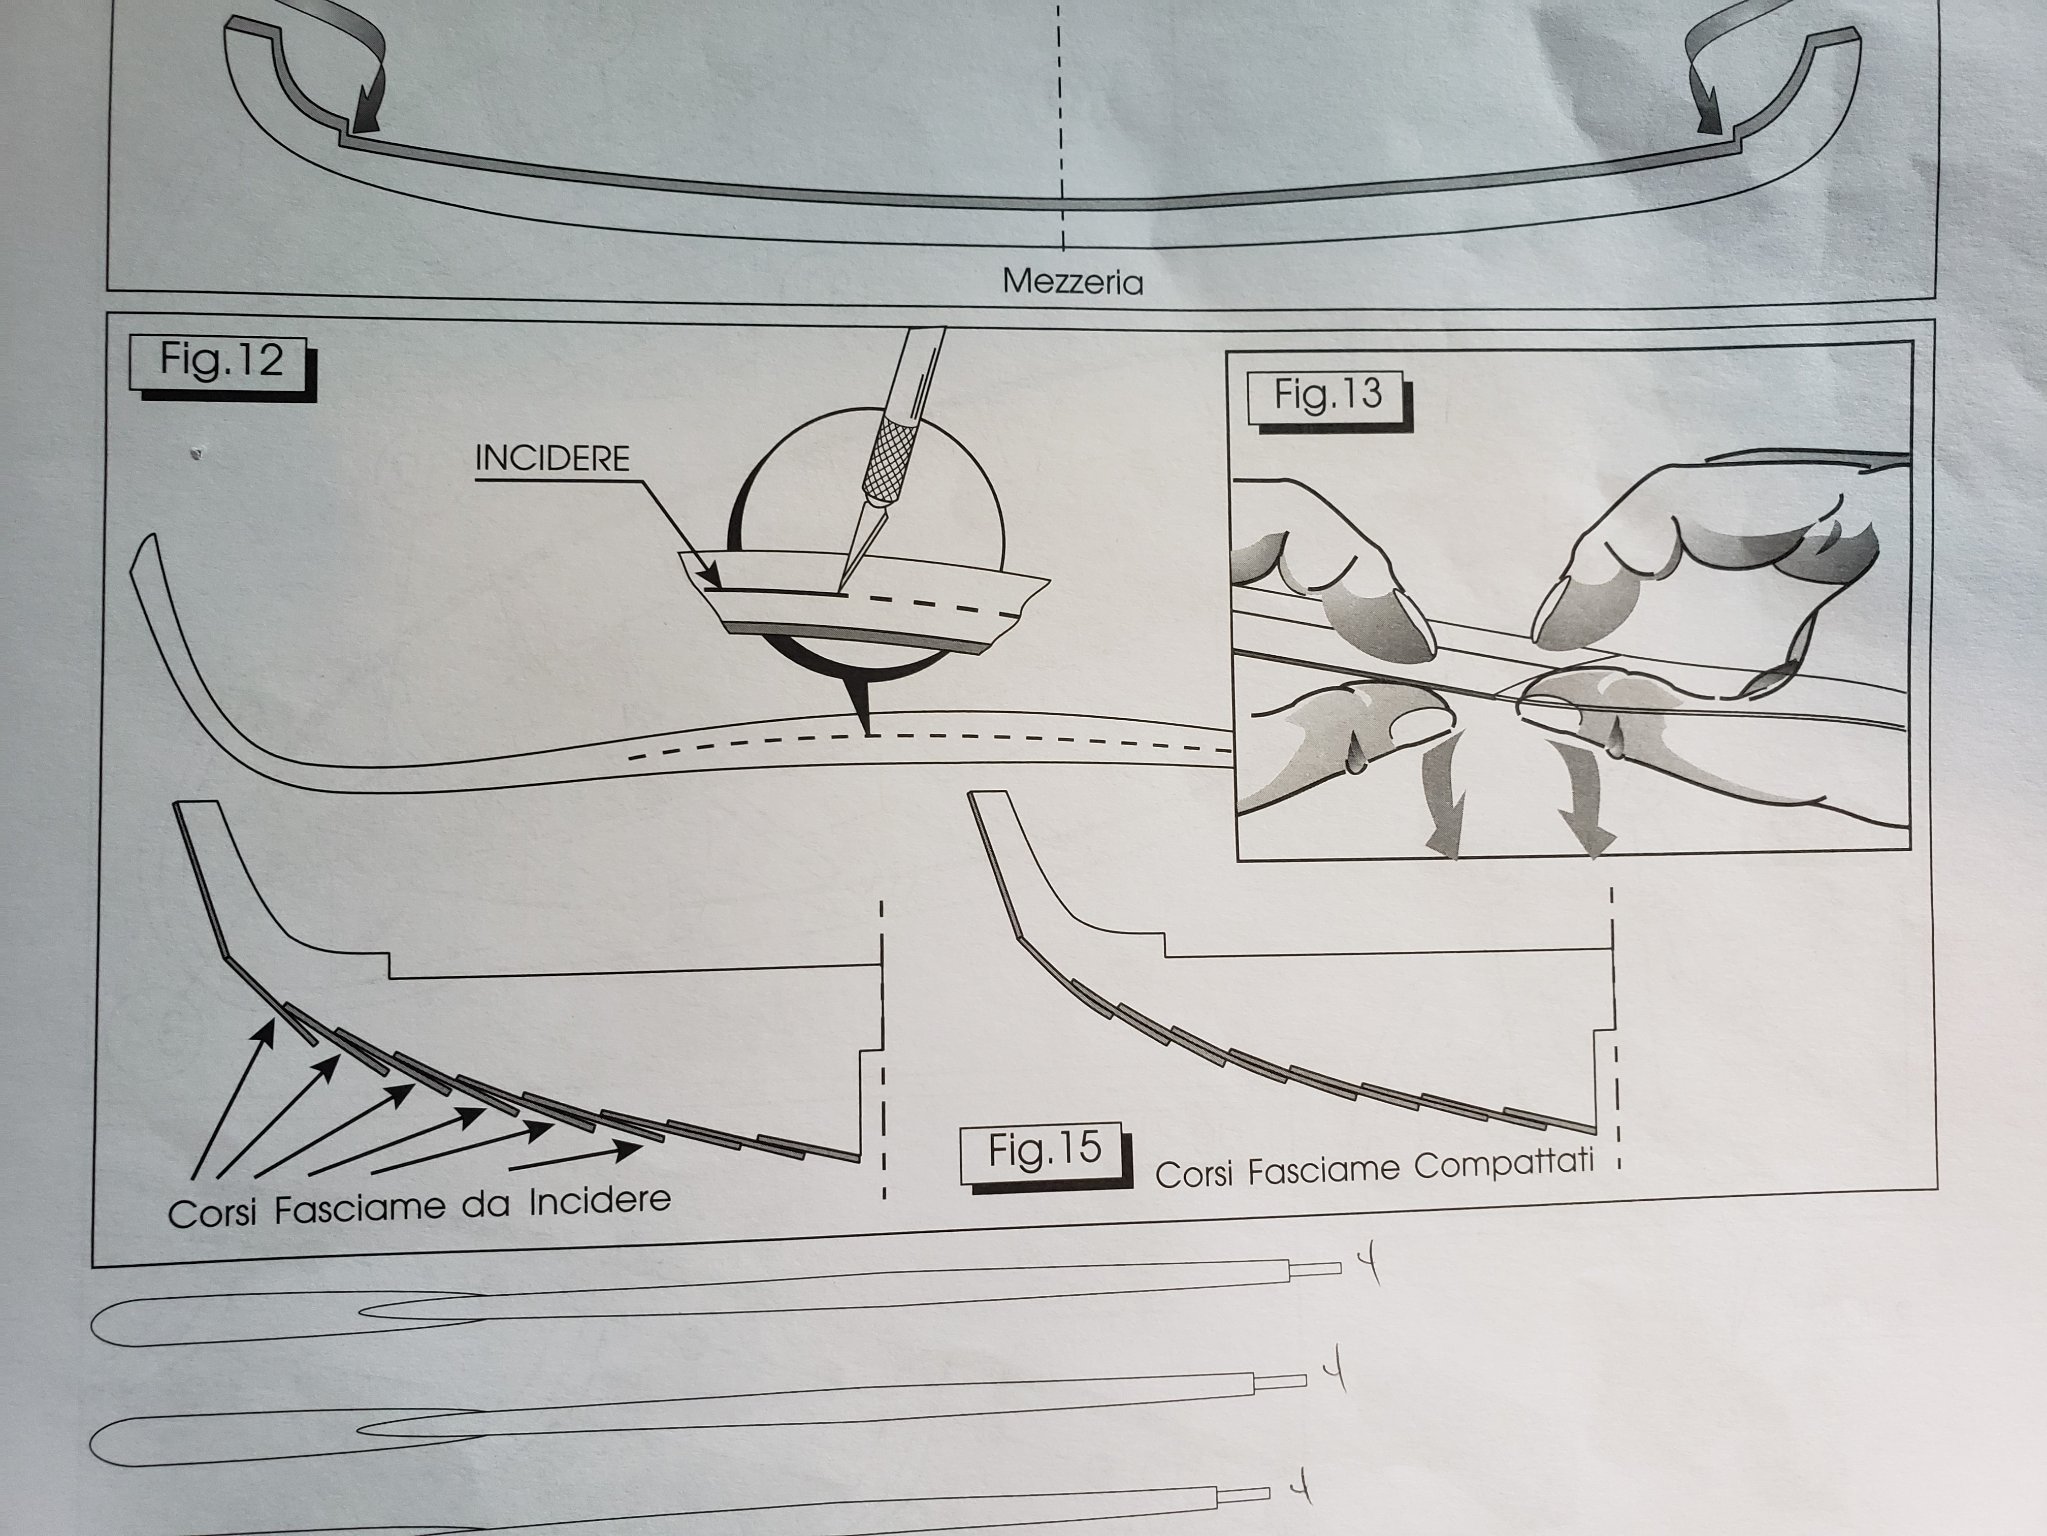
Thanks Louie! If I recall, I did have that problem, but I believe the instructions said that as you got higher in the planking, you should cut partway through the plank horizontally along the length of the plank. Not along the entire plank but rather the middle section up to about 3 bulkheads from the bow and stern. Cutting partway through from the outside of the plank allows the plank to fold and the bottom half lies on the plank below it, and the top half is able to be folded up against the bulkhead. I just checked the instructions and this is demonstrated in figure 12 on page 3. If you look closely you may see that slice and fold/bend in my photos.
-
I would like number 6, the Victory cutaway. Sending PM.
-
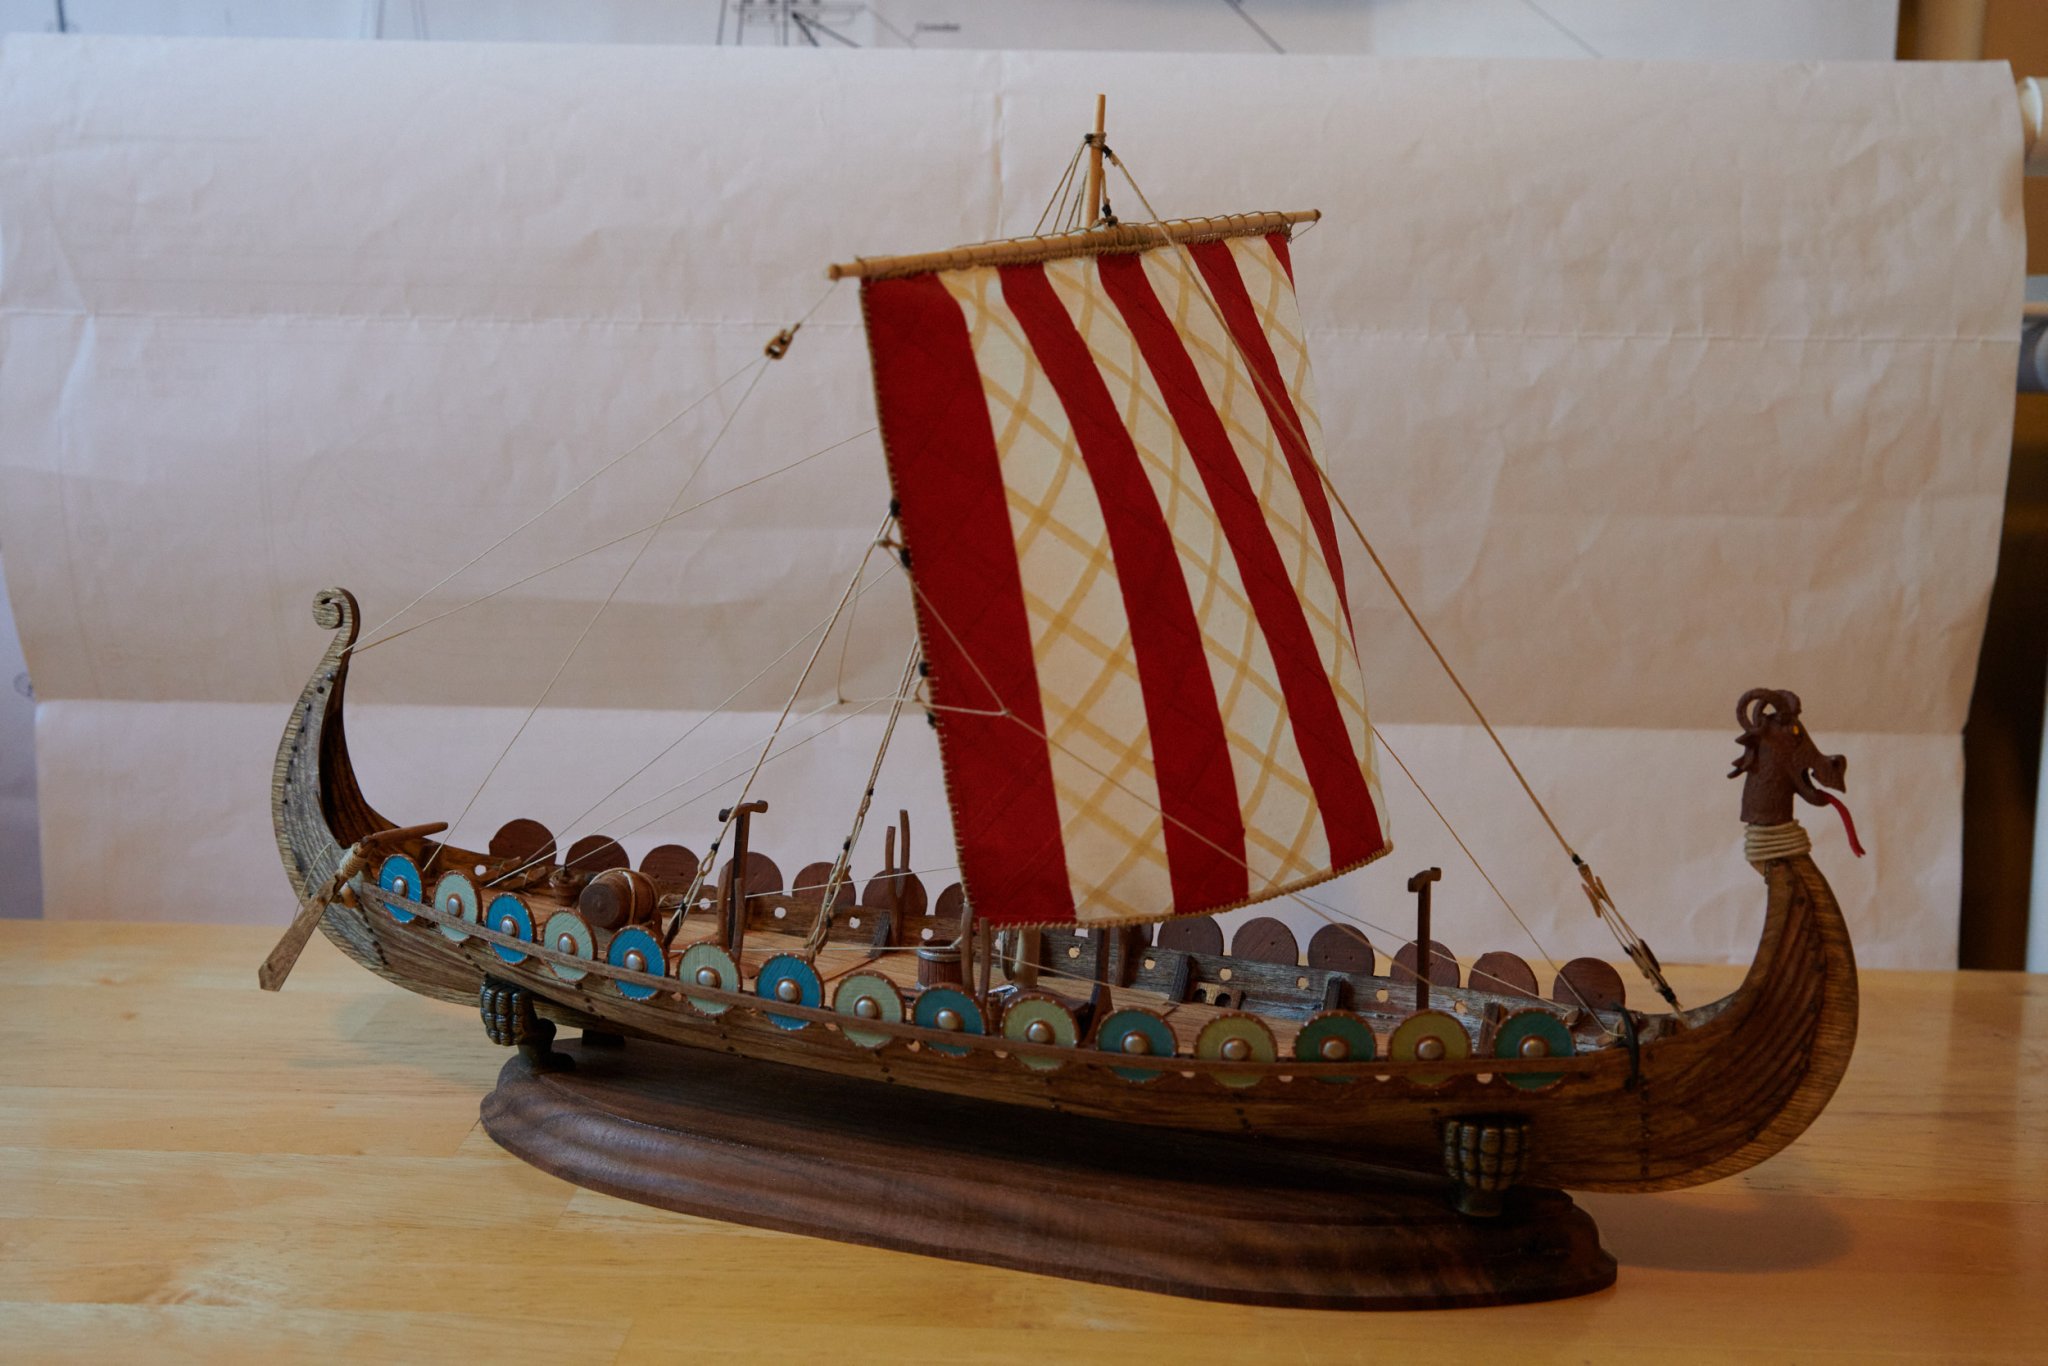
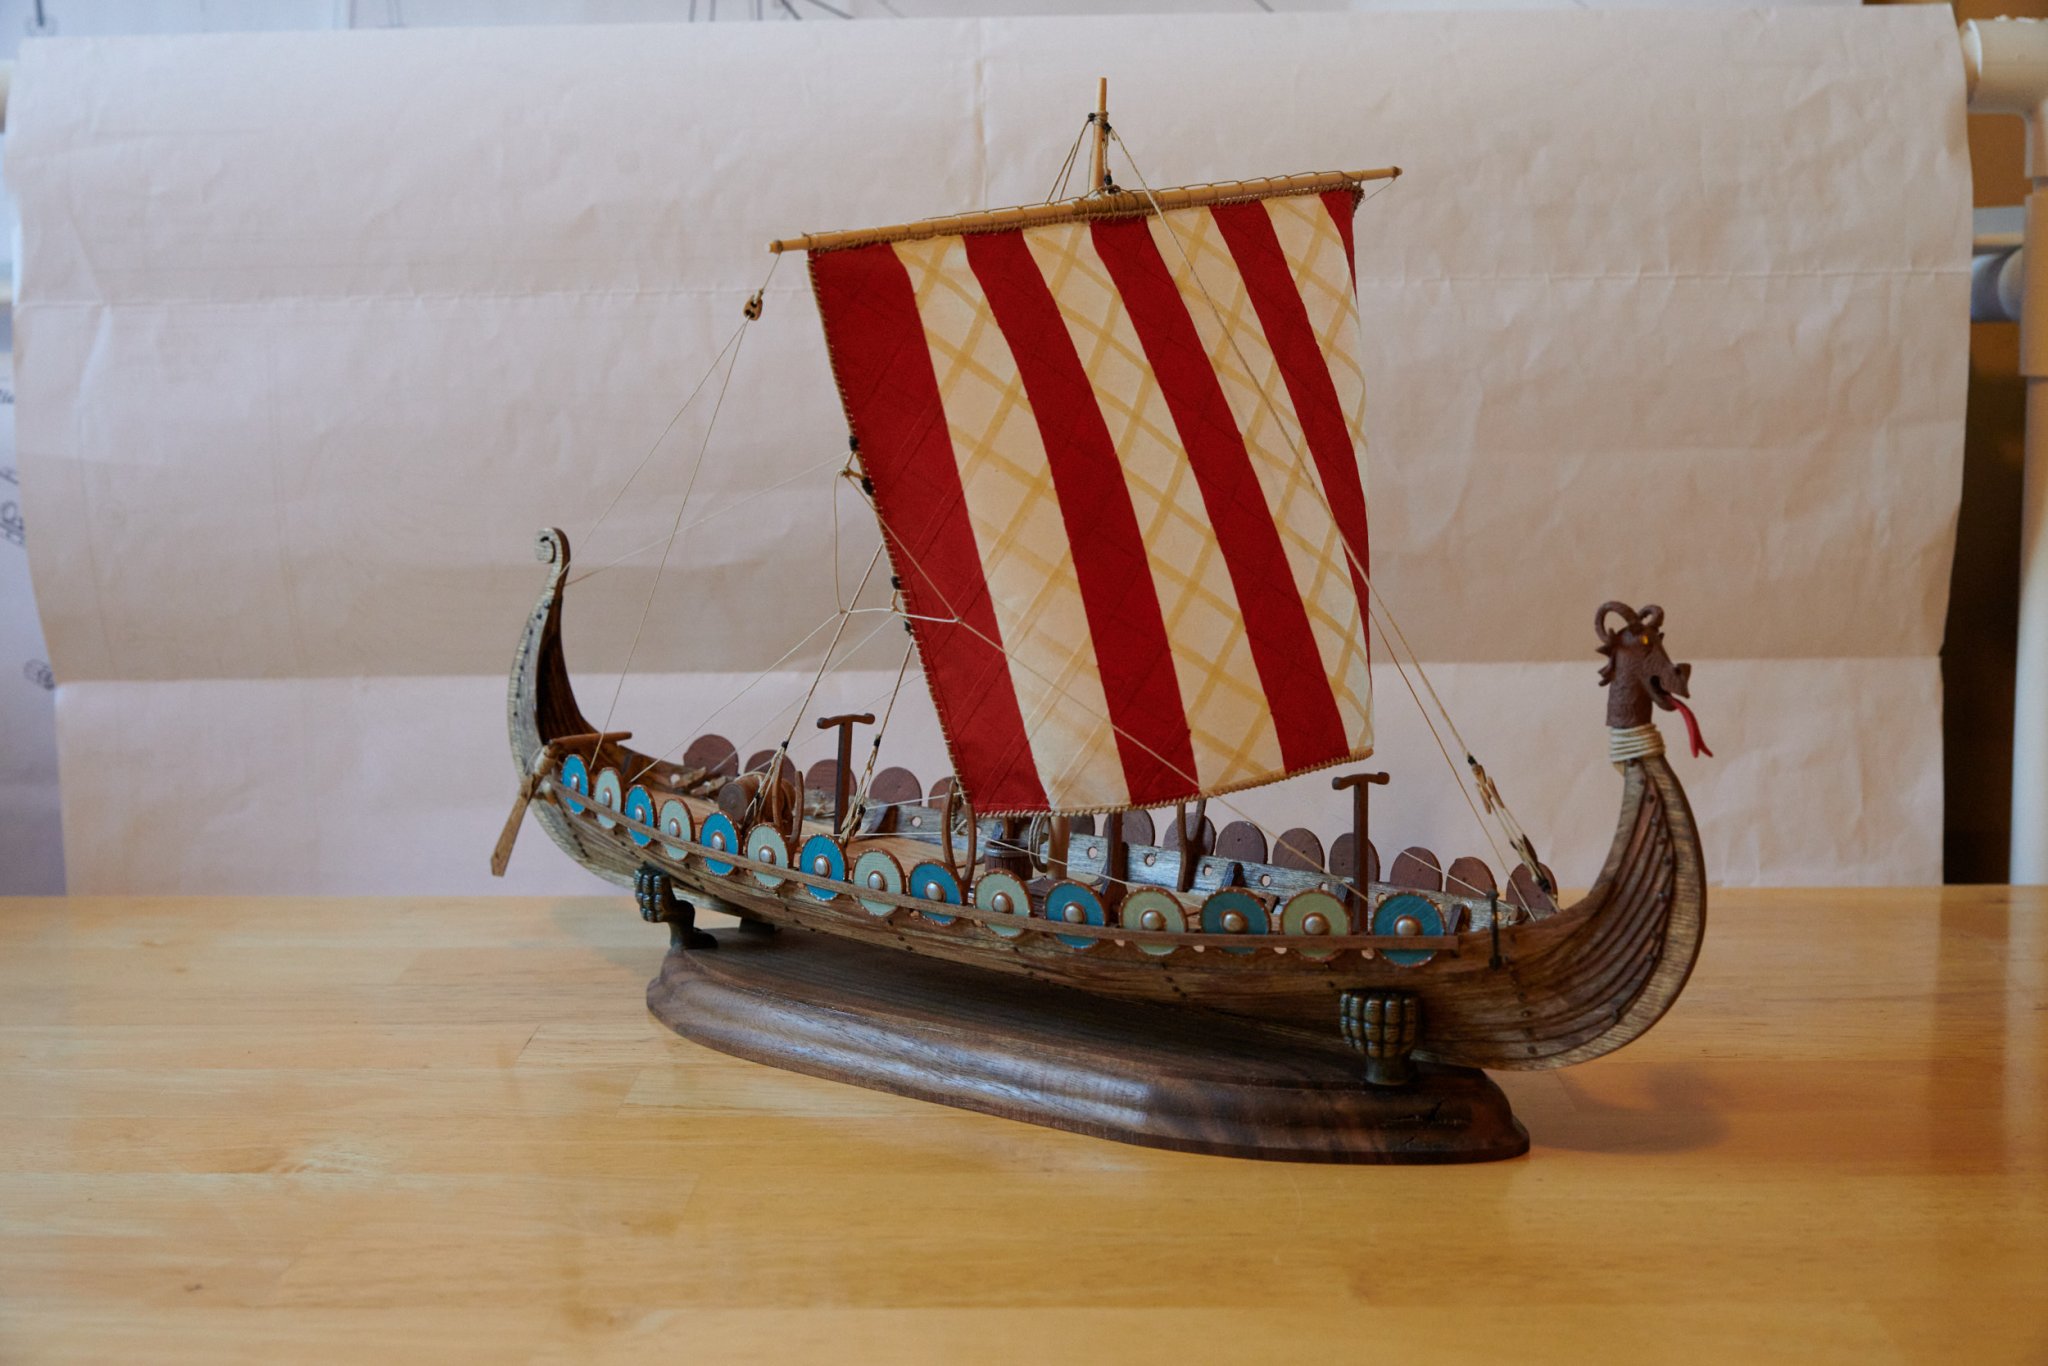
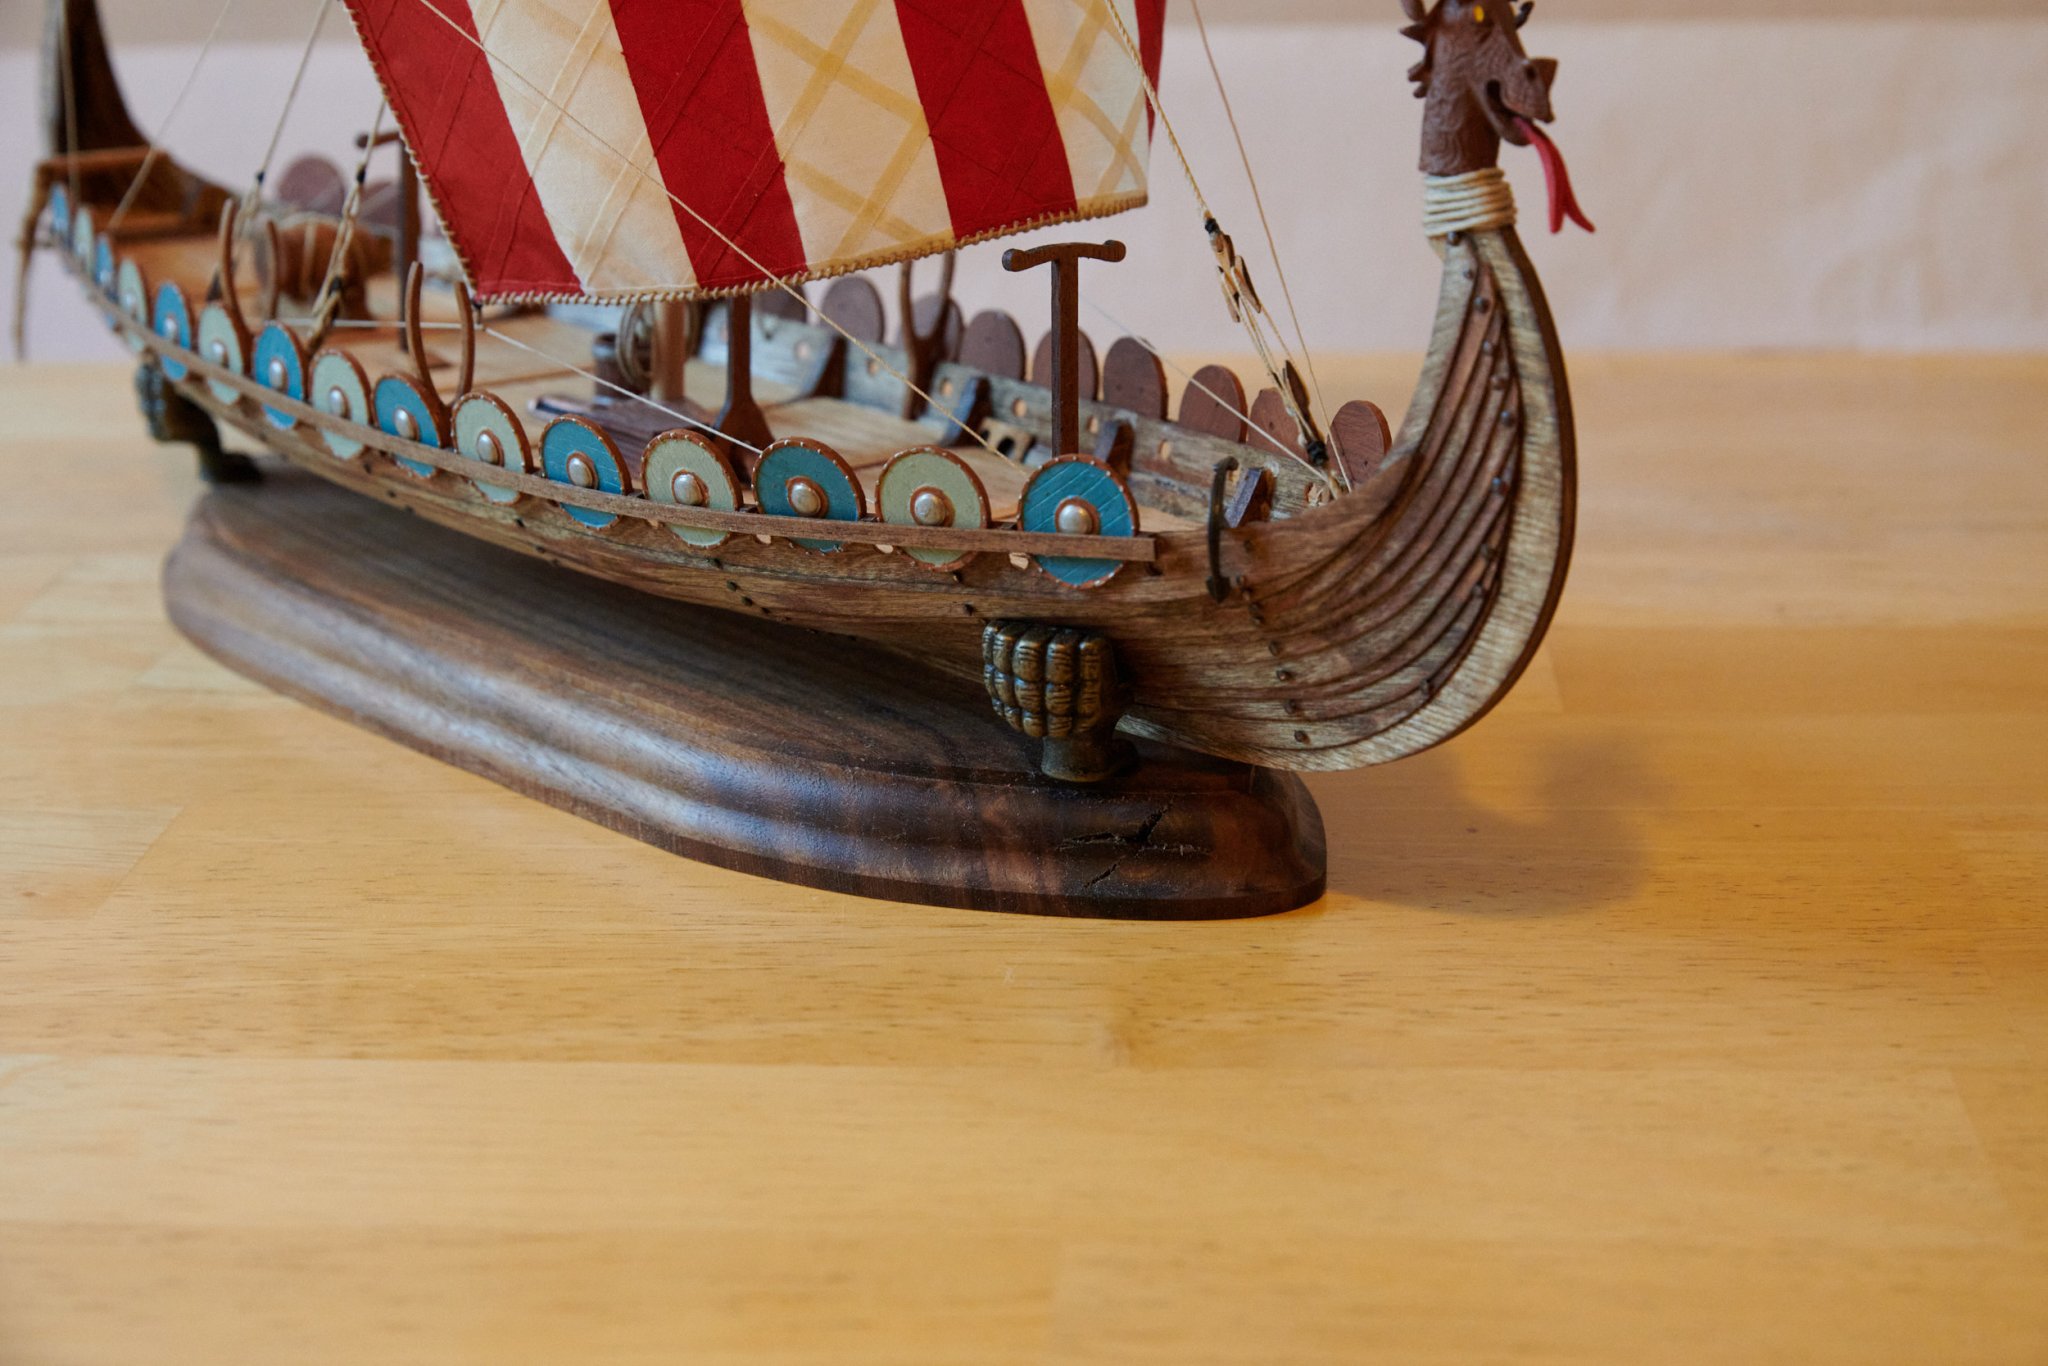
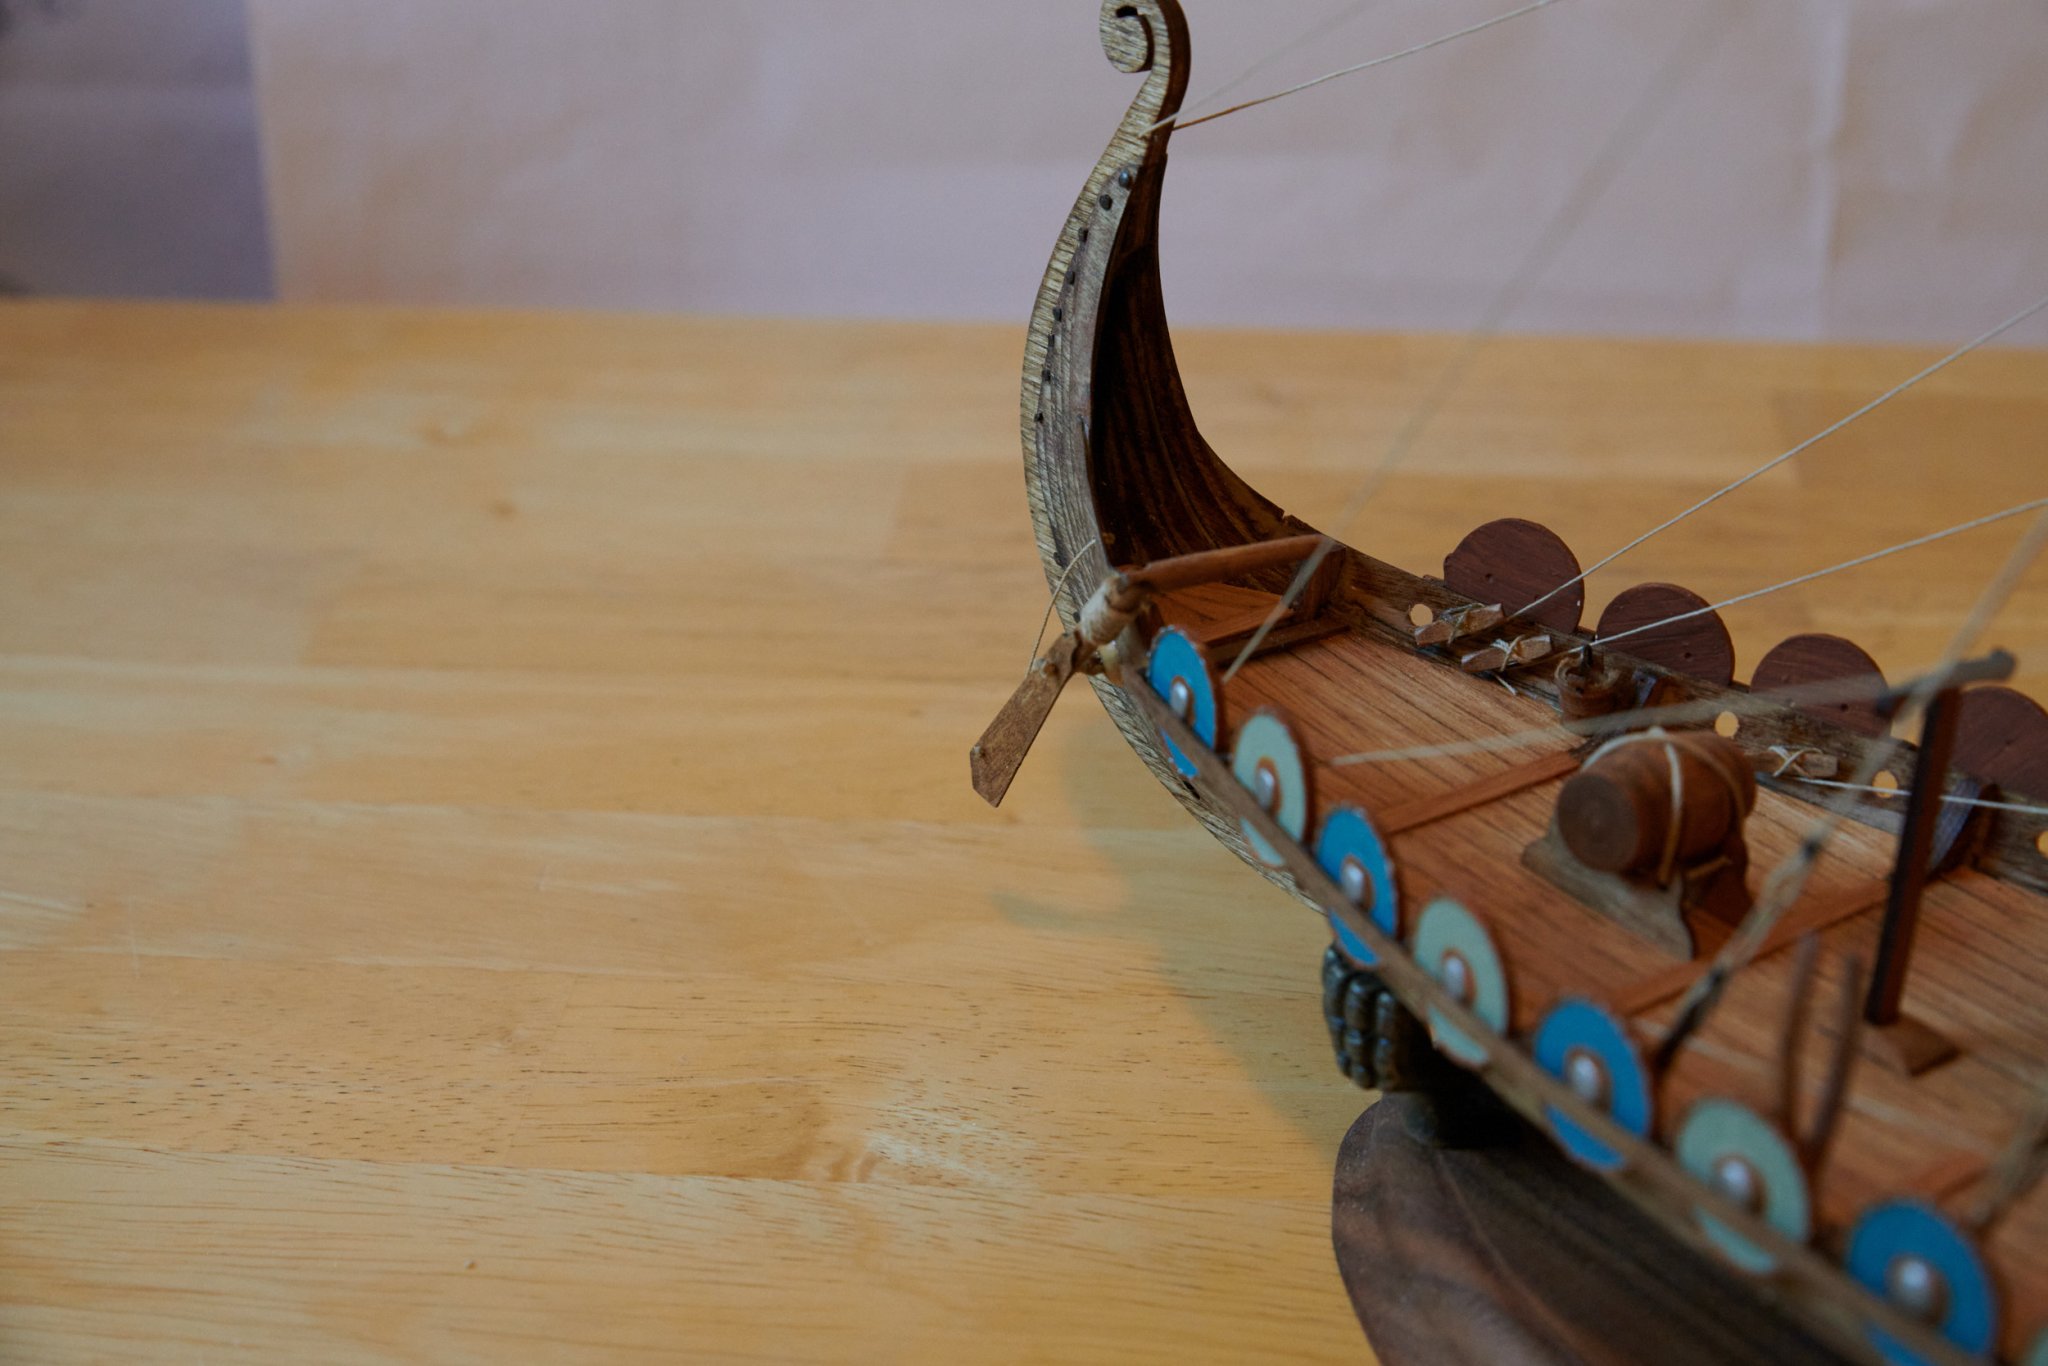
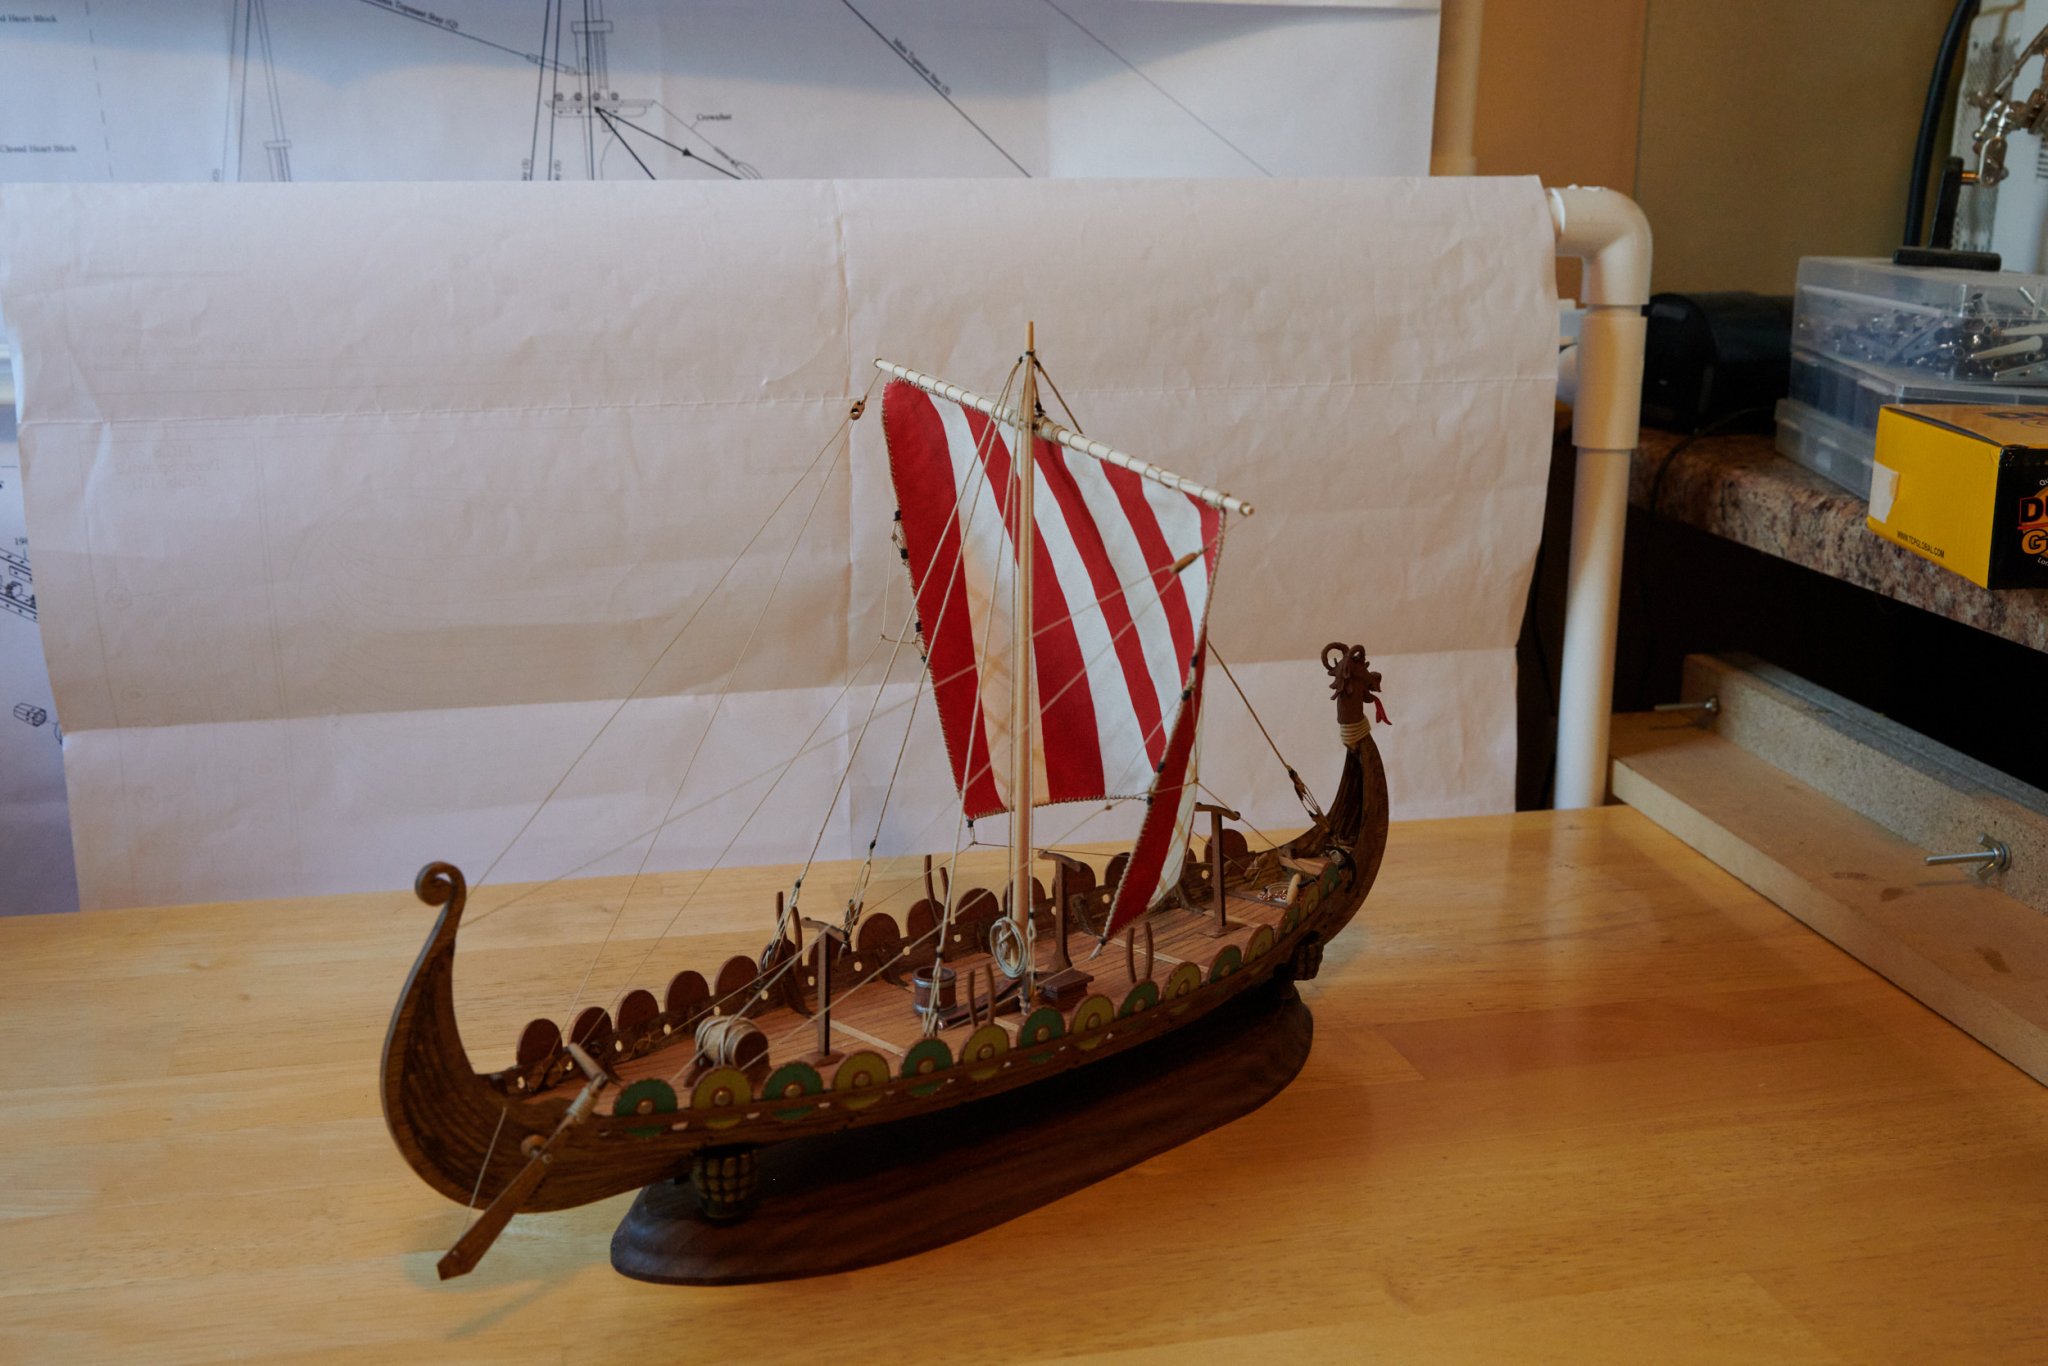
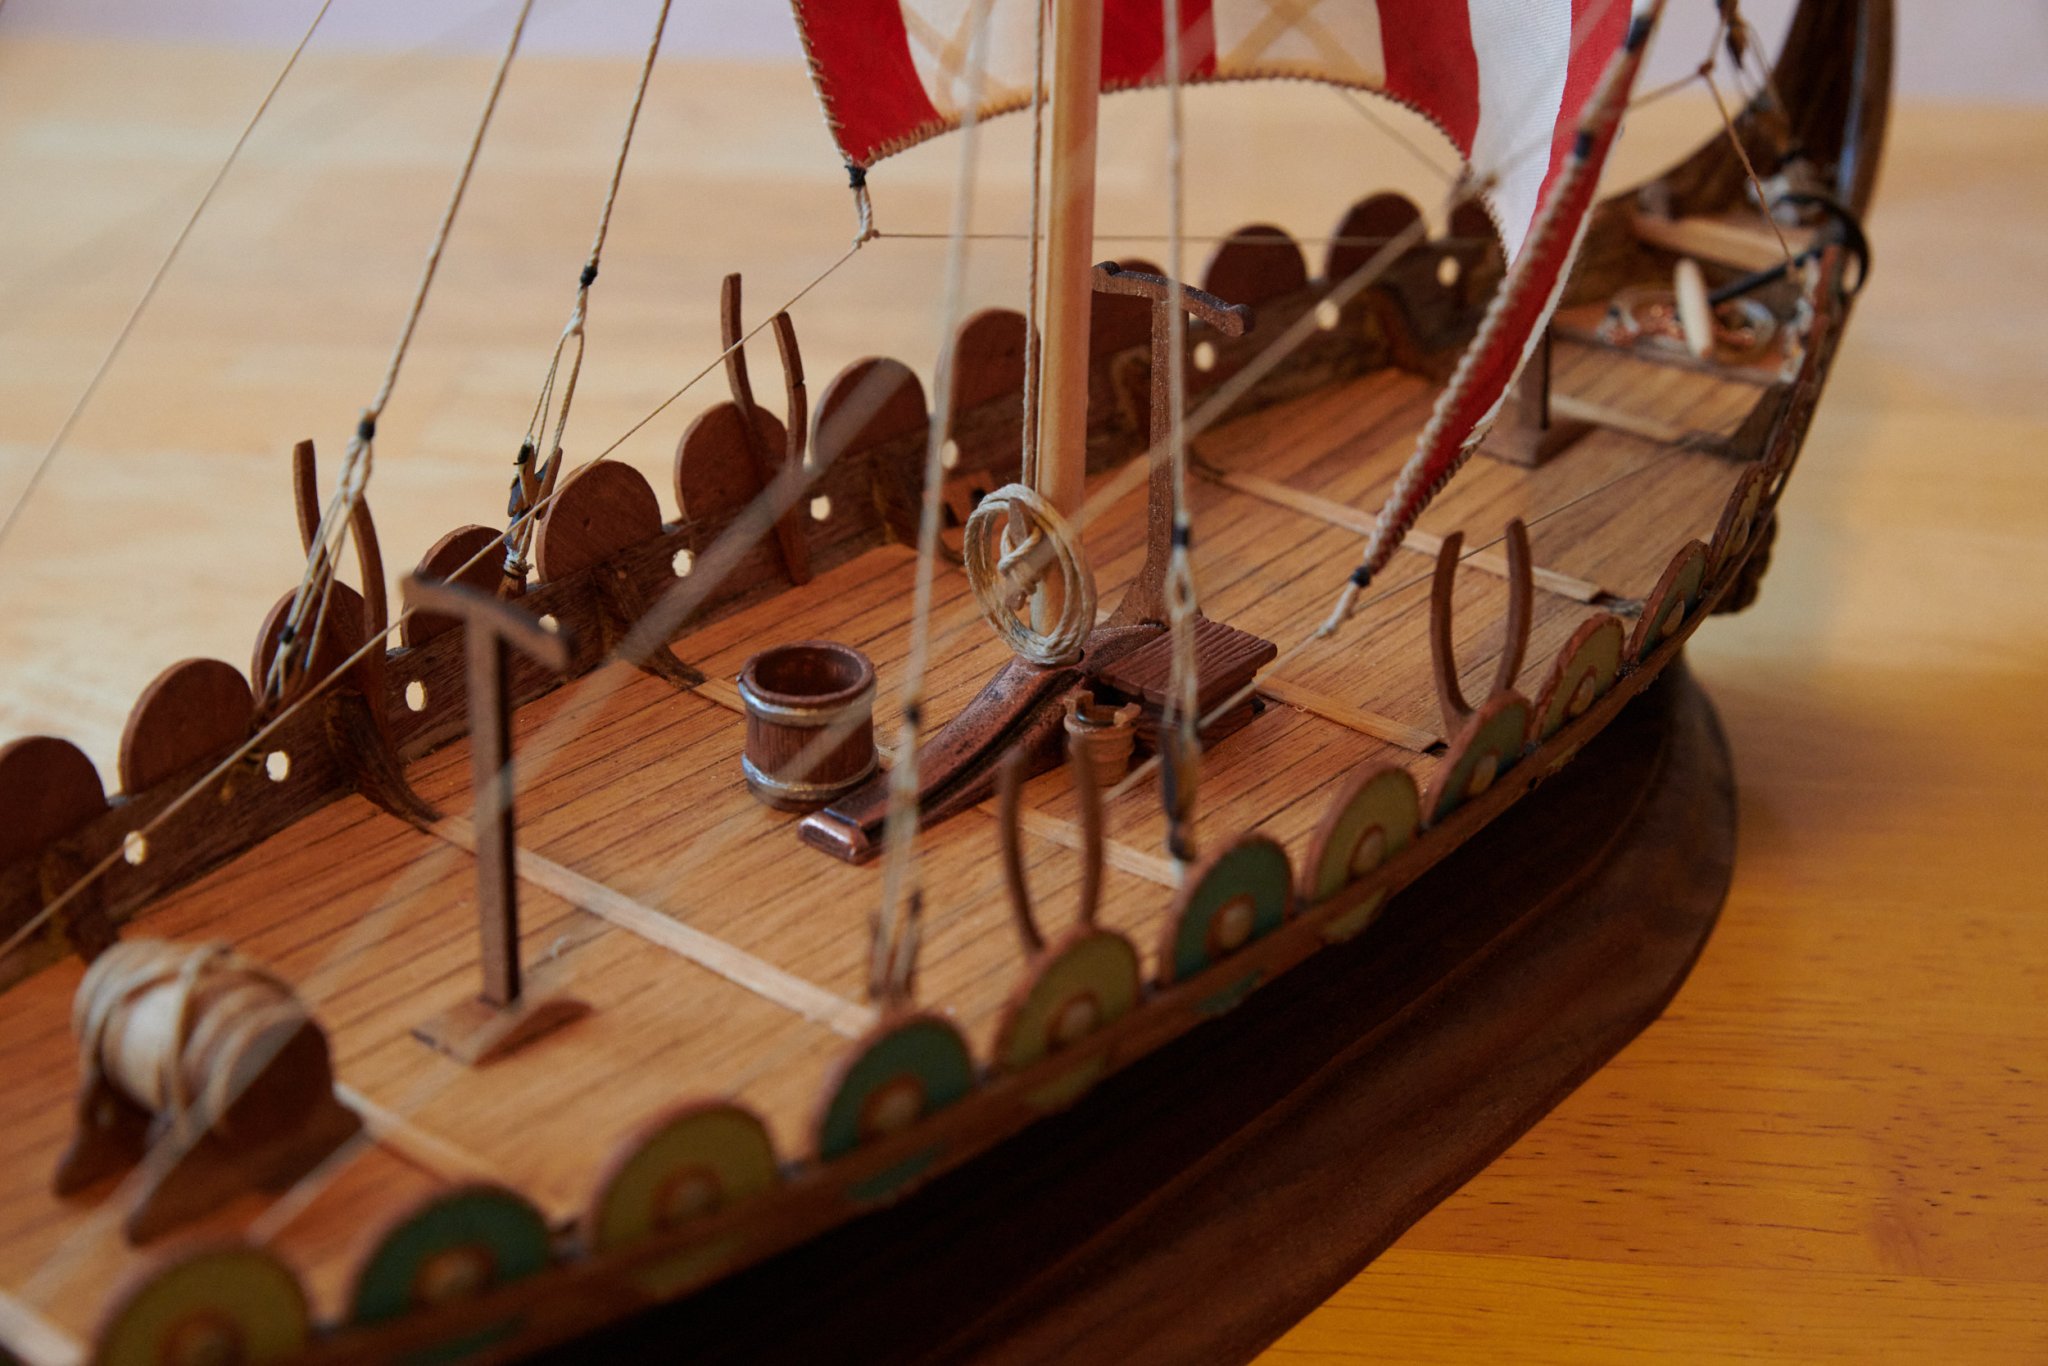
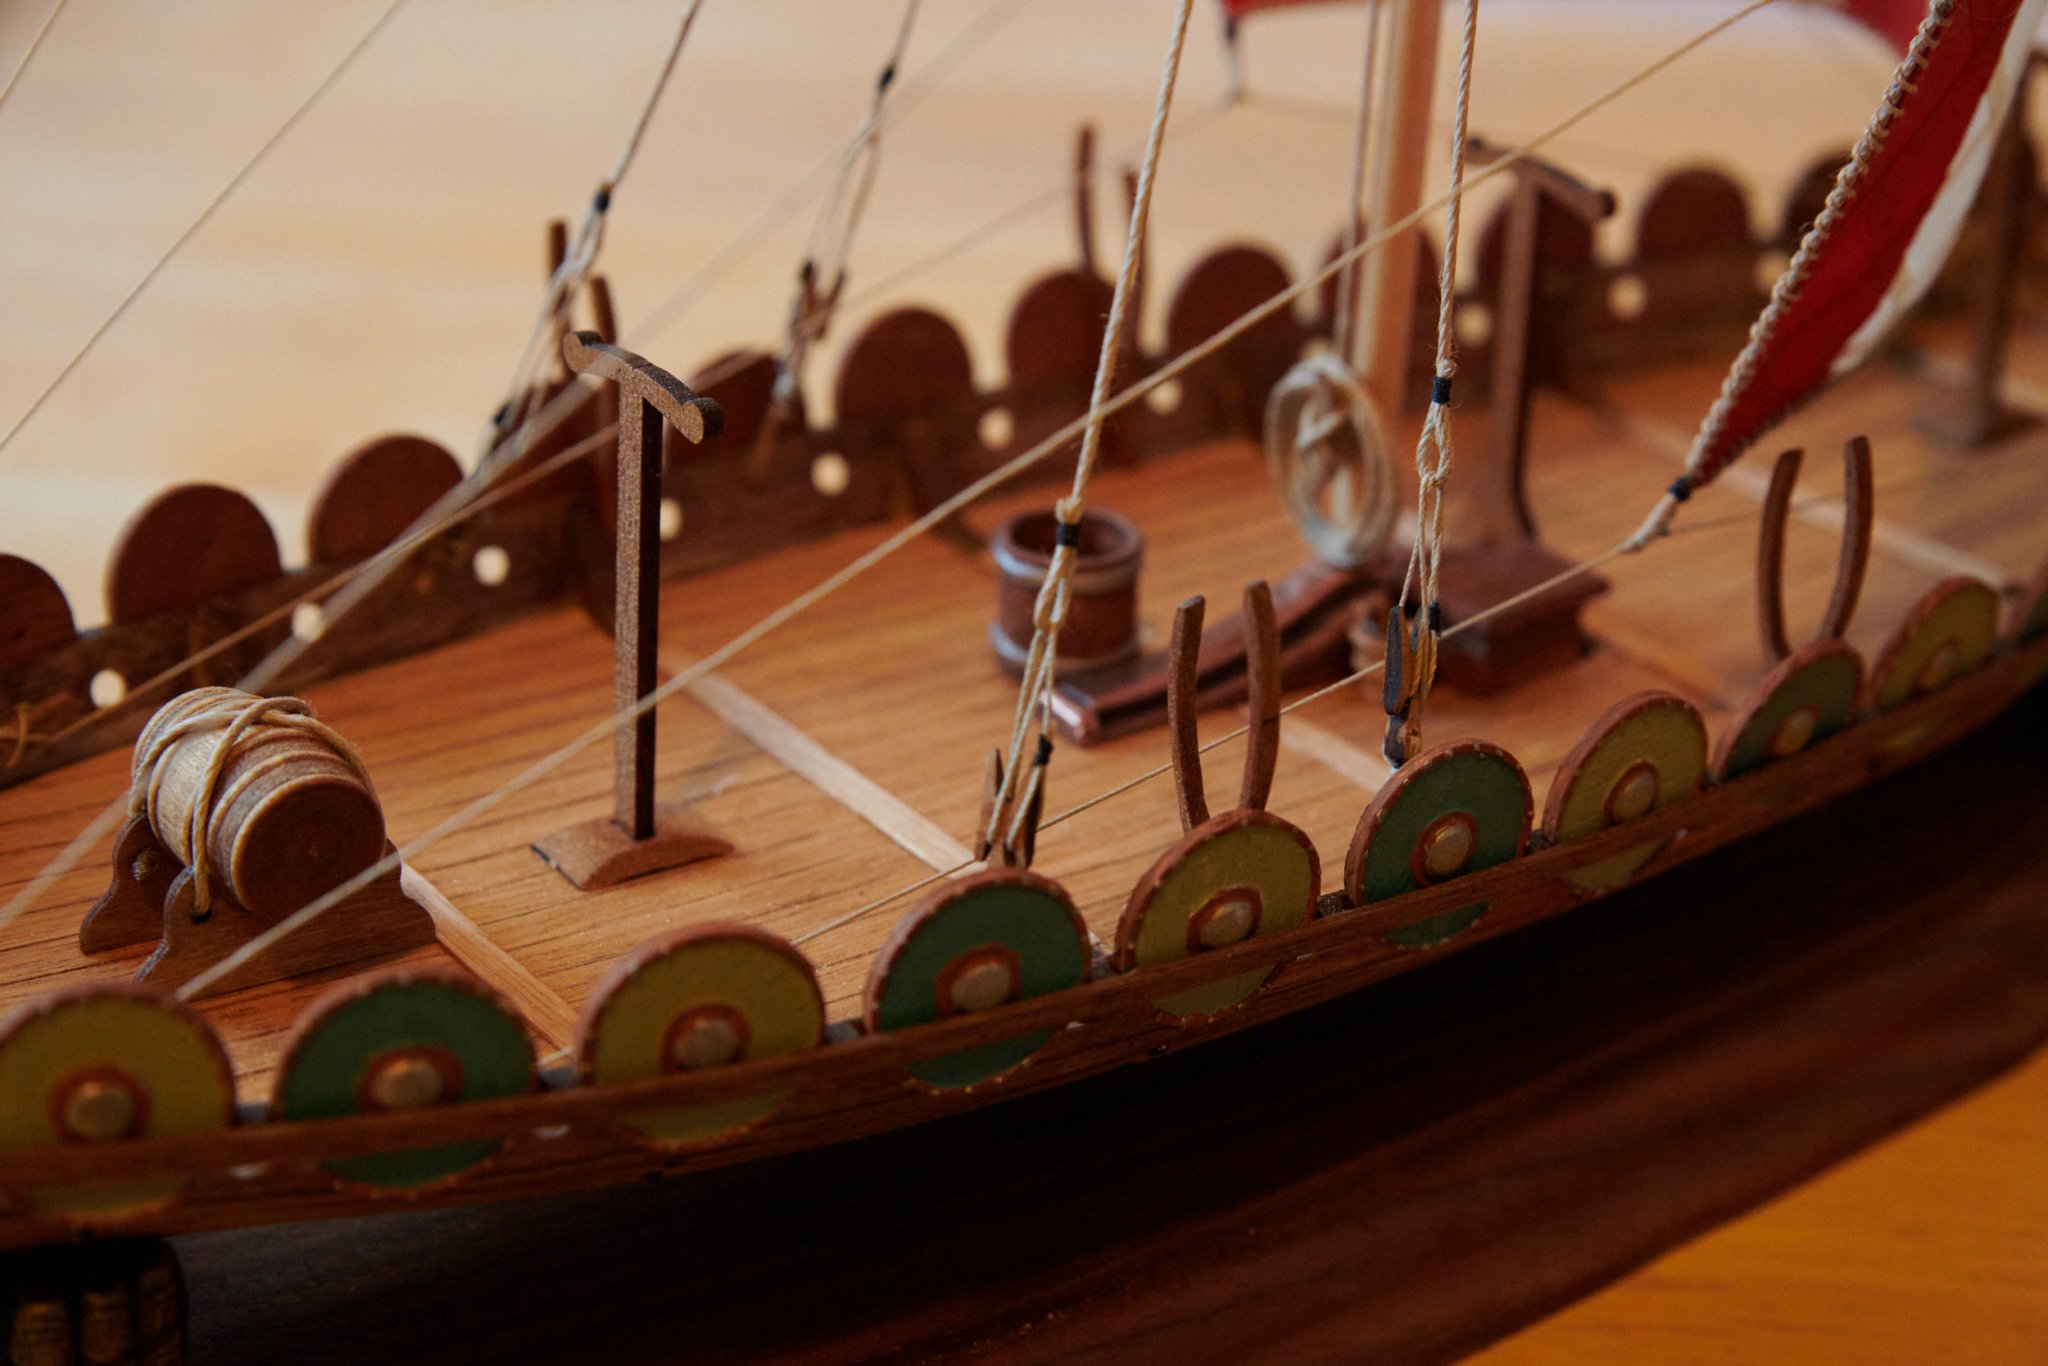
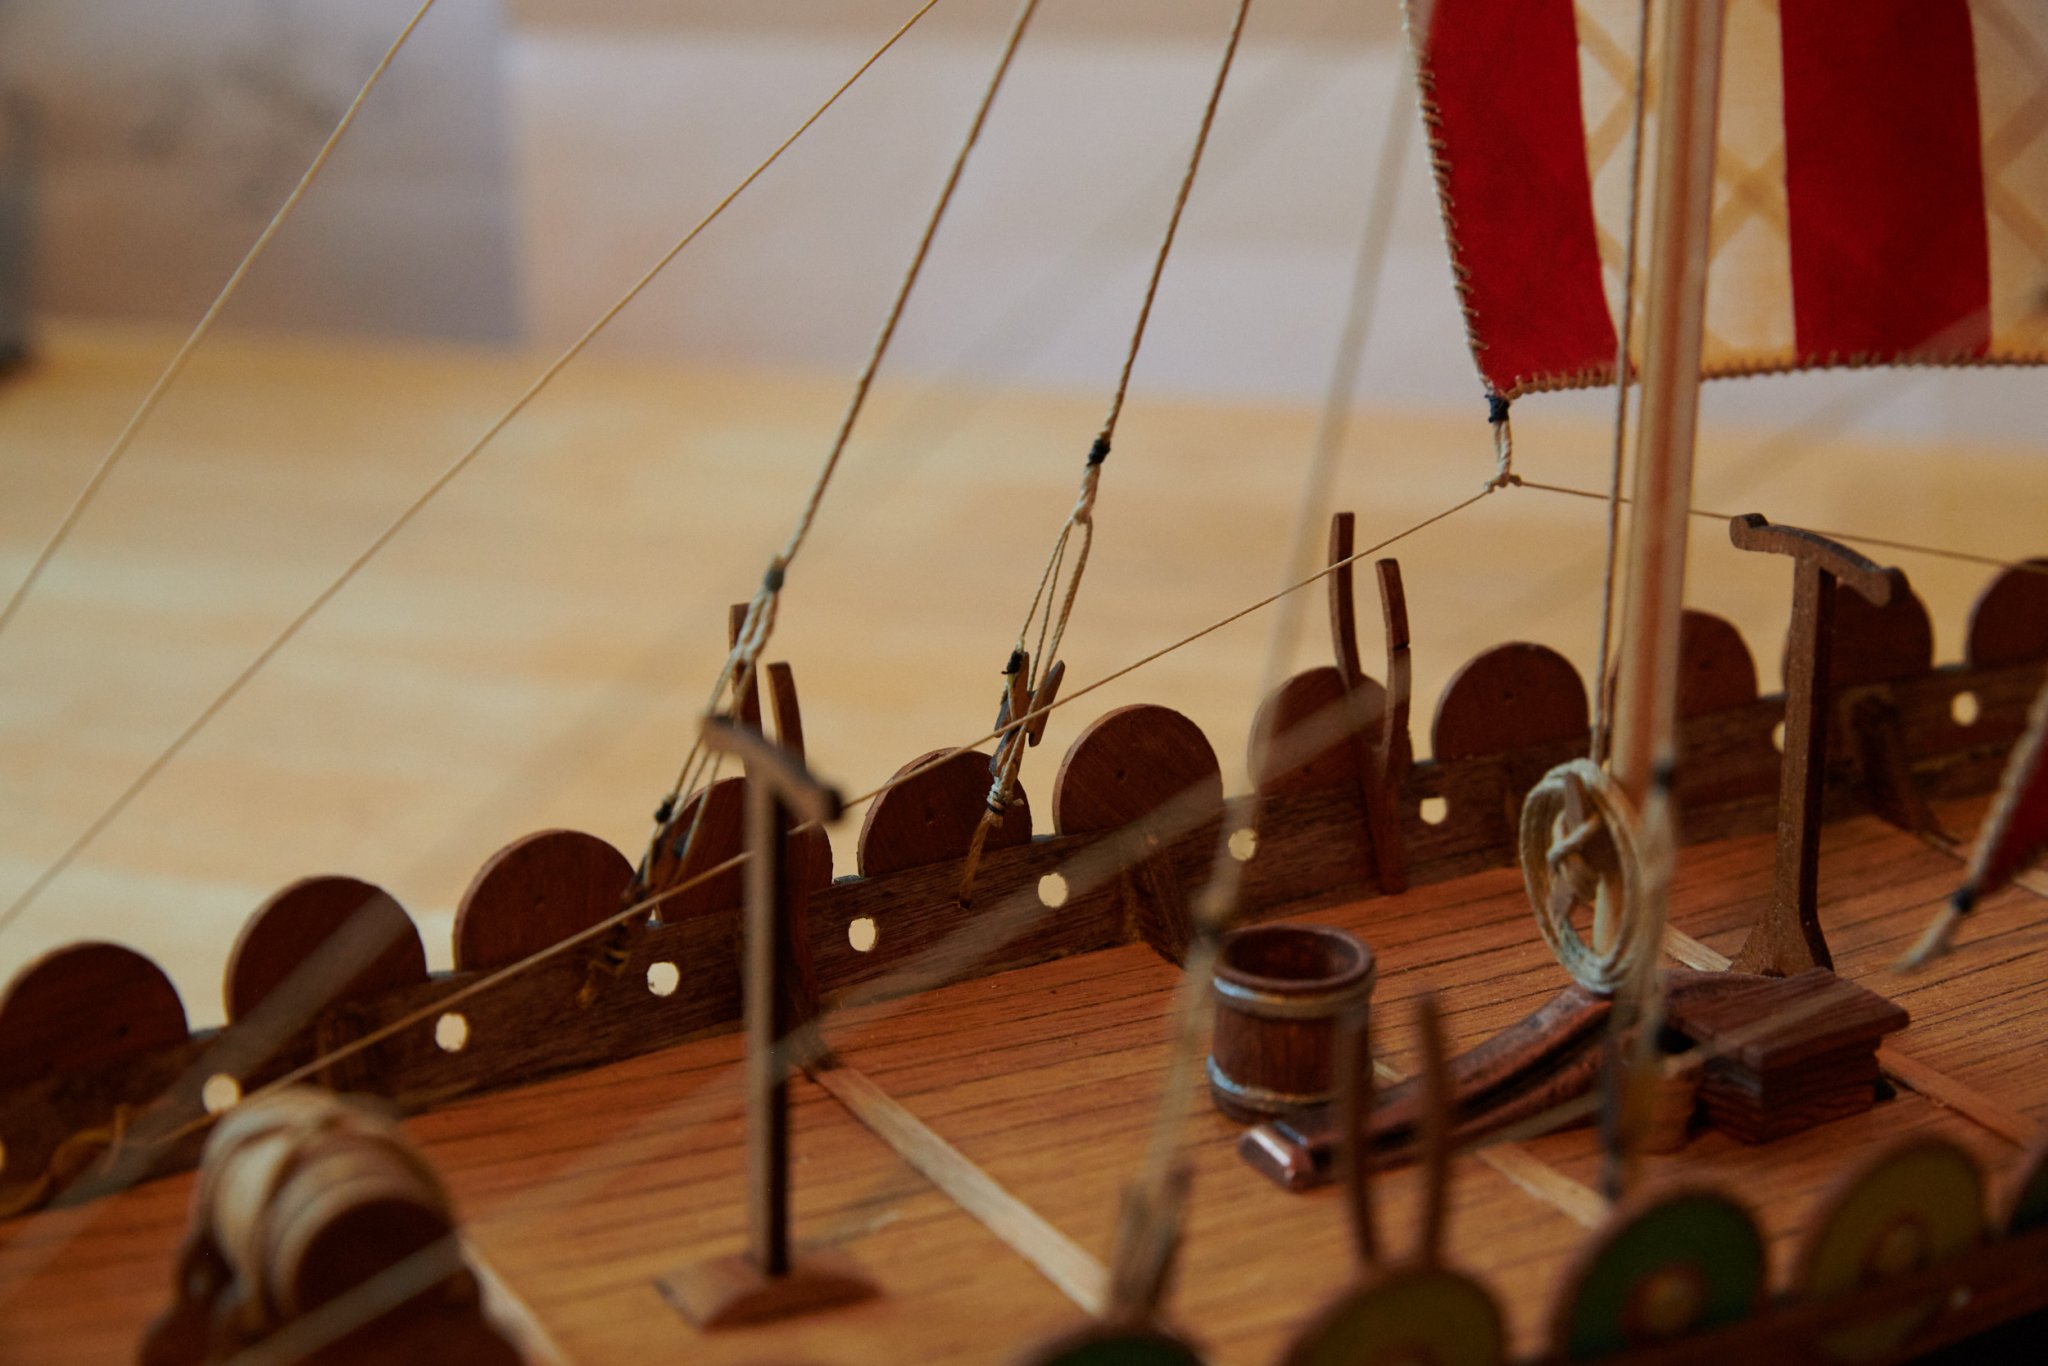
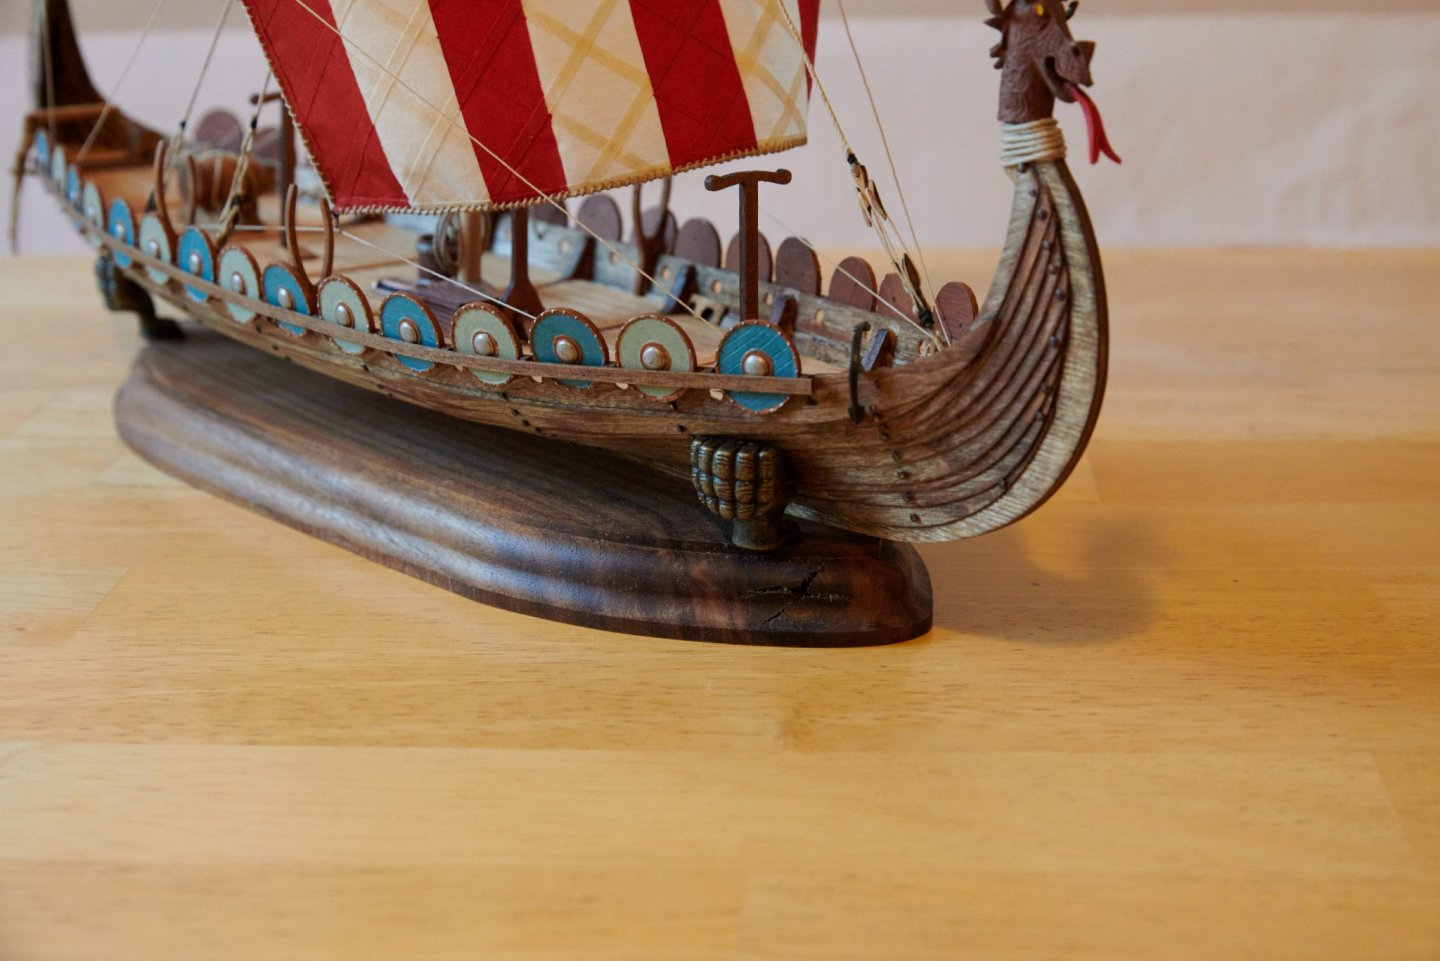
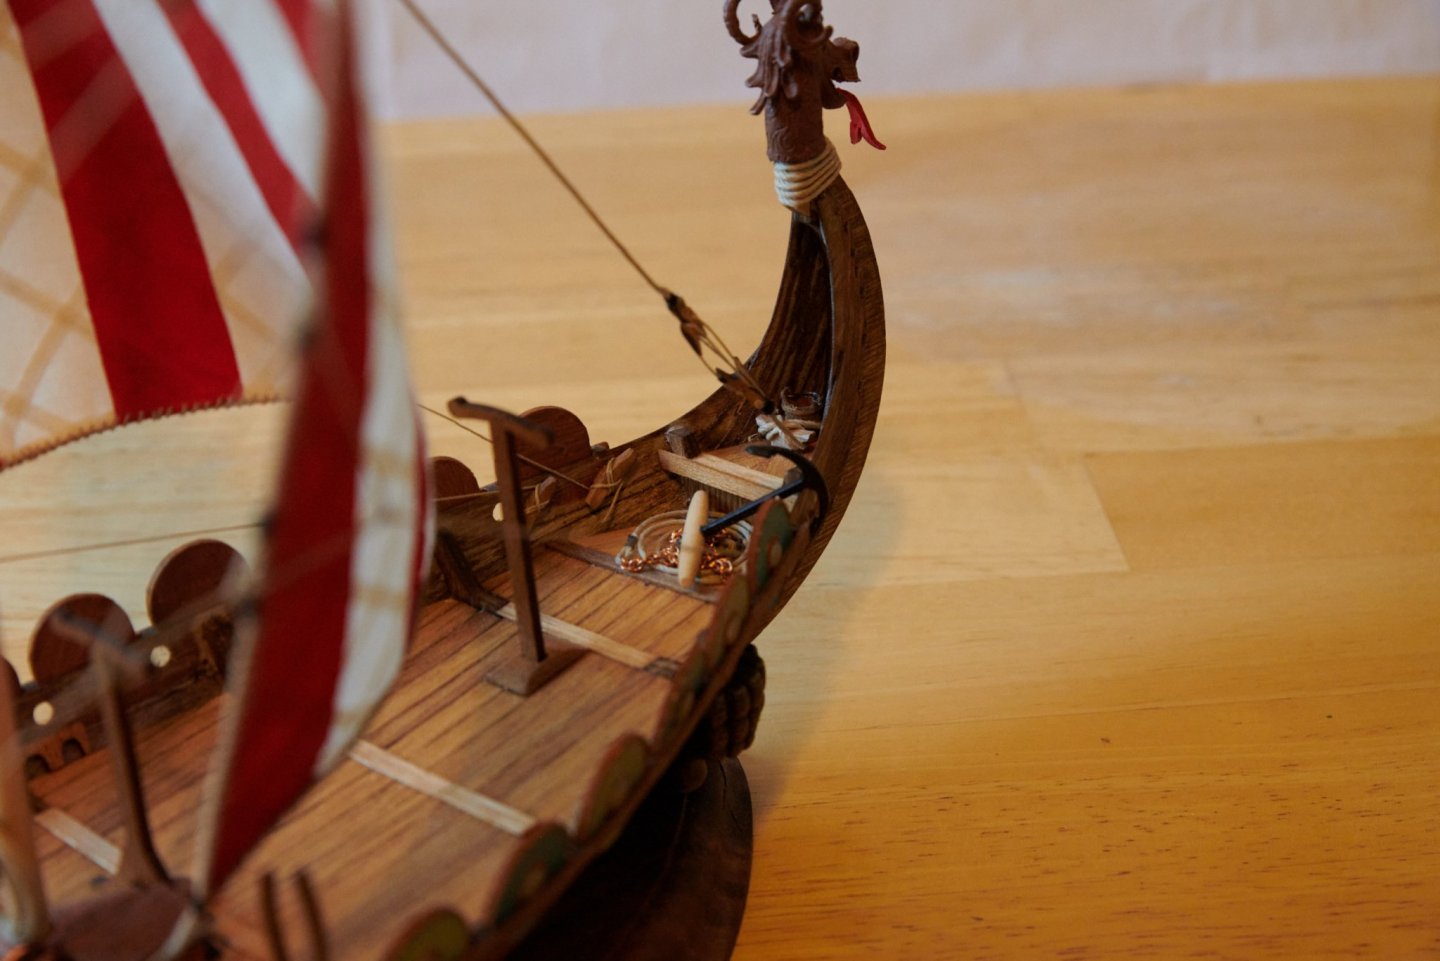
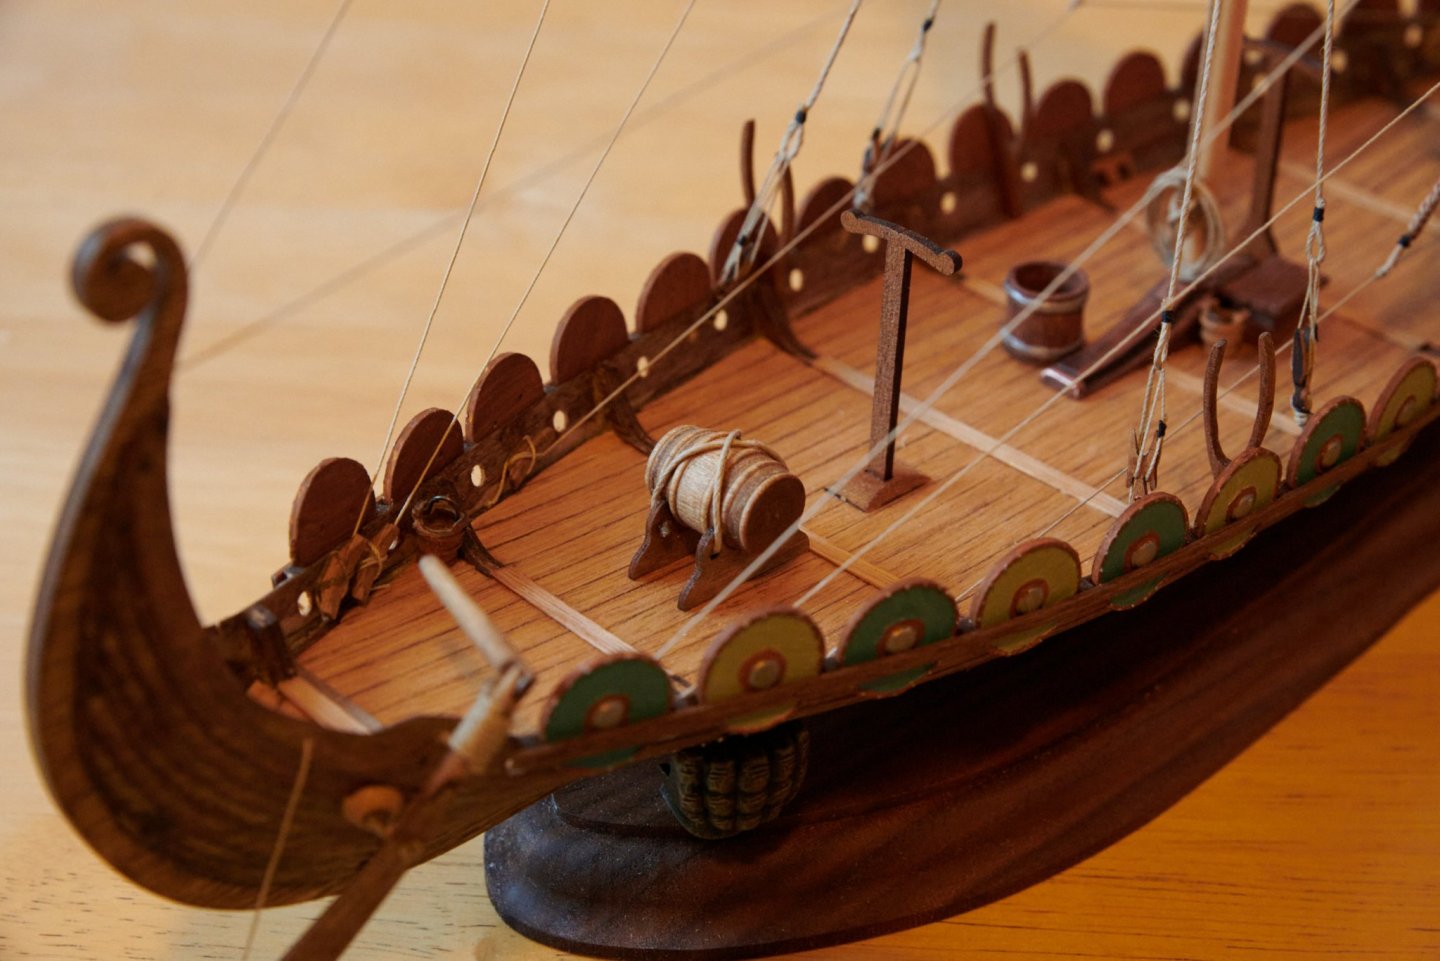
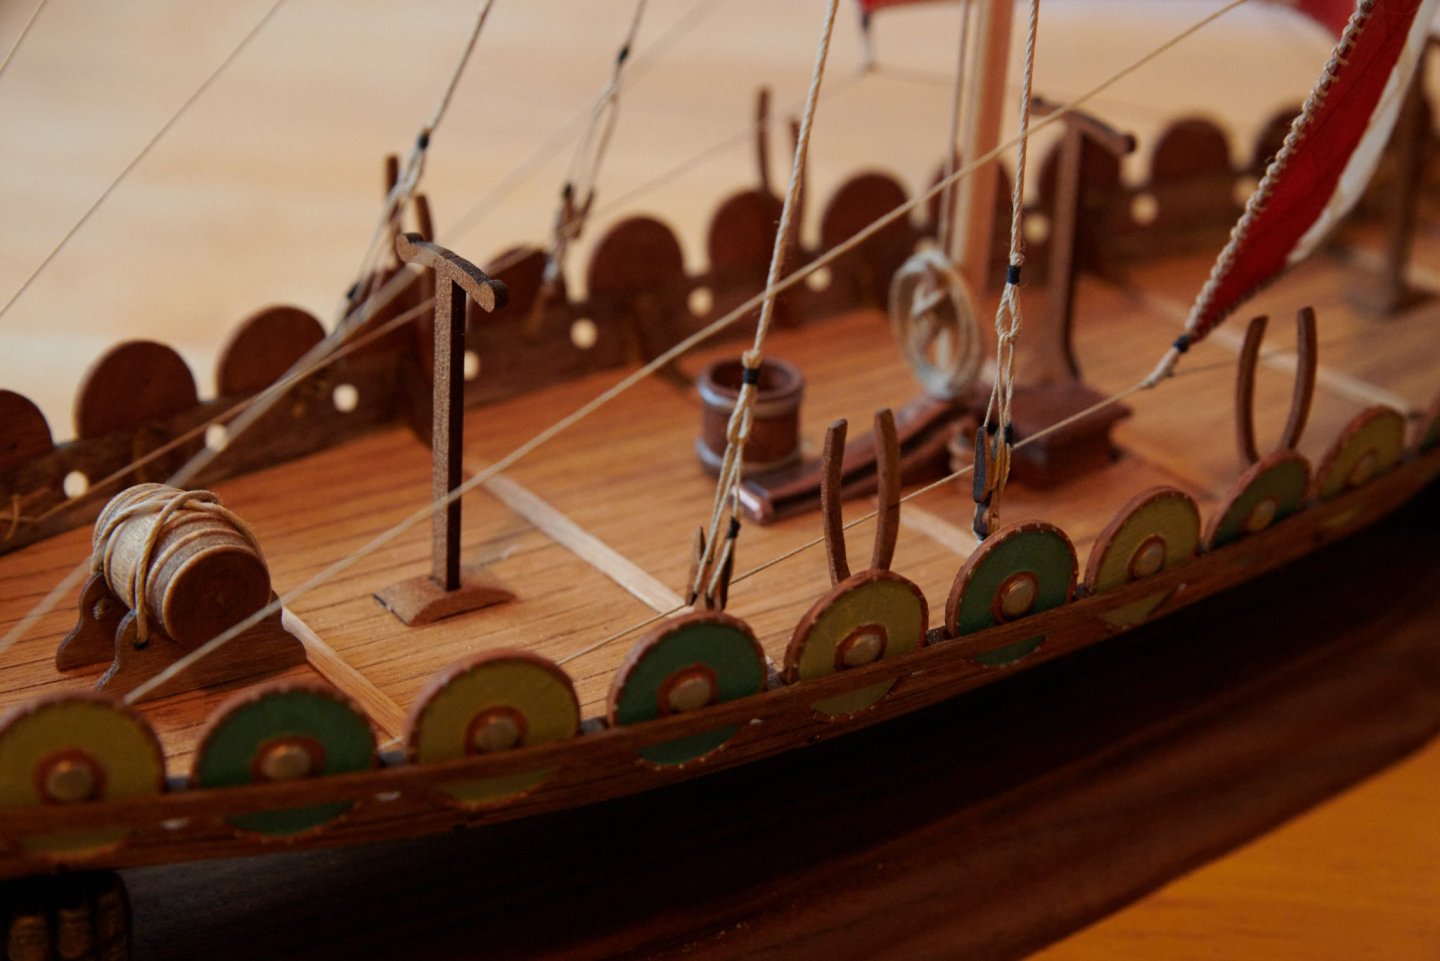
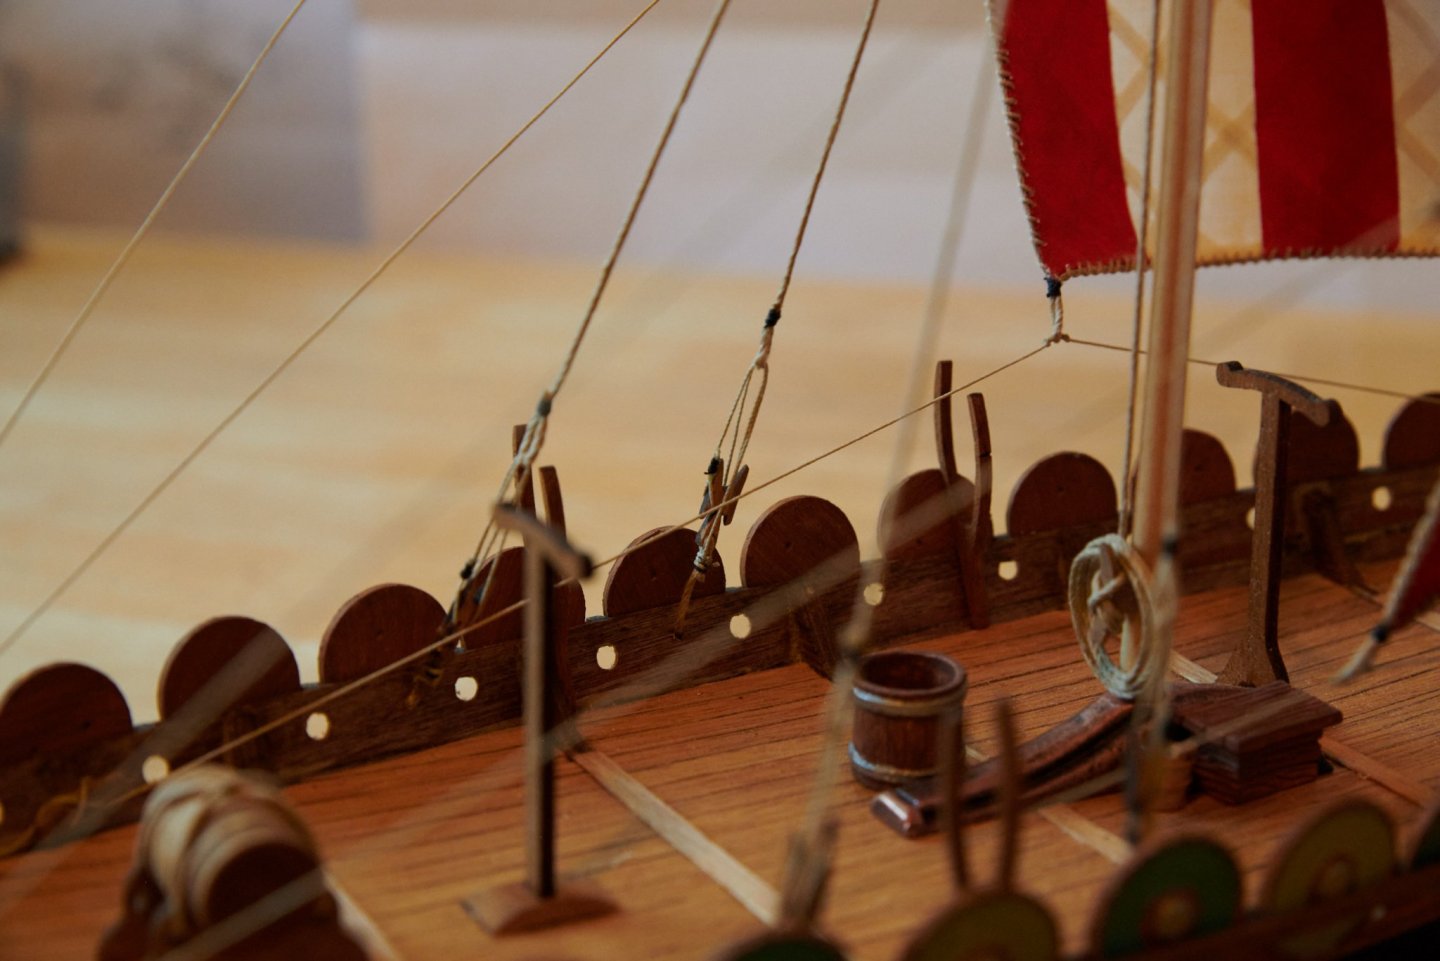
Thank you very much, yes I did complete it in the time presented here in the build. Probably a bit shorter because it took a couple 2 or 3 weeks to get the final post and images uploaded. I am a teacher and so I had a lot of time at home after we closed down in March for Covid-19. In normal circumstances I would not have been able to get as much done so quickly. The Amati instructions are for what you see in my image in post #6 using the rope. The only modification I made was on the top of the rudder where the rope is wrapped around the rudder. The instructions were not clear on how to attach the rope on the top of that wrapping. So I drilled a hole through the rudder twice, once below the wrap where you can see the rope wrap go through the rudder and through the ship plank and another at the top of the wrap where it is just knotted behind the rudder where you can't see it. So I started the rope wrap at the top, knotted one end to keep it from going through with the knot positioned in the back of the rudder towards the plank where it is not visible. Then I wrapped it around and ran it through the bottom hole drilled through the rudder and through the plank and knotted on the back side of the plank. The lower attachment point is also rope that is knotted through the rudder where the blade is attached to the rudder in the front side where it is visible and it goes through that small button cap looking piece and through the plank and into the ship. It is under the deck planking and I did not think of it before I finished the deck so I attached a small wire shaped into an inverted V that when pressed through the hole would open up and prevent the rope from being pulled out since I could not knot it behind the plank due to the decking. The final small rope I believe is more for positioning and keeping the rudder in line with the ship and not drifting outwards to the waterway or inwards up against the ship. It too is just rope with knots on both ends. Hopefully that helps clear things up. I did not do any research into Viking ships, I relied on the Amati instructions. I did a bit of research into the paint colors of the shields and ultimately decided to go with colors I liked rather than the typical red, yellow, or black. I did try to keep the colors more natural looking as if they were able to make/find pigments in similar colors. I also did have to use a website to translate Italian to English because the prints were only in Italian for Amati. I also had a picture encyclopedia book for ships and used that to reference parts of the viking ship I was not familiar with. Otherwise all my info came from the provided instructions.
-
Thank you very much. I am quite proud of her and I think she was an excellent 2nd model and I think I'm finally ready to move on to something bigger and with more masts and rigging. My next one is already on the table, plans hung up, and ready to go. HM Bomb Vessel Granado is in the shipyard.
-
Thank you very much, I appreciate the compliment. If you have any questions on yours along the way don't hesitate to ask, and enjoy the build.
-
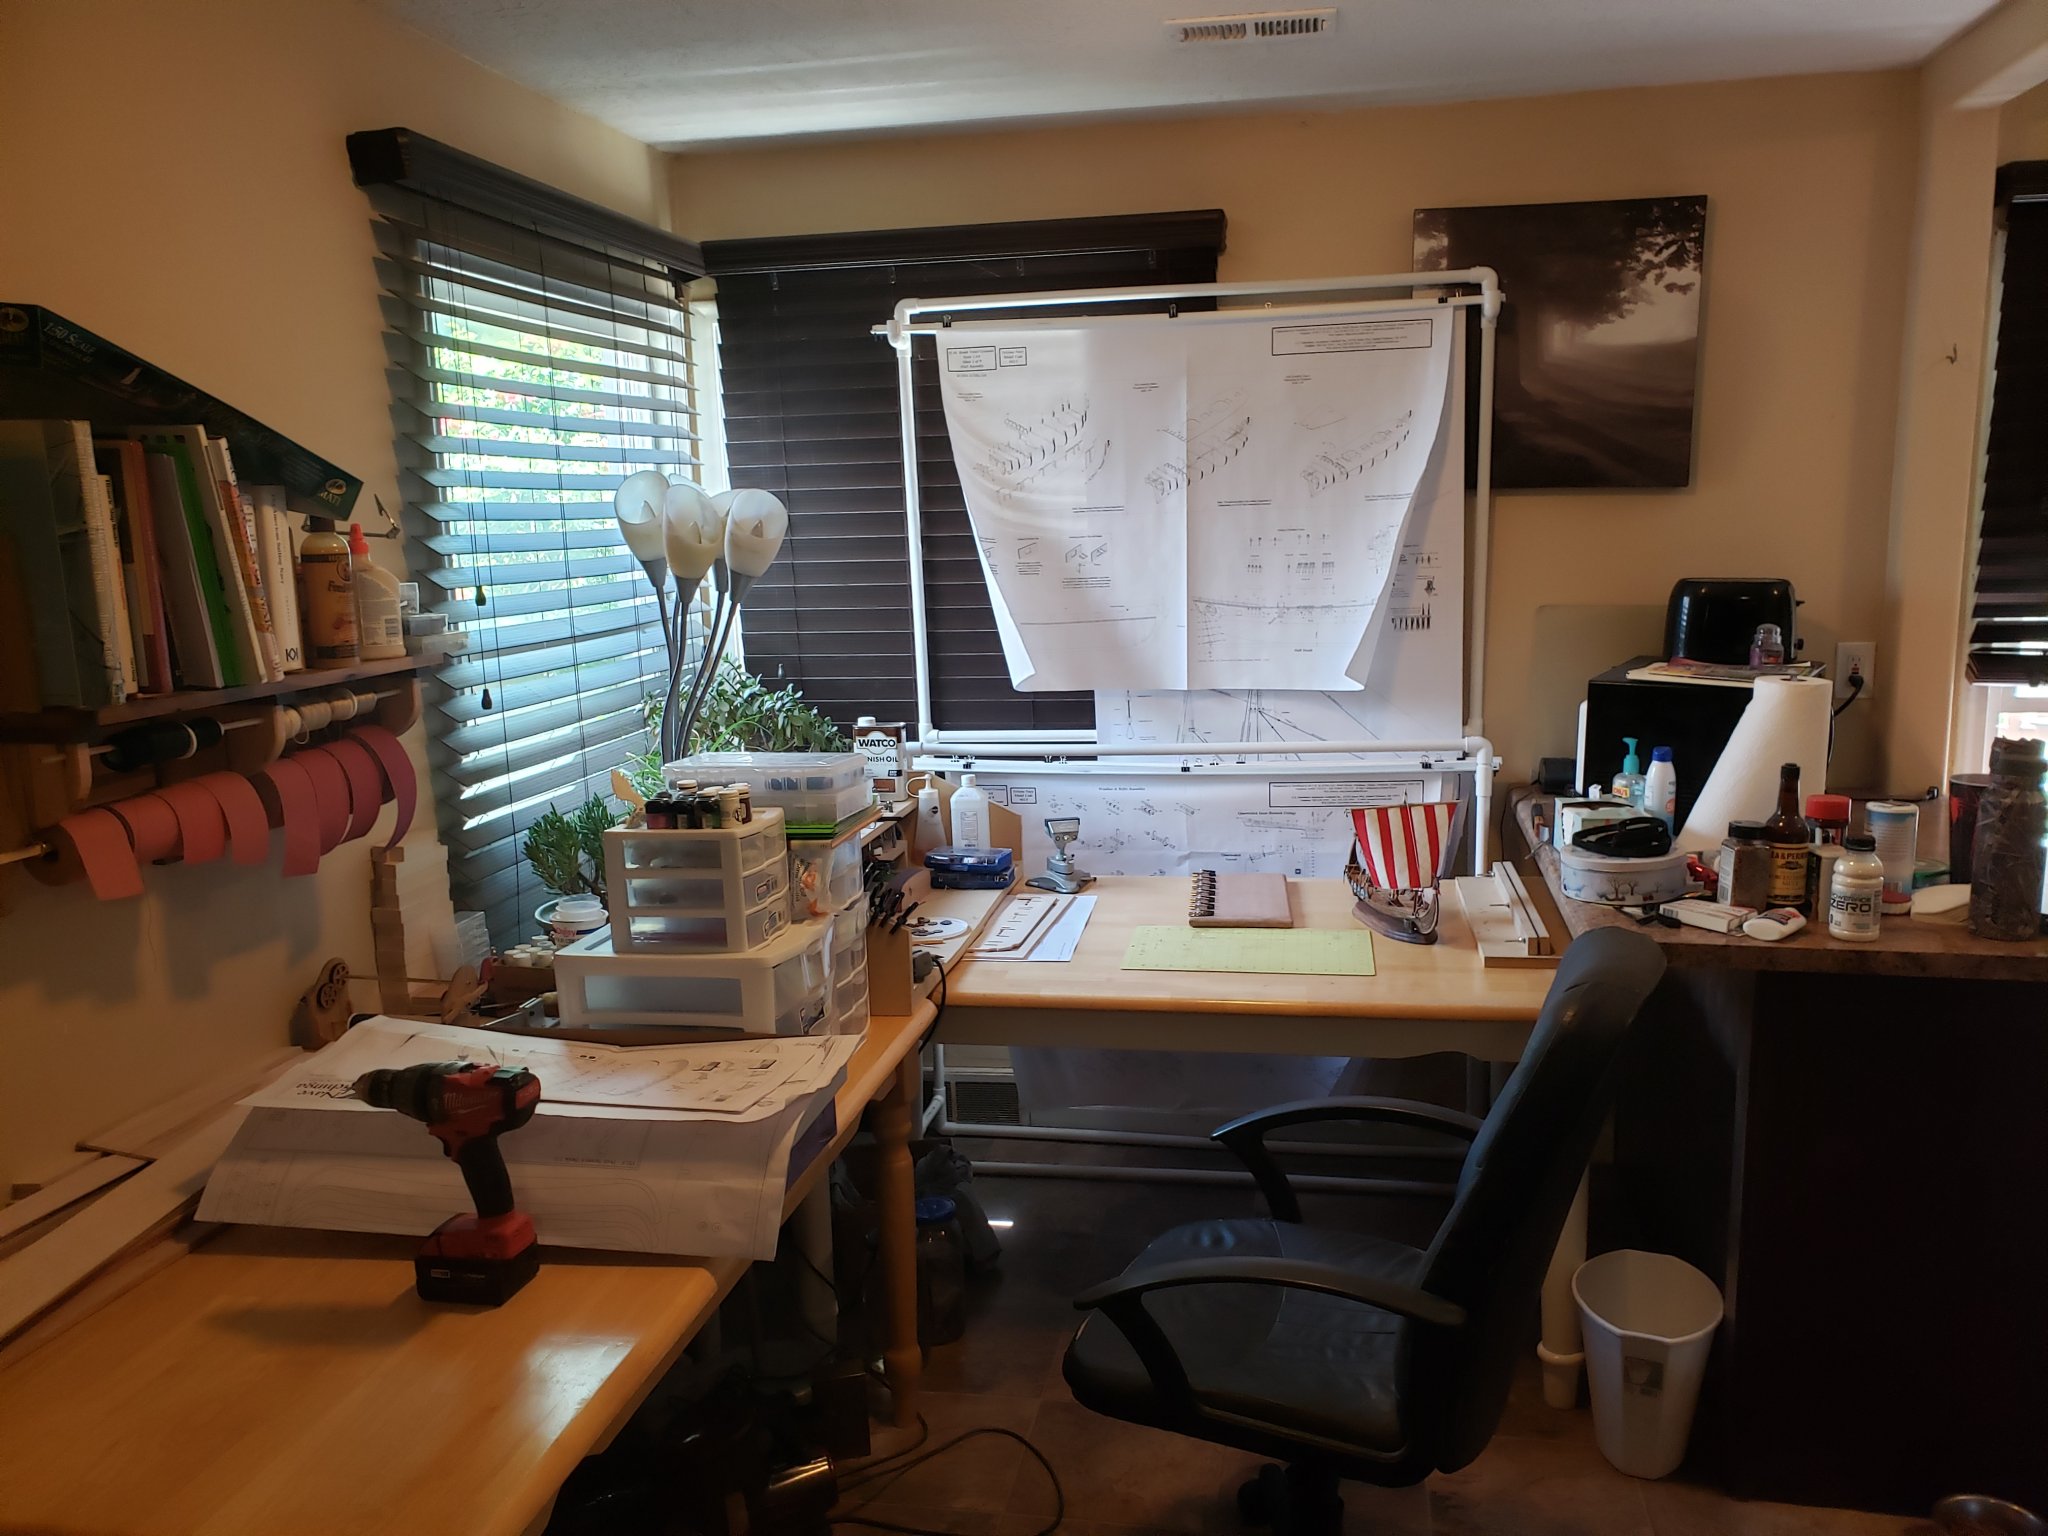
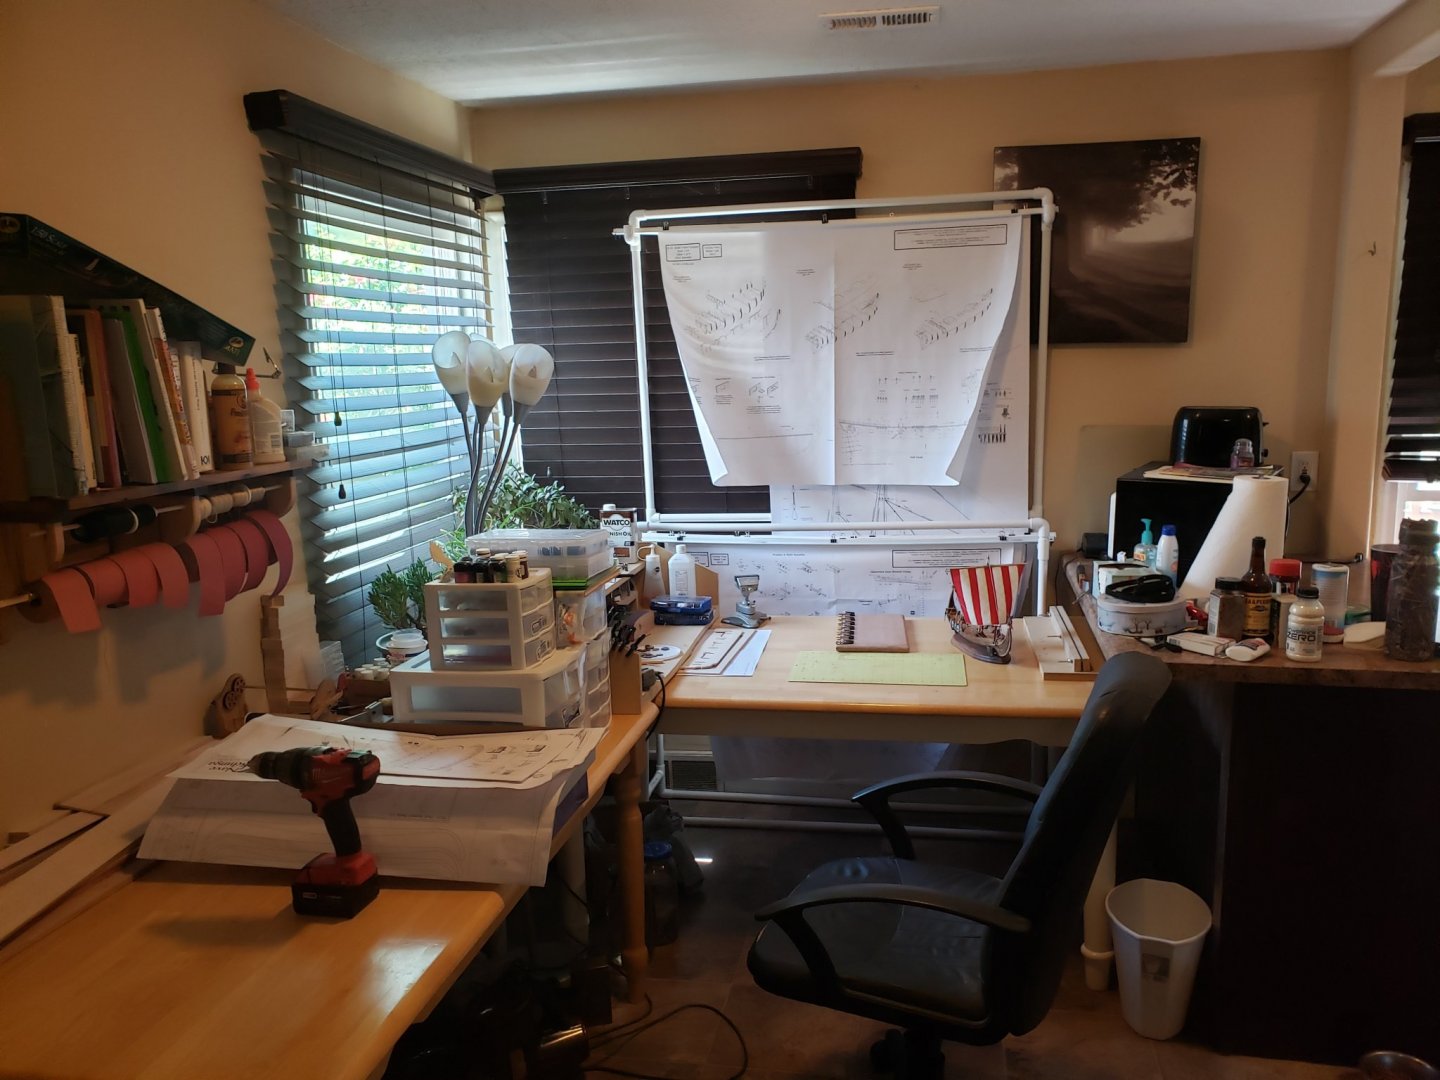
In the background you will see my next ship I am beginning. I built a frame to hold up the various prints. I got the idea for this from this post from Kevin53. I modified mine a bit to make it slightly wider and taller to accommodate the larger prints. Mine is in the photo below.
-
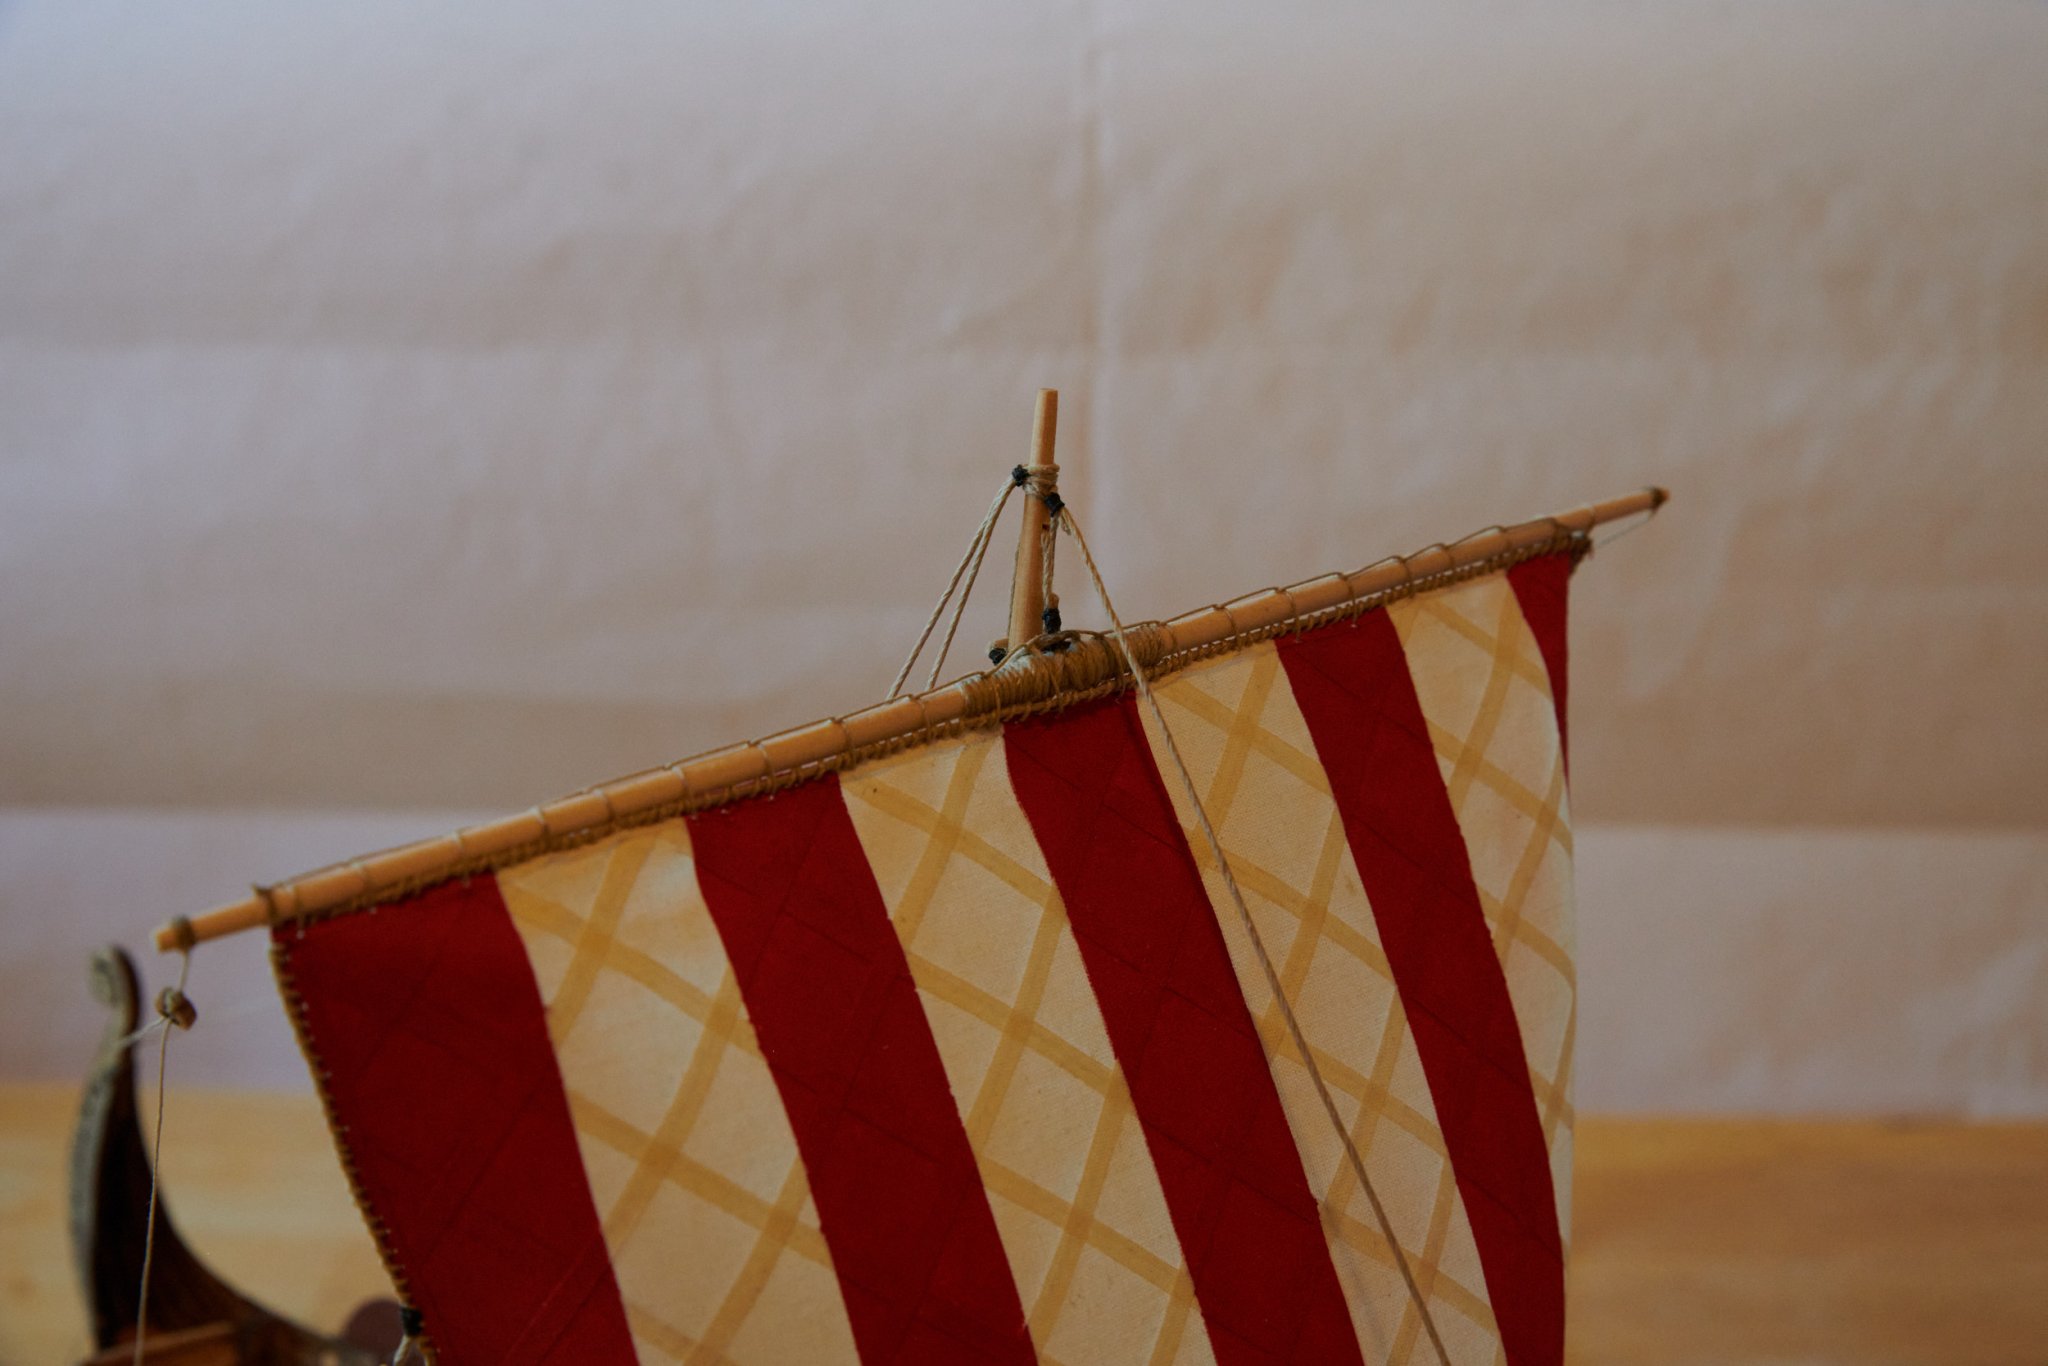
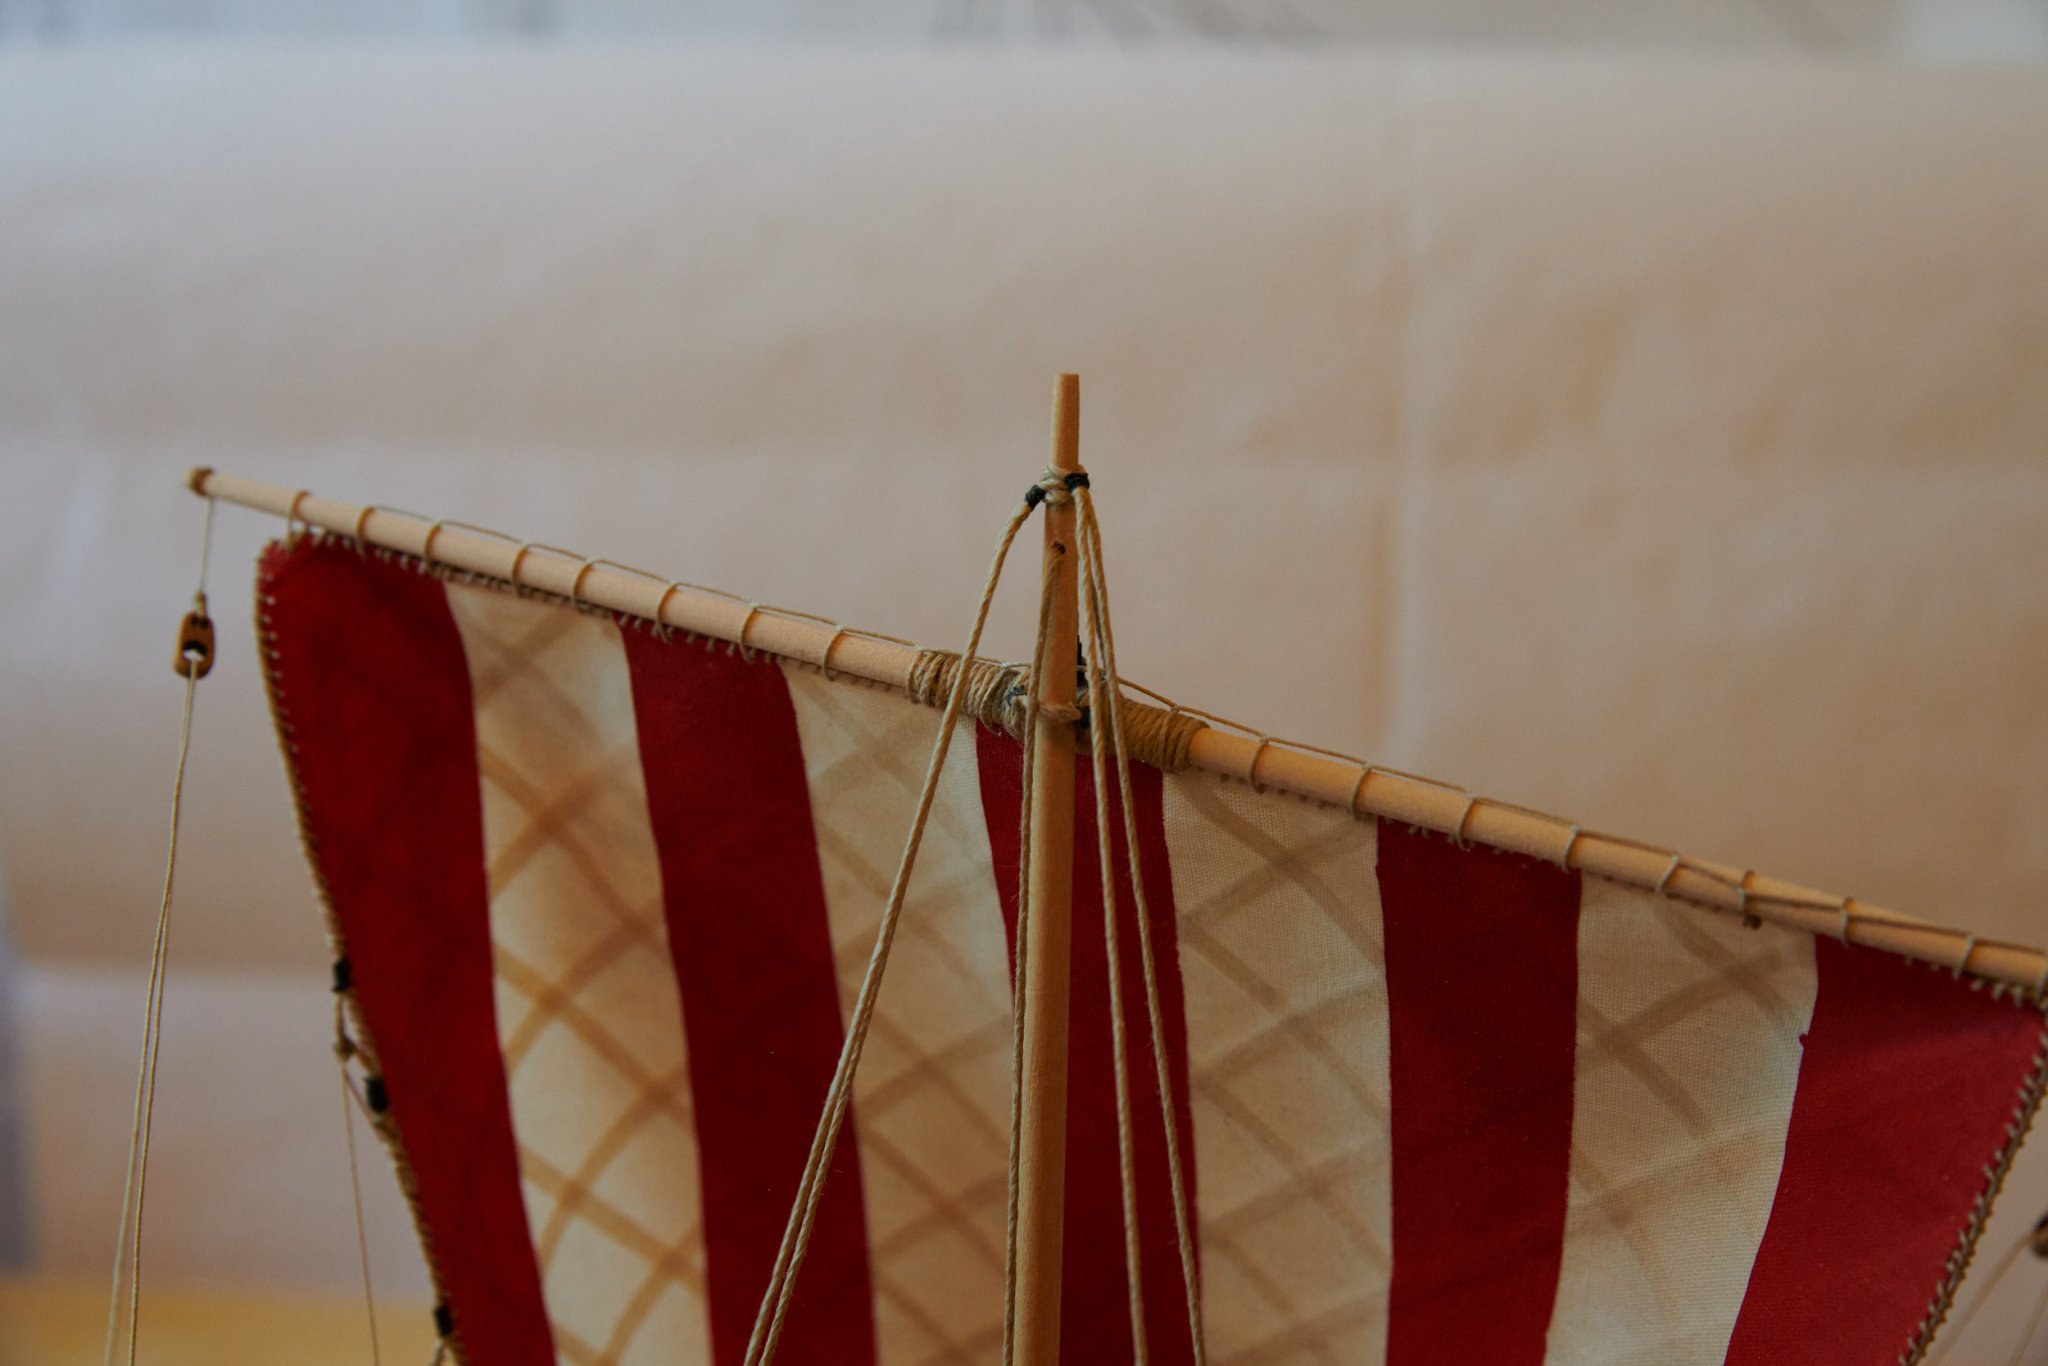
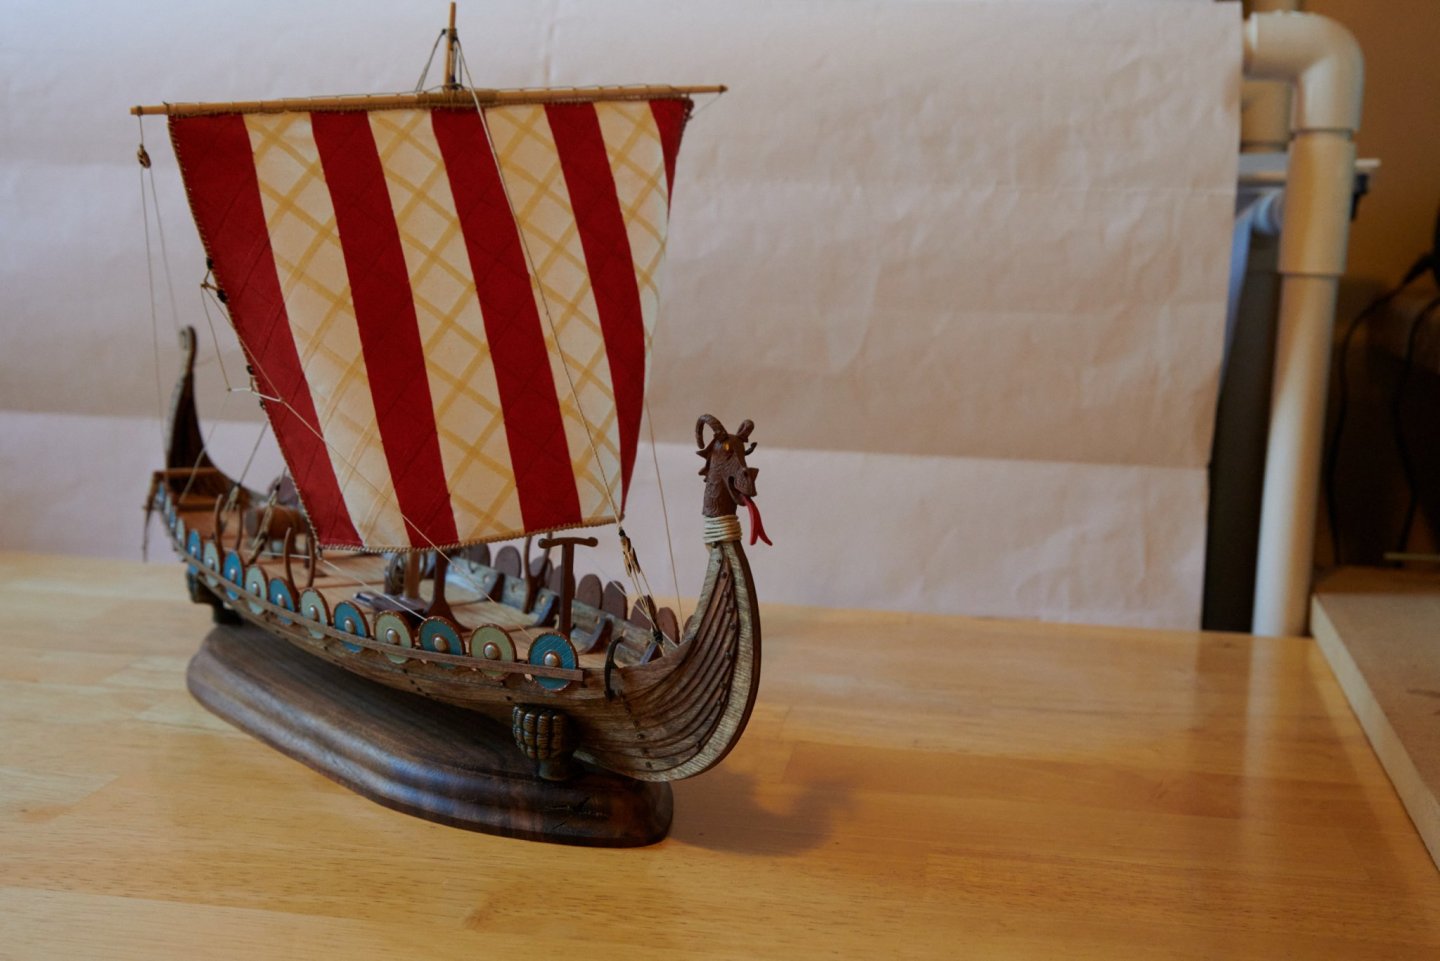
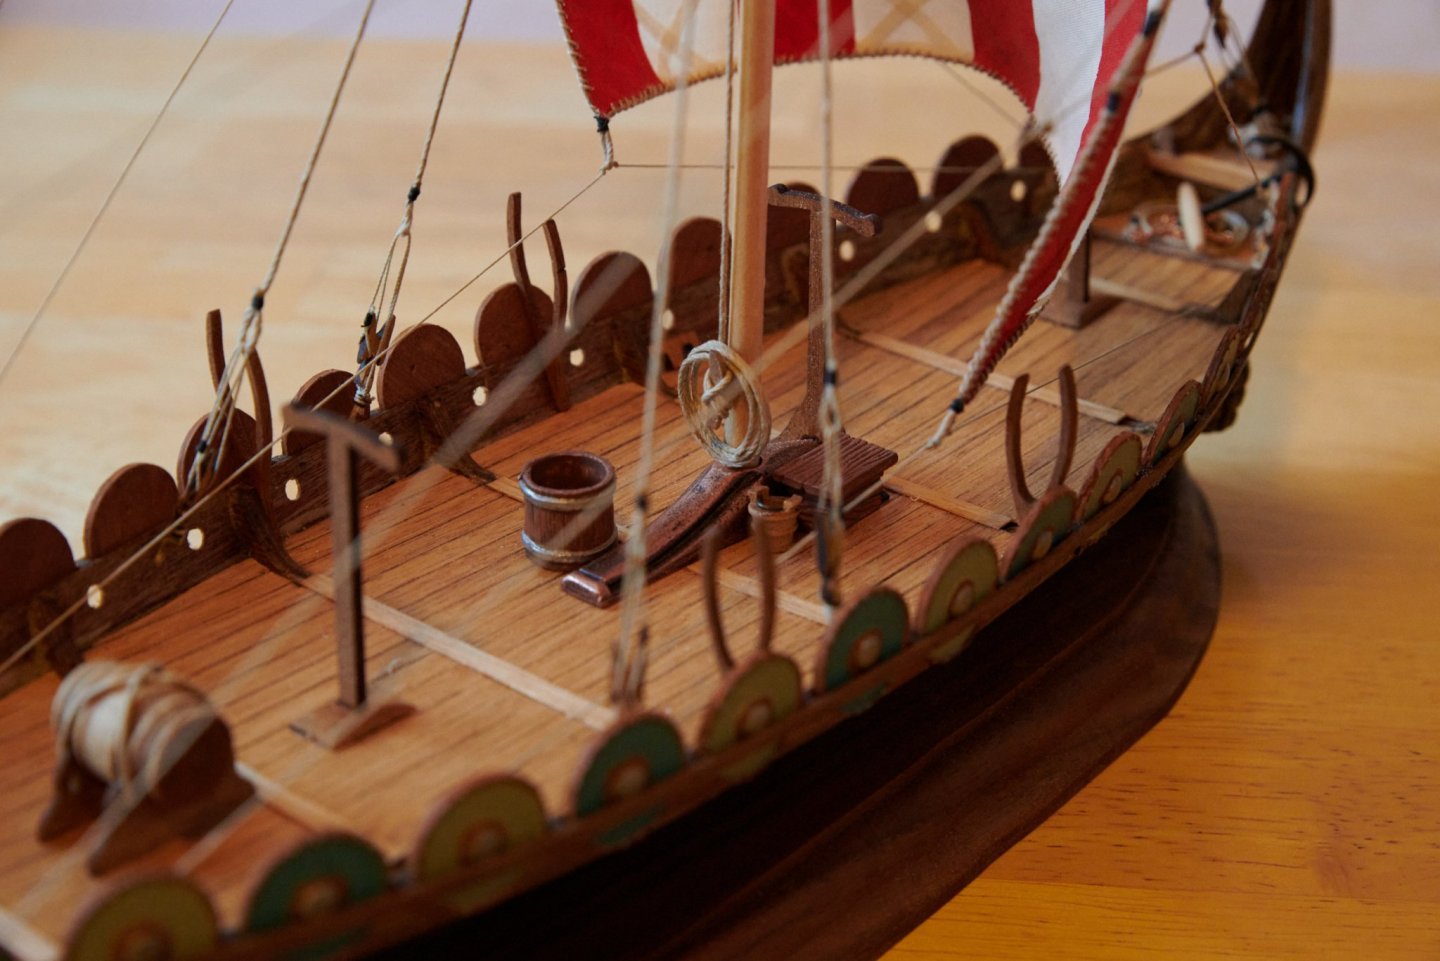
Sorry for the delay in getting an update. I have been busy with other things. She is finished, with the exception of the oars and the two swinging booms. I will get around to making up the oars eventually, but with the sail down they would have been stored any way. So here she is. Starting with some deck and other details and finally with the whole thing.


- 39 replies
-
- 15
-
-

-
I did end up placing an order to get some admiralty paints and a couple other items. The paints are out of stock at Ages of Sail. I haven't heard from anyone regarding my order that was placed on the 11th, or regarding the missing items from the kit. The status shows payment as pending and order status as not shipped. Payment hasn't been deducted from my account, although I did get a small .22 cent charge from Visa I think and it looks like it's some kind of international fee, not sure. I haven't ordered anything else from overseas so I assume it has something to do with this. I guess all I can do is wait. Will update further if/when something happens.
-
What's TFFM Stands For?
Matt H replied to Oskar24's topic in How to use the MSW forum - **NO MODELING CONTENT**
It stands for "The Fully Framed Model", it is a book series. Here is a link. The series is based around the Swan class ship, which the Vulture belongs to. http://seawatchbooks.com/AboutSwan.htm -
Power Sander
Matt H replied to English Rebel's topic in Painting, finishing and weathering products and techniques
Here is the link to Home Depot for the WEN, you can also get it on Amazon but it is slightly more expensive there. There are other models that have a horizontal 4-5" belt sander that is positioned as an edge sander. Other models have a 4 - 5" belt sander oriented horizontally but flat that also has a pivot point to raise it 90 degrees for a vertical belt sander. I felt the linked model was more beneficial for me. https://www.homedepot.com/p/WEN-1-in-x-30-in-Belt-Sander-with-5-in-Sanding-Disc-6515T/307873039 -
Power Sander
Matt H replied to English Rebel's topic in Painting, finishing and weathering products and techniques
Besides a variety of handheld tiny sanding blocks I'd say the most popular power sanders I have seen mentioned are miniature versions of a disc sander and thickness sanders. I myself have just purchased a couple new power tools, a Proxxon FET table saw, and a WEN combo 1 x 30 belt and 5" disc sander. I really like the Byrnes disc sander, but the WEN was only $80 bucks. I do plan to get the Byrnes thickness sander down the road when I get more into scratch building. For now I can use full size tools at work to get small sheets of wood at the proper thickness and then cut them at home. I think the combo WEN sander will be very useful, both the disc and 1" belt. -
Is there an easy wooden tall ship out there to build?
Matt H replied to thegrindre's topic in Wood ship model kits
Those would be the website name or store name, not the brand. If you look at the historic ships site, their menu bar along the top starts with a "Brands" section on the left. These sites sell different brands of model ships. Have you found particular brand of the 3 ships you have chosen? There is another good site here in the U.S. https://www.agesofsail.com/ I have ordered from them a few times. **EDIT** Although looking closer at historic ships, it does appear they may sell their own models. It's hard to say, there are the Mini Nina and Mini Pinta that don't specify a model brand, so perhaps their own. **EDIT 2** Found those same Mini Nina and Pinta on the Ages of Sail site and they are by Mamoli. -
Just a quick update to this. I will be setting this aside for some time. I do feel the instructions are adequate for someone new to the hobby, but I also recognize that despite good instructions things come up and we need to be able to adapt. I feel I would rather put this large beautiful ship aside and one day many years from now after some other ships have been completed and I can do this in a much better way when those scenarios come up that I need to adapt and having more experience will let me do that better and make this look much nicer as it deserves. As far as the kit itself, I haven't opened up the individual bags that the small steps come in, but looking at them through the bag they appear to be good quality. As I learn more and get practice with some of my new tools arriving soon, I may start to replace kit materials with nicer looking lumber, so another reason to delay this particular ship. The only problem I have with this model company is that I don't always receive the printed color instructions. I have to email them which takes days sometimes a week and a half before a response. I have emailed twice, the first back in April about month 3 instructions, and I still have yet to receive them, apparently they are out of stock and have been for the past 2 - 3 months. So the biggest issue is a long time between communication and missing instructions. When I return to this kit I will return to this build log and if there are any questions I may be able to answer you are welcome to post them here.
-
Can't post in some topics.
Matt H replied to Matt H's topic in How to use the MSW forum - **NO MODELING CONTENT**
It works now, thank you. -
I found the answer to my question above and thought I'd come back and post it for others. Those ropes are called reef points and they go through the sail and are knotted on both sides leaving a length on both sides. The purpose is to roll the sail up from the bottom and use those reef points to tie it up, thus reducing the size of the sail. This is done for strong winds. There were multiple rows of reef points to reduce the sail to a variety of smaller sizes. This whole process is called reefing.
-
Wow, this is incredible work. I am very impressed and rather speechless watching part 9 on the first page making the weathered bulwark. I have seen mention of weathering effects, but never actually seen it done and certainly not in a video. I'll go back and watch more from the beginning. I am following and bookmarked this build for future reference. Keep up the excellent work.
- 358 replies
-
- 1
-
-
- occre
- santisima trinidad
- (and 1 more)
-
I'm assuming it has something to do with moving the topics to the new categories but some of them I cannot make a new post on, even my own topic. Example, I was looking through the various categories and went to the BC - 1500 and looked at my own Viking Drakkar log and I can't make a new post on it. Similarly I went down to the next topic for the same ship by Amfibious and I wanted to reply to it that I had found an answer to my question I had posted there a few days ago, I can't post on that topic either. I checked a random topic in another era category and I can post there.
-
Some of my photos rotate 90 despite looking correct in the thumbnail when browsing my photos. If you're on a Windows machine you can open the photo with the default photo viewer. This has some basic editing capabilities, just click on edit in the upper right corner. Even if your photo is currently displaying in the correct orientation in the photo viewer, it is sometimes coded into the image that it was originally taken at a different camera orientation, hence why it rotates in some applications. In that edit mode, there is a button to rotate the photo, again even if it is already displaying correctly, just rotate it 4 times to get back to normal. Then save it, whether you choose to save it as a new photo or overwrite the original, doesn't matter. The photo will now be coded to display in the orientation you see when you save it. Should display correctly when you upload to those applications or sites that have previously displayed it incorrectly. This is the easiest "edit" to do without actually editing the photo, even though the end result appears the same as the original you are modifying the coded data in the photo regarding it's orientation. As far as why or how it changed suddenly, that I can't say. It is possible the site got some soft of update or even the behind the scenes coding in the new theme that displays photos based on the orientation that is coded into the photo rather than "smartly" displaying it as intended. Meaning, I believe some software will recognize that if you turn your camera 90 degrees to switch from portrait to landscape, that was intentional and will display the image that way, despite the coding in the photo explicitly stating that the camera was rotated 90 degrees and should be displayed rotated. Here is an article on the subject that may explain it better than I as to why some software does this. https://www.howtogeek.com/254830/why-your-photos-dont-always-appear-correctly-rotated/