
William-Victory
-
Posts
127 -
Joined
-
Last visited
Recent Profile Visitors
1,117 profile views


-
Professional modeling must take priority. I haven’t touched my Vic’ for a month. …waiting for paint and parts anyway. Be it from the 1700’s or 2035 it’s still a ship of sorts. Happy modeling guys!

-
 William-Victory reacted to a post in a topic:
HMS Victory by William-Victory - Heller - PLASTIC - First ship build
William-Victory reacted to a post in a topic:
HMS Victory by William-Victory - Heller - PLASTIC - First ship build
-
Malcolm Brown reacted to a post in a topic:
HMS Victory by William-Victory - Heller - PLASTIC - First ship build
-
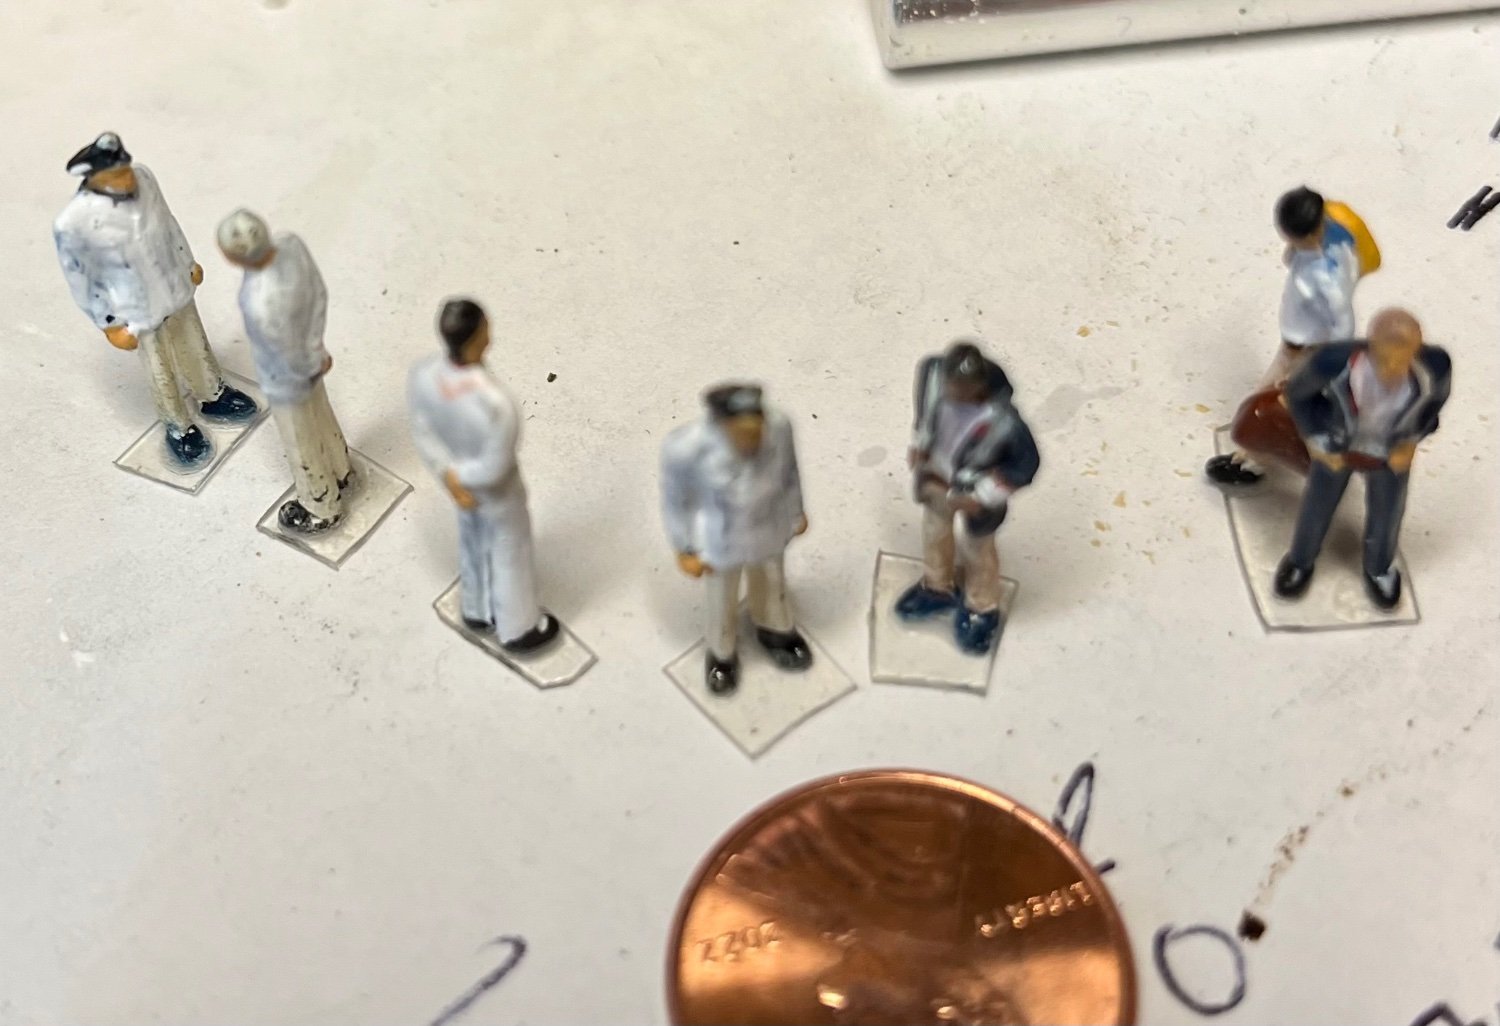
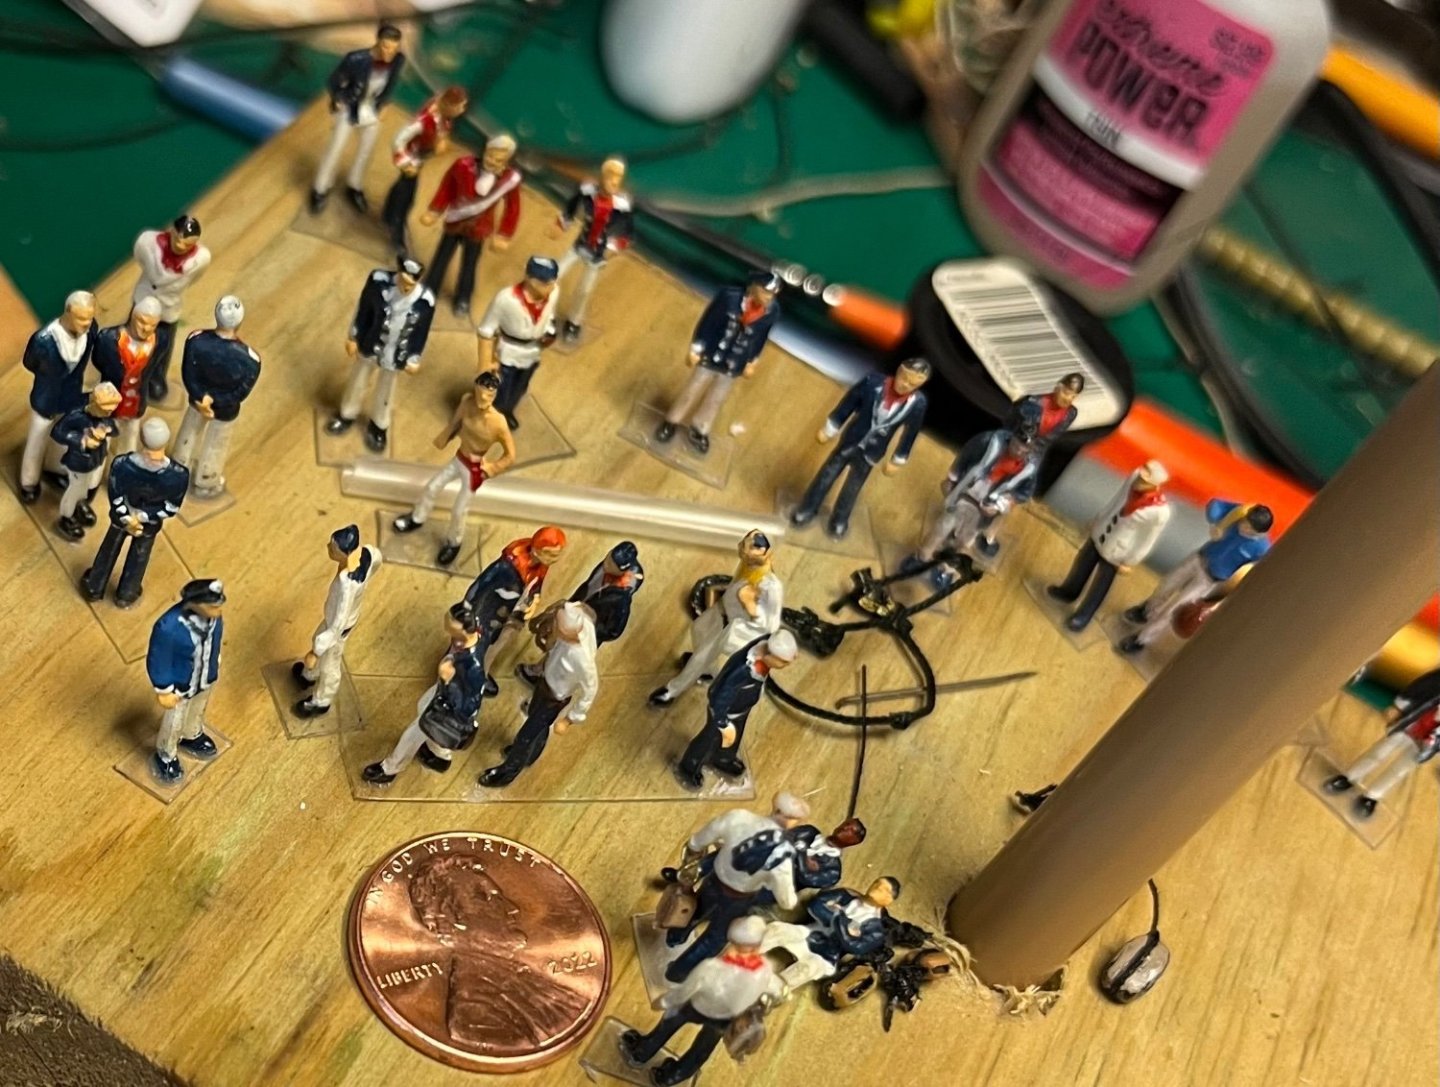
I’m waiting on paint and primer. So I’m back at mangling my crew uniformity. Been trying to figure out the correct uniform. I’ve seen all white with black kerchief. Or blue jacket and blue pants. By the time I get the uniforms correct they’ll be FAT from so many layers of paint. And hats?! Oh boy. Still have no idea how to make those. PS. Dafi? I need hats. 😂😂😂

-
William-Victory reacted to a post in a topic:
HMS Victory by William-Victory - Heller - PLASTIC - First ship build
-
 Yabuhebi reacted to a post in a topic:
HMS Victory by William-Victory - Heller - PLASTIC - First ship build
Yabuhebi reacted to a post in a topic:
HMS Victory by William-Victory - Heller - PLASTIC - First ship build
-
 William-Victory reacted to a post in a topic:
HMS Victory by William-Victory - Heller - PLASTIC - First ship build
William-Victory reacted to a post in a topic:
HMS Victory by William-Victory - Heller - PLASTIC - First ship build
-
dafi reacted to a post in a topic:
HMS Victory by William-Victory - Heller - PLASTIC - First ship build
-
Thank you Daniel. So should I use this pendant on the mizzen while I change course for the main and foremast?
-
Malcolm Brown reacted to a post in a topic:
HMS Victory by William-Victory - Heller - PLASTIC - First ship build
-
Knocklouder reacted to a post in a topic:
HMS Victory by William-Victory - Heller - PLASTIC - First ship build
-
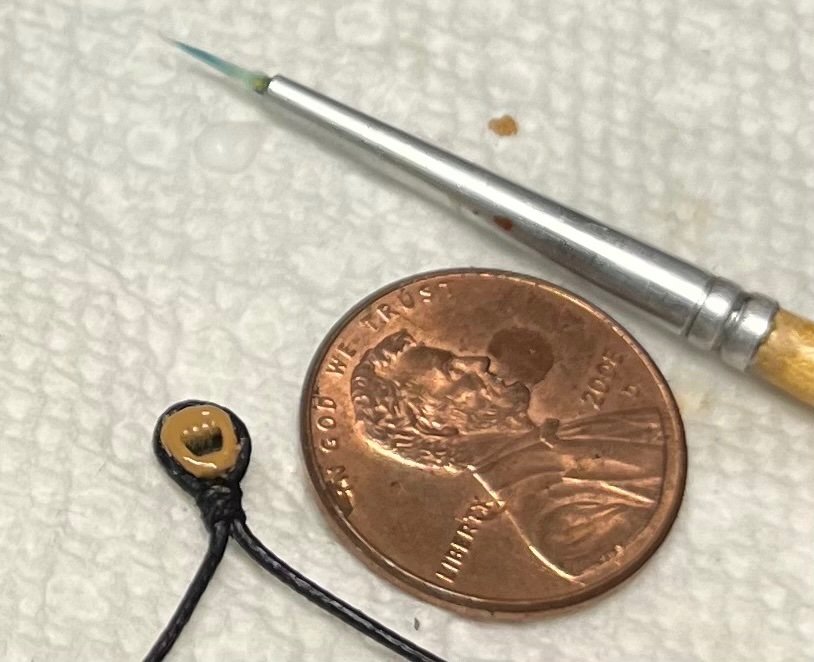
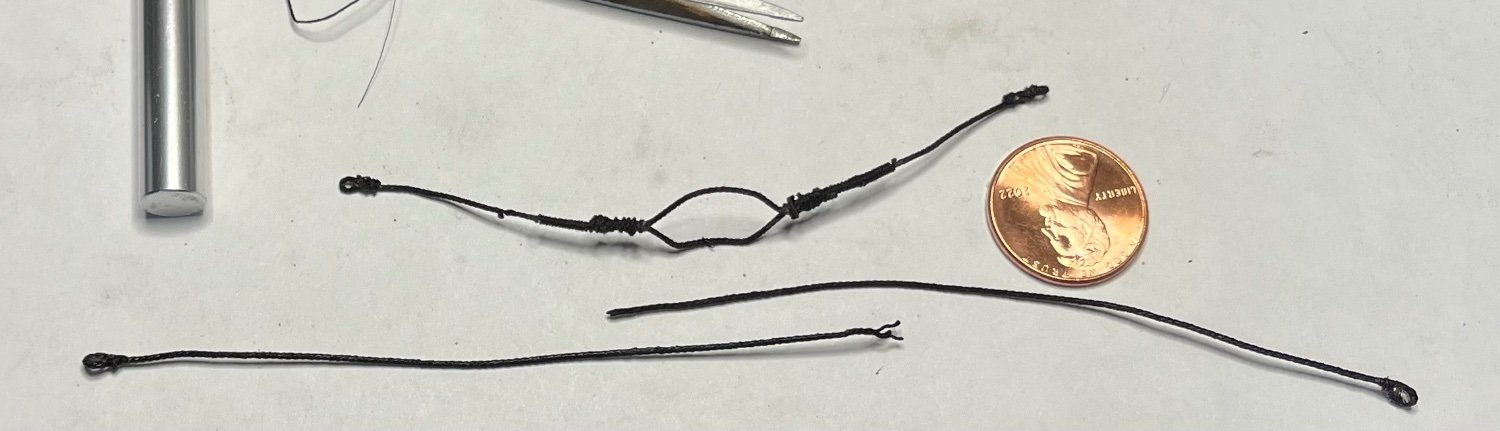
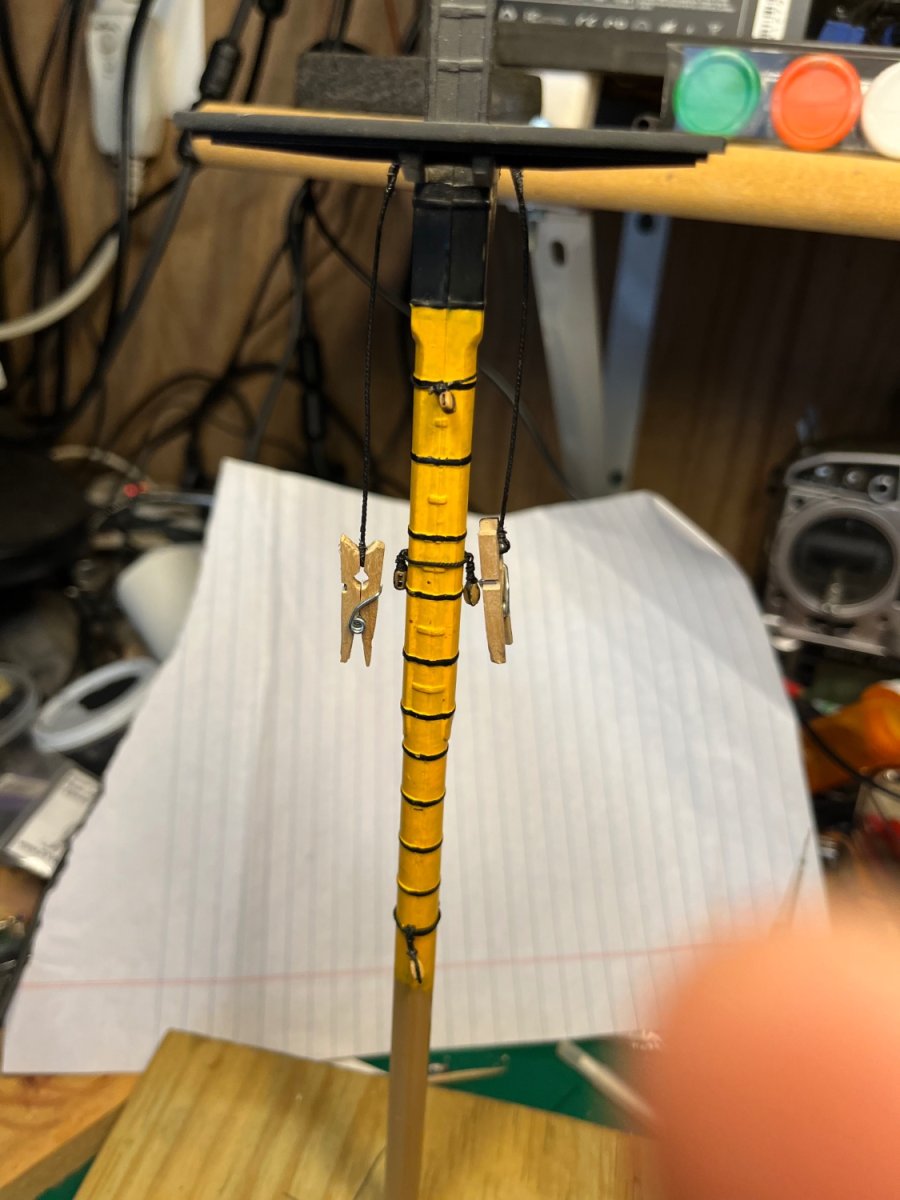
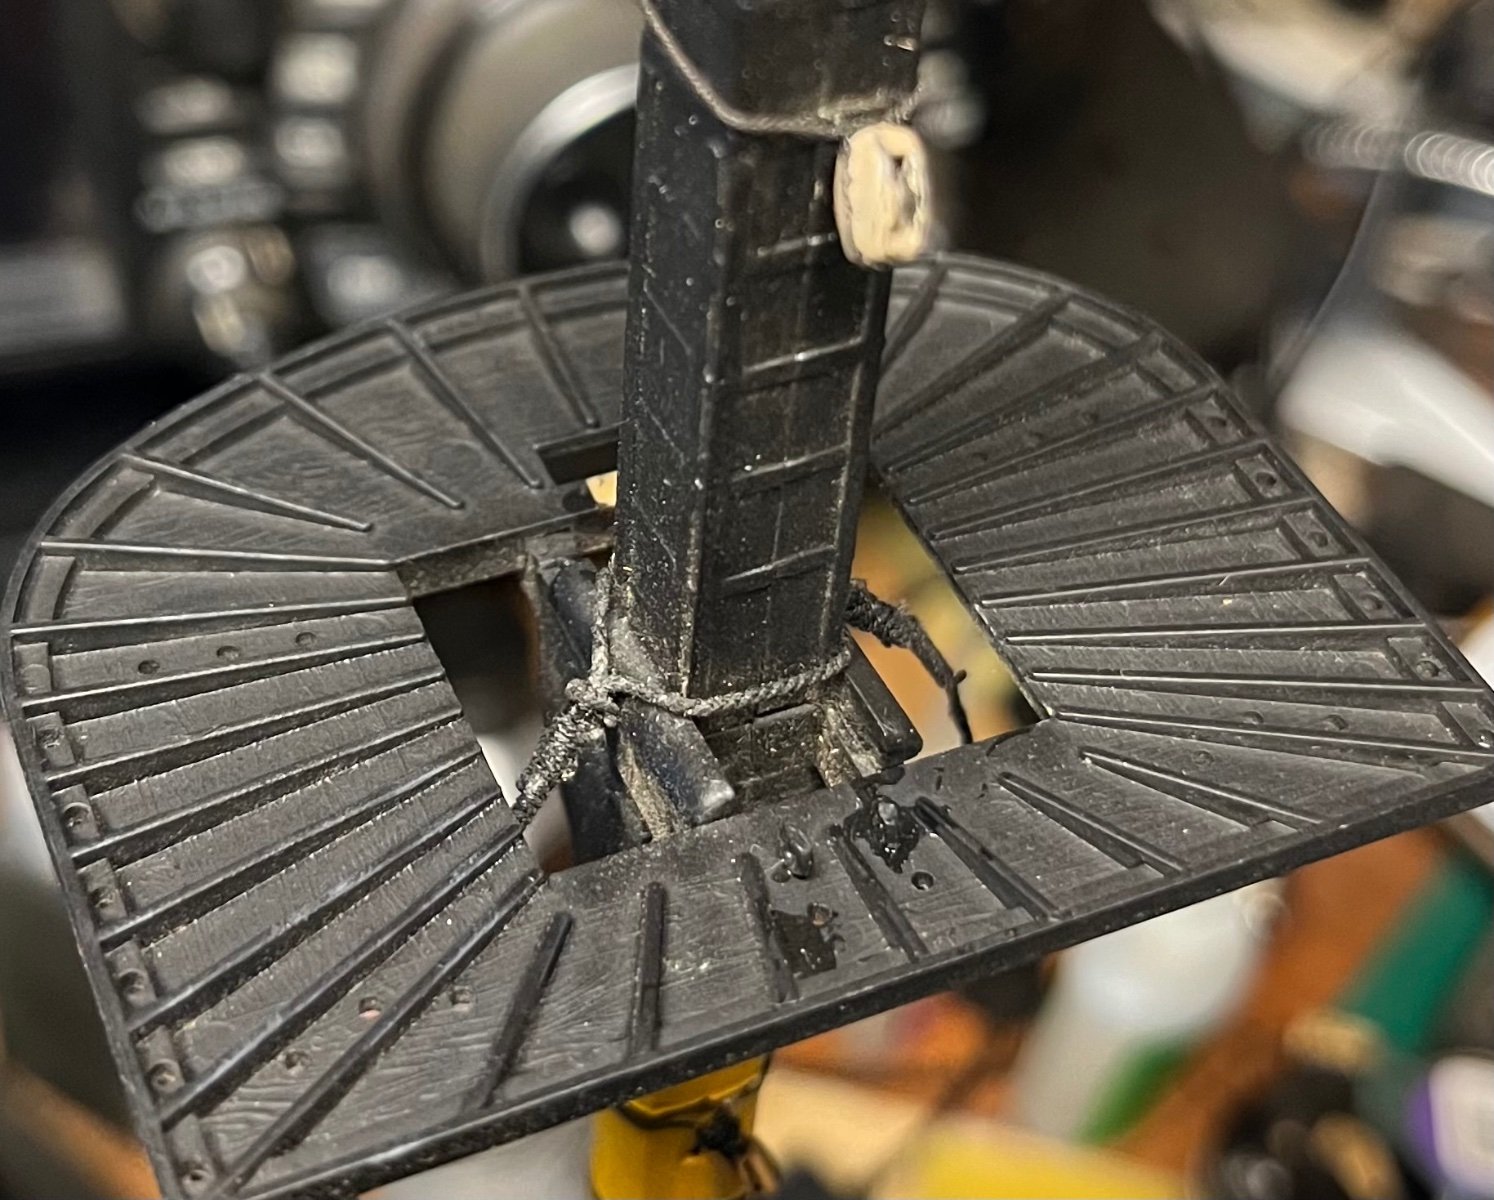
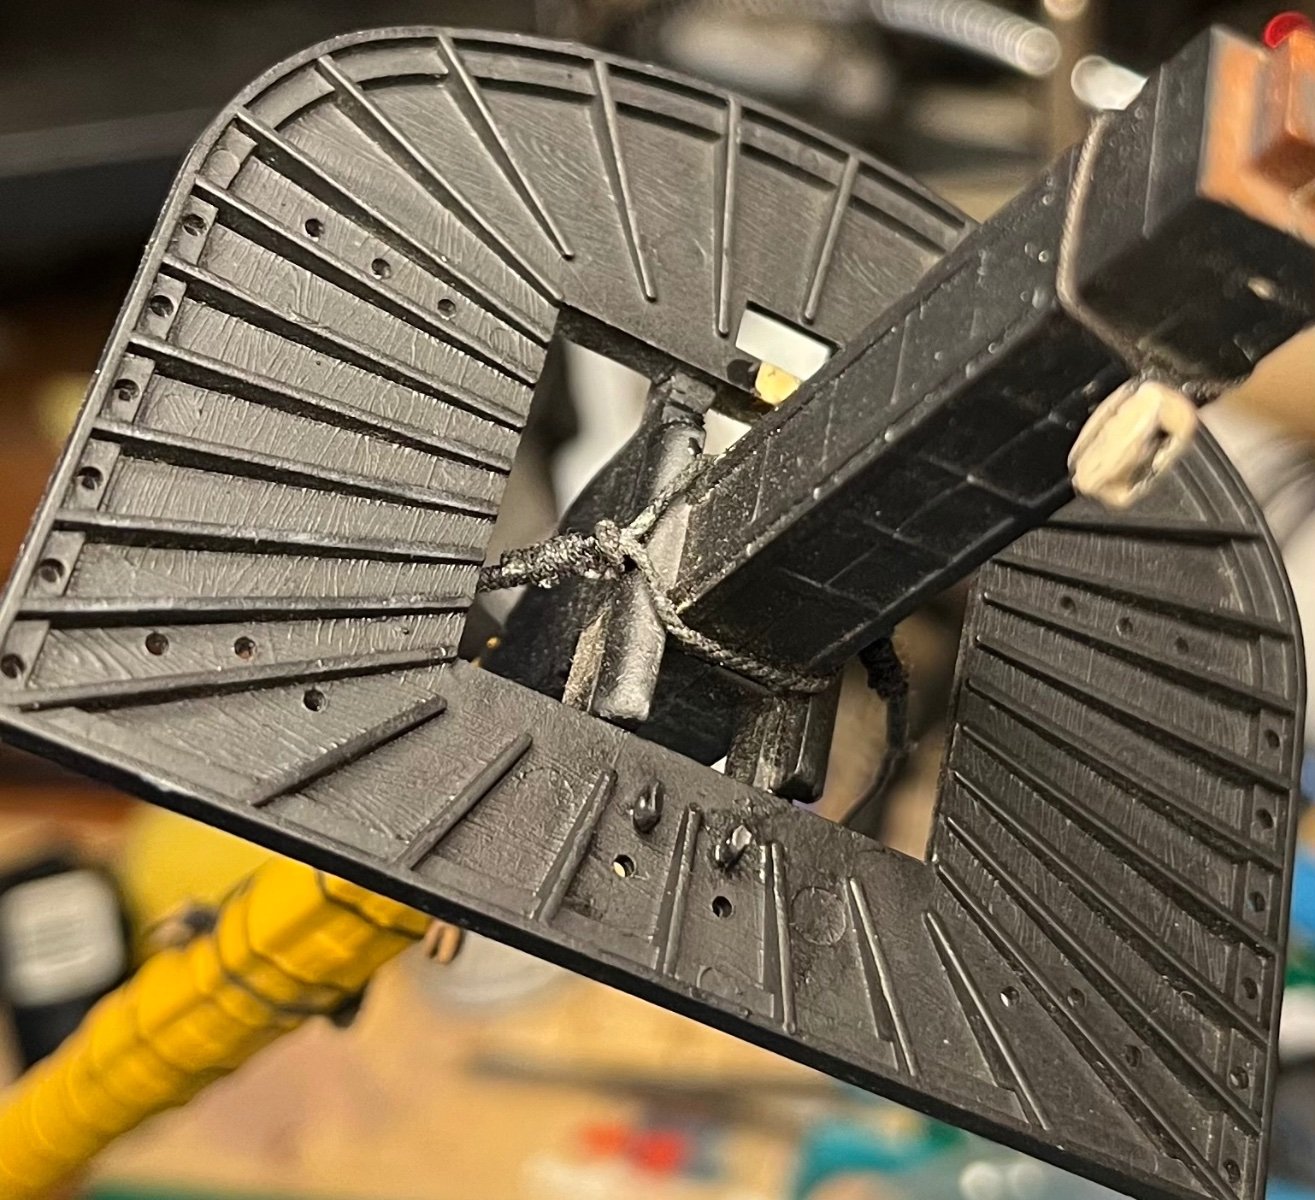
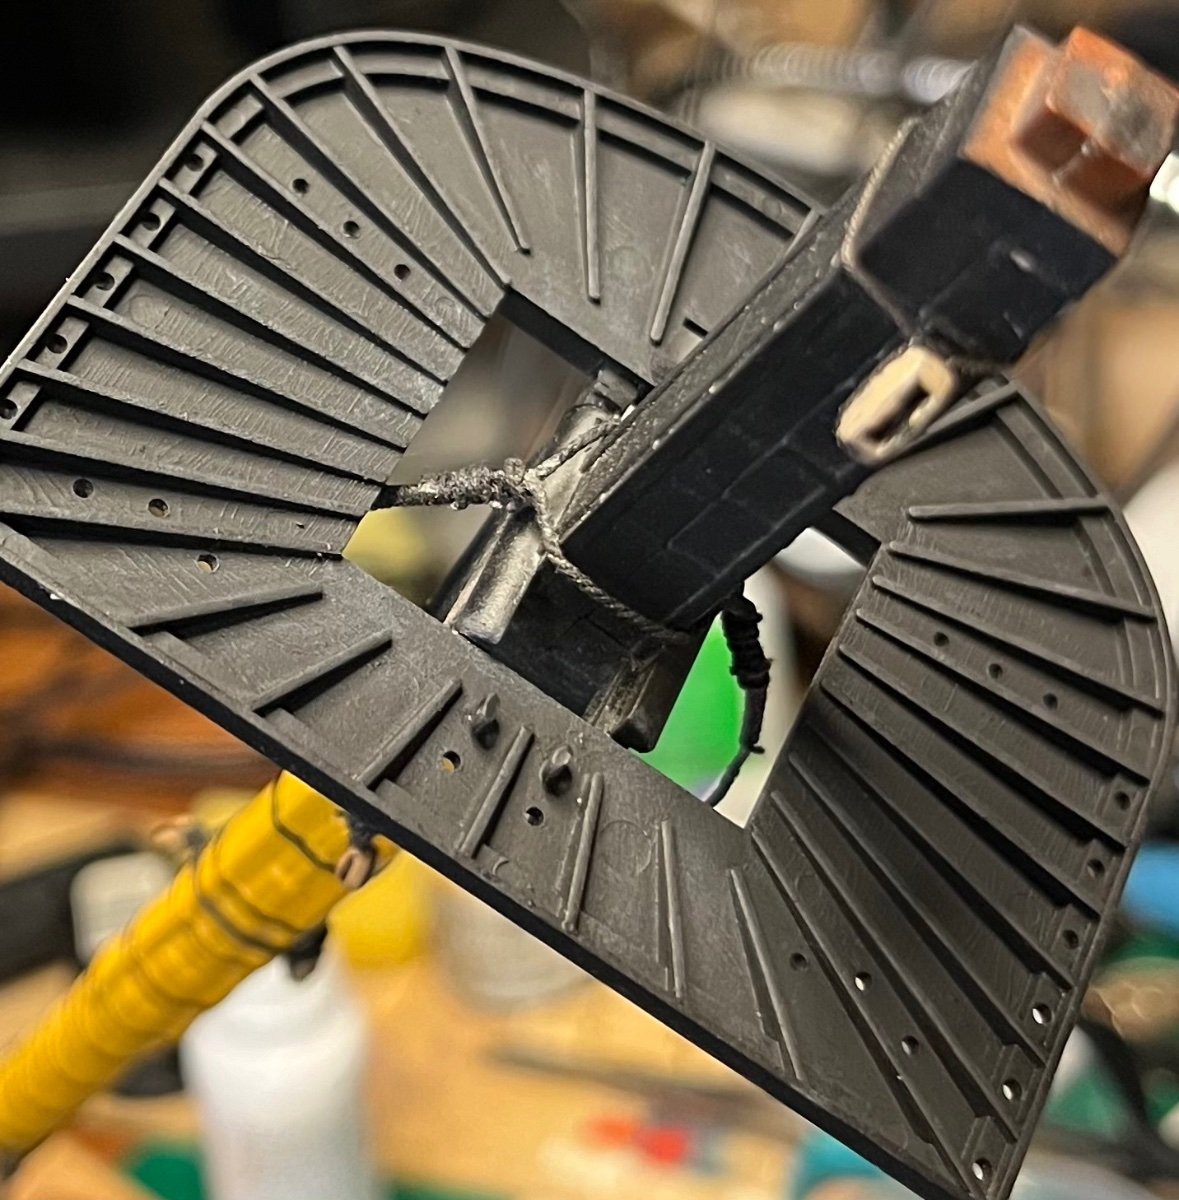
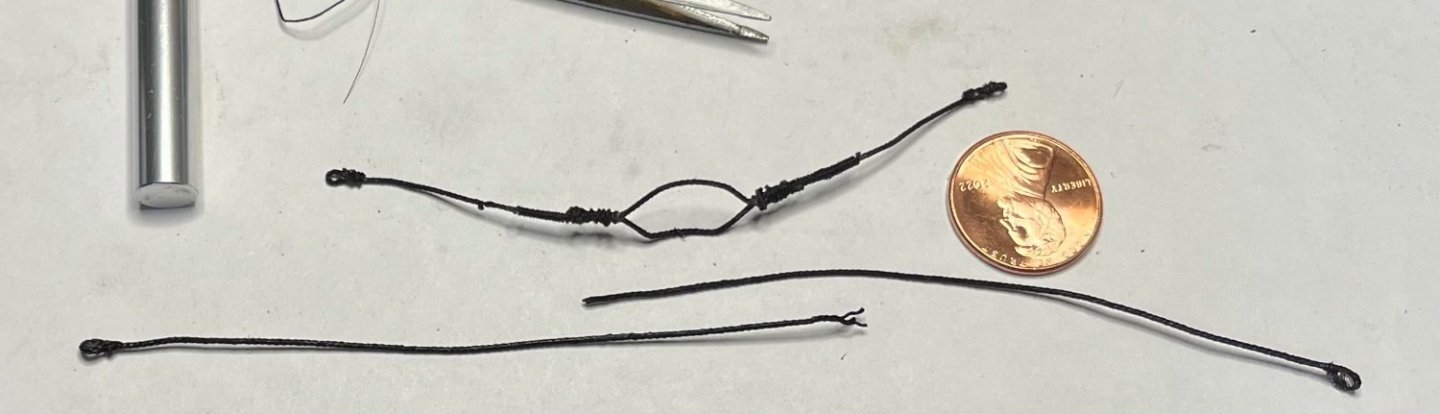
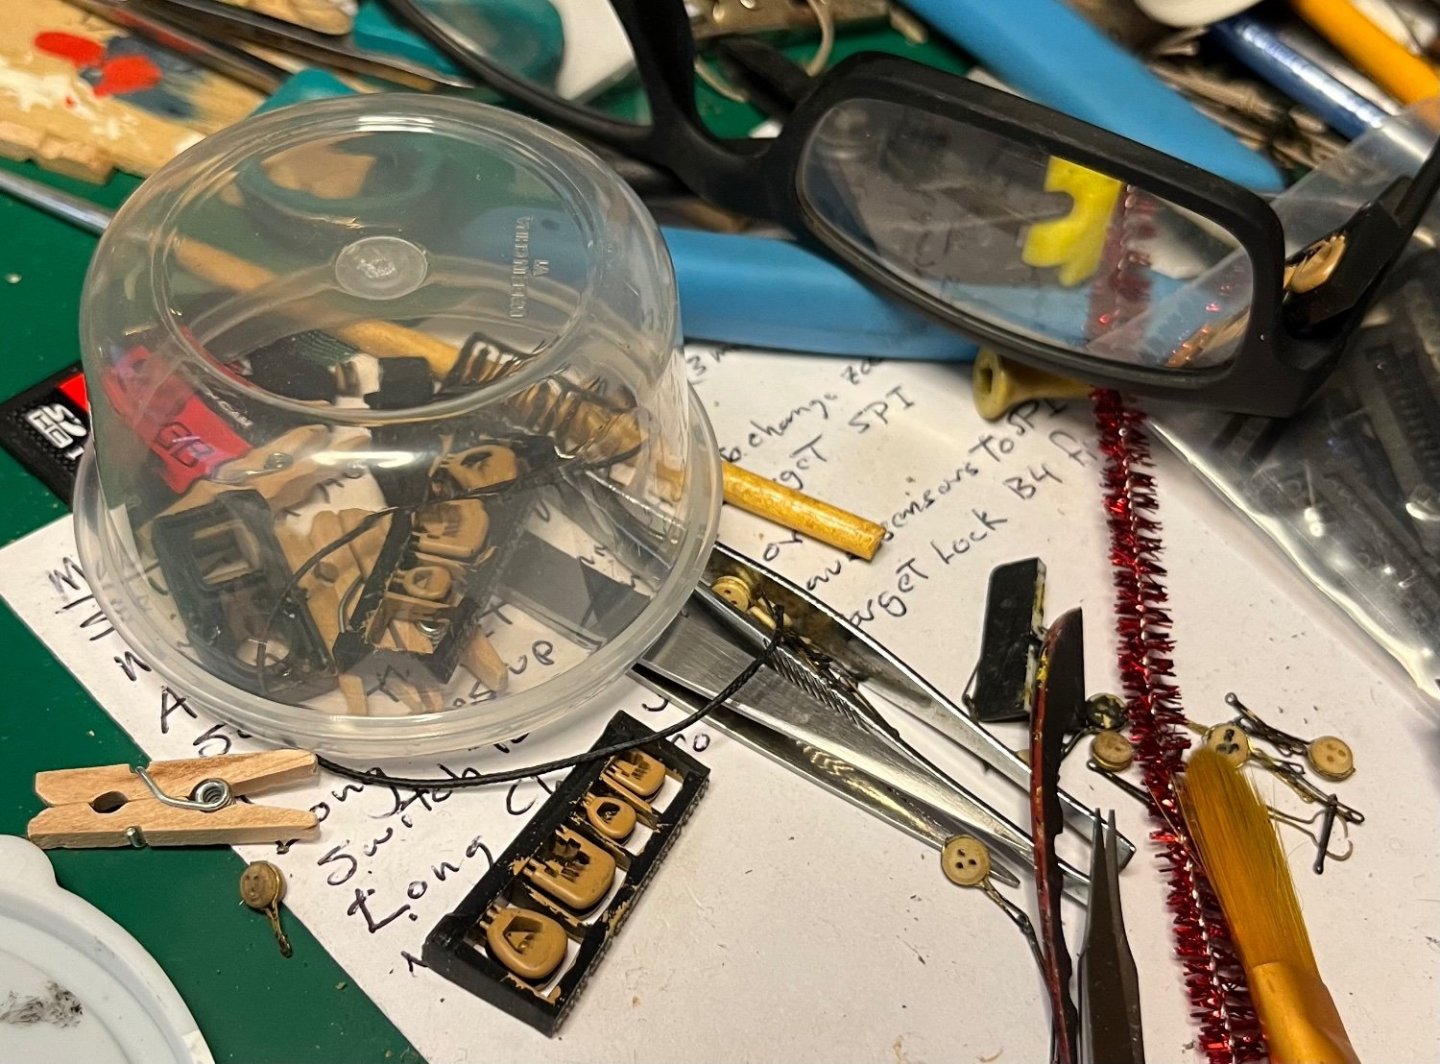
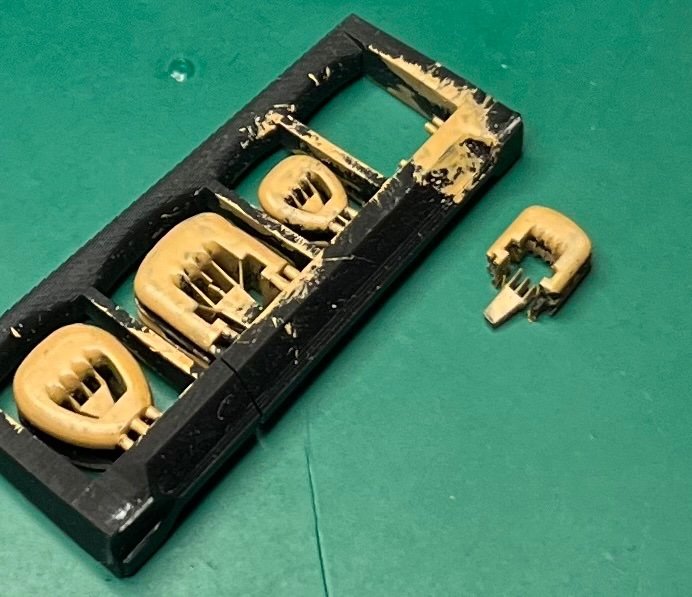
Today is redoing the Burton pendant. The previous was too short almost by half. Also I had just done eyesplices. No block or thimble. Now I am aware that there are two ways to do it. With a thimble (Longeidge) and a single block (McKay). I chose thimbles. I seized the spindles by hand this time for haha’s. My workspace is 2’x1 1/2’… yeah…. The gap between seizing is 22mm+\- I moistened the rope and put a couple micro clothespins for weight to straighten the fall of the dangly pendants. Going to remove the kit blocks and replace them after a repaint of the foremast. Better blocks are going on.

-
dafi reacted to a post in a topic:
HMS Victory by William-Victory - Heller - PLASTIC - First ship build
-
Malcolm Brown reacted to a post in a topic:
HMS Victory by William-Victory - Heller - PLASTIC - First ship build
-
wvdhee reacted to a post in a topic:
HMS Victory by William-Victory - Heller - PLASTIC - First ship build
-
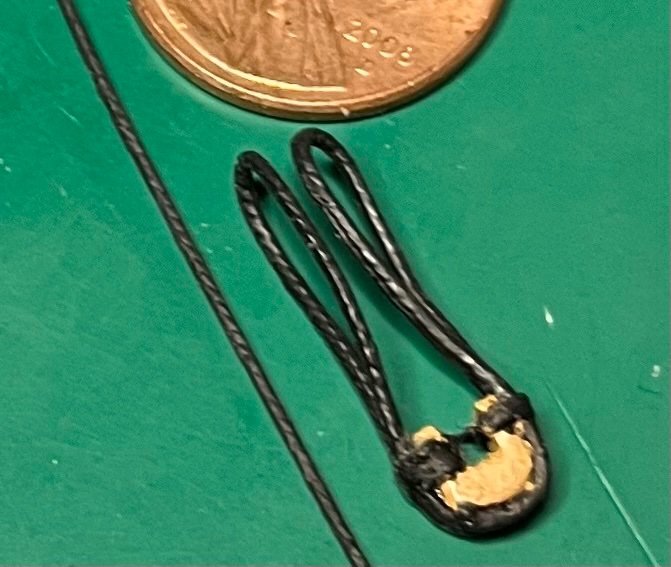
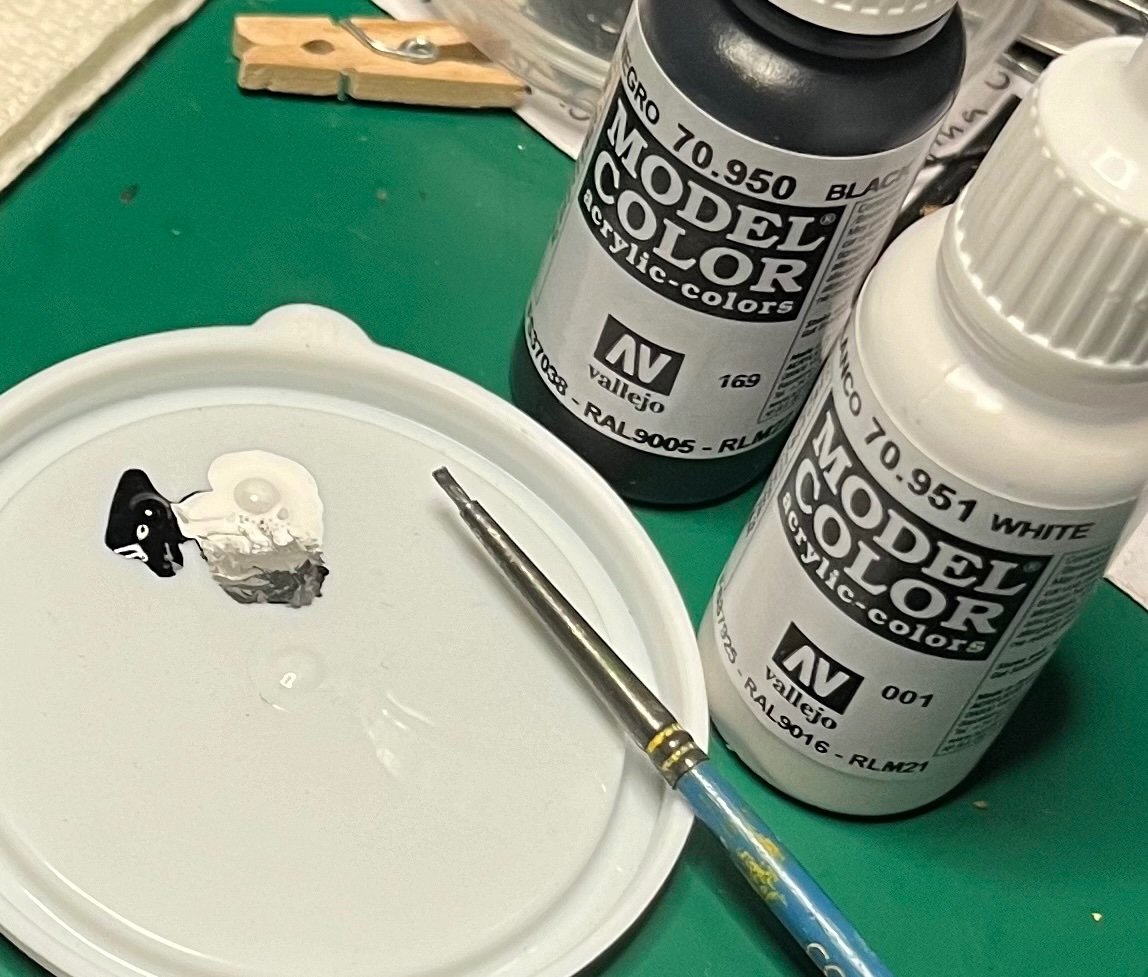
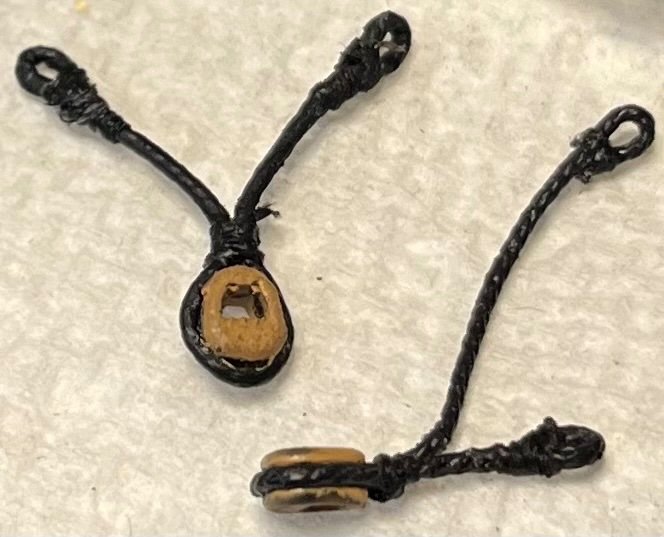
Verdict on using the acrylic is “bulky”. Same number of applications. Tinted glue did the same job with a smaller diameter result. (Bottom with hook)

-
William-Victory reacted to a post in a topic:
HMS Victory by William-Victory - Heller - PLASTIC - First ship build
-
William-Victory reacted to a post in a topic:
HMS Victory by Bill97 - FINISHED - Heller - 1/100 - PLASTIC
-
William-Victory reacted to a post in a topic:
HMS Victory by William-Victory - Heller - PLASTIC - First ship build
-
William-Victory reacted to a post in a topic:
HMS Victory by William-Victory - Heller - PLASTIC - First ship build
-
William-Victory reacted to a post in a topic:
HMS Victory by William-Victory - Heller - PLASTIC - First ship build
-
dafi reacted to a post in a topic:
HMS Victory by William-Victory - Heller - PLASTIC - First ship build
-
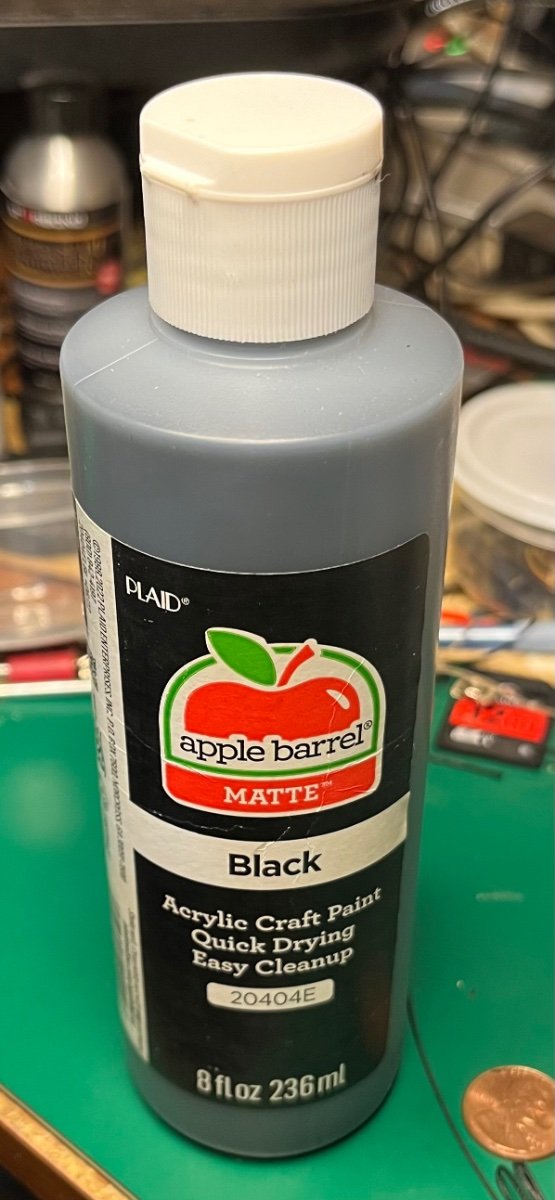
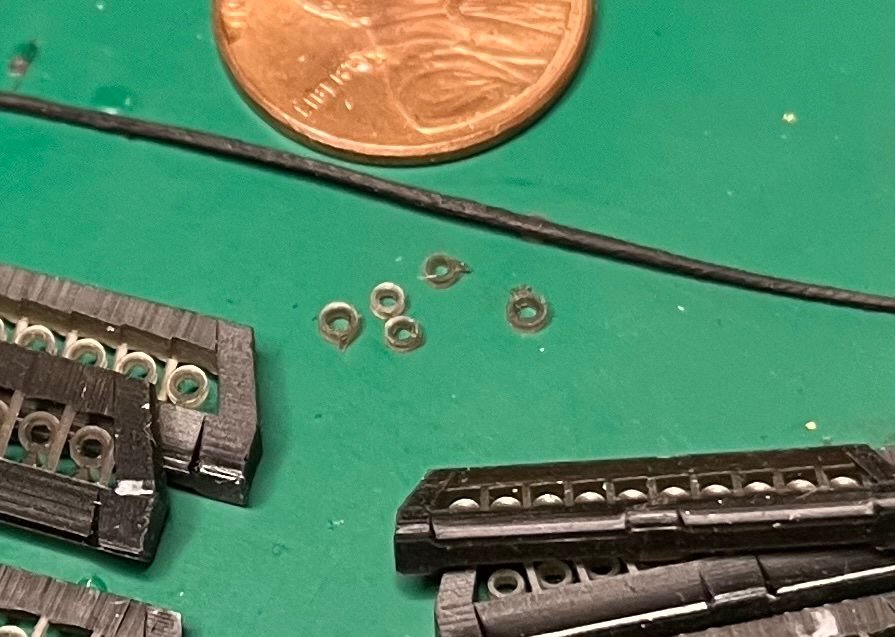
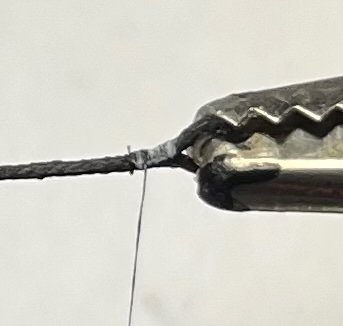
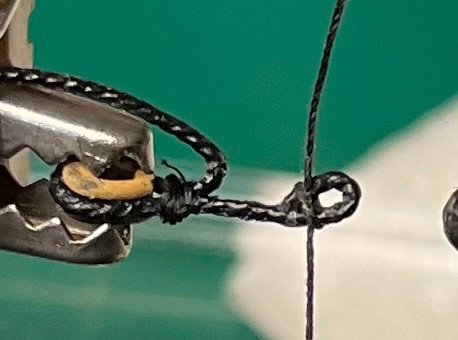
Took a shot at the 2mm thimbles for a bowsprit shroud. Intimidation was heavy. I’m using .63mm line treated with diluted glue and acrylic craft/textile paint top coat. In my experience the craft paint dries flexible. The reason is that the white glue is drying white on the new rope. I had to seize it twice to cover the gap between the thimble and the rope. Touched it up with the acrylic. I can’t get rid of the stubby ends of trimmed seizings. But I think I’ll keep it. Thimble-hook-ring-ring(pin). I’m struggling with my brass blackening skills. I cleaned the plates with warm water and Purple Power cleaner. But the black doesn’t stick.
-
Malcolm Brown reacted to a post in a topic:
HMS Victory by William-Victory - Heller - PLASTIC - First ship build
-
William-Victory reacted to a post in a topic:
HMS Indefatigable 1794 by Kevin - Vanguard Models - 1:64 - Feb 2023
-
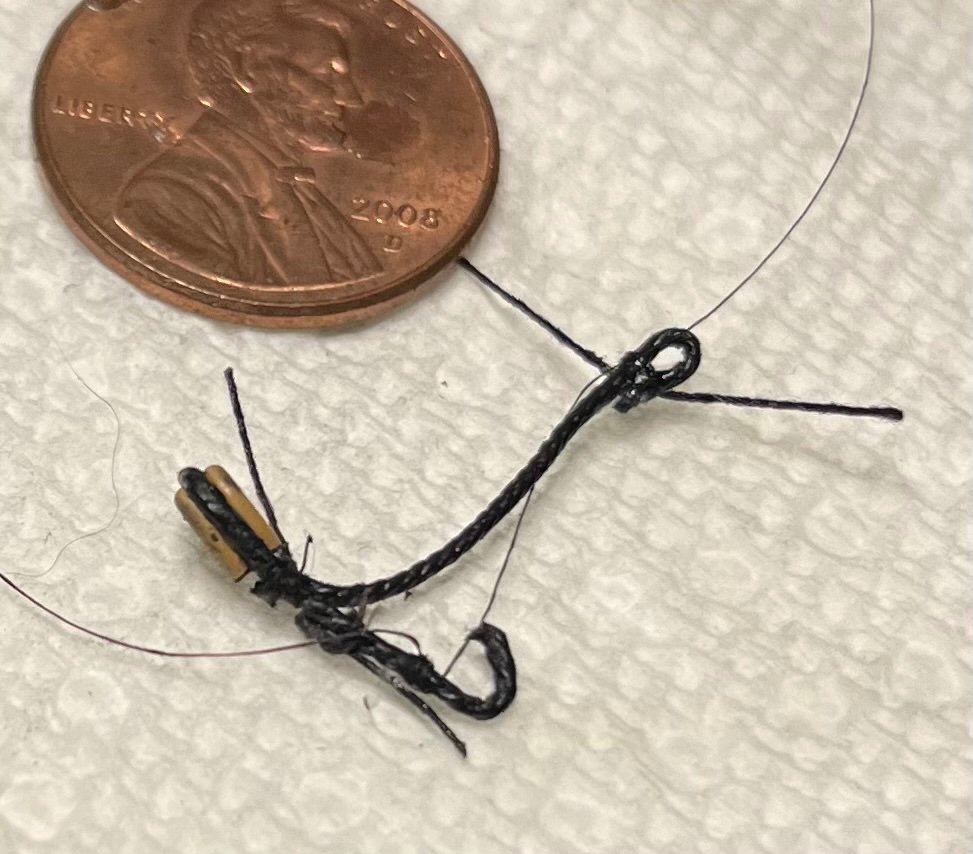
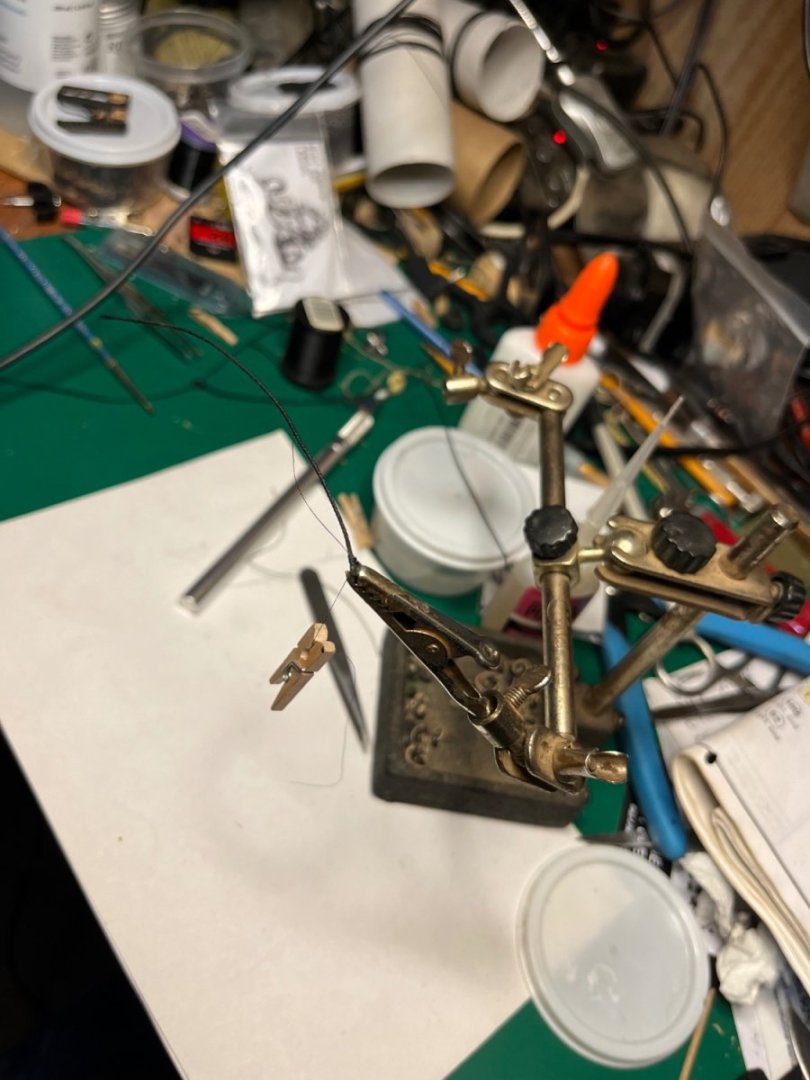
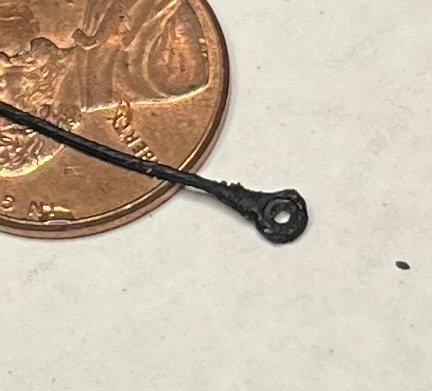
I broke my heart. And the fix is not to par. It became bulky from the repair, thickness of lines I used annnd trying to hide the splice. Today I am experimenting in reducing the line thickness. (Straight rope) to the orphaned attempt of my fore preventer stay heart. I started with a fresh pack of rope. The water thinned white glue had problem adhering this time. When I finally got the glue to coat I decided to try a second coat of acrylic craft paint. Normally I would shudder at the thought of using this on any model. But. When I airbrushed t-shirts I used this type of paint. It dries like a rubber almost. Flexible and used for textiles. So far I like that it doesn’t obscure the rope windings. Opinions please.

-
William-Victory reacted to a post in a topic:
HMS Victory by dafi - Heller - PLASTIC - To Victory and beyond ...
-
These are all for scaling in the devil dealing of the dentist office!? i’ve been looking for something that can “sculpt“ in modeling plastic
-
Does dafi remember where William can find his yard build photos. Should I do wood or kit Daniel?
-
Freshening up the top and experimenting with new paint. I have only rarely used water based paint on a plastic kit. Just like my avoidance of water based glues. Here is the top after a few years of dust. A bit of CA glossiness. The paint had more flow than I am accustomed to. And a bit too glossy. Adding a drop of black matte Acrylic Craft paint subdued the glare. …my small parts cup (for safe keeping) fell from a high place 🤔 might be time to order new chains set.


-
Parts cut nice and clean. Diggin’ it. Kudos Daniel! oops! I didn’t mean to post this here. Don’t mean to clutter up the log. The parts are great though.
-
Not sure which attempt this is. Process is cut at angle like Daf. Then I put little drop of white glue on the junction of the “splice” and on the tip of the angled cut. I love simple so .2mm with overhand knot just to hold the two (the end and junction) together. next step I am going to fly wire and white glue after I successfully pull of the simple knot. more results trying to simulate a splice.
-
Hello from Perth, Ontario - On to Victory!
William-Victory replied to Malcolm Brown's topic in New member Introductions
Hey Malcom. Sorry I didn’t visit earlier. im exited to see what you are doing and current progress.- 31 replies
-
- 2
-
-
- Victory 1:100
- Heller
- (and 1 more)
-
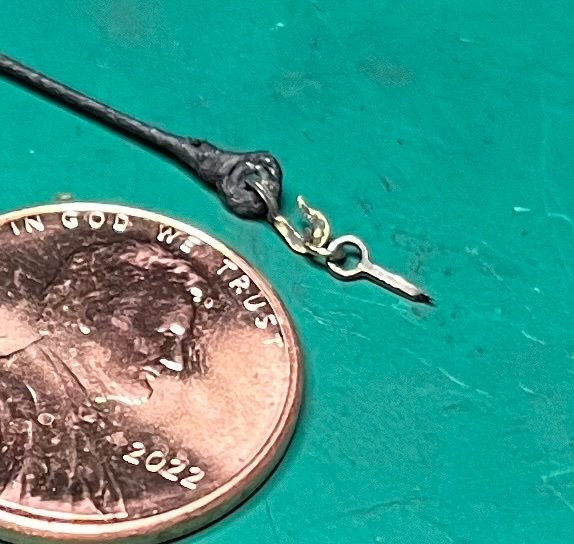
…I’m using .64mm? (edit)…. Are you using the same hearts?
-
So I tried a different technique. Not happy with some seizings using fly line. Putting the overhand knot on it makes a bulge. So today I applied dafinology and…. Put white glue on the seizing rope. Make the knot the just keep turning the seizing machine. Touch up with paint. I am preparing to do thimbles after these. So I really need to practice simulating splices. but I am reaching roadblocks. And I JUST realized that the method at the top of this post Malcom is described it. Sorry Malcom. Credit goes to you.