

Oliver24
-
Posts
106 -
Joined
-
Last visited
Content Type
Profiles
Forums
Gallery
Events
Posts posted by Oliver24
-
-
Hi guys! Do you have any opinions about the above mentioned tool? It is significantly smaller than its siblings and weights only about 250 grams. It is powered by a li-ion accu and has a fancy wireless charger. It lasts about 3,5 h of work with a single charge. Seems a very versatile tool for ship modelling...
-
I am thinking of buying an Occre kit myself, the HMS Terror. Till now, I have experience only with an Amati kit. Any other thoughts on the subject? Other people seemed to like Occre wood quality.
-
Thank you all! I would like to mention that I cannot bent the metal line to hold the dead eye even loosely. How did you managed to solve this issue in your projects?
-
Hi Guys,
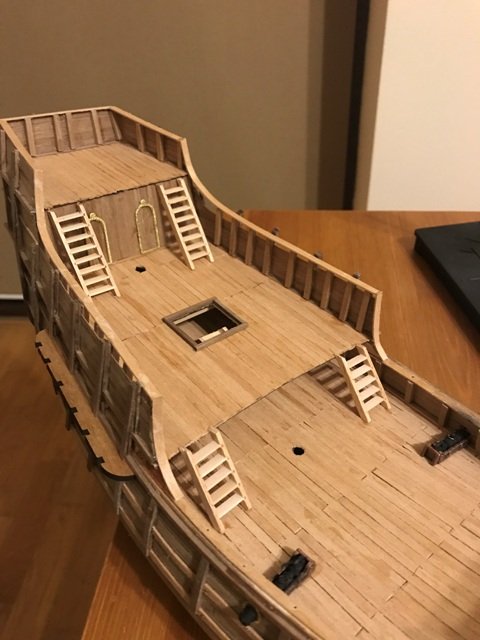
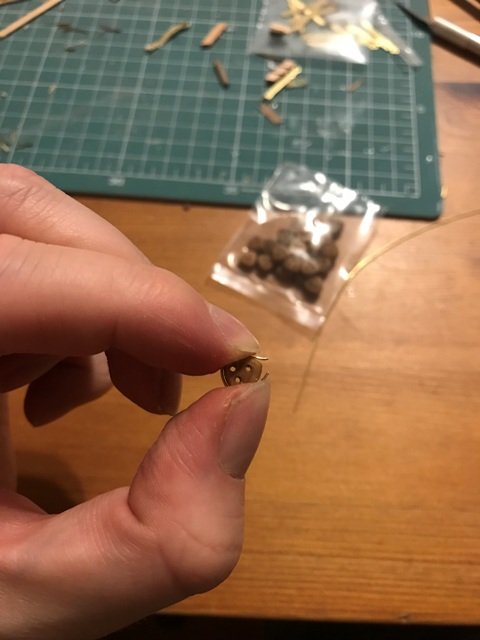
Here are some pictures about my progress. I had no problems with the ladders, however the rudder was a pain in the ***. The metal sticks which must be attached to the rudder came with no pins and it seems to me that smaller pins were necessary that the ones used in other parts of the ship. I used the bigger "standard" pins and bent them after but it was difficult and not very pleasing. Did I miss something? Moreover, the "V" shaped metal sticks must hold also another little piece which enables the rudder movement which I struggled to fix and eventually tried to glue. What is the correct procedure here??
I have problems also with the fixing of the dead eyes. The instructions provide that a slim metal line should be fixed around the dead eye and the extremes must be bent. I tried to do this but I never managed to exercise such pressure to the line to actually hold still the dead eye and it remains somewhat loose whatever I do. What should I do??

- Tigersteve, zappto, ccoyle and 3 others
-
 6
6
-
I am very interested in this project! No news for some time now...I hope it was not abandoned...
-
Thank you ccoyle! I am encouraged by the fact that Occre posted on its youtube channel a session of videos regarding the step-by-step building process of the ship. There are about 90 videos, 1 to 2 minutes long each! So I guess that will be very helpful for beginners.
-
-
-
Hi,
All the best for your wife Old Collingwood! Hopefully the medication will improve her condition.
Oliver
- popeye the sailor, Canute, Piet and 3 others
-
6
-
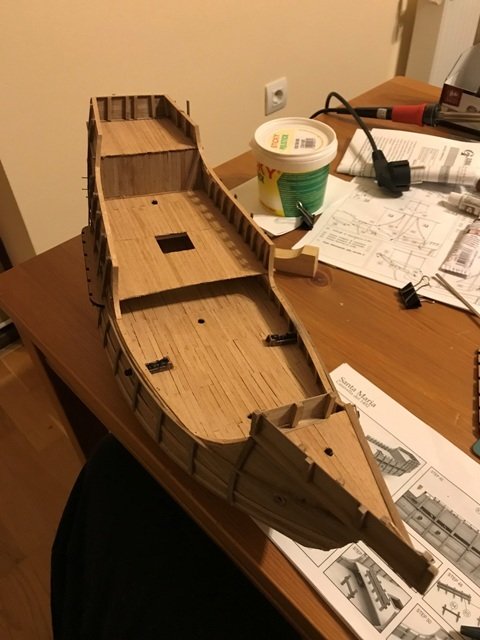
Hi Guys!
I was absent for quite some time due to work and MA studies. I still haven`s finished my Santa Maria but I will not give up and eventually it will be finished.
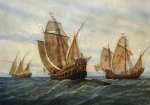
@Zappto, you guessed it right, there will be some open doors from the deck.
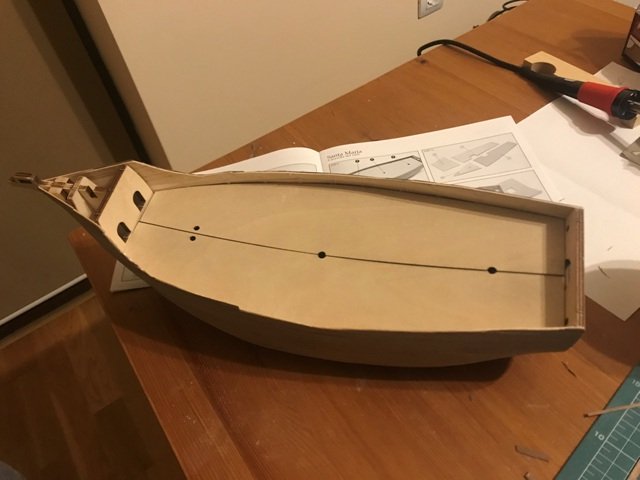
Here are some pictures of the ship>

- Old Collingwood, BETAQDAVE and zappto
-
3
-
Great work! very smooth deck planking. I assume you did a fear amount of sanding before.
-
-
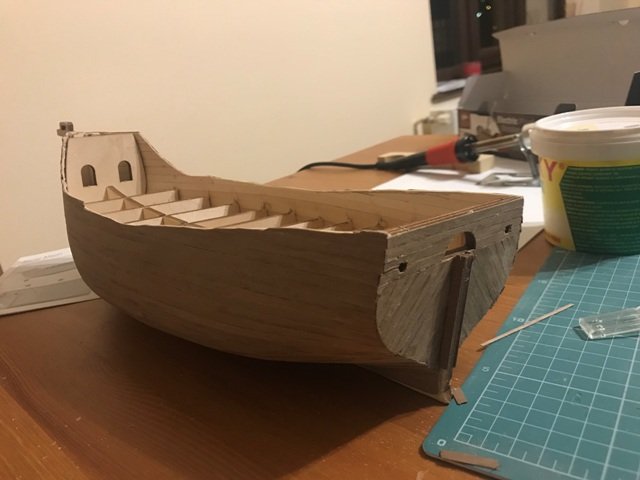
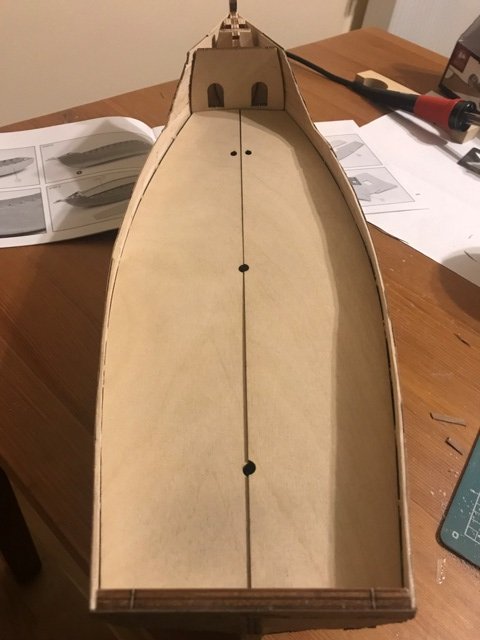
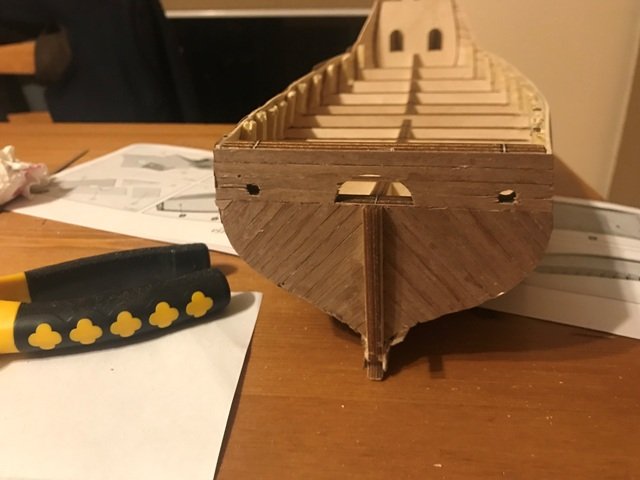
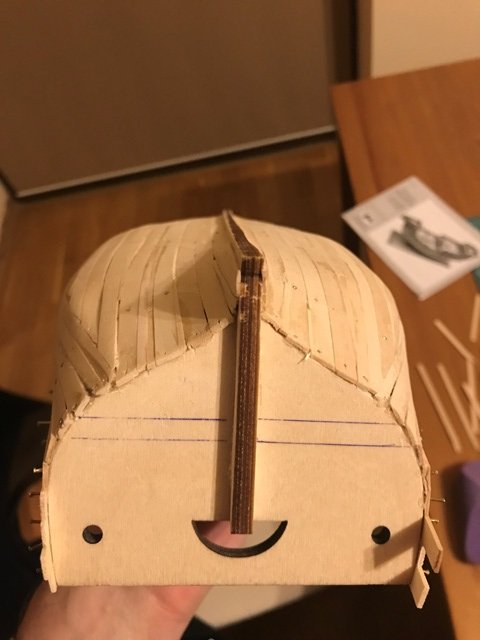
I have started the deck planking process. I have tried to place the false deck as straight as I could but unfortunately that did not work out very good. As you can see, for some reason the deck is not straight at the stern... However, I would not rip it off, because this part will be covered with a second deck, so I believe that it will remain as you see from the photos.
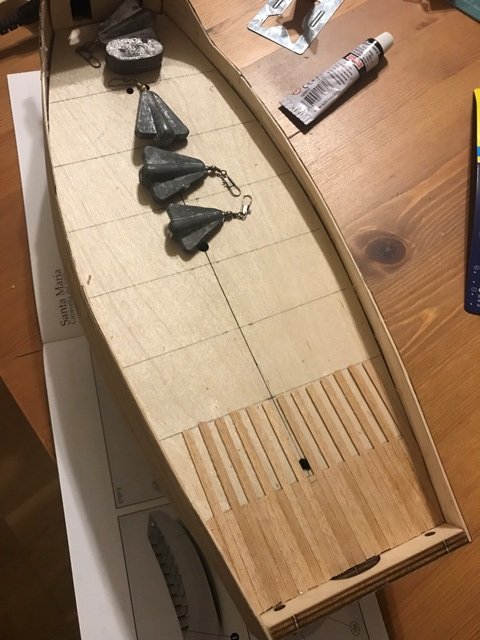
I forgot to mention that I painted in black the bow section:

- Old Collingwood, zappto, BETAQDAVE and 1 other
-
4
-
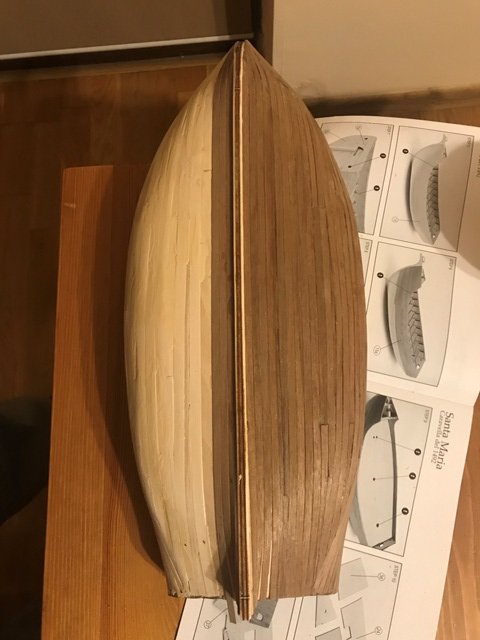
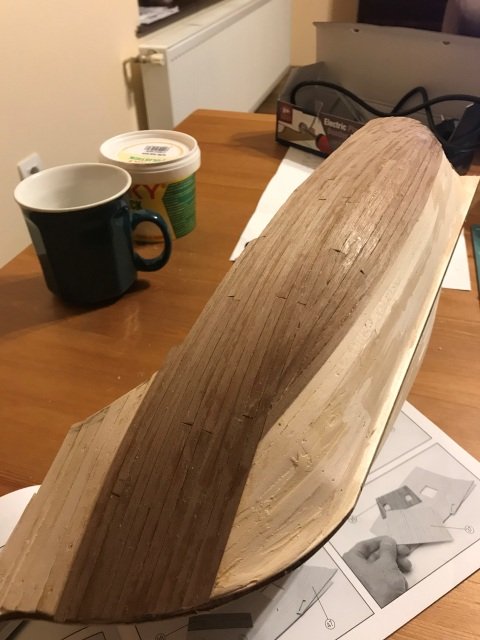
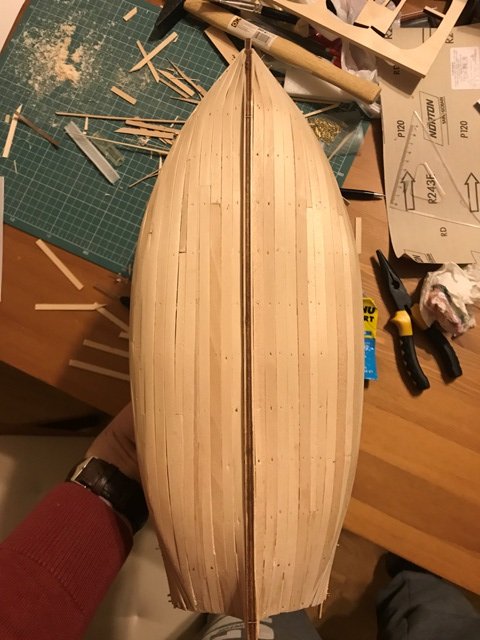
Second planking is finished. I will continue to sand it and afterwards I will use some tung oil/danish oil (I still did not found any).
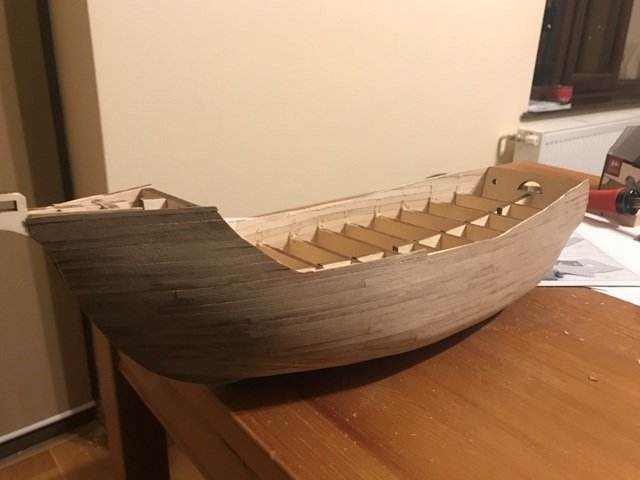
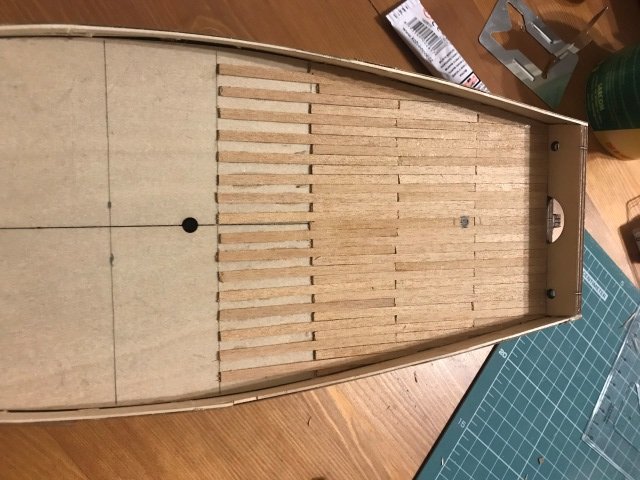
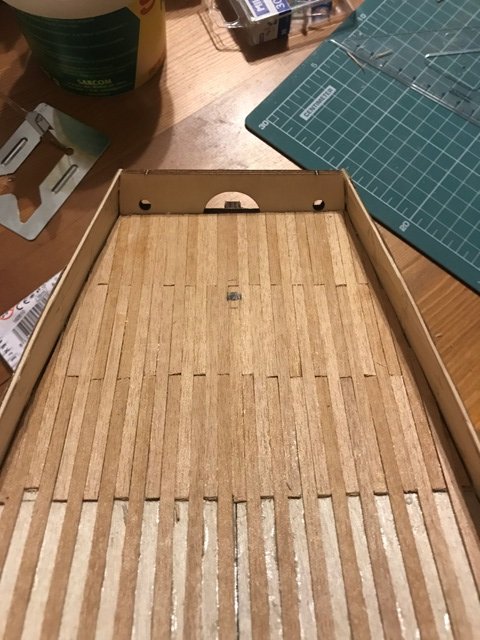
Now I am in the process of attaching the false deck. This proved to be a little bit tricky because the initial shape of the false deck did not fit perfectly on my bulkheads and some ugly gaps appeared between the hull planks and the deck. I sanded the edges of the false deck and slowly it is taking the right shape as you can see from the photos above. It still needs some adjustments on the stern area... My plan is to attache the deck first and apply the deck planking only afterwards. Doing so will avoid eventual warps of the deck planks afterward. What do you think?
- Tigersteve, zappto, BETAQDAVE and 1 other
-
4
-
My first and only kit is the Amati Santa Maria but I had no issues with the planking strips. However the second planking strips are very sensible as they are very thin and tend to scratch on the horizontal. This makes the cutting process very difficult. However, I did not encountered warped strips...
The problem with Amati as far as I am concerned is the lack of more detailed instructions...At least for me. However, I noticed that the Victory line is much better in this regard.
-
Any other opinions about Occre? While I am working on my Amati Santa Maria I always search for my next model. At this point I lean towards a big Spanish ship of the line... Maybe the Santissima Trinidad
 . However I do not know much about Occre but they seem to be the only to deliver big Spanish ships. One concern for me are the instructions. I am a beginner and while I tend to learn fast, I would be more comfortable with some fairly clear and detailed instructions. Some of the smaller Occre kits have poor instructions...
- CaptainSteve and Canute
-
2
-
This must be one of the most beautiful dutch ship model I have ever seen. Outstanding work

- zappto, Ferit and Old Collingwood
-
3
-
Hi zappto! I am still not decided how to fill some of the gaps of the second planking. I found the second planking quite difficult due to the thin planks which tended to snap very ease on the horizontal.
I guess I will sand the hull after finishing and see if I will manage to close the gaps. For a finish I searched like crazy for danish oil, but I could not find any... In our region in seed oil is more at hand. I am thinking also to order some tung oil. All in all, my purpose would be to darken a little bit the second planking. Not really sure what type of oil would fit best.
- zappto, BETAQDAVE and Old Collingwood
-
3
-
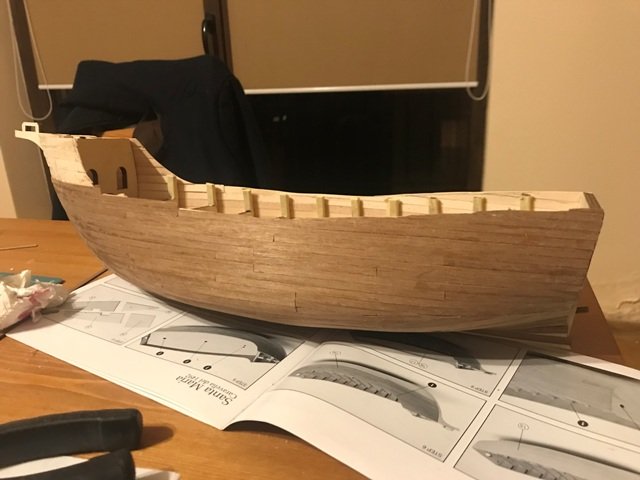
More photos about my second planking. I have finished one side and started the other:
-
Wow! Very nice progress. I love books also. So much better than reading from a computer... I heard about David Antscherl and my understanding is that he is an excellent ship modeler. I bought Frank Mastini`s book "Ship modelling simplified" and I am also thinking about buying Donald Dressel`s "Planking techniques for model ship builders and Milton Roth`s "Ship modelling from stem to stearn". I will check out Antscherl`s book also...
-
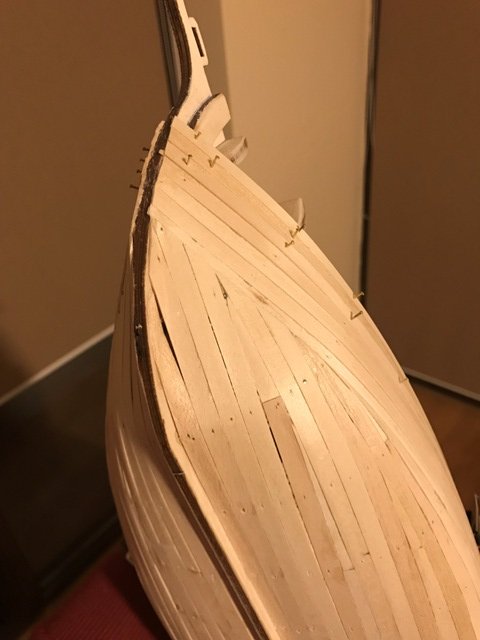
Here are some photos of the second planking. I was a little bit surprised that dough the planks are slimmer, at the end the shape of the hull forced me to follow the same planking positioning of the first planks. I would have preferred more straight lines at the bow and center of the hull... What do you think?

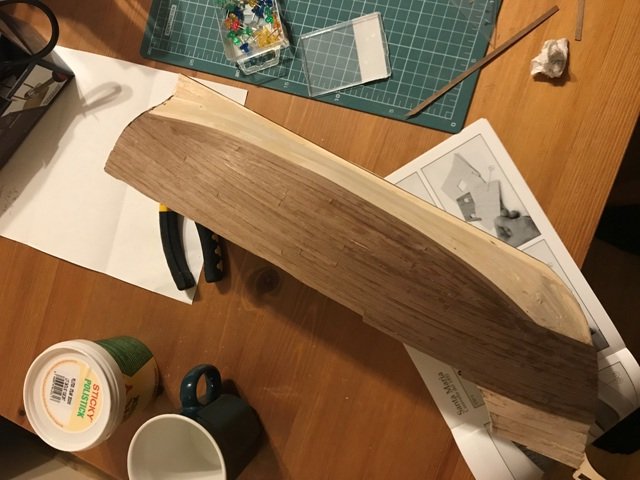
I have a further question: in the process of the second planking some strips got excessive glue and maybe you can see that in the first picture. Will the second planking be sanded as well? I intend also to buy some danish oil or tung oil just to darken a bit the second planking and to emphasize the old age of the ship. Any suggestions?
-
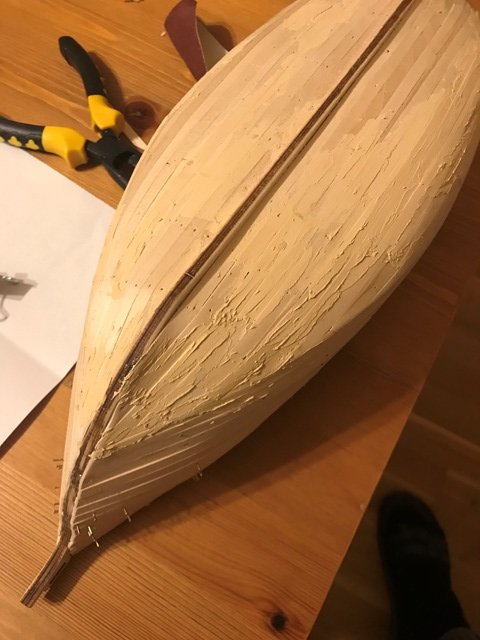
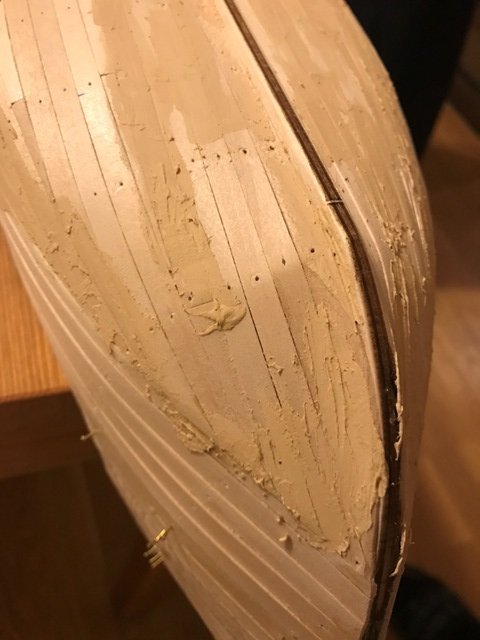
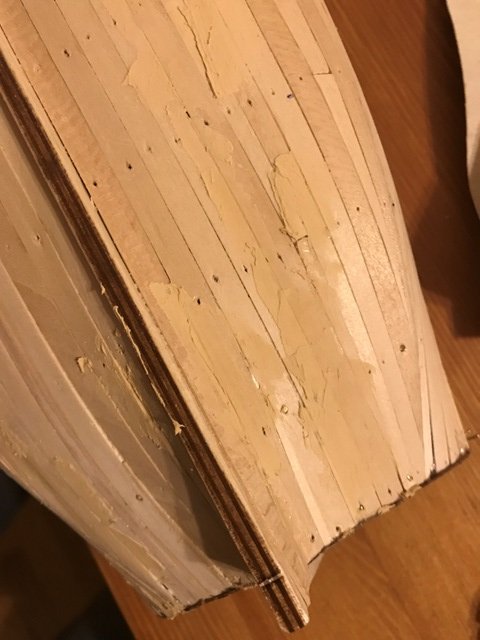
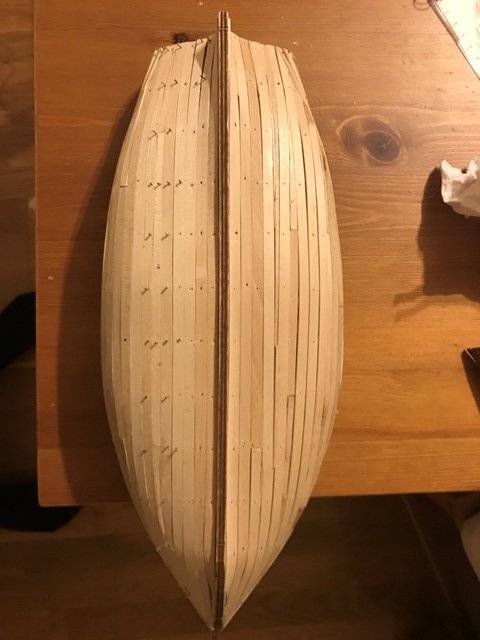
Peter I followed your advice and I bought some wood filler. Funny thing is that I managed to buy a very close colored wood filler, even as you said, this is not important. I gently applied some as you can see from the photos.
I also trimmed the bow as you can see. This was very tricky because the trim level must be the same on the opposite side of the hull. I did a fair job I guess... Now I am waiting it to dry and I will begin the final sanding process before applying the second planking.
-
Thank you for the nice words guys! It encourages me to go on continue this project. I have a question: I have seen on more logs that some builders use PVA glue and wood sand to fill the gaps. Is it a good idea? What moisture should I use if not?
-
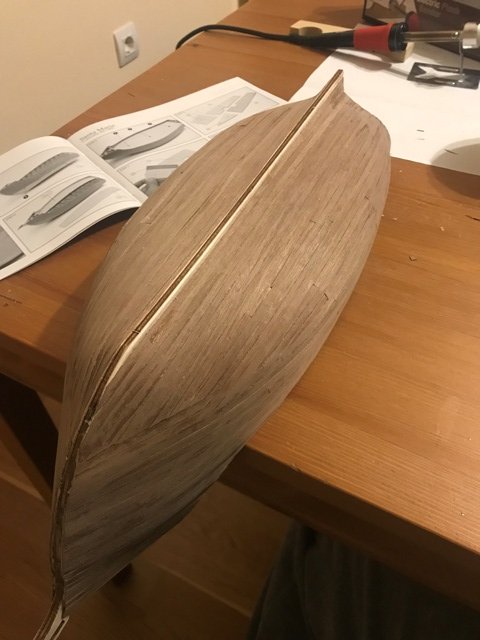
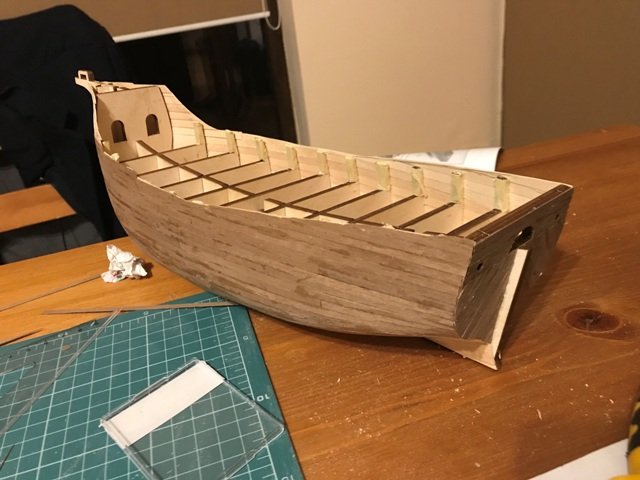
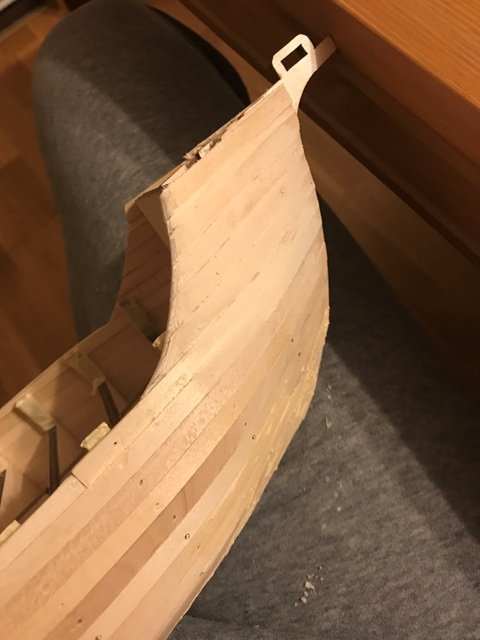
Hi guys! I have finished the hull planking with some questionable results but I guess this is normal for a beginner. As you can see, the second half of the hull is more clear as I gained some experience with the first side.
I had some problems with the garboard plank also. Unfortunately I fixed it too strongly to the keel with a clips and it left a small gap. I intend to cover it with some scratch wood which I have gathered in the sanding process and mix it with PVA glue maybe.
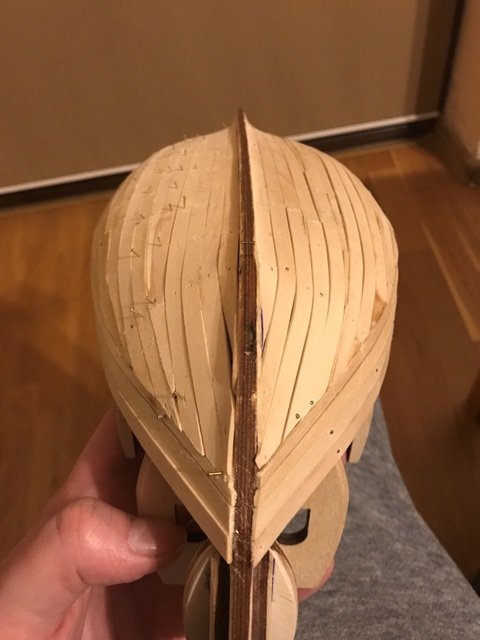
This is the hull after sanding it a bit. I managed to sand down the inconsistencies. There are some little gaps here and there but thy are filled by scratch wood.
In the next days I will concentrate to finish plank the upper portion of the bow and stern.
- Old Collingwood, zappto and BETAQDAVE
-
3
Dremel 8050 micro
in Modeling tools and Workshop Equipment
Posted
Thank you for your opinions! Any other possible alternatives?