niwotwill
-
Posts
549 -
Joined
-
Last visited
Content Type
Profiles
Forums
Gallery
Events
Everything posted by niwotwill
-
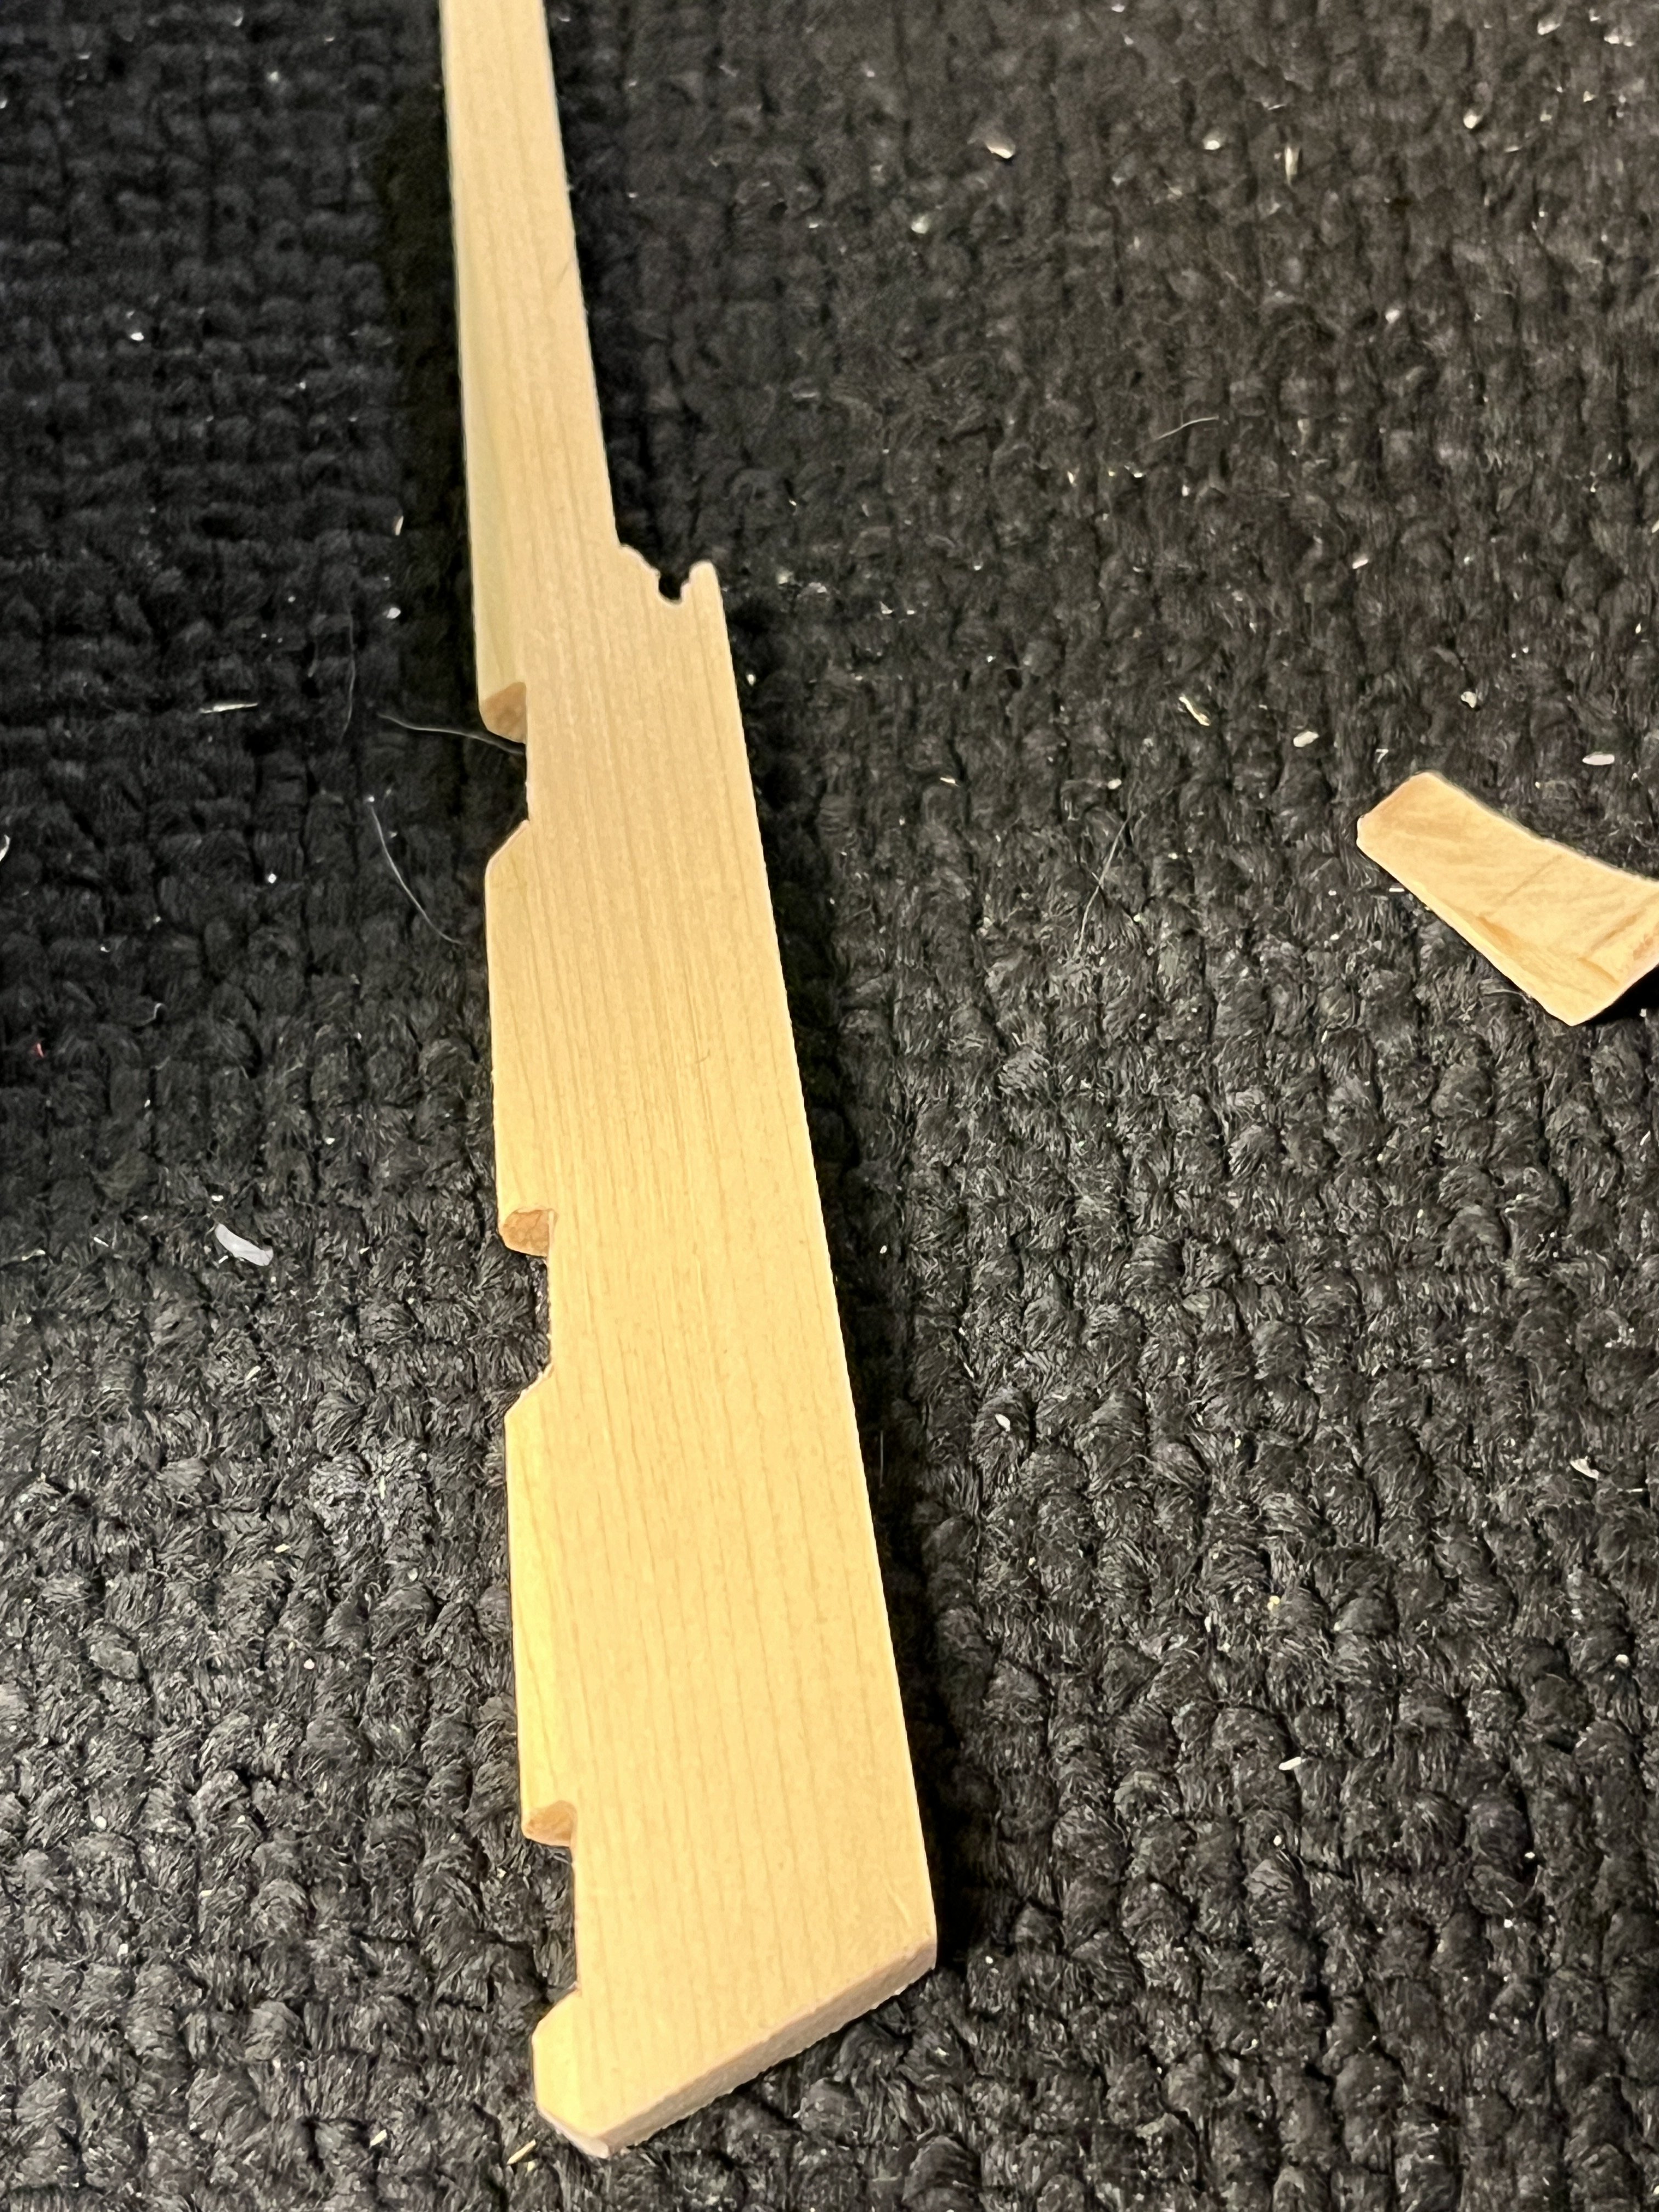
 With all that done it is time to make the boom crutches. These are going to be simulated to be an extension of the fashion piece. Following the manual I first made the stem angle aligned with the fashion piece when viewed from the rear. The second angle is to align with fashion piece when viewed from the side. These are to simulate being one piece with fashion piece. Now the face needs to be looking at the mast and with this done I glued the crutch to the cap rail. Next will be filling the joint and sanding making it appear as an extension of the fashion piece. That said it took two full days and seven attempts to make one. Couple of photos from stern and side Not to sand the top making the last angle toward where the boom would be at rest. Putty and paint. Oh yea I have to make another for the other side.

-
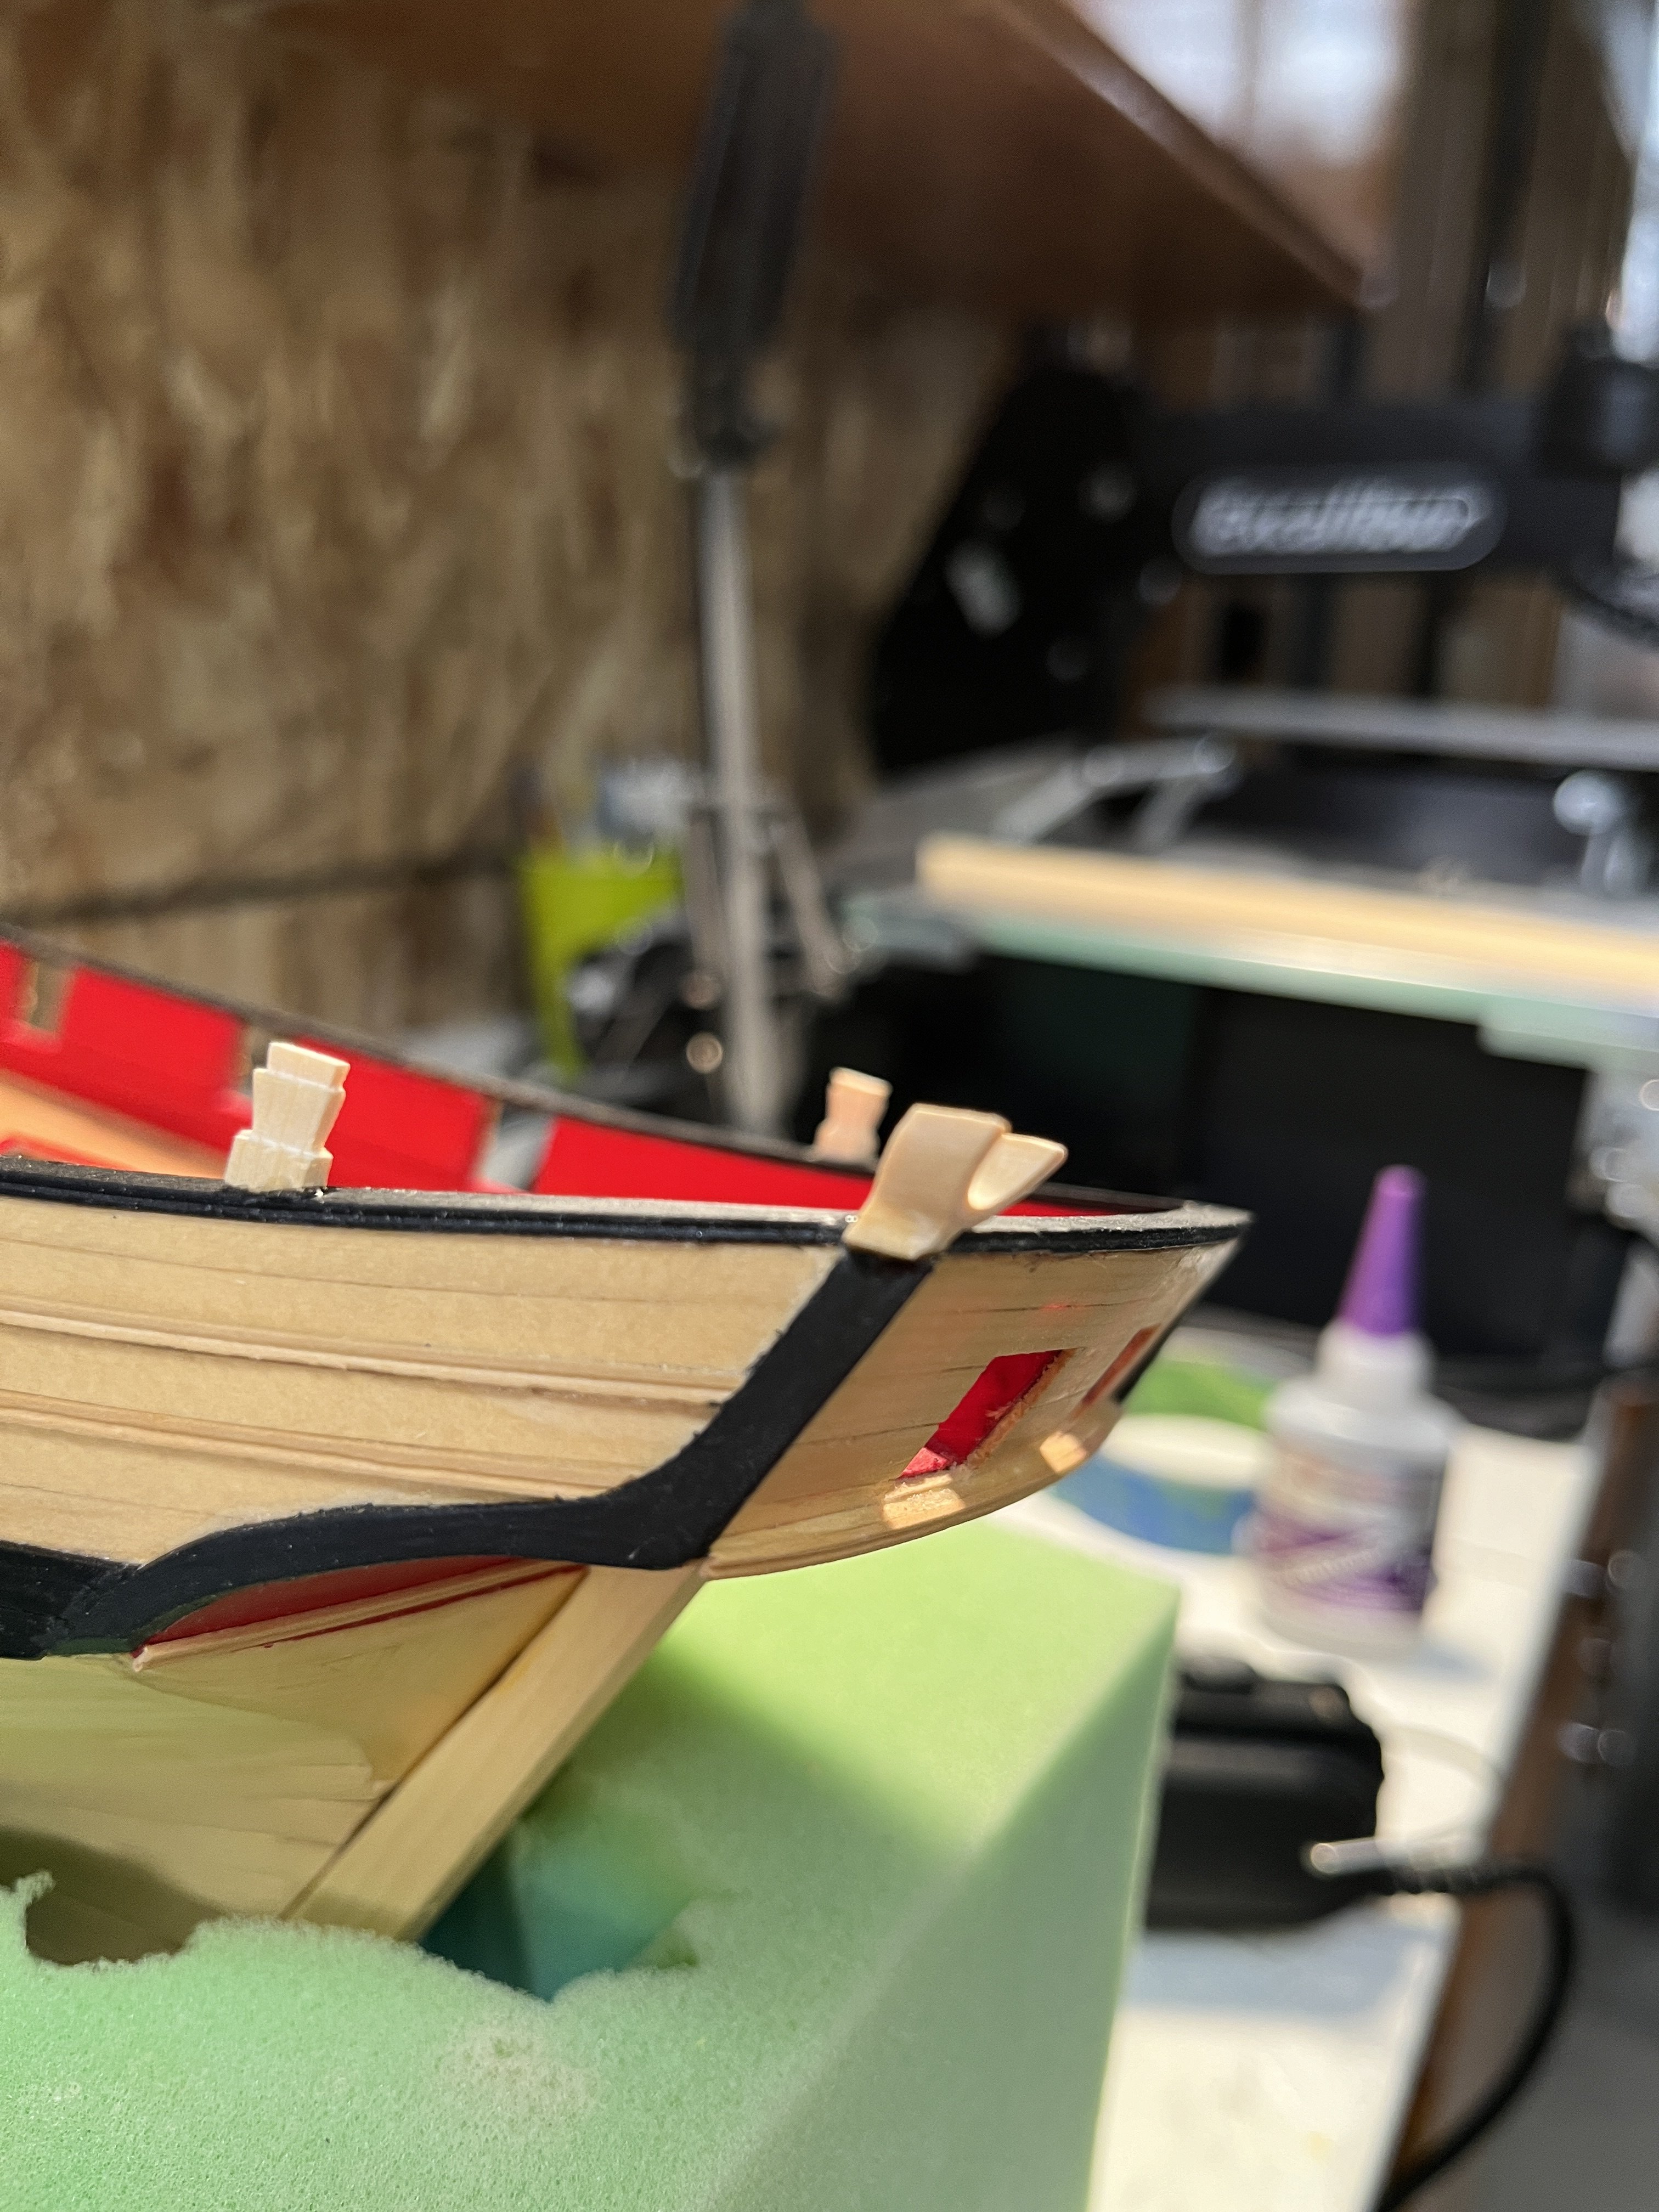
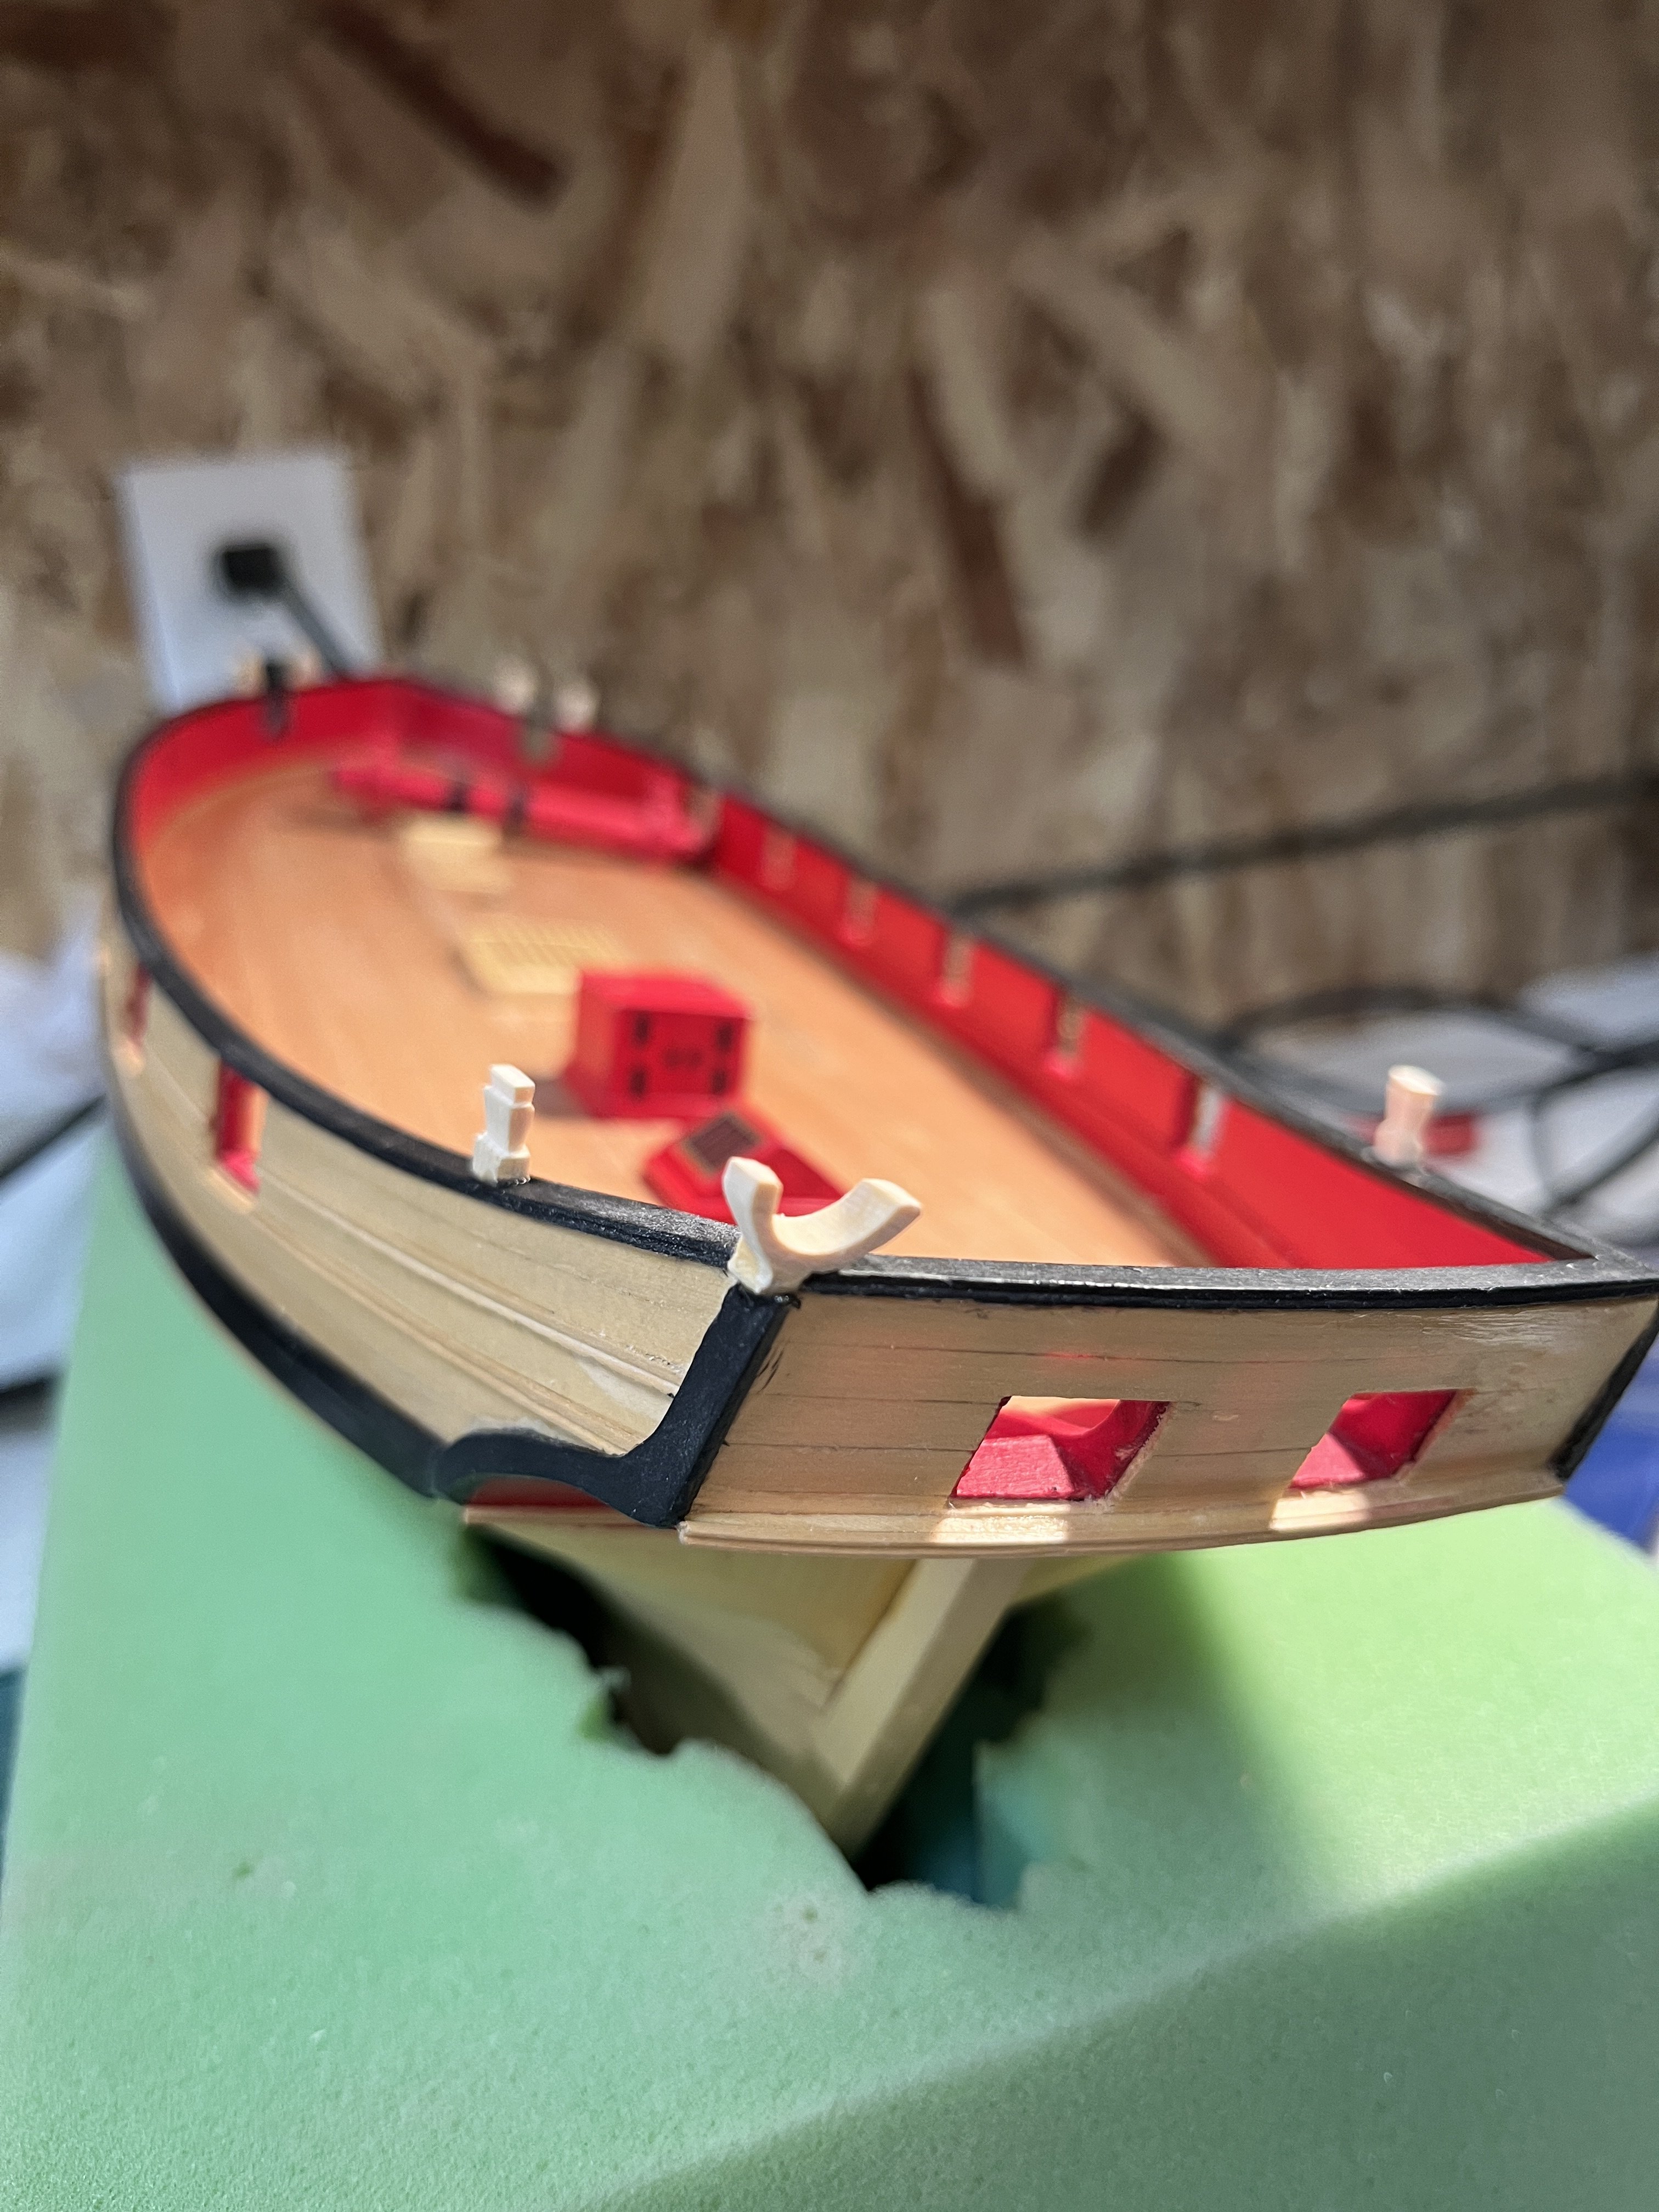
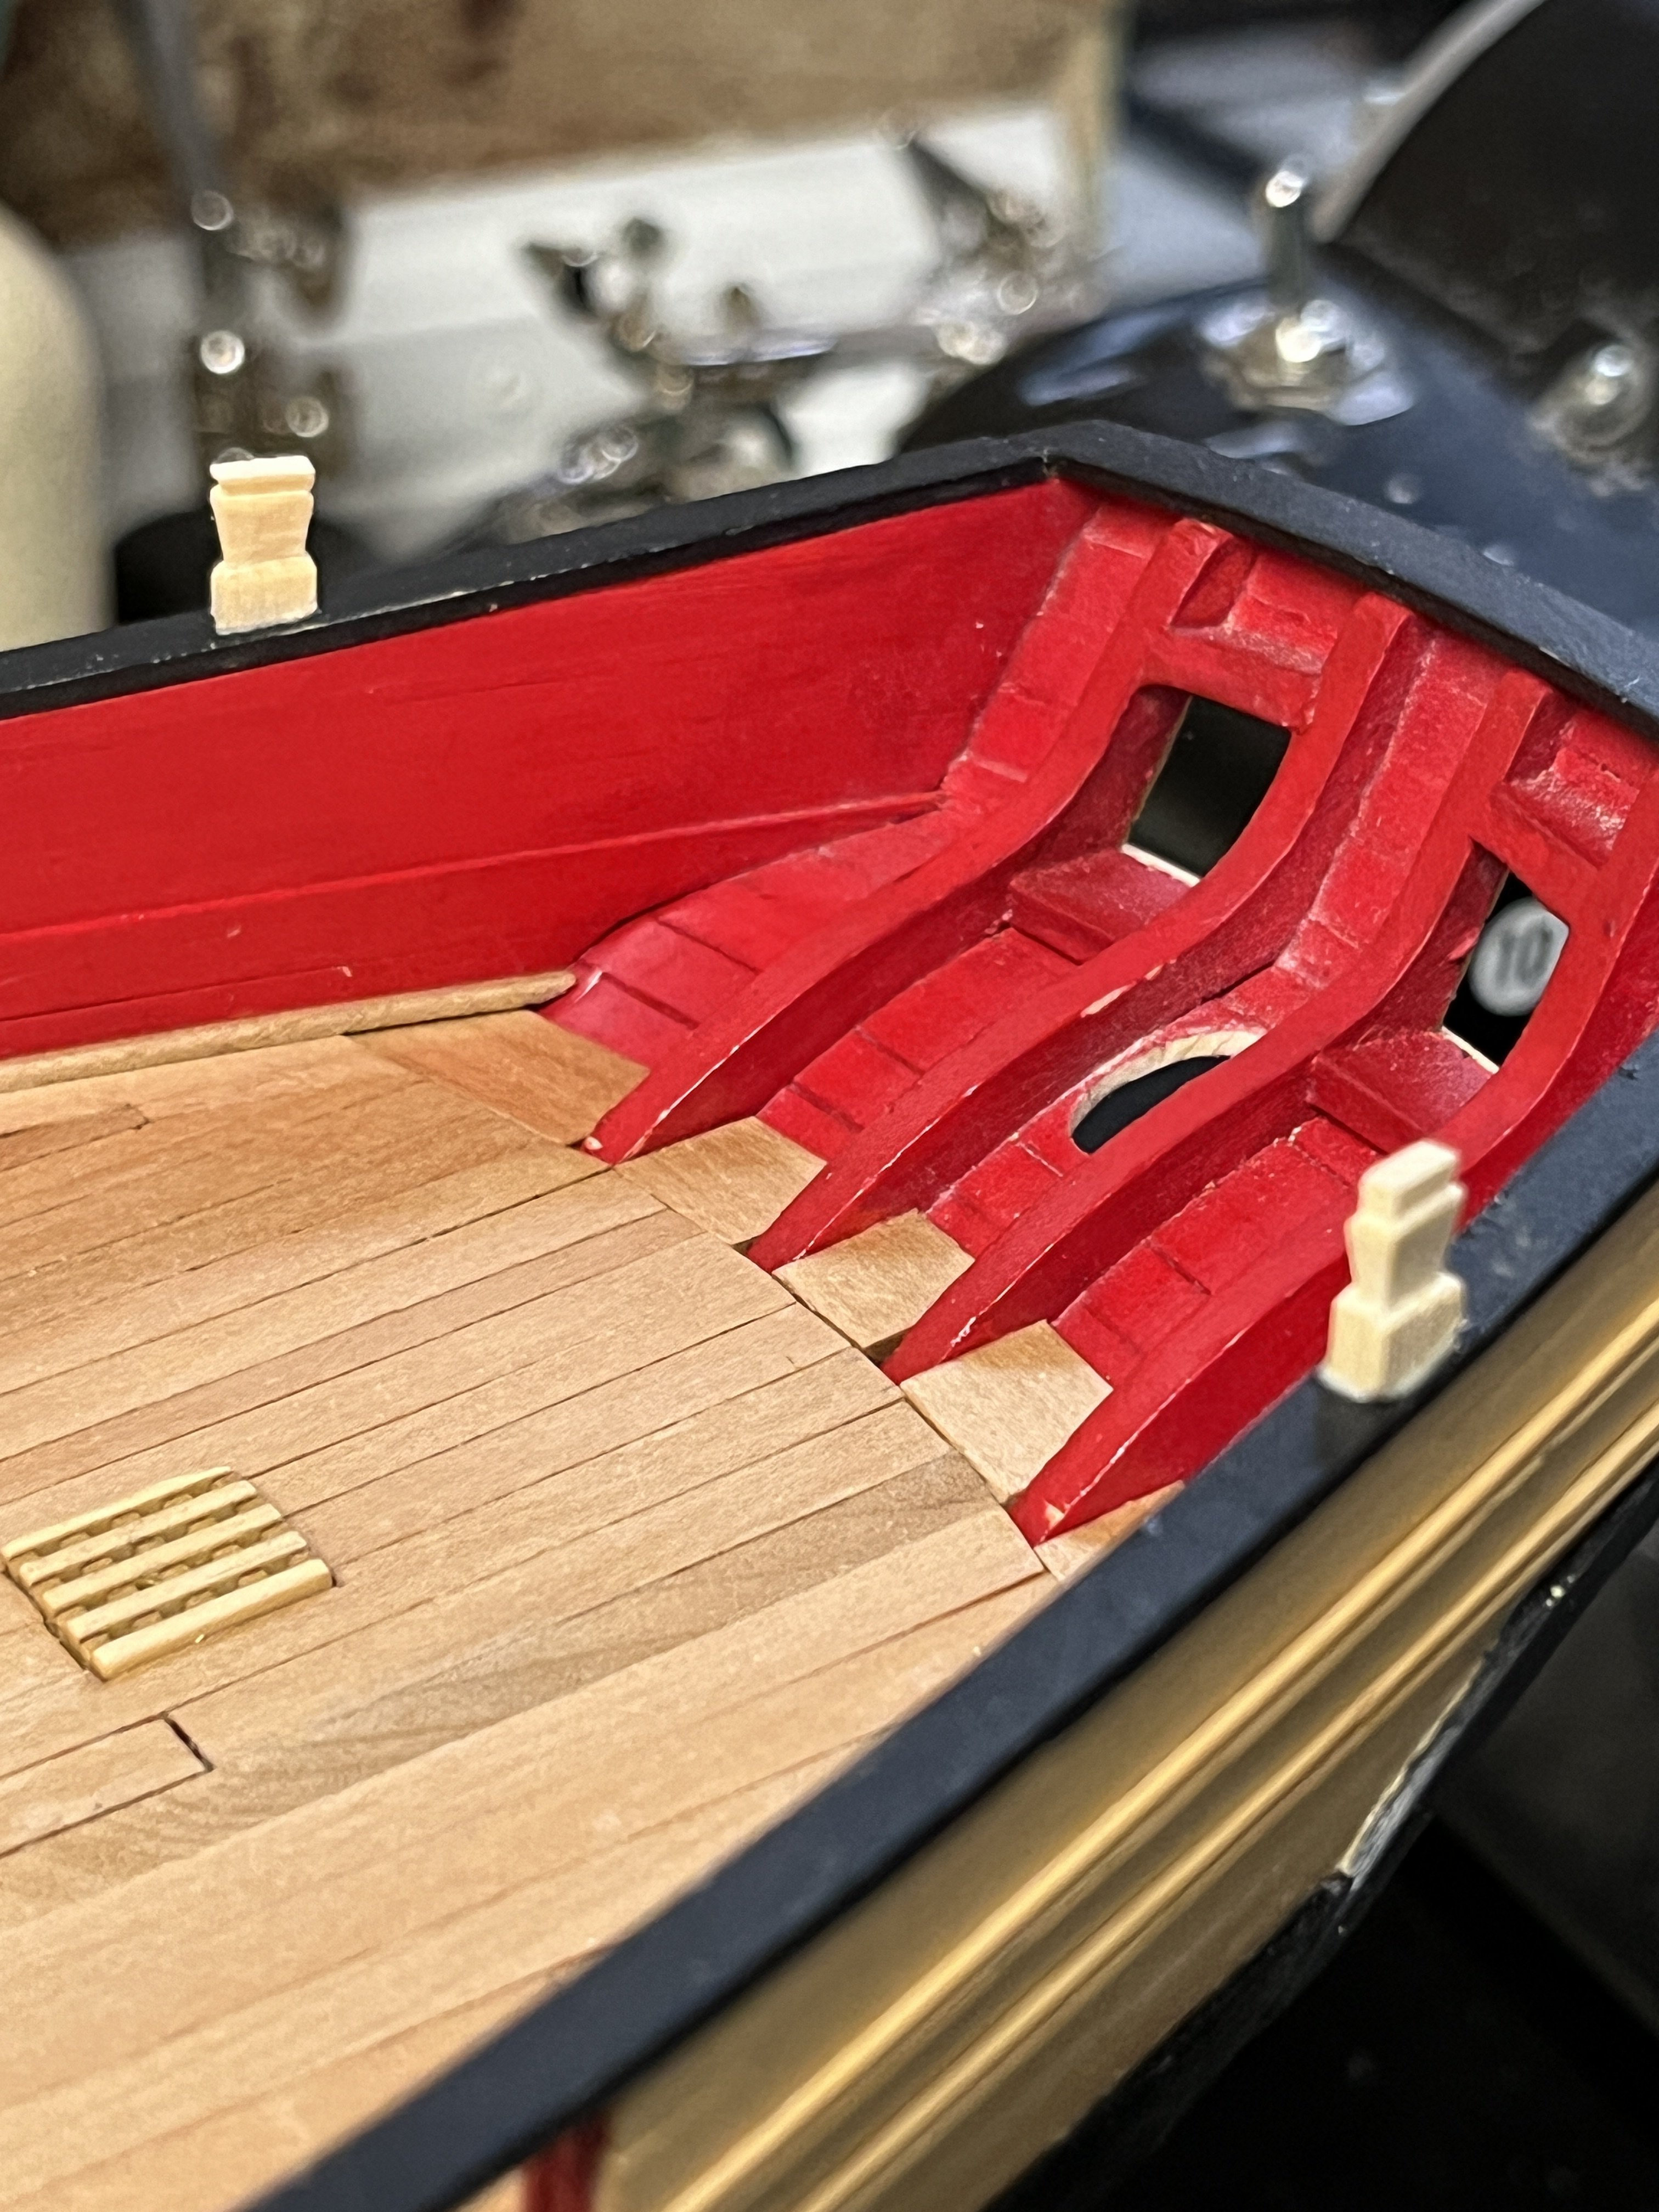
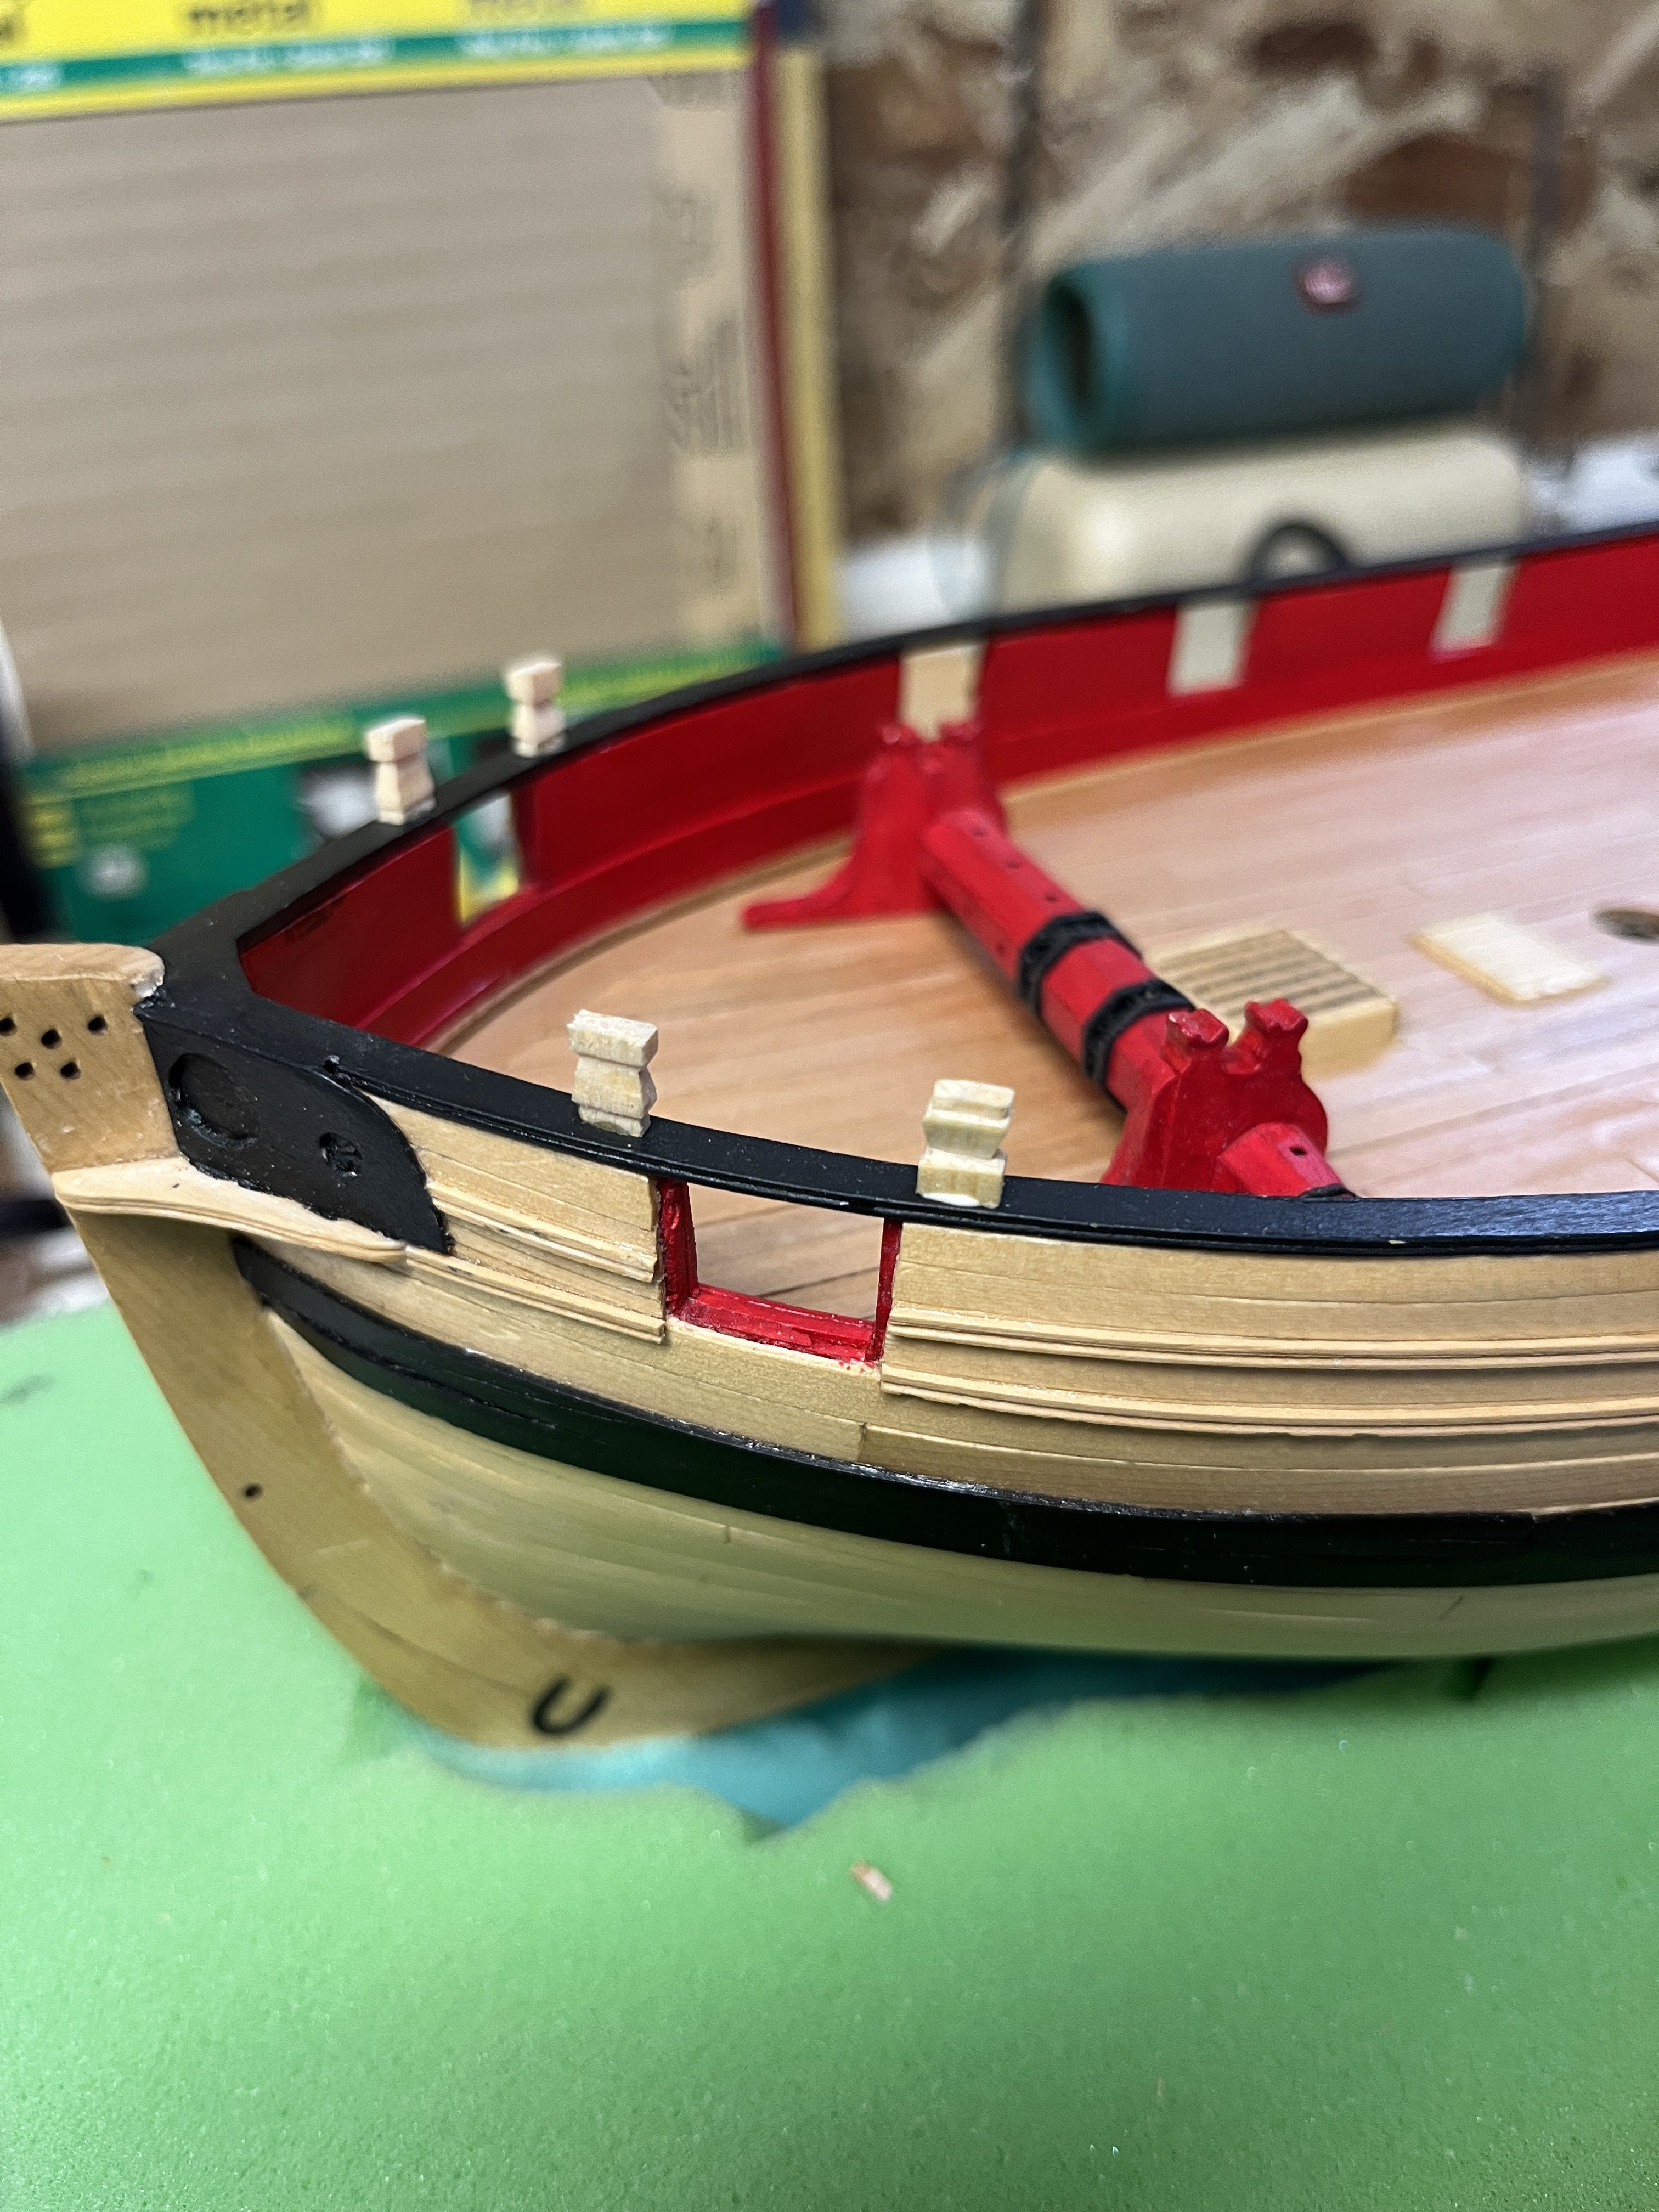
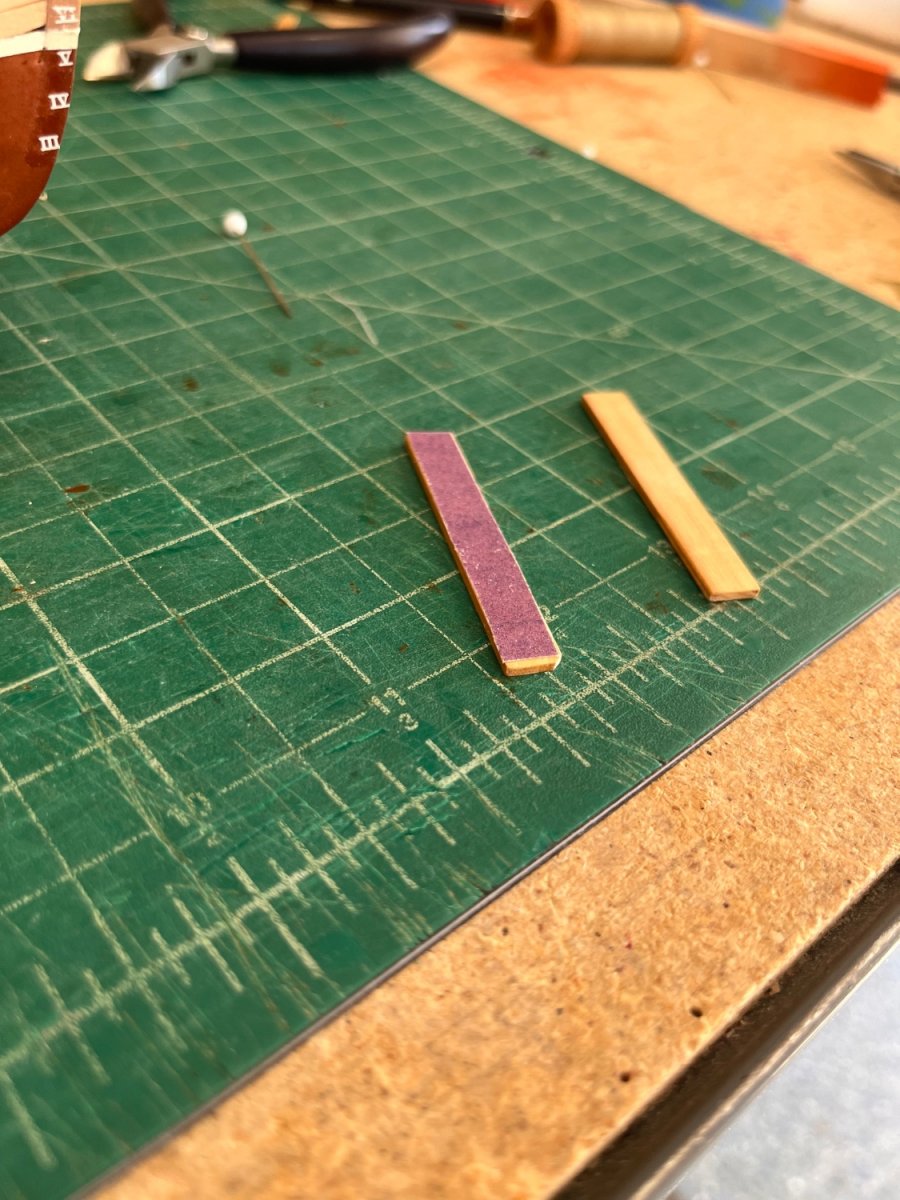
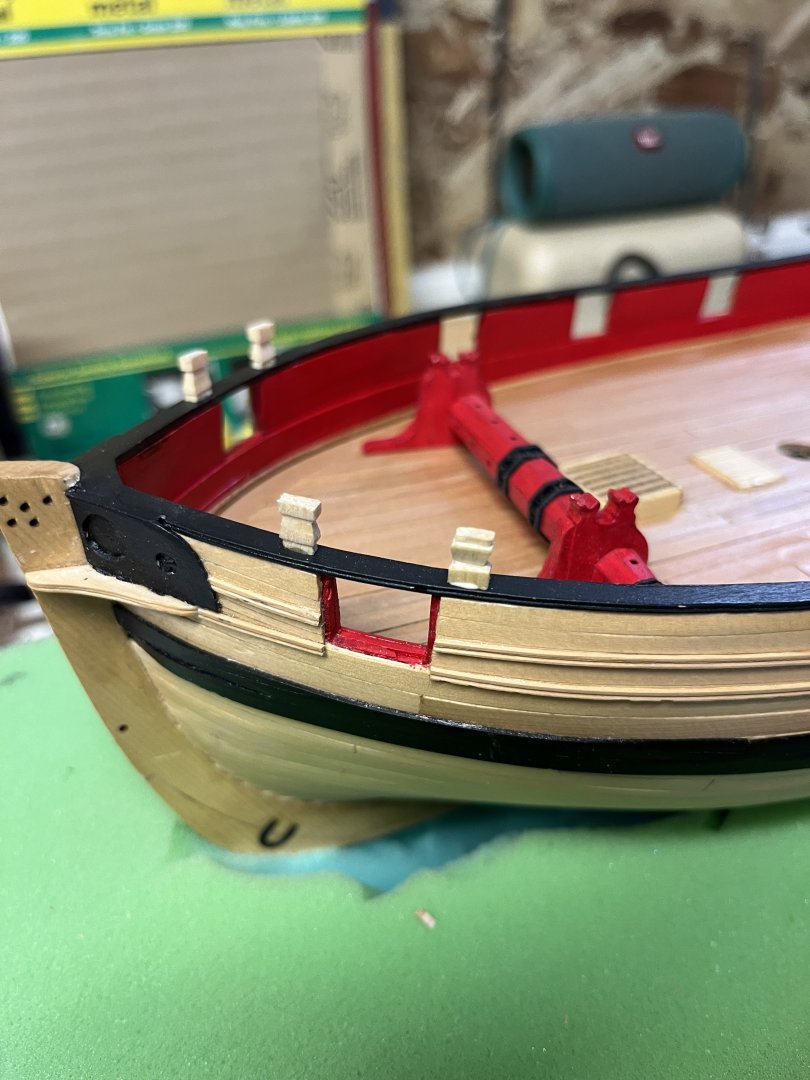
Now with the deck completed its time to start the cap rail tops. I spent a few hours trying to decide whether to use Alaskan Yellow Cedar or Boxwood. The Boxwood held an edge better the AYC but was very hard to cut so in the end I'll use AKC. First were the timberheads where I followed the suggested method by drawing a pattern on a shaped piece of wood. I cut the first and then used it as the pattern so I could make all 6 with the same shape. It was also time to shape the rudder and make a hole in the counter. Drilling the hole in the counter was nerve wracking let me tell you. All done for some photos. Rudder shaped with a piece that simulates the rudder post inside the counter Forward timberheads After timberheads and you can see the rudder hole that still needs to be painted


-
Not much to say except the deck is planked waiting for glue to set. Tomorrow I'll sand and scrape if I get that done wipe on poly will be applied. Next is reading the instructions and start with another project.
-
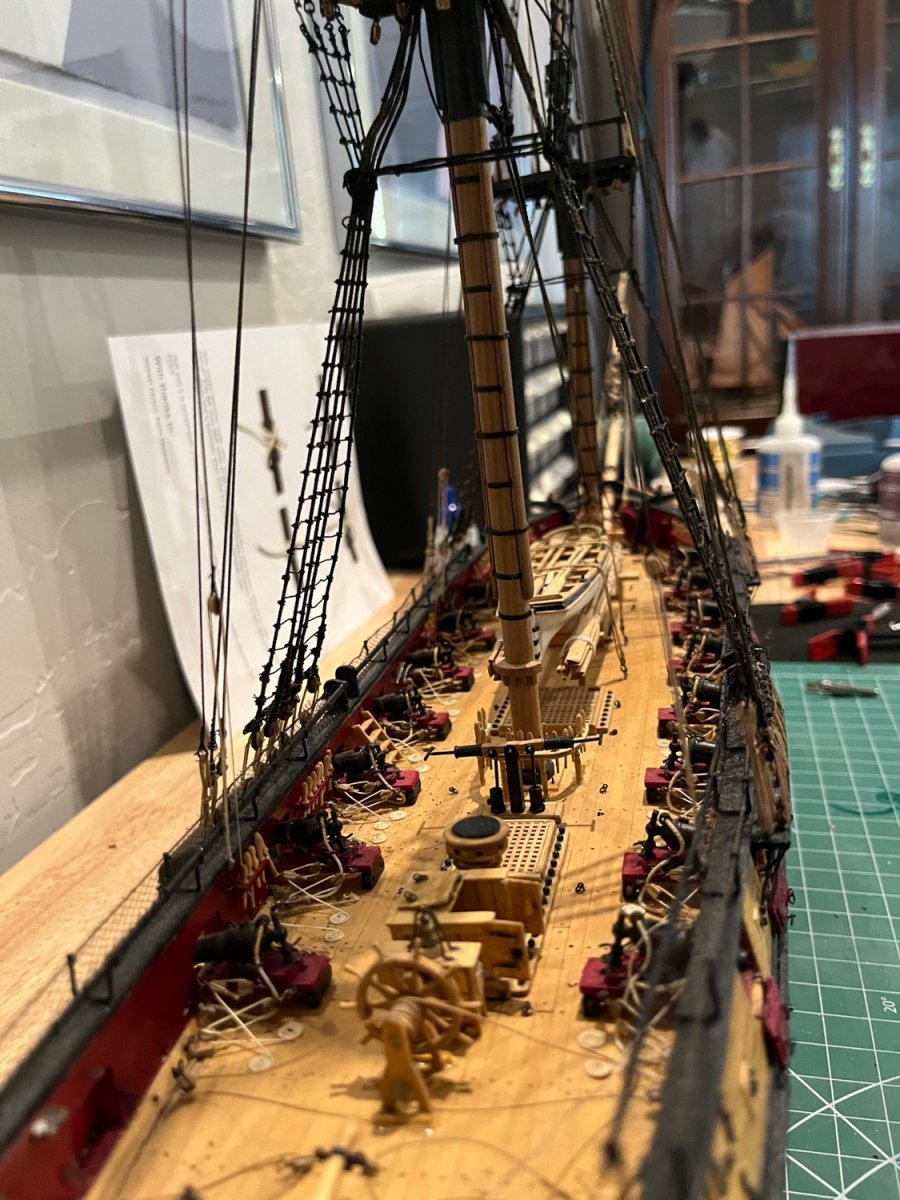
Starboard side deck complete and ready for scraping and sanding. Cutting the margin plank was not very difficult towards the bow but when cutting the aftermost was very difficult. Forward the margin plank has a rather severe curve that allowed the cuts rather short. The short cuts made matching the plank into the nibbing fairly quick without too many oops along the way. The after plank nibbing made for long cuts into the margin plank. Several of these were slightly off grain so many new blades were required. The last is 1/4" wide and made of three pieces. I was able to make the ends from 3/16" planks nibbed into the margin. The center plank is the 1/4" wide with a radius cut into the margin plank side which allowed the ends to align with end pieces. The center was extremely difficult to make. First I tried making a pattern from paper and then cutting a poster card with no success. Finally taking the plank sanding one end to align with the 3/16" end piece and with trial and error getting the width and radius correct I cut the plank to length. Lastly sanding the shape to match the curve and butt against the forward end piece. It all came together The photo exaggerates the butt joints which are tighter than the iPhone photo
-
Finished the planking up to needing to start ribbing. I've never nibbed a deck into the waterway so I'm going to Rocky Mountain Shipwrights meeting tomorrow. The club is part of Nautical Research and has a meeting on the first Saturday of each month to help and just meet on the third Saturday is the club general meeting. This is a very active club and I'm glad to be a member. More after the meeting tomorrow
-
Center planking completed. Several logs mentioned how difficult the center planking had been for them. The manual simply states to start in the center and makes no mention of dificulty. During this process my wood bin got its fair share to fend off hunger. I found it necessary to add an additional plank that facilitates a slight notch around the largest hatch. This worked well finishing the planking by making a logical plank length to build off starting the 4 plank shift pattern. The walnut wood is more varied in color than I wished but after scraping at the mast hole the colors were not as varied so i'm hoping that the deck will blend into a more uniform pattern. Tomorrow I'll start the second plank of the 4 plank shift pattern.
-
Couple of days working on the center plankings between the furniture pieces. A lot of measuring, cutting, filing and fitting and making a new one. Slow and methodical work with not much to show for the hours spent. This is where I stopped today. The starboard piece laying on the false deck is the next to be notched around the companionway and skylight. Studying the work I've done and how it progresses along with several decks where the bent the planks rather that ribbing them into the waterway I decided to nib them. I feel the bent deck planking makes the deck appear to bulbous and the straight seem to be more common.

-
Started post and went to lunch so I'm not sure how the photos got reversed. OOPS on my part.
-
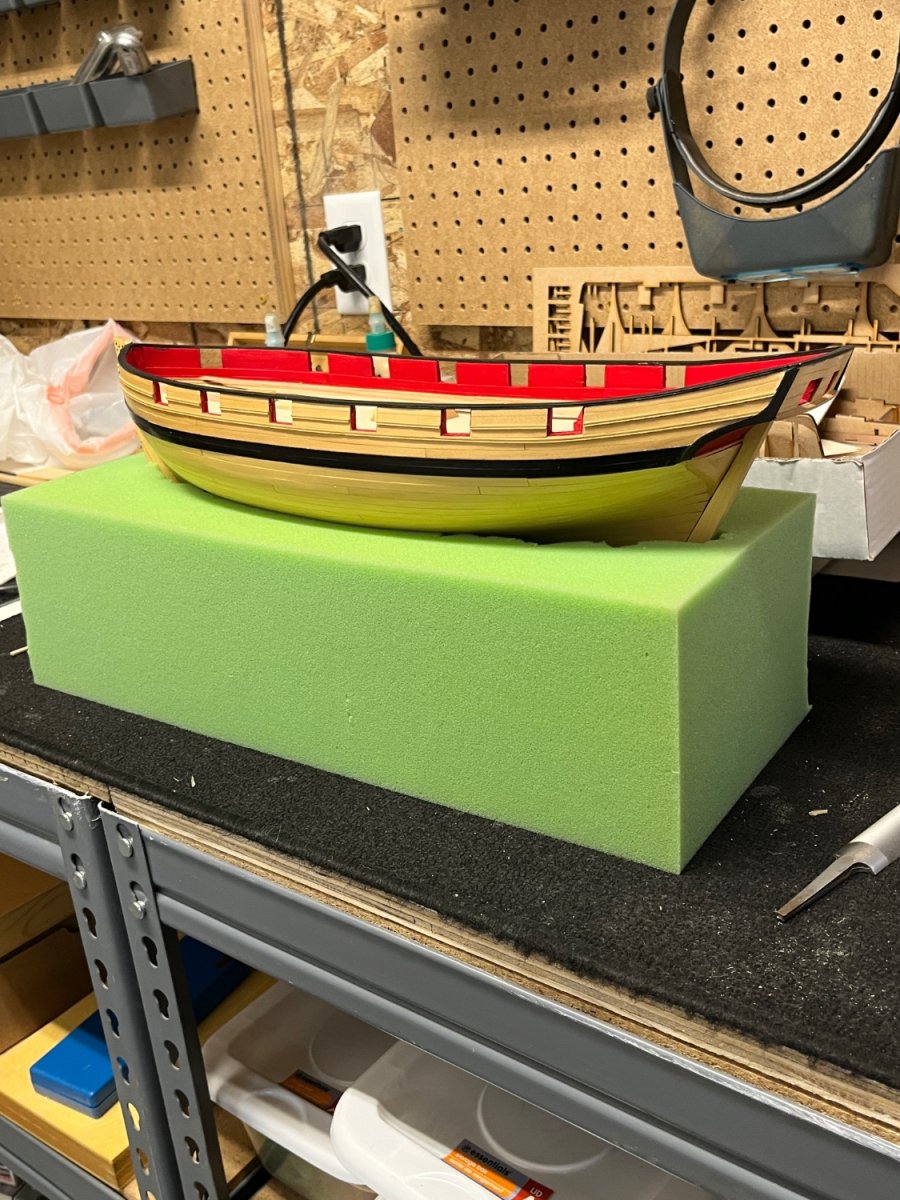
Another short update. The center planks completed from bow to first hatch. th Now its on the lining off the deck for final planking. Prior to lining the deck I needed to protect the finish planking. I've used foam rubber on another model with copper plating with great results. No damage. I'll use the same method this time. Bought a remnant of 5" foam at JoAnns. Cutting a slot the length of the hull and then cutting along the sides creating a valley where the ship sits. I also find that this is very helpful when rigging on the top of a lazy susan. Now on to lining off the deck for planking.


-
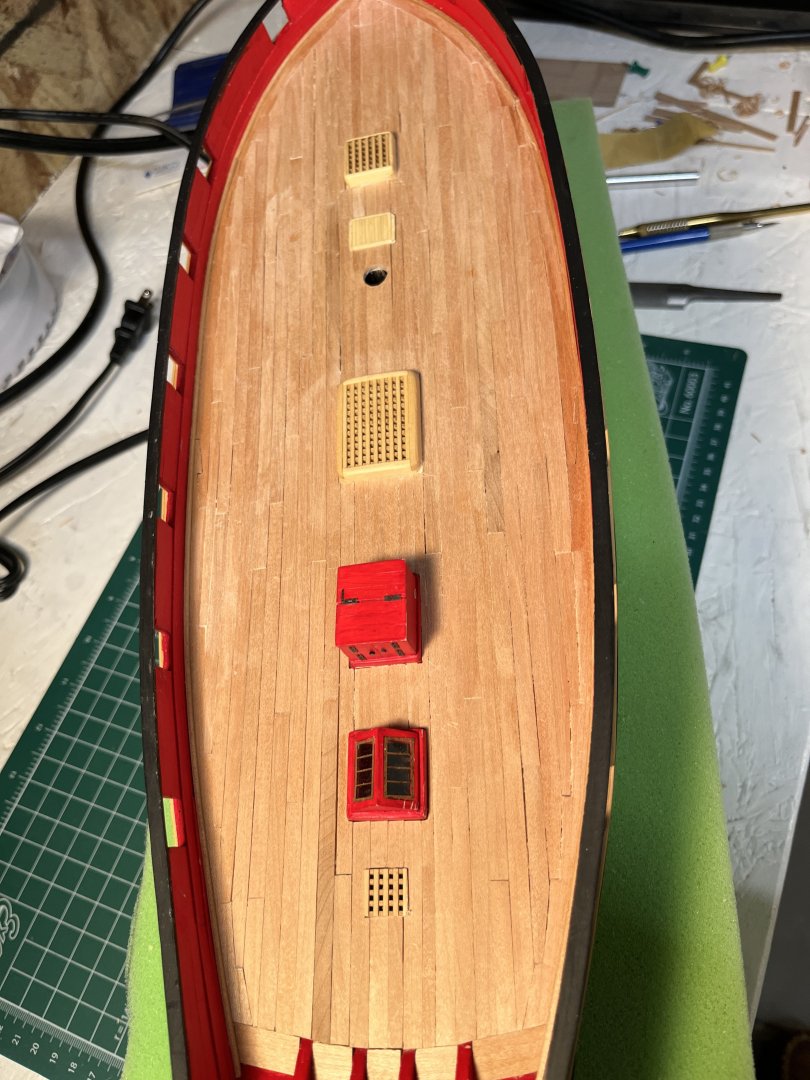
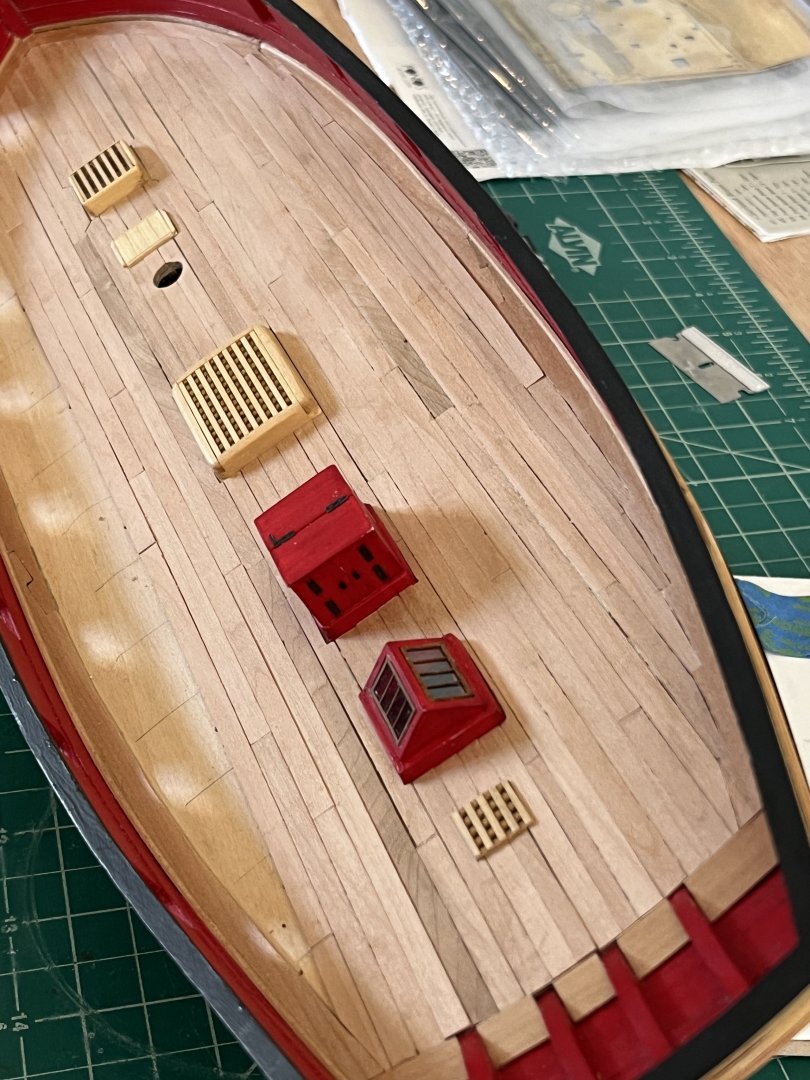
Short post bringing everything I completed up to date. Finished all the deck furniture Lined off the hull First plank laid More planks tomorrow

-
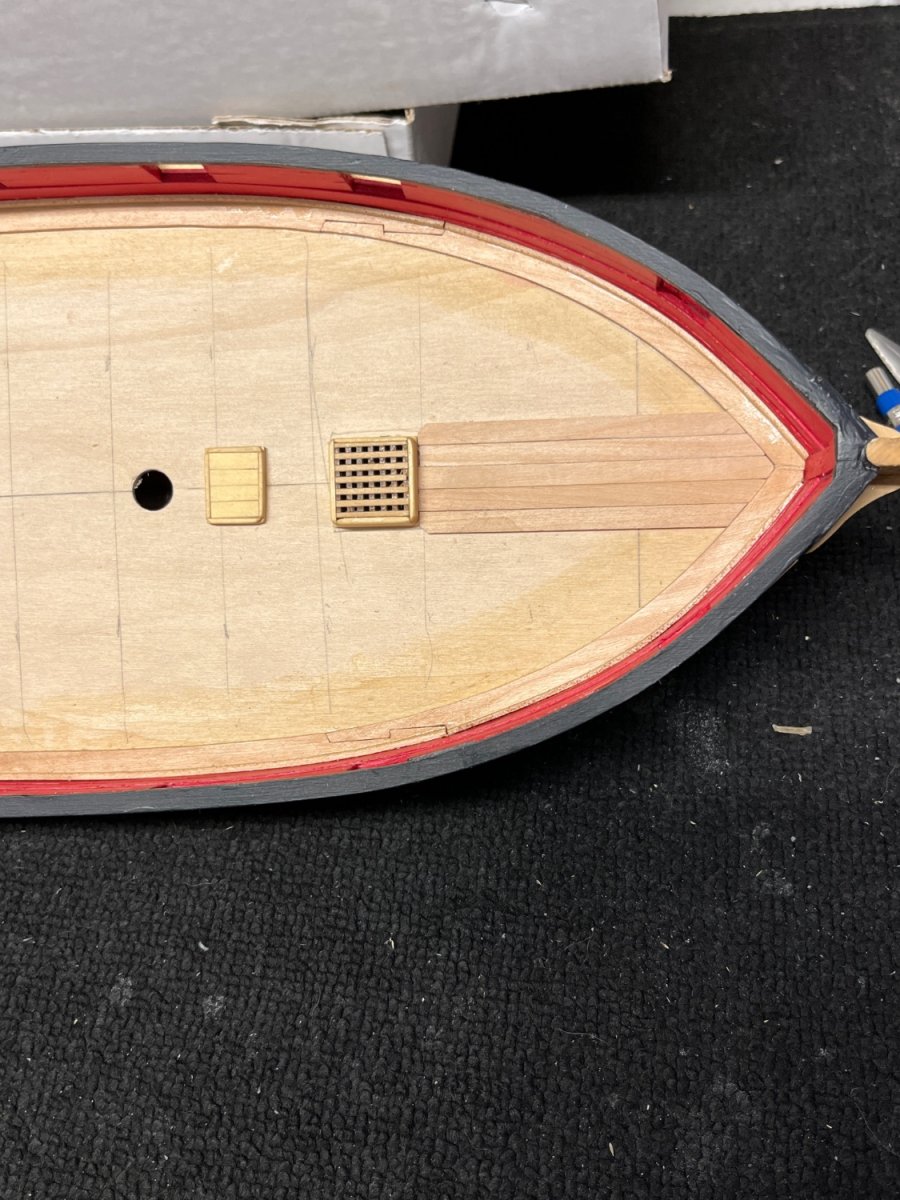
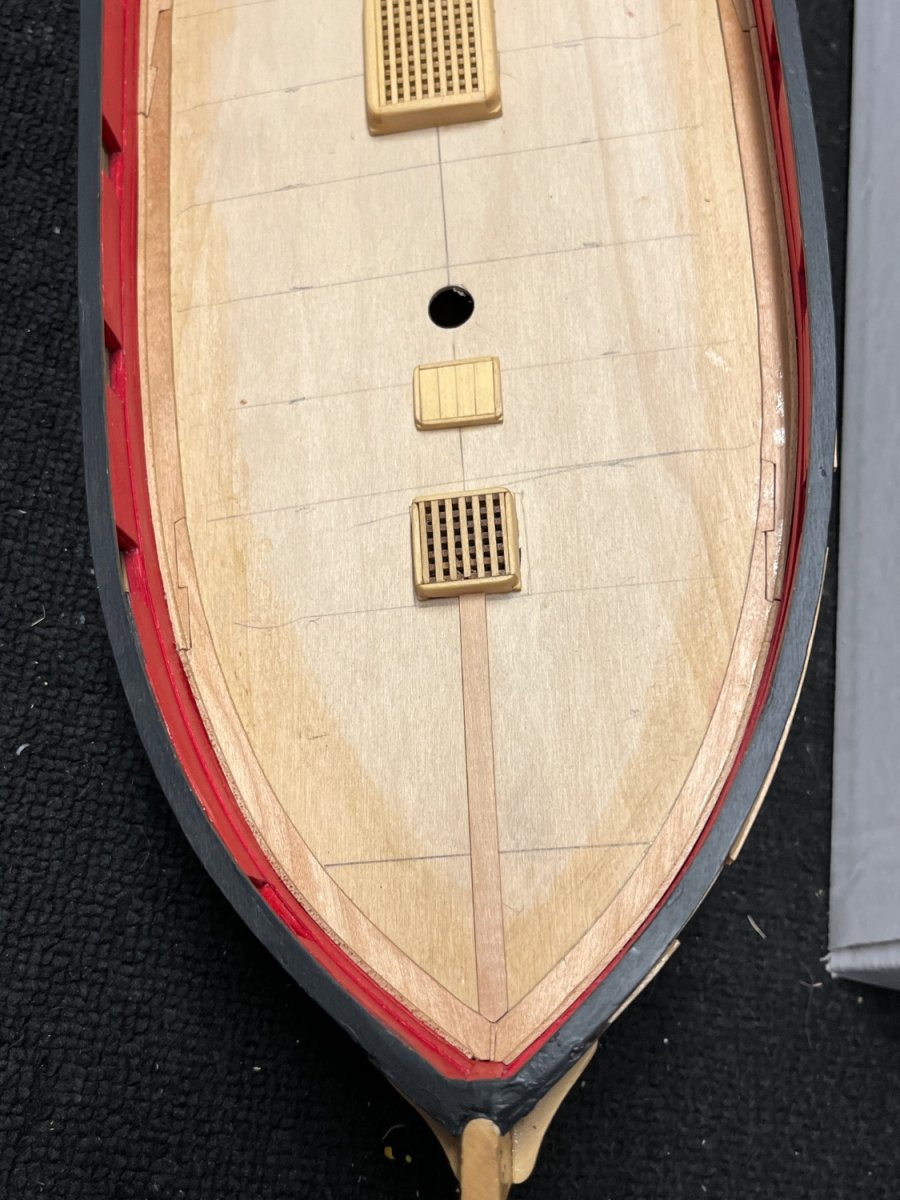
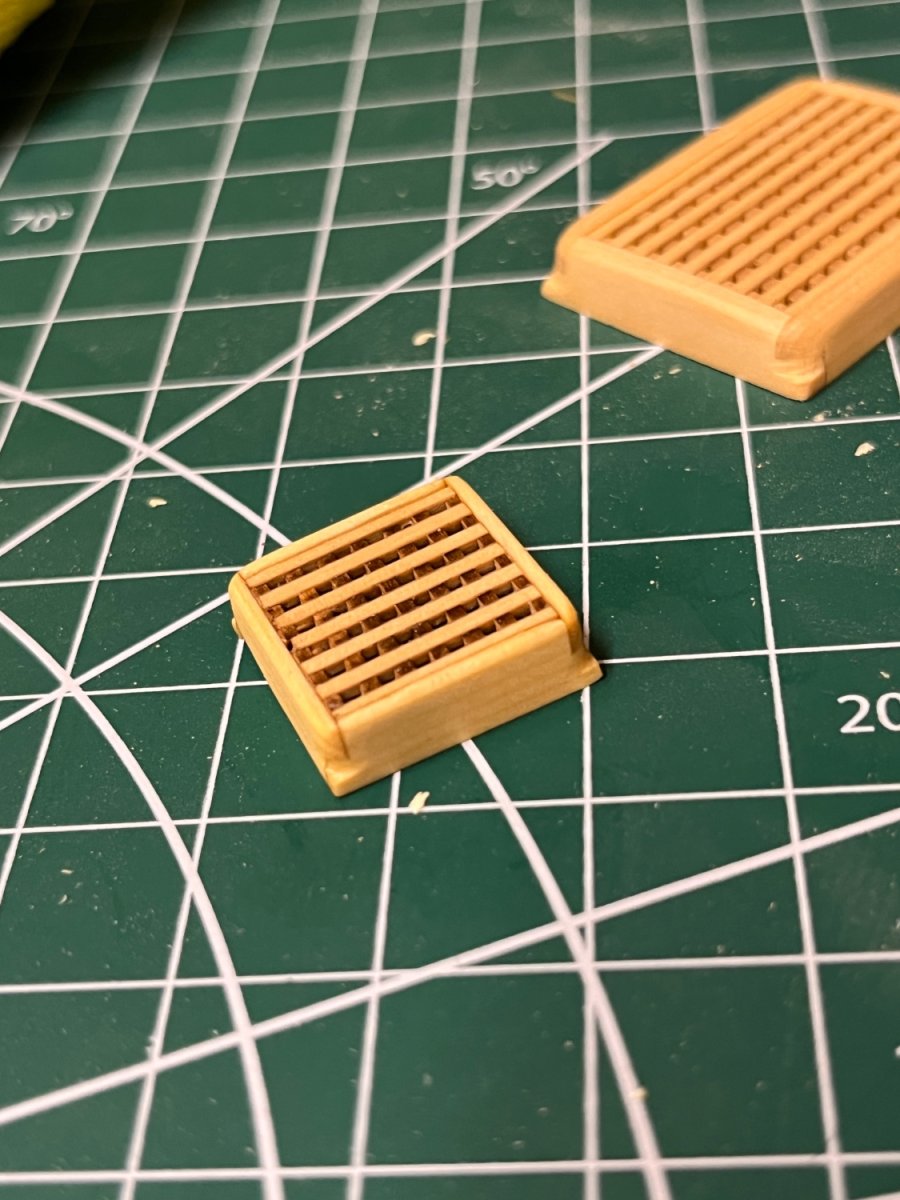
So I thought I was ready for planking but, I forgot the small forward hatch and galley cover. Needing my mill and having everything packed in boxes from the move forced me to unpack 14 boxes of shop stuff. Spent two days doing the first organizing in my new space. I have some tall cabinets on order so I'll do a proper job of organizing. With the mill found now how to put together. Took quite awhile to remember what went where and then put it all together. Spent the afternoon aligning and squaring and thank goodness for lasers to make it level and square. It had been two years since I cut any wood and I can't tell you how good it felt. Found the stock from the larger hatch and went to work. Previously I had made the grate using Syrens kits so it was striaght to the coaming. True confessions the wood bin was well fed. Completed grate after one coat of wipe on poly Next on the the galley vent

-
Two years and a lot has happened to me and the family. First we left Arizona and returned to Colorado. One morning while sitting at breakfast I said "I don't like it here and want to go home" my wife said "I don't like it either". We put the house up for sale and in two days we had many offers. Choosing one we soon discovered we had no where to go. Back in Colorado and setting up a workshop. We hired a professional moving company and they made custom shipping crates for my models. Nothing was damaged but I think the vibrations in the moving truck caused some breakage in the gaff rigging that will need to be fixed before starting the finishing. All that said I'll soon get back to Syren after finishing some other chores. But just wanted to say I will be back on site finishing the Syren
-
It would be funny to say "Well I'm back" since I've been gone for 2 years but I'm back. A little history 4 years ago we moved to Arizona to become snowbirds but it never felt like home. In Nov of 22 we moved back to Colorado. New house, no shop, and too many boxes. I did a miserable job of packing my workshop and now I don't know what box has what. We finished our walkout basement and framed up an area for my shop. All that being done today I finally started just unpacking boxes not knowing what I'd find. One box had soldering equipment both soft and silver solder. Put all of the equipment in a wall cabinet and boy did that feel good. So much to do but I'm back. Now I'm ready to start planking the Cheerful's deck so new will be progress posts.
-
Love the wipe on poly. Makes the planks have a finished appearance highlighting how the wood takes the poly and changes the color. Now the trunnels really become part of the visual experience. Very nice Kenny
-
Amazing Andrew. Love the net and the catch in salted boxes. I believe they salted the catch. I am in awe of your work.
- 206 replies
-
- 3
-

-

-
- Vanguard Models
- Brixham trawler
- (and 2 more)
-
started making the boom and gaff until the shop got too hot. Little AC unit can't keep up to the Arizona summer heat. But as I started to making boom jaws I came across some parts and have no idea what or where they are. Help Many thanks for the likes and looks
-
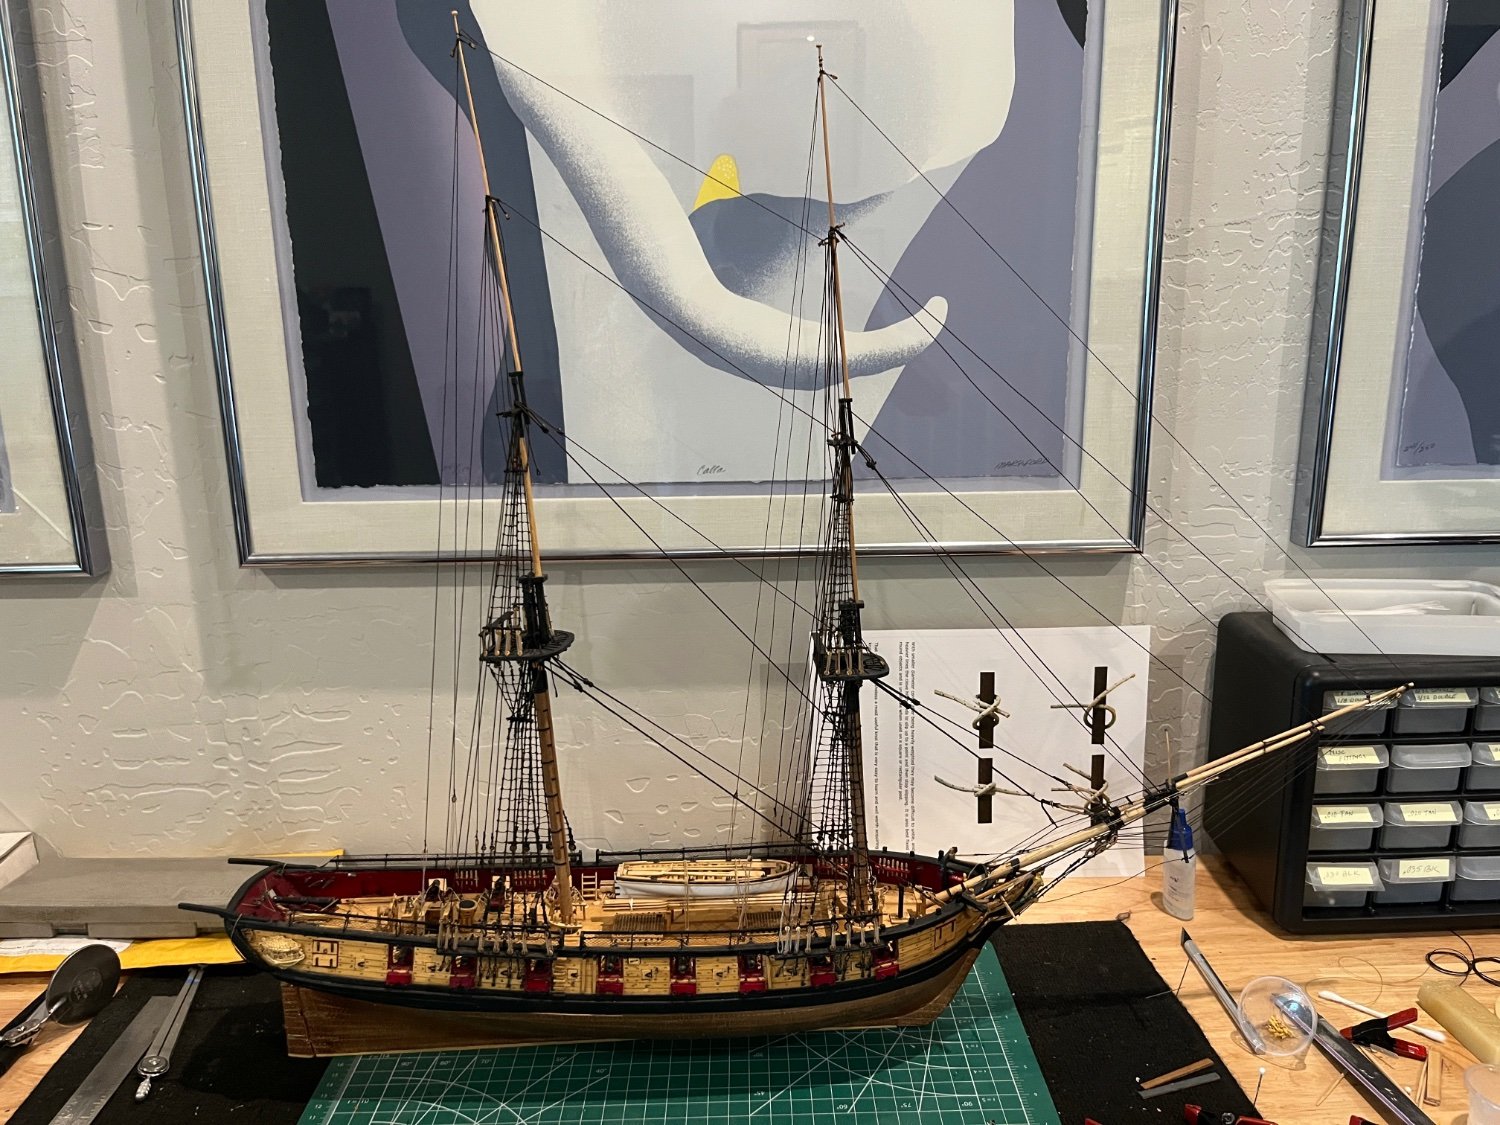
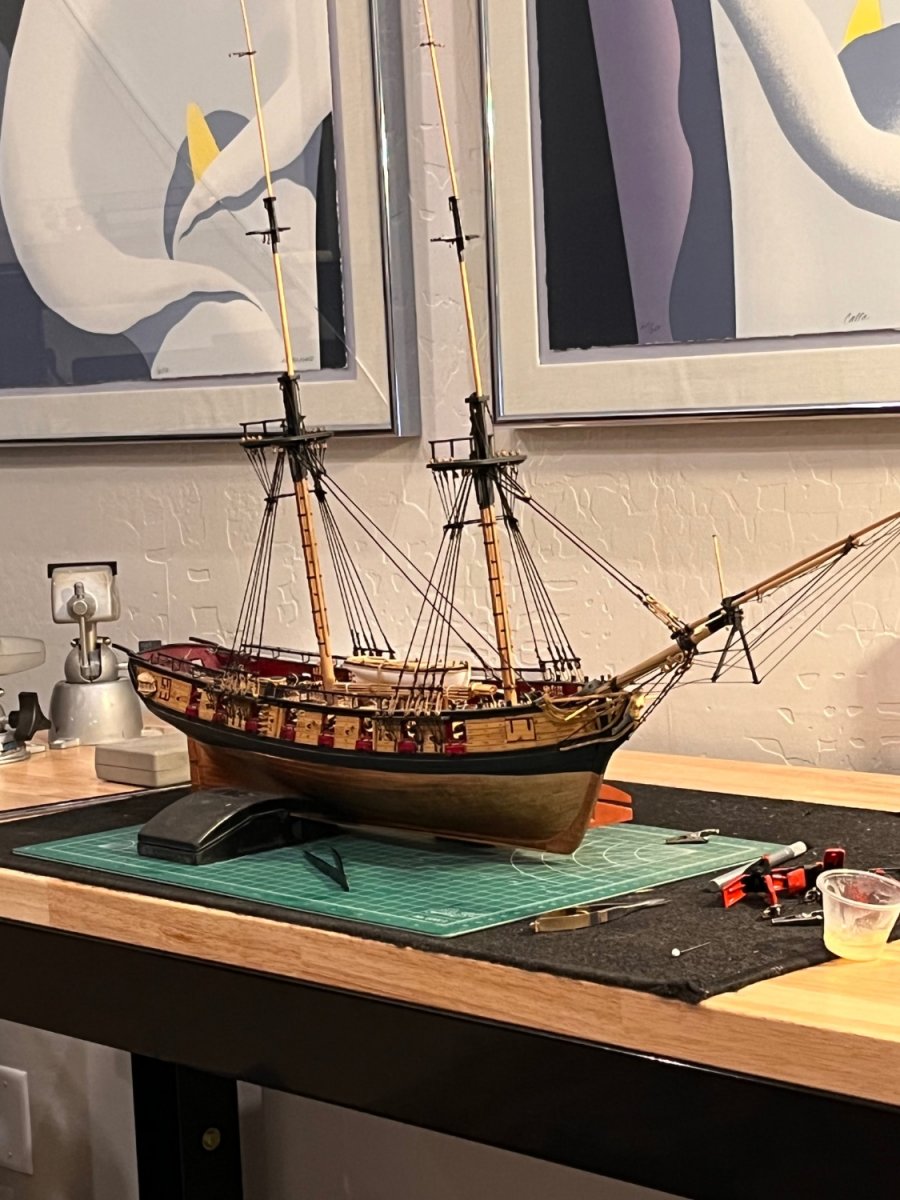
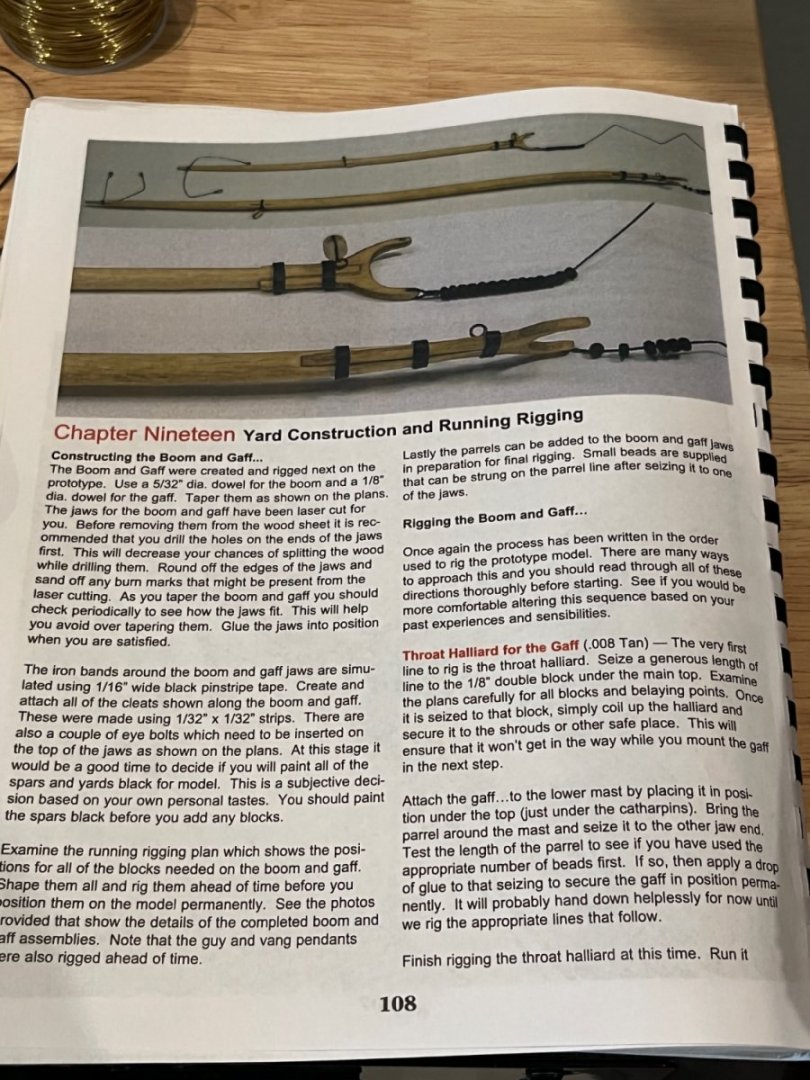
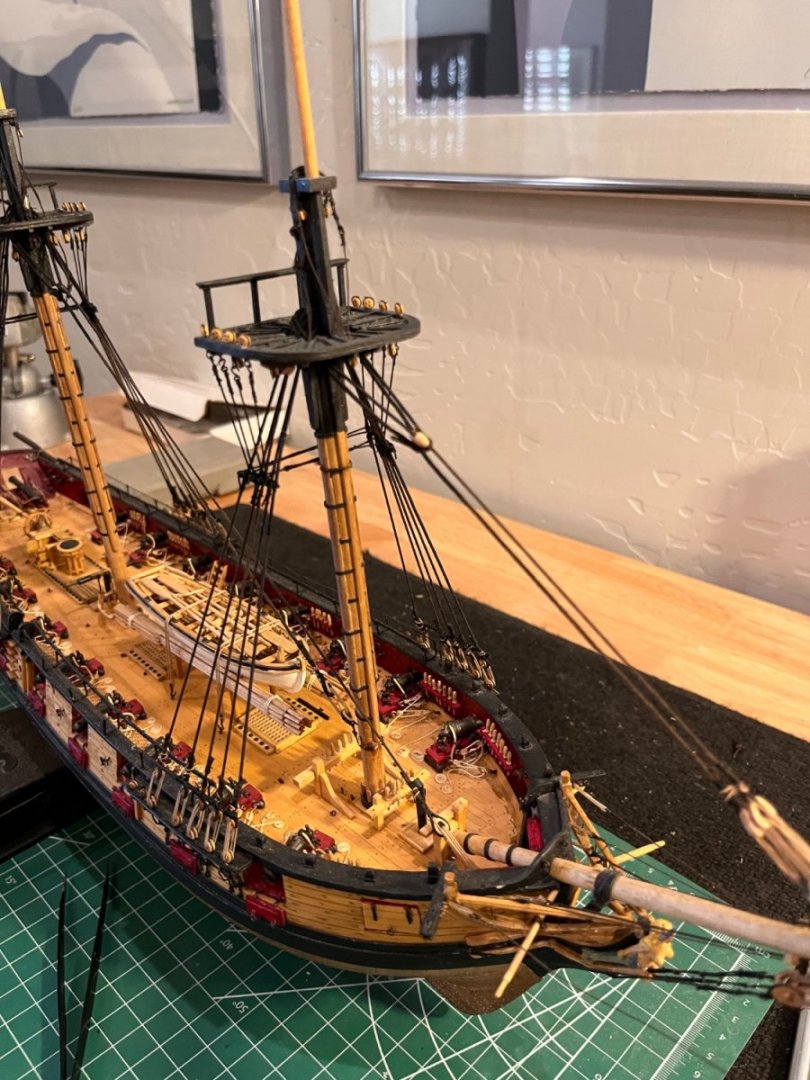
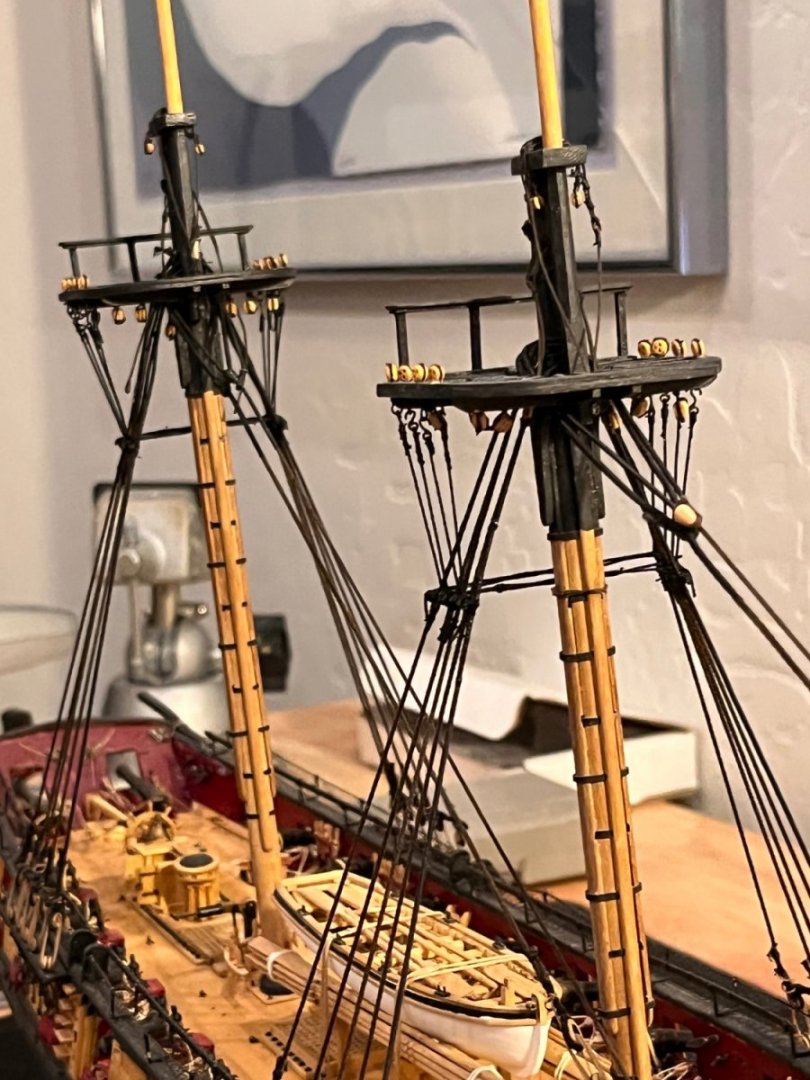
Standing rigging completed and now on to chapter Not much write but here's a few photos Plan view Foremast Mainmast Looking forward Looking aft More to come as I get started with Yards, Parrels, Foot ropes and rigging blocks. Thanks to all for the looks and kind words


-
Great job on the green tail and the flesh tones. High lighting the subtle features is well done. Best Regards Will
-
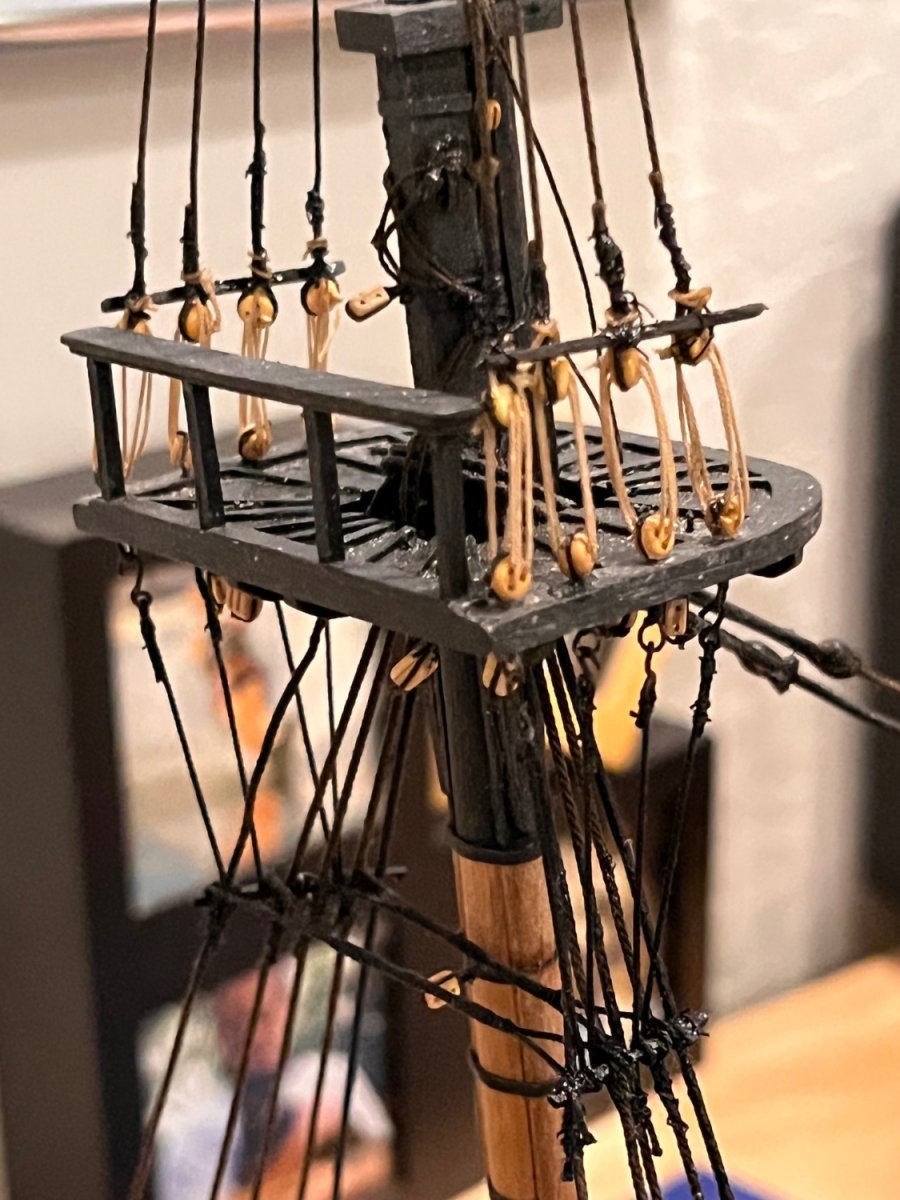
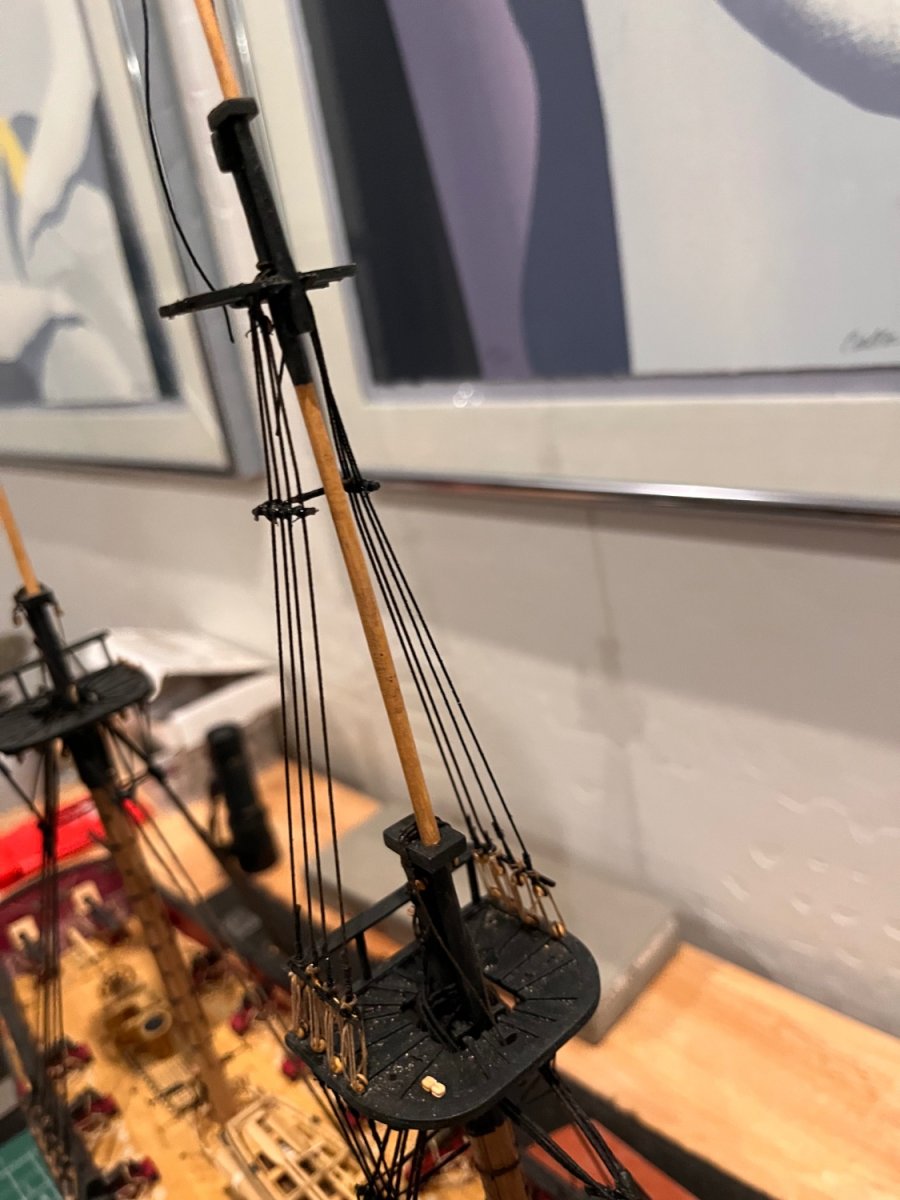
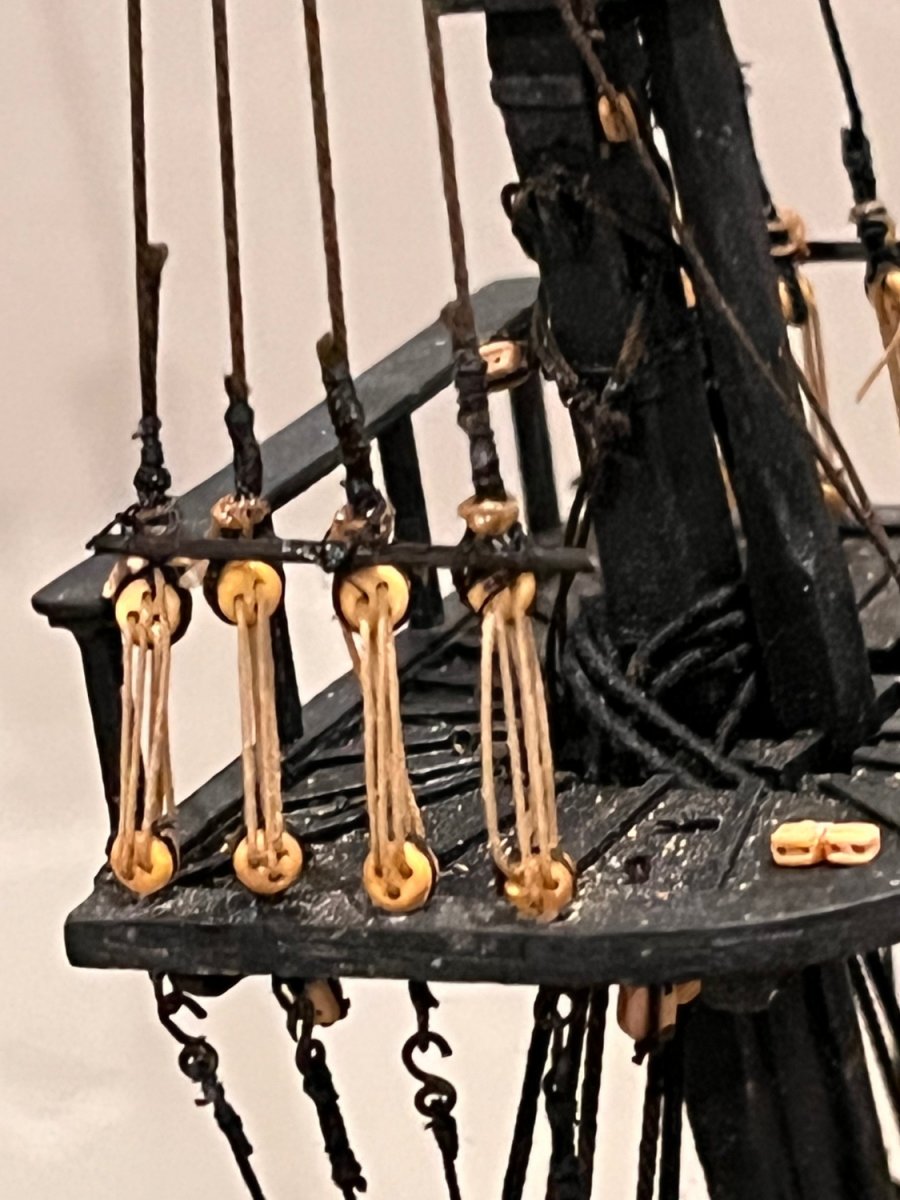
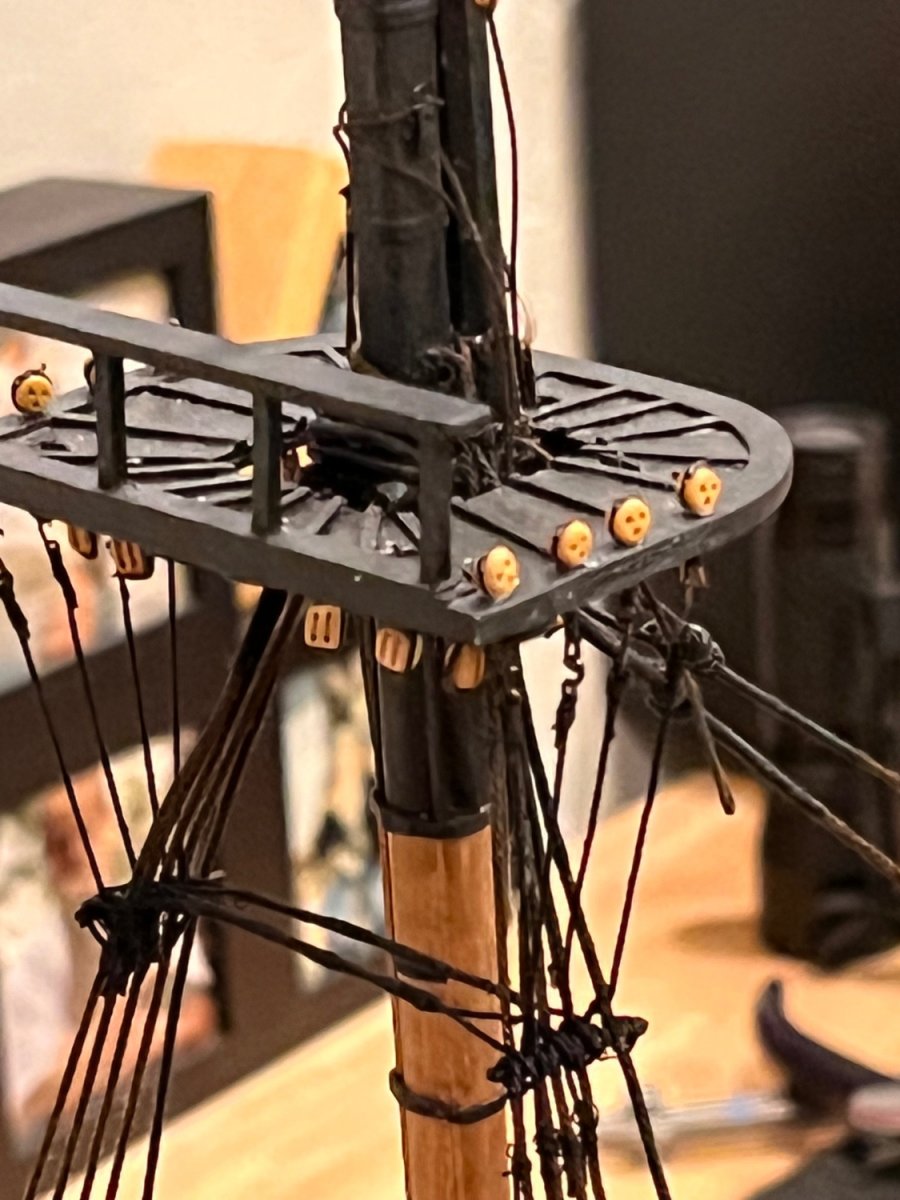
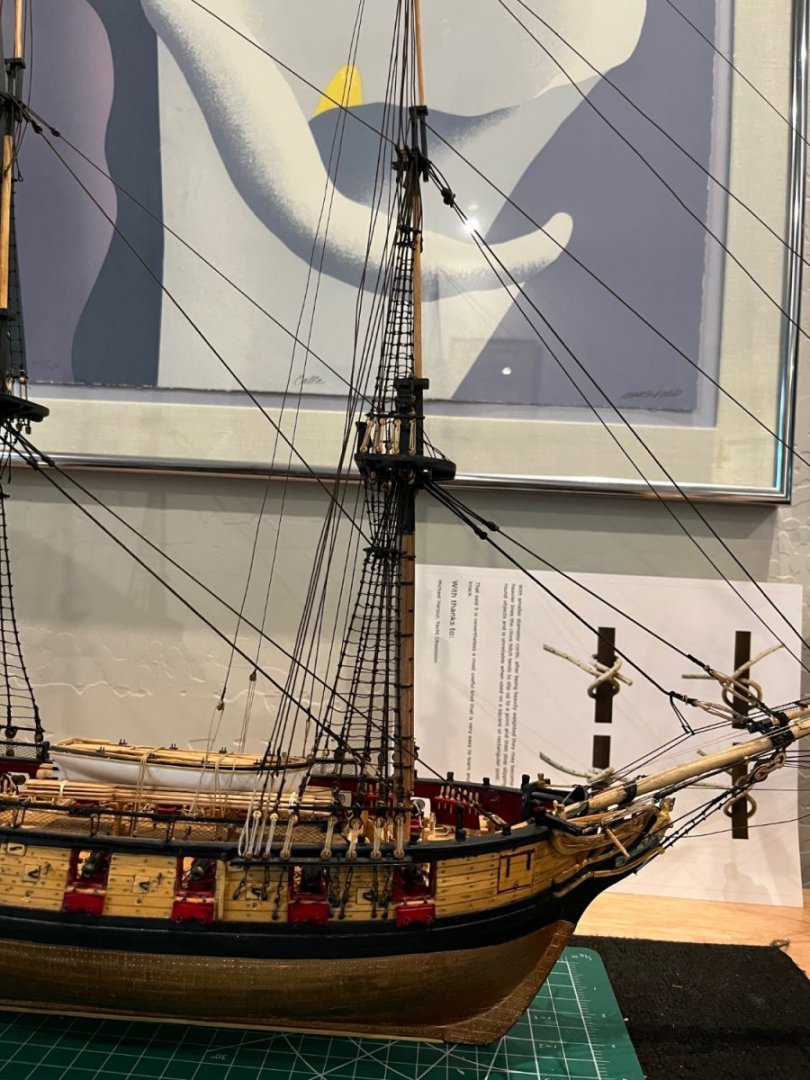
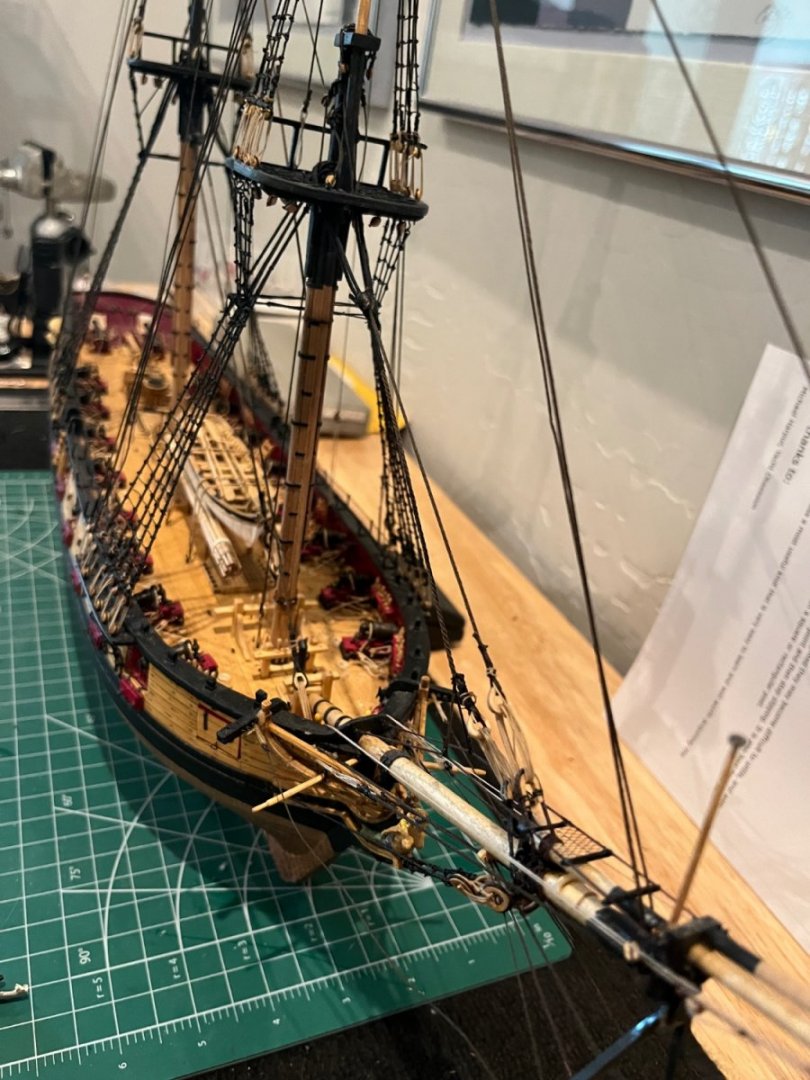
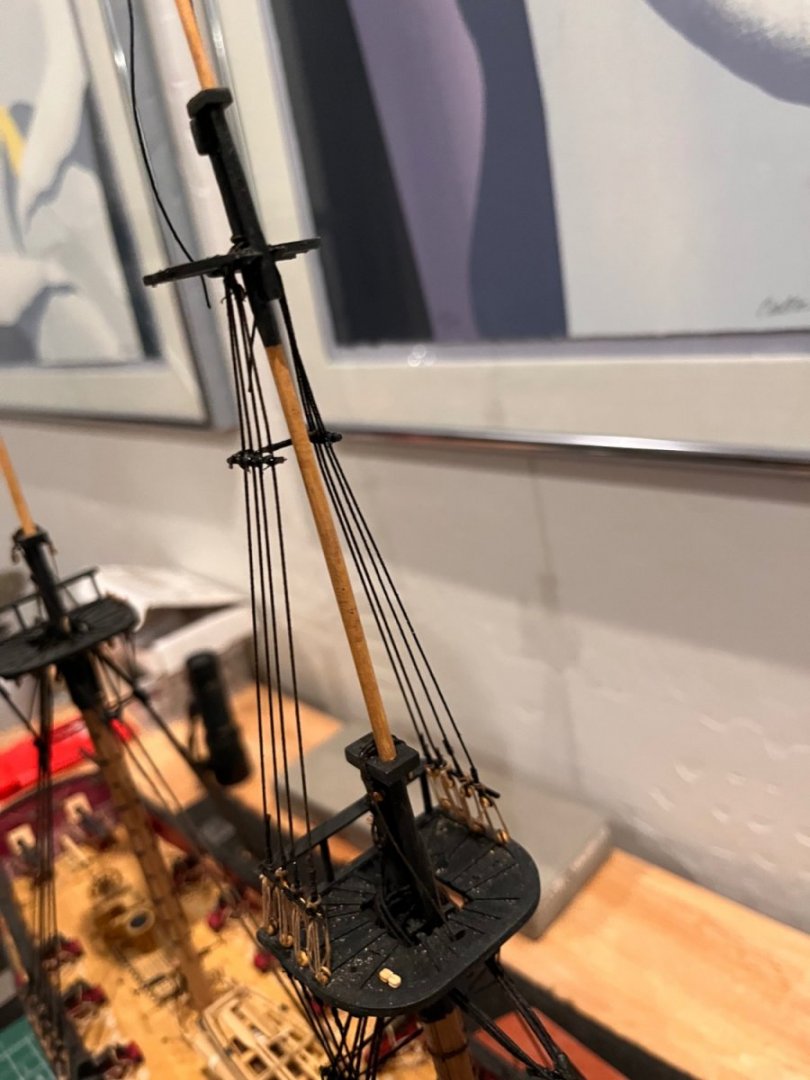
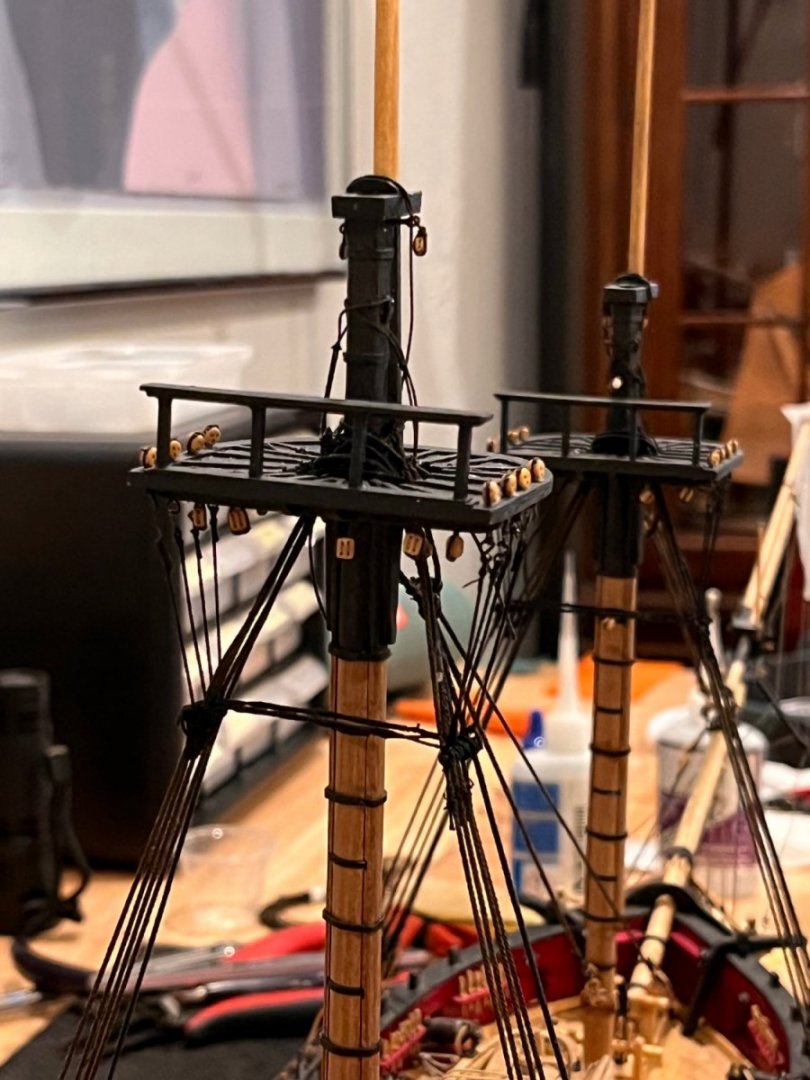
I've decided to press ahead before the lower mast ratlines. I added the top fore mast shrouds, sheer poles and futtock staves with the catharpins. Next i'll add the sister blocks and the top mast fore and back stays. a Don't know when I'll get back to the Syren. Next week I have a daughters graduation from Arizona State with a degree in Electrical Engineering. We have family coming starting tomorrow and through next week. On the 16th we head to Colorado for 4 weeks so it will be the middle of June before any work. Thanks all for the looks, likes and kind comments. Regards Will


-
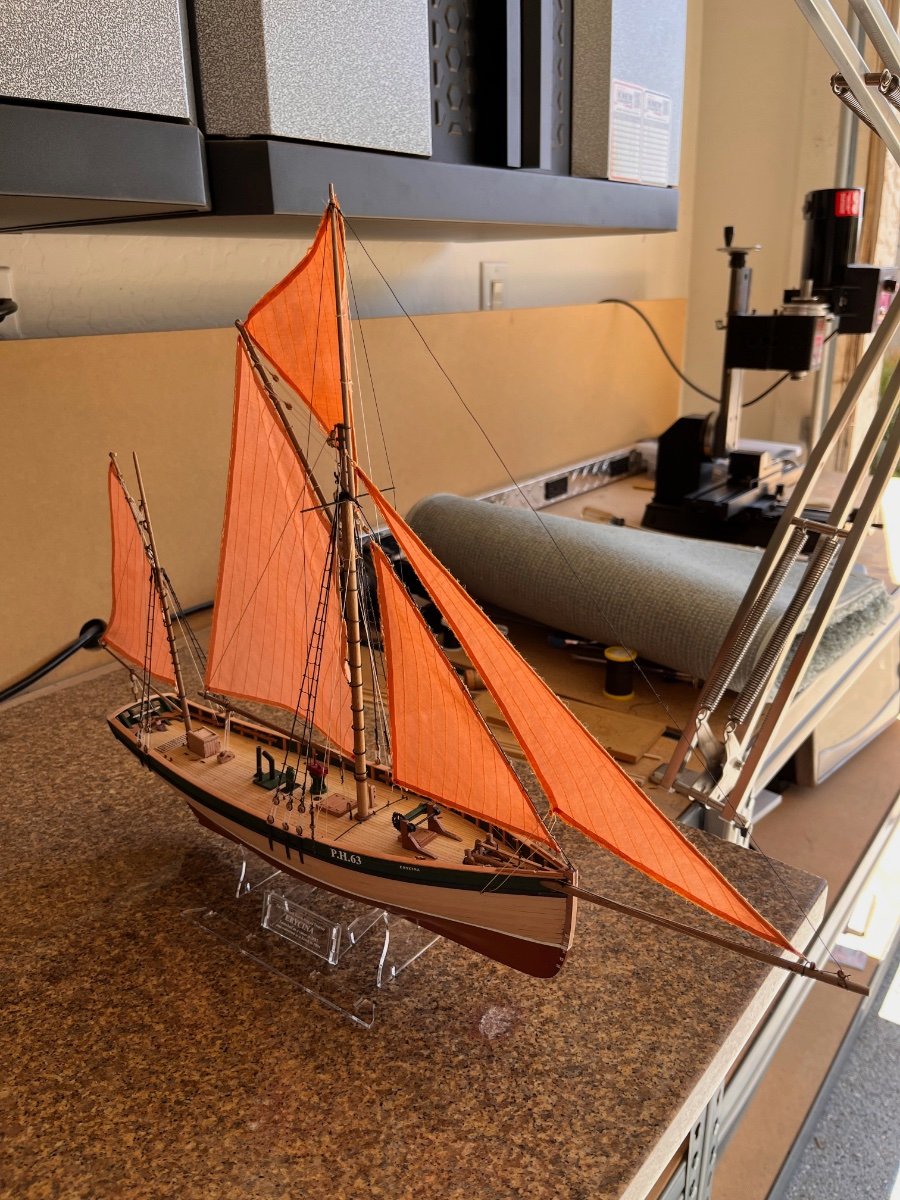
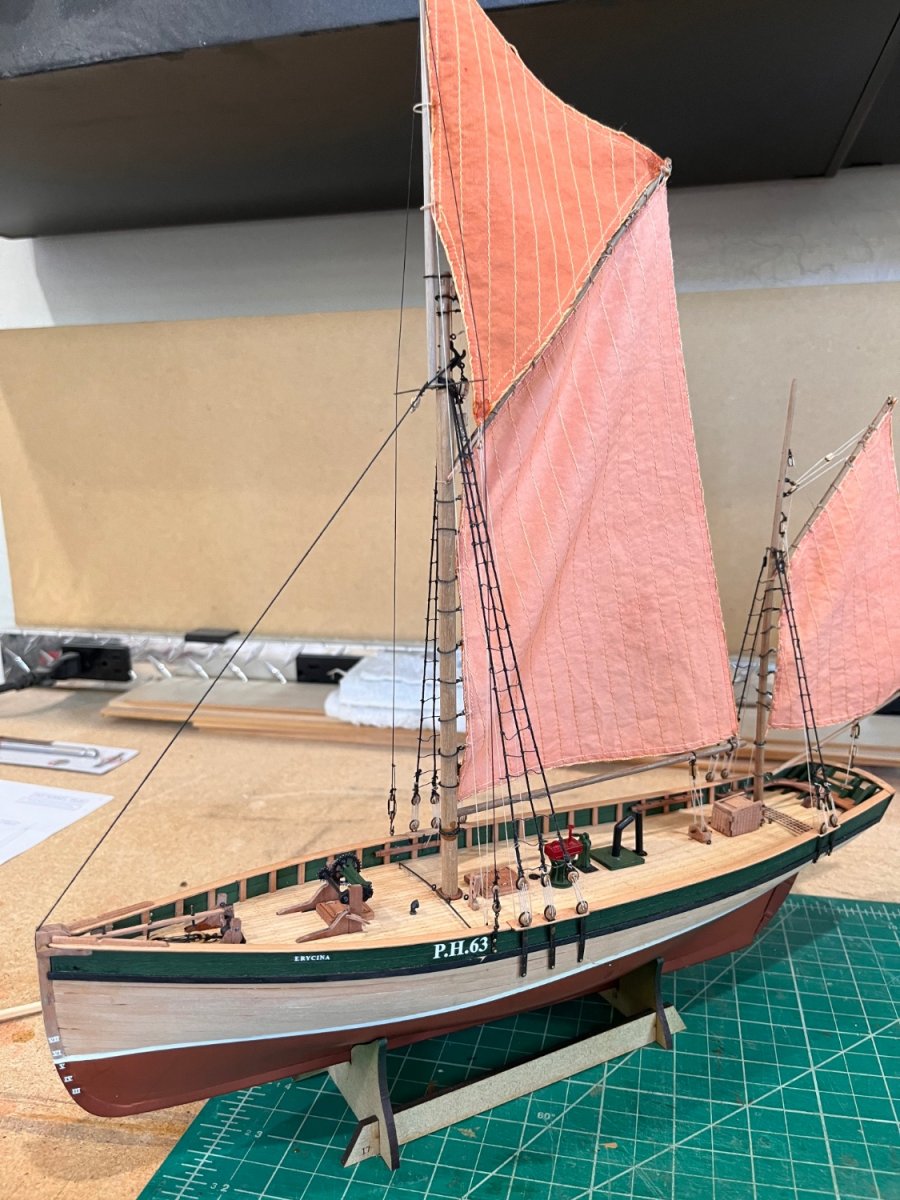
All the comments are right on spot. I've built two of Chris's fishing boats and can testify to the quality of the kits along with the finished product. Enclosed picture of completed fishing boat Eyrcina making a wonderful display. Regard Will

-
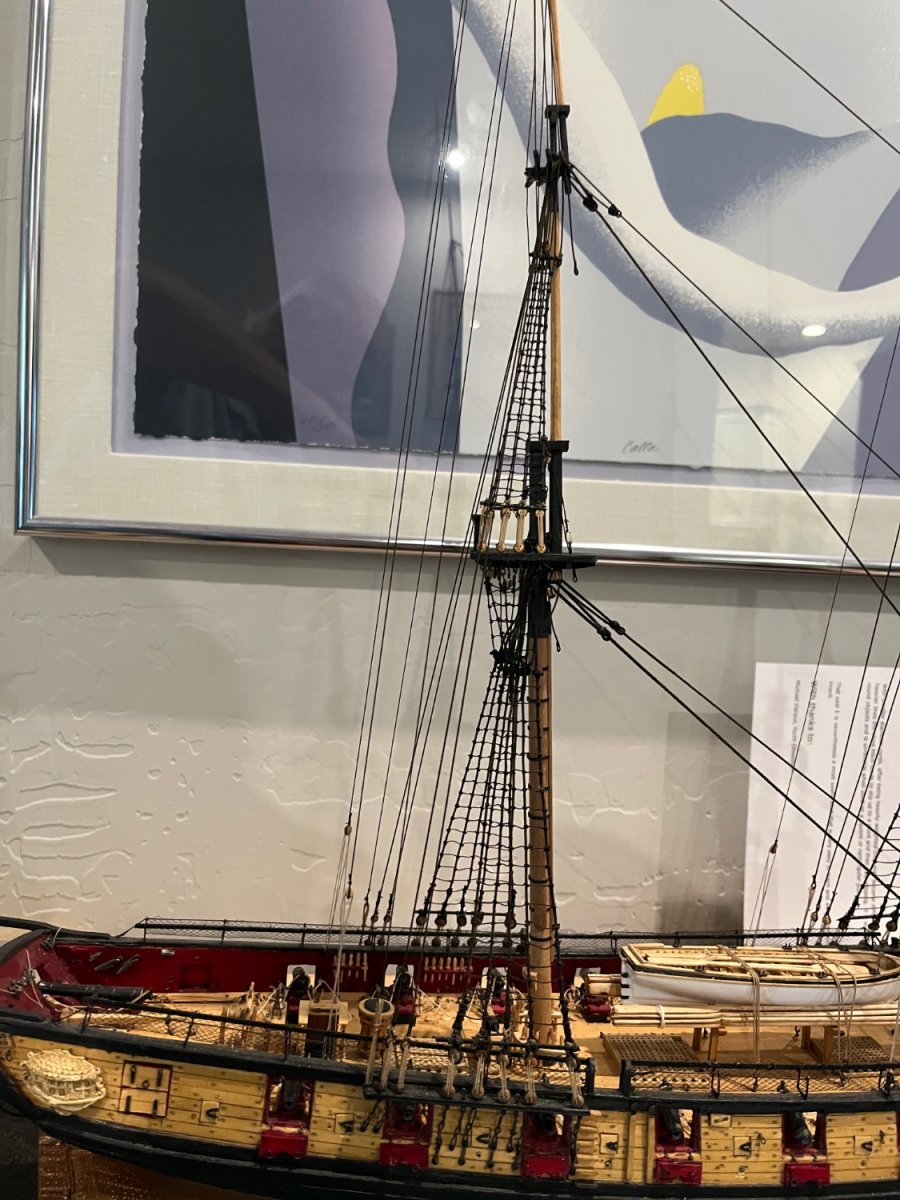
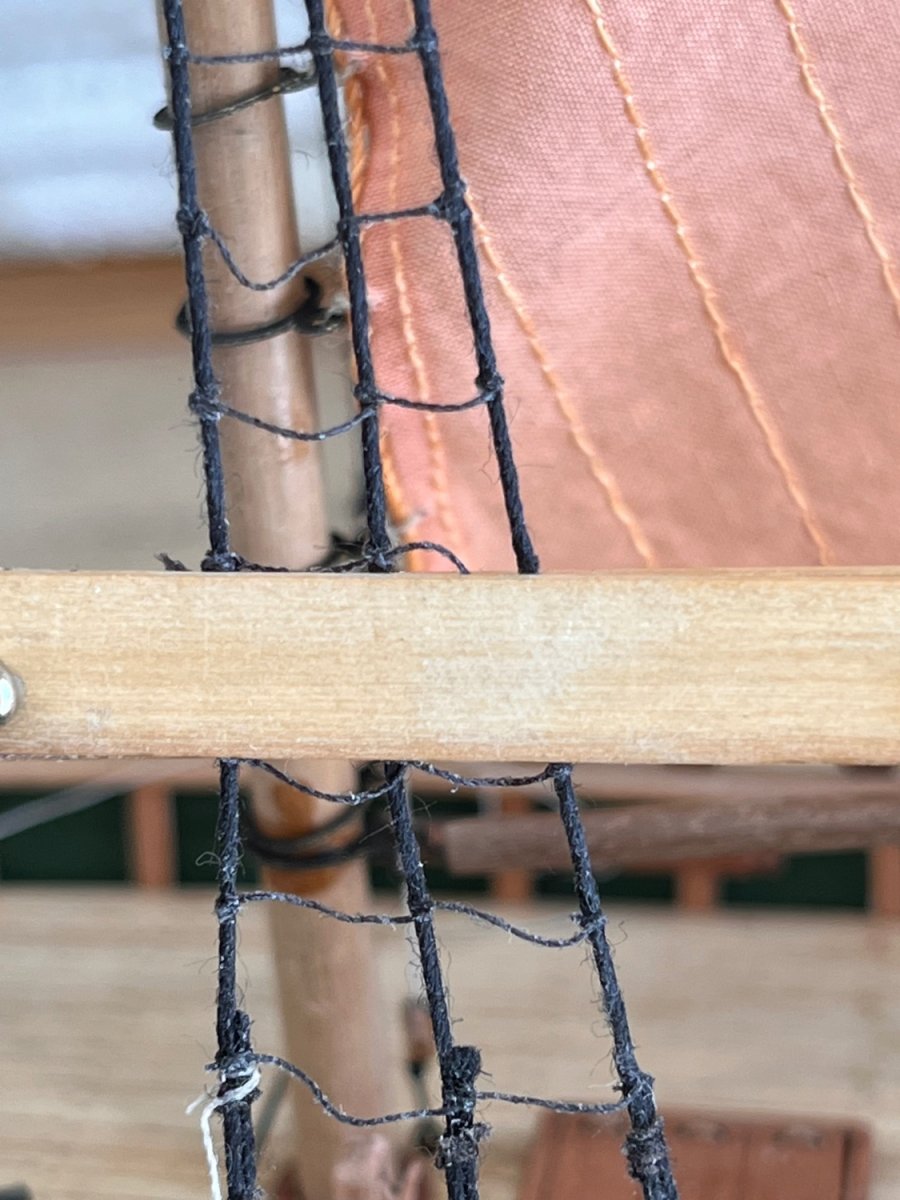
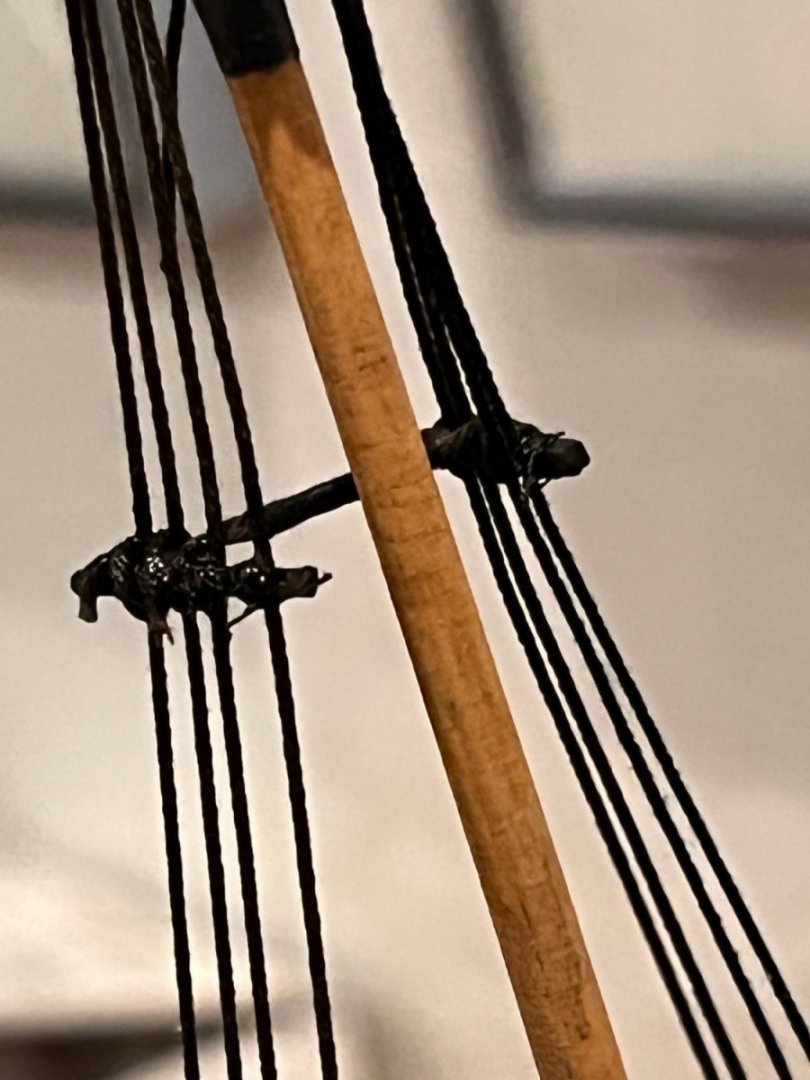
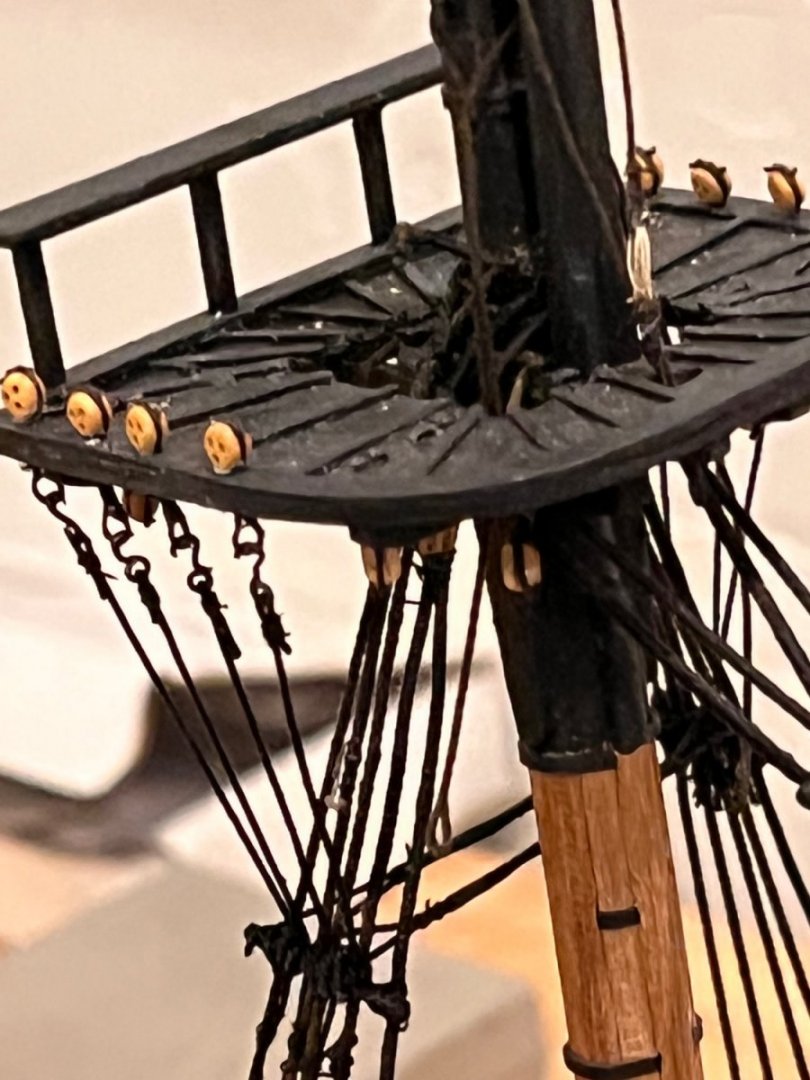
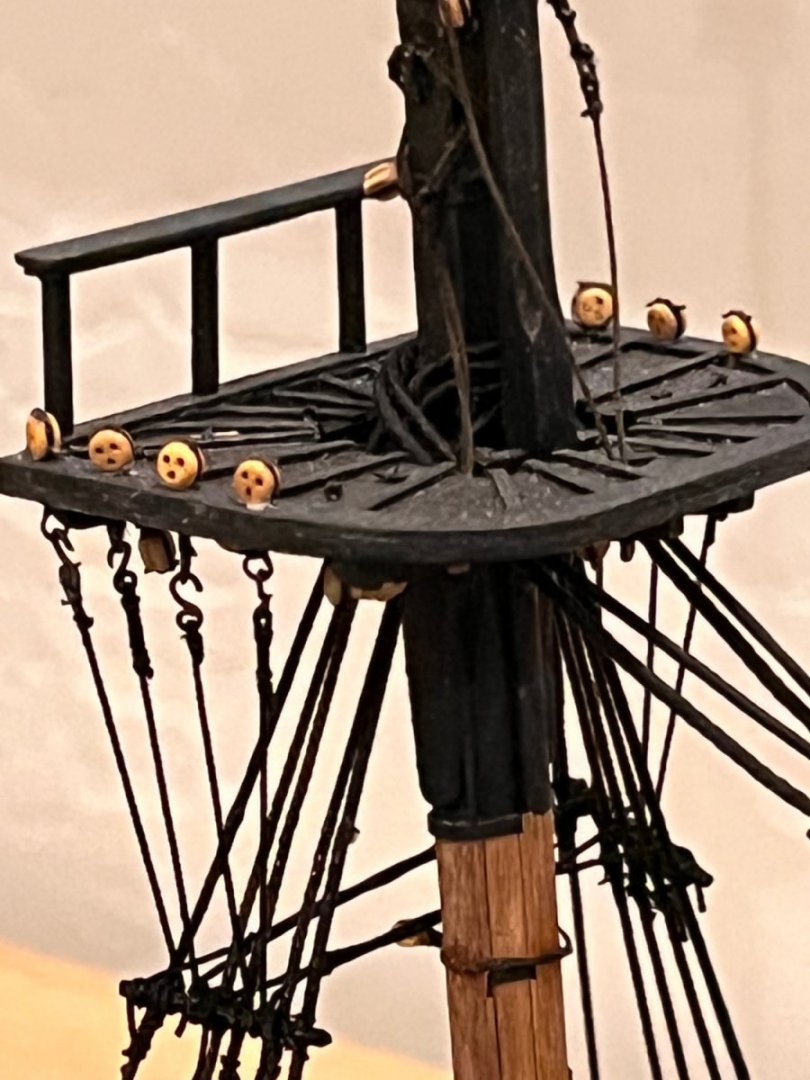
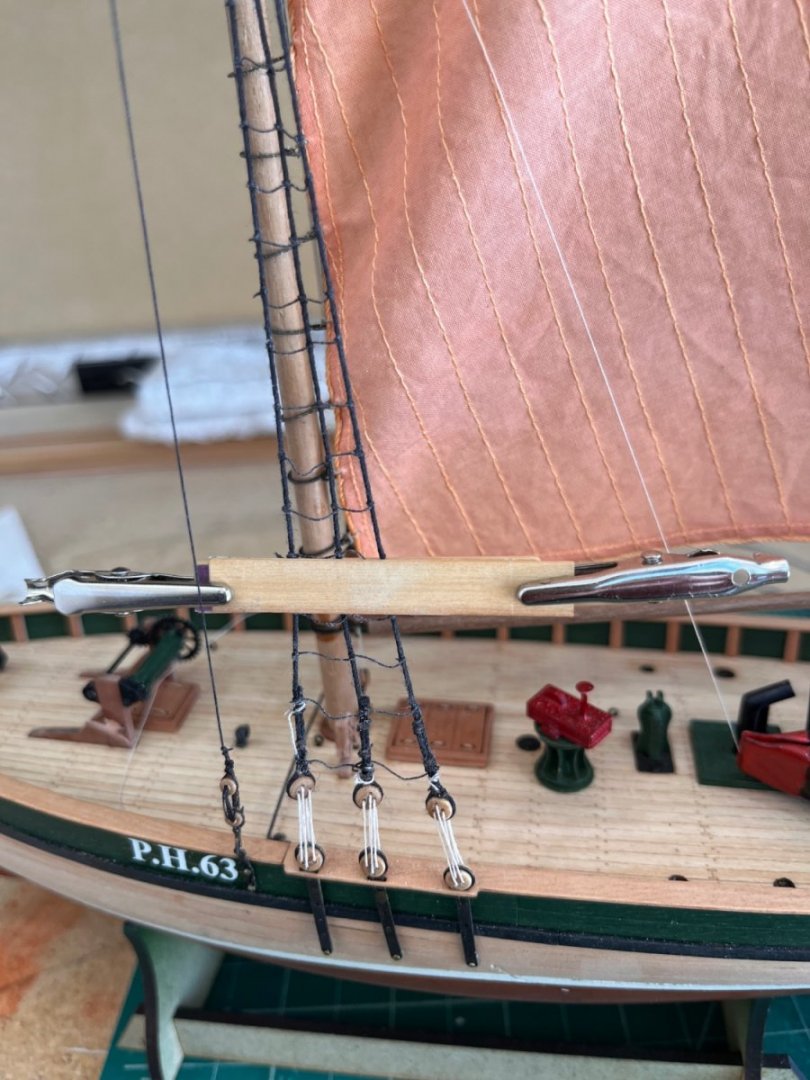
Back in the shop working on Syren. A lot of work/time to complete the snugging up the lower shrouds. Next was the futtock staves a simple but detail necessity. I a strip of ebony left from a previous build to make the futtock staves and then lashed them to the lower shrouds. The futtock shrouds were a simple matter of the the lines through the eyes below the upper mast deadeyes to the staves. Had to take a day making more rope when I think I have enough rope of a size I seem to need more. Reading all the logs along with several books I decided to take an easier way to make my catharpins. I served i" on two pieces of line to create the center one piece. I the draped the lines over the staves using clips on each of the four pieces of rope. This way I was able to center the served 1" section in the center between the staves. That done I could seize each line without pulling the center out of alignment. With all that done it is as another poster said "it so crowed in here you can't see the individual knots". I've decided to complete the upper shrouds and fore & back stays and do the ratlines at the same time. Regards Will


-
Looks fantastic. It was very interesting about the sail scale on your drawings as on Erycina the sails were correctly scaled. You are doing a beautiful job she's going to be great. Will
- 206 replies
-
- 4
-
-
-
- Vanguard Models
- Brixham trawler
- (and 2 more)
-
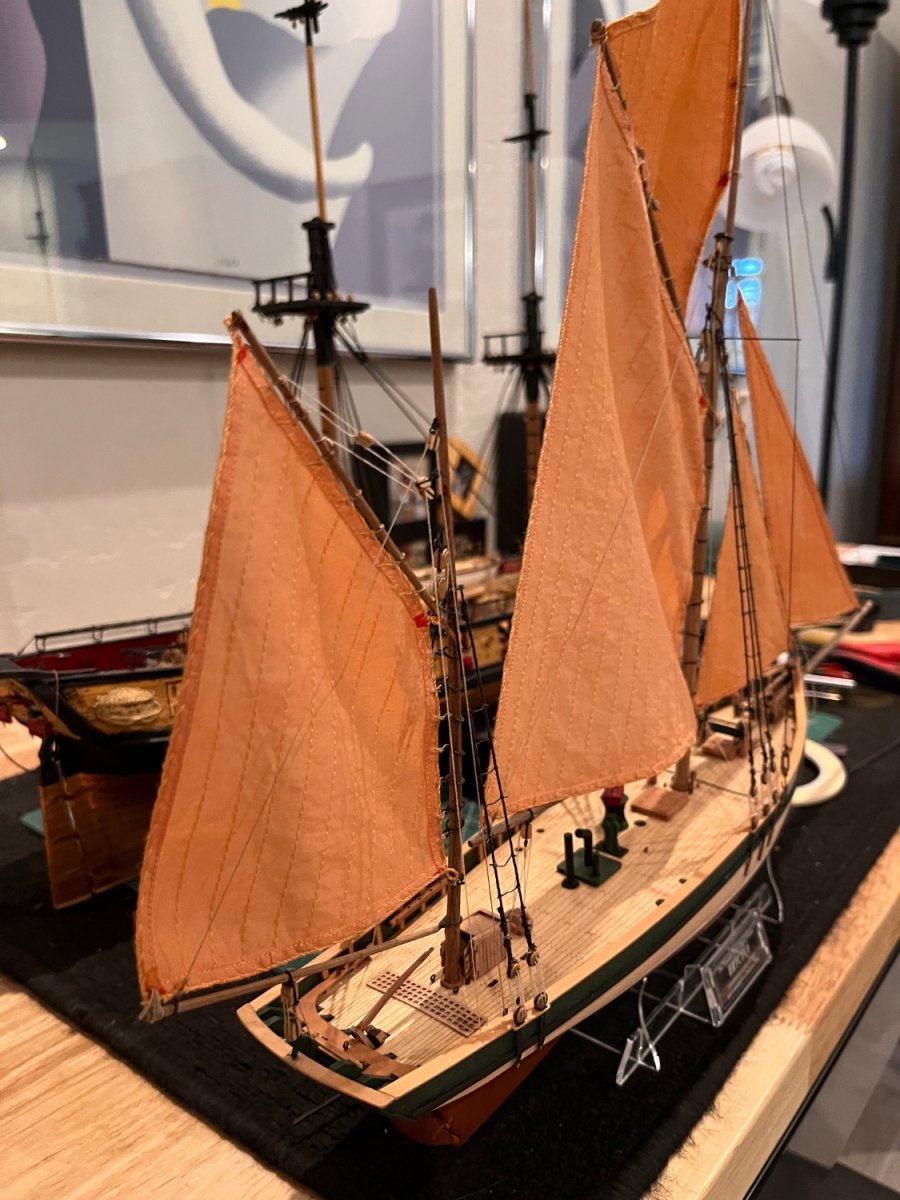
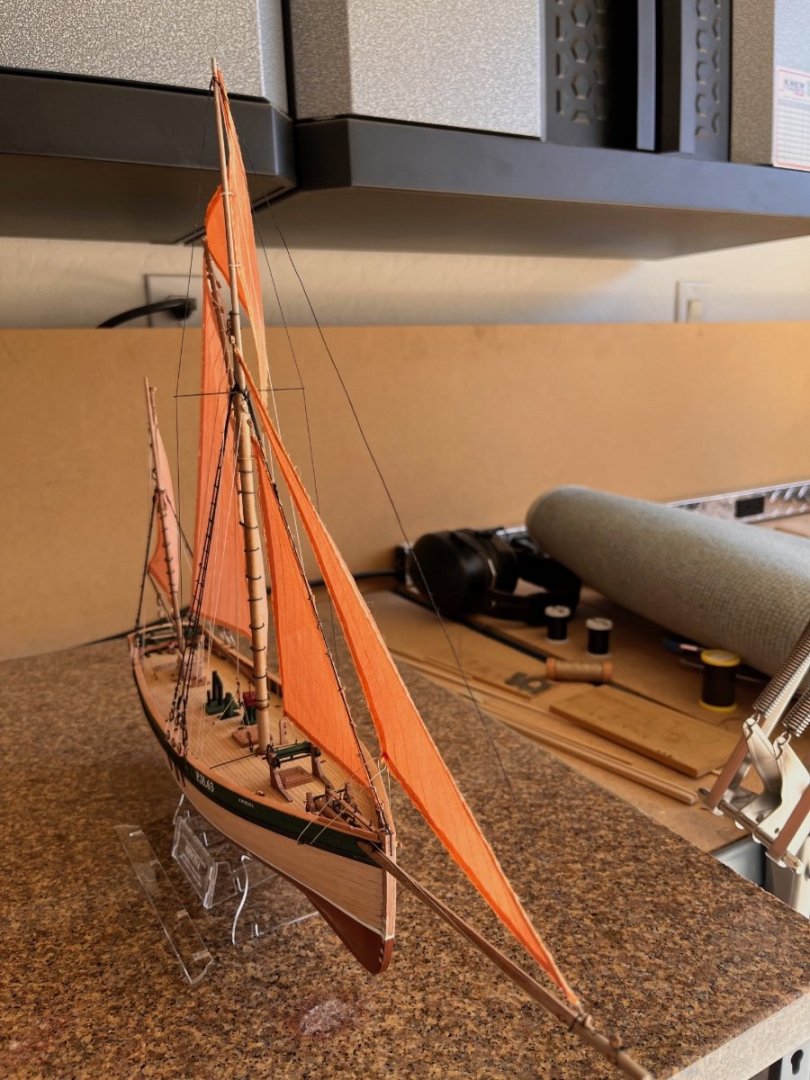
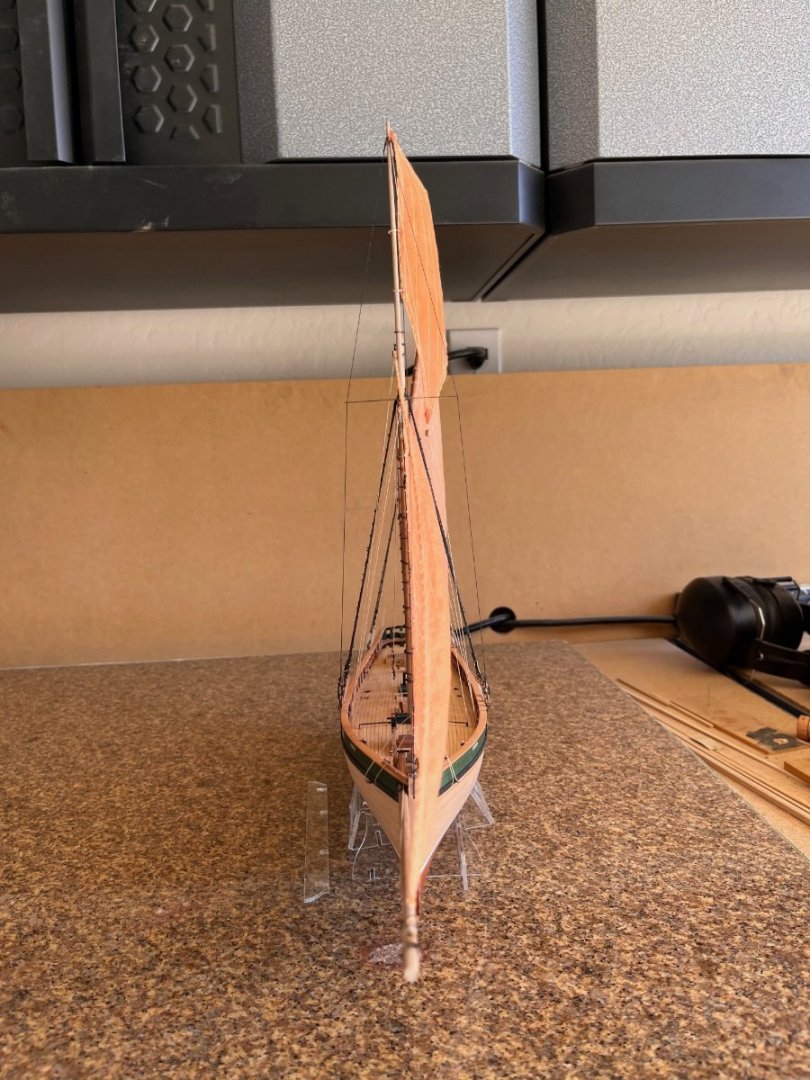
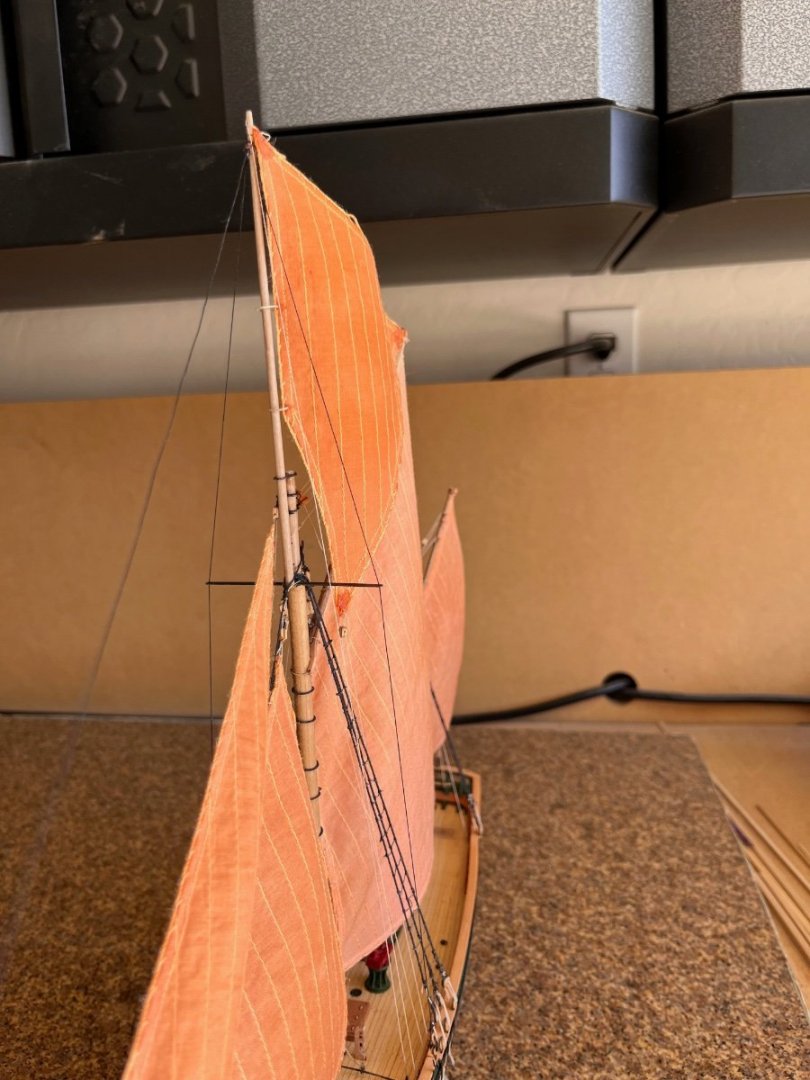
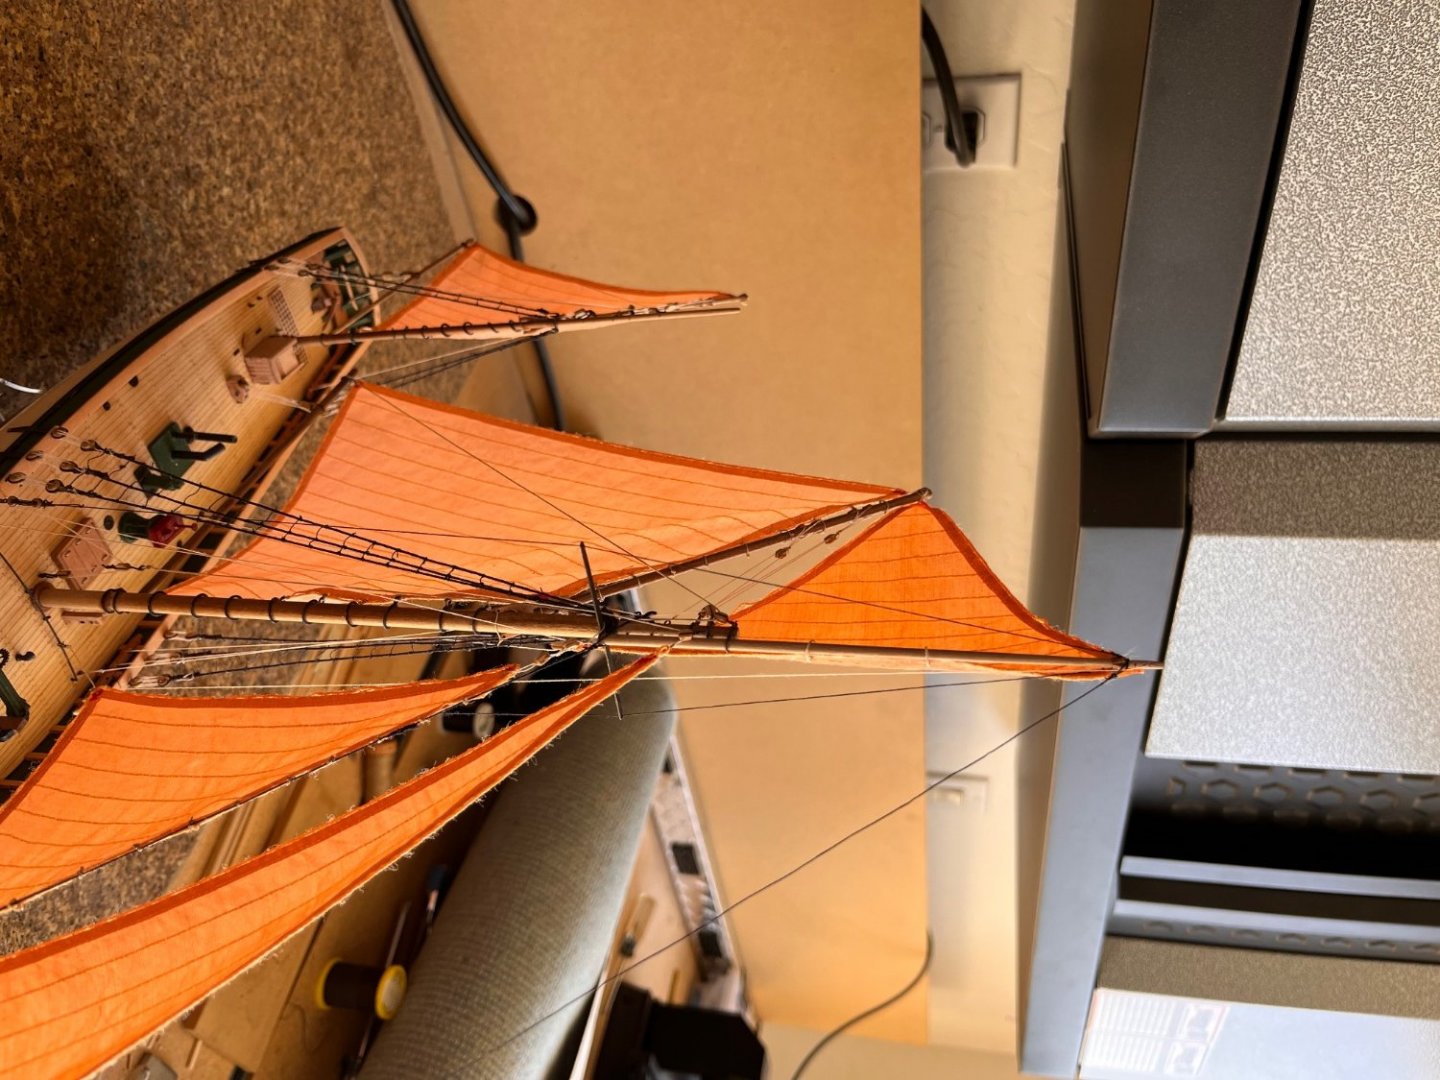
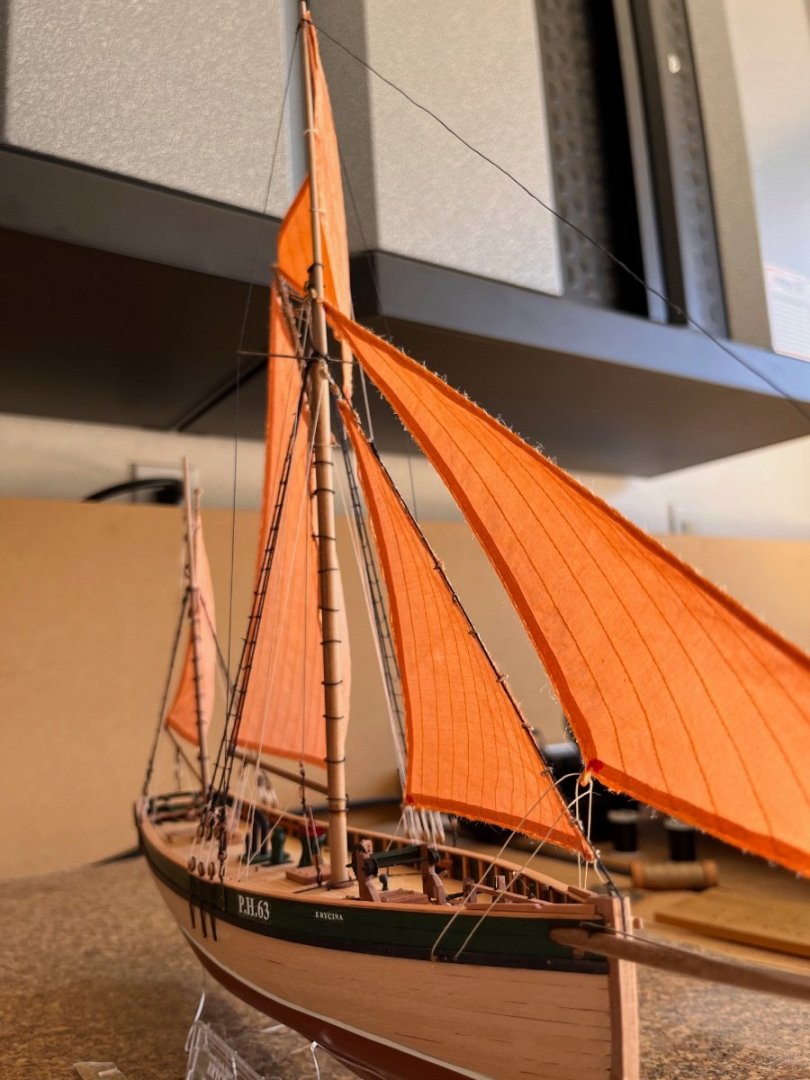
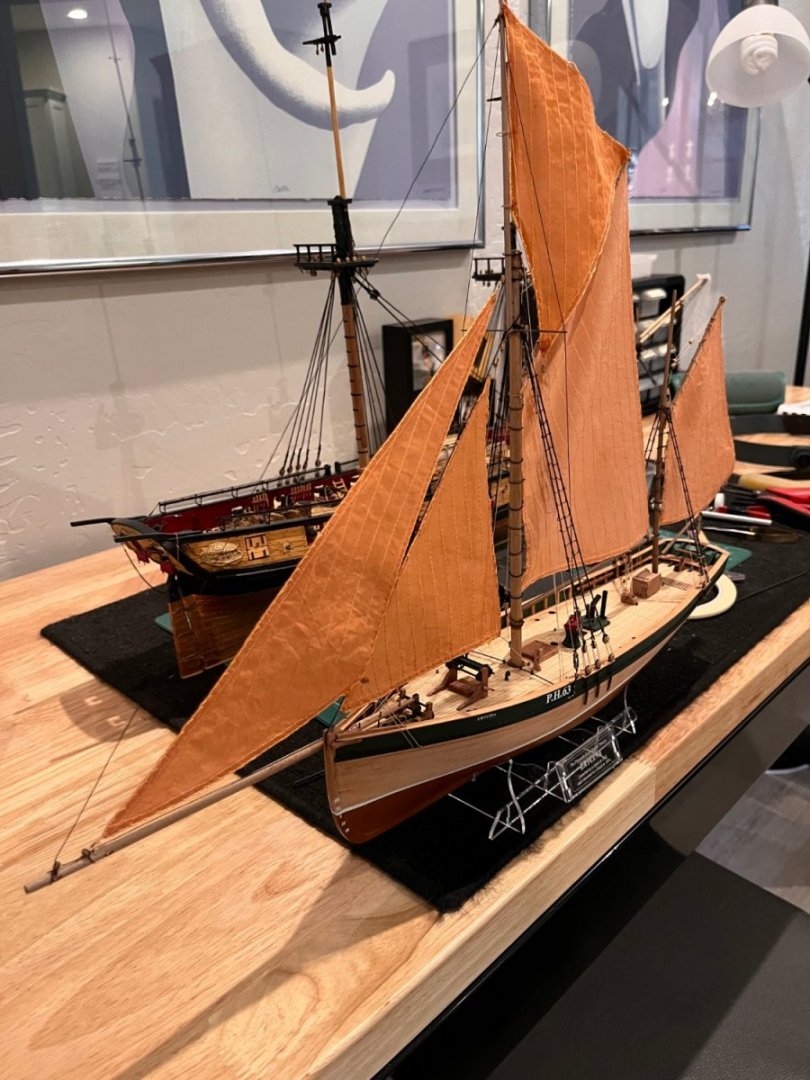
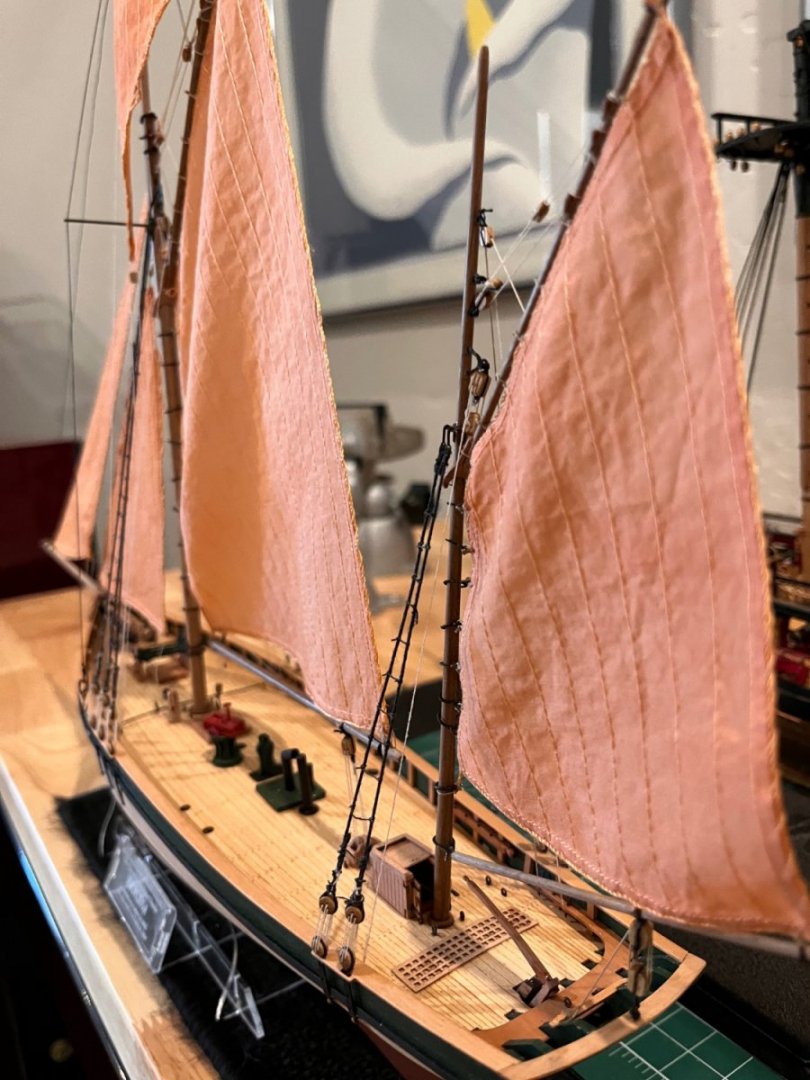
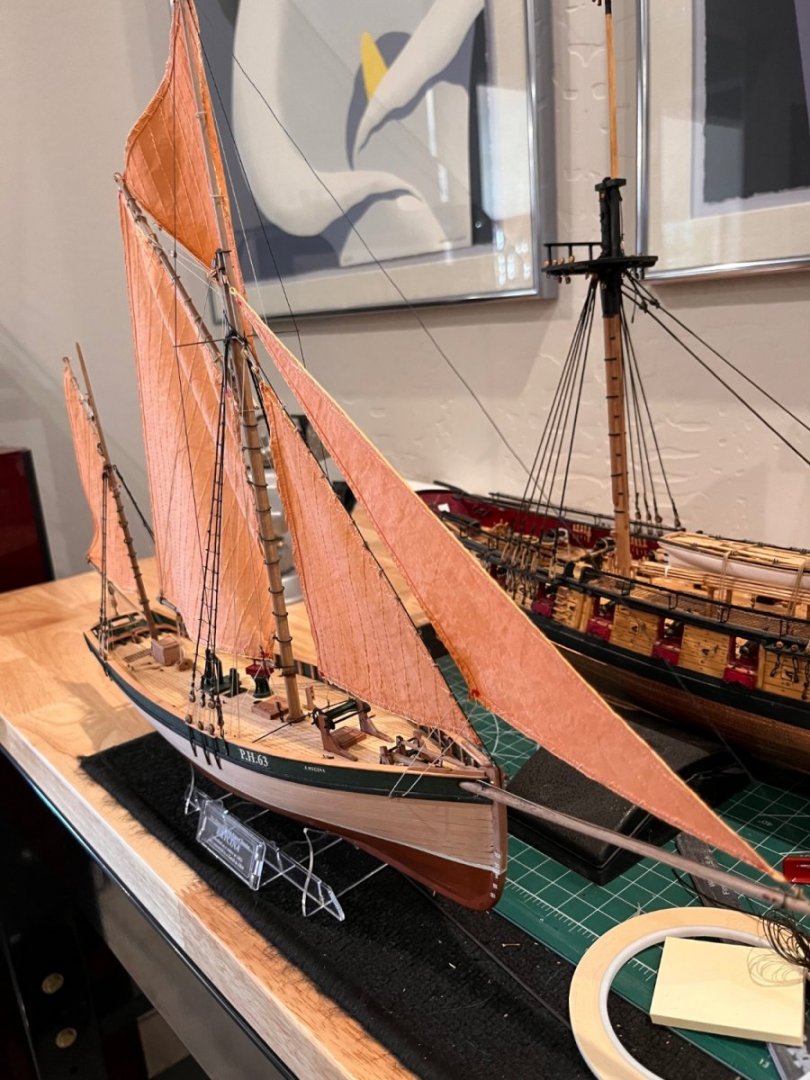
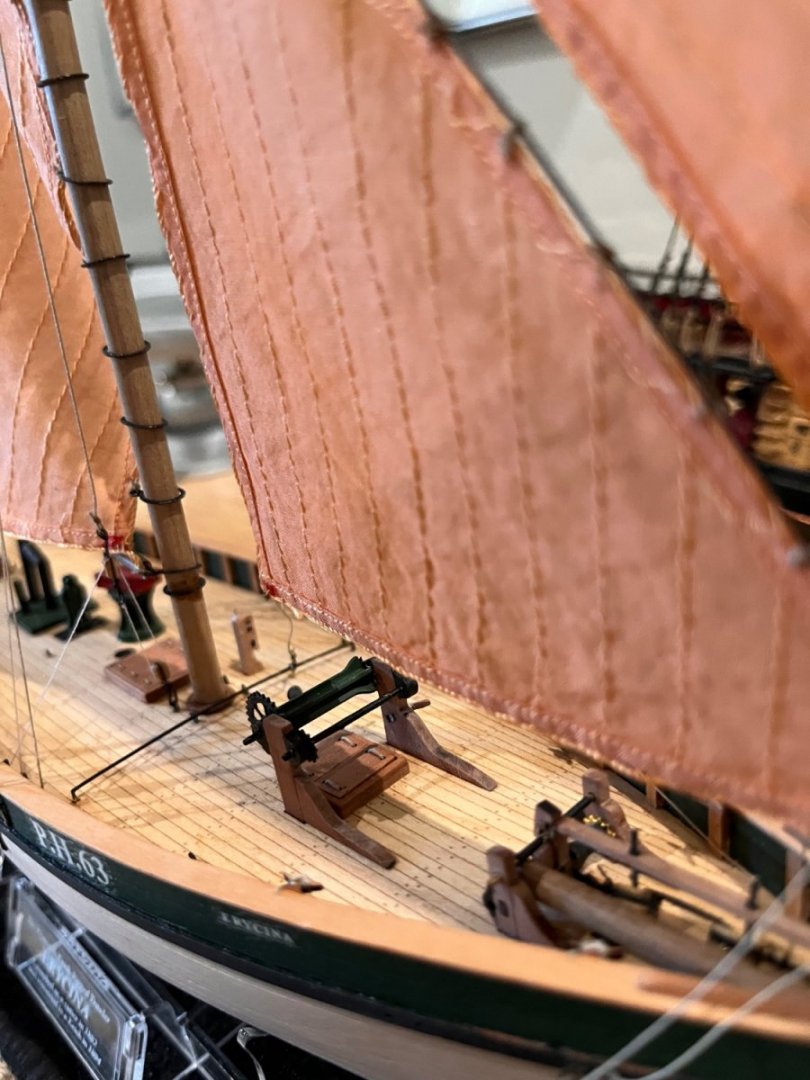
Finished, Finished, Finished The last thing to do was the final shaping of the sails simulating a starboard tack hard to the wind. To achieve the final sail shape required many tests of different material. First I tried to spray on diluted white glue but as it dried the sample started to curl and when completely dry became almost cylindrical. Next was a flat gloss varifane sprayed with the same results as the glue. Next was clear lacquer sprayed with the air brush to keep down the overspray. When it dried it became very stiff and fragile but held the shape as I wanted. During reading about lacquer I had read that it has a tendency to yellow with age so with the being fragile and yellowing that was a no go. Lastly on a lark I tried plain old aerosol hair spray and voila. I covered the decks and using a 16" box fan on lowest setting about 4' from the model I sprayed one coat on the sails. The sails became dark with wet spray which took an hour to dry to the original color. A series of photos of the completed Erycina Well she's finished and makes a beautiful display model with colored sails and red and green paint. I want to thank everyone who followed along the path and especially all those who helped with much appreciated help. Many Regards Will


- 77 replies
-
- 12
-

-
-
- Erycina
- Vanguard Models
- (and 1 more)
-
Just a quick update. Rather than work on Syren I decided to finish all the small boats I'd started. Then I came down with covid and its been a long recovery, but not I back to Syren. Will
-
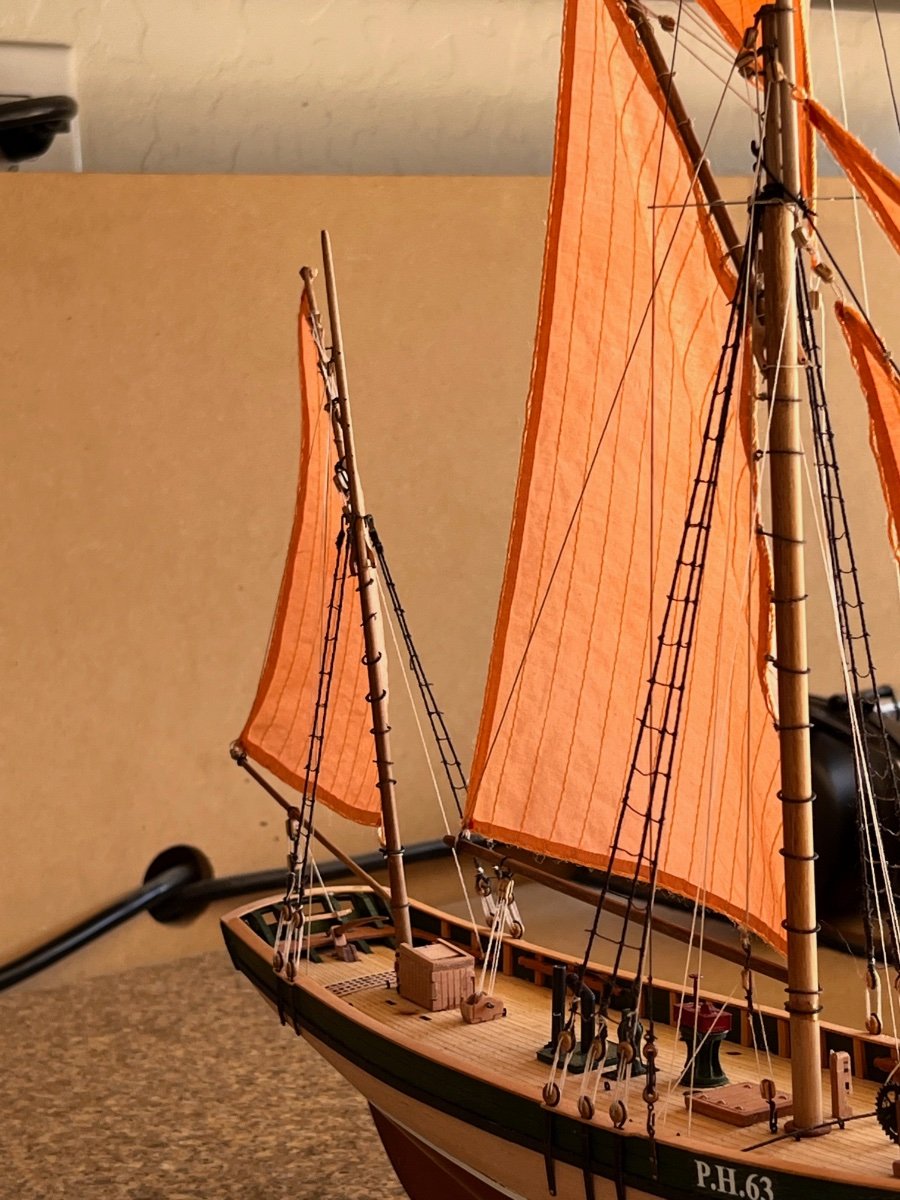
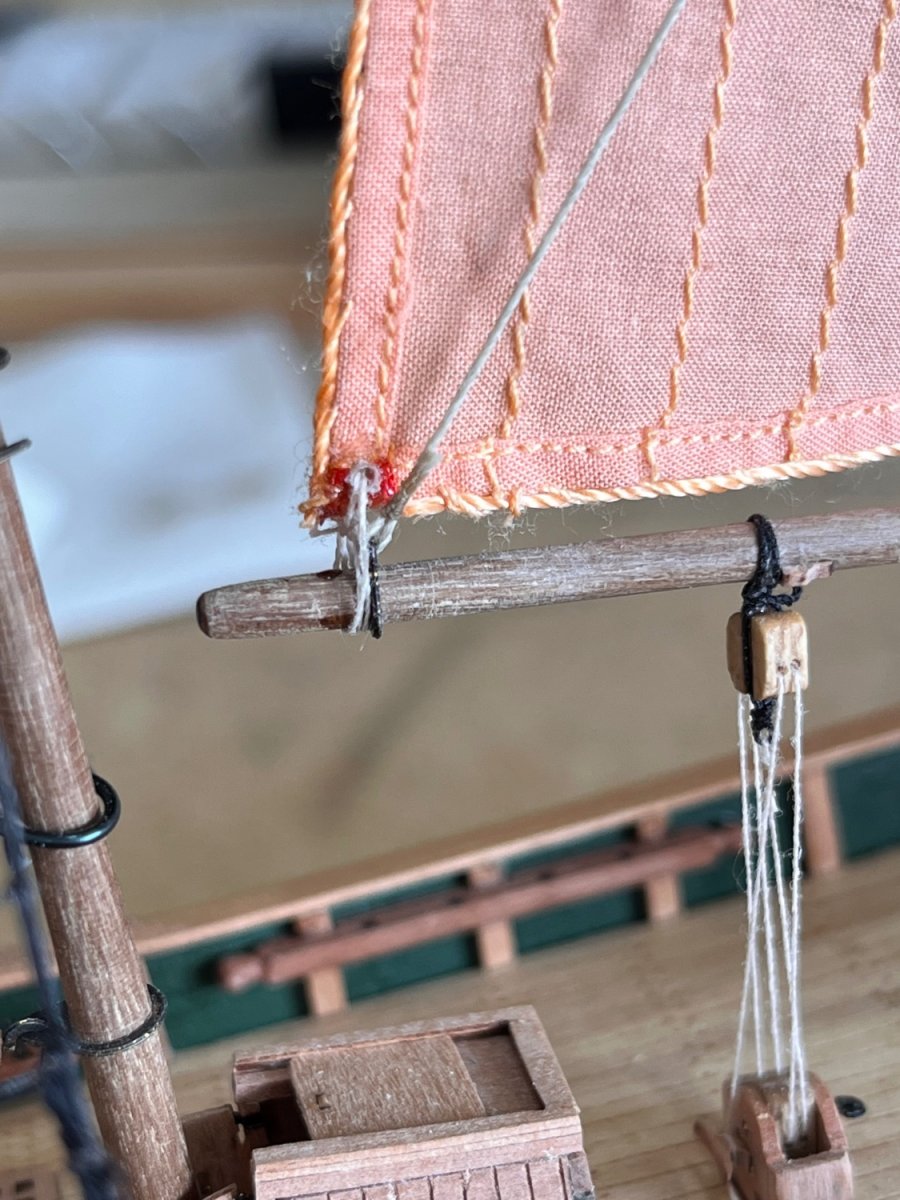
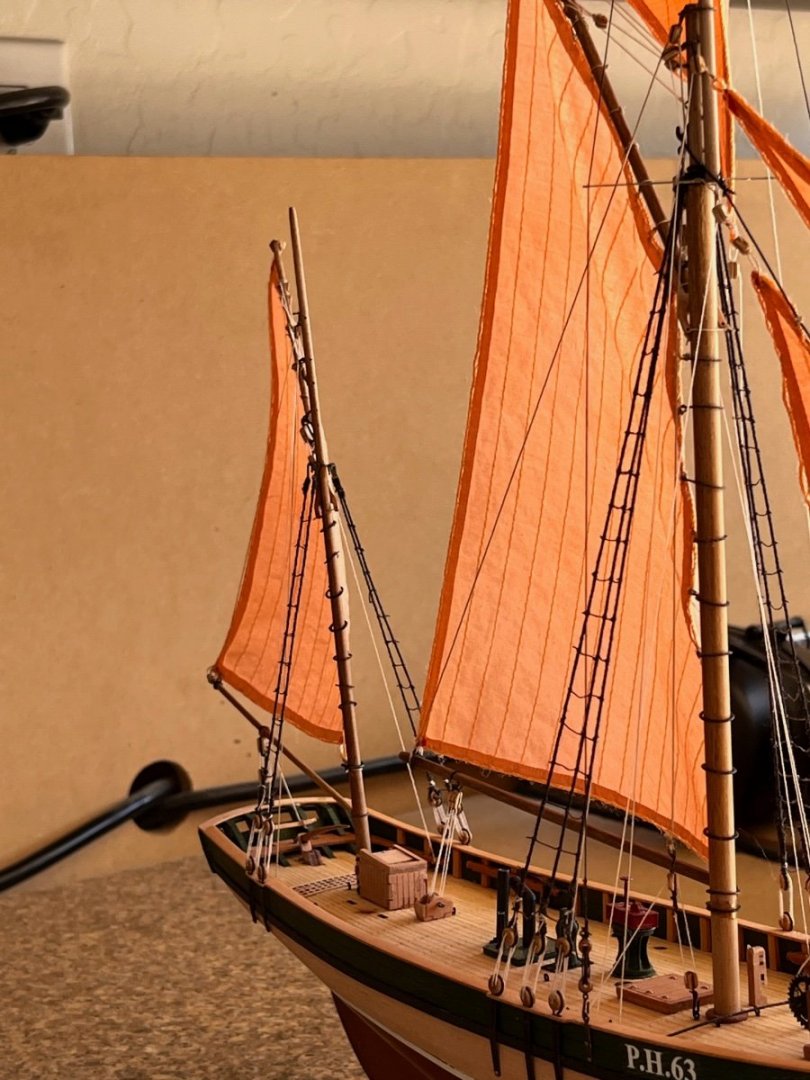
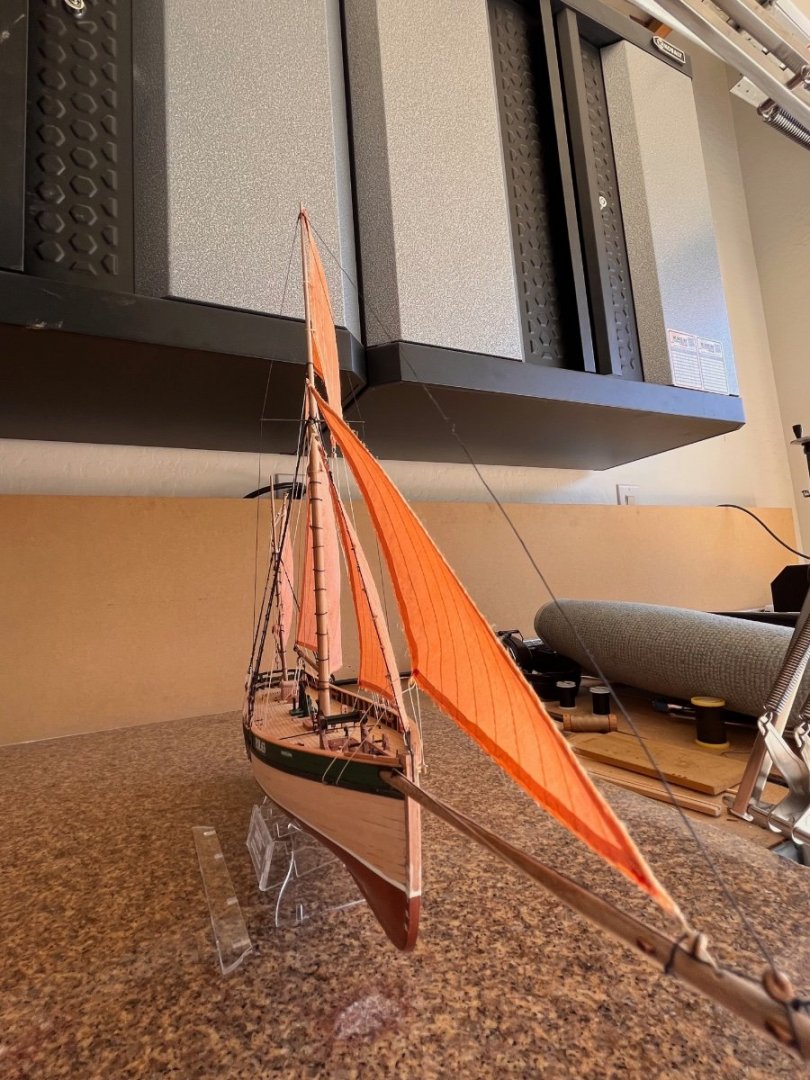
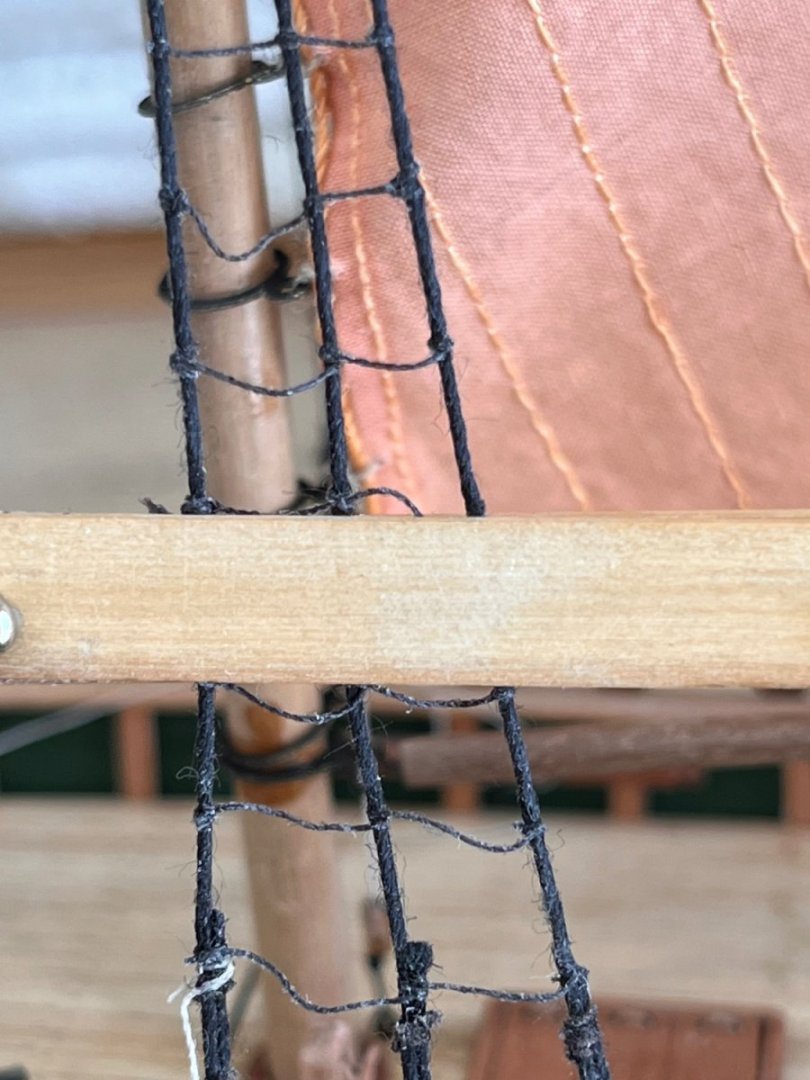
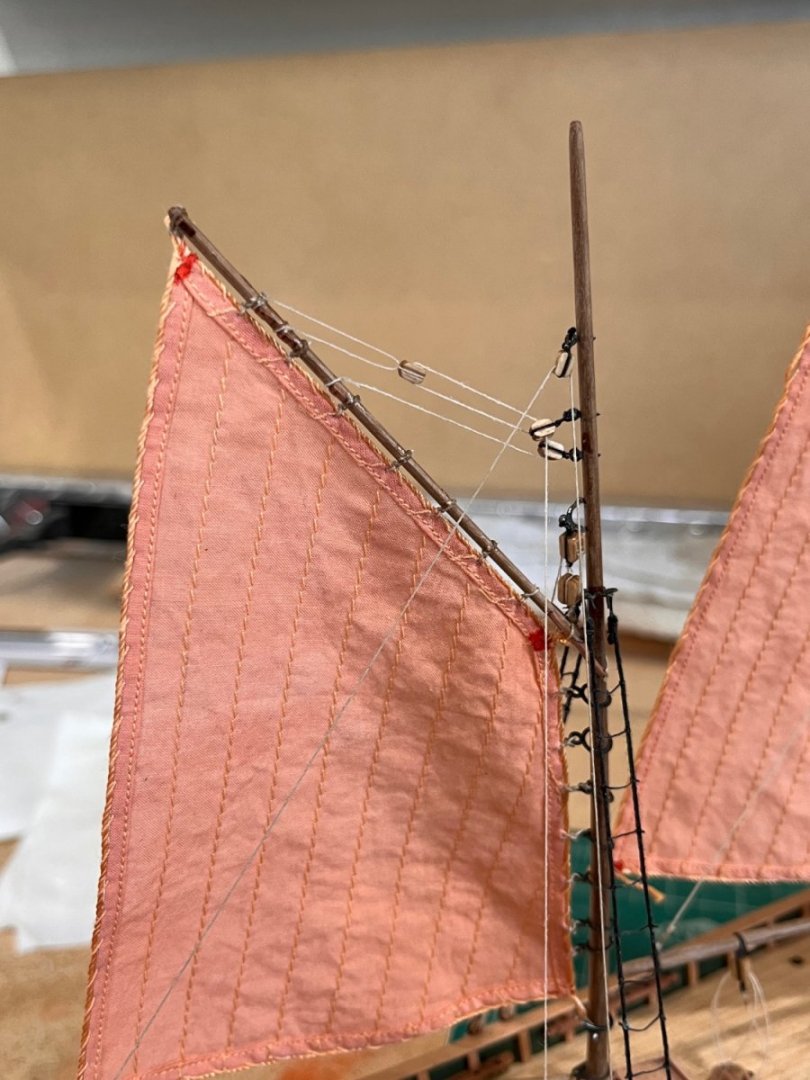
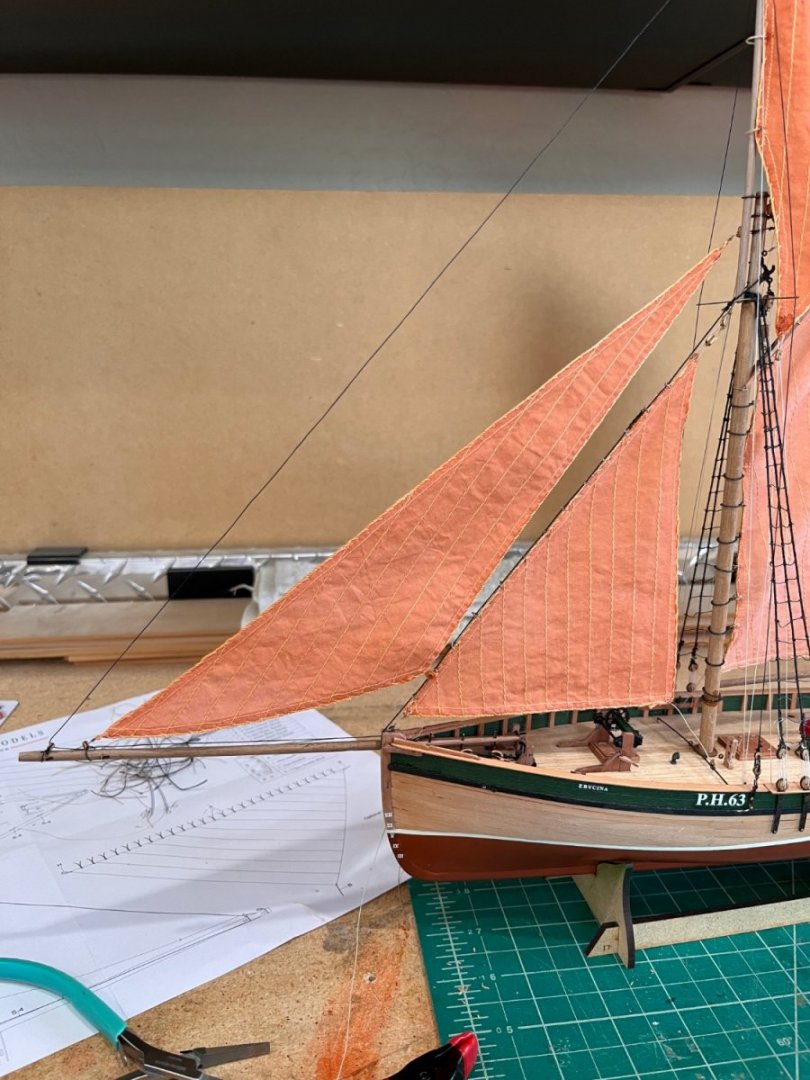
Finally got back into the shop on the Erycina. With the shrouds and forestay done it was time for ratlines. On another model I borrowed a neat little tool for ratline spacing. Take a thin piece of wood long enough to cover all the shrouds with a width the same at the ratline spacing. Glue sandpaper to the wood (I used 320grit) place one piece behind and another in front clipping them together. (I use alligator clips). Tie the lines and slide the knot down to the spacer wood. Wood with sandpaper. I use glue sticks for glueing the sandpaper also works for patterns much better than rubber cement. spacers placed spacers clipped (I remembered to describe this method afterthe ratlines were done but not shaped) Time to lift sails and running rigging. This was fairly straight forward and there's not much to show. Added the parrel rope to main gaff and rigged per drawing. Lashed the sail to the boom and routed the boom sheets to the block. Tied the topsail to the topmast added the halyard, down haul and tied the gaff. Mizzen sail like the main sail with the exception of tie off points. The foresail and jib were very straight forward with little explanation. One last set pictures of the basically completed Erycina. Need to make hanging ropes at the tie off points and one last thing forming the sails. Using a box fan set the sails in a tight starboard run but I haven't decided how to keep them in shape. Thoughts are use dead flat water based variphane thinned and sprayed with an airbrush. Just thinking. Will


- 77 replies
-
- 10
-
-
-
- Erycina
- Vanguard Models
- (and 1 more)