spider999
-
Posts
75 -
Joined
-
Last visited
Content Type
Profiles
Forums
Gallery
Events
Everything posted by spider999
-
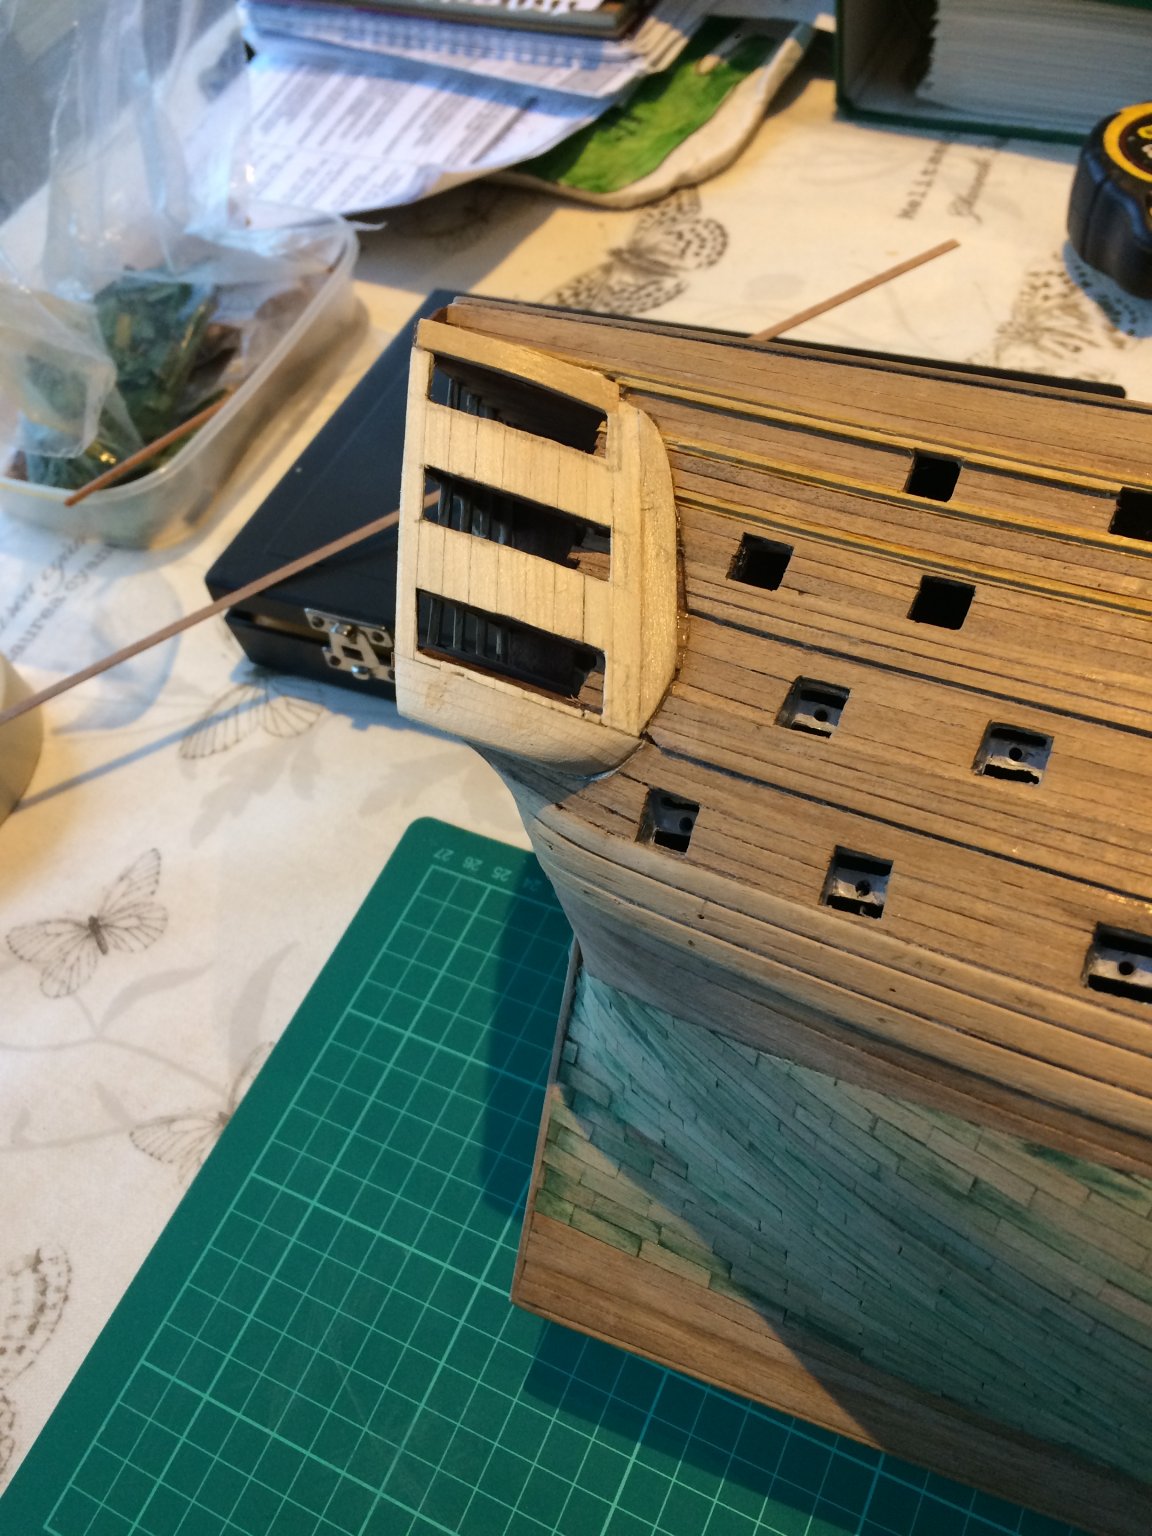
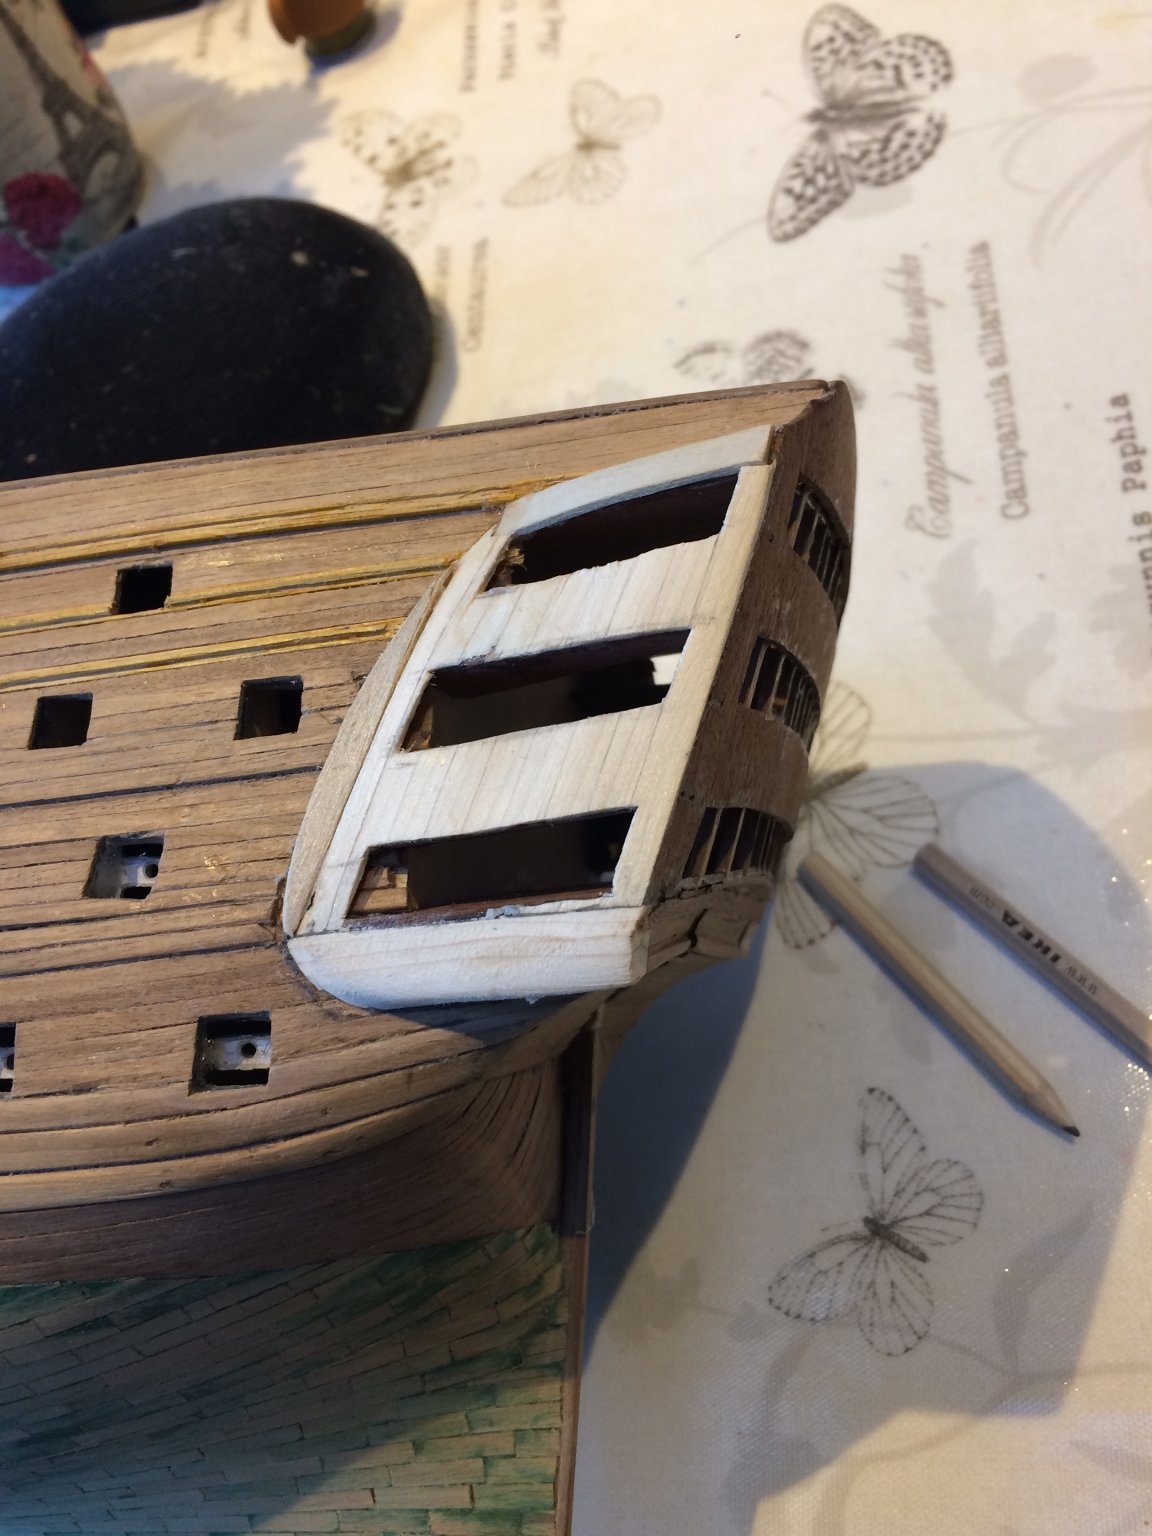
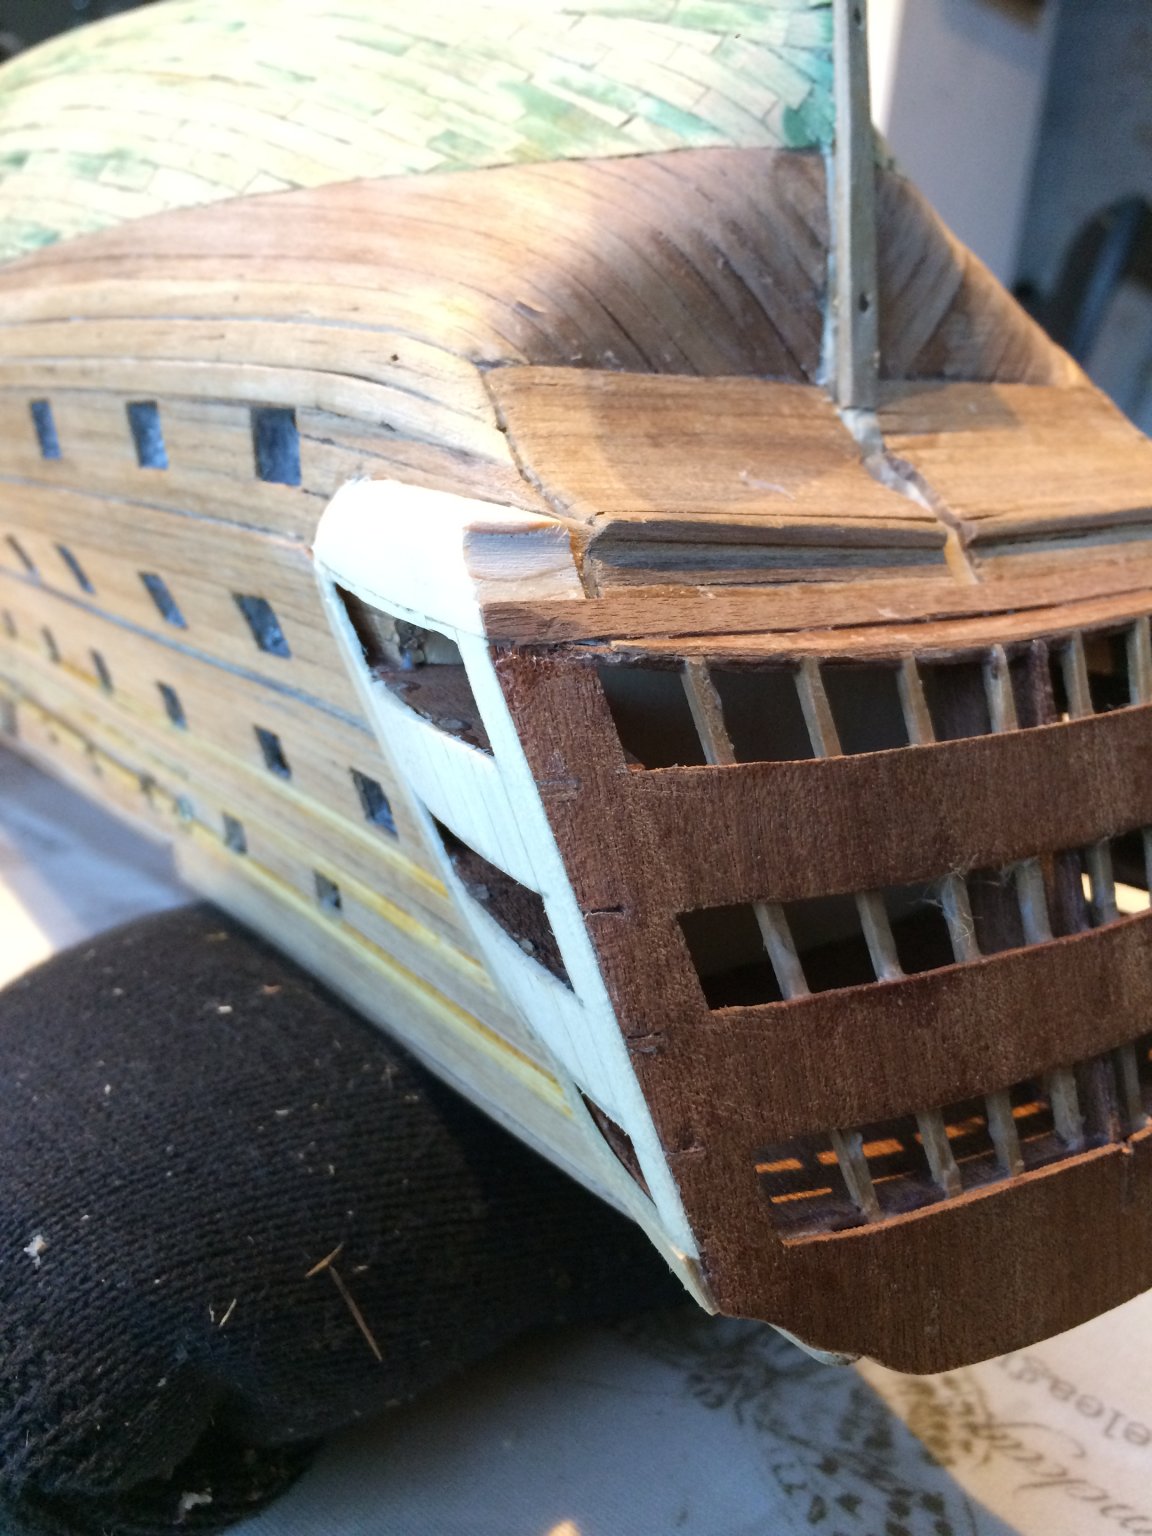
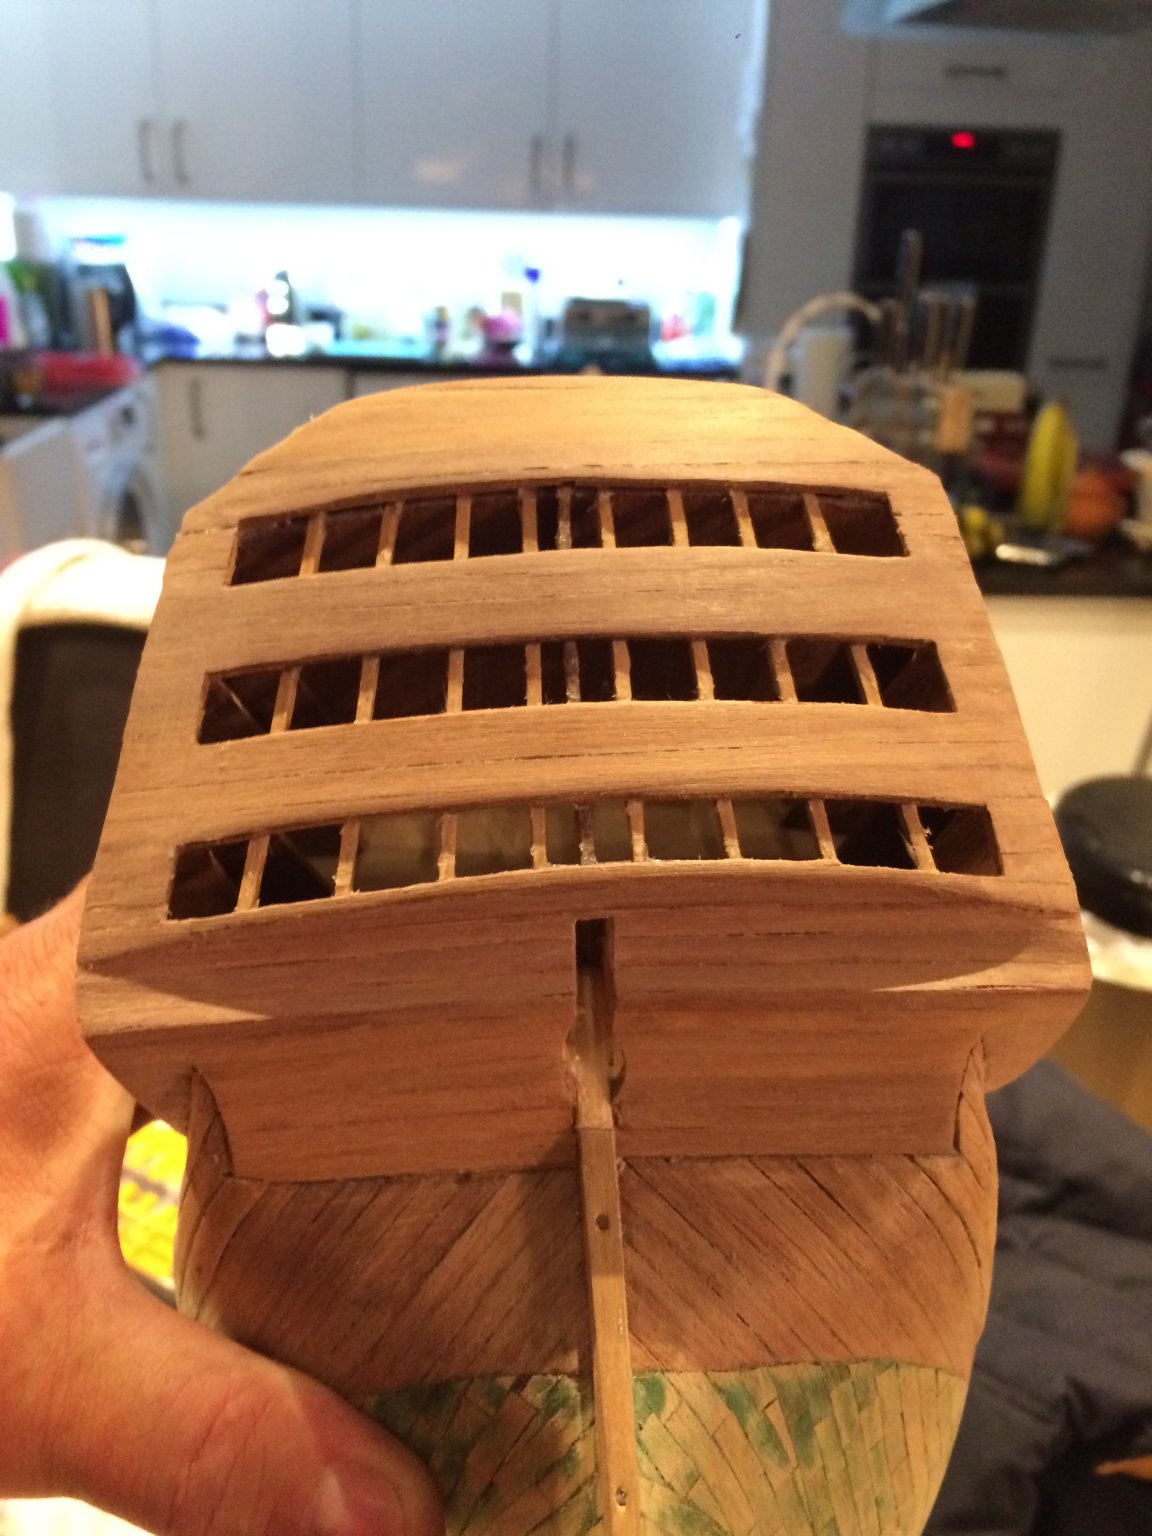
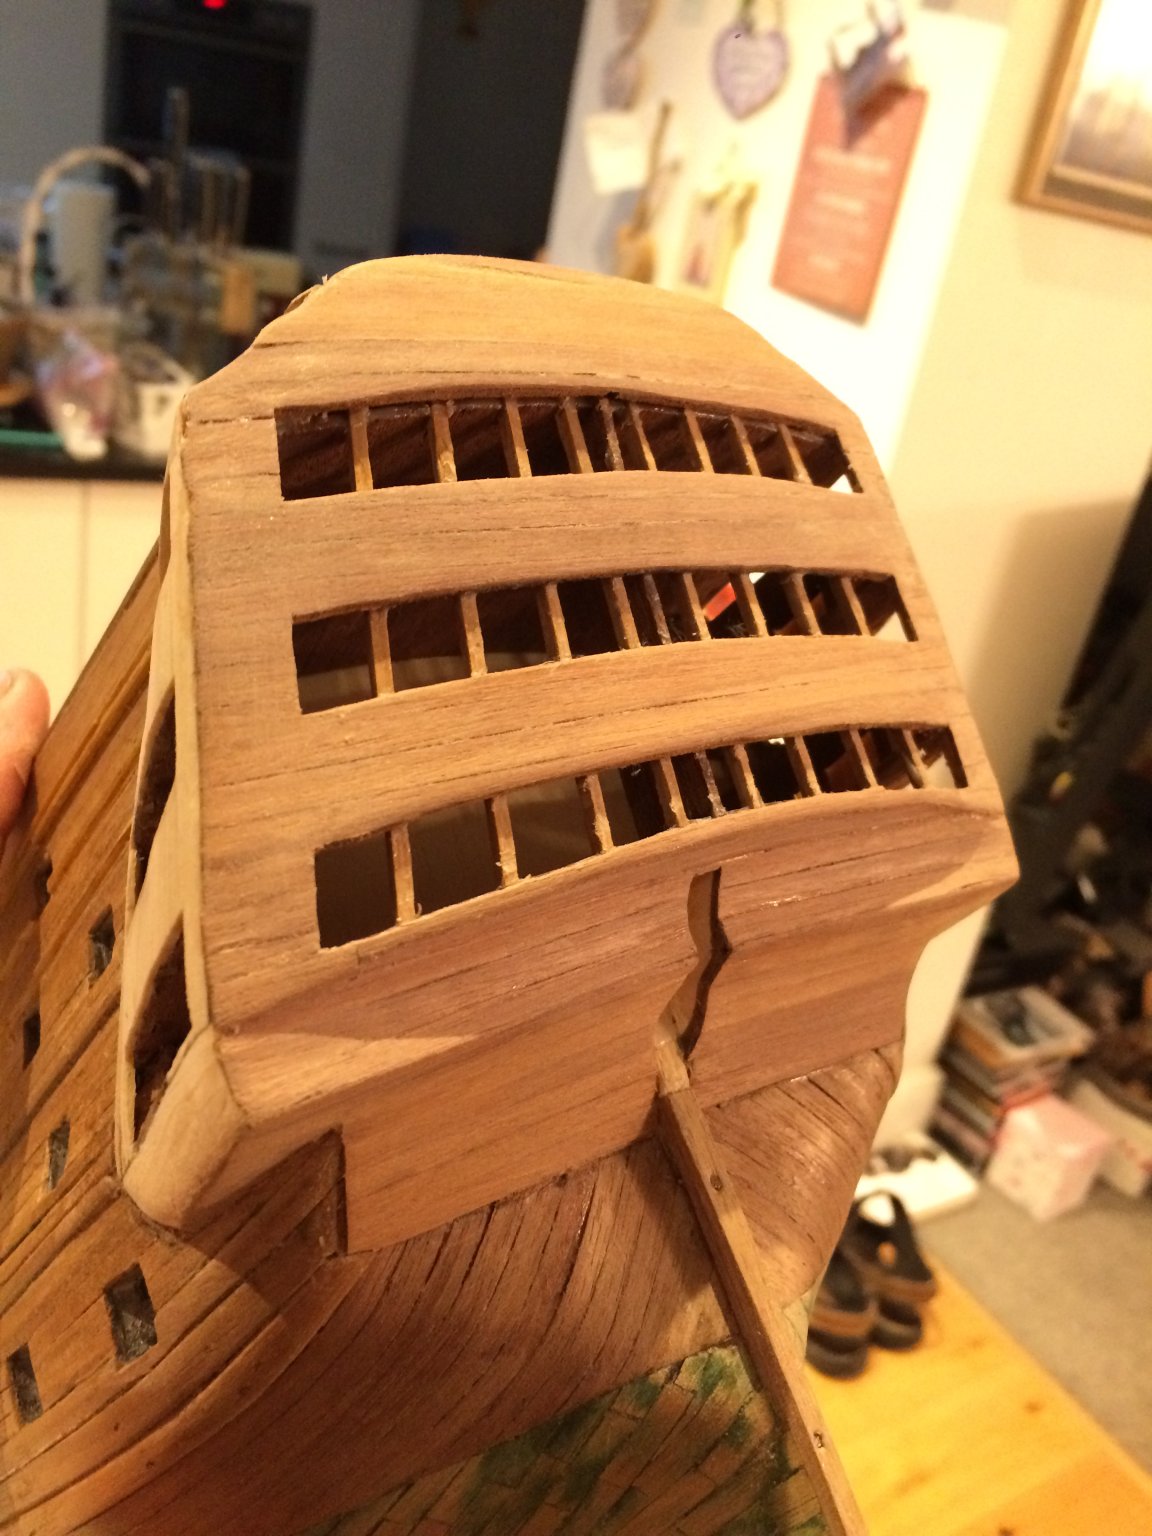
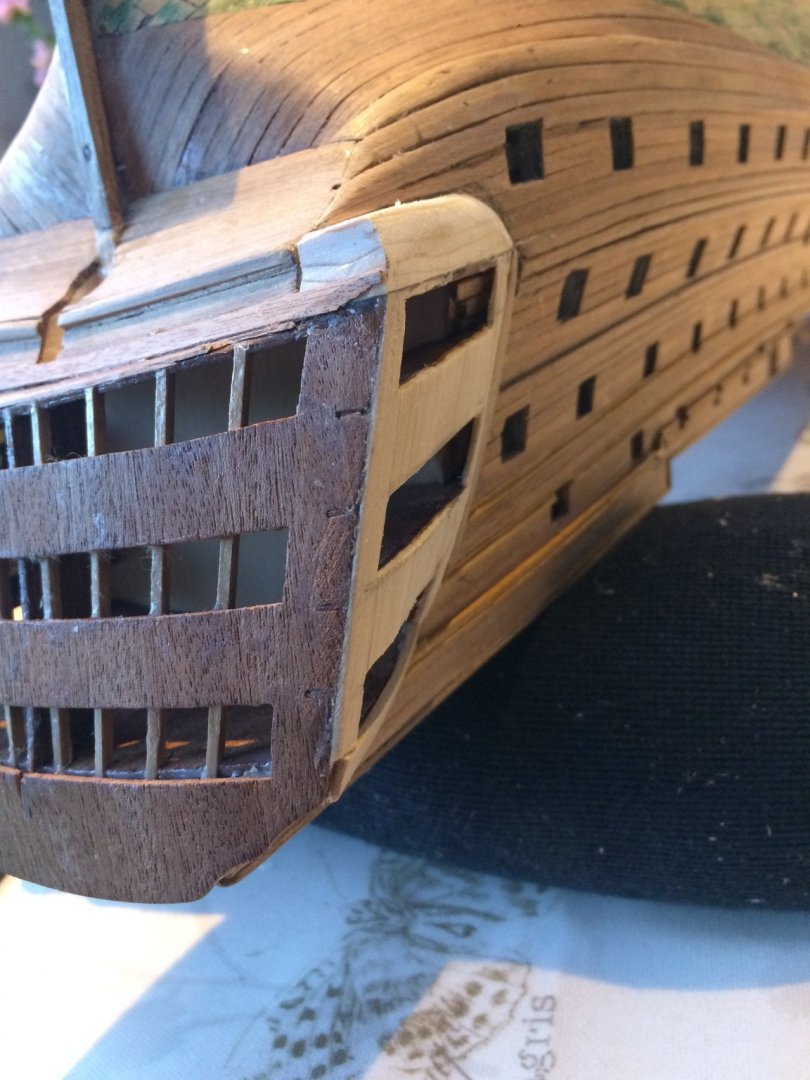
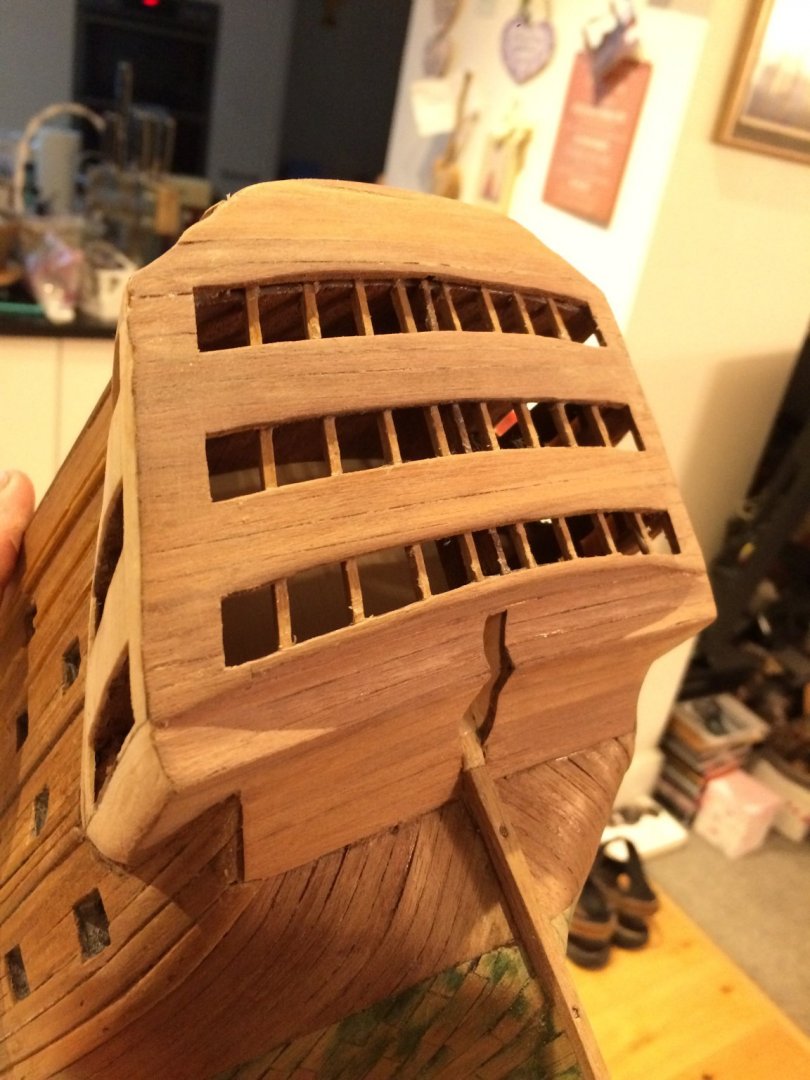
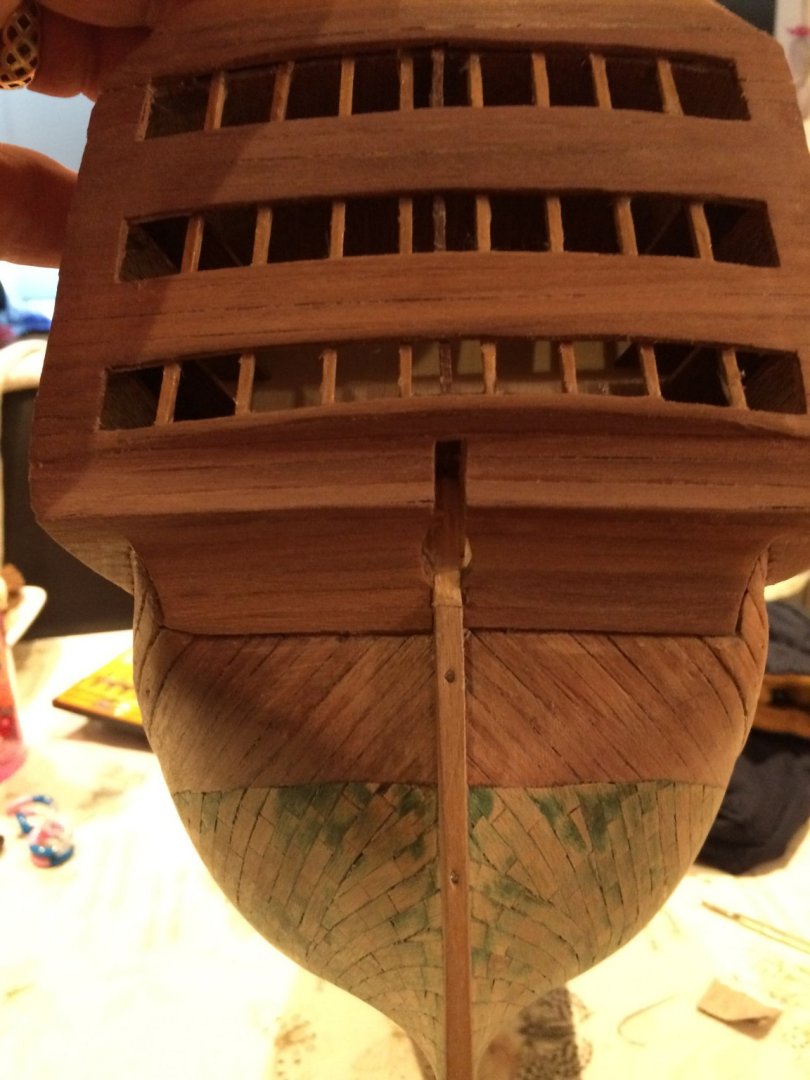
 started work on the stern and side stern galleries, not sure whether to do the foil tape on the hull first or do the windows, mmm choices choices..


-
Oh Deep Joy, just what I was looking forward to next, the stern galleries... YT's build log here I come!!!!
-
I bought mine about 10 years ago, only ever opened the yellow to paint the bulkheads on the upper decks, they are still unopened, so I will maybe paint the black/yellow next, nothing to lose, worst case scenario they are all dried up and i buy another set. we'll see
-
Rob, dont thank me, thank YT, he is the one I am looking to for inspiration. But you're welcome my friend. Was just gonna go down to my boatshed to see what the next challenge is on the instruction sheet!!, either end is gonna be daunting.. Cant wait to get started on the rigging..
-
Hi mate, thank you for your comment. I took my inspiration from YT, he did pretty much the same, ties then covered them with the foil tape. His looks a lot better than my effort. But then again a jeweller does have a very good attention to detail, bless him. regards Spider

-
I think I got the same paint set from Cornwall modelboats "HMS Victory paint set" a few years ago now, wonder how long it stays good for if they are unopened??
-
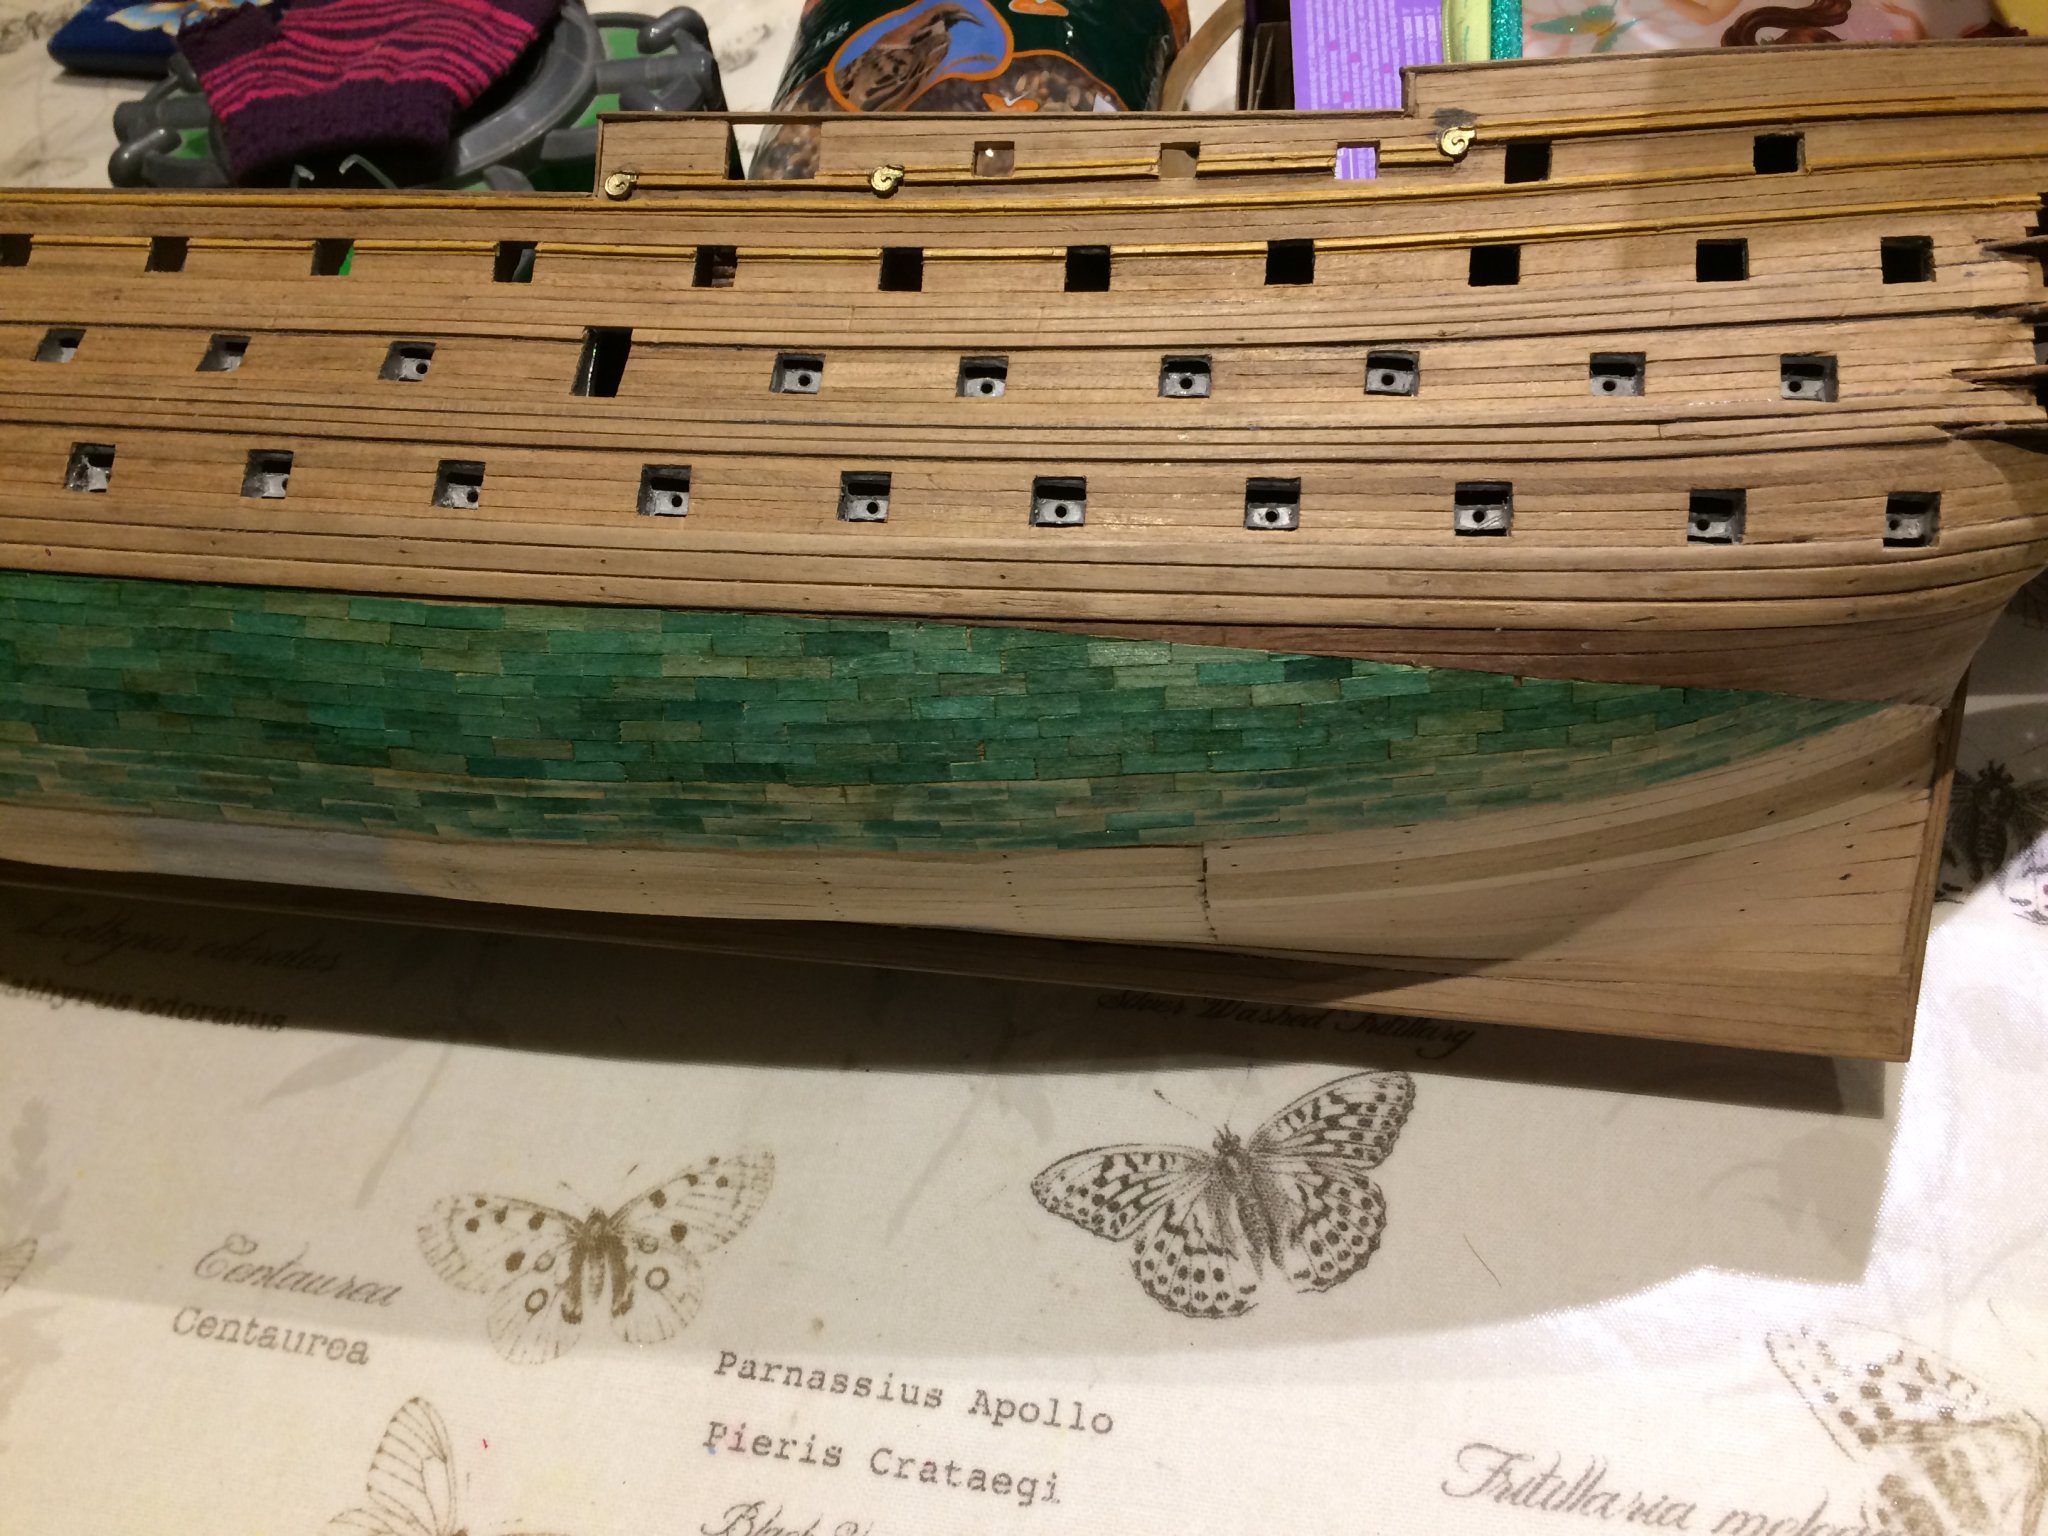
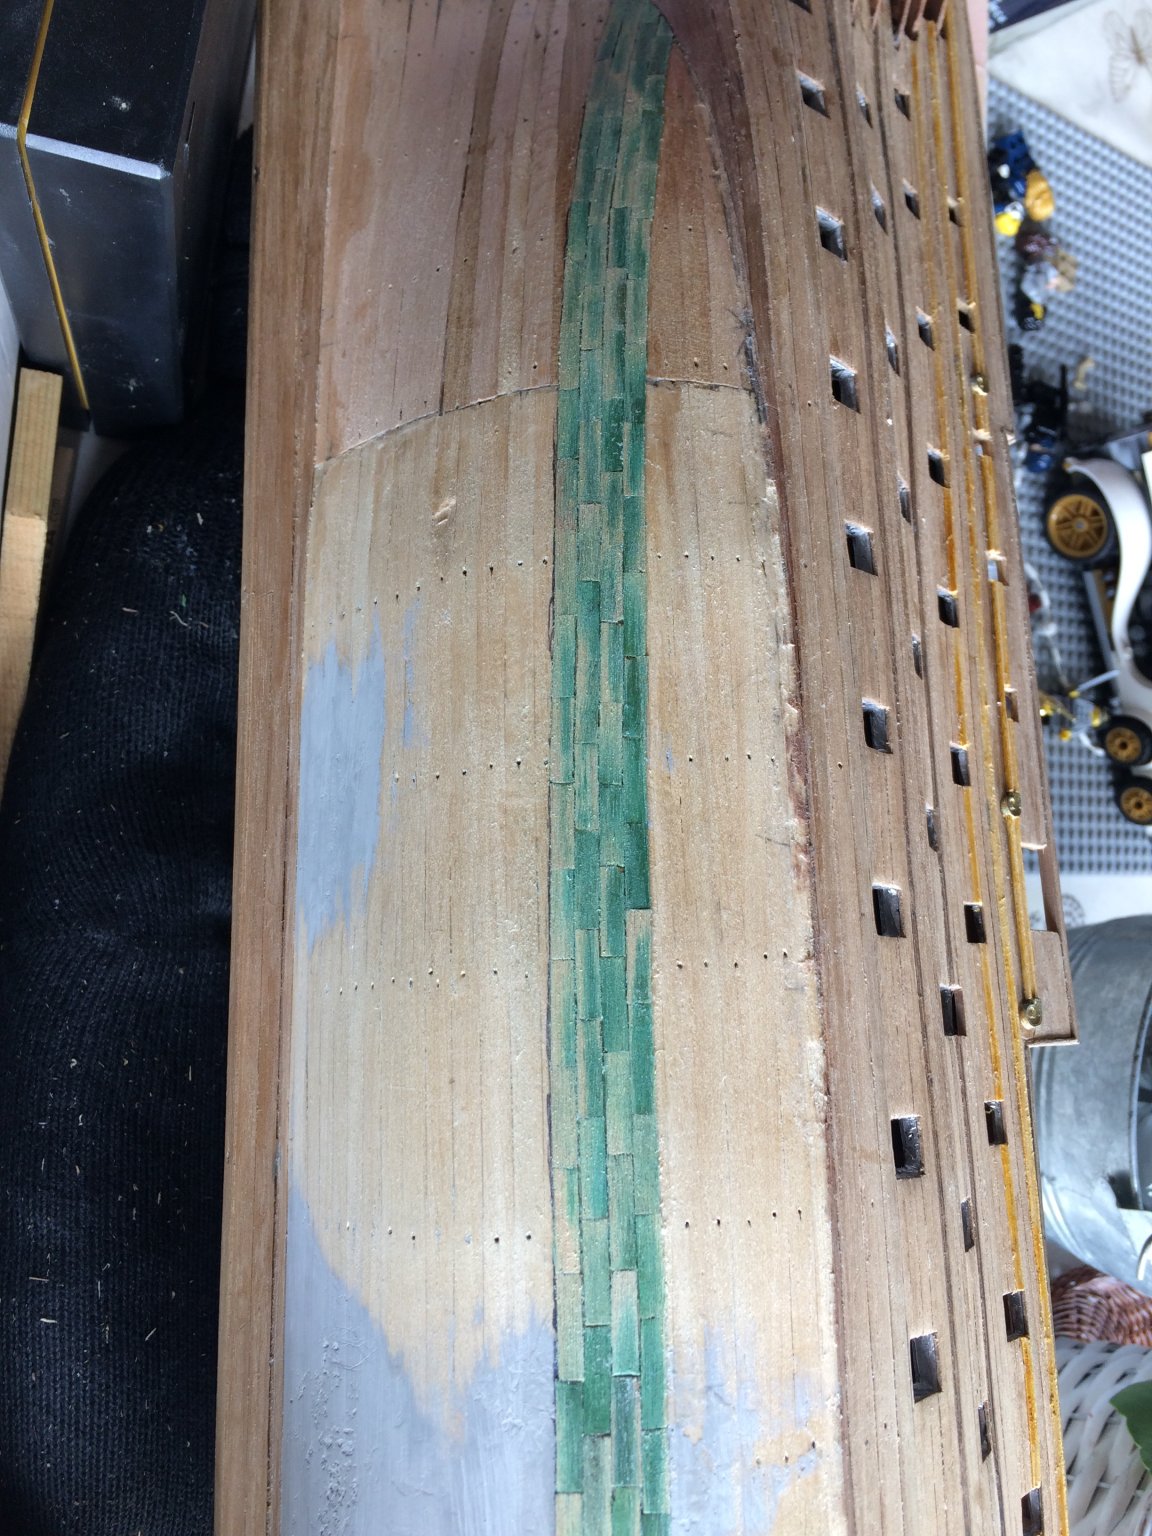
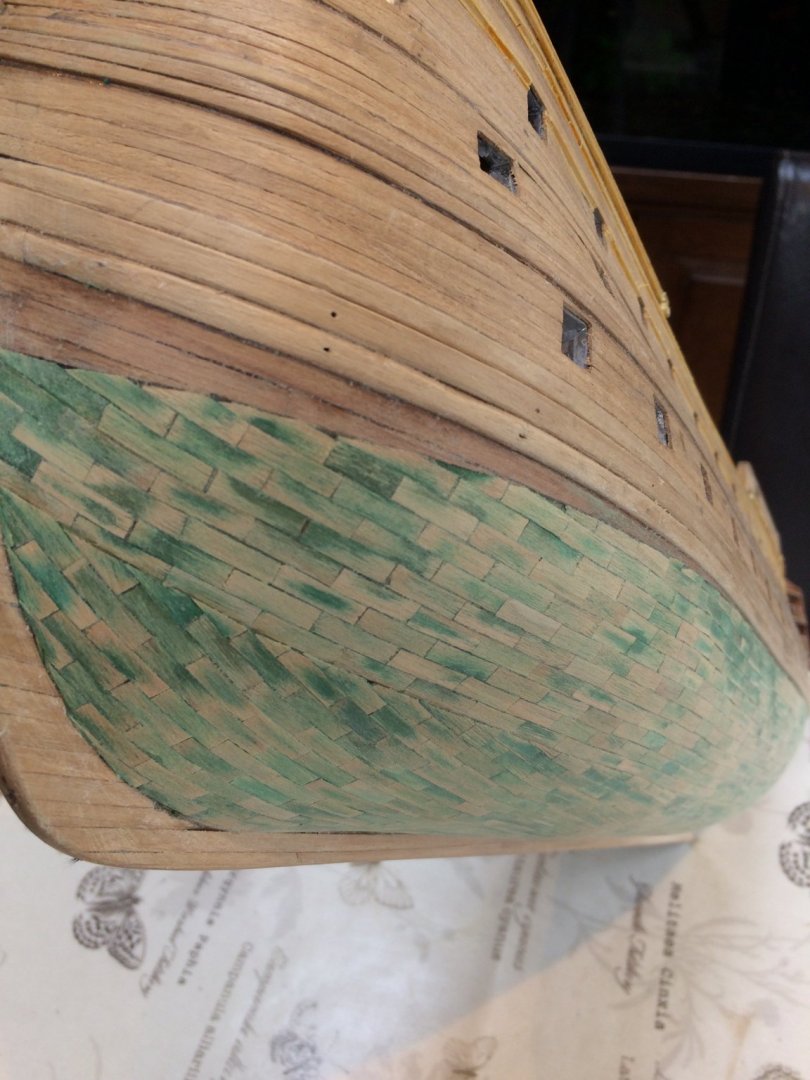
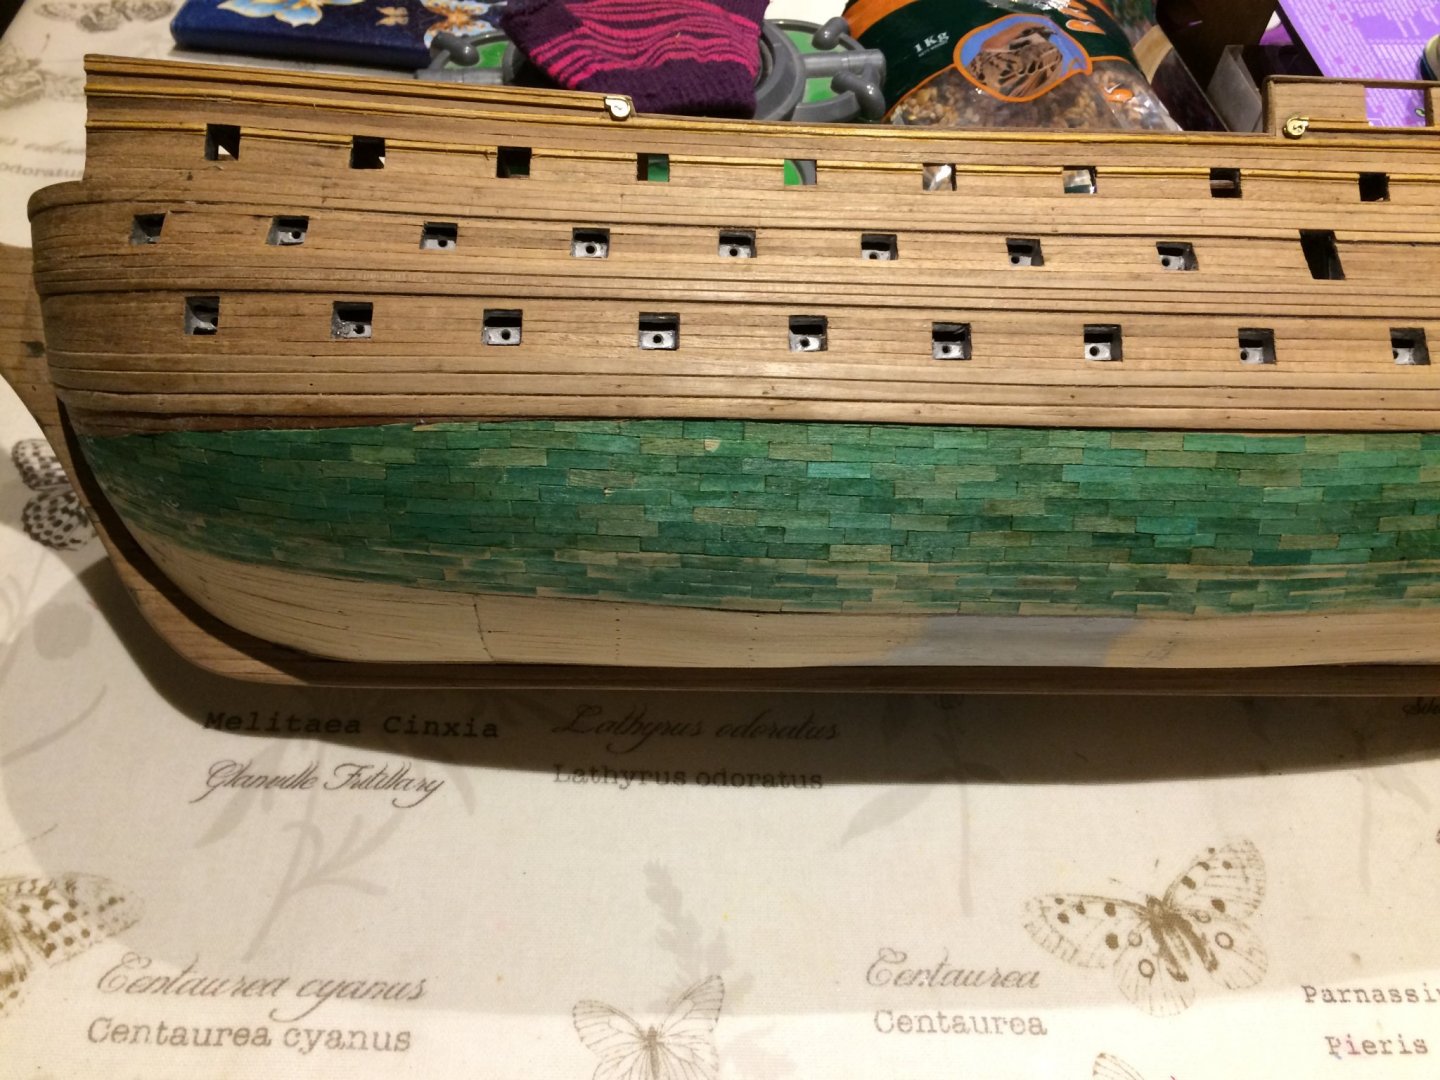
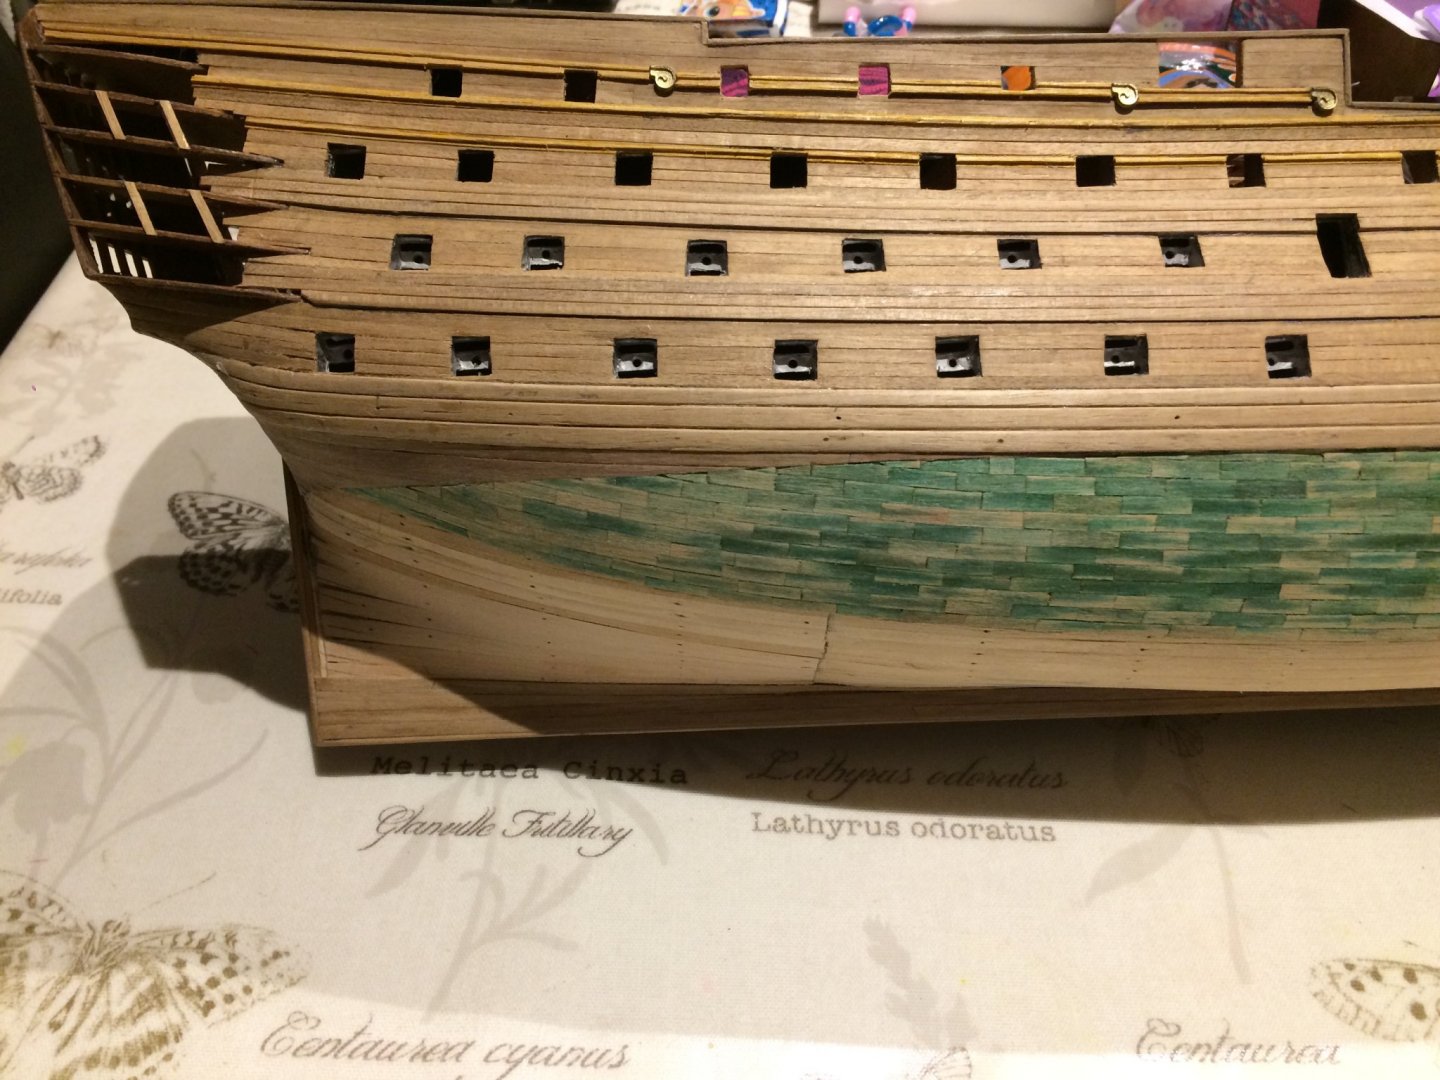
Hi there, They do look ok, shame I'm gonna cover them in copper foil tape... I like the shiny authentic look so many other people have on their build logs. I just used the tiles to give me the reference for the vertical joins when I do the rivet lines. (it's a scale thing)
-
Hi J, answered you on the other forum, but for the benefit of anyone who isn't on there : It's HMS "Victory": Her Construction, Career and Restoration by Alan McGowan but I have loads of books about her, The Anatomy of Nelson's Ships by C. Nepean Longridge Haynes owners manual by Peter Goodwin Rigging Period Ships Models: A Step-by-step Guide to the Intricacies of Square-rig by Lennarth Petersson THE MASTING & RIGGING ENGLISH SHIPS OF WAR (Conway's History of Sail) by James Lees The Art of Rigging by George Biddlecombe I was just flicking through the first one and came across the layout plans for the copper plates and thought it would be very helpful as that was the stage I was approaching. To be honest, I haven't really looked through the others yet as I only got the books to help with the correct layout of the rigging.. I can tie knots, I am a former Able Seaman in the British Merchant Navy, I just want to know which line goes where!! I forgot to say, I also just got hold of a mint copy of The 100-Gun Ship Victory, Revised Edition (Anatomy of the Ship) by John McKay.
-
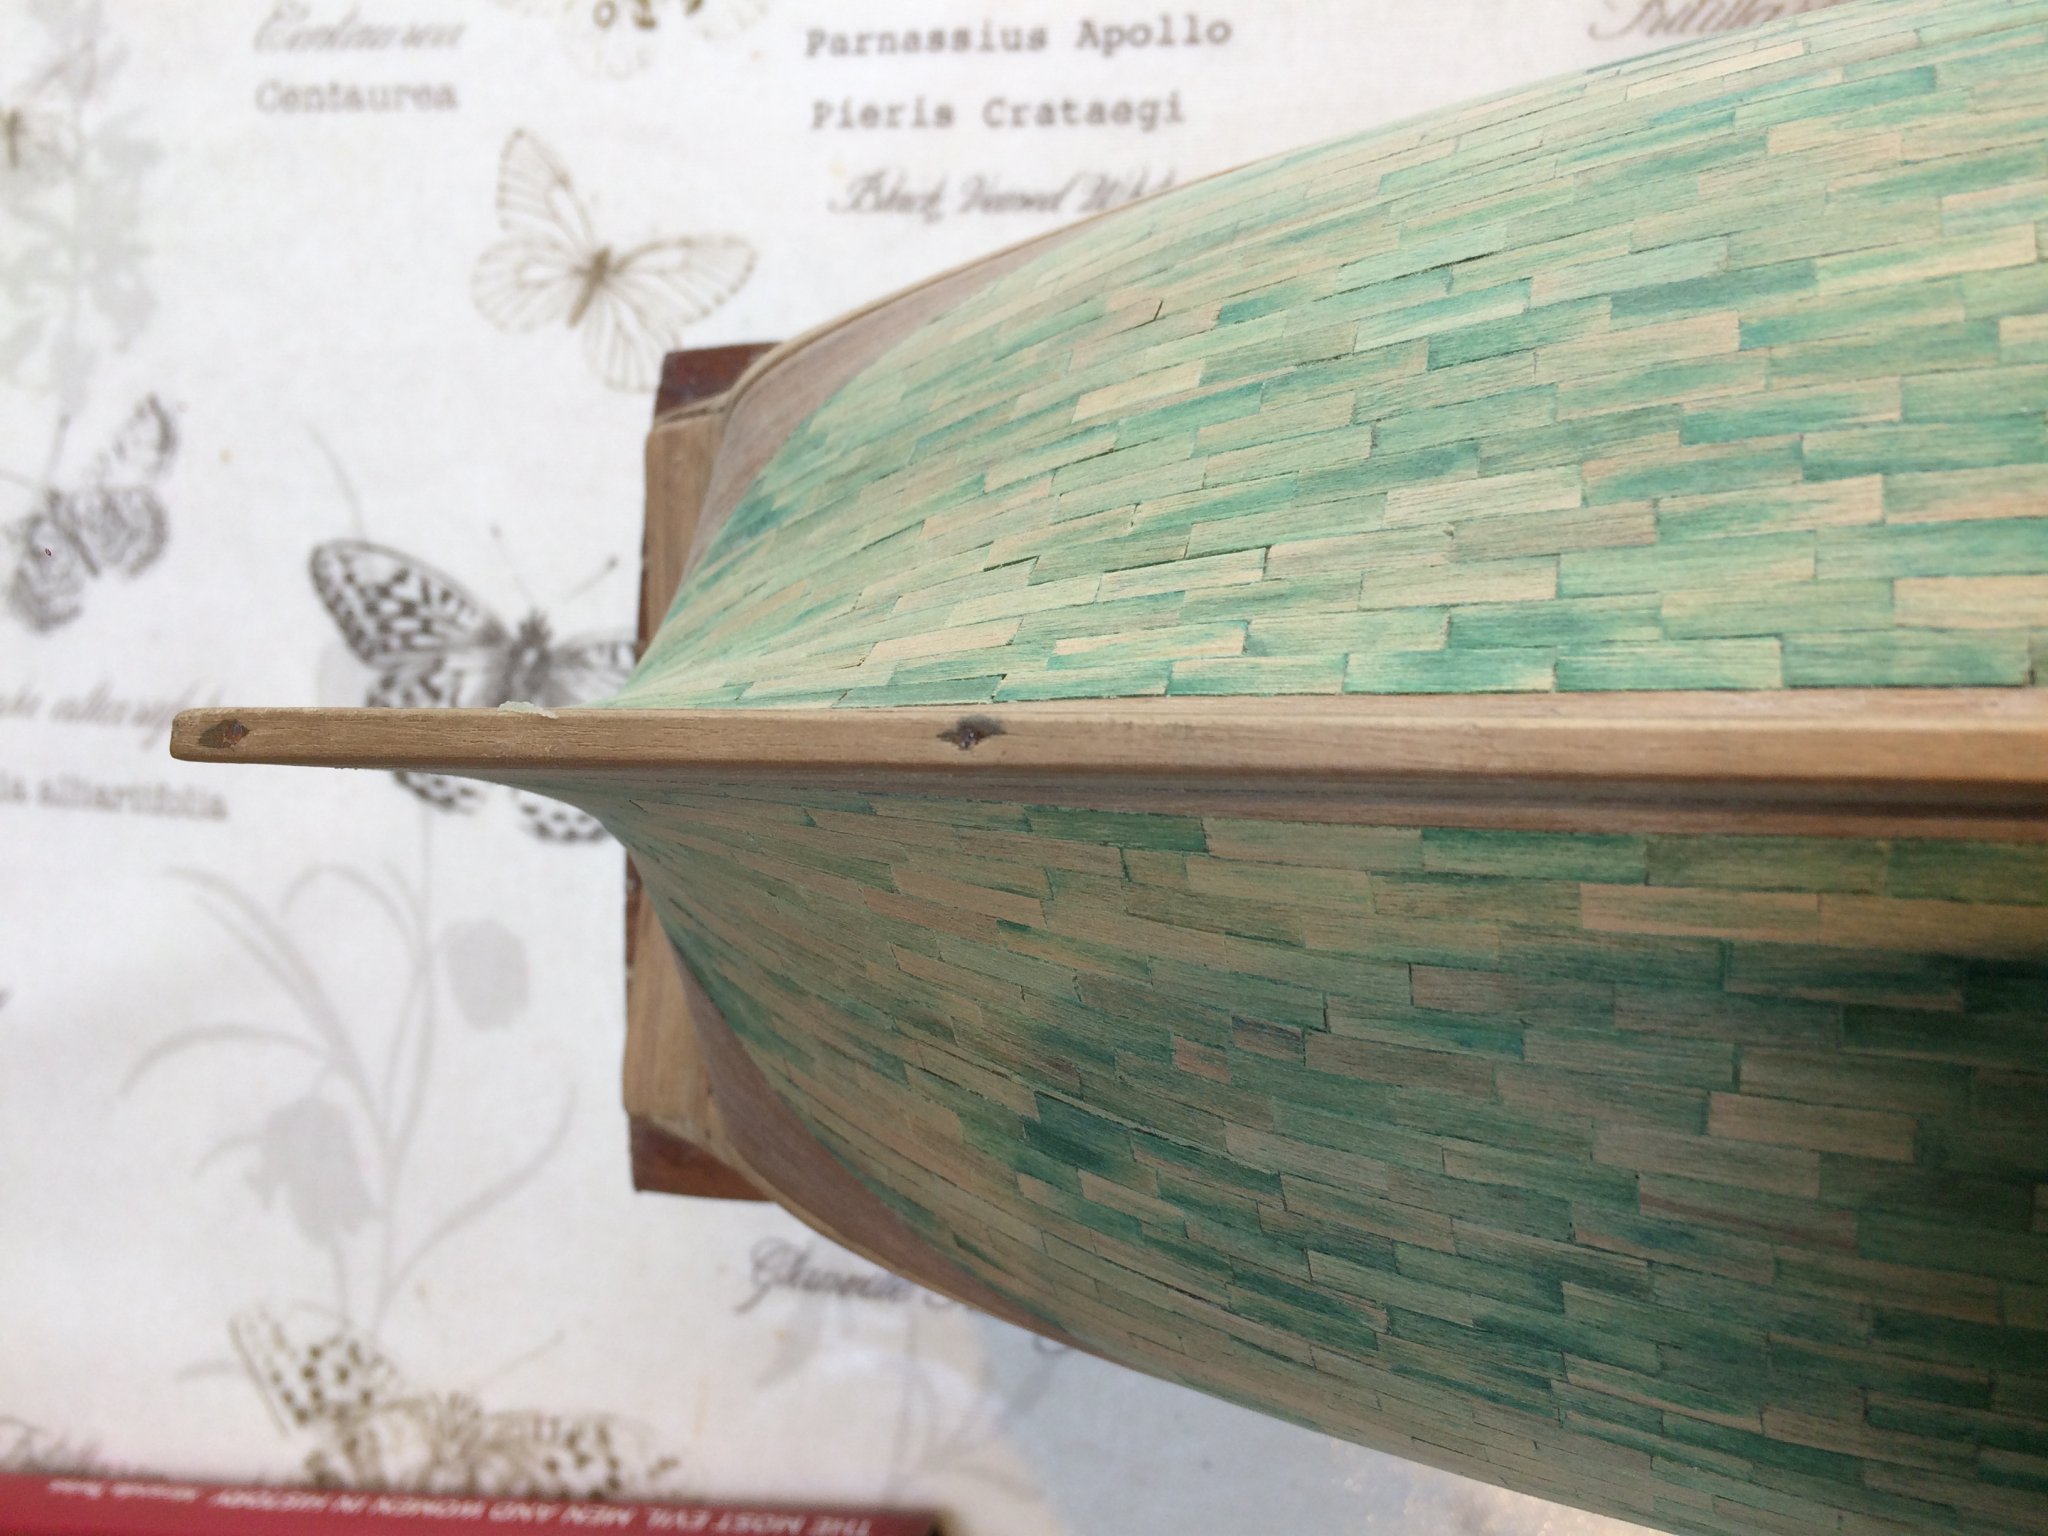
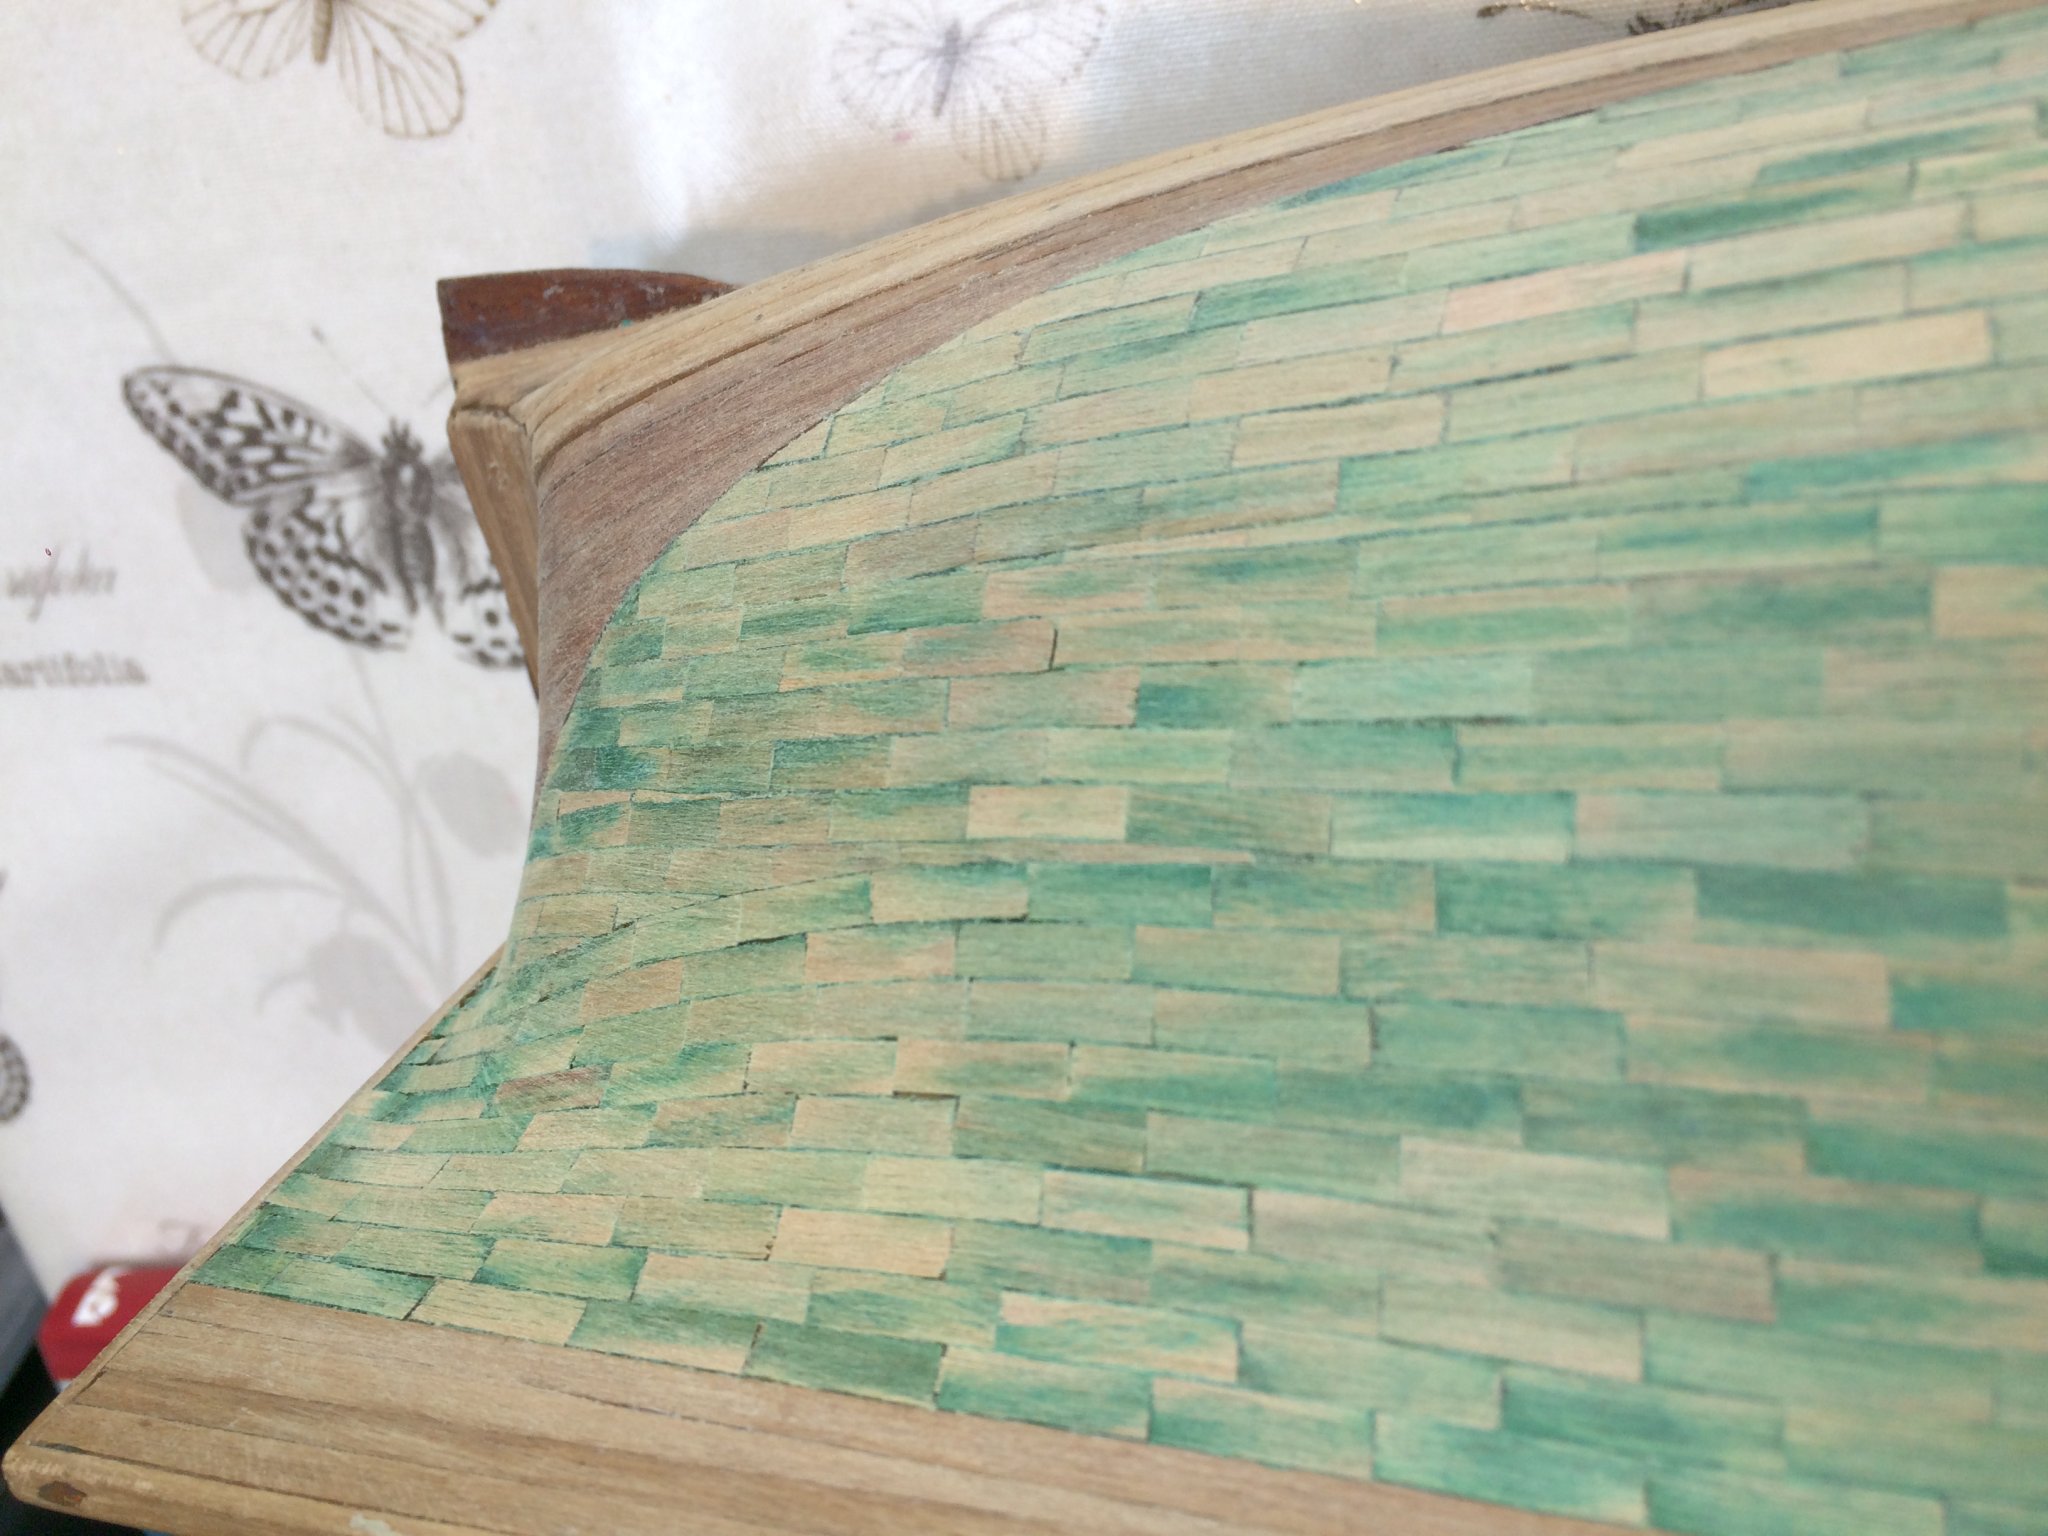
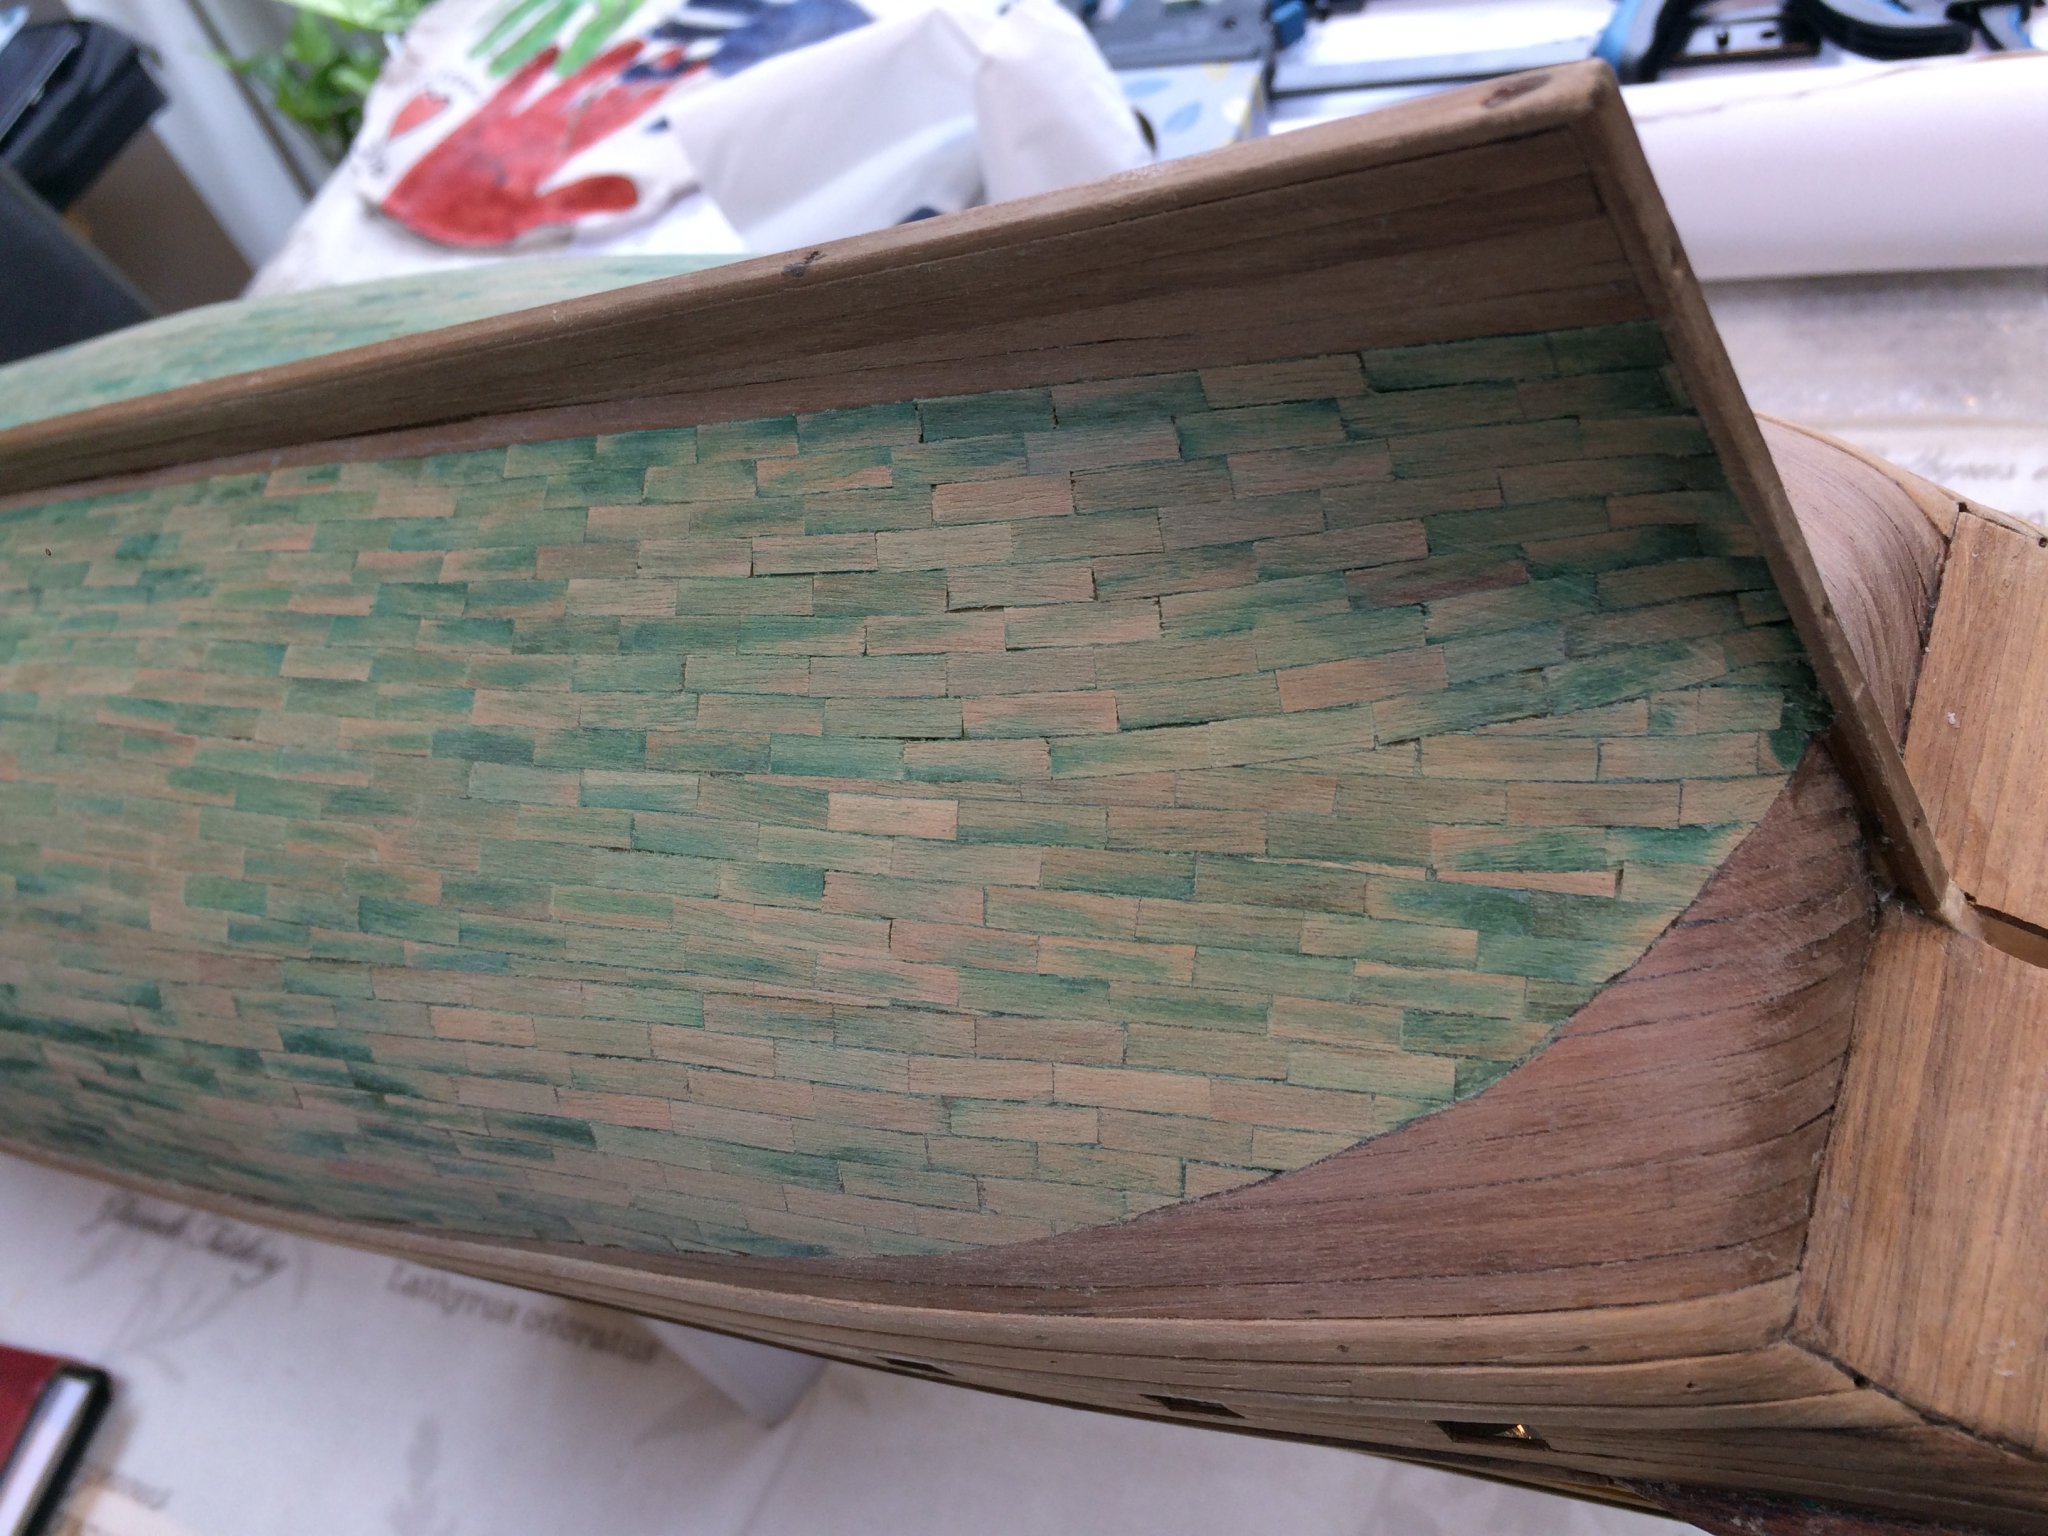
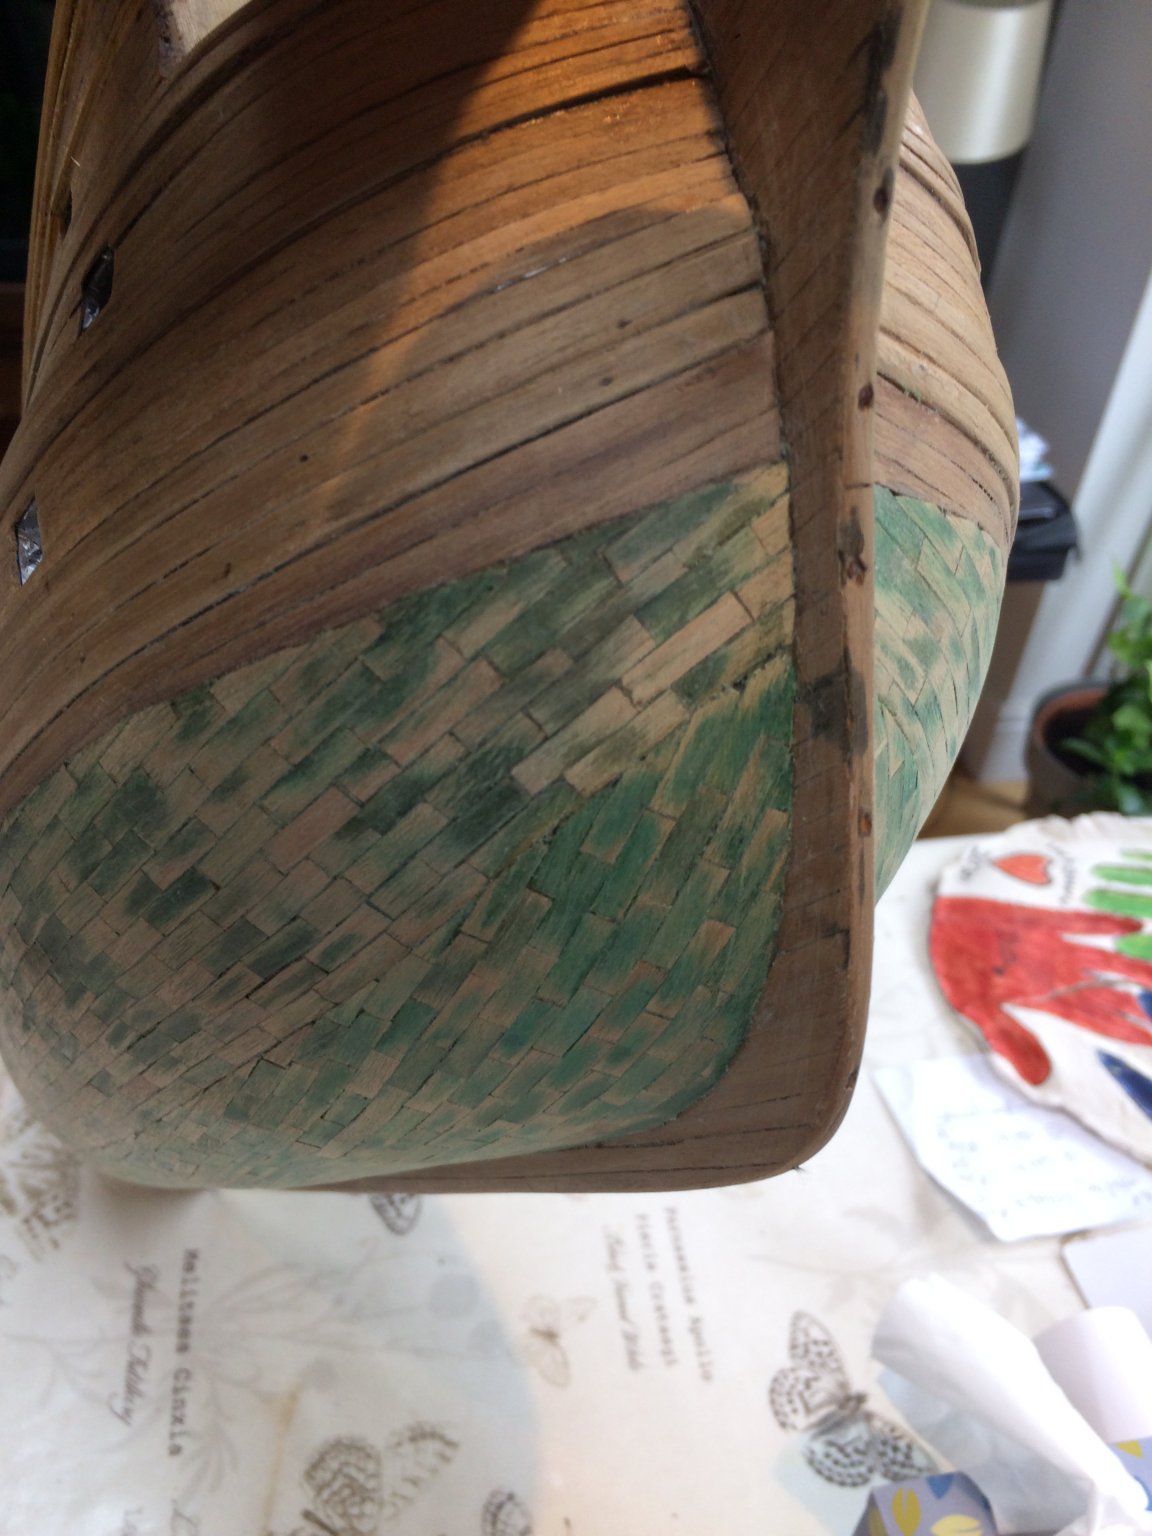
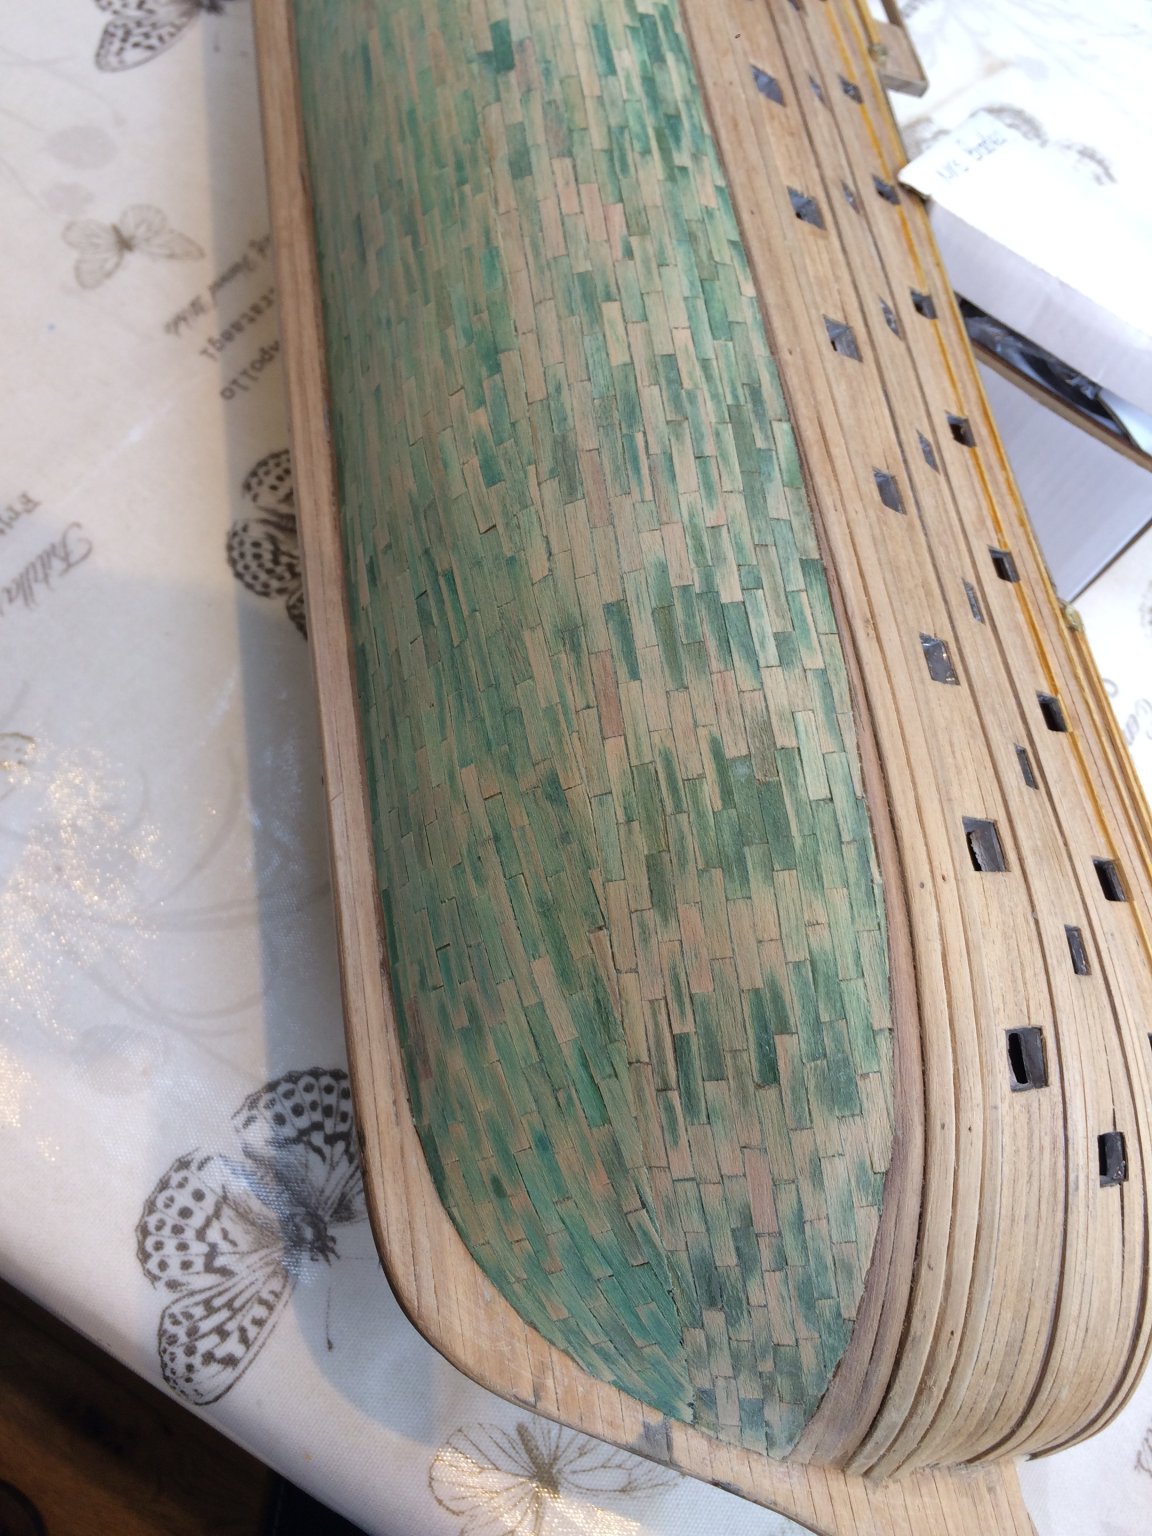
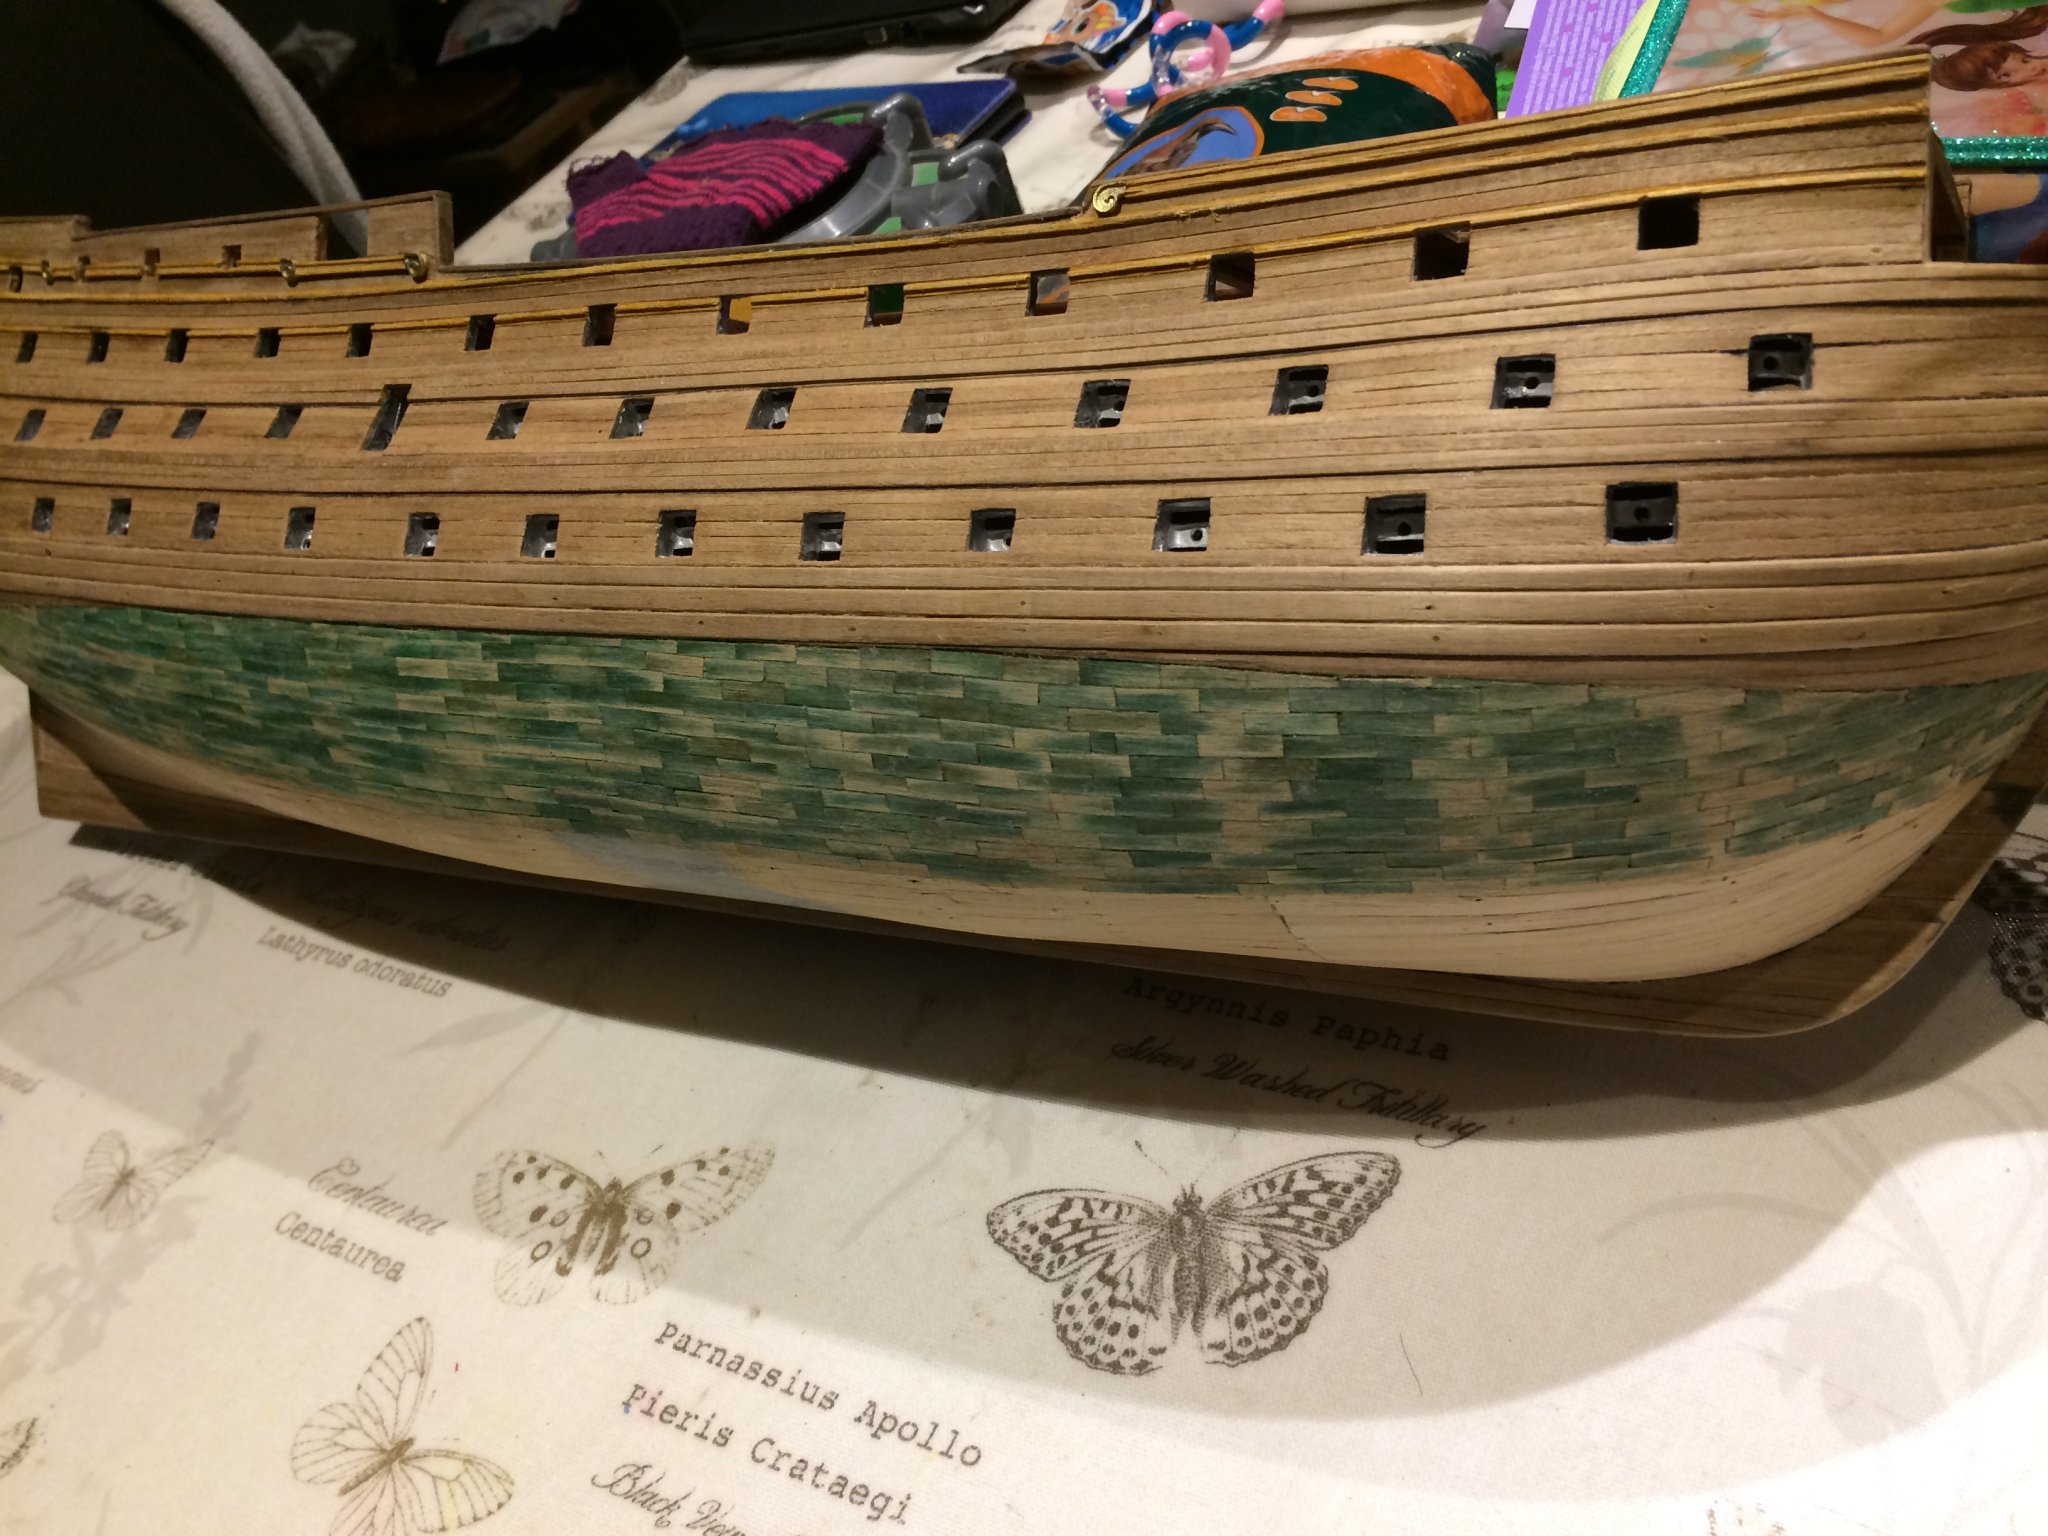
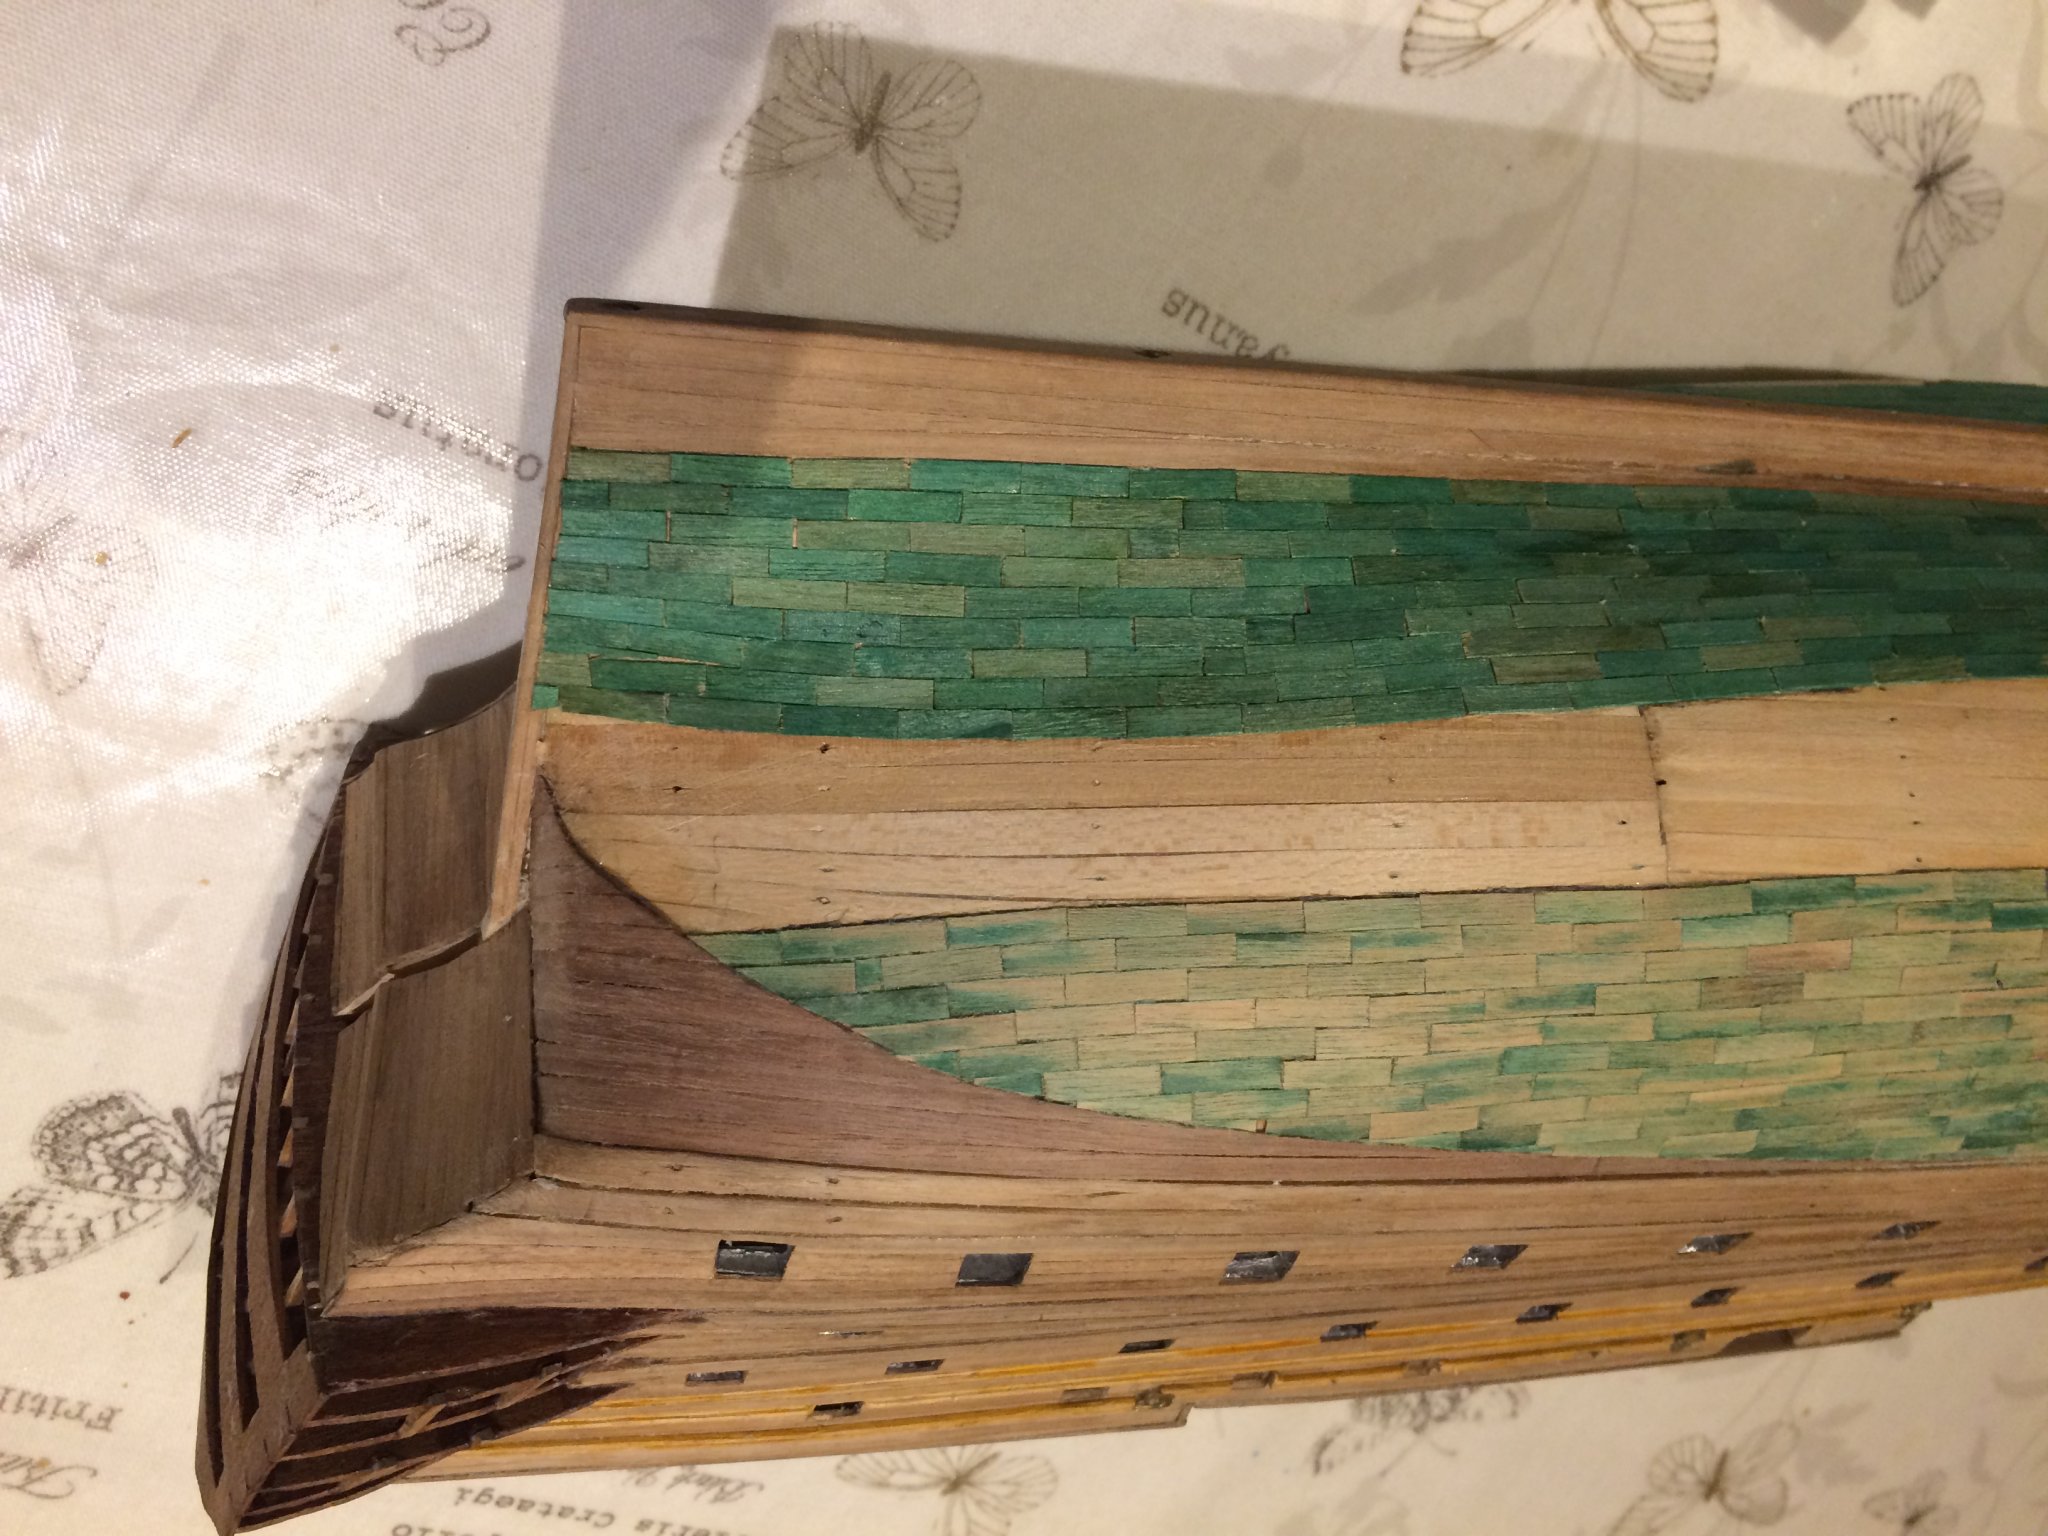
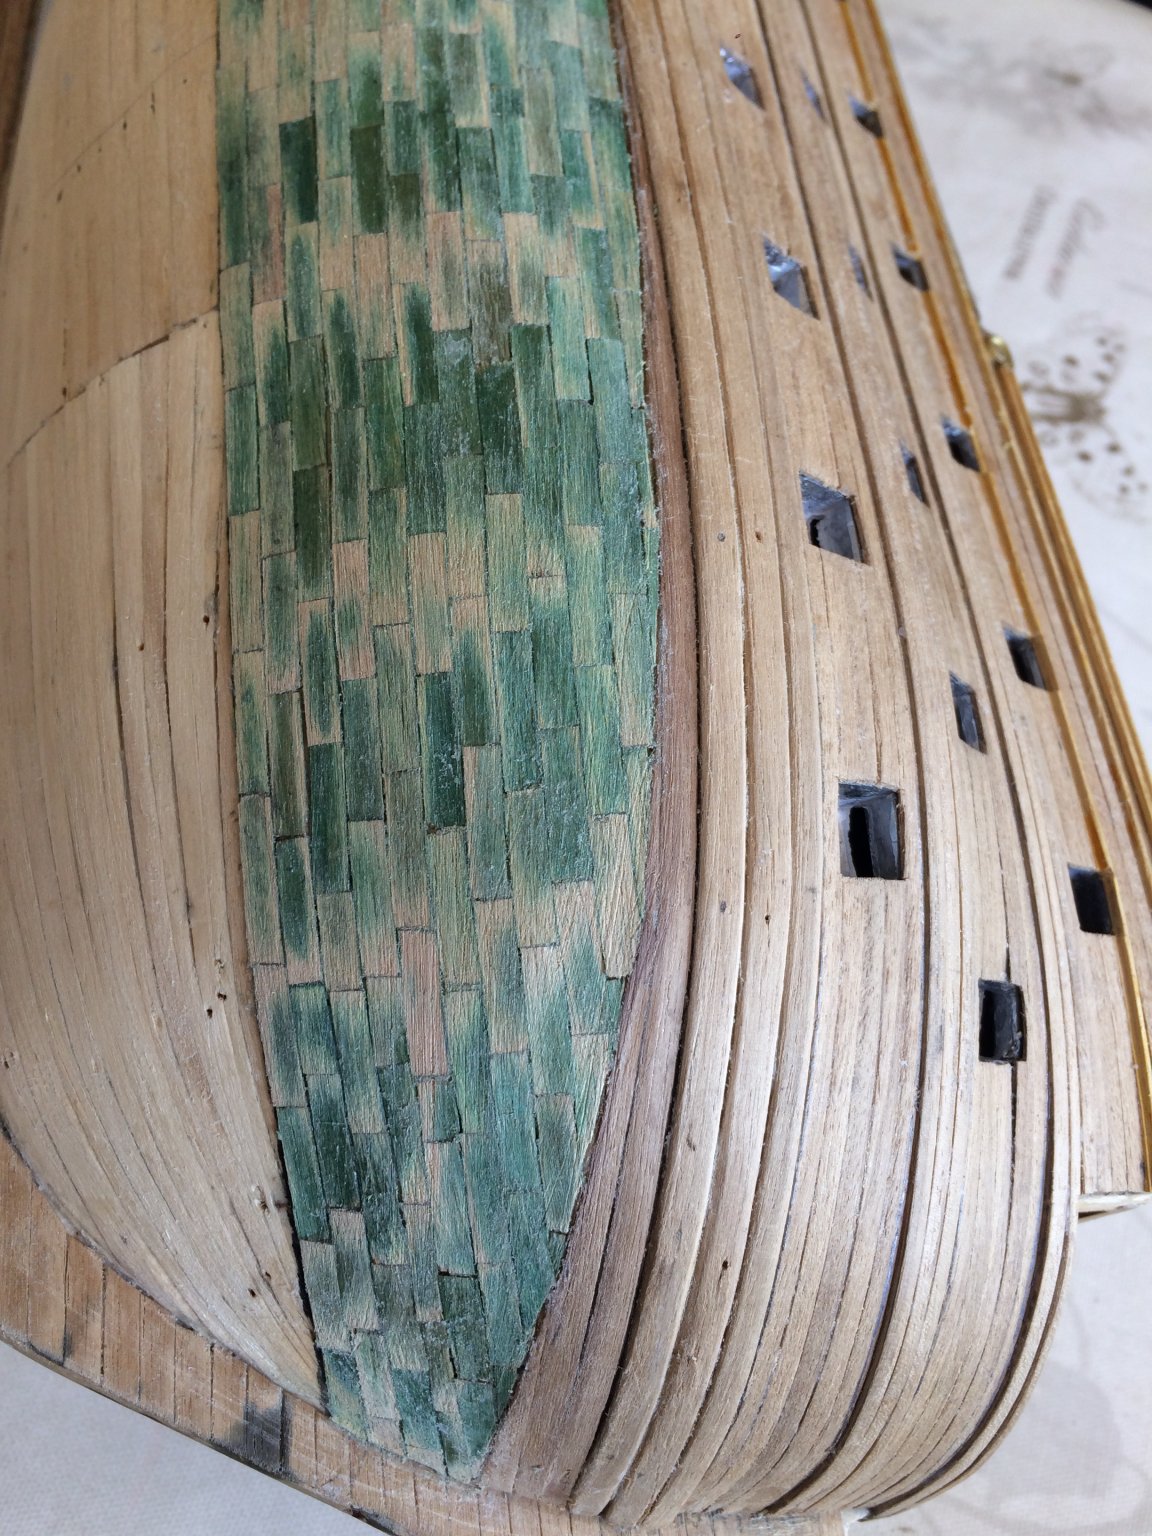
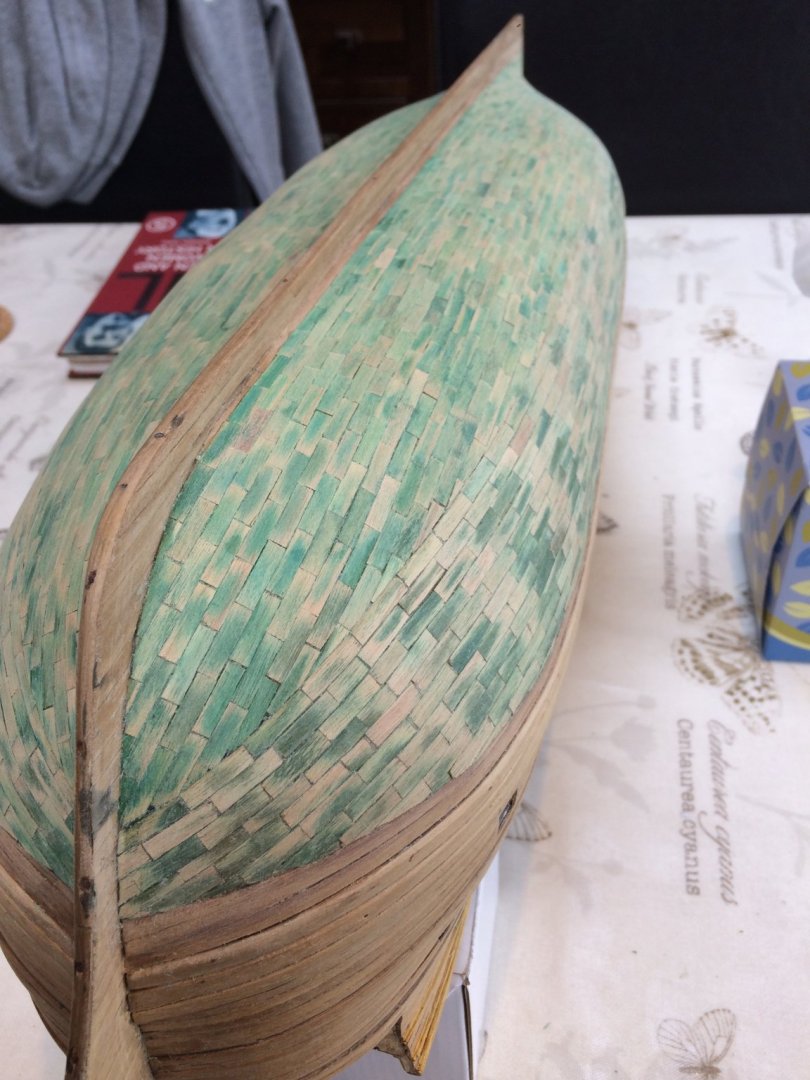
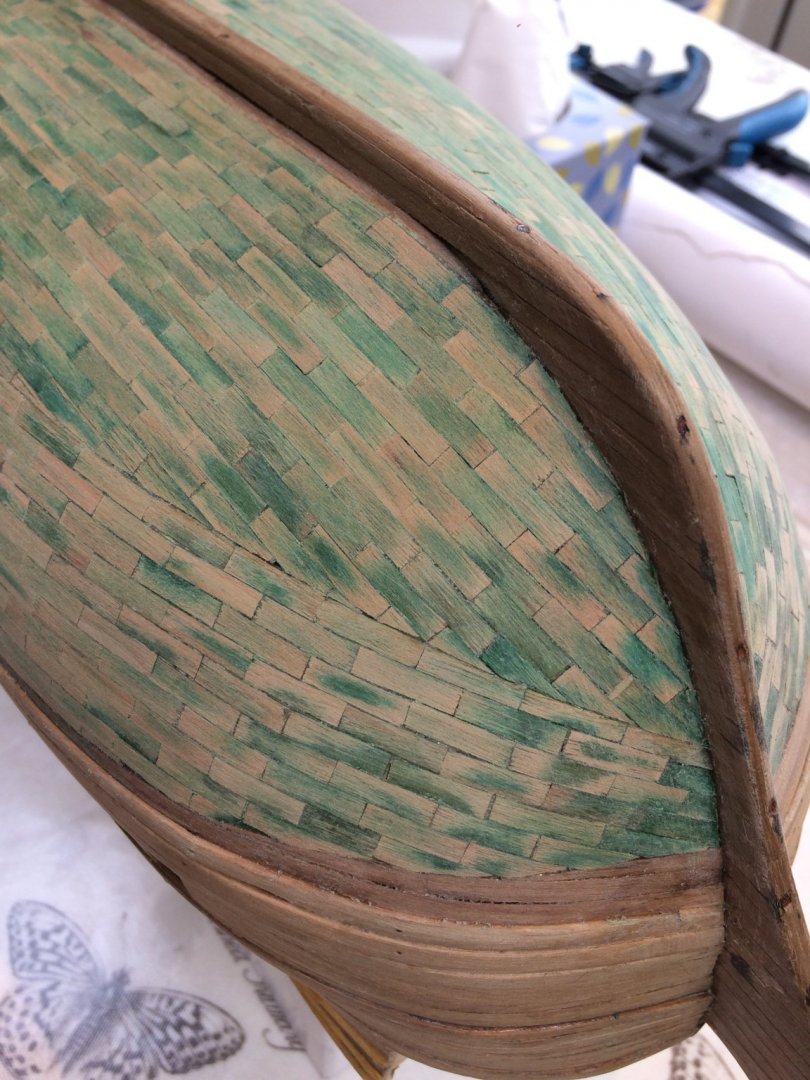
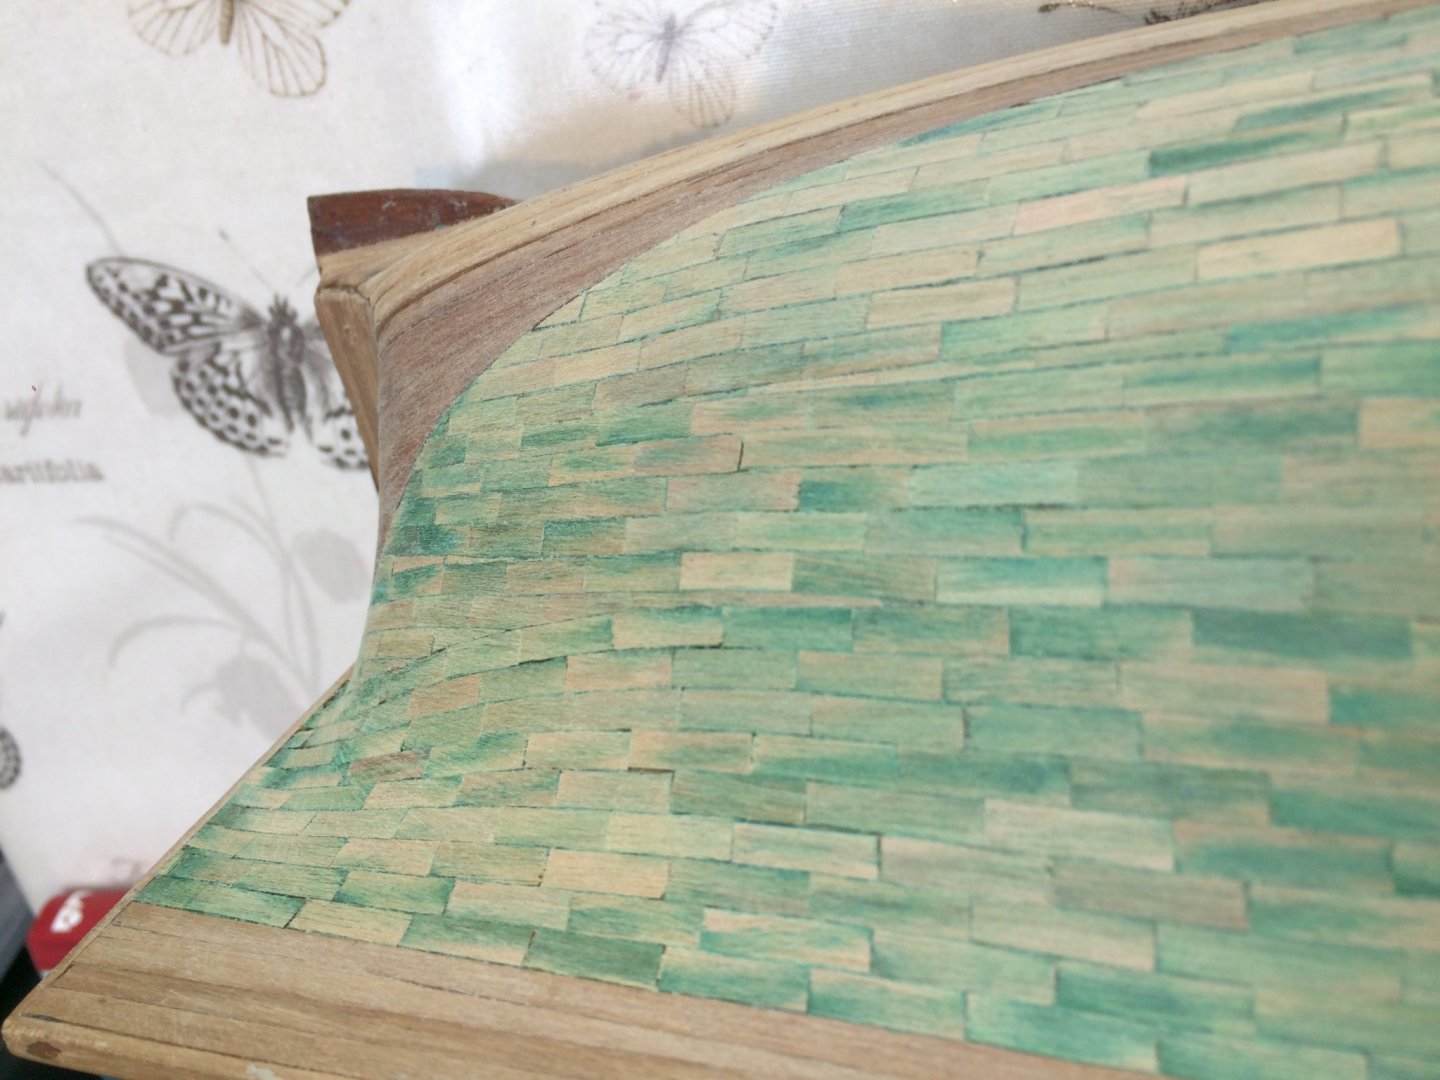
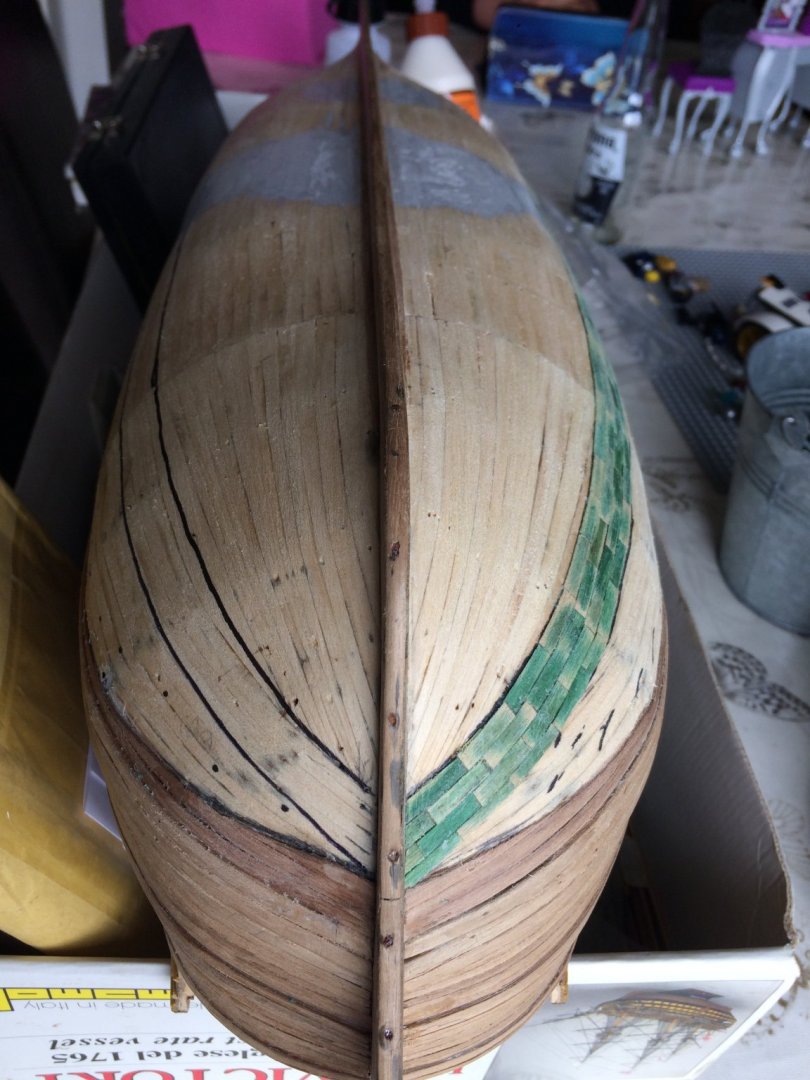
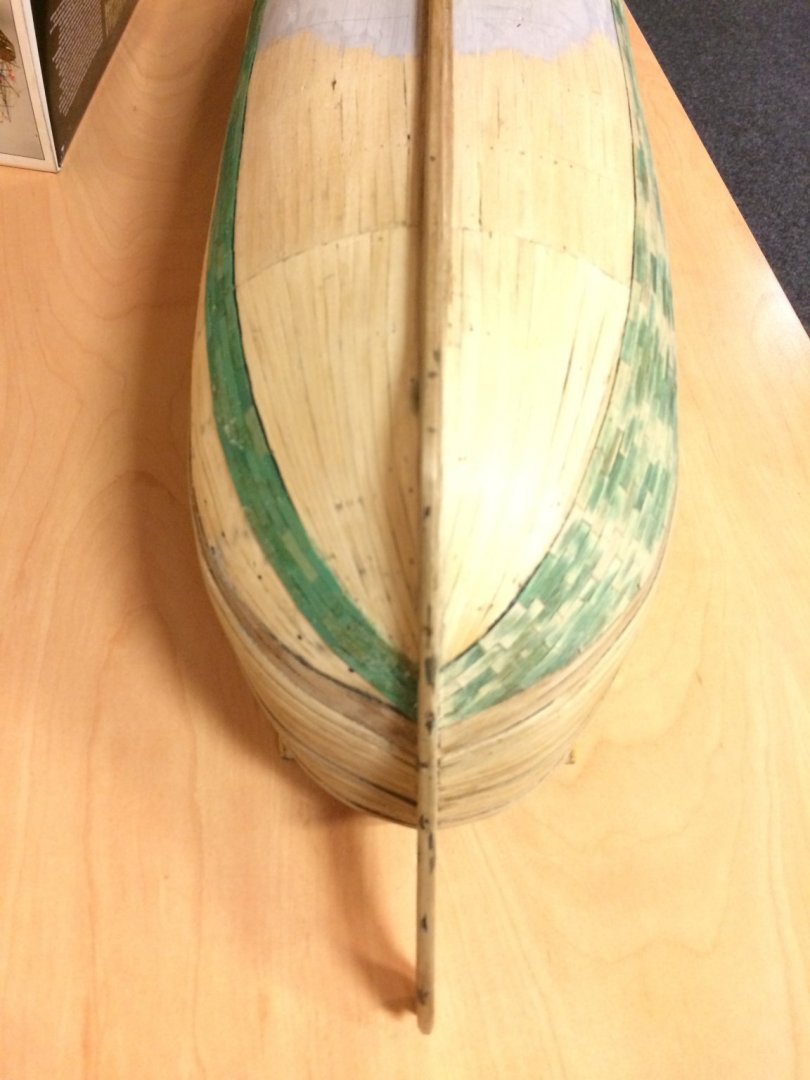
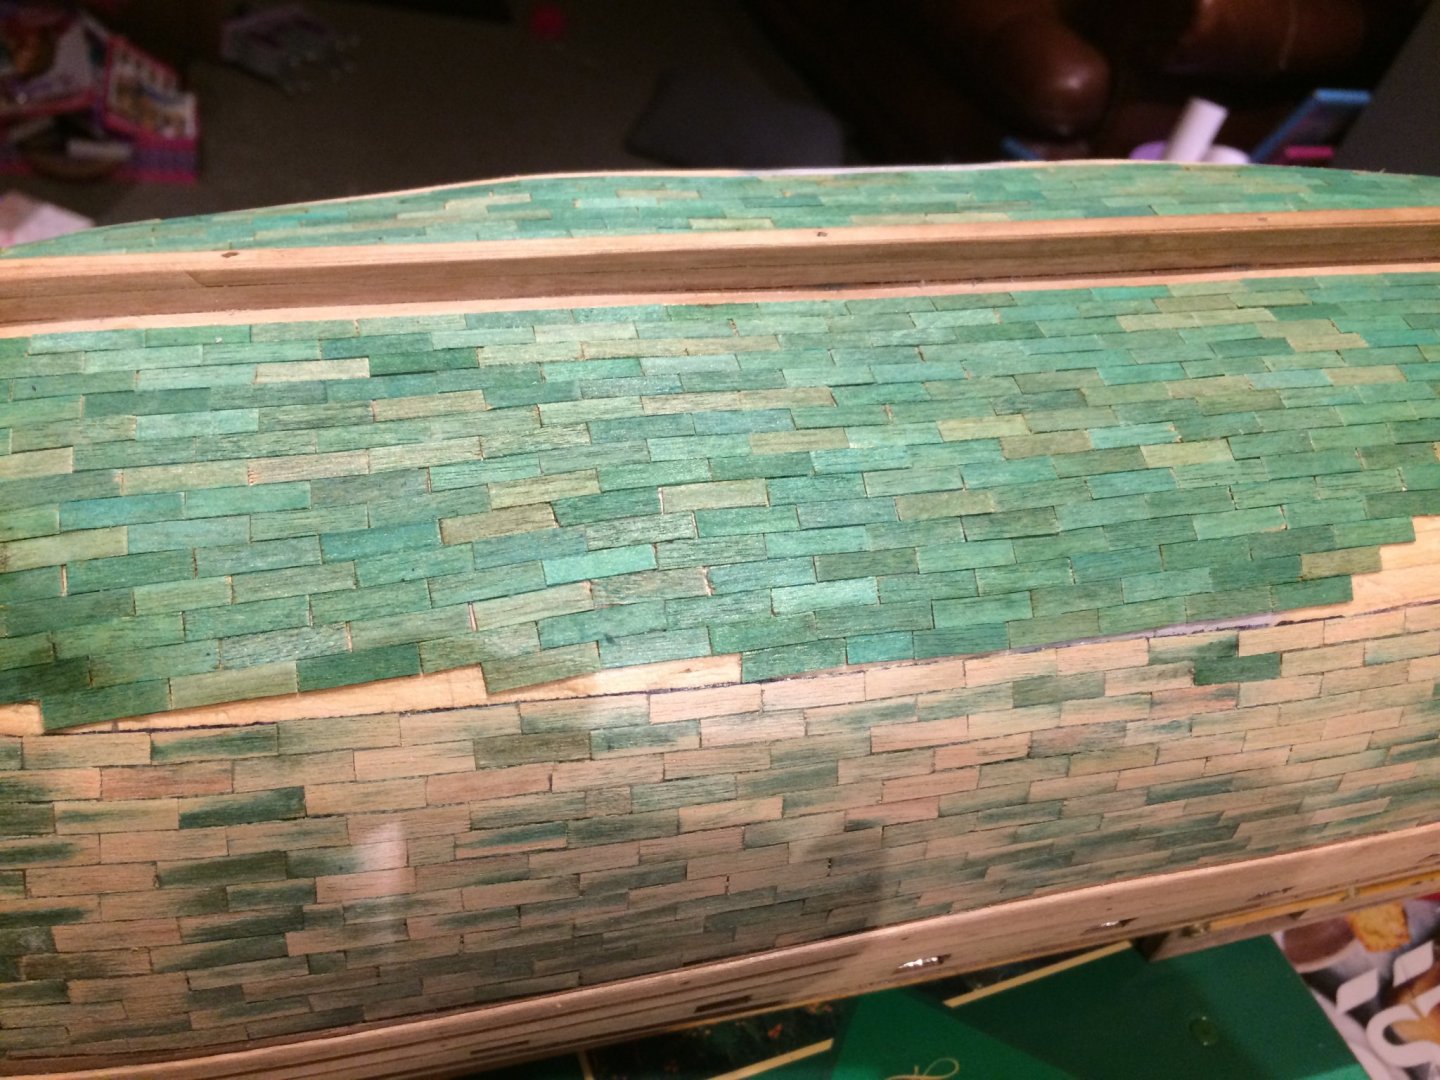
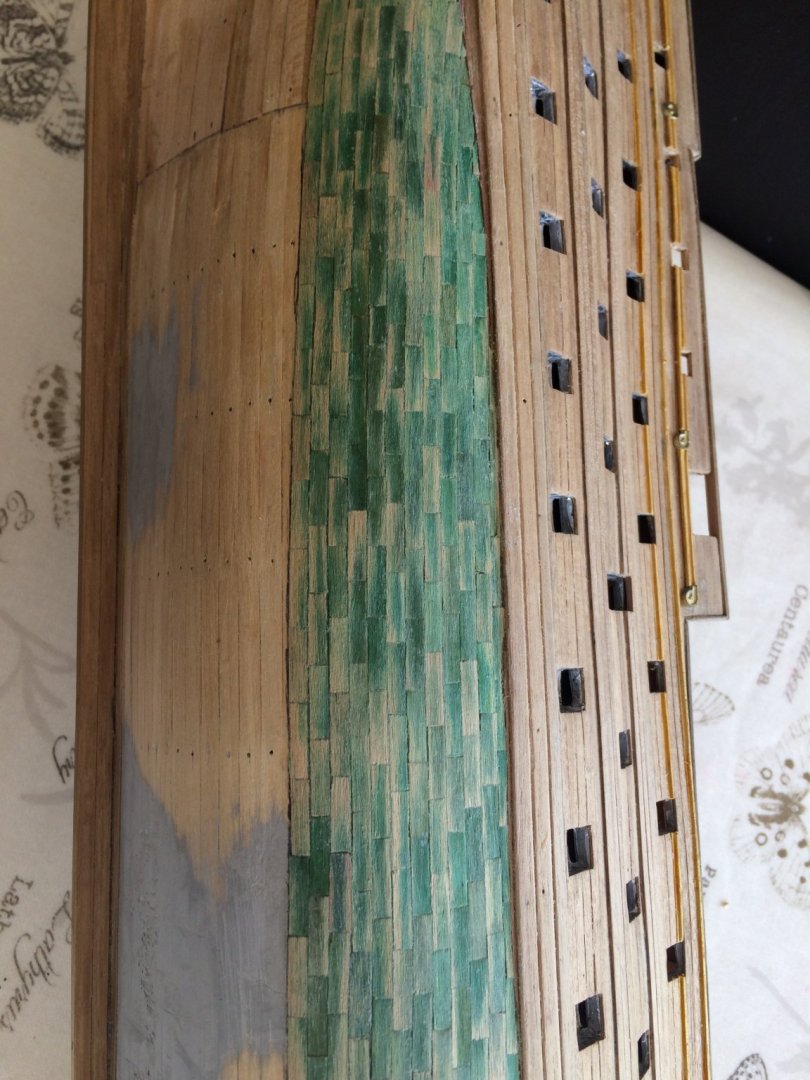
Hi Rob, thanks for your feedback mate, always good to hear that I am going in the right direction.. The tiles appear washed out only cos I sanded them down to leave a nice smooth surface to stick the copper foil tape onto. I was originally going to put the green tiles on one side and paint the black/yellow on that side only , then on the other side I was going to carry the planking from above the waterline all the way down to the keel, and give all the planks on that side an oiled waxy finish, best of both worlds , but then I saw YT do the copper foil tape on his build and had a rethink. I decided to put all the green tiles on both sides, but to then cover them with the foil tape. That way I can use the tiles as a reference for the vertical joins when I indent all the little rivet lines... (really looking forward to that little adventure..) I am glad that stage is finished because I was getting a bit fed up with the tiles being different sizes etc. Oh well, character building I suppose. Nobody said theis boatbuilding lark was gonna be easy..
-
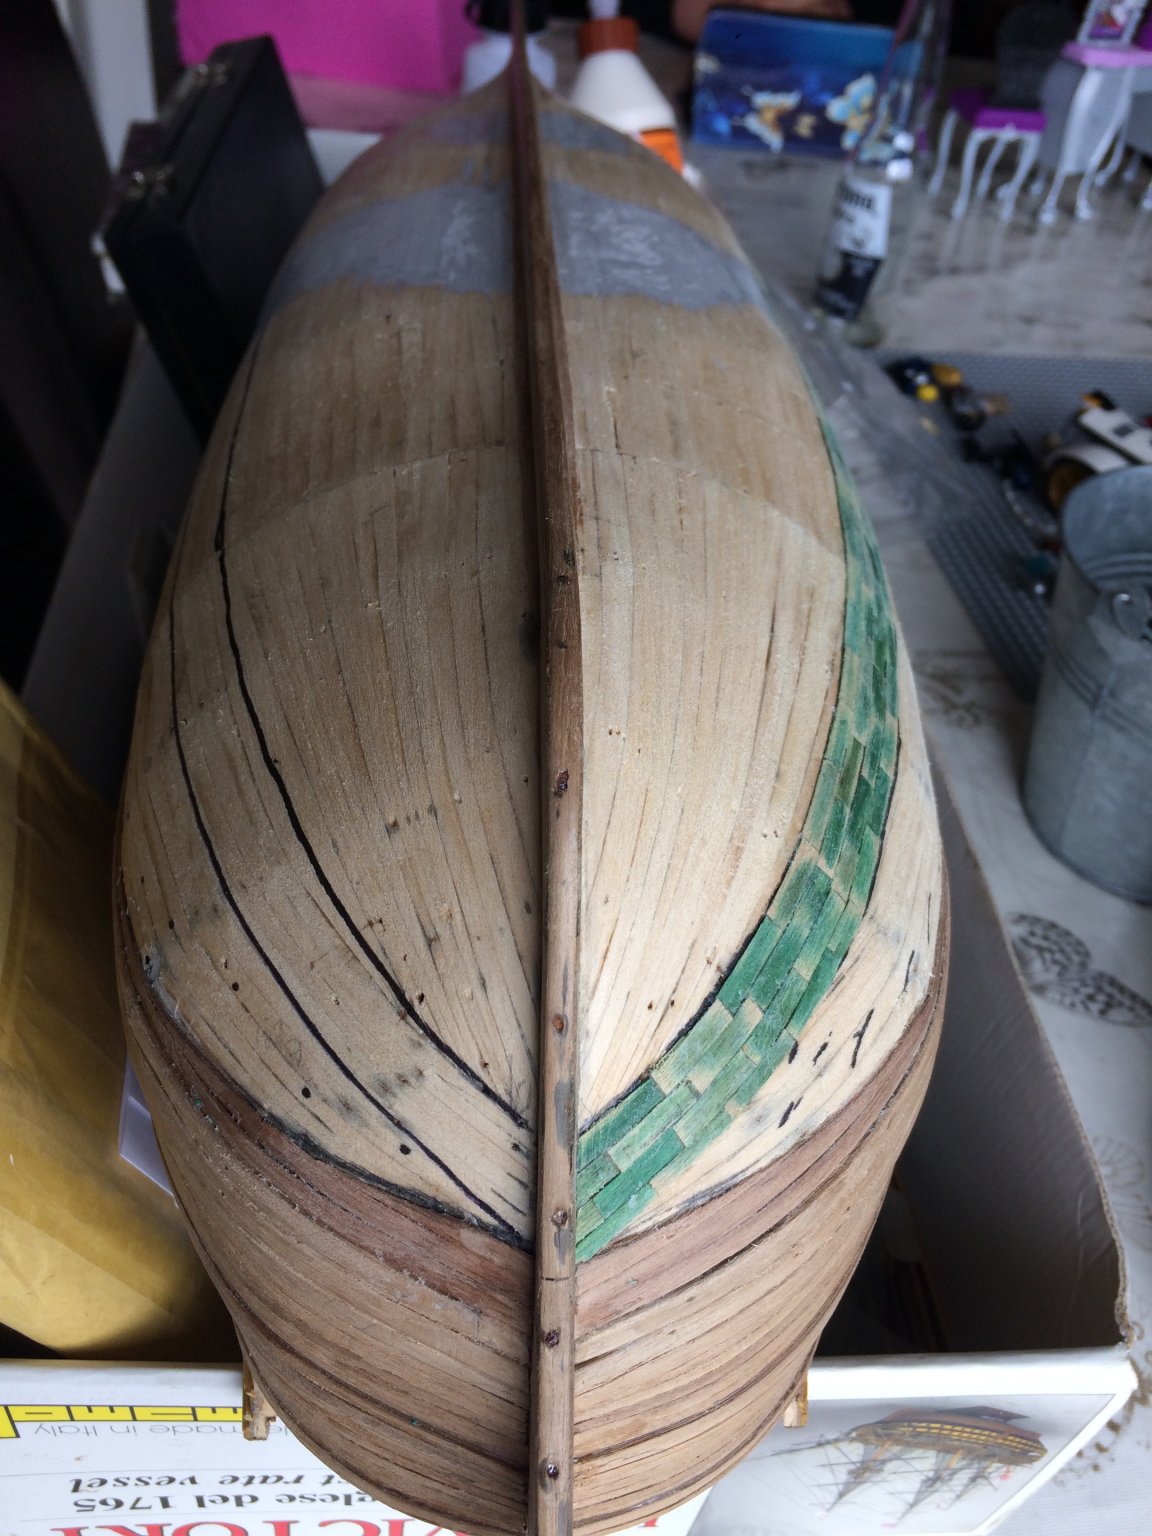
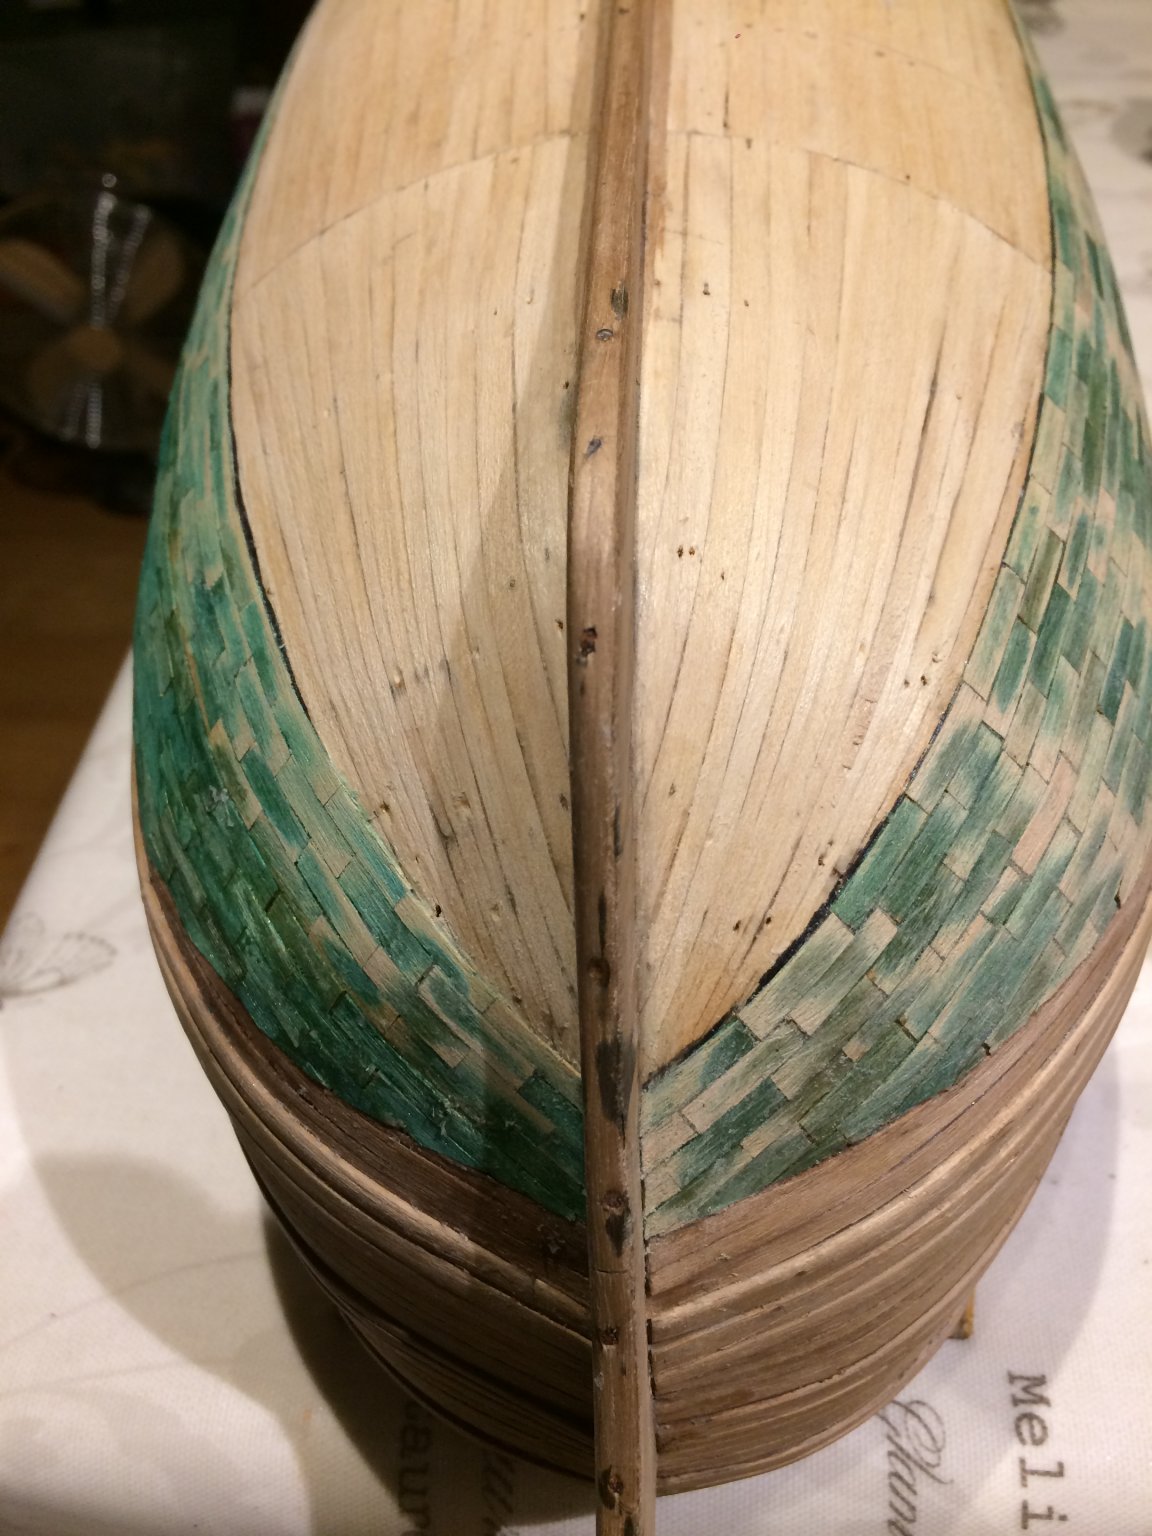
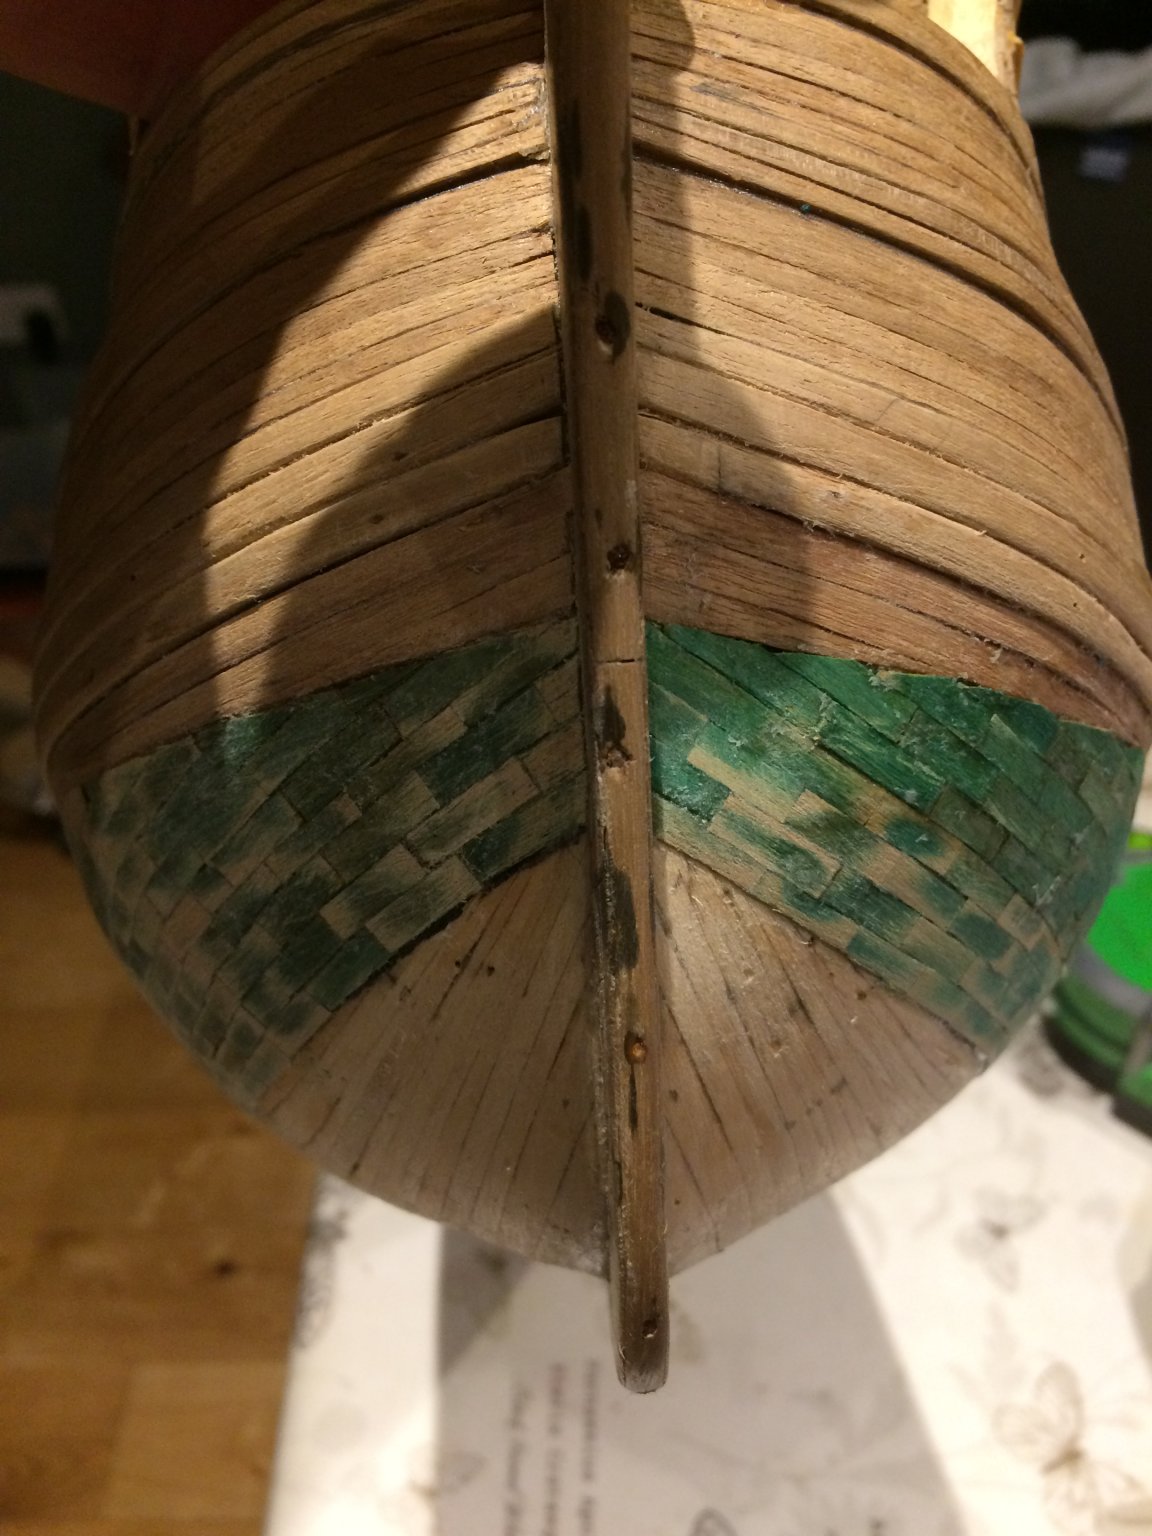
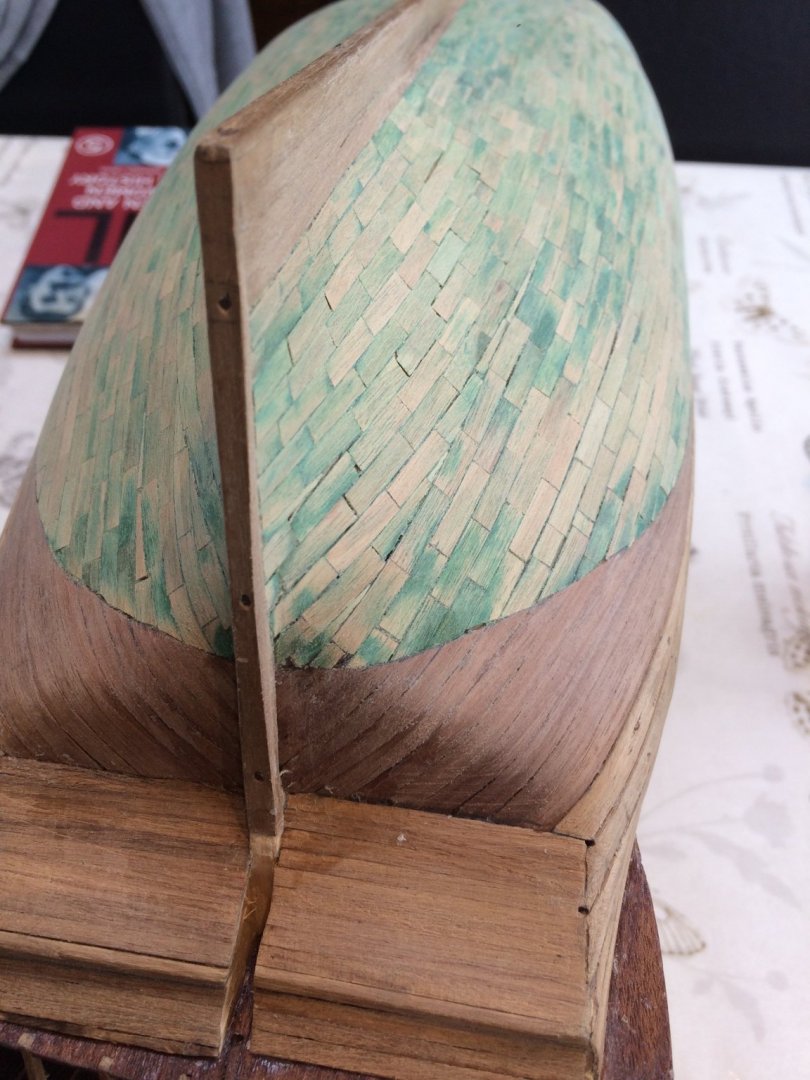
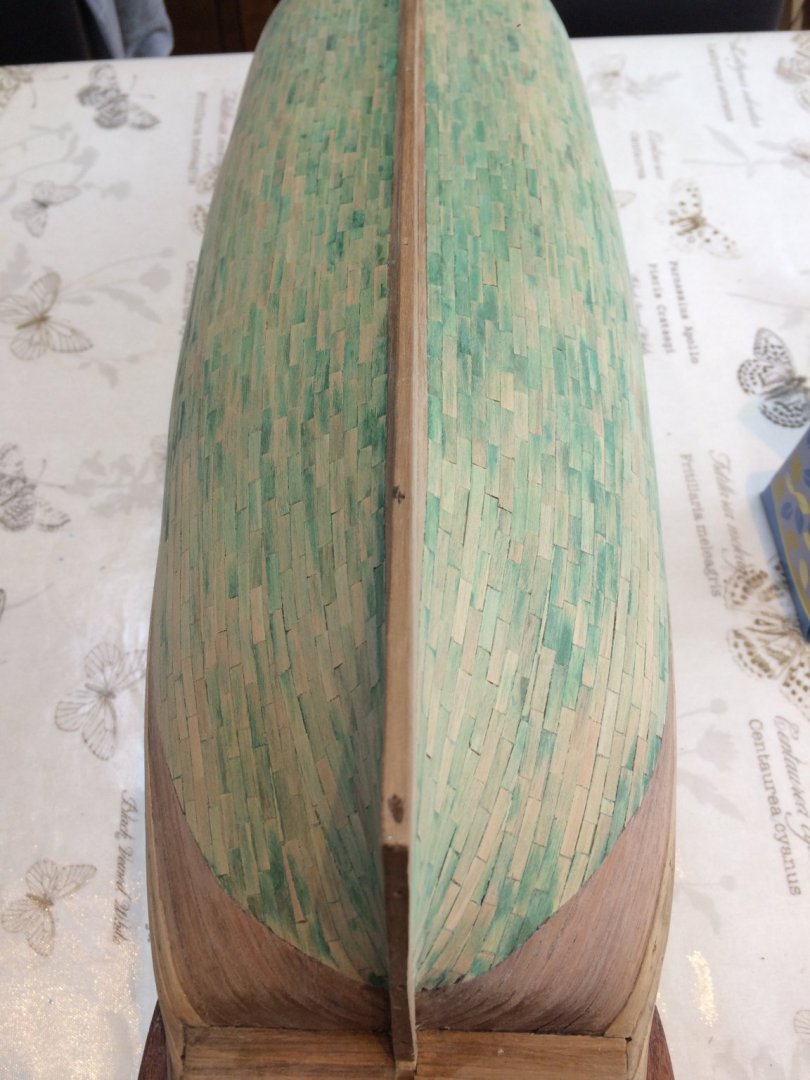
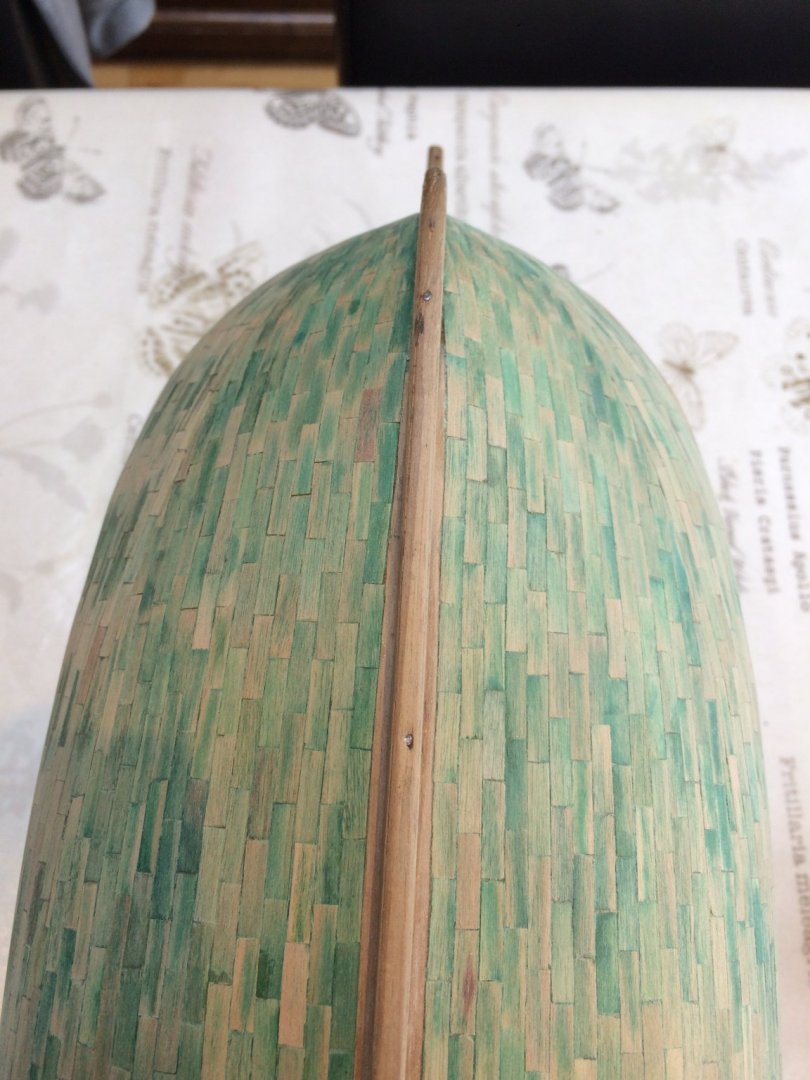
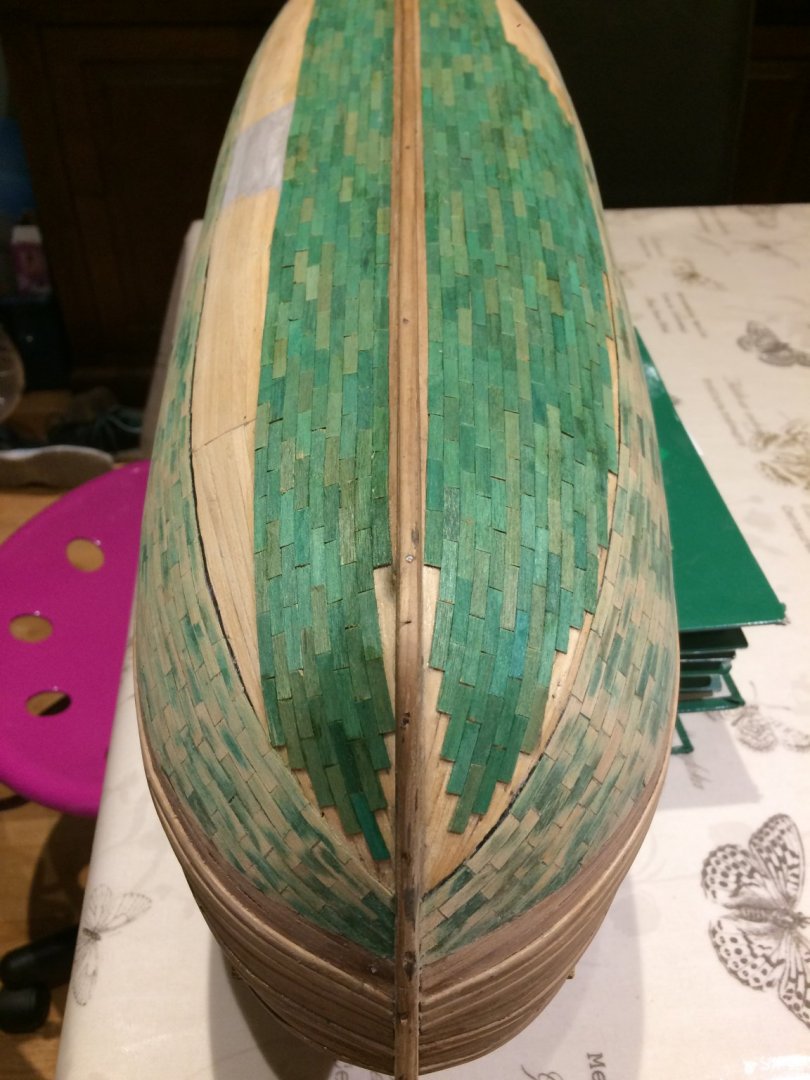
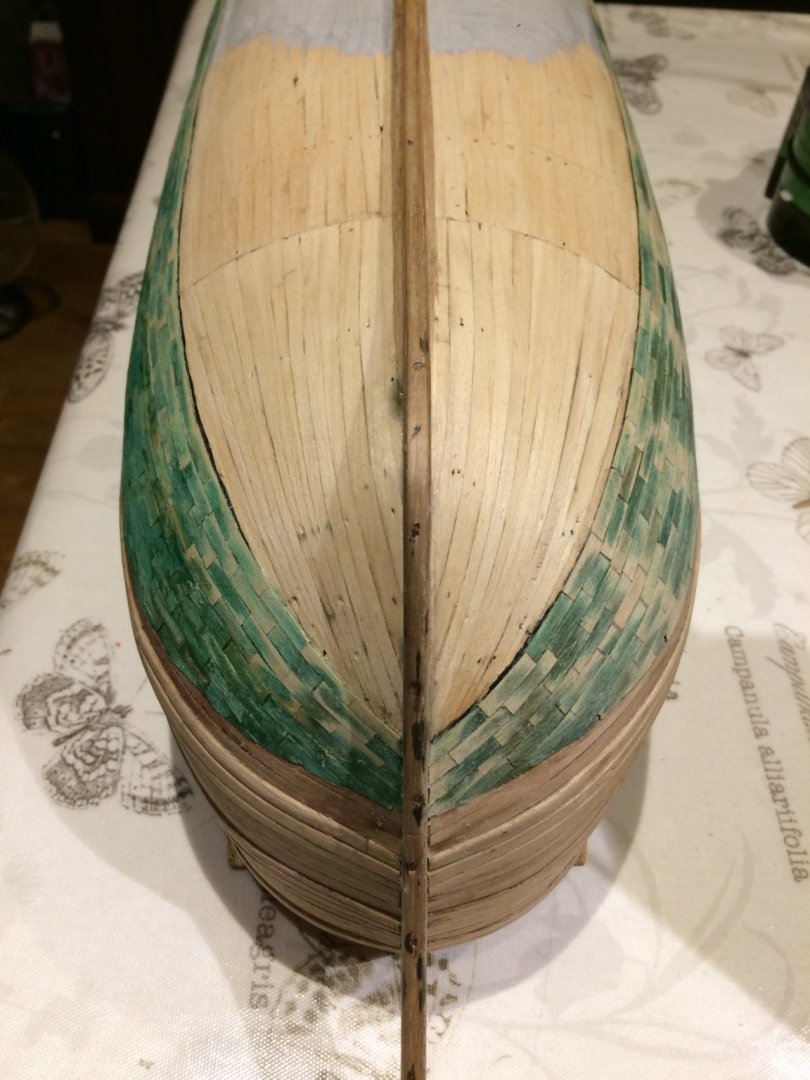
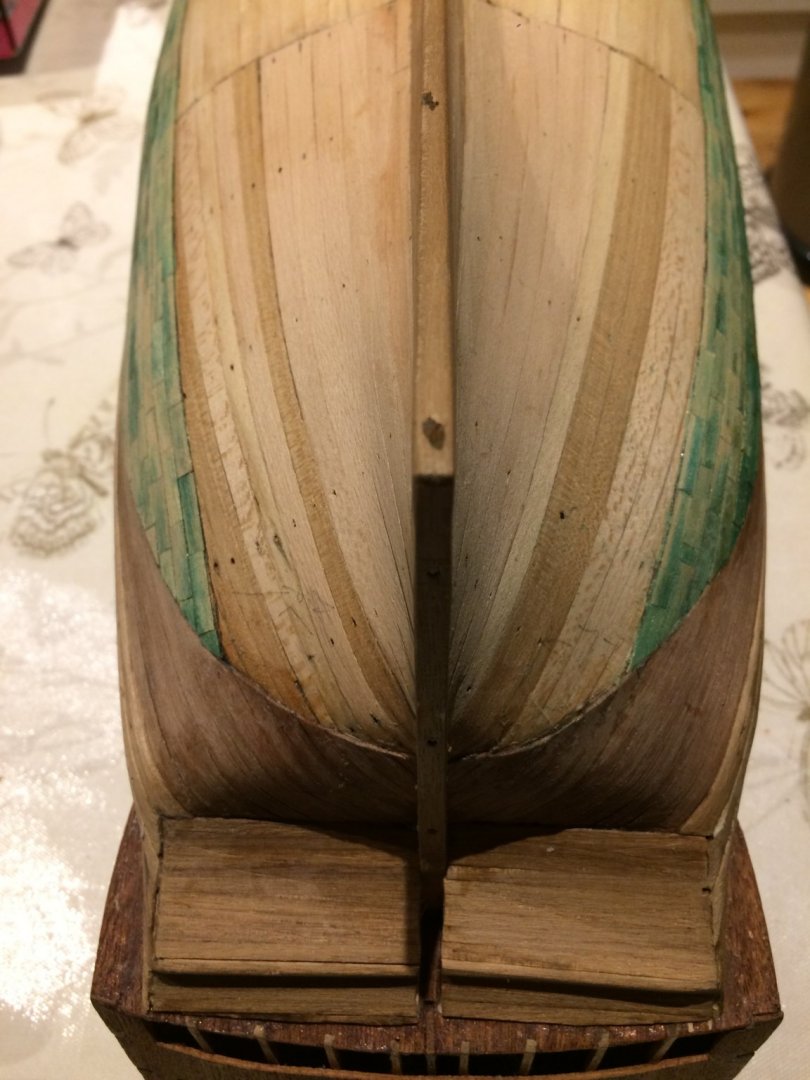
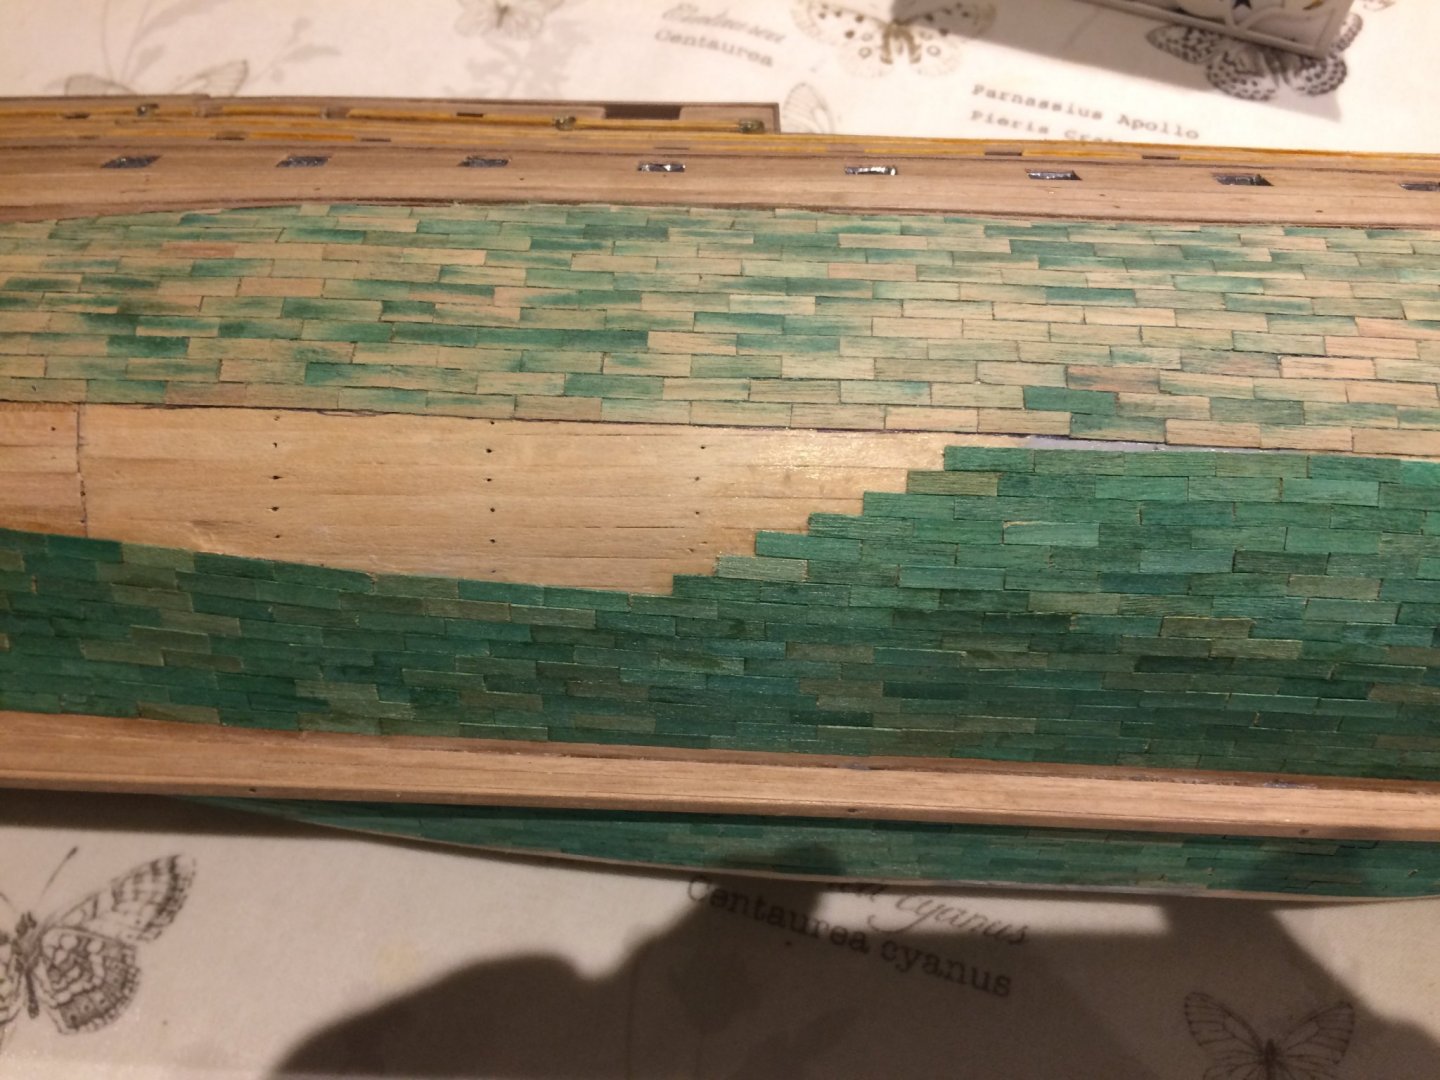
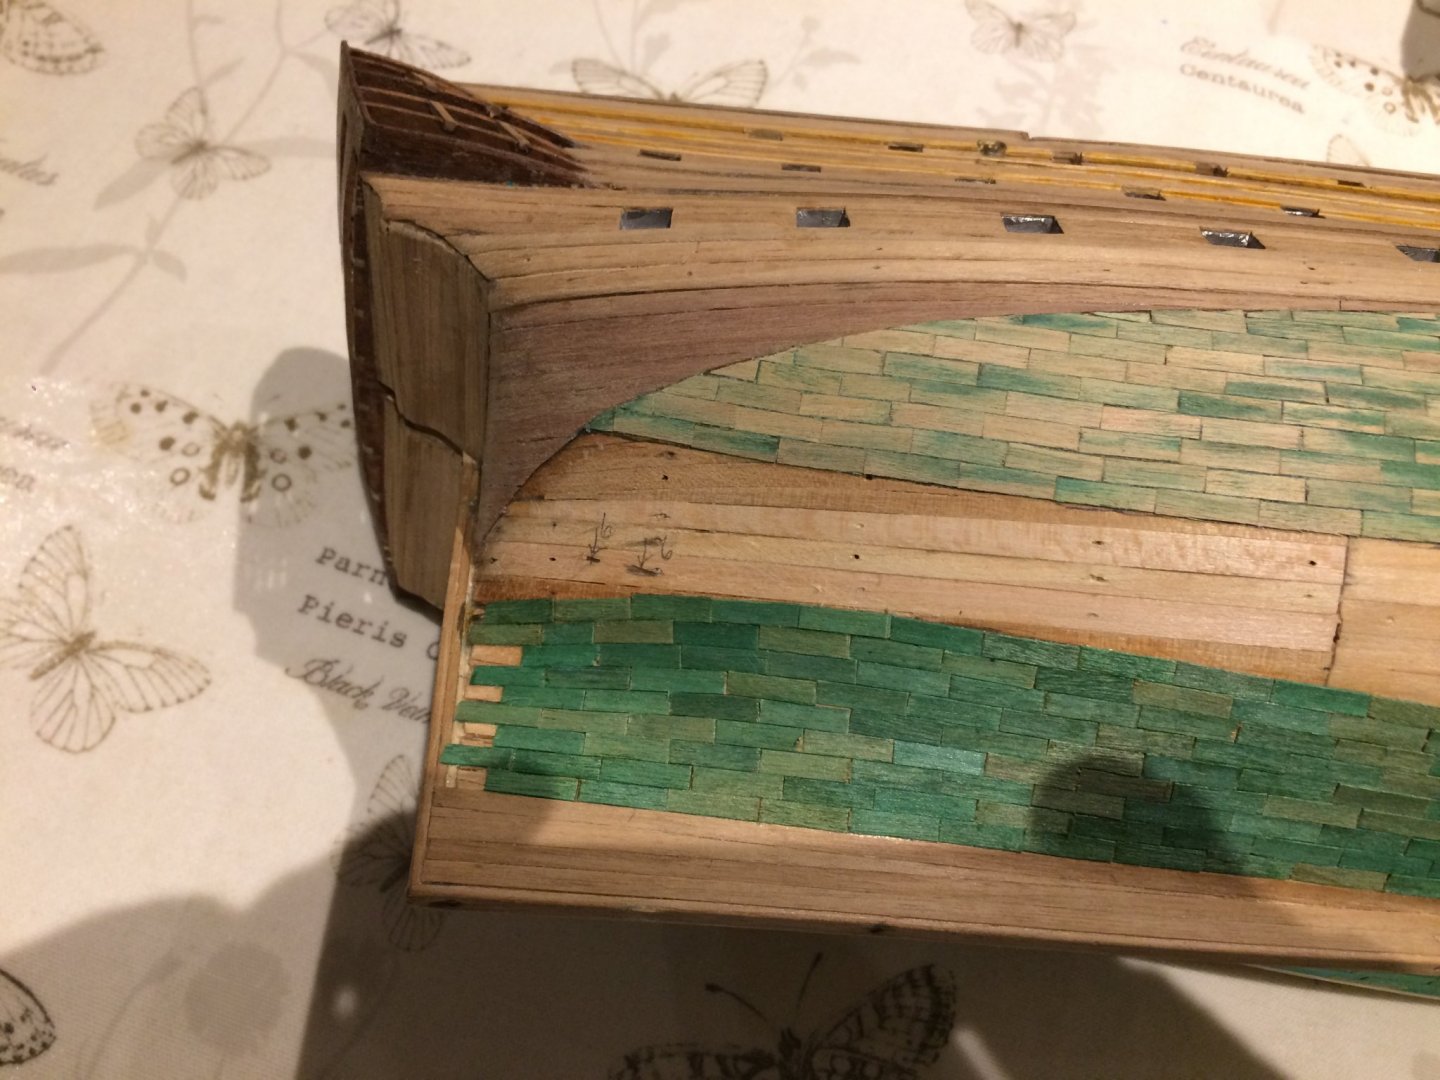
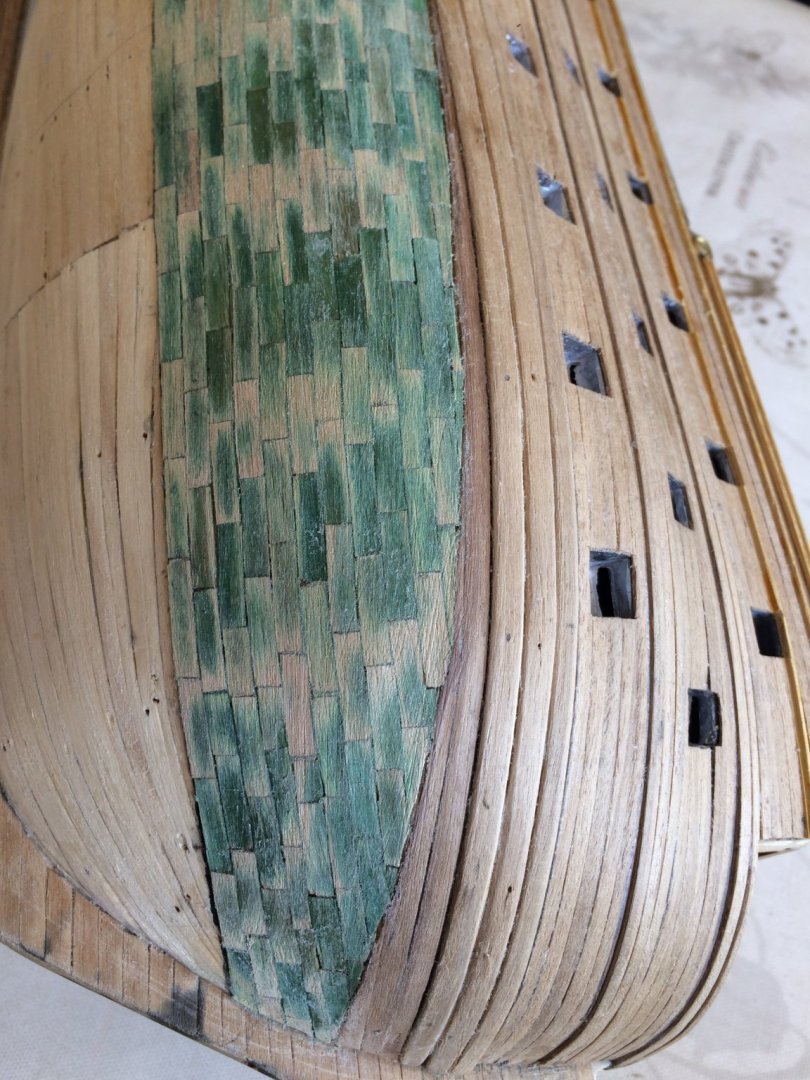
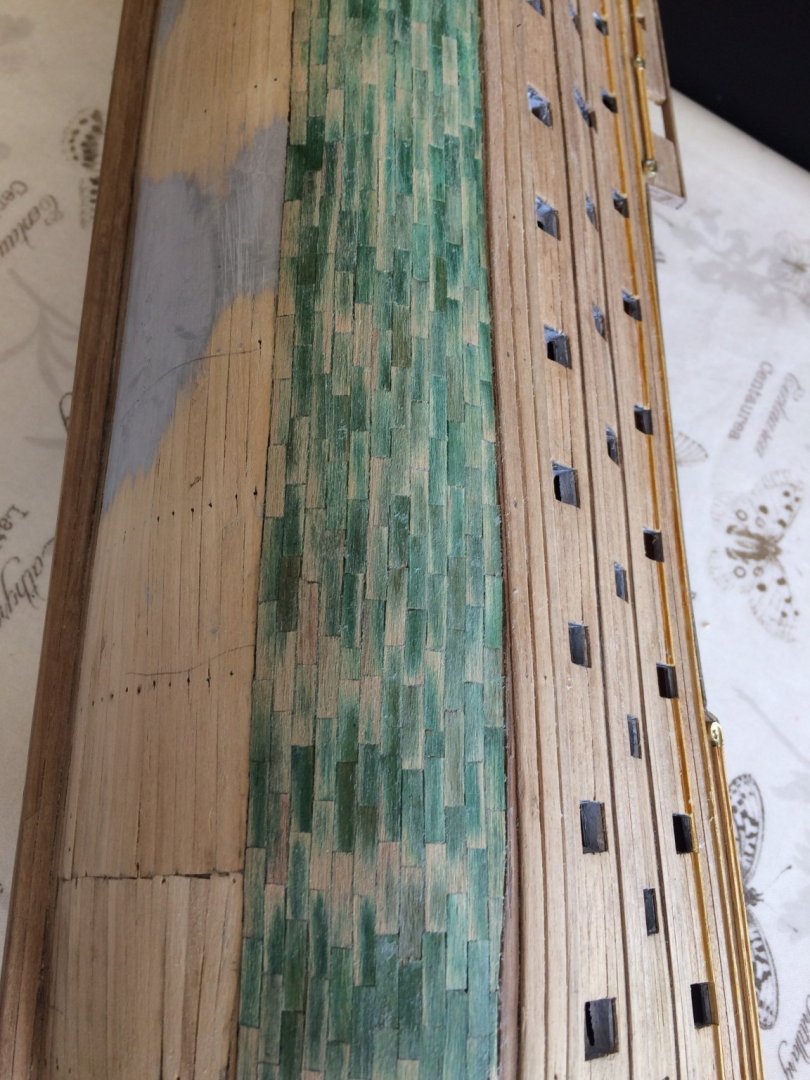
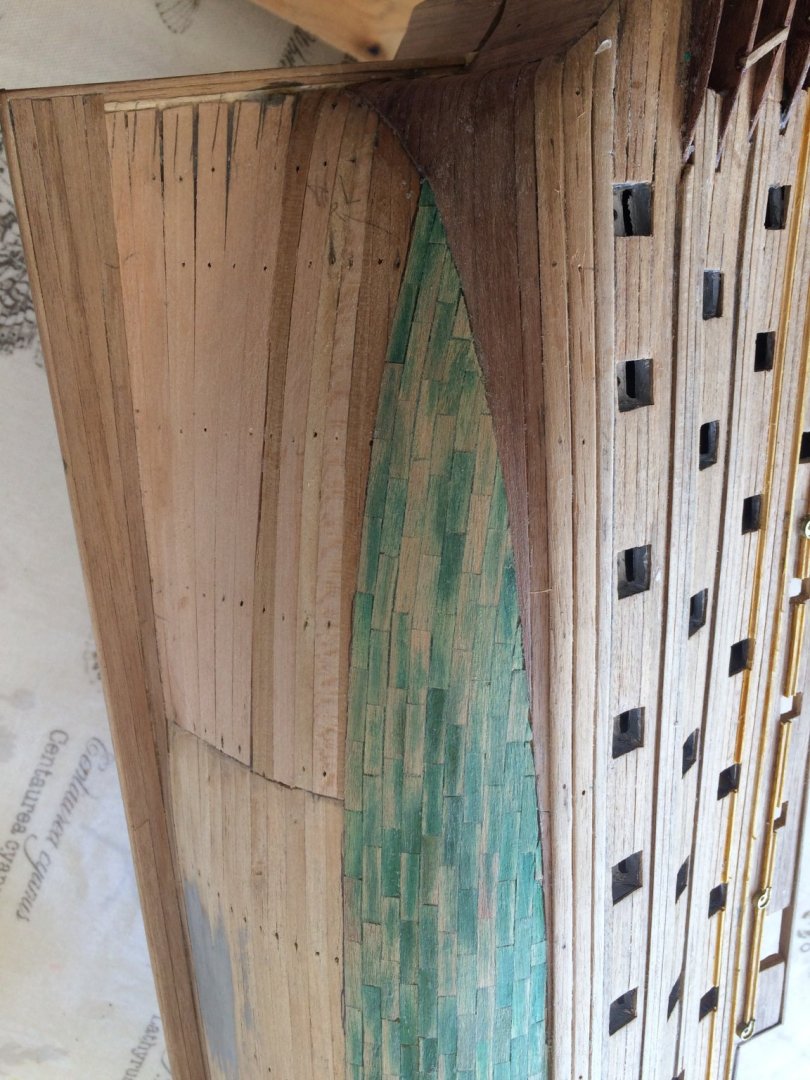
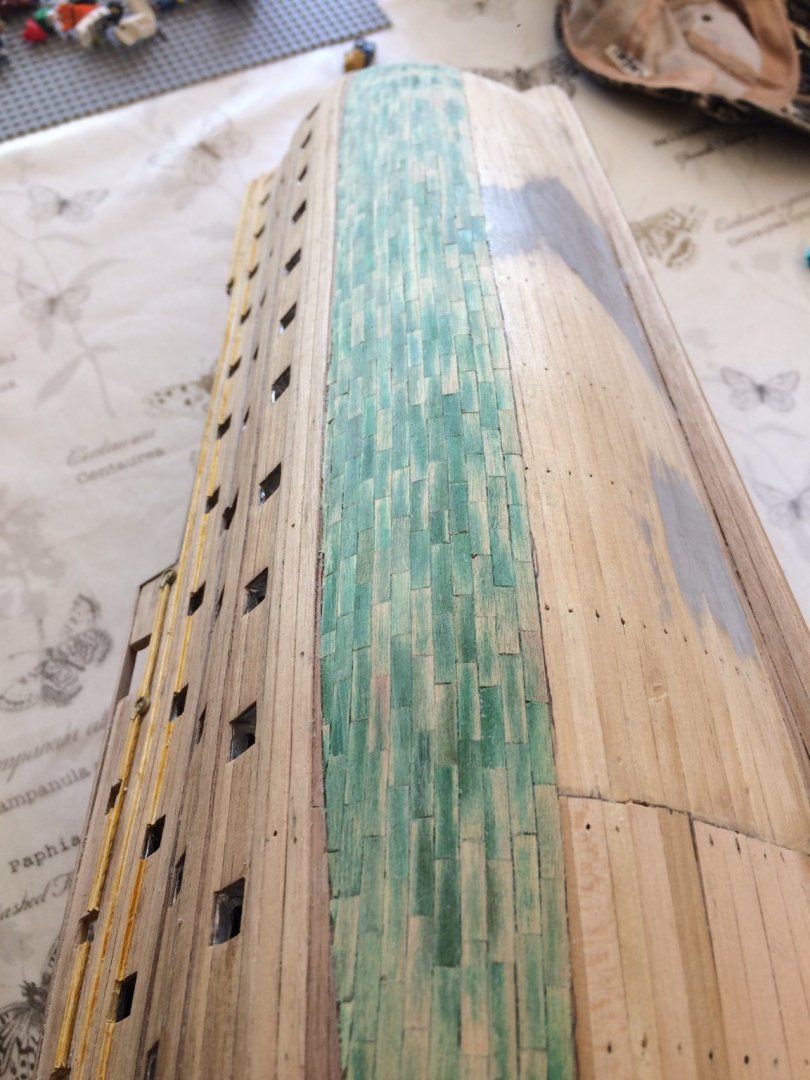
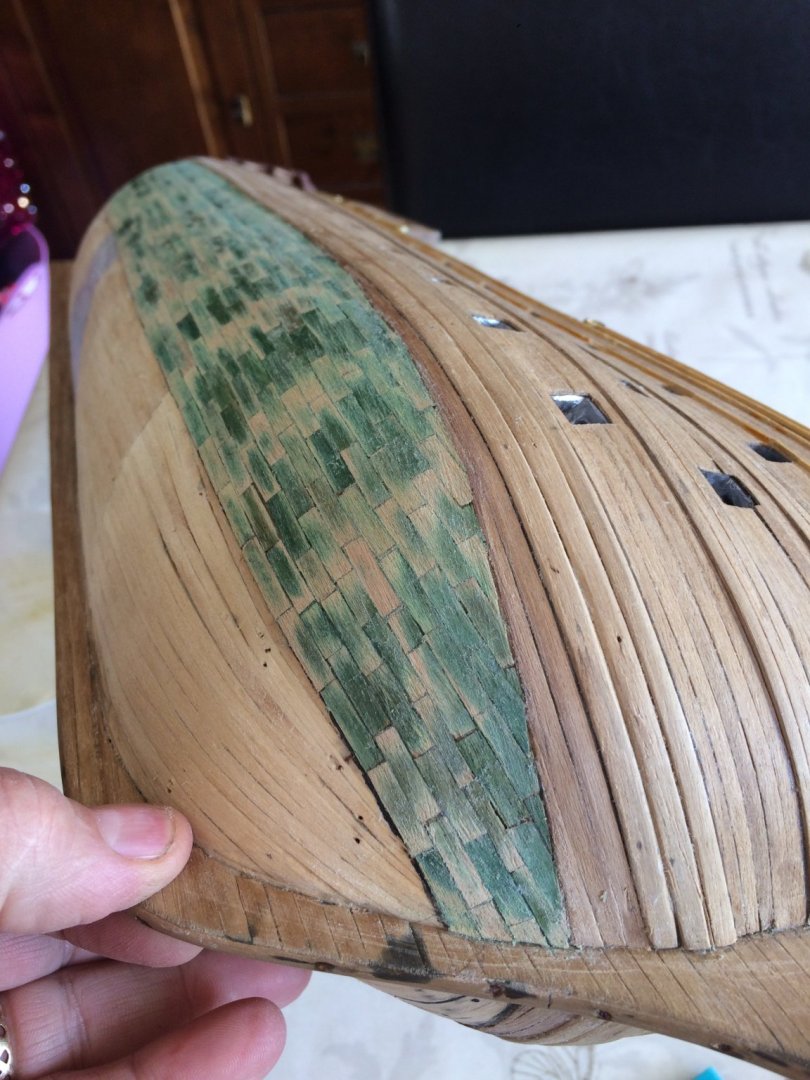
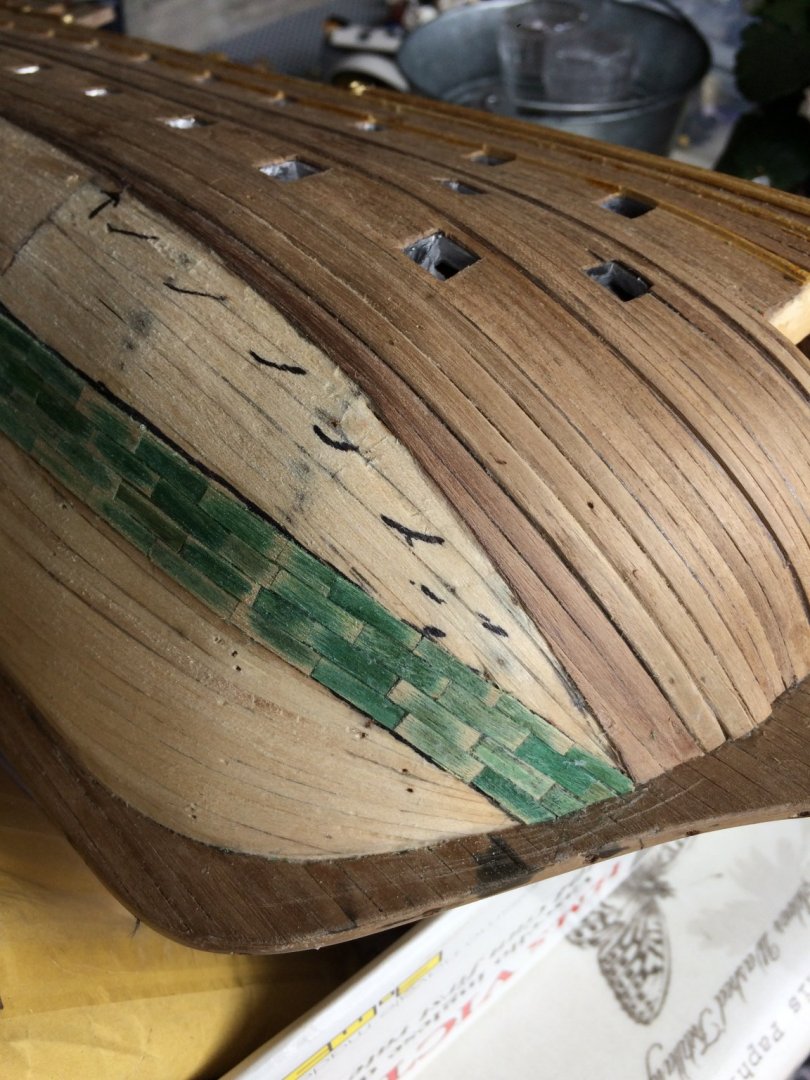
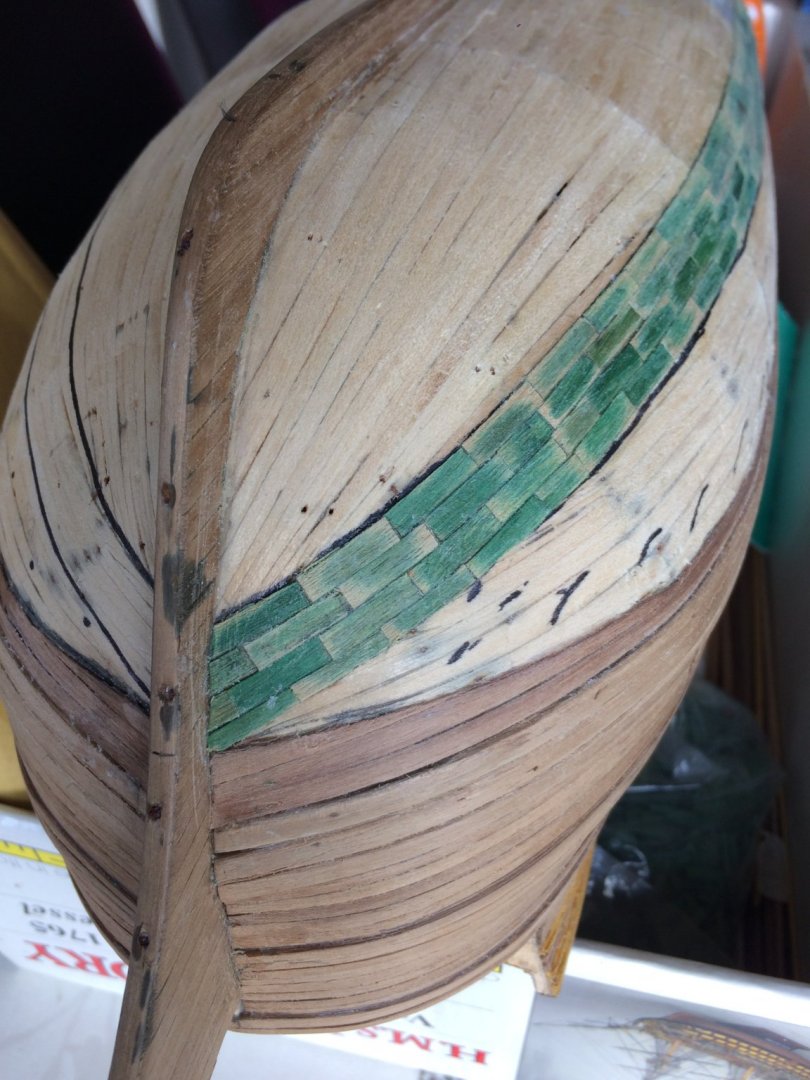
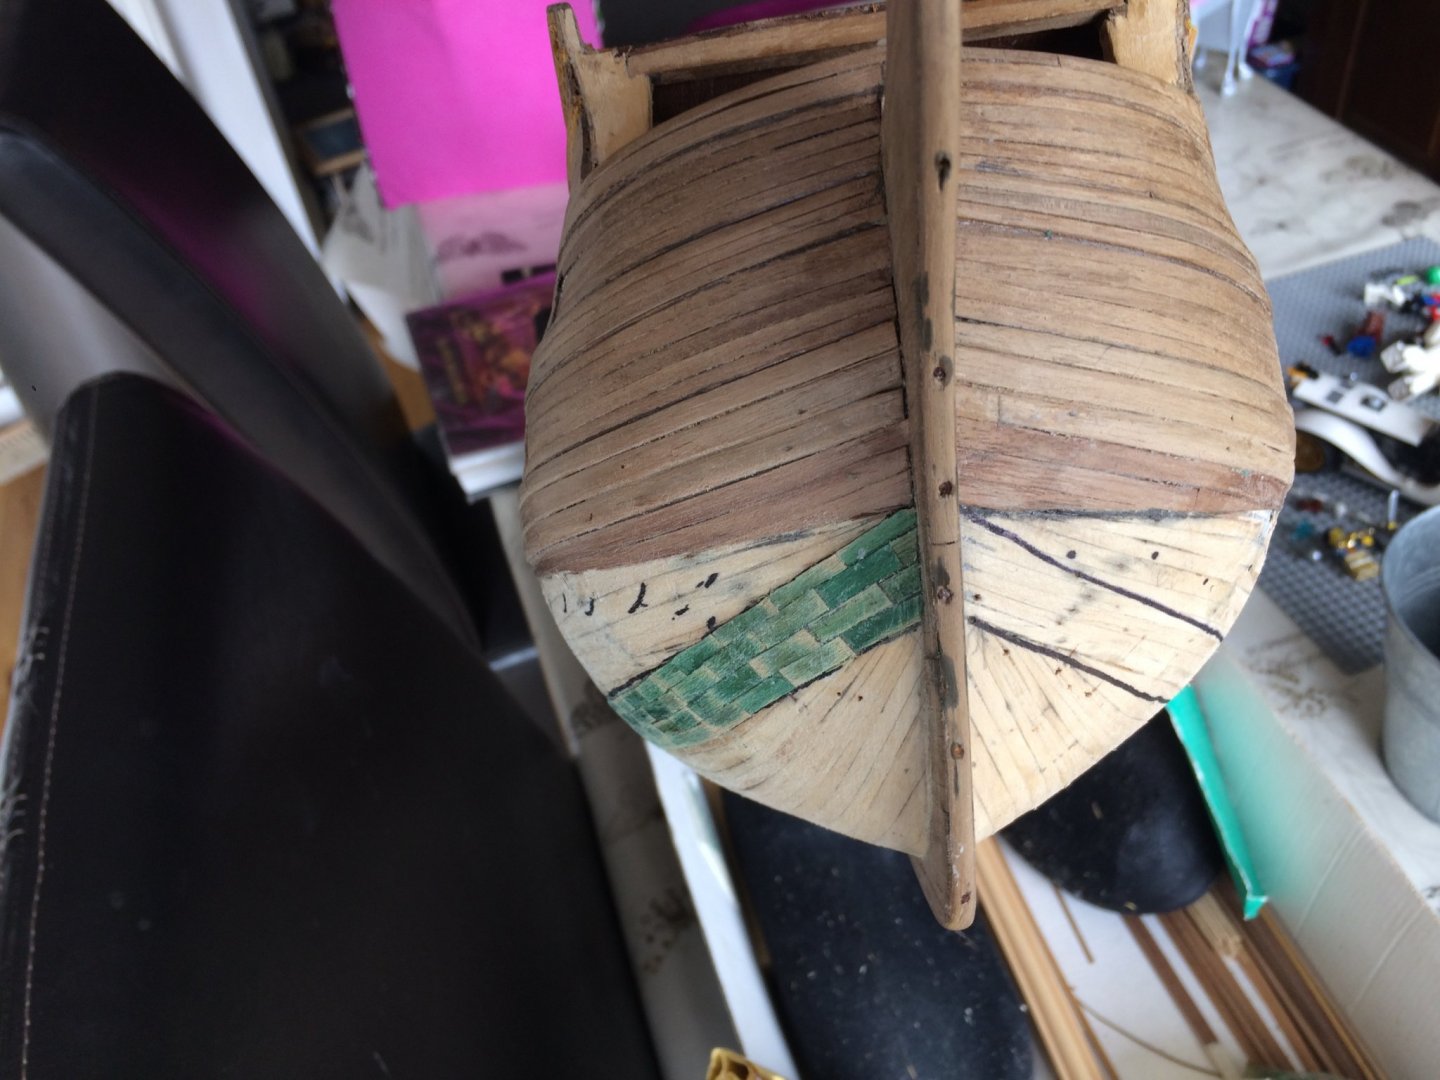
Gentlemen/Ladies, I am pleased to announce that I have finished..... The bloody green tiles. They went a lot easier than I thought they were going to. That set of plans certainly helped. I have a question , having seen a few of you go through this stage, and not wanting to mess it all up now I have gotten this far: Do I A: just stick the copper tape straight onto the sanded down green tiles or B: as I saw on YT's build, he sealed the tiles with acrylic matt varnish. What is the benefit of actually sealing them first? Advice please.. here are a few new pics showing my milestone achievement!!! (big smiley face emoji..)


-
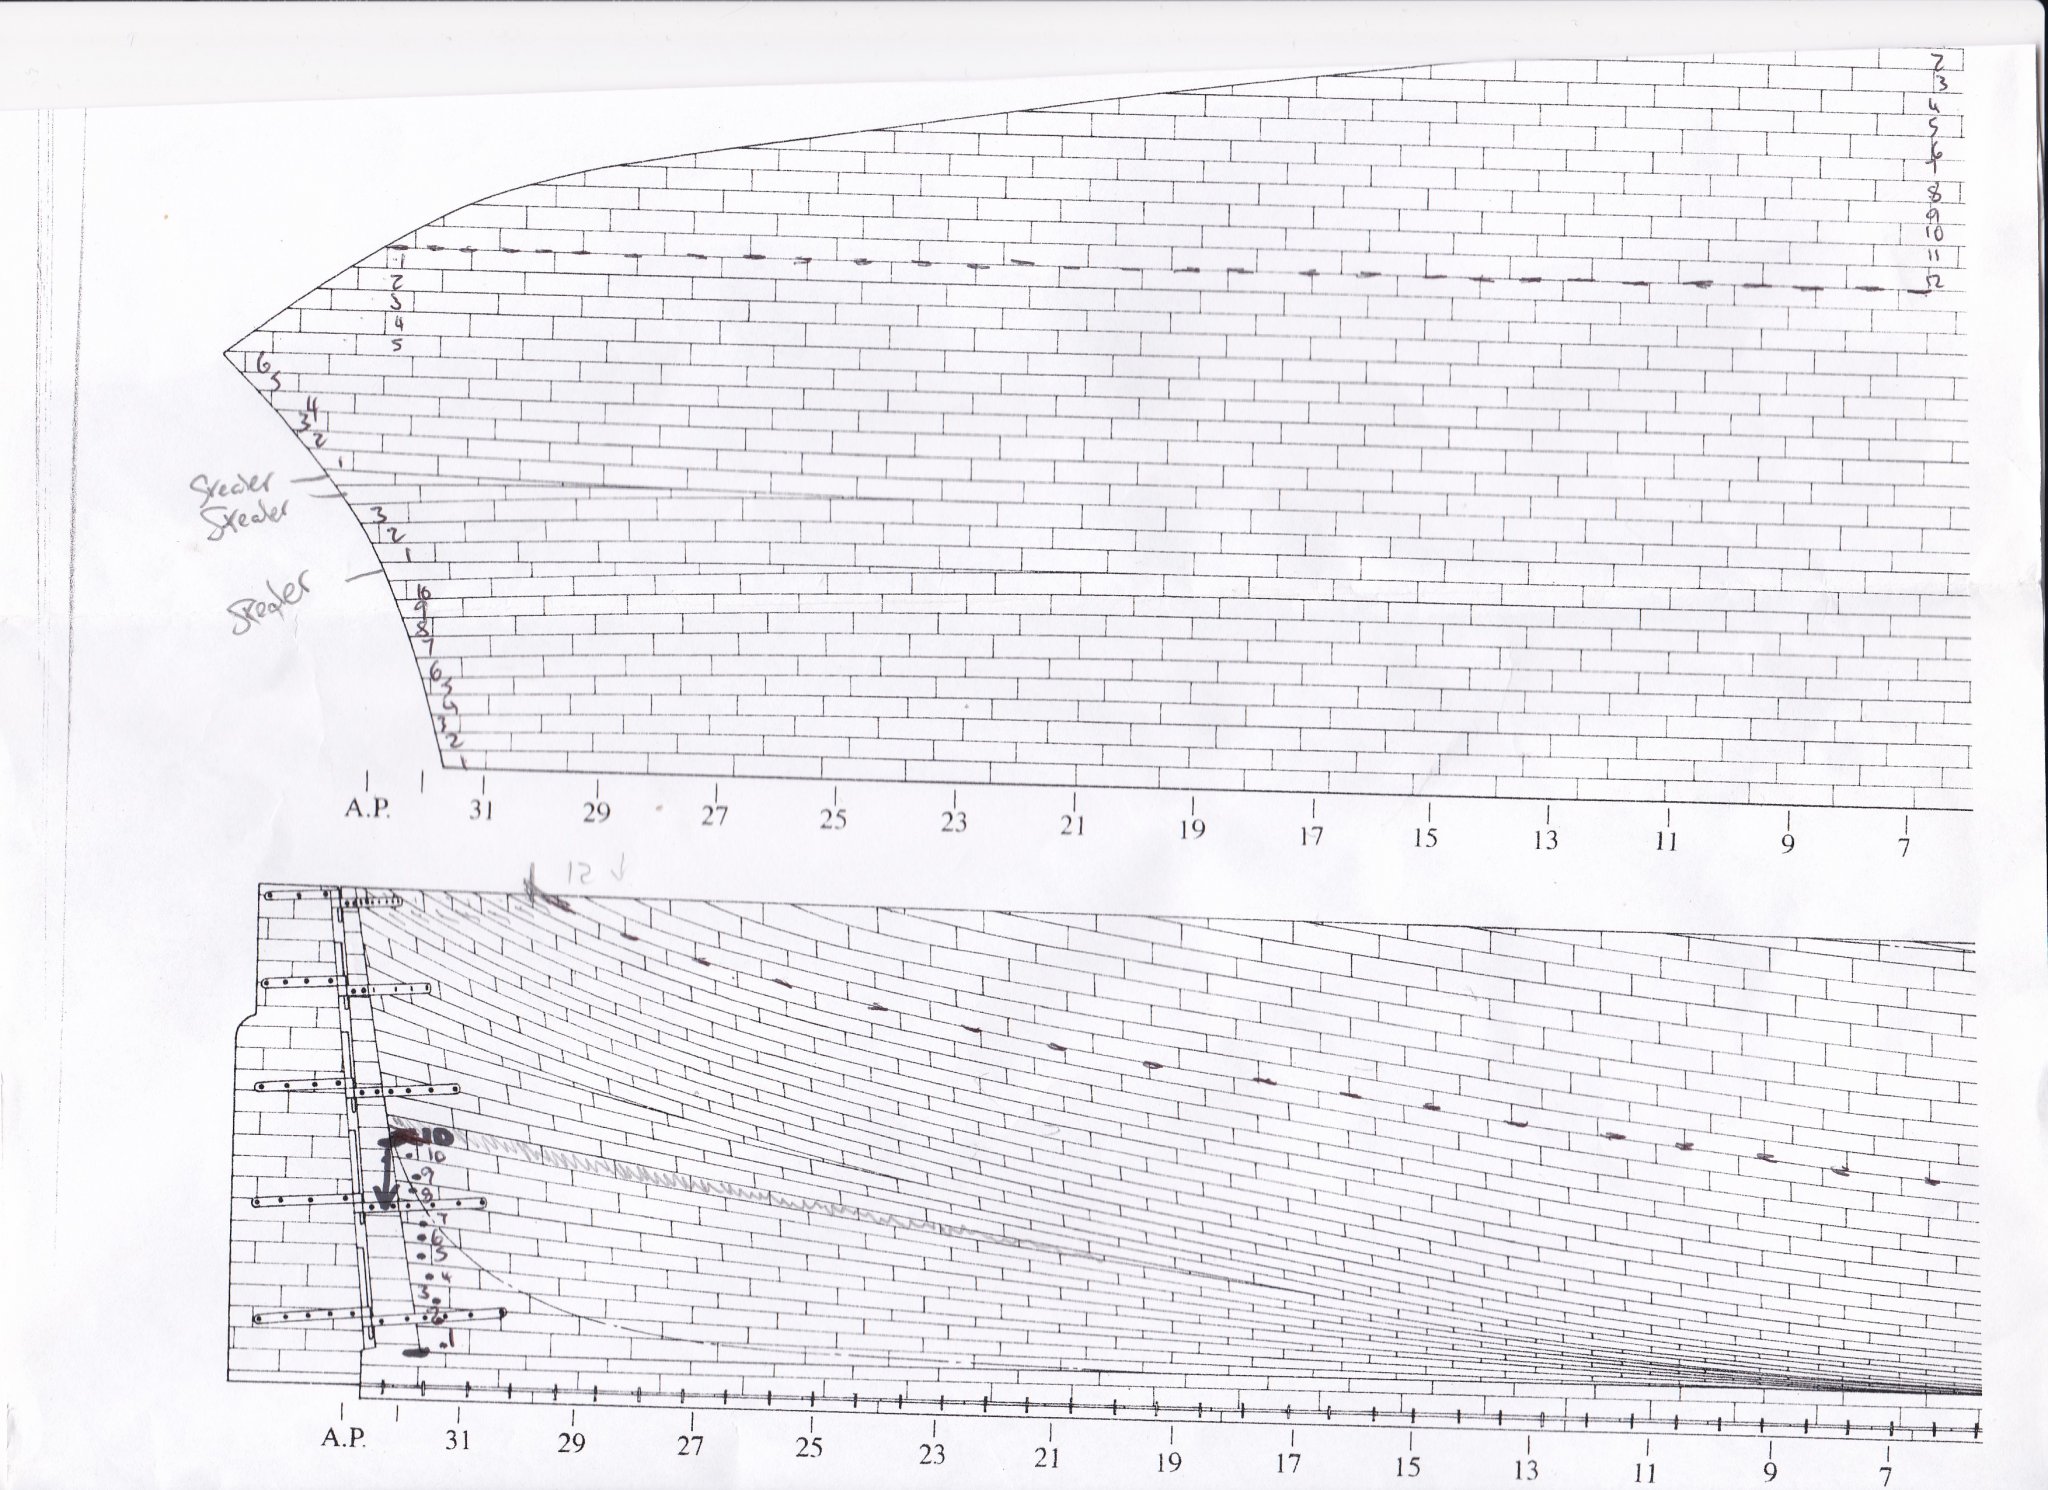
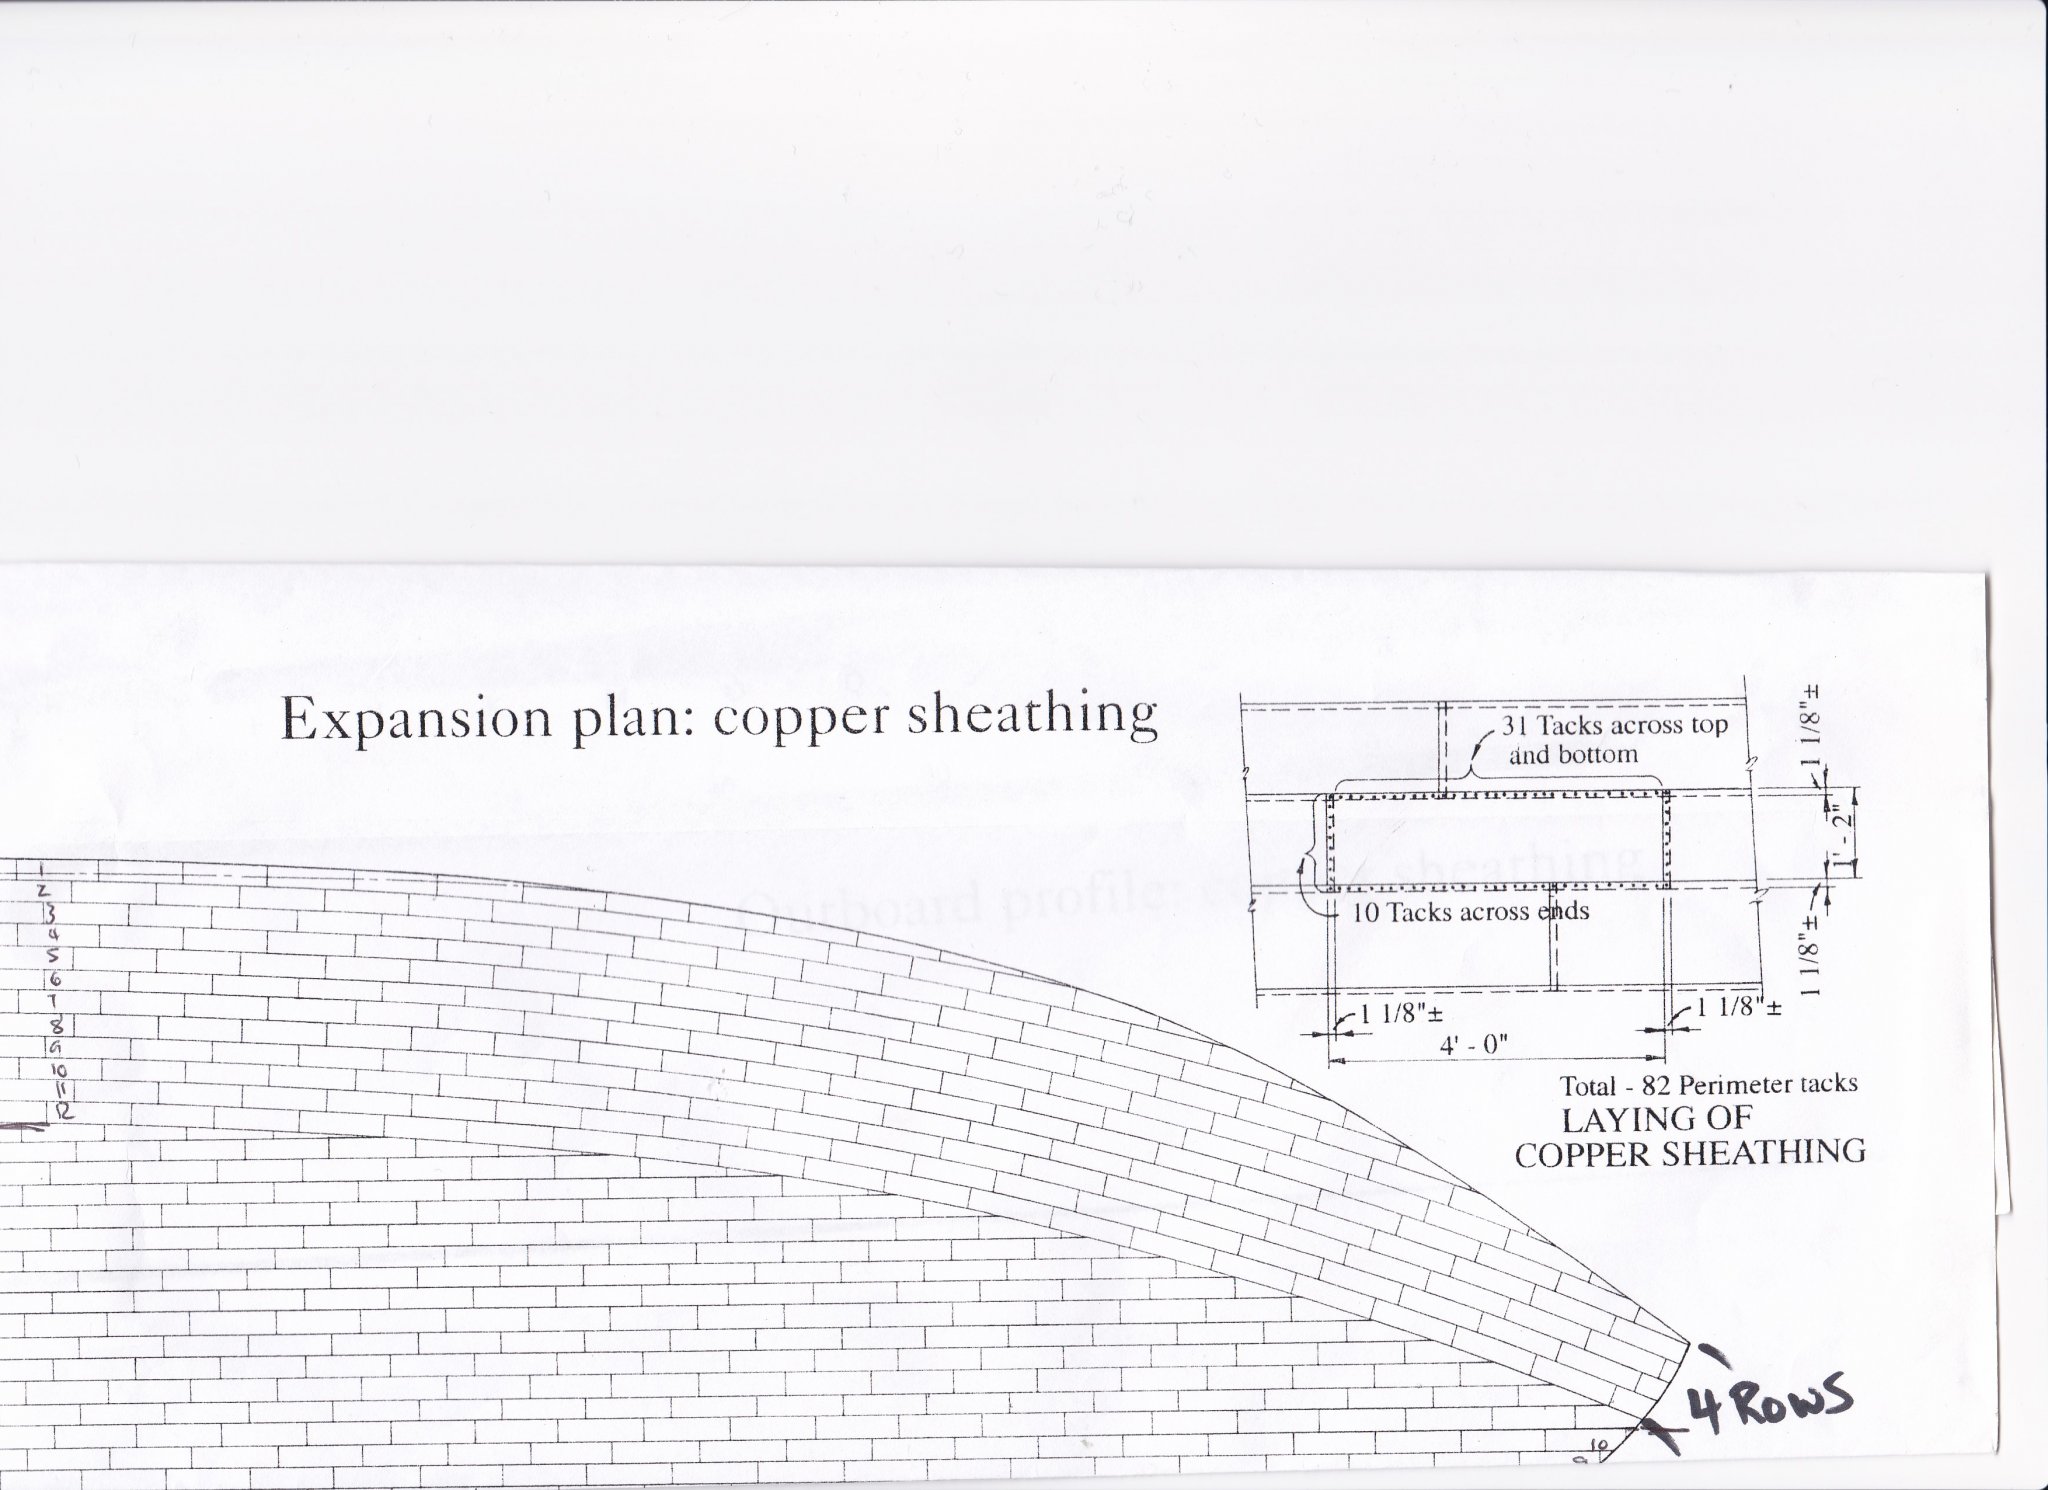
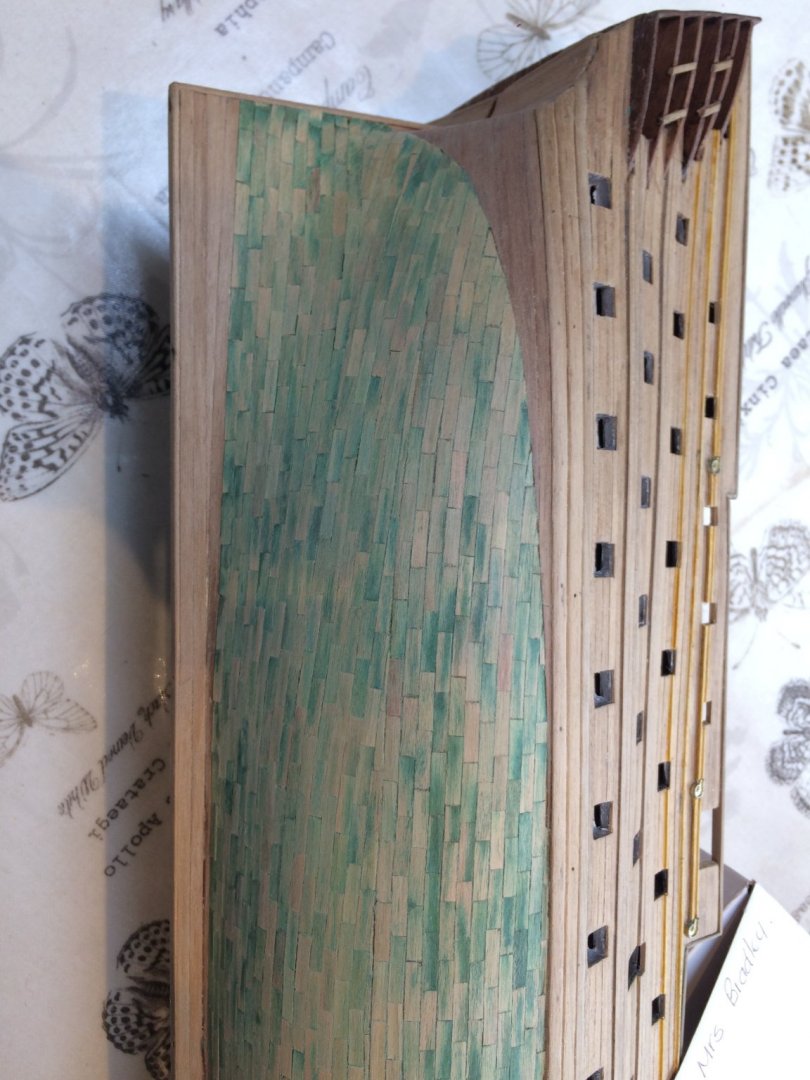
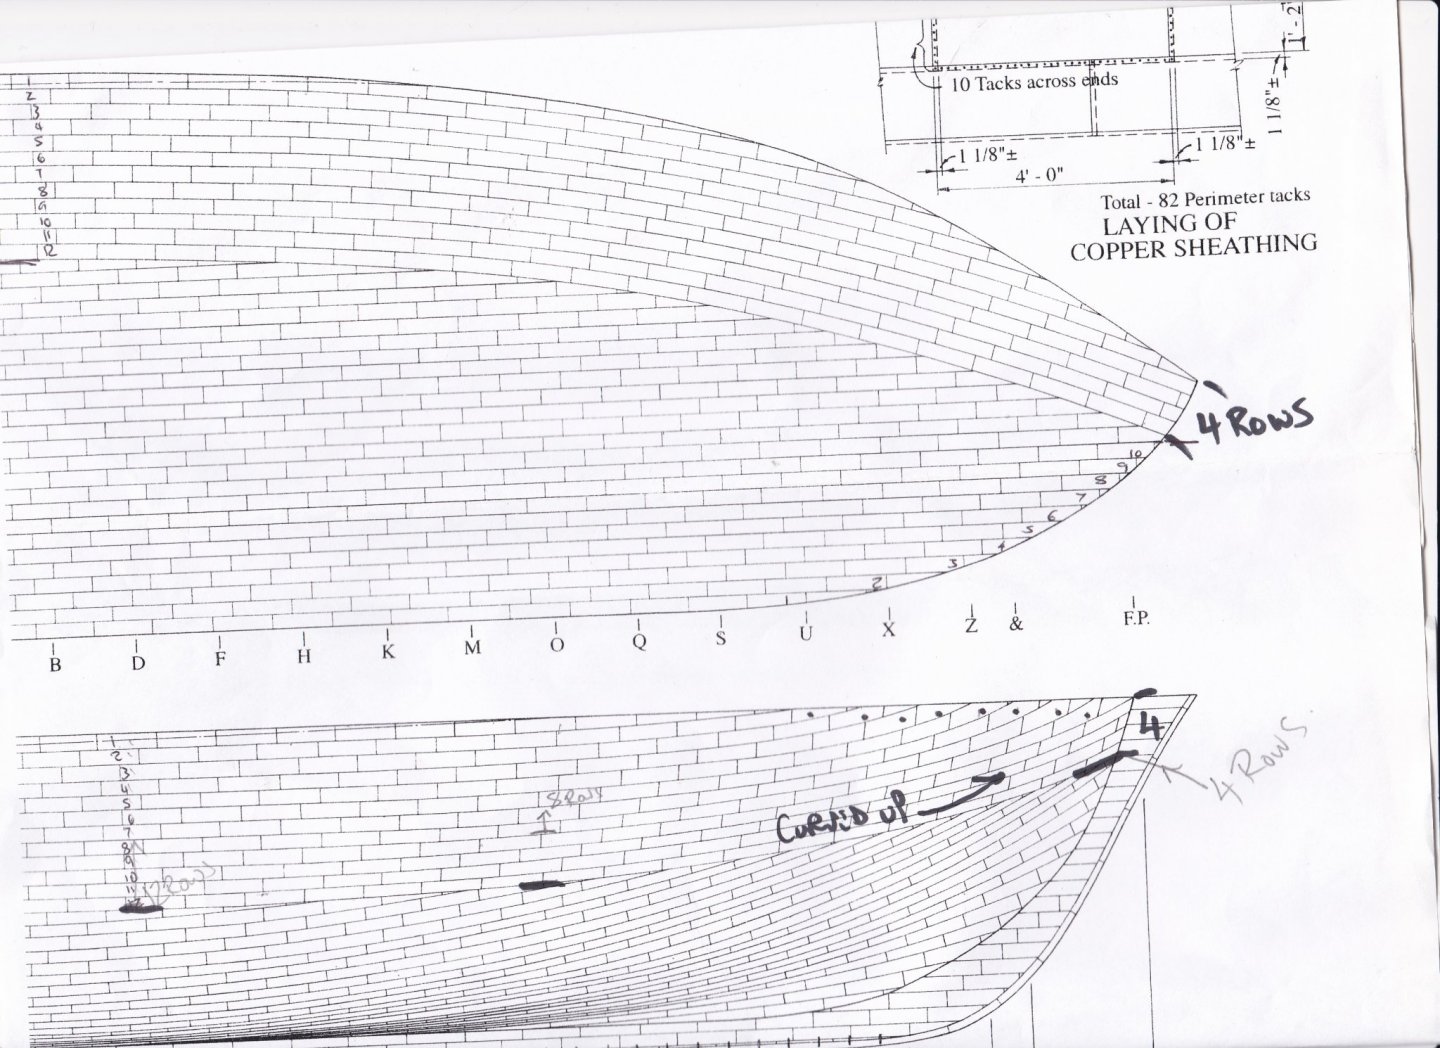
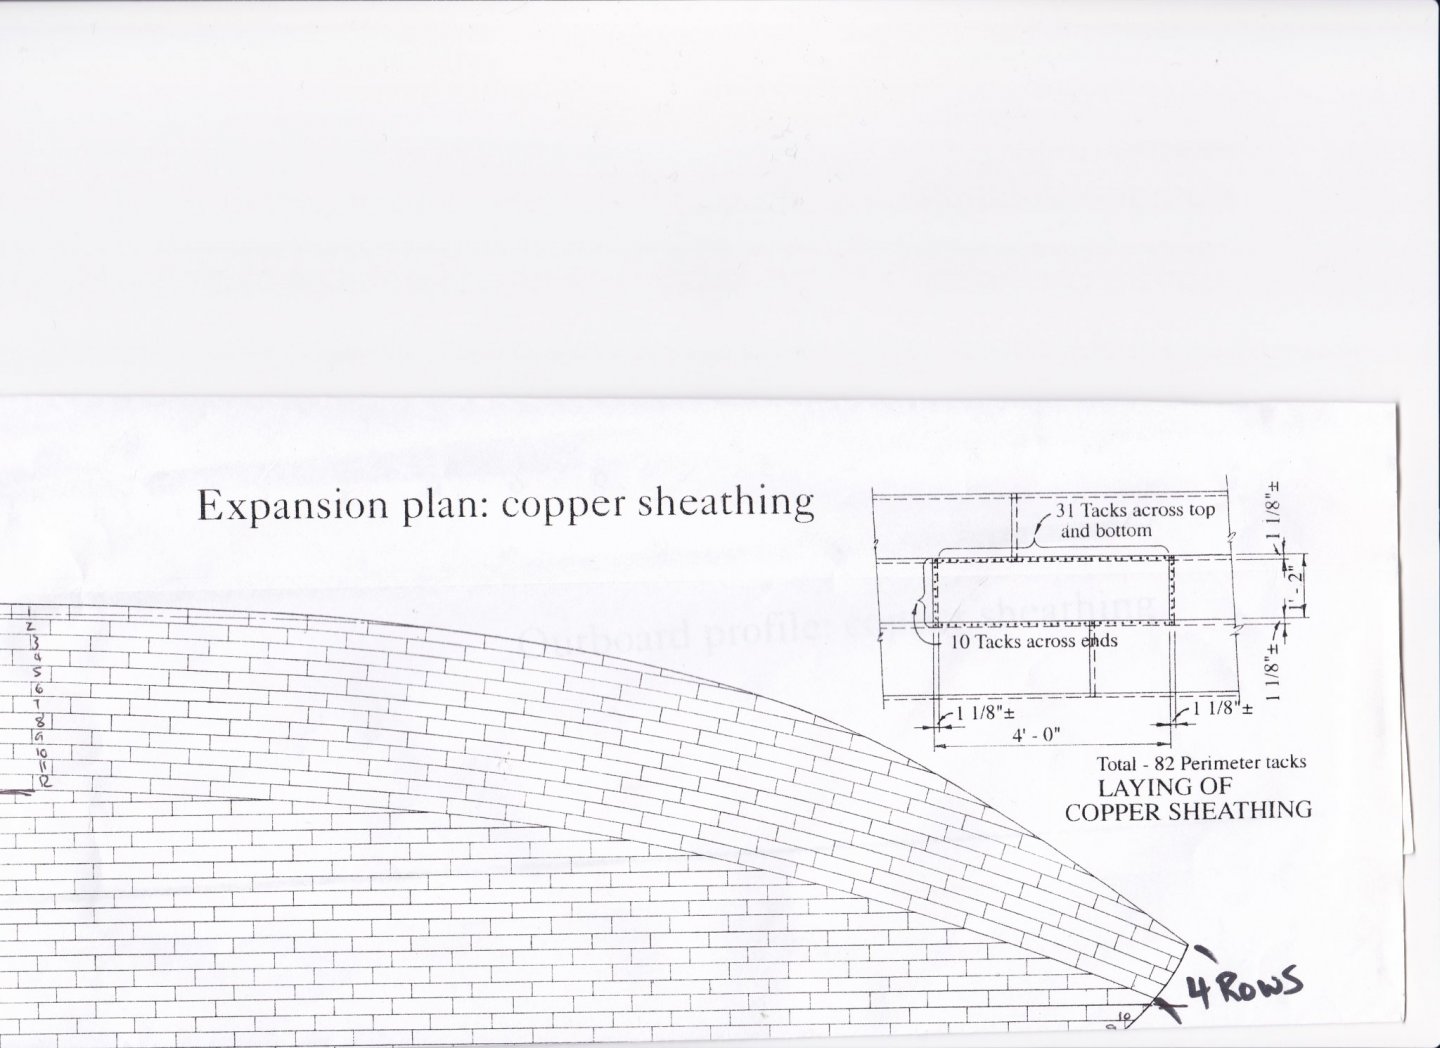
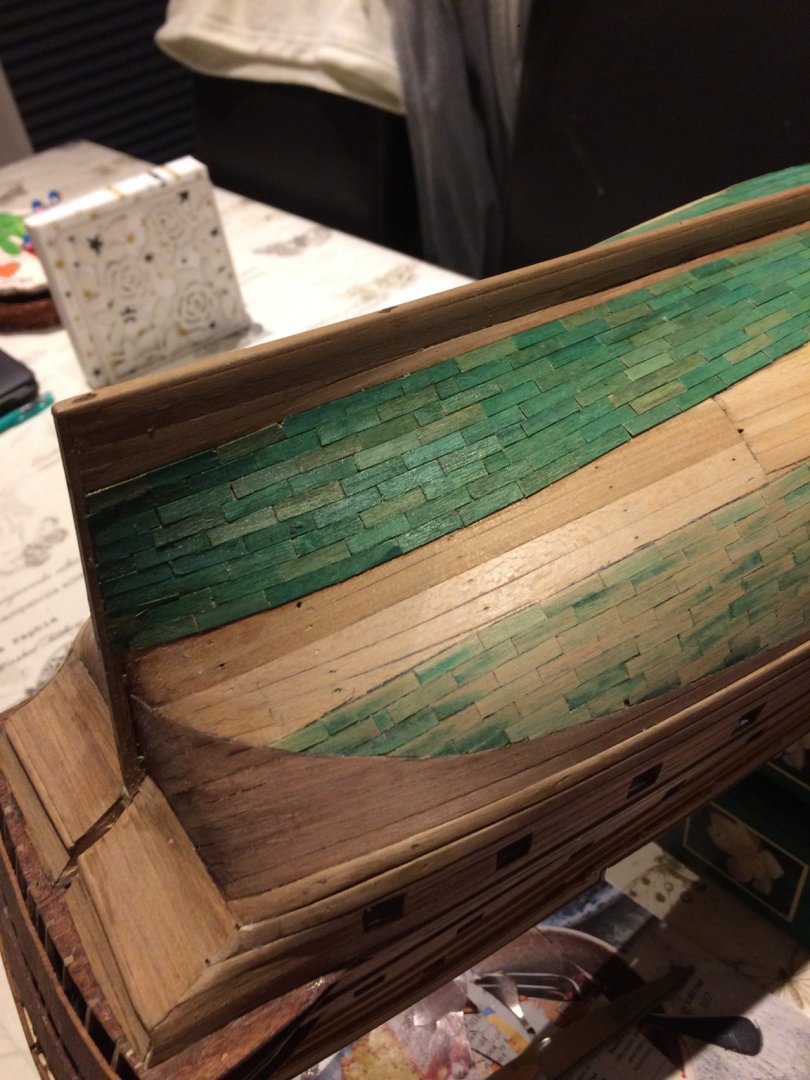
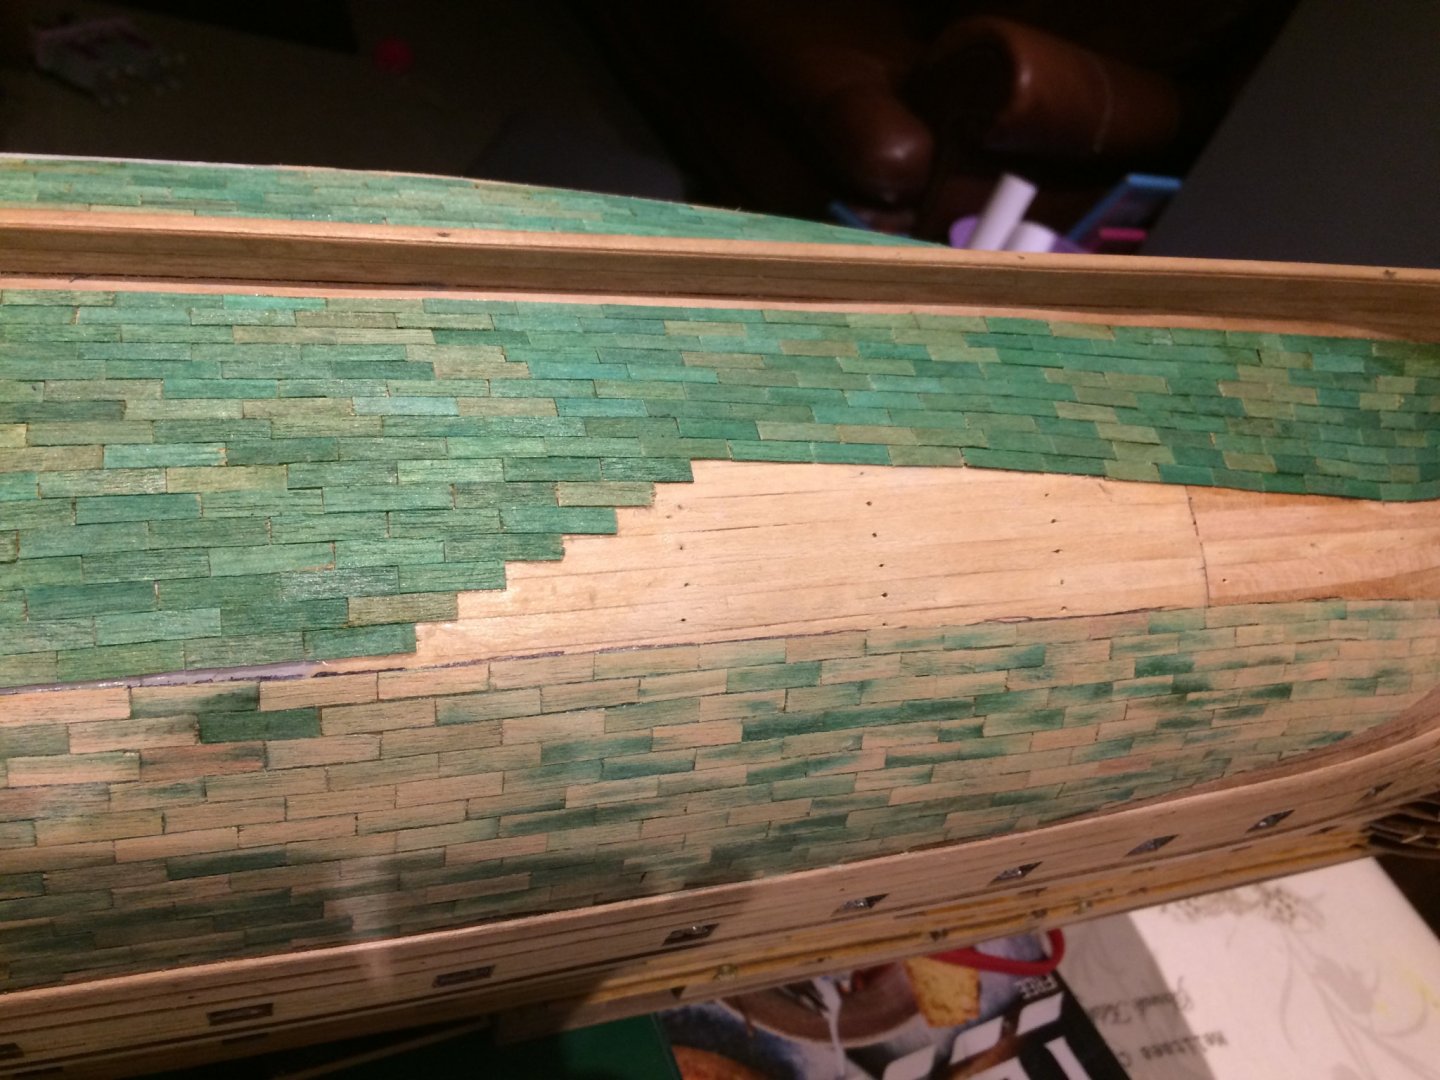
Rob, I dont know if this is of any use to you mate, but here are the 2 pages from the book I have showing the details of the copper tiles, I have clearly marked where the break in the pattern lies, as well as the position of stealers etc. I found it very very helpful. Hopefully you can make use of it. As you can see from the photos on my build, I started with the 4 rows at the waterline at the bow, , then went to amidships and put 12 rows (held on with masking tape) in place, drew a mark on the planks, then same at the stern. joined the dots so to speak and glued on the first 4 rows. After that I just filled in above them up to the waterline. did both sides, then started down at the keel working up parallel to it until I got up to the first set., just got to cut and fit the shaped ones now. Regards spider


-
As you can see from the photos on my build, I started with the 4 rows at the waterline at the bow, , then went to amidships and put 12 rows (held on with masking tape) in place, drew a mark on the planks, then same at the stern. joined the dots so to speak and glued on the first 4 rows. After that I just filled in above them up to the waterline. did both sides, then started down at the keel working up parallel to it until I got up to the first set., just got to cut and fit the shaped ones now.


-
Rob, I dont know if this is of any use to you mate, but here are the 2 pages from the book I have showing the details of the copper tiles, I have clearly marked where the break in the pattern lies, as well as the position of stealers etc. I found it very very helpful. Hopefully you can make use of it. Regards spider


-
Mate, it is looking good, thanks for your comment on my build. YT is the other guy I was terlling you about, as well as Diablo from damascus, his boat is a beauty., we are all pretty much in the same place, keep going mate.. spider
-
Hi Diablo, how are you keeping? well, I hope. I have been doing a bit more of my build and have nearly finished the green tiles. I am going to cover them with the copper foil tape that so many of you seem to have used.
-
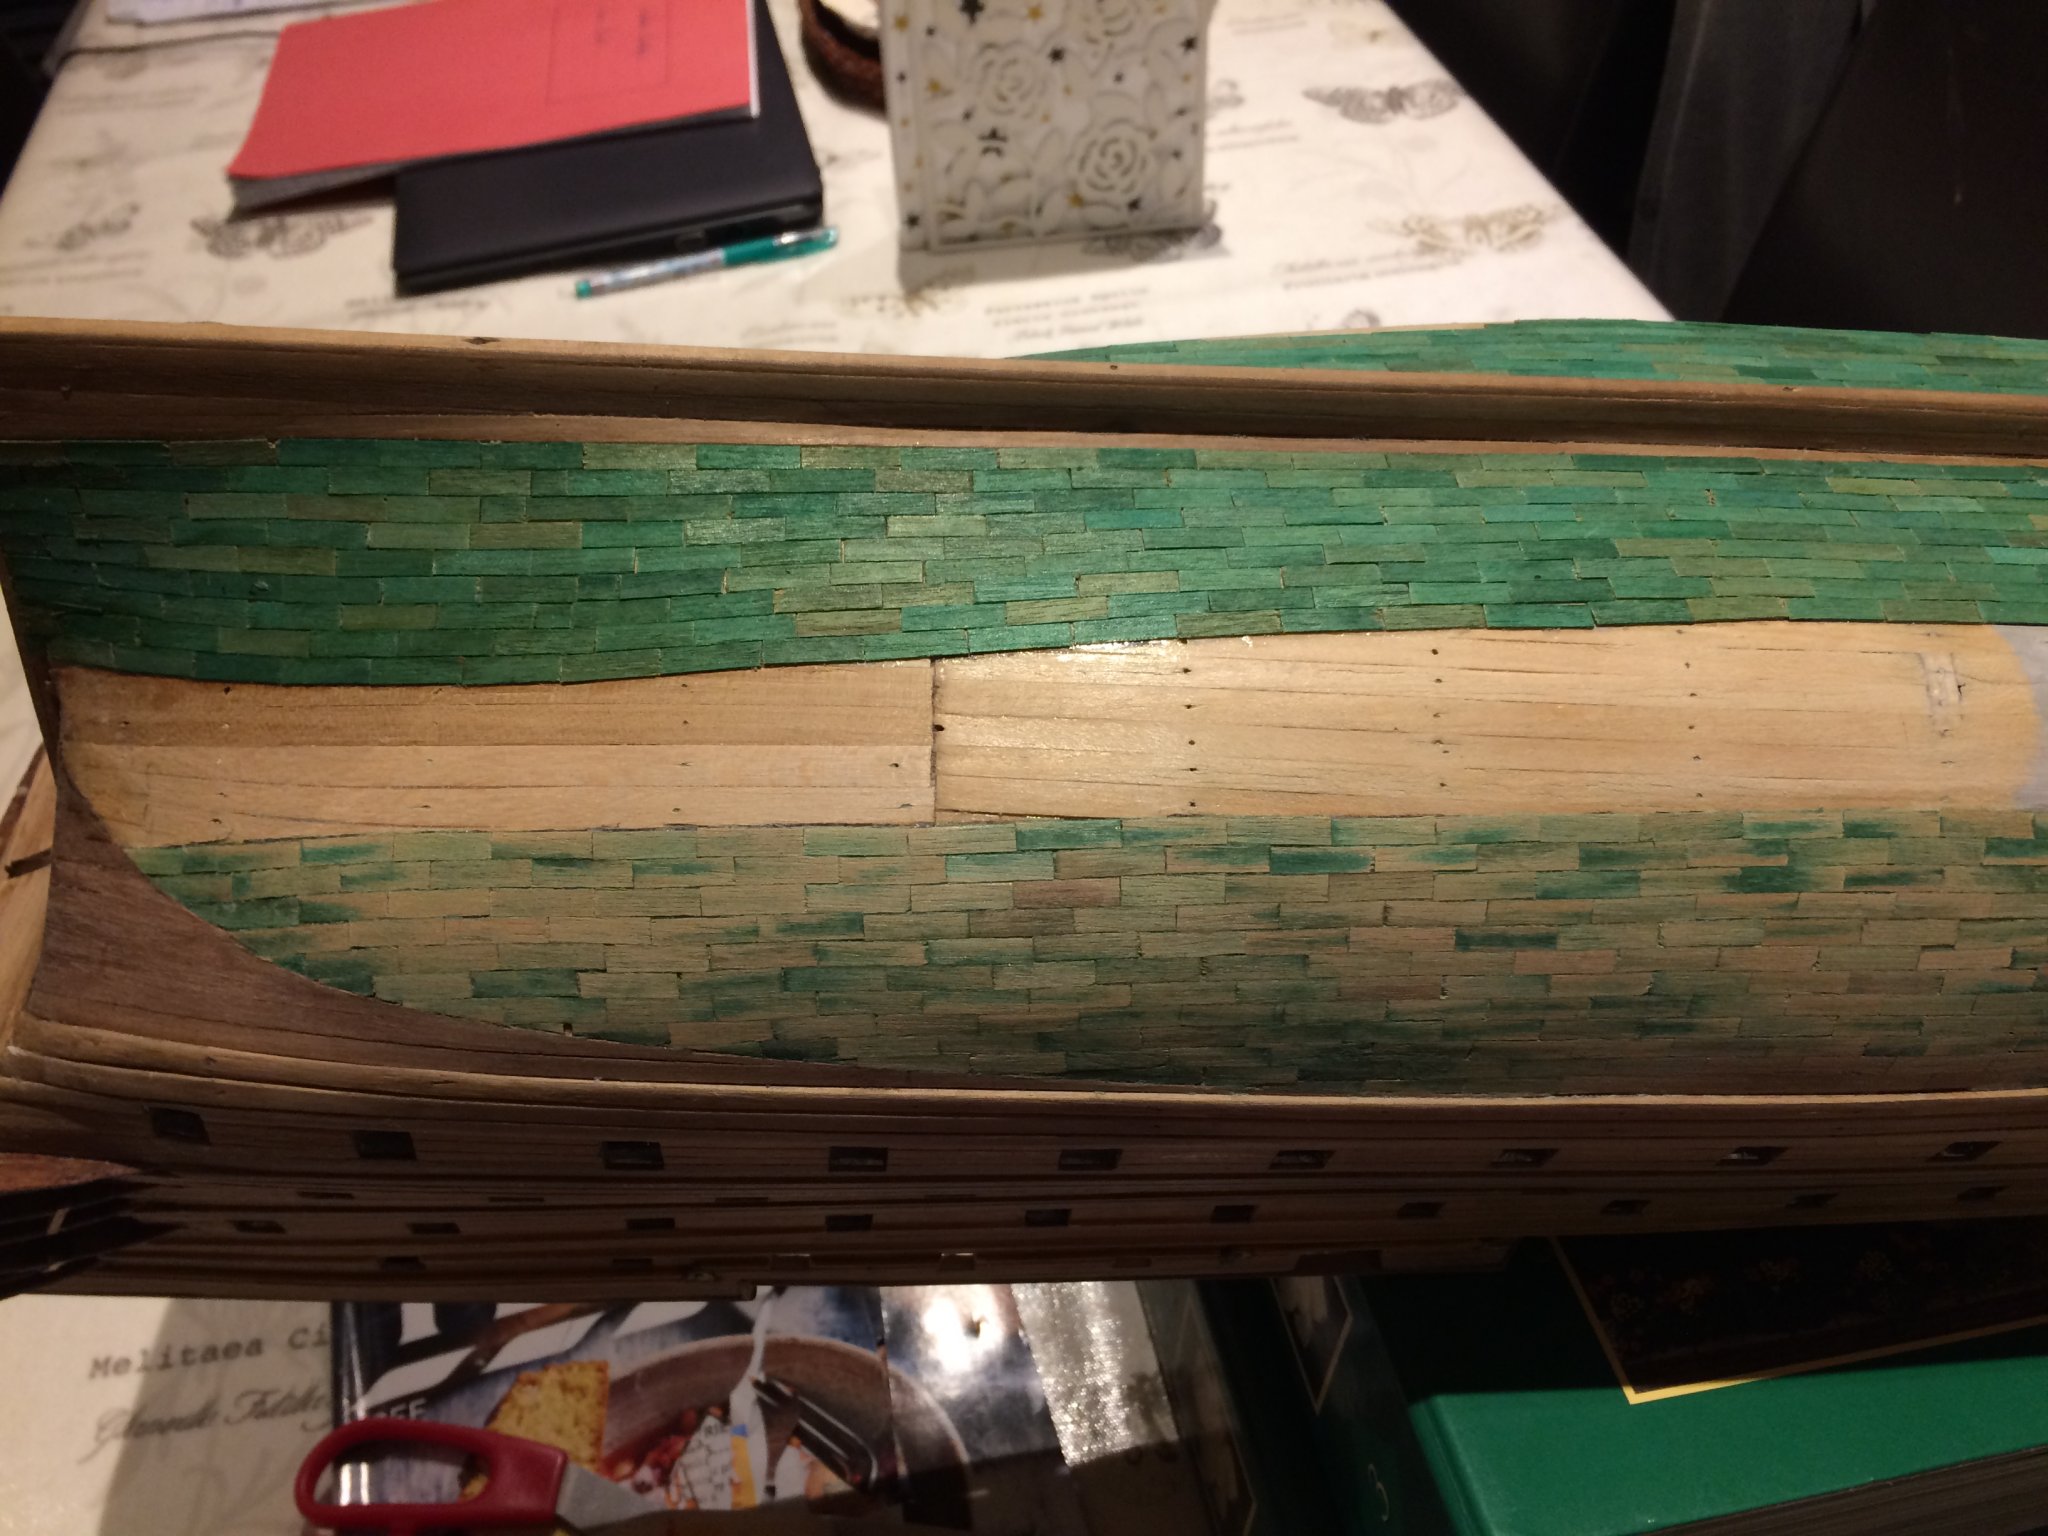
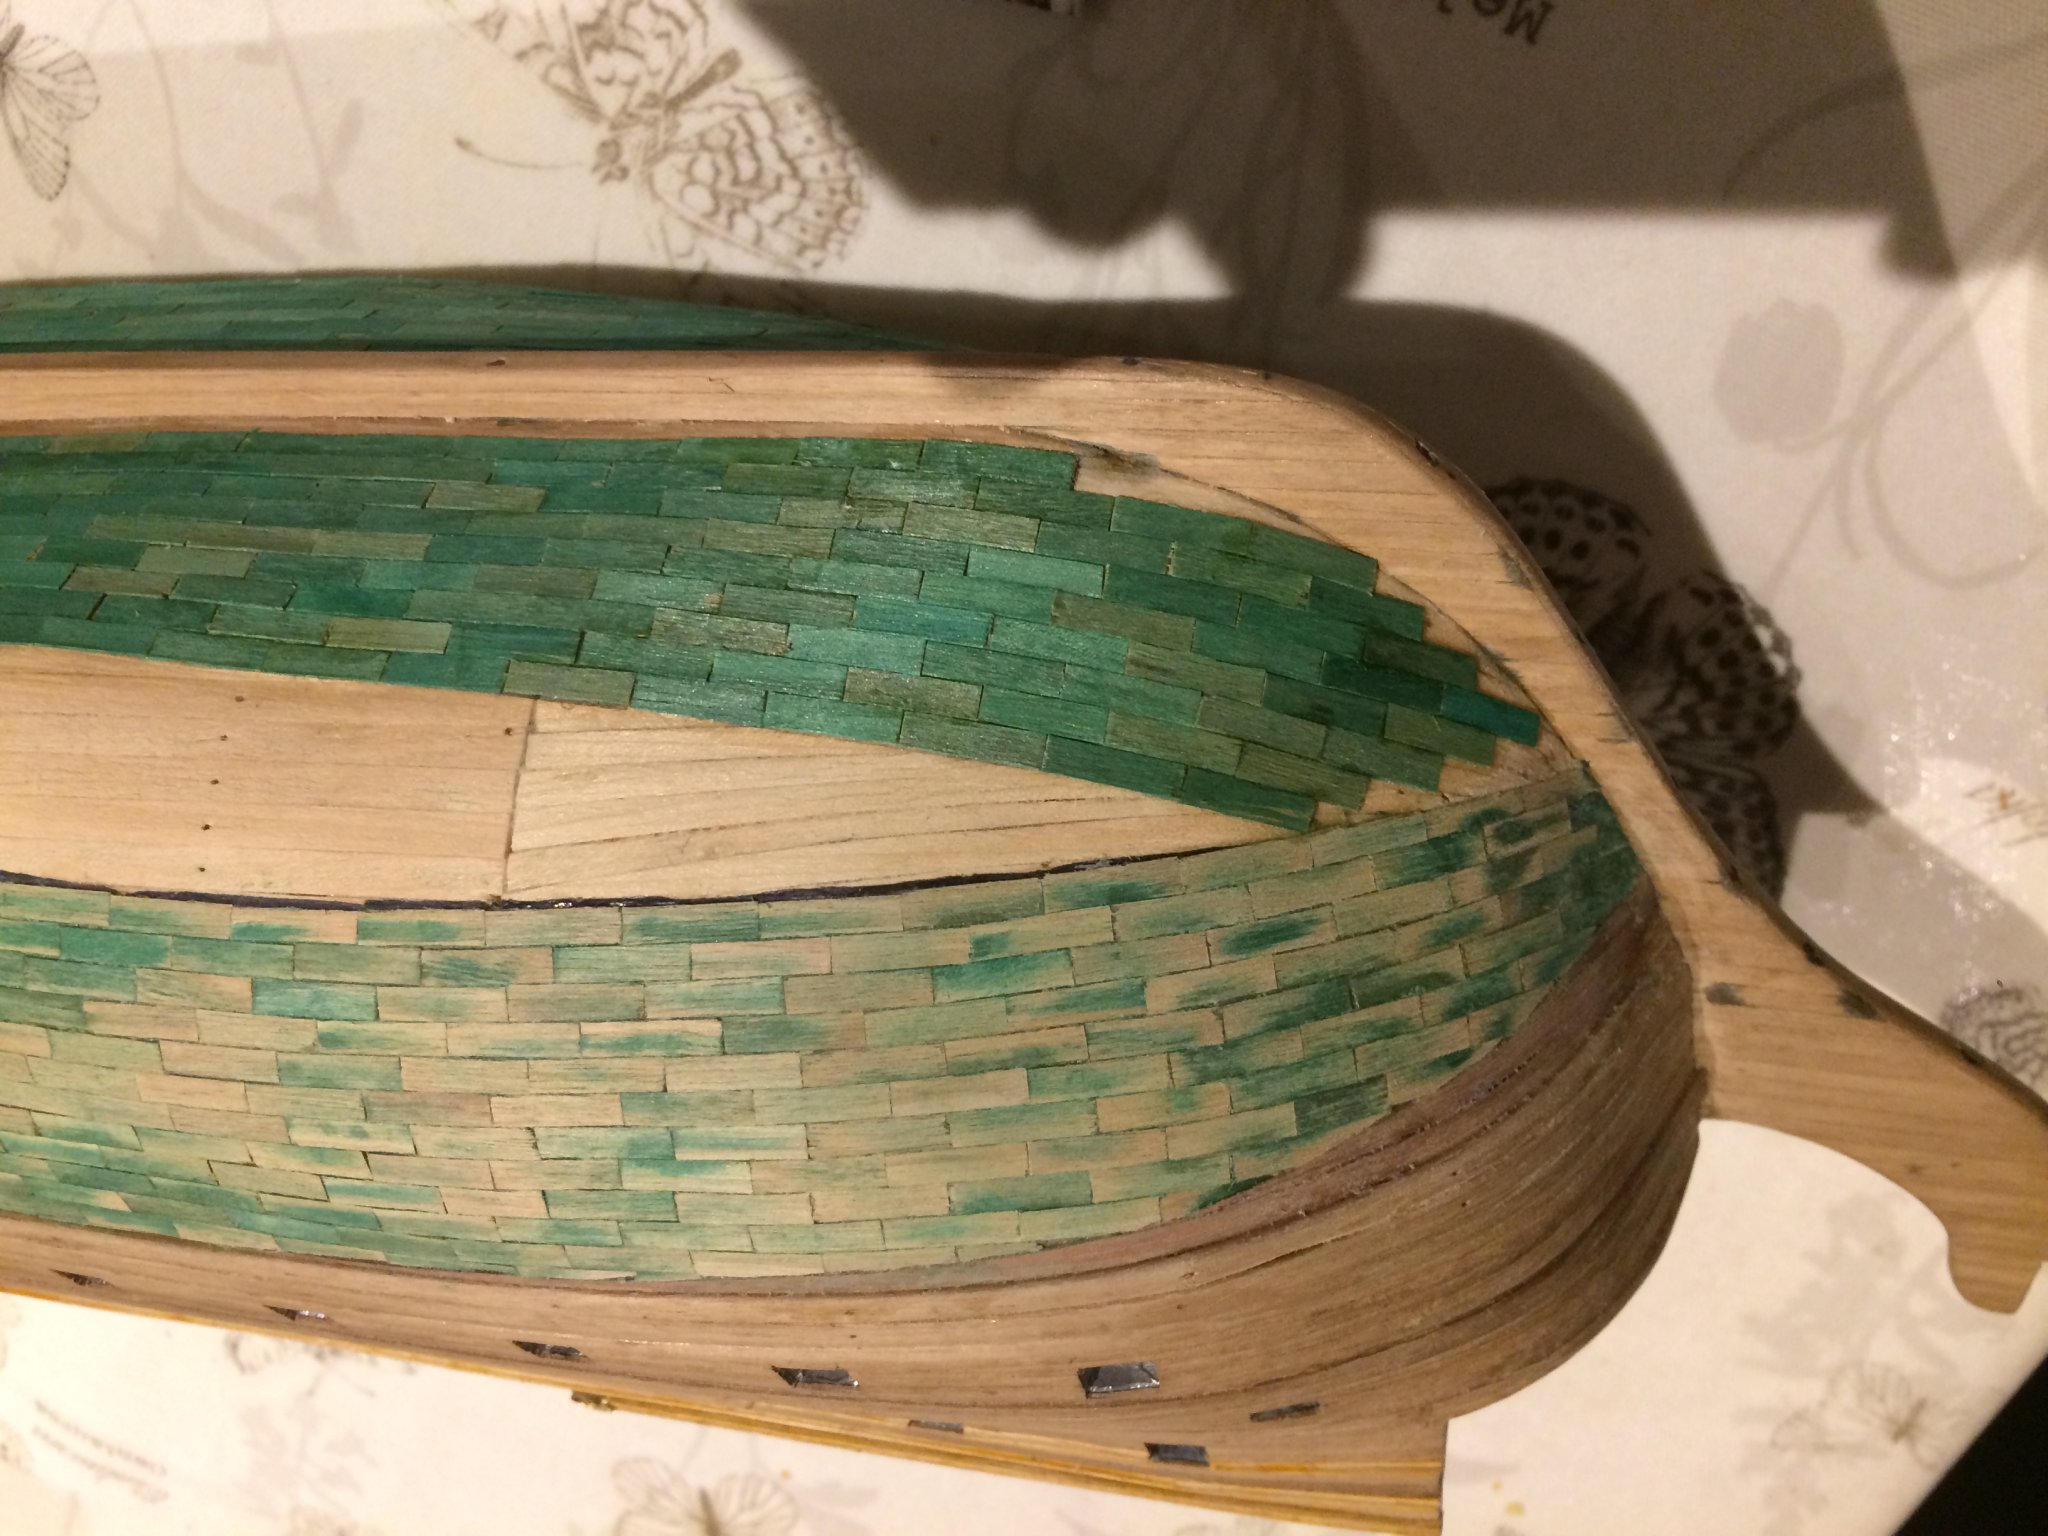
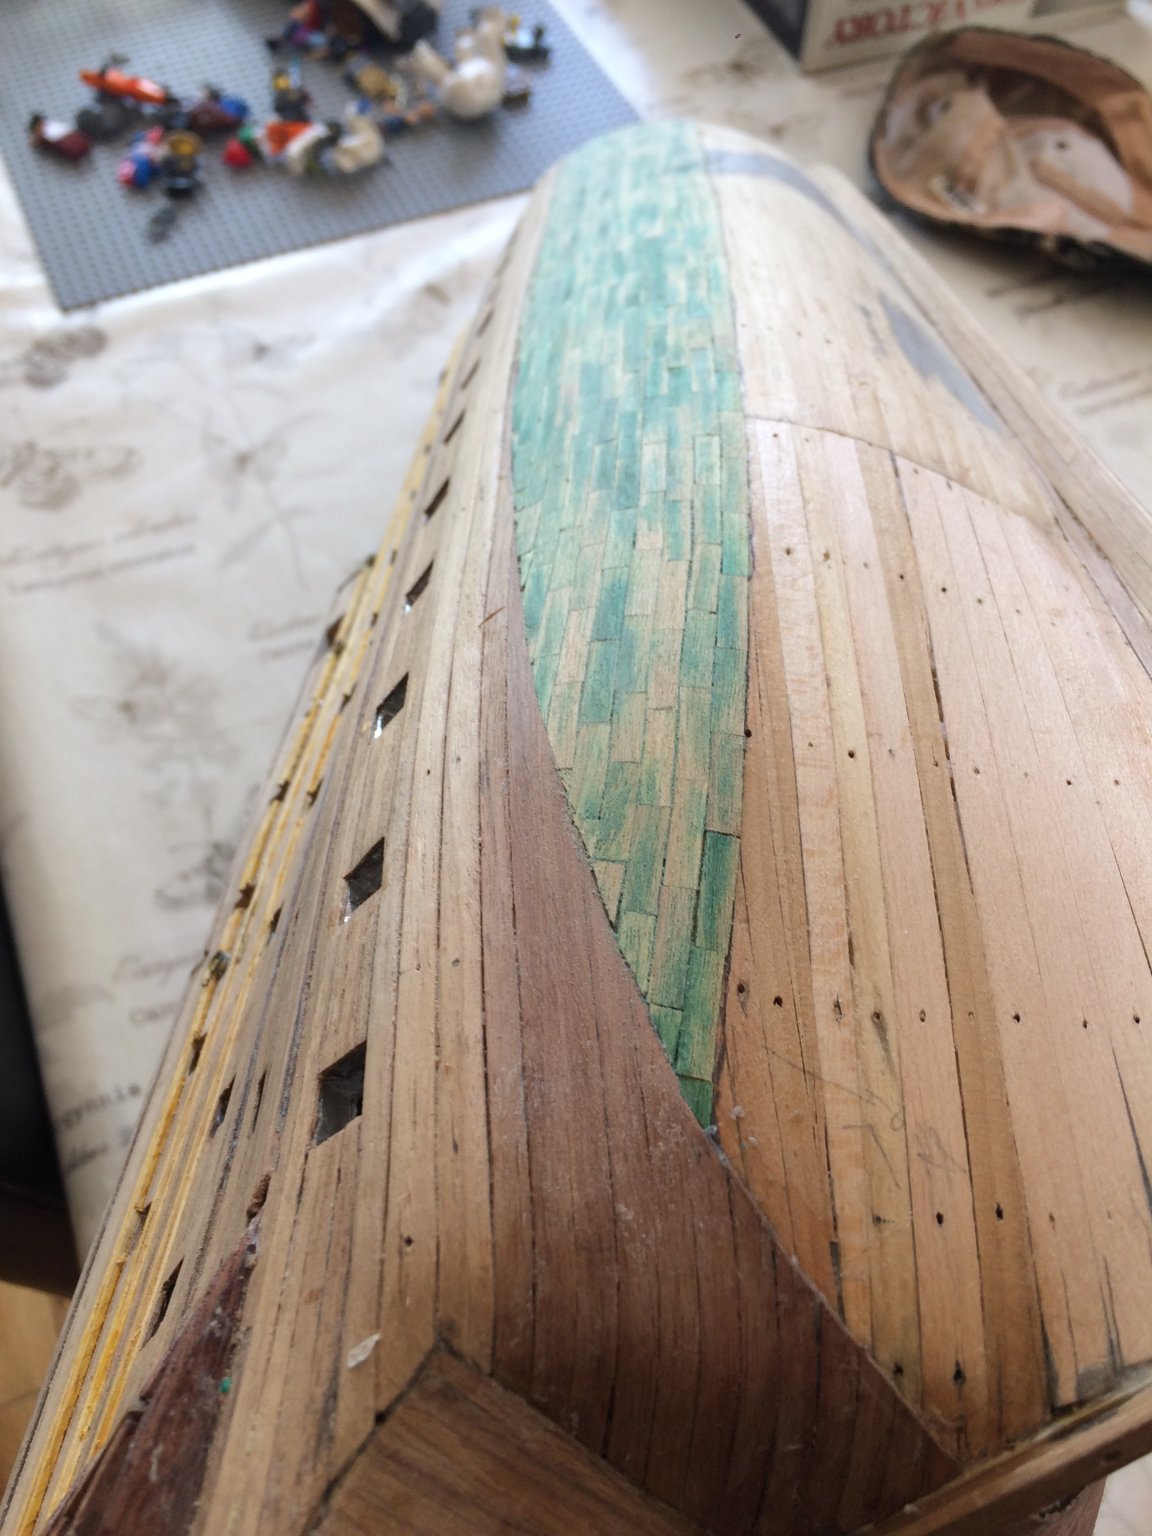
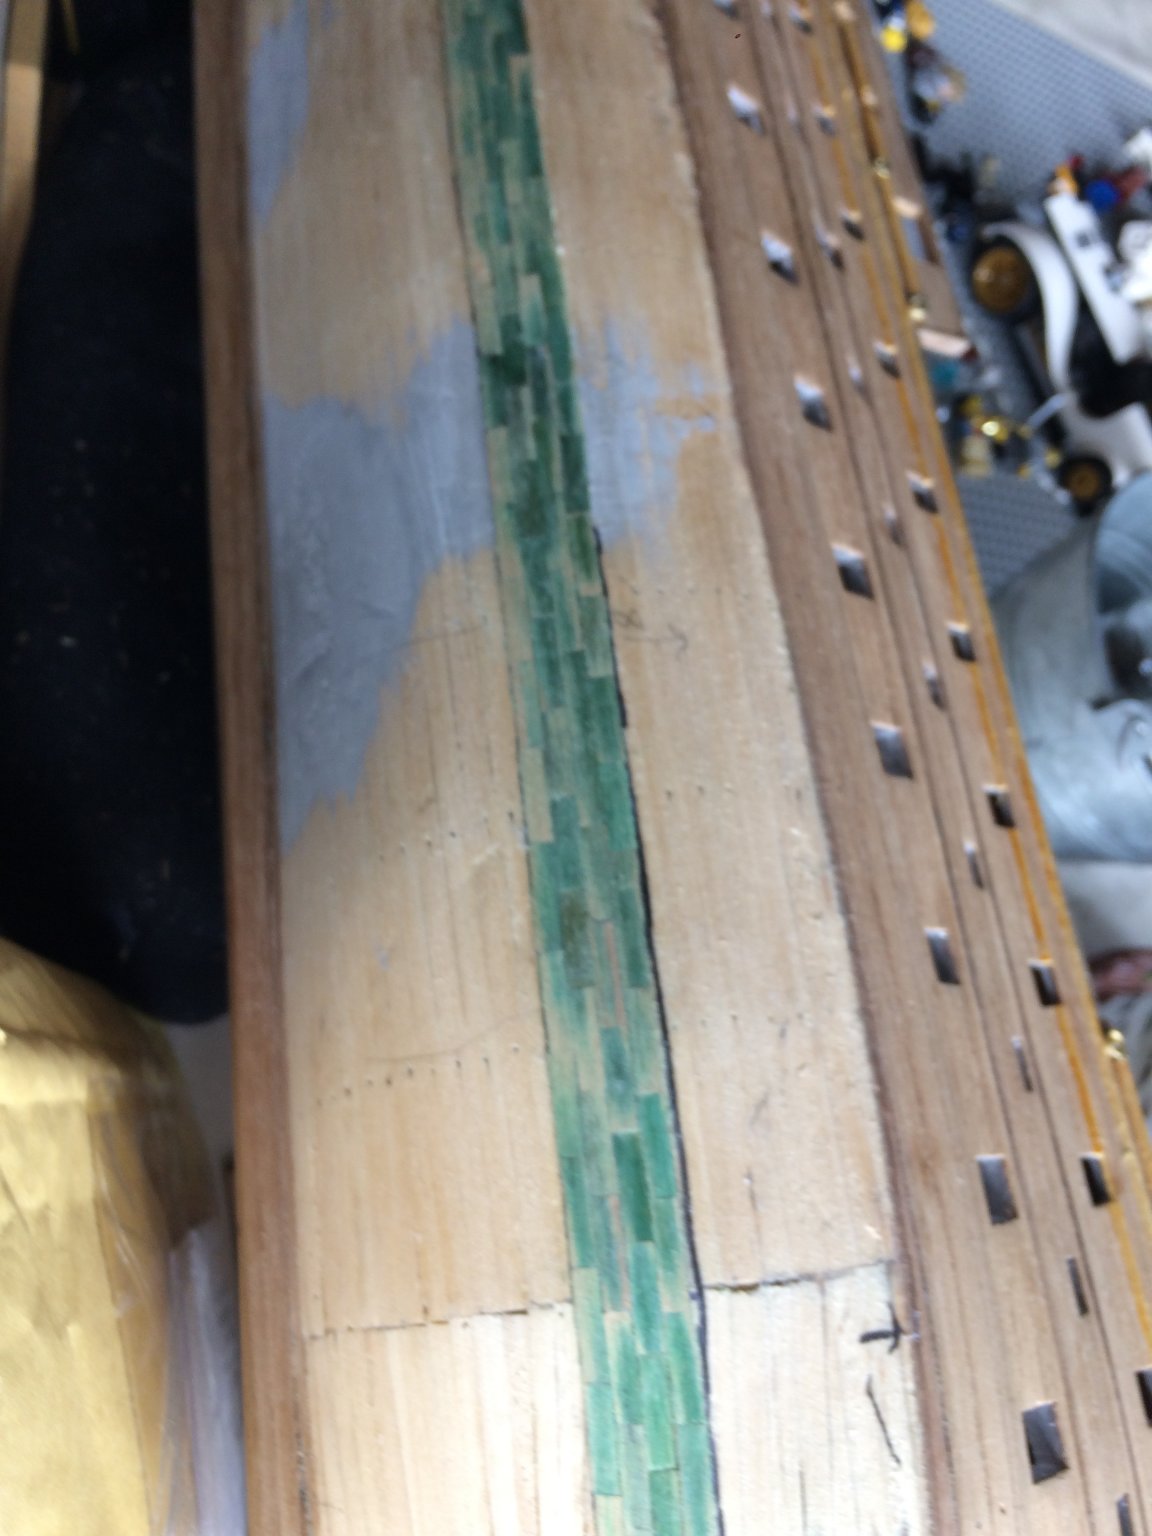
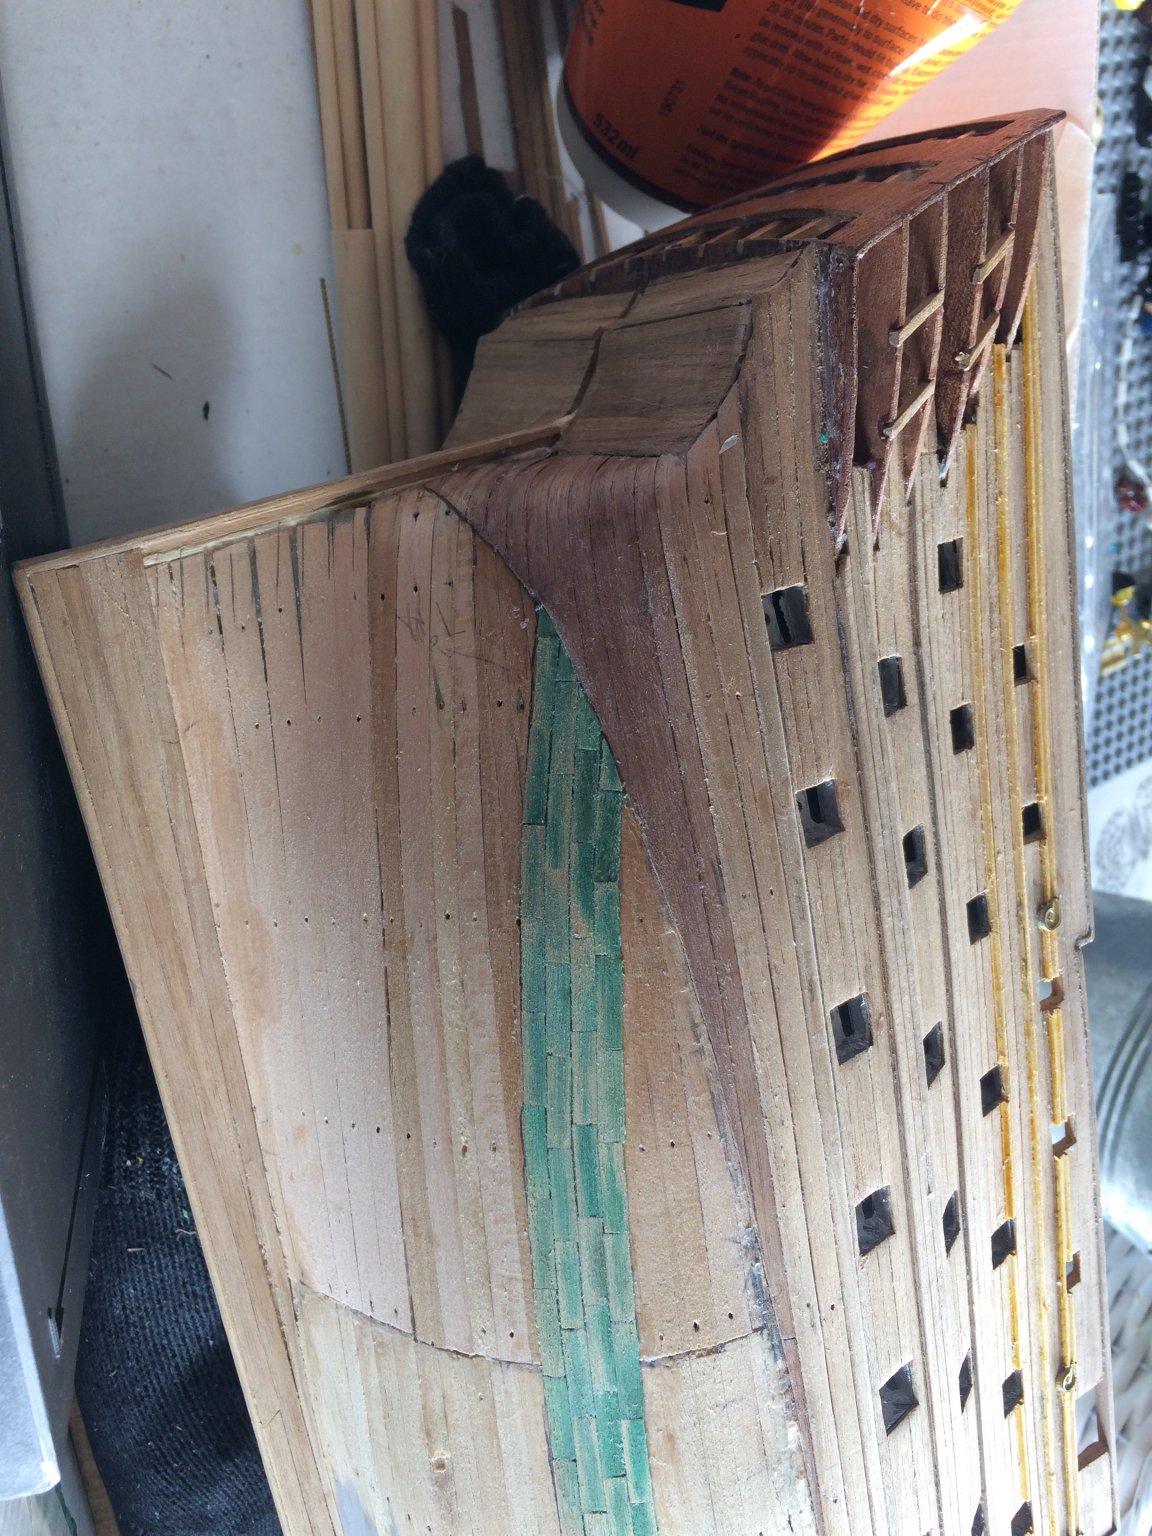
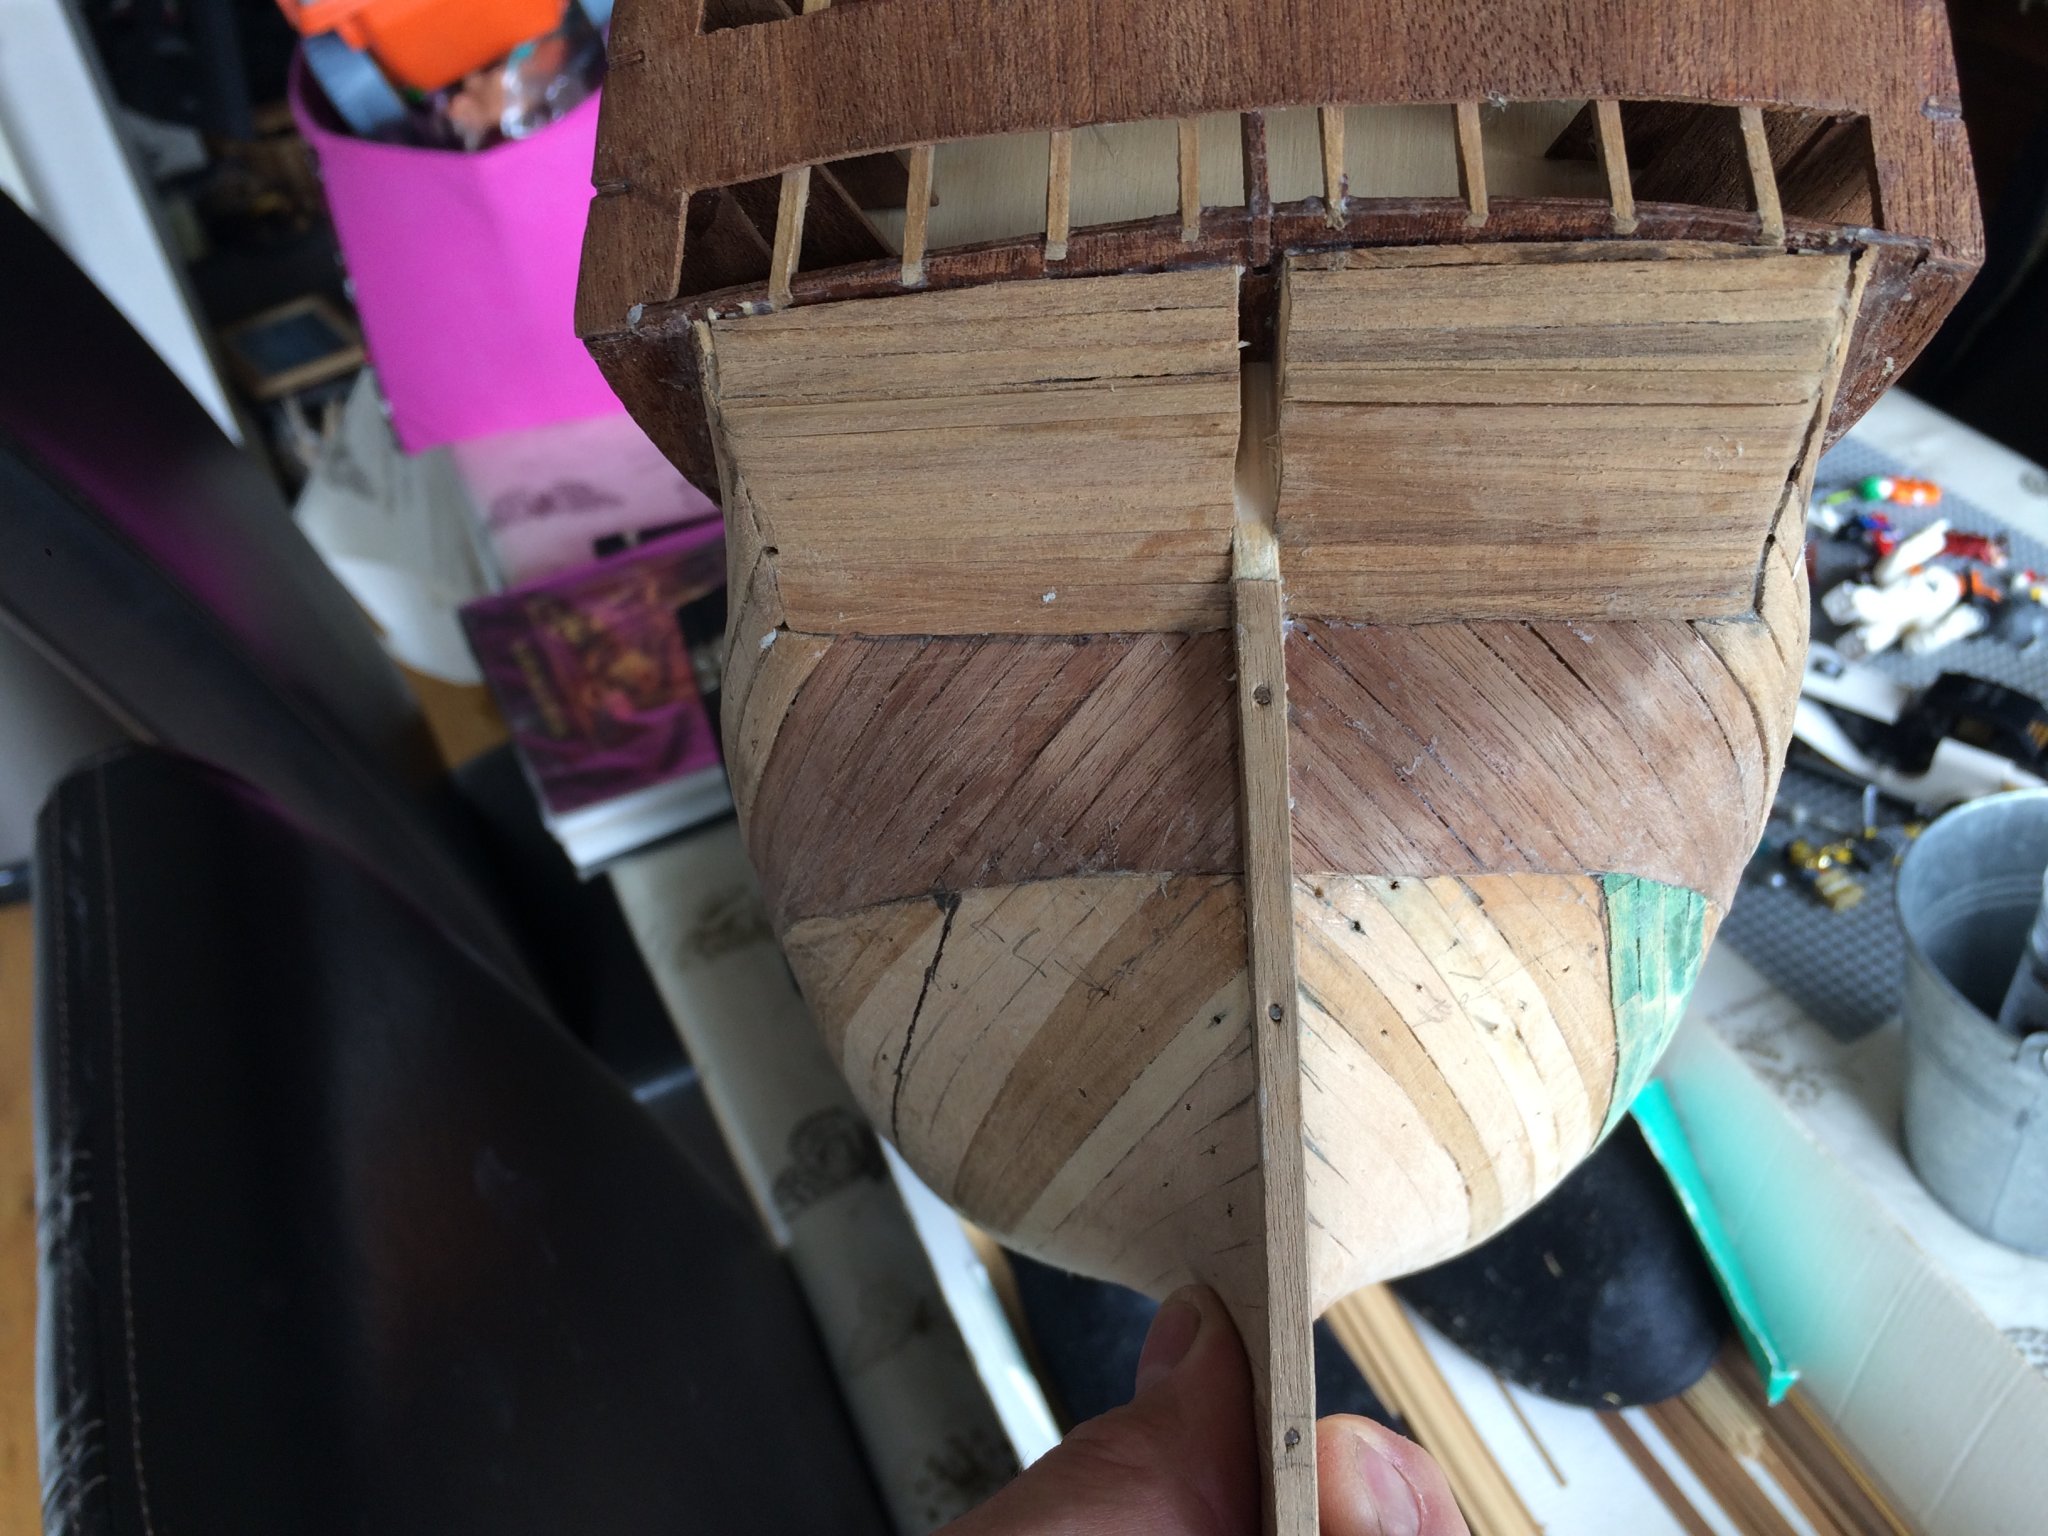
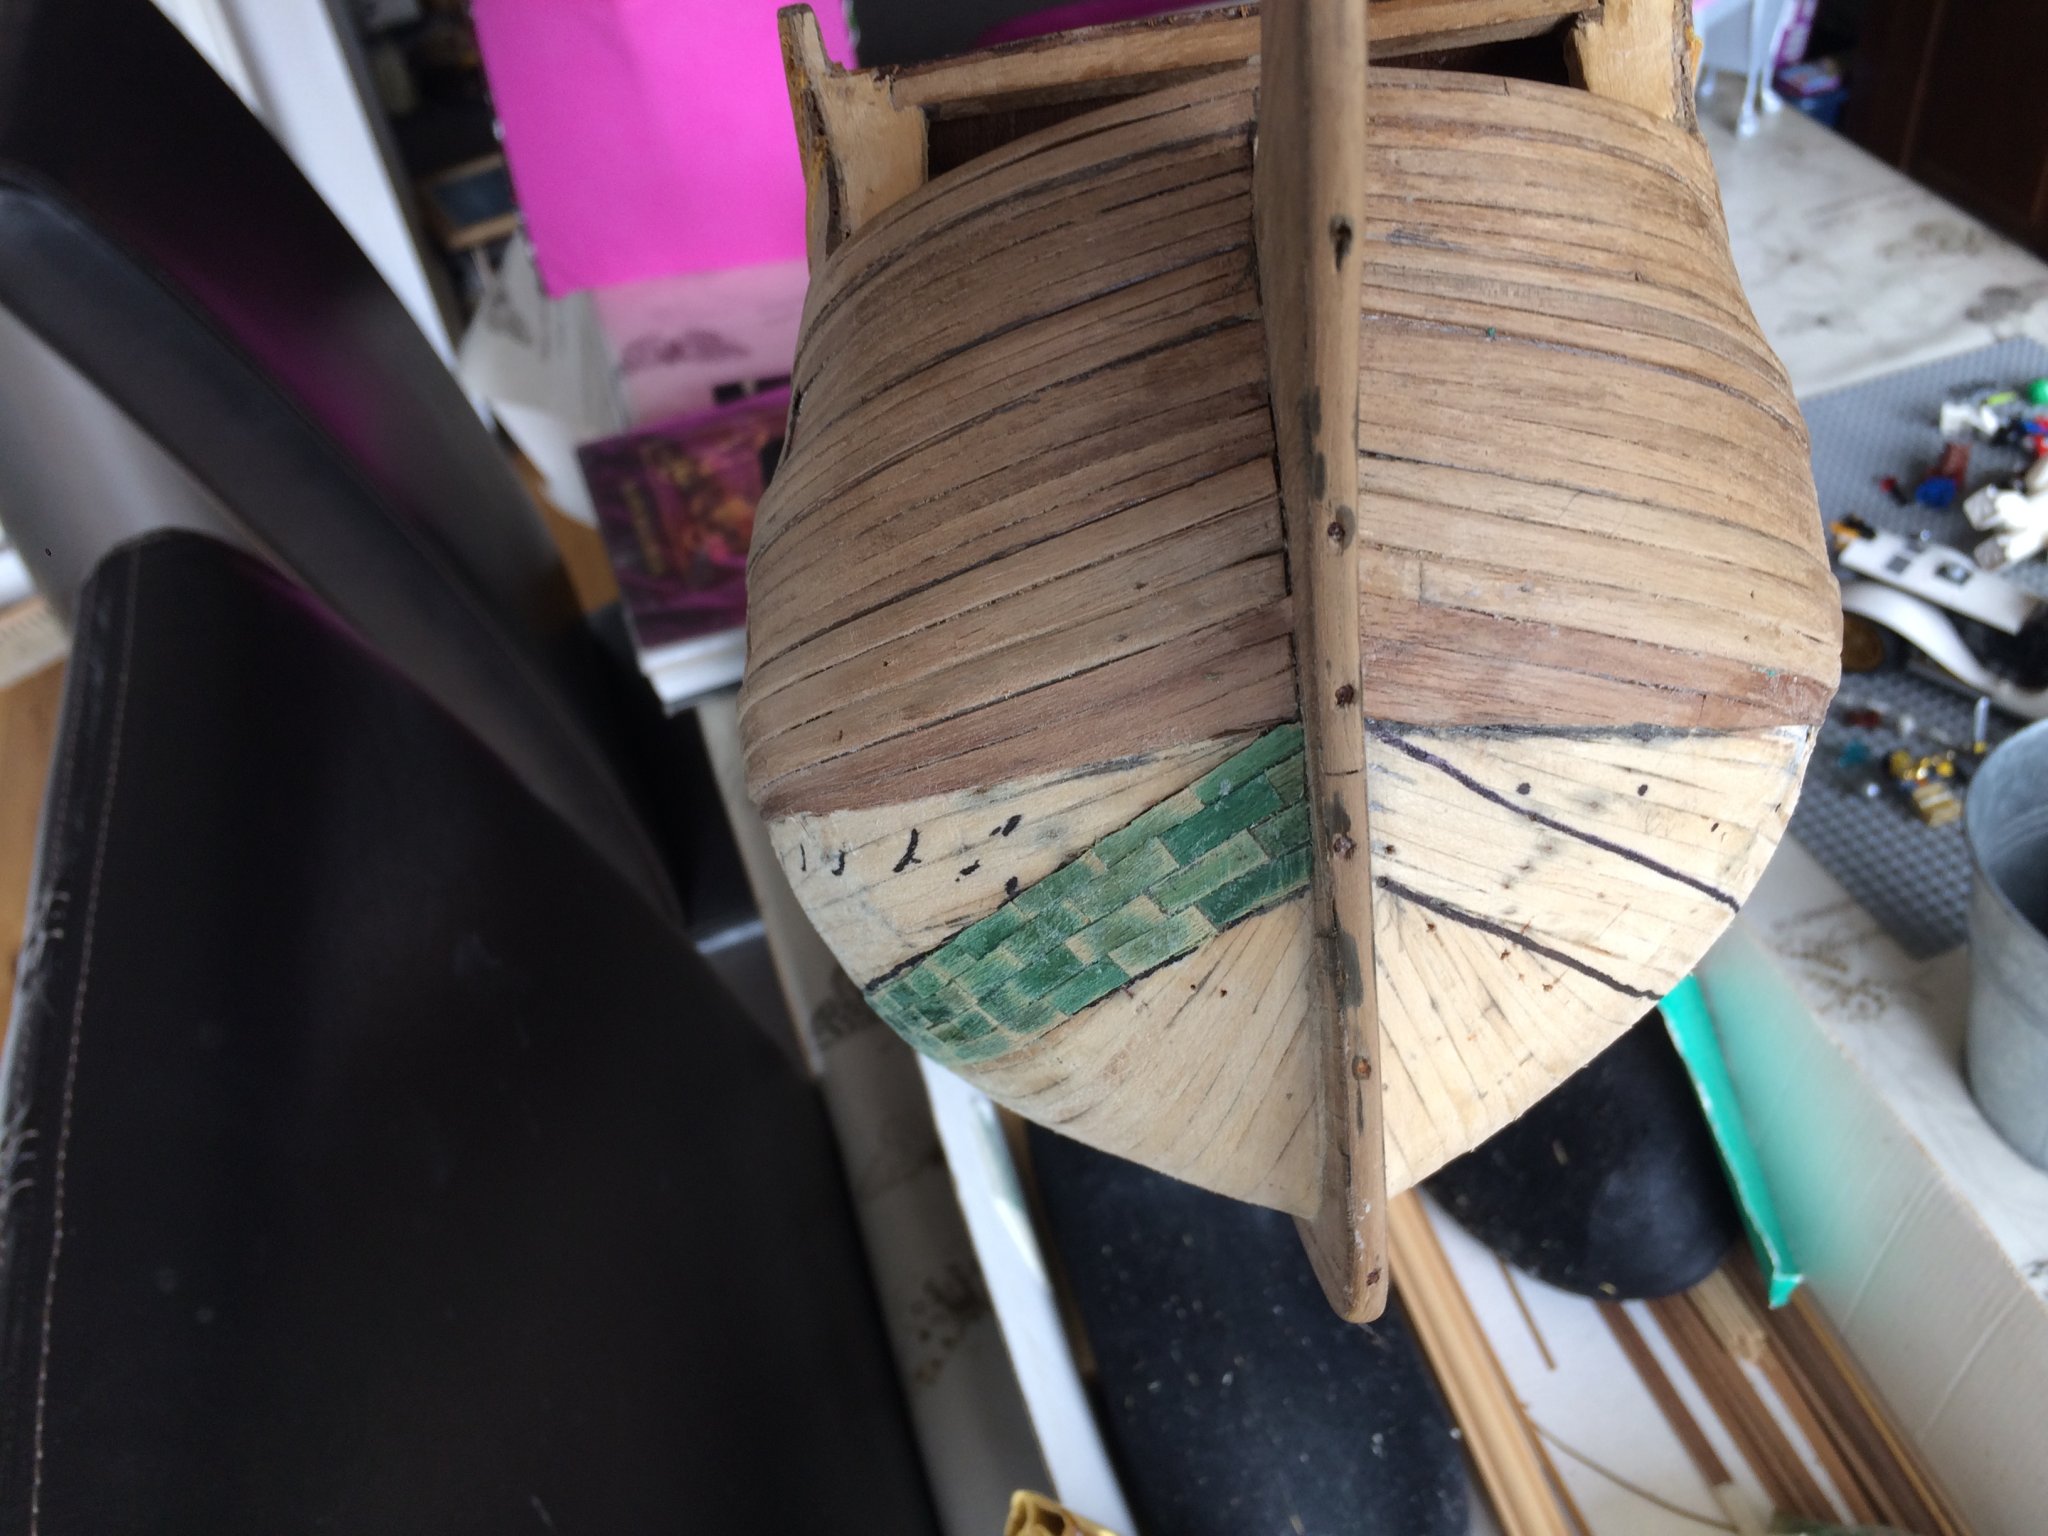
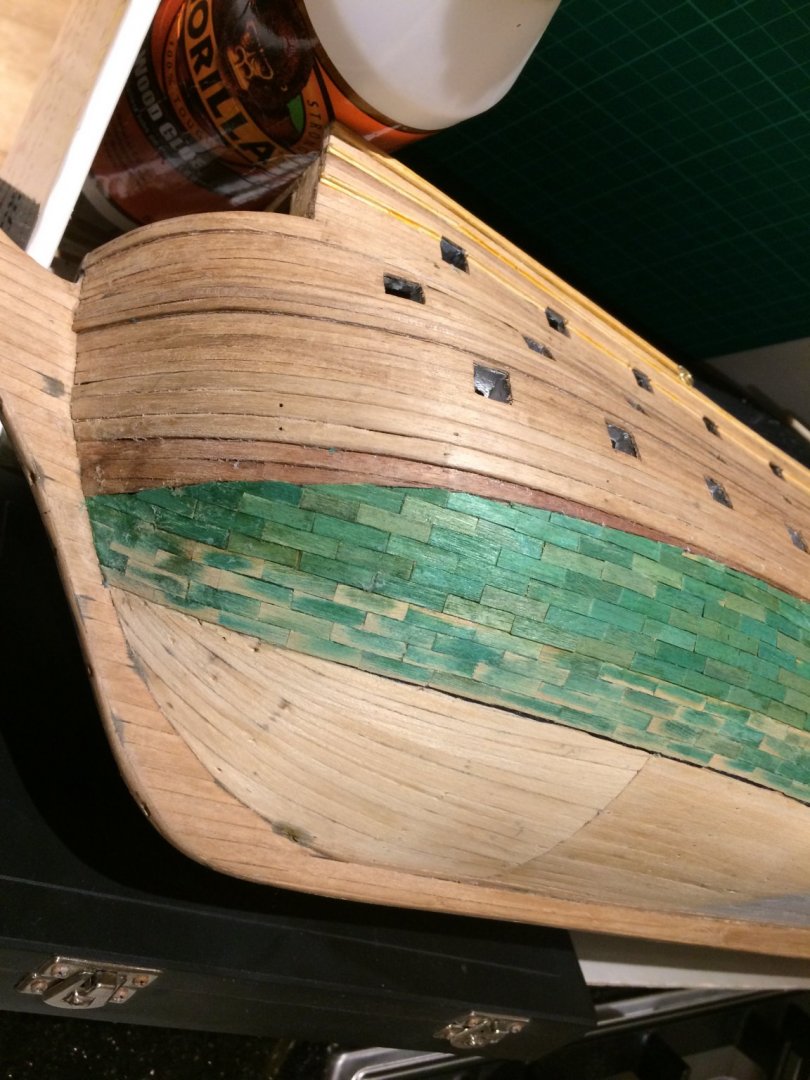
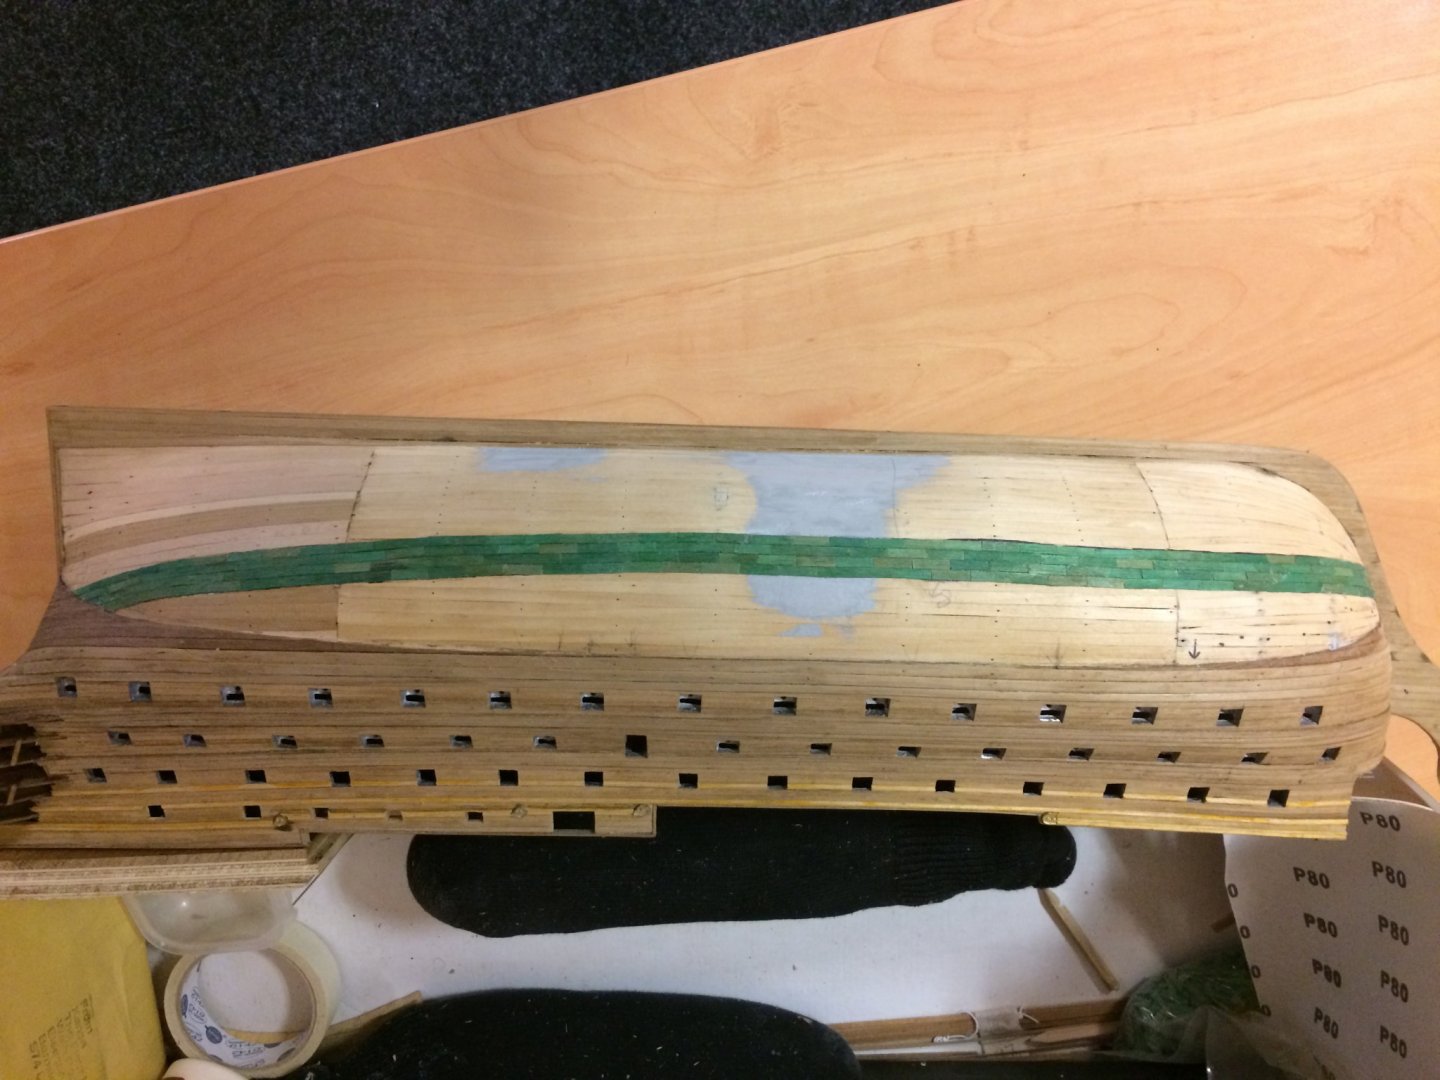
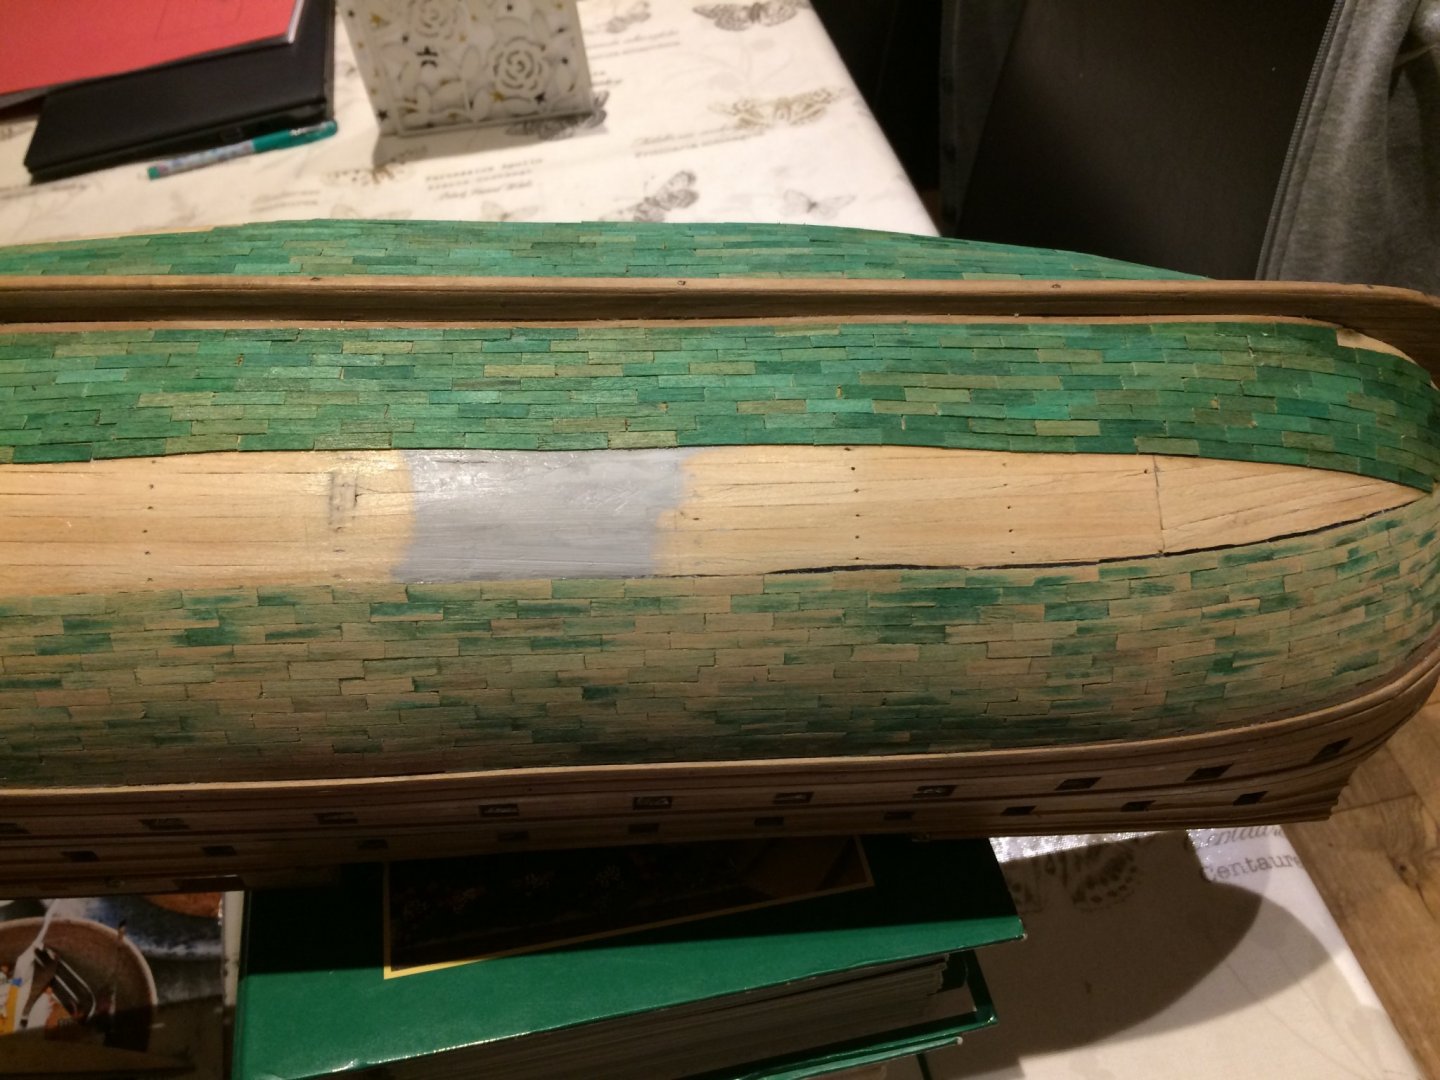
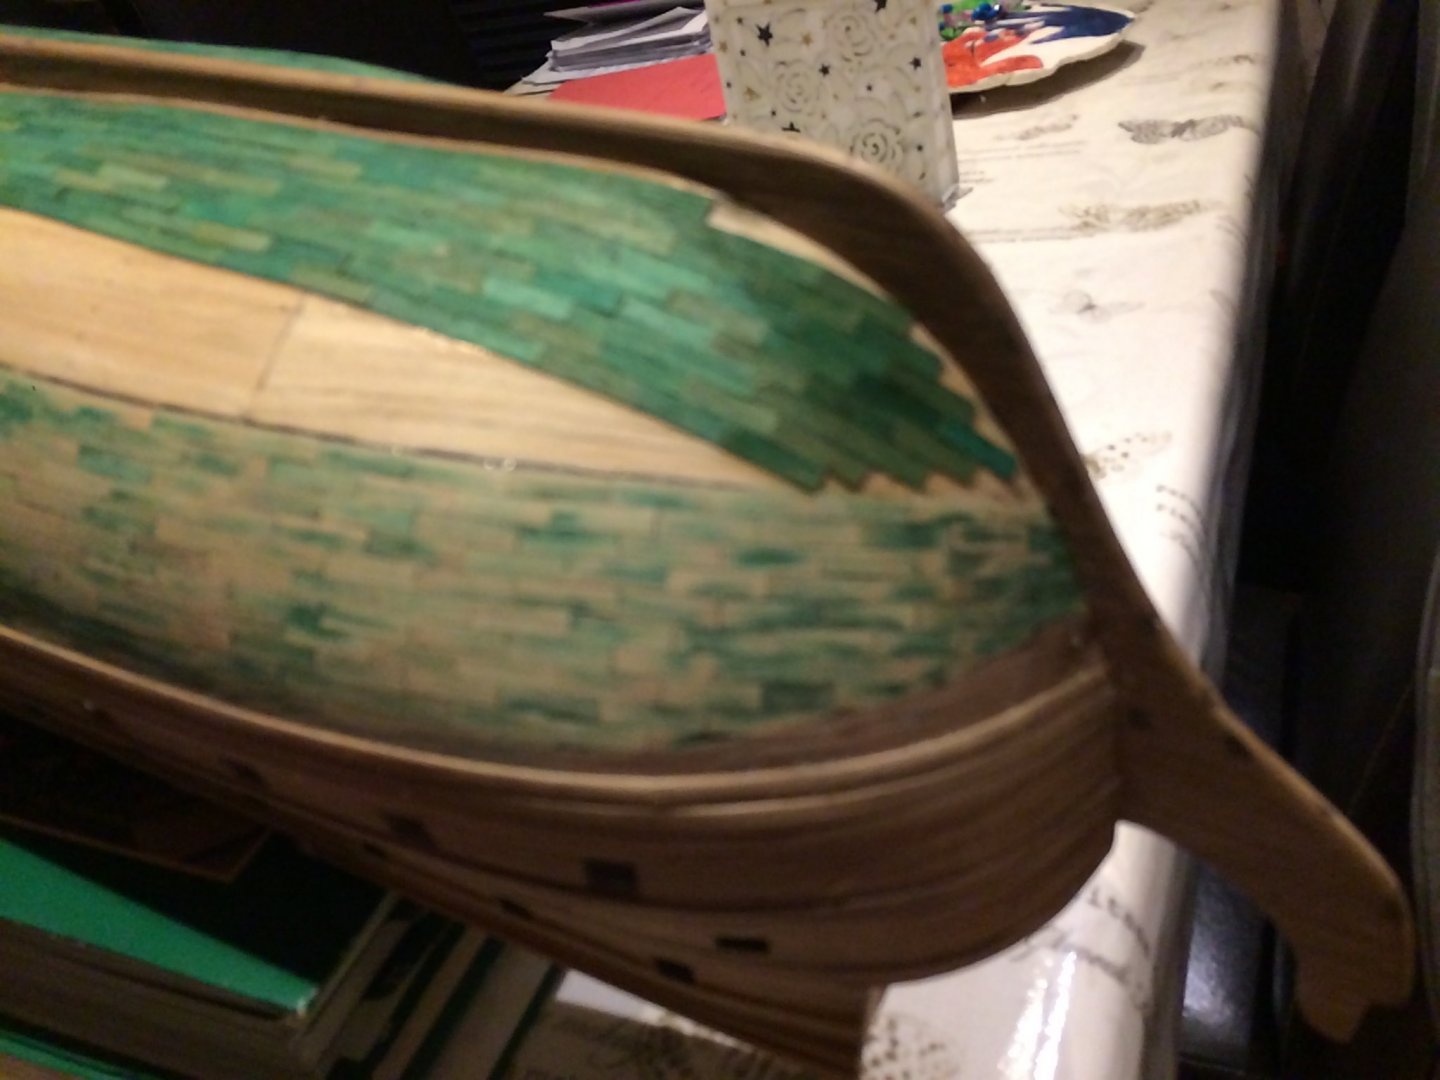
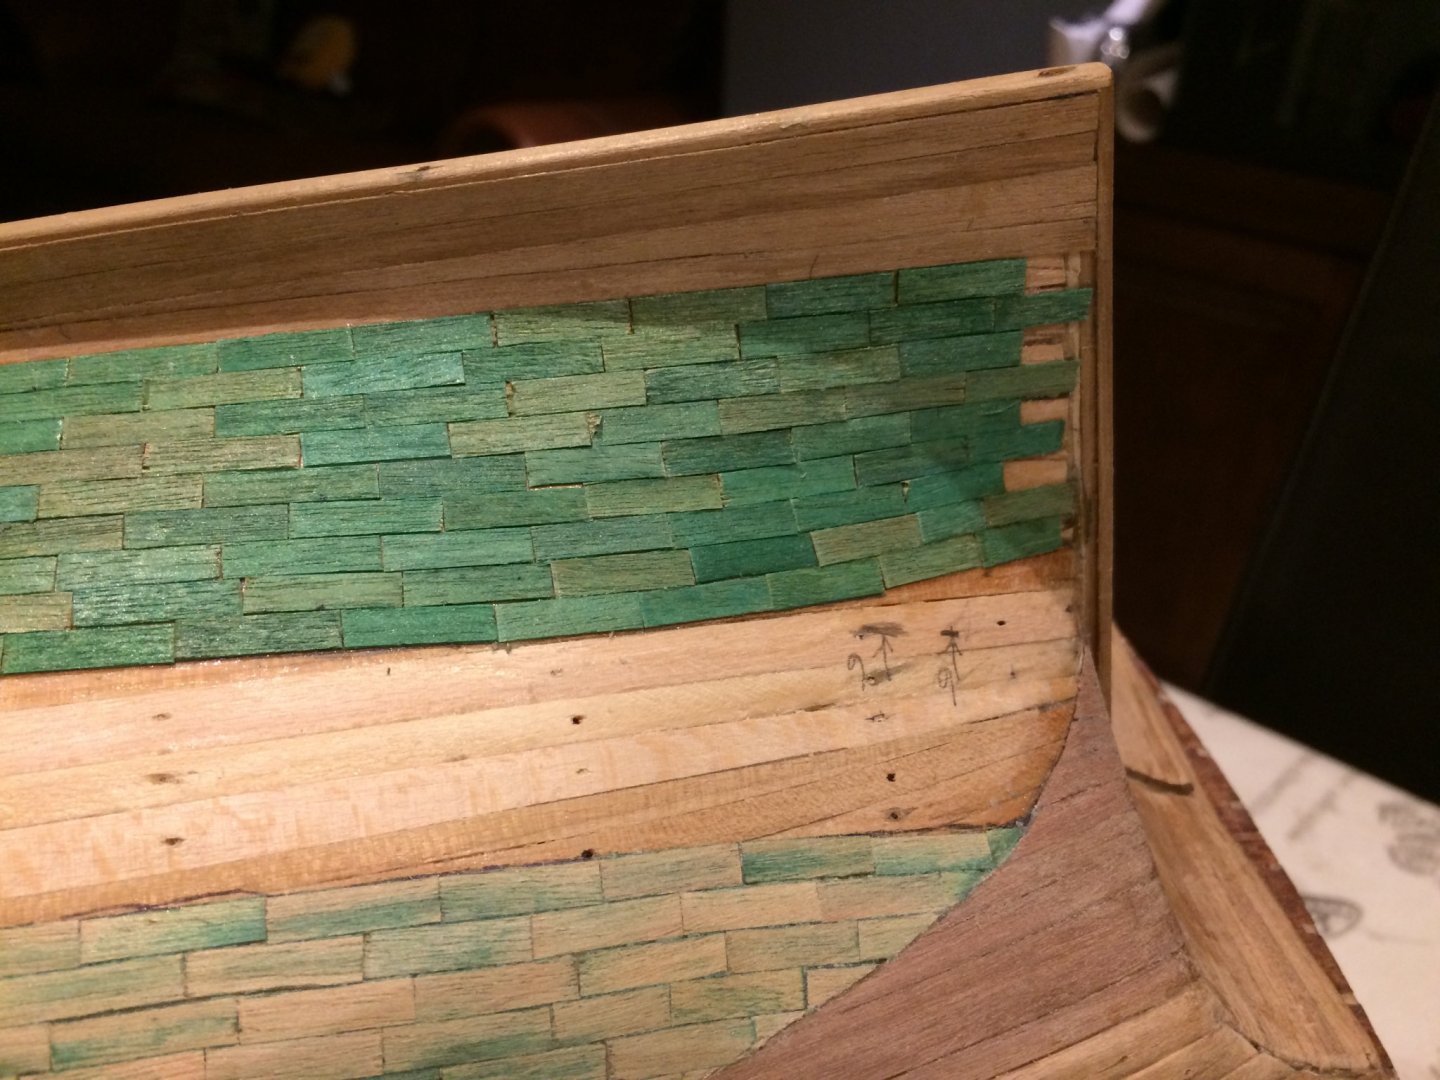
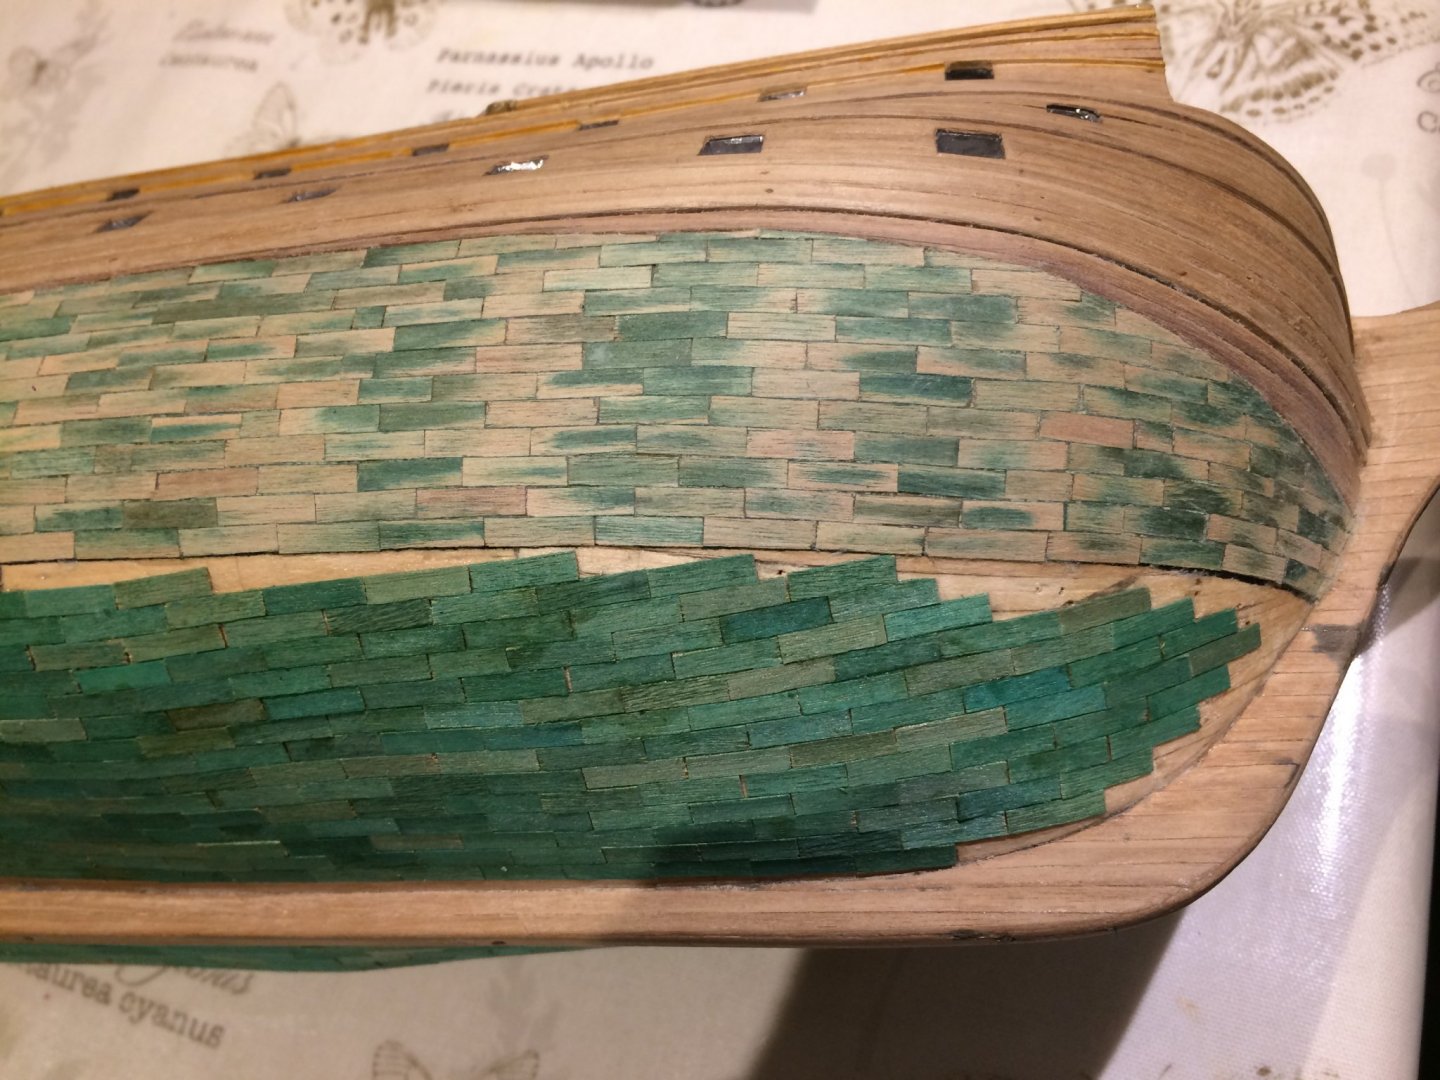
Update time. I have managed to finish both upper sets of planks (port and starboard), sanded them to remove any imperfections, and worked out the layout of the lower set of tiles, working up from the keel. According to the book I am following there are 10 rows of tiles up from the keel, then at the stern there is a stealer, followed by 3 more rows, then 2 stealers, finally 6 rows brings you up to the upper band of planks. At least that's how I read it. enjoy:


-
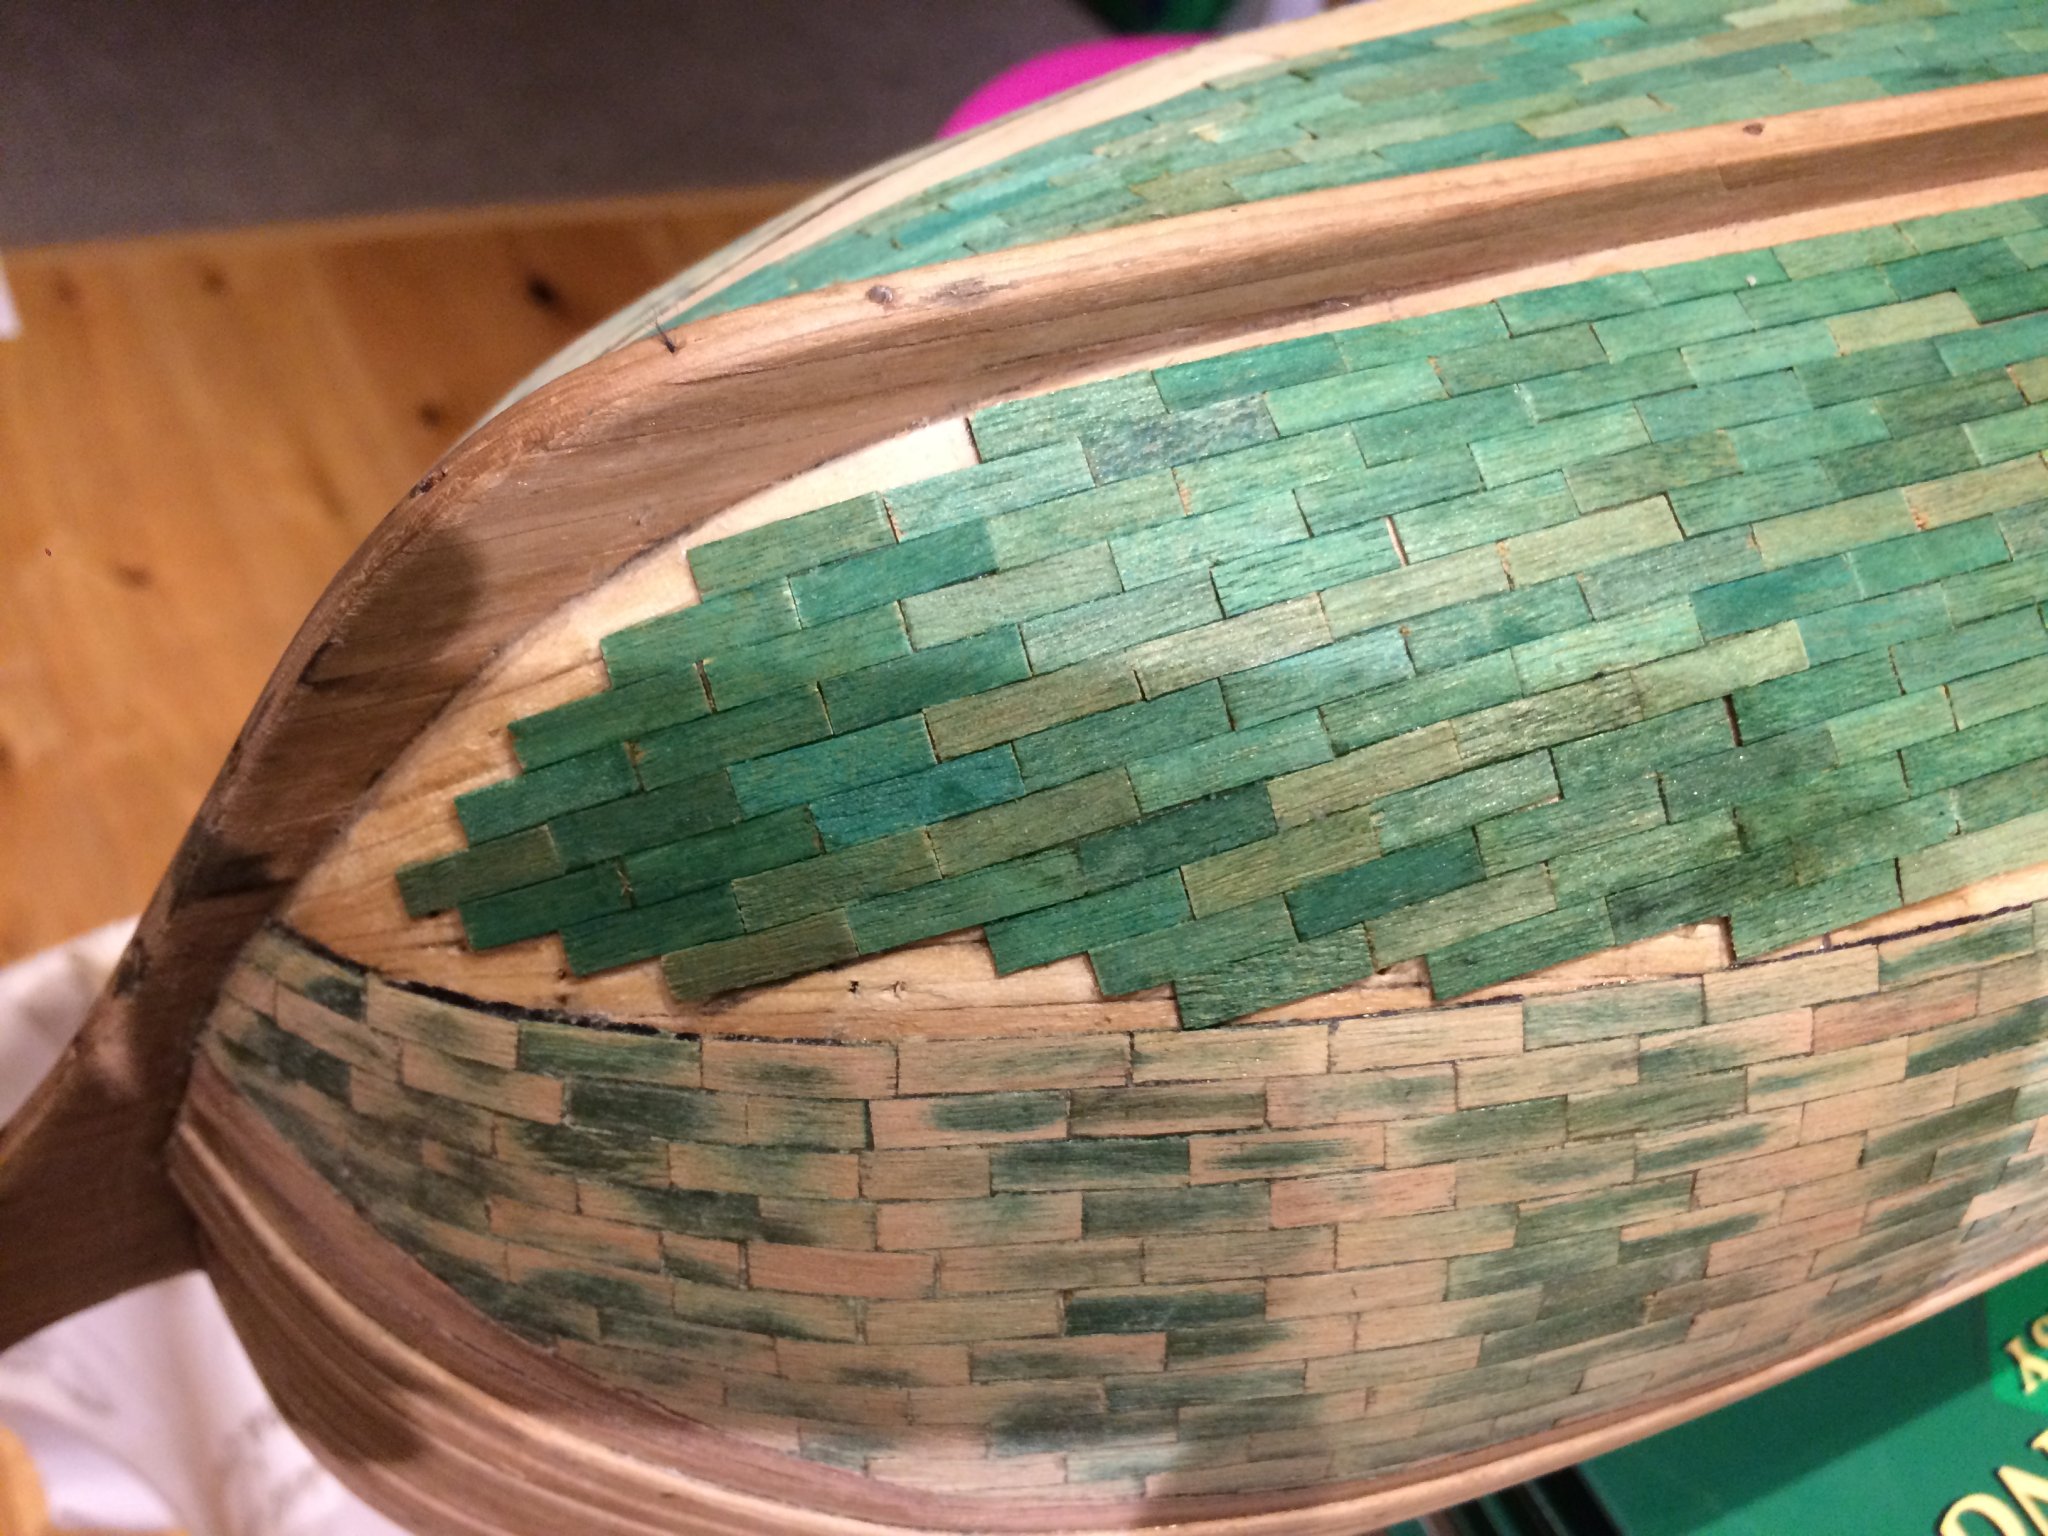
Done a bit more, got one side done down to the break in the pattern, it shows 4 rows coming to a point at the waterline at the bow, so I just drew that line, it shows a further 8 rows amidships, approx, then tapering back towards the stern. see pics, dont worry too much about the brick pattern, I am covering it all with the copper tape, so will get the vertical joins right then.

-
As the airport I work at is now only open 18 hrs a day instead of 24, only for cargo flights and childrens air ambulance flights/police air we have changed our shift to 1x 18 hr shift on, 2 days off. so in the downtimes at work I have done a bit more of my boat here is the latest:


-
I hope you are all safe and well and managing to get through any restrictions due to this awful virus. I have done a few little bits on my planking , mainly down to the waterline, I have now decided to do the green plates both sides and then cover them with copper foil tape.. watch this space.
-
Copper Imitation
spider999 replied to dafi's topic in Building, Framing, Planking and plating a ships hull and deck
Been wondering how to do the copper, was originally gonna do one side with the little green tiles supplied with my model (mamaoli 1:90 scale Victory), and the other just carry the outer planks all the way down to the keel, and same with the paint scheme, one side black/yellow, the other just waxed, to leave a lovely wooden finish. But having just seen your pics I bought 2 rolls from a website here in the UK, Kansacraft.co.uk. if I can get mine looking as good as yours mate I will be well chuffed. -
I'm not in a rush mate, am busy decorating the hall/stairs and landing at the moment, stripping all the paint off the stairs to leave them with a waxed polish light oak finish and a carpet runner down the centre... more bloody wood!! my boat is a lifetime project, hopefully soon to be a retirement project!!
-
Diablo, just been catching up with your build log, man am I in good company. You are doing a lovely job my friend, you and YT are keeping me going!! I am well into the house jobs and am looking forward to getting back on the boat, hopefully by the end of the year!!!, only been 13 years since I started, so no rush then!!!
-
I'm gonna stick to the plans on one side, little green tiles and black/yellow paint scheme but on the other side I am just gonna run the planks down past the waterline to the keel, and give the timbers a waxed oiled finished to bring out the natural beauty of the wood, no black/yellow paint!!. best of both worlds..
-
Cheers Bill, glad you like it. It isn't as crisp and neat at YT's build but rather has the aged patina of a battered old sailing ship, bit like me!!!
-
Why thank you my friend. Kind words go a long way to bolster one's confidence.. Glad someone is enjoying my attempts at building a boat, you'd never guess it is my first go!!