Javier Baron
-
Posts
633 -
Joined
-
Last visited
Content Type
Profiles
Forums
Gallery
Events
Everything posted by Javier Baron
-
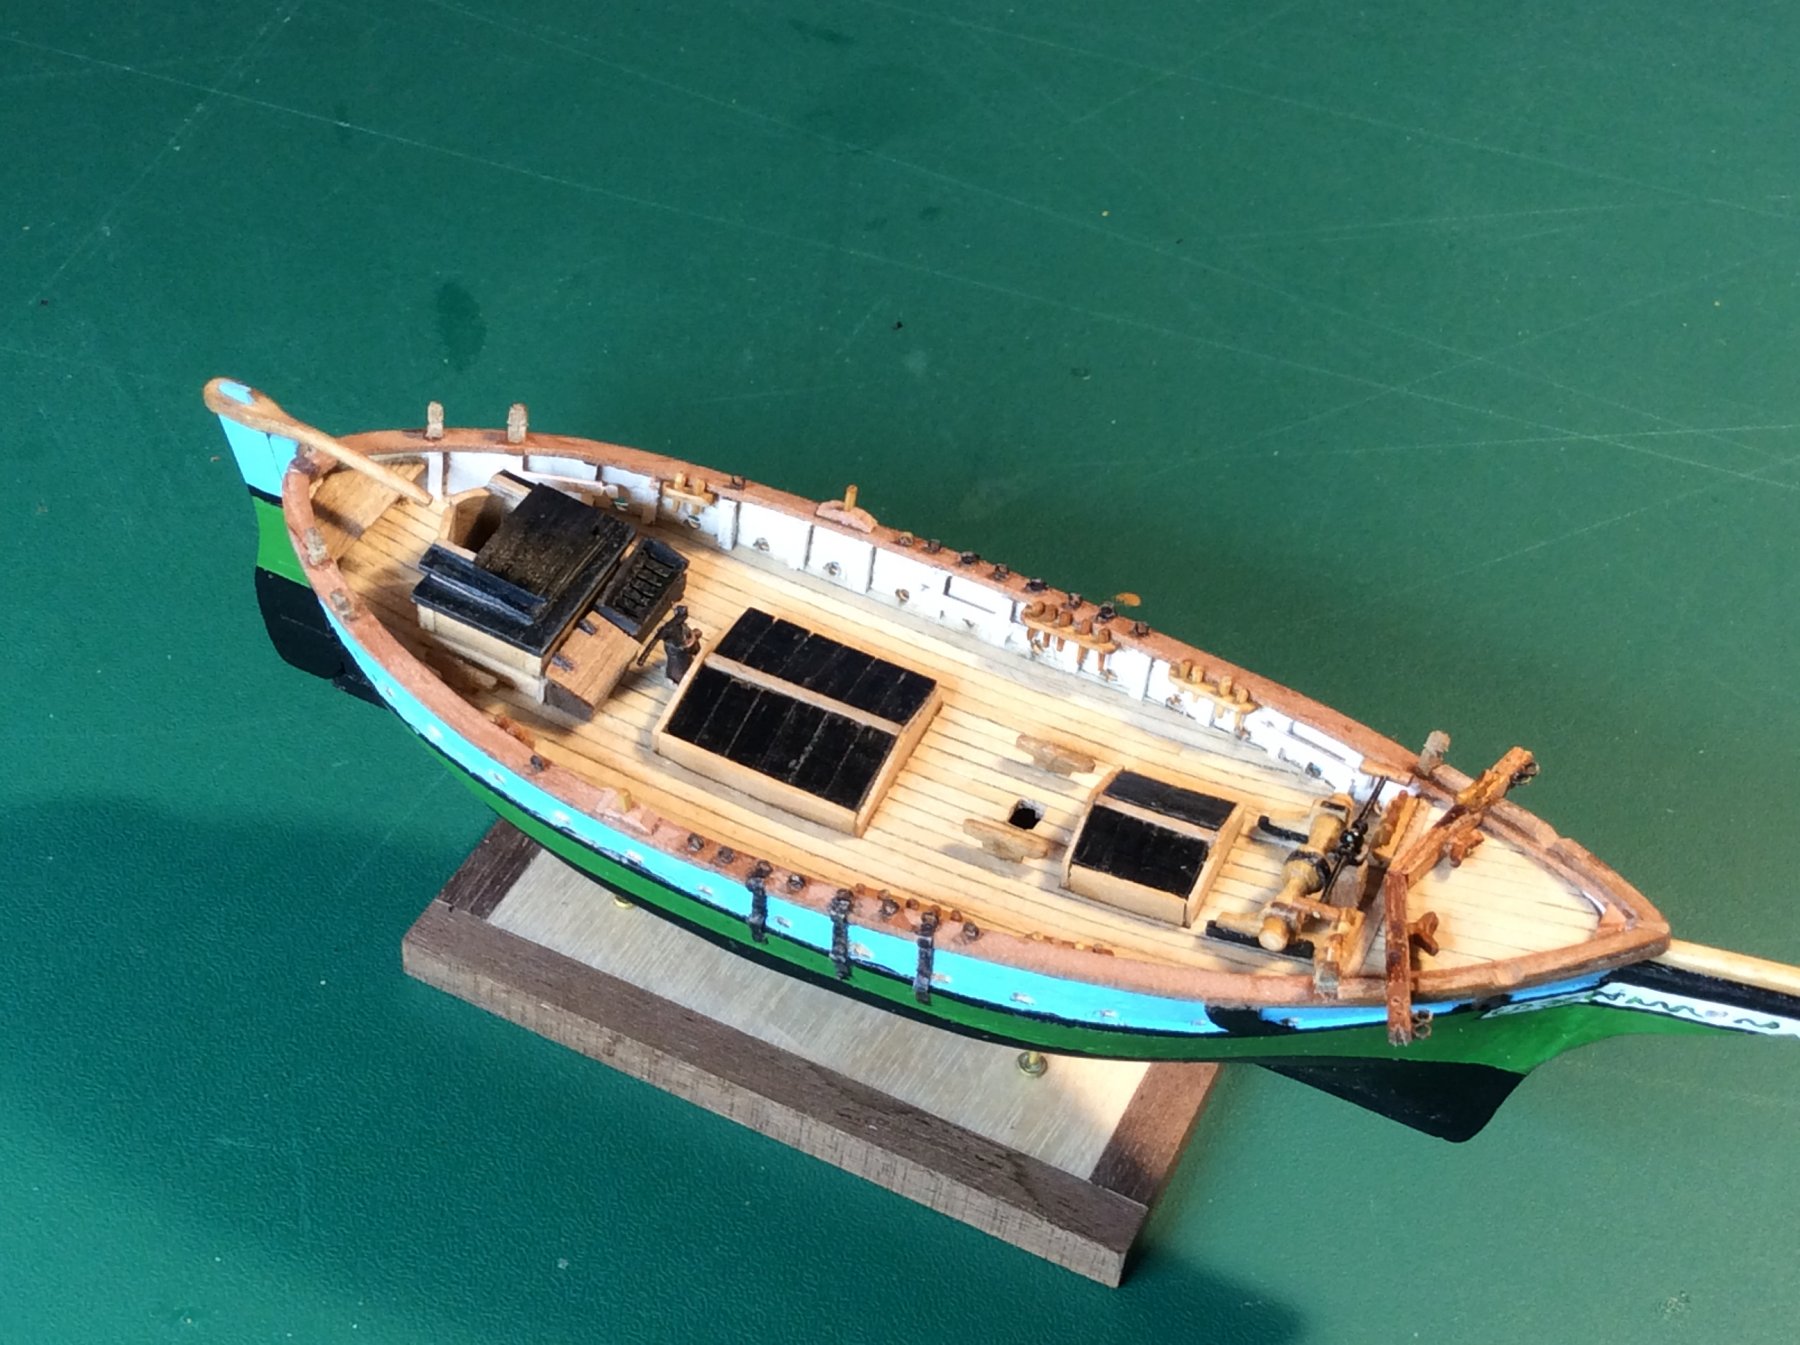
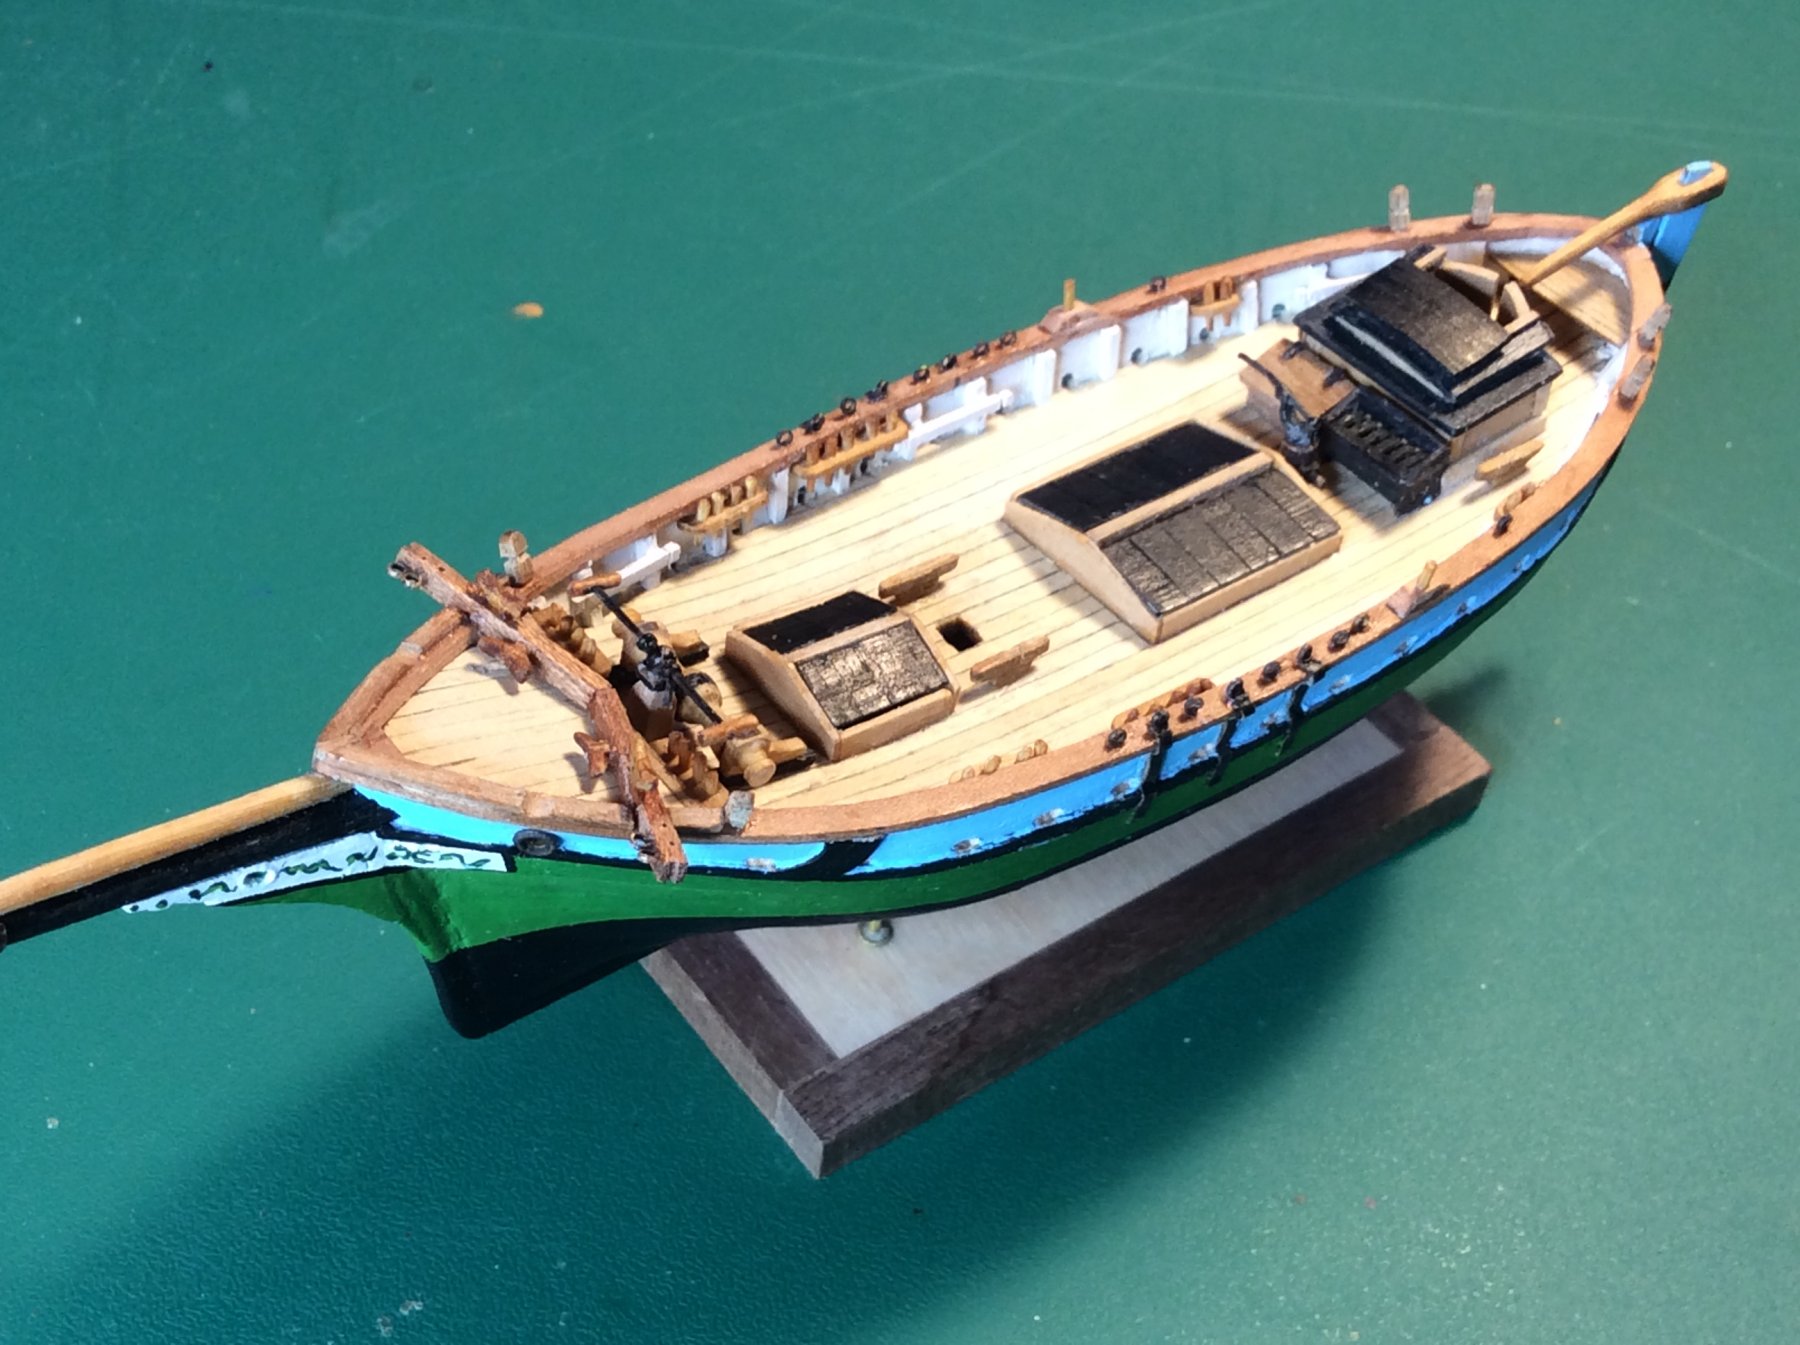
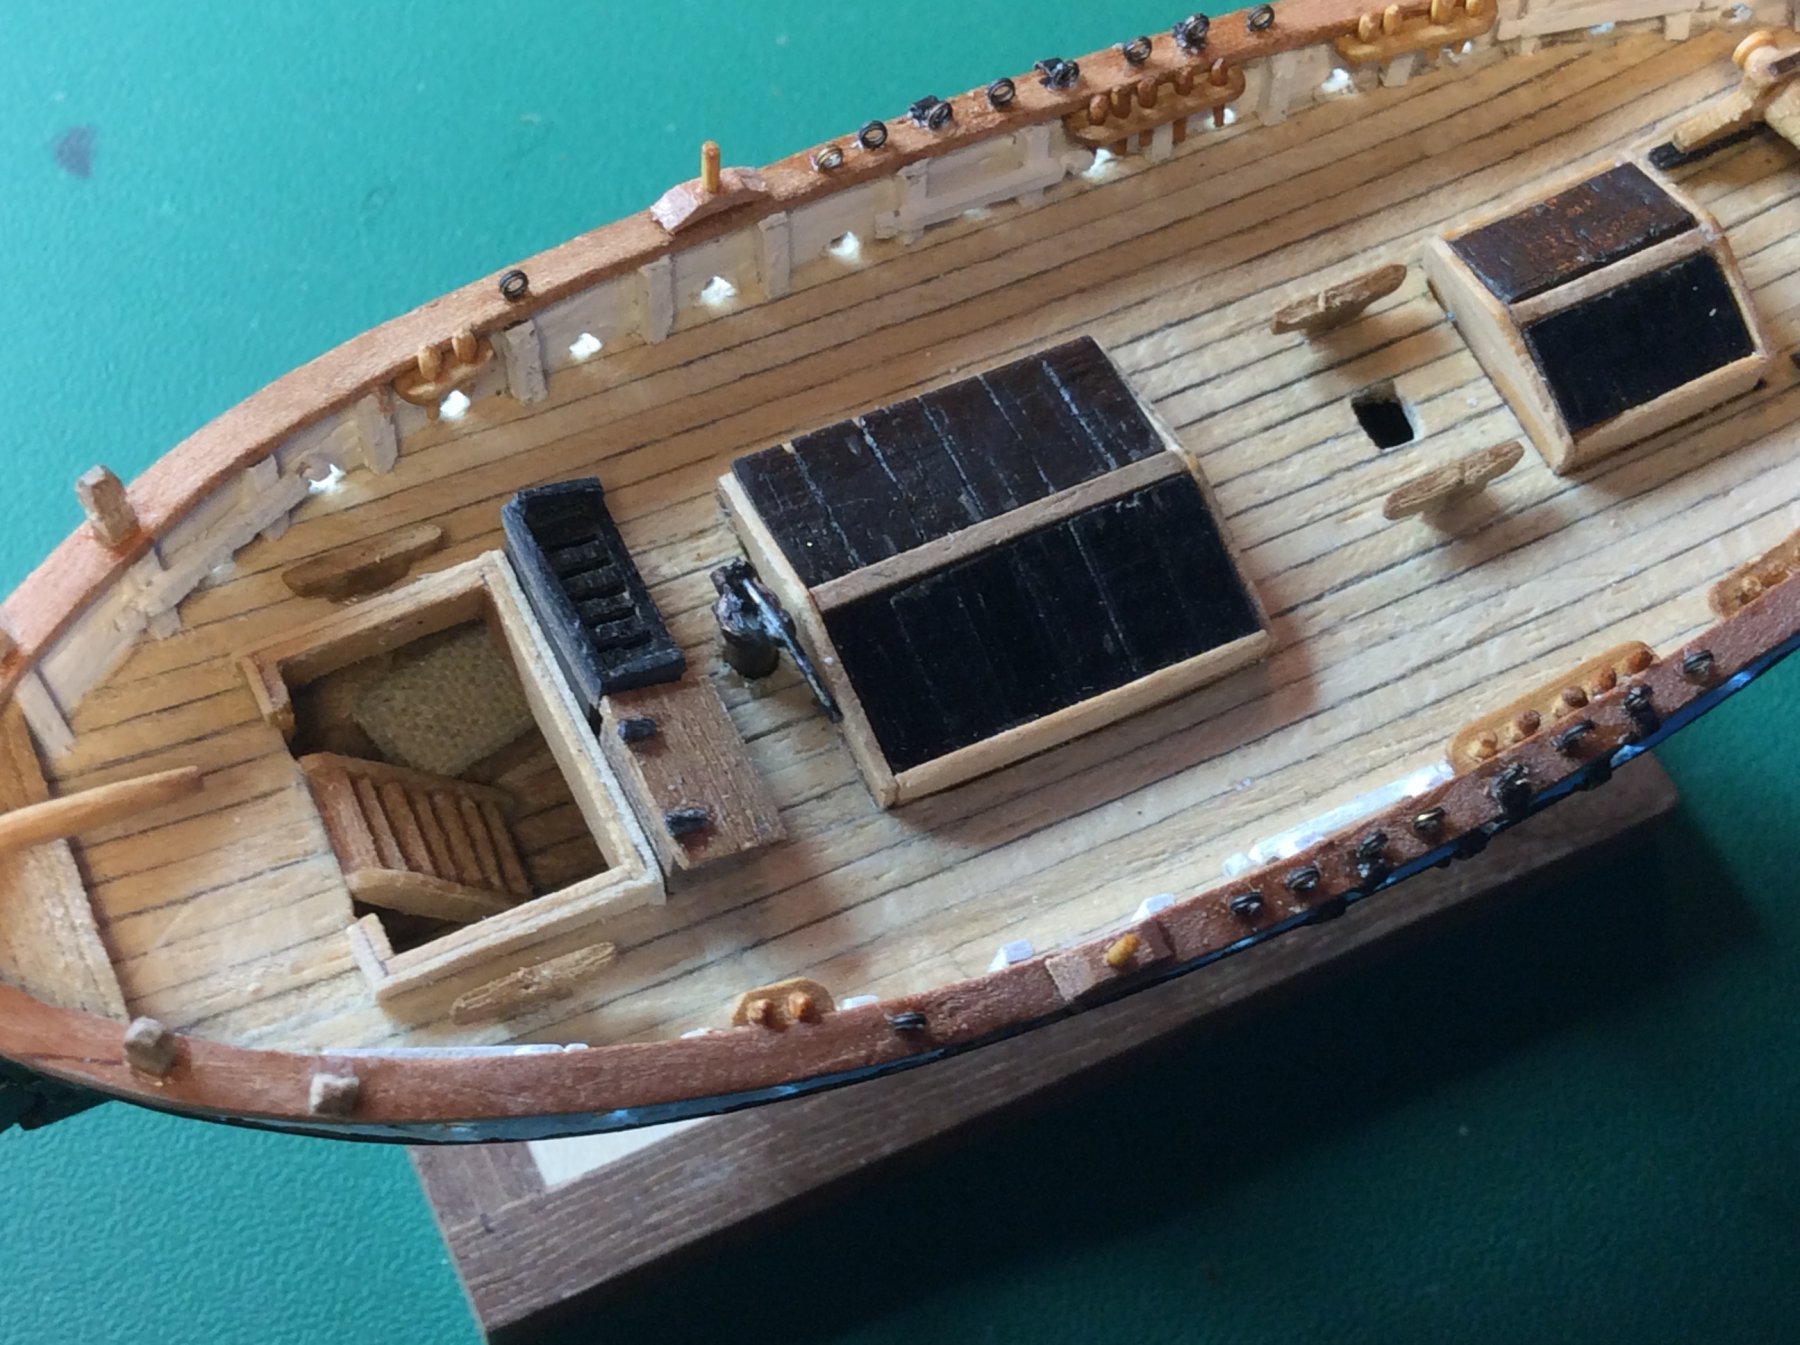
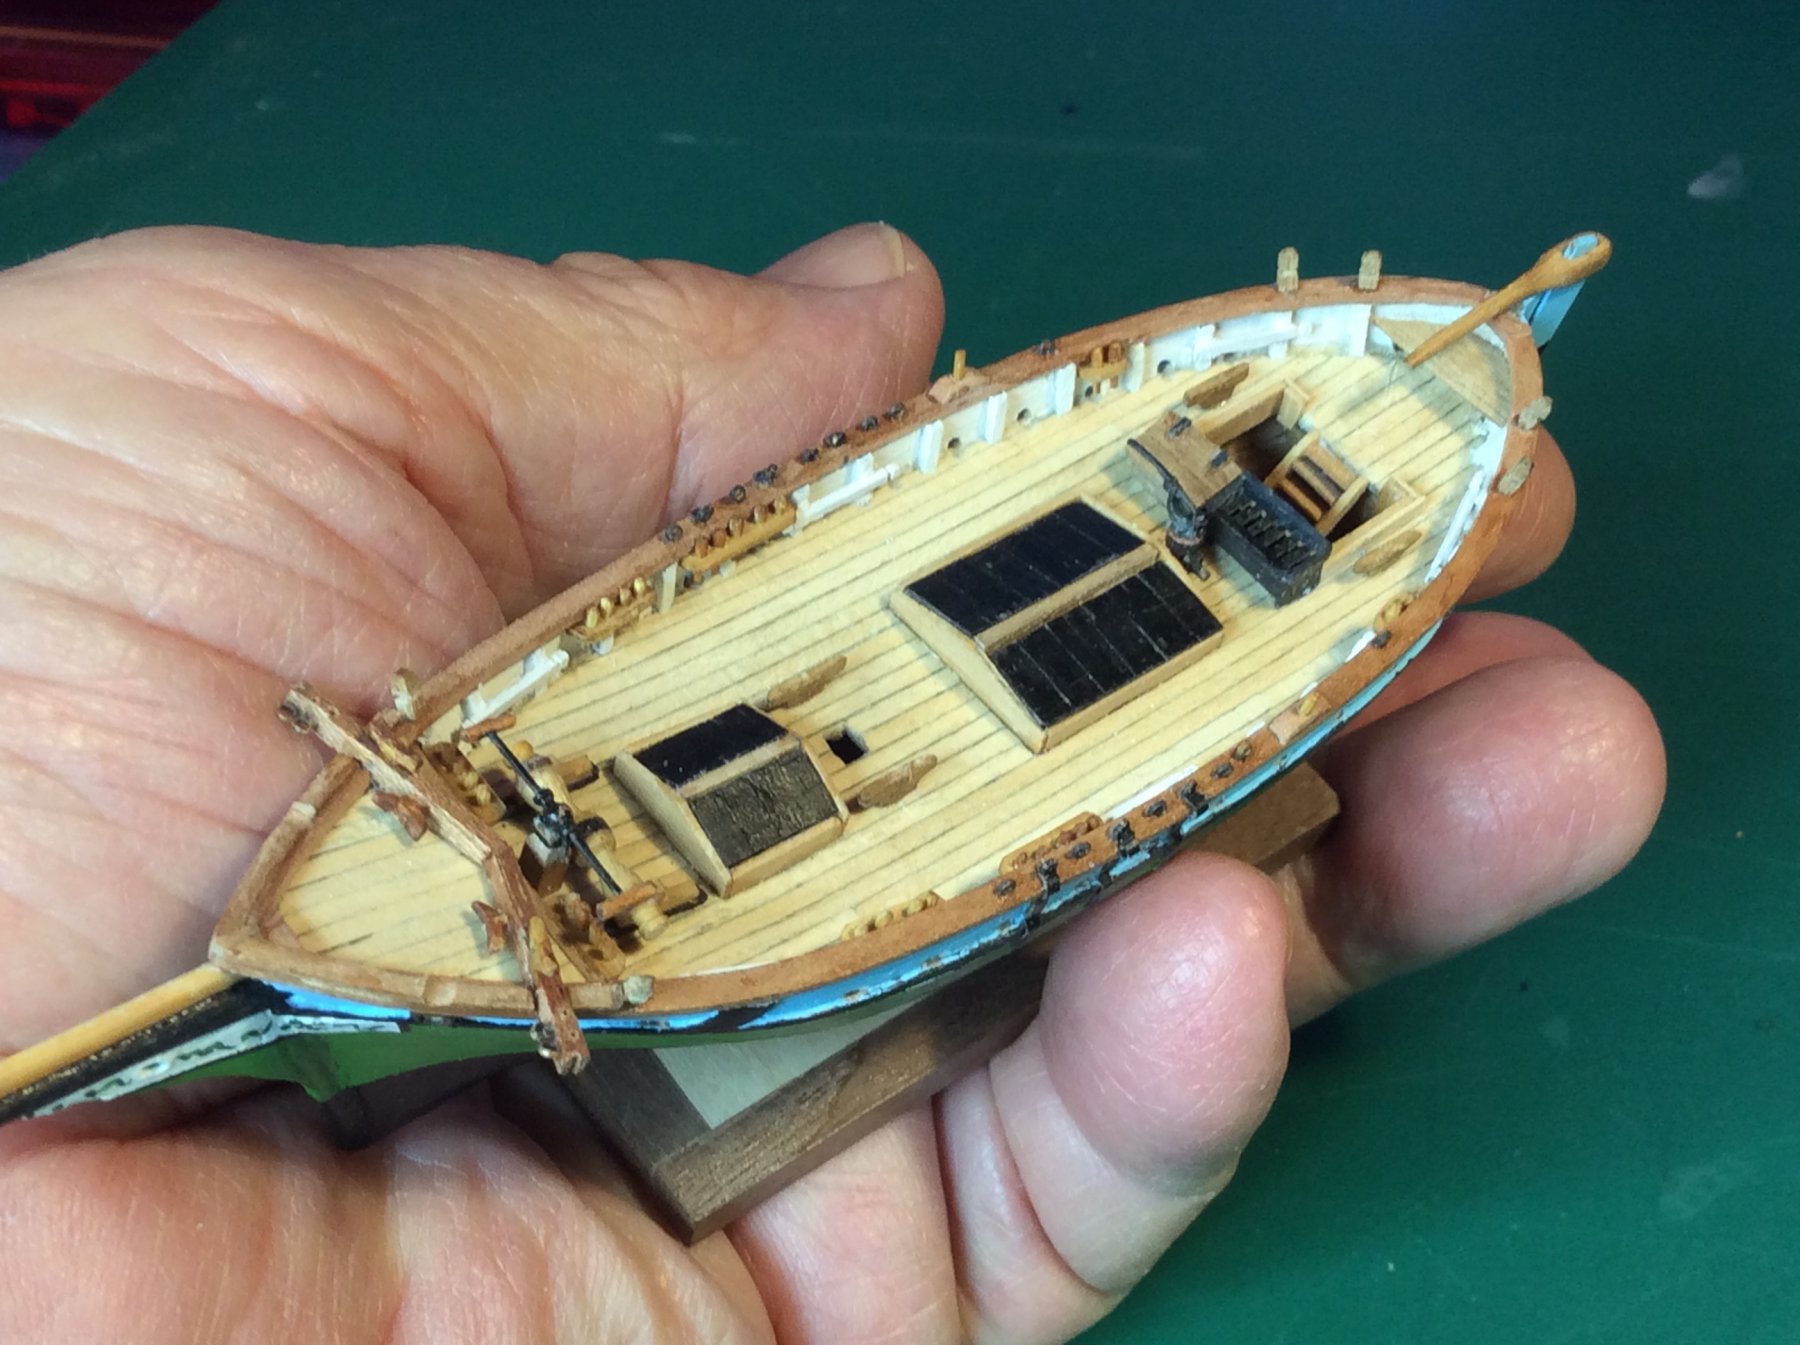
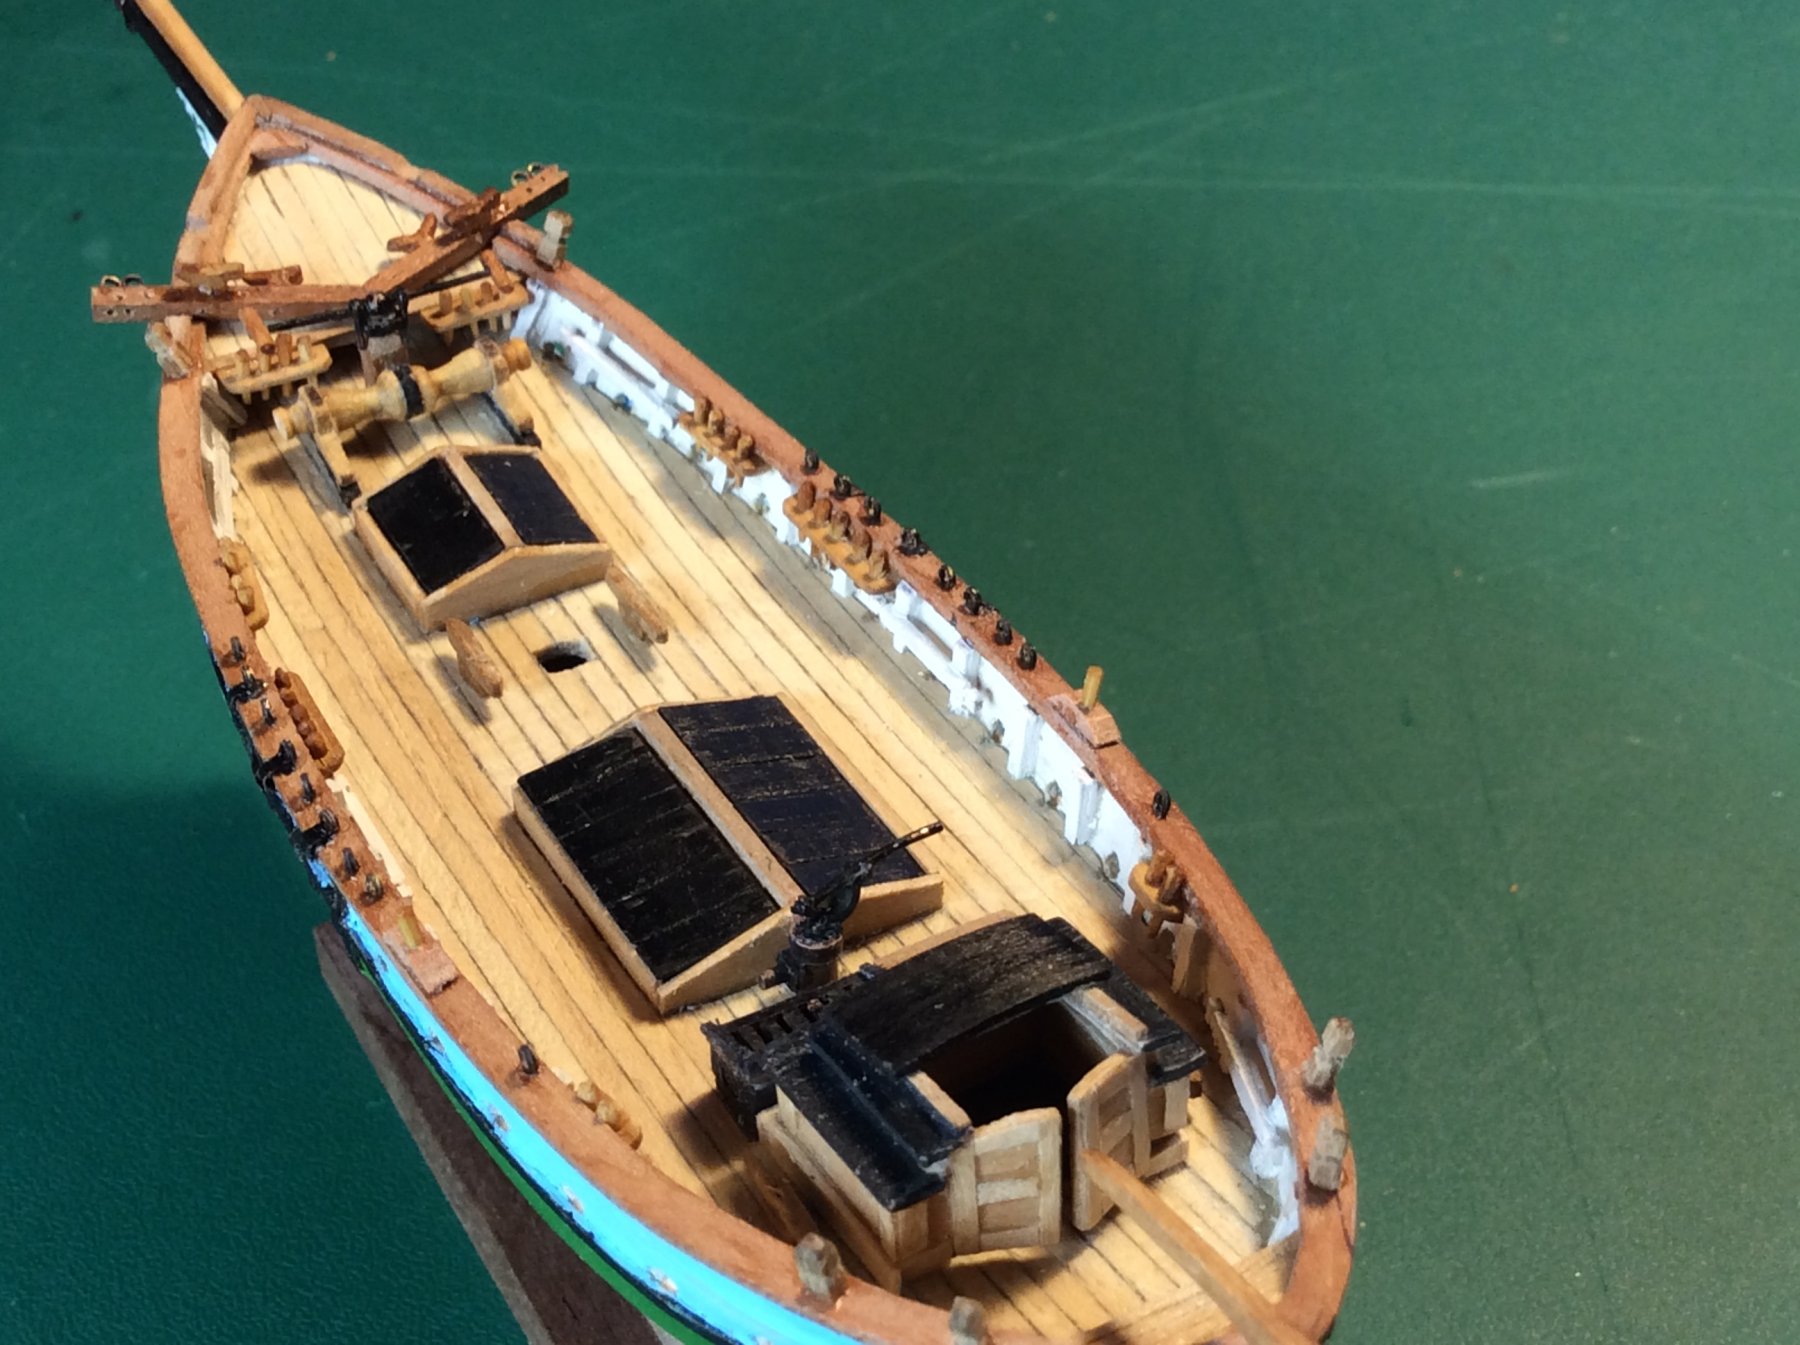
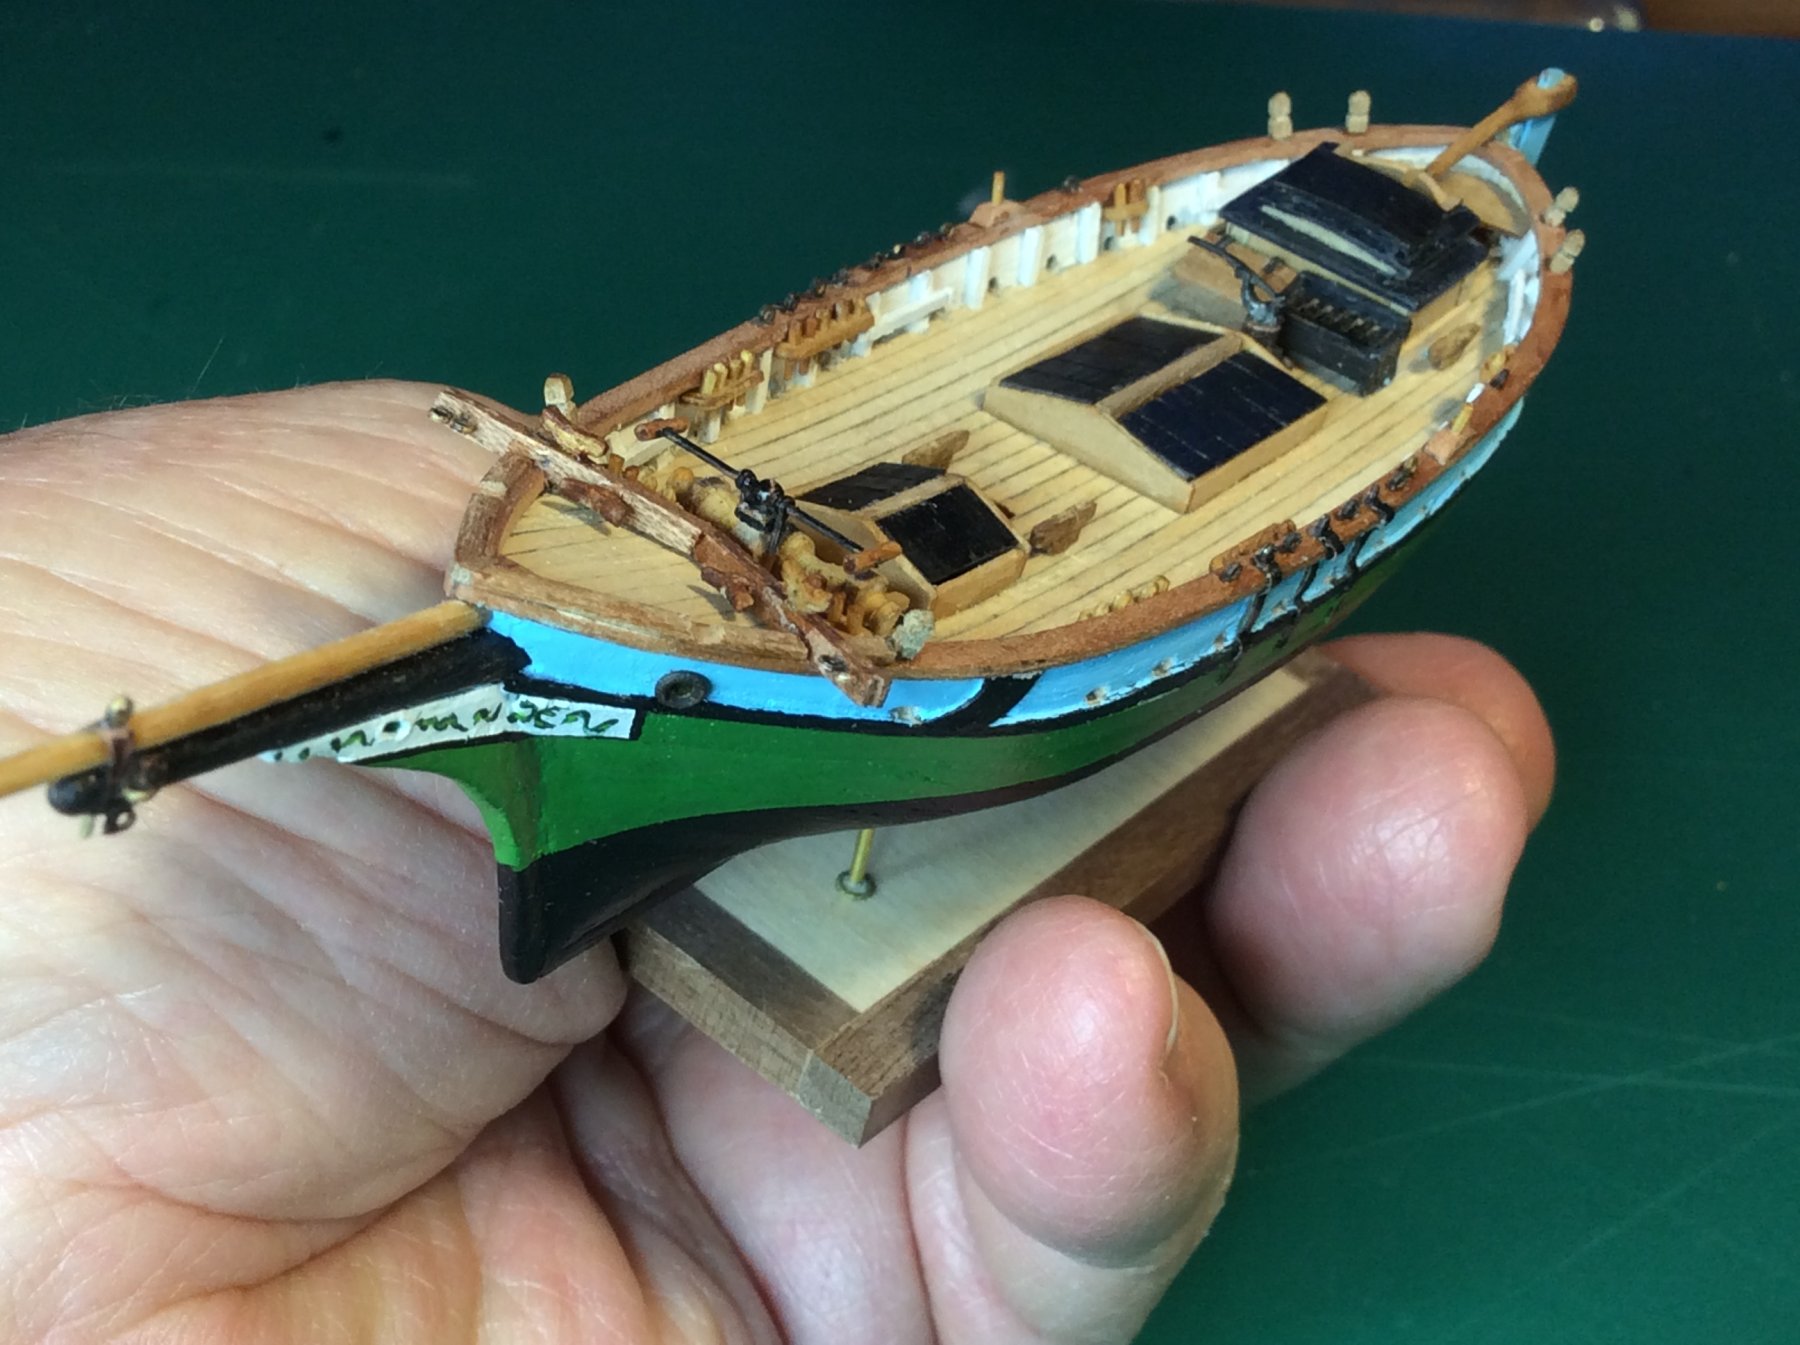
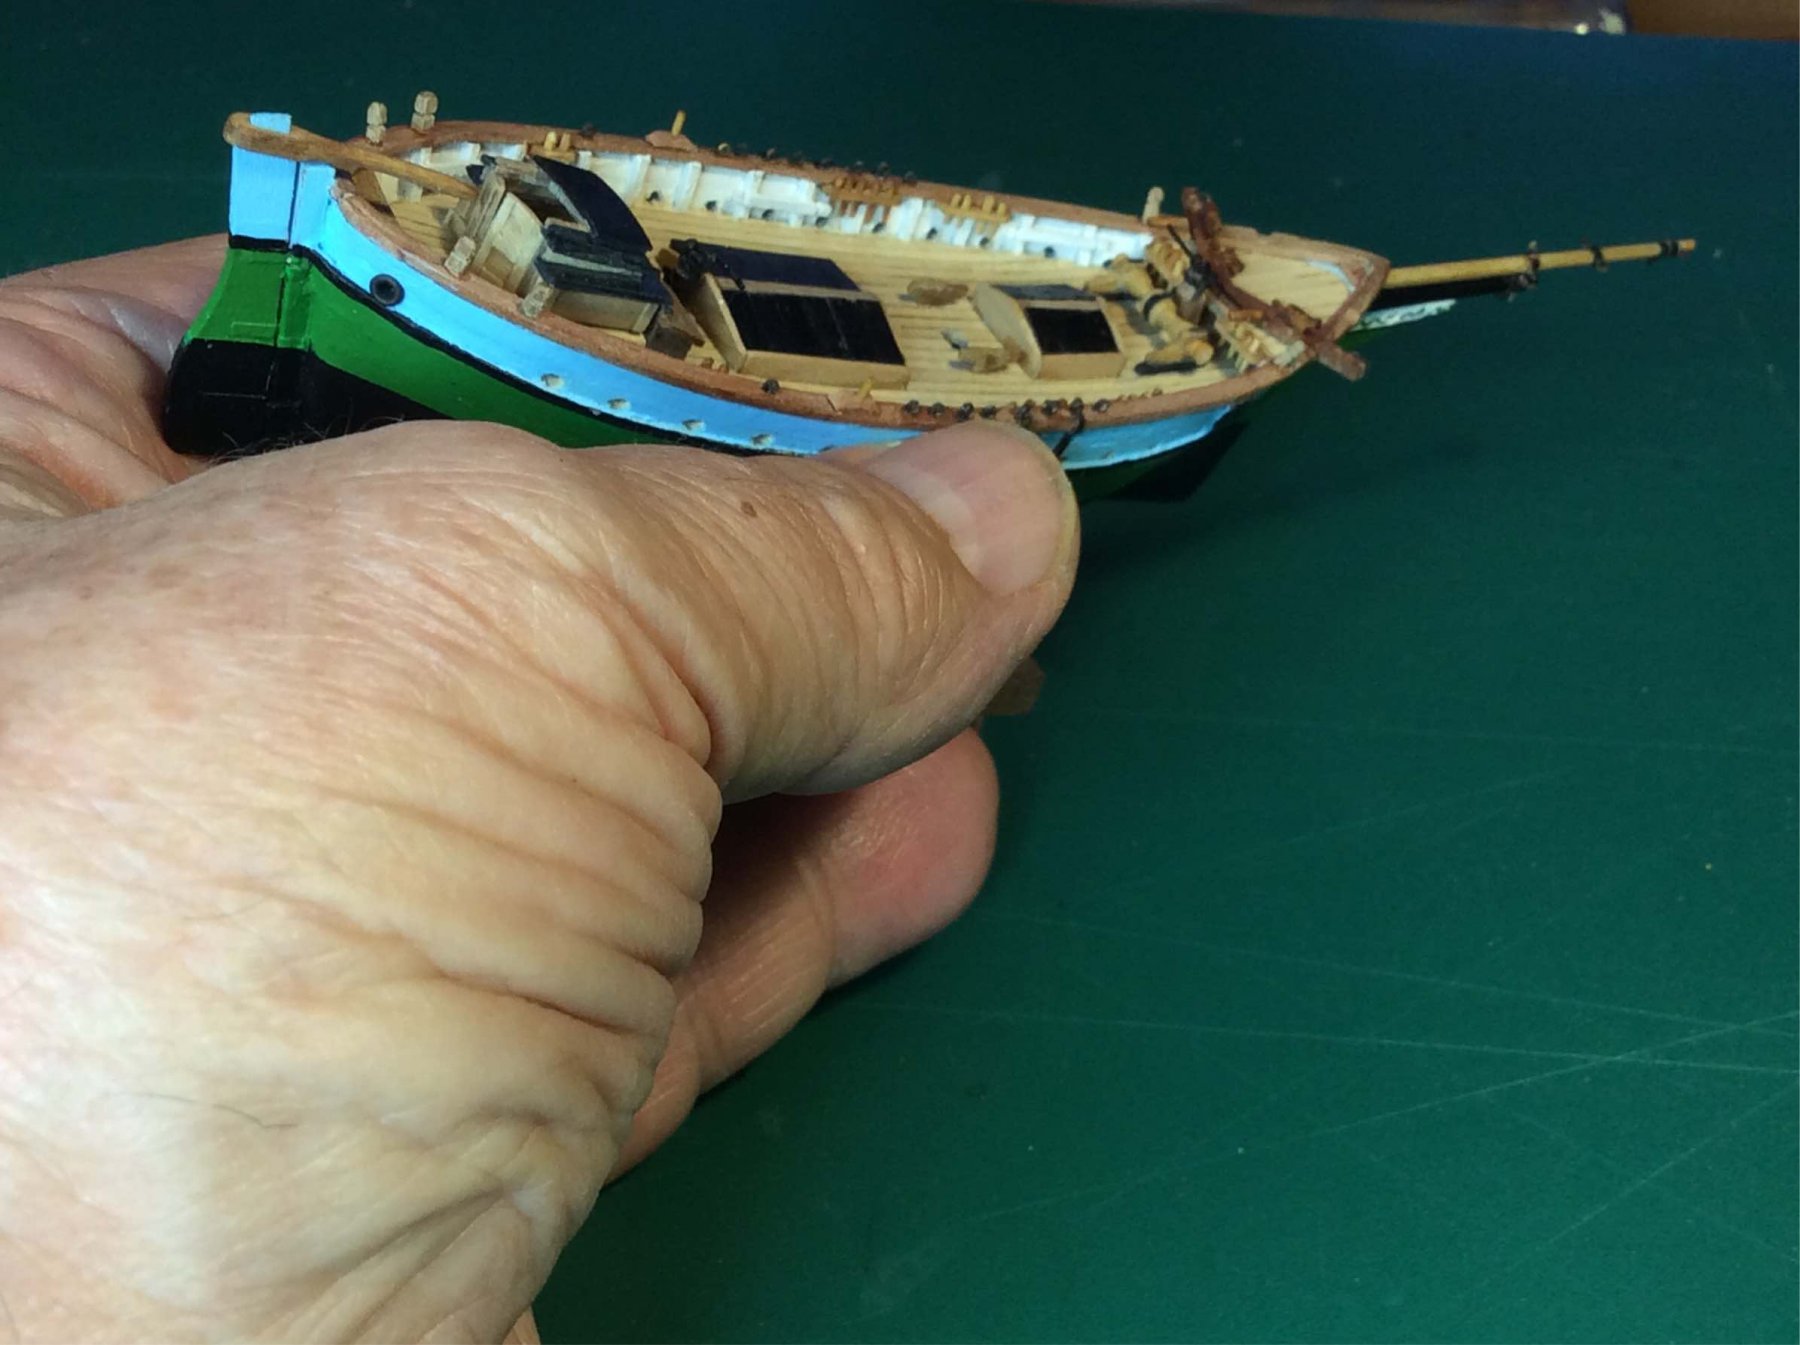
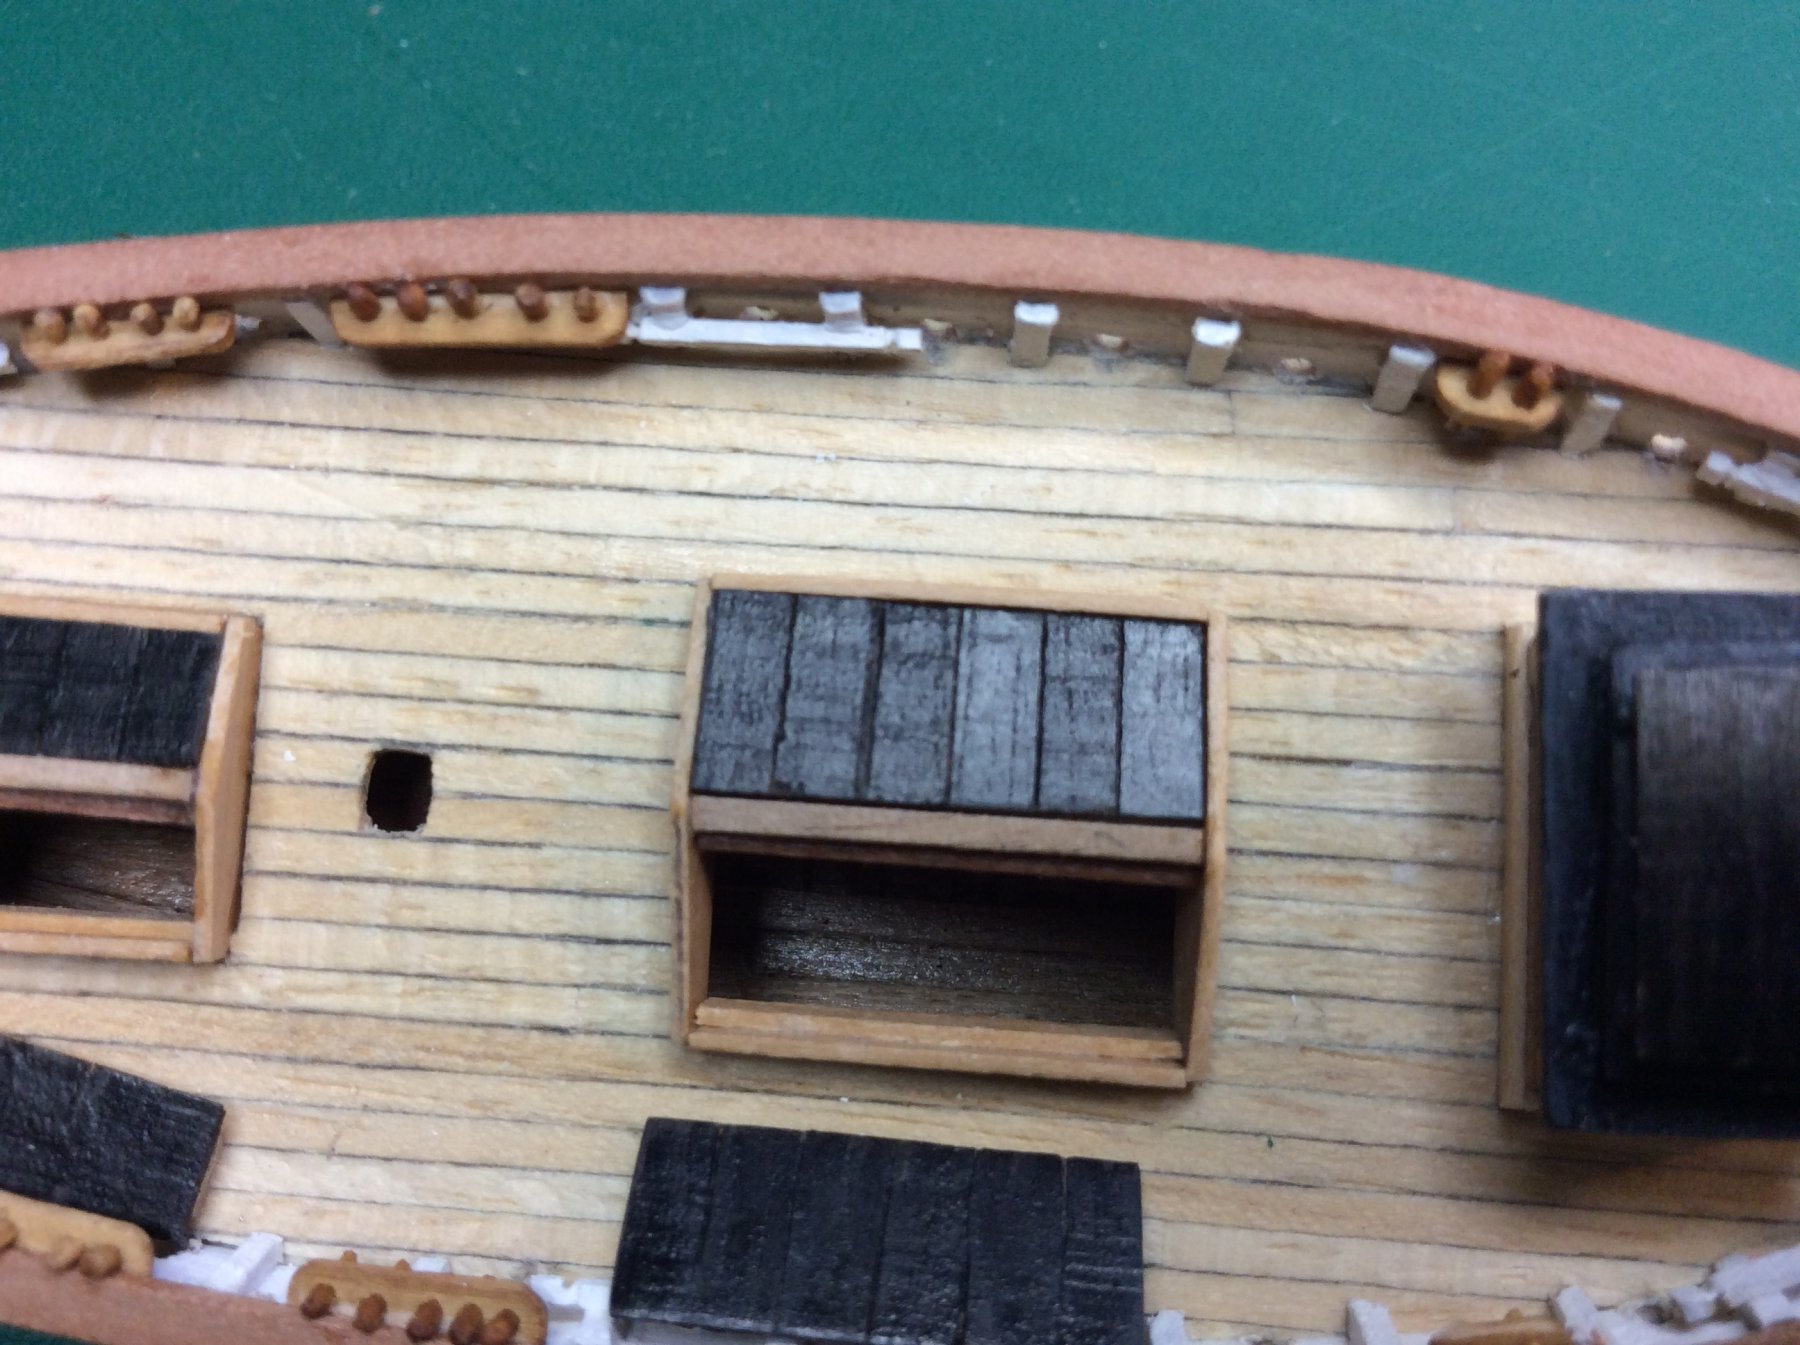
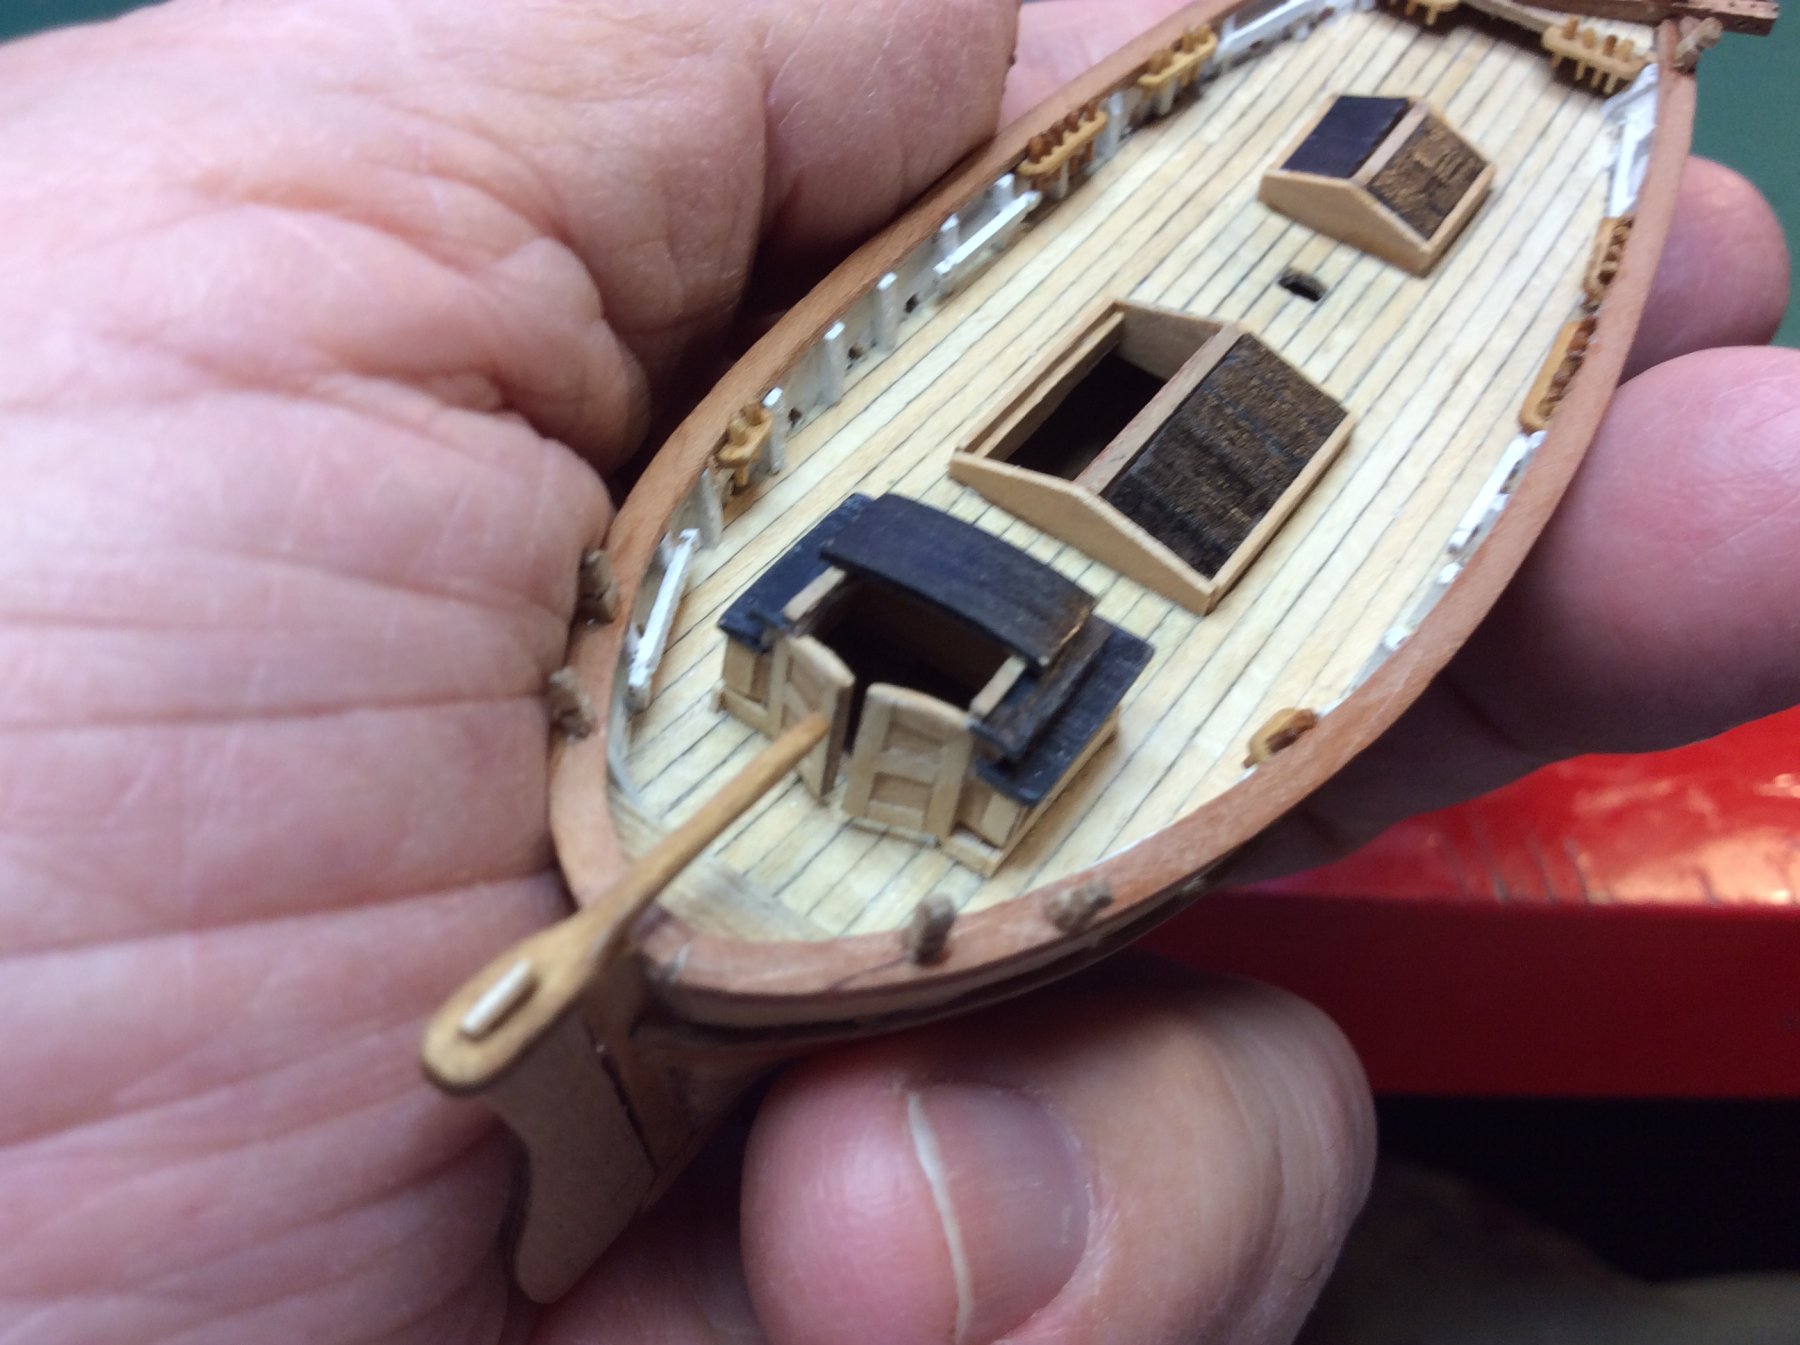
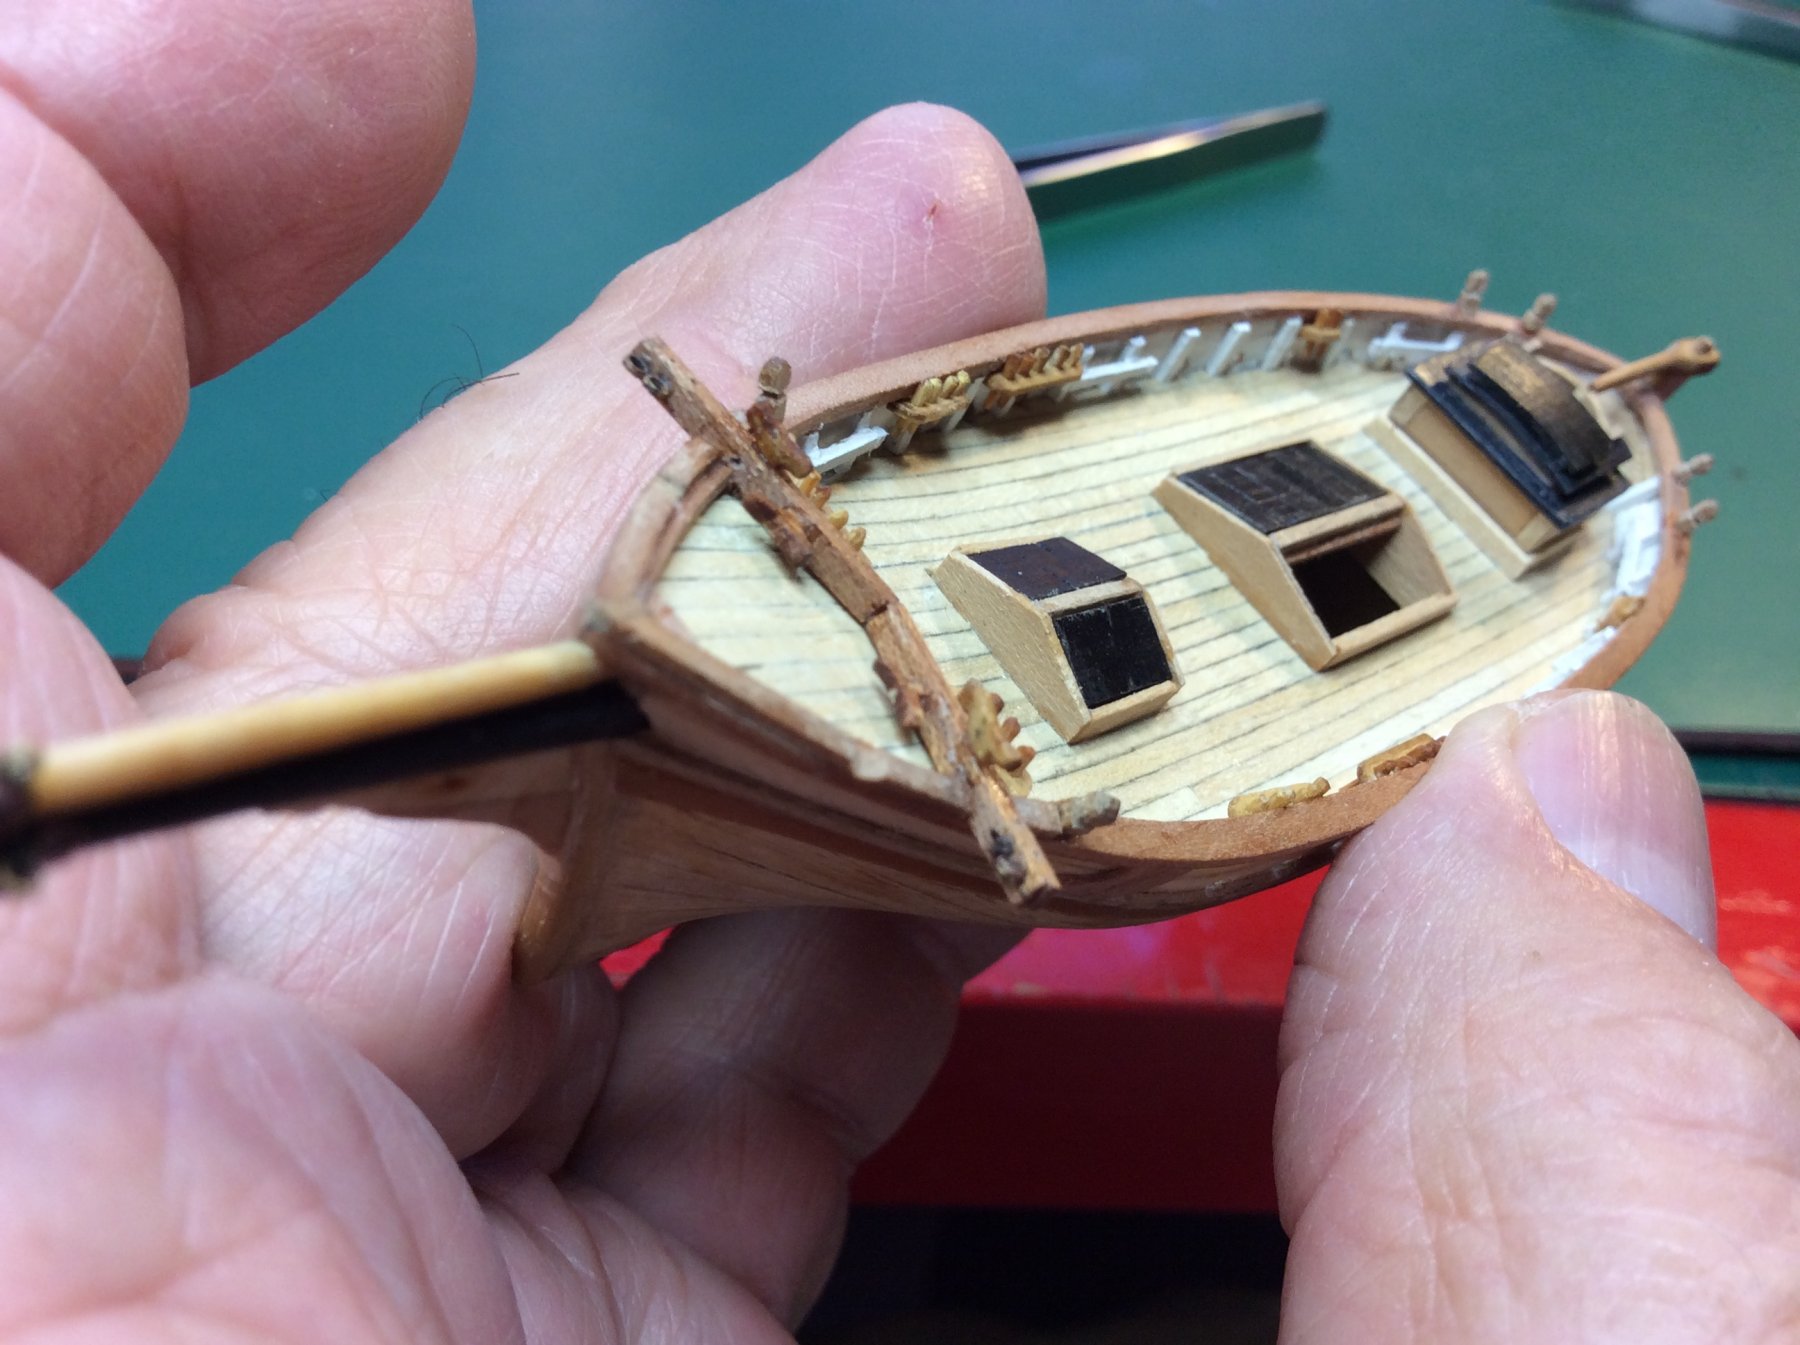
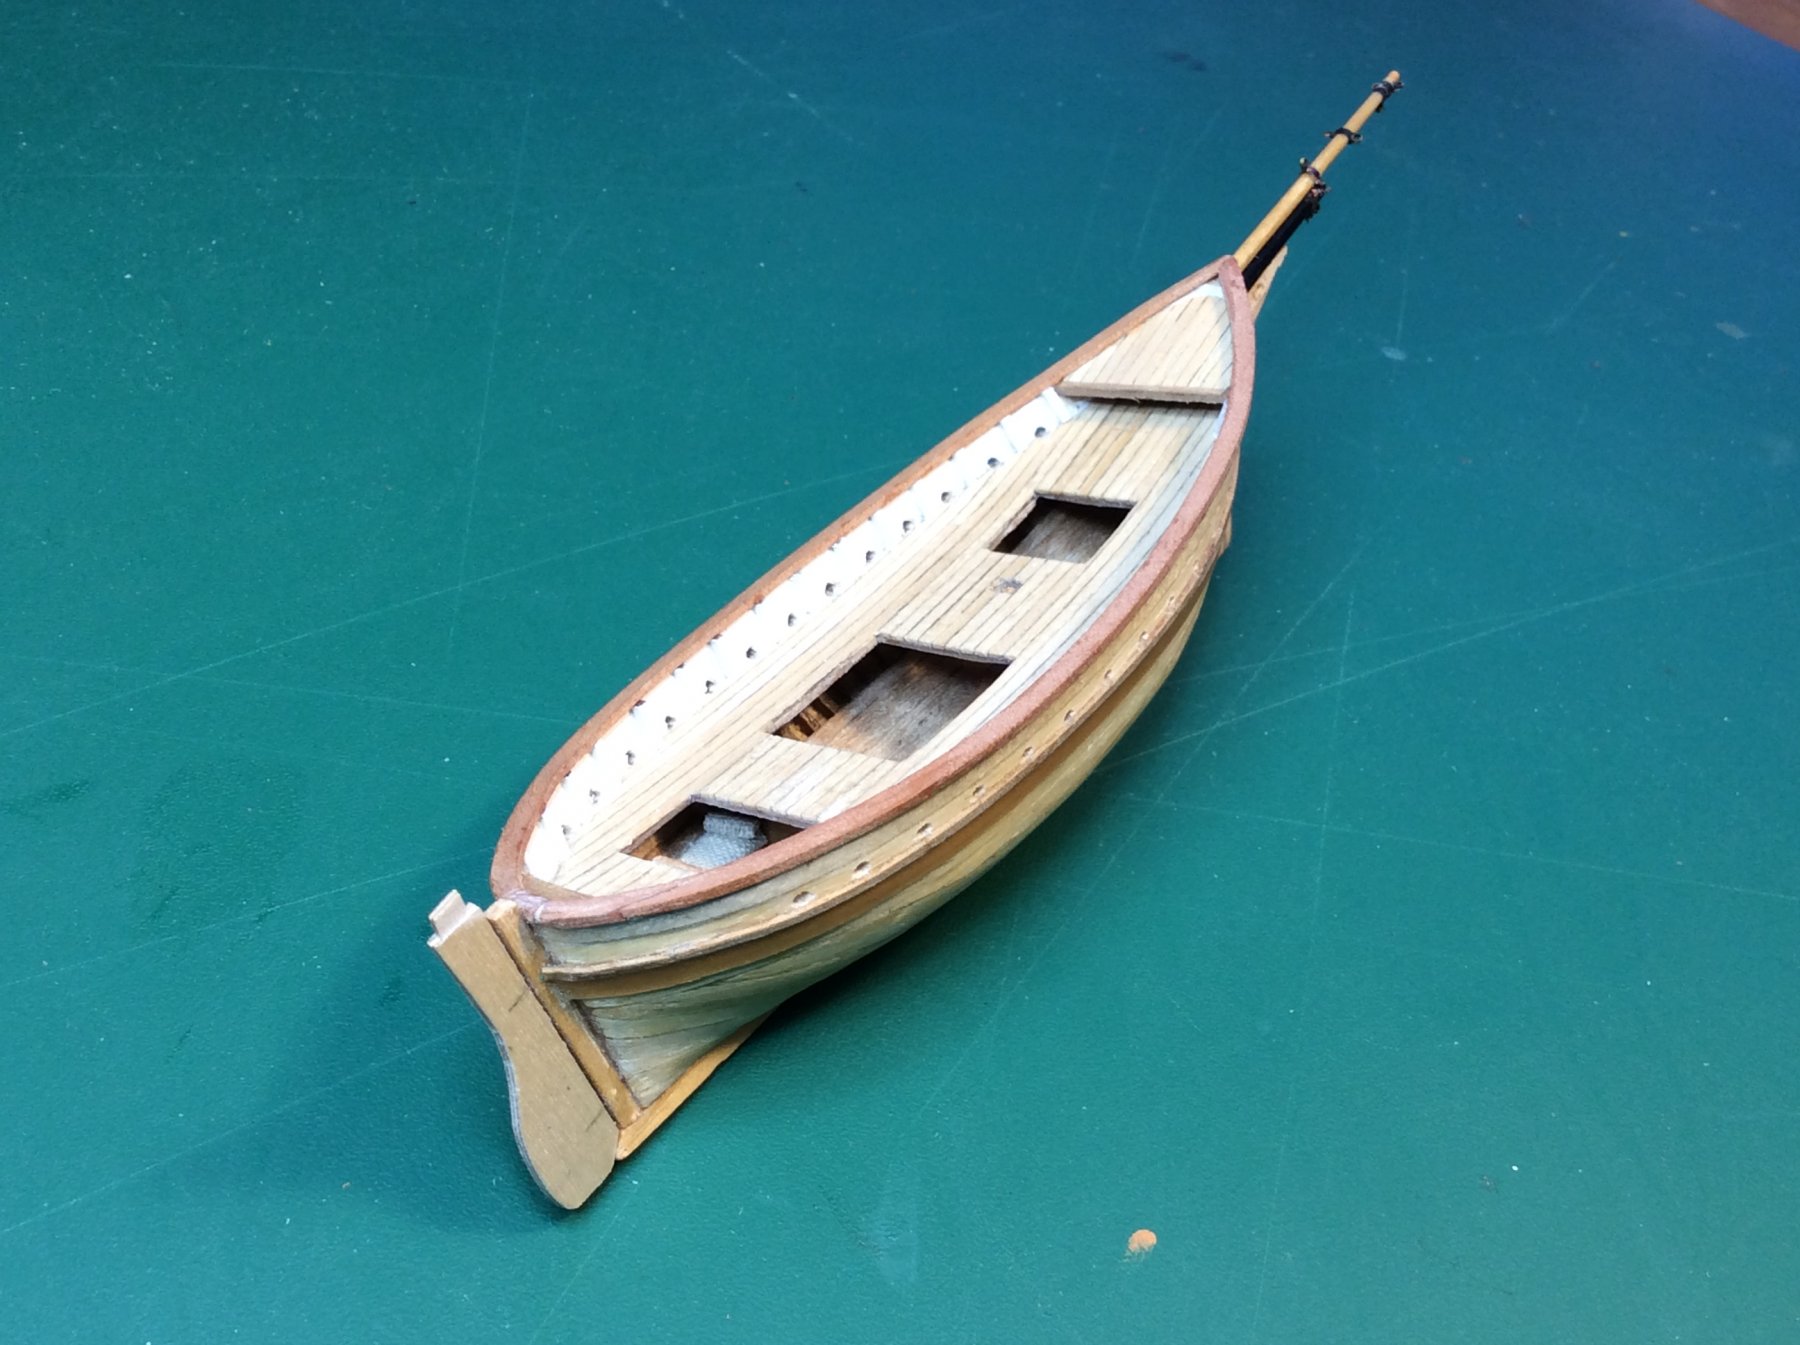
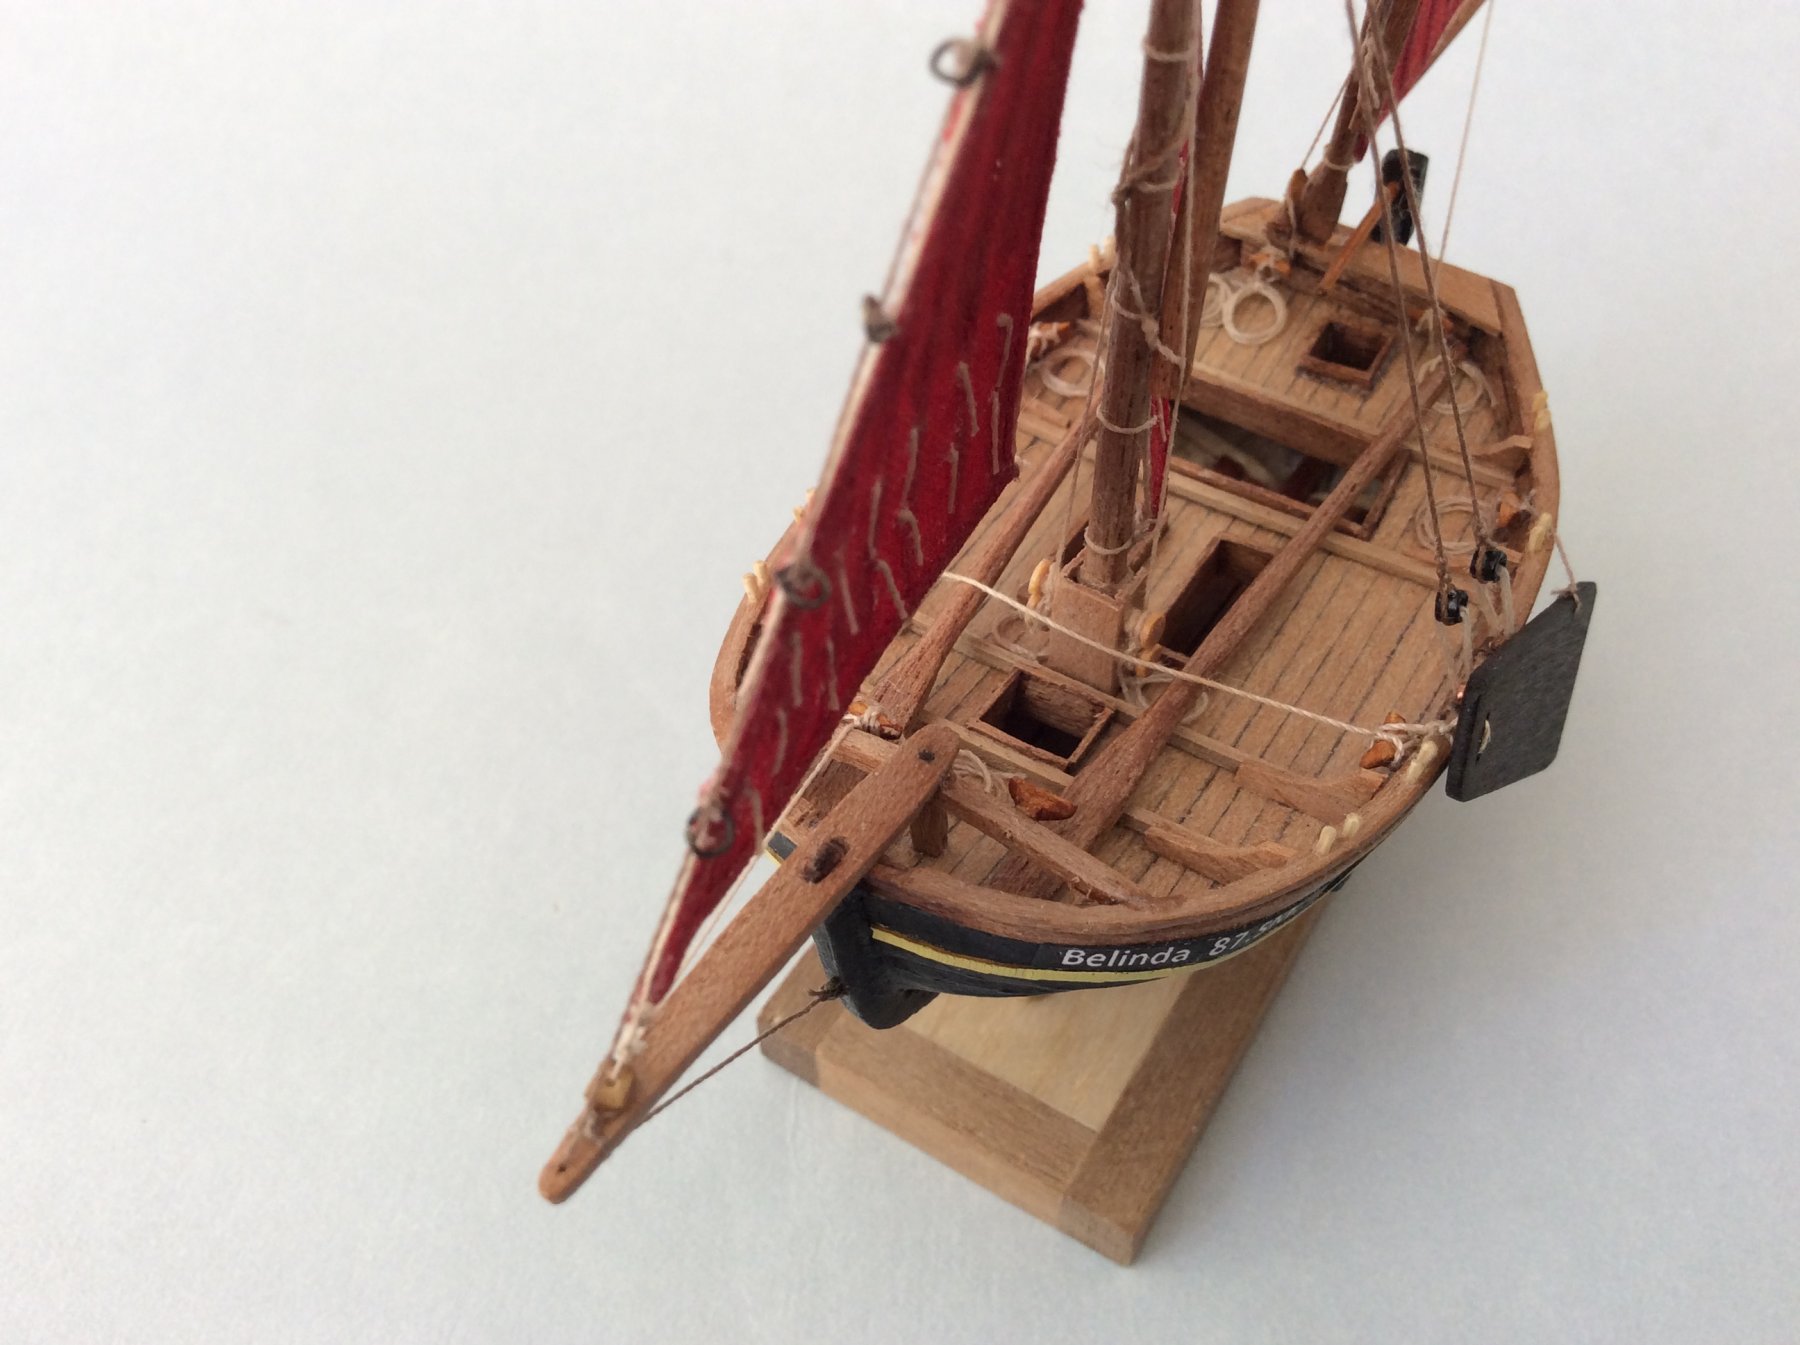
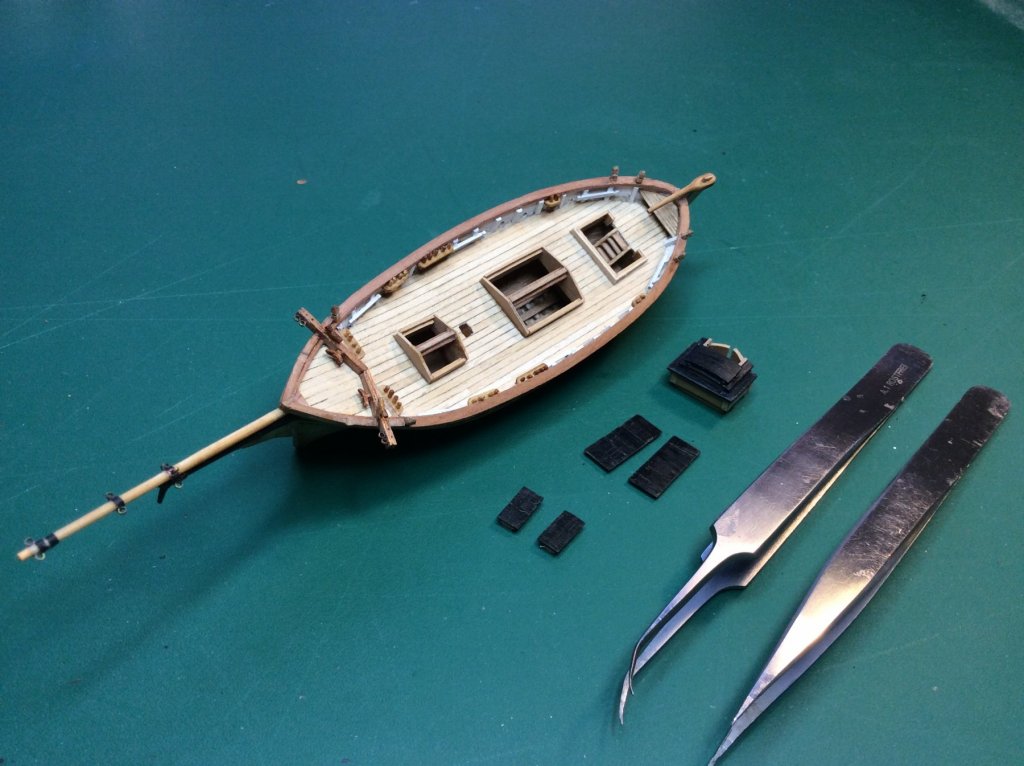
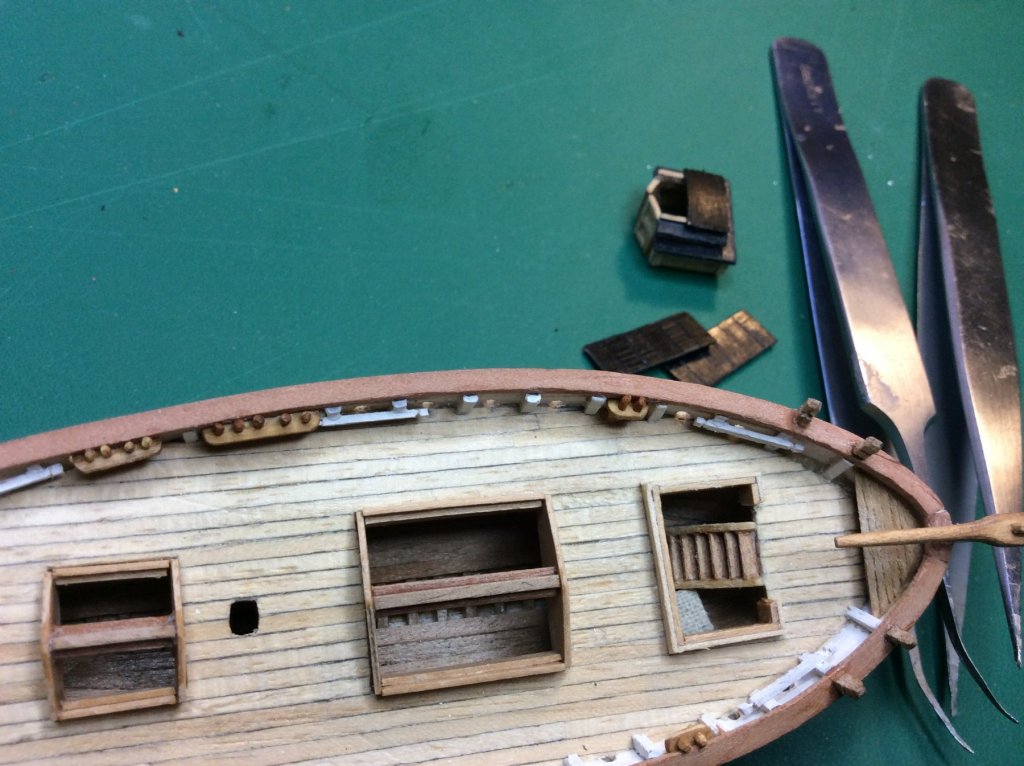
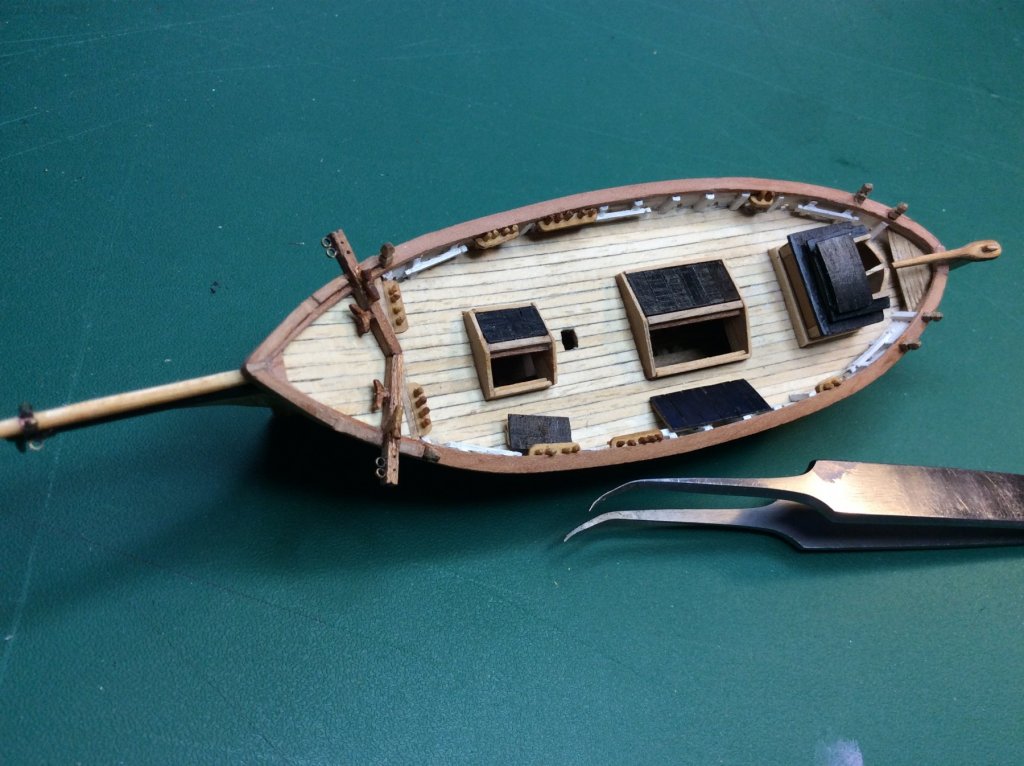
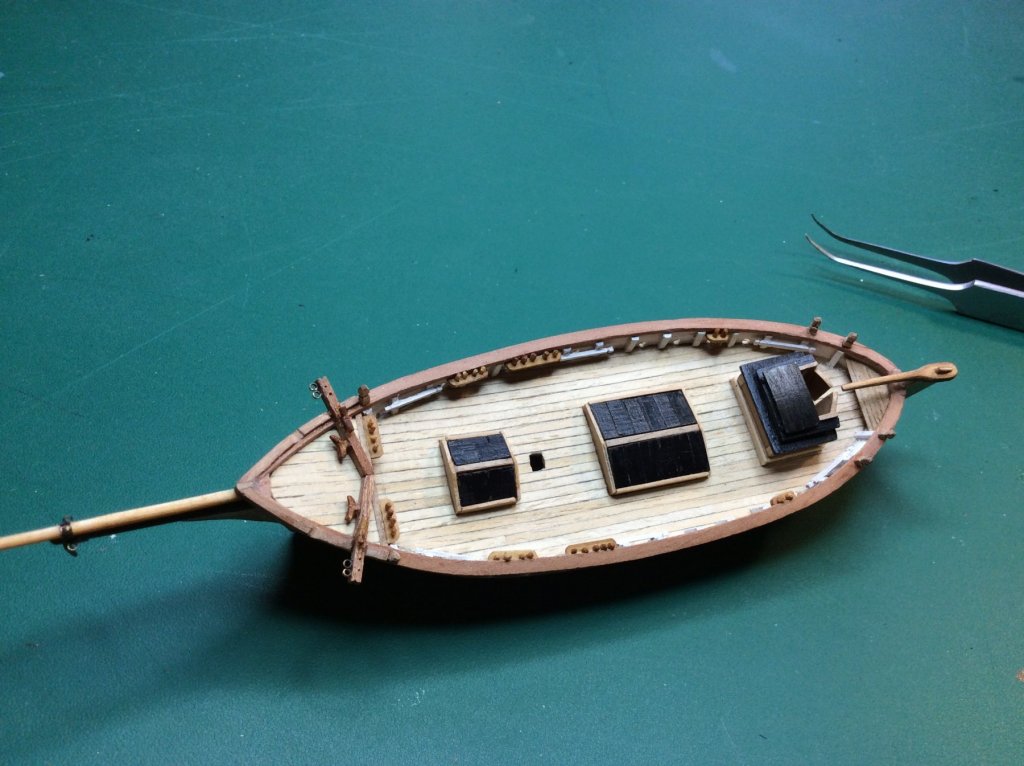
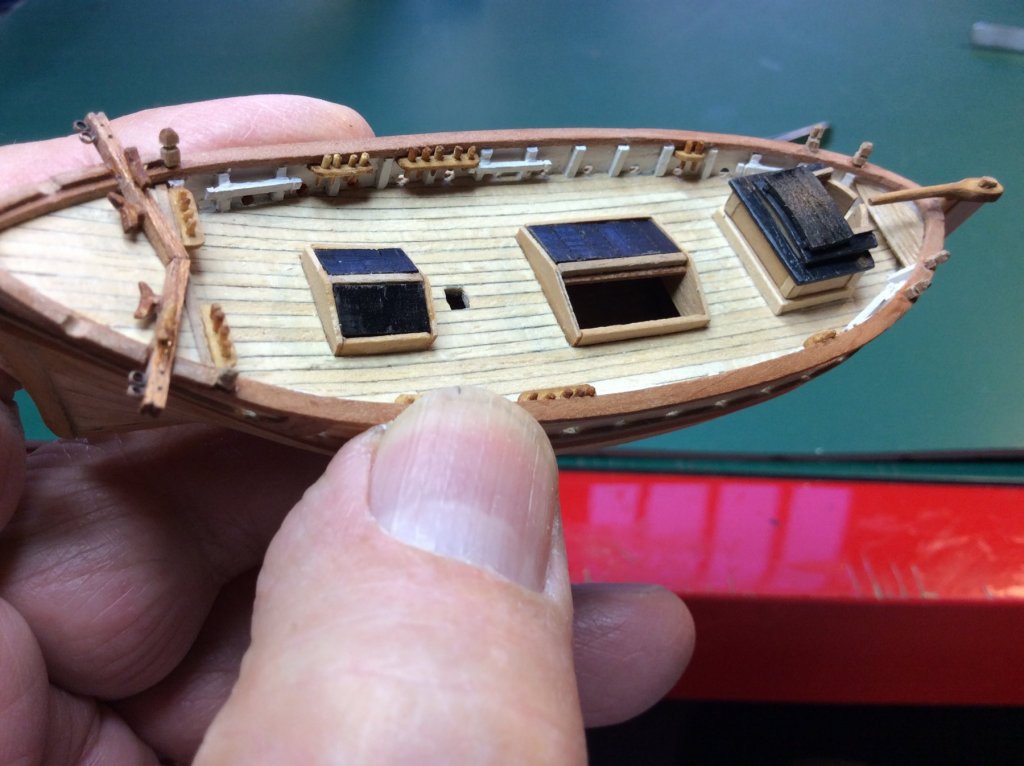
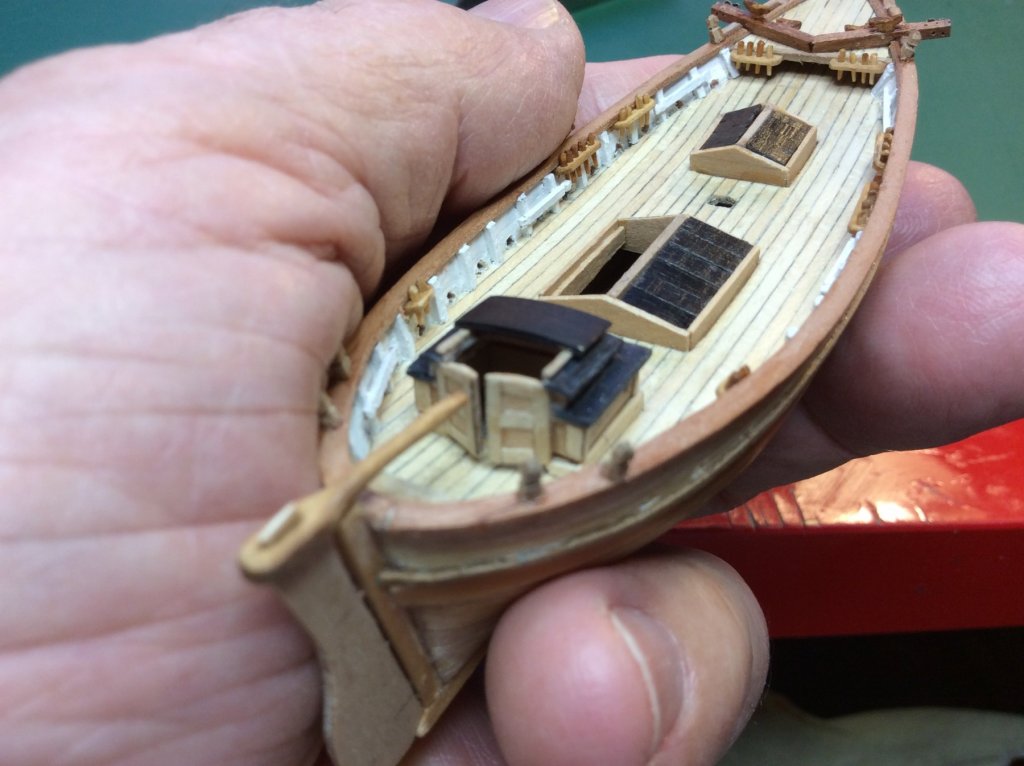
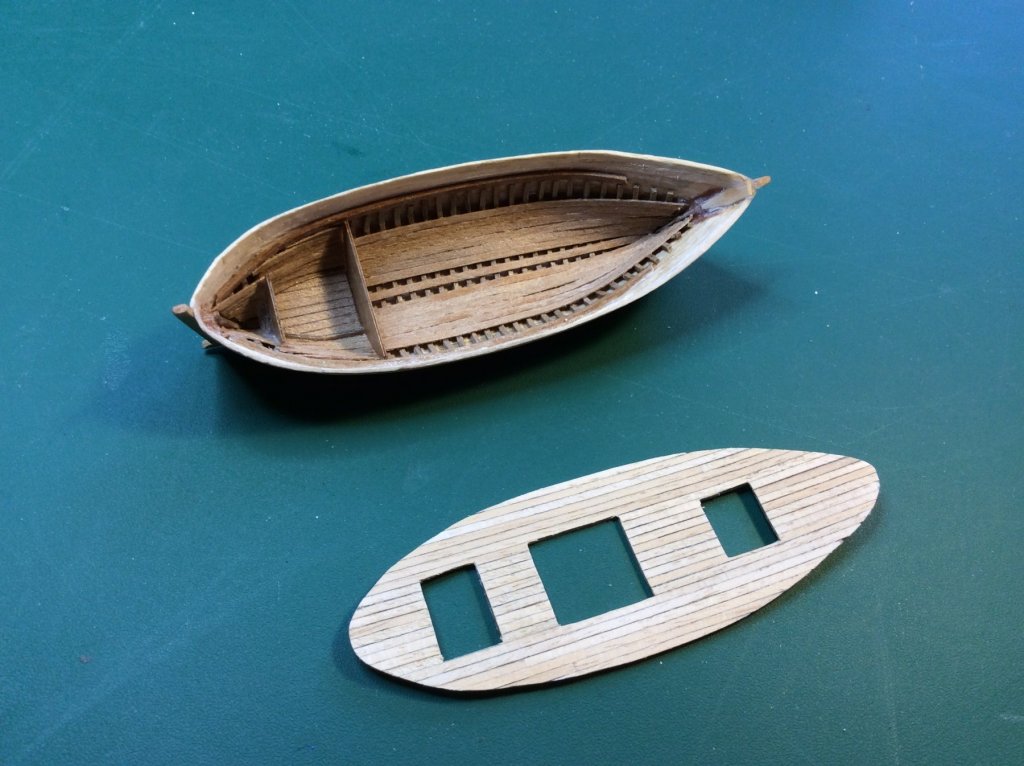
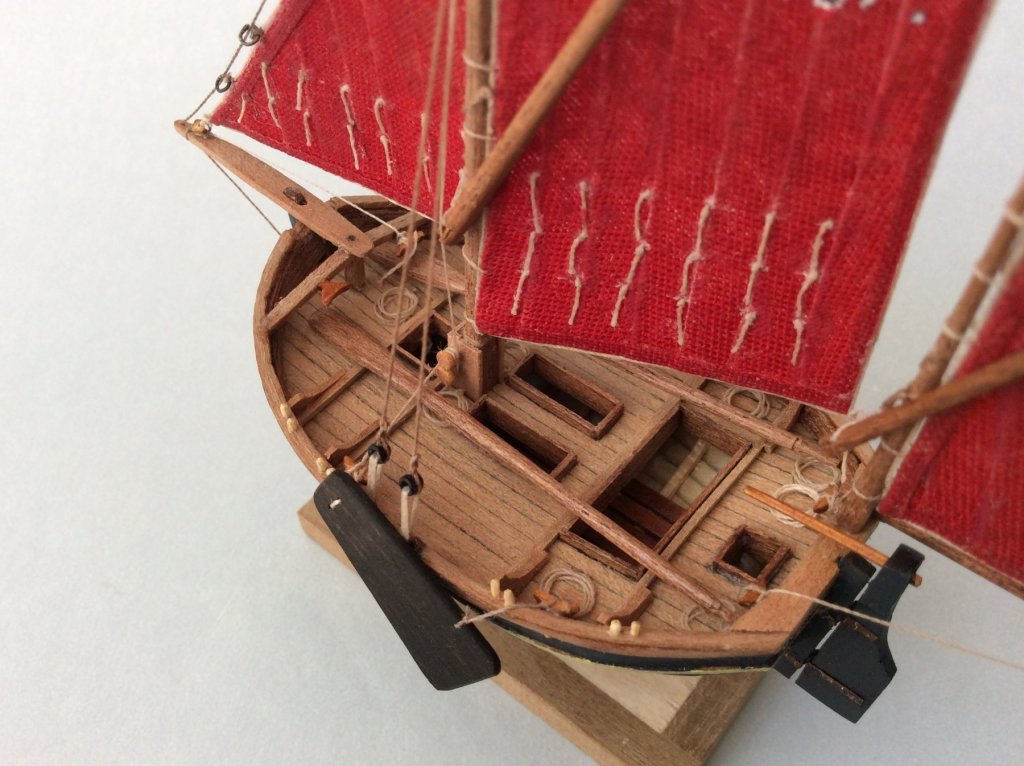
 The covers of the hatches and the cabin of the camera are removable to be able to see the interior
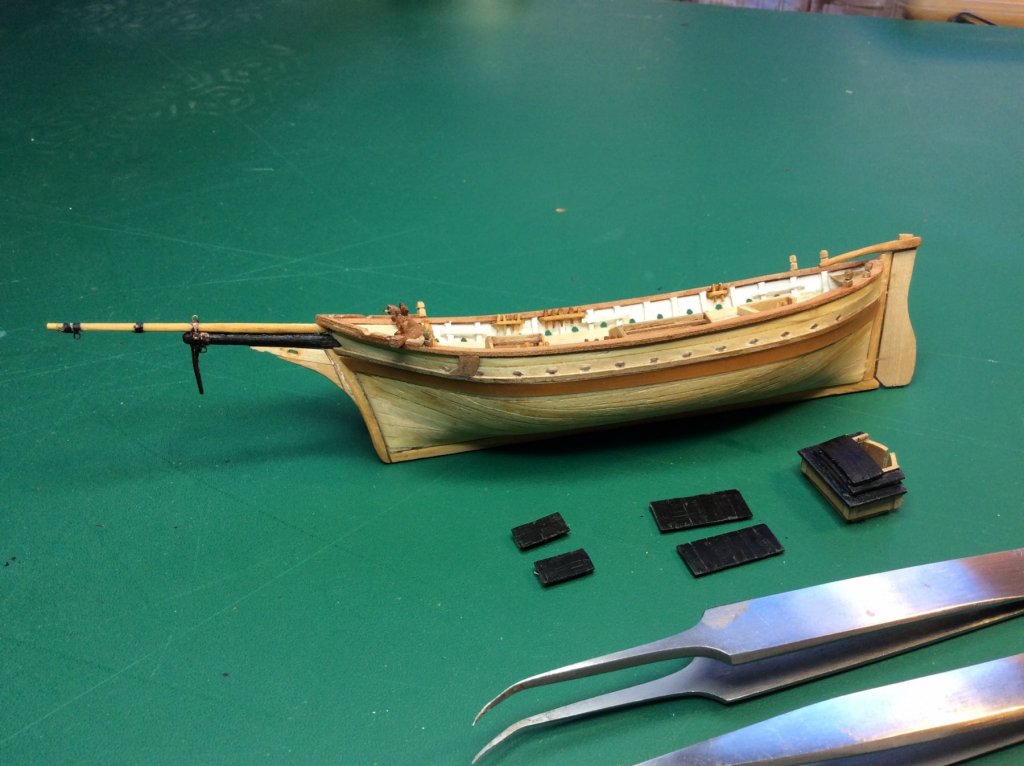


- 51 replies
-
- 17
-

-
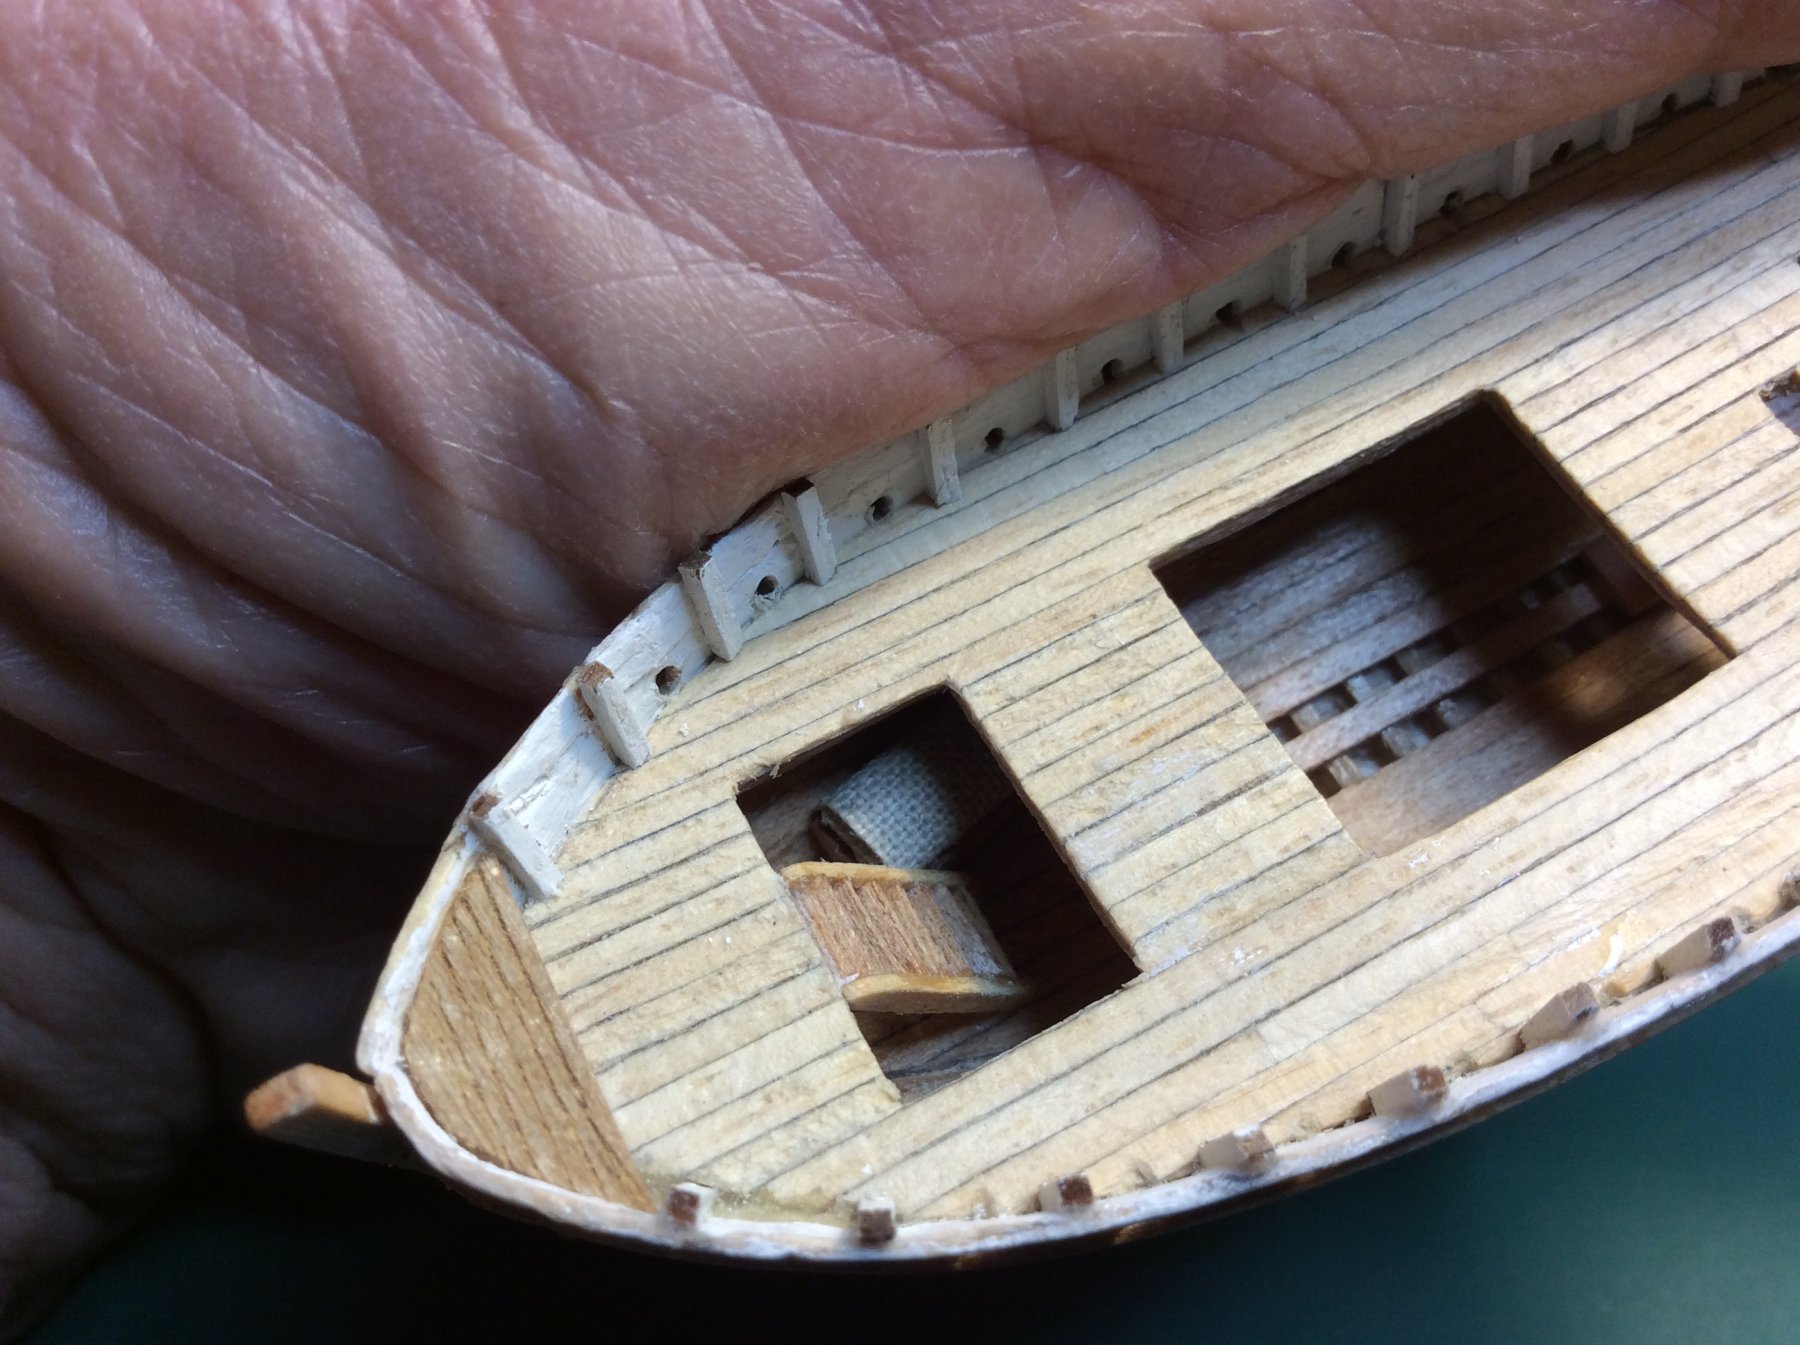
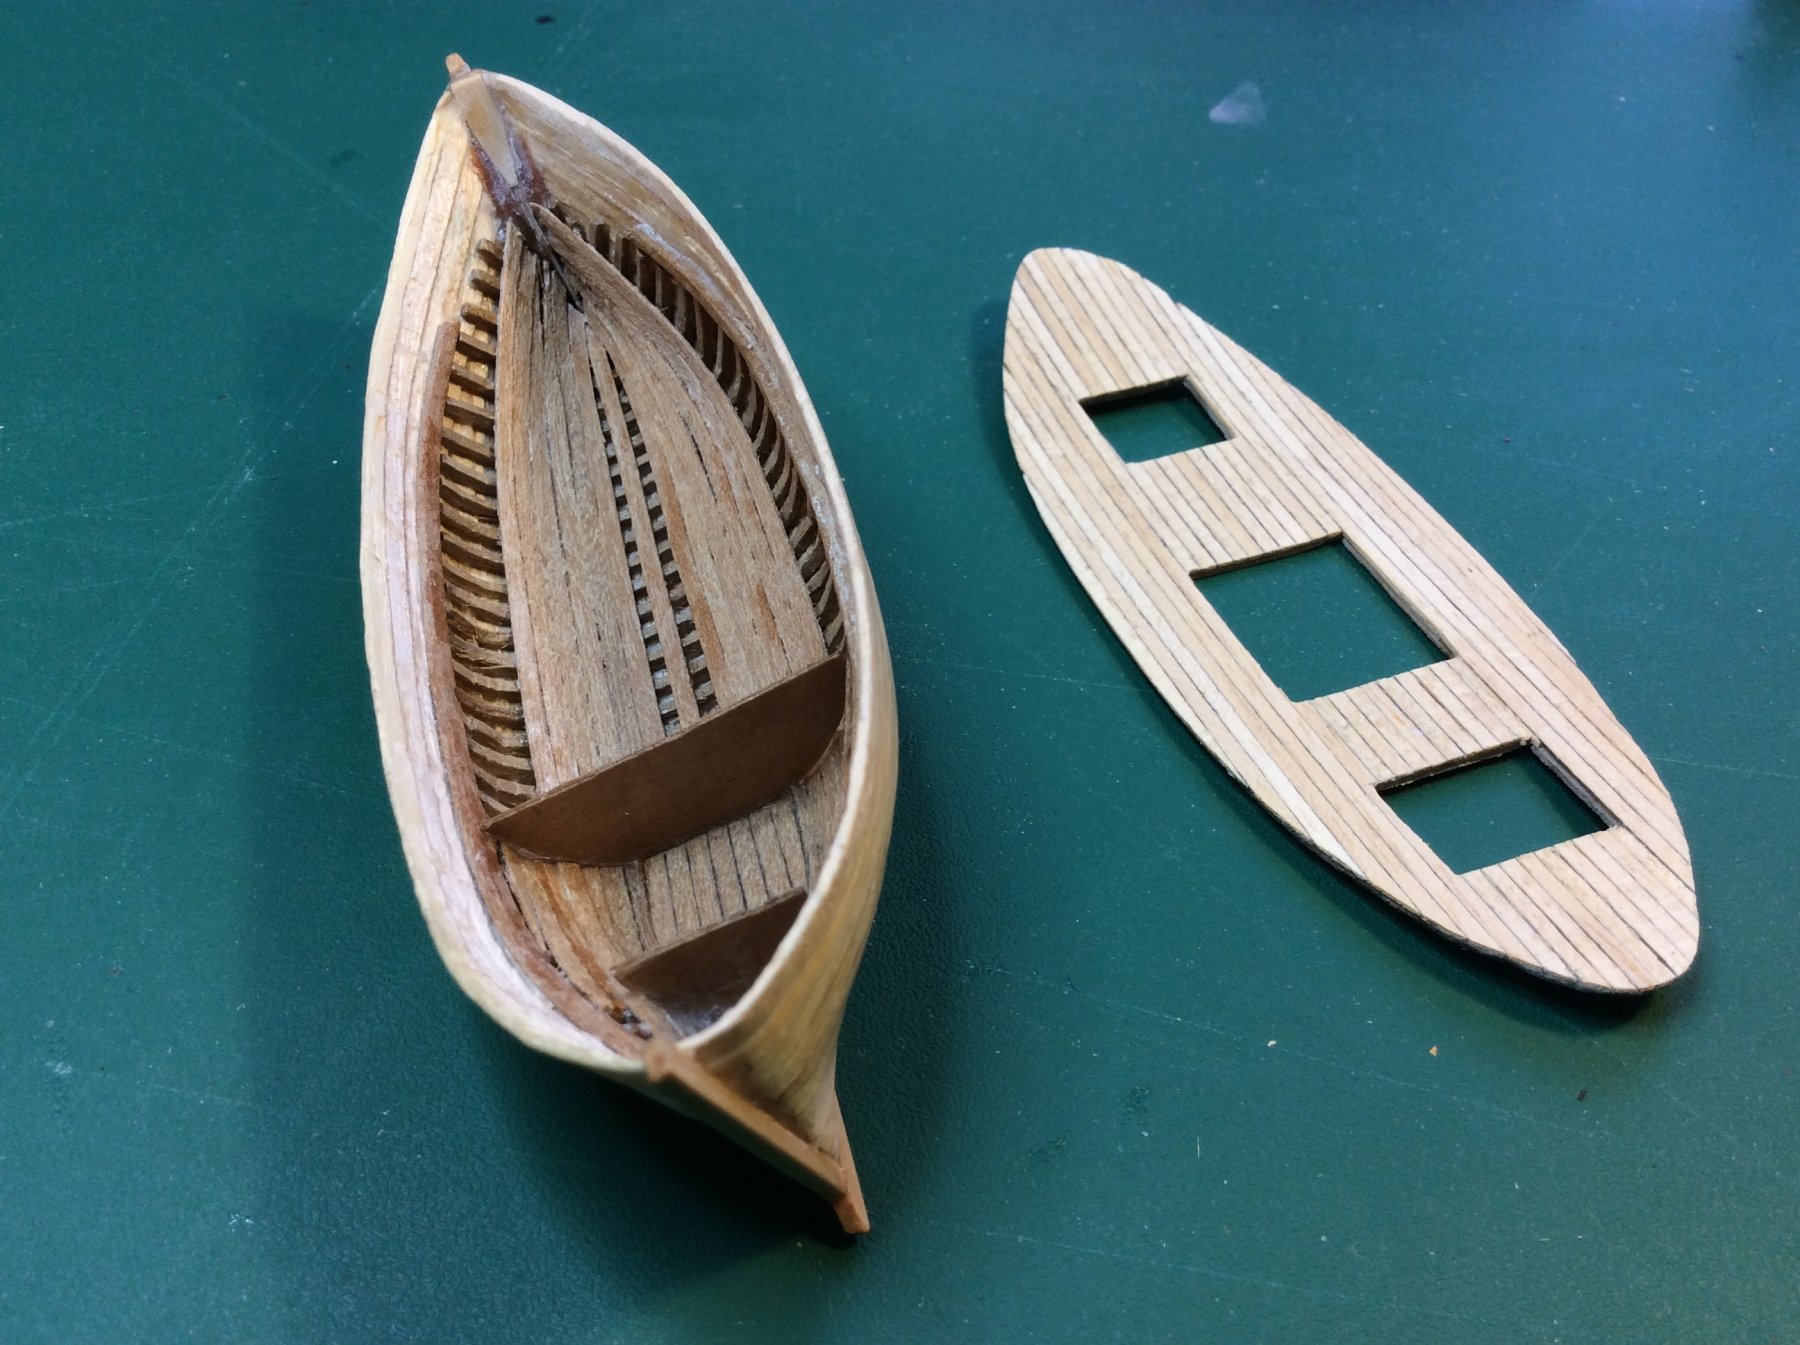
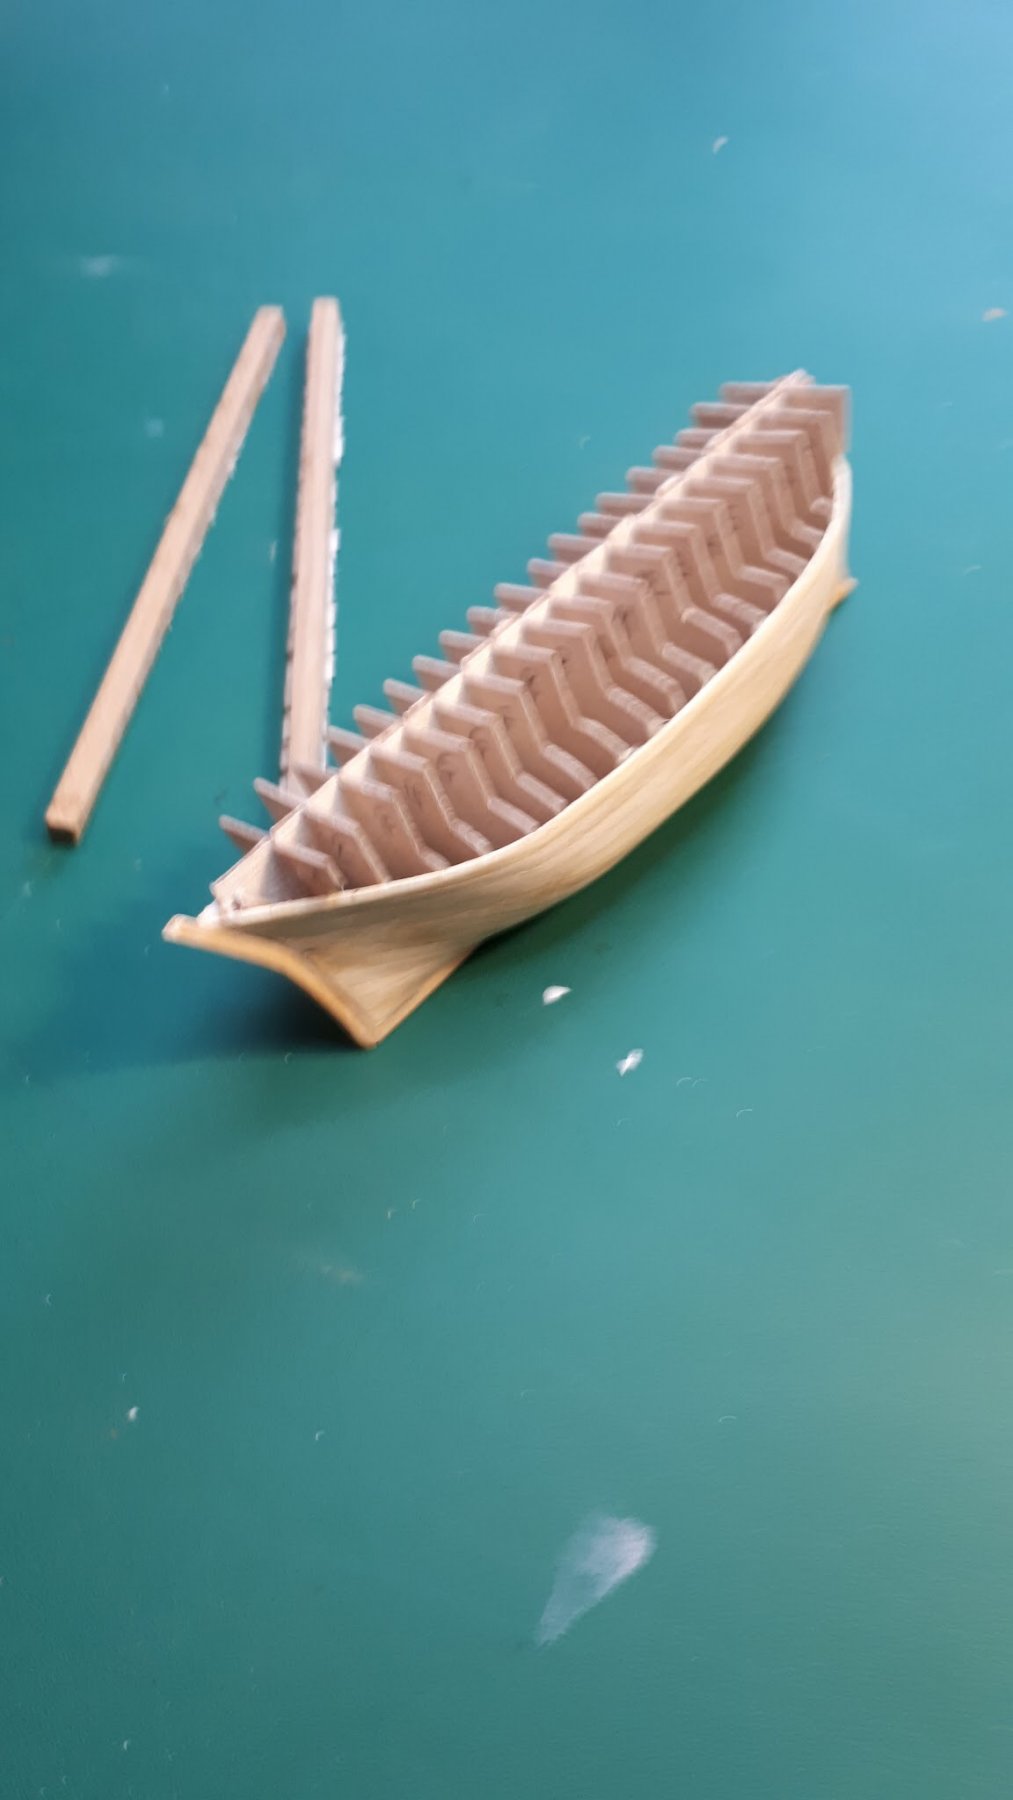
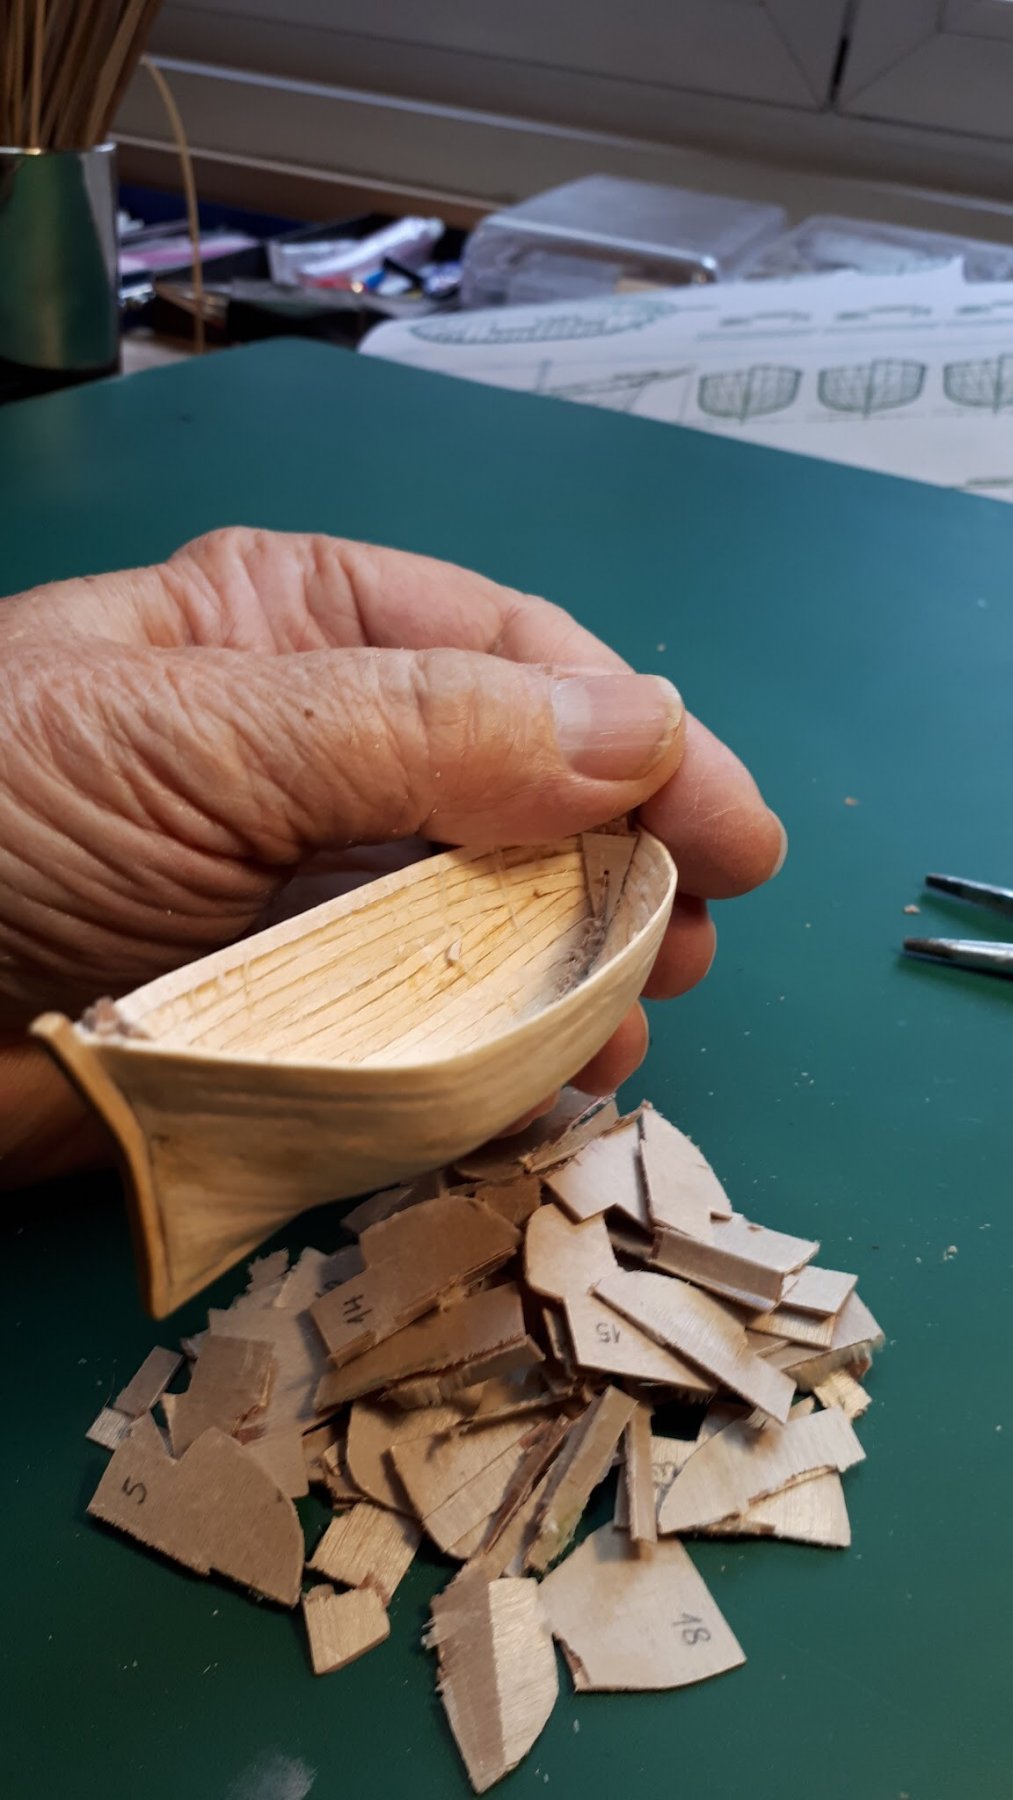
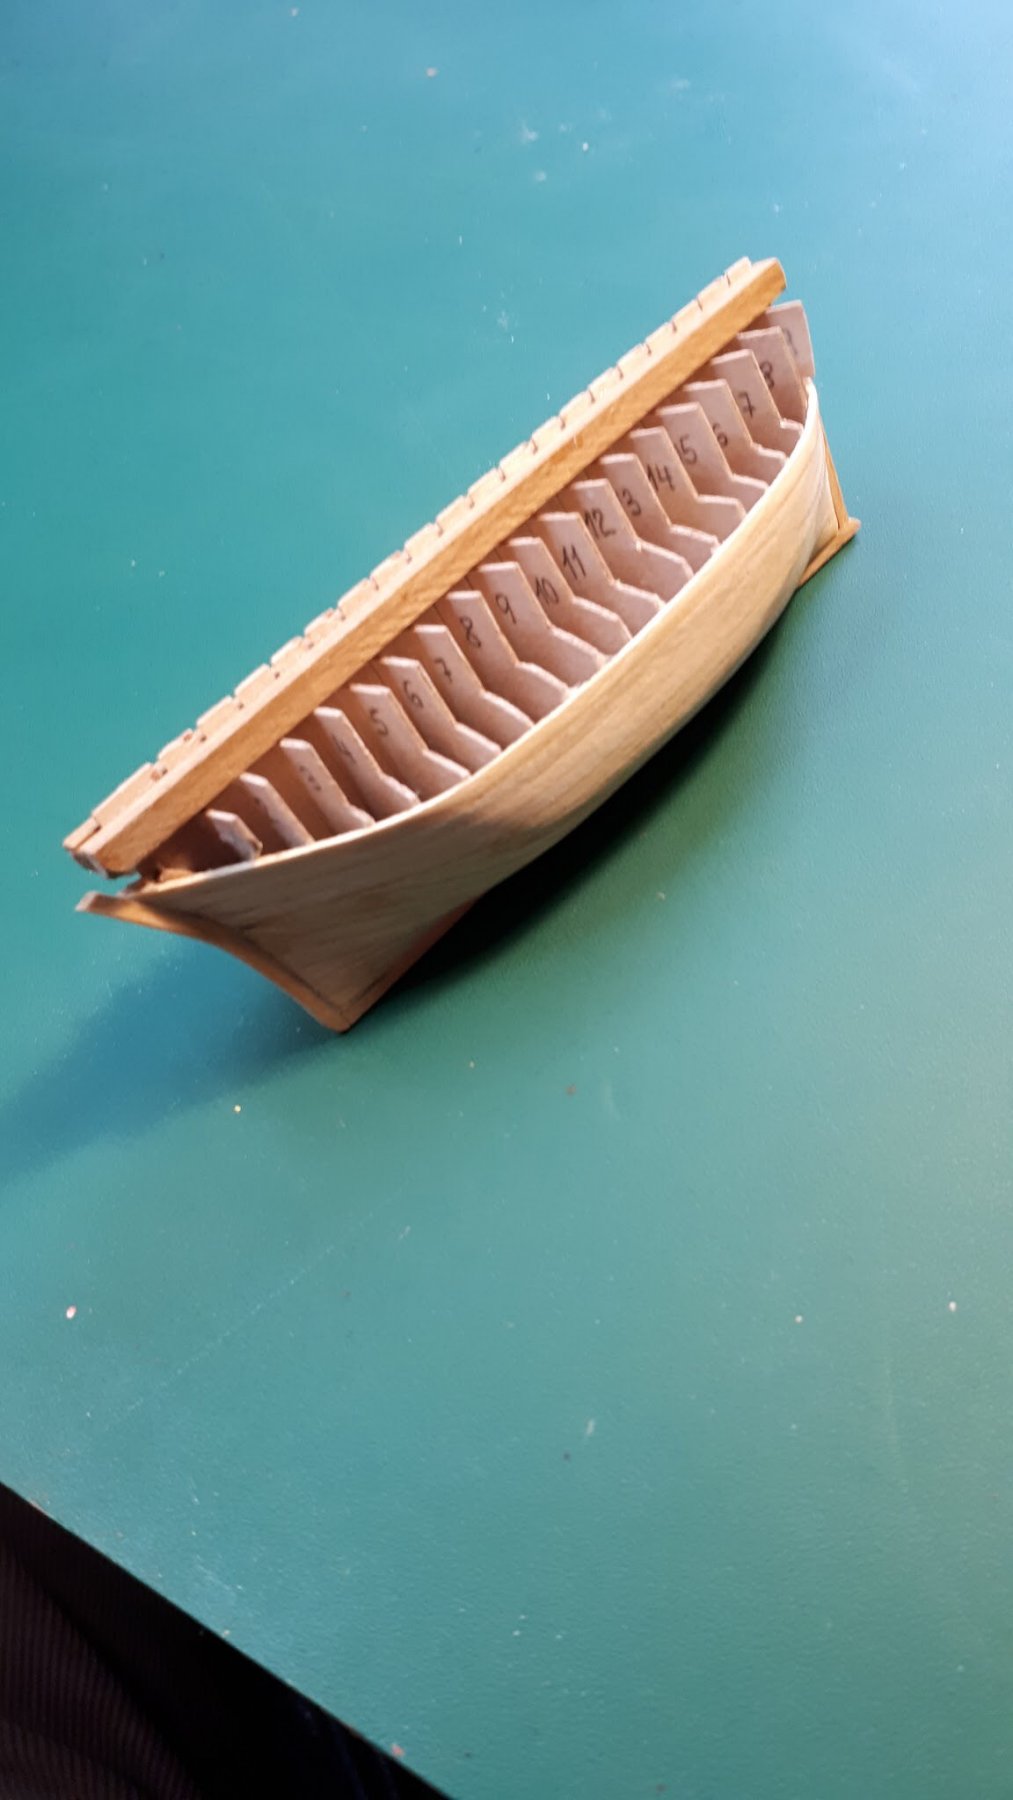
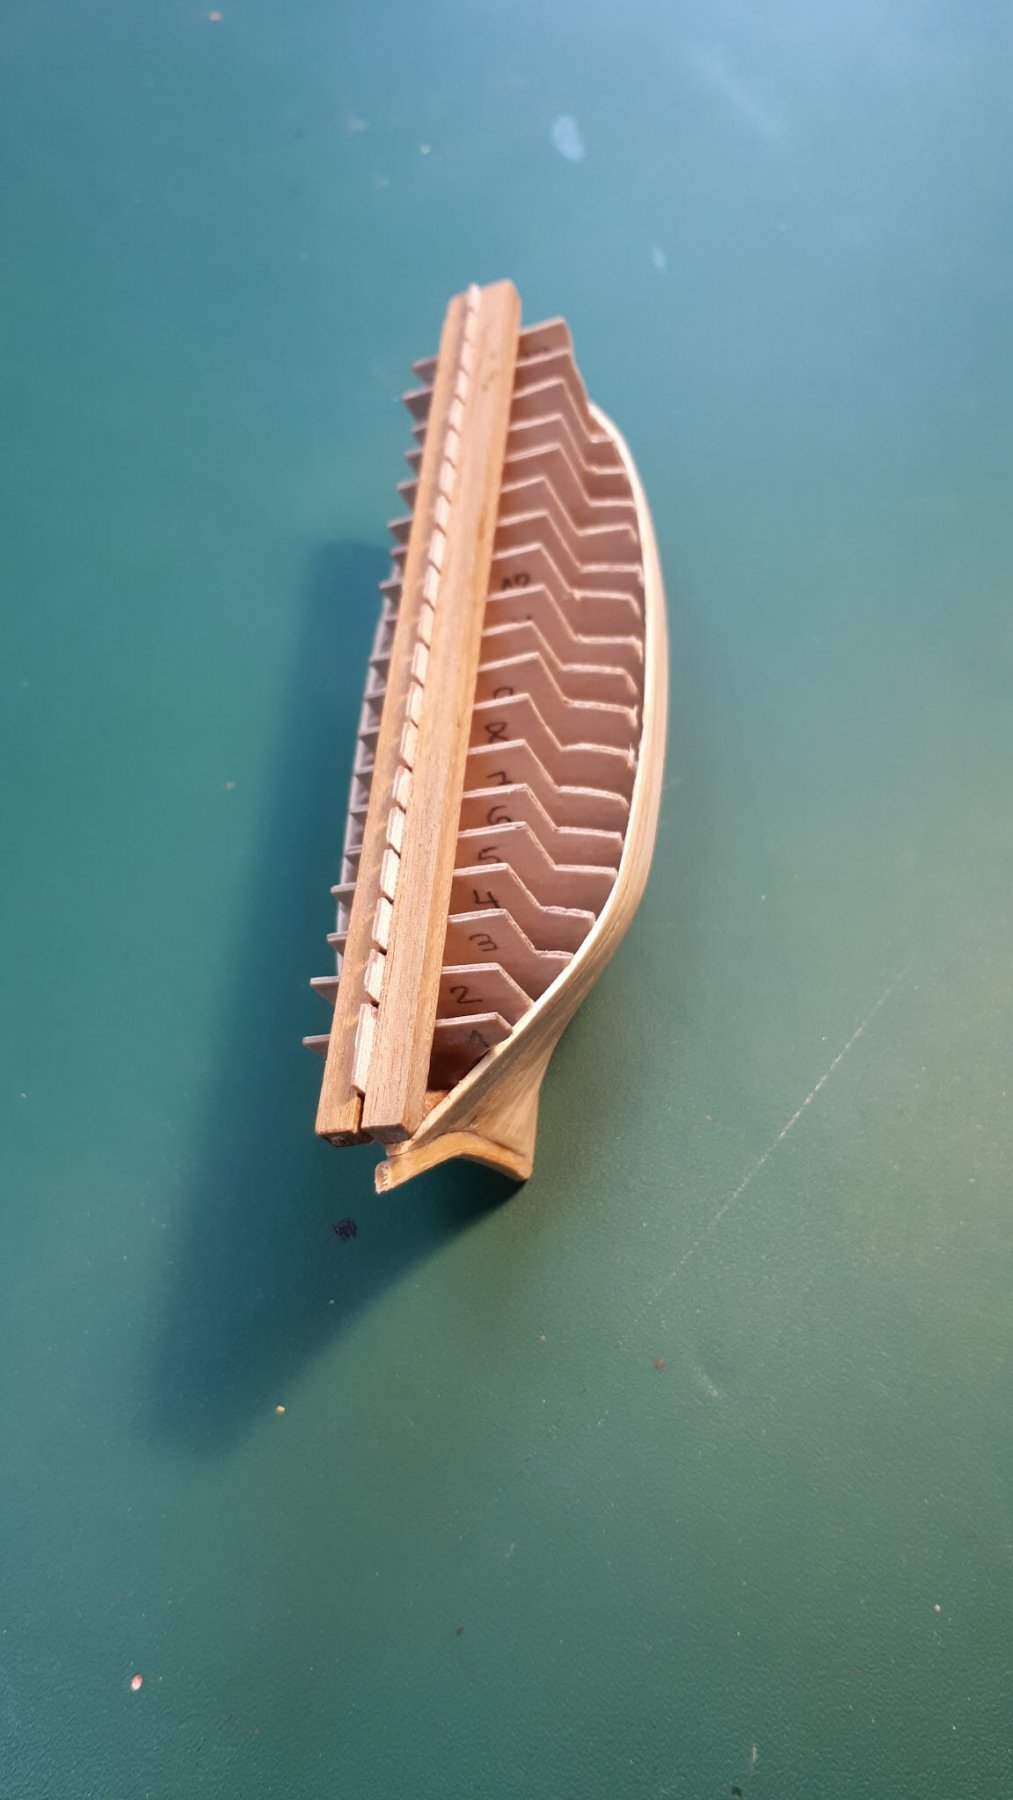
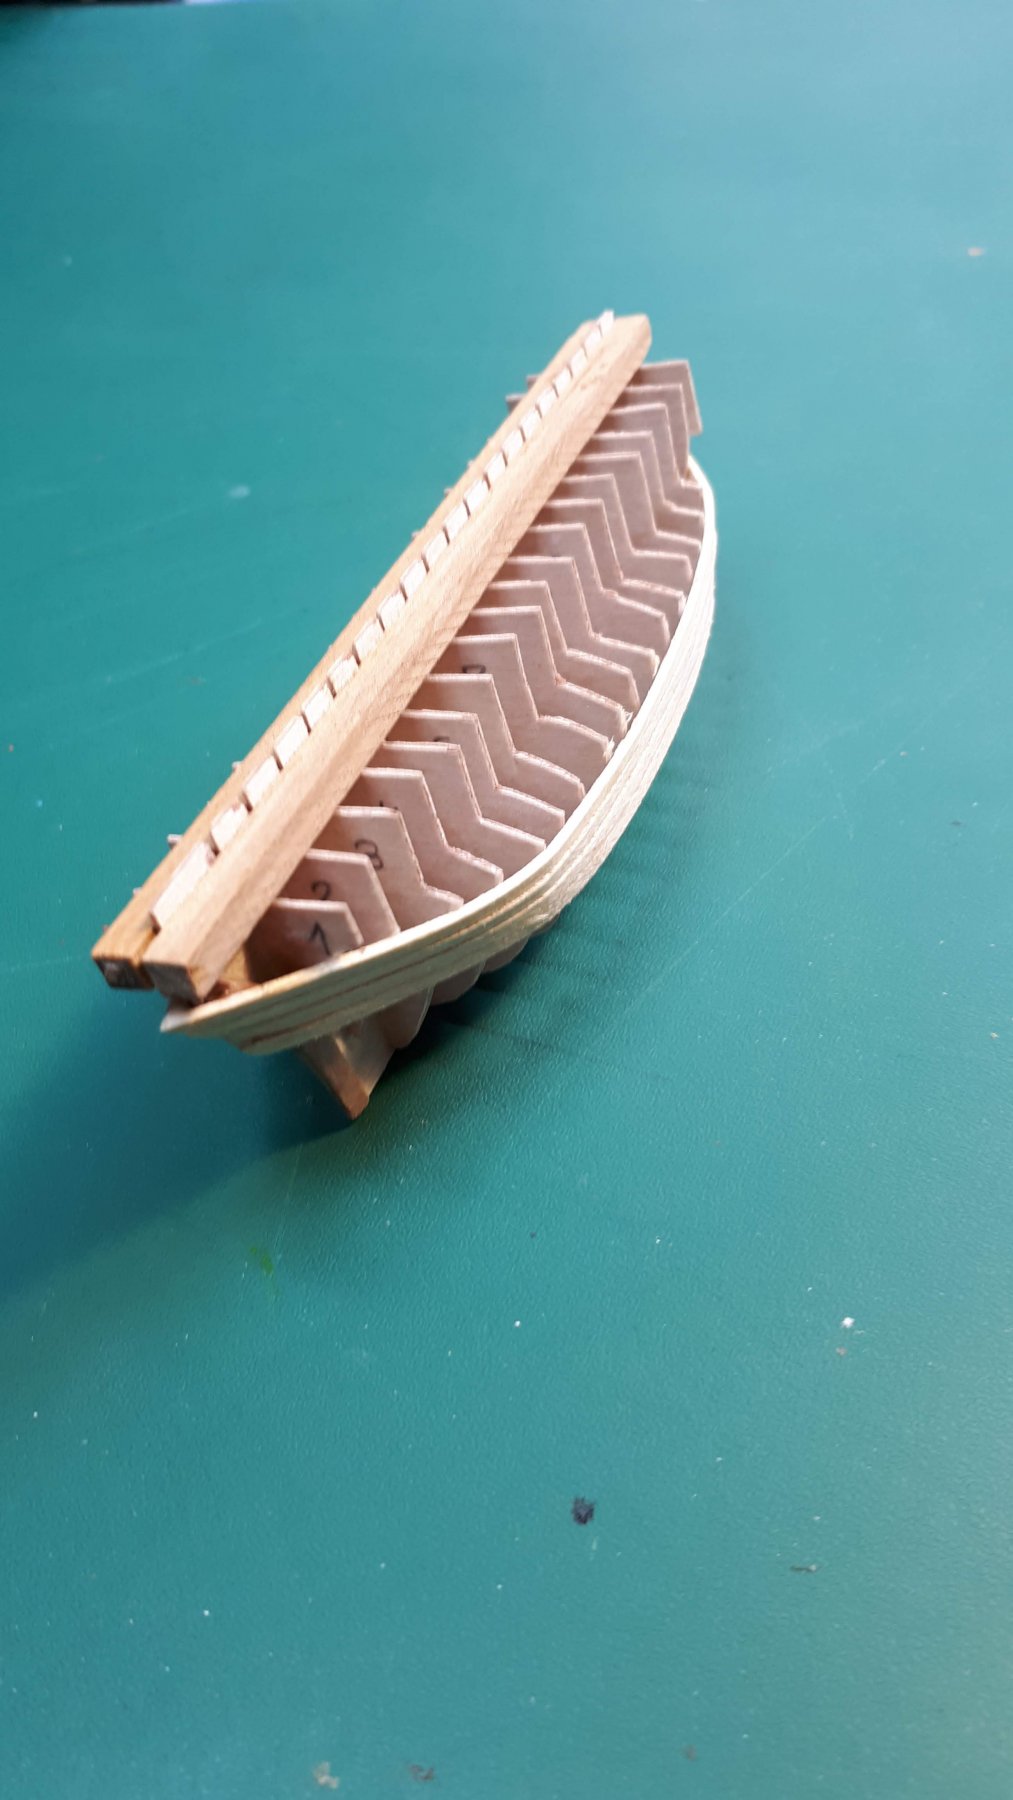
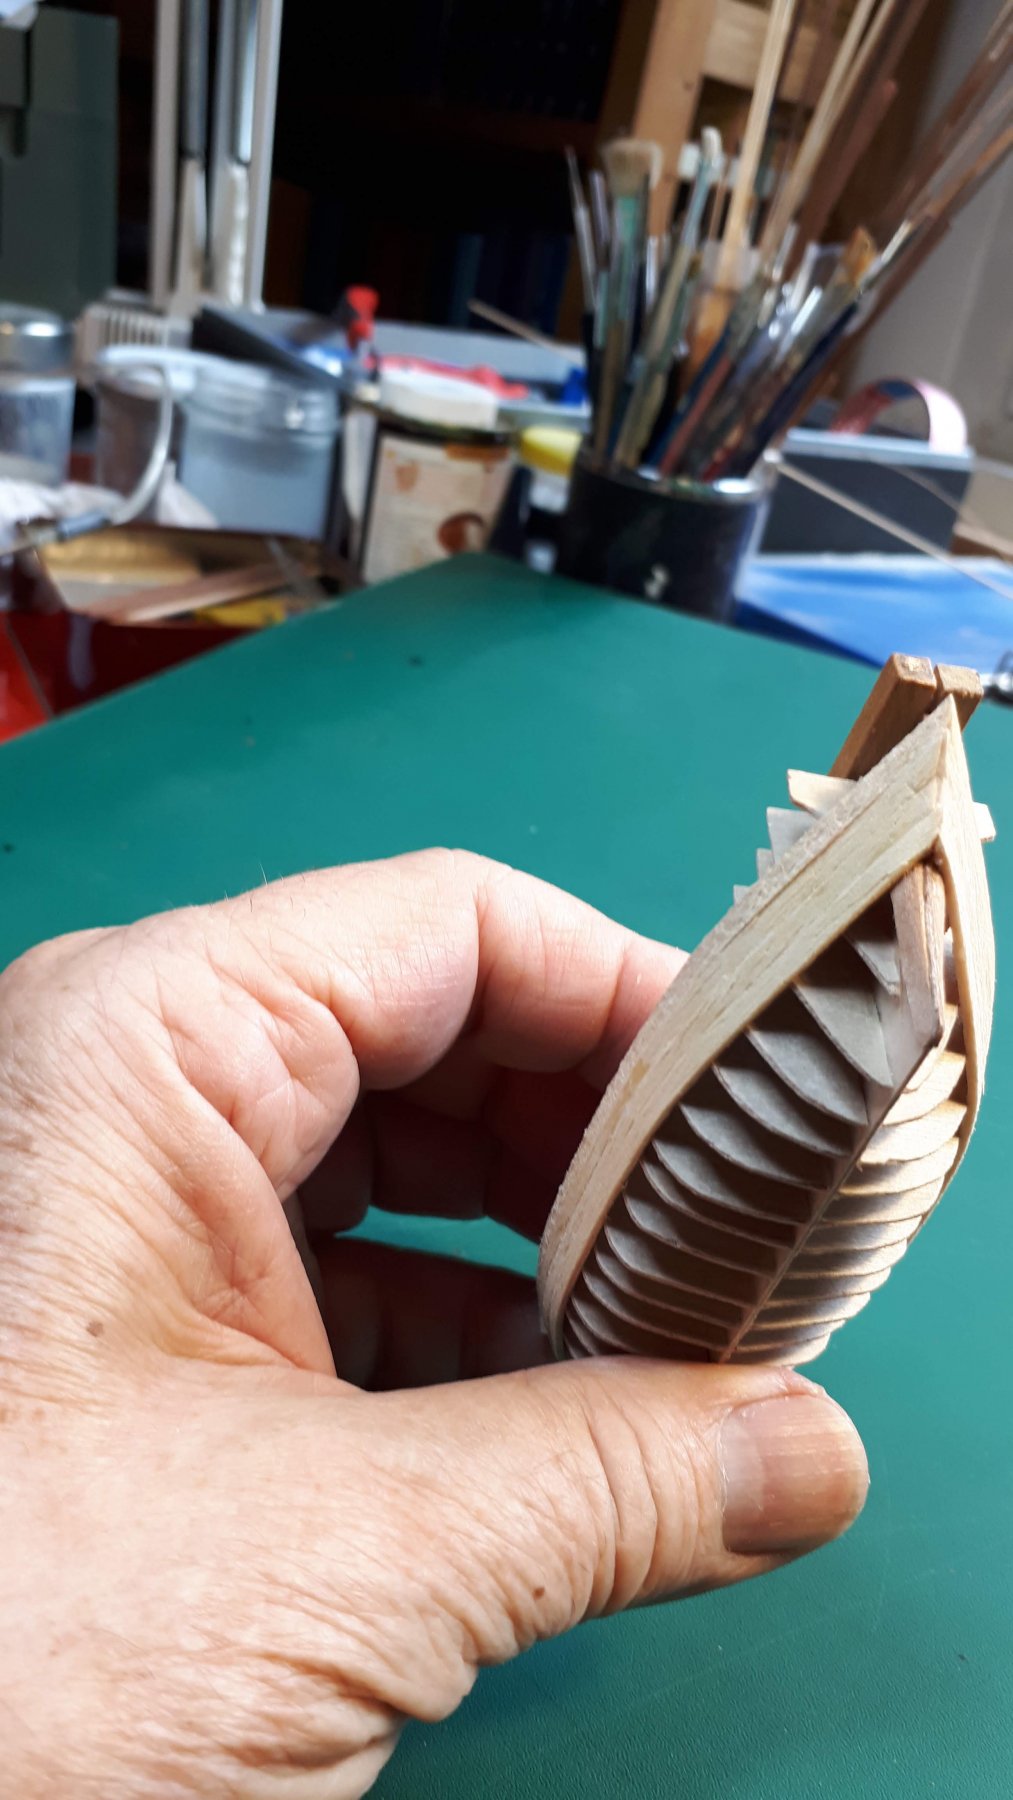
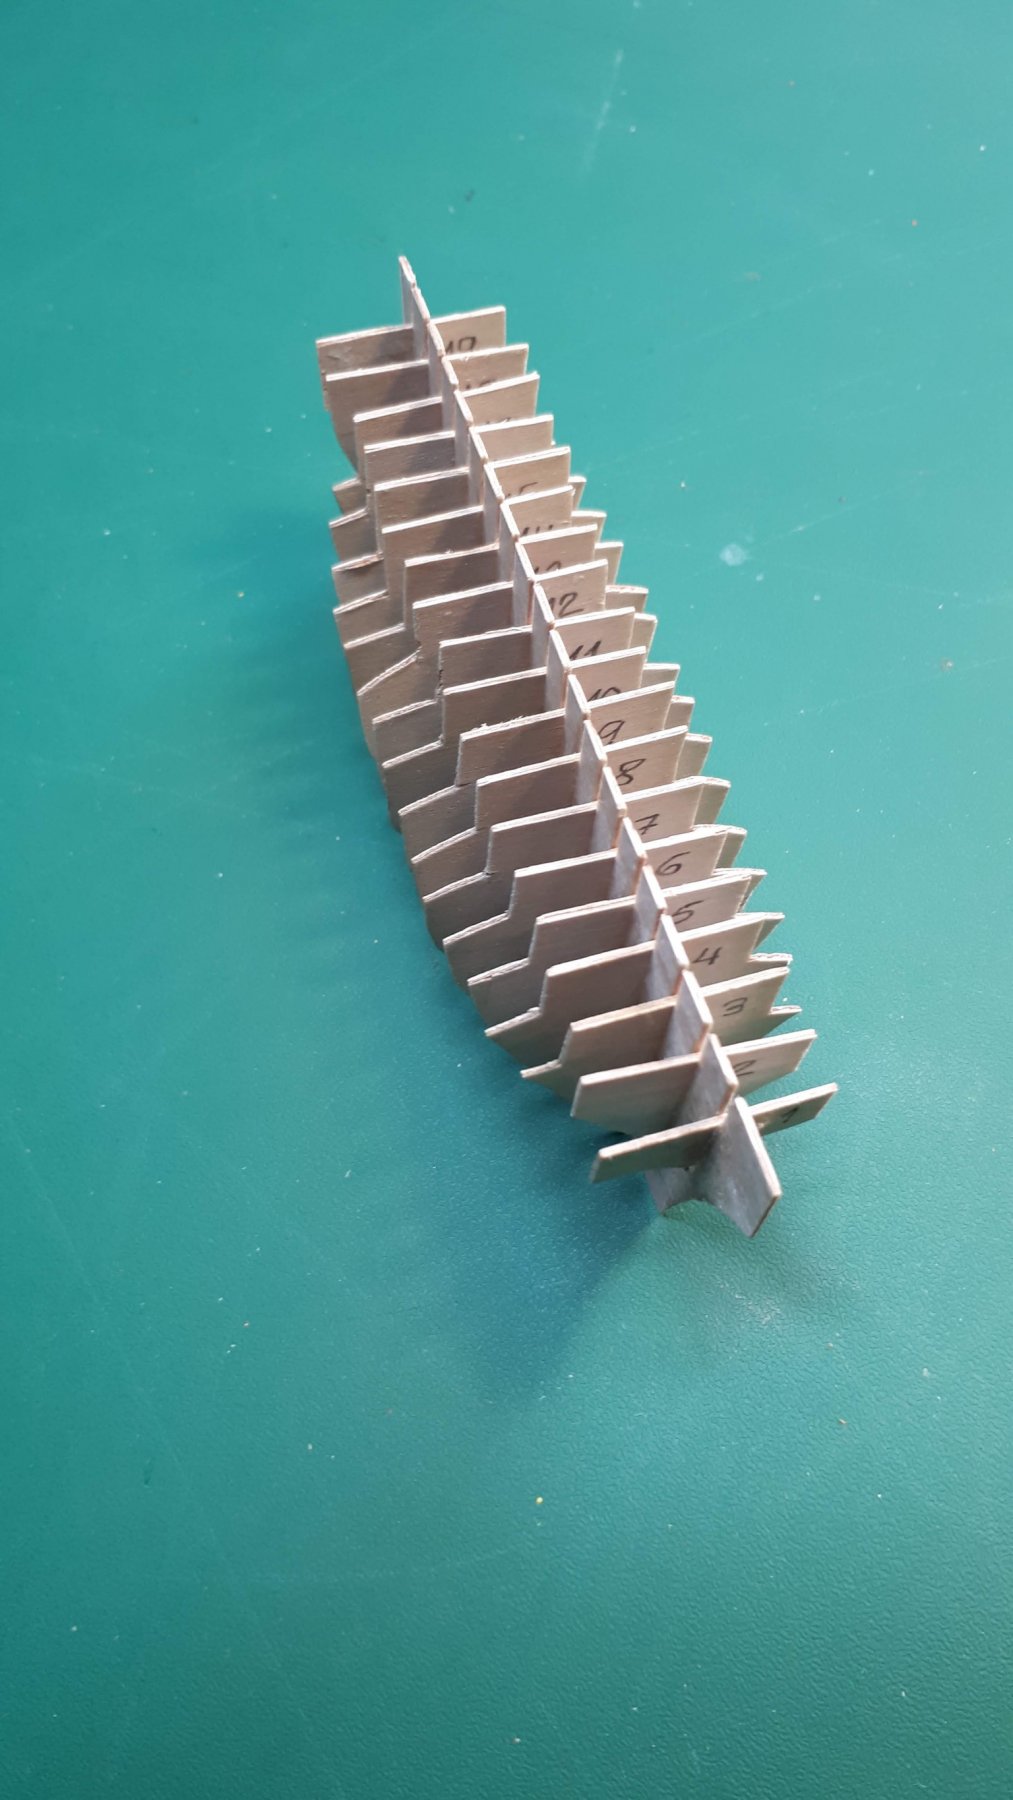
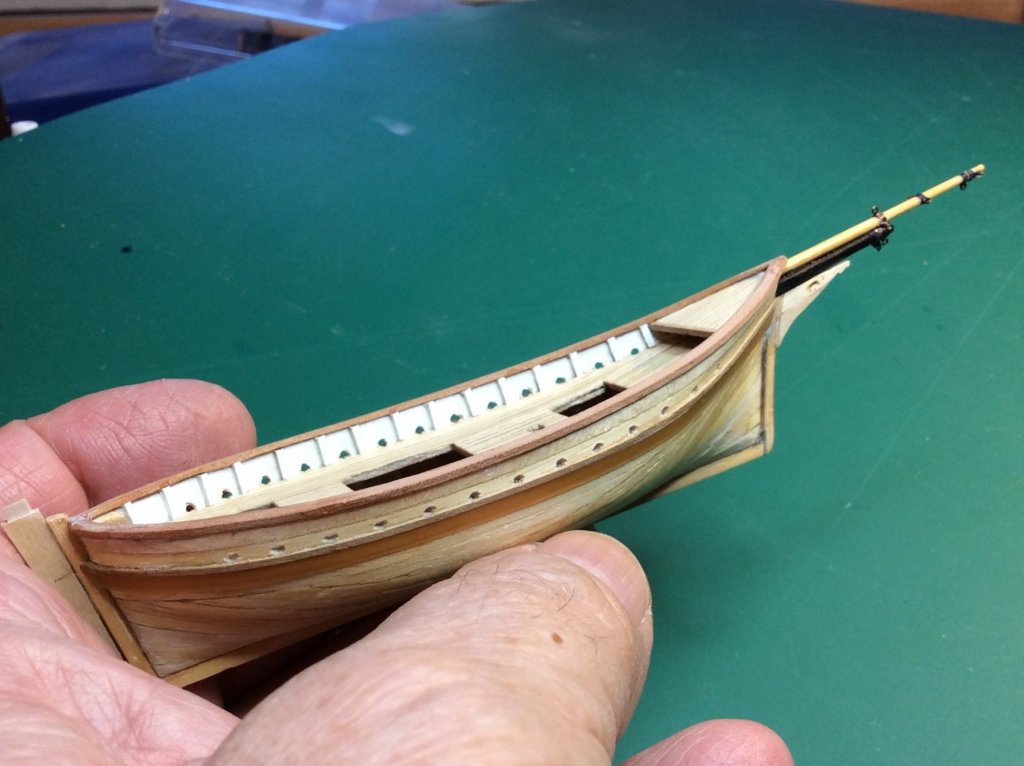
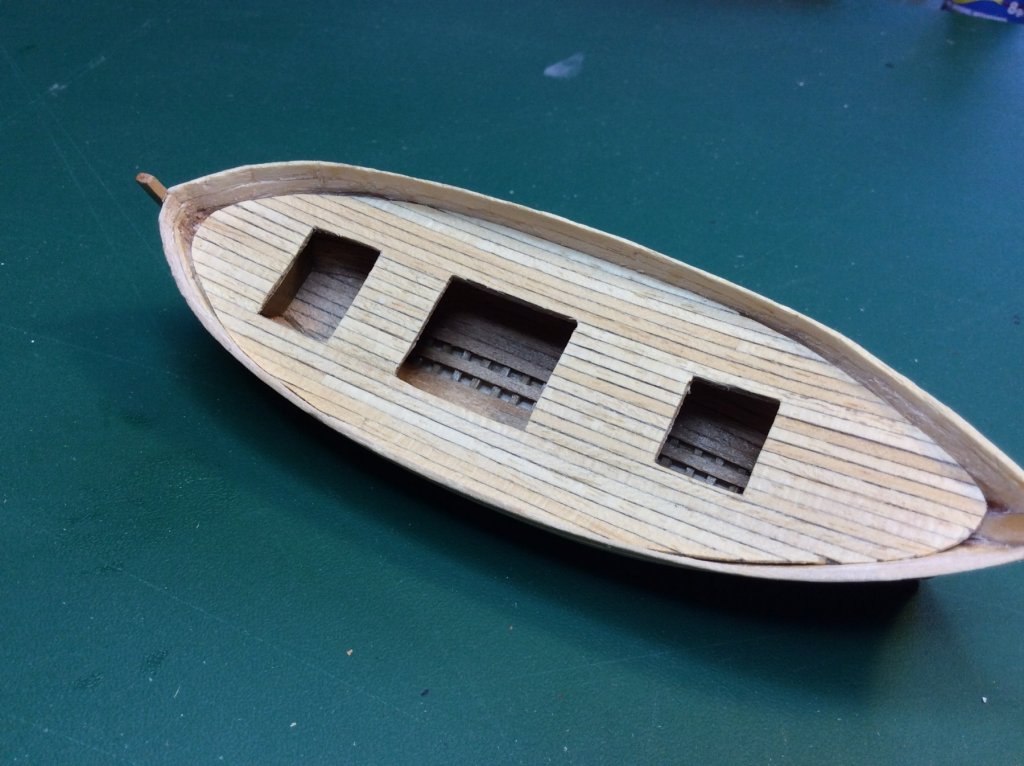
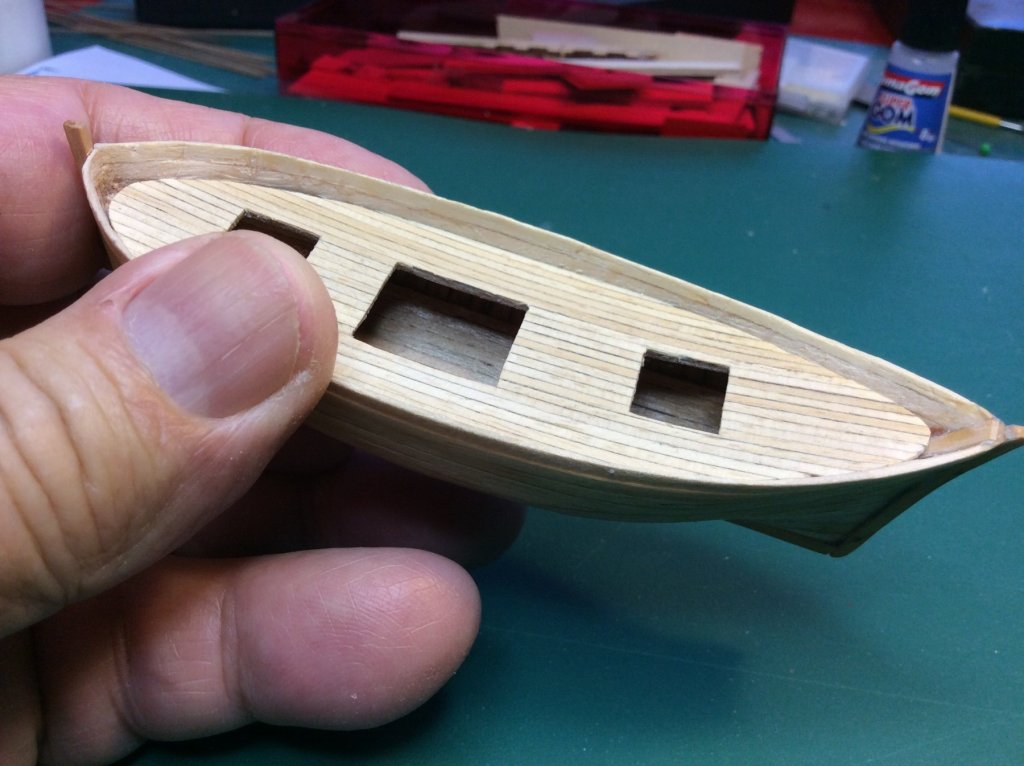
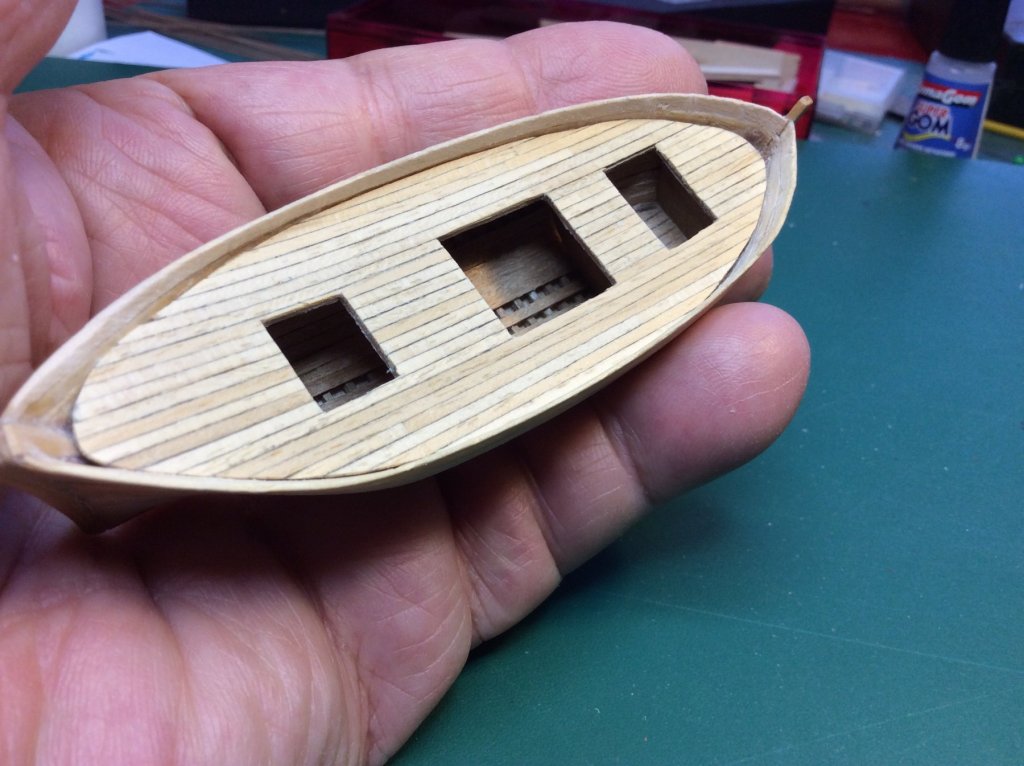
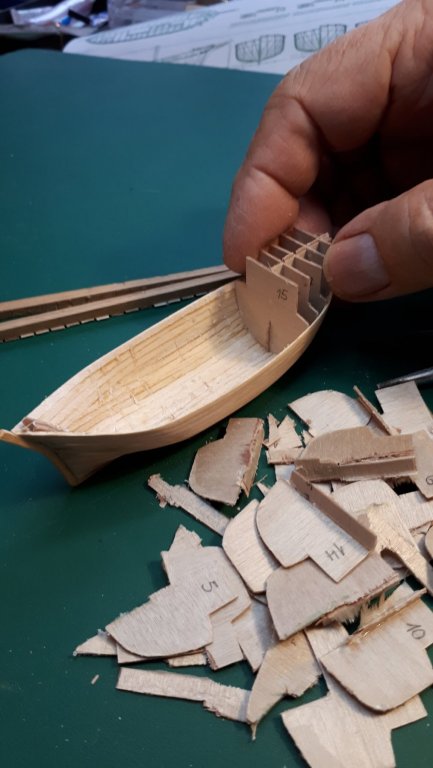
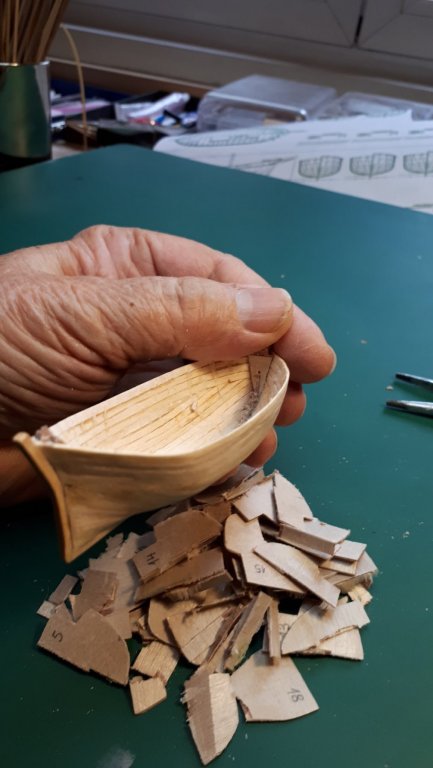
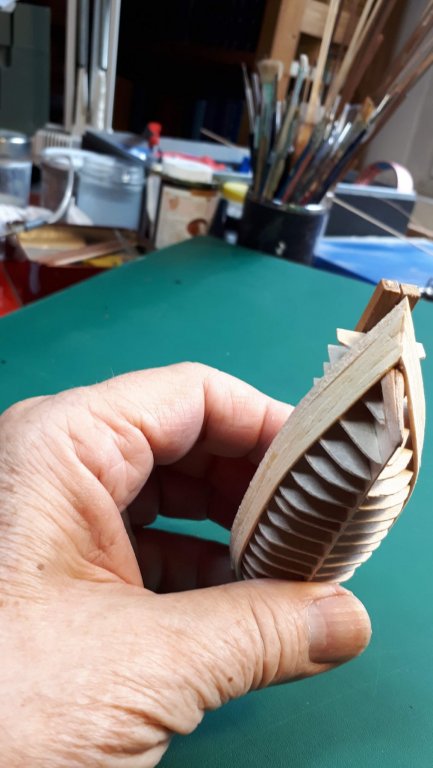
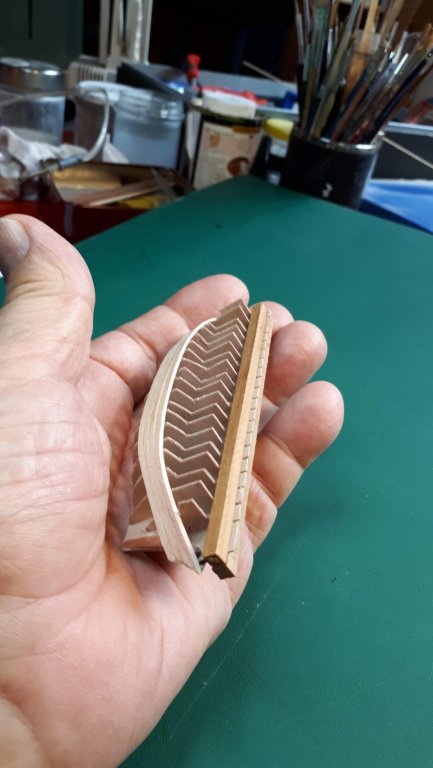
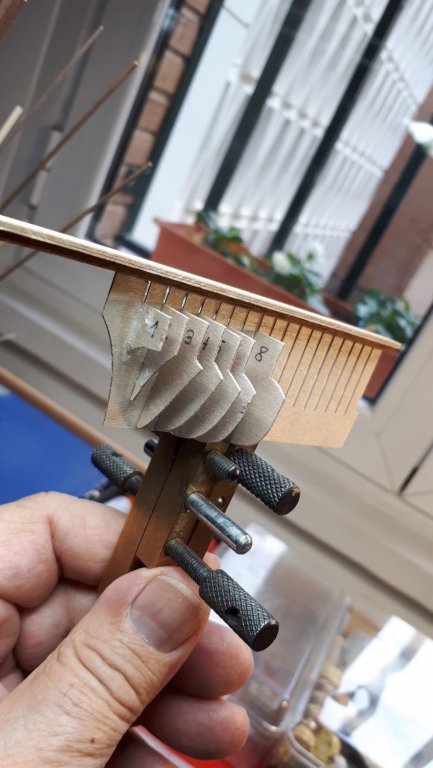
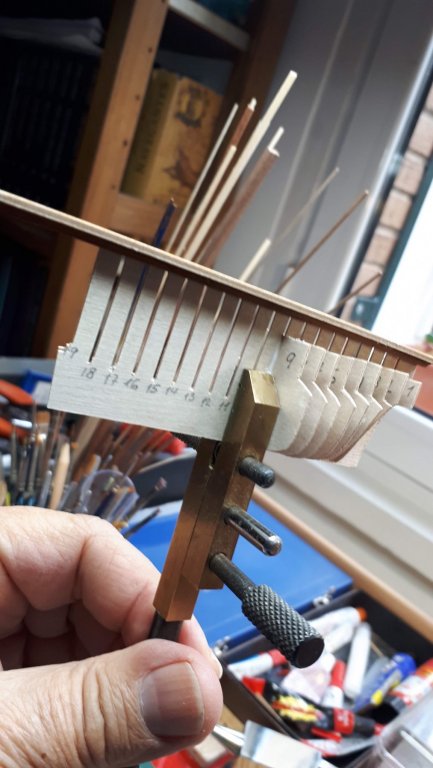
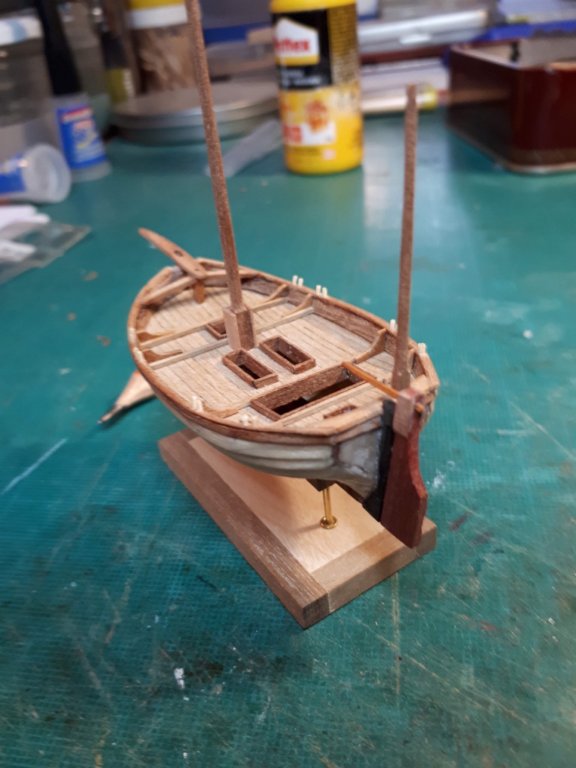
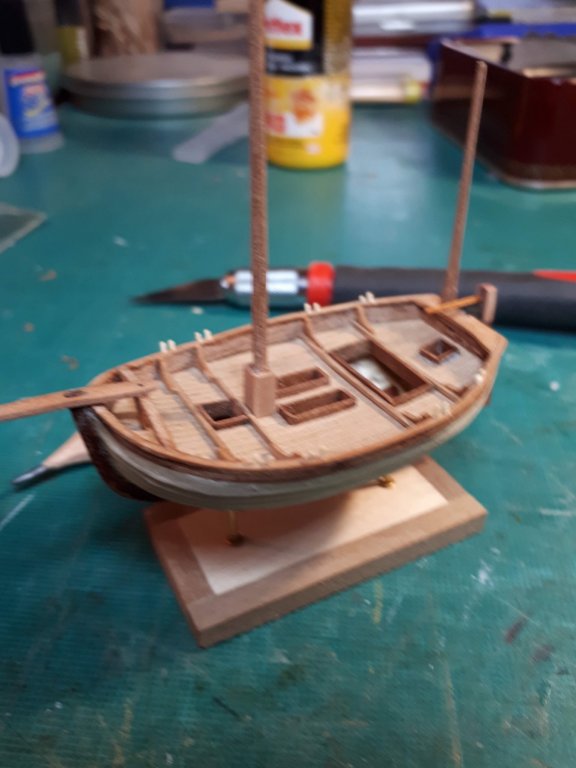
Thanks for your comments. Part of the interior of the ship can be seen, since I will leave the cargo hatches open and the door of the cabin half-open. In addition, one of the reasons why I build part of the interior carpentry is to give the hull greater rigidity. In the system that I use, the most delicate moment is just when the false bulkheads are pulled, since the hull only has 0.6 mm walls in its raw state, that is, before sanding.


- 51 replies
-
- 19
-
-
Thanks for your comments. Part of the interior of the ship can be seen, since I will leave the cargo hatches open and the door of the cabin half-open. In addition, one of the reasons why I build part of the interior carpentry is to give the hull greater rigidity. In the system that I use, the most delicate moment is just when the false bulkheads are pulled, since the hull only has 0.6 mm walls in its raw state, that is, before sanding.
-
You're right, Dave; my technique can be applied to the auxiliary boats of the big ships instead of the traditional technique of doing it with a solid mold. The traditional system has as an important advantage in the possibility of using the mold many times and making an equal series of boats, which is important for steam boats of modern times, but has the disadvantage that it is very difficult to make boats of lines very sharp or that are of concave section with greater width in the waterline than in the line of the deck. Javier
-
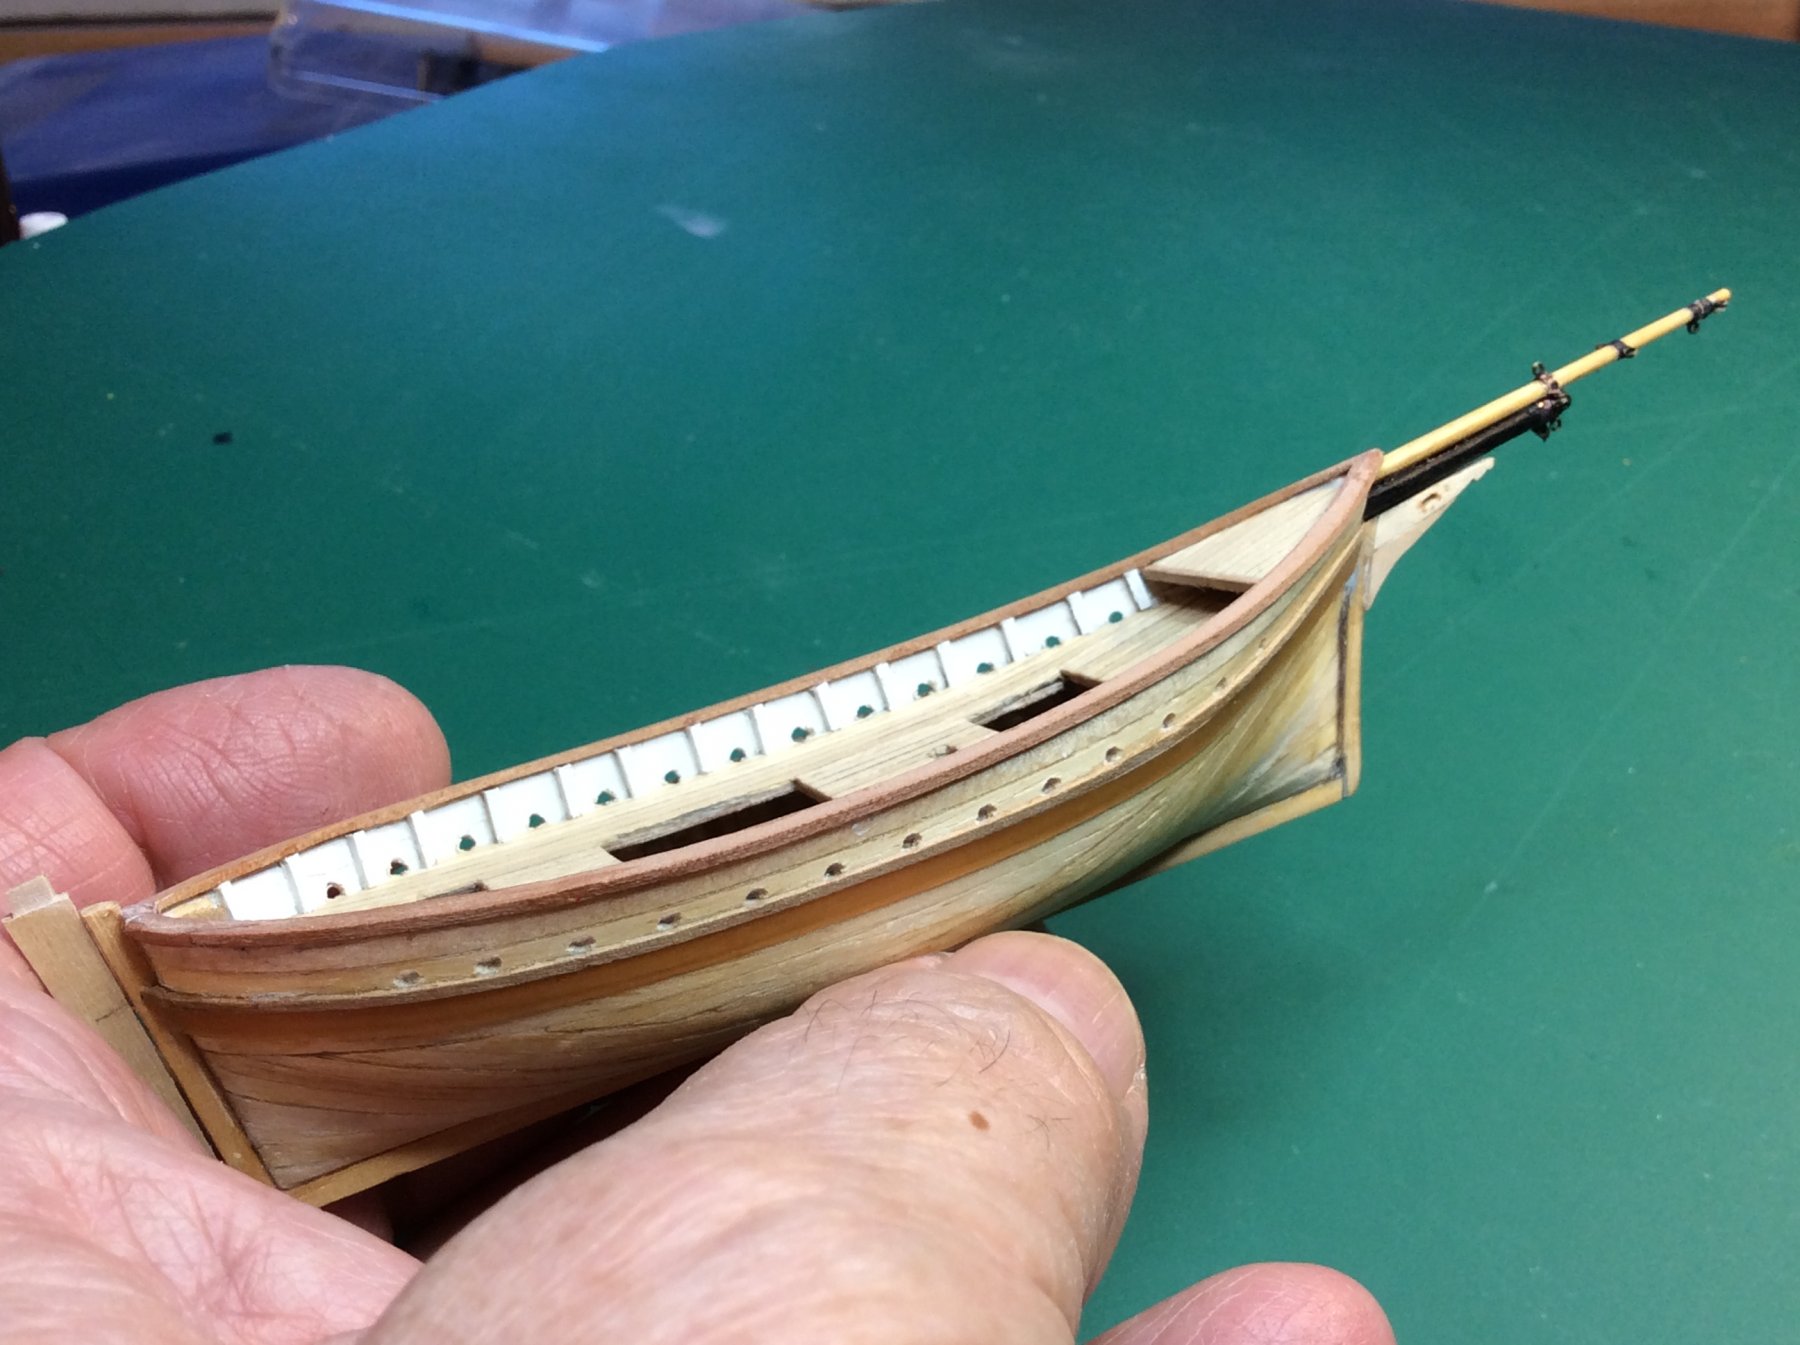
thank you very much, Steven, for your kind comment. I continue advancing in the construction of the tartana. The images that I show correspond to a somewhat earlier stage of the work, and in a short time I hope to be already reporting in real time.

- 51 replies
-
- 14
-
-
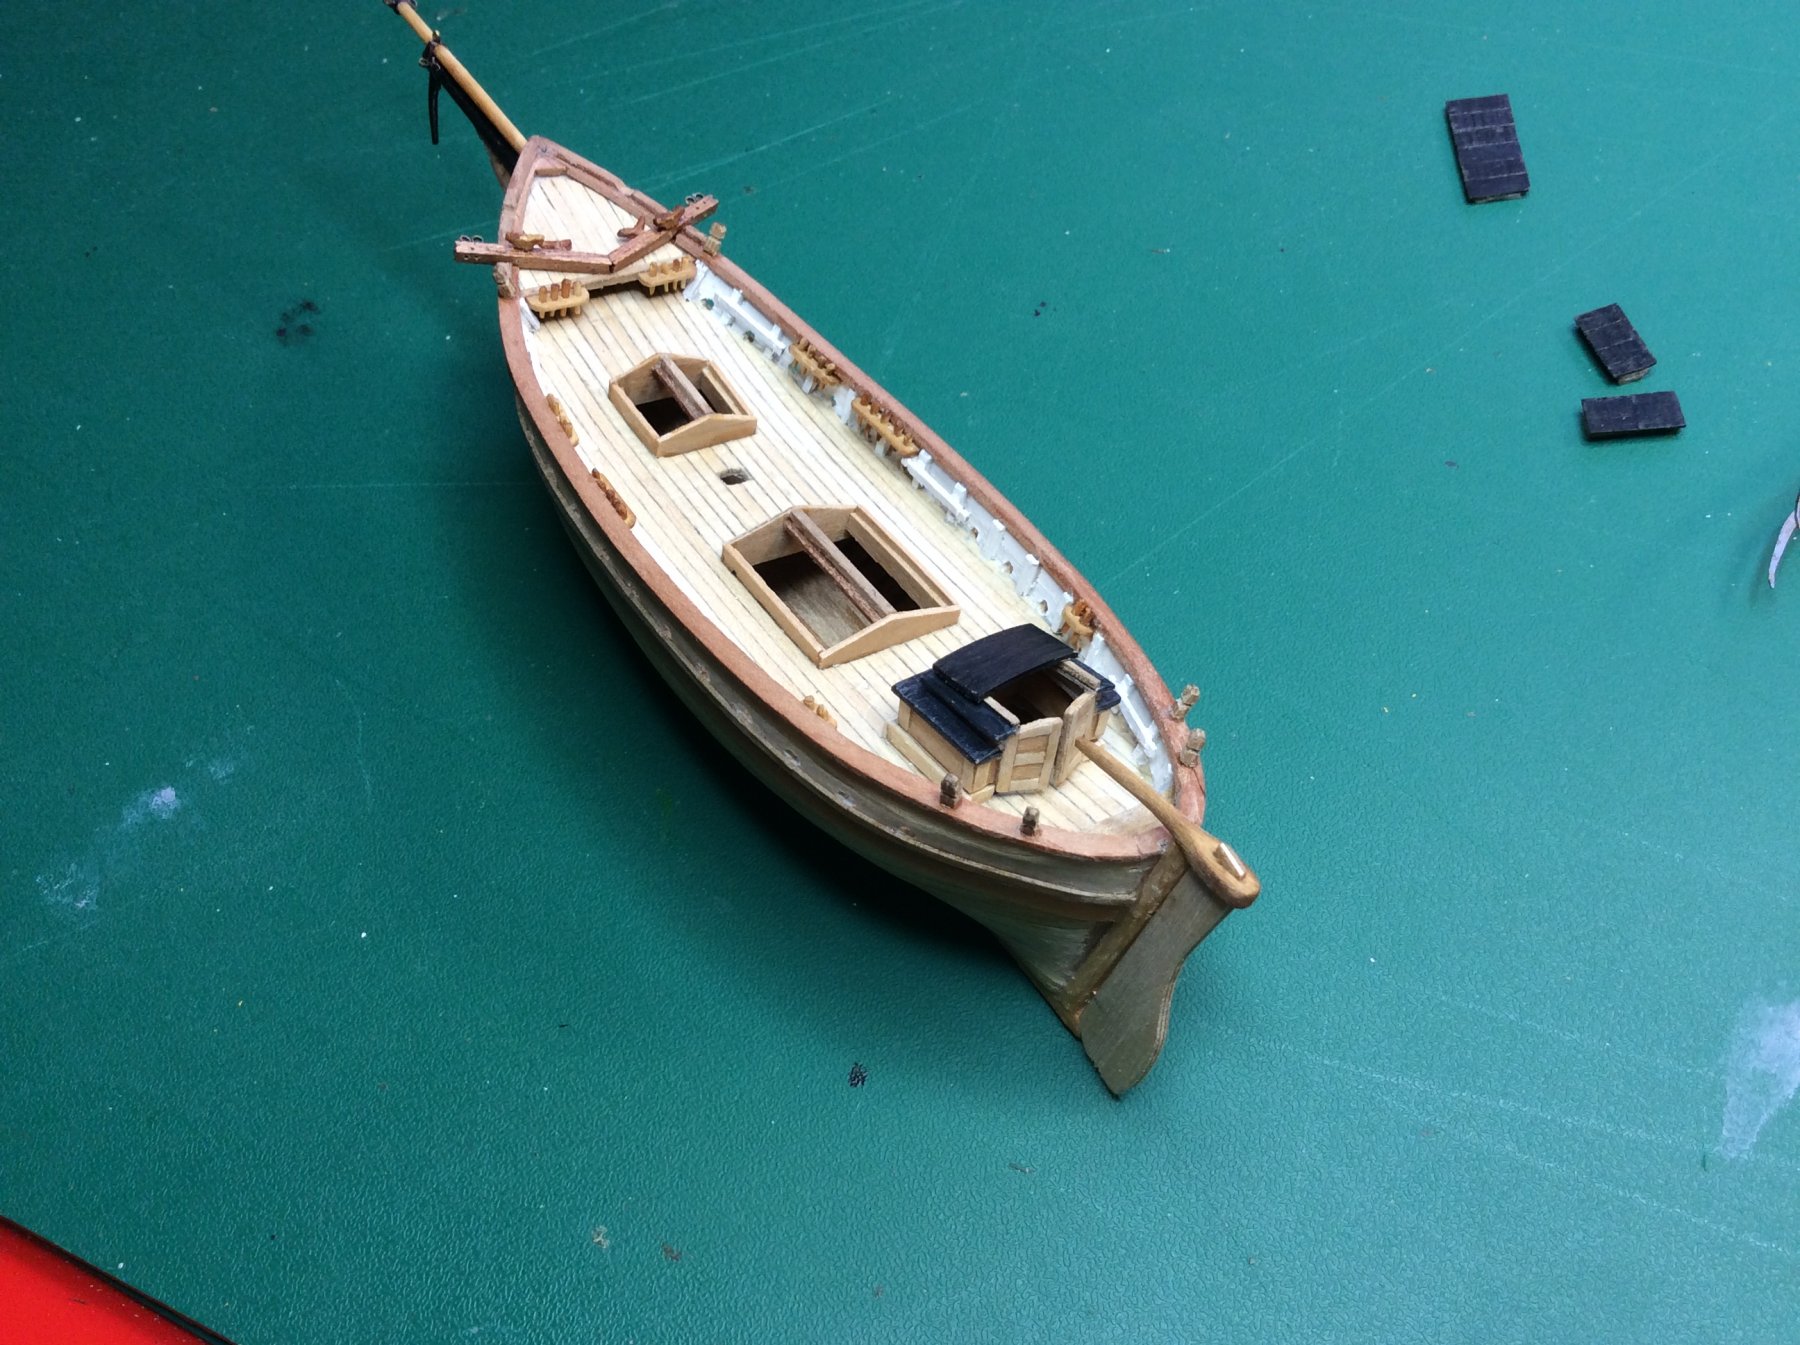
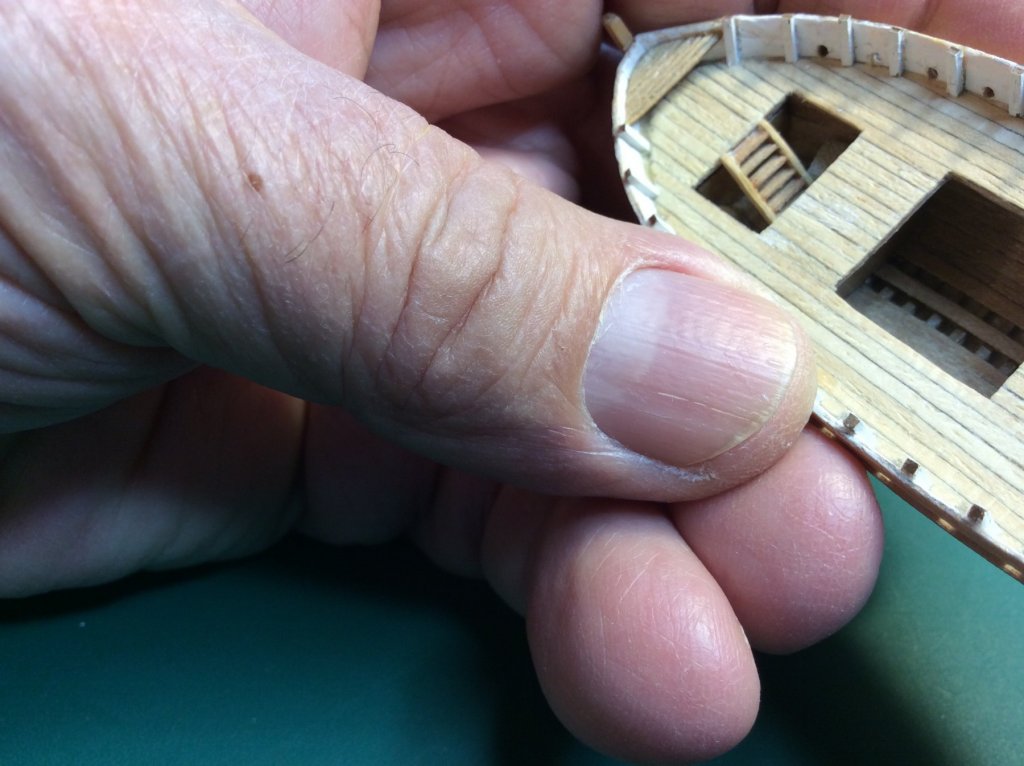
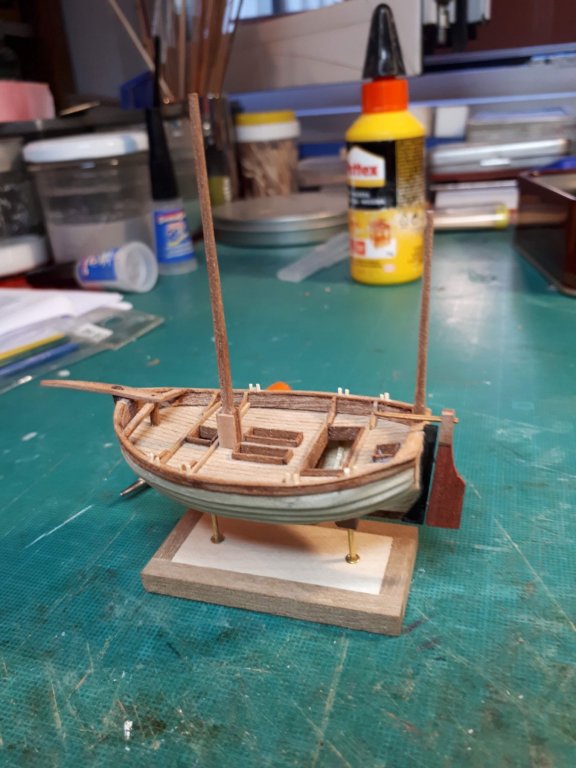
Thank you very much, Daniel. It's a pleasure to contact you again after Rochefort. I continued with the construction of the Ligurian tartana:


- 51 replies
-
- 19
-
-
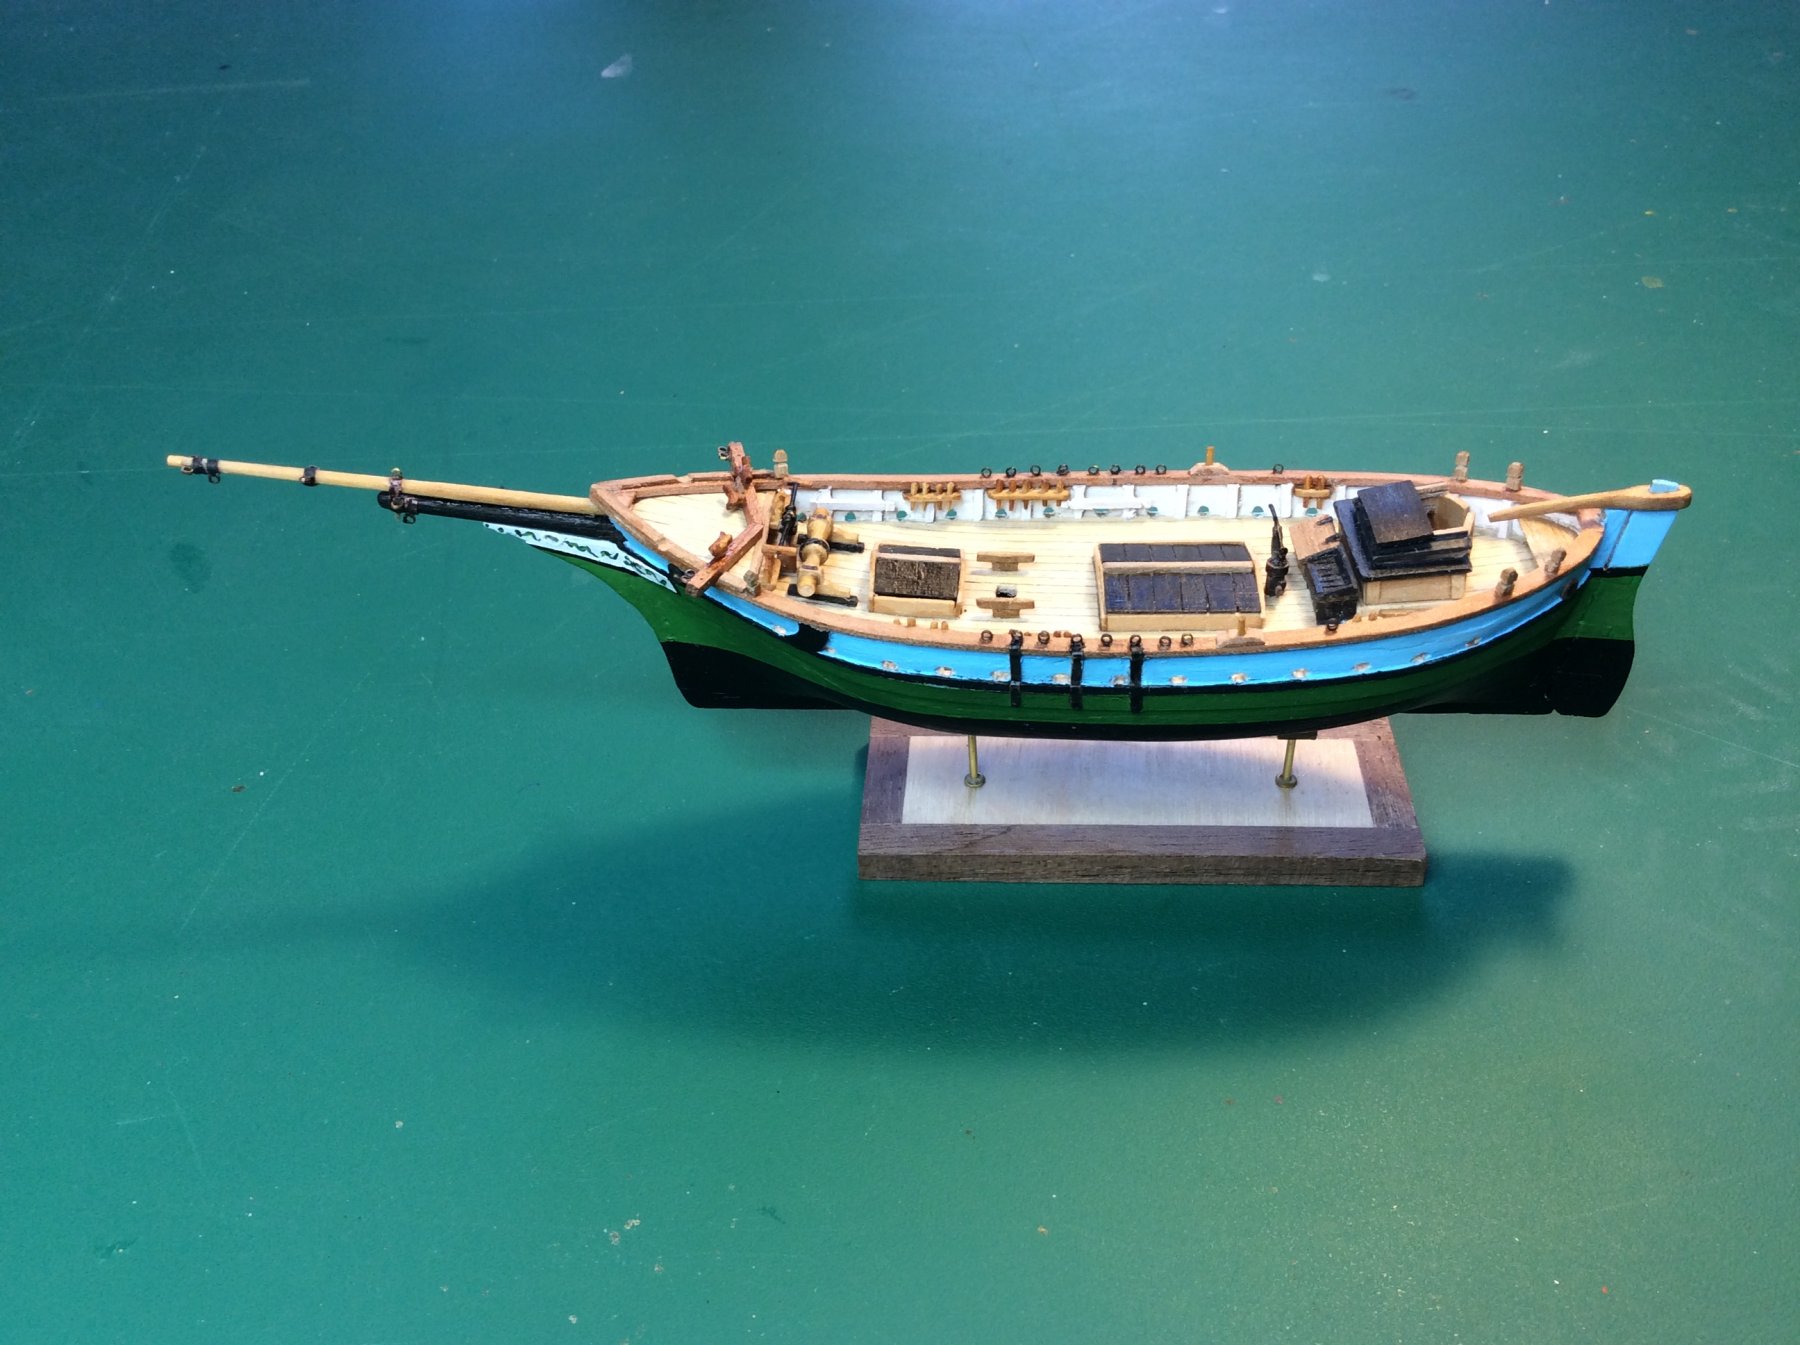
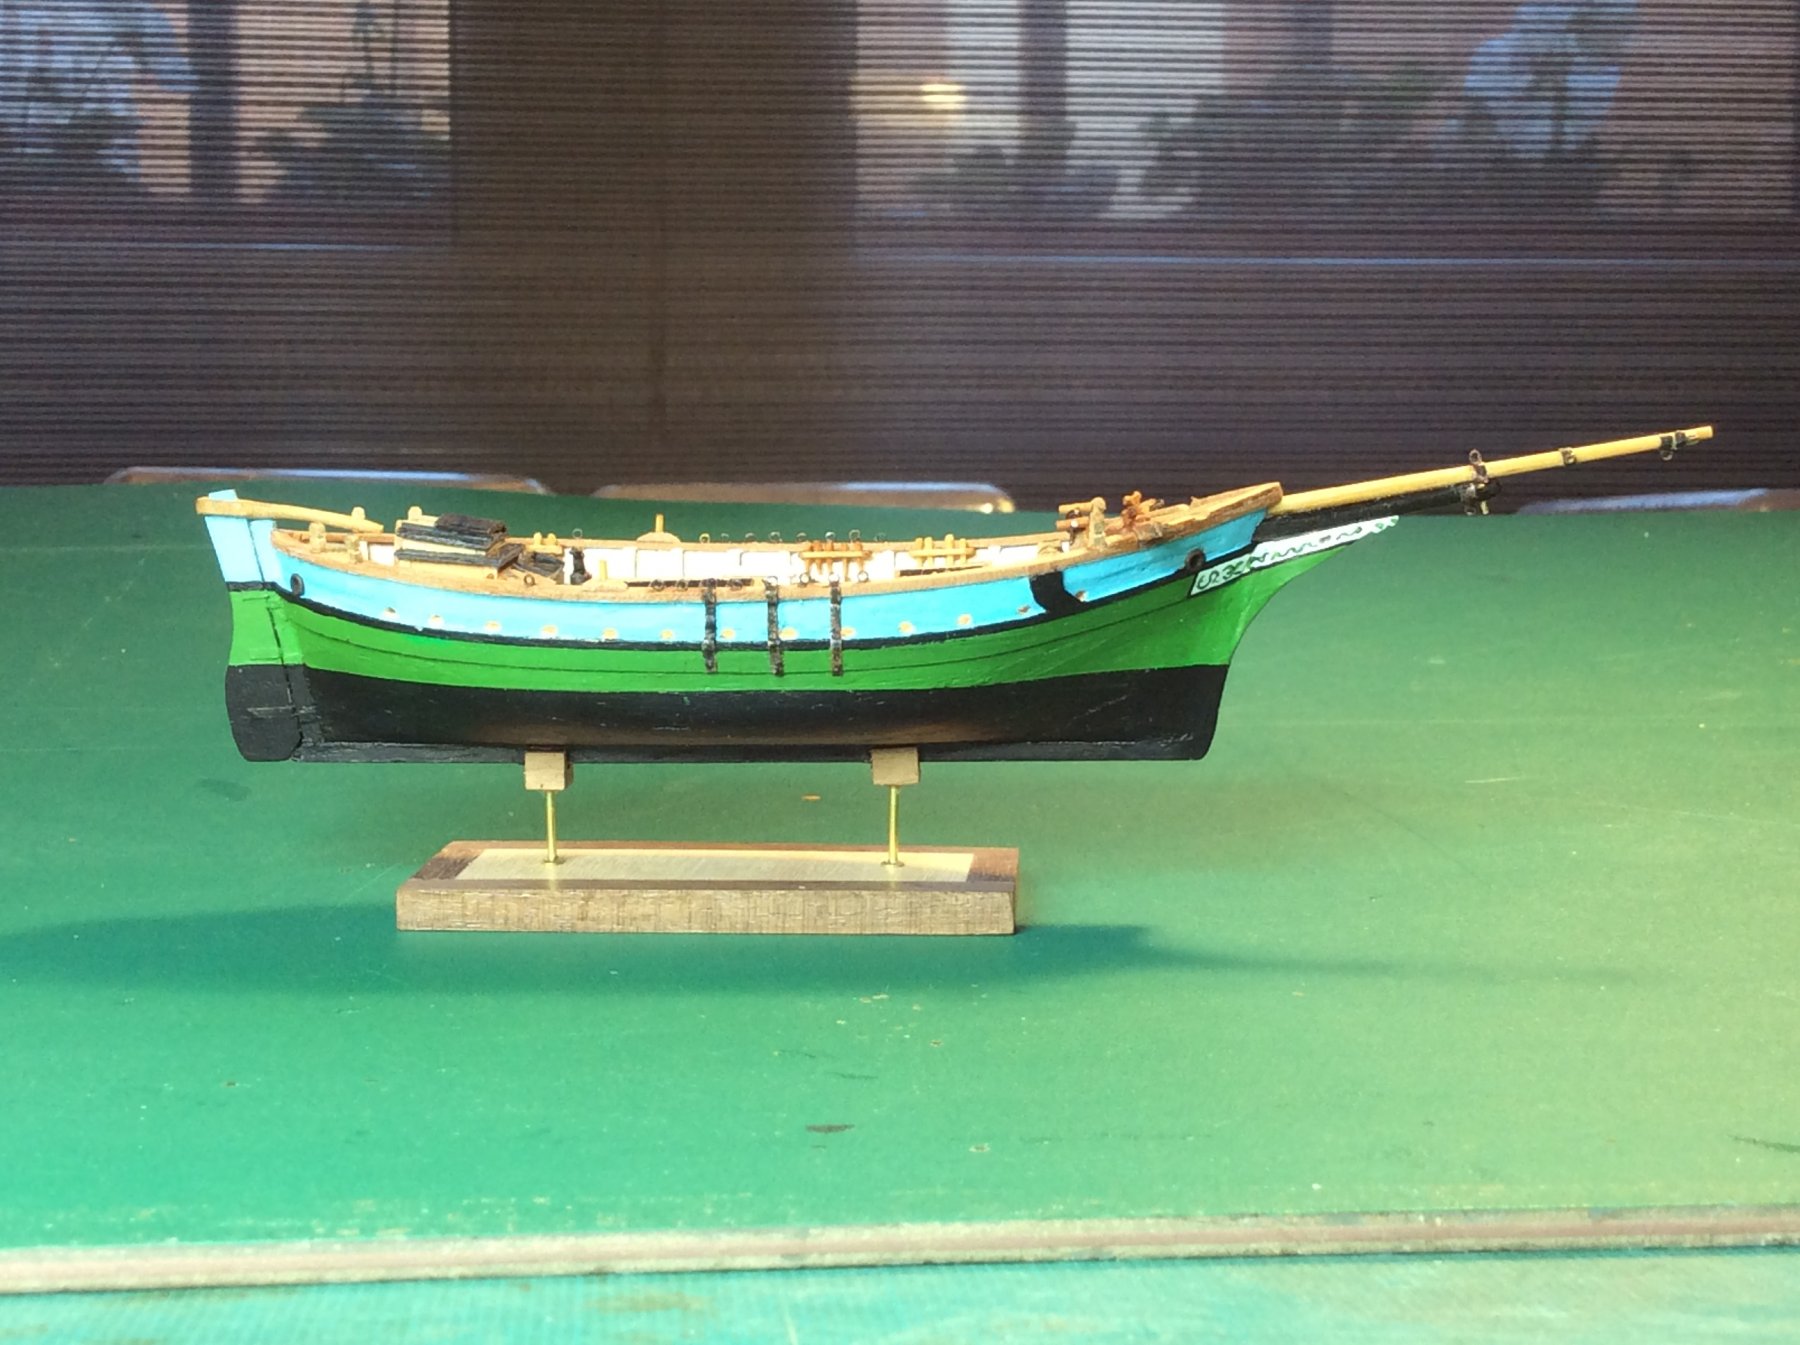
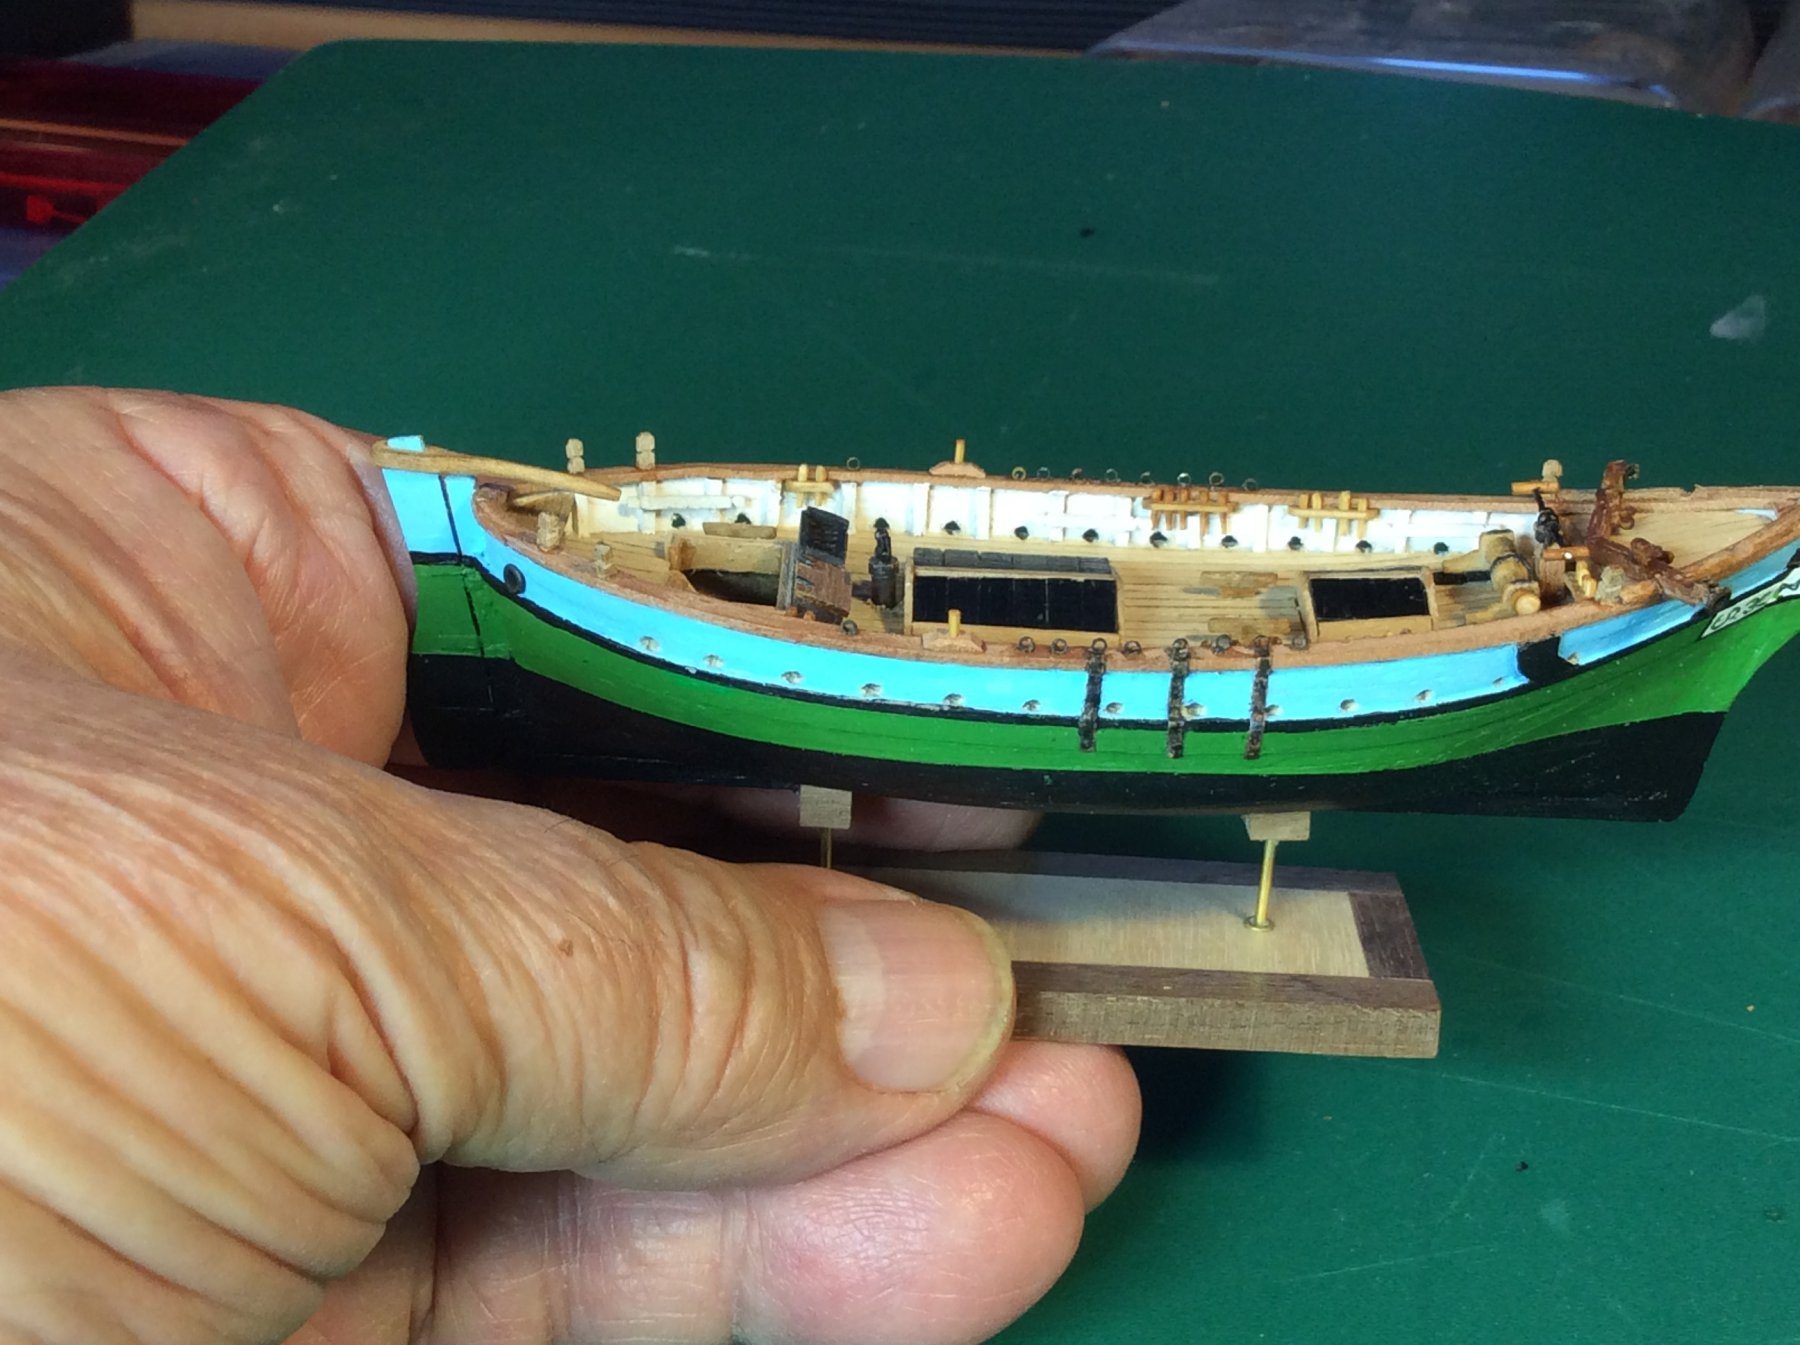
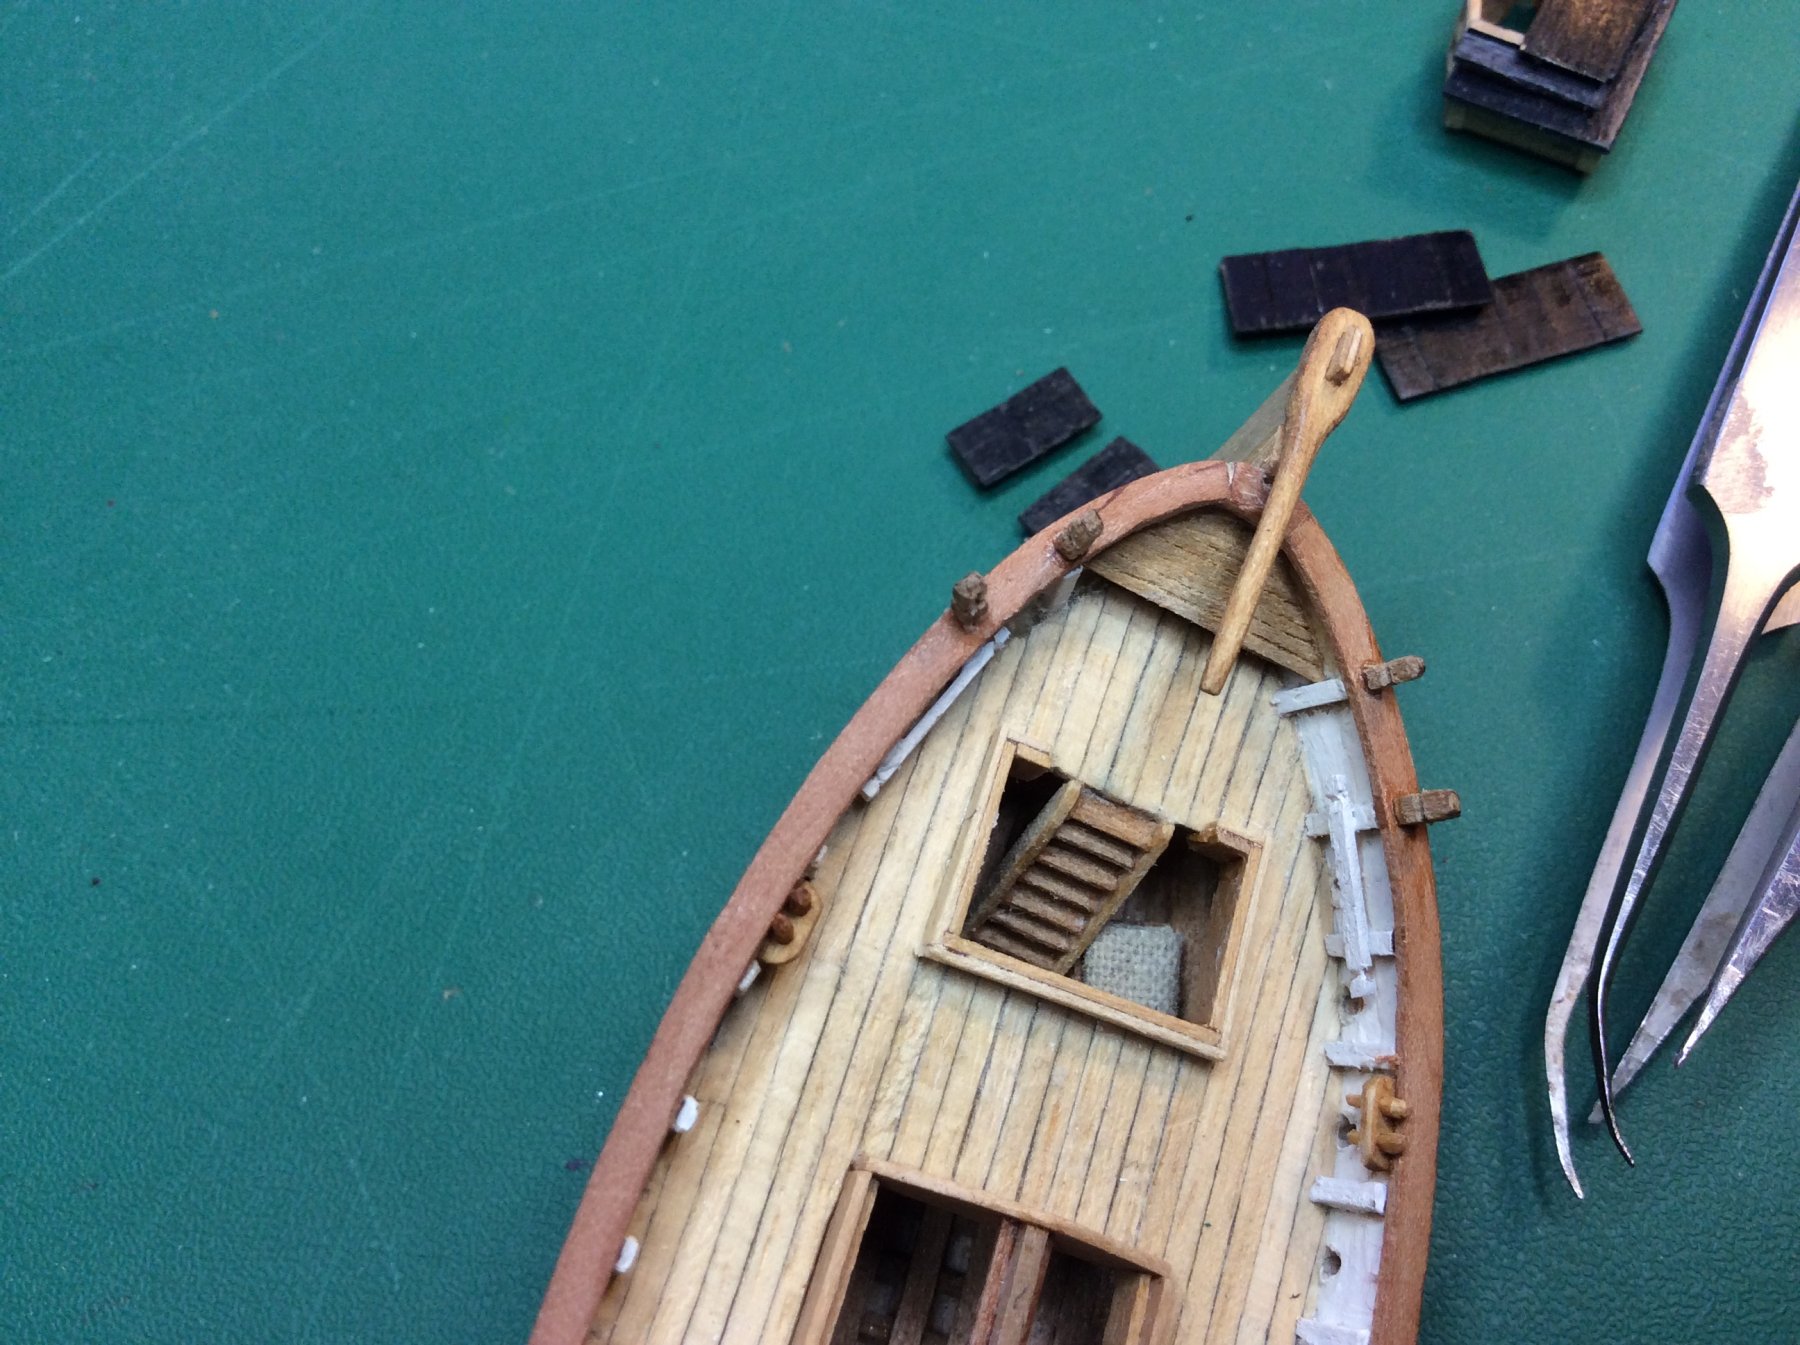
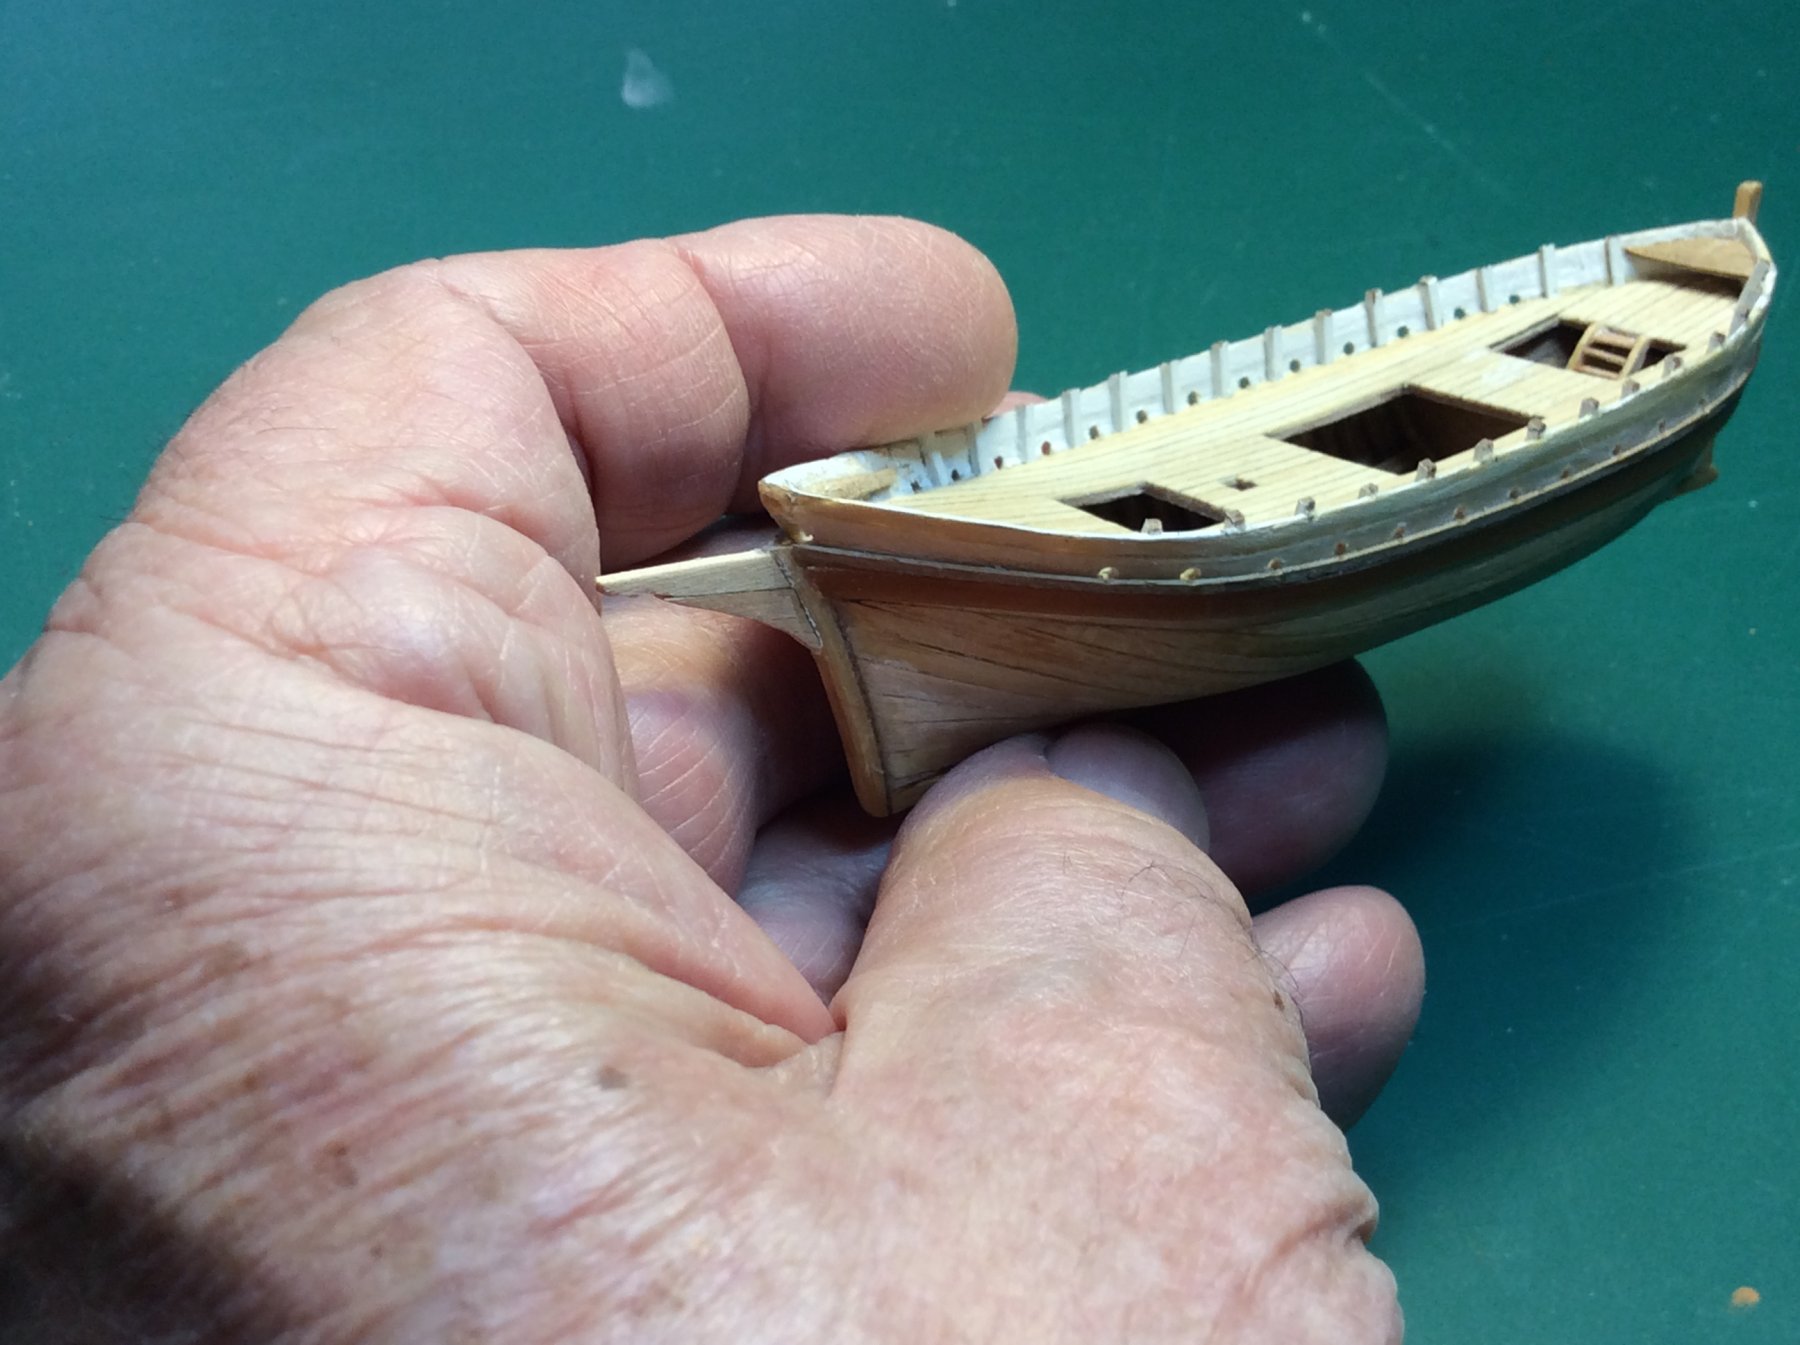
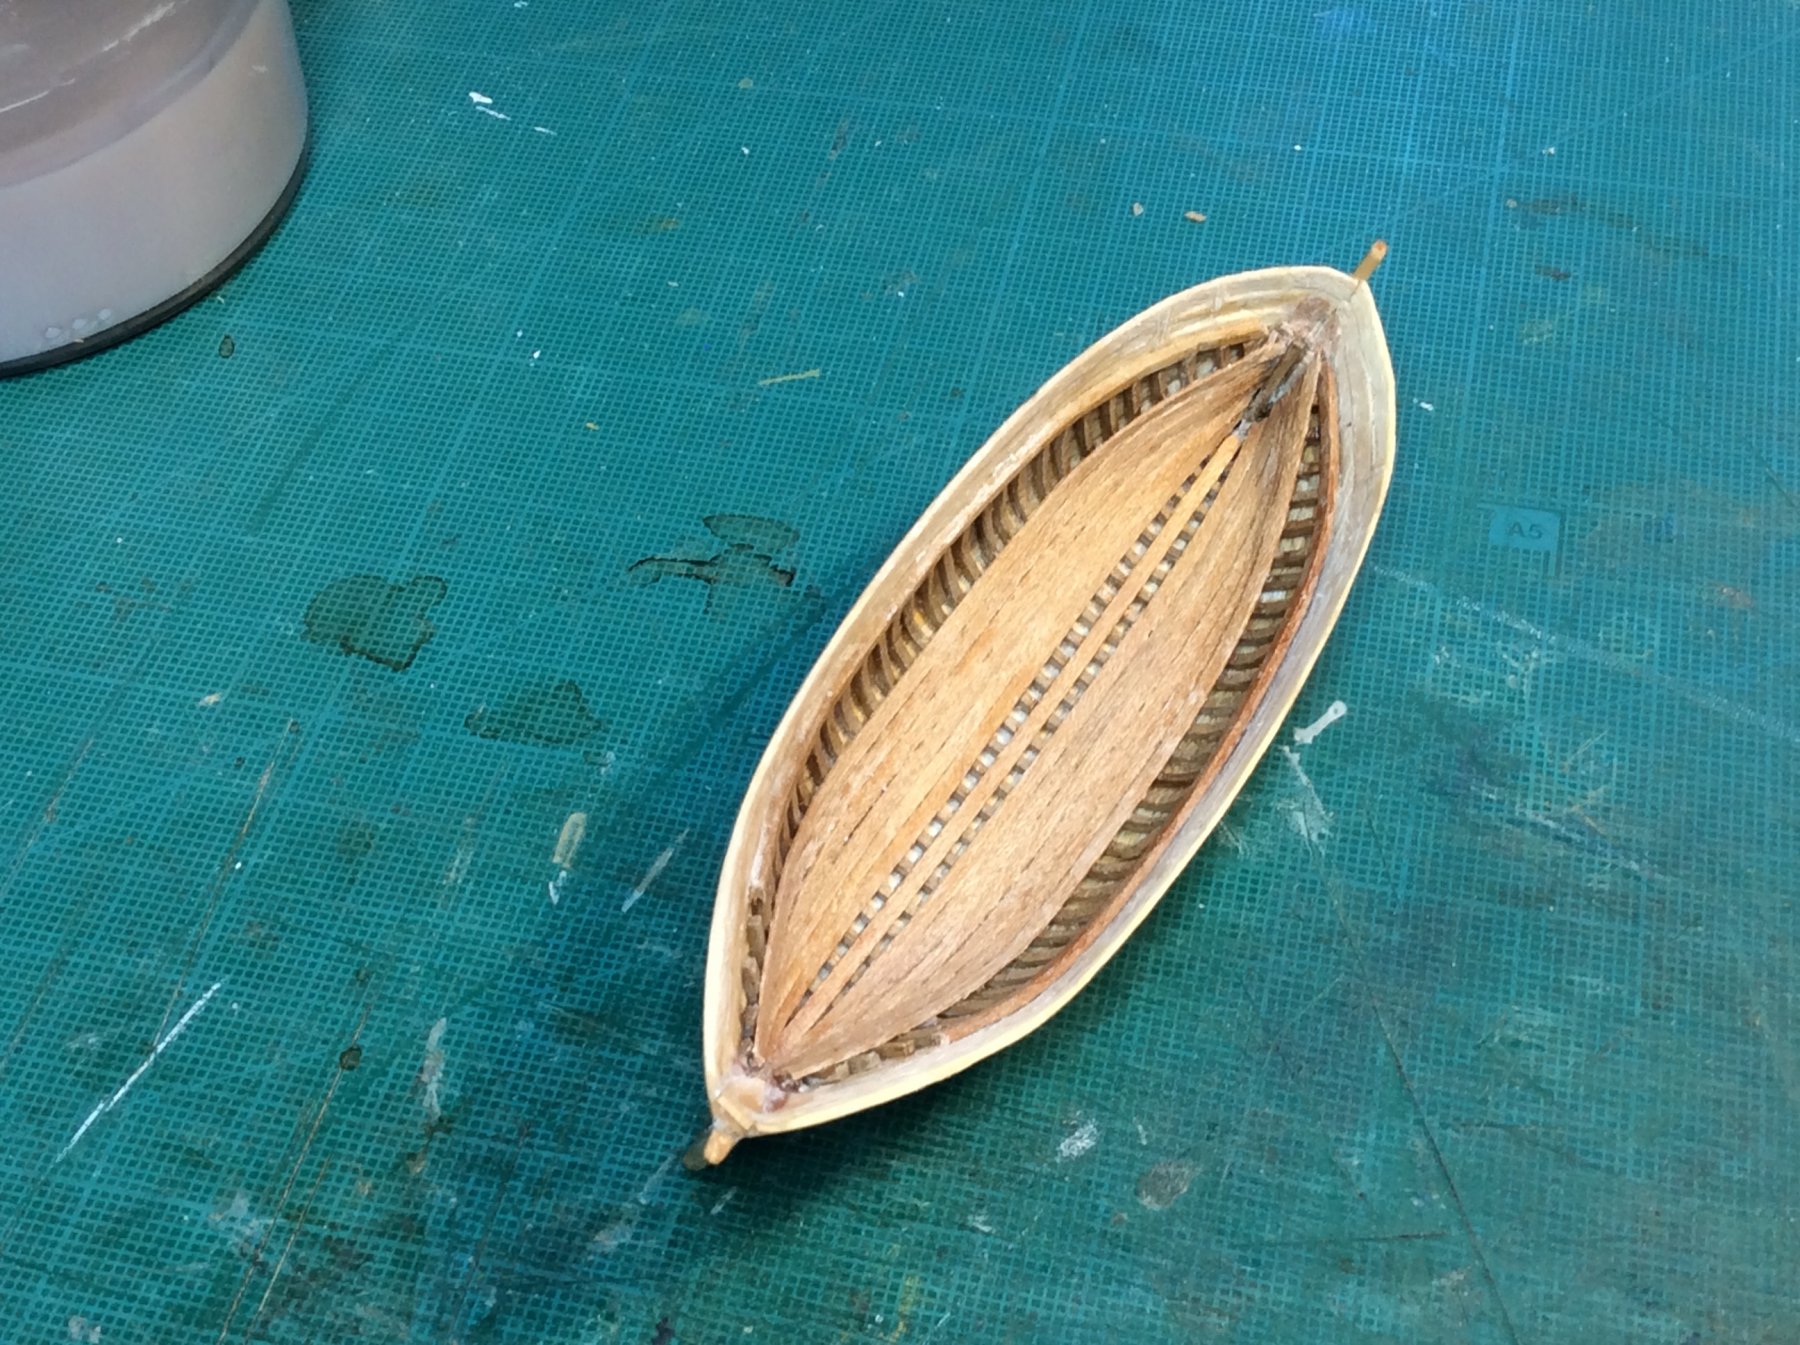
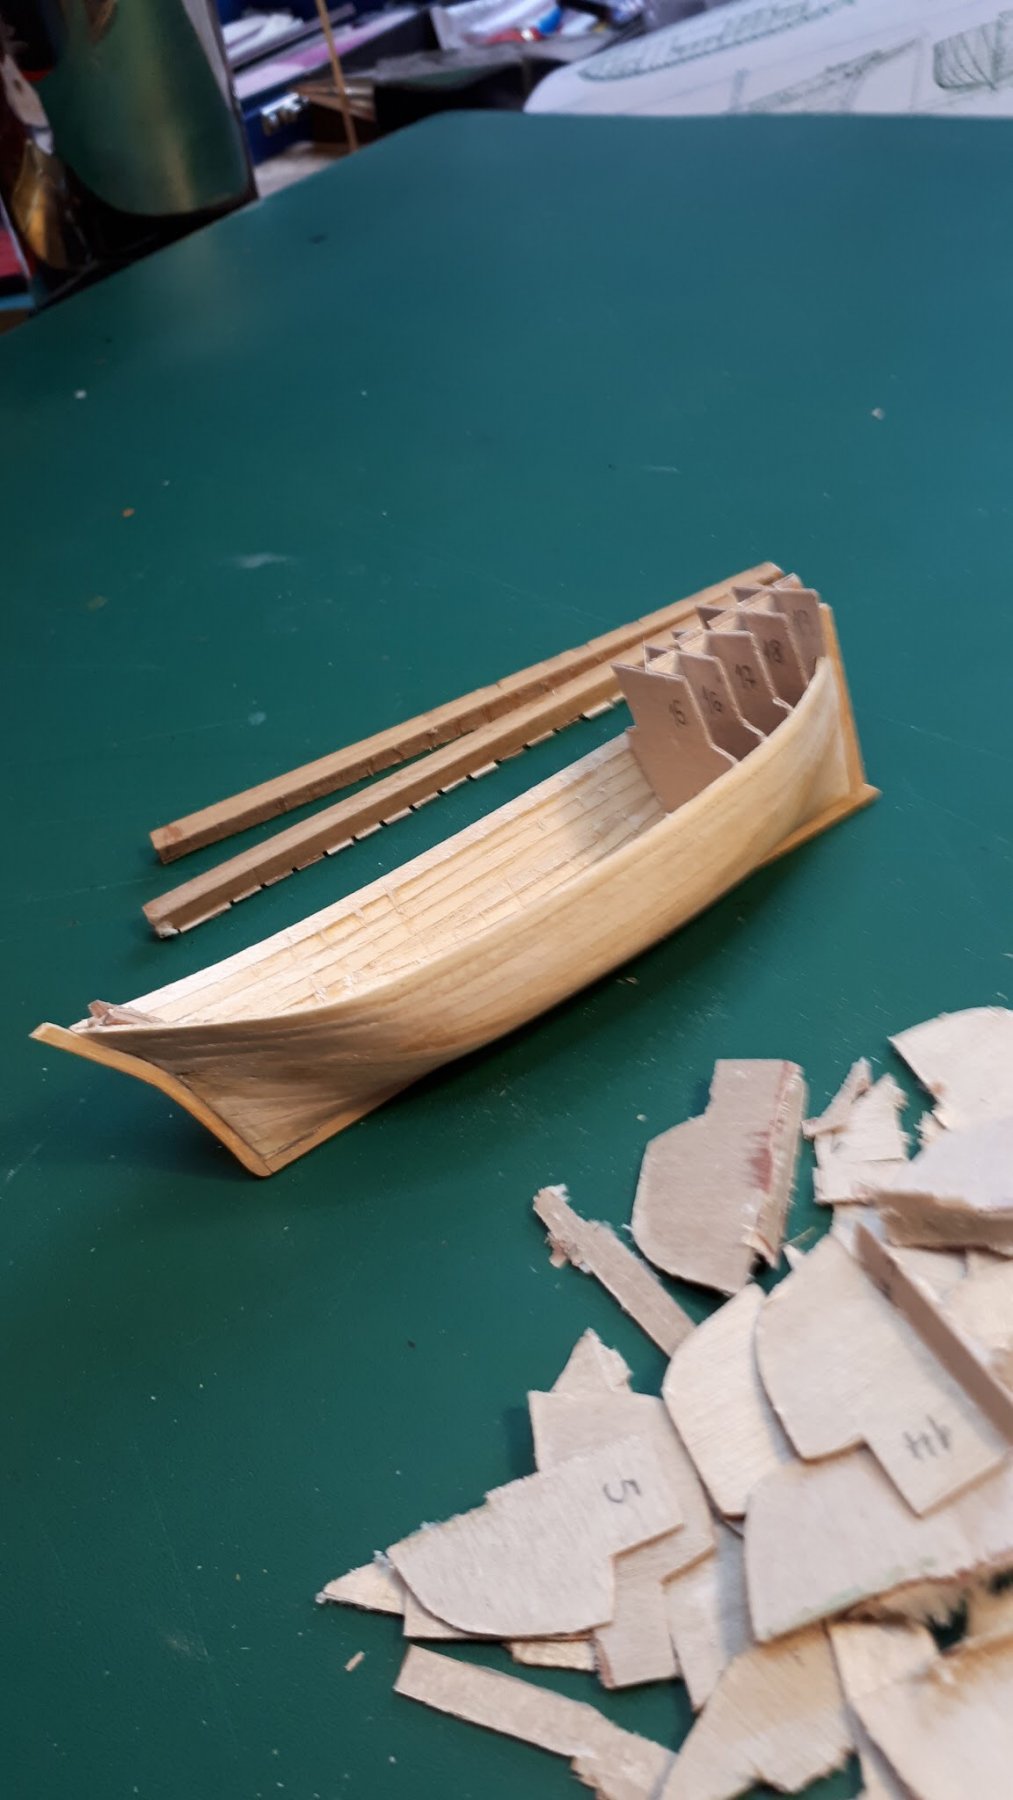
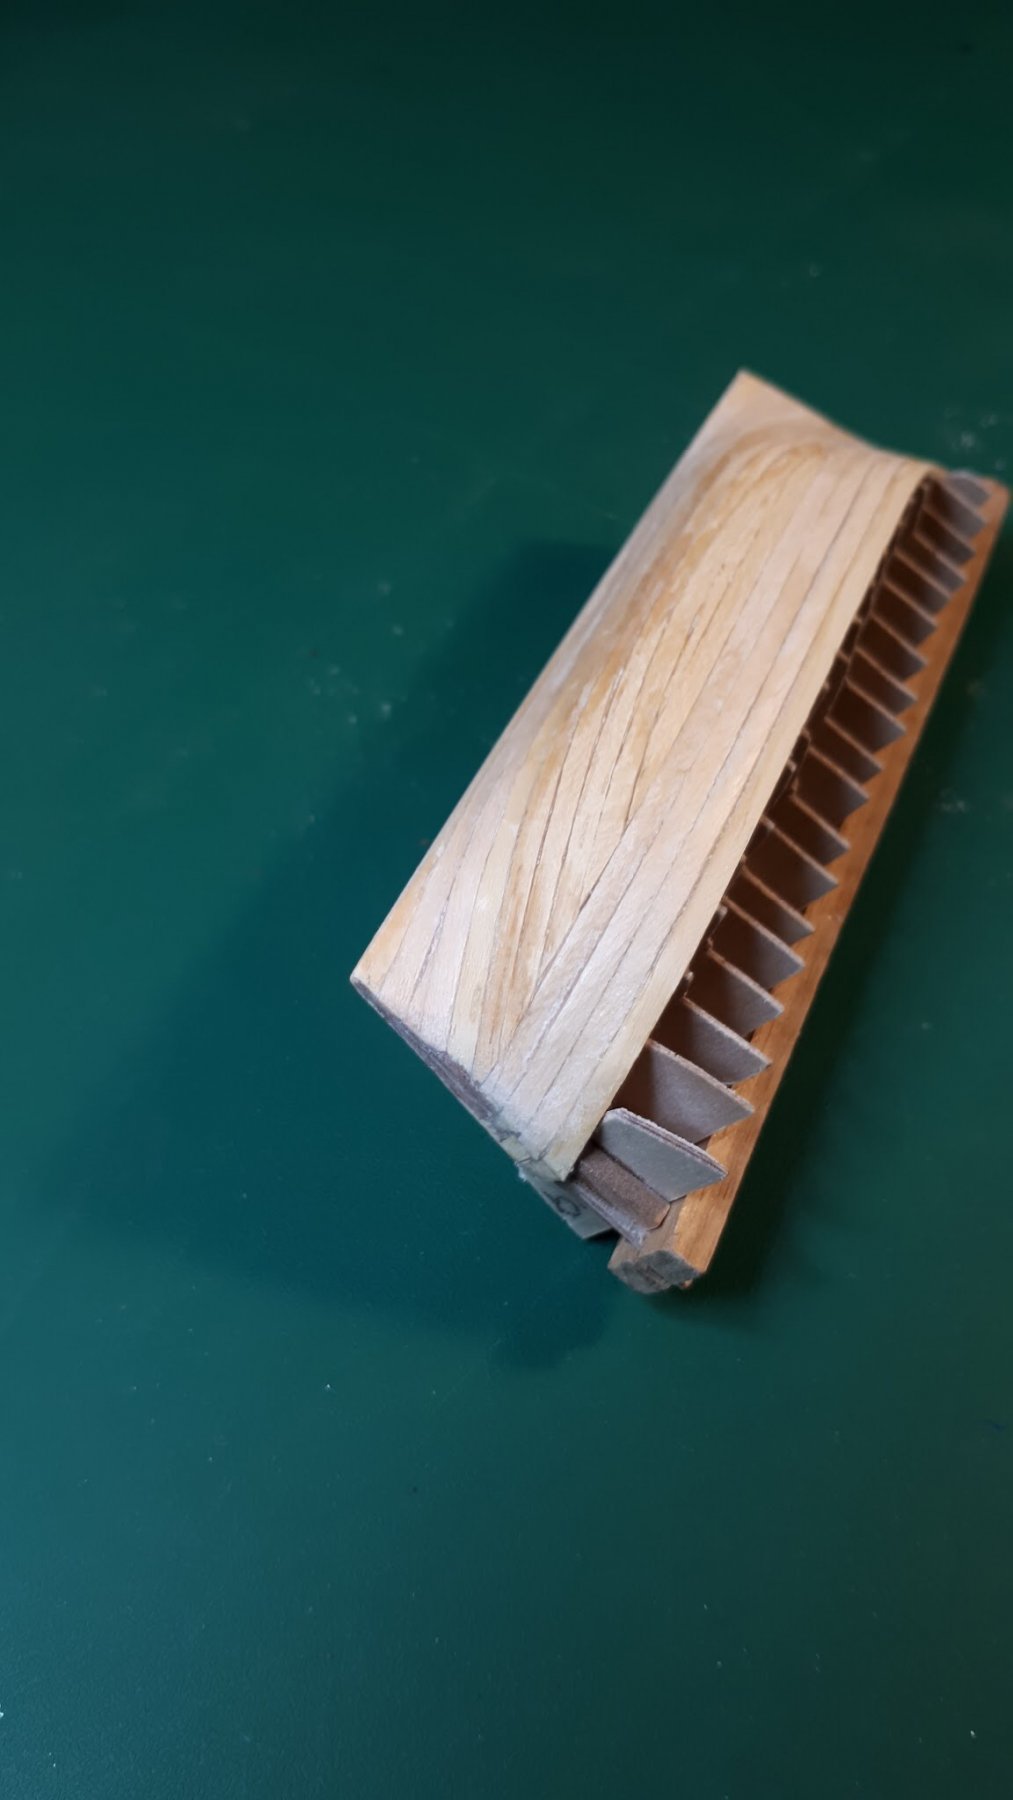
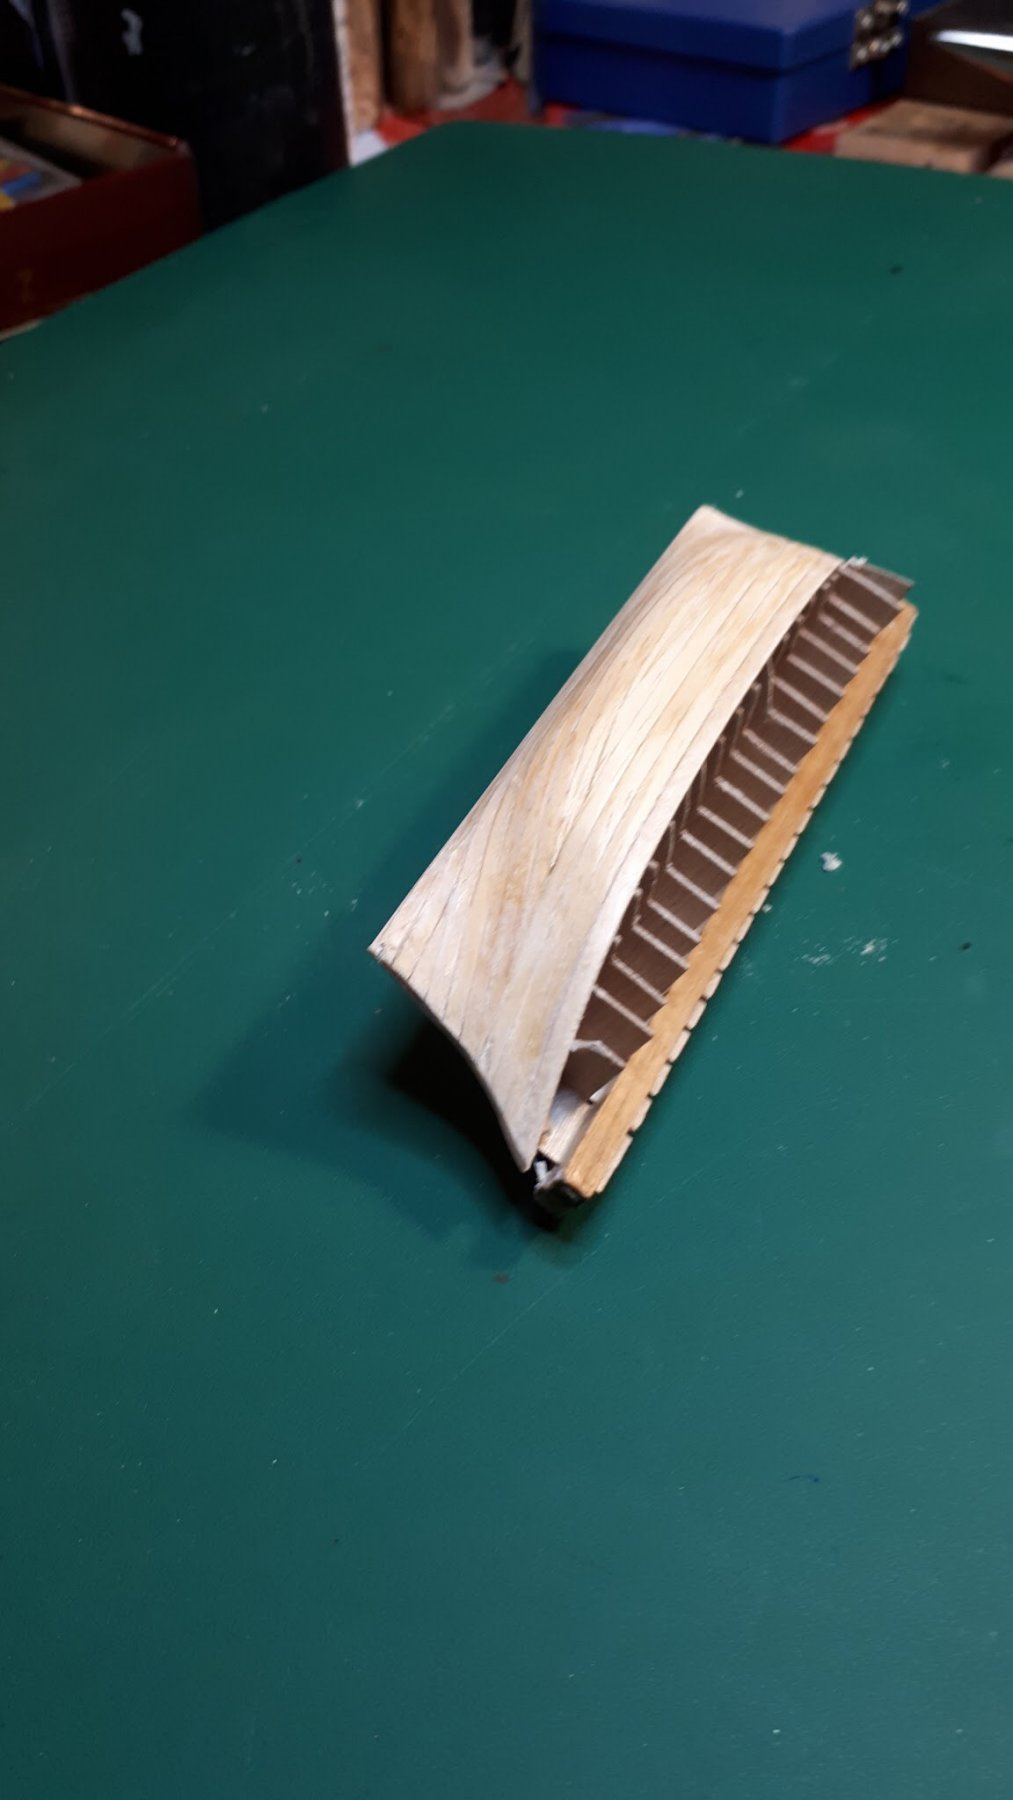
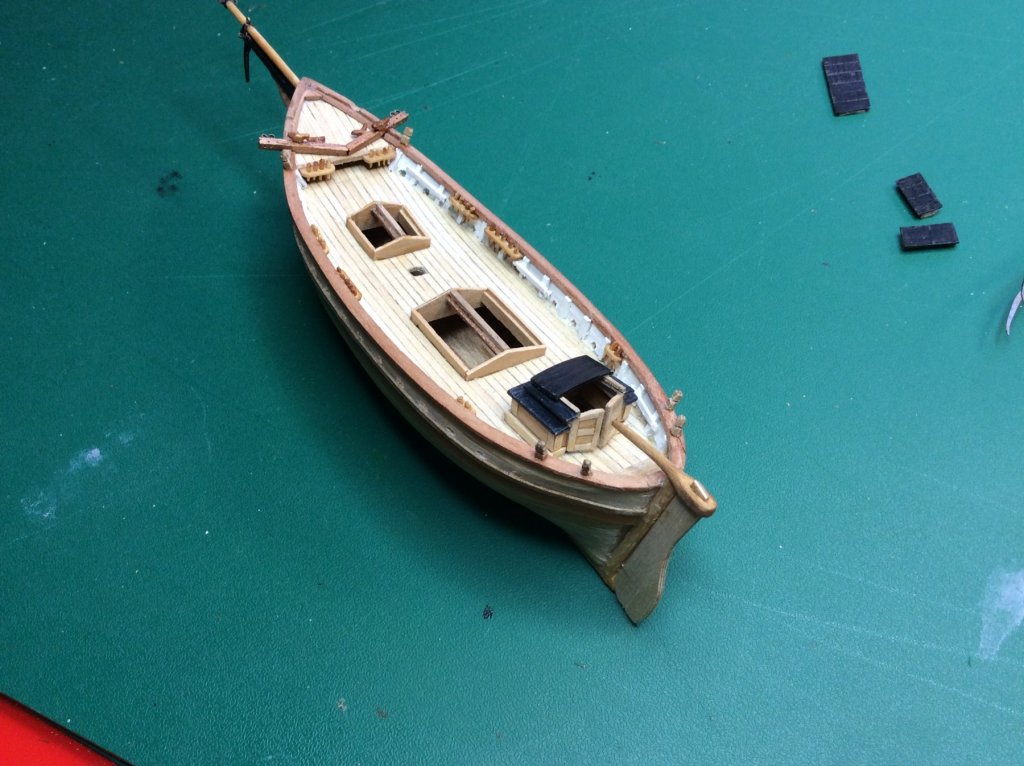
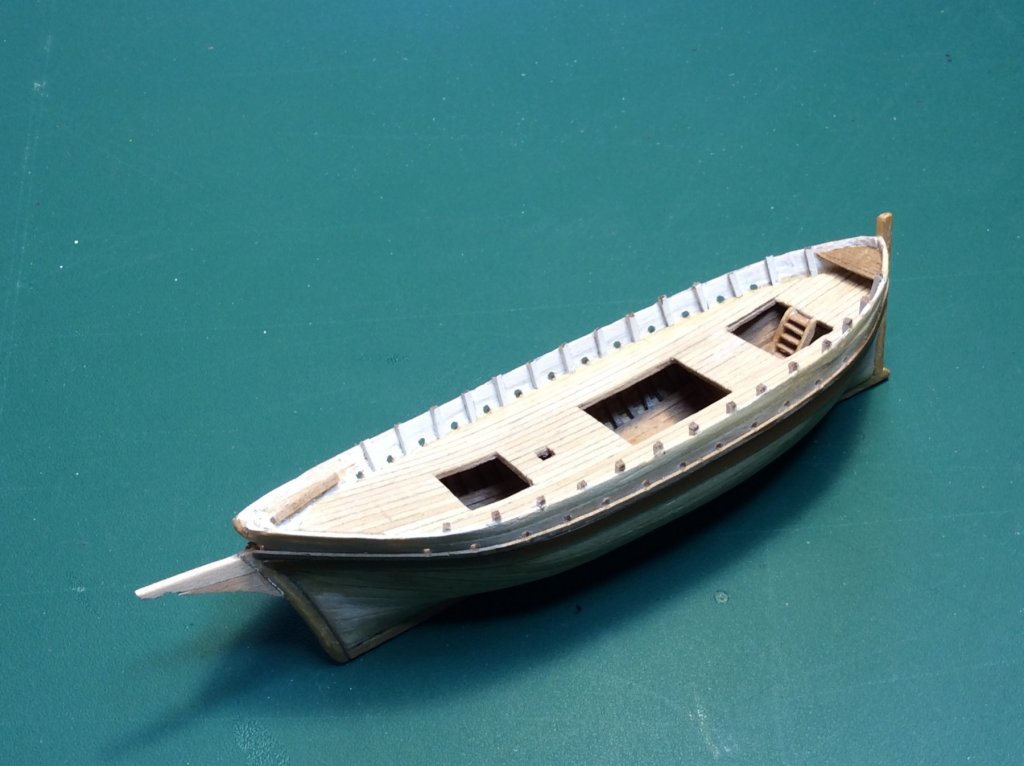
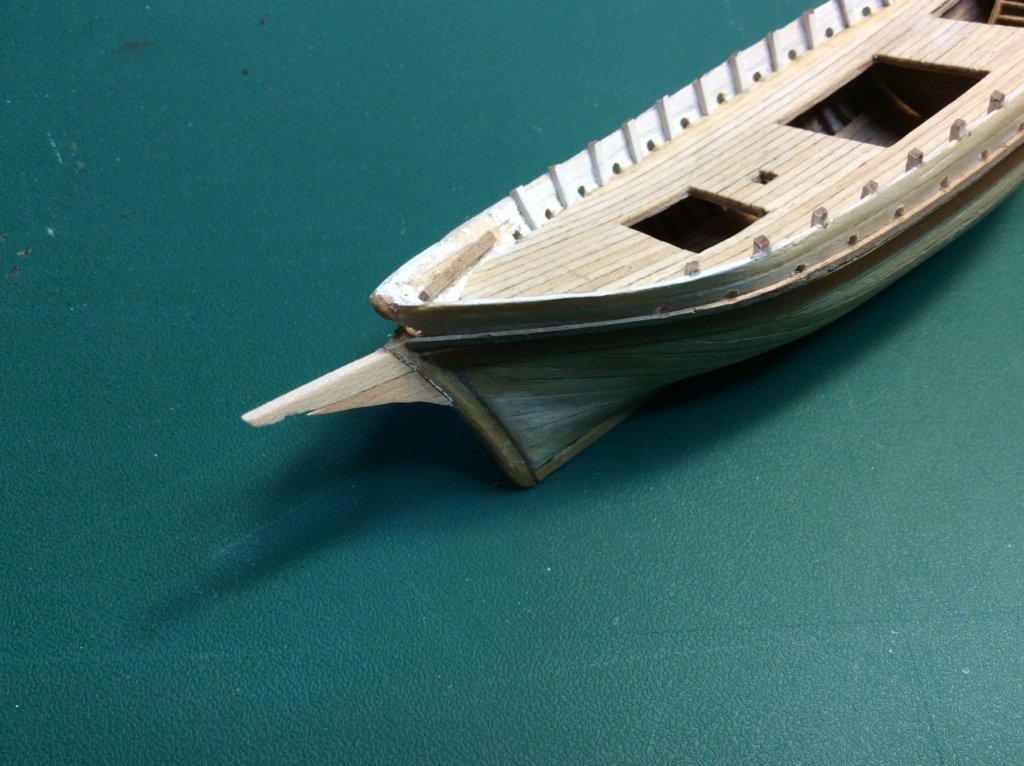
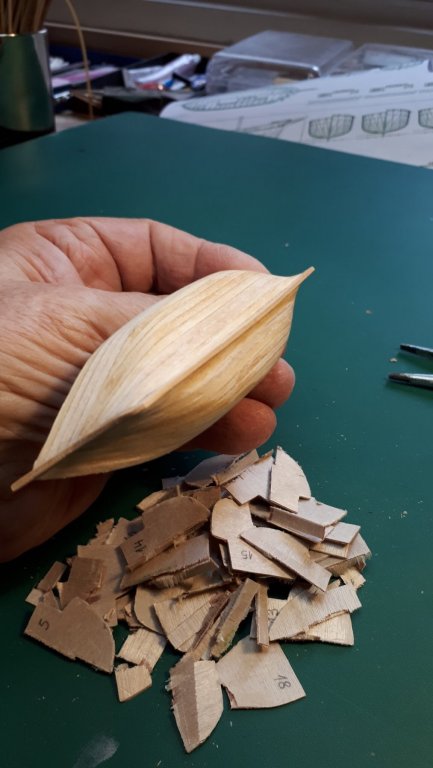
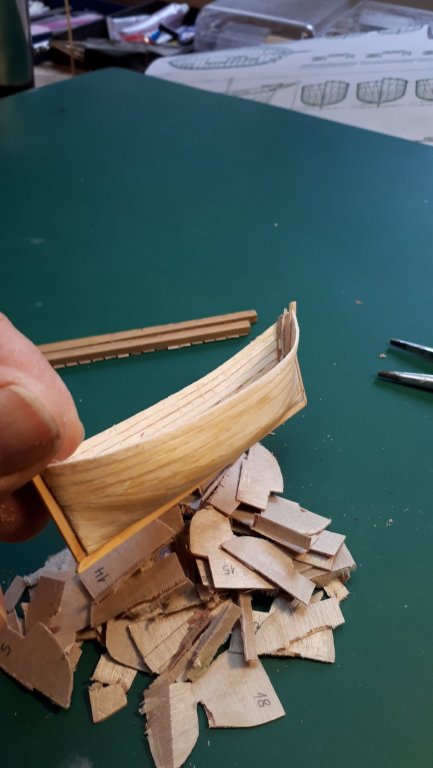
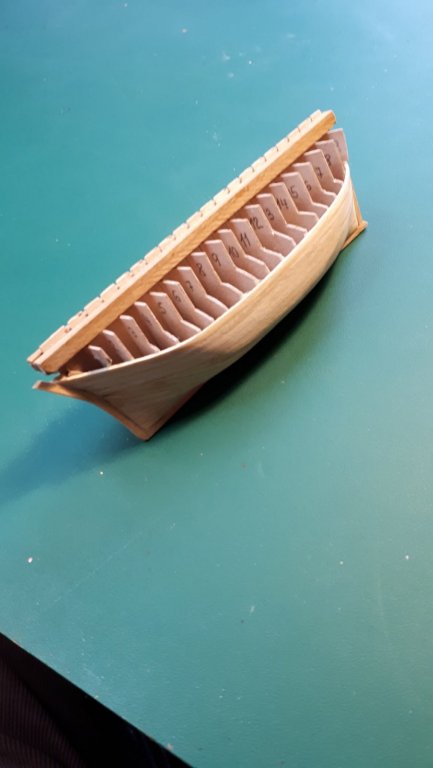
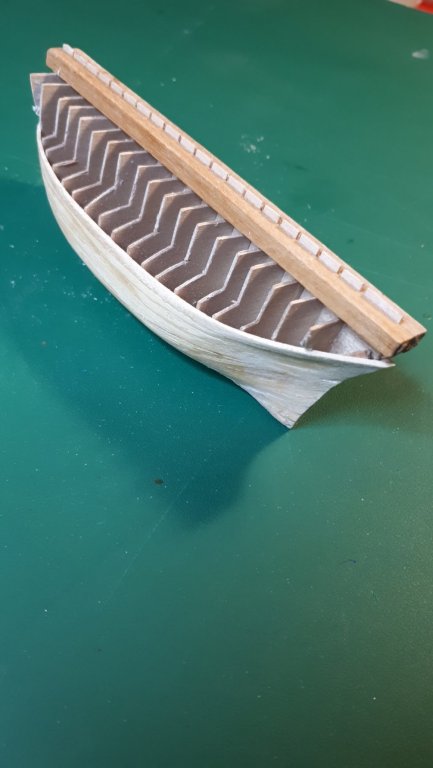
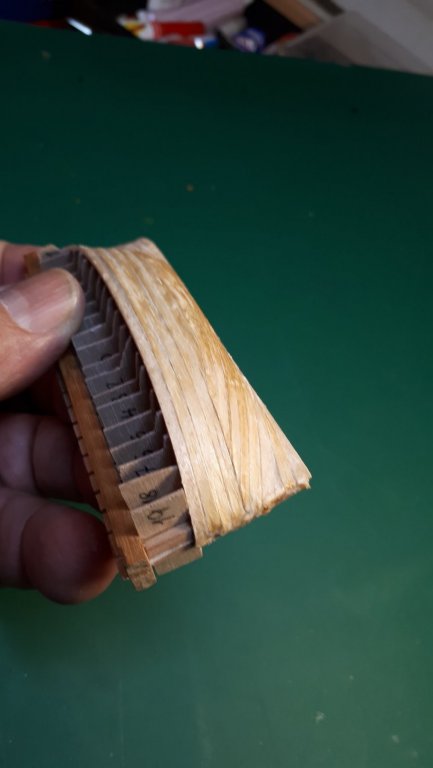
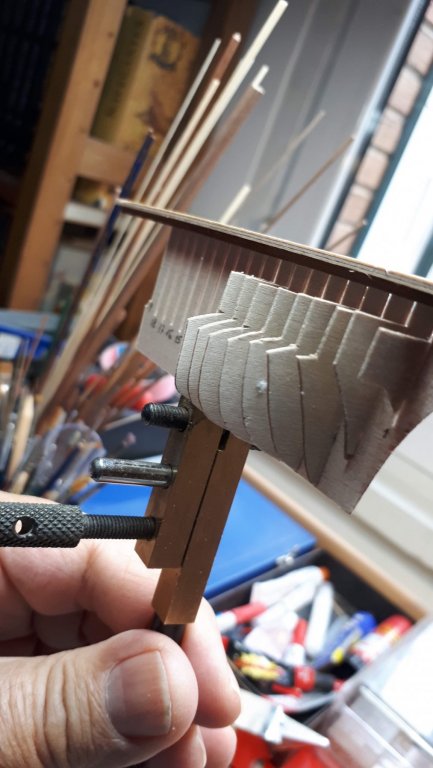
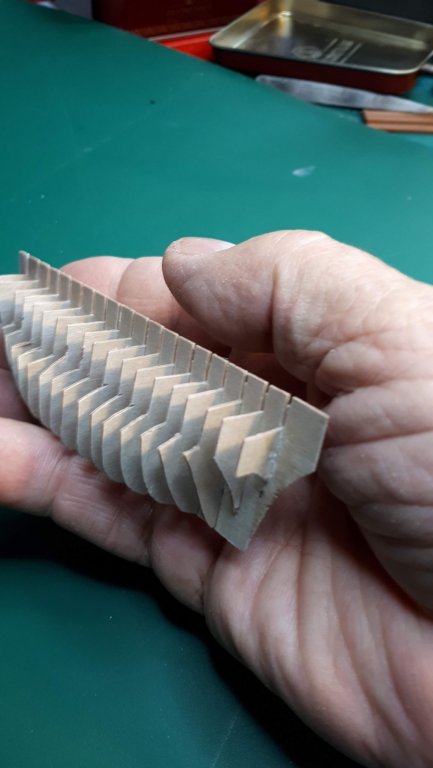
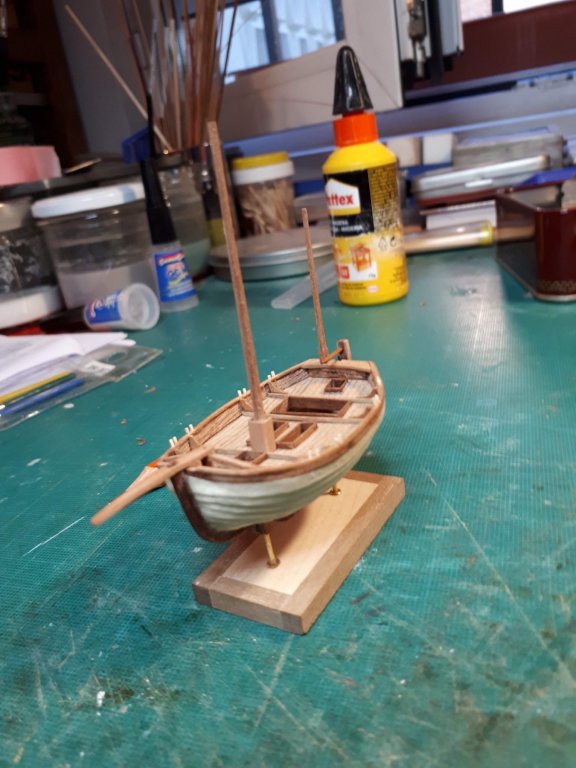
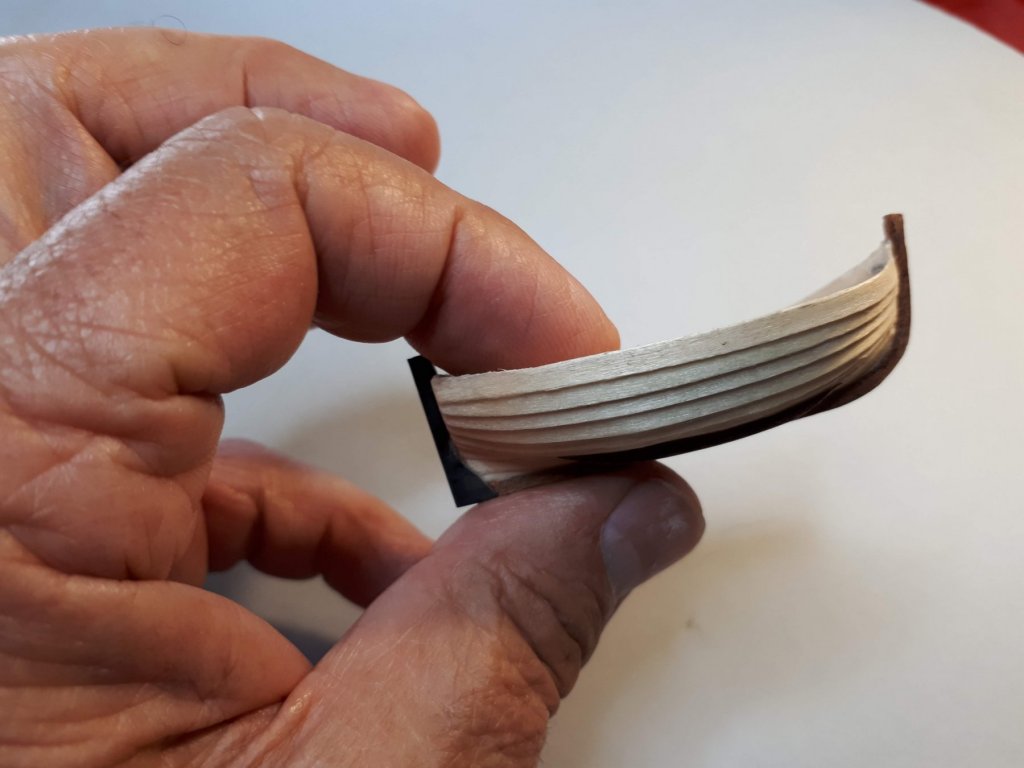
Thanks for your comment. I closed the hull. As the model is going to be painted, I have not taken too much care of the placement of the strakes, which I would have done if the hull were in exposed wood or in clinker-built instead of a carvel-built. Then I have sanded and polished the hull before proceeding, as next step, to tear out the false frames. To harden the hull before its sanding I have cover it, as if it were a topcoat varnish, with a layer of liquid cyanoacrylate.


- 51 replies
-
- 20
-
-
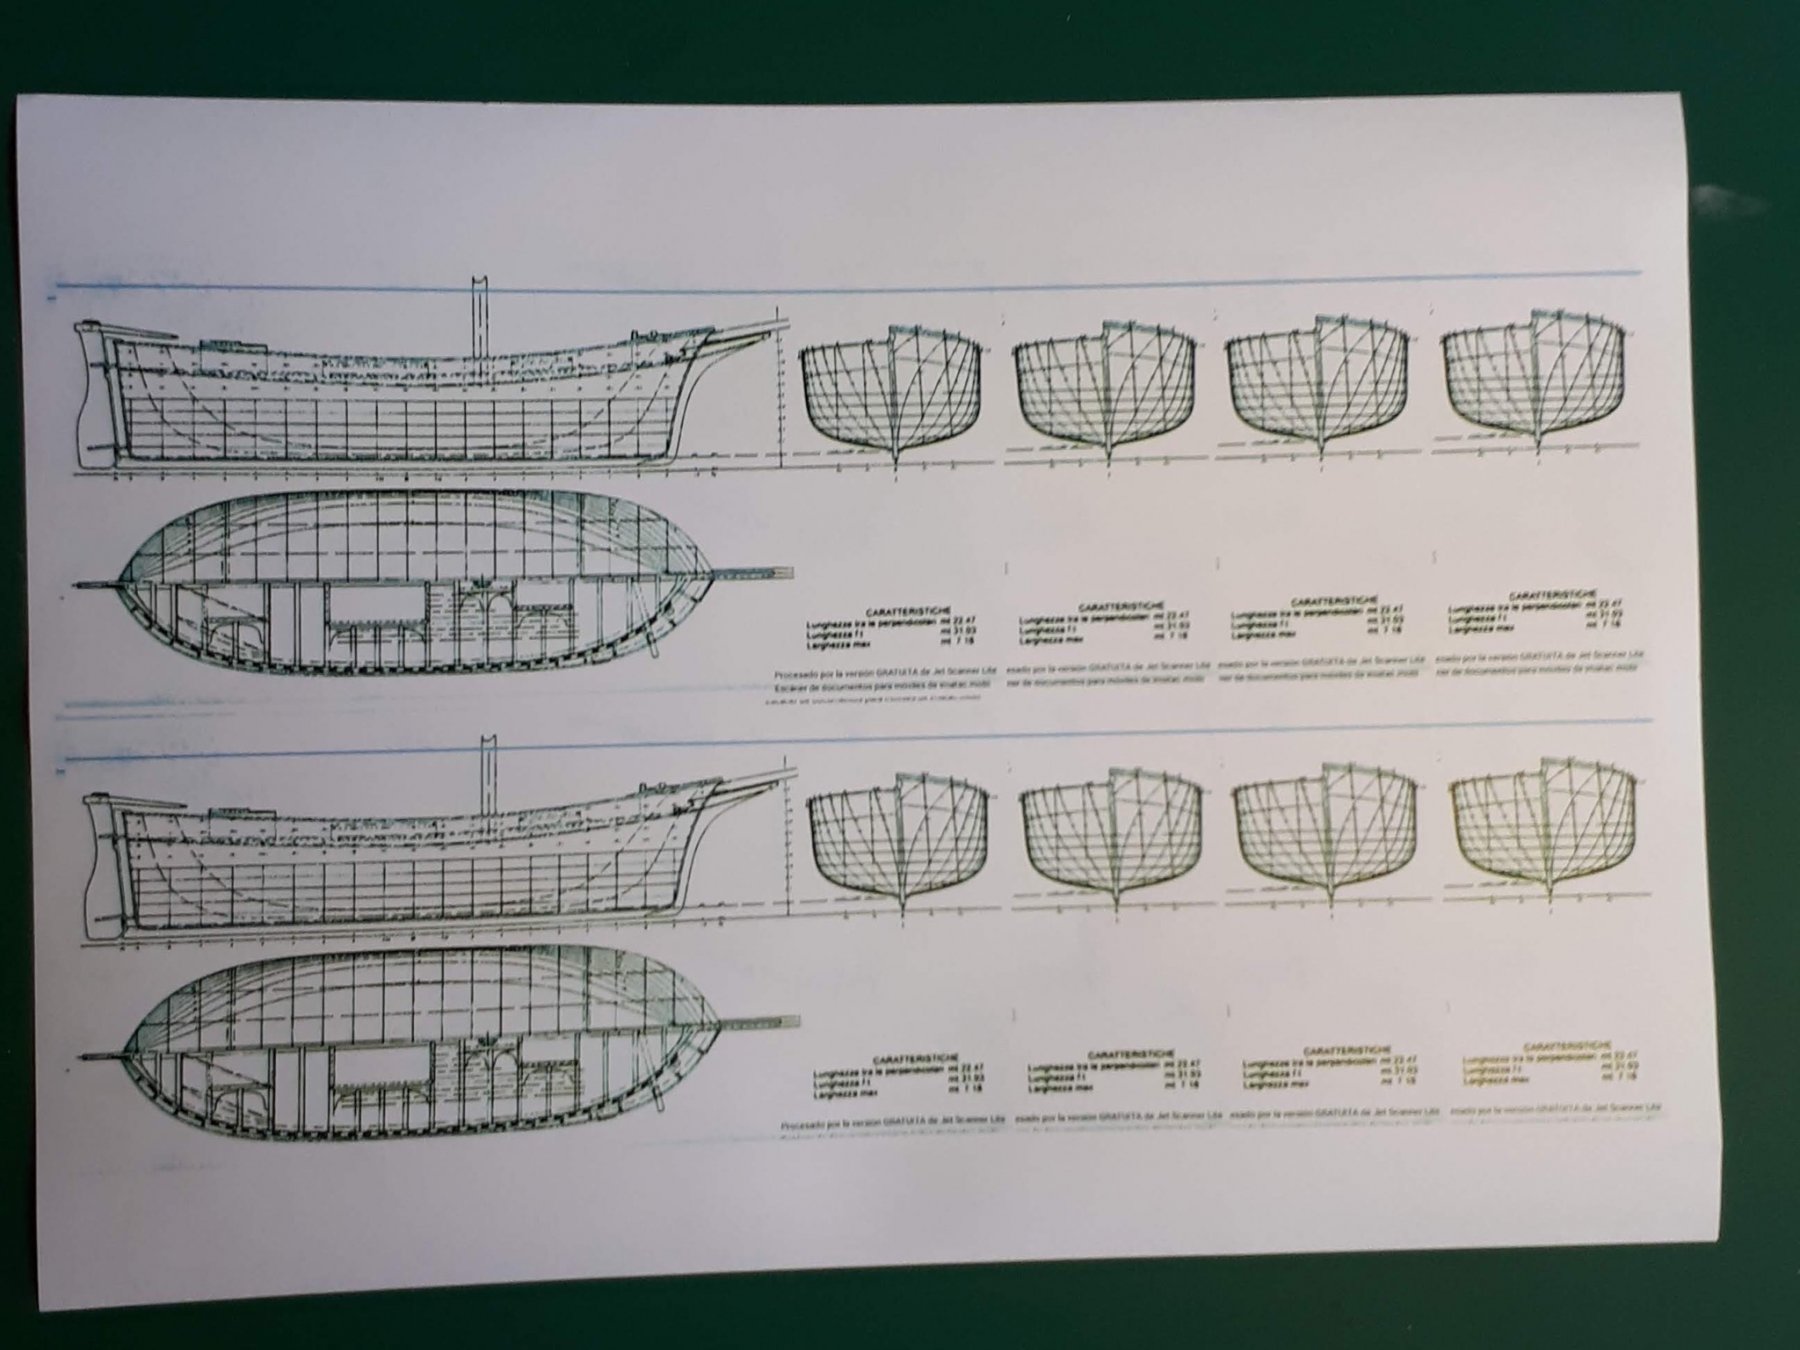
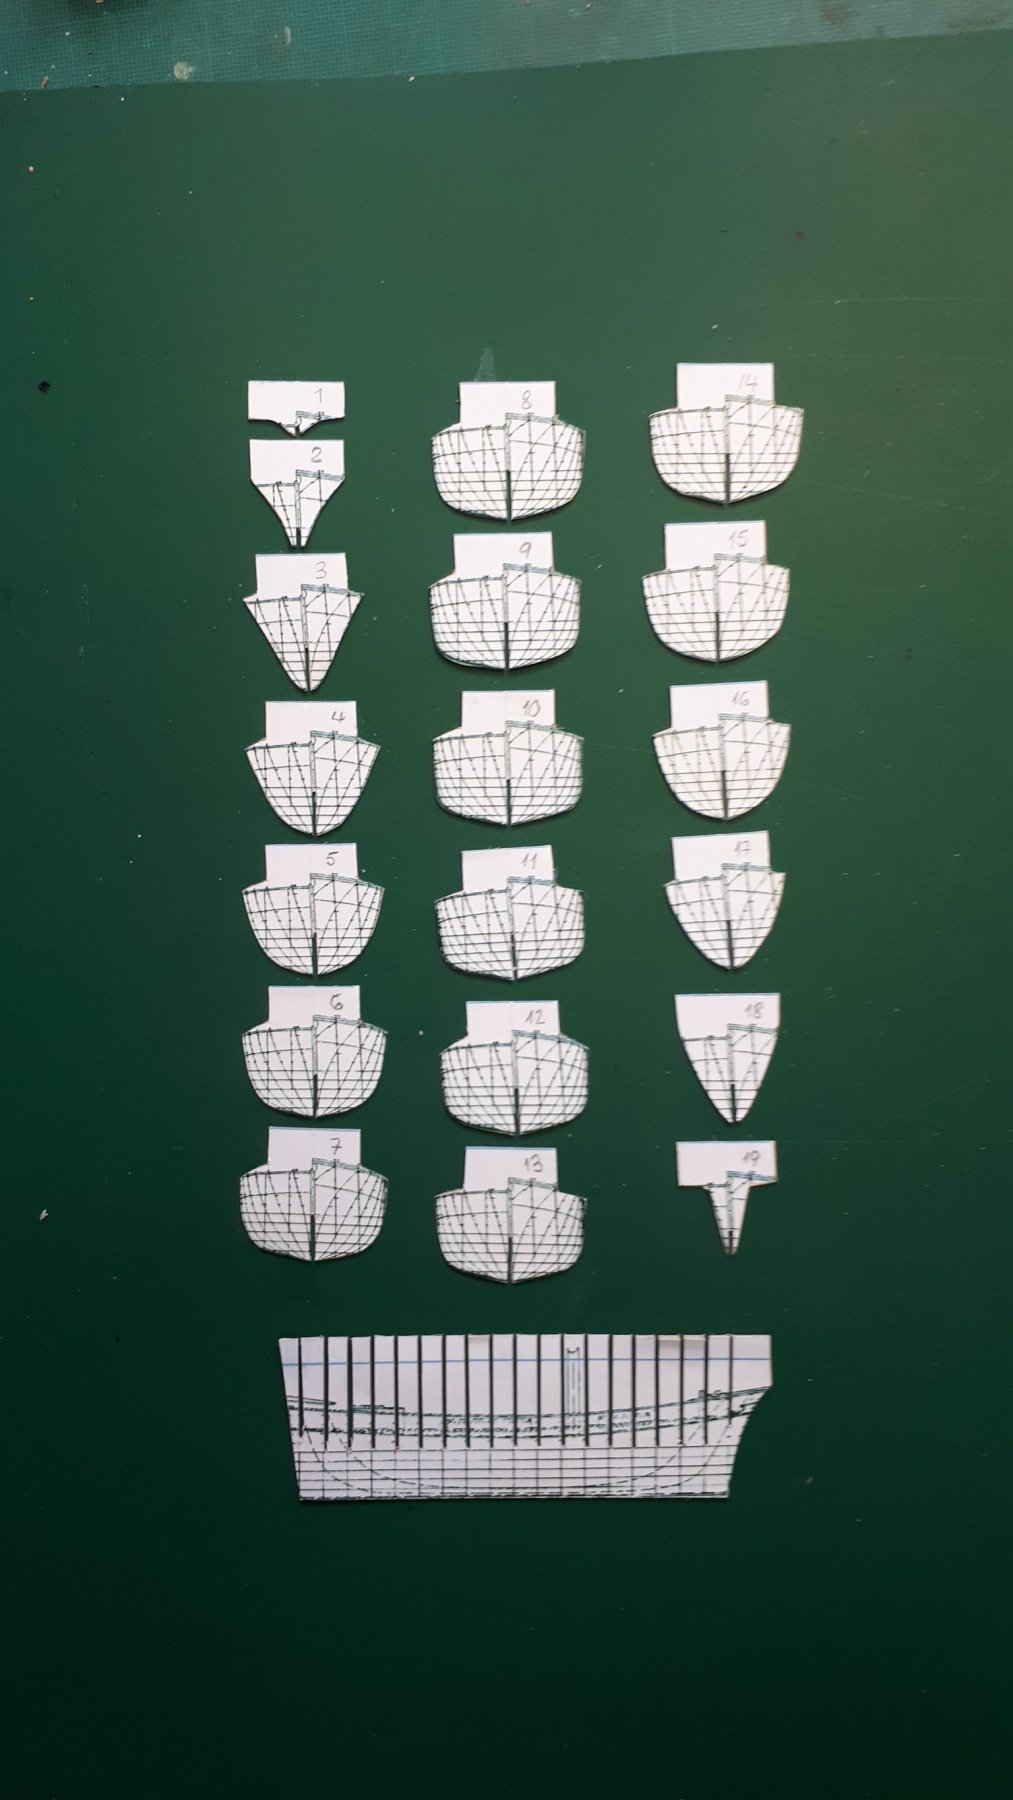
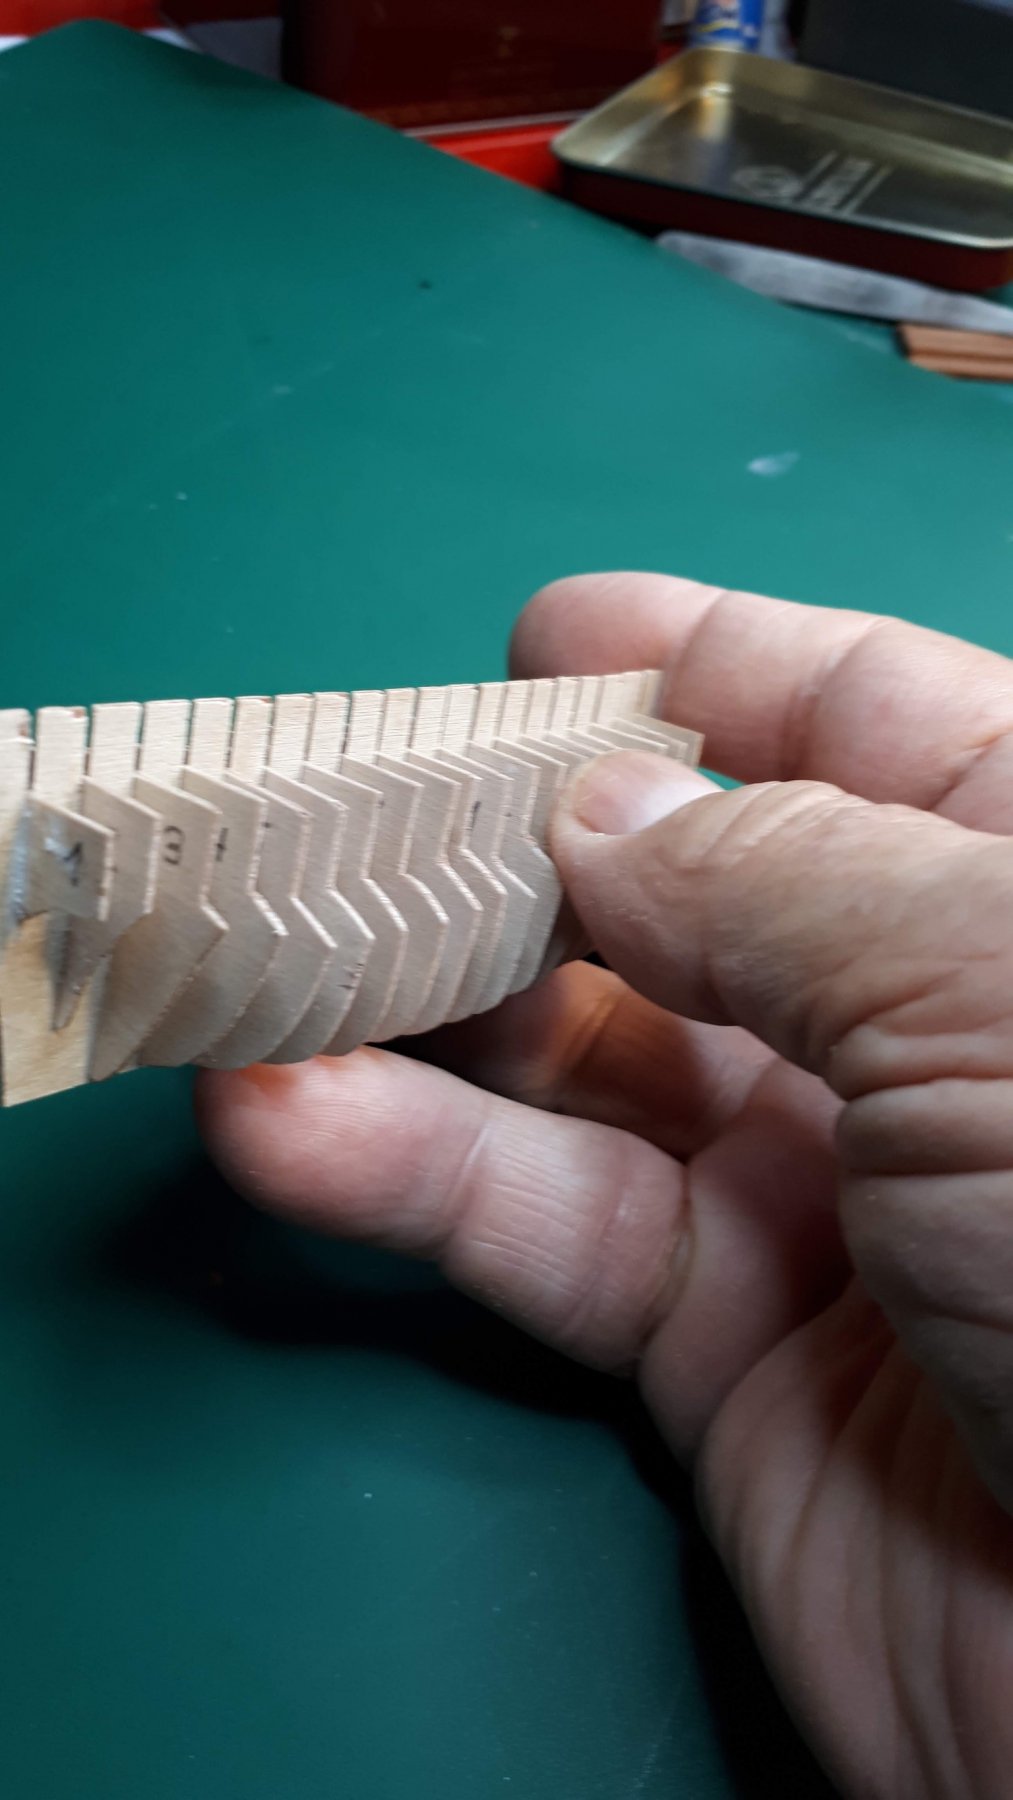
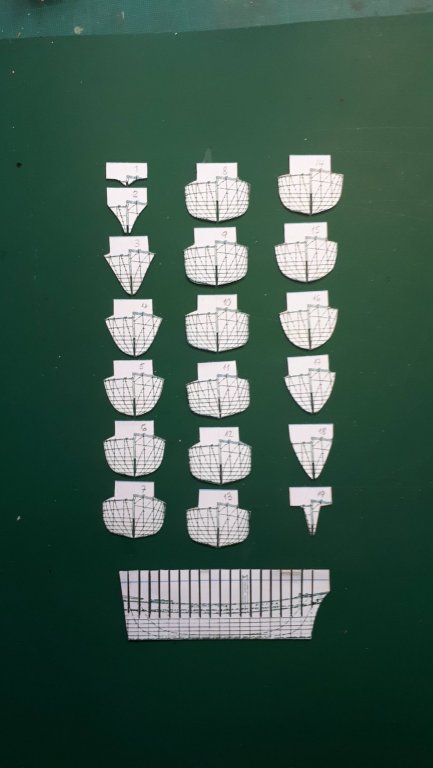
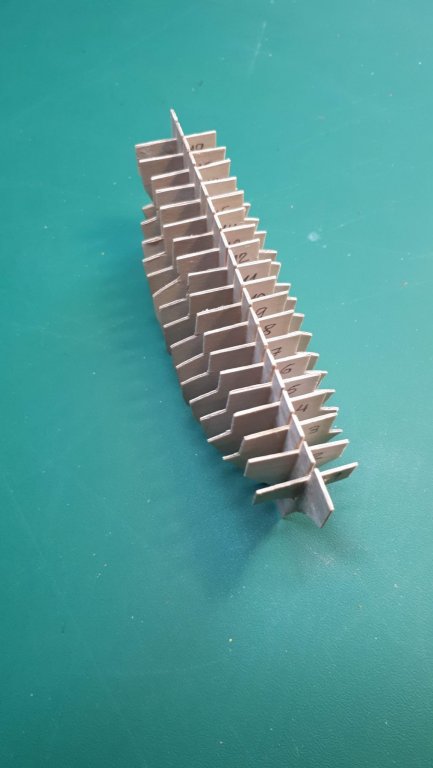
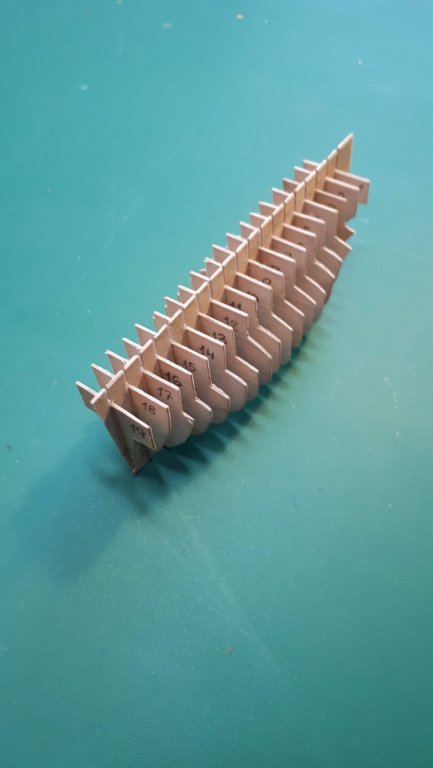
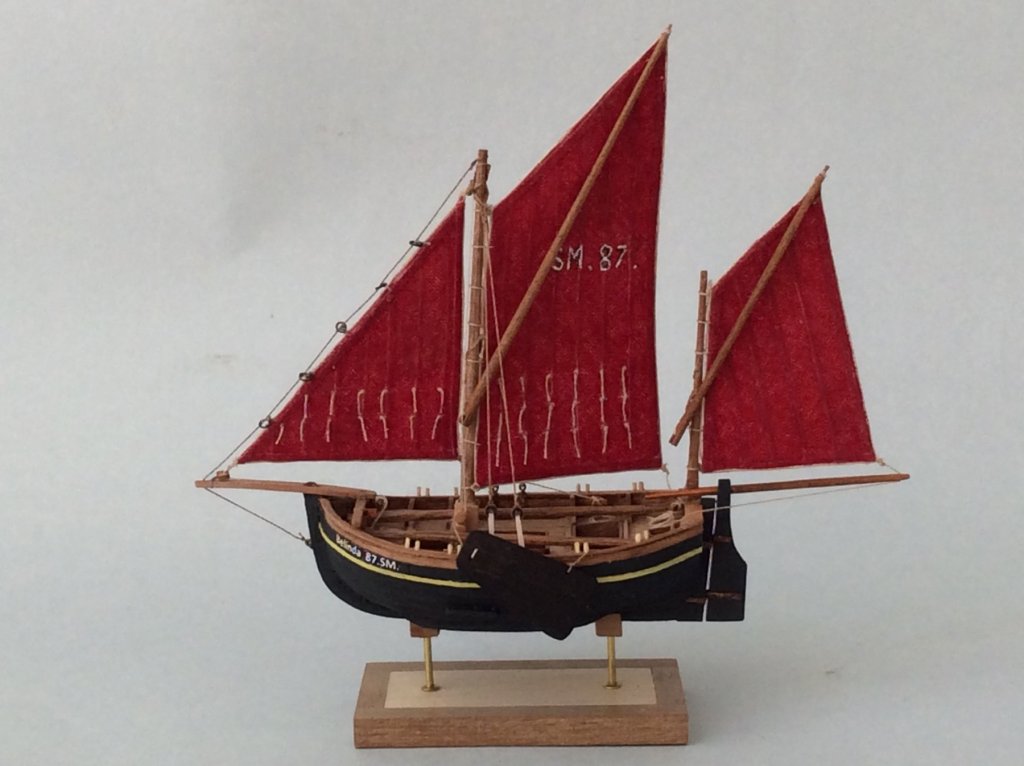
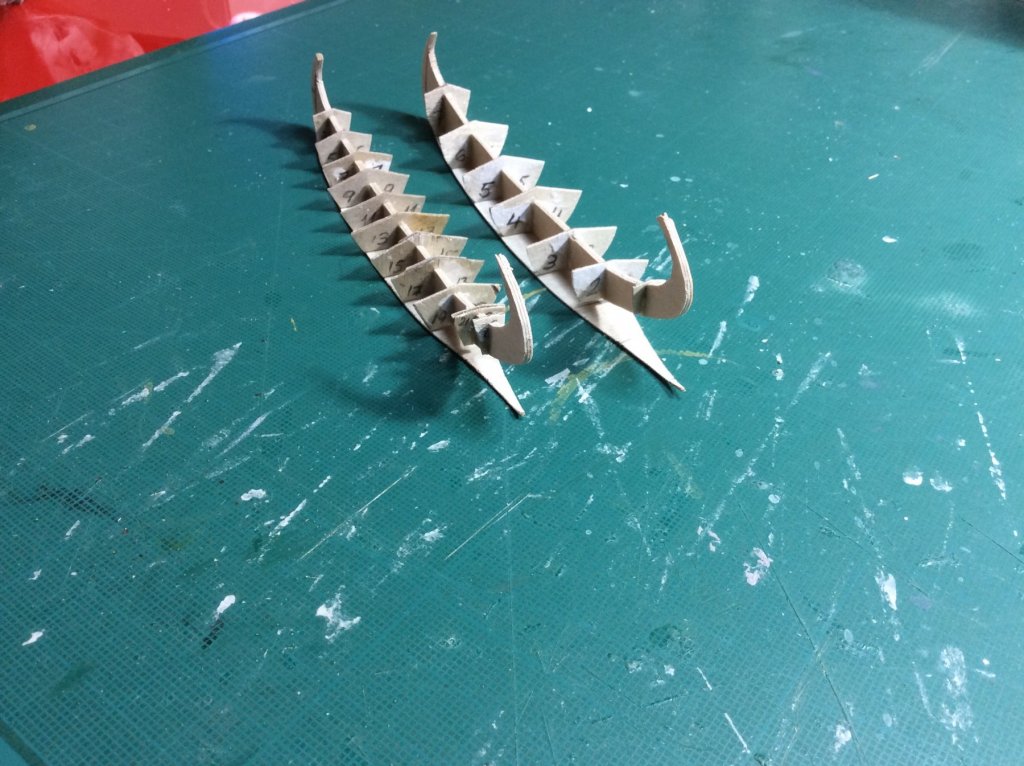
I have started the construction of a new model to add to my collection, which will be number 67. It is a tartana from Liguria in a scale of 1: 200. I use as a main source of documentation the monograph of the tartana Gemma, by Franco Fissore, published in Ancre, although I will also use other sources, such as the book "Vele italiane de la costa occidentale" by Sergio Bellabarba and Eduardo Guerrieri, and old photographs of complementary form. For the construction of the hull I use Finnish plywood of 0.6 mm. to make the frames.


- 51 replies
-
- 29
-
-
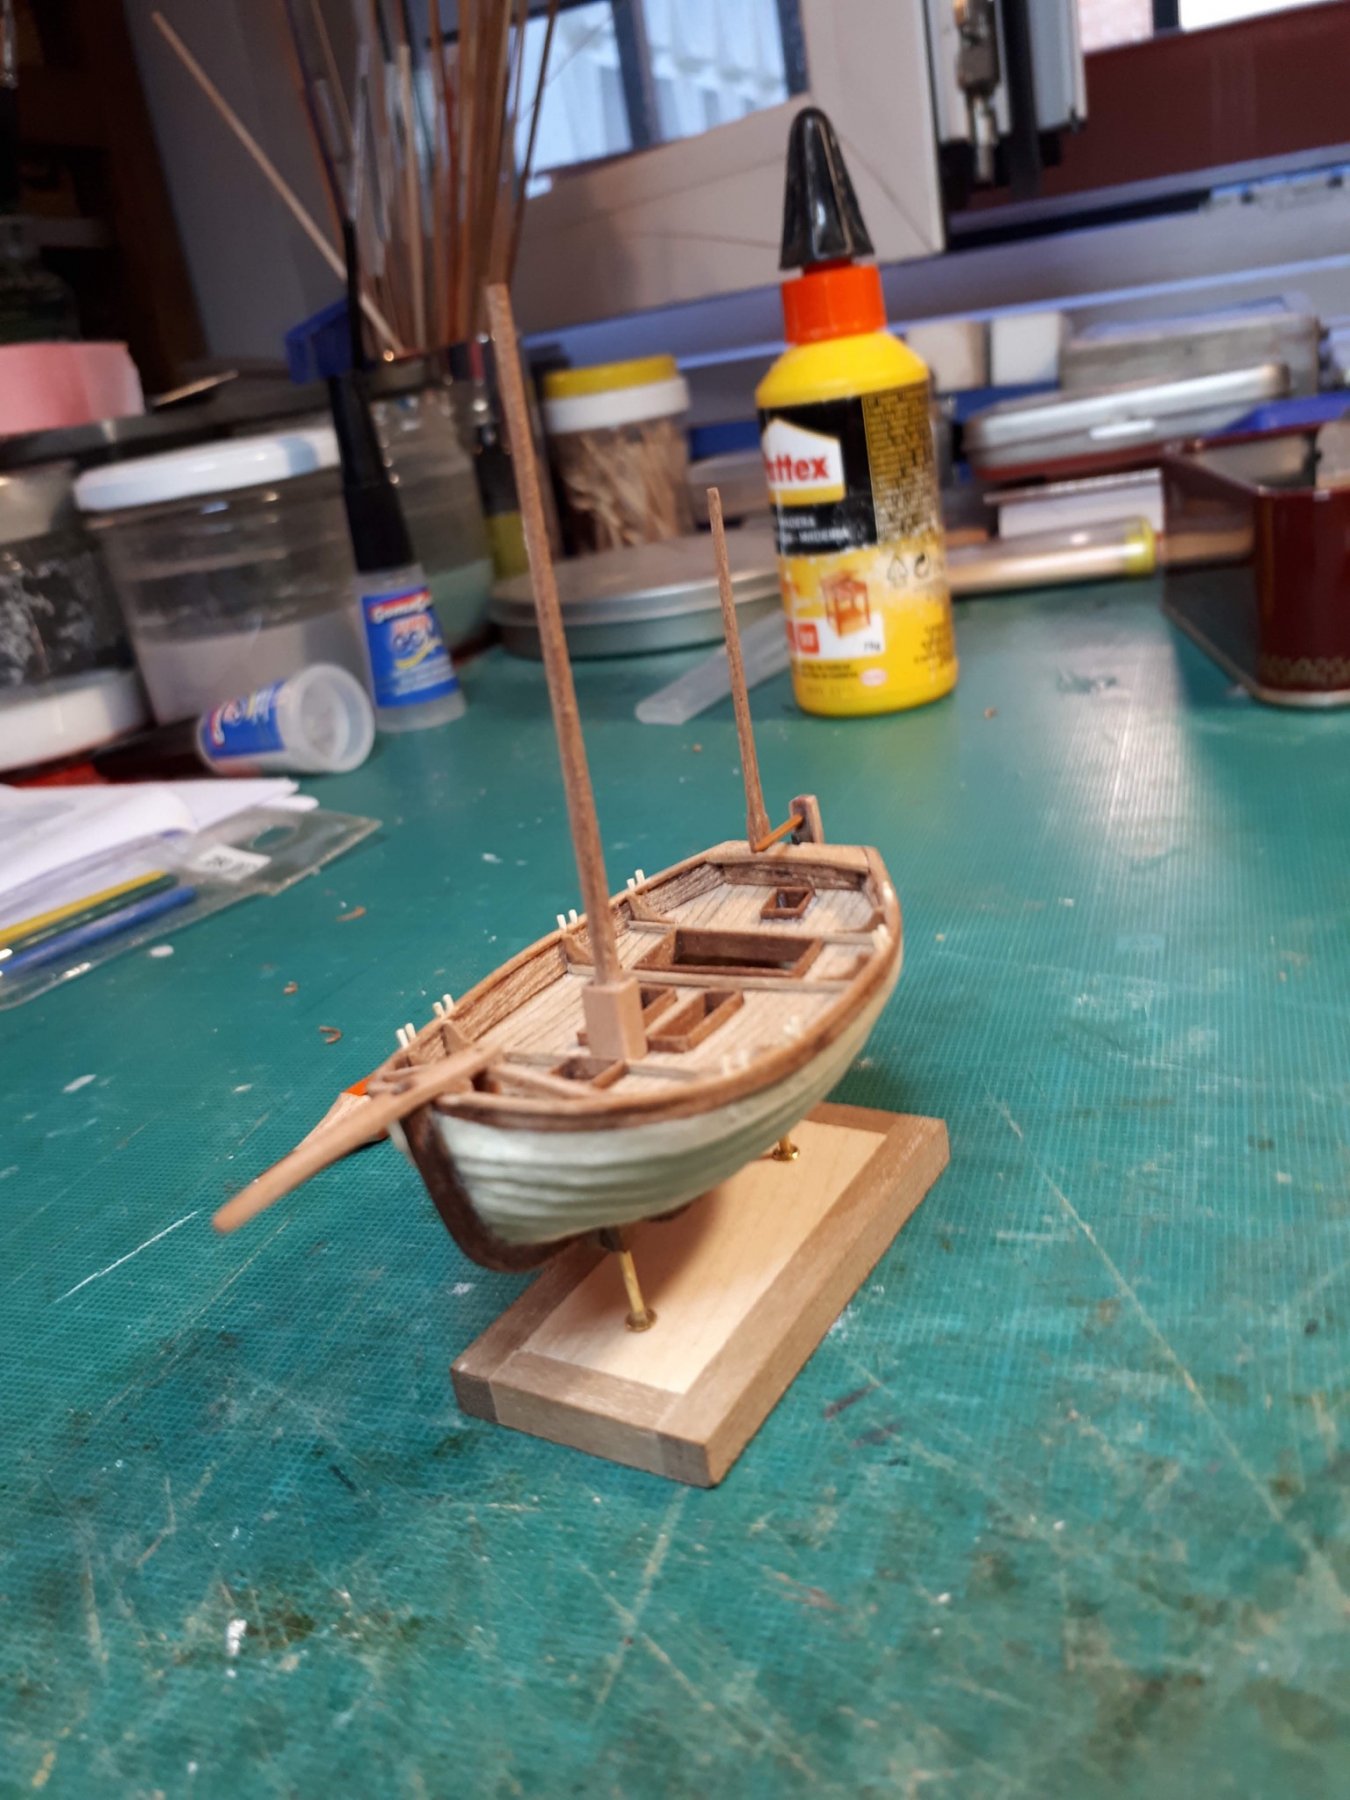
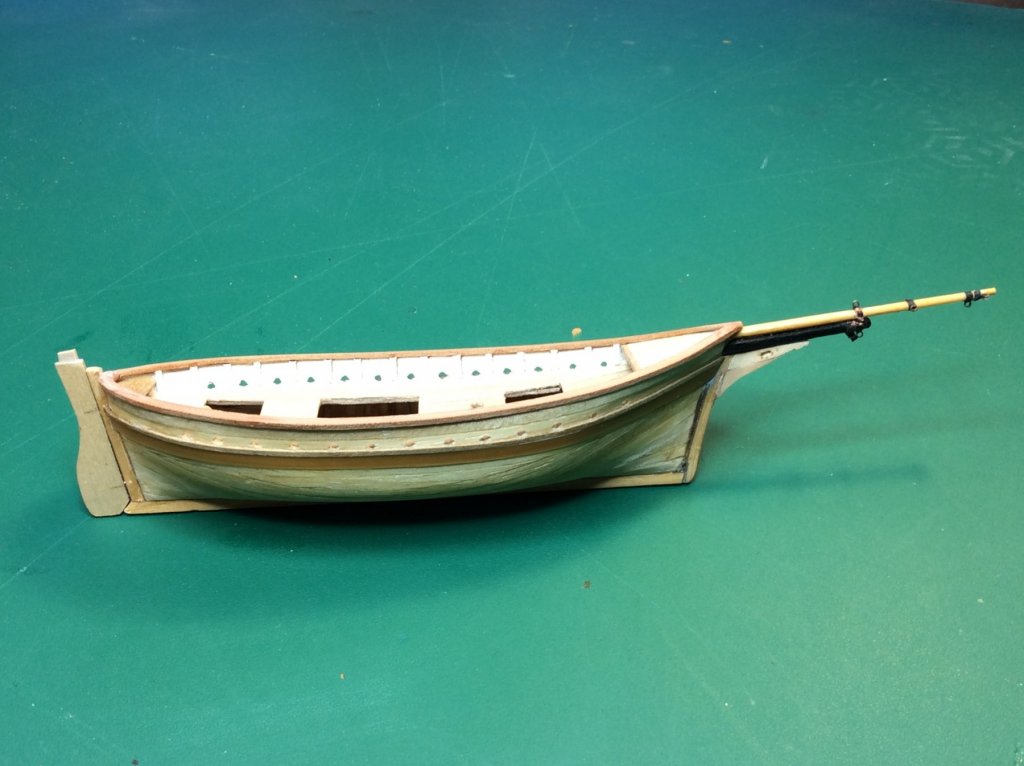
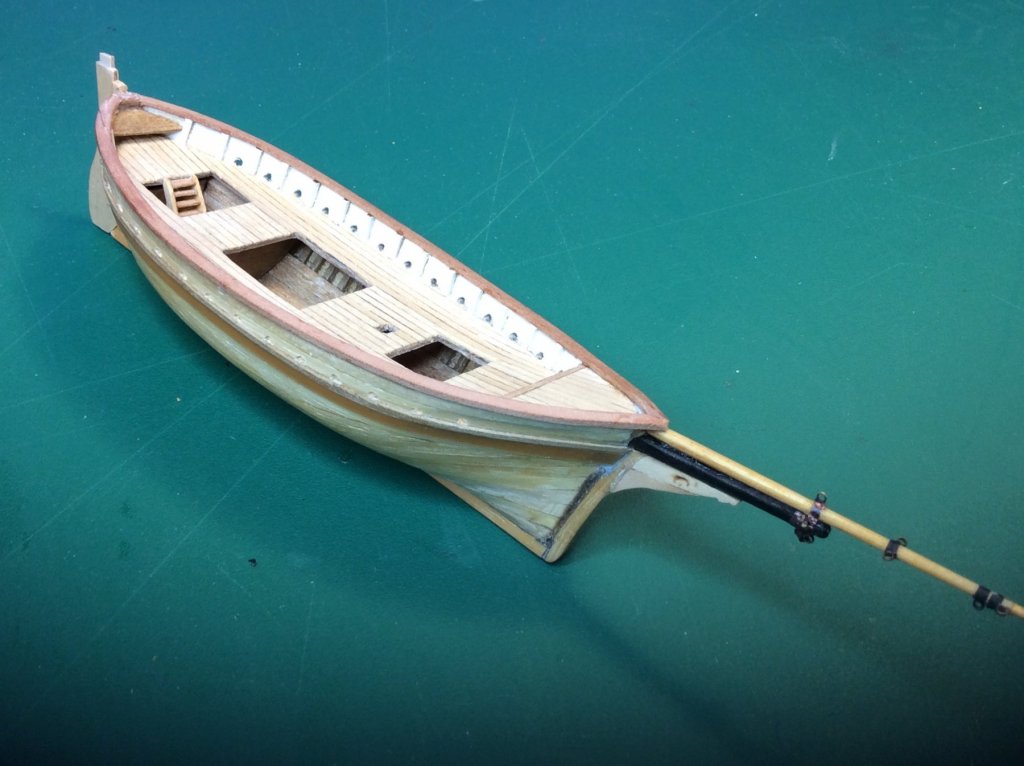
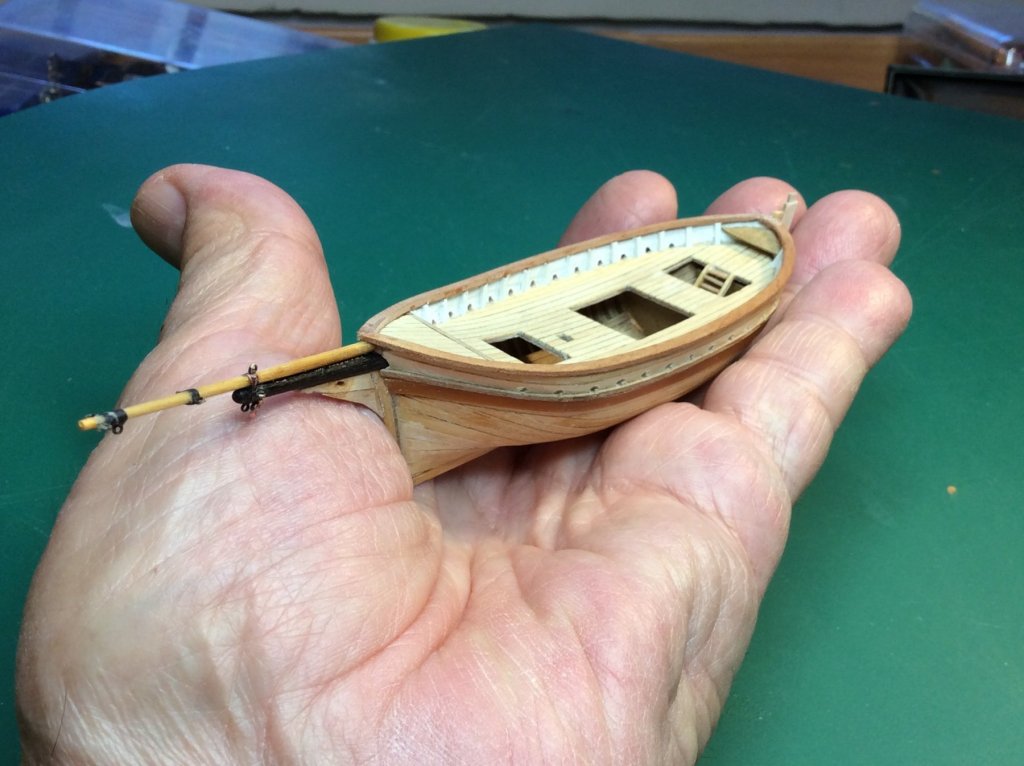
Placed the sails, the hoggie is finished. It's an ugly boat, but I find it nice. Javier


- 11 replies
-
- 12
-
-
- small
- brigthton hog
- (and 1 more)
-
Thanks, Michael. I used to take small cuts from when I built larger models: pearwood, boxwood, cherrywood .... And for the frames (disposable) use plywood Finnish birch of 0.6 mm. Javier

- 11 replies
-
- 11
-
-
- small
- brigthton hog
- (and 1 more)
-
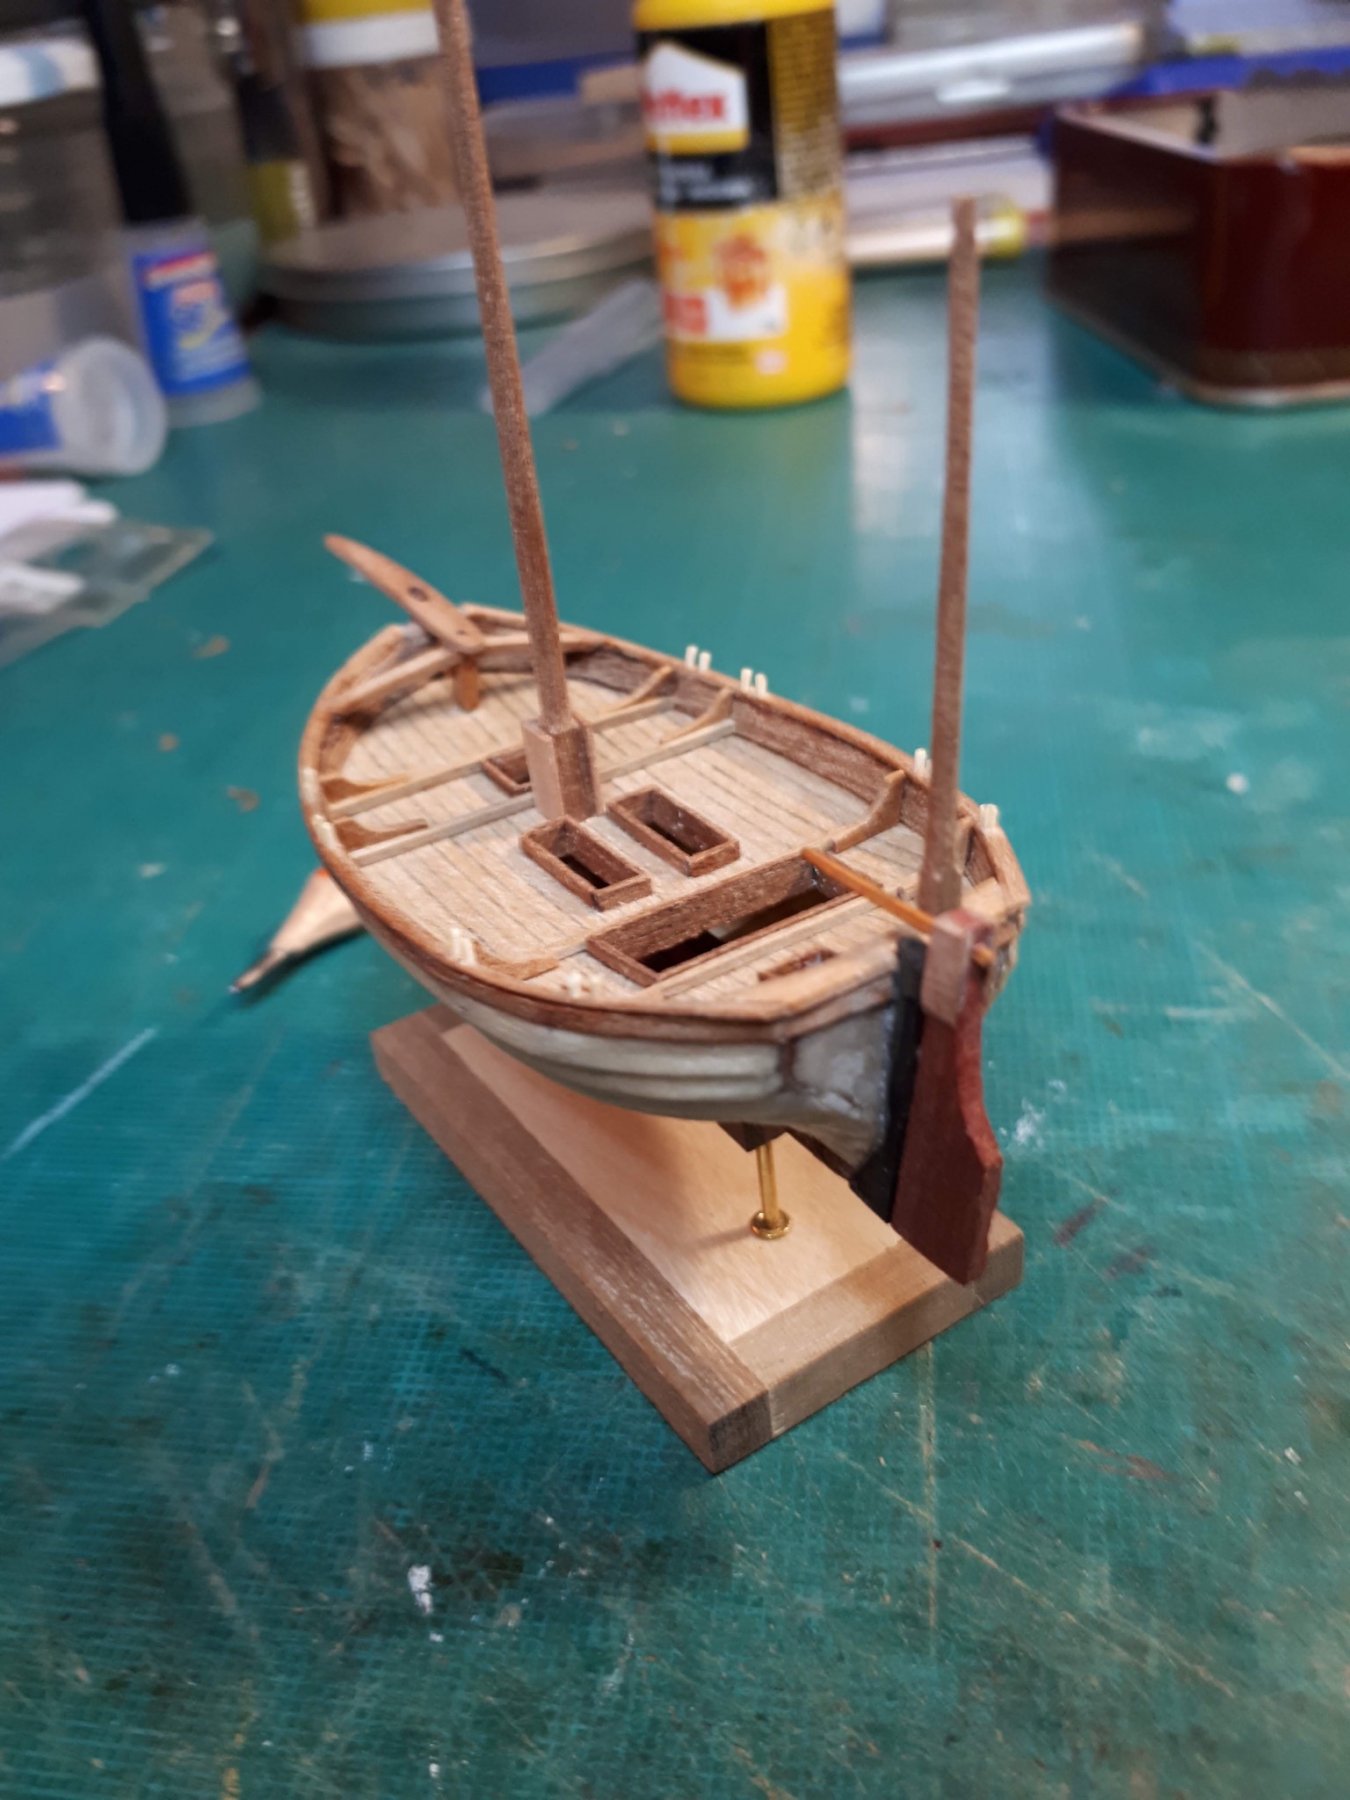
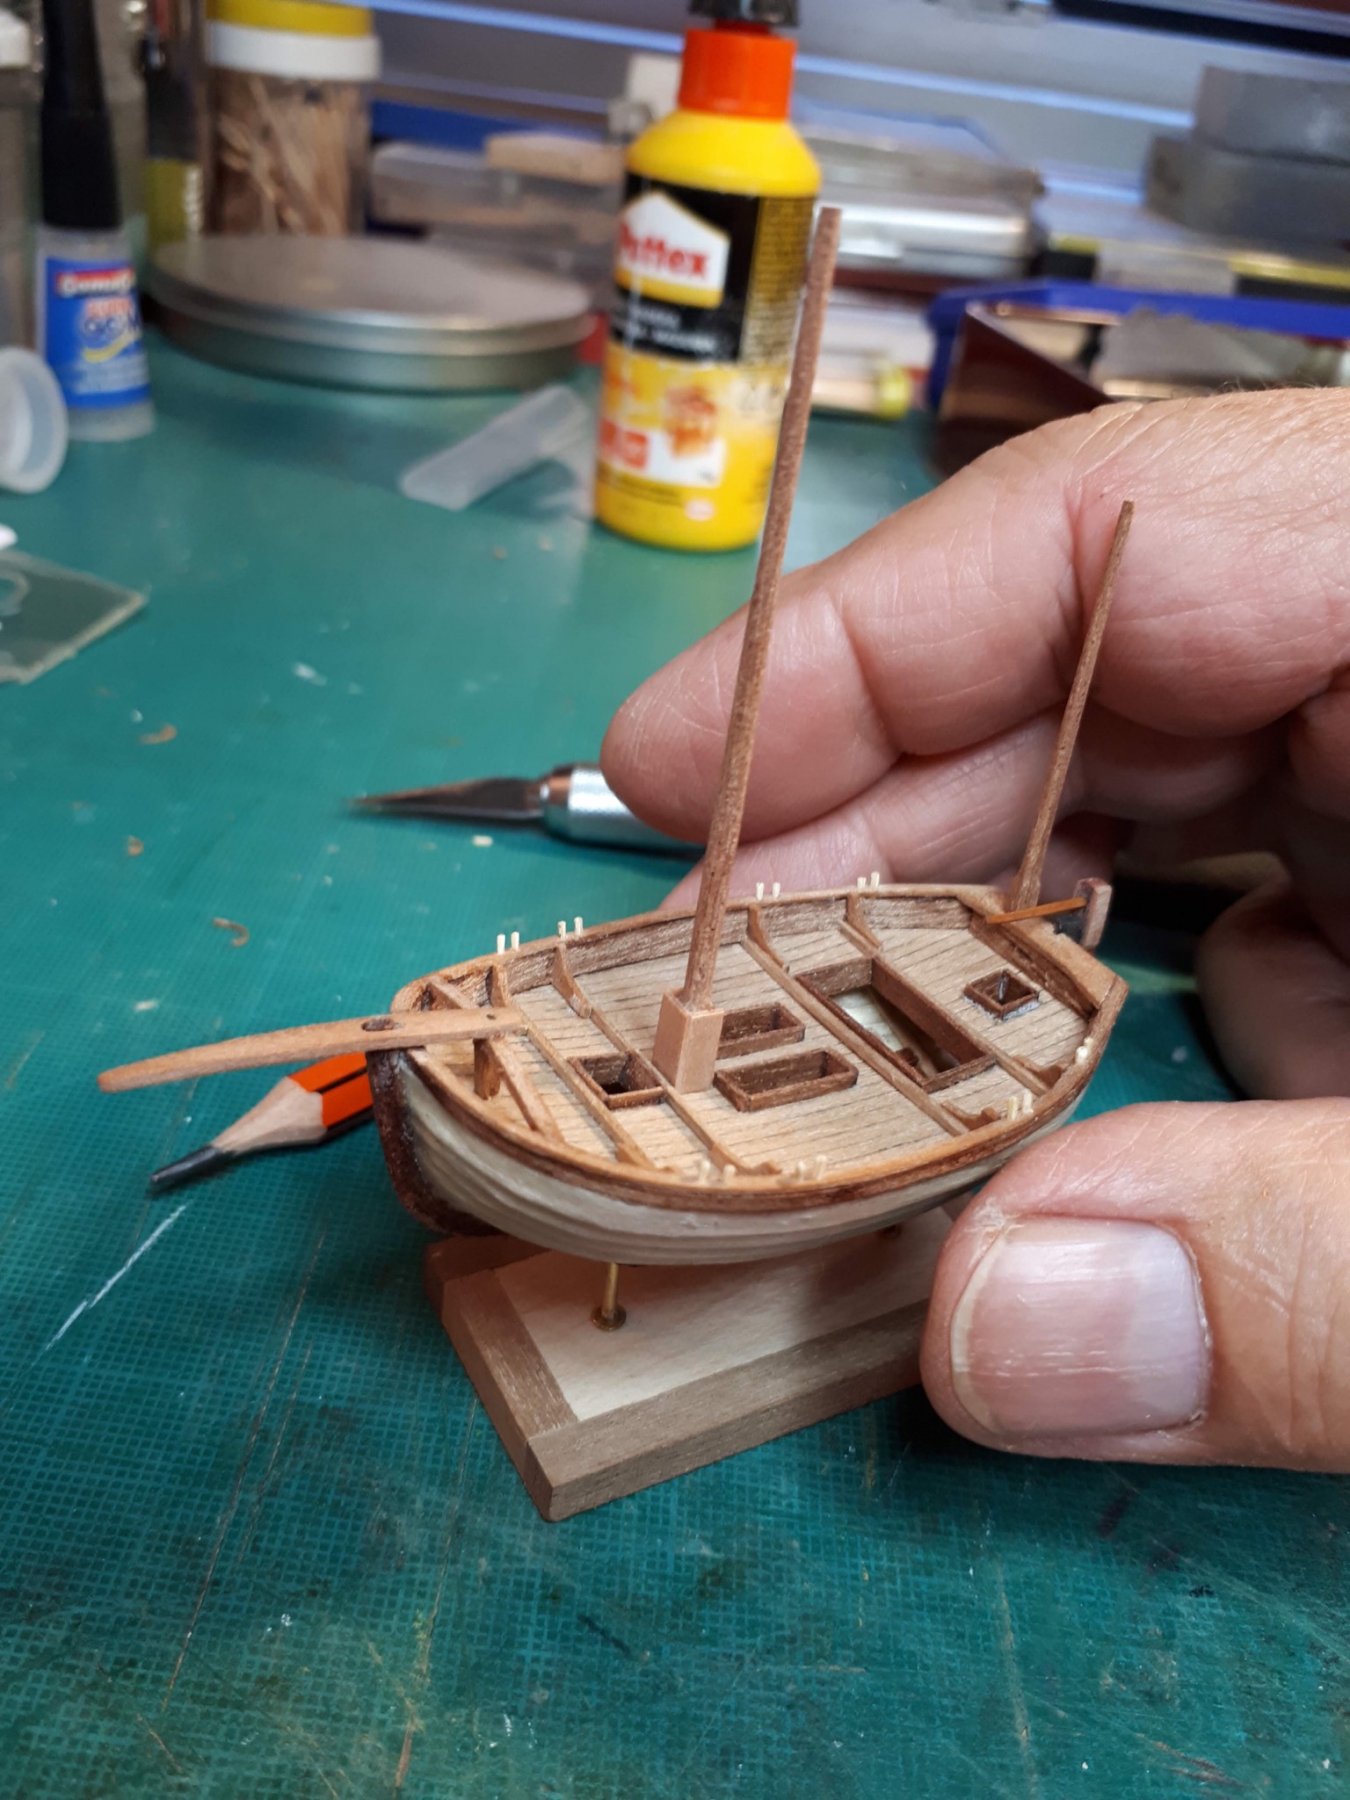
Thank you very much to all for your comments. continued with the construction of the hog-boat


- 11 replies
-
- 10
-
-
- small
- brigthton hog
- (and 1 more)
-
The hoggie or hog-boat of Brighton was a fishing boat of about 9 m. of length that had a breadth of about 5 m., a tiny transom and very full shapes with a nearly flat bottom, which allowed it to cross the breaking water and float in the beach like a duck. It was equipped with a deck, had an leeboard to counteract the excess drift produced by its peculiar forms and armed two masts with spritsail rigging. The true hoggies disappeared around 1880, although other Brighton boats, which are actually luggers made in Hastings or in Rye, continue to be known as hoggies.


- 11 replies
-
- 12
-
-
- small
- brigthton hog
- (and 1 more)
-
Hello from spain to everybody
Javier Baron replied to Javier Baron's topic in New member Introductions
Thanks Michael for your comment. Unfortunately I do not have images of the construction process of almost any of the boats in my collection. I only have photos of the construction of two or three of them. Anyway, I'm going to open a new build log with the latest model that I just finished: a hoggie or hog-boat from Brighton. A cordial greeting -
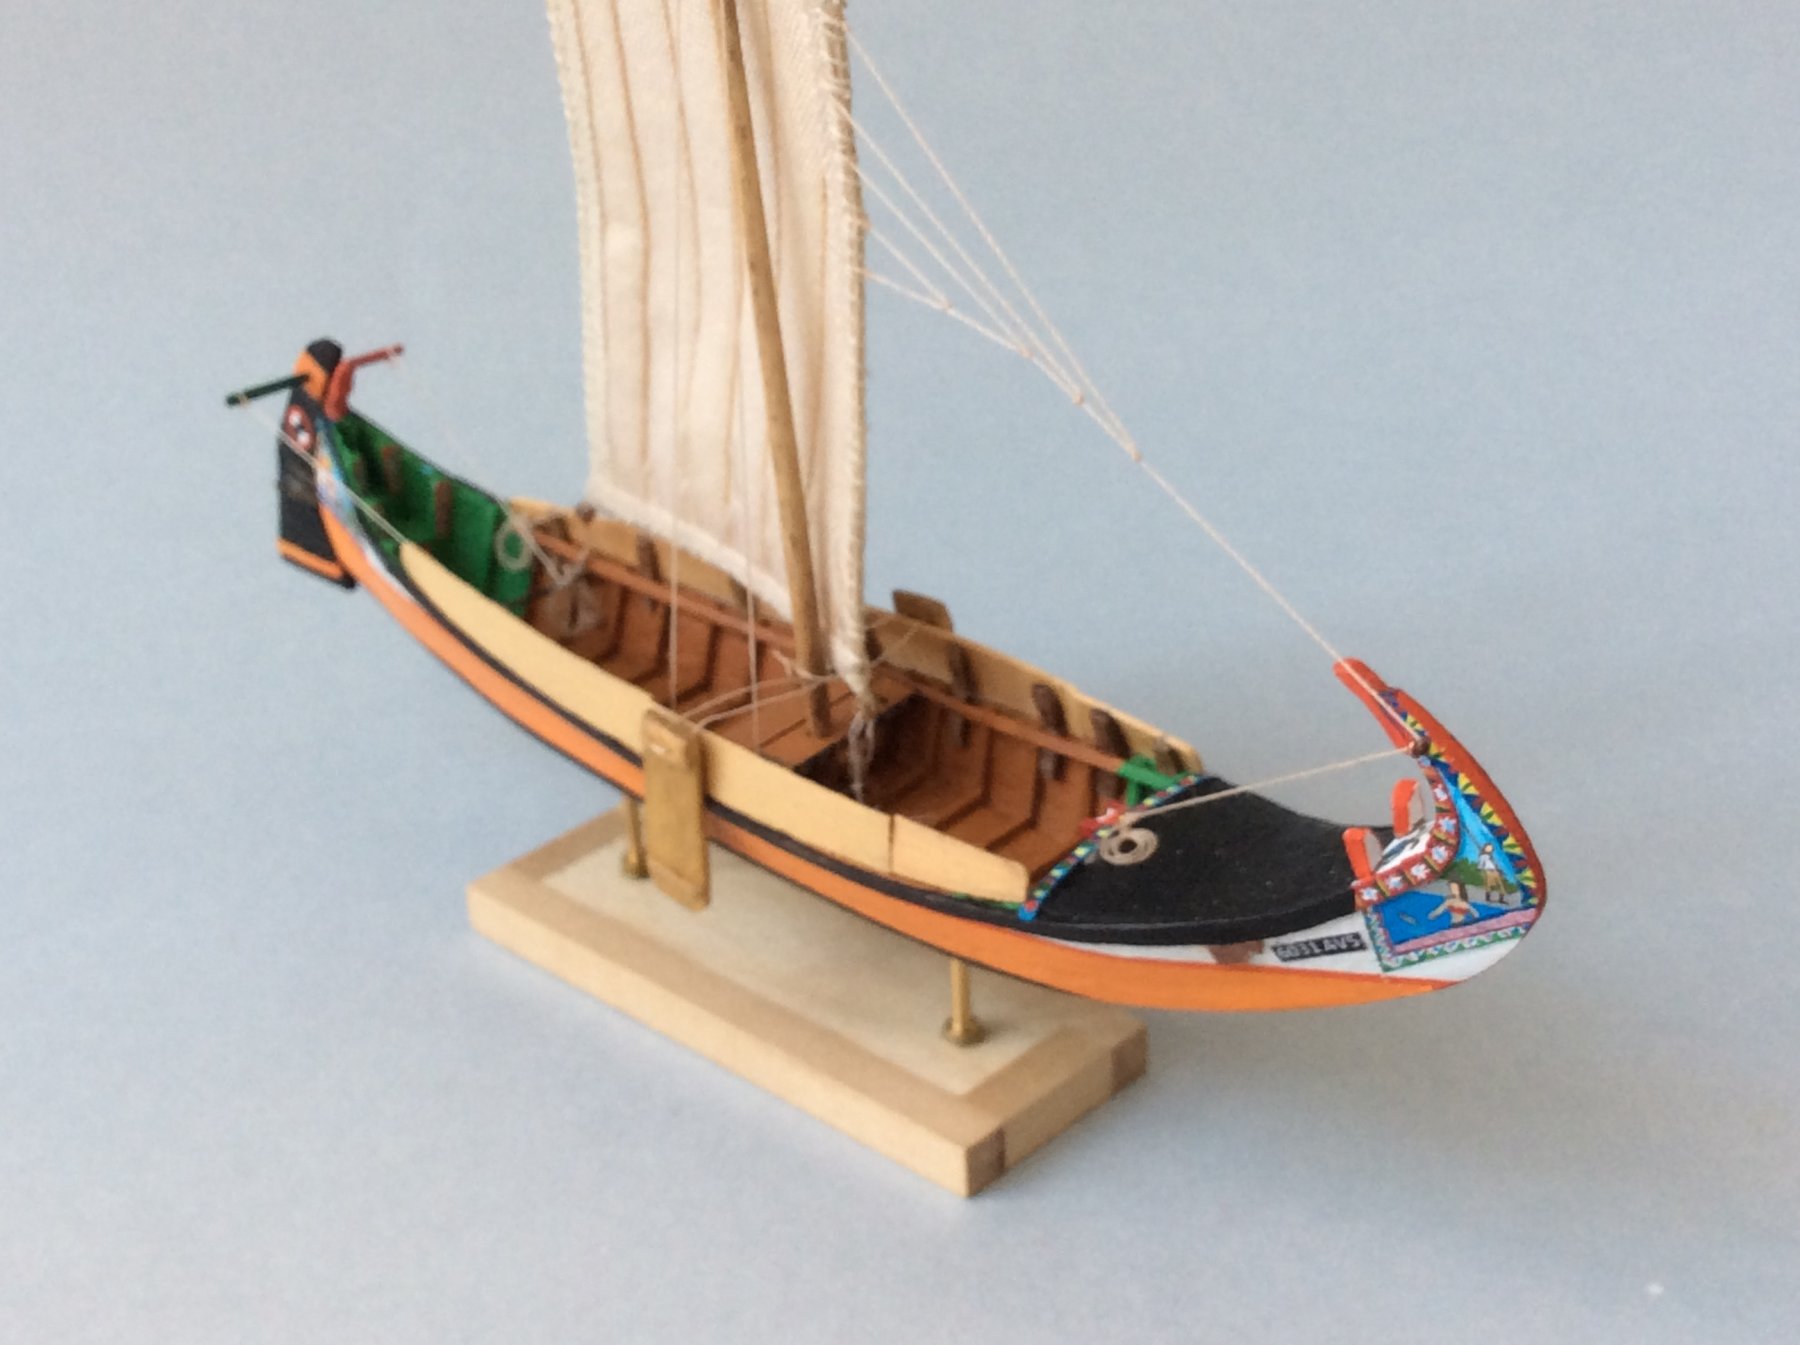
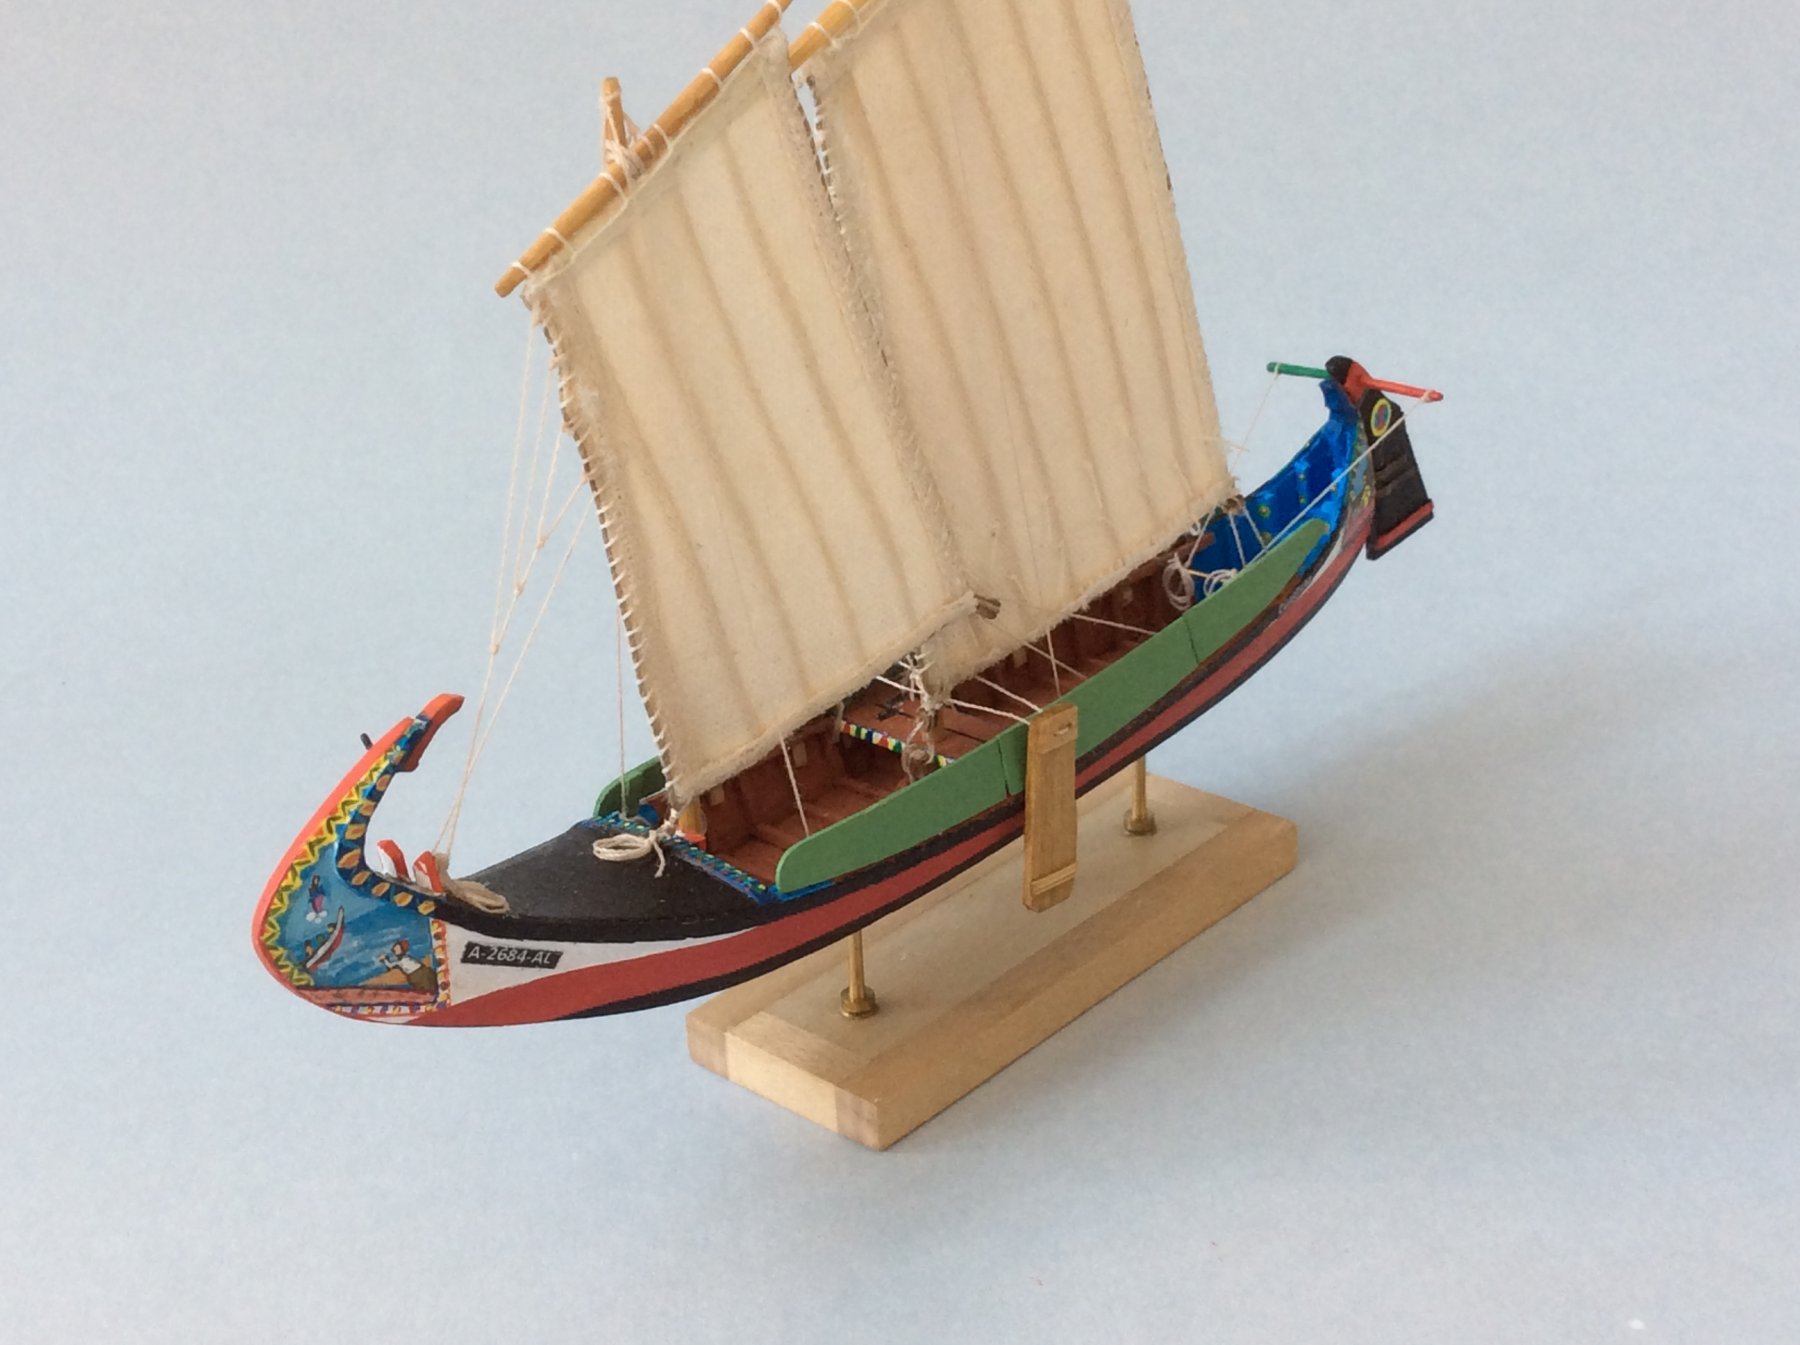
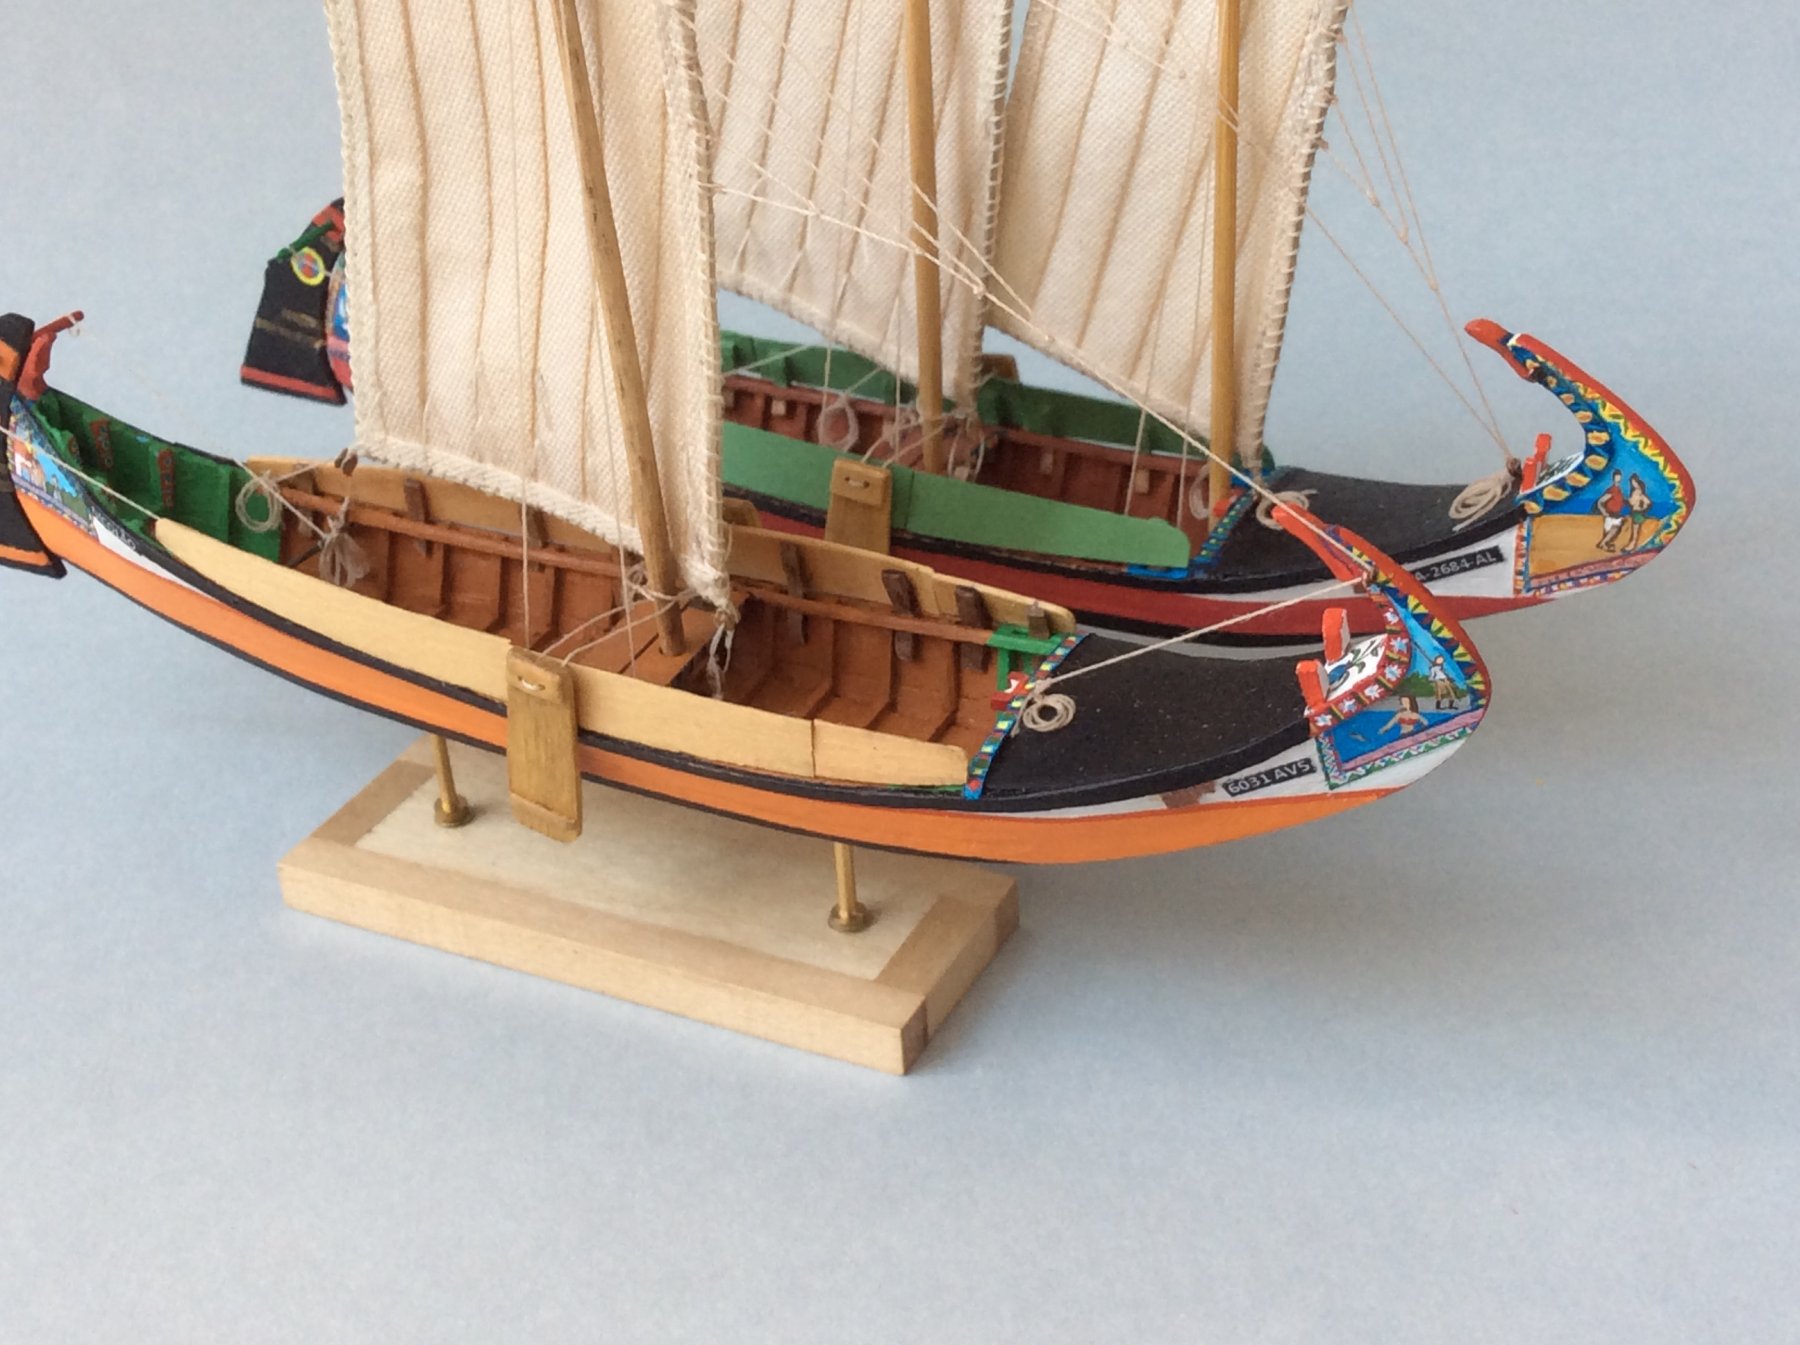
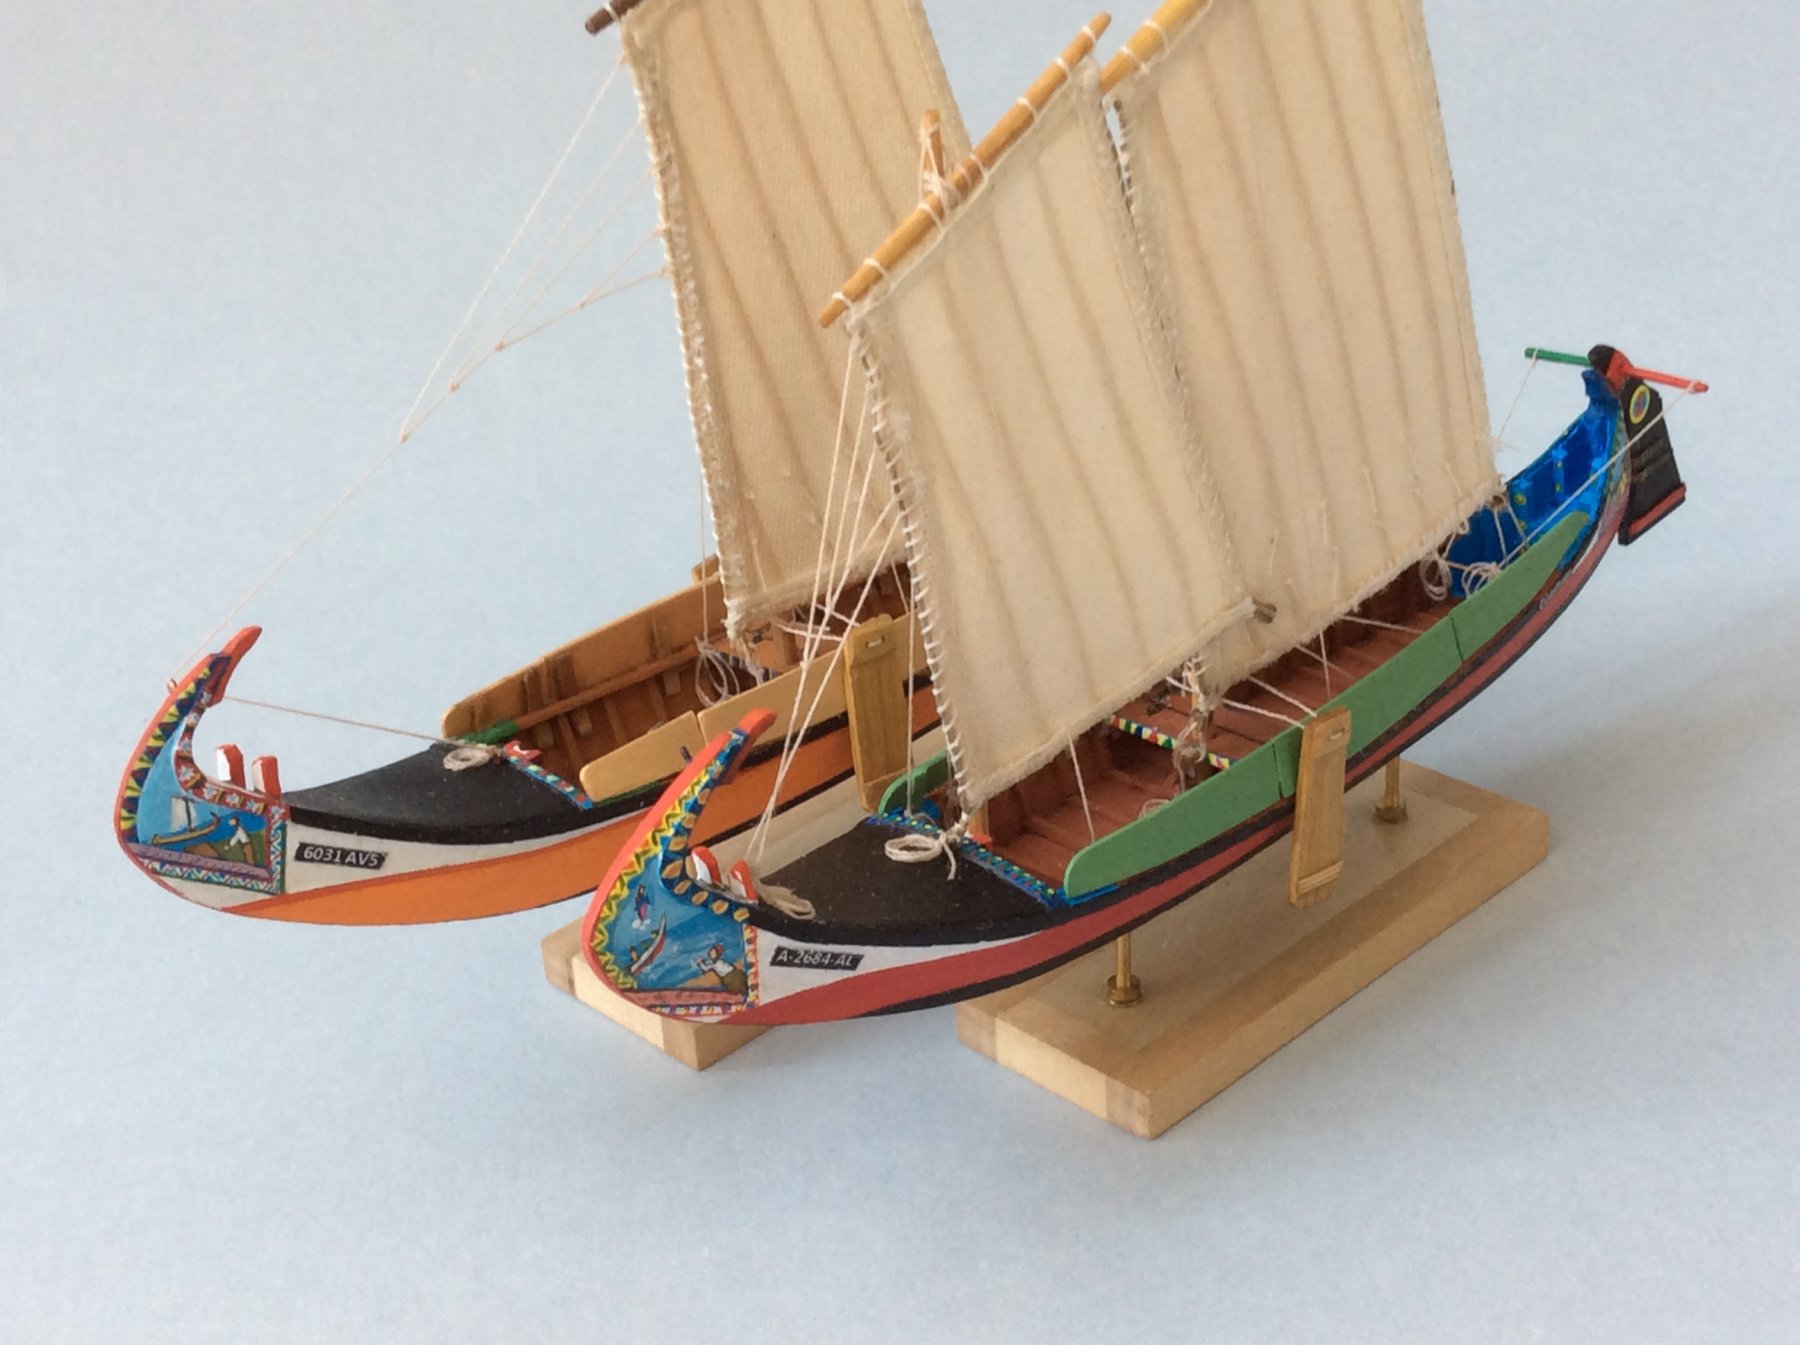
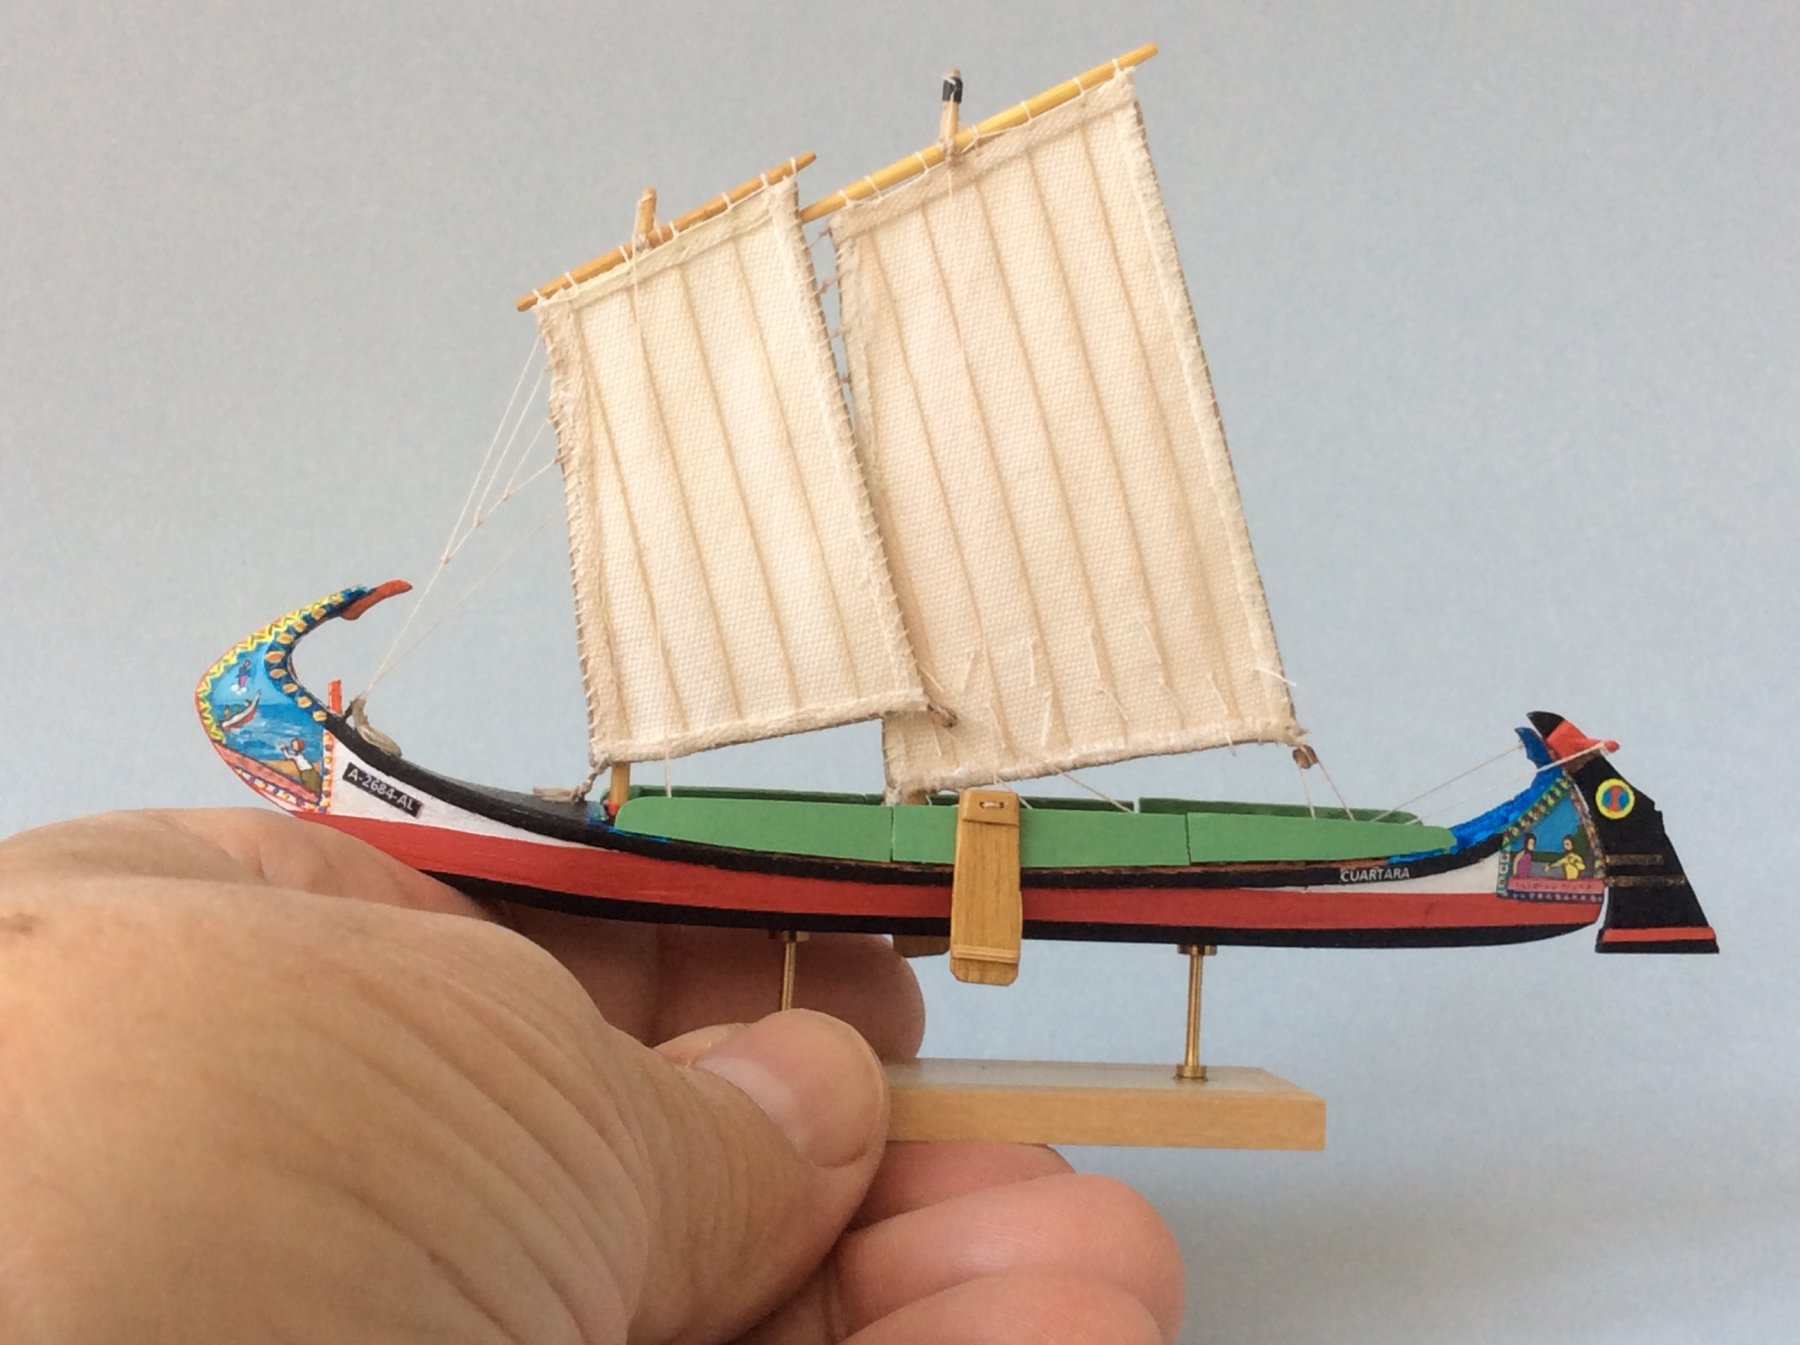
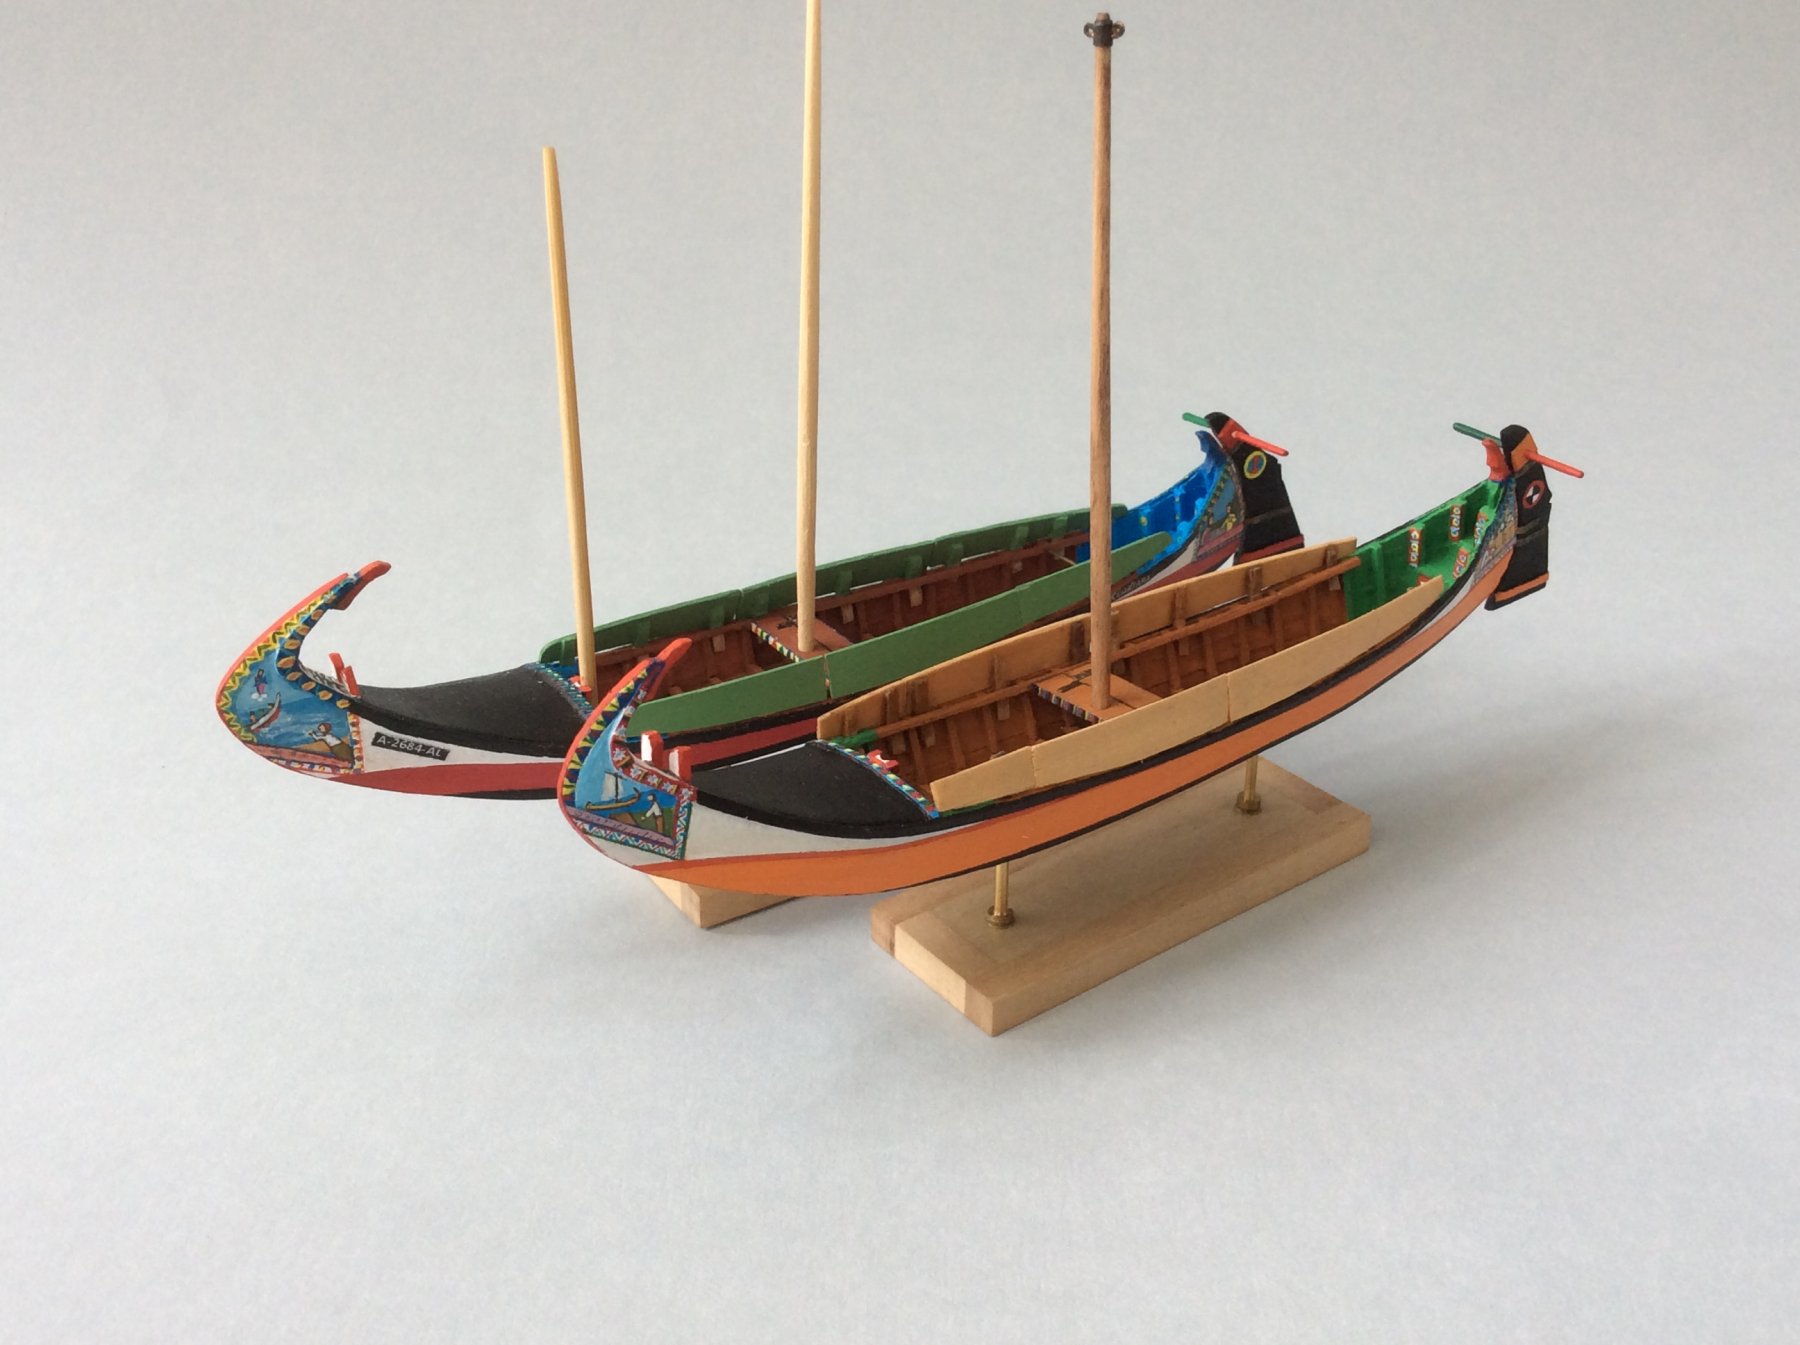
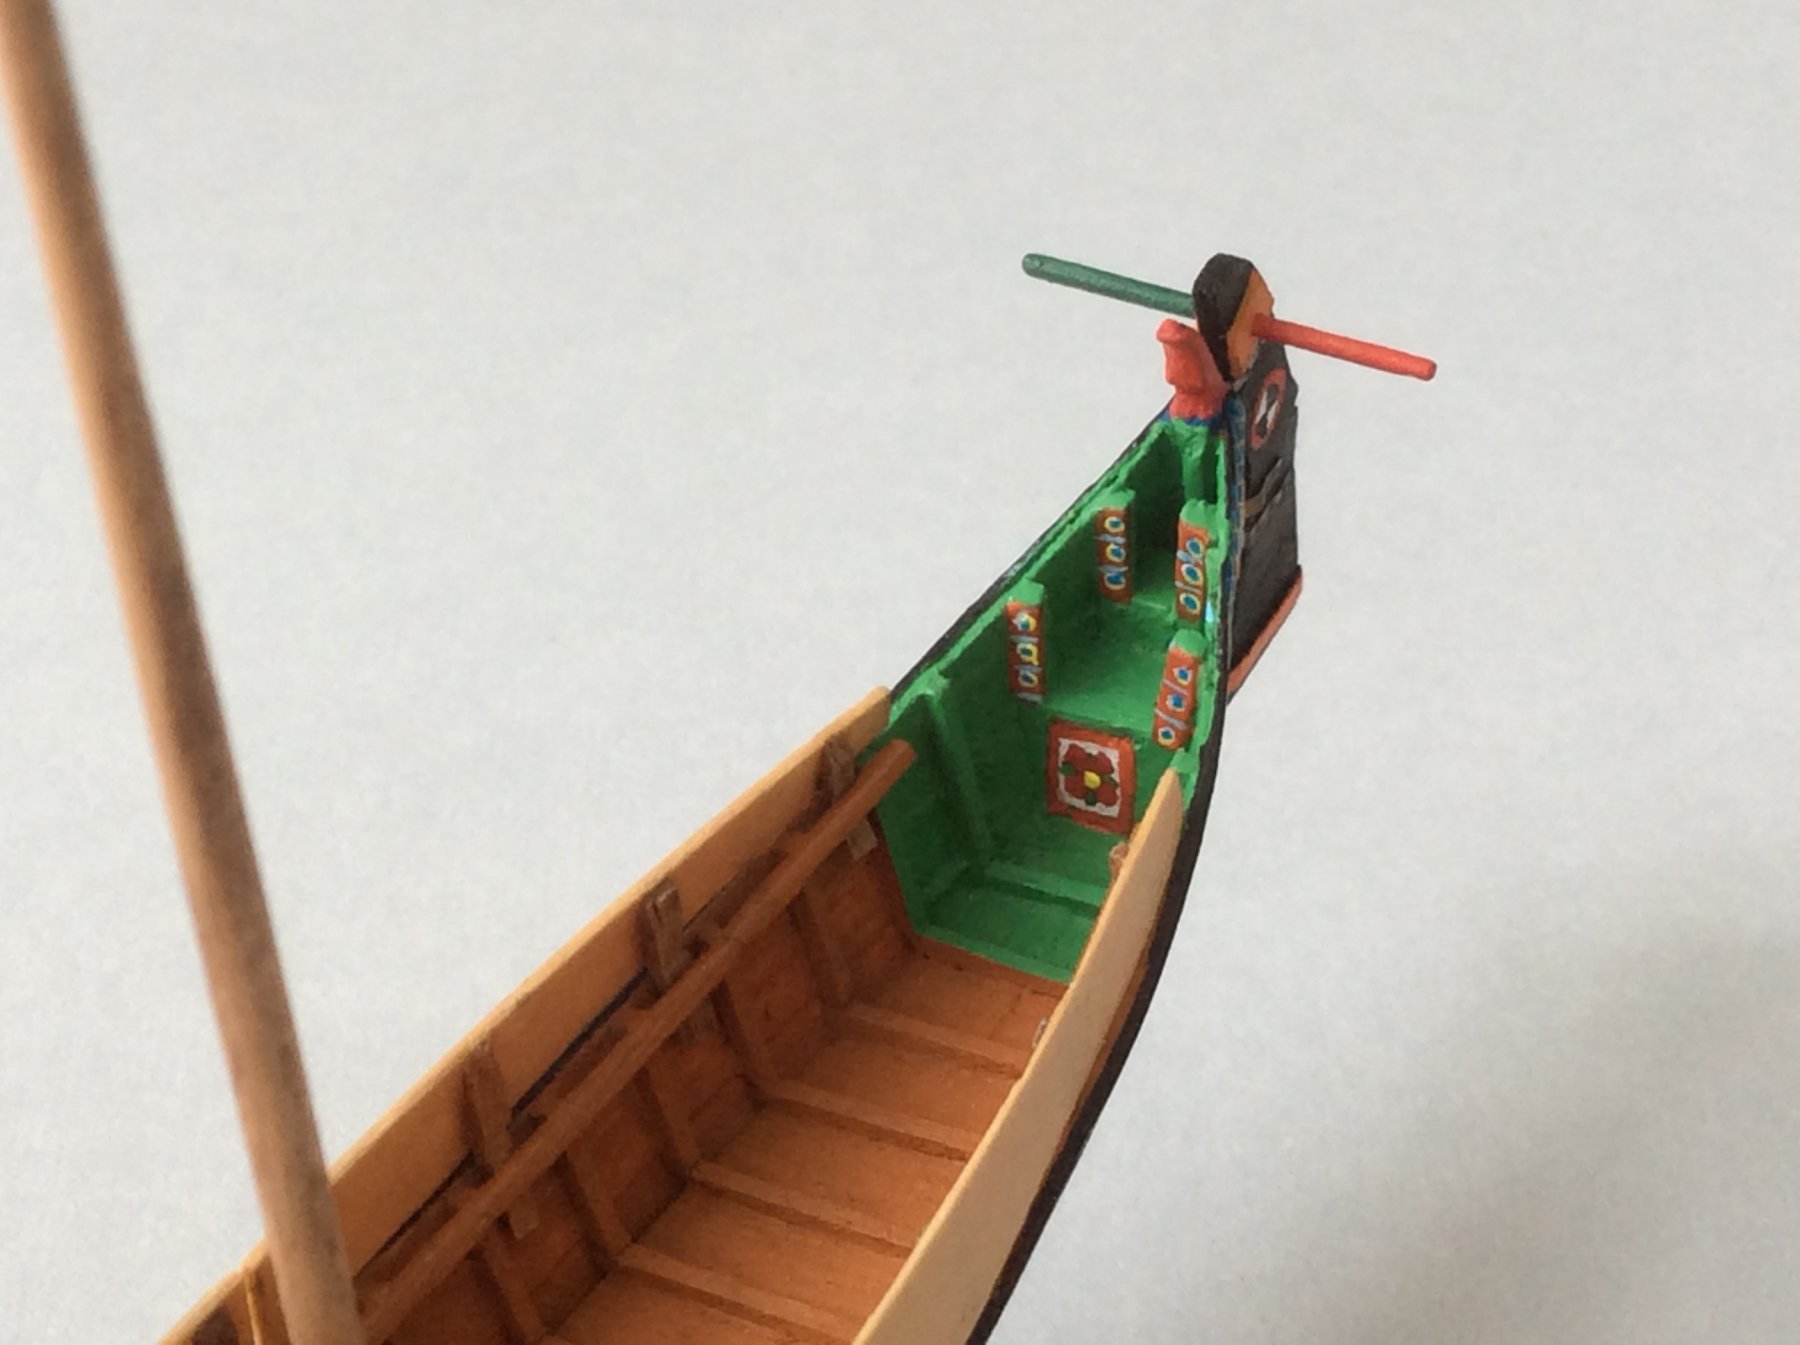
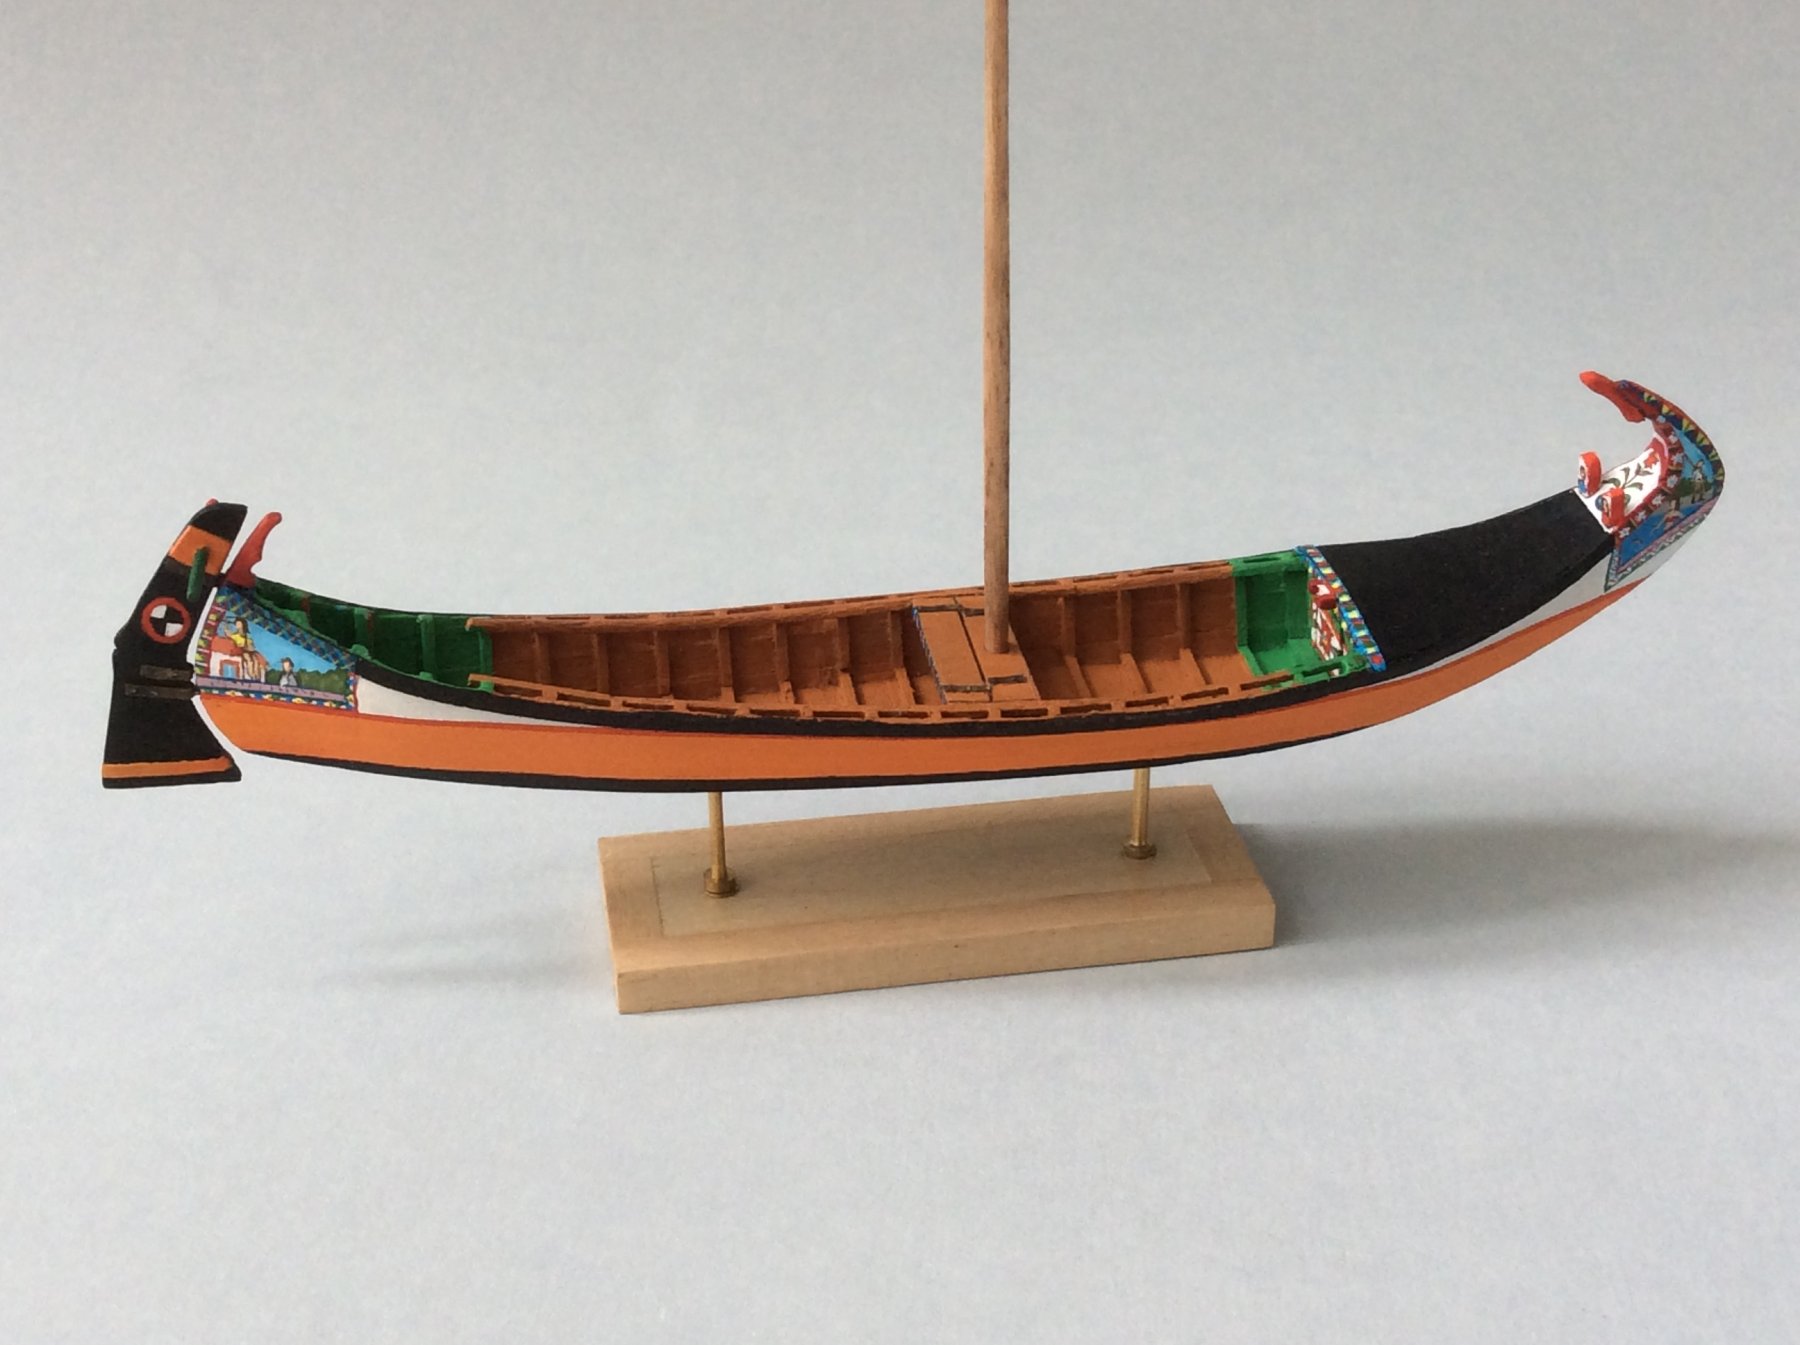
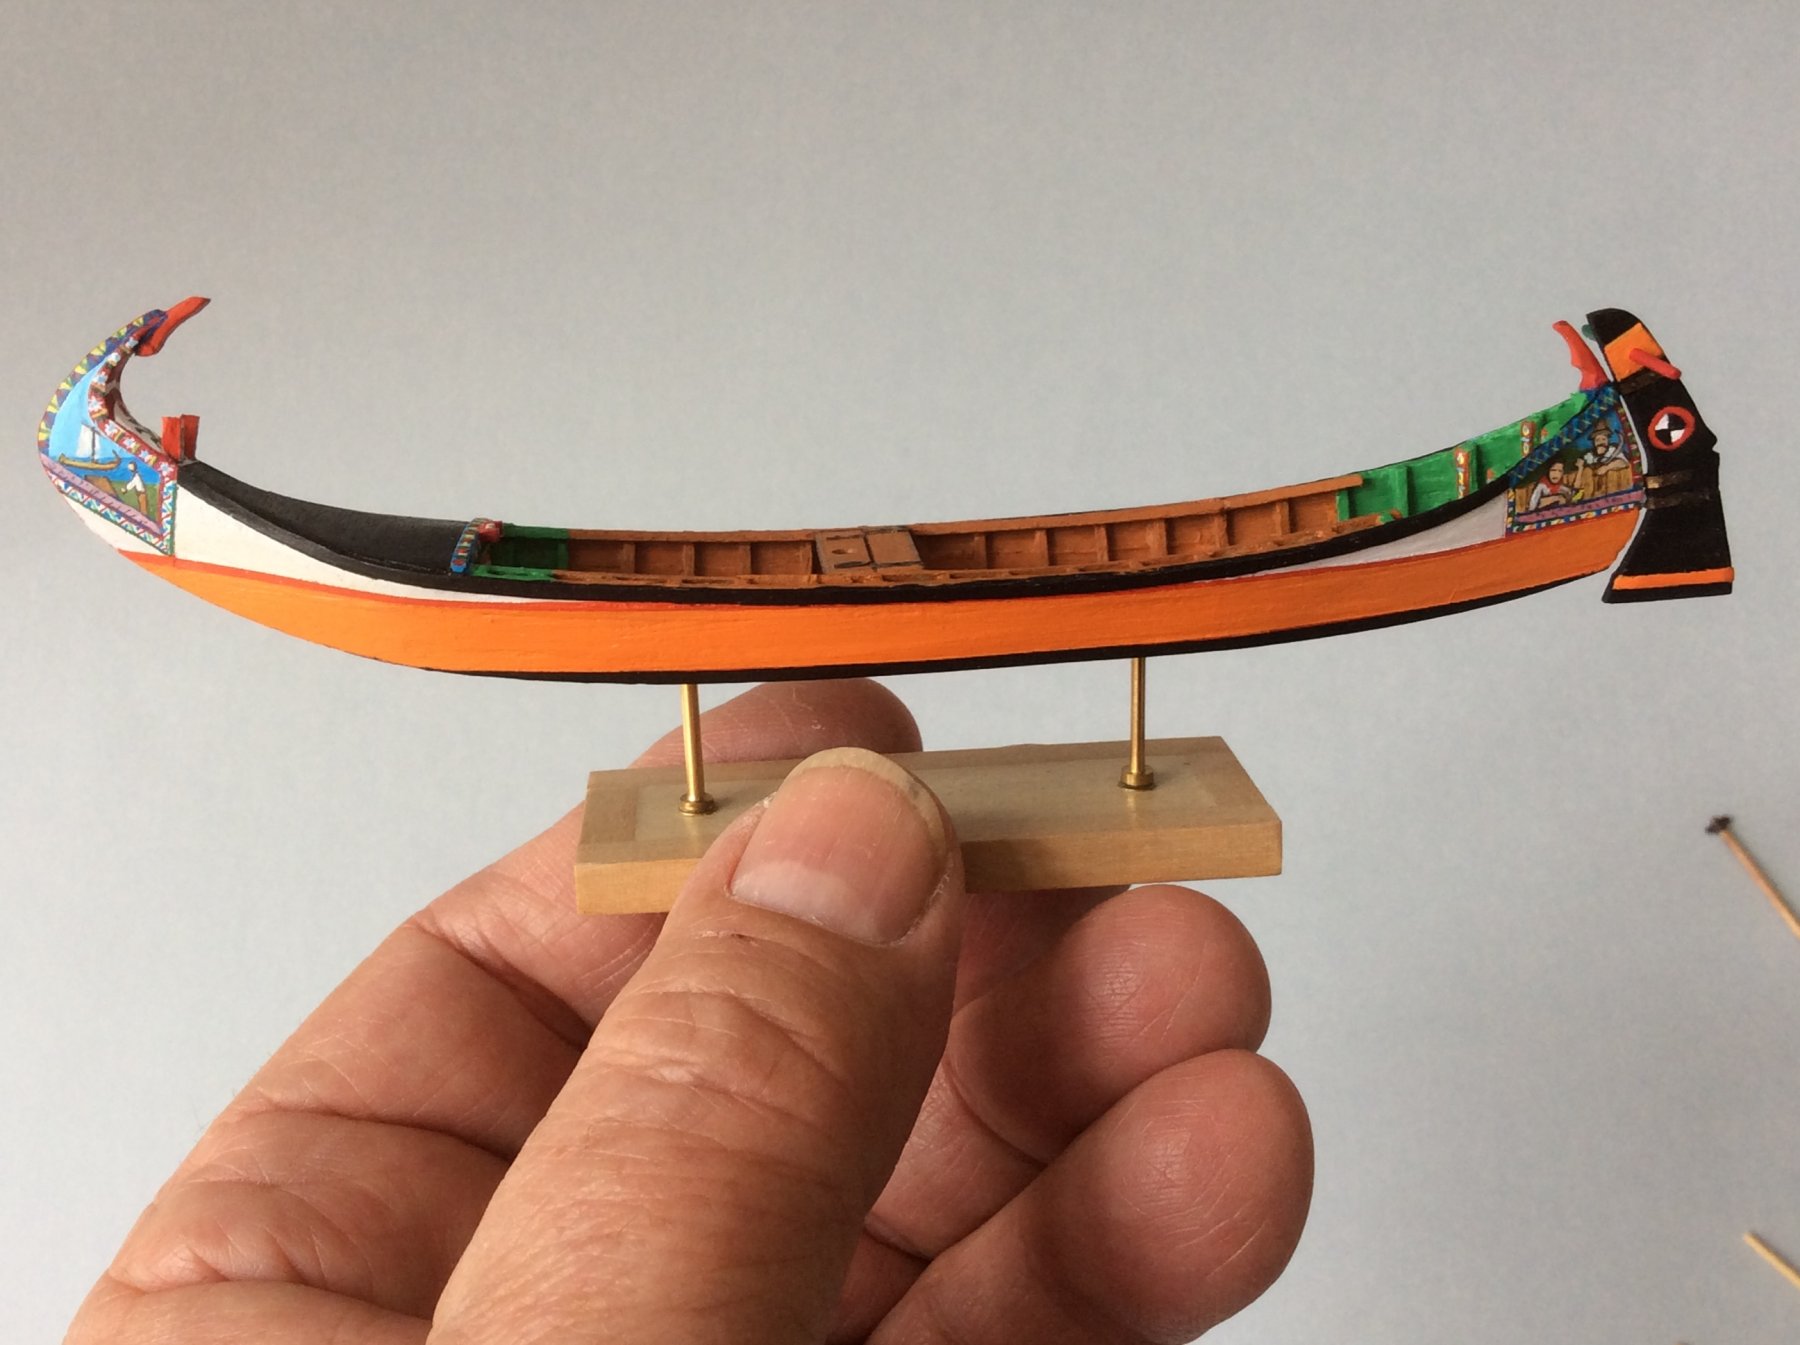
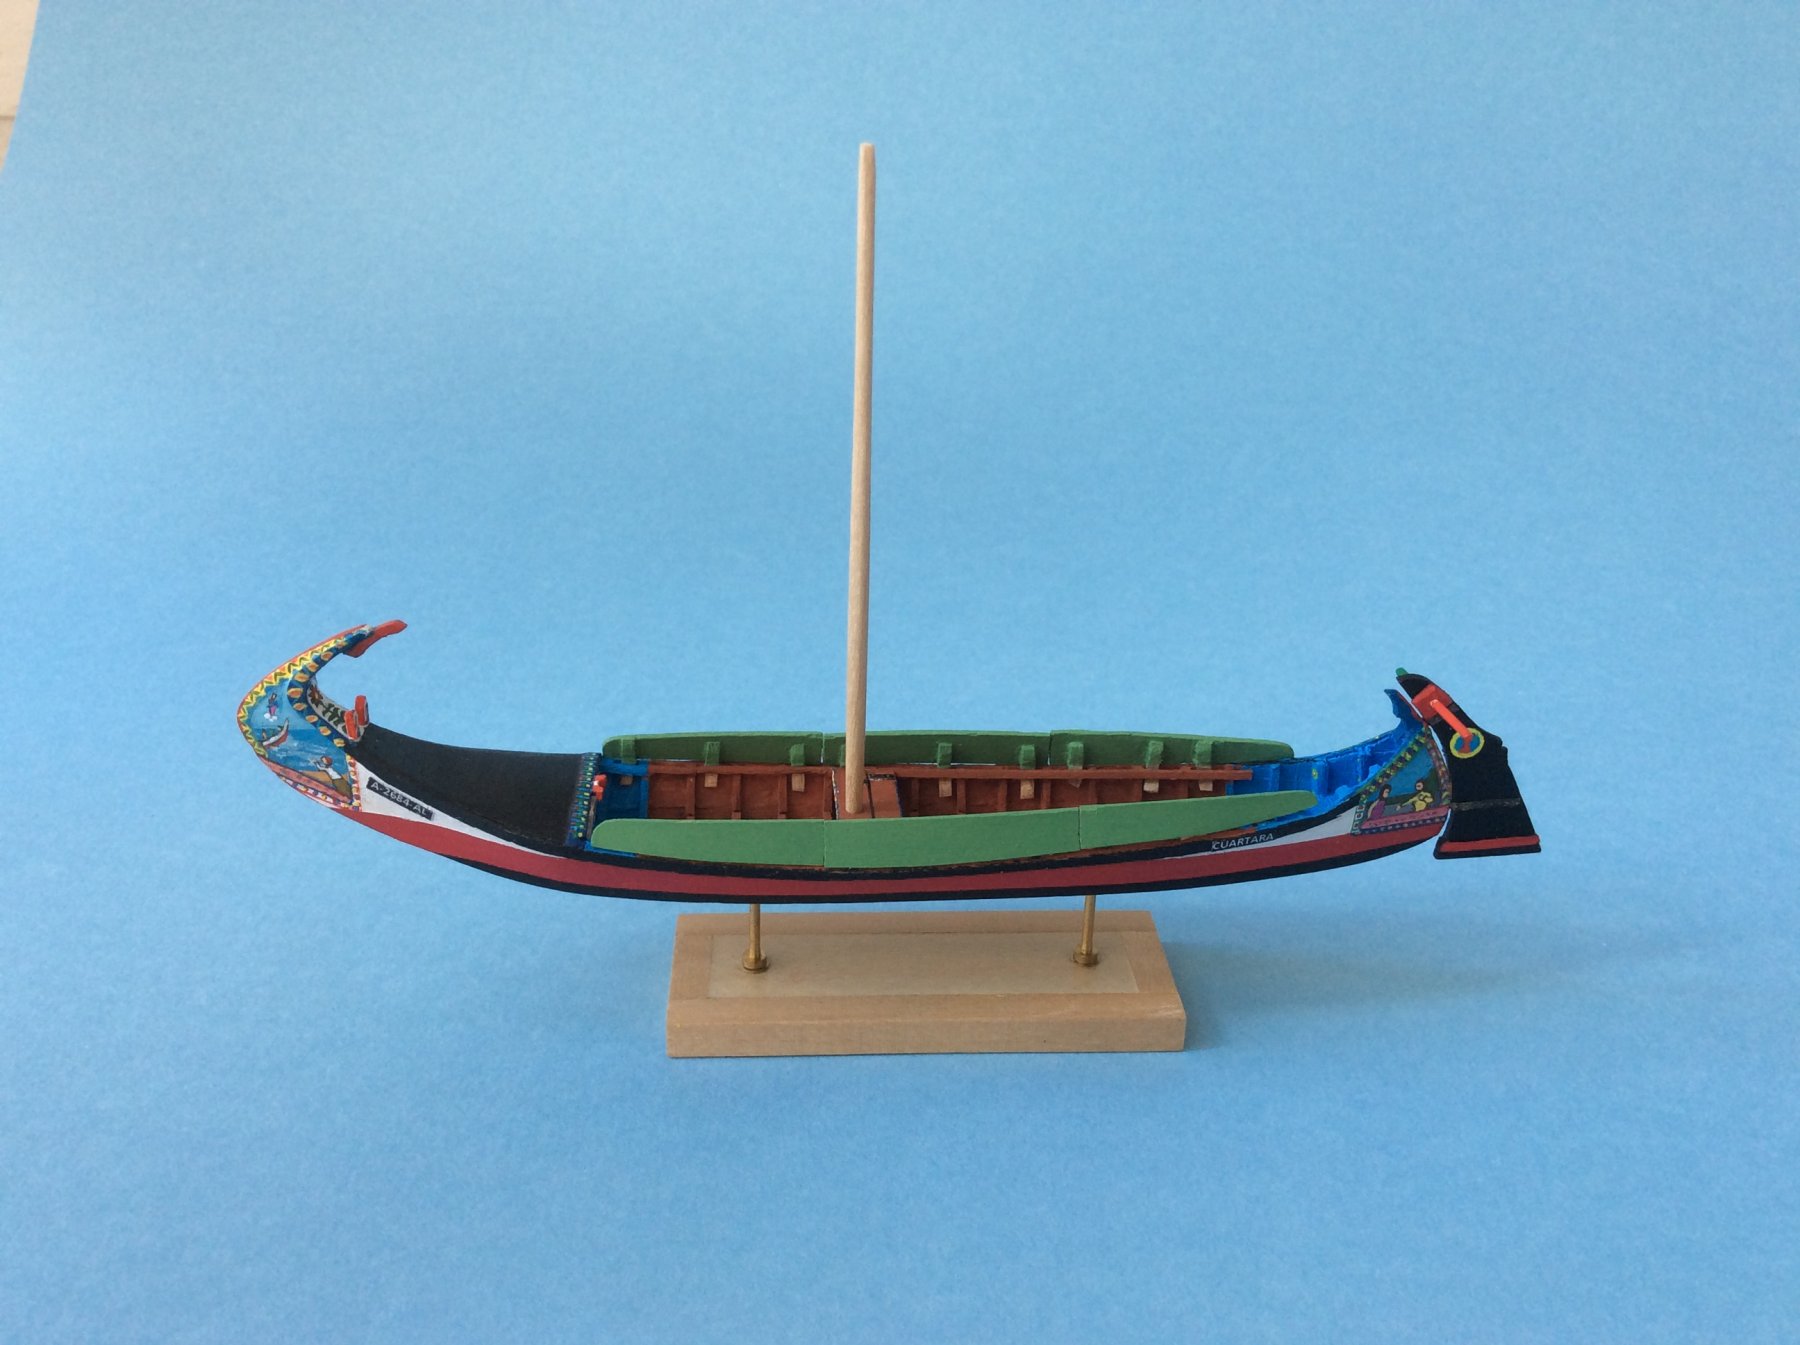
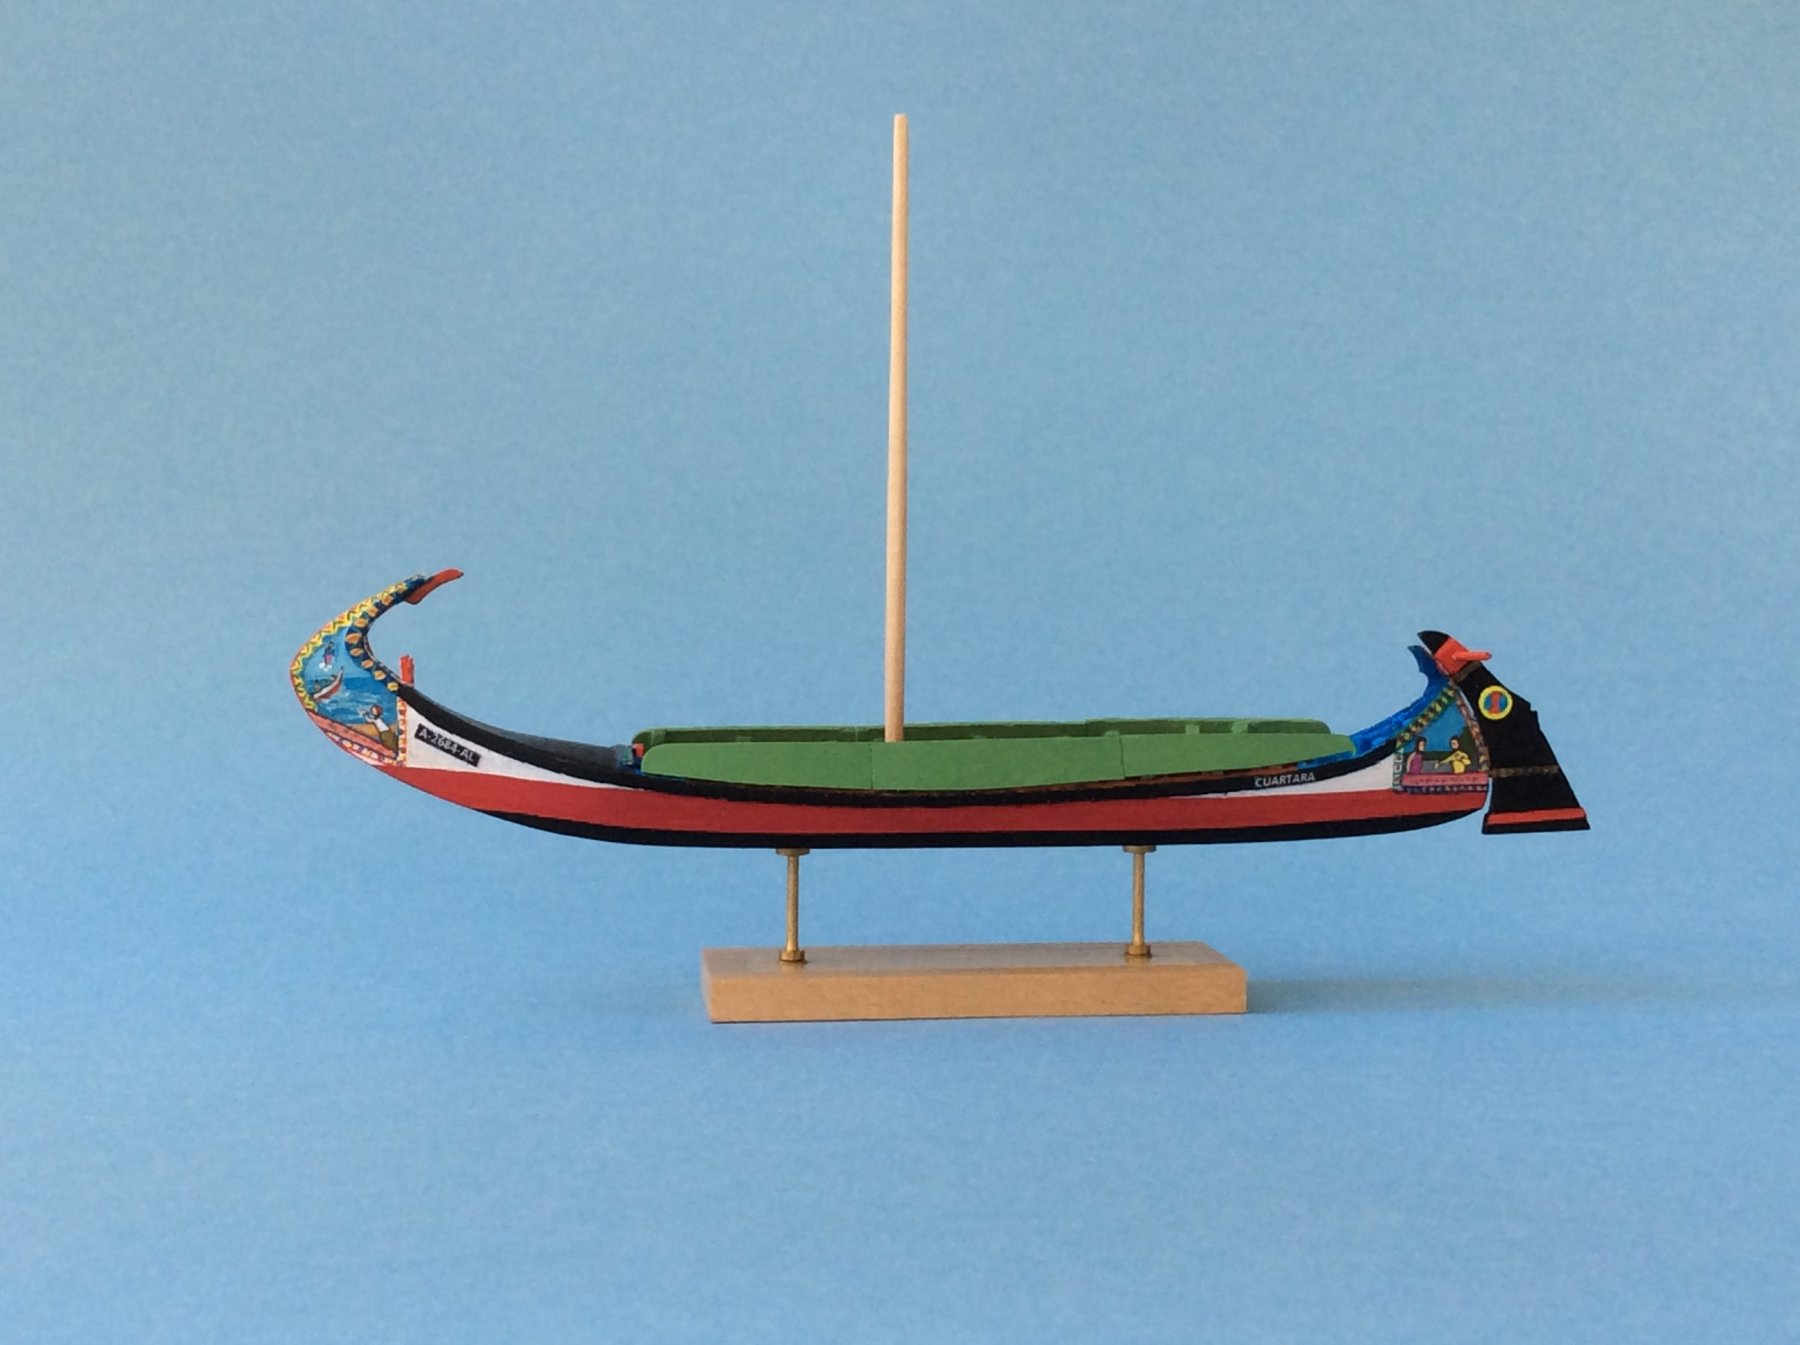
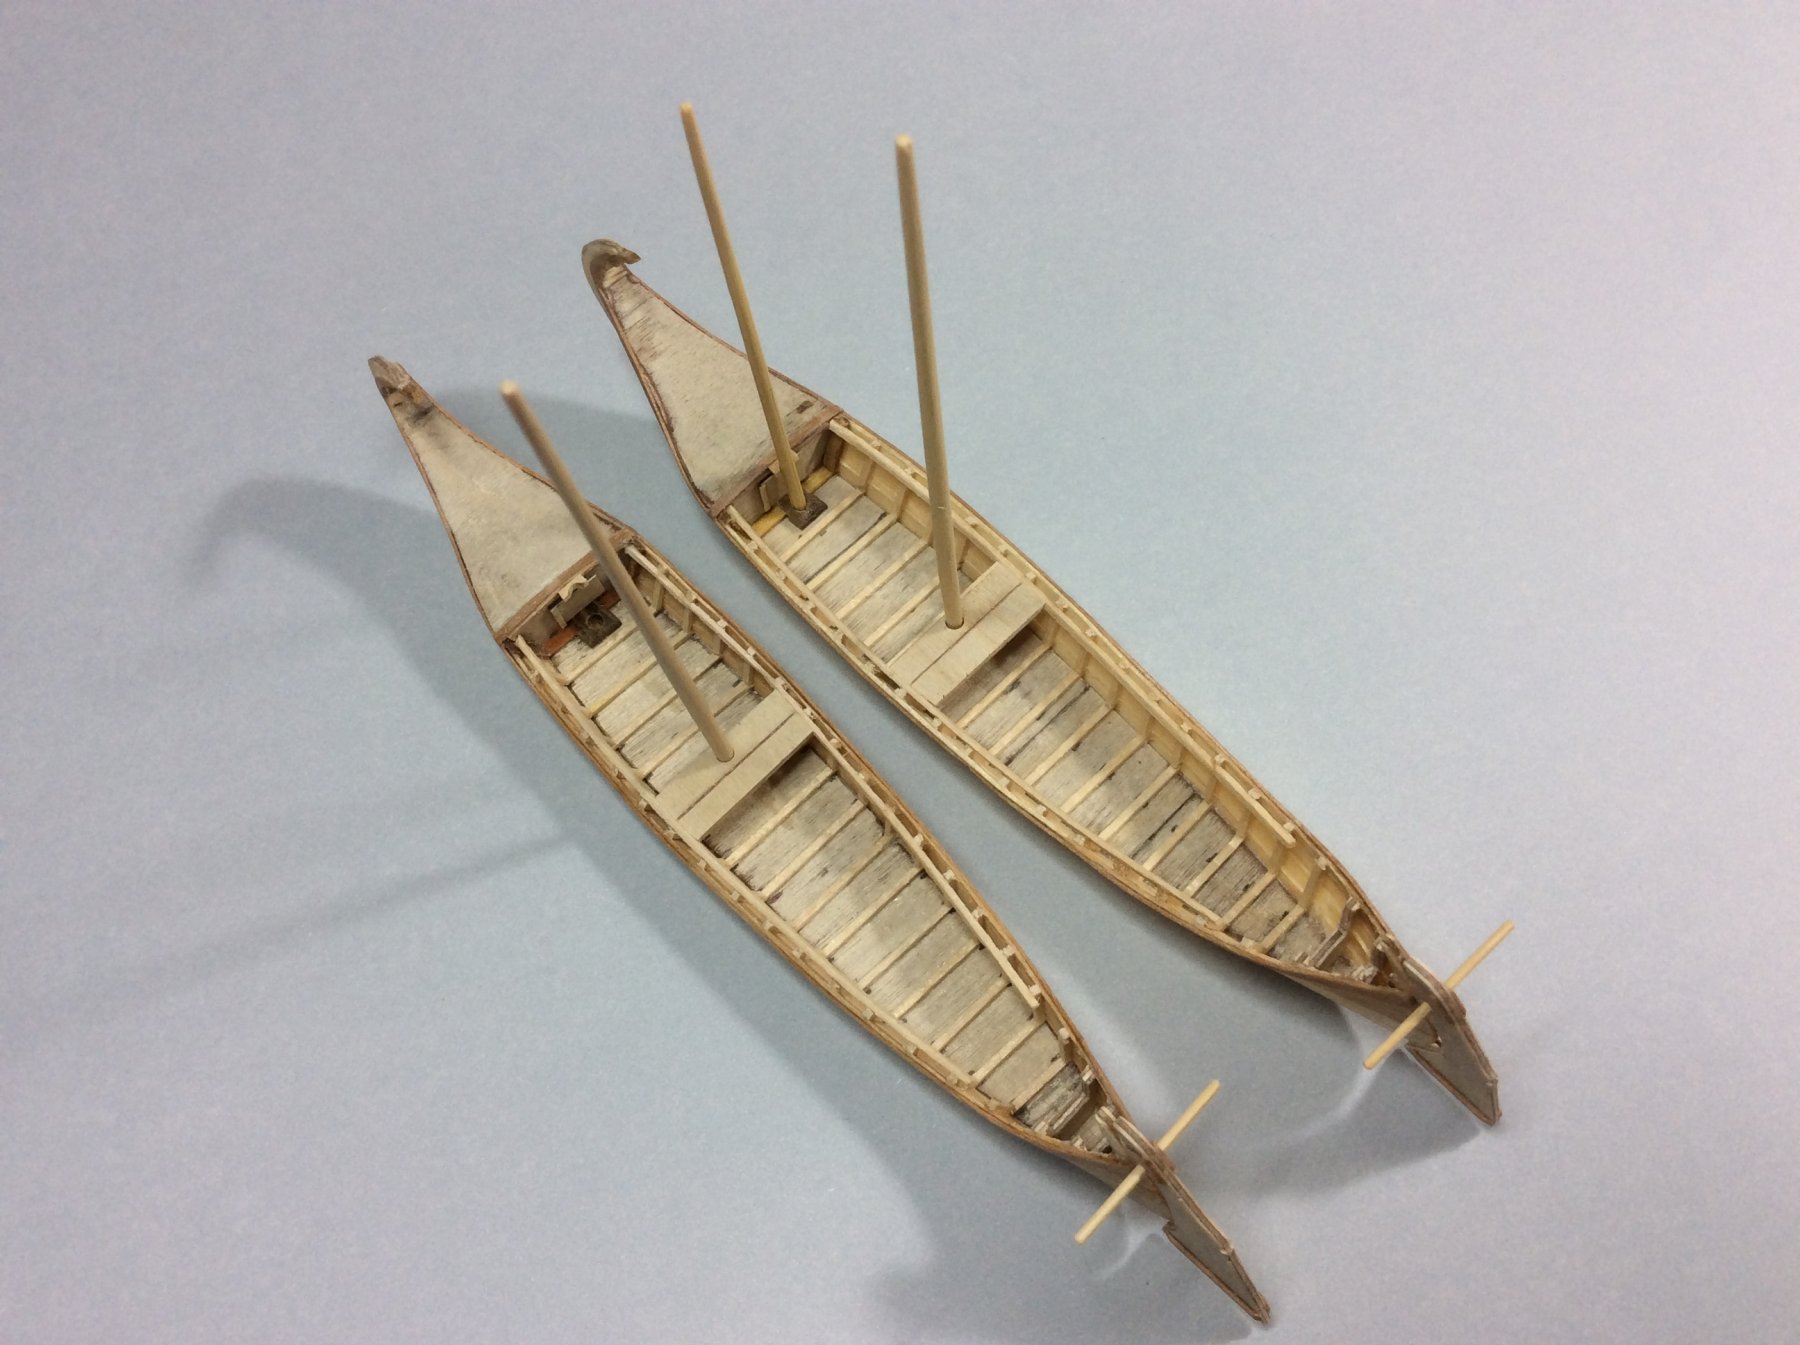
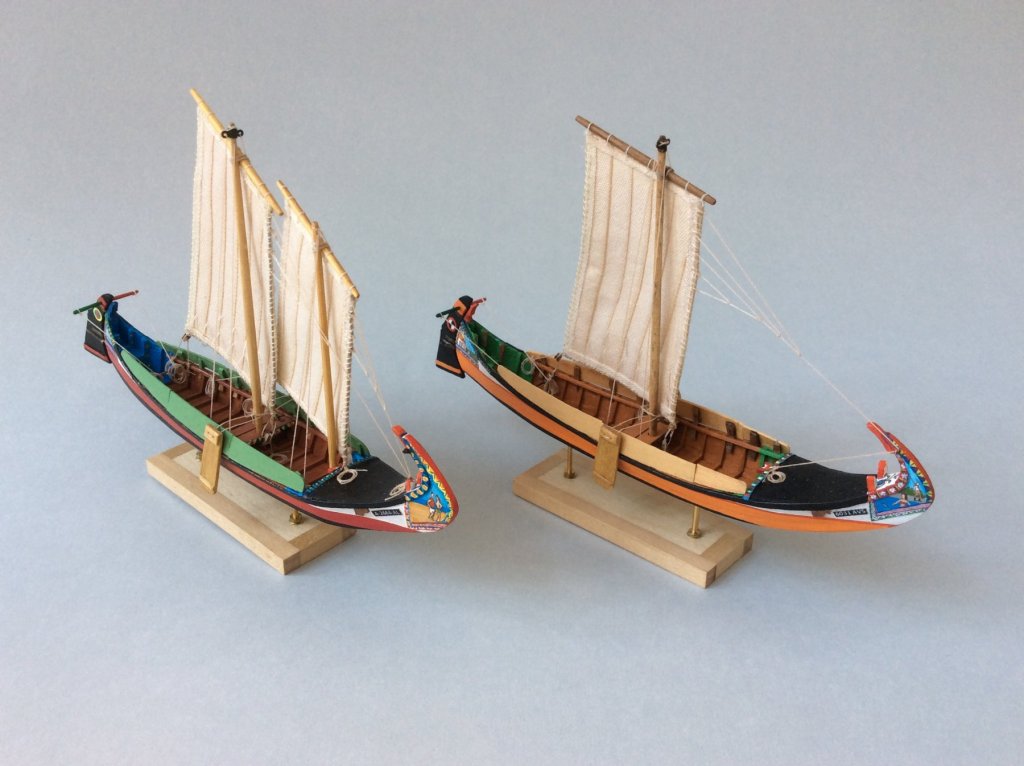
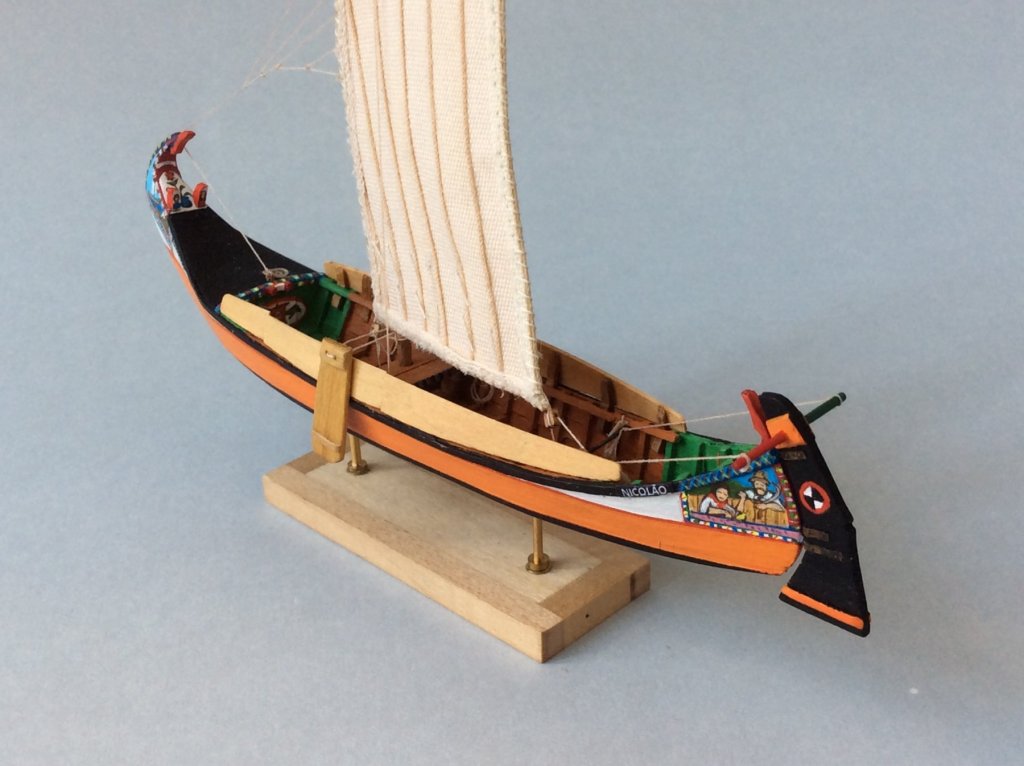
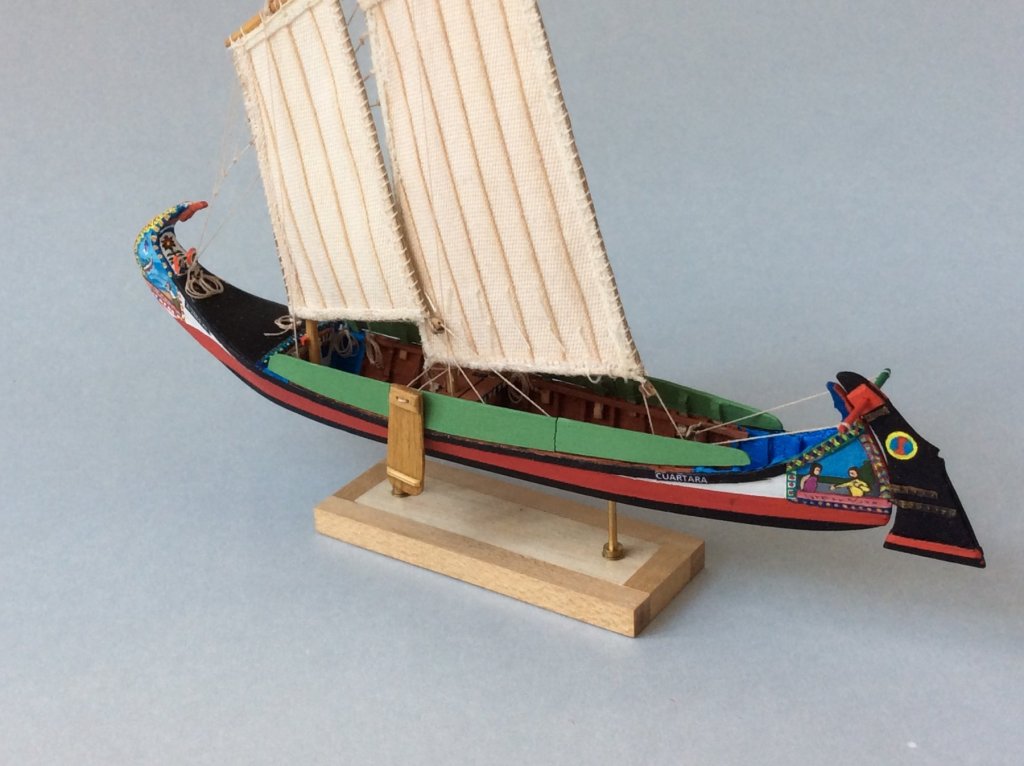
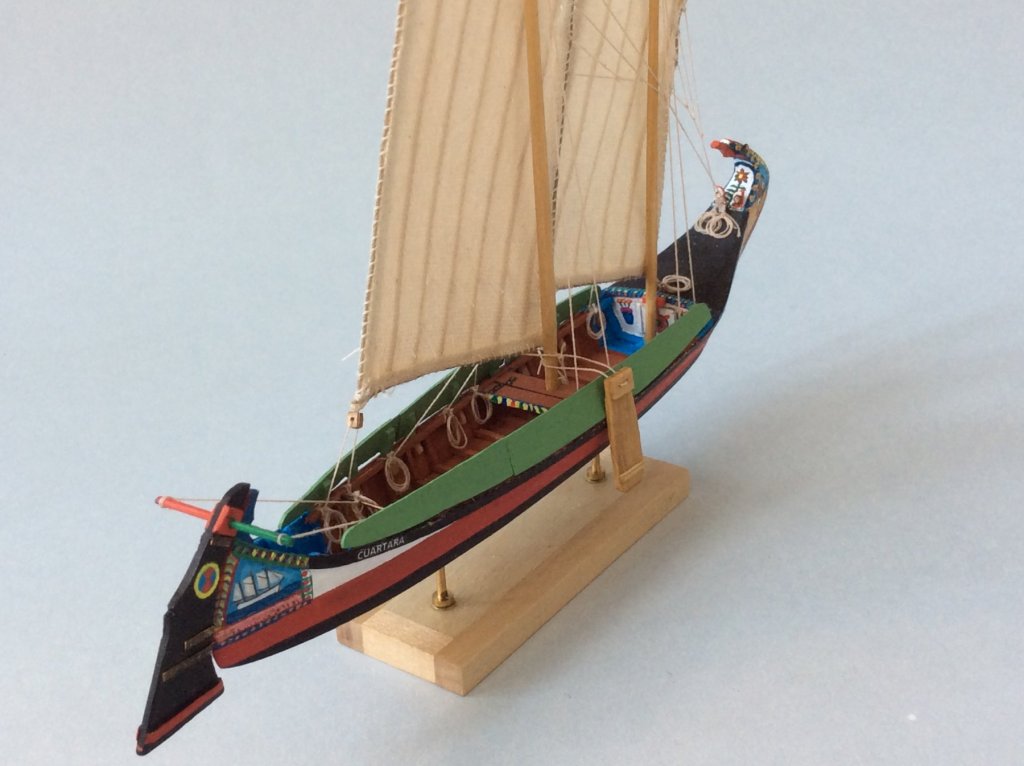
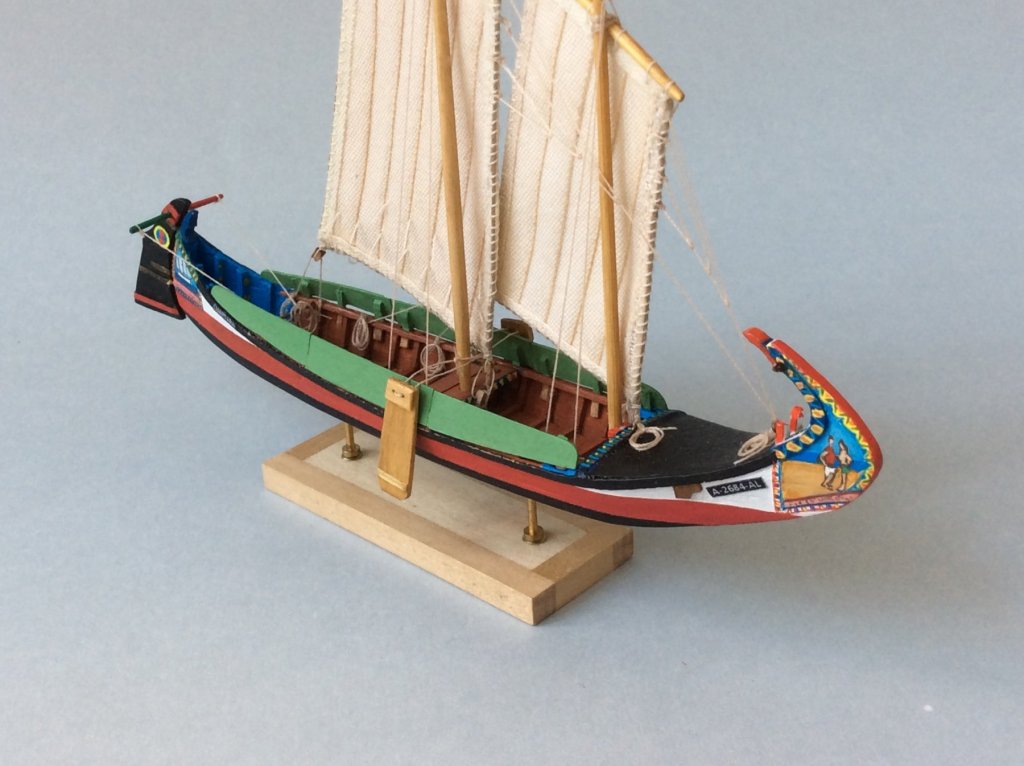
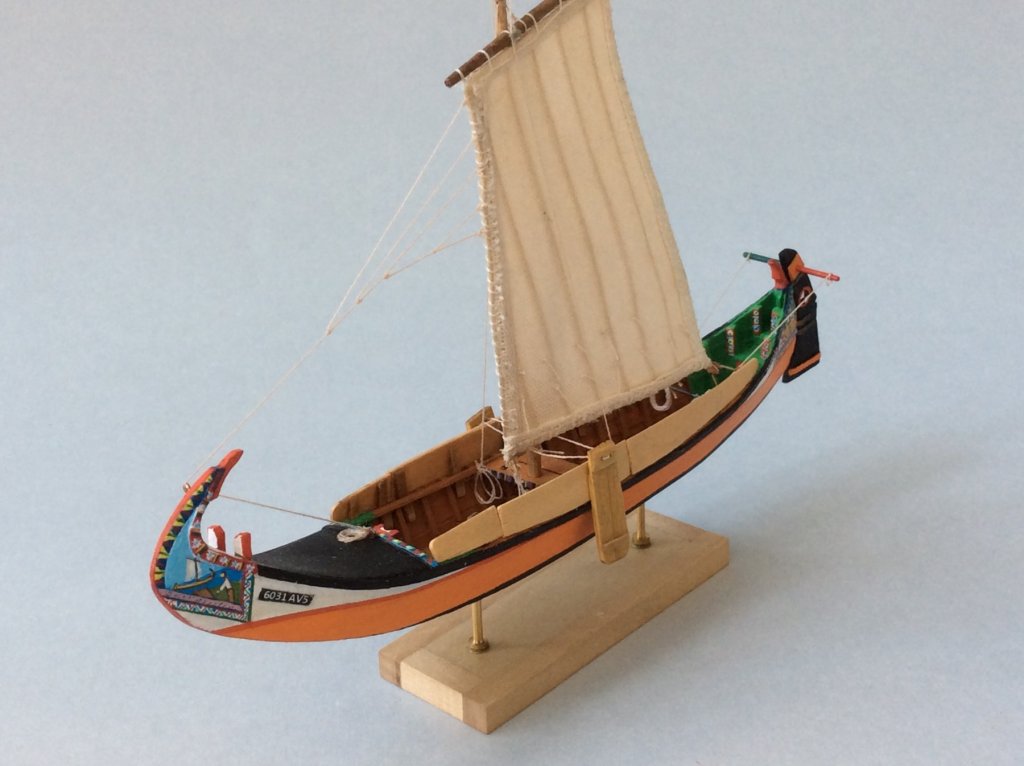
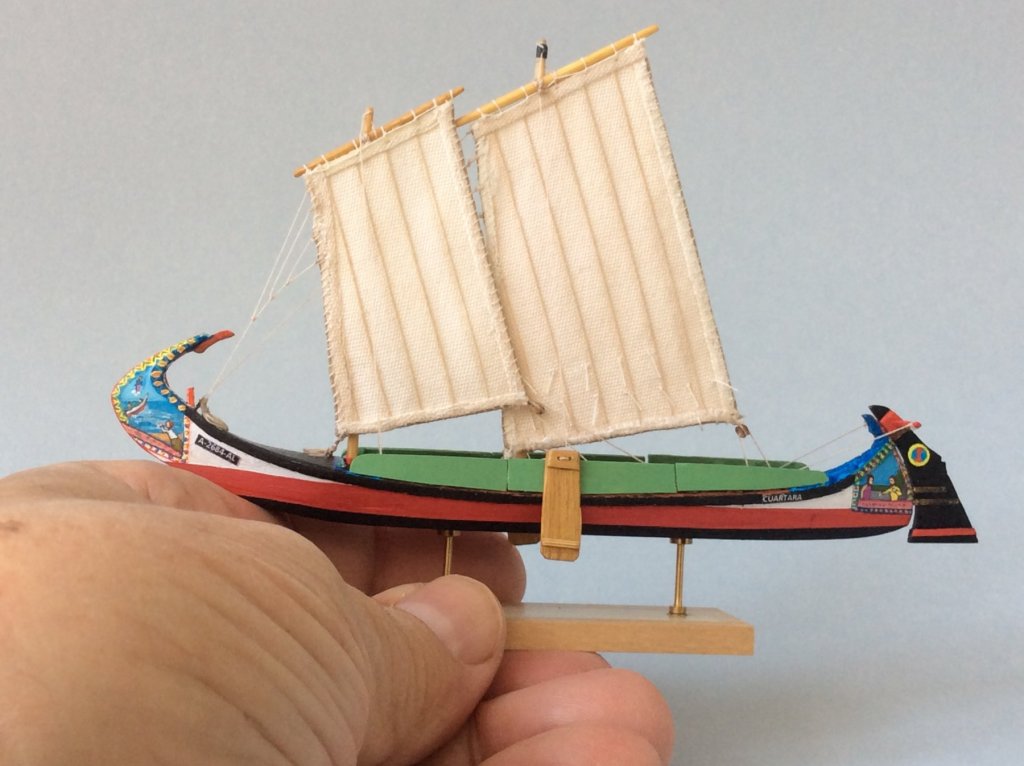
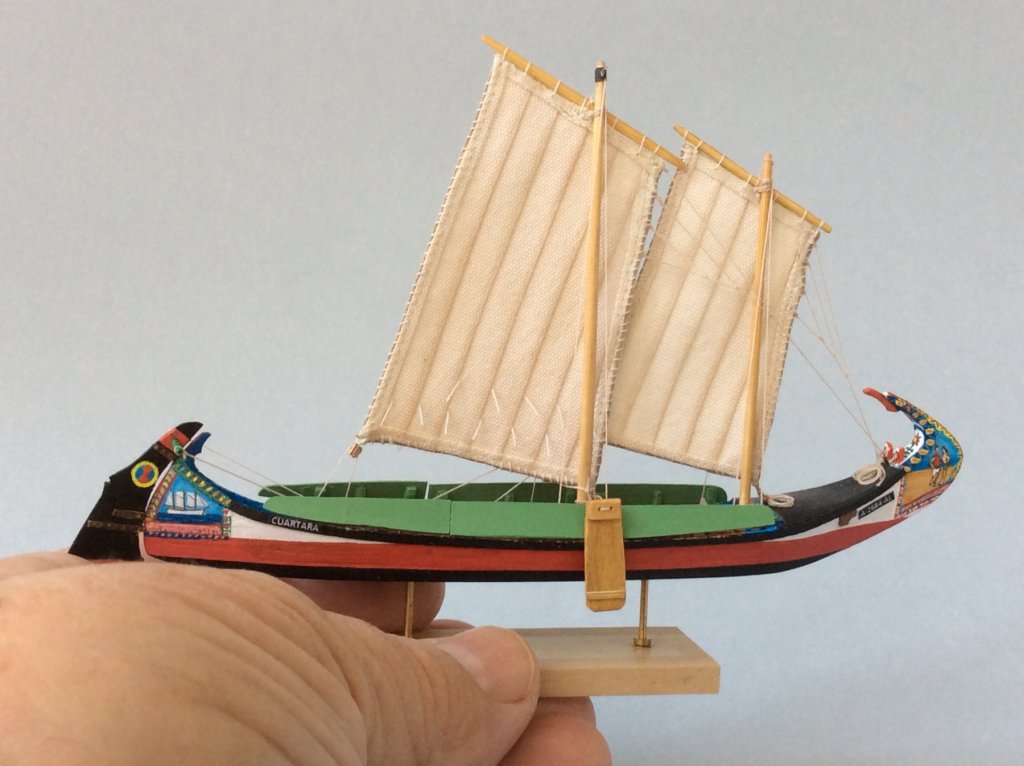
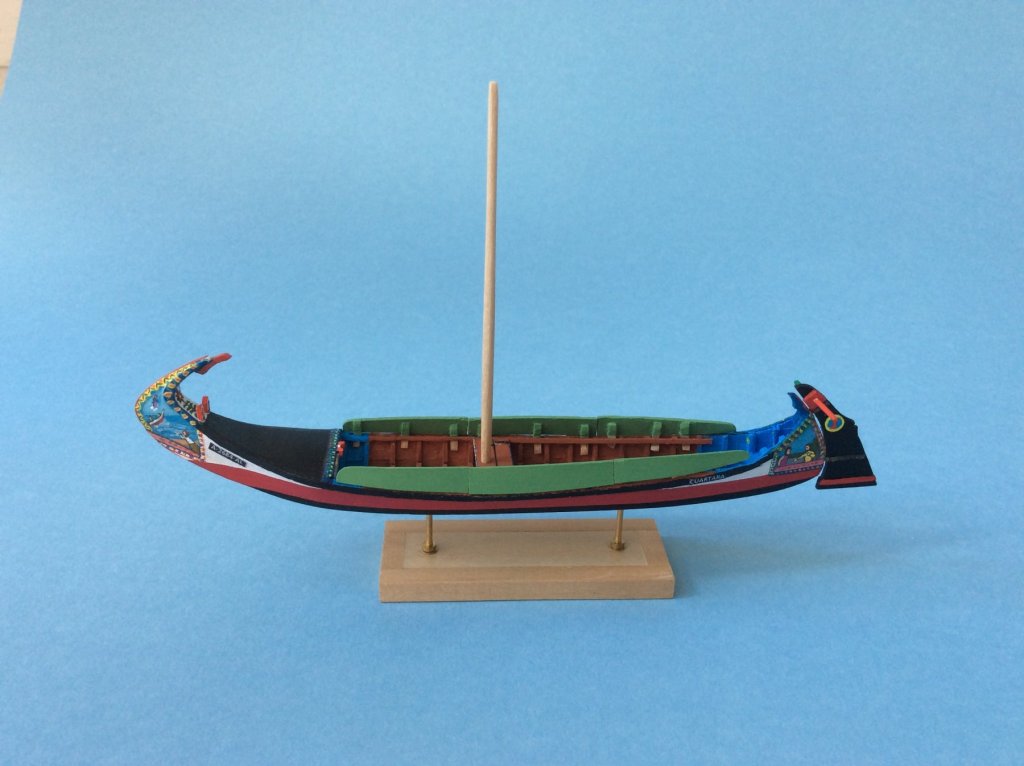
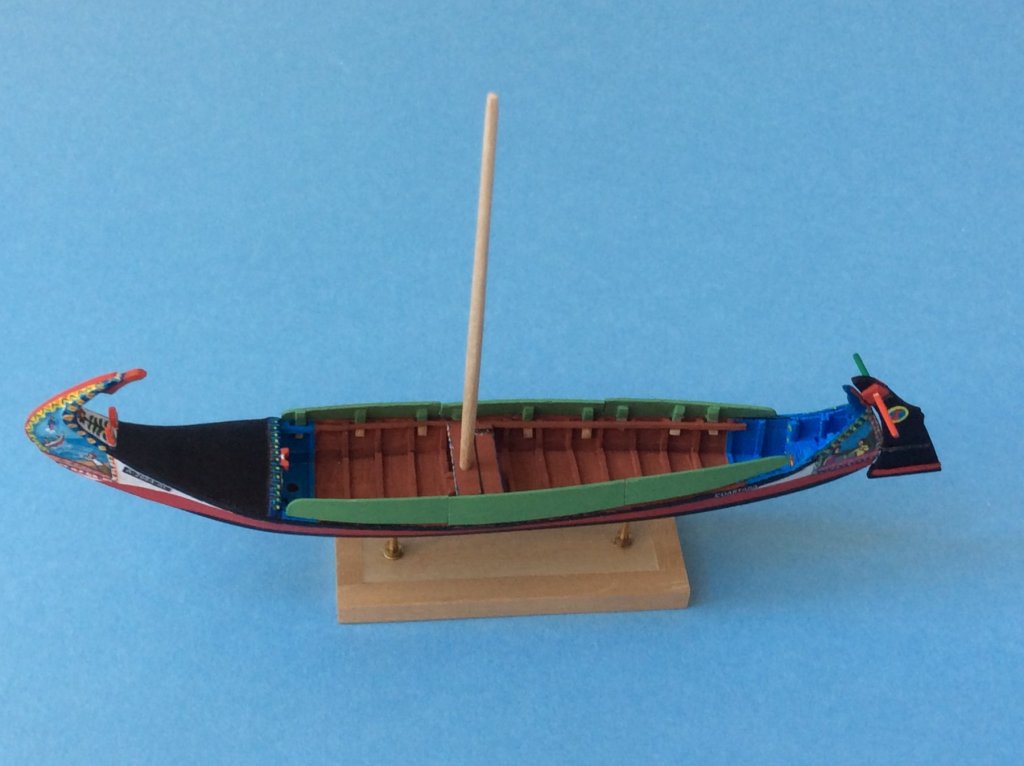
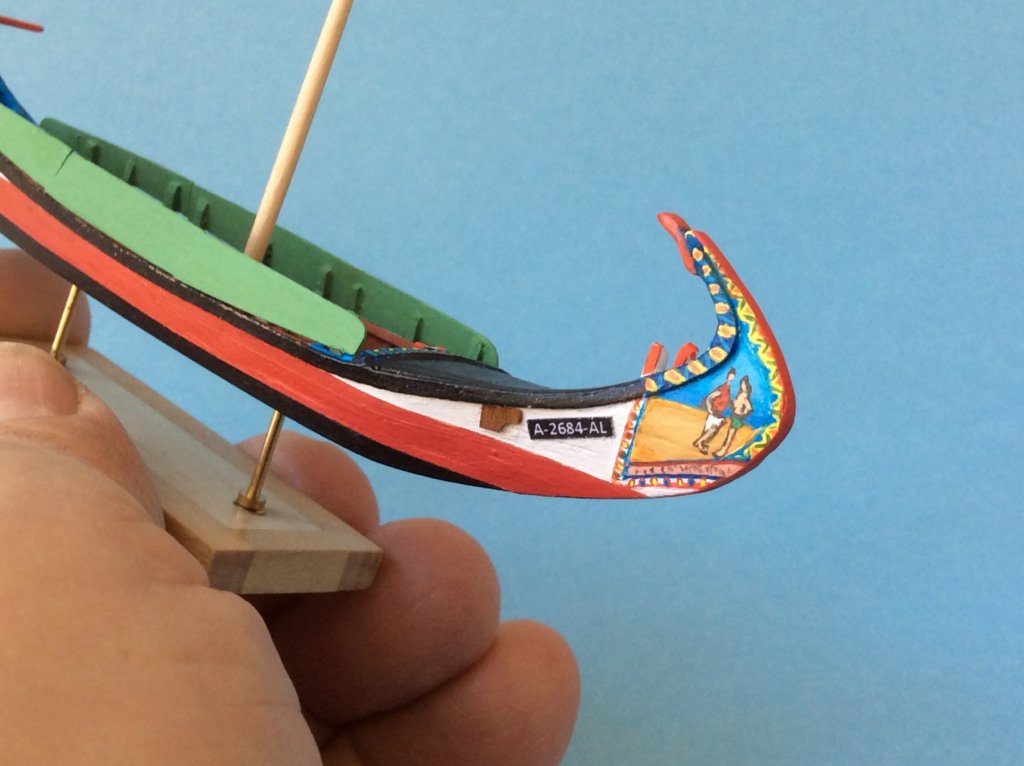
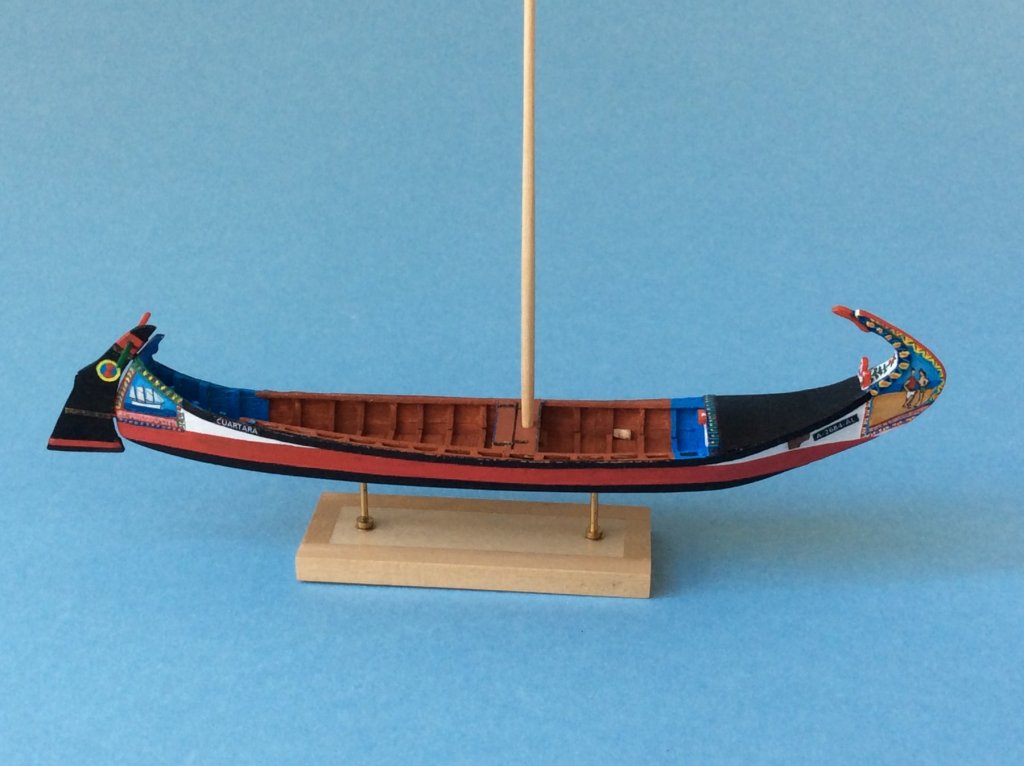
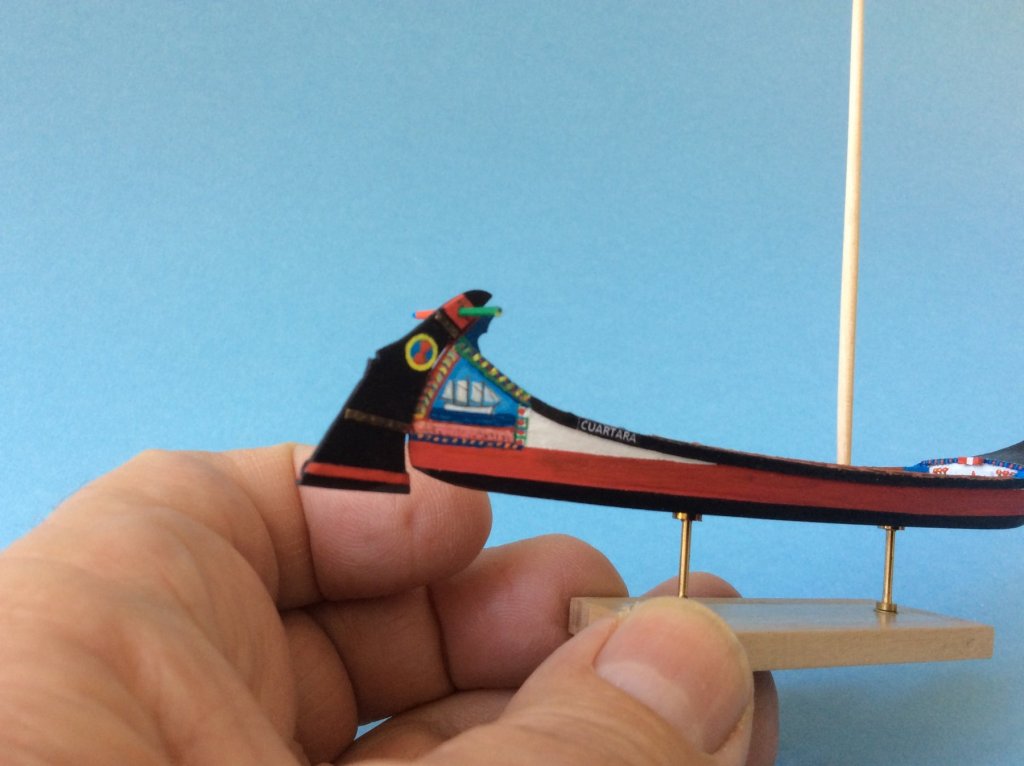
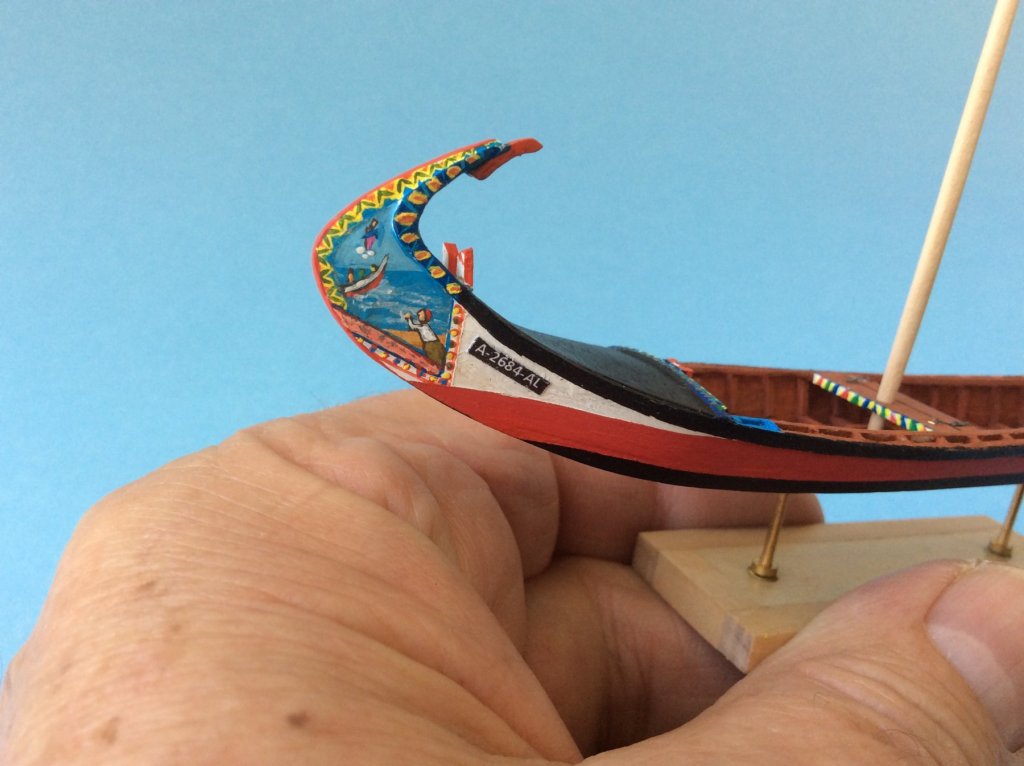
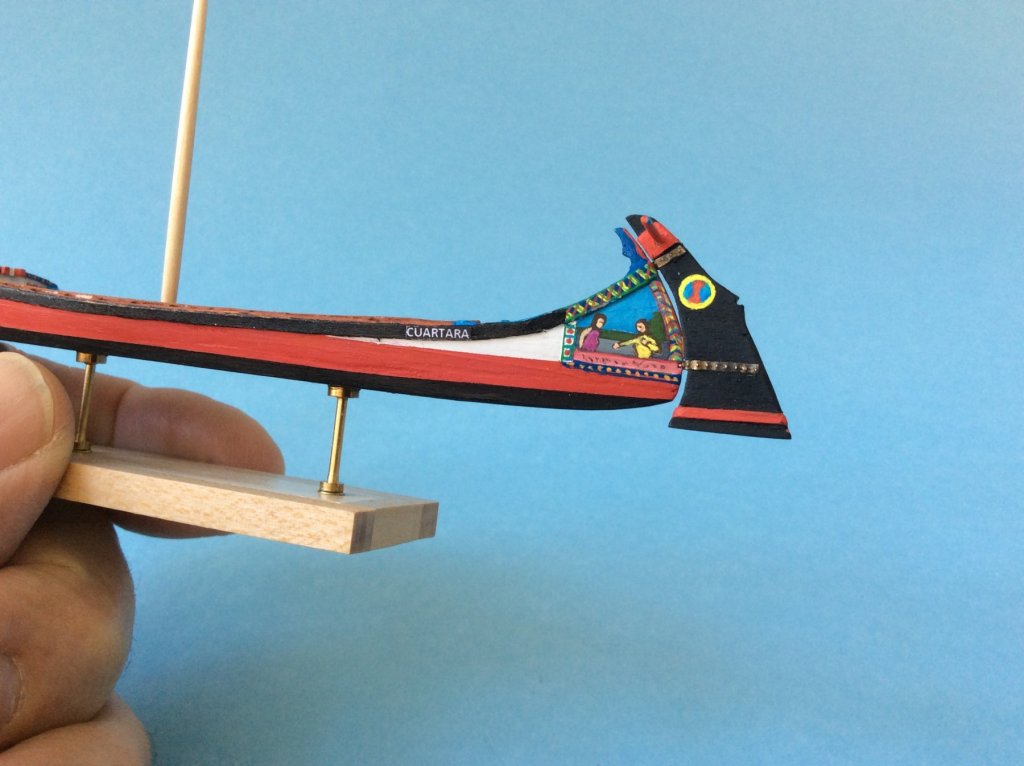
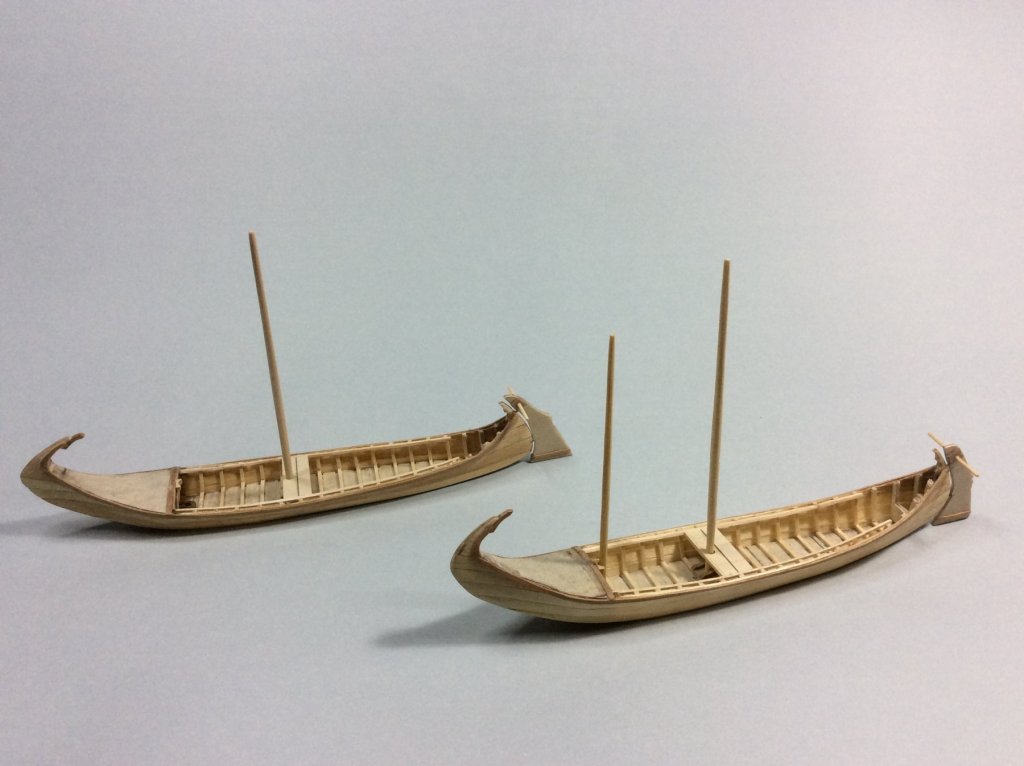
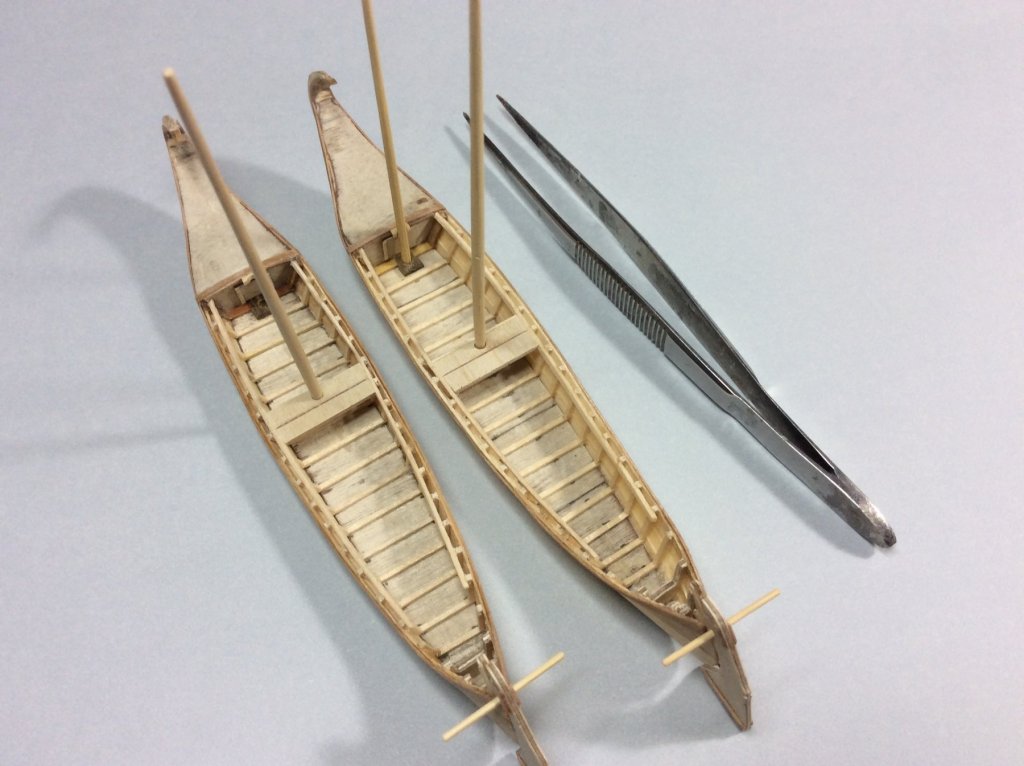
Once the mast and the sails have been placed, the two moliceiros are finished. I was wondering if these boats had two plates, one on each side, or only one that was changed on board because of where the wind would blow; However, looking for information about it, I found in the book of Senos da Fonseca the following paragraph talking about them that cleared my doubts: "Utilizam-se duas a cada mastro; uma levantada (a barlavento) enquanto a outra está metida na água (a sotavento). As tostes na situaçao de arrasto do moliço podem ser colocadas, pousadas transversalmente, com o sentido de facilitar o trabalho aquando das manobras de recolha e amação das ervas ... " That's why I put two plates in each moliceiro, taking the license for presentation purposes to present the two stuck in the water, although in reality one of them had to go up on board


- 13 replies
-
- 11
-
-
- small
- moliceiros
- (and 1 more)
-
Hello from spain to everybody
Javier Baron replied to Javier Baron's topic in New member Introductions
A lot of thanks to all of you for your kinds comments After making ships on a larger scale for years and not knowing what to do next with them, it was precisely the problem of space in the home, together with my facet of collector, which led me to make and collect miniature models ( I'm now making number 62 of my collection). Regarding the techniques, I'm posting in the forum section “Build Logs for Scratch Ships Model Projects”a topic called “Two miniature moliceiros”, which without being a step by step, shows part of the process that I follow in the construction of my models. In any case, I will be happy to answer all questions and doubts that may arise A cordial greeting Javier -
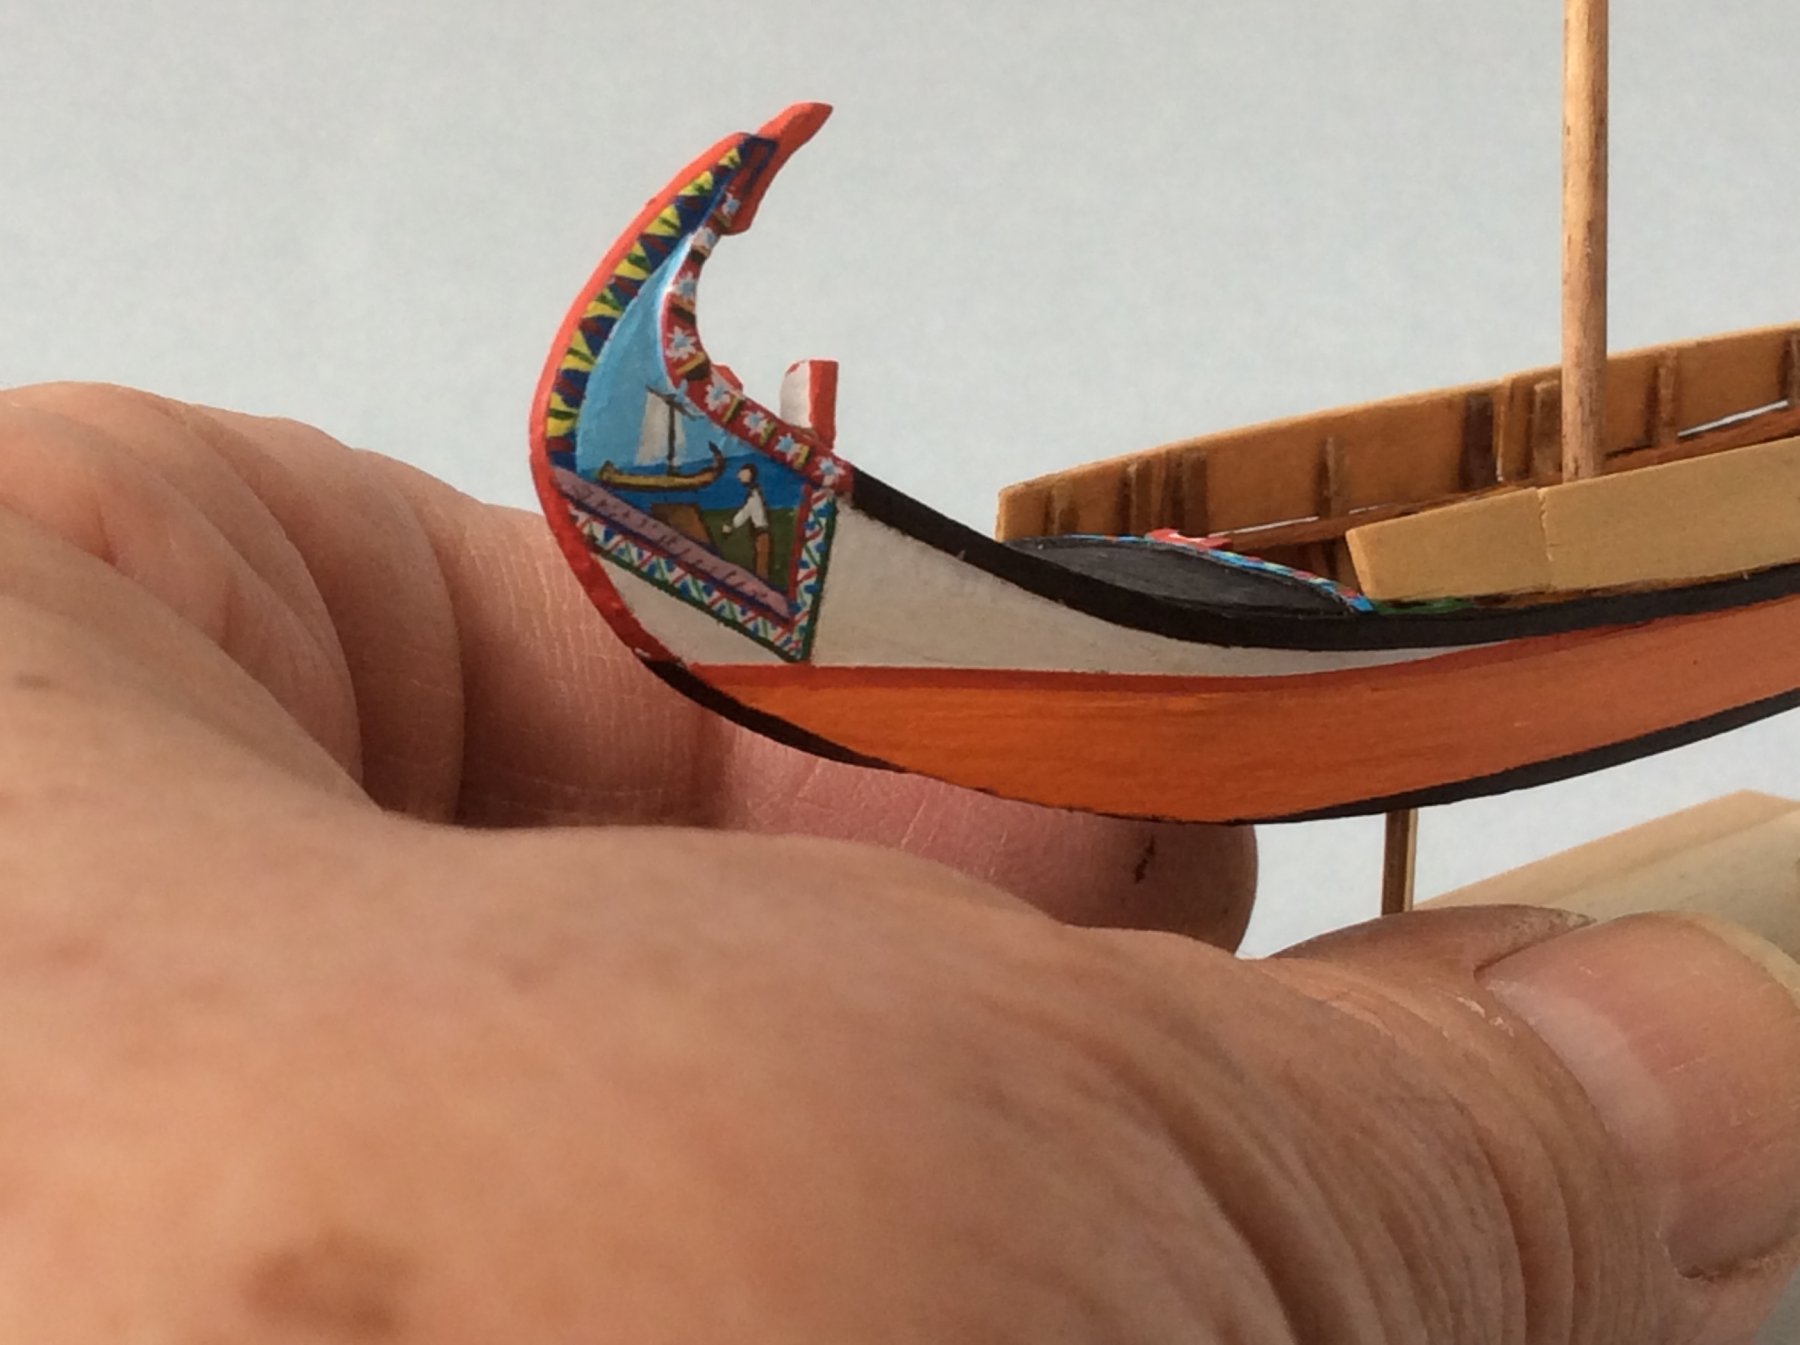
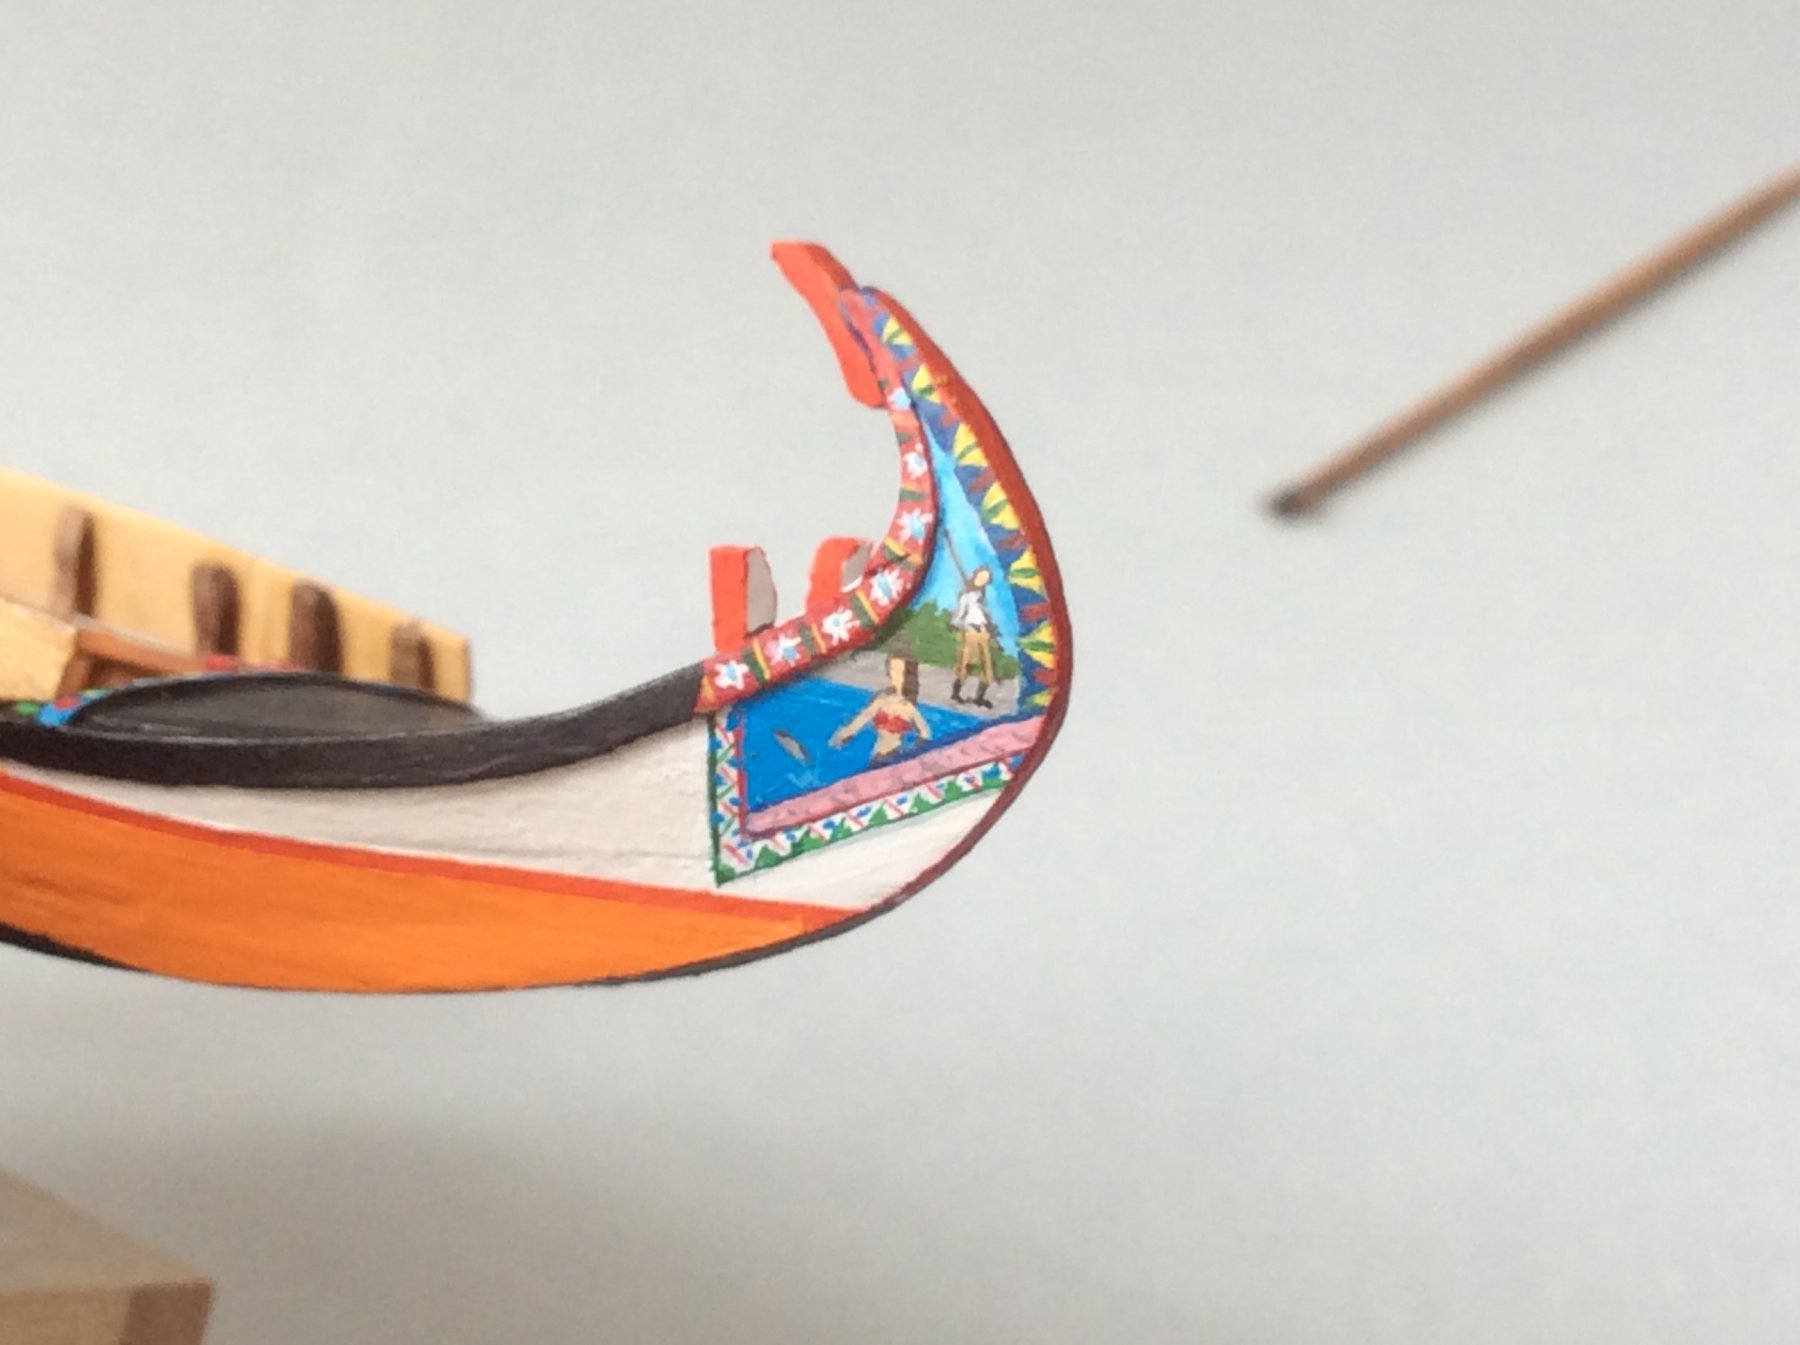
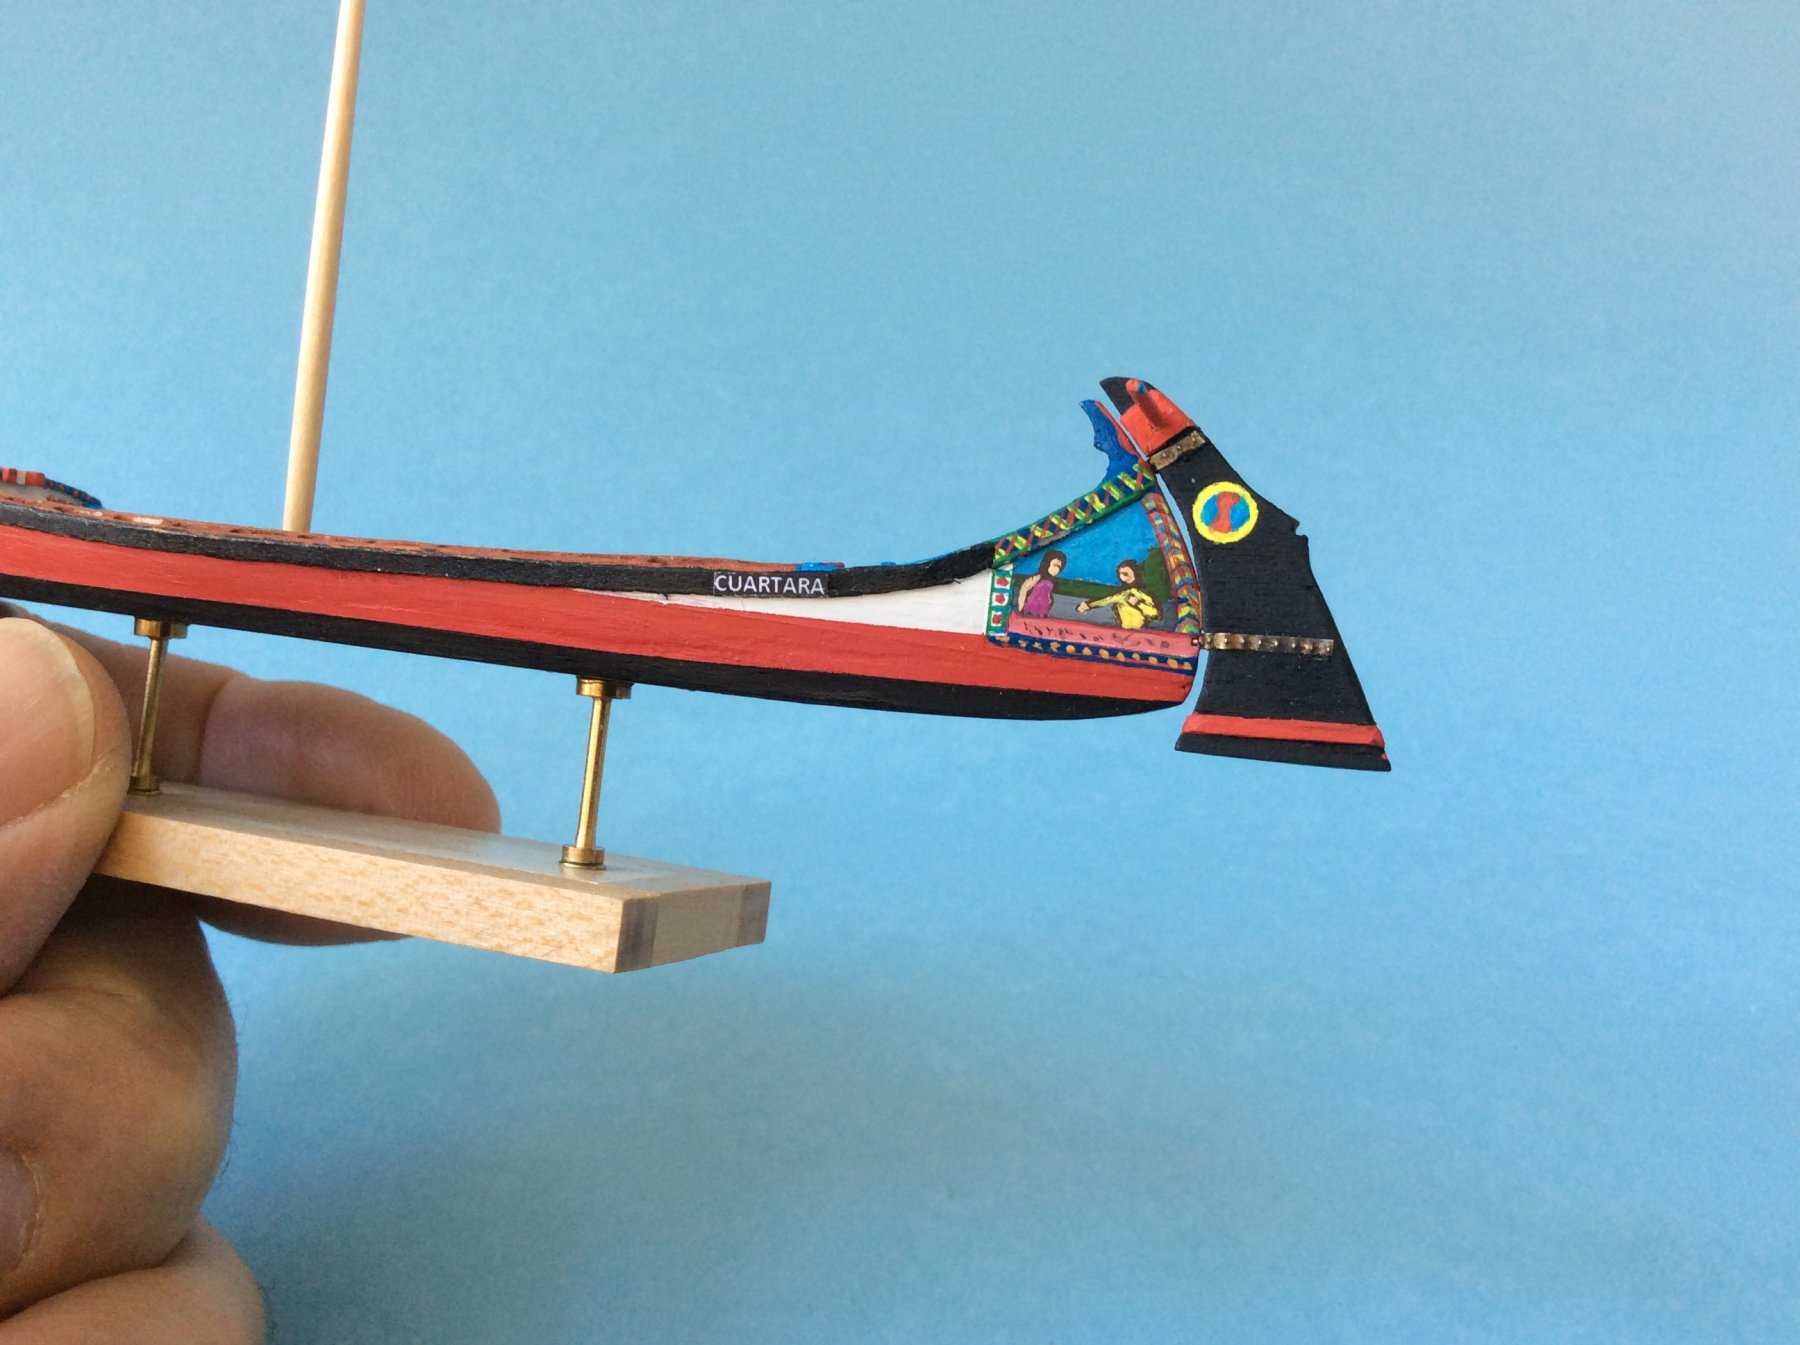
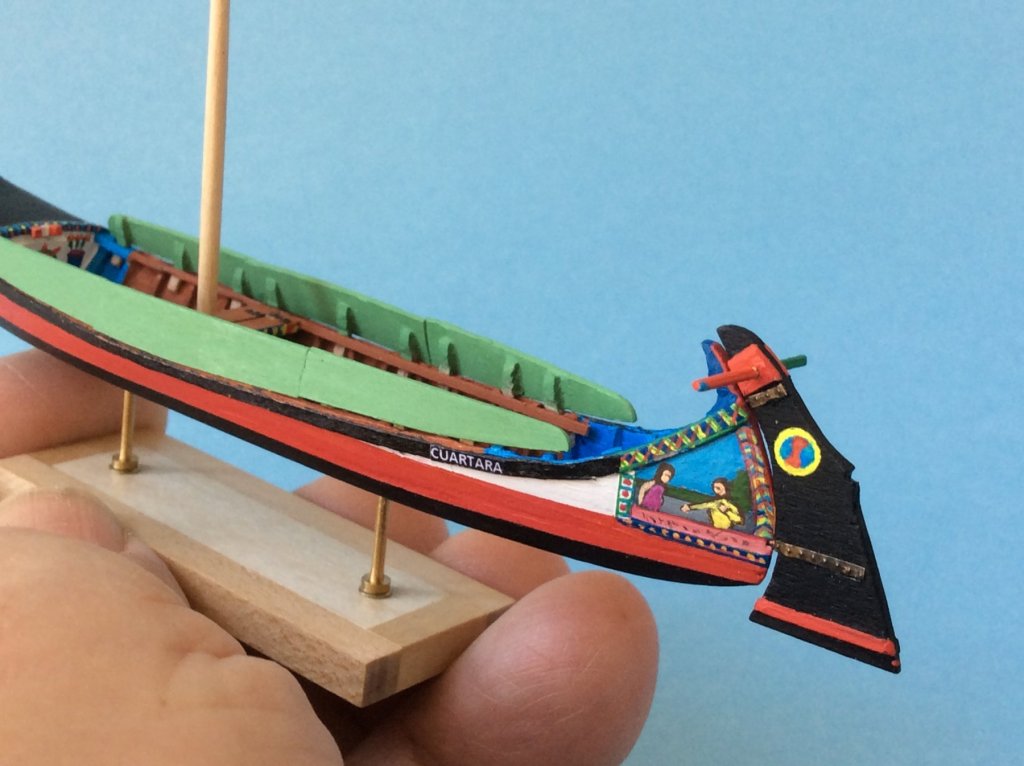
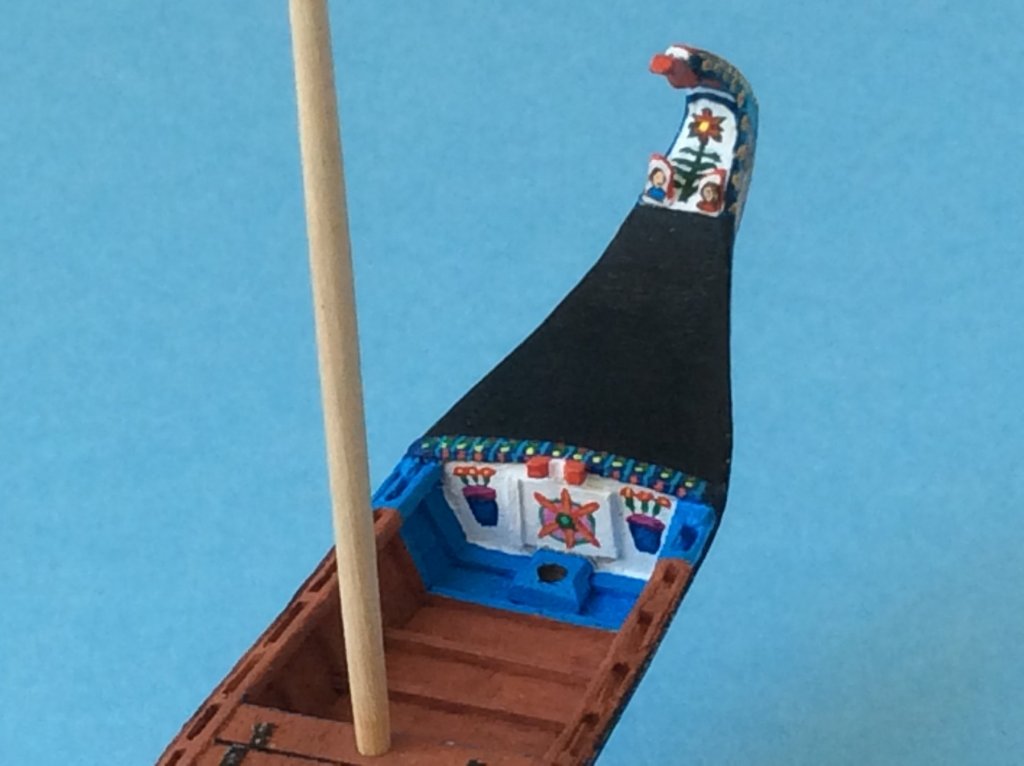
Thanks, Nils. The first of the two Moliceiros is already painted. In my case the “paineis” do not carry a legend, because I have to admit that I am unable to write on that scale, so I have tried to simulate the "shadows" of a text, whose content I leave to the imagination of the observer .


- 13 replies
-
- 20
-
-
- small
- moliceiros
- (and 1 more)
-
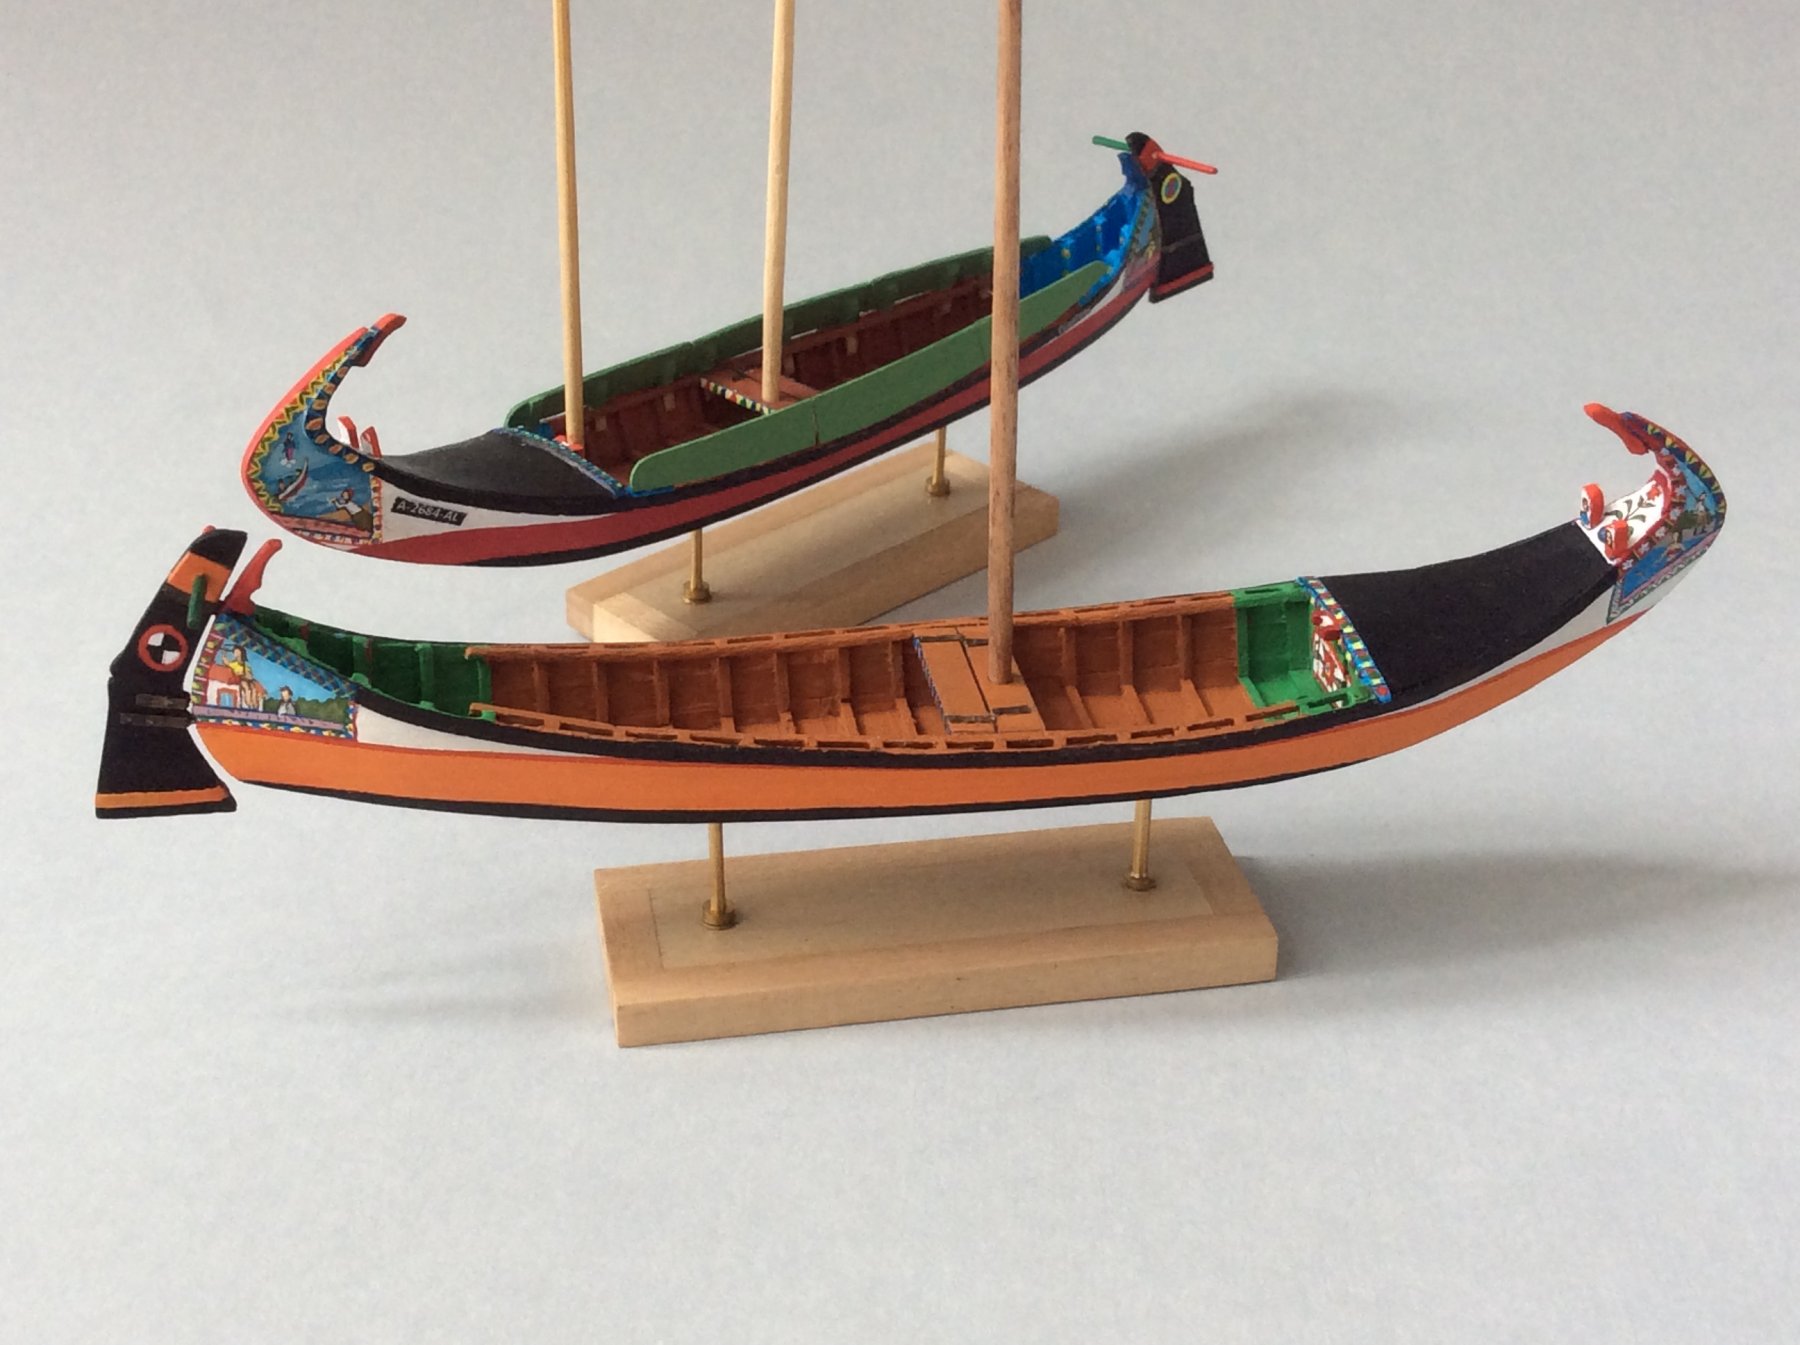
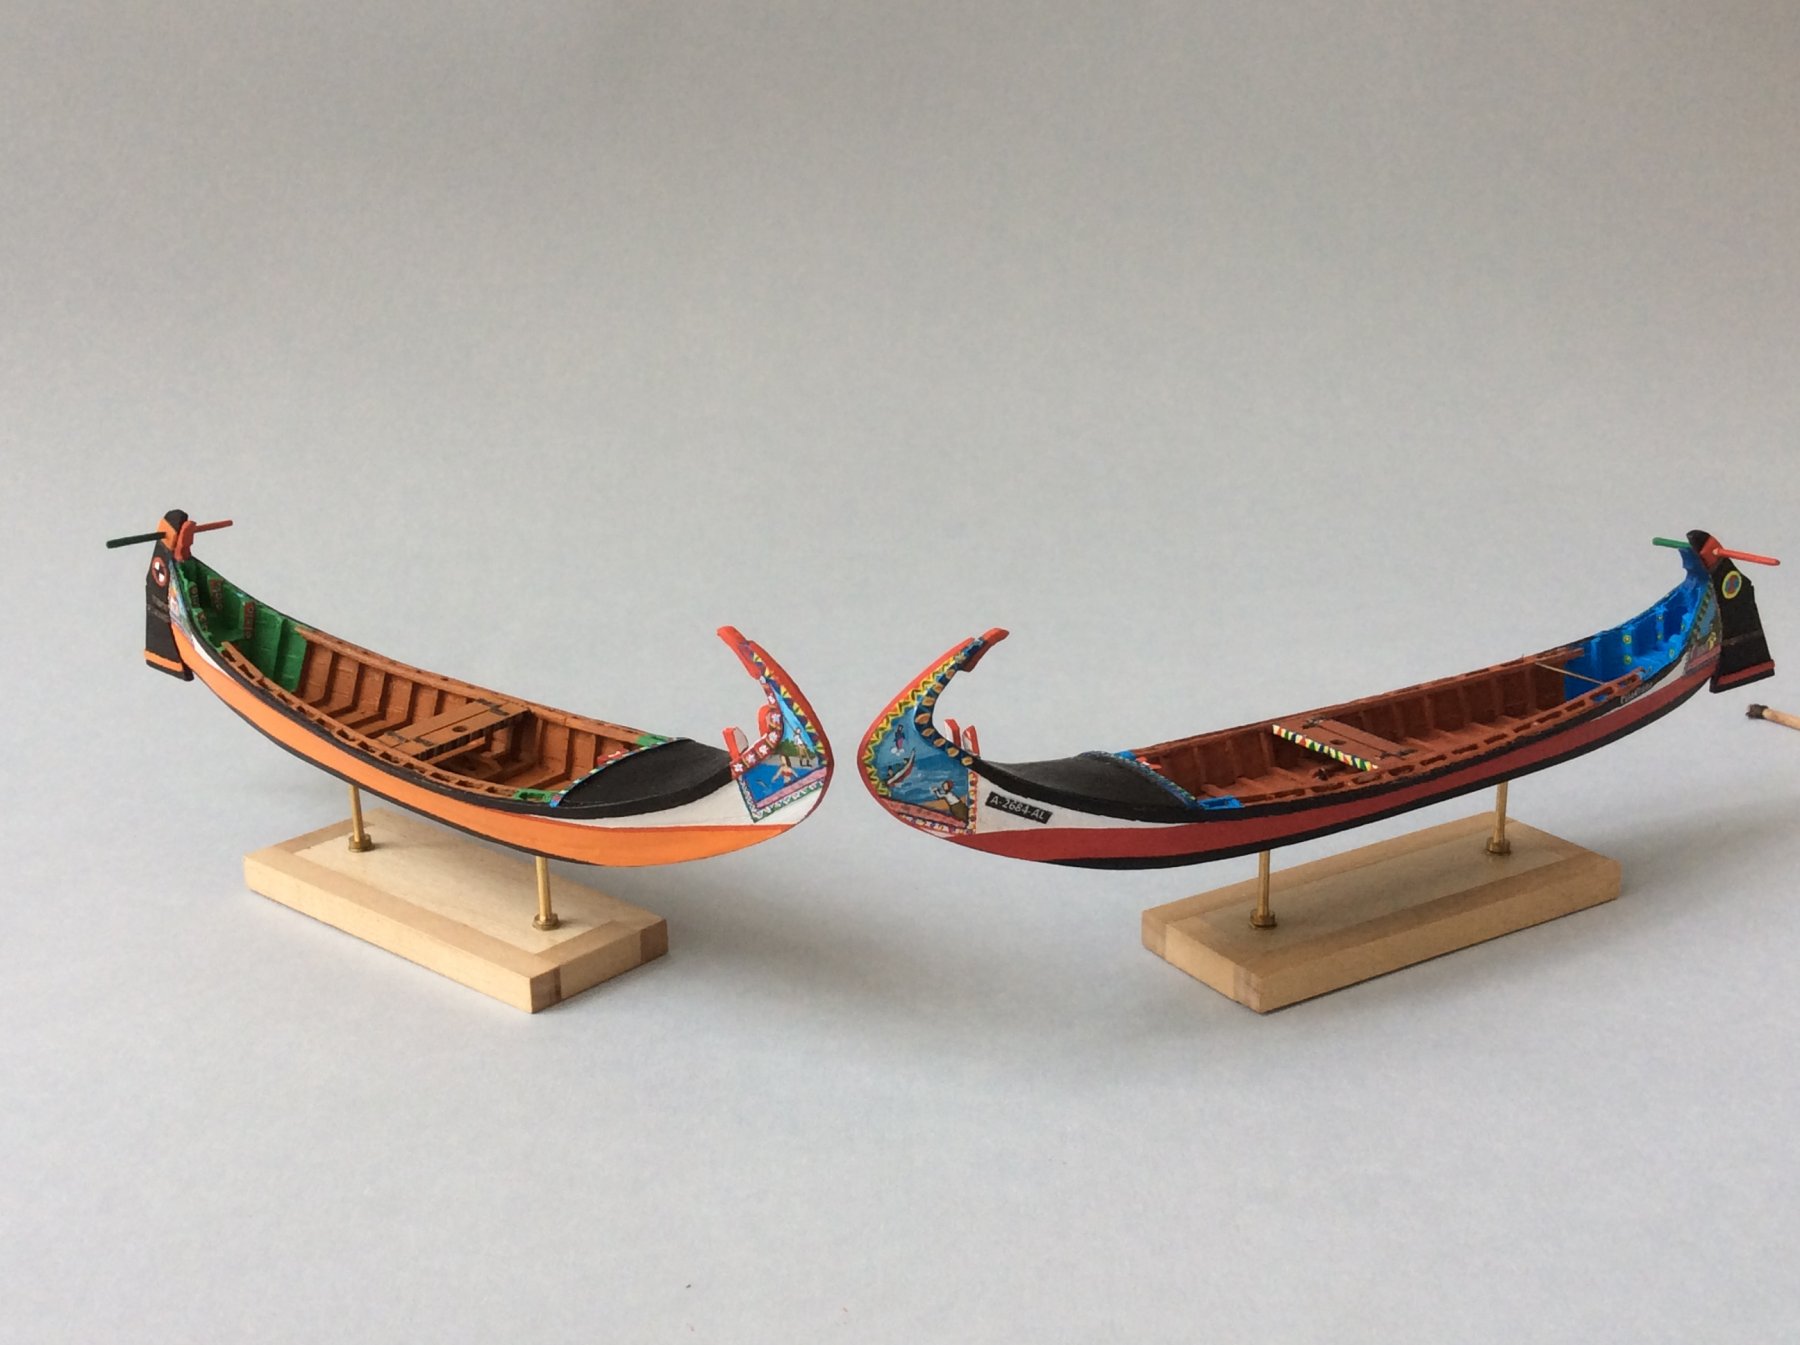
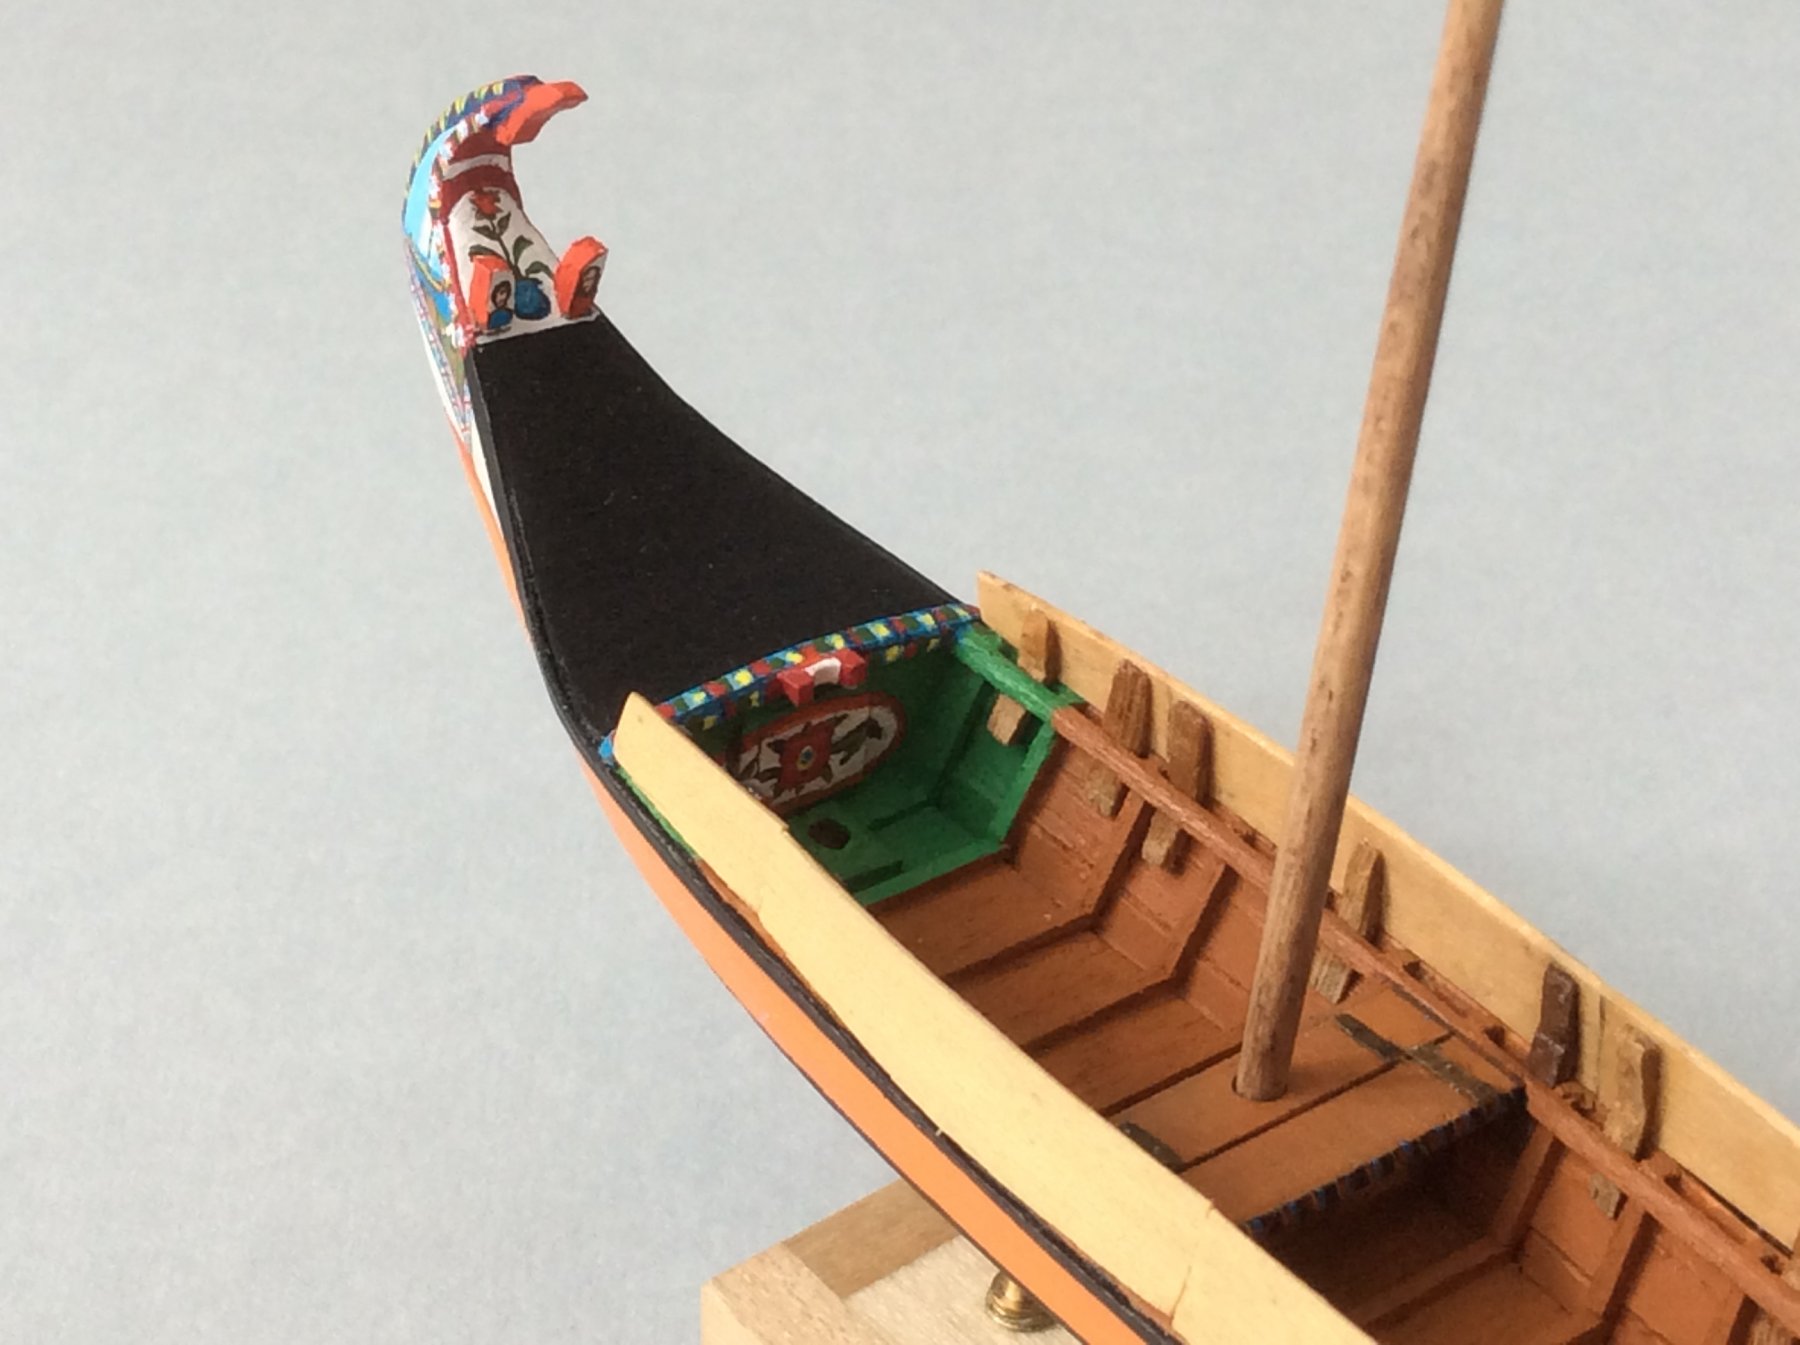
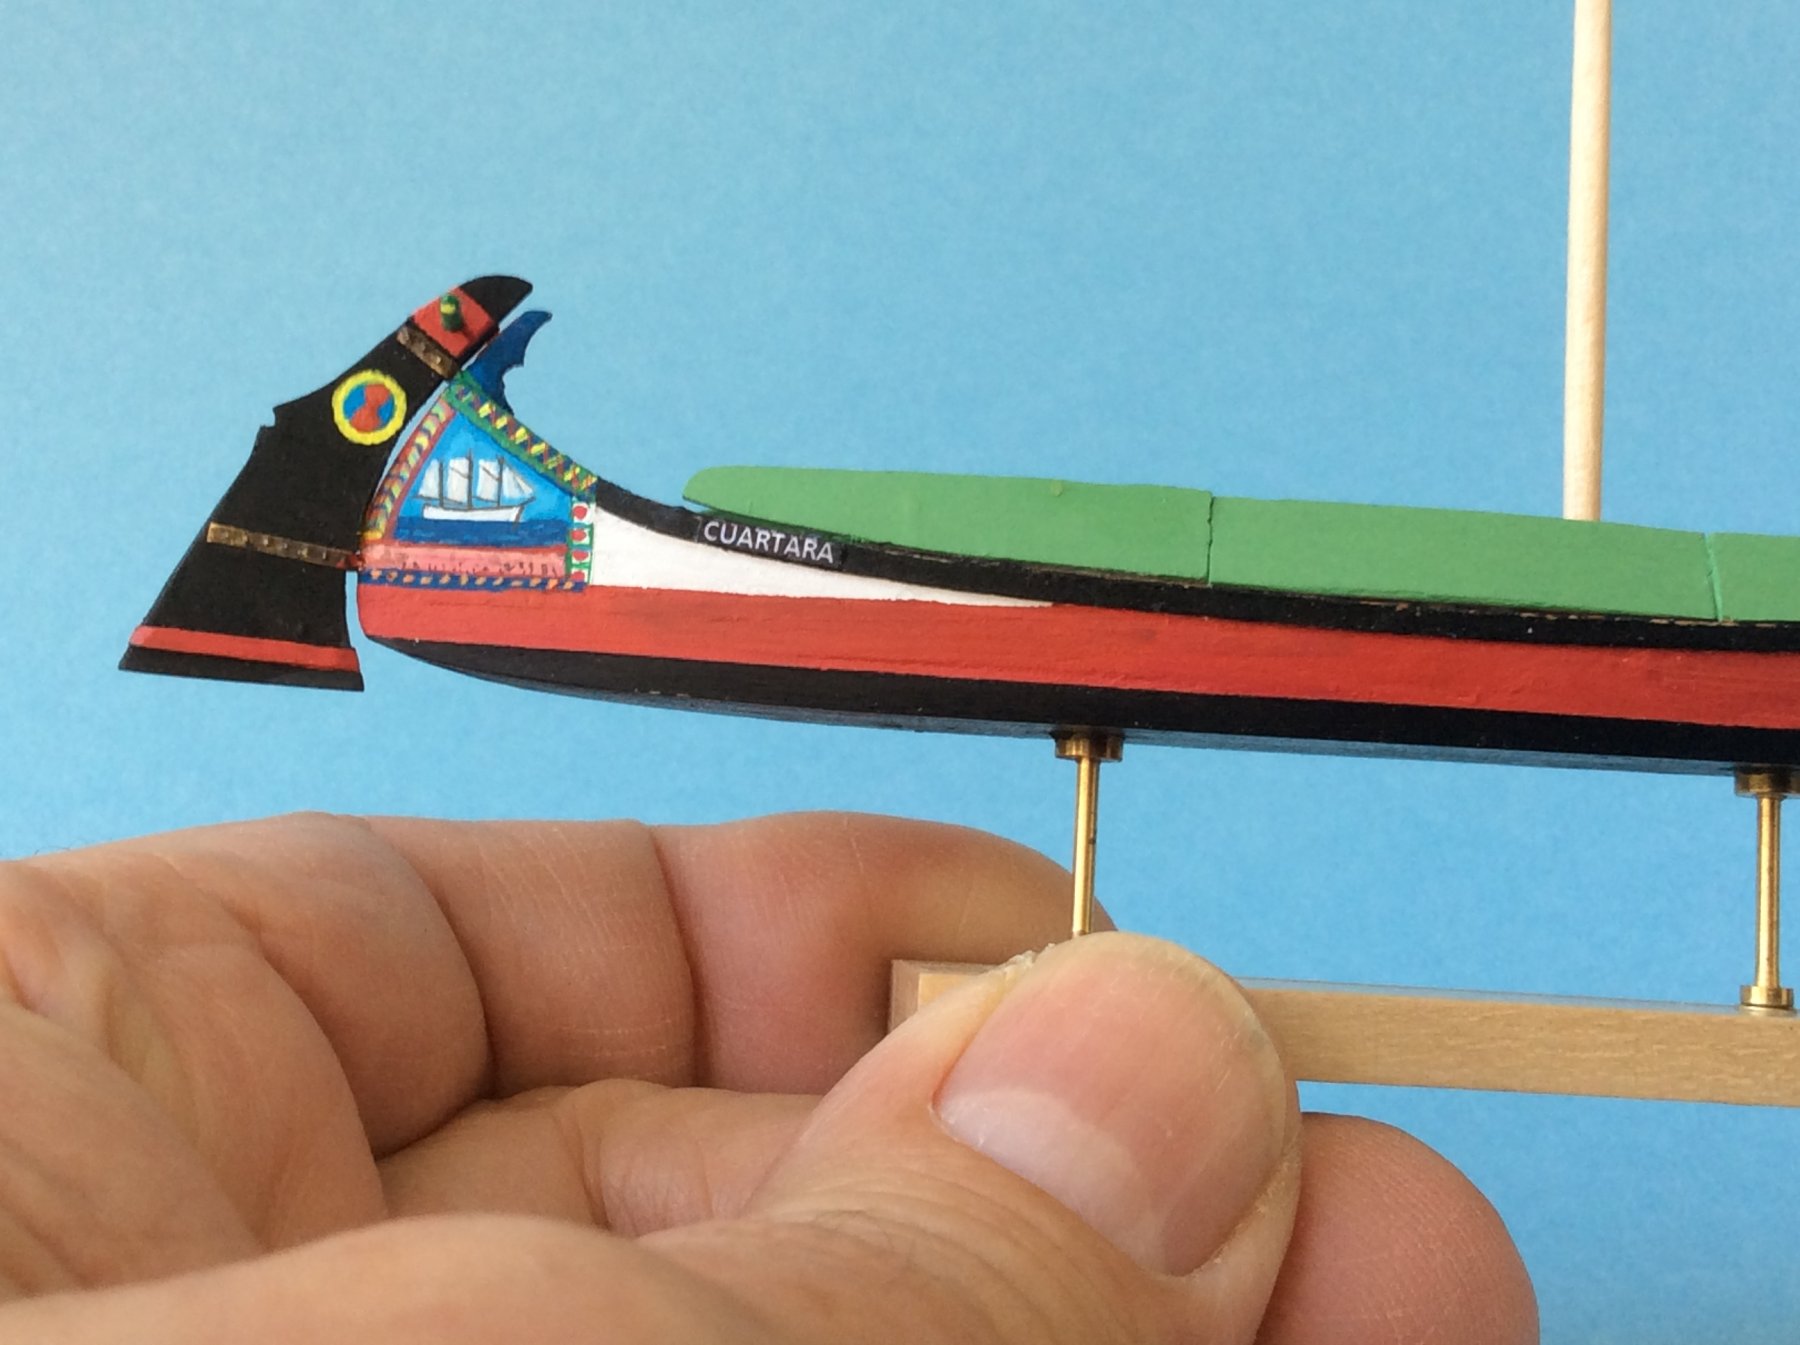
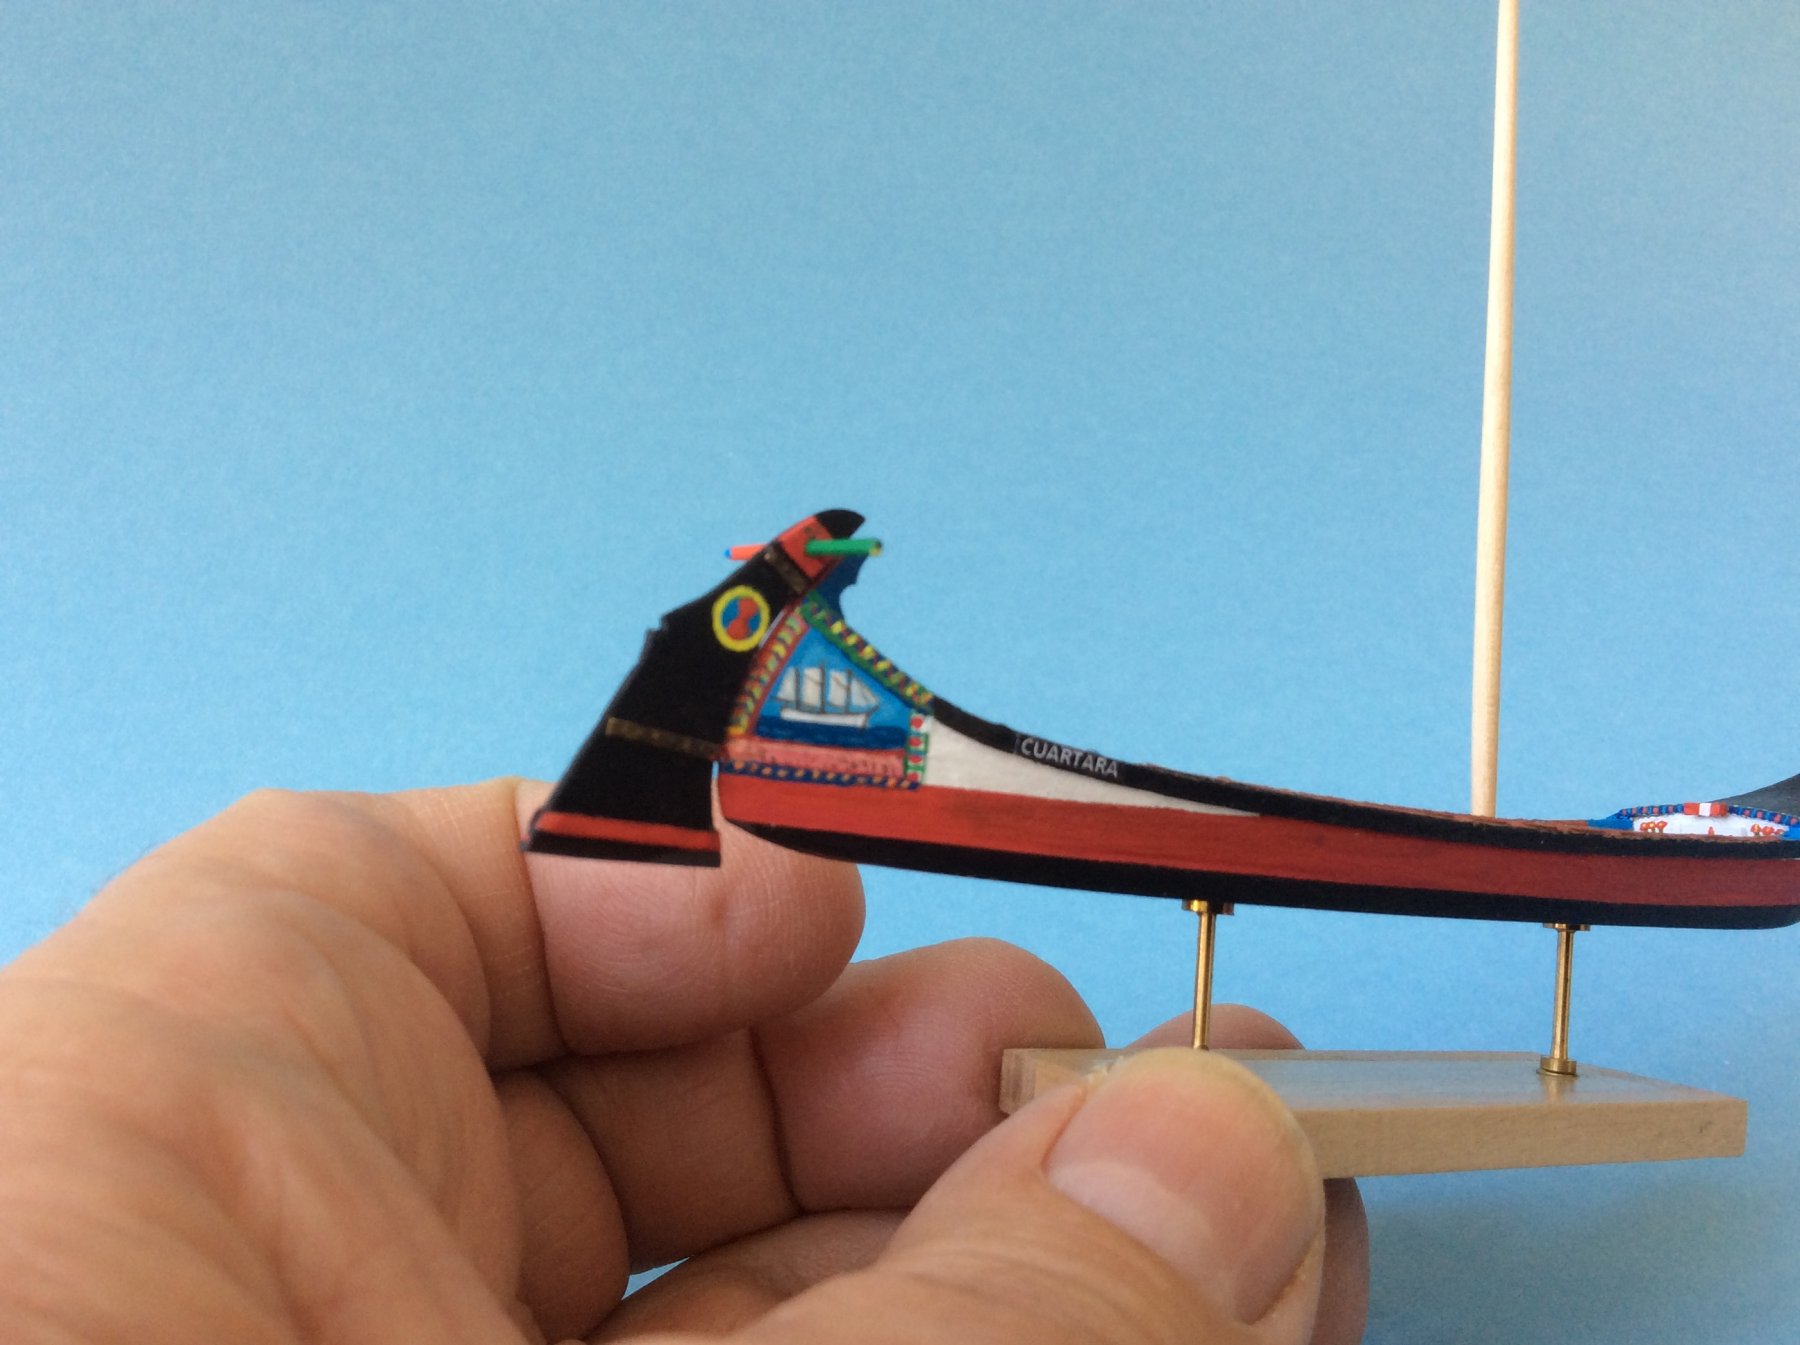
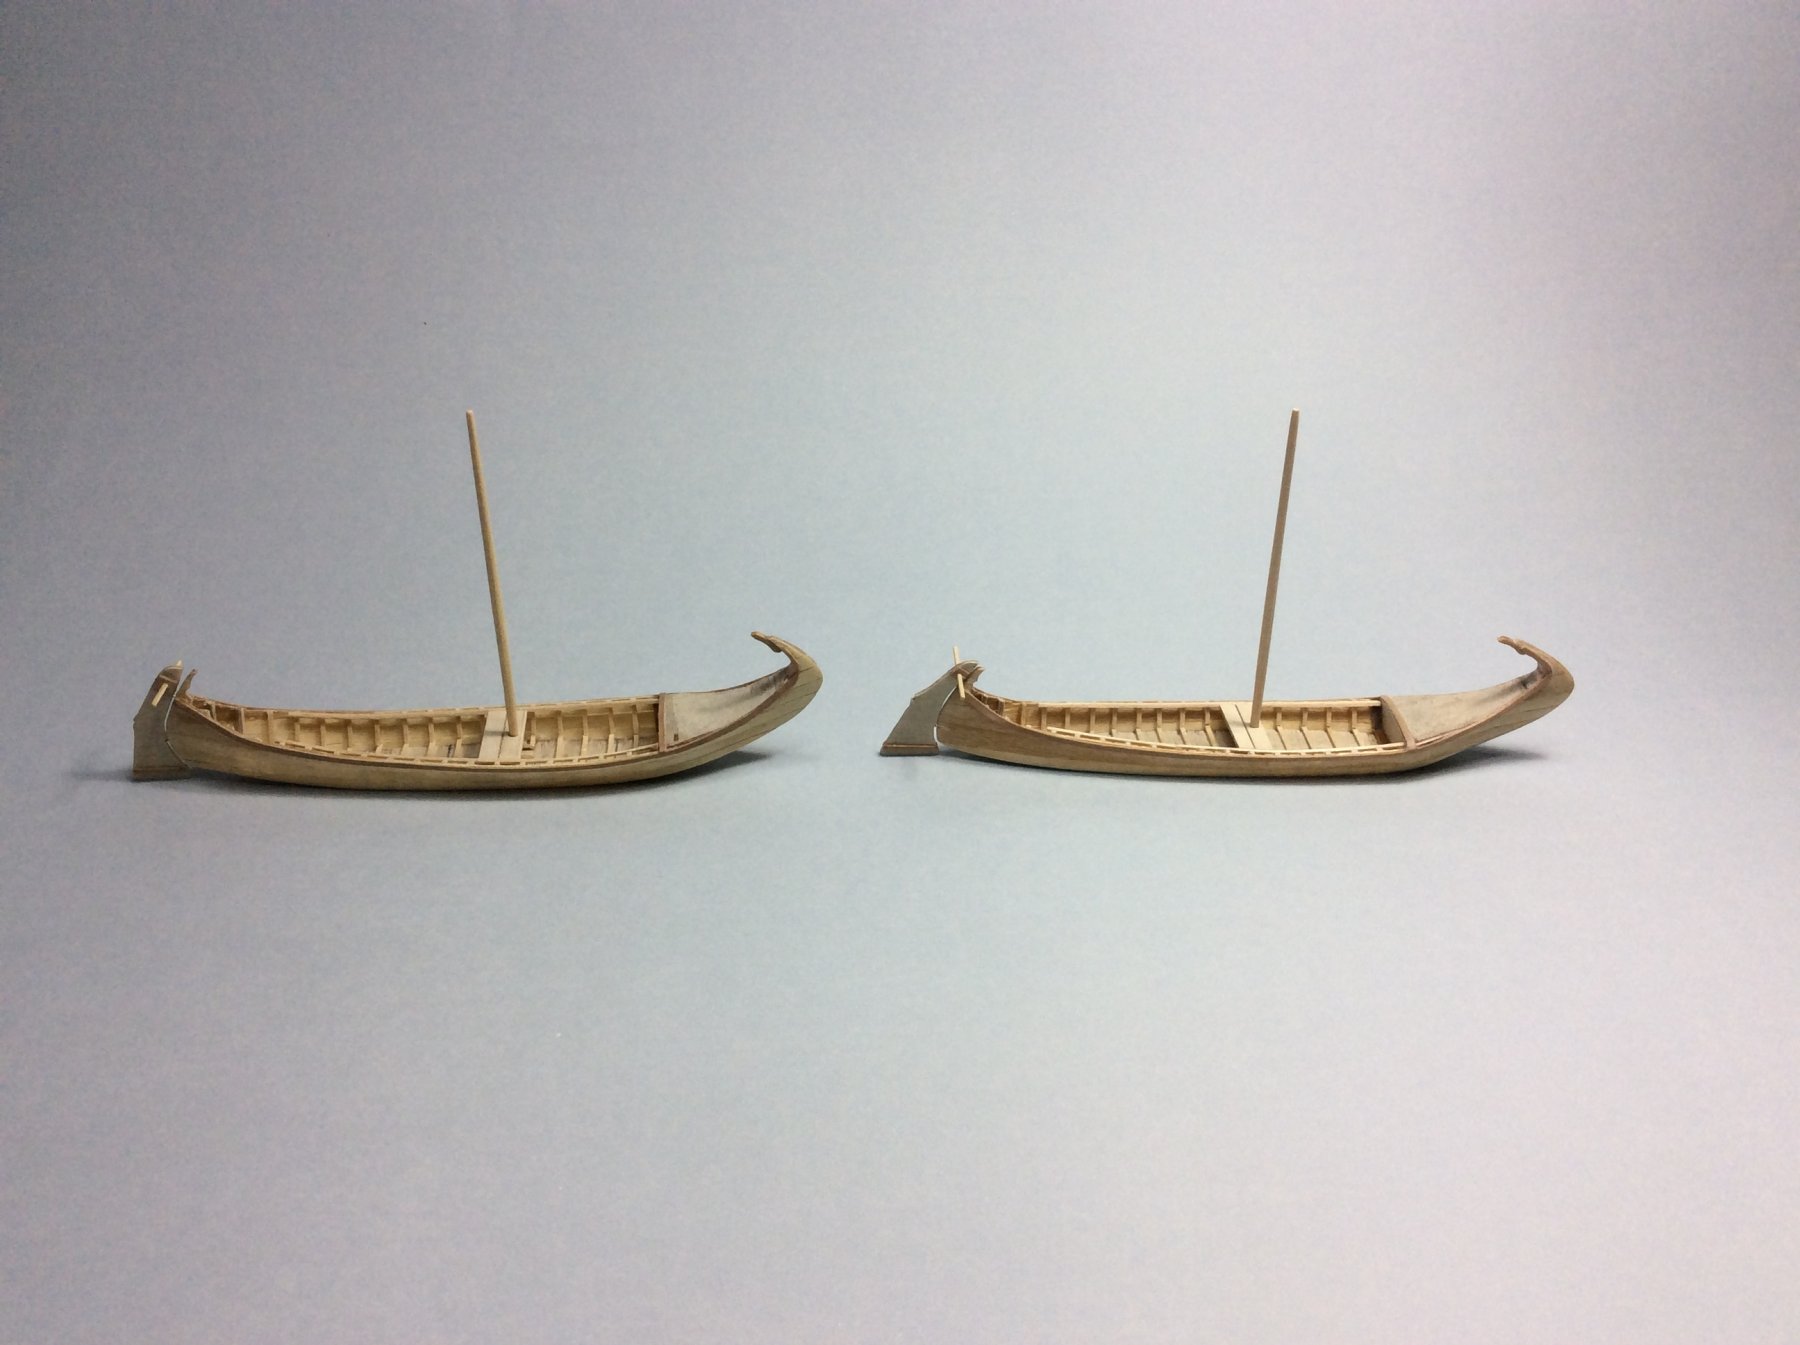
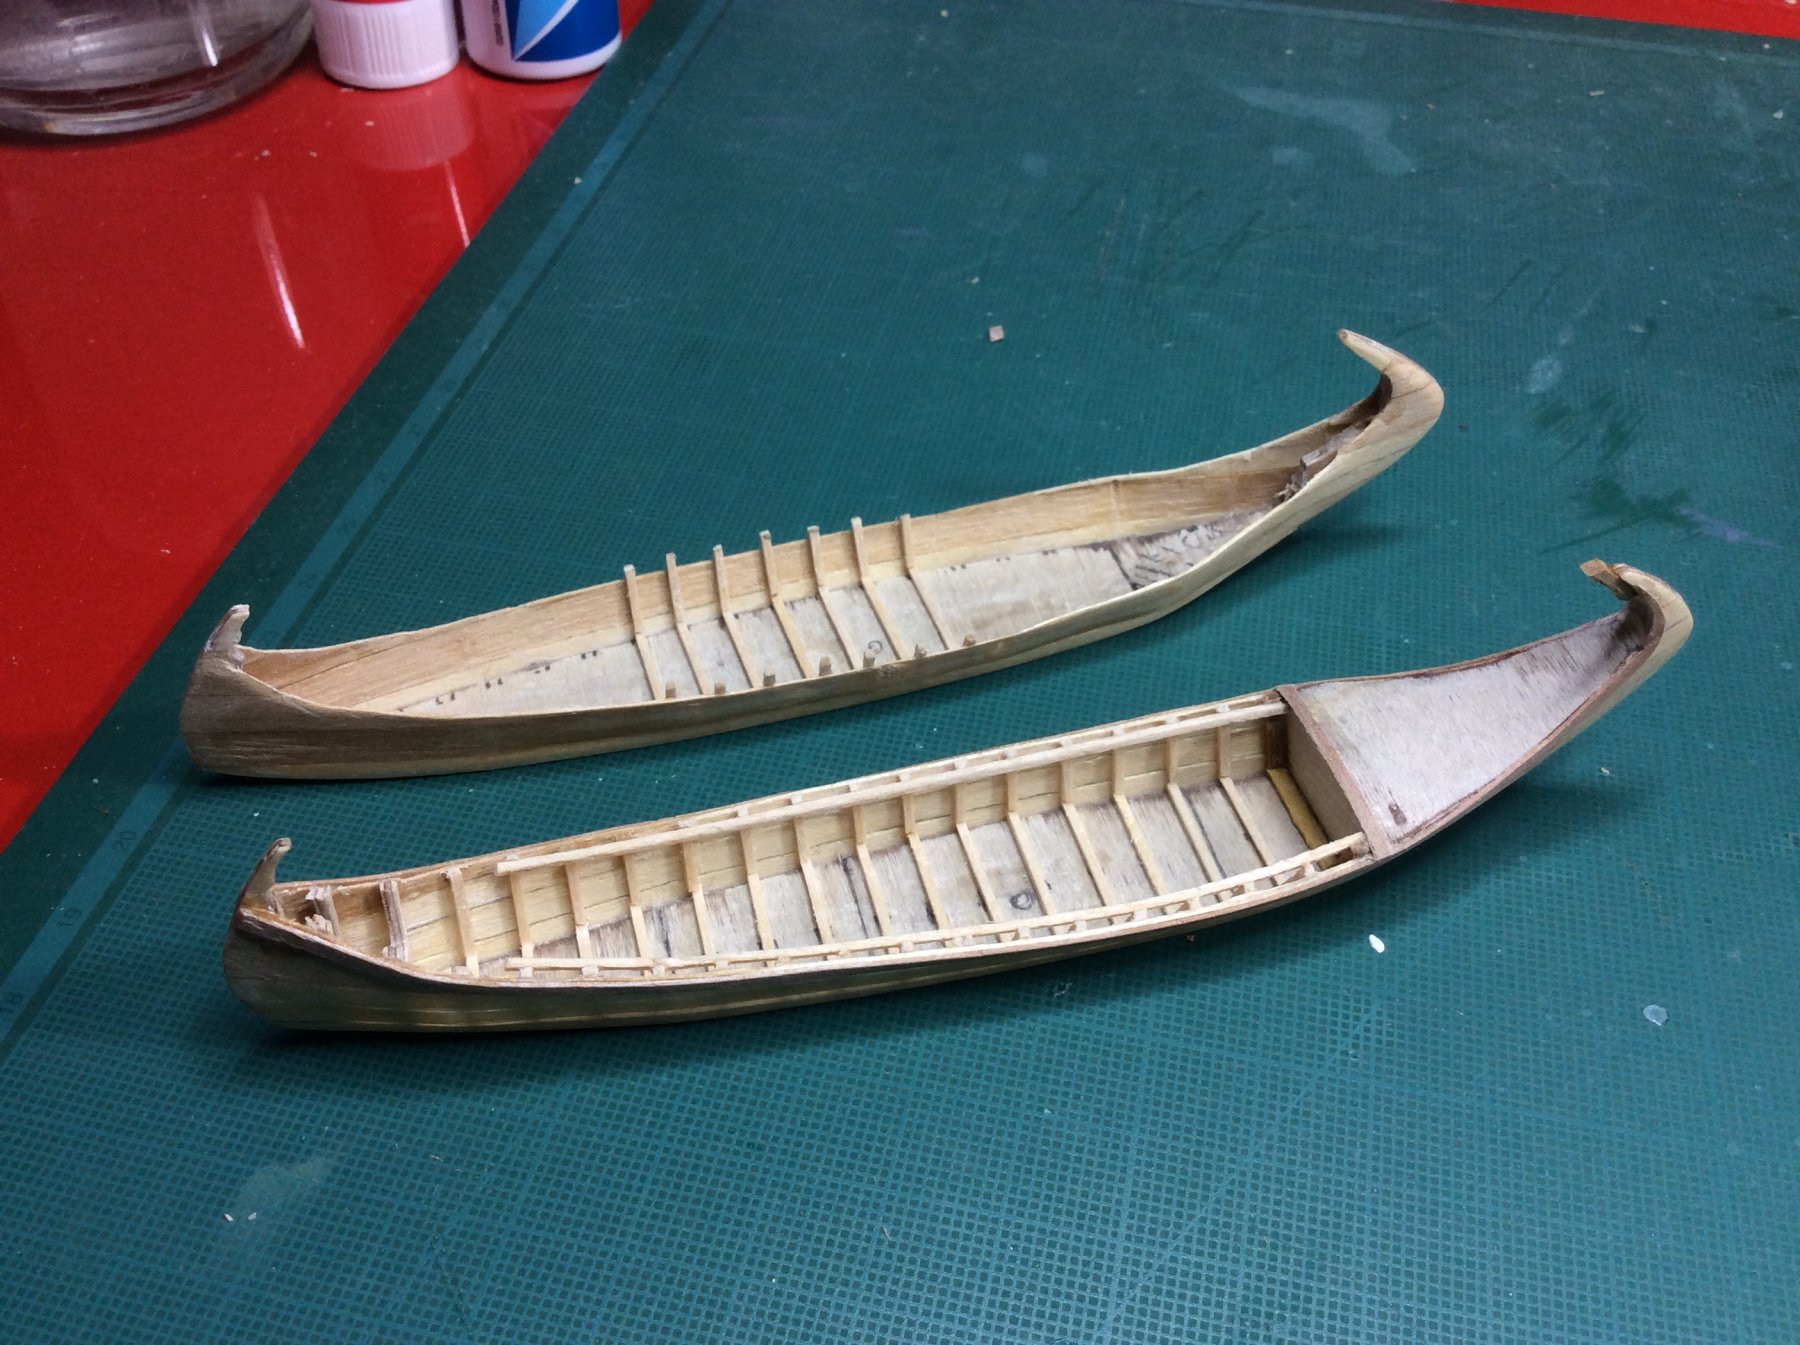
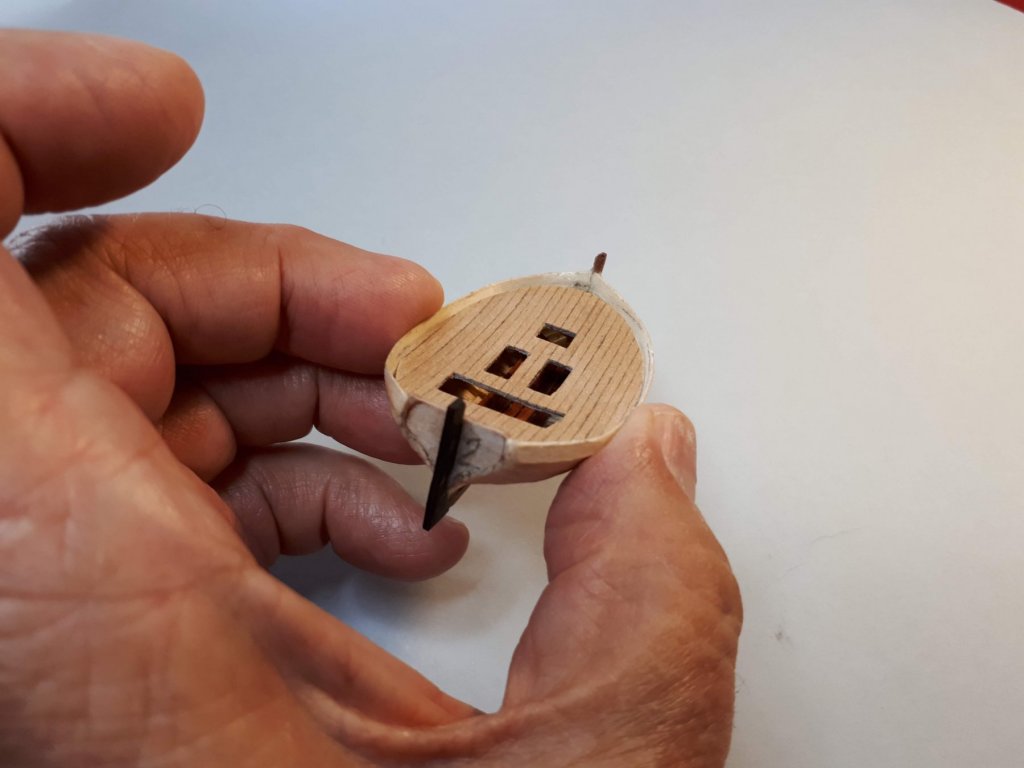
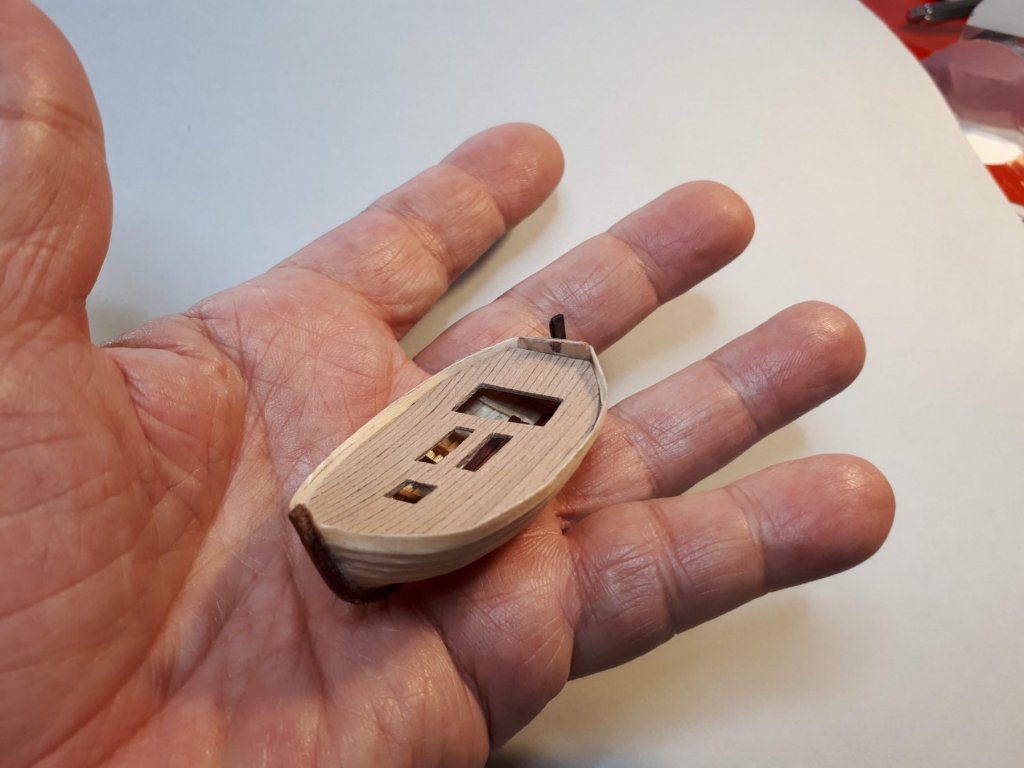
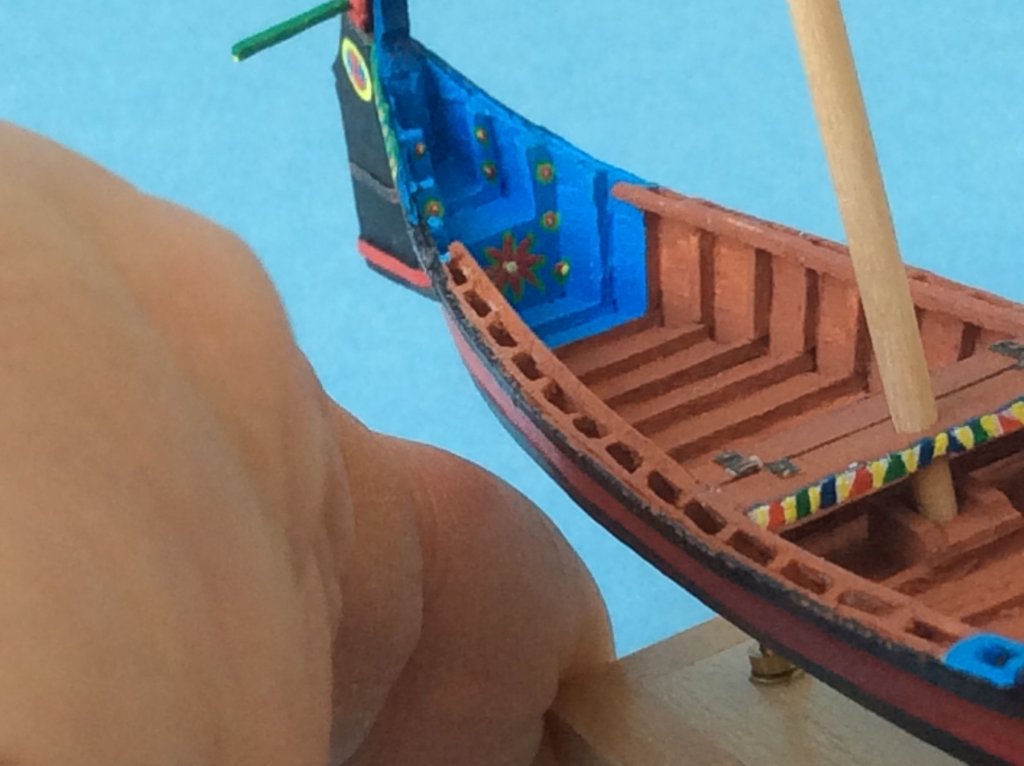
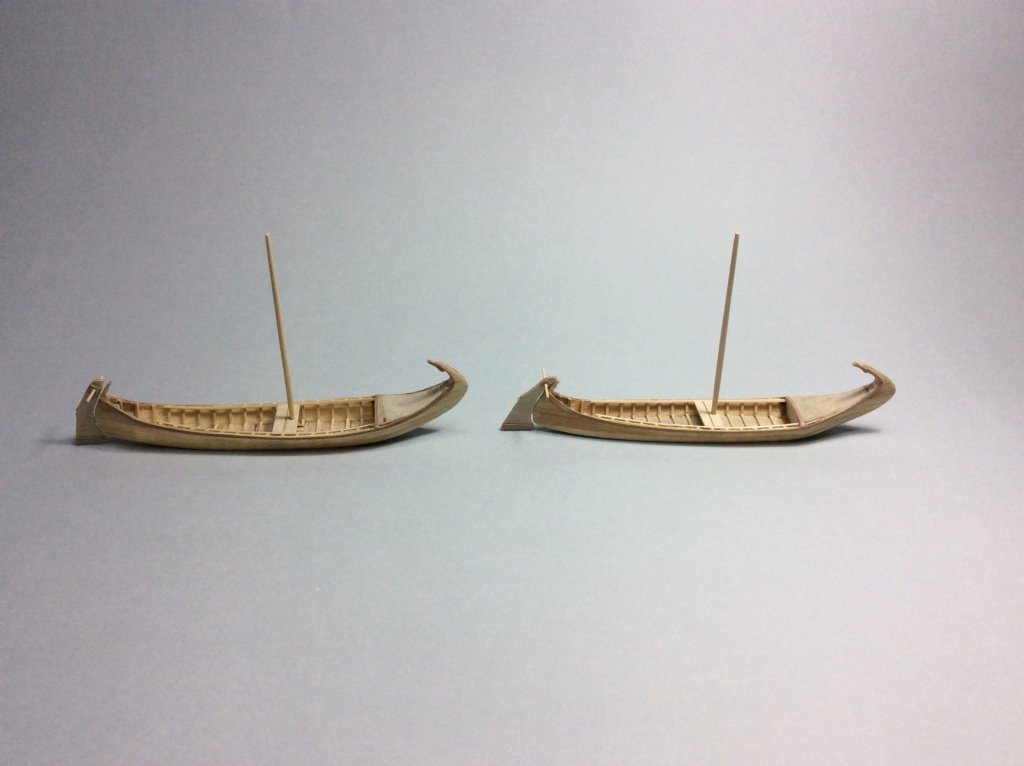
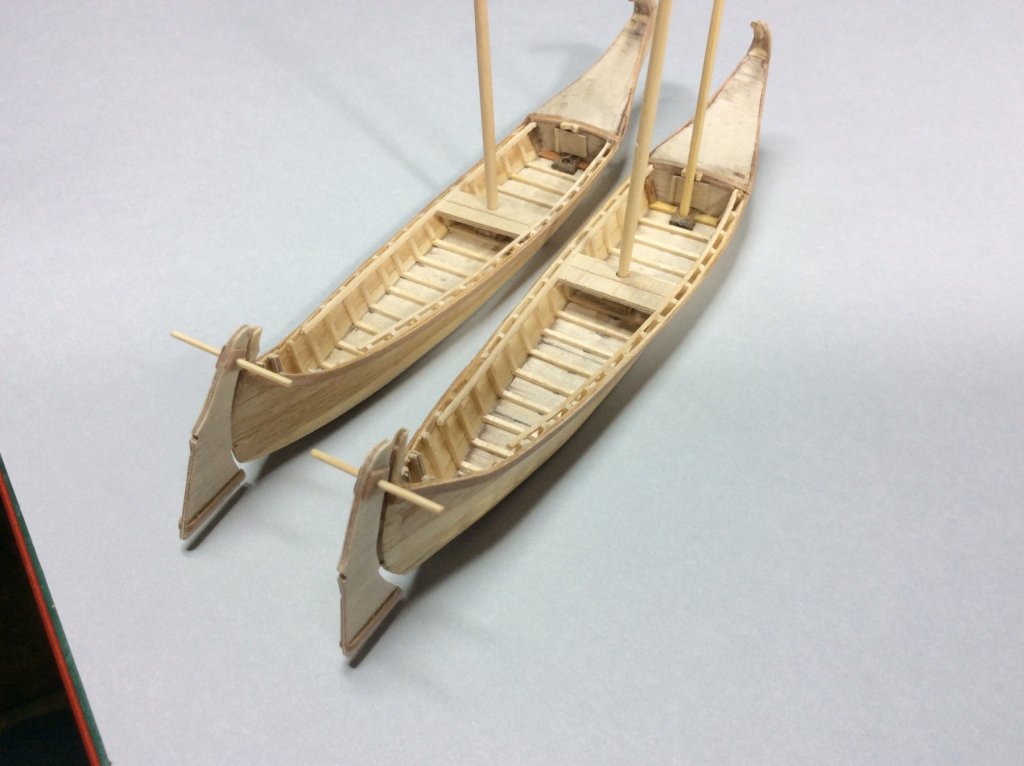
I have manufactured the two rudders, and in the following photos, in which I show them each presented in their respective vessel, it is possible to clearly appreciate the differences that, following in each case the corresponding plane, exist between both moliceiros. Not only the rudder has a different profile, but also the height of the rail and the curvature of the bow. The forested benches and the cockpits are already assembled. I have also added the doors of the “camaretas”, the moldings that in the “vertente” or “bar” support the “mastaréu”, and the holes to fit it in the corresponding frame.

- 13 replies
-
- 13
-
-
- small
- moliceiros
- (and 1 more)
-
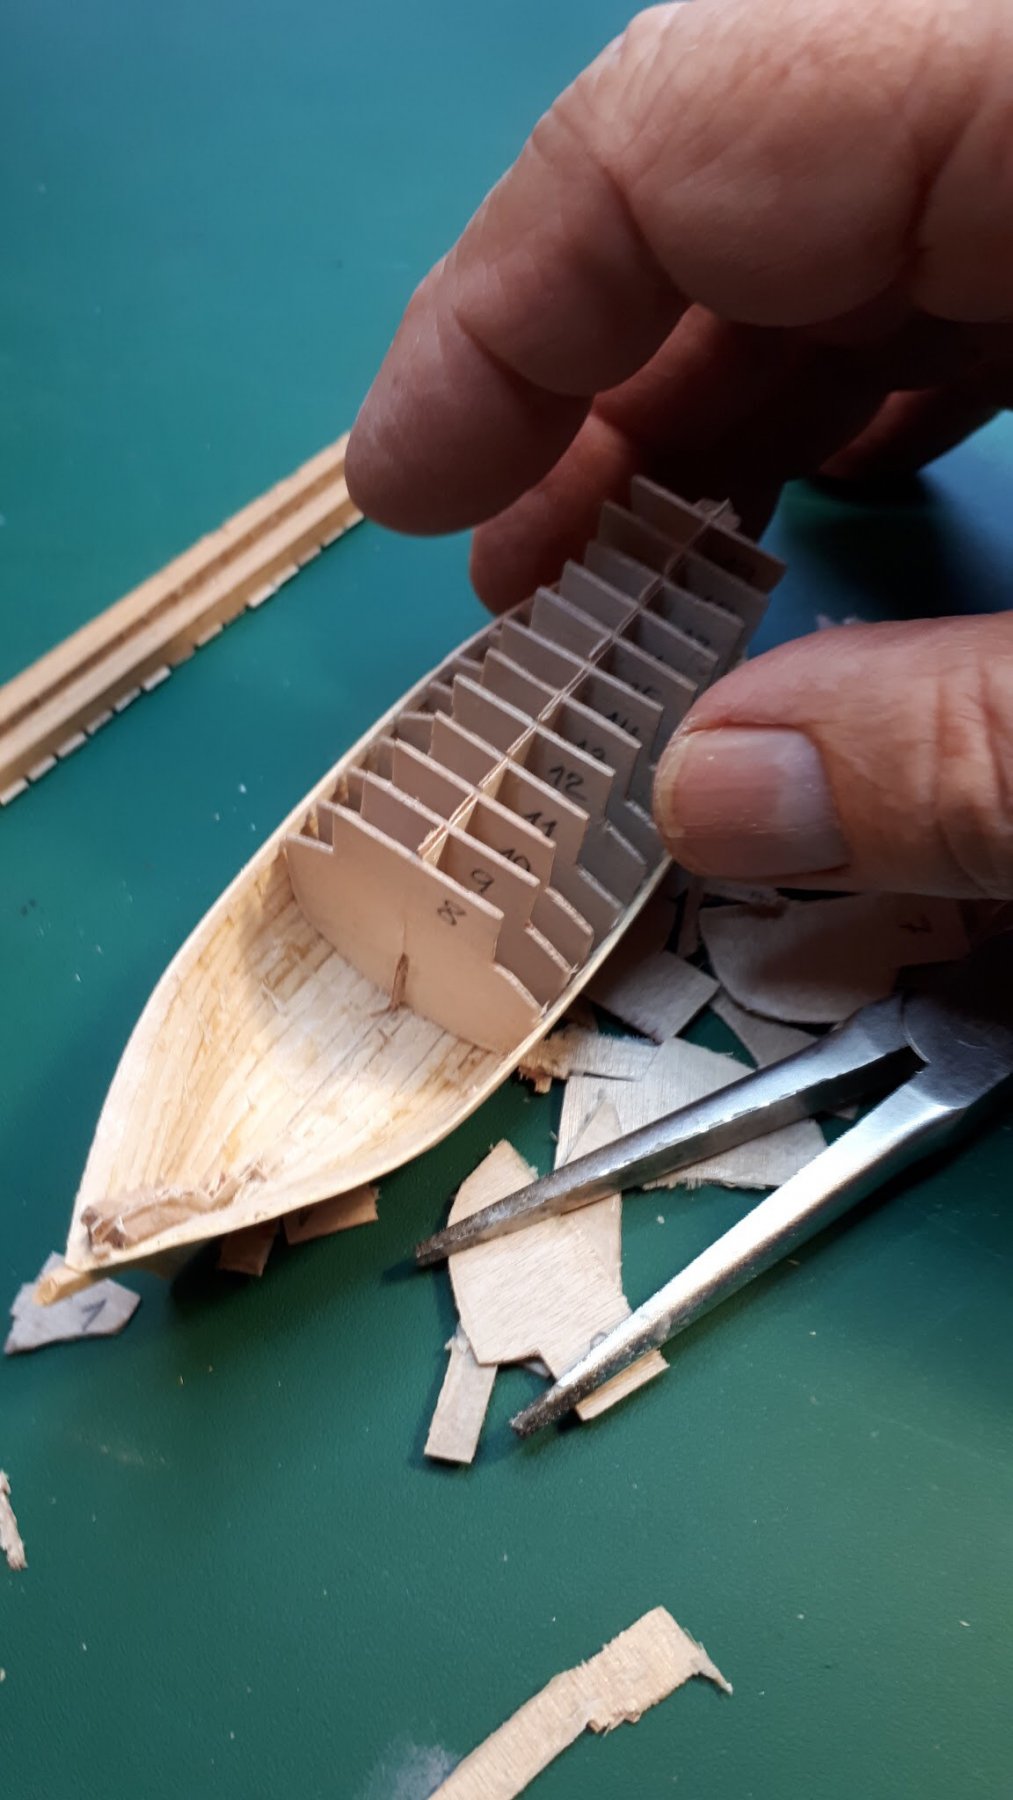
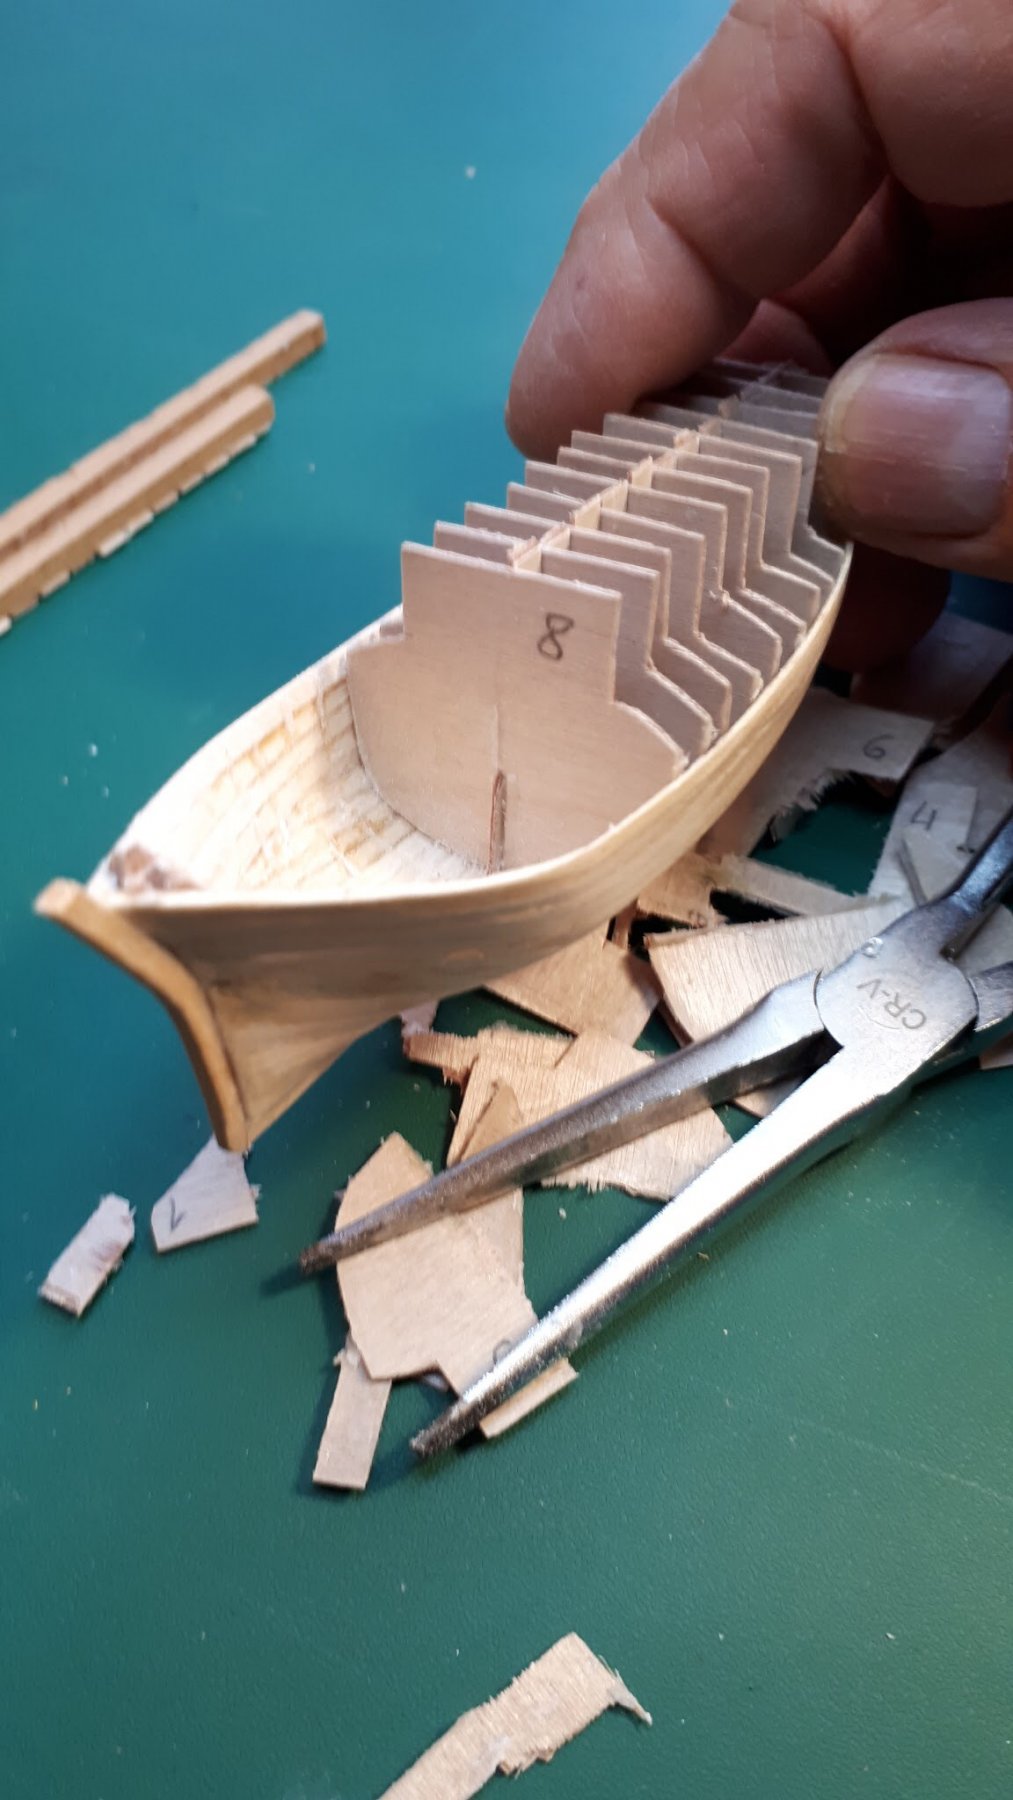
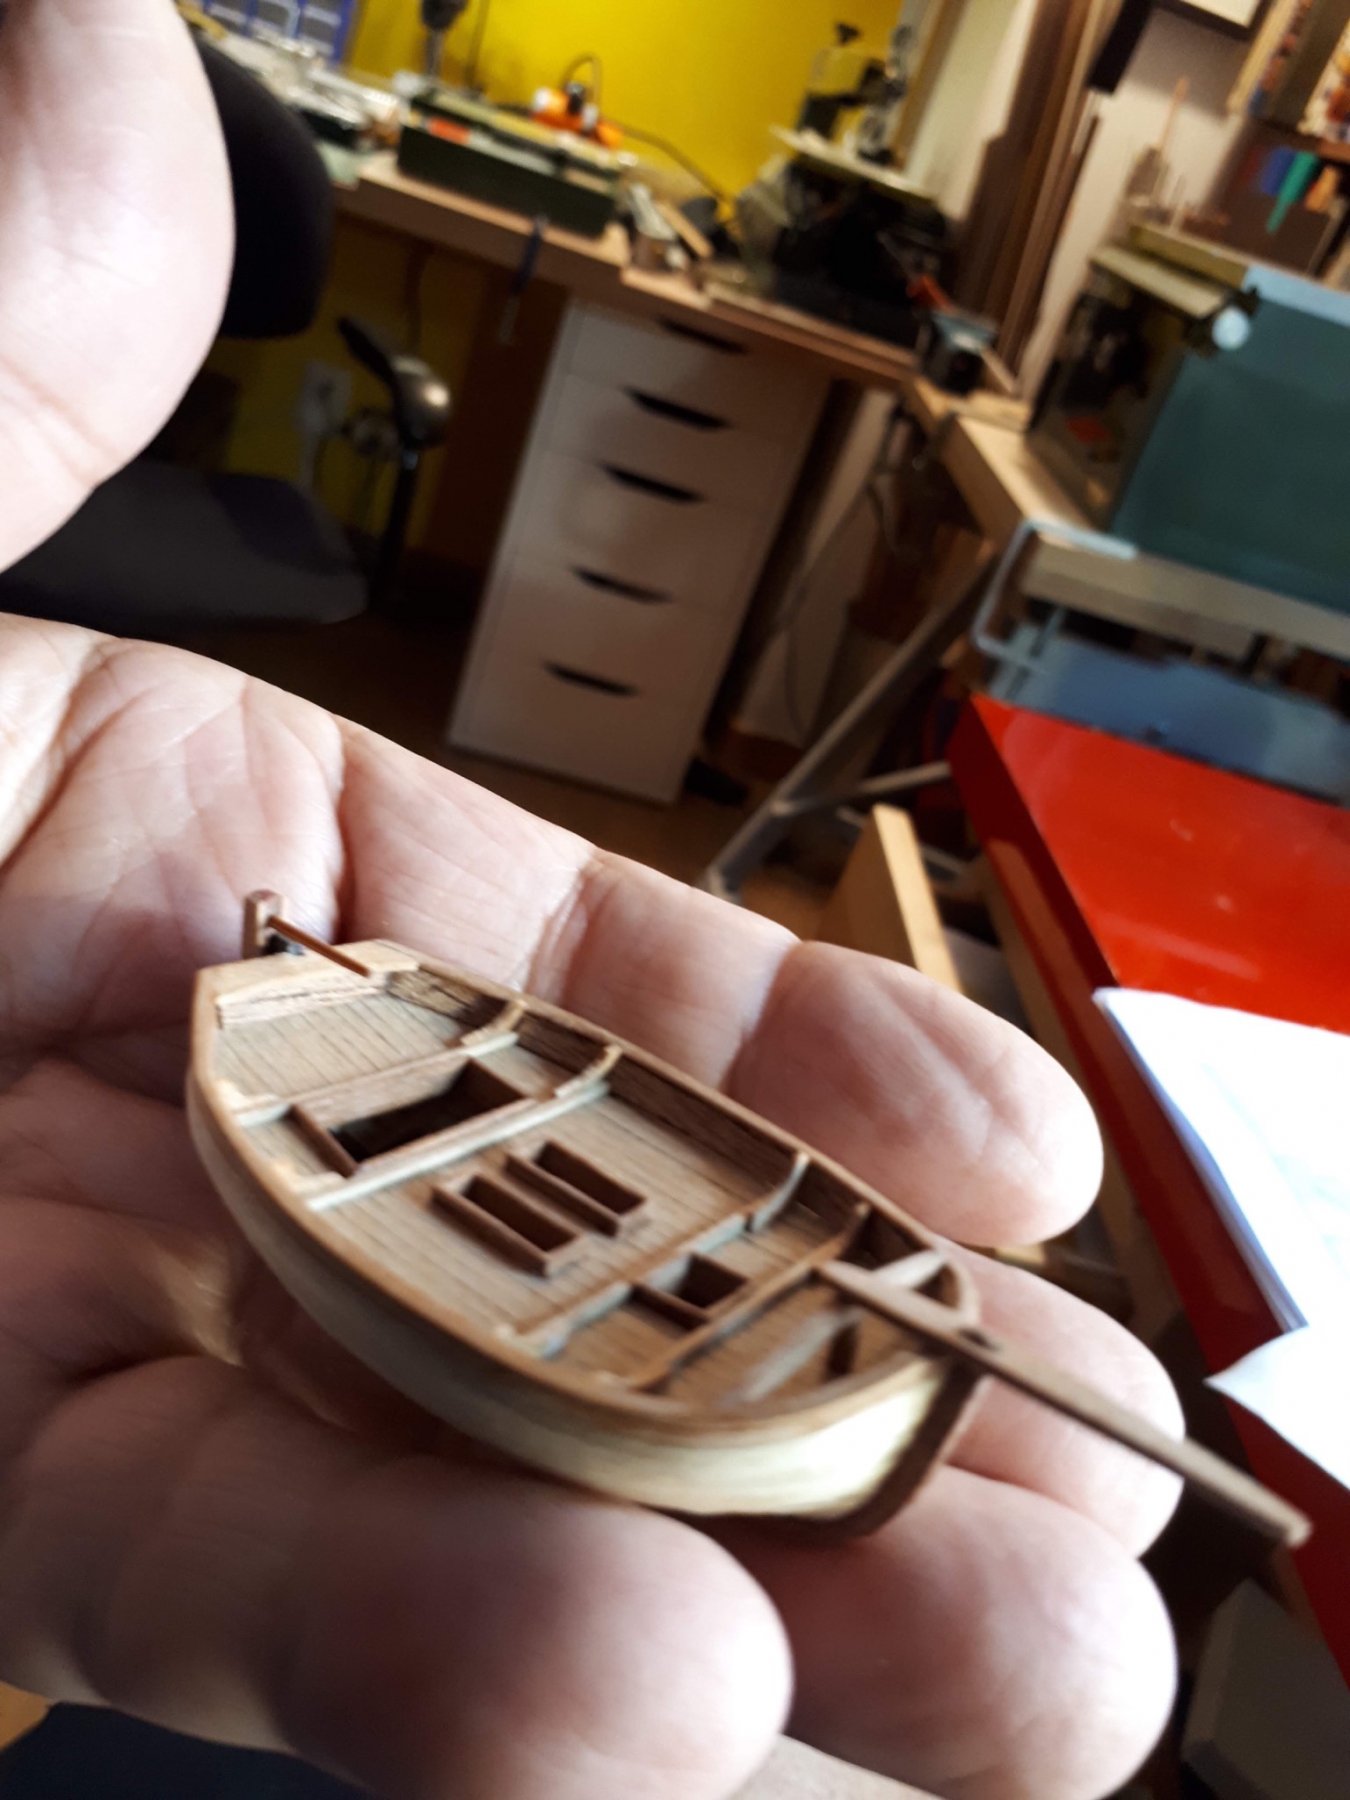
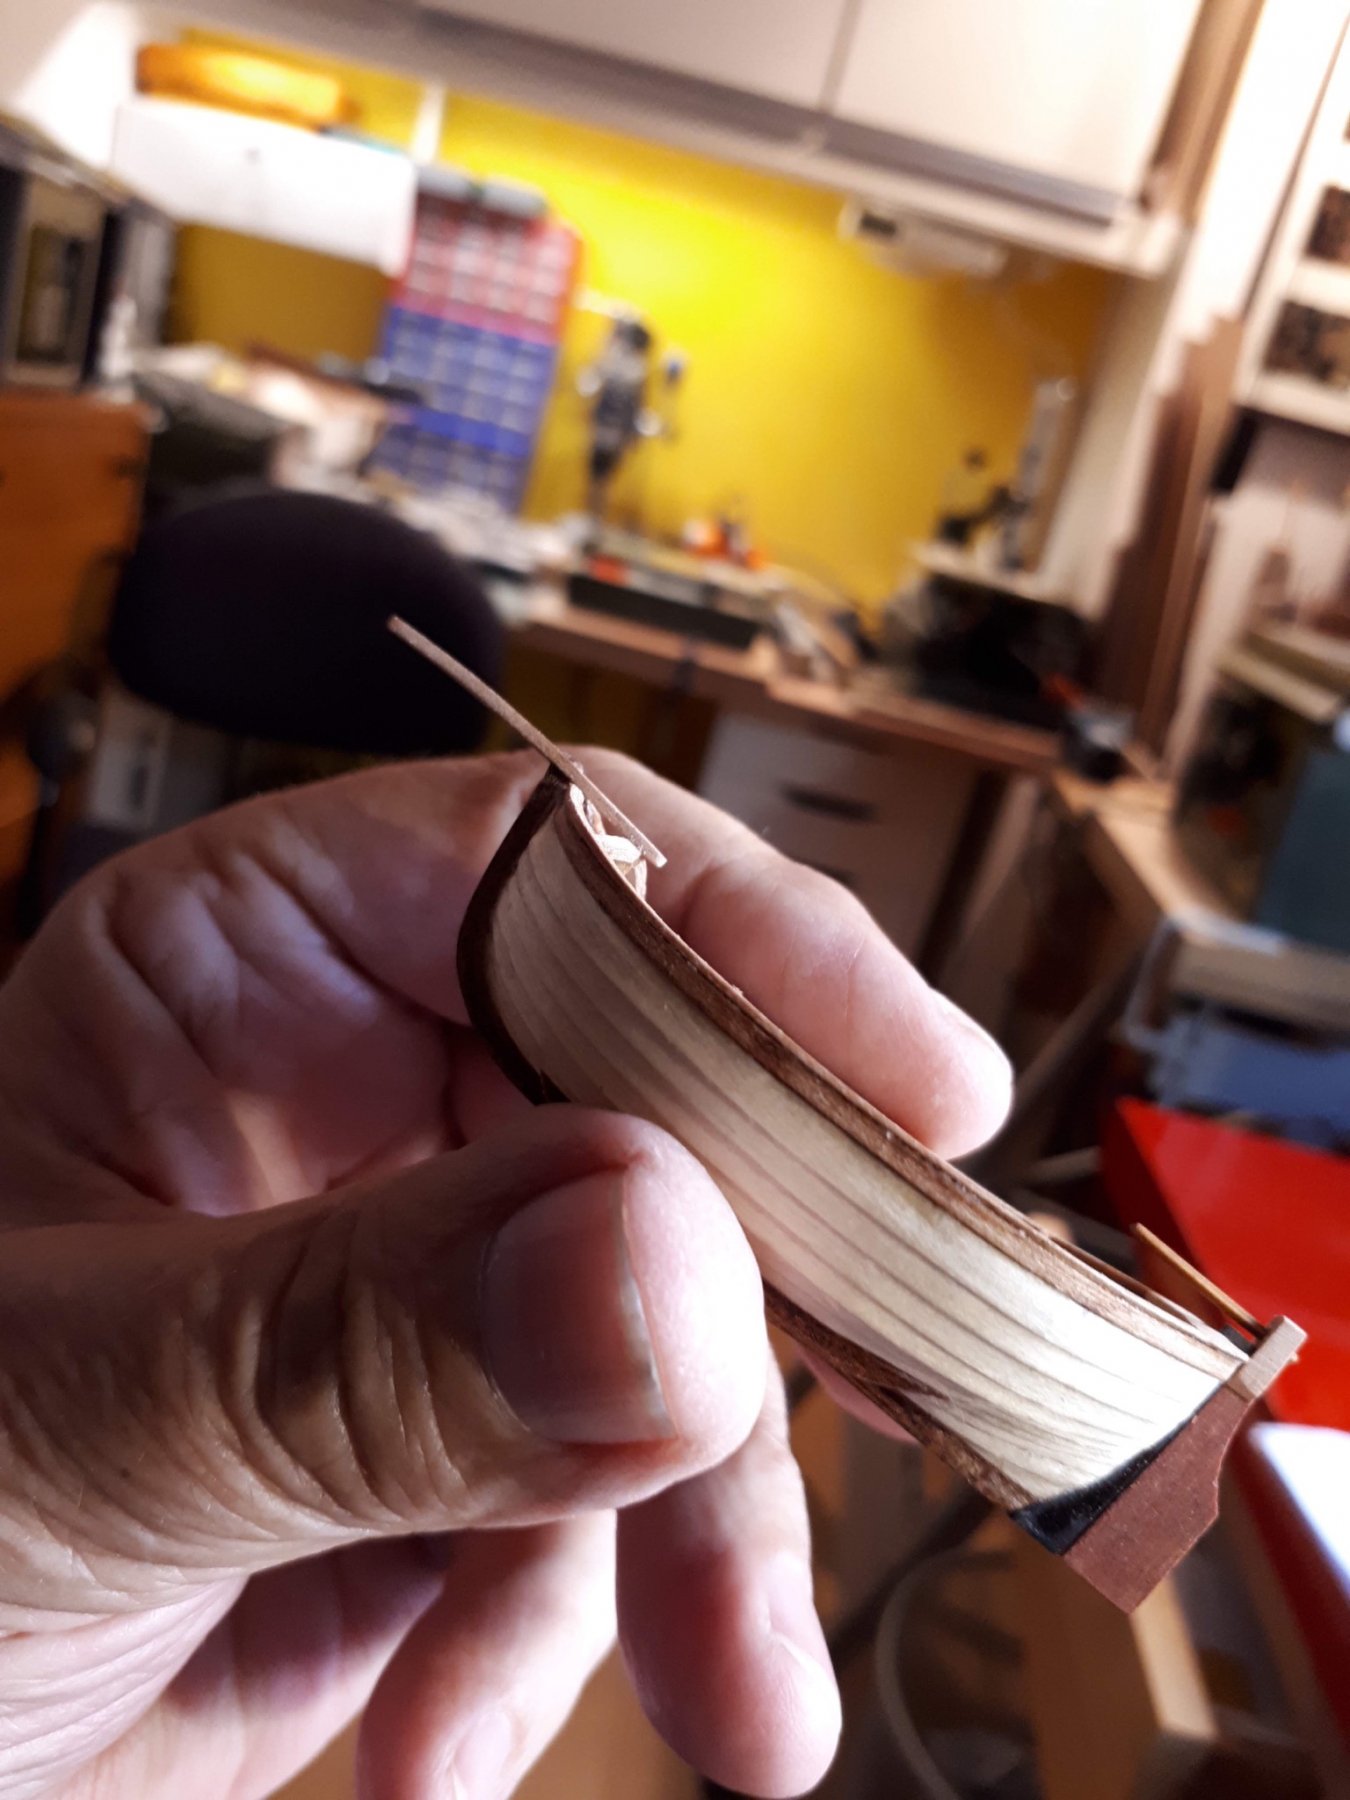
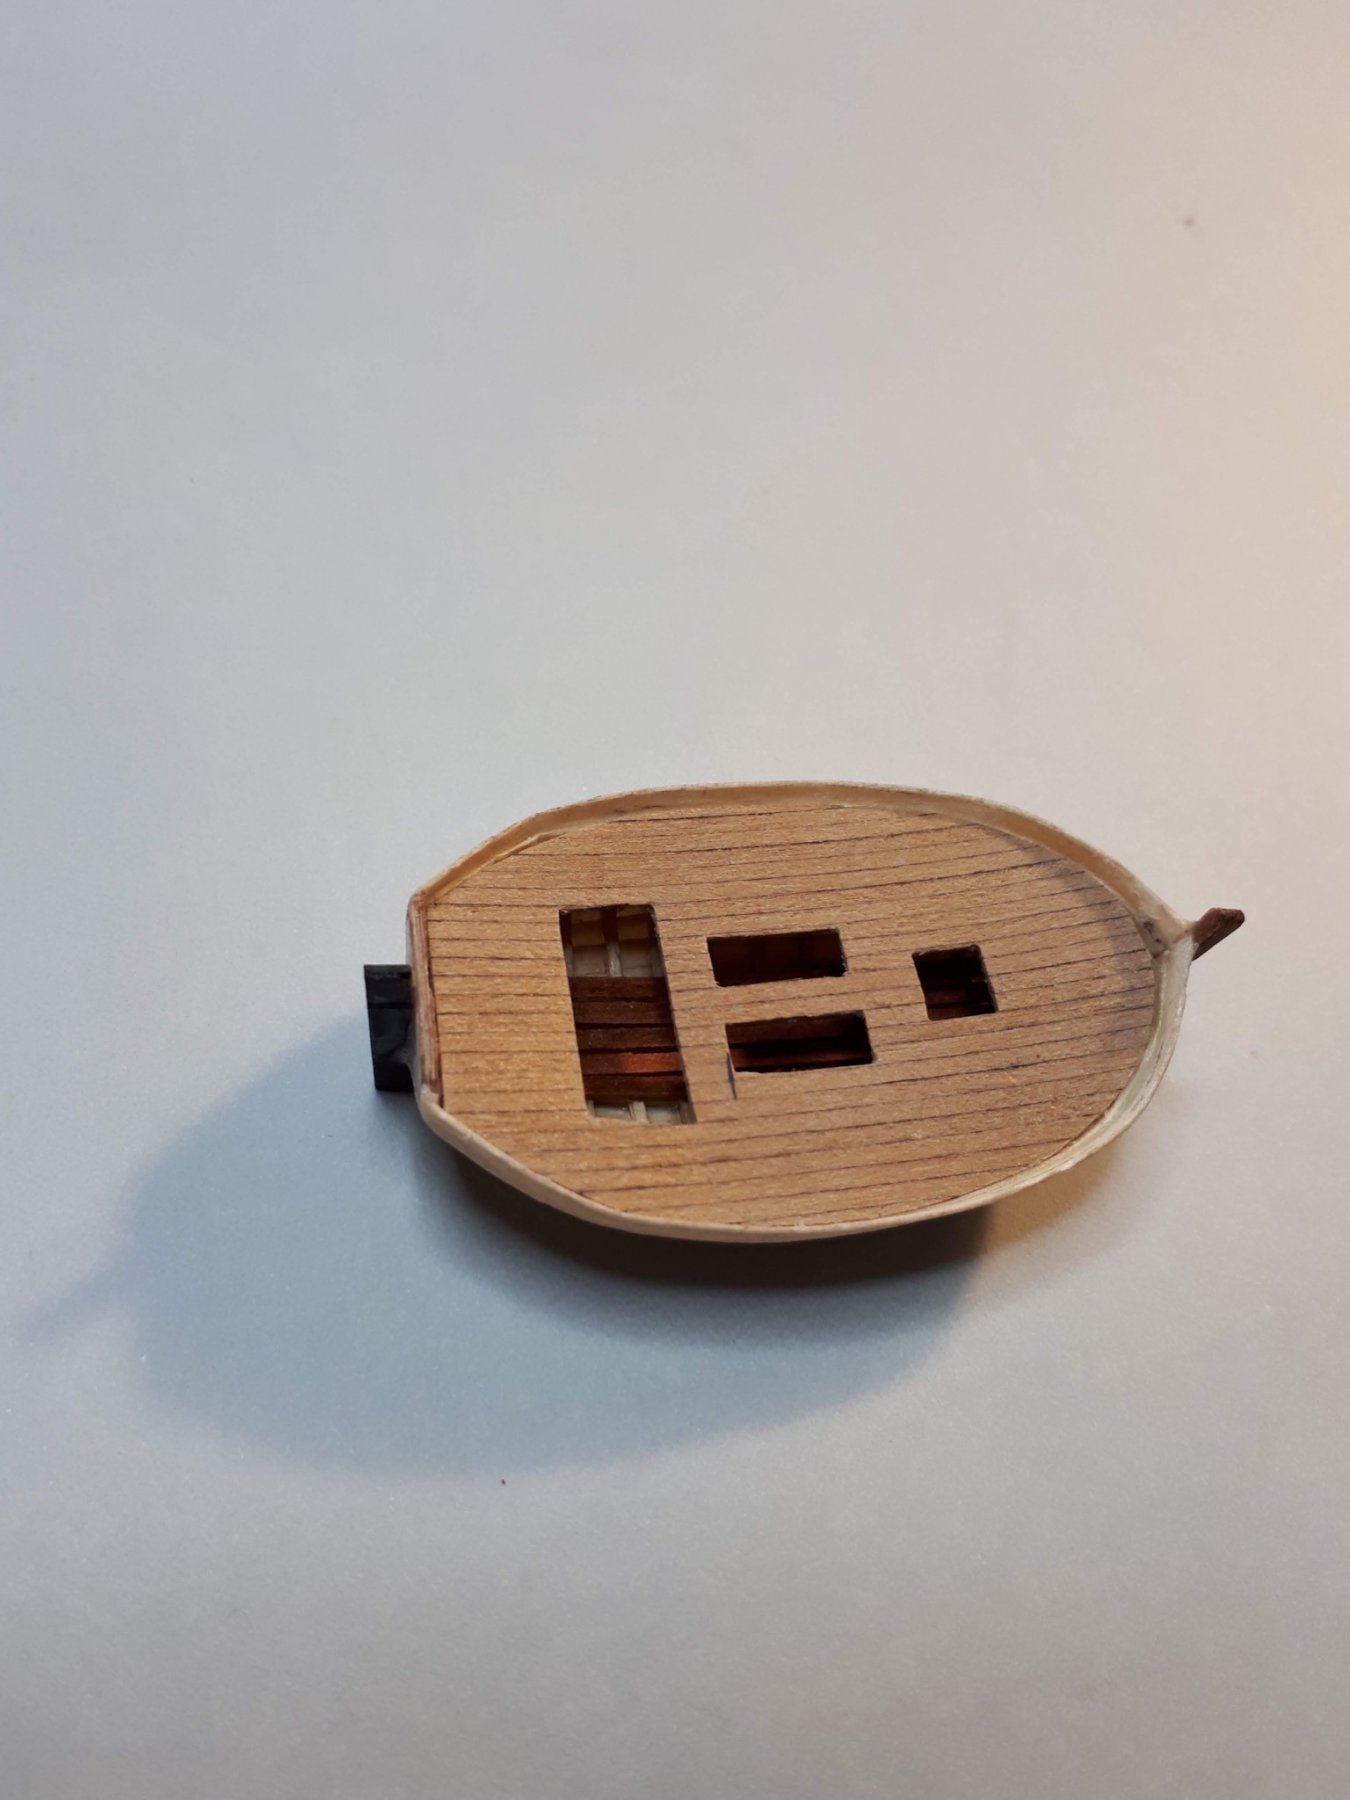
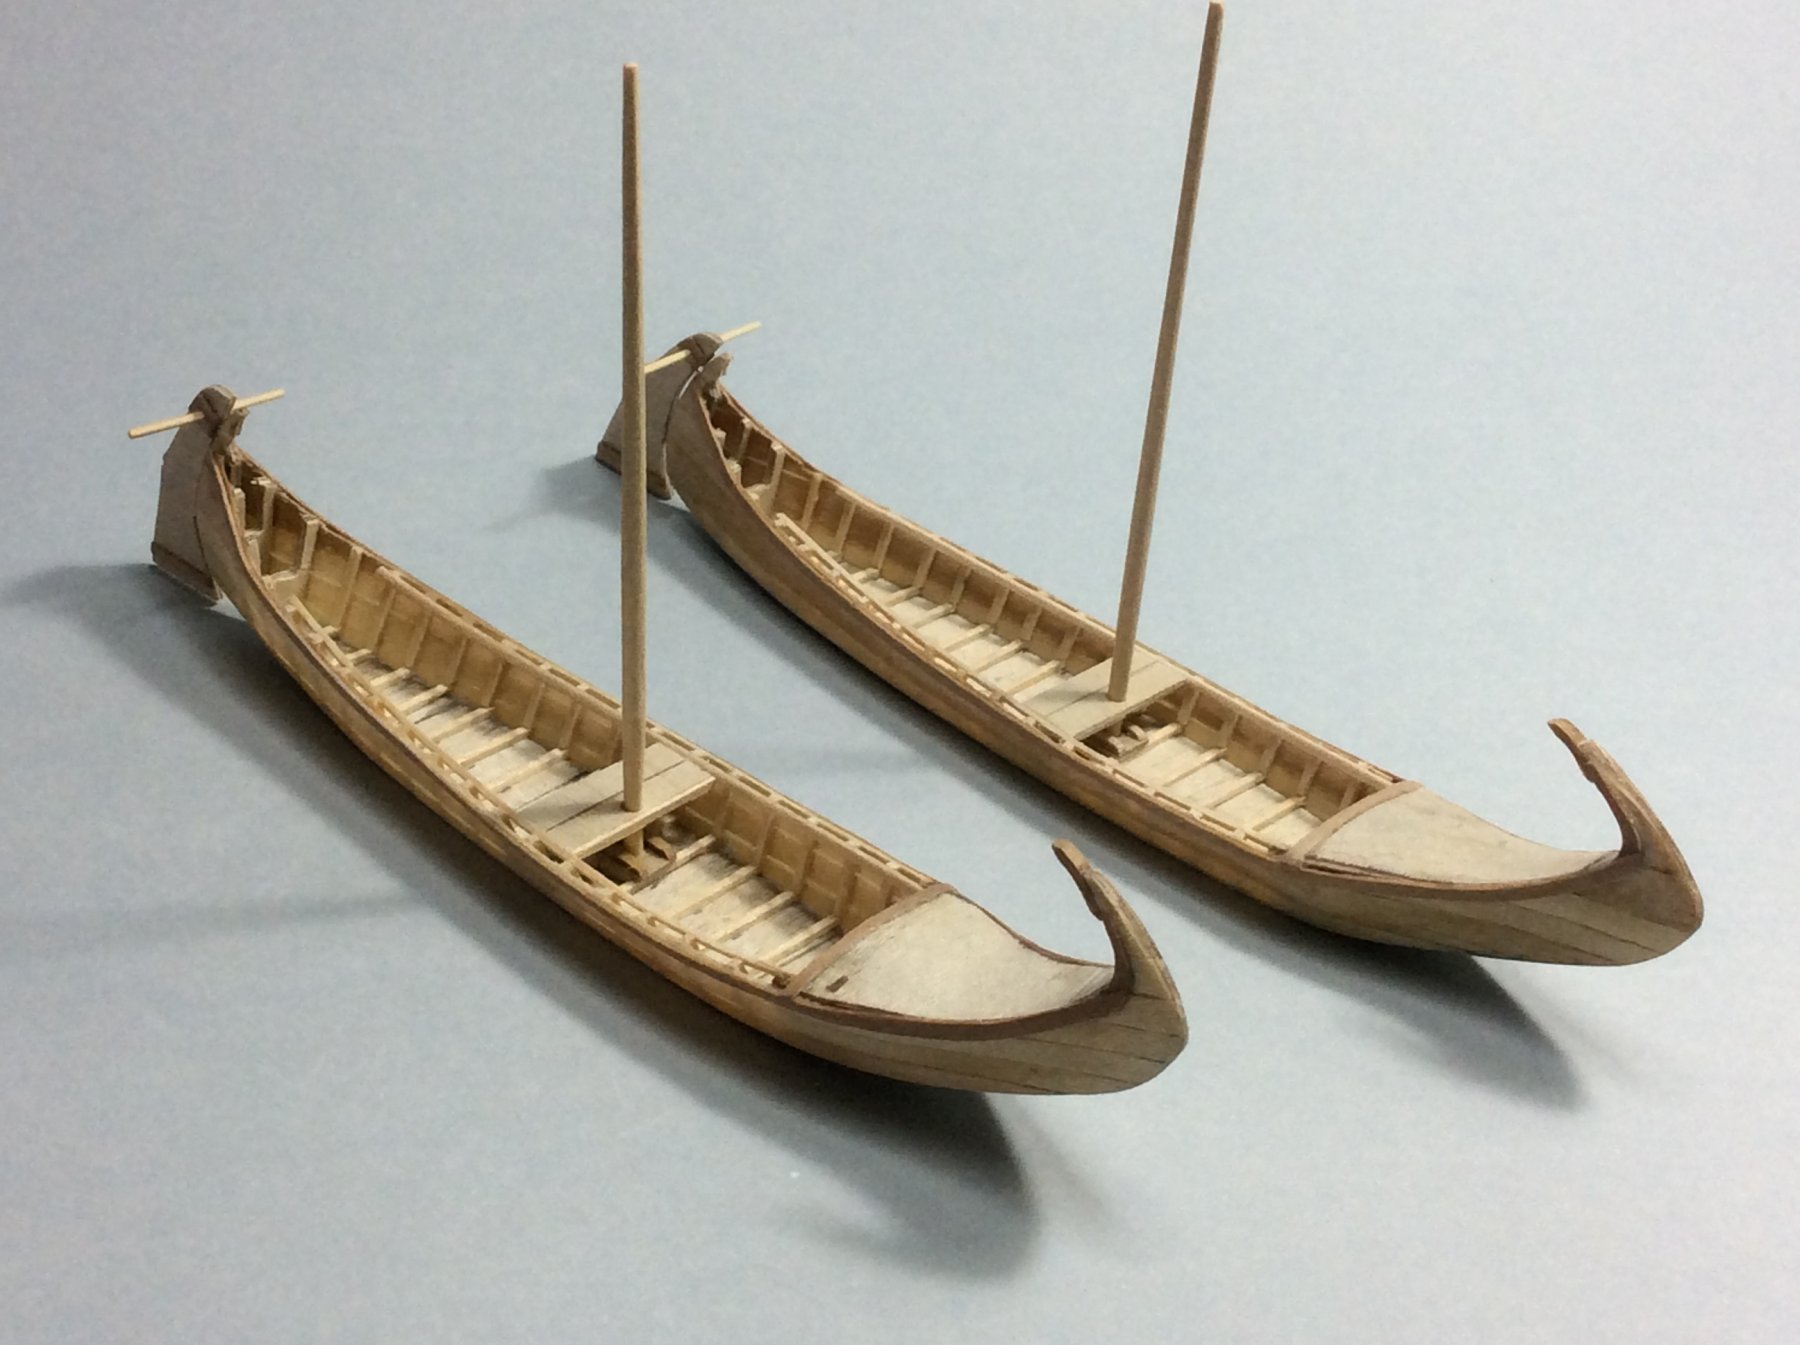
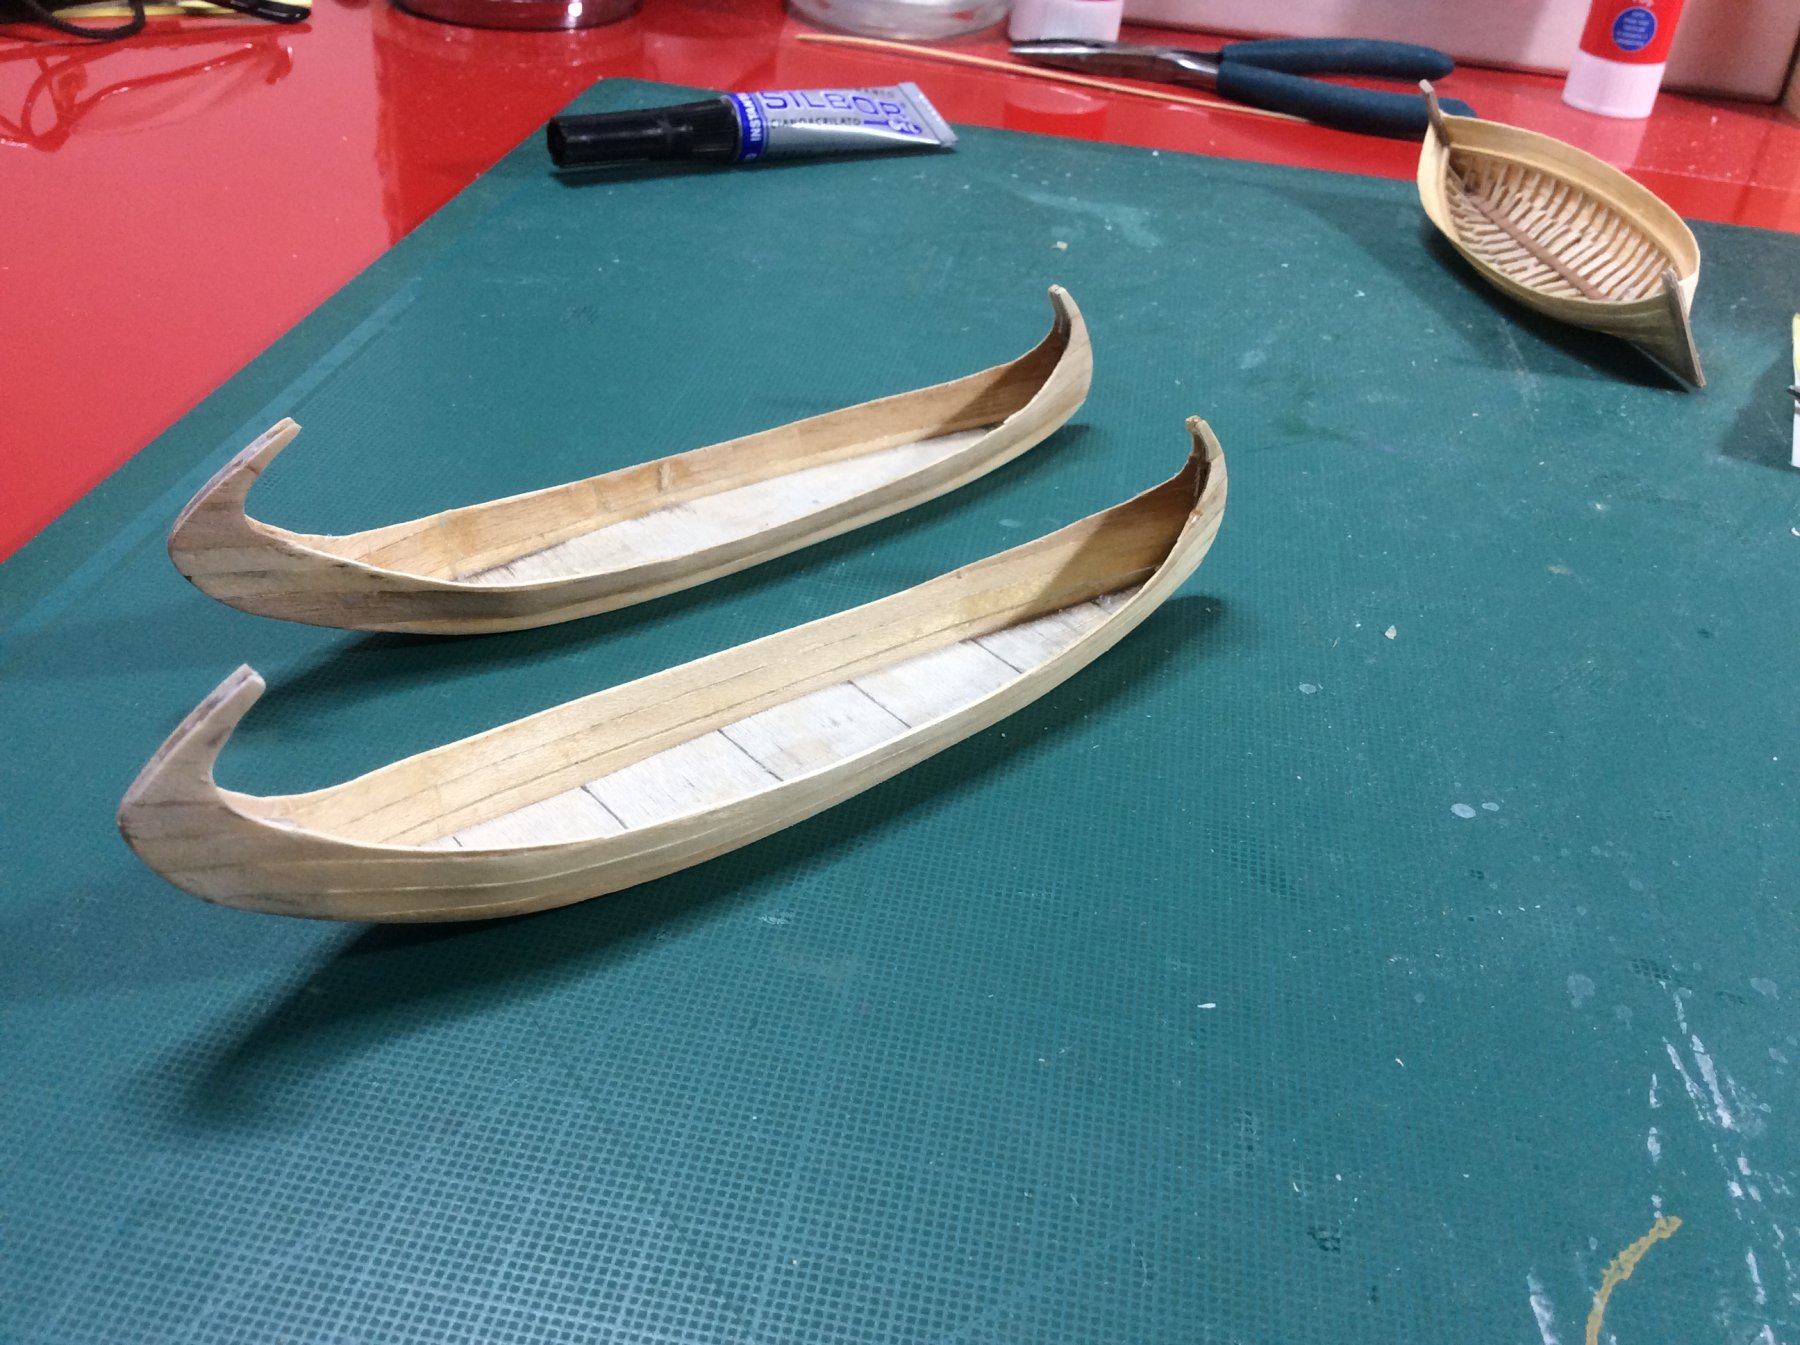
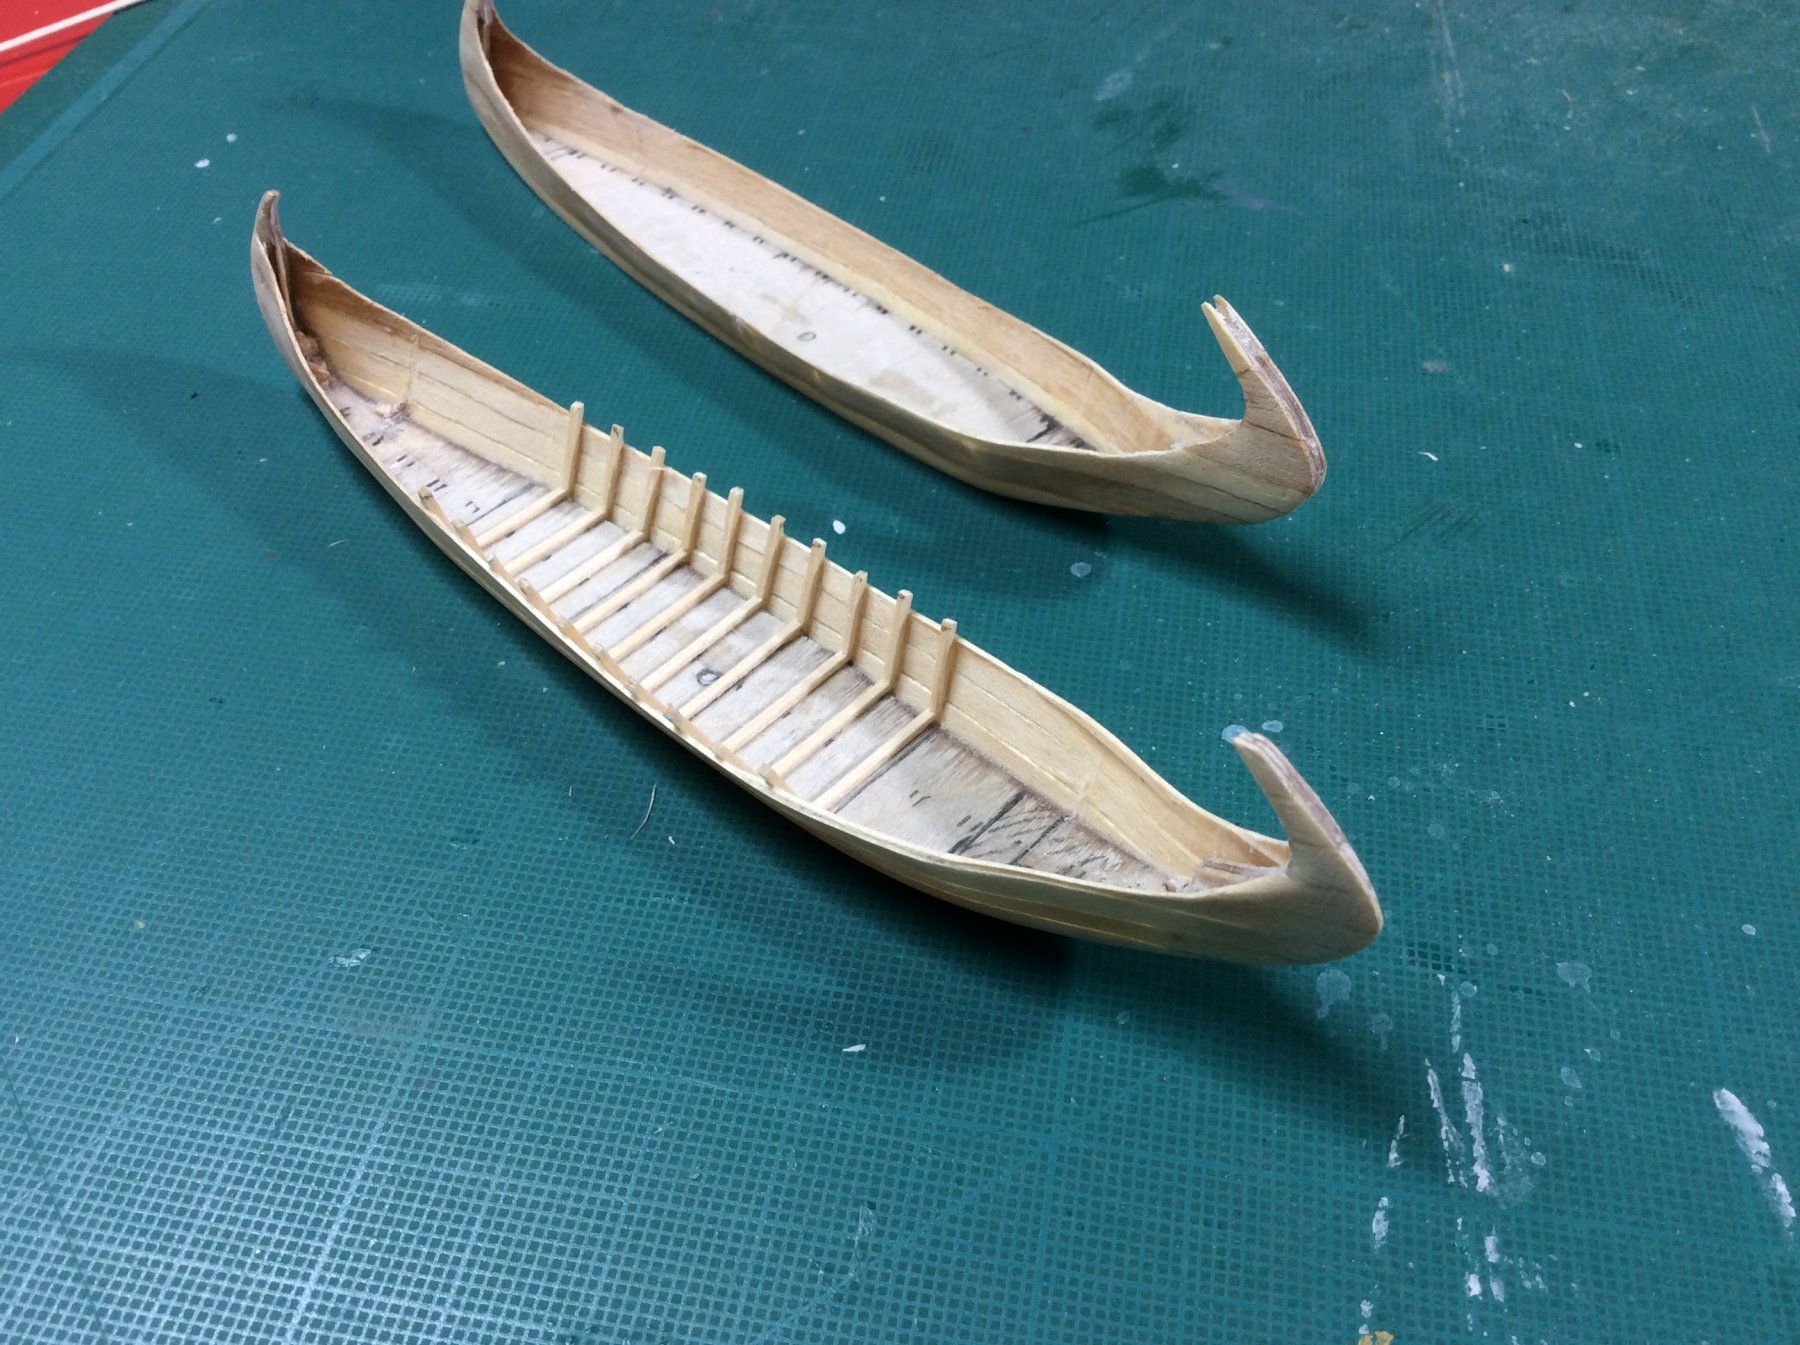
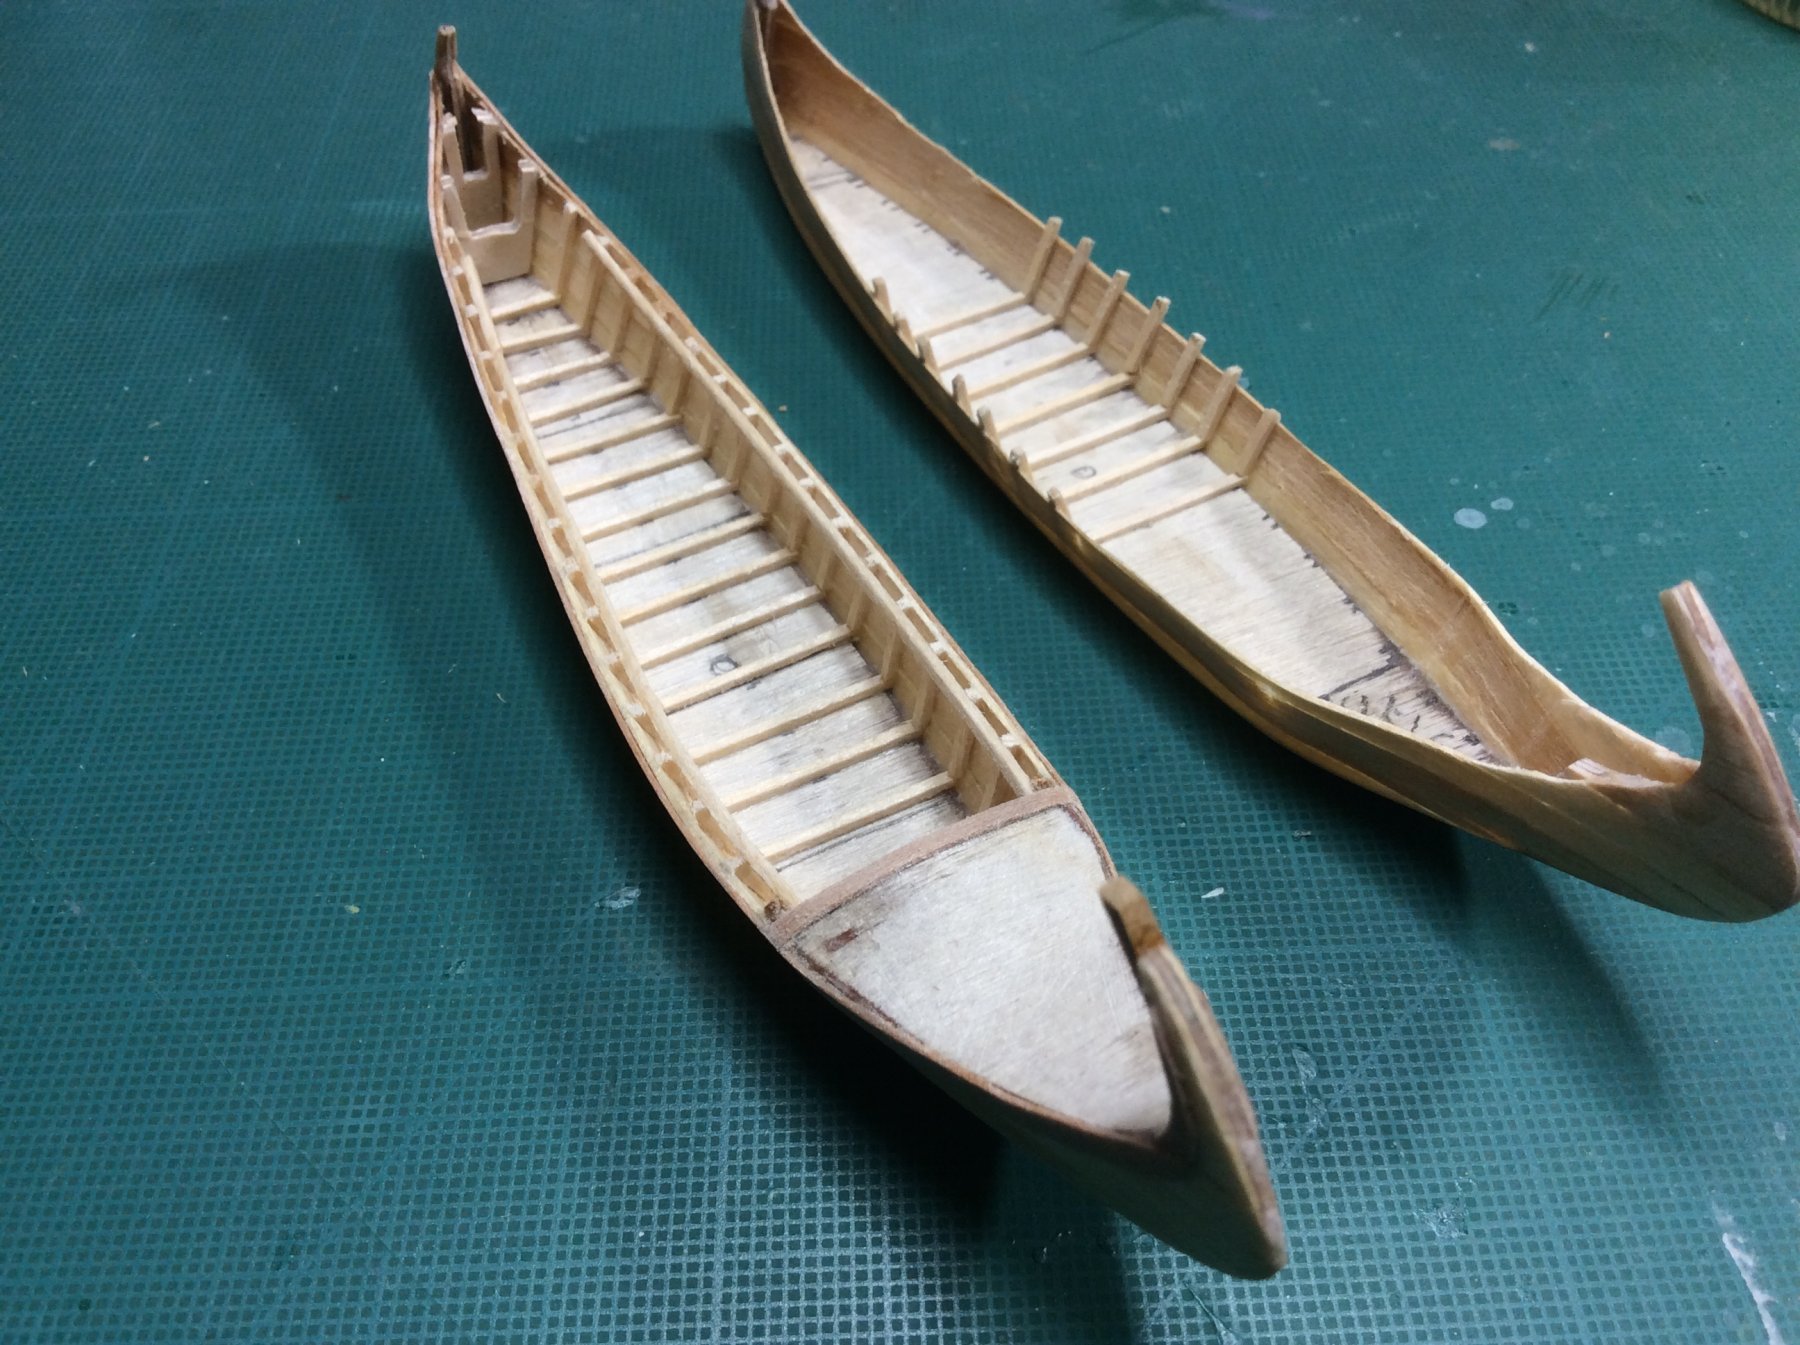
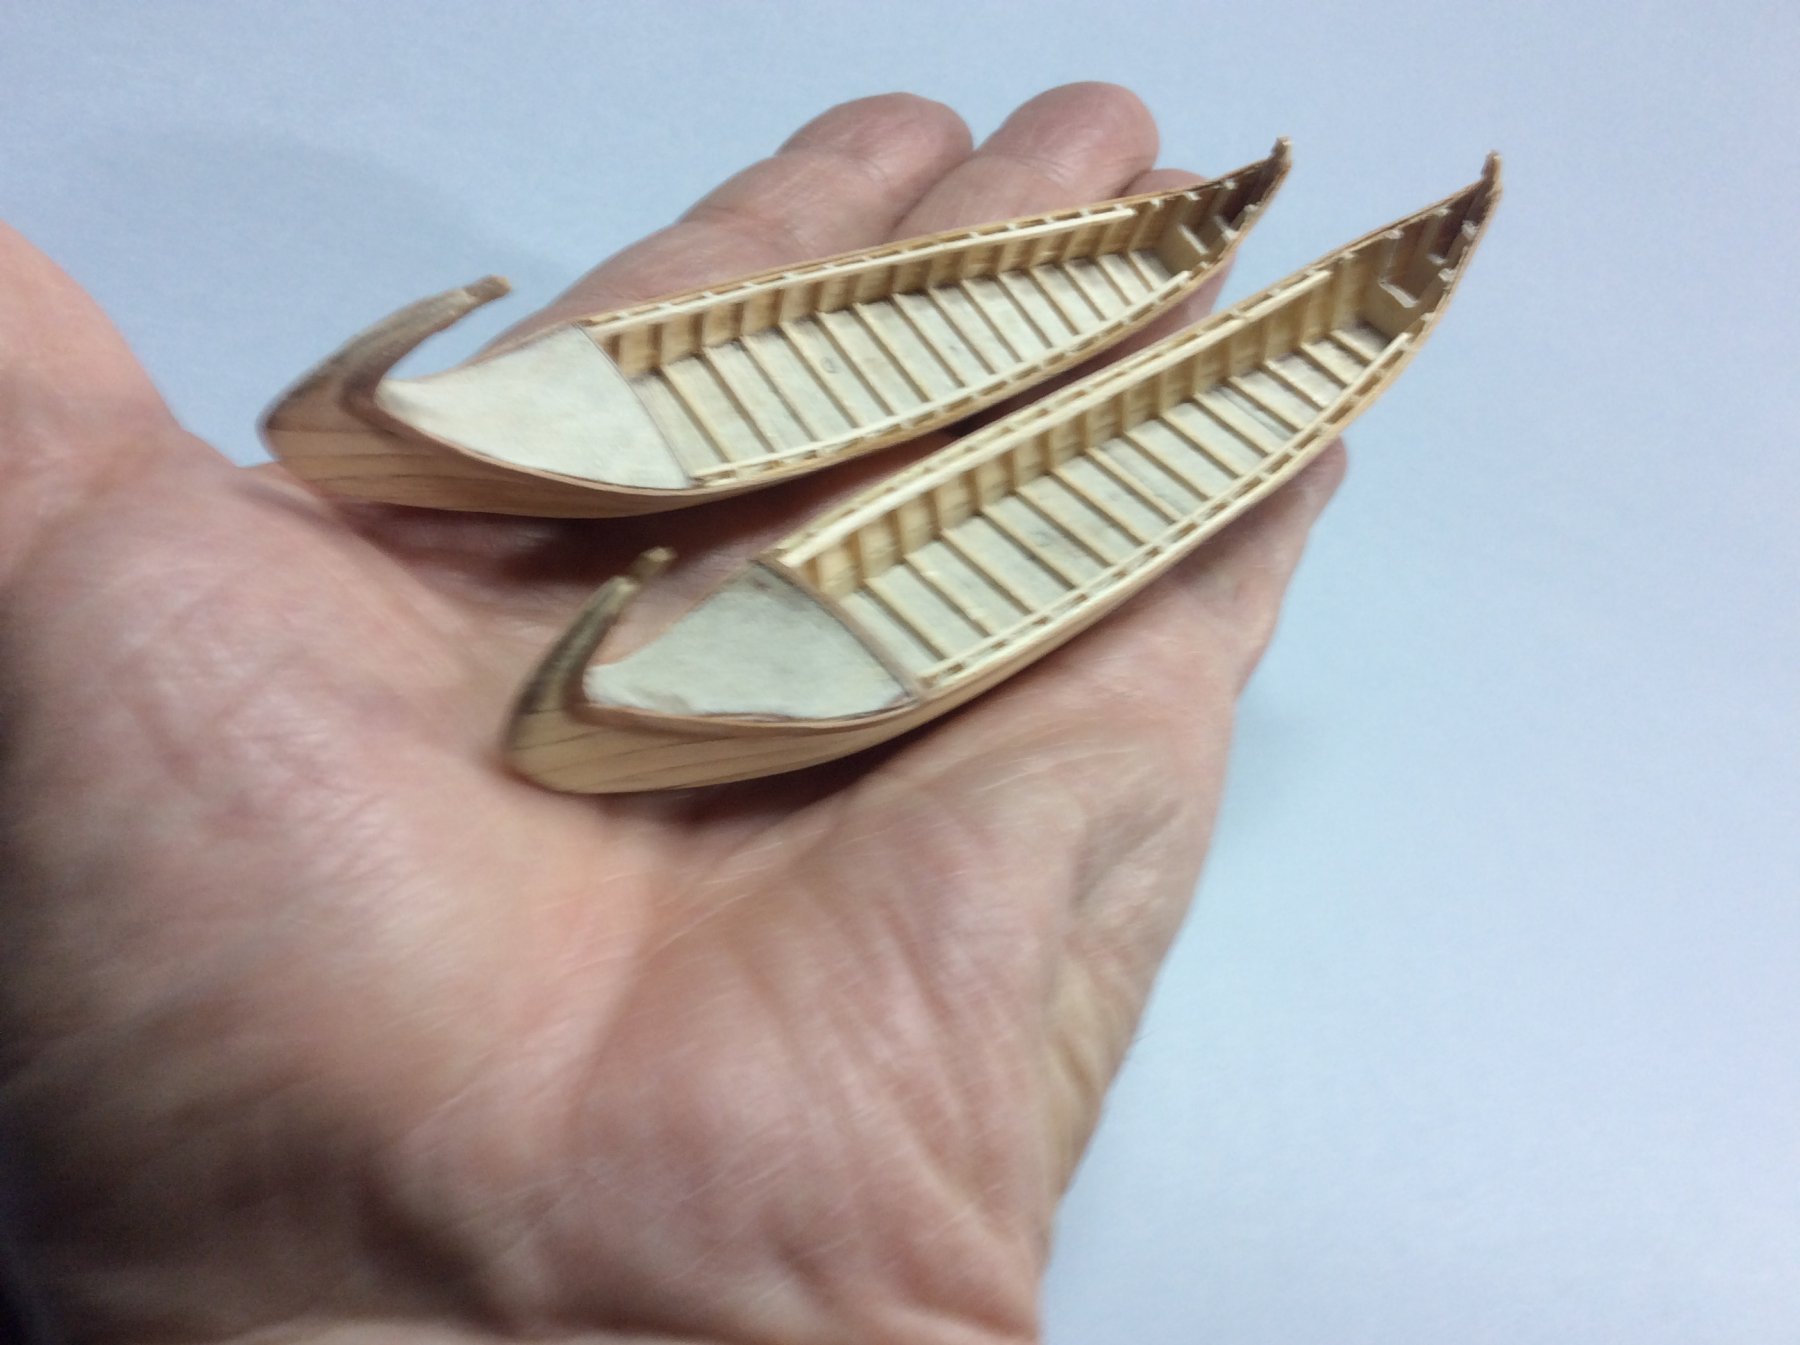
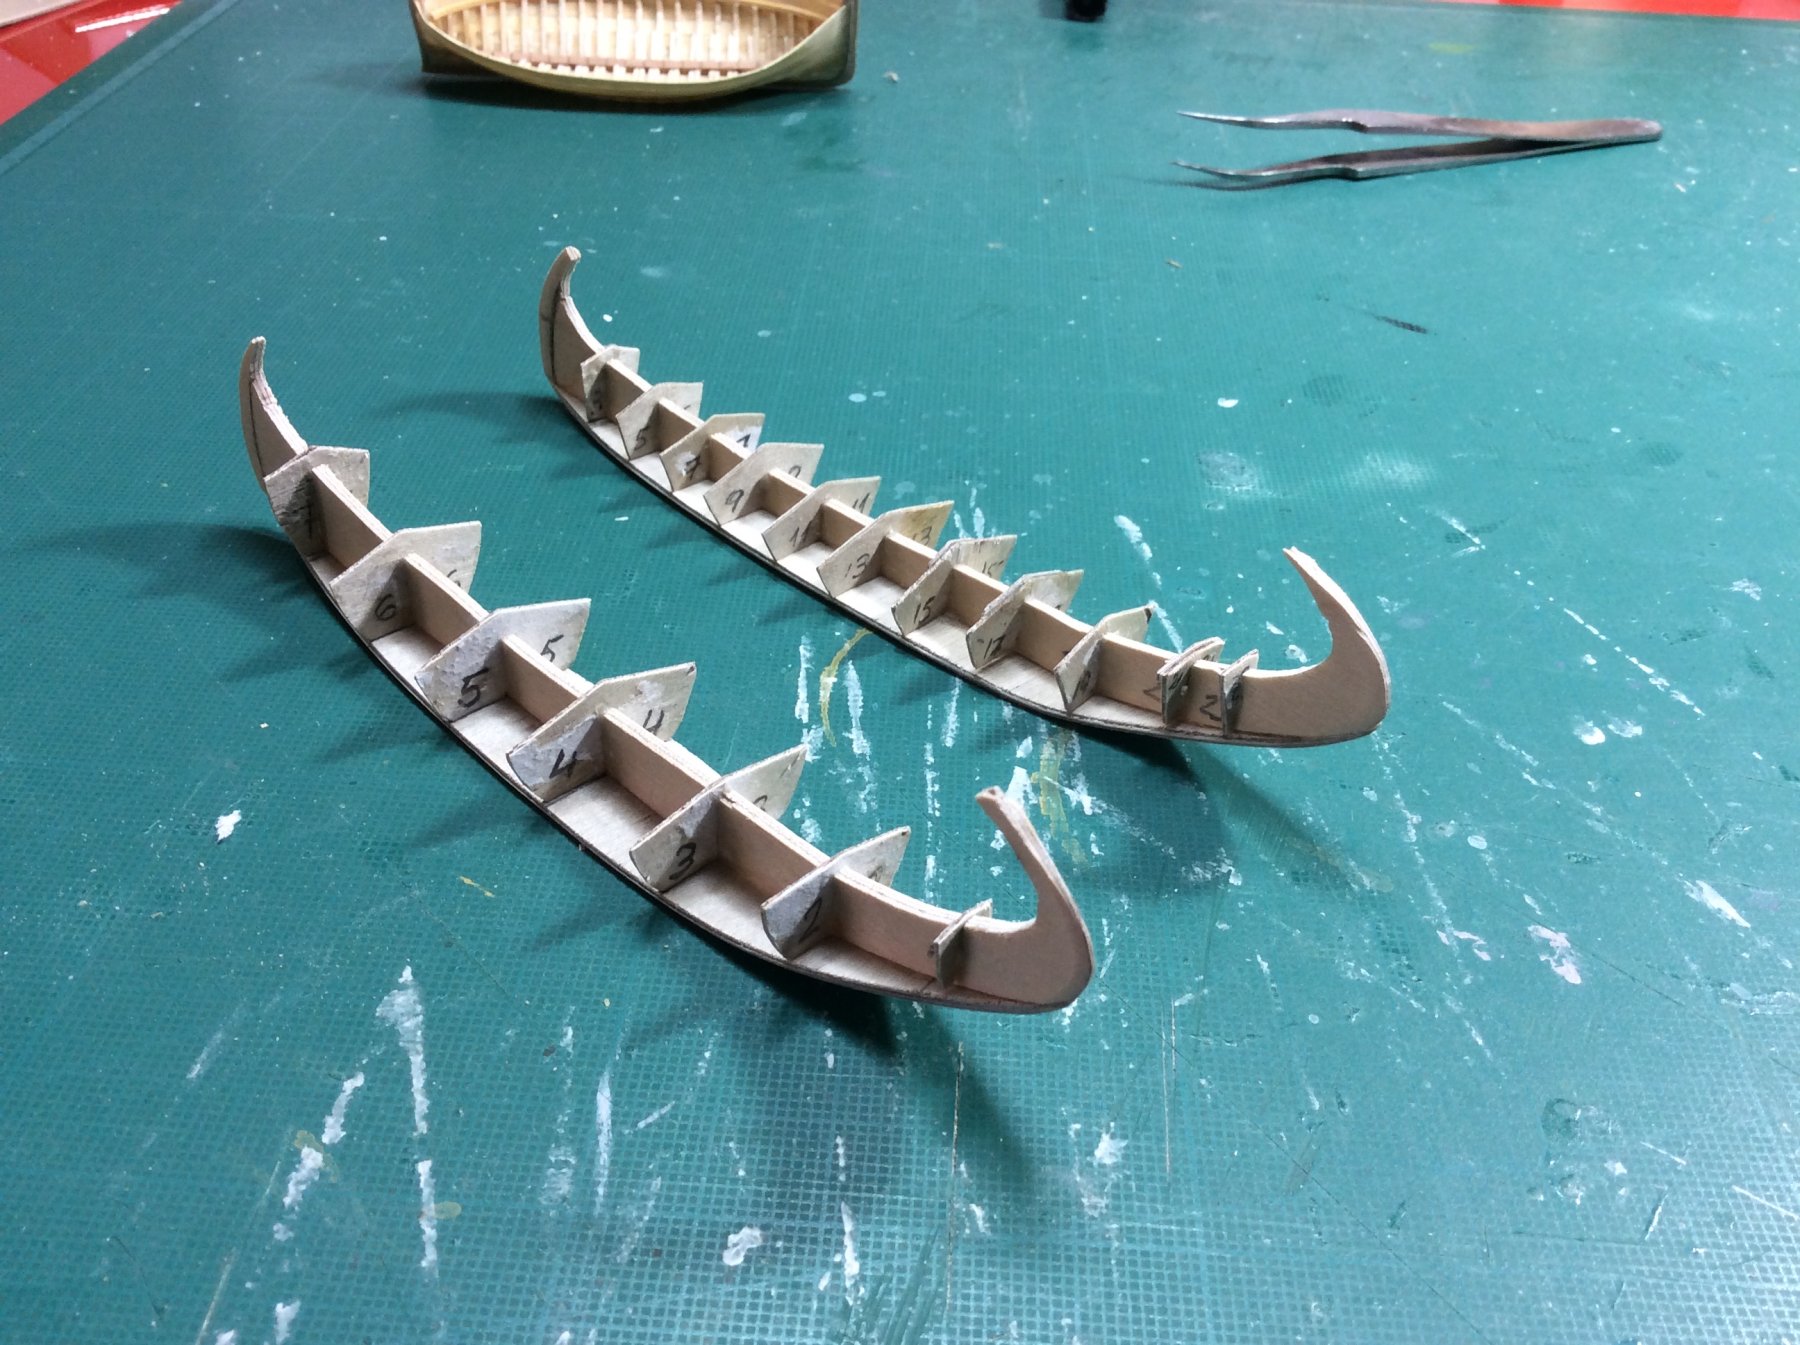
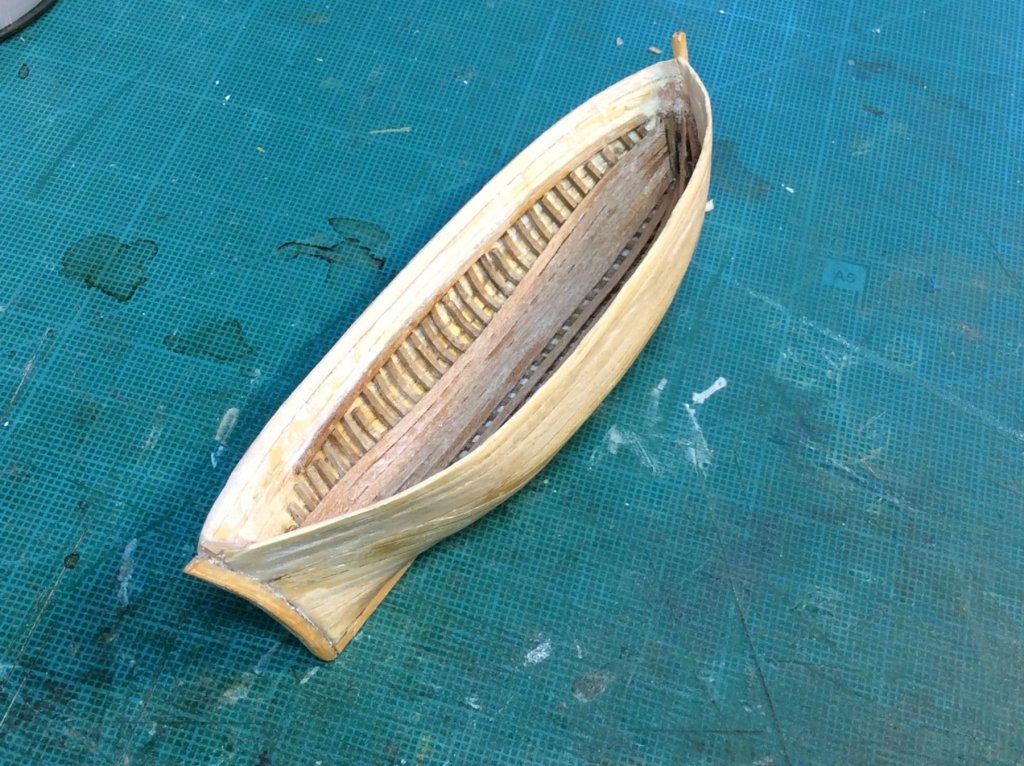
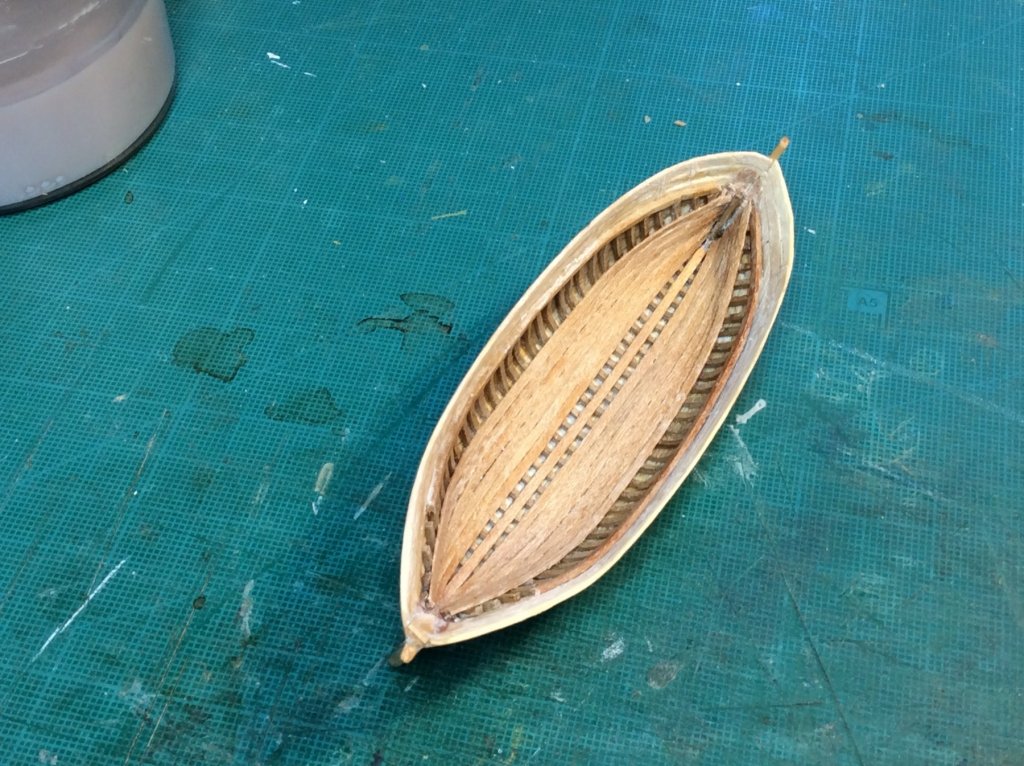
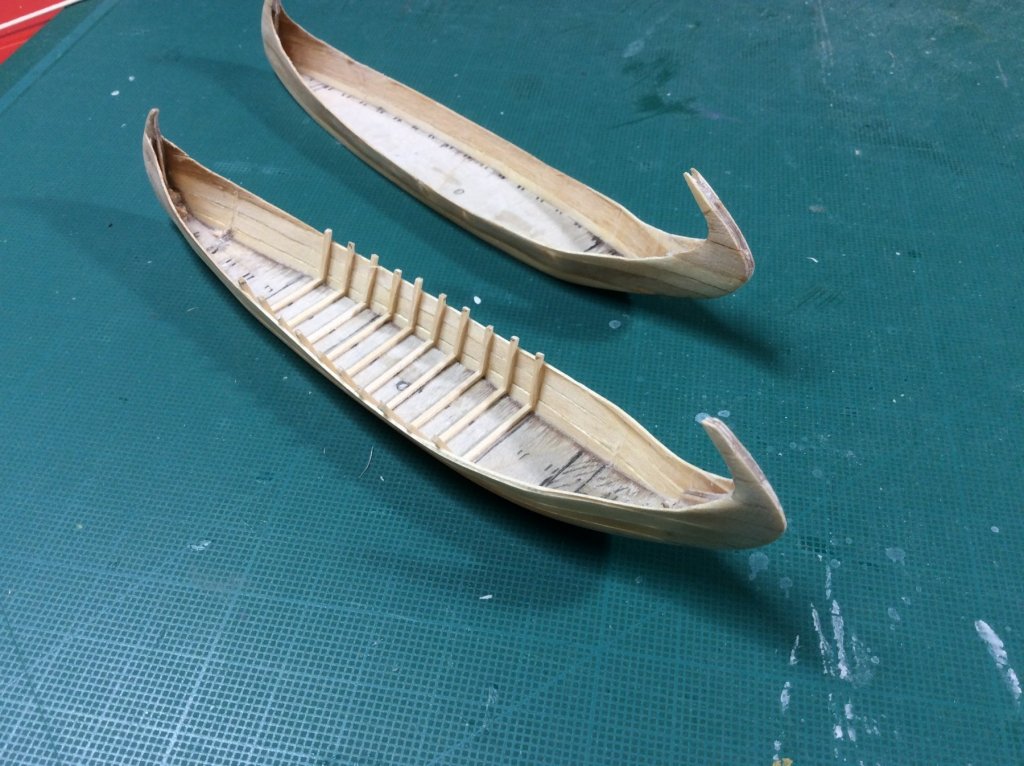
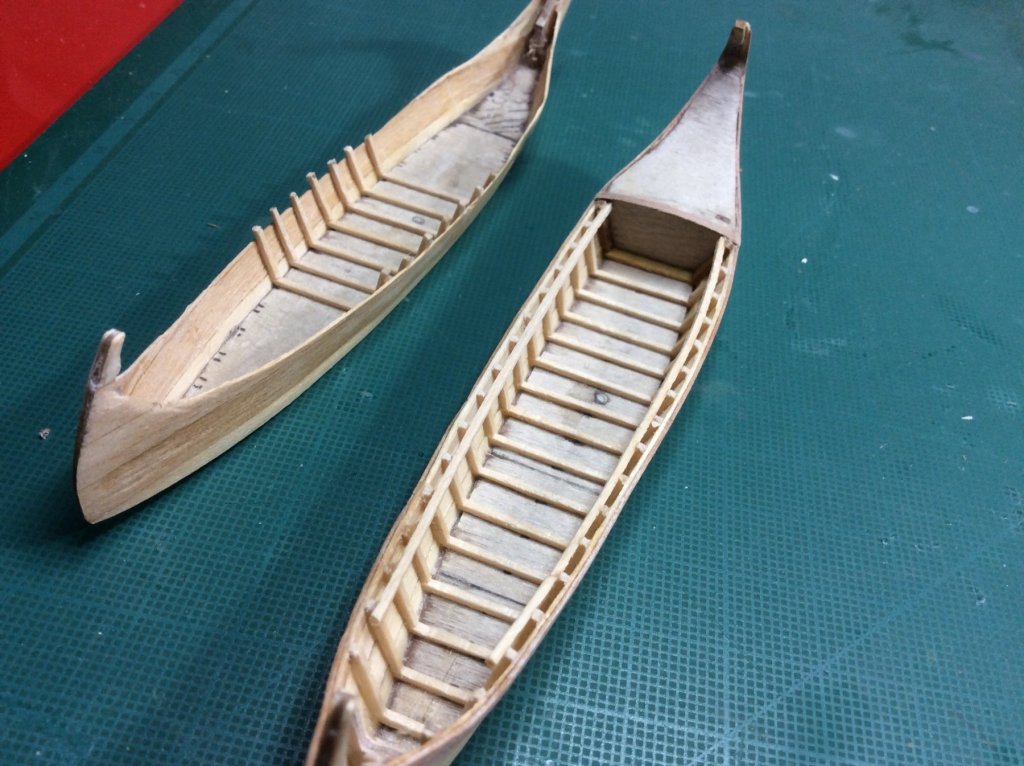
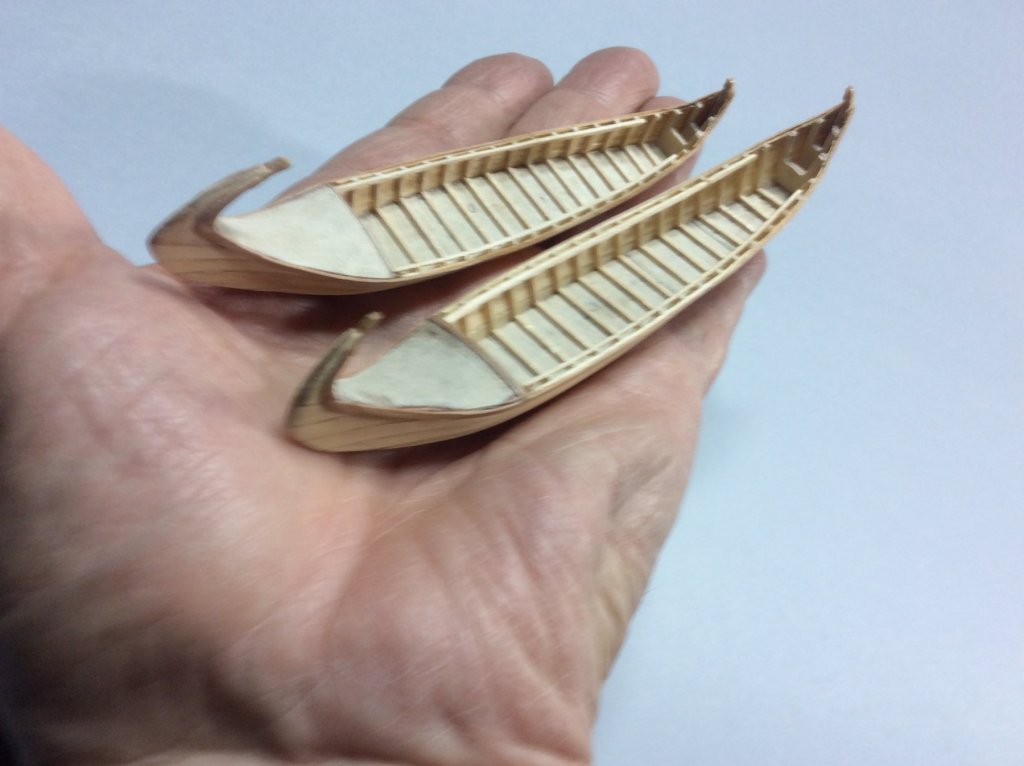
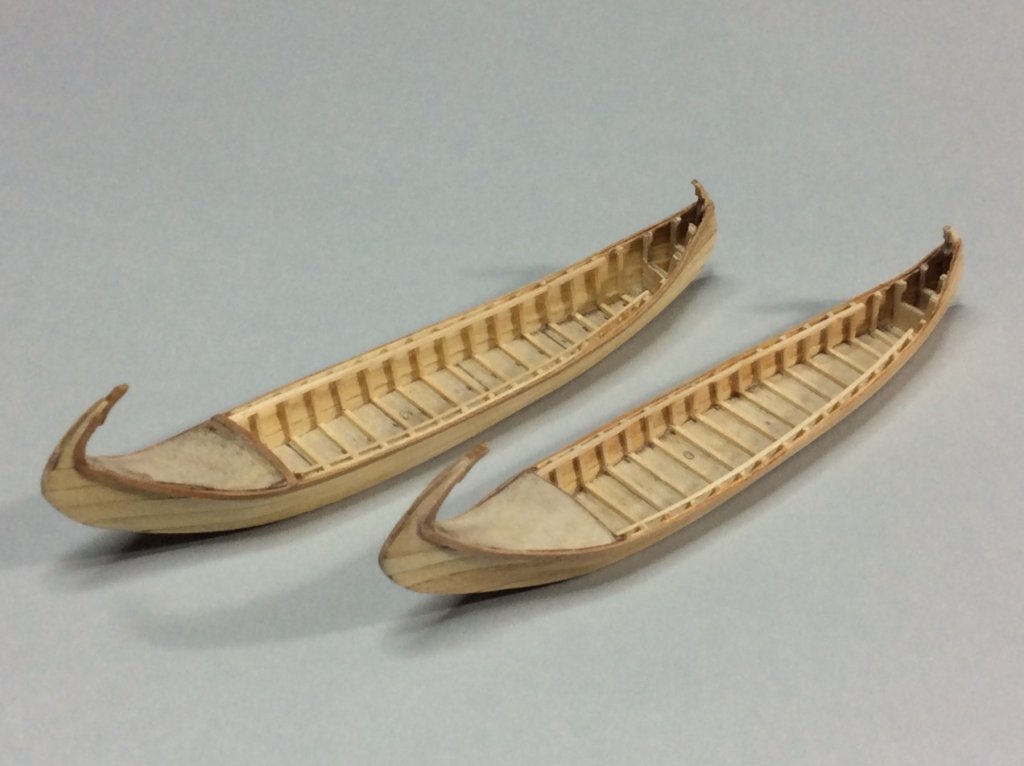
The next step is the placement of the strakes, which are quite easy to place in this type of boat, given its small relationship between breadth and length, which translates into a weak curvature of the same. Previously I have given two or three layers of primer on the edge of the false keel and frames, to facilitate the detachment in the event that the strakes remain attached to them in the lining process. The strakes with which lining have a thickness of 0.6 mm. The first strake is stuck to the base and its union with the next strake I do edge against edge, all with cyanoacrylate gel. Once this paste has dried, I place the hull in a vertical position and let slip a drop of cyanoacrylate (in this case in its liquid version) through the joints, in which it penetrates by capillarity. Once the hull are closed, and before starting the false frames of work, I make a first polishing taking care not to eat too much with the sandpaper, since I work with a wall of only 0.6 mm. Proceed then to tear off the false frames and leave the hulls empty. It is necessary to act with delicacy, since the "shell" that is obtained is quite fragile. Then clean the remains of glue that may have been stuck inside the helmet. The next process is the placement of the frames, which are made in this case in three pieces and also contribute in giving the hull a certain greater rigidity. I continue with the construction of the two moliceiros placing the “cavernas” (frames) I also place the foredeck and the bulkhead of the “camareta” (cabin) And then I hit the upper part of the “cavernas” the “dredger” and, surrounding the boat externally, the board. All these elements provide the helmet with greater resistance, thus facilitating the handling of the model during its construction. And I repeat this whole process in the second moliceiro.


- 13 replies
-
- 14
-
-
- small
- moliceiros
- (and 1 more)
-
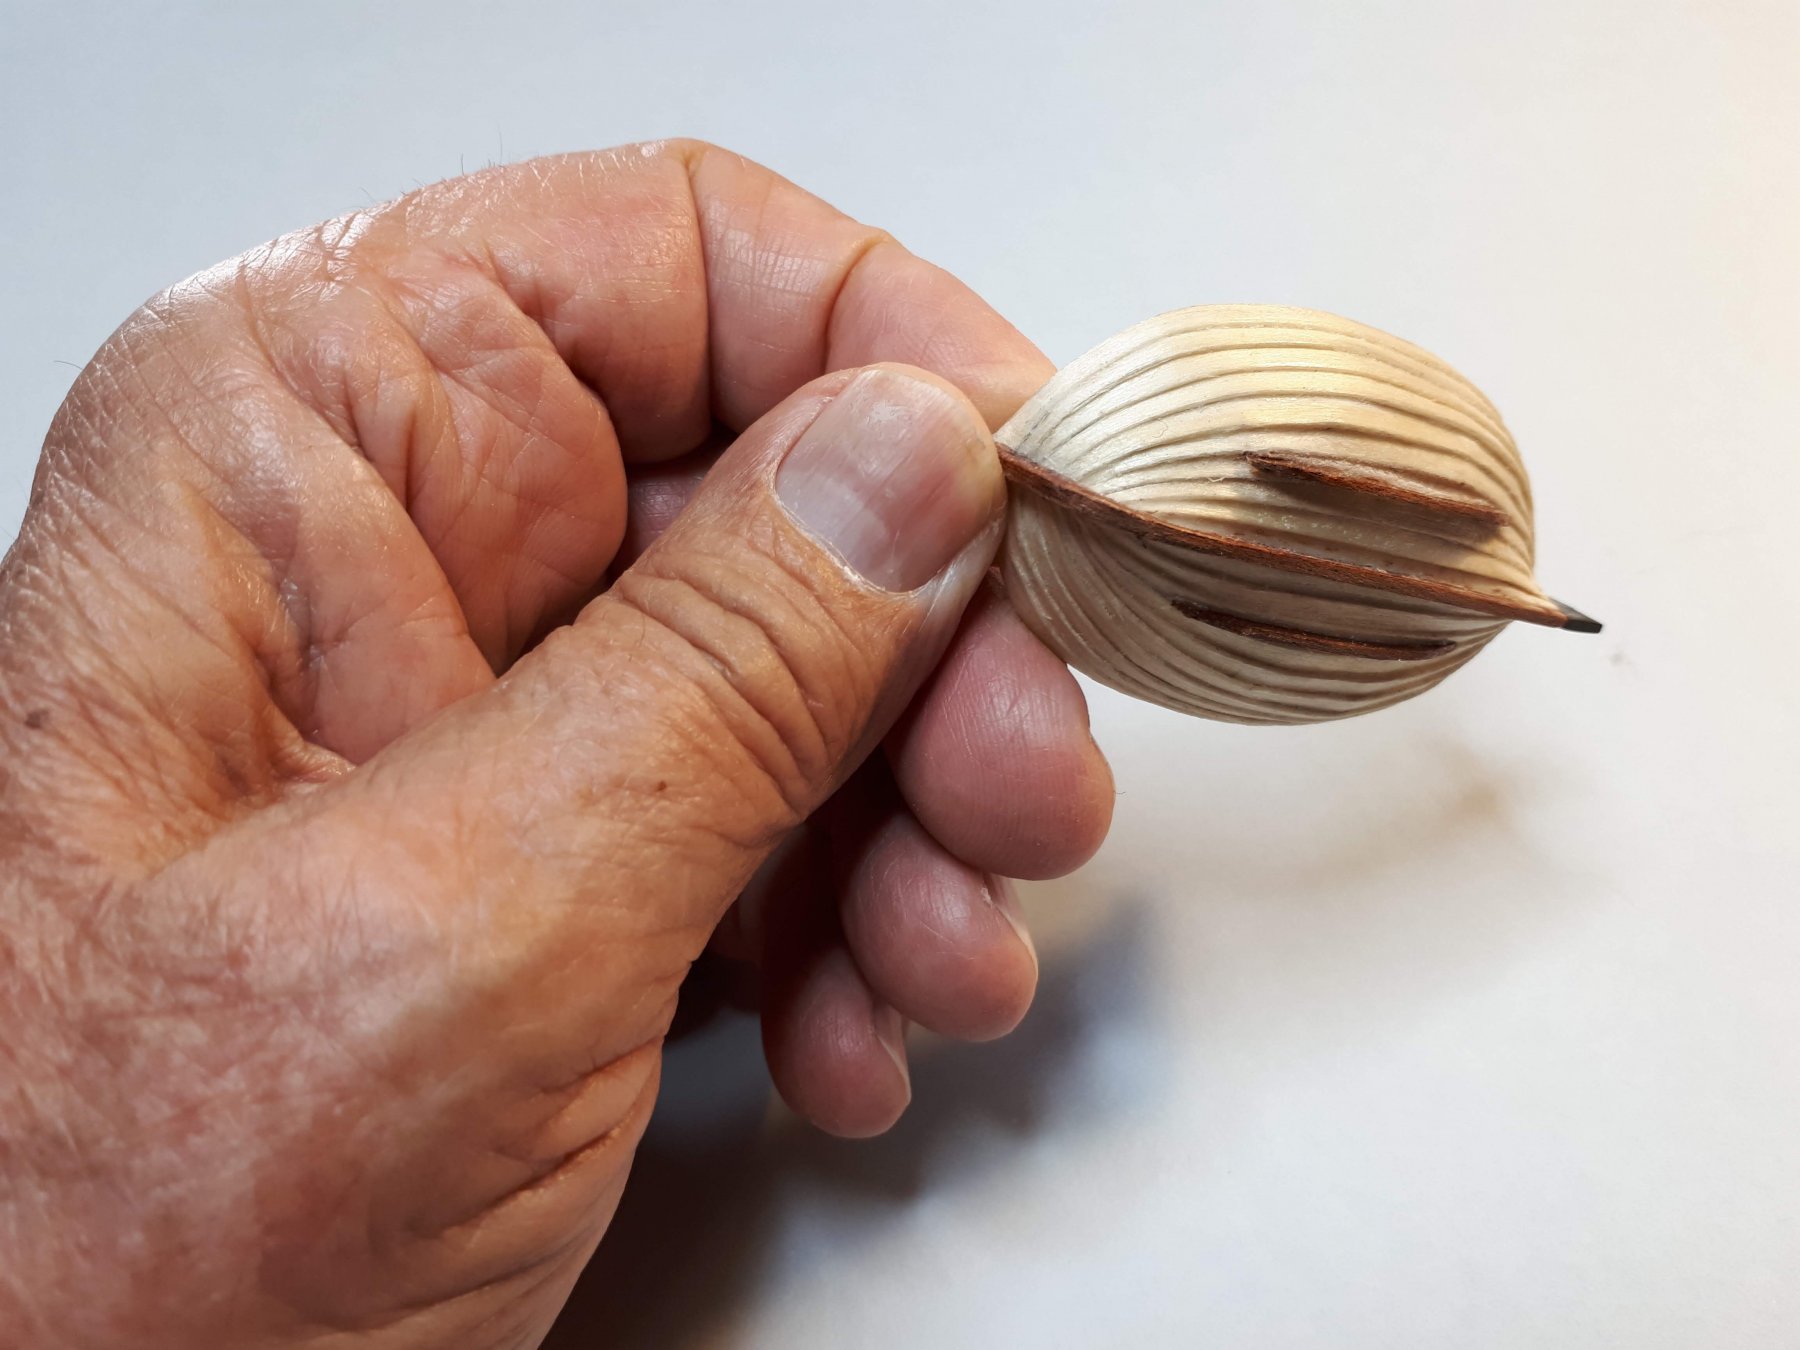
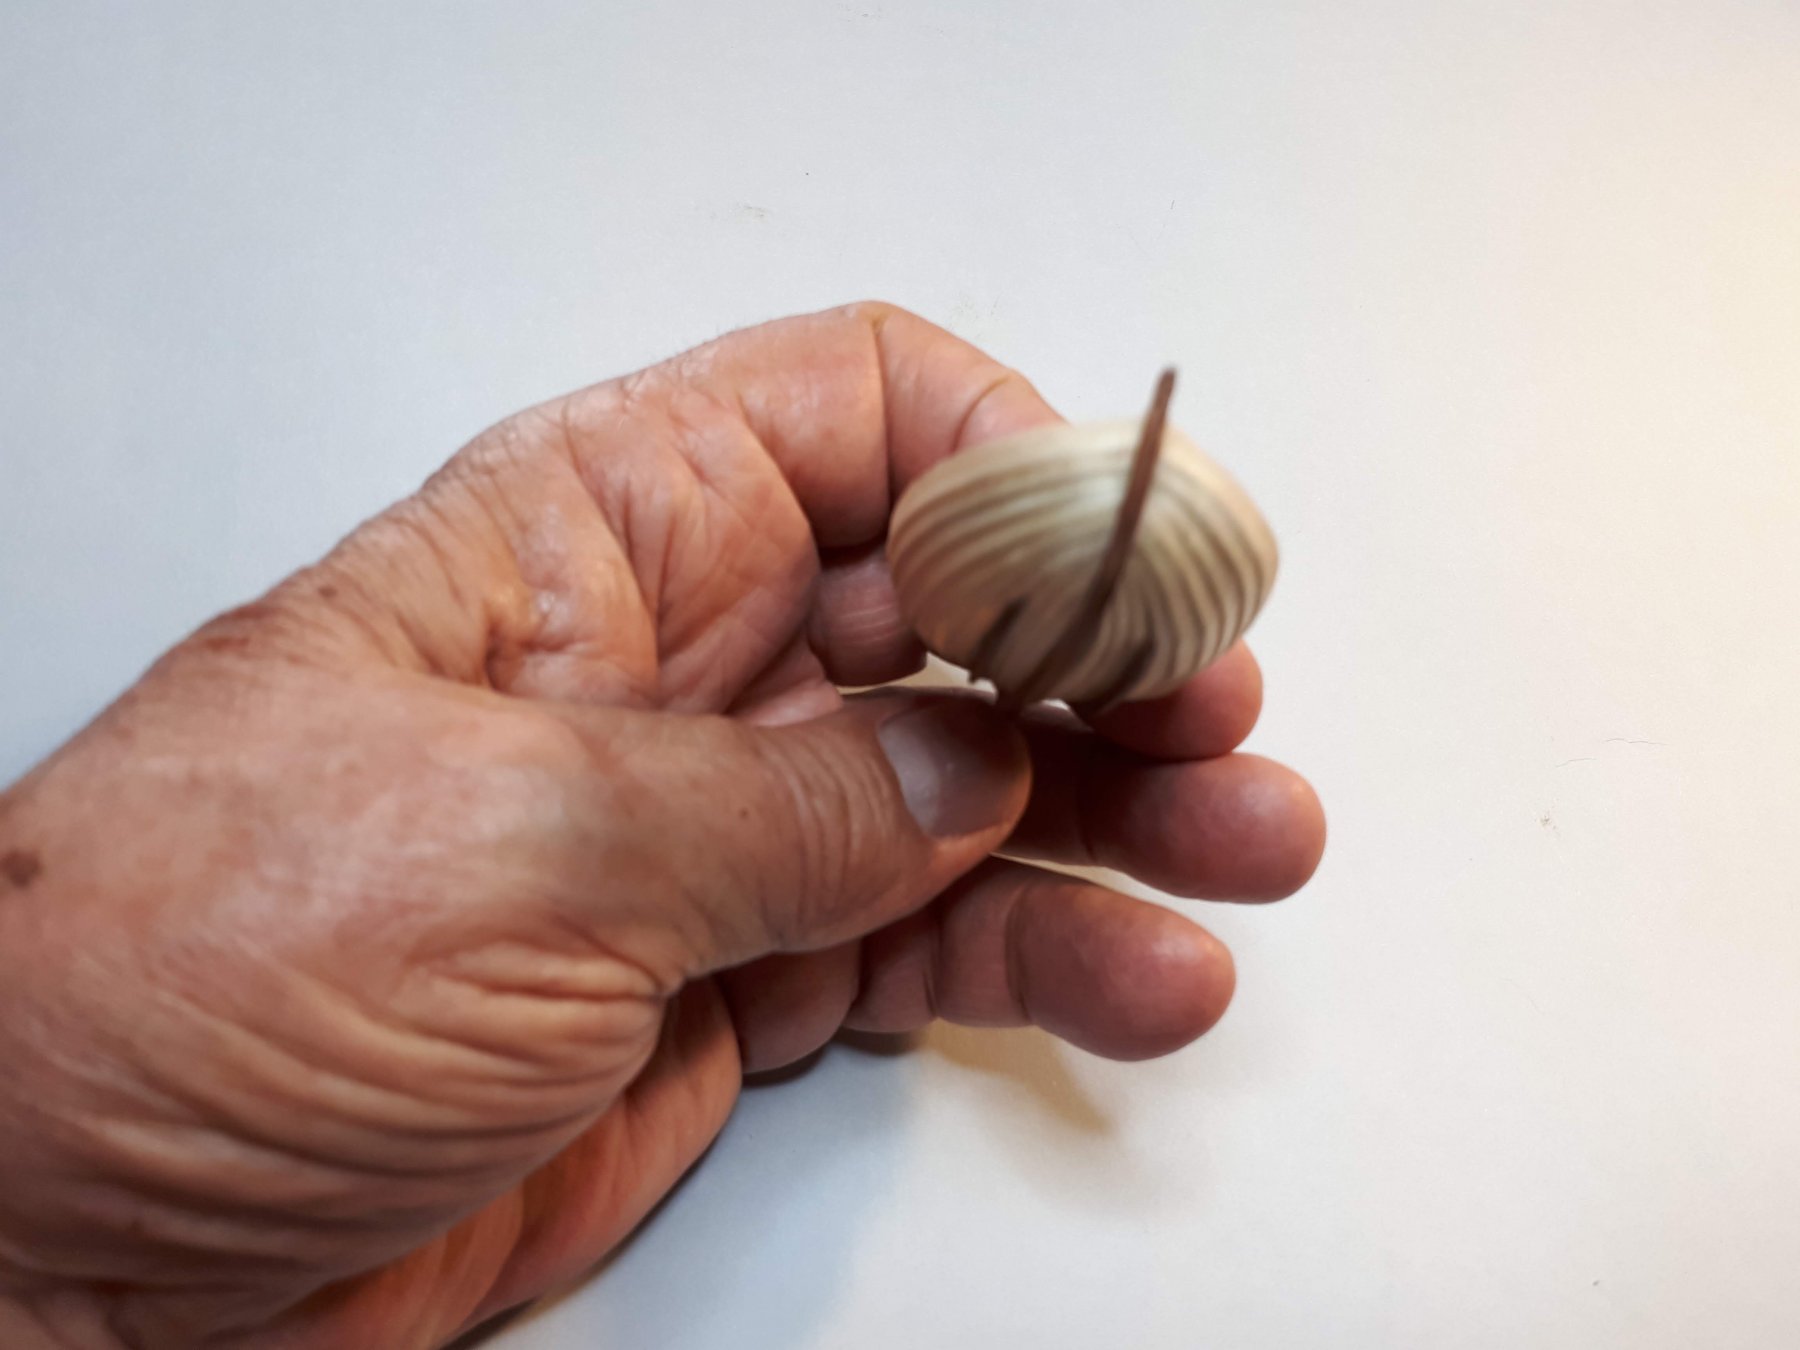
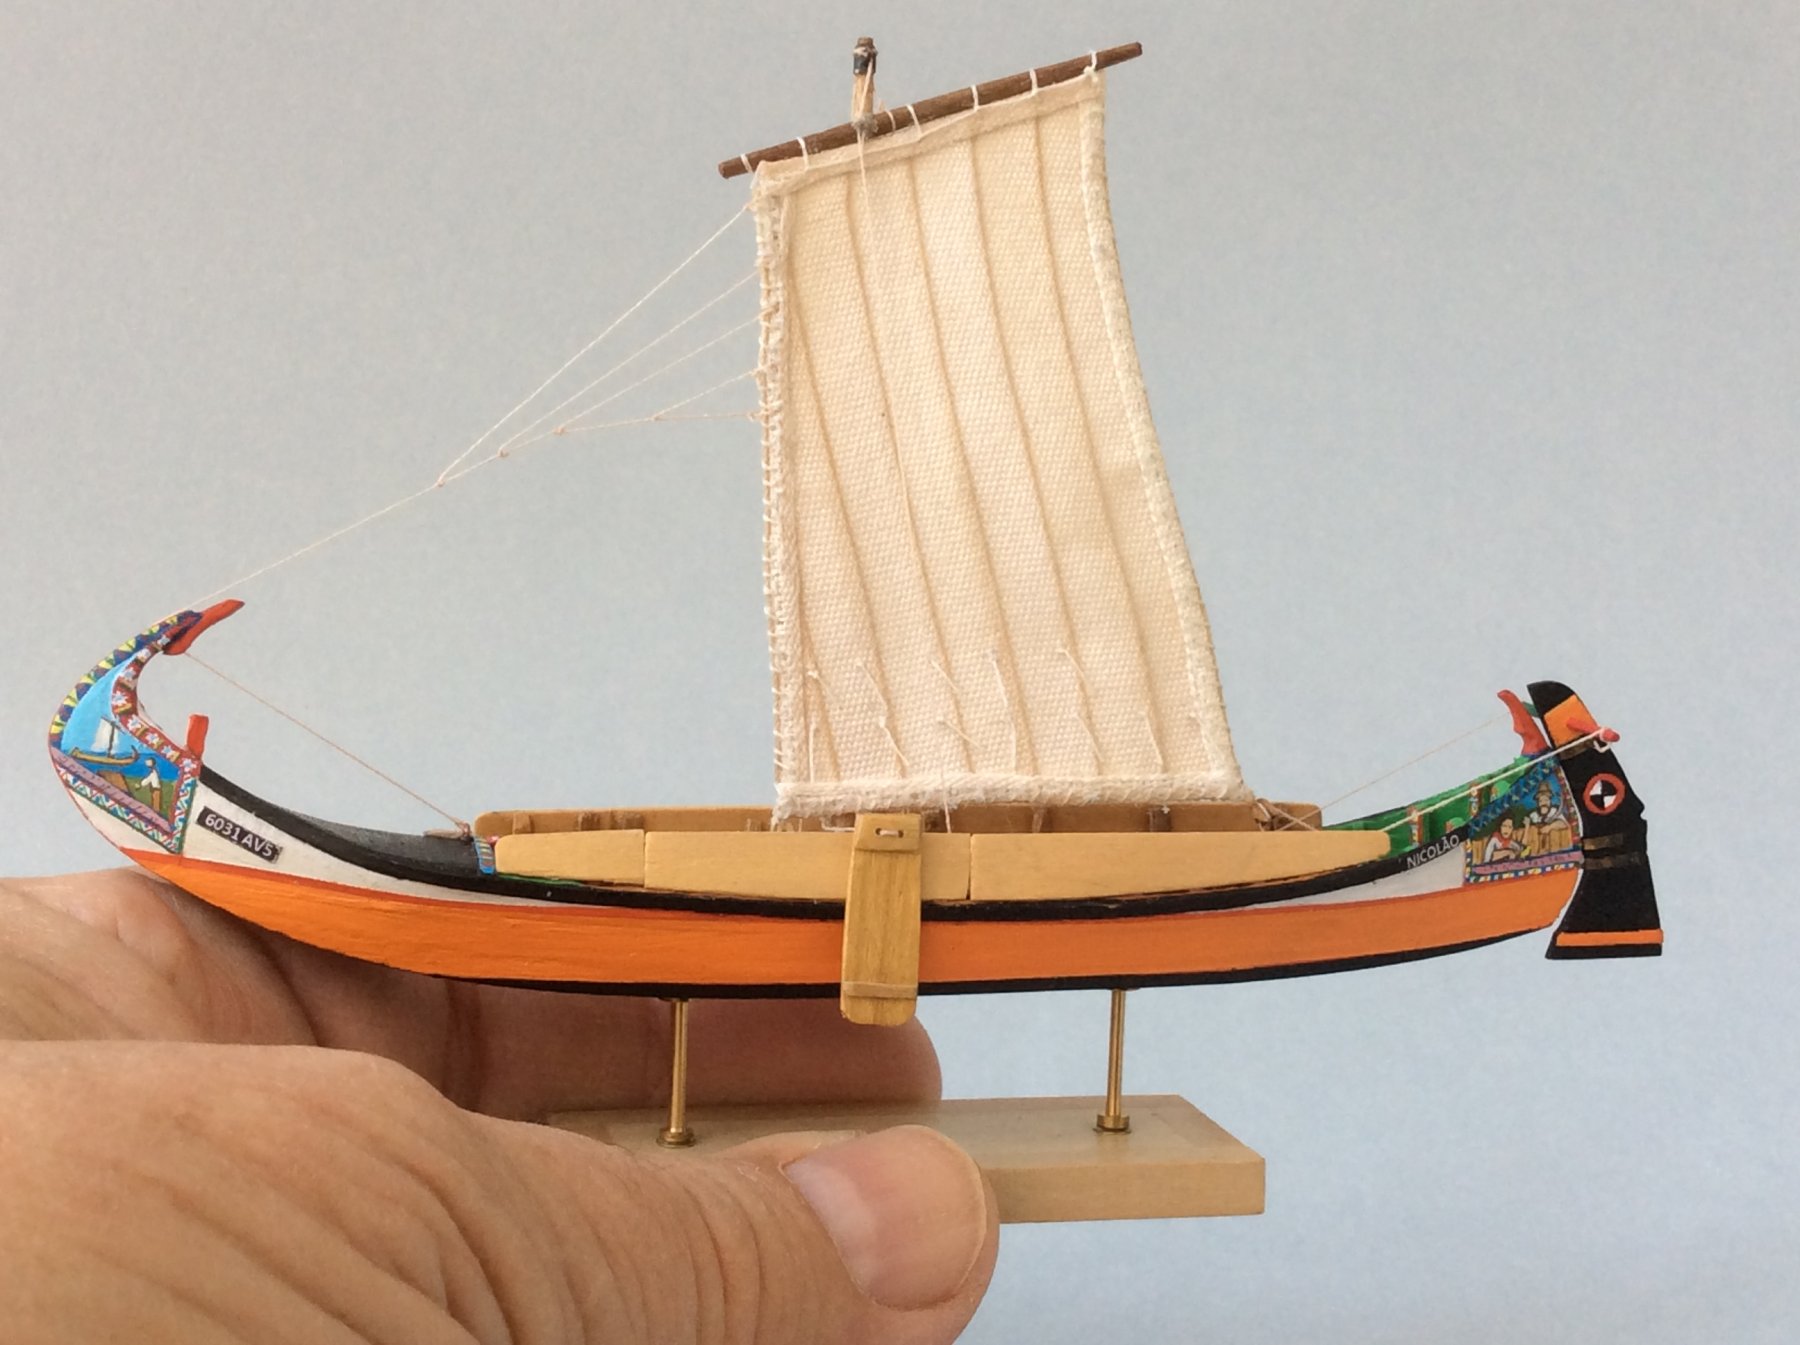
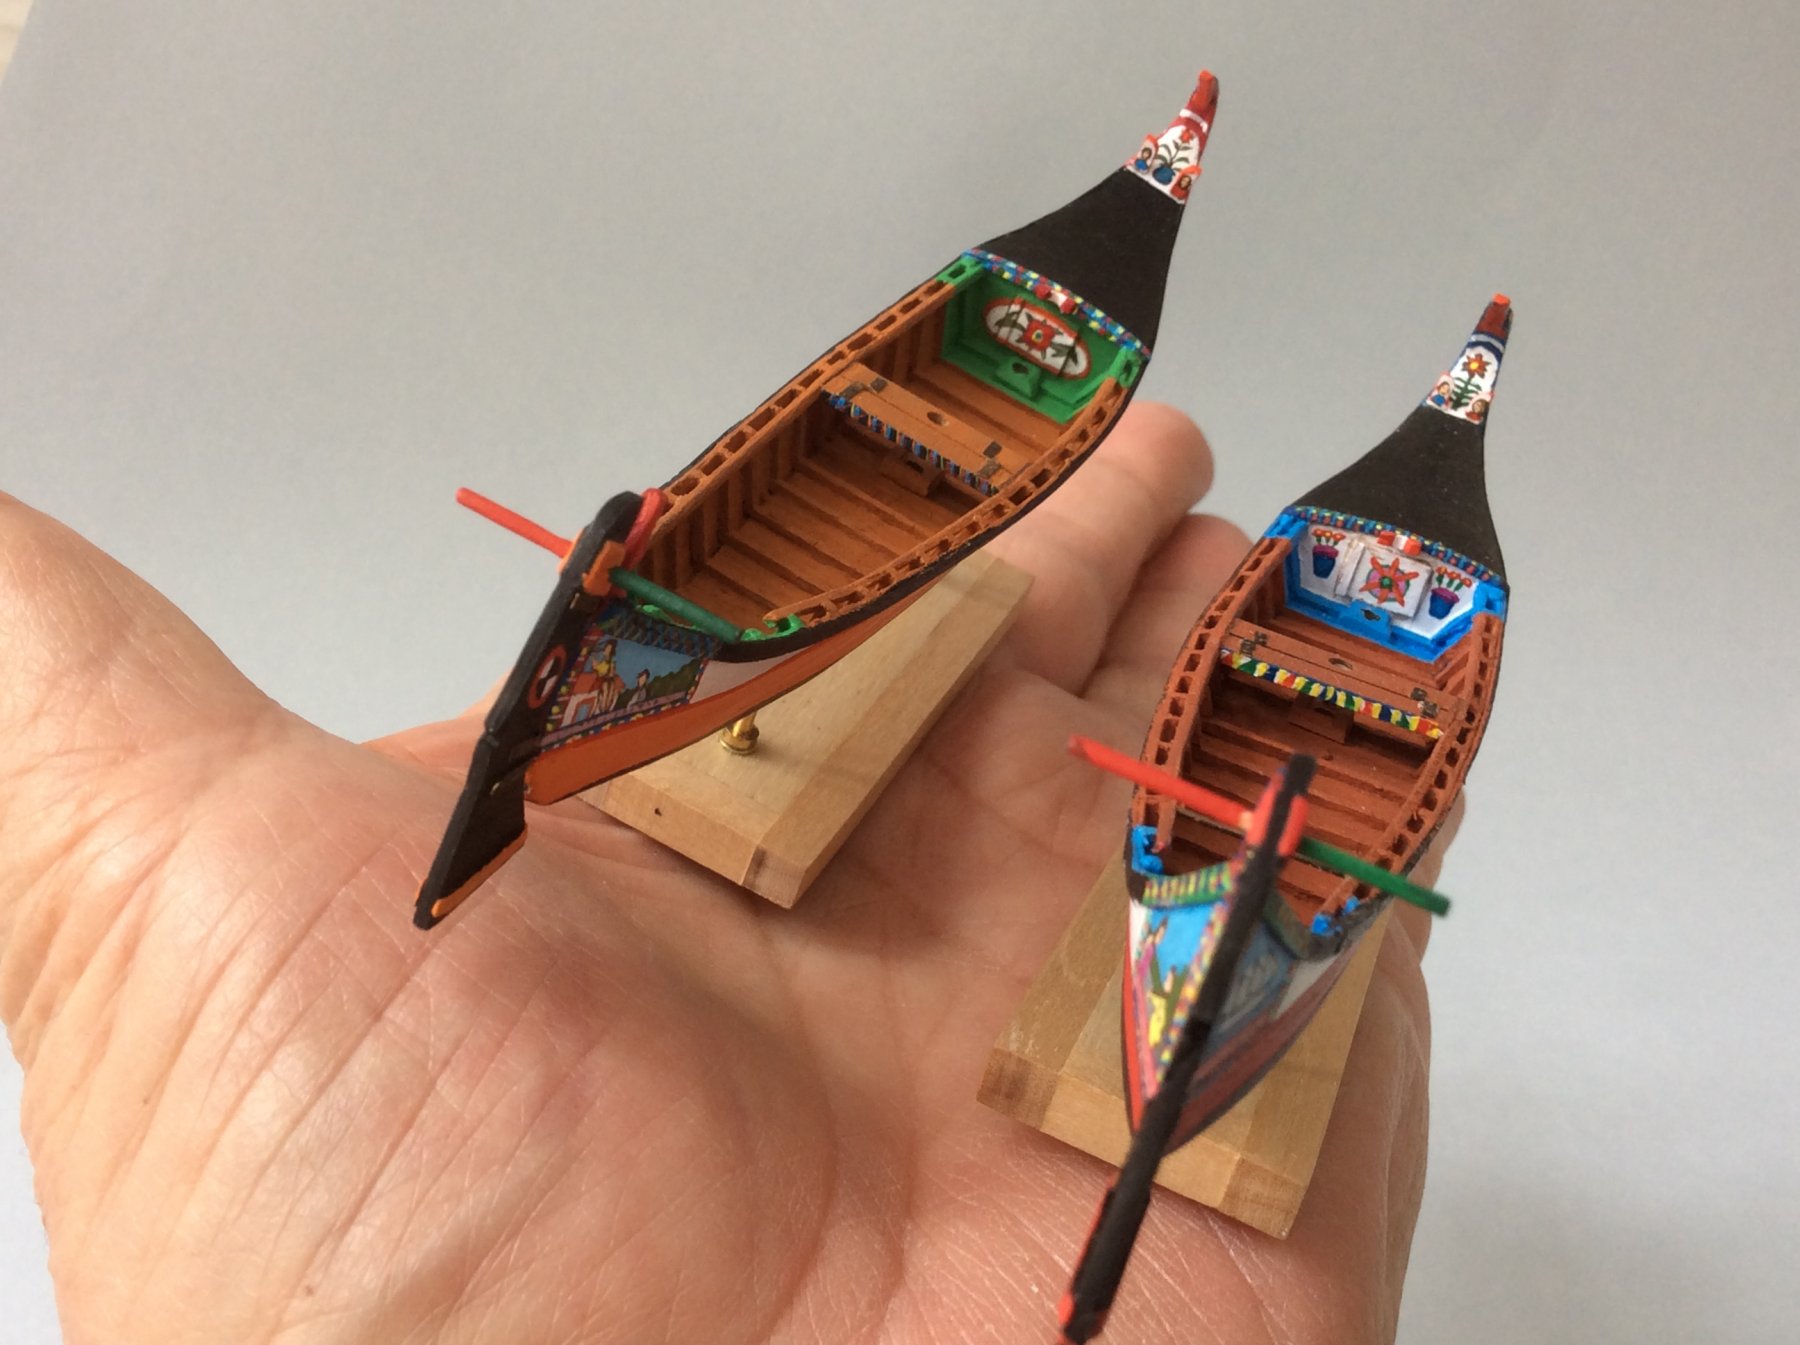
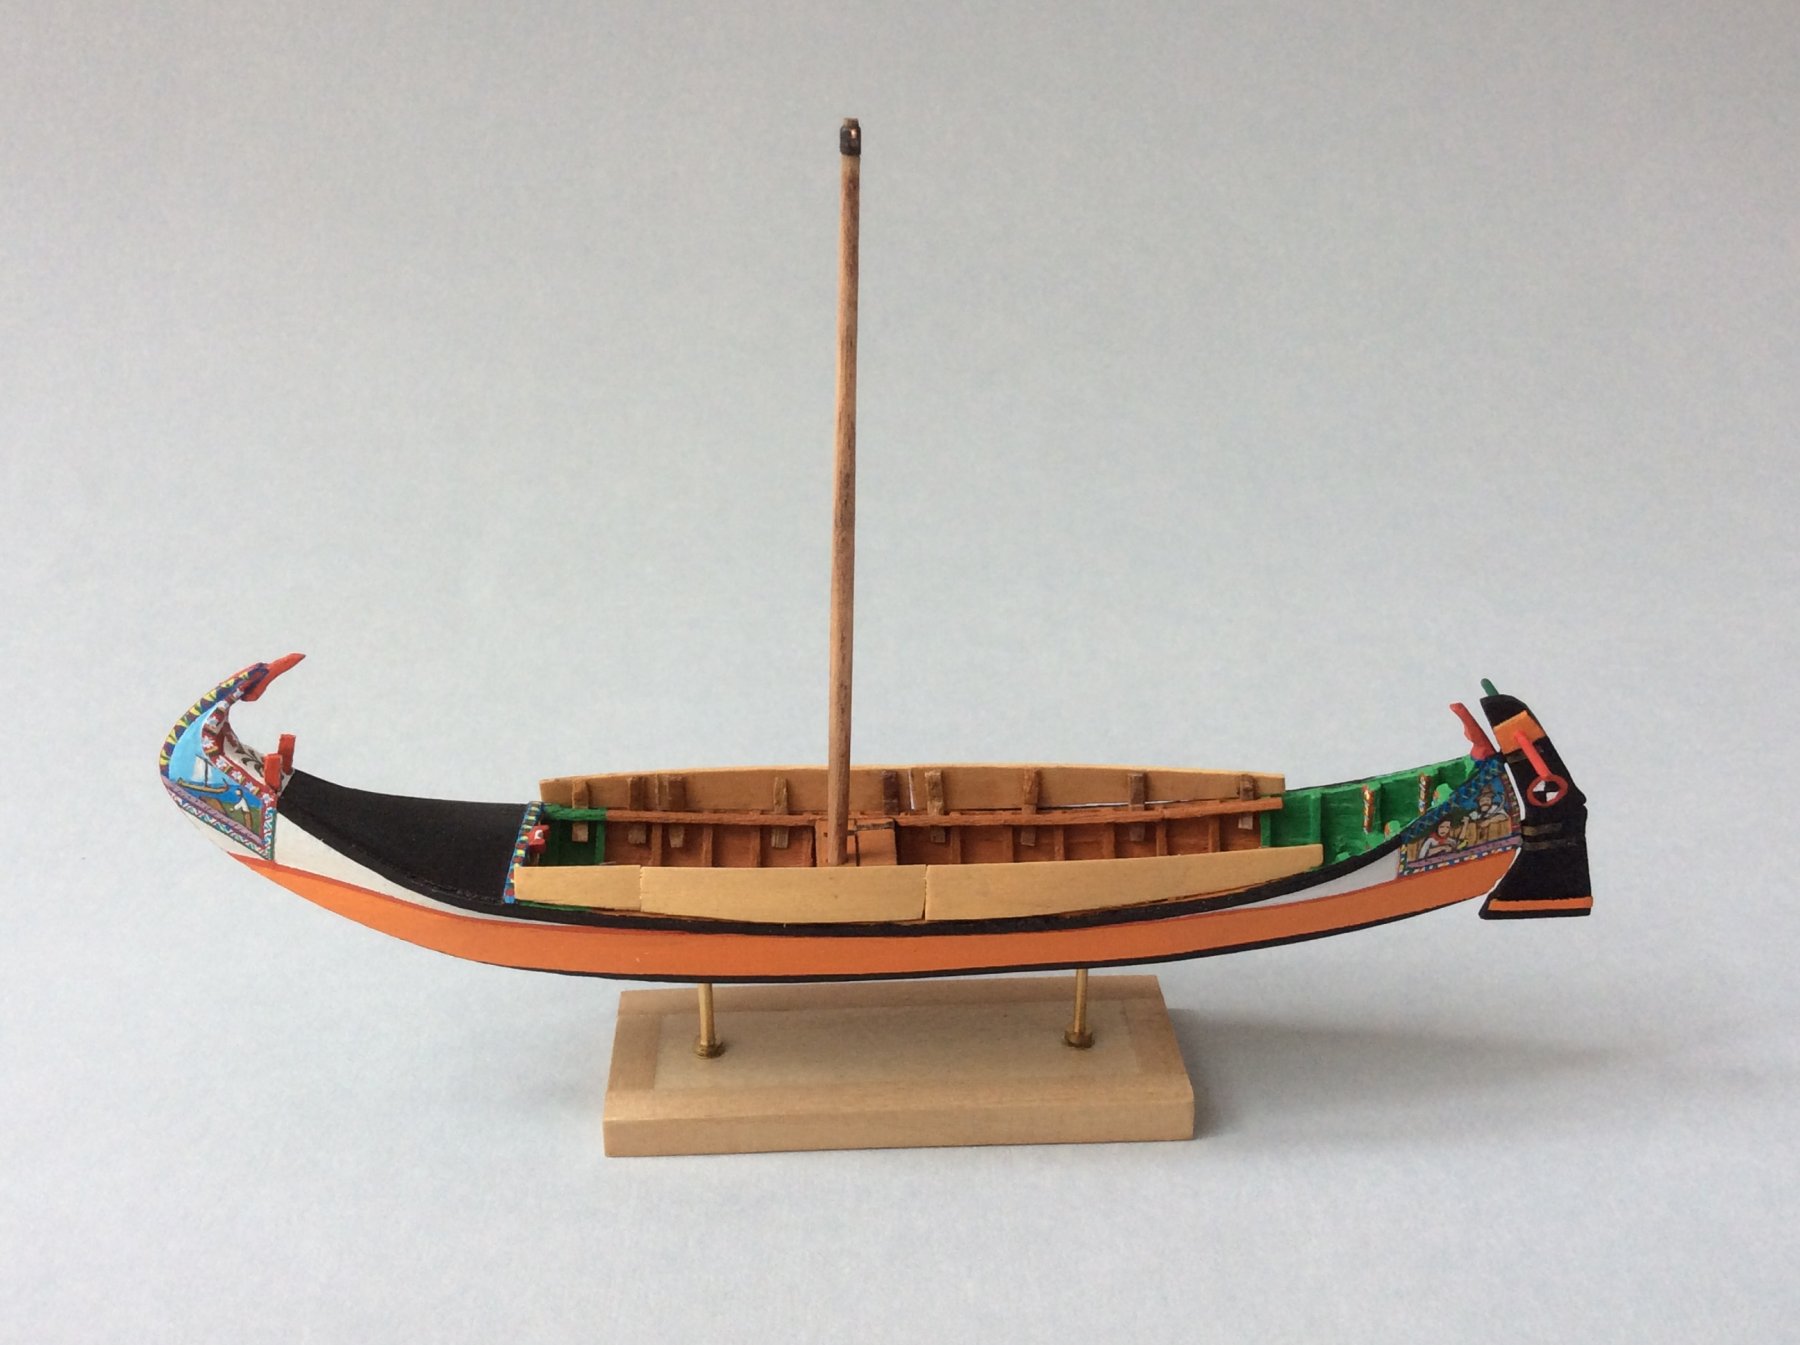
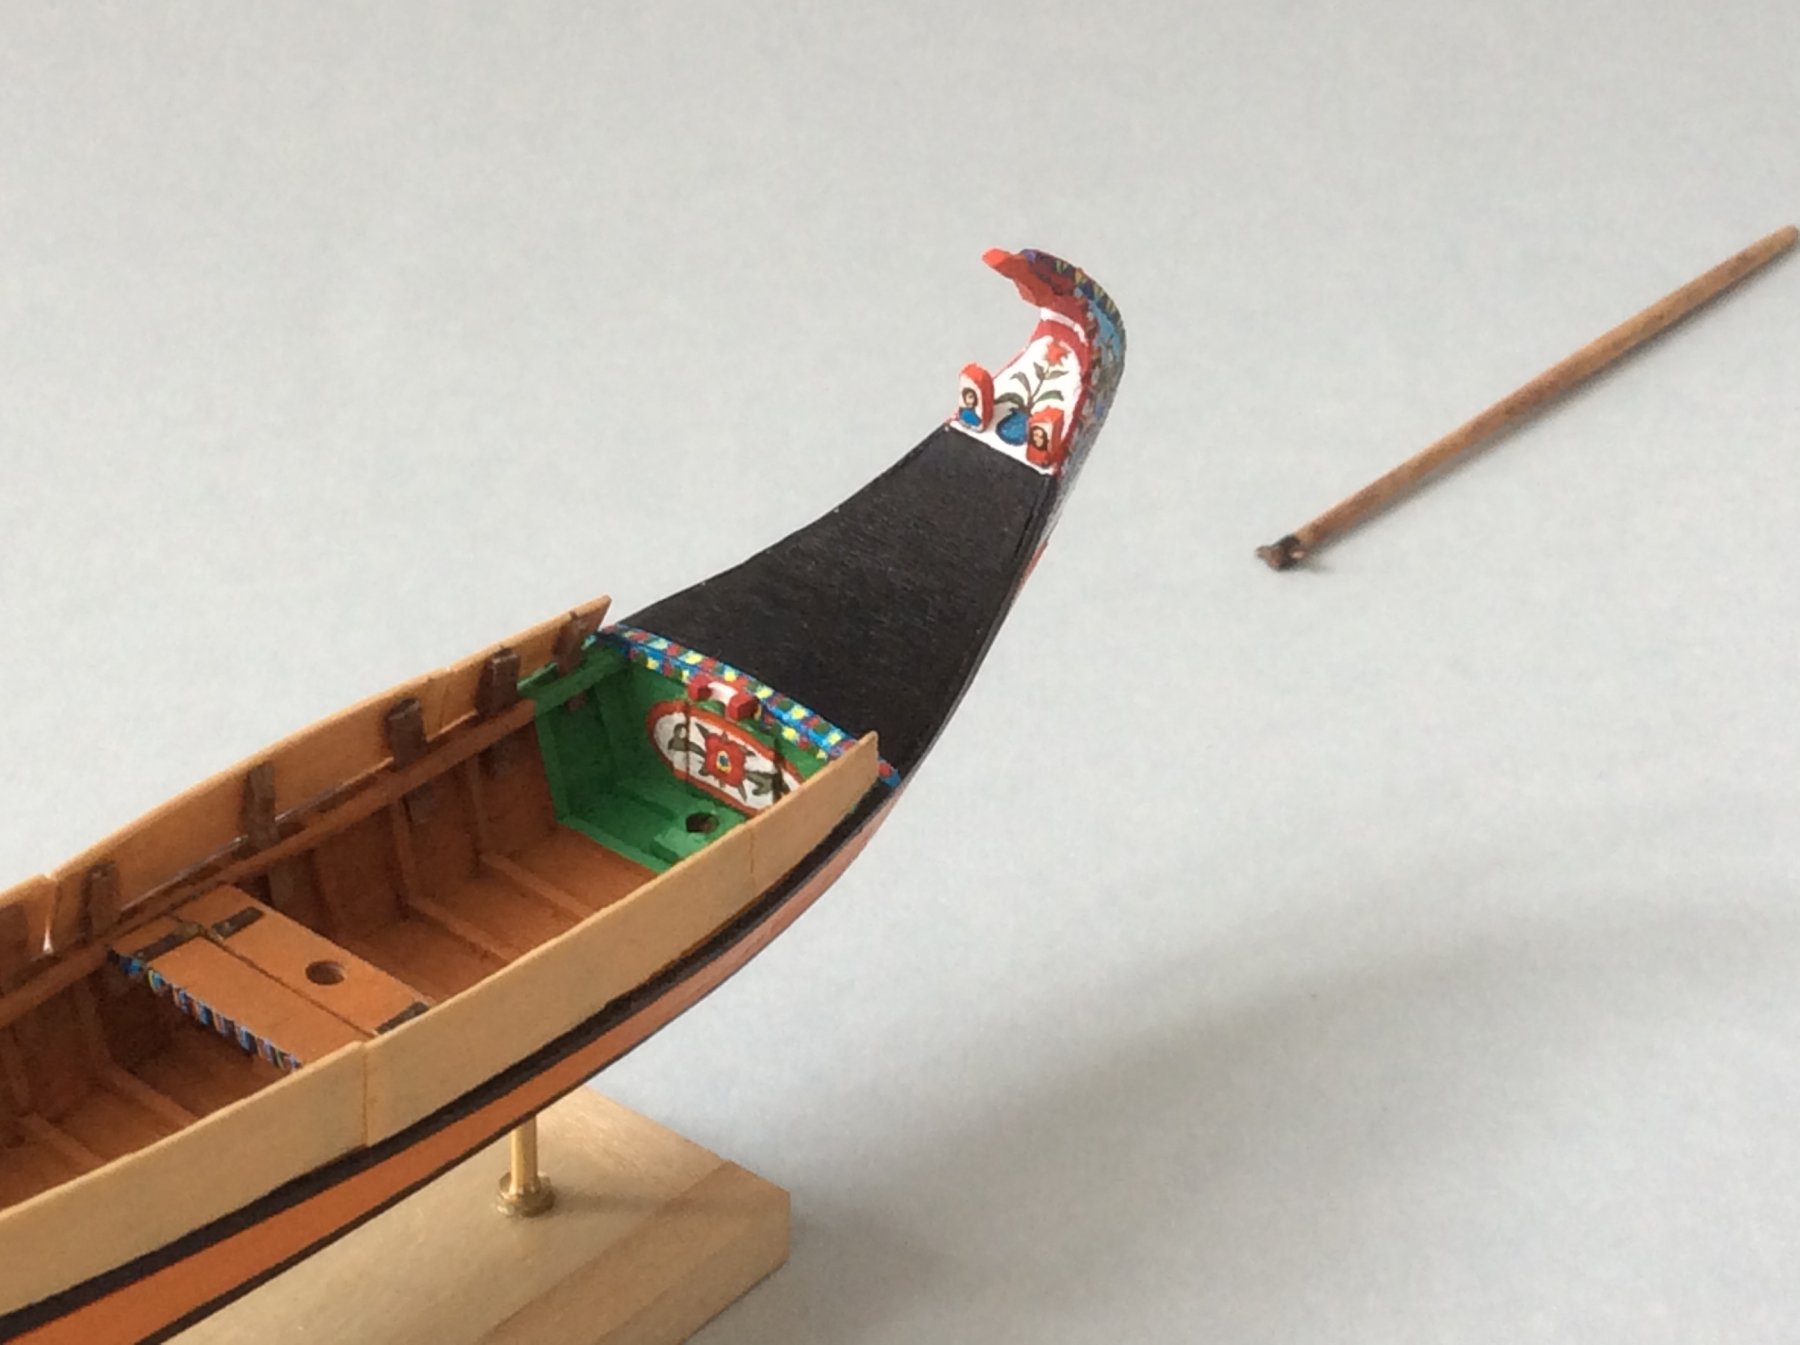
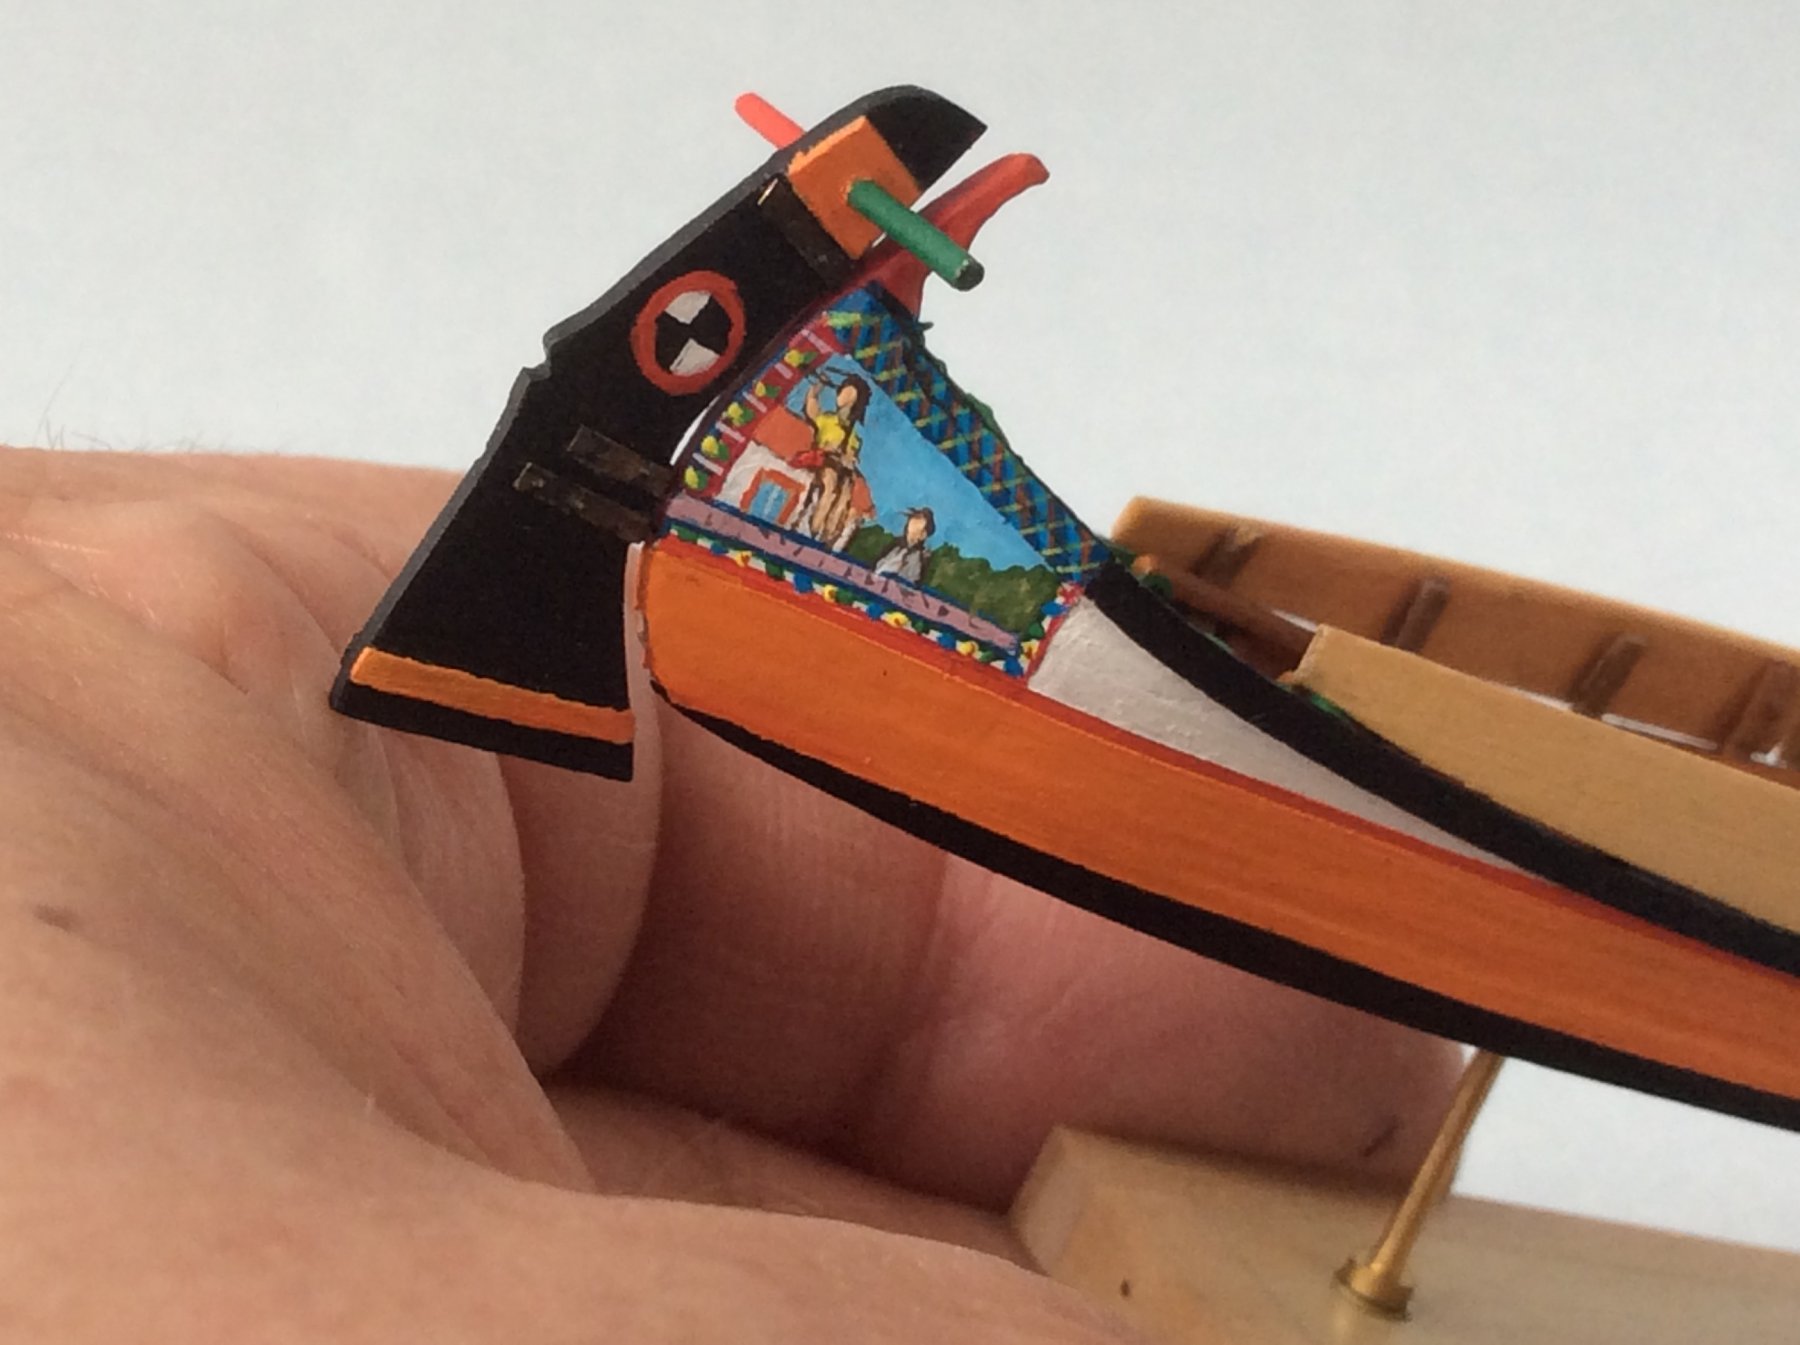
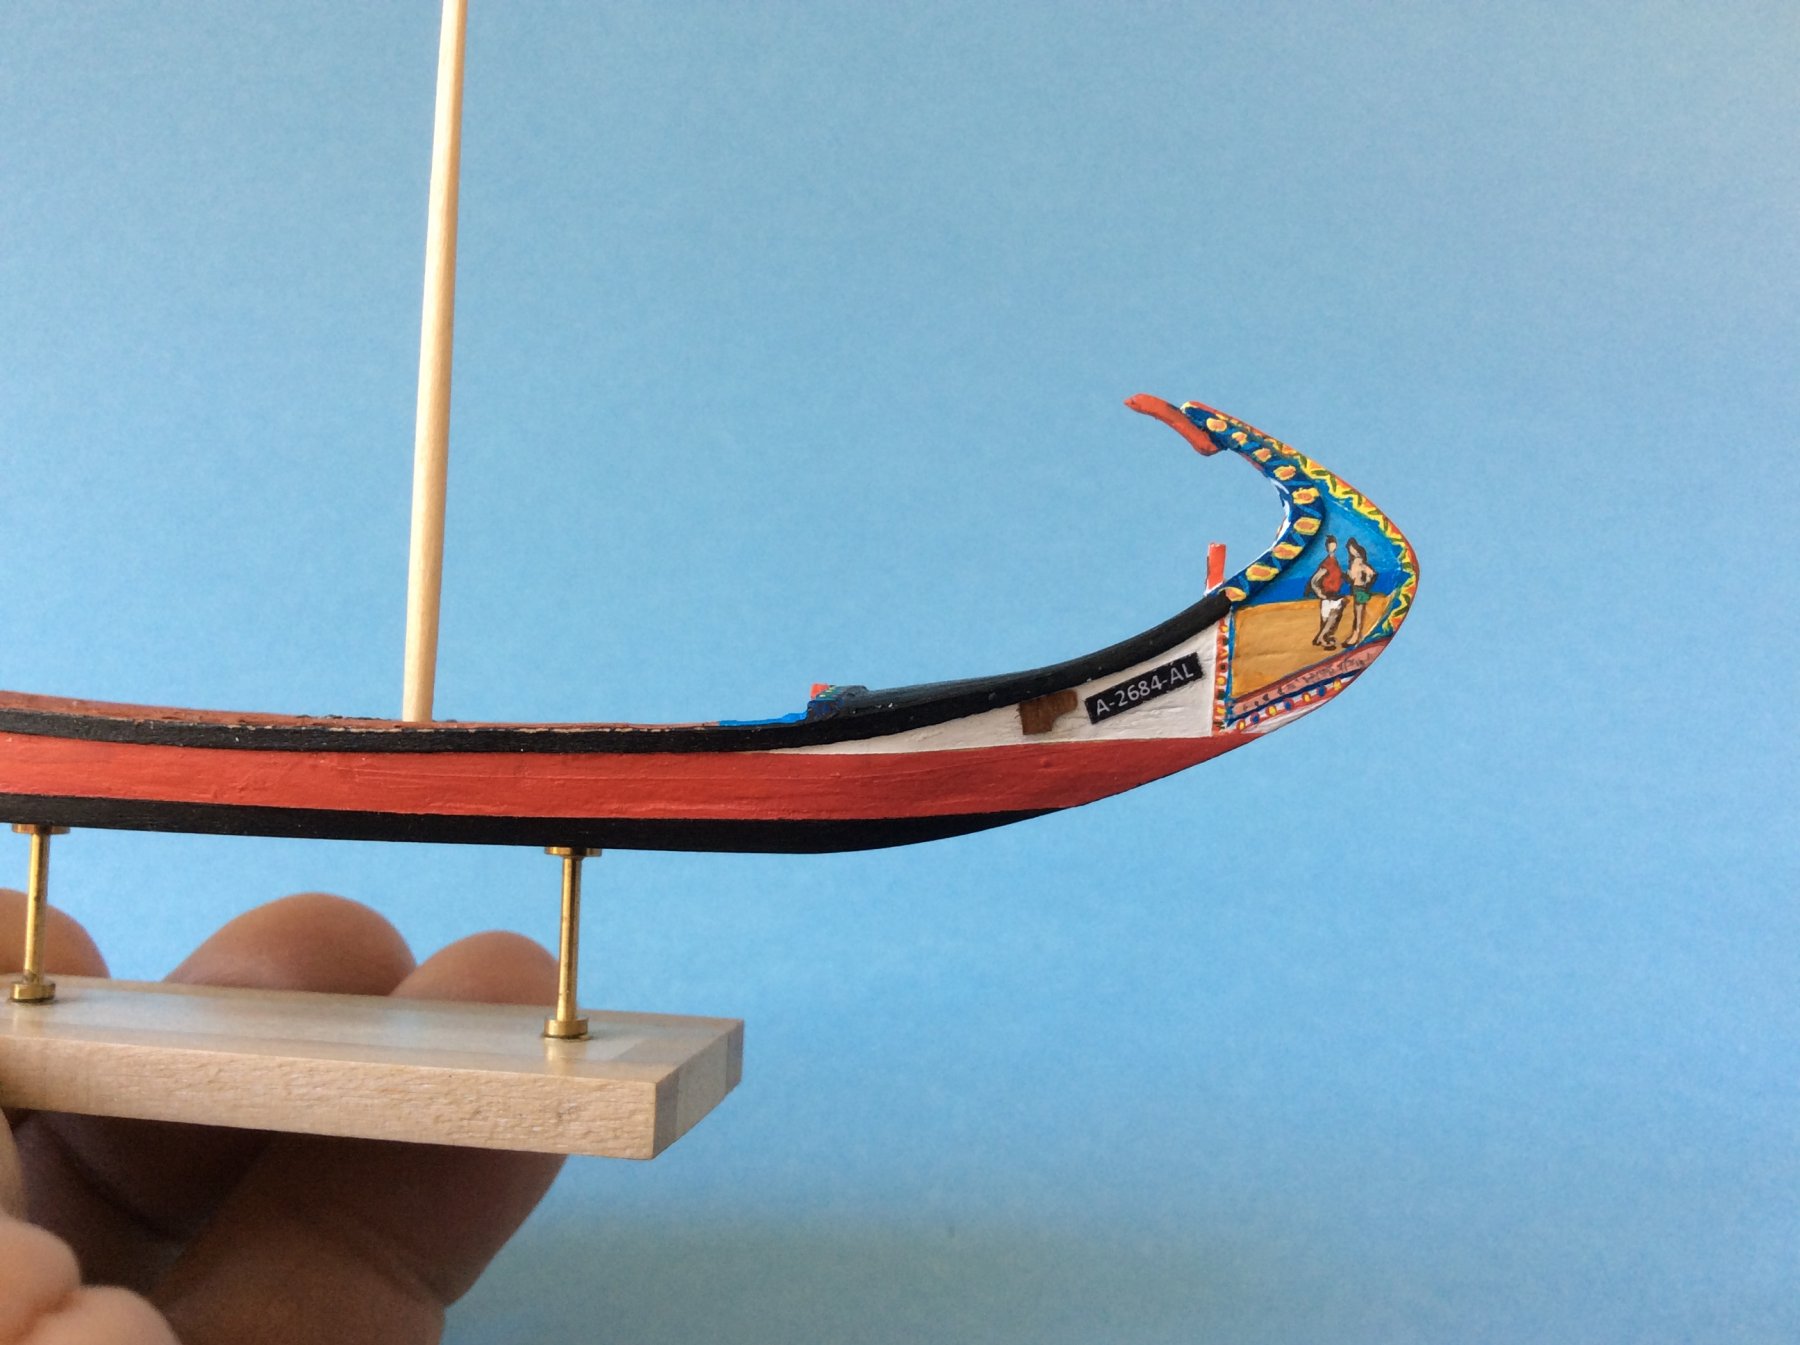
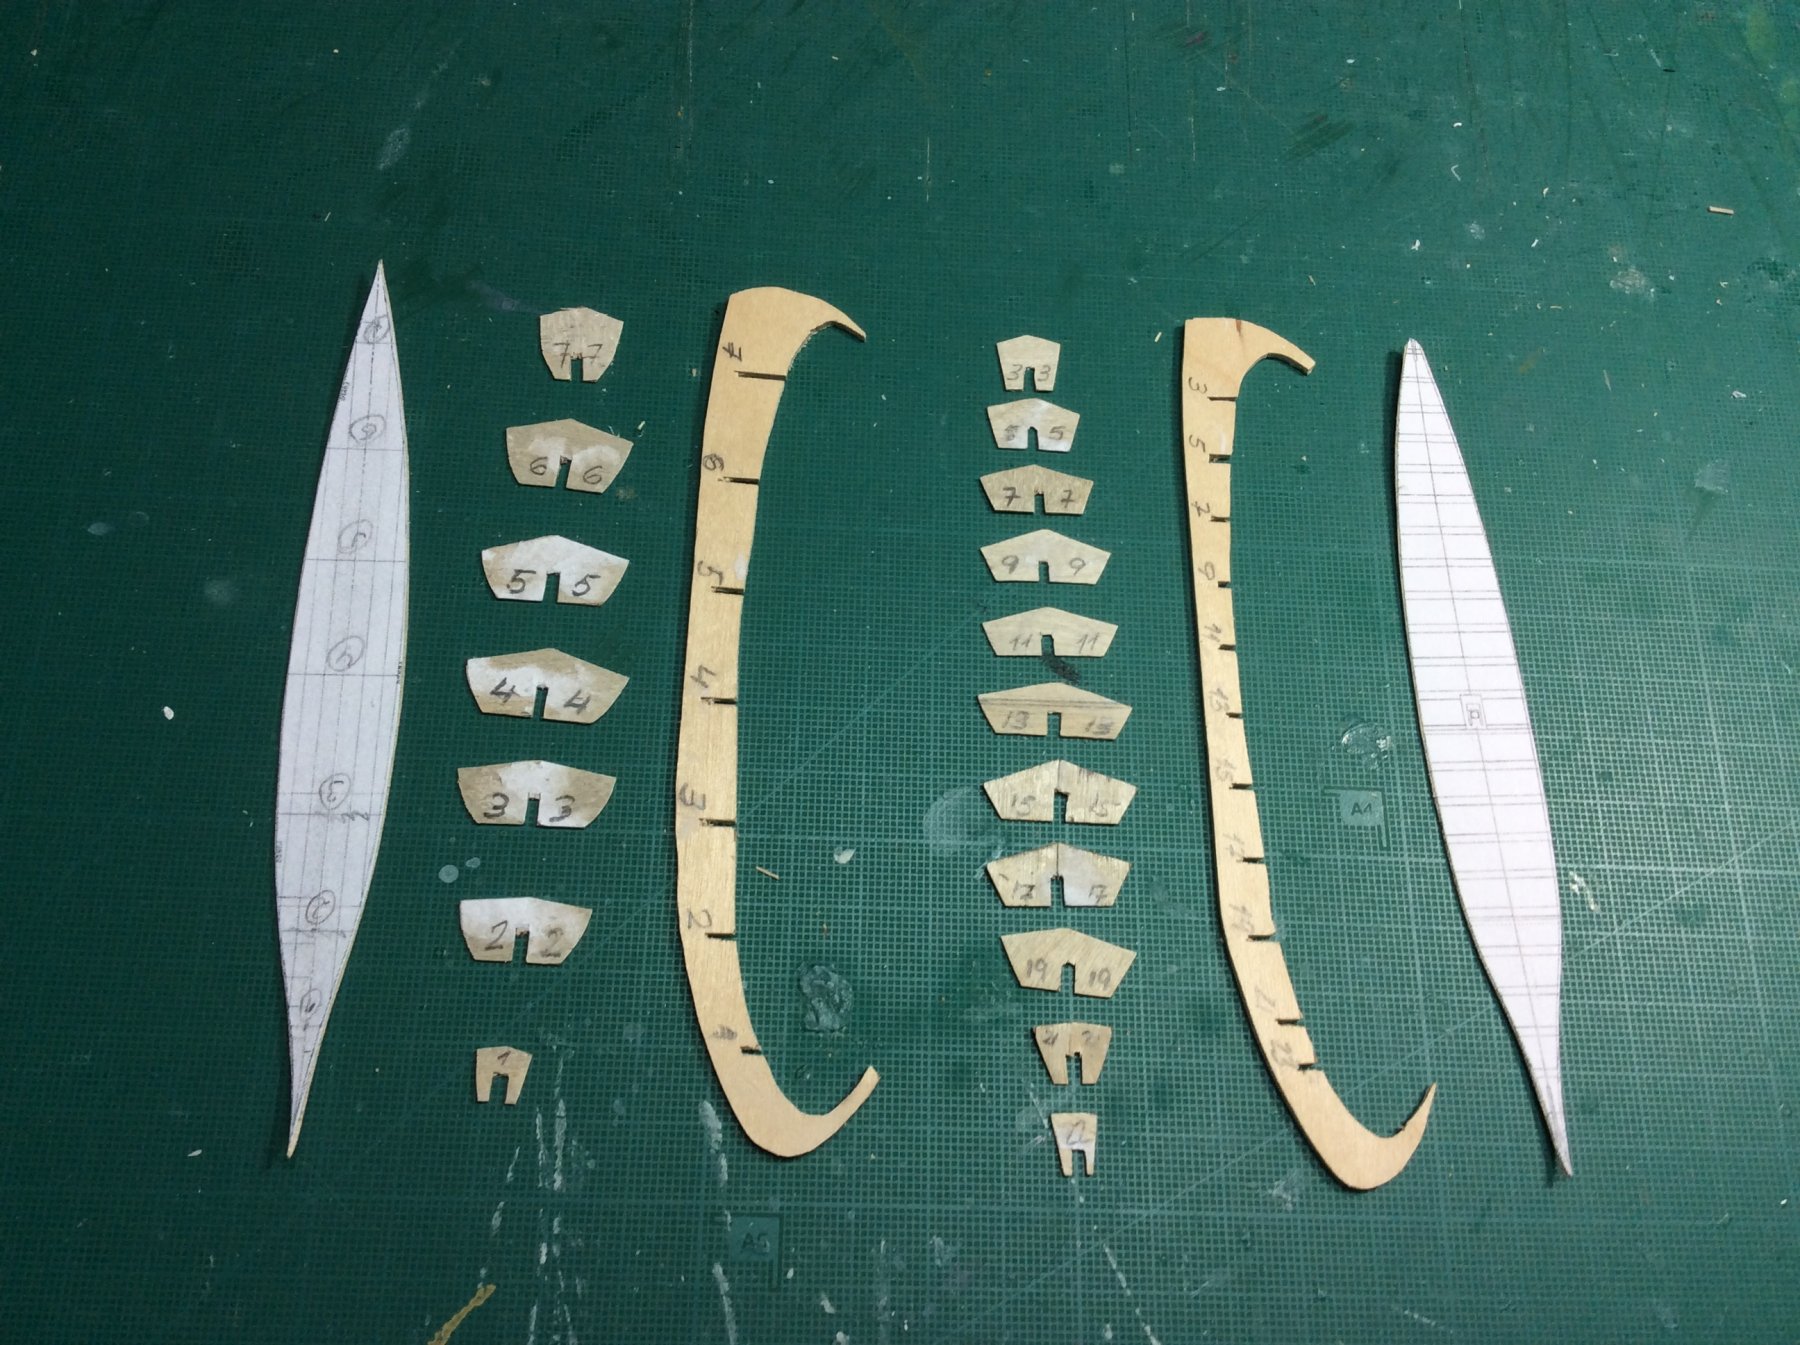
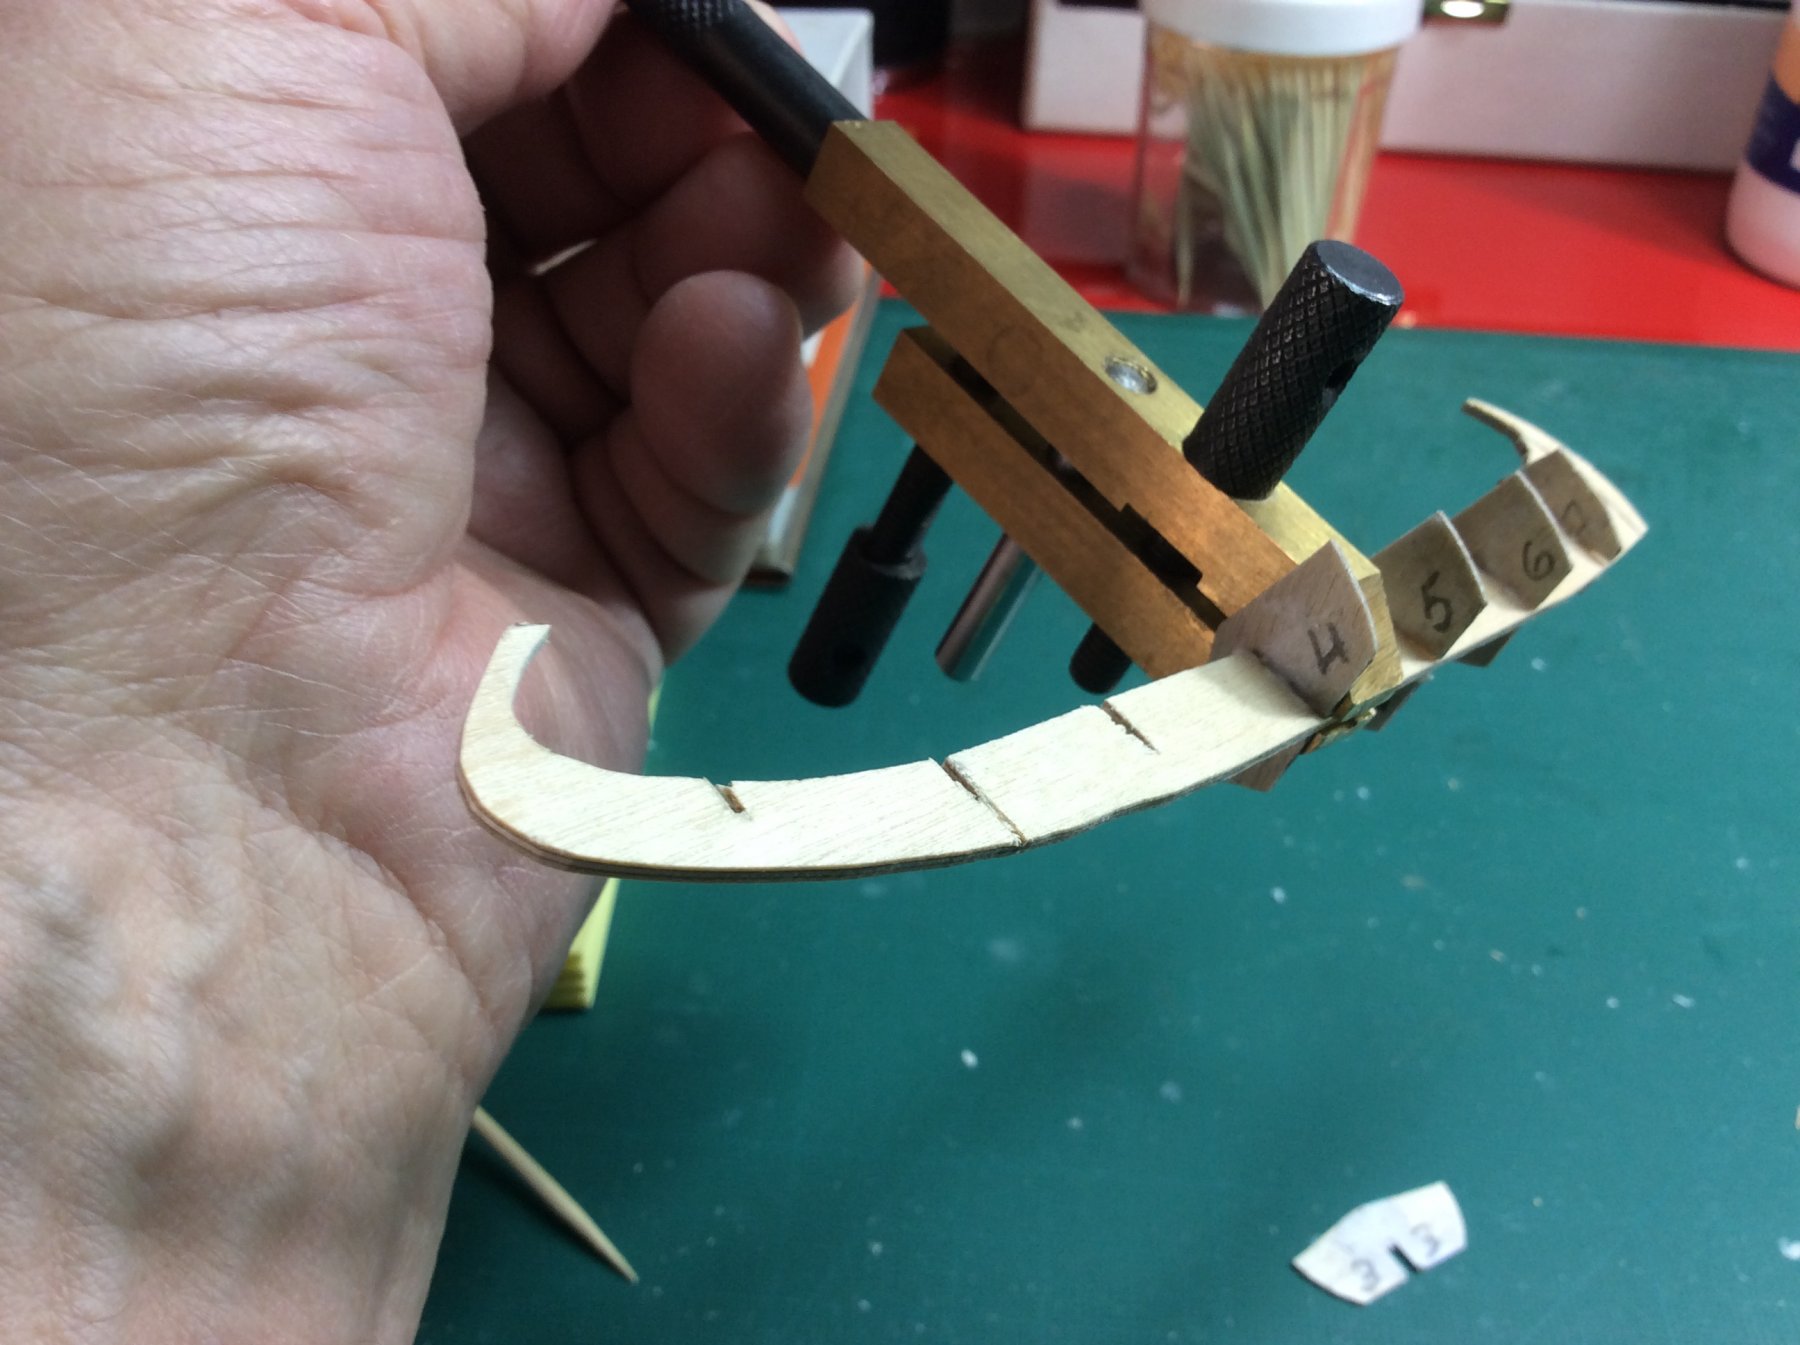
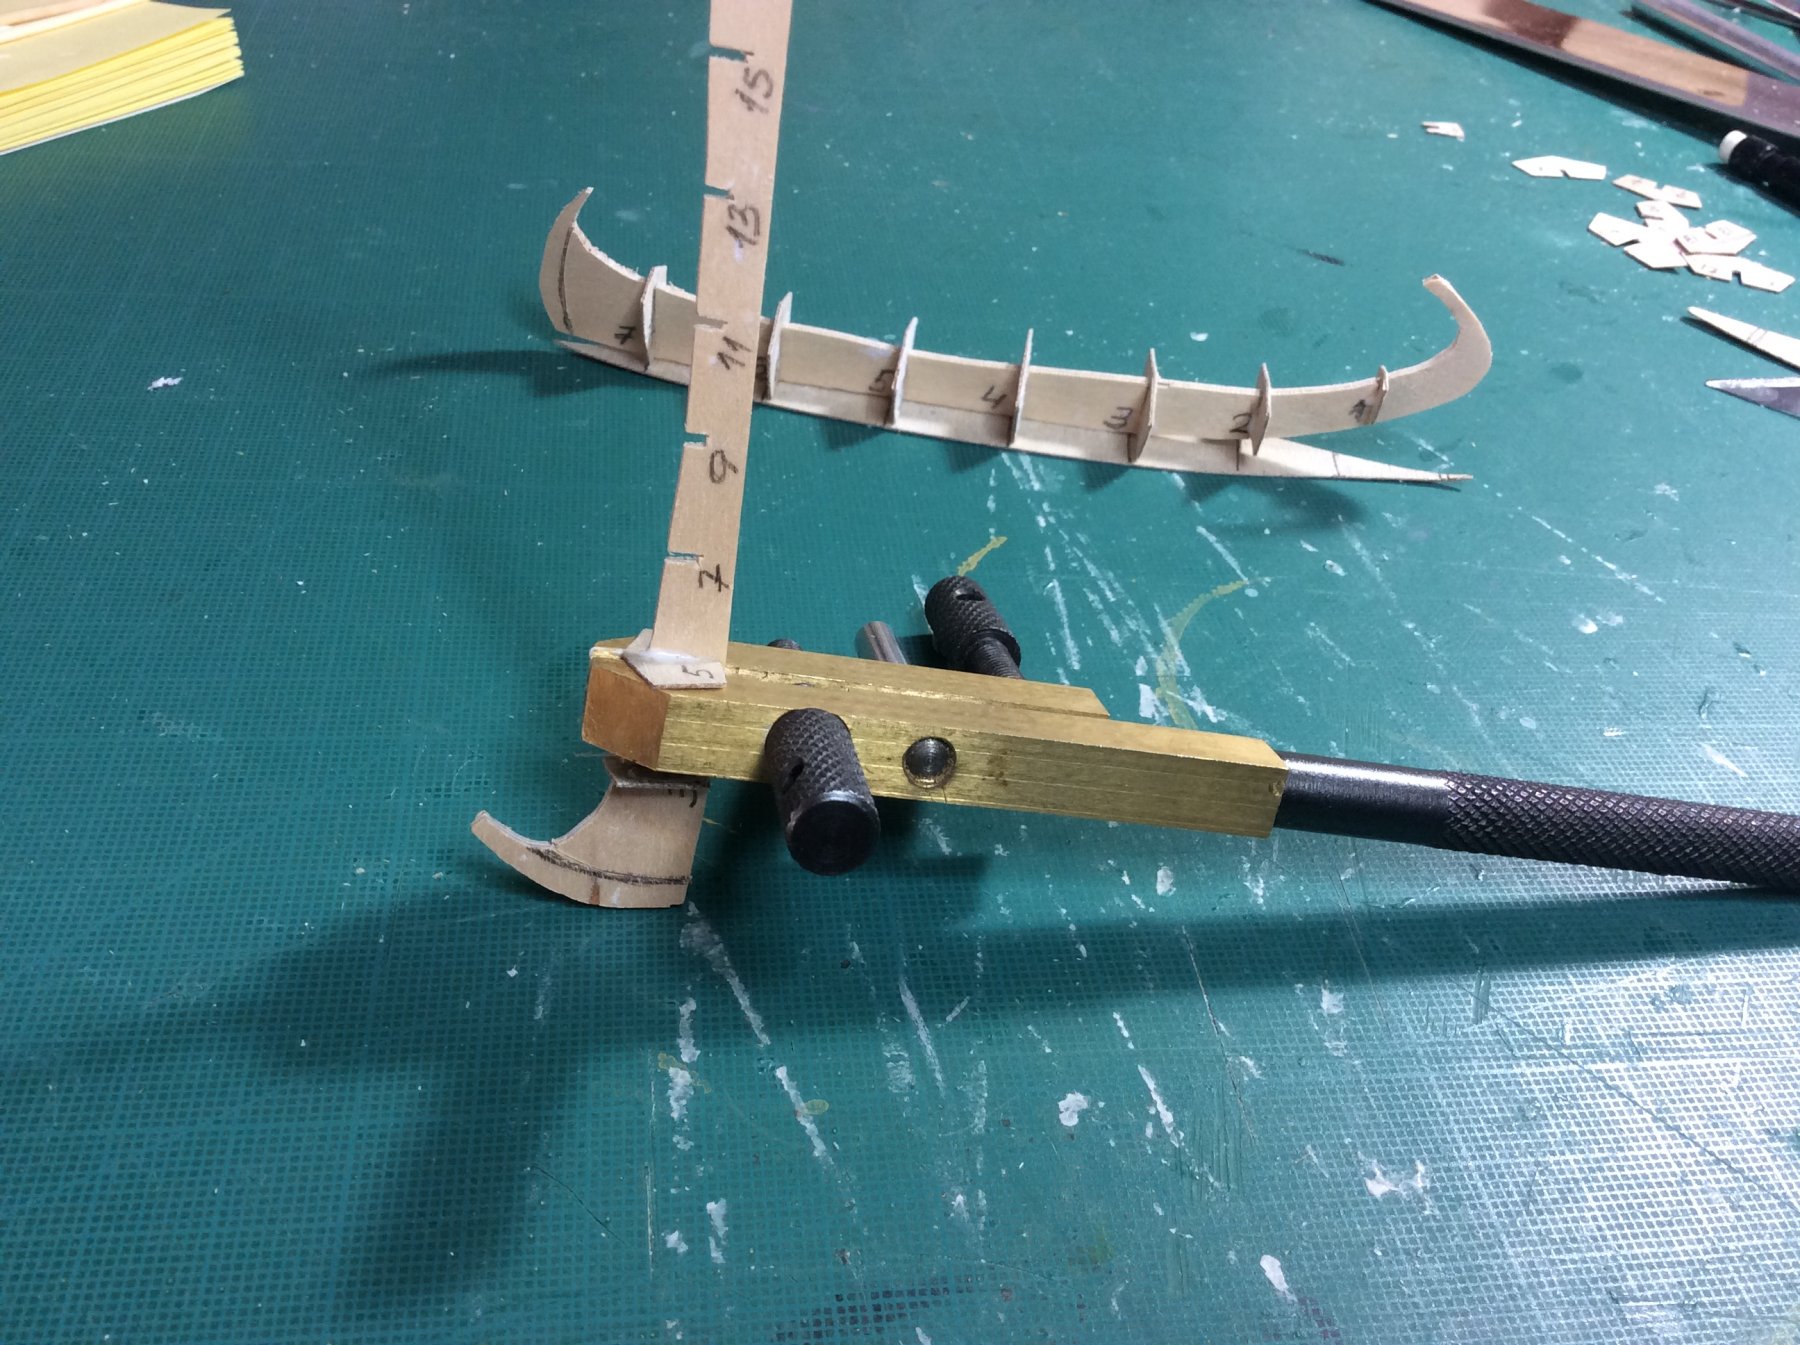
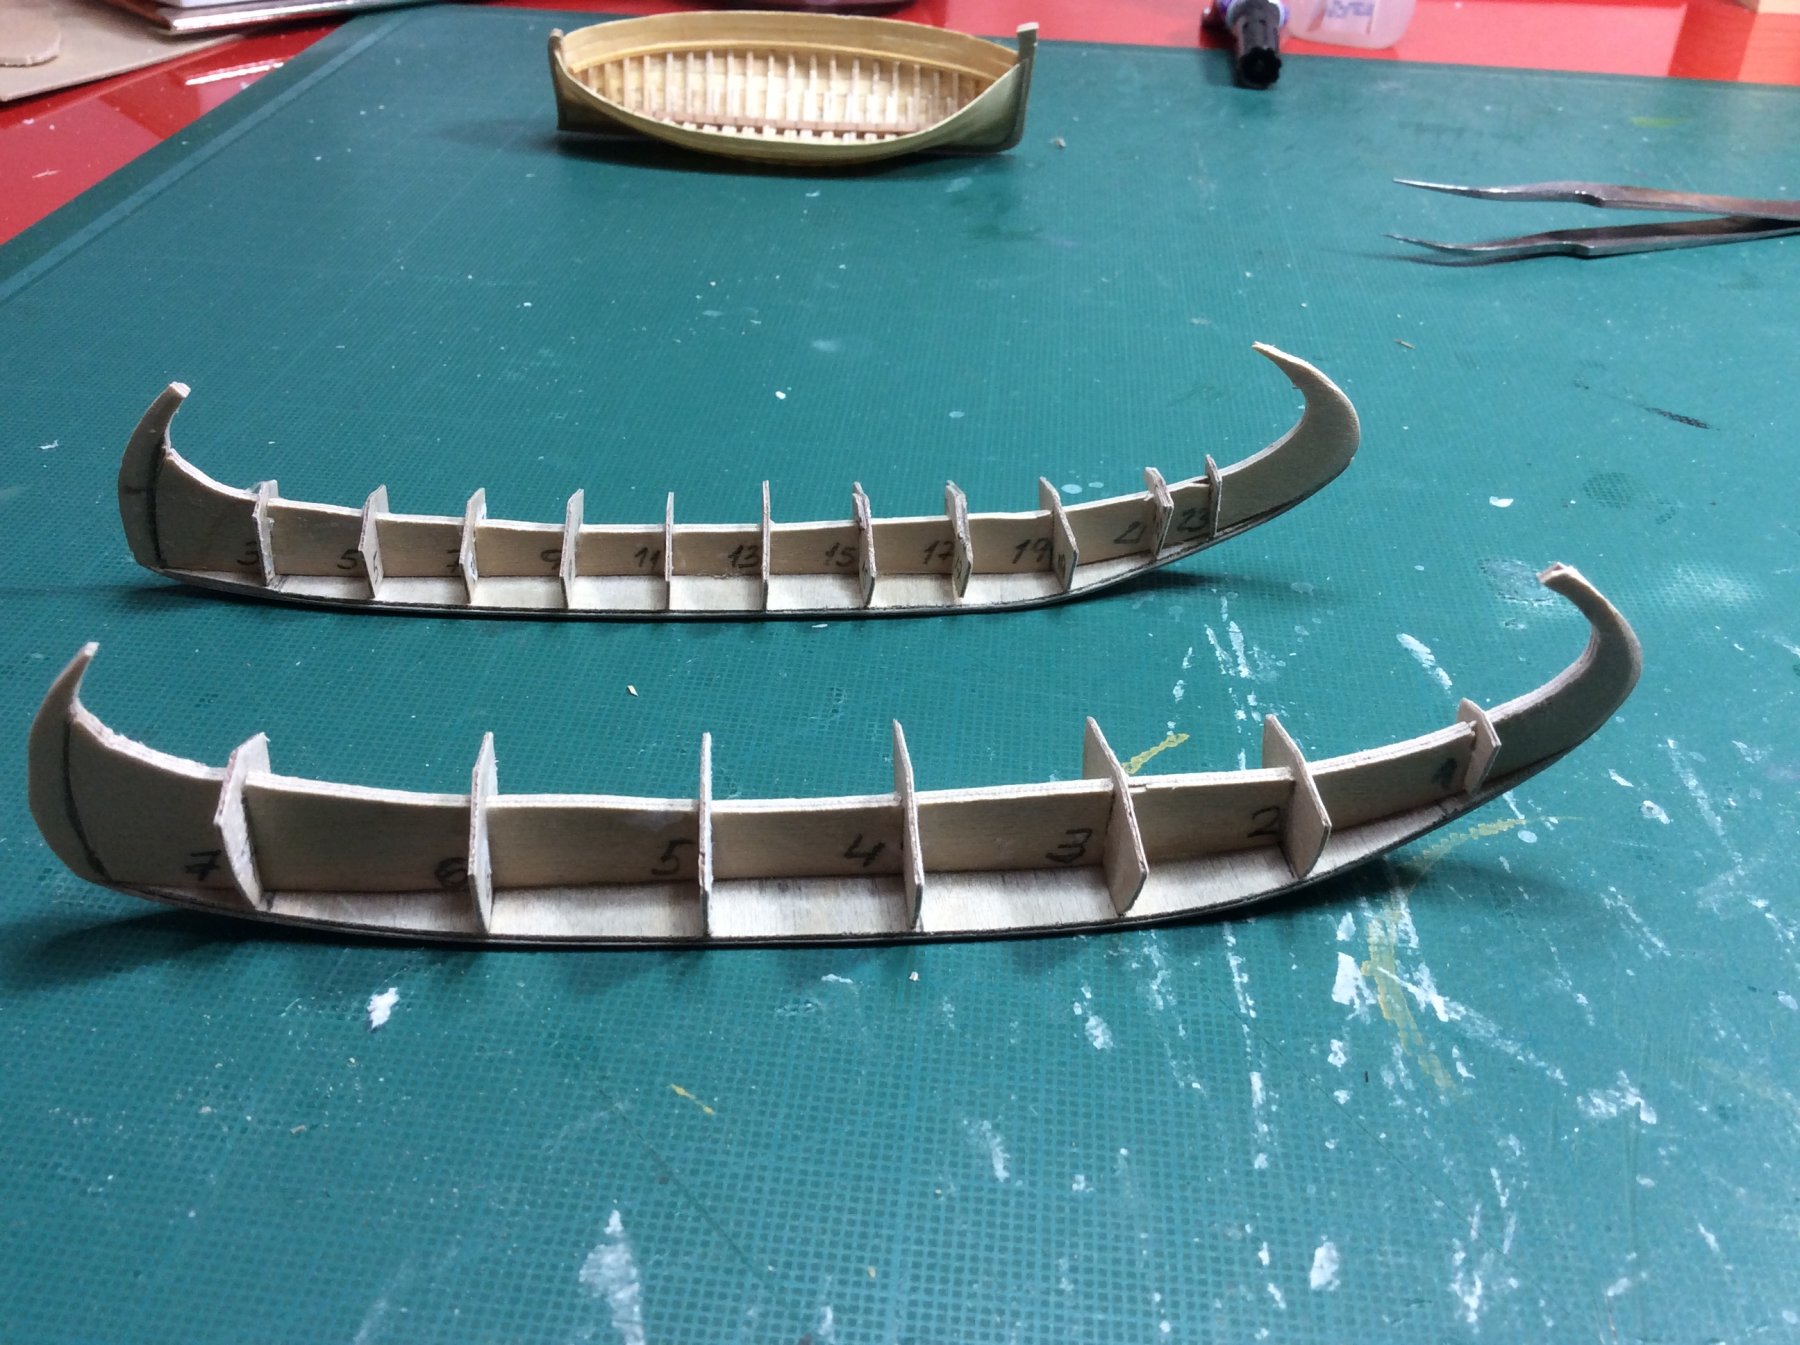
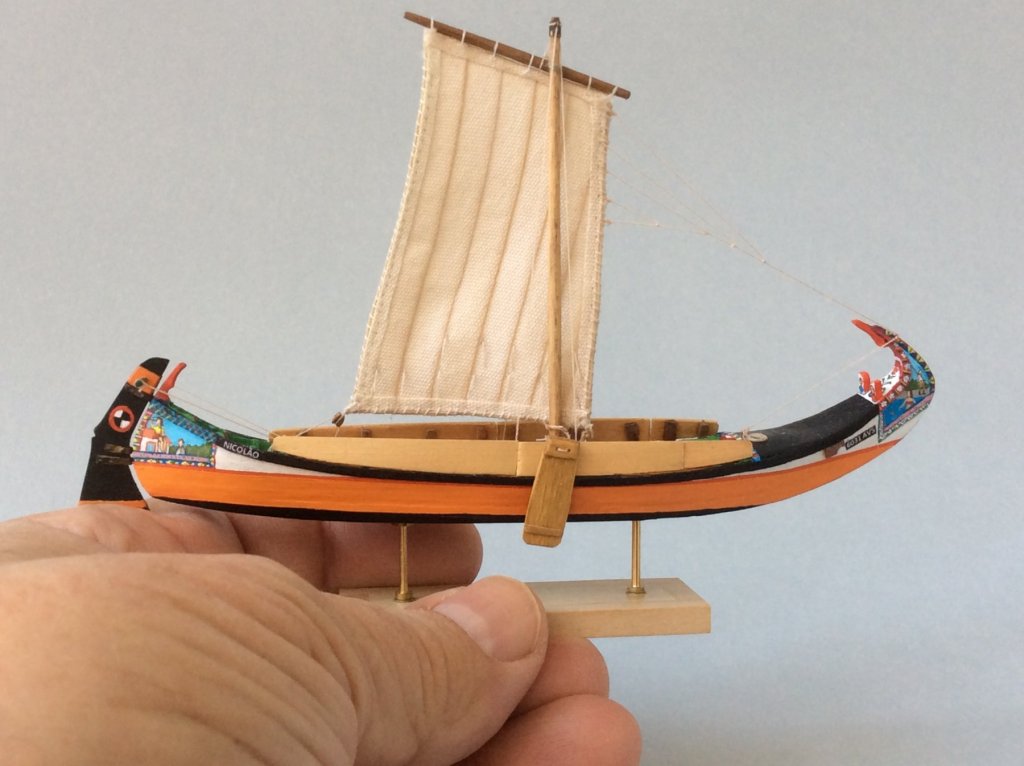
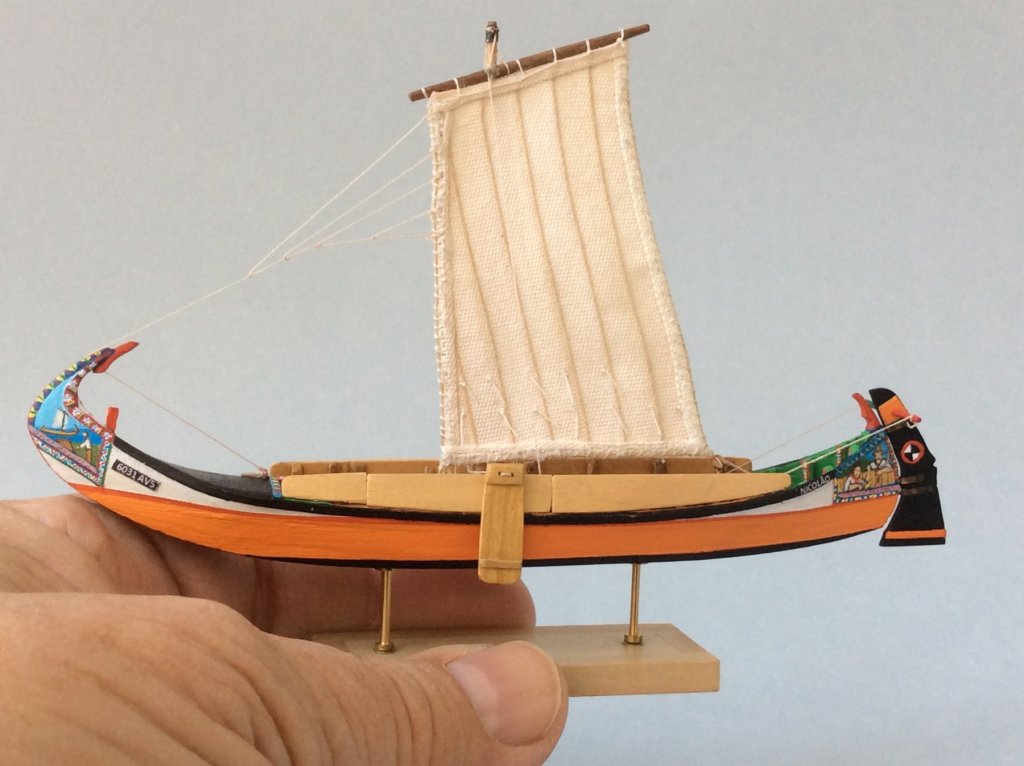
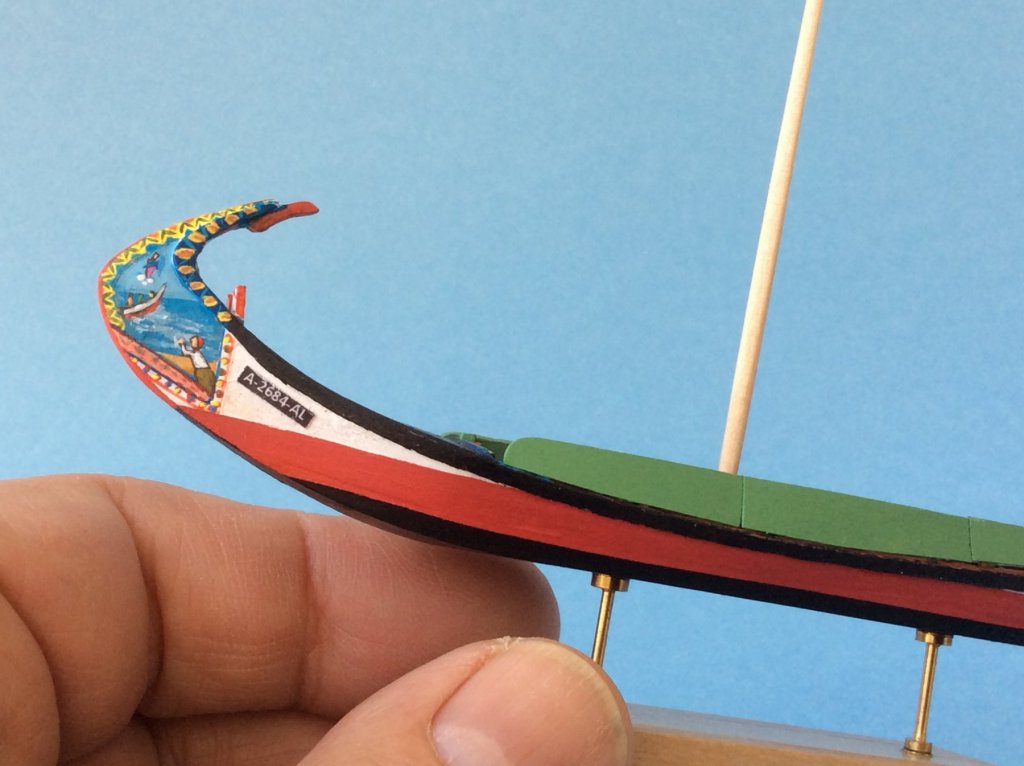
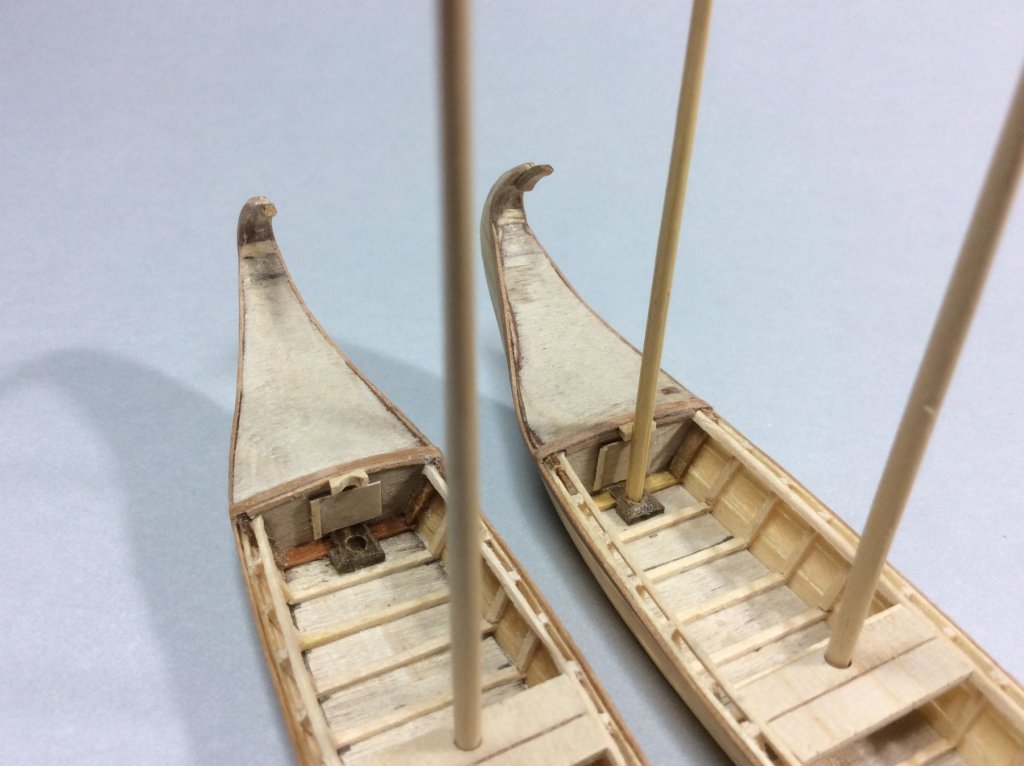
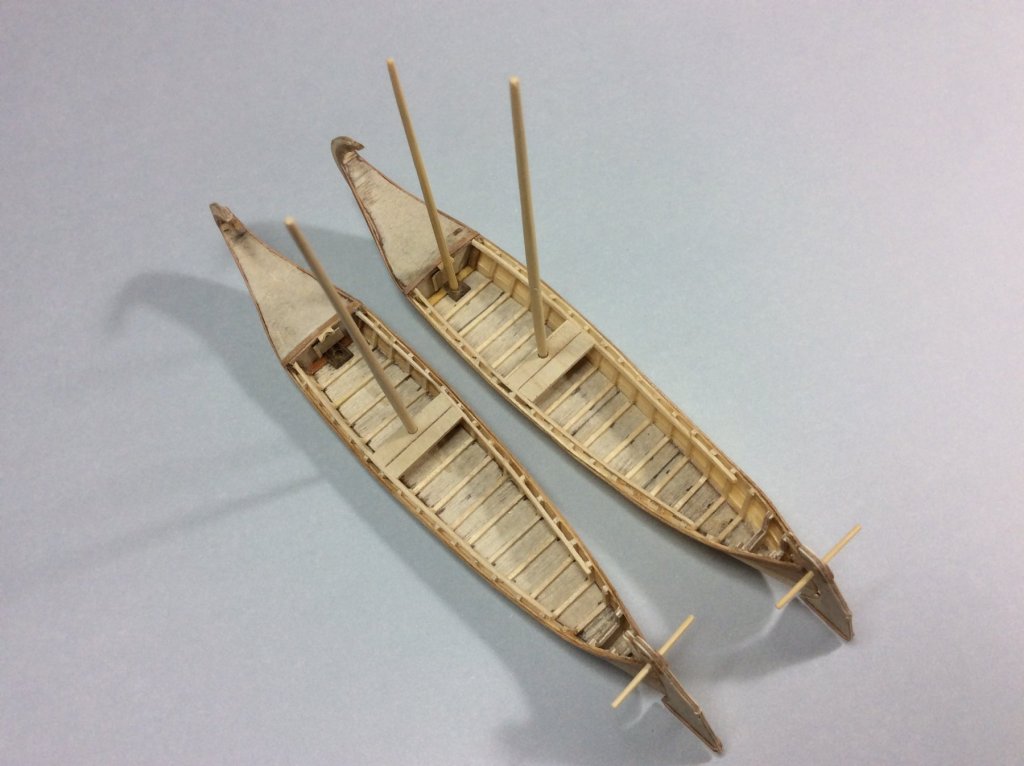
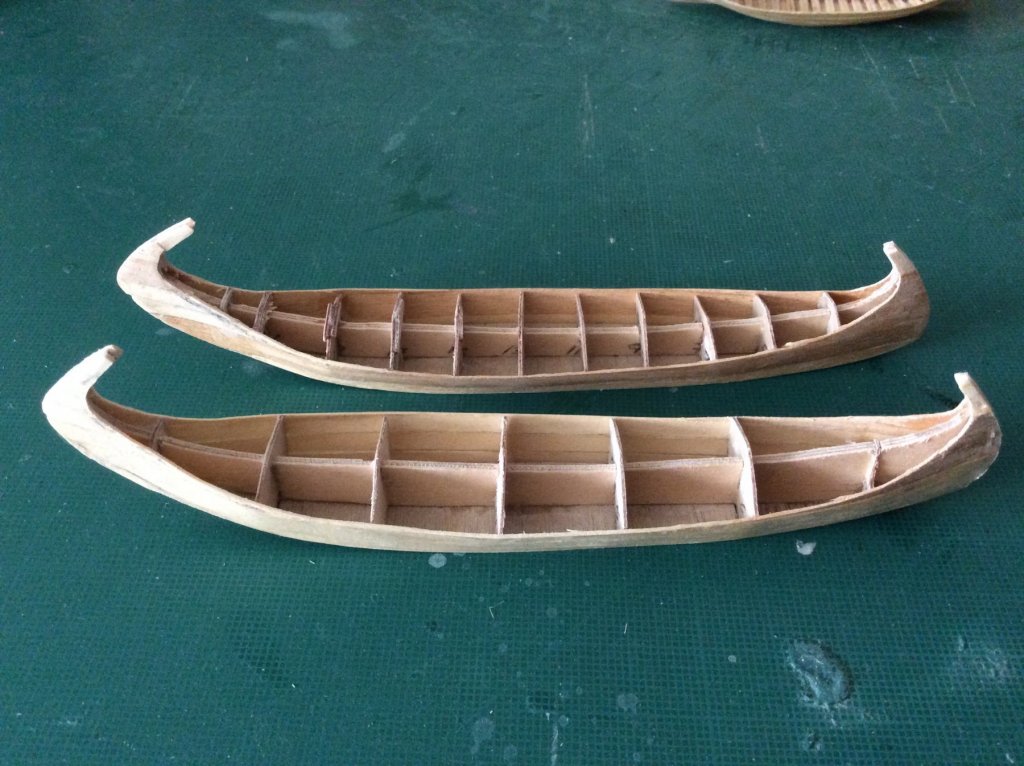
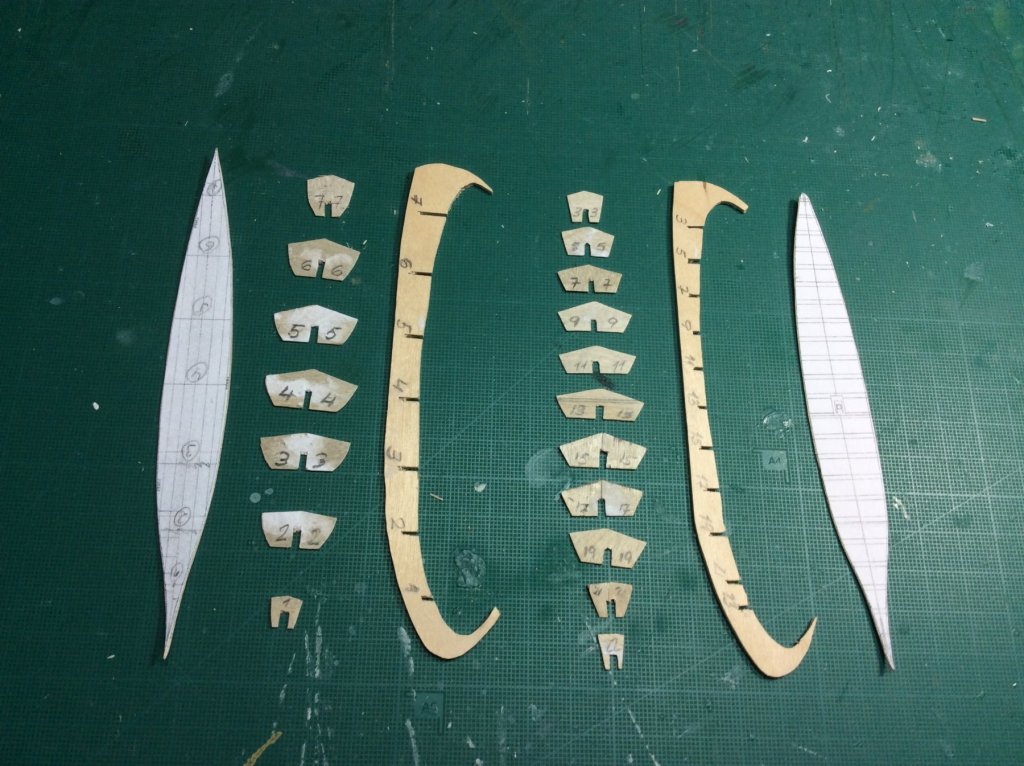
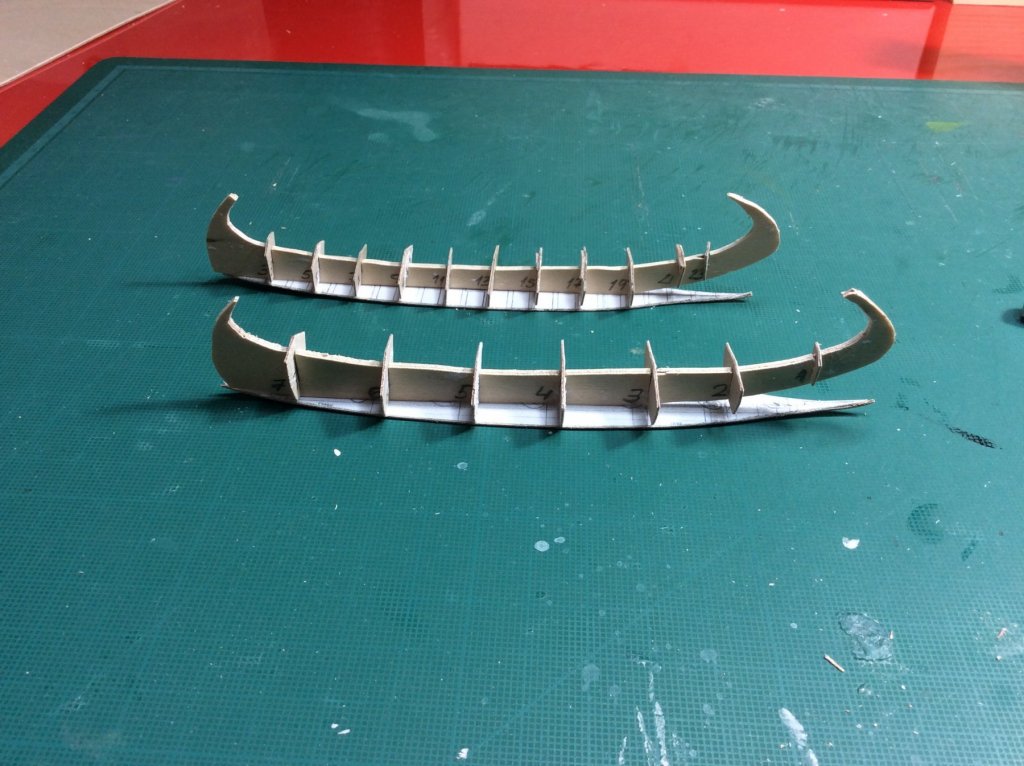
The moliceiro, from the Ría de Aveiro, was born as a working boat destined for the collection of the “moliço”, lagoon aquatic vegetation that was used for the transformation of the sandy banks in the lands of labor, providing them with a substrate that favored the retention of water and fertilized them together with other organic materials. Being originally a work boat, striking unusual decoration, colorful and full of color, in which, framed by polychrome wreaths and geometric designs, highlight the four panels located in the noble areas of the boat, a bow and stern and port and starboard. These panels appear decorated with paintings often naive and naïve, full of expressiveness, topped off at the bottom by a legend that if sometimes it is a malicious point and borders on the vulgarity, other Although normally the moliceiro only wobbles a stick, sometimes, with loose winds, it is armed with two, to endow it with a “traquete”, small front sail that is rigged in a mast of smaller size (“mastaréu”) nailed in a square holen that is practice in the cavern adjacent to the bulkhead of the deck. This second moliceiro of my collection, which I have made simultaneously with the other moliceiro, starts from different planes: the first is made from the ones that appear in the book of Senos da Fonseca entitled “Embarcações que tiveram berço na laguna”, and this second It is made from the plans of the Museu de Marinha de Liboa. Both are made to the same scale (1: 110), and there are some differences between them, which I think is perfectly logical and admissible in boats whose bill is basically handmade. Perhaps the most striking of these differences is the higher height of the moliceiro board of Senos da Fonseca, which also has a certain curvature in a vertical sense that is not found in the moliceiro of the Museu de Marinha. I am thinking about leaving one of them planted in the usual way with just one mast and sail, and doing the other with two masts, giving it a “traquete”, small front sail that is rigged in a smaller mast (“mastaréu”) nestled in a square inkwell that is practiced in the “cavern” adjacent to the forward deck bulkhead The first thing I do is cut out the false frames, which I previously pasted on a Finnish birch plywood of 0.6 mm. (very simple cut, since I do it with scissors: it's like cutting cardboard). A first difference between the two moliceiros is the number of false frames that I am going to use; in the Marinha Museum come the profiles of the 23 frames that make it up (I'm going to use only half of them for my false frames), while in the plane of Senos da Fonseca only profiles appear of seven sections and I will use all of them. Checking its correct alignment, I'm sticking the false frames on the longitudinal profile of the boat, which I have cut, this time, with a blade, on a 1.5 mm plywood. (this greater thickness helps to avoid deformations and warping in the sticking phase of the strands) Once the "skeletons" are assembled, I proceed to stick the floor of the boat. To reinforce it, I do it with two cut plates of 0.6 mm. hitting first one and then another superimposed. And now, let it dry well before starting the gluing of the strands.


- 13 replies
-
- 15
-
-
- small
- moliceiros
- (and 1 more)
-
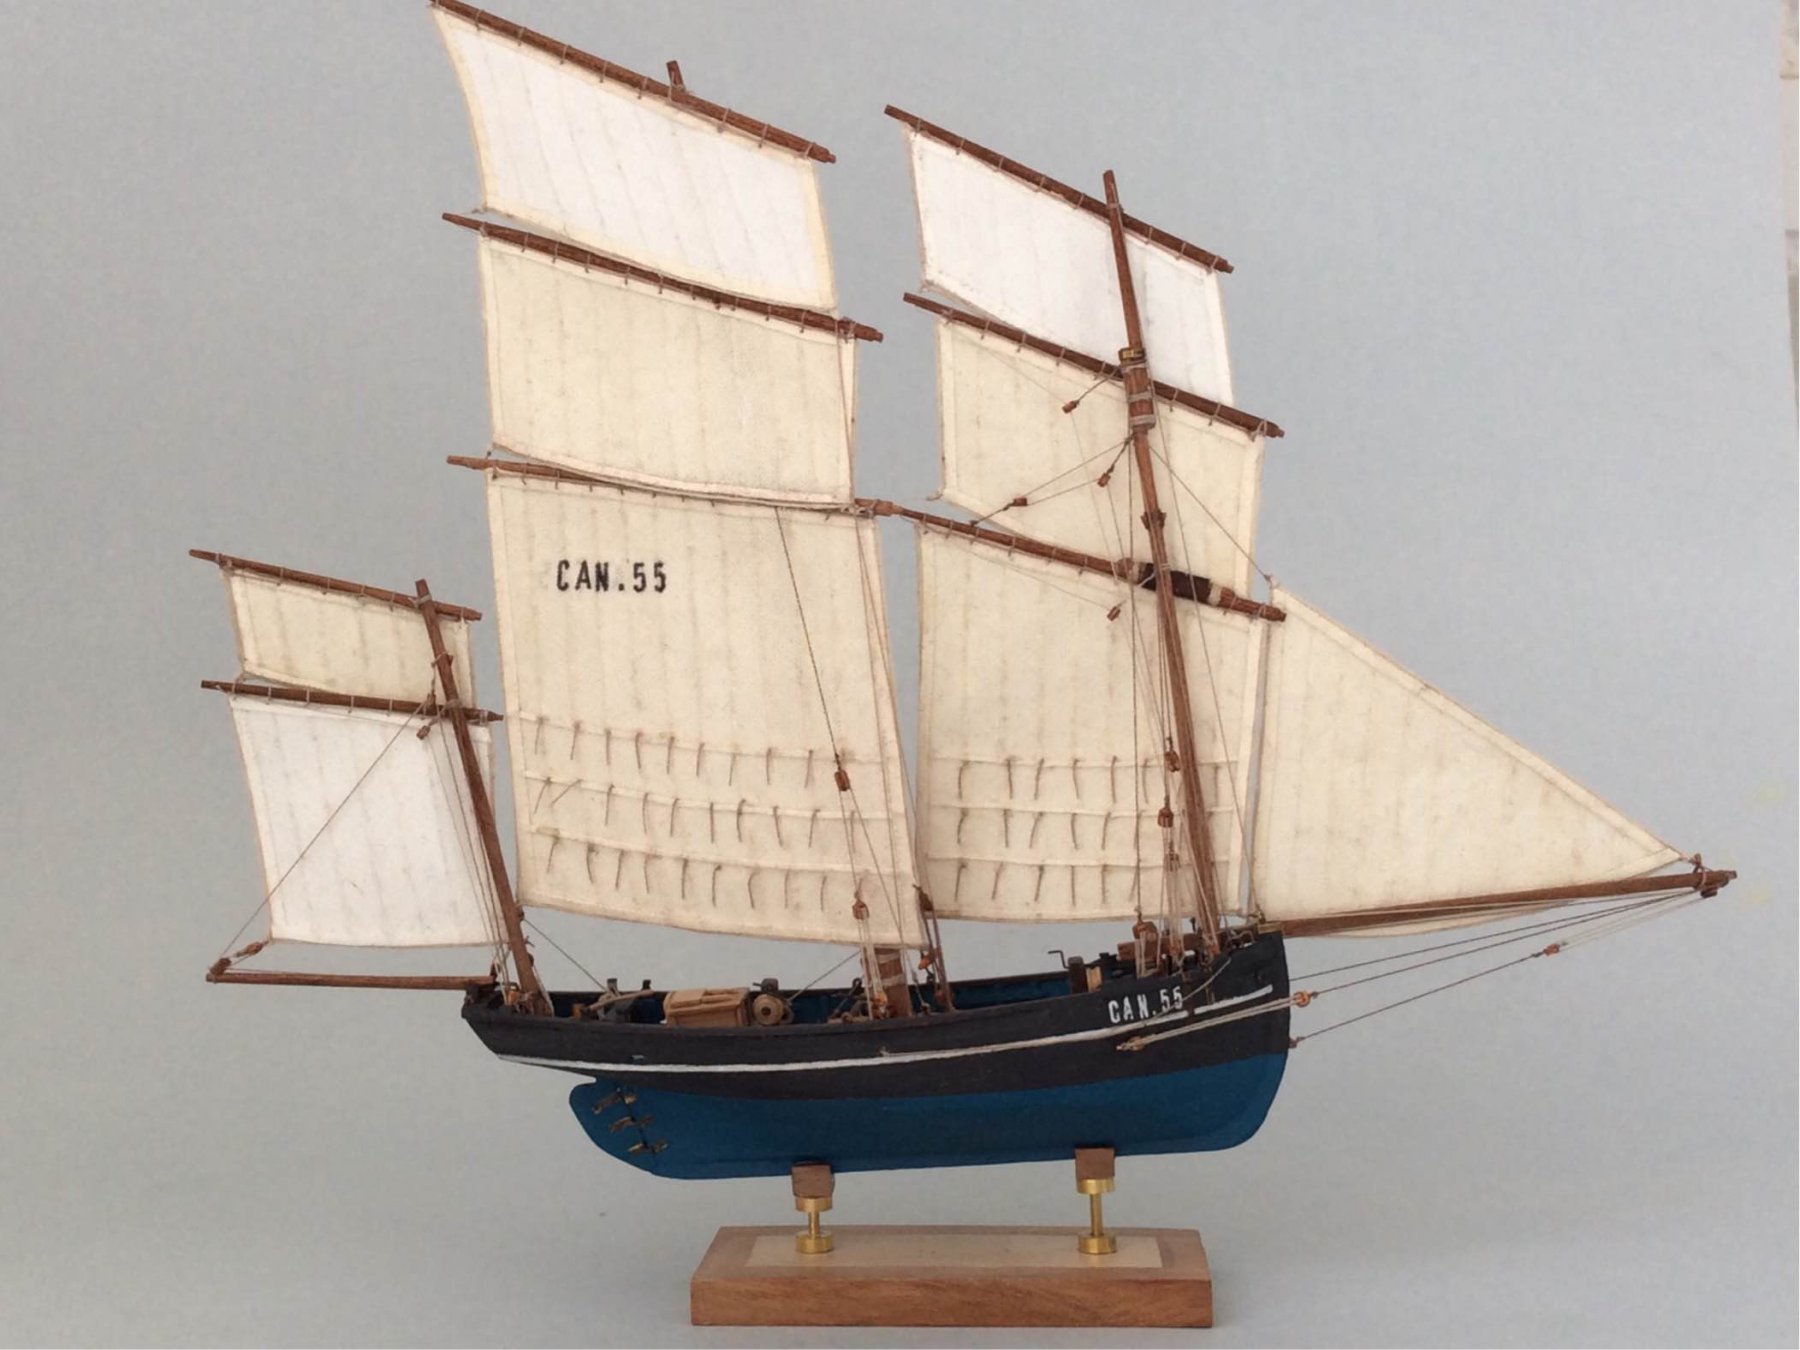
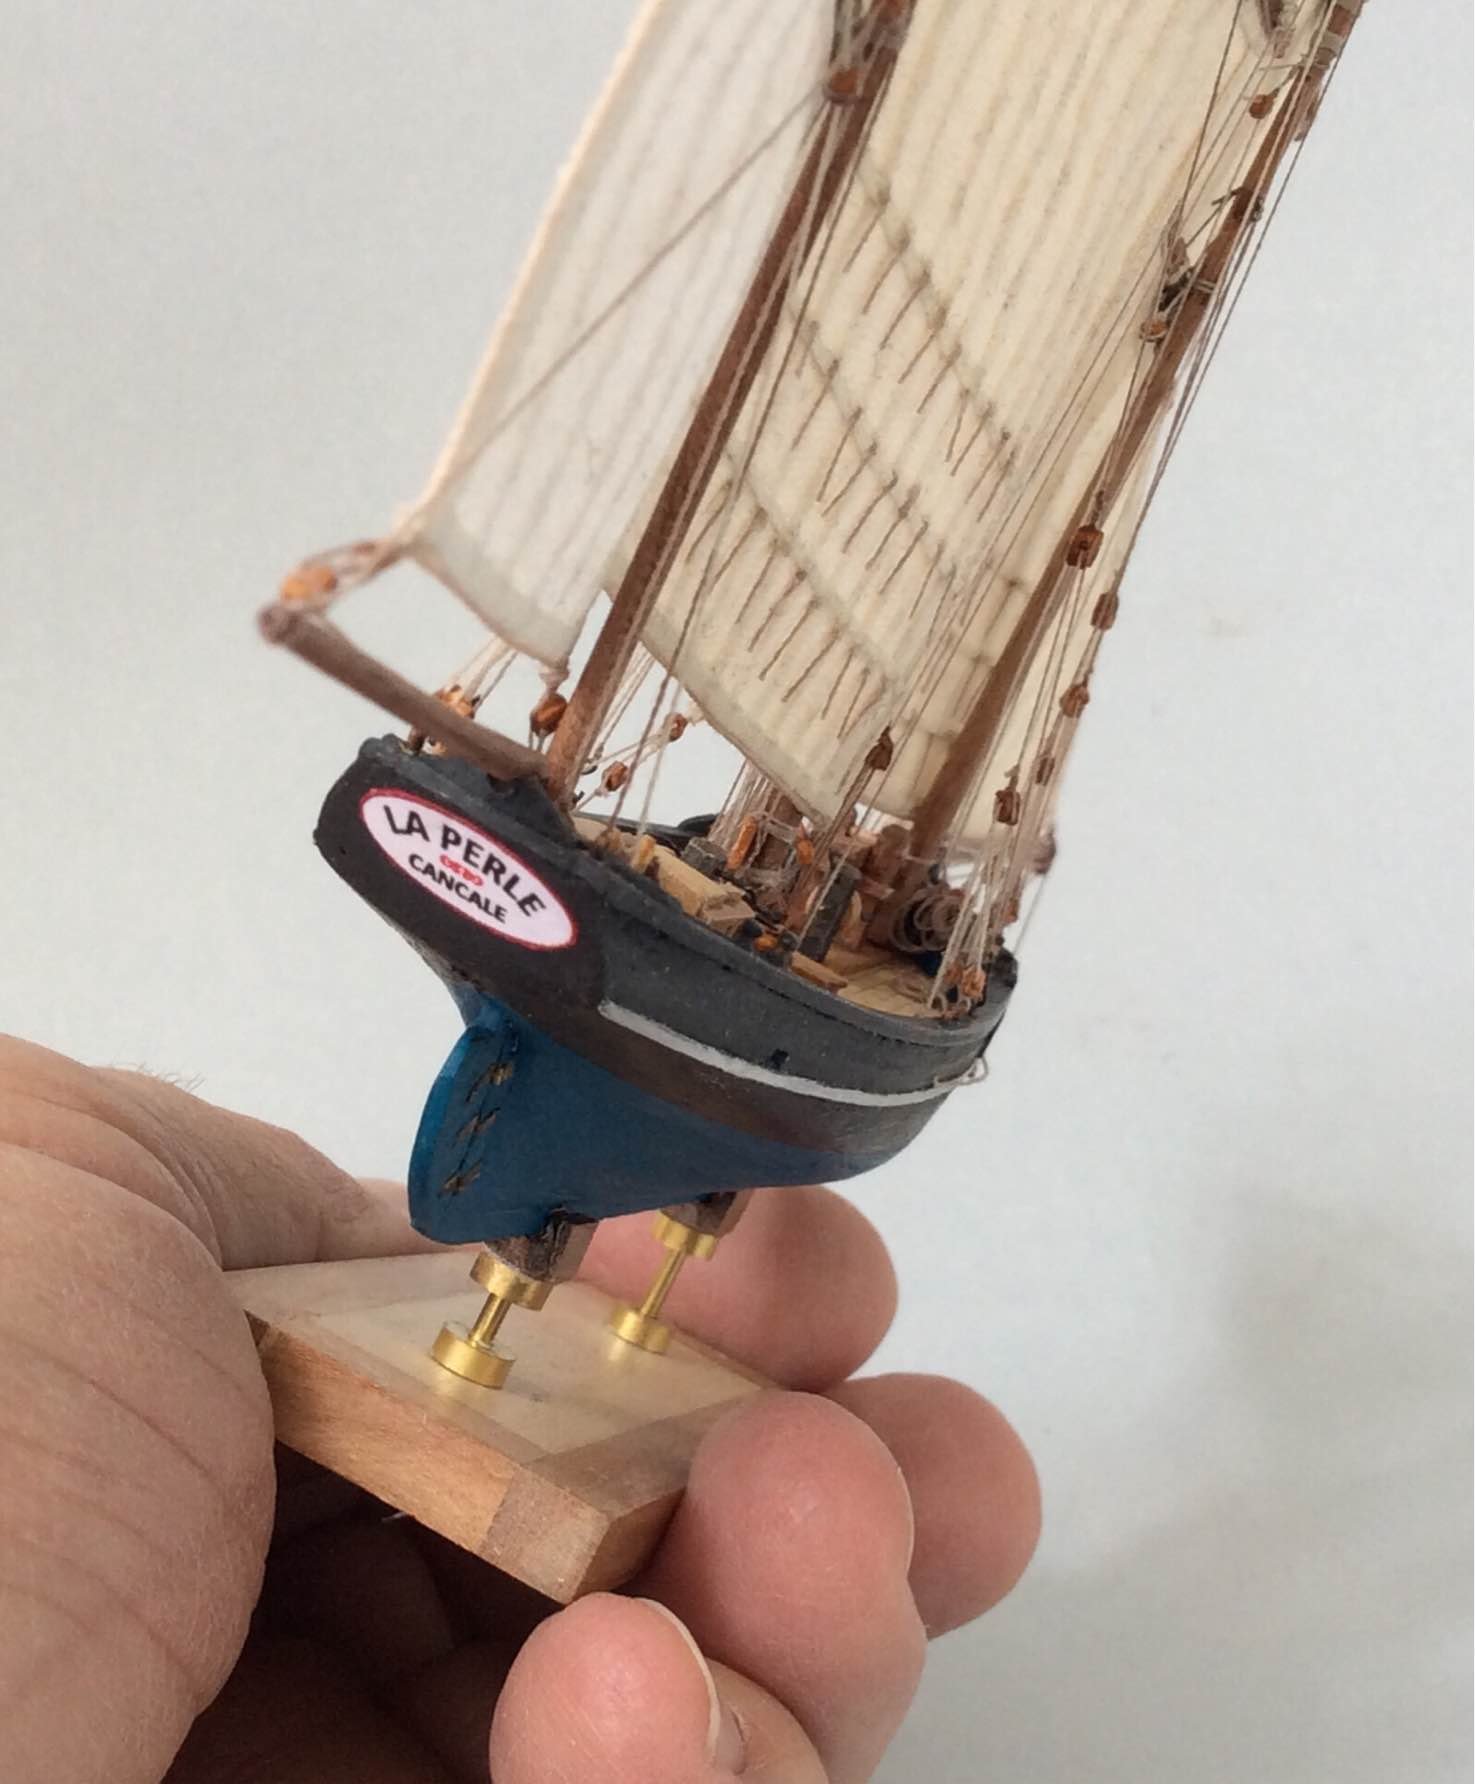
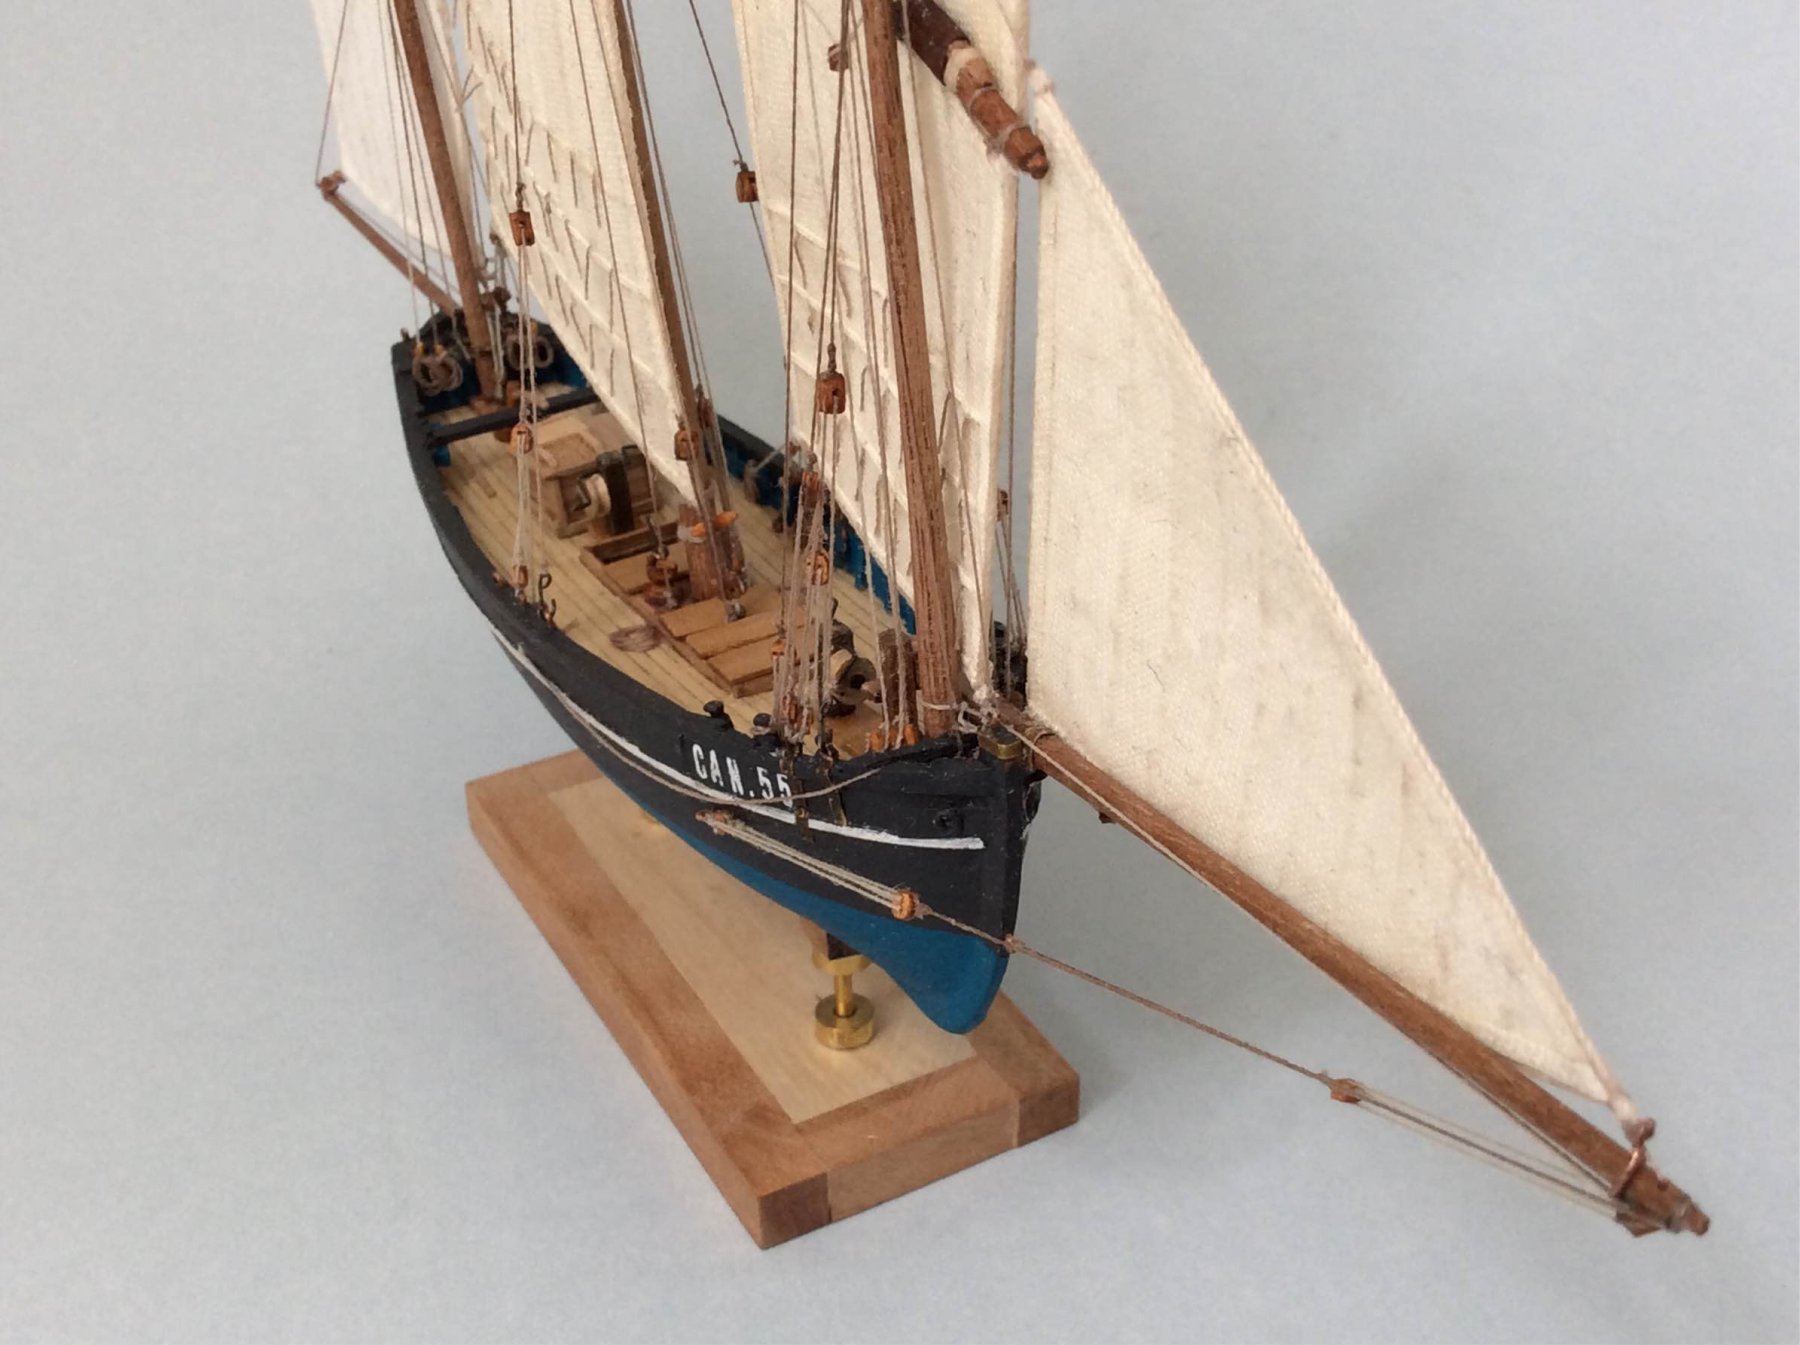
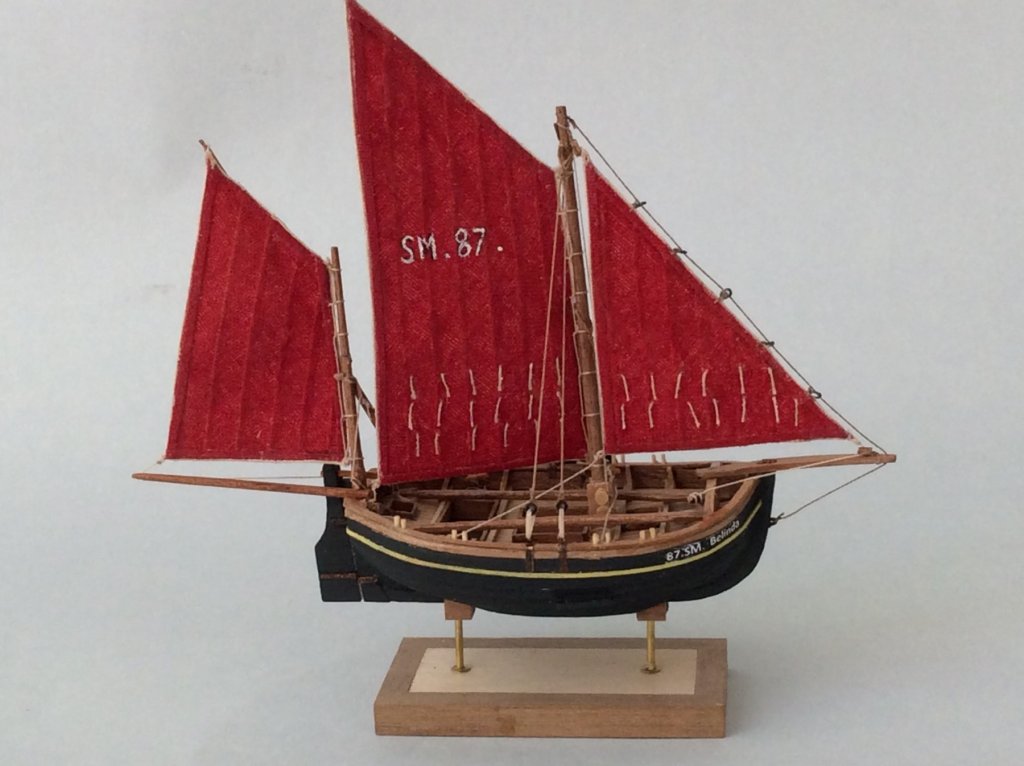
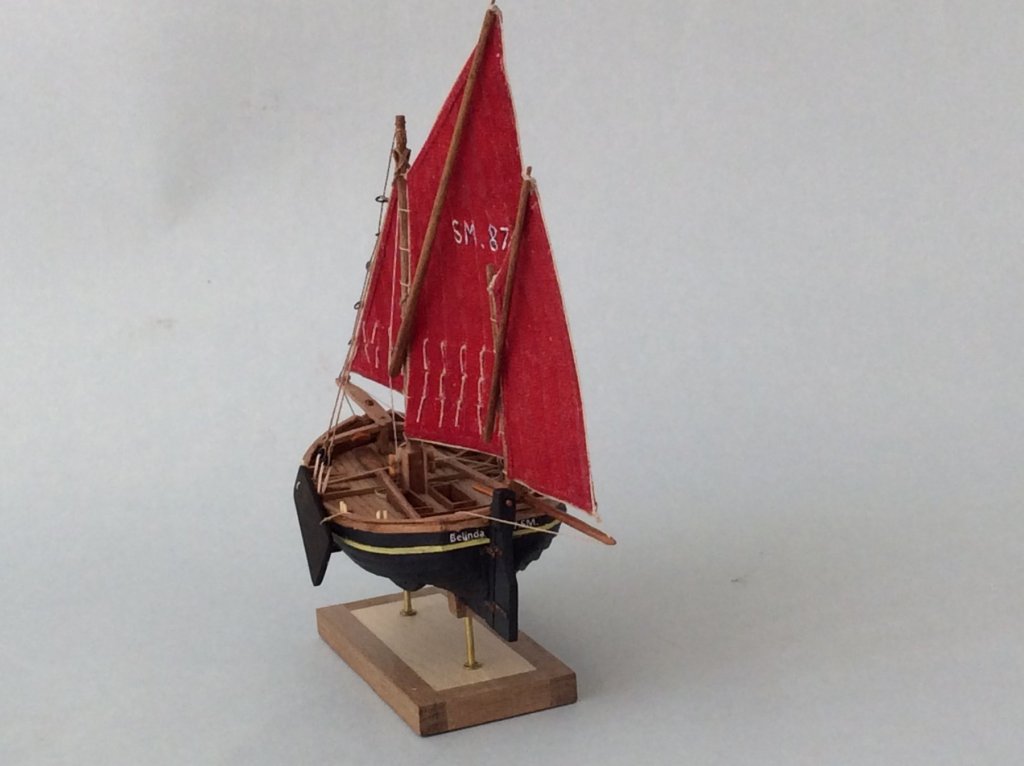
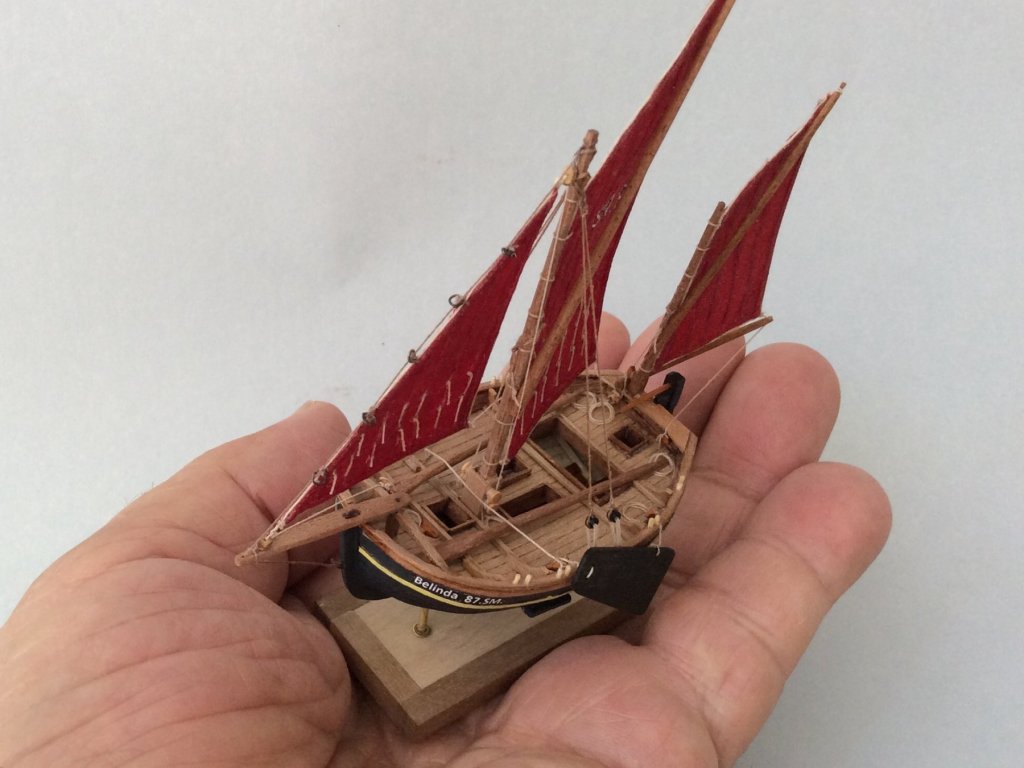
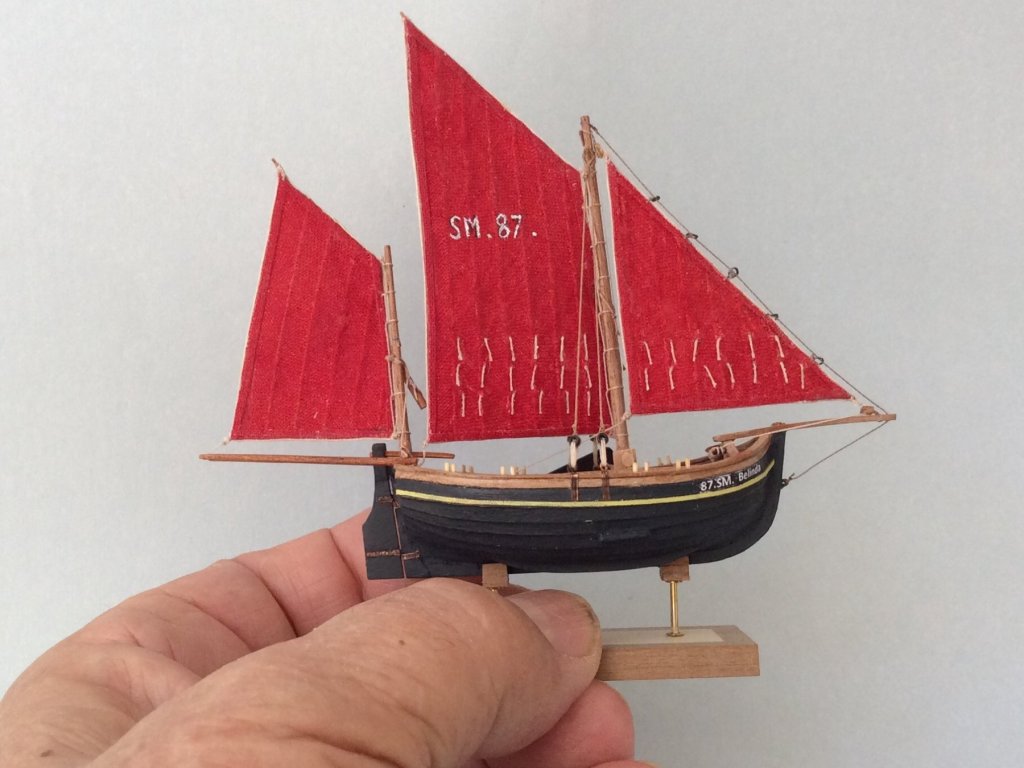
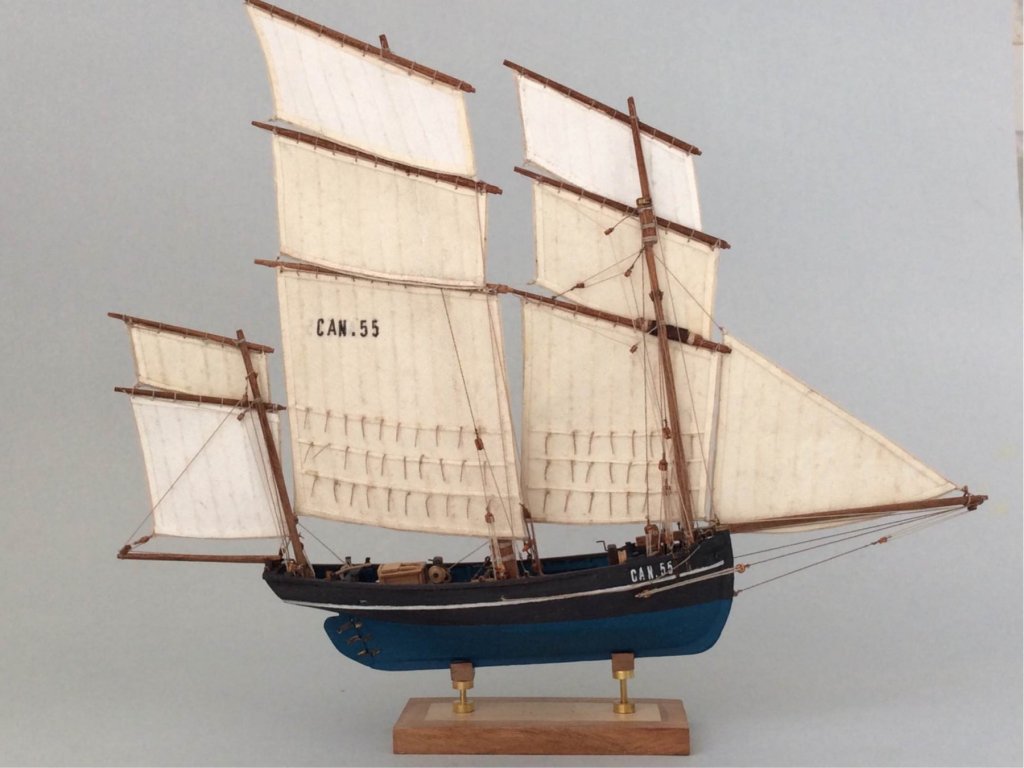
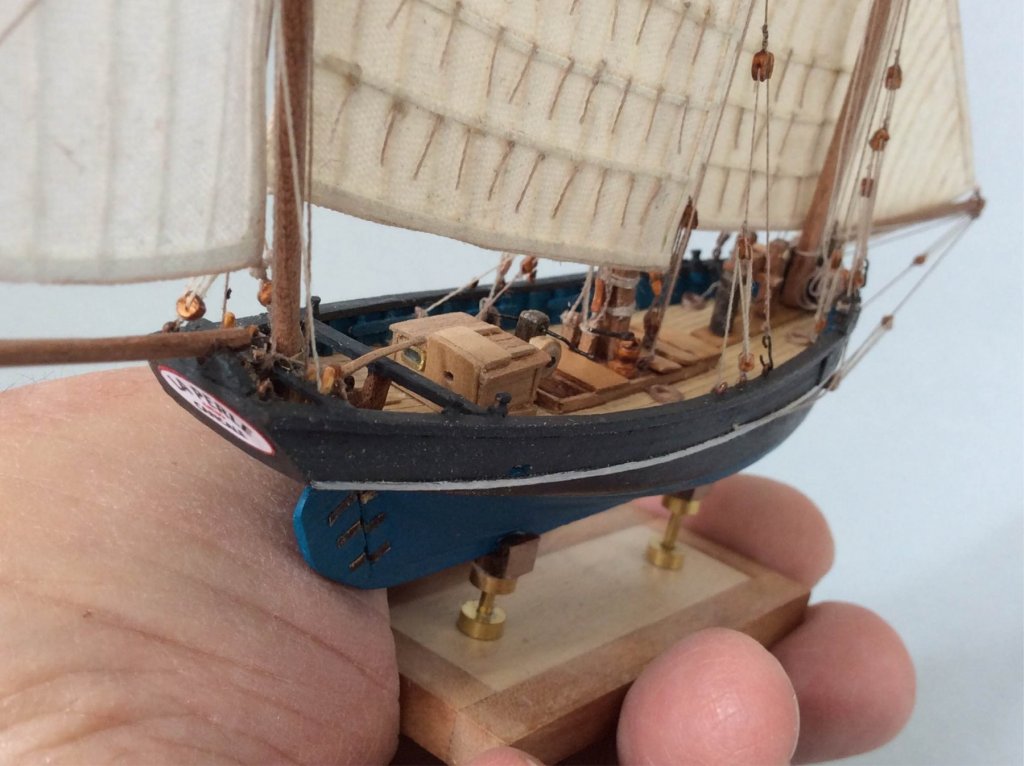
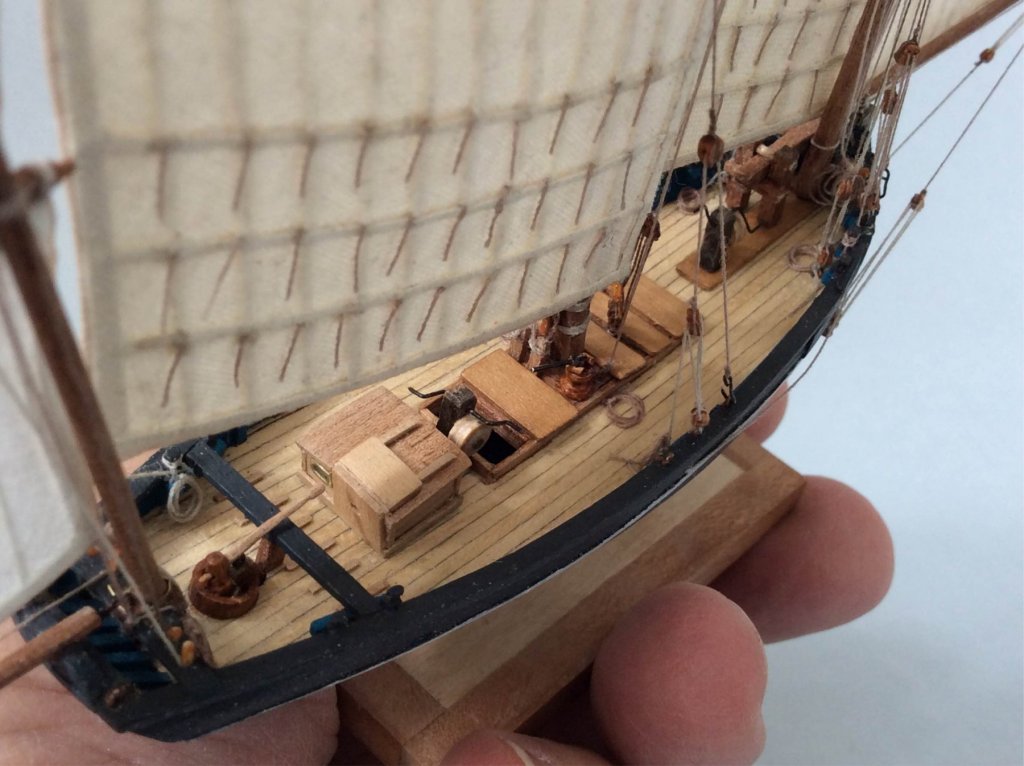
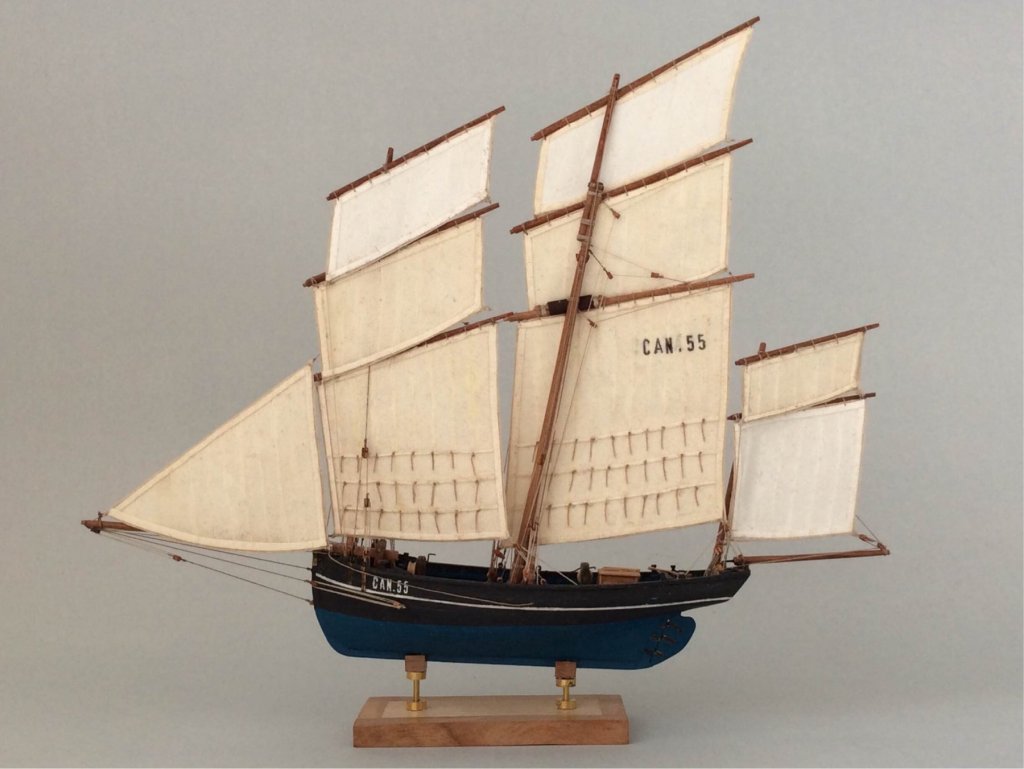
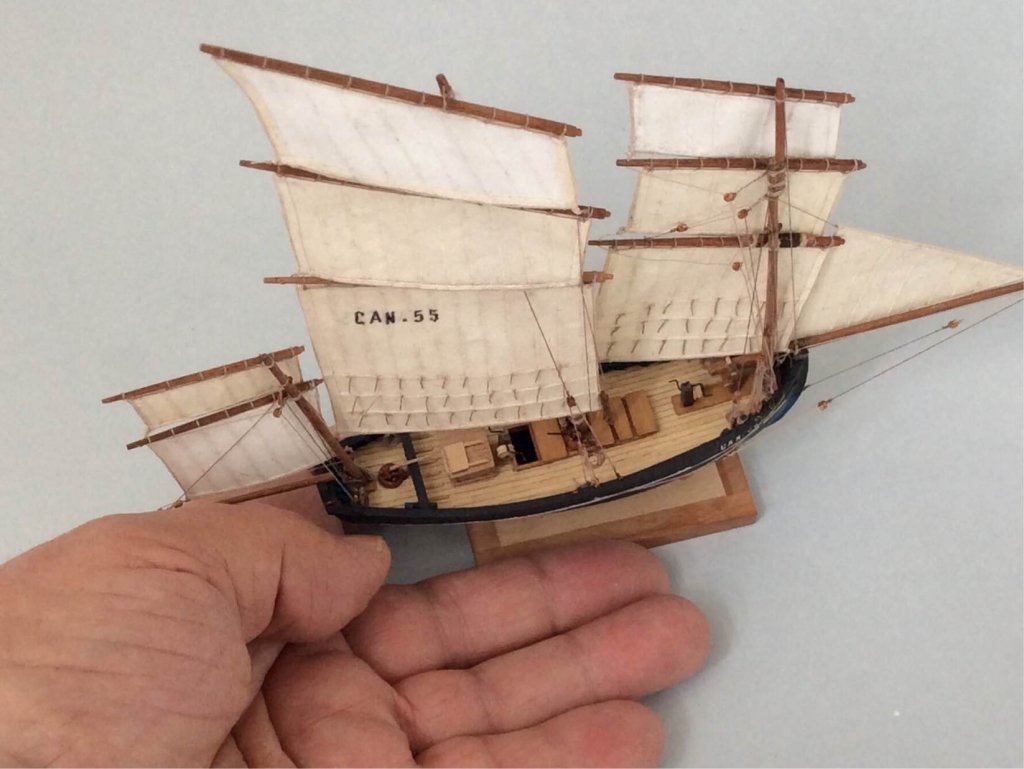
Hello everybody My name is Javier Barón, I was born in 1948 and I live in Madrid, Spain. Unfortunately, I do not speak English fluently, although I am able to understand the texts written in your language. Therefore, I use the Google translator and in advance I apologize for any errors that may be contained in my writings. I have been a modeller for many years and I am currently doing a series of miniatures of small work boats (I have just finished number 61 of the collection). The collection can be seen at barcosbaron.wordpress.com and although the texts are currently in Spanish, I have a nephew of mine who is bilingual busy translating them into English. To complete my presentation I put some pictures of my latest work: a bisquine of Cancale in miniature (scale 1: 160). If you find it interesting, I will publish some of the models in my collection in the gallery.


- 20 replies
-
- 17
-