
bluesy76
-
Posts
19 -
Joined
-
Last visited
Content Type
Profiles
Forums
Gallery
Events
Everything posted by bluesy76
-
 I've also gone ahead installing the keel. The skeg fitted in almost perfectly which I'm proud of. Filled in the inevitable gaps (not too bad). All that's left now is to even out the keel at the bottom.
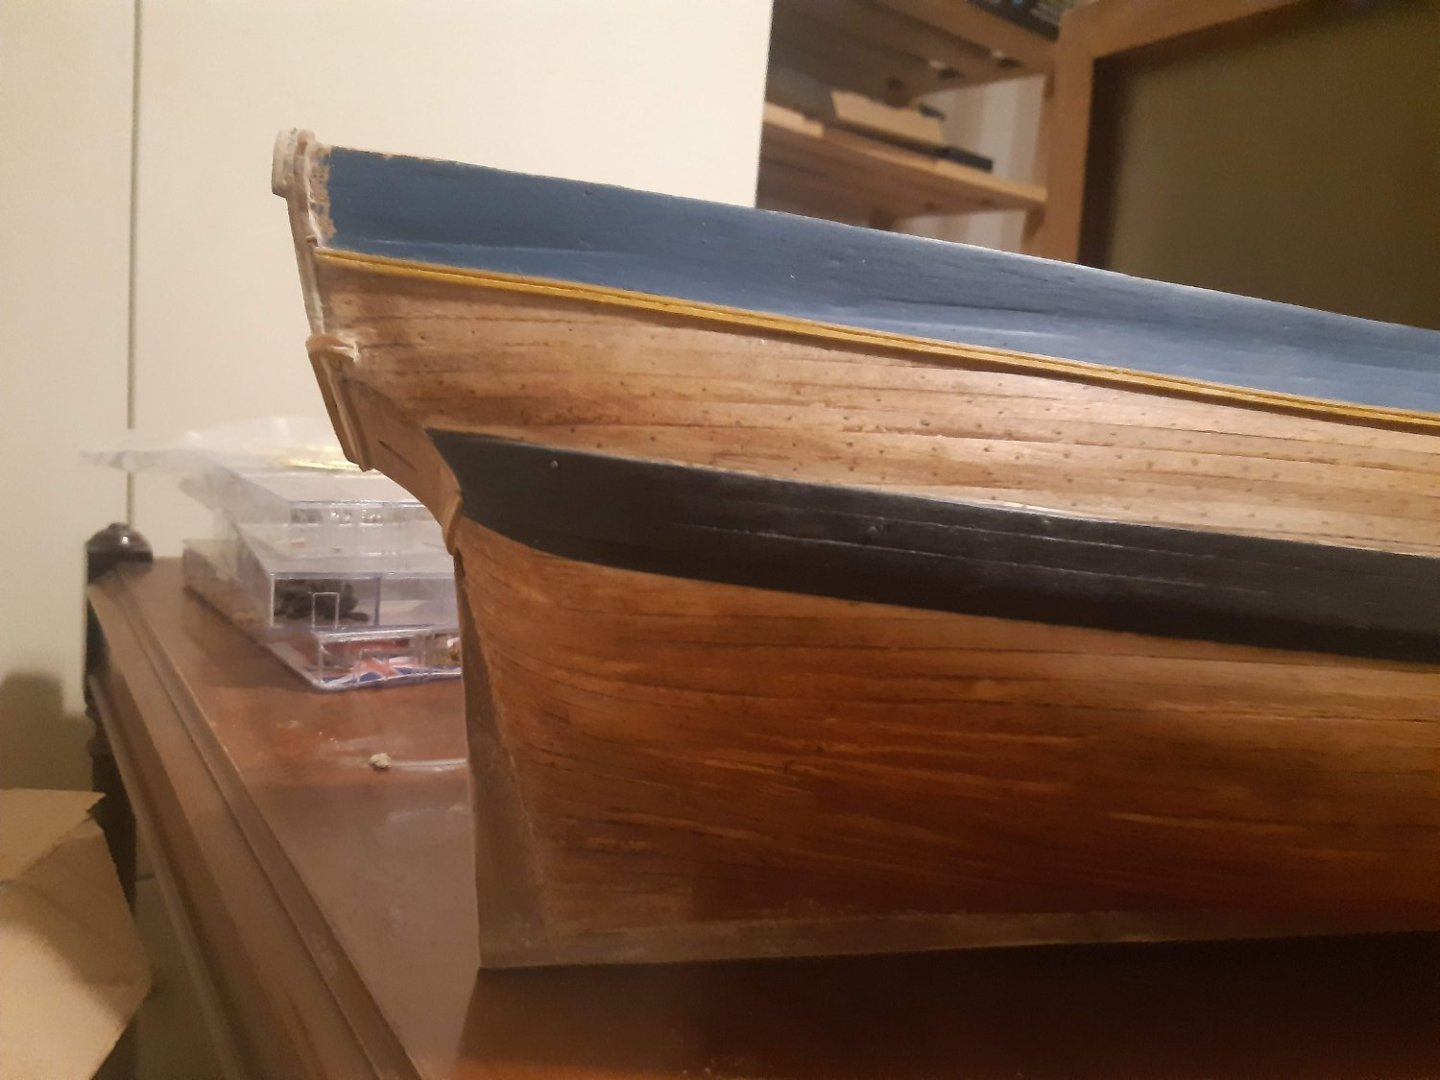

-
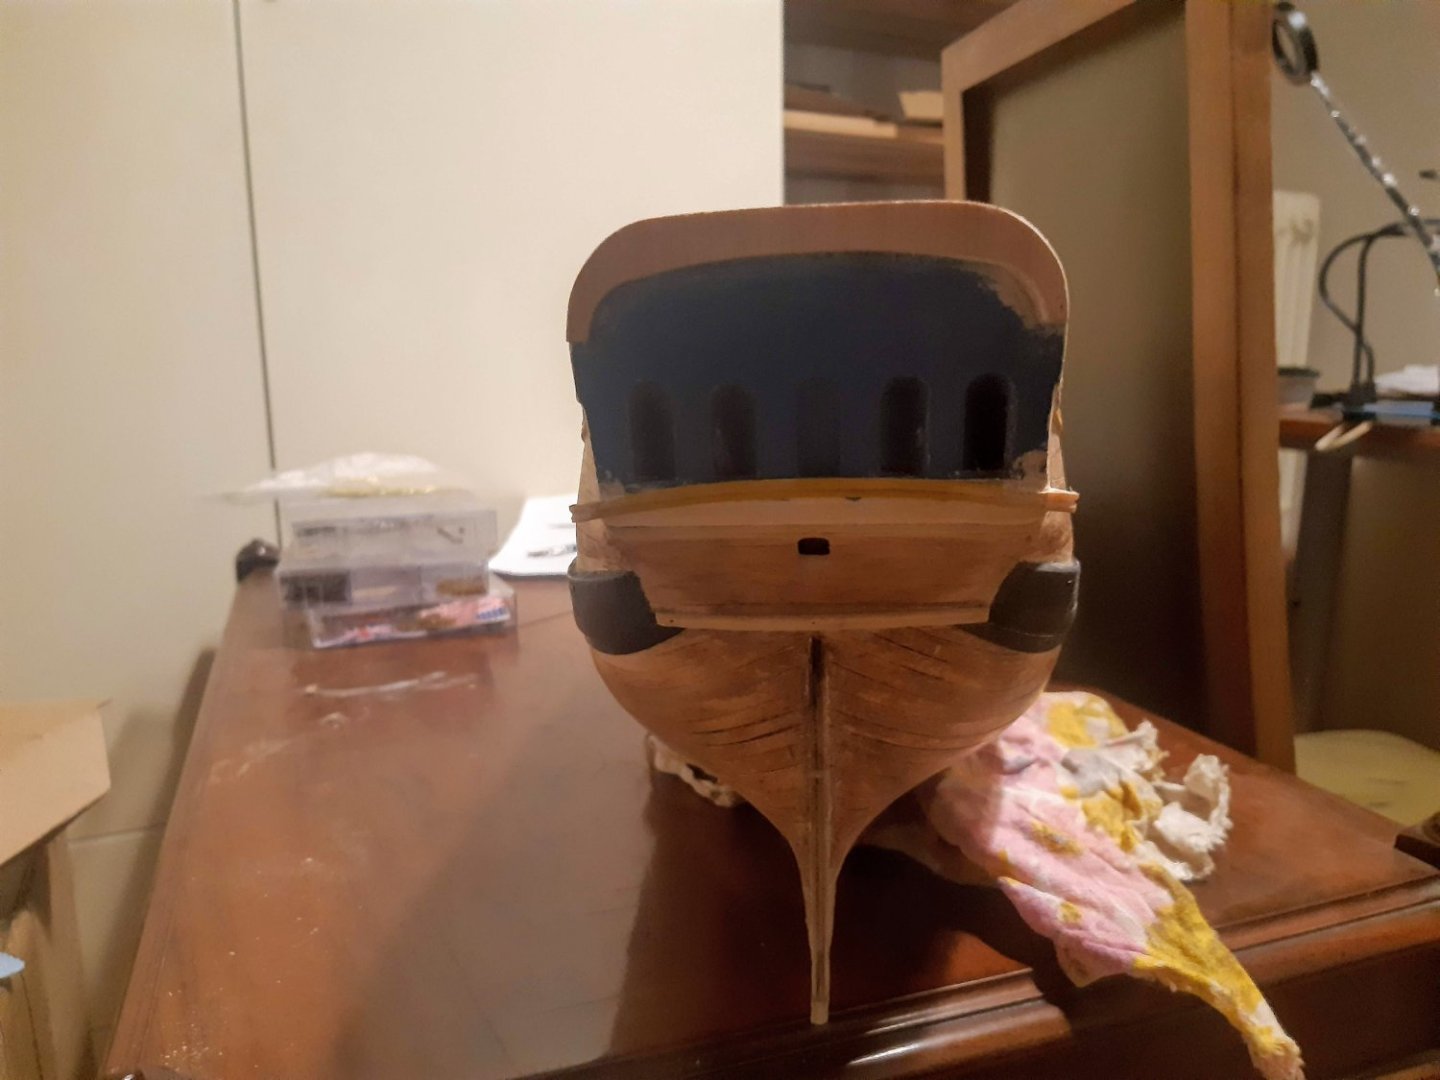
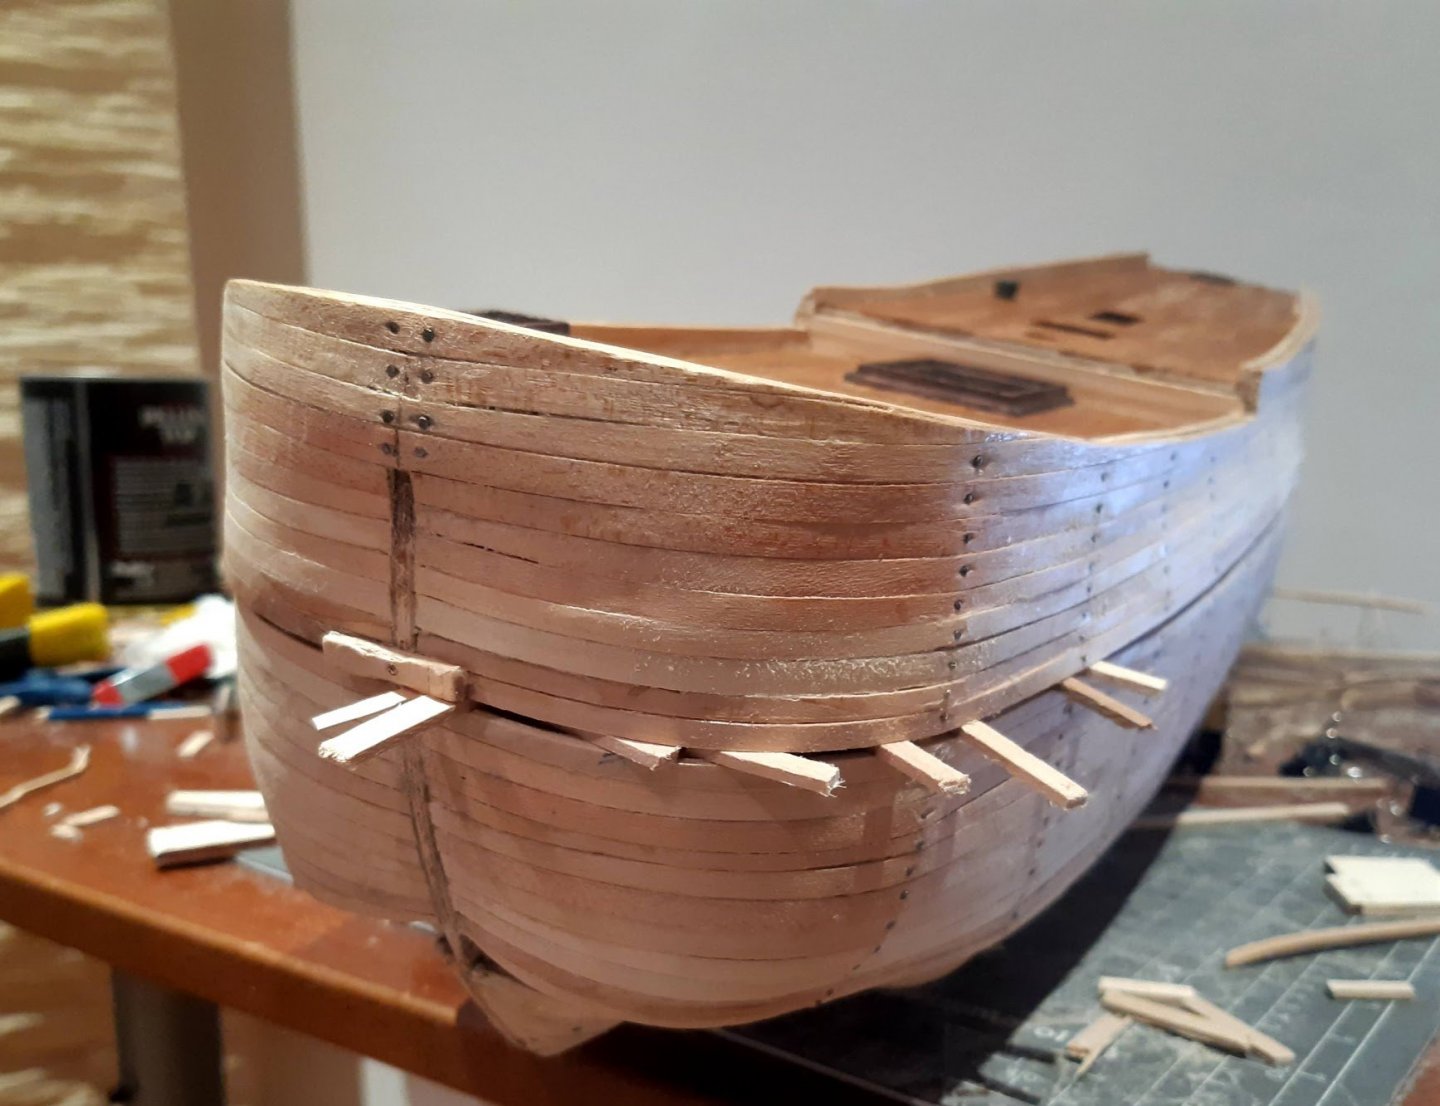
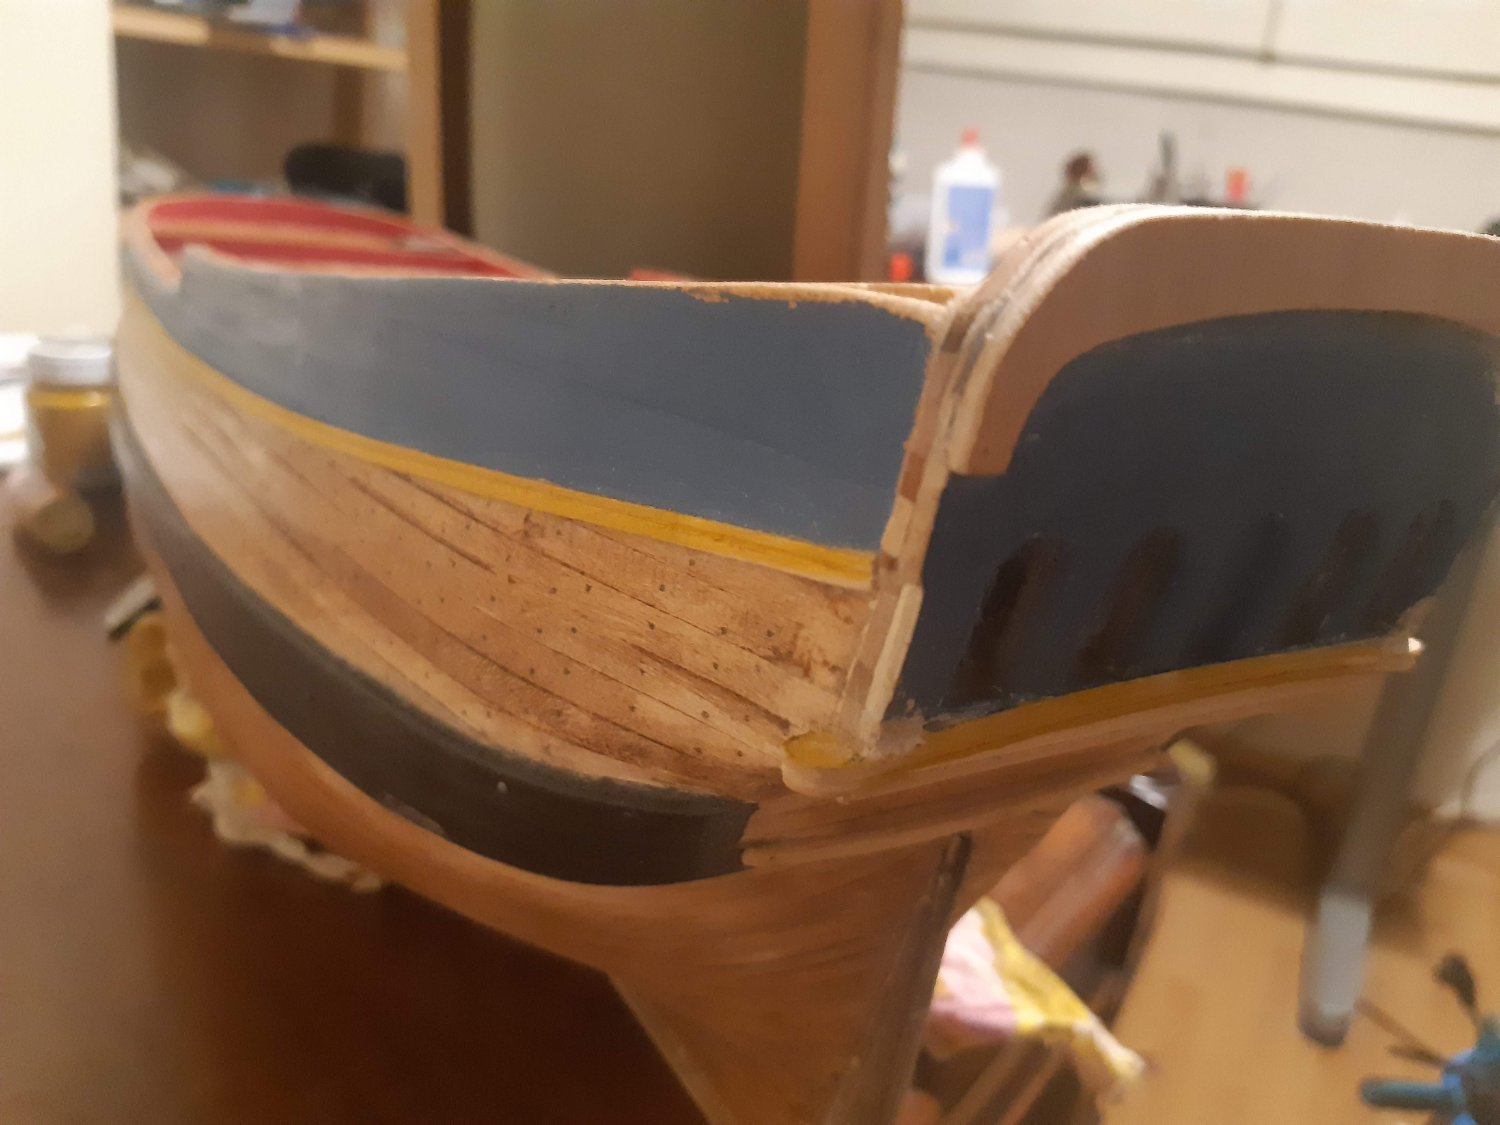
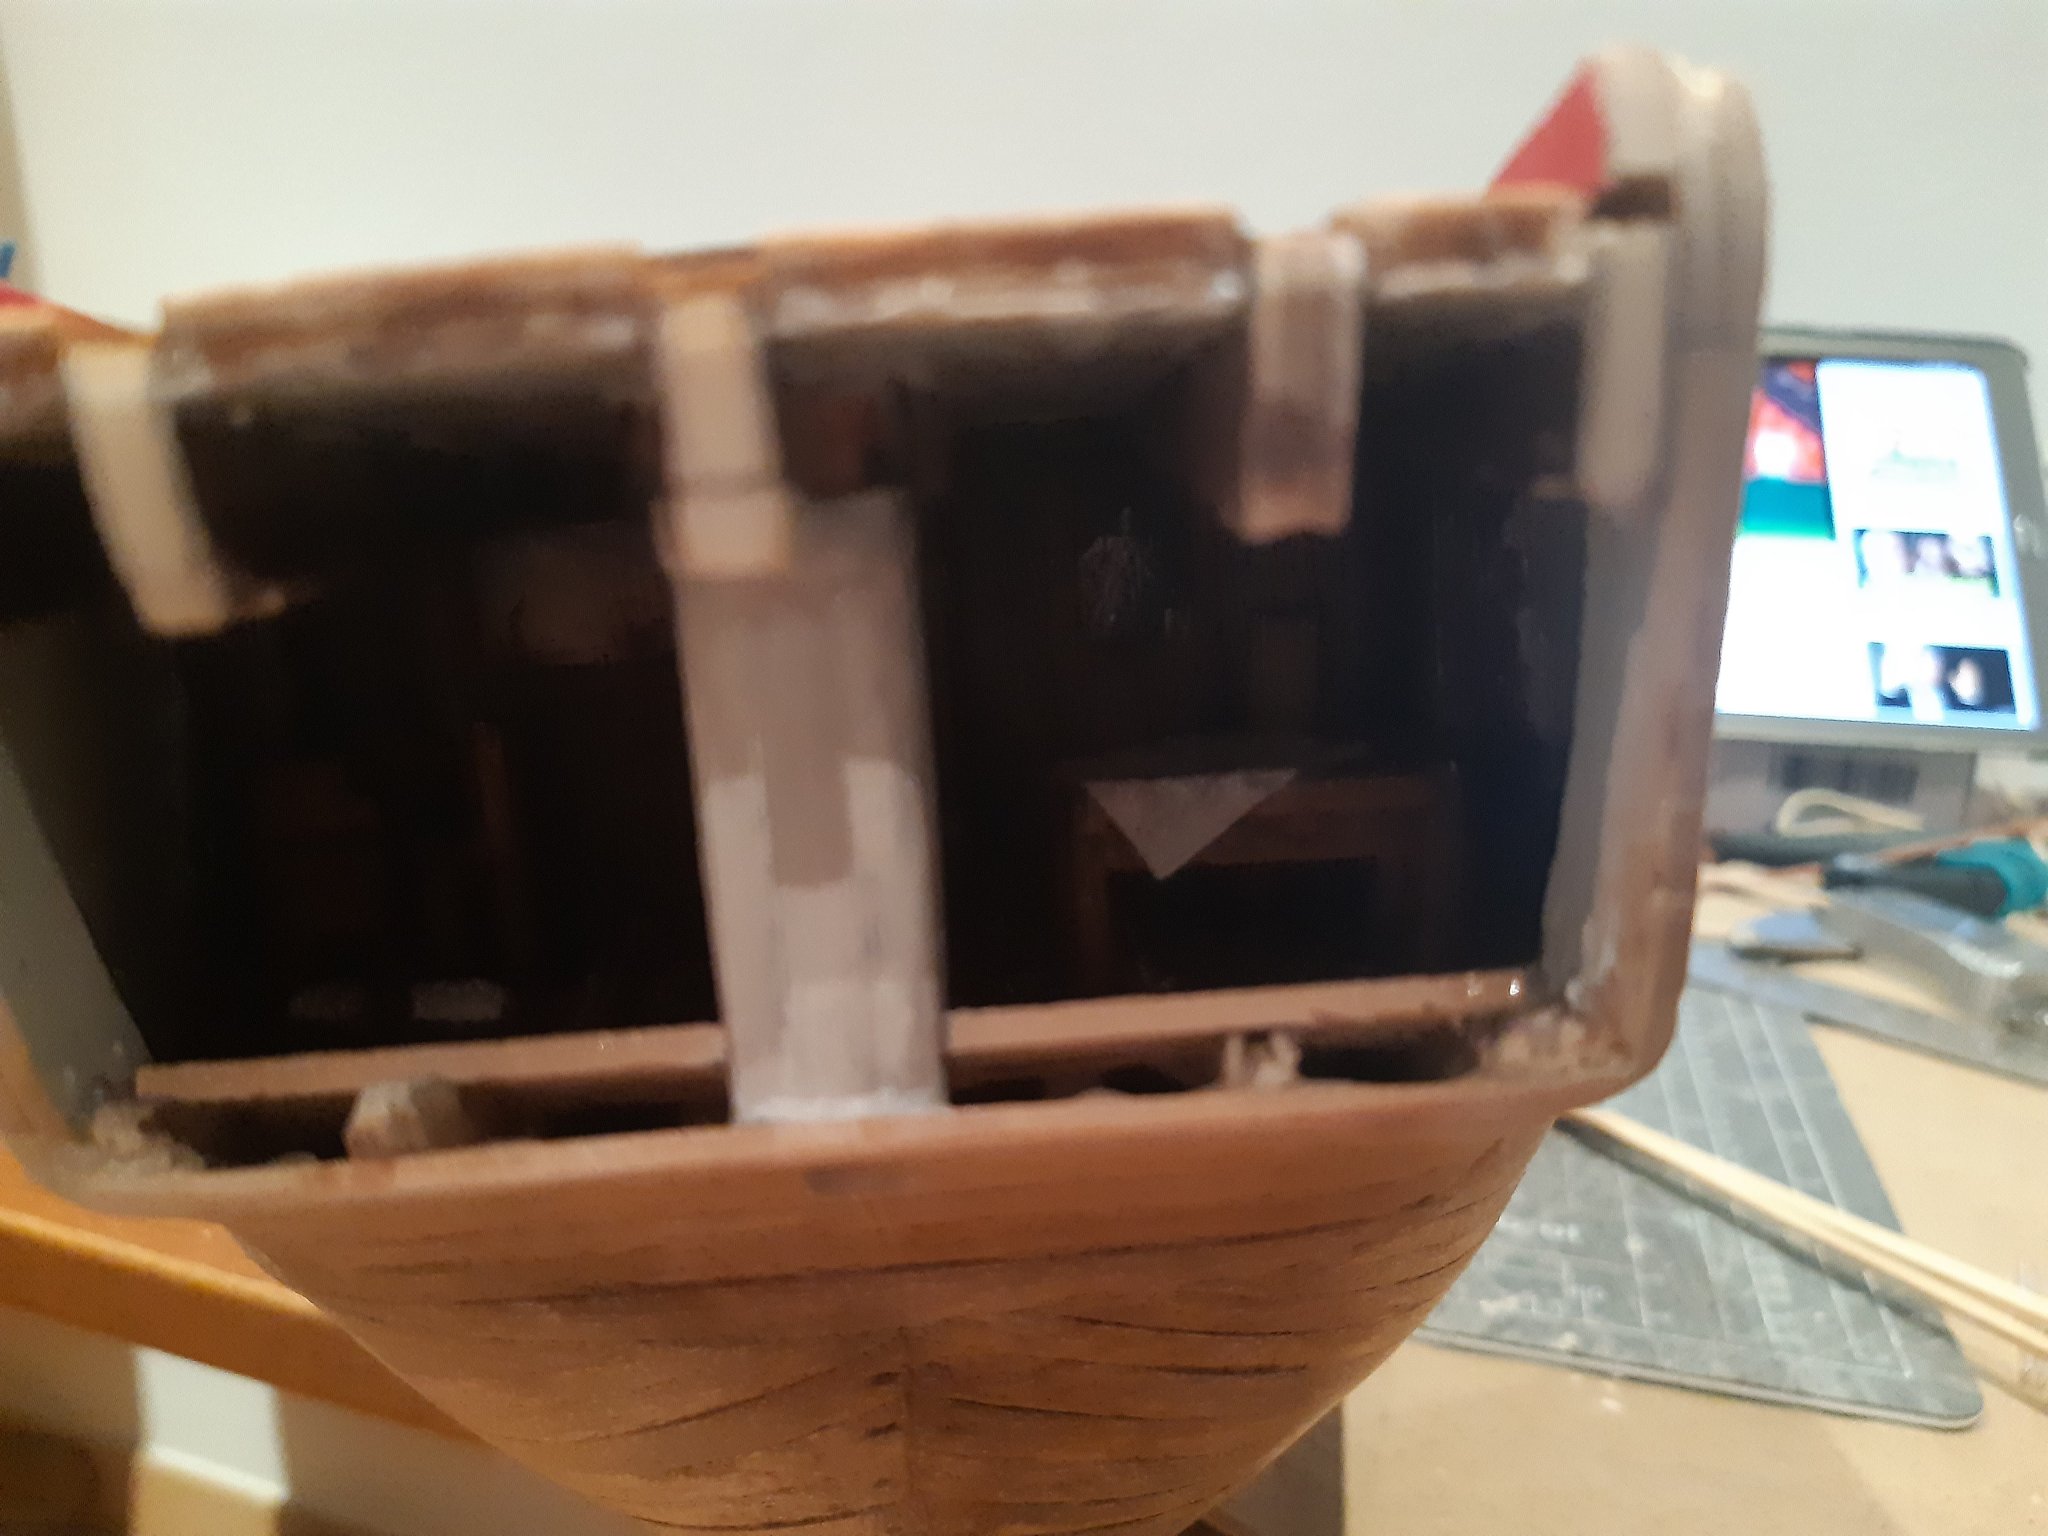
It's been a looong time that I've left the model sitting in a closet unattended. Life happens... During that time, I've installed the wale and progressed on the stern. I've now resumed where I left off at the stern. I had installed the windows ages ago. Unfortunately can't see anything inside but I may get a chance to let more light in as I progress. This time round I've finished off the ledge under the windows and the top border upon which the leaf decorations will be placed. Due to me straying from the design, it's a bit crammed under the windows but I think it'll look better once all the bits and pieces are installed. I have to extend the border down to reach the ledge and clean things up before placing the adornments and statuettes. As shown above I've extended the ledge around the sides of the stern with a rounded finish to support the statuettes.

-
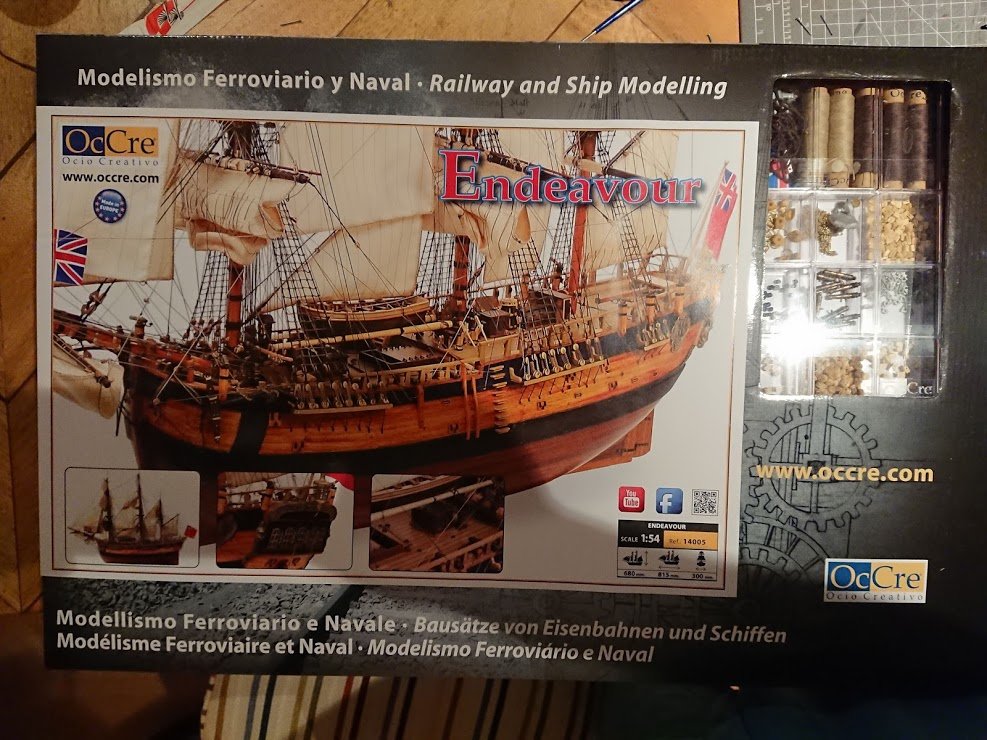
Hi Bill97, I would give this kit a favourable review. The instructions are very good and they even helped me out sending them to me in pdf format. From what I can see, the order of the steps in the instructions make sense. The quality of the materials is good, complete and nicely packaged. Occre have a pretty good reputation here in Spain and it's well-deserved I think. I personally don't agree with some of their artistic choices regarding the selection of some materials but that's a matter of taste. Overall, I'm happy I went with their version and you have room for maneuvre if you want to do things a bit differently.
-
80% probability I'll follow your lead clogger.
-
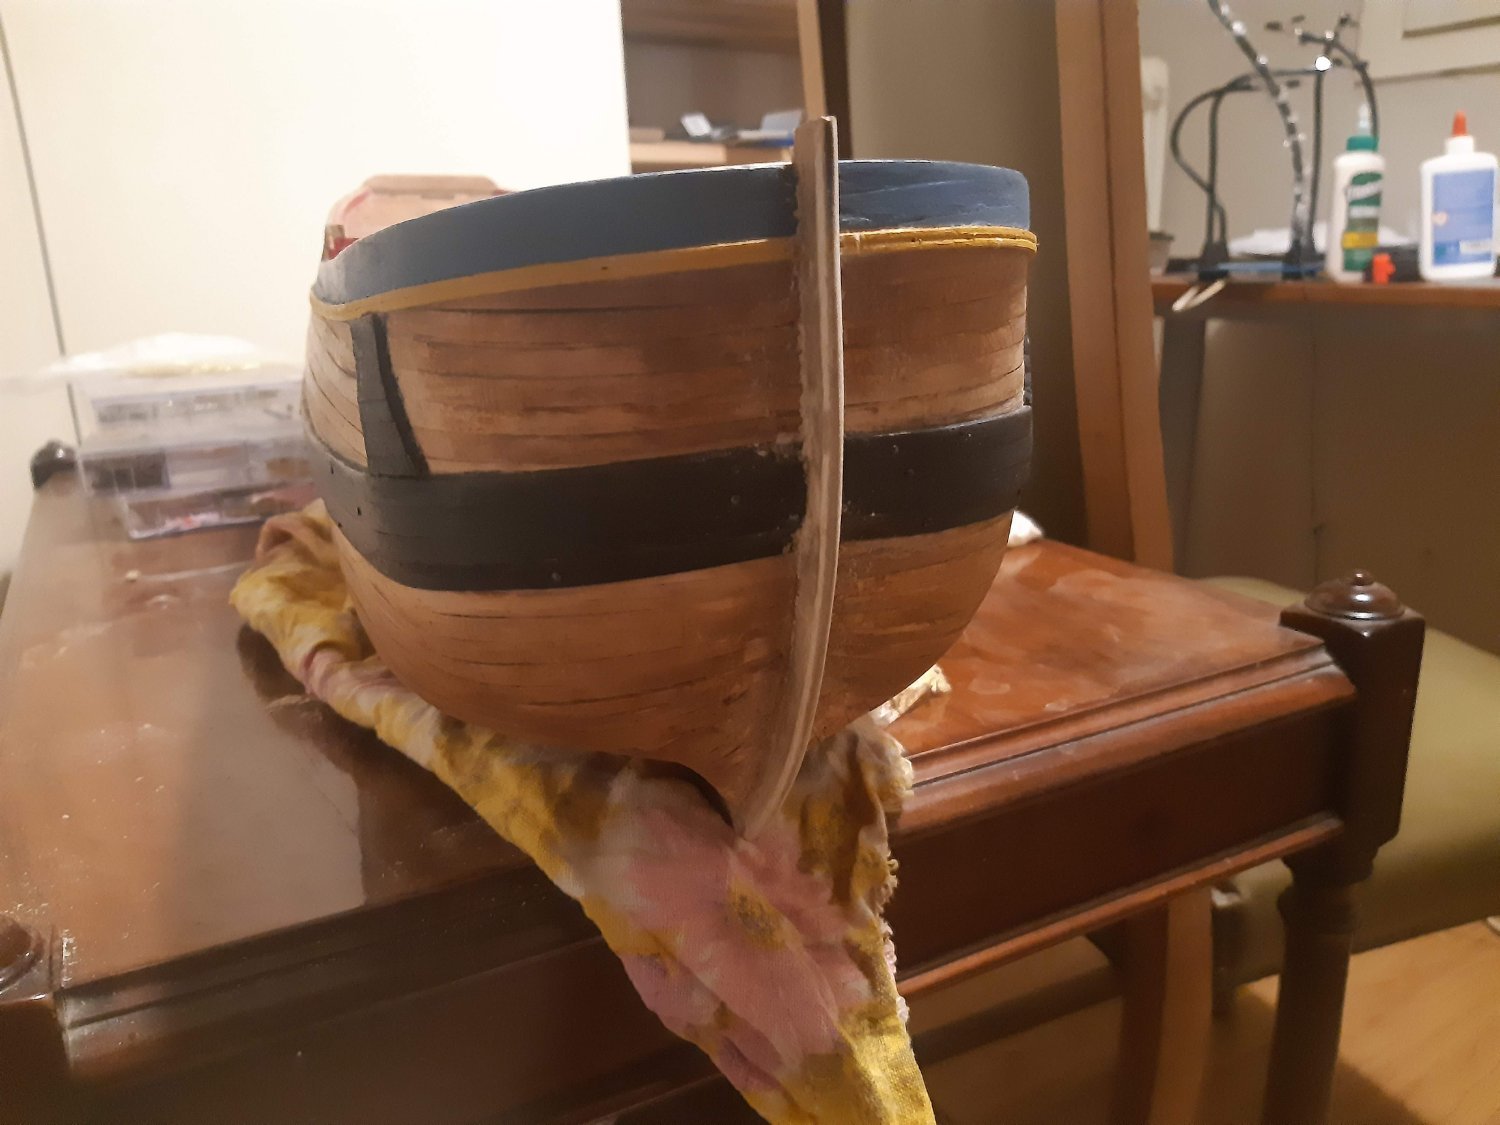
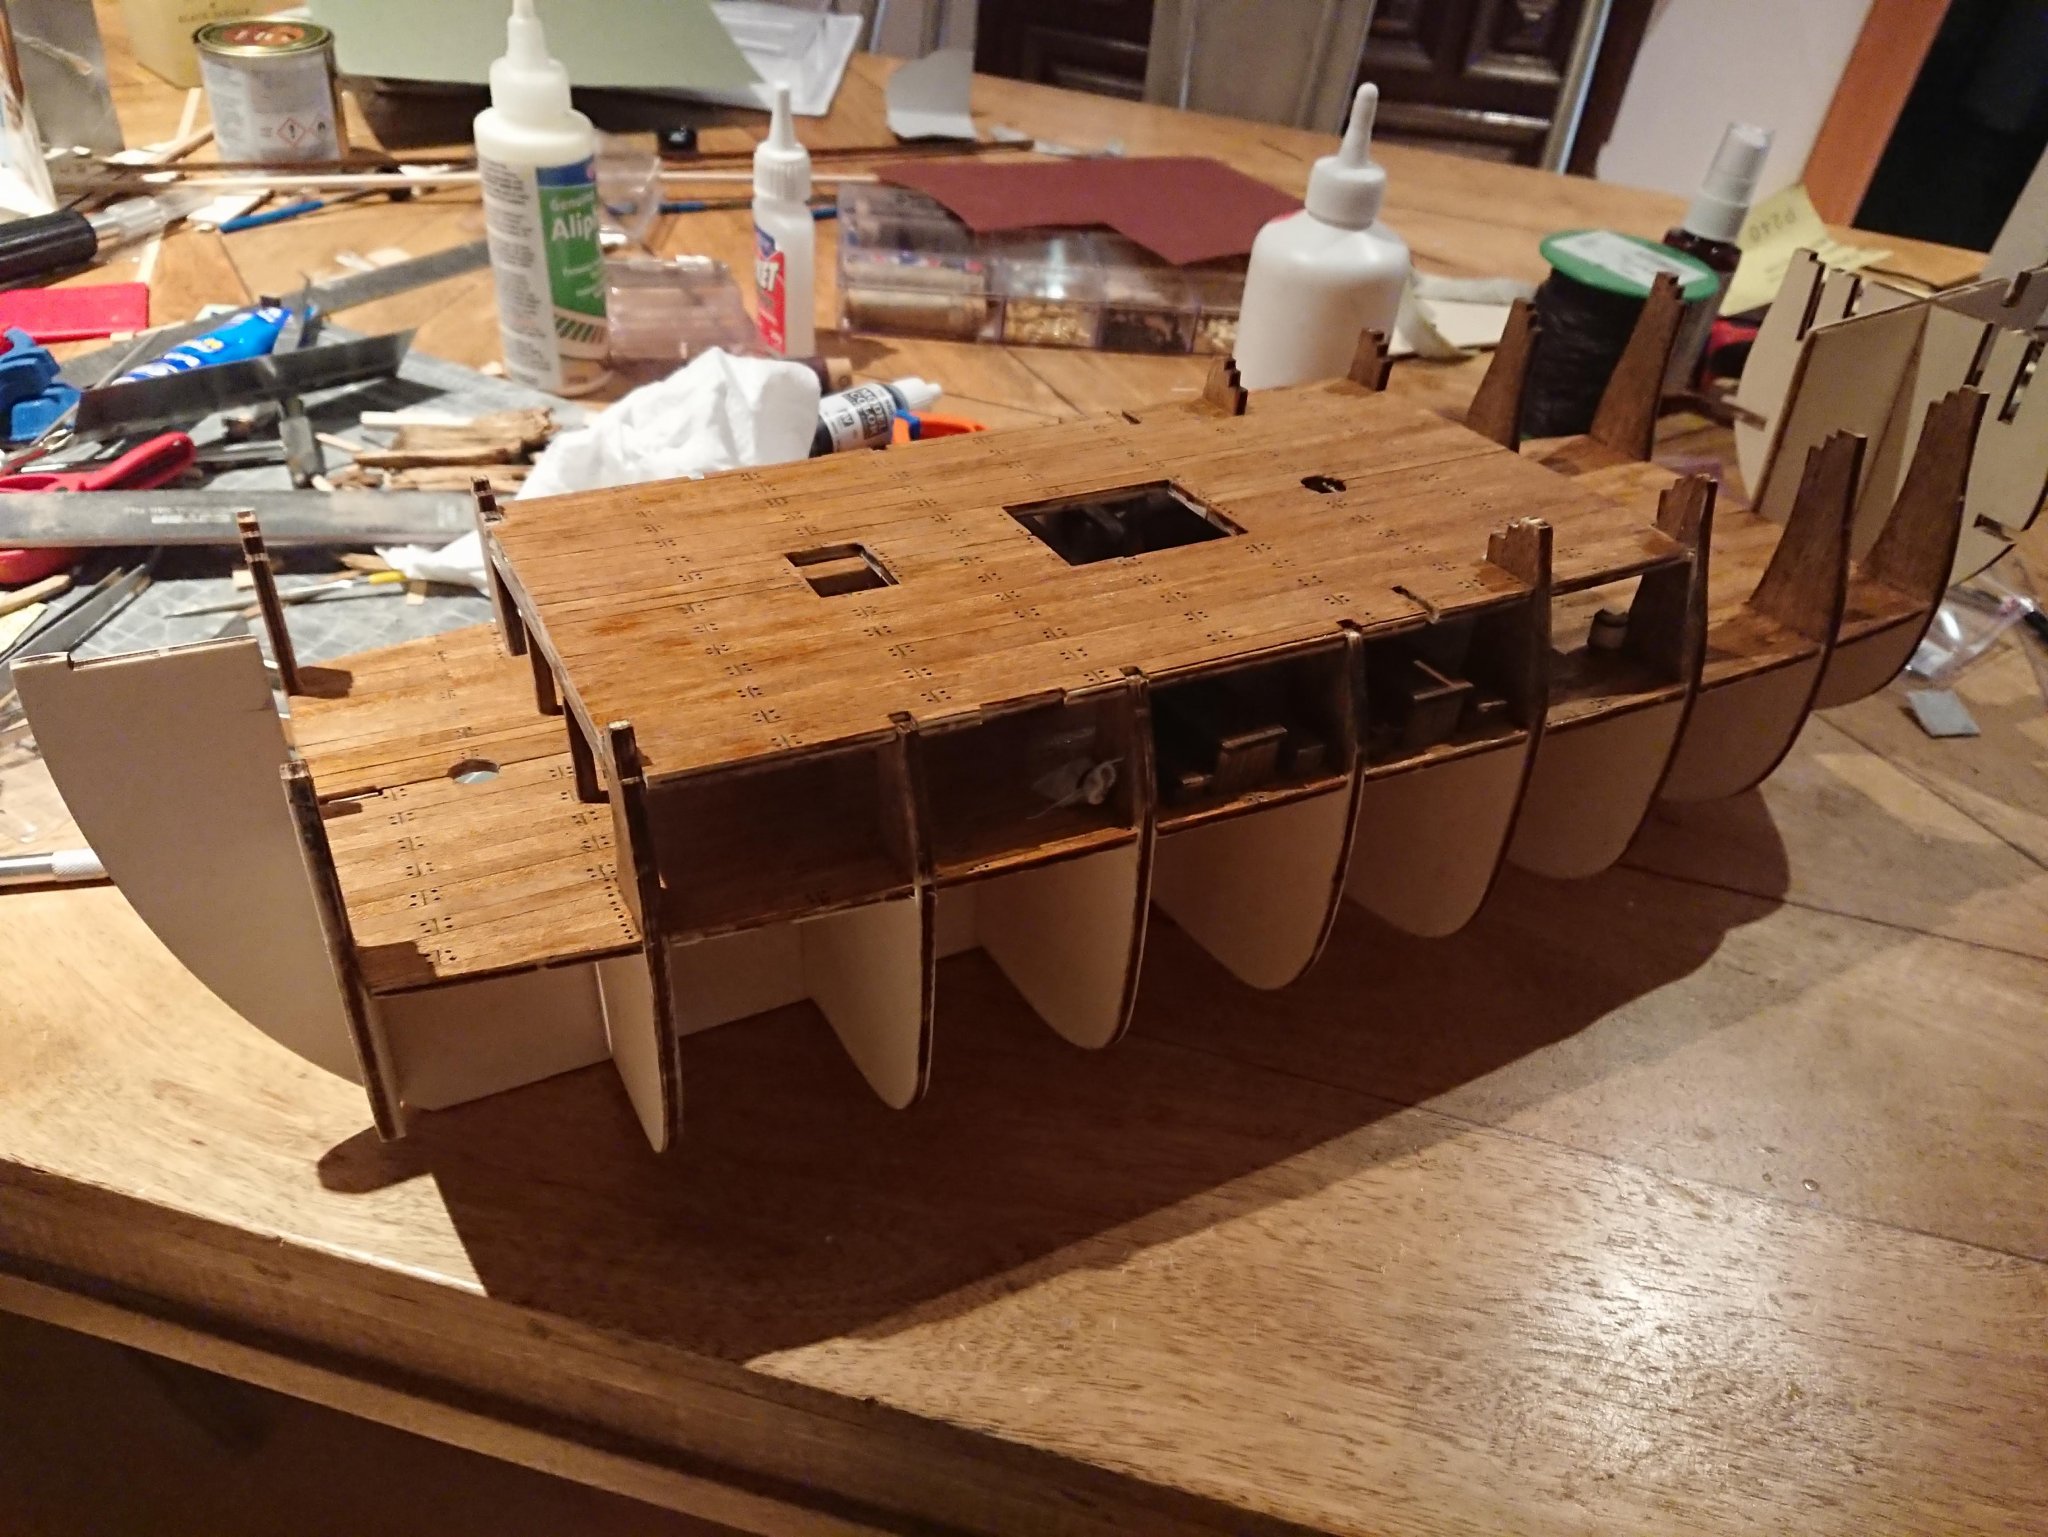
Making progress very slowly this week as I'm in the middle of my sixth house move in six years 😒. Painting the ship exterior now, starting with the deck. I've painted the bulwarks red matte with a matte varnish on top. Onto building the stern cover next. I've built an interior here just for fun. I added gloss varnish and painted some areas white, hopefully once I build the windows (using microscope slides) I can see what's inside relatively clearly: After the stern cover is done I'll add the wales, finish off the bulwarks, add the keel and finish painting the rest of the hull. Still debating in my mind whether to paint the lower part of the hull white or just varnish it as is. I bought a really nice white luminos paint/protector from lasur for that purpose but I really like the look of the oak stain and I think it will look great on its own with the blue and yellow ochre decorative paint to be added...we'll see.

-
I also completed the first staining pass using a flat brush. I used light oak stain from valmour which turned out a bit darker than I thought it would but I still like the result. After staining I polished the entire surface thoroughly with a clean rag to get rid of the excess. I will need to give it one more light staining job.

-
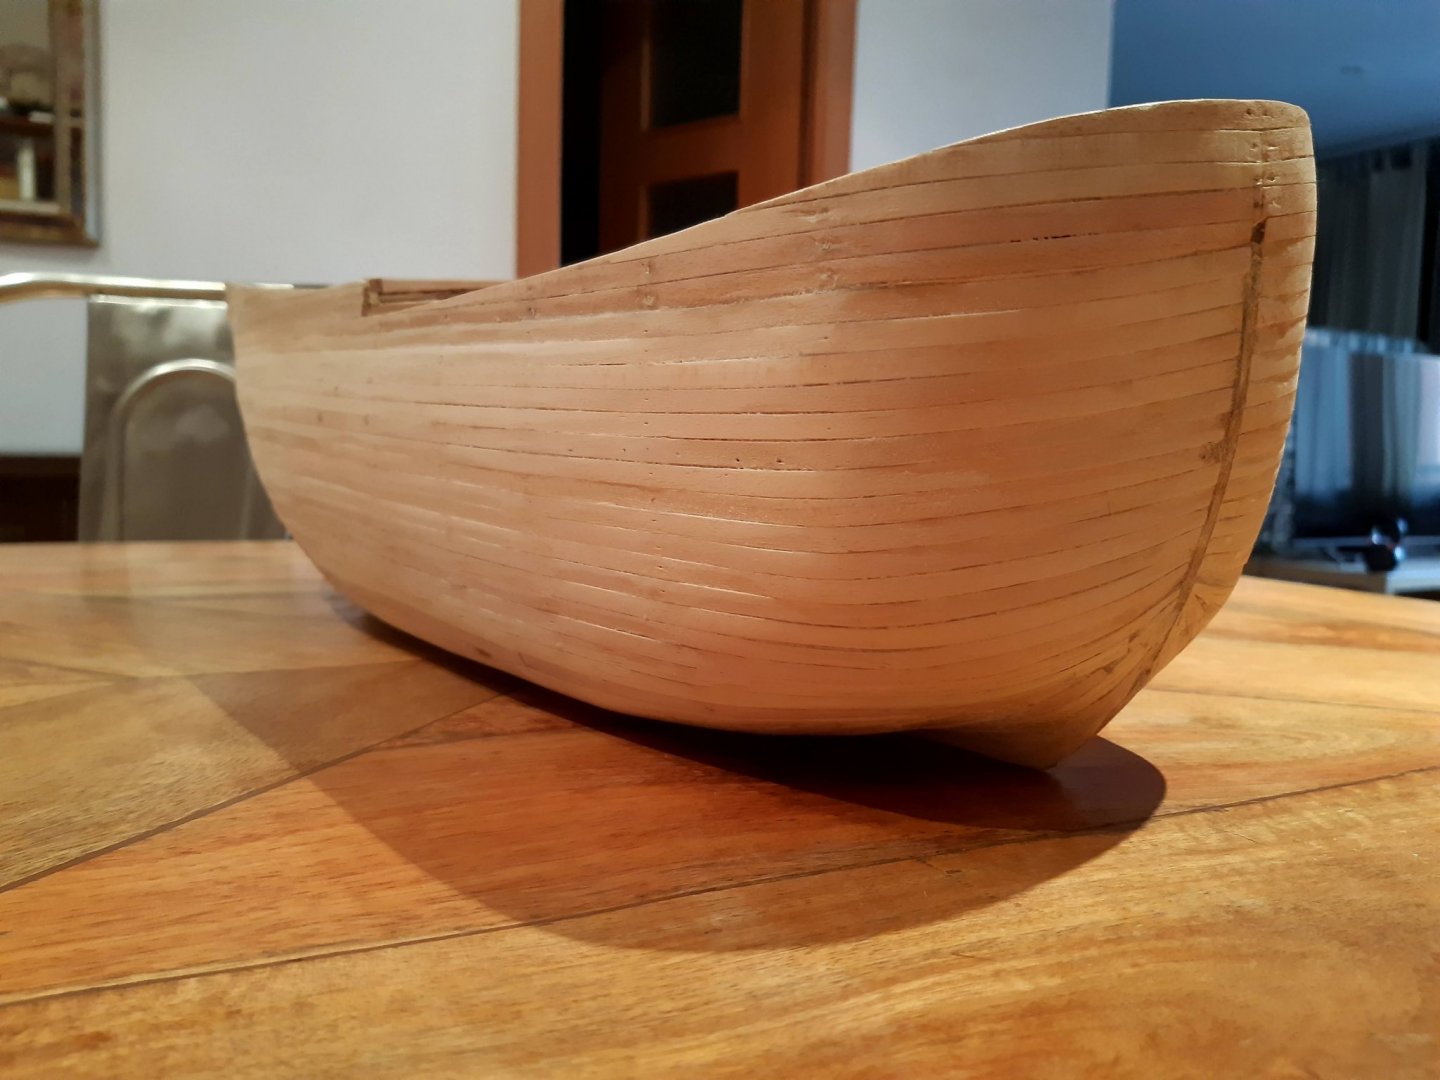
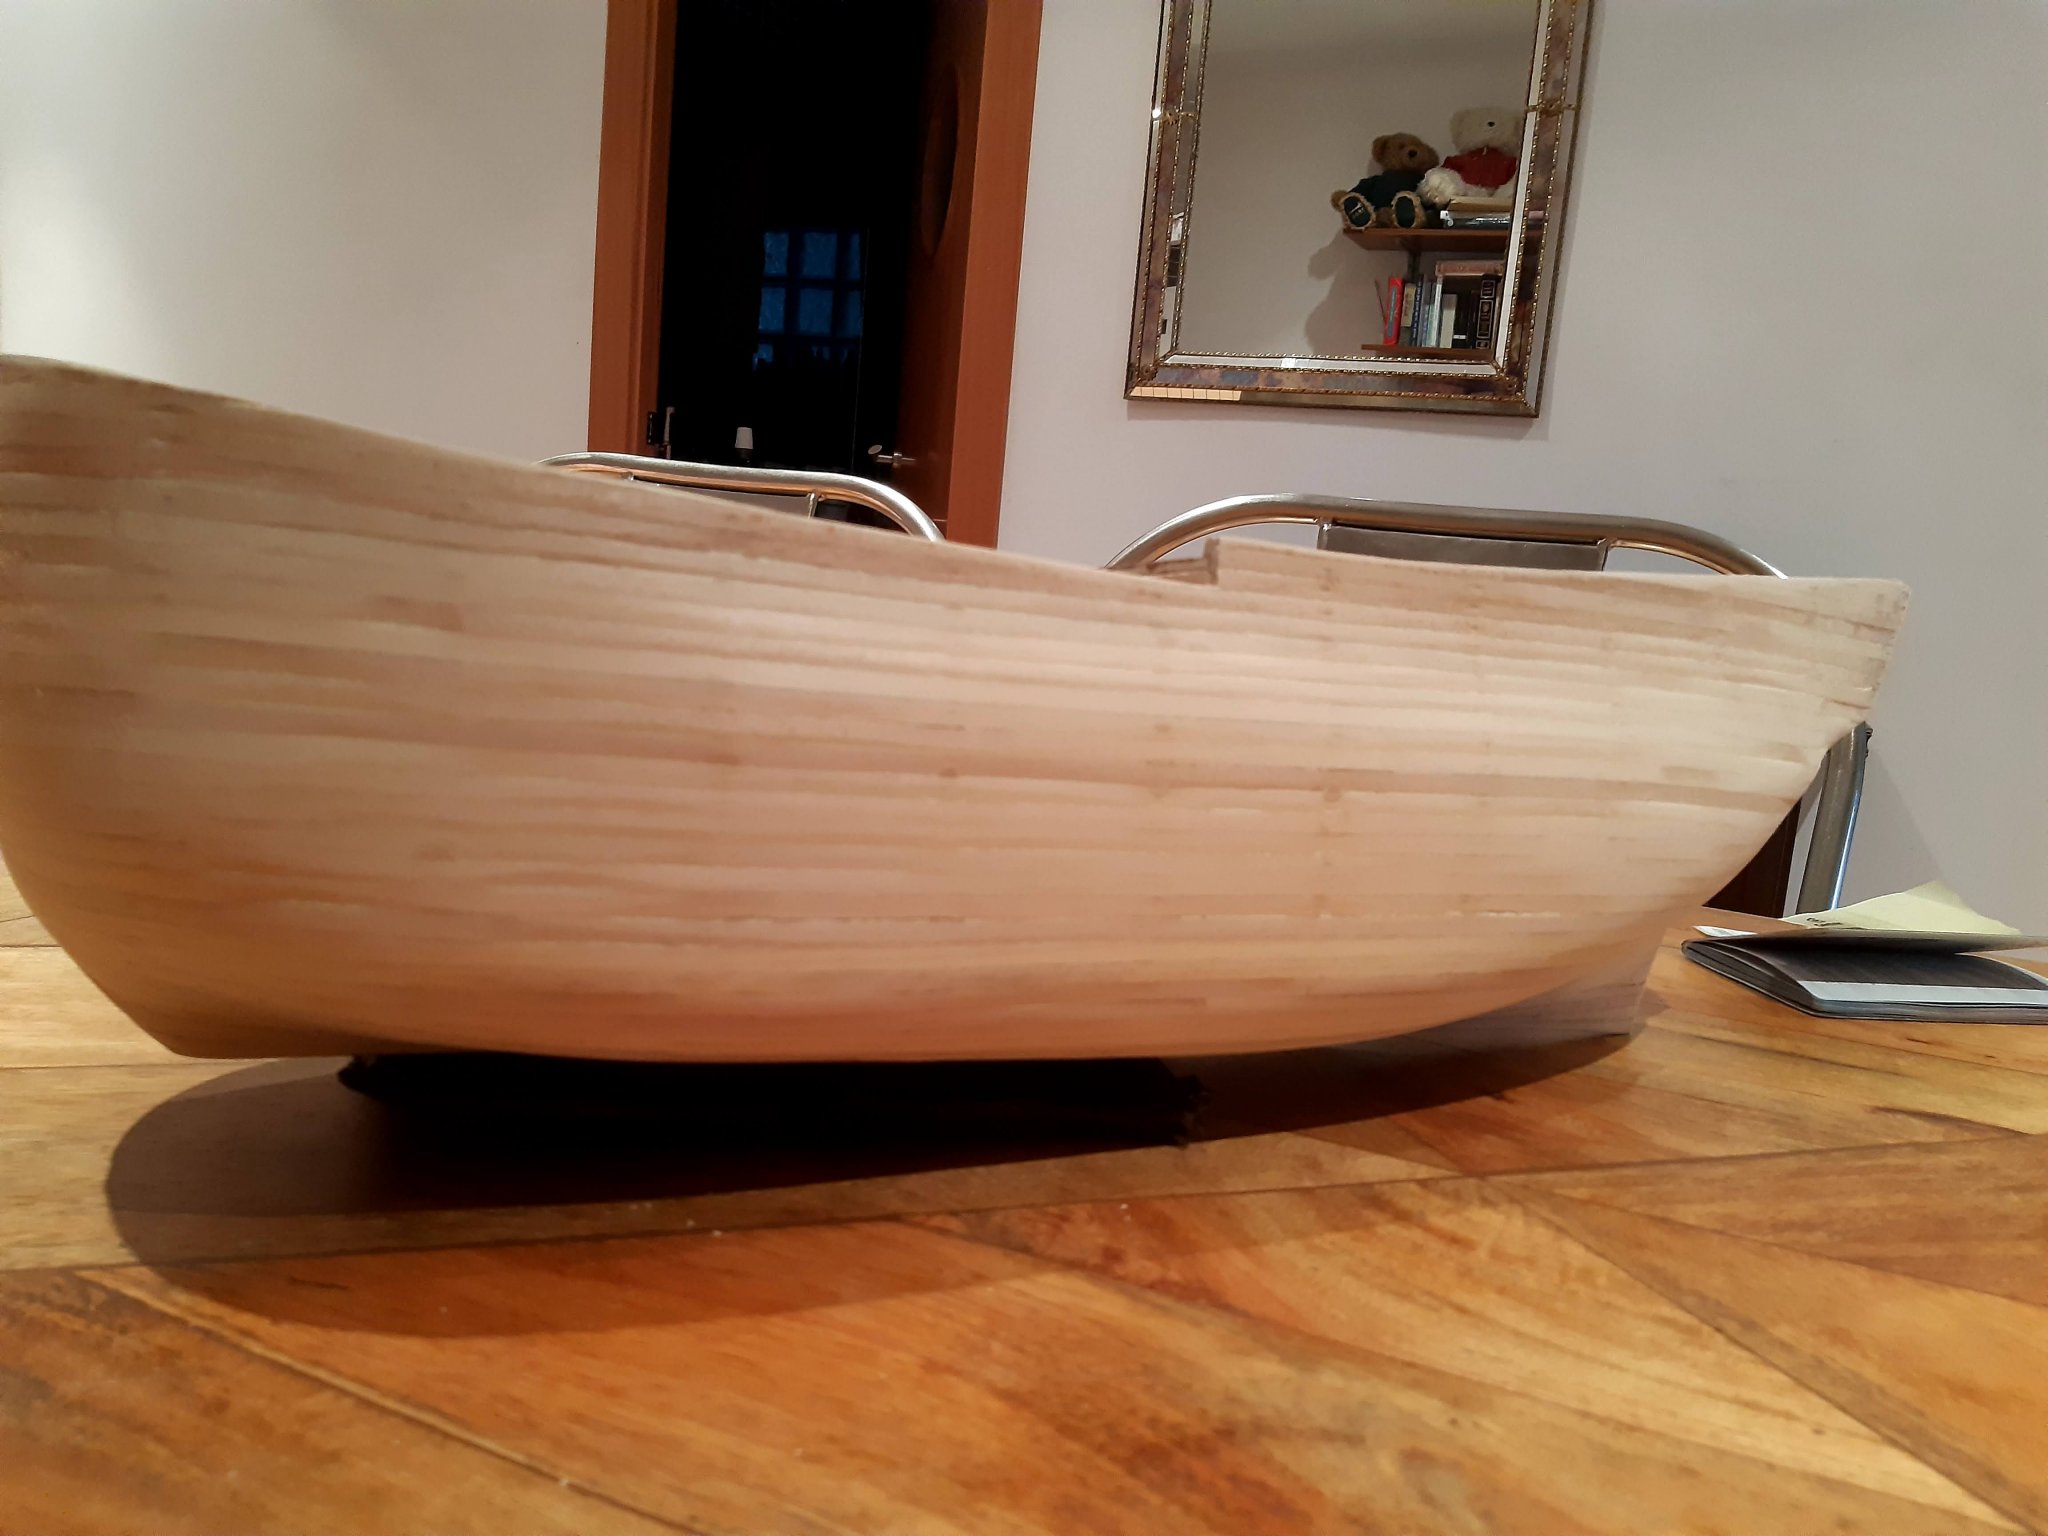
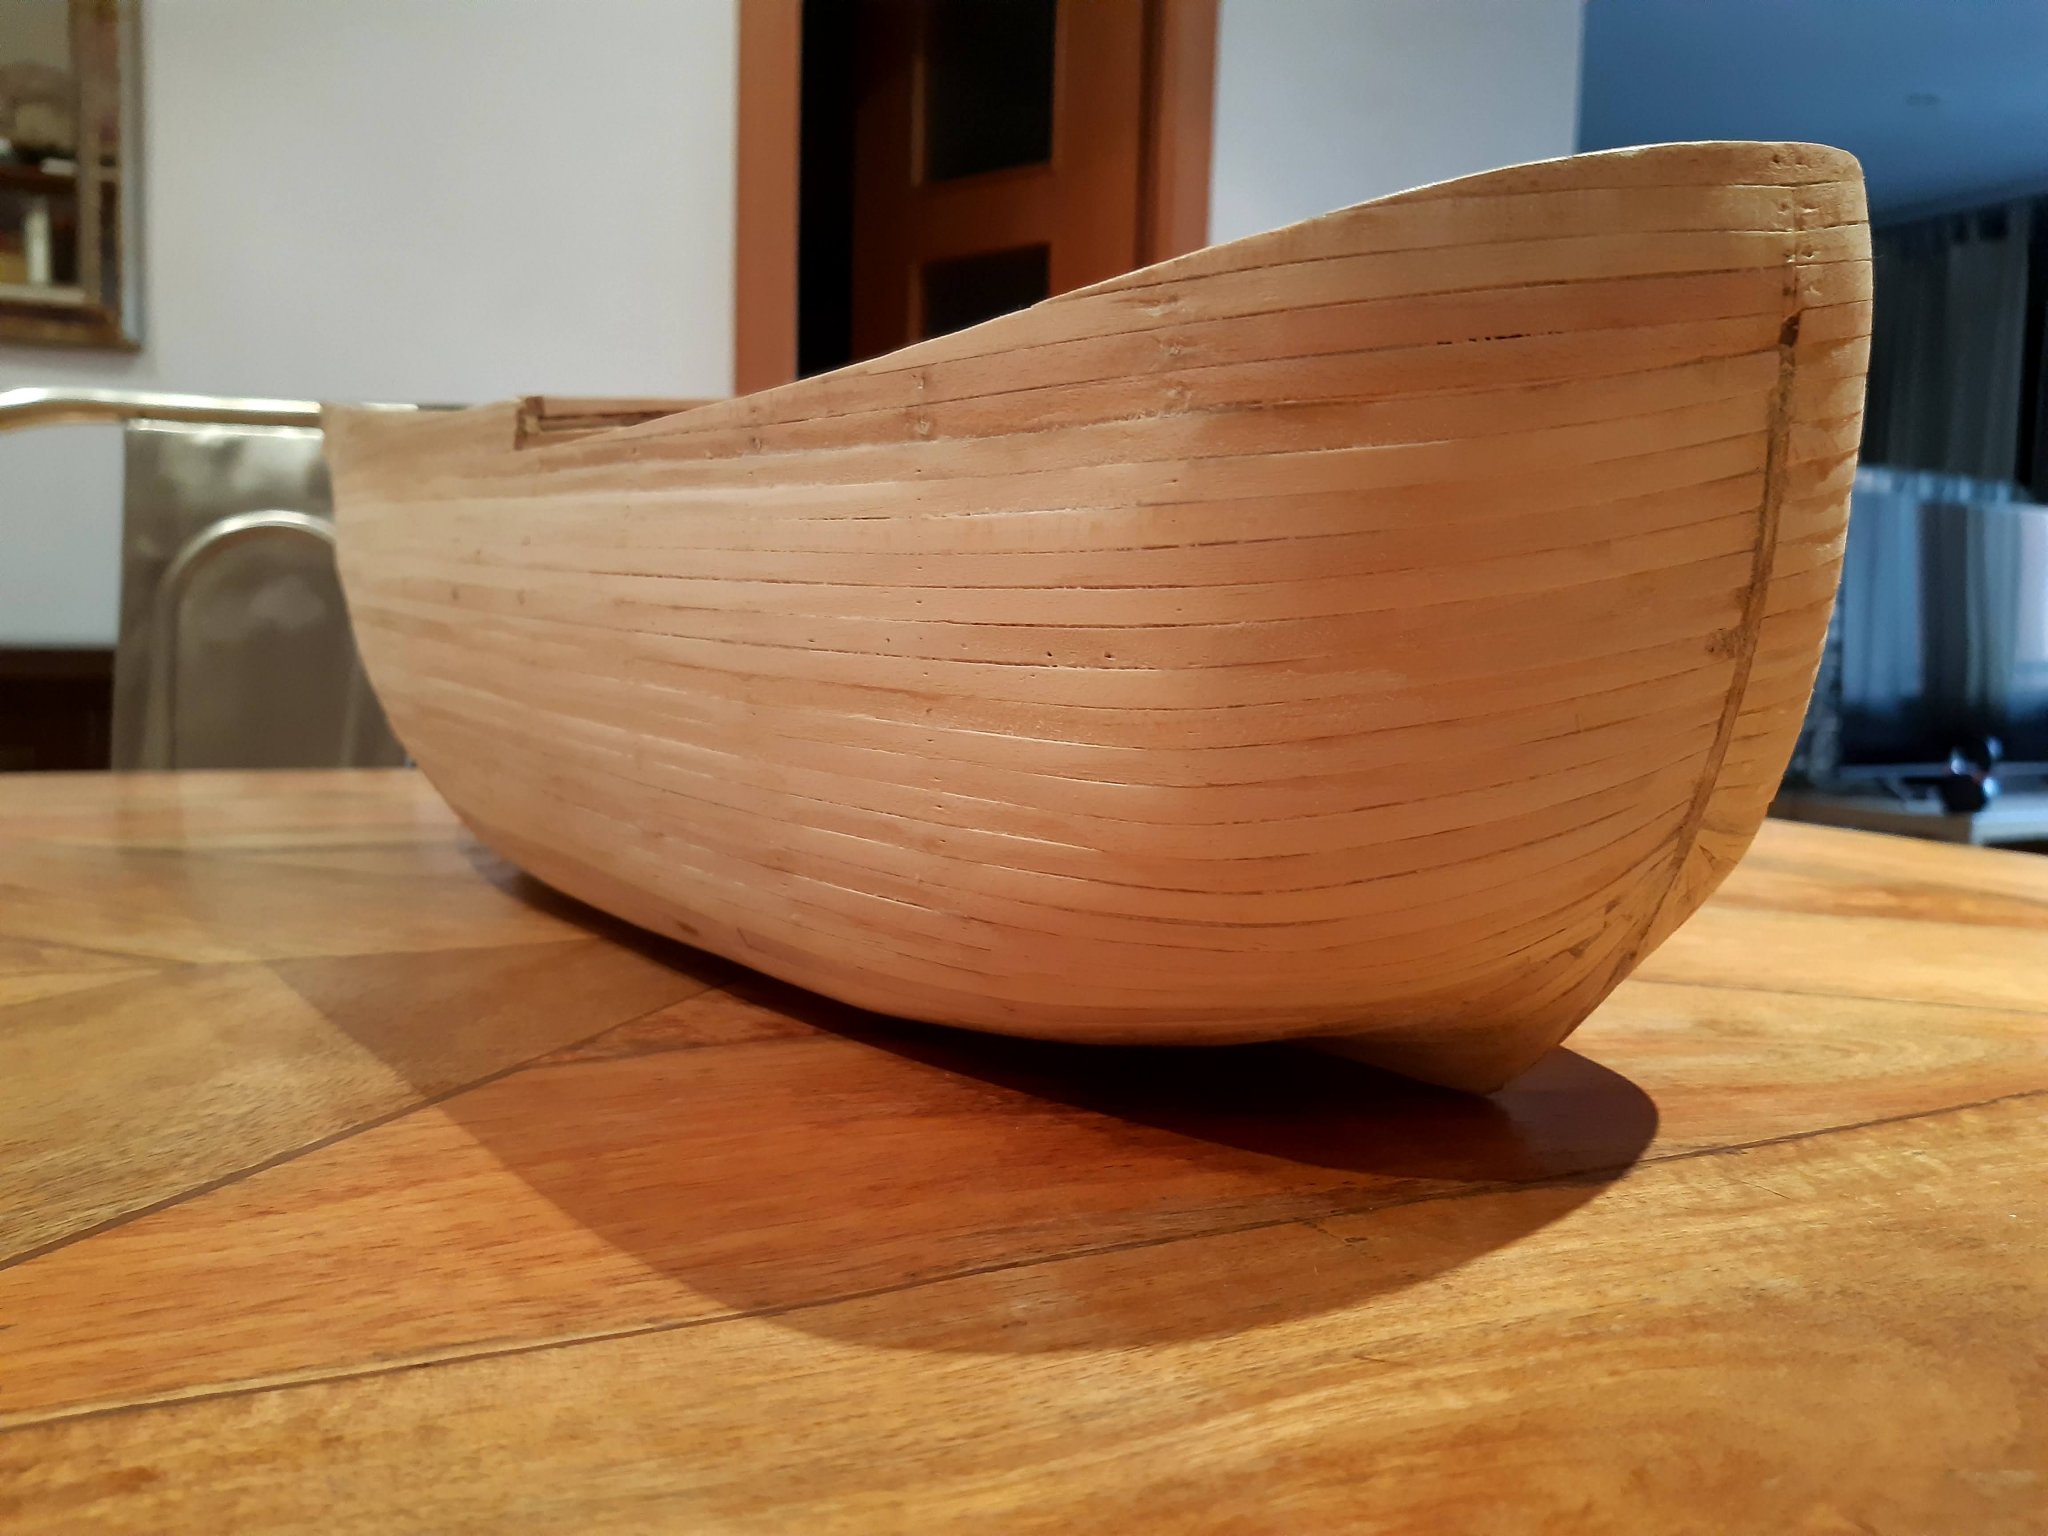
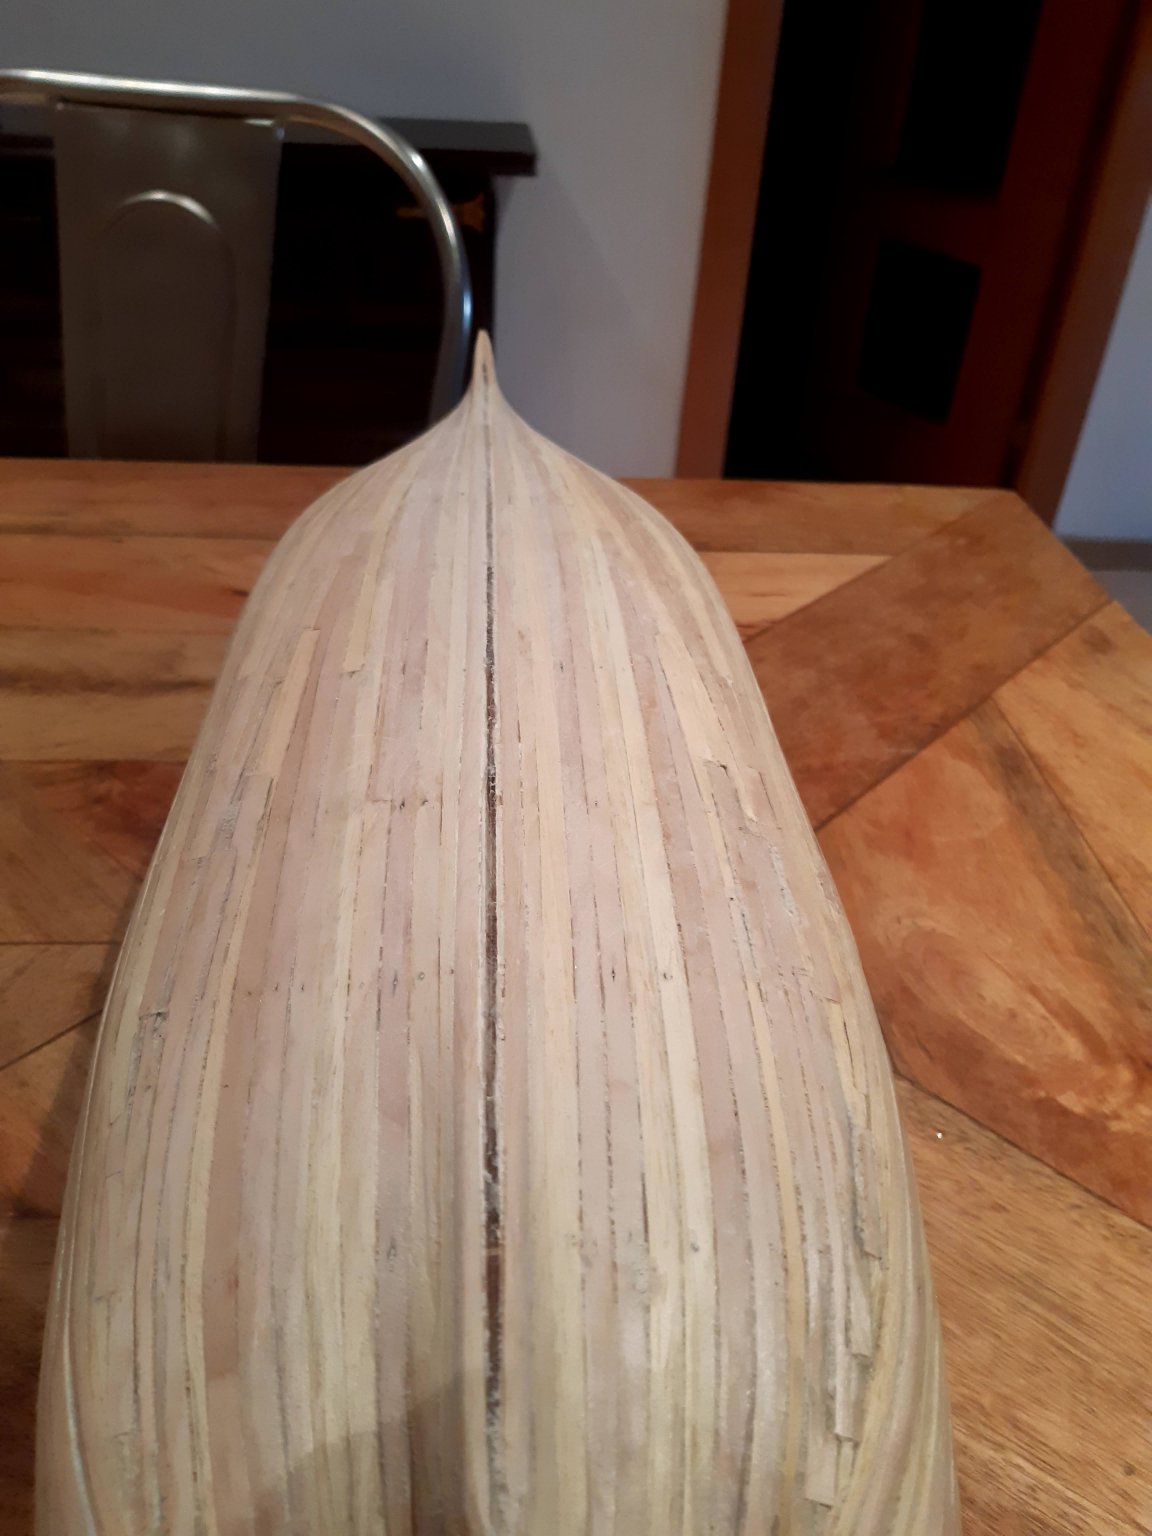
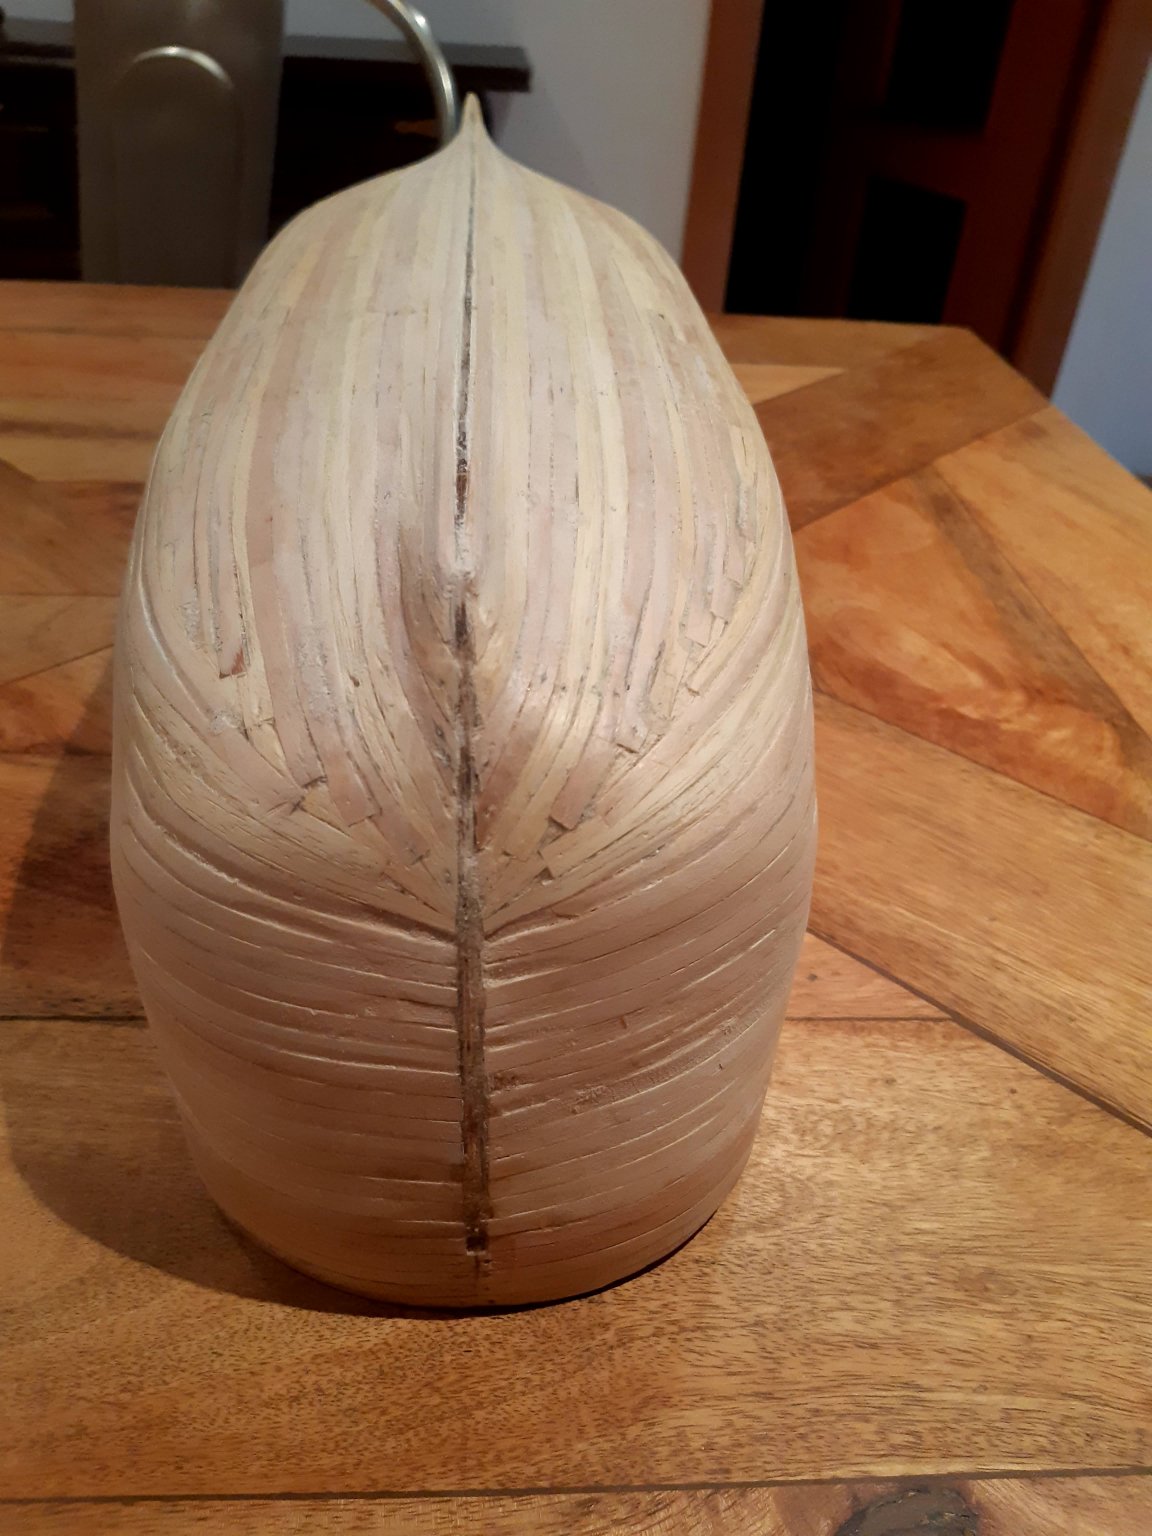
Was away down in south of Spain visiting family last several days. Today I got back to finishing the sanding. Practically all the surface is even now. Note the use of different sources of wood for the planking After completing the sanding I gave it a good once over with a soft brush and a rag to get rid of all the dust.


-
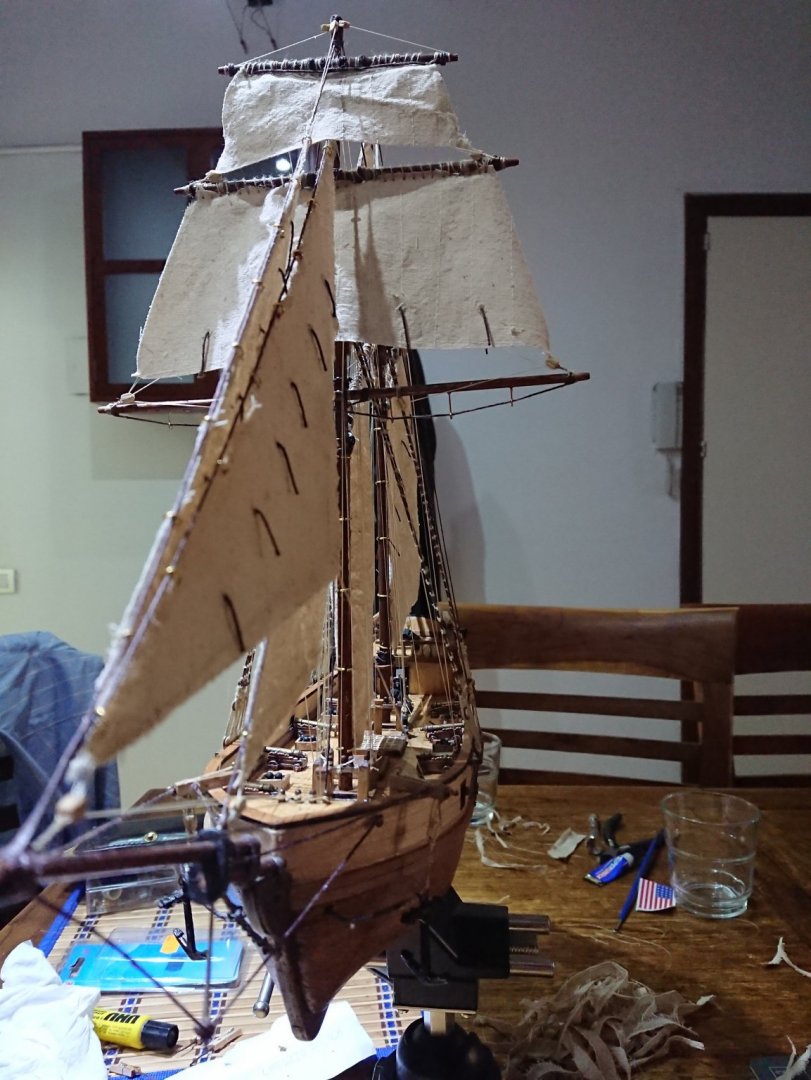
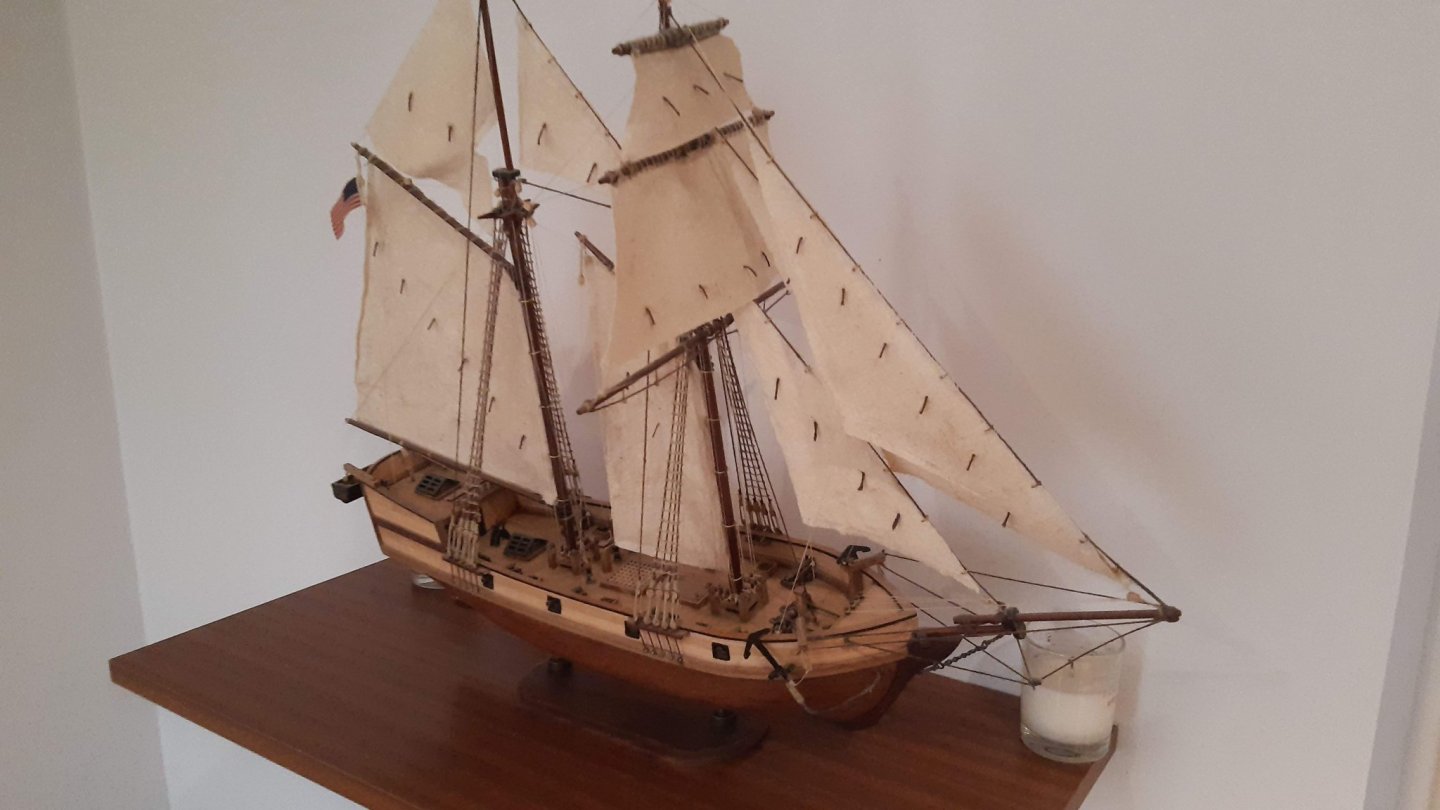
Felt it was right to post a final update for this build log, confirming completion in August 2018. I was busy moving apartment around this time so was really distracted and lost track of this build log. The running rigging was added: Then the sails: A little clean-up and added the flag to finish this off: As with any beginner, I look back with a little bit of frustration at all the silly mistakes that have cost me time and negatively affected the final result. But at the same time it's been a great learning experience and I'm motivated for my next build.


-
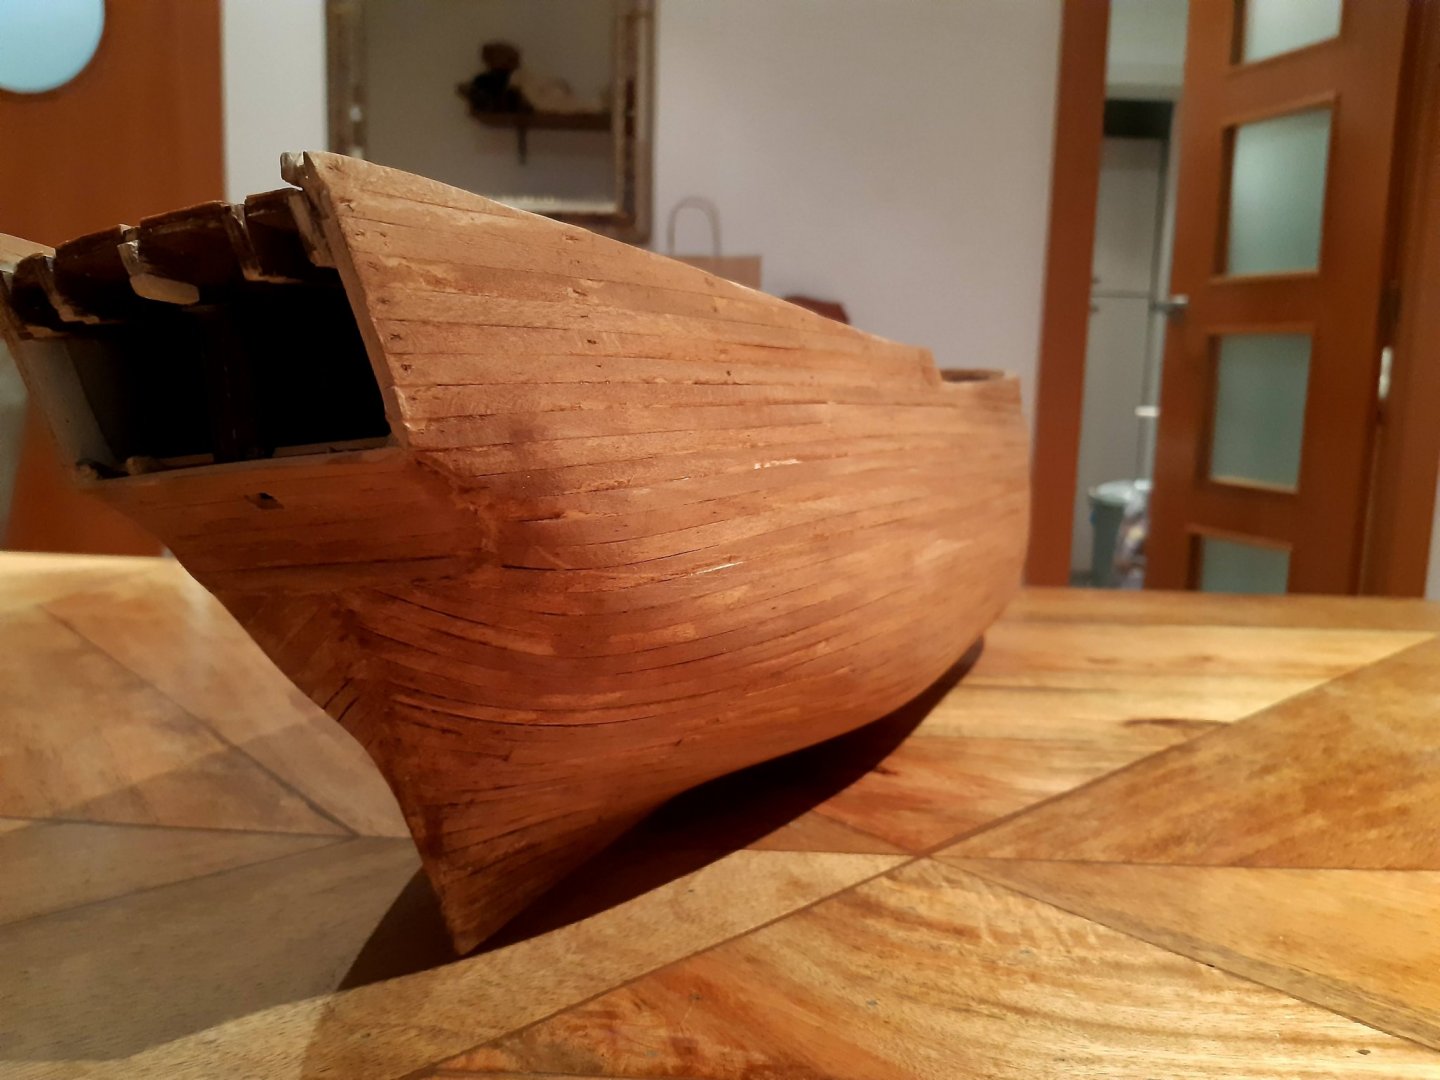
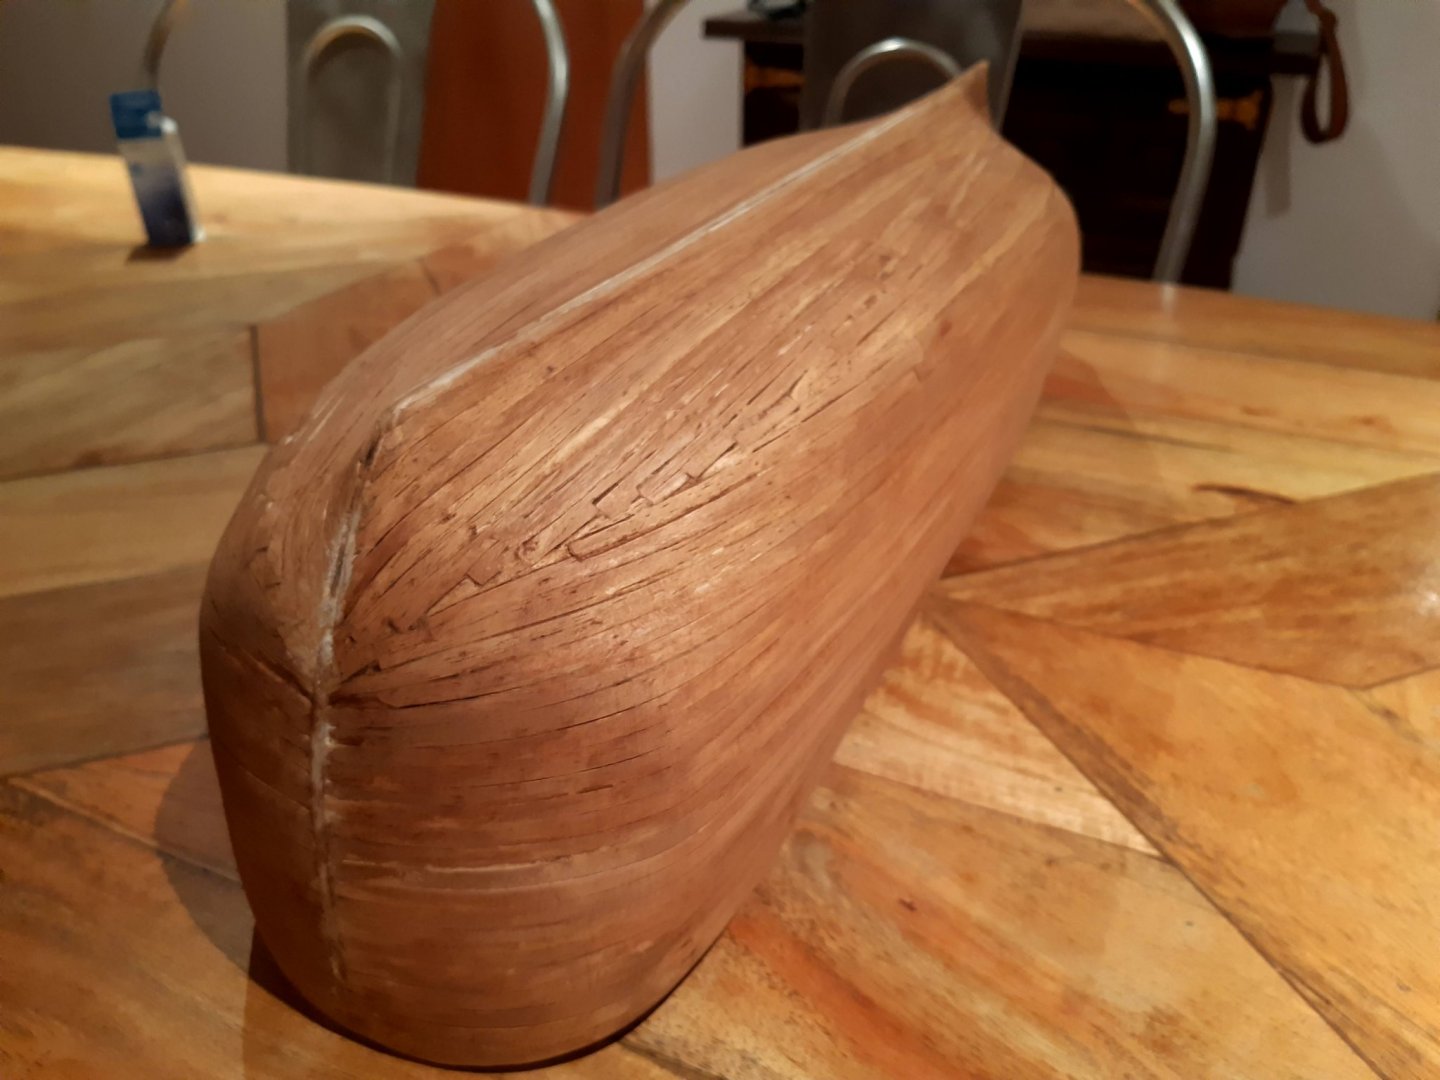
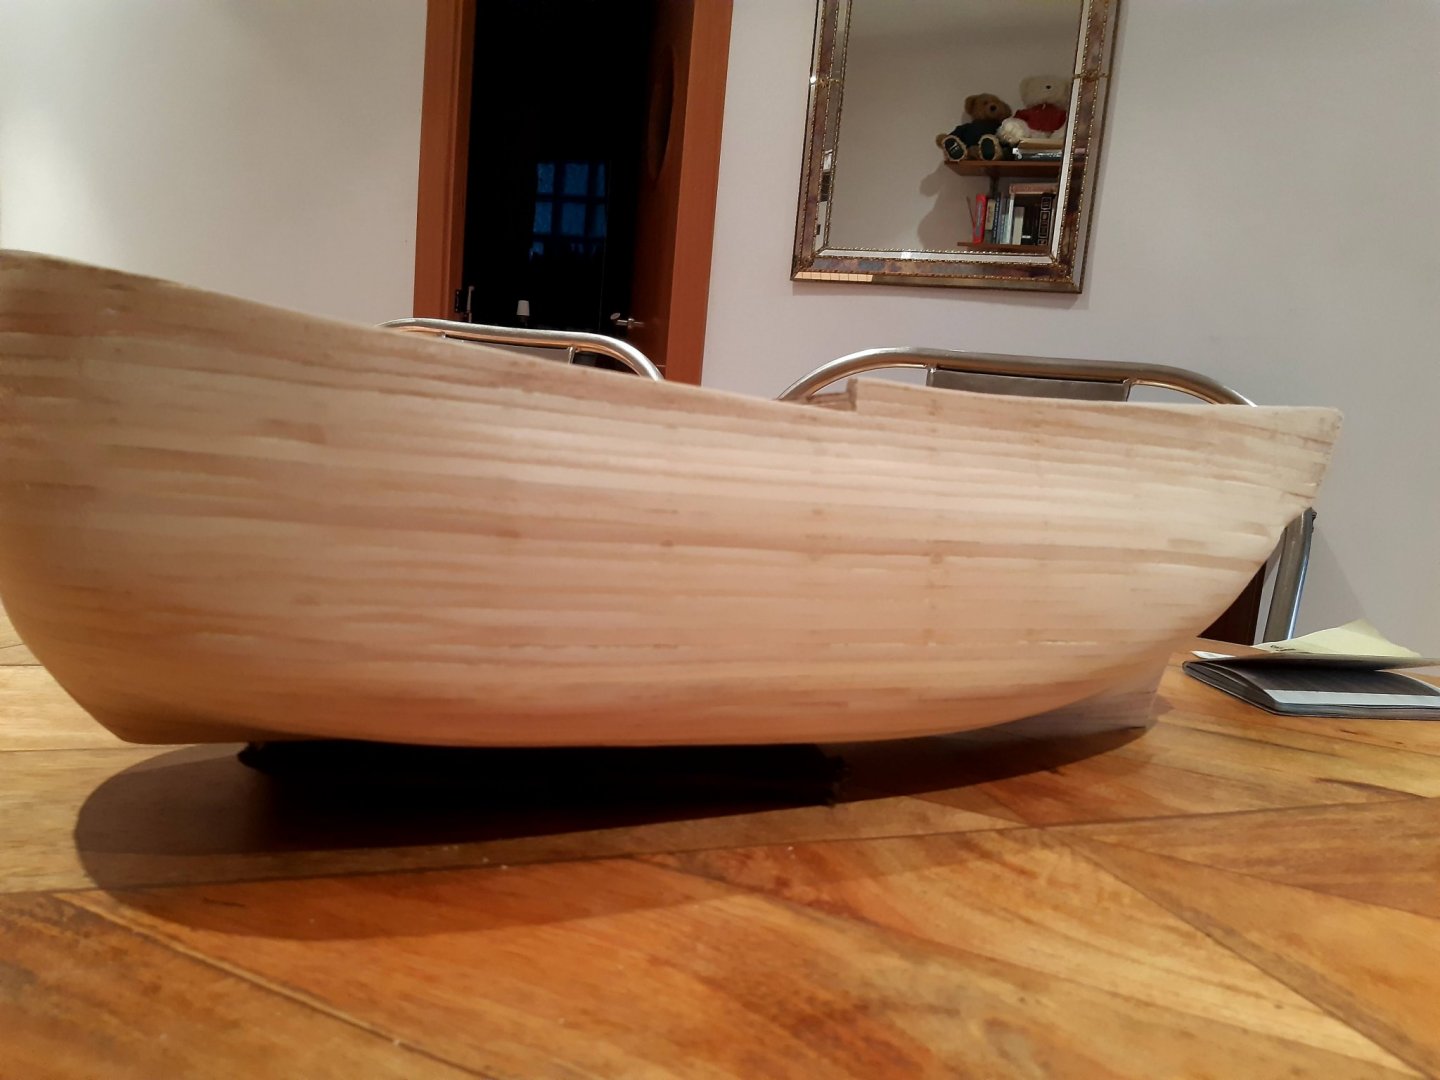
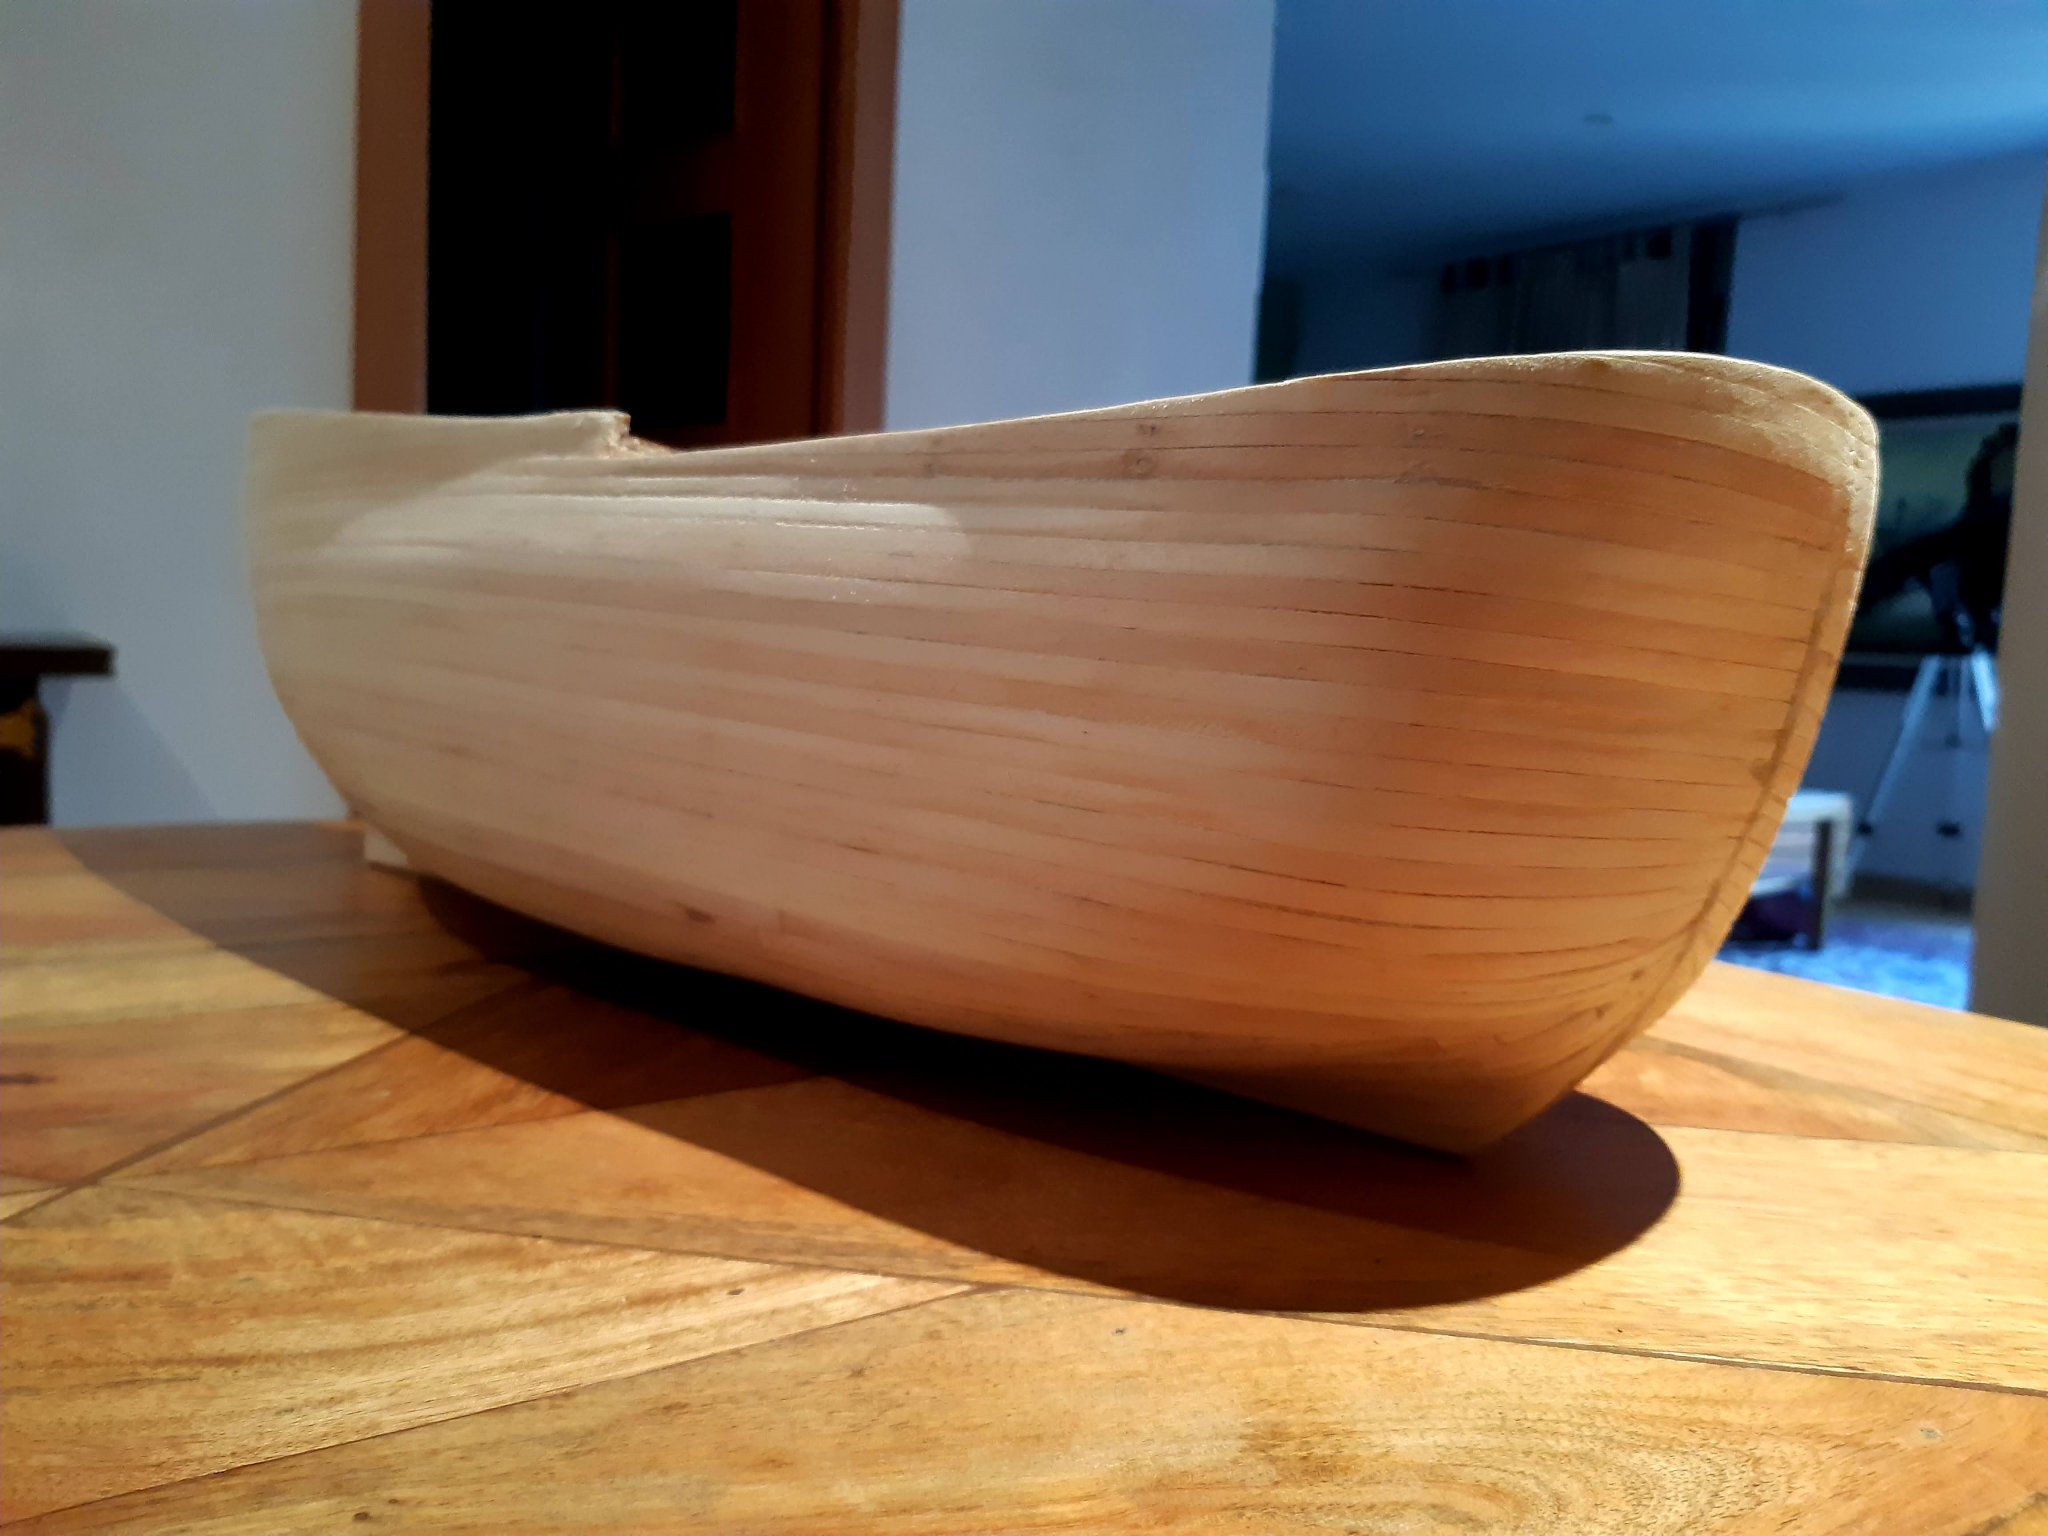
First phase of cleanup now complete. First rubbed in some alcohol followed by grease remover mixed with water. After removing all moisture with a clean rag I proceeded to sand the hull working my way up to 240 grit. Now all I have left is some localised sanding to remove those stubborn bumps and imperfections. My end goal however is to give the boat a used and weathered look so I am not too concerned with very minor irregularities on the surface.

-
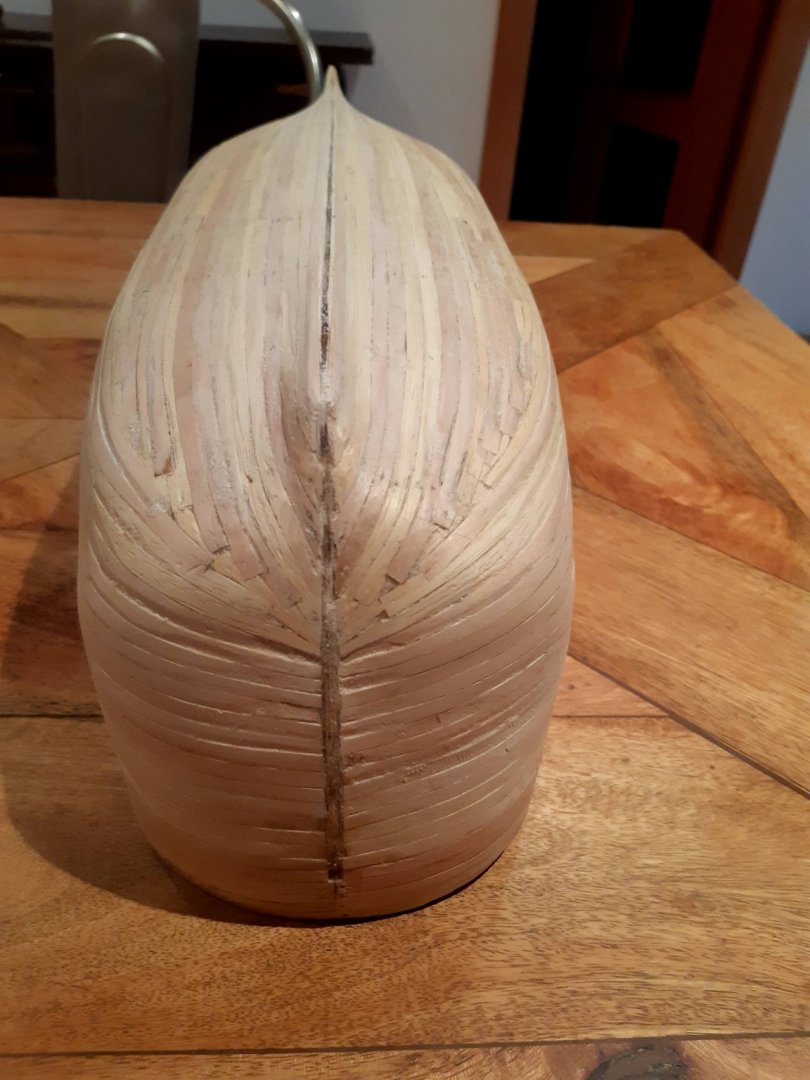
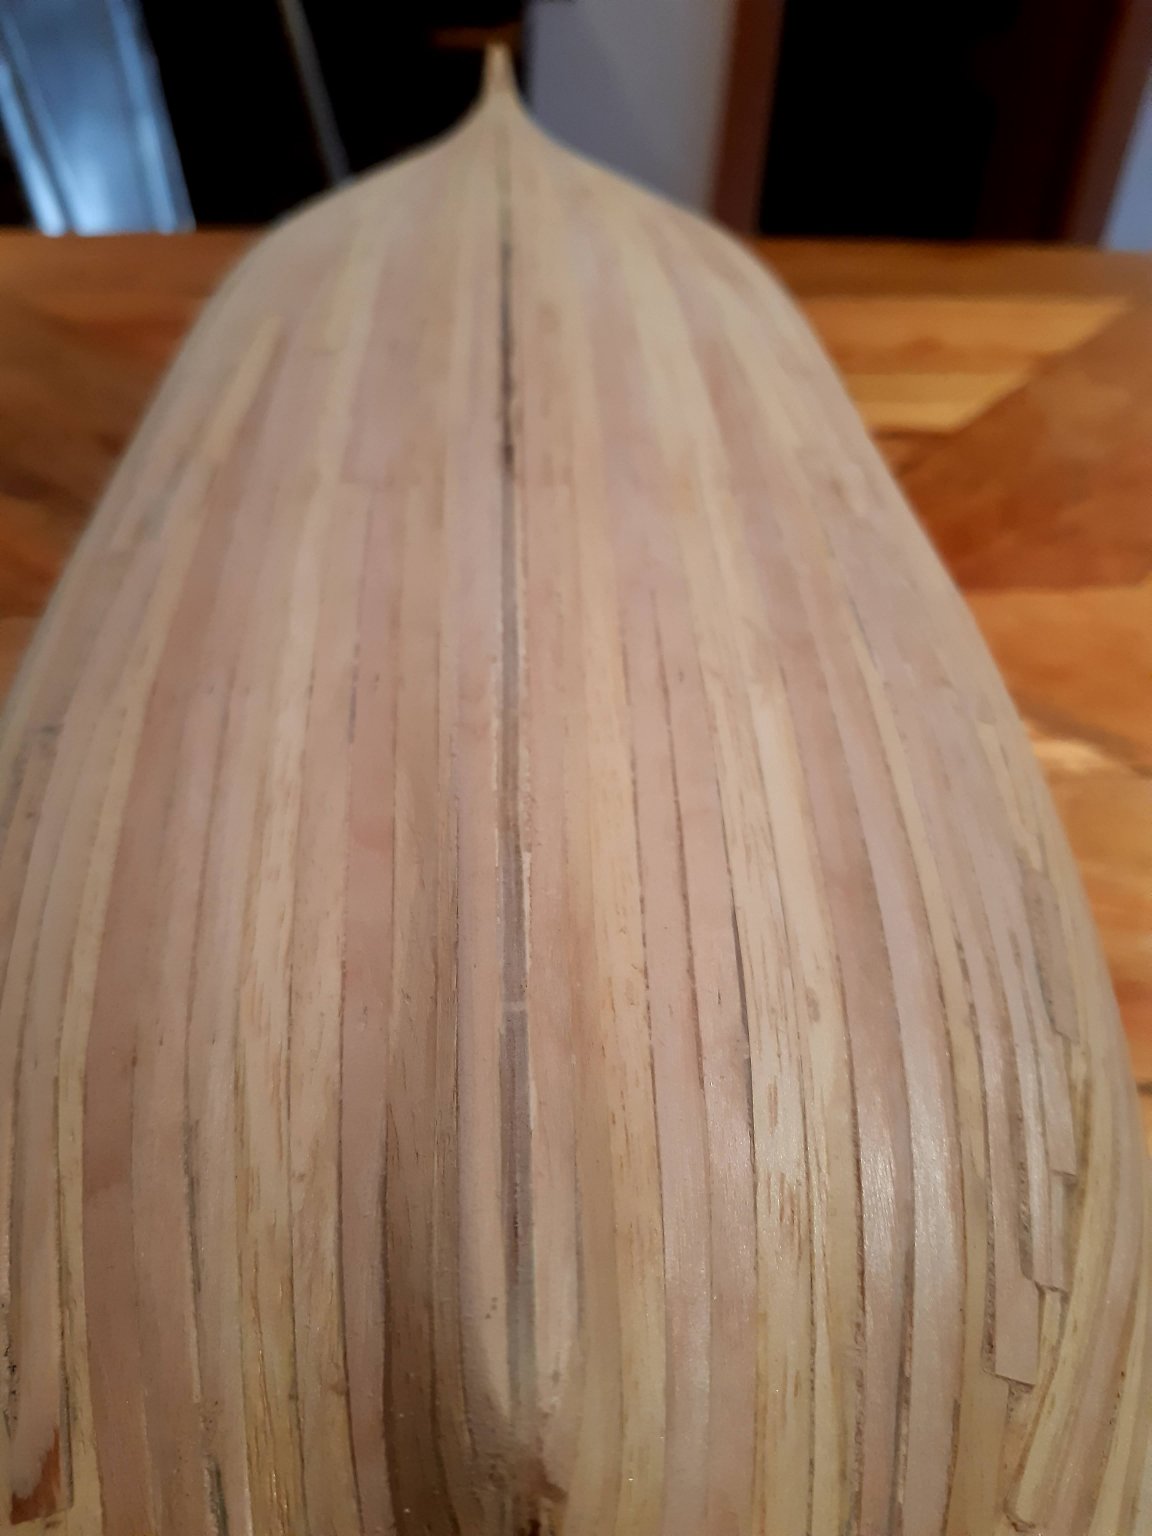
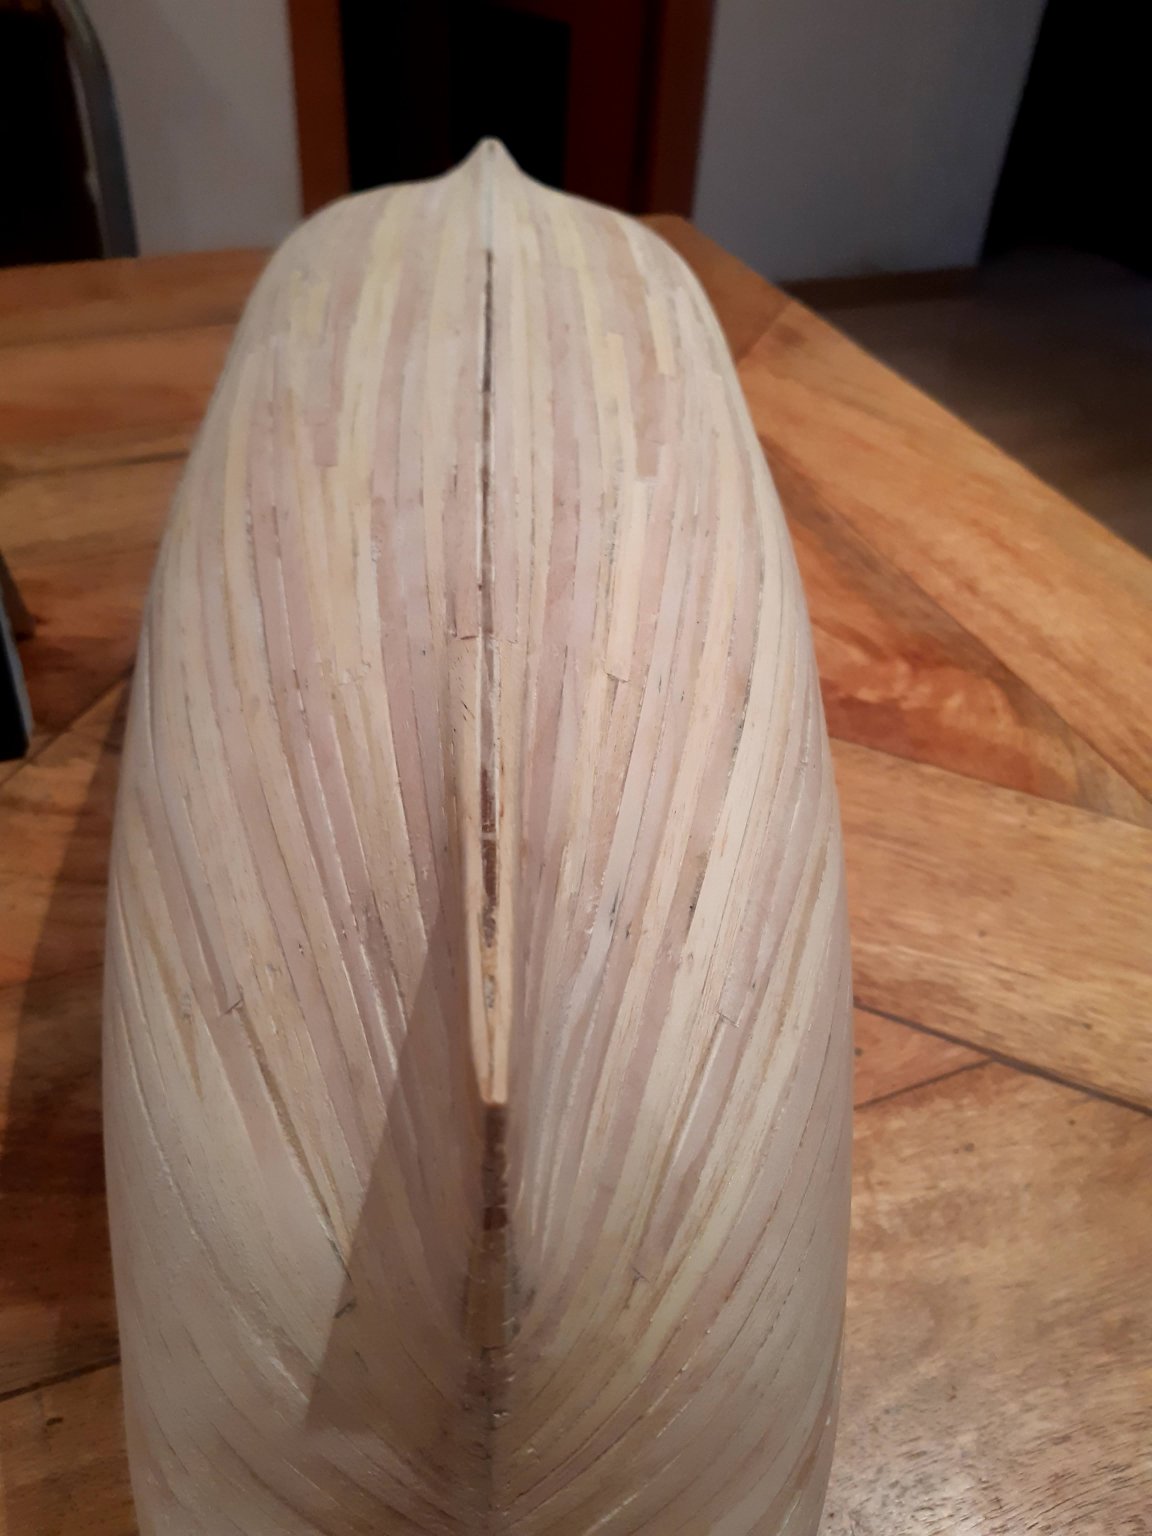
After several iterations of "directional change" I finally managed to finish the first layer of planking and am pleased with the results. Up till the point where the bow drastically changes shape the planks are completely parallel to the bottom. After that it's more like a jigsaw, with single planks partially laid across the full length of the hull and slotting around eachother. I tried to avoid extremely thin pieces and planks with sharp endings and by and large I managed that except at the bow itself. I am disappointed somewhat by the finish at the bow but when I get to sand and paint that over it should look better. This is the point I have reached as of present day and the next steps will be filling in any gaps (thankfully not too many), sanding and cleaning the wood. After that I will stain the entire hull with light oak stain.


-
I re-started the planking from the top going down. Once I reached the point where I couldn't lay the next plank in a natural position I then laid the plank at an angle with respect to the previous plank so that I could place it flat, i.e. "where it lay". According to this guide this is a "directional change". After laying a couple of planks following the placement of that plank I ended up with this situation: So this was ok to work from but I wish I had encountered the guide to buff-bow planking earlier as I would have started modifying the orientation of the individual planks earlier in the process.
-
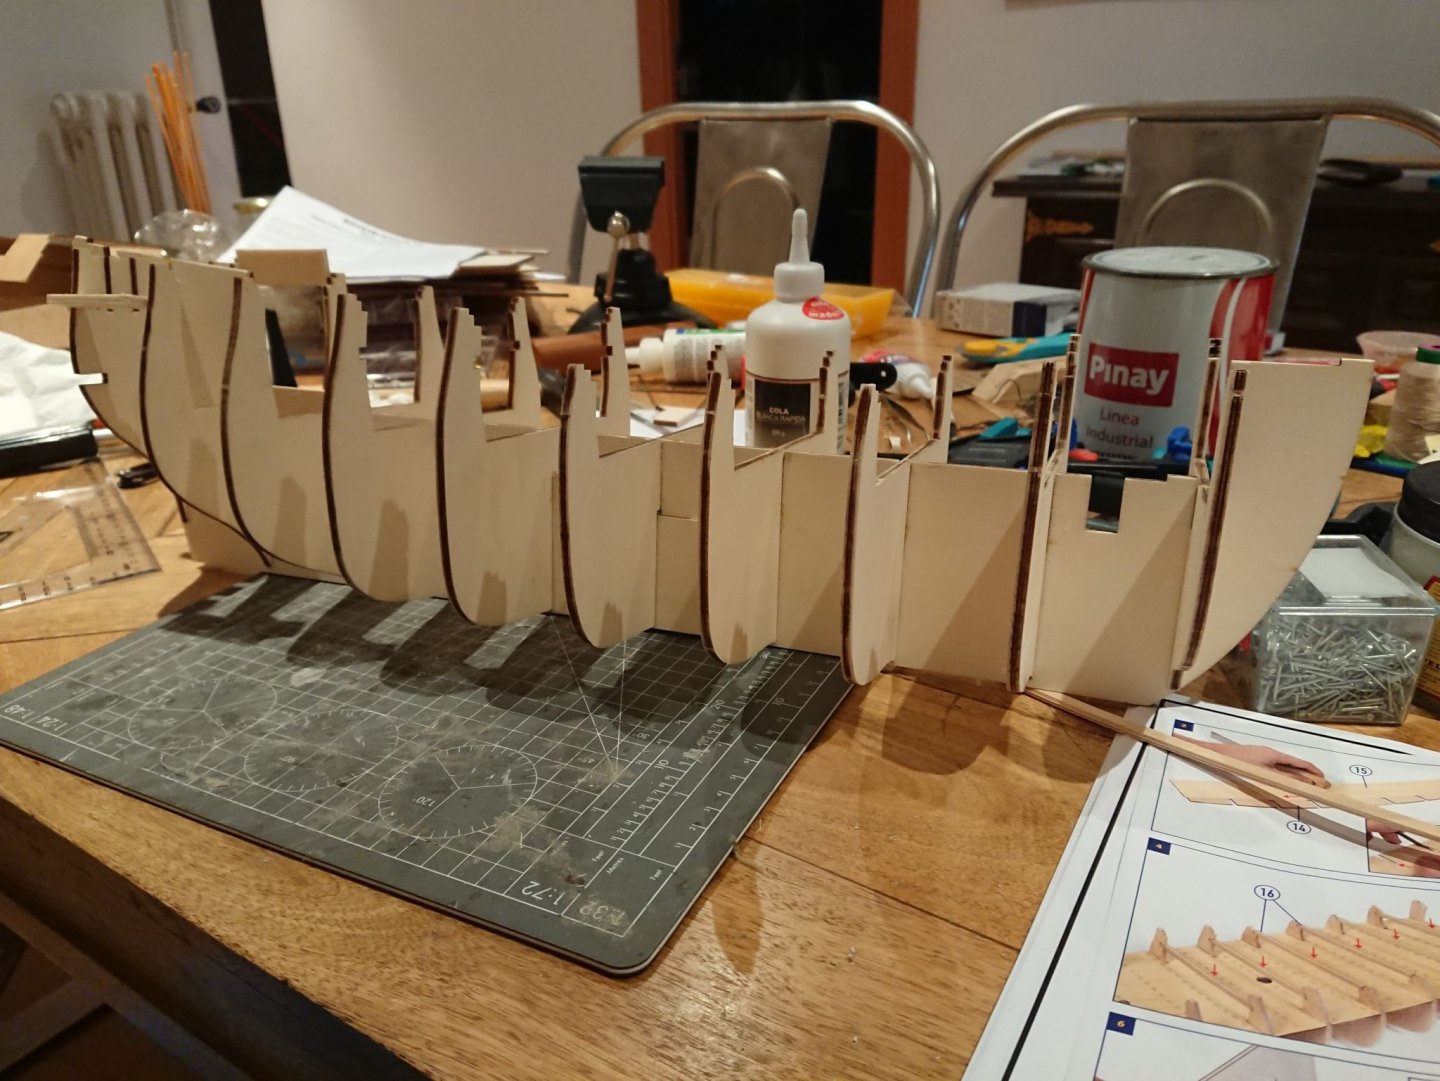
After a year of the build sitting around neglected I decided (or compelled by quarantine!) to revisit in May and start the planking. The kit instructions advise not to plank the bow and stern but rather fill those areas with balsa and sand those to shape. The rest of the hull would be planked stopping just short of the bow and stern. The second layer of planking (with sapelli colored material) would then cover everything. I was keen to stain the entire hull and paint the different areas directly on the first layer. So I decided to make the effort to lay down a clean and good single layer of planking. Apart from the aesthetic preference I was also worried that my sanding of the balsa on the bow and stern would be unnatural. I should have done more research on the structure of the hull as I soon realized that the shape of the bow conditioned the laying of the planks from early on. Once you approach the bottom then it is impossible to lay the planks parallel to the planks above without virtually destroying them at the bow. In addition building up/down from different positions in the hull and - critically - not using filler in the bow at all - resulted in a distorted shape at the bow. So I had no choice at this stage but to remove all planking up to the very top and start again.
-
I started on this build Easter 2019, the following pictures are from that time when I got up to just before the planking.


-
Greetings all. Yet another HM Bark Endeavour build - there are quite a few of them in this community which I have enjoyed perusing - hopefully I can produce something that is worth your time 🙂 This is my third build and I gravitated towards it as it's a very recognizable ship, has a painted hull which is a first for me and there is a huge wealth of information available to help me with any doubts I have.
-
This is really great work. I will be following with attention. My two cents regarding the captain's deck : I prefer the second of the set of three.
-
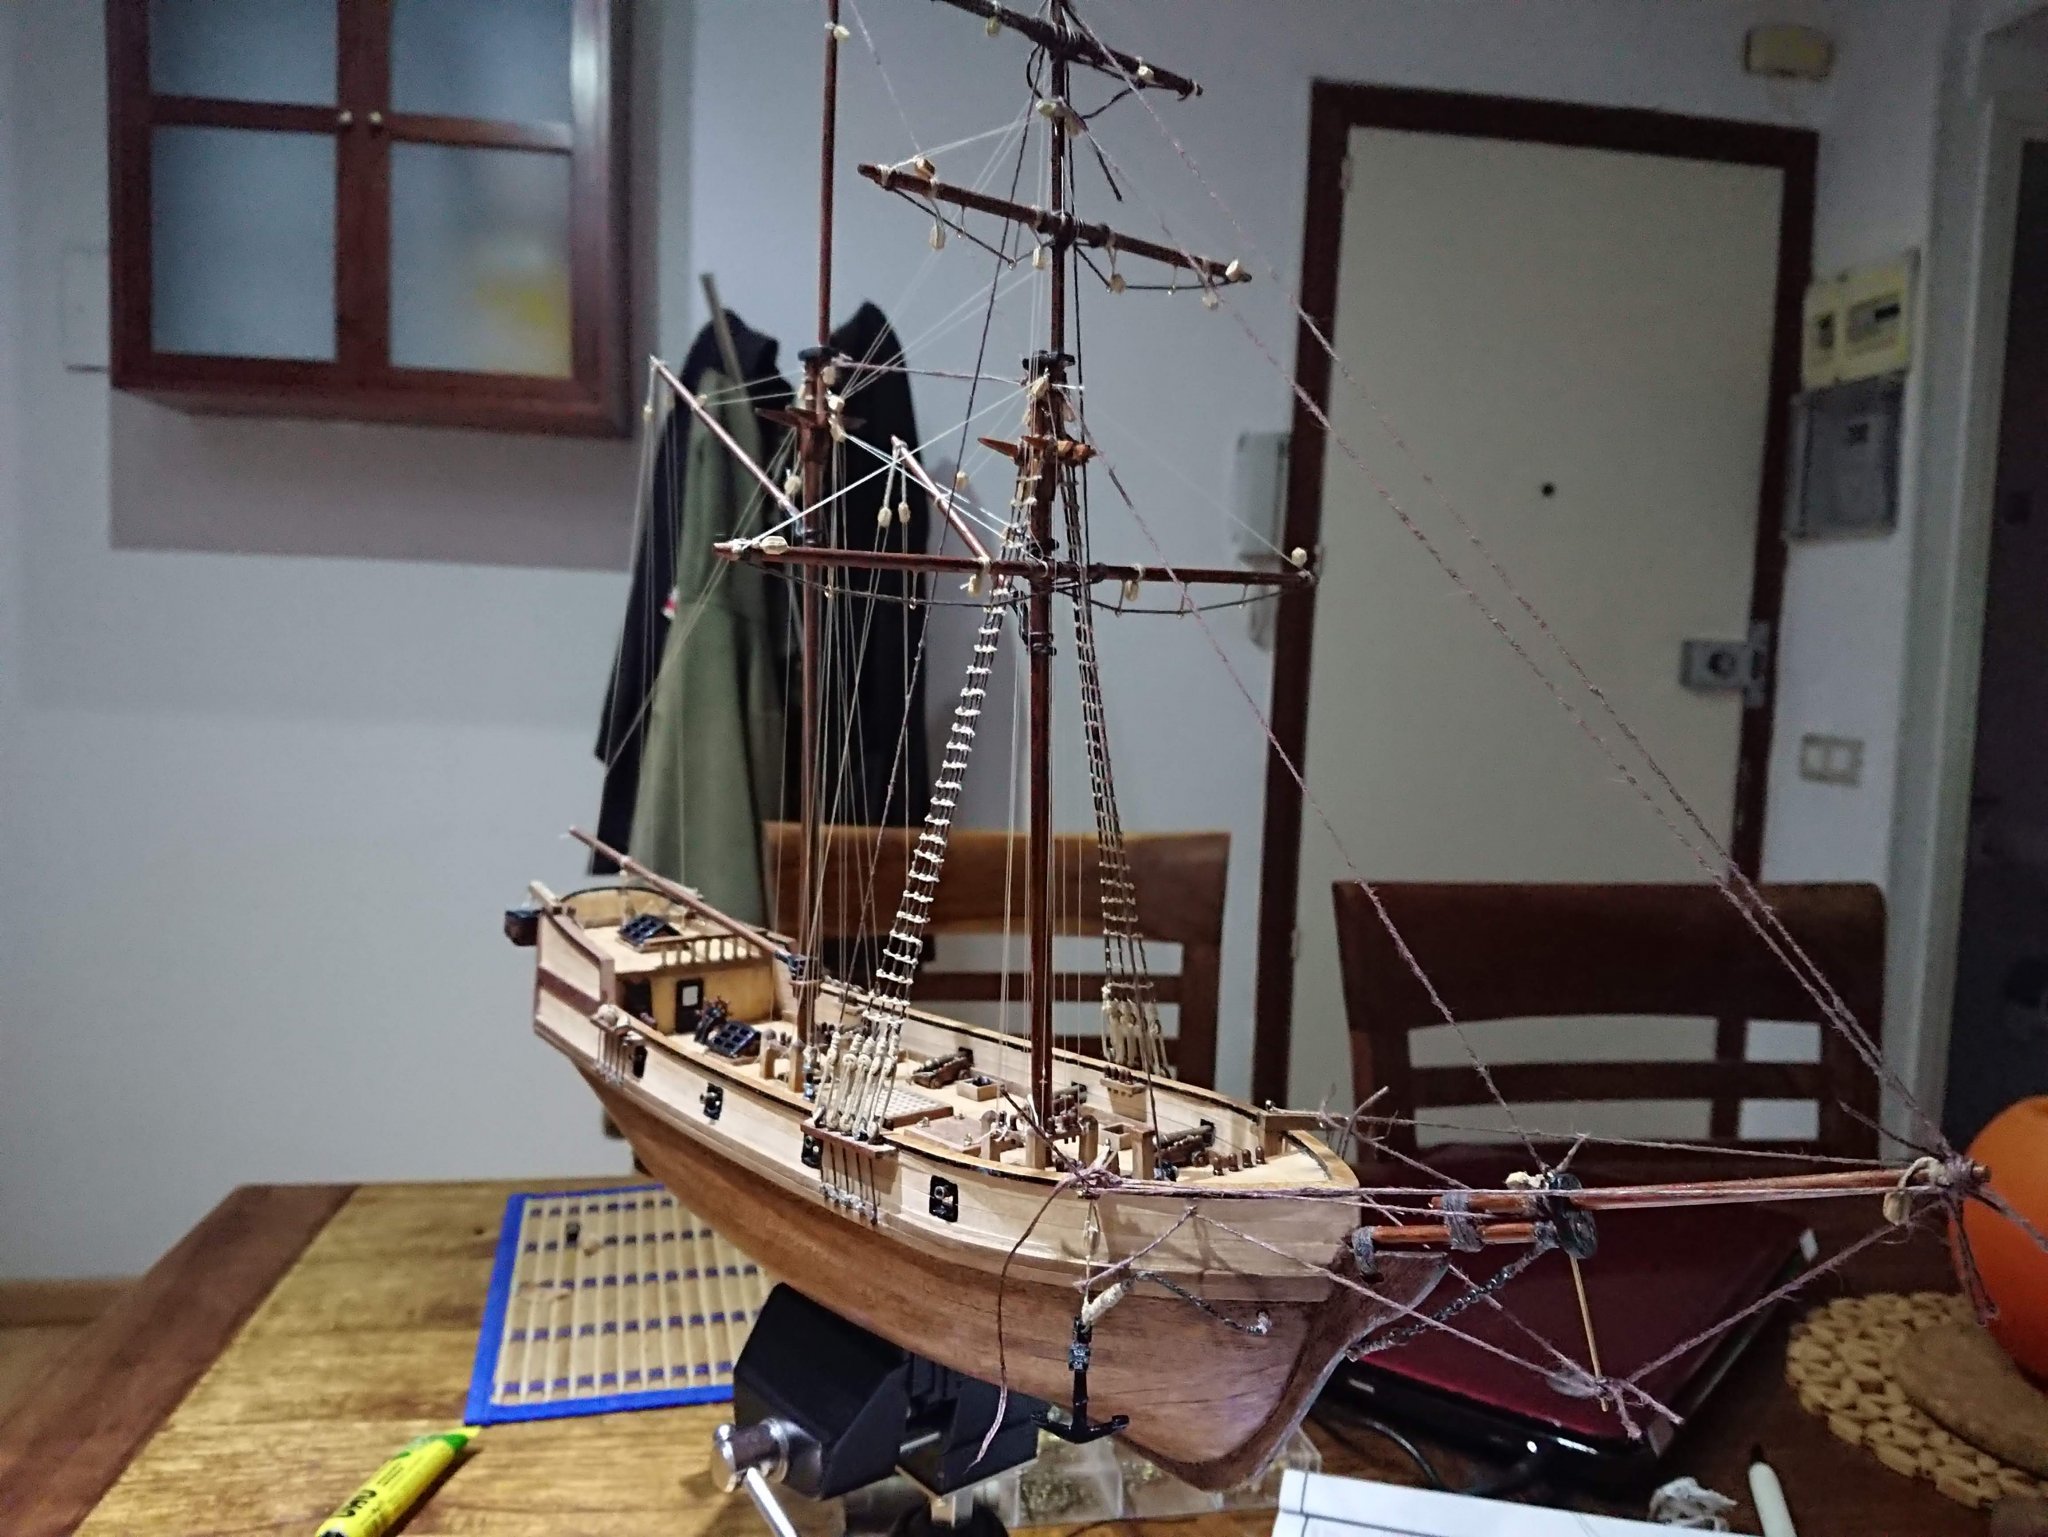
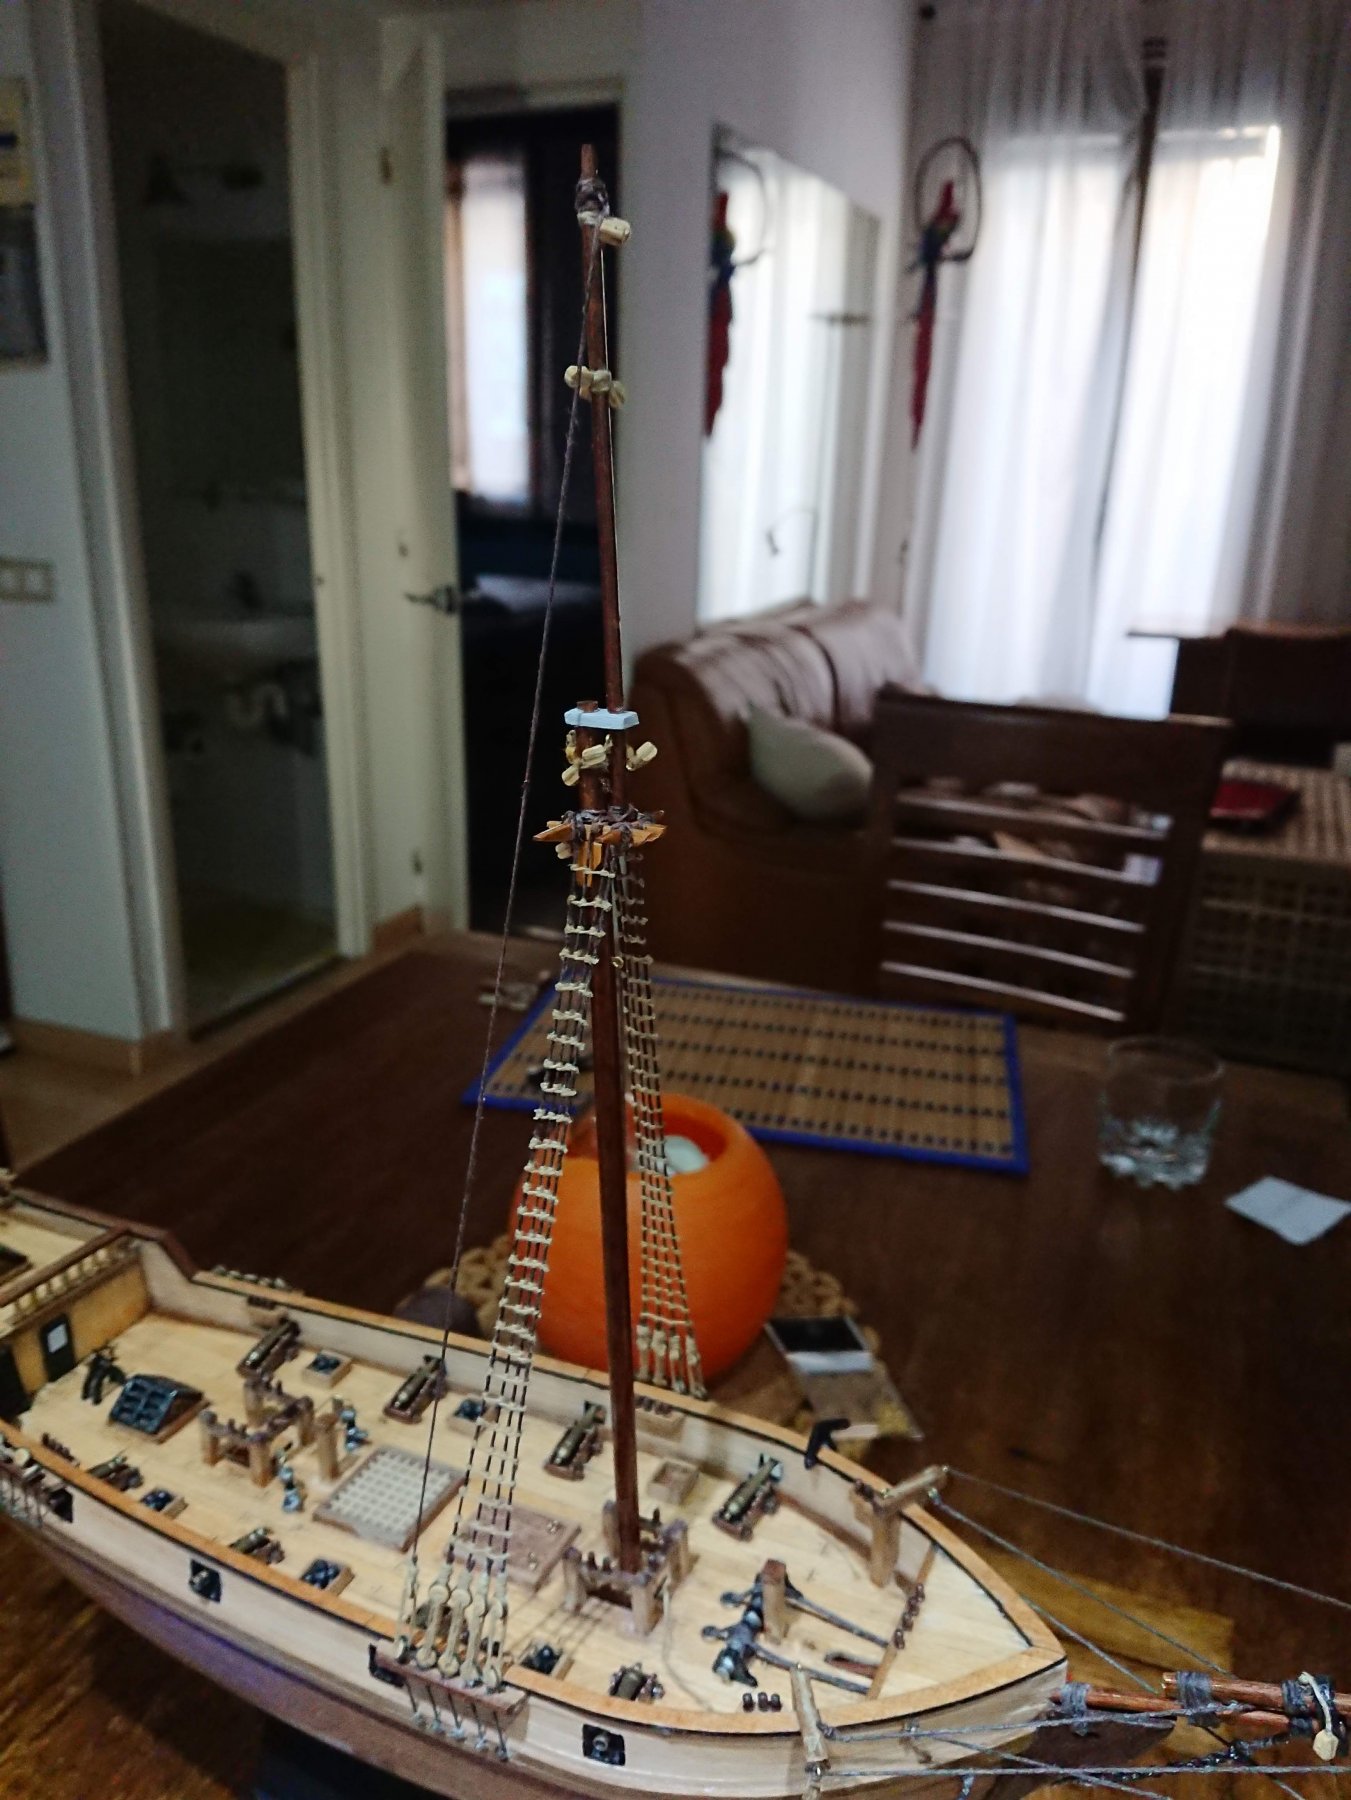
Haven't posted in a while but plenty of progress has been made since my last post and, most importantly, a lot has been learned. I've completed a sort of first draft of the bowsprit rigging as shown below. I say "first draft" because I'm sure that after I hook this up with the foremast that the rigging is going to lose some tension and it's going sag. So I'll wait till that happens and replace everything. It'll work out better that way I think and I can replace the martingale that I intended to paint with some brass material I just got hold of. I've also managed to complete most of the foremast. I got the mast ready and carefully placed it in the ship ensuring it was inclined slightly back: I then had a first try at placing the shrouds and though it went well I decided to redo it as a) the waxed thread I decided to use didn't look very good and b) I had used the jig incorrectly leading to the lanyards being placed too high up. In the end I managed to build up my skill set a little bit and got the shrouds and ratlines completed sooner than I thought (that's not a real parrot in the background by the way...) I decided to avoid securing the shroud lines at the top of the mast all near the centre of the mast as that would lead to a huge mass of knots all jumbled up together. The end result after securing the ratlines is that the shrouds separate a little near the top but this doesn't look too bad in my opinion: There is still some fluff on the thread which I aim to wipe down with some beeswax soon. As of now, I have completed two of the yards with the topmost yard remaining: I must say that though I dreaded getting started with the rigging it really brings the model to life in a way I couldn't foresee - especially as I haven't seen many model ships of this type in real life. Even at such a small scale you can really appreciate the sophistication and effectiveness of this type of naval engineering. In short, I'm really enjoying this part of the process.

.thumb.jpg.ac9a209946f435cdd56f0327060f310f.jpg)

.thumb.jpg.aa6315fadd161166bf090680d90ac8d4.jpg)
.thumb.JPG.8907e684ccb3679b6fd9e23be8ba02e3.JPG)
.thumb.JPG.4039fb9ac0d7296a4ecf4980487f75fa.JPG)
-
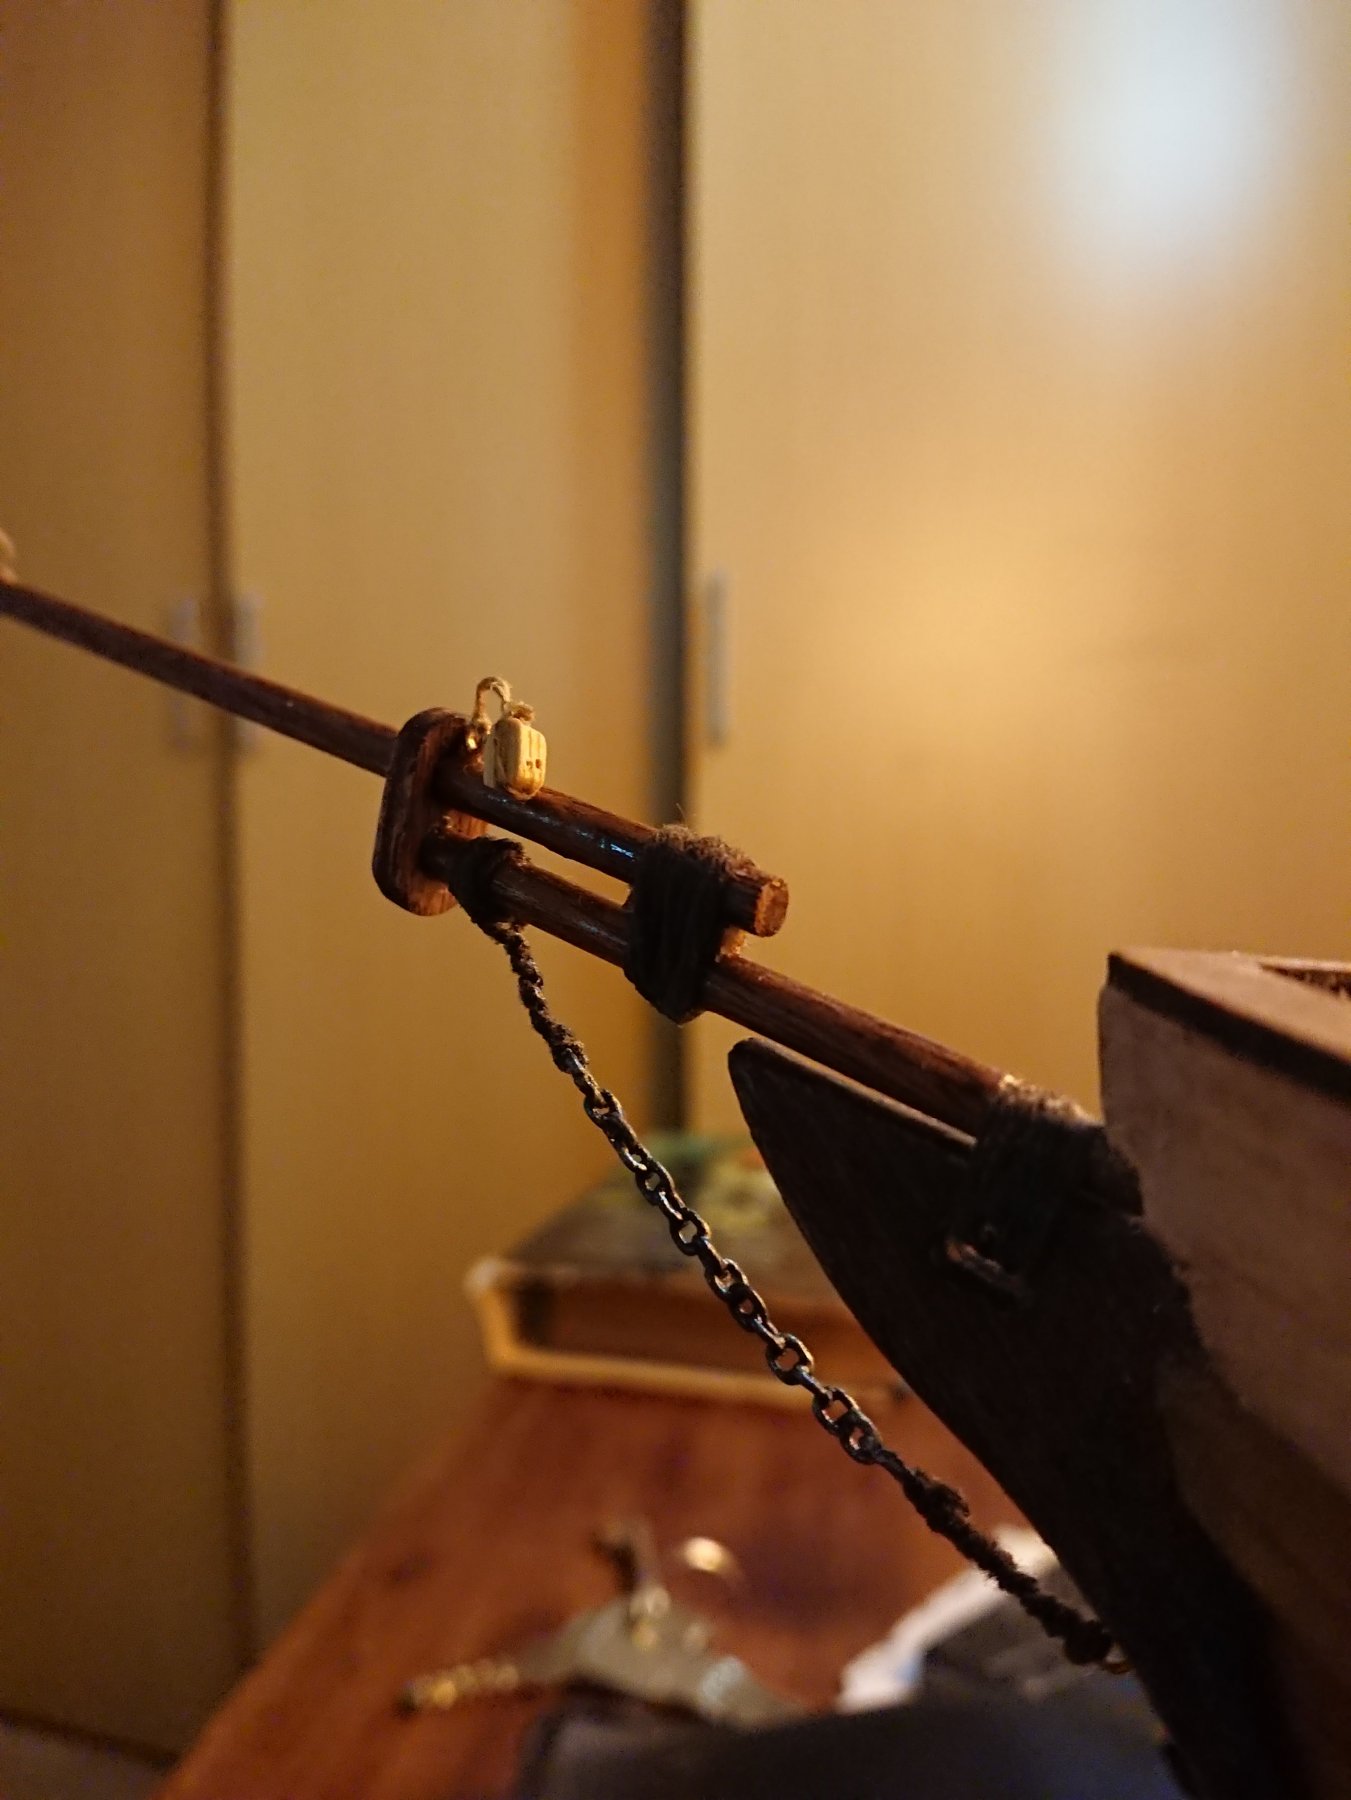
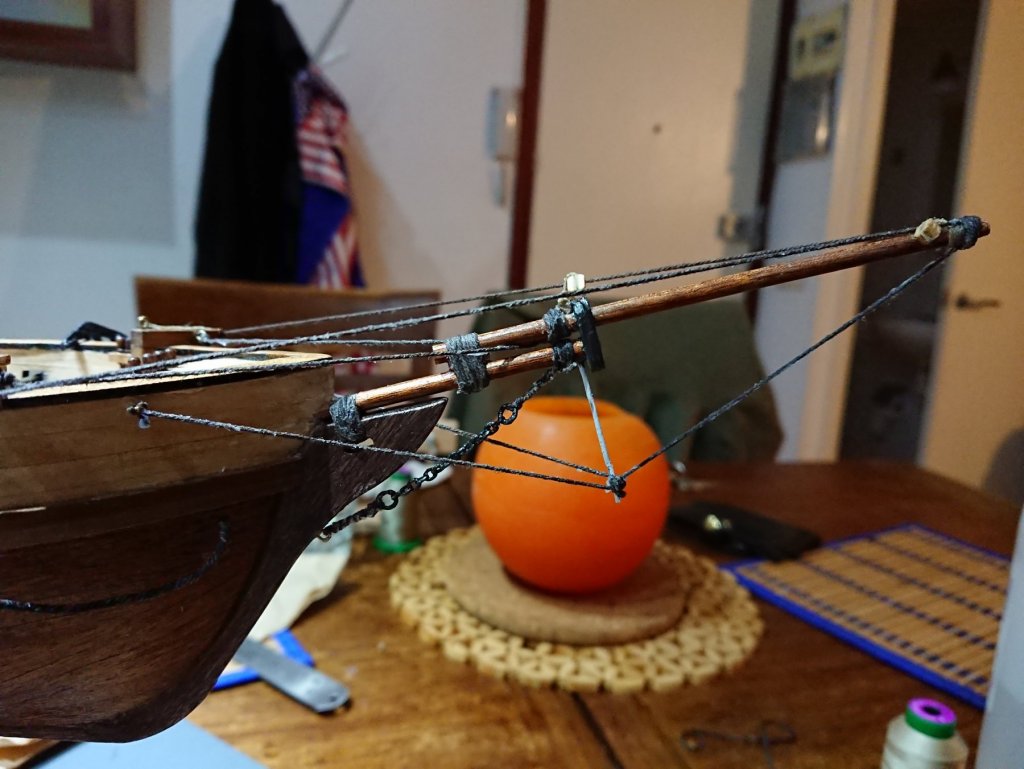
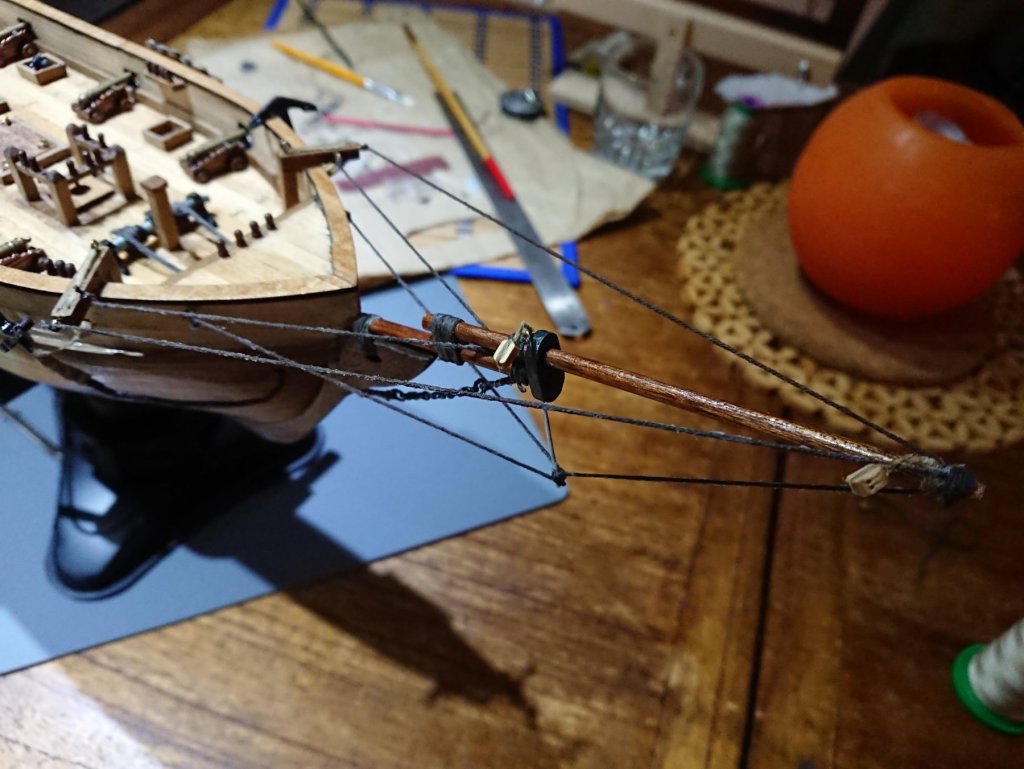
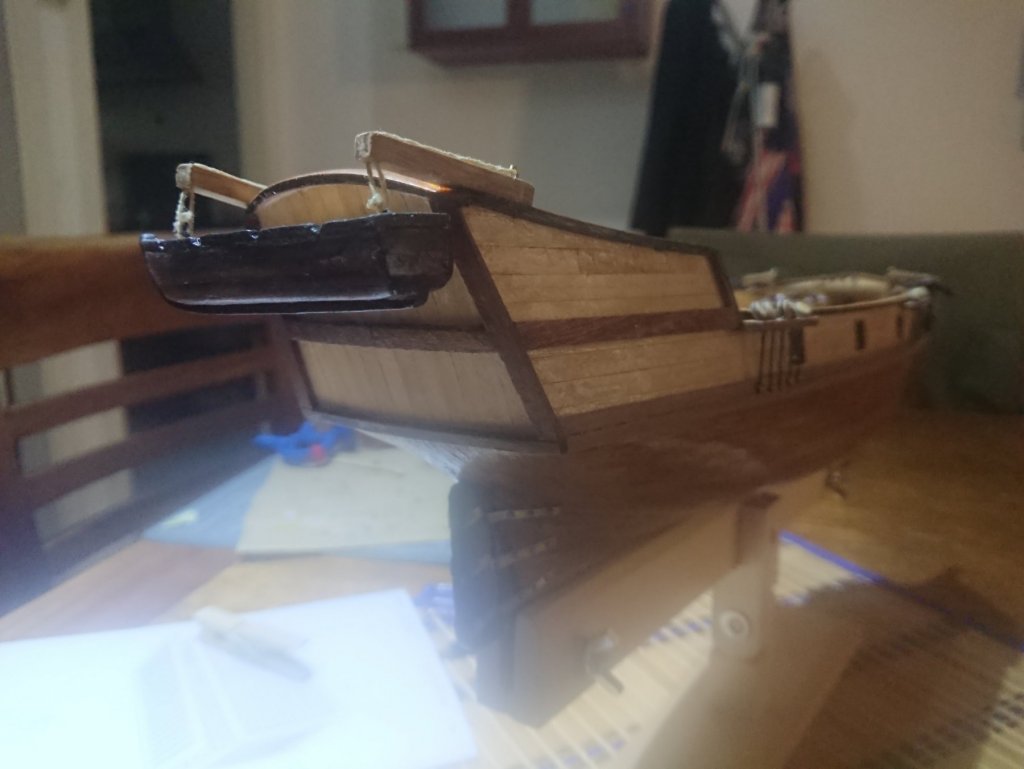
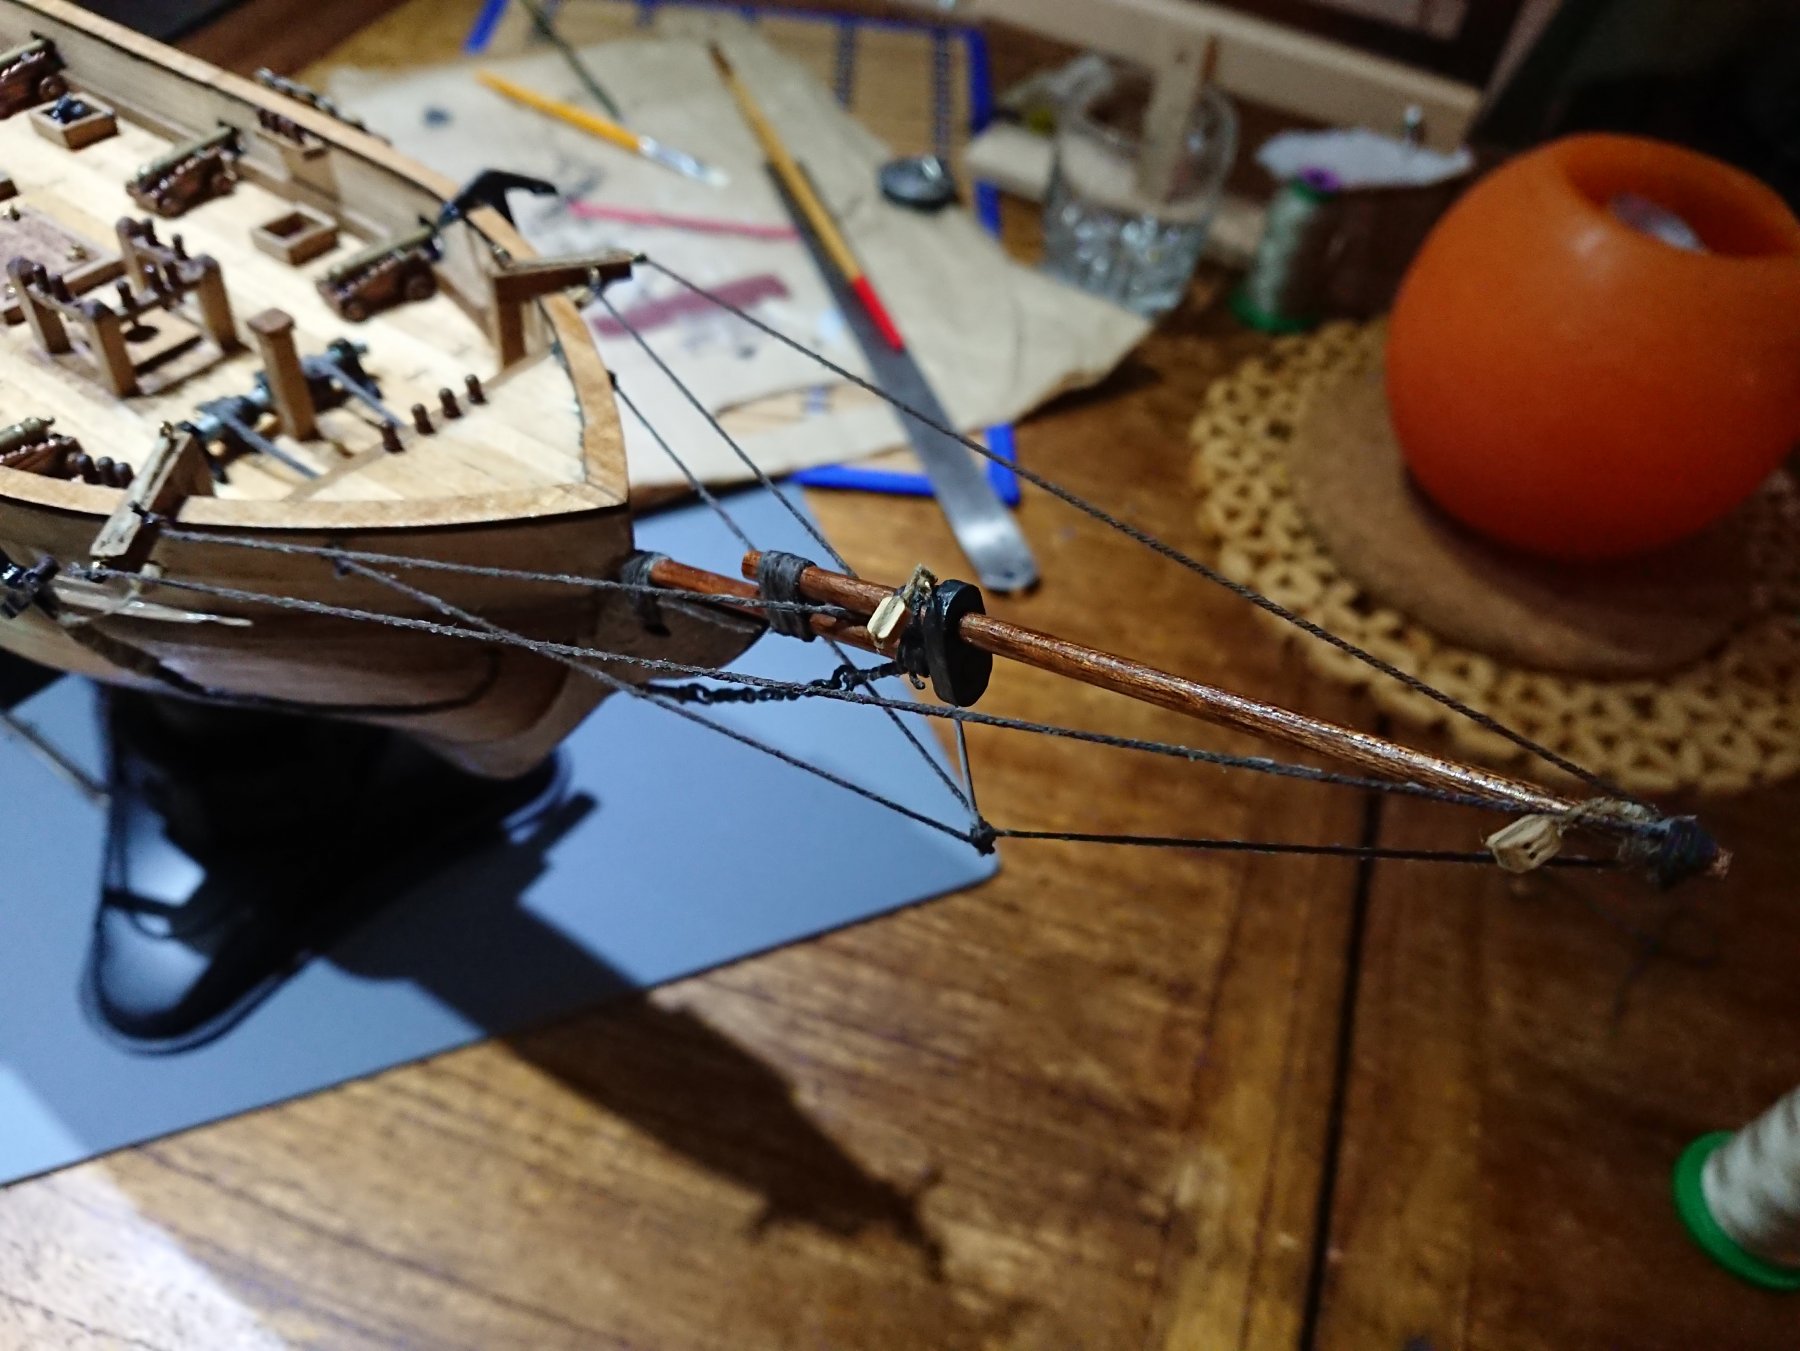
Bowsprit is now completed minus the rigging which comes later. The instructions ask you to use a two pieces of string connected by a 3mm diameter ring to make up the bobstay. However the picture on the cover of the booklet clearly shows a gold chain being used and I didn't like the look of so much string being used in that area so I elected to use a chain instead. I used part of a cheap chain necklace painted Vallejo "oily steel" mixed with black acrylic: Also, not sure about the cap, the instructions do specify to paint it black but I decided to dye it a dark walnut colour for now. I'll check out the forum for tips but any guidance on that is much appreciated.

-
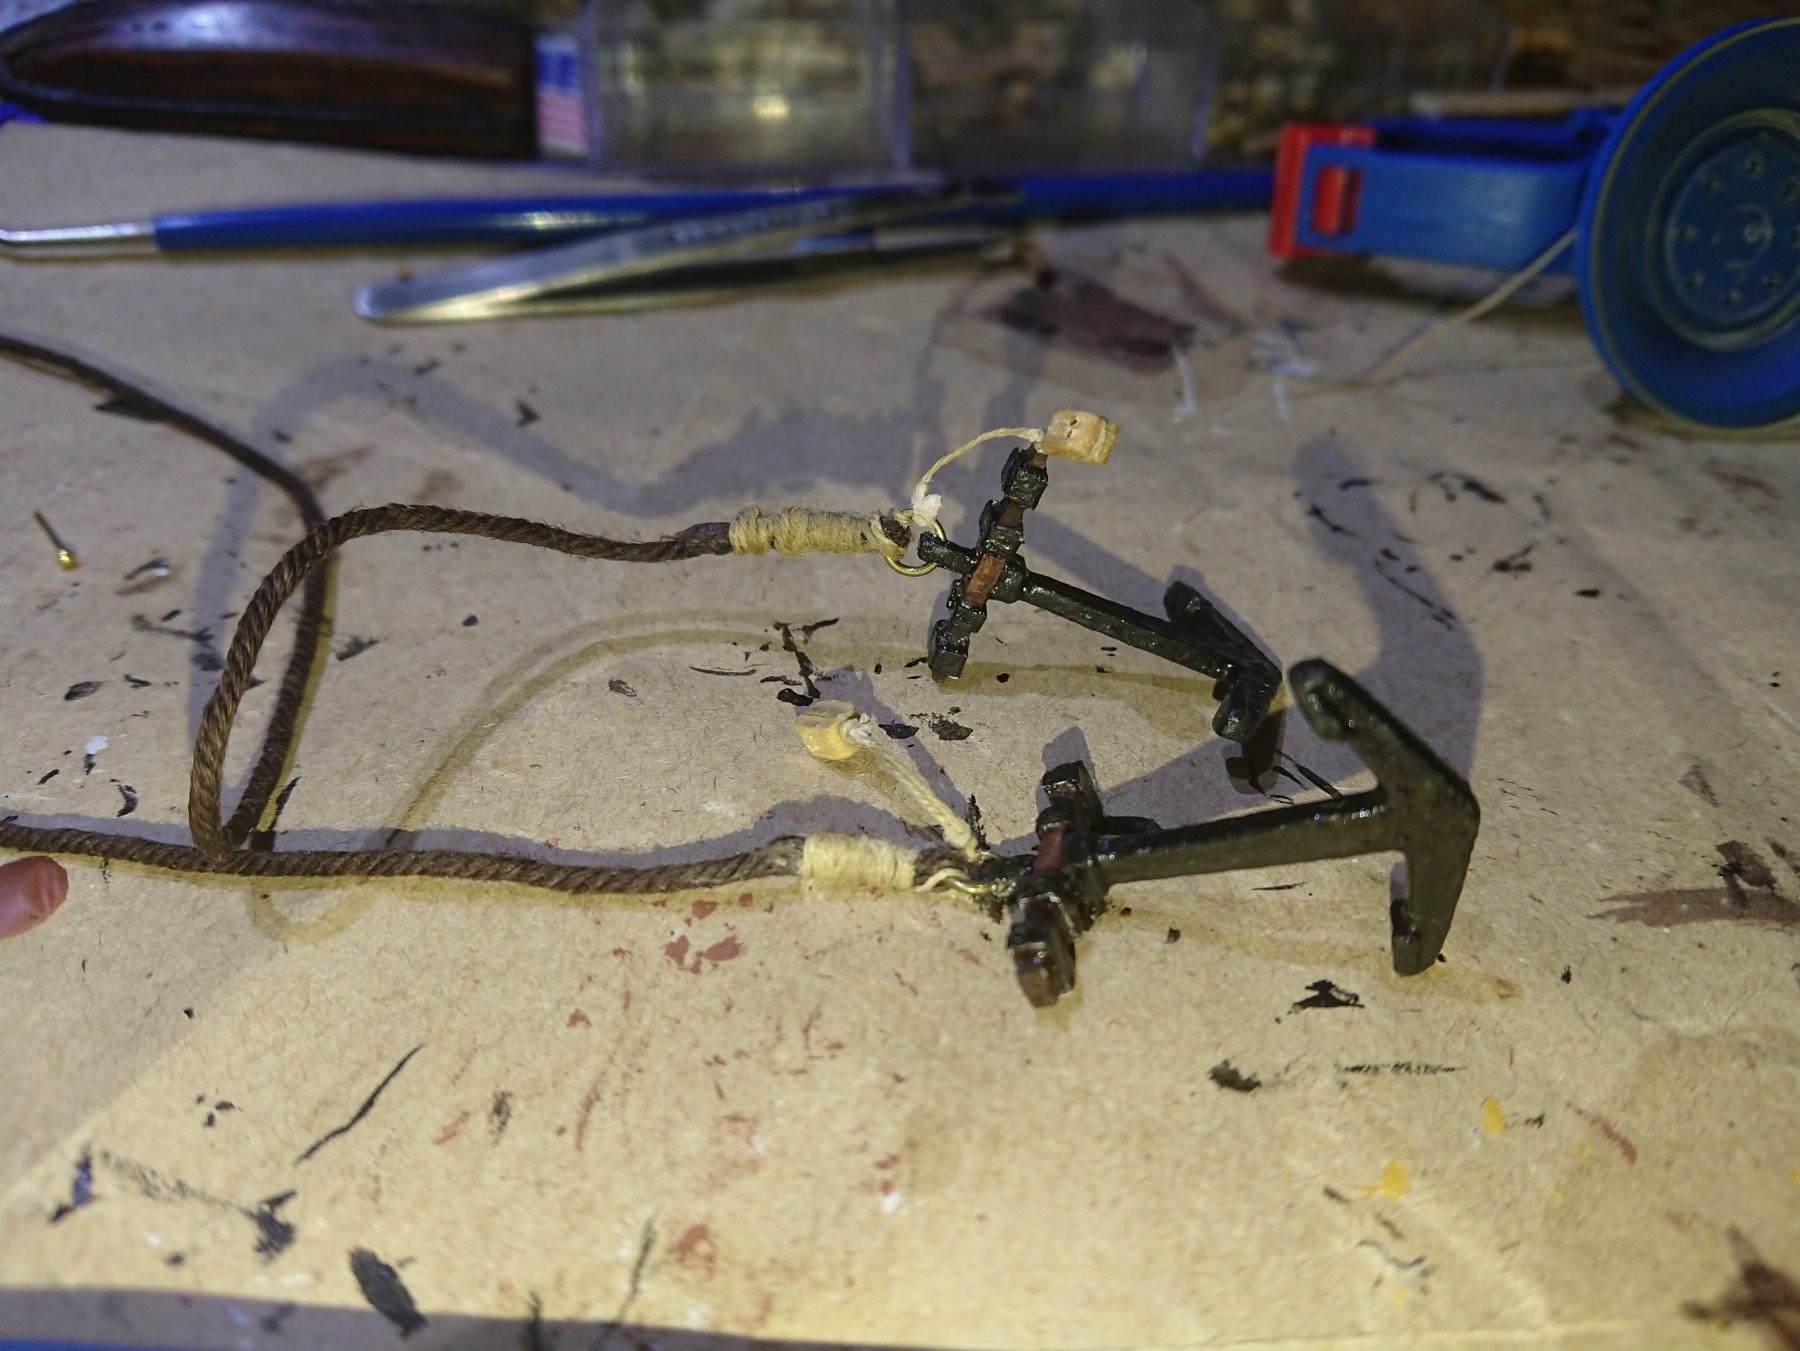
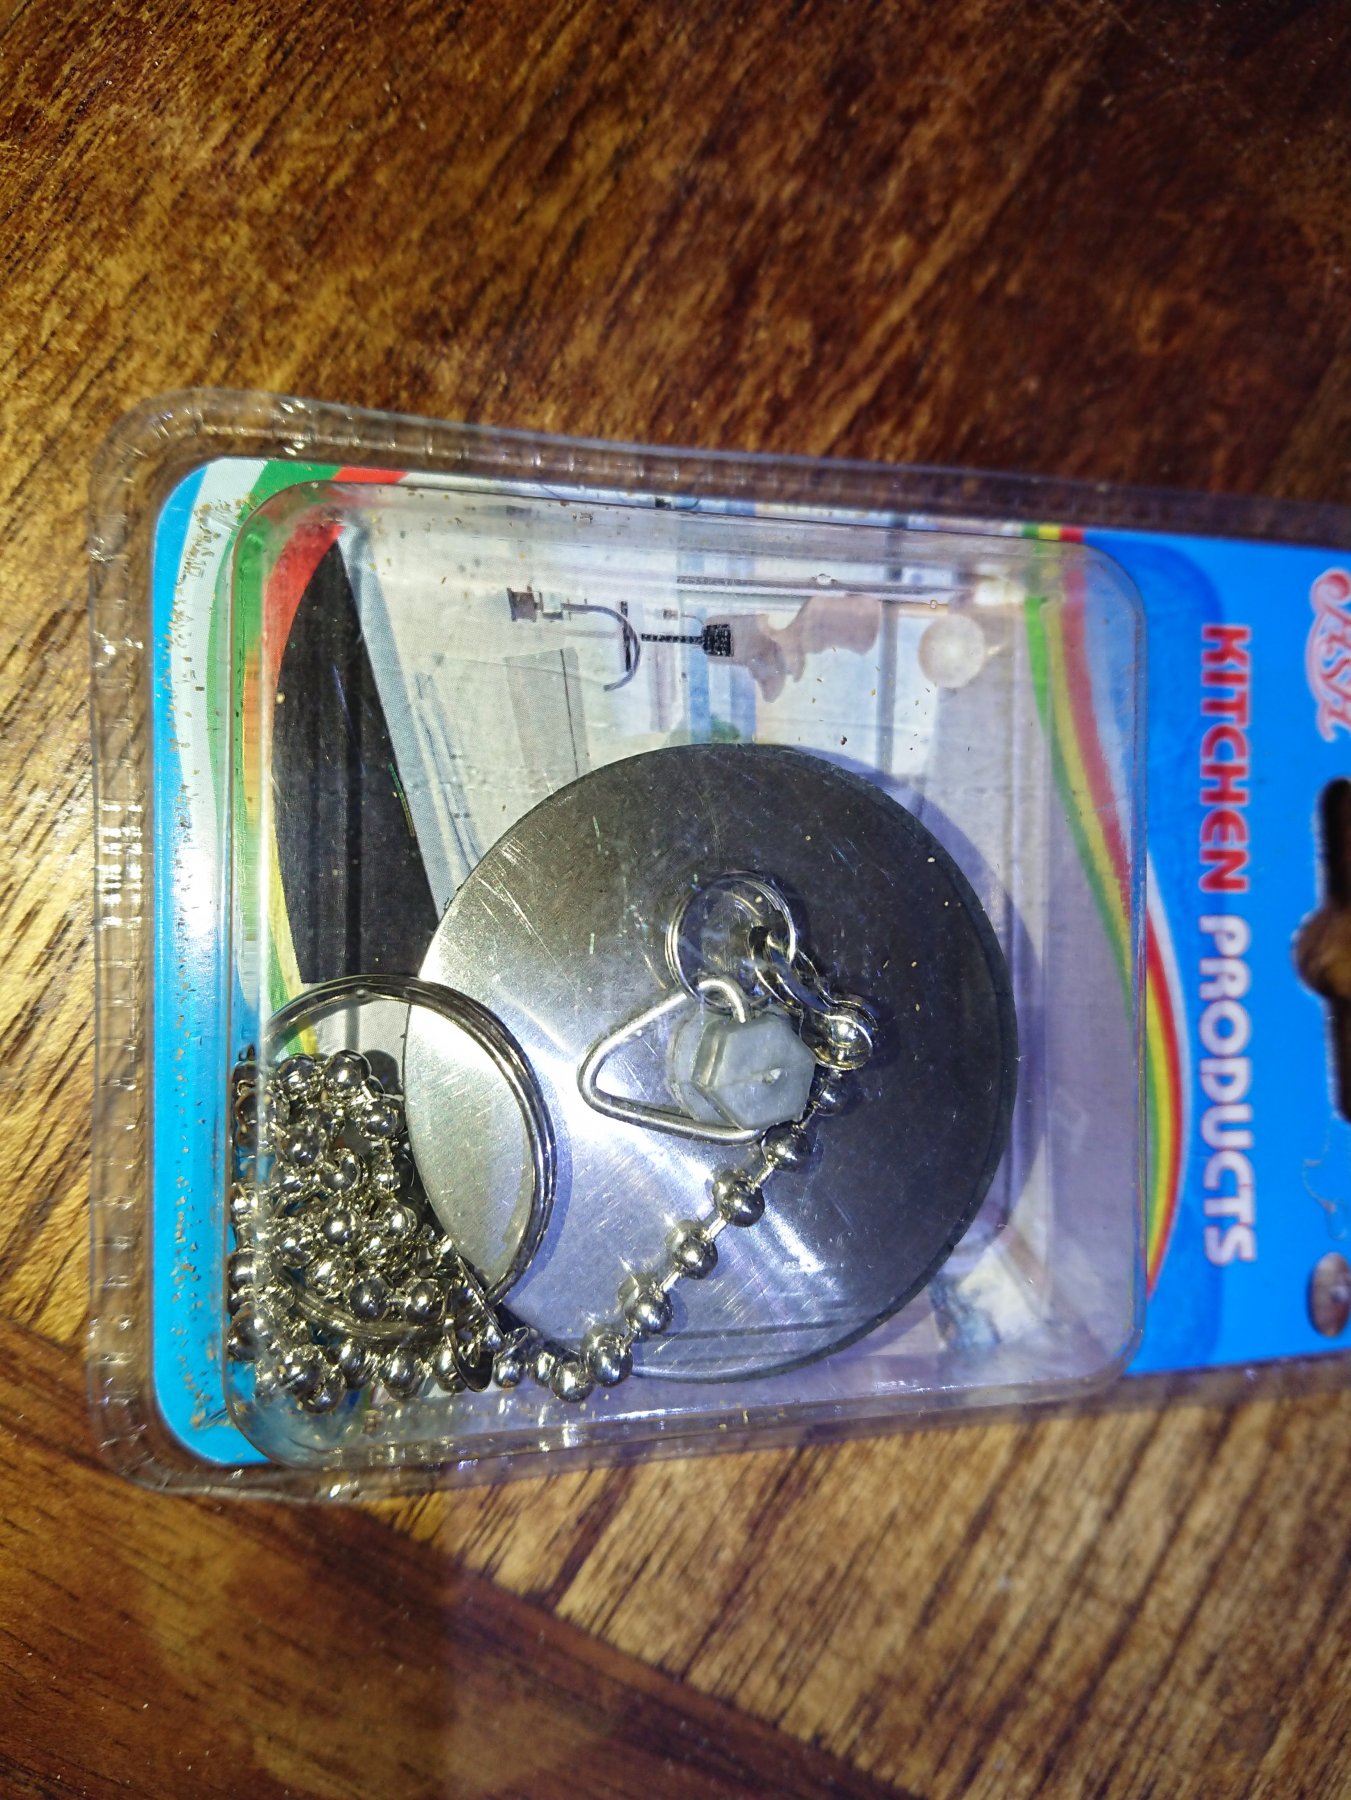
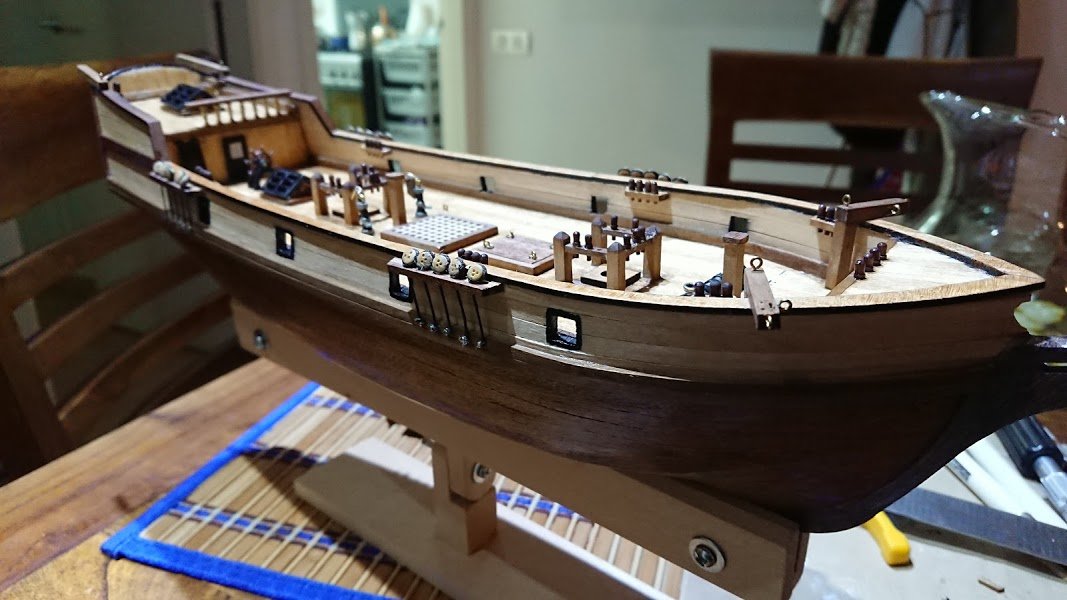
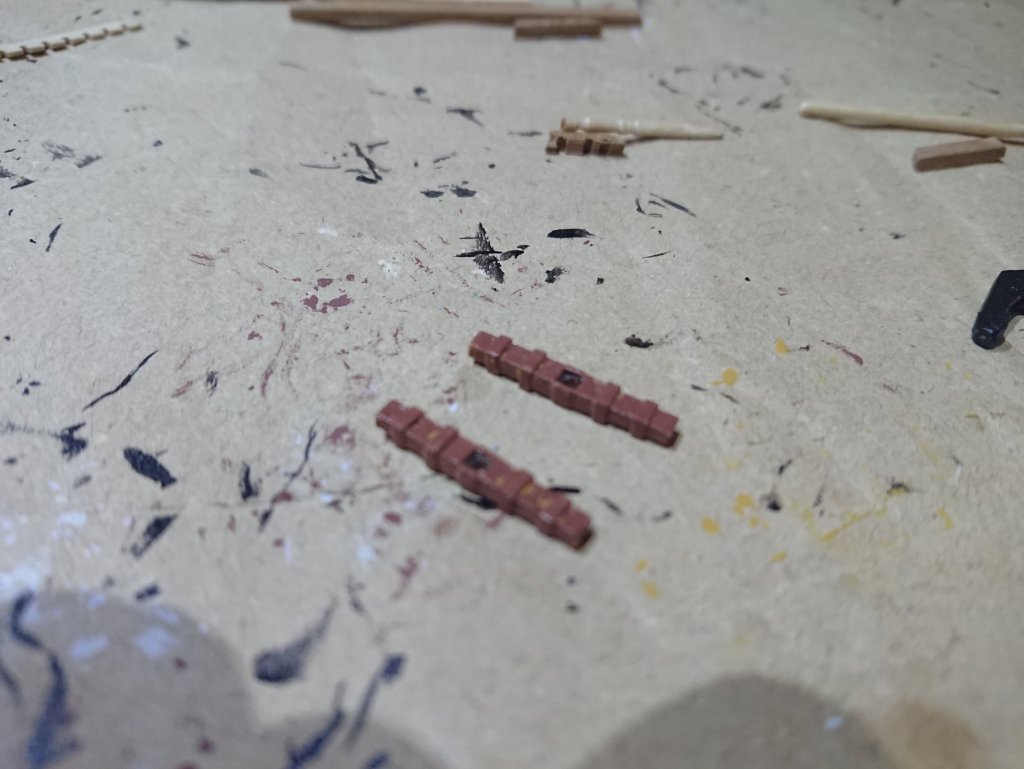
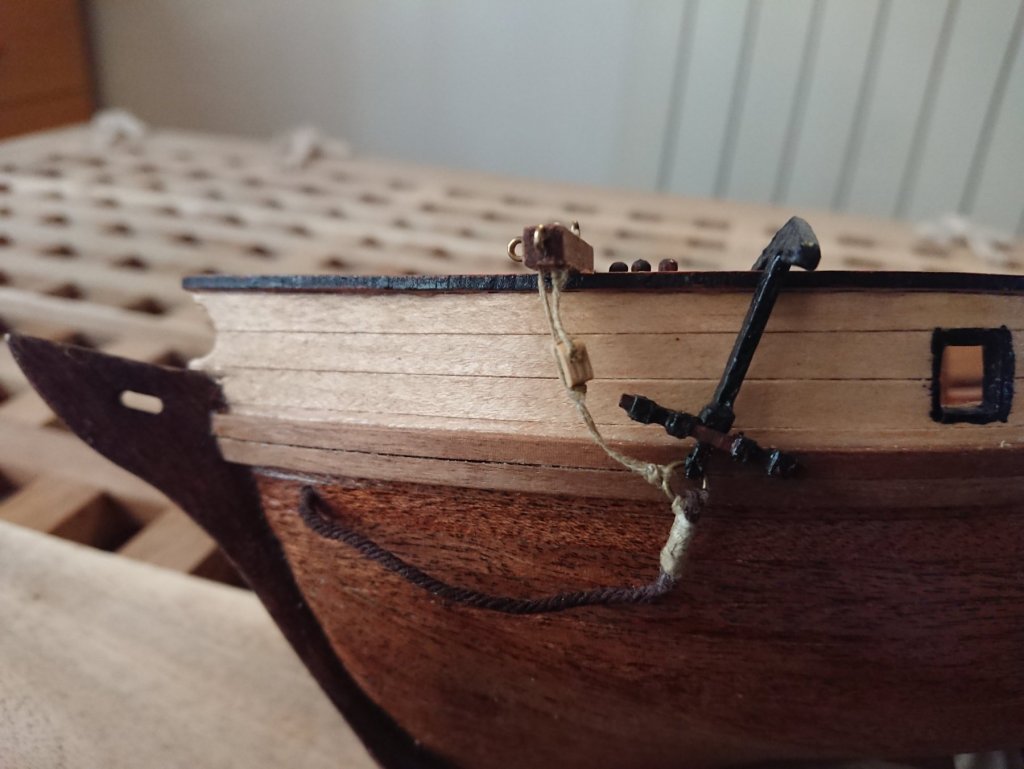
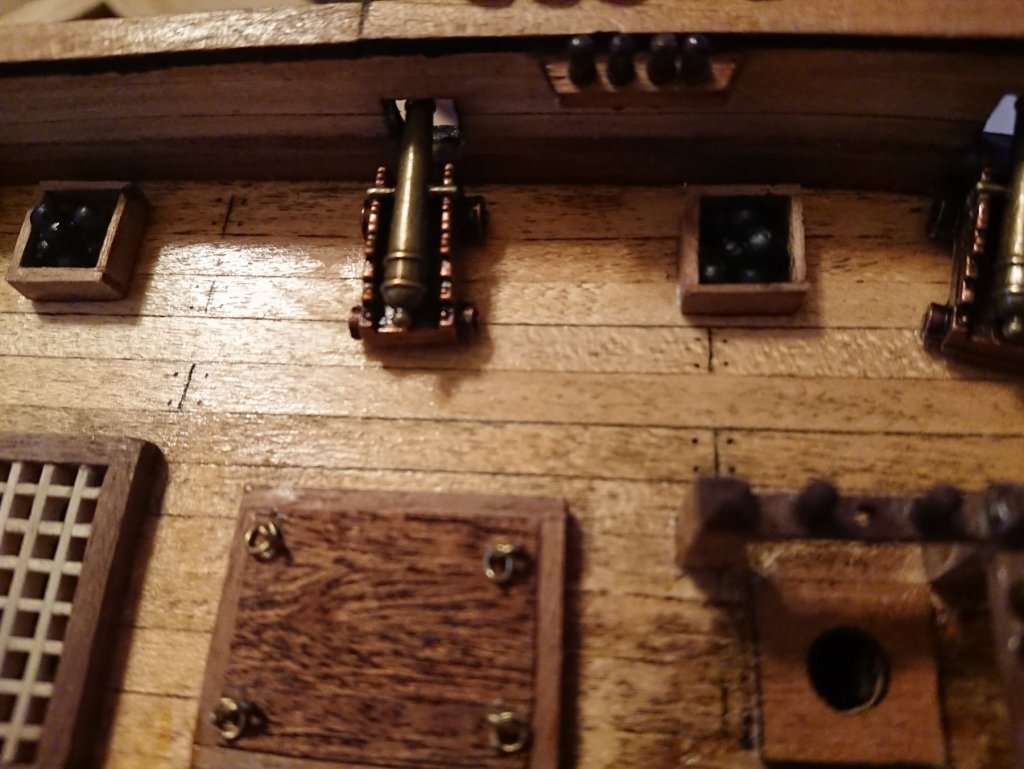
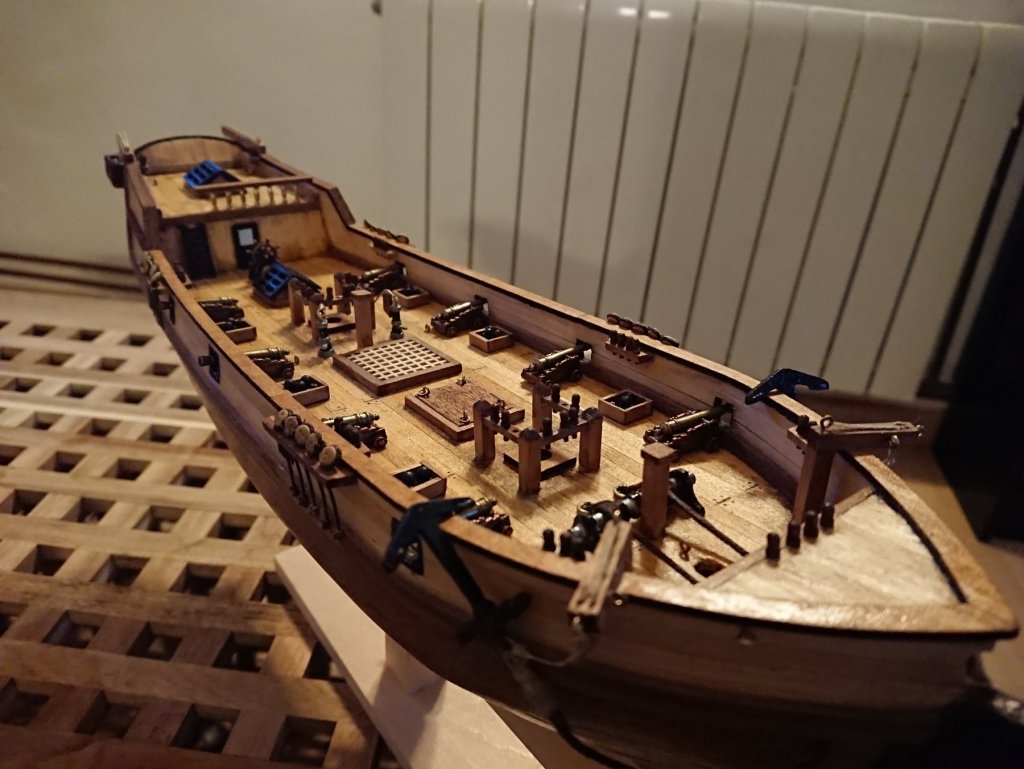
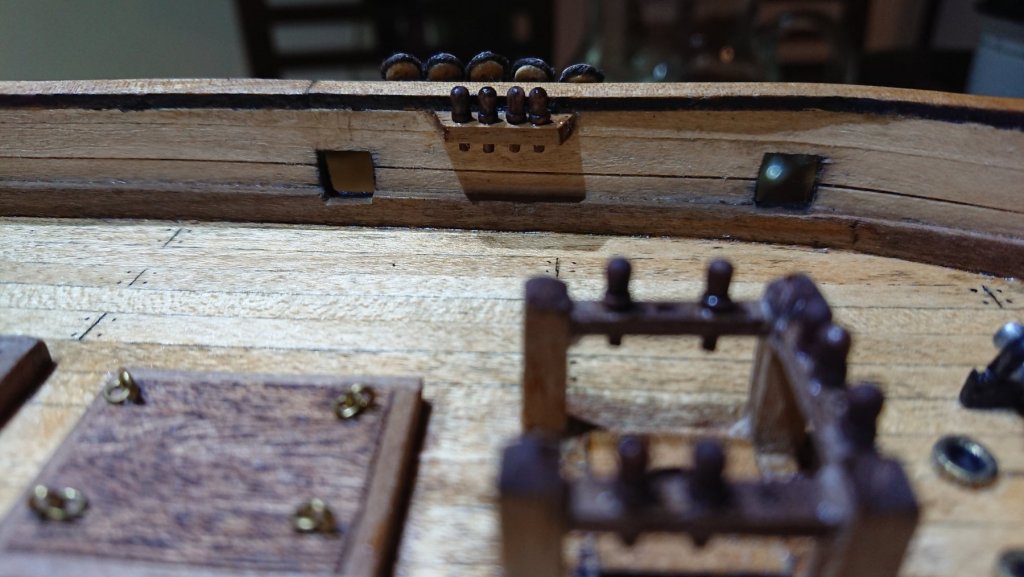
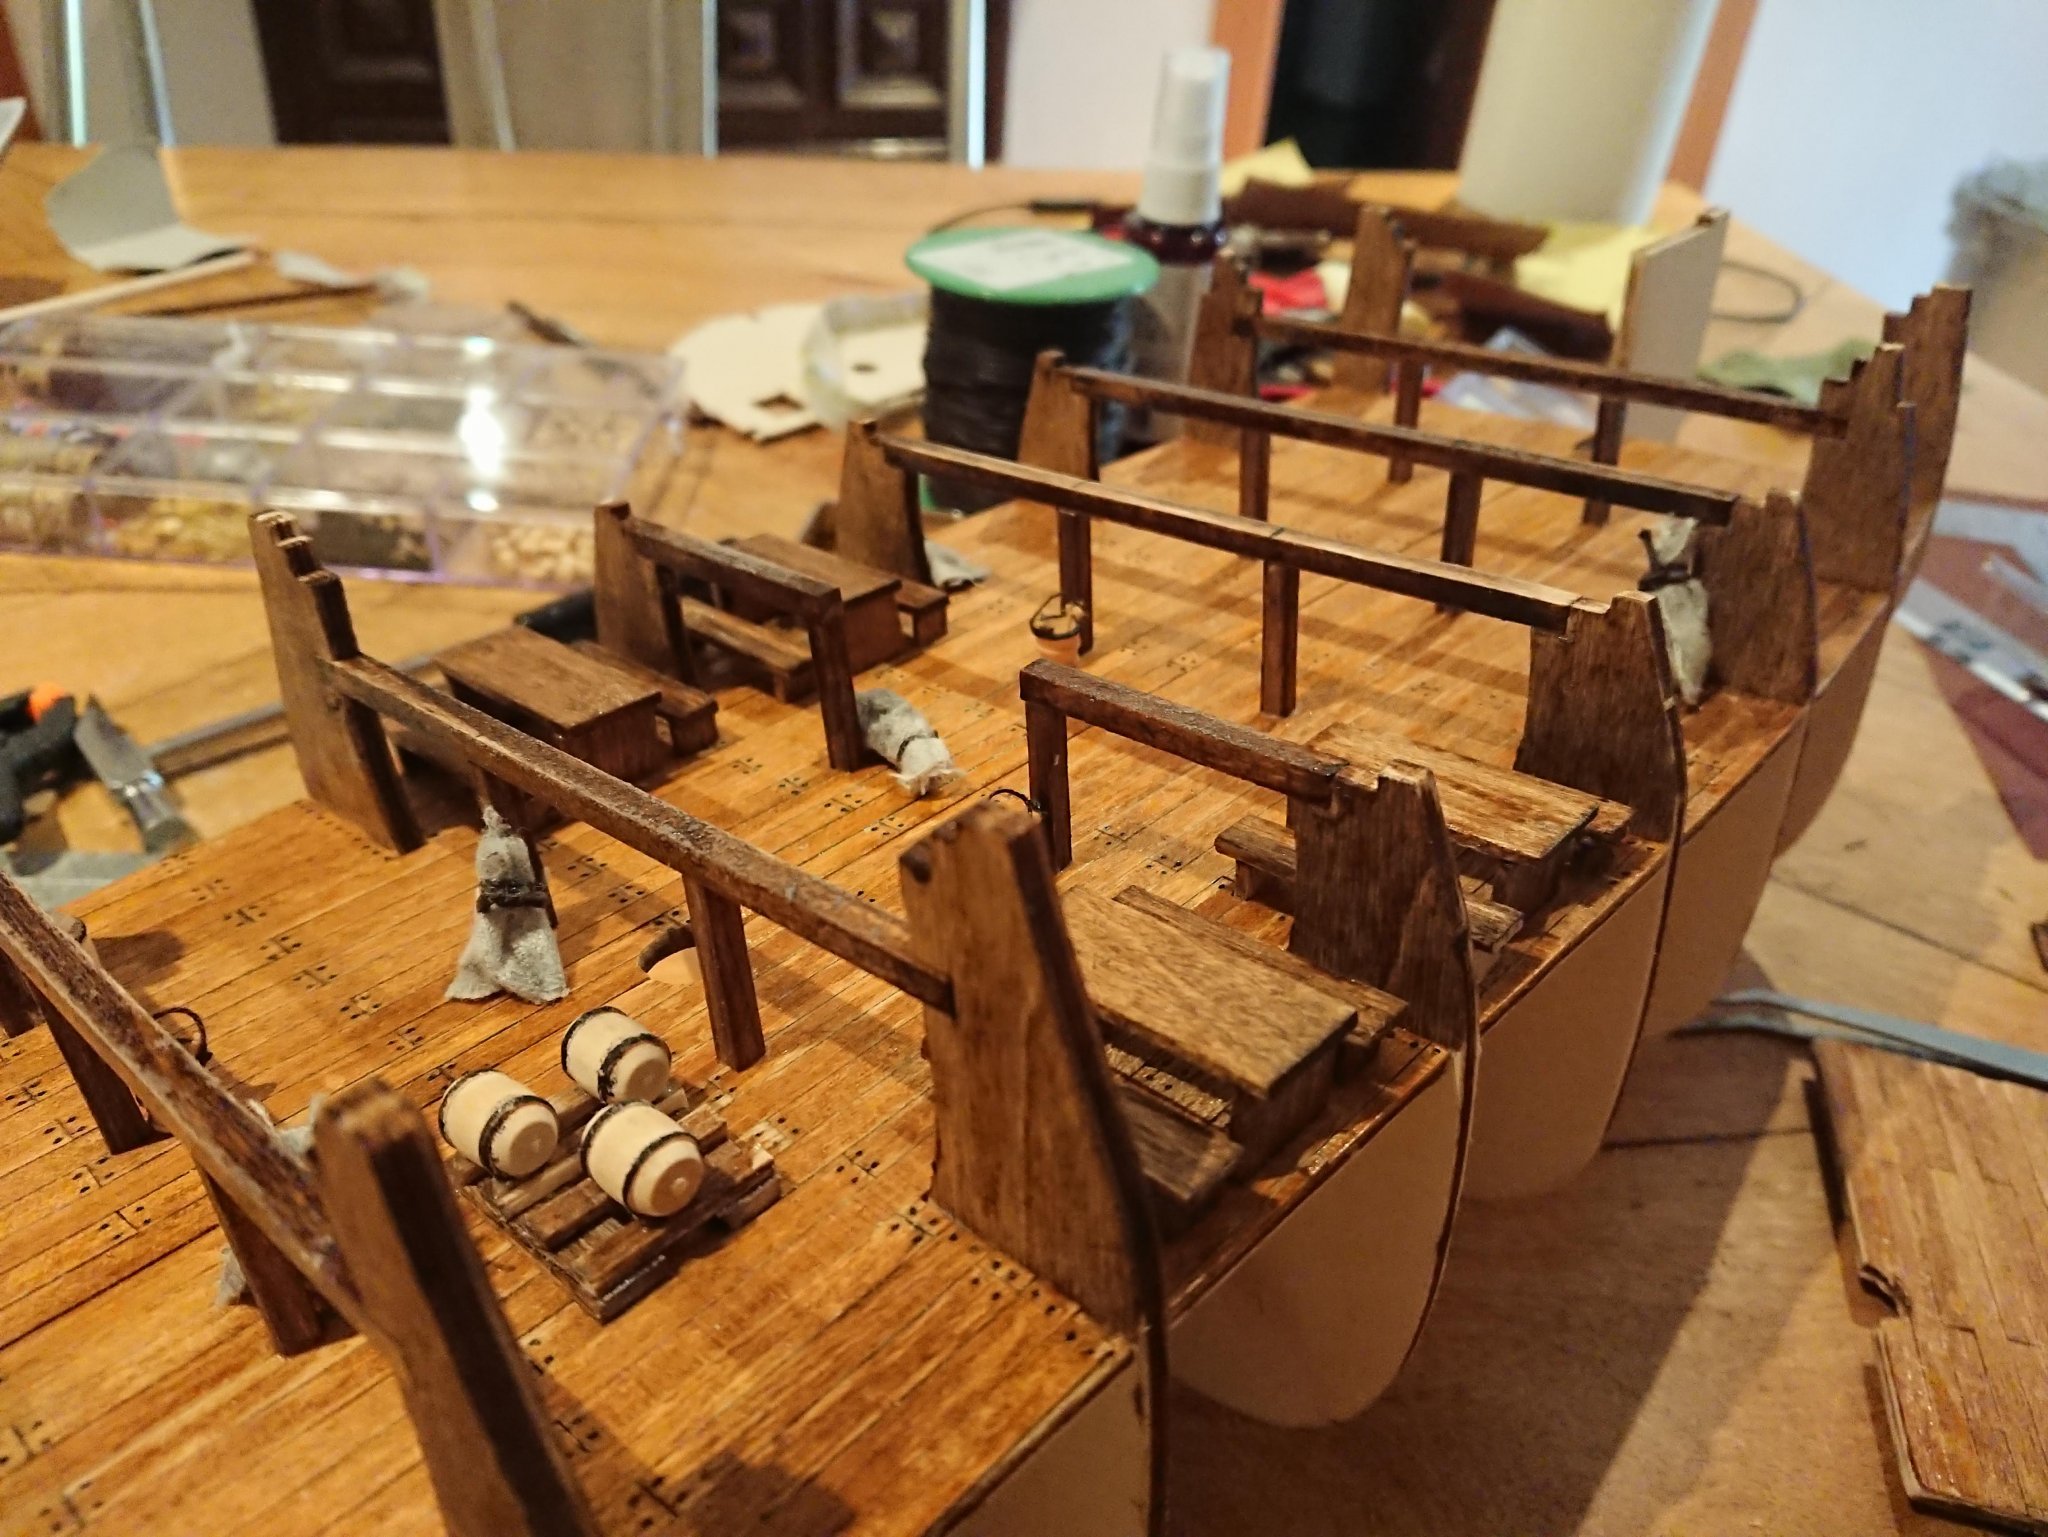
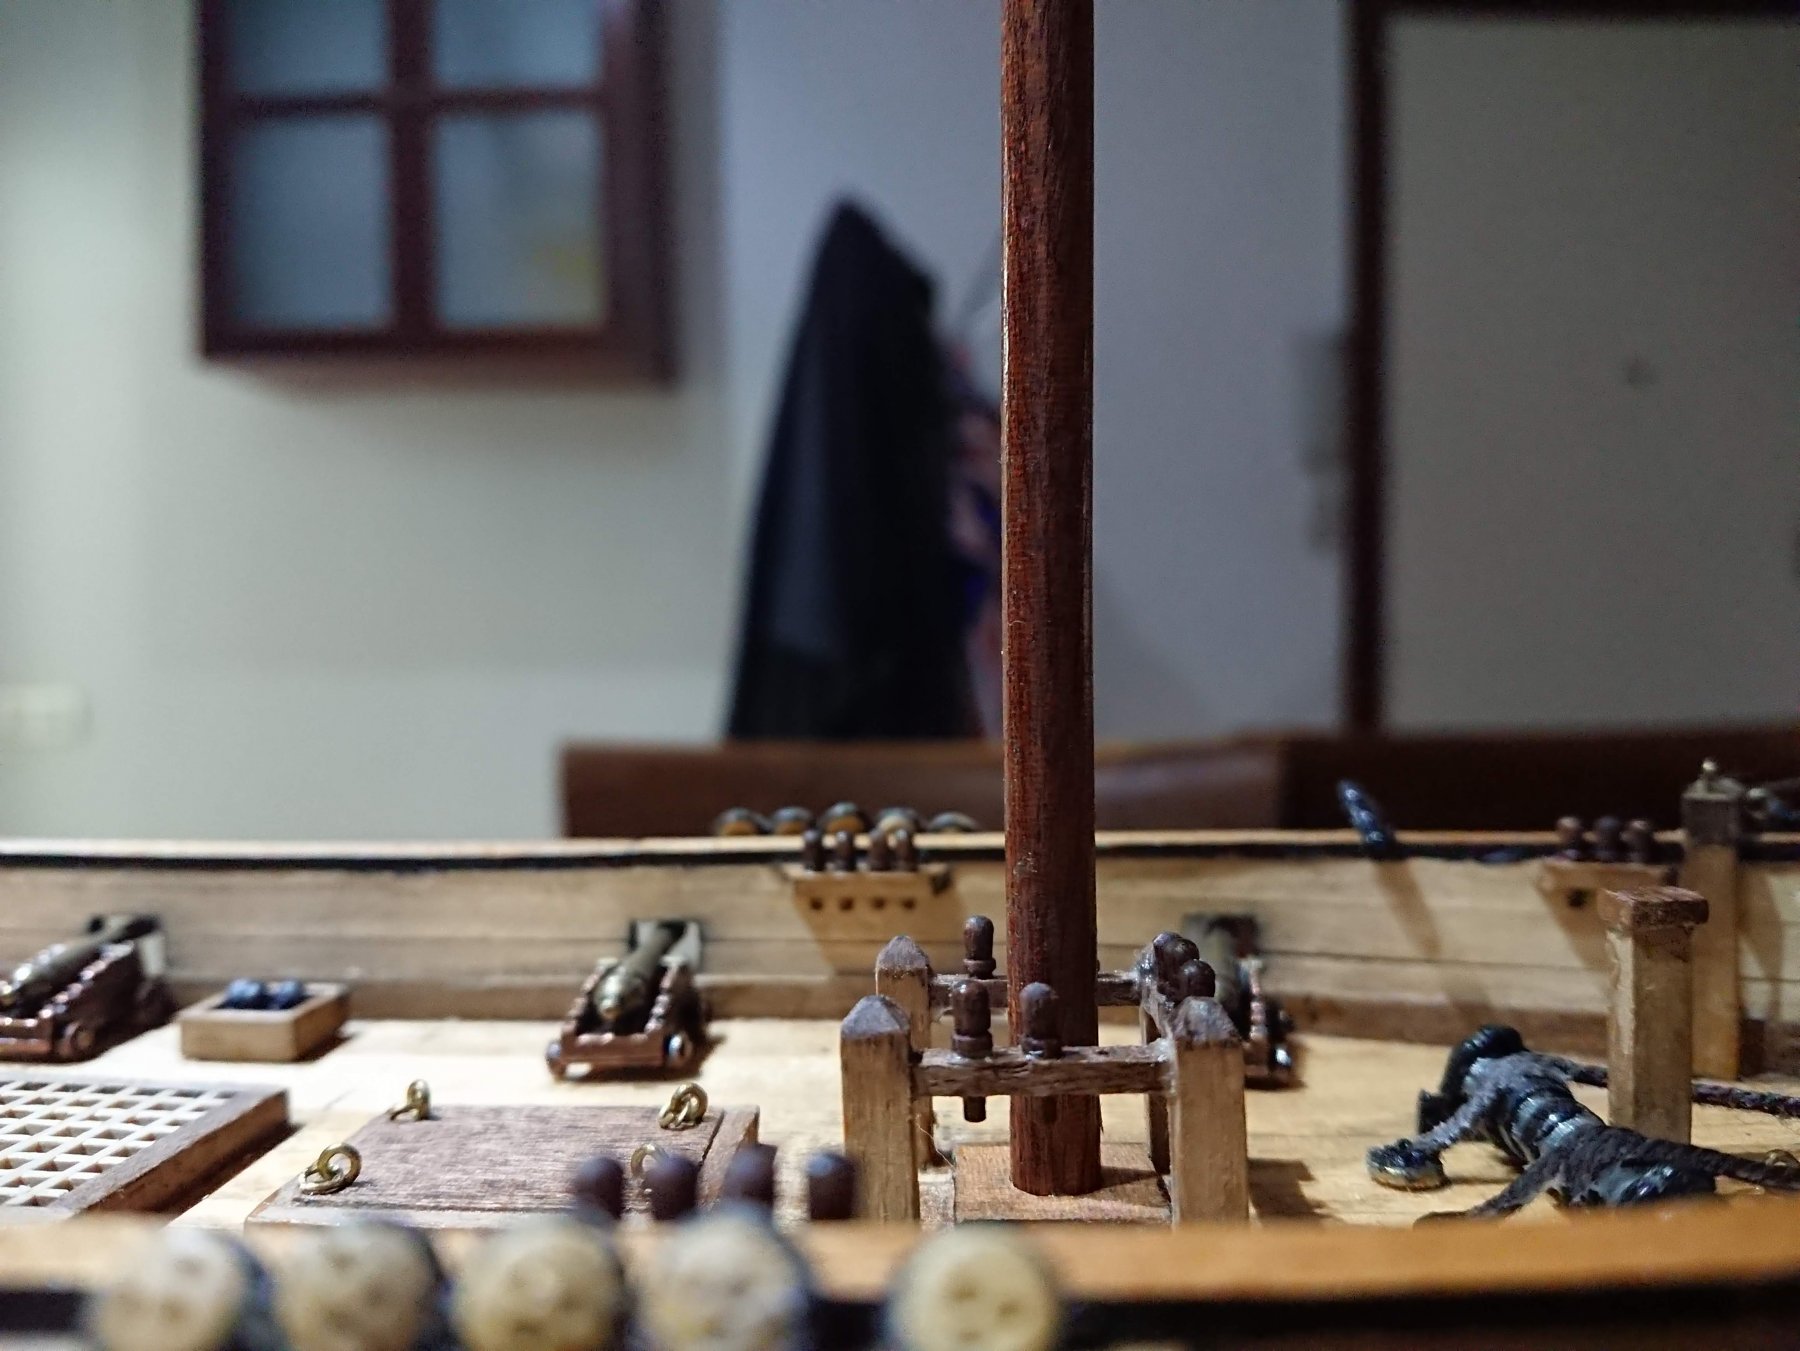
Hi again. Ready for the rigging now after completing the anchors. The kit provided metal pieces to be painted brown to simulate wooden stocks. Had a go at it but they were awful in my opinion: so I used some spare wood to make my own: The instructions specified using 3mm diameter rings for the anchor but even if I could manage to fit two loops and the anchor head in there - which is a big ask - it would look naff so I bought some 4mm faded gold rings from a jewelry craft shop and used those instead. I also finished tying up the launch boat at the stern: Finally, I wanted to upgrade the deck furniture a bit so I made cannon balls out of those beads you find in the sink plug chains and arranged them in trays around the deck. So, that's the structure pretty much done...on to finish up the standing rigging: I will give Artesania Latina credit at this point: the instructions for the rigging are well laid out with scale diagrams for each section including some annotations to guide you on specific techniques for rigging the string.


-
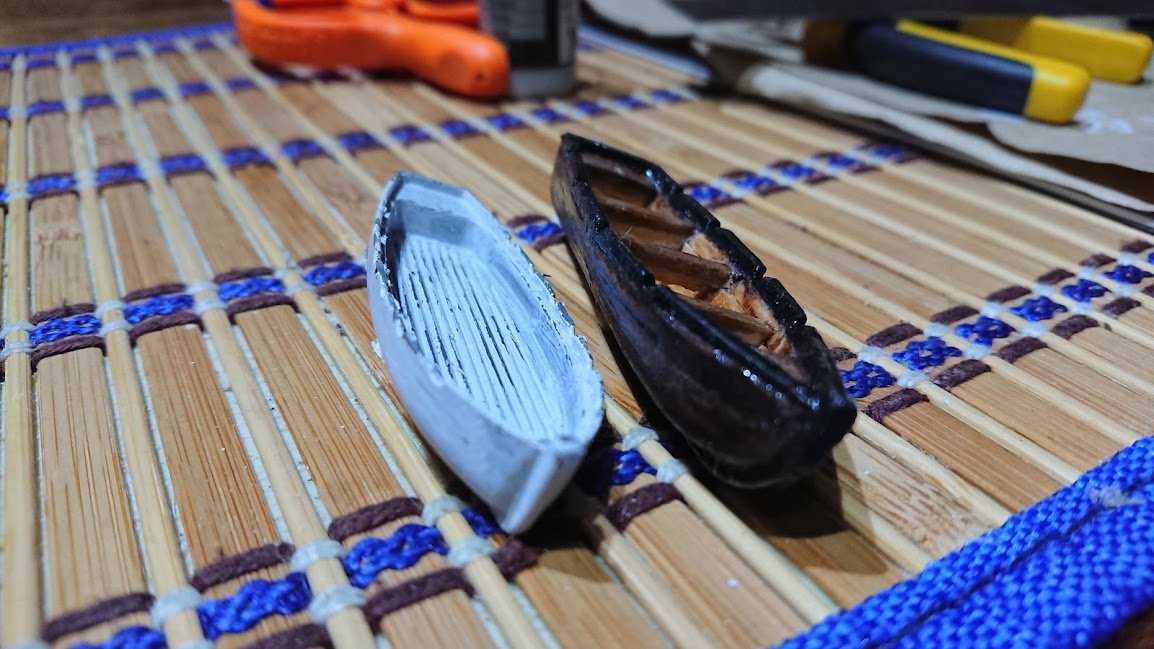
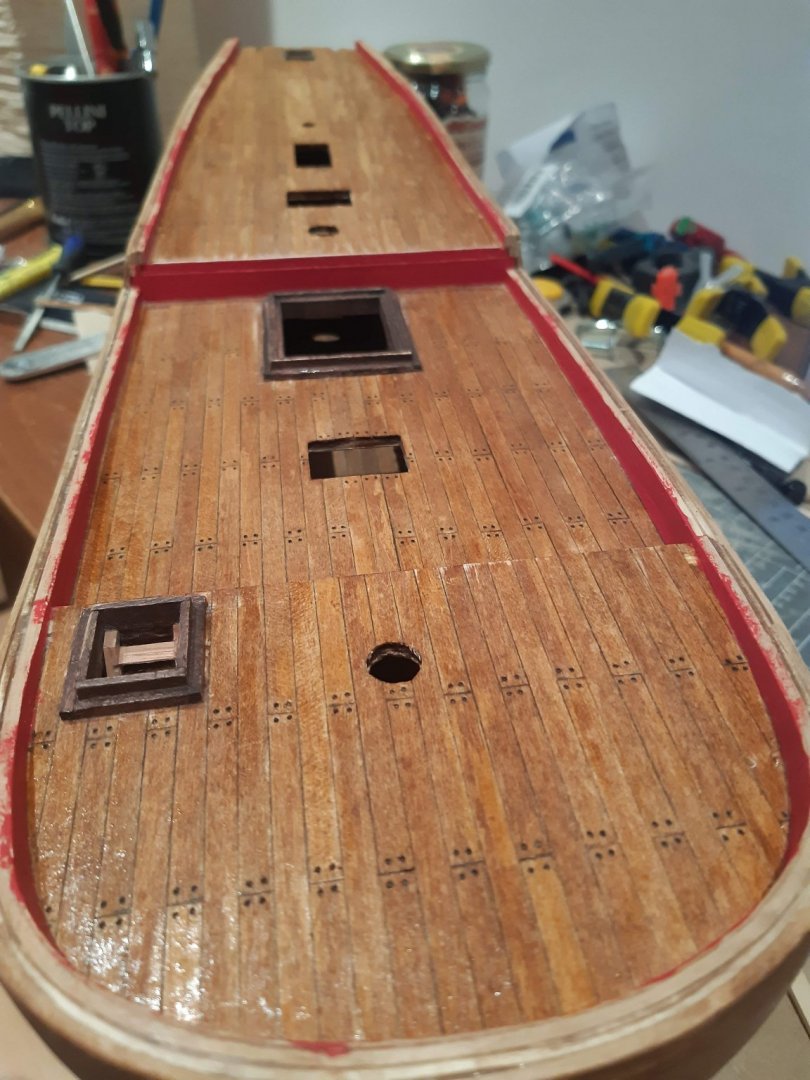
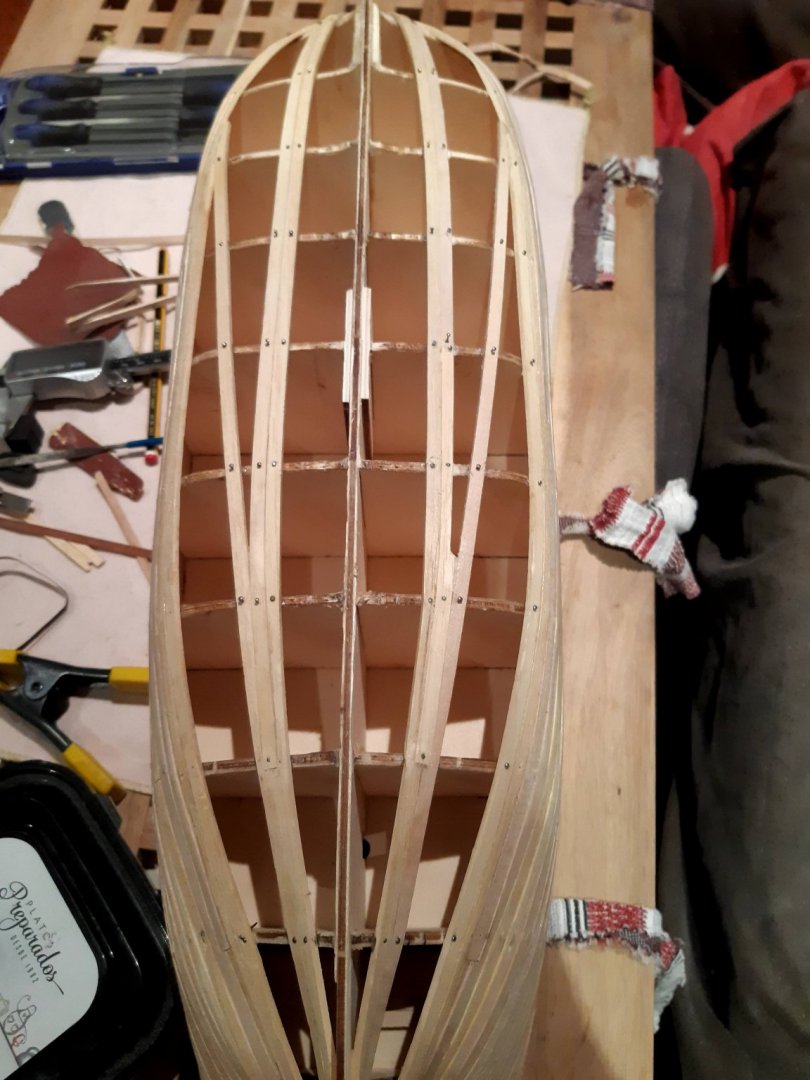
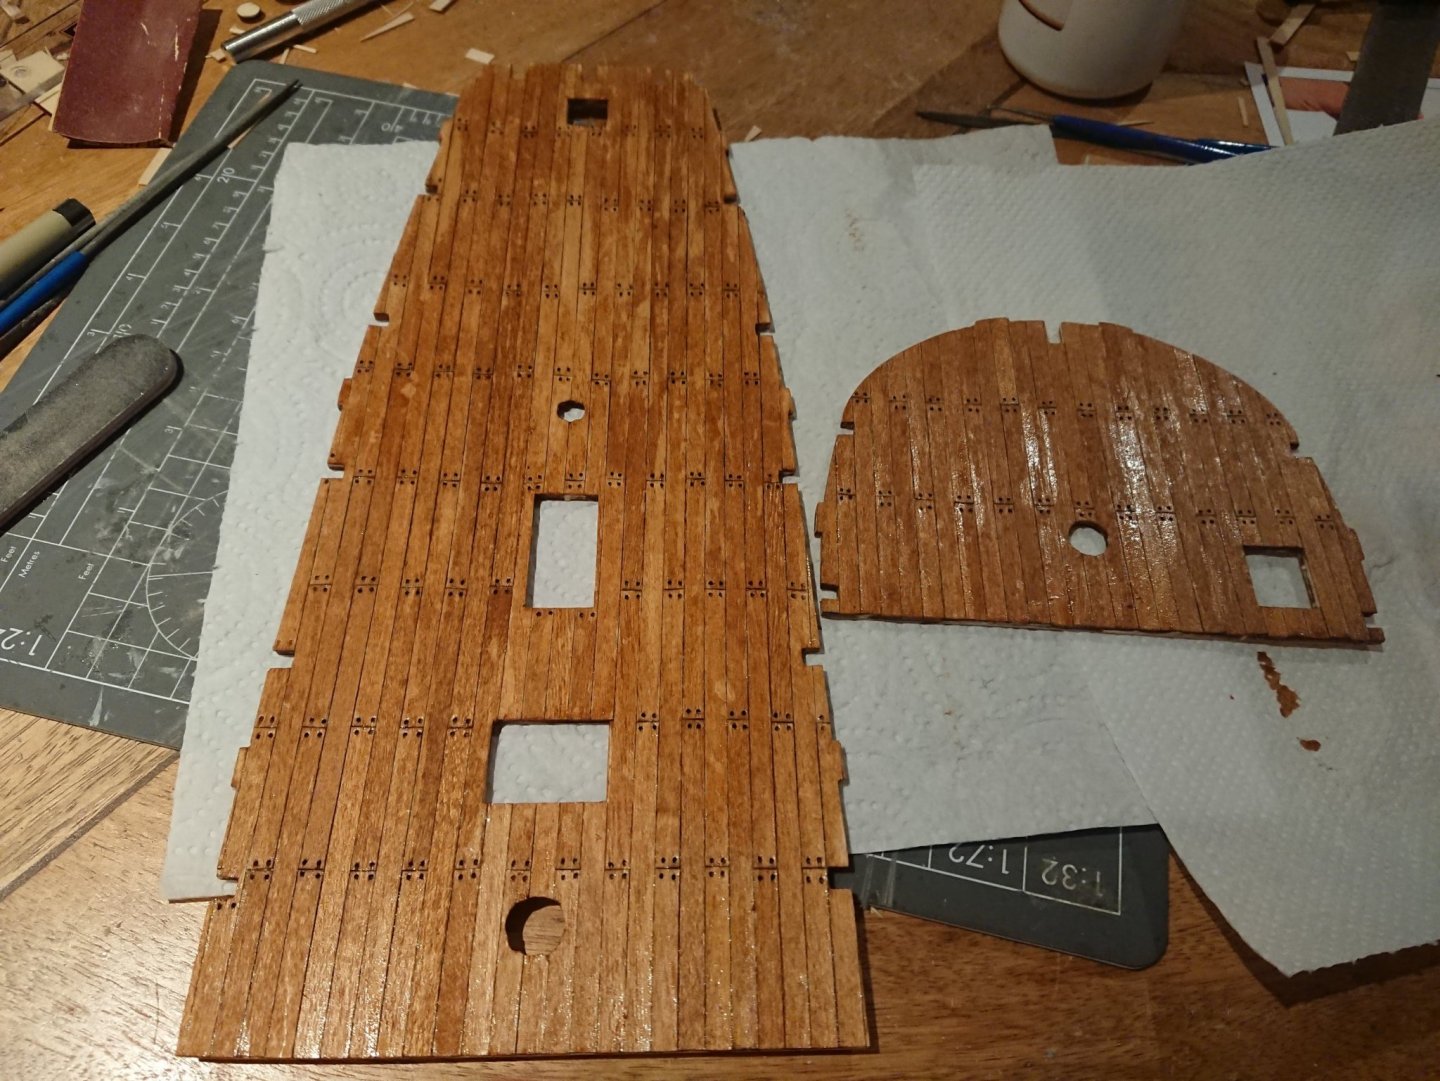
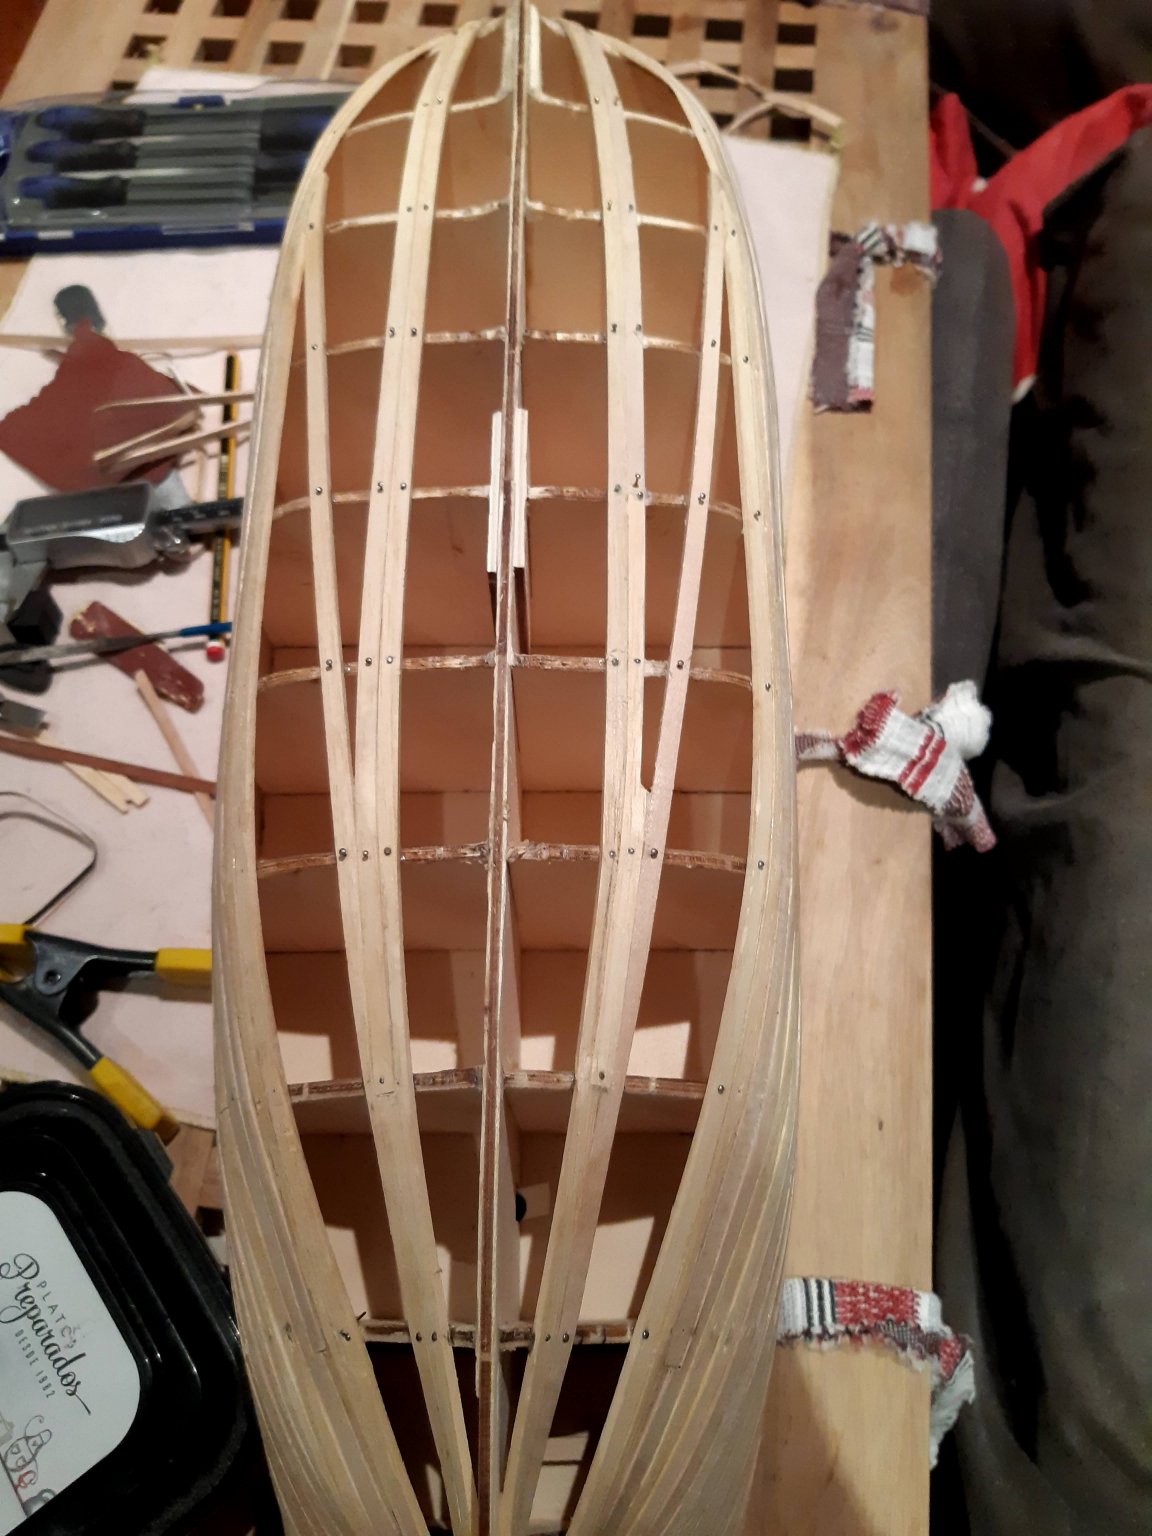
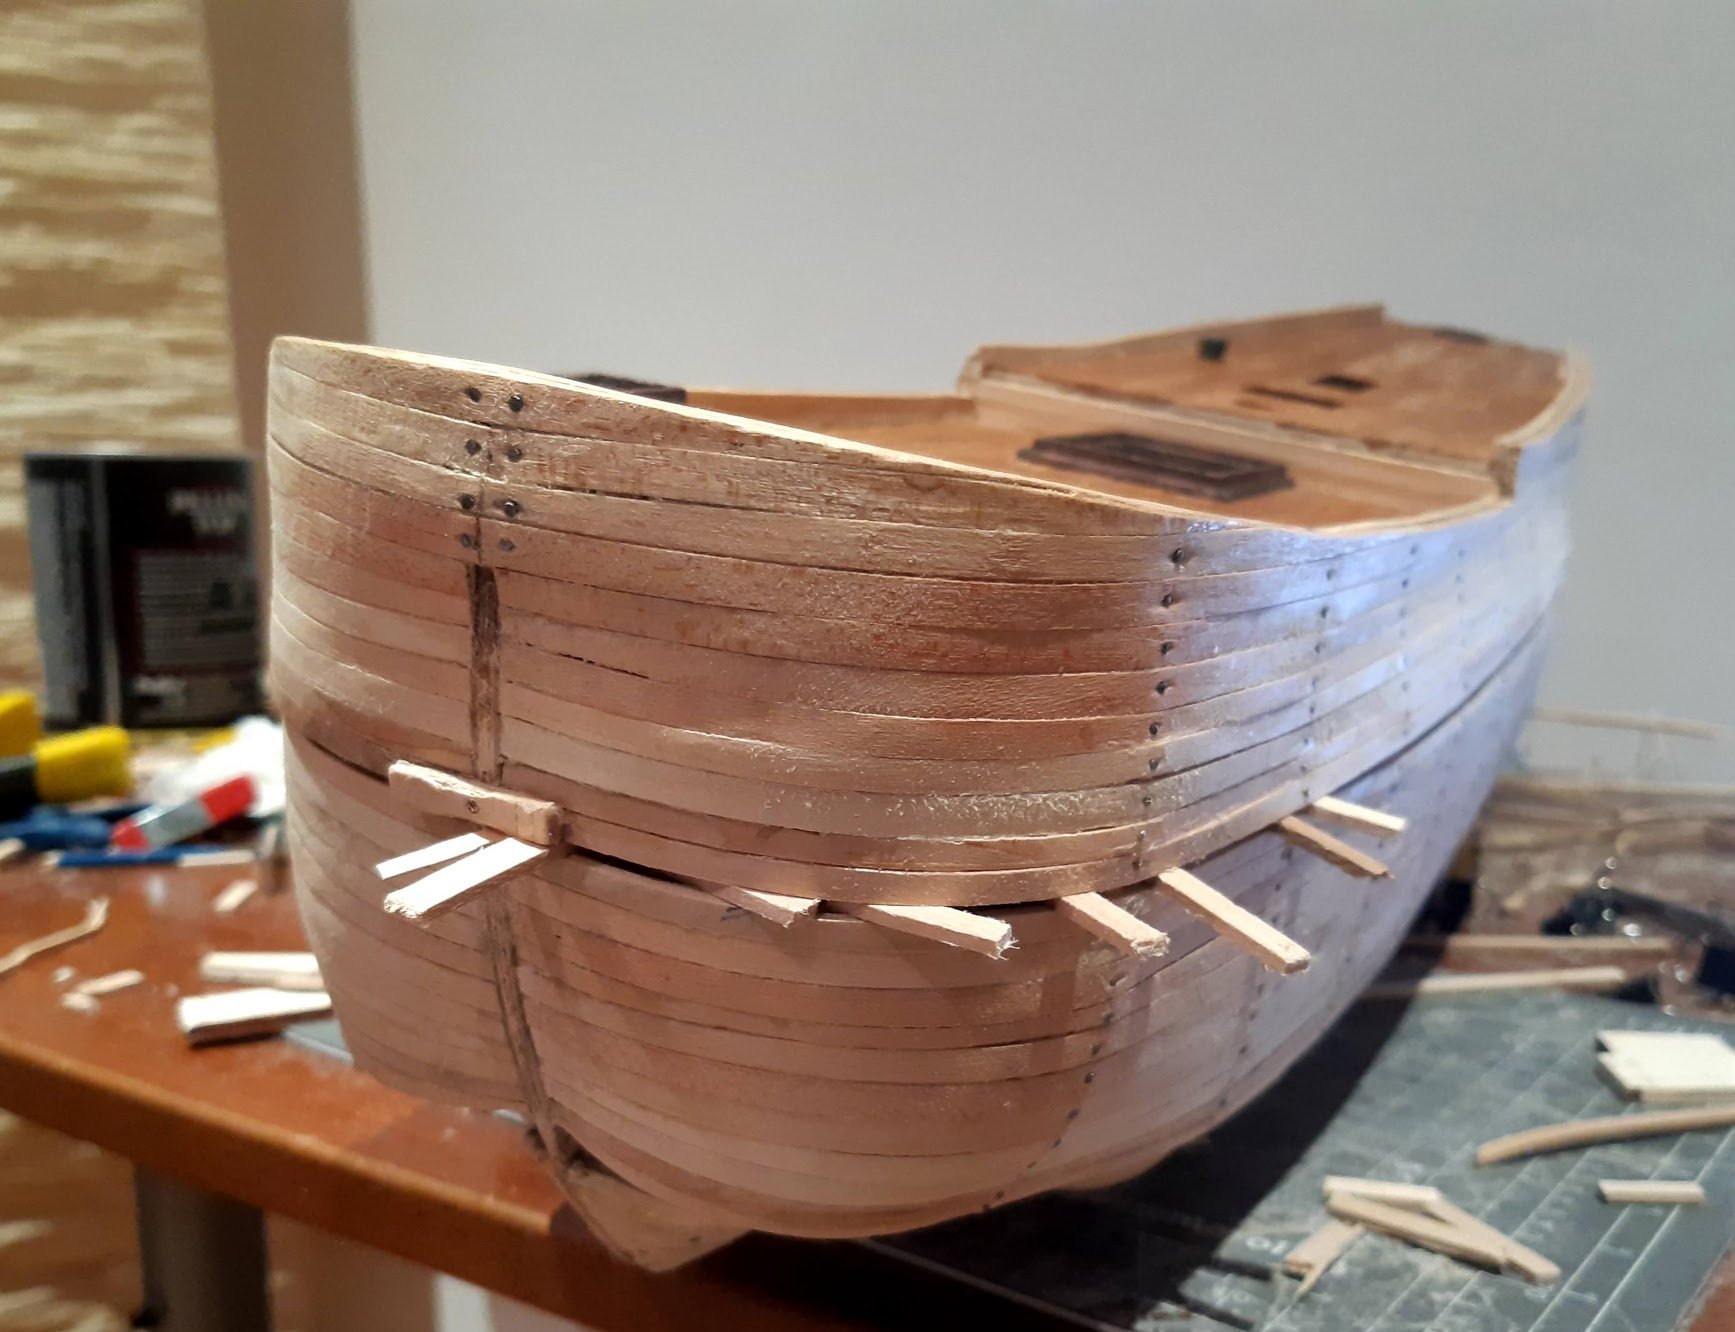
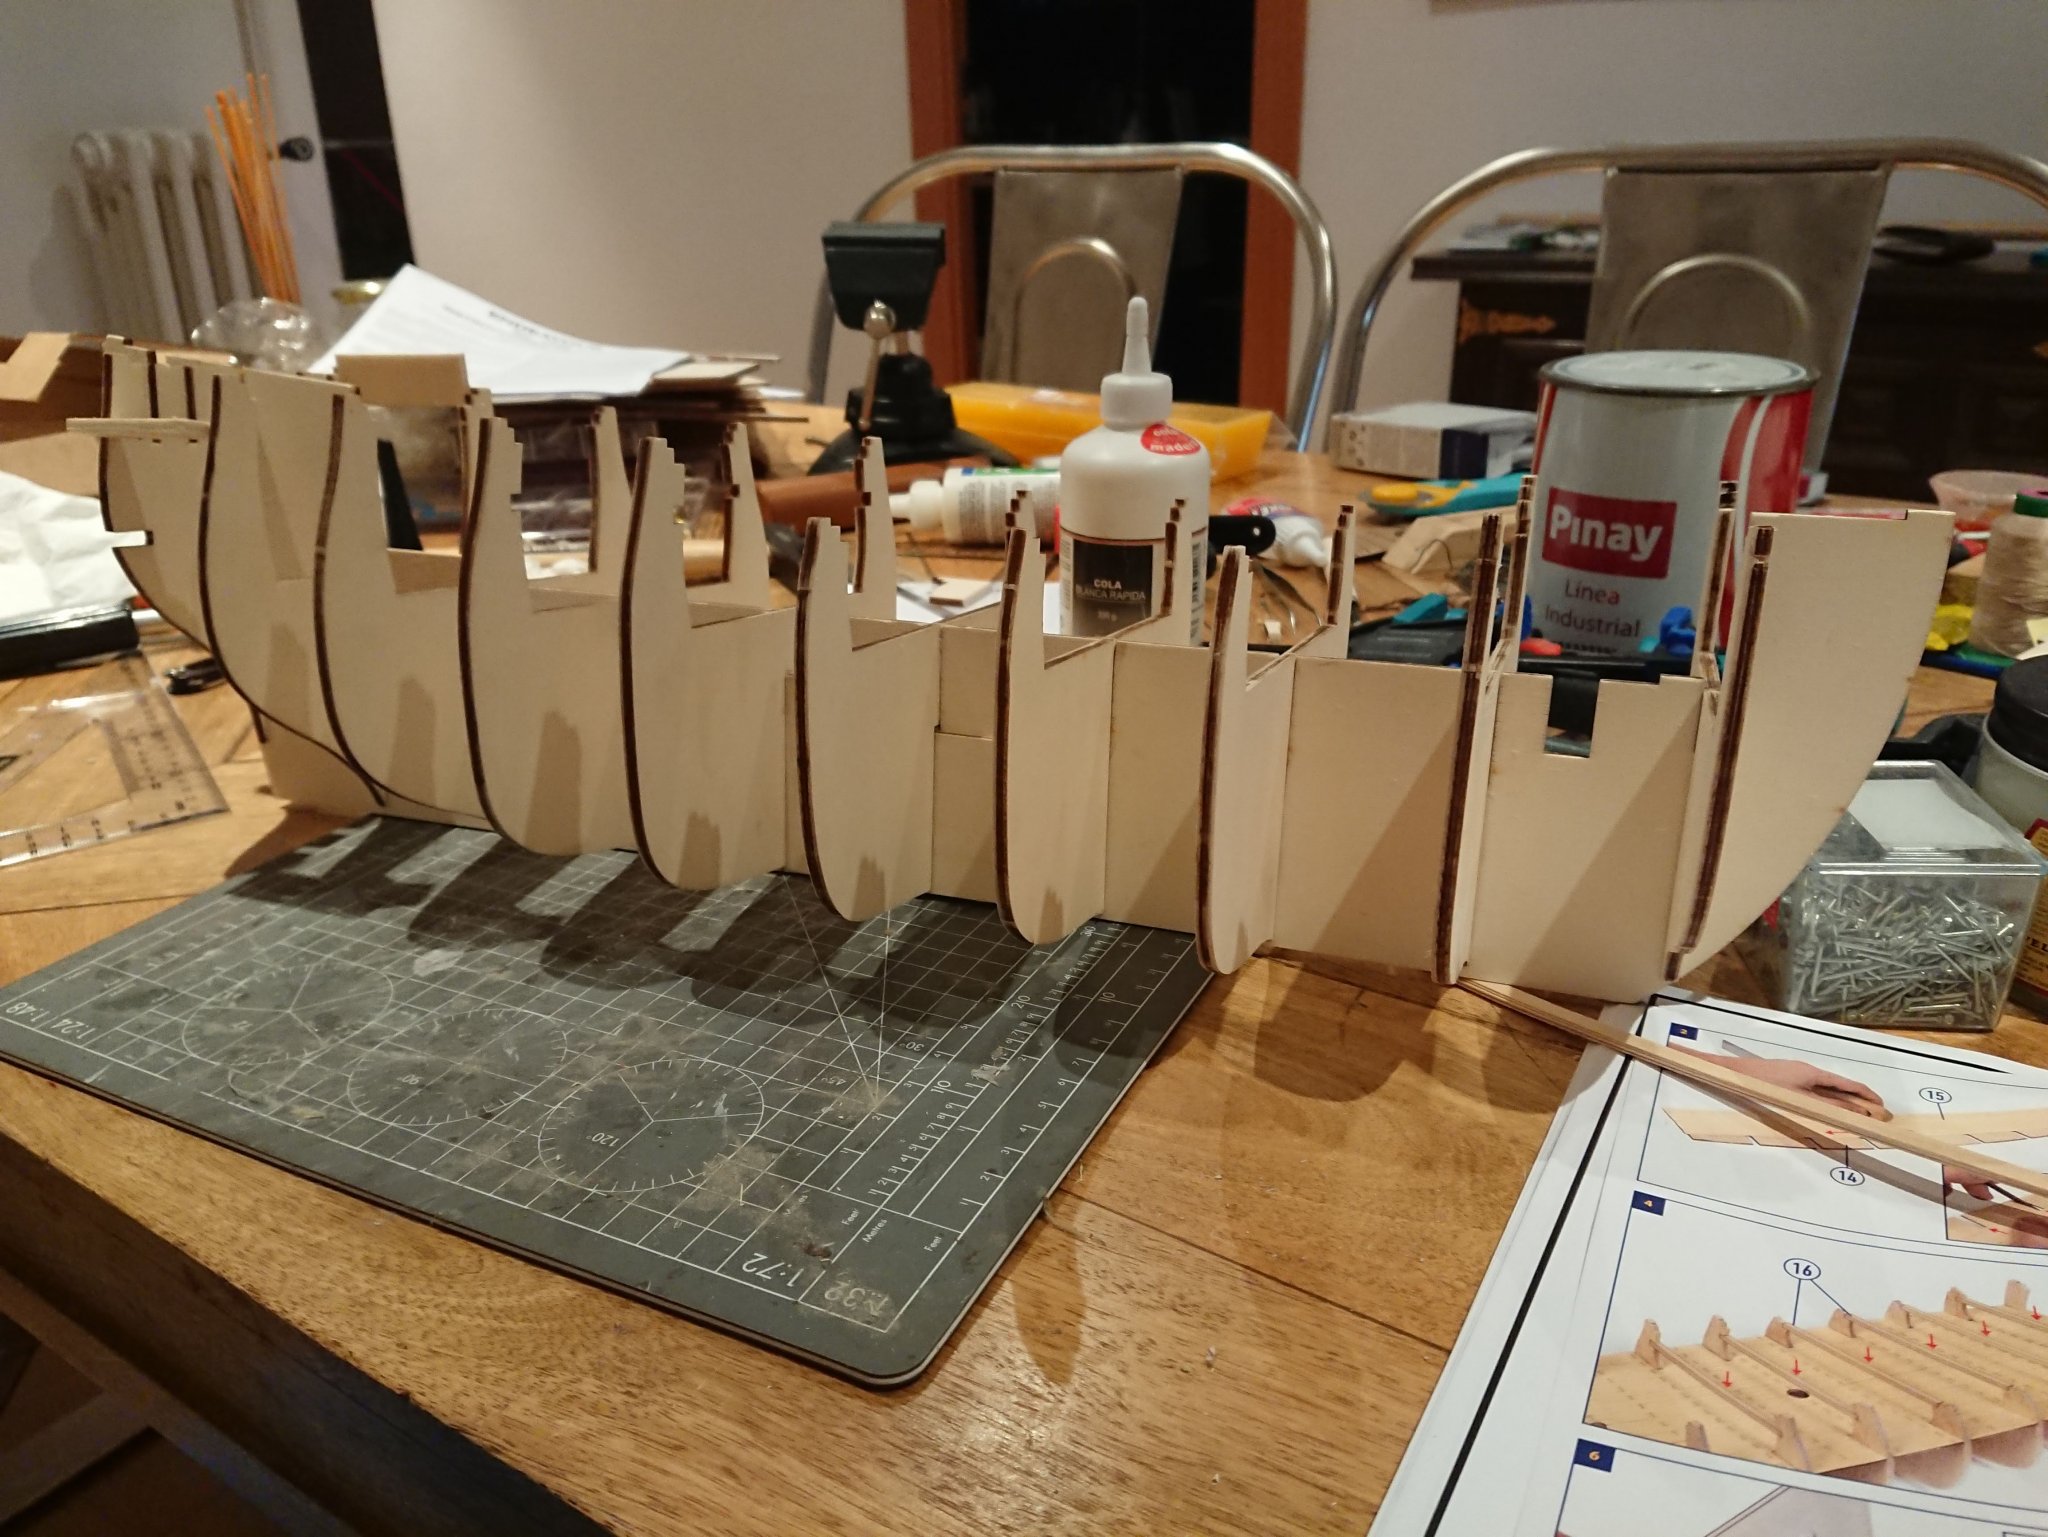
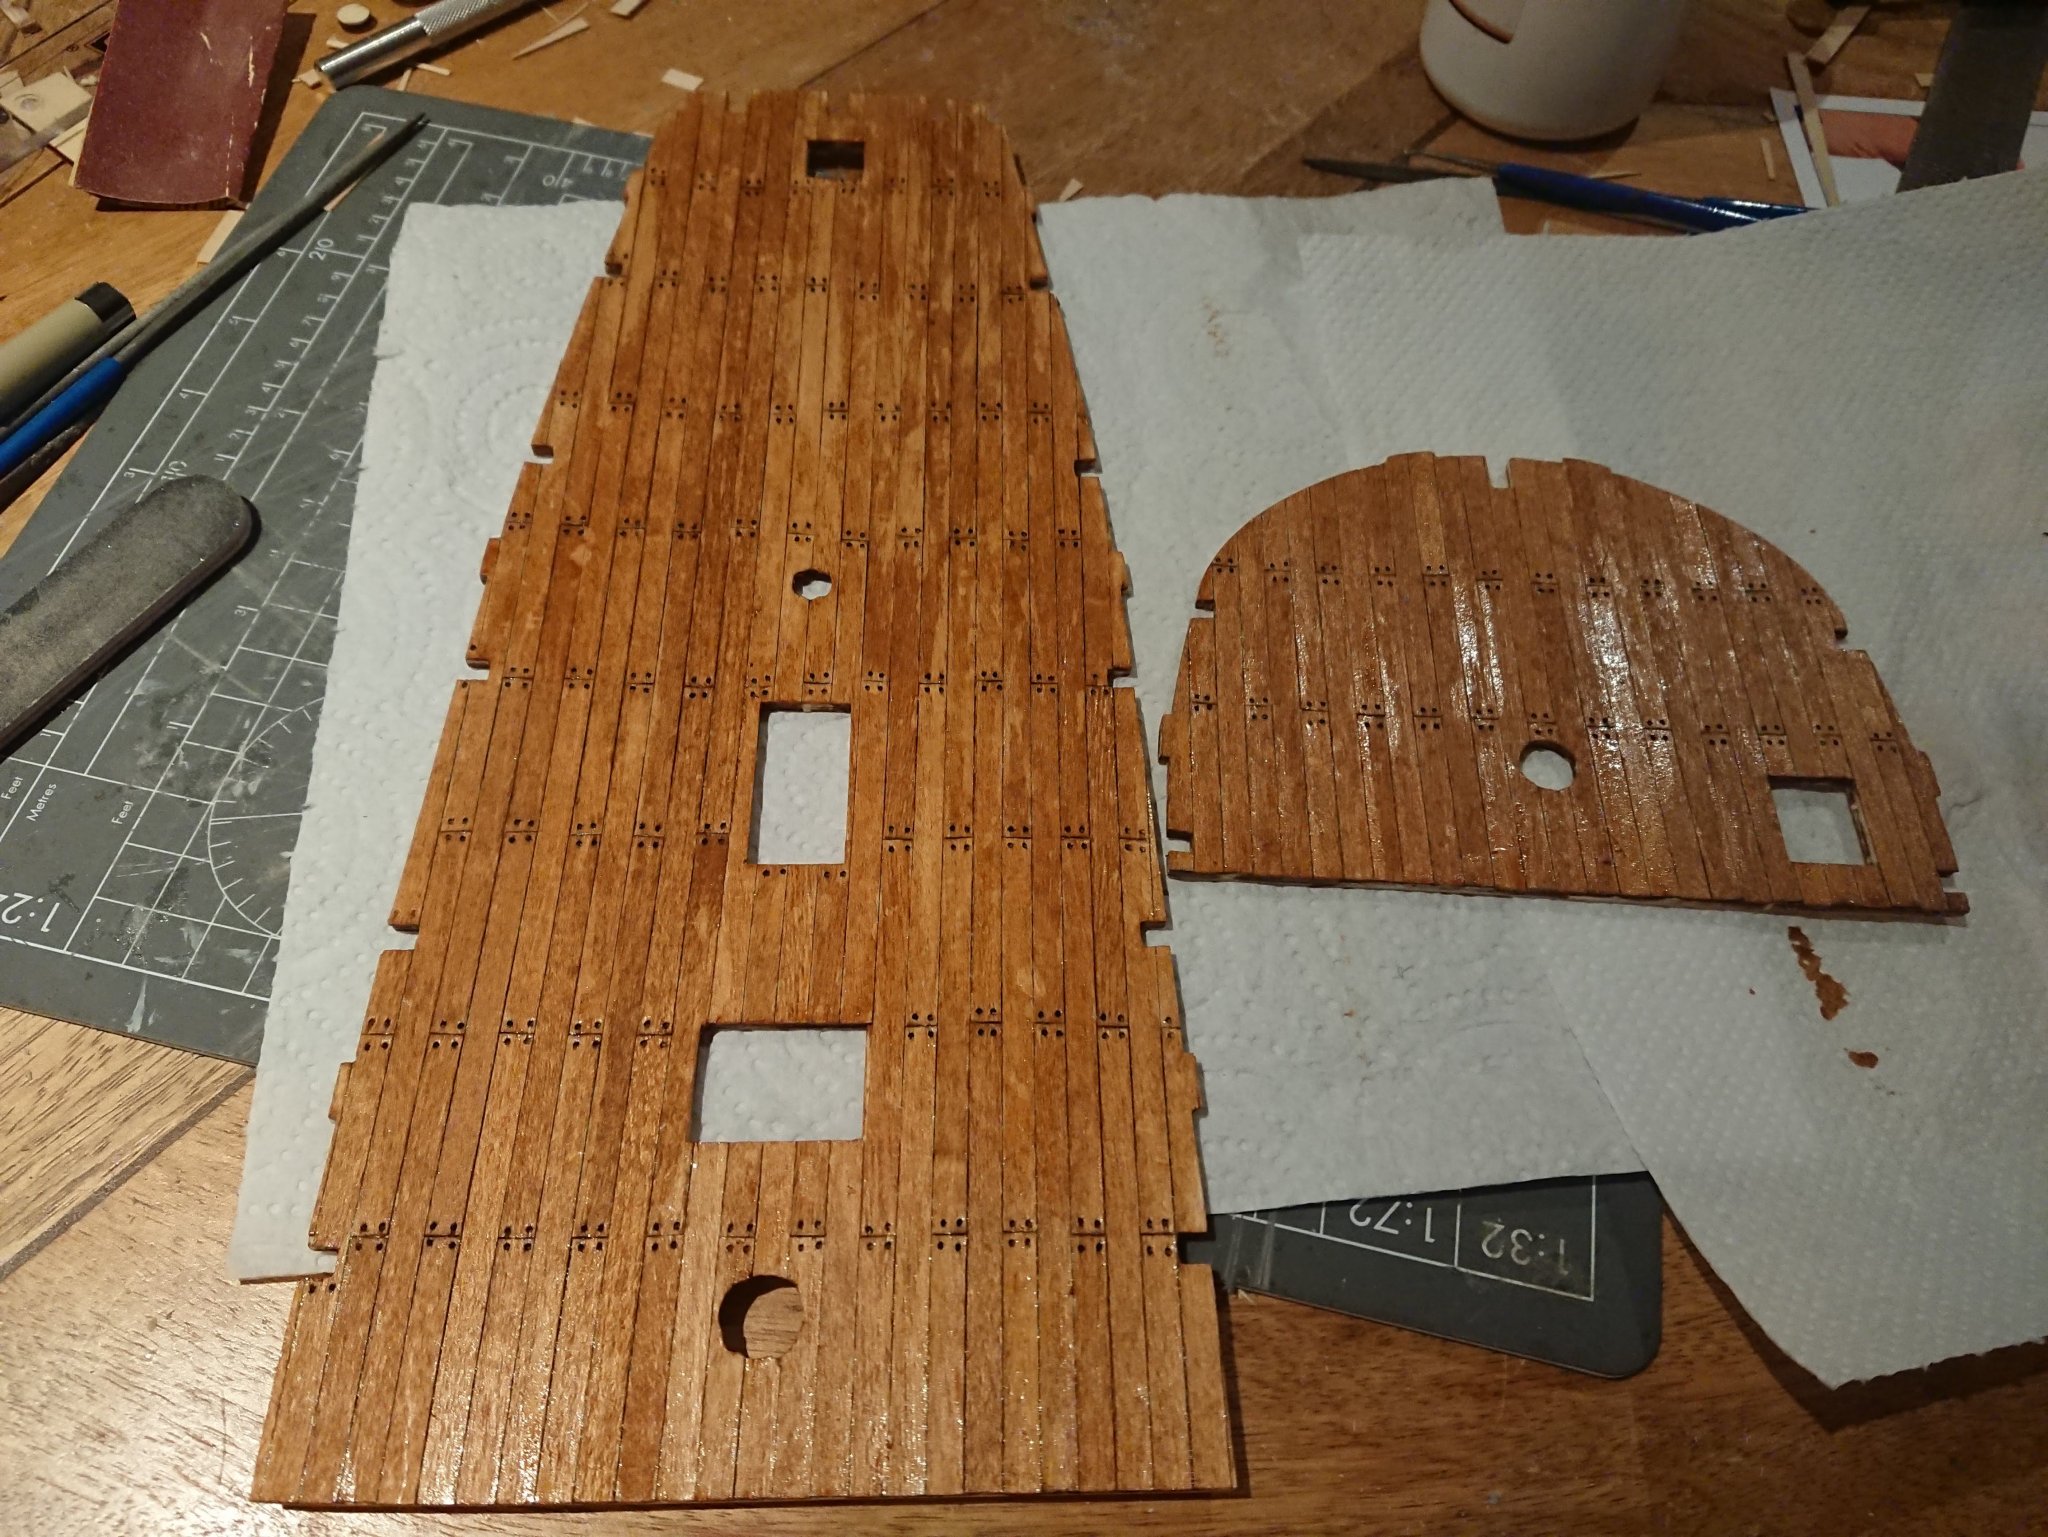
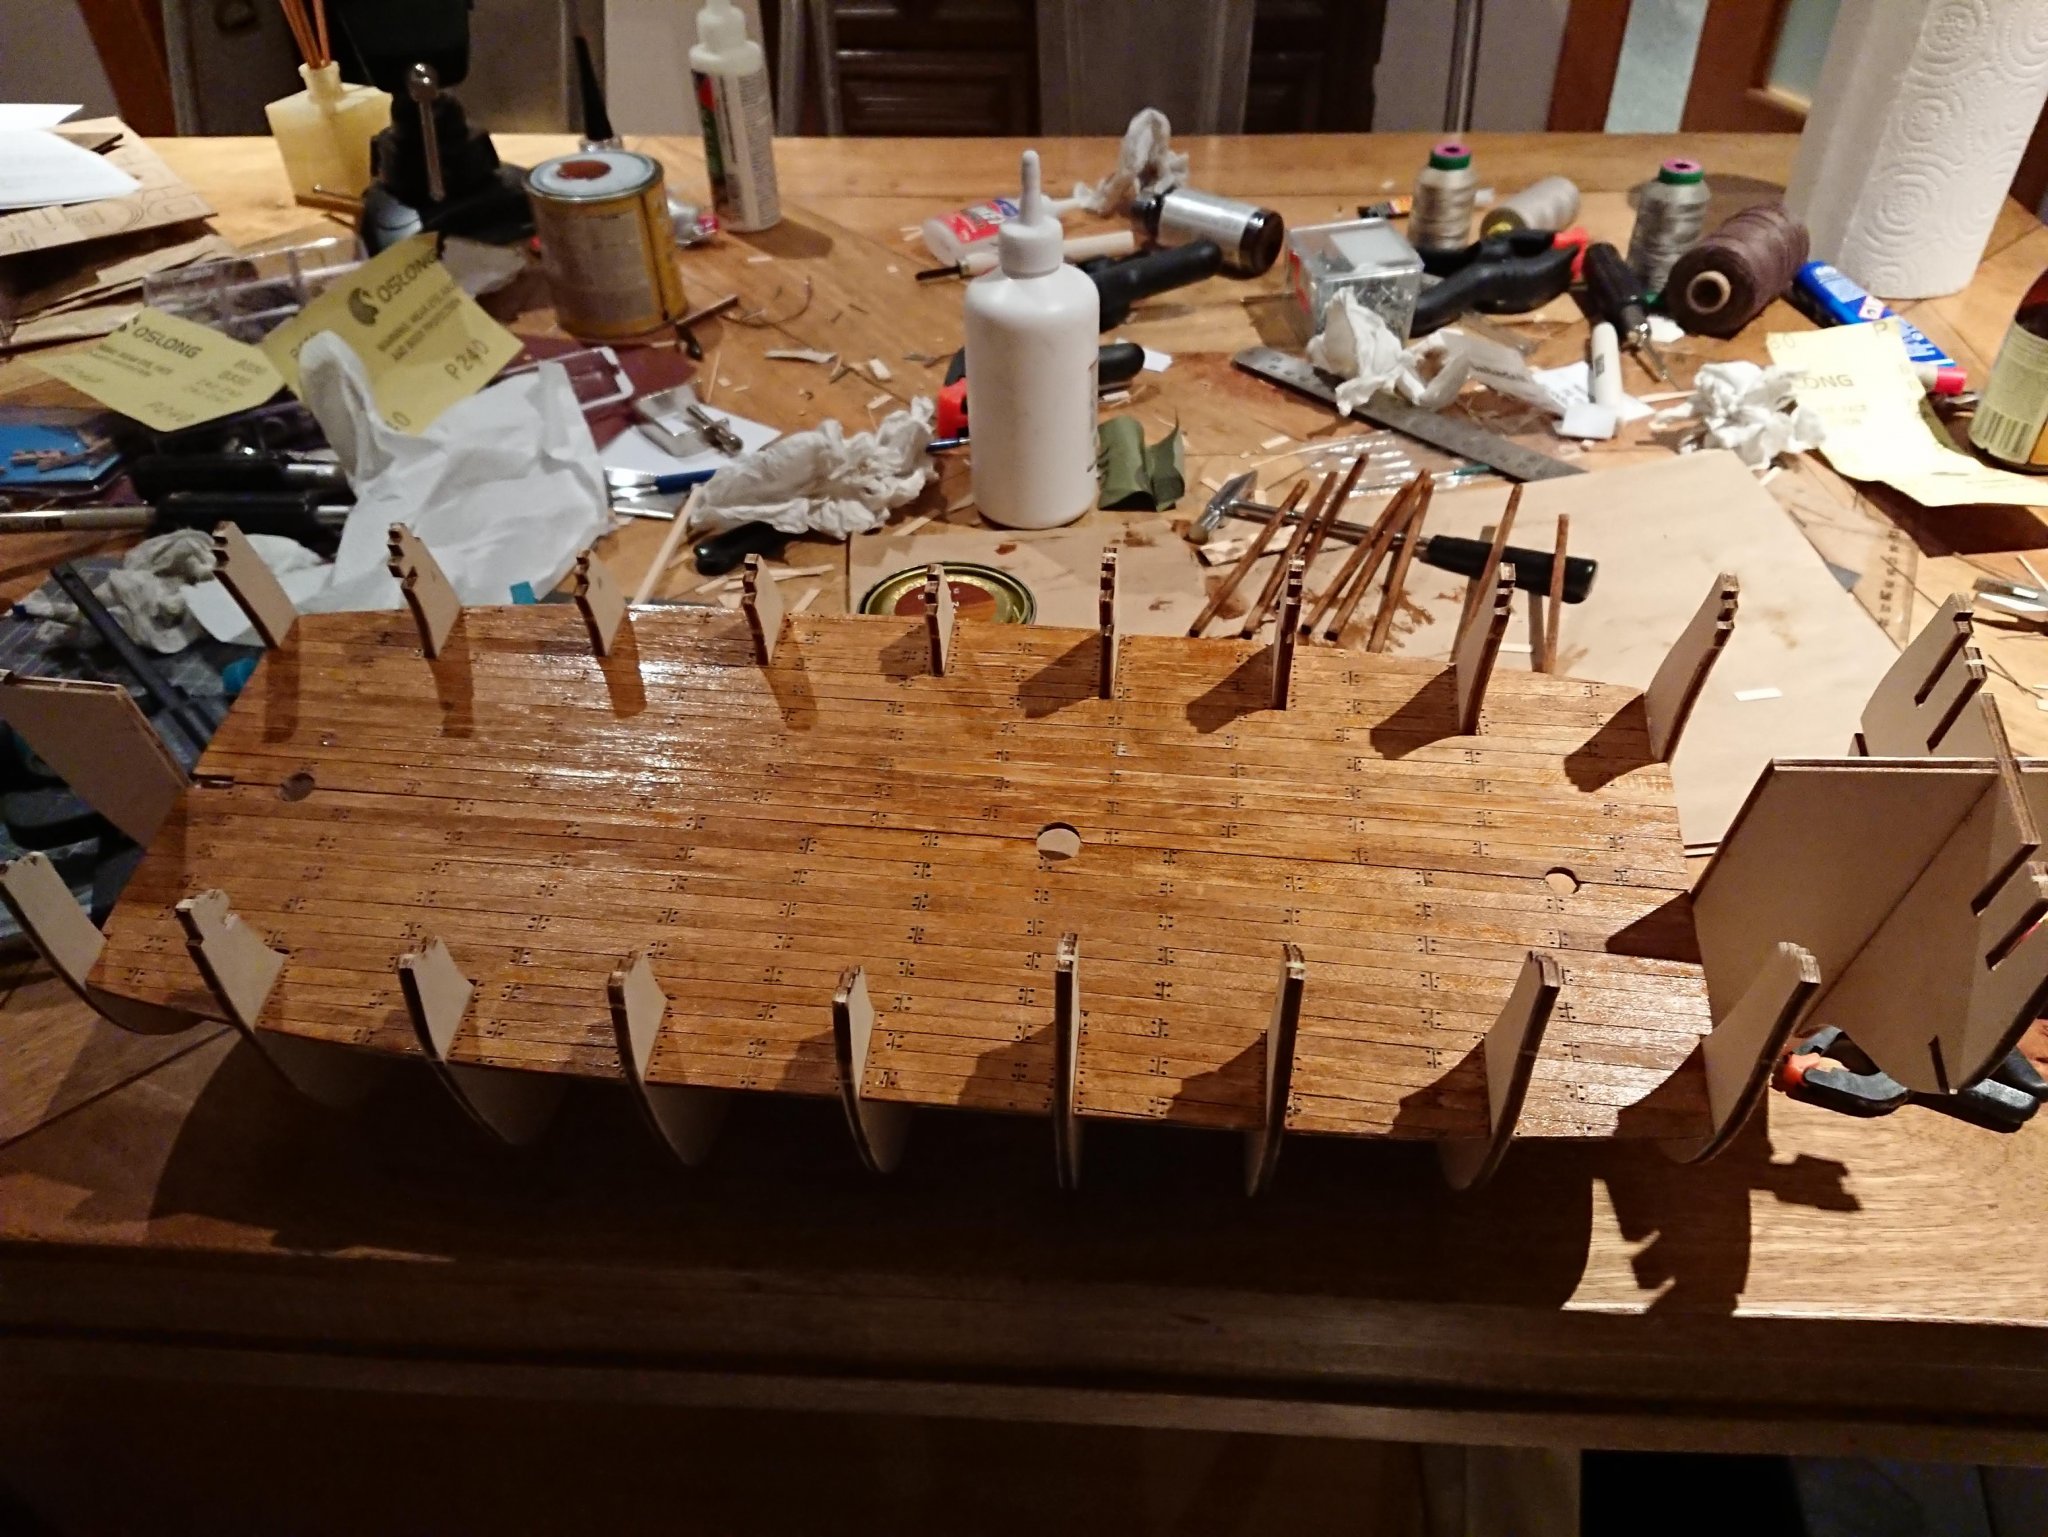
Hi there. This is my first post on this forum so apologies for any missteps... From what I can see this is an Occre/Artesania Latina kit and it seems to be sort of a generic build as I haven't been able to locate any references to a ship that existed under this name. This is my second kit, the first one being a Mantua kit that was a disaster and I abandoned. I've never done any sort of woodworking or model work so this is all pretty new to me. I bought this kit back in December 2017 and have been working on it with small breaks since then. At the time of posting this I have already finished most of this structure. Regarding this kit: Good points: - Ideal beginner's kit that is not too hard but provides enough of a challenge. Bad points: - Illustrated instruction booklet is terrible. It's 8 pages of inconsistent, vague and saturated colour images that in some instances cause confusion. - There is inconsistency with the parts illustrated and in some cases the measurements of small parts which is very frustrating In my endeavour to experiment and develop my skills a bit, I tried to weather the deck but I fumbled and ended up blotching the deck with black ink. I had to resort to sanding it to remove most of the stains but with limited success. In addition I decided to replace the metal launch boat provided with my own scratch build. On to the anchors next. Some pictures attached.


.jpg.8997df63331a4a2d292bd555bb81fbf0.jpg)
.jpg.2c0f3f1e67823addcd632225c92858a1.jpg)
.JPG.21d200fb5dbd47eef0fdef20285f01d1.JPG)
.JPG.e460690ad0a4f6dc450607d9a2ba7640.JPG)