
Peter Y.
-
Posts
71 -
Joined
-
Last visited


.thumb.jpg.62d1d69fed1f32364417cb1f9cdeb009.jpg)

-
 popeye the sailor reacted to a post in a topic:
RV Kilo Moana by J Harreld - FINISHED - Lego - 1:94 scale
popeye the sailor reacted to a post in a topic:
RV Kilo Moana by J Harreld - FINISHED - Lego - 1:94 scale
-
Nirvana reacted to a post in a topic:
New to ship modelling? But what do you build first?
-
GrandpaPhil reacted to a post in a topic:
HM Schooner Pickle by Peter Y. - Caldercraft - Scale 1:64 - First ever ship build
-
mtbediz reacted to a post in a topic:
HM Schooner Pickle by Peter Y. - Caldercraft - Scale 1:64 - First ever ship build
-
maddog33 reacted to a post in a topic:
HM Schooner Pickle by Peter Y. - Caldercraft - Scale 1:64 - First ever ship build
-
maddog33 reacted to a post in a topic:
HM Schooner Pickle by Peter Y. - Caldercraft - Scale 1:64 - First ever ship build
-
maddog33 reacted to a post in a topic:
HM Schooner Pickle by Peter Y. - Caldercraft - Scale 1:64 - First ever ship build
-
maddog33 reacted to a post in a topic:
HM Schooner Pickle by Peter Y. - Caldercraft - Scale 1:64 - First ever ship build
-
popeye the sailor reacted to a post in a topic:
Kenworth K100 tipper truck by Peter Y. - Lego - Scale 1:48 - Custom creation
-
Peter Y. reacted to a post in a topic:
P-61 Black Widow by GrandpaPhil - FINISHED - Monogram - 1:48
-
Peter Y. reacted to a post in a topic:
V-Express Steam Train with Tender by yvesvidal - FINISHED - uGears
-
Peter Y. reacted to a post in a topic:
Kenworth K100 tipper truck by Peter Y. - Lego - Scale 1:48 - Custom creation
-
Peter Y. reacted to a post in a topic:
What this area is for
-
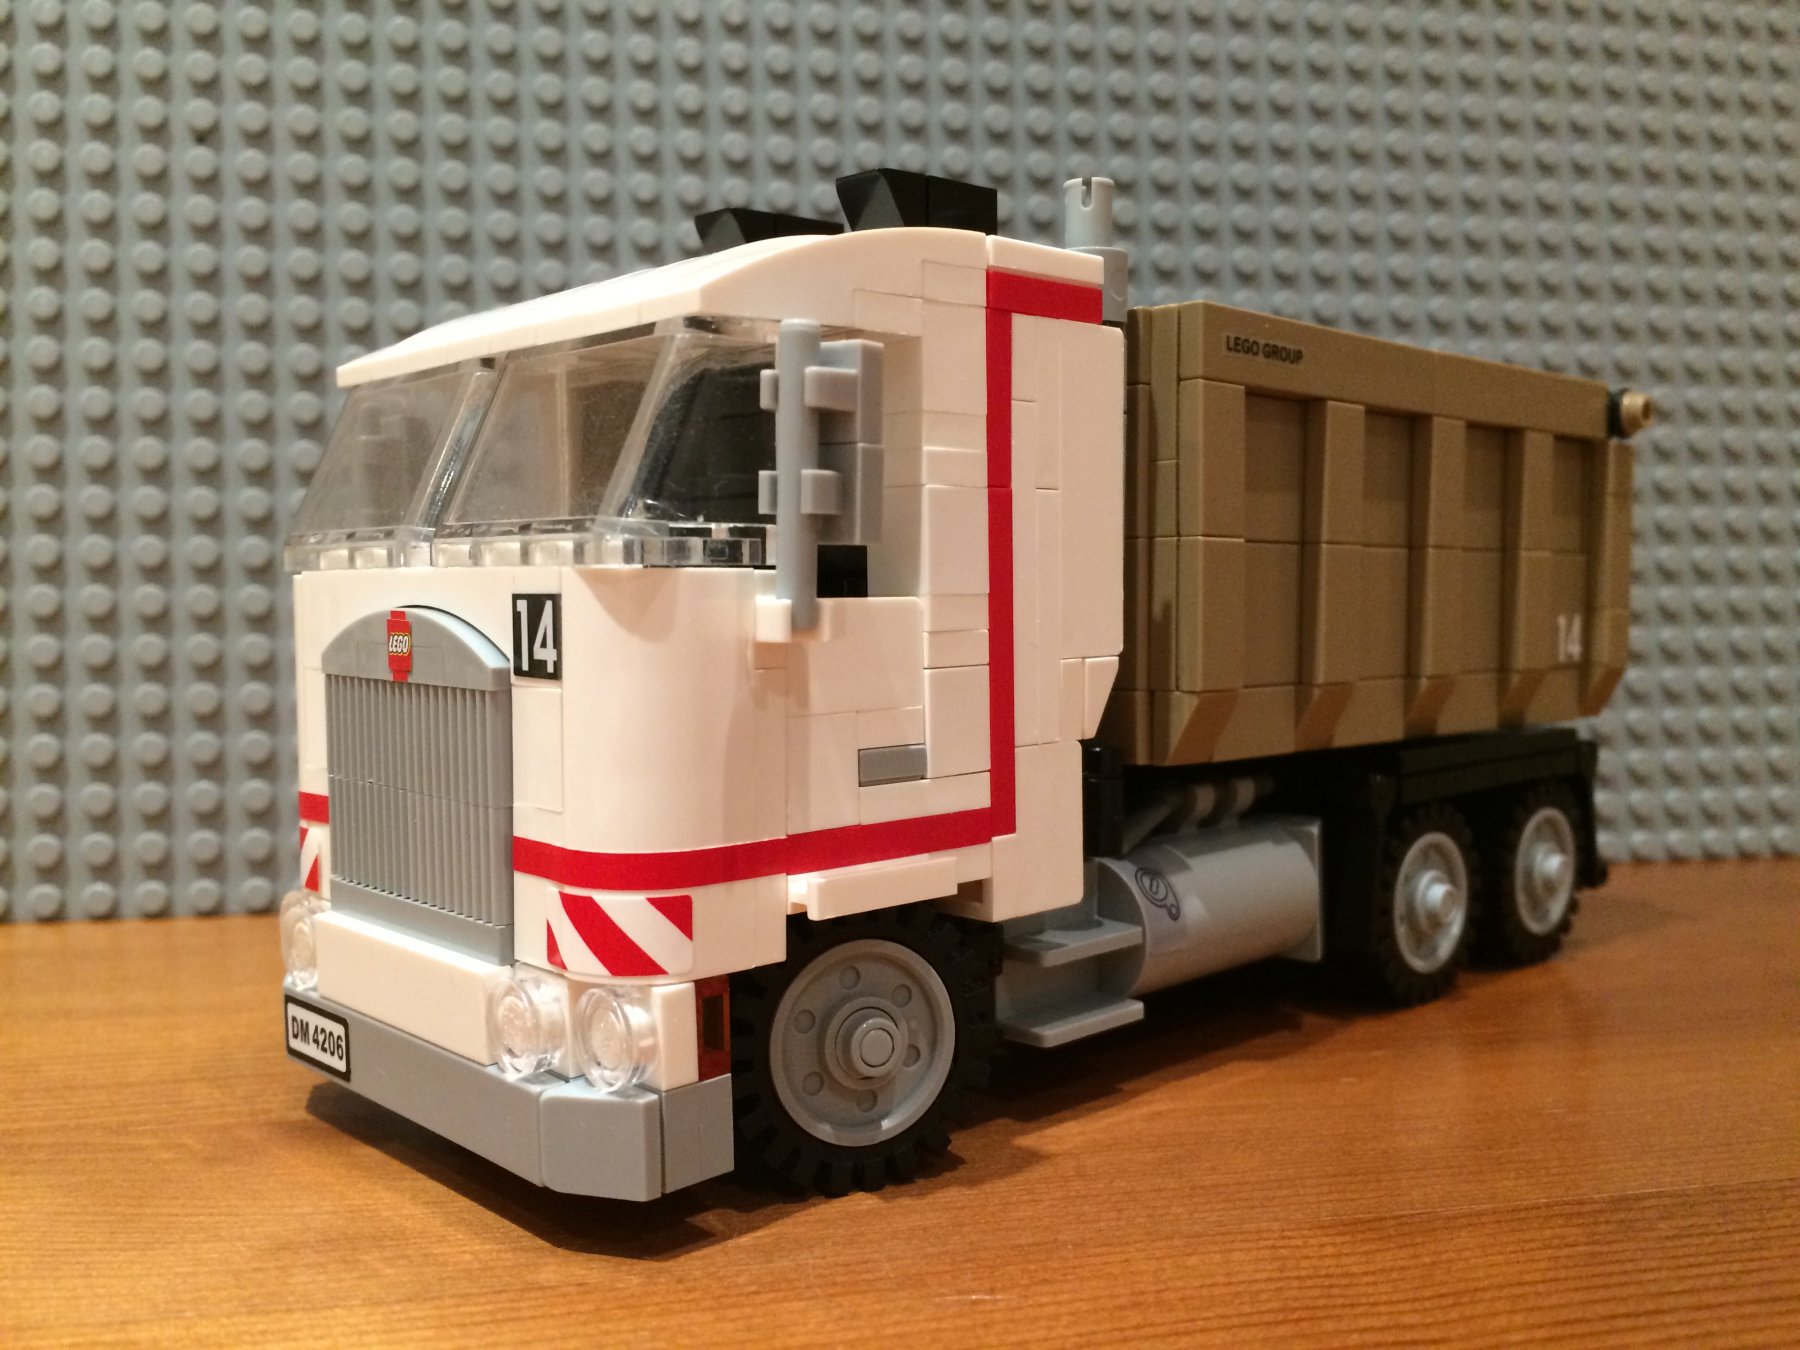
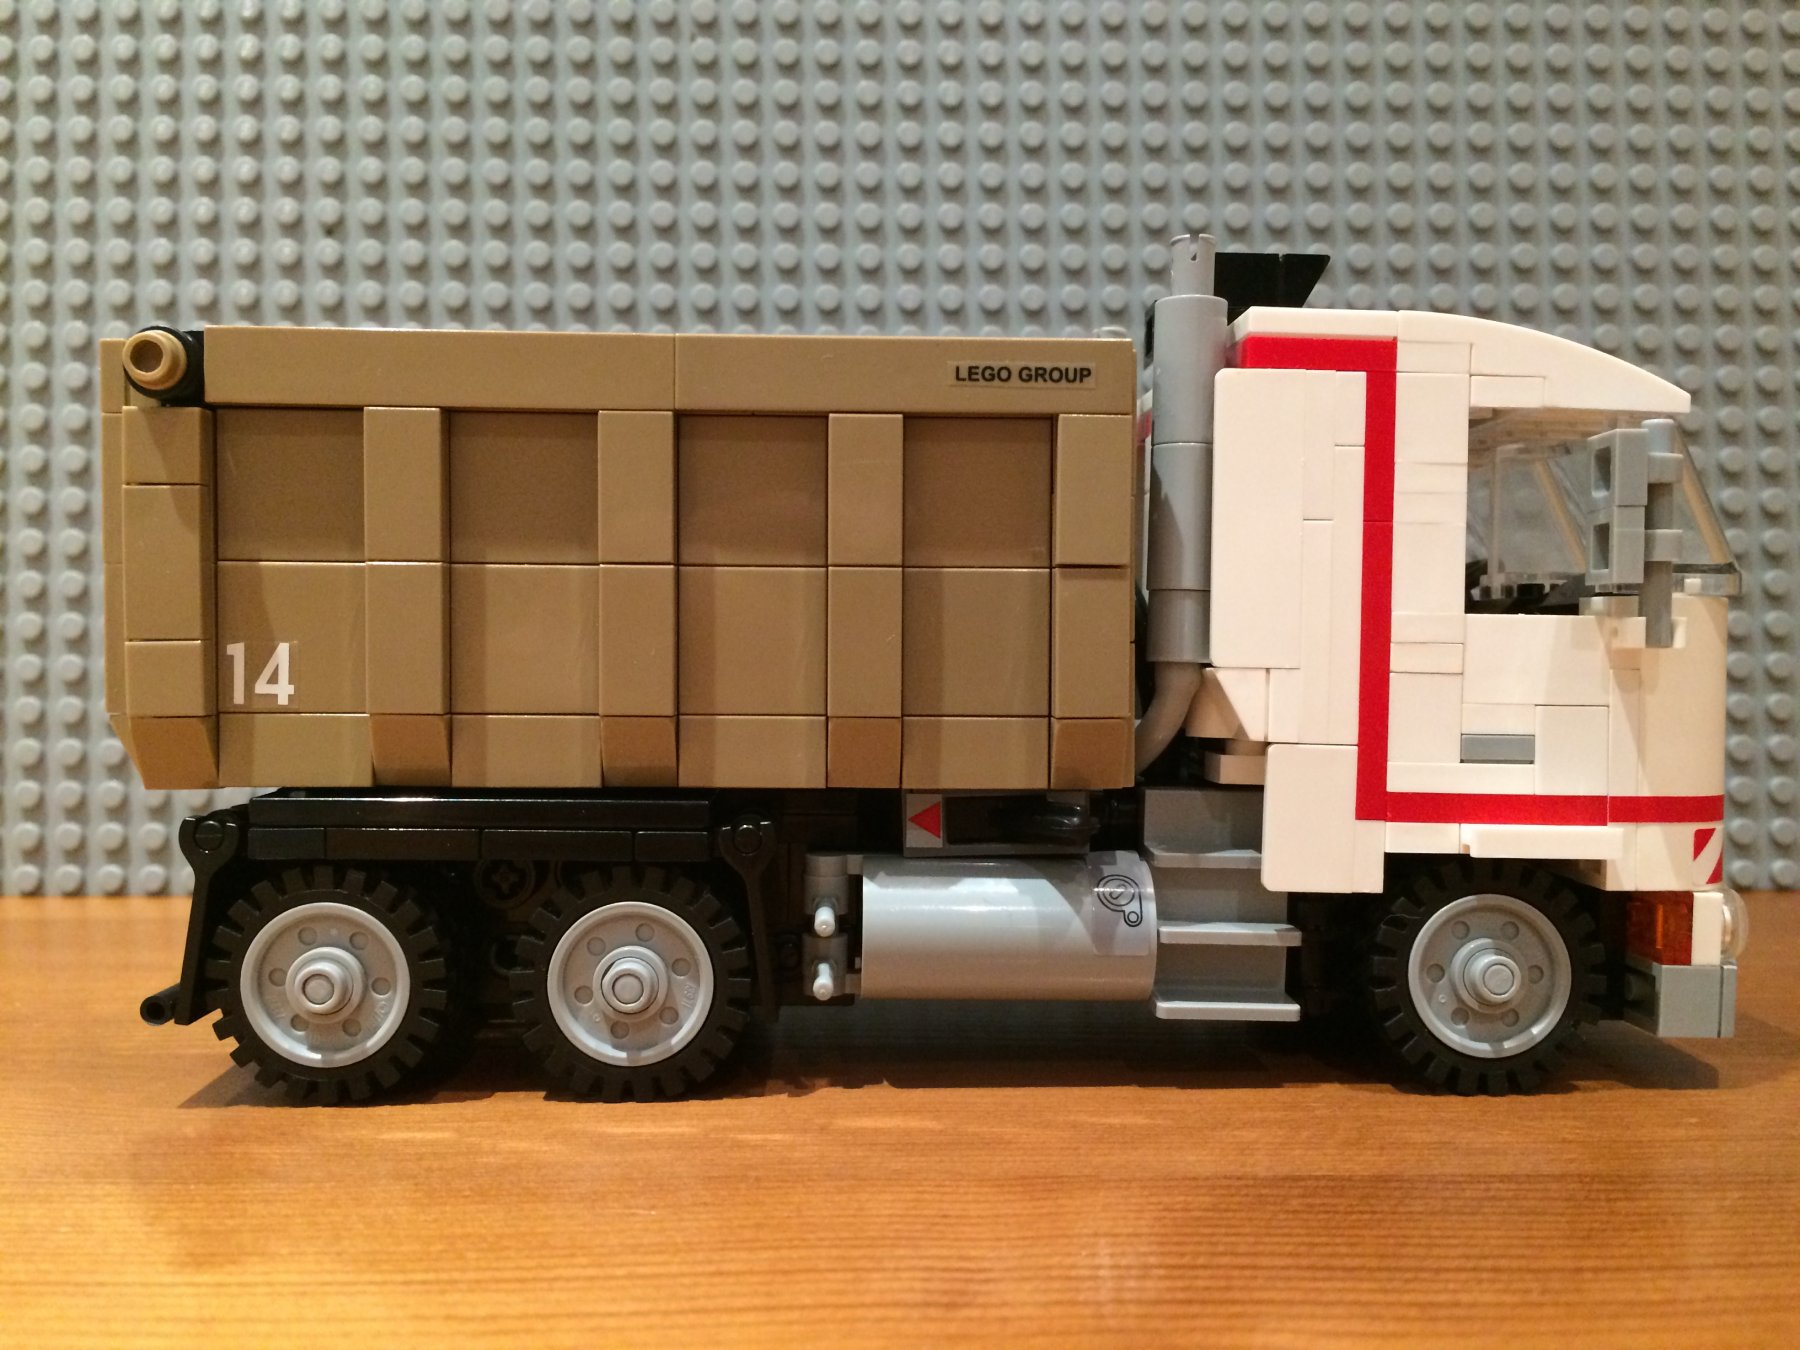
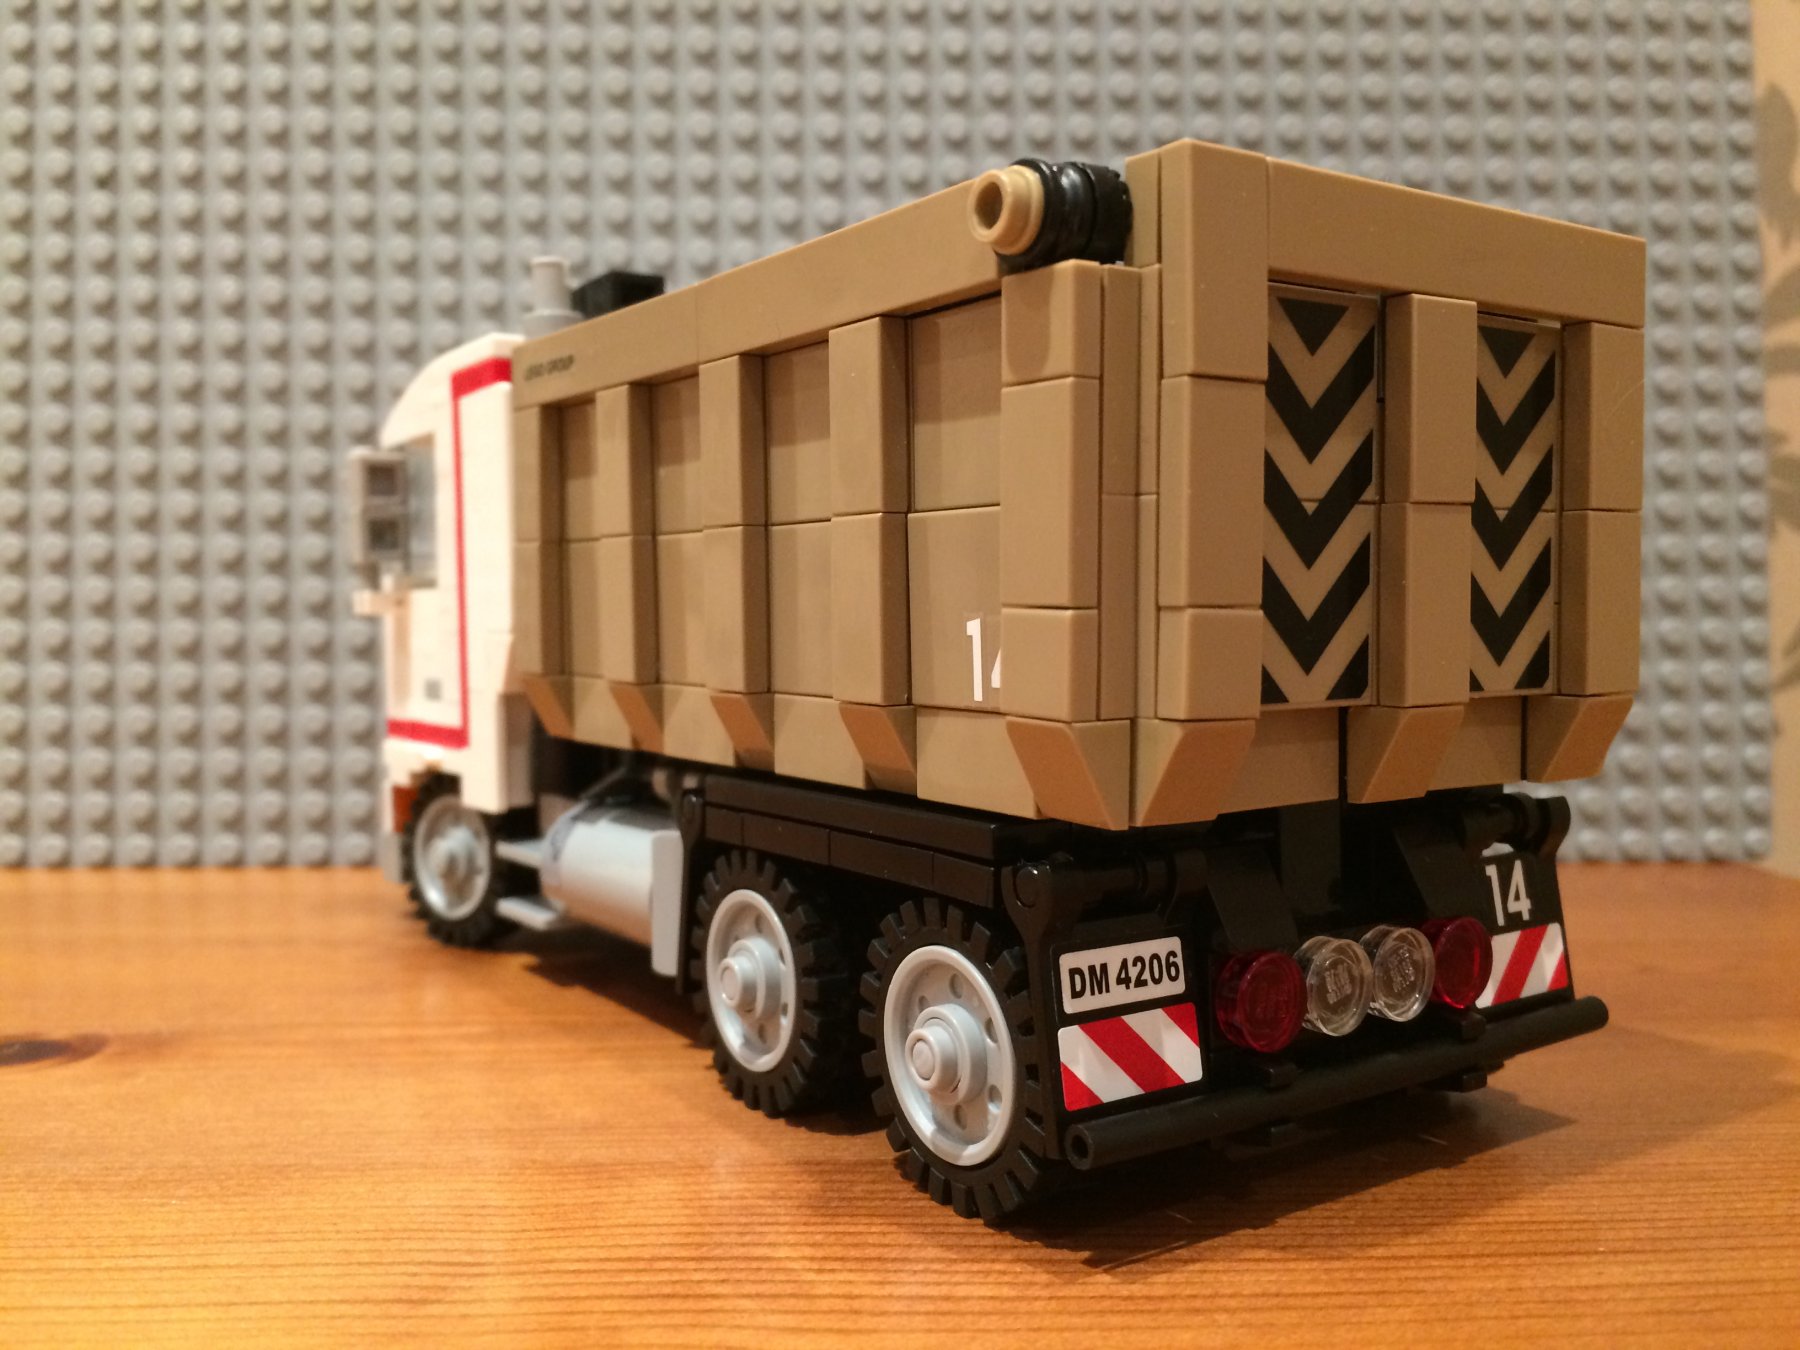
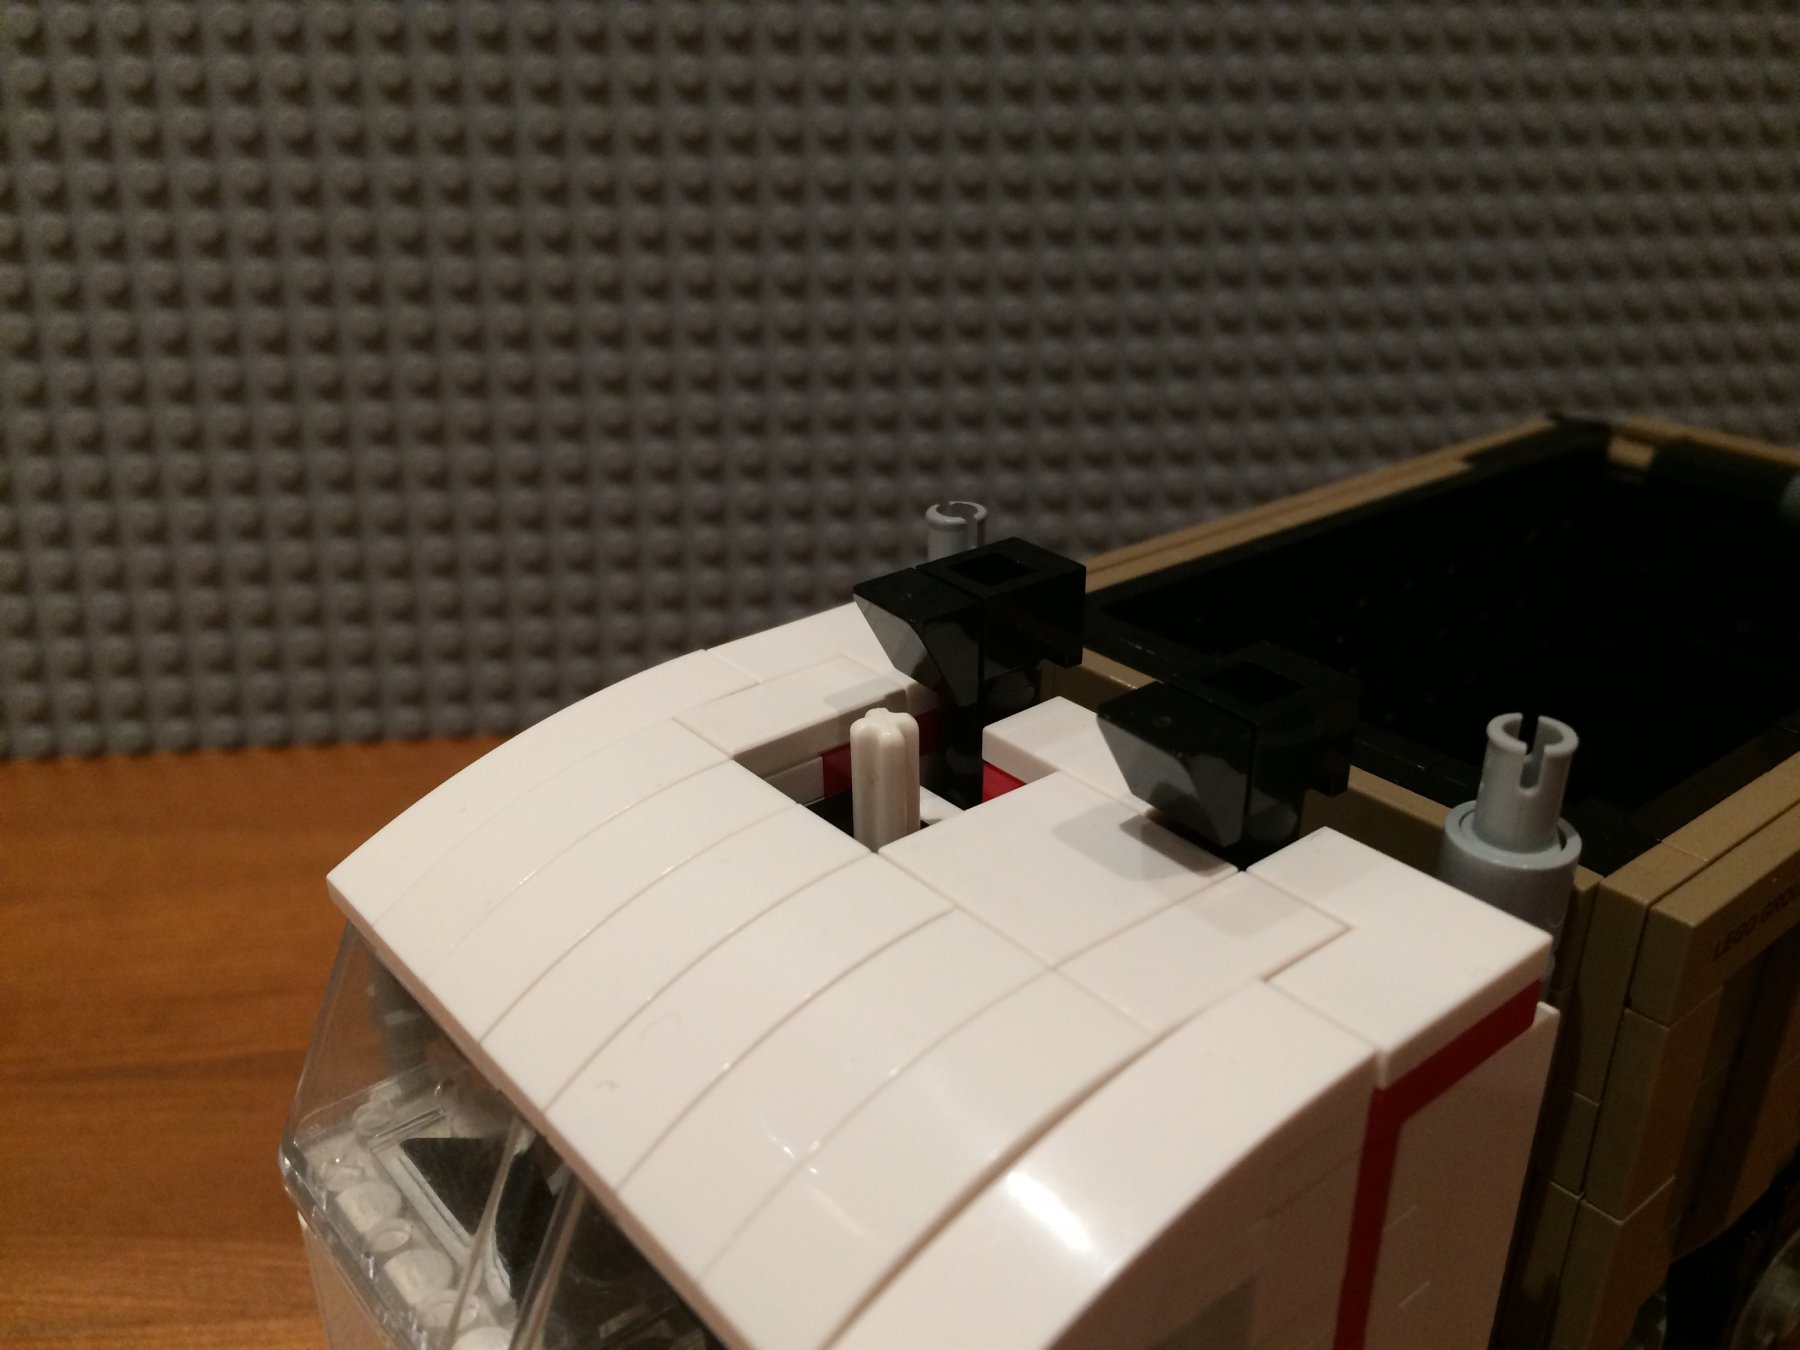
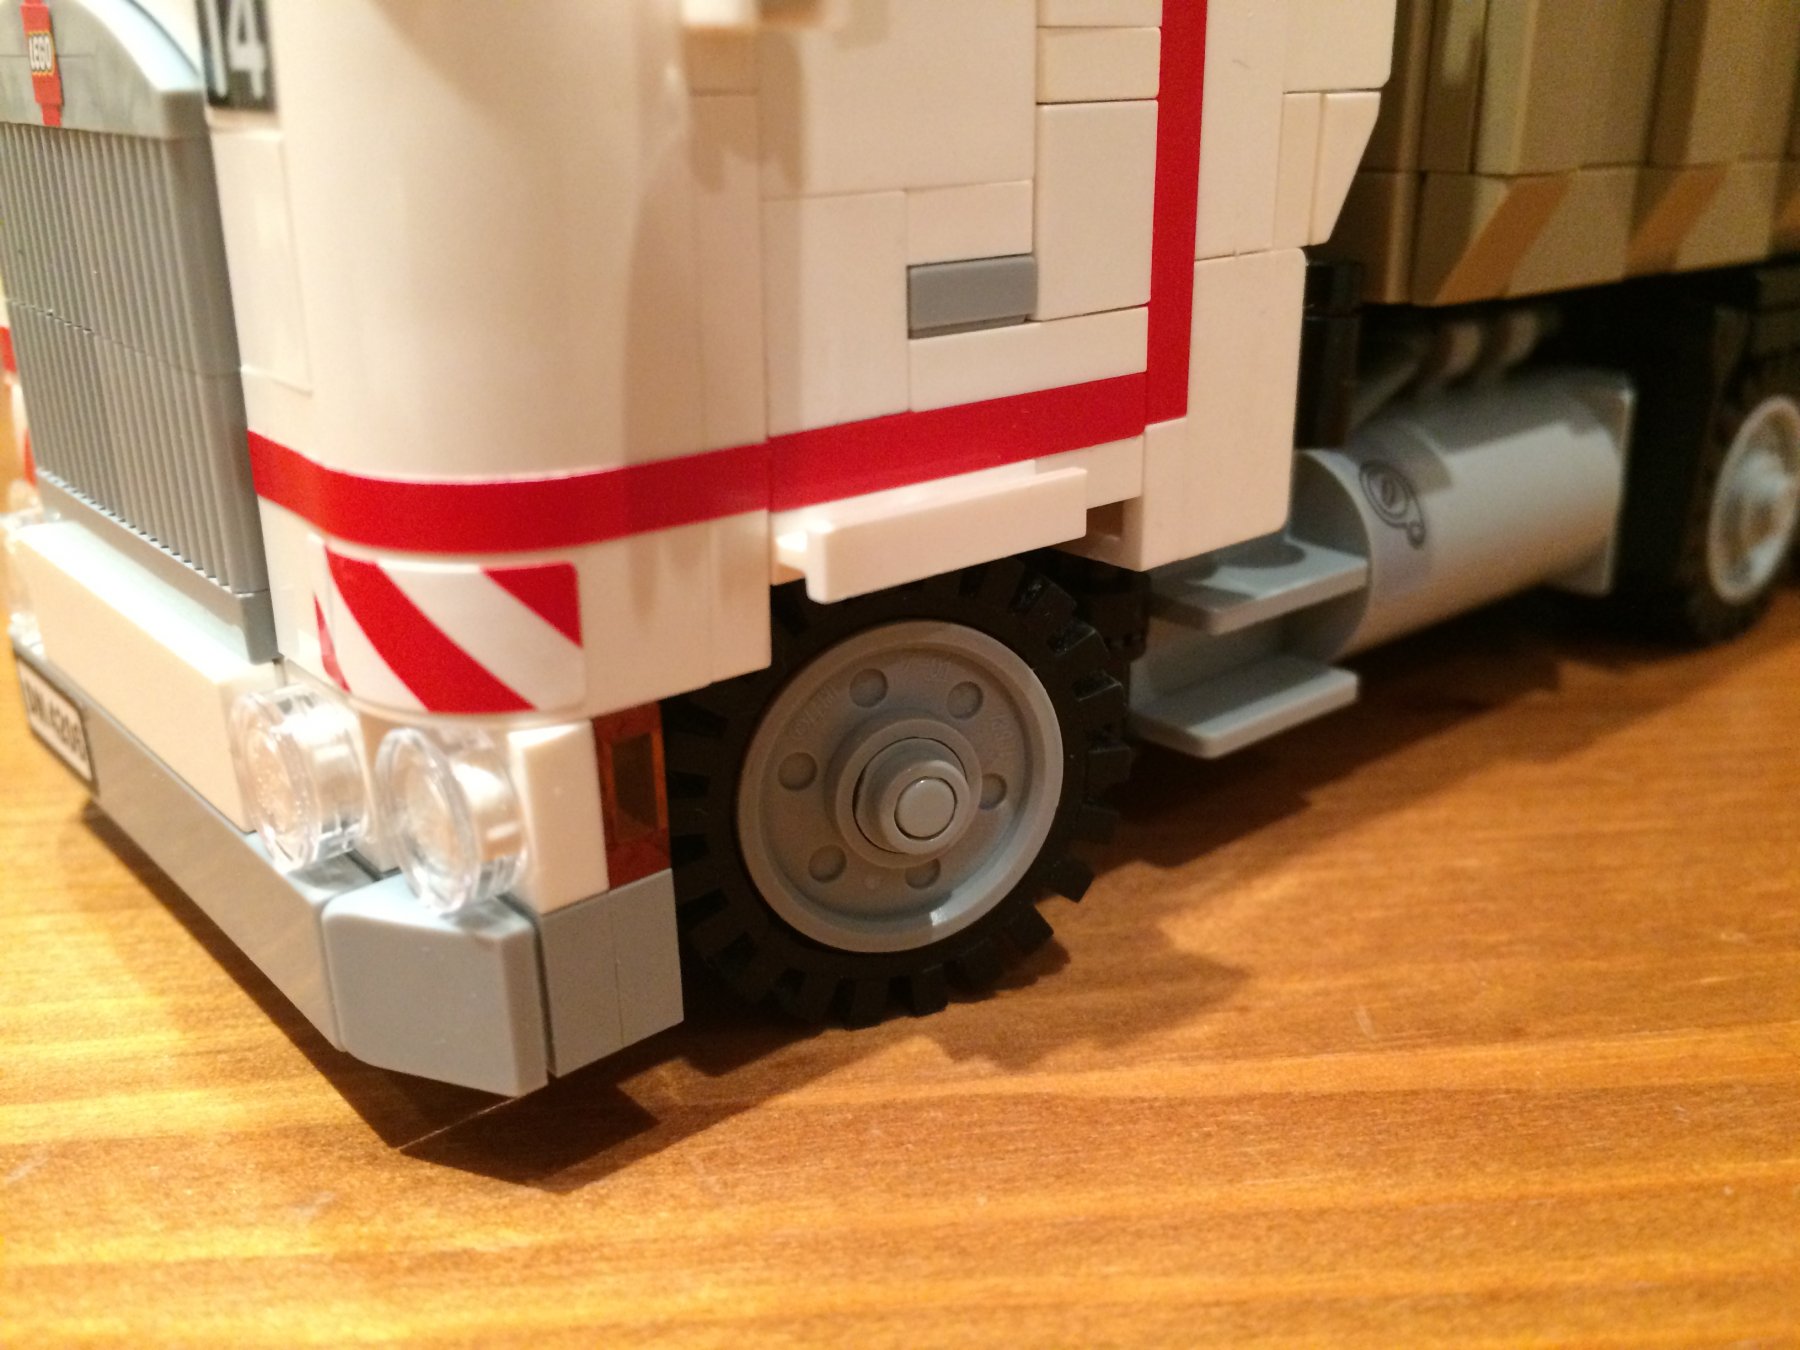
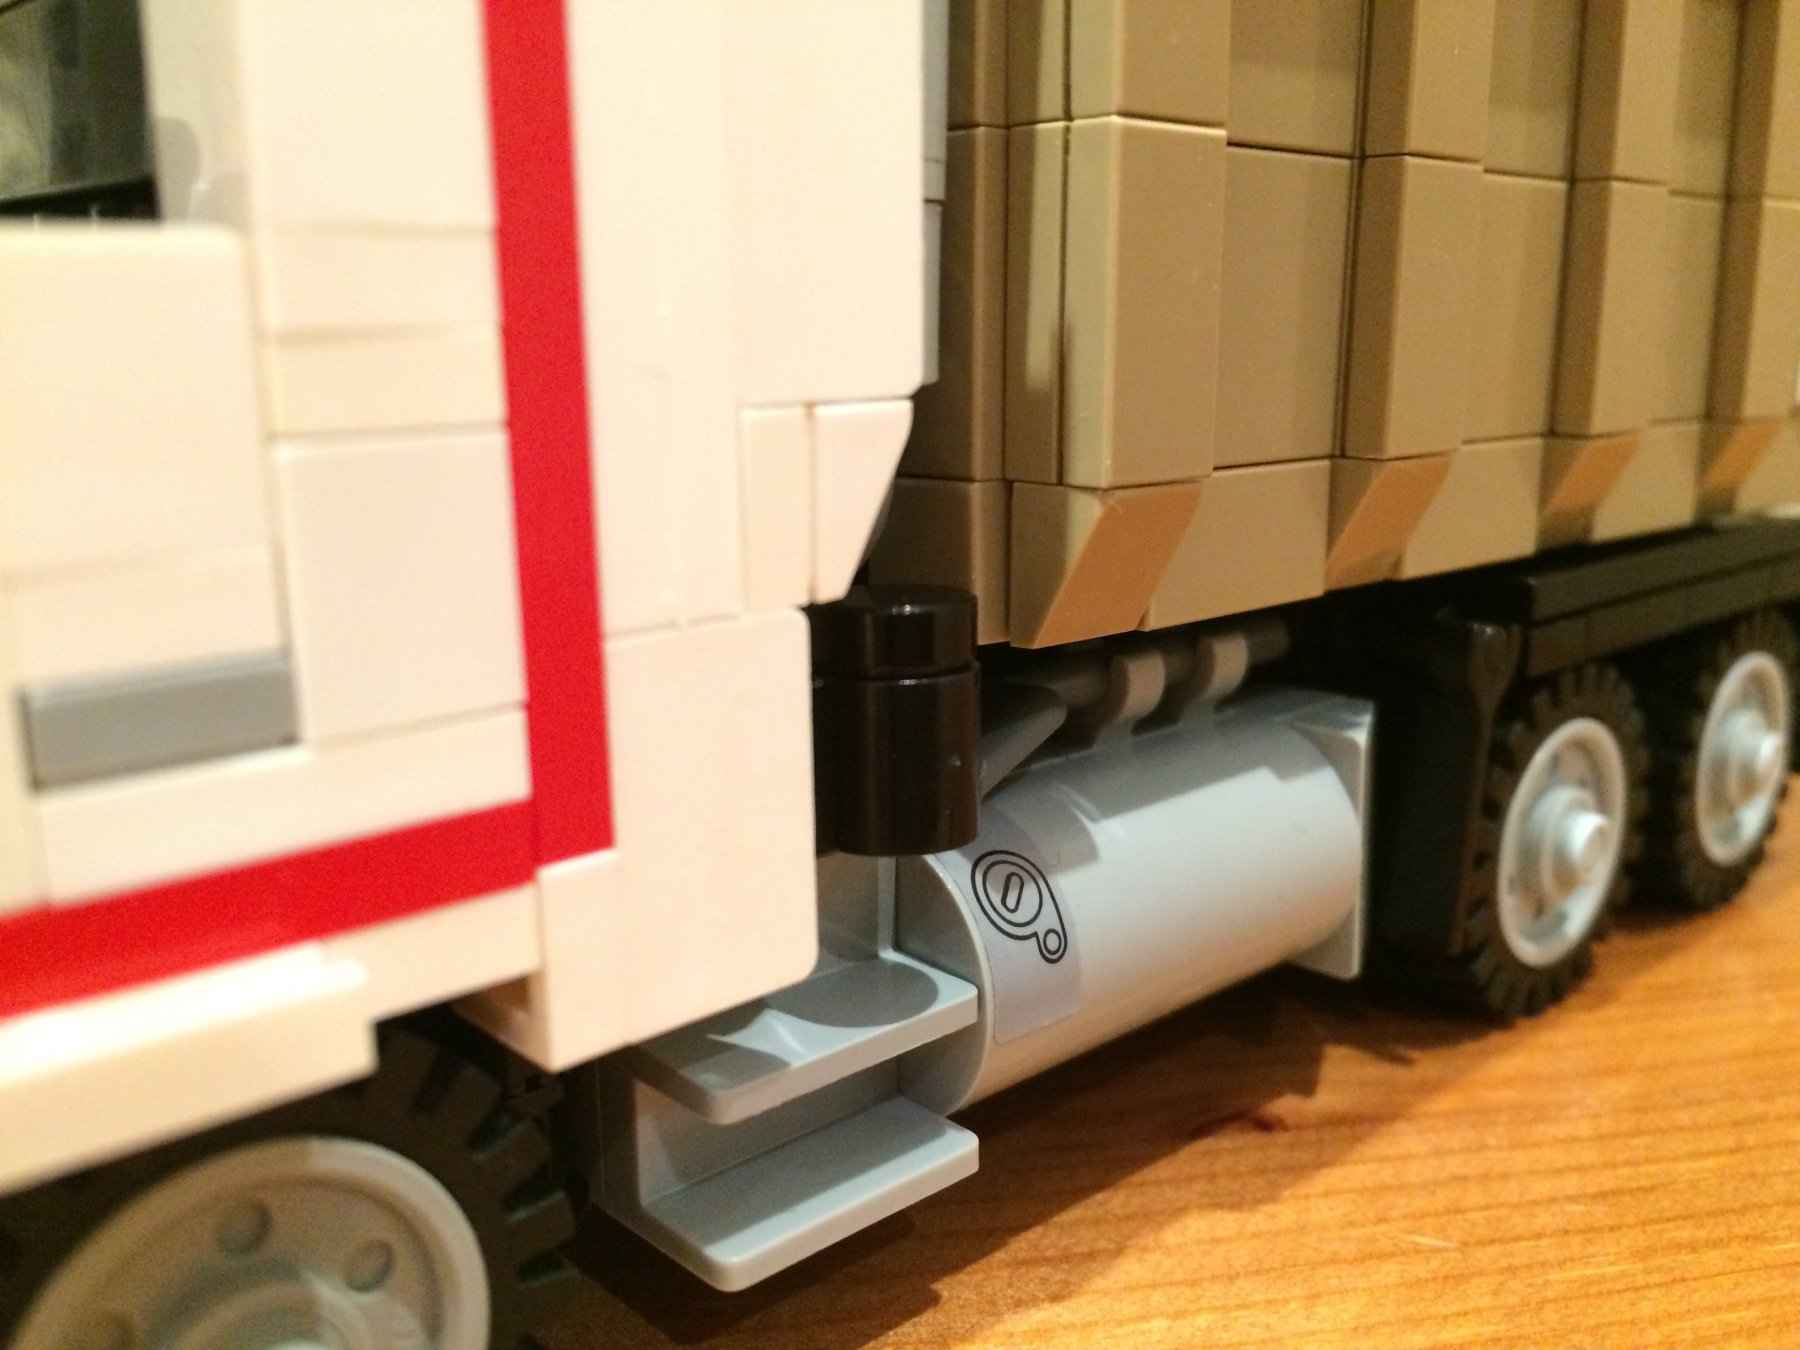
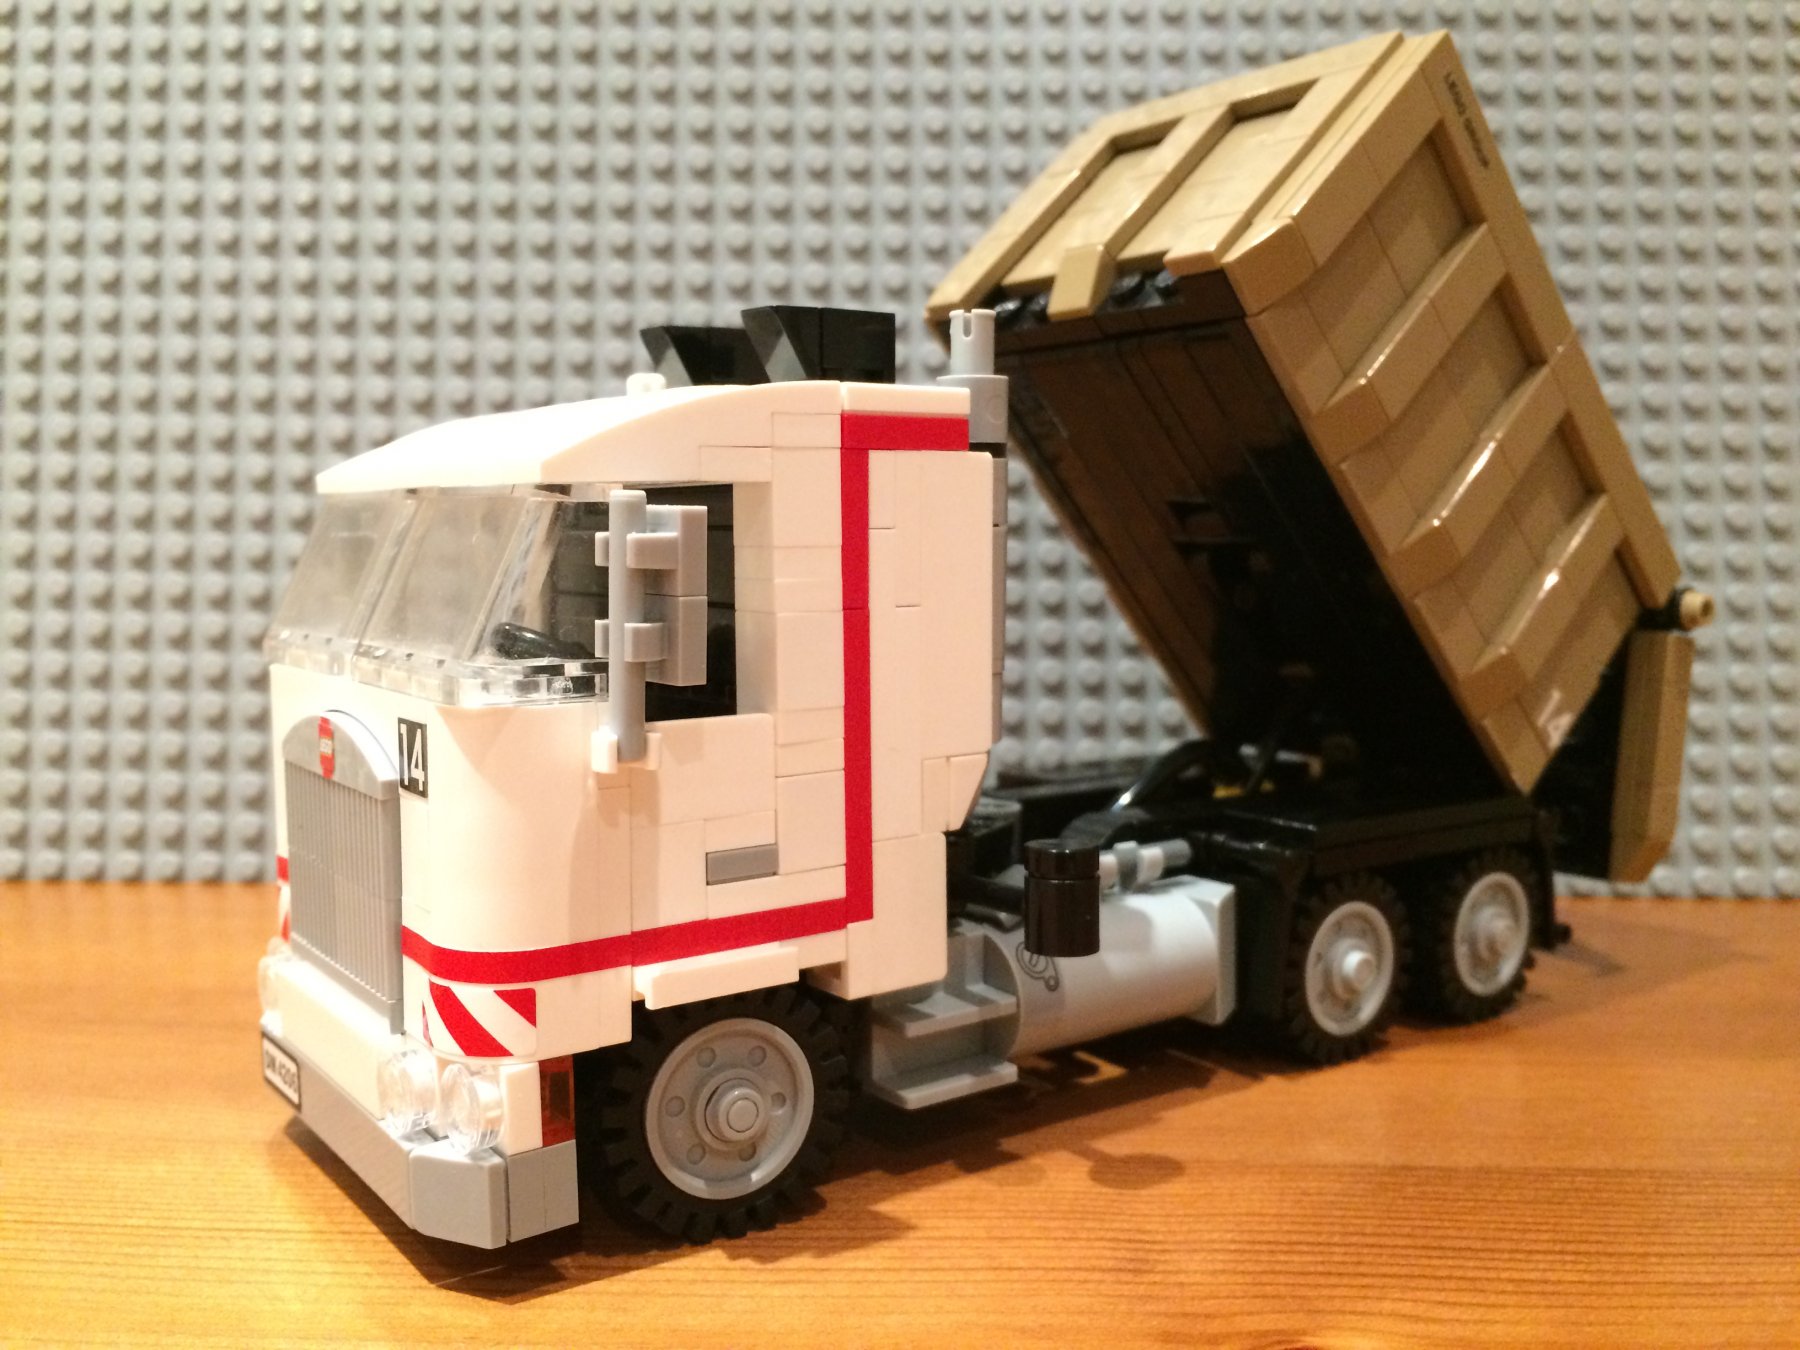
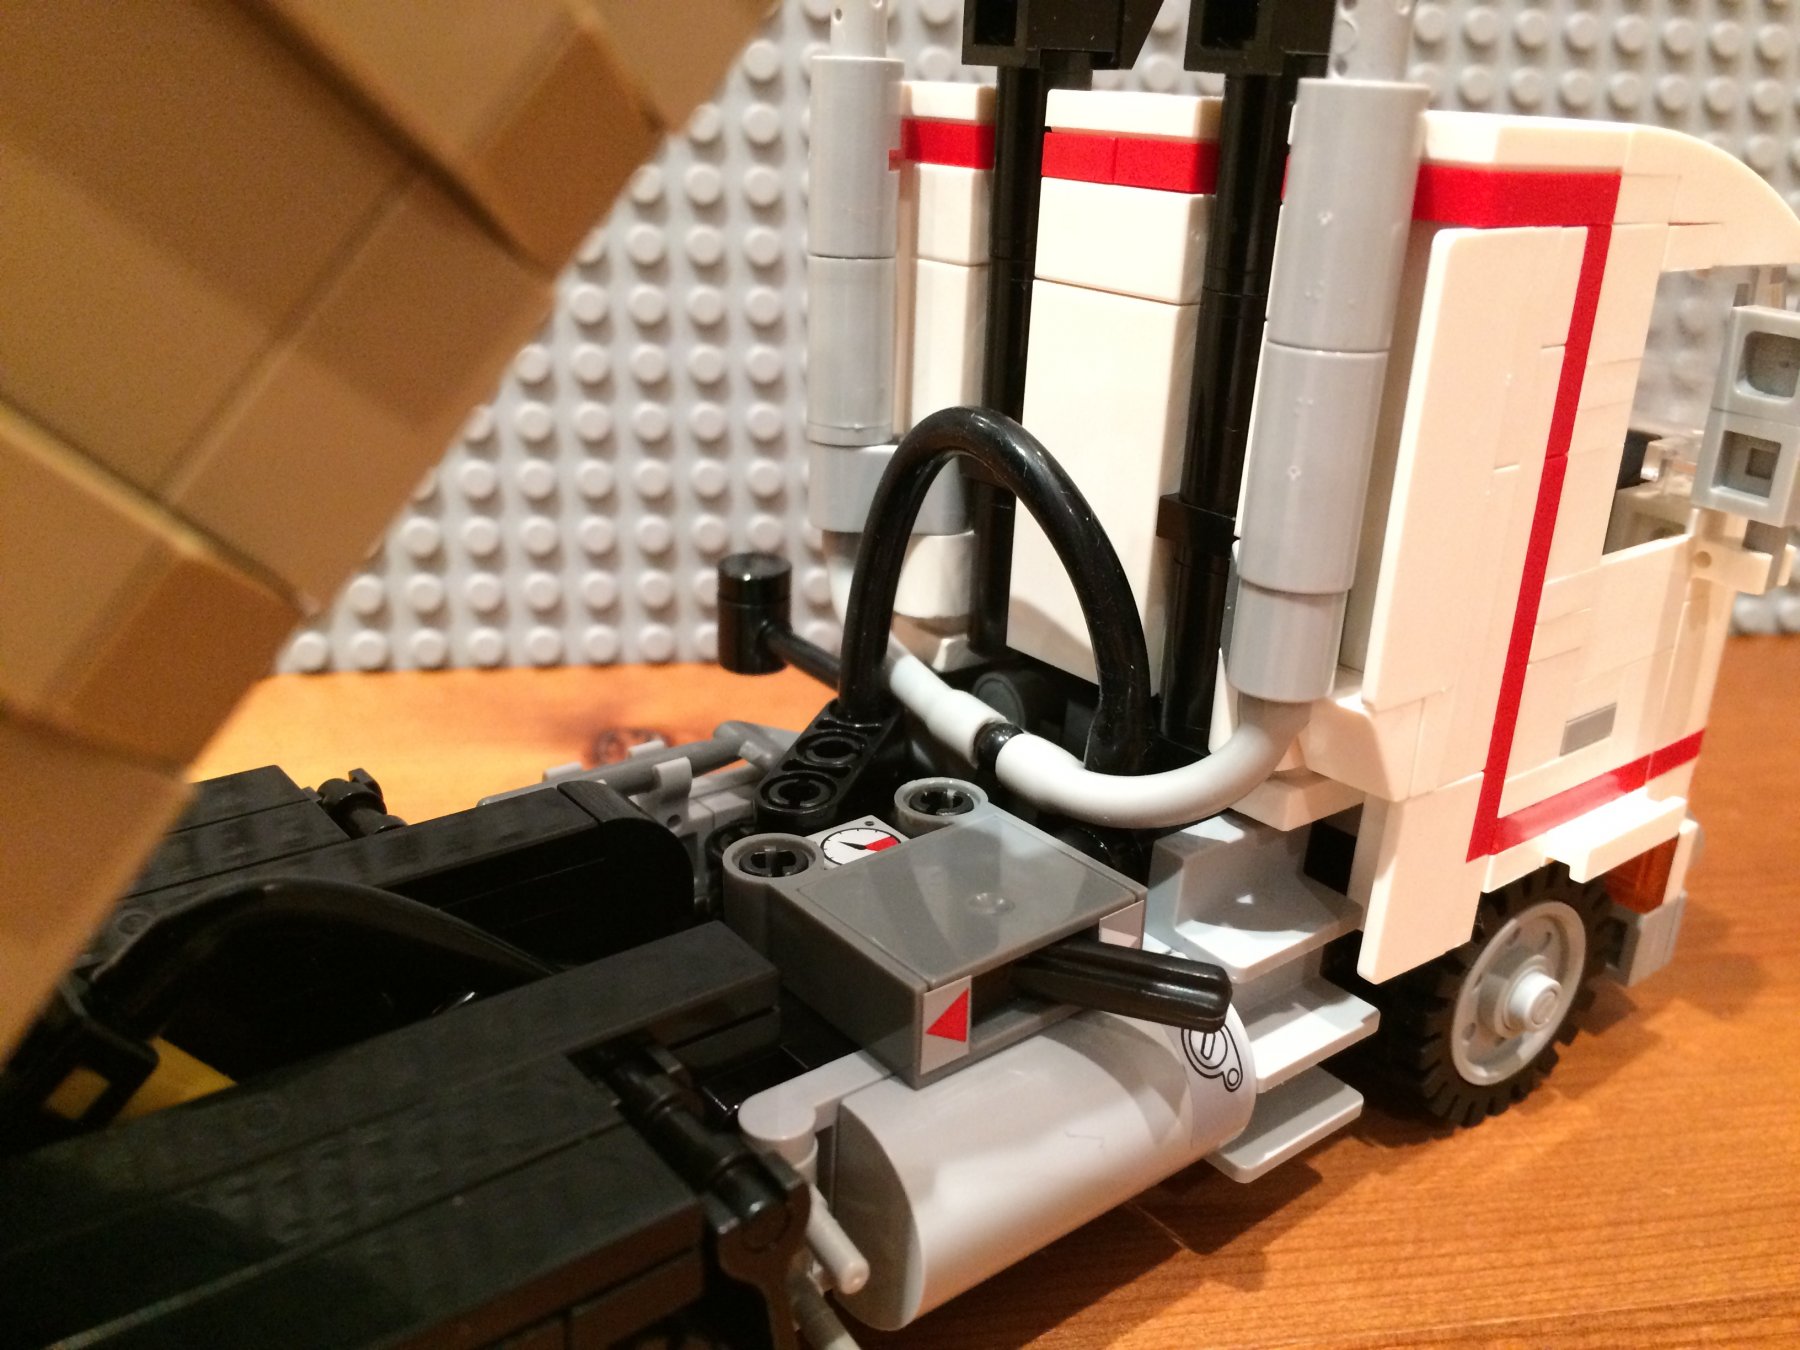
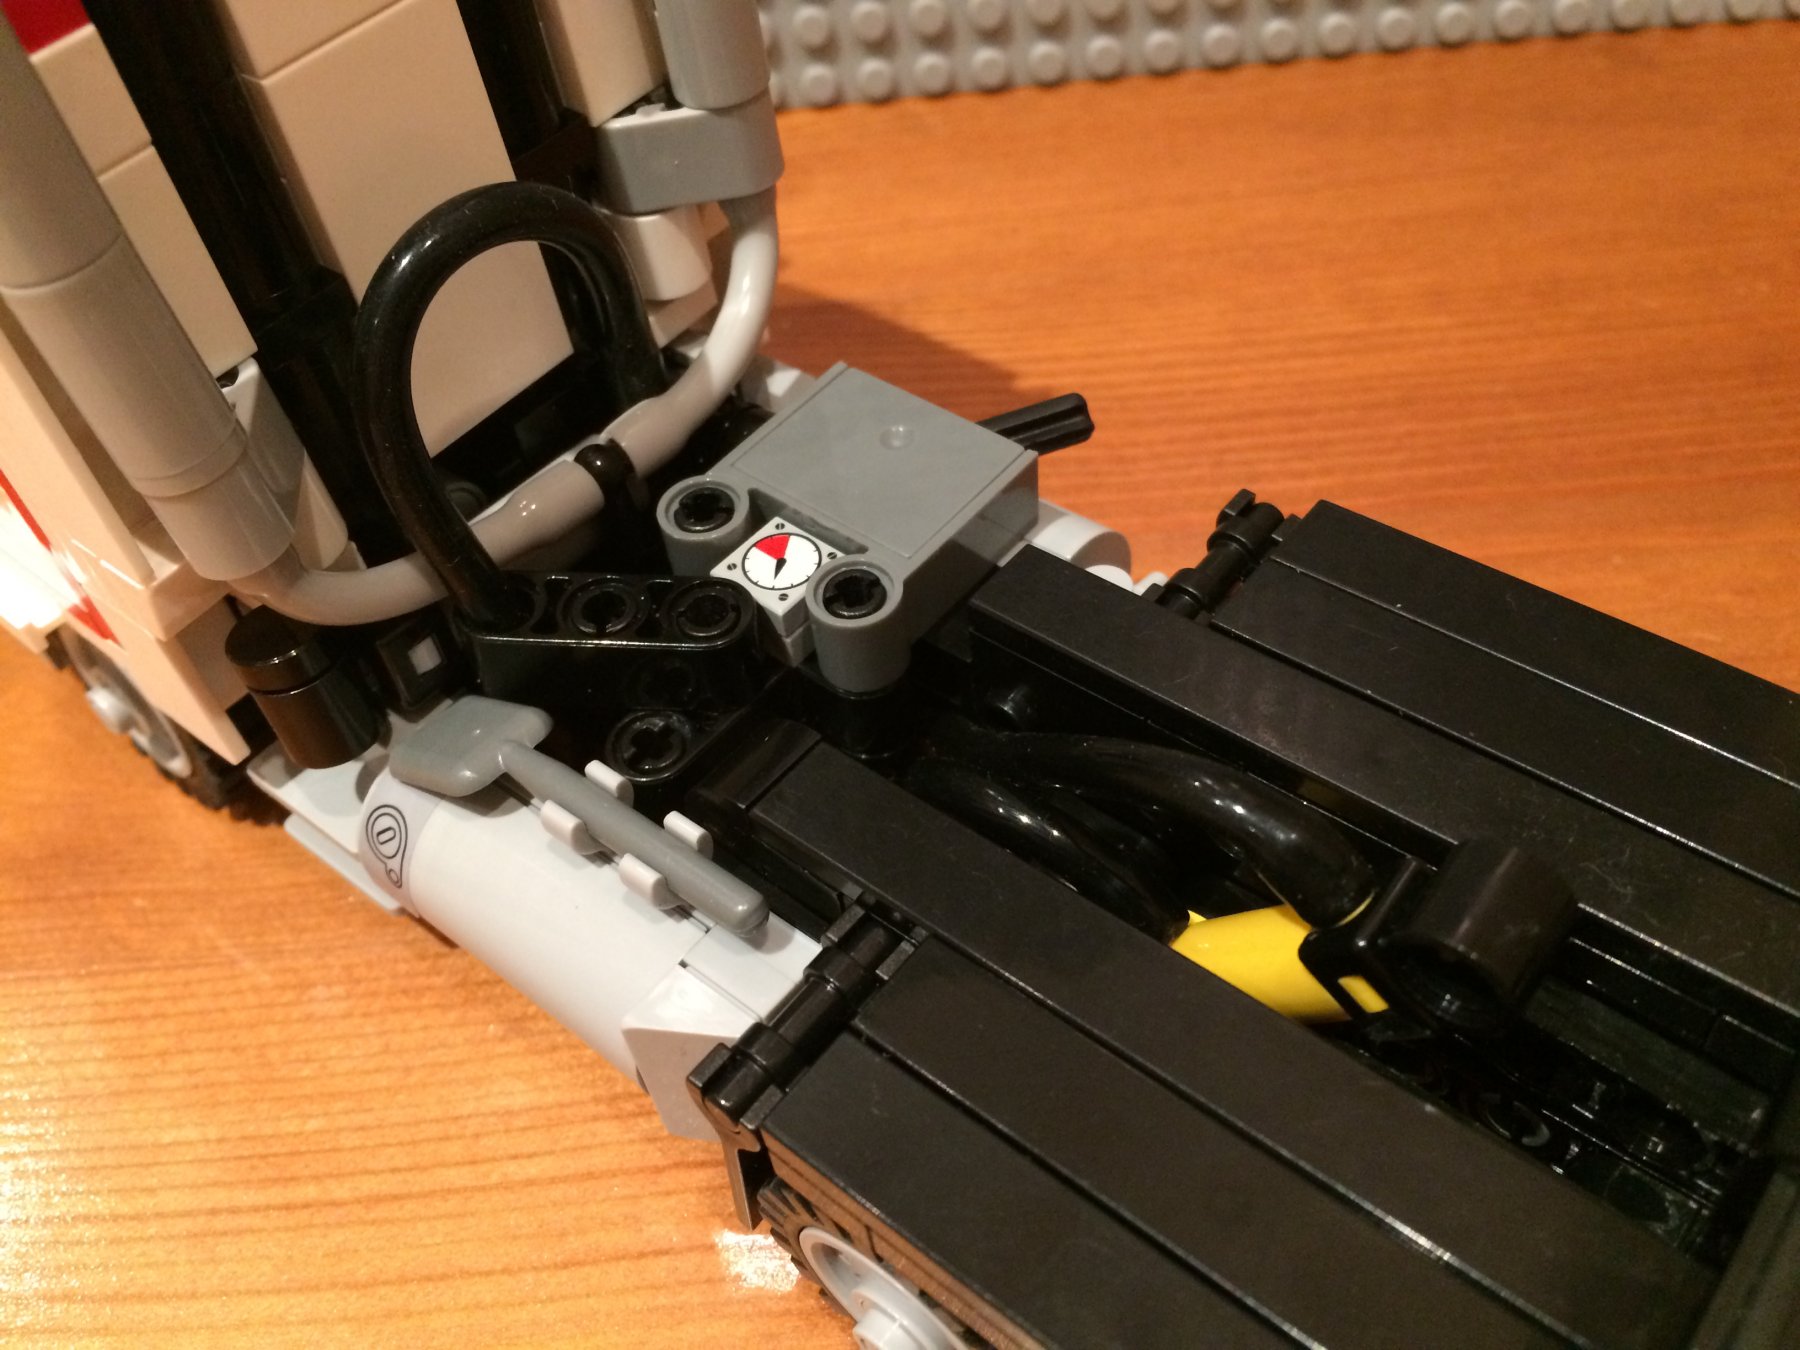
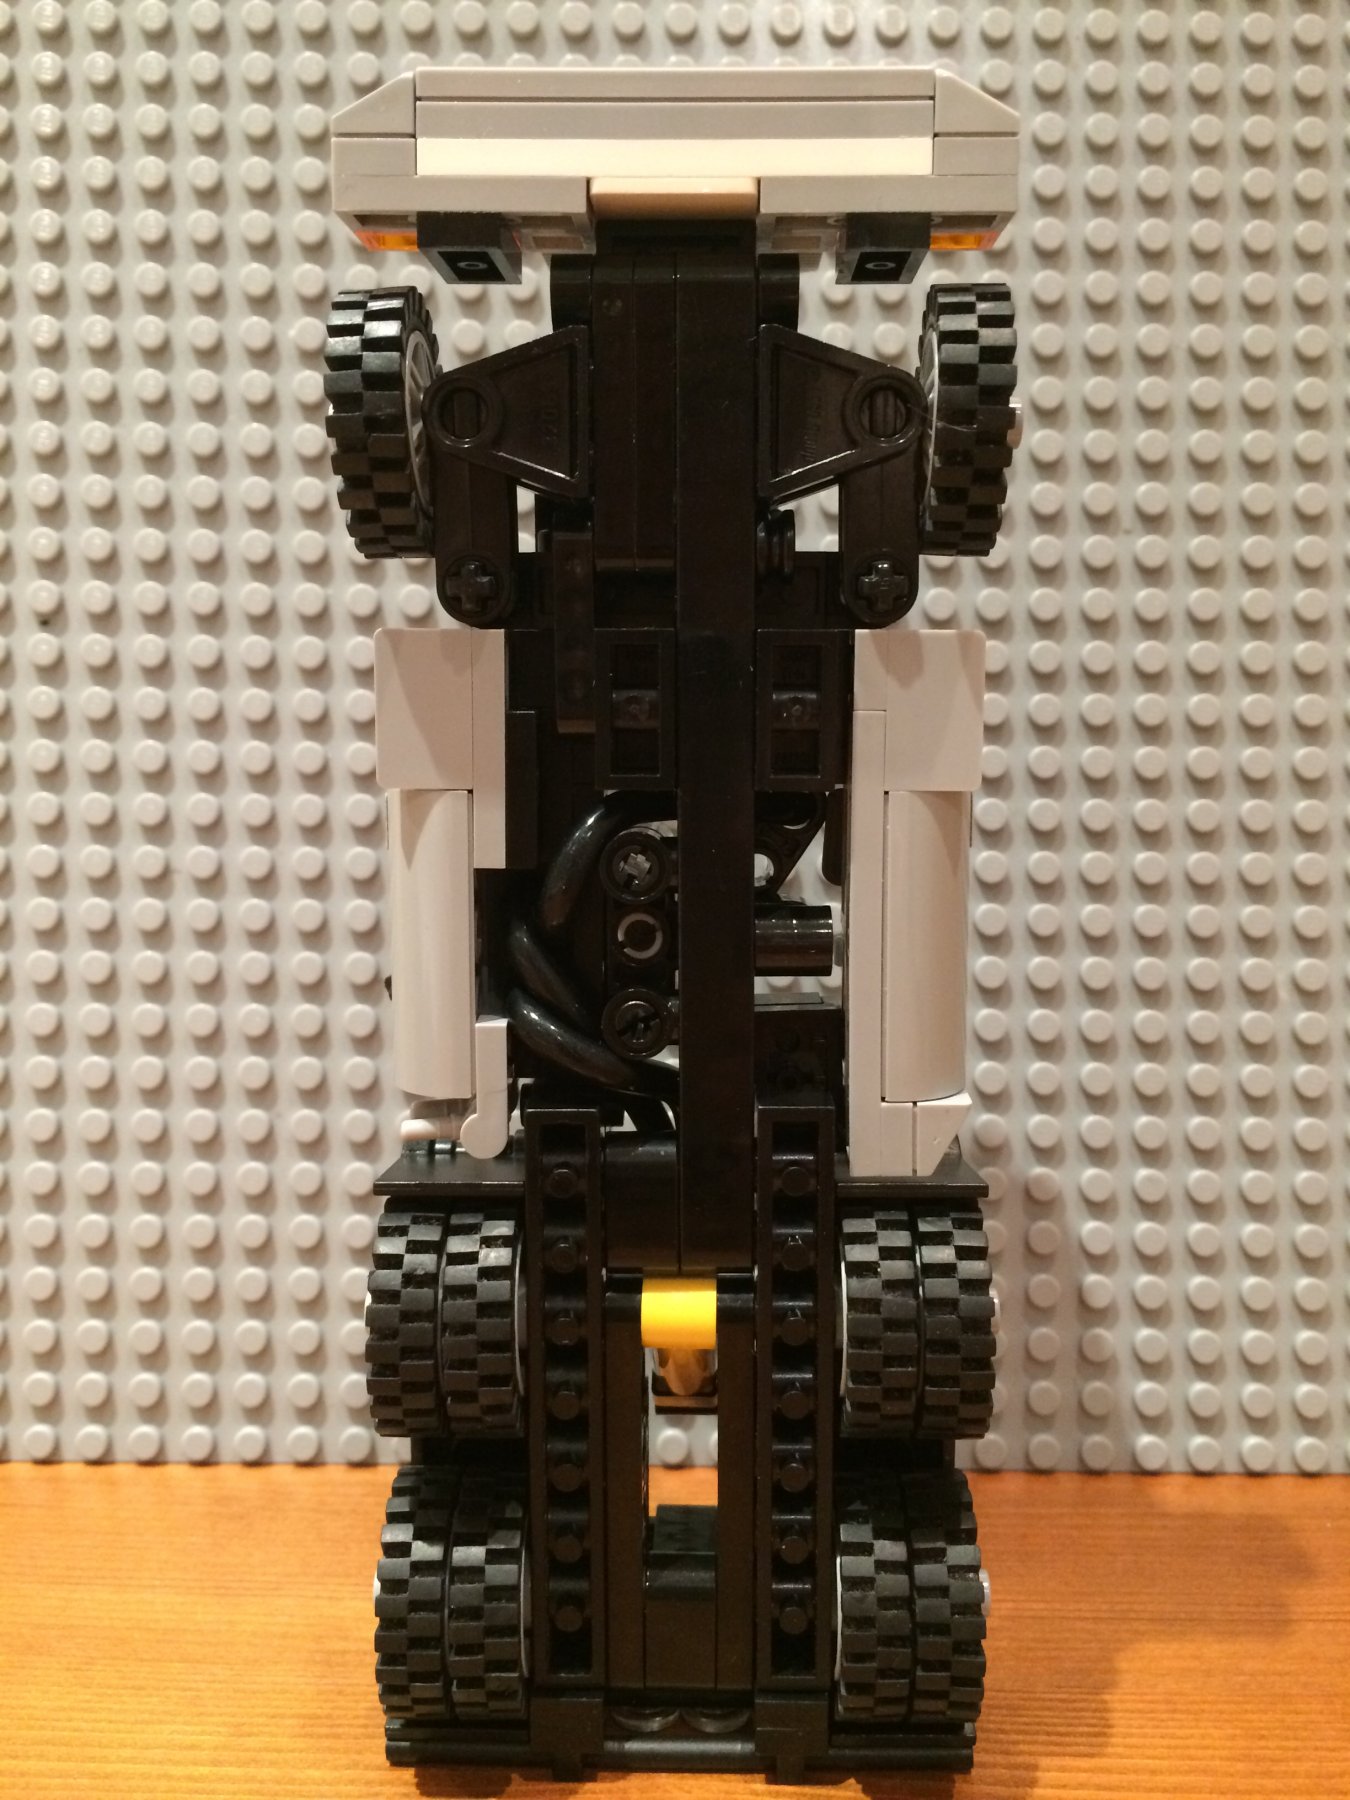
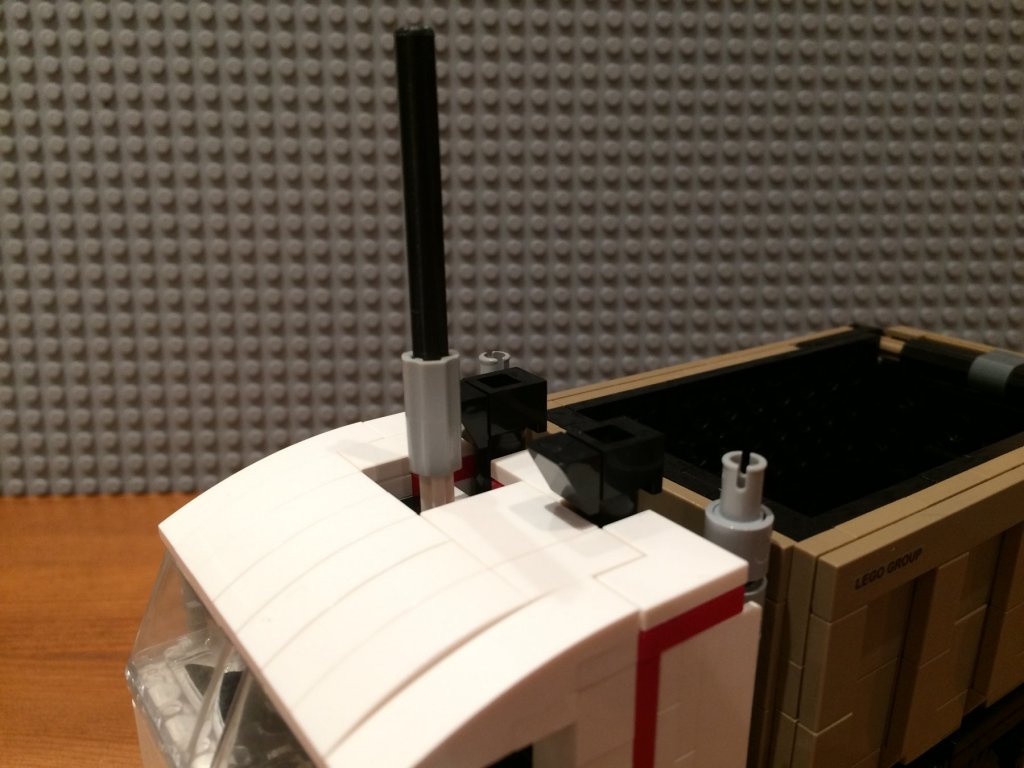
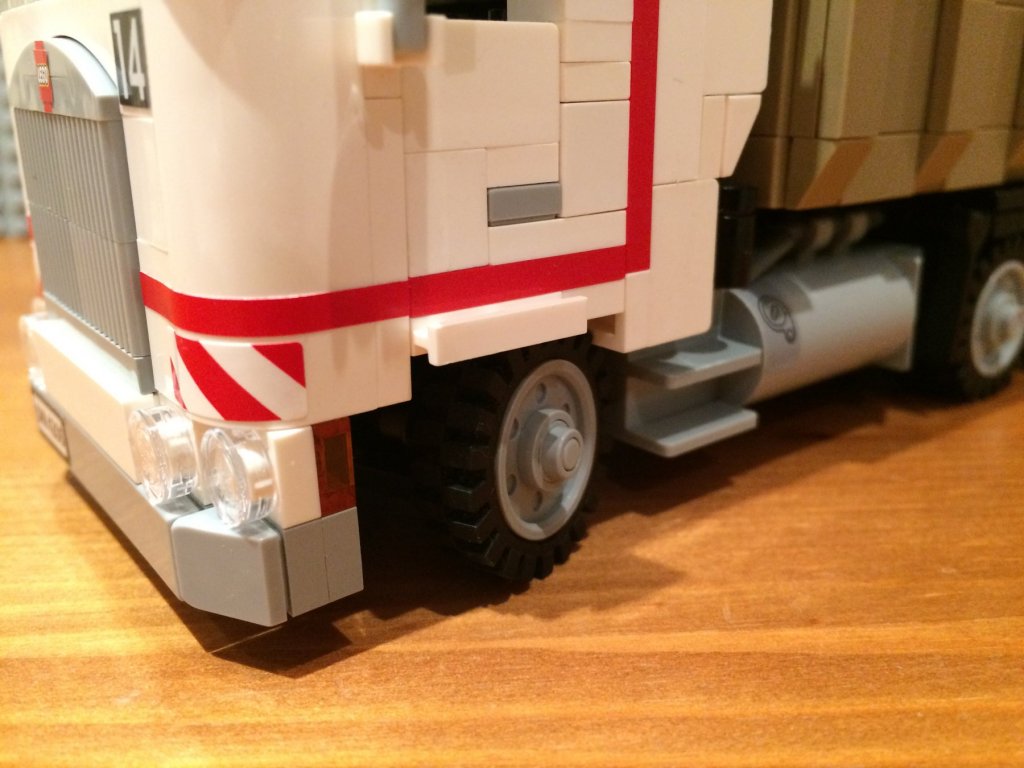
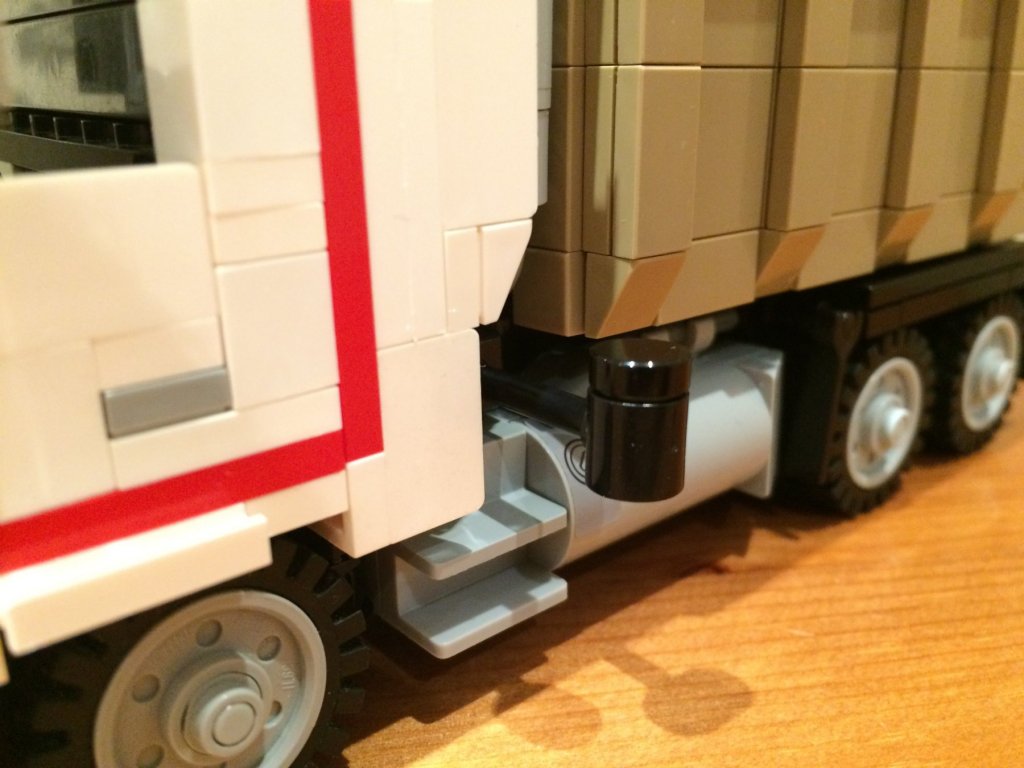
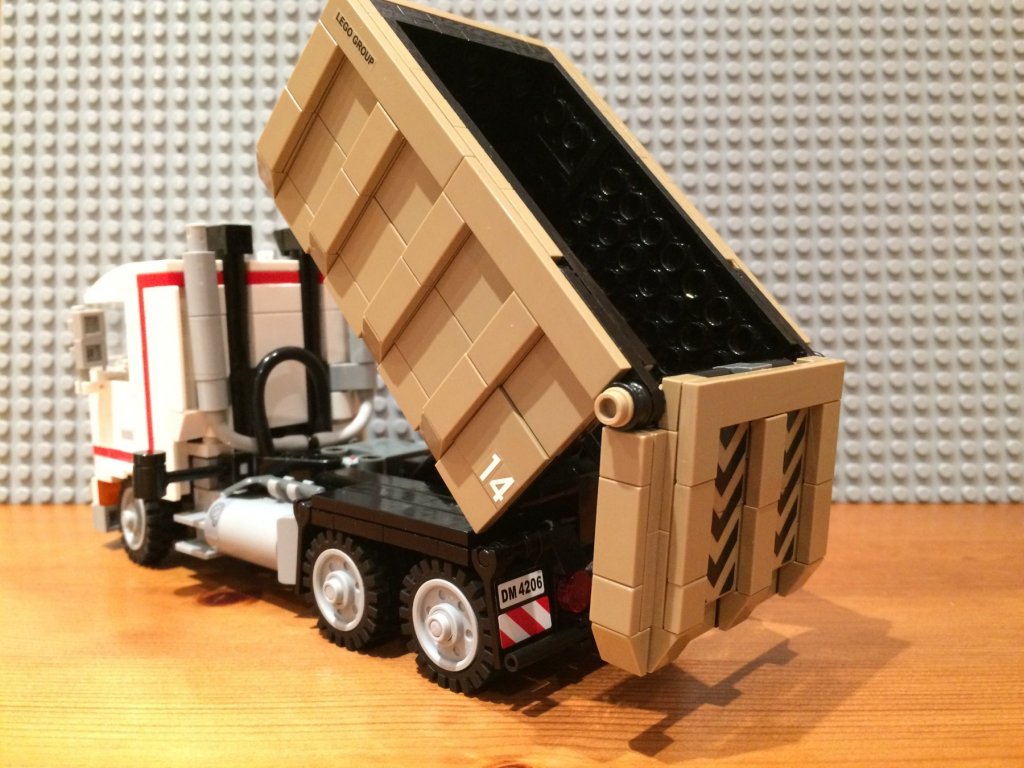
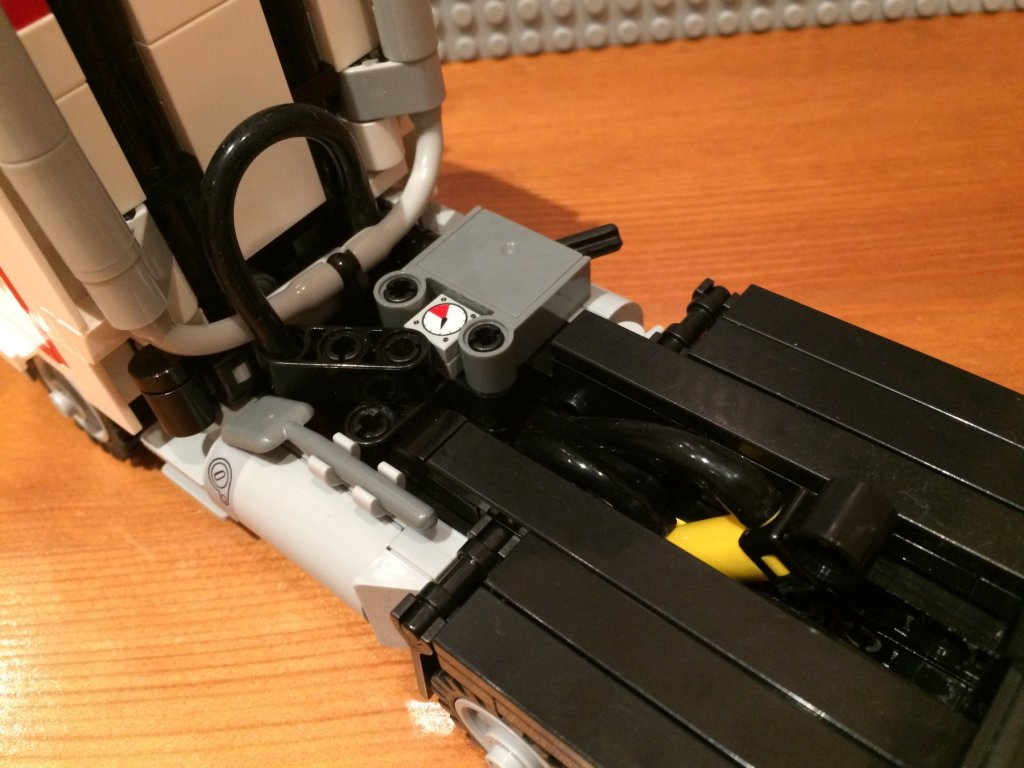
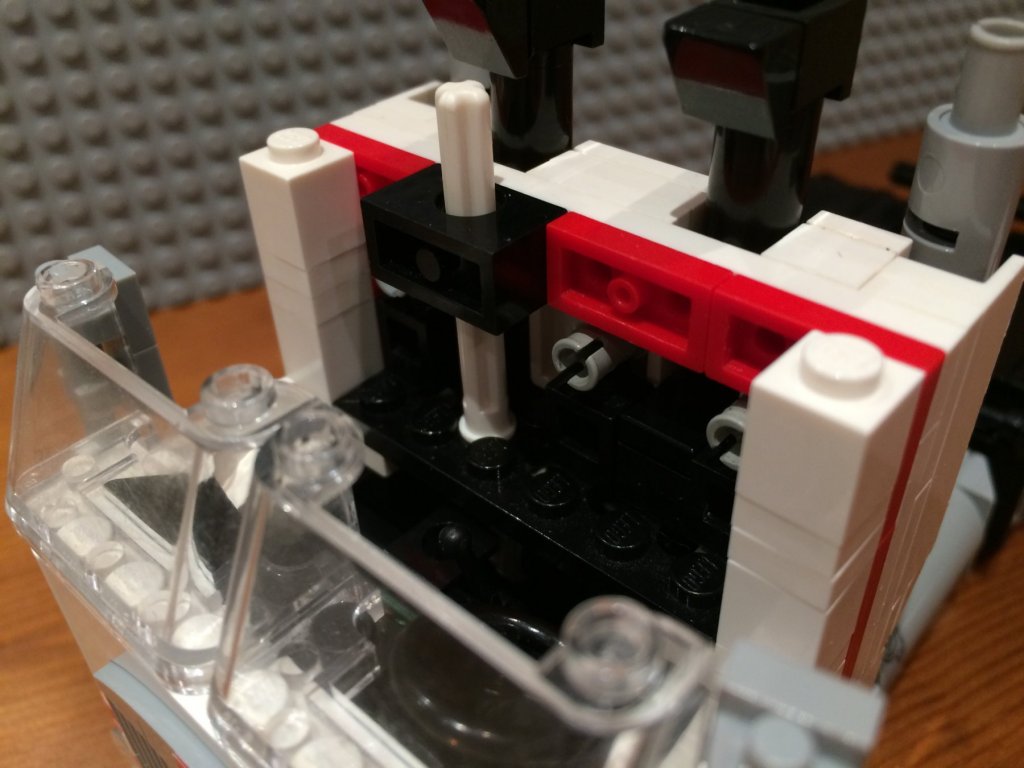
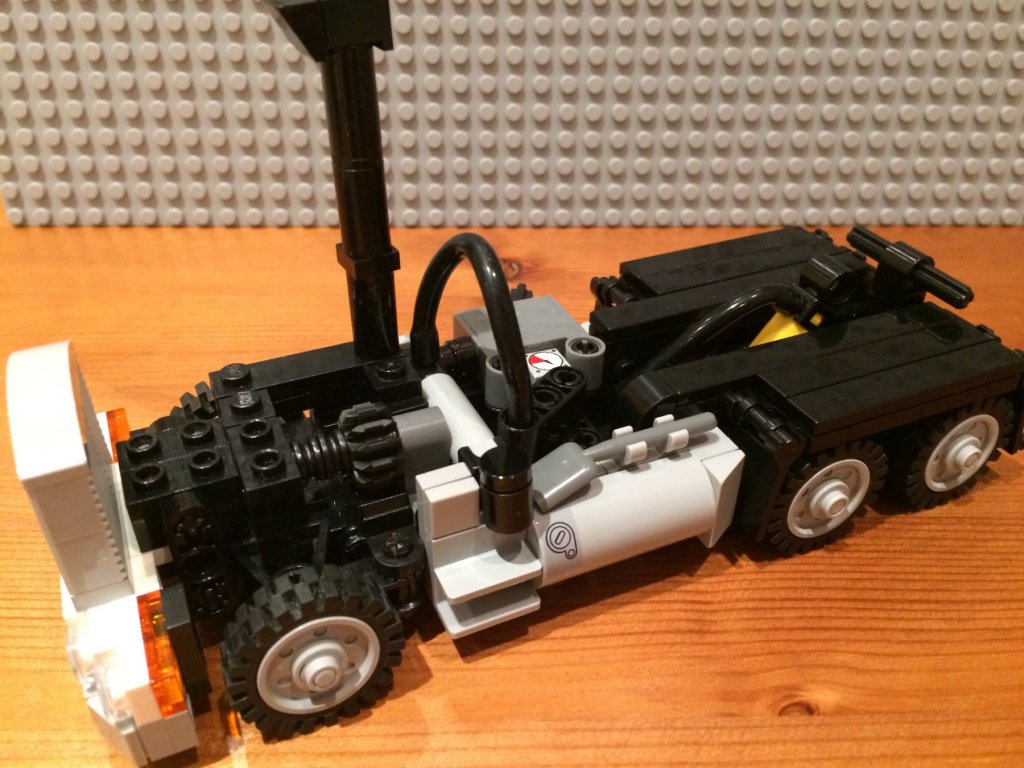
 I got pulled into the recent 'Lego renaissance' on the forum and finally decided to fiddle around with some of my own pieces. The parts inventory is modest in comparison to the other builders so the final result isn't very big. I decided to build something with wheels and came across this photo while looking for my inspiration online: I always liked classic American trucks and thought that a tipper is a great idea. Lego creations should not only look good but also be functional and this gave me the opportunity to feature something more then just spinning wheels and a steerable axle. The end result can be seen below (larger versions of photos available upon clicking). As you can see I made the cab shorter and the tipper taller - I used other photos that I've found online as reference. The stickers used are from other Lego sets: The model can (of course) roll and has two main features: 1. Steering via a 'hand of god' axle placed on the roof. I made it very short as I didn't want it to spoil the cab lines but you can easily attach an extension: 2. A pneumatic tipping system. There's a small air pump placed on the left side just behind the cab, an air flow switch on the right and an actuator between the undercarriage and the tipper. All you need to do is press the pump and the actuator will either extend or retract depending on the switch position you selected: Below you'll find some photos of a partially dismantled model - it's way easier to show 'how it's made' this way than trying to explain it: All pneumatic systems in full glory: Interior - fits two Lego minifigures, complete with a steering wheel, gear stick and a cup holder: Upper, middle and lower parts of the steering system: Undercarriage seen from below: That was fun. Hope you like it.
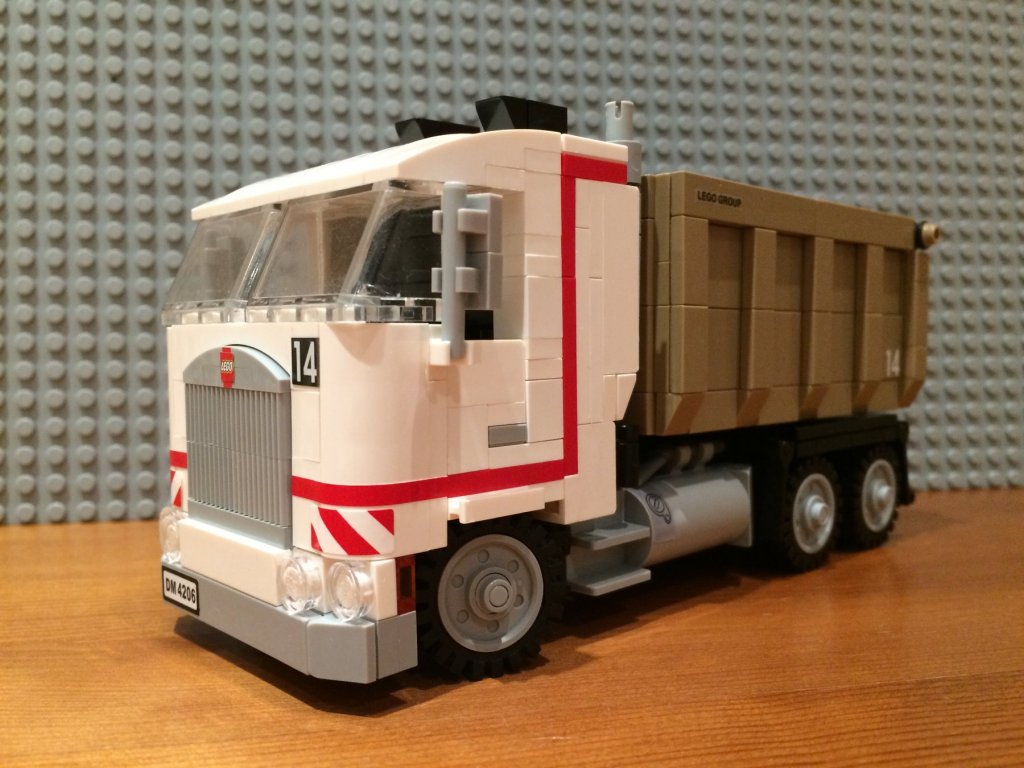


- 1 reply
-
- 10
-
-
Aston Martin DB5 by James H - FINISHED - Lego - 007
Peter Y. replied to James H's topic in Non-ship/categorised builds
Each time I stop thinking about digging out my pieces there's an update on something Lego-related and nostalgia kicks back in. I give up - I'll try and put something together this evening or it will never go away. Considering how limited my parts are it'll probably be something with wheels. Don't expect fireworks. -
Peter Y. reacted to a post in a topic:
Aston Martin DB5 by James H - FINISHED - Lego - 007
-
Peter Y. reacted to a post in a topic:
P-61 Black Widow by GrandpaPhil - FINISHED - Monogram - 1:48
-
Hi Arctic, Have a look in these two topics:
-
Peter Y. reacted to a post in a topic:
Aston Martin DB5 by James H - FINISHED - Lego - 007
-
Peter Y. reacted to a post in a topic:
RV Kilo Moana by J Harreld - FINISHED - Lego - 1:94 scale
-
Peter Y. reacted to a post in a topic:
Fokker Eindekker by philo426 - FINISHED - scratch build
-
Peter Y. reacted to a post in a topic:
Prince de Neufchatel by David Lester - FINISHED - Model Shipways - Scale 1:64
-
2018 NRG CONFERENCE - REGISTRATION OPEN
Peter Y. replied to kurtvd19's topic in NAUTICAL RESEARCH GUILD - News & Information
Thanks for the prompt answer Kurt. Glad to hear you're thinking about it.- 19 replies
-
- 1
-
-
- nrg
- conference
- (and 2 more)
-
2018 NRG CONFERENCE - REGISTRATION OPEN
Peter Y. replied to kurtvd19's topic in NAUTICAL RESEARCH GUILD - News & Information
Do you plan on live streaming or recording some of the sessions/panels?Would be great if they were available in a webinar-like form for those that can't make the event itself.- 19 replies
-
- 1
-
-
- nrg
- conference
- (and 2 more)
-
This is a very unique vessel and I agree that building it just above the waterline wouldn't seem right. Glad you made that decision John. I would assume that the real propellers would be made of some kind of copper alloy so you might consider changing the color to yellow. Brilliant idea with that disc-shaped piece!
-
Aston Martin DB5 by James H - FINISHED - Lego - 007
Peter Y. replied to James H's topic in Non-ship/categorised builds
Those are some really great photos Jim - made me feel like I build the thing myself. The kit itself is pretty interesting. I especially like all the functions - there's nothing worse than a Lego kit that does absolutely nothing and this one looks jam-packed with fun features. I am however quite disappointed with the final look. The front and rear end somehow lost all of its slickness and sexiness. - They managed to make it look bulky and heavy. I know that this is made out of Lego but considering the scale I think they could have done a better job. - I just can't shake off the feeling that the design should have stayed in the oven for a bit longer. Also the inconsistencies in coloring are killing me - why did they make the bumpers and some minor details matte chrome but not the wheels, exhausts and door handles? -
Nice one. Makes me want to look in my Lego box.
-
@No Idea I'm glad you like it. Thanks for the great advice! I've started the copper plating yesterday and man... This is definitely the most challenging bit yet - at least for a newbie. A very slow process and one that requires a lot of precision.
-
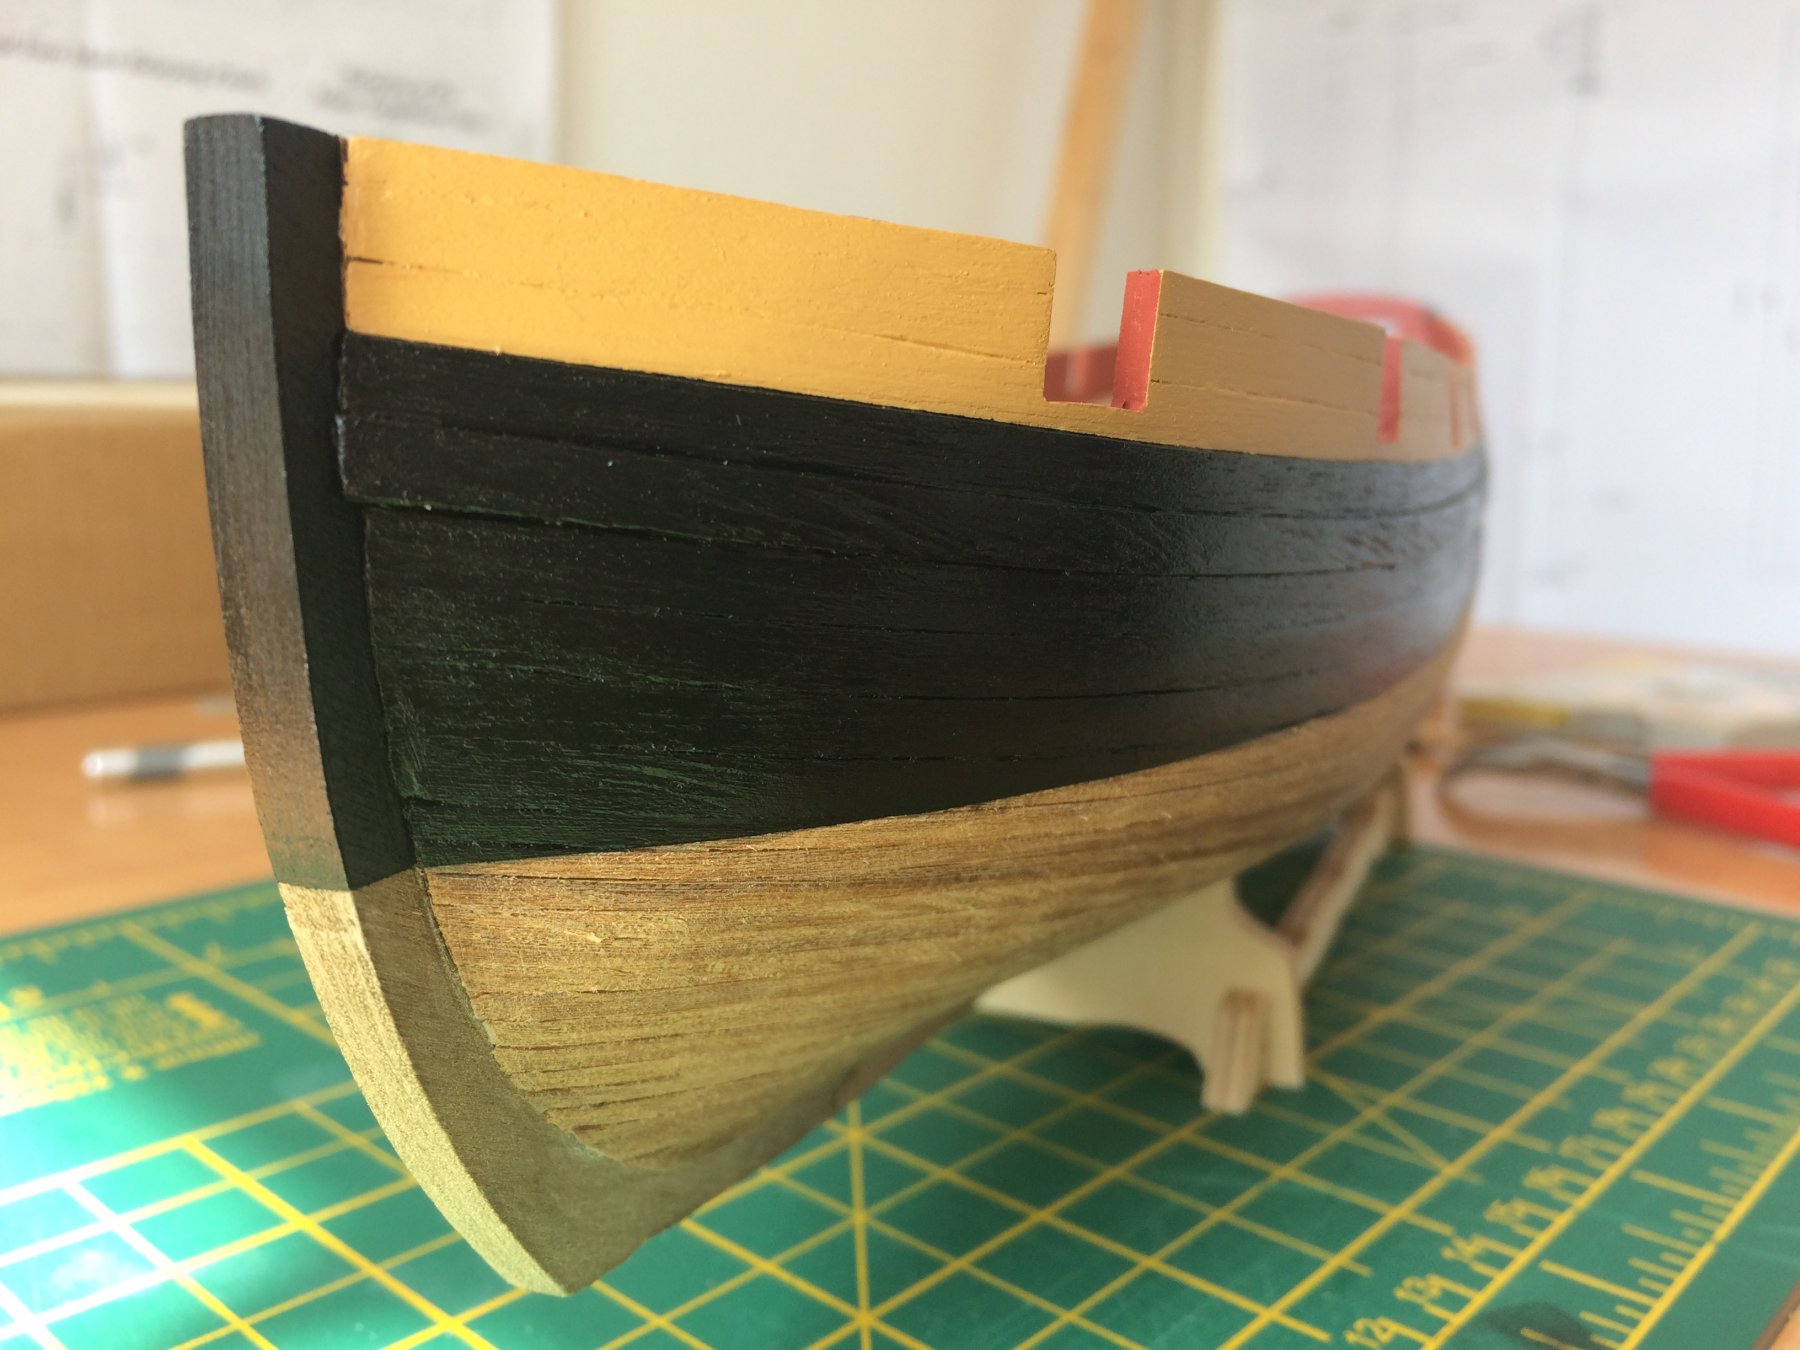
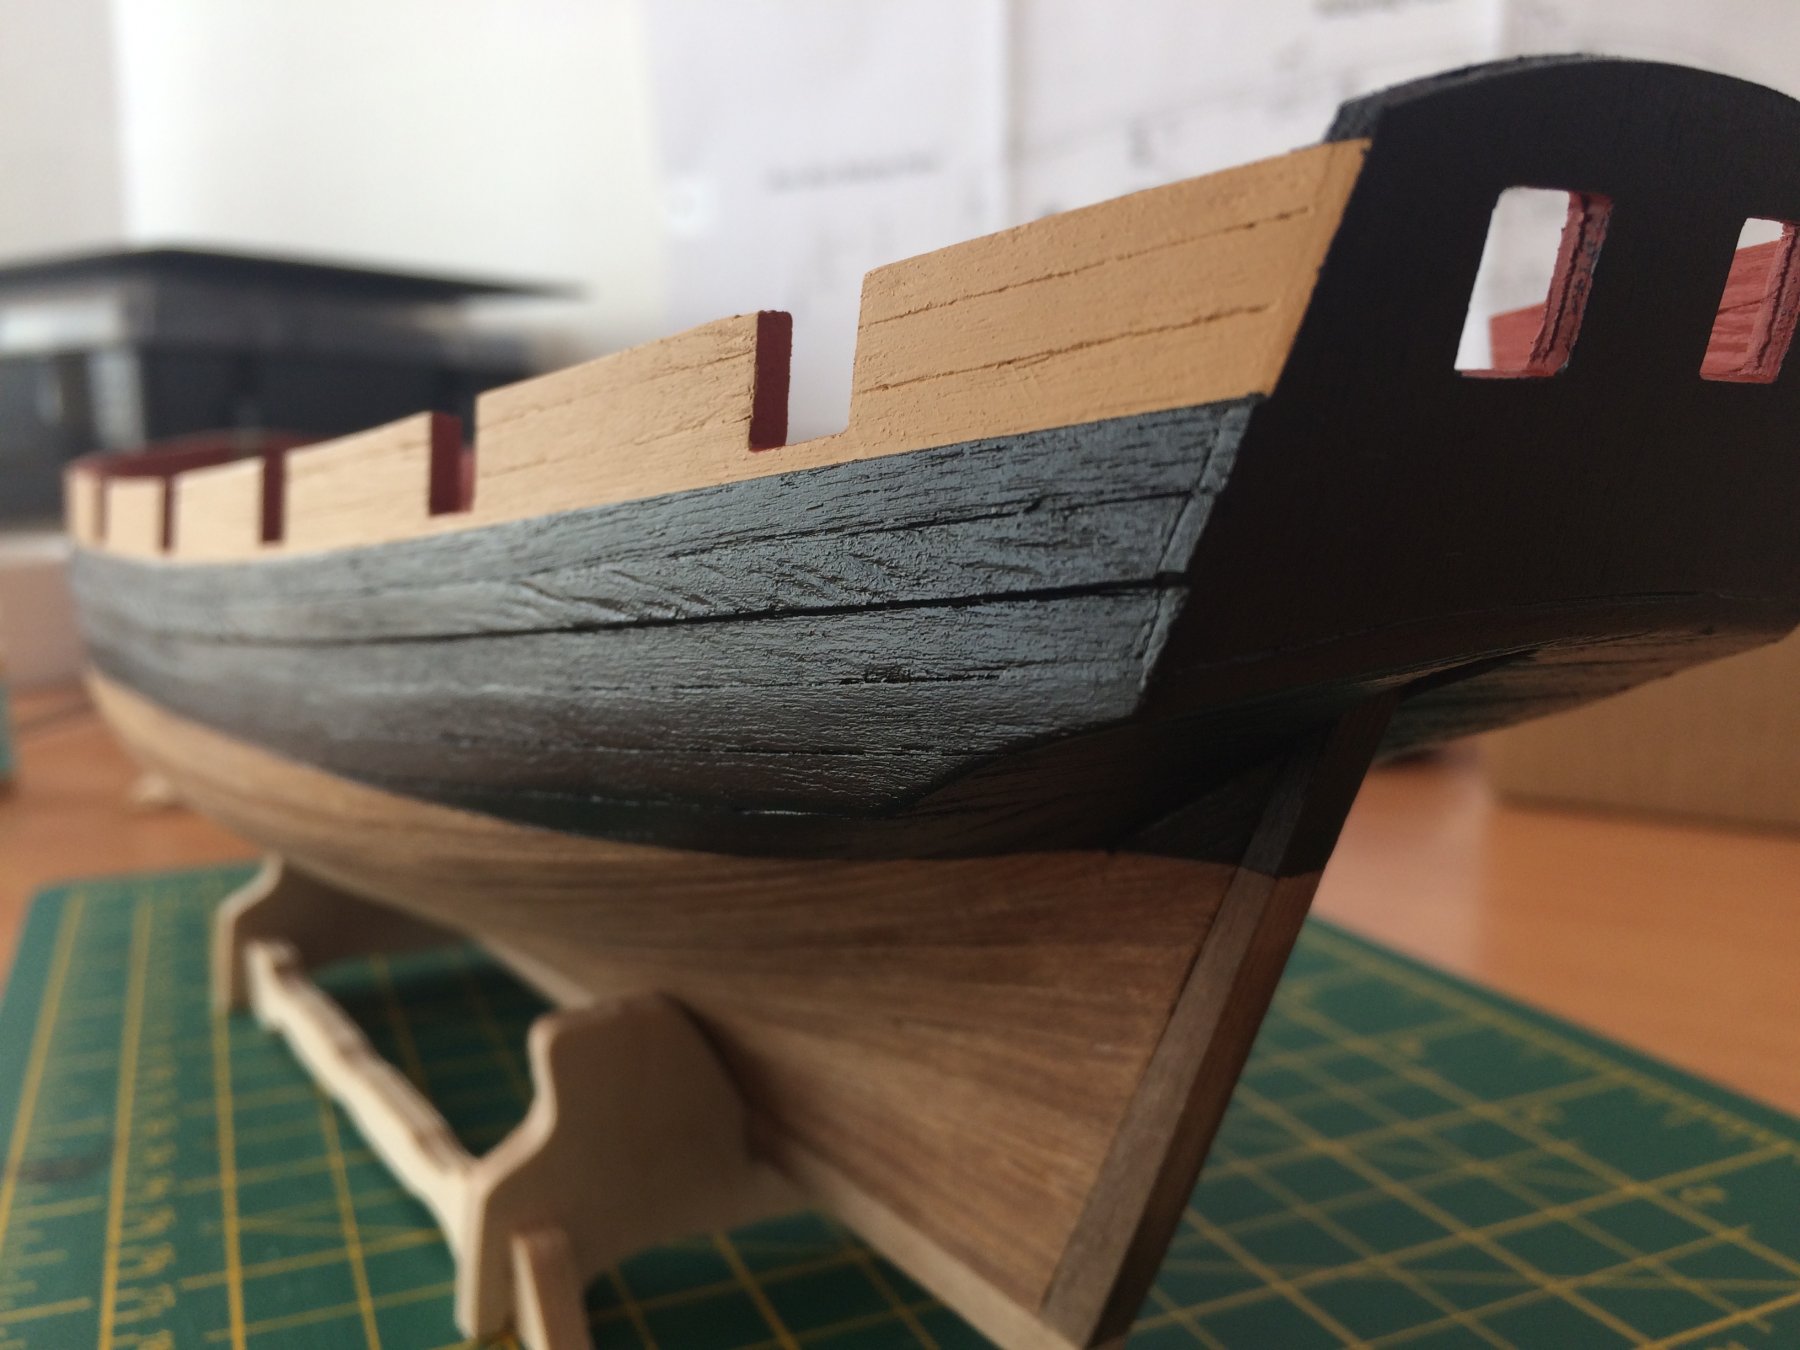
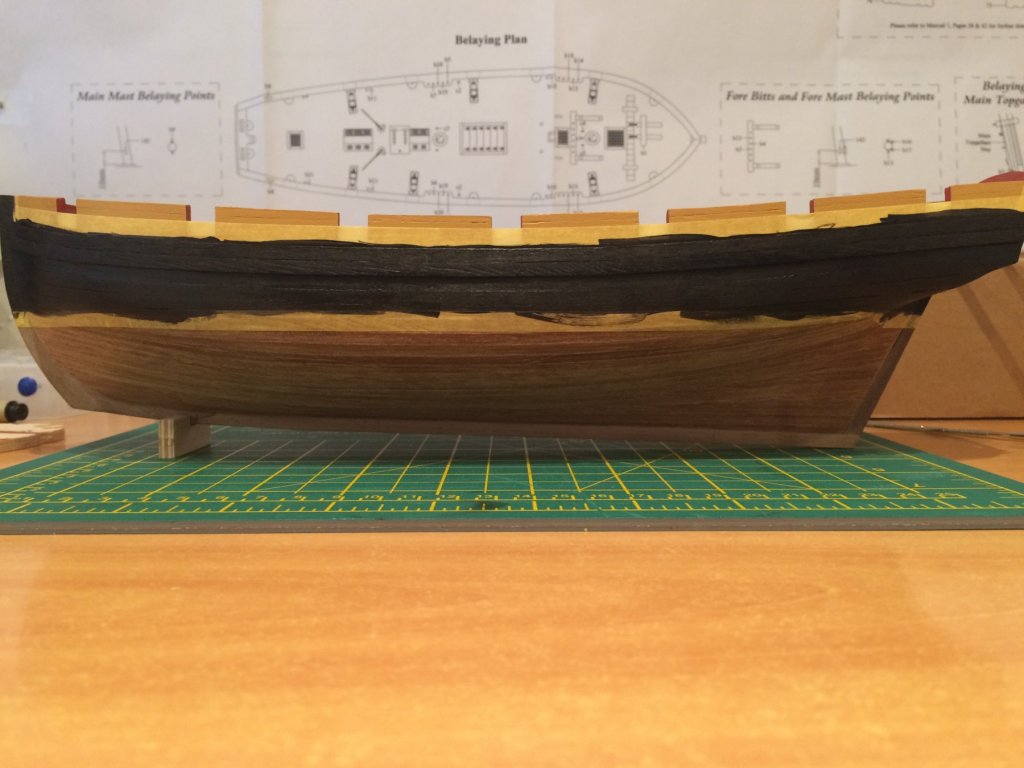
Hull painting completed: As you can see I was a bit sloppy with the stern ports so they'll require a bit of detailing. I guess it's time for the copper plating. - The capping rails that I mentioned earlier will be fitted after I'm done with it. Not sure yet which glue to use.


- 37 replies
-
- 2
-
-
- pickle
- caldercraft
- (and 1 more)
-
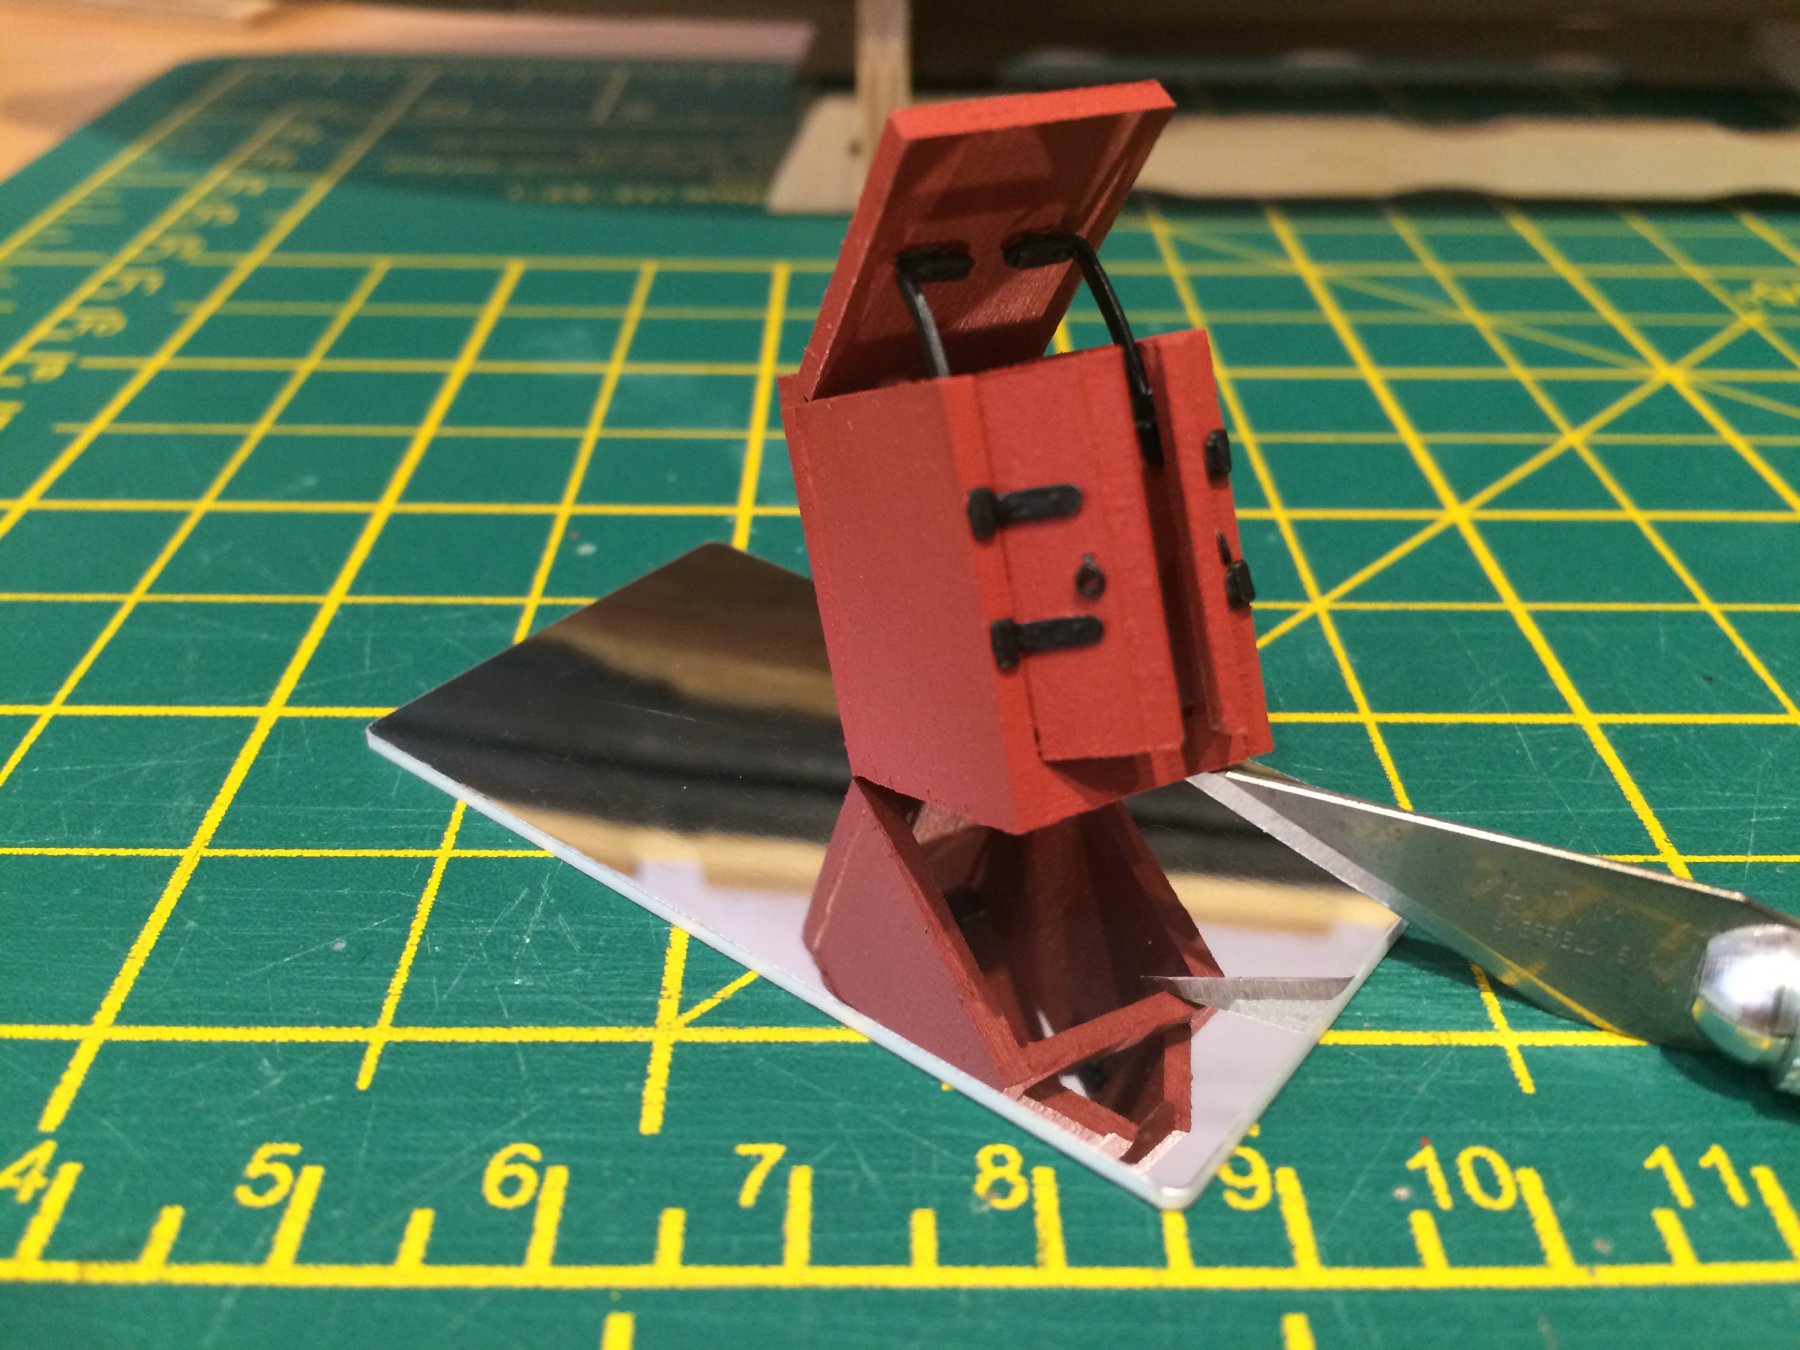
Minor update. Bulwarks painting completed, black bits got their first layer: I also did the companion: Next steps will be completing the hull painting (obviously) and then doing the capping rails.

- 37 replies
-
- 1
-
-
- pickle
- caldercraft
- (and 1 more)
-
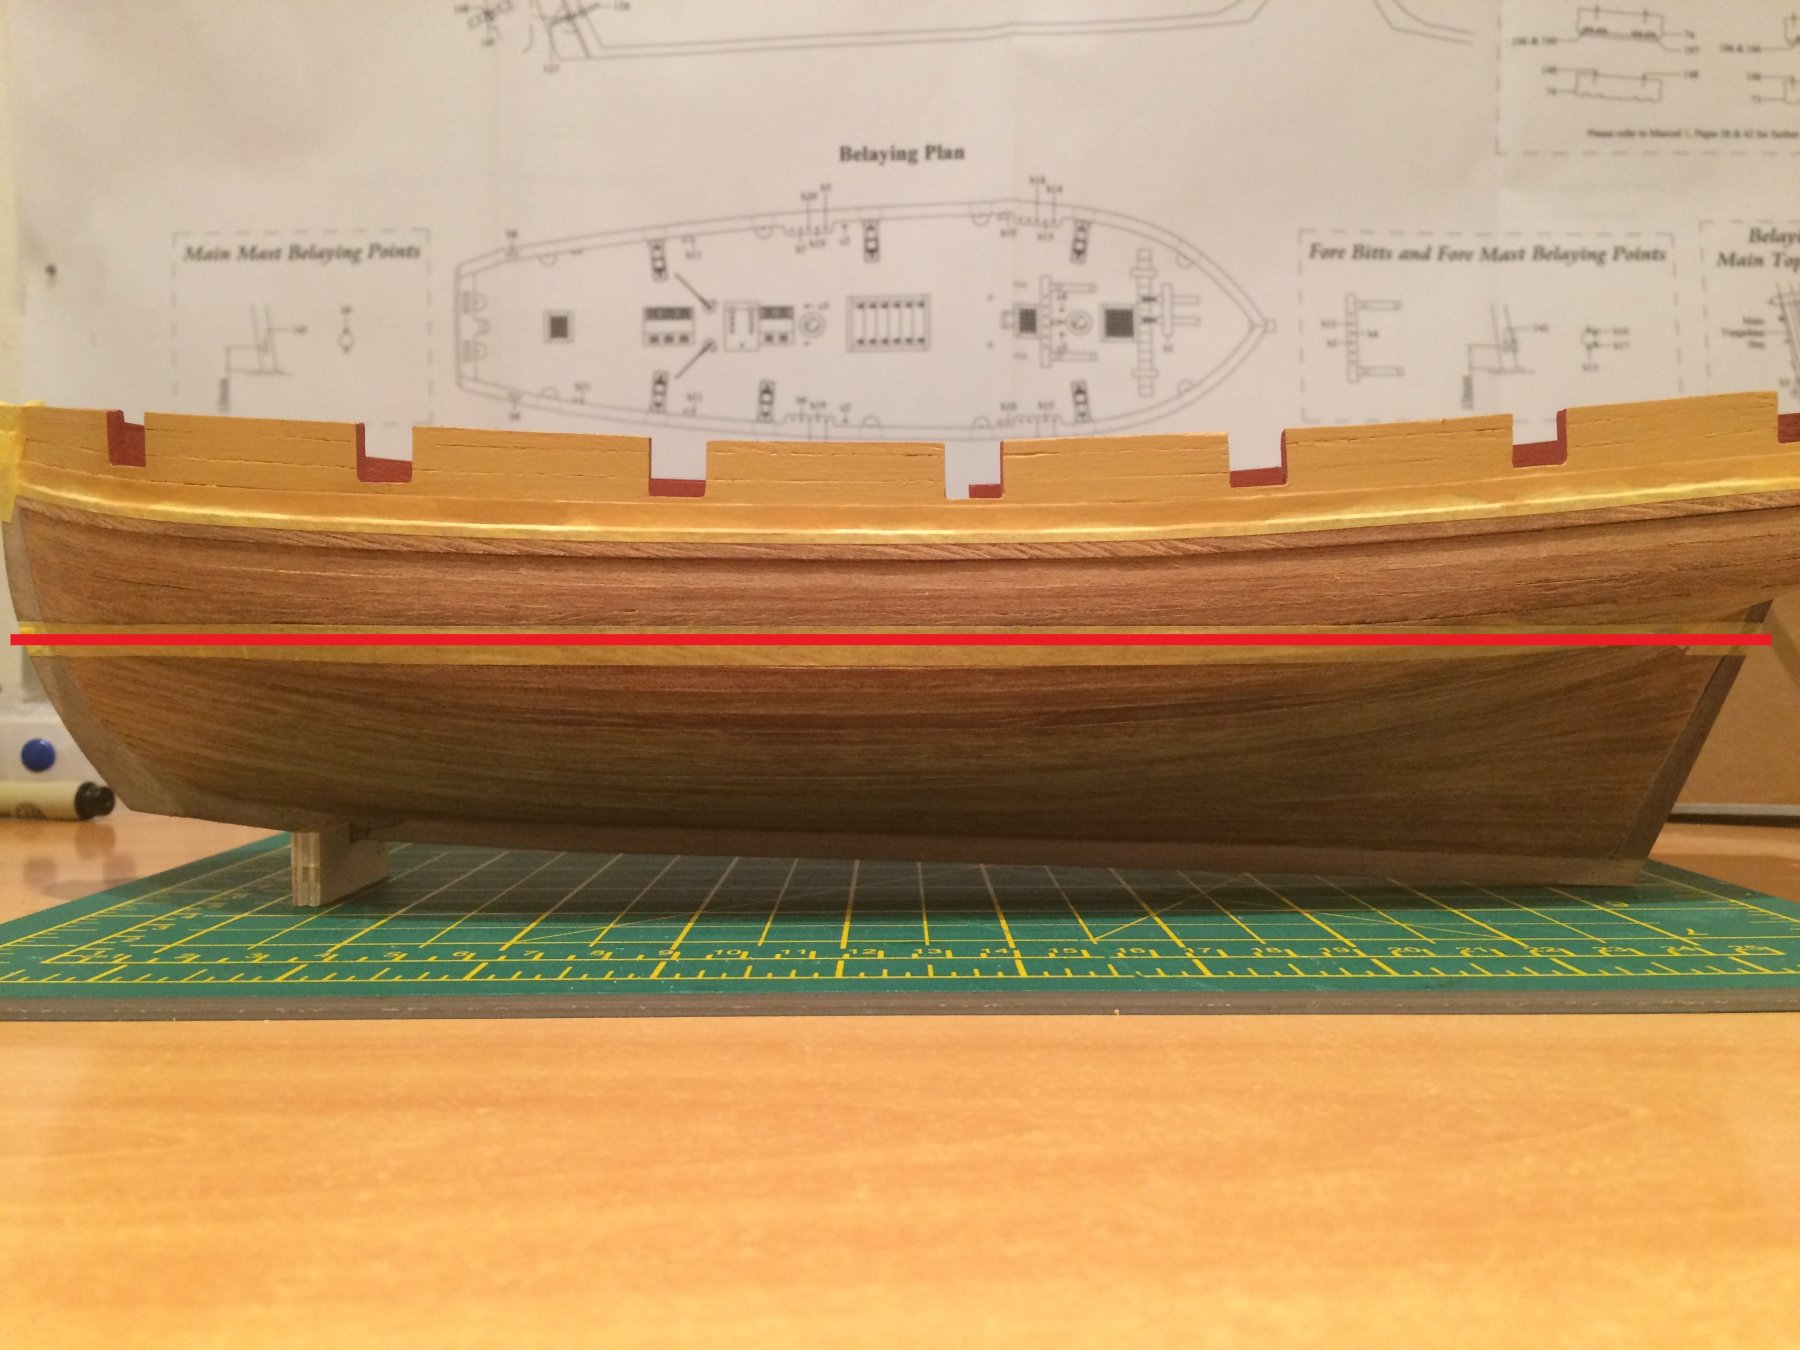
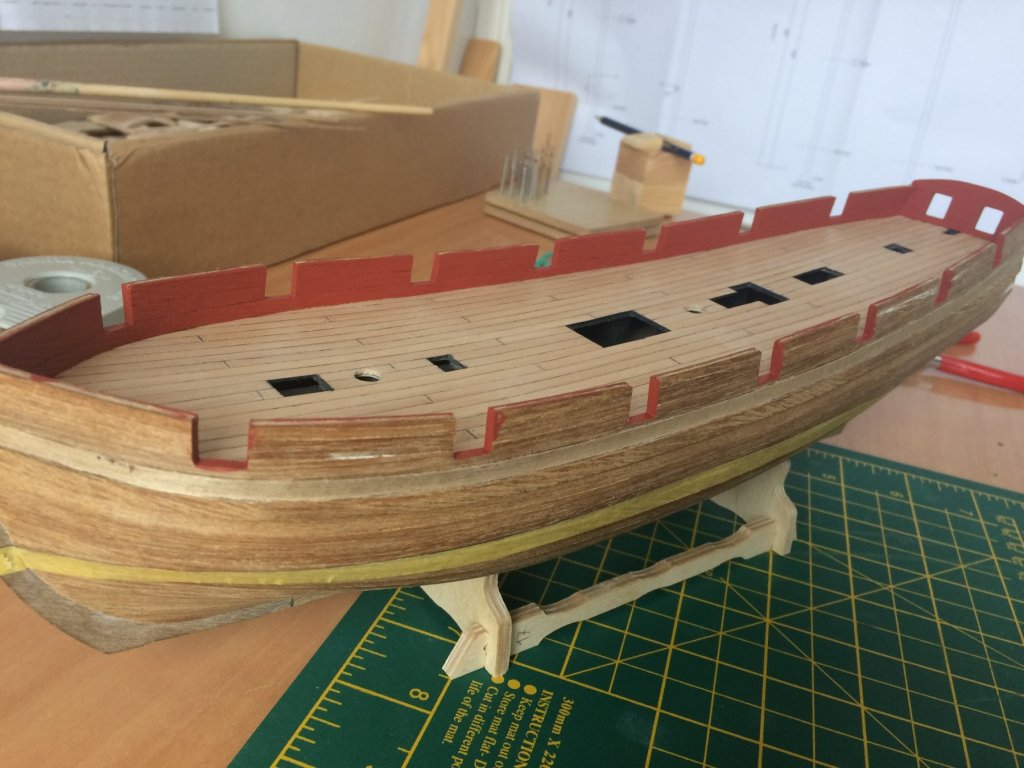
Yup. I've used it for the picture below. I made sure that the angle is right before taking the photo and also added a nice red line so it's easier to see that it's level: As seen above, the outer bulwarks have their first coat of 'Yellow Ochre'. 2nd layer tomorrow.

- 37 replies
-
- 3
-
-
- pickle
- caldercraft
- (and 1 more)
-
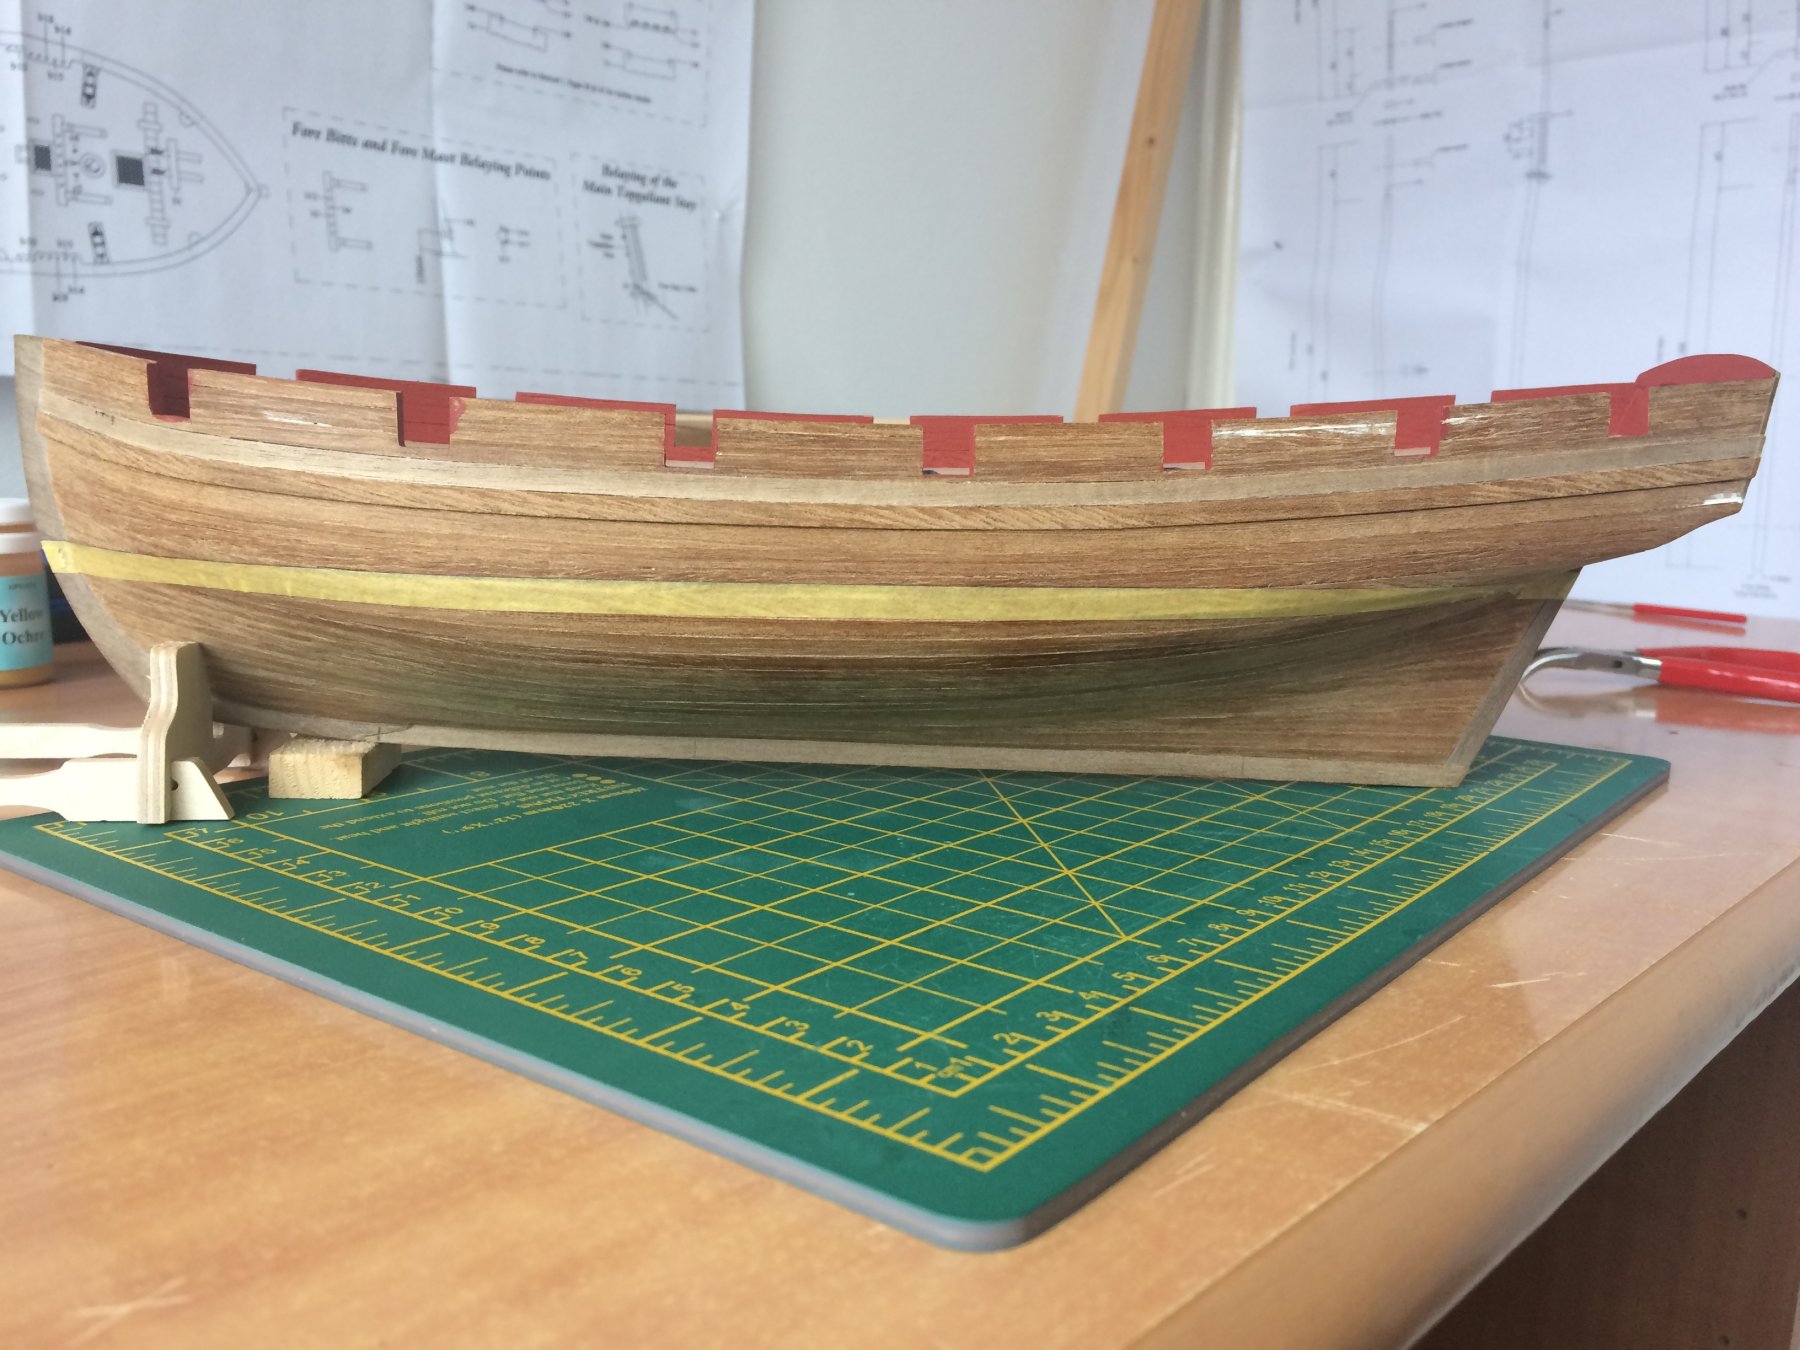
I'm actually surprised by how well it turned out: As you can see I also marked the waterline and filled some of the imperfections (note that the waterline on the photo below doesn't appear straight because I tilted the phone when taking the picture): 'Waterline Tool 5000' (as seen on TV) 😉: Up next - outer bulwark painting.


- 37 replies
-
- 2
-
-
- pickle
- caldercraft
- (and 1 more)
-
@SpyGlass Believe me, I've thought long and hard about whether I should just varnish the damn thing but ultimately decided to go with painting and copper plating - I even ordered some Amati plates because of their slightly more realistic look. I've read your log in great detail before starting mine - just like every other Pickle log on this site (I think there's a dozen of them) and I was very impressed with your craftsmanship. That first planking is definitely better than mine!
-
Inner bulwark painting
Peter Y. replied to Peter Y.'s topic in Painting, finishing and weathering products and techniques
I had a look in both build logs and found them quite helpful. Thank you for the links! Yes, there are indeed two coats of varnish. I didn't think of it as a lifebuoy but it's a good point Rob. That's the tape that I'll be using - not knowing anything about the craft I just went with what many people here recommended. Sounds like a great tip with the burnishing. I was thinking whether time or temperature are factors when it comes to the masking tape sealing abilities. For example: - Will applying the tape and leaving it for an hour before painting make any difference? - How about blowing some hot air on it? Wouldn't that 'loosen' the tape's adhesive and enable it to fill any surface irregularities better?