Tector
-
Posts
62 -
Joined
-
Last visited
Content Type
Profiles
Forums
Gallery
Events
Everything posted by Tector
-
 Thank you for your kind words! Building wooden models is very different from the plastic, resin and metal ones I have experience with-- be it a kit or a bespoke architectural model, and it requires a different mindset too... but the end result can be very beautiful and something just feels right about building a model of a wooden ship out of wood.
- 38 replies
-
- 1
-

-
- bluenose
- model shipways
- (and 1 more)
-
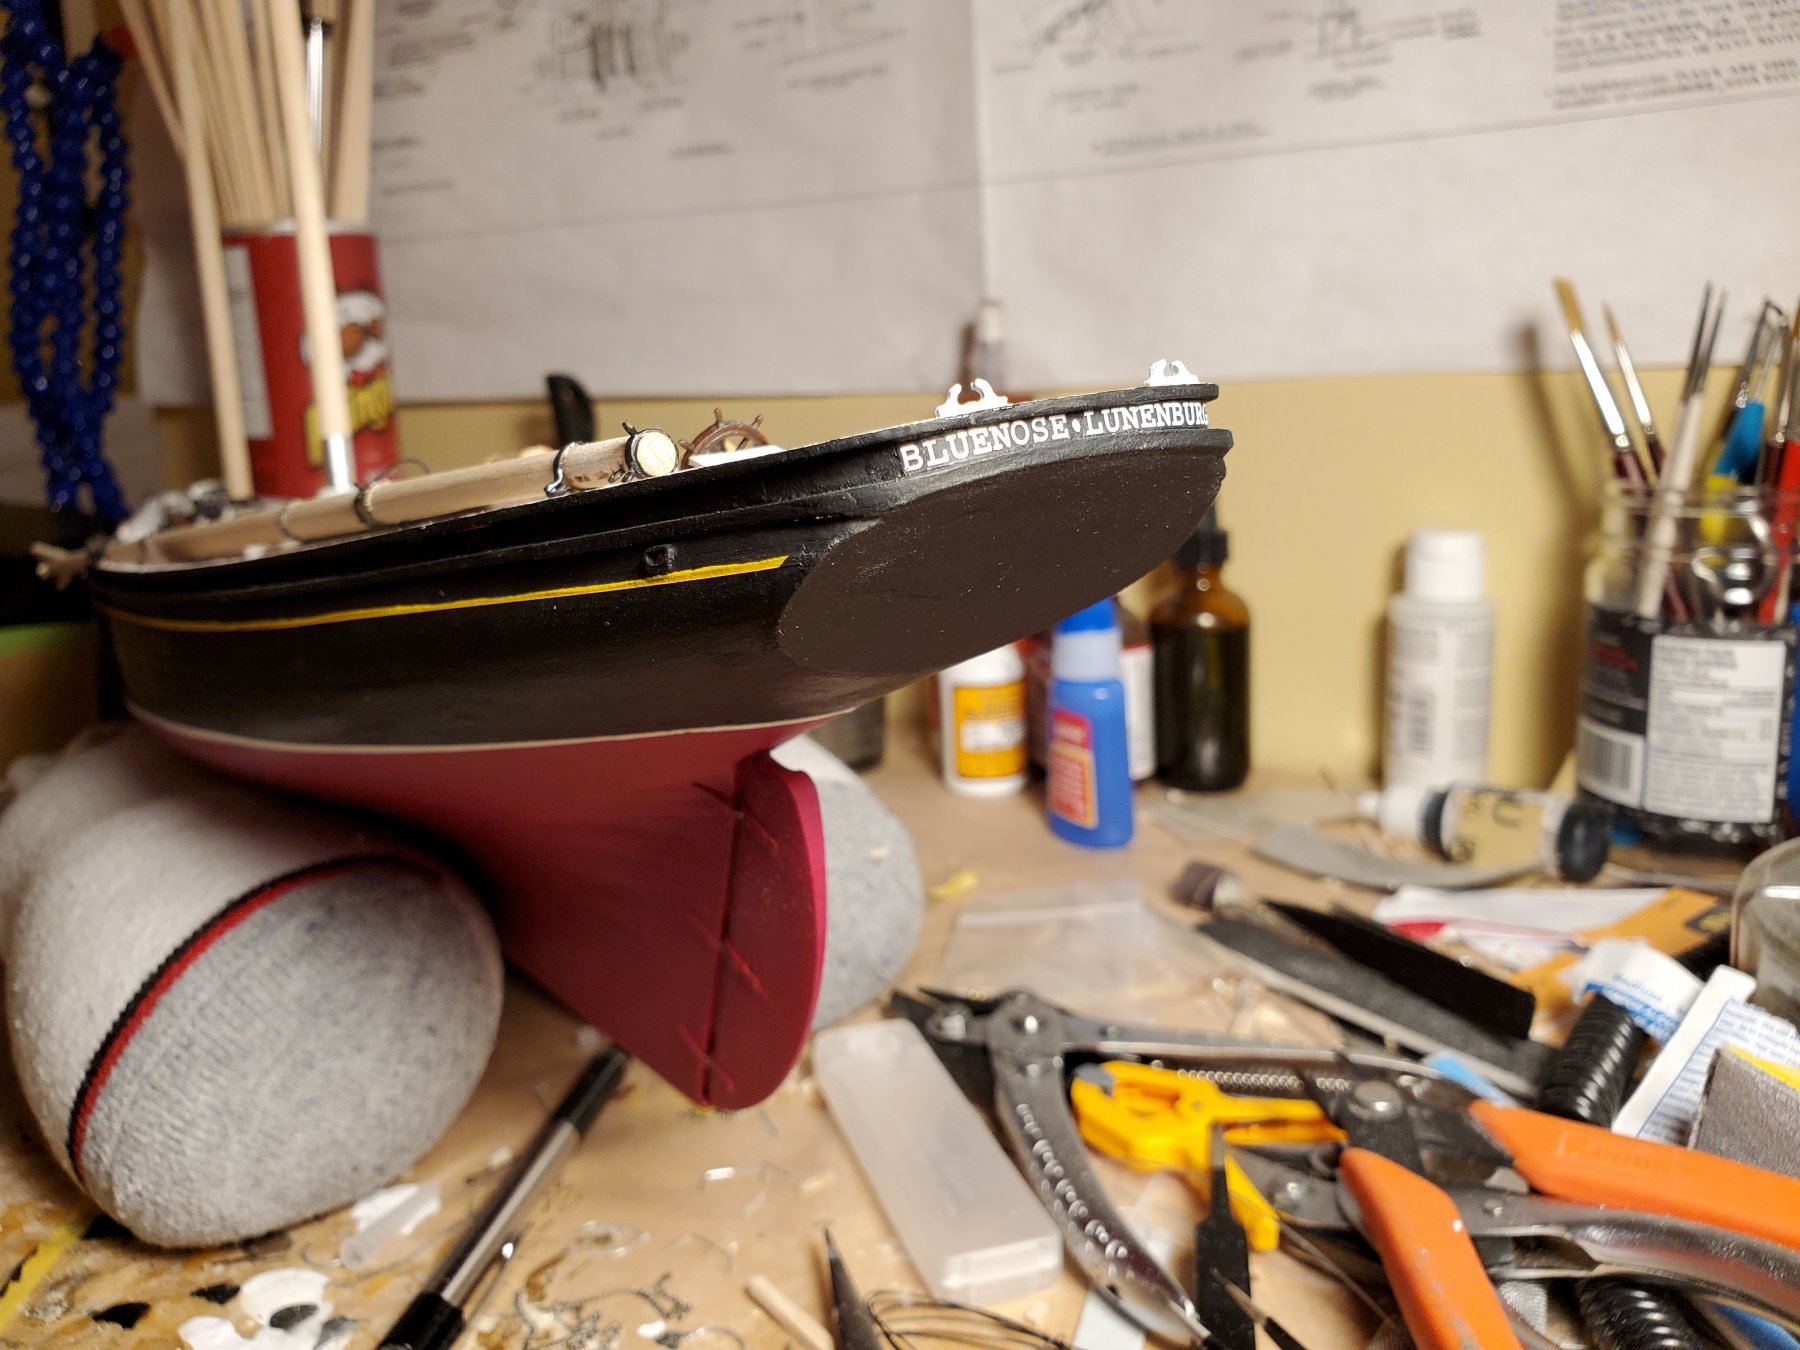
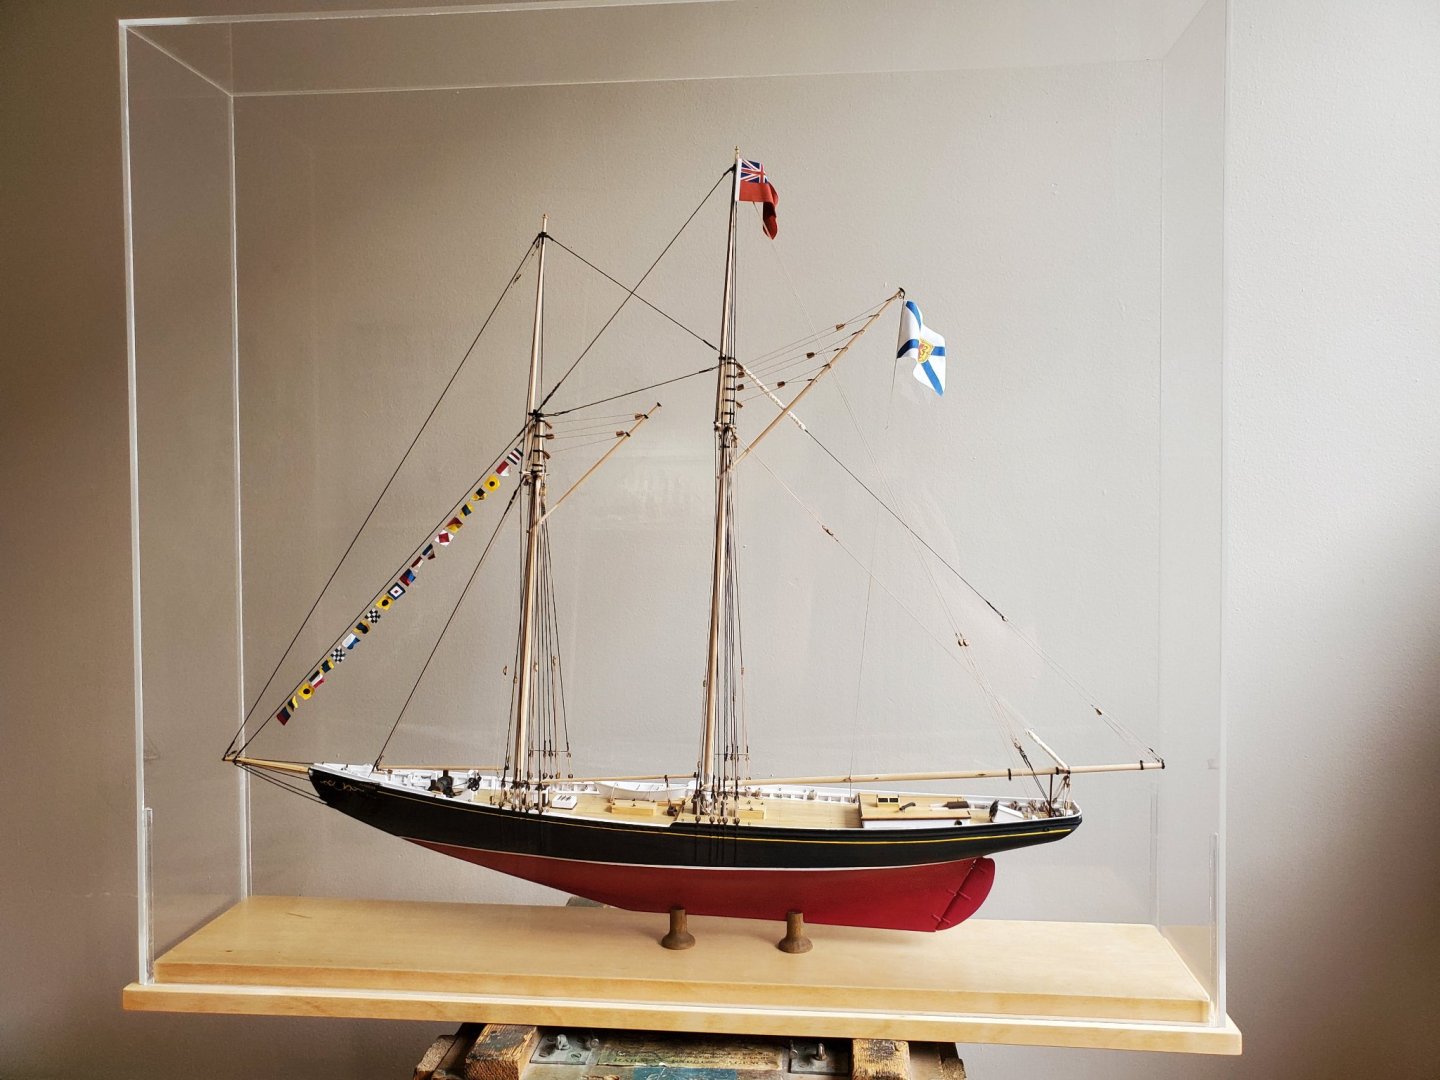
One more: I had a case custom built through Nick Melchin at Pro Model Builders in Vancouver. I've worked with Nick on a variety of projects in the past and always come away impressed with his skill and sheer versatility; he's built everything from architectural models, to scale product replicas, wargaming terrain, movie props and a great deal besides. And so it came to pass that he built a display case for the first large scale wooden model ship that I have built and I couldn't be happier with it. In particular, I'm just delighted to see it without its construction cradle that was composed of two rice filled socks.
- 38 replies
-
- 6
-
-
- bluenose
- model shipways
- (and 1 more)
-
Thank you. Bluenose is easy in that she is beautiful in her own right and looks like she is going fast just sitting there. She's not hard to make pretty.
- 38 replies
-
- 1
-
-
- bluenose
- model shipways
- (and 1 more)
-
The best advice I ever got for this kind of work is to treat each piece as a project in its own right, its own milestone. The second best piece of advice to getting through a big build was to walk away when you are getting frustrated. Though I recall a great wit observing on this very forum that we build for accuracy and for pleasure, and when our output isn't sufficiently accurate, we have the pleasure of doing it all again. While I was kind to myself in this build, there were definitely occasions in which I tore things out and did them again, because there is being forgiving, and then there's just enabling bad habits. I think that this kind of modelling is a lot more contemplative and process oriented than the plastic and resin kits I used to build and while building something like this absolutely has an overall goal, what really matters is the journey rather than the getting there. And that's the part I am really going to miss--as the first big build for me, each big milestone seemed extra big by virtue of having never gotten that far before.
- 38 replies
-
- 2
-
-
- bluenose
- model shipways
- (and 1 more)
-
Thank you. I'm very pleased with it, but I have to confess it took an act of will to down tools and clear the bench for something else. While on a rational level I wanted to see the project through, there was also a part of me that didn't want to move on to something else just yet.
-
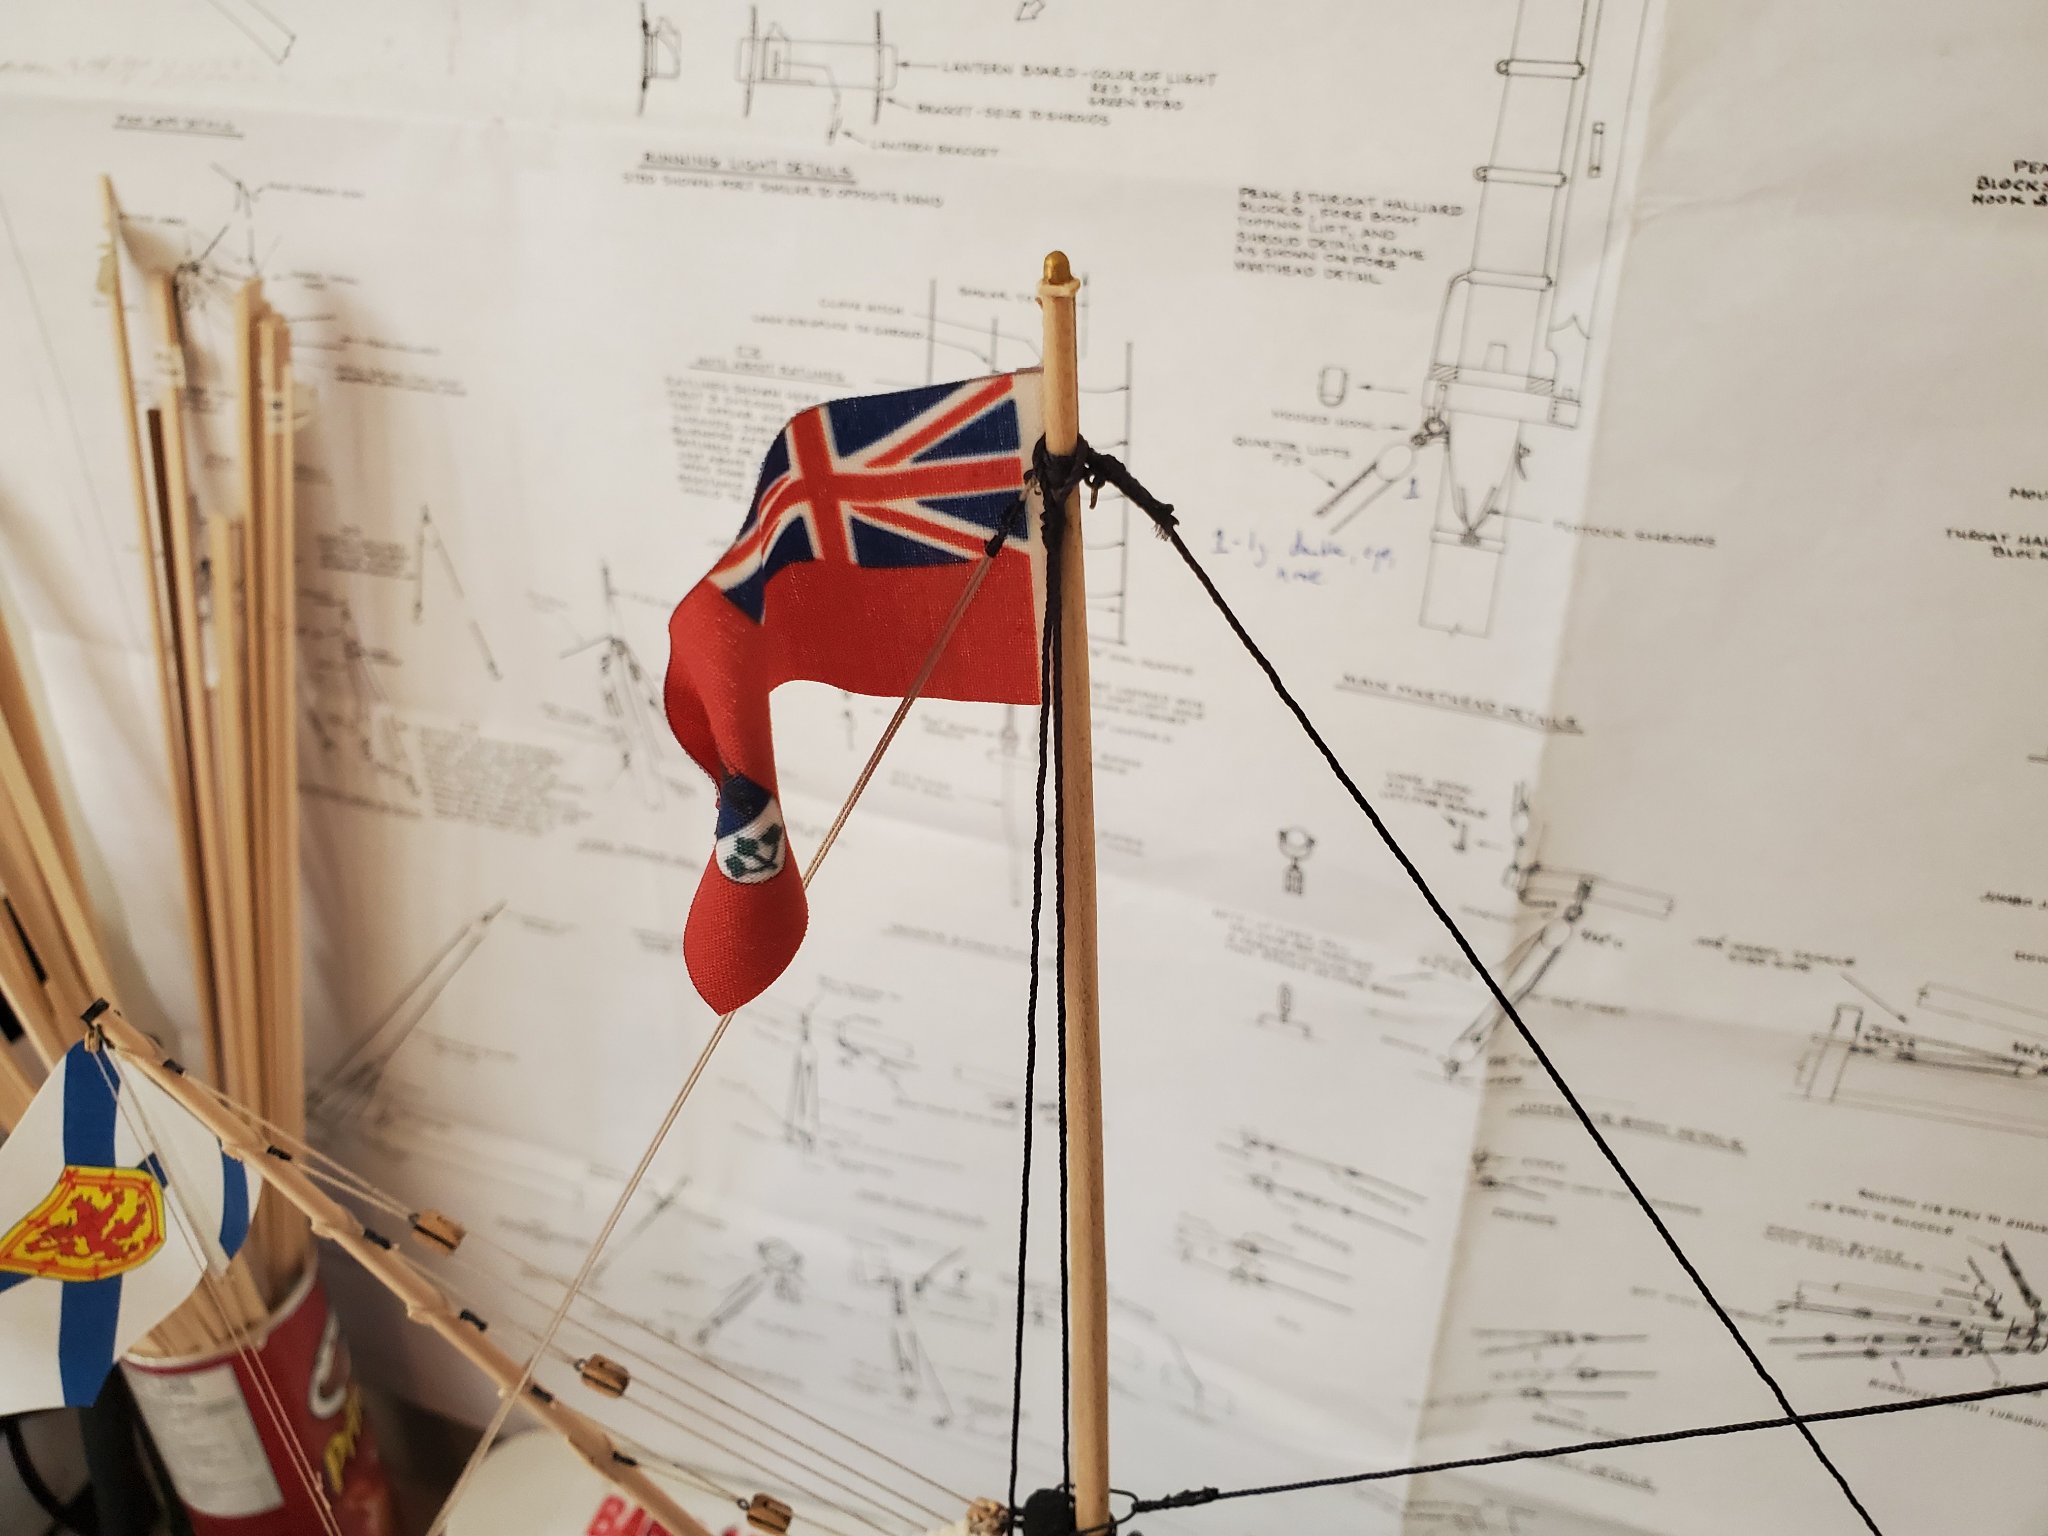
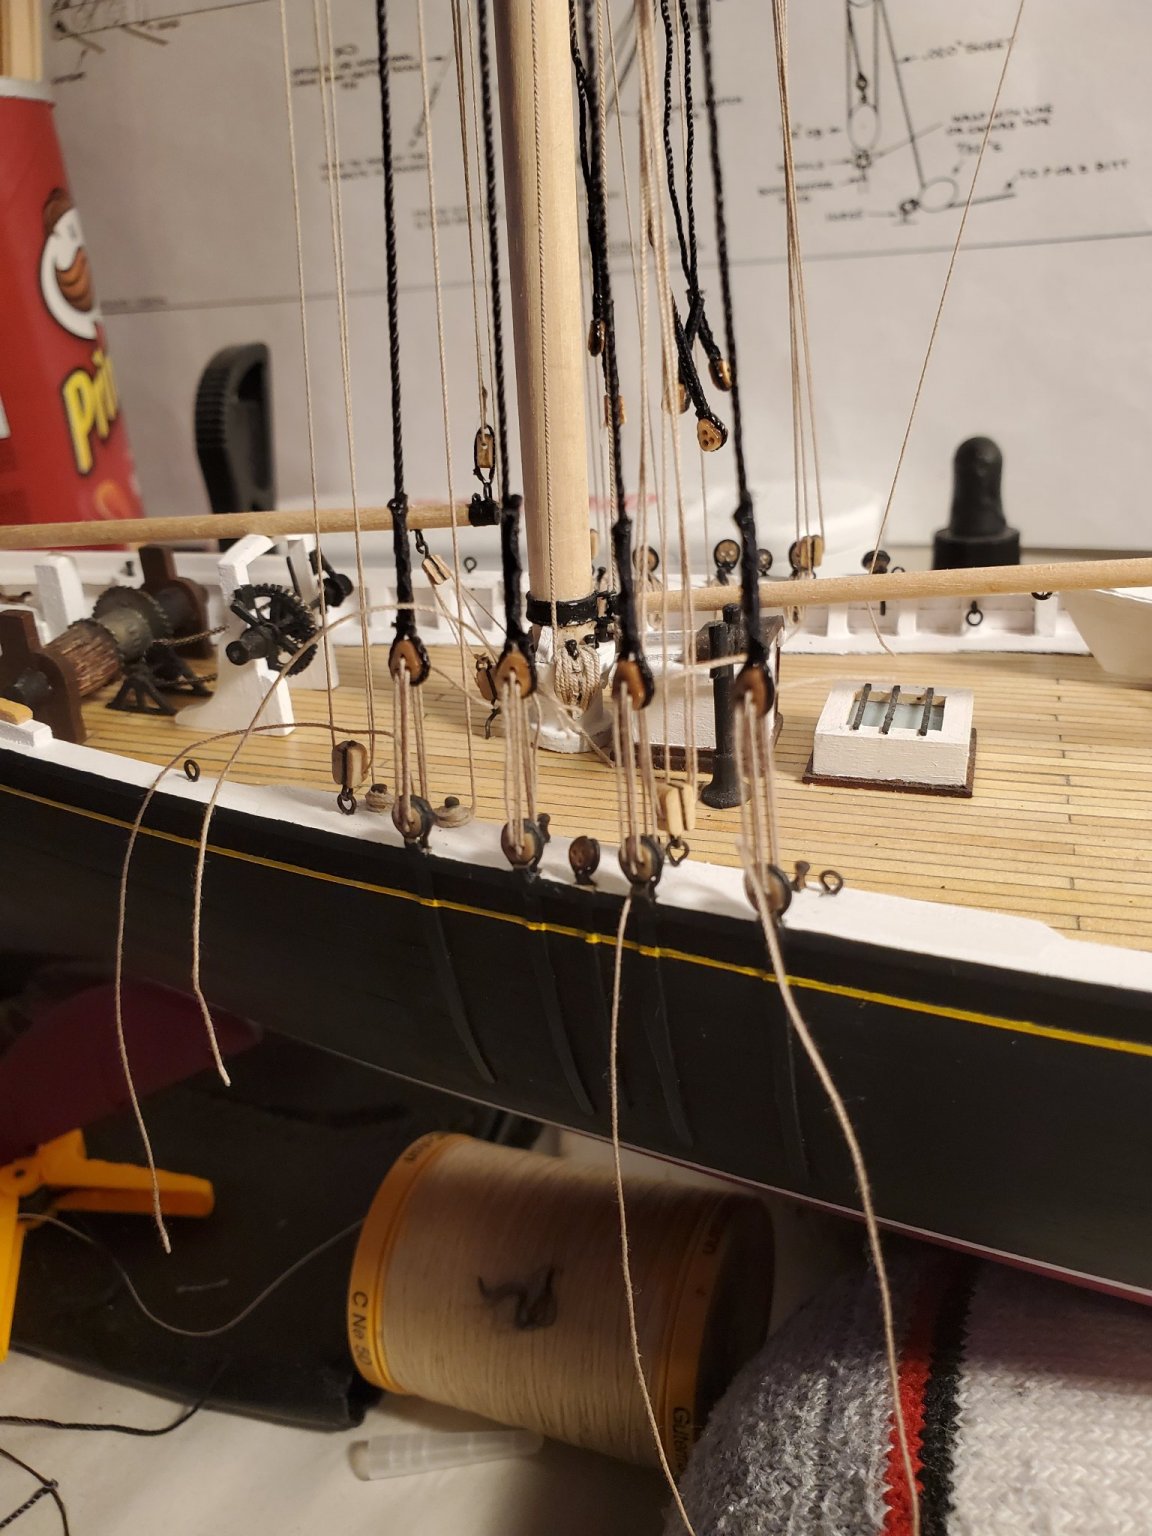
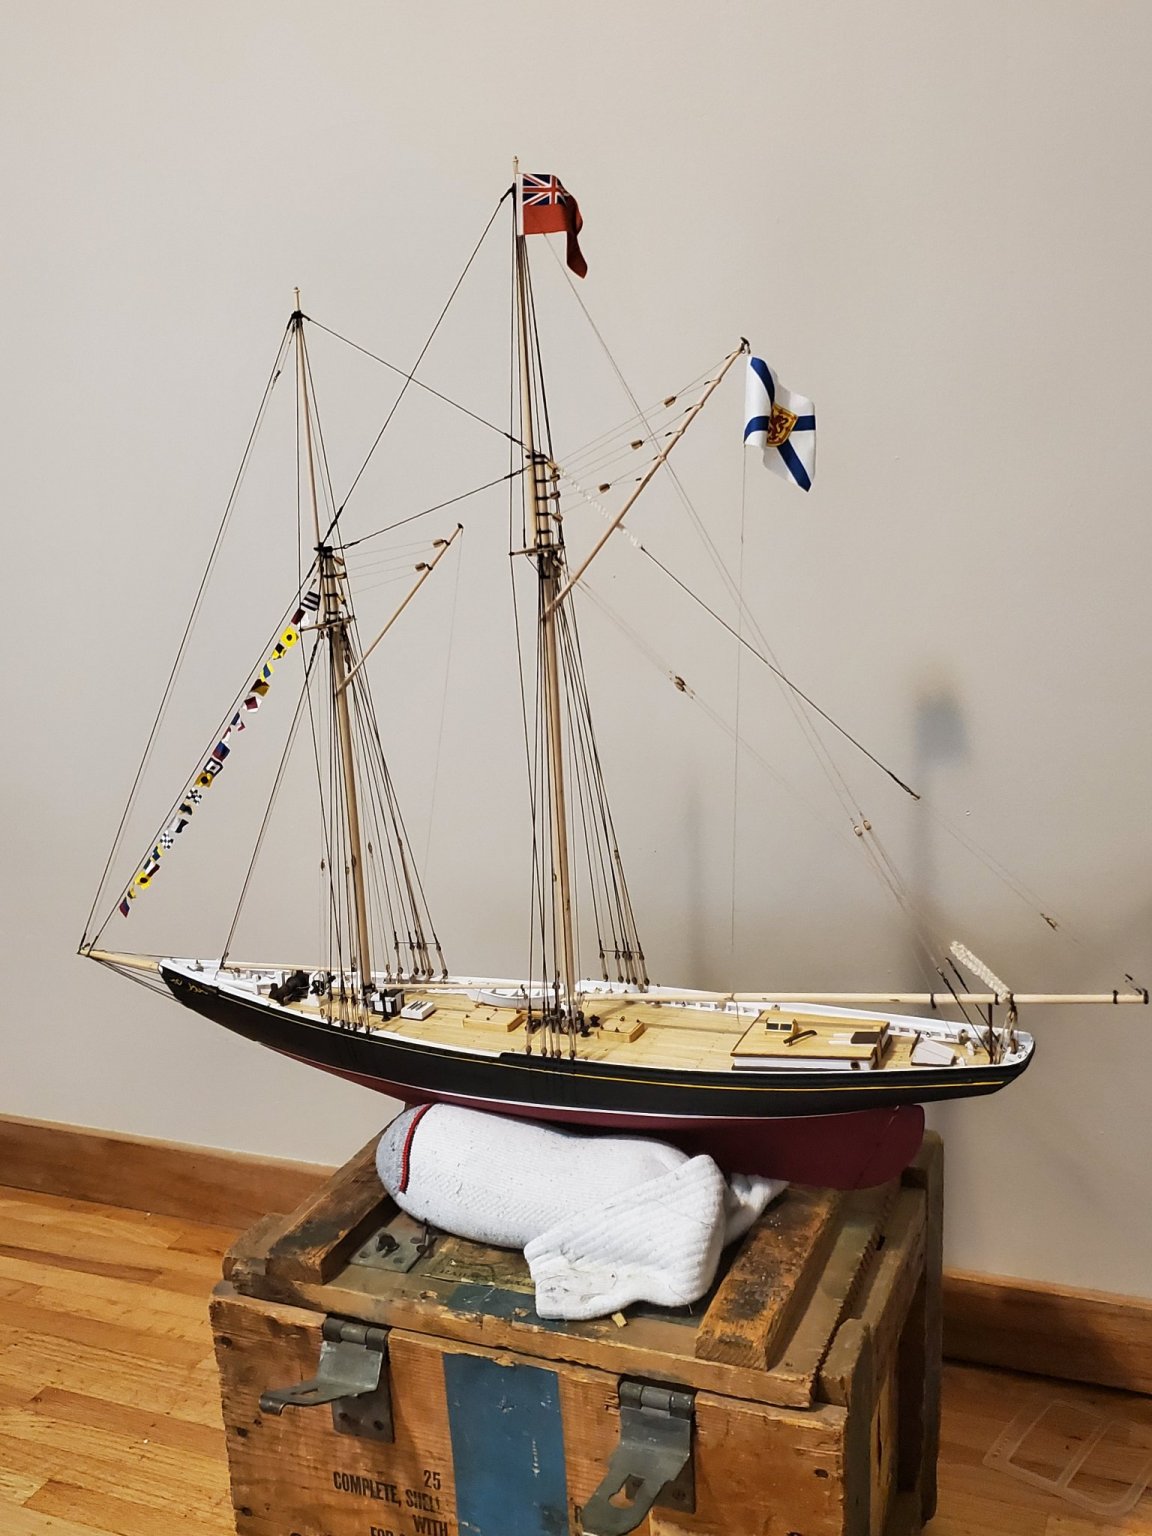
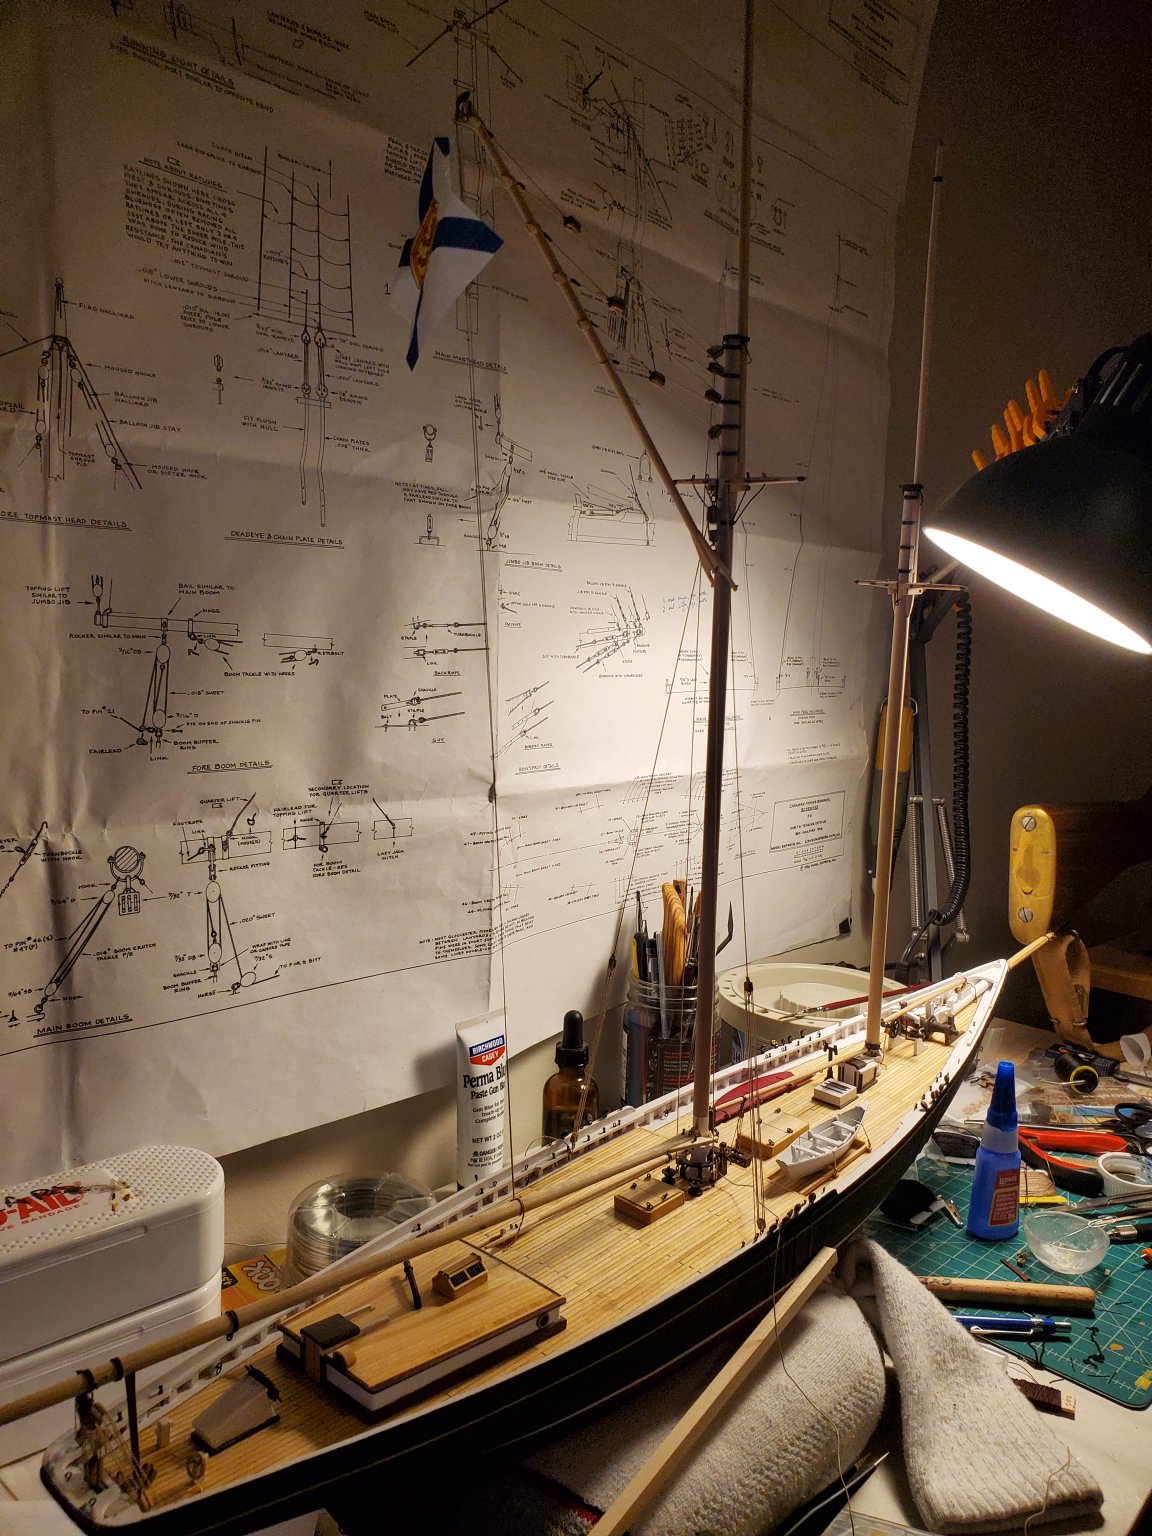
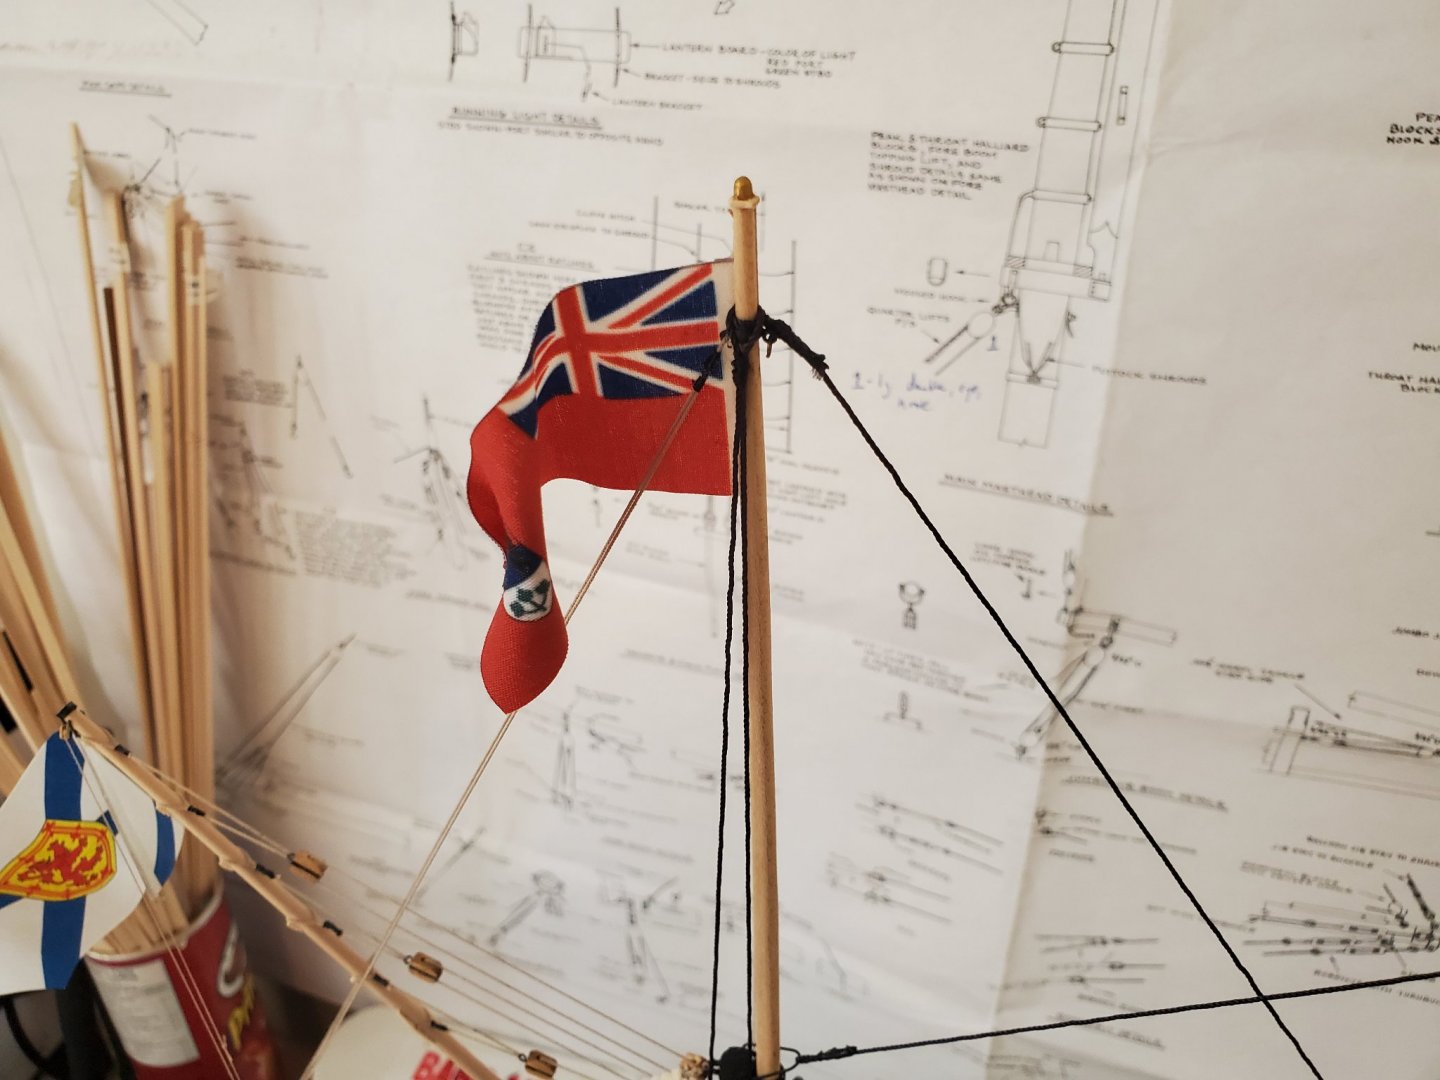
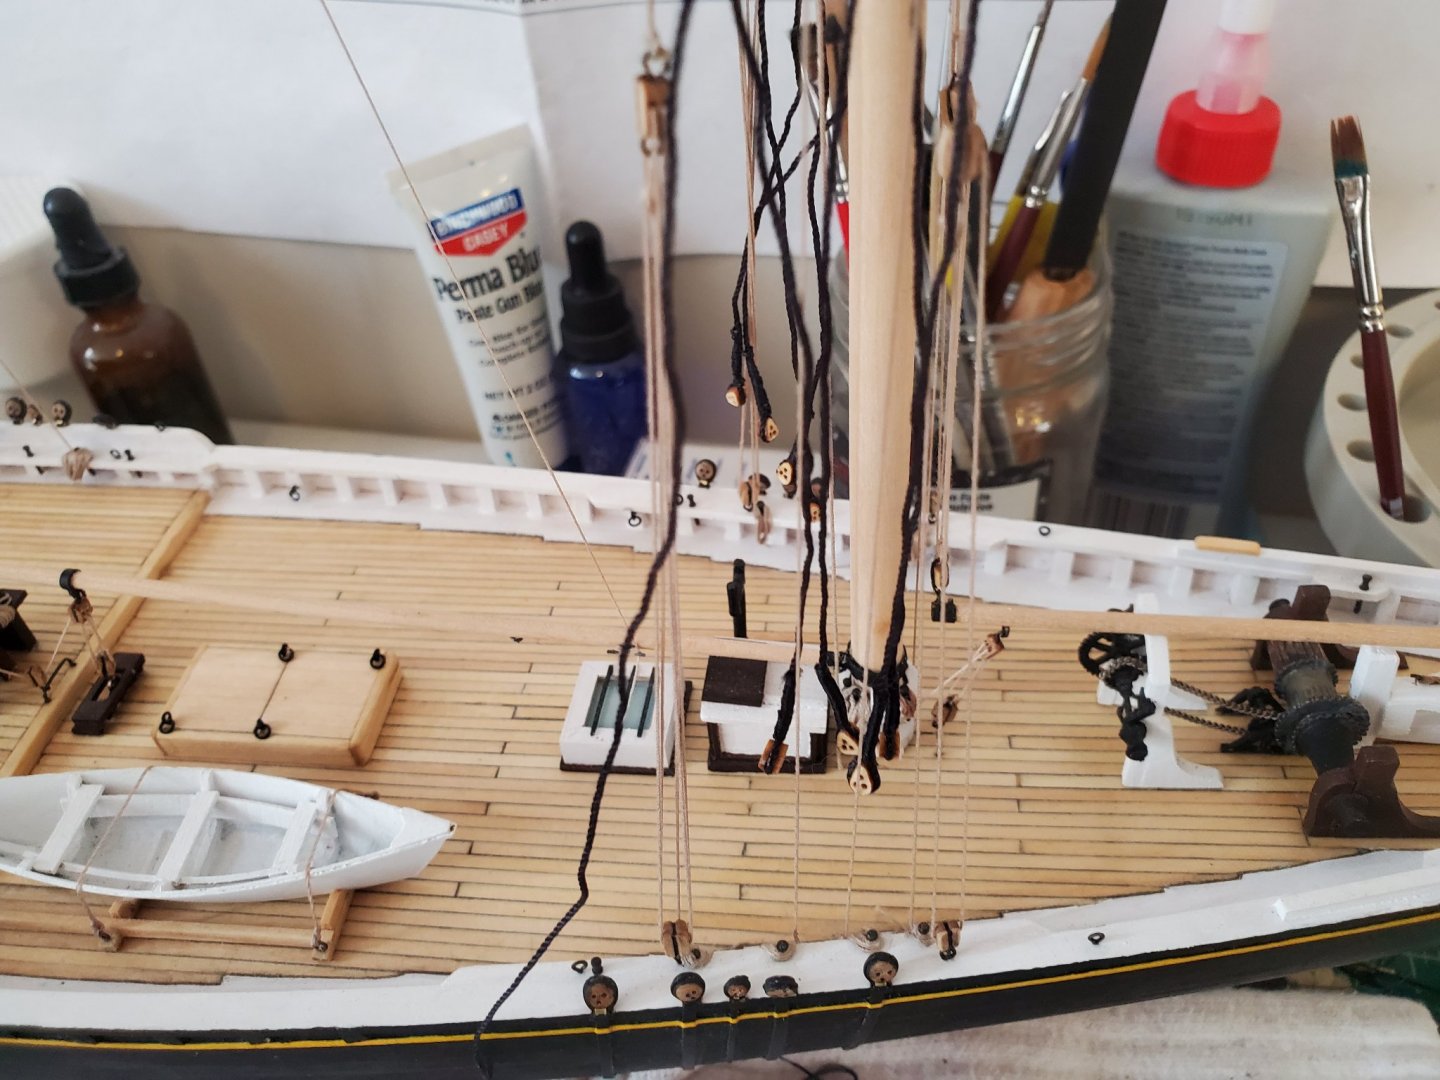
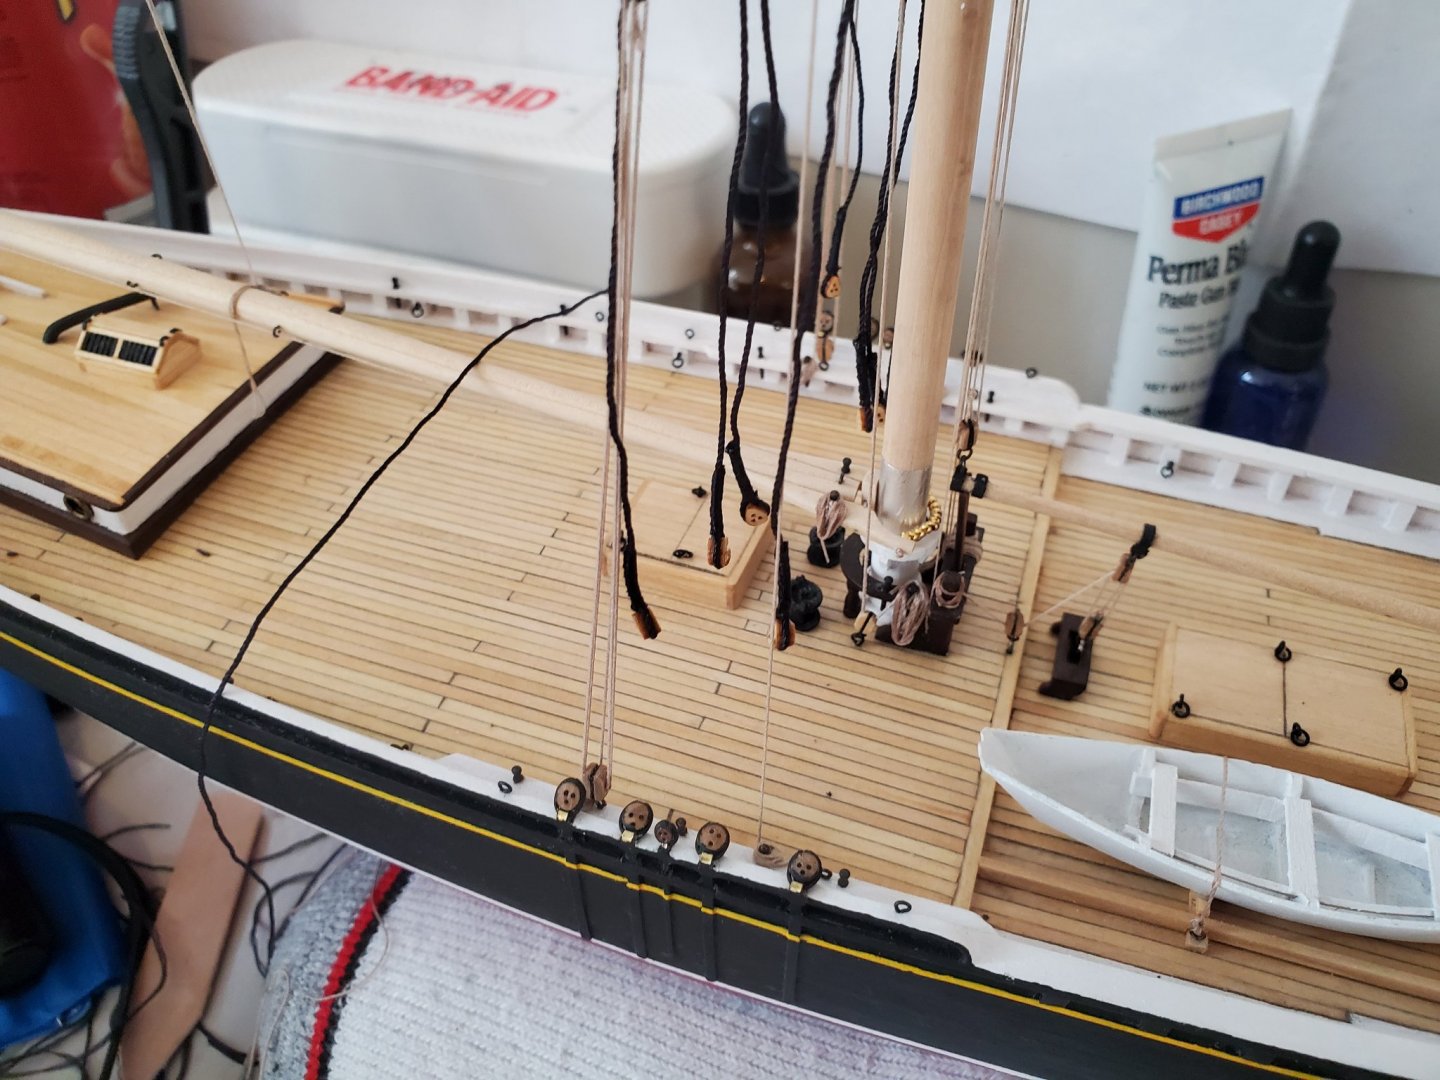
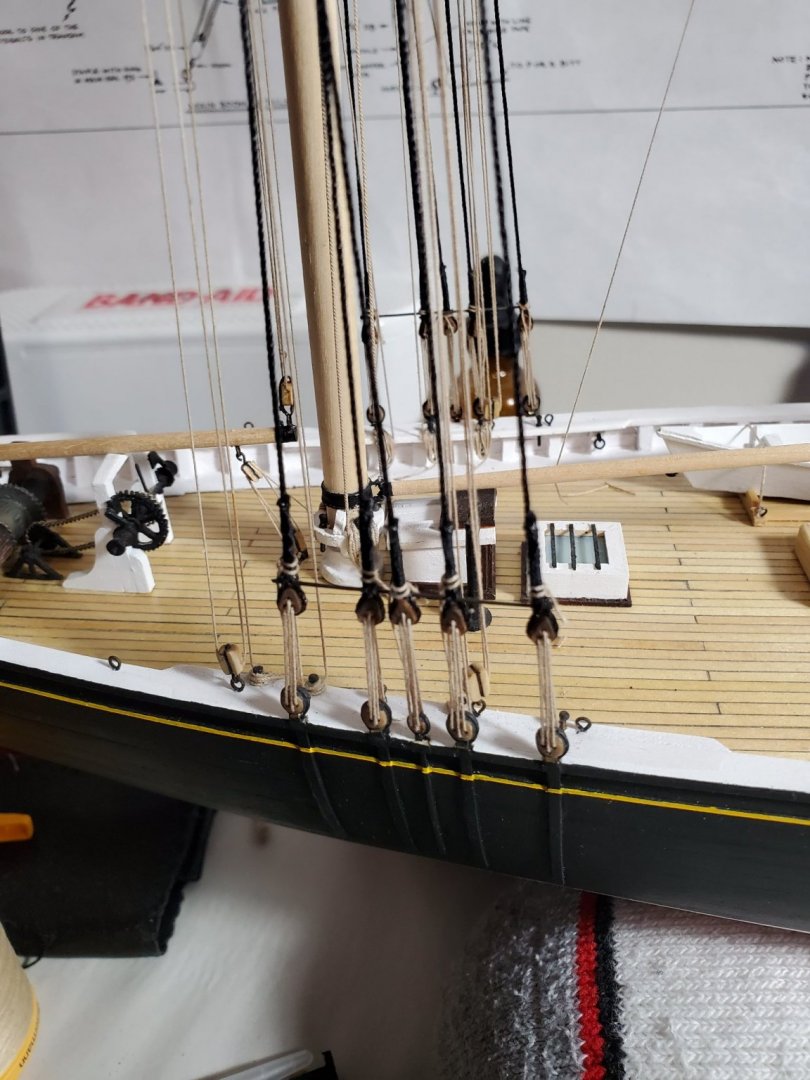
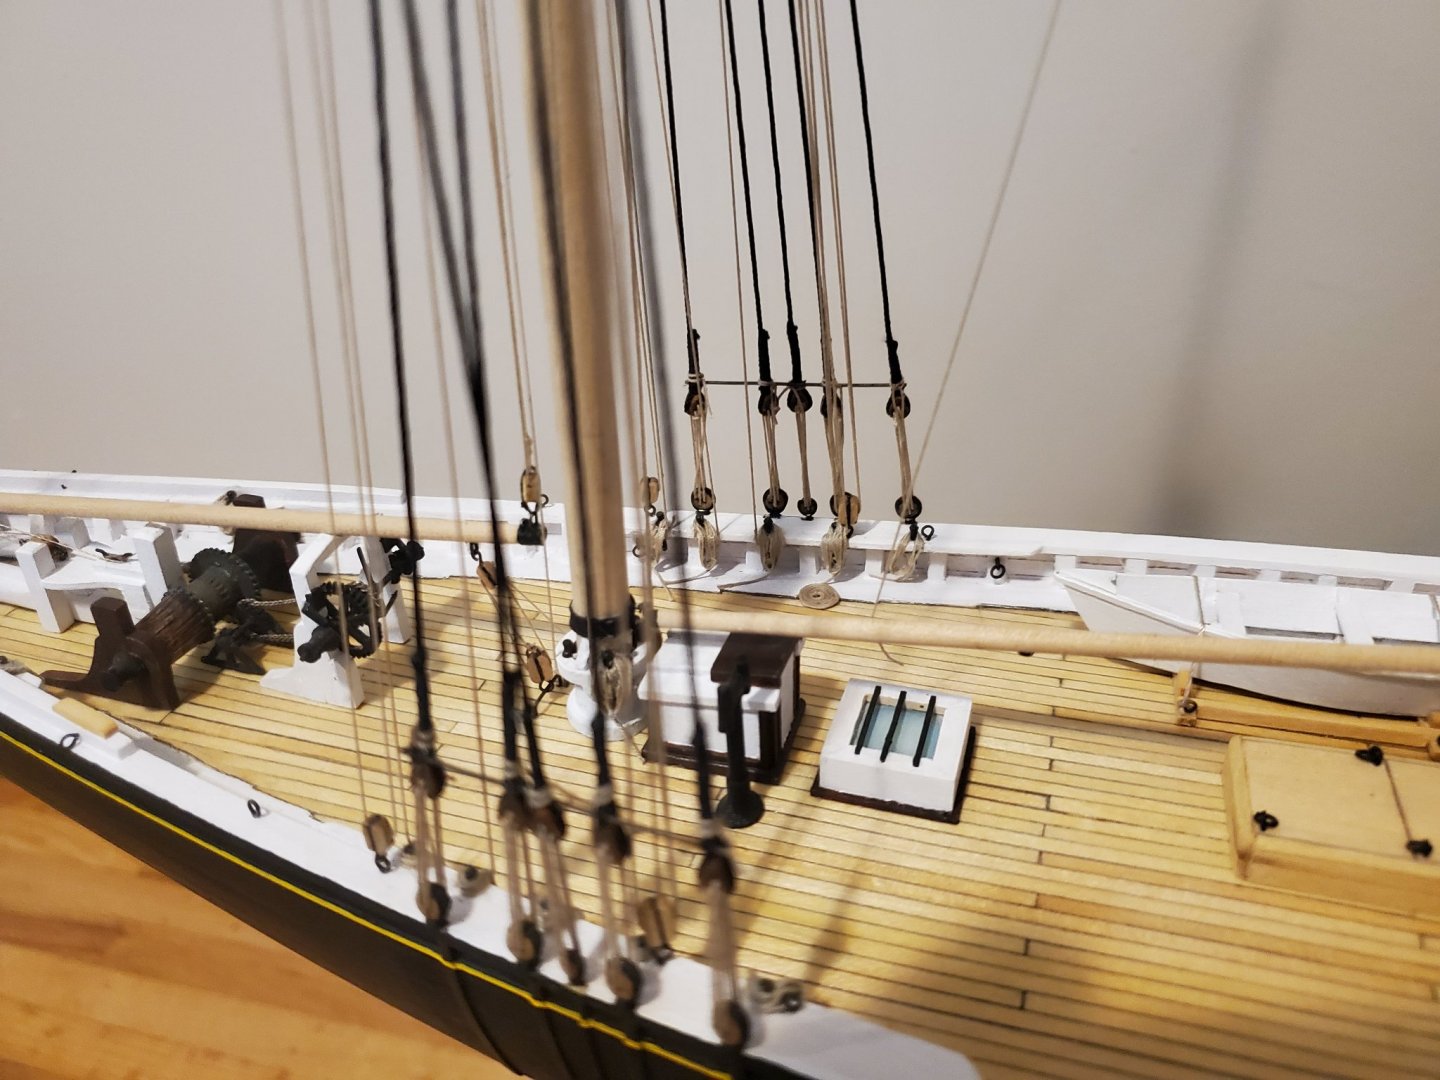
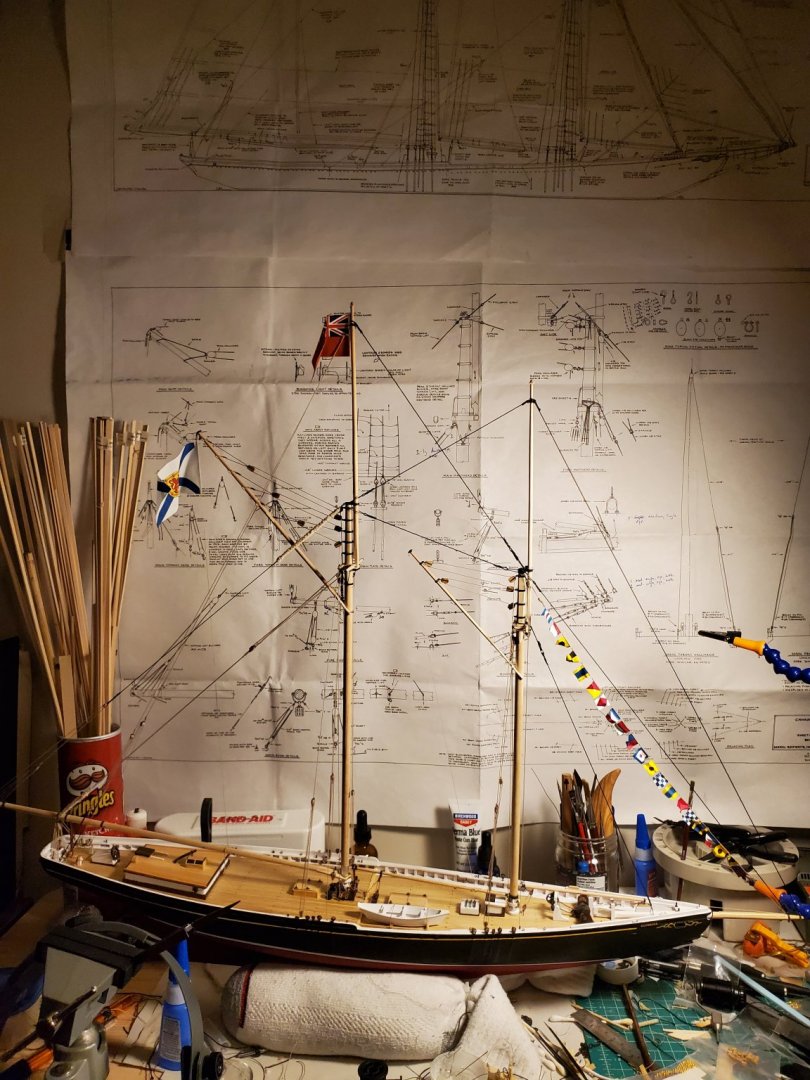
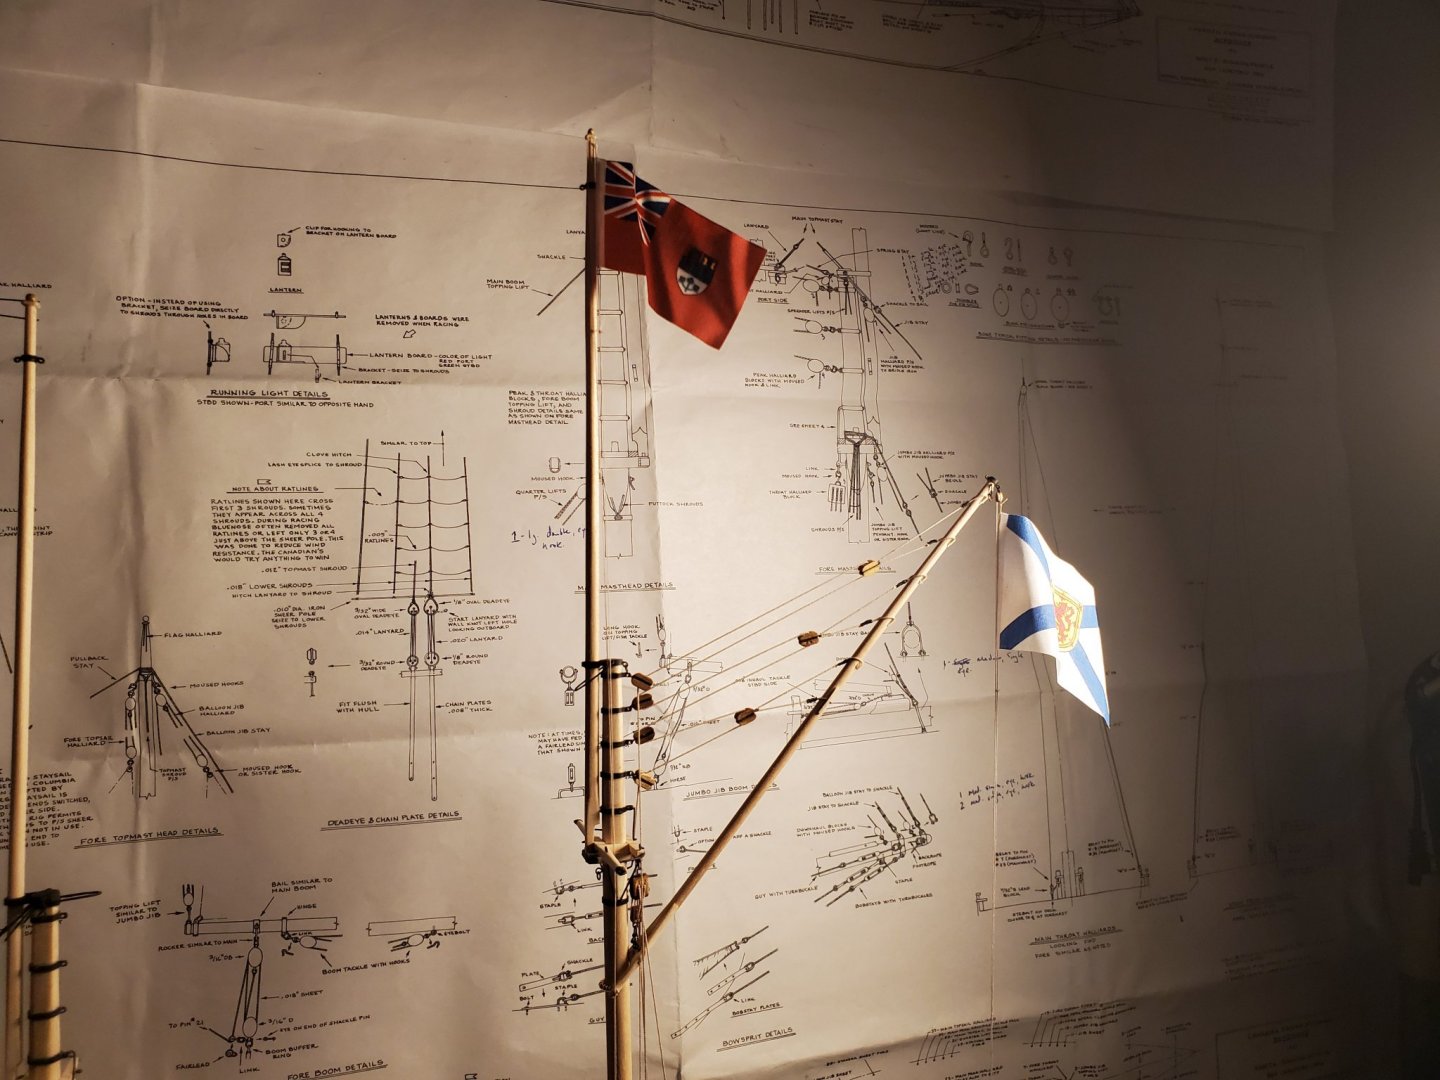
Work continues on the Bluenose. I was not happy with how the Red Ensign looked in terms of its shape, and reactivated the thin coat of glue it had been given with alcohol and shaped it again, using clamps to help hold it in shape while the glue set up again. The same was done to the Nova Scotian flag as well. Subsequent to this, I went about installing the shrouds. I found this one of the less enjoyable parts of the build because of how repetitive it was. But it wasn't long before the sheer poles were ready to go in. From here, the final bits of rigging were up at the bowsprit. And then I set the model aside for a few days to give it an editing pass to correct a few small things, or add details that I missed. So it came to pass that a build that started on 12 April 2018 concluded on 5 December 2020 and my table has been cleared for another project that has just begun. This was the first large scale wooden ship model I have ever completed and I did the best I could with the skills, tools and knowledge I had at the time. For this reason I am very proud of what I have done and what I have learned, and I will carry those lessons forward. I am looking forward to getting her display case completed to keep her safe and dust free. I will miss working on Bluenose, because this project was a huge labour of love, a symbol of a home that I had to move away from but never left. It's also been a welcome distraction and means of self-care that has been a huge support in some difficult and stressful times. But I will also apply what I learned here on the next build, and so it goes.


- 38 replies
-
- 4
-
-
- bluenose
- model shipways
- (and 1 more)
-
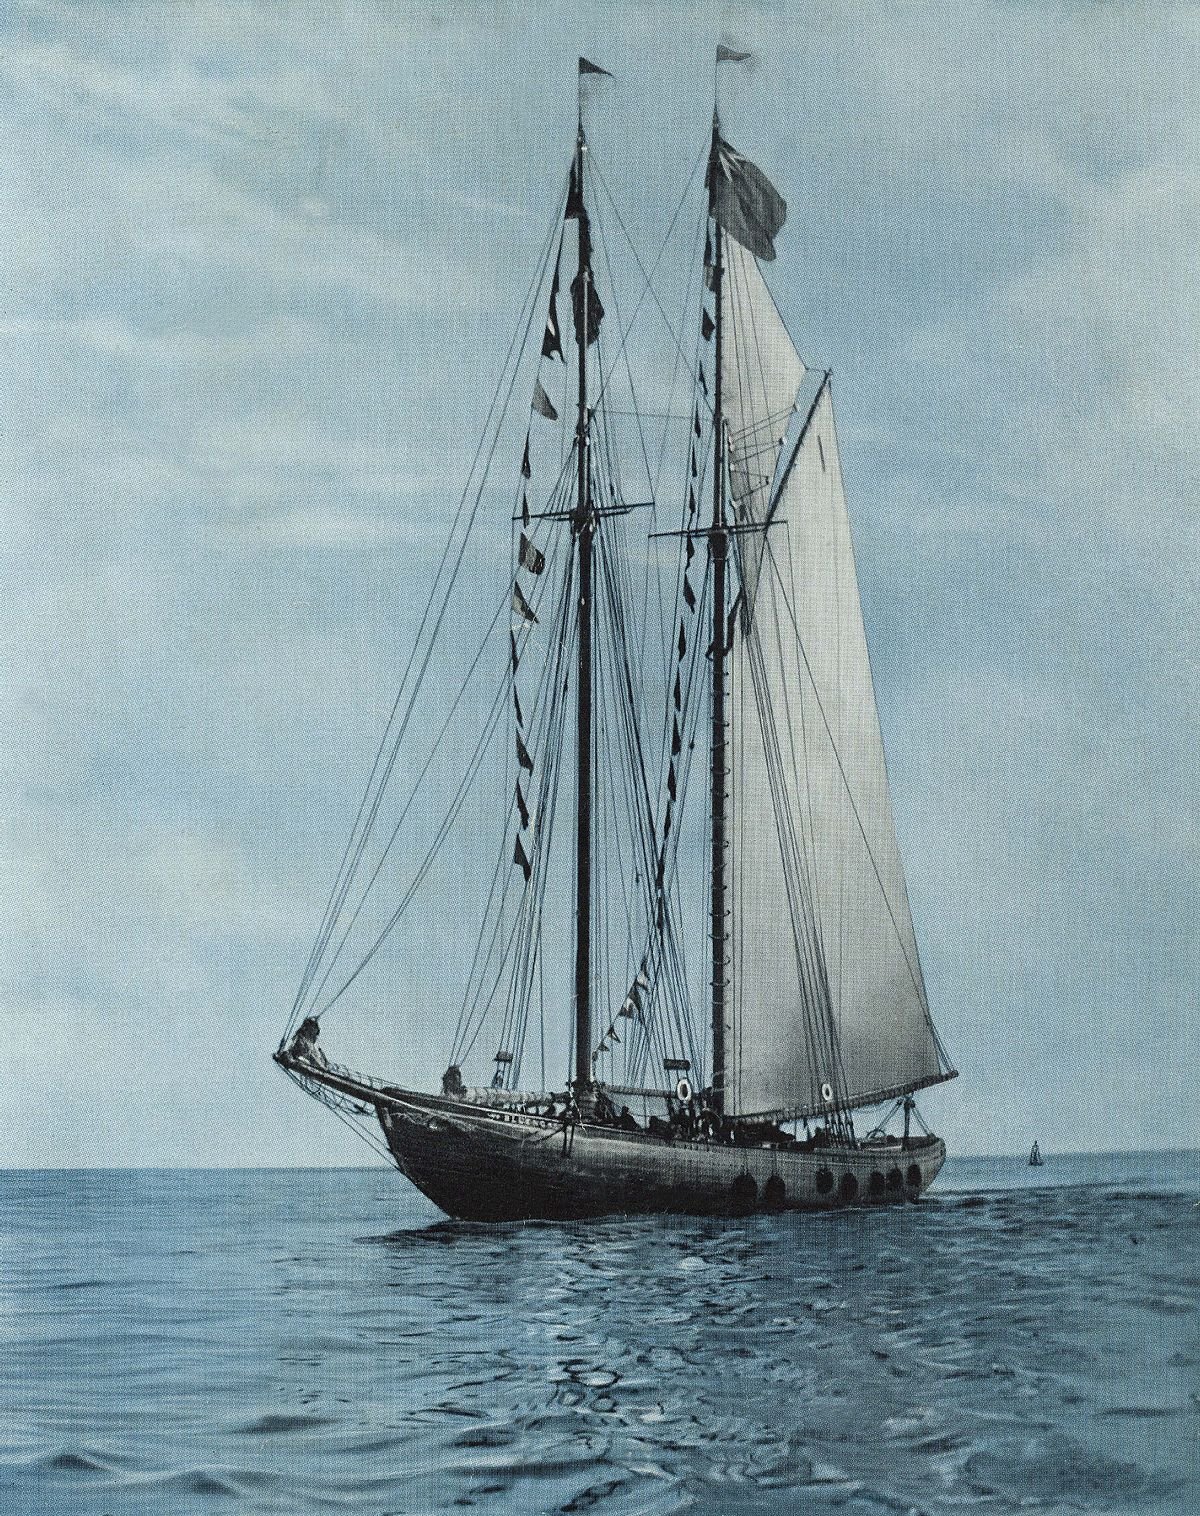
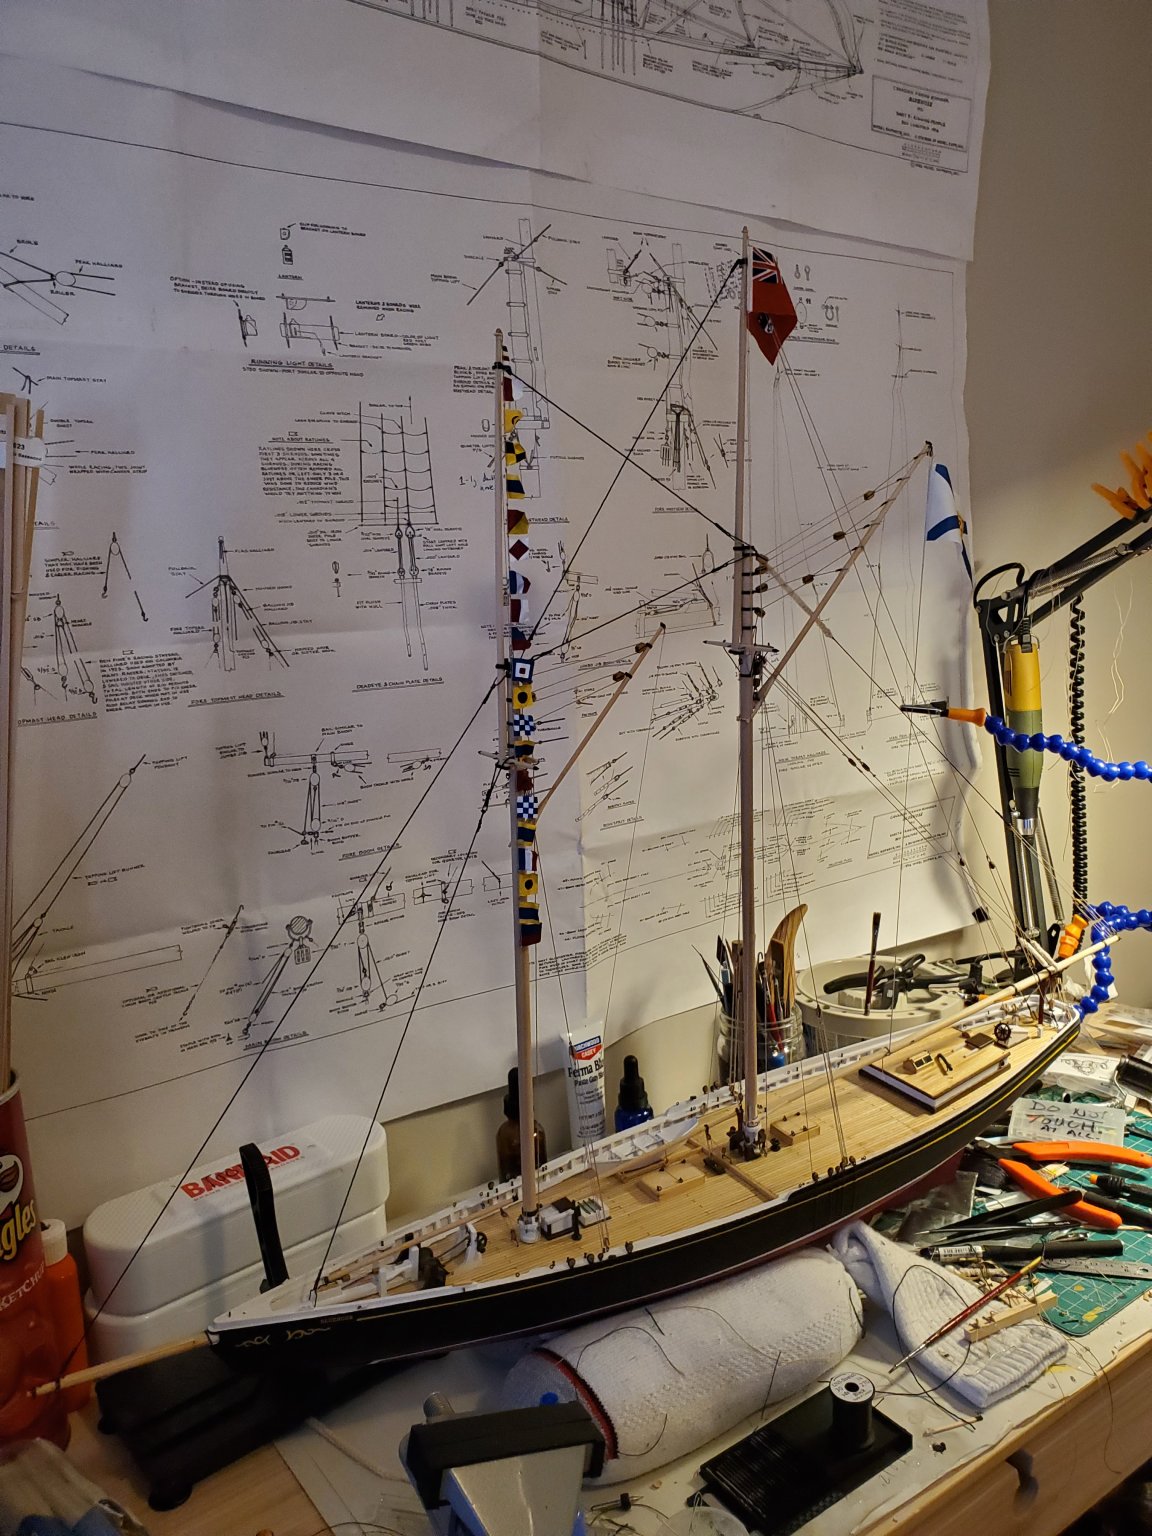
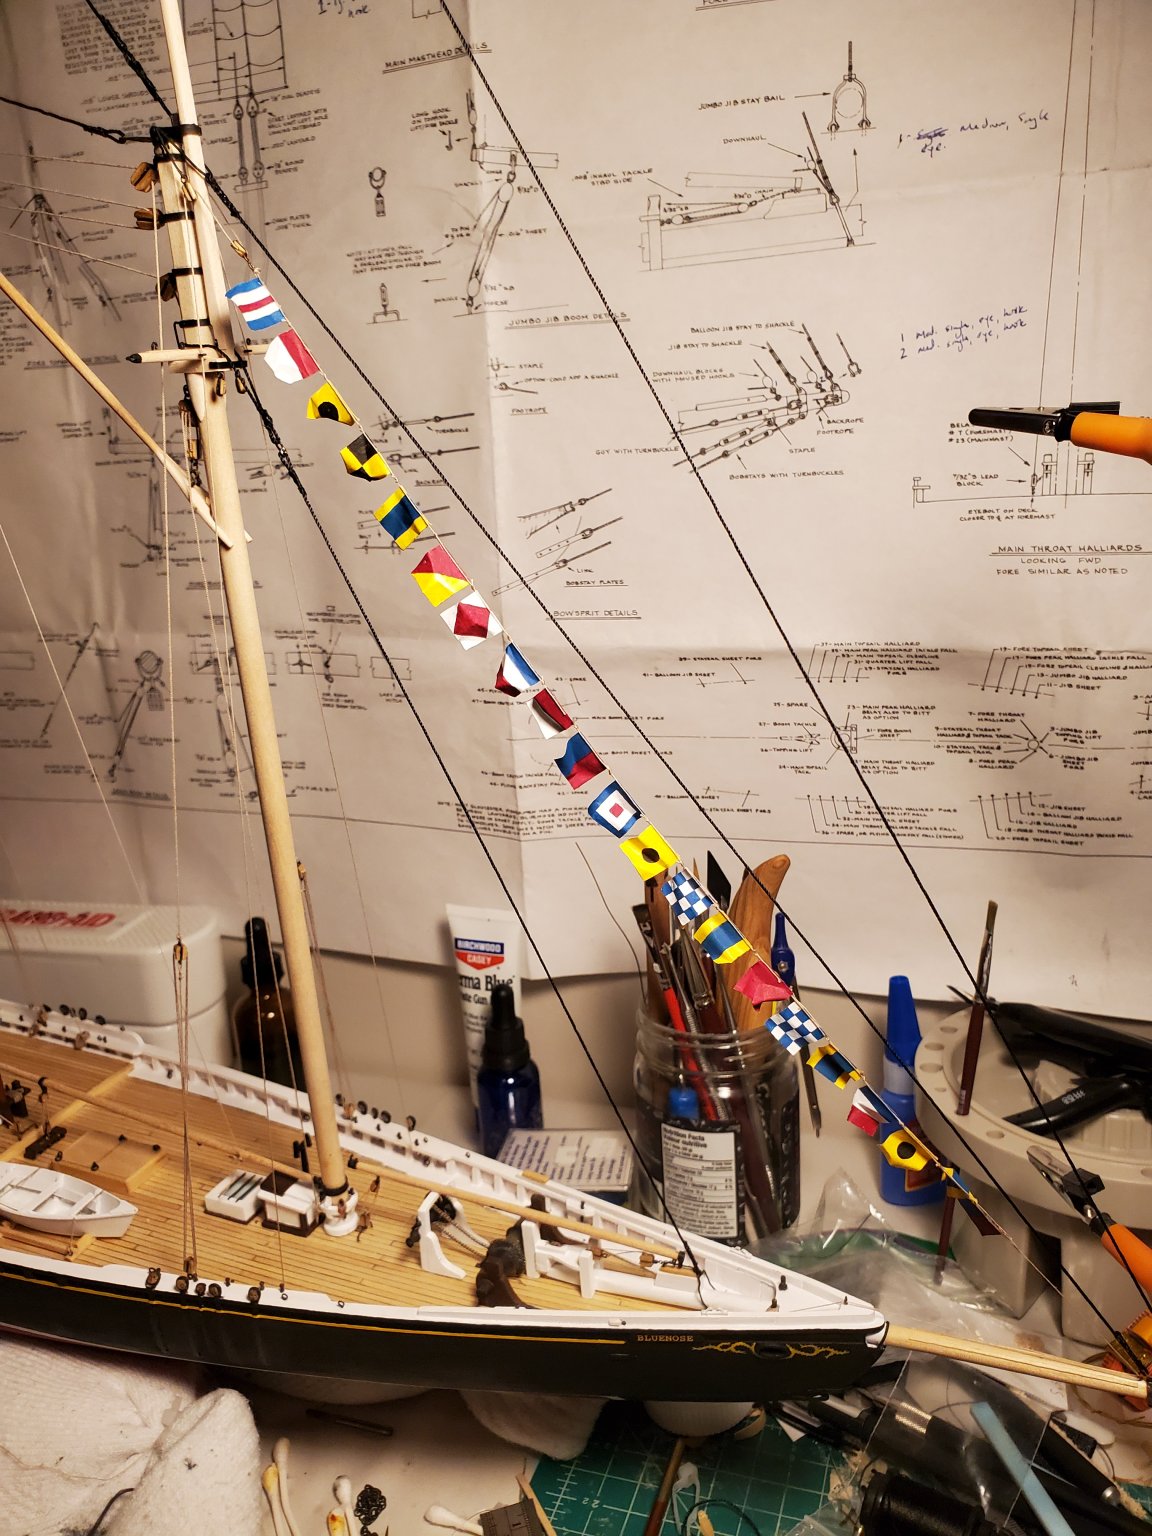
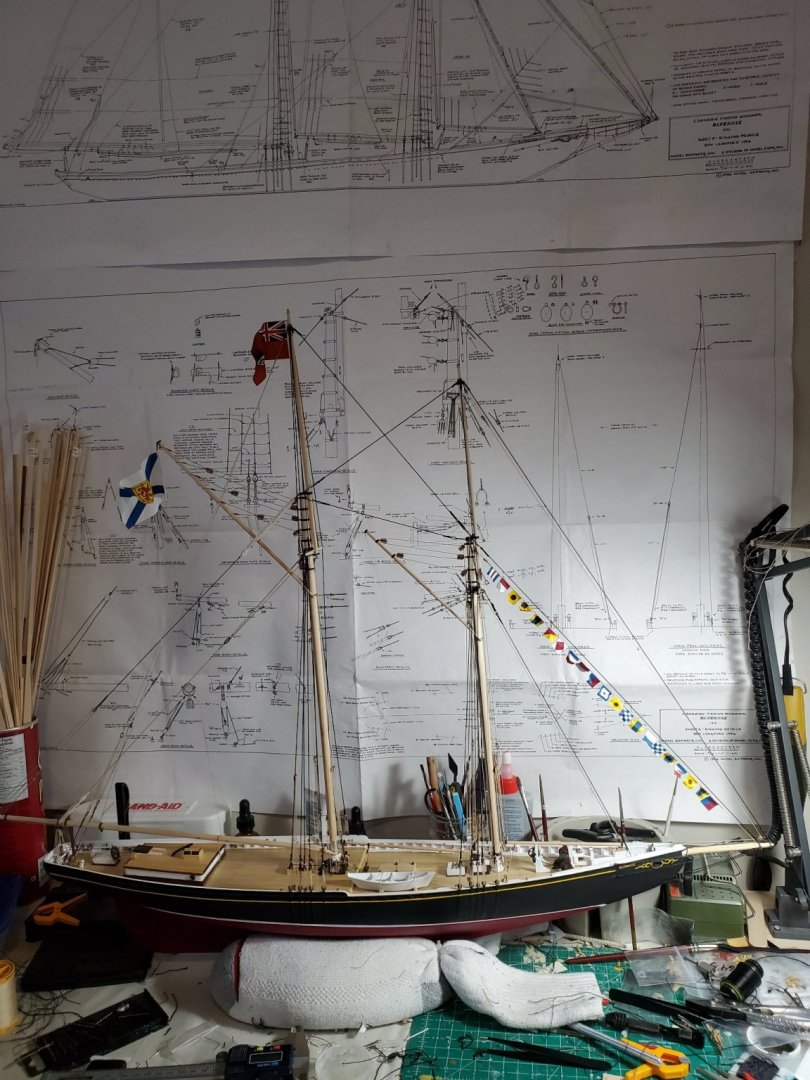
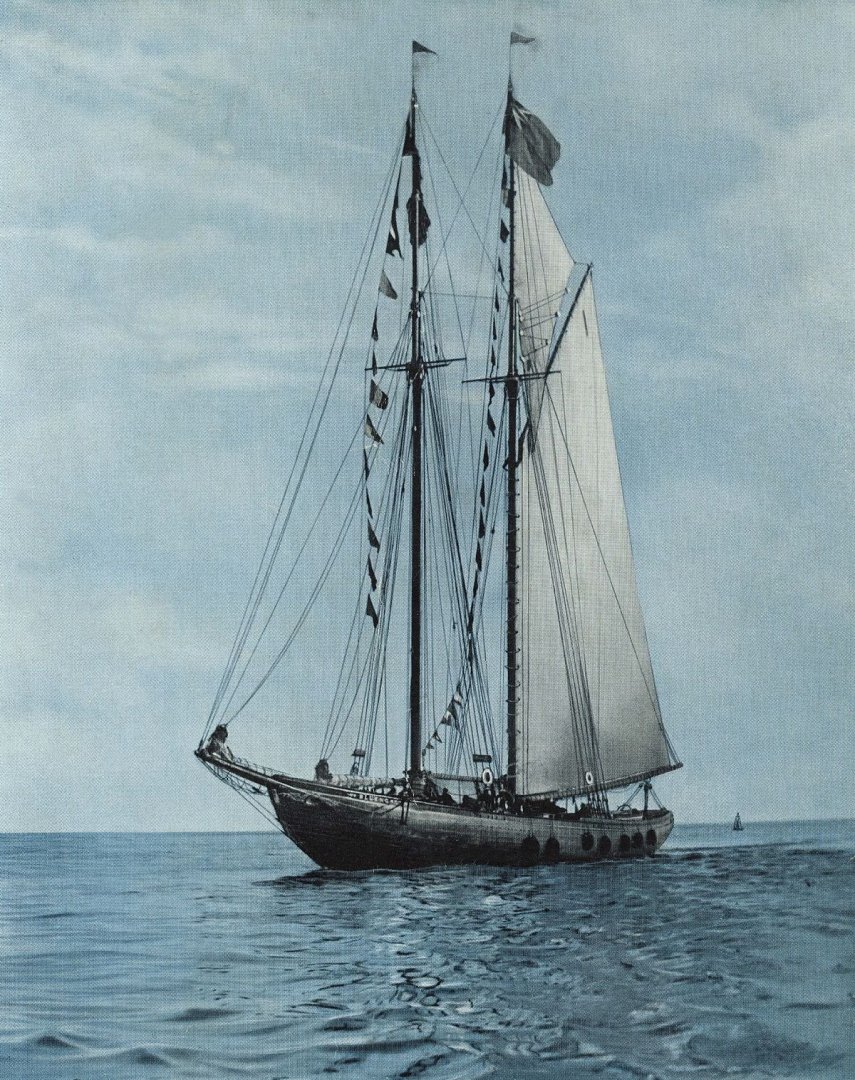
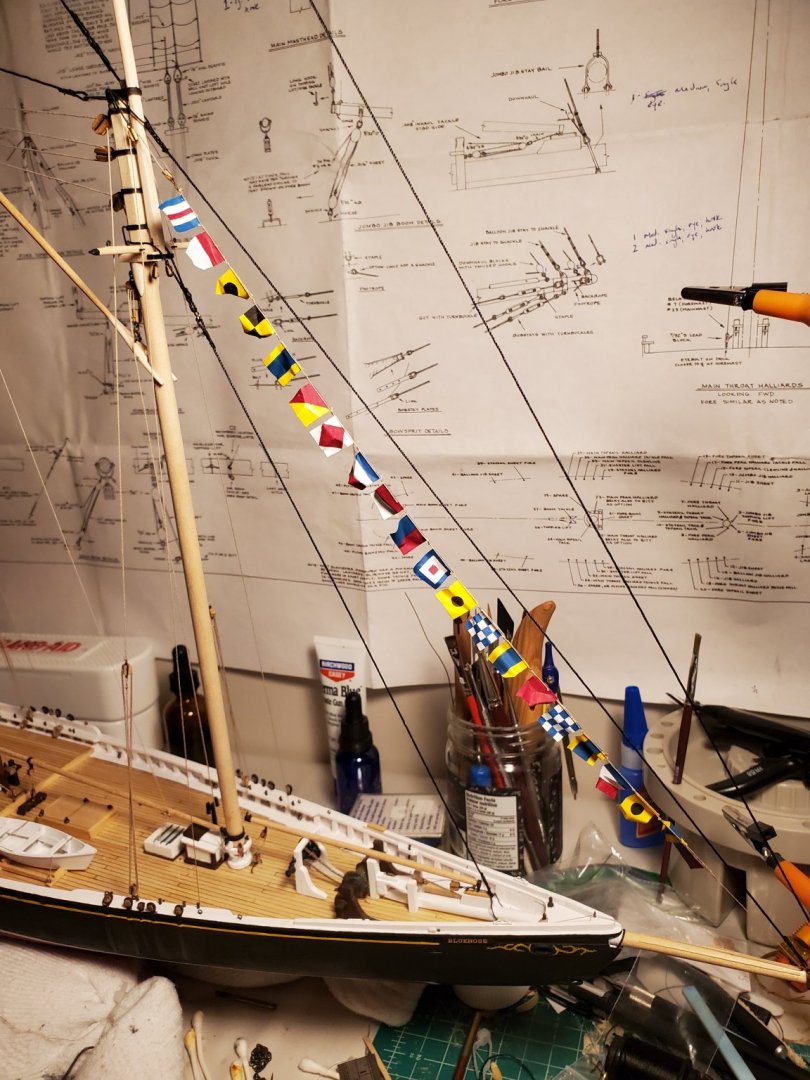
Work continues on the Bluenose. For everyone's reference, here is a photo of the original that has informed some of my choices in how the model has turned out so far: I am not trying to precisely emulate the image, but rather used it as a guide as I continue to work on the model. My intention was to give the model a post-race kind of appearance, with the ship dressed and as a result, I initially chose to run my string of signal flags up the foremast's flag halyard, creating this appearance: But to be completely honest, I wasn't happy with how this made the model look as the flags are mostly hidden if viewed from the starboard side of the schooner so I pulled them down and considered my options. In the inspiration image, there does not appear to be much appreciable rhyme or reason to where the crew put signal flags when dressing the ship, so I thought on this for a while before arriving at a different solution... ...which I am far happier with. The model looks dressed and the flags are visible from port and starboard. I put way too much work into those for them to be hidden away! And here's the model as of late last week. I'm currently working on the downhauls and halyards in a few places, and then it's on to shrouds. When those are done, it will be time to mount and display the model... it's hard to believe that the end is this close.

- 38 replies
-
- 7
-
-
- bluenose
- model shipways
- (and 1 more)
-
It was a conscious choice. There's a specific photo of the schooner that I've been drawing from and its flag arrangement is very similar. Thank you for the kind words; the signal flags were quite a bit of work but I feel will be worth it once the model is finished.
- 38 replies
-
- 2
-
-
- bluenose
- model shipways
- (and 1 more)
-
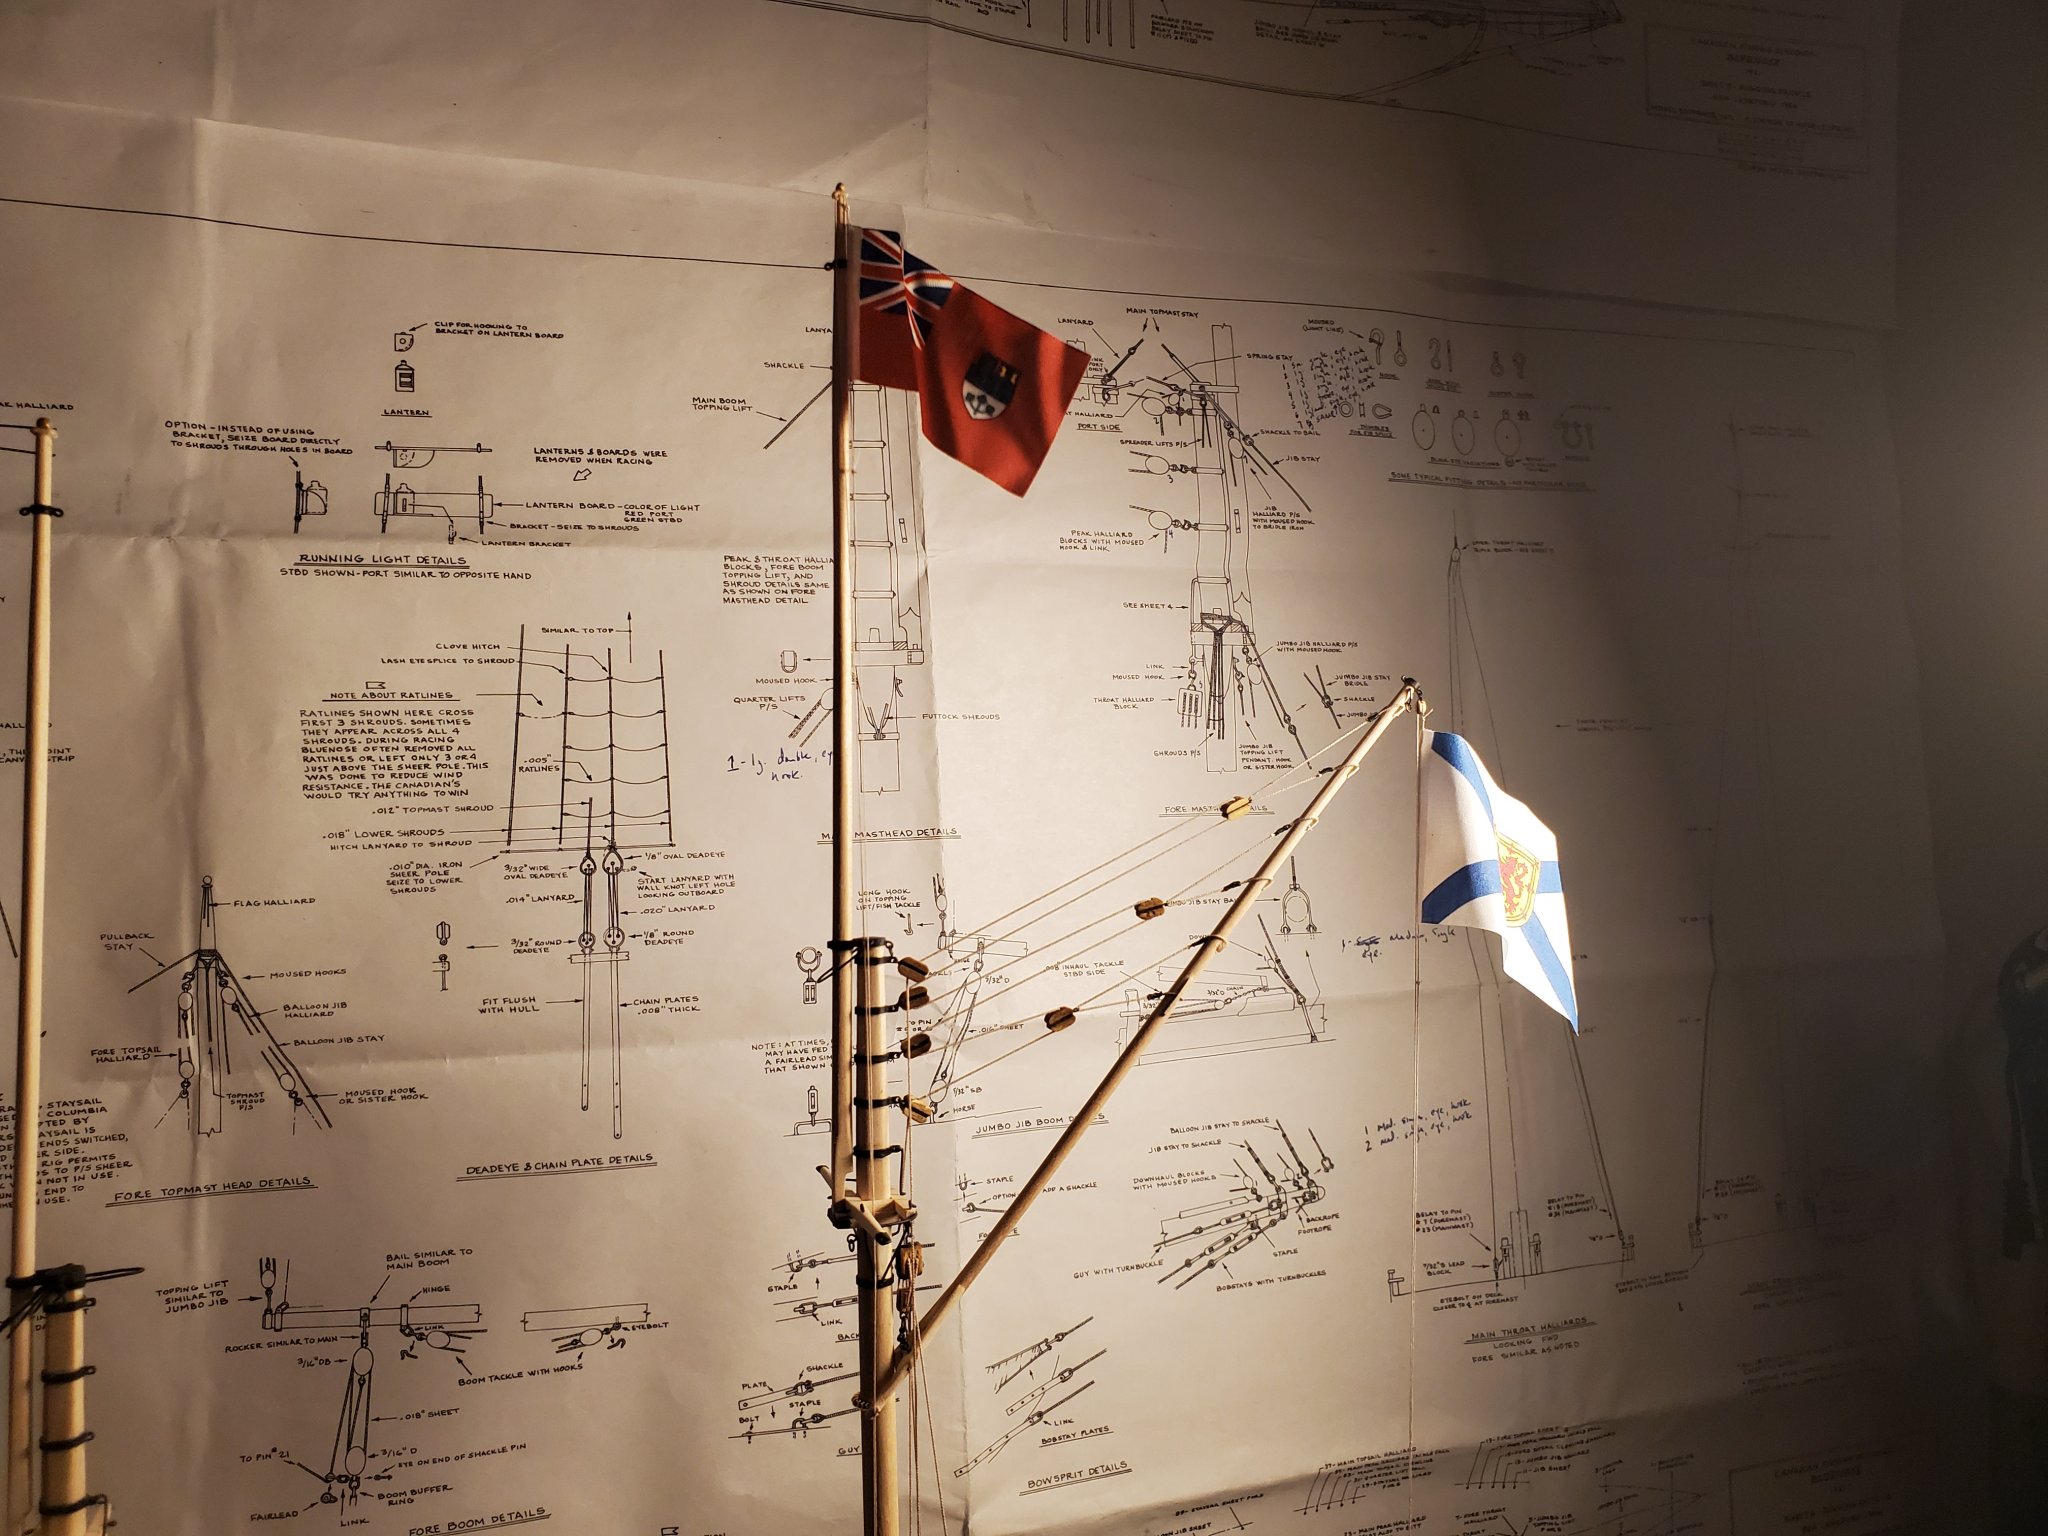
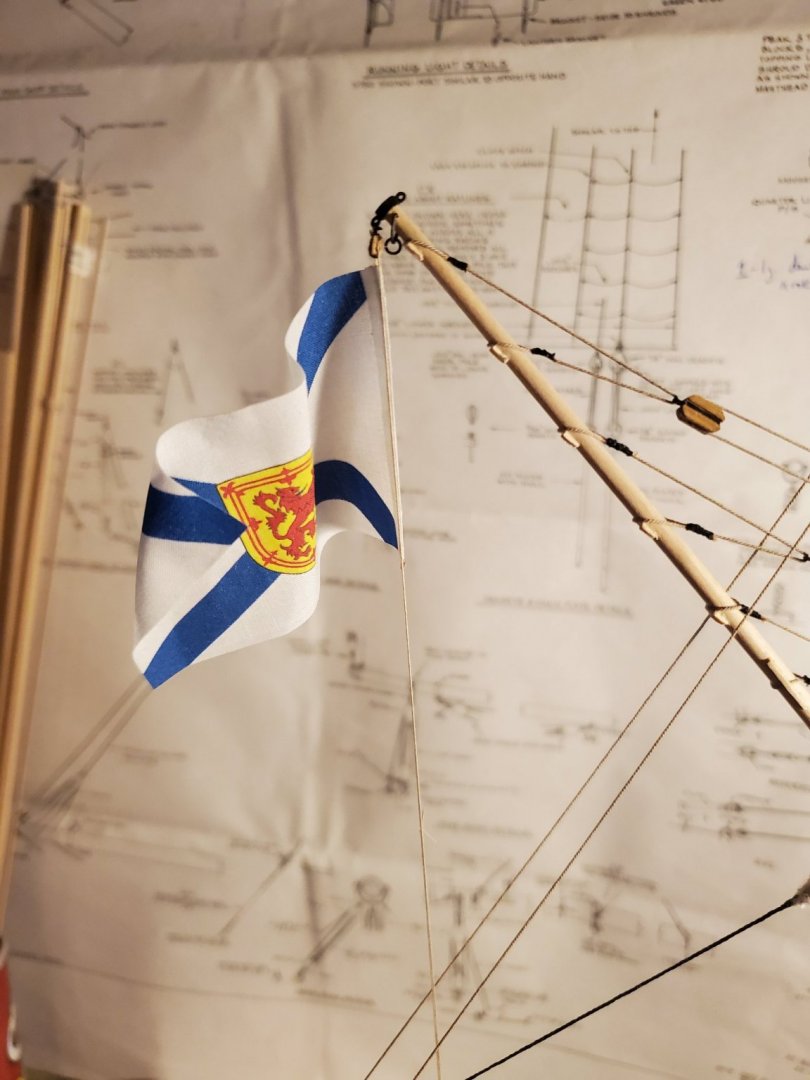
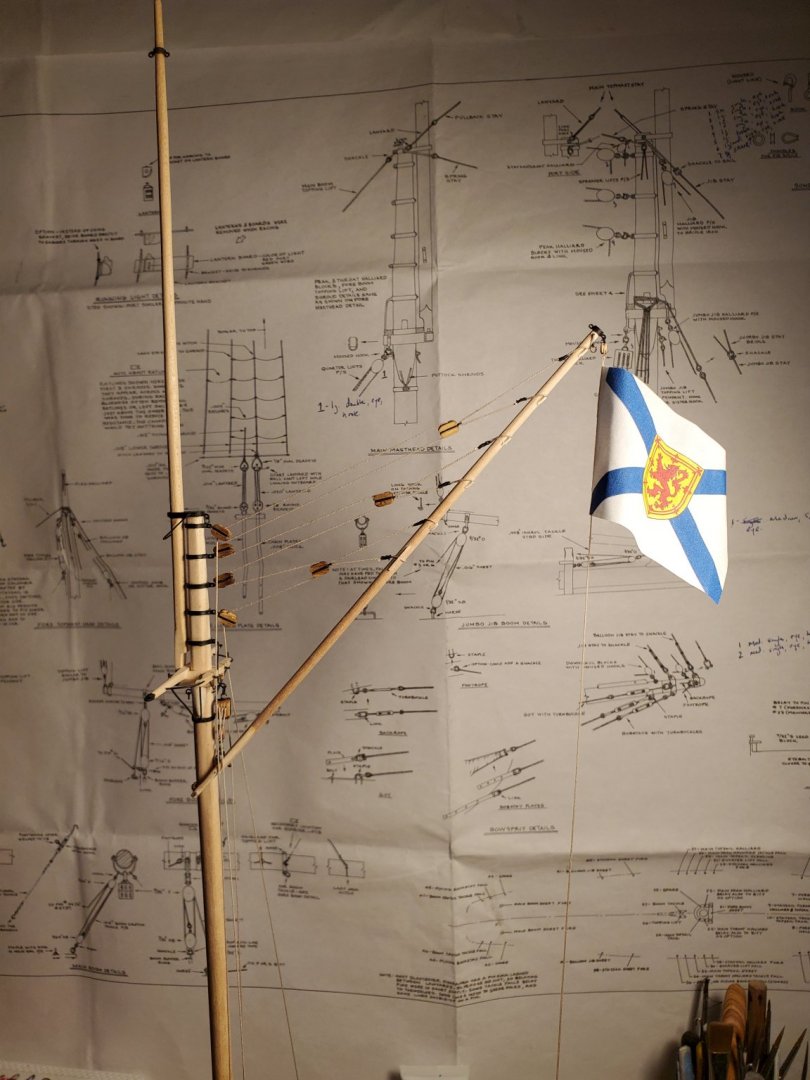
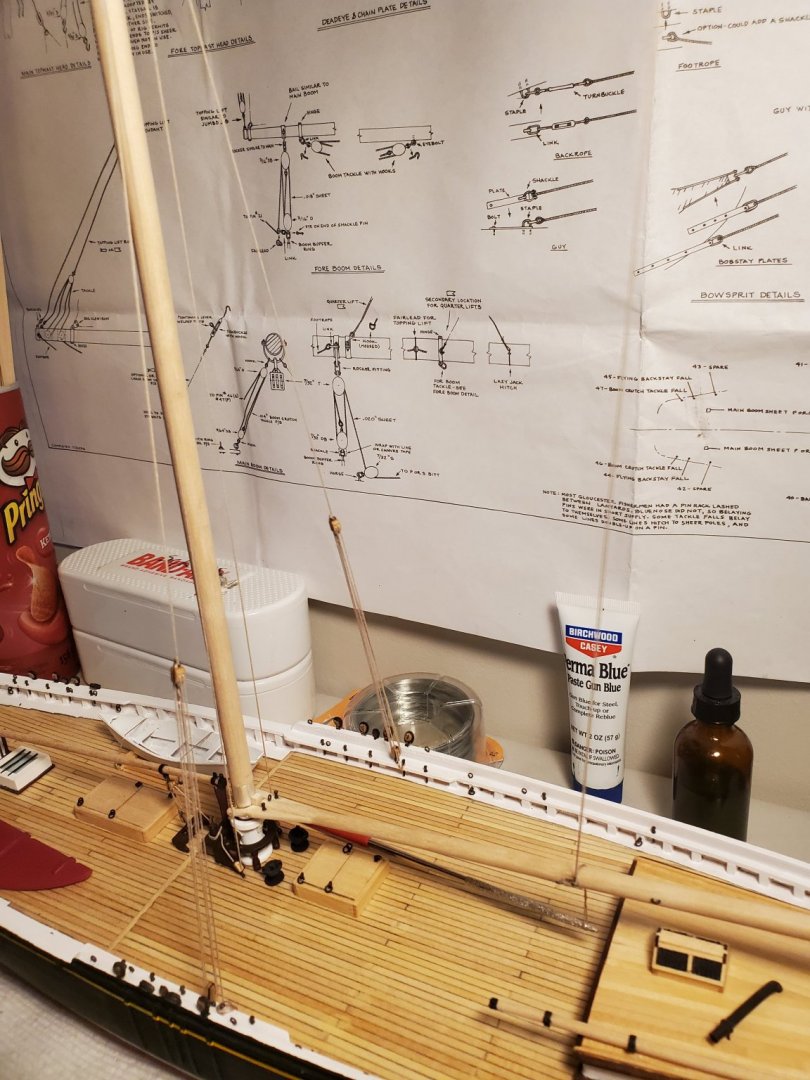
I'm still chipping away at the rigging. I've spoken with other builders in the past that find this the most tedious part of the model, but I find that so long as I give myself other things to do to take a break, it's not so bad (though I rather suspect I would change my tune at a great rate of knots if I was doing anything with a full ship rig). I've found the Model Shipways plans to be a bit confusing by times and this has guided me to make a couple of mistakes that required going back into the model and fixing earlier oopsies, but I am glad that I did. This has taught me once again to slow down a bit and draw out how a piece of rigging works so as to confirm understanding before seeking to recreate it (one of these days, the lesson might even take!) In addition to this, the kit came with what is quite possibly the ugliest version of the Maple Leaf that I have ever seen and between this and the fact that the Bluenose never flew it, I opted for some after market bunting to toss aloft. Modern photos of the Bluenose II show her flying the national flag off the main gaff with a much smaller Nova Scotia flag flown at the top of the main mast. I've seen at least a couple of photos of the original with the national flag at the top of of the main mast and have sought to replicate this. The Nova Scotia flag could be viewed as somewhat oversized, but I like to believe that if the original crew had access to a flag that big they'd have flown it as we're all proud Nova Scotians. Through this process I have been getting increasingly good at tying some basic knots with tweezers, chiefly the reef knot and bowline. It really amazes me how each additional line seems to add something new and seemingly important to the model-- it really feels to me like each part brings this project tangibly closer to completion.


- 38 replies
-
- 5
-
-
- bluenose
- model shipways
- (and 1 more)
-
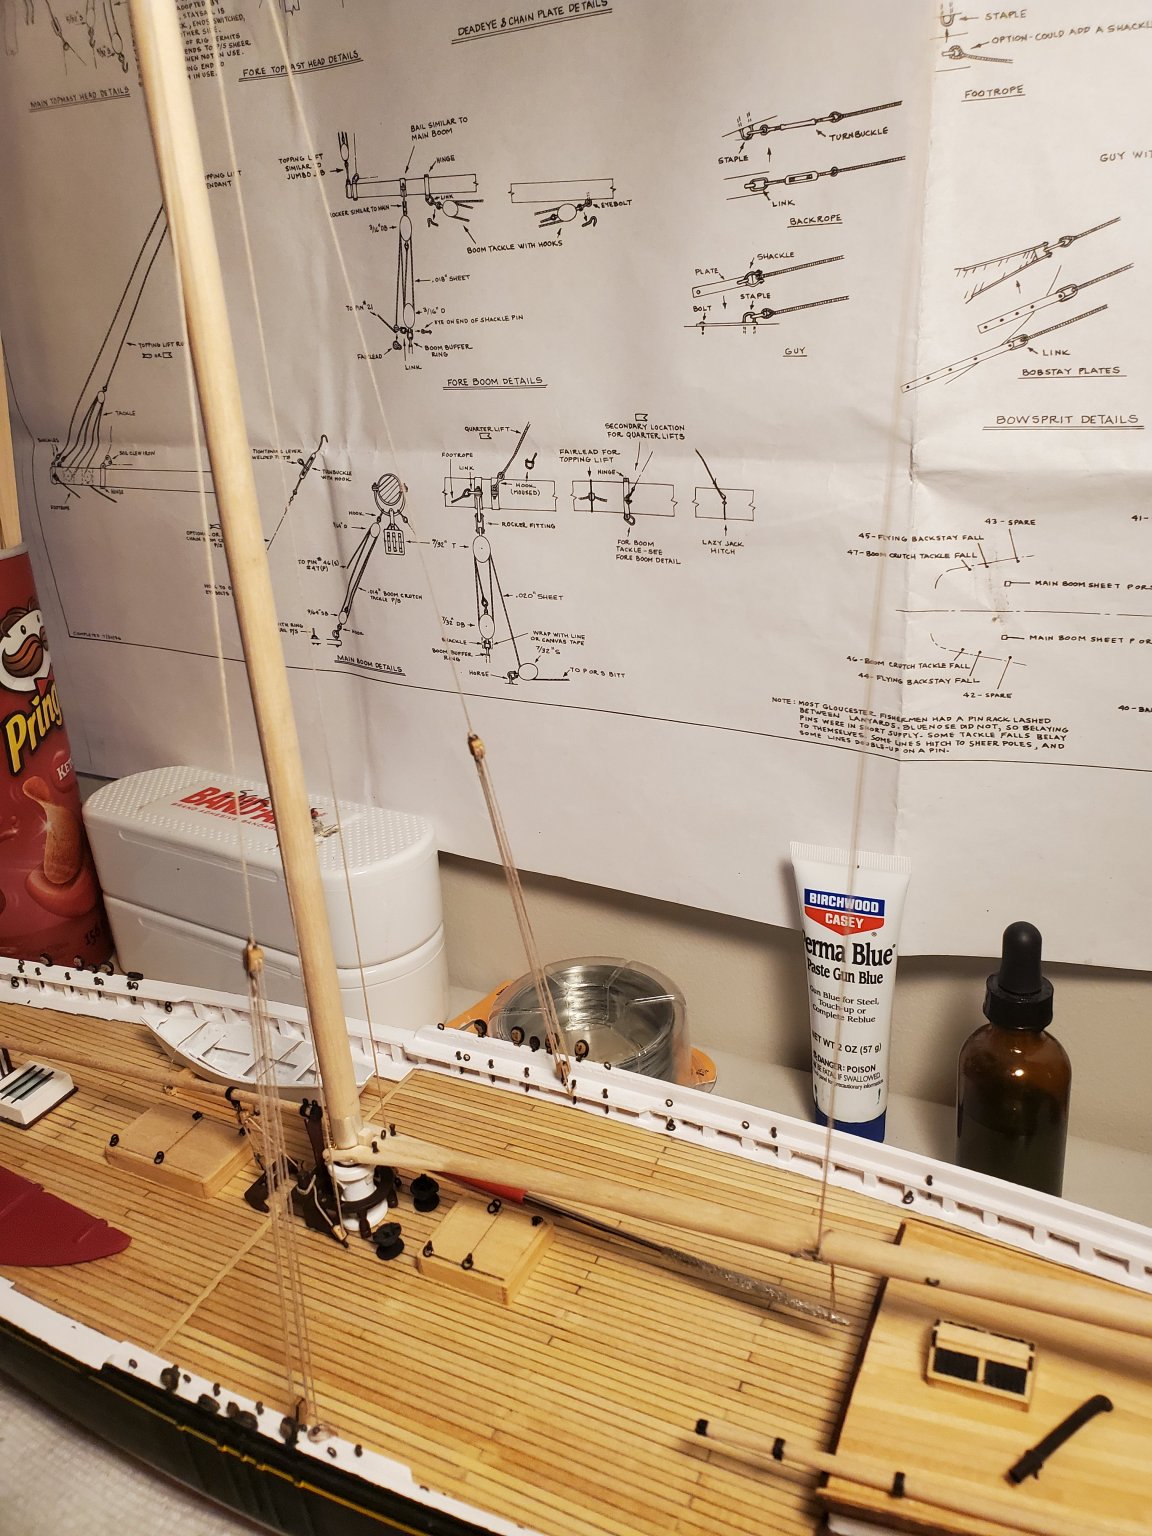
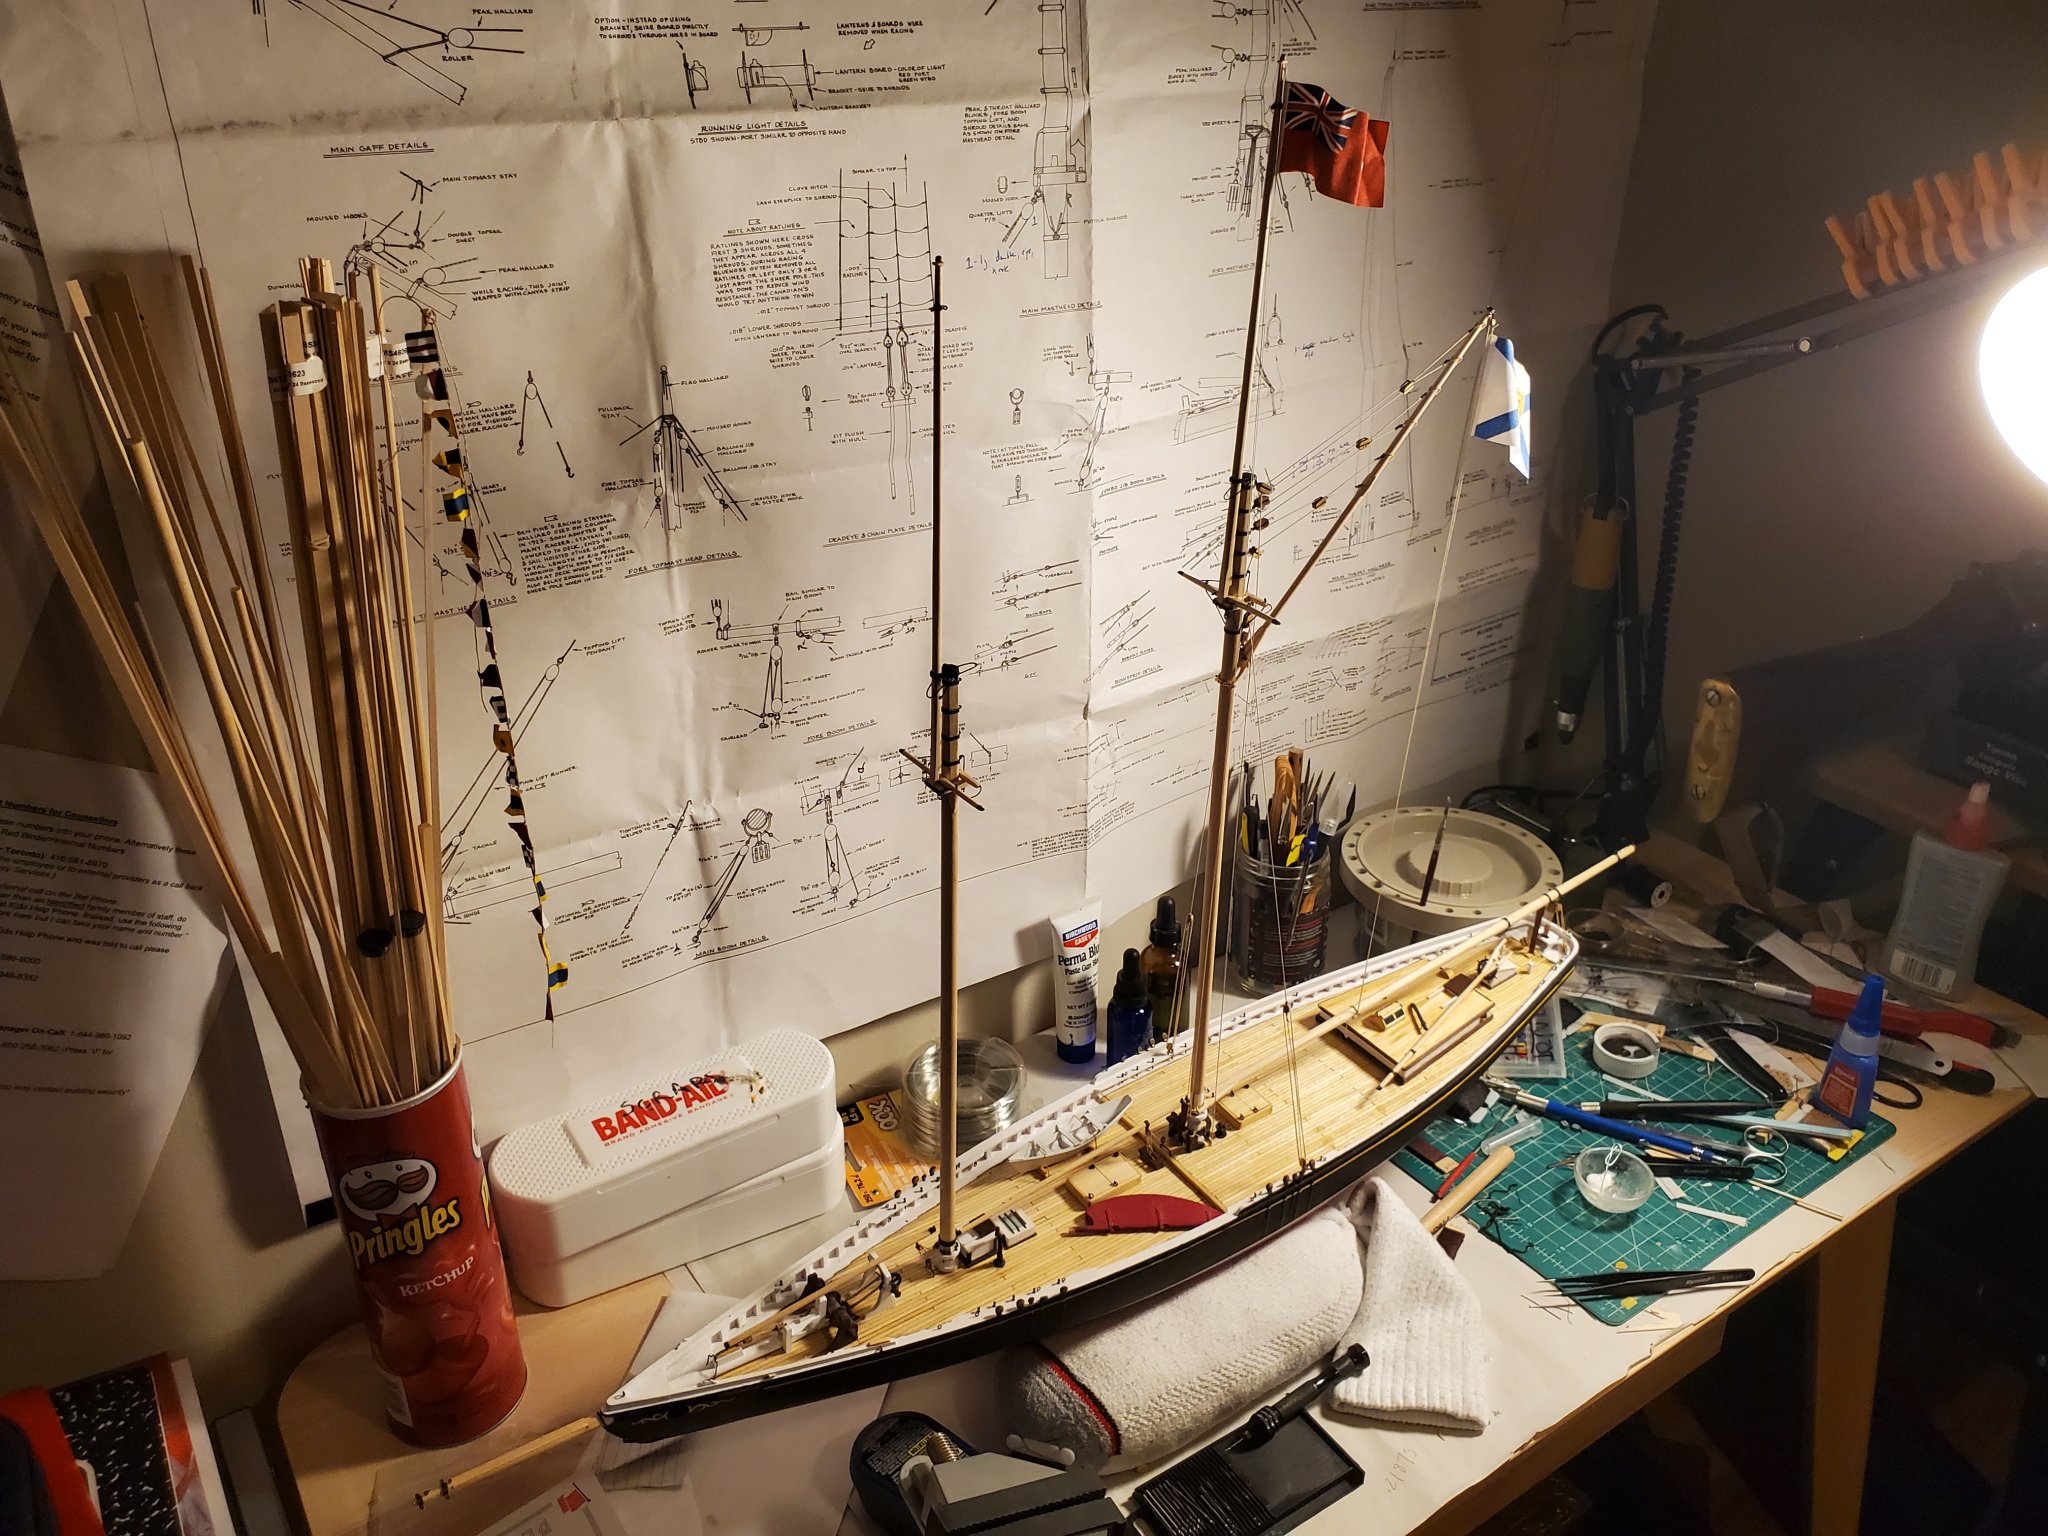
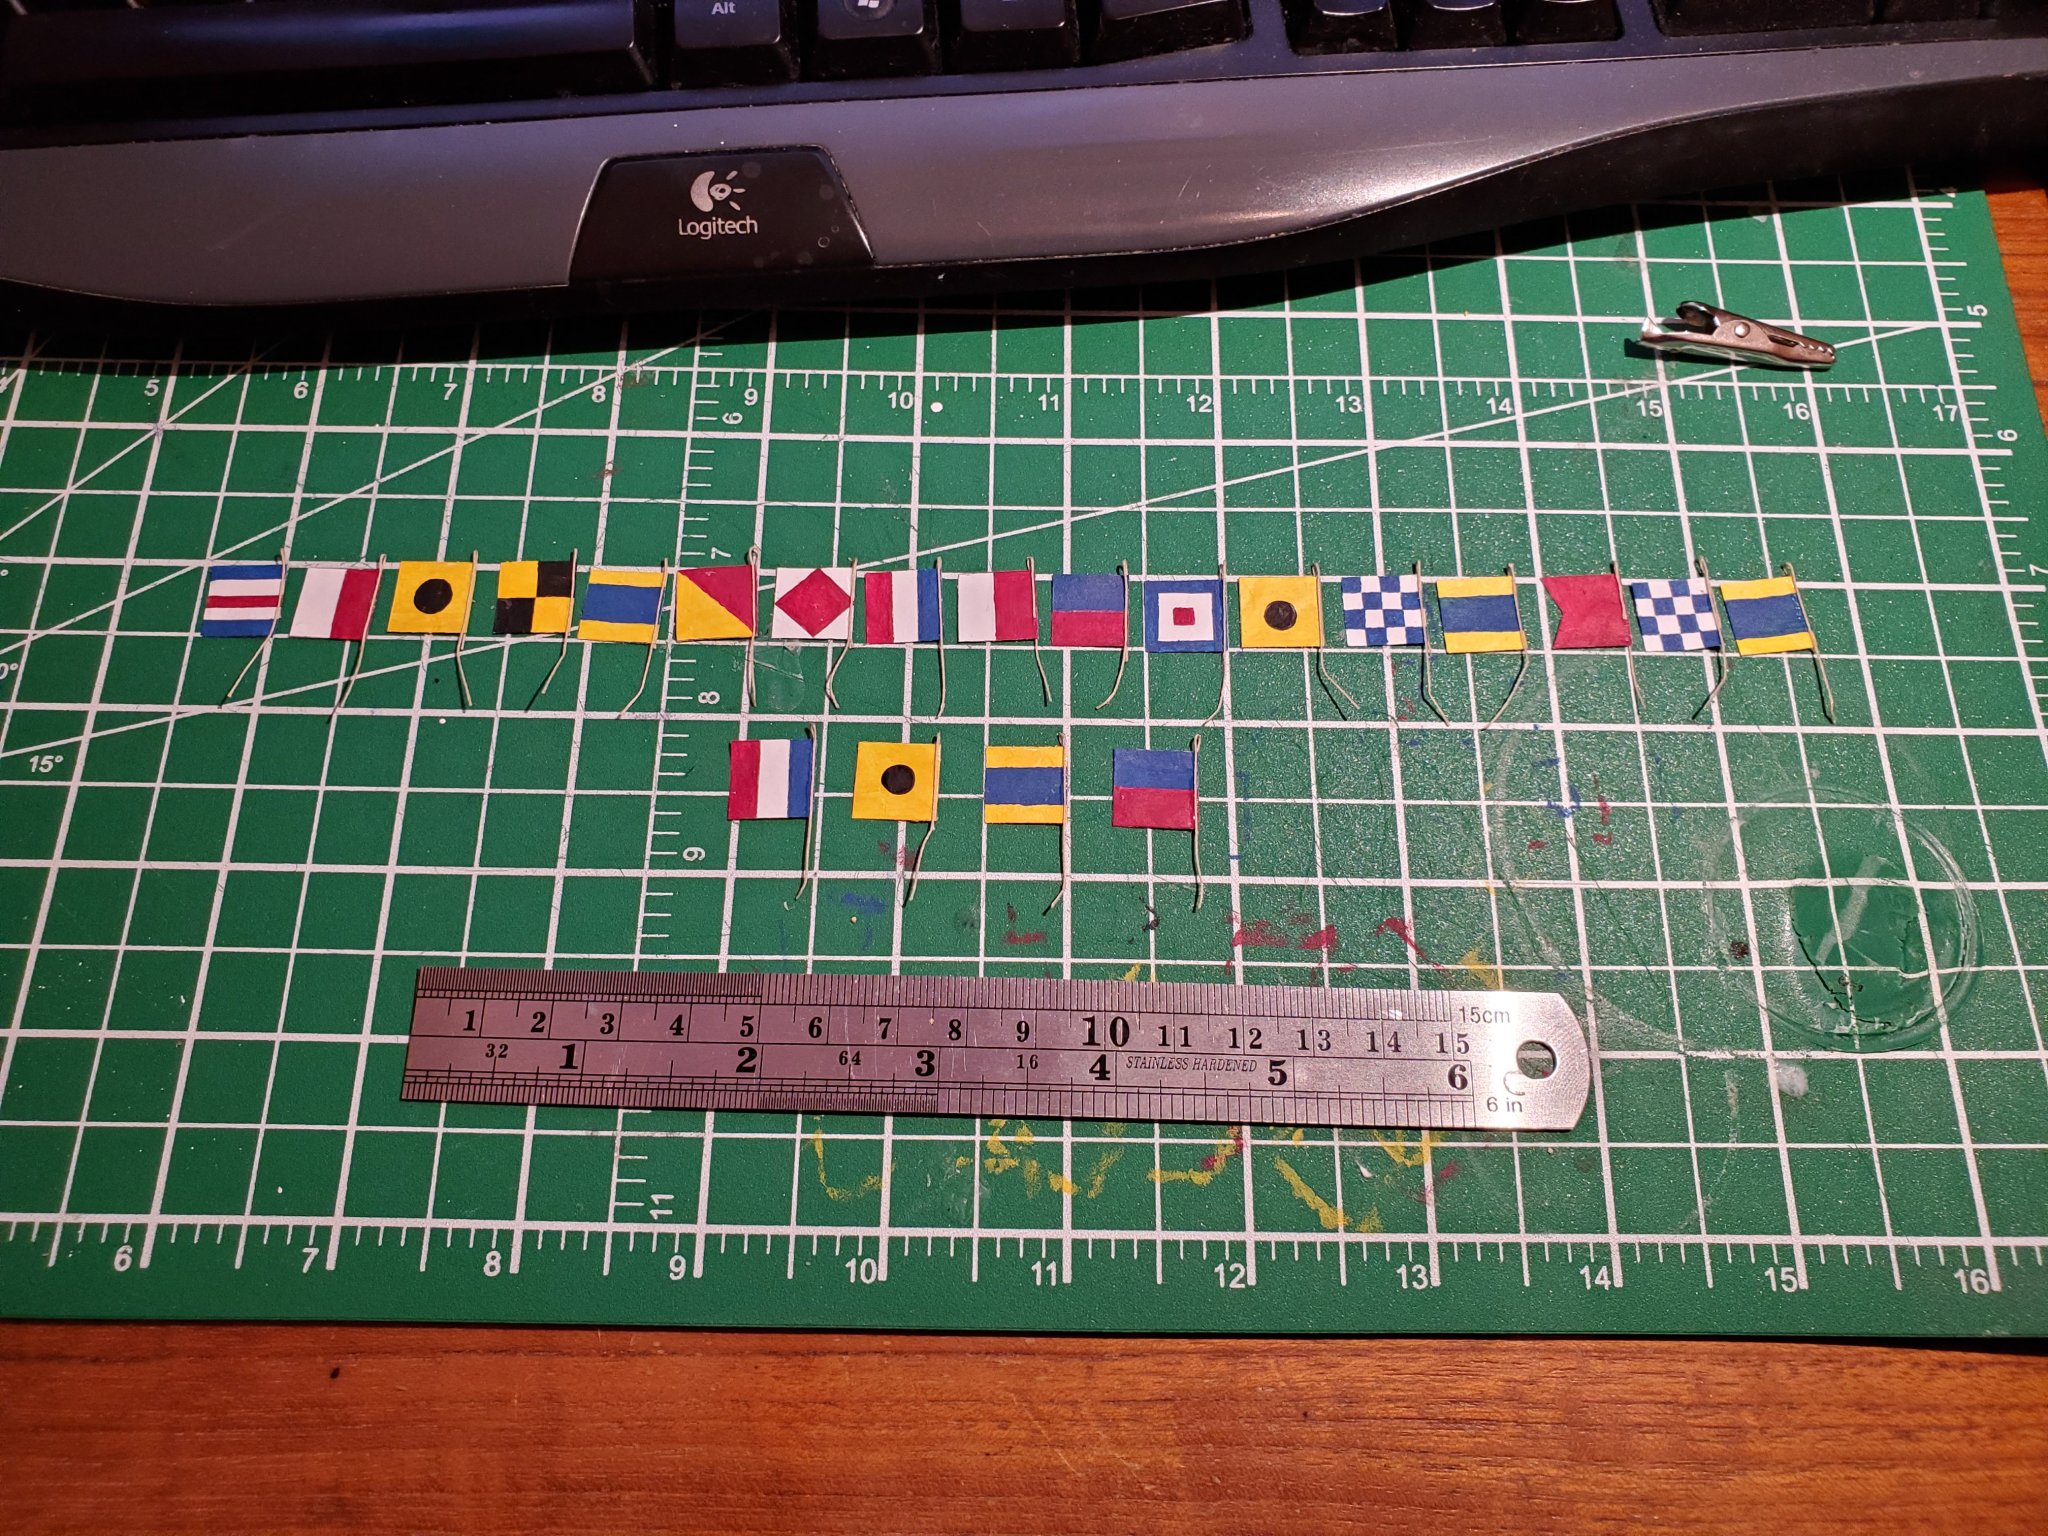
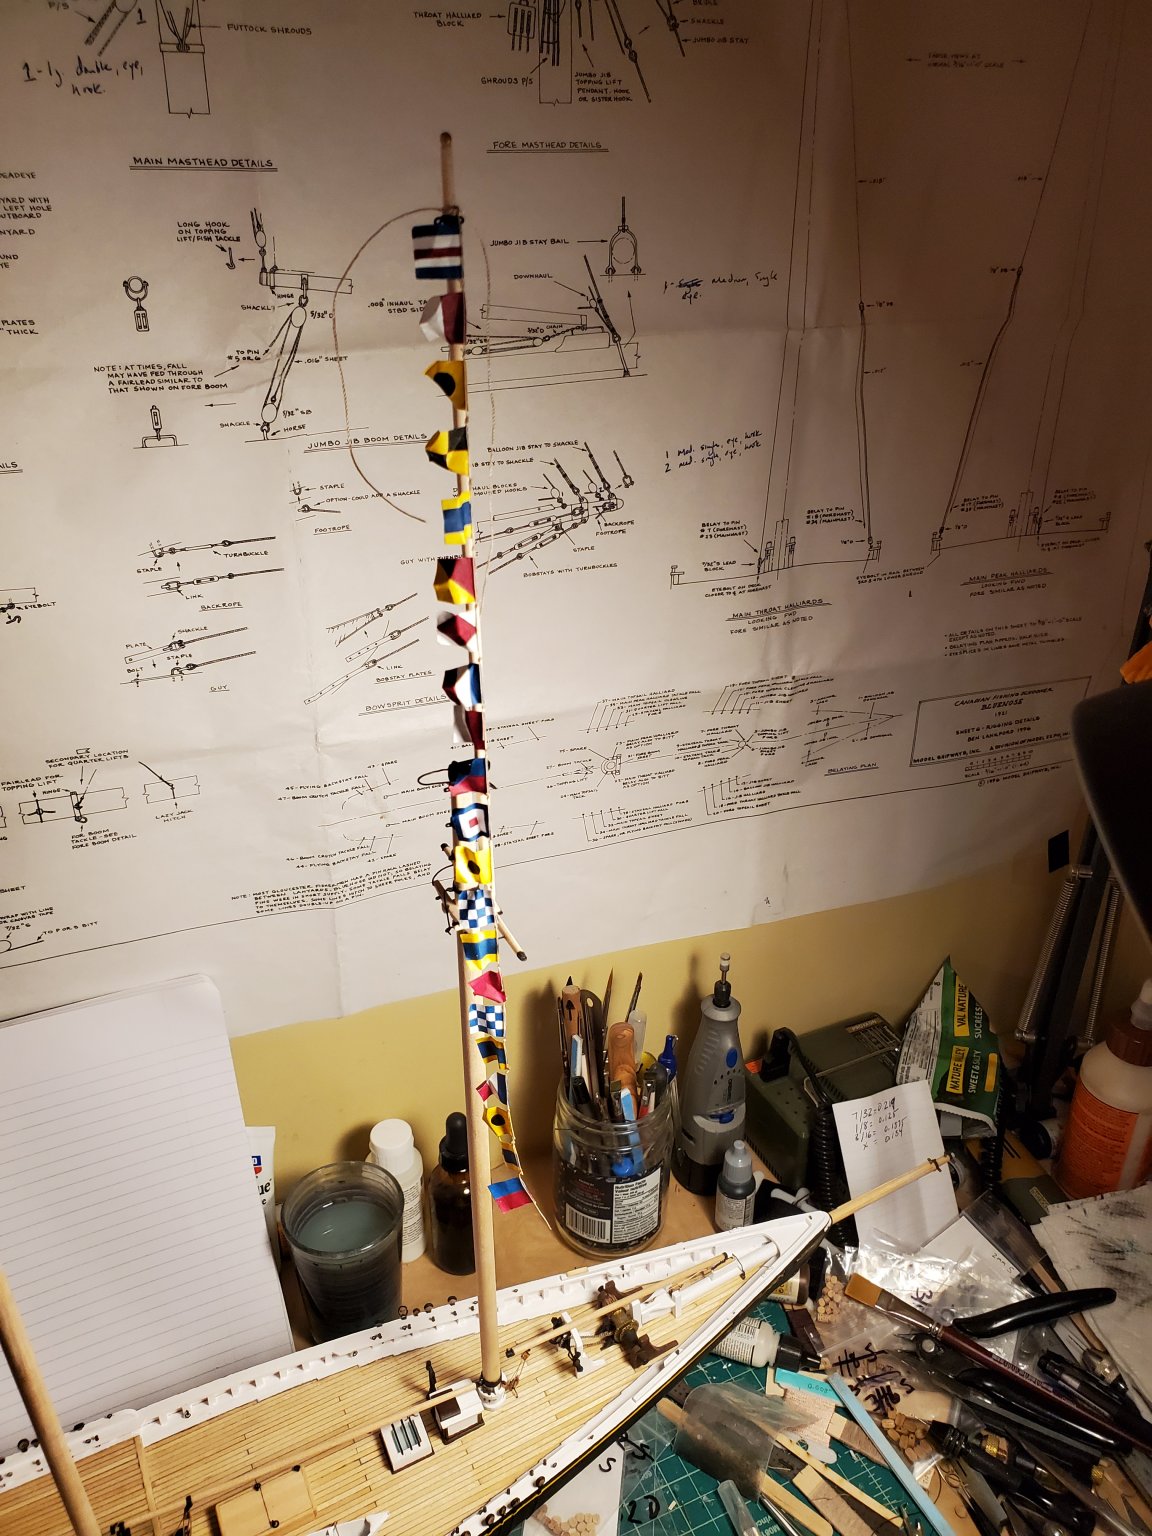
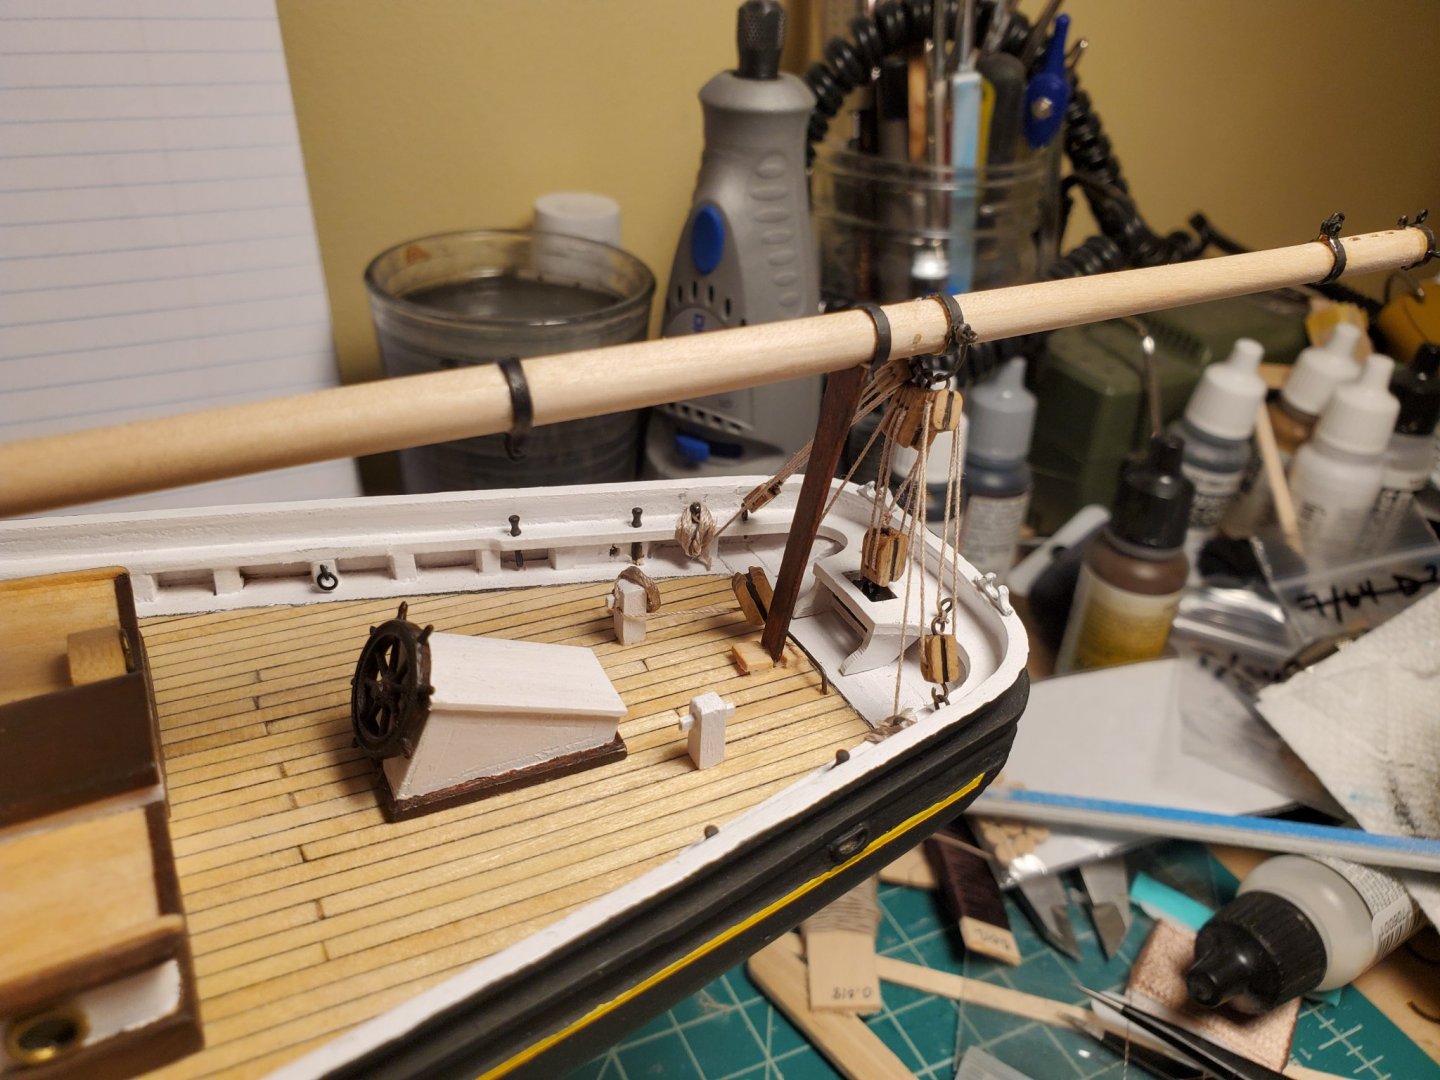
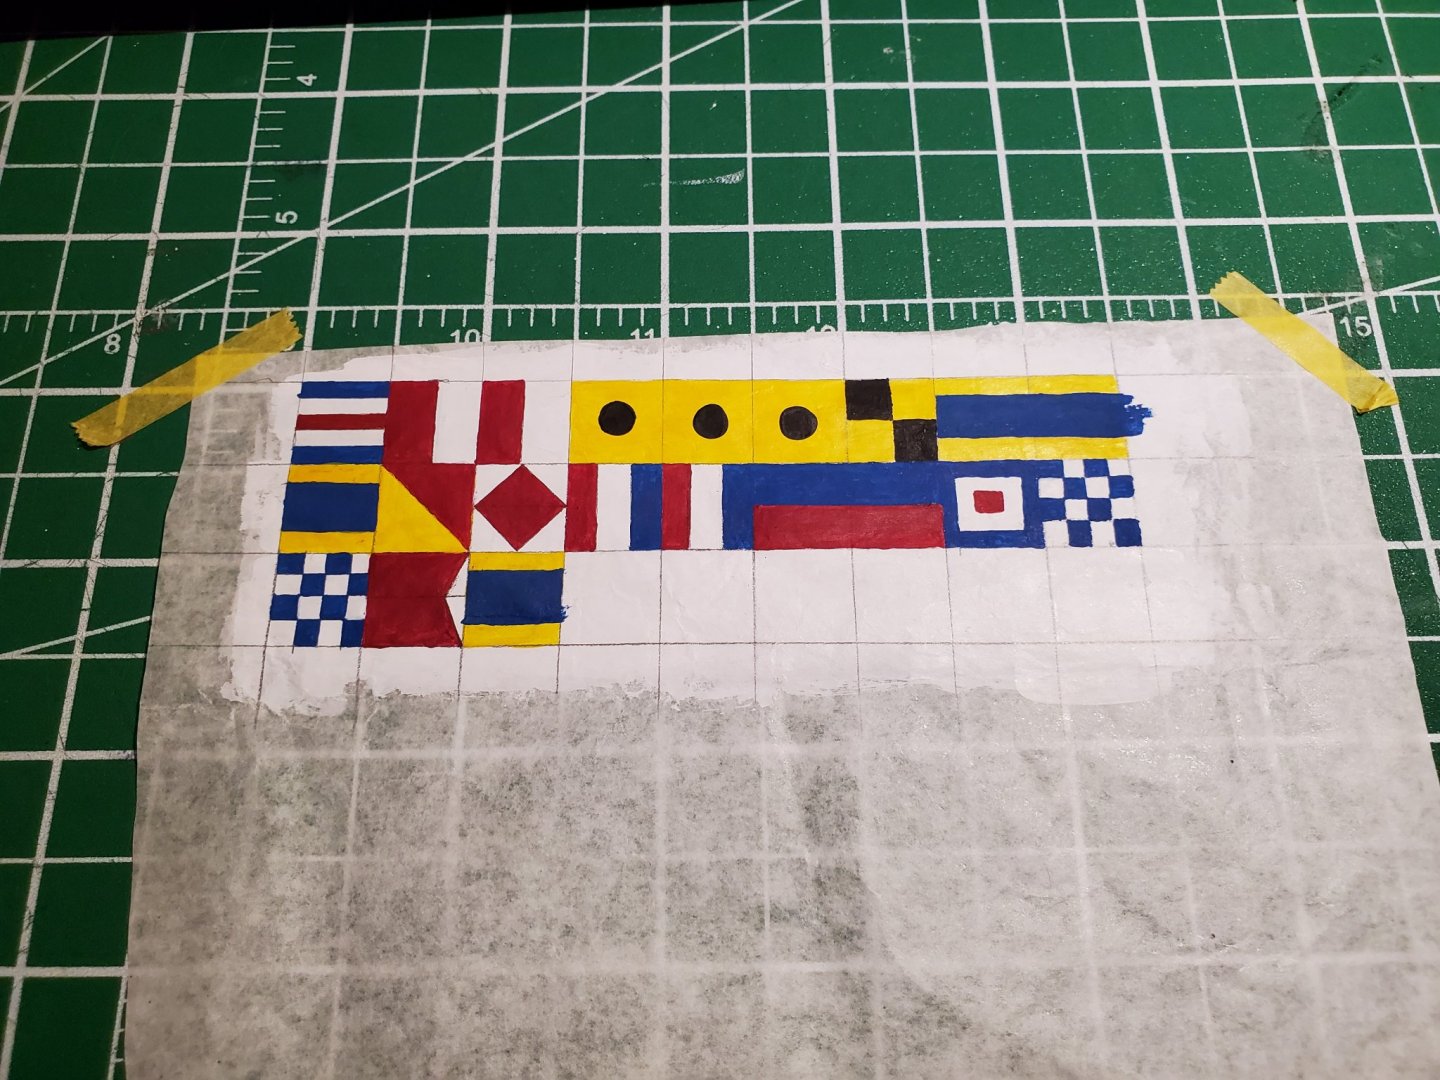
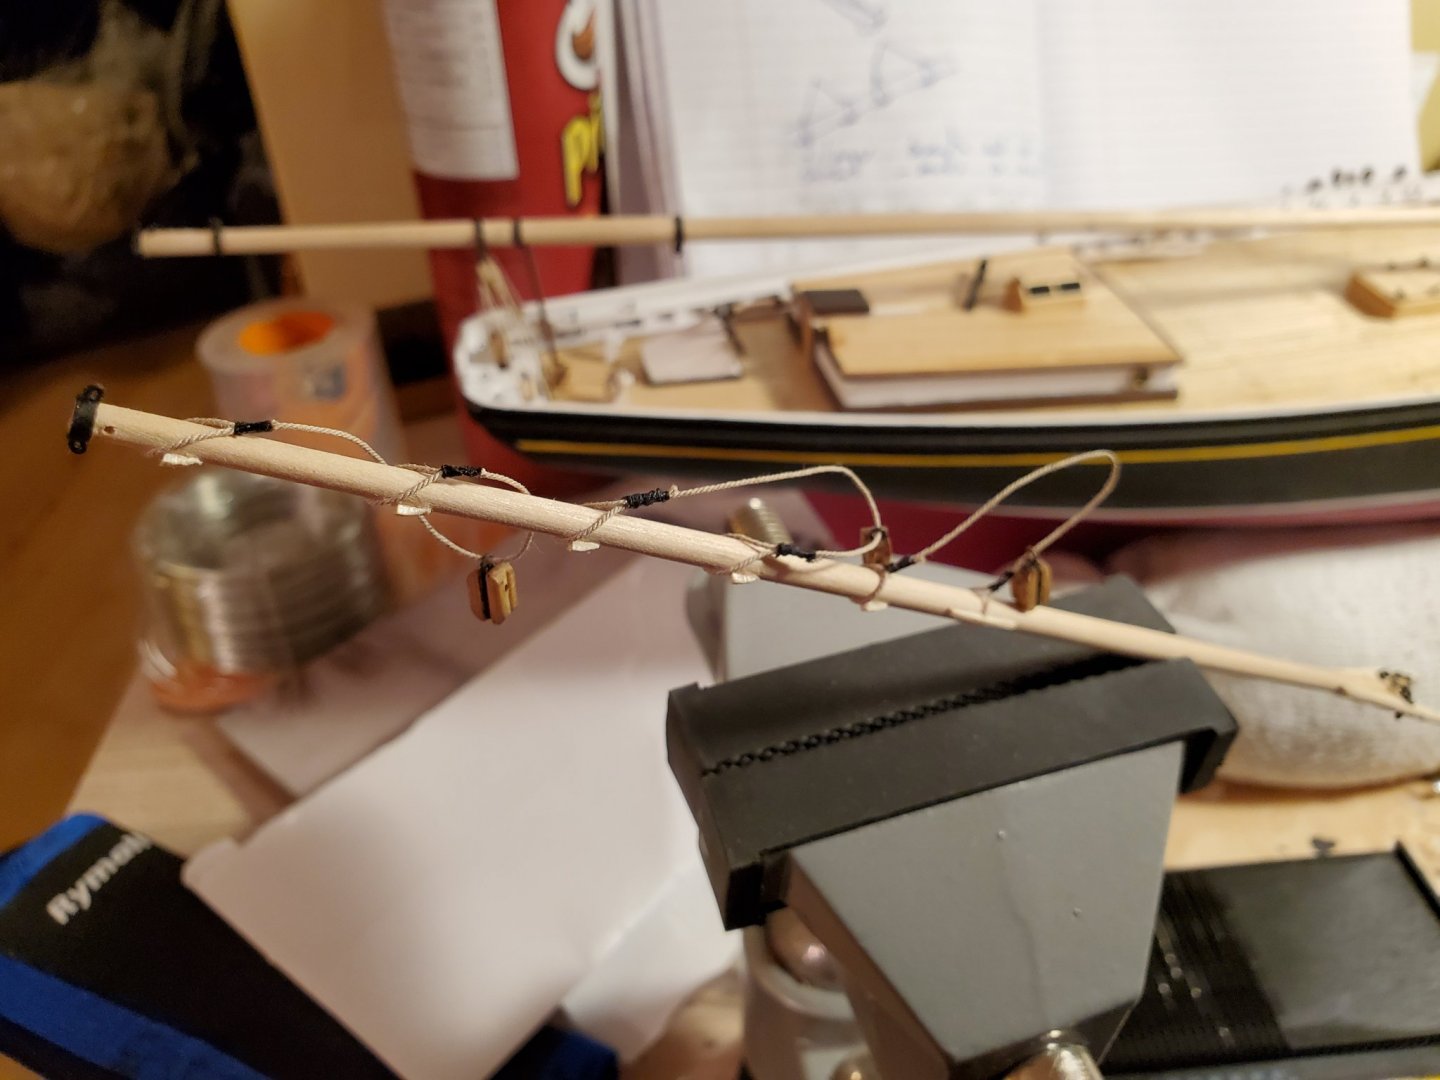
I've been doing a lot of work on the Bluenose over the course of the past few months. Before getting started on the rigging, I decided to install the masts, but because of how I went about preparing the sockets that they would sit in, this turned into a substantially more challenging task than originally intended. If I was smarter, or at least more experienced, I would have cut the bottom of the masts into square pegs to slot into a square hole and then carefully shaped and tapered the rest of the mast before installing the spreader bars and other hardware. This I did not do so as to make it easier to assemble the masts... but what this accomplished was to simply delay a present difficulty to a later date and so I spent a lot of time agonizing over how I was going to get the masts into the correct positions and square to the deck. Eventually, I realized that I only really had to do make sure one mast was aligned both fore and aft and port and starboard-- and then use that as a reference point for installing the other one. I installed the foremast first and used a jig to help align it: At this stage I went about starting the rigging with what was included in the kit. It really didn't look very good so I took the suggestions of a couple of other builders and purchased some replacement rope from Syren, and my goodness I am glad that I did. It is so very much better. I also went about creating some signal flags to run on the foremast flag halyard: These were painted by hand onto tissue paper and then cut out with a scalpel and metal straight edge. These can also be purchased in sets, but as I wanted to spell a message out and am also extremely cheap, I did not want to spend a pile of money on three sets of signal flags, most of which I would only use once. Once painted, I added string to create a loop at the top of the flag and a tail at the bottom to allow me to chain them together to spell a message. These were then secured to one another by means of a series of tiny reef knots, tied with tweezers. I have found that the extremely fine tweezers used for soldering computer components are invaluable in this kind of work. To get a sense of what the flags would look like on the model, I attached them with a temporary loop: And most recently I have gone about working on the main gaff before packing up the model for a move to our new home. And that is where things stand at the moment. I still have plenty to do, but it is nice to see the rigging under way. My plan overall is to do the rigging starting from the centerline and then radiate outwards so as to not drive myself insane trying to set up rigging with other bits of rigging in the way.


- 38 replies
-
- 3
-
-
- bluenose
- model shipways
- (and 1 more)
-
Model Shipways has a great starting kit, the 18th Century Longboat (designed by our own Mr. Chuck Passaro). I got skunked by a larger kit years ago, then came back to something smaller and easier like that kit. It contains some wonderful instructions on how to plank, and makes the process far less arcane. And forgive yourself your mistakes when you make them. Each one of them represents a learning experience, and nobody is going to judge you for learning here.
-
Planking can be really intimidating, but on Bluenose it's comparatively easy due to how gradual most of her curves are. Thank you for your kind words and there will be more forthcoming as the rigging is completed!
-
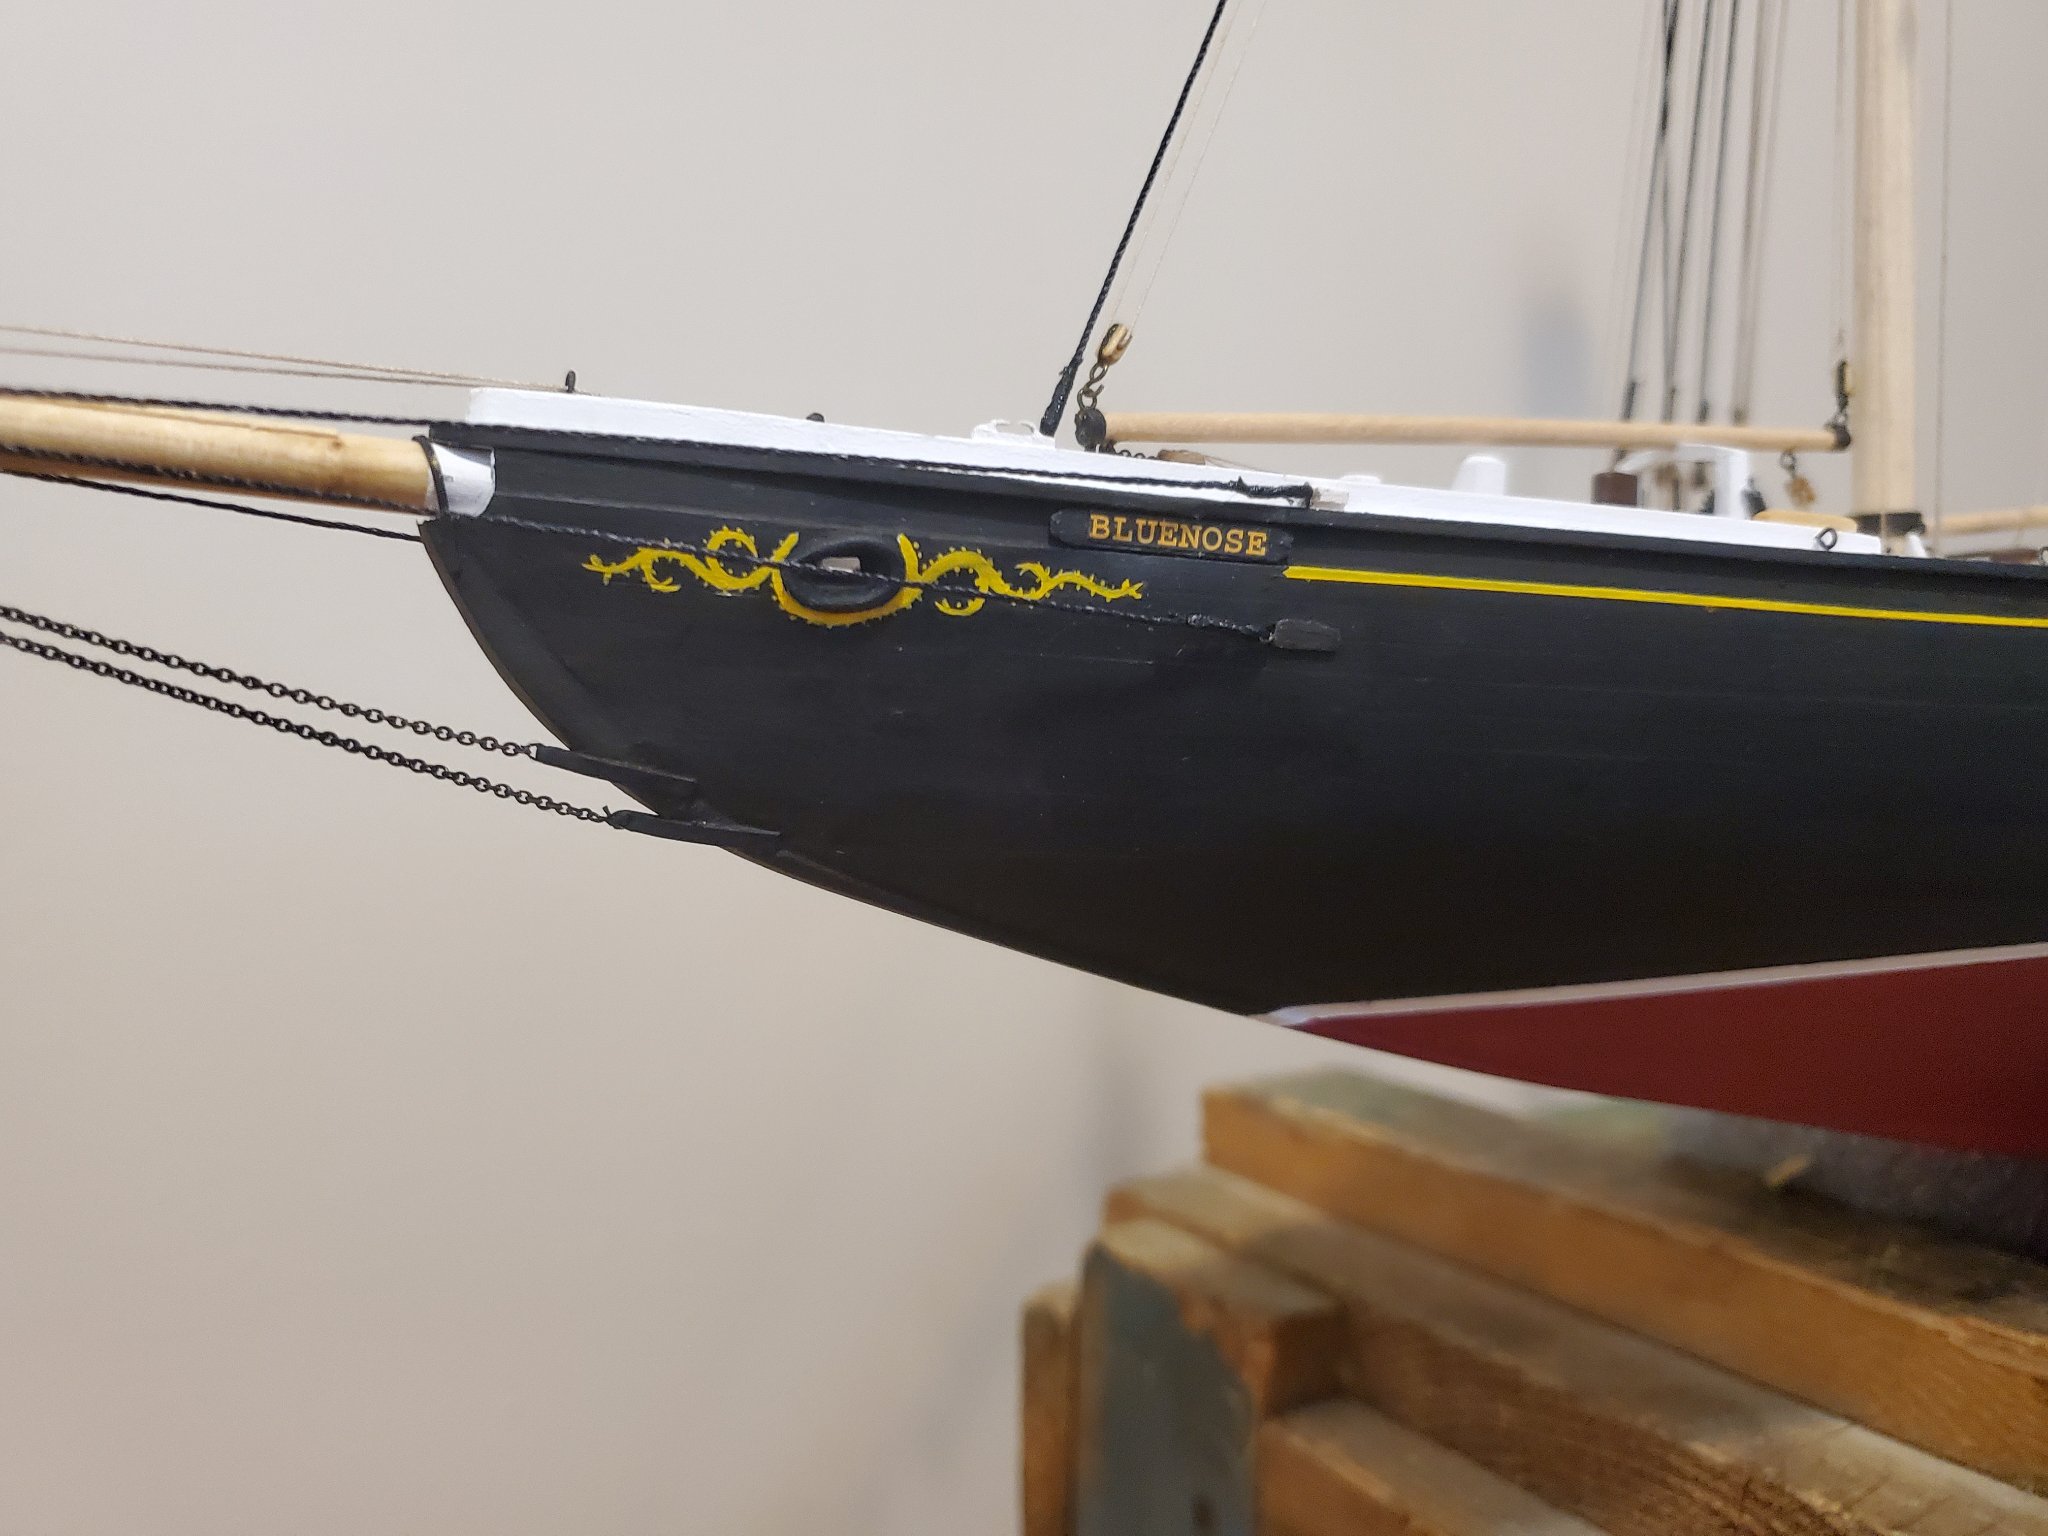
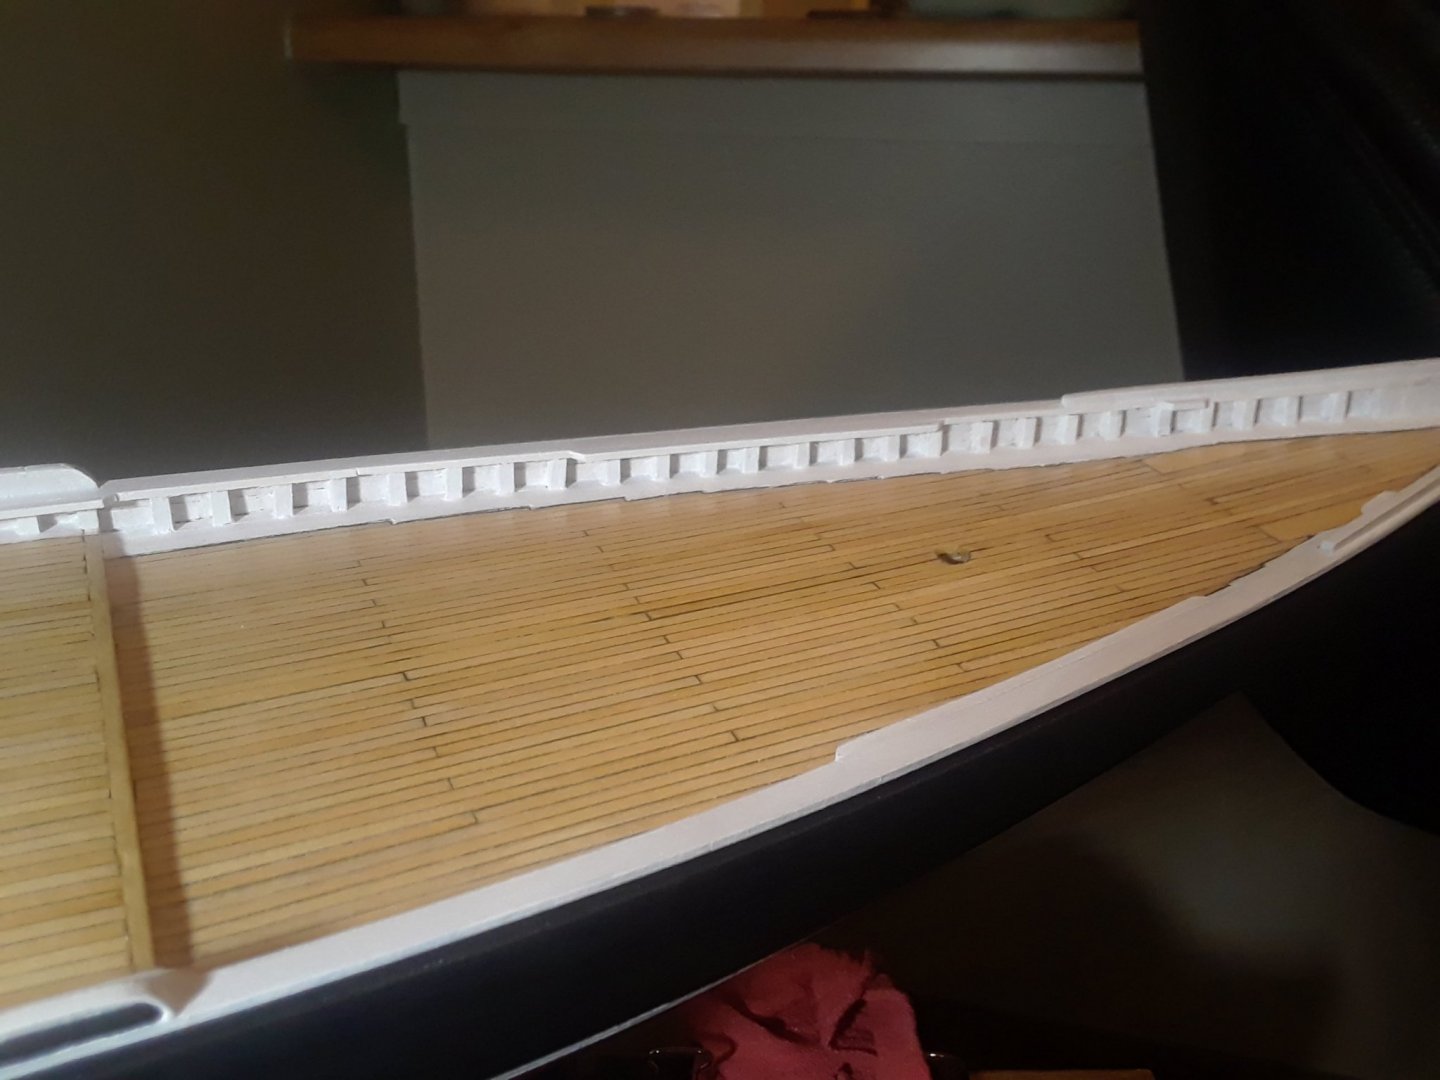
Double post! The caprails widen in places around the chain plates. This was added later on after the cap rails were installed. So an edit, with some content:
- 389 replies
-
- 1
-
-
- bluenose
- model shipways
- (and 1 more)
-
On mine I planked up to the top of the stanchions and then used the curve created by the top plank to create one side of a template for the cap rail. Next, I went down that line and marked out the desired thickness, then cut out the template and used that on the appropriate wood from the kit (I remember noticing too that this was not properly marked) to create my new rail. This was repeated four times, then the rails were sanded down to the desired width.
-
One can never have too much of a vessel that looks like she's going fast when she's sitting still. Beautiful work on your Endeavour, you'll clearly do Bluenose justice.
-
Thank you for the kind words. I took most of the summer off, because it's the summer. I started rigging this weekend, but stopped myself after a little while as I had had too much coffee previously and was shaking like a leaf... and that is no foundation for progress.
-
Welcome to MSW, there are quite a few of us in BC (and even several who are also working on Bluenose)!
-
She's so well preserved that there is talk of trying to recover documents from the captain's cabin. Imagine if some of Crozier's logs could be recovered?
-
Very glad to see you back to it, and I hope above all else that you are feeling better and that your recovery is as smooth as possible. My Dad recently had a heart attack and is undergoing tests to determine if a bypass is necessary-- it's a pretty scary time and it is good to see that you are moving past it. The Red Jacket is looking beautiful!
-
Holy smokes. This is incredible work! Miniaturized steam power plants are utterly fascinating to me. No idea why, but seeing such a thing put to use in a model like this is captivating.
-
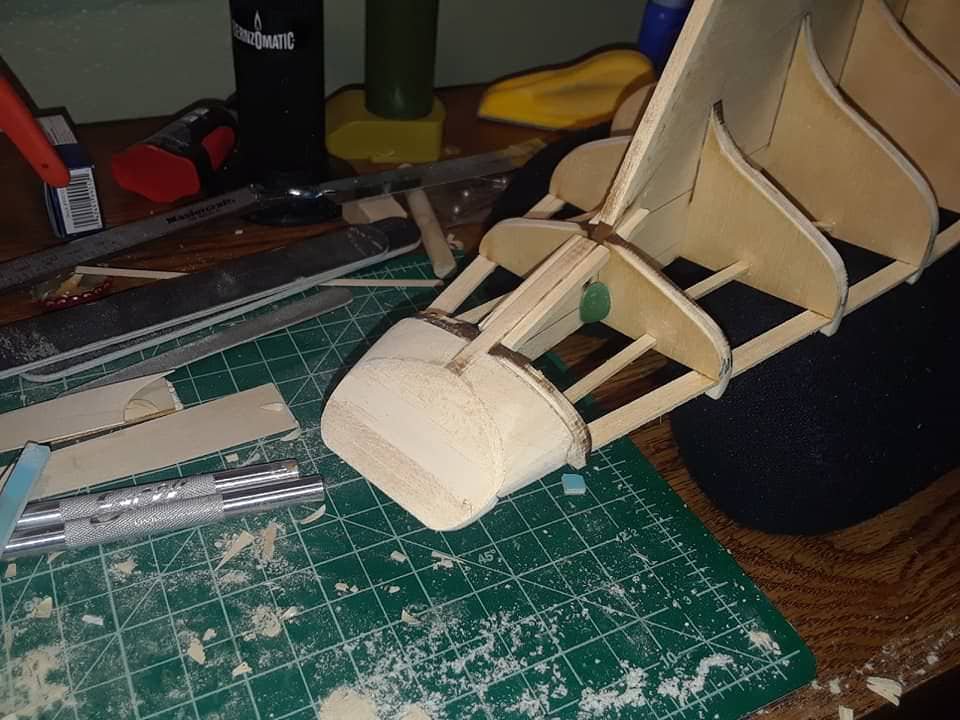
With regards to the filler blocks: I installed mine flush with the bulkheads in the stern so I could plank over top of them without issue, and after I had otherwise mostly faired the bulkheads. The general angles created by the fairing was then used as a guide for a rotary tool to bring the filler blocks down to something approaching the right size, then the final fairing pass was completed by hand with regular sand paper on a sanding block. I think I did the fairing with 120 grit sandpaper and experienced no issues with tearing out the wood. Specifically, I used my wife's Foredom tool with an abrasive drum on it for shaping the filler blocks-- I now have my own Proxxon tool that meets my needs. There are tons of cheap and cheerful rotary tool options out there, and I do recommend picking up a razor saw, ideally with a miter box, as it will be handy for this build. You can see it here. The transom was also added at this point, with the contour shaped in large part by using a couple of what I referred to as "bunny ears" that were installed into notches on the top of the filler blocks and then planked over. This has helped me get pretty close to what I feel is the correct oval shape of the transom, with a gentle curve on the main and monkey rails: I've also gotten a lot of mileage out of emery boards that my wife keeps around for doing her nails. They can make for splendid sanding tools and for the kind of job we are doing here, even one or two will last quite a while.

- 3 replies
-
- 2
-
-
- bluenose
- model shipways
- (and 1 more)
-
I loved living in that state, and the cruiser herself has always had a special place in my heart too. Her and her sister were just so elegant.
-
This little kit is a wonderful build and I suspect for a great many people has been very much a gateway into the hobby as a whole. You've done some beautiful work here, I particularly appreciate how tidy so much of your paintwork is, and a lot of the small optional details that you have added just to make things really pop.
-
You're not going to offend me. I promise you, I've heard far, far worse. On the topic of masking, I have had good luck using a low-tac tape (specifically, I use the Tamiya brand stuff, but this is far from the only answer) and have minimised bleeding along the edge by carefully burnishing the tape with something smooth and solid like a piece of polished metal or bone to ensure good adhesion.
-
I've explained to my wife on several occasions that obscenity is a part of the creative process and that cursing like a sailor while building a model boat is thematically appropriate. That I have had to explain this on several occasions indicates to me that one of us doesn't seem to understand the core issue.